BioShock Walkthrough
The center of the dystopia was…underwater? Take a trip through Rapture in GameSpot's Walkthrough to BioShock.
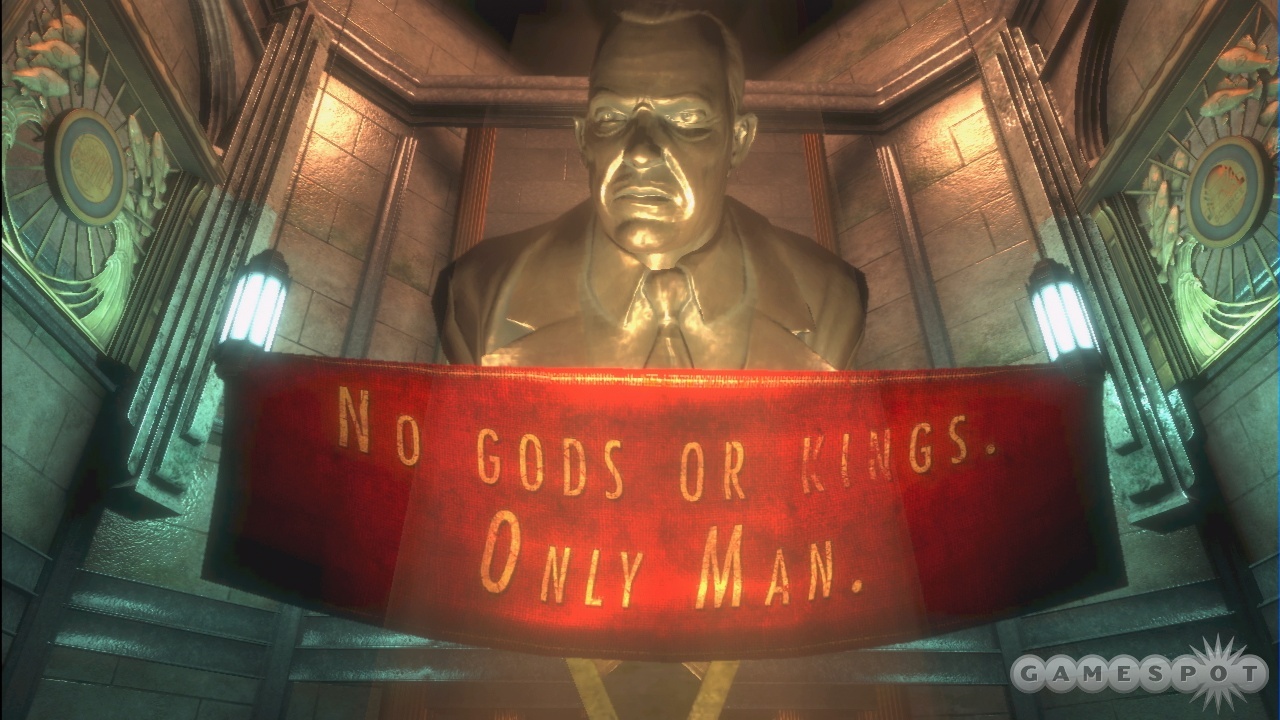
The amount of hype that's surrounded BioShock in the months leading up to its release has been pretty remarkable. Billed as a "spiritual successor" to System Shock 2, Irrational Games' 1999 choose-your-own-adventure shooter, BioShock takes place in the world of Rapture, an underwater city built by Andrew Ryan, an industrialist who was intent on creating a utopia at the bottom of the sea where artists and businessmen could pursue their goals without interference from governments.
Unfortunately, utopias are pretty boring places to stage FPS games, and as such, things went terribly wrong. The citizens were torn apart by crime, and took to rewriting their genetic makeup. This also had the wonderful side-effect of causing most of the civilians in the city to go crazy, so that the failed utopia is now populated by barely-human freaks that want nothing more than to kill interlopers.
Unfortunately for you, your unnamed character has crash-landed on Rapture's surface dock and has no choice but to descend into the city to survive. In order to fight back against the inhabitants, you'll need to adapt their tools for use against them. A large suite of weapons will be available, each of which can use different ammo and be fully upgraded, and you'll also be able to use a large number of plasmids, which are basically spells that can be cast on your opponents for various effects. You can set them on fire, force them to fight for you, freeze them before smashing their bodies, and perform any number of other actions.
GameSpot's Game Guide to BioShock is going to have plenty of tips and tricks for you. In addition to a full walkthrough, we're going to give you suggestions on how to bring down the game's enemies, instruct you on the game's fully modifiable weapons, and round things off with some basic hints. Enjoy!
Weapons and Upgrades
Weapons will be your primary source of dealing damage in the game if you're anything like us. Sure, you can get all fancy with plasmids if you like, but weapons are there to be used on your opponents. Luckily, the game encourages you to use weapons by liberally supplying you with ammo; if you're diligent in searching, you shouldn't have any problems finding huge amounts of ammo for your guns, assuming you don't insist on using a single weapon in every fight. The game also gives you plenty of cash, so if you do run low on ammo, you'll usually be able to find plenty to make up for it.
Each weapon (except the wrench) has three kinds of ammo available for it: a normal ammo, a rare ammo, and an inventable ammo. Normal ammo will be commonplace, and can be bought at most Circus of Values stores. Rare ammo will be tougher to find, but will still be around, and can usually be bought at Ammo Banditos stores. Inventable ammo will be the toughest to find, although you will come across it in the game world. If you want a steady supply of it, though, you'll need to take your junk items to a U-Invent store and make some.
Lastly, each weapon (again excepting the wrench) can be upgraded in two ways. You do this at Power to the People stations scattered around the game world. Each station can upgrade one of your weapons one time, after which it'll shut down. There should be 12 stations in all, although they're usually somewhat obscured and can be difficult to find since they don't appear on your map. Not all upgrades are really worthwhile, though, so you don't need to find all of them unless you're looking to get all of the Xbox 360 achievements.
Wrench
The wrench will be the first weapon you pick up in the game, and one of the most useful throughout the game. At its most basic, this is a simple melee weapon: you hit your enemies with it a bunch of times, and they'll eventually die.
The wrench can't be upgraded like other weapons can, but once you start delving into tonics, you'll be able to find a number of tonics that enhance your ability to swing the wrench. In particular, look for the tonics on the list below.
- SportBoost: A physical tonic that lets you move more quickly and swing the wrench faster. Get these by taking snapshots of Thuggish Splicers.
- Bloodlust: A physical tonic that lets you regain health and Eve when you hit a foe with the wrench. Can make this at U-Invent stations later in the game.
- Wrench Jockey: Combat tonic. Increases the amount of damage you deal with the wrench.
- Wrench Lurker: Combat tonic. Decreases the noise that your footsteps make, and increases the amount of damage you do with the wrench on opponents who aren't aware of your presence. Bop!
When you have all of these equipped, you'll be in a position to dish out tons of damage to your opponents. The Wrench Lurker 2 tonic, in particular, will let you basically run up behind splicers and instantly kill most of them with a single blow.
In addition to these, other tonics can come in handy while using the wrench. You might want to consider Frozen Field, which will let you deal freezing damage with the wrench; this will prevent you from looting most of your enemies, though, since their bodies will be destroyed when you kill them. Static Field can also help stun your enemies when they strike you, which will be handy since you'll be in melee combat quite a bit.
Note that even if you have a bunch of wrench tonics, you still won't be able to take on a Big Daddy with the wrench by itself. It can be a handy weapon to use when you use up all of your frag grenades and need to finish your opponent off, but don't try to sneak up behind a Big Daddy and hit him on the head; they'll just shrug it off.
Pistol
The pistol is a nice little weapon, and it'll serve you well on the weaker splicers that you come across, especially when dealing with Leadhed Splicers early on in the game. As you progress in the game, the damage output probably won't be enough to keep up with the increasing health of your enemies (unless you can make a lot of anti-personnel ammo at the U-Invent), but you can still use the pistol as a rapid method of hitting explosives that are near your opponents, or to quickly eliminate turrets with anti-armor ammunition.
Ammo
Normal Ammo: Good all-purpose ammo for hitting explosives or weak enemies.
Rare Ammo: Anti-armor ammo. Decent against turrets and cameras, when you absolutely can't shock and hack them. Probably won't do much in the way of damage to Big Daddies, though.
Invented Ammo: Anti-personnel ammo. Nice damage against splicers, and is one of the cheaper anti-personnel ammos that can be made at the U-Invent. You can't carry much of it, though, so unless you like to trek to a U-Invent after firing a couple dozen rounds, it probably won't be your primary kind of ammo at any point in the game.
Upgrades
When it comes to upgrade selections, you probably don't want to select the pistol for any upgrades until you've fully upgraded all of your other weapons. Even a fully-upgraded pistol probably won't be too helpful against a Big Daddy, so spend the upgrade points elsewhere, unless you're a big fan of the weapon.
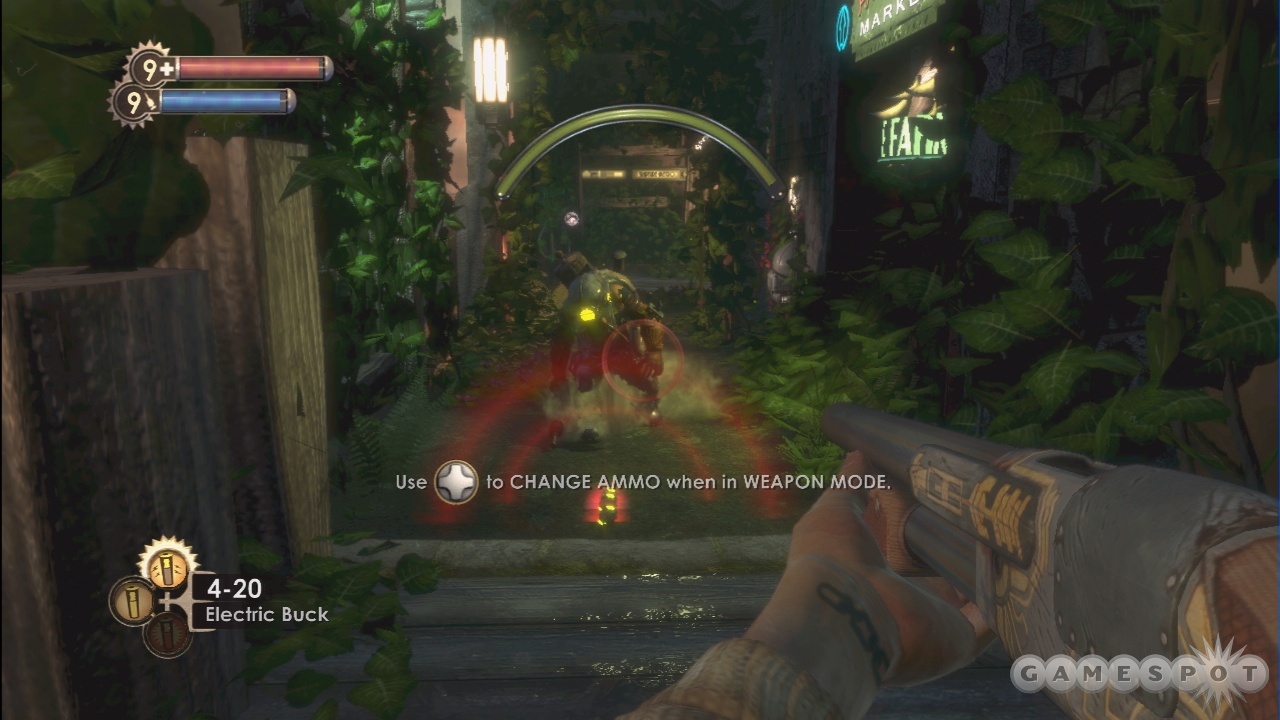
Shotgun
The shotgun is going to be a handy weapon for most of the game, whether you're facing off against big daddys or splicers. It can let loose a devastating stream of buckshot into the face of whatever enemy you're going up against. At close range, with a good ammo selection, you can usually shoot an enemy to death with a single hit, but at longer ranges, most of your pellets will miss, causing you to do less damage.

Although Big Daddies aren't particularly weak to electrical damage, the electric buck ammo here is going to be an important part of taking those tough enemies down early in the game. The wide spread of the shotgun's blast will also make it handy when hitting fast-moving targets that are likely to be missed when you attempt to hit them with narrower-firing weapons like the pistol.
Unfortunately, the shotgun can only hold four rounds of ammo at a time, so if you don't manage to kill your opponent with those four rounds, you'll likely be forced to switch to another weapon if you don't want to sit through a fairly lengthy reloading animation. This can be a liability when facing off against Big Daddies, especially.
Ammo
Normal Ammo: Good all-purpose ammo for hitting weak enemies.
Rare Ammo: Electrical buckshot. Great against machines, obviously, but also carries an electrical charge that will stun enemies, just like an Electro Bolt plasmid charge will. This can help you in fights against Big Daddies, as you can use the buckshot to stun them while you backpedal to put a little space between you and your foe.
Invented Ammo: Exploding buckshot. Handy for firing into groups of enemies; there's a bit of splash damage around the initial hit. By the time you get around to being capable of making this regularly, though, you're likely going to have gained access to the grenade launcher, which is usually a better choice for doing explosive damage to a group.
Upgrades
Increased Damage: A nice boost to damage. Handy if you enjoy using the shotgun, obviously, and helps when you're using electrical buck on the Big Daddies.
Increased Rate of Fire: Lets you pop out your four rounds in about three seconds, which is a big improvement over the original firing rate. Unfortunately you'll still be hamstrung by the reload rate, but at least you'll take less damage before needing to reload--assuming you manage to kill your opponent in those four rounds.
Machinegun
The tommy gun is a handy little weapon for close-quarters encounters, and will be capable of firing for much longer without reloading than the pistol or the shotgun. Unfortunately, its inaccurate fire will make it difficult to hit targets that are far away. It has a longer effective range than the shotgun, to be sure, but the spread of the rounds here will make you waste ammo if you attempt to hit targets at long range.
That said, the machinegun is still a decent weapon to take down enemies that are closing in on you. Although each individual round does less damage than a pistol round, you can hold many more of them in a clip, allowing you to unload for a good length of time without having to reload, which helps when you're trying to sweep your fire across multiple targets or lay down sustained fire on a single target. The reload animation is also fairly brief, making this a decent weapon in lengthy firefights.
Ammo
Normal Ammo: Good all-purpose ammo for hitting explosives or weak enemies.
Rare Ammo: Anti-personnel ammo. Pretty damn handy for taking down Splicers, especially late in the game when they gain a lot of health.
Invented Ammo: Anti-armor ammo. Great for taking down Big Daddies, but it'll take a while to dish out the necessary damage; try to get a little space between you and them before opening fire (or fire on them from a different level, if possible).
Upgrades
Increased Damage: Great early on in the game, but the machinegun won't be dealing much damage to anything later on unless you're using anti-armor or anti-personnel ammo, so if you don't want to deal with buying or inventing ammo a lot, this might not be a great choice for you.
Reduced Kickback: Reduces the amount of recoil that the machinegun produces when it's fired for a lengthy amount of time. This isn't really worthwhile unless you have nothing else of use to choose: the kickback can be compensated by edging upward on your right analog stick. The real lack of accuracy here comes from the spread of the rounds, not the recoil.
Grenade Launcher
The incredibly unstable-looking grenade launcher is going to be a powerful weapon for you during your time in Rapture. As the name implies, it launches grenades, which in this case are makeshift bombs constructed in old coffee cans. They're powerful weapons that deal large explosive damage to any enemy caught in the blast, but they can be difficult to place properly due to the way that they lob and bounce. They also have a nasty tendency to explode and destroy hacked turrets or cameras that are helping you fight your battles, so you need to be careful about where you place them.
Ammo
Normal Ammo: Nice explosive damage from these grenades. If you fire a grenade and it doesn't hit something, it'll bounce and detonate a few seconds later, but in general, you'll want to try and hit your target dead-on with this guy. Failing that, try aiming it at someone in a corner, where it'll probably bounce right back to their feet. This is the game's premier crowd control ammo, so use it when you're facing off against multiple targets.
After you get the damage upgrade, unloading grenades onto a Big Daddy will let you knock off half or more of their health before they can react; you'll usually be able to fire an entire clip at them before they break out the stun and start fighting back.
Rare Ammo: Proximity Mines. Proximity Mines are great for defending an area if you know you're going to be attacked; just plop down a mine or two in front of a door and wait for your enemies to show up. They're also handy for laying down in the path of a Big Daddy that you haven't aggroed yet; just place six of them on the floor, shoot the target to get them aggroed to you, and watch a huge chunk of their health fly off. In a tight spot, proximity mines can be used as regular grenades; they detonate immediately if they hit a target.
Note also that you can walk through the explosive radius of your proximity mines without a problem; they only explode when a foe goes through them.
Invented Ammo: Heat-seeking RPG rounds. Will track most enemies and explode on contact. These will be overkill against most foes, who will usually die to one grenade round, but can be handy against Big Daddies or enemies that move quickly, like spider splicers.
Upgrades
Increased Damage: The grenade launcher does a lot of damage already; with increased damage, it'll deal even more. Nothing difficult to understand about this. Choosing this addon will make it a lot easier to take down Big Daddies if you can keep your supply of frag grenades topped off.
Eliminates Self-Damage: Makes it impossible for your own grenades to hurt you, even if you hit someone at point-blank range. Pretty handy if you're clumsy, but in most cases you should be able to take down your opponents without letting them get up close to you, with the possible exception of the Bouncer.
Chemical Thrower
The "chemical thrower" is a good way to replicate the elemental damage properties of the fire, ice, and electrical plasmids without necessarily having to equip those plasmids. Like them, you can use the chem thrower to unleash napalm, liquid nitrogen, or electrical gel on your foes or the environment. The weapon features a great sustainable rate of fire, allowing you to spread your damage quickly across multiple targets without the need to reload very often. That said, when you do need to reload, it'll take you around ten seconds to do so, so it's effectively impossible to reload or change ammo during a fight unless you like hiding or taking a beating.
Ammo
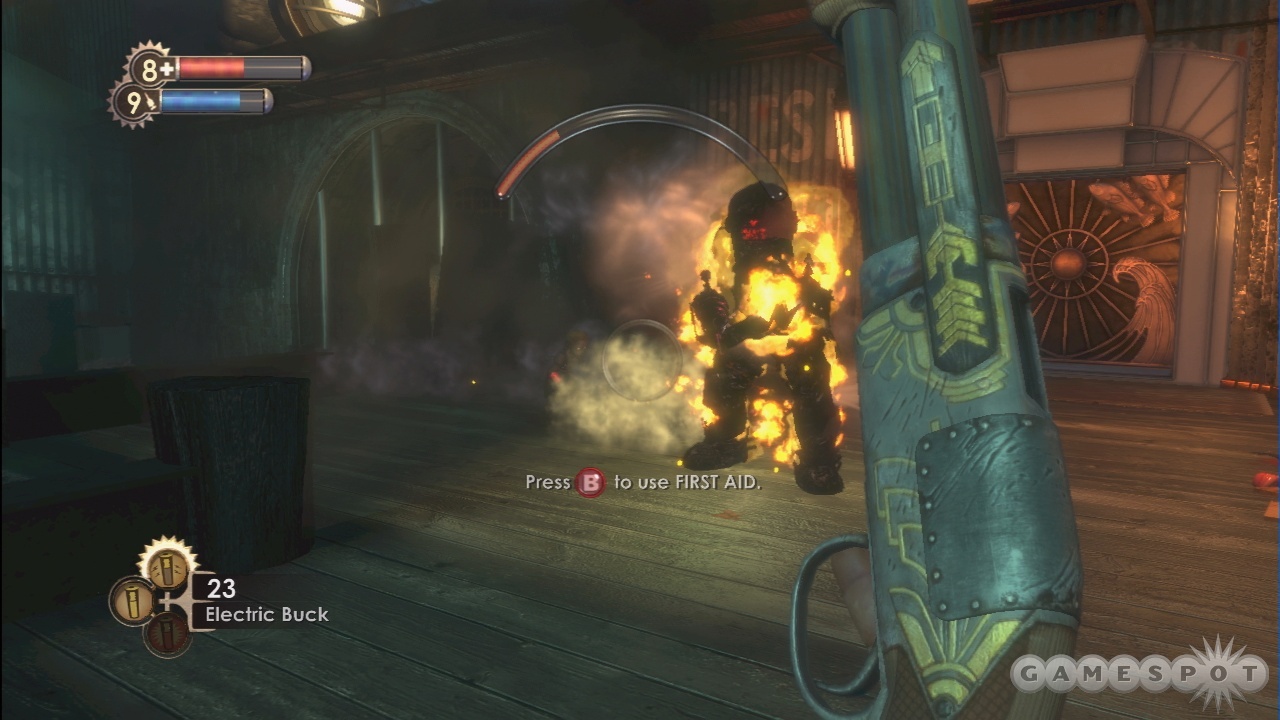
Normal Ammo: Napalm. Adheres to targets that it touches, engulfing them in flames. Relatively few of your enemies are actually weak to fire (nitro splicers don't seem to like it very much), but many splicers will begin writhing in agony when sheathed in flame, allowing you to finish them off relatively easily. This is also usually an easier way to deal with flame-oriented environmental stuff (frozen doors, oil fields that can be set alight) than keeping Incinerate in your plasmid list.

Rare Ammo: Liquid nitrogen. This will freeze any enemy that you hit, giving you a couple of seconds to flip over to your wrench and bash them to pieces, but that'll forgo the possibility of looting their bodies. We normally killed our enemies in other manners, since we wanted to get their loot, but if you're dealing with a crowd, this can be a great way to give yourself some breathing room.
Invented Ammo: Electrical Gel. Fantastic against anything mechanical. Since you don't need to reload too often, this will make quick work against hostile security bots--if, that is, you don't have to switch over to electrical gel when they first start firing on you. Of course, you can also use this to electrify water or flip electrical switches.
Upgrades
Increased Range: Not tremendously useful. The range on the thrower is already pretty decent; it should be good enough for almost any purpose. It's a flamethrower, not a sniper rifle. Generally the huge jets of chemicals will obscure your view enough to make it difficult to judge whether or not you're hitting distant targets, anyway.
Reduced Ammo Consumption: Pretty much required if you're going to be using the chemical thrower often; this drastically cuts the amount of ammo that is used up when you fire the weapon, and thus, lets you fire it for longer without reloading. You'll almost never burn through a single tank of fuel in one firefight either way, but this will let you keep your reserves topped off and reduce the amount of money you spend on buying or making new stuff.
Crossbow
The crossbow is the last weapon you'll pick up, but it'll be a dandy. It effectively winds up being the game's sniper rifle, in that it can fire quite accurately at pretty long ranges, but is also pretty handy at short ranges, as well, thanks to the fact that it can deal a lot of damage in one quick shot. A single round from the default ammo here will usually wind up killing a splicer outright, at least until you wind up hitting the harder varieties later on.
When you fire a bolt, it will often lodge in your enemies, or in the wall behind them if you happen to miss. You can later pluck these rounds back from their bodies and add them back to your ammo supplies. You won't be running short of ammo for your weapons in BioShock, regardless of whether or not you bother to pick up your bolts, but still--it's fun to do so, and it will help you save money in the long run.
Note that, like a typical sniper rifle, there is a bit of a reload in between shots, making misses a bit painful when you're in combat.
Ammo
Normal Ammo: This is a good solid bolt that deals a lot of damage in one strong shot. With upgraded damage and full research points, these will actually deal quite a bit of damage to Big Daddies.
Rare Ammo: Incendiary bolts. Deals extra damage to enemies that are weak to fire, but these aren't exactly common. We never found these bolts to be that much more damaging to enemies than the regular bolts were.
Invented Ammo: Trap bolt. When fired, these bolts will implant themselves into the wall. A few moments later, they'll spit out a tripwire towards a nearby wall that will shock any enemy that happens to run through it. A nice weapon when you want to be tricky with an opponent, but it's kind of gimmicky; there are plenty of ways to kill enemies outright.
Upgrades
Increased Damage: Hey, guess what this does?
Reduced Chance of Ammo Breakage: Lets you pick up more ammo from enemies after filling them with arrows. Not a bad choice if you plan on using the weapon a lot, as it'll save you money, but not as good as increased damage.
Enemies
There aren't a huge variety of enemies in BioShock, but those that do appear are pretty darn creepy. Rapture's insane inhabitants have mostly become splicers, genetic monstrosities that only exist to kill. In addition, you'll have to deal with Rapture's security systems, and also the huge, lumbering Big Daddies, who guard the Little Sisters that carry Adam, Rapture's primary source of genetic currency.
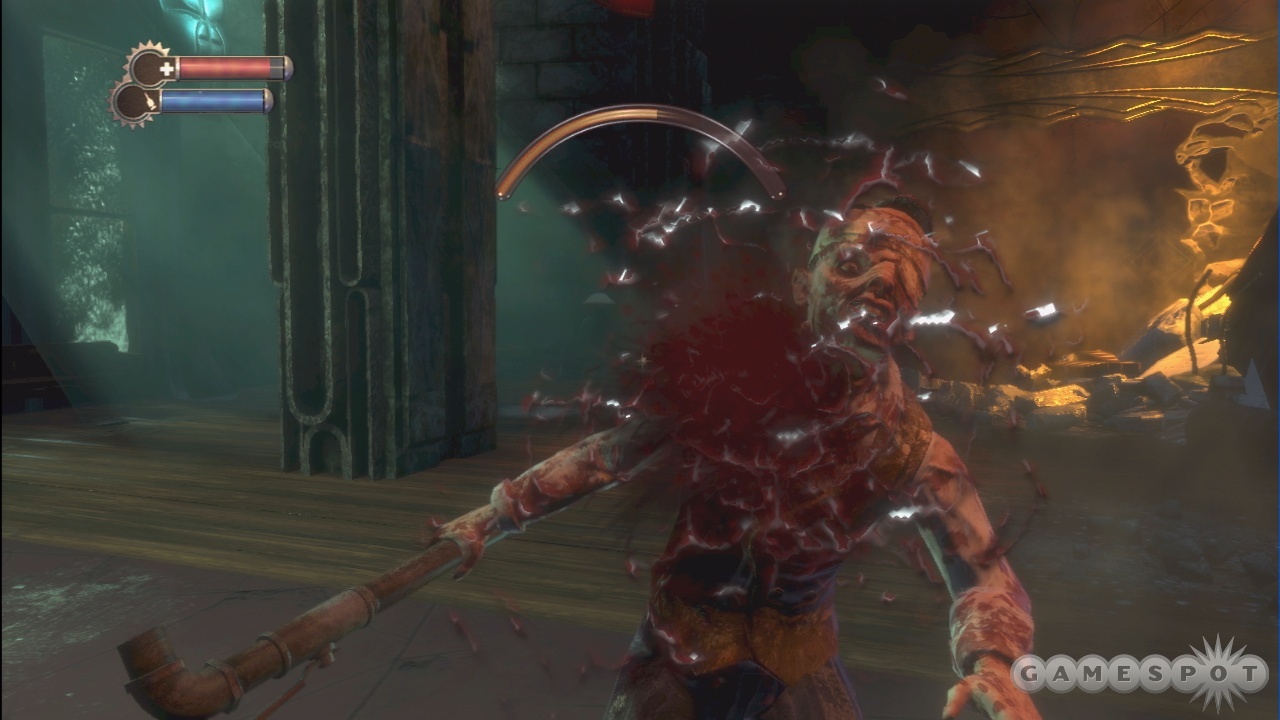
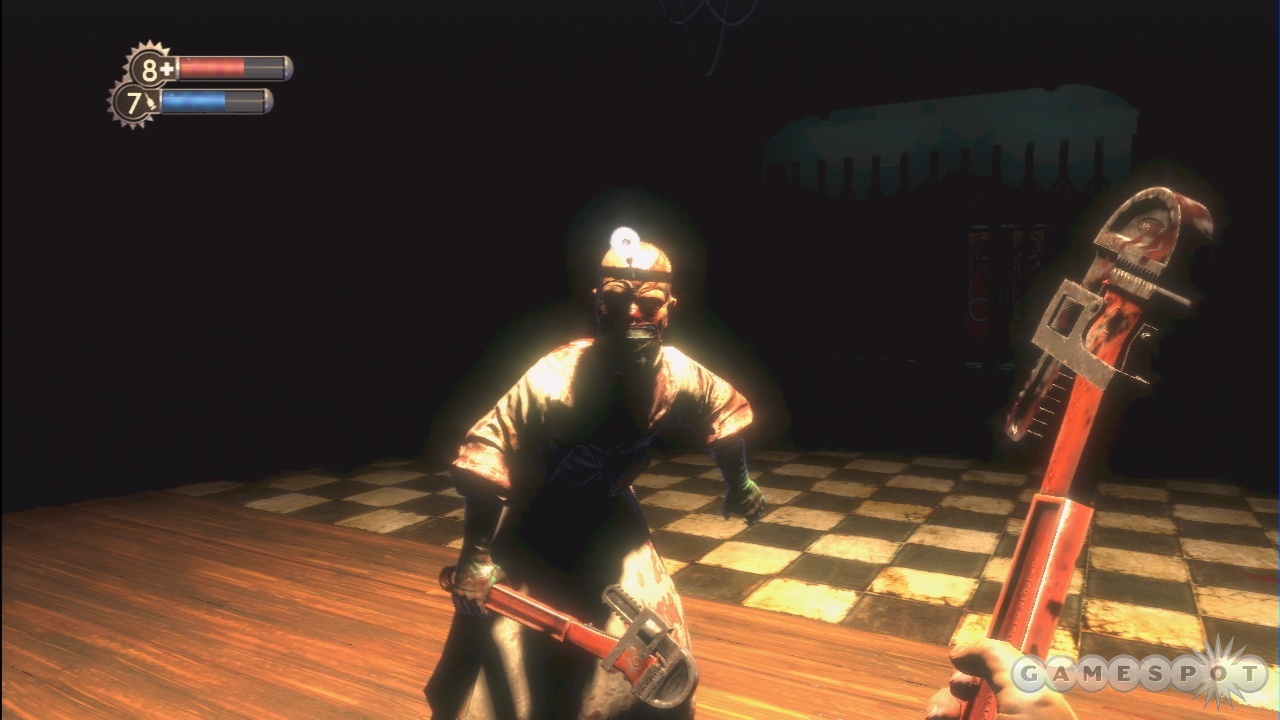
Thuggish Splicer
Thuggish Splicers are prevalent in the early parts of the game, then disappear for a bit before appearing throughout the rest of the game. They wield pipes, wrenches, flashlights, and other melee weapons. Typically they'll first appear by pacing around, muttering to themselves, but when they spot you, they'll make a beeline for you and attempt to leap at you with their weapons. It's pretty simple behavior, as they won't attempt much in the way of dodging or hiding, but they will run for a health station if they get low on health.
Early on, it's easies to hit a thug with Electro Bolt, then whack them with your wrench; this is usually an instant kill. As the game progresses, you'll need higher ranks of Electro Bolt to keep your enemies frozen long enough for you to strike them, but it's still a handy technique when you want to finish off an enemy. (Most other types of splicers are more resistant to melee damage and won't die outright to this attack.) After you gain a bunch of wrench-related tonics, you should be able to dispatch even the toughest thugs with only two blows from your wrench, so you won't even need to shock them first.
Apart from that, anti-personnel ammo will also dispatch thugs right quick.
Research Bonuses
In addition to the normal damage increases from research, you also obtain a pair of tonics from researching Thuggish Splicers. The SportBoost tonics (there are two ranks of them) will let you move more quickly, which alone is a benefit well worth equipping them for. In addition, though, you also swing your wrench more quickly, making this a very handy tonic to get.
Leadhead Splicer
Leadheads are the weapon-using splicers: they'll come armed with pistols, at first, and then will gradually shift over to machineguns later in the game. They'll prefer to fire at you from range, if possible, and will attempt to dodge the fire that you send back at them by strafing a lot. If you get close, they'll try to pistolwhip you or use the butt of their gun to give you a melee strike.
The Leadheads are a lot more resistant to melee damage than the Thuggish enemies are, so you'll probably want to fight fire with fire and use pistols or other ranged weapons on them. Besides that, they're pretty much your typical FPS enemies: try kill them without letting them deal a huge amount of damage to you. Anti-personnel damage will finish them off quickly.
Research Bonuses
You get a pair of tonics for researching Leadheads. The first is the Scrounger addon, which lets you search most searchable objects twice in the hopes of finding something the second time around. This can sometimes reveal some hidden cash or invent items in a seemingly empty crate, but most of the time empty stuff is just empty. Not really worth using in our opinion.
Secondly, Static Discharge 2 will shock any enemy that strikes you in combat, stunning them temporarily. That's really handy if you like using the wrench a lot, but be careful not to get hit by an enemy when you're standing near a Big Daddy, as they'll interpret that as a hostile act and attack!
Nitro Splicers
Nitro Splicers use molotov cocktails and grenades to deal their damage; they'll continually pluck ammo out of a large box that they carry around and chuck it at you. These guys have significantly more health than most other kinds of splicers, and can deal more damage to boot. However, if you use Telekinesis to catch their grenades and chuck them back at them, they'll usually go down quickly. Nitros also usually have more cash on them than other splicers. When they do die, they'll often drop a good-bye grenade, so be careful when attempting to loot them.
Napalm or fire attacks seem to work well against Nitros, as does anti-personnel ammo.
Research Bonuses
After a bit of researching, you'll get a permanent 15% chance that enemy grenades will be duds. These grenades will still look dangerous, but will fizzle out without exploding. After more research, this chance will increase to 35%.
Spider Splicer
Spider slicers are the assassins of the bunch. They're the most agile splicers that you'll come across, with the ability to sink their meathooks into the ceiling and crawl along it; you'll hear them jabbering as they do so, as well as hear their distinctive clanking sound, and you'll also see material falling from the ceiling, so this isn't exactly a stealth move, but it can be a surprise. They'll usually prefer to drop to the ground and slice at you before flipping away, but they can also throw their blades at you from a distance, whether they're on the ground or on the ceiling.
In general, spiders are pretty tough to kill, mostly due to the unpredictable way they move. After you research them a bit, though, they get a little easier. Napalm puts them down pretty quickly, and wrench attacks work reasonably well if you use the correct tonics.
Research Bonuses
The first bonus you get from Spider Splicers is the ability to harvest their organs and use them as first aid kits. Nice, but nothing spectacular. We didn't happen to note what the second upgrade was, so we'll update this space with that info when we get it (or remember it…).
Houdini Splicer
Houdinis are the spellcasters of the lot. They don't use weapons, instead preferring to blast you with plasmids. Most Houdinis will use fire-based plasmids on you, but a frustrating few will use ice; these are usually a lot tougher than the fire guys. Still, it's pretty easy to sidestep their fire, assuming you have room to do so.
What's more annoying is that Houdinis will disappear and reappear when you engage them. When they disappear, they'll generally move behind you and attempt to shoot you in the back, so flip around when they disappear. They get easier as you research them more. Their movement makes them difficult to hit with melee attacks, so stick with anti-personnel ammo. The pistol is quick and accurate, making it usually the best way to take these guys out.
Note that you can shoot the Houdini while it reforms; if you're using the chemical thrower or machinegun, just start spraying and praying with the weapon before it can fire back at you.
Research Bonuses
The first upgrade here will make it easier to tell where the Houdini will reappear after he disappears; you'll see his or her cloud reforming with plenty of time to judge where it will eventually solidify. Secondly, you'll get a Natural Camouflage tonic. When you stand still, you'll be much more difficult to see. We never found this all that useful since it only works when you're standing still, but stealthy sorts might like it.
Security Cameras
Security cameras aren't "enemies", per se, but they aren't exactly friendly, either. When they spot you, they'll lock onto you for a few seconds; if you don't run behind cover, they'll sound an alarm and summon security bots. Most of the time it's not too difficult to avoid the camera's glare, either by running beneath or behind them, or by simply zapping them with Electro Bolt and running past. If you want to shoot them, they're easily destroyed, but in most cases, you'll want to try and disable them or sneak around for a hack.
If you hack a camera, it will detect any enemies that wander into its glare and summon security bots to attack them instead of you. While it's probably not worth the effort to lure enemies back to a hacked camera to get the extra help in killing them (except maybe the Big Daddies), it's still worth hacking the cameras, if only to have them cover your back, especially in crowded, open areas. Enemies won't attack hacked cameras, instead preferring to shoot the security bots, so a hacked camera is essentially a permanent hindrance for your enemies.
Research Bonuses
Researching cameras can be tricky, since your first instinct is to immediately get under them and hack them. Still, if you can remember to take snapshots of them, you'll eventually get a couple of rewards, albeit unimpressive ones. The first will let you find twice as much film when you destroy a camera and search it, while the second will reduce the flow speed of the electric fluid while hacking cameras.
Security Bots
If you get lit up by a security camera or otherwise trip an alarm, you can expect security bots to come for you quite quickly. These flying drones wield machineguns, and will quickly start to chop away at your life.
If you want to destroy the bots, using any kind of electrical ammo is handy. A single electric buckshot round from your shotgun will usually destroy a bot straightaway, and electrical gel for the chemical thrower will also dispatch them quickly. Keep in mind that more bots will come as long as the alarm is in effect, so try to put some distance between you and the camera as soon as you see it go off.
On the other hand, if you want to make some new friends, check your map for a bot shutdown panel and flip it. This costs 20 bucks, but will drop the bots to the ground without hurting them, allowing you to hack into them and make them into friendly drones that will follow you around and fire on your foes.
Research Bonuses
Security bots can be something of a pain to research since they don't appear normally, but if you have plenty of first aid kits, you can simply stand in front of a camera and summon in bots until the cows come home and get plenty of research out of the way. (You can't research friendly units, so you can't simply hack them and get free points that way.) A safer method of taking your pictures would be to hack cameras in a busy area, wait for an enemy to trigger the alarm, then start snapping away at the neutral bots that attack your foes. (The Farmer's Market area is great for this, with a couple of cameras and a fair amount of enemies running around.)
The first upgrade you get is the Security Expert 2 tonic, which will make hacking a bit more easier. The second upgrade lets you automatically succeed when you hack a security bot; you don't even need to go through the hacking interface.
Turrets
Turrets come in a few varieties, but most of them will be machinegun turrets. When they spot you, they'll open fire on you after a few seconds, sending a whole lot of metal through the air. In addition to machineguns, though, turrets will also sometimes possess heat-seeking rockets or, very rarely, flamethrowers.
Turrets aren't too difficult to destroy; four or five rounds of anti-armor pistol ammo will usually blow them up. If you can hack them, though, they're powerful allies and will dish out the pain to any enemy that gets near them. You can theoretically hack a turret by sneaking up on it, but they have 360 degree vision, so this is pretty difficult. Usually you'll need to use Electro Bolt to stun them, then quickly run over and hack them. As the game progresses, you'll need to buy higher ranks of Electro Bolt to stun turrets long enough to hack them; if you use the basic rank of it, they'll tip over and come back up too quickly to hack unless you're standing right next to them.
Research Bonuses
First, you find twice the ammunition on destroyed turrets. Later on, you get free omg H4X on all turrets, which is incredibly handy.
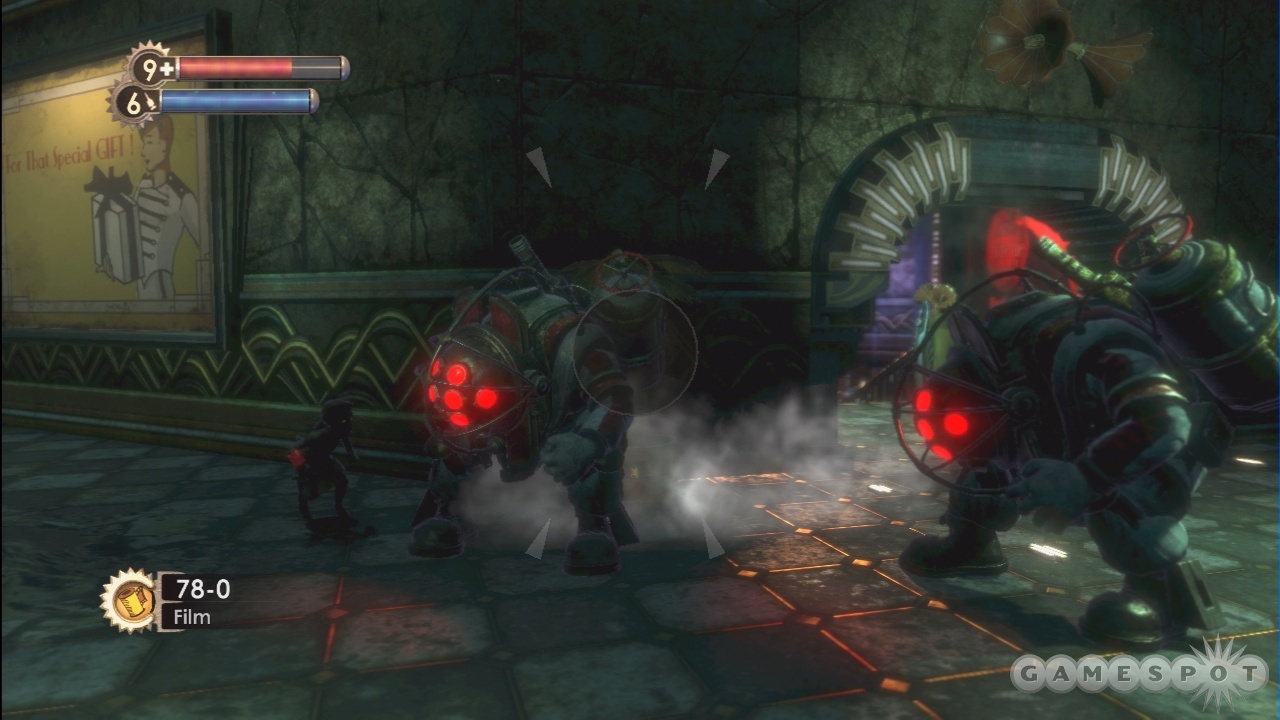
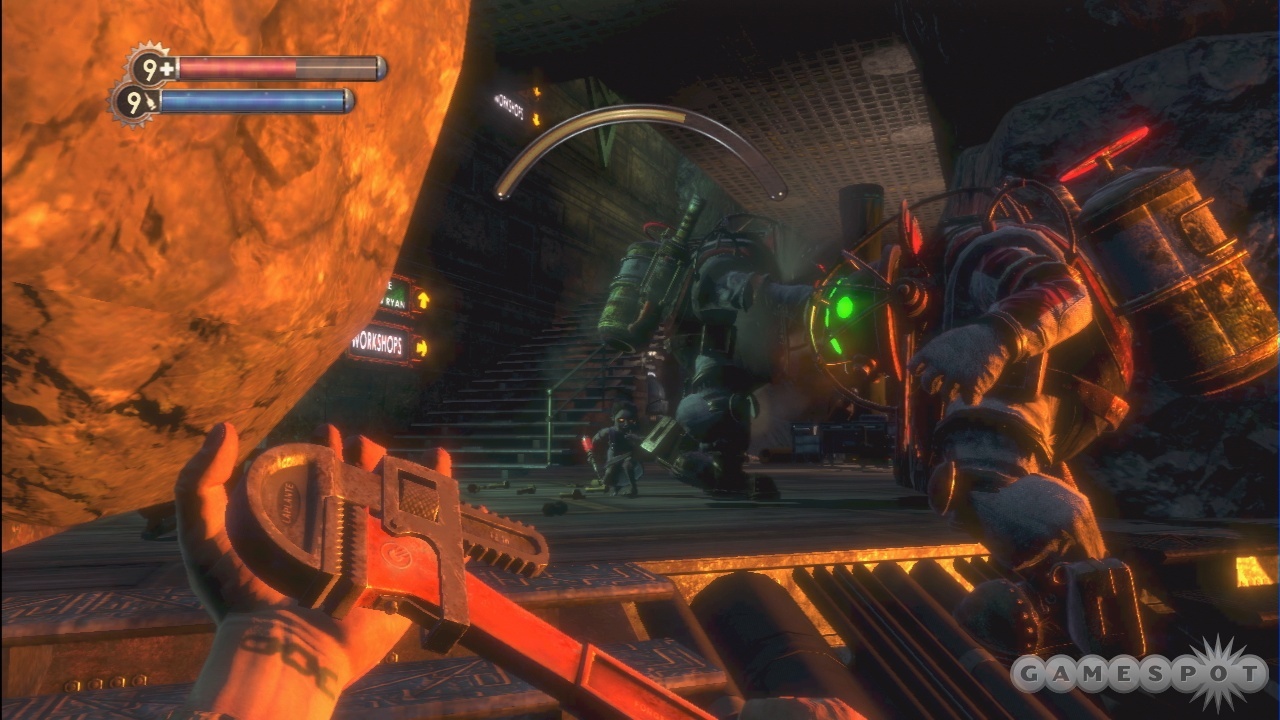
Big Daddy (Bouncer)
Bouncers are tough. These are the first kinds of Big Daddies that you come across, although you'll only kill one of them before dealing with Rosies for a long period of time.
Offensively, Bouncers are easy to describe, since they only really have three methods of attack. If they're far away from you, they'll attempt to charge into you, which will knock you back and deal a lot of damage. If they're up close, they'll swing their fist, which will also deal a lot of damage. Lastly, they can strike their fists into the ground; this doesn't deal much damage, but will make it much more difficult to run away. You'll take a lot of damage when fighting a Bouncer, so try not to engage them unless you have a lot of first aid packs on your person.
At first, you won't have many options to deal with Bouncers; all you'll really be able to do is unload on them with electrical buck ammo and try to keep them stunned while you backpedal. Later in the game you'll have a lot more weapons to use on them, but you'll still have to be aware that the fight will proceed on their terms; it'll be difficult to keep them off of you, in other words.
If you have the benefit of being able to plan ahead, try laying down a bunch of proximity mines between you and the Bouncer before attacking it. When you have a bunch of mines laid down, flip over to frag grenades and start chucking those at the Bouncer. That should significantly weaken him, and when he tries to charge you, he'll hit the mines and take even more damage. Although he'll still be alive, most likely, you can start to finish him off with either crossbow ammo, electric buck, or anti-armor machinegun fire from close range. If he's really low on health, you can fight fire with fire and wear him down with the wrench. This is by no means an exhaustive list of ways to take these guys out (in larger levels, we liked to use Hypnotize Big Daddy on them, then lure them back to another Bouncer and have them fight each other), but it should get you started on taking them out.
Keep in mind that dying sends you right back to a Vita-Chamber. If you're having a lot of trouble with a Bouncer, simply lure it back to a Vita-Chamber, attack it until you die, then pop out of the Chamber and repeat the process until the enemy is dead. There's no penalty for using a Vita-Chamber, so this is a valid course of action if you're getting stomped.
Research Bonuses
Big Daddies are easy to research: they respawn when killed and there are usually a few of them per level. If they're escorting a Little Sister, run up to them to get them angry, then quickly take a picture; you'll earn an Action Shot bonus for your snapshot. If you have to kill one to reach a Little Sister, wander around for a bit and a different one will eventually spawn, letting you take more snapshots.
First you get the Wrench Jockey 2 tonic, which increases the amount of damage you deal with your wrench. Later on you get a blanket 50% upgrade to all wrench damage; this isn't a tonic or a plasmid, so it doesn't take up a slot, but is instead always active.
Big Daddy (Rosie)
Rosies are similar to Bouncers in terms of their overall health, but feature different attacks. Whereas Bouncers want to get up close and personal, Rosies will be more than happy to stand back and attack from a distance. They'll use their rivet guns to fire nails at you; each one will deal a significant amount of damage to you, so try to find some kind of cover to duck behind instead of facing them out in the open. In addition, Rosies will drop proximity mines near you. If they hit you, they explode, and you can also wind up walking over them in the heat of battle. If you're quick, you can use telekinesis to catch the grenade and chuck it back at the Rosie, but you'll probably be using a weapon as it comes your way, so just focus on dodging.
Without all the knockback effects of the Bouncer, the Rosies usually wind up being easier fights, at least in our opinion. They won't try and charge you, but will instead simply stand and fire at you if you don't move around too much. While their fire hurts and can be difficult to dodge, strafing around them seems to help, and you'll be able to return fire yourself without getting knocked around.
The same weapons that work on the Bouncer work well on the Rosies. Use a full clip of frag grenades to open the fight and deal the meat of the damage, then flip over to anti-armor machinegun ammo or crossbow bolts to seal the deal.
Research Bonuses
Big Daddies are easy to research: they respawn when killed and there are usually a few of them per level. If they're escorting a Little Sister, run up to them to get them angry, then quickly take a picture; you'll earn an Action Shot bonus for your snapshot. If you have to kill one to reach a Little Sister, wander around for a bit and a different one will eventually spawn, letting you take more snapshots.
You'll first net the Photographer's Eye 2 tonic, which will net you 15% more research points for your photos. Pretty handy when you're trying to complete your research. Next up will be a passive bonus: each Rosie you kill will drop theoretically rare invention materials. We mostly found steel screws, which we also found pretty much everywhere else, so this didn't seem too useful to us.
Little Sisters
You can't engage Little Sisters in combat; they're essentially unkillable thanks to the Adam that flows through their bodies. If you want to get to them, you'll have to take out the Big Daddy that guards them, then either harvest or rescue them, depending on whether you care about killing them or not.

Harvesting a Sister will end her life, and net you 160 Adam. Rescuing a Sister will net you 80 Adam, but after every third or fourth Sister you rescue, Dr. Tanenbaum will send you a reward at the nearest Gatherer's Garden, consisting of 200 Adam and a couple of extra goodies, including some tremendously useful plasmids. The choice of harvesting v. rescuing will also come into play during the last couple levels of the game, and will of course have an impact on the game's ending.
Research Bonuses
Researching Little Sisters won't ever increase the damage that you deal to them, since you can't hurt them; instead, you'll gain a small bonus to your health and Eve reserves each time you hit a new research level. You can research Little Sisters after defeating their Big Daddy guardian if you want to get an unobstructed shot of them, or simply follow them around and snap away with the zoom lens.
Note that if you use the Hypnotize Big Daddy plasmid, the Little Sister that the Big Daddy is guarding will run back to a wall vent. After the Hypnotize effect wears off, the Big Daddy will usually summon another Sister. If you want to quickly get a lot of Sister research done, simply hypnotize a Big Daddy repeatedly and wait for it to summon different Sisters, then snap away at them.
Hints and Tips
Everyone Needs A Friend
While security bots are fairly weak in combat, they can be a helpful companion if you can bend them to your will. If you feel like you want some friends to fight alongside you, there's a simple way to get them. Find a hostile security camera, then run in front of it and trigger the alarm. When the security bots appear, check your map for the nearest Bot Shutdown Panel, then run to it and flip the switch. That'll cost you 20 bucks, but the bots will fall to the ground and will be hackable. Early on this will only net you one bot companion, but for the latter two-thirds of the game, most security alarms will summon two bots. You can only have two bot helpers at a time, so that's pretty convenient. Your bots will be destroyed quickly, but can still take out most splicer enemies on their own.
Researching Enemies
Early on in the game, you'll obtain the research camera. When used on your enemies, you'll be able to proceed through five levels of research for each kind of foe you face. For example, if you consistently take snapshots of a single type of enemy, you'd proceed through the ranks like so:
- First Rank: Increases all damage you deal to that enemy by a small amount, and reveals what kinds of ammo they're weak against. (Your first snapshot of an enemy will automatically let you hit this rank.)
- Second Rank: Unique bonus for each enemy.
- Third Rank: Higher damage increase.
- Fourth Rank: Second unique bonus.
- Fifth Rank: Final damage bonus.
To research an enemy, all you need to do is center your camera on them and start snapping away. Each enemy can only be photographed so many times before you don't get any points for it; you can only extract so much information from a single specimen, after all. When you stop getting points for an enemy, you can kill it and move on to the next one.

After you obtain your research camera, you'll want to have it on pretty much all the time. Since you can survive most firefights without too many problems, just start snapping away at enemies as they approach you or fire on you; you can snap out four or five photos on an enemy relatively quickly, and since time pauses while the photo is being developed, you should only be exposed to a relatively minor amount of enemy offense. Just stand there and take the beating; everyone has to suffer for their art. Of course, if you can sneak up on an enemy without their being aware of your presence, you can simply film them from behind for the bulk of the available points. You can also get your photos from a good distance away, if you like. They won't be worth as much as an in-your-face action shot, but you'll have plenty of targets to choose from as the game progresses, so you don't need to worry too much.
You can get bonuses to your picture scores by taking pictures of multiple enemies in one frame (corpses count!) and by taking pictures of enemies as they actively attack you. Keep in mind that you can zoom in by clicking the right analog stick on the 360 controller for a tighter shot.
Search Everything
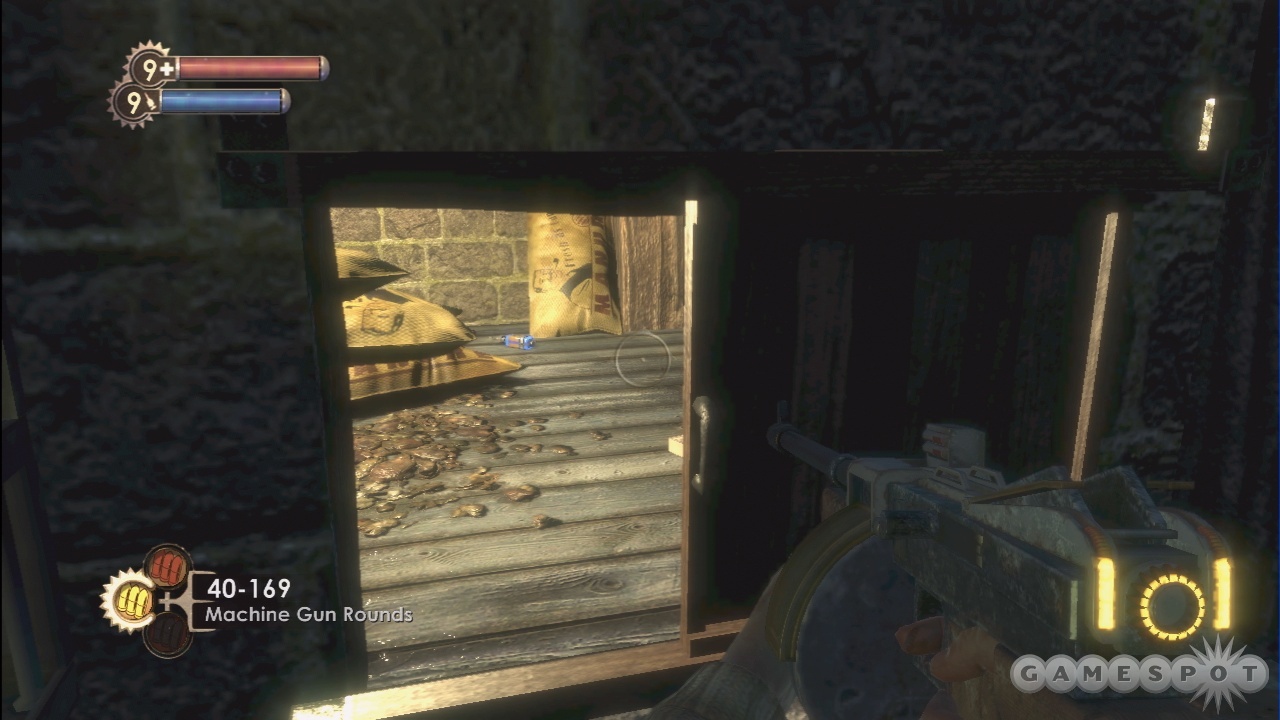
It's a pretty simple suggestion, but just to be explicit: be sure to search every container that you see. Doing so isn't difficult, at least on the 360; just look at a container and tap A as quickly as you can to perform a quick search and pick up everything inside the container.
Searching is important to keep your ammo reserves up, and will also eventually net you huge amounts of junk items that you can convert into items at the U-Invent. Even if you don't wind up inventing a lot of ammo, you'll still want the parts to invent Autohack devices, which will let you instantly hack difficult locks.
Plasmid Tips
There are too many plasmids to cover each one of them in depth, but here are some tips on using some of the more common plasmids that you'll gain access to.
Telekinesis
Can pick up objects from a distance and bring them to you. Letting go of the button will send them flying away again, so be sure to grab the object as it's levitating in front of you if it's something you want to actually use. You can pick up explosives and throw them at your foes, as well, but be careful: if they shoot you while you're holding an explosive, it'll blow up and you'll take damage. You can also pick up objects and use them as shields. Offensively speaking, you can pick up almost anything and throw it at your enemy to deal damage, even the corpses of their fallen comrades. You won't gain a lot of instant kills as you would with Half-Life 2's gravity gun, but you can still deal a lot of damage if you use heavy items as projectiles.
Hypnotize Big Daddy
You obtain the Hypnotize Big Daddy plasmid by rescuing three Little Sisters; it'll appear in a gift that's left for you at the Gatherer's Garden. You can obtain a higher rank by rescuing more Little Sisters. When you cast this on a Big Daddy, it will temporarily become your ally and fight against whatever enemies attack you. This can let you quickly clear out large crowds of splicers, but keep in mind that before a Big Daddy will attack an enemy, you'll need to either be shot by it or shoot it yourself; it won't automatically be hostile to enemies you see.
Hypnotize Big Daddy drains an entire bar of Eve, so it'll cost you an Eve hypo if you want to use it. You can get around this by casting it, then immediately switching to a weapon and tracking down some coffee or cigarettes to regain a sliver of Eve, which will forestall the use of a Hypo and let you cast the spell again with the small amount that you regained. (If you have the Bloodlust tonic installed, you can simply whack an enemy with your wrench a couple times to get you above zero Eve.)
Note that you can still force the Big Daddy to turn on you by accidentally attacking it, so try not to use explosives while it follows you, and try not to get hit if you have Static Field active.
Cyclone Trap
Cyclone trap lays down a small trap where you target it. If a splicer runs over the trap, they'll be launched into the air, taking damage from hitting the ceiling and from their fall. This will also knock them over, allowing you to get a few licks in without fear of being attacked yourself.
You can set as many as five cyclone traps at a time, so if you know that enemies are going to be coming from a certain direction, you can make a little trap across a hallway to be sure you get them. Unfortunately, the traps themselves are pretty small, making them easy for your opponents to miss when they're charging you. However, you can lay them down at a good range, and they appear almost instantly, so these are a great way to get a first attack in on a Splicer that hasn't noticed you yet.
Insect Swarm
If you find yourself having problems with groups of enemies, you can use Insect Swarm to try and distract them. While the insects themselves deal little damage, Splicers that are caught in the swarm will be unable to act for a while, letting you attack them freely.
While the Swarm is most useful against Splicers, it can also be used against Big Daddies. They'll resist the effects, for the most part, but if you're lucky, a Bouncer might temporarily slash at the air around himself rather than attack you. Rosies will start firing in random directions, as well. This'll give you a bit of breathing room when taking on these behemoths.
Winter Blast
Of the elemental attacks, one of the least useful is probably Winter Blast. Freezing enemies is helpful since they can't attack you, but smashing their bodies will also prevent you from looting them. That said, if you're having trouble hacking some objects, use Winter Blast to freeze them before attempting the hack! Not only will this stun hostile mechanical enemies, just like Electro Bolt, but it'll also slow down the fluid in them, making for an easier hack.
Walkthrough
You make a splashdown in the middle of the ocean right at the beginning of the game here. There's actually a bit of a clue to the game's eventual twist right here as you're sitting in your seat, but we're not going to reveal it, obviously.
After your plane crash, head up and towards the large building that juts out of the water. You're in bad shape, but you're still capable of swimming. Head up the steps and into the building. You don't know where you are, but one thing's for sure: it's the only place you're going to be for a while. Soon enough you'll find the bathysphere lever. Head inside and take the trip down to Rapture.
Welcome to Rapture
After Andrew Ryan's little spiel is over, you'll find yourself in Rapture. Things go…poorly, at least at the outset. Take the shortwave radio off of the wall near the door to speak to Atlas, your initial guide to the game--he'll be leading you to higher ground, and hopefully help you avoid the vicious enemies in the area.
After the fiendish splicer is drawn away from you by the gunfire of the drone, pick up the wrench in the spotlight and use it to blast through the chunks of stone that are holding up the door, then crawl through. Be prepared to backtrack, though, as a burning couch will immediately head down the steps towards you. When it comes to rest, head back up the stairs and kill the Splicer there. He'll wound you a bit, but no worries; he'll drop a healing pack and there'll also be some food items on the table here. Eat them to heal yourself.
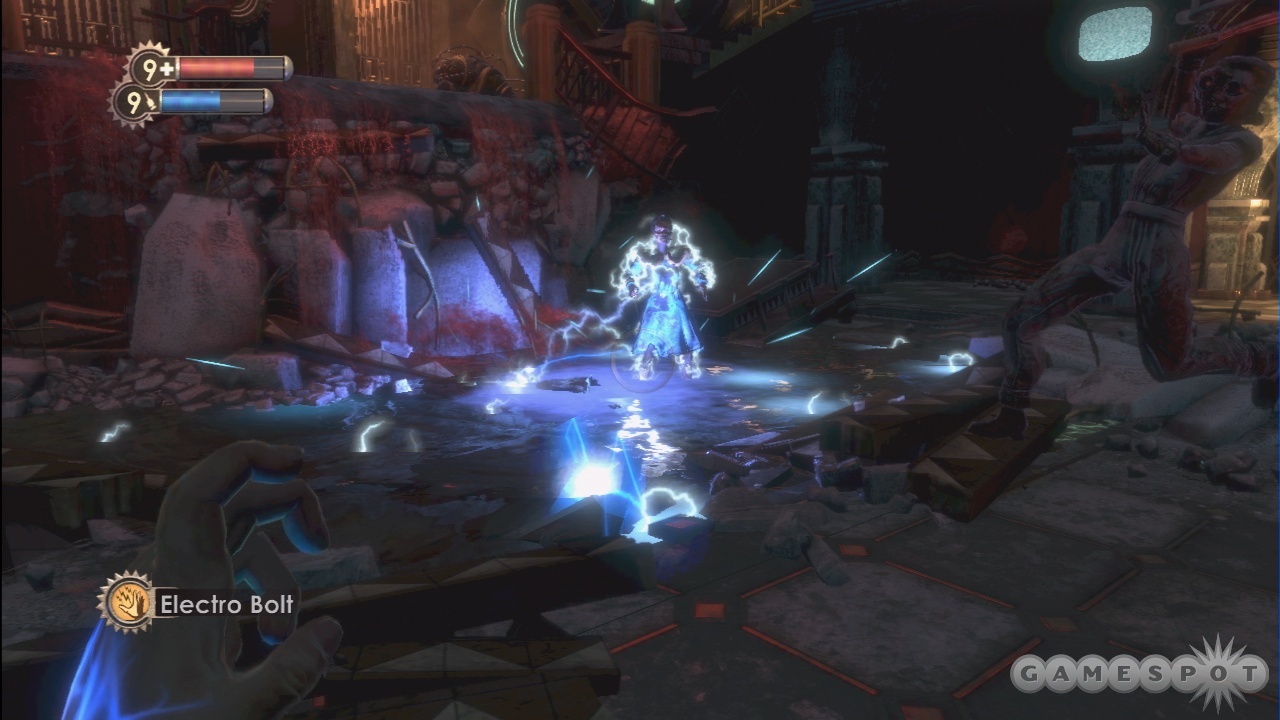
When you're ready to move on, head up the stairs and exit through the door. You'll see something called an Electro Bolt plasmid in front of you. Grab it, and you'll automatically--and perhaps not very wisely--inject it into your arm. After the cutscene that follows, use the Electro Bolt power on the broken switch by the door here to open it.
Finding Atlas
Head through the pipe in front of you. You'll be stopped short by the sudden arrival of your plane's fuselage, however (sure took its time in sinking, eh?); you'll have to climb through it to move on. The hallway will end in another lounge a bit down the way, so search everything for more items. The bodies, the trashcans: anything you see may hide delicious treats.
When you're done searching, the splicers will bang through the door. Get used to the process of taking them down: you hit them with an Electro Bolt shot to stun them, then whack them with your wrench. That'll take care of them nicely, so repeat the process on any others in the area.
As you ride the elevator nearby to the upper level, Atlas will give you your first real goal: he wants you to go to a place called Neptune's Bounty and find his family. Kill the Splicer nearby and take the Revolver from the crib that she's guarding. This is your first weapon, but you won't have enough ammo to use it just yet. You'll find plenty as you go along, but stick with the Electro Bolt/Wrench combo for now.
Goal: Go To Neptune's Bounty
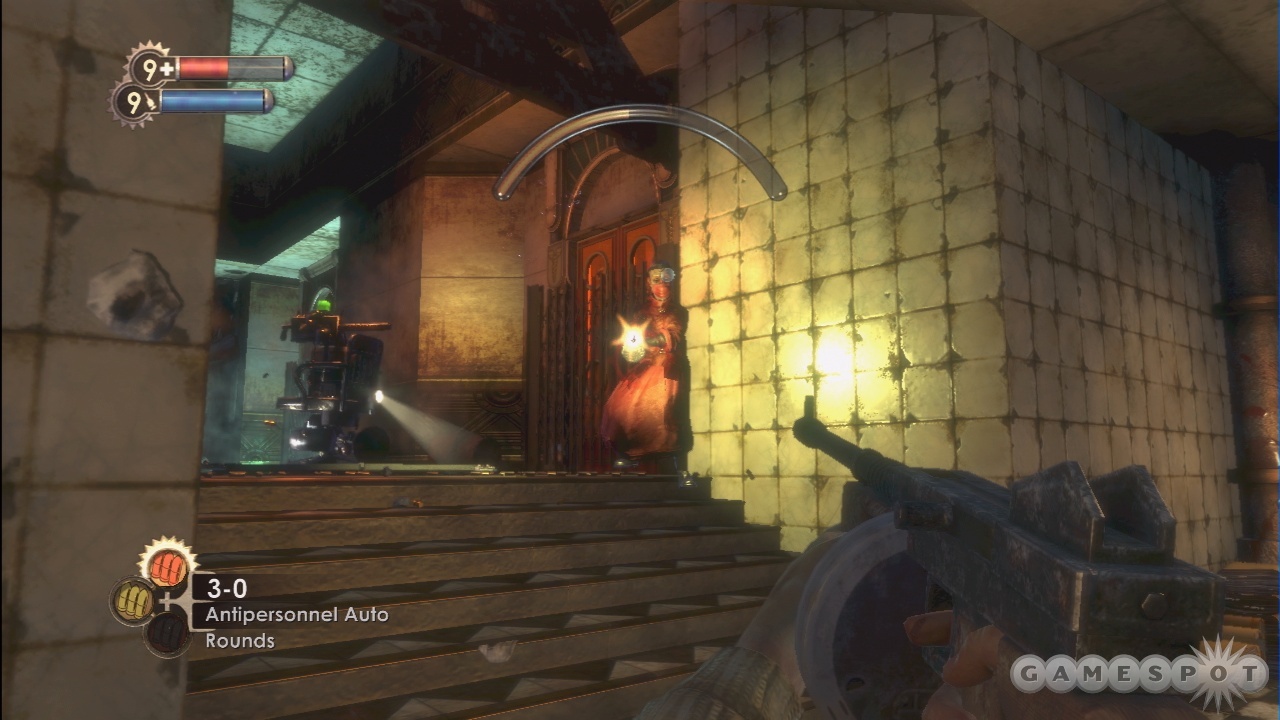
Head into the Kashmir Restaurant nearby to start out towards Neptune's Bounty. There are plenty of enemies in the Kashmir, with a number of them being located in the downstairs dancing area. Head down there to find a pair of splicers, and take both of them out. When you kill the woman in the kitchen, explore the area to find another corpse with a decent amount of cash on him. Take it all, then head back to the dancefloor and zap the water to kill the enemies there. An audio diary can be found on the table here; these will be one of the neatest ways in which you'll continue the story of Bioshock. Be sure to listen to all of them as they come along.
You'll encounter your first Little Sister after passing through the Ladies Room in the Kashmir to the Footlight Theater. There's a hole in one of the stalls. Pass over the light walkway and head downstairs to see precisely what happens when people screw with the Little Sisters--they get a visit from a Big Daddy.
Transit Hub
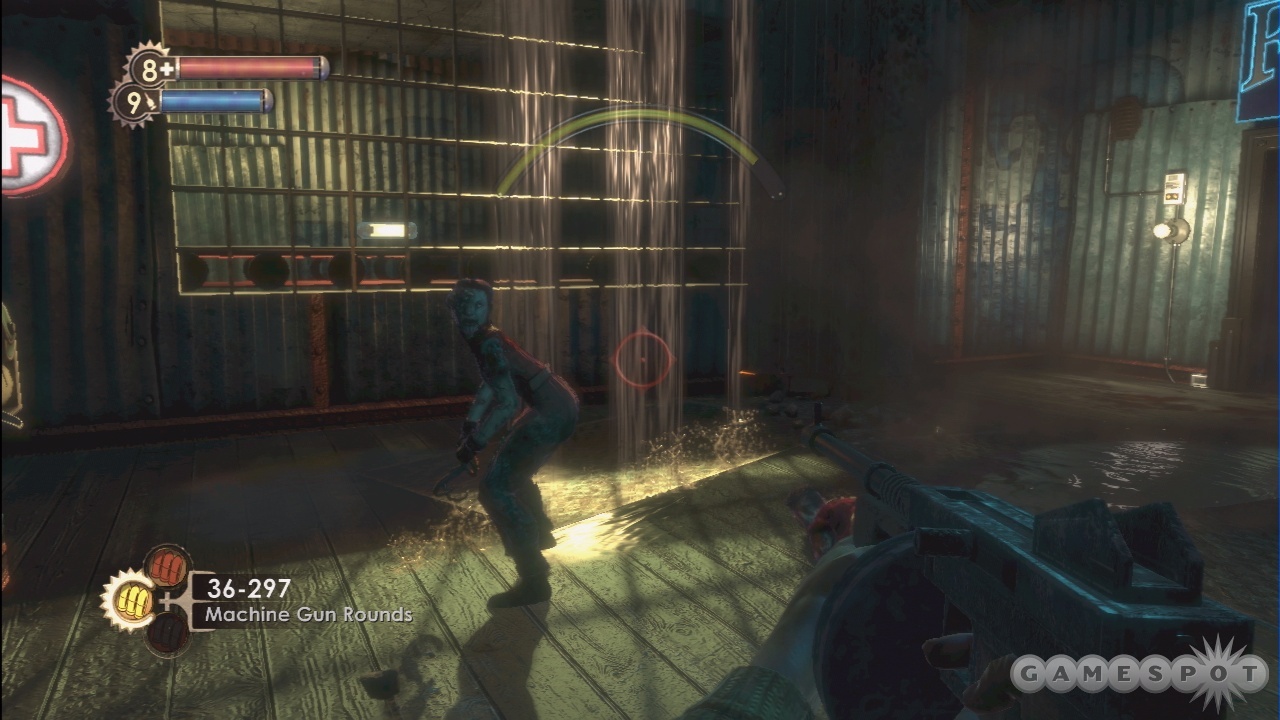
Proceed through the theater into the top floor of the Transit Hub. You'll have your first taste of multi-target combat here, as two splicers will attack you at the same time. The usual formula applies here: zap one of them and beat them with the wrench (or shoot them), then proceed to the other one. If you have enough bullets, feel free to simply shoot them from a distance. If you manage to get close to them without surprising them, you can also just zap the water to take them both out. Be sure to search the body of the Big Daddy; these guys usually drop a significant amount of cash.
When you reach the bottom of the room, you'll find that the path to the Neptune's Bounty will be sealed, and that you'll have to face off against a goodly number of splicers all at once. Now's the time to use the ammo for your weapon, as well as the first aid kits that you've been hoarding. Hide in the bathrooms here to force them to follow you and let you jam them into a chokepoint. The second wave will also come from the stairs and drop down into the pool of water here, allowing you to zap the water to kill them all.
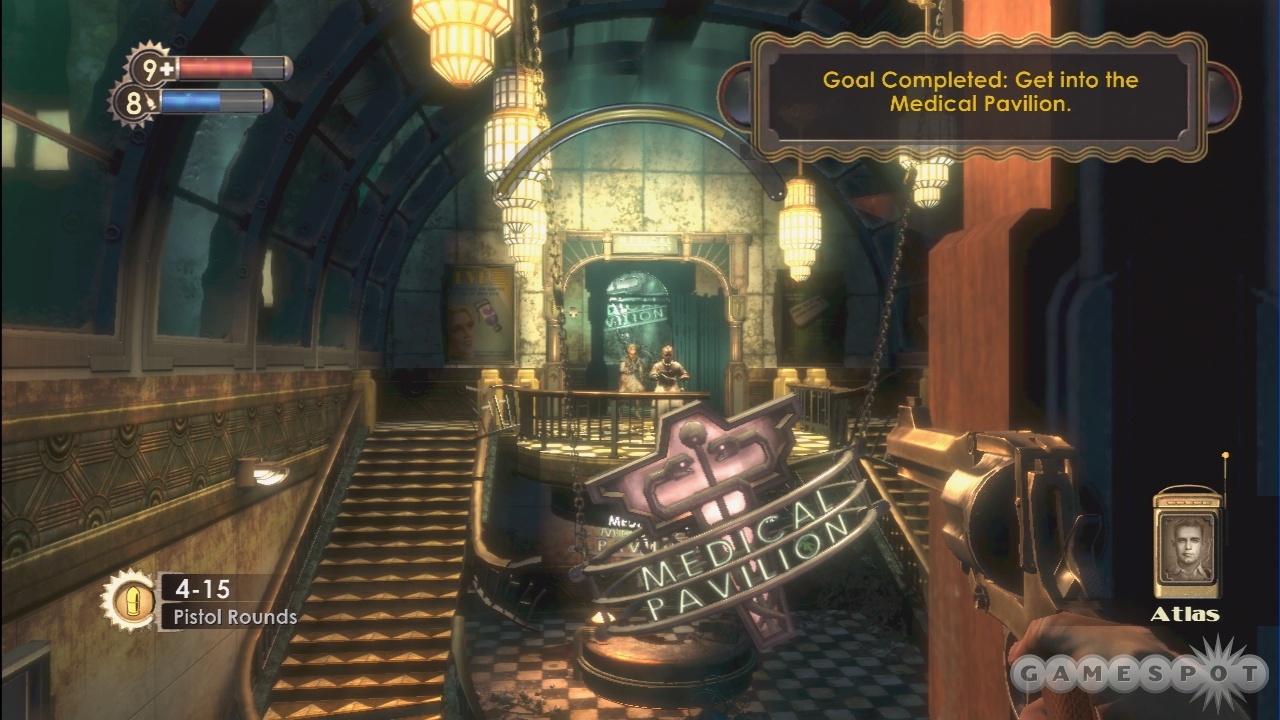
Head down the hallway to the Medical Pavilion. You'll get a nice little message from Andrew Ryan when you arrive. Wait for Atlas to open the doorway, then head through to the Pavilion.
Medical Pavilion
Goal: Use Emergency Access Route
Your first vending machine is to be found here, although it's unlikely that you really need to buy anything yet, and in fact you should save your money for the moment. Search the area for another audio log and more items, then head upstairs to repeat the process. In the end, though, you'll need to head through the emergency access path to move on; it's the doorway with the security bot that lies broken in the middle of it. You'll need to hack it to move on. It isn't super difficult, as long as you pay attention to the little tutorial: your goal is to connect the fluid that flows from the starting point to the ending terminal. Click on all of the obscured tiles to reveal the piping beneath them, then click on the pieces you need to send them to your holding cell in the bottom left of the hacking area. Move it to the tile where you need it by clicking there as well. You can hit Y (on the 360 version of the game) to speed up the fluid when you think you have a solid connection. It might be confusing at first, but eventually you'll get the hang of it.
Tip: After hacking the security bot, you'll be able to hack the vending machine as well. That'll make more items available and make the available items cheaper. You'll probably want to keep saving your money until you can afford the Electric Buck ammo, though, which you won't need for a while at any rate.
When you get through the door, you'll have a new friend in the security bot. Let it follow you through the door, then hide behind a pillar as it mops up in the battle between the two splicers here. Check their bodies, then head upstairs and flip the switch on the panel to open the doorway behind you.
Goal: Get the key from Steinman
To use the emergency access route, you'll have to get the key from a Dr. Steinman who runs the Medical Pavilion. Head into the nearby hallway, then take a right to find a machinegun. Not much ammo for it at the moment, unfortunately, so you'll probably want to stick with the pistol for now. Anyway, flip the switch here to restore power to the main Medical Pavilion area.
That will cause a number of Splicers to start pouring in your direction, however. Start backtracking towards the Medical Pavilion entrance, shooting enemies as you go. Whenever possible, tag a foe with a single bullet, then let your security bot finish them off, to help save ammo.. Kill everything in your way, then open the door leading to the Surgery Ward, where Steinman resides.
Surgery Ward
Unfortunately for you, there are turrets set up in the surgery ward. They'll make mincemeat out of you if you allow them to remain standing, so you'll have to disable them. Doing so can easily be done with a Electro Bolt hit, but you'll have to expose yourself to gunfire in order to hit them. There are two turrets here, so try to nail both of them and hack them. If you do so, then you'll be able to bring your enemies back into their fields of fire and use the turrets to kill them. Don't expect them to last too long, though.
There are a number of enemies in the area, including a nitro splicer that will throw grenades at you. He's pretty tough, so he'll probably take out one of your turrets before you manage to take him down.
If you can, try to hack the two vending machines in the pool of water to one side of this area. They'll dispense ammo for you that'll be important in an upcoming fight.
Ignore the branching paths here, and head straight through to the Surgery Foyer. When you arrive, Steinman will block your progress by bombing a sign that blocks your progress onward. In order to proceed, you'll need to find a Telekinesis plasmid. Before you can do that, though, you'll need to find some way past the icy barricades that block your paths back in the Surgery Ward.
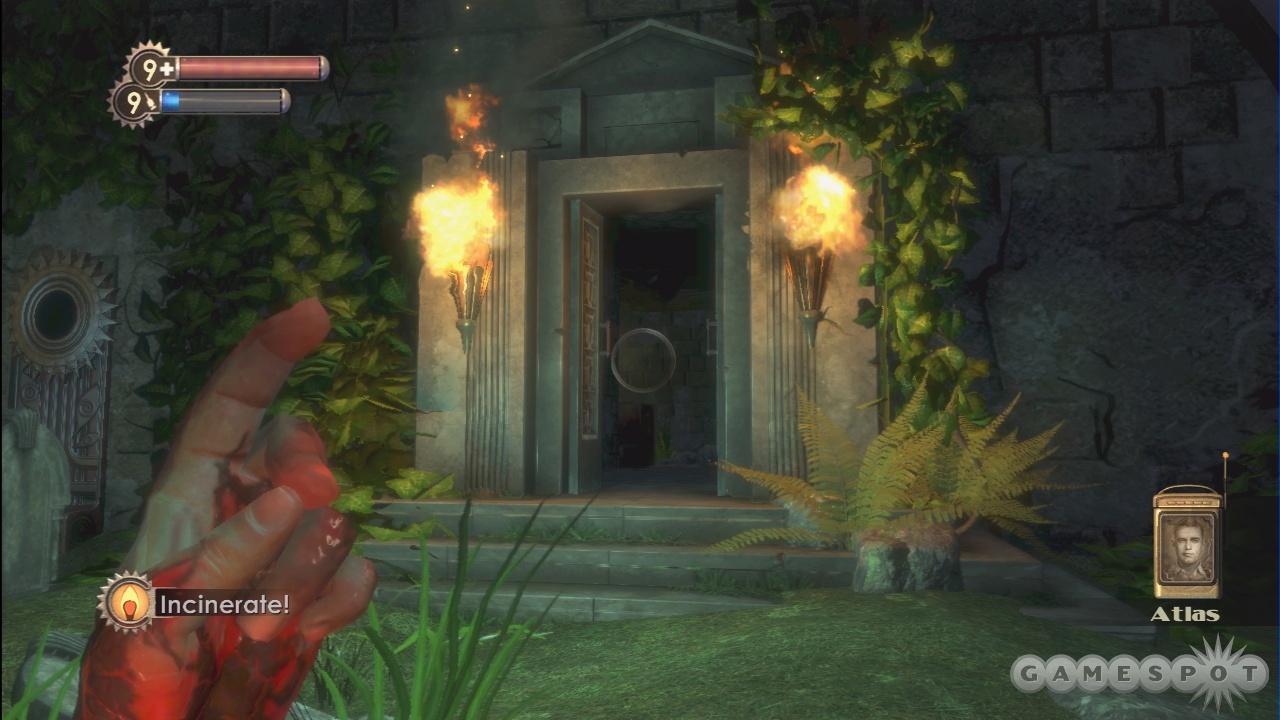
Finding Incinerate
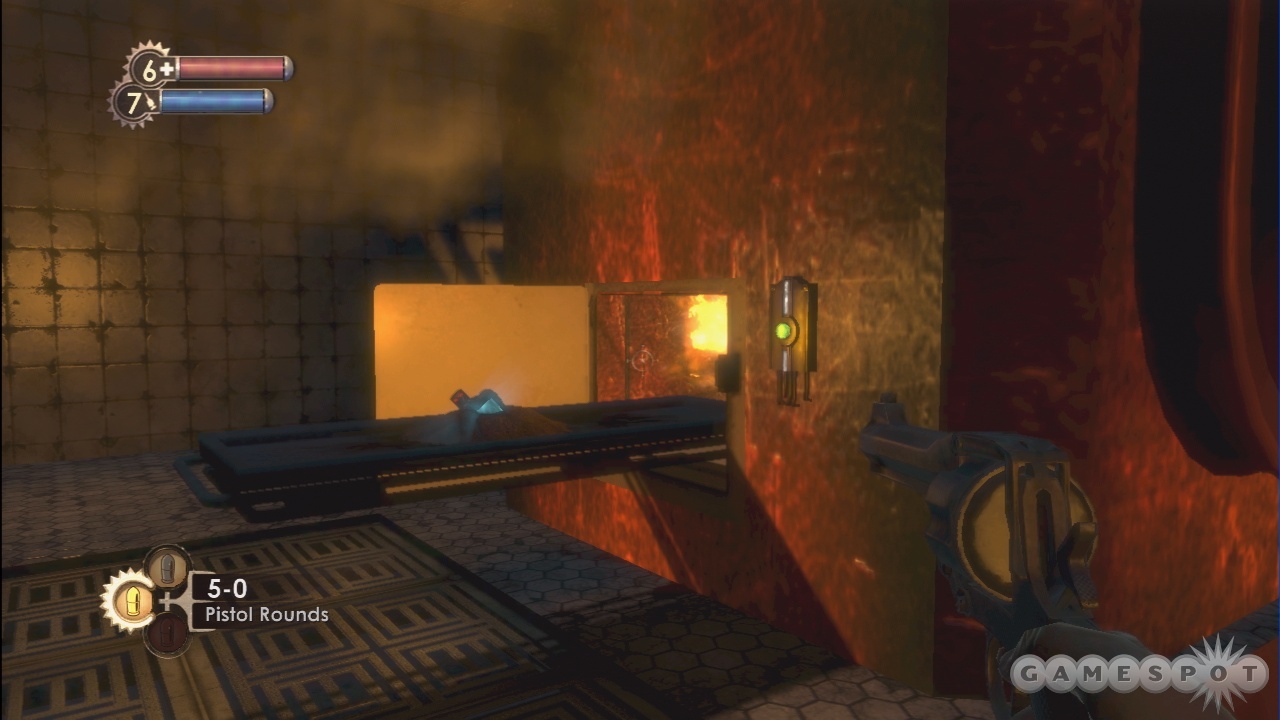
Before heading out to Surgery, check around the other areas here in the Medical Pavilion. In addition to the Surgery Ward, there's also a crematorium--hack the camera here to prevent it from detecting you. You can find a body by an incinerator nearby; press the button nearby to burn it up, and you'll receive a Hacker's Delight tonic, which will restore some of your health and EVE whenever you hack anything.
Head upstairs and crawl into the locked room to find an Incinerate plasmid. That'll let you set almost anything on fire, including the oil slick outside the room. Do so to burn up the enemies here. In addition, there's also a 30-round clip of machinegun ammo in one of the open lockers.
There's also a supply closet beneath the stairs leading to the surgery ward. Zap your way into it to find an object that will allow you to automatically hack into any object--but only once.
Now that you have Incinerate, you can melt the ice that blocks your path here. One of the ice barriers leads you to the Twilight Fields funeral home, while another blocks the path near the supply closet. Burn both of them.
Funeral Homes
Kill the Splicer near the door here and check the tiny coffin for items. There's a code written on a piece of paper here--0451? Interesting. You can use it on the doorway nearby to unlock it and find some supplies. The morgue room here will lead you to an autopsy table with a Security Expert tonic to find. Nab it and apply it! Lastly, another Splicer will throw a coffin at you when you leave. Avoid it, and especially avoid the turret in the doorway nearby, as it'll pop open when you look for items down there. There's a safe behind the turret, though, which you can pop open as well, or autohack if it's too hard.
Downstairs
Head back down the steps towards the supply closet you raided before and melt the ice there. Proceed onward and start poking around. The first door on your left is another medical experimentation ward. There's a turret to your right as you enter, so zap it and hack it, then proceed to look around. You can find a Monkey Wrench tonic by looking along the floorboards for a vent cover and whacking it with your wrench; that'll let you crawl through and nab the tonic.
After exploring this area, return to the hallway and grab the Shotgun. You'll have to fight off numerous enemies after you grab it, and there's really nowhere to hide, so start backpedaling and taking them down with the shotgun. If you got the Monkey Wrench tonic, then you can also kill these guys with a single blow from the wrench.
When you've cleared out everyone, you can start working on finding the Telekinesis Plasmid. You can find it inside the Dandy Dental office nearby; just stroll on in and pick it up. You'll have to write over another plasmid to get it, but don't worry; you'll be able to change these around in the future. For now, the Incinerate plasmid is probably the less useful, so lose it and keep the Electro Bolt as your alternate. With the Telekinesis power, grab the tank of oxygen off the floor and throw it at the splicer that appears to kill her.
Some more goodies await in the two remaining dental offices, in a nearby corridor. After disabling or shooting the turret that watches over the corridor, you can hop over the boxes nearby and enter the Painless Dental office there to find a Speedy Hacker tonic. This is one of the game's best tonics, as it'll make all of your hacks easier, so don't miss it! Also, smash the grate on the vent nearby to find another small office with some goodies.
At the end of the corridor, you'll find Chompers Dental. Use Telekinesis to grab the key from the cracked window and open the door. Kill the enemies inside to find a safe; hack it for some machinegun ammo and cash.
Aesthetic Ideals
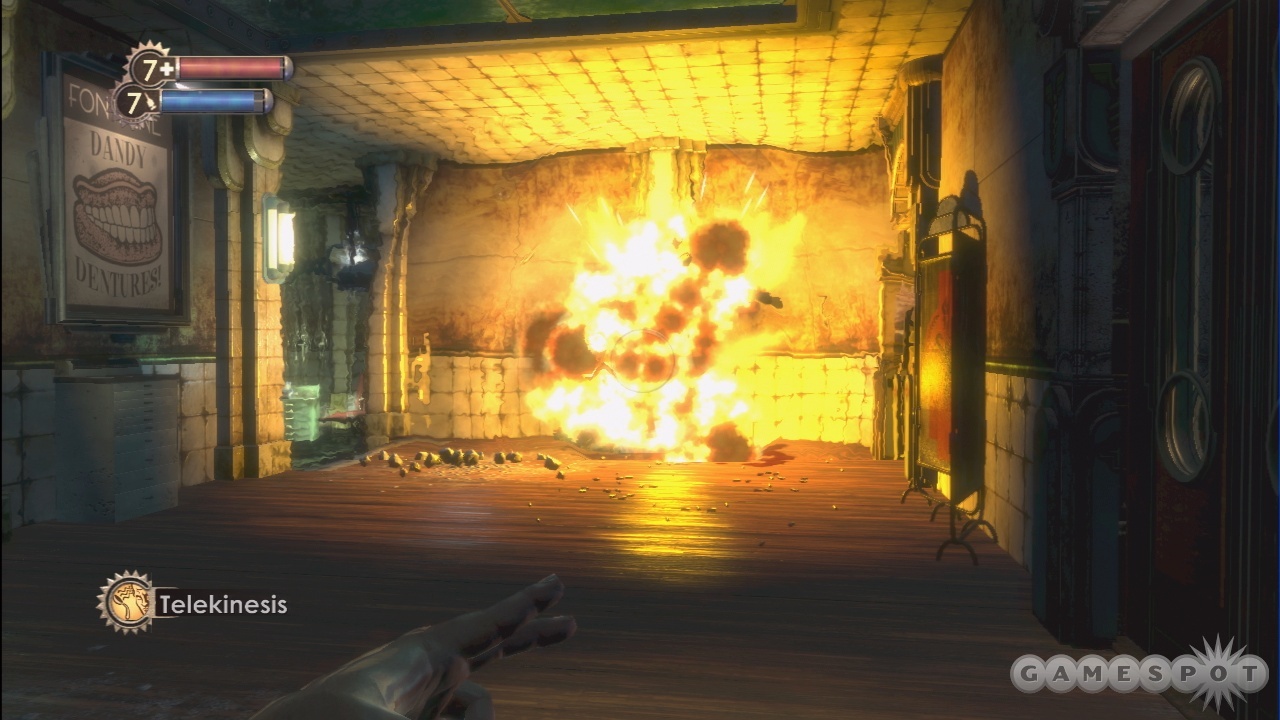
Head back upstairs now and down the corridor leading to Dr. Steinman's Aesthetic Ideals. (If you run into any more Nitro Splicers, use Telekinesis to throw their bombs back at them; that's the easiest way to kill them.) When you do, a nitro splicer will appear on a balcony and chuck grenades at you. Use Telekinesis to grab a grenade from mid-air, then throw it at the debris in front of the doorway to blow it up.
In the nearby hallway, you'll be faced with a turret. Zap it if you can, but if not, try to shoot it with armor-piercing bullets. You'll find a Static Discharge tonic on the ground in the hallway here; equip it to return a bit of electrical damage to anything that strikes you. It's easy to miss, so keep an eye out.
Duck into the office to your right to find a camera, a safe, and more armor-piercing bullets. Soon afterward, you'll come across Dr. Steinman himself. The man wields a machinegun, so he's not going to be easy to take down. If you brought along Electro Bolt, head into his chamber and attempt to lure him into the water, either by Telekinetically throwing a fuel canister at him and setting him alight, or by running through the submerged portion of the level and waiting for him to follow you. You can then zap the water to deal a goodly amount of damage to him. If you brought Incinerate, then set the oil in the room on fire and try to lure him through it. He'll head to the water to douse the flames, giving you time to Telekinetically pick up one of the fuel canisters and using that to finish him off. Or you can just shoot him a bunch of times, but he has plenty of health! You can also lure him out into the hallway and let your hacked turret or security camera deal the bulk of the damage, but he's tough to lure out.
When Steinman dies, grab the emergency access key off his body, then loot his safe and desk to replace any first aid kits you used up. Return back to the hallway you passed through earlier, defeat the splicers, then head back through the entryway. The passage to the Medical Pavilion has been destroyed, forcing you to take another detour.
Choices, Choices
You'll come across an unprotected Little Sister here: her Big Daddy has been destroyed, leaving only you and she…and Dr. Tanenbaum. Your choice is to either harvest her for the ADAM that she carries, or "rescue her". You'll get less ADAM for the latter choice, but Tanenbaum will make it worth your while in the future.
ADAM is what you spend on new plasmids at Gatherer's Gardens, so the choice isn't a trivial one. You'll get 80 ADAM for rescuing Little Ones, while harvesting them will net you twice that amount. You'll have an easier time playing through the game if you harvest every Little Sister you can, but will you be able to sleep at night? If you must know, the rewards you get for rescuing Little Sisters will probably eventually outweigh the loss of ADAM, so if you want us to tell you what to do, we would recommend that you rescue the girls.
Regardless of your choice, you can buy new Plasmids at the nearby Gatherer's Garden. You'll definitely want a health upgrade at this point, and if you have the extra ADAM, the Enrage plasmid will be handy in dealing with upcoming groups of enemies.
The First Big Daddy
In order to take out the Big Daddy, you'll need to use pretty much all of your anti-armor or electrical ammo. You might want to check the vending machines in the area and buy more of that ammo before attacking the enemy. The vending machine near the exit to the Emergency Access passage can be hacked to dispense Electric Buck ammo for your shotgun; buying 6 or 12 rounds of that will let you pick off the Big Daddy without too much trouble.
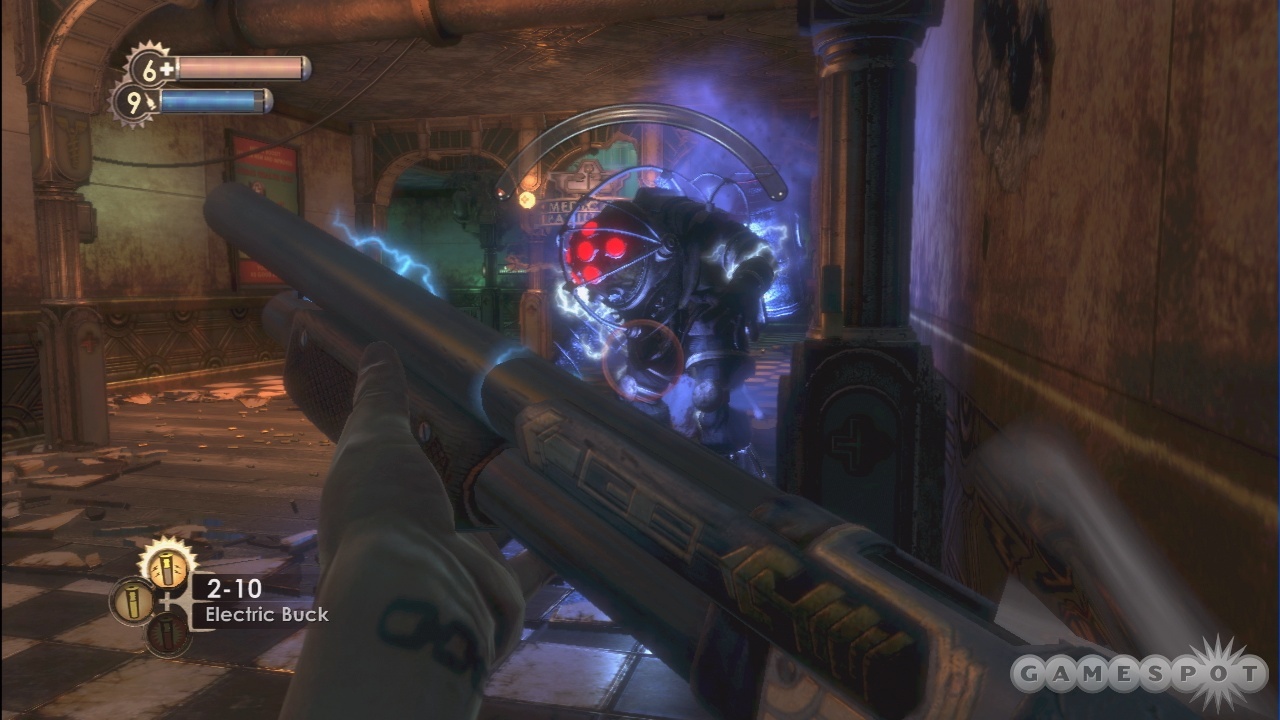
Now, don't let appearances fool you: Big Daddys are bad-ass. They can move incredible quickly, and will stun you to prevent you from running away from them. After engaging them in battle, all you can really do is unload on them and hope that you manage to hit the healthpack button before you die. With the shotgun ammo, though, you can stun them temporarily, allowing you to hopefully unload on them. When you need to reload, though, they'll come back with a vengeance.
If you want, you can try to lure the Big Daddy into the crematorium, where you can hide in the upstairs cubbyhole and fire on him from there, or down into the dental area, where you should be able to crawl into one of the inaccessible areas and fire away without too many chances of being hit. Take it slow and use electric buck on him to stop
With the Big Daddy dead, harvest or rescue the Sister, then return to the Emergency Access corridor. Find the bathysphere beyond it and head on to Neptune's Bounty.
Neptune's Bounty
You can use the Gene Bank here to shuffle your plasmids and tonics as you like. Movee through the semi-flooded passage in front of you; a splicer will jump up into the ceiling to avoid your wrath. Look up after her, and you'll see some Electric Buck ammo up there; use Telekinesis to grab it.
Move around to the southeast and you'll come across another Big Daddy, but this one is actually a Rosie. They don't rush you like Big Daddys do; instead, they use their Rivet Gun to attack you from a distance. Don't attack it yet, though; it'll come under attack from a few gentlemen that seem to want its Sister's ADAM. Wait for them to do their damage; the Rosie will eventually kill them, but they'll take off a large chunk of its life. You can finish it off with your Electric Buck. If you wait around for a bit, more Rosies will spawn and take Little Sisters out of the walls. Rescue or harvest them, as you like, or just leave them alone and deal with them later. Be sure to kill them before you leave the level, however. If you want to open on this one with a bang, use Telekinesis and find a gas canister to chuck at it before resorting to anti-armor or electrical rounds.
Explore this large room before moving into the Fishery. There's plenty of machinegun ammo under the floorboards, as well as a pair of turrets that can be shocked and hacked. Plenty of splicers make their way through here, as well, so be ready for them. You can also find the Medical Expert tonic embedded in the ground here.
The Fishery
Make your way into the Fishery when you're ready to move on. You'll come across a rocket turret pretty quickly here, so try to shock and hack it as quickly as you can to turn it on your enemies. There's another Gatherer's Garden here, as well, and it'll sell a couple of Plasmid slots for 100 ADAM apiece; well worth the money. If you've been rescuing your Sisters, then you'll also receive a gift here, in the form of the Hypnotize Big Daddy plasmid. While you have to have a Big Daddy around to use it, it'll be pretty handy when you can, as they'll make mincemeat of most of your enemies.
Fight your way to the bottom of the area to find a hackable door with some goodies beyond, (the code is 5380, which you'll find on a diary later on) then return to the rocket turret and move through the door behind it to reach the next goal.
Goal: Find The Research Camera
When you meet Peach Wilkins in the fishery, he'll tell you that he wants you to find him a research camera before he lets you through the doorway. First, though, you'll have to survive your encounter with a super-splicer of some sort: a woman that drops from the ceiling and starts to slice away at you. Hack the first aid station here if you can, and try to avoid her for 15 seconds or so; eventually, a security bot will come along and chase her away. Peach refuses to relent, though: you'll need to find the camera, which is in the wharfmaster's office, before he lets you through the door.
Head back up to the upper level of the building, where you'll find a new passage to the wharfmaster's area. This is a perfect time to try out your Hypnotize Big Daddy power, assuming you obtained it. Make your way up the stairs until you reach the Wharfmaster's office; Atlas will contact you again when you do. There are plenty of security cameras in the area, so be ready to either hack them or shoot them with anti-armor ammo if they're out of reach.
Wharfmaster's Office
The Office is covered in turrets and cameras, making for a difficult trek through it. Either proceed with anti-armor rounds chambered up in your pistol, or shock and hack everything that you see. Explore a bit, and you'll find an air conditioning vent that leads to a barricaded office; you can find more grenade launcher ammo there.
Fight your way through to the office itself, and you'll find the Research Camera. With it, you can take a picture of the Spider Slicer on the other side of the window. Wait until it's facing you and up near the window for bonus points on the picture; you'll wind up with more damage when you face off against Spider Splicers in the future. You can take pictures of almost any enemy to earn extra damage against all enemies of that type, but for now, your goal is to find and take pictures of three Spider Splicers, including the one you already saw. One down, two to go!
Your path backwards from here is blocked now, so you have to find a new way to escape. Fortunately for you, one of the security windows nearby has been destroyed, allowing you to drop down. Before you do, though, grab the Security Bullseye plasmid from the windowsill and use it on the Splicer below you, assuming you have enough slots to fit it in (it's probably a lower priority than most others at the moment). That will cause him to instantly trip the security system and be killed. Yay!
Finding The Spider Slicers
Head out into the underwater corridor here and hack the security camera. There are plenty of enemies in both of the two exits from this area: Jet Postal and Fightin' Mcdonagh's bar. If you head into Mcdonagh's bar, have your camera ready, as a Spider Slicer will jump away from you as soon as you open the door! You should be able to get a snap of him before he does so, but only if you have your camera out and ready. There's also a Spider inside Jet Postal, but she won't retreat when she sees you. Take a picture of her, then run back to the hacked security camera and get a security bot to help you take her down.
There are a few more goodies in Jet Postal, so explore there and look on the shelves before returning to Mcdonaghs. First, drop down into the water near the Vita-Chamber and explore the little passage there; then return to the main area of the bar and clear it out.
Before you head into the room behind the bar itself, head upstairs and poke around the rooms up there. When you enter Room 5, another Spider Slicer will drop down behind you; take the opportunity to get another picture of him, if necessary. When you've explored upstairs thoroughly, head down through the doorway behind the bar and start poking around. There's a small hidden room behind some boxes that has a safe in it if you're looking to hack something.
When you're done in the bar, head back to the Fisheries and speak to Peach Wilkins again. You can find a Wrench Lurker tonic near the Gatherer's Garden by the rocket-launching turret here, and you'll also have to take down a significantly tougher Spider than you've been fighting; use grenades on her.
Peaches will let you in, but will ask that you give over your weapons by putting them in the pneumatic tube, which you'll be forced to agree to. Before doing so, though, use Incinerate on the ice nearby to find a Focused Hacker tonic. You can also change your plasmids at the Gene Bank nearby. It'd be wise to grab Incinerate and Enrage, if you bought it, along with Telekinesis. Anything else is up to you; Hypnotize Big Daddy will not be handy here.
Peaches--The Betrayal
Unsurprisingly, Peaches will turn on you after you enter his little icebox. You don't have any weapons with which to defend yourself, so you'll have to rely on hacking and plasmids in order to do the job for you. To begin with, move off to the right and find the security camera there; hack it to bring in a security bot to help you out during the fight. Then, find the healing station in the middle of the room and hack that as well. There's also a turret on the northern side of the arena, but it'll be inconvenient to shock and hack it.
With those helpers in hand, you can also use Telekinesis to throw barrels at your enemies (assuming they don't shoot them while they're in your hands--ouch!), Incinerate the oil slick to set people alight, Electro Bolt the water if they happen to dive into it, or Enrage them to fight each other. This fight is mostly a matter of using your First Aid to stay alive while you let the environment do its dirty work, though.
Peach himself is a Nitro Splicer, which can make fighting in the open a bit difficult. If you want to easily take him out, melt the ice in front of one of the two doors off to the western side of the room (check your map if you need help getting your bearings). Only melt one of the entrances, though; then head through. If you only melt one entrance, Peach and the rest of the gang won't be able to reach you except by following the path that you blazed. Peach himself can easily be dispatched by waiting in the doorway, then catching his molotov cocktails and returning them into his face.
When Peaches is dead, explore the area and melt any ice that you see to find more goodies, including a secret passage in one of the iceboxes that leads to a pile of frozen cash (check your map and look for the small tunnel in the east). You can head through the now-open door on the northern side of the room and retrieve your weapons from the pneumatic tube. Most of your ammo will be gone, but there's nothing you can do about that. Head downstairs to find the Power to the People machine. You're going to be able to pick one--and only one--upgrade for a single weapon of yours. When you pick one, the machine shuts down.
The choice here is going to be kind of personal, depending on the weapon that you find you use the most. The only really bad choice is Machine Gun Kickback Reduction; it doesn't do much to reduce the kickback, and does nothing to address the machinegun's real problem, which is lack of accuracy. everything else has its application, so choose something based on the weapon that you use most often. Personally, we went for Shotgun Damage Increase, but that's just us.
Smuggler's Hideout
Smuggler's Hideout is a fairly small level, where you'll meet Atlas at last--or at least see him. Head along the path, searching crates as you go and defeating the lone turret that blocks you, until you manage to reach the submersible control room. Flip the glowing switch there, and watch the fireworks. You'll see Atlas run out to the submarine bay, but things go…wrong.
Make your way through the nearby corridors, keeping your research camera active in order to photograph the Spider Splicers that will surprise you periodically. Kill the enemies, and blow up all of the fuel canisters you see; some at the bottom of the steps will reveal a semi-secret area. Be sure to look at the lake underneath the steps and telekinesis the anti-armor rounds down there.
When you make it to the submersible, things get even worse. Make your way to the Arcadia bulkhead and head on through.
Arcadia
You'll start finding ingredients in the crates now, which you'll eventually use at the U-Invent stations to create new objects.
After smashing off the chains of the doors, head out into the Tea Garden area. On the southeastern wall here, you'll notice a locked door. There's a torch outside of it that's lit. Use Incinerate on the other torch on the opposite side of the door to unlock it and find plenty of items and inventing materials.
Search the Tea Gardens for items. You'll hear voices, but don't think too much about them: these guys aren't friendly. Head through the doors on the north side of the area first; it leads to a little alcove where you can find more items. When you're ready to meet a new enemy, head through the door marked "Rapture Metro". Houdinis await within.
Houdinis are creepy enemies that are capable of disappearing and reappearing elsewhere, as you'll discover. Explore the ground floor of the area here, and try to snap a picture or two of the Houdinis that are creeping around. Keep a weapon out, though, and keep in mind that when a Houdini disappears in front of you, it'll likely wind up reappearing behind you, so watch your back.
When you reach the top of the stairs, kill the Houdinis, then look at the floorboards to find a couple of crawlspaces with goodies.
Through the Glens
Head across the path leading to the Rapture Metro area, using Incinerate to set the oil fields alight, and luring enemies back across them. When you reach the area with the electrically locked door, the turret, and the Circus of Values machine, start, again, looking for crawlspaces. There's one around the corner from the healing machine, near the potted plants, and another one on the wall near the turret. Check the Employee's Only room for more items, but be careful to jump on the table to avoid the electrical traps.
Head down the stairs here and through the door to find more Houdinis going to town with some other Splicers; apparently they don't like each other too much. There's a watery passage underneath the area here where you can find another electrical trap; beyond it is a crate and some ammo. You'll also likely spot your first Little Sister here; if you haven't yet, try taking pictures of her for some health and EVE boosts. If you manage to kill the Big Daddy, you can continually shoot the Little Sister (with film) if you rescue her, as she makes her way back to a vent.
There's also your first U-Invent terminal here. Using the junk items that you've been picking up, you can create new ammo for your weapons and other objects, as well. Hack it, then try your best to create some new ammo! Or just keep the junk and wait for a machine with a better selection.
Near the U-Invent, there are some boxes stacked up against the wall. If you can jump atop them and get up to the little ledge above you, you'll be able to open a little box and also crawl up to another crawlspace, where you'll find a shotgun and some items on a corpse.
There are a number of paths leading on from here, including the water path beneath the wooden planks. You want to head north, towards Rolling Hills, but there are also some very large areas to explore that aren't necessarily required, such as the Waterfall Grotto and a storage room down the steps to the west of the Rolling Hills entrance. Look around for items and goodies before moving on to the Rolling Hills. Of particular entrance is a little crawlspace near the Storage Room; after going down the stairs, you'll bypass a healing station and then come out near a Circus of Values area. Search the northeastern corner of the room to find the crawlspace, which contains a safe.
Note the position of the Bot Shutdown panel here. This is one of the first areas of the game where an alarm will summon two security bots instead of one. If you trip the alarm and quickly shutdown the bots, you'll have a pair of helpers guiding you along.
Rolling Hills
There's an RPG turret near the entrance here. Try to shock it and hack it if possible. If you do, then you may be able to lure a Big Daddy back into the area, have it summon a Little Sister, then let the RPG turret deal most of the damage to the Big Daddy and get you some easy ADAM.
Head down towards the exit to reveal a new travesty: Ryan will disperse a defoliant into the air, killing all of the trees in the Hills. Without trees, no oxygen will be generated for Rapture, and not much of good will come of that. Atlas will tell you to track down one Julie Langford, the woman who grew the trees in the Rolling Hills. If anyone can stop what's going on, it'd be her.
Proceed into the corridor leading to the Research Lab. Julie won't let you in to see her until you find her a rose specimen, however, so start backtracking through the Arcadia Glens. The destroyed vegetation will have revealed a few secret areas, but nothing of any huge import is contained within; you will want to start gathering Chylorophyll Solutions, however. You can also climb onto some of the rocks here to reach previously inaccessible areas, such as the balcony above the rocket turret.
Tree Farm / Waterfall Grotto
One large area has been exposed by the defoliant, however: the Tree Farm. Check your map; it's the large, unexplored area near the Glens. Head through there and start poking around. There's a Power to the People station in here, near the Circus of Values, that's easy to miss, so be sure to keep your eyes open.
You won't be able to proceed past the gates here just yet, so return to the hallway and head to the Waterfall Grotto. Even if you explored it before, you'll find a new tonic: Security Evasion. It's being attacked by a few Splicers, so grab some pictures of them before unloading a frag grenade onto them. The tonic'll make turrets and cameras take longer to lock onto you.
Anyway, at the bottom of the Waterfall Grottos, you'll find a rose bush. Grab a rose sample, kill the enemies, and return to Julie. She'll let you into the labs.
Research Laboratories
You can find the Hacking Expert security tonic on the desk as soon as you enter the area. It'll eliminate one alarm and one overload tile from each hacking attempt. Anyway, Julie's up in her office here, and has politely shut down all of her turrets for three minutes. Explore the lower levels of the office, if you like, then head upstairs. Julie will predictably not be around to shake your hand, but she has left you a message, a code: 9457.

Head into the office and search Julie's body, grab the Chemical Thrower weapon off the table, then use the code on the wall safe to nab the Market Key. The diary in the safe will give you your next goal: invent the Lazarus Vector. Start making your way out of the lab, and be sure to hack (not destroy) the security camera and turrets as you leave.
Goal: Create the Lazarus Vector
To create the Lazarus Vector, which will resurrect the dead trees, you'll need equal parts Distilled Water, Enzyme Samples, and Chlorophyll Solution. You can find them in the Farmer's Market, which you now have the key for. You likely have already found enough Chlorophyll at this point, but no matter: you still need the other ingredients.
Hack and fight your way back through the lab's security, then proceed through the tree farm and the Farmer's Market. You'll find a bulkhead leading on at that point.
Farmer's Market
There's an Enzyme Sample on the corpse just outside the bulkhead here, so grab it, then move to the main market area and hack the RPG turret to your right. It'll be a helpful ally here, especially if you can lure a Big Daddy towards it when you want to grab some Adam from the Sisters.
Check this little area before heading through the door to Worley Winery and Silverwing Apiary. You can find an EVE Link 2 tonic on the ground at the bottom of the steps below the RPG launcher. In the basement of the market, you can also find a Distilled Water element, as well as a hackable door that'll lead you to plenty of invent items.
If you look around in the market stalls, you'll find a machinegun turret. The fallen beam next to it leads up to a crawlspace with a few proximity mines in it, as well as two Autohack devices.
Silverwing Apiary
When you're ready to move on, head through the doors leading to the Winery and the Apiary. There's another Distilled Water by the door here. Go into the Silverwing Apiary. You'll be attacked by bees when you head through the doors, and there doesn't seem to be a great way to get them off of you--yet. Run away from them and you'll minimize the damage that they deal until they wind up fading away.
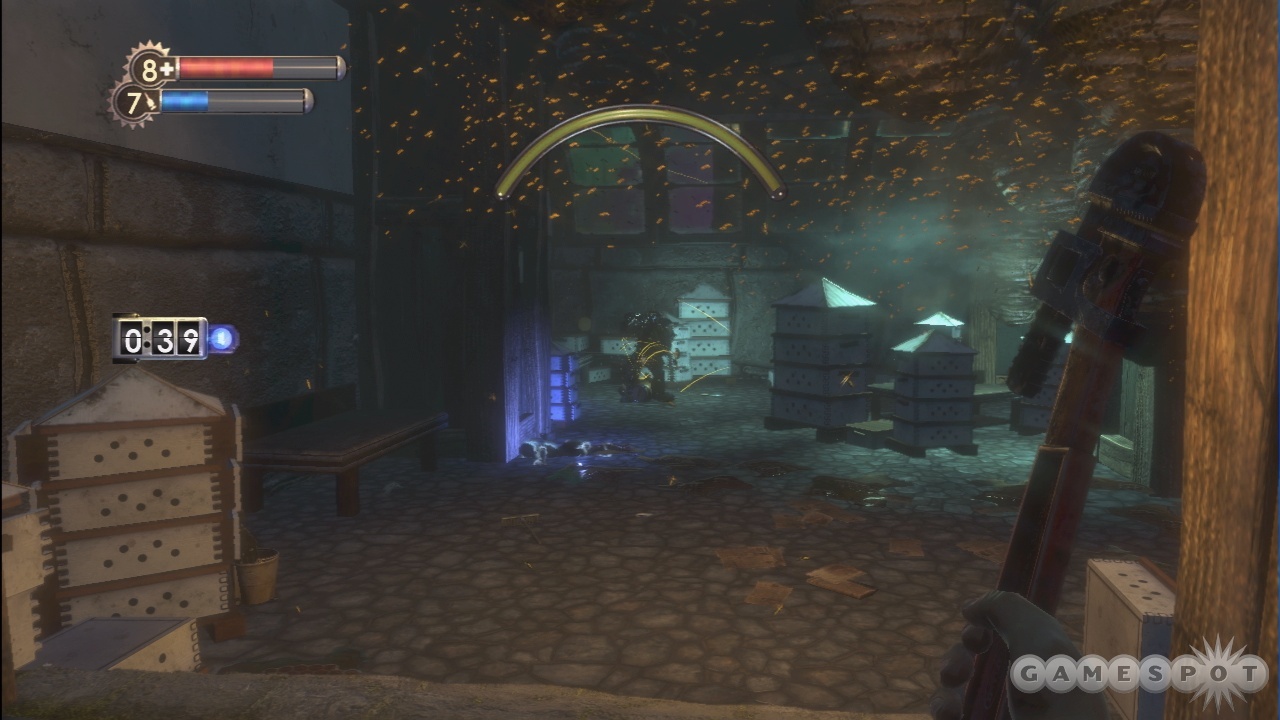
Anyway, the main room here is in the rear: the smoke room. You can activate the smoke here by flipping one of the two switches behind the glass. That will force all of the bees to retreat into their hives and prevent them from damaging you. Unfortunately, when you search any hives, you'll spawn a few Splicers that will come at you from the doorway, making it somewhat difficult to get your searching done before the smoke wears off. You can leave a proximity grenade by the door before searching the hives, if you wish, or set the oil slick here on fire and try to lure your opponents through it.
Regardless, you need to find six more Enzyme Samples to complement the one you found at the beginning of the level here. The process involves flipping the smoker switch, rapidly running around and checking as many beehives as you can for the enzymes, then switching to your offensive weaponry and blasting the Splicers before repeating the process. (If you have wrench powerups, most of the enemies can easily be defeated with it.) There's a Circus of Values shop in the apiary, which will let you buy health packs and EVE packs if you hack it. Might want to do so, as you'll be churning through some health as you search for the enzymes. There should indeed be at least six enzymes in the area, so nab them all and look through every nook and cranny for beehives. If you can't get to seven enzymes, then be sure you hit every beehive, and be sure that you picked up the enzyme near the beginning of the level; they're not found anywhere but this spot and back there.
Worley Winery
Hack the health dispenser and security camera here, as well as the turret, if you like. There's another Distilled Water on the floor near the camera, so nab it. There's also two more of them inside the safe between the camera and the turret, so hack it to open it up. There's plenty more waters scattered around the winery, so finding more shouldn't be hard.
Before you leave, though, explore a bit: there's another Power to the People machine in the flooded section of the bottom floor of the winery. There's also a Photographer's Eye tonic in a little shack down there, but be careful: heading towards it will trigger a trap involving tripwires and multiple splicers. You can head off the trap at the pass by hypnotizing a Rosie before heading into the shack.
Return to the Hills
When you have enough Chlorophyll, Distilled Water, and Enzymes to make your Lazarus Vector, do so at any U-Invent machine and start heading back to the Rolling Hills. Pass through the bulkhead to Arcadia, obviously, on your way. When you pass through, Ryan will trip an alarm that will send multiple security bots your way. The electrical chemical thrower ammo will cut them down rapidly, but you'll probably want to just run towards a bot shutdown station to end the alert.
Holding Them Off
Before you enter the labs, you may want to use a U-Invent machine or an ammo machine to pick up some anti-personnel ammo. Just a tip.
When you get back to the labs, head up to the office and insert the Lazarus Vector into the misting machine. That will start the process of regenerating the biosphere down here. However, Ryan will also have a present for you: he's sending a huge number of splicers your way. If you want to have any hope of living, you'll need to seal the main doors and kill off a number of waves of enemies. Head back to the main door of the lab and flip the switch there: you can also grab some items from Atlas in the Pneumo Tube.
With any luck, you'll have obtained the Hypnotize Big Daddy plasmid and will have a Big Daddy roaming the labs. If you've done that, then you might have an easier time of fighting here than you might expect. There's no way around a fight, but if you can hypnotize a Big Daddy to help you out, then you'll hopefully be able to use their powers to rid you of most of your foes. Otherwise, you'll just have to take them down the hard way.
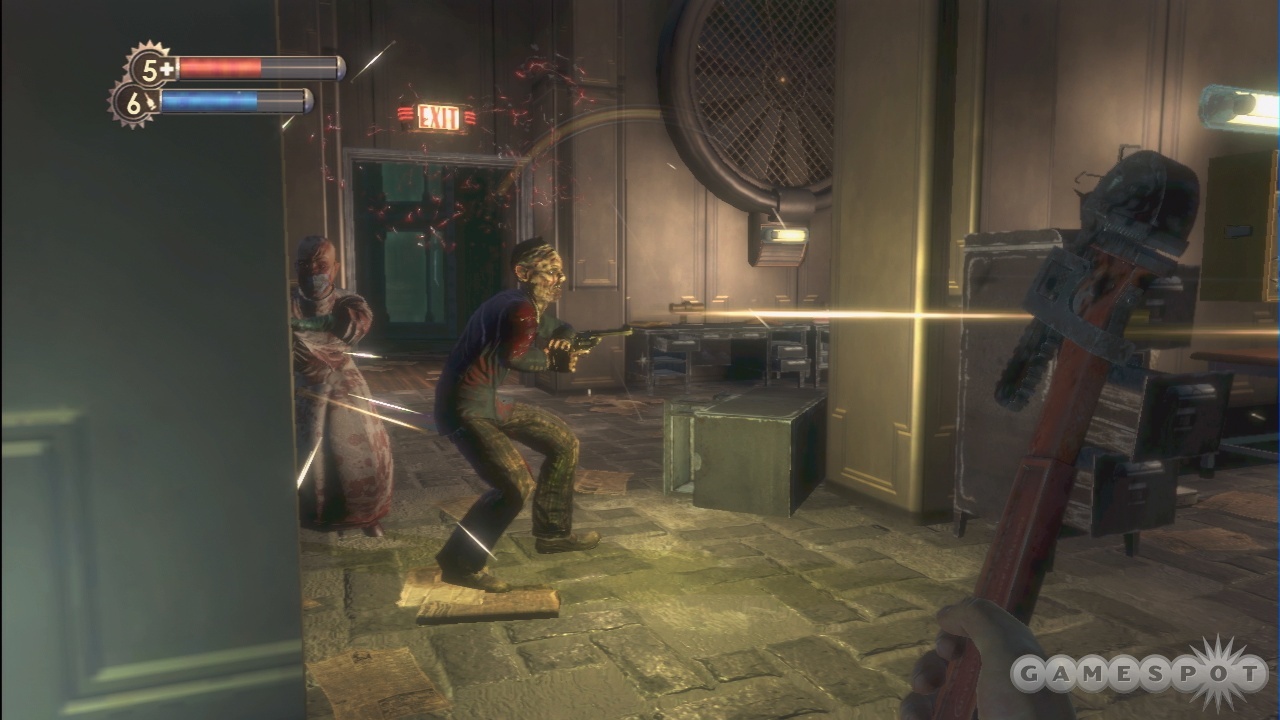
You're going to face three waves of splicers of various sorts. There isn't much to say here about combat tactics, since they'll be coming so quickly and in such numbers. If you've upgraded your machinegun firing power and have plenty of anti-personnel ammo for it, it'll likely be your best bet here; otherwise, you can try using the chemical thrower's freezing or burning ammo to get the enemies off your backs for a bit. There is both a healing station (which you should hack) and a Circus of Values, which you should likewise hack. If you run low on health, either use the healing station or buy more first aid kits.
As enemies come, shoot them or lure them into the oil slick near the stairs leading up to the lab, or use any other plasmids you have as you think will be effective. Search the bodies as they fall, time permitting, since they'll disappear rather quickly here. One thing to keep in mind is that you don't want to upset any Big Daddies in the area, assuming one is roaming around. If you happen to hit one with stray gunfire, it'll turn on you, and that'll probably be more than you can handle, if it's firing on you in addition to the Splicers.
Anyway: survive. Use as much ammo as you need to, and be ready for a tough third wave here. When the third wave hits, you will want to use up any remaining proximity mines that you have to cover your back, then wait for the door leading up to the office to open up. That will let you head back up to the office and flip the switch to disperse the Lazarus Vector, thus returning all the trees to life.
Fort Frolic
When you're ready to do so, head to the Rapture Metro station and enter Fort Frolic. There are slot machines near the entrance--this is apparently the entertainment portion of Rapture. You can use the slot machines if you want, but you won't always win. Keep in mind that there's a 360 achievement for hitting the jackpot! You might want to save your game before spending all your money trying to hit it, though.
The U-Invent machine here will let you make a number of new items, assuming you have the junk to create them. Explore your options before heading onward. You'll find a shop near the slot machines, with some shiny objects in the windows. Breaking them, however, will set off a one-minute alarm, so be careful around them, and don't bother breaking in unless you know where the alarm shutoff is or are capable of running far enough to avoid the security bots.
The Twist
When you attempt to head into the bathysphere here, one Sander Cohen will submerge it out of your reach, and then send spider splicers in your direction. This is the perfect time to go crazy with the picture-taking and finish off your research of these guys; just keep taking pictures until you get no credit, kill them (fire works well, especially napalm), then wait for another pair to arrive. After a few pairs have been dispatched, Sander will tell you to find him in Fleet Hall. You should oblige.
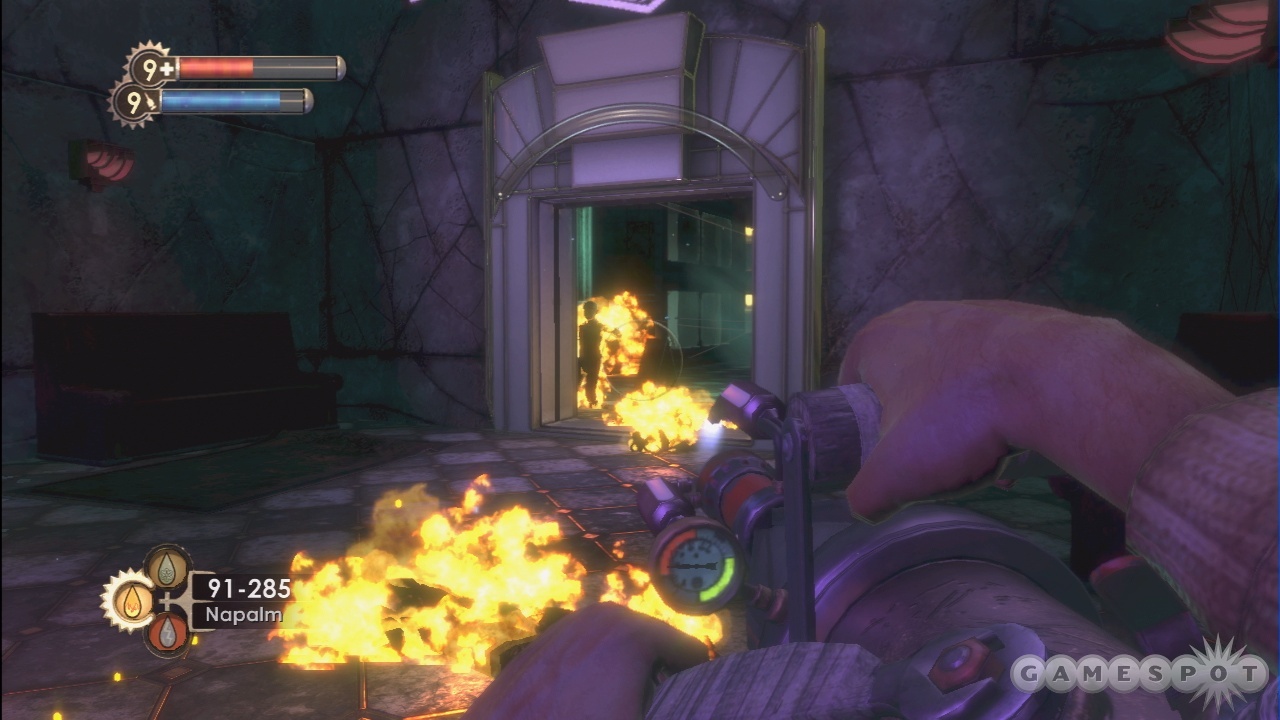
Head into the Atrium nearby and start looking around. Before heading upstairs to your goal, though, stay on the ground floor and make your way to the southwest, through the Cocktail Lounge, to a shop called Le Marquis D'Epoque. Inside, you'll find another Power to the People terminal, as well as a corpse with a code written by its body: 7774. Keep in mind that you'll be picking up the crossbow pretty soon, so you may want to hold off on upgrading weapons until you find it if you don't see anything that really appeals to you.
With that done, head back to the Atrium and go upstairs. Your goal is to the southwest, so head into the burned-up shop directly to the south first. This is Cohen's Collection. There isn't much to see here, but if you head up the stairs, you can disable a turret and find three wall safes. Pop them if you wish, but be aware that doing so will cause enemies to come into the room.
Fleet Hall Theater
Hack the camera here to be on the safe side, then head up the stairs to the storage area of the theater to meet up with Sander Cohen for the first time. He won't have much to say to you, so return to the foyer and use the call button next to the elevator to bring it up to your level.
You'll wind up overlooking the stage of the theater at this point, where a young Splicer is being forced to play a piano that's been rigged with explosives. He's dead whether you watch or not, so feel free to shoot him. Afterward, Sander will request that you get on the stage and take a picture of the unfortunate pianist, but first, explore this area until you find a couple of turrets. You can take pictures of them to increase your research score, if you like, but disposing of them is probably easiest to do with a frag grenade. They safeguard a…well, a safe, so hack it for the goodies inside. They also overwatch a vending machine with predictably overpriced theater food inside.
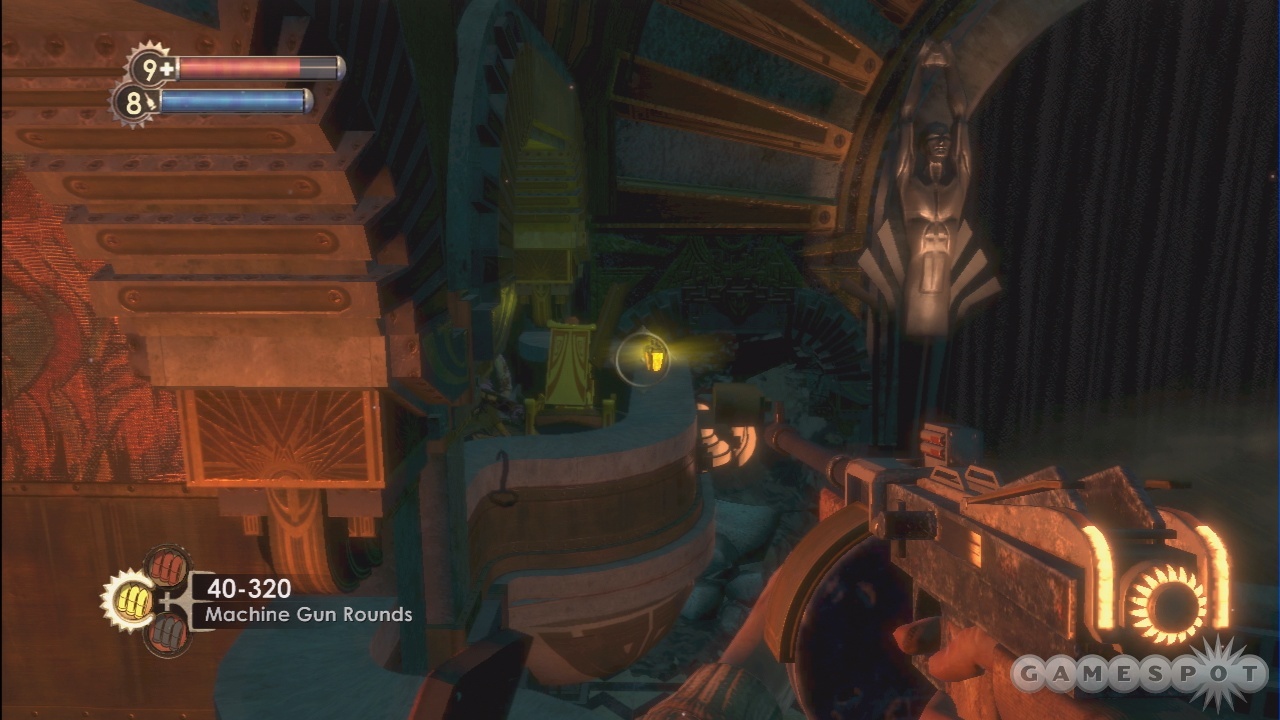
An Alarm Expert tonic is waiting for you in one of the upper boxes in the theater. You can jump to it from the box next to it, or suck it to you with Telekinesis.
Take the snapshot of Fitzgerald, then return to the Atrium as Cohen demands. Place the picture in his "masterpiece", the large sculpture of frozen bodies that's appeared on the floor, and you'll obtain the crossbow. Nice! If you didn't use the Power to the People terminal before, feel free to do so now.
Martin Finnegan
Cohen has another task for you now: capture pictures of the corpses of three more former proteges of his, all of whom reside in the Poseidon Plaza area here. After making your way through the frozen corridor, head into the larger room here and get ready for a fight.
Martin Finnegan is lying in wait for you as you enter the room here. Fry the frozen splicers with your napalm or Incinerate powers to clear the room a bit and search their corpses. You can shatter them, if you like, but then you won't be able to loot them. Keep in mind that these guys are still alive, so if you need to use the research camera on any of these guys, now's a good time to do so.
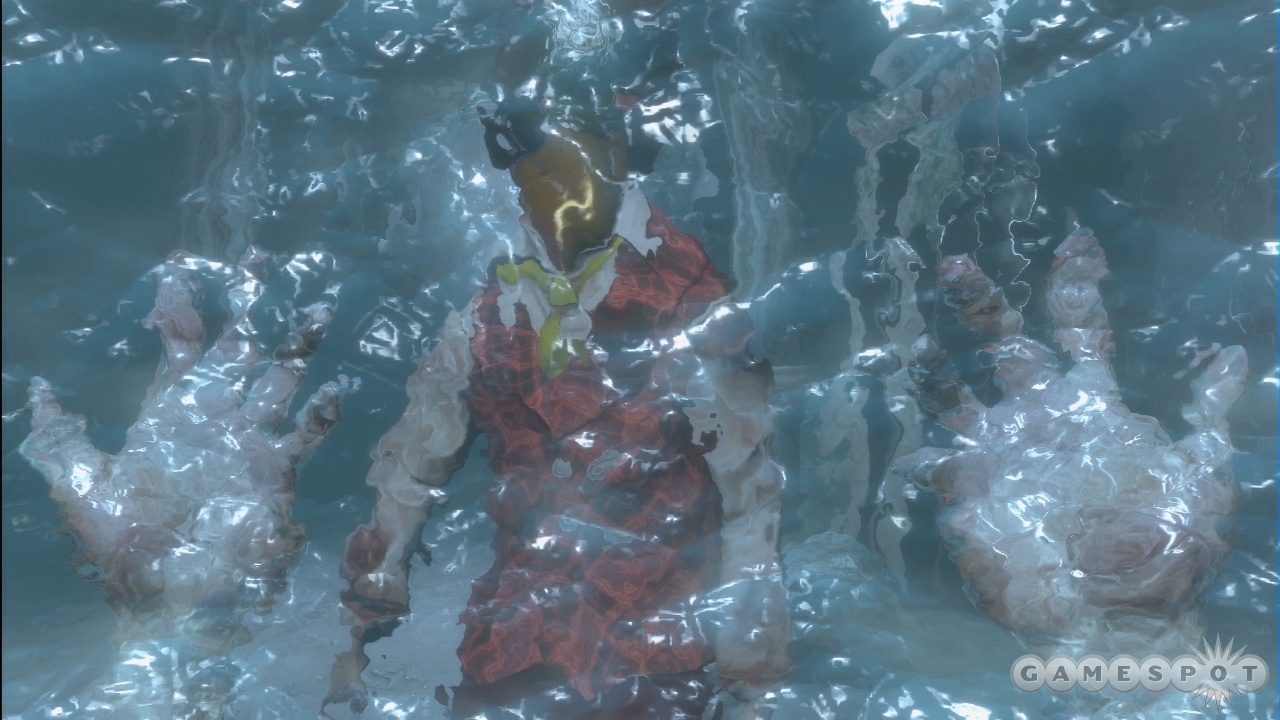
After exploring a bit, Finnegan will freeze you and pose you. For some reason, you're able to break out of his freezing power and will be wake up in the same room, but it's been repopulated by more splicers. There's a Nitro Splicer here on the left if you need more research on them. Again, you can either shatter or melt your opponents, but they're not too difficult to kill with napalm. Finnegan is on the far side of the room. He's essentially an upgraded Houdini Splicer, but with the ability to throw shards of ice, instead of fire. If you didn't blow up the explosive containers in the corner, he'll likely warp right next to them after he disappears the first time, letting you blow them up and kill him instantly. He'll drop the Frozen Field tonic, so grab that and take a picture of his body.
Return to the Atrium now and place the picture into the quadtych. There may be some more enemies here, including, perhaps, a Little Sister and a Bouncer. If you haven't seen a Bouncer in a while, and you probably haven't, get close to it to prod it into taking an offensive stance, then snap away with your camera to boost your research levels a bit.
Paradise Plaza
Return to where you killed Finnegan and melt the door leading into Paradise Plaza. Numerous Spider splicers will attack you here, so be on the ready.
There are a bunch of shops in Paradise Plaza, all of which you should explore. There's nothing special in the Sir Prize shop, save for a bunch of slot machines, but you can find a safe behind the counter, as well as another crossbow on the top floor with some trap bolts nearby. You can also find Robertson's Tobaccoria on the ground floor, near Eve's Garden XXX. Remember that code by the body way back when, 7774? It works on the safe here, so head in to find a good amount of cash. Also down here is Sinclair Spirits. Head inside, flip the small switch on the rear side of the counter, and head down into the basement to find a hidden Power to the People station.
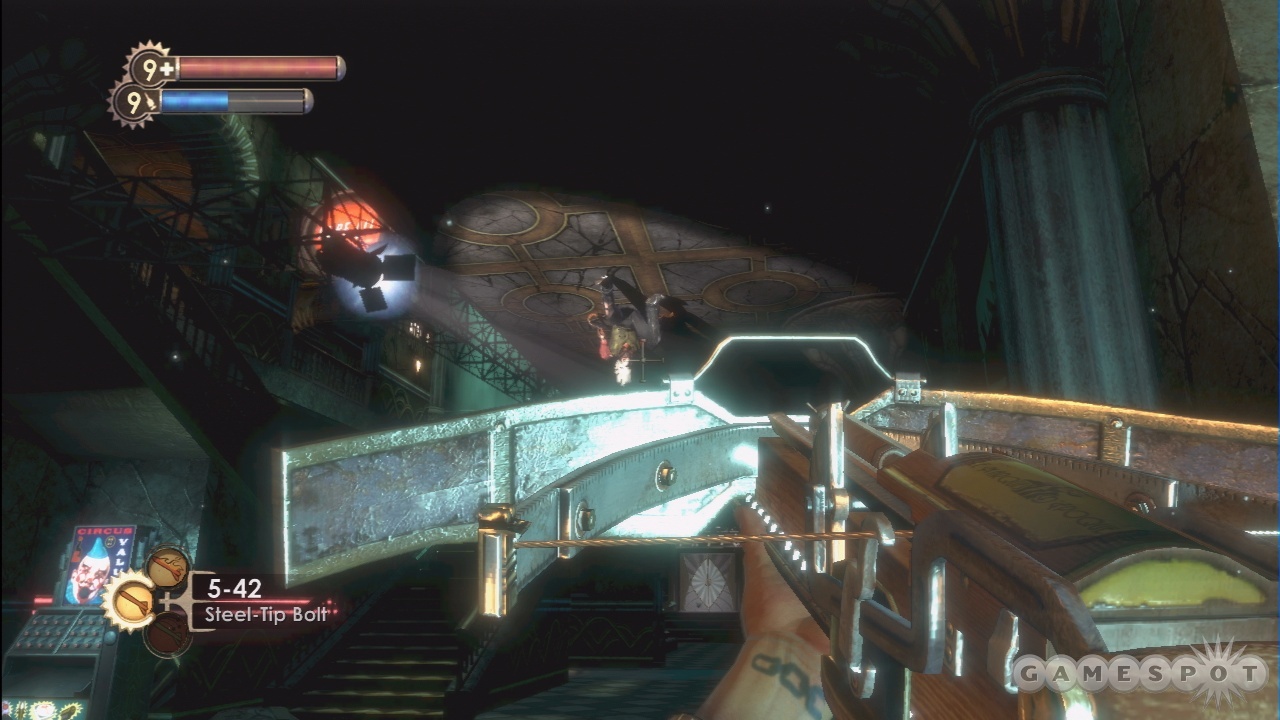
Flipping the switch in Sinclair Spirits also seems to unlock the stairs leading downward in the main open area of the Plaza. (If you check around near the twin stairs leading up, you should see a lit sign with a finger pointing downwards.) If you check around down there, you'll find an Extra Nutrition 2 tonic and some other goodies.
The Pharoah's Casino on the second floor likewise doesn't have much interesting in it, but feel free to check it out and grab what items are in there.
Lastly, visit Eve's Garden XXX to revisit a nasty scene from Andrew Ryan's past. If you explore it thoroughly, Hector will show up. Silas is in Rapture Records. You need to take both of them out.
Hector Rodriguez
You have two targets to kill in Paradise Plaza: Hector Rodriguez and Silas Cobb. We started with Hector, who appears in Eve's Garden after you poke through Jasmine's bedroom, which you can find by jumping onto the stage. He'll run out as soon as he spots you, so you'll have to track him down to kill him. What's annoying is that he constantly runs away from you, throwing napalm explosives over his shoulder, making this a difficult game of shoot-him-from-behind for most players. If you've been rescuing Little Sisters, though, this is easy: just hit him with a single bullet, then hypnotize a Bouncer and let them do the dirty work. Even with a Bouncer on your side Hector will take a while to go down, so try to keep up.
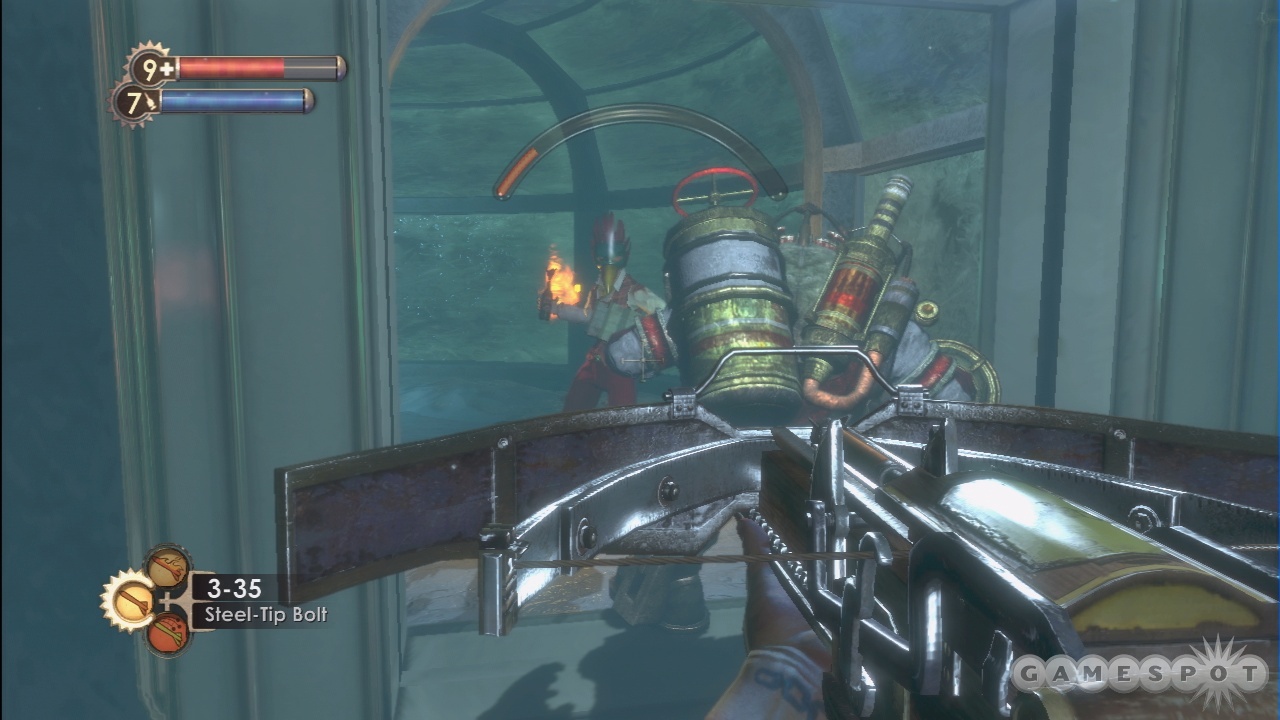
If that's not an option, then you can try to either freeze Hector in place, telekinetically throw his grenades back at him, or use anti-personnel rounds from a distance. Crossbow bolts might also be a wise investment here, especially if you manage to see him from a long distance, where he won't fire or move away, but those occasions are rare. You can also try hacking the two turrets on the upper level of Eve's Garden and pushing him in that direction, but there's no guarantee he'll ever actually approach them.
With the third picture in your possession, you can either move on to Silas Cobb, or return to the Atrium and put the picture in one of the frames. If you do so, Cohen will fly into a rage and send a huge number of splicers your way. Get back to the security camera that you hacked and let them deal with most of the enemies, or head to a Gene Bank and equip all your wrench-boosting tonics for some extra fun. When you kill everything, Cohen will pop up a gift for you at the quadtrych.
Silas Cobb
Silas resides in the Rapture Records shop on the second floor of the Plaza. Head in and drop down to the lower level, then hide in one of the covered alcoves until the bomb goes off. Silas will summon some burning spider splicers to deal with you; kill them all, then climb through the vent in the wall and drop down to the upper level again.
Silas doesn't run as much as Hector does, or so it would seem, so the easiest way to kill him is to grab his molotov cocktails with Telekinesis and send them back his way. Three or four cocktails to the face will finish him off, so grab a picture and head back to the Atrium.
Cohen
When you plant all four pictures into the quadtrych, Cohen himself will appear on the steps and applaud his own genius. Touching, really. You probably won't expect this, but he doesn't actually attack you. Instead, he'll offer you a gift: the Medical Expert 2 tonic that you probably saw in the glass case here earlier. If you want to access the other case, you can probably guess what you're going to have to do.

If you want to take Cohen out and open the case (see the tip below on why you probably don't want to do so), you'll be well served by having the Hypnotize Big Daddy plasmid up and available, as they'll be more than capable of taking Cohen out by themselves, whereas he'll be a lengthy fight for you otherwise. He's a Houdini, so he'll warp all over the area and attack you with firebolts. He's got a ton of health, though, so taking him down by yourself will take a while and consist of pelting him with plenty of anti-personnel ammo, and wandering around aimlessly while waiting for him to reappear.
If you manage to kill Cohen, you can pop open the case, which contains 100 dollars, a few incendiary bolts for the crossbow, and four first aid kits (assuming it's not randomized). You can also head back to the Fleet Theater and enter the projection room to obtain the Electric Flesh tonic.
With all that done, head to the Bathysphere station and proceed to Haphaestus.
Hephaestus
Make your way through the tunnels here, noting the increased difficulty of the enemies. The Thuggish splicers have upgraded weapons that deal electrical damage, and the Leadheads have machineguns. every type of enemy will have a lot more health than you used to have to deal with.
Pass through the first large open area here, being sure to activate the Vita-Chamber in the northeastern corner. You'll come to Andrew Ryan's vestibule, which leads to his office. You can find a Frozen Field 2 tonic in the southern room here. Be sure to check all of the corpses that are nailed to the walls in the vestibule; one of them will have an audio log that will give you your next goal: Overload the Core. That will overload the electromagnetic lock on Ryan's office's door.
Hephaestus Core
Head to Hephaestus Core here. Explore it thoroughly before leaving; there's a Power to the People machine across from the Gatherer's Garden machine on one of the middle levels. There are also three exits: one to Geothermal Control, one to the Workshops, and one to the Heat Loss Monitoring area. Your goal is to head to Heat Loss, but feel free to explore the other areas first. You can't do much in Geothermal Control, since the lower level is flooded. The Workshops have some stuff inside of them, but you'll be heading back there in a bit, so for now, head to Heat Loss Monitoring.
Heat Loss Monitoring
Head into Heat Loss Monitoring. The lights will go out a couple of times on the way, which indicates, of course, that an ambush is about to occur. Use napalm or a frag grenade on the bodies that suddenly animate when you reach the far door to quickly clear them out.
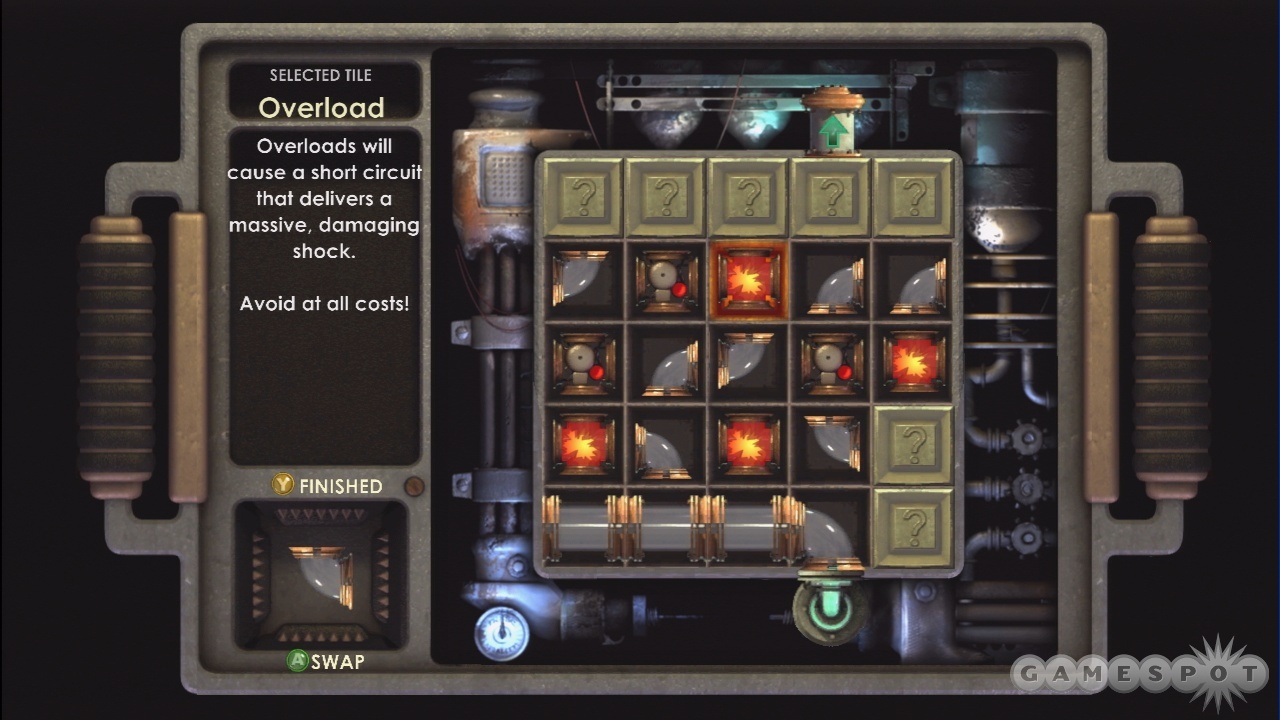
In Monitoring itself, you can find a Kyburz Door Code diary on the ground of the upper level, letting you know that the code to Kyburz's door in the Workshops is the date of Australia Day.
You'll find Pablo's desk at the bottom of this area. Nab the Security Defense 2 tonic off of it, as well as the audio diary. The diary will tell you what you need to know: Pablo sent the would-be assassin, Anya Andersdotter, to Kybutz' Workshop, elsewhere off the Hephaestus Core. Search the Heat Loss area thoroughly before heading back to the Core and into the Workshops.
Workshops
One of the posters here on the first floor will tell you that Australia Day is 01-26, so no need to head to Google just yet. After exploring the upper floor, proceed downstairs and take out the two turrets. Kybutz's workshop is beyond there, so enter the code into the keypad and proceed through. You'll need to proceed through the tripwires to find the goodies within, so you will have to somehow destroy the bolts that are attached to the walls. You probably have a good amount of ammo at this point, so feel free to shoot them with a shotgun or something, or just fry them with Electro Bolt.
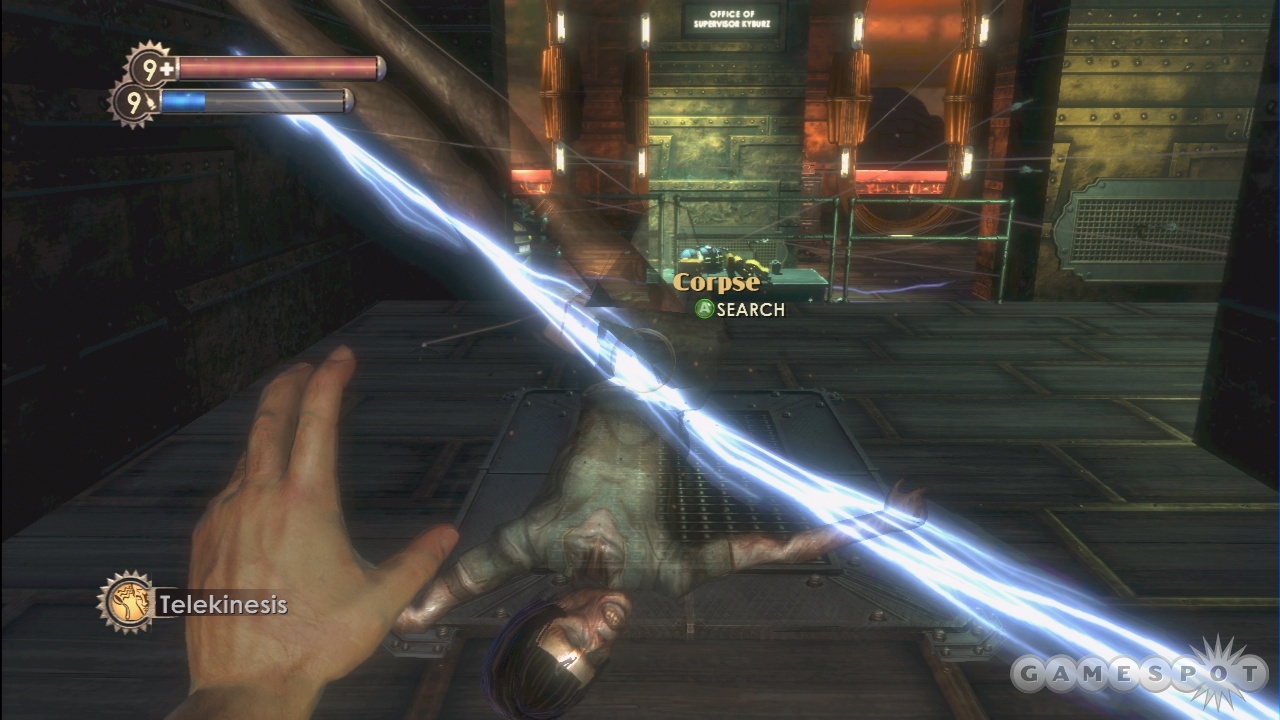
When you clear out the office, flip the switch on the side of the desk to open the safe nearby; you'll nab some Nitroglycerin. After searching the office, head back out to the lower level of the Workshops. There's a small crawlspace near the position of one of the turrets that you destroyed; it leads around to a secret area under the stairs, where you'll find an audio diary that gives you the code for a maintenance area all the way back in the Farmer's Market. You probably hacked it back when you were there the first time, though.
In the southeastern corner of the lower level here, you can find another crawlspace leading to a hidden research lab. Grab the diary here to learn how to complete the unfinished EMP bomb on the table nearby. You already have the Nitroglycerin; now all you need is a couple of Ionic Gel cans and four R-34 Wire Clusters. You may have found a diary before complaining about the number of R-34's that the Big Daddies go through, and indeed you'll have to find them on their bodies.
Collecting Ingredients
You can find one R-34 on the body of the Big Daddy outside of the secret research lab. There's also a bottle of Ionic Gel on one of the tables in the upper level of the Workshops.
Head back to Hephaestus Core and you'll find another Ionic Gel between two workstations, on the highest level of the Core. There's another Big Daddy corpse on the path between there and Andrew Ryan's office, so that'll give you two of those. Now, you may have passed some other Big Daddy corpses in other levels, but none of them will have any R-34's on them.
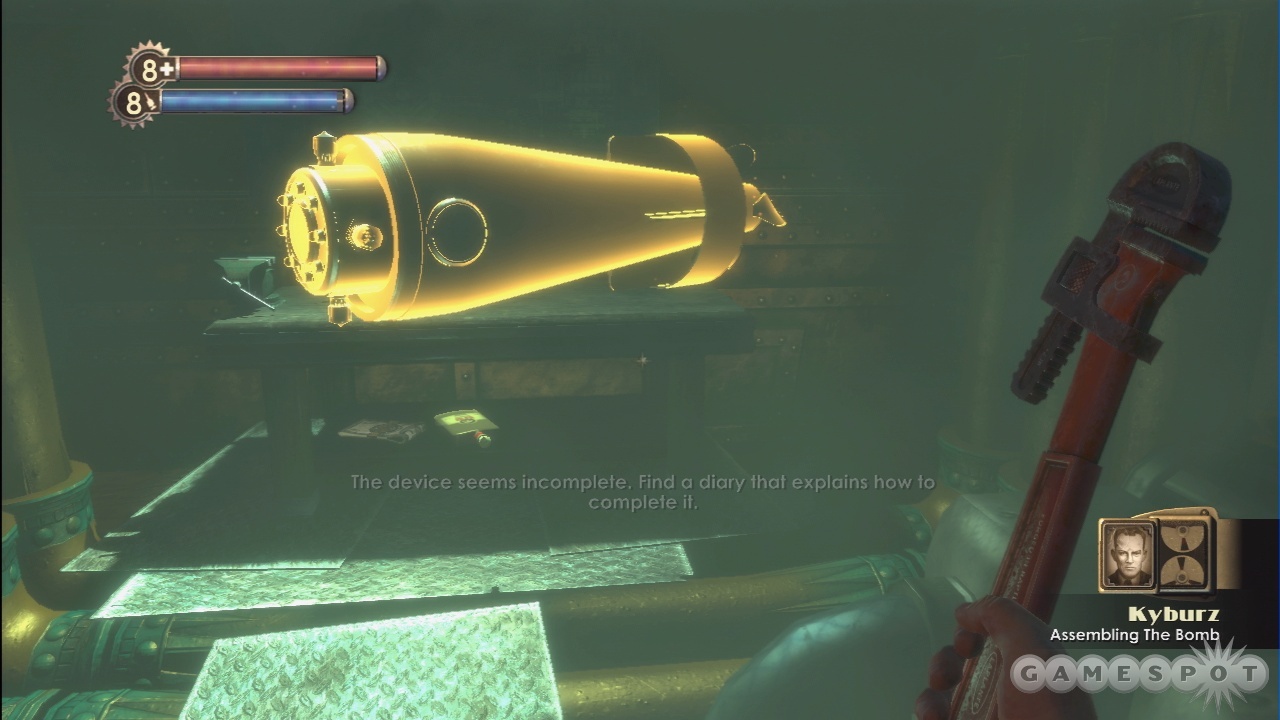
So…looks like you need to kill a couple of Big Daddies. By this time, you should have a pretty good method of doing so, but if you want the easiest time of it, you can Hypnotize one Big Daddy from the Workshops or Heat Loss and drag it back to the Core; that will let you shoot the Big Daddy that roams the core and set the two Bouncers against each other. Wait until they're almost dead and drop some frag grenades into the mix, and you'll have your dead Big Daddies and your R-34's.
Geothermal Control
Head back to the workshop and nab the EMP Bomb. With that in hand, head back to the Core and into the Geothermal Control section. Shock and hack the two turrets here, then let Atlas tell you what to do: You need to use the magma redistribution lever to steam away the water in the area. However, Ryan will definitely notice that this is occuring, so you'll need to be prepared for an assault. The turrets will help out in that regard, as will the six proximity mines in the container here.
This actually isn't nearly as difficult as it sounds, so lay down a couple of proximity mines near the doors here and start turning the wheel. We only saw two Splicers during the entire time that it took us to turn the wheel (around 30 seconds). When the magma was poured into the water, it melted away, as promised, allowing us to head down to the lower level.
Proceed along the walkway, nabbing the Shortened Alarms 2 tonic that lies in your path. Raise the core platform up to the top and pop the EMP device onto the Core in order to overload it.
Return To Ryan
One last task remains: return to Ryan's office and undo the locks on it. There are a lot of enemies between the Core and his office, though, so you may want to try tripping an alarm, shutting down the bots, and hacking them to nab some helpers.
Anyway, head to the circuit breakers, flip them, then move on to Rapture Central Control.
Rapture Central Control
When you enter the Central Control, Ryan will prematurely retaliate for his upcoming death by instigating the Core's self-destruct system. He'll blow all of Rapture sky-high if you don't get to him and reverse the process!
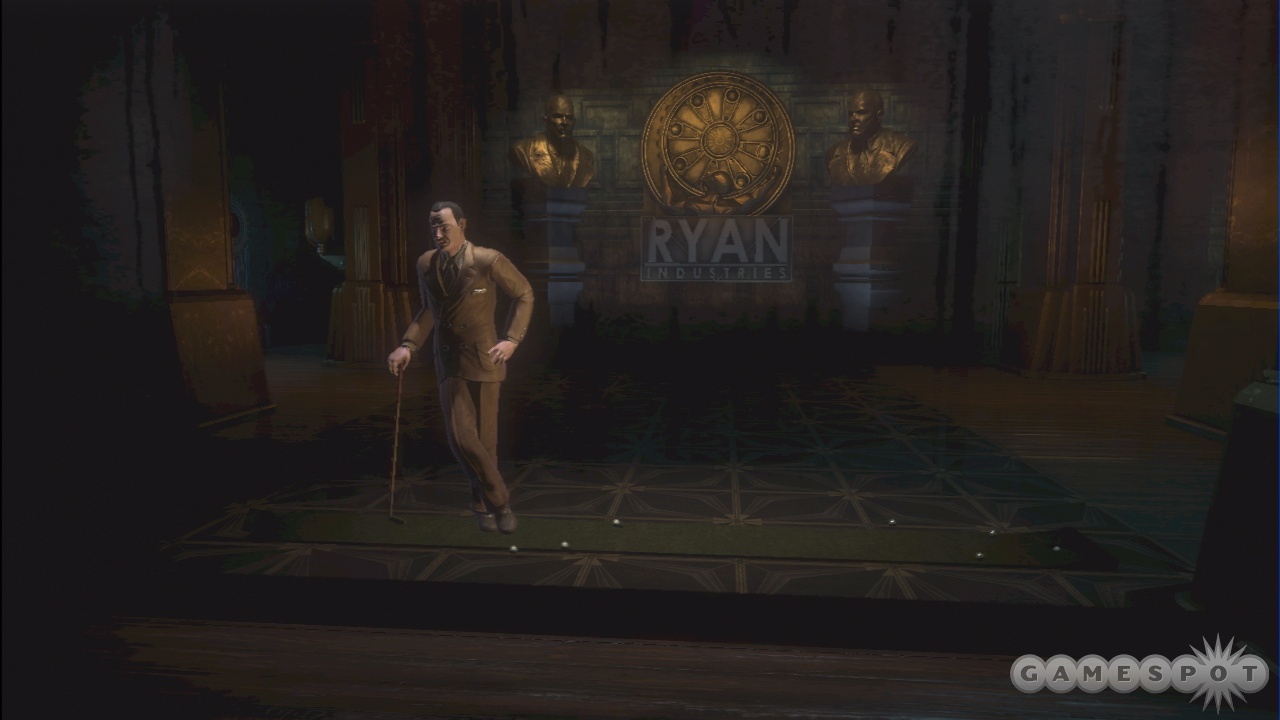
Head up to the rafters and crawl through the crawlspace to reach the eastern corridors. Listen to the last few audio diaries, then head through the door to reach Ryan at last. Things are out of your hands at this point. Ryan will soon be out of the picture, and you'll have to proceed to the self-destruct override machine. When the self-destruct has been shut off, you'll need to run to the ventilation shaft on your map and escape.
Olympus Heights
Note that things will play out differently here depending on whether or not you've been harvesting or rescuing the Little Sisters. We had been rescuing, so we awoke to a safehouse that was full of little girls, with Tanenbaum watching over them from behind a pane of glass. She clued us in to what Fontaine had been doing to you all along, and sent one of the girls up to open the door to the sewers. Presumably the same basic chain of events occurs if you've been harvesting the girls, as well.
Up in the sewers, grab the gate crank from the ground and use it to open the door. That'll lead you up to Athena's Glory, a little highway waystation that Fontaine has turned into a turreted deathtrap. Try to hack the turrets, if possible, and clear it out.
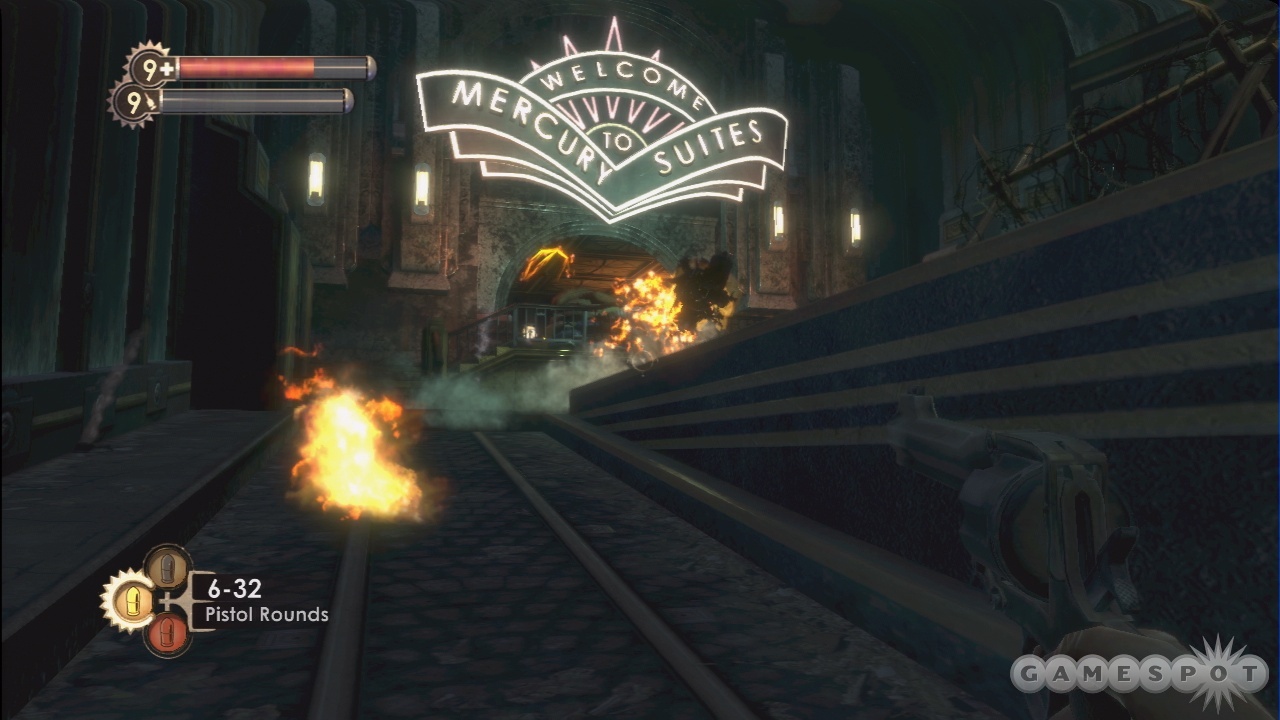
Now, as you do all this, Fontaine will continually be reducing your maximum health. Don't worry about this too much--the effects are eventually reversible. However, if you spend an exorbitant amount of time exploring, you will find yourself with a very tiny health bar, so it's important to keep moving as best as you can. That basically entails leaving the Little Girls alone for now and keeping to the task assigned to you.
Mercury Suites
Your first goal here is to search Suchong's apartment in Mercury Suites and find a way to negate the mind control that you're being subjected to. Head to that location on your map and find the goal marker for Suchong's pad; it's on the western side of the ground floor here. (Do the usual hacking of the turrets and cameras on the ground floor before proceeding in.) There's also a Power to the People machine on the pillar in the center of the ground floor.
Explore Suchong's suite thoroughly, and you'll find a Clever Inventor tonic on a desk next to a glowing audio diary. The diary reveals that there is an antidote to the mind control that's being filtered throughout the station: the mysterious Lot 192. Two samples were known to exist, one in Suchong's lab, and another that used to be located in Tanenbaum's apartment, upstairs in Mercury Suites. We'll go for the latter one first.
Finding the Antidote
Head for the stairwell here and start climbing upwards. Although the goal on your map appears on the second floor, the door to Tenenbaum's apartment actually isn't openable there; you'll have to head to the third floor. Have Electro Bolt ready to zap the camera that overwatches the walkway up there. When you reach the balcony of the third floor, follow the path around to the northwestern corner, being sure to grab the audio diary of the paparrazi along the way. That'll reveal the door code to Fontaine's suite here.
When you reach Tenenbaum's apartment, exploring the upper floor will reveal that the antidote has been moved to Fontaine's penthouse suite. Return to the ground floor of the Suites and input 5744 into the door to unlock the elevator leading up.
Fontaine's Apartment
A fierce battle will ensue as you enter Fontaine's little area. You may want to whip out your crossbow and take out the camera on the far northern wall as soon as you arrive; that'll prevent it from locking onto you and summoning security bots. Apart from that, take out the splicers and the turret, then move through the northern door.
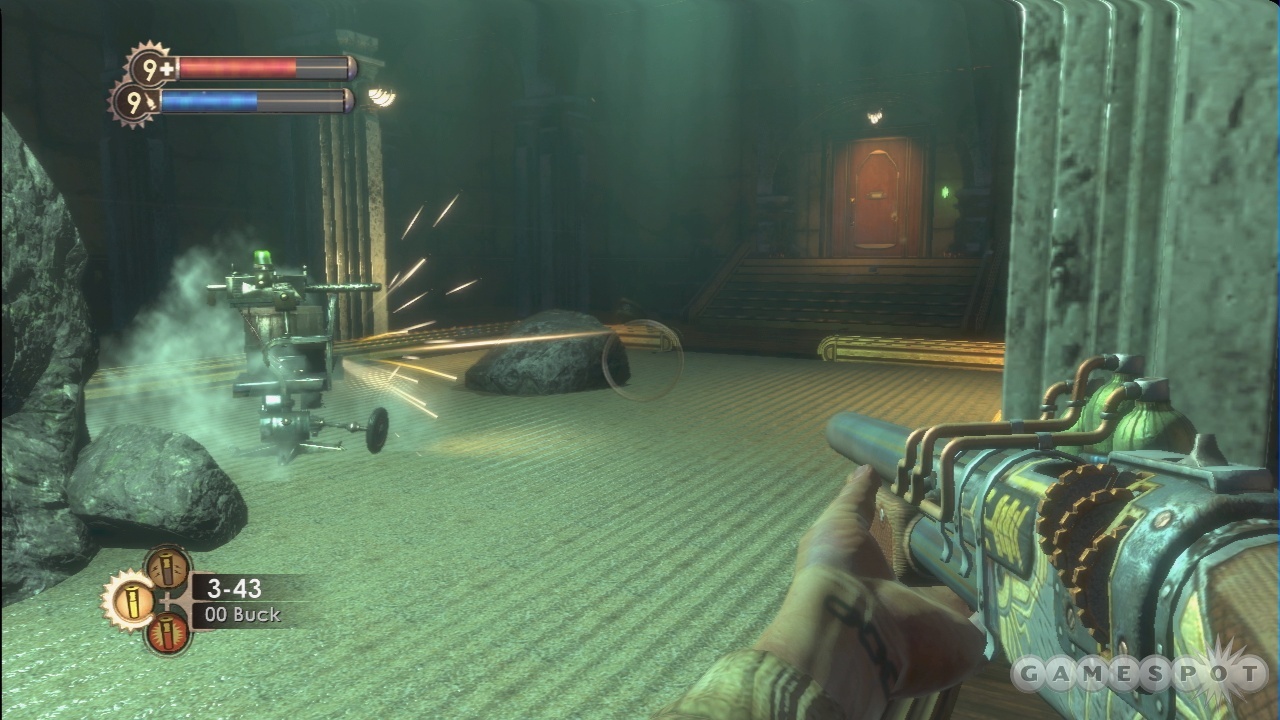
Head upstairs and find the small chamber off to the side of Fontaine's bedroom to obtain the Lot 192. It'll restore your health bar, but there's a side effect: you can't control what kind of plasmid you equip. You'll flip to a new plasmid, including some that you don't even own, once a minute or so. This effectively makes it impossible to plan ahead for fights, but no matter: you should be able to take on any enemy in the game with just your weapons at this point.
In order to restore your ability to control your plasmids, you'll have to find the second dose of Lot 192. It's in Suchong's lab, in Apollo Square. Before you leave, explore the rest of Mercury Suites for goodies. The main portion that you'll be interested in is Sander Cohen's apartment on the first floor. If you left Cohen alive back in Fort Frolic, he'll be here waiting for you. Kill the splicers near the piano to open the door to the second floor of his apartment, then take Cohen out and nab his Muse Key. There's also a Power to the People station in this locked area. You can't access it if you killed him earlier.
Anyway, when you're ready to move on, find the exit to Apollo Square, back a ways down the tram system.
Apollo Square
Head into the tramway here, being on the lookout for a Rosie that'll be set upon by a few splicers. Feel free to kill the Rosie after she's weakened up a bit for some more ADAM; you won't be able to spend it at a Gatherer's Garden until you find the next antidote, however.
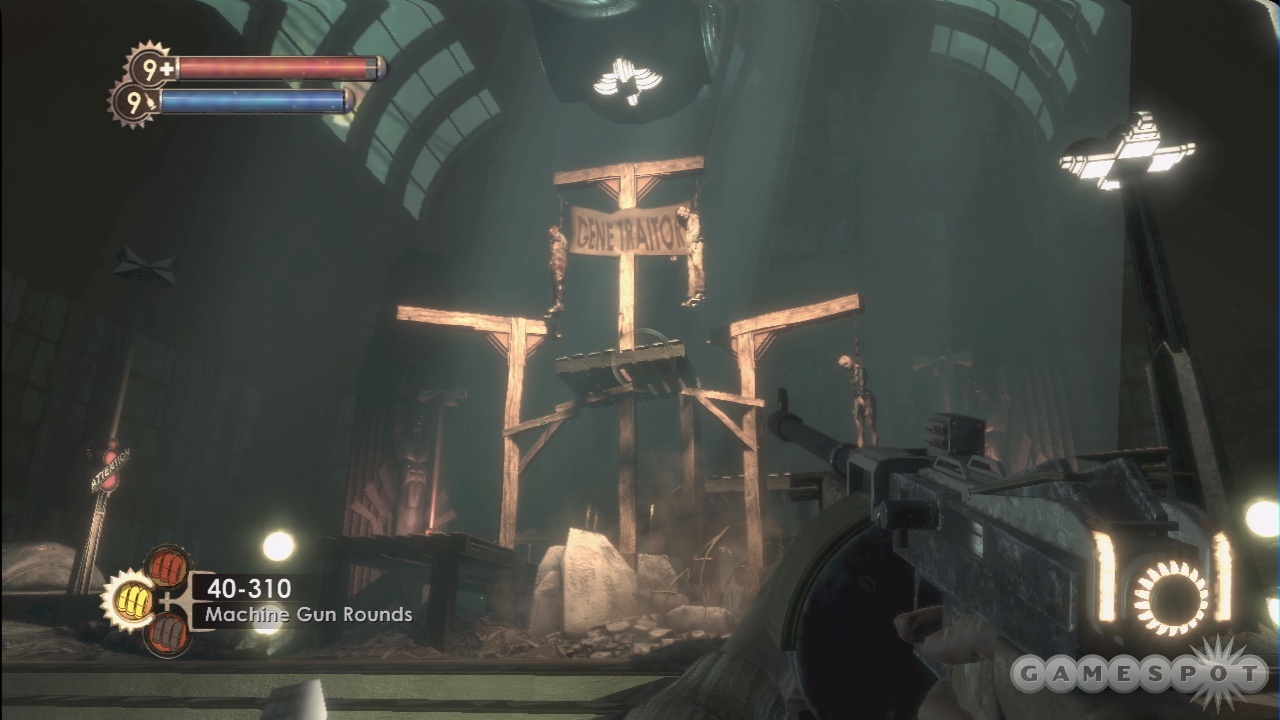
Make your way through the dystopian Apollo Square and head towards the Artemis Suites, where Suchong's lab is located. He's on the second floor, so open the door, shoot out the trap bolt across the way, then dash across, blow up the turret, and sneak around to hack the camera. That'll cover your back. You'll find the second Lot 192 on Suchong's desk, alongside an interesting audio log. You can also grab a Medical Expert 3 tonic in his operating room.
After exploring the third floor of this area, return to Apollo Square. You can now spend your ADAM at the Gatherer's Garden, so if you have a stockpile, now would be the time to use it.
Hestia Chambers
Before leaving for Point Prometheus, there's one last optional area to explore: Fontaine's Center for the Poor, in Hestia Chambers. It's found to the south of the Rapture Metro, so head on in, if you wish.
The top floor of Hestia is Atlas' hideout; it has a substantial amount of weaponry in it, if you happen to be running low on ammo. If you take the stairs down from the fifth floor to the fourth, you can find a Power to the People machine. The other side of the fifth floor has a wooden barricade over the door; smash it with the wrench and drop down to find some first aid kits, then jump onto the windowsill and crawl through to drop back down.
When you're ready (and have freed the last Little Sisters here), head into the bathysphere leading to Point Prometheus. If you want to revisit any of the previous levels (say, if you left behind some Little Sisters), feel free to do so now.
Point Prometheus
Fontaine smash! The bad guy's angry, or perhaps somewhat bemused at your effrontery, and is intent on giving you what you want: a fight. Well, he'll give it to you after you find him. It's a merry game of hide and seek!
Follow Fontaine until he breaks through a doorway and locks it behind him. You can't follow him unless you have a Little Sister open the door for you. How are you going to get them to trust you, though? Tanenbaum has a plan…
Become a Big Daddy
Search the body of the Big Daddy nearby (there's a Power to the People machine behind it) to find the Suit Control Device. Now that you have that, you can listen to Tanenbaum to learn more about what's required here. In order to effectively mimic a Big Daddy, you're going to have to look like one, smell like one, and sound like one. It's a big job, but someone'll have to do it.
Look Like a Big Daddy
There are three parts to the Big Daddy suit: the boots, the bodysuit, and the helmet. The Failsafe Armored Escorts facility on the south side of the area is where you want to go for these, or at least two of them. If you explore the area thoroughly, you shouldn't have any problem find the helmet (it's in the Candidate Induction room, but you'll be ambushed after picking it up, so be careful) and the bodysuit, in one of the larger central rooms. Explore the area as you wish after that.
The boots, as you'll discover if you read the diaries that you find, were delivered by accident to a library. The Mendel Family Library, to be exact: it's to the west of the entrance to the Failsafe facility, on the second floor of the area. Find it, enter, grab the boots, and you'll have the look down pat.
Sound Like a Big Daddy
You can find the voicebox modulator in Optimized Eugenics, on the northern side of the area. The modulator itself is in Live Subject Testing, on the southeastern side of Optimized Eugenics. Use it to change your sound, and don't miss the Alarm Expert 2 tonic on the bookshelves nearby.

If you poke around here a bit, you'll find a diary of Suchong in the northeastern room, letting you know that the code to the ammo locker here is 1921. This probably refers to the ammo locker in Failsafe, which you probably already hacked into. Sorry! You can also find another Power to the People machine in the Eugenics Analysis room in the northwestern corner of the facility.
Lastly, there's a safe hidden near the generator. If you find the control room to the south of the generator room (you'll need to zap the locks), you can shut off the generator temporarily and reach the safe, which contains 100 bucks and some incendiary bolts, as well as a few EVE hypos on top of it.
Smell Like A Big Daddy
Lastly, you need to smell like a Big Daddy. That means pheromones. You can find them in the Little Wonders section on the eastern side of the area; head in via the second floor doorway to avoid the turrets on the first floor.
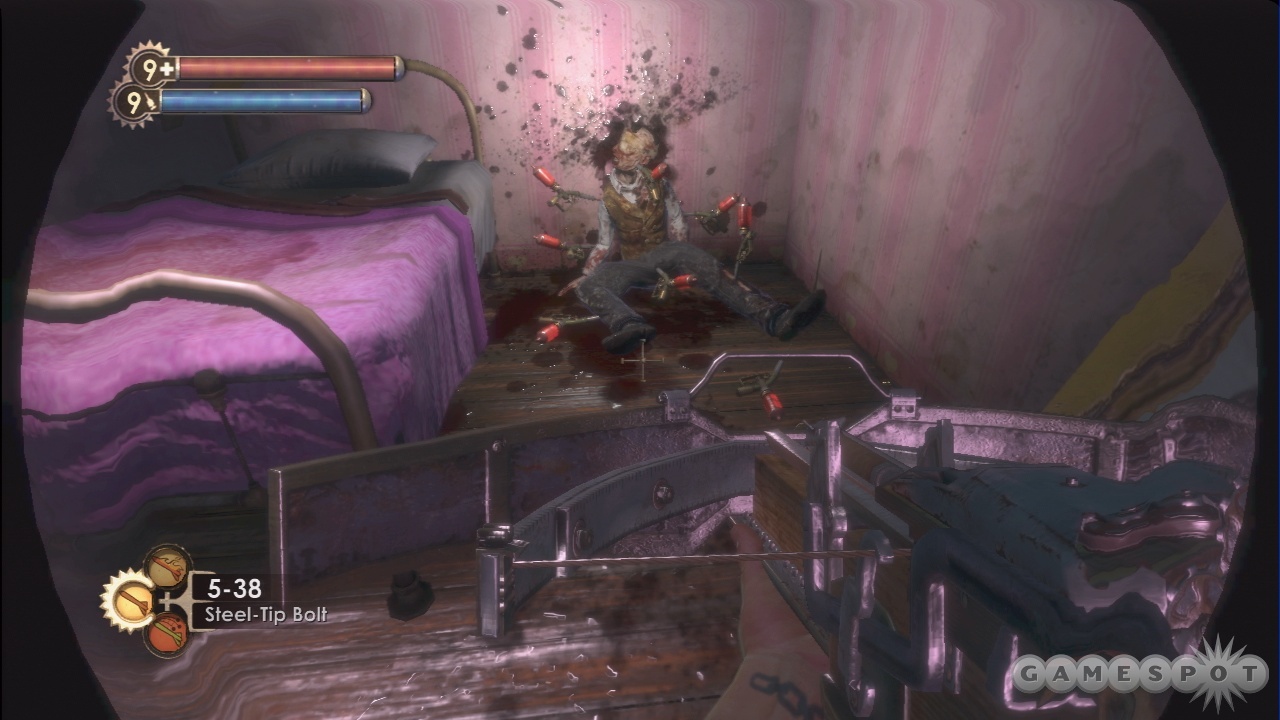
You need three pheromone samples here, and they're spread out around the area. Two of them can be found on desks in the upper part of Little Wonders. There's also one sample in Room 5 on the ground floor, as well as Room 7 (which is only accessible by dropping down from the second level), as well as another one in the Autopsy Ward. You can also find Safecracker 2 in the Autopsy ward.
Pursue Fontaine
After you become a Big Daddy, return to the doorway that Fontaine escaped through and bang on the duct nearby with your wrench to summon a Little Sister. Time to bring the fight to Fontaine!
Proving Grounds
A semi-tough little area here. With the Little Sister at your side, you'll need to escort her through two separate corridors, while attempting to prevent the numerous Splicers in the area from killing her. The girl will run at her own pace while you're nearby; if you move far away from her, she'll stop, but she'll also be undefended.
Tip: If a Little Sister gets killed here, you can summon another one by banging on a wall vent with your wrench. There's no achievement for not getting a Sister killed, so don't worry too much if you lose a couple.
Luckily, your appearance as a Big Daddy will prevent the security systems from locking onto you; however, if you've been rescuing the Little Sisters, then your ward will be foreign to the security, so you'll need to hack everything you see. You should hack away anyway, since the Little Sister will periodically stop at a corpse and extract ADAM from it. This will be the most difficult part of the escort, since numerous Splicers will start coming at you during these trials. Most of the corpses will have a turret or a camera somewhere nearby, so be sure to hack those and enlist them to help you defend the little girl. Also try to set traps for the incoming enemies by laying down proximity mines, Cyclone Traps, and setting the nearby oil fields ablaze.
Escortion
The first two rest stops are a bit more complicated than the last one, so try to save your more powerful ammo, like proximity mines, for the second half of the trip. After you pass through the room where the dinosaur bones have fallen from the ceiling, you'll come to a pool of water where many Splicers are waiting for you. Frag grenade them out of sight, then head around the corner and quickly hack the turret and camera near the last body. This is going to be the hardest test for you to keep the girl alive. The turret and camera will be able to keep most of the enemies from further down the hallways at bay, so concentrate on nagging the enemies that come from the direction you've already travelled. Hitting them with napalm seems to help incapacitate them while also dealing damage.
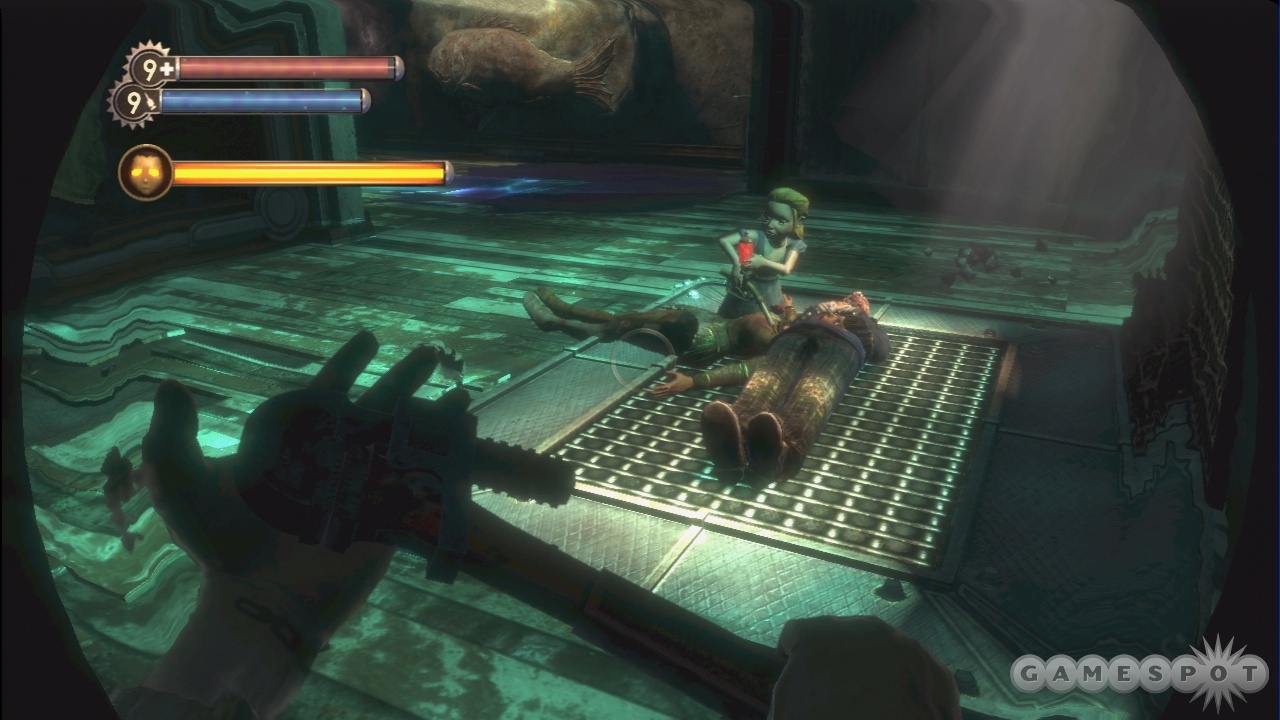
Lastly, a Bouncer will pop out of a wall while you turn the corner to the last door you need to get through. Quickly hit it with frag grenades or powered-up crossbow bolts to take it down, then get to the final staging area before the boss fight.
When you have the Little Sister's needle in hand, make as much ammo as you can at the U-Invent machine here and get ready for a fight by buying first aid kits. (Don't spend all your cash, though; try to save at least 50 bucks.) Static Field 2 might be a handy tonic to have for the upcoming fight.
Fontaine
The end boss guy attacks you here as soon as the level begins. You have to fight him in three forms in order to finally kill him. Start the fight by running up to him while he's strapped to the chair and using the needle to drain his ADAM; that'll cause him to react…violently. You can't hit a Vita-Chamber here, so you have to finish him off in one life.
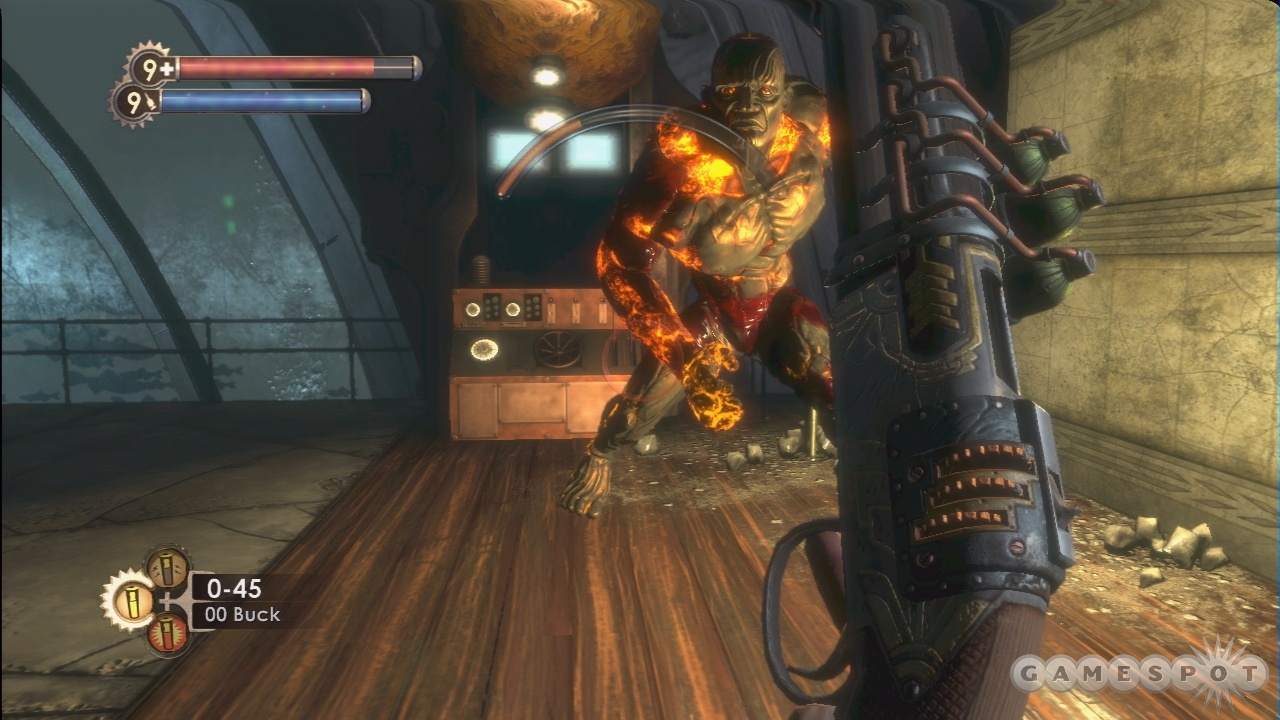
There are three phases here: one where Fontaine attacks you in a fire form, one where he's ice, and one where he's electrical. Each is pretty similar in functionality, however; they each have a powerful ranged attack and a very quick-moving charge attack. Kind of like a combination of a Bouncer and a Rosie, in effect. One thing is constant, and that's the fact that Fontaine is very resistant to damage: it'll take a long time to take him down, no matter what phases he's in. Note the appearance of a first aid station in one corner of the area. Instead of using first aid kits, you might want to try hacking that and using it when you run low on health.
Anyway, dealing with Fontaine isn't too difficult, at least not on the Medium difficulty. The first form here is going to be fire-based, with a huge fireball that he can send your way. Stay in the middle of the area and strafe to avoid his charge attack. He'll basically just charge at you, turn around, fling a fireball, charge again, and so on. Each of his attacks can be pretty easily dodged if you just keep moving to the side. Try to paste Fontaine with liquid nitrogen from your chemical thrower until he's good and frozen, then wrench him for a bit. That'll wear down his health a good amount, allowing you to repeat the process and finish him off without too much wear and tear. If you like, you can, of course, use other weapons or plasmids on him, but again, he's pretty resistant to damage.
Wearing Him Down
After you take off one life bar of Fontaine's, he'll reappear in his little medical chair and start the Adam pumping again. Get close to him and needle him again. He'll summon a security bot or two to help him at the beginning of the next phase of the fight, so quickly find the bot shutdown panel near his chair and shut them down before quickly hacking them.
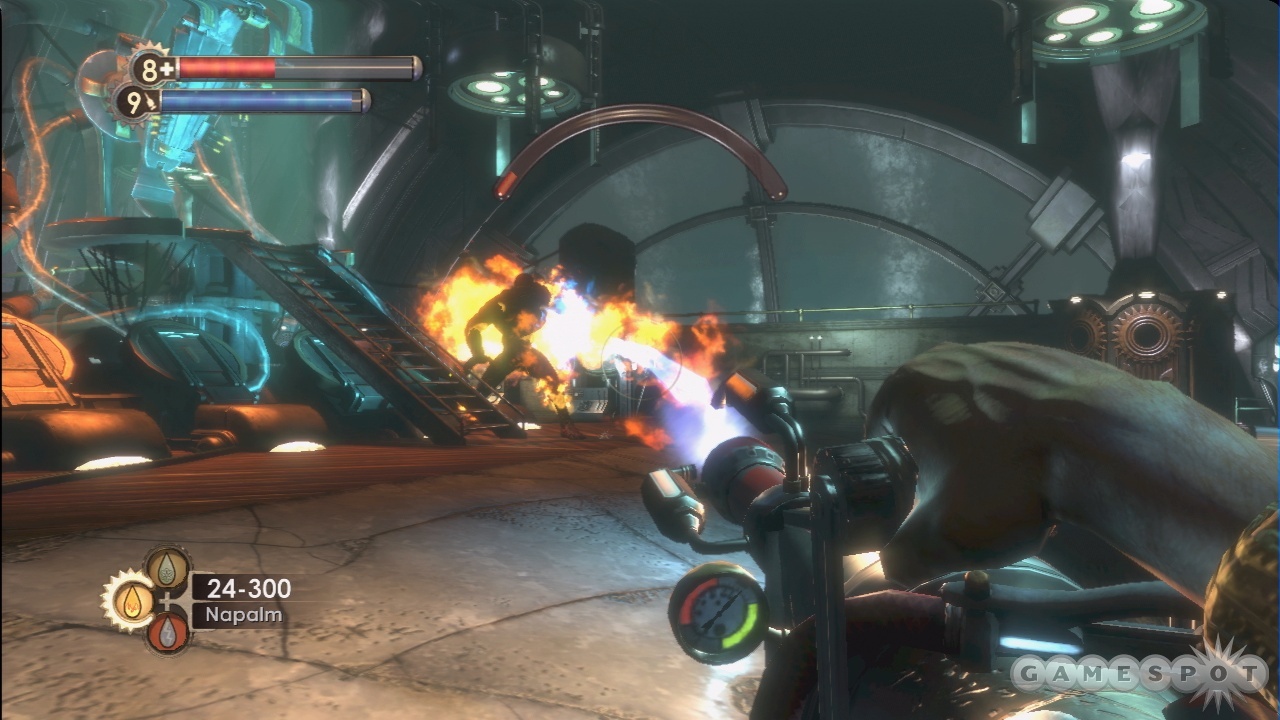
Fontaine is icy now, but no matter: his attacks are pretty much identical. Napalm will be a good bet against him here, if you've upgraded your chemical thrower, but anything will work, for the most part. Wear him down until he returns to the chair, then needle him again and prepare for the final assault.
In his electrical form, Fontaine isn't too much more difficult to deal with, but he'll summon in an apparently endless amount of splicers to help him out. You might be disoriented by the fire that comes from multiple directions, but you should be able to take it by now, assuming you didn't use up all of your first aid kits. If you have any kind of ammo for your grenade launcher, now would be a good time to use it; you can also try using telekinesis to fire the explosive containers onto his body. We also had decent luck with explosive shells for the shotgun; if he catches on fire, he'll head to the water in the rear of the room. While you can't do much in the way of electrifying the water to hurt him, he'll be a little less mobile while he stays in there, allowing you to pound on him a bit more effectively.
After you wear down his final health bar, stick the needle in Fontaine one last time to end the game. We're told there are three endings: one for rescuing all of the Little Sisters, one for harvesting all of them, and another ending for proceeding with a mixture of both actions. If we get more details on these endings, we'll update this guide with extra info on how they're unlocked.
Xbox 360 Achievements
Note that there are Spoilers on this list.
| Achievement Name | How To Earn | Point Reward |
|---|---|---|
| Completed Welcome | Complete the first level of the game. | 10 |
| Bought One Slot | Bought one slot in any Plasmid or Tonic track. | 5 |
| Maxed One Track | Unlock six slots in any Plasmid or Tonic track. | 20 |
| Maxed All Tracks | Unlock six slots in all Plasmid or Tonic track. | 50 |
| Upgraded A Weapon | Acquire one weapon upgrade. | 5 |
| One Fully Upgraded Weapon | Fully upgrade one weapon. | 5 |
| Two Fully Upgraded Weapons | Fully upgrade two weapons. | 5 |
| Three Fully Upgraded Weapons | Fully upgrade three weapons. | 10 |
| Four Fully Upgraded Weapons | Fully upgrade four weapons. | 10 |
| Five Fully Upgraded Weapons | Fully upgrade five weapons. | 10 |
| Weapon Specialist | Fully upgrade all weapons. There are precisely 12 Power to the People stations in the game world, and you'll need to find them all for this achievement. | 20 |
| Fully Researched Thug Splicer | Fully research the Thuggish Splicer. | 10 |
| Fully Researched Gun Splicer | Fully research the Leadhead Splicer. | 10 |
| Fully Researched Spider Splicer | Fully research the Spider Splicer. | 10 |
| Fully Researched Houdini Splicer | Fully research the Houdini Splicer. | 10 |
| Fully Researched Nitro Splicer | Fully research the Nitro Splicer. | 10 |
| Fully Researched Rosie | Fully research Rosie. | 10 |
| Fully Researched Bouncer | Fully research the Bouncer. | 10 |
| Fully Researched Little Sister | Fully research the Little Sister. | 10 |
| Prolific Photographer | Take at least one picture of every enemy. | 5 |
| Researched a Splicer | Take at least one research photo of a Splicer. | 5 |
| Quality Research Photo | Take an A-ranked research photo. | 5 |
| Research PhD | Complete all research. | 20 |
| One Successful Hack | Complete a hack. | 5 |
| Hack A Security Bot | - | 10 |
| Hack A Security Camera | - | 10 |
| Hack A Turret | - | 10 |
| Hack A Safe | - | 10 |
| Hack A Vending Machine | - | 10 |
| Skilled Hacker | Complete 50 hacks. | 40 |
| Basic Inventor | Invent one item. | 5 |
| Ammo Inventor | Invent at least one of each possible ammo type. | 25 |
| Avid Inventor | Invent at least 100 items. If you collect enough loot, you should be able to equip the Clever Inventor tonic just before the final boss, hack the U-Invent there, and make a billion cheap things to get this achievement. | 10 |
| Tonic Collector | Collect or invent 53 tonics. Difficult to do, as this apparently means that you need to collect every tonic in the game, and some are squirreled away out of sight. | 50 |
| Historian | Collect all audio diaries. Likewise, pretty difficult. Some of these are in objects or on corpses, so it's difficult to get them all unless you're following a checklist. | 50 |
| Toaster in the Tub | Shock an enemy that's standing in water. | 10 |
| Lucky Winner | Hit the jackpot at a slot machine in Fort Frolic. | 10 |
| Seriously Good At This | Beat the game on the Hard difficulty. | 40 |
| Dealt with every Little Sister | Rescue or Harvest every Little Sister in the game. | 40 |
| Little Sister Savior | Beat the game without harvesting any Little Sisters. | 100 |
| Defeated Dr. Steinman | Story objective; impossible to miss. | 15 |
| Defeated Peach Wilkins | Story objective; impossible to miss. | 15 |
| Restored the Forest | Story objective; impossible to miss. | 15 |
| Completed Cohen's Masterpiece | Story objective; impossible to miss. | 30 |
| Defeated Andrew Ryan | Story objective; impossible to miss. | 30 |
| Broke Fontaine's Mind Control | Story objective; impossible to miss. | 30 |
| Became a Big Daddy | Story objective; impossible to miss. | 30 |
| Defeated Atlas | Story objective; impossible to miss. | 100 |
| Found Cohen's Room | Enter Sander Cohen's personal quarters. Only possible if you don't kill him in Fort Frolic; you'll encounter him in the Mercury Suites later on in the game. | 10 |
| Irony | Take a picture of Sander Cohen's body after killing him. | 10 |
Got a news tip or want to contact us directly? Email news@gamespot.com
Join the conversation