Baldur's Gate: Dark Alliance II Walkthrough
Baldur's Gate: Dark Alliance 2 duplicates the original's role-playing action hack-and-slash gameplay with enhancements including additional character classes, more feats, and magical item creation.
Design by Collin Oguro
Evil has once again returned to the city of Baldur's Gate. Black Isle Studios' Baldur's Gate: Dark Alliance 2 duplicates the original's role-playing action hack-and-slash gameplay with enhancements including additional character classes, more feats, and magical item creation.
This GameSpot game guide for Baldur's Gate: Dark Alliance 2 includes:
- Character Classes: This section provides an overview of the five heroes of Baldur's Gate: the barbarian, the monk, the necromancer, the rogue, and the cleric.
- Feats: Look here for a complete list of all available feats, including each character's "bonus" feats. You'll find skill point requirements and benefits for each feat level.
- Item Creation: This section reveals bonuses provided by each gem type for use when creating your powerful magic weaponry, armor, and jewelry.
- Walk-through: A complete walkthrough of Baldur's Gate: Dark Alliance 2 featuring story quests, optional quests, and rewards. The walkthrough also includes details on the unique class quests found in the third act.
- Cheats and Secrets: Check here for level-up, bonus gold, map warp, and invincibility codes for both the PlayStation 2 and Xbox versions of Dark Alliance 2.
Table of Contents
Character ClassesVhaidra Uoswiir, the Dark Elf Monk
Ysuran Auondril, the Moon Elf Necromancer
Borador "Goldhand," the Dwarven Rogue
Allessia Faithhammer, the Human Cleric
Extra Dark Elf Monk Feats
Extra Moon Elf Necromancer Feats
Extra Dwarven Rogue Feats
Extra Human Cleric Feats
Walk-Through
Act I
Sewers
Bloodmire Manor
Luvia's Laboratory
Warehouse
Hands of Glory Guildhall
Argesh the Gouger's Hold
Cloak Wood Lower and Upper Cliffs
Red Fang Camp
Red Fang Base
Red Queen's Lair
Red Fang Secret Passage
Firewind Cellar
Firewind Dungeons
Firewind Catacombs
Firewind Manor
Lyran's Hold
Lyran's Cellar
Lyran's Ossuary
Lyran's Observatory
High Moor Ambush
Brigand's Ruins
Brigand's Hall
Halls of the Hammer
Trollclaws Ambush
Dragonspear Castle
Dragonspear Dungeons
Dragonspear Caverns
Ulchaloche's Lair
Sea-Cave
Sea Temple
Hill's Edge
Vhaidra the Dark Elf Monk's Class Quest
Ysuran the Moon Elf Necromancer's Class Quest
Borador the Dwarven Rogue's Class Quest
Allessia the Human Cleric's Class Quest
End of the Class Quests
Air
Earth
Fire
Water
Chapter 1 - Character Classes
Baldur's Gate: Dark Alliance 2 improves on its original by increasing the number of playable character classes from three to five. Players choose from a barbarian, monk, necromancer, rogue, and cleric.
Attributes and feats define the character classes. Each character class uses the same six attributes but in different initial configurations. Also, the character classes share similar feats; however, there are many feats unique to each class that focus the class' specific strengths.
The six attributes are:
Strength measures your character's physical power. It affects melee damage, chance to hit in melee, and how much weight the character can carry. Strength should be an emphasis of any character using melee weapons as their primary attack. The strength attributes adds +1 melee to hit and +1 to damage per every two points over 10.
Dexterity gauges your character's hand-eye coordination, agility, reflexes, etc. This attribute affects your chance to hit using ranged weaponry, damage with ranged weaponry, and increased armor class. Dexterity should be an emphasis on characters using ranged weaponry as their primary attack. The dexterity attribute adds +1 ranged to hit and +1 to armor class per every two points over 10.
Constitution measures your character's health and stamina. Higher constitution means higher hit points and faster hit point regeneration. Obviously constitution is important for every character and this attribute can be either aided or countered with feats that also improve hit points as well as health potions. The constitution attribute adds +1 hit point per level per two points over 10 and also supplies faster hit point regeneration.
Intelligence measures your character's leaning skills, which deals with your character's ability to utilize magic. The higher the intelligence, the faster your character's magic energy regenerates, the more energy gained for each level advanced, and the greater damage from spells. This primarily benefits spellcasters, such as the necromancer, but realize that all classes have "spells" that consume magic energy (like the barbarian's Cleave, for instance). Intelligence attribute adds +5 to magic energy per two points over 10.
Wisdom reveals your character's "willpower, common sense, and perception". This translates to experience points in the game. Thus a character with higher wisdom gains experience at a faster rate. This can be beneficial to any character, though you'll likely want to focus on other attributes that are more focused on your character. The wisdom attribute adds a +5% earned experience per two points over 10.
Charisma measures your character's personality. This translates to how your character interacts with the merchant. The higher your charisma, the cheaper the goods you hope to buy and the more gold you receive from the goods you hope to sell. The charisma attribute adds a +5% bonus to store buy and sell values per two points over 10.
Dorn Redbear, the Human Barbarian
The barbarian class is for the player who wants to battle toe-to-toe with the game's toughest creatures. The barbarian excels in melee combat, which is exemplified by his starting attributes. He has the greatest starting strength and excellent constitution, which provides additional hit points per level.
A sturdy barbarian should acquire the Hero's Arm feat, which allows the barbarian to wield a great weapon (normally requiring two hands) in just a single hand. This gives the barbarian two great weapons. Use skill points to elevate two-hand fighting and great weapon focus to increase your melee abilities. Get at least one point in Cleave as it's the barbarians' only area effect attack. Sunder lowers your enemies' armor class. Initiate an attack with sunder then utilize your standard attack combinations that are boosted by your great weapon and two-handed fighting skills.
Health: 17/17
Energy: 8/8
Armor: 10
Base Attack: 4
Damage: 4-5 (1-2)
Strength: 16 (+3 hit/+3 damage)
Dexterity: 10 (+0 armor)
Constitution: 14 (+2 hit points)
Intelligence: 10 (+0 max energy)
Wisdom: 10 (+0% experience)
Charisma: 11 (+0% buy/sell)
Starting Feats: Armor Proficiency (2), Barbaric Rage (1), Sprint (1)
Starting Weapons: Shoddy Handaxe (1-3), Shoddy Short Sword (1-3)
Starting Armor: Cloth Boots, Cloth Bracers
Vhaidra Uoswiir, the Dark Elf Monk
The monk excels in hand-to-hand combat. In fact, one of the monk's unique feats is unarmed combat. The monk can also excel with hand weaponry, such as staffs; you could use the Spinning Strike feat for area effect damage with the help of the staff. Or if you wish to stick with unarmed combat, go with the Sweep Attack for the area effect damage. For the monk, strength and dexterity are the only attributes that begin over the base of 10.
The monk's ability to stun most enemies is one of the best features of the class. Emphasize the appropriate feats (such as Stunning Blow) as well as those that help reduce damage (such as Evasion). Add gear that improves critical damage and your unarmed combos can unleash some vicious damage at high levels. Improve her proficiency with armor, combat reflexes for increased combat speed, and acquire Hail of Knives after completing her class-specific quest for a good ranged counterpart to her melee stun attacks.
Health: 14/14
Energy: 12/12
Armor: 19
Base Attack: 3
Damage: 5-9
Strength: 12 (+1 hit/+1 damage)
Dexterity: 17 (+3 armor)
Constitution: 10 (+0 hit points)
Intelligence: 10 (+0 max energy)
Wisdom: 10 (+0% experience)
Charisma: 10 (+0% buy/sell)
Starting Feats: Armor Proficiency (1), Sprint (1), Unarmed Combat (1)
Starting Weapons: None
Starting Armor: Cloth Boots, Cloth Bracers
Character Classes
Ysuran Auondril, the Moon Elf Necromancer
Ysuran is the resident spellcaster. He also possesses the ability to summon the dead with his animate dead feat. He excels with magic and spells. The necromancer offers a wide variety of feats to use and, not surprisingly, begins the game with the best intelligence of any character. He'll need that magic energy to fund those powerful spells--be prepared to remain stocked with rejuvenation potions!
Key feats for the necromancer include Clarity, which decreases the cost of spells, Empower, which increases spell damage, and Iron Will, which increases your magic energy regeneration rate. Enervation is a solid ranged attack spell; Shadow Spray (unlocked after completing the class-specific quest) is worth every point; and Slow can be used to keep multiple enemies at bay while you punish them at longer range. Note that the necromancer begins with no armor proficiency. But despite being a spellcaster, he can be trained to wear the best armor with no penalty to his abilities.
Health: 11/11
Energy: 35/35
Armor: 13
Base Attack: 1
Damage: 1-4
Strength: 10 (+0 hit/+0 damage)
Dexterity: 12 (+1 armor)
Constitution: 10 (+0 hit points)
Intelligence: 17 (+15 max energy)
Wisdom: 10 (+0% experience)
Charisma: 10 (+0% buy/sell)
Starting Feats: Life Drain (1), Shield (1)
Starting Weapons: Dagger (1-4)
Starting Armor: Cloth Boots, Cloth Bracers
Borador "Goldhand," the Dwarven Rogue
Borador is a dwarf excelling in ranged combat (with the increased dexterity) and thievery (for his Ransack feat). The Dwarven Rogue has the feats to focus on ranged or melee weaponry, though the best melee-focused feats aren't unlocked until Borador completes his class-specific quest found well into the game. Thus it's better to focus on Borador's initial strengths by utilizing his ranged abilities.
Invest skill points in Accuracy, which increases the accuracy and damage of ranged attacks, Combat Reflexes, to increase rate of fire, Hail of Bolts, for increased range ability, and Smokepowder Satchel, for luring enemy groups to the explosion. Consider Dwarven Warsong, which decreases enemy effectiveness, after completing Borador's class-specific quest. Enhance Borador with items that increase dexterity, ranged abilities, and damage for a very potent ranged character.
Health: 16/16
Energy: 10/10
Armor: 16
Base Attack: 3
Damage: 5-8
Strength: 11 (+0 hit/+0 damage)
Dexterity: 15 (+2 armor)
Constitution: 16 (+3 hit points)
Intelligence: 10 (+0 max energy)
Wisdom: 10 (+0% experience)
Charisma: 10 (+0% buy/sell)
Starting Feats: Armor Proficiency (1), Ransack (1)
Starting Weapons: Shoddy Short Sword (1-3), Shoddy Crossbow (3-6)
Starting Armor: Cloth Boots, Cloth Bracers
Allessia Faithhammer, the Human Cleric
The cleric offers a balanced set of statistics. Allessia doesn't excel in any particular area statistically but all but dexterity are at least two over the base of ten so she receives at least some benefit from each attribute. The cleric begins with the ability to wear any armor; her Armor Proficiency feat is already maxed completely. Also, most of her feats benefit allies so she's the ideal support character if you're playing Dark Alliance 2 cooperatively.
Some of her feats that benefit her and her allies include Bless, which makes Allessia and her allies hit enemies more accurately and for more damage, and Cure Wounds, which heals Allessia and her allies. Divine Strength is a must if you're going to emphasize melee weaponry. Allessia also is very effective against the undead and begins with skill in Turn Undead, which repels and damages nearby undead. Consider Flame Strike for spell damage, though it's weaker late in the game when the enemies are stronger (be sure to strike enemies in the flame's center for the most damage). If you plan to use spells frequently, Empower and Iron Will become much more valuable. Complete her class-specific quest in the third act to gain a number of fighter-related feats.
Health: 13/13
Energy: 22/22
Armor: 12
Base Attack: 2
Damage: 2-4
Strength: 12 (+1 hit/+1 damage)
Dexterity: 11 (+0 armor)
Constitution: 12 (+1 hit points)
Intelligence: 14 (+10 max energy)
Wisdom: 12 (+5% experience)
Charisma: 12 (+5% buy/sell)
Starting Feats: Armor Proficiency (3), Cure Wounds (1), Divine Strength (1), Turn Undead (1)
Starting Weapons: Shoddy Lt. Mace (1-3)
Starting Armor: Cloth Boots, Cloth Bracers, Wooden Shield
Chapter 2: Feats
As you gain levels in Dark Alliance 2, your character acquires skill points to spend on feats. The number of skill points you receive per level depends on the level you just were. For instance, when you reach level 2, you are given 1 skill point (you were just level 1). When you reach level 10, you're given 9 skill points (you were just level 9). By level 10, you will have been able to spent 45 skill points.
This section compiles all available feats, lists which character can use each feat, and reveals the skill point cost and benefit from each feat level.
Accuracy
Improves the accuracy and damage of ranged attacks. Available for the Human Barbarian, Dark Elf Monk, Moon Elf Necromancer, Dwarven Rogue, and Human Cleric.
Level 1 (Cost: 2): +2 to hit and +1 to damage
Level 2 (Cost: 4): +4 to hit and +2 to damage
Level 3 (Cost: 6): +6 to hit and +3 to damage
Level 4 (Cost: 8): +8 to hit and +4 to damage
Level 5 (Cost: 10): +10 to hit and +5 to damage
Alchemical Lore
Allows you to change potions from one type to another. Available for Moon Elf Necromancer.
Level 1 (Cost: 2): Allows you to change potions from one type to another.
Animate Dead
Summon undead aid, higher ranks give stronger pets. Available for Moon Elf Necromancer.
Level 1 (Cost: 1): Summon an ally.
Level 2 (Cost: 2): Summon an ally.
Level 3 (Cost: 3): Summon an ally.
Armor Proficiency
Allows you to equip heavier armor for better defense. Available for the Human Barbarian, Dark Elf Monk, Moon Elf Necromancer, Dwarven Rogue, and Human Cleric.
Level 1: (Cost: 2): Equip leather and padded armor.
Level 2: (Cost: 4): Equip scale and chain armor, and shields.
Level 3: (Cost: 6): Equip half plate and plate armor.
Barbaric Rage
Enter a state of barbaric rage. While enraged, you will be unable to block. Available for the Human Barbarian.
Level 1 (Cost: 1): +1 to attack, +1-6 to damage, -2 to AC
Level 2 (Cost: 2): +2 to attack, +2-12 to damage, -4 to AC
Level 3 (Cost: 3): +3 to attack, +3-18 to damage, -6 to AC
Level 4 (Cost: 4): +4 to attack, +4-24 to damage, -8 to AC
Level 5 (Cost: 5): +5 to attack, +5-30 to damage, -10 to AC
Bless
Increases the combat abilities of you and any allies. Available for Human Cleric.
Level 1 (Cost: 1): +1 to hit and +1 to damage for 25 seconds.
Level 2 (Cost: 2): +2 to hit and +2 to damage for 30 seconds.
Level 3 (Cost: 3): +3 to hit and +3 to damage for 35 seconds.
Level 4 (Cost: 4): +4 to hit and +4 to damage for 40 seconds.
Level 5 (Cost: 5): +5 to hit and +5 to damage for 45 seconds.
Chill Touch
A freezing touch attack against a single enemy. Available for the Moon Elf Necromancer.
Level 1 (Cost: 2): 1-6 additional cold damage.
Level 2 (Cost: 4): 2-12 additional cold damage.
Level 3 (Cost: 6): 3-18 additional cold damage.
Level 4 (Cost: 8): 4-24 additional cold damage.
Level 5 (Cost: 10): 5-30 additional cold damage.
Clarity
Reduces the casting cost of your spells. Available for the Moon Elf Necromancer and Human Cleric.
Level 1 (Cost: 2): 10% reduction in cost.
Level 2 (Cost: 4): 20% reduction in cost.
Level 3 (Cost: 6): 30% reduction in cost.
Cleave
An attack that strikes all enemies in front of you. Available for the Human Barbarian.
Level 1 (Cost: 2): +1 damage
Level 2 (Cost: 4): +2 damage
Level 3 (Cost: 6): +3 damage
Level 4 (Cost: 8): +4 damage
Level 5 (Cost: 10): +5 damage
Combat Reflexes
Increases the speed of your attacks. Available for the Human Barbarian, Dark Elf Monk, and Dwarven Rogue.
Level 1 (Cost: 2): Speed Increases
Level 2 (Cost: 4): Speed Increases
Level 3 (Cost: 6): Speed Increases
Level 4 (Cost: 8): Speed Increases
Level 5 (Cost: 10): Speed Increases
Contagion
Curse your enemies with the plague. Available for the Moon Elf Necromancer.
Level 1 (Cost: 2): 2 poison damage to 1 target.
Level 2 (Cost: 4): 3 poison damage to 2 targets.
Level 3 (Cost: 6): 4 poison damage to 3 targets.
Level 4 (Cost: 8): 5 poison damage to 4 targets.
Level 5 (Cost: 10): 6 poison damage to 5 targets.
Crushing Blow
Adds damage to unarmed attacks. Available for Dark Elf Monk.
Level 1 (Cost: 1): +2 damage
Level 2 (Cost: 2): +4 damage
Level 3 (Cost: 3): +6 damage
Level 4 (Cost: 4): +8 damage
Level 5 (Cost: 5): +10 damage
Cure Wounds
Heals yourself and any allies. Available for the Human Cleric.
Level 1 (Cost: 1): +10 Hit Points.
Level 2 (Cost: 2): +20 Hit Points.
Level 3 (Cost: 3): +30 Hit Points.
Level 4 (Cost: 4): +40 Hit Points.
Level 5 (Cost: 5): +50 Hit Points.
Dark Possession
Control humanoids and lesser undead creatures. Available for Moon Elf Necromancer.
Level 1 (Cost: 2): 6 seconds, +100% damage.
Level 2 (Cost: 4): 12 seconds, +200% damage.
Level 3 (Cost: 6): 18 seconds, +300% damage.
Death Blow
Increases the damage inflicted by a critical hit. Available for the Human Barbarian and Dark Elf Monk.
Level 1 (Cost: 1): +2 damage
Level 2 (Cost: 2): +4 damage
Level 3 (Cost: 3): +6 damage
Level 4 (Cost: 4): +8 damage
Level 5 (Cost: 5): +10 damage
Deflect Missiles
Gives a chance to automatically block missile attacks. Available for the Dark Elf Monk.
Level 1 (Cost: 1): 5%
Level 2 (Cost: 2): 10%
Level 3 (Cost: 3): 15%
Level 4 (Cost: 4): 20%
Level 5 (Cost: 5): 25%
Divine Resilience
Temporarily boosts your Great Fortitude. Available for Human Cleric.
Level 1 (Cost: 1): Improved regeneration for 5 seconds.
Level 2 (Cost: 2): Improved regeneration for 10 seconds.
Level 3 (Cost: 3): Improved regeneration for 15 seconds.
Level 4 (Cost: 4): Improved regeneration for 20 seconds.
Level 5 (Cost: 5): Improved regeneration for 25 seconds.
Divine Strength
Temporarily boost your Strength. Available for Human Cleric.
Level 1 (Cost: 2): +2 for 35 seconds.
Level 2 (Cost: 4): +4 for 45 seconds.
Level 3 (Cost: 6): +6 for 55 seconds.
Level 4 (Cost: 8): +8 for 65 seconds.
Level 5 (Cost: 10): +10 for 75 seconds.
Dodge
Enemies are more likely to miss in combat. Available for the Human Barbarian, Dwarven Rogue, and Human Cleric.
Level 1 (Cost: 1): +1 to AC per piece of armor worn.
Level 2 (Cost: 2): +2 to AC per piece of armor worn.
Level 3 (Cost: 3): +3 to AC per piece of armor worn.
Level 4 (Cost: 4): +4 to AC per piece of armor worn.
Level 5 (Cost: 5): +5 to AC per piece of armor worn.
Diamond Body
Resist the effects of poison and acid attacks. Available for the Dark Elf Monk.
Level 1 (Cost 1): 1 less damage per tick.
Level 2 (Cost 2): 2 less damage per tick.
Level 3 (Cost 3): 3 less damage per tick.
Level 4 (Cost 4): 4 less damage per tick.
Level 5 (Cost 5): 5 less damage per tick.
Empower
Increases the effectiveness of various spells. Available for Moon Elf Necromancer and Human Cleric.
Level 1 (Cost: 4 for Necromancer, 3 for Cleric): 15% damage.
Level 2 (Cost: 8 for Necromancer, 6 for Cleric): 30% damage.
Level 3 (Cost: 12 for Necromancer, 9 for Cleric): 45% damage.
Enchant Item
Decreases the cost of creating and breaking down magic items. Available for the Moon Elf Necromancer.
Level 1 (Cost: 1): -15% workshop costs.
Level 2 (Cost: 2): -30% workshop costs.
Level 3 (Cost: 3): -45% workshop costs.
Level 4 (Cost: 4): -60% workshop costs.
Level 5 (Cost: 5): -75% workshop costs.
Endurance
Increases your carrying capacity. Available for the Human Barbarian, Moon Elf Necromancer, Dwarven Rogue, and Human Cleric.
Level 1 (Cost: 2): +15 more pounds.
Level 2 (Cost: 4): +30 more pounds.
Level 3 (Cost: 6): +45 more pounds.
Level 4 (Cost: 8): +60 more pounds.
Level 5 (Cost: 10): +75 more pounds.
Feats - cont.
Enervation
Channel death energy at nearby enemies in your front arc. Affects one additional enemy per rank. Available for Moon Elf Necromancer.
Level 1 (Cost: 2): 3-9 damage per half second while button is held.
Level 2 (Cost: 4): 6-18 damage per half second while button is held.
Level 3 (Cost: 6): 9-27 damage per half second while button is held.
Level 4 (Cost: 8): 12-36 damage per half second while button is held.
Level 5 (Cost: 10): 15-45 damage per half second while button is held.
Evasion
Aids in damage reduction from certain magical attacks. Available for the Dark Elf Monk and Dwarven Rogue.
Level 1 (Cost: 1): +10% reduction.
Level 2 (Cost: 2): +20% reduction.
Level 3 (Cost: 3): +30% reduction.
Level 4 (Cost: 4): +40% reduction.
Level 5 (Cost: 5): +50% reduction.
Fear
Enemies closest run away for a limited duration. Additional rank increases targets and duration of the spell. Available for Moon Elf Necromancer.
Level 1 (Cost: 2): 1 second, 1 target.
Level 2 (Cost: 4): 2 seconds, 2 targets.
Level 3 (Cost: 6): 3 seconds, 3 targets.
Level 4 (Cost: 8): 4 seconds, 4 targets.
Level 5 (Cost: 10): 5 seconds, 5 targets.
Flame Arrow
Summon magical flaming arrows. Available for the Moon Elf Necromancer.
Level 1 (Cost: 1): +2-11 damage, 1 arrow.
Level 2 (Cost: 2): +3-12 damage, 2 arrows.
Level 3 (Cost: 3): +4-13 damage, 3 arrows.
Level 4 (Cost: 4): +5-14 damage, 4 arrows.
Level 5 (Cost: 5): +6-15 damage, 5 arrows.
Flame Strike
Holy Fire called down on your enemies. Available for Human Cleric.
Level 1 (Cost: 2): 7-48 fire damage.
Level 2 (Cost: 4): 8-60 fire damage.
Level 3 (Cost: 6): 9-72 fire damage.
Level 4 (Cost: 8): 10-84 fire damage.
Level 5 (Cost: 10): 11-96 fire damage.
Forge Lore
Decreases the cost of creating and breaking down magic weapons. Available for the Dwarven Rogue.
Level 1 (Cost: 3): -15% workshop costs.
Level 2 (Cost: 6): -30% workshop costs.
Level 3 (Cost: 9): -45% workshop costs.
Level 4 (Cost: 12): -60% workshop costs.
Level 5 (Cost: 15): -75% workshop costs.
Ghoul Touch
A touch attack that paralyzes a foe. Available for the Moon Elf Necromancer.
Level 1 (Cost: 1): 1 poison damage.
Level 2 (Cost: 2): 2 poison damage.
Level 3 (Cost: 3): 3 poison damage.
Level 4 (Cost: 4): 4 poison damage.
Level 5 (Cost: 5): 5 poison damage.
Great Fortitude
Increases your Hit Point regeneration rate. Available for the Human Barbarian, Dark Elf Monk, Moon Elf Necromancer, Dwarven Rogue, and Human Cleric.
Level 1 (Cost: 1): +2 HP per minute.
Level 2 (Cost: 2): +4 HP per minute.
Level 3 (Cost: 3): +6 HP per minute.
Level 4 (Cost: 4): +8 HP per minute.
Level 5 (Cost: 5): +10 HP per minute.
Great Weapon Focus
Increases your ability to fight with two-handed great weapons. Available for the Human Barbarian and Human Cleric.
Level 1 (Cost: 2): +2 to hit and +1 to damage.
Level 2 (Cost: 4): +4 to hit and +2 to damage.
Level 3 (Cost: 6): +6 to hit and +3 to damage.
Hail of Bolts
Allows you to fire multiple bolts at once. Available for the Dwarven Rogue.
Level 1 (Cost: 2): 2 bolts.
Level 2 (Cost: 4): 3 bolts.
Level 3 (Cost: 6): 4 bolts.
Level 4 (Cost: 8): 5 bolts.
Level 5 (Cost: 10): 6 bolts.
Hand Weapon Focus
Increases your ability to fight with one-handed weapons. Available for the Human Barbarian, Dark Elf Monk, Moon Elf Necromancer, Dwarven Rogue, and Human Cleric.
Level 1 (Cost: 2): +2 to hit and +1 to damage.
Level 2 (Cost: 4): +4 to hit and +2 to damage.
Level 3 (Cost: 6): +6 to hit and +3 to damage.
Haste
Increased speed for you and any allies. Available for the Moon Elf Necromancer.
Level 1 (Cost: 1): 6% increase, 8 seconds.
Level 2 (Cost: 2): 12% increase, 11 seconds.
Level 3 (Cost: 3): 18% increase, 14 seconds.
Level 4 (Cost: 4): 24% increase, 17 seconds.
Level 5 (Cost: 5): 30% increase, 20 seconds.
Hero's Arm
Allows you to wield great weapons in only one hand. Available for the Human Barbarian.
Level 1 (Cost: 15): Allows you to wield great weapons in only one hand.
Hero's Mantle
Resistance to physical damage. Available for the Human Barbarian.
Level 1 (Cost: 1): +5% damage reduction.
Level 2 (Cost: 2): +10% damage reduction.
Level 3 (Cost: 3): +15% damage reduction.
Level 4 (Cost: 4): +20% damage reduction.
Level 5 (Cost: 5): +25% damage reduction.
Hold
Stuns creatures in front of you. Available for the Moon Elf Necromancer.
Level 1 (Cost: 3): 1 second, 1 target.
Level 2 (Cost: 6): 1 second, 2 targets.
Level 3 (Cost: 9): 1 second, 3 targets.
Level 4 (Cost: 12): 1 second, 4 targets.
Level 5 (Cost: 15): 2 seconds, 5 targets.
Improved Critical
Increases your chance of a critical hit with melee attacks. Available for the Human Barbarian, Dark Elf Monk, and Dwarven Rogue.
Level 1 (Cost: 1): +3%
Level 2 (Cost: 2): +6%
Level 3 (Cost: 3): +9%
Level 4 (Cost: 4): +12%
Level 5 (Cost: 5): +15%
Iron Will
Increases your Magic Energy regeneration rate. Available for the Human Barbarian, Dark Elf Monk, Moon Elf Necromancer, Dwarven Rogue, and Human Cleric.
Level 1 (Cost: 1): +125%
Level 2 (Cost: 2): +150%
Level 3 (Cost: 3): +175%
Level 4 (Cost: 4): +200%
Level 5 (Cost: 5): +225%
Life Drain
Drain Hit Points from enemies to restore your own. Affects on additional enemy per rank. Available for the Moon Elf Necromancer.
Level 1 (Cost: 1): Drains 2-5 per half second.
Level 2 (Cost: 2): Drains 4-10 per half second.
Level 3 (Cost: 3): Drains 6-15 per half second.
Level 4 (Cost: 4): Drains 8-20 per half second.
Level 5 (Cost: 5): Drains 10-25 per half second.
Long Weapon Focus
Improves your ability to fight with staves, spears, and halberds. Available for the Human Barbarian, Dark Elf Monk, Moon Elf Necromancer, Dwarven Rogue, and Human Cleric.
Level 1 (Cost: 2): +2 to hit and +1 to damage.
Level 2 (Cost: 4): +4 to hit and +2 to damage.
Level 3 (Cost: 6): +6 to hit and +3 to damage.
Melf's Acid Arrow
Summons a magic acidic arrow. Available for the Moon Elf Necromancer.
Level 1 (Cost: 4): 8-18 damage.
Level 2 (Cost: 8): 13-23 damage.
Level 3 (Cost: 12): 18-28 damage.
Level 4 (Cost: 16): 23-33 damage.
Level 5 (Cost: 20): 28-38 damage.
Piercing Strike
Reduces your enemy's Armor Class. Available for the Dark Elf Monk.
Level 1 (Cost: 1): 4 armor class reduction.
Level 2 (Cost: 2): 8 armor class reduction.
Level 3 (Cost: 3): 12 armor class reduction.
Level 4 (Cost: 4): 16 armor class reduction.
Level 5 (Cost: 5): 20 armor class reduction.
Power Attack
Inflict additional damage upon enemies with any melee weapon. Available for the Human Barbarian.
Level 1 (Cost: 1): +2 damage per hit.
Level 2 (Cost: 2): +4 damage per hit.
Level 3 (Cost: 3): +6 damage per hit.
Level 4 (Cost: 4): +8 damage per hit.
Level 5 (Cost: 5): +10 damage per hit.
Precise Shot
You can make more accurate, damaging shots with a crossbow. Available for the Dwarven Rogue.
Level 1 (Cost: 1): +1 to hit and +15% to damage.
Level 2 (Cost: 2): +2 to hit and +30% to damage.
Level 3 (Cost: 3): +3 to hit and +45% to damage.
Level 4 (Cost: 4): +4 to hit and +60% to damage.
Level 5 (Cost: 5): +5 to hit and +75% to damage.
Feats - cont.
Protective Ward
Creates a protective aura around you. Available for the Human Cleric.
Level 1 (Cost: 1): +4 to Armor Class for 30 seconds.
Level 2 (Cost: 2): +8 to Armor Class for 40 seconds.
Level 3 (Cost: 3): +12 to Armor Class for 50 seconds.
Level 4 (Cost: 4): +16 to Armor Class for 60 seconds.
Level 5 (Cost: 5): +20 to Armor Class for 70 seconds.
Purity
Temporary poison and acid resistance; resist some status effects at higher ranks. Available for the Human Cleric.
Level 1 (Cost: 2): Resist 1 acid/poison damage for 25 seconds.
Level 2 (Cost: 4): Resist 2 acid/poison damage for 35 seconds.
Level 3 (Cost: 6): Resist 3 acid/poison damage for 45 seconds.
Level 4 (Cost: 8): Resist 4 acid/poison damage for 55 seconds.
Level 5 (Cost: 10): Resist 5 acid/poison damage for 65 seconds.
Ransack
Knock additional loot out of enemies. Available for the Dwarven Rogue.
Level 1 (Cost: 2): 1-6 damage and 13% chance of additional treasure.
Level 2 (Cost: 4): 2-12 damage and 16% chance of additional treasure.
Level 3 (Cost: 6): 3-18 damage and 19% chance of additional treasure.
Level 4 (Cost: 8): 4-24 damage and 22% chance of additional treasure.
Level 5 (Cost: 10): 5-30 damage and 25% chance of additional treasure.
Ray of Enfeeblement
Reduces an enemy's damage output. Available for the Moon Elf Necromancer.
Level 1 (Cost: 1): 10% damage.
Level 2 (Cost: 2): 20% damage.
Level 3 (Cost: 3): 30% damage.
Level 4 (Cost: 4): 40% damage.
Level 5 (Cost: 5): 50% damage.
Sanctuary
Enemies will not attack you unless you attack them. Available for Human Cleric.
Level 1 (Cost: 1): 5 seconds.
Level 2 (Cost: 2): 10 seconds.
Level 3 (Cost: 3): 15 seconds.
Level 4 (Cost: 4): 20 seconds.
Level 5 (Cost: 5): 25 seconds.
Shield
Magic Shield that improves armor. Available for the Moon Elf Necromancer.
Level 1 (Cost: 1): 10% absorb, +6 Armor Class.
Level 2 (Cost: 2): 20% absorb, +7 Armor Class.
Level 3 (Cost: 3): 30% absorb, +8 Armor Class.
Level 4 (Cost: 4): 40% absorb, +9 Armor Class.
Level 5 (Cost: 5): 50% absorb, +10 Armor Class.
Shocking Grasp
Your touch electrifies enemies. Available for the Moon Elf Necromancer.
Level 1 (Cost: 1): 2-9 electrical damage.
Level 2 (Cost: 2): 4-18 electrical damage.
Level 3 (Cost: 3): 6-27 electrical damage.
Level 4 (Cost: 4): 8-36 electrical damage.
Level 5 (Cost: 5): 10-45 electrical damage.
Smokepowder Bolt
Fire a burning bolt with your crossbow. Available for the Dwarven Rogue.
Level 1 (Cost: 1): +1-5 fire damage.
Level 2 (Cost: 2): +2-10 fire damage.
Level 3 (Cost: 3): +3-15 fire damage.
Level 4 (Cost: 4): +4-20 fire damage.
Level 5 (Cost: 5): +5-25 fire damage.
Smokepowder Bomb
Hurl an explosive bomb at your enemies. Available for the Dwarven Rogue.
Level 1 (Cost: 1): +5-10 fire damage.
Level 2 (Cost: 2): +10-20 fire damage.
Level 3 (Cost: 3): +15-30 fire damage.
Level 4 (Cost: 4): +20-40 fire damage.
Level 5 (Cost: 5): +25-50 fire damage.
Smokepowder Satchel
Place and later detonate an explosive satchel charge. Available for the Dwarven Rogue.
Level 1 (Cost: 2): 35 damage, explosion radius: 3 feet.
Level 2 (Cost: 4): 70 damage, explosion radius: 6 feet.
Level 3 (Cost: 6): 105 damage, explosion radius 9 feet.
Level 4 (Cost: 8): 140 damage, explosion radius 12 feet.
Level 5 (Cost: 10): 175 damage, explosion radius 15 feet.
Slow
Slows down enemies. Available for the Moon Elf Necromancer.
Level 1 (Cost: 2): 10 seconds, 1 target.
Level 2 (Cost: 4): 20 seconds, 2 targets.
Level 3 (Cost: 6): 30 seconds, 3 targets.
Level 4 (Cost: 8): 40 seconds, 4 targets.
Level 5 (Cost: 10): 50 seconds, 5 targets.
Spinning Strike
A devastating staff attack that strikes all enemies around you. Available for the Dark Elf Monk.
Level 1 (Cost: 2): +1 damage.
Level 2 (Cost: 4): +2 damage.
Level 3 (Cost: 6): +3 damage.
Level 4 (Cost: 8): +4 damage.
Level 5 (Cost: 10): +5 damage.
Spiritual Weapon
Summon the avatar of Helm's sword, ‘Ever Watchful.' High ranks give stronger summons. Available for the Human Cleric.
Level 1 (Cost: 2): Summon an alley weapon.
Level 2 (Cost: 4): Summon an alley weapon.
Level 3 (Cost: 6): Summon an alley weapon.
Level 4 (Cost: 8): Summon an alley weapon.
Level 5 (Cost: 10): Summon an alley weapon.
Sprint
A quick burst of running speed. Available for the Human Barbarian, Moon Elf Necromancer, Dwarven Rogue, and Human Cleric.
Level 1 (Cost: 1): +66% increase in speed for 1 second.
Level 2 (Cost: 2): +99% increase in speed for 1 second.
Level 3 (Cost: 3): +132% increase in speed for 1 second.
Level 4 (Cost: 4): +165% increase in speed for 1 second.
Level 5 (Cost: 5): +198% increase in speed for 1 second.
Stealth
Allows you to avoid enemies and make a sneak attack. Available for the Dwarven Rogue.
Level 1 (Cost: 1): +2-6 damage to sneak attacks.
Level 2 (Cost: 2): +4-12 damage to sneak attacks.
Level 3 (Cost: 3): +6-18 damage to sneak attacks.
Level 4 (Cost: 4): +8-24 damage to sneak attacks.
Level 5 (Cost: 5): +10-30 damage to sneak attacks.
Stunning Blow
A powerful attack that damages and stuns your enemy. Available for the Dark Elf Monk.
Level 1 (Cost: 1): Stun for 1.50 seconds, 4-10 damage.
Level 2 (Cost: 2): Stun for 2.00 seconds, 7-16 damage.
Level 3 (Cost: 3): Stun for 2.50 seconds, 10-22 damage.
Level 4 (Cost: 4): Stun for 3.00 seconds, 13-28 damage.
Level 5 (Cost: 5): Stun for 3.50 seconds, 16-34 damage.
Sunder
Reduces your enemies Armor Class with every successful attack. Available for the Human Barbarian.
Level 1 (Cost: 2): -4 enemy armor class.
Level 2 (Cost: 4): -8 enemy armor class.
Level 3 (Cost: 6): -12 enemy armor class.
Level 4 (Cost: 8): -16 enemy armor class.
Level 5 (Cost: 10): -20 enemy armor class.
Sweep Attack
An unarmed attack that strikes and knocks back all enemies before you. Available for the Dark Elf Monk.
Level 1 (Cost: 2): +1 damage.
Level 2 (Cost: 4): +2 damage.
Level 3 (Cost: 6): +3 damage.
Level 4 (Cost: 8): +4 damage.
Level 5 (Cost: 10): +5 damage.
Toughness
Grants you extra Hit Points. Available for the Human Barbarian, Dwarven Rogue, and Human Cleric.
Level 1 (Cost: 1): +6 hit points.
Level 2 (Cost: 2): +12 hit points.
Level 3 (Cost: 3): +18 hit points.
Level 4 (Cost: 4): +24 hit points.
Level 5 (Cost: 5): +30 hit points.
Turn Undead
Repels and damages nearby undead. Available for Human Cleric.
Level 1 (Cost: 2): 15-28 damage.
Level 2 (Cost: 4): 20-36 damage.
Level 3 (Cost: 6): 25-44 damage.
Level 4 (Cost: 8): 30-52 damage.
Level 5 (Cost: 10): 35-60 damage.
Two-Weapon Fighting
Improves your ability to fight with two weapons at once. Available for the Human Barbarian, Dwarven Rogue, and Human Cleric.
Level 1 (Cost: 3): +90%/+30% primary/off-hand damage.
Level 2 (Cost: 6): +100%/+40% primary/off-hand damage.
Level 3 (Cost: 9): +110%/+50% primary/off-hand damage.
Level 4 (Cost: 12): +120%/+60% primary/off-hand damage.
Level 5 (Cost: 15): +130%/+70% primary/off-hand damage.
Unarmed Combat
Improves your ability to fight bare-handed. Available for the Dark Elf Monk,
Level 1 (Cost: 2): 4-8 to damage, chance to stun.
Level 2 (Cost: 4): 7-14 to damage, chance to stun.
Level 3 (Cost: 6): 10-20 to damage, chance to stun.
Level 4 (Cost: 8): 13-26 to damage, chance to stun.
Level 5 (Cost: 10): 16-32 to damage, chance to stun.
Vampiric Touch
A touch attack that steals life from enemies. Available for the Moon Elf Necromancer.
Level 1 (Cost: 1): 3-18 damage.
Level 2 (Cost: 2): 5-30 damage.
Level 3 (Cost: 3): 7-42 damage.
Level 4 (Cost: 4): 9-54 damage.
Level 5 (Cost: 5): 11-66 damage.
Willpower
Grants you additional Magic Energy. Available for the Human Barbarian, Moon Elf Necromancer, and Dwarven Rogue.
Level 1 (Cost: 1): +5
Level 2 (Cost: 2): +10
Level 3 (Cost: 3): +15
Level 4 (Cost: 4): +20
Level 5 (Cost: 5): +25
Feats - cont.
Extra Barbarian Feats
The following feats are awarded to the Human Barbarian upon completion of the class-specific quest in Act III.
Animal Friendship
Allows you to charm animals.
Level 1 (Cost: 1): 6 seconds
Level 2 (Cost: 2): 12 seconds
Level 3 (Cost: 3): 18 seconds
Level 4 (Cost: 4): 24 seconds
Level 5 (Cost: 5): 30 seconds
Bale Arm
Allows you to hurl two throwing weapons at the same time.
Level 1 (Cost: 2): Allows you to hurl two throwing weapons at the same time.
Barkskin
Makes your skin as tough as bark.
Level 1 (Cost: 2): +3 to Armor Class.
Level 2 (Cost: 4): +6 to Armor Class.
Level 3 (Cost: 6): +9 to Armor Class.
Level 4 (Cost: 8): +12 to Armor Class.
Level 5 (Cost: 10): +15 to Armor Class.
Heart of the Bear
Increases your hit points.
Level 1 (Cost: 2): +10
Level 2 (Cost: 4): +20
Level 3 (Cost: 6): +30
Level 4 (Cost: 8): +40
Level 5 (Cost: 10): +50
Heart of the Wolf
Increases your running speed.
Level 1 (Cost: 2): +10%
Level 2 (Cost: 4): +20%
Level 3 (Cost: 6): +30%
Level 4 (Cost: 8): +40%
Level 5 (Cost: 10): +50%
Resist Elements
Aids in elemental damage resistance.
Level 1 (Cost: 3): +10% elemental damage resistance.
Level 2 (Cost: 6): +20% elemental damage resistance.
Level 3 (Cost: 9): +30% elemental damage resistance.
Level 4 (Cost: 12): +40% elemental damage resistance.
Level 5 (Cost: 15): +50% elemental damage resistance.
Extra Dark Elf Monk Feats
The following feats are awarded to the Dark Elf Monk upon completion of the class-specific quest in Act III.
Arterial Strike
Wound enemies to inflict gradual loss in Hit Points (weapon equipped and in Stealth state).
Level 1 (Cost: 1): 5 damage per second for 3 seconds.
Level 2 (Cost: 2): 10 damage per second for 6 seconds.
Level 3 (Cost: 3): 15 damage per second for 9 seconds.
Level 4 (Cost: 4): 20 damage per second for 12 seconds.
Level 5 (Cost: 5): 25 damage per second for 15 seconds.
Crippling Blow
An attack that slows the enemy (weapon equipped an in stealth state).
Level 1 (Cost: 1): 9 second duration.
Level 2 (Cost: 2): 12 second duration.
Level 3 (Cost: 3): 15 second duration.
Level 4 (Cost: 4): 18 second duration.
Level 5 (Cost: 5): 21 second duration.
Hail of Knives
Allows you to throw multiple knives at once.
Level 1 (Cost: 1): 2 knives
Level 2 (Cost: 2): 3 knives
Level 3 (Cost: 3): 4 knives
Level 4 (Cost: 4): 5 knives
Level 5 (Cost: 5): 6 knives
Poison
Inflicts additional poison damage on attacks.
Level 1 (Cost: 1): 2 poison damage for 6 seconds.
Level 2 (Cost: 2): 4 poison damage for 12 seconds.
Level 3 (Cost: 3): 6 poison damage for 18 seconds.
Level 4 (Cost: 4): 8 poison damage for 24 seconds.
Level 5 (Cost: 5): 10 poison damage for 30 seconds.
Stealth
Allows you to avoid enemies and make Sneak Attacks.
Level 1 (Cost: 1): +2-6 damage to Sneak Attacks.
Level 2 (Cost: 2): +4-12 damage to Sneak Attacks.
Level 3 (Cost: 3): +6-18 damage to Sneak Attacks.
Level 4 (Cost: 4): +8-24 damage to Sneak Attacks.
Level 5 (Cost: 5): +10-30 damage to Sneak Attacks.
Extra Moon Elf Necromancer Feats
The following feats are awarded to the Moon Elf Necromancer upon completion of the class-specific quest in Act III.
Claws of Darkness
Attack with claws of deadly shadow that freeze and weaken your enemies.
Level 1 (Cost: 2): +7-12 damage, weaken by 8%.
Level 2 (Cost: 4): +14-24 damage, weaken by 16%.
Level 3 (Cost: 6): +21-36 damage, weaken by 24%.
Shadow Conjure
Summon a shadow ally, higher ranks improve the pet.
Level 1 (Cost: 2): Summon a shadow ally.
Level 2 (Cost: 4): Summon a shadow ally.
Level 3 (Cost: 6): Summon a shadow ally.
Level 4 (Cost: 8): Summon a shadow ally.
Level 5 (Cost: 10): Summon a shadow ally.
Shadow Shield
Shield spell that auto-blocks some attacks.
Level 1 (Cost: 2): 10% absorb, +6 Armor Class, 3% chance to block.
Level 2 (Cost: 4): 20% absorb, +7 Armor Class, 6% chance to block.
Level 3 (Cost: 6): 30% absorb, +8 Armor Class, 9% chance to block.
Level 4 (Cost: 8): 40% absorb, +9 Armor Class, 12% chance to block.
Level 5 (Cost: 10): 50% absorb, +10 Armor Class, 15% chance to block.
Shadow Spray
Inflict damage to nearby enemies with ribbons of shadow. The caster fires one ribbon per rank.
Level 1 (Cost: 2): 4-12 damage per ribbon.
Level 2 (Cost: 4): 8-24 damage per ribbon.
Level 3 (Cost: 6): 12-36 damage per ribbon.
Level 4 (Cost: 8): 16-48 damage per ribbon.
Level 5 (Cost: 10): 20-60 damage per ribbon.
Feats - cont.
Extra Dwarven Rogue Feats
The following feats are awarded to the Dwarven Rogue upon completion of the class-specific quest in Act III.
Cleave
Attack multiple targets with one swing.
Level 1 (Cost: 2): +1 damage
Level 2 (Cost: 4): +2 damage
Level 3 (Cost: 6): +3 damage
Level 4 (Cost: 8): +4 damage
Level 5 (Cost: 10): +5 damage
Death Blow
Increases the damage inflicted by a critical hit.
Level 1 (Cost: 1): +2 damage
Level 2 (Cost: 2): +4 damage
Level 3 (Cost: 3): +6 damage
Level 4 (Cost: 4): +8 damage
Level 5 (Cost: 5): +10 damage
Dwarven Warsong
Bellow to temporarily increase combat ability.
Level 1 (Cost: 1): +1 to hit, +1 damage
Level 2 (Cost: 2): +2 to hit, +2 damage
Level 3 (Cost: 3): +3 to hit, +3 damage
Level 4 (Cost: 4): +4 to hit, +4 damage
Level 5 (Cost: 5): +5 to hit, +5 damage
Great Weapon Focus
Increases your ability to fight with two-handed great weapons.
Level 1 (Cost: 2): +2 to hit and +1 to damage.
Level 2 (Cost: 4): +4 to hit and +2 to damage.
Level 3 (Cost: 6): +6 to hit and +3 to damage.
Shield Bash
A short dash forward that damages and stuns your enemy,
Level 1 (Cost: 2): Stun target for 1 second, inflict 4-9 damage.
Level 2 (Cost: 4): Stun target for 2 seconds, inflict 7-14 damage.
Level 3 (Cost: 6): Stun target for 2 seconds, inflict 10-19 damage.
Level 4 (Cost: 8): Stun target for 3 seconds, inflict 13-24 damage.
Level 5 (Cost: 10): Stun target for 3 seconds, inflict 16-29 damage.
Shield Expertise
Gain additional armor bonus and physical damage resistance from your shield.
Level 1 (Cost: 2): +3
Level 2 (Cost: 4): +6
Level 3 (Cost: 6): +9
Level 4 (Cost: 8): +12
Level 5 (Cost: 10): +15
Sunder
Decrease your opponent's defenses and gain a small damage increase on subsequent attacks.
Level 1 (Cost: 2): -4 to enemy Armor Class.
Level 2 (Cost: 4): -8 to enemy Armor Class.
Level 3 (Cost: 6): -12 to enemy Armor Class.
Level 4 (Cost: 8): -16 to enemy Armor Class.
Level 5 (Cost: 10): -20 to enemy Armor Class.
Extra Human Cleric Feats
The following feats are awarded to the Human Cleric upon completion of the class-specific quest in Act III.
Cleave
Attack multiple targets with one swing.
Level 1 (Cost: 2): +1 damage
Level 2 (Cost: 4): +2 damage
Level 3 (Cost: 6): +3 damage
Level 4 (Cost: 8): +4 damage
Level 5 (Cost: 10): +5 damage
Death Blow
Increases the damage inflicted by a critical hit.
Level 1 (Cost: 1): +2 damage
Level 2 (Cost: 2): +4 damage
Level 3 (Cost: 3): +6 damage
Level 4 (Cost: 4): +8 damage
Level 5 (Cost: 5): +10 damage
Improved Critical
Increases your chance of a critical hit with melee attacks.
Level 1 (Cost: 1): +3%
Level 2 (Cost: 2): +6%
Level 3 (Cost: 3): +9%
Level 4 (Cost: 4): +12%
Level 5 (Cost: 5): +15%
Power Attack
Inflict additional damage upon enemies with any melee weapon.
Level 1 (Cost: 1): +2 damage per hit.
Level 2 (Cost: 2): +4 damage per hit.
Level 3 (Cost: 3): +6 damage per hit.
Level 4 (Cost: 4): +8 damage per hit.
Level 5 (Cost: 5): +10 damage per hit.
Shield Bash
A short dash forward that damages and stuns your enemy,
Level 1 (Cost: 2): Stun target for 1 second, inflict 4-9 damage.
Level 2 (Cost: 4): Stun target for 2 seconds, inflict 7-14 damage.
Level 3 (Cost: 6): Stun target for 2 seconds, inflict 10-19 damage.
Level 4 (Cost: 8): Stun target for 3 seconds, inflict 13-24 damage.
Level 5 (Cost: 10): Stun target for 3 seconds, inflict 16-29 damage.
Shield Expertise
Gain additional armor bonus and physical damage resistance from your shield.
Level 1 (Cost: 2): +3
Level 2 (Cost: 4): +6
Level 3 (Cost: 6): +9
Level 4 (Cost: 8): +12
Level 5 (Cost: 10): +15
Smite Evil
Inflicts additional damage and can disrupt undead.
Level 1 (Cost: 1): +1 damage, 8% chance to disrupt undead.
Level 2 (Cost: 2): +2 damage, 11% chance to disrupt undead.
Level 3 (Cost: 3): +3 damage, 14% chance to disrupt undead.
Level 4 (Cost: 4): +4 damage, 17% chance to disrupt undead.
Level 5 (Cost: 5): +5 damage, 20% chance to disrupt undead.
Chapter 3 - Item Creation
Baldur's Gate: Dark Alliance 2 offers a complex item system. Each item bears a specific quality that affects its usefulness and worth. Plus, valuable gems can be purchased from Bartley the merchant or found throughout the dungeons and used to enhance weapons, armor, and jewelry with magical properties. This section provides details on item quality and gems, including their specific magical properties so you can create the items best suited for your character.
The following chart defines the item qualities and reveals their effect on weaponry, armor, and jewelry.
| ITEM QUALITY | WEAPONRY | ARMOR | JEWELRY |
| Shoddy | x0.5 damage | -15% to Armor Class | Decreased Value |
| "Normal" | Standard | Standard | Standard |
| Fine | x1.5 damage | +15% to Armor Class | Increased Value |
| Remarkable | x2 damage | +30% to Armor Class | Increased Value |
| Superior | x2.5 damage | +45% to Armor Class | Increased Value |
| Grand | x3 damage | +60% to Armor Class | Increased Value |
| Imperial | x3.5 damage | +75% to Armor Class | Increased Value |
| Flawless | x4 damage | +90% to Armor Class | Increased Value |
Flawless quality equipment is the cream of the crop. Upgrading equipment with gems at Bartley's workshop is very expensive; since quality already offers innate benefits, you should try to save your gold coins to upgrade the best equipment you can find. As you see from the table, a Flawless great axe offers much more damage potential than a Fine great axe.
Item upgrading is a three part process. The first part to item upgrade is the rune stones; you must use rune stones in the first slot of your item upgrade. The second and third part to the item upgrade is the gems. You should place an equivalent amount in each of the three slots for the best possible weapon. Otherwise you will be wasting a rune stone or a type of gem. As you are creating the item, you can watch the items' abilities alter which can help you determine how many stones and gems you should use.
The following chart reveals the thirteen gem types and their base effects. Note that rune stones affect weaponry by increasing damage, armor by increasing armor class, and jewelry by increasing armor class. The effects revealed in the table reflect a single gem. Increase the number of gems for greater effect and combine gems to add both effects.
| GEM | EFFECT IN WEAPONRY (INCLUDING GLOVES) | EFFECT IN ARMOR | EFFECT IN JEWELRY (INCLUDING BOOTS) |
| Amethyst | +1-8 extra critical hit damage | +3% damage resistance | +1 Charisma |
| Aquamarine | +1-4 cold damage | +5% cold resistance | +1 Intelligence |
| Coral | +20% to minimum damage | +1 Shield Expert (max. rank: 10) | +10% ignore knock-back |
| Diamond | +15% disintegrate undead on a critical hit | +3% fire, cold, shock, acid, poison damage resistance | +1 Bless (max. rank: 10) |
| Emerald | +5% damage inflicted added to magic energy | +5 magic energy and -15% weight | +1 Iron Will (max. rank: 10) |
| Jacinth | +1-6 fire damage | +5% fire resistance | +1 Strength |
| Jade | +1-4 acid damage | +5% acid and poison resistance | +1 Constitution |
| Jet | +1 Armor Class for each piece of armor worn | +5 Hit Points | +1 Sanctuary (max. rank: 10) |
| Moonstone | +1 Combat Reflexes (max. rank: 10) | Reduces duration of Slow/Stun by 20% | +1 Sprint (max. rank: 10) |
| Pearl | +1 Improved Critical (max. rank: 10) | +1% increased treasure drops | +1 Wisdom |
| Ruby | Target bleeds 1 damage per second for 1 second. | Reflect 5% melee damage when struck | +1 Great Fortitude (max. rank: 10) |
| Sapphire | +1 Cleave (max. rank: 10) | +1 Power Attack (max. rank: 10) | +1 Sunder (max. rank: 10) |
| Topaz | +1-8 shock damage | +5% shock resistance | +1 Dexterity |
Chapter 4 - Walk-through
This section offers a complete walk-through for Baldur's Gate: Dark Alliance 2. Inside you'll find instructions on finding all story and optional quests, the quest rewards, and tips on traversing all locations. The walk-through also features coverage of the class-specific quests found in Act III.
Prologue
Your character begins on a nondescript road along a trade route. Approach the save game pedestal and speak with the wounded woman to begin your adventure.
The Trade Way
Keaira is the caravan guard. The caravan was attacked by the Red Fang marauders. The nefarious thugs took some of the caravan group hostage into the Trollbark Forest and are likely headed toward Wayfork Village to raid and burn. Keaira provides some directions to these new locations.
Quest: Rescue the Caravan Prisoners--Rescue the prisoners from the goblin lair in Trollbark Forest.
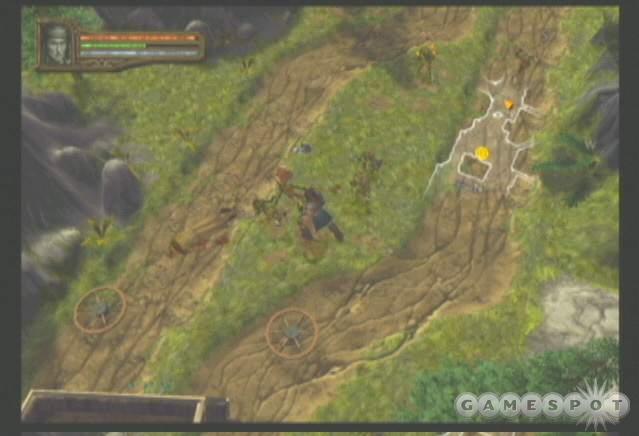
Follow the path away from Keaira and beyond the ambushed caravan. Turn on the automap and note that you can explore small pathways through the mountainside along the sides of the path. Some of these paths lead to chests and additional goblin enemies. It shouldn't take long to gain enough experience for your first level up.
When you reach the fork in the path, explore a small path near the stream for an additional treasure chest. Comb the entire area as you make your way through the Trade Way and beyond pieces of caravan and bodies of unfortunate caravan traders. Return to the road if you're ever lost and not sure where to proceed. You'll eventually reach the entrance to Trollbark Forest and one step closer to rescuing the caravan prisoners.
Trollbark Forest
The atmosphere has turned ominous in the Trollbark Forest. It's dark and the enemies are as plentiful as the raindrops pouring down. Save your game at the podium and follow the forest path. A cutscene reveals several vultures feasting on the body of a trader. Though it's too late for the trader, defeat the vultures and follow the path west toward the river.
The battle is tougher now with ranged enemies pelting you with arrows from the other side of the waterway. Search their camp southwest for supplies and follow the river back toward the north. It shouldn't be long before Trollbark bears witness to your second level up.
Continue following the single forest path (making detours into the small goblin camps for additional experience and items). The path forks into three after the next save game pedestal. Enemies and experience lies to the northern side with the main path continuing southwestward. Search the alcoves near the next save game pedestal for more enemy encounters (and a chest or two). Sadly the trader corpses mark the path deeper into the forest and into your next destination. Raid the goblin camp up ahead to the north and enter the cave marking the route into the next section.
Red Fang Goblin Lair
After the flyby revealing the location of the imprisoned traders, save your game and proceed down the northern tunnel. A tough group of goblins protect the path ahead; it's two groups of ranged goblins flanking the central path. Avoid them by moving to the west or east to stay and fight (with plenty of health potions on hand to survive the encounter).
It's easier to lure the melee goblins away and deal with them first. You should also attack the goblin archers from the west or east route. This provides some cover against half of them, which makes the battle more manageable.
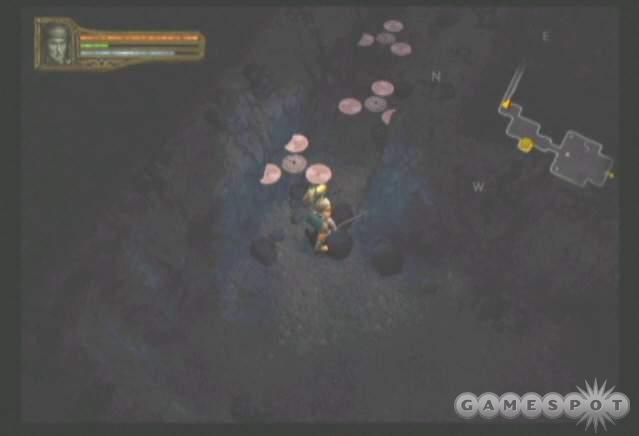
The west and east paths circle around and join up beyond the goblin archers. A save game pedestal lies down the next tunnel and marks a junction of four new pathways branching to the west, north, northeast, and east. The northeastern path contains a gate key required to continue through the other pathways. Follow the eastern path to a small side area, the Dark Cave. Beware of the poisonous mushrooms along the way. Search the Dark Cave for bats and a couple treasure chests.
The western path leads to some sort of goblin ritual. Plentiful enemies are gathered here including a pesky spell caster. But there's a good amount of gold to be had so it's well worth the effort. Move into the area slowly and lure the goblin fighters toward you and away from their ranged counterparts.
The northern path is the route toward the caravan hostages. At the next fork, follow the path northwest and search the chests for a cell key to open the prison doors. There are six prisoners total; watch the countdown as you rescue each one. There are only three in this initial area. Continue along the path as it curves around toward the east.
You'll spot an area to the south that's blocked off by crates. To get over them, push a barrel over next to the crates. Jump onto the barrel then over the crates to enter the room, which is littered with treasure.
Follow the path to find additional cells. Rescue the remaining caravan hostages while battling the wolf and goblin guards.
Quest Reward: Rescue the Caravan Prisoners--500 gold coins, 500 experience points.
You found the prisoners but haven't located the caravan master; a new quest appears in your journal.
Quest: Rescue the Caravan Master--Find and rescue the caravan master.
Follow the path toward the next save game pedestal and the entrance into the next area. If you haven't explored some areas of the lair, do so before venturing into the treasury of Bile-Tooth.
Bile-Tooth's Treasury
Bile-Tooth, a wily goblin riding a giant spider, isn't too thrilled that you've entered the treasury. Defeat Bile-Tooth (he's slow so avoid battling him along with his smaller spider minions) and procure a key that unlocks the treasury.
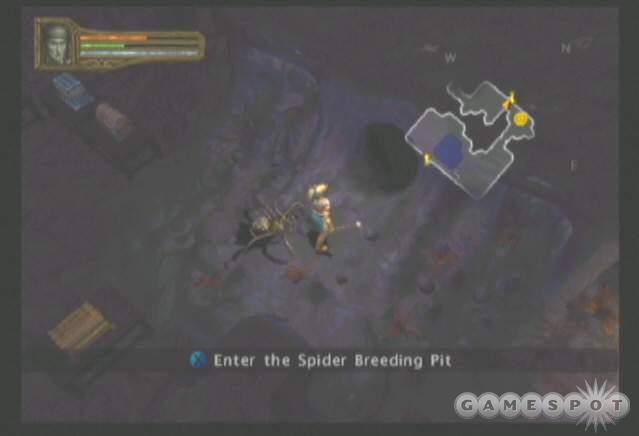
Raid the treasure chests inside the treasury and be sure to explore an optional area, The Spider Pit, near the save game pedestal. Defeat the spiders inside and search the ground for a rune stone.
Enter the alcove beyond the treasure and speak with Randalla Brasshorn, the caravan master, and accept your quest reward.
Quest Reward: Rescue the Caravan Master--1,000 experience points.
Allow Randalla to hire you on as her bodyguard on route to Baldur's Gate and automatically transport to the Wayfork Village.
Quest: Escort Randalla to Baldur's Gate--Escort Randalla Brasshorn to the city of Baldur's Gate.
Wayfork Village
Speak with Randalla up ahead. The Red Fang marauders have attacked the Wayfork Village and have hole up additional prisoners in the Wayfork Inn. Other villagers are under attack throughout Wayfork.
Quest: Save the Villagers--Save the people of Wayfork Village from the marauding goblins.
Proceed north through Wayfork and explore the western and eastern edges of the path to locate all ten threatened villagers. Defeat the enemies surrounding each villager to complete the rescue (the villager will automatically flee when you've eliminated nearby enemies).
Quest Reward: Save the Villagers--250 gold coins, 750 experience points.
You've managed to save these ten villagers, but more are trapped inside the Wayfork Village Inn. Another objective appears in your journal.
Quest: Liberate the Wayfork Village Inn--Save the survivors holding the Wayfork Village Inn from the goblin marauders.
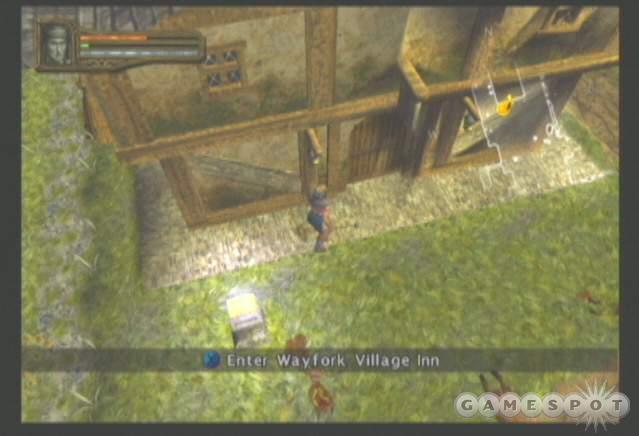
Approach the Wayfork Inn to the far north. Save your game before venturing inside. Inside the Inn waits Harnak the Butcher, a brawny (and quick) goblin boss. Eliminate the weaker goblin foes if possible before taking on the butcher. Defeat him to liberate the Inn from the rampaging marauders. Speak with the Innkeeper after the battle for your reward.
Quest Reward: Liberate the Wayfork Village Inn--500 gold coins, 1,000 experience points.
Speak with Randalla and, when ready, tell her "Let's Go" to proceed to Baldur's Gate and the game's first act.
Act I
You automatically speak with Randalla upon reaching Baldur's Gate. She provides your reward for escorting her through Wayfork and safely into the city.
Quest Reward: Escort Randalla to Baldur's Gate--1,000 gold coins, 1,000 experience points.
Continue the conversation to learn that you can find her and more work inside the Purple Wyrm Inn. She also has associates that could use an adventurer.
Baldur's Gate

Take the opportunity to explore the city. Before speaking with Randalla in the Purple Wyrm, find Bartley across the street from the inn and speak with him. He's the local merchant and will be your source of buying and selling armor, weapons, and other items. Shop his wares and consider upgrading some of your weaponry and armor with his selection of stones and gems (which will increase once you reach the second act). And definitely stock up on health and rejuvenation potions. Don't forget recall potions, particularly if you plan to head down into the sewers.
Other locations in the city to explore include the Church of Helm and Omduil's Manor. Search the Church of Helm and speak with Huros; if you're Allessia, Huros provides some experience points in exchange for gold. Search Omduil's Manor and speak with Omduil; if you're Ysuran, Omduil provides some experience in exchange for gold. Inside the Purple Wyrm Inn you'll find Durdem and Ulua. Speak with Durdem; he provides experience for gold to Borador and will sell a key to the Halls of Hammer treasure room to any character. Talk to Ulua and receive experience for gold if you're Vhaidra.

Before you speak with Randalla in the inn, find Sollus captain of the guard. He has an optional quest for you. The Baldur's Gate sewers are crawling with vermin. You can clear out the sewers for additional experience, loot, and a reward from Sollus.
Quest: Clear Baldur's Gate's Sewers--Slay all the monsters in the sewers for Sollus.
Locate the sewer entrance around the corner from the Purple Wyrm Inn. Descend into the sewers to begin the quest.
Sewers
The Sewers is a surprisingly challenging dungeon for early in the game. You must do this quest before you accept any of Randalla's story-based missions, which, not coincidentally, is when the challenge will be the greatest. There are plentiful insect-like creatures roaming the sewers. You must kill over 100 of these (along with a variety of rats) to successfully complete the quest. A counter indicates how many monsters remain; it counts down by 10 until you reach single digits at which time it counts down one at a time.

Lure the insects one at a time, if possible, or at least in as low a number as possible. When fighting the slime, beware of their projectiles and dodge them if possible before moving in for the kill.
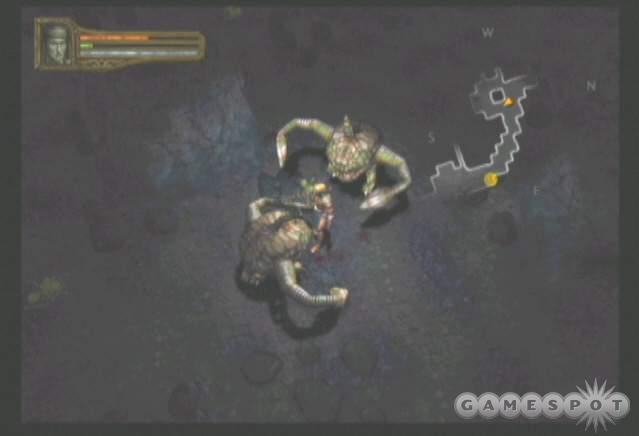
Head east from the start location and work your way around the dungeon. Use tight corridors and doorways to your advantage. Clogging up a doorway and help you battle only one enemy at a time instead of becoming surrounded by a horde. Beware of the large, but slow, creature lurking in the pool. Use hit and run tactics to defeat it. Search south of the pool for a small treasure room. The far western side contains a couple levels that must be pulled to enter the remaining rooms containing the last handful of creatures.
Hot, damaging steam blocks some tunnels. Don't walk through the steam; wait until it dissipates before moving on. Note that the steam does do minor damage to enemies.
Once you are notified that all sewer creatures have been killed, return to the surface and speak with Sollus to collect your reward.
Quest Reward: Clear Baldur's Gate's Sewers--1,000 gold coins, 1,000 experience points.
Return to the Purple Wyrm Inn and speak with Randalla. She has two news stories of note: a series of grisly murders and a series of kidnappings. You can hear more about either one but will eventually complete both tasks. Choose to hear about the murders. Randalla suggests starting your search at Bloodmire Manor, home of Luvia Bloodmire, sole heiress to a substantial fortune.
Quest: Investigate Bloodmire Manor--Investigate Bloodmire Manor and put an end to the murders for Randalla.
Exit the inn and head through the northeastern exit of Baldur's Gate to enter Bloodmire Manor.
Bloodmire Manor I
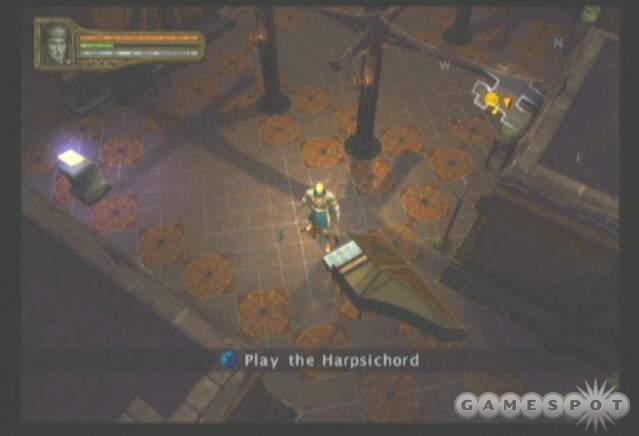
Note the harpsichord just to the right after you've entered Bloodmire Manor. You can attempt to play the harpsichord now but it will only be a nameless tune. There's a locked door behind the harpsichord. Your goal is to locate the five musical note sheets. Finding all five then playing the harpsichord will "plunk out" the correct tune. This unlocks the door and provides access to Luvia's laboratory levels.
Quest: Collect the Music Sheets--Find all the music sheets and then play the harpsichord on the first level.
There's another sub-quest inside the manor. Five servants are trapped by the nefarious beasts overrunning the manor. Rescue all five and receive an additional award.
You can find the five servants:
- On the first floor, down the eastern route down the second hall across from the save game pedestal.
- On the first floor, follow the eastern route up to another split. Go south and find another servant huddled amongst the creatures.
- On the first floor just through the library.
- On the first floor, south of the library near the entrance to the Bloodmire Manor Cellar.
- On the first floor, go through the library and follow the hallway north past a save game pedestal and search the rooms to the east.
Finding and rescuing all of the servants provides a reward of 500 gold coins and 1,000 experience points.
You can go east or west from the entrance but each leads to the same place. As with all "dungeon" areas it's to your advantage to search every nook and cranny for the most experience and loot as possible. Following the eastern side leads up to a split in the path. Search south for room containing a key permitting access to the adjacent library. The library contains one of the harpsichord musical sheets.
From the library, continue around north then west. Keep the auto-map on at all times because you'll be able to easily spot the secret rooms. For instance, if you're in a hallway and spot an adjacent room but no entrance then there's likely a secret door or panel along the hall. In the manor, these are the bookcases. Use the bookcase like you would a door to get access to the room. One beyond the library provides access to the second harpsichord sheet.
Continue north past a save game pedestal then search a western room for the third harpsichord sheet. Turn east and traverse into another series of rooms. Find and rescue another servant here. Search the rooms along the hallway. At the end of the hall discover a save game pedestal and the entrance into the manor's second level.
Searching south of the library reveals an entrance into the Bloodmire Manor Cellar. It's a small dungeon with a few chests to open and a handful of monstrosities to slay. Proceed to the manor's second level when ready to find the remaining music sheets.
Bloodmire Manor II
As soon as you enter the second level, go north straight across to the small room and search the chests for the fourth harpsichord music note. Proceed east at the intersection and follow the hallway as it bends around to the north. You'll encounter a save game pedestal here next to another optional Bloodmire area, the attic. The Bloodmire Attic is filled with rats, bats, and various goons. Make sure you explore every corner to locate all the treasure and gold. Also, you'll need to use barrels as stepping stones over crates blocking the attic's sections.
Continue west from the attic and explore the branching hallways. One will led you south and back toward the second level's entrance. Another heads to the north. Don't forget to use the auto-map to locate secret hallways. Use the bookcases like doorways to reveal the new passages. Continue to the far corner of this hall to find the final harpsichord sheet.
Quest Reward: Collect the Music Sheets--1,000 experience points.
Return to the first floor of Bloodmire Manor and to the harpsichord. Use the harpsichord to play Luvia's Melody. As the music echoes through the manor's halls, the secret passage into the laboratory opens nearby. Use the trap door to enter the next section.
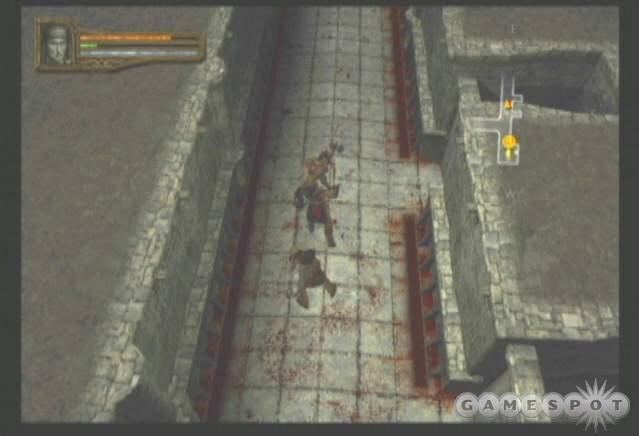
Luvia's Laboratory I
Follow the blood soaked hall to the east and search a corpse for an intriguing letter. Addressed to "Lady F," the letter makes it clear that Luvia has sent something to the warehouse, a thing called Argesh, and that the Hands of Glory need to know that fresh--and live--supplies will be needed. Continue around to the north. Note some of the cages monstrosities; some appear now while others remained caged for later.
At the end of the north hall is a gate that won't open. The auto-map reveals a path beyond. Search the two cells to the south of the closed gate for a hidden, loose floor switch that opens the door. The room inside contains another closed gate. Find the hidden lever against the opposite wall to open the way.
Enter the large room to the south. Take on as few enemies as possible in the multi-leveled room. Use the lever on the upper section to open the double doors on the far end of the chamber. Inside the next room you'll find Atrocious, a double-headed hound. Luvia sends a greeting after you slay Atrocious; a passage opens nearby revealing the path to the second laboratory level.
Luvia's Laboratory II
Follow the single passage through the dank hallways. Once again you should take note of the many small cells with doors that won't budge. Although it seems quiet now, it won't be long before those doors are opened.
At the end of the winding hall, open the gate and greet Luvia. She makes her exit and leaves you to face a couple brawny beasts. You likely won't be able to take them one at a time so use area effect damage if possible. Be prepared to suck down health and rejuvenation potions as needed. After the battle you automatically speak with Luvia through the closed gate. She's not happy whatsoever and releases poisonous gas into the laboratory.
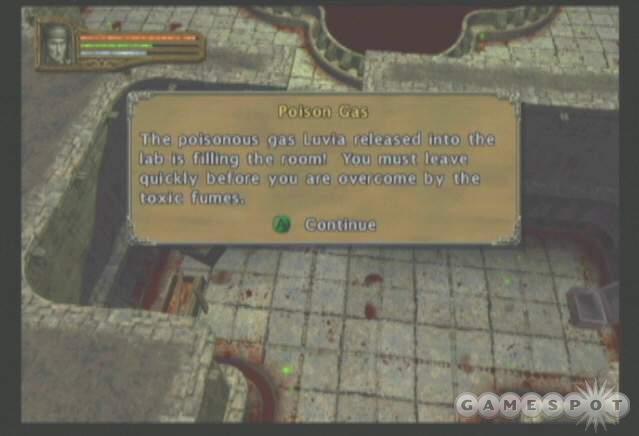
You can't recall. Quickly make your way back through the second level. Remember those closed cages? They're now open and additional enemies have been released. Beware of the toxic steam vents as well.
Return to the surface and return to the Purple Wyrm Inn and speak with Randalla to complete the quest.
Quest Reward: Investigate Bloodmire Manor --1,500 gold coins, 2,000 experience points.
Ask her about the kidnappings to receive information on the Hands of Glory; they have a hidden lair in the warehouse in Baldur's Gate.
Quest: Rescue the Kidnapping Victims--Rescue kidnapping victims from the Hands of Glory's warehouse hideout for Randalla.
Make your way to the warehouse in Baldur's Gate (making a stop by the merchant as needed).
Warehouse
The Hands of Glory thugs "greet" you almost immediately. Defeat them and leap over the crates to the east. When the path splits, continue east to find a locked door. Return to the split path and proceed north.
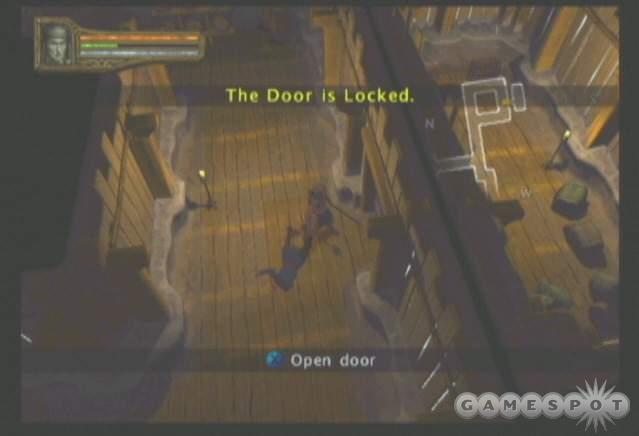
The next room is a challenge. Avoid the archers in the room's center by luring out the dogs and other enemies into the previous hallway. Kill the archers once the other foes have been disposed and retrieve a crowbar. This crowbar opens the locked door you discovered previously. Return and open the door and gather the goods inside.
Follow the hall north until the path splits west and east. Move to the west and clear out the corner room. Move back east and follow the singular path. As you near its end, one enemy will carry a key needed to get through the door blocking the route into the Hands of Glory lair. Maneuver around the boxes until you can enter the next section.
Hands of Glory Guildhall
Head north and battle the irate Glory members. Follow the winding hall past the flame tower trap (be careful when running by) and reach an intersection that leads west and north.
Continue north and battle the archer groups. As you enter the next door, the Glory members order the dogs to be released. Back off and face as many enemies as possible away from the archers. Clear the room and comb the area for loot.
Return to the intersection and go west. Another split leads north and south. The southern route leads to a save game pedestal and across a bridge. Defeat all enemies along this route to find a key ring. Release the prisoners nearby. There are three here and five total to find.
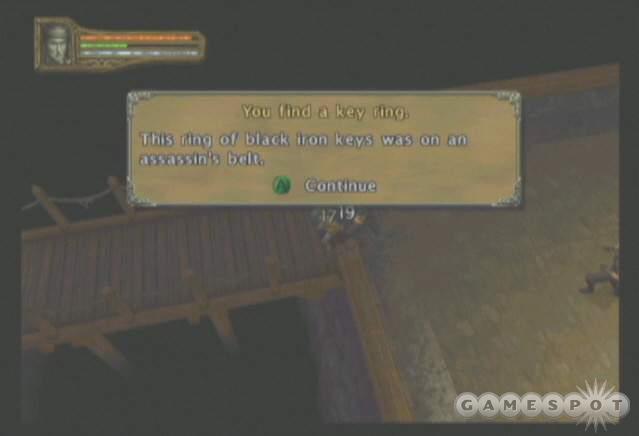
You could continue north past the prisoners and down the only path but it eventually ends in a locked door. Return to the previous intersection and go north. Defeat the enemies here to locate another key ring. Unlock the nearby doors to release the final two prisoners. You're given a reward as well as a key to that locked door.
Quest Reward: Rescue the Kidnapping Victims--1,000 experience points.
Follow the north route to the locked door. Save your game and enter the next section.
Argesh the Gouger's Hold
This is a small area containing Argesh and a few minions. Defeat the weaker enemies first, if possible, or just stay out of the line of fire of any archer enemies. Argesh is quick on his charge but not too accurate. Strafe around his charge. He's vulnerable after the miss and provides an inviting target for any damage. Defeating Argesh nets a map to the secret Red Fang base and a key.
Search the room for another kidnapping victim and an additional reward.
Quest Reward: Rescue the Kidnapping Victims--250 experience points.
Exit the spiral staircase up to Baldur's Gate. Return to the inn and speak with Randalla for more reward.
Quest Reward: Rescue the Kidnapping Victims--4,000 gold coins, 1,000 experience points.
She has news that Sollus may have additional work for you, especially since you've discovered the map to the Red Fang base. Randalla also offers an optional quest that can allow you to gain some experience and loot. You can purchase the map to the Wood of Sharp Teeth. It's a wise purchase because you can visit the location in the next act for even more experience and treasure.
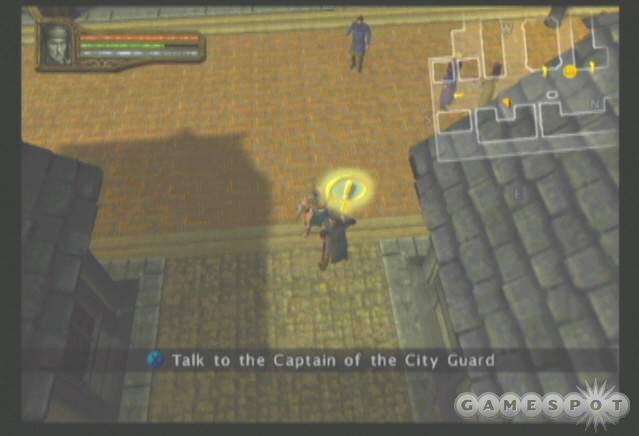
Quest: Speak to Sollus--Find and speak to Sollus, Captain of the Guard in Baldur's Gate.
Quest: Investigate the Ruins--Explore the ruins within the Wood of Sharp Teeth.
Quest Reward: Investigate the Ruins--Experience gained and treasure found.
Exit the inn and locate Sollus near the southern section of Baldur's Gate. He's troubled because the Red Fang base remains hidden...but you have the map! You'll reveal the map to him and note the connection between the Hands of Glory and the Red Fangs.
Quest Reward: Speak to Sollus--Receive a new quest.
Quest: Destroy the Red Fang Marauders--Locate and destroy the hidden Red Fang Marauders base in Cloak Wood.
Exit Baldur's Gate to the south to open the world map. Proceed to the Cloak Wood Lower Cliffs (or into the Wood of Sharp Teeth if you wish to complete the optional area).
Cloak Wood Lower and Upper Cliffs
The Cloak Wood cliffs feature a new enemy to tangle with: goblins riding wolves. You must first defeat the wolf and then the goblin rider. Follow the mountain path to the west and begin the ascent up the cliffs. Don't neglect to check every inch of the ground, including the tight pathways between the mountains, for additional enemies and treasure.
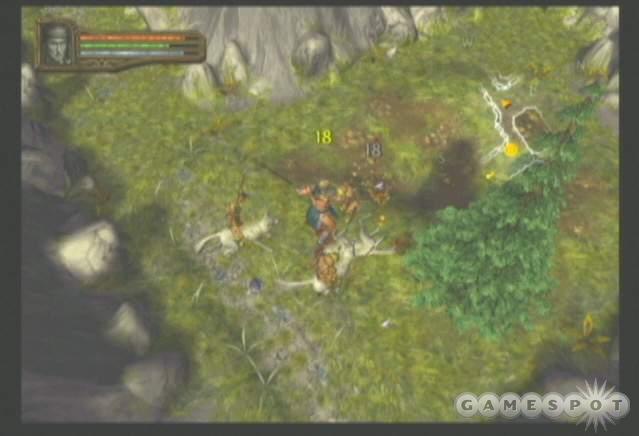
The path will take you west, up the cliff to the north, and back around to the east. You'll find another save game pedestal here just before a cave that bridges the game between the lower and upper Cloak Wood cliffs. Enter the cave and battle through the dark cavern. You're warned of a rust monster up ahead. You can scurry past him or render him useless by stripping off your metallic items (search to the alcove north of the rust monster for a small treasure chest). Battle through the cave exit; lure the melee goblins away from their archer support. Exit the cave into the upper cliffs.
Follow the route west beyond the dry river and to the north into the small encampment. Save your game at the pedestal and proceed east into the next section.
Red Fang Camp
Proceed down the main path toward the north. You can quickly reach the entrance to the next section by sticking to the main route and following it east. But there are many branches to the path on this small map; the branches are worth exploring to find additional enemies and treasure chests. For instance, search the small path east of the next entrance to find a treasure chest. When you've finished exploring, enter the next area.
Red Fang Base
Follow the abandoned rail system to the split and proceed south (west leads to a broken track). This map contains many magic users as well as explosive barrels to ignite. Push the barrel toward a group of enemies and ignite the barrel to cause a damaging explosion.
When you reach the narrow, rocky bridges, traverse them carefully and don't fall over the sides. Look for a southern alcove across the bridges to find a couple magic users protecting a trio of chests. Continue around north to the save game pedestal. When the path eventually splits, you can follow it east to reach the other side of that broken track (worth exploring for experience and loot). Return back north into several encampments. Clear them out then move into the next section.
Red Queen's Lair
You automatically meet the Red Queen upon entering the lair. Other enemies lurk about the room, including a second magic user (the Red Queen being the first). Beware of the room's edges as fireball traps protect the area. The Red Queen will flee upon receiving approximately 75% damage. You can explore the room for any remaining loot then scurry through the opened passage.
Save your game at the pedestal. Work carefully through the blade traps in the narrow eastern hallway. As you move ahead, beware of the arrows launched from the two walls. Save your game and enter the next section.
Red Fang Secret Passage
You won't get lost in the secret passage. It's an easy-to-follow route from beginning to end. It's a narrow section and filled with an assortment of bats and rats. Beware of the numerous traps, including floor spikes. Look for the holes in the floor and tread carefully. Save your game at the exit then enter the next section.
Firewind Cellar
The "boss" wasn't too impressed with the Red Queen's performance and offs her in the opening cutscene. Follow the cellar hallway to the north. When you reach the large room forming an intersection, continue to the north. In the far corner room you can reach a couple weapon racks by pushing a crate next to the crates blocking the area.
Continue west. In the next large area, pull a loose stone on the northern wall to open a secret room. Follow the path south into the next large chamber. It's filled with arrow traps but plentiful chests. Work carefully through the room and avoid sustaining damage.
Beyond the next save game pedestal, there's a room on the western side that contains a secret wall. Pull a lever found in the eastern room to open the passage.
Follow the path south then around to the east until you open a door into the final chamber: the mysterious woman, Lady Arogazia Firewind, greets you and drops you into the dungeons.
Firewind Dungeons
An objective presents itself as you land. You've been dropped into the dungeons below the manor. You must escape and confront the Lady Firewind to complete your quest.
Search the three rooms (and battle the emerging skeletons) and find the lever that opens the nearby door. Move west to another lever. Pull it to open the door to the north. Traverse the hall (search side rooms) and avoid the fireball tower at the far end. You'll need to get around it and use the lever to open the next door.
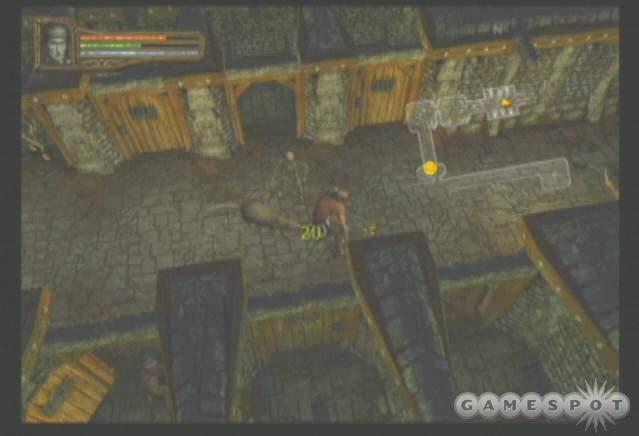
Go east down the next corridor. Beware of the fireballs and don't bother trying to the door on the northern side. Just keep moving. Look on your auto-map to see a hidden room on the right side of the hall. Push on the wall to find a loose stone opening a passage. Resume course to the end of the hall and find the lever. This opens the locked door you passed.
Follow the opened route (save your game) through a winding corridor. Open the cells to face more skeletons and scamper past the fireball traps. When the path finally splits, the exit lies to the west and additional rooms lie to the east (use the levers to open the doors).
Firewind Catacombs
As soon as you enter the catacombs, you're greeted by the ghost of Felldane. If you allow him to live, he has an offer to make and a quest to be had.
Quest: Destroy Firewind Manor--Destroy Firewind Manor to preserve House Felldane's terrible secret.
Save your game and proceed northwest. The path splits quickly. Explore the branches to find additional enemies and loot. Both southern paths are dead-ends but are worth exploring for the combat and treasure. Follow the main path north (another branch continues off to the east) and save your game at the next pedestal.
Continue through the larger rooms toward the man path to the east. The rooms contain plenty of areas for cover. Don't take on too many enemies at once. Back off and battle the faster melee enemies then move in against the slower skeletons or the archers. Before exiting, search the rooms to either side of the exit hallway for additional treasure.
Firewind Manor I and II
Proceed to the north (use the bookcase to open the entrance) and save your game. Follow the hallway east and when given the option, hide in the alcove and eavesdrop on the conversation in the next room. After the interlude, continue onward and meet Arogazia and her true form.
And her true form has managed to annihilate the manor. The manor crumbles at your feet. The fire does damage so it's best avoided. Also beware of the ceiling chunks falling from the roof. You must escape but can also earn additional reward by rescuing some servants trapped by the fire.
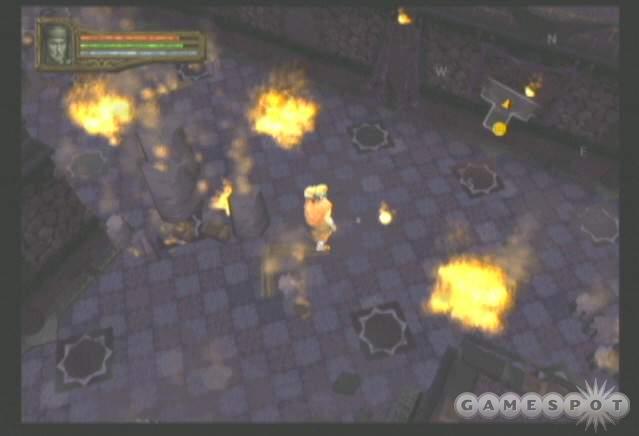
From the save game pedestal, proceed along the eastern path. The first two doors on the right are locked. Approach the next door on the left. It's also locked but the chest in front of the door contains a key.
Continue the same direction down the hallway. Avoid the split path to the north. Reach the next door and open the chest in front to find a second key. Now unlock the door using your first key. Gather the treasure inside. Continue around the hallway in a complete circle. Reach the third locked door you found (it's on the left side of the hall) and open it with the second key. This rescues the trapped servants and provides 1,500 gold coins and 1,500 experience points.
Proceed out of the northern exit. If you accepted Felldane's quest, he'll greet you here and provide your reward.
Quest Reward: Destroy Firewind Manor--Two pieces of magical jewelry, 1,000 gold coins, and 250 experience points.
Upon exiting the manor, return into Baldur's Gate and visit the merchant if necessary. Return to the southern section of the city and speak with Sollus for your reward.
Quest Reward: Destroy the Red Fang Marauders--3,000 gold coins and 3,000 experience points.
Return inside the Purple Wyrm Inn and talk to Randalla. She instructs you to visit Jherek; he's waiting inside the warehouse.
Quest: Speak to Jherek--Find Jherek in the now-abandoned warehouse and speak to him.
Act II
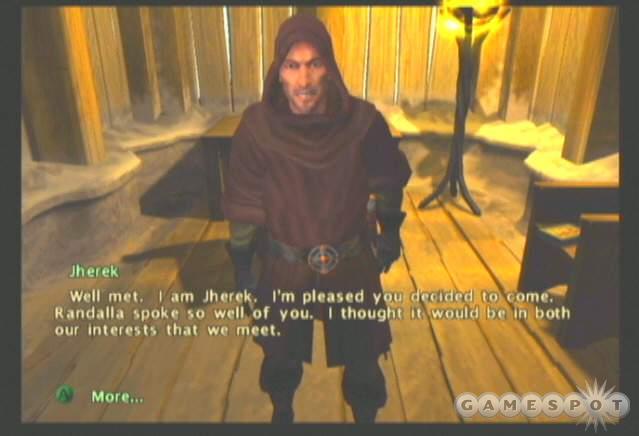
Return to the warehouse (where you battled the Hands of Glory assassins in the first act) and find Jherek in the back room. Speak with him to receive your next set of quests.
Quest Reward: Speak to Jherek--Additional quests.
Jherek is searching for a number of artifacts scattered across the Western Heartlands. Ask him about the first artifact, the Orb of Thunder, to initiate the quest.
Quest: Obtain the Orb of Thunder--Acquire the Orb of Thunder from Lyran's Hold for Jherek.
Exit the warehouse and proceed to the world map. Select Lyran's Hold to advance the adventure. However, before you can reach Lyran's Hold, you're ambushed in the Forest of Wyrms.
Forest of Wyrms Ambush
On the way to Lyran's Hold, you're ambushed by a marauding band of Ettins and Hobgoblins. Proceed north through the forest and battle the numerous enemies as you fight your way through to Lyran's Hold. Search the alcoves on the western side for chests. You'll discover the path out of the forest on the northeastern side of this small map.
Lyran's Hold I
You automatically enter Lyran's Hold upon traversing through the forest. Save your game at the pedestal and proceed north, taking time to search the pots for any gold or items. It's a straight route for a bit until you reach an intersection with paths leading to the west and the north.
Continue north and discover another split in the path, this time north and northeast. Follow the northern route through the two doors. By now you've discovered that the furniture in Lyran's Hold isn't just for sitting on or eating at--the furniture seems possessed and attacks like any other enemy! Follow the north route as it bends to the east. Search the racks and chests and battle a horde of tables en route to the entrance to the second level of Lyran's Hold.
Exploring the other areas on this floor reveals the entrance to Lyran's Cellar (the door is currently magically sealed) on the northeastern route and Lyran's Observatory on the western route. It's also locked and requires a key. A door adjacent to the Observatory entrance is also locked. Return through the north path and proceed to the second level of the hold.
Lyran's Hold II
Save your game and battle the enemies to the northeast. Traps fill this floor. Watch your step in the next room, particularly around the chests; floor spikes are scattered around the room. The path splits three ways: west, north, and east.
The northern route ends abruptly at a locked door. The rooms beyond are your eventual goal.
The east route sends you through a hallway cluttered with fireball tower traps. Find a couple chests at the northern end. Enter the side door where the path splits and enter the narrow tunnel going north. This tunnel offers even more chests. Continue west and spot a southern door. This connects to northern route of the first intersection you discovered. Search the chest near the opposite door to recover a key that unlocks the door. There's a table adjacent to the save game pedestal. Read the bundle of ancient scrolls on the table. It reveals the location of Lyran's remains--in the cellar--and your goal is to destroy them and banish him from the world of the living.
Now if you exit south out of this study, you'll summon Lyran and have to deal with him (and his invincibility). You may want to finish searching the level before moving into this room.
Continuing along the original eastern route will eventually connect to the western route at the level's initial intersection. A large, trap and treasure-filled chamber lies near the connection. Tread carefully around the fireball and spike traps as you search the chests for valuables.
After exploring the level, enter the study and "release" Lyran. Note that he's invincible and can't be killed--at least yet--so just evade his attacks as you return to the first floor of Lyran's Hold. Make your way to the cellar entrance, which is now unlocked, and make a descent.
Lyran's Cellar
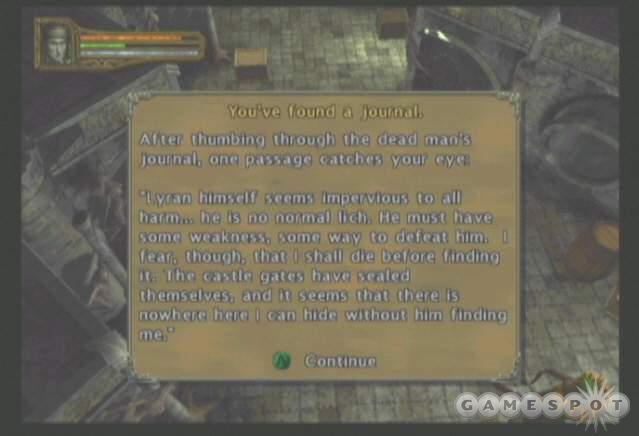
Save your game and proceed north quickly. Lyran sticks close behind and will attack whenever you're close. Search the decaying corpse to find a journal with hints on Lyran's current status. Move quickly through the cellar. At the intersection, go west (north leads to a dead-end, though it does contain some chests).
This path will lead you straight into the next section. But it's a long route and filled with many enemies, both humanoid and furniture. Since Lyran hangs close behind, you must battle the enemies quickly (or avoid them). Area effect attacks will help soften up the enemy groups as you lead Lyran toward his eventual door. Check the chests and racks to find loot, gold, and potions. Reach the entrance into Lyran's Ossuary.
Lyran's Ossuary
The time has come to battle Lyran. Remember that he's still invincible! Don't attack Lyran directly. Instead, you must destroy Lyran's remains, which are scattered inside the white pots throughout the Ossuary. Force fields block sections of the Ossuary. You must start breaking pots because you gain access to these sections.
Break the pots in the first room then move through the open alcove and find the white pot in a niche along the wall. If you search these alcoves and don't find the pot, rotate the camera around until you spot the object resting in the niche. Destroy all pots to eliminate Lyran. You'll find Lyran's hand as part of his remains; his hand opens the entrance to the Observatory.
Exit the Ossuary through the staircase in one of the alcoves. It exits the cellar and returns to the locked room just outside the Observatory. Search the chests here then open the Observatory entrance.
Lyran's Observatory
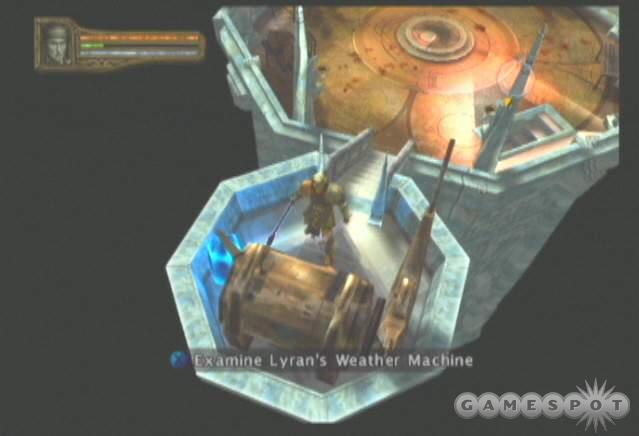
Search the chests and tables on the bottom section then ascend the staircase to the weather machine. Examine Lyran's weather machine to recover the Orb of Thunder.
Upon doing so, Sleyvas and a handful of minions enter the Observatory. You must defeat them to escape. Sleyvas can teleport around the Observatory, which provides a difficult target at times. He doesn't attack very fast, though, and he's relatively weak. Eliminate him and his escort before returning to the hold. Escape back to the world map and return to Baldur's Gate. Enter the warehouse and return the artifact to Jherek.
Quest Reward: Obtain the Orb of Thunder--2,000 gold coins, 4,000 experience points.
Jherek tells you that he seeks three other artifacts--the Jade Octahedron, the Brazier of Eternal Flame, and the Oceanic Urn. You can complete these quests in any order. Choose the Jade Octahedron.
Quest: Obtain the Jade Octahedron--Acquire the Jade Octahedron from the Halls of the Hammer for Jherek.
Before heading off in search of Jherek's artifacts, you can also speak with Randalla inside the Purple Wyrm Inn and receive information on an optional quest. It's the Skull Gorge. You can battle through the gorge and its connecting caves for additional experience and loot.
Quest: Investigate Skull Gorge--Explore the caves of Skull Gorge.
As you battle through the Skull Gorge, be sure to explore the far western and eastern sides for the additional caves, which include the Goblin Cave, the Goblin Cave II, the Waterfall Cave, the Gnoll Cave, and the Gnoll Cave II. Note that you will encounter trolls inside the Gnoll Caves. Trolls can only be injured by weapons (or spells) that inflict fire or acid damage.
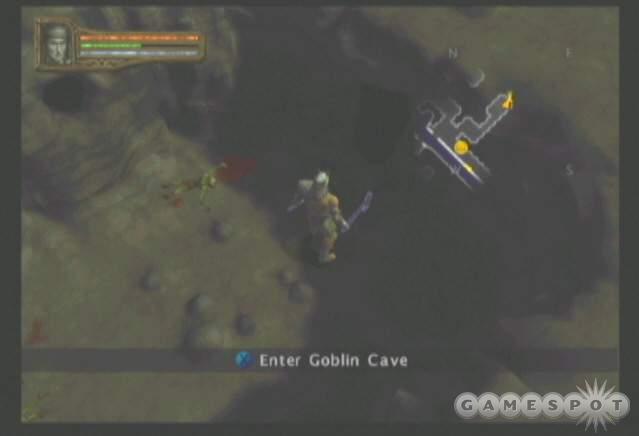
The Gnoll Cave II contains a small puzzle. Defeat the enemies in the southwestern area to find a "decorative" stone that resembles a reptilian eye. Search another area of the map to find a dragon idol. If you've recovered the reptilian eye, use it on the idol to open a locked room between the two areas.
Quest Reward: Investigate Skull Gorge--Experience and loot.
Once you're ready to proceed on Jherek's Jade Octahedron quest, return to the world map and select the Halls of the Hammer. Once again, though, you're ambushed on the way to your destination.
High Moor Ambush

This is a pretty small map but the reptilian adversaries are fairly tough. Be sure to explore the western side of the river and speak with the wounded bodyguard. His name is Landen and reveals that the troglodytes have kidnapped Lady Cadmere. He reveals their possible location and offers an optional quest.
Quest: Rescue Lady Cadmere--Rescue Lady Cadmere from Brigand's Hall.
Return to the world map and proceed to Brigand's Ruins if you wish to complete the side quest.
Brigand's Ruins
Move west through the narrow canyon and battle the tough troglodytes. Move slowly so you fight as few as possible. A mixture of melee and ranged enemies protect the next larger section. Lure the melee fighters away from their ranged counterparts. Follow the sole path through the ruins. Search any alcoves or corners for chests and weapons racks.
Some of the larger areas feature an elevated section. You can use the small staircases to ascend the ruins and battle the additional troglodytes inside. Follow the path toward the save game pedestal to the north. It eventually bends east toward the next entrance. Search the path to the south for a small section containing more treasure. Battle up the ruins to the east and descend into Brigand's Hall.
Brigand's Hall
Begin your battle through the dark hallway leading north. You'll soon reach an intersection with paths leading to the west, east, and continuing to the north. Search the eastern route to discover two dead-end alcoves (after another intersection). If you're hoping to explore the dungeon for every inch of its available experience and treasure, follow the eastern path to the two corner rooms.
The intersection's western path mirrors the east. It leads to a nearly identical set of two dead-end rooms containing more troglodytes and chests. After exploring both side paths, return to the intersection and push north.
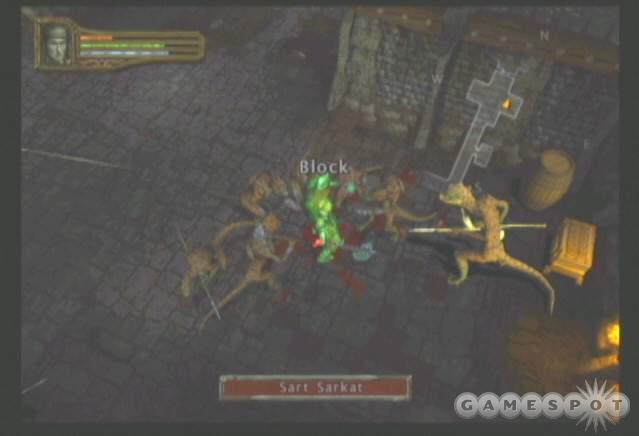
The end of the north hall contains a boss character, a brawny troglodyte magic user named Sark Sarkat. He hangs in the right side of the room so eliminate his minions before disturbing Sark. Stick close to him and pummel Sark into submission. Grab the key off his body then search the room for chests and loot.
Enter the prison cells, kill the remaining guards, grab the loot, and rescue Lady Cadmere from captivity.
Quest Reward: Rescue Lady Cadmere--4,000 gold coins, 2,000 experience points, magical jewelry.
Exit Brigand's Hall and Brigand's Ruins and enter the world map. Proceed to the Halls of the Hammer.
Halls of the Hammer I
Maneuver north through the halls. The west and east side routes lead to a couple trolls so be sure to have fire or acid weaponry (or spells) available to kill them. Continue across the narrow bridges (watching your step carefully not to fall off). You'll reach another intersection with dead-end tunnels to the west and east. Feel free to explore these areas to encounter more enemies and treasure.
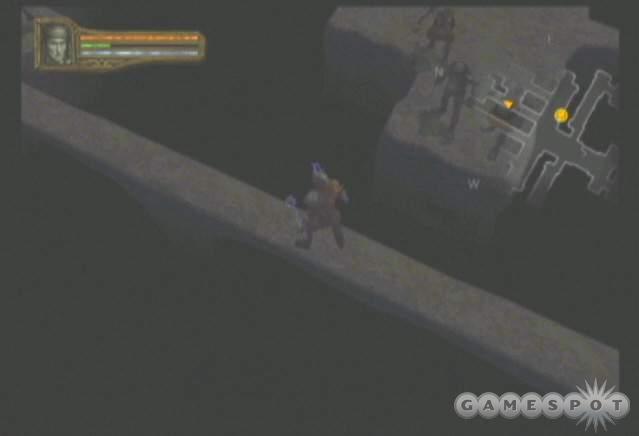
When you reach the next large chamber, save your game at the pedestal before attempting to cross the narrow pathways. Enemies populate the edges of these pathways and will pummel you with range weaponry. You must watch your step careful, especially if you retaliate with spells or your own range weapons.
Your destination lies to the north though you can explore some alcoves to the west and east for more treasures. Traverse the next big room before locating the exit to the next section to the far north.
Halls of the Hammer II
As the opening cutscene reveals, you'll have to be on the lookout for hostile chests in this level! Follow the singular hallway as it winds east then back to the north. Remember as you check chests to be prepared for battle! The hall eventually opens into a larger room. Kill the guards on top of the center platform.
The path splits to the north and west. North is simply a small room, though it does contain a pedestal to save your game. Follow the route to the west, which will eventually leads into the next section. Before descending, check out the locked room adjacent to the next section's entrance. You can obtain this key from the Durbem the dwarf in the Purple Wyrm Inn. If you haven't already, recall back to Baldur's Gate and purchase the key from the dwarf. There's a guard inside the room; it's a disembodied weapon and is technically invincible. Though you can take out the enemy temporarily, it will rise again and attack moments later. Rummage through the treasure quickly!
Halls of the Hammer III
You must defeat the Chimera to obtain the Jade Octahedron! Wait for the Chimera to land before engaging him in battle. Move around the Chimera to avoid facing his harmful jaws. Once you have defeated the beast, search the chests (though some will attack!). Return to Baldur's Gate and speak with Jherek to receive your reward.
Quest Reward: Obtain the Jade Octahedron--3,000 gold coins, 4,000 experience points.
Speak with Jherek further and accept your next quest, which can be either selection. For the purposes of this walkthrough, select to recover the Brazier of Eternal Flame next.
Quest: Obtain the Brazier of Eternal Flame--Acquire the Brazier of Eternal Flame from beneath Dragonspear Castle for Jherek.
Move to the world map and select Dragonspear Castle. However, once again you're ambushed en route!
Trollclaws Ambush
As the section's name suggests, trolls are the creatures that ambush you so you must be ready with weaponry or spells that inflict fire or acid damage. If you need a weapon, look in front of the camp to find a "flaming dagger" to inflict damage against the trolls. Scour the entire map for remaining trolls then exit the section in the northeast corner. This sends you back to the world map. Proceed to Dragonspear Castle and continue the adventure.
Dragonspear Castle
Move into the castle grounds to the north. It's a large, wide-open area with lots of corners to explore. There are goblins and other enemies lurking almost everywhere. The dangers aren't significant out here; just move slowly so you only trigger a few enemies at once. Take the opportunity to look everywhere for additional treasure and gold before moving on toward the north.
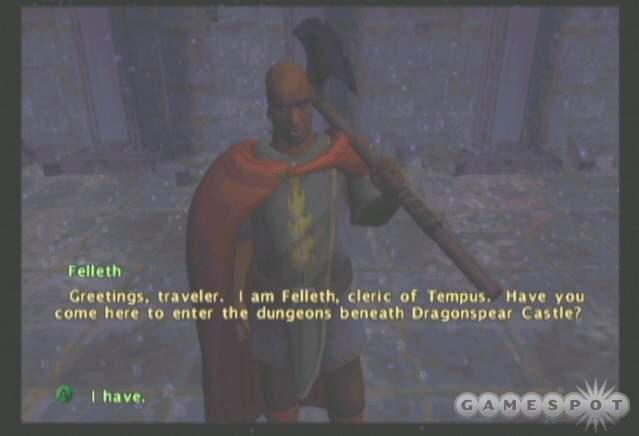
Proceed through the small entrance and into another large castle grounds area. You'll find the entrance into the next section at the far north. Before descending, speak with the Cleric of Tempus standing to the west of the entrance. He has a story to tell and a quest to give. It's not mandatory but worth the effort.
Quest: Obtain the Holy Symbol of Tempus--Find the lost Holy Symbol of Tempus beneath Dragonspear Castle for Felleth.
Head to the entrance and descend into the next section.
Dragonspear Dungeons I
Use the nearby lever to open the storage room (loot it for treasure). Use the other lever to open the path deeper into the dungeon. As you follow the route, you'll discover some rooms that you can't enter just yet (keep auto-map on to see these locations clearly). Follow the path to its dead-end and locate a lever in the back alcove. Use the lever to open one of those blocked entrances. On your way back, it will be a door that leads into a small room on the south side.
Tread carefully around the fireball traps and pull all of the levers to clear passage into the back room. Exit back to the main hallway and proceed east to the next blocked area. It's now open so move through this hall headed east. You'll reach an intersection with two side rooms. You must pull a lever in each room to unlock the door.
Defeat the enemies in the next large chamber and search the hall to the west. One of the cells contains a medallion bearing the Holy Symbol of Tempus. Return to Felleth to receive your reward.
Quest Reward: Obtain the Holy Symbol of Tempus--2,000 experience points, magical weapon.
Return inside the dungeons and continue through beyond the cells you searched. Another large chamber lies ahead with more levers. You must pull a lever in each of the four corners of the room to open the passage. Once all four levers are pulled, descend into the next section.
Dragonspear Dungeons II
Proceed west through the dark dungeon hall. You'll quickly reach an intersection. Proceed north and follow the hall to its dead-end to the northeast. Use the lever here to open a door elsewhere on the level. Return down the hall and continue west along this branch of the dungeon.
You'll soon discover that this basically forms a large square around the level's central room. The central room contains the staircase to the next level. Explore each corner of the map (by following this hall around to each corner) to battle enemies and gather treasure. You may encounter a blocked passage here and there. Search for nearby levers to open the routes.
After you have concluded the exploration, return to the central area and descend into the caverns.
Dragonspear Caverns
Beware of the poisonous mushrooms around the caverns (with gold conveniently nearby many of them). The big spider enemies are tough customers. Battle them one at a time if possible. Take out any bats or weaker enemies in the area before engaging the tougher foes.
Expect to find more gems in this cavern than you have all game. Explore the area thoroughly as there are many side alcoves and routes to explore. Comb the ground carefully as not all gems are dropped by enemies or found in chests; some are simply scattered across the ground.
Move north then east and back south to follow the route into the next section. Save your game at the pedestal before entering the lair.
Ulchaloche's Lair
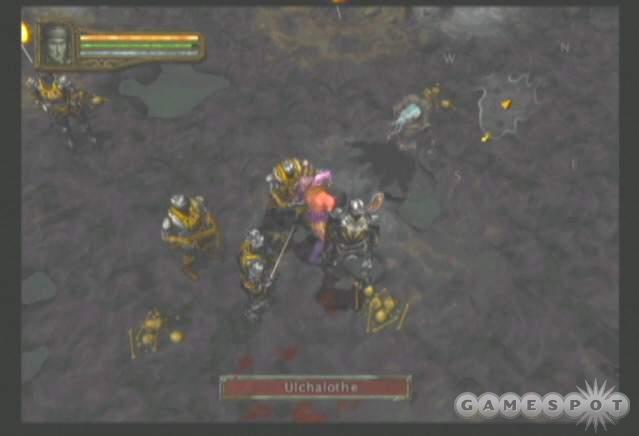
You must face Ulchaloche in this lair to recover the Brazier of Eternal Flame. Your enemy is a formidable magic user with the ability to stun and hold you frequently. Plus, there are numerous other enemies in the area to great an even greater danger. Attack the other minions with area effect damage when they're grouped together and stay on the move. You automatically recover the artifact upon eliminating Ulchaloche.
Search the room for loot then head to the chamber's rear and open the cell. Use this hidden route to return to the surface. Make your way back to the world map and return to Baldur's Gate and speak with Jherek to receive your reward.
Quest Reward: Obtain the Brazier of Eternal Flame--3,000 gold coins, 4,000 experience points.
Continue the conversation with Jherek and lean about the Oceanic Urn. Accept the quest.
Quest: Obtain the Oceanic Urn--Acquire the Oceanic Urn from Seer's Isle for Jherek.
Exit into Baldur's Gate and return to the world map. Proceed to the Sea-Cave.
Sea-Cave
Undead pirates populate the sea cave off of Seer's Isle so it's wise to use blunt weaponry or spells effective against the undead (though they're not terribly tough in small numbers). This is a fairly straightforward dungeon. There's a single path for much of the terrain. Just move slowly and trigger as few undead pirates as possible. Search the corners of each room for chests and other items containing possible loot.
There's a small intersection just before the entrance into the next section. The path to the right is a short alcove and the path to the left contains Captain Khoris guarding the entrance into the temple. He excels at melee combat so if you have the ability, use ranged weaponry or spells to keep him at bay. When you defeat him, you're told he no longer has the Oceanic Urn under his possession. Time to visit the temple!
Sea Temple I
Move north and use the wall like a door to enter a small secret room. Be sure to have auto-map on during this dungeon so you can see the secret rooms and locations. Proceed around to the east and battle the reptilian warriors. There's another secret door here that leads to a small room containing a few chests.
Battle through the narrow hallway to the north and follow it as it bends eastward. You'll eventually drudge through shallow water en route to a save game pedestal to the south. Maneuver east then north toward the passage to the next level. Don't forget to search the room to the west for treasure and gold before making your descend.
Sea Temple II
Traverse the halls heading to the east. Search the alcoves inside the large, column-filled room for chests, then continue through the eastern hall and follow it north. Explore the western path to follow it back to the section's start position. There are also a few rooms here worth exploring for the possible loot.
You can also move through the water west of the start position for another path through the level. These halls all connect together at some point or another. The far northwestern section contains a few rooms with no apparent means inside. Use the wall near the save game pedestal (just to its right when facing it) to open a route inside the treasure rooms.
There's also a secret chamber on the upper northeastern corner of the map. Move along the eastern edge of the map to the northern corner. Use the wall like a door to enter the western room and search the chests inside.
Moving north from the start position will send you toward Dibtolpt, the reptilian boss creature. Battle him at close range. Defeat him and continue north and search the rooms on the western side to unlock the rooms on the eastern side. Keep the auto-map open, which will reveal blocked rooms. Just use the wall like a door and it will open the route inside.
Examine the altar of Blipdoolpoolp to recover the Oceanic Urn. Don't forget to snag the gold from the top of the altar.
Exit the Sea Temple and return to Baldur's Gate. When you arrive to the city, you realize the urn is missing. Someone must have stolen it on the ship you returned on. Return to the warehouse and speak with Jherek. He says the thieves are en route to Hill's Edge.
Quest Update: Obtain the Oceanic Urn--Reacquire the stolen Oceanic Urn from Hill's Edge for Jherek.
Exit the warehouse and Baldur's Gate and proceed to Hill's Edge.
Hill's Edge
Save your game at the pedestal then move to the northeast. Spot the giant up ahead! He moves slowly so you should definitely use spells or ranged weaponry. If you want to go toe-to-toe then you better wear great armor on have a lot of health potions on hand.

Follow the only available route to the northeast. You'll eventually encounter the thief and his guardians. Lure the defenders away from the thief and battle them in smaller numbers if possible. Take out the thief to recover the urn. After receiving word that you have recovered the urn, you can return to Baldur's Gate or take the time to explore the entire hill and recover available loot.
Return to the city and speak with Jherek.
Quest Reward: Obtain the Oceanic Urn--3,000 gold coins, 4,000 experience points.
Recovering all four artifacts for Jherek concludes the game's second act.
Act III
The third act contains class-specific quests for each of the five characters available in Baldur's Gate.
- Dorn the Barbarian's quest is given by Randalla.
- Vhaidra the Monk's quest is given by Ulua.
- Ysuran the Necromancer's quest is given by Omduil.
- Borador the Dwarven Rogue's quest is given by Durbem.
- Allessia the Cleric's quest is given by Huros.
These quests are well worth their rewards, which include new a set of new feats for each character class. These quests can be completed any time from the start of the third act. It's beneficial to complete them first because you gain new feats that may come in handy during the elemental quests provided by Jherek.
Dorn the Human Barbarian's Class Quest
If you're playing as Dorn, proceed to the Purple Wyrm Inn and speak with Randalla. She tells you about a druid named Allana who seeks your help. The location is marked on your map.
Quest (Dorn Only): Speak with druid Allana--Speak to the druid Allana at her home in the Reaching Woods.
Exit Baldur's Gate to the world map and enter Allana's home.
Allana's Home
Move northeast and speak with Allana.
Quest Reward (Dorn Only): Speak with druid Allana--Special quest.
She tells you about a green dragon that has taken up residence in the Reaching Woods.
Quest (Dorn Only): Slay Baragoth, the Green Dragon--Slay Baragoth in the Reaching Woods for Allana.
Move north and enter the Reaching Woods.
Reaching Woods
The Reaching Woods is primarily populated by wolves wandering the main pathways and gnolls scattered in small alcove camps. Search to the north and east from the start to find a couple small dead-end alcoves then proceed to the west and around to the north to continue along the main path.
You'll encounter several intersections but branched path is short and ends quickly in a small camp. They're worth searching for the potential loot and the extra experience. As you near the end of the map, you'll encounter the large giants. Battle through the towering enemies and reach the entrance into the green dragon's lair.
Baragoth's Lair
Since you're a barbarian, you're likely equipped to the hilt with strong armor and even stronger melee weaponry. Avoid sticking in front of the gigantic green dragon and instead maneuver around its side. Be prepared to dodge the meteor-like poisonous spells that drop from the sky. Maneuver around until you're lined up with one of Baragoth's feet. You can inflict plenty of damage without being directly in Baragoth's line of bite!
Upon defeating Baragoth, you recover a key. Find a treasure room to the northeast. Use the key to open the door and gather the gold and search the chests inside.
Exit the lair and return to Allana's home. Speak with Allana to receive your reward.
Quest Reward (Dorn Only): Slay Baragoth, the Green Dragon--8,000 experience points, Dorn gains access to new spells and feats.
Skip ahead to the end of the class quests in this walk-through.
Vhaidra the Dark Elf Monk's Class Quest
Enter the Purple Wyrm Inn and speak with Ulua to initiate Vhaidra's class quest.
Quest (Vhaidra Only): Destroy Draezen Direhand--Destroy the Draezen Direhand in the Dark Raven Monastery for Ulua.
Exit the city and open the world map. Proceed to the Dark Monastery.
Dark Monastery
Follow the hallway north and battle the monks. At the intersection, you can search the alcove to the west but you will trip an alarm that alerts more enemies to your presence. Continue to the east.
The next intersection eventually connects to the same point so you can go either route. If you're hunting down as much treasure and experience as possible then search both pathways.
Follow the primary hall west (taking the chance to explore any side routes to the north) and save your game before entering the final large chamber. It's here where you will battle Draezen and his monk escorts. Utilize any area effect damage feats, if acquired, when surrounded by the monks. Eliminate Draezen to complete the quest. You can recall back to Baldur's Gate or return to the world map.
Find Ulua in the Purple Wyrm Inn and speak with her for your reward.
Quest Reward (Vhaidra Only): Destroy Draezen Direhand--8,000 experience points, Vhaidra gains access to new feats.
Skip ahead to the end of the class quests in this walk-through.
Ysuran the Moon Elf Necromancer's Class Quest
Enter Omduil's Manor and speak with Omduil to initiate Ysuran's special class quest.
Quest (Ysuran Only): Speak with Zarad Duskmarrow--Speak to Zarad Duskmarrow in his Clock Tower for Omduil.
Exit the manor and proceed to the world map. Proceed to the Clock Tower.
Zarad's Clock Tower
You automatically speak with Zarad Duskmarrow upon arriving. He doesn't seem particularly pleased to see you and orders his automatons to attack.
Move west through the hall and battle Zarad's minions. When you reach the third save game pedestal, you can search a small alcove to the south before entering the trap-filled room to the south. Watch your step around the arrow and fireball traps.
You'll reach an intersection at the end of a north hall. To the east you'll find the entrance to the Bell Tower, which is currently locked. Proceed to the west and you'll find the entrance into the study, also locked. But guarding the study is a gigantic automaton. Defeat the golem (keep away from its melee attacks by using your ranged spells and necromancer allies) to recover the key to the Bell Tower. Return to and enter the tower.
Zarad's Bell Tower
Battle your way through the automatons and apparitions to reach a chest at the end of the bell tower walkway. The chest contains the key that unlocks Zarad's study. Note that as you approach the chest, additional apparitions appear to make your escape more difficult. Return to the clock tower and use the key to enter the study.
Zarad's Study
Zarad still doesn't seem too pleased to see you and now you must battle him to complete your quest. Zarad teleports around the map and even creates duplicates of himself. Blast Zarad with your ranged spells. If you try to maneuver close, Zarad will just disappear and keep you running around.
Before recalling back to the city, search the corners of the study for large chests containing potential treasure and gold.
Return to Omduil and speak with him for your reward.
Quest Reward (Ysuran Only): Speak with Zarad Duskmarrow--8,000 experience points, Ysuran gains access to shadow magic spells.
Skip ahead to the end of the class quests in this walkthrough.
Borador the Dwarven Rogue's Class Quest
Enter the Purple Wyrm Inn and speak with Durbem to initiate Borador's special class quest.
Quest (Borador Only): Retake Gandam's Hold and Mine--Slay the basilisk in Gandam's Mines for Durbem.
Exit the inn and proceed to the world map. Enter Gandam's Hold.
Gandam's Hold
Blast your way through the goblins and assorted foes that have taken over Gandam's Hold. At the first intersection, continue north into a small treasure room. At the next intersection (at the save game pedestal), search the south route for a locked door. Remember its location for later.
Move north until you reach another intersection. Follow the east path and eliminate all enemies. In a southern corner you'll kill a hobgoblin wearing a key. Use the key to open a passage south to uncover more hobgoblin foes. The leader here is wearing another key. Take this key back to the locked door from earlier (south of the save game pedestal) and open the treasure room.
Return to the north and enter Gandam's Mine.
Gandam's Mine
Follow the sole path and battle a scattered group of bats here and there. Take note of the stoned dwarves throughout this area: the basilisk lies just ahead!
The basilisk has the power to turn its enemies into stone with just a gaze. Don't face the basilisk for an extended period of time. If you begin to slow, turn around and away from the basilisk to regain your mobility. Stay on the move and eliminate the basilisk from long-range if you've specialized with bows or at close-range if you chose to use melee weapons. Blocking also blocks the basilisk's gaze so use that to your advantage. Don't forget to use your feats too. Drop some satchels and lure the basilisk over them.
Search the edges of the chamber to locate treasure chests. Recall back to Baldur's Gate once the task has been completed. Visit Durbem in the Purple Wyrm to receive your reward.
Quest Reward (Borador Only): Retake Gandam's Hold and Mine--8,000 experience points, Borador gains access to new feats.
Skip ahead to the end of the class quests in this walkthrough.
Allessia the Human Cleric's Class Quest
Visit Huros in the Church of Helm to initiate Allessia's class quest.
Quest (Allessia Only): Destroy Goreth Vileblack--Defeat Goreth in his Unholy Mausoleum for Huros.
Exit the church and enter the world map. Proceed to the mausoleum.
Unholy Mausoleum
Prepare to battle hordes of the undead throughout the mausoleum. Utilize your cleric feats accordingly; blunt weapons (enhanced by magical benefits against the undead) will prove the most valuable. Proceed north and attempt to use the door ahead. It's the entrance to Goreth's sanctum; however, it's magically sealed so you must find another way inside.
To enter the sealed room, you must circle around to the sanctum's rear side. Follow the west or east hall around to the face side of the sanctum. Search the optional halls that lead off to the southeast, southwest, northwest, or northeast sections. These are dead-end corners that contain more enemies and items.
Enter the rear passage to the sanctum to confront Goreth. He has a vicious knockback attack. Counter with your chosen feats and weaponry and battle Goreth until he's slain.
Recall back to Baldur's Gate and enter the Church of Helm. Speak to Huros for your reward.
Quest Reward (Allessia Only): Destroy Goreth Vileblack--8,000 experience points, Allessia gains access to new feats, spells, and equipment.
End of the Class Quests
With all four artifacts on hand, Jherek has now left the warehouse and moved into the manor.
Quest: Speak to Jherek--Find Jherek in Omduil's Manor and speak to him.
Move through the city to Omduil's Manor. Once inside, speak with Jherek.
Quest Reward: Speak to Jherek--Additional quests.

Your task now is to take the four artifacts to four different elemental planes: air, earth, fire, and water. You can complete the elemental quests in any order. Choose the air quest.
Quest: Reactivate the Air Foundation--Reactivate the Air Foundation for Jherek.
When you're ready to leave, speak with Omduil to be sent on your quest.
Air I
You'll encounter several new dangers on the air elemental level. First, there's a stiff wind out there so your character will be blown around a bit. That wouldn't a problem in a safe, enclosed dungeon but it's a challenge when the level rests high in the air. Avoid the edge of the land because you can fall to your instant death if you fail to watch your footing. Save at every pedestal as it's certainly highly possible to fall off the edge at any section.
Cyclones are another danger on the map. Although they're easily killed, the cyclones hurl rocks at range. If the rocks make contact, they can knock your character around. If you're standing near an edge at the top, you could fall to your death!
A final issue is the lack of an auto-map! Although you can turn it on, you won't be able to see anything. This can make you lose your bearings easily. Thankfully the map isn't too complete. There are a few side routes but they don't lead too far off the main path.
Note that if you're daring, you can jump across gaps to other sections of land. If you're a perfectionist and want to eliminate each and every enemy on the map, then watch your step as you leap over to the small islands. Follow the land as it winds in each direction until you reach the entrance to the next section. Save your game close by as the next level is a boss battle!
Air II
Engage in battle against Habdazar Doomwing onboard his flying monstrosity. There are also other minions lurking about the level. Like all big beasts, it's pretty slow so maneuver around to its side when attacking. Beware of Habdazar's spells. Keep moving to avoid being bombarded by fire or ice. When you defeat the creature, Habdazar flees. After clearing out the enemies, approach and use the air foundation...and watch Habdazar get what's coming to him.
You automatically return to Omduil's Manor. Speak with Jherek for your reward.
Quest Reward: Reactivate the Air Foundation--5,000 gold coins, 8,000 experience points.
Choose your next destination, the earth elemental, and speak to Omduil to begin the journey.
Quest: Reactivate the Earth Foundation--Reactivate the Earth Foundation for Jherek.
Earth I
Like air, the earth elemental has its own unique features. First, there are rust monsters lurking about. So if you want to protect your equipment, then remove all metallic weaponry and armor and the rust monsters will simply ignore you! Also, take note of the small stone formations scattered around the map. You can bust these apart like pots and recover items (including gems!) from inside. Finally, there will be frequent times for you to bust through weak rock to clear a passage to the next pathway.
Punch through to the east. You can do so without any weapons and using just your fists if necessary. An elephant-like beast waits on the other side and he won't ignore you like those rust monsters! Continue east and search the end of each path for possible rock formations that contain items. Move down the middle eastern path to continue deeper into the dungeon. You could also have moved north from your start position to get there faster; both paths connect in a large room with big rock-like behemoths.
Locate and use the save game pedestal in here and continue west. Follow this path past another save game pedestal and more behemoths until you reach the entrance to the next section.
Earth II
Advance forward and greet Luvia Bloodmire, your old nemesis. Steer clear of Luvia at first and eliminate the other minions in the area. Luvia will battle in two forms. Her first form is rather easy; you should have little trouble blasting her into the dust. But her second monstrous form is much more of a challenge. It spews poison. Stay away from its front and keep your distance if possible. Kill Luvia's two forms and use the earth foundation to complete the quest.
You transport to Omduil's Manor automatically. Speak with Jherek for your reward.
Quest Reward: Reactivate the Earth Foundation--5,000 gold coins, 8,000 experience points.
Choose your next destination, the fire elemental, and speak to Omduil to begin the journey.
Quest: Reactivate the Fire Foundation--Reactivate the Fire Foundation for Jherek.
Fire I
The fire elemental offers its own unique challenges, an important one being the amount of fire damage you'll sustain against the enemies that reside here. Also, there's lava all over the place and you better stay out of it unless you want to incur major damage. You'll need to leap across lava pools with careful jumping on the safe platforms. For instance, search south from the start location and leap over the platforms to reach the enemies and treasures on the other side.
This map contains many open areas that are divided by a rock wall that's not readily apparent on the auto-map. When trying to reach a new section, follow the rock wall until you locate a gap allowing you to continue to the other side.
The entrance into the next level is located in the eastern edge of the map. The map is well worth exploring for the ample, and large, treasure chests scattered throughout the alcoves. Note also that you can bust apart the larger molten rocks for even more potential items.
Fire II
You must battle Aizagora in her fire-breathing red dragon form, naturally, to gain access to the fire foundation. Avoid her fire spells and her chomp. Move around to her side when battling if possible. Activate the fire foundation after the dragon has been slain. You'll automatically return to Omduil's Manor.
Speak with Jherek to receive your reward.
Quest Reward: Reactivate the Fire Foundation--5,000 gold coins, 8,000 experience points.
Choose your next destination, the water elemental, and speak to Omduil to begin the journey.
Quest: Reactivate the Water Foundation--Reactivate the Water Foundation for Jherek.
Water I
As you might expect, in the water elemental it's cold...really cold! Take note of the small snow piles; these can be broken to recover potential items (including gems). You'll also face rock-throwing yetis en route to the elemental boss encounter.
Follow the sole route through the icy canyon. At the split, north leads to a dead-end with additional creatures and potential treasures. Continue east toward the save game pedestal. You'll follow a single route once again until the path splits again near the level's end. The south route leads to another alcove with more monsters and treasure. Continue west to a save game pedestal adjacent to the entrance to the next section.
Water II
Wade through the shallow, murky water and battle Illudra and her minions, which includes a many-tentacle beast and other humanoid adversaries. Illudra has the habit of teleporting, especially if you get close. Use ranged spells or weapons if possible, though a barbarian should be dominating her at close-range. Avoid her spells and eliminate her to gain access to the water foundation.
Use the water foundation and return to Omduil's Manor. Speak with Jherek for your reward.
Quest Reward: Reactivate the Water Foundation--5,000 gold coins, 8,000 experience points.
With all four foundations activated, Kharne arrives...much to the dismay of Jherek. After their conversation, you can speak with Jherek to begin the fourth act and proceed toward the Keep of Pale Night.
Act IV
Speak with Jherek and tell him you're ready to proceed to the Keep of Pale Night to receive your next quest.
Quest: Destroy Mordoc Setanmere--Destroy Mordoc Setanmere in his Keep of Pale Night on the Battle of Bones.
When you're ready to move on, speak with Jherek and tell him to proceed.
Battle of Bones I
Both Kharne and Jherek join you in much of this act so you will have assistance against the evil hordes of enemies you'll face throughout this section. You'll primarily face ghosts, which can steal your magic energy, and the undead through this section. If you get too far ahead of Kharne and Jherek, the two warriors will automatically teleport to catch up to your location.
Proceed down the main path, which eventually straightens up leading west. You'll reach a save game pedestal in the distance before the path continues on toward the west. The undead enemies emerge from the dirt so it's important not to advance too quickly. Move too fast and additional undead will materialize and provide a much tougher fight.
This is a long map but it's a straight shot that winds to the west, north, east, south, and back again. Save your game at each pedestal and avoid encountering too many enemies at once. Don't forget about your two non-player assistants and make sure they're engaged with the enemy at all times.
Battle of Bones II
Move to the northeast and battle the Nightwalker, which defends the entrance to the Keep. Eliminating the Nightwalker disintegrates the other undead in the area. Before proceeding into the Keep, search the corners of the map for potential loot and items. When ready, enter the Keep!
Keep of Pale Night I
Proceed north and reach the organ. Use the organ and read about the "spectral" chests. Playing the organ summons various chests and objects into the room. But you have to be quick because the objects disappear quickly. Leaving the room will end the exercise. You can attempt to snag as many chests as you can but will have to battle enemies for the effort. When finished, exit the room to the west.
There's a treasure room off to the north. Be aware, though, that "darkness attacks" if you raid the chests; this just means more enemies will block your exit! Follow the hall around to the south and then back to the west. Search the southwest corner to discover the entrance to the Keep Dungeons. If you move to the north, you'll find the room containing the entrance to the next level of the Keep. The dungeons are worth exploring now, however; the three heroes from the first Dark Alliance are trapped there and provide a great reward for their rescue!
Keep Dungeons
The Keep Dungeon is a single, large room with a set of prison cells at the center. To unlock the prison cell, you must pull five levers scattered around the dungeon. The levers are scattered all around the dungeon, which means you'll have to battle nearly every undead enemy to find them all. There are also fireball traps to avoid. The location of the five levers are: southeast corner, southern side in front of the prison door, northern side across from the entrance, eastern side near the locked treasure room, and western side near a fireball trap.
Enter the unlocked prison. Sitting in the three prison cells are the legendary heroes of Baldur's Gate: Kromlech the dwarven fighter, Adrianna the elven sorceress, and Vahn the arcane archer. Save your game and search the room.
Your reward here depends on which hero you rescue first. If you rescue Kromlech, then you're awarded his powerful magic axe (ideal for barbarians or any character excelling in great weapons); if you choose to rescue Adrianna, then you're awarded her magic staff (ideal for a monk or any class specializing in hand weapons); if you choose to rescue Vahn, then you're awarded his magic bow (ideal for rogues or any character excelling in ranged weaponry) as well as 10 gems. You also receive 12,000 experience points.
After you rescue the hero, you must locate their weapon in one of the sarcophaguses scattered around the dungeon. Approach each sarcophagus until you find the weapon.
Return to the previous floor and battle through to the entrance to the next level of the Keep.
Keep of the Pale Night II
Jherek remains behind to hold off any pursuing enemies. Proceed east into the next chamber. The center section of this chamber is your destination but you must take a long route to get there. These rooms are multi-leveled so you must use the staircases to reach the upper section and traverse into this central area to reach the next level of the Keep.
Maneuver north out of the chamber and save your game. You can search the alcoves for treasure but note that doing so often triggers additional enemies into the area. You can search the area west of the pedestal then continue around east and finally to the south. Use the staircases to find additional chests that are elevated off of the ground floor.
A room off to the east contains another organ but it's not the mystical kind. Playing the organ summons additional enemies. You should be on the upper level now and can simply circle around to the initial chamber and save your game before continuing deeper into the Keep.
Keep of the Pale Night III
Here's your first battle against Mordoc. He's a tough adversary up close. Players excelling in long-range spells and weaponry may find an easier time against the nefarious vampire. Beware of the nightwalkers in the room's corners. Defeat Mordoc to within an inch of his life and he flees and you're automatically sent to what's left of Baldur's Gate...now renamed.
Quest Reward: Destroy Mordoc Setanmere--Story continuation.
Mordoc's Gate I
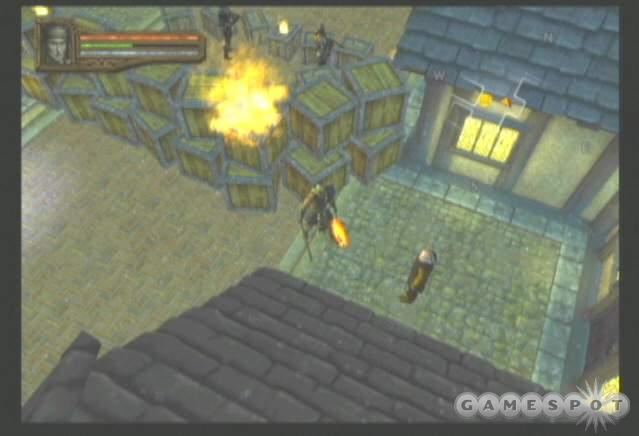
Save your game at the pedestal then speak with Bartley on the other side to learn about the city's current state. Take the chance to upgrade any weaponry, purchase new items, or restock your potions.
Leap over the crates and assist the city guards against the undead forces. Find Randalla on the side of the city street and speak with her...she looks different. After the conversation, you're automatically sent to the next section.
Quest: Destroy the Onyx Tower--Travel to Baldur's Gate and destroy Mordoc and his Onyx Tower.
Mordoc's Gate II
Approach the Onyx Tower and defeat your former ally, Randalla, in combat. She's been corrupted by your enemies and has now become on of your enemies! Enter the Onyx Tower.
Onyx Tower I
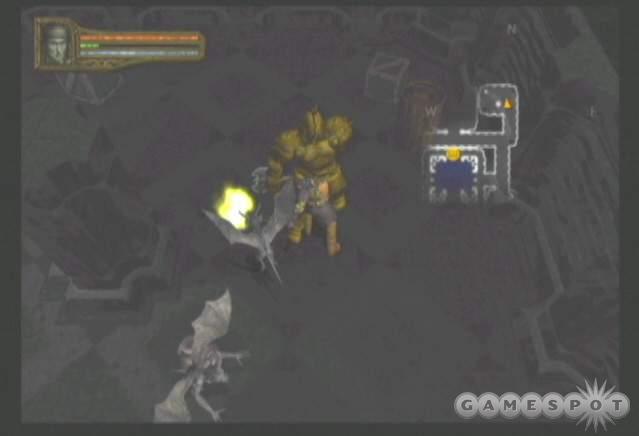
The Onyx Tower levels are short but challenging. There are tough enemies patrolling these halls. A daring adventurer can search the side rooms for additional treasure and loot. In the first level, the side rooms are situated along the west and east sides of the level. You'll find the entrance into the next section at the far northern end.
Onyx Tower II
In the second level, the side rooms are found on the western side of the map. To reach the next level, proceed to the east and follow the hall to the north. Save your game then continue into the third level.
Onyx Tower III
Battle the towering statues through this level. Search the west and east side to locate the optional treasure rooms. You'll find your destination to the north. Save your game and continue into the next section.
Onyx Tower Top

Battle one of Mordoc's cohorts Xanhast on the top of the Onyx Tower. He excels in melee combat so unless you can withstand his power, keep your distance and use ranged weapons or spells.
Quest Reward #1: Destroy the Onyx Tower--10,000 experience points.
Upon defeating Xanhast, proceed through the far entrance and into the next section.
Plane of Shadow

Once again you face off against Mordoc. You'll find the battle similar to the first time you faced him. Pound Mordoc at close-range if you're a barbarian, monk, or cleric with the armor to withstand the nefarious vampire's attacks and the strength to inflict plentiful damage. A spellcaster or ranged-weapon rogue should keep a distance and use ranged attacks to eliminate Mordoc.
Quest Reward #2: Destroy the Onyx Tower--16,000 experience points.
After defeating Mordoc, destroy the center object to release his hold on Baldur's Gate.
Game Reward: Completing the Game--Unlocks "Extreme" difficulty mode and the new playable character Drizzt.
Chapter 5 - Cheats and Secrets
This section provides cheat codes and secrets for Baldur's Gate: Dark Alliance 2. These codes include invincibility, level warp, and a wealth of gold!
Xbox Cheats
Level Up to 10 and 500,000 gold cheat: Press and hold the following buttons: left trigger, right trigger, Y, X, A, B. With all of those buttons held, press the white button. If you hear a comment about cheating, then you preformed the action correctly.
Level Warp and Invincibility: Press and hold the following buttons: left trigger, right trigger, Y, X, A, B. With all of those buttons held, press the START button. This activates a special menu with the level warp submenu and invincibility toggle.
PlayStation 2 Cheats
Level Up to 10 and 500,000 gold cheat: Press and hold the following buttons: L1, R1, Triangle, X, Square, Circle. With all of those buttons held, press the L2 button.
Level Warp and Invincibility: Press and hold the following buttons: L1, R1, Triangle, X, Square, Circle. With all of those buttons held, press the START button. This activates a special menu with the level warp submenu and invincibility toggle.
Game Completion Unlockables
Completing the game on any difficulty unlocks the "Extreme" difficulty mode.
Completing the game on any difficulty the first time unlocks the Drizzt playable character.
Completing the game on "Extreme" difficulty unlocks the Artemis playable character.
Got a news tip or want to contact us directly? Email news@gamespot.com
Join the conversation