INTRO:
Games which are regarded as having set the metaphorical bars are often labours which are made with great effort and ambition.
Unfortunately, great effort and ambition do not always translate to great success, if what it is lacking is great execution.
Arcen Games’ attempt at creating an open-ended game is one such example.
(Note: A Valley Without Wind will be referred to as AVWW in this review. After all, this appears to be how Arcen Games refers to its own game in short-form when posting on forums.)
PREMISE:
The fictitious world of Environ is winter-stricken, the result of some kind of anomaly which messed up time and space for this world. Worse, powerful despots have arisen to rule entire continents, somehow using the weather to their advantage.
The player takes on the role of a particular survivor, who is out to gather other survivors and eke out an existence of sorts. Eventually, they intend to gather enough strength to challenge and defeat the oppressors of the continents which they live in.

That is the overarching story which the player will encounter ad nauseam, because there are other countless continents which will be generated for the player to liberate, one after another.
ONLINE DOCUMENTATION:
There is Arcen Games’ publicly viewable online documentation for AVWW, accessible at arcengames.com.
The game does attempt to include doles of information in in-game tooltips, but there can only be so much lest the user interface is one cluttered mess (as is usually the case in Arcen Games’ titles).
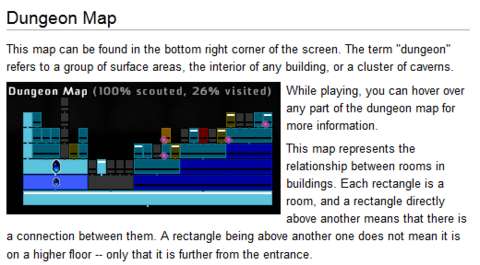
Some of the most nuanced – or most confusing - bits of gameplay in AVWW is not mentioned in in-game texts. Instead, they are mentioned in the online documentation. For example, the in-depth description of how the map system works is available in the “Learning the Game” section of the online documentation.
Perhaps the game could have explained all that through a tutorial, but it would have been a long and boring show-and-tell lesson.
IN-GAME DOCUMENTATION:
As mentioned earlier, the game has plenty of in-game documentation. However, this is mainly for the basics of the gameplay, as well as reminders of the controls which the player will be using a lot.
The game can still be complicated for new players to comprehend, despite the dense in-game documentation. To know how to play better at the game, the player will need the online documentation – especially the explanations on why the game is not intended for players with completionist streaks.
PLATFORMING, ACTUAL PLATFORMS & CRATES:
The most immediately noticeable aspect of AVWW’s gameplay is its platforming. The player character is a person with infinite endurance. He/She can jump and run with gusto, which is just as well because the game tends to produce levels with a lot of crags to jump over.
On his/her own, without any tools, the player character is likely to get stuck somewhere, with no recourse but to commit suicide.
To prevent such an embarrassing occurrence, the player has to bring along some wooden platforms and crates, as well as light sources. These are needed to overcome such situations – something which the game will greatly emphasize.
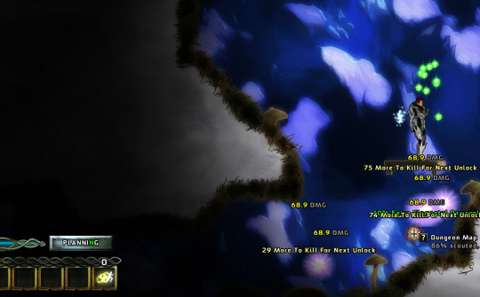
Wooden platforms can be placed onto the wall in the background, if there is any, to become semi-permanent platforms. The game will actually remember their locations and put them into the player’s save-file, which is good. This is also bad, because frequent use of these wooden platforms will eventually inflate the save-game file.
(Players who have played 2011’s Terraria may be having more than a vibe of that game by now.)
Crates are simply there to be stacked onto each other and then jumped onto and off from. Falling inanimate objects will always fall in a straight line, due to the limited physics of the game.
Crates and wooden platforms can be used for cheesy tactics too. For example, the player can make a wooden platform above melee-only enemies such as regular Skelebots and then spam spells on them with impunity. (That is, assuming that the spells do not end up destroying the wooden platforms.)
As seemingly useful as these are, the game could have made do without them if the procedural level generation had been designed such that these items are not needed. Using them for cheesy combat tactics also cheapens the already low appeal of the dumb enemies in AVWW.
SPELLS & MANA:
The next element of the gameplay to be introduced is casting spells. Spells are obtained by collecting and equipping spell-gems.
The player character has a reserve of mana with which to cast spells. It refills quickly on its own, but over-eager players can eventually drain it. There are enchants which increase the reserve’s size and how fast it refills, but the player should remain cautious.
As for spells, there are a few dozen of them in the game. They can be categorized in many ways, but perhaps the best way to categorize with is their reach, projectile speed and how many enemies they can hit – in other words, their combat efficacy.
The first spell which the player gets is a long-range spell which fires off fast projectiles at a rate of one per second. Later, the player gains variants of the long-range spell; some have a tremendous rate of fire, but slower projectiles, for example.
Then there are area-effect spells, of which there are a few variants. Some fire off in the cardinal directions, whereas others fire off in a ring around the player character. Yet others fire off projectiles which explode upon contact.
Next, there are incredibly short-ranged but very strong spells, Intended for when enemies get too close (and they will always try to get close).
It is in the player’s interest to have some of each spells, if only as preparation for different combat situations. This is especially so when the player is late into his/her playthrough, when enemies have become rather tough and getting rid of them is a matter of efficient target selection.
Finally, there are utility spells. Most of these are useful, such as the Light Snake spell which can be fired off so that it “explores” unexplored areas for the player. Interestingly, these are the only spells which lack levels and modifiers (more on these later).
SPELL ELEMENTS:
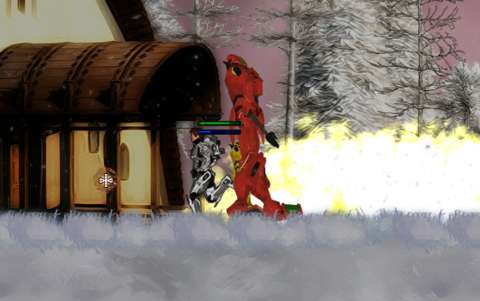
The spells are further categorized according to their “elements”. The system of elements is actually nothing more than a rock-paper-scissors system.
There are enemies which are weak to specific elements but resistant (and sometimes completely immune) to certain others. It is important to know these, or else the player could end up wasting a lot of time dealing with an otherwise easy-to-dispose enemy.
This also means that the player will need spells of different elements, even if they fulfill the same niche in combat.
SPELL LEVELS:
Each of the few dozen spells has its own set of statistics, starting with the set at Level 1. These statistics increase with every level, becoming more powerful in order to match the increased statistics of enemies.
(The levels of monsters increase together with the player character’s own level. There will be more elaboration on this later.)
Increasing spell levels also happens to increase their mana consumption too. However, the player character’s increase in statistics from a level-up should be able to cover these additional costs.
SPELL MODIFIERS:
Each of the several dozen spells already has their own statistics. Every spell-gem which contains any of these spells will have the set of statistics which is associated with that spell.
In addition, individual spell-gems can have modifiers attached to them. These modifiers alter the statistics of the spells, generally for the better.
The player can find spells through the discovery of stashes (more on these later) or as rewards from missions. These usually have one modifier each, and not a very powerful one.
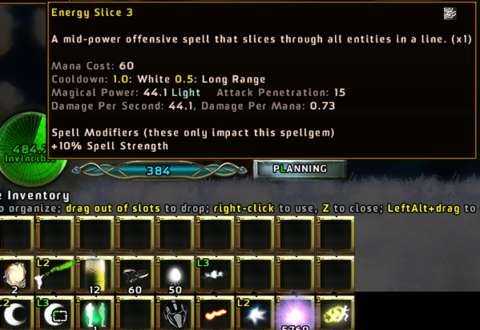
Spells which are crafted have a small chance to have better and more modifiers. However, this is due to better pre-disposed RNG rolls. Bad luck still can mean that a crafted spell turns out bad, whereas good luck can have a player finding spells which are more than decent.
When the player kills one of the lieutenants of the current continent’s overlord, it will drop a special crafting ingredient which guarantees better and more modifiers when used to craft a spell-gem (in addition to the usual ingredients). These ingredients are rare, of course, but usually there is no reason to hold onto it because its benefits are not as important as maintaining spells of as high level as possible.
SPELL-CRAFTING:
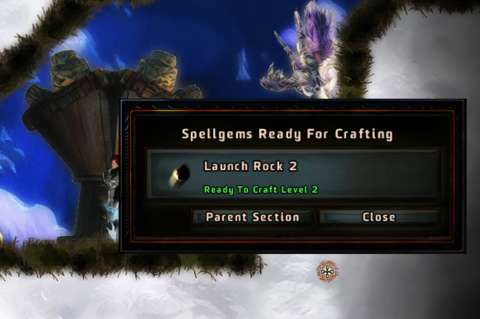
Speaking of spell-crafting, the player will be doing this occasionally if only to get the next level of spells after having defeated a Lieutenant or Overlord.
Crafting spell-gems requires ingredients. These are items such as cedar logs from cedar trees and ores from mineral deposits. Some of these ingredients can also be obtained from stashes.
Every spell has a crafting recipe, which is already known from the start. Obviously, if the player wants to craft a particular spell, he/she needs to have all the ingredients. Gathering them can be a chore though.
Although the game will describe every ingredient and even mention how and where they can be found, whether they will appear for the player or not is a matter of luck. For example, the Walnut can be found at towns, but only if they happen to have walnut trees – yet not all towns have walnut trees, thanks to the randomness in the procedural generation scripts.
ENCHANTS:
Enchants are AVWW’s equivalent for gear pieces. Every major part of the player character’s body can have an enchant slapped onto it. Usually, the enchant offers benefits of a nature which is compatible with the body part. For example, enchants for feet usually increase the player character’s movement speed.
Enchants are not terribly difficult to come by, but it can take a while for a new player to figure out the ways to obtain them.
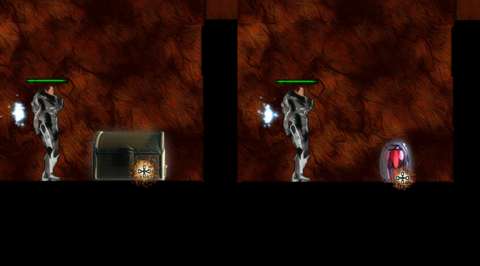
The default way is to collect what the game calls “enchant containers”. These appear as large blue vials which often appear indoors. Collecting these advances the player’s progress to obtaining an actual enchant.
The player can also “drop” existing enchants from his/her inventory. The enchant is destroyed, but it contributes to this progress.
Unfortunately, enchants which are obtained in this manner are weak and often not worth the trouble of looking for enchant containers.
Rather, the best enchants are often found in stores and warehouses, which sometimes occur in building dungeons (more on the dungeon system later). They are usually secreted away within archetypal treasure chests. These ones usually have more potent benefits and are marked with special labels.
TOOLBAR & INVENTORY:
There is a toolbar with slots which are associated with the number keys; this would be quite familiar to veterans of hack-and-slash RPGs. The first, second and third slots are also tied to the mouse buttons, conveniently; the game helpfully recommends tying them to the casting of spells and the placing of wooden platforms.
There are other slots, which appear above the toolbar when the player toggles the inventory view for spell-gems and deployable items. There are plenty of slots; new bars of them are created above the older ones, at least until they reach the top of the screen.
There is also a separate set of slots for enchants, which is convenient.
OTHER INVENTORY:
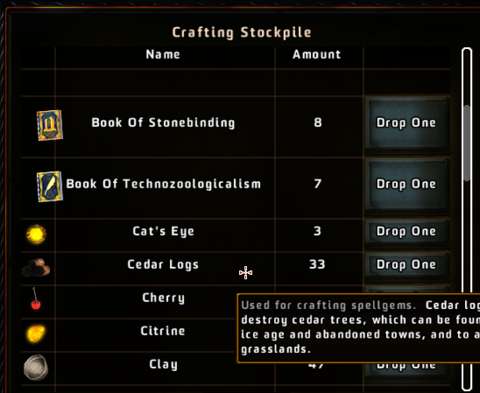
Conveniently, there is a separate inventory system for crafting ingredients and gift items (more on these later). This inventory system is not so much an inventory as it is a list – an endless one too.
Interestingly, the player does not ever need to look at the list. This is because whatever user interface which will use these items will display them in filtered lists anyway.
SETTLEMENT:
Shortly after completing the tutorial sequence, the player character walks into the settlement for the first continent.
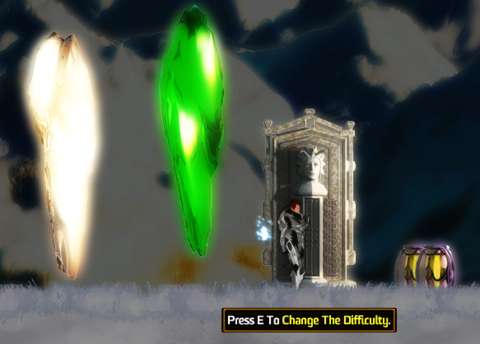
Every continent has a settlement where all survivors of the “Cataclysm” event congregate at. In terms of narrative, the settlement is made relatively safe due to the presence of giant, floating and sentient crystals called the “Ilari”.
One of the Ilari will act as a healer; it is located close to the entrance of the settlement. Health restoration is not exactly easy to come across, so the Ilari’s location is quite convenient.
A couple of the “Ilari” acts as a vendor and a manager of survivors, respectively.
The player can purchase items from the vendor Ilari using the currency known as “consciousness shards”, which will be described later. However, oddly enough, the player cannot sell things to the vendor.
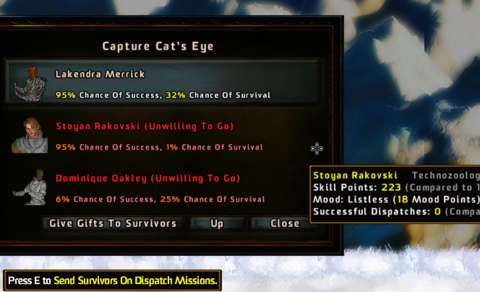
The manager Ilari is through whom the player directs the other survivors to actually do productive things instead of loitering around the settlement. The user interface which is used to do this has layers after layers, but it is otherwise straightforward to use.
DUMPING SPELL-GEMS:
The settlement also has a small facility for the player to dump unwanted spell-gems, namely those which contain lower-level spells. The player has to manually drop spell-gems onto the sprite of this facility.
Considering that the other facilities in the settlement (namely the Ilari) can be interacted with quite easily (i.e. through actual menus), this can seem a bit finicky.
SURVIVORS:
As mentioned earlier, the player character is not the only survivor of the Cataclysm.
In terms of narrative, these other survivors have diverse backgrounds; some are even from different eras and alternate timelines, before the Cataclysm smashed them all together.
The survivors also have different vocations, from the plain-sounding “Adventurer” to weird careers such as Lumbermancers and Forgicians. Most of them start off a bit mopey, and quite inexperienced at surviving in the wilds; hence, they will relocate to the settlement on the continent.
In terms of gameplay, they are hangers-on and at best are little more than resources to be expended whenever convenient.
Survivors do not starve, despite their supposed need for food. However, lack of food hurts their “mood” rating; this rating becomes important when sending them out to do something productive.
When they are starving, their “mood” rating will bleed off over time.
Therefore, the player has to build farms to support them; there will be more on building structures later.
Afterwards, the player needs to increase their skill ratings and mood ratings for them to be able to do anything worthwhile.
Boosting their skill ratings can be done either by giving them books according to their careers, or building structures which improve their skill ratings. The latter gives diminishing returns though, making books more reliable.
Their mood ratings can be boosted by giving them gift items; any gift item suffices, and every gift item increases mood ratings by the same amount. This is a bit of a lost opportunity, because the player will be finding seemingly different gift items which could have had different effects.
Survivors can be shunted between continents, but this causes such a hit to their mood ratings that the player is probably better off looking for ‘native’ survivors.
JOBS FOR SURVIVORS:
Survivors can be sent on only a few types of jobs. The results of any job are given as soon as they are sent on one; previously, the game makes the survivors unavailable for a while, but this has since been patched out.
The most commonly done job is to gather ingredients. At first, this may seem useful, because the survivors can do tedious work for the player. Unfortunately, the player must first find these ingredients before the survivors can find them themselves. This makes the survivors seem even more useless.
One of the other two jobs is to send them after “ice pirates”. Ice pirates start to appear from the second continent onwards; they make the exploration of surface areas harder because they bombard any surface areas within range. The player cannot directly deal with them, and must instead send the survivors after them.
This can seem to be a rather artificially imposed necessity.
The last job is the most difficult and the most unlikely to be pulled off. The survivors are despatched to attack the overlord of the continent. This requires the player to build up the skill and mood of the survivor that is to be despatched, often to very high levels. Yet, the gain – a few levels knocked off from the Overlord’s strength - may not seem to be worth all that effort.
Worst of all, when a survivor is sent on a mission, his/her mood has a very high chance of going down. The magnitude of the reduction has factors which can be controlled, such as the average skill level of all survivors. However, again, the small benefit from controlling these factors is not worth the effort.
GUARDIAN SCROLLS:
The Ilari may be powerful and some of them seem beneficent, but they will not flaunt their capabilities without favours done for them in return.
To get them to do things, the player must have scrolls which specifically reference certain powers which they have. These scrolls are usually the rewards for performing missions; hence the remark about favours earlier. Some scrolls are also obtained as loot; the Ilari will perform their miracles when given these scrolls too.
Otherwise, the player will need to obtain scrolls by buying them with consciousness shards.
Most of these scrolls have the Ilari constructing buildings. These buildings include the aforementioned farms which are needed to support survivors. Some other buildings increase the skills of survivors of certain professions, but such buildings come with diminishing returns.
Some scrolls grant benefits which apply only within that continent, but otherwise, they are practically permanent. These scrolls tend to be more precious than the rest.
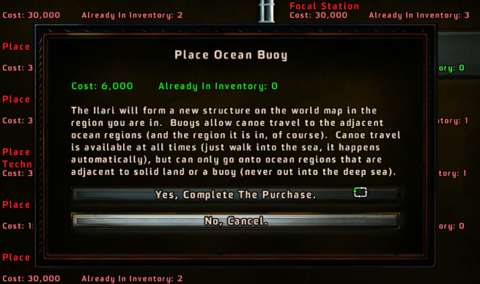
A few scrolls change the missions which the player can get, or even create new ones. There will be more elaboration on missions later. However, it should be said for now that performing missions will be something which the player will be doing a lot, so being able to change undesirable missions to easier ones is a bit convenient.
A couple of these scrolls are very much needed in the player’s quest to free the continent from its overlord. This will be described later.
THE STORMS, BUOYS & WIND SHELTERS:
The word that is “Wind” in the title of this game is portrayed through the severe weather-based hazards which slam the world of Environ every day.
Other than the region around the settlement (which, as a reminder, has been made stable by the presence of the Ilari), the rest of the current continent is swathed in storms. Although the player can enter these regions, as long as his/her player character stays on the surface, he/she will be buffeted with strong winds which impede movement and cause damage over time.
Therefore, the game element of storms serve very well as a deterrence against free-wheeling exploration.
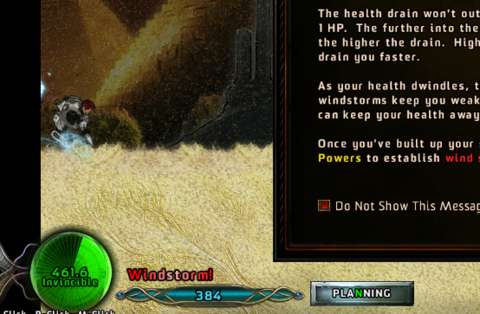
The storms can be held back by placing certain buildings. For storms on land, the player has to place “wind shelters”, and then perform the mission to bring them online. For storms in the seas, the player has to place buoys, which somehow make the immediate ocean region calm.
These buildings have to be placed with guardian scrolls. They are the cheapest scrolls around, but they nevertheless demand quite a price. The player does get to gather more shards as the playthrough progresses, but having to buy scrolls for these buildings always gives the impression that the player’s progress is being slowed down artificially.

CONSCIOUSNESS SHARDS:
Consciousness shards are what pass for a currency resource in the game. Consciousness shards are mainly obtained through killing monsters and collecting the clusters of sparkly things which they leave behind. Shards can be spent at the Ilari vendor for scrolls and other items.
However, the best stuff are usually found (or crafted), not bought. At best, this element of the game is only there for convenience.
For example, if the player is short of one more buoy-placing scroll, he/she can buy one from the Ilari vendor instead of hoping that a mission which rewards this scroll would come up. Yet, grinding for these shards just to buy and hoard things can become boring and tedious.
MISSIONS – IN GENERAL:
In lieu of exploring locales, the player can spend his/her time performing missions.
Missions are randomly generated side-quests. They appear randomly on regions, which the player can then enter in order to find the monuments which start these missions.
Entering these monuments brings the player to the mission start area; the player is considered to have started the mission, so there are no second thoughts from here onwards.
The levels which are created for missions are considered to be separate from those which are procedurally generated for the regions. However, the mission levels will share the same terrain type as the region.
Another difference which missions have that make them stand apart from the actual regions is that most monsters will not release consciousness shards. The only exceptions are mini-bosses and micro-bosses (more on these later).

This lack of consciousness shards is supposedly intended to encourage the player to finish missions as quickly as possible. After all, there is little profit to be gained from fighting monsters who do not drop anything other than healing sparkles.
TYPES OF MISSIONS:
There are many types of missions, some of which will only be unlocked after the player has performed a few missions of certain types.
There are certainly many types of missions, though jaded players may recognize the design tropes in them almost immediately. For example, there are search-and-destroy missions which can seem rather familiar, despite their varying mission conditions such as pervasive darkness and multiple floors.
Still, it is in the player’s interest to complete a few missions of each type, if not for variety’s sake then at least for unlocking some goodies.
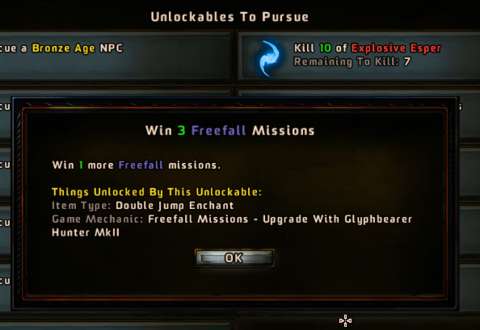
As mentioned earlier, there are practical rewards for completing missions. This is the most significant incentive for completing missions, yet they are awarded regardless of how the player completed them. Therefore, calculative players may attempt to complete them as efficiently as possible.
For example, the player may attempt to pursue Survivor Rescue missions at easier regions, such as Abandoned Towns. This results in levels with convenient geometries.
Indeed, the game appears to subtly encourage the player to do this via suggestions that missions may be more or less difficult when performed in different regions.
However, there are mechanisms in place to deter players from relying on a few types of missions too much.
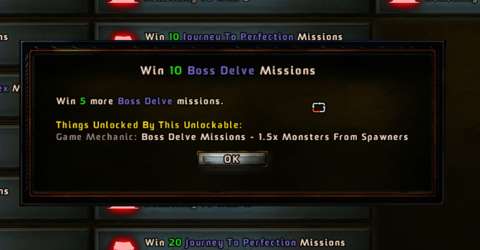
After the player has played a type of mission one too many times, he/she “unlocks” the tougher variants of the mission; he/she will be playing these variants for ever onwards.
TEDIOUS MISSIONS:
In its attempt to diversify the missions, Arcen has made some of these a tad more frustrating than the rest.
This includes the mission to activate Wind Shelters after “building” them. Unless the player has some Enchants which grant immunity to the force of the winds, completing them is going to be a major pain.
Of course, one could argue that this is what these particular Enchants are for, but other people would consider them as an artificial requirement, considering that these Enchants compete with other Enchants for the same slot.
One of the most frustrating missions is the one which has the player hunting down monsters who are not “native” to a building. The player cannot kill the “native” monsters, because they just end up spawning more monsters. To complete the mission efficiently, the player must leave them alone, which can be a chore.
DUNGEON SYSTEM:
The procedurally generated levels are called “chunks” in the game’s own parlance. This is because they are part of one of three types of “dungeons” which are generated for almost any region tile in the world map.
The three types of dungeons are the surface levels, the cave levels and the building levels. The surface levels usually have nothing of interest, except maybe trees which can be destroyed for crafting ingredients. Entrances to buildings are usually found in the surface levels, but sometimes they are found elsewhere.
Cave levels are mainly where the player can find ore deposits to destroy for mineral-based crafting ingredients. However, cave levels have some of the most inconvenient terrain, which complicates platforming.
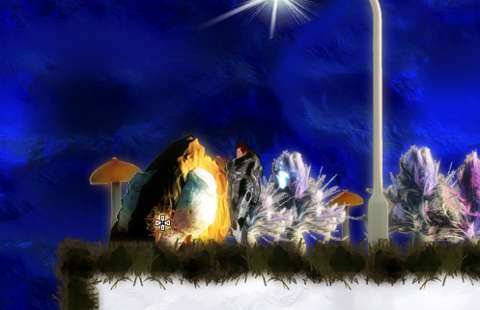
In contrast, the building levels usually have convenient geometries. They also tend to have very few enemies.
Building levels are also where the player will find stashes. These will be described shortly.
Moving around the “rooms” in levels can take a while to get used to, due to their Zelda-esque limitations which do not exactly show where the player can find the doors into the other rooms. However, the game’s online documentation does mention these limitations and how the player can still use the mini-map (called the dungeon map) to get around a building level.
STASHES:
Perhaps the most enjoyable activity in the game is the discovery of stashes. These are found in building levels.
Generally, every building level has a room or two which have stashes; these rooms are coloured gold. These rooms are generally the only rooms worth going into, with the exception of basement rooms, which often have treasure chests with powerful Enchants in them.
Anyway, stashes yield items such as gift items, especially books. However, the stashes in a building level are finite. After they have been looted, they are gone for good. There are plenty of building levels though, so the player would not be running out of stashes to raid soon.
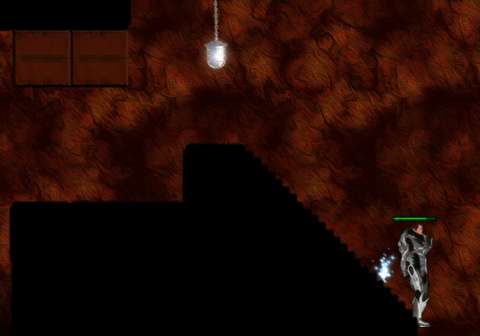
(Basement levels are not marked on the dungeon map. The player needs to manually check the tooltip of each room to know which rooms are basements.)
WARP:
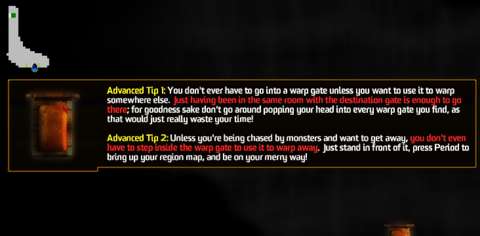
There is a system of warp gates which appears to have been implemented in order to cut down on backtracking. Every one level in a few which are adjacent to each other will have a warp gate, which the player can use to travel to other warp gates within the region.
The user interface for this system can take a while to get used to, mainly due to its use of the dungeon grid map, which is rather small (at least by default). However, once the player has become used to it, using warp gates cuts down on a lot of tedium.
Yet, there may be an impression that the warp gate system has some vestiges of its earlier designs which still linger. For one, the player can enter any warp gate into some limbo-like area, which has absolutely nothing interesting, other than a bunch of rosette stones telling the player that there is nothing interesting.
It’s a bit silly at first, but it also reeks of loose ends in the game’s designs which remained untied.
ENEMIES – IN GENERAL:
Firstly, it has to be said that all of the enemies in the game are very stupid.
Veterans of side-scrolling platforming games may be familiar with some of their stupidity. There are enemies who just bounce around, completely oblivious to the player character. A rare few patrol back and forth between the two ends of a platform.
Most enemies attempt to chase the player character. However, they are quite terrible at doing so.
Ground-bound enemies often get caught on terrain geometries, if they are not falling into pits or running against walls. Flying enemies are not any smarter either; they also get caught on geometries, and they just do not know how to go around overhangs which are directly in their way.
These limitations in their intelligence means that they provide laughable opposition at best.
This brings this review to how the game has them providing “challenge” to the player; it does so through artificial means, namely increasing their statistics instead of more nuanced methods (namely increasing their smarts).
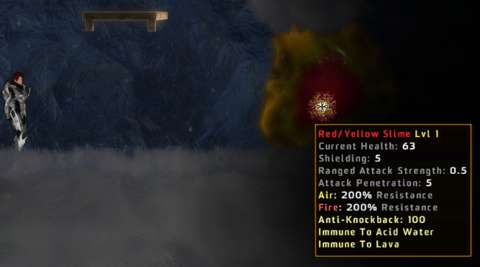
Anyway, enemies are categorized according to the following classes: ‘regular’, ‘micro-bosses’, ‘mini-bosses’, ‘bosses’, the continent’s lieutenants and its overlord.
From one class to the next, enemies have increasingly higher statistics, e.g. more resistances, fewer weaknesses and of course higher hit point counts. Higher classes also have more spells which they can toss at the player, often simultaneously. However, they still remain stupid.
Micro-bosses and mini-bosses are more powerful variants of regular monsters; in fact, they are practically palette swaps. They are usually used to make a level more dangerous, to use the loose sense of the word. However, the player will not have much to fear from them if he/she can exploit their stupidity.
Bosses are usually the objectives of some missions; they are sometimes seeded into regular levels. The main reward for dealing with them is a substantial amount of consciousness shards, more so than micro-bosses and mini-bosses.
Lieutenants and overlords are particularly powerful – and large – bosses. They can pile a lot of spells at the player character, but due to their massive size, it would be very difficult to miss them with any spell. Moreover, they are just as stupid as the other monsters.
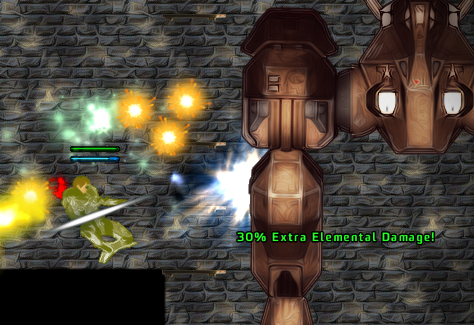
Enemies which the player has not slain but has damaged will have their hit-points restored if the player exits out of the current room and re-enters it. This is intended to prevent players from cheesing the game, but enemies are so stupid that the player should not be resorting to exiting and entering rooms if he/she was competent in the first place.
Interestingly, there is also a system of unlocks for monsters. After killing a number of monsters of a certain type, the player “unlocks” a variant of these monsters – it is usually nastier.
GAINING LEVELS:
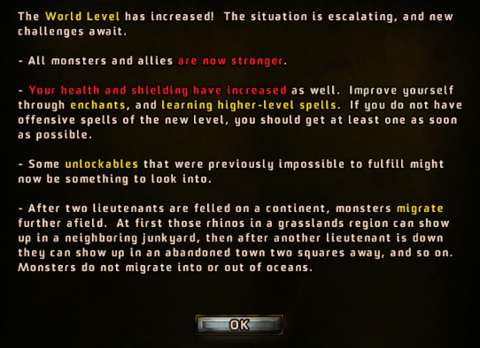
When the player kills a lieutenant, the player character gains a level, thus gaining increases in his/her statistics. However, monsters also gain a level too, becoming more powerful, at least in terms of statistics. Loot also becomes more powerful. These gains are retained when the player moves to the next continent.
Theoretically, a competent player’s playthrough can go on indefinitely. However, mistakes become costlier, if only because enemies hit harder, possibly outpacing the player character’s own durability.
SWITCHING CHARACTERS:
Generally, any player character which the player controls is functionally similar to the rest.
The main difference among player characters is the “age” which they come from. This grants them advantages which the others may not have.
For example, the starting set of player characters is from the “Ice Age”; these characters have special cold-resistant suits which grant them immunity to the cold by default. This allows them to explore Ice Age regions without a problem, whereas the other player characters need snowsuits.
When the player character dies, his/her death is permanent. However, the player gets to pick someone else to play as; enchants, spell-gems and other gear, as well as the level of the previous player character, are all transferred over to the next one.
This is the main way to “switch” player characters, at least to cavalier players who do not know better. There is a nasty consequence to this “convenience”, however.
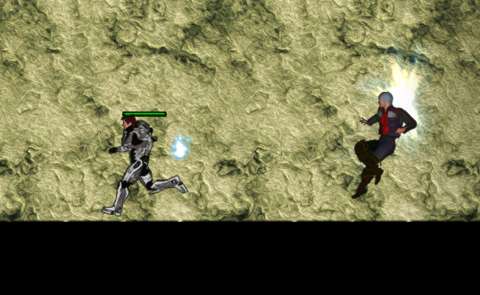
Previous player characters somehow return as ghosts, which is as stupid as any other monster. However, they have capabilities similar to the player character, so they may be unpleasant surprises to players who had not fought them many times before. (Competent players probably never will, unless they deliberately let their player characters die.)

A better way to switch player characters is to use what the game calls “glyph-transplant” scrolls. In terms of cosmetics, this transfers the floating fire sprite which is next to the player character to another character, who then becomes the player character. This can only work if the player has some survivors back at the settlement.
Another kind of scroll “retires” the current player character, effectively turning him/her into one of the other survivors; the player is then allowed to ‘roll’ another character.
These features are convenient, because some survivors do better in certain regions than others, or simply have a general-purpose advantage, such as faster movement.
MULTIPLAYER:
At this time of writing (and according to third-party documentation), the multiplayer experience of AVWW is mainly cooperation-oriented.
Players can play in different regions simultaneously, or within the same level or same dungeon if they choose to. Purportedly, the programming for multiplayer in AVWW is so reliable that dozens of players could play in a single host-server.
This is generally desirable, because the game either duplicates loot (especially those from stashes) for every player character or has gathered resources going into a commonly-shared pool. It even duplicates different resource counters for different players, allowing them to spend resources without consulting other players.
VISUAL DESIGNS:
It would take an apologist of Arcen Games to downplay the issues of AVWW’s visual designs.
They are not terrible to look at, but they may look rather amateurish. This can be seen in the artwork for the player characters, many of whom look like they had been made by self-taught 3D art enthusiasts. Of course, the player characters look detailed, but when the player sees them making cheesy poses, it is hard to be impressed further.
Most of the environment appears static. However, when they do move, the transition tends to be rather drastic. For example, trees can swing wildly, seemingly too elastic to be believable. Destroyed objects collapse into a puff of smoke and dust, which disguise the fact that they are simply sliding out of existence.
Worst of all, people who have played Arcen Games’ earlier titles, especially A.I. War, may notice that some sprites in the game appear to have been reused and recycled from these other games.
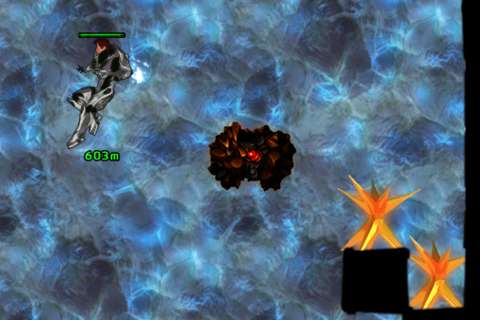
In addition to the nearby screenshot, there is another example: some of the minerals seen in the game (which was released in 2012) appear to use art assets of the “advanced materials” in the Light of The Spire expansion of A.I. War; the expansion was released in 2011.
SOUND DESIGNS:
Most of the sound effects heard in AVWW appear to have been obtained and adapted from publicly available stock noises. Consequently, they are not particularly remarkable. Some of them might even be annoying, especially the sound effects which are used for enemies. That there is no variety in the sound effects for any particular occurrence makes the sounds in AVWW seem even more boring.
Perhaps the most disappointing sound design in AVWW is its music; the composer, Pablo Vega, has great talent, but has great whims as well. The music is a hodgepodge of actual instruments, MIDI, pseudo-chip-tune and electronic, none of which is memorable. Rather, those who have played Arcen’s earlier games may notice that some of the music may have been recycled from A.I. War.
AN END WITHOUT END (CONCLUSION):
AVWW has quite a bit of content and a lot of documentation to make sure that players are not completely lost in its supposedly sophisticated gameplay.
Unfortunately, all of this content contributes to the impression that the game offers an experience in repetition; the player will be going through continent after continent to see “new” content which does not change the gameplay by much. Recycling of art and audio assets from Arcen’s previous games further bolsters this impression, making AVWW seem like one of Arcen’s less-well thought-out offerings.
