Greatest Gaming Rig Part Three - Boot Test
We fit a cooler, plug in some SATA cables, and wire up a power supply as our epic rig springs to life.

With all of our gear ready to go, and the processors and RAM already slotted in place, we decided it was time to boot up our epic rig. Before we could fire it up, though, we needed to attach some cooling, a power supply, and some storage. Sadly, this process wasn't as straightforward as we initially hoped, with confusing error messages and parts that didn't want to fit together causing problems.
Kingdom Come: Deliverance 2 - Official Cinematic Announcement Trailer Stellar Blade - BIBI ‘Eve’ Official Music Video Trailer | PS5 Apex Legends: Urban Assault Collection Event Trailer Total War: WARHAMMER III - Elspeth von Draken Gameplay Showcase Genshin Impact - "Arlecchino: Sleep in Peace" | Official Character Teaser Potionomics: Masterwork Edition - Official Announcement Trailer Sclash - Console Release Date Trailer Snowbreak: Containment Zone - "Gradient of Souls" Version Trailer Harold Halibut GameSpot Video Review Nancy Drew: Mystery of the Seven Keys | World Premiere Official Trailer Modern Warfare III & Warzone - Official Cheech & Chong Bundle Gameplay Trailer SteamWorld Heist II – Official Reveal Gameplay Trailer
Please enter your date of birth to view this video
By clicking 'enter', you agree to GameSpot's
Terms of Use and Privacy Policy
For any boot test, it's wise to start off with as few parts as possible. This minimises the risk of failure and allows for an easier diagnosis of the problem, should something go wrong. To that end we went for the simplest possible configuration: one processor, 12GB of RAM, one graphics card, a storage drive, and a power supply. With the processor and RAM already in place, our first task was to fit a cooler to the CPU. While this is usually a relatively simple task, the server-based nature of the SR-2 motherboard made things a little more complex.

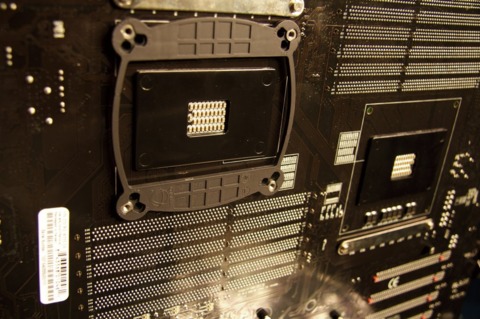
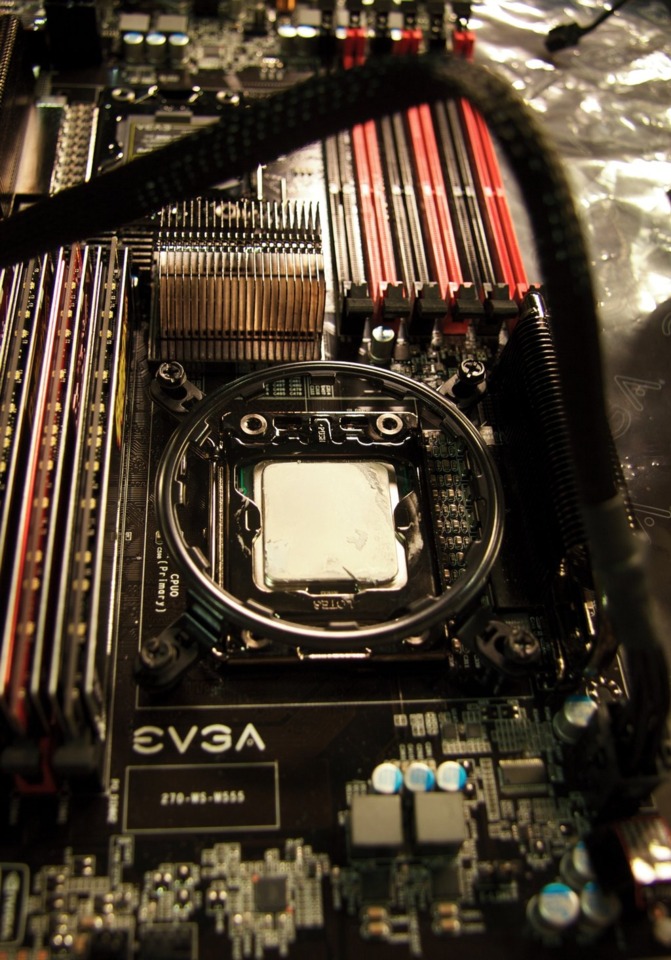
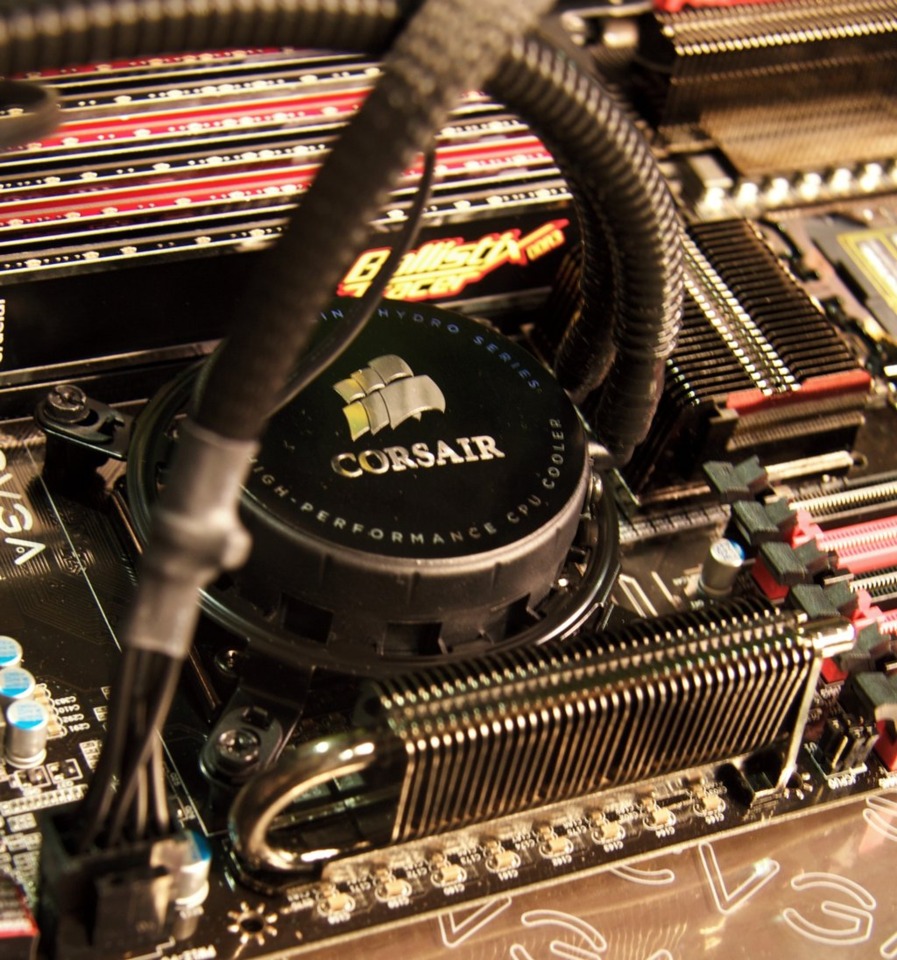
Intel's Xeon processors mount into a standard LGA 1366 socket. While this should make them compatible with a range of coolers, the SR-2 actually comes fitted with a specialist Xeon backplate, designed specifically for server cooling setups. This means standard consumer coolers like the Corsair H70 won't fit. Fortunately the SR-2 also comes with a set of standard LGA 1366 backplates, which allow for consumer setups. However, removing the existing ones was not an easy task, requiring a torx screwdriver, some skillful motherboard balancing, and a delicate touch around the processor slot. Once the smaller plates were fitted, mounting the plastic backplate for the H70 was as easy as pushing it through the holes on the rear of the board and screwing in the retention ring on the other side. We then slotted the pump into the retention ring and tightened the four screws, and hey, presto, instant water-cooling.
Next we mounted a GTX 460 in a PCI express slot and plugged in a solid-state drive and an optical drive into the SATA ports on the motherboard. The final step was to wire up the power supply. The SR-2 requires more power than the average board, especially when overclocking. As standard, it needs one 24-pin ATX connection and a further two 8-pin ATX connections. For overclocking, the board has slots for two additional 6-pin PCIe connectors as well as another situated next to the expansion slots, which is required when using multiple GPUs. When we totaled up the connections, we realised that the Corsair AX1200 we were using simply didn't have enough connectors to power everything. Including the four graphics cards, we would need an astonishing 12 PCIe connectors to keep everything powered when overclocking. To get around this we decided to use an additional power supply for the full build, Corsair's AX850. This way we'd be able to power the board and storage with the AX850, while the AX1200 powered the four graphics cards.
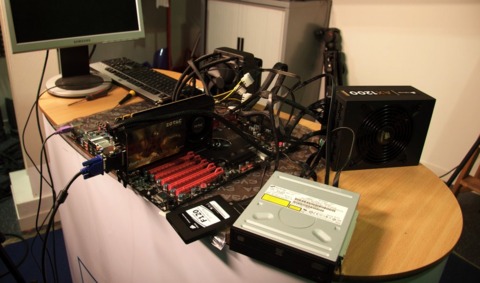
With everything wired up and all fingers crossed, we hit the power button and hoped for the best. We were greeted with a barrage of flashing lights, spinning fans, and numerous indecipherable beeping noises. We waited for the boot menu to appear on the monitor, only to be filled with crushing disappointment as the motherboard's debug LED flashed 2E and failed to boot. After a quick flick through the manual we discovered 2E stood for "Initialise output devices." Not hugely helpful, but enough to tell us that the problem likely lay with the graphics card. After a lot of fiddling and puzzling, we realised our rookie mistake: only one PCIe connector was plugged into the GPU, meaning it didn't have enough power to initialise. One huge facepalm later we fired up the rig again and all was well. We hit the boot screen and entered the BIOS, where we could see that the RAM and the processor were both recognised and working fine.
Now that we've got the rig up and running, it's time to plug in the rest of our gear and install an OS. Check back next week, because we'll be running some initial benchmarking at stock speeds to see what this thing can really do. Don't forget that we're giving you the chance to win the entire rig*, complete with accessories! Just head over here to find out more.
* To enter you have to be over 13 and a UK resident; the competition is subject to our normal terms and conditions.
Got a news tip or want to contact us directly? Email news@gamespot.com
Join the conversation