Greatest Gaming Rig Part Five - Caging the Beast
We set about encasing our rig into DangerDen's Tower 29 case, adding fans, and fiddling around with cable ties.

So far on Greatest Gaming Rig we've been running our machine naked on a test bench, and while that's all well and good for some benchmarking, it's not practical for use as an everyday PC. This week, we set ourselves the task of sticking the entire rig into a case, which, as we discovered, was not an easy task. Not only did we have to try to track down a case big enough to house the gargantuan SR-2 motherboard, but we also needed something that could easily house two power supplies, along with four graphics cards.
Fallout 4 Next Gen Update Comparison Stellar Blade - (Almost) All Outfits Granblue Fantasy: Relink - New Content Trailer Modern Warfare III - New Season 3 Reloaded Modern Warfare Zombies Update River City Girls 2 - New Playable Characters DLC Reveal!! Sand Land Review Stellar Blade - Hard Mode No Damage Abaddon Boss Gameplay That Time I Got Reincarnated as a Slime ISEKAI Chronicles – Official Announcement Trailer MEGATON MUSASHI W: WIRED – Official OP “MUSASHI English Ver.” Trailer Gothic 1 Remake | Official Collector's Edition Trailer SaGa Emerald Beyond – Official Launch Trailer Paper Mario: The Thousand-Year Door – Official Switch Overview Trailer
Please enter your date of birth to view this video
By clicking 'enter', you agree to GameSpot's
Terms of Use and Privacy Policy
Thankfully, we managed to find such a case with the DangerDen Tower 29. Standing at a massive 29 inches tall, 20 inches deep, and eight inches wide, the case is large enough to house all our hardware, as well as a load of additional cooling fans. However, in its stock state, it has space for only one PSU. Fortunately, most cases at DangerDen can be custom ordered, and once we'd sent our requirements across, they customised the tower for us.
The case arrived at GameSpot UK HQ flat-packed requiring assembly. All those years of assembling IKEA furniture were about to pay off--or so we thought. Opening the box revealed a large pile of acrylic pieces and a bag containing an astonishing 275 screws. On top of that, the instructions were very long and differed slightly from our case because of its customisation. Thankfully though, all the screws were in individually numbered bags, corresponding to codes in the instructions. It took us the better part of a day to build the case, including having to rebuild some sections due to misinterpreting the instructions.
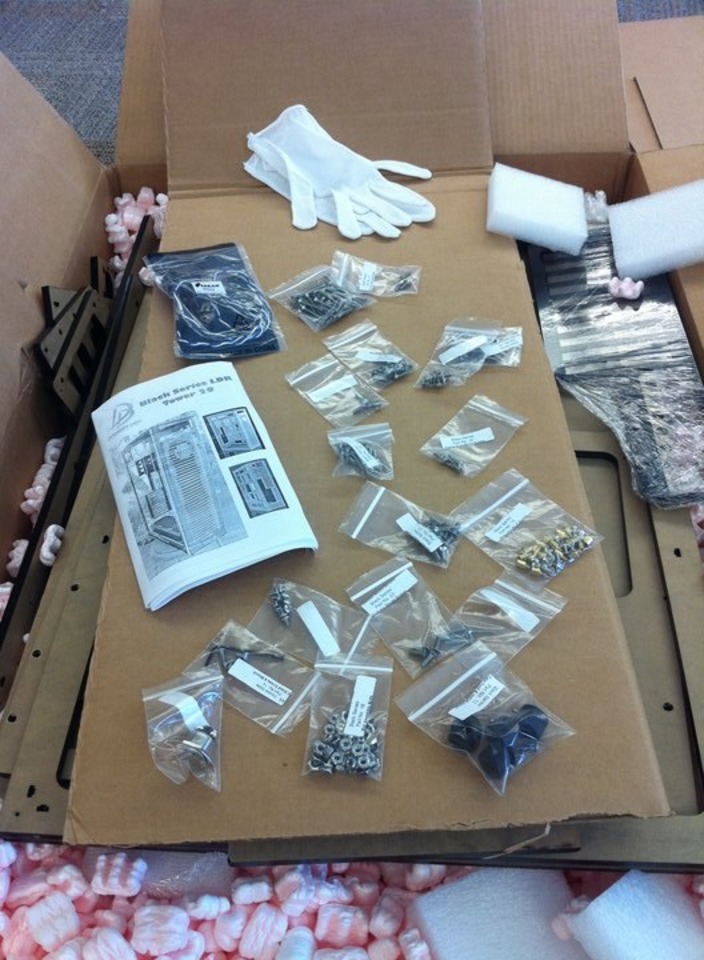
While the assembly wasn't easy, we were extremely impressed with the finished product. Each of the acrylic pieces was covered in brown paper to protect them during transit, which meant that when assembled, they were incredibly glossy and shiny. Putting in the components was also a tricky process, as the instructions detail only case assembly. If you're planning to use one of these cases, you'll need some prior experience with PC building. We also found some of the screws were very difficult to get into place, as none of the screw holes were threaded, so it took quite an amount of force to get them in. Others were at weird angles, which made the process even trickier.
Once we'd installed our core components, we set about putting in cooling, where we encountered a number of issues. On the front of our case there are mounts for four 120mm fans. We planned to use one of these to install our Corsair H70 cooler, along with three fans. However, because of the acrylic construction, we found the walls of the case were much thicker than standard metal ones, so the stock screws weren't long enough. To counter this we bought an additional set of longer screws with bolts, which allowed us to mount the fans and cooler securely.

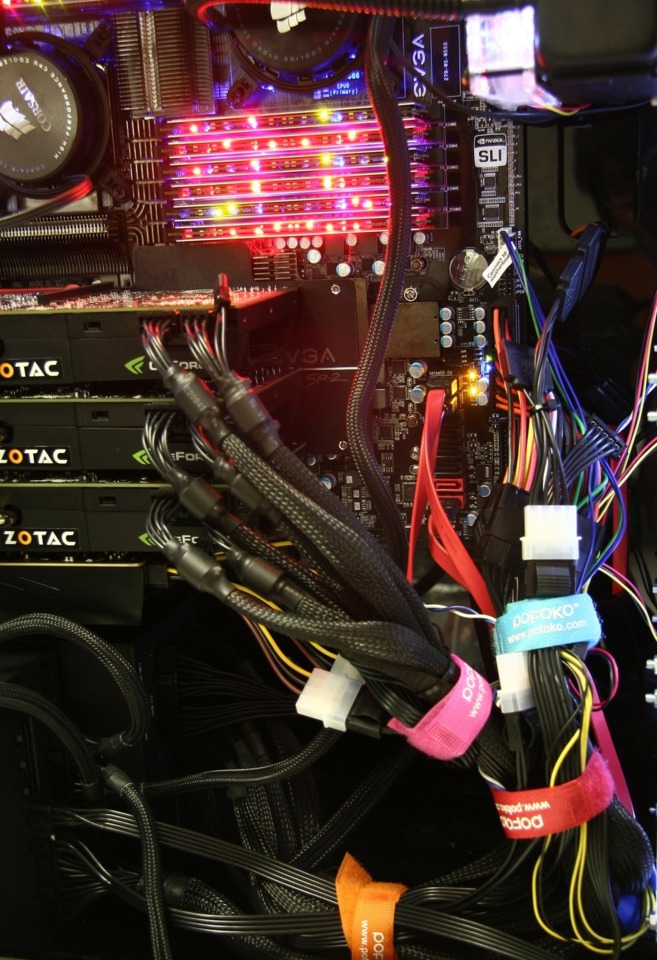
Unlike the stock Tower 29 case where the PSU mounts at the top, our case had the PSU at the bottom, mounted sideways. This allows it to hold two PSUs adjacent to each other. While this is a good utilisation of space, it did present us with a few cable management issues. The SATA power cables wouldn't reach to the top of the case, at least not without running the cables over the top of the motherboard, so we had to buy extenders. The same applied to the SATA data cables, and we had to buy some extra one-meter-long leads. One nice feature of the case is that it gives you room to route cables behind the motherboard tray, which we found extremely useful for getting rid of cable clutter. However, it's not quite enough space to route power cables, unless your PSU uses particularly thin ones.

With everything assembled, we were extremely pleased with the look of the case. Thanks to the space inside, we were able to keep the build relatively clean, though we will certainly do a little bit more cable management to get things looking even cleaner. The service from DangerDen was second to none, and they happily customised a case to our exact specifications. Building it isn't for the fainthearted, but for the enthusiasts who are likely to buy this case, it won't be a problem. We were also impressed with Akasa's white LED fans, which were noticeably quieter than the stock Corsair fans, and a tad prettier too. The rig is actually quiet in operation, at least until the graphics card fans kick in. We'll be doing some accurate noise measurements in the next part of the feature, as well as overclocking and messing around with 3D vision surround. Don't forget that we're giving you the chance to win the entire rig*, complete with accessories! Just head over here to find out more.
* To enter you have to be over 13 and a UK resident; the competition is subject to our normal terms and conditions.
Got a news tip or want to contact us directly? Email news@gamespot.com
Join the conversation