Spider-Man 3 Walkthrough
Put your black suit on, because Spider-Man 3 is finally here. GameSpot's Walkthrough shows you the ropes.
Design: Randall Montanari
It's been three years since the last Spider-Man media blitz, which obviously included a gaggle of licensed games, took us by storm. During that time, though, Treyarch and Activision have been adapting the Spider-Man license to fit onto next-gen consoles. Now that the Spider-Man 3 film has finally hit the big screen in record-breaking fashion, it's time for another round of games, including the PS3 and Xbox 360 variants.
In the film and the games, Peter Parker has to deal with a few new enemies, including Sandman, Venom, and Harry Osborn, who's taken over his father's mantle as the New Goblin. Along the way, he'll pick up his famous black suit and fight his enemies with the added power that it affords him. The games don't stick very close to the plot of the film, although they do take the primary story points as a starting position and expands upon them to include many of Spider-Man's famous villains that don't appear in the movie.
GameSpot's Game Guide to Spider-Man 3 will walk you through the game's main storyline missions, giving you tips and tricks for all the main bosses of the title. So let's get swinging!
Learning The Ropes
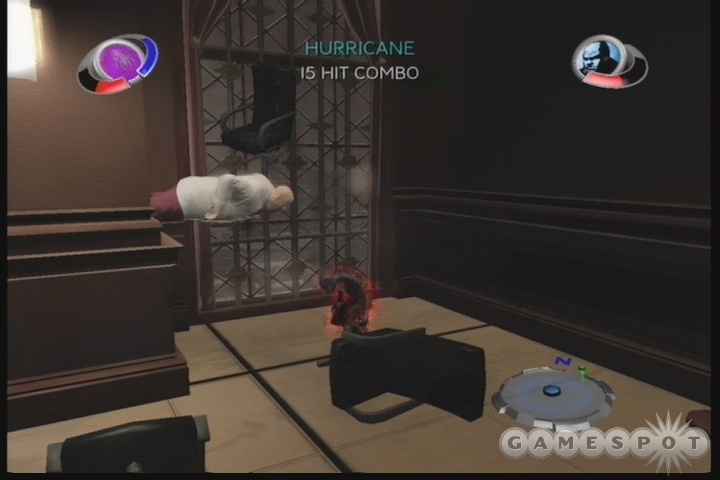
So, a madman is attempting to blow up his own building? Guess it's up to you to stop him. As the game begins, you'll rocket through a window into an exploding building and start fighting dudes. Learn by doing! The small tutorial here will introduce you to combo attacks, dodges, and counterattacks. Defeat all of your enemies to move on.
After jumping up to the next room, use the super combo to defeat the enemies within. Keep in mind that you can keep tapping on the face button after activating the supermove to keep hitting your foes.
Anyway, after a few more trials, you'll escape from the building after saving a woman who's been strapped to a bomb. Who is she? Why was she marked for death? Apparently we're not supposed to care.
Hitting The Streets
After the intro cutscene, you'll take control of Spidey on the streets of New York. After a brief swing and map tutorial, you'll be let loose and able to roam the city. Feel free to try doing either the storyline missions or the side activities at this point; you can find these activities on the map.
You can also try fighting some crime. As you swing through criminal-infested areas, you may hear Spidey telling himself that his Spider-Sense is tingling. When this occurs, a dot will usually appear on your minimap, allowing you to home in on it; alternately, you may see police cars racing off towards a distant point. If you investigate with your Spider-Senses activated (click the right thumbstick), you'll generally find some kind of nefarious evildoers perpetuating some kind of criminal act. A lot of these missions are simple beat-em-ups, but there are other tasks thrown in for good measure, usually involving rescuing a bystander. As you perform these crimefighting tasks, you'll earn more health and/or reflexes.
When you're ready to move on in the game, you'll find that you have a few missions available to you. You can tackle them in any order. Each will lead to its own separate storyline that can be pursued independently of the others. Note that some questgivers will give you missions, then disappear from the map, then reappear later on. Don't be worried if you find that you can't complete a quest chain right off the bat!
As you complete missions, you'll earn new rewards, usually consisting of new moves. These aren't locked into specific missions, though, so if you attempted to play the game twice in a different mission order, you'll likely earn the same skills in roughly the same order, but from different missions.
Mary Jane Thrill Rides
This is a basic run around town. Mary Jane will want you to pick her up and give her a ride to Central Park, but she wants to have fun along the way! You have to swing along and follow her commands as you do so. She'll want to swing low, near the ground, then swing high, then swing low again, then go as fast as possible until you reach the end.
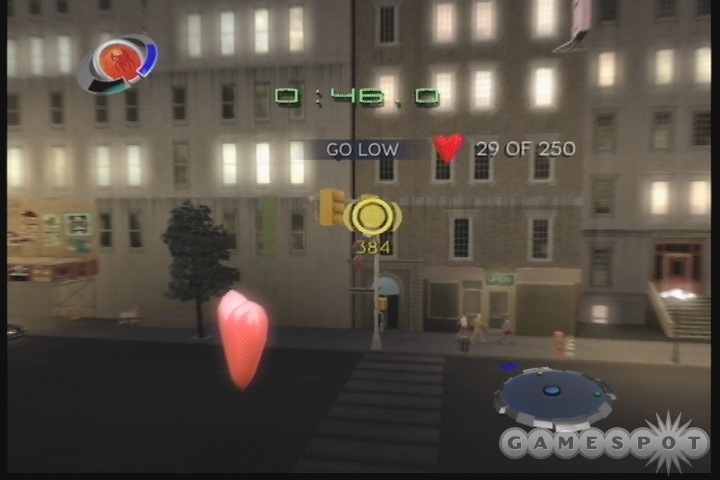
As you move around with MJ, she'll give you hearts according to how well you're following her commands. If you get low to the ground when she asks for it, you'll quickly earn hearts; if you swing up high, however, the flow of hearts will slow to a trickle. You can also earn more hearts by picking up the large heart icons in the streets, but you can easily max the number of hearts received for this mission without picking up any of them, so they act more like a guide for the trail that you're supposed to follow here.
There are a couple more thrill rides that follow this one, of varying difficulties. Eventually you'll find that there are gang members on the route of your rides; Mary Jane won't give you any hearts while they're around. Luckily, you can usually zoom past their positions in a couple of seconds, so don't bother fighting them.
Scare Ride
Eventually, after your black suit takes you over, you’ll have to give Mary Jane the ride of her life. This is a pretty basic thing, though. With her on your back, simply swing through all of the marker areas, then get her back to home base as quickly as possible.
Gang Missions
Apocalypse
Apocalypse Mission One: Catch of the Day
Sadly, Apocalypse doesn't refer to the ancient, immortal mutant of Marvel Comics lore; instead, it's a simple crime gang. Insert sad face here.
Nothing too crazy here. A man is being lowered into the ocean by a group of Apocalyptos. You need to fight them off while periodically flipping the switch on the crane to bring the man back up to the pier. The Apocalyptos will attempt to cause the crane to lower (why couldn’t they just push him into the water?), so you'll need to constantly flip the switch while fighting them off. Use the Speed attack to hit multiple enemies at one time and to clear a bit of the pier when needed.
When the man is free, he'll tell you of more Apocalypse forces in the subways.
Mission Two: Bomber's Hideout
When you reach the subway entrance, head down to the trains to find a group of Apocalyptos that are standing guard. Defeat them, then check the walkway nearby to find a door leading on. (There's a Secret Token inside the boxes by the door.) After you take down all the Apocalyptos, free the hostages in the room (you can spot them with Spider-Senses), then quickly move through the door to rescue the train conductor.He'll clue you in on the fact that the Apocalyptos have hijacked an express train. It's up to you to stop them! For some reason, this involves travelling down the train tracks and defeating another group of Apocs that are milling about in a subway station. No train's in sight; guess it was a false alarm.
Mission Three: Power Grid
This is a three-part mission. The first part is simple: follow the cop car until you find the Apocalyptos, and defeat them. Next, follow the police car until it starts following a van. It can be tricky, but you need to land on top of the van (it'll appear red in your Spider Senses), then attack the passenger and use the face buttons of your controller to rip off the hood and disable the vehicle. It's tough to land on the van, but you have an unlimited amount of time to do so. 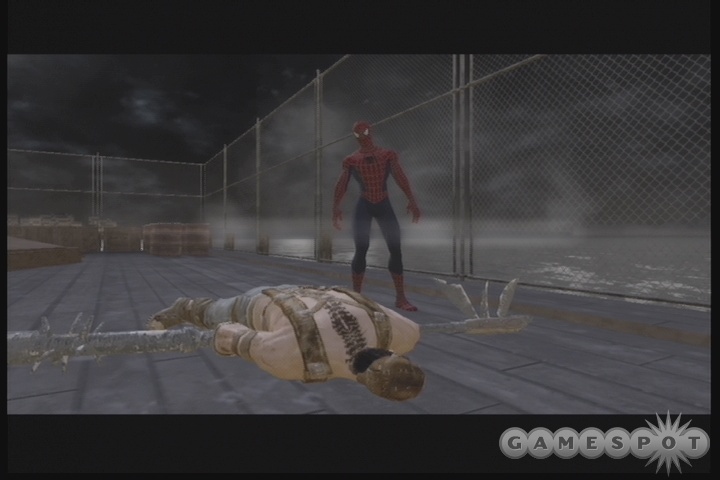
Thirdly, an Apocalypse van will ram a bomb into the power station. You might not want to bother with the enemies here; instead, flip on your spider-senses, run around to the four power switches in the station, and flip all of them off. When you do so, you'll be able to return to the van, grab the bomb, and flip your way to the piers, where Spiderman will chuck it into the water.
After that, a rumble will begin, with you against five Apocalypse fighters, including one of the street sign-wielding characters that acts as a boss fight. You may want to take down the two gun-wielding foes before moving on to the tougher fighters here, or they'll pelt you from the sidelines. Stay airborne and use your webs to confuse your foes. We managed to get a lucky end to the fight by using the Multi Rodeo attack and throwing the boss into the water through the fence, but you shouldn't count on that happening.
Arsenic Candy Missions
Arsenic Candy is a girl gang that terrorizes the Upper East Side.
Mission One: Shop Till You Drop
A simple street fight here will net you a clue: the Candies are holed up in an abandoned theater nearby. You need to head inside and free the hostages within, which will be attacked by the Candies when you appear. They have plenty of health, so it's not too difficult to fight off the Candies before they die, but there is a boss-level character here that wields a hammer. She can dodge most of your light attacks, so use heavy attacks to wear her down, or grapple her and throw her around.When you've freed the hostages (which happens automatically when all the enemies are defeated, a hidden Candy will dislodge the large chandelier here, which acts as a guillotine and will kill the hostages if it hits them. To spare you a bout of frustration, just hold down your light attack button while it swings, then release it when the "Now!" prompt pops up. That'll smash the chandelier back up to the ceiling, allowing you to do this again. Perform the action a few times to destroy it outright and end the mission.
Mission Two: Bear Necessity
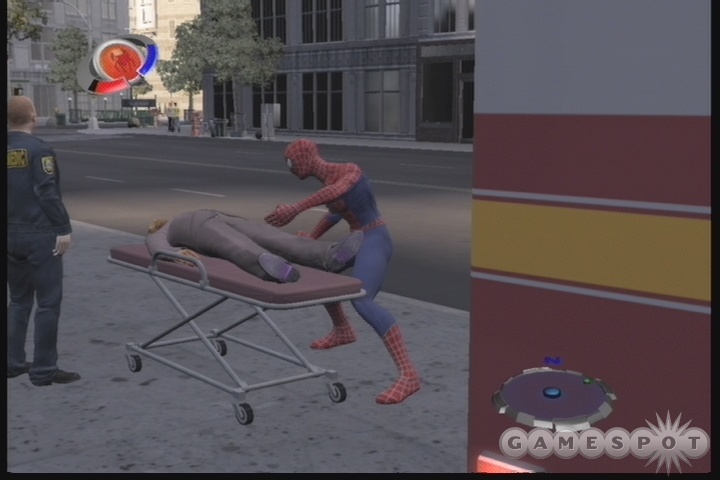
Again, clear out the low-level Candies with normal attacks, but use heavy attacks on the hammer-wielding foe. When they're cleared out, head into the factory and repeat the process on the foes inside. With that done, you'll have to follow their helicopter across the bridge outside, without getting too close to it. When it lands, clear out the Candies that appear, then head into the burning building. There are two civilians to rescue, but the first one you'll want to help is the man pinned underneath a bar of metal on the ground floor. Lift the metal off of him, then pick him up and take him to the ambulance outside, via the doors.Next up is the woman behind the glass window here. Lift the rock away from the door, pick up the woman, then use Spider Sense to find the holes in the ceiling here. You can superjump up through them, so try to get up and through the roof before the building collapses. There's no timer for the event, so you can probably take as much time as you like.
Mission Three: Jurassic Heist
You have to grab the librarian here as he is dropped off the clock tower. If you press your web swing button as soon as you gain control of Spider-Man and swing straight ahead, you'll hopefully nab the dude before he splats, but be ready to take a few tries to get it just right.Head over to the Natural History Museum (what do they need with wedding rings?) and quickly bash the Candies before they completely destroy the dinosaur skeleton in the middle of the area, using Spider-Senses to track down the enemies that are launching the explosives. There are plenty of them, and there are a couple of phases to the fight, so use your crowd-clearing powers as best you can to eliminate them before the skeleton is completely annihilated. When you're ready to leave, don't forget that you have to head downstairs to find the exit.
Mission Four: Bridezilla
The big day has finally arrived! Priscilla is marrying some…guy. Good for her! Unfortunately, when you crash the party, she tells her Candies to kill you, as well as the unfortunate groom.You'll need to pick up the groom and move him around the chapel when told to do so. This is stupid on the face of it, since you're telling yourself that you need to move him somewhere safer, then wind up moving him 20 feet into another huge crowd of Candies. Don't worry too much about it, though; just unload your combos on the girls while dodging their attacks as best you can, and unload your Earth Shaker move on them to knock the lot of them around. You'll need to use your super powers to knock all of them down at once if you want to survive the fight.
Eventually you'll move the groom to the upper section of the cathedral. Defeat all the girls up here (the Earth Shocker will send most of them flying back to the floor and give you some breathing room), and you should be able to free the groom and face off with Priscilla.
Priscilla shouldn't be too much of a threat for you at this point. It's best to take her on on the ground floor, near the doors to the church. In the tight space, you can unload combos on her to boost your rage meter, or whatever it's called, then use your added combo power to knock her into walls while raging. You'll normally knock her out of attack range with your first hit, but if you can attack her while her back's to a wall, your entire combo should land, letting you finish her off relatively quickly.
Dragon Tail
Mission One: High-Speed Pursuit
The Dragon Tails have stolen a van loaded with statues. Use your Spider-Sense to track the statues on the street. Don't bother swinging along, as it can be difficult to find the statues from above. Just stick to the ground and sprint along the streets to keep an eye on the statues in front of you. When you get to the end of the trail, fight the remaining Tails to complete the mission.
Mission Two: Tail of the Dragon
You’ll meet with the Collector at the outset of this fight, but your rendezvous will quickly come under fire by Dragon Tails. At first, three rocket launcher enemies will pop into existence on the nearby rooftops; track them down and kill them, then do the same for the multiple foes that appear on the rooftop itself.When the helicopter appears above you, it can be difficult to figure out what to do; you need to get as close to it as possible, and you should automatically warp to it and pull off the gatling gun that’s attached to it. With that done, you’ll need to use your slingshot ability to get in front of it before mashing a few buttons to protect the civilians below as the helicopter slides to the ground.
Mission Three: Collection Protection
This one can be annoying. Your job involves escorting an armored car through the streets of New York and protecting it as it’s attacked by Dragon Tails. There’ll be plenty of cars that will follow it and attempt to smash it up, so you’ll have to jump on them, defeat the passengers, then rip off the hood or otherwise disable the cars in order to prevent them from chasing the van. Don’t bother attacking the drivers when they hop out of the disabled cars; just leave them behind and move on to the next car.Eventually the van will stop on the street when it gets near to the water. Disable any cars in the area, then hop onto the nearby buildings and destroy the rocket launcher soldiers up there. If you do so, you can return to the van, clear out any remaining foot soldiers, and end the mission.
Mission Four: Hidden Temple
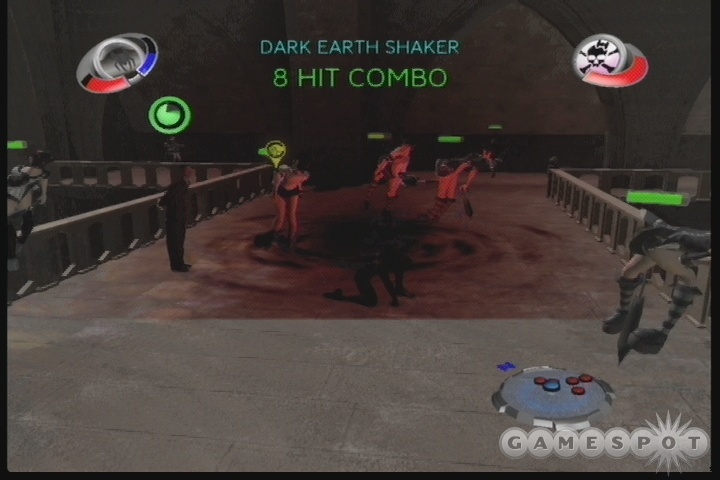
When you get the prompt to head to the police warehouse, do so, then follow the van as it speeds away. When you finally manage to begin to disable it, though, a helicopter will come and snipe you off. Swing above it and web up the rotors to free yourself to disable the van, and you'll discover that it's a decoy!Return to the warehouse and follow Chen's chopper to one of the nearby skyscrapers, where the rest of the artifacts are located. Do your best to take down the bulk of the first group of soldiers without getting too beat up; use your Dark Earth Shaker power if you have it to knock off the health of most of them in one fell swoop.
After the initial goons are taken care of, four tougher soldiers will appear and start wailing on you. These guys can be wickedly difficult, since some of them will attack with their swords while the others shoot at you with their guns. Try to lure them up the stairs here and take them on one at a time, if possible; the stairs should protect you from the gunfire.
Boss Fight!
The Dragon Tail bossman is a teleporting samurai with two swords. He's difficult to hit, but doesn't deal too much damage during the fight, unless you get too far away from him, in which case he'll begin shooting you. Stay close! If he teleports away from you, hold the dodge button to dodge the attack that's likely incoming and counterattack it.
If you attempt to open up a combo, he'll teleport away most of the time, but you'll still be able to get some of your combos through. We found the Rofl Copter move to get through a fair amount of the time; that and the Punch Fury both deal a decent amount of damage if they manage to penetrate his teleportation affects. You can also sometimes counter his incoming attack by doing the basic strong attack while he's coming your way; you'll kick him out of the air and can follow through with punches.
Lizard/Dr. Connors Missions
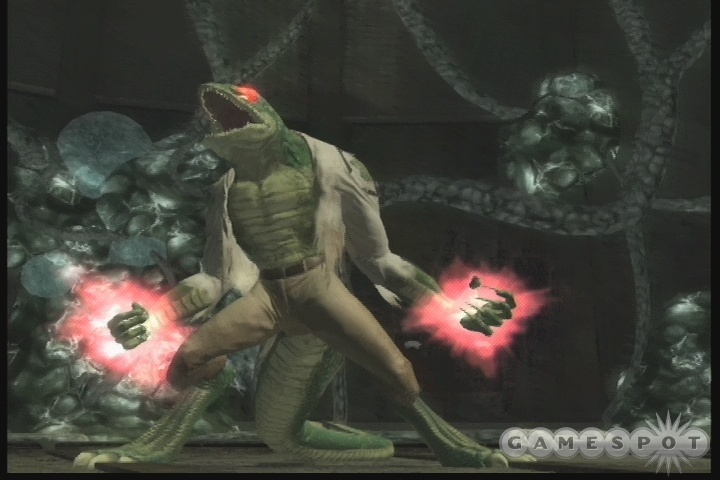
Spidey's former college professor, Curt Conners, has transformed himself into a hideous beast after injecting himself with reptilian DNA in the hopes of regenerating his lost arm. It's up to Spider Man to track him down and give him the help he needs!
Mission One: In Search of the Lizards
Head to the Daily Bugle building to pick up this mission. Apparently giant lizards have been spotted in Gramercy Park! This mission also acts as a tutorial for the photography mini-game you'll have to periodically partake in, so pay attention to the instructions as they're outlined for you.
After taking a picture of the cellphone salesman, return to the Daily Planet, then head out to Gramercy Park, where the real lizards are located. After you track one into the alleyway near where a frightened man reports its location, stay away from it and take a picture! If you get too close, it'll disappear and you'll have to try again.
When you find and defeat the Apocalypse soldiers, you'll be able to find numerous lizard tracks by using Spider-Sense. The correct path leads to the northeast, up and over a building, and into a small park near the "Midtown" label on your map. You'll probably have to backtrack a couple of times until you find the correct path, but when you do, you'll be able to take a picture of a lizard that is attacking a hotdog stand. Return it to Jonah to end the mission.
Mission Two: Connors The Lizard
Connors' appearance as the Lizard apparently has spawned a number of smaller lizards in the sewers. After Connors busts through you in the classroom, head through the pipe in the center of the alleyway after opening it up. You'll have to defeat a few more sub-lizards when you land, or you can just ignore them and drop through the hole created by the explosion of the goo that they popped up from.
You can avoid most of the lizards that appear in the first couple of rooms, in fact. Simply move past each group into the backgrounds as you can. When you reach a set of lizards in an electricity-infested stretch of water, knock down the other platforms that are extending upward from the water in order to knock the lights inside of them into the water and electrify the lizards. When all of the platforms are knocked over, the doorway moving on will be revealed.
Keep moving on until you come to another large green slime-covered wall. You need to use the two flaming barrels in this area to melt it; grab onto them with your web, rotate them, then let go of the web button when you're swinging the barrels towards the wall. Getting the timing right here can be tricky, but it's fairly forgiving, and the barrels do respawn, so you have multiple chances.
A bit beyond that, in the hydraulics room, jump down the shaft in the middle to find yourself in another section of the area. When you defeat the two larger lizards, look for a large switch in the floor to open the gate leading onward. You can avoid most of the lizards in the next couple of areas, so just jump over them and follow the path through the steam-laced hallway. Hop onto the pipes to avoid the steam.
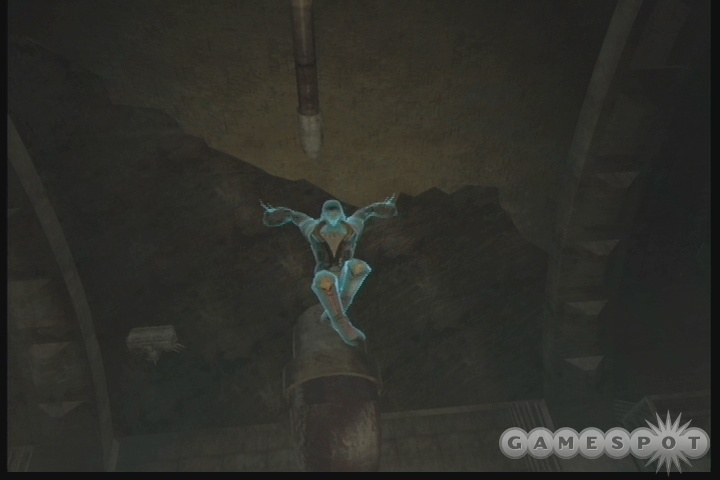
Connors!
Eventually, you'll spot Connors again. Following him, you'll come across a premiere entry into the "Umm…okaaaaay" contest: apparently the underside of Manhattan is populated by 50-foot wide drills that meander through the tunnels. Avoid it by swinging through the rocks in front of it as they break open. Each rock wall will break in a different spot, so you'll need to move around a bit to keep moving along the path. And not die.Eventually you'll find Connors. At first, you'll have to stand on a set of grinding platforms and wait for him to attack you. When you see the bubbles forming in the water, hit your dodge button, and you'll grab Connors in mid-air and hold him down on the platform. If you mash the button that appears quickly enough, he'll bang his head in the grinders. Repeat this process three times, then initiate the finishing combo to launch Connors into the arena where you'll finish him off.
Finish Him!
The fight against Connors here can be difficult, as he hits pretty hard and moves quickly. It's best to try and use your powerful attacks on him while holding down the dodge button, if at all possible; that'll let you dodge any attacks that come your way while you're attacking. The most important part of this fight (which will take a while) is to get away from him while your dodge is recharing! The longer you stay near him while you're not dodging, the more likely you'll be to get pounded.
At around the halfway mark of the fight, Lizard's eyes will bug out and he'll supercharge. This doesn't change the mechanics of the fight all that much, but will give you a new restart point if you happen to die. Repeat the same attack pattern until he goes down, then play the button-pressing game to finish the mission off.
Mission Three: The Hunter and the Hunted
Follow Connors into the sewers to find that he and his ilk are being hunted by Kraven. When you reach the decrepit train station, use your attack button to first cover up the hole that's issuing forth all of the lizards by pushing the nearby train onto it. The other train here, the one that’s blocked by a beam, is the second one you'll need to push. After blocking the hole, kill the lizards in the area, then move the beam away from in front of the train and push that one as well to uncover the passage leading on.
The electrified river here can be difficult to bypass. You need to crawl onto the walls and move down the tunnel until you're on the ceiling near the metal bars at the end. You should see a target icon if you use Spider-Senses. Go there, drop down on your web until you reach the control panel, and flip the switch there. You'll need to repeat the process a couple of times before you reach Kraven and Connors.
Kraven will attack you when you interrupt his visit with Lizard. You'll have to take him down before you can complete the mission, obviously, but as you might have expected given the last few boss fights, the black suit's power should make it relatively easy. Kraven has a few powers, including an ability to summon doubles of himself, which will disappear in a puff of smoke when attacked, and the ability to shift into an animal form. The most dangerous animal form is the eagle, which will let him levitate and shoot little puffs of feathers at you on the floor which deal large amounts of damage. Don't get under him while he's flying! Double-jump around the room until you can zoom in at him with a light attack from above. You can still get hit by the feathers in midair, but hopefully you'll be able to dodge them and knock him to the ground.
This is a difficult fight since there's no health pick-ups until the very end, and dying will cause you to have to restart at the very beginning. When you do manage to wear Kraven down to near-death, you'll have to finish him off with a button-pressing game. That will allow him to escape, so give chase!
More Hunting
In the next phase of the fight, Kraven will mostly become invisible while he runs around the little arena. You can track his movements by looking at the water; he will splash along as he moves. You can also detect a bit of fuzz in his location if you use your Spider-Senses. Unfortunately, three lizards will constantly spawn and attack you here, so you're going to have your hands full. Try to use them to charge up your rage meter, then unload with single-target attacks on Kraven. Eventually he'll fall, but it can be tricky to take him down here.When you take him down, follow Calypso to where she confronted Lizard. If you hop upwards through the hallways, you'll find the monstrous version of Lizard that you need to fight next.
Lizard!!!
The supersized version of Lizard that you fight against here is shielded, so you can't actually hurt him at first. How? Why? Who knows! Apparently it's some new special superpower of his. 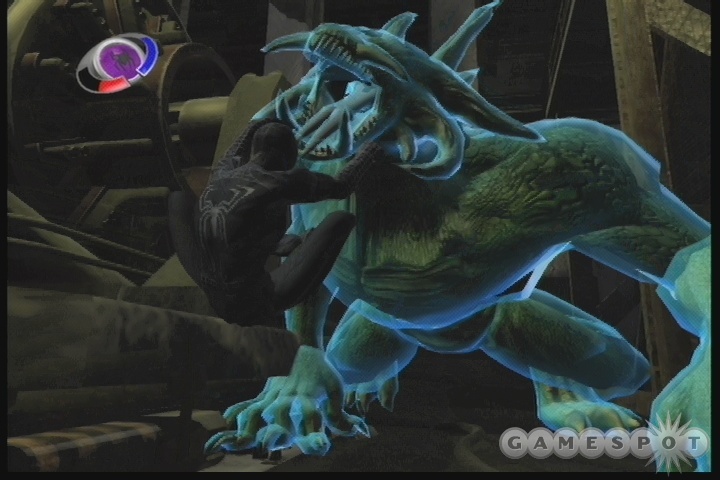
Anyway, to knock the shield away, you're going to have to swing Lizard into the four generators here. Doing so is relatively complicated; he's not just going to let you fire away at him, after all. He's got a few powerful attacks, including an acid spit which can hit you from across the room and a roar that will knock you around. If you get tumbled, try jamming on the jump button to recover before you hit the ground.
Anyway, to proceed here, you have to try and web up the Lizard to subdue him. Try throwing your webs at him after he gets done with his attacks. Eventually you'll wind up managing to web up his hands. He'll break free in a second or two, but if you get close to his front side at this point, you'll get a button prompt that will let you web up his eyes, at which point you can move to his rear and grab his tail.
When you have his tail in hand, move the left analog stick to one side to start swinging him around. When you want to let him go, you'll need to tap the web button again; that will fling him off, hopefully into one of he generators. This can be difficult to do, since you need to wait until Lizard is moving just past the generator before tapping the button. He also needs to be fairly close to the generator, since he doesn't travel too far when you let him go, but you can't be too close to the generator, either. If you're too close to a wall or generator, you won't be able to swing Lizard around at all.
All of this adds up to something of a headache. It's kind of difficult to get Lizard webbed up so that you can fling him, and it's also difficult to actually get him into the generators, not to mention the fact that he'll be attacking you the entire time. Do your best to web him in the middle of the room, and hopefully you'll clear the fight within a reasonable timeframe.
Finish Him Off!
When you bust through all of the generators, the shield will fall and let you attack Lizard directly. Don't worry about doing so at the outset, though; let him jump on the walls and keep an eye on him. Eventually he'll jump off towards the middle of the room and attempt to smash you by jumping atop you, but it's easy enough to dodge this by running away in slo-mo towards the opposite side of the room. You can jump and punch to get some attacks in at this point, especially if he manages to trap his claws in the floor and becomes immobile; unload with Rofl Copters at this point.Eventually, you'll get a button prompt when he jumps and locks himself into the floor. Finishing him off here will require you to perform some tricky button combos involving both the analog stick and button presses. Eventually you'll start to slingshot yourself; quickly tap downward on both analog sticks to finish the Lizard off. Ugh! Good riddance!
Dr. Connors Mission One: The Lizard No More
After defeating super-Lizard, another mission will appear later on. Dr. Connors wants your help in retrieving a serum from his lab in the sewers that will hopefully reverse the Lizard transformation permanently and help save the people still transformed in the sewers.
Head to the sewers and free the woman being attacked by lizards. When you do, you can pry open the manhole she was standing on to delve deeper into the sewers. Follow the lizard that escapes through the sewer pipe and it’ll lead you to the lab. Grab all three serums in it and you’ll automatically warp back to Dr. Connors.
Dr. Connors Mission Two: The Salvation of Dr. Connors
Time to dispense the antidote throughout the sewers! Connors has three gas dispensers set up that can spread it to the remaining lizards in the sewers, which will hopefully return them to their human forms.
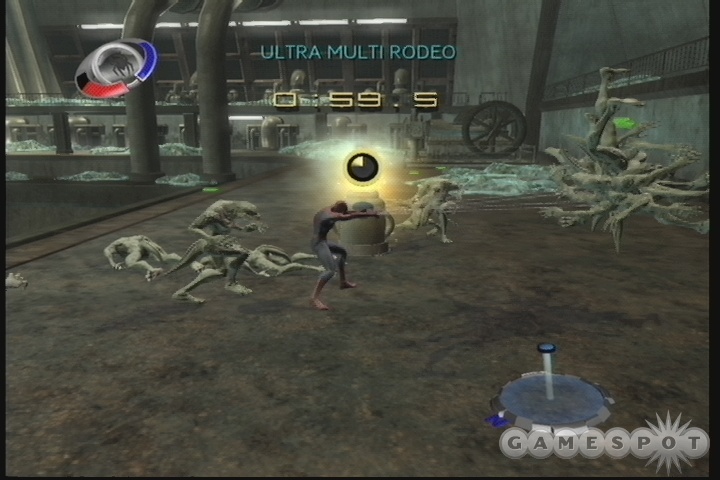
The trick here is that, when you plant the antidote, the lizards will attempt to attack the gas dispensers. You need to fight them off in order to allow the gas to disperse throughout the sewers. The first dispenser is easy enough to defend; just beat up the lizards as they arrive and use your Ground Pounder super attack (heavy attack button) to disperse the crowds. The second one will be a fair bit tougher, as you have to deal with lizards that spit their goo at the dispenser from a distance, which makes it much tougher to protect it; using the light attack super power, which rockets you around the room towards all nearby foes, will help make it more manageable.
The last dispenser is definitely the most difficult. You’ve got to protect the dispenser for two whole minutes against a horde of foes that will swamp you. The best way to proceed here is to simply mash away at your heavy attack button, which will eventually cause you to unleash a Hurricane move, which kicks all nearby enemies. A single combo of this will kill most of the enemies that it hits, and will build up your attack meter, eventually allowing you to bust out a Ground Pounder to clear out the lizards. Just stay as close as you can to the dispenser so that the lizards attack you and not it! It will take a bit of perserverence, but spamming kicks and using your special moves will eventually let you win the day.
Kingpin
Mission One: The War on Gangs Has Been Won
Head to the courthouse and take the stairs up to the upper library area. You'll need to enter the press conference through the balcony entrance here. Snap a picture of the three gang leaders, as well as the police commissioner. You can listen to the speech if you want. Oddly enough, it'll repeat as soon as it gets done.
Head outside to spot the Kingpin. In order to get your picture, you'll have to move close to the guard near him. When you do finally manage to get a shot of his face, you'll be thrown into the middle of a gang fight! Take down everyone you see with your super powers here and leave the courthouse to end the mission.
Mission Two: The Kingpin Must Pay
Head to the Kingpin's penthouse and defeat his gang, then head up to talk to the man himself. He'll attempt to distract you with more guards, but simply attack the door that malfunctions and you'll be able to fight him. He's not too horrific, but he does pack quite a wallop; it won't take him more than half a dozen clean punches to off you. You'll need to hold your dodge button down when you attempt to engage him, and try to connect with enough punches to build up your rage meter. When it's full, activate it and wail on him with heavy attacks, which he shouldn't be able to block while you're enraged. Lather, rinse, repeat, assuming you don't get pasted.
Next up is a boss fight between you and the three leaders of the various gangs that were freed from the press conference. Believe it or not, this shouldn't be too ridiculously difficult, mostly because these guys will get knocked around severely by your attacks while you're in rage mode. Feel free to use your super attacks (the web super attack will deal some good damage if you can hit two or three of your enemies with it) while dodging the incoming attacks. With enough dodging and buttonmashing, your foes will go down.
Last up is one more fight against Fisk. The procedure is exactly the same as it was earlier: avoid him while your dodge juice is charging, use counters to build up your rage, then unleash your rage and nail him with heavy attacks until you start the button game to finish him off. Spidey's guilt complex here is great. "Did I kill him? Maybe I did! That's too bad! Oh well…"
Dewolfe
DeWolfe is a police officer who turns to Spiderman for some under-the-table law enforcement help.
Mission One: A Cry For Help
After speaking to DeWolfe, you'll be told to head to a drug warehouse to find some evidence that might convince a judge to issue a search warrant. Follow the dirty cops to the warehouse, then hop up onto the roof and drop down through the hole in the ceiling. While standing on the air conditioning duct, take a picture of the arms deal below you, then follow the car back out onto the streets. If you can jump onto it and rip the dirty cops out of it, you'll be able to put an end to their gunrunning ways. Return to Dewolfe for your reward.
Mission Two: Dirty Cops
DeWolfe is a magical cop, capable of overhearing conversations that are extremely unlikely to be had in a police station. Whatever her intel, she’s going to inform you of some dirty cops. Time for you to go bust up their meeting with the Arsenic Candies, after you nab some proof of their misdeeds, of course.When you reach the toy factory, head off to the northwest a bit to find the meeting between the two forces. You need to reach one of the three spots here in order to take your picture. If you head off to the western side of the building, you should be able to find one of the spots that’s unguarded. If you feel like taking out a guard near the other spots, use your Web Rodeo ability to get them away from the edge of the building; if they fall down, they’ll end the mission immediately!
After you take your picture, beat up the remaining cops and Arsenic Candies to finish the mission off.
Mission Three: Suspicious Invitation
DeWolfe suspects that she’s being set up, and wants you to trail her to a business meeting that she’s been invited to. Get there before she does, then take pictures of all the dirty cops on the pier before she arrives. There are nine in all, but they’re all clustered around fairly closely together. Start by nabbing some pics from the street, then move around to the back and climb up on top of the shipping containers to finish off the rest of the portraits. It can be difficult to see all of them at first, so feel free to reconnoiter, and keep in mind that you have unlimited film, so feel free to get insurance shots of cops that you’re unsure you’ve already shot or not.When DeWolfe does arrive, quickly clear out the cops, then rescue her from the police car before it hits the water. It’s one of those cars that explodes when it gets wet—very dangerous to drive in the rain.
Robbie's Photo Assignments
Mission One: Photo Taking
This is a simple one. Move around town, getting shots of the assignments that Robbie gave to you. Keep in mind that you can stick to walls and take pictures from up above if you wish to get a bird's eye view bonus for some of the shots. If you want more points for your photos, try to get as many people into them as possible!When you finally track down the tourists in Times Square, you'll have to fight off some Apocalypse to finish the mission. Return the photos to Robbie to move on.
Mission Two: Beauty Contest
Your goal here is to get pictures of all of the beauty contest contestants, as well as the winner. To boost the score of your pictures, get behind the stage and try to frame your shots so that you get most of the crowd in them along with the contestants. When the winner is crowned, keep snapping shots until the fight breaks out. Get a shot of the brawl (when the contestants turn hostile), then finish off the Candies to turn the quest in.
Mission Three: Rivalry
Seems like your rival at the Bugle, Eddie Brock, is intent on framing Spider-Man, if it means that he becomes J. Jonah's favorite photographer. Track him down to the street, steal his camera, then use your Spider-Sense to find the nine other cameras hidden in the alleyway and on the streets nearby. Some of them are fairly high up on the walls, so tilt your camera view upwards to track down any stragglers. Stick to the walls and use your sprint button to quickly nab anything that's out of jumping range.
Mission Four: Power Suits
Relatively easy mission. Head to the docks and nab a picture of the first chopper and its cargo. You need to get both of them in the frame at the same time, so take the pic from a distance away and zoom in until you have the shot you need. The second chopper will be speeding along the waterfront, so get into position on one of the docks and repeat the process to nab your shot.
Mission Five: Dragon Tail Combat Suits
Head out to the waypoint here and take a picture from right where you stand when you take control of Spider-man. If you get enough figures into the frame, you should be able to clear the 250 point requirement.With that done, drop down and take out the Dragon Tails running around. No need to fight the combat suits just yet; just focus on the humans, dropping them perhaps with the help of the rocket fire from the suits. When they go down, make your escape and return to the Bugle.
Mission Six: Spidey Saves Spidey
It seems there's a Spider-man impersonator that's hanging from a helicopter that's roaming around town. You need to follow it and get a picture of the guy as he swings around on the helicopter's underside. A number of photo spots are scattered around the route, so stop at any of them and get a clear shot of the man to fulfill your obligations.Unfortunately, after the chopper stops over the Empire State Building, the man will fall off of the chopper and plummet to his death. Unless you can save him, that is. If you’re standing on the last target spot, you should be able to dive off the building and nab him on his way down to the ground.
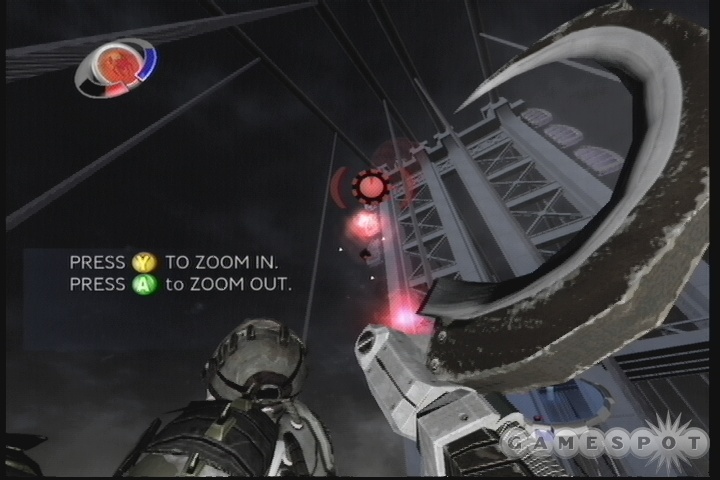
Mission Seven: UFOs?
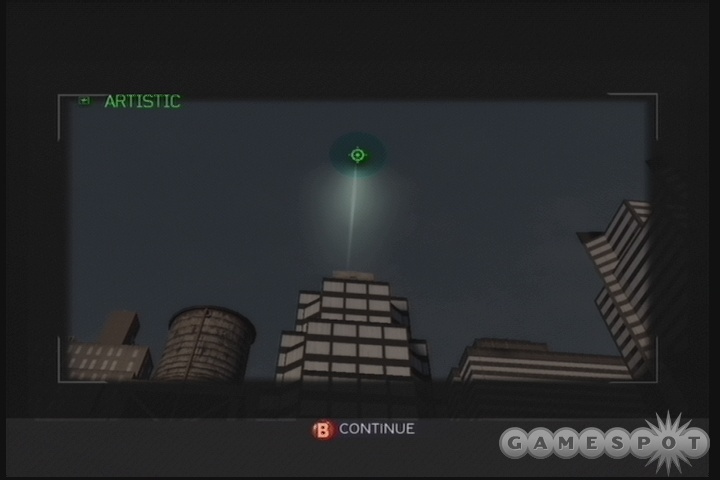
Nothing too crazy here, unless you count UFOs. One is running around above New York, and you have to track it down and take pictures of it. This is going to be pretty annoying, but considering the stuff you’ve probably done thus far in the game (we’re looking at you, Scorpion fight on the bridge), you should be used to it by now.Anyway: move to the spots indicated, take pictures as best you can (the UFO moves very quickly, so prepare to be frustrated), then return to Robbie when you have all the pictures that you need. You need one of it hovering, one of it moving side to side, one of it moving up and down, and a shot of it with its cloak disengaged. It’ll shift between all of these states fairly regularly, so you’ll get chances for all of them.
Mad Bomber Missions
Mission Two: Subway Disaster
If you missed Mission One, don't worry about it; that was the opening scene of the game that acted as the tutorial. These missions don't appear to be available until you do some of the initially available ones.Anyway, someone's planted bombs in the subway, and it's up to you to ferret them out. Head down through Grand Central Station and follow the yellow markers until you see a man flying into a broken section of the tunnel. Follow him and defeat his friends, then use Spider-Sense to find a map on the table nearby. That will reveal the presence of bombs…in your very room! Attach yourself to the pipes and web them up to prevent them from detonating.
A larger bomb is hidden away in the tunnels above you. Follow the trains until you find it, then wait near the metal plate that's covering it up. When you get a new prompt to web one of the trains, do so, then drop down and follow the instructions on the mini-game that appears to disarm the bomb. The mini-games at this point won't be too difficult to get done with.
Another bomb is located nearby, at the rear of a drain pipe. To clear the water, find the smashable wooden panels in the train tunnel nearby, break them, then flip the switch on the other side to shut down the water.
One last bomb is hidden away near the train switching machine. Flip the switch here two times to pull out the train that obscures the bomb. When it's defused, you'll have to help stop a runaway train from presumably causing havoc. This is another face-button game; press the buttons as they pop up on the screen to slow the train down before it explodes. You don't need to hit every button that pops up, but you will need to hit the bulk of them. When you stop the train, you'll warp back up to the streets, where apparently everything is fine. Yay!
Mad Bomber 3: Jetpack Bombings
A lengthy mission that sees you, at first, running around the city to disarm bombs. You won’t have to disarm all of them; some of them can simply be kicked into the ocean. Eventually you’ll run across the eponymous jetpack bombers, who’ll run off and leave you bombs to defuse. The bombs definitely start to become more challenging here, so stay on your toes! Periodically you’ll have to catch one of the jetpackers and defeat him. If you get close enough to them, you’ll note a green targeting reticule over their bodies; use your web button to drag them down to street level, and either jump onto them and ram them into buildings to defeat them, or just unleash a few combos into them.
Mad Bomber 4: Carlyle’s Plan
Time is against you here, so quickly swing your way across the city to the George Washington Bridge. A number of bombers will be clustered around another large bomb, so use your super attacks to defeat them quickly before defusing it. When you do, you’ll see a bomb go off in a factory nearby, so head over to the entrance and move inside!Things start happening quickly here. You’re going to be faced with three pressure valves and a few enemies when you see Carlyle. You have to defeat the enemies, then move all of the valves so that their readouts are in the green. They all have to be in the green at the same time if you want to stop the flow of chemicals to the fire. It’s not as difficult as it sounds, assuming you can defeat the enemies quickly enough to work unfettered. You’ll be able to see all of the pressure readouts when you work on any of them, so move to the most dangerous valve first and work backwards from there. If you move quickly, you’ll be able to shut off the energy and move on.
Eventually you’ll find a larger group of enemies that’s attempting to airlift a chemical tank out of the factory. You need to destroy the tank before they can abscond with it! You have plenty of enemies to deal with here, but you should auto-lock onto the tank if you get close enough to it. Bash it until it explodes, then ignore the rest of the enemies and follow Carlyle through the upper door here. A few button mashes to escape the factory, and you’ll be done.
Mad Bomber 5: Death to J. Jonah
More bombs, this time in the Daily Bugle building itself! You have to defuse the bombs while engaging in some button-mashing sequences to take out the bombers. The bombs are complicated, especially when you have to deal with the incredibly twitchy number-matching sequence, but you’ll have a couple of minutes to solve each one. 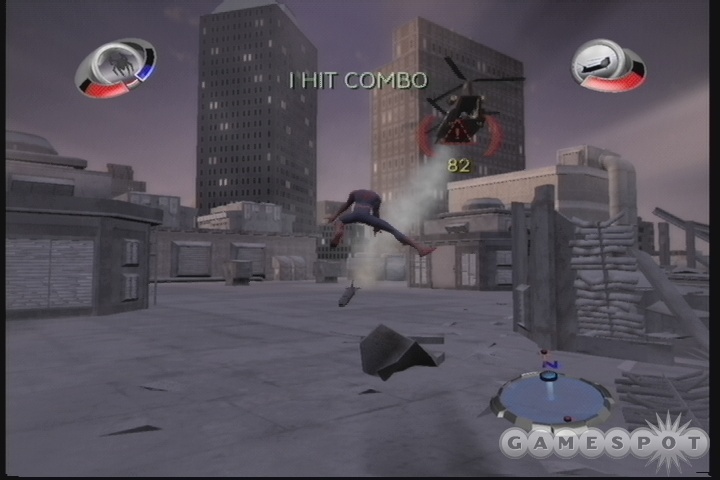
After Jonah’s helicopter takes off, follow it as closely as you can until a cutscene plays and Jonah falls out the back. You need to grab him as he falls, then resume your pursuit of the helicopter; if you get too far away from it, you’ll both be toast. The chopper will fire rockets as you as you chase it, but they won’t deal much damage to you unless you intentionally run into them.
Eventually, you’ll be able to land on a building, where the helicopter will begin attacking you. It will vary its attacks in a predictable pattern. At first, it’ll fire rockets at you from the tail end, so activate your dodge and reflect the rockets back towards the chopper with one of your face buttons to damage it. After that, it’ll launch a cluster of mini-rockets at you, then follow along with some gunfire. The minirockets are difficult to avoid; you might want to hop off the side of the building and stick to the opposite side of it from the helicopter. The gunfire can be outrun fairly easily. The rockets will bust open the ducts and vents on the rooftop, which will reveal healing items for you to pick up.
When the chopper goes down, you’ll have seen the last of Carlyle…for now.
Scorpion
Mission One: Scorpion Unleashed
Head to the waypoint here and use your slingshot to travel across to the island. After hitching a ride on one of the trams here, you’ll come to a large room where you theoretically need to stick to the shadows. It’s actually not that important; you can just drop down to the bottom of the room here and let everyone spot you. Run into the corridor there instead of fighting anyone and find the sterlization chamber at the end. Hit the switch to open the door nearby.
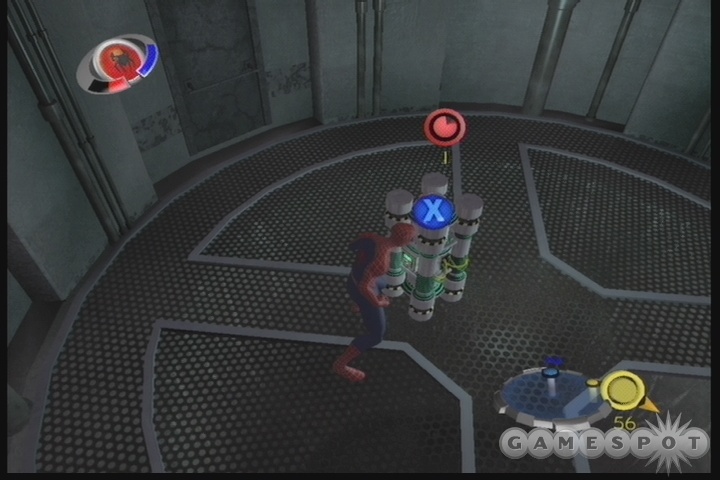
When you overhear the two scientists’ conversation, eliminate the soldiers, then open up the elevator shaft in the room and drop down to the bottom. You’ll come to an energy-filled room. Your goal is to reach the top, but the electricity will bar your passage. If you run around and destroy the four large power generators in the corners of the room, you’ll be able to web or jump up to the top of the room and move through the fans there. You can web them up to stop their movement, or use dodge to slow them down.
When you get done with the ensuing cutscene, run past most of the enemies in your way until you reach the large room with the orange pool at the bottom. Inside, find the two rooms off to either side and flip the switches within. That will cause the arms to go crazy; you’ll need to perform some button-mashing to cool them off. With that done, web up to the top of the room, find the small pipe with a fan in it, and use your Web Yoyo ability to climb up to the top of the black section of the pipe in the ceiling in front of the fan.
The final section of the mission involves you escaping the facility; just run to the indicated doors as they shut and get underneath them before they do. The second door will be the toughest to hit; at the third one, run underneath the blast doors through the broken window to end the mission.
Mission Two: Mind Control
When you enter the facility here, don’t worry about the tripwires; flipping them will bring some more guards, but nothing crazy. Look into the first room here to find a security panel and flip it to open the door leading onward. When you reach the security room with the red lasers, play the bizarre Scorpion Attack game on the security console (just mash the X button through five waves of opponents) to drop the red lasers, then play the face button game to leap through the green lasers.
You’ll come to Scorpion after this, and he’ll soon be convinced to fight you by mind control! He’s not as difficult as some of the boss fights you might have had thus far, though. He’s mostly resistant to heavy attacks, but attacks fairly slowly, allowing you to dodge most of his maneuvers, then let your dodge meter recharge while you unload a combo on him.
When you take Scorpion down, he’ll knock you out the nearby window and force you down to the city streets. Quickly swing along behind him (he moves quickly!), get through the button-mashing minigames as they pop up, and follow him to the bridge that he winds up at. And prepare to be really, really annoyed.
Boss Fight!
It’s nice to see that the company that’s controlling Scorpion has been able to install massive mind-control devices on the bridge here without anyone inquiring as to what they’re for. You’ll need to take them out in order to convince Scorpion to lay down his arms. Or tail. Or whatever.First off, beat him up. When he’s on the ground, this isn’t too terribly difficult, but eventually he’ll jump up to the cables and shoot at you from above, which is greatly annoying, since it’s difficult to tell where he is from the ground. Double jump upwards when you get an idea of where he’s hiding and start mashing your attack buttons; normally you’ll home in on his location if you’re anywhere nearby and attack him, hopefully knocking him to the ground in the process.
When you get Scorpion down to almost zero health, the incredibly frustrating part of the fight begins. He’ll have a prompt over his head, allowing you to grab him and aim his tail at the shield generators on the bridge. Pay attention to the prompts here; they’ll tell you what the relevant controls are for your particular platform.
The catch here is that while you aim Scorp’s tail, he’ll be struggling with you, preventing you from getting a clean shot. You’ll need to zoom in on the generators and use your dodge to slow down time while you attempt to line up your shot. It sounds easy, but it’s actually really, really annoying! It’d be easier if he followed you around consistently, because then you could take him to the sides of the platform in order to line up better shots on the generators, but no; he has to hop around and play tag like he can’t stand to actually get close enough to finish you off. It’s going to take a long time for you to actually make these shots, since he’ll eventually break out of your control and gain back a good amount of health when he does so, forcing you to beat him down yet again in order to take more shots.
When you do finally manage to hit all of the generators, you’ll need to play another button minigame to get up to the top of the bridge and destroy the mindcontrol device. On the 360, the sequence is A, X, A, LB; your mileage may vary. When it’s destroyed, the fight finally comes to an end.
Mission Three: Mechabiocon Exposed
Follow Scorpion down the tunnel towards Mechabiocon until you see the Rhino taking away his girlfriend. He'll let you through the first forcefield, but you'll have to scale through the laser beams yourself. Use your Web Yoyo power while standing on the red symbol on the ground, then use your dodge button to slow down the movement of the laser beams and head upward.
When Scorpion moves ahead through the locked door, you have to jump upwards into the shaft above the door and start crawling through the red laser beams. They don't hurt you if you hit them, but they will cause you to lose your grip. Crawling around here will be difficult, since you can't move in small increments; moving will cause you to kind of lunge forward. Still, there's no other way to go, so sneak your way around the lasers and reach the vent above. When you come to the group of soldiers that's barring your way, run past them to the room where Scorpion and Rhino are facing off, then jump down to join the fray.
Boss Fight: Rhino
Some ground rules here, first off. You can't attack Rhino while he's glowing blue; he's protected at that time. The only time you can attack him is when he's not glowing, and even then you can only attack him from behind, so be prepared to use your dodge button to maneuver around him. Secondly, Scorpion can't die here, so don't worry about keeping him alive. He'll periodically take enough damage to get knocked out, but he'll always get back up again a while later. 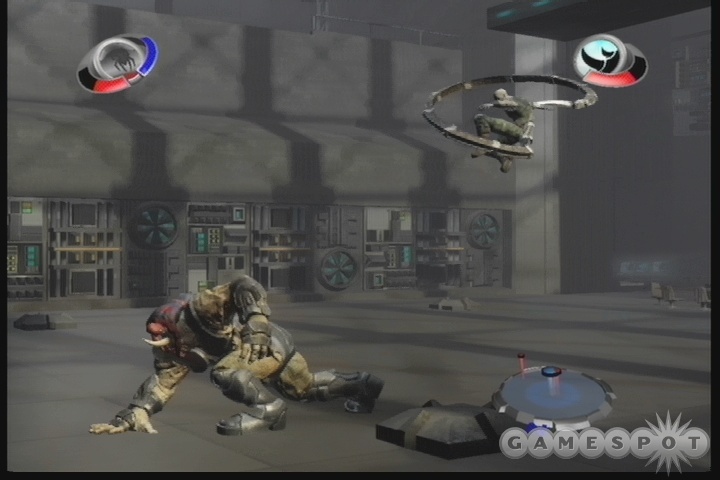
Luckily, Rhino's attacks are, for the most part, very easy to dodge, since he's so slow. Initially, he'll only use his fists against you; just hit the dodge button and get behind him to attack from that angle. Jump away when he regains his blue glow, however, as he'll jump and hit the ground to create a large shockwave; distance is your only protection from this attack. Eventually he'll start smashing the girders here and using them as weapons. You can dodge the normal swings, but he'll eventually start swinging it around to throw it at you. This is easily dodged, but if you're standing right next to him when he starts swinging and activate your dodge button, you'll be able to press the web button to grab the girder and ram it into his face.
After a few rounds of basic damage consisting of some combos aimed at his backside, Rhino will eventually get rid of all of the girders and start to charge you like a bull. Again, this is easily dodged with your dodge button. Eventually he'll wind up running into a wall, winded. Use the opportunity to pound him a bit. Repeat the process until he has a sliver of health left, and he will eventually wind up being unattackable, at which point he'll run to Scorpion and you can start the final button-pressing sequence to finish him off. This is a complicated one, involving moving the analog stick in time with your button presses. (The second analog stick movement is upwards, if you can't see it on your screen.) After pressing the requisite buttons (the final combo is three quick presses of the jump and web buttons, so be ready for it), you'll finish off Rhino and complete the mission.
New Goblin
When you get a dozen or so missions out of the way, all available missions will disappear from the map except for the New Goblin mission, which requires you to take it if you want to move on in the game.
Mission One: The Birth of the New Goblin
This is a three-phase fight. In the first phase, Harry will attack you on his little hoverboard. You’ll be strapped to it and forced to participate in his little game. This is another long sequence of button mashing; you’ll either get a prompt for a face button, which you should mash to attack Harry, or get a prompt for dodge, which you need to hit and then tilt your d-pad in numerous directions to dodge his attacks. It’s not overly difficult, but it is a lengthy fight.
In part two, you drop to the ground (after you knock off around a third of Harry’s health), and take him on while he flies around you. The process isn’t overly difficult: wait for him to get close, activate slo-mo, then use your heavy attack combos on him while dodging his attacks. He does have ranged attacks and some unblockable bombs, so when your dodge is drained, flit away with your webs to another intersection to avoid him while your senses are recharging, then repeat the fighting. If you try not to engage him until you have a full dodge meter, then you should be alright; just avoid the bombs that he throws.
When you’ve about finished off Harry, you’ll see a large prompt on your screen while you’re below him. Mash a few more buttons and you’ll be forced to whisk him off to the hospital. Afterward, a cutscene will play, indicating that Rhino and Scorpion have come to town to play.
Sandman Missions
Mission One: Pillar of Sand, Not Society
The first Sandman mission is obtained inside an apartment, which can be confusing if you land on the roof of the building and can’t find the icon. Crawl down the wall and through the open window to find it, and you’ll quickly be back in black. 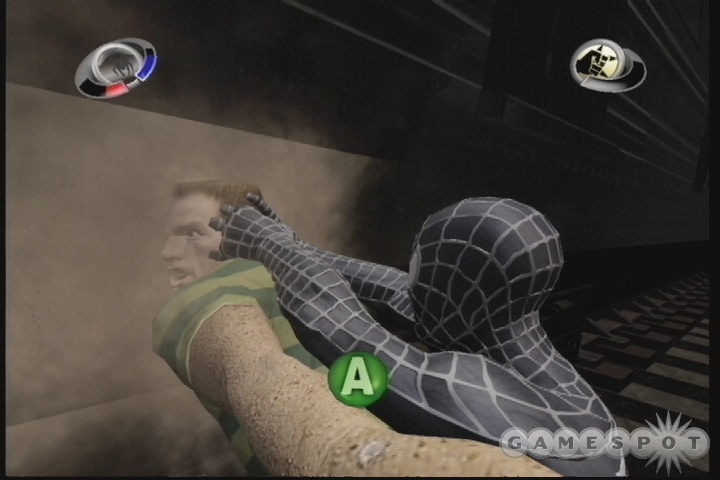
A very lengthy fight with Sandman will ensue. He’s got various sand powers, including blasts of sand that he’ll fling at you whenever you get too far away from him. You’re also going to have to deal with the subway trains that will blast you whenever they come by; try to stay off the tracks if you don’t want to get nailed. If you do get hit, you’ll be flung a long distance away from Sandman, and if you don’t get back to him quickly, he’ll run off and escape the playing field, instantly failing the mission.
General combat here isn’t too mystifying; you only have two attack buttons, after all. Use a mixture of strong and light attacks to wear him down. The black suit’s Rofl Copter attack (ughhhh), which is something like strong, strong, then mashing on the light attack button, will deal a nice quick flurry of damage when it connects.
This fight isn’t supercomplicated, but it is somewhat lengthy, especially since you have to go through some five or six-button press sequence to transition between each successively lower set of tracks. Luckily for you, though, you can repeat them fairly quickly, and dying will only reset you to the latest track that you hit, not all the way to the beginning of the fight.
Grand Finale
Showdown
Time to get swinging and rescue Mary Jane! She's being held captive by both Sandman and Venom, so you'll need to fight them off in order to rescue her.
Venom Phase One
The first fighter here is Venom. You can make it easier to take Venom down if you manage to stun him with sounds, but what can you use to make loud noises? If you flip on your Spider-Senses, you'll spot groups of metal beams on the floors above you. Quickly jump up to the floor above where you start the fight; you should see two groups of bars here. Wait for Venom to follow you up, then smash one of sets of bars and start unloading a combo on him. Venom will typically enter his rage mode when you're done with your combo, or sometimes even before it, so be ready to use your dodge mode to escape his wrath.
After beating Brock up for a few minutes like this, he'll attack Mary Jane. Repeat the process of beating him until another cutscene begins.
Sandman
After taking control of Harry Osborn, you'll be able to fly on his hoverboard towards the construction site. The controls here will take a bit of getting used to, so pay attention to the tutorial that you receive on the way over there.After MJ's safe, throw a couple of pumpkin bombs at Sandman, then wait for the trigger to start the button game that will lead you to the ground. On the 360, the controls are LS Down, Left Trigger, LS Right, LS Left, LS Down, X, LS Left, B. Each time you mess up here, you'll lose life, which will make the rest of the fight more difficult to complete, so try to get it right as quickly as possible.
When you get down to the ground, you'll be able to point a stream of water at Sandman from the fire hydrant. Aim it at his face and upper body as best you can. Periodically he'll throw a car or piece of metal at you; you can block these with the water if you're quick enough.
Throwing Bombs
When Sandman is good and solid, you can try to damage him with your bombs. This is where the targeting system comes in. You can cycle between his two hands and his head here, but you're going to want to stay focused on his head. Using your hoverboard, move as high up as possible in the area and continually circle around him to avoid the projectiles that he throws at you. If you go too low, he'll smash you with his hands. Just stay up high.
You can throw pumpkin bombs at him during this phase of the fight, but normal pumpkin bombs aren't going to do you much good, since he'll block anything that comes near his head with his hands. You can blow up his hands to uncover his head, but that won't last too long. It's best to simply get up high and repeatedly use one of your special attacks to attack him. If you hold your special attack button while holding down the heavy attack button as well (right bumper plus Y on the 360 controller), you'll chuck out a group of three pumpkin bombs at once. Just remember to hold down the Y button to get extra distance on your throw. Some of these will hit his head, and some will hit his arms, but they will eventually wear down his health.
Finishing Him Off
In order to take Sandman down for good, you have to make it through two more button games. On the 360, the controls are LS Left, X for one hand, LS Right, X for the second hand; and then B, LS Up, and B for the head.
With that done, you'll be forced to escape the whirlwind that appears. You can't die from failing the whirlwind portion of the match, so don't worry too much about failing. The sequence is LS Left, LS Right, LS Left, A, LS Down, LS Up, A, LS Down.
Venom Phase Two
It's you and Venom, one on one, for all the marbles. The fight is basically the same as it was earlier, with you attempting to reach the groups of pipes, hitting them, then wearing Venom down until the final button sequence game starts up. You will both likely have only a little bit of health left, so do your best to stay away from Venom while he's not stunned.When you do manage to get him down to zero health, the button sequence is as follows on the 360: LS Up, A; LS Left, A; A, B; LB, X; LB, Y; Right Trigger. Completing it successfully will end the game.
Xbox 360 Achievements
| Name of Achievement | Task | Point Reward |
|---|---|---|
| Police Sergeant | Complete all Bank Robbery missions | 30 |
| Police Officer | Complete all Crime Spree missions | 30 |
| Police Corporal | Complete all Petty Theft missions | 30 |
| Police Detective | Complete 25 random city missions | 30 |
| Police Chief | Complete all combat tours | 30 |
| Sweet Tooth | Collect all Arsenic Candy tokens | 10 |
| Punk Rocker | Collect all Apocalypse tokens | 10 |
| Fire Breather | Collect all Dragon's Tail tokens | 10 |
| Arachnophile | Collect all Secret tokens | 10 |
| Pied Piper | Collect all Subway tokens | 10 |
| Frequent Flyer | Collect all Skyscraper tokens | 10 |
| Trick Novice | Get at least bronze on all easy trick races | 20 |
| Intermediate Racer | Get at least bronze on all easy and medium trick races | 20 |
| Bronze Finalist | Get at least bronze on all trick races | 20 |
| Silver Finalist | Get at least silver on all trick races | 20 |
| Gold Medal Winner | Get at least gold on all trick races | 30 |
| Bomb Squad | Get at least bronze on all bomb tours | 20 |
| Pole Swinger | Swing on 50 poles (you can swing on streetlights and the like by jumping to them and using the web button to grab them, like you would grab a wall) | 10 |
| Hitch Hiker | Hop onto the roof of a car or truck and ride it for five miles | 20 |
| Web Slinger | Web up 25 enemies | 20 |
| Fast Swinger | Swing at 200 miles an hour. Using the web attack combo (left trigger and Y button while swinging) will make this easier. | 20 |
| Splat Master 2007 | Splat into the ground 25 times (fall from a high spot and don't swing) | 20 |
| Web Swinger | Swing a total of 10 miles | 20 |
| Master Web Swinger | Swing a total of 50 miles | 20 |
| Mega Web Swinger | Swing a total of 200 miles | 30 |
| Shutterbug | Complete all Daily Bugle photo missions | 20 |
| Mega Tourist | Take a photograph from a great height | 10 |
| Master Tourist | Take a 500-point photograph | 20 |
| Luke Carlyle | Defeat this nemesis | 30 |
| Curtis Connors | Defeat this nemesis | 30 |
| Sergei Kravinoff | Defeat this nemesis | 30 |
| Macdonald Gargan | Rescue this adversary | 40 |
| Harry Osborn | Defeat this nemesis | 30 |
| Flint Marko | Defeat this nemesis | 30 |
| Aleksei Sytsevich | Defeat this nemesis | 30 |
| Wilson Fisk | Defeat this nemesis | 30 |
| Eddie Brock | Defeat this nemesis | 40 |
| Deputy | Complete all DeWolfe missions | 30 |
| Cold Blooded Super Master | Complete all Connors missions | 30 |
| Spider-Man | Complete all missions | 50 |
| A Dark Reward | Unlocks black suit for replaying the game. Achieve at the end of the final mission. | 20 |
Got a news tip or want to contact us directly? Email news@gamespot.com
Join the conversation