Metal Gear Solid 3: Snake Eater Walkthrough
Snake is back in Hideo Kojima's newest epic. This time around you'll face not only enemies but the environment. Our walkthrough to Metal Gear Solid 3: Snake Eater includes a full walkthrough, tips on combat and stealth, and much more.
Design by Collin Oguro
Metal Gear Solid 3: Snake Eater is the latest stealth action game from acclaimed Konami designer Hideo Kojima. Snake Eater features a new Cold War setting and several new gameplay features, including wearing face paint and camouflage, hunting for food to replenish stamina, and curing serious injuries with medicine or surgery.
This GameSpot Metal Gear Solid 3: Snake Eater game guide features:
- Stealth and Combat Strategies: This section offers tips on using stealth or combat to help Snake complete his mission.
- Weapons and Equipment: Look here for a rundown of weapons and equipment with tips on their uses.
- Camouflage: This section compiles Snake’s face paint and camouflage and reveals their location.
- Food and Cure: Check this section for tips on gathering food and curing Snake’s wounds.
- Walk-through: This section offers a complete walk-through for Metal Gear Solid 3: Snake Eater. Included are strategies for combating and avoiding guards, locating hidden face paints, camouflages, and weaponry, and completing all boss battles in the game.
- Secrets: This section compiles secrets, Easter eggs, and other hidden features.
Table of Contents
Stealth and Combat StrategiesWeapons and Equipment
Camouflage
Food and Cure
Walk-through
Dremuchij, Dolinovodno, and Rassvet
Chyornyj Prud and Bolshaya Past
Boss: Ocelot
Chyornaya Peschera Cave
Boss: The Pain
Ponizovje
Graniny Gorki
Boss: The Fear
Svyatogornyj
Boss: The End
Krasnogorje
Grozny Grad
Boss: The Fury
Grozny Grad Weapons Lab, Torture Room, Sewer
Boss: The Sorrow
Tikhogornyj and Grozny Grad
Boss: Volgin
More Grozny Grad
Boss: Shagohod
Final few areas
The Boss
Chapter 1 - Stealth and Combat Strategies
This section covers Metal Gear Solid 3: Snake Eater stealth and combat strategies. You can tackle the game by remaining undetected from enemy guards and avoiding alerts as much as possible or you could choose to take advantage of Snake’s ample firepower and use firearms and melee attacks to muscle your way through the missions.
- If you’re trying to complete Snake’s mission by avoiding guards then you’ll need to use a variety of items and features at your disposal. Camouflage is extremely important. When entering a new area, check your face paint and camouflage options to maximize your stealth potential. Increase your camouflage ability by crawling instead of walking through a particular area.
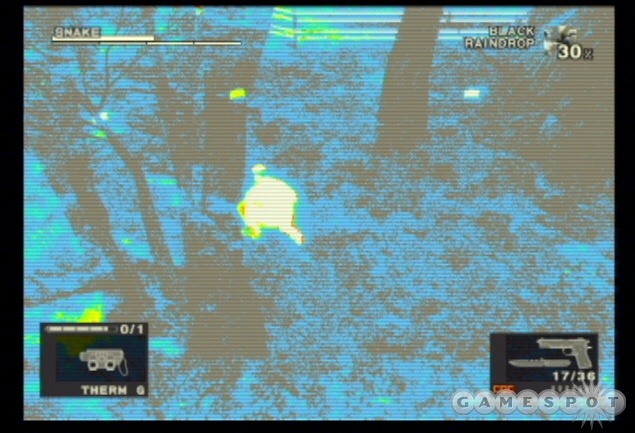
- Pinpoint the location of enemy guards using binoculars, sensors, and thermal goggles. Use the binoculars if you have a clear view toward where you suspect an enemy patrol might be moving through. Equip the thermal goggles to spot a guard’s heat signature through thick forest foliage. Utilize the sensors if you’re unable to determine if there’s a guard nearby.
- Monitor guard patrol patterns carefully. A guard generally moves in a fixed pattern. By observing the patterns you can gauge the best time to sneak past or, if desired, the best time to sneak up and incapacitate the guard.
- When sneaking up on a guard, remain as camouflaged as possible near the guard’s patrol (even prone in some grass). When the guard turns away, use the directional pad to sneak up on the guard and use the new close-quarters combat (CQC) moves to knock the guard out. Of course if you don’t mind killing guards, you can also use the same move to slit the guard’s throat.
- If another guard happens upon his knocked out comrade, you’ll have a few moments to incapacitate the new guard as well. He’ll try to revive his friend before getting too concerned. Sneak up on the second guard while he attempts to revive his friend and use a CQC move to incapacitate him. But if you aren’t sure if there are other enemies around, drag an incapacitated enemy into a corner or behind cover to prevent another foe from finding him when you aren’t around.
- Weaken guards in a particular area by destroying their food supply. If you find a shack containing several food items (rations, calorie mates, instant noodles) then you’ve found the enemies’ food storage. Destroy the structure with TNT. Now you’ll hear enemies whine about their hunger. This affects their stamina and overall performance. Take advantage of their hunger by tossing them some food. Toss rotten food to poison guards.
- When faced against a guard standing at a stationary post, check above him if you’re in a forest area. There might be a bee’s nest in a nearby tree. Shoot the nest. The angry bees make a beeline for the nearest guard. He’ll run off trying to get the bees away; the guard may also send the bees toward more guards.
- Keep a collection of caged snakes in your inventory. Use the mk22 tranquilizer gun to knock out a snake so you can add it to your cages. When faced with a troublesome guard you are having trouble getting around, toss the snake near the guard to create a distraction.
- If you do create an alert and a guard is notifying headquarters via radio, toss a chaff grenade to disrupt the transmission. If you see the guard you can also shoot the radio to prevent the transmission. Should the transmission go through, reinforcements arrive and begin their search.
- The weapons that offer suppressors (mk22, M1911A1, and XM16E1) should be used when your goal is to remain undetected. Getting as close as possible to the enemy guard before firing will help ensure an accurate head shot (so the guard falls instantly; hitting other locations may only injure the guard). It’s also important to be sure there are no other guards looking at the guard you’re attacking. His friends may wonder why he suddenly slumped over! Don’t waste shots with active suppressors; the suppressor deteriorates over time. Without a suppressor, the weapon creates too much noise for use in areas with multiple enemies.
- In the event disaster strikes and you’ve been spotted and reinforcements are in route to your position, try to take advantage of a chokepoint. For instance, enter a room or shack with a single entrance. That way you can aim your favorite weapon (ideally the M37 shotgun, AK-47, or something similar and stronger than just a pistol) at the door. As enemies open the door, blast them. Repeat until the enemies stop entering.
- After incapacitating or killing an enemy, pick up and drop his body to search him for items, such as ammunition or grenades. If you simply knocked out the enemy, you can revive him with some kicks and hold him up for more items or interrogate him for information or hidden radio codes.
- Take the time to radio your contacts upon acquiring new items, wearing new camouflage, or procuring new food. Para-medic can tell you about new food items while Sigint offers information on weaponry and camouflage.
Chapter 2 - Weapons and Equipment
This section provides a rundown of Metal Gear Solid 3: Snake Eater weapons and equipment and includes a complete description, strategies for use, and location when applicable. Locations are tied to the normal difficulty mode. Note that this section contains game spoilers in regards to how and when to use particular weapons and items.
AK-47
Description: A Soviet-made assault rifle. Reliable, durable, and highly precise. Uses 7.62 x 39 ammunition. Magazine size is 30 rounds. Equip in first person view and use the L1 button to aim from the shoulder. Open the window and press the triangle button to switch between semi-auto and full-auto fire.
Uses: Find this weapon in the abandoned factory in Rassvet during the Operation Snake Eater mission. Excellent assault rifle for combat against larger numbers, such as against Ocelot’s guards that surround Rassvet. It’s a loud weapon without a suppressor so certainly avoid using when you’re trying to remain undetected.
Book
Description: A picture book for "gentlemen". Full of stunning photos of young, female models.
Uses: Toss a book on a ground to distract a nearby guard. Once you’ve distracted a guard, you can sneak up on him for a close-quarters combat move or just slip past the guard undetected. Try using it on Raikov when you’re getting the jump on him in the east wing locker room.
Chaff Grenade
Description: An electronics jamming grenade developed by the Soviet Union. Upon detonation, scatters a large quantity of metal fragments into the air, jamming radio signals and rendering electronic devices inoperative.
Uses: Toss them to jam radios if guards are attempting to contact headquarters for reinforcements. Also use chaff grenades to disrupt Shagohod’s missile attack.
Cigar Gas Spray
Description: A sleeping gas pistol shaped like a cigarette. The gas it sprays puts enemies to sleep.
Uses: An excellent way to immobilize guards while you’re in the scientist or officer disguise. Don’t use the cig gas spray if there are other guards watching!
Claymore
Description: An American-made anti-personnel directional mine. Modified by Soviet technicians to automatically detonate when it detects a moving object within the trigger areas to its front and rear.
Uses: Place on the ground in an enemy’s path.
Fork
Description: Uses for eating. Can be used in place of the survival knife. Plants and animals nabbed using the fork can be eaten on the spot.
Uses: You’ll acquire the fork after you are captured in the Grozny Grad Torture Room. Use the fork to kill animals to instantly eat them. You may also need to use the fork like a knife in close-quarters combat.
Grenade
Description: A Soviet-made blast fragmentation grenade. Deals damage to enemies with both the blast and the ensuing shrapnel.
Uses: Toss at a group of enemies to cause big damage to multiple foes. Obviously not a stealth weapon.
Knock-Out Handkerchief
Description: A handkerchief soaked in anesthetic. Can be used to put enemies to sleep after grabbing them with CQC.
Uses: Grab an enemy using close-quarters combat and put them to sleep with the anesthetic in the handkerchief.
M1911A1
Description: A .45 gauge automatic pistol that boasts high reliability and massive stopping power. Magazine size is 7 rounds. Open the window and press the circle button to attach/detach a suppressor.
Uses: A handy stealth weapon because of its suppressor (and you don’t want to use Mk22 ammunition). However, unlike the Mk22, this weapon isn’t a tranquilizer. Shooting enemies in the head will kill them, though certainly silently when the suppressor is attached.
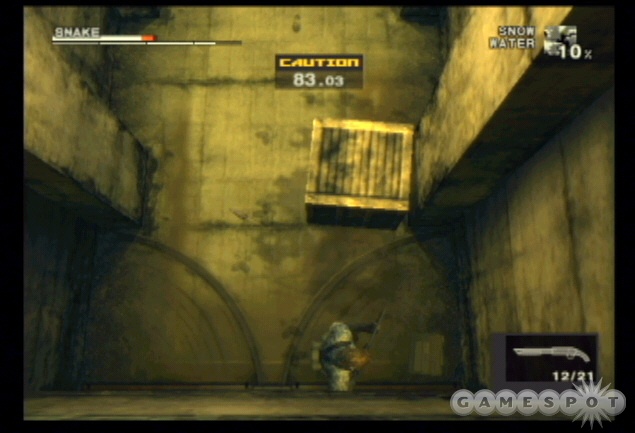
M37
Description: An American-made shotgun. The stock and barrel have been sawed off to reduce the weight. Carries four 12-gauge shells.
Uses: A powerful close-range weapon. If enemies surround your position, blow them back with the M37. Fire the shotgun at the legs of enemies using riot shields. Acquire the M37 during your first trip into Rassvet and within the abandoned factory.
M63
Description: An American-made system weapon. Belt-fed light machine gun version. Uses 5.56mm x 45 ammunition. Magazine size is 100 rounds.
Uses: Burly machine gun that’s best used in the end game chase sequences to hold off pursuing guards--unless of course you just want to shoot your way through the game. If you don’t mind clearing a room while making a lot of noise, try the M63. Find the M63 behind some crates in the shack in Svyatogornyj East.
Mk22
Description: A modified special ops version of the Mk22, a suppressor-equipped tranquilizer gun being developed by the Navy. Because it uses a slide lock mechanism for added suppression capability, it can only be fired once before reloading.
Uses: The Mk22 is a non-lethal, stealth weapon. If you’re trying not to kill guards, use the Mk22 and aim for the head. Keep the suppressor attached against guards so you don’t raise alerts. The suppressor deteriorates over time so don’t waste shots. The Mk22 will also be used against bosses if you’re trying to get their special uniforms. Detach the suppressor during the boss battles. Use the tranquilizer against snakes and certain fish so you can capture them.
Mosin Nagant
Description: A tranquilizer sniper rifle and The End’s weapon of choice. Adapted by The End from the M1891/30, a bolt-action sniper rifle used by the Soviet military during World War II. Uses special 7.62mm x 54R tranquilizer rounds. Magazine size is 5 rounds.
Uses: Acquire the mosin nagant by defeating The End using only the Mk22 (reducing The End’s stamina to zero). It’s essentially a non-lethal sniper rifle--extremely useful if you’re trying not to kill any guards. You can also use the mosin against bosses when trying to recover their special uniforms (by reducing their stamina to zero).
RPG-7
Description: A state-of-the-art Soviet portable anti-tank rocket launcher. The rocket-propelled grenade warheads are loaded with HEAT, a plastic explosive. Press the L1 button to use the scope.
Uses: Create an explosive ruckus with the rocket launcher. Best used during the end game when fighting the Shagohod and fleeing guards riding motorcycles. Find the RPG-7 inside the armory at the Krasnogorje Mountainside.
Scorpion
Description: A Czechoslovakian-made submachine gun. Uses 32ACP ammunition. Magazine size is 20 rounds. Equipped with a laser pointer. Open the window and press the triangle button to switch between semi-auto and full-auto fire.
Uses: It’s a submachine gun equipped with a laser sight and a decent weapon to clear out several guards at close-range. You’ll also find it useful against the pursuing guards in the end game chase sequences, though not as much as the M63. Find the scorpion in the downstairs supply room of the weapons lab east wing. You’ll need Raikov’s disguise to get inside.
Single Action Army
Description: A .45 caliber, six-shot revolver. Equip in first-person view and press the L1 button to aim precisely. Can also use the right analog stick to do tricks.
Uses: Bullets can ricochet off of walls. Plus you can perform some gun tricks using the right analog stick! Unlock the Single Action Army revolver by selecting the gun on the right when faced against Ocelot in the game’s final cut scene.
Smoke Grenade
Description: A Soviet-made smoke grenade. Upon detonation, releases a cloud of white smoke, blocking the enemy’s field of vision.
Uses: Toss a smoke grenade to blind enemy units, which can create the diversion necessary to sneak past the guards, sneak up to the guards and disable them, or even shoot them from long-range.
Stun Grenade
Description: A flash-bang type grenade developed by the Soviet Union. Upon detonation, produces an intense flash of light and a loud bang, disorienting and even knocking out human targets in the area of effect.
Uses: Toss a stun grenade near enemy guards to knock them out. You can also use the stun grenade to distract enemies as you retreat or sneak past them.
Survival Knife
Description: A large-bladed knife for field operations. Can be used to defeat enemies without making a sound.
Uses: Kill animals to gather food, cut plants for medicine, and use as a close-quarters combat weapon to disable guards.
SVD
Description: A Soviet-made automatic sniper rifle known for its high precision. Uses 7.62mm x 54 rimmed cartridges. Magazine size is 10 rounds. Press the L1 button to use the scope. Press the triangle button to change the magnification ratio on the scope.
Uses: When you don’t want to get close! Assault guards from long-range with the sniper rifle. It’s a loud weapon, though, so other guards will be alerted to your presence. Find the sniper rifle early on by exploring the eastern fork within Dremuchij North. Find another inside the armory at Ponizovje West.
The Patriot
Description: An assault pistol developed for The Boss. Uses 5.56mm x 45 ammunition. The feeder mechanism inside the drum magazine forms an "infinity" shape.
Uses: Unlock the Patriot by defeating The Boss (completing the game). Start a new game on that completed game save and you will start with The Patriot in your inventory. Use the Patriot to mow down enemy guards if you aren’t concerned with stealth.
TNT
Description: Trinitrotoluene. A military-grade explosive equipped with a remote-controlled detonator. Press the square button to plant the bomb, then press the circle button while equipping TNT to detonate the planted bomb.
Uses: Destroy enemy shacks that contain ammunition, food, and medical supplies--after you’ve hoarded their supplies of course. When you destroy a structure containing food, the enemies in the area become hungry, essentially drained of stamina so they’re less perceptive. Also, you can toss rotten food in their direction and they’ll eat it (since they’re starving!) and be poisoned.
Torch
Description: A torch made from white birch soaked in turpentine. Press the circle button to swing it around as a weapon. Press the square button to light/extinguish the torch.
Uses: Light the torch for illumination or to even light up a guard. Stick a guard up with a lit torch. Locate the torch inside the Chyornaya Peschera Cave Branch.
White Phosphorous Grenade
Description: A Soviet-made incendiary grenade. The intense flames created by the white phosphorous inside cause all living beings in the area of effect to suffer severe burns.
Uses: Toss a white phosphorous grenade into a group of guards to cause heavy burn damage.
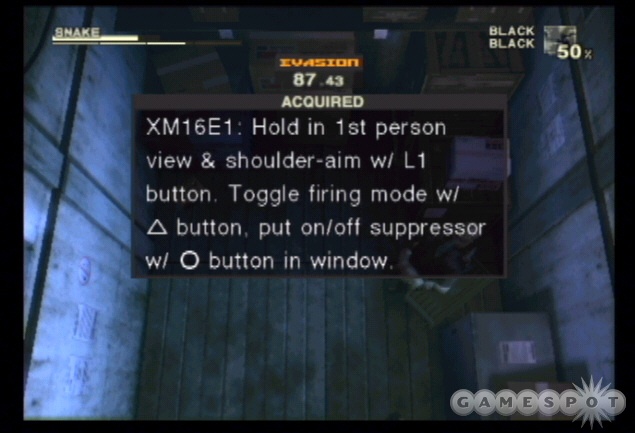
XM16E1
Description: A state-of-the-art assault rifle currently being field-tested by the U.S. Army. Uses small caliber, high muzzle velocity 5.56 x 45 ammunition. Magazine size is 20 rounds. Features several modifications geared toward jungle combat. Open the window and press the circle button to attach/detach a suppressor; press the triangle button to switch between semi-auto, full-auto, and 3-shot burst fire.
Uses: An assault rifle with a suppressor so it can be used in stealth. Aim for a head shot to disable a guard in a single hit. Unlike the Mk22, the XM16E1 kills the guard. Find it in the alcove below the rope bridge the first time you cross or later inside the armory at Graniny Gorki Lab Exterior: Inside Walls.
Equipment
Active Sonar
Description: Sensor that detects animals with sound waves. Press L3 button to emit waves. Consumes battery power while used.
Uses: Help Snake hunt with the sonar. It can detect stationary objects (including guards) as well. It’s not quiet, though, so be careful using around enemies if you’re trying to remain hidden.
Anti-Personnel Sensor
Description: Vibrates when detecting lifeforms. Equip to use. Consumes battery during use. All other vibrations will be off when activated.
Uses: Turn on when you aren’t sure of guards’ positions. Your controller will vibrate if there’s a guard (or animal) nearby.
Binoculars
Description: Military binoculars allowing long-range reconnaissance. Zoom in with triangle button. Zoom out with square button.
Uses: Pinpoint guard locations using the binoculars. You can remain safe at long-range while observing their location and patrol pattern.
Bug Juice
Description: A bug repellant. Keeps away hornets and leeches while lasting. Apply with circle button in window.
Uses: Keeps off bugs and leeches.
Camera
Description: Press circle to take photos. Zoom in with triangle button. Zoom out with square button.
Uses: Snap photos of your favorite characters!
Cigar
Description: Highly addictive and hazardous to your health.
Uses: Burns off leeches.
Crocodile Cap
Description: Equip to wear.
Uses: Disguise yourself as a crocodile to get past guards near water, specifically through Ponizovje South.
Directional Mic
Description: A high-performance directional microphone. Picks up sound in the direction it is pointed. Can be used to pick up the footsteps of distance enemies and other sounds normally too faint to hear.
Uses: Use the directional mic to pinpoint the position and movement of animals or guards. You can also use the mic to assist during the battle against The End or even The Fury to help determine their position so you can plan your next move.
Fake Death Pill
Description: Espionage pill developed by the CIA. Can fake death temporarily. Use with circle button in window.
Uses: Swallow one to fake death. Use if there’s no cover and you spot a guard on the way. When he leaves, use a revival pill and sneak up on the guard. You can also use the fake death pill as a means of loading a saved game quickly!
Life Medicine
Description: Developed by the U.S.S.R. Restores life. Press circle button in window to use.
Uses: Replenishes some of Snake’s health but doesn’t cure significant wounds. You must open the cure menu to fix cuts, broken bones, burns, or other injuries.
Mine Detector
Description: Makes sound upon detection of claymores on the ground. Equip to use. Consumes battery while used.
Uses: Equip to detect the presence of claymore mines. If you have the thermal goggles, use those instead.
Motion Detector
Description: Sensor that detects an object’s motion. Does not detect stationary objects. Consumes battery power while used.
Uses: Helps pinpoint the location of patrolling guards. Use the information to plan your route either to sneak up on the guard or avoid the guard completely.
Night Vision Goggles
Description: Electronically amplifies weak dim light for visualization. Allows one to see in the dark. Consumes battery while used.
Uses: Equip the night vision goggles to help Snake navigate a dark area, such as the caverns. Don’t look at bright lights, though!
Revival Pill
Description: Espionage pill developed by the CIA. Can wake up from fake death. Use with circle button in window.
Uses: Essentially reverses the effects of the fake death pill. Complete the Sorrow boss battle by using the revival pill after the Sorrow "kills" Snake.
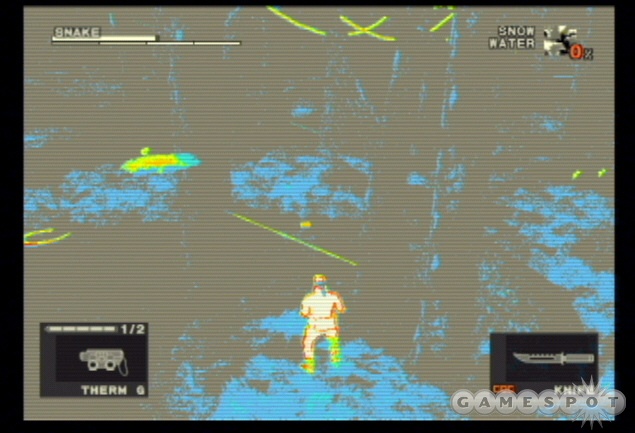
Thermal Goggles
Description: Visualizes heat source distribution. Allows one to see in the dark. Consumes battery while used.
Uses: The thermal goggles are arguably the most useful piece of equipment in the game. Equip the thermal goggles to see claymore mines, breaks in electrified fences, guard locations and patrols, and to see animals and plants in dense forest environments.
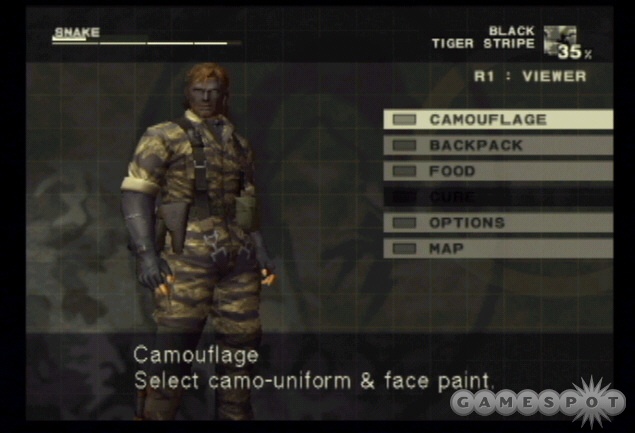
Chapter 3 - Camouflage
This section reveals Snake’s available face paint and camouflage, their uses, and their location in the game. Note that these locations are from normal difficulty.
Face Paint
| Face Paint | Description | Location |
| Black | Black face paint. | Start with item. |
| Desert | Effective in mountainous terrain. | Ponizovje Warehouse. In southern corner. |
| Mask | Mask used for disguise. | Start with item. |
| No Paint | No face paint applied. | Start with item. |
| Oyama | Kabuki’s female role face paint. | Graniny Gorki Lab Exterior: Inside Walls. Crawl into crawlspace on western side. |
| Snow | For cold environments. | Bolshaya Past Base. Inside the trench on the west side. |
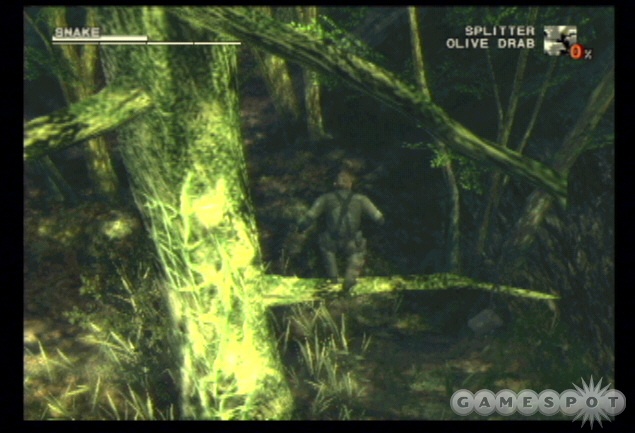
| Splitter | For indoor-ops. | Start with item. |
| Woodland | For use in forested areas. | Start with item. |
| Zombie | Face paint that mimics a zombie. | Rassvet. Behind the factory. |
Camouflage
| Camouflage | Description | Location |
| Animals | An animal skin camo uniform. Wearing it removes any hand-shaking while aiming a gun. | Defeat Ocelot by reducing his stamina to zero. |
| Black | Black battle uniform. Effective in the dark. | Start with item. |
| Choco Chip | Camo pattern designed to provide cover in the desert. Named for its resemblance to a chocolate chip cookie. Effective in desert and mountain environments. | Bolshaya Past South. Inside a hollow stump. |
| Cold War | Volgin’s camo uniform. Enemies from the Soviet side will hesitate to attack. | Defeat Volgin the first time by reducing his stamina to zero. |
| Fire | The Fury’s camo uniform. Reduces damage from flames and explosions by half. | Defeat The Fury by reducing his stamina to zero. |
| Fly | A foul-smelling camo uniform. It smells so bad that it attracts flies, but it also makes enemies think twice before coming in for a proximity encounter. | Graniny Gorky Lab B1 East. Inside the bathroom in the third stall on the right. |
| GA-KO | GA-KO pattern camo uniform. Wearing it enables you to hear Kerotan’s calling. | Chyornjy Prud. In the water to the northeast. |
| Hornet Stripe | The Pain’s camo uniform. Wards off hornets, spiders, and leeches. Also allows wearer to tame hornets. | Defeat The Pain by reducing his stamina to zero. |
| Leaf | Camo pattern developed to provide cover in forested areas. Effective in underbrush. | Start with item. |
| Maintenance | Maintenance crew uniform. | Groznyj Grad Weapons Lab: East Wing. After you enter the hangar, return to the east wing and check the lockers across from Raikov’s locker. |
| Moss | The End’s camo uniform. Gives wearer photosynthetic capabilities. Extremely effective in Svyatogornyj and Sokrovenno areas. Essentially restores stamina while in sunlight and 100% camo when crawling in certain areas. | Sneak up on The End during the boss battle and hold him up with a weapon. |
| Naked | Nothing worn on the upper body. | Start with item. |
| Officer | The officer’s uniform that Raikov was wearing. | Recovered from Raikov. |
| Olive Drab | Commonly known as OD. A single-color battle uniform for general infantry use. Does not provide much camouflage. | Start with item. |
| Raindrop | Camo pattern used extensively in Eastern Europe. Effective in the rain. | Dolinovodno. Under the bridge after Operation Snake Eater. |
| Scientist | Scientist’s uniform. | Given by EVA. |
| Snake | Snake pattern camo uniform. Provides the ultimate cover in any environment. | Defeat The Boss by reducing her stamina to zero. |
| Sneaking | The latest battle uniform developed by the Soviet Union. Cuts all damage in half and reduces stamina consumption. | Groznyj Grad Weapons Lab: East Wing. After you enter the hangar, return to the east wing and check Raikov’s locker. |
| Snow | Camo pattern designed to provide cover in snowy environments. Effective against white backgrounds. | Chyornaya Peschera Cave. On the right path before meeting The Pain. |
| Spider | The Fear’s camo uniform. Gives wearer stealth capability at the cost of stamina. | Defeat The Fear by reducing his stamina to zero. |
| Spirit | The Sorrow’s camo uniform. Eliminates footstep noise. Also allows wearer to drain stamina by choking enemies in CQC. | Defeat The Sorrow. |
| Splitter | Camo pattern often used on German airplanes during World War II. Effective in urban environments. | Bolshaya Past South. On a ledge on the eastern side. |
| Squares | Camo pattern consisting of an array of squares. Makes it difficult to distinguish the silhouette of the wearer. Effective against brown backgrounds. | Start with item. |
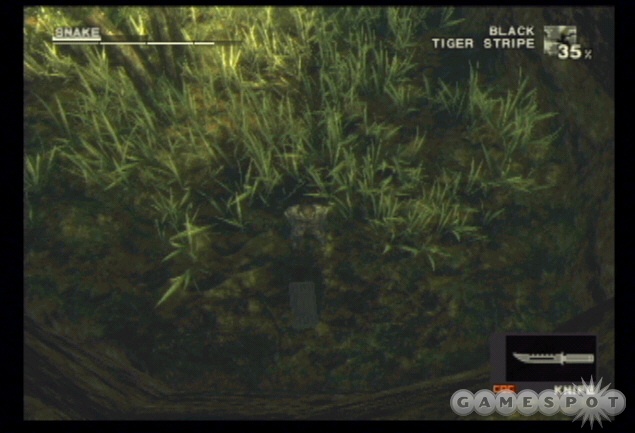
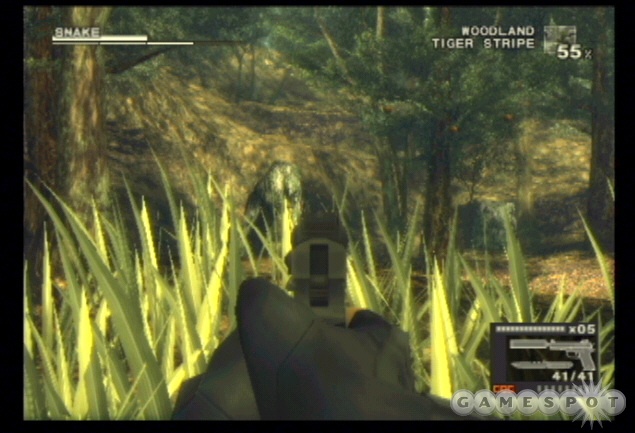
| Tiger Stripe | Striped camo pattern resembling a tiger’s coat. Effective in wooded and grassy areas as well as against soil and mud. | Start with item. |
| Tree Bark | Camo pattern designed with hunters in mind. Pasted with photos of tree trunks and leafy branches. Effective when pressed against trees. | Start with item. |
| Tuxedo | Formal dress coat. | Complete the game on normal difficulty. |
| Water | Camo pattern used extensively by the old German Defense Force. Effective when underwater. | Bolshaya Past Base. On the rooftop of the southern structure. |
Chapter 4 - Food and Cure
This section offers tips on the food and cure elements to Metal Gear Solid 3: Solid Snake. The stamina meter slowly decreases over time and decreases more rapidly during strenuous activity. As the stamina meter gets low, Snake becomes less proficient with his weapon (aim becomes less steady) and his health won’t regenerate as quickly. Replenish Snake’s stamina meter by eating food.
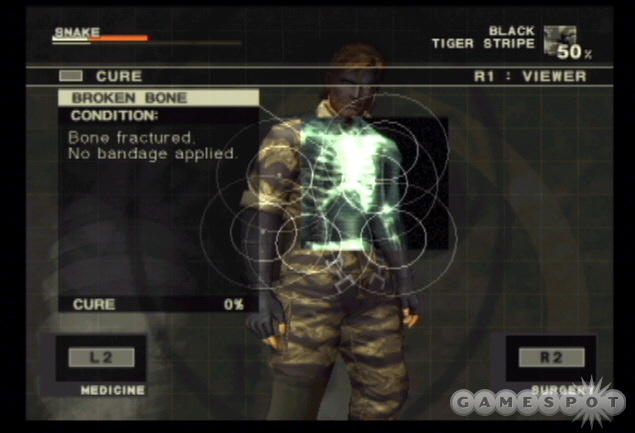
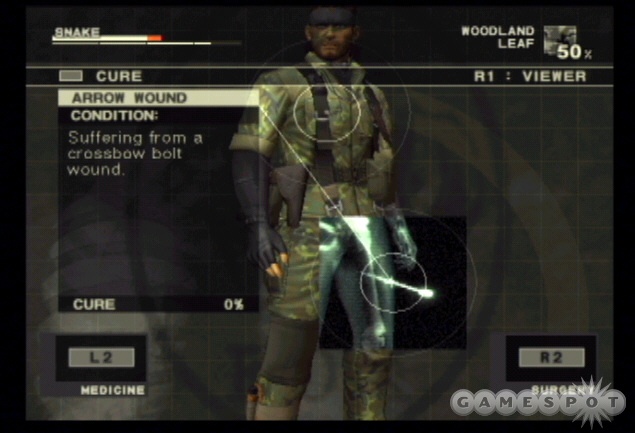
A particularly vicious attack can inflict a deeper wound that Snake won’t be able to simply regenerate. Use the cure menu when you notice a red line within Snake’s health bar. Within the cure menu you can apply various medicines and surgical procedures to mend Snake’s wounds or cure ailments.
- Keeping your meat supply at maximum isn’t a bad idea. You’ll always have something in your reserves in case your stamina becomes too low and you need quick refreshment. However, as meat sits in your inventory, it does become rotten. Eating rotten meat negates any benefits to stamina and actually poisons Snake, which adversely affects health.
- If you do eat rotten food, you can cure the poison with medicine or force Snake to regurgitate the bad grub. Press start and use R1 to select the viewer. Using the right analog stick you can spin Snake around in a circle. Spin him around for several seconds. It sounds silly but when you return to the game, Snake--apparently dizzy from all that spinning--vomits and regurgitates the rotten food. It does cure the poison problem but stamina takes a big hit. Now you’ll have to go find some better food to replenish Snake’s stamina!
- Take the time combing areas for food items, especially unguarded areas. Equip your thermal goggles to help you find food. You’ll be able to see the heat signature of snakes, or even the distinct outline of certain plants (which add medical items to your inventory). Don’t forget to look up into the trees as well. You may find a snake hanging from a branch or some fruit. Shoot the fruit to knock it to the ground.
- Preserve certain animal meat by capturing the animal alive instead of slaughtering the creature and picking up the meat. You can also use the Mk22 and its tranquilizer ammunition to knock out small animals like snakes so you can capture them. The meat remains fresh in your inventory since the creature is caged and alive. Use mousetraps found in the game to capture smaller animals. It’s also possible to throw caged animals to remove them from your inventory. Toss one at a guard if you need to create a distraction.
- Many base areas in the game contain storage structures for the enemies’ food supply. Here you’ll find rations, calorie mate, and even instant noodles. These foods are extremely beneficial to your stamina and don’t spoil over time (or at least as quickly). If your food reserves are full and you find the enemies’ food storage, toss out some of your meat and replace it with the rations, calorie mates, and instant noodles.
- After collecting the food from the enemies’ food storage, destroy the structure with TNT. This depletes the enemies’ food supply and basically causes them to starve. When you’re around an enemy, you’ll hear him mumbling about being extremely hungry. These enemies are now weaker, with less stamina, and basically less perceptive then their well-fed counterparts. You can also take advantage of their hunger by tossing out rotten food. They’re so hungry they’ll eat the rotten food on sight. The resulting sickness creates the distraction you’ll need to get around the guard.
- Snake automatically suffers some significant injuries throughout the game (as the result of cut scene encounters) but if you’re trying to muscle your way through the game, you’ll likely suffer some injuries on your own. When part of Snake’s health bar turns red, you have a significant injury. Open the cure menu to tend to your wounds. You must use combinations of surgery and medicine to mend specific wounds. The chart below lists cures and fixes for common ailments.
| Wound Or Ailment | The Fix |
| Broken Bone | Splint and Bandage |
| Cut | Disinfectant, Styptic, Suture Kit, and Bandage |
| Burn | Ointment and Bandage |
| Gunshot | Knife (or Fork), Disinfectant, Styptic, and Bandage |
| Leeches | Cigar |
| Crossbow Bolt (The Fury) | Knife and Bandage |
| Anesthetic Needle (The End) | Knife |
| Bee Sting (The Pain) | Knife then Disinfectant, Styptic, Suture Kit, and Bandage |
| Animal Poisoning | Serum |
| Food Poisoning | Antidote |
| Colds | Cold Medicine |
| Stomach Ache | Digestive Medicine |
- As you would also search areas for food, search areas for plants that have medicinal properties (and can add medicine or surgical items to your inventory). Equip thermal goggles to spot the plants easier then cut the plant with a knife to recover the item.
- After finding new food or medical supplies, speak with para-medic for valuable information regarding the items.
Chapter 5 - Walk-through
This section provides a complete walk-through for Operation: Virtuous Mission and Operation: Sneak Eater. Included are strategies for combating and avoiding guards, locating hidden face paints, camouflages, and weaponry, and completing all boss battles in the game. This walk-through was completed on the normal difficulty level.
Operation: Virtuous Mission
Snake is dropped into Dremuchij with orders to retrieve Dr. Sokolov, who’s being held in an abandoned factory to the north of the drop site.
Dremuchij South
Your first task is to locate and retrieve your backpack, which got snagged on a tree after your rather rough landing. From your start position, either move to the northwest or northeast. When you move toward the northwest, you’ll encounter a log blocking the path. Crouch and crawl under the log to reach the northern section of this area. Go northeast and along the eastern side of the map and drop off of the ledge to end up in the same location on the northern side of the map. Climb the tree (marked with vines) and traverse the narrow branch to the right. Press the action button above your backpack to retrieve your supplies.
As you learn from the radio communiqué, your mission is to retrieve Dr. Sokolov; he’s being held in an abandoned factory to the north of your current position. Orders are to avoid heavy combat and maintain stealth.
Before exiting the area to the north, explore the northeastern side (just before the ledge to your backpack) to find life medicine and the southwestern corner for mk22 bullets. You should also begin to stock up on food items, such as snakes and mushrooms. Search the southwestern corner for mushrooms on the logs and a couple snakes slithering around on the other side. Exit the area through the north passage.
Dremuchij Swampland

Advance north into the swampy marsh. You’ll sink in the mud here so maneuver through quickly. Beware of the crocodiles inhabiting the swampland. Get to close and the croc will unleash its powerful swipe attacks. It is possible to knife a croc and, eventually, kill it. The crocodile meat replenishes a decent portion of stamina but it’s not worth the effort or damage potential at the moment.
Carefully search the area for several items. Just east of the swampy entrance, find the bug juice under some brush. Search just to the northeast for a grenade pick-up. Move very carefully, though; the crocodiles are extremely hidden in the brush and you may think you’re walking over a pick-up when you’re actually walking over a croc tail. Finally find mk22 bullets in the northeast and an mk22 suppressor in the northwest. Exit the swampland through the north passage.
Dremuchij North
Now you’ll actually have a couple guards to contend with. Take the opportunity to don the best camo for the area (woodland face paint). Move forward carefully. The first patrol is just up ahead at the fork in the path.
Before continuing to the north, find the fork that leads eastward. Take it and find a weapon case at the end--it’s the SVD sniper rifle. Kill any snakes nearby to add to your food collection.
Return to the intersection and scan the area for the patrolling guard. He patrols well into the intersection so don’t be surprised if he’s there. Hide behind the stump in the section’s center and sneak behind him for a close-quarters move or take him down with the suppressed mk22. Drag him back to the east. Search his body for ammo or supplies by picking him up and dropping him a few times.
Crawl and sneak toward the north to find another patrol in the northwest corner of the map. Avoid him completely by moving to the east or eliminate him with the mk22 or a close combat move. He essentially patrols in a circle so wait until he’s moved to the right side before approaching. Search inside the stump here for a grenade pick-up.
This northern area is basically a circular path. Your goal is to continue through the northern passage but there are a few useful items on the eastern side that are worth seeking out. Take the southern edge of the circle and locate a stun grenade near a log. Watch for the patrols here and use the suppressed mk22 to take them down or wait until they move toward the north so you can sneak along the southern edge. Grab some mk22 ammo and crawl through a hollowed log to find thermal goggles. When finished, proceed through the northern passage to enter the next area.
Dolinovodno

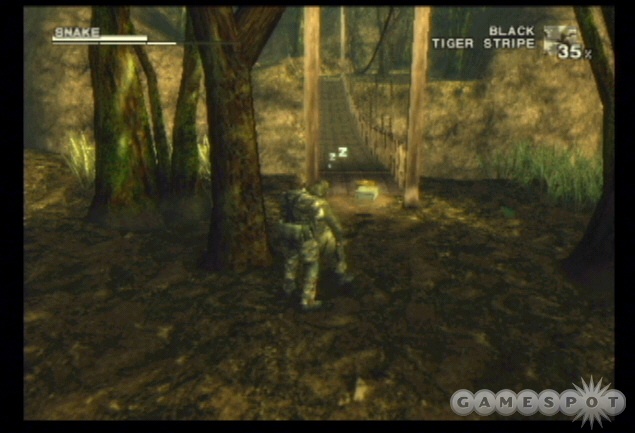
You begin the section on a ledge overlooking a guard standing post at the edge of a rope bridge. You can certainly use the mk22 to eliminate the guard or even possibly sneak up on him but one of the best ways to deal with the guard is to use the bee nest on a tree above him. As the guard patrols below, shoot the nest with your suppressed mk22. When it lands, the angry insects bombard the enemy. He runs across the bridge and causes the other approaching guards to become enveloped in the furious bees. Problem solved! The nest is the large object hanging from the tree furthest to the right but on the left branch.
Run across the bridge carefully (grabbing the ointment left by the nest on the way). Stay in the center or you might fall off the side. If so, pull yourself back up quickly. If you begin to run toward either side, return to the middle. Cross the bridge and look down to see an alcove below.
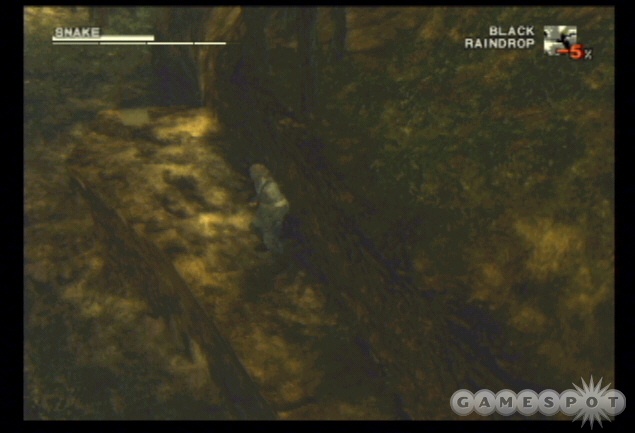
 | 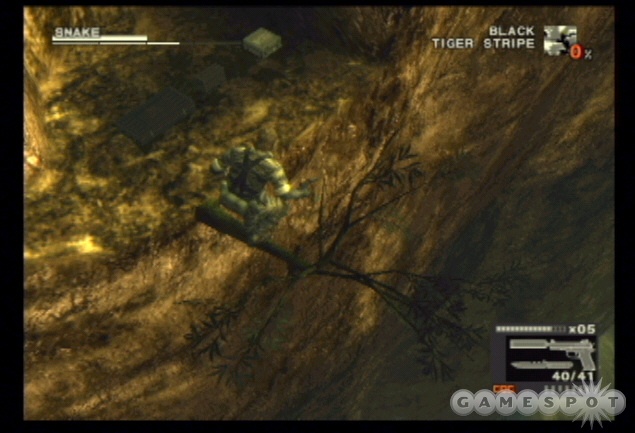 |
To reach the alcove, get back onto the bridge and drop off the left side near the bridge’s end. While hanging off, spot the branch below. Drop down from the bridge and press the action (triangle) button again when you reach the branch. Pull up and maneuver into the alcove to retrieve the XM16E1, pentazemin (keeps aim steady), and some mk22 ammunition. Exit the alcove to the left. Carefully traverse the narrow ledge to the top. Exit the area through the north.
Rassvet
The abandoned factory is just to the north. The opening cut scene reveals some tight security with several sentries posted around the perimeter. There are two patrols to the factory’s south perimeter, one in the eastern corner, and three more hostiles patrolling throughout the factory. You must move carefully and avoid triggering an alert or you’ll have to deal with all interior and exterior guards at the same time.
Advance to the north until you reach the brick wall on the right side. Crawl through the brush ahead and spot the patrol along the path to your left. Look down the path toward the east and you will likely be able to spot the second guard. Make your move on the western guard while the eastern guard moves away. Shoot him in the head with a suppressed mk22 or sneak up behind him and perform a close-quarters combat move. Drag him away from the factory and toward the south as you check his body for items. Watch for the eastern patrol to move along the path toward the western side and use your mk22 or wait until he turns around and sneak up for a close-quarters move.
Crawl to the southern edge of the factory and watch for the patrols inside. One guard patrols the southwestern corner of the factory while two others move through the rooms to the north and northeast. Hide behind the crates and watch for the western guard’s patrol and take him out with the suppressed mk22. One last guard remains outside the factory along the eastern edge. Take him out now or wait until you move over there to eliminate him.
Reaching the rooftop is an alternate method of eliminating the guards inside the factory. After taking out the first two patrols, sneak to the far eastern side of the factory’s exterior. Eliminate the other patrol here then climb the ladder onto the roof. Navigate the roof carefully toward the west and spot the patrols below. Shoot each patrolling guard with the mk22.
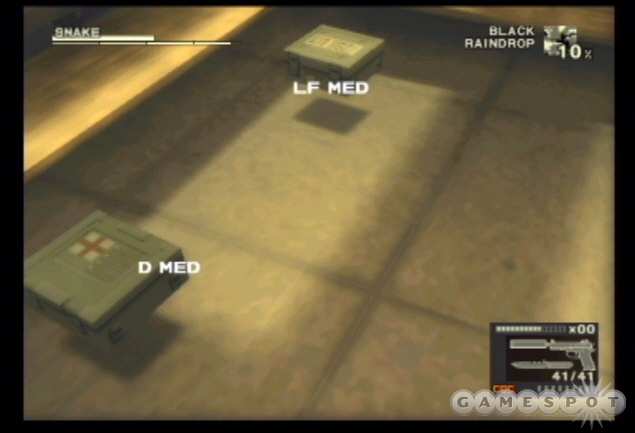
Search near the crates in the southwestern corner of the abandoned factory for the M37 shotgun. Ascend the stairs and find XM16E1 ammo and a XM16E1 suppressor. Go into the storage room to the east of the stairs and locate a life med in the back corner. You can also crawl underneath the factory to find a mousetrap underneath (may also find some food to kill). After searching the area, proceed into the adjacent room to the east and enter the northern door to find Sokolov.
Watch the extended cut scene and leave the unconscious Ocelot alone (though you can search the bodies). Exit Rassvet and return south into Dolinovodno. After the extended cut scene, a wounded Snake must mend his wounds before continuing onward. Open up the survival window then the cure section. Mend the broken bones with splints and bandages; mend the cuts with disinfectant, styptic, suture kit, and bandages.
Operation: Snake Eater
You’re dropped into Dremuchij for a second time with new orders. Rescue Sokolov, find out what’s happened to the Shagohod and destroy it and finally eliminate The Boss. Press R1 during the opening cut scene for Snake’s view during the drop.
Dremuchij East
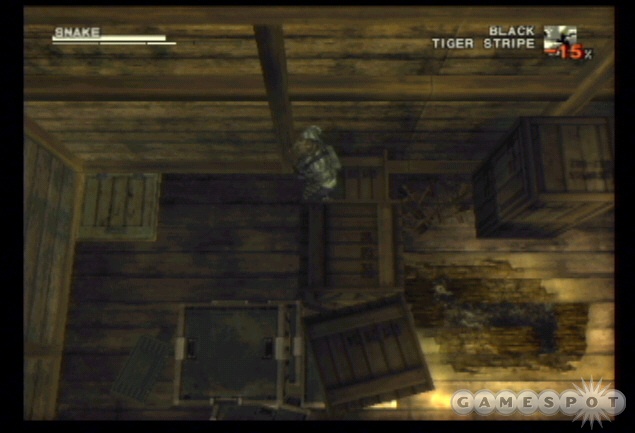
There are no enemies in this area but there is food. Hunt around the area for snakes, frogs, and fruit in the trees to add to your reserves. There are also plants that convert into medical items. Find them along the area’s edge. Use your thermal goggles recovered previously and you can find the plants easier. Check your camo to maximize stealth. Black face paint and tiger stripe uniform should be ideal. Continue through the northern path to find the area’s exit.
Dremuchij North
Traverse the forest path until you encounter the cliff edge going west. Drop off to the ground below. If you need additional food, take the time to hunt snakes (including one in a tree as you continue west) before reaching the intersection toward the western edge. A cut scene interrupts the action when you reach the intersection and the crashed drone.
Your eventual goal lies to the north--back to the abandoned factory. However, if you want to take a brief side trip to gather some items, proceed south from the intersection. Move carefully, though. The ruckus at the crash site has gained the attention from a small patrol. Sneak carefully to the south if you take the side trip; the southern route leads into the Dremuchij Swampland.
Dremuchij Swampland
Navigate the swamp and avoid the crocodiles. Continue across the swampland and into the southern passage to reach the next area.
Dremuchij South
This is your original landing site in the Virtuous Mission. It’s worth the side trip here, especially if you’re low on food. Hunt snakes, rabbits, and even a goat to add to your food storage. Snip medicinal plants to add splints and other cure items to your inventory. Also find an assortment of grenades from the west and eastern sides of the southern section. After exploring the area, return to the north and move through the swampland. Continue toward the intersection in Dremuchij North at the crash site.
Two guards patrol the western edge of the map near the intersection and crash site. Approach the area carefully by taking cover or remaining in a prone position. When the guards move away from each other, sneak up behind and attack with a close-quarters move or use a stun grenade if necessary. Careful camouflage will allow you to sneak by undetected. Continue north into the next area.
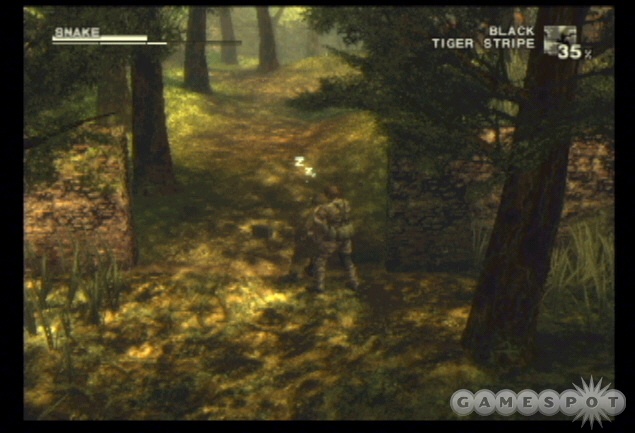
Dolinovodno
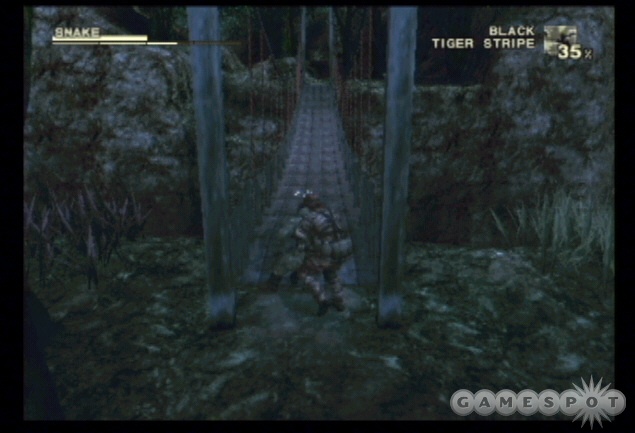
This is the rope bridge from the previous mission. Walk to the ledge and observe the guard standing post at the bridge. Slide down and hide behind the tree as the guard moves away and onto the bridge. Sneak up behind and perform a close-quarters combat move to take down the guard. Drag him back to the brush then cross the bridge.
On the other side of the bridge, another guard patrols the western side of the map. Remain hidden in the brush and watch the guard’s pattern moving north and south. When he moves away to the south, sneak up and take him down with a close-quarters maneuver.
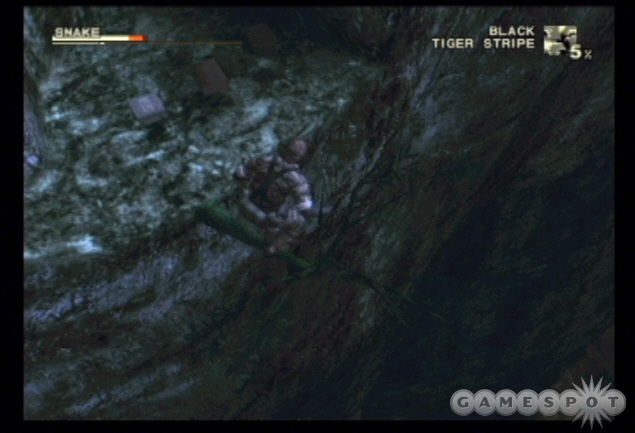
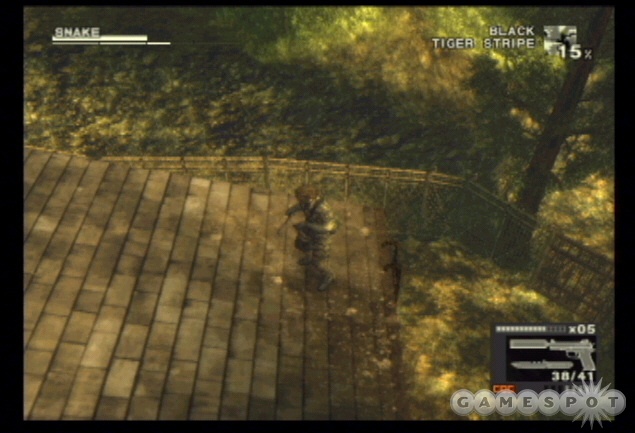
There are new hidden items under the bridge. Return to the bridge and drop off the left side. Drop off again and press the action button to hang onto the branch. Move from the branch to the alcove to retrieve a life medicine, smoke grenade, and the raindrop camouflage. Exit the alcove to the left along the narrow ledge. Proceed north and toward the factory.
Rassvet
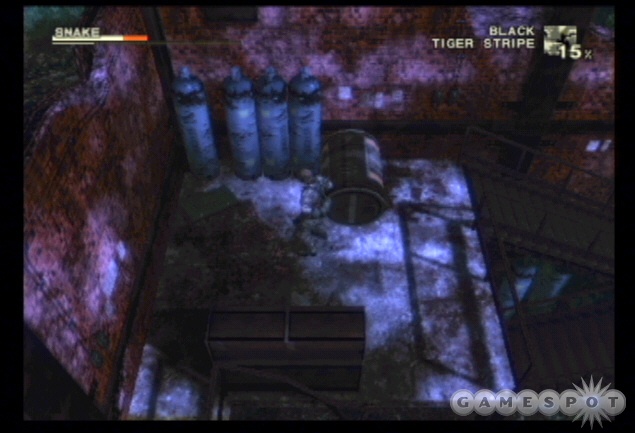
Advance toward the abandoned factory. Beware of guards that may be patrolling inside the factory. Take cover behind the walls or in the brush and wait for your chance to sneak up behind a patrolling guard. Ascend the stairs on the left side of the factory and find an AK-47 at the top. Find a smoke grenade in the back corner of the factory (north of the stairs). Move east into the factory rooms and locate a cardboard box on top of the crates (it can be used to hide inside) and the mine detector in the room south of Sokolov’s previous chambers. Go to the eastern edge of the map and locate the bug juice. Move to the northern edge behind the factory to find the zombie face paint.
Once you have explored everywhere, go into the room where Sokolov was held. Search the locker in the left corner for thermal goggles then exit to trigger the next sequence. Press "R1" when available--twice!--during the scene to get Snake’s view of EVA. You also receive some items, including weaponry back and the scientist uniform for use later in the game.

When you regain control of Snake, eight of Ocelot’s troops have surrounded the factory. You must kill all eight to escape the factory. Arm your AK-47 and remain inside your start position. Use first-person view and aim the AK-47 at the door. Open fire with the AK-47 as each soldier opens the door to hunt down Snake. Repeat until the first batch of soldiers are eliminated. Aim for head shots to conserve ammunition. If an enemy tosses a grenade in the room, move away or out of the room to avoid heavy damage.
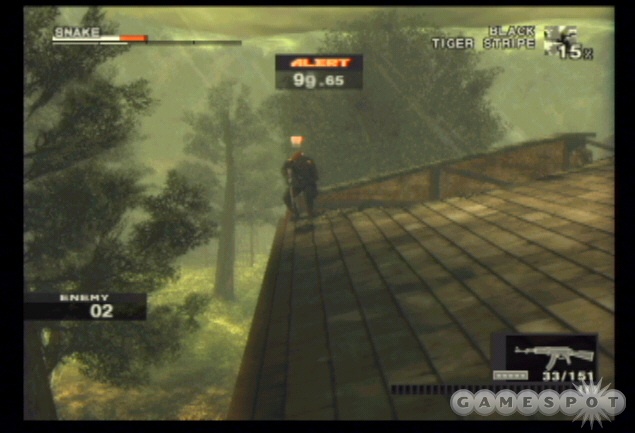
Take cover upon exiting the room and check to the west and east for enemy locations. Switch to the M1911A1 and use it in first person mode and go for head shots on any enemy you can spot from your cover. An additional enemy takes position on the roof. You can eliminate him from below or even climb the ladder and take him out at closer range. Work quickly because he will discover you soon after you reach the rooftop.
After defeating all eight enemies, exit Rassvet to the northeast to trigger the cut scene. Exit again to the northeast and into the next area.
Chyornyj Prud
This new area is free of hostiles, though there are crocodiles, so take time to explore completely for items and food (snakes, fruit, and even croc meat if desired). Avoid getting to close to the crocs or you may suffer damage. You can switch to thermal goggles to see the heat signature of the crocs so you can navigate the terrain a bit easier.
Wade through the water along the eastern edge to find AK-47 ammo and a couple grenades. You can also use the thermal goggles to hunt for these pick-ups easier. Continue up the western side until you find the path that leads further west. Swim underneath the log to reach the adjacent stream and find mk22 ammunition and a grenade as reward for your exploration.
Spend some time in this murky water and it’s inevitable that you will pick up a few stragglers--leeches! Check the cure section periodically and when you see a leech attached to Snake, use the cigar in the surgery section to burn off the leeches.
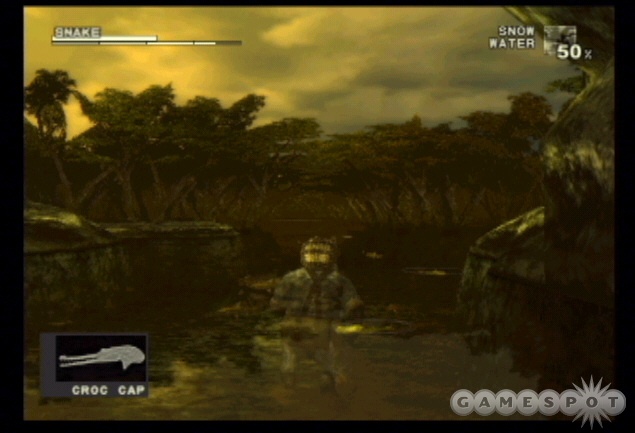
Move to the northwest section of the map and find the climbable tree just to the east near the waterline. Climb the tree and maneuver onto the right branch to the rope. Drop to the rope and traverse it until you’re over another rope. Drop down and press the action button to grab onto the other rope. Traverse it to the right until you’re over land. Drop down and find the croc cap for your efforts. Just south of the croc cap and back in the water is a stun grenade and some M1911A1 ammunition. Before exiting the area, search the northeastern water for a chaff grenade and the GA-KO uniform.
Stock up on croc meat and proceed to the northwestern exit. There’s a trap here, which can be spotted with the thermal goggles. Avoid it and continue north into the next section.
Bolshaya Past South
Walk north and find the electrified fence. Switch on your thermal goggles to spot a hole in the bottom of the fence. Crawl through the hole. If necessary, you can also shoot the power box on the far left side of the fence to disable the charge so you can hunt for the hole without danger.
The area on the other side of the fence is mined. The best way to avoid the mines is with the thermal goggles. You could use the mine detector but it’s much easier to spot the mines using thermal vision. There’s another electrified fence beyond the mines. Crawl to the west along the fence until you find the hole. Squeeze underneath and hide behind the log as you scan for nearby guards. There are two in the area along the western and eastern sides of the section. The path splits along the far west and east sides of the map; both paths lead to the same area.
Avoid the guards or take them down with a suppressed weapon or a close-quarters move. Explore the eastern side of the map to find a narrow ledge. Traverse the edge carefully moving north to reach a hidden pick-up: the splitter uniform.
Remain on the eastern side of the map as you carefully move to the north and northwest. Toggle your thermal goggles on to spot several tree and ground traps scattered in the area. Spot the two guards near the electrified fence ahead. You can take them down from long-range if you’re a quick shot or create some noise to lure one to your position and take him down with a close-range shot or a combat move.
Use thermal vision to find the hole at the bottom of the fence and crawl through. Another guard patrols west and east just north of the fence. Sneak up behind him or shoot the guard with a suppressed weapon. Search a hollow tree stump along the western edge to find the choco chip uniform. There are two northern exits into the next area. Take the exit on the northeastern side of the map.
Bolshaya Past Base
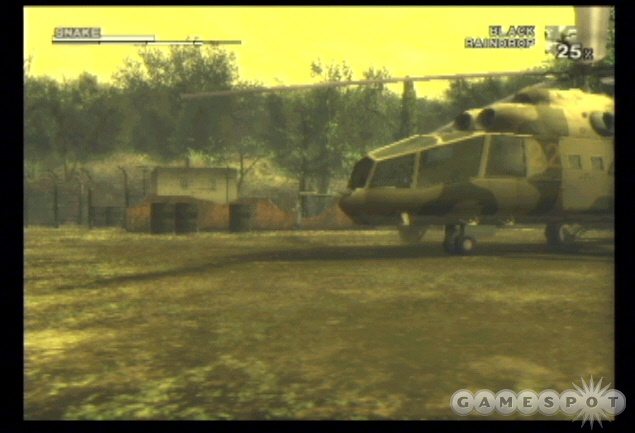
You’re just on the outskirts of a hostile base. There are numerous guards inside the base; they are fairly spread out, however, which means you can take them down from long-range without worrying about a fellow guard spotting the deed.
When you enter from the eastern side, you’ll spot a guard patrolling just ahead of you along a west to east route toward a stationary turret. Wait for an opportunity to sneak up on the guard or take him down at long-range with a suppressed weapon. A second guard patrols in a circular pattern around the helicopter just to the northeast. Take cover near the turret and wait until the guard moves within range and eliminate him with a suppressed shot or wait until he passes and sneak up on him.

A third guard stands at his post in front of the entrance to the structure just west of the helicopter. Sneak carefully along the southern edge of the structure and eliminate the guard with a suppressed shot. Climb the ladder to the structure’s rooftop and grab the water uniform. You may also be able to eliminate the guard to the west with a suppressed shot from here. If not, descend and take him out from ground level. Search the trench and under the walkway for the snow face paint. Go inside the structure to find mk22 ammo and a mousetrap.
Move to the northern side of the structure and locate another guard standing post at a turret. His back is to you so sneak up on him and perform a close-quarters move to take him down. Enter the shack just to the south to find food storage; grab the rations from inside the structure. You can also crawl underneath and find a stun grenade. Search the trench just left of the turret gunner to find mk22 ammo.
There are two additional structures to the northeast. The first is the medical supply shack; grab the antidote, life med, digestive med, and bandage before exiting. The second structure is the armory. Beware of the guard patrolling out front. Avoid or eliminate him before searching the depot for M1911A1 ammo, an assortment of grenades, AK-47 ammo, and TNT. You can use the TNT to destroy the armory or food shack to weaken the forces in the area; destroying the armory limits their ammo supply while destroying their food makes him hungry and weak. Exit the area to the north after you have concluded your exploration.
Bolshaya Past Crevice
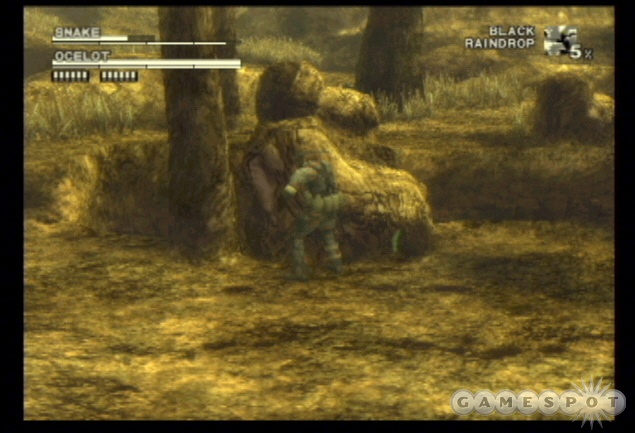
Ocelot greets you immediately upon entering the area. This is the first boss battle in the game.
Boss: Ocelot
Ocelot stands on the far side of a crevice. You won’t be able to get close to him; instead you must use long-range weapon attacks and precise aim to defeat him. There are additional ammunition and grenade pick-ups in the area. Find AK-47 bullets to the west and M1911A1 and mk22 ammo to the eastern side. Grab the phosphorous grenade from the top of a tree to the northwest.
Take cover behind the boulders to avoid Ocelot’s shots, though he can bounce his bullets off of surfaces and still hit Snake. Shoot Ocelot whenever he moves from cover to cover. You can also shoot bee nests above Ocelot’s position to cause Ocelot to move out from cover. Take the opportunity to inflict damage with your weaponry. Scamper and grab additional ammunition as necessary.
To gain a secret camouflage, use only the mk22 against Ocelot. Turn off the suppressor so you don’t waste it. Fire only the mk22, which reduces Ocelot’s stamina instead of health. Defeat him with the mk22 and receive the animals camouflage at the start of the next area.
Chyornaya Peschera Cave Branch
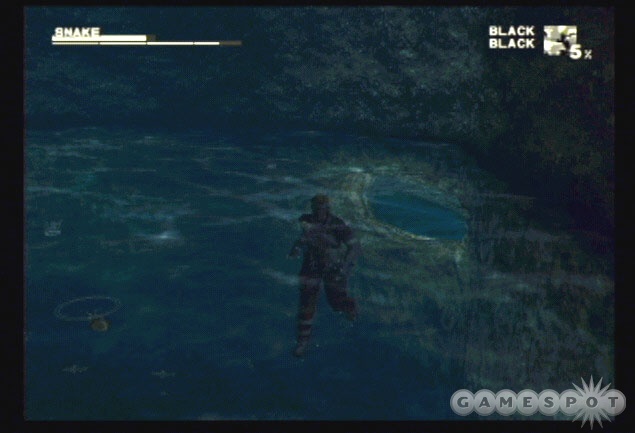
Grab the animals camouflage if you defeated Ocelot using the mk22 only. This cave is extremely dark. Use thermal to help you find food (various frogs, mushrooms, etc) and pick-ups. Move west from the start position and reach the water. Swim down to find some AK-47 and M1911A1 ammunition. Swim across and continue north to find the battery. Return to the water and swim down to find the tunnel on the eastern side. Swim through the tunnel. Grab the ration and swim back. Return to the start location.
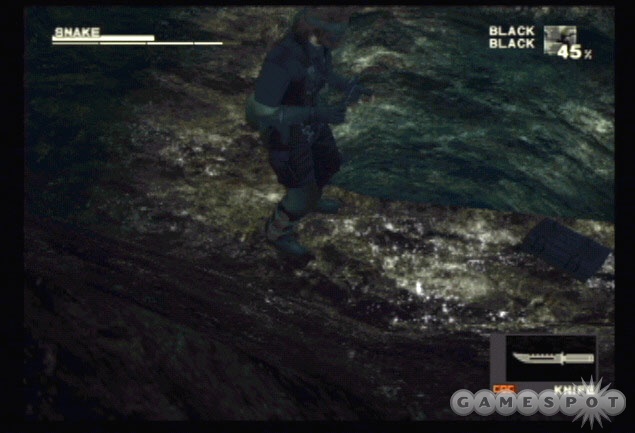
Proceed east from the start location. You’ll reach a chamber with three exits. Go through the left path and toward a new chamber with falls. Grab the torch and phosphorous grenade up ahead. Return to the previous chamber.
Crawl through the middle exit until you’re overlooking the falls. Grab the serum at the top of the falls. Continue north and snag some AK-47 and mk22 ammunition. Move further north to find bug juice. Return to the falls and drop down. Find a narrow passage on the west side and follow it. Crawl through the tunnel and find the room with the medicine and serum.
Go around south and find more AK-47 ammo along with the night vision goggles on the back side of the pit. You can drop down into the pool; it’s where the ration was located earlier. Swim back through the passage and return to the start position. Go east and through the right tunnel to find more ammo.
After exploring the cave, return to the falls and continue north toward the area’s exit.
Chyornaya Peschera Cave
This next cave splits into two paths near its start location. To the right find an M37 shotgun and some mk22 bullets. The right side contains AK-47 and M1911A1 ammunition. On the right side, continue through a crawlspace to find the snow uniform. Throughout both paths, take the opportunity to stock up on food by hunting snakes and frogs.
After exploring thoroughly, advance to the northern end of the cave to find the next boss encounter.
Boss: The Pain
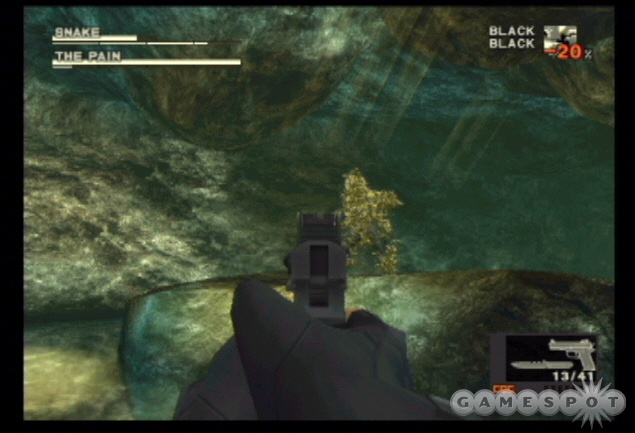
You’ll meet The Pain in this cave pool chamber. He stands on a rock across from your start position. Like the battle against Ocelot, you won’t be able to reach The Pain at close-range and instead must use long-range weapon attacks to defeat the boss. Thankfully The Pain doesn’t bother to duck behind cover; however; he uses his control over hornets to create a shield for himself that’s as good as any rock. While The Pain’s hornet shield is active, you can’t damage him.
To force the hornet shield off temporarily, toss a smoke grenade at The Pain’s position. The Pain is vulnerable without his hornet shield active.
Initially, The Pain’s two most deadly attacks are his grenade and "Tommy gun" assaults. He’ll toss a hornet-made grenade to your position. If you’re within the blast radius, you’ll suffer serious damage--including damage that may require a cure. One of the best ways to counter the grenade is to watch when it lands on your position and see which way the explosive rolls. If it rolls to the left, then jump into the water on the right; if the grenade rolls to the right, jump into the water to the left. Swim away from the grenade to avoid the blast radius.
Avoid the Tommy gun attack in a similar fashion. The Pain creates a machine gun of hornets and fires them at your location. Dive into the water and swim down to avoid getting struck by the projectiles.
In fact the water is your best defense against most of The Pain’s attacks. When threatened, just jump into the water and swim down. Return to your start location and resume the attack after avoiding the danger.
After reducing The Pain to half health (or stamina if using the mk22), he’ll unleash stronger hornet projectiles. If you’re struck, check the cure section to see if you’ve been stung. Use the knife to dig out the stinger and mend the wound like a cut.
The key to the battle is to avoid The Pain’s attacks and wait for him to become vulnerable (out of his hornet shield) and strike effectively when given the opportunity. You can wait it out or toss smoke grenades at The Pain to speed the process.
Like the Ocelot battle, if you have the patience to defeat The Pain with only the mk22 (don’t use the suppressor), you receive a special uniform as a reward. After defeating The Pain with the mk22, move around the right side of the chamber and follow it to the ledge overlooking The Pain’s start spot. Perform a running roll to the location to find the hornet stripe uniform.
Chyornaya Peschera Cave Entrance
Advance toward the north through the narrow cave. Gather snakes, mushrooms, and other food items if needed. Look in an alcove on the left for mines and mk22 ammunition. Exit to the far north.
Ponizovje South
Wade carefully through the river. There are guards patrolling the river bank. Stay out of their light. If you took the croc cap from Chyornyj Prud then you’ll have an easier time. Equip the croc cap and crouch if spotted. When the guard looks away, continue to the north. Stick along the left riverbank to pick up some chaff grenades before reaching a fork in the path. Your goal lies to the north; however, there’s an armory and valuable supplies to the west if you want to take a side trip. At the split in the path, take the left route into Ponizovje West.
Ponizovje West
There are two guards at this supply depot. One patrols the dock to the west and another is positioned toward the north. Swim along the southern edge and move up the western side to the dock. Swim as close to the dock as possible; avoid detection by the patrolling guard on the western dock by remaining underwater until you’re near the boats and dock. If possible, eliminate the furthest guard with a suppressed weapon while the closer guard is walking away. Eliminate both guards to freely search the area. If you trigger an alert, reinforcements may arrive.
Search the boats for grenades and mk22 and M1911A1 ammunition. Walk to the northwest corner and find an mk22 suppressor in the back corner. Walk to the east and open the door into the armory to grab the sniper rifle, grenades, TNT, and AK-47, M37, and mk22 ammunition. Back in the water near the southwestern corner is a M1911A1 suppressor. If you have trouble finding it, use the thermal goggles. Use the TNT to destroy the munitions depot before leaving. Return to Ponizovje South and swing north into the next area.
Ponizovje Warehouse: Exterior
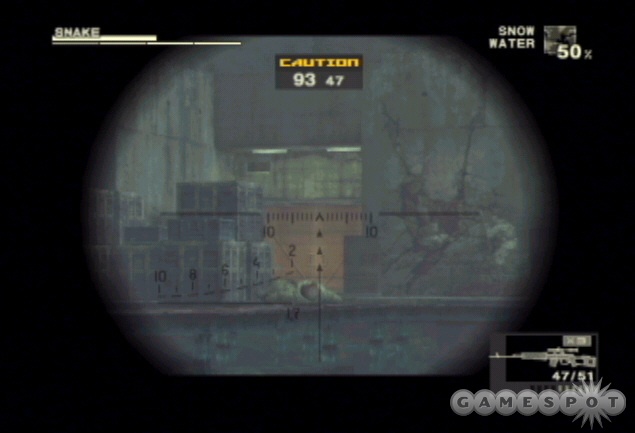
This is another dock area that somewhat resembles the Ponizovje West area. After the extended cut scene, equip a suppressed weapon. There are three guards on the docks. One stands guard on the closest dock; a second guard patrols the western dock; and a third patrols the northern landing. The closest guard can be taken out with a suppressed weapon. It shouldn’t alert any other guards. The other guards are further away. The sniper rifle recovered from the munitions depot in Ponizovje West can easily eliminate the guards but you will need to work fast to avoid reinforcements. You could also swim closer to the north or western guards and attempt to eliminate one with a suppressed weapon before using the sniper on the final enemy.
After eliminating all hostiles, swim to the southwest corner to find additional sniper ammunition. Check the boats for AK-47 and mk22 ammunition as well as stun grenades. Walk north and find smoke grenades behind a couple barrels. Swim underneath the eastern dock to find M1911A1 ammunition and a M1911A1 suppressor. When you’re finished exploring, go through the hall on the right side into the next area.
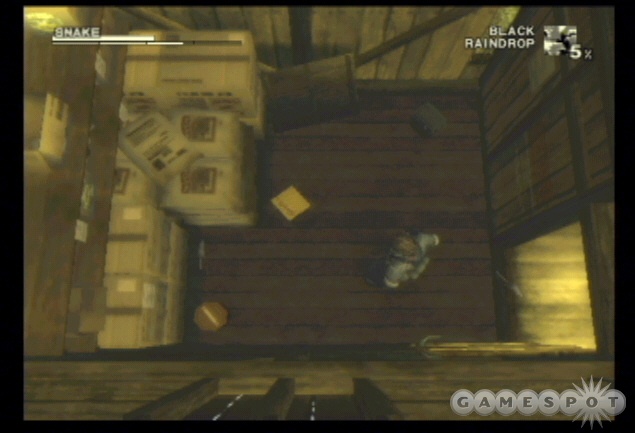
Ponizovje Warehouse
Move down the hall and up the staircase. Exit to the left and spot the guard below. Go down and grab the antidote and serum in the corner. Look down the stairs for the guard positions. There are two guards below patrolling in a circular pattern around the supplies. Use a suppressed weapon to take out the closest enemy while he’s behind cover then eliminate the second with close combat or a firearm.
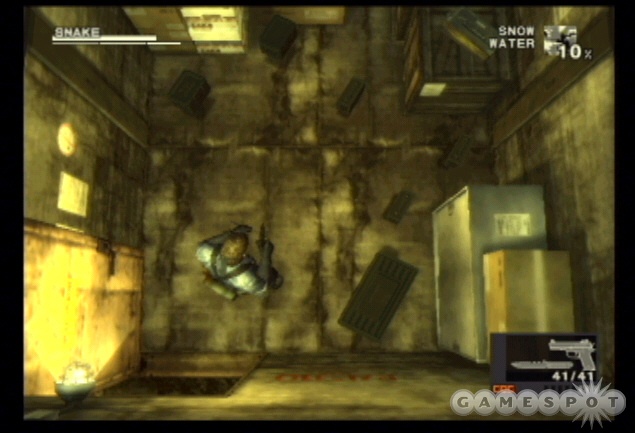
When you reach the ground level, look in the southwest corner for the desert face paint. Ascend the stairs on the other side of the warehouse and pick up the styptic and disinfectant from the first floor. If you want the mk22 suppressor off of the crate below, perform a running roll to drop onto the crate with the pick-up. Back on the first floor enter the room across from the styptic and disinfectant to find the food storage. Grab the rations and mousetrap and destroy the place with TNT if you wish.
Ascend to the top floor carefully. There’s a guard that patrols the upper level. Wait until he’s turned away before reaching the top level. Once there either sneak up on the guard or take him down with a suppressed firearm. Exit through the open door ahead.
Graniny Gorki South
Walk forward into the dark forest. Toggle your thermal goggles as you near the trees: there are plentiful traps in the area. The goggles will help you spot the traps as well as items, creatures, and plants that you can add to your inventory. Find a book in the southwestern area, noodles in the northwestern side, and life medicine in the southeastern corner. Move very carefully and with thermal on to avoid triggering any traps. Stock up on food before exiting through the northern passage.
Graniny Gorki Lab Exterior: Outside Walls
Switch to black face paint and black camouflage for maximum stealth. Get prone and crawl toward the fence. There are several guards patrolling the lab exterior just beyond the fence. Stay down to avoid detection. If you crawl to the far west you’ll find a suppressor for the mk22.
Crawl to the far western side. Move slowly and remain down to stay undetected. Use thermal goggles to detect a hole in the fence to the far left. When guard patrolling the area moves to the right, crawl through and to the left side of the structure ahead.
Snag a suppressor from the M1911A1 and crawl through the hole in the side of the structure and into the next area.
Graniny Gorki Lab Exterior: Inside Walls
Remain on the ground because there are a couple guards nearby. Look to your left and spot a couple guards patrolling near a truck. Wait until the nearest guard moves to the truck and shoot him with a suppressed weapon or you can wait until he’s moving away from you and sneak up behind for a combat move. Observe the next guard’s patrol and use similar tactics: either a suppressed weapon or sneak up behind with a combat move. A third guard patrols the eastern side of the interior walls. Take him down from long-range after clearing the other guards.
Scamper to the northwest corner and find a smoke grenade. Hug the right wall and find the crawlspace into the lab. It leads into the Graniny Gorki Lab 1F but you’re only here to grab a secret item (this isn’t the optimum entrance). Crawl through the tight space and take the first left. Grab the oyama face paint. Return back outside.
In the northeast corner of this exterior area is an armory. Sneak toward the northeast corner and eliminate any remaining guards. Enter the armory and pick up the AK-47 and M37 ammunition, the TNT, and the XM16E1 assault rifle.
Return to the front of the structure and spot the double doors. That’s not the entrance. Look to the right and find the single door around the corner. Switch to no face paint and the scientist uniform that EVA gave you earlier in the game. Now you’re in disguise and ready to infiltrate the lab!
Graniny Gorki Lab 1F
Walk into the lobby and go right. Avoid contact with guards. You won’t be recognized by guards unless you hang around for too long--or accidentally knock them down with an opened door. Just move carefully through the lab.
Take the first right and follow the hall around until you turn back to the north. Enter the first door on the left. Grab several medical supplies, including a bandage, ointment, serum, and suture kit. Steer clear of the scientist here. These scientists are much more astute and uncovering your disguise. Don’t stare at one. If there’s a scientist around, turn away or just leave the area.
Return toward the main lobby at the section start. Find a door to the northern side. Go through the door and through the large chamber. Descend the staircase at the back end.
Graniny Gorky Lab B1 West
Follow the hall to the left and around another left corner. Go through the door on the right side. Careful around the guard! Don’t slam the door in his face or he’ll set off an alert. Search the right side of the room for the cig gas spray--extremely useful in knocking out scientists or guards. Cross the hall into the conference room.
Steer clear of the scientist here. Either knock him out with the cig gas spray or simply avoid him. Search the left locker for the knock out handkerchief--another excellent tool to knock out the lab’s inhabitants using stealth means. Exit through the door in the upper right corner of the room.
Traverse this work area carefully. Several scientists inhabit the room so you’ll need to stay out of their line of vision and keep your back turned when necessary. Find a battery in the back right corner of the room. Also, there’s a suppressor for the XM16E1 in a cubicle on the right side. Exit through the door at the end on the left and advance to the next door to trigger the cut scene.
After the discussion, return through this section of the lab and back up the stairs into Graniny Gorky Lab 1F. Heading toward the lobby, take the hall on the right and back toward where you grabbed the medical supplies. Instead of entering the room that contained the med supplies, continue toward the staircases at the far end of the hall. Check the lockers first to refill your cig gas spray if needed. Though not necessary, take the staircase down to collect a few items.
Graniny Gorky Lab B1 East
Follow the hall to the door on the left. Avoid the guard if he’s moved nearby. Enter the room and pick up the mk22 ammunition and antidote. Search under the desk (while the guard is safely away) for M37 and sniper rifle ammunition. Exit the room.
Continue down the hall and enter the open cell. Crawl under the bed to grab the life medicine when no guards are looking. Return up the stairs to Graniny Gorky Lab 1F and ascend the staircase.
Take the right turn and open the first door on the right into the library. Pick up the mk22 suppressor inside. Exit and take the next door on the right into the bathroom. While no guards are inside the room, punch the far right stall door to break it down. Pick up the fly uniform inside the stall. Exit the bathroom.
Go around the corner to the lockers. Search the left lockers for AK-47 and XM16E1 ammunition. Return near the stairs and go east and around the corner. Search the first door for some food items. Go through the second door to find a book.
Return to the lockers and exit the door just beyond the lockers. Exit onto the balcony at the labs inside walls.
Drop off of the balcony and switch camouflage. You’ve been here before and guards have returned--plus it’s daybreak. Items have also returned so pick up what you’ve grabbed before as you exit through these areas. Switch to woodland face paint and leaf uniform and adjust as needed to remain hidden.
The exit remains in the same place, in the lower left corner of the area. It’s along the left wall just beyond the truck. Either sneak by the patrolling guards or use a suppressed weapon to eliminate each guard one at a time. The two most important are the two near the truck.
Return to the exterior walls. Look around the corner and when it’s clear, crawl under the electrified fence. Hug the southern edge and crawl to the southern passage and out of the area. Keep out of sight as you return to Graniny Gorky South and confront The Fear.
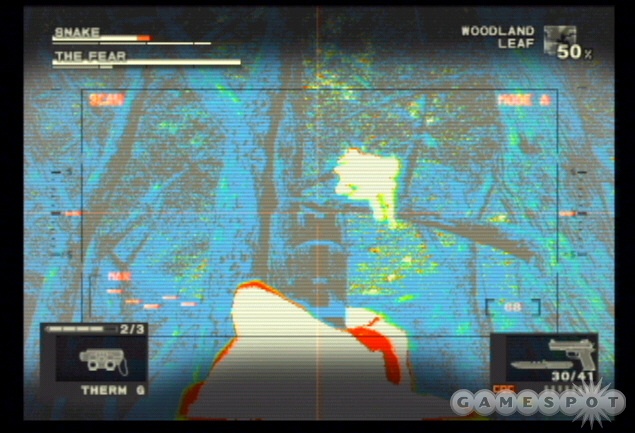
Boss: The Fear
That crossbow bolt you took in the opening cut scene is real--plus it’s poisonous. Open up the cure section to mend your wound. Take out the bolt using the knife then use the styptic, suture kit, and bandage to heal Snake. Open the medicine inventory and select the serum to cure the poison.
The Fear leaps around from tree to tree making him hard to keep track of and often harder to shoot. Equipping the thermal goggles will help you keep sight of The Fear. It’s also extremely important to wear the thermal goggles so you can spot the traps scattered around Graniny Gorky South if you plan to move around. With the thermal goggles on, you can spot The Fear’s heat signature in the dense trees. Aim and fire your weapon and follow The Fear around as he moves from tree to tree. If you don’t have the thermal goggles then capitalize when The Fear looks for food.
As The Fear losses stamina, he’ll find something to eat. You can even toss rotten food and he may go for it. If you don’t have any poisonous meat, you can also shoot some of the mushrooms or poisonous frogs in the area and he’ll go for those too. Either instance it’s an excellent time to be aggressive and shoot The Fear as much as possible. If you need ammunition, search the area’s edges to find ammo for the AK-47, XM16E1, M37, and m22.
If you want to secure a hidden uniform, defeat The Fear by only using the mk22. Take the suppressor off and follow the same strategy. Toggle the thermal goggles so you can see the traps and The Fear’s movements and attack the boss using the mk22 only. Upon defeating The Fear, use the goggles to locate the spider uniform nearby.
Explore the area for food and remaining ammunition before exiting south and returning into the warehouse.
Ponizovje Warehouse
Guards have returned to the warehouse. One patrols the staircase. Take him down with a suppressed shot or wait until he moves back down to get closer. Eliminate the other guards on the ground level and pick up the items that have also returned. From the ground floor, ascend the stairs in the lower right and go through the door on the left. You possess the necessary key. Continue into the next area.
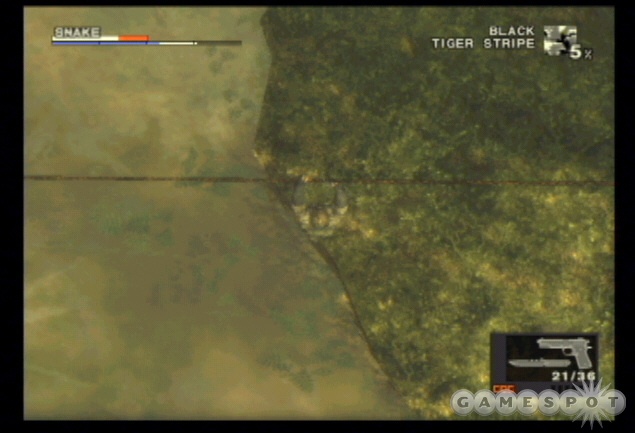
 |  |
Svyatogornyj South
Traverse this hostile-free zone and collect food and medicine (from plants) as you pass through. Switch on thermal goggles if you have trouble spotting items. For instance, cut the plants just outside the area’s entrance for some medicinal supplies and more plants along the eastern edge. Canvas the area completely before proceeding through the northern passage and into the next area.
Svyatogornyj West
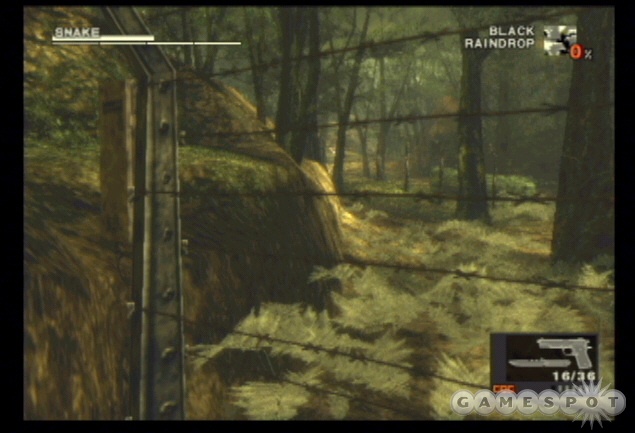
Advance carefully through the dense, narrow passage. There are a couple guards patrolling up ahead. If you move too quickly, you’ll encounter them before you realize they’re even close. When the path splits, keep to the eastern side. As it turns more to the west, take cover and scan for the nearby guards. Toggle the thermal goggles and try and pinpoint their location. Sneak up behind and use close-quarters combat or use a suppressed firearm to eliminate the guards.
There’s plenty of cover available so it’s easy to remain hidden. Utilize your various sensors as well as the thermal goggles to pinpoint enemy movements and patrols and use your suppressed firearms to silently eliminate each guard. A noise could also lure a patrolling guard toward your position for an easier kill. After dispatching the first two guards, continue through the dense forest toward the northern side.
There are two additional patrols here after you weave through the snake-like section of the map. Remain prone and behind cover as you seek out enemy positions with sensors and the thermal goggles. Lure guards close for a combat move or take them down from longer range with a suppressed weapon. Check the western edge of this section for XM16E1 ammo then continue north. The exits split to the north and east. Your goal lies to the north but if you’re up for a side trip for supplies, proceed east and into the next section. It’s worth the side trip for a valuable machine gun.
Svyatogornyj East
A couple guards patrol near the start position. If you’re quick, you can move to the east and just past them and avoid them completely (if you fail to alert any other guards). If you want to take them out, wait until they turn around and eliminate the rear guard by sneaking up on him and using a close-quarters combat move or just use a suppressed firearm from long-range.
Hug the eastern edge of the map as you advance toward the north. Grab the book from the foliage and spot the structure ahead. You can either sneak close and use a suppressed firearm or use the sniper rifle from longer range. There’s a single exterior guard that patrols outside the structure and two more inside. Any noise may garner the attention of the interior guards; when they exit the structure to see what’s happening, eliminate them from long-range.
Enter the structure and grab the M37, XM16E1, mk22, and sniper rifle ammunition. Enter the room on the left to find mk22 and M1911A1 suppressors. Search under the cots to the north for an XM16E1 suppressor and TNT. Return to the previous room and go north. Look behind the crates in the northwest corner to find the M63.
Exit the structure and go to the northwest to find food storage. Pick up food here and blow up the structure with TNT to cause guards in this level to starve. Exit the area and return to Svyatogornyj West. Your goal lies to the north. Save your game at this point before the challenging boss battle since you can’t be killed during the fight, only captured! Proceed north when ready.
Svyatogornyj South
A cut scene opens as you enter Svyatogornyj South. Prepare for the battle against the ultimate sniper known as The End.
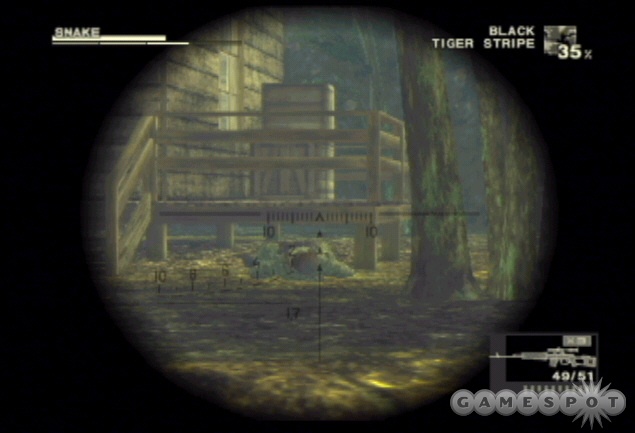
Boss: The End
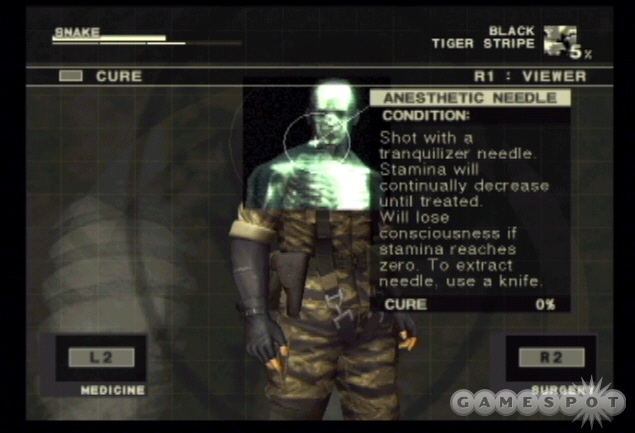
This is an impressive battle that takes place over three maps. Snake is both the hunter and the hunted against The End, a sniper that’s surprisingly adept for his apparent age. The End doesn’t attempt to kill you but capture you. He’ll hit you with tranquilizer needles that deplete Snake’s stamina. If you’re struck, check the cure section and use a knife to extract the needle immediately. As you get low on stamina, eat food to replenish it. If your stamina falls completely, you’re captured and return to a point earlier in the game.
Check the overhead map and note the circles. These are The End’s potential sniping spots. As stated, even though you’re being shot at you’re also the hunter. You’ll need to use several items in your inventory to effectively hunt down The End. First, thermal goggles can help you spot The End at his sniping location when you’re within range--you’ll be able to see his heat signature. Also, the thermal goggles can be used to see The End’s footprints when he moves from sniping spot to sniping spot. The directional mic can also be useful. You may be able to pick up on The End’s breathing and be able to determine the direction of his location.
When The End strikes with his weapon check the map again and spot the red "X" that denotes his location. Maneuver toward the location carefully and attempt to gain sight on your target with your sniper rifle or other weapon using first-person viewpoint. You’ll have to move throughout all three maps to keep up with the end. Plus it’s worth the effort to explore as you will likely need additional food to remain in the battle. Collect every food item found to keep your inventory full.
If you do get too close to The End and he spots you, he’ll toss a flashbang grenade to help him make an escape. When The End does leave a sniping post, use the thermal goggles to track his footprints and move toward possible sniping spots in that direction.

There’s an armory in Sokrovenno South on the western side. If you need additional ammunition, enter the armory and grab the supplies. It includes mk22, M37, sniper rifle, and XM16E1 ammunition.
This boss battle offers two possible hidden rewards. If you can eliminate The End using only the mk22--so you deplete The End’s stamina instead of his health--you can recover the Mosin Nagant, which is The End’s tranquilizer sniper rifle. Note that The End’s stamina depletes on its own during battle (though at a rather slow rate).
To recover The End’s hidden camouflage, you must "force" him to hand it over. You must sneak up on The End and point your weapon at him at close-range. Keep your weapon pointed at him until he finally gives up the moss camouflage.
Speaking of camouflage, check your face paint and uniform during the fight and try to remain as hidden as possible, especially if you want to get the jump on The End. Sneak around instead of running to remain out of his sight, especially if you know his current location and hope to get behind him.
Krasnogorje Tunnel
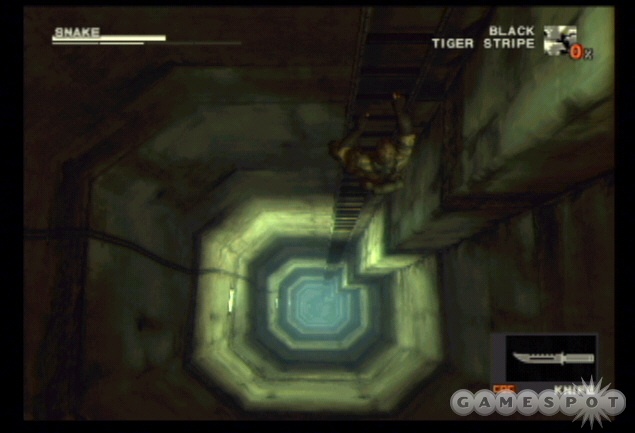
Collect rats through this tunnel if needed and reach the ladder at the back end. Climb the ladder (it’s a long one!) until you reach the top. Hunt more rats if desired before scampering to the exit at the end of the hall.
Krasnogorje Mountain Base
Switch face paint and camouflage for this mountainous terrain--it’s quite different from the lush forest locale from earlier in the game. If you picked them up, choose the desert face paint and choc chip uniform. Snag the serum and smoke grenade from the corner before proceeding to the west. Drop down the ledge and carefully move to the corner.

Peer around the corner and spot the patrolling guards. It’s difficult to see each guard because of the uneven terrain. Most guards patrol east to west; thankfully they’re fairly spread out, which will help you pick them off one at a time. Four guards patrol the ground level while a fifth stands post on a ledge on the eastern side of this area. Eliminate him first if possible since he’s looking down on his fellow guards below and may notice when one of them takes a bullet to the head.
The sniper rifle is an excellent weapon here, though it is rather loud. If you can sneak closer and use a suppressed mk22 or M1911A1, you can prevent the noise from alerting other guards. Use thermal to pinpoint guard locations as you crawl close to their location.
Check the western edge of the area for a rock formation holding some items, including serum, mk22 ammunition, and sniper ammunition. It’s also possible to reach the ledge where the guard stands post. Find the crawlspace on the eastern edge just south of the ledge. Crawl through and reach the ledge containing some grenades.
After you kill a guard, vultures swoop down to feed on the remains. Shoot or knife the vulture to collect its meat and add the food to your reserves. The vulture meat replenishes a good amount of stamina so replace any rotten or low-end food from your reserve with vulture. Once you’re done exploring the area, exit to the north.
Krasnogorje Mountainside
Several guards patrol the cliffs and ramps leading to the base area. At the area’s entrance, look toward the first ramp and wait for the first guard to proceed down. Wait until he turns away and sneak up on the guard for a combat maneuver or use a suppressed weapon to eliminate the hostile. A second guard patrols a bit higher near the anti-air gun. Wait for him to move close to the gun and eliminate him with the sniper rifle; or you can wait until he moves away and gives you a chance to move closer for an alternate weapon.
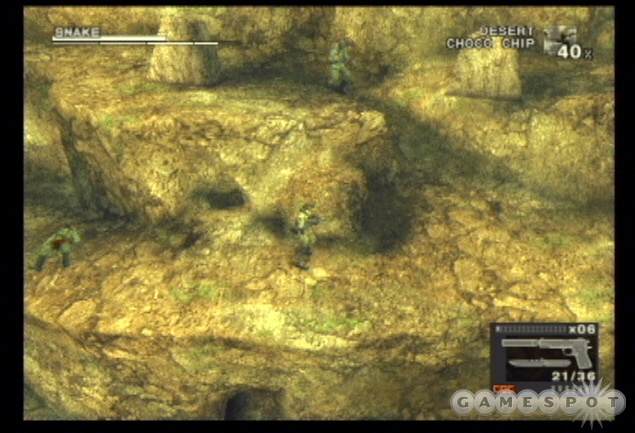
Before moving up the ramp, go to the corner and pick up the sniper ammo, antidote, AK-47 ammo, M37 ammo, and M1911A1 ammo. You can ascend the ramps or even check some of the caves for additional routes up the mountainside. Check the cave behind the anti-air gun for XM16E1 ammo.
A helicopter patrols the airspace around the mountainside--if you didn’t destroy it earlier in the game. The helicopter provides sound cover for your attacks, including the loud sniper rifle. Carefully move up the ramps and spot another guard patrolling above you. Take cover behind rocks and wait for him to move away before eliminating him.
Vultures feed on guard corpses in this location as well so if you need additional food, kill the scavengers and collect the meat as you move toward the mountain base.
After eliminating the guard on the ramp, continue to the higher ramp to reach an excellent sniping position over the base. Scan the base with sniper zoom to locate remaining guards and eliminate them with the sniper rifle (with sound shrouded by the helicopter if it’s around). You can also sneak in through the ground level and take out the guards at closer range but it’s more risky and a higher chance of causing an alert. The sniper position also contains mosin ammunition if you have the weapon.
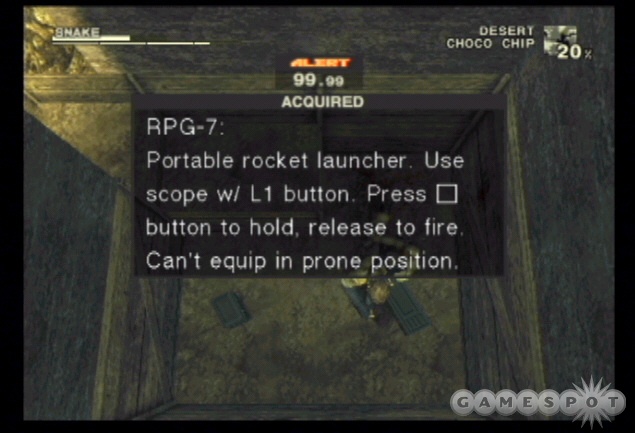
The mountain base contains three structures. The first structure on the south side is the armory. Take a trip inside to find the RPG-7 rocket launcher and TNT. The second structure just to the northeast is the medical supplies shack. Pick up the serum, splint, and disinfectant. Check the final adjacent structure to locate the food supplies. Snag the rations inside. Use available TNT to destroy these structures to weaken guards throughout the area. Continue east into the next section.
Krasnogorje Mountaintop
Take cover behind the crates and spot the nearby patrolling guard and another patrolling near the anti-air gun up on the cliff. Use the sniper rifle to eliminate these foes or wait for a chance to sneak up on the nearby hostile. Three other guards patrol the northern side of the area. Check thermal to pinpoint their location as you move toward the north. Check the shack in the southeast corner for a handful of grenades and some M37 ammunition.
Beware of guards patrolling the trenches, which might be harder to see if you’re running above them. There are two more structures on the northern side of the map, including an armory with RPG-7, sniper, and M63 ammunition as well as TNT and a claymore mine. Blow up the building with the TNT. The other structure contains some medical items. Exit through the red door in the northeast corner after exploration.
Krasnogorje Mountaintop Ruins
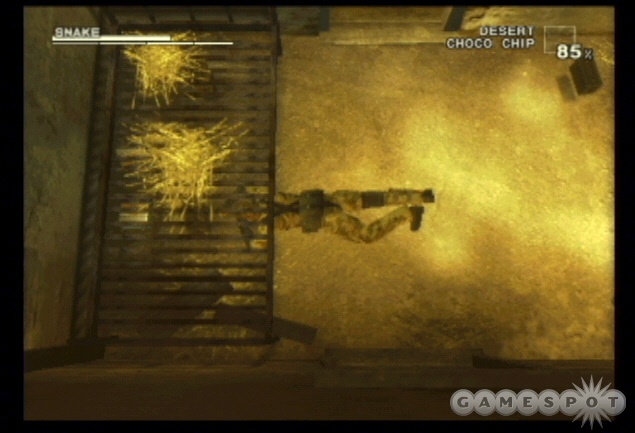
Find EVA in the opening cut scene. When you regain control you’re overlooking the weapons base. Return to the mountaintop ruins and grab the food in the first building. In the second quarters, pick up the claymore, XM16E1 ammunition, and search under the bed for sniper and AK-47 ammo (as well as mosin if you have the weapon).
Return to the mountaintop. Guards have returned so move carefully down the eastern side to the other red door. EVA gave you the key so you’re ready to proceed. Spot the flamethrower guard near the anti-air gun south of your start position. Eliminate him as you move along the eastern edge. Drop down above the door and enter quickly before setting off any alerts.
Grozny Grad Underground Tunnel
Descend the stairs picking up the grenade along the way. Note the bats on the ceiling; shoot them if you need some meat. At the bottom of the stairs, turn south and pick up the XM16E1, M37, and M1911A1 ammunition. Proceed down the hall. At the end of the hall snag the ointment and bandage. Turn right and pick up the AK-47 and mk22 ammunition. Stand back and shoot the barrels ahead to expose a battery. Drop down into the tunnel’s center to encounter the next boss.
Boss: The Fury
The fight against The Fury takes place in this underground tunnel separated into several rows. The Fury uses a devastating flamethrower attack that can inflict heavy damage, including burn damage that should be cured on the spot with ointment and a bandage. The Fury blasts his fire attack down rows or across the end of rows; the fire remains long after the attack and can still cause damage if you move within the flames.
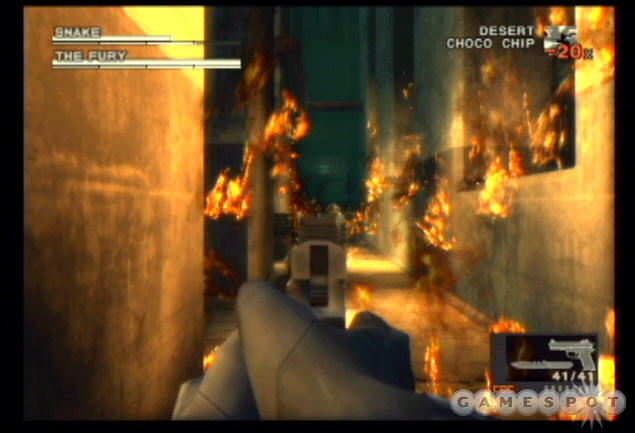
The key to beating The Fury is hit and run attacks. You can’t remain in The Fury’s line of fire (literally) or you will get rolled over in flame. Also, steer clear of maneuvering near the southern edge. The Fury’s attack can knock you off. While Snake holds on and pulls himself up, you can suffer additional damage or even be knocked off completely.
When you spot The Fury down an alley, take your shot then quickly move to an adjacent (or even further) alley to avoid the fire attack. If you defeat The Fury using only the mk22 or the mosin, grab the fire uniform as your reward. Grab the disinfectant and mk22 ammo on your way out. Pick up the ointment to the left of the ladder and hunt any nearby rats if you need food. Climb the ladder to enter Grozny Grad.
Grozny Grad Southwest
The Grozny Grad base is separated into four primary sections: northwest, northeast, southwest, and southeast. Your goal lies in the northeast section of Grozny Grad--that’s the entrance into the weapons lab. It’s certainly possible to explore the entire grounds to find plenty of supplies as well as the ability to destroy food and weapon storage. Guards populate the ground, however, so you must move carefully to avoid alerts and subsequent reinforcements.
You begin in a small recessed area. A guard patrols above you to the north. When the guards are turned away, crawl under the stairs and find XM16E1 and M1911A1 ammunition and grenades. Watch the patrol of the nearest guard to the north. Use a suppressed weapon or sneak up on him for a close-quarters combat move. Drag his body behind the nearby storage crates.
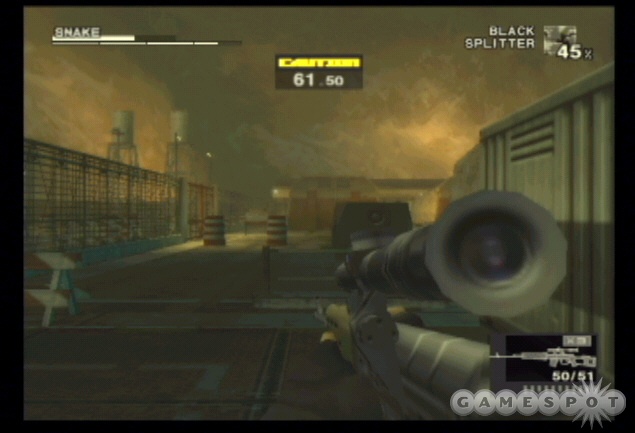
A second guard patrols near the southern edge near the bunkers. Wait for him to get close and eliminate him with melee or a suppressed weapon. As you move west, search under the storage units for more items, including chaff grenades. Another guard patrols the north side of the bunkers and another patrols the western side. Eliminate both from long-range with a suppressed weapon. The sniper rifle is also useful but will likely draw the attention of a guard. Search the back of the truck on the west side for a M1911A1 suppressor.
If you wish to explore the southeast section, find the entrance on the eastern side of the current area near your start position. There’s a crawlspace just northeast of your start location. Crawl through into the southeast.
If you picked up the cardboard box early in the game--in Rassvet--you can use it to get inside the weapons lab easily. Hop into the back of the truck on the western side of this first area and equip the box.
Grozny Grad Southeast
Remain prone. A guard patrols on the far side of the nearby truck. Wait for him to move into your line of fire and put him down with a suppressed shot. You could also sneak up behind him as he patrols near the truck. Another guard patrols the alley to the eastern side of the area. There’s a cardboard box here too; leave it as it proves much more useful later. Shoot the guard with a suppressed weapon.
Two more guards patrol near a staircase on the western side of this area. You can climb the ladder to the roof to gain height advantage over the guards or remain behind the crates and wait for the guards to move within view or away from your position so you can safely expose a weapon and eliminate the guards with a suppressed projectile. The rooftop also contains a book.
There’s another optional section here. Enter the door on the ground floor into the torture room.
Grozny Grad Torture Room
At the corner, look toward the station to the north and wait until a guard’s head appears into view and drop him with a suppressed weapon. Enter the door south of your start location to find a collection of medical supplies, including ointment, disinfectant, and styptic. Maneuver into the guard station to find a camera. Return to the southeast after exploring the room.
Move to the western side of the southeast section of Grozny Grad to find another crawlspace. Squeeze through the crawlspace into the northeast section.
Grozny Grad Northeast
Sneak to the right of your start position and spot the guard in the alley. Sneak up behind him and take the guard down with a close-quarters combat move. Remain hidden behind the structure and get a pinpoint on the other guards patrolling between your position and the northern building, which holds the entrance into the weapons lab. Eliminate each guard with a suppressed weapon starting with the furthest away.
The trucks near the door into the weapons lab (at the northern structure) contain grenades and ammunition if you need supplies.
Sneak to the northeast section to find food storage and another patrolling guard. Eliminate him as you approach then search the storage building for some rations. If you have TNT, blow up the food storage to starve the guards throughout Grozny Grad.
If you wish to explore the northwest section, its entrance is in the southwest side of the northeast area. Find the orange door and go through into the northwest section. It’s worth exploring for the items as well as the chance to destroy the armory.
Grozny Grad Northwest

Sneak toward the tanks. There’s a guard dog patrolling the west side of the tanks. Eliminate it with a suppressed head shot. If a guard comes to look, take him down in a similar fashion. Remaining guards patrol the central road to the east of the tanks that runs north toward the armory. Stay hidden near the tanks and use suppressed shots to eliminate them in turn. Search the back of trucks for ammunition.
Reach the armory in the northern corner to find XM16E1, M1911A1, M63, and M37 ammunition as well as TNT to blow up the structure.
When finished exploring, return to the northeast section. Proceed to the north structure and find the orange door into the weapons lab. It’s behind the stack of crates so it’s tough to see from long-range. Walk north to the building and find it in a corner near the crate. Switch to no face paint and the scientist’s uniform before entering.
Grozny Grad Weapons Lab: East Wing
Use the same care as you did the last time you were in the scientist’s uniform. Avoid close contact with guards and don’t allow other scientists to stare at Snake for too long. Remain with your back turned and move through area’s without hesitation.
Enter the lobby and ascend the stairs in the back northern corner. Move through the classroom and south into the locker area. Your goal is to get a jump on Raikov so you can acquire his disguise. While waiting, search the lockers for rations and a suppressor for the XM16E1.
Raikov will eventually enter the locker room, though it can be a long wait. He could also be in the downstairs bathroom if you have set off alerts. Remain in the locker room and when Raikov arrives, sneak up behind and perform a close-quarters combat move. You’ll automatically acquire Raikov’s officer uniform and stuff him inside a locker.
Switch uniforms to the officer uniform and change face paint to the mask. Before continuing into the next area, return downstairs and enter the storage room. Go to the eastern side of the wing and enter the door on the left. There’s a scorpion sub-machine gun inside along with some ammunition.
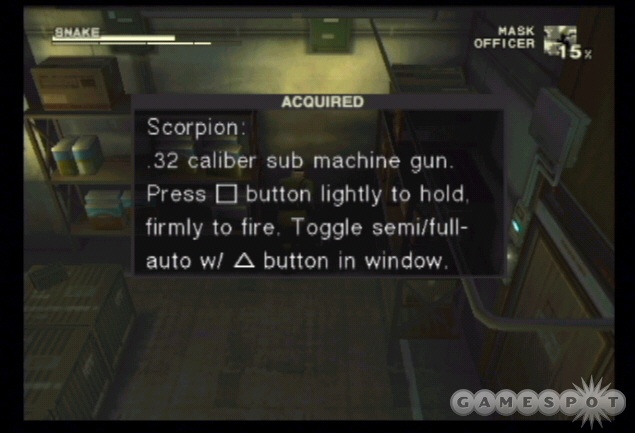
Note that guards treat you much differently now that you look like Raikov. When a guard stops to salute, do the same by pressing the action button or you raise suspicion and possibly an alert. After exploring, return to the locker room and enter the door in the bottom left corner.
Grozny Grad Weapons Lab: Main Wing
Follow the hall to its end and into the next section.
Grozny Grad Weapons Lab: West Wing Corridor
Continue down the corridor until you automatically pass the door guards and trigger the cut scene. During the second half of the cut scene, press the R1 button to get Snake’s view of a special radio code that will prove useful in a moment.
Grozny Grad Torture Room
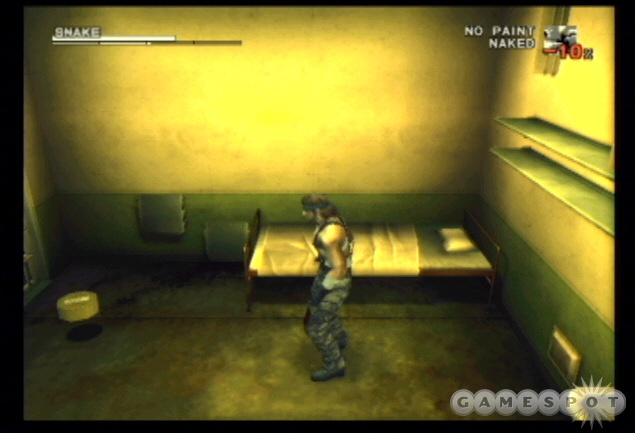
You’ve been captured and stripped of your supplies. Grab the fork inside the cell. It can be used to kill and eat rats as needed to replenish stamina. Check the cure section and dislodge the fake death pill. Use it and the guard becomes alerted to the problem and enters the cell. Revive Snake with the revival pill and attack the guard with punches, kicks, and even the fork. Now you can escape.
You can also escape using the code revealed by pressing R1 during the cut scene. Enter that code into the radio and it’ll open the jail cell. If the guard is patrolling outside, he’ll be alerted and attack. It’s better to get him out of the way before opening the cell. Do so by tossing the food he provides back out of the cell (though the opening on the right side). He’ll eat whatever you toss and eventually will get sick and run to the bathroom.
Another way to escape is to toss all food the guard provides out of the cell. Even if he gets sick, he’ll eventually approach Snake and thank him for the generous food. While the guard is close, press R1 when instructed and spot the jail cell code. This is also useful because the guard hands snag the cig gas spray as well. You can use it to knock out the guard before opening the cell.
Exit the torture room into the southeast section of Grozny Grad. If you didn’t get it earlier, pick up cardboard box c from behind the eastern alley. Proceed to the northeast then northwest sections of Grozny Grad using the same doors and crawlspaces as before.
You should also open the cure menu and remove the transmitter. This will help your escape as enemies won’t be able to track you as easily. Leaving the transmitter in rewards you with a unique cut scene later in the game.
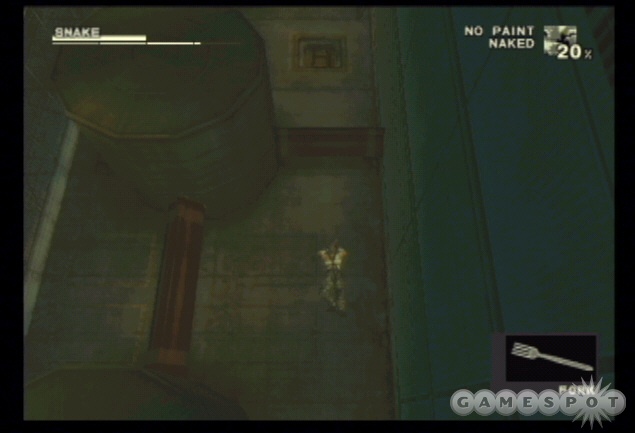
The entrance into the sewers is in the northern area of the northwest section of Grozny Grad. Hug the eastern side of this road and crawl under the pipes to reach the entrance.
Grozny Grad Sewers
Pick up the life med and SAA ammunition from the catwalk before descending the stairs. At the bottom find the ration in the back corner. Proceed north. Circumvent the gates by crawling through the narrow spaces on the west or east sides of the tunnel. You can also find items in these tunnels so it’s worth exploring both sides. The center water beyond the first gate also contains styptic.
About this time guard dogs enter and pursue. Scurry down the sewer tunnel to the bright light at the northern end and your next boss encounter.
Boss: The Sorrow
This is an extremely unique boss battle because you aren’t really fighting anything. Your goal is to simply continue your advance to the north while avoiding the ghosts of all the enemies you’ve killed in the game thus far. You’ll spot bosses and an assortment of troops. Note that you’ll even spot how you killed certain troops, such as throat slashes. If they touch you, the ghosts can drain your life energy. Avoid the ghosts by adjusting your path to the left and right as necessary.
The Sorrow remains ahead of you and launches an attack periodically. Avoid the attack by moving just as The Sorrow fires. If you move too soon, The Sorrow’s attack can track your movement and knock you down leaving you vulnerable to the ghosts. Have life medicine ready to administer during the trek and replenish your stamina with food collected after the torture room escape.
The length of the trek depends on how many enemies you killed during the game thus far. The more enemies killed, the longer the trek. At the end of the battle, The Sorrow attacks and apparently kills Snake. Select your inventory and use the revival pill to return Snake to life and resume into the next section.
Tikhogornyj
The waterfall rendezvous lies to the north. This area contains no enemies if you removed the transmitter before reaching this position. If it’s still in, you will be tracked by Ocelot’s guards. You don’t need to defeat them. It’s possible to just reach the waterfall even with guards in pursuit to safely continue on into the next level.
Navigate the stream to the north. You’ll have to cross the stream several times, first heading east then back across the log to the west, to reach the northern section. Walk on the ledge to behind the waterfall to complete the section and make your rendezvous.
Tikhogornyj: Behind Waterfall
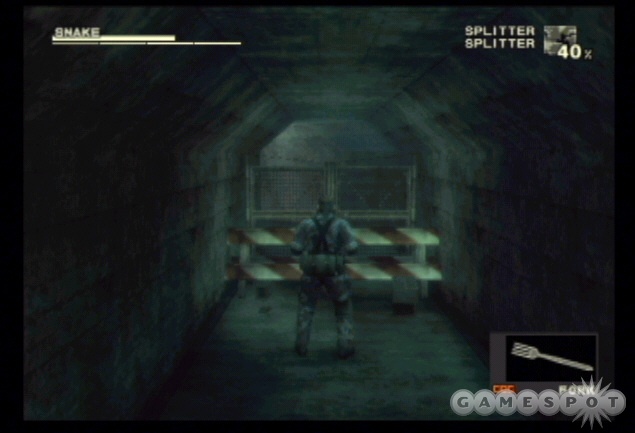
After the rendezvous with EVA, proceed north and pick up the M1911A1 suppressor in an alcove on the eastern side. You’ll also find styptic, bandage, mk22, and AK-47 ammunition along the path. Hunt a few rats along the way. In the back corner just after the exit on the left pick up the cardboard box B and M1911A1 ammo. Exit to the left and grab the ration and mk22 ammo. Climb the ladder to return to Grozny Grad.
Grozny Grad Northwest

Your goal is to get back inside the weapons lab. The easiest way back in is to be driven back inside! You’ll need the cardboard box B from the previous section. You’ve been to this area before but all guards have returned. You emerge among the tanks. There’s a truck to the northeast near the sewer entrance you used either. You must enter the back of the truck undetected and equip the cardboard box B--which reads "To the Weapons Lab: Hangar". Once equipped, a soldier will take note of the box’s destination (exactly where you need to go!) and drive the truck inside.
Groznyj Grad Weapons Lab: Main Wing
You’re inside the hangar but your ability to remain unseen will be extremely difficult in your current condition. The box moving around the hangar will surely alert guards and workers. You’ll need to find a better disguise. Ascend the staircase (inside the box if you wish) and on the first floor keep going south to move through a door into a corridor you moved through before. Proceed to the east and return to the east wing.
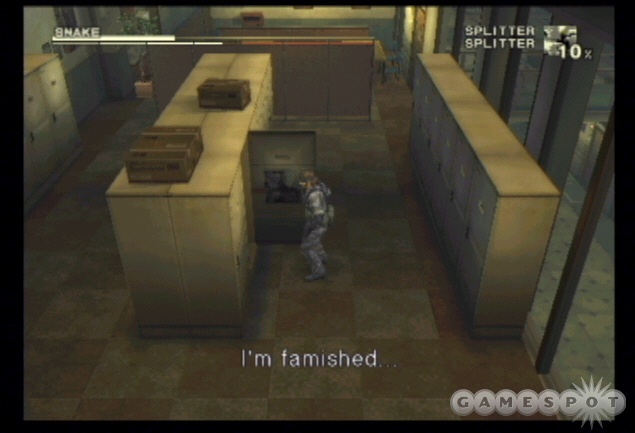
You’re back inside the locker room where you knocked out Raikov. Search the locker with the red stripe for the sneaking uniform. Check a locker on the opposite side a bit further down to the left for a maintenance uniform. Now you can disguise yourself as one of the hangar workers. Comb the other lockers for food and items before returning to the main wing and into the hangar. Switch to no face paint and the maintenance uniform.
As with scientists earlier in the game, don’t stand around other workers for too long or you risk detection. Keep your back turned and move away from workers if they’re close.
The cig gas spray in your inventory is one of the best tools for this mission. Just approach a guard or maintenance worker and use the cig gas spray when close. Don’t hesitate too long and don’t let any other hostile see your action.
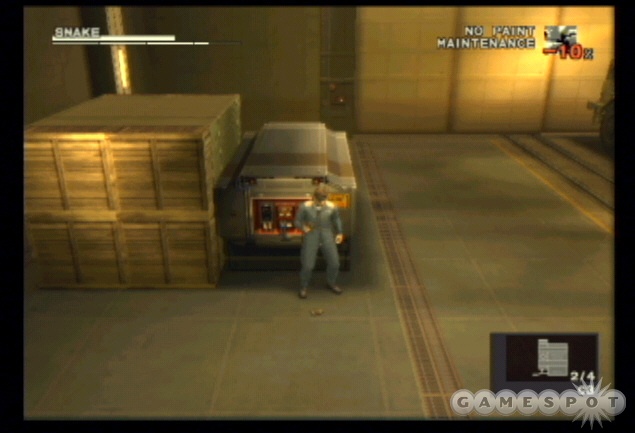
There are four fuel tanks within the hangar--two on each side of the Shagohod. You don’t place the explosive C4 on the fuel tank. Instead you place it just in front of the fuel tank’s panel. If you place it on the fuel tank, present workers are alerted to the problem. When placing the C4, be sure no hostiles are watching you. Search the upper walkways of the hangar to find more cig gas spray and knock-out handkerchiefs if necessary.
A cut scene interrupts the action once you have placed all four explosives. After the extended cut scene you face off against Volgin.
Boss: Volgin
Volgin erects an energy shield when he’s attacked from the front so you’ll have to attack him from the side or the rear to inflict damage. Another concern is when you’re hit by Volgin’s electricity bolt, any weapon hand also suffers--some ammunition explodes! It’s better to holster your weapon between attacks in case you’re struck.
Spot Volgin charging his bolt and then run away from the projectile and toward Volgin’s side. Equip your weapon and attack as quickly as possible. When you hit Volgin’s shield, holster the weapon and repeat. Occasionally Volgin recharges his energy at a panel in the left corner. While his back is turned, blast him with your weaponry.
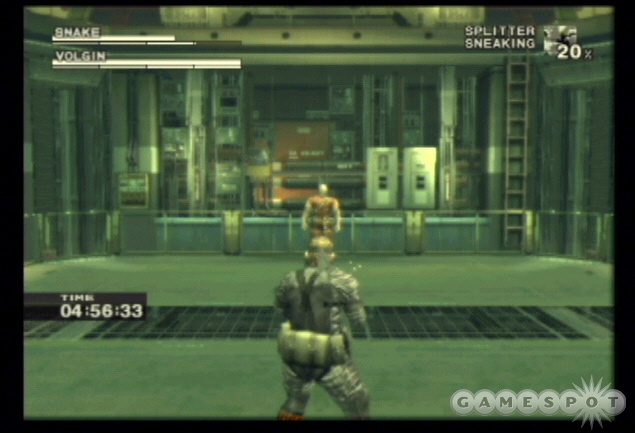
And perhaps the most difficult problem: you must defeat Volgin in under five minutes or the explosives detonate and you perish in the explosion.
Midway through the battle (inflicting significant damage) Volgin mixes up his attacks. He’ll fire a multi-pronged electricity bolt; just remain in between the bolts to avoid damage. Volgin will also use his powers like a machine gun. Run and perform rolls to avoid most projectiles and move to Volgin’s side or back to attack and inflict damage.
You can acquire Volgin’s camouflage by defeating him using the mk22 only. You’ll find additional mk22 ammunition in the northwest corner of the room and it respawns on occasion if you need more. Use the same strategies outlined above but just use the mk22 only. Grab the cold war uniform after Volgin falls.
For a couple of additional ways to distract Volgin, try putting on the officer uniform and mask. Volgin will recognize Raikov and become quite upset giving you an opportunity to attack. Toss out some of the glowcap mushrooms that restore battery life when you eat; they have an effect on Volgin too but not one that he’ll be happy with. Once again use the opportunity to inflict some damage. Try tossing stun grenades behind Volgin or using chaff to disrupt Volgin’s lightning attacks.
Grozny Grad
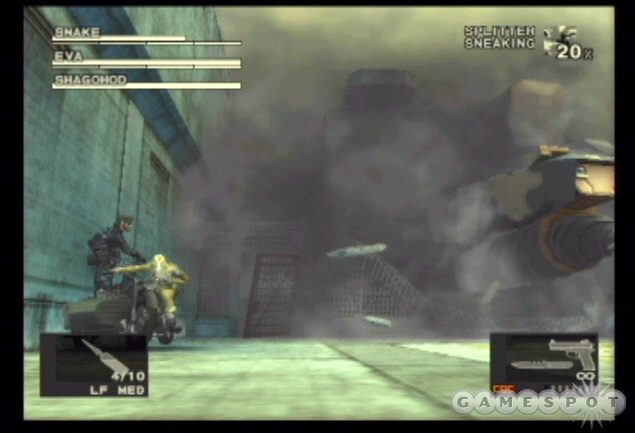
After the cut scene, you join EVA on a motorcycle and flee the pursuing Shagohod. Equip your favorite weapon and shoot guards along the route. If you picked up the M63 machine gun, scorpion sub-machinegun, or RPG-7 rocket launcher then you’ll annihilate everything in your path. You have unlimited ammunition for all weapons so keep firing. Tap "R2" quickly when you need to reload. Switch to first-person view when attacking guards. Continue to clear out Grozny Grad as EVA presses on toward the air strip.
Grozny Grad Runway South
Shoot barrels near guards to cause explosive damage to any hostile nearby. Continue to fire at guards on the ground and on the roof as EVA reaches the primary runway.
Grozny Grad Runway
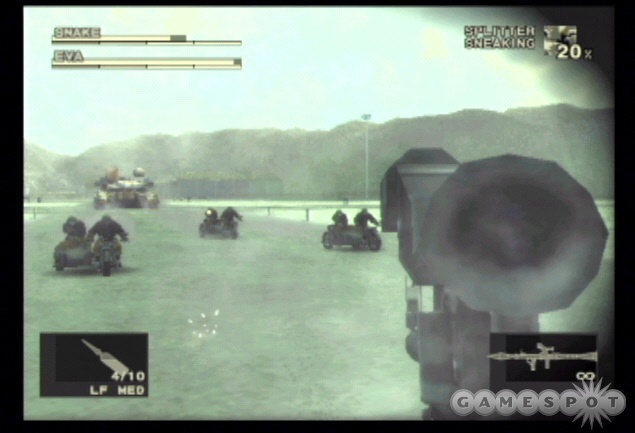
The Shagohod remains in pursuit along with a group of guards riding their own motorcycles. Blast the motorcycles off the runway with the rocket launcher or a machine gun. Focus on the motorcycles and ignore the Shagohod in the distance for now. You can toss stun grenades too. Toss them in front of your own motorcycle so they detonate by the time your pursuers reach the position. It’ll often cause bikers to fall of their ride.
As the pursuit continues, the Shagohod gets much closer. If the Shagohod launches missiles, toss chaff grenades to disrupt their tracking. After the cut scene, keep the Shagohod at bay by shooting its treads. Keep the pressure on until the next cut scene begins and EVA takes Snake toward the bridge rigged with explosives.
Grozny Grad Rail Bridge
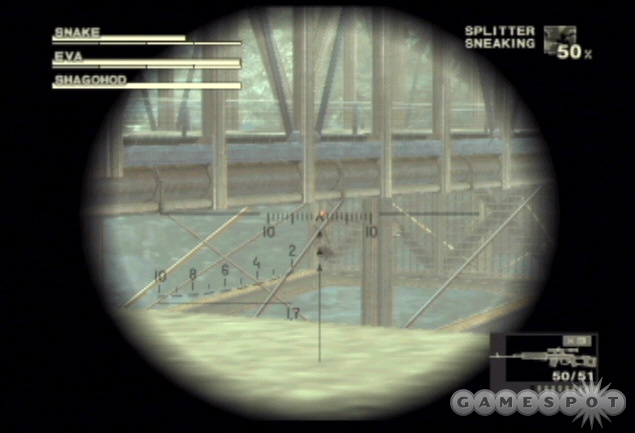
When you regain control of Snake, you’ve assumed sniper position and are waiting for the Shagohod to reach the bridge. You must detonate the two explosives on the bridge while the Shagohod crosses the bridge’s center. You can see the explosives by finding the flashing lights. Zoom in the sniper rifle’s scope toward the two flashing lights. Detonate one explosive immediately then wait until the Shagohod cross the bridge’s center (EVA lets you know when) before firing at the other. Maintain your sight on the second explosive and fire at the precise moment to send the Shagohod into the ravine.
Boss: Shagohod
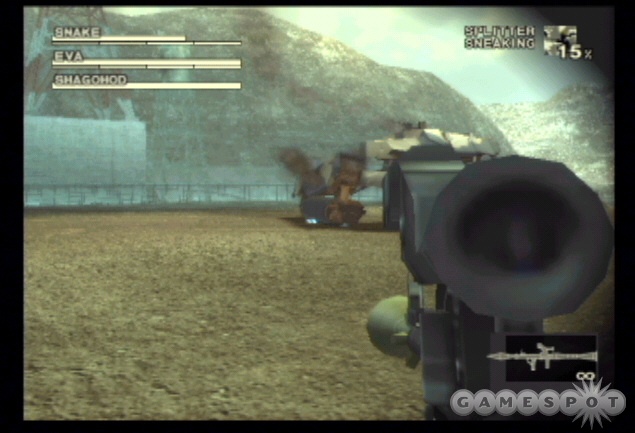
Like any good villain, the Shagohod (and Volgin) refuse to stay down. After the cut scene you must battle the Shagohod in a tight circular arena. Arm the RPG-7 and fire rockets at the Shagohod’s treads as EVA circles around the enemy vehicle. When you damage the treads, the Shagohod remains stationary and spins around to expose its vulnerable rear side. Fire rockets at the rear of the Shagohod’s "head" region to inflict damage. Press "R2" to reload the RPG-7 quickly in between shots. When the Shagohod begins to move again, fire rockets at the treads until Volgin claims it can’t move again. Watch for the vehicle to turn around and expose its weak spot.
Once you have exhausted the Shagohod’s health...it returns again! Volgin uses his power over electricity to revive the Shagohod for another fight. This time EVA plays decoy while you scurry around the arena on foot. In this battle you’re aiming for Volgin, not the Shagohod.
While EVA distracts Volgin, he’s vulnerable. Attack him with the turrets placed along the arena’s perimeter or shoot the Shagohod’s treads with a rocket then lay into Volgin with any weaponry. After a couple successful hits, he’ll ignore EVA and plow the Shagohod in your direction. If you’re in a turret, get out and run to the left or right quickly (and try to stay away from the arena’s edge) or you’ll get slammed by the vehicle. Expect any used turret to get bombarded by the Shagohod.
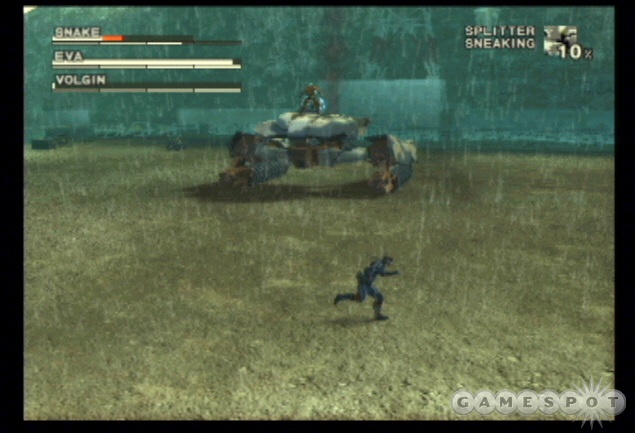
Flee from the Shagohod until EVA plays decoy again. When you’re under attack, flee to the left or right to avoid the red-colored machine gun fire. Run back and away from the other machine gun fire. When Volgin launches missiles, toss a couple chaff grenades to confuse targeting or you’ll be hit by a powerful missile. As soon as Volgin follows EVA, move to a turret and resume your assault or fire the RPG at the Shagohod’s treads and attack Volgin.
When Volgin says "I’ll grind you into dust!!" he’s about to move straight at you. Run under the Shagohod and between the treads. While still underneath the Shagohod, equip the sniper rifle. After the Shagohod passes overhead, turn around and zoom in on the back of Volgin’s head. Score a successful shot to inflict excellent damage. Reduce Volgin’s health to zero to complete the battle.
Grozny Grad Rail Bridge North
EVA and Snake flee in her motorcycle but more enemies resume a pursuit. Use your favorite weapon (unlimited ammunition still!) and fire against the pursuing motorcycles.
Lazorevo South
The pursuit continues into the woods. Blast the aerial pursuers with the rocket launcher. Listen for a cue from EVA to shoot the log. Aim in front of the motorcycle and destroy the log.
Lazorevo North
Eliminate more enemies pursuing on motorcycles. Eventually you lose the pursuers but crash the cycle. EVA suffers serious wounds. When you regain control of Snake, open the cure section and mend her cuts (disinfectant, styptic, suture kit, bandage) then fix Snake’s wounds.
Zaozyorje West

You must now escort EVA through the woods. She’s extremely weak and will require food frequently. Watch her stamina level and listen for her to mention her hunger. Grab the various ammunition, grenades, and food items in the immediate area before moving onward.
Begin moving to the southeast through the forest path. Keep EVA close by gesturing to her with the action button. Check all areas for food (toggle the thermal goggles if necessary) and remain stocked. As EVA gets low, feed her by using the food section.
As you begin to turn south on the forest path, a cut scene reveals troops have entered the area and have begun a pursuit. These troops enter from the north and aren’t too far behind. EVA moves very slowly so it’s highly likely the troops will catch up to you. When EVA stops to repel their attack, aid her with one of your machine guns or assault rifles. You can also place claymore mines on the ground to eliminate some pursuing troops along the way.
The path will split to the southwest and southeast. Take the southwestern route as it’s narrower and easier to shoot pursuing guards when necessary. If enemy weapons fire strike you or EVA and inflict major damage, open up the cure section to mend the wound. Reach the southeastern corner and go east into the next area.

Zaozyorje East
Though you no longer have to worry about troops from behind, there are now enemies in front of your path. To aid your sight in the dense forest, switch to thermal vision to spot the nearby guards. Eliminate them with the sniper rifle or machine gun on sight. Proceed carefully to the northeastern corner of the map. Continue to feed EVA as needed and hunt for food if you need more in your storage. Scan for guards using thermal vision as you advance to the northeast.

Rokovoj Bereg
Watch the cut scene as EVA and Snake make it past the guards...but one more confrontation remains.
Boss: The Boss
The Boss performs both long-range weapon and close-quarters combat attacks. If The Boss gets close, she’ll grab Snake and use melee attacks. Press the circle button during the assault and Snake may be able to reverse the attack. To inflict damage on the Boss, knock her down during the close-range attacks then fire a weapon at her while she’s down.

Snake has the ability to knock her down with his own melee attacks. When The Boss is close, attack her with melee strikes. When she falls, shoot her a couple times then flee and repeat.
Equip appropriate camouflage (try the snow) and remain close to the ground as look for The Boss’ position. You can damage her from long-range if she hasn’t spotted you. As soon as you’re seen and she runs toward your position, though, she’s invincible.
You must defeat The Boss in under 10 minutes before the MiG jets bombard the area with bombs.

Like many other bosses in the game, you can recover a hidden uniform by eliminating The Boss with the mk22 or mosin only by draining her stamina. The strategy remains the same. Knock The Boss down with melee attacks then shoot her with the mk22. Recover the snake camouflage after defeating The Boss.
During the ending cut scene, select the gun on the right to unlock the single action army gun.
Chapter 6 - Secrets
This section offers a compilation of secrets, Easter eggs, and other hidden goodies in Metal Gear Solid 3: Snake Eater.
Camouflage Downloads
If you have a network adapter for your PS2, you can download additional camouflage for use during the game. At the time of this writing there were two new camouflage uniforms for download.
| Camouflage | Description |
| Grenade | A grenade pattern camo uniform. Wearing it allows you to use grenades limitlessly. |
| Mummy | A bandage pattern camo uniform. Wearing it prevents you from being seriously injured. |
Boss Camouflage
You can recover special boss camouflage by defeating each boss using the mk22 or, if acquired, the mosin nagant. Using the mk22 reduces the boss’ stamina to zero instead of reducing their health to zero. The exception is The End’s special moss camouflage. Acquire it by "holding up" The End after sneaking up on his position. The following chart reveals the special camouflages, their description and use, and location.
| Camouflage | Description | Location |
| Animals | An animal skin camo uniform. Wearing it removes any hand-shaking while aiming a gun. | Defeat Ocelot by reducing his stamina to zero. |
| Cold War | Volgin’s camo uniform. Enemies from the Soviet side will hesitate to attack. | Defeat Volgin the first time by reducing his stamina to zero. |
| Fire | The Fury’s camo uniform. Reduces damage from flames and explosions by half. | Defeat The Fury by reducing his stamina to zero. |
| Hornet Stripe | The Pain’s camo uniform. Wards off hornets, spiders, and leeches. Also allows wearer to tame hornets. Shoot down a nest while wearing the camouflage. | Defeat The Pain by reducing his stamina to zero. |
| Moss | The End’s camo uniform. Gives wearer photosynthetic capabilities. Extremely effective in Svyatogornyj and Sokrovenno areas. Essentially restores stamina while in sunlight and 100% camo when crawling in certain areas. | Sneak up on The End during the boss battle and hold him up with a weapon. |
| Snake | Snake pattern camo uniform. Provides the ultimate cover in any environment. | Defeat The Boss by reducing her stamina to zero. |
| Spider | The Fear’s camo uniform. Gives wearer stealth capability at the cost of stamina. | Defeat The Fear by reducing his stamina to zero. |
| Spirit | The Sorrow’s camo uniform. Eliminates footstep noise. Also allows wearer to drain stamina by choking enemies in CQC. | Defeat The Sorrow. |
Fun with EVA
During the many cut scenes with Snake and EVA, look for opportunities to press "R1" to see a first-person view of Snake’s viewpoint. He’s often looking where he shouldn’t be looking.
After you escape the torture room, don’t remove the transmitter (you’d open the cure menu to do so). As you make the escape to the waterfall rendezvous point with EVA, you will come under more attack from pursuing guards because of the transmitter but once you reach EVA, your efforts will be worth it. With the transmitter in, there’s a hilarious bonus cut scene where EVA "removes" the transmitter.
Late in the game you work with EVA side by side as you escort her through the jungle and past hostile guards. After completing the first area, open the survival viewer up again and check her out. Apparently she’s donned different attire for the second leg of your journey. Open up her cure menu too and check out the x-ray for several seconds. Read her food and medical history for some amusing tidbits.
As you escort EVA, there are several humorous things you can do. Try shooting her in the leg with the Mk22. She’ll fall asleep and begin mumbling about certain activities with Snake...and the Boss? Grab EVA in a close-quarters combat move and interrogate her--she’ll describe some of her misguided youth. Equip binoculars and zoom in on EVA’s various body parts. She doesn’t seem to appreciate your stalker behavior. Wear the scientist’s uniform and stand near EVA. She doesn’t approve of your lack of stealth. And if you’re completely off your rocker, you can even kill EVA. Listen to the radio chatter after doing so but realize you’ll have to load a saved game after your crazy actions.
Snake’s Dream
After you are captured by Volgin and tossed into the Grozny Grad Torture Room, save your game immediately. Reload that save later and take part in Snake’s unusual dream. You control a different looking character and battle a horde of creatures inside, what looks like, the prison. Press the "X" button to jump and the square and circle buttons to attack. Kill everything in your path and Snake will wake up from the weird dream.
After waking up, speak with the various contacts on your radio for conversations pertaining to the dream. Speak with para-medic and discover Snake links the weird dream to para-medic’s incessant movie talk...specifically about a certain vampire.
I Like MGS2!!
At the start of a new game, select that you prefer Metal Gear Solid 2. The intro is slightly different as Snake uses the "mask" in his inventory.
Snake’s Hidden Viewpoints
During many cut scenes you’re told to press "R1" (a symbol appears in the upper right corner) so you can view the scene from Snake’s eyes. On some cut scenes, though, you can still press R1 to see Snake’s viewpoint but there’s no indication to do so. For instance, press R1 during the final cut scene as Snake shakes the President’s hand.
A Quick End to The End
When you reach Ponizovje Warehouse: Exterior, you spot The End being pushed around in his wheelchair. If you act quickly when you regain control after the cut scene, you can equip your sniper rifle, zoom in on The End’s head, and shoot him a few times to eliminate him. You won’t have to contend with him later in the game. Instead, The End’s boss battle is replaced with a fight against Ocelot’s soldiers.
Radio Frequencies
Try entering these frequencies into your radio! Note that these may differ between games and difficulties. Try these on normal difficulty. If you’re playing other difficulty levels, these radio frequencies probably won’t work. Obtain radio frequencies by interrogating guards in close-quarters combat mode.
These frequencies are part of "Healing Radio". Listen to the music and watch your life and stamina bar.
141.85 - DON’T BE AFRAID / RIKA MURANAKA
142.09 - SEA BREEZE / SERGEI MANTIS
143.32 - SAILOR / STARRY.K
144.86 - JUMPIN’ JOHNNY / CHUNK RASPBERRY
145.83 - SALTY CATFISH / 66 BOYS
146.65 - ROCK ME BABY / 66 BOYS
148.39 - SURFING GUITAR / 66 BOYS
148.96 - PILLOW TALK / STARRY.K
Got a news tip or want to contact us directly? Email news@gamespot.com
Join the conversation