League of Legends: League of Lessons
In our new League of Legends-focused training feature, we outline the best ways to take advantage of each of the five important roles in the game.
Welcome to League of Lessons, a weekly feature where we explore each of the five perennial roles when combating online in League of Legends. These guides are courtesy of Elliot Lucas Marcell, an avid League of Legends player who's largely involved with the Singapore LoL community.
His notable achievements have been placing fourth with his team EqualsD Gaming in Singapore's first League of Legends tournament in 2011, and recently placing third in a Dominion tournament in the country last February. He and his team were also shoutcasters for last year's WCG selection finals and the Garena Carnival in both Singapore and Malaysia.
The AP Carry Role
Nothing makes me feel more satisfied than to melt my opponent's HP away in a full combo of spells. That's exactly why I love playing Ability Power Carries--the mages of League of Legends. They pack a whole chunk of magical power in their kit of spells, bursting down almost any opponent in mere seconds. Sure, we are a vulnerable class; we are susceptible to being focused out and killed easily, due to the nature of our low health pools.
But it doesn't really matter. We do our job as best we can, dishing out tons of AoE damage and crowd controlling the right targets. That's just how we roll.
So what makes a great AP Carry? We know what our spells do, but that just isn't enough. There is an art to playing a great mage. I mean, come on; mages are masters of magic, right? We should be doing more than just dealing damage. We should be messing up our opponents with a flick of our fingertips. For today's session, I'll be covering the early game, and how to have solid lane domination.
The Lane Phase
Like most AP Carries, you will want to hit the middle lane. Why? Simple enough: it's a very safe lane. Relative to the other lanes, the amount of skirmish space is really small. You have AoE spells to farm minions; and you don't really need to overextend in your lane and risk getting ganked from the sides. What's more, being in the middle lane makes it accessible for you to gank both top and bottom lanes easily once you've secured control in middle.
Here are some tricks for performing better in the middle lane:
Skirmishing like a Mage
To have lane dominance, it's important to poke your opponents with your spells while avoiding theirs. When fighting against other AP Carries, you need to follow one simple rule: give them hell. Aggression pays off pretty well, since most casters are made to be offensive. Being able to land your skill shots on them while avoiding theirs gets you the advantage.
Once they've taken enough damage, you can push them out of the lane by standing alongside your minions. They will have little choice but to retreat back to their tower or the nexus. If they come close to you again, scare them away by dropping more spells. Don't forget to continue getting all the last hits on the creeps, though; it's still way more important overall.
The Skill in Skill Shots
Landing a beautiful Barrel from Gragas, or that face-melting Pillar of Flame by Brand isn't all about luck. There is a rhythm involved when casting these spells. One way to improve is to get used to the casting time and animation. When you understand and feel the tempo in those spells, chances are that you can make a better prediction on when to drop them on an opponent.

A more important trick to pick up, though, is learning your opponents' movement patterns. Let's use the example with Brand's Pillar of Flame. Observe your opponent and see how he moves when you are landing the Pillar on him. Now you know his "natural" reaction for movement when caught in such a spell, and you can skew your subsequent spells accordingly.
When you see enemies being blocked out by creeps, you can use this to your advantage, too. Throw in an Area of Effect spell. Their exit choices are limited. Next thing you know, their health bar is significantly lower. You are on your way to winning your lane with these "small victories".
The Smart Way to Play
One adjustment that I made, which helped me get better at this game, was moving to smart cast. It can be enabled through the Key Bindings menu. Smart cast basically enables you to cast your spell on the mouse-over target. It's brilliant, really. By doing so, you save a ton of reaction time, and also remove the clunky targeting interface for most of your AoE spells.
It takes some getting used to, but it worked out great for me. However, I would suggest avoiding smart casting certain spells, unless you are really good with it--Anivia's wall, Malzahar's Call of the Void, Karthus' Wall of Pain, and Veigar's Event Horizon, just to name a few.
The Ganking Phase
Like I've mentioned before, the AP Carry in the middle lane has easy access to ganking both top and bottom lanes. Once you're done pushing your first turret, it's time to bring those magical powers to your allies. There are certain objectives that you might want to keep in mind when roaming:
• Help your jungler secure dragons
• Aid your jungler in stealing the opponents' blue and red buffs
• Ganking lanes and pushing for gold and tower advantage
• Ensure your mid-lane turret is not in danger of going down.
It's especially important to keep the fourth point in mind. Helping is great, but you just cannot jeopardise your original lane. This applies to all lanes; you don't want to lose map control. There will be more avenues to gank you and your team if there is a loss of allied turrets. Sure, you can ward up more, but remember: that's going to cost you more gold.
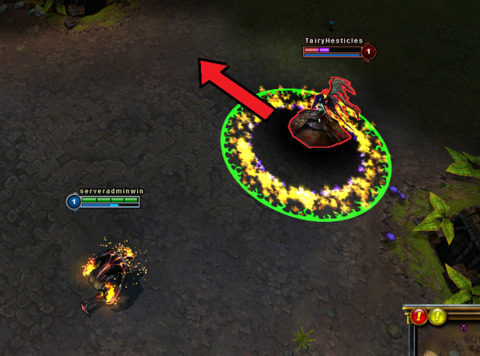
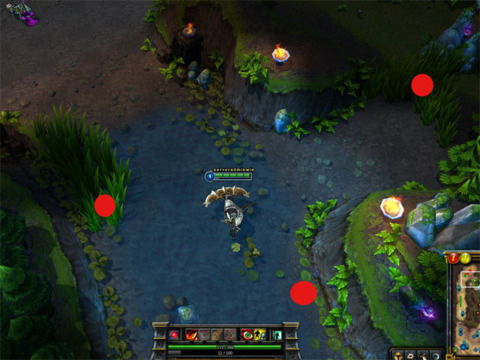
Here are some great paths you can use to avoid conventional ward placements when roaming the map.
On the blue side
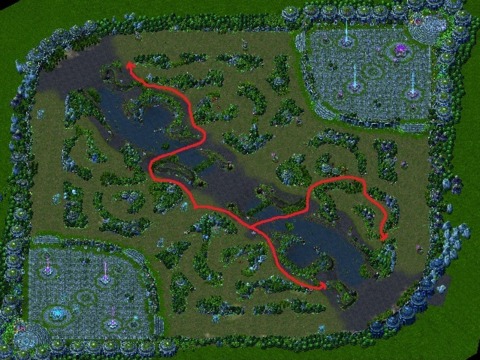
On the purple side

The main reason why you want to start roaming once you've knocked down the first turret is so you can start creating that overall team advantage. Early game is all about lane dominance, and, with your help, you can further provide that to your allies. AP Carries have really good early game damage, so use it while it's relevant.
Helping your teammates win their lanes is essential to having a better late game. Pushing other lanes gives so much more map control, and, by 15 minutes into the game, that means better control of Baron Nashor. Once you've ganked enough, the opponents will start sticking together, and this means moving on to the team-fight phase.
Previously, we touched on the laning phase and how to ramp up towards the team engages. Nothing much changes--you still do tons of damage. Now the real question is: How do I do this best?
Team-Fight Phase
It's now time to have a 5v5 clash. Your team is trying to push into the opponents middle lane base turret. You stand behind your tank, just waiting to make your opponents go KABOOM! But it's more than just that. There are two parts to team-fights: the Pre-engage and the actual engage.
During the Pre-engage, it's your duty to harass the opponents with your long range pokes. AP Champs are great at doing this. It helps to weaken down the opponents before any engages happen. If you do this really well, you might just force the opponents to back off to heal up, giving you some time to down the turret. Keep in mind though, be wary of the opponents--they might take advantage of you getting close to them for the pokes, and instead turn it into an actual engage.
When an engagement happens though, don't panic! Keep these few simple points in mind:
• Prioritize the Carries: Nuke off the AD and AP carries on the opponents side as quickly as possible. Focus your damage on them. If they are out of control, it's very important to drop your crowd-control spells on them. We don't want them tearing through your team. Remember, it's either you or them.
• Keep a Safe Distance: Positioning is very important. Sticking with a tank is great, they can help you peel off those pesky opponents who want to tag you down. If your tank is doing the engaging on the front-line, stay a safe distance and wait till the right to strike. Don't follow him into the fray immediately--you will become the main target.
• Look Out For Your Teammates: Sure, you deal tons of damage but you also provide some neat utility for your team. Your crowd-control can save the life of your AD carry so don't hesitate to do so.
Once you've cast most of your spells, you have a window of time for movement while your spells go off cooldown. Try to assist the others in any way possible. Personally, I find guarding the AD carry extremely useful. Most of the time, the AD carries don't have a form of crowd-control, so helping disable their pursuers helps a great deal.
• Let The World Burn: And when all that's done, destroy everything in sight! If everything goes well, you'll probably win the team fight. From there on, it's pretty straight forward. Down more turrets, push into the base, steal all buffs from the opponents jungle camps, get Baron's. Summoner's Rift is your oyster--you just need to pillage everything in sight.
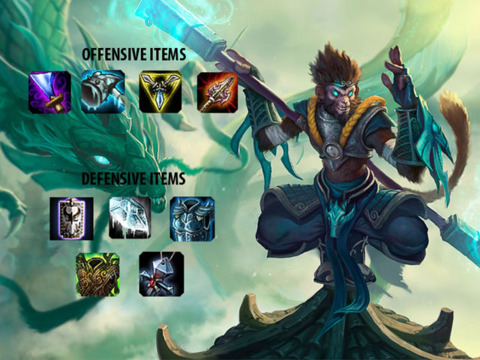
The Arcane Arsenal
Even Harry Potter needed an awesome wand to win Voldermort. Every mage needs to know his gear choices. Here I'll be sharing some tips on itemization to help turn the tides of battle in your favour. More importantly, these are some tricks that'll help you up your game.
When starting the game, I usually start with Boots of Speed and 3 Health Potions. It gives good sustain early on in lane and allows you to dodge opponents' skill-shots much easier. Also, it provides better chances of escape in case of a gank. Junglers don't usually get Boots of Speed as opening items, so it really helps to have that movement speed advantage. Most people like going for Catalyst the Protector, but I prefer getting 3 Doran's Rings.

You might not be able to build them into anything, but they are extremely useful. Sell them off only when you need the inventory space to build new items. The list below are just some of the great items mages should be getting:
Rabadon's Deathcap
This is the item for all AP carries to get. Contrary to popular belief, you don't need to get this first. If you're having a great early game, rushing this is an option. It gives the greatest AP boost. In short, a must have; don't ever skip this.
Zhonya's Hourglass
I love this; it is the Caster's solution to getting jumped on during an engage. With the active ability, grating 2 seconds of invulnerability stasis, you have lots of leeway to poke during pre-engages. When enemies jump onto you, activate the hourglass, and watch as your team jumps in for the engage.
Post-stasis, you can let your magic rip the battlefield. It's really a life saver; AP carries should forgo Guardian Angel as a defensive item and get this instead. AP and Armor? Yes please.
Abyssal Scepter
A really underrated item. I personally like running this when I'm up against anti-mages in lane (e.g. Kassadin, LeBlanc, Veigar). The magic resistance reduction aura amplifies your damage. At the same time, it grants 57 magic resist itself.
Great item to build in the lane phase. Grabbing an early Negatron Cloak to build into Abyssal Scepter can make your opponent give up on the idea of poking you with his/her spells. It's slightly expensive, but it's pretty much worth it. Winning.
Rylai's Crystal Scepter
I don't usually pass up getting this item on my AP carries. It gives a nice amount of health, AP and an awesome slow effect to your spells. Champions like Cassiopeia and Ahri really love it. It is expensive, and it doesn't give that much additional damage. Definitely worth getting though, probably after ramping up a Rabadon's Deathcap.
Will of the Ancients
Spell Vamp is a great stat on most casters. The sustainability you get from this is insane. The great thing about this item is that when you're low on health and enemies think they can take you down, you turn around, shoot them up with your spells, and watch as you hardly take any damage due to the healing done. With a blue buff, you don't have to worry about going back to base to heal yourself up.
Void Staff
And of course, the item which cuts through the beefiest of champions. 40% magic penetration is solid. With the Arcane Knowledge mastery, you are getting a total of 46% magic penetration - almost half of their resistance is ignored.
It's good value for the gold you put in, but only build this if your opponents start stacking resistance. I'd still choose Will of the Ancients or Rylai's Scepter over this if I'm doing well early game.
The next page is the final part of our discussion on the AP Carry as we talk about the mages themselves, their skills, and ways to improve with them. Till then, have fun on Summoner's Rift.
Now that we've gone a little deeper into the whole concept of the AP carry, you probably want to try them out yourself. That's great: here are some champions I would recommend that have great potential in the right hands. Practice with them; that's the only way to make a good mage great.
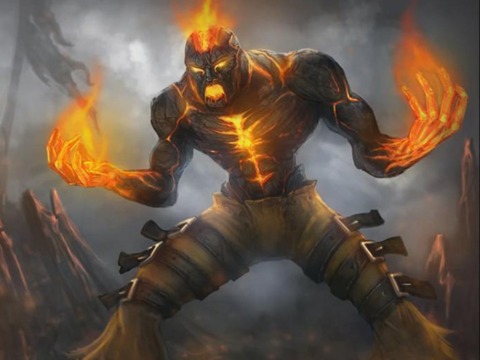
Brand, the Burning Vengeance
He melts the opponents in every sense of the word. I'm always impressed by his damage, especially his innate passive ability Blaze. As long as you are able to land a spell on the opponent, you're going to leave a painful 8 percent HP damage over time effect (DoT) on the enemy for 4 seconds. That's additional damage mind you; talk about a fiery death.
During the lane phase, poking with Pillar of Flame and Conflagration won't allow your opponents to stay near the creep wave. Constantly refreshing that Blaze debuff on your opponent keeps them well at bay.
His difficulty in playing mainly comes from the fact he has two skill-shots, Sear and Pillar of Flame. Once you get good though, he really does massive amounts of area of effect (AOE) damage. My tip: Practice his tempo. Casting his skills in succession in the right skill order can really change the outcome of a fight. Don't be too hasty when casting Sear for the secondary stun effect (which triggers if the opponent already has the Blaze debuff). Wait for the right moment. Blaze lasts 4 seconds, so that's a pretty long time.

LeBlanc, the Deceiver
She is simply a beast to play against 1v1. Like Brand, she needs to cast her skills with a certain tempo to be really effective. However, her single target burst and disables make her a really huge threat. Most players like to trigger the silence effect from Sigil of Silence with Distortion. One way to improve is to try using Ethereal Chains instead to proc it.
I like saving up Distortion as a gap closer and an escape mechanism. It's just more effective that way and allows you to mess with the opponents more. Juking is one of LeBlanc's strong points, but most players do not capitalize on it.
LeBlanc is very much an early-to-mid game champion. Win your lane quickly and then start roaming. Your damage does start to stagnate during the team fights, and you can't really AoE down your opponents. You need to assassinate your targets (i.e. the other carries) once the battle starts. Surviving allows you to help crowd control (CC) out the other opponents with Sigil of Silence and Ethreal Chains. Distortion's fairly long cooldown means you'll have to use it wisely. Don't worry, her Sigil and Chain have short cooldowns. This is your utility to the team after the initial burst from the Sigil and Mimic combo; try it out.
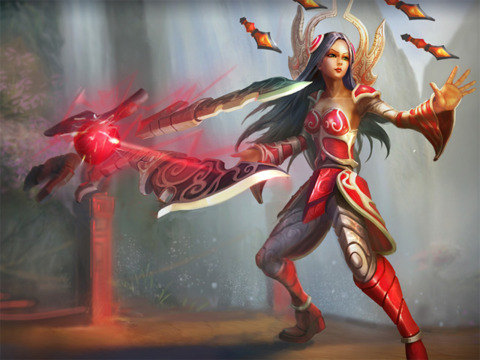
Ahri, the Nine-Tailed Fox

Everything about Ahri's spell kit is just so…alluring. Her Orb of Deception is great for farming and harassing the opponents, not to mention the true damage component of it. Great AoE team fight damage as well. Her Fox-Fire is strong, especially mixed in with Rylai's Crystal Scepter.
Each charge of Fox-Fire gives the full 35 percent slow from Scepter so tagging down opponents is really easy. Charm, one of the coolest skill-shots in the game, not only deals damage but also taunts the opponent, making him harmlessly walk towards you. It's a really powerful CC which does moderate amounts of damage.
The signature spell of Ahri though has to be her ultimate, Spirit Rush. It is just so versatile. I recommend you try doing more than just damage to your opponents. Don't be in a rush to use consume all 3 charges. Take it slow. You have 10 seconds to do so. Juking and kiting becomes just so easy with her ultimate. What's more, you can line up a perfect Charm and Orb combo for some devastating damage. In short, she's a highly recommended champion for you to up your game.

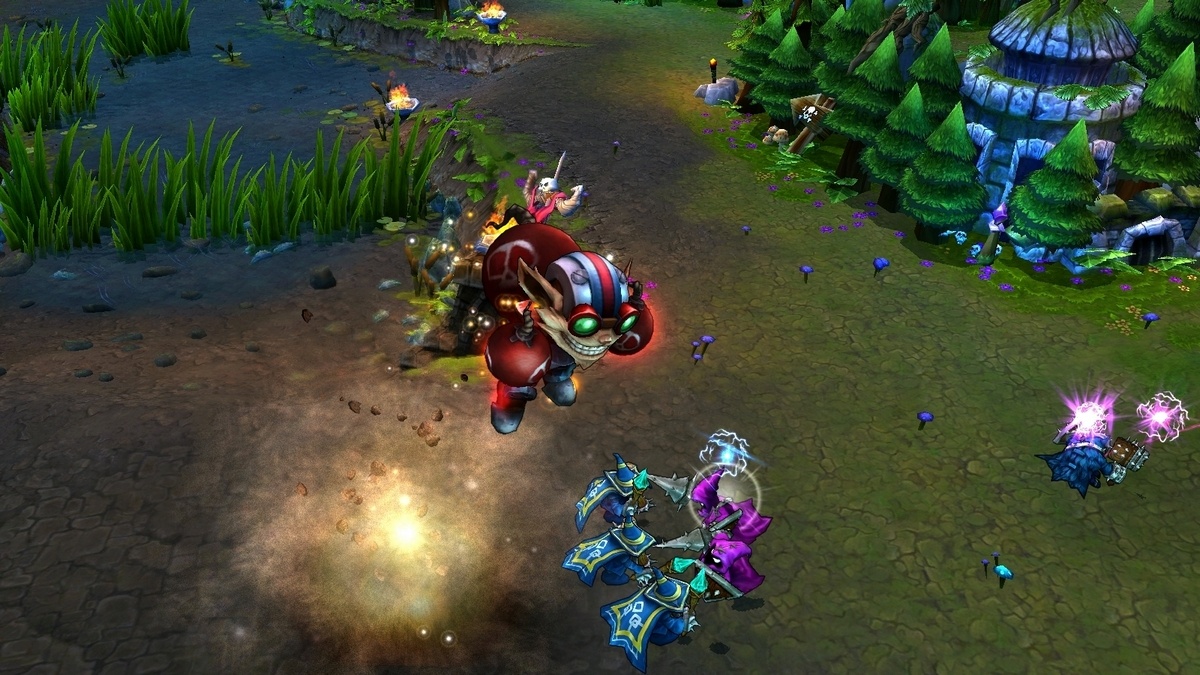
Ziggs, the Hexsplosives Expert
Added to the League of Legends roster not too long ago, Ziggs is really great for training those skill-shots. Every spell in his set is a skill-shot, and it rewards great players. His damage is simply HUGE. With his ultimate, which has some sick range, you can assist other lanes with massive output just by standing in the river.
I suggest you try him out, get a feel of his skills and their range. With enough practice, he becomes a deadly lane opponent. A pro tip is to throw in auto-attacks in-between your spells to maximize his innate passive, Short Fuse. Most people don't realize how painful that thing really is.
As you play him, watch your mana. Having high mana costs for his skills makes him very mana-hungry. If you don't have the blue buff, I suggest you plan your shots carefully. I always ensure I have enough mana to cast the Hexsplosive Minefield and Satchel Charge for some safety. Since Satchel Charge allows you to knock yourself back quite a distance, use it to create the gap between you and any pursuers. This guy takes quite a bit of practice, so don't be too disheartened if you aren't maximizing damage within the first few games.
Cassiopeia, the Serpent's Embrace
The power of poison is always deadly. She zones out opponents really well in lane. Utilize Noxious Blast with Twin Fang for some really good damage in lane. As Cassiopeia, I'm usually unafraid to stick closer to my minions. It allows me to push the opponents out of the experience range quite easily. Most of my games, I rush Rylai's Crystal Scepter on her. Combined with her speed boost buff after landing a Noxious Blast on enemy champions, you have the perfect method of chasing down your prey. This easily allows you to follow up with Twin Fang.
When it comes to team-fights, use your ultimate to turn the odds in your favour. A good ultimate should stop the enemies in their tracks with that 2 second stun. Always follow up from your ultimate with Miasma and and Noxious Blasts. This will allow you to continue pursuing them even after the stun is over. Focusing down your targets is really easy too with Twin Fang. Poison your main target and spam Twin Fang. That is your main source of focused damage.
Blasts and Beyond
So you are now pretty much equipped with everything you need to know about playing the AP carry. If you enjoy making things explode, setting things on fire, creating magical thunderstorms, firing giant lasers and making a bunch of crows fly around you for tons of damage, then the AP caster is definitely for you. Till next time, have fun blowing things up!
Welcome to another session of League of Lessons, a weekly feature where we explore each of the five perennial roles when combating online in League of Legends. These guides are courtesy of Joshua Lim, another avid League of Legends player who's largely involved with the Singapore LoL community.
His notable achievements have been placing fourth with his team EqualsD Gaming in Singapore's first League of Legends tournament in 2011, and recently placing third in a Dominion tournament in the country last February. He and his team were also shoutcasters for last year's WCG selection finals and the Garena Carnival in both Singapore and Malaysia. We now focus on the bruiser role.
Winning in style demands a champion that plays with style. Constantly at the front ranks of a team skirmish, soaking up damage effortlessly, isolating key targets, and being the guardian of your teammates--that's the everyday life of the bruiser. You utilize an arsenal of deadly gap closers, crowd-control and damage-absorbing shields. You are the nightmare to your opponent's carries as you tag them relentlessly, hindering their every attempt to get to your vulnerable teammates.
By choosing a bruiser who dedicates his life to the top lane, winning in style is not that far away.
The Laning Phase
Let's cover the Laning Phase first. No one should be foreign to the idea of last hitting and warding. But there are unique characteristics of playing a bruiser in the top lane in the early game. Here are just some things I'll cover:
Duelling Basics
This is a common occurrence in top lane. Since most bruisers are melee, HP is the highest valued stat to have in the lane. Therefore, if you can start a duel with your opponent and come out the one with the higher hp, lane dominance is almost assured. This way you can constantly farm and force back the opponent, minimizing his farm and experience earned.
Starting a Smart Duel
A common mistake many players make is to engage the opponent despite the presence of a large minion wave. Players often underestimate the damage that minions deal, often drawing minion aggro by engaging in a duel. Caster minions dish out 23 damage at 0.6 attacks per second--sounds minimal, but not when 5 of them are hitting you at a time. A quick way to remove unnecessary minion aggro is by simply popping in and out of the brush. This way the fog of war briefly obscures the minion vision and they quickly switch back to fighting your own minions.
Aside from minion presence, starting a smart duel requires proper knowledge of the opponent’s peak and lull periods of dishing out damage. What this means is that you should take note of your opponent’s cooldowns and strike only when their high damage skills are on cooldowns.
For example, Garen charges forward to fight me with his Courage buff on. Courage is a damage negating skill that Garen employs, reducing a sizeable percentage of damage taken while it is active. The wise thing to do here is to, that’s right, run away.
Of course, most fights won't have a Garen running after you with Courage (if they are decent). Although this is a hypothetical situation, what you need to learn is to bait out the opponents skills without suffering any consequences. This is something which differentiates a good bruiser from a great bruiser.

It doesn’t stop at just running away though. Running alone gets you nowhere: once you spot his buff disappear, turn back and counterattack! Since they can't mitigate your damage now, it is the most effective time to throw in all your punches. Rinse and repeat for lane control.
Sustaining in Laning
The longer you stay in your lane, the more farm you can achieve. Sustain is the key to purchasing a permanent residence in top lane. Also, you may lose to your opponent in duels, but if you are capable of recovering HP faster than your opponent, lane dominance will sway to your favor.
Certain bruisers come with skills that help in the sustain department. Champions such as Garen, Xin Zhao and Renekton have abilities and passives which provide a steady IV drip of hp that prolongs their stay at top. As a result they can forgo buying potions, opting to buy more tank-like items such as Doran’s Shield or more damage such as Doran’s Blade .
Gank Incoming!
The layout of top lane is made to be rather susceptible to ganks (i.e the act where people from other lanes or from the same lane target one person to kill them and take their gold/experience) from the enemy jungler. Always keeping a ward up in lane will foil many ganks. Some commonly placed wards are at the three points highlighted below.
Try not to let the lane opponent know that you’ve planted a ward as he will be sure to inform his jungler of the ward position. This will result in the enemy jungler selecting a different gank route so as to avoid detection. There are many gank routes that are available to at top lane; these will be covered in a future article for junglers.
Observing your opponents behaviour in lane is another key point in detecting a gank. If your lane opponent has been playing passively against you, but suddenly inches forward to try to engage you it probably something's going to happen. This is one of the telltale signs a gank is about to come. At this point, call out to your support to drop a Clairvoyance or simply back off until you know it's safe.
Bruiser Discipline
At the end, a lot of it boils down to practice. More than that though, you need to be focused in executing your plays with good timing. It sounds elementary, but one of the reasons most players are stuck at the 1400 - 1500 elo is because they are unable to use their champion's abilities efficiently. Wasting auto-attack resetting abilities such as Wukong's Crushing Blow or Shyvana's Twin Bite really pull your damage down, and every piece of damage counts. Be aware of what you are doing. In all honesty, a huge factor in tuning your game up a notch is to not "scrub" out.
Join me on the next page where I talk more about the mid-game and team fight role of the bruiser and how to itemize to unlock the best within!
Welcome back! Today, we're going to pick up where we left off on the power of the bruisers in League of Legends. Previously, we talked about their lane phase and how to win it. Today, let's focus on more of the team dynamics.
Mid-game phase
Around this time, the enemy turret in your lane has been pushed down. This opens up much more movement around the map, as enemies have fewer places to retreat to. Here, you should be roaming to various locations.
• Key objectives
• Lanes with standing turrets
• Lanes that require help defending
• Ganking stray enemies in their jungle.
Most of the time while roaming, team fights will occur, and this leads us to our main topic.
Team fights
Here's a scenario to consider: a dragon has just spawned, your team moves in to take it out, but your support drops a vision ward just to be sure and spots an enemy ward that highlights the entire position of your team. A team fight will break out at any moment now. At this point, the enemy team makes its appearance, the tension lurks in the air, and any move could result in a clash.
During the pre-engage time, your job as a bruiser is to keep your HP up and avoid getting hit! Why? As a bruiser, you're not a dedicated tank. Sure, you can take a few hits, but that's not your priority. Ensure that your carries are well protected for the time being. Look out for your opponent's bruisers as well, as they may jump onto your squishy allies. If your team decides to engage, your job is to break through the ranks of the enemies and push back the high-threat targets, such as the AD carry. Your HP, combined with above-average resistances, will be your trump card against these pesky hard hitters.

At the actual engage, this is when your show begins. Run in, unleash your defensive abilities, pick out the highest threat carry, and focus that champion down. However, if the squishy takes a really far retreat from you, turn around and cover your squishy teammate's back.
You must not let them die! Sometimes, enemy tanks may turn their attention on to you, but do not fear. This just means that your carries can have free rein to throw everything they've got with no fear of interruption. You may die, but the team fight will be won overall. A victory for the team is a victory for you.
Beating down with badass gear
Bruising the right way requires you to have a good balance of resistances and damage. Some of these items are practically core to most bruisers. When starting out, always try to predict who your top lane opponent is. AD-centric opponents should be replied with a Cloth Armor and five health potions, which should in turn be upgraded to either a Wriggle's Lantern or a Ninja Tabi. Facing a magic damage-heavy top would need a Null-Magic Mantle and two health potions.
These should be upgraded to either a Spirit Visage or a Chalice of Harmony, depending on the situation and your own champion's presence of a mana pool. Also, consider getting early items, such as Philosopher's Stone and Heart of Gold, which provide good HP and sustain. After all, they can be built into nice utility items at the late game.
Of course, these are early/mid-game items. Now, let's talk about the core late-game items.
Wit's End
This item is a strong pick for champions that rely on auto attacks for the bulk of their damage, such as Irelia, Shyvanna, or Shen. It provides good magic resistance, along with good damage and attack speed. It used to be very underused, but it's becoming a very popular item choice in the current meta.
Frozen Mallet
This is the item that allows you to stick to a target and never let him leave. (Free hugs?) It provides a heavy dose of HP, letting you take more punishments with ease. It's a good combination with Atma's Impaler.
Trinity Force
This is considered as being a luxury item for most bruisers. It does, however, provide a big threat to the enemy team, due to its good mix of critical chance, damage, slow, and that awesome 150 percent damage proc. I usually rush these items on Irelia and Nasus.
Warmog's Armor
A beasty champion needs a beasty hide. We all know the Warmog + Atma's combo. Applauded for the bonus health and health regen, it's really a great item. It's a pretty expensive item that provides no resistance, so buy this if you really need the bonus health.
Atma's Impaler
This is an outstanding item that gives armour, crit chance, and an additional damage boost based off the amount of max HP you have. Every 1,000hp grants about 20 damage, allowing champs such as Volibear, Olaf, and Sion to benefit greatly from it.
Randuin's Omen
This shuts down pesky ad carries that are good at kiting, such as Ashe. It also follows up from buying that early Heart of Gold. It's highly recommended if you're having problems against AD teams.
Frozen Heart
Another strong item to consider for champs who rely on mana and cooldown reduction (CDR), such as Singed, Urgot, or Malphite. It's really strong in toning down the power of the AD carries. I strongly suggest rushing this item if the AD carry is ramping up damage faster than he should.
Force of Nature
This is a brilliant item that provides a high amount of magic resist. But its passive effects are just brilliant. Increased movement speed, along with a mundo-like 0.35 percent of HP/five regen per second, it truly makes you a force of nature. Unstoppable. It works wonders on HP stackers.
Banshee's Veil
If you are a bruiser who is capable of engaging, investing in a Banshee's Veil isn't a half-bad idea. It can be used offensively and defensively. Eating a crowd-control spell on behalf of your team really helps. Moreover, you should be able to pin down enemy carries easier, since they won't be able to lock you out with a single crowd-control spell.
You need to strike a good balance between damage and "tankibility." Too much resistance but no damage results in your being a meat shield, producing no threat. That will result in the opponent's AD carry ignoring you, and whaling on your teammates.
In the next part of this intermediate guide, we will be talking about some of the line-breaking, enemy-smashing bruisers themselves.
For our final segment on the Solo Top Bruiser, we're going to cover some of the more popular champions who reign control of the lane, and make pain their game.
Irelia, the Will of the Blades
She's a champion built for tearing through the ranks of enemies, due to her amazing innate passive damage, which gives massive crowd-control reduction. Always pair this with Mercury Treads; it makes CC look stupid on her. Maximising damage on Irelia is key to making her a real pain to handle during the laning phase. She's already equipped with enough sustain from Hiten Style, and the active attack really helps in the damage department.
Most bruisers on top have difficulty handling true damage; you must capitalise on this. With her recent nerfs, you should expect lower self-sustain in the lane. When trading blows with the opponent, make sure to time your Equilibrium Strike just right. It may give you the chance to deal damage, CC the guy, and walk out of the fight with more HP. Timing is everything, so learn it well.
Wukong, the Monkey King
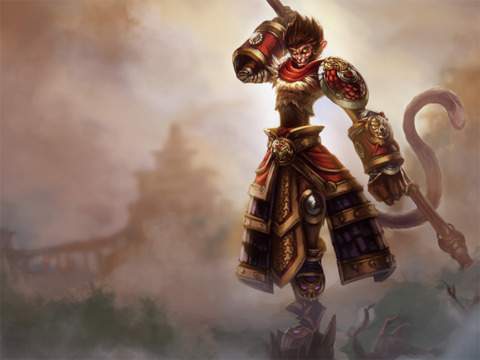
A cheeky champ that is juke heavy, Wukong is a strong, top player, due to his annoying ability to poke the opponent in the lane, but run away unscathed. He can contribute greatly in a team fight with his ultimate attack and its knock airborne utility, along with great single-target dps to remove squishies. Decoy is excellent at messing with your opponents' heads. You have to learn how to use the stop function in-game to maximise his juking prowess.
Just be mindful of when your opponent picks up oracles or a vision ward; the option to juke is greatly encumbered by it. When being chased by enemies, using a combination of Decoy and Nimbus strike, Wukong can be almost uncatchable. Cyclone does give a gradual increase in movement speed while spinning, so using it to escape is also viable. With Wukong, though, fighting is always an option, so don't be afraid to stand your ground if you have no way of running.
Riven, the Exile
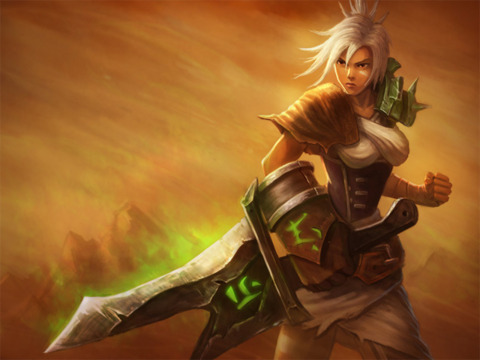
Triple Jump Riven, Bunny Hop Riven; despite these comedic names, Riven is not to be underestimated in the lane. She has a strong combination of skills that give her the ability to be highly mobile, and highly disruptive. Her skills all scale with bonus damage--even Valor, her dash-and-shield skill, which allows her to build damage and yet stay pretty tanky at the same time. Her spells have a pretty decent area of effect (AoE), which punishes teams that stick too close together, allowing her to chain her stuns and knockbacks together to heavily cripple the movements of the enemy team.
Her passive skill acts as a damage steroid, boosting her basic attack damage each time a skill is cast, causing many people to underestimate her damage just by viewing stats alone. Her ultimate attack works amazingly well with all of her skills, as it increases damage and range, which makes her AoE even larger than before. That's not all; her ultimate attack has delicious icing on the cake--Wind Slash fires a wave that does increasing damage based on the percentage of missing health. This works as a great finisher to pick off fleeing targets, or to burst down a squishy target really quickly at the end of your combo.
Gangplank, the Saltwater Scourge
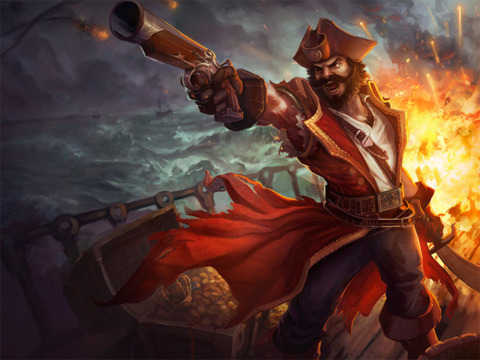
Avast, matey! Oranges be good for ya skin! This pirate of Bilgewater is a great one-on-one bruiser, due to his ability to have prolonged and slow attack from his passive skills, along with a single target nuke, a high movement speed, and a free Cleanse.
In the lane, he dominates most CC-reliant champions, such as Nocturne and Sion, as he can easily remove them with Remove Scurvy. Ganking him is a pain, as he can simply pop Raise Morale, as well. However, one of the most fearful things about Gangplank is his ability to drop his global ultimate, Canon Barrage.
This skill is capable of turning a losing fight around. Its large AoE slow can be used to cut off escapes, prevent ganks, or just provide that additional damage to help out your teammates. It's also a great initiator for any team fight at key objectives, which is useful for separating opponents, forcing them to run through the damaging ultimate to help out the isolated teammate. With trinity force, Atmogs (warmogs + atmas), and rarely Infinity Edge, his critical-strike Parleys and Canon Barrage will turn the tides of battle in your favour.
Yorick Mori, The Gravedigger
I simply love the irony of playing Yorick, a champ who simply won't die, and easily puts his enemies into their graves. He claims the throne in having incredible lane sustain and harass in the lane. Most of you are familiar with his skills, and should know that he becomes very tanky when they are all up. It's important to note that Yorick isn't a high-damage type of champ. He deals very good constant damage, and helps his team lock down opponents with his incredible slow attack, Omen of Pestilence.
You should definitely build him tanky, with items such as Frozen Mallet for a complete lock down. I strongly suggest Manamune for good damage increase to build some threat, as it also solves Yorick's mana problems. My last piece of advice for him is to throw your ultimate attack on your AD carry, once it hits the team fights. It's a killer set-up; no explanation needed.
Wreaking Havoc
Bruising isn't that hard, once you know the key roles you have to perform, and how to build yourself effectively. Play smart, and adapt to the situation. Bruising brings a lot of joy to my games, as I lock out the poor carries. Expect to get much hate from the opponent.
However, you can just shrug it off and smile. I promised you that you would be winning in style, didn't I?
This part of the guide is courtesy of Darren Seah, another avid League of Legends player, who is largely involved with the Singapore LoL community, via EqualsD Gaming.
The Support is like a babysitter to the steroid babies. Her job is to ensure that the steroid baby she is nurturing develops into a hard-hitting, skull-cracking monster. Like any good parent, the Support must be able to protect her child, keeping those who would seek to harm her baby at bay.
For part one of this series, I will be covering a general guide for most Supports.
The lane phase
The current meta game for Attack Damage Carries and Support is to hit the bottom lane and play it as a team. Out of all the lanes, bottom is probably the lane that sees the least action at the early to middle phases of the game, and will most likely stay as a two-on-two skirmish between the two sides. The only times that both of you move out of your lane is when your team decides to contest for dragon, or when your team foresees a clash at the bottom half of the map.
Map awareness
The most important task as a Support is to know when, where and how many enemies are coming for a gank. Picking up Clairvoyance is highly recommended for Support. This pre-emptive ability is mostly used to predict and prevent the ganks by your opponents on the bottom lane. Rule of thumb: the longer your AD Carry is alive and farming, the stronger he gets. AD Carries scale up really well, relative to other roles in the game.
The best tools to help you with this task, besides Clairvoyance, are Sight Wards and Vision Wards. Where to ward is one of the major questions that new players of League of Legends inquire about, so we will be covering prime ward locations for both the blue team and the purple team.
Clairvoyance for dummies
Opening Clairvoyance

The opening Clairvoyance should be done within the first 15 seconds of the game. This is useful, because it grants you insight into the opponent's opening items. At the bottom right of the picture is the opponent's starting items that I was able to gain intelligence on just by a simple Clairvoyance at the start of the match.
Jungle Clairvoyance
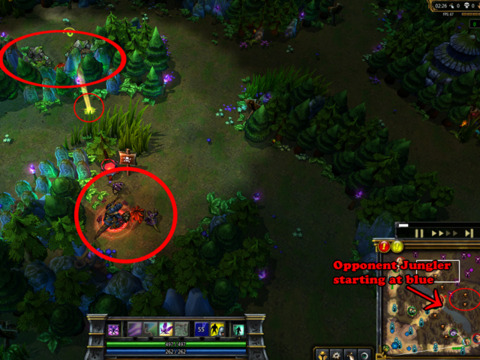
The next Clairvoyance you should be aiming at is the opponent's jungle, primarily targeting the enemy's Ancient Golem or Lizard Elder. Of course, it would be better if I had actually captured the enemy jungler in action, as we would have more affirmative intelligence on his location, but this is the second-best option, as we now know that the opponent's jungler is either at his own blue buff or counter-jungling our jungler's red.
Good places to use Clairvoyance
Clairvoyance of the map beyond this point should be based on your predictions of where the opponents will move. It's either that, or using it on a location where your allies foresee themselves getting ganked and request a Clairvoyance.
Depending on the situation, occasionally you would want to hold Clairvoyance so you are able to use it in the middle of a clash to spot a fleeing opponent. A thought to keep in mind, though, is that a well-placed Clairvoyance can decide whether your team wins or loses a game, as it could save your squishy carries from getting caught in a bad location and getting taken out even before the fight begins, or spotting out singular opponents wandering in easily gankable places. Clairvoyance is definitely one of the most game-changing spells in League of Legends; imagine if the military had this ability!
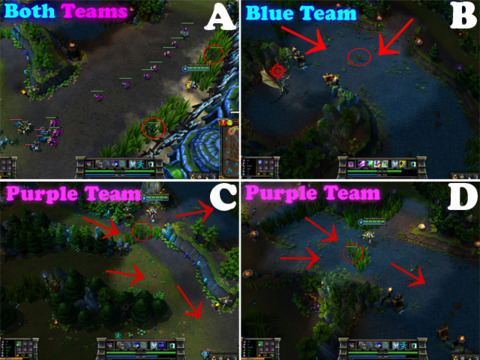
Warding for dummies: jungler gank path
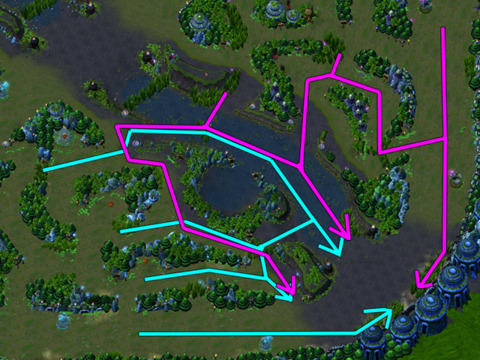
Purple line: purple jungler's gank path
Blue line: blue jungler's gank path
Here, you can see the common gank paths that junglers use to gank. There are, of course, more unorthodox gank paths available, but, due to the rarity of their usage, I will not be covering them. So, based on this image, we now know where the prime spots are to ward and safeguard our lane with pre-emptive map intelligence.
Ward locations (early game)
Vision gained from warding each location
Ward A:
- Prevents offensive play from brush camping
- 1 enemy jungler gank path
Ward B (blue's prime ward):
- Most probable path to bottom lane from middle lane
- 2 enemy jungler gank path
- Dragons
Ward C (purple's prime ward):
- 1 probable path for blue team's middle lane to bottom lane
- 2 enemy jungler gank path
Ward D:
- Most probable path to bottom lane from middle lane
- Watch for counter-jungling from opponent junglers
- 1 enemy jungler gank path
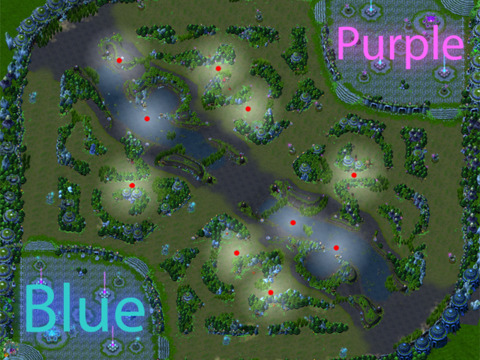
Good places to ward
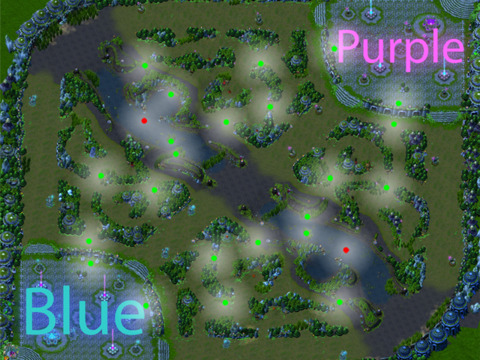
Green dot: good places to ward that have significant coverage of the warded area.
Red dot: vital area! Have a ward down at all times if possible, as this area contains important map objectives, like Dragon and Baron, that grant team-wide benefits.
Translucent white area around ward: estimated vision coverage for the ward.
Warding is one of the Support's most vital tasks in League of Legends, as without wards, your teammates are extremely vulnerable to ganks and getting caught off-guard by enemies waiting for an ambush.
Support's role in-lane
The Support's role in-lane, as stated above, is to babysit your steroid baby the best you can, so he can become a full-blown AD Carry that shreds the health of both enemy tanks and Carries. To do this, there are a few guidelines to follow if you wish to become a Support player.
1.The penniless player
Well, you are not exactly penniless, but this is a good way to depict the amount of farm you should be getting as a Support. If you are a good Support player, having less than 20 creep kills at the end of a 40-minute game should not come as a surprise for you, because throughout the game, you will probably be giving away all possible farm to your allies.
At the lane phase, you should be giving every single farm to your AD Carry, as long as he is in-lane. The only time you should be last hitting to farm creeps is when your AD Carry is not in the lane, or you know that your AD Carry will definitely miss the last hit on the creep.
Your primary source of income will be generated passively by both GP10 runes and items. This will be covered in greater detail when our Part 2 of the Support role is released.
2. Brushing of the enemies
Control of the brush in the bottom lane can give you and your AD Carry a distinct advantage in the lane, especially when you use more aggressive Supports that thrive on hiding in the brush and popping their heads in and out of the brush like a jack-in-a-box to deal damage or create disruptions.
When you are getting outplayed by the opponents in your lane, brush control becomes especially important, because if you don't have vision of the brush, and an enemy champion is hiding in it, then Supports like Alistar can easily stun-lock their targets for a good two to three seconds, which is more than enough time for their Carry to take either you or your AD Carry down.
3. Don't hurt my baby!
Keeping your baby healthy is yet another aspect of Supports. Most Supports have in-built defensive spells, like shields or heal. Shielding Supports are usually harder to use, as they require quicker reflexes to nullify the enemy attacks. I highly recommend using Smart-Cast for these champions, as it really does speed up the rate at which you cast your spells, whereas healing Supports should spam their healing.
Join me next time, when I will be covering the team-fight components and itemisation of the ever-so-important support champions.
Welcome back! Today, we will be covering the team-fight phase and item builds of the generic Support champion. Let's get right into it.
Team-fight phase
You have now reached the stage of the game where your team utility has extended beyond just your AD Carry, and instead to your team as a whole. This part of the game is where all of the minor and major clashes alike will start to occur in quick successions. Like in the previous article, I will be separating this section into two parts: the pre-engage and the actual engage.
Pre-engage

The pre-engage consists of removing the enemy team's vision as much as you possibly can. By this phase of the game, you should have your Oracle's Elixir up and exploiting its stealth-detection capabilities. Nothing annoys people more than seeing their wards on the map destroyed, as every ward destroyed reduces their ability to predict ambushes.
For Supports with healing spells, common sense dictates that before a clash happens, you should keep your team as healthy as possible, meaning that you heal even champions that are above 80 percent health. The number of times that I have seen my Carries escape with less than 100 health is astonishing.
Actual engage
During the actual engage, most Supports have some form of crowd-controlling (CC) or disabling spell, like Silence, Stun, or Slow. During the fights, you do have to make sure that you pick out the right targets. Most of the time, during a 5v5 team clash; chances are that you will not be able to get close enough to their Carries to disable them. So the next best thing you can do is keep your teammates alive. Just ensure that you prioritise your AD and AP Carries.
1. The squishy buddy
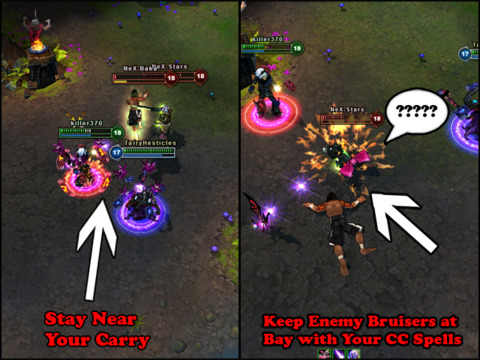
Opponents tend to enjoy targeting your Carries, as they have the lowest life and the highest damage, so your job as a Support is to prevent them from succeeding in what they set out to do. By using your arsenal of disabling and defensive spells, you assist your Carries in juking the enemy Bruisers who bullet through your team's defensive line to take their shots at your Carries. At this point in time, do not hesitate to throw your entire array of spells to stop the opponents advancing, as the longer your Carries stay alive in the fight, the more damage they can deal, which in turn gives your team a higher chance of winning the engage.
2. Use your Support items!
The next thing to watch for during clashes, which I seemed to always forget when I was new to League of Legends, is to make sure you remember to use your items before or during the engage. Items like Shurelya's Reverie, Locket of the Iron Solari, and Randuin's Omen. The active abilities of these items are excellent in helping your teammates chase fleeing opponents, or catching an enemy who's in a vulnerable position.
3. You can run, but you can't hide
Saving Clairvoyance to be used during the engage is an excellent way to help catch enemies that are good at juking, so occasionally you will want to hold Clairvoyance back and use it only when you notice a low-health enemy running away. Sometimes, this can help your team to easily secure an otherwise-difficult kill.
The protector's pouch
This section is dedicated to the magical pouch that your champion carries around, which contains tools to help you and your Carries in their quest for "Can't Touch This", or at least minimises the touching, as Carries who get touched too much by the enemy are dead Carries.
For the game opening, as a Support, I usually go for Faerie Charm, three Sight Wards, two health potions and one mana potion. Three Wards are sufficient to keep your prime ward location warded until your automatic gold generation enables you to get your first GP10 item, which is usually Philosopher's Stone, and, at the same time, the potions allow you to sustain yourself in your lane to guard your Carry.
The items above are a rough list of the items that are viable options for a Support to purchase, but do remember to prioritise the purchase of Wards and Oracles before you decide to go for end-game Support items.

Aegis of the Legion
This item is very useful if you face an opponent with very balanced damage types of both physical and magical. The team-wide magic-resist and armour-boosting aura can help cut out a significant part of the opponent's damage on your team, especially if the damage is being done to paper-cannon-type players who go with fully offensive items.
Shurelya's Reverie
One of the items I would recommend most for Support, the two-second instant speed boost for your team, can be used for multiple situations; for instance, chasing fleeing enemies, fleeing from chasing enemies in a disadvantageous fight, and catching up to vulnerable opponents who have placed themselves in a bad position. The utility and usage of this item is limitless, depending on how or when you use it.
Randuin's Omen
This item is exceptionally useful for the Big Daddy-type Support that charges into the fray and disrupts the opponents. Some examples of Big Daddy-type Supports include Alistar, Blitzcrank, Shen, and Taric. It also has its occasional use on ranged Supports, if you wish to have an extra mechanism to keep the enemy Bruisers off your Carries.
Soul Shroud
Have a team that is cool-down reliant? You can consider getting Soul Shroud. The 10 percent increased cool-down reduction for your team can help your team thrash out more damage, and teammates that possess juking abilities can use them at faster rates. The extra health it provides also means that you can play a little more recklessly during team clashes, running deeper into enemy lines to cause more disruption at their core.
Zeke's Herald
This item has surfaced on Supports more often after the nerf on all of the physical life-stealing items. Supports who get this are aiming to help their physical Bruisers and Carries make up for the nerf by purchasing an item that provides a life-steal aura, so that they are able to better sustain themselves in a fight. I recommend getting this towards the later phases of the game, and concentrating more on purchasing other Support items, as it does not provide much utility to the Support itself.
Locket of the Iron Solari
This item absorbs up to 230 damage at level 18; it allows your entire team to soak up roughly one extra attack by the opponents, or to save a fleeing ally from a damage-over-time spell, like Ignite, that would otherwise kill them. It's as useful as a burst-defence mechanism, for example that by Soraka, who can burst-heal a dying teammate and then throw out this item's shield to cover the entire team.
Hello again, guys. So far, we have covered the broad strokes of what a Support is and how you play them. In this section, I will be recommending two types of Support: the Loving Mother type, and the Big Daddy type.
The Loving Mother type of Support sways more to the side of sustaining the Carry that you are partnered with, while dealing minimal disruption during the lane phase. The Big Daddy Support is the type that charges head on (or makes the enemy "charge") into the enemy, and hopes that his Attack Damage (AD) Carry is smart enough to assist him whenever he does that. Without further ado, here are my Support recommendations.
The Loving Mothers
Soraka, the Starchild
Soraka is right now said to be the strongest Support champion in the game. Although her auto-attack looks like bananas, that humour is made up for by her incredible healing capabilities. She currently has the best burst heals, and also very sustainable lane management. Infuse doubles as a silence if cast on an opponent, or is a very nice mana-restoration device for your allies.
Considered a fully defensive type of Support, her heals can burst up a Carry from critical to full health, with a combination of her two healing spells, which, at level 18, and without any ability power items, heals for a whopping 800 health! Her weakness is that her offensive capabilities in the team are comparable to using a daisy as a weapon. So, if you do decide to try her out, make sure that you stand out of enemy fire, and just try to keep your team alive with all of the regenerative spells that you possess.
I recommend building cool-down reduction items on her, as her heal has a rather long cool-down period. It is a wonderful healing spell, which provides armour on her target, so the more times you can cast it, the better.
Sona, Maven of the Strings

Sona is extremely squishy, but what she lacks in defensive stats, she makes up for in team utility. She is the Queen of Auras; all of her three basic spells have an active effect and a persistent aura that have their own form of beneficial stats to improve the combat capabilities of her allies. She can choose between three types of auras, and change them around to adapt to the situation: Offensive Aura, Defensive Aura, and Mobility Aura.
Her ultimate attack is also extremely useful and cute to boot; it is an AOE stun that forces opponents hit by it to start dancing. A good use of her ultimate attack can easily turn the tides of an engage in your favour. So, if you're feeling lazy and want to minimise the use of your mouse, then Sona is the champion for you.
Taric, the Gem Knight
"Sparkling Man" is the name of this guy's game; he sparkles brightly and is proud of it. He is actually midway between a Loving Mother and a Big Daddy, but I have decided to put him in the Loving Mother section, as his skills are targeted more towards the defensive side. Of course, they can be used offensively, as well. Taric is the only Support champion with a consistent stun.
The stun is superbly useful in helping your AD Carry land his skill shot, and the stun also greatly increases the odds of your jungler being able to pull off a successful gank. At the early stages of the game, he enjoys having picnics in the brush, and throwing diamonds at his enemies, which stuns them if they wander around his vicinity.
Towards the later parts of the game, you can build him on the tankier side, so that he can be a front-liner. His ability to do so is why he does contain elements of the "Big Daddy" Support champions. While he cannot be a superb tank, he is able to soak up quite a bit of damage. His natural armour is rather high. Don't forget that his heals on his allies also heal himself.
The Big Daddies
Alistar, the Minotaur

This Big Daddy is an angry, rampaging bull equipped with horns and a huge, muscular body. Nonetheless, Alistar's speciality lies not in being able to punch people's faces in, but in his ability to consistently disrupt the enemies through knockbacks and AOE stuns. He also has a small AOE healing spell called Triumphant Roar that is useful at early stages of the game, as it helps sustain your AD Carry.
I rate him at 7/10, because mastering his Headbutt-to-Pulverise combo does require quite a bit of skill and practice. This two-spell combo works like a mini Unstoppable Force, and you guys know how much disruption a single unstoppable force can cause. Imagine it happening once every 10 seconds during a team clash. It's hard to grab this bull by his horns.
Blitzcrank, the Great Steam Golem
While other Big Daddies like charging into enemy lines, Blitzcrank likes making people charge to him--most of the time, against their will. A good Blitzcrank can turn an Insanity Wolf into Paranoid Parrot in a lane. Blitzcrank is the king of zoning at bottom lane when coupled with an AD carry that has higher damage at the early stages of the game.
His Rocket Grab to Power Fist combo can easily cut the opponent's Carry's life by over 50 percent if his partner supports him, and, most of the time, forcing the enemy to burn their Summoner Spell Flash, making them easy targets for future ganks. But his weakness lies in not being able to sustain either him or his Carry in the lane, as he has neither an active healing nor a shielding spell. If your opponents are able to out-harass you and your Carry, both of you will suffer in the lane together.
That's it for the coverage of our ever-so-handy Support champions. Go out there to the Fields of Justice and raise your kids into strong and capable fighters to win you those games. Just be warned: parenting is not an easy job. Good luck, Summoners!
This part of the guide is courtesy of Darren Seah, another avid League of Legends player, who is largely involved with the Singapore LoL community, via EqualsD Gaming.
What is an AD Carry? Here's a poem to describe an AD Carry's life:
They see him farmin', they hatin',
And in the late game they scream, "holy sheet just kill him",
Come on guys, let's all just aim him,
Look at him, he's so paper thin,
Holy crap, he needs to be pinned,
Aced! Never mind…
The AD Carries are like the diamonds in the rough. They start out ridiculously weak compared to most other roles, but their damage just scales out of control once they have sufficient level and items. This guide is dedicated to teaching you newbie AD Carry-wannabes to be the smallest, yet most kick-ass guy there is on the playground. And once again, this guide is targeted for the newer players to League of Legends, and there might be some stuff that is so fundamental, that most people cannot help but pin-point and rage on it.
Lane phase
As stated before, the current meta-game for AD Carries and Support is to hit the bottom lane and play it as a team. Out of all the lanes, bottom is probably the lane that sees the least action at the early to middle phases of the game, and will most likely stay as a two-on-two skirmish between the two sides, with occasional backtracking due to Jungler or mid-lane interference. During the early phases of the game, the only times that both of you move out of your lane is when your team decides to contest for dragon, or when your team foresees a clash at the bottom half area of the map.
The AD Carry's guide to awesomeness:
Phase one: early game
Basic tactic one: the art of last-hitting

Last-hitting is timing your attacks so that when your attack connects with the target, you land the killing blow. Last-hitting is important because, if mastered, it enables you to itemize much faster than an enemy who has not mastered the art of last-hitting.
I cannot stress the importance of learning this skill. Not only is it a technique used by the AD Carry, but it is an essential skill that is required by every single player who aspires to improve themselves in League of Legends. It also increases your gold acquiring capabilities by tenfold.
If you desire to practice AD Carries last-hitting, Caitlyn is a good choice. She has the furthest opening range, and her attack animations are clear and fast. Next on the list of champion types would be the melee champions. Xin Zhao makes a good practice dummy, as his auto-attacks are also clear and fast. For targeted spell last-hitting, Annie is a good choice. Her Q spell, Disintegrate, refunds the full mana cost when it lands the killing blow.
Basic tactic two: support coordination
Although farming is high up in your priority list, coordinating pokes, aggressive or defensive plays are also important. If you Support spots out an opportunity and goes in for the assault, more often than not, you will have to drop whatever you are doing and focus on the enemy your Support has targeted to ensure that your side is able to dish out the maximum damage possible.
What this achieves, if successfully executed, is that you are able to put immense pressure on your enemies in the lane. In the best case scenario, you walk away with a kill. However, most of the time, it is to deter the enemy from farming minion kills, as he knows that if he goes in for the last hit, he's going to lose a few bar of hit points with it.
Likewise, if your Support gets attacked, going in for the counter-offense is also extremely important. We call that a 'trade'. When both teams are trading damage with each other, the side which takes less damage also gains lane superiority. Although, you are relatively safe from enemy fire when your Support gets focused, but do be mindful, some tactics involve aiming the Support, making him burn his defensive cooldowns on himself, then swapping over to the now vulnerable AD Carry and vice versa.
Advance tactic one: lane minion control
Although minions are mindless idiots who walk a fixed path and charge stupidly to their own deaths (while kindly providing us with a reliable meat-shield from tower damage when you siege them), your hero's actions can greatly influence the movement of the minions within the lane.
Ideally, to minimize pushing the lane too far out, which makes your lane susceptible to Ganks from the enemy, players prefer to farm the creeps on a 'one hit, one kill' basis, meaning, the only time you attack the minion is the final hit that will end its life. Below are some scenarios that might occur in the bottom lane, and the location you want the minion collision to be at.

If you are playing against a very aggressive enemy composition, you want to keep the enemy minions more towards your side of the map. The ideal location for this situation is just a short distance away from your tower and just slightly out of its attack range, so you do not lose minions to the tower. The benefits of doing this is that it makes it harder for the enemy Jungler to Gank you while farming, it also deters the aggressive opponents from jumping on to you or your support, because both of you are so near the proximity of your tower.
When the enemy AD returns to his base or is dead, a good choice of action would be to clear the enemy minion wave as fast as possible, so your minion wave is pushed into the range of the enemy turret. The benefits of doing this is that, for the duration that the enemy AD Carry is not in lane, he loses out on the minions that are killed by the tower, and this further increases the gold gap between you and the enemy AD Carry.
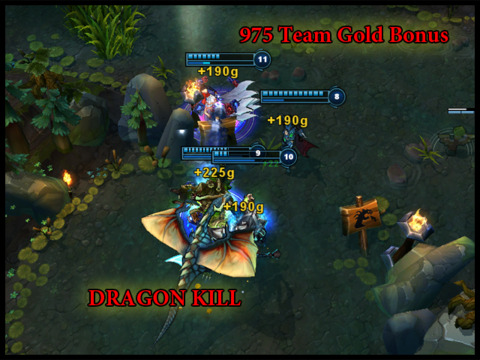
Advance tactic two: global objective, operation Dragon control
AD Carries usually have the highest consistent damage, and the situation that requires the most consistent damage is the securing of global objectives, like Dragon and Baron Nashor. For this section, I will be focusing more on Dragon, as this is the Early-Game section of the guide. Each Dragon kill provides a team-wide bonus of 190 gold, per player, and 25 extra gold for the killer. That is a whopping 975 gold for a well-coordinated Dragon kill that can be taken down in less than 10 seconds.
Being dwellers of the bottom lane, the lane nearest to Dragon, being present at Dragon attempts are extremely important. As an AD Carry, you usually deal the most damage to the Dragon, and if a team clash does happen, it also means opportunities to attain champion kills, which will further increase your champion's farm.
Knowing the best opportunity to take Dragon is an acquired skill. Some common situations to take Dragon includes:
Outnumbering the enemy - Multiple enemy Ganks on your top-laner, which means that the enemies there will not be able to arrive in time to contest for Dragon
- Successfully killing off the enemy champions at bottom-lane or mid-lane
- Scoring an Ace, and ensure to capitalize on this if your team leaves the fight with too little health to attempt Baron Nashor.
Superior map intelligence - Knowing that the enemy lacks wards around the area, providing you with the opportunity to stealth-kill Dragon
- Knowing when Dragon spawns, and gaining area control a few seconds before it becomes active.
Phase two: mid game
This is the phase of the game where you start to become a threat to your enemies, as you probably will have an end-game item or most of the components of an end-game item by this time.
Vital tactic 1: stayin' alive, stayin' alive
To your enemies, you are the best-looking person on your team, the apple of their eyes and they all want to hit on you. And by hit on you, I mean, they literally want to smash you with whatever means possible, with whatever they have at their disposal, from bare-hands to weapons to magicl over 9000 kilometre-long swords falling from the skies. Because everyone wants you dead so badly, it is your job to make it as hard as possible for them to kill you, because the longer you stay alive, the more time you and your team will have to be able to pick your enemies off.
An advice: one of the world's best AD Carry, Kang "Cpt Jack" Hyung-woo from team Azubu Blaze, stated that you have to deal as much damage as possible while you try to live. "To be a good AD Carry, you have to be able to survive, regardless of the situation, and be the last player that keeps on dealing damage. However, if you aren't dealing damage because you are trying to live, you wouldn't be a good AD player."
One tactic that will give you an advantage in this field is to stay out of enemy vision before the team-fight breaks out, and enter when you notice the enemy has blown some of their major spells on your teammates. You lose some damage-time, but you gain the advantage of coming in when the risk of getting focused is lowered.
Vital tactic 1.1: positioning, positioning, positioning
What is positioning? Good positioning is having your champion at a location that allows you to deal as much damage, while taking as little damage, if not no damage at all. I cannot stress the importance of learning this skill. Many games are lost in high level games due to bad positioning of the players from the team that lost. Unlike other MOBA, the loss of 1 player in the team, especially the Carries, can spell defeat for the game.
In team-fights, many people have this misconception that an AD Carry's job is to take out the enemy Carries as quickly as possible, while putting themselves at risk. This is incorrect, as more often than not, you will not be able to reach the enemy Carries unless they come into your face, or the enemy front-liners are dead. And emphasizing on the advice from Cpt Jack: never put yourself in a compromising position, but instead, rain as much devastation as possible on whomever you can target at that given point in time, or what you feel to be the most threatening target within your champion's attack range.
Timing movements between your attacks is also extremely beneficial to keeping yourself alive and preventing dying enemies from escaping. The name of this next skill an AD Carry has to learn is called "Kiting"; it means to keep as much of a distance as you can from melee enemies, while raining auto-attacks on their team. A moving target is always harder to hit than a stationary target, thus, constant repositioning in team-fight will make it harder for the enemies to focus you down.
Phase three: late game
Who's your daddy? You are your own daddy. At this phase of the game, you should be the highest threat to your enemies, as you possess the strongest consistent damage out of all your team-mates, and have successfully racked up 2 to 3 end-game items. An analogy for you in the late game phase is: you are a ninja plushie, equipped with a Gatling gun and moving swiftly and avoiding enemy fire, while rapidly filling them with arrows or lead.
Vital tactic: identical to phase two
Your job in phase three is pretty much identical to that in phase two, except that, at this point of the game, you getting caught out of position can instantly spell defeat for your team. Also, your enemies will love to sink their weapons into you more than ever at this phase of the game, as you will probably have the lowest life and highest damage in your entire team.
Survival tactic 1: mind your own business
Team-fights at this phase of the game are usually messy, and it is extremely hard to keep track of everything that is going on. Thus, you might want to reduce the things you choose to focus on in these big team-fights, to things you need to focus most in these fights. As an AD Carry, keeping an eye on your champion should be number one on your list.
I understand some of the issues faced by newer AD Carries, as personally, before I transitioned to play this role, my primary roles were either Jungle or Top and, usually, members of these two lanes are thicker and in the face of the enemies to keep them off your team. As such, you have to watch the enemy's position, as well as your team's, and that will cause you to focus less on your own champion. So when I first transitioned to the AD Carry role, there were countless times where I lost sight of my champion, and when I finally caught sight of him again, he was already kissing the floor like a romantic scene from Twilight.
As an AD Carry, you have to be extremely self-centred and stay alive, regardless of the situation. Newer AD Carries, like me in the past, tend to focus too much on the enemy you are targeting, and lose sight of your champion. (Players call this "Tunnel Vision") But as an AD Carry, if you happily keep firing while stupidly waltzing into your enemy lines, you will get destroyed instantly, which will spell disaster for your team, as the enemy now possesses more damage output and will always -- always -- keep an eye on your champion.
Survival tactic 2: survival items
Possessing a survival item is paramount to succeeding in the late game when the opponents will try their best to lock you down. I would recommend Guardian Angel or Banshee's Veil. As a summoner, you should be able to decide on what survival items are best suited to maximize your chances of staying alive.
Guardian Angel is ideal for most situations, but I would say that it is for situations when the enemy champions have high, long ranged burst damage and low sustain damage. This grants a second wind while the enemies still have all their spells on cooldown.
Banshee's Veil is less commonly used in the tournament scene, but it is good for situations where the opponent has an AP Carry, which possesses high, focused target burst. A good example of this type of champion is Leblanc, and the extra magic resist and spell shield will be able to block off a good chunk of her burst damage, keeping you alive.
Quicksilver Sash is not an item that I will recommend for newer players, as newer players in the heat of battle tend to forget that they have this item. But I would say, under the hands of a skilled player, this survival item definitely has the highest utility compared to the rest, and it is so much cheaper compared to the other 2 choices, as well. What this item does is remove all enemy debuffs that are affecting your champion. At the end of this article, I will recommend some professional AD Carry players for you guys to check out, and you can see how these skilled players abuse, so disgustingly well, the utility of this item.
One tactic that will give you an advantage in this field is to stay out of enemy vision before the team-fight breaks out, and enter when you notice the enemy has blown some of their major spells on your teammates. You lose some damage-time, but you gain the advantage of coming in when the risk of getting focused is lowered.
Vital tactic 1.1: positioning, positioning, positioning
What is positioning? Good positioning is having your champion at a location that allows you to deal as much damage, while taking as little damage, if not no damage at all. I cannot stress the importance of learning this skill. Many games are lost in high level games due to bad positioning of the players from the team that lost. Unlike other MOBA, the loss of 1 player in the team, especially the Carries, can spell defeat for the game.
In team-fights, many people have this misconception that an AD Carry's job is to take out the enemy Carries as quickly as possible, while putting themselves at risk. This is incorrect, as more often than not, you will not be able to reach the enemy Carries unless they come into your face, or the enemy front-liners are dead. And emphasizing on the advice from Cpt Jack: never put yourself in a compromising position, but instead, rain as much devastation as possible on whomever you can target at that given point in time, or what you feel to be the most threatening target within your champion's attack range.
Timing movements between your attacks is also extremely beneficial to keeping yourself alive and preventing dying enemies from escaping. The name of this next skill an AD Carry has to learn is called "Kiting"; it means to keep as much of a distance as you can from melee enemies, while raining auto-attacks on their team. A moving target is always harder to hit than a stationary target, thus, constant repositioning in team-fight will make it harder for the enemies to focus you down.
Armaments of the Destroyer
The Black Cleaver
Occasionally attained by top-tier players, this item reduces up to 45 of your opponent's armour, and when coupled with armour penetration runes and masteries, you can easily deal close to full damage to most Carries and Supports. This is an item that is superior in the mid-game, as most champions do not have high base armour and can be considered if you are ahead in gold.
The Bloodthirster
The item with the highest total physical damage bonus, as well as life-steal, the only drawback of this item is that it requires you to kill off 40 enemies before it reaches its full potential. You also lose half the current bonus on this equipment when you die. This item is usually bought as a counter if they enemy has Thornmail, as the lifesteal allows you to negate the return damage, preventing you from killing yourself when attacking that target.
Infinity Edge
A hot favourite, first end-game item for most AD Carry players, as it adds the most effective physical damage in the game. This item provides 80 physical damage, 25 per cent critical chance and 50 per cent increase critical damage; this is definitely a must-have for all AD Carries, regardless of the phase of the game they are in.
Trinity Force
Commonly seen in champions that possess spells that have relatively low cooldown or high usage counts, this item is extremely potent, because it has a good balance of survivability, offensiveness and utility. AD Carries that favour this item include Corki and Ezreal, as they both have spells that have relatively short cooldown, allowing them to maximize the use of this item's unique passive.
Phantom Dancer
Thee dub said item, the Bringer of Speed. No other item in the game adds as much speed and critical hit chance as this item. This item is usually the second item an AD Carry builds after it has acquired either one of the three damage items: The Black Cleaver, The Bloodthirster or Infinity Edge. But out of all the three, the item which compliments Phantom Dancer the most in terms of damage output is Infinity Edge. A combination of Phantom Dancer and Infinity Edge grants a whopping 55 per cent critical chance.
Last Whisper
This item focuses on armour penetration. This item grants a staggering 40 per cent armour penetration and is usually built when the enemy starts to build items with armour. It allows AD Carries to chip off the health of even the thickest tanks and bruisers, because without it, they would be near impossible to take down.
Guardian Angel,Banshee's Veil,Quicksilver Sash
AD Carries are almost always the focus of enemy fire, thus having at least one of these survival items on your champion can spell the difference between victory and defeat for your team. The choice of which survival item to choose is covered in the previous section of this guide: phase three: late game survival. Look to that section for a short breakdown between the three items.
AD Carries game-phase strength comparison
Below is a few graphs, based on personal opinion of how I rate each champion's effectiveness in the early, mid and late game phase, based on damage, survivability and utility, with 1 being the weakest and 3 being the strongest and their difficulty level on the scale of 1 to 10. Thus, for newer players, if you are not confident in trying out tough champions right off the bat, try to stick to champions below the difficulty of 5, and slowly move up the difficulty curve when you start to understand the game better.
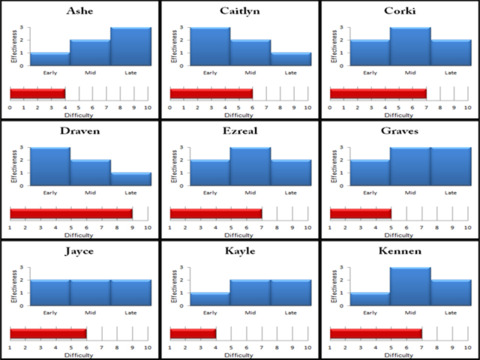
Note that this is only a comparison between AD Carries and not with other roles. Also, this is just based on my opinion, and if you think that certain ratings are incorrect, leave a comment down below, including why the champion should have a different rating.
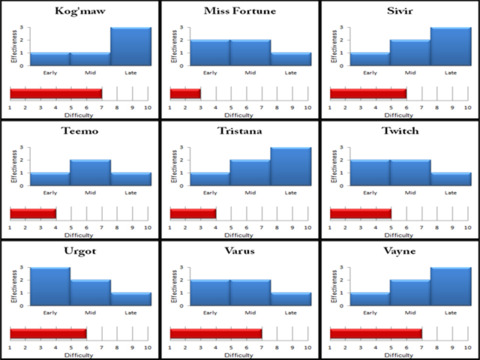
In the next part of the AD Carry series; there will be an analysis on why these champions are rated weak or strong at certain phases of the game and how to minimize each champion's weakness at the early game, with the help of your Support.
The Dream Destroyer
The Champions in this category are extremely potent in the early phases of the game, and if your plan is to shut down the enemy AD Carry in the early game, these champions are the best ADs to do it.
Caitlyn
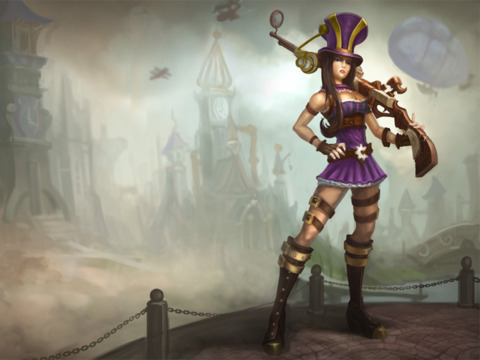
No one has longer physical attack range in the early game than this cute sheriff who leaves her fuzzy cuffs at home. Caitlyn boast the furthest opening range out of all the AD Carries, at 650, and is able to outrange and poke any other ranged champions in lane. She is a champion built for the early game, with Yordle Snap Trap to help your lane gain brush superiority and a gap-breaker coupled with a slow as her mobility spell. The problem with heroes in this category is if opponents are able to out-farm or be on par with your farm, you will probably lose to them in terms of damage.
Urgot

Crab-man is known to most AD and Support laners as the God of the early game. His primary damage dealing spell, Acid Hunter, boast insanely far range when the target is infected with his Noxian Corrosive Charge debuff. He is literally able to out-trade every AD Carry in the early game, and his ultimate Hyper Kinetic Position Reverser (The Swap) is the best spell to catch any enemy Carries out of position -- awesome for coordinating Ganks with your Jungler.
Late game ladies
Generally, champions in this category are extremely vulnerable at the early game, with not many ways to counteract early aggression, except from the use of auto-attacks and with the help of some simple spells that does not have significant contributions to their overall DPS.
Ashe

Apart from her passive and volley combo, she does not possess any other form of burst, and focuses on consistent damage. Ashe begins to shine when her Frost Arrow is maxed out, as she can permanently slow the opponents, as long as she keeps auto-attacking them. Her ultimate also has one of the strongest utility out of all the AD Carries, and a great spell to decide if the team should go in for the engage or not.
Tristana
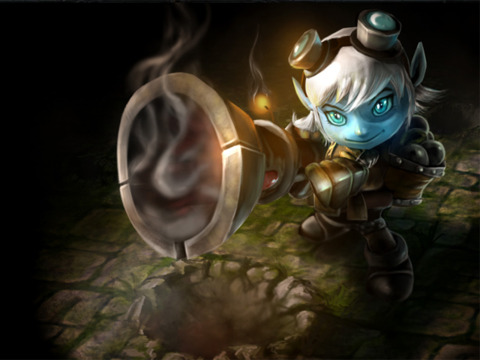
What makes Tristana strong in her late game is her insane range. Boasting a range of 703 at level 18 makes her the champion with the furthest auto-attack range (minus Kog'Maw with his Bio-arcane Barrage active). She is the queen of auto-attacks with her Rapid Fire granting her a 90 per cent attack speed boost when it is maxed. A pick to counter against enemies that have strong healing capabilities is her Explosive Shot's active component, which grants Grievous Wounds (50 per cent healing reduction).
Graves
Definitely the prettiest champion in my books, nothing turns me on more than a woman with a moustache. Graves' strength lies in his ability to be relatively balanced, regardless of the phase of the game he is in. He has the ability to deal insane burst damage during team-fights with the combination of Buckshot and Collateral Damage. He also has decent sustain damage with his Quickdraw ability ,which works as both as an offensive gap closer with an attack speed buff to boot, or defensively to get out of tight situations.
Vayne
The trademark of Vayne is her ability to deal true damage, making it extremely hard for tanks and bruisers to take her down. In team-fights, she is constantly dodging your attacks and turning invisible every 2 to 3 seconds. Vayne is probably the AD Carry that deals the highest consistent damage in the late game, and even the largest tanks squeal like little girls when she starts focusing her attacks on them.
This part of the guide is courtesy of Joshua "Meep" Lim Jun Wei, another avid League of Legends (LoL) player who is largely involved with the Singapore LoL community, via EqualsD Gaming.
Jungle Like A Boss
Are you bad at last hitting? Do you enjoy the humid, tropical climates of rainforests? Does being the main source of ganking in your team turn you on? If so, mastering the role of a Jungler is the role for you! Hi there, I’m Meep from EqualsD Gaming, and I’m here to give you some tips and tricks to up your game in the jungle.
So, what exactly does a Jungler do? This role is important to the point that Junglers controls the early to mid stages of the game. The success of your team at these points in time largely rests upon your shoulders, because the various global objectives in the map all reside in the jungle, aka, Blue Buff, Red Buff, Dragon, and Baron. These are important objectives to always keep track of, for they can always help turn the tide against your opponents.
I’ll be breaking the game down into three simple components: early, mid, and late game. So let’s get to it.
Phases
Early game
Jungle paths are all up to your own personal preference, or more catered to the champion that you are jungling with. Picking the right path for the style of jungling you wish to do is important. On that note, there are three different ways to jungle: the usual farm it out and sustain in the jungle; the aggressive early game ganking at level 2; and my personal favourite, which is counter-jungling to make the opponent Jungler’s life a living hell. All styles have their own merits, but take note: only certain champions can do certain styles exceptionally. A picture speaks a thousand words, so do take a look at the bottom screenshots for your reference. These pictures are in reference to the purple team, so just mirror them if you play the blue team more.
Peaceful jungling
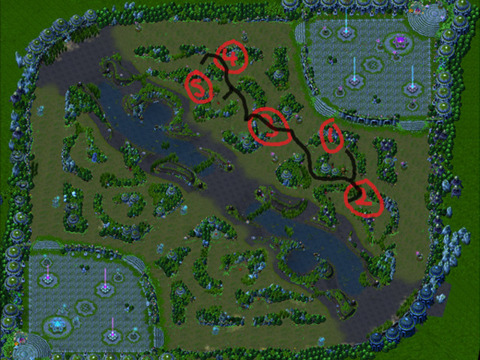
The picture says it all. Once you have your double buff, you can either head home to pick up items or try to gank top or mid.
Fast ganks
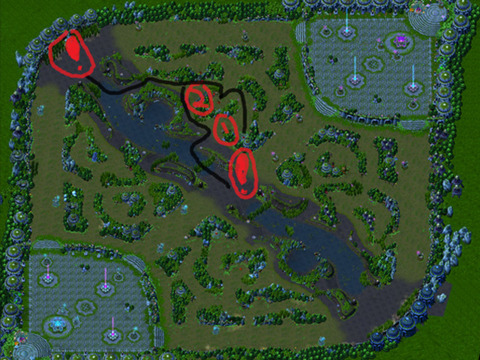
This path is pretty awesome for champions who can gank well early on, especially with a red buff on. Grabbing wraiths first before red spawns is very important; it gets you to level 2 once you're done with red, allowing you to be a level higher than the lane you are about to gank. This means one extra skill! Woohoo!
Proceed to gank either lane of choice, mid or top, and receive a big "thank you" from your allies after it's done for giving them a huge advantage in-lane. Here on out, you can continue to farm your jungle in any order you please, or continue ganking. It’s all about map awareness and knowing your champion’s strengths and weaknesses.
Counter-jungling
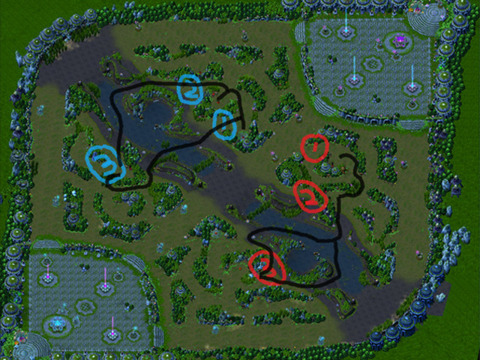
Again, this is my favorite play style; most people don’t expect this to happen, so while they are peacefully hitting away at either blue or red, jump on them from out of the bushes, steal their buff, and kill them. Or, if you’re an exceptionally fast Jungler like Mundo or Shyvana, get a hard leash at your first buff and don’t smite. Save it for the enemy buff, and then camp in the brush, waiting for them to appear. They’ll never see you coming.
So pick any play style you prefer, but there’s one thing in common that all Junglers must master, apart from smiting at the right moment: ganking a lane. Now, a good entrance always gives a better impression, and in this case, entering the lane you wish to gank in the right manner will always produce results (see below).
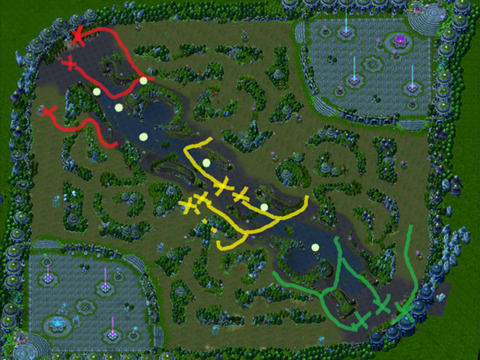
These paths are catered toward the opponent’s ward placements. Above where the green dots are, you will commonly find wards in the area. So it’s up to your allies to keep an eye out for where the opponents are warding. That’s why you should always communicate with your teammates. Remember, only tower dive when you know you can escape alive. It sounds elementary, but there’s no point in getting a kill when you give away a kill. Unless it's first blood; then “it’s worth it”, as Phreak would say.
In higher-level gameplay, you will often find the enemy team invading your jungle at level 1, prompting level 1 fights, which I love so much. These nasty events are sure to dampen your jungle play when they successfully get to you. Remember, only you can stop jungle invasions by adapting to the opponent's invasion and making the best of it. There are many ways to invade a jungle, either through wraiths, then to red buff, or straight on toward blue.
But take note: these buffs all have a choke point from the river. As long as you have vision of these choke points either through wards from your support or having a teammate bravely guarding the entrance, you should be relatively safe. However, in the event where the opponents do manage to get in by overpowering your team, don’t lose hope! Fight back by counter-stealing their buffs! If the opponents are stealing your blue, run over to theirs and take it from them.
Mid game
Now that you’ve understood the different methods to play out the early phase of the game, mid-game objectives such as dragon and baron starts coming into the picture. Always make sure that enemy wards in the area have been cleared, and to pull out the dragon so that the enemy doesn’t have a proper bead on its location in case they want to pull off a pesky steal for champions with long-ranged spells such as Ezreal (see below).
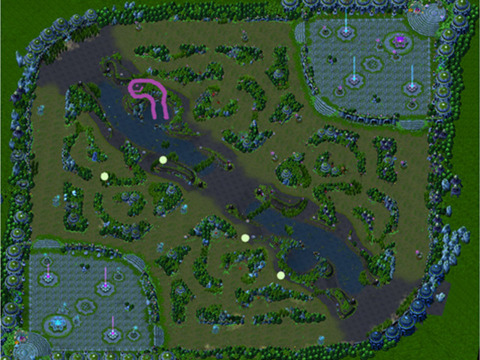
Above are some ward placements that you should have while attempting the objectives.
Late game
Depending on which Jungler you chose, you will fill the role of either a Tank, Bruiser, or DPS, and you need to take note of important spawn timings of key objectives on the map.
*Red – 5 minutes
*Blue – 5 minutes
*Dragon – 6 minutes
*Baron – 7 minutes
Be sure to always keep an eye out on the world timer, and jot down the timings in chat of every baron or dragon kill. This way, your team has a better sense of when and what to prepare (wards, etc) for.
Top-Grade Tenderloin Junglers
In my opinion, these are some of the greatest Junglers. Do note that the items tagged to the Lee Sin portrait are just some of the general items that tournament Jungler players get; the item is not specific to Lee Sin, but general Jungler itemisation.
Lee Sin
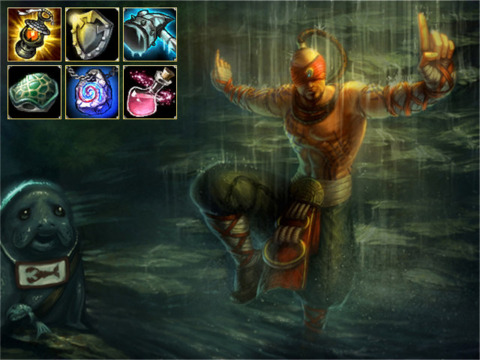
High damage, impeccable ganks, excellent mobility; it’s no wonder Lee Sin is one of the top bans when it comes to Junglers. He does an incredibly good job at ganking lanes, due to his synergistic skill set. Chasing him can often turn into a disaster, as he kites your team around and may actually take out one of your squishier champions in the process. Watch out.
Mundo
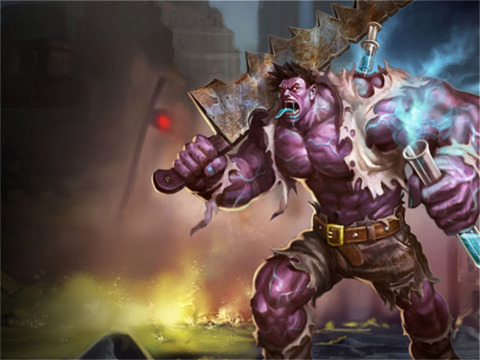
Mundo has great clearing speed, high damage, good ganking capabilities, late game toughness, and is a great champion for one-versus-one combat for counter-jungling. He may have some trouble in the sustain department early on, due to Burning Agony draining health over time on top of the damage from the jungle monsters. Ward up your jungle, as this beast goes down pretty easily before he hits level 6.
Shyvana

Another beast of a counter-Jungler, Shyvana has extremely fast jungle-clear speeds, which means more time to invade opponent jungles. She's hardy and packs a punch with the auto-attack twin-bite combo, coupled with the great speed from Burnout. Her weakness is that she lacks CC, but makes up for it when in possession of Red. When facing her in the opponent team, be sure to ward up your jungle choke points. I mean it.
Skarner
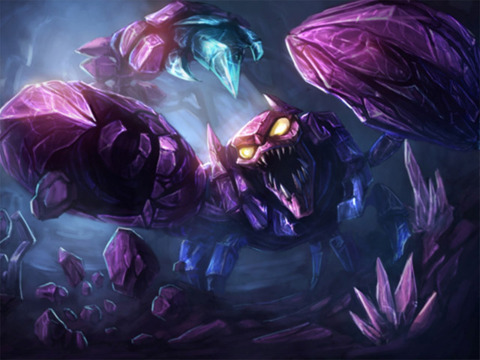
This critter is reliant on blue, but has pretty good jungle-clear speeds with it. He's also tough to gank early on, due to his short range of Crystal Slash, but he does a great job in isolating targets once he hits level 6. Not to mention he’s one tough insect to crush, with his crystalline exoskeleton.
Nocturne

The lovingly nicknamed "Eternal Nightmare" really instils fear on the laners when he’s jungling. With a great Cleaving passive, which also heals, and a Fear CC to boot, Nocturne does a great job in the field of ganking. This is further enhanced when he hits level 6, where he can bypass wards with his Ultimate Paranoia, exploiting the sense of security that the enemy thinks they have when their lanes are warded, which usually leads to overextending.
Diana
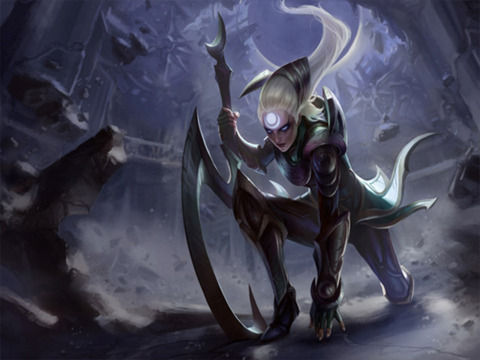
Still pretty new to the League of Legends scene is this scary-looking lady. She’s an ability power-based Jungler, and an assassin who hits hard and ganks even harder at level 6. Her jungle-clear speeds are pretty off the charts, too.
Gearing up your Jungler
Every Jungler has a different itemisation due to the versatility of the roles that Junglers can take, be it tank, bruiser, or DPS. Most of the time, however, you will see them pick up these few items early on.
Boots and three health potions are best for those Junglers who wish to be aggressive and gank early. Cloth armour and five potions would be the more standard items picked up early for more resistance against the neutral minions, and more potions allow for better sustainability in the jungle.
The next most popular items for those champs who wish to clear key objectives faster would be Wriggle’s Lantern. This 1,600 gem of an item boasts good armour and damage, with a healthy dose of life-steal, which is the perfect combination of relevant stats for jungling and sustaining. It also includes a unique passive, which has a 20 percent chance on hit to deal 425 damage to non-champion units. Think of the free ward on a 3-minute cool-down as the cherry on top of the cake.
Now, from here on out, itemisation will vary across the different Junglers there are. Building beefier items for the Junglers who choose to adopt a tank role, a mix of defensive and offensive items for bruisers, and all-out damage items for DPS.
George of the Jungle
With this, I bring you my closing statement. Be map aware, communicate with your team, take note of key objectives, and please, please, please smite at the right time. No other players can say that they have a brushier brush than you once you follow these simple guidelines for jungling.
Got a news tip or want to contact us directly? Email news@gamespot.com
Join the conversation