Halo 3 Walkthrough
Finishing the fight has never been as easy as GameSpot's Halo 3 Walkthrough will make it!
If you need to be told what Halo is, then welcome to the modern world, Lothar. Your cave was warm and inviting, to be sure, but this land has many conveniences, such as video games.
Anyway, Halo 3 is here. Microsoft's nuclear bomb in the next-gen console wars has been three years in development, but the delay has apparently allowed Bungie to create a game that not only features a superb campaign, but which also has a huge and expansive multiplayer feature. GameSpot's Game Guide to Halo 3 is going to focus more on the singleplayer campaign than the multiplayer; if you're looking for online tips, then we recommend you check our forums for the game.
If you want to know more about the campaign, however, here's what we have in store for you.
Weapons and Equipment
Details on all the weapons and equipment you'll find in the game.Vehicles
Tips on using the many vehicles that you'll come across while you play.Enemies
Need to know a particular foe's weak spot? Head here.Skulls and Terminals
If you want to find all of the hidden skulls and terminals, check out this chapter.Walkthrough
A detailed walkthrough for the game.Achievements
A list of achievements and how to earn them.
Weapons And Equipment
USNC Weapons
Magnum (Dual Wield)
The pistol was once considered to be a very powerful weapon in the multiplayer version of the original Halo, thanks to its great accuracy and ability to get headshots from a distance with its scope. In Halo 3, however, the scope has been removed (you can zoom in while aiming, but your targeting reticule is removed and you leave the zoom after firing once), and the ammo capacity has been dropped to eight rounds. You can still nab headshots with the pistol, but you probably won't want to use this if you have any better weapons available.
Submachine Gun (Dual Wield)
The SMG is a close-range weapon that can be dual-wielded. Its primary weaknesses including poor accuracy and a tendency to induce recoil when fired in automatic mode for a bit. Its weapon fire also isn't particularly powerful, but the weapon has a large clip, allowing you to fire for quite a while without needing to reload. The reload times are fairly quick, besides, and you can carry around a ton of ammo, so this is a decent backup weapon, especially against Grunts.
Assault Rifle
The assault rifle took a game off in Halo 2, but has now returned to help Master Chief finish his particular fight. This high-capacity automatic rifle can fire up to 32 rounds per magazine before having to reload, but each round does a fairly small amount of damage, and if you attempt to fire for too long you'll also lose a lot of accuracy.
In short, small bursts, you can hit enemies a good distance away with the assault rifle, but on higher difficulties, you'll want something that does more damage. On Heroic or above, you can use the assault rifle to take out enemy Grunts, particularly when they're fleeing, grones, who have pretty low health amounts, and the smallest creatures in the Flood, but for anything else you'll probably want to find a battle rifle.
Sniper Rifle
The sniper rifle is a powerful single-shot weapon that's designed to quickly and permanently eliminate foes that are far away from you, although of course it can be used on enemies close to you with devastating results as well.. You can fit four bullets into a clip, and can hold 24 bullets in total. The rate of fire isn't great, but again, in general, this should be a one-shot kill on most enemies.
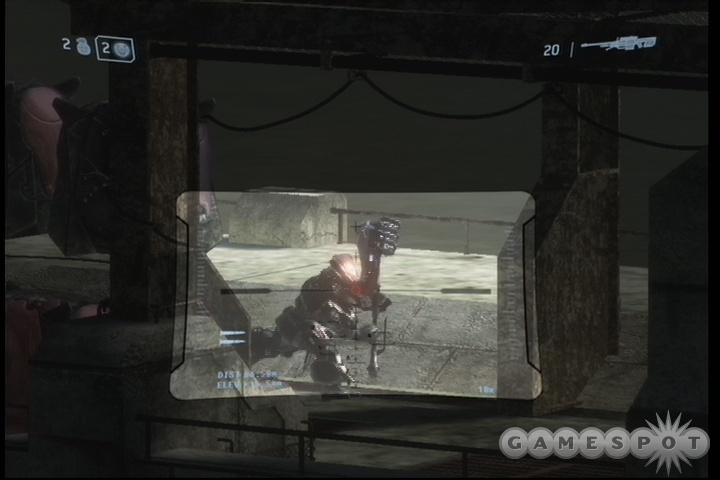
Headshots are important for most weapons, but with the sniper rifle, you really want to learn how to nab them, especially at long range. On heroic difficulty, anything up to and including a jackal should be a one-hit kill, even if you hit them in the body, but Brutes and hunters will of course require more hits. Low-level Brutes (the blue ones) will still die in one hit from a headshot, but the upper-level Brutes will probably require at least one headshot to knock off their helmets before you can kill them.
Battle Rifle
Shot to the dome! The battle rifle returns from Halo 2, and is as desirable a weapon to have as ever. The USNC counterpart to the Carbine, this little guy will let you bust out three shots in a tight grouping with great accuracy at long distances, making it perfect for nabbing headshots. You can burn through ammo relatively quickly if you use it on tougher enemies or against large groups, but if you can set the terms of an engagement, firing on your foes from a distance and use cover to hide, this will be your best friend for a large portion of the game. We almost always had one on our person during our playthrough, excepting when it ran out of ammo or when we fought against Flood forces.
Shotgun
The shotgun won't be found very often in the game, and even when you do find it, you probably won't want to use it very often on Heroic or higher difficulties. While it does plenty of damage at close range, it will still leave enemies standing an uncomfortably large portion of the time. It's great when used against unshielded Flood enemies, or swarms of Flood parasites, however, and can be great for pounding the rear sides of Hunters when they turn around. Apart from that, you probably won't want to keep it in your inventory very often.
Rocket Launcher
The rocket launcher is a dependable method of dishing out the hurt, especially to enemy vehicles, but the speed of the rockets is a concern; they're fairly slow, if not quite as slow as the fuel rod gun charges seem to be. That said, they pack quite a punch, and this is sure to be a highly desired weapon in multiplayer maps, so learn where they spawn and get used to checking the location every once in a while.
The launcher can only hold two rounds of ammo at a time, making each miss somewhat of a harsh penalty, since it takes a while to reload after firing the weapon. Get your shots on target and make sure they stay there by firing at close range, at least when going after vehicles. In multiplayer, you can fire on vehicles that are stationary without too many problems (perhaps from a distance when you see an enemy about to enter them), or simply use the rocket launcher as an antipersonnel weapon. Its splash damage will be good enough to kill almost anyone if you manage to hit close enough to them. Just remember the old Quake rule: aim at their feet, not at their bodies. That'll increase the likelihood that you'll get them with splash damage, even if you happen to miss them. Don't even bother trying to hit someone unless you can see their feet; i.e. no shooting at people on ridges above you. You'll miss 99% of the time if they move away from you, and you'll simply waste a rocket.
Spartan Laser
One of the major new weapons is the Spartan laser, a powerful beam weapon that can toast just about anything in the game in one blow. It's arguably the most powerful hand-held weapon in the game, but requires a lot of skill to use properly, even more than the sniper rifles.
When you push the fire button on the Spartan laser, nothing happens. It'll take five seconds or so for the weapon to charge itself completely; check the aiming reticule, and look for the small arrow to rotate from the bottom to the top. When it does reach the top, a wide and very powerful laser will shoot out, toasting anything in its path. This'll be a one-shot kill on any moving target, and will also one-shot most vehicles excepting Wraiths or other high-armor targets; these move so slowly, however, that they'll be easy to shoot twice.
So basically, the Spartan laser is a super-powered beam rifle that requires five seconds to charge. The catch is that your target has to be in your view at the end of that countdown; if someone seems you aiming at them with a Spartan, they're pretty sure to duck under cover, which will waste your shot. You can always just let go of the button to stop the countdown, but that will cause the arrow to revert back to its starting position, meaning that you'll have to charge it all the way up before you can fire again.
The countdown makes the Spartan basically worthless for close-quarters combat, unless you can completely get the drop on an opponent; any decent enemy will close on you when they see the laser in your hands, and will be able to stick you with a grenade or otherwise kill you before you can fire. (In these situations, though, you can always try to use a melee swing; like most big weapons, the Spartan deals a heavy punch in melee combat.) In open maps, though, if you can find a laser (it's predictably rare), you can wreak havoc with it. Try firing it on high-priority targets like the slow-moving flag carrier or a Warthog that's loaded up with your enemies. Since your range is virtually limitless, it's also great for taking out opposing Wraiths or Scorpions that are sitting back and shelling you from afar.
Covenent Weapons
Plasma Pistol (Dual Wield)
The plasma pistol is the most basic weapon in the Covenent armory, but it's still going to be more worthwhile to you than the default USNC pistol. The plasma pistol fires energy bolts at your enemies, and more rapidly than the pistol does. Each individual bolt does a light amount of damage, making this default firing method useful only against weak enemies like Grunts.
However, if you press and hold the trigger, you can charge the plasma pistol and fire a supercharged burst of energy. This can be used to instantly drop the shields on a target, allowing you to finish them off by switching to another, more powerful weapon, like the battle rifle. This attack has light homing capabilities, so it'll usually hit an enemy unless they actually try to dodge away from it. You can keep the trigger depressed as long as you like, but the longer you hold it down, the more energy you'll drain from the battery reserves. This doesn't result in a super-charged weapon; it just means that you lose ammo. Each charged shot automatically drains 10 ammo from the weapon anyway, so if you can't fire these charged shots quickly, you'll probably only manage to get a couple of them off before running out of ammo.
Carbine
As far as light ranged weapons go, the carbine is a decent tool for taking down distant, lightly armored enemies. There isn't much to say about it: when you fire, a round will quickly travel to your target. The fire is almost perfectly accurate at any range, and you can fire the weapon while scoped. Unfortunately, the carbine does fairly light damage, so you'll need a lot of shots to take down anything hardier than a Grunt. The rate of fire is also somewhat limited, so if you have the choice, you'll probably want to use a battle rifle instead of the carbine. If you need distance fire, however, and nothing better is available, the accuracy of the carbine will be good to have.
Plasma Rifle (Dual Wield)
Another iconic Halo weapon, the Plasma Rifle will be a trusty weapon in the hands of any soldier. It rapidly fires plasma bolts at your targets, causing their shields to fall just as rapidly. It won't do as much damage against flesh as a bullet-based weapon would, but it'll still finish them off quickly, especially if you can find a pair of them to dual-wield. Just keep in mind that firing them for too long will cause them to overheat, and you'll have to wait a few seconds for them to cool down before you can fire again, leaving you quite vulnerable.
Brute Spiker (Dual Wield)
The Brute spiker is something of a baby version of the Brute shot, at least in appearance; it has the same curved blade on the underside. However, it fires in a much different manner. Instead of firing grenades, it fires spikes which pierce your foes and deal damage. It fires rapidly, and can be dual-wielded, making it the Covenent counterpart to the USNC submachinegun, and it has enough rounds in a clip (40) to allow it to be fired for five or six straight seconds without needing to be reloaded. It's a decent weapon, but requires you to be pretty close to your targets to hit them, due to the spread of gunfire.
Needler
The needler is back in Halo 3, and as powerful as ever, at least in the singleplayer campaign mode. One of the big changes in Halo 3 is that the needler can no longer be dual-wielded; you're restricted to one needler at a time now.
The needler fires multiple small explosive strikes that will home in on a target if fired in their general direction. Spikes do a bit of damage on impact, but then explode a few seconds later, causing a great deal more damage to the target and anyone nearby. One of the prime benefits of this method of firing is that you can unload an entire clip of needles pretty rapidly, letting you fire on a Brute before ducking back under cover. Both the rate of fire and reload rate are very fast here, meaning that you can unload a lot of damage pretty quickly, but that you'll run out of ammo pretty quickly.
The needler is a bit more useful in singleplayer than in multiplayer, since your enemies will be more likely to stand still and let you shoot them, while in multiplayer you will probably only want to use this in close-range combat against enemies that have nowhere to hide, which is a situation that won't occur very often. Note also that the needles will burn themselves out after a hundred feet or so, making this weapon useless at long ranges.
Brute Shot
The favored weapons of the Brutes, the brute shot is a portable grenade launcher that can deal explosive damage over a small area of effect when fired. Unfortunately, the area of effect is very small, so you can't expect to take out multiple enemies with this weapon unless you're firing into a group of Grunts. Against larger enemies, brute shot grenades can be useful to blast the armor off of Brutes, but it can be difficult to hit enemies at any decent range due to the slowness of the grenades in the air. If you must use the Brute shot, try to aim downwards at enemies below you to ensure that they have a better chance of taking splash damage from it. Note that although the grenades appear to fly in a straight line, they will actually dip into a slight arc if fired at extremely distant targets.
The brute shot does possess a mighty blade attachment that will let you kill almost any enemy in one melee blow, excepting Brutes themselves. If you find yourself in a melee situation, this isn't a bad weapon to have handy, but keep in mind that firing grenades at short range will damage you as well, since you'll be in the area of effect.
Gravity Hammer
The gravity hammer is a rare weapon, and only dropped by powerful Brute chieftans. If you manage to pick one up, though, you can swing it into the ground by tapping the right trigger, which will cause area-of-effect damage to all nearby foes. If you manage to hit an opponent with a swing, you'll usually instantly kill them, although of course high-level Brutes and hunters will be the exception to this. You can also swing the hammer into the ground and jump immediately before you do so to increase your jump height slightly.
Beam Rifle
The Covenent version of the sniper rifle is the beam rifle. Unlike the sniper rifle, it doesn't use ammo, so it requires no reloading, but it does have a finite number of shots in it (20 if you find a fully-charged weapon). It also can't be fired very quickly; if you attempt to rapid-fire it, it'll overheat and take a few seconds to cool down before it can be fired again. Apart from that, it's a fine weapon; find a distant enemy and send a little love his way if you find one.
Energy Sword
The Energy Sword, long a favorite in close-quarters multiplayer, returns to Halo 3 as good as ever. When you have this weapon equipped, you can kill pretty much anything in one blow, whether you use it with a melee attack (B button) or attempt to use the charge manuever that's bound to the right trigger. The charge is most helpful in multiplayer, especially on the intimate, smaller maps, as it'll let you close in on a target before he sees what's coming. Having the energy sword out and in your hand will put an immediate target on your head, so don't be surprised if you suddenly become the center of attention while wielding it.
Mauler (Dual Wield)
Another new weapon in Halo 3 is the mauler, a simple single-handed shotgun that can be dual-wielded. The spread from the fire here is extreme, making it impossible to hit anything that's not right in front of you. The power level also seems to be lacking compared to other weapons. If you're fighting in extremely tight corridors, then this can be useful to finish off a foe after you drop his shields, but apart from that you probably won't want to bother with it.
Fuel Rod Gun
The heaviest weapon in the Covenent arsenal is the fuel rod gun, which acts as a slightly weaker rocket launcher. When fired, the fuel rods quickly accelerate, but they're still somewhat slow and dodgeable while in the air. What's more, they're highly noticeable when they fly, since the projectiles become large and green when they're in the air. Most enemies will have little trouble dodging them if you fire at range.
That, and the fact that the FRG can hold five rounds of ammo in a clip, makes it best used as an up-close anti-personnel weapon. The splash damage is there, but not as big as the rocket launcher, making you less likely to hit yourself with it, and you can fire the rounds fairly rapidly, letting you finish off wounded foes without a problem. The slow speed of the projectiles makes it more difficult to take out enemy vehicles with the FRG, but if you're close enough or approaching from behind, it's quite doable.
Heavy Weapons
Machinegun Turret / Plasma Turret
When you spot a turret in the game world, you're able to use it, sure, but that's for plebians. Real men gird their loins and rip the damn things right off their moorings, then shove them down their enemy's throats, cleaving their bodies in two.
Well, some of that's correct; you can rip a turret off of its base by pressing RB to use it, then tapping B. Some turrets will also be found on the ground, or in the hands of Brute Chieftans. Using a turret in your hands will let you dish out a lot of power, but it will greatly curtail your ability to move, so you'll be more easy to hit while you wield one. You also won't be able to make a melee attack or throw a grenade until you drop the weapon.
Missile Pod
The missile pod is intended to be your anti-vehicle weapon. When you pick it up and aim at a vehicle, it'll instantly lock on, letting you rapidly fire homing missiles at your target. These are quick enough to take down Banshees, but also excel when used against ground vehicles.
Flamethrower

The flamethrower is one of the rarest weapons in the campaign, only appearing three or four times in the entire game, and being easy to miss at that. It first made its appearance in the Halo canon in Halo 2 for the PC, and now appears on consoles for the first time. As you may be able to tell from the title, this is a flamethrower; it shoots flammable gel a few meters from your position, causing instant and extreme damage to most foes that you manage to hit with it. Unfortunately, since it slows you down so much, it's difficult to use well on mobile enemies. The flames stick around for a few seconds after hitting an enemy or the floor, so you also need to be wary of using it if you think you might be walking through the flames; they'll burn you just as well as your foes.
Equipment
You pick up a wide variety of equipment as you play, and can store them on your person to use them later with the X button.
Auto Turret
The auto turret won't be found very often during the campaign, and it isn't as useful as you might think it would be. When deployed, it'll automatically fire on your enemies with periodic laser fire, but it takes a while to recharge and is fairly weak, so you can expect it to be destroyed pretty quickly when your enemies notice it.
Bubble Shield
Deploying a bubble shield will cause a translucent barrier to pop up around the deployment point. This will prevent all gunfire and projectiles (including grenades) from breaching the barrier. Enemies will still be able to pass through the barrier physically, though, which leads to some interesting possibilities. If you have a powerful melee weapon, like a brute shot or energy sword, you can always pop a bubble shield to force people to come to you, then whack them. Since your enemies can walk through the shield, though, they'll be able to attack the emitter and destroy it. If it's not destroyed in that manner, it'll blink off after 20 seconds or so.
Cloaking
When you activate cloaking, you'll have 20 seconds or so of near-invisibility. In the campaign, enemies won't react to your presence, but a faint Predator effect will still be present in multiplayer. Firing a weapon will partially reduce the amount of invisibility that you possess.
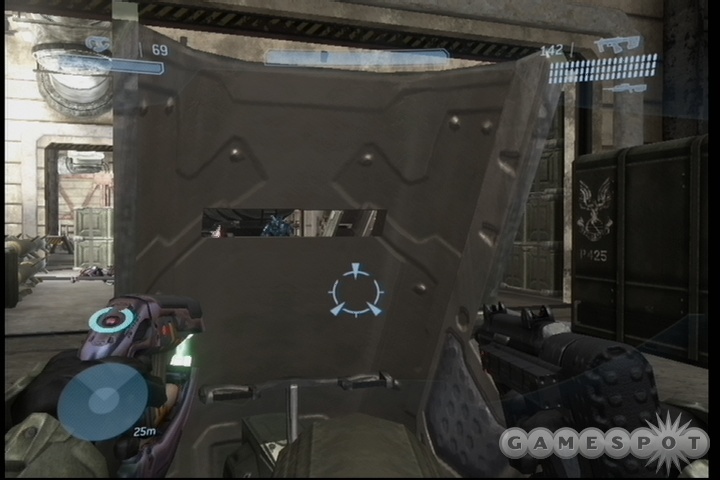
Deployable Cover
The deployable cover is perhaps the most common equipment you'll see and find, at least in the campaign. It'll pop up a small energy shield when deployed. Unlike the bubble shield, this shield is impervious to enemy movement, which means it'll block them if they try and run through it, but it can be fired upon and destroyed from a distance. If you just shoot the shield, it'll take a bit to go down (and will regenerate the damage it takes if left alone for a bit), but if you hit the bottom center of the shield, it'll be quickly destroyed. You can also use the shield to block doors and hallways, although most enemies (in multiplayer, at any rate) will quickly bust through.
Flare
Flares are used to blind your foes. If you manage to drop one in the line of sight of an enemy, they'll be almost completely blinded for 7 to 10 seconds. They'll still be able to fire and move, of course, but won't have the benefit of eyesight during the duration.
Grav Lift
Need to get up high? The grav lift is your answer. When deployed, it'll cause a jet of wind to burst upward above it. Jumping into this jet will propel you upwards, letting you reach previously inaccessible heights. Nifty, but a very specialized usage. Keep in mind that enemies will be affected by the propulsion too, though! If you want to prevent them from coming into a doorway, just set down a grav lift right outside, and they'll be foiled by its presence.
Invincibility
One of the more powerful effects that is available, invincibility means what it says: when activated, you become unkillable for around 15 seconds. No one can damage you, and you can't even damage yourself. Use this time to get close to an enemy or take out a tough foe, but keep an eye for when the ability fades, because you'll then be just as vulnerable as you were before.
Power Drain
Power drain acts as something of the opposite of Regenerator; it will cause shields to constantly drain while you remain in its area of effect. It can't kill you (although the generator does explode when the timer is up), but will make you greatly more vulnerable than you would otherwise be. Power drain also prevents vehicles from moving while they remain in the area of effect.
Radar Jammer
The radar jammer will cause numerous red dots to appear on all nearby enemy's active radars, moving in all different directions. It essentially makes their radars totally worthless for 15 or 20 seconds, which is handy if you're trying to sneak up on them. Doesn't do much in the campaign and as such doesn't appear to drop off of any enemies.
Regenerator
When dropped, the regenerator will cause a large green cloud to appear in the area. Any character, friend or foe, that enters this cloud will have their shields continuously regenerated. You can still die from damage if it's applied quickly enough, but you'll be much safer from the small sources of damage that you regularly encounter, such as when you duck out of cover to snipe enemies.
Trip Mine
Trip mines are lain down on the ground and remain there until an enemy steps on them. When that occurs, a tremendous blast will be set off that will take out all nearby foes. It's a somewhat small mine, and easily avoided if seen, so this is best set down in tight corridors or doorways where it'll be impossible to avoid.
Enemies
Grunts
Grunts are the lowbiest of lowbie enemies. These foot soldiers for the Covenent are poorly armored and usually poorly armed, packing plasma pistols, needlers, and plasma grenades. (Late in the campaign you'll run across perhaps half a dozen Grunts that wield fuel rod guns, but they're very rare.) They're also quite cowardly, and will usually run in fear if you happen to kill the Brute that stands guard over their squad.
Grunts come in different colors, which roughly denote their varied strengths. Even on Heroic difficulty, though, you're unlikely to notice any real difference in strength between the various Grunts, although there are rare gray Grunts that have significantly more health than the other types.
Some Grunts can be driven insane by the pressures of combat and will ignite plasma grenades in their hands and rush towards you. Shoot them before they get close, or they'll blow you to pieces.
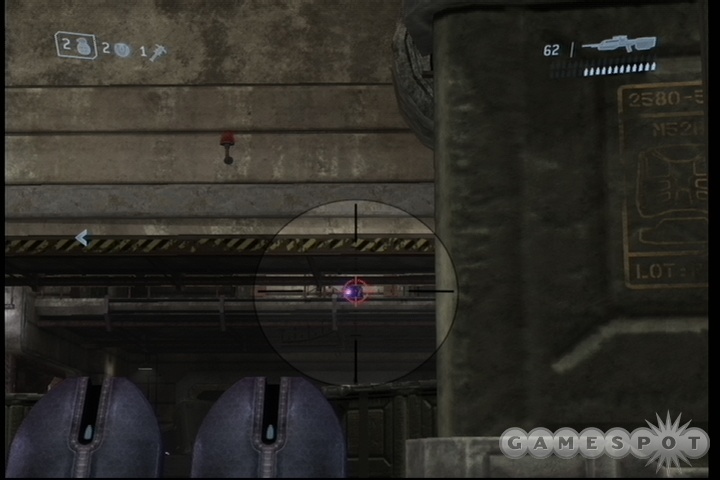
Jackals
Jackals are the regulars of the Covenent army, and usually arrive in one of two forms. The rarer form is the sniper. These guys sit back on cliffsides and balconies in support of a Brute/Grunt squad, usually with a beam rifle or a carbine in their hands, and will take potshots at you. It's important for you to identify them and take them out before proceeding into combat with the squad they're attached to. Usually they'll start firing at you as soon as they're alerted to your presence. If you find yourself under fire from above, immediately backtrack to cover and start zooming in on the cliffs above you to find your adversary and shoot them.
More commonly, however, Jackals will appear with power shields in front of them and will fire on you from a narrow slit on the side, usually using a plasma pistol for the task. The shield will protect them from most damage, so killing them can be tough. If you can get close, landing a grenade anywhere near them will cause them to turn away, letting you fire on them. If you're using a precise weapon, however, you can actually aim at the firing hole on the right side (as you're viewing them). It's small, but you can hit it; a sniper rifle shot will kill them if you hit them here, and any other weapon hit will cause them to recoil, momentarily dropping their shields and allowing you to blast them with a headshot.
Brutes
Brutes are your primary foes throughout much of Halo 3. Although Grunts will be more numerous, Brutes will be more deadly. Although Brutes will possess a wide variety of weaponry, they all have one thing in common: body armor that will protect them from damage until it's removed. As with Elites in the previous Halo games, you need to knock this armor off (preferably with plasma-based weapons), then finish off the meat inside (preferably with bullets). One weapon in particular is great at taking down Brutes: the needler. If you can fire off a clip at most Brutes, they'll die right quick. Grenades also work well, especially the varieties that can stick onto your opponents, but then again, most Brutes will be good about diving away from your grenades.
There are a few different varieties of Brutes, from the lowliest (usually clad in blue armor) to the toughest chieftans (armored with yellow plating). The lower ranks will often be found commaning squads of Grunts; if you can kill them, then their Grunt soldiers will often flee in disarray. Mid-level Brutes will usually be found in groups, and will be a formidable challenge; these groups are when you want to bust out your grenades or explosive weapons.
The chieftans are a breed apart; their yellow armor will prevent you from sticking plasma or Brute grenades onto them (they'll bounce right off), and they'll often wield powerful weapons like the gravity hammer, the fuel rod gun, or dismounted turrets. They'll also usually use the Invincibility equipment just before wading into battle, making them impossible to kill for ten or fifteen seconds or so. Nothing to do then but run away!
Drones
Drones are rare, but annoying. These flying buzzards will descend from the skies and attack with plasma pistols more often than not. Individually they're not very difficult to defeat, but since they attack en masse they can dish out a lot of damage in a small amount of time. Their flying capabilities also usually makes them immune to grenades unless you get a lucky stick.
In most cases, it's best to let your teammates deal with the Drones, or just attempt to run past them while they're firing at another target. If you do need to fire on them, use a weapon that fires rapidly, like the plasma rifle or the assault rifle.
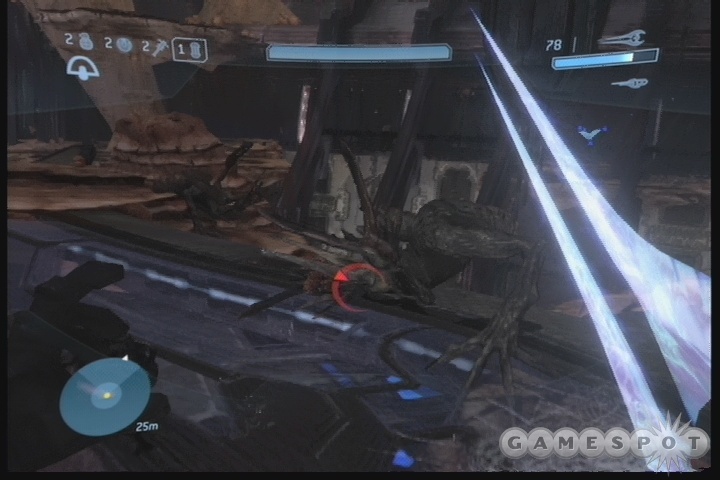
Hunters
Hunters are also fairly rare, only appearing perhaps three times throughout the game. Hunters always appear in pairs, and attempt to fire on you with their massive green lasers before they close in for the kill with their melee attacks. Hunters are tough and incredibly well-armored, making them difficult foes to bring down.
The best way to kill a hunter is to attack it from the back. If you get close to it, it will start to swing its fists at you. Strafe around it as best you can and unload a shot to its unprotected backside (or stick a grenade on there). Just be careful, though, as they often will attack backwards over their heads in retaliation.
If you find that you truly can't take down a Hunter, you can always run away. This probably won't work on the first encounter, but they don't seem to pursue you if you run from them after you encounter them the second time during the campaign.
Flood
The Flood consists of three basic creatures, although one of these is more complex than you might originally assume.
Parasites
The parasitic form of the Flood is a small, seemingly harmless creature that comes at you in waves of dozens at a time. Individually, they're not tough, and will bounce off your shields for minor damage. En masse, however, their shield damage will accumulate and can quickly overwhelm you. If you shoot one of these guys, they'll explode, which can lead to chain reactions when a bunch of them are clumped together, as they often will be.
Parasites will attempt to find dead bodies in their vicinity and reanimate them as Flood zombies. This isn't always avoidable, as the parasites themselves are tiny, fast-moving targets and difficult to shoot.
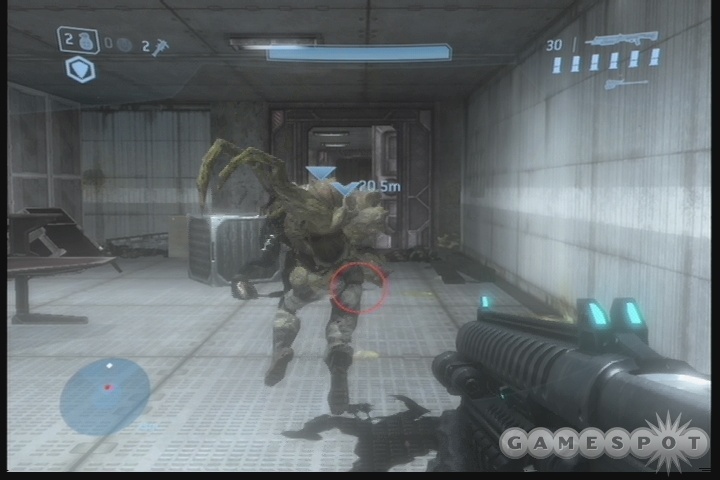
Flood Zombies
Zombies are the Flood's way of taking over the universe; the Gravemind never met a corpse it didn't like. When a parasite infects a corpse, it becomes a zombie and shambles about, looking for more corpses to create for the parasites to infest. These zombies are dullards compared to their former selves, but retain their speed and ability to fire weapons, and even the energy shields of their former selves.
Zombies should be approached with caution, but are generally fairly weak. If you can overcome their shields, they'll usually go down quickly; dual plasma rifles are ideal for the purpose of chopping through them. It's very important that you keep firing on the zombie, even after it dies again, until its body disintegrates. That'll rob the parasites of another host to infest. If you only hit a zombie until it falls down, it'll eventually just get regenerated to full health by a parasite. If you want to save ammo, just use melee attacks on the corpses until they explode. If you're using an energy sword, attacking corpses uses no ammo.
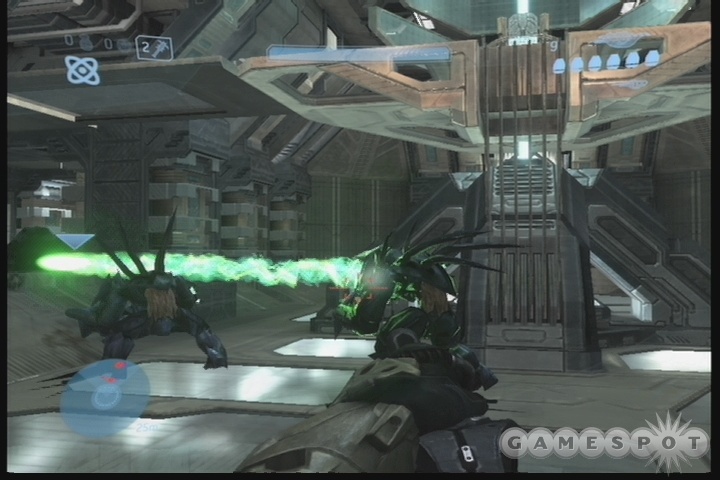
Changelings
Some of the higher-level Flood creatures have evolved to a point where they can change shape. These guys have three forms, and can change almost at will. They'll often shift based on your behavior.
Stalker: In stalker form, the changeling will become a spider-like creature that sticks to walls and searches you out. You'll often encounter changelings in this form first, before they're aware of your presence, and that's a good thing, as the only attack is a weak melee attack. Shoot them quickly or use your own melee attacks before they jump away and shift.
Hunter: Resembling the Covenent Hunters, the changeling form is even slower and possesses no ranged attacks. They do have a lot of health, though, and can take quite a bit of damage before dying. Use an energy sword on this form if you can.
Ranged: In ranged form, a changeling will attach itself to a wall and shoot numerous spikes at you from a long range. This is by far the most annoying of the forms, as the changelings are often impossible to hit with weaponry at this point, forcing you to switch to a ranged weapon to take them down. Dual plasma rifles will do the job, so long as you aren't too far away, as will a carbine. If you can get close, a sticky grenade will work well.
Vehicles
There are a wide variety of vehicles in Halo 3, from the small and quick to the slow and well-armed. To enter any of them, walk up to them and press R2; this will put you into a different position in the vehicle depending on where you stand and which vehicle it happens to be. You can also press R2 when an enemy is riding a vehicle to attempt to carjack him. In light vehicles, this will automatically kick them out of the driver's seat, but on heavier vehicles you'll simply cling on for dear life. In the latter case, you can attempt to punch out the driver with the B button, which will leave you with a damaged but usable vehicle, or you can just chuck a grenade inside with the left trigger, which will blow the whole damn thing after a few seconds.
Most vehicles will have alternate abilities that you can perform when you're inside them by clicking the left trigger. Generally these act as some kind of speed boost, but some vehicles use this functionality for additional offensive powers.
Warthog
The Warthog is the iconic vehicle of the Halo franchise, and as such will see near-constant use during your time in Halo 3. It's hardy (and seems to be able to take more damage before exploding than it could in Halo 2), and comes in a few different configurations for your pleasure.
Driving the Warthog can be a tricky proposition, since it takes air easily and has a tendency to flip with little provocation. If it does start flipping, you can wait and see if it rights itself, but it will often land upside down, forcing you to get out and flip it over again before you can use it.
Warthogs have two to five slots for Marines to fit into. If one of your Marines is getting into the passenger slot, try to trade them a powerful weapon if you have one in your inventory, like a beam rifle, sniper rifle, or rocket launcher. They'll be able to use it while you drive to take out enemies.
Machinegun Warthog
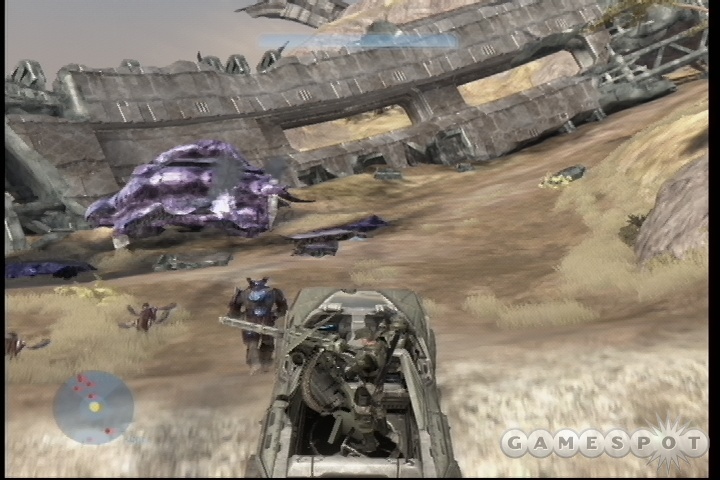
For most of the single-player campaign, you want to be driving the Warthog instead of taking the gunner's position. You can drive well, theoretically, but the AI Marines are terrible at driving, especially during combat. On the other hand, they're ace shots with the turret, so they'll be much better at shooting it than you'll ever be.
Gauss Gun Warthog
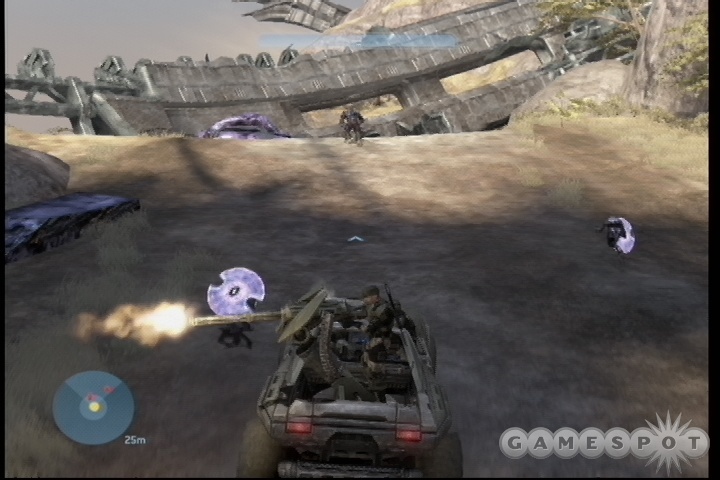
Although rare, Gauss guns mounted on Warthogs are ideal for taking out opposing vehicles; they're capable of dropping most enemy vehicles in one to four hits. You'll need to stay mobile to avoid enemy fire if you're driving one, but your gunner will be wreaking havoc on your enemies. The Gauss gun can one-shot most enemies, as well, but it has no splash damage, so it might be difficult to take out whole crowds with it; you might be better off just running them over, if possible.
Troop Transport
Some Warthogs won't have any mounted turrets on them at all, instead converting the extra space into room for three more passengers. You gain a bit of extra ability to bring troops to the front of the battle with these Hogs, but you lose a lot of firepower.
Mongoose
The Mongoose is a small two-seater ATV that features no weapons and little armor for the driver or passenger. With no weapons, this is basically useful only for getting to where you want, but it does this faster than any other ground vehicle. The passenger can still fire their weapons, and this can be handy if you give a Marine a heavy weapon to use, but otherwise you won't be doing much except zooming around on these guys. They can be handy in multiplayer if you have to get to a central point on the larger outdoor maps.
Hornet
The USNC variant on the Banshee, the Hornet packs more firepower but is less speedy and maneuverable. Instead of dual plasma cannons, the Hornet gets a rapid-fire machinegun that can steadily wear down the health of anything it shoots. Since it's a hitscan weapon, it takes no time to travel to its target, meaning that you can pretty safely aim at ground targets from pretty high up, letting you kill enemies running around on the ground without fear of counterattack, at least until an enemy aircraft comes around or someone nabs a Spartan laser.
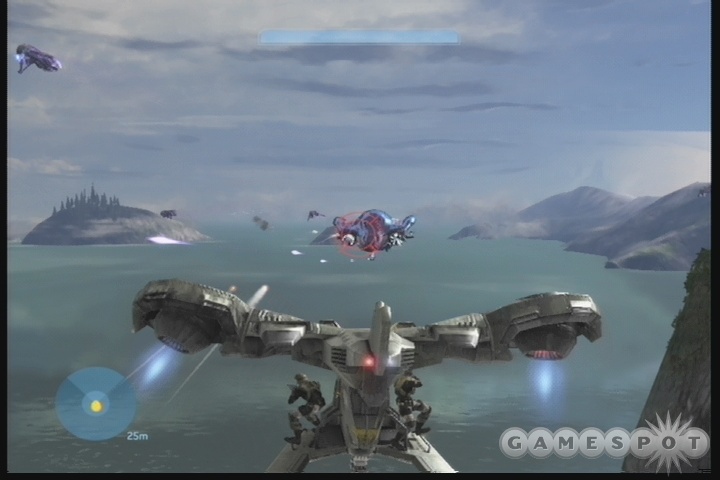
The alt-fire here are homing missiles; you need to be pretty close to your target for these to home in (the reticule will turn red), but if they do home, then they'll be an instant kill on most Banshees, or perhaps your target will only need a little machinegun fire to finish them off. These missiles can, again, be used on ground targets, especially large vehicles.
Scorpion
Ah, the Scorpion. This hulking tank is painfully slow, but equally painful to your enemies when they get hit by its shell. The shells here are highly explosive and accurate at long range, but they do take a second to hit their target, so will need to lead distant foes. That said, the ability to hit pretty much anything at any range is obviously a powerful one.
There's room for five passengers here, including four seats above the treads and one gunner, but you shouldn't expect people to climb aboard in multiplayer unless they get to man the turret, as you'll probably be moving at about walking speed and passengers are totally exposed to enemy fire. Unlike in Halo 2, you can only fire the main cannons here; the turret can only be fired by a second passenger who rides in your vehicle.
Ghost
This small, one-passenger craft is a handy tool in Halo 3, but you probably won't find unmanned Ghosts very often. When you do climb into one, you can use it to move a bit faster, take a bit more damage, and fire on your enemies, so you're basically just a bit more enhanced in your combat capabilities than you would be on foot.
That said, the Ghost is a fun vehicle when you can get in it, as it's quick to move and can deal good damage with its dual plasma cannons. You can tap the left trigger for a burst of speed, which is handy if an enemy is directly in front of you and you want to run them down. Just be careful, as the Ghost is prone to tipping on bumpy ground.
Wraith
The Covenent's heavy tank is the Wraith, which has been overhauled in Halo 3. In Halo 2, it was usually pretty easy to jack these vehicles, but the vehicle has been retrofitted with a forward-firing turret in H3, making it a much more deadly vehicle at all ranges.
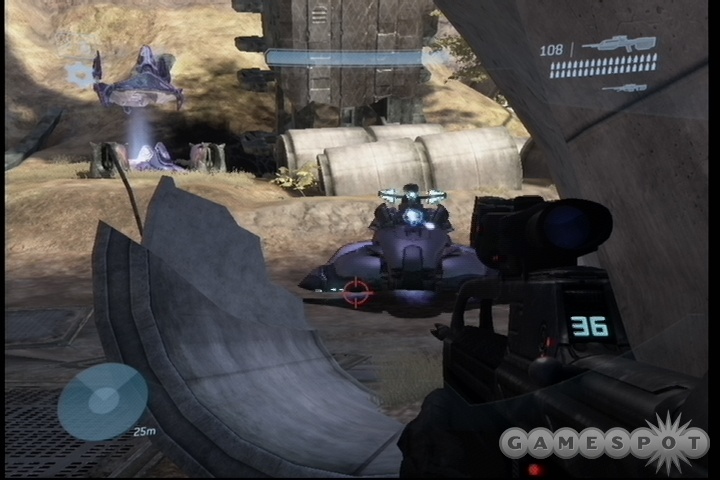
Taking out a Wraith is a tall order now. In Halo 2, you could simply run up to them and jack them, but the presence of a turret on their fronts makes that very difficult. In the campaign, you'll usually have access to a turreted Warthog or another long-range vehicle that you can use to take out a Wraith, but if you don't, you might want to try sniping out the turret gunner (he's vulnerable to headshots), then driving a quick vehicle up close and jacking or grenading the Wraith.
Mortar Variant
Most of the Wraiths you see will pack mortars that fire huge bursts of energy at extremely long ranges. These move very slowly, in an arcing manner, so you should be able to see them and dodge them when you're at a distance. As you get closer, though, these mortars get progressively more deadly, since they can be fired at very close range and will impact pretty much instantly. On Heroic difficulty or higher, a single mortar hit anywhere near you will instantly kill you, and they can hit even quick vehicles pretty accurately if you're driving straight towards them. Try to approach at an angle, then, and if possible get on their rear side, where you can grab onto their back sides and throw a grenade into the engine without having to deal with the turreteer.
Anti-Air Wraith
There's only one part of the game where the AA Wraith will actually be firing on you while you're in an aerial vehicle, and even then you're not in much danger; these guys are more intended to be used against Pelicans than Hornets. They won't be able to hit you with rockets, although some may home in on you if you get too close to the stream.
AA Wraiths can be fired at ground targets, and this is tough to deal with since there's so much fire that comes your way. Best to fire on them from a distance, or use quick vehicles to make your approach. These guys have turret gunners, just like the mortars do, though, so be careful.
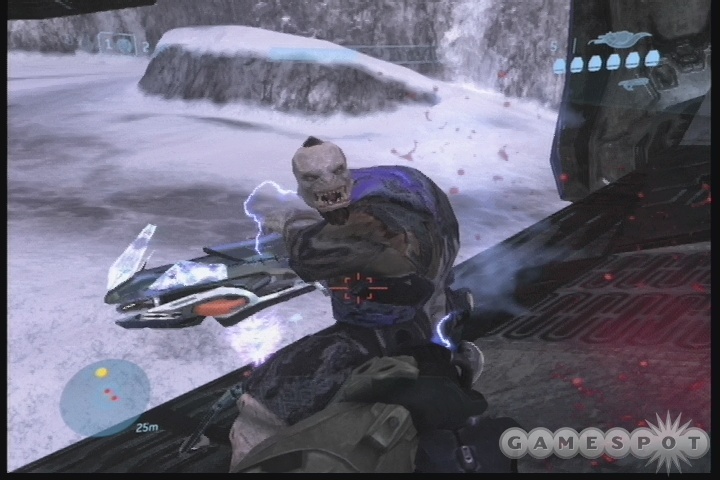
Chopper
The Chopper is the new one-seater vehicle in Halo 3. If the Ghost is the small and sleek vehicle of the Grunt, then the Chopper is the powerful motorcycle of the Brutes, who will almost always be the ones you see driving it. There's nothing especially complicated about it; the primary fire button is a powerful laser cannon that can chew through most light vehicles relatively quickly, while the left trigger will get you a bit of a boost in speed for a few seconds.
The narrow width of the Chopper will make it difficult to hit players with it, unless you're good at fishtailing the vehicle. The width also makes it easier to get into lengthy flip sequences when you get off-axis, though, so you need to be careful while driving.
Prowler
The Prowler essentially replaces the Spectre from Halo and Halo 2; instead of being a vehicle designed to take Elites into battle, the Prowler…is a vehicle designed to take Brutes into battle. As such, it's much more aggressive in form, and seems to be more heavily armored. In addition to the driver, there's room for two soldiers as passengers on the skids and one as a gunner. This is the closest analog the Covenent forces have to a Warthog, and like that vehicle, won't be very useful to you as anything other than transportation unless you can find a friend to ride with you.
Banshee
The ever-popular Banshee returns in Halo 3, and this time around it has a new addition to its arsenal: a homing missile. It doesn't seem to do as much damage as the homing missiles on the Hornet, but still, it'll help you out in those wild dogfights.
Skulls & Terminals
There are 13 skulls in Halo 3, nine of which affect the difficulty of the game, and four of which offer interesting if minor effects. The nine difficulty skulls are also all tied into achievement points. You can use these skulls to increase the difficulty multiplier on Legendary mode if you're looking to nab the achievements for getting high scores in Campaign Scoring mode. They can also be used to increase the difficulty of Normal or Heroic-level games if you want to get a bit more of a thrill from them, but can't quite bring yourself to play on Legendary.
All of these skills are difficult to find, but most of their positions are noted in the guide, usually under their own header. We'll update the guide as missing locations are pointed out to us. All of the skulls can be found on Normal, Heroic, or Legendary difficulties, but some of them will be quite difficult to reach on anything above Normal due to the increased toughness of enemies around them. You also need to start from the beginning of the level for them to appear; you can't start from a checkpoint or Rally Point if you want the skull to appear.
Each of the skulls below is listed by the level that it's found on first, then by the name of the skull itself. We'll try to link back to the page that has the description or video of where you can find the skull. We'll also describe the effects of the skull when it's activated. To activate a skull, head back to the campaign start screen and hit X to enter the Options menu. You can also turn on Campaign Scoring on this screen.
Golden Achievement Skulls
Iron Skull - Sierra 117
When activated, this skull will cause you to return to the beginning of the mission when you die. If you use it in co-op, the death of any player will cause all players to return to the previous checkpoint.
Black Eye - Crow's Nest
If you take any damage to your shield, it simply won't regenerate. In order to cause your shield to regenerate, you have to hit an enemy with a melee attack. Obviously enough, this is only appropriate for levels where you can engage enemies in melee combat regularly. If you spend a lengthy amount of time in a vehicle, you don't want to use this skull.
Tough Luck - Tsavo Highway
With Tough Luck active, enemies will be much better at diving away from your grenades and some of your slower-moving projectile attacks, such as needler and fuel rod gun shots. This will make it much more difficult to get grenade kills, especially on Brutes.
Catch - The Storm
Enemies that throw grenades will throw more of them, and throw them more often. Your Elite and Marine teammates will do the same. Everyone that has grenades will drop more of them, as well, causing some ridiculous explosions during firefights.
Fog - Floodgate
Your motion tracker is disabled when this is active. Not a huge penalty for most players, since most enemies can be located visually, but it's tough when you're fighting invisible Brutes or partaking in vehicle combat.
Famine - The Ark
Every weapon you find off of dead enemies will have a greatly reduced amount of ammo. Some weapons that you find, such as in drop pods or weapon racks, will be full as usual, but this will still have a big impact on your fortunes in combat. Get ready to conserve some ammo!
Thunderstorm - The Covenent
All Covenent forces become tougher versions of themselves. Brutes are more likely to be Captains or Chieftans when encountered, while Grunts will more likely be the toughest gray versions. Flood units will often be the tougher shielded variants.
Tilt - Cortana
The natural resistances of enemies are greatly heightened here. Basically this means that enemies with shields (Brutes, and some Flood units) will only be stripped of their armor if you use a plasma-based weapon on them, while most fleshy enemies will only die to bullets. Brutes will require plasma to strip them of their armor, then you'll need to switch to bullets to finish them off.
Mythic - Halo
All enemies have twice the amount of health. Depending on the difficulty level, this can be anything from an annoyance to a heart attack-inducing source of stress.
Silver Fun Skulls
Cowbell Skull - The Ark
This is located deep within the Ark level, near the end of the mission, as you fight your way to the Cartographer. When activated, it will increase the blasts of all explosions in the game: grenades, Needler shots, you name it. They'll all be bigger and better than before.
Blind Skull - Sierra 117
This is one of the first skulls you'll find in the game, as it comes after the first major firefight. When activated, it eliminates your HUD while playing - no radar, no health indicator, no ammo indicator, no nothing.
Grunt Birthday Party Skull - Crow's Nest
This skull unlocks a cheat mode wherein every Grunt will die with an explosion of confetti when you hit it with a headshot.
IWHBYD Skull - The Covenent
The IWHBYD Skull is located at the very end of the Covenent level, near where you, the Arbiter, and the Flood forces attack and destroy the Brutes on your way to defeat the Prophet of Truth. If you look upwards as you proceed, you'll see that there are seven holograms of the seven Halo rings in the galaxy here. Count them as you proceed, with the first hologram being at the beginning of the area (starting at the elevator), and the seventh one being at the end.
What you need to do here is jump through the rings in a certain order. Head down to the halfway point and jump through the rings in this order: 4, 6, 5, 4, 5, 3, 4. If you do so, you'll play the notes of a musical jingle, and will be able to find the IWHBYD Skull near the bridge that leads you on to the Prophet of Truth.
When unlocked and used, the IWHBYD skull will unlock additional dialogue at certain points of Halo 3's campaign.
Terminal Locations
There are seven Forerunner terminals scattered throughout the game. Individually they act as backstory exposition; you read them to find out what happened during the last days of the Forerunners. If you find all seven of them, though, you'll earn an achievement. Yay.
Anyway, there are seven in all, but they're only found on three levels. These are short reminder texts on their location; the mission walkthroughs are usually a bit more detailed.
The Ark
The first terminal is near the beginning of the level; you head through a small Forerunner corridor with a room to your left. Head into that room to find the terminal. The second is a bit further on; when you extend the bridge for the Scorpions, turn around and you'll see it. The last one appears underneath a ramped stairwell near the end of the level.
The Covenent
As you make your way into the towers here to shut down the shield, jump across the gaps near the first and third elevators to find two of the terminals. The third terminal is inside the second tower, which you pass by on your Hornet; you'll have to land it and head inside to find the terminal.
Halo
The last terminal is near the beginning of the final level. Keep to the right as you start walking and look for some icy ledges leading upward. Jump into the Forerunner facility to find the terminal.
Walkthrough
For the record, this walkthrough was written focusing on solo play on the Heroic difficulty. If you're playing on Legendary, you'll have a much tougher time; on Normal or Easy, you'll likely encounter fewer enemies than we describe here.
Sierra 117
Walk It Off
Get To The River for Evac
After your crash landing, meet up with Sergeant Johnson and the Arbiter, then start heading through the forest. Before long, you'll be told to split up. If you keep the Arbiter's arrow in front of you, you should come across your first prey: a Brute and a squad of Grunts. The Grunts are no match for you, so take them out with your assault rifle, then focus your fire on the Brute to collapse its shielding and armor before finishing it off. Your teammates will do most of the work here, if you let them, allowing you to trade in your pistol for a plasma pistol, or dual-wield for a bit.
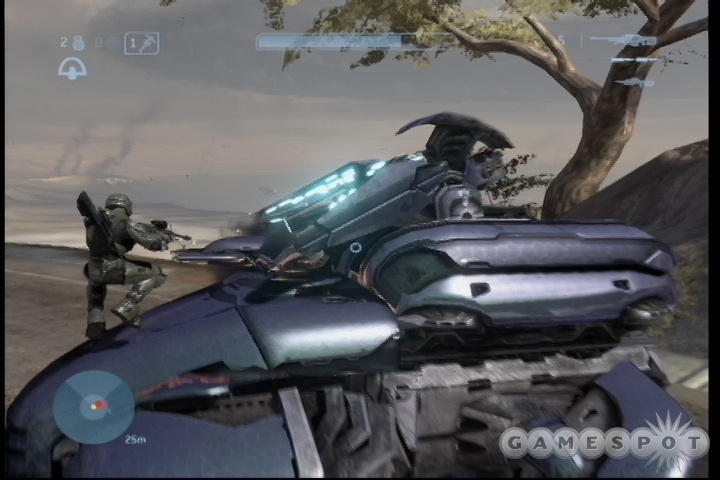
When you're clear, wait for the enemy Phantoms to arrive, drop off their loads, and take off, then start heading down the river with your crew. More of the Brute/Grunt combos will be in your way. Keep in mind that taking down the Brutes will cause all nearby Grunts to enter panic mode, so it may be worth your while to focus on the Brutes first. If you can find a Brute shot weapon, using its grenades on the Brutes can knock their armor off in a few blows, causing them to enrage and charge you, which will let your squadmates more easily finish them off.
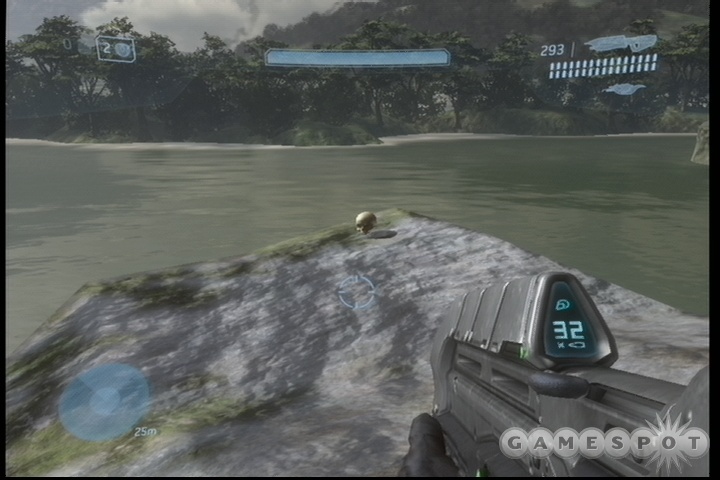
Blind Skull

The first skull of the game is located here, in this area, near where the first dropship comes to drop off its load. To find it, head to the small bunker buildings along the cliff's edge and start walking towards the water, hugging the cliff. There should be a large rock jutting out over the water; the Blind skull will be on it. Pick it up with the R2 button to unlock it.
After passing through the caves, you'll come out to a large open area, where one of your troopers will call out sleeping enemies. After killing them, escort the Arbiter up to his sniping ridge, where he'll start firing on the enemies below. You can help him, if you wish, but if you're just looking to survive, let him fire away while you jump across the chasm to find a carbine of your very own. Use it to snipe out any remaining enemies (click the right analog stick to zoom and fire), then proceed across the riverbed and up into the hills beyond.
Beyond this section, you'll spot a ferocious Brute interrogating a soldier. Hit the Brute with all the ammo that you can before he kills the marine; you don't seem to be able to hurt him while he's holding the soldier, but if you deal enough damage, he'll instantly die after completing the scene, letting you finish off his compatriots and move on.
Charlie Foxtrot
You can find your first battle rifle to the left of the exit from the cave just after starting this subsection of the level. Nab it to replace your carbine, if needed, then move down to the riverbed. Wait for the Phantom to appear and fly away, then drop down to the river, using your battle rifle to take out the jackal snipers on the far side of the river, in the trees.
Find Johnson's Crashed Pelican
Assaulting the dam here can be tough, due to the large number of Brutes and jackals that appear. One of the soldiers that was killed by the Phantom was manning a machinegun turret, which you can rip from its moorings and carry around for a free 200-round magazine. It, like the plasma turrets, slows you down and suffers from a lot of recoil, but you'll still be able to chew through your foes without too much of a problem. Nab the turret and hug the left side of the cliff wall to find a path leading up which will allow you to flank the Grunts and Brutes as the Arbiter takes a more direct approach. If you can find one, a needler also works quite well on the Brutes here.
Clear the area out and move beyond the dam to reach a sniper's canyon. Numerous jackals will appear on the cliffs wielding beam rifles and carbines. It'll be difficult to proceed through here unless you have a long-distance weapon like a carbine or a battle rifle, so backtrack if you need to and find one. When you're properly armed, proceed slowly through the canyon, marking positions of your foes and attempting to snipe them before they spot you after moving behind cover. On Heroic difficulty, you can be killed almost instantly by a jackal with a beam rifle - it only takes two shots - so be on your guard.
If you can find a beam rifle here, feel free to pick it up and use it in the next section of the jungle.
Find Johnson Before He's Captured
You'll eventually come to a large-scale firefight between the marines and the Covenent. Snipe the jackal who's stationed well across the canyon here, then start blasting the Brutes and Grunts in the valley below you. When you're ready to do so, drop down and begin proceeding along the valley area, but keep in mind that there are multiple snipers above you. Clear out the Brutes and Grunts, but don't forget to watch for jackals on the cliffsides.
When you find the ramp upwards, you can examine the wreck of Johnson's Pelican. There'll be a couple of sniper rifles here, which will give you 24 sniper shots if you nab both of them, which you definitely should. Kill the last squad of enemies between you and the cave leading on, then head through.
Quid Pro Quo
Rescue Johnson And His Men
Johnson has been captured by Brutes, and they're keeping him in a secure room above a large dam. After you get the mission assignment, whip out your sniper rifle and begin picking off your foes from the perch that you're on. Focus on the jackals first; they're spread out around the area in different directions and at different heights. Zoom out with your rifle and try to find them and pick them off before worrying about the Brutes, but if you see a Brute crossing the bridge and can get a clean shot off, it might be worth doing so.
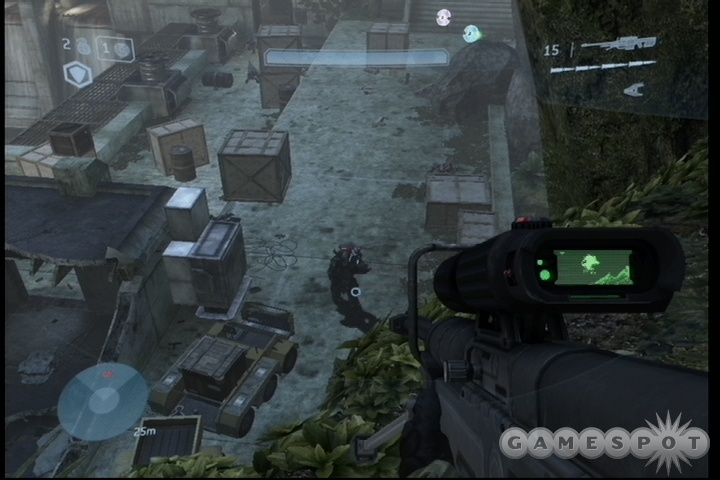
If you manage to sit up top and clear out most of the snipers, then you should be facing a number of Brutes and Grunts in the buildings below you. Some of these fellows will wait for you to hit the bridge, but some will be pretty brazen about approaching you and firing at you from below. Feel free to snipe away at anyone that you spot. If you're lucky, the Brute chieftan will appear in his yellow armor, wielding a gravity hammer. He can't attack at range with the hammer, meaning that you can unload on him until his armor turns white. He's invulnerable at this point, so leave him be and fire at him again when the armor returns to normal. If he drops the gravity hammer, you can use it on the miscellaneous Grunts and Brutes in the area and get some easy kills. If he doesn't appear, though, don't worry about it.
Make your way to the bridge. There should be a substantial number of enemies here to deal with. If you think you can take them down, feel free to attack them, but if the numbers are too much (or if the commander is here), then you should drop down to the underportion of the bridge and cross through via that passage. One of the benefits of this latter path is that it's open to the side, allowing you to snipe on the reinforcements as they drop down on the other side of the river, near where Johnson is being held captive.
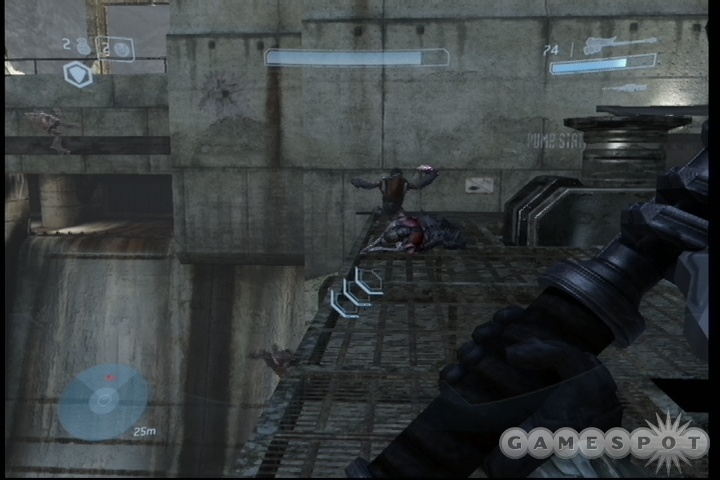
Anyway, pass along underneath the bridge and let the Arbiter clear a path up top. He can't be killed, only stunned; even if he gets taken out, he'll eventually pop up and continue on his killing spree. He'll catch up to you eventually, so stay alive and find targets to hit. When he reaches the far side of the bridge, pop up and make your way to Johnson's little hut and use the RB button to drop the plasma shield that keeps him and his crew imprisoned.
Stay Alive! Pelican Inbound!
After Johnson and his men rearm themselves, stay inside the hut for a few minutes and fire away at the enemies as they arrive. The Arbiter will do most of the hard work here, meaning that all you have to do is stay alive until the Pelican arrives.
When it does come down, you can head towards it if you like, but first you should find the Iron Skull. These skulls are optional pickups, but they'll let you change the rules of the campaign the next time you play. To find it, head to the Pelican, but look to the left of it (if you're looking at the back of the Pelican), then hop up on the walkway there. You should see a large block in front of you that you can jump to. Jump onto it, then hop up onto the walkway that one of the jackals was using as a sniping roost before. Walk all the way to the end of it and tap RB to grab the skull. This is one of nine skulls that will grant you achievement points for finding it.
Crow's Nest
Know Your Role…
Secure Perimeter Defenses
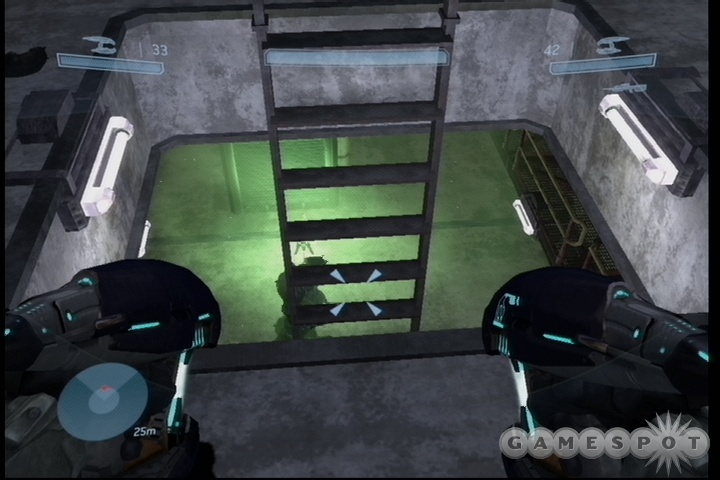
Black Eye Skull
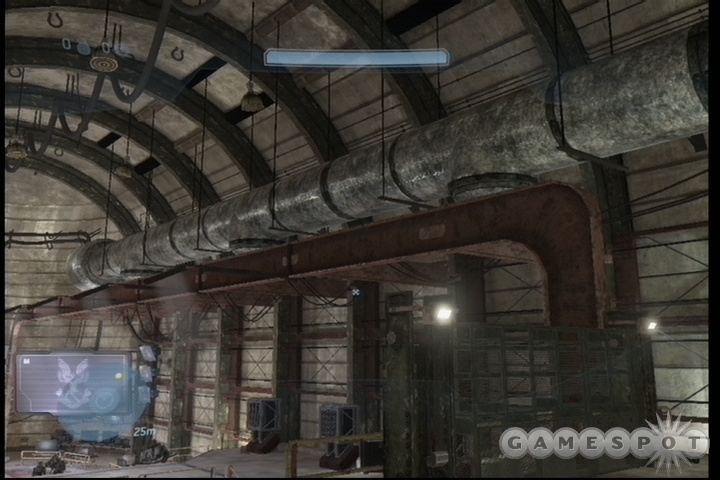
As soon as this mission begins, you can find the Black Eye skull. Look at the top of the first room here; you'll see a large air conditioning duct above you, with a set of red girders below it. If you walk to where the girders meet the ground, at the top of the stairs, you should be able to jump onto them and jump from there onto the duct. At the far end is the skull.
Head down the steps here and arm yourself at the weapons shelves, then proceed onward until you reach a closed door. You can open these by finding the switch and pressing the RB button.
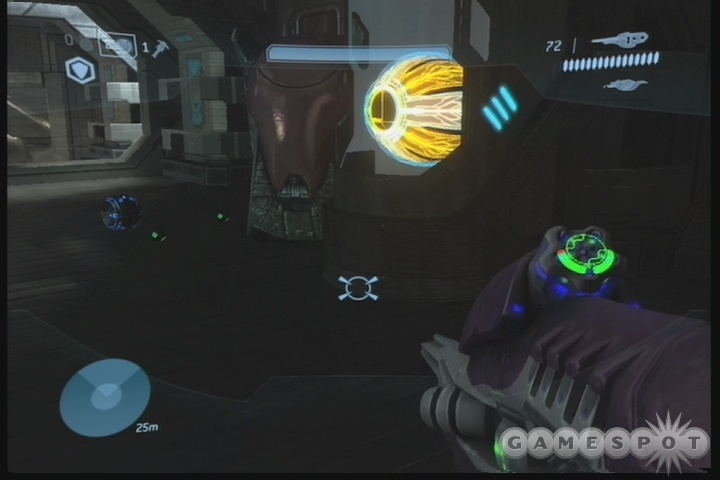
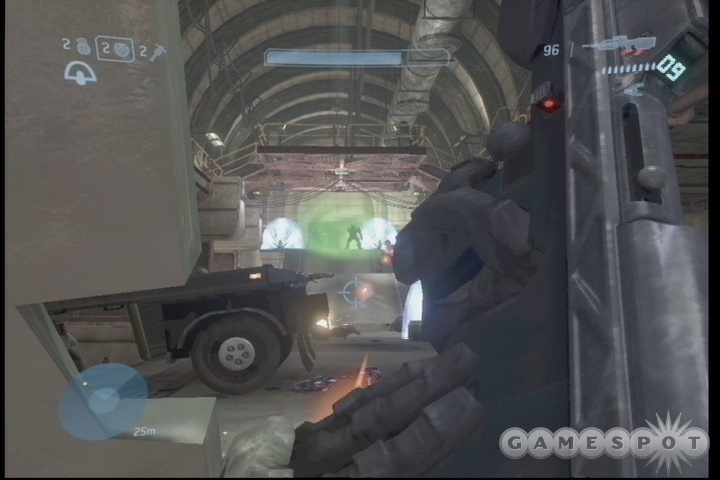
Neutralize Hostiles In The Hangar
Start making your way to the hangar. After you reach the spot where a Warthog gets destroyed, turn to your left and chuck grenades into the crowd of Grunts there to kill most of them.
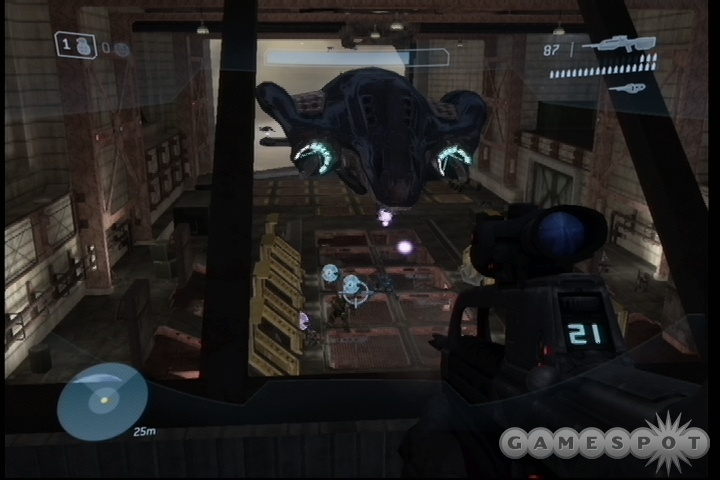
Fight your way from here to the hanger, and load up on ammo for your battle rifle on the way; pairing it with a carbine wouldn't be such a bad idea. When you reach the hangar, you'll have to fight off a few waves of enemies that will be arriving on Phantoms. If you're playing on a low level of difficulty, you can nab one of the turrets and use those to pelt the enemies as they arrive, but on Heroic or above, you'll need to be a bit more cagey, since there'll be a lot of Brutes coming your way. You can find your way up to the top of the room via the staircases; if you stay in the control room up there, you can snipe away at enemies below you. The brutes will be tough to kill, so you may want to wind up sneaking down, tearing a turret off of its moorings, and using that to finish them off. If you want to engage them in close quarters, try running down to the underbelly of the hangar bay and hope that they follow you.
Get Back To The Ops Center
When all the waves are done for, start making your way back to the ops center. In order to get there, start by heading back through the small vehicle path and finding the open doorways that are available to you. If you can find needler ammo here, grab it and save it. You'll need it in a bit.
Eventually you'll run into a swarm of Drones. These guys are annoying to kill since they swing through the air and move erratically, making them difficult to hit. If you have a needler, feel free to use that on them; otherwise, you may want to try using an assault rifle or submachinegun. Try to get to the side of the swarm and flank them to make them easier to attack. If you're having real difficulty, you should be able to just wait for the soldiers here to finish off the enemies.
Gift With Purchase
Rescue Marines In The Barracks
Head to the ops center and take a gander at the present that you'll be leaving the brutes. With that done, follow the door at the top of the room onward to start your quest to reach the barracks. Be sure you have plenty of ammo for your weapons before proceeding through; we used a needler and a battle rifle for the next fight.
When you enter the next corridor, you'll find a group of Brutes that are guarding the high ground. There are perhaps a dozen of them all told, including a gravity hammer-wielding chieftan, and you'll need to take them all out in order to proceed. Step up to the shield in front of you and use it as cover when you open your attack. If you have a battle rifle, you can use that to nab headshots on the distant foes (starting with the chieftan), then switch to your needler or something similar when your enemies get closer to you. It'll take a bit of time to wade through them all, so use grenades when they clump together. If you find yourself running low on ammo, duck off to the side of one of the walls here to grab some cover; that should cause some of the Brutes to come after you, letting you kill them at close range and steal their weapons. There are also a couple of weapon racks in the middle-right section of the room, in one of the parking areas.
After killing all of the brutes here, find any ammo or grenades that you can, then move on and drop down to reach a corridor with some Drones inside. You can ignore them, most likely, and simply run onward until you meet the Arbiter.
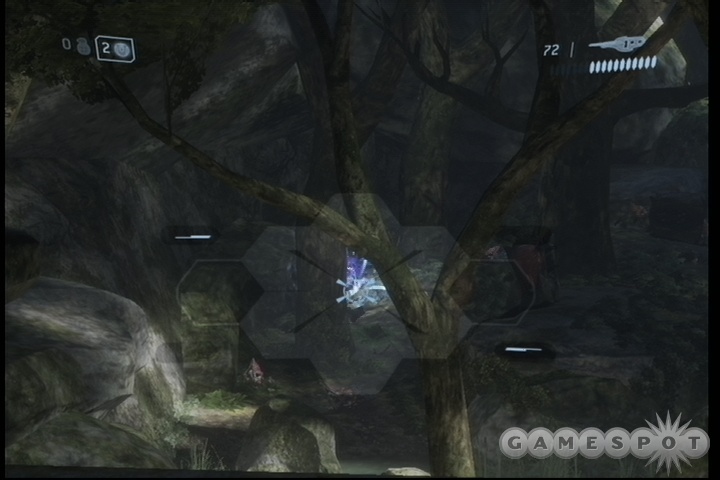
Grunt Birthday Party Skull
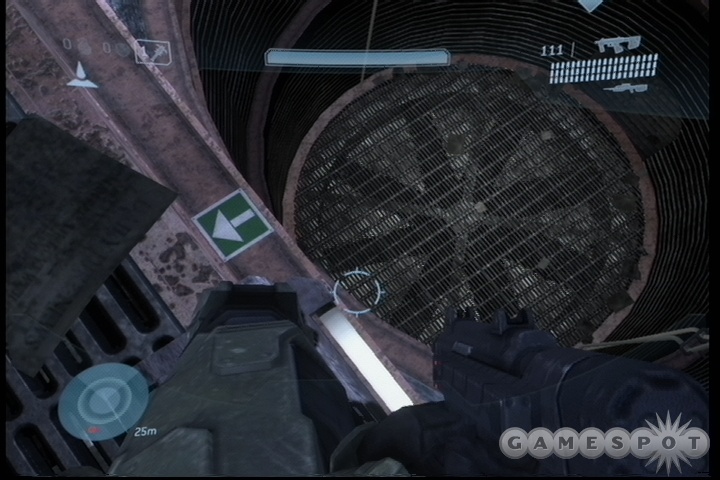
In the hallway with the Drones, the second silver Skull can be found. Move down the hallway until you reach the point where you drop down to the top of the fan. Instead of dropping, though, edge verrrry slowly off the edge of the walkway. If you look down, you should see a green arrow pointing backwards. If you can drop down onto the ledge there, you can walk backwards to find the skull.
Into The Barracks
You'll soon reach the barracks. If you picked up the gravity hammer from the last fight with the Brutes, feel free to charge forward and use it on your foes, if you like. If you prefer a sneaky approach, you can climb one of the ladders leading up to the second floor, then climb up into the ductwork above these corridors. When you reach the last exit from the ductwork, you can drop down and kill another Brute chieftan below you with the gravity hammer, making short work of him.
Another few corridors await you here, but you can repeat the process of crawling into the vents in each one, if you like; it'll allow you to fire on and grenade your foes from above while the Arbiter and the troops draw their fire below. Continue your path until you reach the last group of brutes, but be careful: one of them will have a detached plasma turret for firing on you.
Evac Via The Landing Pad
Escort the soldiers out of the barracks to the lift nearby. Ride it up to the landing platform above, where you'll be assaulted by numerous Brutes with jump packs that allow them to jump long distances. Stay back near the exit from the lift here and jump onto one of the boxes nearby to get a view of your opponents and fire from there; if you have a battle rifle or carbine, go for headshots and stay back. If you're willing to take a risk, you can find the open door at the top of the steps leading away from the landing pad and follow it around to the control room, where you'll find some weapons and will be able to snipe at the Brutes.
Last One Out, Get The Lights
Return To The Ops Center, Arm The Bomb
When the Brutes are finished, you'll have to make your way back to the ops center. Try to pick up a pair of plasma rifles before leaving the landing pad; there are plenty of Jackals and Grunts in your path, and they're easy to take out with those weapons. A battle rifle would be a good weapon to have in reserve.
The path to the motor pool is overrun with the aforementioned Grunts and Jackals, and will also be populated with a number of plasma turrets. You can kill the turreteers relatively easily by hitting them with plasma rifle fire, since the shielding on the turrets doesn't protect them very well. Near the end of the corridor, you'll come to the motor pool; watch out for snipers on the upper walkway here. Kill everything that moves, then move to the top walkways where the snipers were to grab beam rifles and other weapons from the armories there. You may also want to grab a plasma turret before heading through the door in the motor pool.
When you reach the ops center, it'll be well fortified by Brutes and Grunts. The Brutes are tough, obviously, but they'll go down quickly to a plasma turret. They'll kill you quickly, too, if you let them get clean shots off; beware the Fuel Rod Gun that one of them wields, as it packs quite a punch.
Eliminate all the enemies and arm the bomb by pressing RB next to it. Grab the Fuel Rod Gun on the ground and see if it has any ammo; if it has five rounds or so left, pick it up.
Escape Via The Elevator In The Hangar
Head down the stairs and into the cave here. There should be plenty of battle rifle ammo in the corridor before the cave, and inside the cave itself, so use that to make your presence felt. The Grunts here will be too panicked to attack, letting you melee them to death, but there's also a couple of Jackals in the room.
Make your way through the cave and into the tunnels beyond it. With that done, you'll have to head down to the hangar, which is overrun with Grunts and Jackals. Nothing to worry too much about; use the Fuel Rod Gun to blast a path to the elevator and head downwards to end the chapter.
Tsavo Highway
Full Contact Safari
Lead The Marines Away From The Base
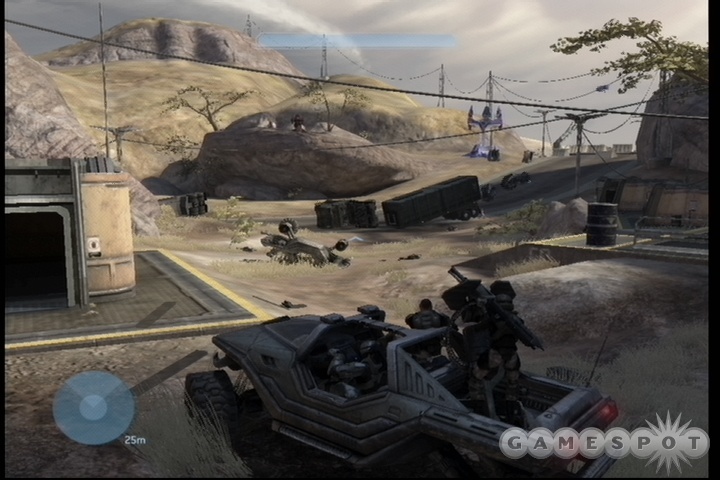
Finally, some Warthog action. Head through the barracks here and find the two Warthogs. After opening the door leading to the cave beyond, nab the driver's seat in one of the two Warthogs and head out. (One of the Warthogs has a turret in the back for extra firepower, while the other has room for more Marines.)
Pick your Hog and leave the caves, and get used to the glorious feeling of running down enemies. You can kill almost anything by running it over, although you need to be going a certain speed to make lethal contact; if you're going too slow the enemy will simply be rubbed along the ground in front of you.
Eventually you'll find a couple of snipers near an in-construction sniping tower. Run them down and pick up one of their beam rifles from the ground, then get back into the Warthog.
Head through the first few groups of grunts until you reach a squad near a crashed ship; they'll have three turrets set up to hit you, and the Brute here will have a fuel rod gun that'll make quick work of you if it hits. You can run down the turrets by simply hitting them, so do your best to quickly eliminate the threats.
Dam Base
Just beyond the three turrets is a more fortified area, where there are high-powered turrets sitting atop a damn. Before charging in here, park your Warthog on top of the little ridge that leads to the area and hop out. If you sneak forward, some of the enemies will come after you, allowing the turret in your hog to chew them up, but you should sneak forward further and start firing on the emplaced turrets to your right, as well as the snipers on the dam itself. When you've weakened the defenses up a bit, return to the Warthog, hop in, and drive in to the left to avoid the dam and find the path leading behind it. If possible, stop near the dam and exchange your beam rifle for a new one with more ammo.
The Battle of Tsavo Highway
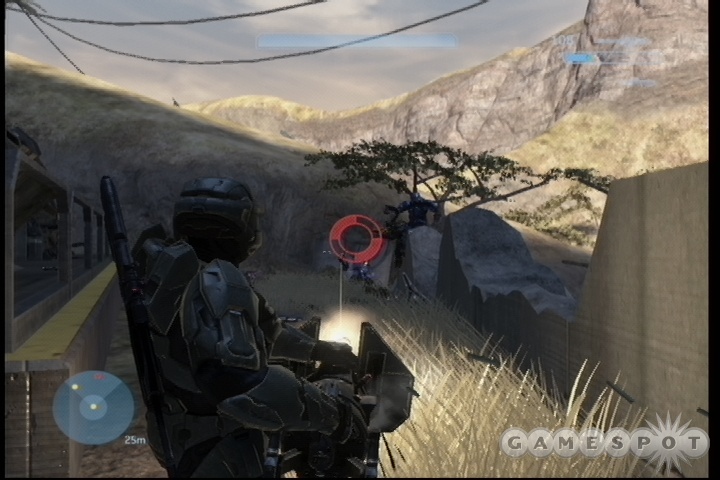
Move through the valley beyond the dam to find another group of Covenent fighting against your troops. If you have a beam rifle, you can move the warthog up over the ridge, where it'll fire on any enemies that come near you, then get out and use the beam rifle to shoot out the turrets and snipers on the far side of the area. If you don't have a rifle, then just proceed slowly with the warthog and use a battle rifle to clear out the turret above you before getting close to it. Your Hog turreteer should be able to engage most of the enemies here and destroy them with minimal damage to yourself or the Warthog, but only if you proceed very slowly and let him or her do their job from maximum range.
After destroying the turret, and the one near the shielded exit, move up to the shield in the truck until you get the audio warning that Drones are incoming, then back away a bit. The Drones will quickly start flooding out of the tunnel, so let your turret gunner take them out. When that's done, get close to the shield and throw a frag grenade towards the generator; that can destroy it from the opposite side of the shield. Alternately, you can head through the shield and destroy it with weapons. When the shield's down, let the turreteer go crazy on the Brutes inside, then proceed through.
Tough Luck Skull
As soon as you exit the tunnel here, you can pick up the Tough Luck skull. Get out into the sunlight, then exit your vehicle and hop onto the building to the left of the tunnel exit, then hop from there onto the pipe beyond it. Walk down a ways until you reach the yellow gate-like thing that blocks you from walking onward. Jump over it, then look downward; you should see a walkway leading out over the chasm. Drop onto it and walk down; you'll see a platform on your right. You can jump across to find the Tough Luck Skull.
The Broken Path
Get To The Town Of Voi
The bridge is out up ahead, so jump off and drop down to the grass below. After the chapter changes, head up the ladder nearby and through the tunnel to reach the next major battle. Kill the enemies nearby, then take a right and find the ramp leading up to the walkway above the tunnel you just came through. You'll find a sniper rifle up there; use it to finish off any remaining Brutes in the area before heading down towards the buildings that they were firing at.
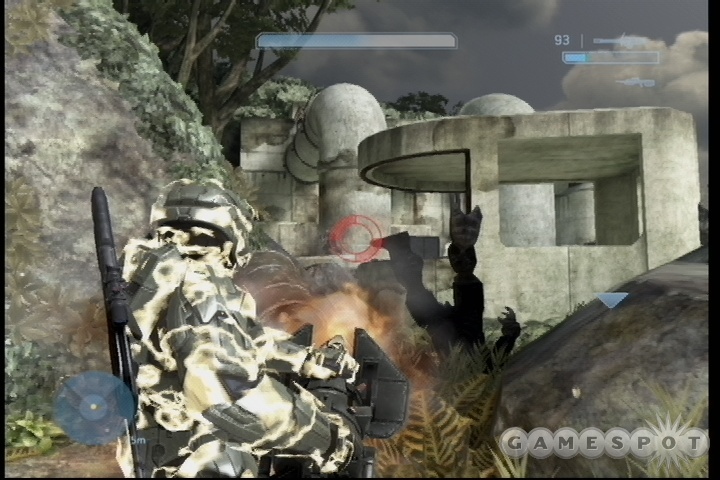
There are a few more soldiers here, but you're all about to come under a severe amount of attack from the Brutes. There'll be a couple waves of eight Brutes apiece that will arrive via Phantoms, so get ready by reloading your sniper rifle at the back of one of the huts, as well as picking up a fully-loaded battle rifle.
The Brute Fight
When the Brutes start coming down, stay in the huts until the Phantoms get away; they'll pelt you with turret fire otherwise. For the first wave, try to hit a few of them with the machinegun turret in one of the huts until your shields drop, then detach the turret and use it to kill the rest of the fools. Keep in mind that some of these Brutes will have fuel rod guns, so you'll want to stay behind cover as best you can, darting out only when a target presents itself. Feel free to drop your machinegun at any time to use your grenades and weapons, and keep in mind that there are a few Trip Mines around. You can jump and throw these into the path of the oncoming Brutes, and you should. If one of them goes off any Brute nearby will be killed quickly.
When both waves are toast, a Wraith will appear. If you can find a Deployable Cover item, then killing it is simple; stay in the pipes until you reach the road, deploy your cover on top of the Wraith, then run up, press RB to jump onto the vehicle, and click LT to pop a grenade into it. With that done, just run away and wait for it to blow up. If you can't find a Deployable Cover, then you'll have to do the same thing, but just with less protection. It should be doable if you stay inside the pipes, though. Keep in mind that if you shoot out the gunner with a battle rifle, you can actually take over the Wraith by grabbing onto it and tapping the B button to kill the driver.
Moving On
Wait for the Warthog to drop from the Pelican, then hop aboard, move it forward a bit, and wait for the other Warthog to come down and fill up. You can move forward on foot to snipe out the turrets and snipers in your path, if you like, or just start steamrolling your opponents by running past them as quickly as you can. Alternately, just use your Warthog to move slooowly up the path as your gunner shoots everything.
The Wraiths
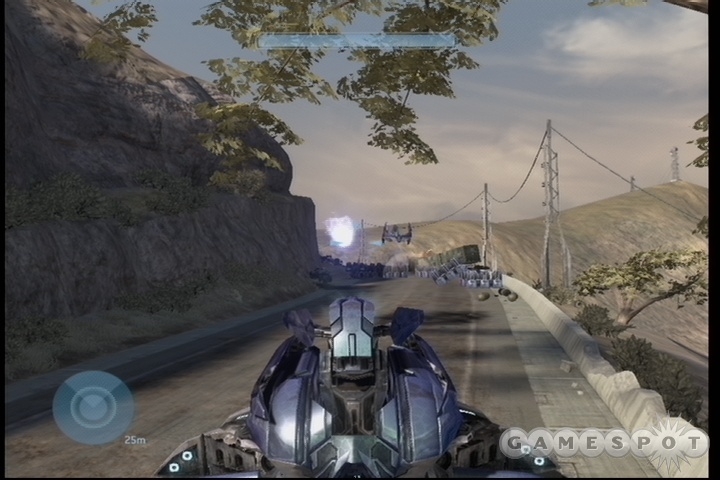
Watch out for the Wraiths after you pass through the tunnel here; there are a couple of them, and they combine devastating artillery attacks with a nasty turret gunning attack if you get too close to them. The artillery can be dodged if you keep moving, however.
This part of the game is pretty difficult, as moving out of this area is dangerous due to cover fire from a couple of turrets, and there's a roadblock if you attempt to blast past everyone which will slow you up enough for the Wraiths to catch up to you, causing you to be caught between the Brutes at the roadblock and the Wraiths themselves. There are also a ton of Brute Choppers that will be patrolling this area, as well as a couple of hardened turrets that watch over the ramp that leads on (it's on the far side of the hill as you come down the smashed bridge).
Your best bet here is to charge up the front side of the hill by getting out of whatever vehicle you're in and jumping up it on foot. There's a single Wraith up here that awaits your attention, so quickly shoot out the gunner with a battle rifle and then hop aboard to kill the driver with the B button before climbing in. If you can get into the Wraith unharmed, take stock of your surroundings; is a turret shooting you? Are more Wraiths climbing the ramp? (You'll have to take out three of them in total.) What you need to do now is start firing away at the opponents down the ramp while strafing along the bridge a bit to get out of range of the turrets. If you can do that, then you can fire away at the Wraiths until both of the remaining two are dead. That will pretty much ensure your safety, since the Choppers don't seem to follow you onto the bridge.
This is all a best-case scenario, of course; you'll die quite a few times here before you manage to break through. If worst comes to worst, try to jack a Chopper and use that to weaken up the turrets before moving up, or try to stay on foot and see if your fortunes improve when you fire on the vehicles from the hills. Still, you won't make it far without dealing with the Wraiths, so try to take them out.
Brute Barricade
Whether you take over a Wraith or not, you'll have to defeat the Brutes at the nearby barricade before you can move on. If you have a Wraith, this simply entails blasting the roadblock from a distance while the Brutes jump around and shake their fists at you, unable to counterattack. Otherwise, you'll have to proceed the hard way, get close, and take them out one by one. That'll be difficult, as there are quite a few of them, but doable if your checkpoint is close enough to the barricade itself.
When you get past the barricade, approach the tunnel and kill the remaining Brutes, and you'll end the mission.
The Storm
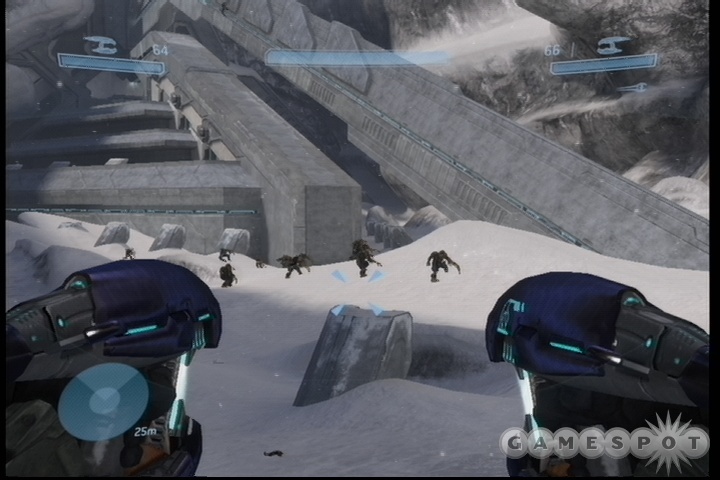
Ghost Town
Destroy First Anti-Air Wraith
After you ride the Warthog to the end of the line, get off and open the doorway leading on. The Warthog's driver will follow you automatially, so there's no need to drive it yourself unless you like to micromanage. Proceed through the tunnel here, unlocking doors as you do so, until you reach the last hallway and head outside.
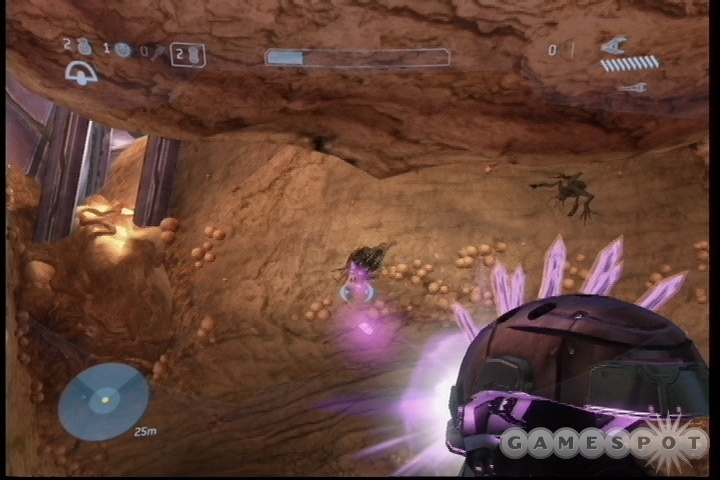
When you reach the last door, you'll spot a couple of Ghosts. Open the door and hop into one, then head outside, taking a left to remain on the docks. When you're ready to head down, find a ramp and pop down to the bottom of the area here. There'll be general chaos, as there's an anti-air Wraith here, as well as an artillery Wraith that overlooks the position, and plenty of enemy Ghosts. Try to eliminate as many of the Ghosts as you can, then fire away at the anti-air Wraith until it pops.
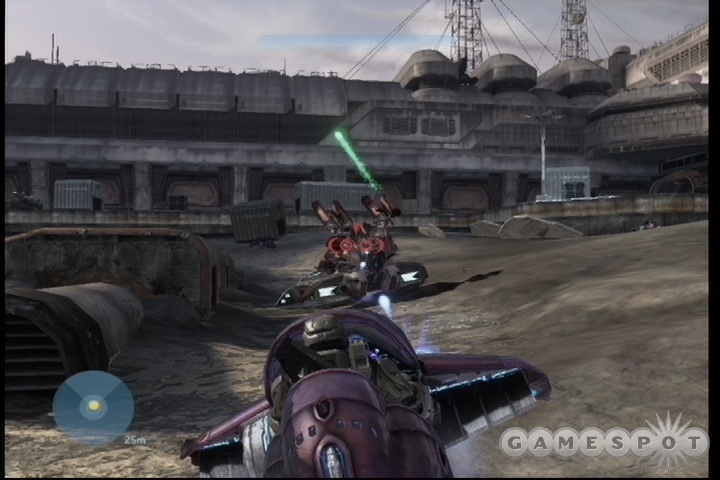
This section can be superbly annoying, especially if the Wraith stays alive and shells you. If this occurs, you may want to head along the docks until you can reach the building that's been built on them. Atop it is a heavy weapon, the Missile Pod. It'll let you lock onto and fire homing missiles at the two Wraiths here. It might be best to use it on the artillery Wraith, which will be a huge annoyance if you keep it alive. There's also a sniper rifle here, which can be used to kill the gunners in either of the Wraiths.
Catch Skull
The Catch skull is here, but it will be very difficult to obtain. It's atop the small silo on the far side of the docks from where you enter this large area, near where the anti-air Wraith sits and fires. Reaching it is way difficult, however, since both of the two Wraiths here must be alive when you get to it; if either one is dead, then the skull despawns. Lastly, the silo is too high to get to by jumping. When you attempt to reach it, you'll also come under fire from the enemy Ghosts. All of this combines to make the task of reaching the skull almost impossible.
Luckily, there is a way to get to it and pick it up without too many problems, although it will require some luck. You'll have to begin in the corridor where you open the door to lead out to the docks. Hopefully your Warthog is still alive; if it is, then enter the driver's seat when you open the door. If not, grab a Ghost here. If neither vehicle is available, then you're probably screwed.
Anyway, if you get into the Warthog, drive down the ramp near the exit door and head for the silo. You'll come under fire from the enemy Ghosts; ignore them as best you can and drive to the far side of the silo so that the Warthog doesn't kill the anti-air artillery. (If this becomes a problem, try to get to this position in a Ghost instead.)
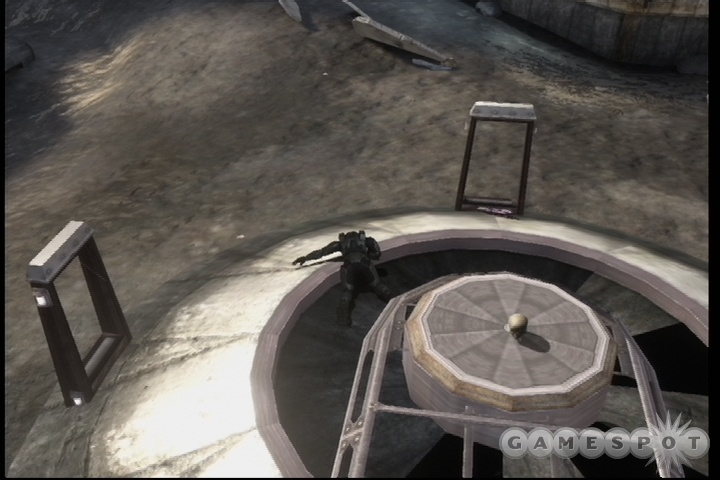
Hop out of the Warthog here and head into the small passage between the shield on one side of the silo and the silo itself; you'll be in a narrow space where no one can hit you unless they basically come in behind you. Wait for your shields to recharge, then drop a frag grenade at your feet. A second after dropping it, jump; the blast from the grenade will propel you up onto the silo where you can nab the skull.
Everything has to go perfectly in order for this all to work, and you will need some practice to make the grenade jump work possible. Possible it is, though, and you'll need to do something like this to get the skull.
Destroy All Other Wraiths
The artillery Wraith in the corner guards the doorway moving on. If you can manage it, grab a Warthog and take it with a gunner into the room beyond, then let it fire away at the enemies up the stairs. When the coast has cleared, the doorway will open, allowing you to move on. Note that the weapons locker here has rocket launchers, if you care to obtain one.
Unfortunately, a huge swarm of Drones will descend from the skies here and harrass you. They'll probably make quick work of your teammates, but there'll also probably be too many for you to take out yourself. If you wish to do so, you can simply wait them out; they'll probably despawn in a few minutes. If not, dash out across the area below you to reach the exit to your right. It's boxed up, but you can move through that way and hopefully avoid upsetting the Drones.
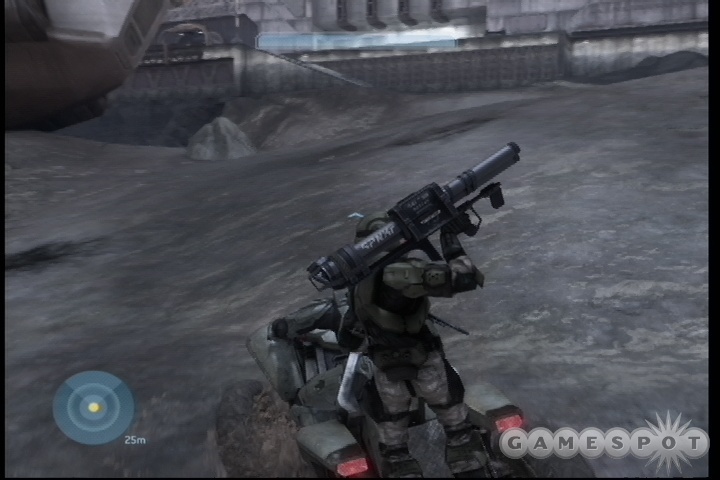
When you reach the end of the hall, a squad of Mongooses will be waiting for you. Hop into the driver's seat of the free one, then head out to the next set of docks, where the last couple of Wraiths will be waiting. There'll be plenty of Ghosts here, too, but don't worry; you've got plenty of rocket-wielding soldiers in your squad, so just keep moving and dodging fire, and eventually everything will die.
Judgement
Kill The Scarab Tank
When you're done with the Ghosts and Wraiths, you'll get a message saying that something big is heading your way. That's your cue to drive towards the friendly turrets on the large wall here. A Scarab will appear momentarily, so find your way to the base of either of the two cranes, then activate the elevator in the middle of the base to ride up to the top. That'll put you into a position where you can fire onto the enemies on the bow of the Scarab (that rocket launcher comes in handy about now) and also jump onto the Scarab when it's below you.
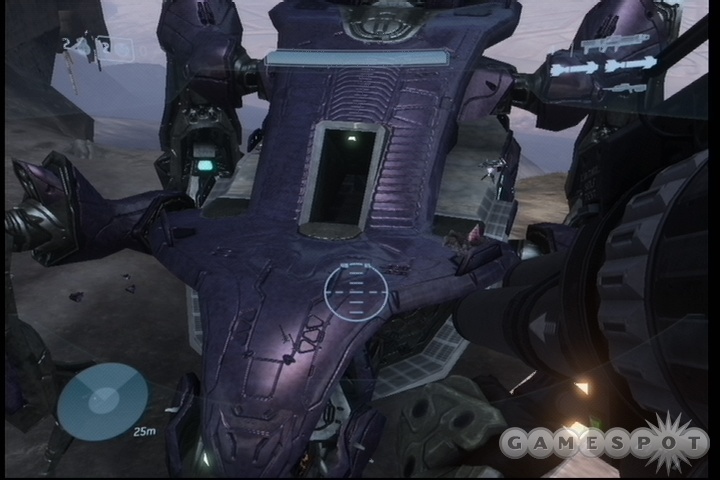
When you're on the Scarab itself, clear out any remaining enemies in your immediate area, then move around to the back where a Brute chieftan is stationed; he guards the power core. Take him and his buddy out, then shoot the core until you get the "Run away!" message. Note that if you head down the ramp here, you can completely miss the core; it's on the same level as the turrets on the side of the ship.
Neutralize The Anti-Air Cannon!
With the Scarab out of the way, you can move on. Proceed back to the turrets, where the Arbiter is waiting for you. Start making your way through the corridors leading to the warehouse, where more Brutes await.
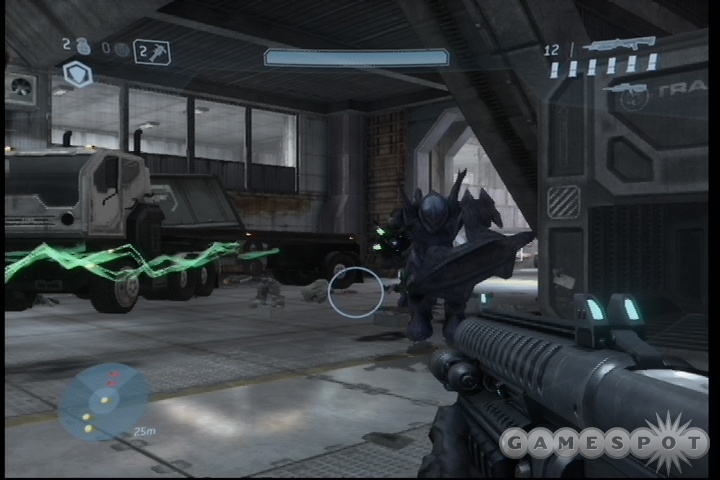
Make your way past the Brutes, allowing the Arbiter to do most of the work if need be. Eventually you'll come to a door where a lot of workers are milling about; you'll face two Hunters after they enter. Pick up the shotgun near the dead body in your path; it's one of the few times you'll find it useful during the campaign. If you start firing away at the Hunters, though, you'll be quite frustrated; what you need to do is get close to the Hunters, let them take a melee swing at you while you strafe around them, then tag them in the middle of the back with the shotgun. It's not difficult, but with two of them coming at you you may get killed a few times. Just keep in mind that their back is their weak spot; you should be able to see the fleshy color of the area when you get behind them. Each Hunter will only take a couple of blasts from the shotgun before dying, luckily.
With the Hunters dead, head up the steps to the left of the door and watch the carnage unfold through the window as a Brute chieftan with a gravity hammer goes after the Arbiter when he heads through the door. The Arbiter will probably take him out, letting you grab the hammer if you wish to use it. You will want to grab the sniper rifle in these rooms, no matter what you do.
The Cannon
With the sniper rifle in hand, use your other weapon to clear the factory of Jackals and Drones. Eventually you'll come into sight of the anti-air cannon itself. Walk forward and be sure that the Arbiter is on pace with you. If he gets stuck manning a turret, head back, take it over, and rip it out.
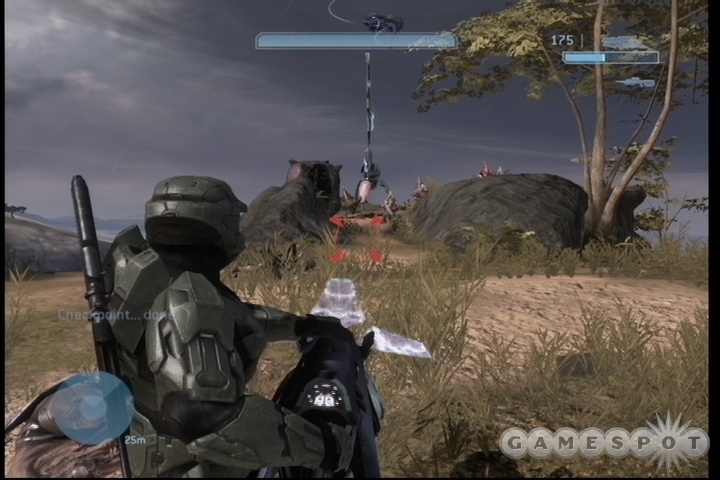
There are numerous Brutes and Grunts in between you and the gun, but if you have a turret in your hands you should be able to make quick work of most of them. Be careful, though, as one of the Brutes has a fuel rod gun.
When the defenders are dead, look up at the base of the gun. Every time it fires, it exposes its core. When the white ball is shootable, hit it with explosives or use plasma grenades on it. When it explodes, your mission is over.
Floodgate
It Followed Me Home
Time to destroy the Flood, hopefully once and for all. They've landed on Earth, and you have to find their ship and destroy its power core to destroy the area.
Fog Skull
Head down the hill towards the town nearby. You can take the opportunity to obtain the Fog skull. This one's easier to demonstrate than to explain, but as you head into town, a Flood zombie will appear on the rooftops to your right and jump over the path in front of you. He'll be difficult to spot unless you're actually looking upwards, though; try sticking your head up just as you clear the first sandbags, and you should see him.
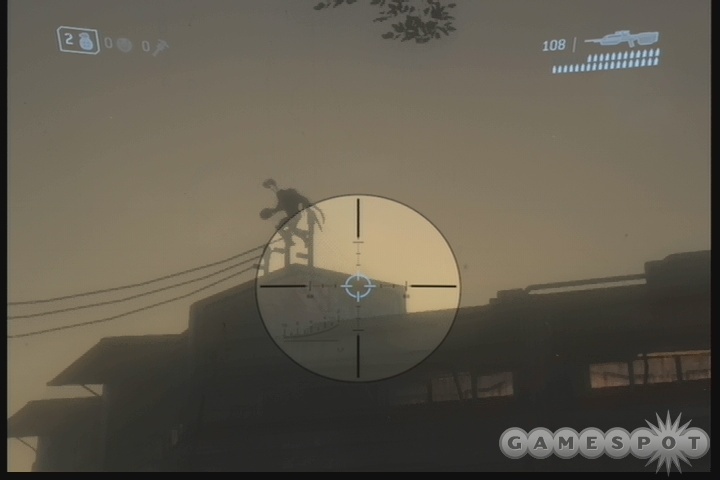
Anyway, if you can manage to shoot this guy with your battle rifle before he jumps over, he'll drop the Fog skull. Sometimes he'll drop it on a rooftop, and sometimes you'll just miss; if this occurs, drop a frag grenade or two at your feet to kill yourself; you should've just passed a checkpoint and it won't take too long to try again.
Find The Crashed Flood Ship
Head through the city, picking up more grenades and weapons. The Flood need special persuasion to go down, so the shotgun and gravity hammer that you come across are decent tools for that job, or you can just let them swarm the Arbiter and have him take them out; he'll chop them down quick with his energy sword.
After killing the first horde of enemies, grab more shotgun ammo from the rack behind the sandbags, then head through the door nearby to reach another warehouse that's filled with Flood. If you have the gravity hammer, you should be able to wade through them without too many problems, but get in the habit of having the Arbiter take the brunt of the attacks, if possible. He doesn't do much damage with his carbine, but will quickly ice anyone when he gets swarmed and switches to the sword.
Shadow of Intent
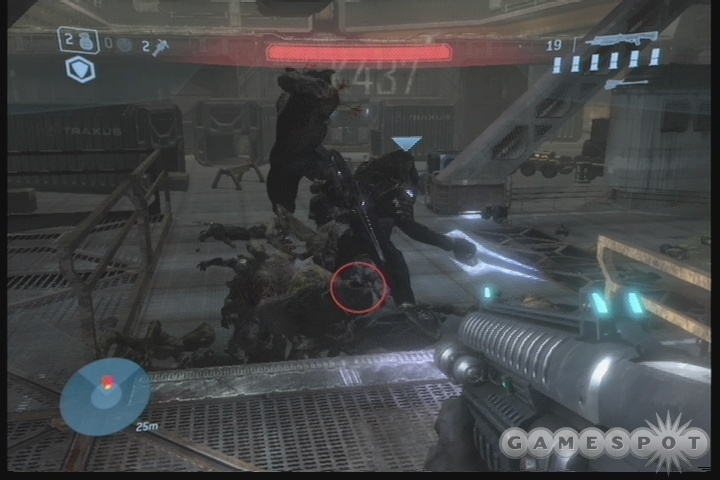
Move through the warehouse and past the crazy soldier in the rooms beyond. Eventually you'll come to an exterior area; let the Elites do the work here, and grab one of their energy swords when they die for some easy kills. There'll be plenty of Flood on the path here, so let the Arbiter do the heavy lifting.
Search The Ship For Cortana
Eventually you'll come to an exterior area, and get a clue as to why the Elites are in the building. Keep in mind that the Elites can be turned into Flood zombies when they die, and that their energy swords will usually kill you in one blow if they hit you.
When you meet up with the Elite squad, move forward along the cliff's edge, letting the Flood enemies beat up on the Elites. Eventually you'll reach the Flood ship. Head inside; the Arbiter will stay behind.
Infinite Devil Machine
Head into the ship here. There are no enemies, but if you shoot the pods on the walls, Flood organisms will appear. So…don't shoot the walls. Instead, just make your way into the ship, find the glowing blue capsule, and hit RB to nab Cortana's memory module. That'll end the chapter.
The Ark
The portal that the Ark opens leads you to another Halo ring, but this one appears to have some kind of special device attached to it. You'll have to land on the surface and attempt to find whatever it was that Cortana thinks can save the Earth.
The seven terminals that must be found to unlock the Wayfarer achievement begin to be found on this level.
Eliminate Hostile Anti-Air Units
You start this mission with a good combo for the task at hand: a sniper rifle and a battle rifle. Follow the soldiers here to the enemy emplacement nearby. When you're in position, bust out the sniper rifle and go to town on the Brutes below, letting your teammates worry about the Grunts. There's a sniper rifle in a container near you, so you'll have plenty of backup ammo.
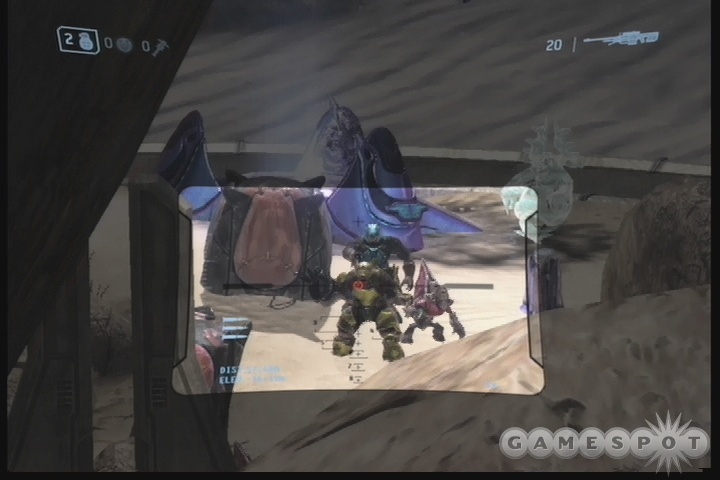
When the enemies here are cleared out, head through the tunnel to the anti-air battery. Lots more Brutes here, so save your sniper rifle ammo for them. You'll need to clear most of the enemies here out before you can cause a Hunter pair to drop. When they're on the ground, hop down and get close to them. If you can cause them to turn their backs to your fellow soldiers, then they'll be able to fire away at the weak spots. Otherwise, Brute grenades work well on these guys, as does plain old shooting them in the back yourself; the sniper rifle will do a lot of damage if you can get a quick hit with it.
The Forerunner Base
After defeating the Hunters and the Brute squad on the ridge above you, head into the Forerunner base. (If you're having problems with the Hunters, just ignore them and move up the ridge behind the anti-air unit.) To your left is a room containing an artifact; some kind of archive terminal. Read the information and proceed to the next page with the A button. If you wait a few moments (or perhaps click the LB button), you will be shunted to some personal communications between the Librarian and his mate. This is the first of the seven terminals in the game.
On the far side of the Forerunner building, you'll come to some more Marines. Switch to your sniper rifle here and take out the Brute chieftan in the sands below, then make your way to the crashed pelican and trade out the sniper rifle for the rocket launcher there.
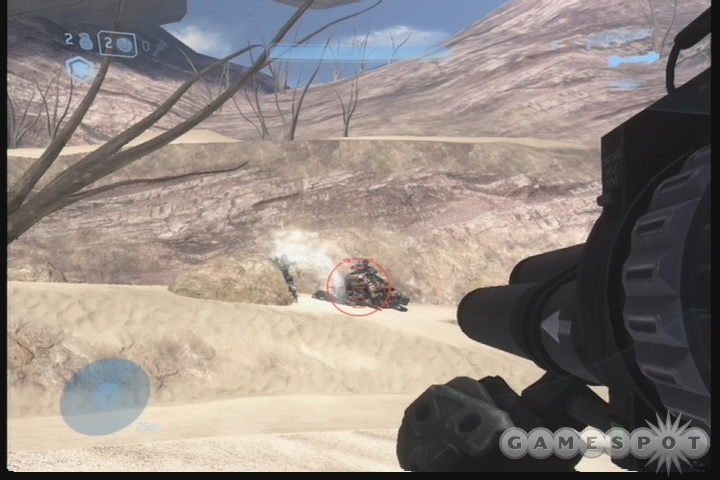
Light APC vehicles called Prowlers will approach you here, each carrying numerous Brutes. Beat them up as best as you can with the rocket launcher, but you might want to try and keep one alive by shooting out the turret gunners as people hop into it. (The first Prowler may actually have all of its inhabitants pop out after it parks, so you may want to leave it alone.) If you do, then the rest of your squadmates will be able to hop into it and use it when you manage to reach the Mongooses. Otherwise, the simplest way to kill them is to wait at the bottom of one of the hills as they crest them on the approach and fire the rockets at their underbellies just before they run you down. That'll eliminate all the soldiers and hopefully keep one of the Prowlers alive.
Into The Vehicles
When you do manage to clear out the Brutes, nab a Mongoose and take off. You're going to be facing some tough vehicle fights here, so hopefully one of the Prowlers from before survived; they do a good job of killing the enemies out of the Ghosts and Choppers here while leaving the vehicles intact, if heavily damaged. If you can switch to a Chopper, you may wish to do so, as they can take a lot of damage, even if they seem like they're on the verge of collapse, and will let you fire at distant enemies with their cannons.
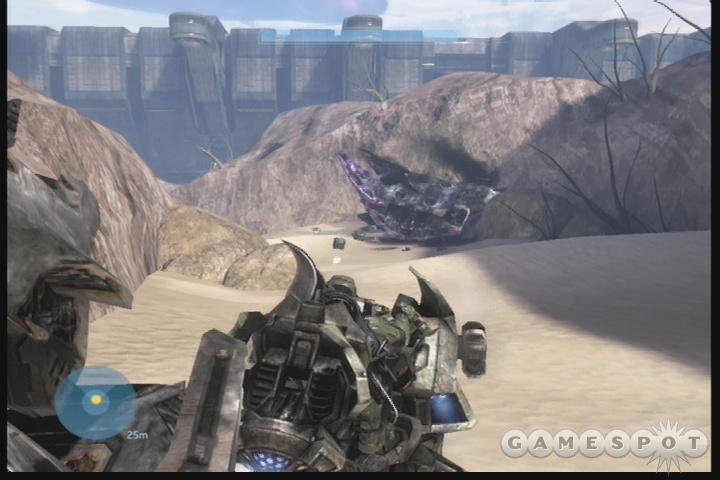
Keep moving along the ridgeline until you pass a crashed Pelican and Phantom, then come to a jump. Proceed down to the left and start destroying the enemy Choppers here; there's a fresh, unmanned Chopper near the entrance to this area that you can use. With them out of the way, take out the turrets on the structure above the ground, then try to get up there to see what the heck is going on. Be careful, as some of the Grunts at the barricade will have fuel rod guns. Kill them and take their weapons, then make sure that all of the enemies at the turrets are dead. That'll cause Johnson to spawn in a Pelican.
Hop into a fresh Chopper (there should be yet another one near the turrets on the bridge upstairs) and follow Johnson down the nearby sandy corridor.
Famine Skull
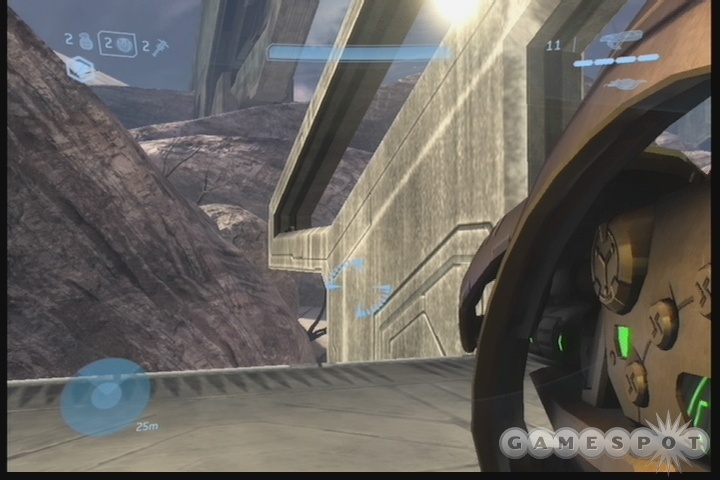
If you follow Johnson, you'll have to defeat a couple of Ghosts near another section of the bridge that extends over the sand. The bridge here can be reached by climbing up the rocks beneath it and jumping up to the bridge itself. If you reach the bridge, head to the right (towards where you had your last fight against the choppers), and zoom your weapon to look out at the last little spire at the end of the bridge. The Famine Skull is here, on the little ledge at the end of the spire. You can't reach it normally, though; you'll need to grenade jump to it. This is more difficult than the grenade jump on the Storm level, since you have to move forward and hit a pretty narrow target to pull it off successfully. Failure to hit the ledge will cause you to have to jump back up to the bridge, which takes a while. If you can't make it, try it on Normal, where grenades will damage you less.
Onto the AA
Head past the bridge and up the sandy ramp beyond. A couple of Ghosts will come your way; take them out, then exit your vehicle and take out the nearby Jackals manually. A Brute nearby has a fuel rod gun, and stands near another fresh Chopper. Kill him and nab the fresh Chopper and move on.
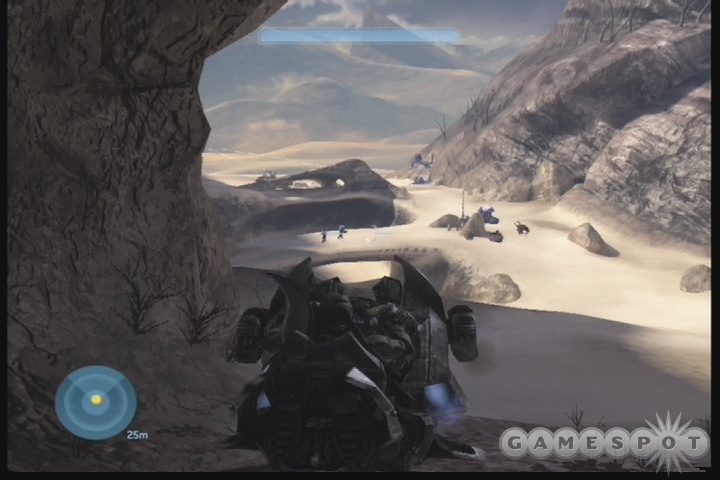
When you get through the tunnel, stop! Hang back inside the tunnel and fire away at the Wraith beyond. It'll fire back at you, but if you're lucky, the rounds will hit the top of the cave and not damage you. When it's dead, fire on the Brutes that cross the bridge below you, then hop out of the Chopper and scope out the opposition. There's a couple of turrets near where the Wraith was, as well as a couple of sniper towers that can be destroyed with Chopper fire. Proceed forward slowly and kill everything, being mindful of new Ghosts that will be coming your way.
When that's done, head forward a bit and take out the anti-air Wraiths, being mindful of the large number of Brutes nearby. A few of them will be using fuel rod guns, so be careful when moving around in this area, and keep in mind that the anti-air Wraiths will fire on you if you rile them up enough.
Forward Unto Dawn
Lead Friendly Armor Through The Wall
Mount up into one of the Scorpion tanks that drop from the frigate and start backtracking; you have to head all the way back to where you originally dropped from the wall on your Chopper or Mongoose. Proceed slowly and use your main cannon to blast your foes from a mile away; you outdistance them greatly in terms of firing range, so take them out before they can fire on you.
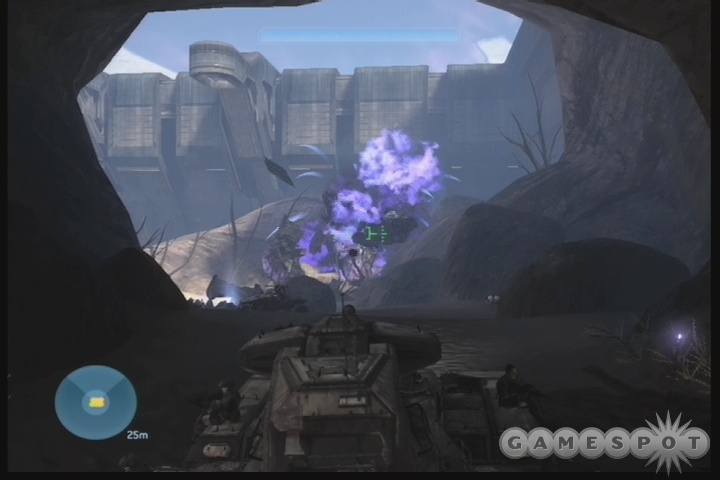
When you reach your destination, you'll have to deal with more Wraiths. You move fairly slowly, so it'll be easy for them to hit you if you stand still; just keep moving and fire on them from a mile away. A Phantom will drop a fourth Wraith near the door that you have to enter, so take it out, as well as the Phantom, if you can, then head around to the doorway that Spark opens up. You'll have to abandon your vehicle to head inside.
When you head inside the base here, head up the ramp to find a new piece of equipment, the Auto Turret, and a sentinel beam weapon. Grab them if you wish. Head on from there to extend the bridge. The second terminal can be found directly behind the bridge controls after you activate them. move out onto the terraces that lead down to the Cartographer.
Locate The Cartographer
A Warthog will appear nearby with a railgun mount in the back. Hop into the driver's seat and start making your way down the hill. The railgun can take out almost any vehicle in just a couple of shots, so let your gunner do the hard work here while you zoom around, avoiding enemy fire. Do your best to stay healthy, as there's a bit of a fight at the bottom of this hill.
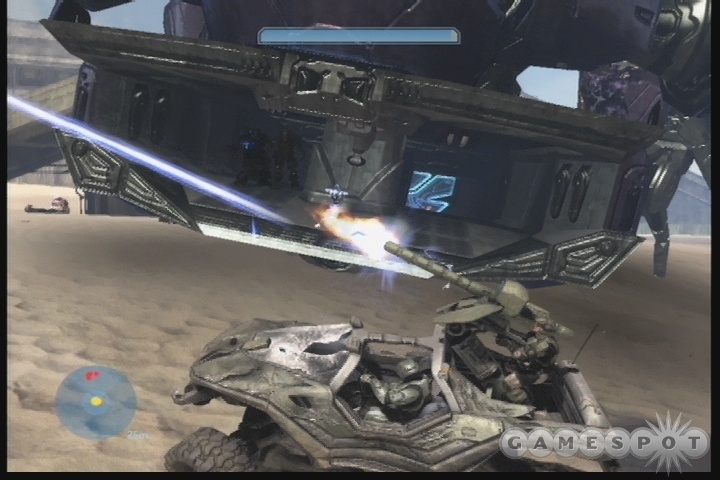
When you reach the bottom of the set of terraces, the Scarab will reappear, along with a few Choppers. Take down the choppers while keeping the large bunker here between you and the Scarab. When that's done, start making circles around the Scarab's legs until your gunner shoots it in the knees enough to drop it to the ground. That'll let you hop aboard it and start making your way to the power core.
If your gunner is dead, or you lost your Warthog, you'll have to wait a bit and attempt to fire on the knees yourself. You can do so with weapons, if you like (there's some fuel rod guns in the bunker), or wait for your Scorpions to do the deed, or hop into a Scorpion and try to aim yourself, but the tanks are slow enough to be sitting ducks to the Scarab's fire, so be careful.
When the Scarab is down, make your way up the ramp where all the enemies are located. At the top, you'll come across a cloaked Brute - a foreshadowing of enemies to come. He'll drop a new kind of grenade, which soaks its target in napalm upon hitting. Kill everything and rendezvous with the Arbiter.
Real Men Don't Read Maps
In the room with the sleeping Grunts, kill everyone with melee attacks. Note that there's a Brute that pees against a wall; hit him from behind and he should go down in one shot.
Make your way downwards here until you find a ramp that terminates near a Grunt walking past some explosive barrels. Check the room underneath the ramp to find the third and final Terminal on this level.
Cowbell Skull
Move past here to find a room stocked with explosive barrels. Kill the enemies inside and head to the stairwell beyond it. The Cowbell Skull is located here.
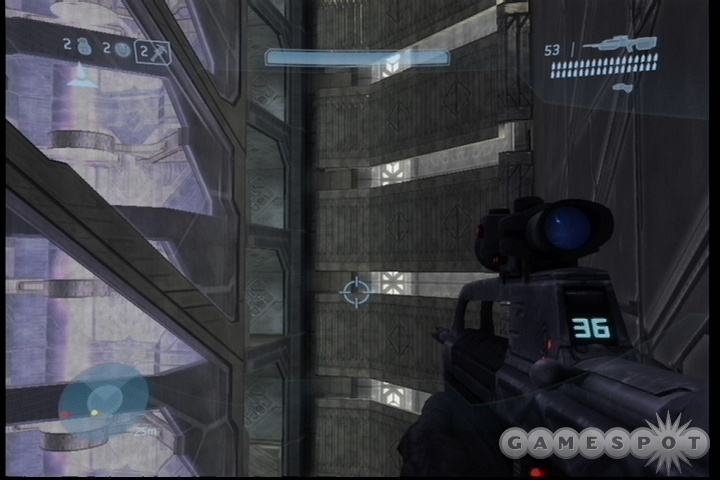
If you head down the first ramp of the stairwell you'll come to a landing leading to the second ramp leading downwards. If you look up above the landing, you'll see four or five platforms above the landing itself; the Cowbell Skull is on the highest one. How do you get there? You have to use the Grav Lift that you picked up from the bunker near the Scarab. Throw it on the ramp that slopes upwards towards the door you walked in from and jump into it to (hopefully) reach the topmost platform. It can be difficult to do, but you should have a checkpoint right as you started down the stairwell.
Head Downstairs For Evac
Move back into the facility and start killing Brutes. Some of them will begin dropping maulers, which are essentially single-handed shotguns. Great for up-close damage, but the spread will make them difficult to use if you're firing on something across a room.
If you head downstairs from here, you'll come to a room populated with nothing but stealthed Brutes. These guys are tough to take down, especially since you can't really see them, but when you damage them, they'll become visible. If worst comes to worst, head downstairs to the room with all the Spikers in it, grab a couple, and start firing blindly. Be sure to kill them all before finding the exit on the lower level and moving down.
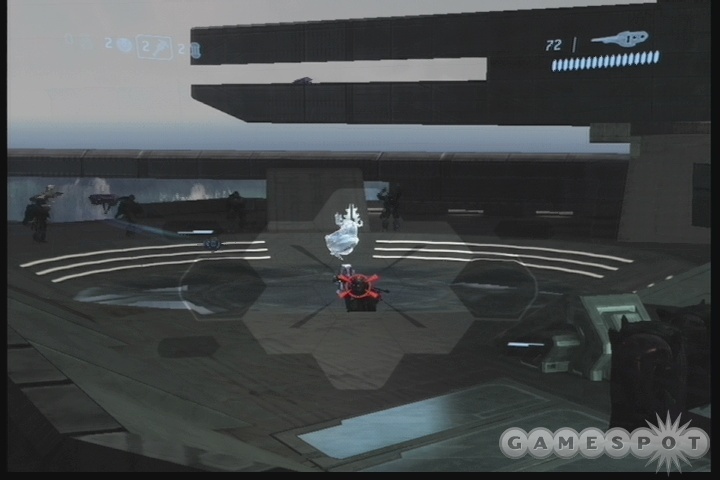
The last level here will feature another convocation of Brutes, including plenty with jetpacks. If you don't have any ranged weaponry, sneak around to the left along the railings to find a box of carbines, then move back a bit, zero in the Brute chieftan, and take him down before worrying about anyone else. The rest of the Brutes can be taken down without too much trouble if you stay inside the guard covers that are protected on three sides; duck out and fire at them a bit, duck back in when they fire their Brute Shots at you, rinse, repeat.
After killing all of the Brutes, a Pelican will come for you. Hop aboard to end the mission.
The Covenent
Trident
Deactivate First Barrier Tower
It's time to bring the fight back to Truth, hopefully before he manages to fire the rings. After your rough landing, examine the new weapon you have: the Spartan Laser. If you hold down the firing button, you'll launch a railgun-esque beam of light where you're aiming. It's incredibly powerful and can hit distant foes, but you only have five shots with it, so don't use it on anything that you can kill easily with your battle rifle. As you move forward, use it to take out the two turrets that watch over your position. There's also a Brute chieftan that possesses a fuel rod gun near the Wraith; if you can get a clean shot, use it on him as well. Don't use the laser on the Wraith itself, though; it's more important to save your ammo for the next tough fight.
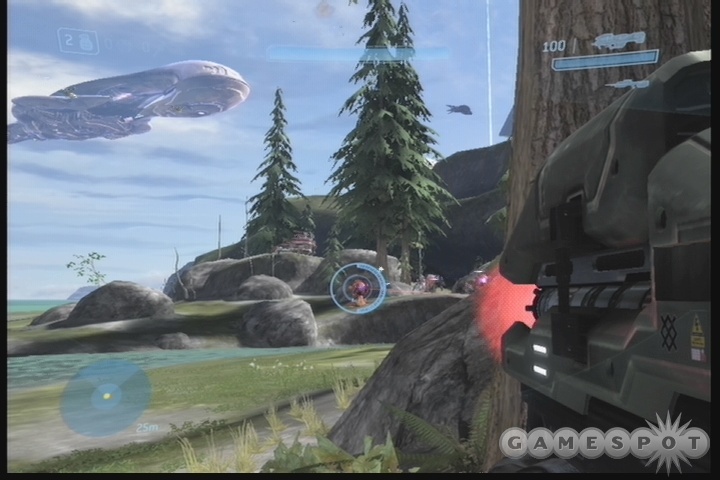
So, after destroying the Wraith with a grenade, you should have a couple shots left on the Spartan Laser when you hop into the Warthog and start driving. Avoid the Banshees and start heading up the nearby hill. A couple of Ghosts will attack you here, so fishtail around them and let your gunner take them out, then move to a position where the gunner can fire on the turret on the path and destroy it as well; it's still not time to use those Spartan Laser shots.
Head up the path until you find the two Grunts heading towards their Ghosts. Let the gunner kill them, if possible, then hop out of the Warthog and pull out your Laser. If you look down into the valley, you should spot a Wraith moving into position. On Heroic, a couple of rounds from your Laser will destroy it, and it's definitely what you want to take out here, because otherwise it will be very difficult to take out. If you have extra ammo, use it on the turret to your left, then hop back into the Warthog and move on. You can switch your empty Laser out for a beam rifle at the container here if you like.
Breaching The Tower
As you move into the valley, a number of Grunts and Brutes will appear from a hidden tunnel and start pelting you. If you managed to take out the Wraith and the turret, then bully for you; otherwise you're going to have problems here. (It may be simpler to just restart the mission and try to conserve more Laser ammo if that's the situation you're in, and maybe also pick up the dropped fuel rod gun from the Brute chieftan.)
Anyway, to avoid the bulk of the crowd, rush your Warthog down the hill, through the lake, and into the small glen on the other side of the bunker here, parking it atop the low rise near the cliff wall, then hop out. Any vehicles that want to get to you will have to come around the bunker to do so, where your gunner will be able to toast them. With that done, grab a beam rifle from the dispensary and try to aim down the tunnel here; you should be able to kill numerous Grunts, Jackals, and a Brute or two. When you've cleared the place out, you can return back to the entrance of the tunnel and try to snipe out the gunner on the turret inside to clear your passage.
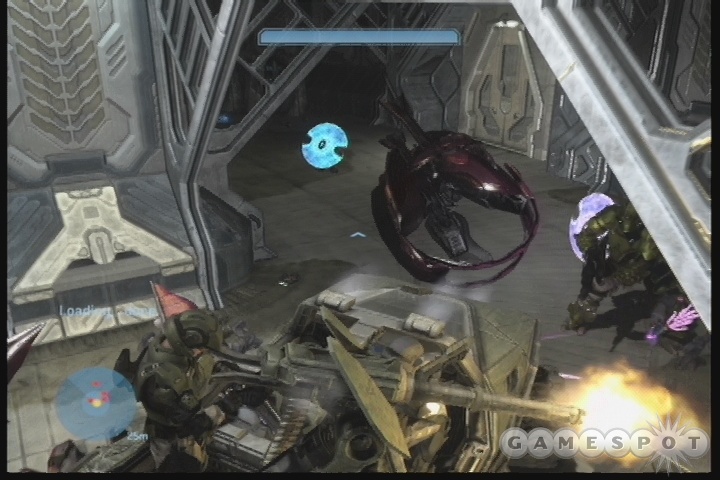
Alternately, if you're a good shot, you can use the Warthog to move down into the lakebed until the vehicles start coming in, then return to the beam rifle dispensary atop the hill and use those to snipe out the drivers and gunners. It'll be difficult to do so, but if you can clear out the vehicles, you can chuck a few grenades into the tunnel, then ram your Warthog down the middle of it to take out the turret.
Into The Tower
When you clear the tunnel, you can head into the tower. As you might expect, there are plenty of enemies inside, so start clearing out the first room and making your way deeper inside. You'll eventually come to an elevator; you can find another Forerunner terminal by jumping across the gap beyond it. Before riding the elevator, you may want to backtrack a bit and nab one of the Jackal's carbines.
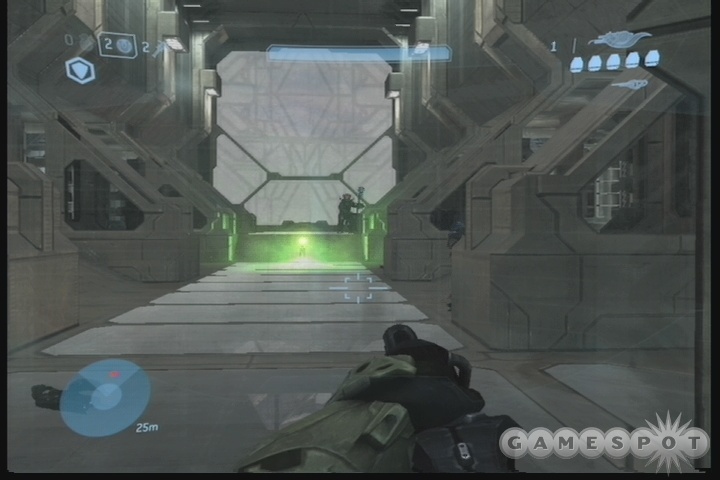
When you ride the elevator up, a Brute chieftan and assorted squadlings will block your path to the control terminal. If you nabbed a carbine, you can duck behind the cover near the elevator, then strafe out and fire at the commander's head to hopefully kill him before he can use invulnerability. With that done, finish the Brutes and flip the switch.
Deactivate Final Barrier Tower
Head back down the elevator and start fighting your way backwards. When you reach the exit to the tower, find a vehicle and head back to the beach, where you'll find a Hornet waiting for you. The Hornet is the USNC equivalent to the Banshee. It's got a rapid-fire machine gun and homing missiles you can fire with the left trigger. You move around with the left stick, as normal, but you can control your height by moving the right stick up and down. You'll get used to it; you'll have to, or the Banshees here will take you out.
If You Want It Done Right…
Start climbing upwards here and engage the Banshees. You should be fine so long as none of them get behind you; it can be tough to tell when they're firing their blue lasers at you if you can't spot them. Just fire away with your missiles, and most of them should go down easily.
Thunderstorm Skull
The Thunderstorm Skull can be found here while you're in the Hornet. It's atop a walkway on the second tower that you pass by on your way to the third tower. When you hit the mass of Banshees with the anti-air Wraith below them, turn to your right and look up; you should see a walkway jutting out from the structure there. Get above it, hop out of the Banshee, and walk to the edge of the balcony to find your skull.
There's also a Forerunner Terminal inside this structure, a bit further down, inside a relatively enclosed part of it.
Clearing A Landing Zone
Move on from the second tower, blasting Banshees and the anti-air Wraith. When you reach the third tower, you'll have to deal with multiple anti-air Wraiths and turrets; you need to kill them before your friendly Pelicans can land. You're nimble enough in your Hornet to dodge most of the incoming fire; just keep pressing that missile button while you aim at your enemies, and they'll go down quickly enough.
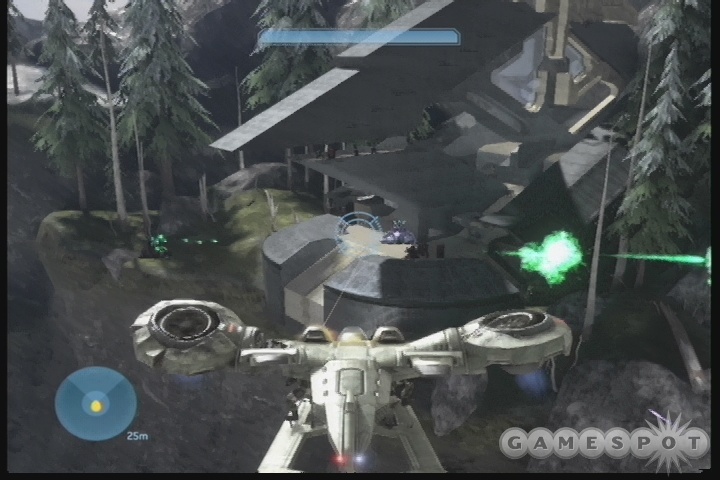
After the landing zones are clear, take out remaining foes, then land and head in with the rest of the Elites. There'll be a horde of Drones, and a couple of Hunters, to block your progress. Take out the Hunters as best you can, or simply turn them around so that the Elites can fire at their backs.
There's another terminal across from the elevator. Only you can ride the Elevator; the Arbiter demurs. Upstairs, you'll find more of the cloaked Brutes and friends. Kill them all and flip the switch on the elevator.
Breach The Citadel
Escape! The Flood have landed and will be pressing you as soon as you deactivate the tower. Shoot your way past the first bunch of them, then use the elevator to get downstairs. There'll be a Warthog waiting for you, but pause a moment, and a Scorpion will fall from a Pelican. Hop aboard.
Journey's End
The Scorpion's path will have some challenges in it, including a couple of fuel rod gun-wielding Brutes and a Wraith near the end. Proceed slowly but surely, though, and you should be able to reach the Hornets at the end of the trail in a couple of minutes.
Don't bother flying a Hornet; just hop onto the passenger slot and let the driver take you up. There'll be two Scarabs that pop into being as you take off, and if you're in the driver's seat of a Hornet, it'll fly directly over on top of one of the Scarabs, letting you pop off, drop down, and take it out.
The second Scarab will be more difficult to take down on your own; luckily, a railgun-equipped Warthog will continuously spawn here. If you can track it down, hop into the driver's seat and move around so that you can fire away at the legs. Or, alternately, you can try to find one of the small hills near each of the Scarabs and use them as ramps to jump the entire vehicle onto the Scarab itself, allowing you to dismount and clear your path to the power core.
When both of the Scarabs are dead, the Arbiter will land on the structure here. Join him, and Spark will create a path to the Citadel.
Stop Truth From Firing The Rings
When the cutscene ends after you head into the Citadel, head forward with the Flood as your helpers. Strange bedfellows, indeed. Move forward along the path, hiding from the fuel rod gun blasts, and letting the Flood take care of most of the enemies. Grenade the fuel rodders to take them down. After one more section of this madness, you'll reach Truth and prevent him from firing the rings.
IWHBYD Skull
The IWHBYD Skull is located at the very end of the level here. If you look upwards as you proceed, you'll see that there are seven holograms of the seven Halo rings in the galaxy here. Count them as you proceed, with the first hologram being at the beginning of the area (starting at the elevator), and the seventh one being at the end.
What you need to do here is jump through the rings in a certain order. Head down to the halfway point and jump through the rings in this order: 4, 6, 5, 4, 5, 3, 4. If you do so, you'll play the notes of a musical jingle, and will be able to find the IWHBYD Skull near the bridge that leads you on to the Prophet of Truth.
Escape The Flood!
Bedfellows, eh? Not so fast. After helping you prevent the Halo rings from firing, the Gravemind will turn on you, forcing you to fight your way back to the elevator through the Flood drones. You'll have the Arbiter along with you, though, so it won't be too difficult. Just rush through them as best you can; when you get to the middle section, the Sentinels will appear to help you, as well. Get back to the elevator and find the purple shaft leading downwards; drop there to end the mission.
Cortana
Rampant
Find Cortana
The ship that Cortana is trapped in is overrun by Flood, including the small spores that act as infestors of dead bodies. Given nothing better to do, these little guys will attempt to rush you and impact on your shields, making them a constant drain on your health. It's easy enough to dodge the effects by moving around, but when you also consider the near-constant presence of tougher Flood enemies, you can see how moving around here without dying will be difficult. The ship is also something of a maze, so finding your way through the level, even disregarding the enemies, can be annoying.
It's important to note that you want to take it slow here. While it is possible to rush forward from one door to the next, doing so will cause you to trigger numerous spawns, and it'll be difficult for you to recharge your shields because of the presence of the parasites and the fire that'll be coming your way from the enemies. A basic goal of yours should be to head forward slowly, get the attention of enemies with gunfire, then drop back around a corner and wait for them to come to you so that you can use your weapons on them. You'll find energy swords that work well here; shotguns and dual plasma rifles are also great for taking down the Flood zombies.
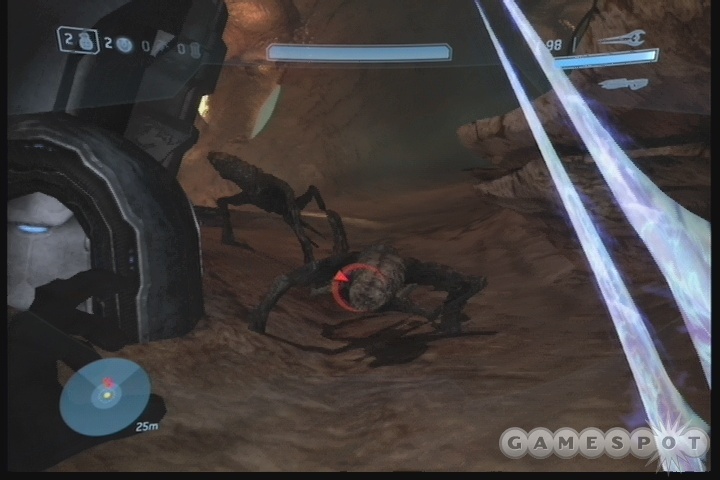
But most importantly, destroy the bodies! Flood zombies will drop to the ground when killed, but can be reanimated by any parasite that finds them and returned to full health. If something drops, keep shooting their body until it disintegrates; you can do this with melee attacks if you want to save ammo. The purebred Flood creatures (which change shape) can't be reanimated, and their bodies can't be destroyed, so don't bother trying this on them. But if you see any bodies of Elites, Brutes, or human soldiers running around, shoot them and don't stop shooting until they pop.
Note also that these first few sections have plenty of Flood pods on the walls. Shooting them will release numerous Flood parasites, so avoid using your weapons here if possible. Later on in the mission it can be difficult to avoid accidentally shooting these pods, but you'll just have to deal with it.
Into The Ship
Begin by heading down the path nearby. You'll eventually be able to head right into a darkened corridor that will lead up to some dead bodies. Some new weapons are here, including an energy sword and a plasma rifle. We found the energy sword to be consistently useful in quickly taking down the tougher Flood members, especially the mock Hunters, so we recommend that you nab it. With it in hand, head through the first door nearby, then drop down into the hole to begin the fun.
First Chamber
Your general goals here are to survive and to head upwards whenever possible. Without any clear kind of direction, it's pretty easy to get lost if you're prone to that kind of thing, and HUD directions can be hard to come by.
After dropping down, you can find a bubble shield near where you land; that'll be useful for when you're attempting to fight melee and ranged Flood at the same time. A group of zombies will attack you just after you drop, too, so be ready for them and stay behind cover, letting them come to you so that you can attack them at close range. Destroy them with the energy sword and destroy their bodies when they die.
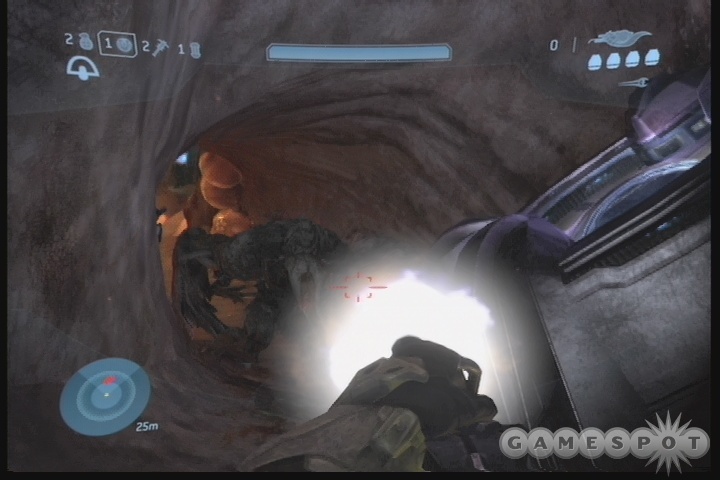
When you're ready to hop up or walk up the ramp here, do so, but be ready for another heavy group of enemies; feel free to backtrack to cover and see who follows you. If possible, hug the left wall and find the small passage that leads to a balcony overlooking the outside area; there's a Pelican here that'll have some equipment scattered around it, including your first Flamethrower. The Flamethrower is a heavy weapon, so it'll slow you down while you use it, but it's a quick kill for most Flood units.
There's another large collection of stalker units before the next door. If you can nab the flamethrower, it'll make quick work of them as they approach you. Some of these guys will shift into ranged form, though, so you'll need to use a ranged weapon to take them out.
Second Chamber
After the next door, you'll have a bit of walking to do. There aren't any enemies here, but Gravemind and Cortana will talk to you again.
Third Chamber
Pass through the first group of soldiers here; they clump up and should be easily dispatched with grenades or other area-of-effect weapons. The path beyond them leads to a hole that you can drop through; it'll also have a number of weapons littered about on it, including a gravity hammer and a few fully-charged plasma rifles. Dual-wielding the plasma rifles is a smart move; it'll let you drop zombies quickly and still have an option against ranged Flood attackers. The gravity hammer works well against parasites, but can take multiple hits to take down Flood; stick with the energy sword on Heroic difficulty or higher.
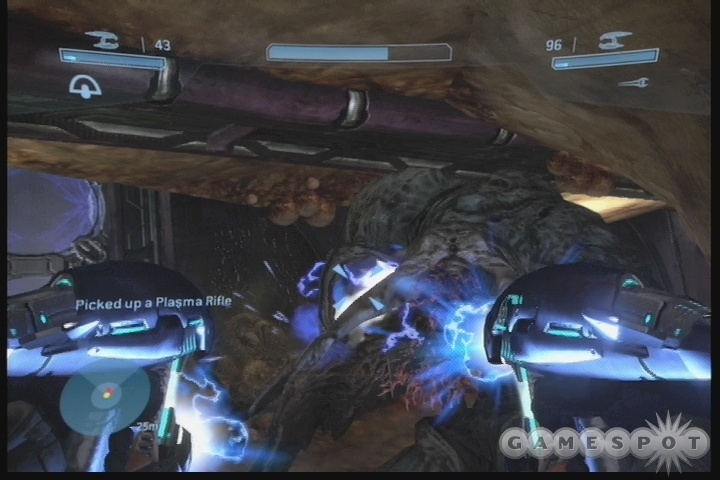
Drop down through the hole and start picking off enemies in the large room nearby, using the little chamber you dropped into for cover. The ranged form of the flood units will start to get very, very annoying here, but if you have dual plasma rifles, you should be able to take them down with burst fire at almost any distance. Keep in mind that just because they're not firing doesn't mean they're dead; they'll be stunned by gunfire and stop shooting for a bit, but will pop right back up in a minute or two. Finish the fight and shoot them until they detach from the wall or ceiling and fall down.
But yes, in general, it's best to find a good hiding spot, lure what enemies you can back to your position, kill them and destroy their bodies, then duck out from hiding and use dual plasma rifles to kill off the ranged attackers in the distance.
Tilt Skull
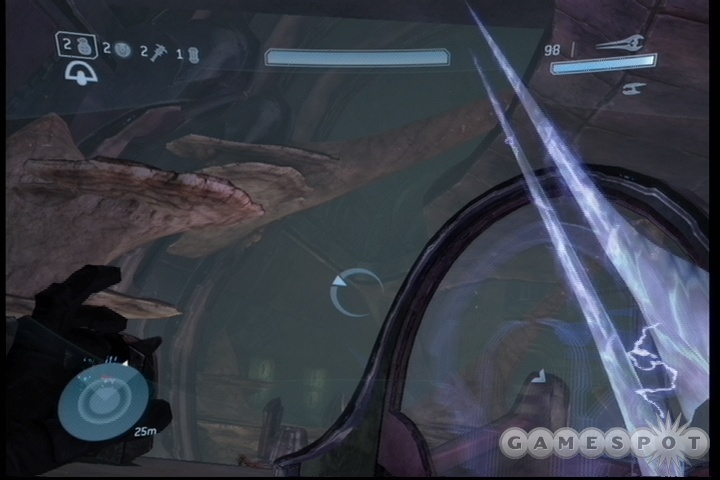
The Tilt Skull is located in this large room here, where Cortana starts gibbering at you, above the fray. You can get it, but you'll need to wait until the fighting has died down. Look around the room; you should see some mushroom-like platforms scattered around the area. It can be difficult to reach them, but if you find the blue arc-shaped display screen in one corner of the room, you should be able to jump to them, then jump to the upper area of the room where the Skull is located.
When you're ready to move on, head into the passageway nearby. There's a semi-hidden flamethrower near where Cortana says "Don't look at me! Don't listen!", if you head to the right and find it. It might be less useful to you against the ranged Flood units than it was against the zombies earlier, though. And there are plenty of ranged units in the fleshy, multi-levelled corridor ahead. Instead of getting them with the flamethrower, proceed slowly and use the carbine that you find on them from a distance, one by one if possible.
Your progress up the hallway will trigger another zombie attack at some point; if you've found a bubble shield, then drop it, whip out an energy sword, and use that when your enemies get close. With that done, head up through the corridor, killing any remaining enemies, until you reach the next door.
Fourth Chamber
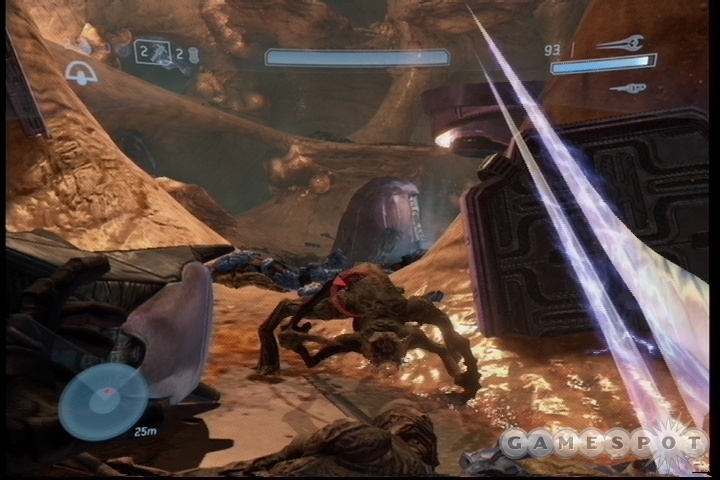
This is a big, open room. As soon as you enter, take some potshots at the zombies and stalkers here, then backtrack through the door and see if any of them follow you. If not, duck back outside and use your grenades and guns to start popping heads. It's especially important to try and lure down the Flood units towards you when they're stalkers and kill them with the energy sword; if you don't, they'll up top and become ranged units. Too many of those will make your life hell.
Anyway, when you've made a dent in the enemies here, move out to the center of the room to draw the ranged fire and kill anyone that you can. (Needlers work very well against the ranged forms, if you can find one.) Head up the ramps and make the required jumps to reach the next door.
Reactor Room
When you reach the reactor room, perform the standard bait and run action, but you probably won't get many biters. There are a lot of full plasma rifles here, as well as some carbines, so you should have plenty of ammo to start picking off your foes. Many of the stalkers won't shift forms for whatever reason, so take them down from a distance.
When you get past the reactor room, you'll find Cortana's prison. Use melee attacks to breach it and free her. She'll still yap in your head, but at least now she won't slow you down when she does so.
Nor Hell A Fury…
Destroy The Reactor
Head back to the reactor room and start clearing it again. You'll need to head to the center of the room to drop the three remaining cores, then hit them with explosives to detonate them.
Escape High Charity
Find the door that opened when you destroyed the reactor and drop down through the hole there. You'll immediately be set upon by zombies, including a couple that wield energy swords. They'll kill you instantly if they get close, so grenade them before that happens.
What follows is a trip backwards through the ship. You've seen all of the areas here, so no mysteries await, although there will be new enemies floating around. Despite the seeming urgency, you can take your time, clear the areas, and head back at your own pace here. There'll be some tough fights, but if you stick to the HUD markers, you'll eventually find the Arbiter, who waits near the Pelican you saw earlier. Find him and run into its rear hatch to leave High Charity behind.
Halo
Full Circle
Find The Control Room
You and the Arbiter need to get inside the Halo ring's control room, fire it, and destroy it. Unfortunately for you, the Gravemind doesn't want to be destroyed, and he'll make his wishes quite clear. Note that there are a lot of weapons near the Pelican here; if you don't have anything decent at range, nab a battle rifle.
Mythic Skull
The last gold skull in the game is at the beginning of the level, and is very easy to find. Head up and into the cave near the crashed Pelican. When you do, hug the right wall and follow it until you see it curve into a little passage on the right side. Follow that until you find the skull.
The Last Terminal
The final terminal can also be found in this area. Continue to hug the wall on the right side. Just before you exit to another, more open area, you'll find some sheets of ice behind a turn that lead up to a Forerunner station. Jump over to the ledge and walk to your left to find the terminal.
Fight The Flood
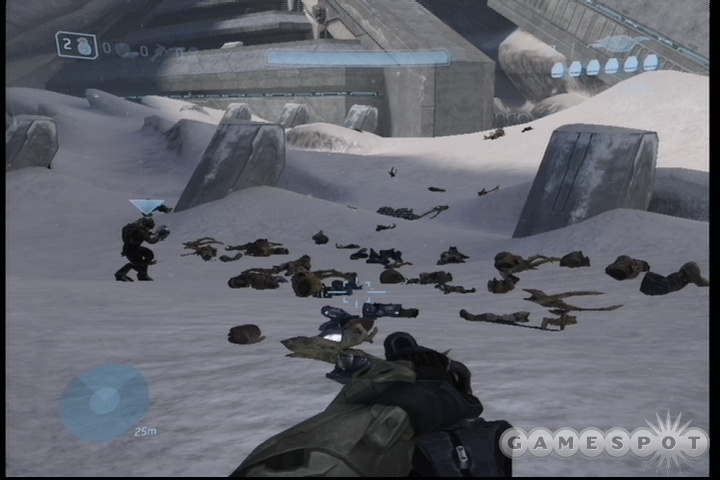
When you reach the open field in front of the citadel, the Flood will begin landing in drop pods. Stay back near the exit from the cave that you just passed through, and try to use your weapons to lure these guys back to you and the Arbiter so that your friend can finish them off and explode their bodies. If you rush forward, lots more drop pods will appear and you'll likely be overwhelmed. There is a fuel rod gun behind a hill near the cave exit that might help you out with the crowds here, but if you pull from a distance, the Arbiter will be able to take on most of the foes.
You'll need to head around to the right side of the installation here; proceed slowly, triggering a few pods at a time, destroying the inhabitants, and moving on. You won't need to worry about destroying bodies until you reach the base of the installation, where changelings will appear. Luckily, by then you'll have Sentinels and Johnson overlooking your progress. Proceed slowly, again, and if you get overwhelmed by enemy numbers, drop down to a lower level of the facility and let your friends take out the enemies.
Open The Door
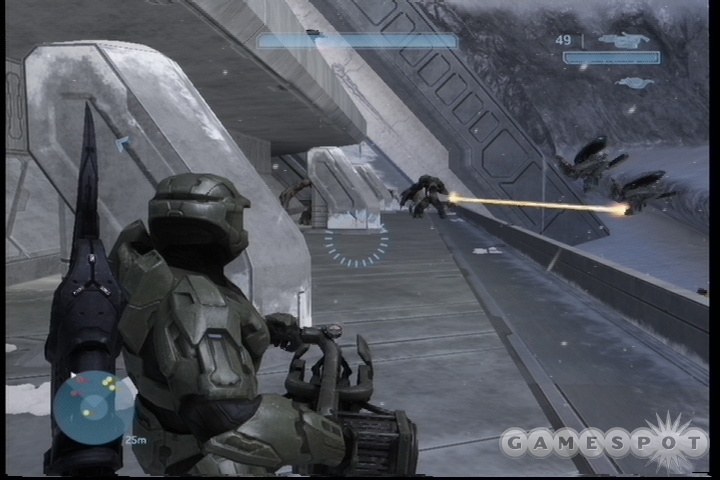
When you reach the door leading into the facility, you'll need to set up a defensive perimeter and defeat all of the Flood that comes your way. Nab the two autoturrets by the door and set them up on the small walkways a bit away from the door so that they're up off the ground and won't be easily attacked. They're not essential to the fight, but they're nice to have. You can also find an Invincibility power on the far side of the upper platform.
You'll need to survive for a few minutes in order to open the door, and it can be tough due to the number of foes you'll face. Dual plasma pistols work well for setting up a sustainable amount of fire, while the Arbiter and the Sentinels will help you out as well. If the going gets heavy, try jumping off the platform to a lower walkway and hiding underneath the overhang. We've actually had this cause the fight to shortcircuit and eliminate much of the fighting, bumping us directly to the sequence where the door is opened.
Kill The Monitor, Activate Halo
When the door's opened, head inside for a cutscene. You'll need to wipe the floor with Guilty Spark. We couldn't stand that wannabe C-3PO anyway.
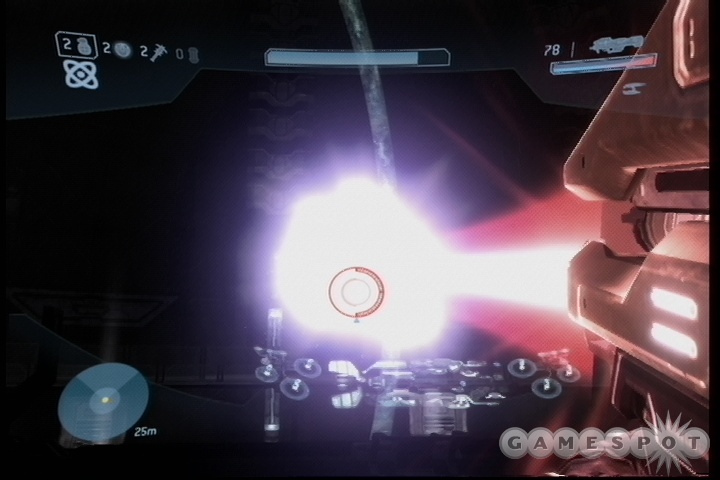
Initially, there isn't much you can do to hurt Spark; fire away at him all you like, though, and be sure to avoid his laser blasts. Eventually Johnson will stir and hit him from behind with the Spartan laser. While Spark is recovering, take the Spartan from his hands, and use that to finish off the Monitor. The Spartan has unlimited ammo, but it'll only take three shots to kill the beast.
The Way The World Ends
Get To The Frigate
You've got a lengthy fight to get out of dodge. Escape the facility here, then hang an immediate right and climb the ice up to the ridge that towers over the facility. Follow it, killing off the sentinals and zombies, until you reach another part of the facility. Bust through there (the sentinal beam is handy against the Flood, especially the parasites), and you'll reach Johnson's Warthog.
At this point, you're basically home free. Anyone who played the first Halo will know the drill: Halo ring exploding, need to escape, lengthy vehicle session with lots of restarts, coming right up!
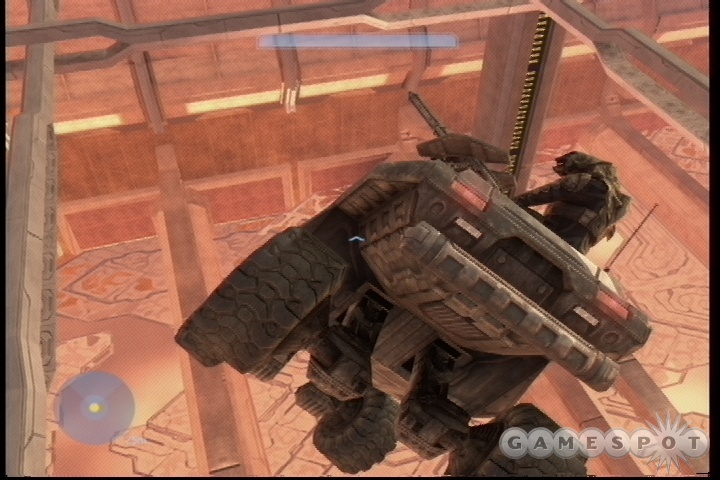
There are three main challenges here that you need to traverse, with the worst being the panelled sections of the path. You need to guide your Warthog over these as the panels blast upwards around you. It's difficult to gauge the stability of a path before you hit it. These sections will require a lot of restarts. There are going to be plenty of enemies here, with the worst being the Sentinels. They don't do much damage to you, but their lasers can impart some momentum to your vehicle, especially in midair. Try not to take any huge leaps while around the Sentinels, or they'll zap you and make your vehicle spin around. It can be fun, but it can also be really damn annoying.
Apart from the panel segments, you'll also have to deal with tunnels that feature enemies arrayed in front of you. Run them down, avoid the debris falling from the ceiling, and you should be able to make it out without a problem. Lastly, there are some more-secure sections of the facility with red stripes to show you where to go. These are generally pretty easy, but beware of zombies jumping onto your Warthog and hitting you; you'll probably need to get out and shoot them if this occurs.
Eventually you'll reach the frigate, and the end of the game.
Achievements
| Achievement Name | How To Earn | Point Reward |
|---|---|---|
| Landfall | Finish the first mission on any difficulty above Easy. | 20 |
| Holdout | Finish the second mission on any difficulty above Easy. | 20 |
| The Road | Finish the third mission on any difficulty above Easy. | 20 |
| Assault | Finish the fourth mission on any difficulty above Easy. | 30 |
| Cleansing | Finish the fifth mission on any difficulty above Easy. | 30 |
| Refuge | Finish the sixth mission on any difficulty above Easy. | 30 |
| Last Stand | Finish the seventh mission on any difficulty above Easy. | 40 |
| The Key | Finish the eighth mission on any difficulty above Easy. | 40 |
| Return | Finish the ninth mission on any difficulty above Easy. | 50 |
| Campaign Complete: Normal | Finish the campaign on Normal, Heroic, or Legendary. | 125 |
| Campaign Complete: Heroic | Finish the campaign on Legendary or Heroic. | 125 |
| Campaign Complete: Legendary | Finish the campaign on Legendary. | 125 |
| Iron | Find the skull on Normal, Heroic, or Legendary difficulty. | 10 |
| Black Eye | Find the skull on Normal, Heroic, or Legendary difficulty. | 10 |
| Tough Luck | Find the skull on Normal, Heroic, or Legendary difficulty. | 10 |
| Catch | Find the skull on Normal, Heroic, or Legendary difficulty. | 10 |
| Fog | Find the skull on Normal, Heroic, or Legendary difficulty. | 10 |
| Famine | Find the skull on Normal, Heroic, or Legendary difficulty. | 10 |
| Thunderstorm | Find the skull on Normal, Heroic, or Legendary difficulty. | 10 |
| Tilt | Find the skull on Normal, Heroic, or Legendary difficulty. | 10 |
| Mythic | Find the skull on Normal, Heroic, or Legendary difficulty. | 10 |
| Graduate | Earn 5 EXP or finish 10 games to complete basic training in online play. | 10 |
| Guerilla | Earn 15,000 points in Campaign Scoring mode on the first mission. | 10 |
| Demon | Earn 15,000 points in Campaign Scoring mode on the second mission. | 10 |
| Cavalier | Earn 15,000 points in Campaign Scoring mode on the third mission. | 10 |
| Askar | Earn 15,000 points in Campaign Scoring mode on the fourth mission. | 10 |
| Exterminator | Earn 15,000 points in Campaign Scoring mode on the fifth mission. | 10 |
| Ranger | Earn 50,000 points in Campaign Scoring mode on the sixth mission. | 10 |
| Vanguard | Earn 50,000 points in Campaign Scoring mode on the seventh mission. | 10 |
| Orpheus | Earn 15,000 points in Campaign Scoring mode on the eighth mission. | 10 |
| Reclaimer | Earn 15,000 points in Campaign Scoring mode on the ninth mission. | 10 |
| UNSC Spartan | Earn a Sergeant rating in online play. | 15 |
| Spartan Officer | Become an Officer in online play. | 25 |
| Two For One | Kill two enemies with one Spartan Laser shot in a ranked free for all online playlist. | 5 |
| Too Close To The Sun | Kill a Banshee with the Spartan Laser or missile pod in the campaign or ranked online play. This can be done in the same area as the first anti-air Wraith in the Storm level of the campaign. | 5 |
| Triple Kill | Kill three enemies within four seconds of one another in ranked free for all online play. | 5 |
| Overkill | Kill four enemies within four seconds of one another in ranked free for all online play. | 5 |
| Lee R Wilson Memorial | Get five grenade sticks in ranked free for all online play. | 5 |
| We're In For Some Chop | Destroy an enemy vehicle with equipment in a ranked playlist or in the campaign. Your best bet is to use a trip mine, probably. | 5 |
| Killing Frenzy | Kill 10 enemies without dying in ranked free for all play. | 5 |
| Steppin' Razor | Score a Triple Kill with the energy sword in ranked free for all play. | 5 |
| Mongoose Mowdown | Kill an enemy with the Mongoose by running them over in ranked free for all play. | 5 |
| Up Close and Personal | Kill five enemies by melee or assassination in ranked free for all play. | 5 |
| Fear the Pink Mist | Kill five enemies with the needler in ranked free for all play or during the campaign. You'll earn this early on if you play through the campaign missions. | 5 |
| Headshot Honcho | Kill 10 enemies with headshots in ranked free for all play or in the campaign. | 5 |
| Used Car Salesman | Destroy a vehicle with three enemies in it in ranked online play or in the campaign. | 5 |
| Marathon Man | Locate and use all the Terminals in the campaign. | 40 |
| MVP | Earn the MVP award in ranked online play. | 5 |
| Maybe Next Time Buddy | After being boarded in free for all online play, board the same vehicle again within 10 seconds. | 5 |
Got a news tip or want to contact us directly? Email news@gamespot.com
Join the conversation