Final Fantasy XIV Primer
There is adventure to be had in the realm of Eorzea. Our Final Fantasy XIV Primer will show you the basics of choosing a disciple, undergo quests, and write macros.
There is adventure to be had in the realm of Eorzea. Our Final Fantasy XIV Primer will show you the basics of choosing a disciple, undergo quests, and write macros.
- Character Creation: Learn the basics of creating a character and the six main attributes
- Disciplines: Discover the interworking of the 18 classes, from warriors, magic users, crafters, and gatherers
- Macros: Find out macros that can be used to quickly make actions, change classes, and assign targets
- Quests: Learn how to undergo storyline quests, dabble with NPCs, and complete leves
- Retainers and Market Wards: Boost your cash flow and purchase items by working the wards
Character Creation
Before entering the world of Eorzea, you'll need to design a character. You have a number of selections, including a clan, deity, starting class, and home town.
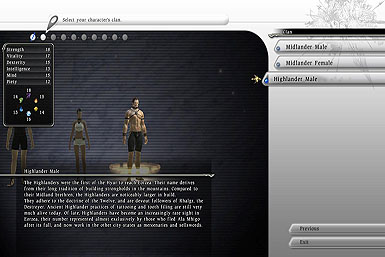
Clans and Attributes
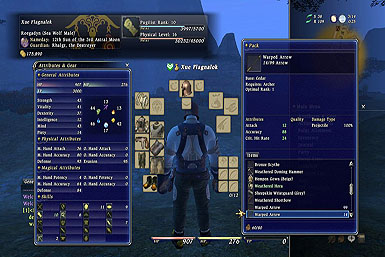
There are five different races in Final Fantasy XIV, each broken into two clans for a total of ten racial selections. Besides physical appearance, each clan starts with different level one attributes and affinities towards elements. However, as you gain physical levels by acquiring experience points, you can manually adjust your character's status. The main attributes include:
- Strength: Increases offensive damage of standard attacks and some Weapon Skills
- Vitality: Increases defensive stats and boosts over all HP
- Dexterity: Governs accuracy and chance to score critical hits
- Intelligence: Controls your amount of magic potency and use of some magic based Weapon Skills
- Mind: Increases magic defense, maximum MP and your ability to heal
- Piety: Boost magic accuracy, allowing you to land enfeebling spells
- Element: Boosts your damage, accuracy and defense with the element. Also effects crafting with that element's crystal
| Clan Name | Strength | Vitality | Dexterity | Intelligence | Mind | Piety | Wind | Lightning | Fire | Earth | Ice | Water |
|---|---|---|---|---|---|---|---|---|---|---|---|---|
| Midlander | 16 | 15 | 14 | 16 | 13 | 16 | 15 | 15 | 16 | 15 | 13 | 16 |
| Highlander | 18 | 17 | 15 | 13 | 15 | 12 | 14 | 18 | 15 | 14 | 16 | 13 |
| Wildwood | 14 | 13 | 18 | 17 | 12 | 16 | 18 | 14 | 12 | 17 | 14 | 15 |
| Duskwight | 15 | 14 | 15 | 18 | 15 | 13 | 12 | 15 | 14 | 17 | 16 | 16 |
| Plainsfolk | 13 | 13 | 17 | 16 | 15 | 16 | 15 | 17 | 14 | 16 | 13 | 15 |
| Dunesfolk | 12 | 12 | 15 | 16 | 17 | 18 | 16 | 15 | 17 | 18 | 12 | 12 |
| Seeker of the Sun | 16 | 15 | 17 | 13 | 14 | 15 | 13 | 12 | 18 | 15 | 15 | 17 |
| Keeper of the Moon | 13 | 12 | 16 | 14 | 18 | 17 | 15 | 16 | 13 | 14 | 18 | 18 |
| Sea Wolf | 17 | 18 | 13 | 12 | 16 | 14 | 17 | 13 | 13 | 12 | 17 | 18 |
| Hellsguard | 15 | 16 | 12 | 15 | 17 | 15 | 16 | 14 | 18 | 13 | 14 | 15 |
Deity
You can select one of twelve deities to watch over your character. The deities have an element that they favor. The moon phase helps determine when your total guardian's favor will restore.
| Deity Name | Element | Moon Phase |
|---|---|---|
| Halone | Ice | 1st |
| Menphina | Ice | 2nd |
| Thaliak | Water | 3rd |
| Nymeia | Water | 4th |
| Llymlaen | Wind | 5th |
| Oschon | Wind | 6th |
| Byregot | Lightning | 7th |
| Rhalgr | Ligthning | 8th |
| Azeyma | Fire | 9th |
| Nald'thal | Fire | 10th |
| Nophica | Earth | 11th |
| Althyk | Earth | 12th |
Starting Discipline
You can choose from any of the starting disciplines: fighter, mages, gathers, or crafters. You can change at any point by purchasing a different type of weapon or tool and equipping it. Several abilities can be cross classed and used on different classes. For the start of the game, you may want to select a combat class. You'll be presented with a battle from the start, and non combat classes will always deal one damage. However, you'll also have allied NPCs that can win the battle for you.
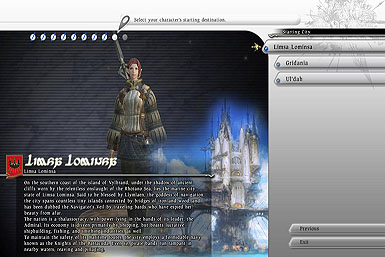
Home City
Selecting a city will determine your citizenship, which will in turn select which of the three storylines you will witness. While you can effortlessly travel between nations, there is no way to currently watch another storyline.
Disciple of War
Disciples of War are frontline damage dealers who use powerful Weapon Skills and use boost their survivability at close range. By using normal attacks, DoWs can gain TP and unleash a string of constant attacks. The key abilities to invest in are Strength, Vitality, Dexterity and some Mind. Keep in mind though, DoWs have penalties when using magic. This includes not being able to use MP restoration abilities or use area of effect spells.
| Weapon Name | Discipline | Price | Limsa Lominsa NPC | Gridania NPC | Ul'dah NPC |
|---|---|---|---|---|---|
| Weathered Gladius | Gladiator | 1,200 | Nystbyrm (5-5) | Wulfthryth (7-3) | Zagylswerd (5-4) |
| Weathered Hora | Pugilist | 1,272 | Kerrich (7-6) | Wulfthryth (7-3) | Zagylswerd (5-4) |
| Weathered Spear | Lancer | 1,680 | Kikimo (5-6) | Twyrmoht (2-7) | Pimelle (4-5) |
| Weathered War Axe | Marauder | 1,680 | Kerrich (7-6) | Zelia (4-7) | Fabrellet (4-6) |
| Weathered Short Bow | Archer | 1,632 | Kikimo (5-6) | Twyrmoht (2-7) | Johannes (4-7) |
Gladiator
Guild location: Ul'dah
Gladiators use swords and daggers in a single hand. Because Gladiators have an open hand, they are one of the few classes that can equip a shield, greatly boosting their defenses. A Gladiator's abilities favor defense, such as Phalanx at rank 8, which gives them a magical shielding. They are also one of the few classes that can alter an enemy's focus and enmity with Provoke at rank 10. Combining abilities from Gladiator with Marauder or Pugilist will make for a strong tank.
Marauder
Guild location: Limsa Lominsa
Marauders are frontline damage dealers that wield powerful axes. Many of their attacks, such as Brandish at rank 4 attack in a sweeping cone motion, allowing them to strike at multiple enemies at once. They can also grant defensive boosts by either stealing HP with Bloodbath at rank 4, or boosting defenses at the cost of offensive power with Defender at rank 10.
Pugilist
Guild location: Ul'dah
Pugilists deal damage with hand to hand weapons. They hit softer than other classes, but attack more often with their ability to land two strikes in succession. They can recover their own hit points with skills, such as Second Wind at rank 6. They also favor evasion, and some of their skills can only be used after dodging an enemy attack, such as Jarring Strike at rank 14. These counter abilities cost a low amount of TP, though.
Lancer
Guild location: Gridania
Lancers are damage dealers that can further boost their ally's skills and weaken the enemy. One of their early abilities, Ferocity at rank 4, will great increase the Lancer's next attack. At rank 10, they can use Speed Surge to regenerate stamina quickly and allow their teammates to steal HP from the target.
Archer
Guild location: Gridania
Archers deal damage from afar, but also have some skills to fight at close range. Their abilities, despite being ranged, can be used with other DoW. Some of the Archer's abilities include Shadowbind at rank 6, which will turn an enemy immobile. They can also debuff enemies with attacks such as Scouring Strike at rank 12.
Disciple of Magic
Disciple of Magic can wield powerful spells that debuff enemies, deal large amounts of damage, or heal allies. They are much more fragile compared to Disciples of War, but can quickly restore their MP or use area of effect spells.
| Weapon Name | Discipline | Price | Limsa Lominsa NPC | Gridania NPC | Ul'dah NPC |
|---|---|---|---|---|---|
| Weathered Cane | Conjurer | 1,680 | Lefleda (7-6) | Osgar (5-6) | Johannes (4-7) |
| Weathered Scepter | Thaumaturge | 1,392 | Lefleda (7-6) | Wulfthryth (7-3) | Pimelle (4-5) |
Conjurer
Guild location: Gridania
Conjurers deal in very direct damage and healing spells. From the start, they can cast damaging spells from all six of the elements and can restore MP with Tranquility. At rank 4 they gain the staple healing ability of Cure. At rank 16 they can further boost defenses with the classic spells Protect and Shell. They also have Weapon Skills which will allow them to restore MP: Radiance at rank 10 is one of these abilities.
Thaumaturge
Guild location: Ul'dah
Thaumaturges use indirect spells to subvert their enemies, making them master enfeeblers. They can also deal astral and umbral damage with their bases spells, Banish and Scourge. Among their staple spells list include Poison at rank 6 and Gravity at rank 8. They can also grant their allies buffing spells such as Sacrifice at rank 4. While this spell harms the Thaumaturge, teammates in range will gain the effect of regen and will recover health over time. It should also be noted that many of their weapons require only one hand, allowing them to train in shields early on.
Disciple of the Land
Disciples of the Land gather raw materials for crafting. They can either sell these goods on the market for profit or take up a Disciple of the Hand class to make their own items. Because gathering in the field can be deadly, Disciple of the Land will want to also learn combat classes to defend themselves.
| Weapon Name | Discipline | Price | Limsa Lominsa NPC | Gridania NPC | Ul'dah NPC |
|---|---|---|---|---|---|
| Weathered Hatchet | Botanist | 1,272 | P'ndolobo (5-5) | Gunzelin (3-3) | Tataroga (4-7) |
| Bronze Scythe | Botanist | 1,008 | P'ndolobo (5-5) | Gunzelin (3-3) | Tataroga (4-7) |
| Weathered Pick | Miner | 1,200 | P'ndolobo (5-5) | Humphrey (4-8) | Nortmoen (6-6) |
| Bronze Sledgehammer | Miner | 960 | P'ndolobo (5-5) | Humphrey (4-8) | Nortmoen (6-6) |
| Weathered Fishing Rod | Fisher | 1,320 | Louvianue (4-8) | Humphrey (4-8) | Tataroga (4-7) |
| Bronze Gig | Fisher | 936 | Louvianue (4-8) | Humphrey (4-8) | Tataroga (4-7) |
Botanist
Guild location: Gridania
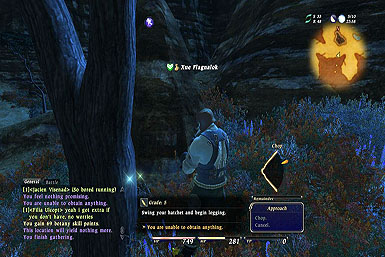
Botanist chop down trees to gather branches, logs, and nuts. They can also harvest patches of grass for wheat, flowers, and other plant life. They work along side Carpenters, Weavers, Alchemists, and Caulinarian to create power magic gear, potions, and food. The Sweat of the Brow ability at rank 15 allows gathers to gain skill points quickly.
Fisher
Guild location: Limsa Lominsa
Fishers catch fish dwelling inside lakes and streams. Fishers can also gather unrefined gemstones and other materials that may have collected in the water. This makes them a key gather for Culinarians looking to cook an interesting dish and Goldsmiths wanted to craft fine jewels. Their Way of Plenty skill at rank 15 will allow all gathering classes to gain more from a single location.
Miner
Guild location: Ul'dah
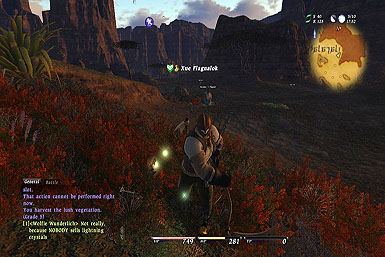
Miners use their pickaxes to gather ore and gems from the natural rock faces. These items are key for Blacksmiths, Goldsmiths and Armorers looking for raw materials to be forged into ingots and sheets. At rank 15, they gain the skill Earthen Favor, which will allow your gathering classes to find more rare items.
Disciple of the Hand
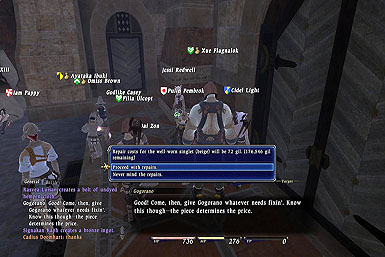
Disciples of the Hand create items with elemental crystals and shards. Because many of these items require for crafting can only be in the field or completing quests, many Disciples of the Hand will want to take up other classes to allow them to farm their own items. Disciples of the Hand can also repair items that have been damaged during adventuring and forging. They will however, need the assistance of repair NPCs in each city:
- Limsa Lominsa: Braitognieux (5-5)
- Ul'dah: Gogorano (3-6)
- Gridania: Meara (3-8)
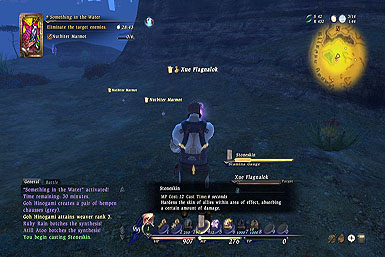
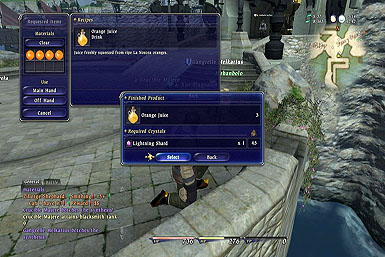
When crafting or repairing an item, a Disciple of the Hand must pay attention to the working conditions of their crystal. When the crystal is white, balanced crafting can be made. If the crystal starts to flash yellow, there is a higher risk of durability loss and failure, but succeeding will produce a lot of progress. When the crystal become red, there is also an increased risk of failure, but succeeding will heighten quality. If a craft is worked on for too long with failures, it may enter a risk mode where the crystal flashes, which will in turn increase failure rates for all attempts.
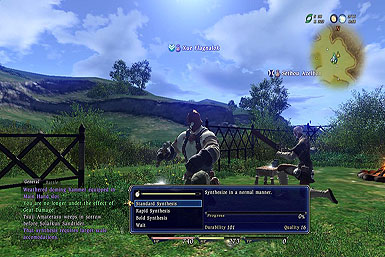
A crafter has several methods of processing an item. Standard will boost an even amount of progress and quality, Rapid will boost progress but will yield little quality, and Bold will make for good quality but low progress. An item must reach 100% progress with at least one durability to prevent shattering, but better quality items have added effects. Finally, the Wait ability will cost one durability buy may return a crystal to the normal white state. As you boost your rank in a DoH, you'll gain skills that can be used with any craft.
| Weapon Name | Discipline | Price | Limsa Lominsa NPC | Gridania NPC | Ul'dah NPC |
|---|---|---|---|---|---|
| Weathered Alembic | Alchemist | 1,224 | Zuzudesu (5-6) | Mumuko (3-8) | Jrmimi (6-5) |
| Bronze Mortar | Alchemist | 1,008 | Zuzudesu (5-6) | Mumuko (3-8) | Jrmimi (6-5) |
| Weathered Head Knife | Leatherworker | 1,176 | Arnald (5-6) | Spaerfedar (3-6) | Elgiva (4-6) |
| Bronze Awl | Leatherworker | 1,080 | Arnald (5-6) | Spaerfedar (3-6) | Elgiva (4-6) |
| Weathered Chaser Hammer | Goldsmith | 1,272 | Teteu (5-5) | Gagaulu (4-8) | Pamisolaux (6-6) |
| Mudstone Grinding Wheel | Goldsmith | 1,176 | Teteu (5-5) | Gagaulu (4-8) | Pamisolaux (6-6) |
| Weathered Saw | Carpenter | 1,320 | Sysley (5-5) | Osgar (5-6) | Barryn (4-7) |
| Bronze Claw Hammer | Carpenter | 1,008 | Sysley (5-5) | Osgar (5-6) | Barryn (4-7) |
| Weathered Cross-pein Hammer | Blacksmith | 1,200 | Smydhaemr (7-7) | Ahldiyrn (3-8) | Doesdornn (4-7) |
| Bronze File | Blacksmith | 912 | Smydhaemr (7-7) | Ahldiyrn (3-8) | Doesdornn (4-7) |
| Weathered Skillet | Culinarian | 1,248 | Jossy (3-7) | Stanilde (4-8) | P'sonjha (4-6) |
| Bronze Culinary Knife | Culinarian | 936 | Jossy (3-7) | Stanilde (4-8) | P'sonjha (4-6) |
| Maple Spinning Wheel | Weaver | 1,152 | Eosilie (5-6) | Fionine (4-7) | Norbettaux (6-7) |
| Rusty Needle | Weaver | 1,080 | Eosilie (5-6) | Fionine (4-7) | Norbettaux (6-7) |
| Weathered Doming Hammer | Armorer | 1,248 | Joellaut (7-7) | Matheonien (3-7) | Allenaure (4-7) |
| Bronze Pliers | Armorer | 960 | Joellaut (7-7) | Matheonien (3-7) | Allenaure (4-7) |
Alchemist
Guild location: Ul'dah
Alchemists great items to bind parts together and alter colors, such as glues and dyes. They can also blend together magic potions for offense and healing. At rank 10 they learn Preserve, which will allow them to hold on to good working conditions when crafting.
Armorer
Guild location: Limsa Lominsa
Armorers can mend items constructed by Blacksmiths and Goldsmiths, forging new armors pieces such as Sallets, Chainmail, and Rings. They can also form raw materials into Ingots for later crafts. At rank 10 they learn Blinding Speed, which will increase their ability with Rapid syntheses.
Blacksmith
Guild location: Limsa Lominsa
Blacksmiths can make blades weapons such as Knives and Swords. They can also make pieces of other items that will be constructed in later levels or from other crafters, such as Arrowheads and Axe Heads. At rank 10 they gain Maker's Muse, which increases Standard syntheses.
Carpenter
Guild location: Gridania
Carpenters work with all things wood: from making full items such as Fishing Rods and Canes, making only item parts as Knife Grips and Arrow Shafts. At rank 10 they can use Tender Touch, which reduces the amount of lost durability from both successful and failed syntheses.

Culinarian
Cooking can produce Food that can give effects during battle and boost other properties for a time. At rank 10 they gain Harmonize, which will lower risk factors for all crafting attempts.
Guild location: Limsa Lominsa
Goldsmith
Guild location: Ul'dah
Goldsmiths can refine Gemstone and also use them to construct new parts, such as Reels, Circlets, and Scepters. Their level 10 skill is Epiphany, which boost their overall craftsmanship total from equipment and other gear.
Leatherworker
Guild location: Gridania
Leather workers create a whole manner of armor that includes Jerkins, Jackets and Hats. At rank 10 they are able to use Fulfillment, which boost overall success rates.
Weaver
Guild location: Ul'dah
Weavers are able to make gear and other outfits suited for mages, such as Cowls, Sashes, and Doublets. Their rank 10 skills is Masterpiece, which increases the rate of Bold syntheses.
Macros
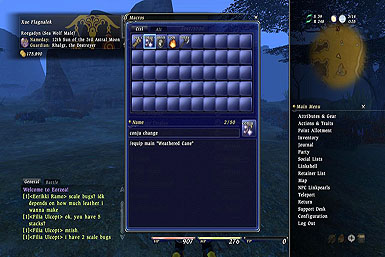
Macros are a means to quickly perform actions with a simple press of a few buttons. These are essential for rapidly changing classes, equipping abilities, or coordinating with other party members. Macros can be accessed in the configuration menu, and a total of 100 can be assigned at one time. Many macros are case sensitive, and require correct spelling, so be sure to proof read and test them before entering the heat of battle.
| Macro | Main Command | Sub Command | Effect | Example |
|---|---|---|---|---|
| Chatmode | /chatmode [Sub Command] | Linkshell, Party, Say, Shout | Changes the default chat option when pressing spacebar | /chatmode party |
| Message | /say, /shout, /tell [PC name], /party, /linkshell, /echo | Chat text | Add a chat message to a channel other than the current default | /shout I'm using Boost |
| Actions | /ac "[Action Name]" <[Target Sub Command]> | <t>, <st>, <me> | Uses an action from the specified weapon on a target | /ac "Cure" main <st> |
| Equip Actions | /eaction [Slot Number][Action Name] [Sub Command] | Main, Sub | Equips an Action into the specified slot | /eaction 5 "Provoke" |
| Equip Item | /equip [Sub Command] "[Item Name]" | Main, Sub, Throwing, Pack, Pouch, Head, Body, Shirt, Legs, Garment, Hands, Feet, Waist, Neck, R.ear, L.ear, R.wrist, L.wrist, R.index, L.index, R.ring, L.ring | Equips an item to the selected slot | /equip main "Harpoon" |
| Use Item | /item "[Item Name]" <[Target]> | None | Use an item in your inventory on the target | /item "Potion" <me> |
| Targeting | /target[Subcommand] | PC, NPC | Targets the closest character that is either player or non-player | /targetnpc |
| Enemy/Ally Signs | /marking # <[Target]> | Number 1-8 | Sets a target marker (<sign0-7>) on up to 8 targets | /marking 3 <t> |
| Battle Mode | /bm | On, Off | Toggles between battlemode and passive mode | /bm off |
| Rest | /sit | On, Off | Switches between a full rest mode and standing | /sit off |
| Status Display | <hp>, <hpp>, <mp>, <mpp>, <tp> | None | Displays current HP, MP, TP and percentage | /party Current MP: <mp> <mpp> |
| Area of Effect | /aoe | On, Off | Turns Area of Effect on and off for Disciples of Magic | /aoe on /ac "Sacrifice" <me> |
| Battle Regimen | /br | On, Off | Starts Battle Regimen mode | /br on /ac "Brandish" <t> |
| Wait | /wait # | Number of Seconds | Delays an action for specified number of seconds | /ac "Bloodbath" <me> /wait 3 /ac "Light Stab" <t> |
| Recast Timer | /recast "[Action Name]" | None | Shows time remaining before the action can be used again | /recast "Tranquility" |
| Loot | /loot | None | Opens the current loot list | /loot |
| Party Commands | /pcmd [Sub Command] | Add, Leave, Oust [PC name], Disband | Add a person to a party or leave your the party | /pcmd add |
| Follow | /lockon /automove | None | Follow and chase a target | /lockon /automove |
Story Quests
There are a number of story related quests that you can access as you increase in rank with a single class. Each town has a tavern NPC that will give out quests after five rank advances (10, 15, 20, etc.). The NPCs include:
- Limsa Lominsa: Baderon (7-5)
- Ul'dah: Momodi (4-6)
- Gridania: Miounne (6-6)

Storyline Quests are a good means of collecting gil and some will allow you to boost extra skill points and experience. Quests include talking to NPCs, fighting monsters and using emotes. It's a good idea to pursue these objectives as a combat class, even if you do access them as a gather or crafter. The next location of a given quest will always be highlighted on your map. As you complete storyline quests, you can unlock new features including parleying with NPCs, going on Guild Quests, and even hiring companion NPCs to fight along your side.
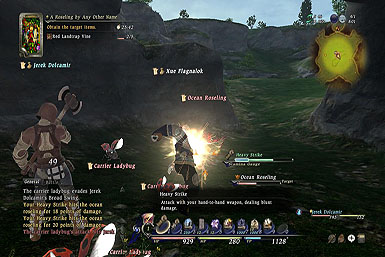
Levequest
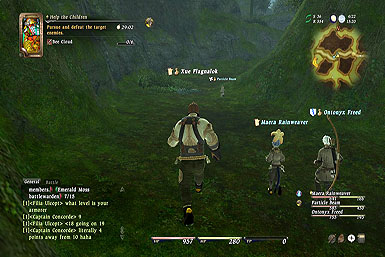
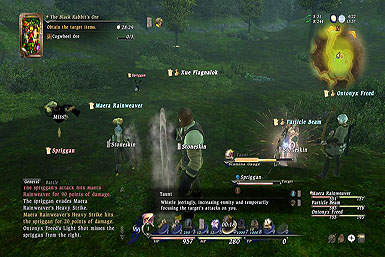
Levequests are a small number of side quests that can be performed to boost your skill points and collect rewards. The leves are broken into different type. Local levequests will allow you to craft items with no cost to yourself, which will in turn be delivered to NPCS. These items do not take up space in your inventory and cannot be equipped or sold off to anyone but the stated NPC. Regional Quests mostly happen in the field and are further broken into sub categories. Battlecraft Leves are design for direct combat, and are best suited for DoWs and DoMs. Fieldcraft levels require gathering and are meant for DoLs. As you complete these leves you will be rewarded with favor towards one of the three factions: The Horn and Hand, The Brotherhood of the Broken Blade, and Azeyma's Shields. Once gaining 100 favor with one of these factions you'll be able to undergo a new type of leve, called Faction leves. However, keep in mind that these leves will deplete your favor stock, forcing you to gain 100 more before you can do another Faction leve. New leves will open every 10 ranks, so be sure to check back as you advance with a single class.
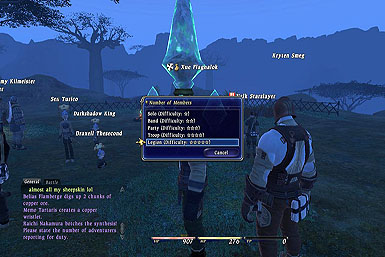
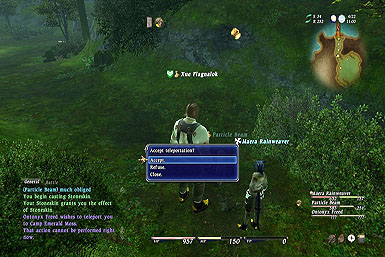
With Local leves, you will either be given materials spot on to craft or will first need to talk to the target NPC. They will in turn supply you with what is needed to make the item. These NPCs may be in town or in a camp, but are almost always in locates without danger. For all Regional leves you will need to travel to the specified camp and select the Aetheryte Gate. If you're in a party, you can be teleported to new locations that any of your teammates have visited. It is recommended that you select Guardian's Favor, as this will greatly boost your skill point returns during the leve. You should select a difficulty that suits your party member total and rank. For example, a five star leve at camp dry bone would need close to 15 rank 10 members, but may be a cake walk for a solo rank 30.
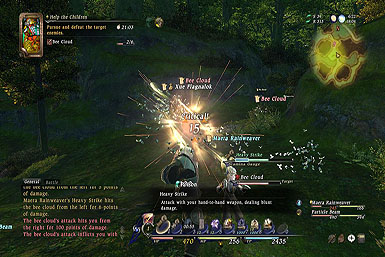
There are a large number of objectives, which include fighting certain monsters, gaining a particular item, or scouting out gathering spots for prospects. You will be given only 30 minutes to complete these task, so be sure to prepare before starting the leve. You'll want every party member by your side and ready to adventure before activating the leve. However, if someone does join the party mid-mission, they can start the leve themselves by returning to the Aetheryte Gate. Note that you will automatically fail a leve if you are disconnected or crash. After completing a leve--or even failing it or not starting it at all--you can return to a tavern and trade in leves towards a future one. When you trade in completed leves, the rewards of the next leve can be greatly affected.
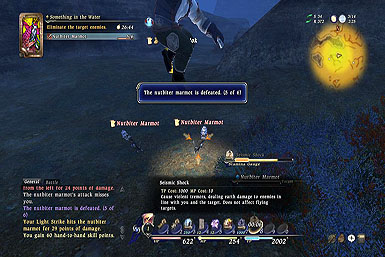
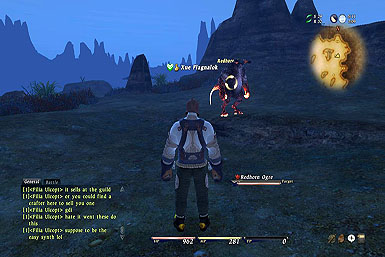
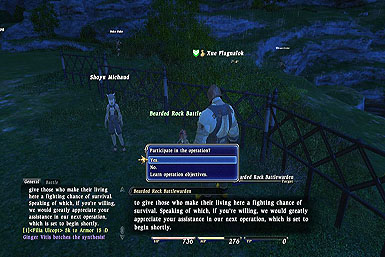
Behest
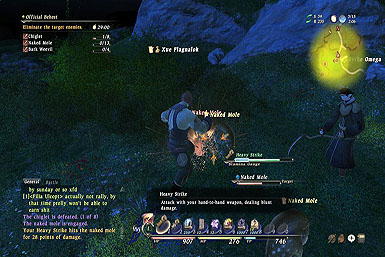
Behest is an event that takes place at the top of the hour in all camps. Talk to the battlewarden while they are still in the camp to join up with the cause. After a few minutes, the warden will request all participants to destroy the initial wave of monsters. After this first wave is cleared, a boss wave ill arrive that will need to be finished.
Keep in mind that you're competing with other parties and players. Claiming a mob works just like a normal fight: if a different player or party attacks a Behest monster, you will be unable to interact with it. You will also not share in the rewards for that particular enemy. If you want to share the benefits of Behest, you'll need to form a single party before heading out.
Parley
Upon gaining rank 15 with one class and completing the third storyline mission, you will be able to parley with a number of NPCs. If you manage to complete their mini games they may reward you with items or other gifts. Some of the current parley targets include:
- Limsa Lominsa: Ansgor (6-5)
- Ul'dah: Baterich (7-4)
- Gridania: Aubrenard (4-7)
You will be presented with a 4 by 3 grid with various icons representing topics of interest. Each icon shows a number of points that you will gain by selecting it. If you pick matching adjacent icons, you will collect all of them at once. Every time your opponent selects titles, the total will deduct from your own total. As icons are removed from the board, the remaining icons will shift to the left, and a new icon will appear form the bottom right. You will need to rack up a total number of points in a specified amount of turns based on the NPC.
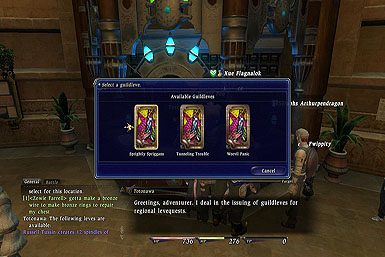
Guild Quests
After reaching rank 20 and completing the fourth storyline mission, you will be able to partake in quests from your associated guilds. These are often much tougher than normal leves, however they will reward you with mark points that be spent on gaining new abilities for your class. There are a large amount of skills that each class can learn, but there are a few simple early ones that can be acquired for cheap.
| Skill Name | Class | Guild Mark Cost | Effect | NPC |
|---|---|---|---|---|
| Heavy Slash | Gladiator | 6000 | Deal Slashing damage and increase enmity | Coynach, Ul'dah |
| Pummel | Pugilist | 6000 | Deal Blunt Damage and increase TP | Moruith, Ul'dah |
| Heavy Swing | Marauder | 6000 | Deal Slashing Damage | S'raemha, Limsa Lominsa |
| Pierce | Lancer | 6000 | Deal Piercing Damage and attack all enemies in between you and the target | Clarembald, Gridania |
| Multishot | Archer | 6000 | Nock up to three arrows in a single attack | Cassandra, Gridania |
| Elemental Shroud | Conjurer | 6000 | Deal an area of effect elemental attack | Hetzkin, Gridania |
| Silhouette | Thaumaturge | 6000 | Deal shadow damage and lower enmity | Nyunoeya, Ul'dah |
| Triangulate III | Botanist | 5000 | Discovery the direction of grade 3 trees. Increases movement if deposits are far | Kipop, Gridania |
| Dowse III | Fisher | 5000 | Discovery the direction of grade 3 schools of fish. Increases movement if deposits are far | Faucullien, Limsa Lominsa |
| Prospect III | Miner | 5000 | Discovery the direction of grade 3 mineral deposits. Increases movement if deposits are far | Shilgen, Ul'dah |
| Milling Training | Alchemist | 5000 | Instructions on how to grind flour | Kylene, Ul'dah |
| Sheeting Training | Armorer | 5000 | Instructions on how to hammer metal plates into ingots | Notrelchamps, Limsa Lominsa |
| Smelting Training | Blacksmith | 5000 | Instructions on how to smelt ore | Qhas Chalahko, Limsa Lominsa |
| Woodlaying Training | Carpenter | 5000 | Instructions on how to lay planks of wood | Frances, Gridania |
| Breadbaking Training | Culinarian | 5000 | Instructions on how to bake bread | Noline, Limsa Lominsa |
| Bonecarving Training | Goldsmith | 5000 | Instructions on how to carve bone and coral | Hnaufrid, Ul'dah |
| Glovemaking Training | Leatherworker | 5000 | Instructions on how to make gloves and other handwear | Gallia, Gridania |
| Spinning Training | Weaver | 5000 | Instructions on how to spin thread | Lafia Morfia, Ul'dah |
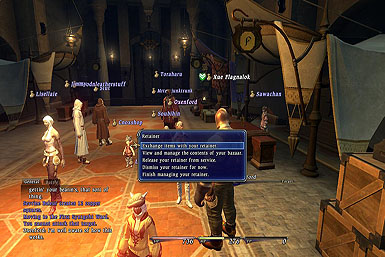
Retainers and Market Wards
After collecting a large amount of items or gil, you may find yourself wanting to spend your goods or sell to other players. in order to do so you will first need to speak to a NPC that deals in retainers. Depending on your city, you may find them at:
- Limsa Lominsa: Ursuulie (7-5)
- Ul'dah: Thaisie (6-4)
- Gridania: Gyles (6-6)
You can select a retainer from any of the ten clans and can even give them a nickname to call them.
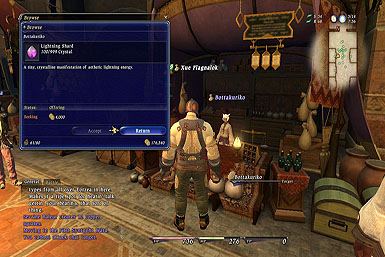
Once your retainer is in place, you'll need to enter one of the city market wards to conduct business. They include:
- Limsa Lominsa: Southern Islands (9-7)
- Ul'dah: The Dunes (4-4)
- Gridania: Lotus Gardens (4-4)
You can summon your retainer and set up a bazaar. Just like your own character, retainers can hold up to 80 items, including the sub election of crystals. You have a number of options for your bazaar: If your retainer happens to have no money, the only option is to sell items for the amount of gil. You will be taxed a small amount of the profits if the sale does go through. You can also choose to sell stacks as individual pieces or as one full item. If your retainer has gil from making a sale, or if you actively supply them with gil, you can have your retainer buy items from other players for your requested price. When another player checks the retainers bazaar, they can choose to give you the item, and will in turn gain your gil or other items you may wish to barter. The final option is to request repairs for damaged equipment you own. When you seek repairs, the amount of money posted will take up an extra slot in your bazaar. Keep in mind that you only have eight slots, so be careful what you choose to sell, buy, and repair before leaving the ward.
Got a news tip or want to contact us directly? Email news@gamespot.com
Join the conversation