Deus Ex Human Revolution Walkthrough
Take the helm as Adam Jensen and uncover the conspiracy. Our Deus Ex Human Revolution Walkthrough provides a full walkthrough, sidequests, and info on augmentations.

- Augmentations: Discover how to build an ideal Jensen
- Walkthrough: A walkthrough of game's quests and cities
- Xbox 360 Achievements: Boost your Gamerscore with a huge list of Achievements
- PlayStation 3 Trophies: Gain new Trophies for your collection
Deus Ex is a game about multiple choices and actions. If your play style has led to a drastically different outcome or unlocked a quest we missed, let us know by leaving a comment for @yarvem.
What's New:
- September 1, 2011: Version 1.3 is ready. The Augmentations, Achievement, and Trophy sections are up.
- August 30, 2011: Version 1.2 has arrived. The Walkthrough is complete.
- August 23, 2011: Version 1.1 is the current update. The walkthrough now traverses through Montreal, and second tours of Detroit and Hengsha.
- August 22, 2011: Version 1.0 of this Guide is up. The first version of the walkthrough is up covering the chaos in Detroit and Shanghai. We will be updating in the next few days, so check back later for more info.

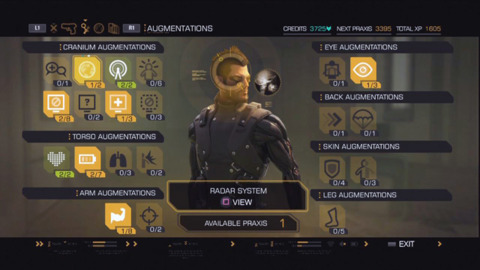
Augmentations
There are 19 Augmentations available for purchase and upgrading. In some cases further upgrades are straight percentage boosts, while other branching upgrades might unlock new unique features. If you wish to acquire everything you will need 69 Praxis points. That's a hefty amount of XP, but close to the needed amount can be gained from concentrating on stealth and going on sidequests. For the rest, Praxis can also be purchased at any LIMB clinic.
Our overall picks for most useful skills include 3/3 Damage Reduction, 4/4 Hacking Stealth, Icarus Landing, Heavy Lifting, Jump, and EMP Immunity. Other great skills that can be gained at later points are Social Enhancer, Hacking Capture Levels, Energy Recharge Rate, Carrying Capacity, Radar System, Infravision, and Multi-Takedown.
The remaining choices depend on your particular play style. We've gone ahead and commented on the pros and cons of obtaining each of these augmentations.
Cranium
Cranium enhancements range from improved speech, stealth awareness, and most importantly boosted hacking. Social Enhancer is incredibly useful for talking down characters during plot situations and unlocking extra dialogue in sidequests. The personality HUD is very helpful in your first play through and pheromones can help with unlocking special outcomes.
The upgrade to Radar System is great for stealth players, or those who at least want to know how many enemies they will be blasting. The Stealth Enhancer is good for a sneaking style of play, but won't really be useful for a shooter. The most helpful upgrade is Vision Cones to get a better idea how far the enemy can see. Marking Targets and Noise Feedback are typically a waste of points or rarely useful.
Hacking Capture is needed for opening doors and safes without the need of finding codes. Professional hackers should of course get Level 5 and the ability to control Robots and Turrets. Even non-hacking specialists should consider Level 3 and maybe Turrets (Your use of the Heavy Lifting Augment should factor into this choice). Hacking Analyze isn't very helpful as with a successful Hack you can easily end up with every reward. Hacking Fortify is a fair skill, helpful if you lack Capture, Stealth, or Viruses, but lackluster if you have one or more of the former. Hacking Stealth is overall the most helpful as it can completely eliminate detection from many computers.
Torso
Torso upgrades include upgrade to energy cells, lungs, and the Typhoon defense system. Increase Cells isn't very good as you will constantly need to keep eating Energy Bars to refill your stock; at most keep four bars, but you can easily get through with only three. On the flip side Recharge Rate is very helpful and should be upgraded quickly. The final cell will always automatically recharge, allowing you to have keep using abilities without eating Energy bars.
Gas Immunity is very helpful in boss fights, heavy fire fights, and some puzzles. You should consider obtaining this skill around half way through the game. Sprinting is an unusual tactic for a cover/stealth based game and isn't recommended. However, Sprint Time has some uses if paired along with the leg upgrade Fast Sprint.
Typhoon lets out a destructive (and lethal) explosion in an area of effect. Stealth players should ignore this skill entirely, while fighters will want it around half way through the game. The further upgrade to destroy robots is nice, but not needed with a good supply of EMP.
Arm
Arm upgrades include the ability to lift bulky objects, carry more items, and improve aiming. Heavy Lifting is one of the most useful abilities in the game. It can clear paths for both stealth and lethal players, and the heavy items can be used as one or two shot kills. Wall Breaking is very contextual, but will often lead to a lot of extra free items.
Carrying capacity is good for players that want to store many different gadgets on them; but don't forget you can drop items on the ground and pick them up while still in the same chapter. Consider upgrading Carrying Capacity after each town hub.
Recoil reduction and Aim are mainly for run-and-gunning. Since Deus Ex heavily relies on cover and your lack of health, both of these skills have limited use.
Eye
Eye augmentations include the ability to see through walls with Energy, awareness of enemy alerted states, and eye protection. Infravision is very helpful for recon and can even allow you to see invisible enemies. It's great for fighting stealth guards and even several bosses.
Alert Cooldown Timer is useful if you keep getting caught, though it's probably better to prevent that in the first place. Flash Immunity is rarely helpful as you should always have enough cover during most encounters. If you are blinded, just sit still and avoid prancing like a madman.
Back
Back skills include improving takedowns and reducing fall damage. Multi-Takedown is contextual during stealth play, but much more common during a lethal (or non-stealth + non-lethal) play through. Have this one by the time you reach the second city.
Icarus Landing completely removes fall damage and allows you to deliver a seismic punch. Dying from falling is incredibly frustrating, making this one of the most useful augmentations in the game. Regardless of play style, this should be one of your first three upgrades.
Skin
Skin augmentations improve defense, immunity from EMPS, and turn you invisible. Damage Reduction is without a doubt the most useful ability in the game. Even with a stealth build, you must fight during key parts of the game. Get Damage Reduction three upgrades even if you plan on sneaking for most of the game. EMP Immunity is also on the same level. So many bosses and routes have electric floors that will violate unprepared players. Upgrade EMP Immunity to laugh in the face of such dangerous situations.
Cloak is overall lacking. It simply drains too fast, even with max upgrades and Energy. There aren't many situations were you can't simply time your movements carefully to avoid detection. Even if you specialize in stealth there are better places to put your Praxis.
Legs
Legs can improve jumping, running, and how audible your movement is. Jumping is very useful and allows you to reach normally in accessible locations. This should be among your first bought skills to quickly access alternate routes. When paired with Landing and Heavy Lifting, you can essentially travel anywhere.
Fast Sprint is pretty much only useful when paired with Sprint Time. Get them both or forget them. Last, Silent Movement is good for any stealth play through; among the best strategies is to do a silent Icarus punch to knock clustered enemies and run before they know what happened.
Attack on Sarif HQ
Stellar Blade - (Almost) All Outfits River City Girls 2 - New Playable Characters DLC Reveal!! Sand Land Review That Time I Got Reincarnated as a Slime ISEKAI Chronicles – Official Announcement Trailer Paper Mario: The Thousand-Year Door – Official Switch Overview Trailer MEGATON MUSASHI W: WIRED – Official OP “MUSASHI English Ver.” Trailer Fallout 4 Next Gen Update Comparison Granblue Fantasy: Relink - New Content Trailer Modern Warfare III - New Season 3 Reloaded Modern Warfare Zombies Update Stellar Blade - Official Launch Trailer | PS5 Games Gothic 1 Remake | Official Collector's Edition Trailer SaGa Emerald Beyond – Official Launch Trailer
Please enter your date of birth to view this video
By clicking 'enter', you agree to GameSpot's
Terms of Use and Privacy Policy
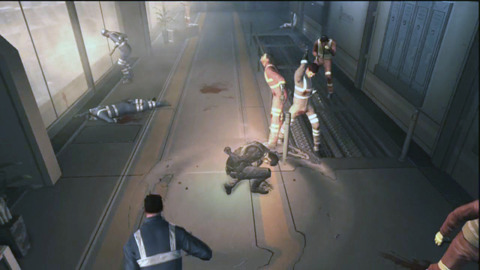
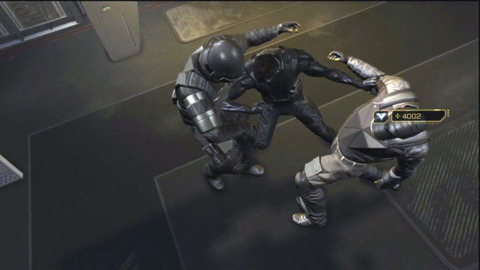
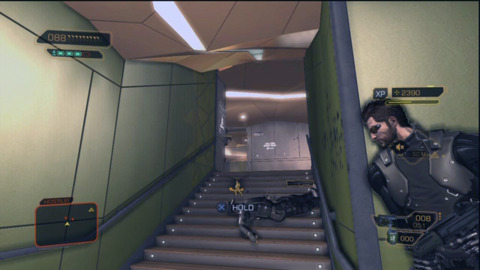
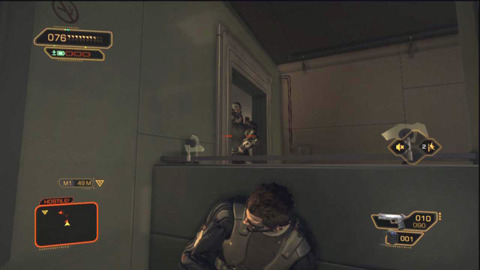
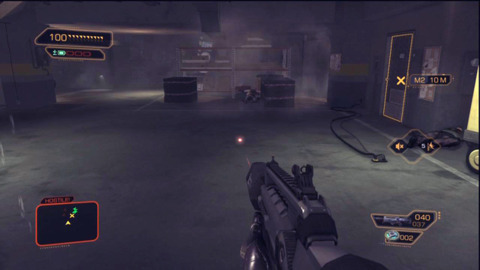
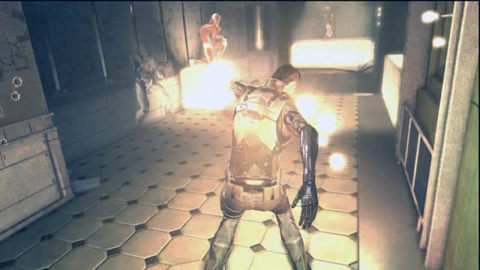
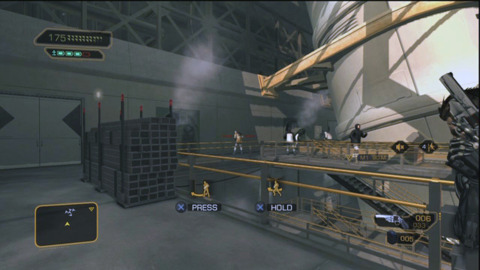
This first mission serves as a tutorial to cover shooting. You won't have any augmentations yet, forcing you to rely on your trusty rifle to get the job done. The enemy soldiers won't spot you at first, allowing you time to get into cover and get a clean shot on them. The first room contains only two soldiers; one of them can be instantly killed with a headshot, while the second can be dispatched before he realizes what's happened to his friend.
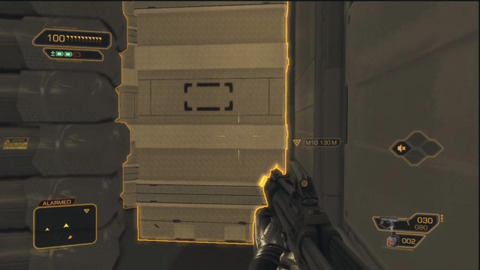
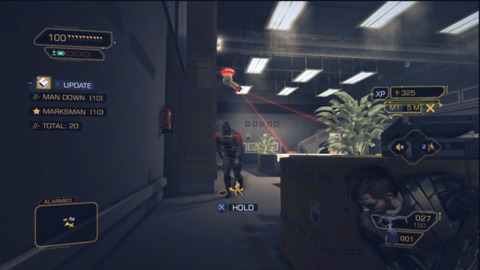
Move down the corridor and into the next room. There will be three soldiers inside this room. Like before the first two can be killed quickly, though a third will pop out from the left. Stay in cover near the entrance and wait for the last soldier to pop out from cover for a fast kill.

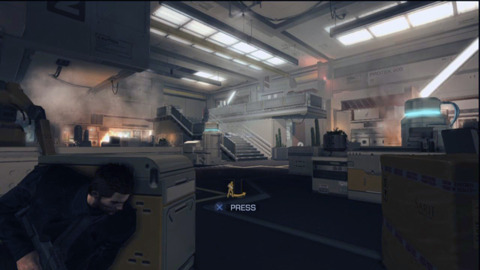
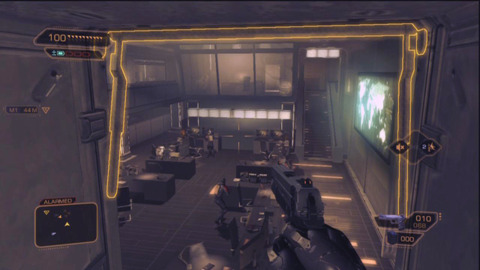
Continue forward and duck passed the jammed doorway. You'll be on the second floor of the next room as four more enemies enter from below. Stay in cover and take them out one at a time. If you need a better angle, shimmy to the right and take cover behind the stairs. When the room is clear head down the halls for a cutscene.
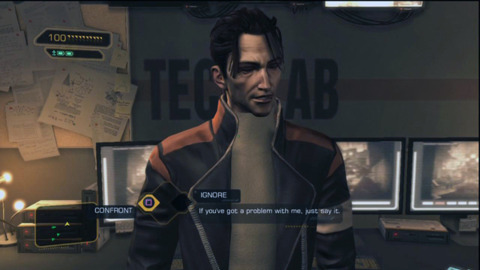
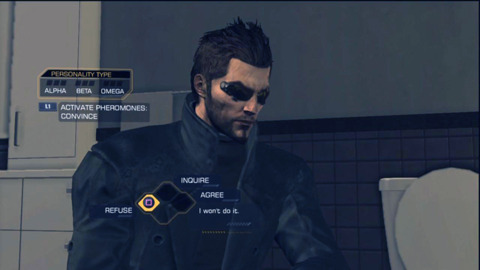
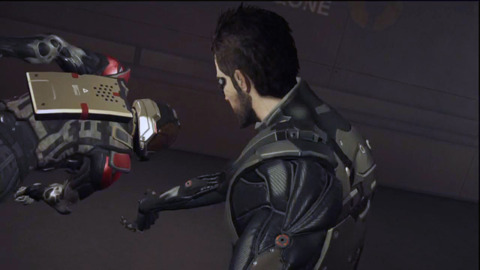
You'll awaken fully augmented, though not all of your systems are functioning correctly. Move up to the second floor of the Sarif HQ and talk to Frank Pritchard. He'll fix your eye implants along with a few snide remarks. Choose to confront him or ignore the comments. Now that you're good to go, exit out to the helipad and talk to Malik to start the next mission.
Sarif Manufacturing
Stellar Blade - (Almost) All Outfits River City Girls 2 - New Playable Characters DLC Reveal!! Sand Land Review That Time I Got Reincarnated as a Slime ISEKAI Chronicles – Official Announcement Trailer Paper Mario: The Thousand-Year Door – Official Switch Overview Trailer MEGATON MUSASHI W: WIRED – Official OP “MUSASHI English Ver.” Trailer Fallout 4 Next Gen Update Comparison Granblue Fantasy: Relink - New Content Trailer Modern Warfare III - New Season 3 Reloaded Modern Warfare Zombies Update Stellar Blade - Official Launch Trailer | PS5 Games Gothic 1 Remake | Official Collector's Edition Trailer SaGa Emerald Beyond – Official Launch Trailer
Please enter your date of birth to view this video
By clicking 'enter', you agree to GameSpot's
Terms of Use and Privacy Policy
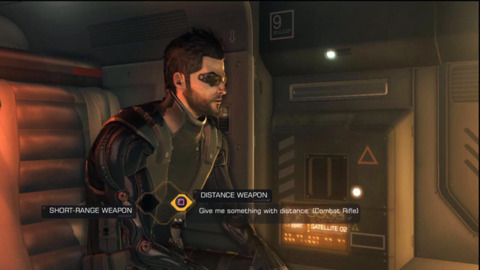
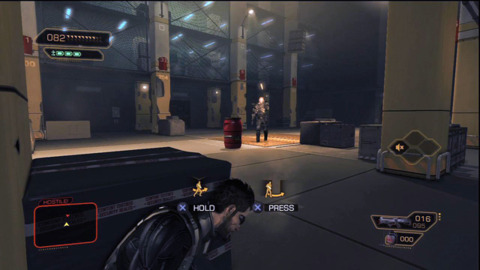
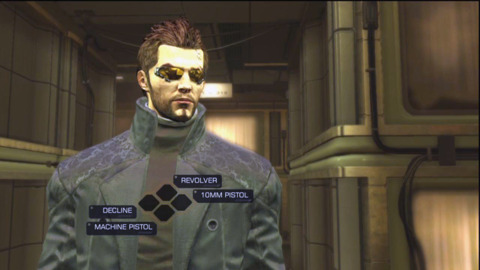
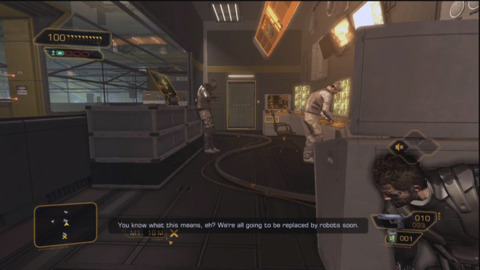
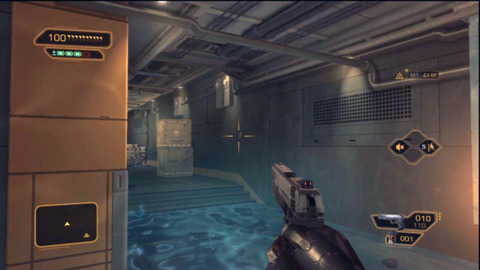
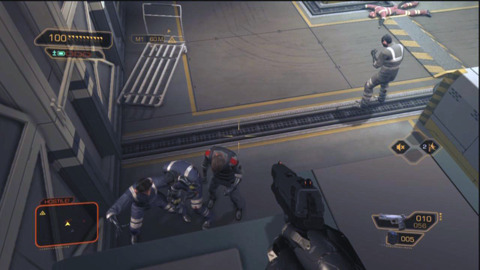
Terrorists have attacked Sarif Manufacturing and are holding hostages. Your main objective is to stop the criminals, while saving the innocent is secondary. David Sarif will ask what type of weapon you will want for the mission: a stun gun, assault rifle, or handgun. You should decide now if you wish to sneak or go in guns blazing. Note that the pistol can be easily found during this mission, so consider choosing a different firearm.
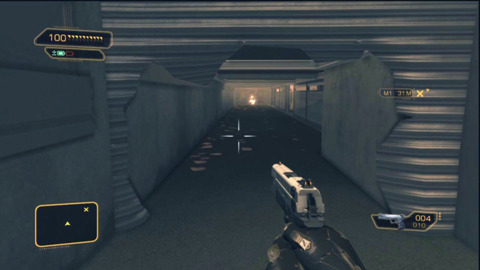
The first area of the facility is crawling with at least five enemies with handguns. Use take downs to deal with at least two of them before sneaking by or killing the rest. There is a broke passage to the left that will allow you to easily crawl passed this first wave of enemies. However, if you feel more daring, explore the area to grab extra ammo and loot the dead or sleeping bodies of any downed foe.
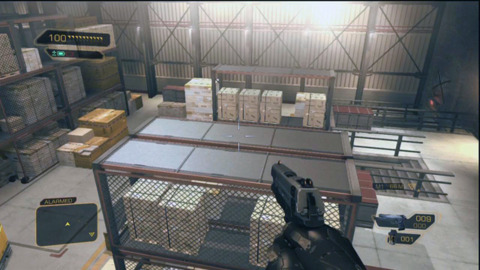
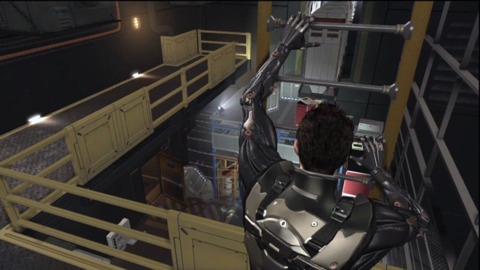
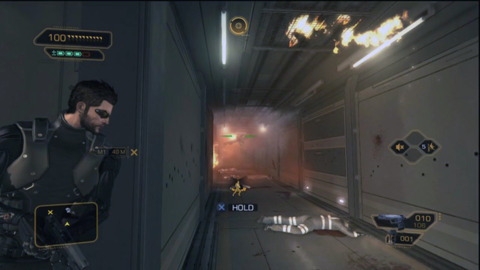
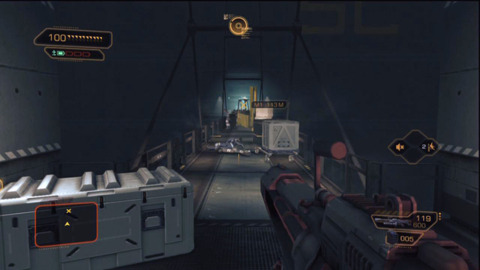
The next room has another four enemies inside, as well as a concussion grenade to stun cluster groups. Like before you can kill them all quickly or sneak by taking the ladder on the right. This ladder will place you on a second level and allow you to jump across the storage platforms. This will soon take you into a locker room with more ammo and beer. Drinking booze will increase your life meter, but will blur the screen for a few seconds. Avoid drinking during a fight or you'll have a hard time aiming.
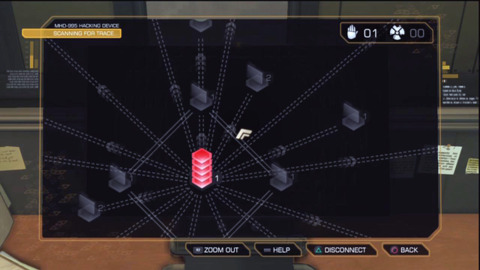
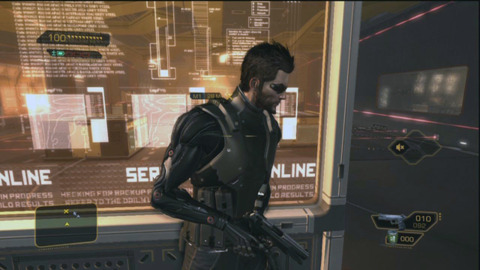
Keep following the objective marker and you'll come to a terminal that needs to be hacked. Even if you don't plan on being a career hacker, there are some level 1 computers that you must get by. Quickly open the first folder which will likely start the tracing alert; before the antivirus locks you out of the system, hack the backdoor to gain access to the system.
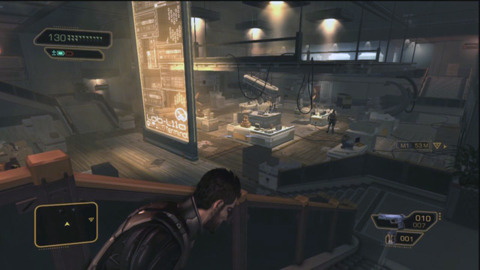
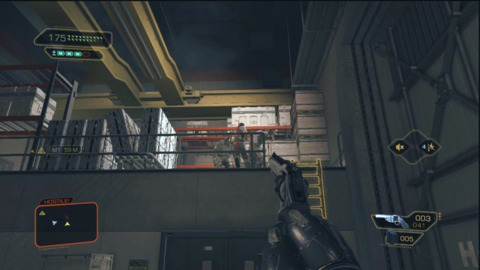
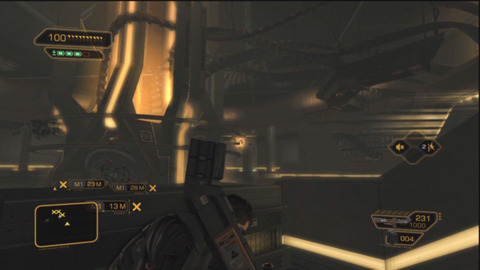
This room has four more enemies. Either take the quick route of killing them all from cover or sneak through the ducts above. However, killing one of the terrorists will drop a security code, allowing you to forgo some later hacking. If you want to take care of your secondary objective (saving the hostages) head up the next flight of stairs and into the next room. A gas bomb will start that will need to be quickly deactivated via hacking. If you fail this hack the hostages will die and you'll need to escape through the duct before the smog takes you out as well.
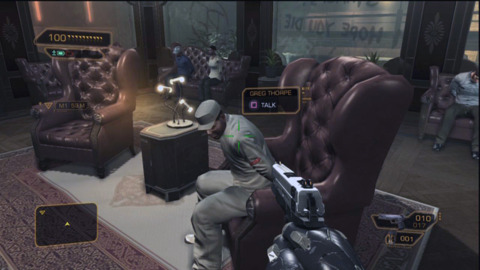
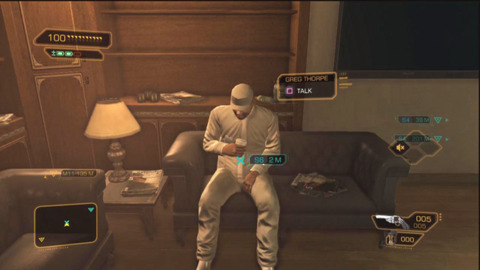
If you do manage to save everyone, talk to Greg Thorpe. He will ask you to save his wife Josie, though it's up to you if you want to make that promise. Either way, exit back out and follow the objective marker to the left. Your goal is the elevator to the next floor, though both guards and security cams can spot you easily. You can shoot out the cameras, though the noise might alert the guards that are patrolling the area. Regardless if you charge through or use stealth, take the elevator to the next floor.

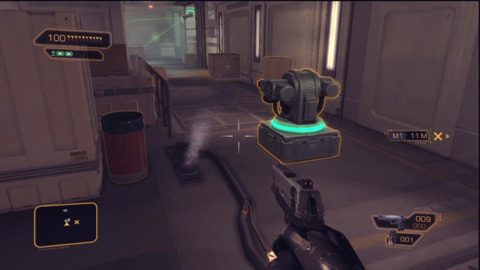
On this floor is a heavy turret blocking the way. If you've leveled your hacking augmentations you can shut off this sentry. Otherwise, move the boxes on the right and sneak behind the turret. Enter the next room for a cutscene where you'll secure the Typhoon. Take the next elevator to the top floor when you're ready. There will be four more clustered enemies. You can sneak by them or use takedowns. Alternately, the majority of them are clustered and can be dispatched with a single grenade. Restock up on ammo and food and head into the main work area.
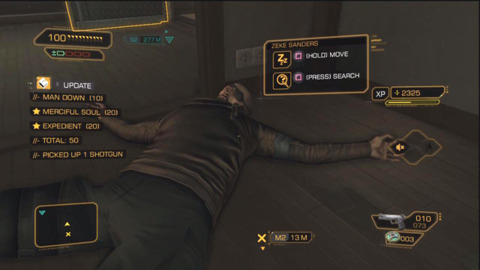
You can hack the various computers for a boat load of free experience. When you're satisfied with your bounty, Head up to the next level and confront Zeke Sanders. He has taken Josie hostage and it's your choice of how to deal with the situation. You can forcibly attack Sanders which will make him kill Thorpe in a few seconds; still you have enough time to take down Zeke and save the hostage. Alternately you can try to talk it out with the terrorist. Choose Empathize, Reason, and then Humble to calm down the terrorist leader.

Regardless of how the situation goes down, meet with Malik outside and head back to HQ. Head up to David's office and chat with the boss. Your main goal now is to head to the police station, however, you'll also have a sidquest inside your office.
Sidequest: Lesser Evils
Sidequests are a good means of acquiring extra experience and cash. Some of them require specific skills, so you might find yourself weaving between the main story and sidequests, spending time in each once if you gained various augmentations.
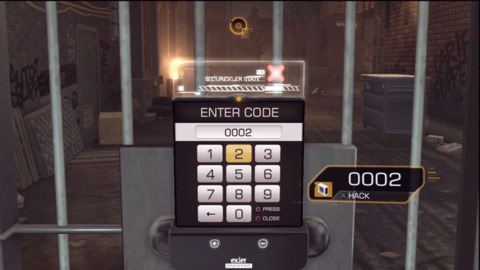
For your first side task, enter your office and talk to Tim Carella. He's being blackmailed by fellow Sarif employee Brian Tindall and Carella wants you to find the evidence hidden in Tindall's apartment. Follow the objective marker to find the right building. You can either use a leg upgrade to jump up the fire escape, hack the main gate or use the passcode 0002 to unlock the door (the code is actually found inside the building, but you can cheat passed doors if you already know the number).
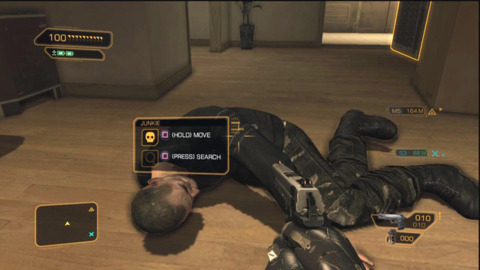
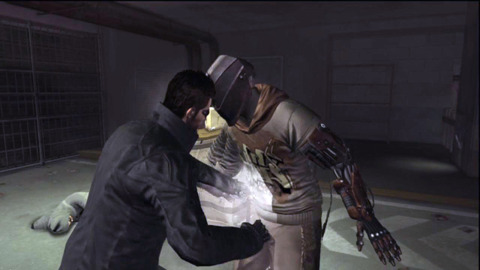
Head up to Tindall's apartment and search his place for the evidence you need. Check both the physical room and hack the computer to check the stored e-mails. As you attempt to exit the apartment, a junky armed with a shogun will arrive. Use a takedown or a headshot to dispose of the thug and loot his weapon.
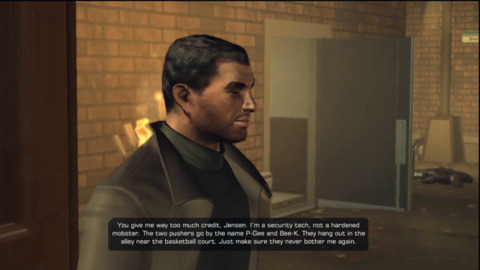
With the info about Tindall's meet up, trace his location with the objective marker and confront the Sarif employee. You can either bust him there or hear Tindall's plea. If you agree with him, head back down the alley and locate P-Gee and Bee-K. You can use takedowns or kill them with your guns; either will satisfy the objective. Return to Tindall to clear up the situation with Carella.
Head to the subway station and you'll find Carella. Chat with him to finish the quest and receive your reward.
Sidequest: Motherly Ties
Upon exiting Sarif HQ you'll encounter Cassandra Reed who wants you to find out the truth about Megan. Her lead is Detective Chase who has quit the force and become an apartment security guard.
Follow the marker and talk to Chase. He will give you security codes to a storage locker in the back of the police station and ask you to speak with Chet Wagner. This sidequest is linked with the main objective at the police station, so your approach to this quest will depend on how you handled the main story.
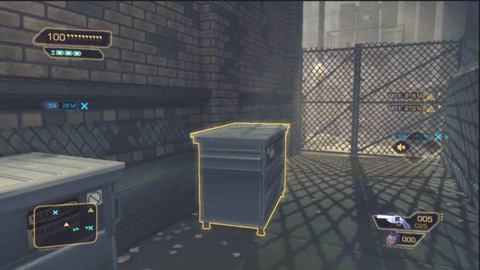
You can access the back of the station by using a combination of leg and arm augments to place a dumpster near the back alley gate and jump over it. You can also improve your skin to block electroshocks and walk through the sparking alley to the left. If you've talked your way into the police station you can also take an exit from the station's ducts. Finally, if you have none of the augments and cannot wander through the station, travel through the maze of sewers to reach the storage locker.
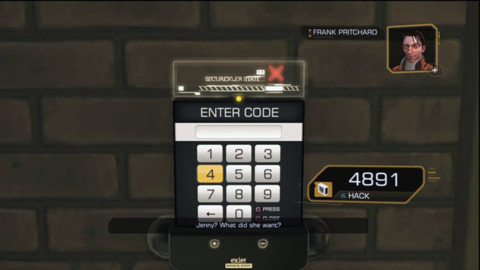
Use the code 4891 to get inside the locker and find the info about Megan's case. This is a decent amount of files to put Cassandra's mind at ease, however you can still get more details by talking to Wagner.
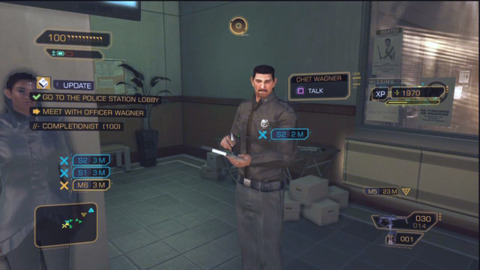
Enter the main lobby and talk to Chet. He will rebuke you, so you'll need to find hard evidence that he's crooked. Either waltz to his office or sneak quietly (if you weren't able to talk your way in). Hack Chet's computer, which might look intimidating, but the system's backdoor is easy to access.
While inside the station, hack Captain Penn's computer for even more info about Reed. When satisfied, head back to the lobby and confront Wagner. With all three leads complete, head to the Chiron building and speak with Cassandra to end the sidequest.
The Police Station
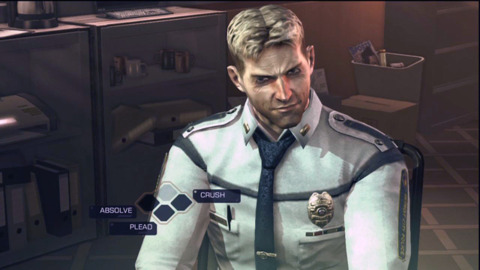
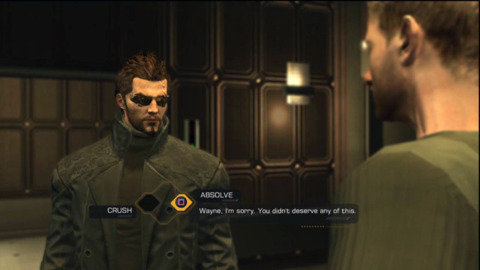
Sarif wants you to check the terrorist's body in the police station morgue. The simplest way is to enter the lobby and speak with Wayne Haas. Use Absolve, Crush, Absolve, and Plead to convince the former SWAT to let you in.
If you don't want to talk your way in, you can sneak through the back by augmenting your legs and arms to jump over the gate and sneak throughout the police station. You can also use the skin augmentation to walk over the electric floor. Entering the station without permission puts you in great danger, as any officer that spots you will attempt to place a bullet in your head.
Regardless if you can walk freely or need to sneak, head down to the bottom floor and examine the body. Once gaining the terrorist's implants exit the station (Cautiously if the police want you less than living) and head for your apartment in the Chiron building.
Watch the scene inside your apartment and learn about your next objective in Derelict Row. Before advancing on, explore your apartment to gain extra ammo and healing items.
Sidquest: Cloak and Daggers
After finishing inside the police station, you'll get a page from Jenny Alexander. She is working undercover as a hooker and wants your help in catching one Jack O'Malley. To do this, you'll be posing as an assassin for hire.
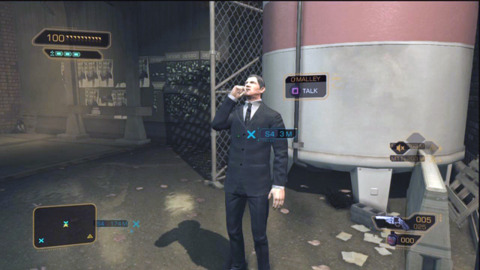
Meet O'Malley behind the police station (Where the locker from Motherly Ties was) and bluff with him that you'll take out Double-T. For this mission he will want you to gain a specific weapon, a crossbow to do in the gangster.
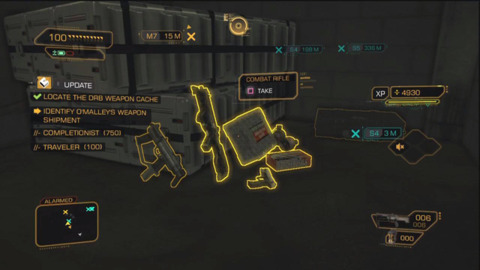
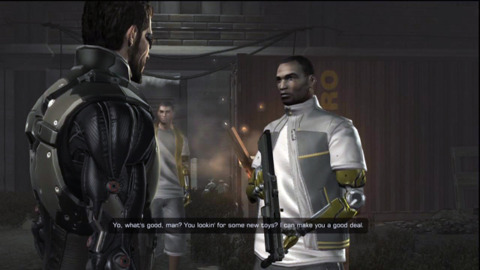
Head to the western entrance of Derelict Row and arm yourself with the gun (It takes up a lot of space, so make sure you have room). While you're hear head into the Row itself. You'll gain more rewards from sneaking, but can still complete the quest if you're caught.
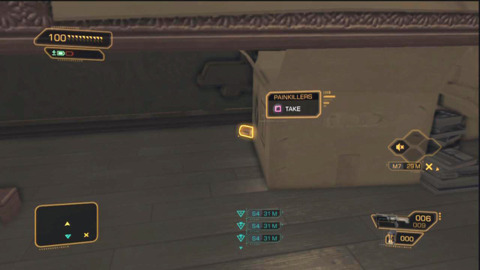
On the second level of the hideout in the north-east will be a hole in the ground. Drop down this hole to find the hidden chance of weapons which will help Jenny in her case.
With these two pieces of evidence, head to Double-T's apartment. Including Double-T, there are six enemies: one guarding the door, one in the kitchen, two watching TV, and two in the locked room. Due to the small space and volume of enemies, it's better to use silent takedowns than kill any of them.
Once the first four are down, either hack the locked door or fire an audible shot to bring Double-T out. Make sure to use a stun gun or silent takedown to detain Double-T. Exit out this apartment and head into O'Malley's place (The same home as Brian Tindall).
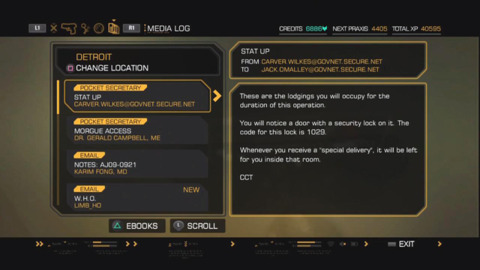
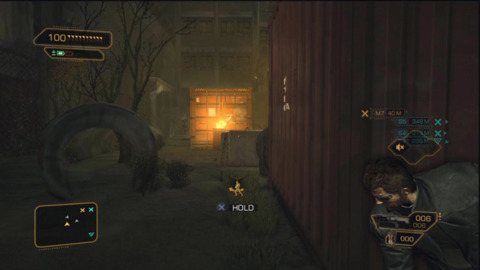
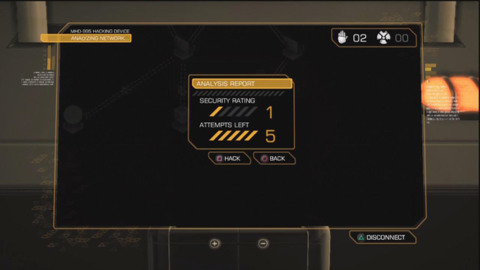
You'll need to either gain the passcode behind the bookshelf (code 1029) or hack through the doors to find O'Malley's stash. However, his room is trapped with mines. Grab on of the cardboard boxes and toss it into the room to detonate the explosives. Once it's safe, explore the bed room for more evidence and clues.

Return to Jenny with everything you've uncovered and she will ask you to bring in O'Malley. Head back to O'Malley's apartment and use a non-lethal takedown. Report back to Jenny to complete the mission.
Derelict Row Transmission
Stellar Blade - (Almost) All Outfits River City Girls 2 - New Playable Characters DLC Reveal!! Sand Land Review That Time I Got Reincarnated as a Slime ISEKAI Chronicles – Official Announcement Trailer Paper Mario: The Thousand-Year Door – Official Switch Overview Trailer MEGATON MUSASHI W: WIRED – Official OP “MUSASHI English Ver.” Trailer Fallout 4 Next Gen Update Comparison Granblue Fantasy: Relink - New Content Trailer Modern Warfare III - New Season 3 Reloaded Modern Warfare Zombies Update Stellar Blade - Official Launch Trailer | PS5 Games Gothic 1 Remake | Official Collector's Edition Trailer SaGa Emerald Beyond – Official Launch Trailer
Please enter your date of birth to view this video
By clicking 'enter', you agree to GameSpot's
Terms of Use and Privacy Policy
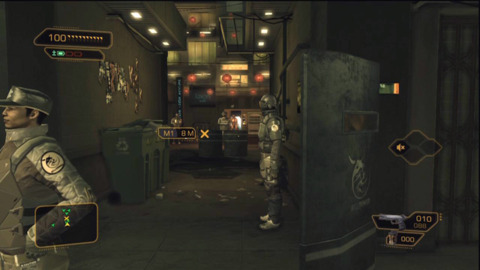
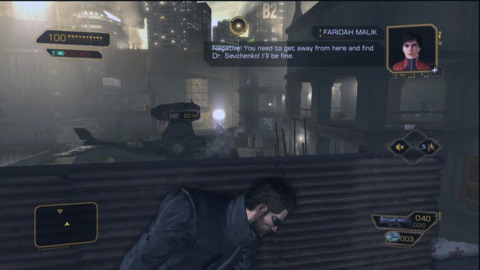
This storyline mission will set you on the path towards the end of the chapter. You can return to the main hub of Detroit later, but for several hours you will be limited to which shops you can go to. Buy what ever supplies and praxis points you need before heading to Derelict Row.
As with most situations, you can choose to go in guns blazing or sneak passed the enemy. Even if you want to kill everyone, it is still recommended that you thin the heard by eliminating at least three or four enemies silently. This will prevent you from getting annihilated from several waves of enemies.

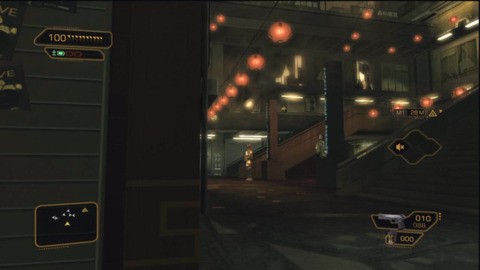
Your goal is to enter the tall building in the east. The first few halls are patrolled by enemies, so kill or stun them as you make your way through. Inside the enemy's den the gang won't suspect your presence, allowing you to easily slip by them as they watch TV. Climb up to the attic and you should spot a hallway filled with mines.
Grab one of the boxes to the left and toss them at the mines to start a chain reaction of explosions. This will alert the enemies below, but it would seem that everyone on your current floor didn't hear the absurd bang. Advance forward and take out the next two enemies.
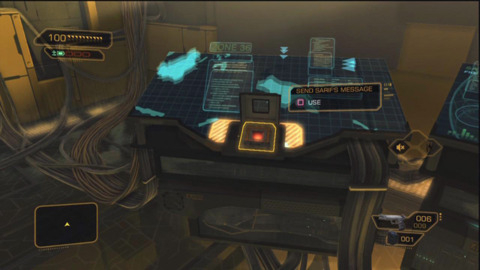
You'll be outside on the roof where the transmission tower rests. Hack the system and turn off the transmitter to finish the mission. Malik will land on the helipad next to you and forcibly send you to the next objective: the FEMA Detention Center.
FEMA Detention Center
You'll be headed into an intense fight soon. Even if you're gearing for stealth or computers, a mandatory fight will be in your future. To prepare it's recommended that you get augmentations for your skin to reduce damage taken. Other helpful augments are the Icarus landing and heavy lifting. To further help you along, talk to the merchant outside FEMA to purchase new gear and sell anything you don't want.
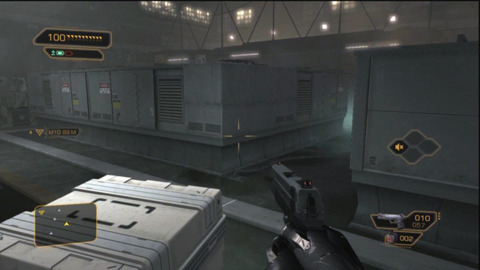
The Tyrant mercs guarding the place are armed with better weapons than the grunts you've faced before. Make sure you're well in cover before engaging them. Better yet, rely on your sneaking skills to get on the roof tops and onto the generators ahead. Thrown down some boxes onto the electric floor (or simply walk on it if your skin augments prevent damage). Your newly created walkway will lead to the next area.
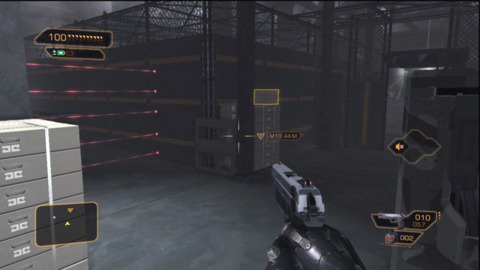
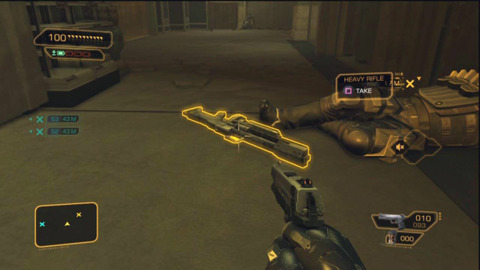
There will now be a tripwire gate to the left. You can either hack the system or use a leg upgrade to complete jump over the obstacle. Either way, take out the patrolling guard on the left and sneak through the next building. You'll soon come to a catwalk roaming with snipers. Stay hidden and use takedowns to deal with these foes; if you have the room grab a sniper rifle for your collect. Now either sneak down to the bottom floor, or leap with the Icarus landing. Take the freight elevator to the FEMA loading area.
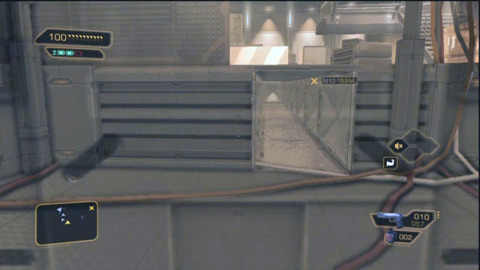
The Tyrants have gotten lazy and are using one of the heavy walkers to load boxes. This might seem deadly for you, but remember that one EMP blast will destroy any robot. Still, stealth and silent kills are recommended before charging in. If you have lifting augmentations you can toss a few heavy boxes to reveal extra underground passages. Regardless of your choice, your goal is to head to the second floor, through the control room, and out the back door.
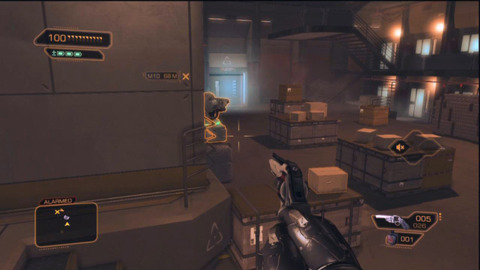
Follow the path and you'll want up at the FEMA cells. Check the ammo case under the desk and arm yourself with more gear. The place is crawling with at least six guards. Start by sneaking passed the cameras on the left and take out as many enemies silently. If you end up getting caught, take cover and blast through the remaining guards. One the coast is clear, explore all of the cells and rooms for extra credits and ammo.
To continue with your objective, dodge passed the auto turret and through the door into the hospital. There are a few plain dressed people in one of the offices, but be careful as they are still armed with revolvers. Sneak through the medical center and down the elevator. Head down the halls of this floor to engage in the game's first boss battle.
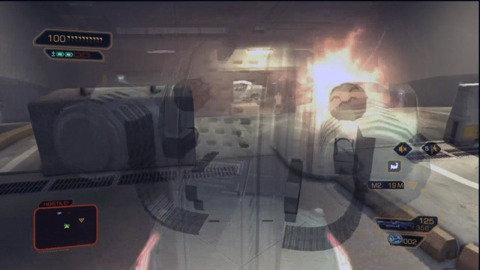
Barret is armed with a powerful Gatling gun that can rip through your health. He's immune to takedowns and doesn't really care about cover. It may be hard to focus in such a firefight, but you may notice a few red barrels in the room. Grab them and toss them at Barret to deal heavy damage. You can also take cover in the small rooms on either side of the main battle area. If you position yourself right, Barret will switch to grenades but will foolishly throw them against a nearby wall, bouncing them right at his feet. During this time pop out every once in a while to deal a few headshots.
Soon enough the boss will kill himself on explosives. After a cutscene, grab the extra weapons and ammo left from the battle and meet up with Malik.
Next Assignment
David Sarif wants to send you on your next mission. Before leaving make sure you finish up any sidequests left in Detroit. Additionally, if you saved the Thorpe couple, Greg will ask to see you at his apartment (The same one Chase was stationed at).
Talk to Greg and he will give you a discount with the weapons merchant Seurat, located in the same building where you found Double-T. But whatever you need and rush back to Sarif HQ.

Instead of talking right with the boss man, go see Pritchard. You'll learn some interesting details about the attack six months ago. It's your choice of how to deal with this bit of news. It's recommended that you purchase the social enhancer augmentation, though it's not mandatory.

Head up to the top floor office and talk with Sarif. If you want to confront David use the process of Refocus, Defend, Refocus, and one last Defend. Doing so will give you extra files on your office computer. Regardless if you pressed the issue, David will order you to go see Malik and head to the Shanghai island of Hengsha.
Court Gardens
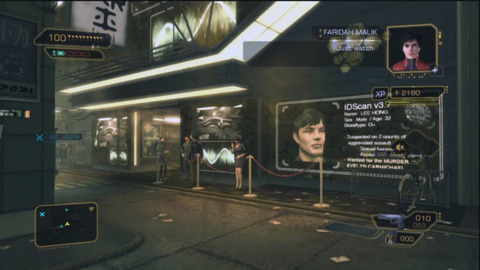
The address Barret gave you will lead to the Court Gardens. The apartment is under patrol of Belltower, the mercenary police force in Hengsha. It is incredibly dangerous to fight your way through. At the entrance itself are four enemies crowded together. You might be able to take them all out with a grenade, but to keep things safe, sneak through the crate on the right and up the long stair case.
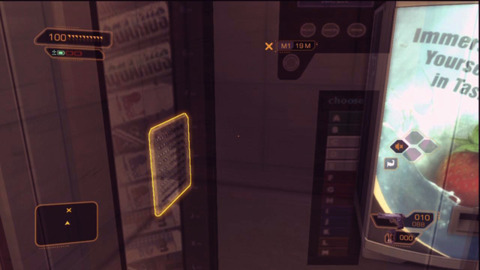
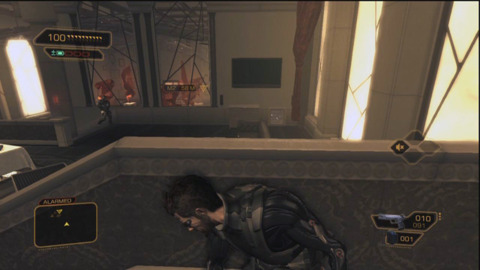
You might want to distract some of the guards by going into only an alarmed state. This will force the enemy to investigate your current position while you slip by them into the main building. Take the elevator on the left to avoid being seen. If you have the arms augmentation for heavy lifting, move the vending machine ahead and slip through the passageway.
The hacker's apartment is filled with several enemies, so it's recommended that you continue to sneak about. Your goal is to enter the secret room between the walls on the right. Inside are several stop viruses and a computer belonging to a hacker with the handle Windmill. Use the viruses or your own hacking skill to read Windmill's e-mail.
It seems Windmill was in contact with The Hive, which should be your next main lead. Exit out of the Court Gardens with either stealth or blasting. You can be more reckless fleeing the scene than you did breaking in.
Sidequest: Rotten Business
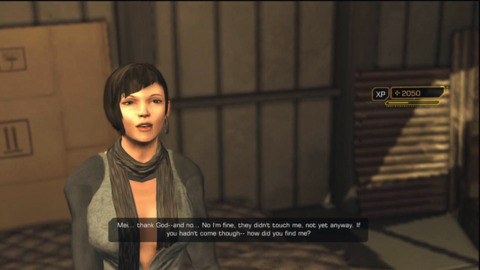
There are several side tasks you can take inside the Hung Hua Hotel. Head up to the top floor and speak with Mei. This fine lady will request that you find her friend Ning, who was taken captive not long ago.
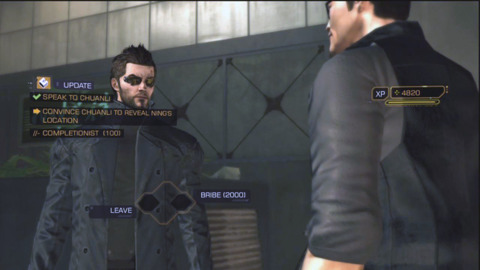
Before leaving the hotel, search around for a Hive Membership card that will make things smoother in the next story mission. As for your current task, you can locate a thug named Chuanli who will give you info for 2000 credits.
If you want to save some money, head down the southern edge of Hengsha where three men are protecting a storage locker. Take them all out with either stuns or bullets. One of them is carrying a pocket security for the code of 5377. Use this number on the locker to free Ning.
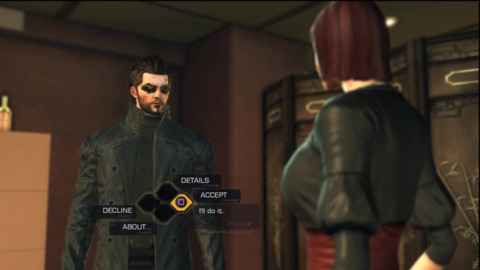
Return to Mei and inform her that you found Ning. You will be rewarded and can take another mission. This time Mei will ask you to takeout Diamond Chan. You can agree or opt for a less lethal solution. Mei will consider and supply you with drugs to plant on Chan.
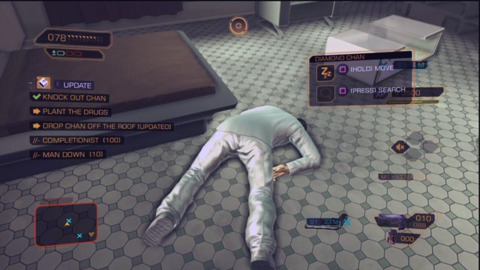
Use the objective markers to find Chan's place and hack your way inside. Use a non-lethal takedown to knock out Diamond. Now either plant the drugs and leave, or drag his body toss him off the roof. Regardless of your choice, go back to Mei to get another reward.
The Hive
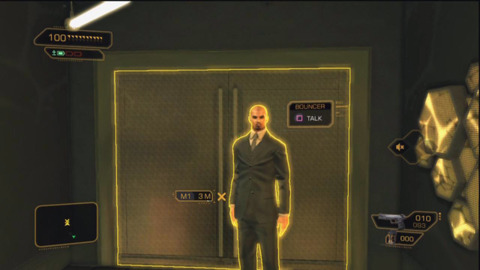
The Hive is a private club designed for members. During your exploration of the Hung Hua Hotel you may have found a membership card. This is the easiest way to get inside the club. However, you can also bribe and threaten the bouncer outside.
Once inside The Hive you'll need to find Tong Si Hung and find out what he knows about Van Bruggen (Windmill). You can start by asking the bartender Bobby Bao who will direct you upstairs. Head up to the second level and chat with the manager about Tong and Van Bruggen. Use Pinpoint, Advise, and Pinpoint to get on the Hive member's good side.
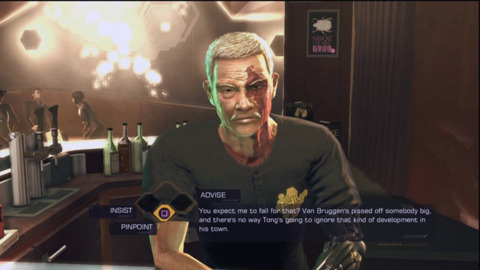
If you some how manage to mess up the conversation or don't want to negotiate, you can also hack the terminal leading to the basement and takedown the lone guard. Either way your goal is Tong's office. Once inside the Hive leader will explain where he is keeping Van Bruggen: Alice Gardens in the east part of town.
Alice Gardens
Upon arriving at Alice Gardens Malik will approach and give you the sidequest Shanghai Justice. It's not a top priority right now, but checking the pod she talks about will help later.
Explore the rest of the Gardens and head over to Van Bruggen's pod. He will aid you in exchange for his safety. It seems he can get you into Tai Yong Medical if you can supply him with an employee ID.
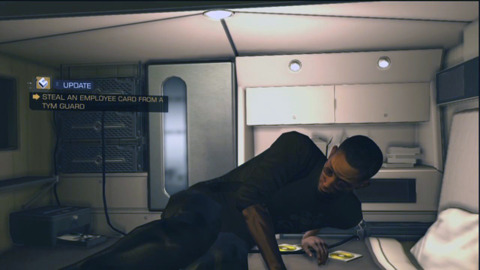
Travel to the Hung Hua Hotel and reach the first floor. You'll find a locked room with a guard "relaxing" inside. You can either hack in, or enter the other room on the left. Exit out of the balcony and jump inside the occupied room. Steal the employee ID and return to Alice Gardens.
Belltower seems to have gotten word of Van Bruggen's location and the mercenaries will burst in as you get to the hacker's pod. To help Van Bruggen survive give him a spare gun. Something with low damage and lots of recoil--such as the machinegun--is a good enough weapon to protect him.
Slowly enter through each pod alcove and take out the Belltower thugs with takedowns. Eventually you'll clear enough enemies to sneak down to the basement washroom. There are still at least four more troops down here that you will need to avoid or kill.
In the next area are a number of shower stalls that seem to be flashing red and beeping. Turns out Belltower has placed enough mines to clear a city block. To get by this hindrance, grab a cardboard box and toss it at the mines, sending out a chain reaction. You will need to do this at least twice in two different shower rooms.
Sneak through the laundry room and takedown two more guards. Exit out to the left and you'll be in the home stretch. However, two final guards will emerge from the door on the right. Hide in cover and use a takedown on the armored brute packing a heavy rifle; his armor protects him from bullets, but even he's not immune to an instant knock out. Kill or stun the second weaker enemy and loot their good.
With your escape from Alice Gardens, it's time to wrap up any sidequests before making the final trip to Tai Yong.
Sidequest: Shanghai Justice
Inside Alice Gardens Malik gave you the task of investigating the death of Evelyn Carmichael. You will need at least level 3 hacking to complete this quest. If you lack the skills, buy some Praxis points or complete other objectives you've missed.
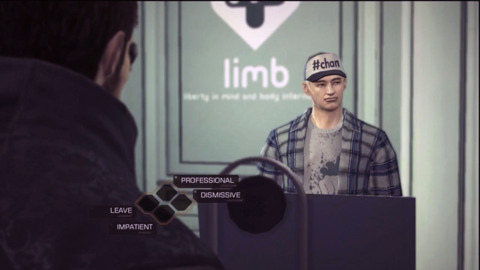
Your first order of business is to go to the LIMB clinic and talk to Anonymous X. Select the professional option to recite the passage Malik gave you. Meet him out back and gain the info about Evelyn's autopsy. You can pay him, but there is really no need to pander to his demands.
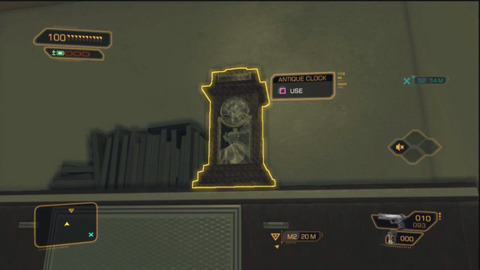
Next, head to Lee Hong's apartment and hack through the door. Inside you'll want to check his baseball bat, broken clock, answering machine and hack into his computers. The evidence points to the fact that Evelyn was pregnant and that if she gave birth Lee's rich family would disown him; it also appears the broken clock was the murder weapon.
Head to The Hive and confront Lee on the second floor. Present all of the evidence you found to gain a confession out of him. Slipping up and pointing to the wrong piece of info can flub the sting, so be sure to review your files and e-mails.
The mission isn't completely over. Head to the terminal behind the upstairs bar and hack the camera system. When this is done, exit back out into the streets to witness Malik's brand of justice.
Tai Yong Medical Infiltration
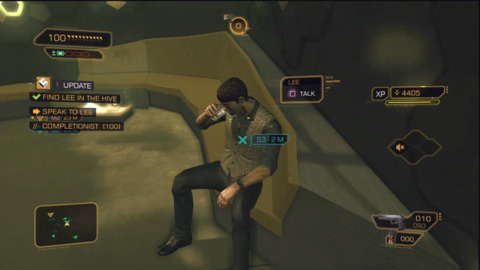
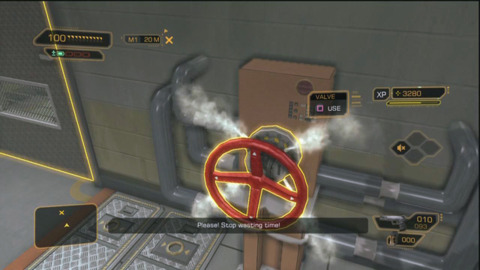
Take the tram to Tai Yong Medical. Within the first passages you can discover the worker Lee that has gotten into an accident. Saving his life can help out, but isn't required. To be a good Samaritan, hack the door on the left and turn the valve inside. This will release the deadly gas. Clear out the boxes and talk to Lee. The worker will be grateful and tell you to see Kim.
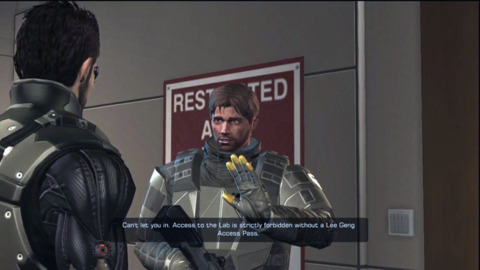
Head up to the next floor to reach the labs. Here Kim will confront you. You can bribe, intimidate, or mention Lee to the guard. He will let you pass, but warn you that he will attack if you get caught. Before leaving your current room, use the button on the console ahead to adjust the catwalk. Head down to the lower levels and into the security room where two guards are busy playing games. Take them out and use the terminal to hack the laser gate to the next area.
This will take you to several lockers with plenty of guns and ammo, so stock up accordingly. Continue down the path and you'll come to several shelves on top of electrified water. If you have advanced skin augments you can simply walk through the hazard. Otherwise, through down some boxes and create a bridge to the shelves. Keep crawling and jumping up the structure to reach the catwalk. Climb up further to reach Tai Yong's main floor.
There are guards everywhere, though none realize you're a threat. Some will even let you pass, granted to have the right security cards. The locked rooms on the far left can be hacked and the lab passes can be found inside. However, with so many guards you need to hack fast or use stuns/non-lethal takedowns to get in safely. Regardless of if you tricked the guards, sneaked, or shot up the facility, your goal is the upstairs portions of the labs.
If you choose the fighting option, beware of the multitude of soldiers and robots patrolling the upper levels. Use EMPs and Typhoons to quickly subdue the bulk of the enemies. If you want to sneak, move into the main security room and hack through the computers controlling the sealed doors. You might need to shoot out a camera or two in order to prevent sounding off the alarm, but either way the unlocked doors will lead to the next zone.
Down in this secured area is a maze of tripwire lasers. You can use leg enhancements to jump over and run passed the moving lasers. Otherwise hide behind the boxes and time your movements to avoid being detected. Even one false move will summon four guards and a robot. There is very little cover, so it is highly recommended that your rush to the lift to the next floor.
After a cutscene you'll be inside a room with more moving lasers. These are much easier to dodge as they only cross and block your passage for a few seconds. Head down to the other side of the hall and you'll arrive in the main office.
Tai Yong Medical Extraction
Inside the actual Tai Yong offices are a few guards patrolling with shotguns. Stay at a good distance and take them out before they can kill you in one or two blasts. Head down the next hall and another three guards and a robot will be guarding the area.
It would seem fighting is the straight forward solution, but you can still sneak through the ducts to get a better angle on the enemy. Remember, an EMP grenade will destroy a robot instantly. Regardless if you sneak or kill the enemy, take the elevator to reach Zhao Yun Ru's office.
Head to the top and watch a cutscene. Upon gaining control, Belltower forces will storm the room. More than a dozen enemies packing heavy weapons will enter the room. The numbers are so great that a straight up firefight will most likely not work in your favor. Instead, hide and sneak down, jumping over each stair case's rails to quickly land on the next floor. Sneak through the ducts and get to the bottom floor.
If you want to mess with the enemies, shoot and kill on of them through the ducts and retreat back up to the second floor. This will cause the enemy to storm up to the second floor and abandon their blockade at the entrance. Quickly head back down the duct and escape the room while Belltower is distracted hiking up stairs.
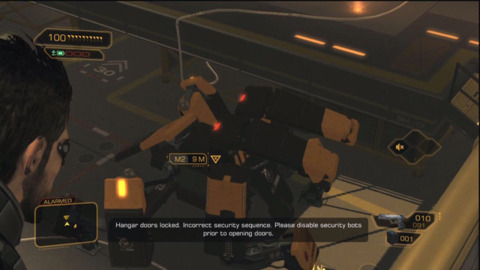
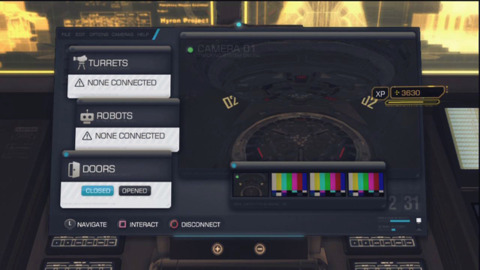
Keep following the path and you'll get a message from Malik. Turns out you'll need to clear the security droids before she can open the hanger. As with before, you can use EMP grenades to destroy the robots. Otherwise, head to the control room and hack the main controls. If you have the robot upgrade take the two armored beasts under your control. Regardless of how you tame the robots, Malik will arrive and take you to Montreal.
Picus Communications
Stellar Blade - (Almost) All Outfits River City Girls 2 - New Playable Characters DLC Reveal!! Sand Land Review That Time I Got Reincarnated as a Slime ISEKAI Chronicles – Official Announcement Trailer Paper Mario: The Thousand-Year Door – Official Switch Overview Trailer MEGATON MUSASHI W: WIRED – Official OP “MUSASHI English Ver.” Trailer Fallout 4 Next Gen Update Comparison Granblue Fantasy: Relink - New Content Trailer Modern Warfare III - New Season 3 Reloaded Modern Warfare Zombies Update Stellar Blade - Official Launch Trailer | PS5 Games Gothic 1 Remake | Official Collector's Edition Trailer SaGa Emerald Beyond – Official Launch Trailer
Please enter your date of birth to view this video
By clicking 'enter', you agree to GameSpot's
Terms of Use and Privacy Policy
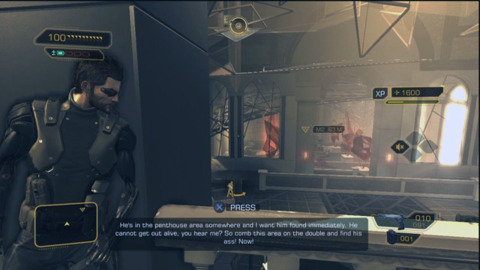
Things are quiet in Picus--too quiet for it not to be a trap--however, this does leave you free to hack the office computers for free experience, credits, and items. For some reason there are no stores during your shore leave at Montreal, so managing your goodies along with everything pilfered from China will take some juggling.

Once your satisfied with your five figured discounts, head to Eliza's office to confront the TV personality. After a cutscene, the alarm will sound. It's best to hide inside one of the nearby ducts, as nearly ten guards will storm the office within 15 seconds. Continue moving through the ventilation system to either stay away or confuse the Tyrant mercenaries.
Return to the main office and down to the lower level. Either sneak behind the desks on the left side of the room or kill each enemy from cover. The large number of enemies tend to cluster, leaving them vulnerable to grenades and heavy rifle fire. Regardless, your goal is the next room down the hall.
The entrance to this room is guarded by a security camera and a lone guard. Carefully crawl passed the camera's view or hack the system. Use a takedown on the single guard and move towards the elevator shaft. The Icarus landing will allow you to drop down and acquire some extra goodies at the bottom of the shaft. Unfortunately there isn't a means of getting climbing back up, so you'll need to go through the ducts and up a few ladders to reach the second floor.
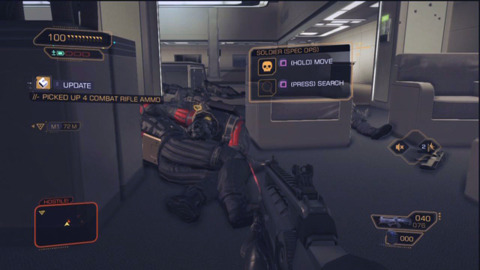
There are another five Tyrants patrolling the next room: four on the ground level and another up the stairs. One of these enemies is a deadly heavy rifleman who can take a few headshots before going down. As with the Belltower heavies, take out this large Tyrant with an instant takedown. Once enough of the area is clear, enter the room marked "Funicular". Hack through the next door and take the stairs down to Zone 6.
Two Tyrant guards will be patrolling the area, however there are plenty of rooms and alcoves to duck into to avoid detection. You can also use these rooms to hide bodies if you choose to use takedowns. Head towards the objective marker to reach two more guards and an auto turret. If you have the hacking skill, sneak to the computer on the left take control of the turret so that it kills the guards for you.
Grab the ammo and mines in this room and hit the switch for the elevator. The lift is on the bottom floor, so it will take a good amount of time before it reaches you. In this time another four guards will emerge. Quickly hide near the elevator and get ready to either fire back or flee when the elevator door opens. Enjoy the ride down and you'll emerge at the Illuminati HQ.

Two guards, two robots, a camera, and tripwires are blocking your path forward. The terminal for the lasers is only level one, so hacking it will be easy no matter your skill. However, to get at the console unnoticed you'll need to stun or kill at least one of the guards. Avoid or destroy the robot on the first floor and loot the weapons on the room to the left.
Even if the remaining guards spot you or are alerted, they won't bother opening the glass doors blocking their line of fire. This can be used to your advantage by baiting them at the door, but instead of charging, head through the duct on the left. Travel into the next room and kill or takedown the Tyrants that are still transfixed on the entrance.
Once ready, follow the objective marker to the sub level and detonate the mines adorning the walls. On this floor is a robot and heavy. Like before, a takedown is an easy way of dealing with the tougher humans. You can also hack control of the robot and turn it on the Tyrant. Once you've cleared your current foes, continue on to the main computer room. Stop inside the supply room on the left to grab a heavy rifle and a huge amount of ammo. Once primed, head to the computer room for a boss fight.
Yelena is packing two machine pistols, a cloaking system, and can slide attack. If you haven't already, upgrade your skin augmentations to lower damage and avoid electric shocks. Arm upgrades to lower recoil and tighten sights will also be a great asset. It's recommended that you use a rapid fire weapon--the rifle, heavy rifle, or machine pistol are all decent choices. Your enemy moves a little too quickly for cover, so keep on your toes and circle around the walls to avoid fire. Eliza will also try to provide you with intel about Yelena's location.

As for the fight itself, you may notice that floor is covered with water. This will not only allow you to see Yelena's footsteps, but can be used for a damage blast (Though you might hurt yourself if you lack the correct augmentations). If you or your enemy cause enough damage to the computers, they will explode with great force and electrify the floor. If you time it right, this environmental hazard is a great means of dealing damage.
Once the high ranking Tyrant is dead, stock up on weapons and ammo inside the room's lockers. When finished resupplying, head to the helipad and Malik will bring you back home.
Sidequest: Acquaintances Forgotten
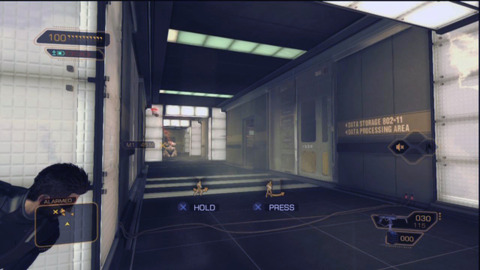
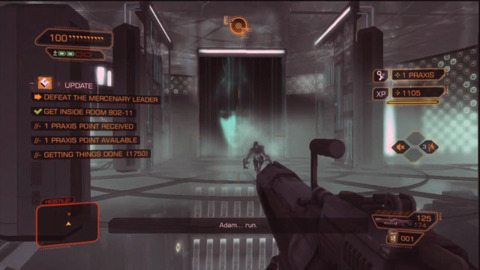
You'll arrive back at your place in Detroit where Sarif is waiting in your apartment. Chat with him and discover that trouble is brewing and you should head to the Convention Center. However, Pritchard will recommend following another lead to a detective named Brent Radford.
If you talked your way into the Police Station during your first Michigan mission, Hass will confront you in the lobby. Either give him a job with Sarif or put him in his place. Either way, you're free to check out Radford's place.
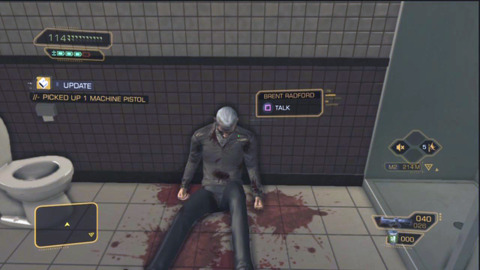
Following the quest marker leads you to a bloody mess. An assassin is standing in the bathroom doorway, but won't seem to notice you. Quickly dispose of him and talk to a dying Radford. He will tell you about a storage locker and to seek Michelle. Search his place for a med kit and you can help him with douses of morphine. If you have a social enhancer augmentation you can convince Radford to live via Alpha Appease.

Head to the locker down by the police station and you'll see that it is being seized by three suited goons. Use silent stuns or kills, as any loud shots will cause the nearby police to gun you down. You will need very high hacking skills to unlock the small safe and acquire the notes and pictures for the rest of the quest.

Once everything is gathered from storage, you'll gain a waypoint to Michelle Walters. Head over there and chat with the old woman. If you give her the pictures your found she will give you the details about your past. Before leaving, she will offer you belated birthday money.
The Convention Center
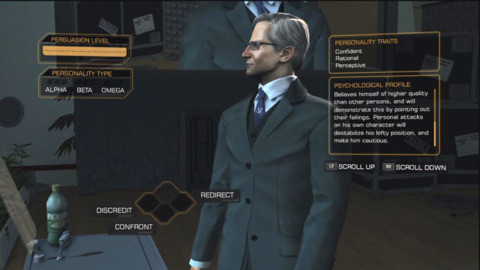
Following Sarif's orders, head to the Convention Center to Confront Bill Taggart. If you haven't already, it's highly advised that you purchase the social enhancer augmentations. With your talking skills honed, barge into the broadcast and grill Taggart. Discredit, Confront, Discredit, and Confront will be enough to get the Humanity Front leader on your side. Back stage Taggart will give you what he knows about Sandoval.
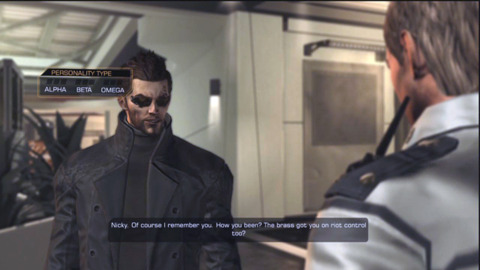
As you exit the Center, Officer Nicky will approach you and start up the sidequest Smash the State. It's a tad out of the way, so leave it for once you've located the missing doctor.
The quest marker will lead you to a fire escape leading to an apartment. Two thugs will be inside that should be removed with a takedown. The small apartment where Sandoval should be is trapped with EMP mines, so be careful as you move about. If Zeke survived the start of the game he may attack you here.
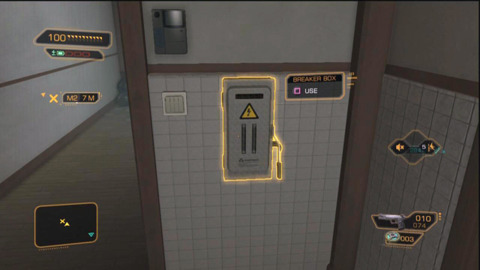
It seems that Sandoval isn't here, but this is a ruse. Head to the back room and hit the breaker box switch to reveal a secret door. There are two more guards in here, but it is too narrow to simply sneak. Either stun or kill the two and head over to the ladder inside the cargo container.
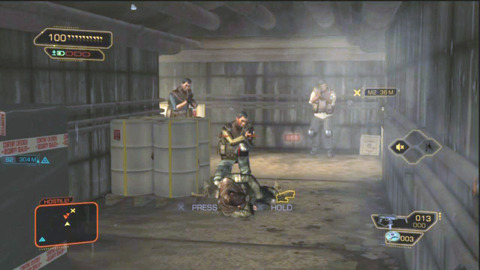
There are another six guards down here, all packing rifles, machine guns and shotguns. You can either gun them down from the first hallway or sneak carefully. However, there are many laser alarms and miens blocking your path. The laser systems require level 4 hacking and detonating the mines will alert the whole floor. It's overall recommended that you stun or kill everyone before moving on.
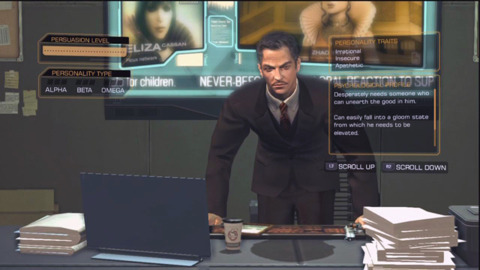
You'll soon arrive in Sandoval's office. He's suicidal but can be talked down. His wrecked emotional state makes him susceptible to an Omega Pressure. After quelling (or erupting) the situation, head back to Sarif HQ.
Head up to David's office for a cutscene. It seems Pritchard has a lead on one of the GPLs. If you're finished with everything in Detroit, talk to Malik to head back to Hengsha. Before leaving, it would be a good idea to stock up on long range weapons (sniper rifles) and some EMP grenades.
Sidequest: Smash the State
Back in the Convention Center Officer Nicky asked you to investigate the released convict Jacob White. The officer is slightly agitated, but can be calmed by chastising him. Nicky has three leads to possible locations of the criminal and the bomb: the transit station, the alley by the precinct, and the sewers.
You can explore the first two if you wish, but the sewers are actually the crook's hideout. White is augmented to the teeth and wields a very deadly weapon. Additionally, he placed several turrets throughout his layer.
It is recommended that you hack into the computers near each turret to disable or control the guns. If you have heavy lifting arm augmentations you can also simply move the turrets out of White's patrol.
Due to Jacob White's thick armor and offensive firepower, to avoid unnecessary danger you should use a single takedown--either lethal or non-lethal. Once the Jacob is subdued, head back to the convention center and report your progress to Nicky.
Following the GPL
Your return trip to China is a rocky one and comes with a heavy burden. Malik's chopper is downed and in trouble. You must make a very bold choice here: leave your comrade to die as you slip through or save the pilot while risking your own life.
All of the enemies are gunning for the helicopter, which can allow you to quickly and easily slip passed them and to the elevator into Hengsha. While saving Malik is taxing, it's not impossible. Your targets include two Belltower heavies, four infantry on the ground, two more infantry standing inside the partial constructed buildings, two snipers, and a robot.
Speed is of the essence here, as the helicopter will explode after taking too much damage. If you grabbed a sniper rifle before leaving Detroit, you have a clear vantage point to take down all of the enemies within the buildings, and maybe even one or two riflemen on the ground. If you don't have a sniper rifle, leave the enemy snipers for last, as they don't do enough damage compared to some of the other foes.

The biggest threats are the heavies and robot. The heavies can be killed with a takedown, but that can put you in the line of fire. Alternately you can toss an explosive barrel at them which will also instantly kill them. As with other robots, a single EMP grenade will destroy it. You can even time the EMP so that a few of the soldiers get caught in the robot's detonation.
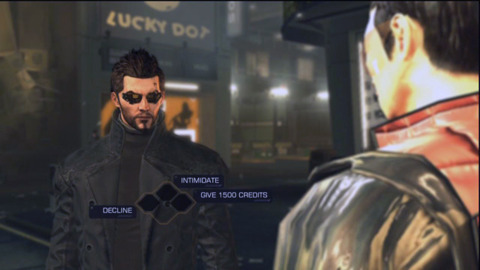
Whether you sweep the enemy, or loose a trusted friend your next objective is tracking the GPL in Hengsha. Implants throughout town are going haywire, even your own. After your augmentations reset, trace the signal by following your quest waypoint. You'll be stopped by a thug that attempt to blackmail you, but he can be intimidated or bribed.
After dealing with the riff-raff, continue tracking the signal to Hive territory. The entrance you need to enter not only needs to be hacked, but is guarded by nearly 10 Harvesters. The door itself is only level 1, so cloaking and quickly unlocking a path is an option. Alternately, you blast your way in, using EMP grenades to stun the Augs.
Make your choice to wind up in a ravaged parking garage. There is a turret ahead, along with a Harvester guarding a computer. Use a takedown to stun the gangster and hack the turret. If you have heavy lifting augmentations, you can consider setting the turret to attack enemies and carry the sentry with you.
Head down the ramp to the lower level and be mindful of the security camera on the left. Three more Harvesters are within the immediate area, and another two are down the ramp on the right. Gun, stun, or avoid detection as you head down to the third level. Your goal is to the left, but there are still plenty of enemies patrolling.
Three guards are in the next room, including a heavy. As with Belltower and Tyrants, Harvester heavies have too much protection for an all out assault and are handled much more safely with a takedown. As for the other enemies, either dodge them entirely or take them out with quick headshots from your rifle or tranqs. This might put other enemies in an alarmed state, but if you stay in cover they won't outright attack.
Head left yet again to arrive just feet from your goal. There are three more Harvesters here that you can easily stun or kill. Since your objective is so close you can also simply dash towards the door.
After a brief cutscene, Tong will order his men to stop harassing you. He is also willing to lend you a hand if you do him a favor and take out Administrator Wang.
Sidquest: Corporate Warfare
Prior to reaching the Harvester base, Hugh Darrow will call you up ask you to meet his contact Mengyao on the roofs of Hengsha. She's not too far from the apartments where you dealt with Diamond Chan and investigated Lee Hong during your first visit.
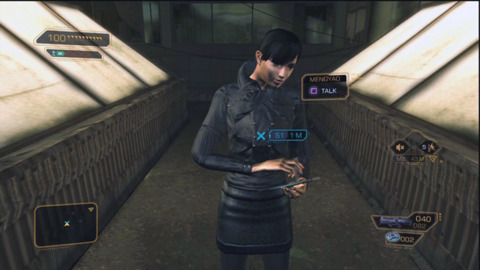
Mengyao wants you to recover a data chip from a rival. She would also prefer that you gain the chip by using non-lethal methods, though she doesn't seem to mind if you're actually spotted.
Head back to the underpass near where you arrived in Hengsha. Five armed suits are around the area and they won't take kindly to you roaming. You don't need to take them all out. The leader of this troop has a second marker on him, indicating that the chip can be simply looted off him.
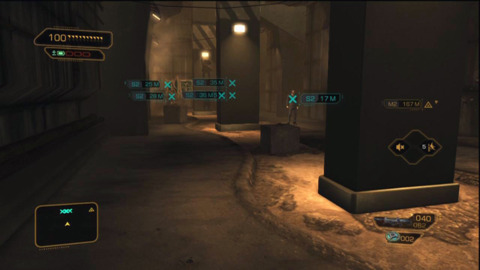
If you want to deal with all five of them, start with the one on the far left. He will occasionally walk into the side alley, leaving him vulnerable to sneaky takedown. Next use a takedown or silent stun on the guard on the mid left. The next two takedowns are much easier with the back augmentations: this will allow you to subdue both the leader and the other suit standing by the barrel.
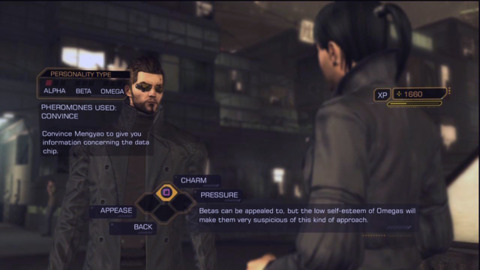
If you're quick on the draw you can also stun one of them with your gun and takedown the other. Last, takeout the last suit that was supposed to be watching the front. Take the dropped datachip and report back to Mengyao. If you have a social Enhancer you can use a Beta Charm on the lady to learn just what you risked your neck for.
Seaport
Stellar Blade - (Almost) All Outfits River City Girls 2 - New Playable Characters DLC Reveal!! Sand Land Review That Time I Got Reincarnated as a Slime ISEKAI Chronicles – Official Announcement Trailer Paper Mario: The Thousand-Year Door – Official Switch Overview Trailer MEGATON MUSASHI W: WIRED – Official OP “MUSASHI English Ver.” Trailer Fallout 4 Next Gen Update Comparison Granblue Fantasy: Relink - New Content Trailer Modern Warfare III - New Season 3 Reloaded Modern Warfare Zombies Update Stellar Blade - Official Launch Trailer | PS5 Games Gothic 1 Remake | Official Collector's Edition Trailer SaGa Emerald Beyond – Official Launch Trailer
Please enter your date of birth to view this video
By clicking 'enter', you agree to GameSpot's
Terms of Use and Privacy Policy
The Seaport is the point of no return. Not only are you about to say bye to China, this is one of the last chances to purchase items, weapons, and praxis. Make sure that you've completed everything you want before undertaking Tong's mission.
The gates of the port are locked closed. If you head into the guard outpost on the right you can hack the computer and open the gate doors. This will arouse the suspicion of the guards who will investigate your location. Since you are still in the parking lot you can detonate the cars and start a chain reaction that can easily clear out all of the enemies. Alternately, you can sneak behind the cars, swooping around the left and passing through the main gate as Belltower swarms the guard post.
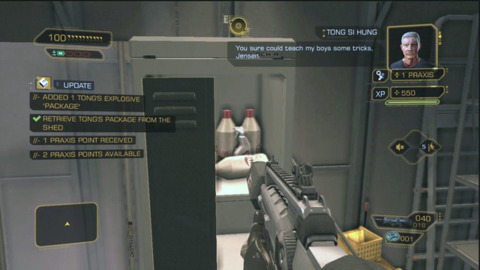
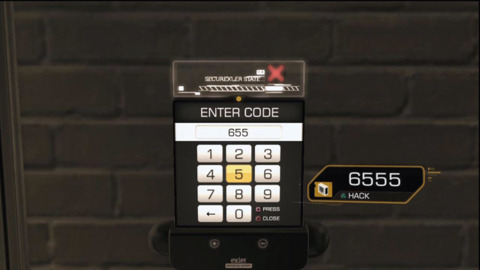
Your next goal is the shed on the far left. The locker inside contains the package that Tong requires for the job. Also, on top of the building is a sniper with a pocket security code of 6555. This is the pass for the balcony entrance to the main building. Use this later if you don't feel up to hacking.
Approach the main facility by either climbing up the side ladders or use leg enhancements to simply jump to the balcony. Another sniper is here, but he'll be distracted watching the cargo bay; use a takedown or stun to clear a path to the door. Use the passcode from the shed sniper or hack your way through the entrance and into the warehouse.

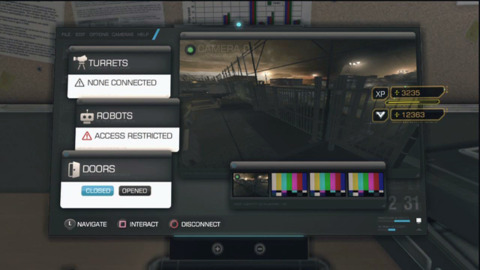
The warehouse is patrolled by four Belltower mercs on the ground, two more on the opposite catwalk, an auto turret, and a robot. There is a computer terminal on the far left that can be used to control both the turret and robot, which can easily wipeout the rest of the enemies. However, this is very dangerous as the terminal is sitting right near an open office window. You need to hack fast before Belltower spots you, as even one bullet will interrupt you hacking attempt.
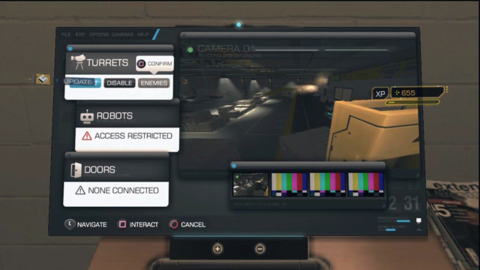
This office is also a good spot if you simply want to shoot all of the enemies dead. The small door will force the enemies to pile in one at a time, giving you an advantage at close range. If you want to destroy the robot use an EMP grenade as always. Alternately, if you lack the hacking skill to take the robot but can hack the turret, consider tossing the sentry down in the mech's path to keep the machines busy.

Last of all you can completely sneak through the whole area. There are ladders above the offices which you can use to jump from roof to roof. If you lack hacking, you will still need to loot the catwalk guard and get his passcode of 3295 (or you won't since it's here in the guide!). Once all of the guards are distracted or dead hack or use the code to enter Wang's office. Place the package on the table to finish up your adventure in Shanghai.
Omega Ranch
You'll arrive in the ranch without a proper functioning signals. The place is being jammed and you will have no waypoints until the device is turned off. Because of this, you might find yourself wondering around the facility.

The place is heavily guarded, but most of these patrols are standing or moving close to each other. If you haven't already, upgrade your back to perform two takedowns at once. As always silent takedowns are preferred. The first two soldiers you'll meet outside are not near anyone else, so they can be slaughtered if you feel like the messy approach.

Once these enemies are dealt with, move towards the left and across a wooden deck to find two more guards. Once again a dual takedown is ideal to keep things silent. Straight ahead will be three more enemies: two heavies and a stealth trooper; there is also a turret far down this hall as well. As before you can choose to use takedowns. However, a much more effective method is to sneak behind the railing on the right and hack the terminal on the far end. This will give you control of the turret and turn the Tyrant's machine against them.
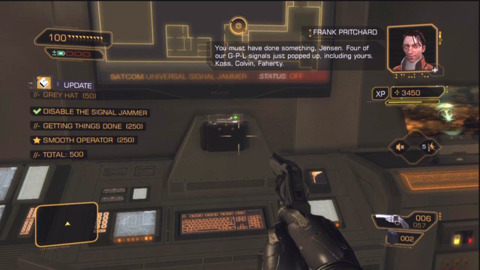
On the right side of this courtyard is a building containing two more guards and many lockers. Deal with these Tyrants and enter the room at the end of the hall. Inside this room are the controls to deactivate the jammer. You'll now have waypoints leading to each of the missing scientists. The building in the north east houses Colvin and Koss while Faherity is down in the underground labs.
Start by entering the northern building and through the decontamination station. On the bottom floor are two guards patrolling along with a turret in the far left corner; on the above floor another three soldiers are keeping watch. The safest bet is to sneak through the vents on the right and use them to circle around the room. The exit of the vents will place you near the turret's controls and is a good spot to stun or kill the guards. You can also crawl up the stairs to reach the second and third floors. One of the stealth troops on the second floor has the code to Colvin's office: 1504. If you want to obtain it yourself, takedown this runt and loot his goods. Head into the room on the far north east to save Colvin.
Koss is on the third floor in the north west. There are two quick ways to get to him. The first is to exit Colvin's room, head west and into the shutdown lab. With the heavy lifting augmentation you can move over a pile of containers and access an elevator to the third floor lab. Alternately, you can take the southern stairs and circle counter clockwise. This will lead you to two sets of laser beams and a panel that can be hacked. If the guards are dead or knocked out, hacking this terminal will be easy; otherwise you'll be more preoccupied with possibly getting caught or having a fight as you hack. Either way, once inside Koss' lab chat with the doctor to hear his info.

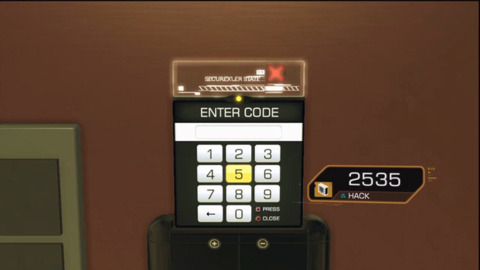
Faherity is inside the center building. You can either enter from the ground lobby or take the skyway bridge from the second floor. If you enter through the lobby, a stealth solder and a heavy will be guarding; take them out and make your way to the upper level. Here will be two more basic troops; take them down and loot them for terminal password: Keppler. Head into the room on the far right and use this passcode on the right side terminal to gain the code 5377. Additionally on top of the table is a pocket security with the code 2535. With these codes return to the first level and to the west to come to a laser grid. Enter 2535 to stop the lasers and enter the elevator on the right. You'll arrive on in the basement. Circle around to the center room to find Faherity.
With all three scientists saved, return to the court yard and travel further west. You'll come across two robots that can be destroyed with EMPs. Search the lockers around the area to stock up ammo and gear. At the far end of the hall is a terminal where you can plant Vasili's virus. Doing so will alarm several soldiers. However, if you stay hidden the group of them will run passed your location. Enter the elevator the guards arrived in to fight the third boss. If you stopped to have your augmentations recalled in China you'll have several handicaps during the battle. However, if you ignored the previous warning you'll actually be at normal power for this brawl.

Namir is fast strong, fast and uses cloaking. The fast firing assault rifle is among the best weapons for the fight, though the machine pistol and heavy rifle can also serve for this encounter. If you haven't already upgrade your defenses to withstand gas and EMPS. Namir loves to throw grenades, but with immunities they won't be a problem.
The Tyrant leader will often climb over the walls in an attempt to surprise you. However, you can also use this time to get in a few free shots. The easiest way to take him down is to keep circling around the walls and shoot him as he comes to you; don't bother actively trying to locate him. You'll have so many augments at this point that this boss fight won't be much trouble. After the fight restock your ammo and head down the path forward.
Broadcast Center
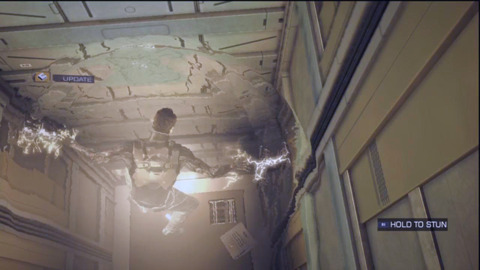
This is it: the final location of the game. At this point your last few Augmentations may be acquired less frequently, so purchase carefully. Start off the mission by heading through the vent on the far right of the complex. Dropping down here will take you into a flooded room that has been electrified. If your skin is augmented enough, this hazard will do no damage. Otherwise you'll need to climb over pipes and through vents to reach the otherside. Even if you can walk on electricity, the path is covered with mines like barnacles on a ship. Detonate these from afar with your gun or toss some boxes at them.
On the far end of the room is a breaker box that will turn off the electricity, along with a ladder to the second level. There aren't any enemies here, so it's a brisk walk towards the waypoint. However, stop in the open rooms and in ducts to gain extra ammo and guns. Just before the broadcast room will be a mounted turret blocking your path. You can either shoot it or back track to the room on the right. Hack the door here and again hack the terminal on the left to shut down the turret. Either way, enter the broadcast room to confront Darrow. There are several ways to talk him down, but Critique, Extrapolate, Extrapolate, Critique is a fast way make him surrender.
Once you resolve the situation, make your way back out of the building. Crazed enemies will be wondering the halls, zombie invasion style. They don't use guns, but the sheer numbers of them makes combat unwanted. It's best to avoid the foes, but your rifle and Typhoon can also be an easy means of culling the heard. Make your way to the elevator marked with a waypoint to descend. Take the next spiral staircase down to find a large group of disturbed Belltower guards. Quietly sneak to the right and travel through the ducts or kill all of the m if you feel like it. The burning truck in this warehouse has several ammo boxes that can be collected, though that might alarm the guards.
The ladder on the far right will lead to your main goal. The nice thing to keep in mind is that the crazed enemies won't climb or jump, allowing you to use the high level terrain to walk above them. An added benefit of taking the stealth approach is that there us a rocket launcher inside the crawl space between the roof. Either way, head through the broken window and out the door ahead. This will take you outside where a huge amount of enemies await. As with before, stealth will avoid an encounter all together, otherwise use area effect attacks such as the Typhoon or mines to clear them out.
Along the way you'll get calls from both Taggart and Sarif to be rescued. Either of these are mandatory, but might be worth your trouble. Taggart is in the main server room, which has been blocked with an inclined beam. However, this barrier can be crawled under. The room is patrolled by a robot, two security cams and a large number of ravenous augs in the room on the right. Sneak or fight your way through to locate Bill and hear out his alternate plans for Darrow's message.
Sarif is down in the machine room. There are plenty of signs and markers that will take you from the server room. The machine room is once again covered with out of control "monsters" as Taggert calls them. You can use your jumping upgrades to walk high above the foes. Alternately there are many explosive barrels in this room that can be detonated to kill everyone in sight. Either way, head forward into the next room and down the stairs. You'll need heavy lifting augmentations to move the barrier set up. Once a path is clear, enter inside and talk to Sarif about his plans.
After meeting with the partisans (or ignoring them completely), follow the waypoint to arrive at the catwalk leading to the core. There will be a heavy rifle along the way that you can use to mow down the crowd. A second solution is to use hacking, heavy lifting, and gas resistance. The duct on the left is blocked, but moving the block out of the way will lead to a room filled with gas. Hack the terminal inside to take control of an out turret on the far end that can defeat the enemies. The third option is to sneak along the lower rails on either side of the catwalk. This may still keep you vulnerable to an unhacked turret, but if you're fast enough it shouldn't be able to hit too hard. Upon reaching the cargo lift, hit the switch and end down to the core.
The Core
Ru has hooked herself up to the main computer and must be stopped. There are three turrets circling around the human-computers and destroying them with heavy weapons (rockets, laser rifle) will make your time easier. However, this isn't needed. Your objective is to kill all three of the human-computers and there are several means to do this:
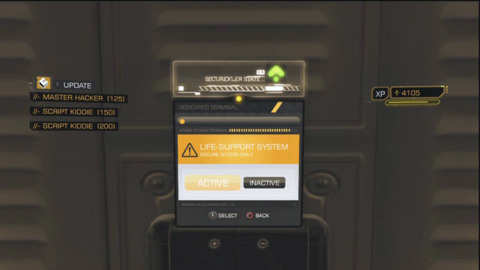
On the central hub is the life support system that can be hacked with a very high skill. If you can sneak by the turrets and are fast enough you can kill all three computers with one hack.
Option two is manually pressing the buttons by each pod. This will release each of the human-computers for a short time where they can be shot dead from close range. The third option is to hack the terminals on the upper levels that will permanently open the pods. These terminals are only guarded by thin glass, so if you haven't destroyed the turrets you will need to hack fast.
Each time one of the human-computers is killed, crazed troops or robots will enter to confront you. Use the Typhoon and EMPs to kill the respective enemies. If you kill the computers too quickly ,you may be swarmed by enemies. Also, every so often Ru will shock the ground; however your skin augmentation will prevent damage.
Once all three human-computers are dead, Ru's shield will be lowered. Walk up to the villain and shoot her a few times to end the boss fight.
After a cutscene, walk into the room passed Ru's charred corpse and speak with Eliza. Depending on who you saw, pick from Darrow, Sarif, or Taggart's ending; alternately you can turn your back on them all and travel down the path on the left for the fourth ending. Once making your selection, sit back and watch the conclusion of Deus Ex Human Revolution.
Xbox 360 Achievements
| Achievement Name | How To Earn | Reward |
|---|---|---|
| Acquaintances Forgotten | Follow Pritchard's lead to uncover the truth. | 10 |
| Bar Tab | Help the Hive Bartender settle a tab. | 10 |
| Cloak and Daggers | Deal with the man in the shadows. | 10 |
| Consciousness is Over-rated | Knock out 100 enemies in a single playthrough. | 15 |
| Corporate Warfare | Protect a client's interests by performing a less-than-hostile takeover. | 10 |
| Deus Ex Machina | Experience all the different endings that Deus Ex: Human Revolution has to offer. | 50 |
| Doctorate | Read all 29 unique XP books within a single playthrough. | 50 |
| First Hack | Perform your first Hack successfully. | 5 |
| First Takedown | Perform your first Takedown. Civilians don't count, so be nice. | 5 |
| Foxiest of the Hounds | Complete Deus Ex: Human Revolution without setting off any alarms. | 100 |
| Gun Nut | Fully upgrade one of your weapons. | 20 |
| Hax0r1! | Successfully hack 50 devices within the same playthrough. | 15 |
| Legend | Complete Deus Ex: Human Revolution at its hardest setting without ever changing the difficulty. | 100 |
| Lesser Evil | Deal with Mr. Carella's indiscretion. | 10 |
| Motherly Ties | Put a grieving mother's doubts to rest. | 10 |
| Opportunist | Perform 50 takedowns within the same playthrough. (Civilians don't count.) | 15 |
| Pacifist | Complete Deus Ex: Human Revolution without anyone dying by your hand. (Boss fights don't count.) | 100 |
| Rotten Business | Help a lady in the oldest of professions clean house. | 10 |
| Shanghai Justice | It may take some sleuthing, but justice must be served. | 10 |
| Smash the State | Help Officer Nicholas take out the trash. | 10 |
| Talion A.D. | Descend into the bowels of an urban jungle and confront a warrior-priest. | 10 |
| Transhumanist | Fully upgrade your first augmentation of choice. | 5 |
| Trooper | Complete Deus Ex: Human Revolution. | 50 |
| Up the Ante! | Upgrade your first weapon of choice. | 15 |
| Balls | Seems you like playing with balls, eh? | 5 |
| Darker Shades | You convinced a fast-talking bartender to let you see Tong Si Hung. | 15 |
| Ghost | You made it through an entire hostile area without so much as a squeak. | 15 |
| Good Soul | Against all odds, you saved Faridah Malik's life. | 15 |
| Guardian Angel | You paid poor Jaya's debt in full. How very... humane... of you. | 10 |
| Hangar 18 | You found and read the secret message. Now you know too much... | 10 |
| Kevorkian Complex | You granted a dying man his final request. | 10 |
| Ladies Man | You convinced Mengyao to spill the beans on the mysterious Hyron Project. | 10 |
| Lucky Guess | Next time, Jacob better use a more complex code to arm his bombs. | 10 |
| Old School Gamer | You found all the hidden story items in Megan's office. Point and Click much? | 10 |
| Sentimental Value | You kept Megan's bracelet for yourself. Apparently, letting go really is the hardest part. | 10 |
| Super Sleuth | You really nailed your case against Lee Hong. | 10 |
| The Bull | You defeated Lawrence Barrett, elite member of a secret mercenary hit squad. | 25 |
| The D Project | You watched the entire credit list and saw the surprise at the end. | 15 |
| The Desk Job | You convinced Wayne Haas to let you into the morgue. | 15 |
| The End | You defeated Zhao Yun Ru and destroyed the Hyron Project. | 25 |
| The Fall | You sent Diamond Chan on the trip of a lifetime. | 10 |
| The Final Countdown | You showed millionaire Hugh Darrow that his logic was flawed. | 15 |
| The Last Straw | You talked Doctor Isaias Sandoval out of suicide. | 15 |
| The Mantis | You defeated Yelena Fedorova, elite member of a secret mercenary hit squad. | 25 |
| The Snake | You defeated Jaron Namir, Leader of Belltower's Elite Special Operations Unit. | 25 |
| The Take | Greedy bastard. You accepted O'Malley's blood money and let him go. | 10 |
| The Throwdown | You convinced the smooth-talking politician Bill Taggart to tell the truth in public. | 15 |
| Unforeseen Consequence | You convinced Zeke Sanders to let his hostage go. | 15 |
| Yes Boss | You had an argument with your boss, David Sarif, and won. | 15 |
PlayStation 3 Trophies
| Achievement Name | How To Earn | Reward |
|---|---|---|
| Acquaintances Forgotten | Follow Pritchard's lead to uncover the truth. | Bronze |
| Bar Tab | Help the Hive Bartender settle a tab. | Bronze |
| Cloak and Daggers | Deal with the man in the shadows. | Bronze |
| Consciousness is Over-rated | Knock out 100 enemies in a single playthrough. | Bronze |
| Corporate Warfare | Protect a client's interests by performing a less-than-hostile takeover. | Bronze |
| Deus Ex Machina | Experience all the different endings that Deus Ex: Human Revolution has to offer. | Silver |
| Doctorate | Read all 29 unique XP books within a single playthrough. | Silver |
| First Hack | Perform your first Hack successfully. | Bronze |
| First Takedown | Perform your first Takedown. Civilians don't count, so be nice. | Bronze |
| Foxiest of the Hounds | Complete Deus Ex: Human Revolution without setting off any alarms. | Gold |
| Gun Nut | Fully upgrade one of your weapons. | Bronze |
| Hax0r1! | Successfully hack 50 devices within the same playthrough. | Bronze |
| Legend | Complete Deus Ex: Human Revolution at its hardest setting without ever changing the difficulty. | gold |
| Lesser Evil | Deal with Mr. Carella's indiscretion. | Bronze |
| Motherly Ties | Put a grieving mother's doubts to rest. | Bronze |
| Opportunist | Perform 50 takedowns within the same playthrough. (Civilians don't count.) | Bronze |
| Pacifist | Complete Deus Ex: Human Revolution without anyone dying by your hand. (Boss fights don't count.) | Gold |
| Rotten Business | Help a lady in the oldest of professions clean house. | Bronze |
| Shanghai Justice | It may take some sleuthing, but justice must be served. | Bronze |
| Smash the State | Help Officer Nicholas take out the trash. | Bronze |
| Talion A.D. | Descend into the bowels of an urban jungle and confront a warrior-priest. | Bronze |
| Transhumanist | Fully upgrade your first augmentation of choice. | Bronze |
| Trooper | Complete Deus Ex: Human Revolution. | Silver |
| Up the Ante! | Upgrade your first weapon of choice. | Bronze |
| Balls | Seems you like playing with balls, eh? | Bronze |
| Darker Shades | You convinced a fast-talking bartender to let you see Tong Si Hung. | Bronze |
| Ghost | You made it through an entire hostile area without so much as a squeak. | Bronze |
| Good Soul | Against all odds, you saved Faridah Malik's life. | Bronze |
| Guardian Angel | You paid poor Jaya's debt in full. How very... humane... of you. | Bronze |
| Hangar 18 | You found and read the secret message. Now you know too much... | Bronze |
| Kevorkian Complex | You granted a dying man his final request. | Bronze |
| Ladies Man | You convinced Mengyao to spill the beans on the mysterious Hyron Project. | Bronze |
| Lucky Guess | Next time, Jacob better use a more complex code to arm his bombs. | Bronze |
| Old School Gamer | You found all the hidden story items in Megan's office. Point and Click much? | Bronze |
| Sentimental Value | You kept Megan's bracelet for yourself. Apparently, letting go really is the hardest part. | Bronze |
| Super Sleuth | You really nailed your case against Lee Hong. | Bronze |
| The Bull | You defeated Lawrence Barrett, elite member of a secret mercenary hit squad. | Bronze |
| The D Project | You watched the entire credit list and saw the surprise at the end. | Silver |
| The Desk Job | You convinced Wayne Haas to let you into the morgue. | Bronze |
| The End | You defeated Zhao Yun Ru and destroyed the Hyron Project. | Bronze |
| The Fall | You sent Diamond Chan on the trip of a lifetime. | Bronze |
| The Final Countdown | You showed millionaire Hugh Darrow that his logic was flawed. | Bronze |
| The Last Straw | You talked Doctor Isaias Sandoval out of suicide. | Bronze |
| The Mantis | You defeated Yelena Fedorova, elite member of a secret mercenary hit squad. | Bronze |
| The Snake | You defeated Jaron Namir, Leader of Belltower's Elite Special Operations Unit. | Bronze |
| The Take | Greedy bastard. You accepted O'Malley's blood money and let him go. | Bronze |
| The Throwdown | You convinced the smooth-talking politician Bill Taggart to tell the truth in public. | Bronze |
| Unforeseen Consequence | You convinced Zeke Sanders to let his hostage go. | Bronze |
| Yes Boss | You had an argument with your boss, David Sarif, and won. | Bronze |
| Platinum | You unlocked every trophy in the game. | Platinum |
Got a news tip or want to contact us directly? Email news@gamespot.com
Join the conversation