Command & Conquer: Generals Walkthrough
This comprehensive GameSpot Complete Walkthrough to Command & Conquer: Generals includes unit strategies, general points, and mission walkthroughs for China, the GLA, and the USA, as well as multiplayer tips and more.
Design by James Cheung
Command & Conquer: Generals places you in control of China, the Global Liberation Army (GLA), or the United States in an all-out war for supremacy. Command & Conquer: Generals is Electronic Arts' latest addition to the popular real-time strategy series, and it includes three unique armies, frenetic RTS action, and addictive gameplay.
This comprehensive GameSpot Complete Game Guide to Command & Conquer: Generals includes:
- China, GLA, and USA Unit Strategies - These sections provide unit descriptions and strategies (applicable to solo, skirmish, or multiplayer) for China, the GLA, and the USA.
- General Points - Look here for a complete rundown of "general points" options for China, the GLA, and the USA. You'll also find suggestions on spending your general points to suit your style of play. This section is best suited for multiplayer or skirmish mode.
- China, GLA, and USA Mission Walk-Throughs - These sections offer complete mission walk-throughs for all three campaigns.
- Multiplayer Tips - In this section, you'll find specific strategies for succeeding in Command & Conquer: Generals multiplayer battles.
Table of Contents
Chapter 1: China Unit StrategiesTank Hunter
Hacker
Black Lotus
Battlemaster
Dragon Tank
Gatling Tank
Overlord
Inferno Cannon
Nuke Cannon
MiG
RPG Trooper
Terrorist
Angry Mob
Hijacker
Jarmen Kell
Technical
Scorpion
Marauder
Quad Cannon
Rocket Buggy
Scud Launcher
Toxin Tractor
Radar Van
Missile Defender
Colonel Burton
Pathfinder
Crusader
Paladin
Humvee
Ambulance
Tomahawk
Aurora Bomber
Comanche
Raptor
Stealth Fighter
Chinook
Chapter 5: China Mission Walk-Throughs
Mission 2 - Hong Kong Crisis
Mission 3 - A Flood of Violence
Mission 4 - Broken Alliances
Mission 5 - Scorched Earth
Mission 6 - Dead in Their Tracks
Mission 7 - Nuclear Winter
Mission 2 - Almaty Region, Kazakhstan; Aid Supplies Drop Zone
Mission 3 - Astana City; Chinese-Occupied Capital of Kazakhstan
Mission 4 - Adana, Turkey; Incirlik Air Base
Mission 5 - Western Shore of the Aralea Sea, Kazakhstan; Toxic Waste Containment and Disposal Facilities
Mission 6 - Somewhere Near Lenger, Kazakhstan; Splinter-Cell-Controlled Region
Mission 7 - Baikonur Cosmodrome, Southern Kazakhstan; Soviet-Era Rocket Launch Facility
Mission 2 - Operation: Treasure Hunt
Mission 3 - Operation: Guardian Angel
Mission 4 - Operation: Stormbringer
Mission 5 - Operation: Blue Eagle
Mission 6 - Operation: Desperate Union
Mission 7 - Operation: Last Call
Chapter 1: China Unit Strategies
This section provides unit descriptions and strategies for China.
Red Guard
The Red Guard are the basic infantry of the Chinese. In an emphasis of the Chinese numbers advantage, two Red Guard are produced at a time. Use Red Guard troops in larger groups and note the star symbol underneath their feet--in groups, Red Guard receive a "horde" bonus that increases their effectiveness. Research nationalism at the Chinese propaganda center to increase the Red Guard horde bonus by 25 percent. You can also upgrade the Red Guard with the ability to capture buildings (researched at the barracks). Finally, improve Red Guard forces by spending a "general point" on "Red Guard training," which makes all Red Guard forces emerge from the barracks as veterans.
Use the Red Guard to garrison civilian structures or capture oil derricks, refineries, and hospitals. The Red Guard are also effective against other infantry and lightly armored vehicles. Garrison the Red Guard in a troop crawler for fast transport, which is useful in reaching remote oil derricks quickly (a purchased troop crawler comes equipped with Red Guard unit inside). As with most infantry, watch out for approaching heavily armored vehicles. Get out of the way or be squished.
Tank Hunter
The Chinese tank hunter is aptly named--use this infantry unit against heavily armored vehicles and avoid using it against other infantry. Like the Red Guard, the tank hunter receives a horde bonus in large groups. Plus, it's simply better to use the tank hunter in numbers. The more the better; a squad of tank hunters can eliminate an approaching tank before getting run over. Purchase "nationalism" at the propaganda center and the tank hunters will have their horde bonus increased by 25 percent. The tank hunter can defend itself against an incoming armored unit with its TNT ability. Click on the TNT icon, then on an enemy vehicle to set the timed charge.
One of the most useful ways of utilizing tank hunters is to garrison them inside structures. They make for an excellent defense against both ground and air attacks, especially if they're near your supply depots. This is fortunate, because a large number of multiplayer maps have a high concentration of civilian buildings surrounding the supply depots, and controlling these with your tank hunters is a cheap and effective way of protecting your expansions.
Hacker
Hackers may not carry weapons, but that doesn't mean they can't inflict some heavy damage. For starters, the hacker can disable enemy buildings. Take out some power plants to cripple enemy defenses, or neutralize a war factory to cease enemy vehicle production. But the hackers' more widely used function is the ability to "hack" the Internet for cash. Each hacker generates a small amount of supplies, and the amount of supplies he generates increases over time. Produce a large group of hackers and watch the supplies flow in. Hackers are fragile, though, and they can't defend themselves. Protect them carefully, either by hiding them in a corner or by spreading them out. If they're all packed together, one missile from a jet can take them all out. Because of their cost and the time it takes to recoup the expense, hackers are likely best used in team games or in extended one-on-one games.
Black Lotus
The Black Lotus is the Chinese specialty unit. She can move with stealth, capture structures, disable vehicles, and hack cash from enemy supply centers. Like the hacker, the Black Lotus can't defend herself, so avoid moving within view of enemy stealth detection. Look for holes in your enemy's defenses and sneak her behind the line. Capturing buildings and hacking cash are her most useful abilities. Grab an enemy building and then sell it or start stealing supplies from the enemy to fund your war machine. Like other special units, you can only have one Black Lotus at any one time.
Battlemaster
The Battlemaster is the basic Chinese tank, and it's used primarily against enemy armored units. Cheaper but not as strong as the Overlord, the Battlemaster benefits from the Chinese horde bonus--Battlemasters are more effective in groups. Upgrade the Battlemaster with nationalism, which increases the horde bonus by 25 percent. You can further upgrade the Battlemaster with uranium shells (this technology improves Battlemaster damage by 25 percent) and nuclear tanks (this technology improves Battlemaster speed by 25 percent) at the nuclear missile silo. Utilize the Battlemaster against enemy armored vehicles or structures. Avoid tangling with infantry unless you plan to run them over.
Dragon Tank
Use the Chinese dragon tank--essentially a flame tank--against enemy infantry. It's especially useful in frying troops garrisoned in a civilian building. Avoid confronting enemy armored vehicles and command the dragon tank instead against the enemy's infantry line. One exception to this rule is the GLA angry mob, which is better countered with the Gatling tank. Upgrade the dragon tank with "black napalm" at the war factory--it increases dragon tank damage by 25 percent. Spread the dragon tank's flame by using its fire wall ability, which is useful against a large line of enemy infantry.
Gatling Tank
As an all-purpose infantry killer, the Chinese Gatling tank serves its purpose well. Use the Gatling tank against lightly armored vehicles and all types of infantry. Decent range and speed provide another advantage for the Gatling tank--early harassment. Build a Gatling tank early and send it to the enemy's base. Drive the Gatling tank around and wreak havoc on the enemy's resource center. You can also use the Gatling tank against air units, so harass American Chinook collectors as well. Upgrade the Gatling tank with chain guns at the war factory--it increases the effectiveness of the Gatling tank and the Gatling cannon (both the defensive structure and the Overlord improvement) by 25 percent. Support your Battlemaster and Overlords with anti-infantry and anti-air Gatling tanks. For the price, it's arguably China's best unit. Building Gatling tanks and Battlemasters in equal measure is highly effective.
Troop Crawler
Transport up to eight infantry units in the Chinese troop crawler (which comes out of the war factory preloaded with Red Guard units). Use the troop crawler to send Red Guard units to specific map positions. For example, send out a loaded troop crawler upon discovering the location of an oil derrick, hospital, or important civilian building that should be garrisoned with your troops. The troop crawler also serves a couple of vital secondary roles--stealth detection and infantry heal. Keep a troop crawler with your battle group to detect mines, disguised bomb trucks, camouflaged rebels, Colonel Burton, or anything else that utilizes stealth. Position a troop crawler in your base to prevent enemy stealth incursion. Make sure you place defenses nearby to deal with the cloaked enemy unit. Garrison wounded infantry in the troop crawler to heal them.
Overlord
The pinnacle of Chinese armor, the Overlord tank is expensive and slow, and it takes a long time to build, but it's extremely powerful. Overlord tanks have three unique upgrades. Each Overlord tank can be improved with a bunker, a Gatling cannon, or a speaker tower. The bunker can house infantry providing additional firepower, the Gatling cannon gives the Overlord tank support against enemy infantry, and the speaker tower heals any wounded units around the tank. Researching "chain guns" increases the power of the Overlord's Gatling cannon by 25 percent. You can further upgrade the Overlord tank with uranium shells (damage increased by 25 percent) and nuclear tanks (speed increased by 25 percent). Support Overlord tanks with anti-infantry and anti-air units. Beware of angry mobs or bomb trucks looking for an expensive target. If necessary, Overlords can run over enemy tanks!
Inferno Cannon
The Chinese inferno cannon launches napalm bombs at long range. Napalm is extremely affective against infantry groups but weaker against armored targets. The inferno cannon's immense range provides an element of surprise against infantry defenses or even a GLA worker group. They're also effective at dismantling base defenses because of their long range. The napalm bombs can be evaded by mobile units, so if you need anti-infantry, consider Gatling tanks instead. Upgrade the inferno cannon with black napalm at the war factory (damage increased by 25 percent). Spend a general point on artillery training to make all inferno cannons emerge from the war factory as veterans.
Nuke Cannon
The Chinese nuke cannon requires both the propaganda center and an expenditure of a general point--but it's worth the effort. Though slow-moving and rather weakly armored, the nuke cannon devastates both units and structures. Immobile when firing, the nuke cannon settles in and then launches a small nuclear warhead at the designated target. It's a powerful weapon against a tightly packed group of enemy units (if you see a nuke cannon, spread your units out!). Its damage lingers; the radiation left behind by the explosion slowly damages units within the area of effect. US players can clear up the radiation with an ambulance, but by then it's probably too late.
Keep nuke cannons behind your primary forces and guard the pricey unit well. It's great for bombarding enemy expansions, but expect immediate retaliation. Keep anti-air support nearby or you'll get bombed. Keep anti-stealth nearby or expect to receive a bomb truck surprise. Upgrade the nuke cannons by spending a general point on artillery training to make all nuke cannons emerge from the war factory as veterans.
MiG
The sole units of the Chinese air force, MiGs drop napalm firestorms on their targets. Use them to support your ground force or bombard undefended expansions or structures. Avoid anti-air units; MiGs are rather easily shot down and are expensive to replace. Upgrade the MiG at both the airfield and the war factory. Research "MiG armor" for a 25 percent benefit. Increase the MiG damage by 25 percent by researching black napalm at the war factory.
Chapter 2: GLA Unit Strategies
This section provides unit descriptions and strategies for the Global Liberation Army.
Rebel
The rebel is the GLA's basic infantry unit. Like the Chinese Red Guard or the American Ranger, the rebel is most effective against other infantry and lightly armored vehicles. The rebel can also benefit from the "capture building" upgrade (researched at the barracks), which allows the rebel to capture important civilian structures and enemy buildings. Rebels also benefit from a few more technologies. Research "AP bullets" at the black market to increase damage by 25 percent. The "camouflage" upgrade, purchased at the palace, adds stealth capability to stationary rebels. Spend "general points" on the "rebel ambush" upgrade to create a squad of rebels anywhere in your line of sight. Surprise your enemy in an undefended area of his or her base with a rebel ambush and start capturing buildings--or destroying them!
RPG Trooper
The RPG trooper counters heavily armored vehicles and can shoot down certain launched missiles, such as the Tomahawk. Avoid using RPG troopers against anti-infantry vehicles, such as the humvee or Gatling tank. Garrison RPG troopers in technicals to increase the vehicle's potency against armored enemies and add to the vehicle's ability to shoot down launched missiles. RPG troopers also provide anti-air support for the GLA. Improve RPG troopers by researching "AP rockets" at the black market--it increases rocket damage by 25 percent. Garrison RPG troopers in buildings around supply docks to aid in their defense.
Terrorist
Terrorists are essentially suicide bombers. Target an enemy vehicle or structure to detonate the terrorist's explosive at close quarters. Prevent terrorist attacks with anti-infantry, such as humvees or Gatling tanks. Terrorists can capture neutral cars, turning the vehicle into a car bomb, which is basically a faster version of the terrorist. Fragile but inexpensive units, terrorists play a significant role in GLA strategy. Utilize them against undefended expansions or in a sneak attack on an enemy base. Explosions are useful in defense too! Crush a potential invader with some flanking terrorists. Properly executed, a terrorist defense expends very little resources to decimate your enemy's collection of vehicles, allowing you to then counterattack! Terrorists are much more effective against clusters of enemy units than against buildings; it's tougher to take down structures with terrorists.
Angry Mob
The angry mob is one of the most unique and, in many instances, most powerful units available for the GLA. Create the angry mob at the barracks after erecting its prerequisite, the palace. Firing hand weapons and tossing Molotov cocktails, the angry mob can be effective against infantry, vehicles, and structures. If you plan on using the angry mob, researching the "arm the mob" upgrade at the palace is a must. This technology gives AK-47s to the mob, increasing its damage potential.
A group of six or more upgraded mobs, though expensive, can level buildings in mere seconds. Countering the mob with anti-infantry vehicles can be tough because its cocktails can blow apart the vehicle before much damage is done. Air units are an optimum counter; the mob can't defend itself against air attacks. Angry mobs also can't travel through the GLA tunnel networks.
Hijacker
GLA hijackers require barracks, a palace, and the use of a three-star general point to produce. Hijackers remain cloaked when stationary and can capture enemy vehicles (though not vehicles with second- or third-level veteran status). Hijack a US or Chinese construction dozer and you can build their structures! Keep a hijacker close during an impending skirmish. Capture one of the enemy's attacking vehicles to create quite a diversion. Meanwhile, your units will continue to pound away at the enemy forces, and you can send in more hijackers to steal more of the enemy's units. Hijack China's supply trucks to cripple its economy.
Jarmen Kell
Jarmen Kell is the GLA's unique unit--he's a sniper with the ability to eliminate an enemy infantry unit with a single shot. Jarmen remains cloaked when stationary; counter him with anti-stealth units. The GLA sniper can also shoot out vehicle drivers, permitting an easy vehicle capture. Jarmen's greatest weakness (other than the fact you can only have one at any single time) is the slow reload time on his sniper rifle. A group of Rangers armed with flash-bang grenades can uproot Jarmen from building fairly easily. If you garrison Jarmen in a building, the building remains neutral--it doesn't turn your team color, which would give away the sniper's position.
Technical
The GLA's technical is a lightly armored anti-infantry vehicle. The technical is one of three GLA vehicles that can be upgraded by running over the scrap left behind by destroyed enemy vehicles. Run over two piles of scrap to upgrade the technical with a rocket attack. You can upgrade the technical via general points--spend a one-star general point on "technical training" to cause all technicals to emerge from the arms dealer as veterans. Research AP bullets at the palace to increase technical damage by 25 percent. Utilize the technical as an infantry transport. Put some terrorists or hijackers inside and drop them off in the heat of battle. Send them at their enemy unit prey to either destroy or capture them!
Scorpion
Scorpions are the primary armored unit for the GLA. They're not as strong as the base tanks of China or the USA, but they're cheaper and can be upgraded to improve their abilities. The "Scorpion rockets" upgrade, available at the arms dealer, gives the Scorpion tanks a rocket attack. The rocket doesn't fire continuously, but the rocket can eliminate several infantry units in a single shot and inflict decent damage upon armored enemies. Research "toxin shells" at the palace to add anthrax to the Scorpion tank's projectiles. Anthrax causes lingering damage within its radius and gives the Scorpion better ability against infantry. Improve the Scorpion's rocket attack by researching AP rockets at the black market--it increases rocket damage by 25 percent. After enhancing the Scorpion with toxin shells, research "anthrax beta" at the palace to increase anthrax damage by 25 percent.
Marauder
The GLA Marauder, which is available only upon spending a one-star general point, is stronger than the Scorpion--it features improved range and better armor. Furthermore, like the technical, the Marauder can be upgraded by collecting the piles of scrap left behind by destroyed enemy vehicles. Each pile increases the size of the Marauder cannon, and at the highest level, the Marauder resembles a smaller version of China's Overlord tank. Research toxin shells at the palace to add anthrax to the Marauder's projectiles. It's a worthy upgrade on Scorpion tanks, particularly if your opponent is using a tank force. After enhancing the Marauder with toxin shells, research anthrax beta at the palace to increase anthrax damage by 25 percent.
Quad Cannon
The quad cannon is the staple of the GLA's anti-air abilities. Against an American opponent, it's virtually mandatory to keep groups of quad cannons within your attack group or defenses at all times. Like the technical and the Marauder, the quad cannon can be upgraded by running over the scrap piles left by destroyed enemy units. The upgrades improve the quad cannon's rate of fire, which further improves the unit's abilities against air targets. Against ground targets, the quad cannon suffers against armored enemies. It's lightly armored and best used against infantry or other lightly armored enemies. Research AP bullets at the black market to increase the quad cannon's damage by 25 percent.
Rocket Buggy
The rocket buggy's greatest advantage is its speed. This GLA unit can run circles around slow tanks or even slower Scud launchers and nuke cannons. The rocket buggy fires its volley of rockets and then must take time to reload. The reload time, combined with the buggy's speed, encourages hit-and-run tactics. Bombard an enemy unit and then retreat to reload. Research buggy ammo at the black market to increase the number of rockets per volley by 25 percent. Increase the rocket buggy's damage by 25 percent by researching AP rockets, which are also available at the black market. Use its speed! Rocket buggies are easily destroyed if left in range of enemy units.
Bomb Truck
The GLA's bomb truck is an expensive but potentially game-turning unit that can disguise itself as other vehicles. It is best used against players who neglect anti-stealth measures in building their main army or base defenses. You can upgrade the bomb truck. Select the bomb truck and choose a high-explosive device, biochemical explosion, or both. The unit's possibilities are limitless. Sneak a bomb truck into an attacking enemy force (go for the highest concentration of units or the strongest enemy unit), or stream a group of trucks into an unguarded enemy base or expansion. In a team game, disguise the bomb truck as one of your enemy's units and then send the bomb into his or her ally's base. In terms of gaining the upper hand in battle, bomb trucks are most effective against a cluster of enemy units. As you outnumber the enemy, you can control expansions and, eventually, his or her base.
Scud Launcher
Available upon spending a one-star general point and building a palace, the Scud launcher is the GLA's long-range artillery weapon. It's expensive, slow to build, and quite fragile--the Scud launcher must be protected by other units, especially anti-air, in order to survive for any length of time. You can toggle between explosive or anthrax warheads (use explosive against structures). Pummel a tightly packed group of enemy units or bombard an expansion from long range. Upgrade the Scud launcher's anthrax warhead at the palace--research anthrax beta, which increases anthrax damage by 25percent.
Toxin Tractor
The GLA's toxin tractor is an excellent anti-infantry unit, comparable to China's dragon tank. Use the toxin tractor to uproot infantry from a garrisoned structure or bunker or wipe out an entire group in battle. It's a fragile vehicle, so don't send the toxin tractor to your front line. Lead with other troops and slide the tractor in to release its toxin on lightly armored or infantry units. Upgrade the toxin tractor at the palace--research anthrax beta to increase anthrax damage by 25 percent.
Radar Van
The GLA must produce a radar van in order to utilize the minimap. The radar van also serves as the GLA's anti-stealth unit. Producing multiple radar vans isn't a bad idea, especially if you keep one with your main forces or at your expansions to detect enemy stealth. Hide another in a corner of your base to serve as your radar, as the other vans may be destroyed in combat. Keep a radar van alive so you won't lose the minimap view; a radar blackout doesn't bode well for maintaining solid defense.
Chapter 3: USA Unit Strategies
This section provides unit descriptions and strategies for the USA.
Ranger
The Ranger is the American answer to the Chinese Red Guard and GLA rebel. Like those units, the Ranger is a basic infantry unit best used against other infantry or lightly armored vehicles. Upgrade Rangers with the "capture building" technology at the barracks and then use a Ranger to capture important civilian buildings, such as oil derricks and hospitals. Much like with Red Guard units and rebels, garrison Rangers inside a building for added protection. Rangers can work in conjunction with American Chinooks (resource collectors and air transports). When inside a Chinook, the Rangers can airdrop into a garrisoned building to take control from the inside. You can research "flash-bang grenades" at the barracks to increase the Ranger's potency against garrisoned structures and even infantry groups, such as the GLA's angry mob. Rangers can also be delivered to a designated area by spending "general points" on the "para drop" ability.
Missile Defender
The missile defender is the American equivalent of China's tank hunter and the GLA's RPG trooper. Like those units, the missile defender is best used against enemy armored vehicles and structures--avoid using the defender against other infantry. Use them to garrison structures near supply centers or choke points, as the missile defender provides excellent defense against approaching enemy vehicles. The missile defender features a laser-guided option for increased rocket accuracy. Place some missile defenders in a humvee for faster, more-mobile anti-tank support.
Colonel Burton
Colonel Burton is the USA's unique unit, and only one can be built at any given time. He's feature-packed: He uses stealth, he carries a knife for silent infantry killing, he uses an awesome firearm that's most effective against infantry, and he can place timed or remote charges on structures. Keep anti-stealth units nearby or pay the price for letting Colonel Burton sneak behind your defenses. Use Burton with care; at the cost of 1,500 in supplies, he's the equivalent of a nice-sized squad of missile defenders.
Pathfinder
The pathfinder carries a sniper rifle and specializes in infantry termination. Plus, the pathfinder enters stealth mode when standing still. Garrison pathfinders in humvees for increased anti-infantry support--they're particularly effective in taking out GLA Stinger sites (the pathfinders eliminate the RPG troopers inside). Place pathfinders inside civilian buildings to mow down approaching infantry, but expect to be blasted with a toxin tractor or dragon tank. Protect pathfinders against anti-infantry enemies with missile defenders or Crusaders.
Crusader
The Crusader may not be the mightiest tank in the American arsenal, but it's definitely no slouch. As with other armored vehicles, use the Crusader against vehicles and structures and avoid infantry, particularly infantry specialized in eliminating tanks (run over those infantry if necessary!). Upgrade Crusaders at the strategy center with "composite armor"--it increases Crusader armor by 25 percent. The Crusader can be upgraded with the "battle drone," primarily for repair, and the "spy drone," for improving sight radius and scouting.
Paladin
The Paladin, which requires the expenditure of a general point to create, is slightly more powerful than the Crusader but offers a unique ability--a laser that can shoot down missiles, such as the GLA's Scud missiles. Other than its laser ability, utilize the Paladin as you would the Crusader. Concentrate fire on vehicles and avoid infantry engagements, especially against tank hunters, missile defenders, and RPG troopers. Like other American vehicles, the Paladin can be upgraded with the battle drone, primarily for repair, and the spy drone, for improving sight radius and scouting.
Humvee
The quick humvee is an excellent counter for enemy infantry. But its ability to hold five troops--all of whom can fire from the humvee--makes the vehicle even more useful. Place missile defenders in a humvee to provide strength against armored units, garrison pathfinders in a humvee to increase its abilities against infantry (an excellent way to take out GLA Stinger sites), or use Rangers for increased firepower. Humvees are also great for quickly shuttling infantry to oil derricks. Upgrade the humvee with "TOW missile" technology, which is available at the war factory. Like other American vehicles, the humvee can be upgraded with the battle drone, primarily for repair, and the spy drone, for improving sight radius and scouting.
Ambulance
The ambulance is a humvee that transports three infantry units, can heal infantry wounds, and can clean up toxins left behind by nuke or anthrax attacks. The ambulance is certainly a must if you're using large groups of infantry. Keep the ambulance close to mend your infantry's wounds--it's certainly cheaper than replenishing your force! If you've captured a hospital, the ambulance becomes less necessary (though it still provides support by cleaning up toxins left behind by nukes and biological weapons).
Tomahawk
The Tomahawk missile launcher serves as the USA's artillery weapon. The vehicle fires powerful Tomahawk missiles at long range, and it is especially useful for assaults on bases, garrisoned structures, expansions, or defensive emplacements. Beware, though--the Tomahawk missiles can be shot down by Stinger sites or Paladin lasers. Tomahawk missile launchers are extremely fragile and must be supported with other American forces to be effective. Like other American vehicles, the Tomahawk missile launcher can be upgraded with the battle drone, primarily for repair, and the spy drone, for improving sight radius and scouting.
Aurora Bomber
The fast-moving, expensive Aurora bomber devastates enemy structures. But the air unit is extremely vulnerable after delivering its attack on its designated target--after deploying its explosive payload, the Aurora's speed is reduced by 50 percent. Watch its return flight path carefully and avoid moving within range of enemy anti-air defenses. It's an expensive method, but bombers are a good way to eliminate a structure, like a nuke silo. The bombers are also useful on the front line in bombarding a packed group of enemy units. America's air force is powerful, expensive, and generally fragile. Sinking most of your resources into an air force is a viable strategy, but these units must be protected. Replacement costs also hinder your ability to maintain an aggressive offense and a stable defense.
Comanche
The Comanche provides an air counter for both infantry and vehicles--it fires a nose cannon for use against infantry and rockets to eliminate vehicles or damage structures. Comanches are an excellent defense against any unit lacking anti-air protection, as it doesn't have to return to base to reload. Upon firing its rockets, the Comanche switches to its nose cannon while the rockets reload. You'll need to return them to the airfield only for repair. Upgrade the Comanche with "rocket pods" at the airfield for additional firepower.
Raptor
Another member of the superior American air force, the Raptor bombards a specific target with a powerful missile volley and then must return to the airfield between attacks to reload. Raptors are fragile and susceptible to anti-air fire. Given the expense in massing an air force, use extreme care when guiding a squad of Raptors to their target. Don't haphazardly select the Raptors and then their target. The Raptors will fly directly toward your designated target and even fly over hostile anti-air units or structures on the way. Guide the Raptors along a safe path and attack the enemy at the base's most vulnerable area. Research the "laser missiles" technology at the airfield, which increases the Raptor's damage output by 25 percent.
Stealth Fighter
The stealth fighter is the only American air unit that requires a general point. As its name suggests, the stealth fighter uses stealth to its advantage. The fighter reveals itself during its attack, but by then it's usually too late. As with other aircraft, the stealth fighter is extremely fragile and expensive--use it with care! Research the laser missiles technology at the airfield, which increases the stealth fighter's damage output by 25 percent.
Chinook
The American resource gatherer is an expensive multipurpose unit. It's a transport helicopter that can transport troops and supplies. Only one Chinook can gather supplies at a single time, but it's still useful to have between two and three gathering from a single dock, since one can load up while the others are returning to the supply center or depositing goods. A Chinook can also airdrop Rangers into a garrisoned building.
Chapter 4: General Points
This section details the multiplayer and skirmish "general point" structure for each side in Command & Conquer: Generals. The general-point structures differ in the single-player campaigns.
China General Points
One-Star General
Red Guard Training - All Red Guards will be built as veterans (first-level vets).
Artillery Training - Nuke cannons and inferno cannons are built as veterans (first-level vets).
Nuke Cannon - Nuke cannons lob small tactical nukes over great distances.
Three-Star General
Cluster Mines - Cluster mines are deployed by air.
Artillery Barrage - Call in an artillery strike on a target. First level: 12 projectiles. Second level: 24 projectiles. Third level: 36 projectiles.
Cash Hack - Steal money from enemy supply centers. You cannot steal more money than the enemy has. First level: $1,000. Second level: $2,000. Third level: $4,000.
Emergency Repair - Repair vehicles in an area. First level: light repair. Second level: medium repair. Third level: serious repair.
Five-Star General
EMP Pulse - Allows you to call in a heavy bomber to drop an EMP bomb. Disables enemy units and buildings.
Nuke cannons are certainly a good idea in the long term, but it's not important that you spend the point immediately. You won't be able to build the nuke cannons until the propaganda center and war factory are built, anyway. Save your initial general point so you can adjust your tactics as needed. For instance, you may need veteran Red Guard units to defend against aggressive enemy infantry assaults or help hold expansion points in garrisoned buildings, though typically your first point is better spent on something other than Red Guard vets.
Furious fighting in the early game could provide the experience necessary to reach the three-star general level quickly. If you've saved all three points, consider placing at least one in cash hack if you have line of sight on an enemy supply expansion. Most players won't have $4,000 saved up to steal, but they might be saving up for a superweapon, and swiping their savings will hamper them in the long run. Opportunities like that are rare, though, so don't upgrade cash hack completely.
Cluster mines and artillery barrage are solid for weakening enemy expansion positions. Cluster mines are dropped from the air, so anti-air defense can prevent their use, but there's no defense against an artillery barrage. Saving all three points for artillery barrage is useful if you can follow up the bombardment with a ground assault or even a MiG strike (assuming the enemy lacks appropriate anti-air defenses). Target weak power plants to disable defenses and then move in with your attack force.
Utilize the EMP just before a base assault to cripple base defenses and structures. The effect lasts long enough to move in and assault the enemy with your attack force. Combine with the Chinese nuke, if your assault didn't defeat all enemy units and structures, as follow-up for complete annihilation.
GLA General Points
One-Star General
Scud Launcher - Fires a long-range rocket that can be equipped with explosives or deadly anthrax.
Marauder Tank - Marauder tanks can scavenge enemy kills to upgrade their main gun.
Technical Training - All technicals will be created as veterans.
Three-Star General
Hijacker - Hijackers are camouflaged and can steal enemy vehicles.
Rebel Ambush - Allows you to create a surprise ambush of rebels anywhere. First level: four rebels. Second level: eight rebels. Third level: 16 rebels.
Cash Bounty - Earn a cash bounty for every enemy unit or building you kill. First level: 5 percent bounty. Second level: 10 percent bounty. Third level: 15 percent bounty.
Emergency Repair - Repairs vehicles in an area. First level: light repair. Second level: medium repair. Third level: serious repair.
Five-Star General
Anthrax Bomb - Anthrax is deadly against enemy troop concentrations.
The GLA's general-point structure should be used to adjust to the current need. Marauder tanks are a safe bet as the first point to spend. Marauders are more powerful than the GLA Scorpions. Slightly more expensive, the Marauder features improved range and better armor. Further, the Marauder is one of three GLA vehicles to benefit from the scrap piles left behind by destroyed enemy units. Run over these piles to upgrade the Marauder's main gun.
The Scud launcher is likely another safe choice, though this unit requires a palace in addition to the general point. Scuds are slow to build and quite fragile. Utilize them against heavy enemy base defenses. Protect them well against air units, especially if you're playing against a US opponent.
Saving up three points for the three-star general level opens up some unique strategies. Putting a couple of points or all three points into cash bounty is wise if you're ahead (for instance, more in control of expansions and up in units or cash) in the game. If you're ahead, the cash bounty keeps you in control, providing money for all your additional kills. Those looking for a surprise attack may want three points in rebel ambush. Upgrade rebels with capture building and camouflage and then activate the ambush behind the enemy base, close to critical structures (where defense is unlikely). Then start capturing or destroying buildings! Drop the ambush near a Chinese or GLA expansion to wipe out the trucks and workers quickly.
The anthrax bomb is almost always a must when you reach the five-star general level--especially against the Chinese. If you suspect your opponent has hackers stuffed in a corner generating money, clear them out in one swoop with an anthrax bomb. Infantry melt instantly under the bomb, and its residue remains in the area for quite some time. Drop it on a base, and as long as the residue remains, any infantry produced die upon leaving the barracks.
USA General Points
One-Star General
Paladin Tank - Paladins can shoot down enemy missiles with an advanced defensive laser system.
Stealth Fighter - Camouflaged when moving.
Spy Drone - Spy drones are camouflaged against enemy sight and radar and reveal enemy positions.
Three-Star General
Pathfinder - Pathfinders are elite camouflaged snipers.
Para Drop - Drop Rangers from the air. First level: five Rangers. Second level: 10 Rangers. Third level: 15 Rangers.
A-10 Strike - A-10 Thunderbolts destroy buildings, vehicles, and infantry. First level: one A-10 Thunderbolt. Second level: two A-10 Thunderbolts. Third level: three A-10 Thunderbolts.
Emergency Repair - Repairs vehicles in an area. First level: light repair. Second level: medium repair. Third level: serious repair.
Five-Star General
Fuel Air Bomb - Fuel air bombs destroy buildings and enemy troop concentrations.
Place a general point in spy drone--it's an excellent way to maintain reconnaissance on your enemy. That way you can gauge your opponent's plans and adjust your strategy accordingly. See a distinct lack of anti-air defenses? Then start building airfields. The spy drones regenerate frequently, and you can place them in various places around the map (for instance, at expansion points) to gauge your enemy's power. Beware of anti-stealth, however--spy drones are easily shot down if detected.
Stealth fighters are an excellent addition to the US air force. Their stealth ability should keep them intact for their attack run and their return to the airfield to reload. At the three-star general level, pathfinders are excellent at terminating infantry, especially when placed in a humvee for quick maneuverability. The A-10 air strikes are powerful. One Thunderbolt is sufficient for smaller structures (for instance, barracks) and weaker enemy units. Put additional general points in the air strike if you're targeting stronger buildings, like superweapons.
Utilize the para drop to get Rangers across enemy lines, such as behind an enemy base. Watch for anti-air defenses, however--the plane could get shot down. Upgrade the Rangers with "capture building" and take over the enemy's structures. Drop in some Rangers near an undefended Chinese or GLA expansion point to blast the trucks and workers and then capture the supply depot.
The uses for the fuel air bomb are obvious. Drop the bomb on the enemy army and then move in your forces to gain control of an area or even the enemy base. Demolish the enemy's power plants to cut power to defenses before you advance into the enemy's base. Follow up the bomb with the particle cannon or A-10 air strikes to finish the job against any structures left standing.
Chapter 5: China Mission Walk-Throughs
This section provides complete mission walk-throughs for Command & Conquer: Generals' China campaign.
Mission 1 - The Dragon Awakes
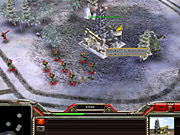
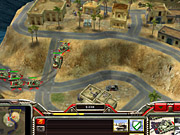
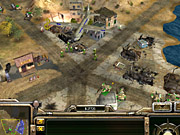
China's might is on parade. Protect China's military display. Eliminate any threat in the Beijing area.
Mission Objective: Destroy the nuclear warhead facility.
The GLA attacks during the Chinese military parade are causing chaos and destruction all over the city. It's time to mount a counterattack against the GLA incursion in the area. Thankfully, you have plenty of supplies and troops to complete the task. Select the large formation of Red Guard troops within your start position. You can augment these units with additional Red Guard units (best used against enemy infantry) and tank hunters (best used against enemy vehicles and structures) at the Chinese barracks.
You also have access to a war factory, which produces vehicles. For this mission, the Battlemaster and dragon tanks are available. Use the Battlemaster primarily against enemy vehicles and structures (or to crush infantry) and use the dragon tank (which shoots flame) against enemy infantry. You don't really need more of these units to complete the mission, but you have plenty of supplies, so it certainly doesn't hurt to add these vehicles to your forces.
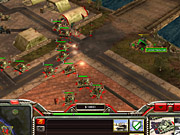
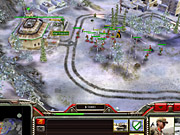
GLA car bombs arrive first. Look for them to enter from the road to the southeast of your starting location. Eliminate the car bombs on approach--don't let these GLA units get too close to your forces, as they can take several units out with one blast. Note the objective marked in the northeastern corner of the map. That's the nuclear warhead facility, though there's plenty of GLA opposition along the way.
Add infantry and vehicles to your force if you wish and then proceed southeast. You'll face a couple of GLA technicals (ground vehicle good against infantry) and rebels (GLA ground infantry). Use tank hunters and Battlemasters against the technicals and your Red Guard units to intercept any rebels. Continue until you reach the road that leads east toward the bridge. You receive reinforcements here--a group of Battlemaster tanks. Move toward the bridge and destroy the GLA tunnel network with your Battlemaster tanks. Don't forget to destroy the GLA hole underneath or the tunnel can be repaired.
Take note of the civilian buildings around the bridge. You can garrison these buildings with Red Guard troops and tank hunters to bolster defenses around the bridge. GLA hostiles on the other side can then be lured to the bridge and into an ambush. Keep this tactic in mind for future missions and don't hesitate to garrison civilian buildings as needed.
Before crossing the bridge, search the roads along the southern part of the map to receive additional reinforcements. Look in the southern corner for more survivors of the GLA attack--a few Battlemaster and dragon tanks. Maneuver a unit into the southwestern corner to discover two Overlord tanks, one of the most powerful units in the Chinese army. You won't have the ability to build Overlords until the fifth Chinese mission, so take the opportunity to utilize this devastating unit.

Cross the bridge with your infantry and vehicle units. Chinese air strikes will destroy a squad of GLA troops attempting to intercept your advance. Upon crossing the bridge, continue east until you reach the oil derrick. This building can be captured, and it adds additional supplies to your reserves (more funds for building units and vehicles). To capture it, research "capture building" at the barracks and then use a Red Guard unit to capture the structure.
Keep the Overlords in front of your forces. They alone can handle anything the GLA sends at your force. Follow the dirt road around to the north. You'll face heavy opposition, but you also have plenty of troops (and supplies to create more forces) at your disposal. Practice smart targeting and use dragon tanks and Red Guard units to intercept the GLA infantry and Battlemasters, tank hunters, and Overlords against structures and vehicles.
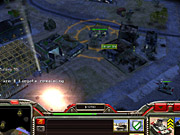
Follow the road to the facility, demolishing GLA structures, defenses, vehicles, and tunnel networks until you reach the facility. Bombard the nuclear warhead facility with everything in your arsenal. The mission ends once it's destroyed.
Mission 2 - Hong Kong Crisis
A GLA cell has been discovered in Hong Kong. Terrorists are using the convention center as a base. The cell must be eradicated.
Mission Objective: Destroy the convention center and its attached parking structures to stop the terrorist threat.
In the opening cutscene, the GLA blows up a bridge, which demolishes a large segment of Hong Kong's defensive force. You begin the mission with a handful of infantry and vehicle units and two construction dozers to build a new base. The GLA maintains control of the convention center in the southeastern corner of the map.
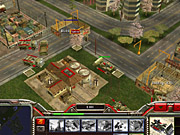
Select one construction dozer and build a command center, then select the second construction dozer and construct a nuclear reactor. When the second dozer emerges, build a supply center close to the northern end of the courtyard that makes up your base area. Note the supply depot just north of this area--placing the supply center here shortens the route for your supply trucks to deliver supplies into your reserves. The faster you collect supplies, the faster you can build units to defend your base and assault the enemy.
Check out the area around the supplies north of your base. The supplies lie in an area enclosed by a fence. Help shorten the route for your trucks by knocking down this fence with one of your tanks. Careful examination of this area also reveals a UN supply crate on the left side of the area. Grab it with a tank to add supplies to your reserves.
Once your command center is completed, select it and upgrade the structure with "radar" so you can monitor GLA troop movements. Build barracks and a war factory inside your base so you can begin producing offensive and defensive units to use against the GLA cell in the area. Also, select your supply center and purchase two to three more trucks to increase your income.
You also have access to some defensive structures that you should experiment with during the mission. Use your construction dozers to build a couple of bunkers and Gatling cannons on the north, northeastern, eastern, and southeastern sides of your base. Garrison Red Guard units or tank hunter infantry inside the bunkers to bolster your defense against incoming GLA infantry and vehicle units. During the mission, a train passes along the tracks to the north. Additional Chinese reinforcements (Red Guard troops) arrive on this train.
Select the war factory and start producing Battlemaster, dragon, and Gatling tanks. Set the war factory's rally point to the road east of your base. Use your barracks to produce Red Guard troops and tank hunters and set their rally point east of your base as well. Once you have a substantial force of infantry and tanks (at least eight tanks), get ready to advance east, toward a new secondary mission objective.
Secondary Objective: Destroy the toxin tractor production facility.
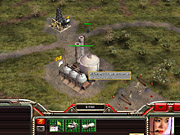
The GLA has a toxin tractor facility in the northeastern section of the map. Toxin tractors spray hazardous chemicals and are particularly devastating against infantry. Advance along the road northeast and lead with your tanks. You'll encounter a couple of tractors before reaching the facility. Don't lead with your infantry or you will suffer several casualties. Continue northeast until you reach the small enclosure containing the toxin tractor facility, a GLA arms dealer.
Bombard the arms dealer with your tanks. If additional toxin tractors exit the structure, target the vehicles instead. Crush the tractors and the arms dealer to complete the secondary objective.
You should take the time to locate some secrets on the map. There's an oil refinery within the enclosure that contained the arms dealer. Send over a Red Guard unit (research the capture building upgrade at the barracks) and capture the refinery--doing so reduces the cost of your vehicles. Search the northeastern area of the map to discover another UN crate; grab it to add supplies to your reserves. Comb the northern corner of the map to locate a hospital. Capture the hospital with a Red Guard unit and gain its benefit--it allows all infantry to auto-heal. There's also a UN crate underneath the overpass just south of the hospital. Finally, look in the northwest corner for another supply depot if you need it.
There are several ways to assault the convention center. One is somewhat hidden. Search the roads south of your base to locate a ferry. The terrorists have ruined the ferry pilot's business, and he offers free transport over to the convention center. The ferry deposits troops adjacent to the GLA supplies. You can ferry over a group of tanks and assume control of the GLA supplies and keep it from producing a significant defensive force.
Alternately, you can spend general points on artillery to bombard the convention center from long range. Once it and the parking garages are destroyed, the mission ends. You can also launch a direct assault on the center and its defenses. Maneuver your troops to the roads north of the convention center. Head south and lead with your tanks, but follow closely with your infantry, including tank hunters.
Don't forget to target wisely. Use Gatling tanks, Red Guard troops, and dragon tanks against GLA rebels and terrorists. Command Battlemasters and tank hunters against GLA vehicles and structures. There's a large concentration of GLA troops surrounding the convention center. Annihilate the parking garages surrounding the convention center. Move around the right side of the center to locate the GLA barracks and arms dealer if you wish to cut off its reinforcements. Concentrate all fire on the convention center to level the structure and complete the mission.
Mission 3 - A Flood of Violence
The GLA has infested the Three Gorges Dam area. Enemy reinforcements now threaten our forces. Drown the GLA with Chinese forces.
Mission Objective: Destroy the dam.
The GLA has overrun the Chinese base at the Three Gorges Dam. All forces have been ordered to retreat and regroup with a new battle plan--demolish the dam to counter the GLA advance. Completing the first objective is rather simple. Select your Battlemaster and dragon tanks and target the dam. It won't take long to destroy it. The water that's released floods the villages to the south and wipes out some of the GLA buildings and forces along the southern edge of the map.
Mission Objective: Destroy the GLA base.
Destroying the dam did have a downside. The dropping water level has created a land bridge east of your starting position. Soon the GLA forces will be able to cross this land bridge and attack your base. Better build a defense quickly! Select your construction dozer and build a command center, a nuclear reactor, and a supply center (build a few more trucks to hasten collection). Select the radar upgrade for your command center.
The GLA will attack the south of your base during your construction. You have Red Guard troops inside the troop transport. Send them out and garrison the bunker and tower south of your base. Counter the GLA forces at this point with the aid of your Battlemaster and dragon tanks.
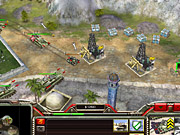
During all this, select your Black Lotus, a special unit that can capture buildings, disable vehicles, and steal funds, and send the unit west toward the edge of the map. You'll discover a couple of structures there--an oil refinery and an oil derrick. Capture the oil derrick to increase your supply income; capture the oil refinery to reduce the cost of your vehicles.
Build barracks and war factory as soon as possible and begin producing Red Guard troops, tank hunters, Battlemasters, Gatling tanks, and dragon tanks. Increase the power of your Gatling tanks with the "chain guns" upgrade and increase the power of your dragon tanks with the "black napalm" upgrade--both offered at the war factory. Send your construction dozer onto the land bridge to the east. Garrison the building there with tank hunters and Red Guard units. Build a couple of Gatling cannons there. Defend at this choke point when the GLA infantry and vehicles arrive.
The remainder of the mission is rather straightforward. Cross the bridge to the eastern side of the map and work your way south. You'll eventually reach a town--the GLA has secured a supply depot at the town's center. Eliminate the workers collecting the supplies to cut down the GLA's reinforcements. Garrison the civilian buildings as needed and crush the GLA infantry and vehicles with their appropriate counters.

There are two supply docks on the map, and you can use them if you need more funds. Find one in the southwest corner of the map and the second in the northeast corner just after crossing the bridge into GLA territory.
Continue the advance south into the heart of the GLA base. Annihilate the GLA barracks and arms dealer on sight--this prevents them from building more infantry and vehicles. Crush their remaining structures, primarily the GLA command center, to complete the mission successfully.
Mission 4 - Broken Alliances
The GLA has constructed a biotoxin factory. Locate the factory with help of a Black Lotus. An air strike will aid in its destruction.
Mission Objective: Destroy the GLA Stinger sites.
You begin the mission with Red Guard troops, tank hunters, and a Black Lotus. There are also barracks and some funds at your disposal. Reinforce your army now if you wish; produce a mix of Red Guard troops and tank hunters. Orders are to destroy GLA Stinger sites. Red Guard units can pick off the GLA infantry inside the sites while tank hunters pummel the structure. Protect your Black Lotus, though another one is provided should she perish.
Gather your troops and proceed east. There's a Stinger site just to the east (check the minimap to spot its location). Eliminate the GLA troops with your Red Guard units and then destroy the site with your tank hunters. You'll likely face additional GLA opposition here, including infantry and vehicles. Counter the GLA infantry using Red Guard troops and vehicles with tank hunters. Should any of your infantry sustain damage, escort them back to your barracks. Send the wounded infantry into the barracks and they'll return healed. After destroying the first Stinger site, additional Chinese reinforcements (Red Guard troops and tank hunters) parachute to the site.
There's also an oil derrick at this site. Here's an opportunity to generate some income. Move the Black Lotus to the oil derrick and capture the structure. The oil derrick supplies you with a small, continuous income, which can be used to fund additional infantry or, later in the mission, some tanks.
Adjust your heading to the north and spot two more Stinger sites. There are also some GLA troops just to the west that attempt to intercept you at the position. Once again, counter infantry with Red Guard units and vehicles with tank hunters. Blast the Stinger site initially with Red Guard troops to clear out its infantry and then bombard the structure with your tank hunters. You receive more infantry reinforcements after eliminating these Stinger sites. Add them to your group. There are two Stinger sites remaining. Once they fall, the Chinese air strikes can firebomb the GLA biotoxin factory.
Go west toward the bridge. The GLA protects the crossing with a toxin tractor. Don't engage this vehicle with your infantry; the tractor's biological weapons can make quick work of your ground troops. Instead, disable the tractor with your Black Lotus. The tractor guards another Stinger site at the bridge. Disable the tractor and crush the Stinger site before continuing west.
Mission Objective: Use the Black Lotus to capture the Chinese war factory.
You'll discover the war factory just to the west, guarded by a handful of GLA troops. Eliminate the defenders and then capture the war factory with your Black Lotus. Start production of Gatling tanks and Battlemasters and set the rally point north of the war factory. You receive some troop reinforcements after capturing the factory--you even receive a hacker. Have him hack the Internet for extra income.
Take control of the town. There's a GLA-controlled oil derrick here, which you can capture using the Black Lotus. Secure a UN crate on the eastern side and prevent the GLA from using its supply depot. Protect the northern area of town with your Gatling tanks and Battlemasters. Upgrade to chain guns at the war factory. You should have plenty of funds to amass a sizable vehicle armada.
Maneuver north and crush the GLA defenses. Demolish the arms dealer located on the upper left of the GLA base first. Capture the supply stash with your Black Lotus if you wish; you can collect even more supplies to fund more tanks. Destroy the GLA command center.
Move east across the bridge. Bombard the GLA-controlled tower. Go east into the final area and face its heavy defense: two controlled buildings, a tunnel network, a couple of tractors (though they're near the factory and likely won't pose a threat), and plenty of GLA rebels. Blow up the final GLA Stinger site in this area to complete the mission. The ensuing Chinese air strike destroys the facility.
Mission 5 - Scorched Earth
GLA has taken over Balykchy. US forces will provide support. Call in carpet-bombing to destroy the GLA.
Mission Objective: Destroy the three GLA camps and the main GLA base.
You have access to US carpet-bombing strikes in this mission. Activate a carpet-bombing strike from the Chinese airfield. Select the carpet-bombing, designate the target, and watch the pyrotechnics. The carpet-bombing ability regenerates approximately every two minutes. Use it as often as possible! You have access to it immediately, so hunt out a suitable target as soon as you can.
You're provided with a small base but still need unit-producing structures. Use the construction dozer to erect barracks and war factory. Select the supply center and construct more trucks to get the supplies flowing in quickly. There's another supply dock just to the north should you need more, but you should be fine for most of the mission.
Construct a nuclear reactor. You'll need the additional power to sustain a new building, the propaganda center, which permits construction of the Overlord tank from the war factory and the Black Lotus from the barracks--both quite useful in this mission.
There are important buildings to the far west from your base: two oil derricks (provide a moderate, continuous income) and an oil refinery (reduces the cost of vehicles). It's not tough to reach these structures, and capturing them increases your available supplies and decreases the cost of vehicles--a win-win situation. Prepare a force. Produce a trio of Overlord tanks and upgrade one with a speaker tower and the others with Gatling towers. Keep a couple of Battlemasters behind and place them just to the north of your base and within firing range of your base's northeastern border (but not too close).
Escort the Black Lotus west. Mines litter the town, and the Black Lotus can spot them. Steer your vehicles around them (you have to be very careful) or use a dozer to remove the mines. You'll encounter some GLA opposition along the way, but nothing your group won't be able to handle. Destroy the Stinger site and barracks along the map's southern edge. Continue west and destroy the supply depot and more Stinger sites. Don't forget to use the carpet-bombing ability. By the time you're done capturing the oil derricks, you should have another strike ready to go.
Monitor your base carefully. The GLA forces try to sneak vehicles into your base, and their rocket buggies and long-range Scuds can pick off vehicles and buildings along the northeastern side of your base. Keep some defenders at home (Battlemasters and tank hunters) to fend off these threats. Capture the derricks and refinery with your Black Lotus.
The remainder of the mission consists of simply combing the map and hunting down the GLA forces in the area. Build a mixed force of Gatling tanks (to counter infantry), Battlemasters (to counter vehicles) and Overlord tanks upgraded with speaker towers or Gatling cannons. Don't forget to use carpet-bombing strikes to annihilate the GLA structures or even large unit concentrations. Head north from your base initially, since there's a supply dock there. Clear out all the GLA forces in the vicinity and begin gathering supplies there.
Hit the northwest and northeast sections of the map to clear out outposts and GLA bases. Cross through the map's center and wipe out every GLA unit you encounter. Reinforce your army as needed. Set your war factory waypoint to the map's center (or wherever your current units are). Above all, don't forget the carpet- bombing! The mission ends when the three GLA camps and the main GLA base fall to your forces.
Mission 6 - Dead in Their Tracks
The GLA has commandeered one of China's railroads. The GLA is gathering in Bishkek, Aldastan. Use the Black Lotus to destroy the train bridge.
Mission Objective: Get the Black Lotus to the middle of the train bridge.
This is an interesting mission, since the only real objective is getting the Black Lotus to the train bridge in the northern part of the map. Skillful maneuvering with the Black Lotus may get you there without eliminating most of the GLA occupation on the map.
You begin in the southwest corner of the map and have hackers, a Lotus, and some Red Guard troops at your disposal. Bolster your force with Gatling tanks, Battlemasters, Red Guard troops (you can spend a general point to produce veteran Red Guard units, if you wish), and tank hunters. Order your hackers to hack the Internet so they'll begin generating extra income. Move a unit to the eastern side of your base--there's a UN crate there for added supplies. Look north of your base, just at the buildings, for a second crate.
The GLA will attempt to assault your base from the opening on the eastern side of your base. Protect it with a squad of Red Guard units. After exhausting your initial supplies on new troops, head north through the building. You'll spot a stadium up ahead.
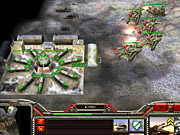
Angry mobs are coming out of the soccer stadium. Mobs can be a devastating GLA unit if they aren't dealt with correctly. It's possible to lose your entire initial force if you aren't careful. To deal with the angry mobs, garrison your Red Guard units in the buildings to the south and east of the stadium. Use your vehicles to lead the mobs toward these buildings.
After destroying a crowd, the mob subsides momentarily. It's your chance to finish off the angry mobs by destroying the soccer stadium. Use your tanks and tank hunters against all sides of the soccer stadium. Keep your Red Guard troops in the buildings. More mobs will appear while you attack. Retract your tanks and hunters and lead the mob toward the buildings.
Be patient and chip away the soccer stadium when possible. Some GLA patrols may enter the area. Counter vehicles with Battlemasters and tank hunters and counter infantry with your Gatling tanks. Once the soccer stadium is spotted, it's best to deal with the threat quickly.
The path should be nearly clear for the Black Lotus. Some GLA defenders reside to the north on the eastern side of the train. If you need more funds, explore the eastern side of the map by crossing the river on the available bridges. GLA supply stashes and piles are in the northeast corner of the map. A couple of UN crates are also in the area, and careful exploration of the map reveals the following UN crates: one across the northern bridge, one in the far northeast corner, one on the eastern side near the tracks, one across the bridge east of your base, and one on the second bridge to the north of your base on the left side of the river. Collect these crates to increase your supplies.
A thorough explorer will also find a Stinger site and an arms dealer on the far southeastern side of the map. Beware of mines in the area and watch your units on the train tracks. Don't get hit by the train!
Two Stinger sites and a concentration of GLA forces protect the train bridge. Eliminate these threats and then move the Black Lotus on the train tracks to complete the mission. Don't get hit by the train! Once the Black Lotus maneuvers onto the bridge, the mission ends in success.
Mission 7 - Nuclear Winter
An Asian GLA terrorist cell has been identified in Tajikistan. You are authorized to utilize your nuclear arsenal.
Mission Objective: Establish a base and locate resources.
The mission begins with a huge battle between Chinese and GLA forces. You're given control of the Chinese army (or what's left of it) during the battle. Fight your way up to the eastern hill. Selectively target the remaining GLA forces using appropriate counters. Select your Overlord and upgrade it with a speaker tower to heal your wounded troops. Continue east and clear out the GLA presence. Protect your Overlord tanks and keep them alive. Some of your other units may perish, but the Overlords are expensive to replace.
You receive two construction dozers at the end of the battle. Escort them east after clearing out the GLA presence. Start base construction here. Spread out your structures. The GLA forces use attack with their Scud storm during this mission. Bunch your structures close together and you'll lose multiple buildings with each barrage. Build a command center (upgrade with radar), nuclear reactor, barracks, war factory, and propaganda center. You'll eventually need additional nuclear reactors to support a nuke silo.
The next problem is locating supplies. Go north and you'll find a small supply pile near the building on the right. Continue into town to find another small supply pile to the north and an oil derrick to the east (capture with an upgraded Red Guard unit or a Black Lotus). Head west in town to find another oil derrick and a supply dock. Set up your resource operation here. Use a construction dozer to build a supply center near the dock (add a couple of trucks to hasten collection). You should also construct a second war factory here so you can get vehicles to the upcoming battles quickly. Separate the structures to avoid having both nailed by a Scud storm (the GLA will target this spot).
There's another way to make funds. Mass hackers and keep them away from your main base. Select the hacker and hack the Internet for cash. A few hackers won't produce good results, but a large group will produce a cumulative income that will be quite surprising.
If you have any unused general points, use them--this is the final China mission!
Mission Objective: Defeat the GLA.
Avoid moving infantry through the middle of town (near the broken-down Overlord). Jarmen Kell, a GLA sniper, maintains a position in the large tower. Destroy the tower with your tanks to stop Jarmen from sniping your infantry.
Produce a large mixed force of Gatling tanks, Battlemasters, and Overlords (upgraded with Gatling cannons or speaker towers). Research the chain guns and subliminal messaging upgrades. Build a nuke silo (or more than one) as funds become available. Make sure you build enough nuclear reactors to support the silos. Replace any vital structures lost to the GLA Scud stormattacks.
The main GLA base covers the northern area of the map. The heavily defended Scud storm lies in the center of the northern area. Reaching the northern part of the base is an adventure in itself. You must navigate through narrow inclines to reach the upper area, and mobile Scud launchers bombard these narrow paths. Plus, Stinger sites and tunnel networks flank the narrow paths and bombard your incoming units.
Search the area just south of the northern area to find two oil derricks and a collection of UN crates. Capture the derricks and collect the crates for additional supplies.
Build an airfield and use Chinese air units to take out the Scud launchers. You may lose the air units along the way, but the end result is worth the effort (especially if you've accumulated a lot of funds).
Don't forget to use your nukes. Locate the GLA base structures, particularly the Scud storm in the map's center, and when it's ready, launch the nuke. Destroying the Scud storm structure will cease the storm attacks. Finish off the GLA by demolishing the remaining structures. Enjoy your victory parade!
Chapter 6: GLA Mission Walk-Throughs
This section provides complete mission walk-throughs for Command & Conquer: Generals' GLA campaign.
Mission 1 - Skymkent DMZ; Operation: Black Rain
Many brothers have been lost. China's defenses are spread thin. Destroy the Chinese forces.
Mission Objective: Destroy the Chinese base.
You begin the mission during an assault on the Chinese base. Most of the structures have been leveled, but a few (and a couple of hostile units) still remain. You receive additional reinforcements--Scorpion tanks and bomb trucks. Use the Scorpion tanks against the remaining Chinese vehicles and the bomb trucks to demolish the structures. Save a bomb truck for use against the Chinese infantry reinforcements, which arrive from the south. Steer the truck into the center of the approaching infantry and attack. Use the remaining trucks against the Chinese structures and clear out the entire base.

The GLA forces retreat to a mountain hideout and prepare for the next attack. The Chinese have dug in around a hydroelectric dam. Destroy the dam to free nearby villages from Chinese tyranny. Also, there's an arms dealer in the area. He can provide some new weapons for the cause.
Mission Objective: Destroy the dam.
Collect supplies with your workers. Select a technical and search the area south of your base (go east out of your base and then double back around to the southern narrow path that leads west). Locate the arms dealer at the end. You can use this arms dealer to construct your vehicles or, even better, build a second arms dealer within your base.
Use the arms dealer to construct Scorpion tanks (use against structures and vehicles) and technicals (use against infantry). Use the barracks to produce additional rebels. Exit your base to the north and defeat the Chinese units patrolling the road. Follow the road southeast to the map's center. You'll find the village here; it's east of your base. Destroy the speaker tower in the village's center to free the villagers from Chinese tyranny. Counter any attacks with your Scorpion and technicals. Your reward for freeing the villagers: a squad of rebels. Add them to your battle group.
Search the area northwest of the village (approximately northeast from your base) to discover a Chinese supply center, a few guards, and several UN supply crates. Destroy the supply center to gain access to the crates. Spend the extra supplies on additional Scorpions, technicals, and rebels.
You'll find the Chinese dug in north of the village. You'll find their resource center here (a supply dock and supply center), as well as a war factory protected by Red Guard troops, Battlemasters, and bunkers. Eliminate all opposition. Pick up all scrap left behind by the destroyed Chinese vehicles with your technicals to gain upgrades (you'll do this later with Marauders and quad cannons). Send a unit southeast along the shore just east of the village to find a supply crate.
Before advancing toward the dam, you can explore the map to uncover some other items. Several Battlemasters, some Red Guard units, and barracks can be found directly east of your base. Search the far southeast corner (across the river, though Chinese Battlemasters guard the bridge) to locate eight veteran technicals. Find four UN supply crates in the northeast corner across the river.
Move up the hill on the western side of the dam. Crush the remaining Chinese forces near the dam (a tank or two and a squad of Red Guard units) and then concentrate all fire on the dam. Destroy the dam to "free" the village. Leave some of your GLA units near the bridge and watch them get "freed" as well.
Mission 2 - Almaty Region, Kazakhstan; Aid Supplies Drop Zone
UN supplies en route to Almaty region. Intercept these deliveries for our cause. Collect the supplies to infuse the GLA with funds.
Mission Objective: Collect $40,000 in stolen supplies.
First Goal: Collect $20,000 by taking the UN convoy's crates.
It's a vicious cycle. The UN convoys drop off supplies for needy villages. The GLA ambushes the drop site and steals the supplies. The villagers are still needy, so the UN convoys return with more supplies.
In the first part of the mission, you must collect $20,000 by destroying the UN convoys and collecting the dropped crates. You're shown on the minimap where the convoy enters and that it must move through the center of town (at the crossroads). Keep in mind that supplies spent on structures and units are removed from your overall funds. The more you spend, the more you need to accumulate to reach the goal of $20,000 (and, eventually, $40,000).

Select a worker and build an arms dealer. Send the other idle worker to your supply stash. When the first worker completes the arms dealer, send him to the supply stash, too. The convoy's humvee guards can counter your rebels and technicals effectively. Thus, it's wise to build at least four Scorpion tanks before engaging the convoy. Ignore the convoy until you have four Scorpions.
Park your Scorpions in the center of town and wait for the convoys. After destroying the vehicles, grab the crates quickly or the villagers will steal the supplies. Also, if a convoy doesn't arrive for a bit, check the ends of each street, because it might be parked there.
There's an alternate way to make some cash, and it works for all the mission goals: destroy civilian buildings. The villagers are hoarding cash in their homes. Level a building and grab the crate that appears to gain another $1,000. Make $20,000 from the convoy and the buildings to activate the next goal.
Second Goal: Collect $30,000 by taking the crates dropped by the US planes.
You've given a new vehicle to assist in taking down the US planes. It's the quad cannon, and it's effective against infantry and air units. You're told the position of the incoming US planes, but it's tough to determine where the crates will drop. You can still demolish civilian buildings for cash. Move rebels around the map for scouts. Watch where the US planes drop the crates and use a fast technical to retrieve them. Keep the speedy quad cannons around and position them in the flight path of the planes. Down the planes and grab the crates that appear.
You must reach the $30,000 plateau before receiving your next goal. If you're having trouble gathering the crates dropped by the planes, just continue leveling buildings and gaining cash that way. The next goal appears once you've collected $30,000.
Final Goal: Collect $40,000 in supplies by raiding the US base.
The northern part of the map widens to reveal a US base that stretches from the far west to the far east side of the map. You can gather cash by destroying US units or structures. The eastern side of the US base is much easier to deal with. Move north up the eastern road and defeat a couple of US tanks there. Demolish the US structures in the small base to gather the necessary funds. You can still crush civilian buildings for cash, too. The mission ends once you've accumulated $40,000.
Watch for US units patrolling along the northwestern side of the map. Your base is awfully close, so leave some defenders or prepare to intercept the US units should they maneuver southeast into the center of town.
Mission 3 - Astana City; Chinese-Occupied Capital of Kazakhstan
We have found new allies in Astana. We can use them to harass the enemy. While Astana burns, loot the city for supplies.
Mission Objective: Destroy civilian buildings and gather $40,000.
The GLA needs more supplies--time to rampage through a town and pillage $40,000. As soon as you have accumulated $40,000, the mission concludes in success. You begin with a new GLA unit--the angry mob, a gang of highly irritated citizens who fire weapons and toss Molotov cocktails. The mob grows over time and can be upgraded at the GLA palace, a structure you can construct during the mission. For now, get the mob on its task and start destroying each civilian building you see. Gather the supply crate left behind to add the cash to your reserves.
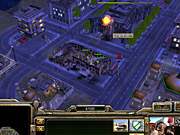
Local cops are the greatest danger to the mob. If you stay in the streets, the cops will run the mob over. When you spot police cars on the roads, move the angry mob onto a destroyed building foundation. The cop cars can't move there, so the mob will be safe. Bombard the approaching cops with the mob's cocktails and collect the supply crate left behind. Keep off the roads and you won't be run over.
Check out your base. Assign your workers to gather supplies. If you like, you can also construct some structures to assist your efforts to complete the first objective. Build barracks, an arms dealer, and a palace, which will be used to upgrade your angry mob. Remember, however, that constructing buildings and producing units requires supplies. The more you spend, the more you must collect to reach the $40,000 goal. After finishing the barracks, train a rebel with the "capture buildings" upgrade and send him east of the road--there's a hospital there that will provide auto-heal for your infantry if you capture it.
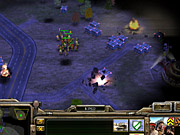
After completing the palace, select it and choose the "arm the mob" upgrade. This gives your angry mob AK-47 weaponry, which allows you to topple civilian buildings and demolish police cars in no time. All your destruction eventually alerts the nearby American base. Expect to see some Chinook choppers dropping in US Rangers. Your mob can handle pretty much anything in the mission. Move slowly and take on one target at a time.
You receive a warning that the American forces are using a nearby airport as a staging base. It's located in the northwest corner. You're told to cross the river and destroy it. The Chinese are in the area as well; search the northeast corner for a small Chinese outpost. You'll find plenty of supply crates here to add to your reserves. Continue crushing civilian buildings and move toward the northwest corner to demolish the airport. Reinforce your angry mob with GLA infantry and vehicle units. Once you've collected $40,000, the mission concludes.
Mission 4 - Adana, Turkey; Incirlik Air Base
The arrogance of the USA cannot go unanswered. Keep the region from its imperialist grasp. Destroy its "superior" air force.
Mission Objective: Destroy the American air base.
You begin the mission with a command center, a supply stash, and some workers. Produce a few more workers. Use all but two to gather supplies; send the other two workers to begin construction of your base. Build barracks and an arms dealer initially. Spread them out a bit to leave room for your anti-air defense--this is a mission against an American air base, so expect to be pounded by US aircraft, including stealth bombers.
When you're finished with the structures, build three to four Stinger sites around the western hill and spread them throughout your base. The Americans also send bombers armed with fuel air bombs that are capable of damaging your base severely. Enough Stinger sites can knock out the bombers before they're able to drop the bombs. Assist the Stinger sites with a squad of RPG troopers and quad cannons and position the group along the western hill.
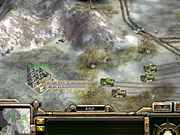
Select the arms dealer and produce a radar van to activate the GLA's radar system. You should also build a palace at the next opportunity. Produce another worker (or two) and send him out of your base to the south. Ignore the bridge to the west initially. Instead, maneuver along the dirt path and back north underneath the bridge. You'll discover a small batch of supplies in the northern area of the map. You can secure these supplies with a group of three to four Stinger sites (US aircraft will attack here). Build the sites and then a supply stash to begin collection.
While performing these tasks, begin construction of your GLA army, which should include at minimum Scorpion tanks (upgrade with "rockets" at the arms dealer and "toxin shells" at the palace), Marauders if you wish to spend the general point on them, quad cannons for anti-air defense, RPG troopers for anti-air defense, rebels for anti-infantry, and perhaps even an angry mob. Keep some reserve funds to replace any structures destroyed by the American air attacks. Repair damaged structures with your workers.
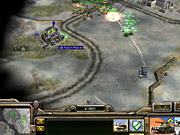
Maneuver your army across the bridge to the west. Follow the road southwest to encounter a squad of American units guarding a supply dock. Destroy the Americans and utilize the supply dock if you wish (move a worker near and build a supply stash). If you like, you can search the southwest corner to discover a Chinese building just south of the American airbase. There's an oil derrick here. Use a rebel to capture it (you must research capture building at the barracks first). Thorough exploration of the northern corner of the map (northwest of your supply stash) reveals another oil derrick.
Patriot missile defenses protect the airbase. You could spend a general point on Scud launchers and use a small group to bombard the airbase defenses. It's not necessary, however--a large group of Scorpions, quad cannons, and infantry should be sufficient. Crumble all American structures within the airbase to complete the mission successfully.
Mission 5 - Western Shore of the Aralea Sea, Kazakhstan; Toxic Waste Ccontainment and Disposal Facilities
Reports from the Aral Sea are not good. US forces have control of our toxin storage facility. Retake the storage bunkers.
Mission Objectives: Capture four bunkers and wipe out all American defenders.
You begin with a small base--a command center, an arms dealer, a Stinger site, some workers, and a collection of scattered infantry and vehicles. Start gathering supplies and use two workers to begin further base construction (train more workers at your supply stash so you can gather supplies more quickly). Build barracks, a palace, and several defensive structures (Stinger sites and tunnel networks) around the northern edge of your base. Finally, erect a black market. This structure provides a continuous stream of income, and it also offers new upgrades, including junk repair, which gives all vehicles auto-repair. You may wish to build a second arms dealer to quicken vehicle production.
Select the palace and research toxin shells and arm the mob. Begin producing Scorpions or Marauders and RPG troopers for use against American vehicles and angry mobs, rebels, or quad cannons to use against enemy infantry and American choppers. Upgrade the various units (such as Scorpion rockets or "AP bullets" for the quad cannons and rebels) at the respective GLA structures. Select the barracks and research the capture building upgrade so you can capture the bunkers. Scout the area north of your base to discover another supply dock. Migrate your gathering here if you need the additional supplies.
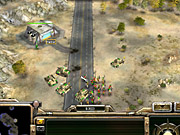
Move toward the southeast corner of the map first. There are two bunkers there with a light American defense and even a supply dock. It's a long trek over to the southeastern corner. Attack the American units with their appropriate counters. Send a worker along for the ride (either on foot or in the back of a technical) and build some defenses at the bridge--the Americans will send infantry attackers from the bridge periodically. Build at least one Stinger site and one tunnel network. Capture the two bunkers with a rebel and begin gathering supplies from the dock if you wish. Leave a handful of vehicle and infantry defenders and send the rest back to your base.
The Americans patrol the map with scouts, and if your base is discovered, you will receive constant attacks from the north--mainly infantry, but expect some tanks and humvees as well. Keep some defenders along the northern edge of your base and build additional GLA defensive structures as necessary.
Explore northwest from your base to discover an oil derrick. Capture it with a rebel to increase your income. Reinforce your vehicle and infantry army using available supplies. Proceed to the northwestern edge of the map to discover another two bunkers. Crush the defenders and capture the two bunkers with rebels. Once the four bunkers have been captured, it's time to launch the attack on the American base.
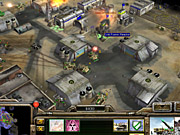
Position your forces at the bridge that leads into the American base. Locate this bridge on the western side of the map. Add some Scud launchers to your fleet, as they can be used to punish the American defensive structures and buildings. Maintain position at the bridge and annihilate the American units that attempt to cross. Push east into the American base and destroy all the structures. Defend your units against air attack with quad cannons. Complete an annihilation of the base (with four captured bunkers) to complete the mission.
Mission 6 - Somewhere Near Lenger, Kazakhstan; Splinter-Cell-Controlled Region
GLA defectors have joined with China. Assault the convoys and sever their supply lines. Eliminate the traitors and their Chinese allies.
Mission Objective: Eliminate all traitors. Sneak the stolen trucks into the traitors' base. Once inside, detonate the trucks to destroy the traitors.
GLA forces win control of three nuclear weapons during the mission's opening cinematic. When moving these trucks near the enemy GLA base, keep your own GLA forces away and they won't suspect danger. You begin the mission with a fairly large force, but it's spread out throughout your base. Collect your rebels, RPG troopers, technicals, and Scorpions and gather them on the road west of your base. You have plenty of supplies, so don't hesitate to train more units and research numerous upgrades.
If you're starving for even more supplies, search the northwest corner of the map for a collection of oil derricks. Send a few rebels up there and capture the oil derricks to receive an additional income.
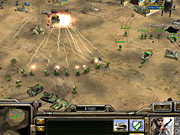
Note the countdown: Chinese reinforcements are on the way. It's possible to complete the mission before dealing with the Chinese, so it pays to work quickly. Drive the trucks carrying the nuclear warheads out of your base and toward the traitor base in the northeast corner of the map. Nuking groups of traitor units is the best way to deal with their presence. Structures can be repaired, so look instead for opportunities to inflict major casualties upon the traitor army. Detonate the nukes separately and try to take out as many vehicles and infantry as possible.
Follow up the devastation with your combined force. The GLA traitors construct a Scud storm and a new countdown begins. You should be able to complete the mission before the Scud storm becomes an issue. After nuking most of the traitor units, bombard their remaining units and structures with your army. Continue to produce reinforcements and send them to the traitor base to join the devastation. Complete the mission by annihilating the GLA traitors. Deal with the Chinese if necessary.
Mission 7 - Baikonur Cosmodrome, Southern Kazakhstan; Soviet-Era Rocket Launch Facility
Take control of the Cosmodrome. The missiles there will deliver toxin to our enemies. Our destiny is at hand.
Mission Objective: Capture the ground-control building. Capture the rocket launch gantry.
You're shown black-and-white recon pictures of the ground-control facility and the rocket launch gantry. The GLA wishes to capture the rocket and install its own warhead. You begin the base with very little--a command center, a supply stash, and some workers. Produce six to seven additional workers and order all but two to gather supplies from the hefty dock.
Start building: barracks, arms dealer, palace, black market, and defensive structures. The Americans and Chinese enjoy using their bombs and nukes, so it's best to spread out your base in an effort to minimize damage. Be prepared to replace your structures after an attack. Train a radar van as soon as the arms dealer is completed. Train a rebel (upgrade with capture building) and send him west to capture the oil derrick for additional income. Build a second barracks and arms dealer to quicken the production of your army. For maximum fun, construct a Scud storm for use on the American or Chinese base.
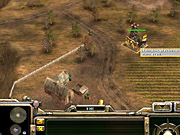
Begin training units for offense and defense, including Scorpions, Marauders, rebels, quad cannons, Scud launchers, angry mobs, RPG troopers, Jarmen Kell, and so on. Select the palace and black market and research desired technologies, which should include toxin shells, arm the mob (if using angry mobs), "junk repair," and AP bullets. If training Scorpions, don't forget Scorpion rockets; if producing rocket buggies, research "buggy ammo;" and if implementing anthrax weaponry, research "anthrax beta."
Go for the ground-control building and the American defenders first. Get there by going directly east from your base. Cross to the southeastern corner of the map. Move your units carefully by the train tracks--if the train hits one of your units (or if one of your units hits the train as it goes by), it will be killed or destroyed. Usher units carefully beyond the train and begin the assault on the American base. Bombard the Patriot missile defenses with Scud launchers or tanks and counter the American vehicles with your tanks and their infantry with your quad cannons, infantry, and Jarmen Kell.
Clear out the entire American base before capturing the ground-control facility (have fun with the Scud storm, if you wish). There are supply docks here that can be used to increase your income. Move some workers there and construct a supply stash or even capture the American facility. Gain control of the ground-control building (it's the one with the two satellite dishes on the northern end of the American base) to complete half of the mission's objective.
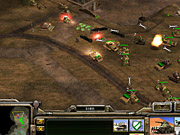
The rocket gantry is just north of the American base. The Chinese defend the rocket gantry with aircraft, so don't forget to protect your army with a squad of quad cannons. Also, beware of the Chinese mobile nuke launchers. When you breach the defenses around the gantry, expect the Chinese to arrive from their base to the west. Crush the defenders and bombard their base. Capture the rocket gantry with a rebel. As soon as the gantry is captured, the mission and GLA campaign end successfully.
Chapter 7: USA Mission Walk-Throughs
This section provides complete mission walk-throughs for Command & Conquer: Generals' USA campaign.
Mission 1 - Operation: Final Justice
The GLA has the Scud storm. Its forces are based just outside Baghdad. Eliminate this threat.
Mission Objective: Destroy all enemy forces.
The mission begins on the outskirts of Baghdad--US forces are engaged in a fierce battle with GLA tanks. You gain control of the US Crusaders and humvees as the mission begins. You can reinforce these units with additional vehicles and infantry by shifting your view back to your base and selecting the war factory and barracks, respectively. Upgrade your Crusaders with "battle drone" and return damaged units them to the war factory for repair.
Advance the Crusaders and humvees northwest into Baghdad. When you breach the town, the GLA launches a Scud storm attack at the center of Baghdad. The attack devastates the city. The appearance of the Scud storm introduces a second objective.
Mission Objective: Destroy the Scud storm.
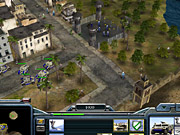
There's a prisoner of war camp on the eastern side of Baghdad. Some GLA rebels lightly guard the camp. Eliminate the rebels with your humvees. Rescue the pilots and insert them into particular Crusaders and humvees to improve the vehicles' abilities. Push northwest through Baghdad with your units. Reinforce your army as needed.
You'll eventually reach garrisoned buildings and will be introduced to a unique feature of the Americans. Chinook choppers can transport American infantry and drop them into garrisoned buildings to assault from the inside. Attack garrisoned buildings in this fashion throughout the mission. Search the town for some secrets. Look on the west side of town to discover oil derricks and UN supply crates (though the locals may run over them and gain their supplies).
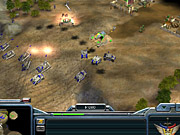
Proceed north out of town and deal with the GLA units, primarily technicals, which are easily wiped out with your Crusaders and humvees in force. As you near the GLA base, you'll notice the row of defending Scorpions--with the advantage of high ground. You automatically request air support to demolish the row of tanks. GLA structures, including defensive tunnel networks, still remain.
Counter the GLA infantry with humvees and the remaining GLA tanks, defensive structures, and buildings with the Crusaders. Level the GLA structures and continue into the northeast corner to locate the Scud storm. Begin your bombardment, which cues another air strike. The Scud storm falls and the mission ends.
Mission 2 - Operation: Treasure Hunt
GLA leaders tracked to Yemen. Comanches are searching for criminals. Save the captured pilots.
Mission Objective: Rescue the captured pilots.
American pilots are down in GLA territory, and you're put in charge of their rescue. You're provided a large base for the mission; it's on the eastern side of the map. Starting units include some Crusaders, humvees, and the American special unit, Colonel Burton. Colonel Burton can place explosive charges on buildings and silently slay enemy guards. You also have plenty of funds to begin further production.
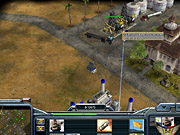
There are some important civilian structures nearby. Select the barracks and research the "capture building" upgrade for your Rangers. Send a Ranger north and capture the two oil derricks there. There's also a hospital just west of your base. Send a Ranger over and capture the hospital, which rewards you with auto-heal for your infantry units.
Place some humvees around the northern part of your base. These will serve as a defense against the rebel ambushes the GLA will launch during the mission. Reinforce your initial army with additional Crusaders, humvees, Rangers, and missile defenders. Garrison infantry in some of your humvees and deploy them when necessary. GLA units are scattered throughout the eastern side of the map. Begin combing the streets and eliminate technicals, angry mobs (use humvees), Scorpions, and defensive emplacements you encounter.
Advance your army east toward the northeastern section of the map. Clear out the GLA defenders around the first captured pilot. After freeing the pilot, select him and garrison him inside one of your units. Pilots immediately increase the veteran status of the garrisoned unit. Upon rescuing the pilot, the map widens to the north, revealing more GLA forces. You have two more pilots to rescue.
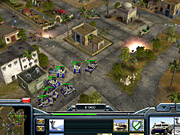
Add additional military units to your army and set your barracks and war factory rally points near your current forces. Patrol the roads and clear out the GLA perimeter forces before closing in on the next captured pilot location. Defeat the mobs, Scorpions, rebels, and technicals guarding the captured pilot. Select the pilot and garrison him in one of your vehicles. One pilot left. Remember to watch your base for ambushes.
Approach the last GLA base. American air support assists against the entrenched GLA forces and their tunnel network defenses. Bombard the defenses with your Crusaders and counter the GLA infantry and vehicles with your humvees and Crusaders. You can also maneuver Colonel Burton inside the base and set explosive charges on the GLA structures. Rescue the third and final pilot to receive a new mission objective.
Mission Objective: Return the final pilot to base for debriefing.
The GLA forces swarm the area from the north. The GLA rocket buggies are fast, but they aren't a threat if you place the final pilot inside a humvee. Escort the humvee back to your base quickly and avoid engaging the GLA forces. The mission ends immediately once the pilot reaches the interior of your western base.
Mission 3 - Operation: Guardian Angel
US forces are in full retreat. The GLA is in close pursuit. Provide cover for retreating forces.
Mission Objective: Ensure the escape of 100 US units.
As the mission introduction reveals, the US forces are in retreat. The US force enters from the southwest corner of the map and exits at the northeast corner. The GLA army enters right behind them. You must defeat as many of the GLA pursuers as possible to save as many US units as possible. Rescue at least 100 units to complete the mission.
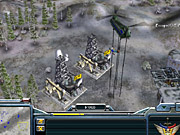
Collect your initial army of humvees, Crusaders, and infantry and send them into the valley. Position them near the southwestern entrance. Select a construction dozer and send it to the valley entrance on the western side. Start building Patriot missile defenses along the edge of the valley. You will need to build more cold fusion reactors (or upgrade the ones you have) to supply power to the defenses.
You can't build a war factory, so be careful with your tanks and humvees. The good news is that you can train infantry at the barracks and Comanches at the airfield. Start building Comanches and set the rally point at the valley's center.
Some GLA forces will break off their pursuit and attempt to exit the valley on the western side and attack your base. Keep some Comanches here to intercept any GLA unit that breaks through your line of Patriot defenses.
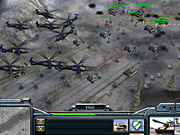
There are a couple of oil derricks on the opposite site of the valley. Use a Chinook to ferry a Ranger over to the derricks (research capture building beforehand) and capture the oil derricks to increase income. You will have to fight several battles before 100 US units are able to escape. Train infantry and set the rally point in the valley so you can crush the GLA forces that pursue your comrades. Continue building Patriot missile defenses on the western side of the valley, because a new GLA attack is launched once you've reached the goal of 100 rescued units.
A massive GLA attack is launched from the southwest, and the GLA forces are attempting to maneuver toward your base. Intercept the attackers with Comanches. The Patriot missile defenses placed on the western side of the valley pay off here and will crush most of the attackers. Use the Comanches to finish off the remaining troops. Defeat the remainder of the GLA troops to complete the mission successfully.
Mission 4 - Operation: Stormbringer
A GLA training camp has been discovered. Eliminate this threat.
Mission Objective: Destroy the Stinger sites.
The mission begins in the middle of a chaotic battle. When you gain control of the US forces, make sure your units are targeting their GLA opposition. It won't take long to finish off the remaining GLA forces in the immediate area. After clearing the beach, you're shown the GLA Stinger sites in the area. These must be cleared before US air strikes can eliminate this GLA outpost.
The Tomahawk missile launcher is the key unit for this part of the mission. You're given four at the start of the mission. Keep them safe and in good condition, as you can use them alone to destroy the GLA bunkers and Stinger sites in the area. Select and group your Tomahawk launchers and bombard the GLA bunkers initially. As the bunkers fall, move an infantry unit to the east until a Stinger site appears in view. Once you have line of sight on the Stinger site, bombard the position with your Tomahawk launchers. Don't let the launchers get too close to the GLA forces--these artillery units are weak and easily destroyed. If attacked, retreat behind your infantry and other vehicles.
Crush the Stinger sites, tunnel networks, and anything else within range (even stationary GLA infantry and vehicles). Although the Stinger sites will fire upon the inbound Tomahawk missiles, don't fret. Most of your missiles will get through (fire all Tomahawks in a single volley, not staggered). Don't forget to crush the GLA hole underneath the structure so it can't be repaired. Defeating the last Stinger site cues the US bombers. The air strikes obliterate the GLA base and pave the way for your own outpost in the area.
Mission Objective: Destroy the GLA base.
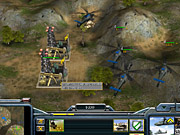
You're given a couple of construction dozers to build a base from scratch. Build a command center, cold fusion reactor, and supply center near the dock. Follow up with barracks, a war factory, and an airfield as desired. As you build, clear the surrounding area of GLA forces (the bombers didn't get them all). Patiently use the Tomahawk missile launchers to bombard the GLA structures and units in the area. Keep your infantry and vehicles close should the Tomahawks come under attack.
Send a Ranger to the southeast area of the map (just north of the beach). There are two oil derricks here. Research capture building and then capture the oil derricks to gain their benefit--additional income! Begin reinforcing your military with infantry, Crusaders, humvees, and choppers. Build a second Chinook to gather resources.
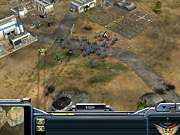
Split your army into at least four groups: Crusaders and missile defenders to use against GLA structures and vehicles, humvees and Rangers to use against GLA infantry, Tomahawk missile launchers to bombard defensive emplacements from long range, and Comanche helicopters to launch air strikes against GLA positions.
Push east and patiently comb the map for GLA forces and structures. Move slowly so you don't engage too many GLA units at any single time. Use your units in force and destroy all GLA structures to complete the mission. However, you don't have to eliminate the GLA-controlled bunkers along the beach to complete the task.
Mission 5 - Operation: Blue Eagle
Peace conference in Kabara City. The GLA cannot be trusted. Be on alert.
Mission Objective: Prevent the GLA from constructing a river base.
As expected, the GLA launches an attack on the peace negotiations. US forces repel the attack but discover a GLA outpost in the area. Orders are to eliminate this base as soon as possible.
There are some supplies and a hospital in town that are worth investigating at the earliest opportunity. Locate a UN supply crate on the eastern side of town. Send a Ranger to the southeast and capture the hospital (research the capture building upgrade first) to gain auto-heal for your infantry. Finally, find another UN supply crate in the market just west of the hospital.
Select your supply center and build a second Chinook to gather supplies faster. Position your humvees and Crusaders near the bridge to the northeast of your base. Reinforce these units with additional humvees, Crusaders, and assorted infantry (which can be garrisoned in the humvees). Build an airfield and air units as desired.
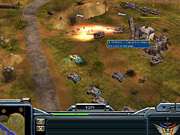
You can build a new structure, the strategy center, in this mission. After erecting the building, select one of the "strategies" to improve your units. The "bombardment" strategy increases the firepower of all your units and erects a defensive cannon at the strategy center, the "hold the line" strategy improves your troops' armor and increases the defensive strength of the strategy center, and the "search and destroy" strategy increases the sight and weapon range of your troops and erects a radar to detect stealth units at the strategy center. The strategy center also offers a variety of upgrades, including "advanced training," which allows American units to gain veteran status at twice the normal rate, and "composite armor," which improves the armor on Crusaders and Paladins.
After assembling a large army, cross the bridge and blast the GLA tunnel networks, buggies, and other defenders. Push east and begin crushing the GLA units and structures. Don't finish off the GLA right away, though--first send a construction dozer or two in and build a command center and a supply center near the dock. Then finish off the GLA to activate the second part of the mission.
Mission Objective: Destroy the GLA's main base.
The GLA destroys a dam on the northern end of the river. The flood destroys anything near the river and cuts off your original base from your current force. You'll still gather resources from the original base and can still use the structures. If necessary, you can transport units with a Chinook to the other side. But you're provided with more dozers and some military units to begin a new base on the smoldering ash of the GLA's outpost.
There's a trio of civilian structures north of your new base worth capturing. Locate an oil refinery--which reduces the cost of vehicles--and two oil derricks to the north. Be careful, however--there are GLA forces lurking near these civilian structures, and they will attack if you move a Ranger close. Wait until you've reinforced your army with more tanks, humvees, and infantry. Escort a Ranger to these structures and defend him against the GLA counterattack.
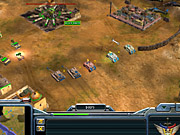
Erect some Patriot missile defenders along the northwest side of your base. Position some humvees there as well, to mow down any GLA infantry units that attempt to penetrate your base defenses. At some point during the mission, the GLA erects a Scud storm and a countdown begins. The storm is located on the northern corner of the map. Use your command center's spy satellite to pinpoint its location.
When you have a large army, advance toward the GLA base along the northern edge of the map so you reach the Scud storm as quickly as possible. Beware of the GLA mines scattered throughout the area (primarily at the entrance to its base). Complete the mission by destroying the GLA structures at its main base. Sweep the map with air power or a ground force and rid the area of the GLA.
Mission 6 - Operation: Desperate Union
A rogue Chinese general has joined with the GLA. The enemy is relying on tunnel networks. An attack must be launched immediately.
Mission Objective: Destroy the GLA forces to the northeast.
The mission's introduction reveals that US forces are pinned down by the GLA. The Americans' devastating particle cannon blasts the GLA aggressors and saves the allied forces from certain death. You begin the mission with a small base that lacks a supply center. Erect a supply center quickly and produce a second Chinook to gather resources quickly. Start building other structures, including barracks, a war factory, and a strategy center. Once the strategy center is built, choose a strategy. We suggest bombardment or hold the line. Research the strategy center's valuable upgrades, including double veteran rate and increased tank armor. You may also want an airfield so you can take advantage of America's strong air force.
There's a second supply dock on the southwest area of the map. Send a construction dozer there and build a supply center. Produce a second Chinook at this supply center to gather resources quickly.
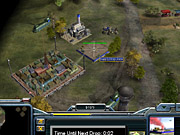
Start producing units, beginning with humvees, Crusaders, and Paladins (if you've spent the required general point). Position four to five humvees on the northern edge of your base--the GLA will launch attacks on this side of your base. The attacks begin with just infantry but escalate to tanks and Scud launchers. Add three to four Crusaders to the northern edge of your base to strengthen your defense.
You have the ability to build a few new structures: the supply drop zone and the particle cannon. Upgrade your cold fusion reactors or build more to support the power required for these new structures. The supply drop zone provides free supplies at a regular interval, and the particle cannon is the American superweapon.
Position remaining offensive units near the bridge just southeast of your base--other GLA attacks will be launched on this point. Bolster defenses there with Patriot missile defenses. Train Rangers and missile defenders and garrison them in your humvees. Gather your force of tanks, humvees, and Tomahawks here.
After massing a large army, push east across the bridge. There's a sniper in one of the towers just across the bridge. Concentrate fire on these towers to destroy them and eliminate the sniper. Work southeast through the roads and blast all GLA and Chinese defensive structures you encounter. Don't forget to use your fuel air bombs when you encounter a worthy target.
Mission Objective: Destroy the Chinese command center and the nuclear missile silo.
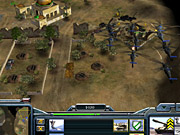
You're ordered to eliminate the Chinese general working with the GLA. Search the south and southeastern sections of the map to locate the Chinese structures. Locate the nuclear missile silo just north of the Chinese command center (the silo is on a small hill). Utilize the particle cannon or fuel air bombs on these structures if you wish or just level them with your tanks and artillery.
Crush the structures in the southern section of the map. Maneuver to the eastern edge of the map and work your way up the east side. The GLA protects portions of its base with mines, but the eastern edge is relatively clean. Destroying each and every defensive structure on the map isn't required. Target the GLA structures throughout the northeastern section of the map. The mission concludes when you've cleared the GLA presence in the northeast and demolished the Chinese in the south.
Mission 7 - Operation: Last Call
US forces have surrounded the GLA capital. The GLA has biological weapons. China has pledged its support to the US. The GLA must be eliminated.
Mission Objective: Destroy all GLA forces and structures.
You begin on the eastern side of the map with a small base. Select your supply center and get another Chinook on resources quickly. You have barracks but little else. Select your construction dozer and build a war factory, a strategy center, and an airfield. You should also build a detention center, which permits you to see the enemy locations for a short period of time, and the particle cannon, which you can use to blast away at GLA structures.
You're shown an abandoned Chinese base in the southeastern corner of the map. You've been authorized to use it. Select the barracks and research the capture building upgrade. Send a Ranger down and capture the Chinese supply center, command center, and barracks. Build a second truck to gather supplies faster. The GLA will attack these structures, so position some humvees nearby or train some Chinese Red Guard units to defend the area.
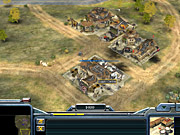
At some point early in the mission, the GLA announces the construction of a Scud storm. It's located in the southwest corner of the map. Use the spy satellite at your command center to reveal that section of the map. You can wipe out the Scud storm in one swoop by using fuel air bombs and full A-10 air strikes. This requires at least four general points to pull off, but you won't have to worry about the Scud storm any longer.
There's also an oil refinery and an oil derrick in the northern section of the map--they're across the river, in GLA territory. Get a Ranger there and capture the two buildings to gain their benefits. The refinery reduces the cost of vehicles and the derrick provides a slow, steady income.
Begin your unit production and position your army just west of your base. Produce a mixture of tanks, humvees (loaded with Rangers and missile defenders), and Tomahawks. Support the ground forces with a mixture of air units. Advance west toward the GLA stronghold. GLA infantry have garrisoned the walls surrounding the outer perimeter of the base. You can uproot these troops with Rangers armed with flash bang grenades or bombard the walls with Tomahawk launchers at long range. Destroy a section of the wall that is wide enough that your forces can maneuver inside without fear of being shot at by garrisoned GLA troops.
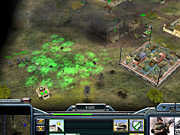
Monitor your particle cannon countdown and use the weapon on the GLA buildings when it's ready. Canvass the western area of the map and destroy all the GLA structures you encounter. You don't have to destroy all the defensive emplacements--simply locate and annihilate the main GLA buildings to complete the mission. If you've acquired fuel air bombs and air strikes, utilize them to further your dominance. Bombard GLA targets with your Tomahawk launchers, but protect these fragile vehicles carefully. Finish off the GLA to complete the mission and the campaign.
Chapter 8: Multiplayer Tips
This section provides specific strategies for succeeding in Command & Conquer: Generals multiplayer battles.
Expand, Expand, Expand
Expansion may very well be the most important factor in multiplayer games. Gaining and maintaining control of additional supply docks can make or break both one-on-one and team games. The more supplies you control, the more supplies you have to research, build superweapons, and produce units. But expansion isn't a cut-and-dried affair. It's possible to expand too early. While you're using your time and supplies to build an expansion, your opponent might be using that same time and cash to build units. If you expand quickly, have funds set aside for defensive structures or units to help protect your expansion from early assault. Losing an expansion early will set you back significantly, and if you don't protect your expansions with defensive structures or units, your opponent will be able to destroy them with ease. Many multiplayer maps also include oil derricks. Capture nearby oil derricks as soon as possible, as you receive $1,000 for capturing the derrick (plus additional supplies over time).
Teammates
One of the most important aspects of team multiplayer games is support. You must support your teammates to succeed. Support means helping protect expansions, ganging up on a single foe in a battle, or coordinating an assault on an enemy base. Place scouts around the map to keep an eye on your opponents. Know where their units are headed so you can call for help or provide it when needed. If you're the GLA, place tunnel networks near your teammates' bases or expansions so you can quickly move reinforcements to assist. Support also means producing units that complement your team. For instance, a US ally may choose to spend all his or her supplies on an air force. Provide support with a ground force that can chew through anti-air defenses and open holes for the aerial assault.
Counter Stealth and Scouting
Stealth units play an important role in multiplayer, particularly in prolonged engagements. If you don't have the proper counters, a camouflaged unit can wreak havoc throughout your base. Colonel Burton could place explosives on buildings or a Black Lotus could start stealing your supplies. Anti-stealth also helps prevent a US player from hovering spy drones over your base and expansions. Anti-stealth units include China's troop crawler, the GLA's radar van, and the US pathfinder. Other stealth detectors include the strategy center and its "search and destroy" mode, which reveals camouflaged units, Patriot missiles, spy drones, Stinger sites, tunnel networks, Gatling cannons, speaker towers, and Overlords upgraded with speaker towers. Stealth units can also detect other stealth units.
Scouting is a vital part of all multiplayer games. The Americans benefit greatly from the spy drones, which provide valuable recon on designated locations on the map. Keep an eye on what your opponents are doing and planning. If your opponent is producing a large army of tanks with no air support, build an airfield. Or if you're playing as the GLA, prepare some terrorists or bomb trucks to help bombard the tank group. Scouting also helps gauge defenses and locate the weak areas of an enemy's base or expansion. Fast vehicles make excellent scouts, so the GLA technical, the US humvee, and the Chinese Gatling tank are ideal for that purpose.
Resource Harassment
As important as expansion is, it's equally important to prevent your opponent from expanding or maintaining an expansion. Look for opportunities to harass resource areas, particularly resource collectors, which must be replaced to continue gathering resources. The GLA workers are extremely weak and often huddle up in close quarters. Long-range bombardment or even a para drop or rebel ambush can wipe out a group of undefended workers in mere seconds. American Chinooks are pricey collectors. Send a Chinese Gatling tank, GLA quad cannon, or a humvee packed with missile defenders to perform hit-and-run strikes.
Cheap GLA terrorists are an excellent way of destroying Chinese trucks. Pile a group of terrorists in a technical for quick delivery. Pop them out of the technical when you arrive and target the trucks and the supply center. Avoid running into these problems by erecting defenses around each expansion. The cash spent on a couple of Stinger sites and a tunnel network will pay off in the long run.
Adjustments and Tips
Part of success in multiplayer battles is unpredictability. Play proper defense, scout, and build appropriate counters, but be unpredictable when it comes to combat. If you spend all your money on one type of unit, you can expect to be easily countered. Even powerful units like nuke cannons are defenseless against an air force. Be prepared to adjust your tactics on the fly. For example, perhaps you didn't plan to build an air force but you see that your opponent hasn't erected any anti-air defenses. Changing your plans and launching an aerial attack will give you a significant advantage. Here are some other tactics to consider in multiplayer games:
- Load up a technical with five terrorists and drive it along the edge of the map to your opponent's supply center. If you're playing as the GLA against China, send one terrorist to each truck (though a single terrorist's detonation could take out a group of trucks) and the remaining terrorists to the supply center. Finish off the center with the technical or retreat back to your base for another load. This strategy works even better with multiple technicals that are fully loaded with terrorists!
- Terrorists and bomb trucks are excellent against enemy structures but can be even more useful against enemy units. Have some terrorists or a bomb truck handy when you're about to engage in a ground battle. Move in the explosive GLA units during the fight. More often than not, your opponent won't adjust quickly enough to avoid getting bombed. While terrorists are cheap, bomb trucks are expensive. Use them carefully. Losing cash without inflicting damage will prove disastrous in the long run. A similar strategy is to use hijackers instead of terrorists. Spend a three-star general point on hijackers and keep them inside a technical and out of the battle. As combat rages on, move in the technical, pop out the hijackers, and start stealing enemy units.
- Para drops and rebel ambushes are effective behind an enemy's defensive lines. Drop them in the corner of the map behind the enemy's base. You'll discover that there are typically no defenses placed behind bases, so your Rangers and rebels can wreak havoc without being shot--at least initially. Destroy or capture buildings. Power plants are weak. Knock them out and you could cut power to defenses, which could provide the edge you need to move in for an attack. These tactics are best used when the enemy has moved his or her army out, leaving the base empty or nearly empty.
- In long multiplayer games, expect to see multiple superweapons for each player. Yes, it's possible to build multiple Scud storms, nuke silos, and particle cannons. China and the USA are limited by total power, but the GLA is limited only by real estate. While their utility against buildings is apparent, the superweapons are also powerful against units--though you must look for the right opportunity to launch. Locate a tightly packed group of enemy units and fire the superweapon. It's an excellent way of whittling down an enemy's defenses before moving in your main army.
- The spy drone is arguably the Americans' most valuable asset, particularly in the early game. Spend a general point on a spy drone and immediately place it over the enemy base. Use it to see what your enemy's early game plan is. Is your opponent weakly defended and vulnerable to a rush? Is your opponent churning out units and planning to rush you? The spy drone helps you plan ahead. Place additional drones at expansion points so you know exactly when your opponent has built a secondary supply center. Place some around your own base and expansions to detect stealth units.
- In addition to the above, combine the spy drone with the Tomahawk for a devastating attack. The spy drone provides line of sight for the long-range Tomahawks. If the spy drones are allowed to remain active, the Tomahawks can bombard enemy targets without being revealed on enemy radar. Keep the Tomahawks near support units or, better, Patriot missile defenses. Should the enemy attempt a counter, position your Tomahawks near the defenses and target units instead of enemy structures. Place anti-air units around the Tomahawks to guard them from air strikes and look out for Scud launchers or nuke cannons. Counter spy drones with anti-stealth (defensive structures, primarily) around the perimeter of your base.
- A single American humvee can ruin a GLA player's day early in the game. GLA workers are extremely fragile, and if measures aren't taken to protect them, a humvee loaded with infantry (upgraded with flash-bang grenades) can wipe out a worker group in seconds. This is effective on small maps, particularly in a one-on-one battle. Protect your workers early with a Stinger site or a tunnel network.
Got a news tip or want to contact us directly? Email news@gamespot.com
Join the conversation