L.A. Noire Walkthrough
Crime doesn't pay. Our L.A. Noire Walkthrough will show you how to solve crimes, catch liars, and provide tips for cleaning up the streets.

- Walkthrough: A walkthrough of Phelps' rise to power
- Unlockables: Where to find locations of hidden film reels
- Xbox 360 Achievements: Boost your Gamerscore with a huge list of Achievements
- PlayStation 3 Trophies: Gain new Trophies for your collection
Also be sure to see what's coming up in our LA Noire FAQs section.
What's New:
- May 19, 2011: Version 1.2 of the guide is here. The Arson desk has been added along with Achievements and Trophies.
- May 18, 2011: Version 1.1 of the guide is up. It now includes the Vice desk and Film Reel locations.
- May 17, 2011: Version 1.0 of the LA Noire Walkthrough Game Guide completed. It currently features a walkthrough of the first three case desks.
Upon Reflection
Kingdom Come: Deliverance 2 - Official Cinematic Announcement Trailer Stellar Blade - BIBI ‘Eve’ Official Music Video Trailer | PS5 Apex Legends: Urban Assault Collection Event Trailer Total War: WARHAMMER III - Elspeth von Draken Gameplay Showcase Genshin Impact - "Arlecchino: Sleep in Peace" | Official Character Teaser Potionomics: Masterwork Edition - Official Announcement Trailer Snowbreak: Containment Zone - "Gradient of Souls" Version Trailer Harold Halibut GameSpot Video Review Nancy Drew: Mystery of the Seven Keys | World Premiere Official Trailer Modern Warfare III & Warzone - Official Cheech & Chong Bundle Gameplay Trailer SteamWorld Heist II – Official Reveal Gameplay Trailer Dead Island 2 – Official SoLA Expansion Gameplay Launch Trailer
Please enter your date of birth to view this video
By clicking 'enter', you agree to GameSpot's
Terms of Use and Privacy Policy
The Patrol Desk serves as a tutorial to the game. These first four cases are rather short compared to bigger cases that come along. Your partner for this desk is officer Ralph Dunn.
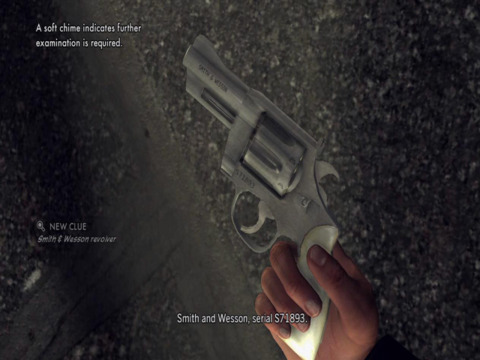
You'll be looking at the murder scene of one Mr. Rose. You can examine the blood stains, but the main objective is to find the murder weapon. Swing around to the left side of the alley to discover a drain pipe. Climb this pipe and you'll land on the roof. Just a few steps away is the murder weapon, a revolver with serial number and all.
Talk to Dunn and he'll inform you of a gun store nearby. Get back into your squad car and visit this store. The shop owner will know the gun, and give you the registry to cross check the serial number. You'll learn that the gun belongs to a man named Schroeder who knew Rose; the gun registry also has his home address.
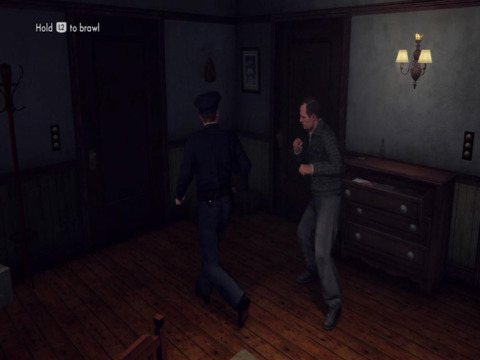
Ride to Schroder's apartment and inspect the mail boxes to find his room. Bust into his place and he will sock Dunn cold. Take down the suspect in a fist fight and examine his dresser drawer to find a notebook with Rose's name. Dunn will tell you to leave it, ending the case.
Armed and Dangerous
You'll get a call about an armed robbery in progress. You'll be armed with a shotgun, but can also switch to your trusty pistol in a pinch. First kill the robbers in the street that attempt to take cover behind their cars. One clean shot with your shotgun should kill each.
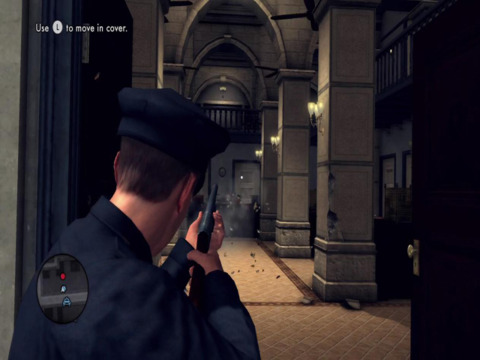
Next move towards the bank's entrance and take cover. Pop out of cover and kill the three criminals on the ground floor, followed with the few up on the second level. Dunn will also take out an enemy or two and aid with suppressant fire.
Warrants Outstanding
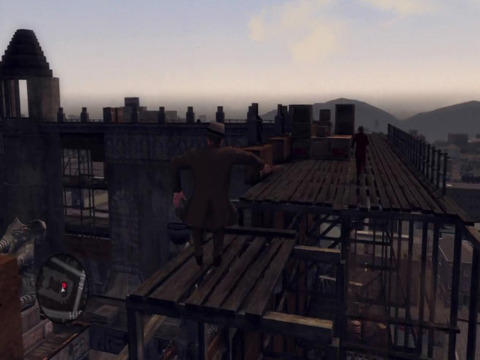
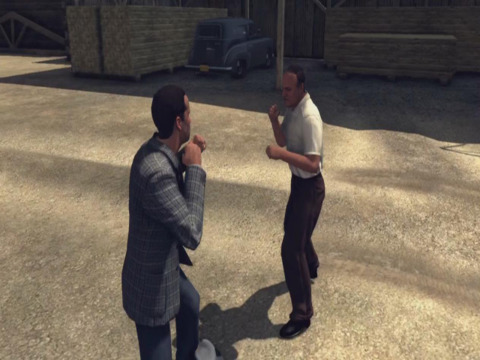
You'll be chasing after a crook from Dunn's past that's skipped his parole. Chase him through the street and up to the roof tops. Don't get too close while you're both climbing; if you are near a suspect while ascending, they will automatically shove you down.
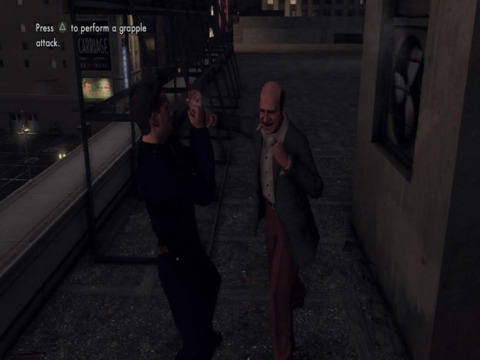
On the roofs, you'll get into a fist fight. Like most brawls in the game, block the enemies attacks and come in with a strong counter punch. Lay in a grapple or a finisher to end the case for good.
Buyer Beware
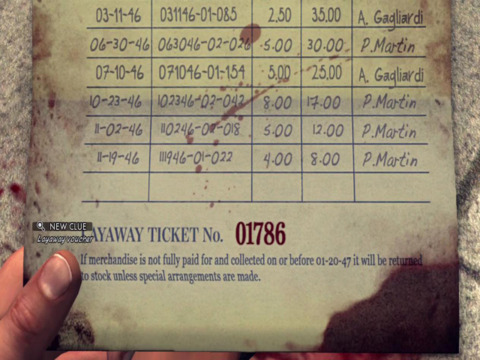
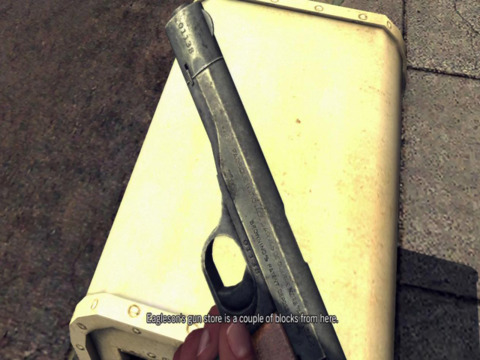
This will be the first full crime scene investigation case. You'll discover a Mr. Gage dead at the scene. First explore the victim's jacket to find a layaway voucher. Also look into the trash bin to discover the murder weapon.
The gun's serial number is in tact and there is a gun store nearby that has more information. Traveling to Eagleson's guns will reveal that a Mr. Kalou had brought in the gun for cleaning.
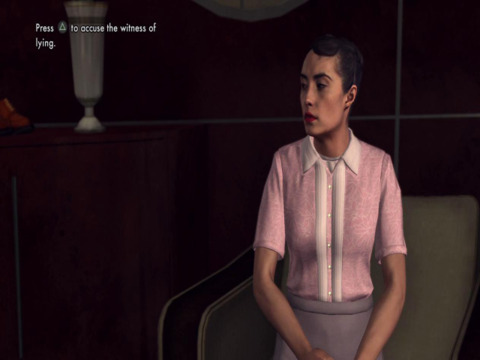
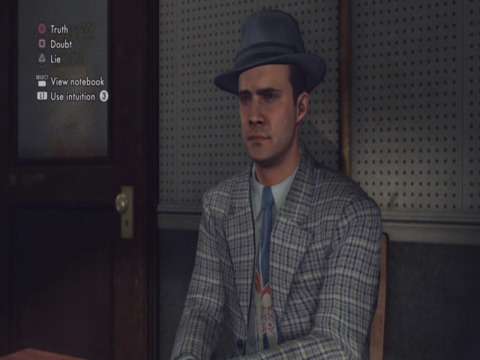
There will be one witness to question, the store clerk. As this desk is still a tutorial it will freely point out when she is lying, telling the full truth, and hold back information. Call out her lies and doubts when promoted.
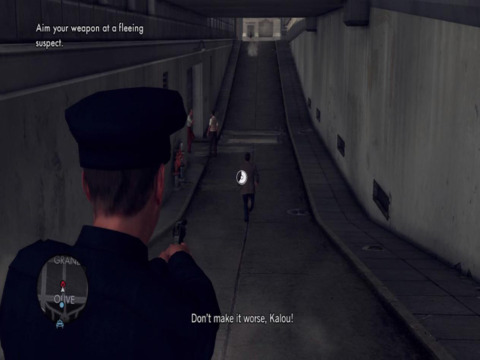
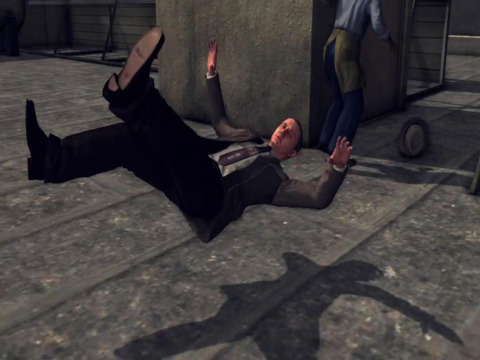
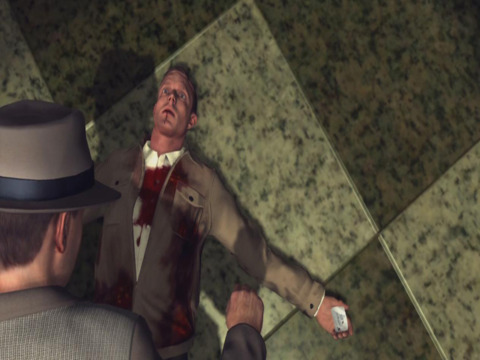
Both the witness and the gun will point to Kalou. Travel to his jewelry store and ask the man at the counter to get his boss. It turns out however that this man is Kalou, and he will dash off. Take chase and fire your gun once inside a long alley way.
You'll now be taken into the interrogation room to get a confession from Kalou. Doubt his intentions and use the witness testimony to put him behind bars.
The Driver's Seat
You'll now be promoted to Traffic Desk. Your new partner is Stefan Bekowsky. You'll be investigating a possible murder on the rail tracks. While there is no body, there is a lot of blood.
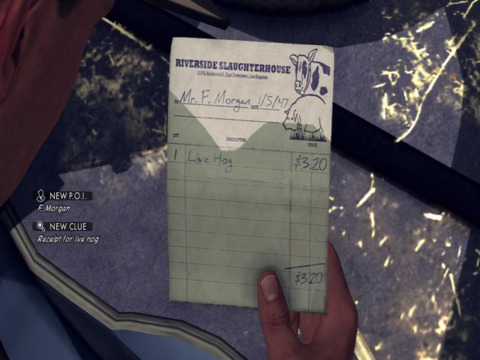
Search the trunk for a receipt in the name of a Mr. F Morgan. You can also find a possible weapon, a blood covered pipe, and a pair of Stenzel glasses. You can even find an ID of the victim, Adrian Black.
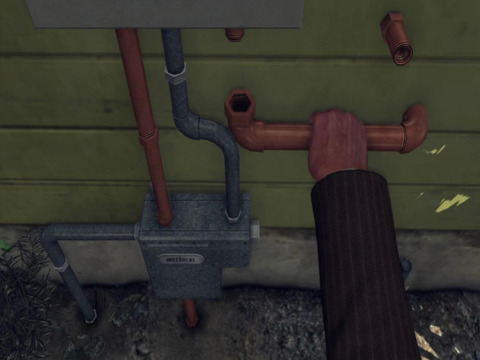
Travel to Black's home and speak with his wife. You can explore the house to discover problems with the marriage, including clear signs of infidelity. Behind the house is also a newly installed heater that is missing a pipe.
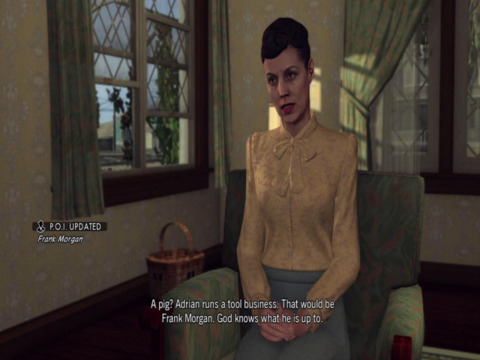
Talk to the wife again and learn about F Morgan, who turns out to be Frank Morgan, a friend of Mr. Black. The two friends are known to hang around bars, and Mrs. Black will give you an address.
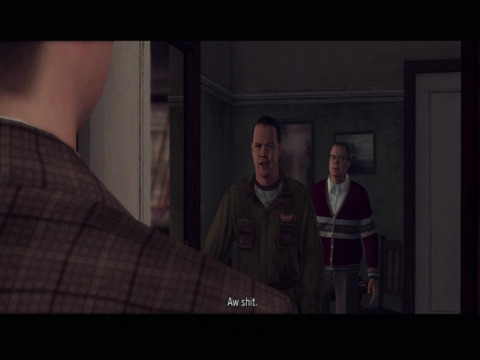
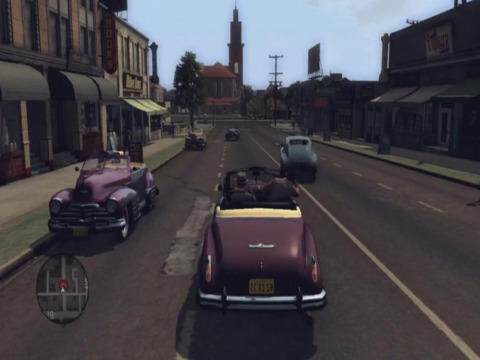
Head to the pub and confront Frank about what happened to Adrian. When he leaves, tail his car to his apartment. You'll discover that Adrian is alive. Chase him down and arrest him for conspiracy to end the case.
Marriage Made in Heaven
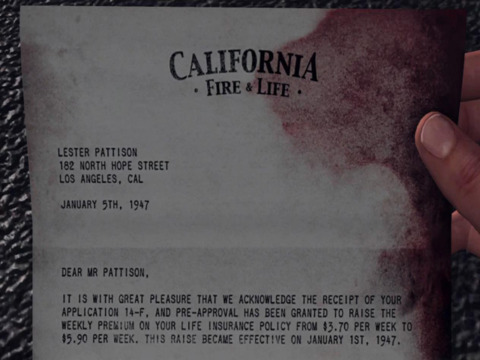
You'll find a dead Mr. Pattison outside a local bar. It seems that it was a hit and run, though the body has more blood than expected. Search his coat further to find that he had taken out a life insurance policy.
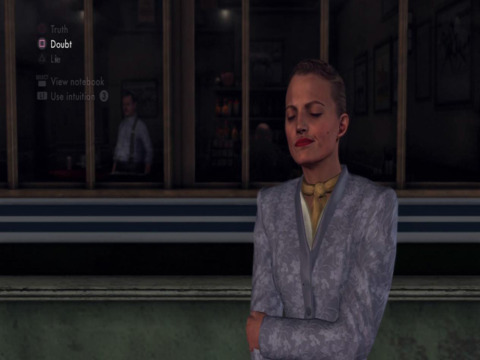
Talk to the two witnesses: the bartender and the actress. They claim that the deceased was arguing with his wife before she stormed off. Both witnesses tend to tell half truths, but rarely straight out lie.
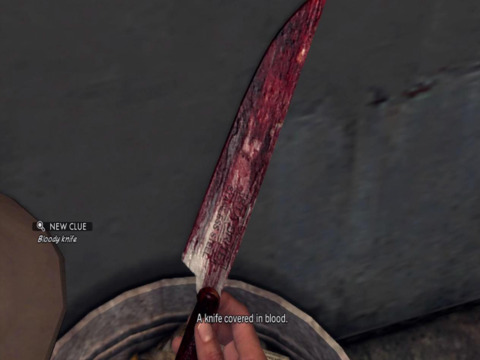
If you continue to search the area, you'll discover a bloody knife in the trash bin along the back alley. There is no sign that this has anything to do with the murder, but keep it in mind. For now, follow the lead and travel to Mr. Pattison's home.
You'll meet the wife, along with a Leroy Sabo; neither seems to be worried that Pattison is dead. They will ask you to leave. For now check your messages at the police phone. You'll learn that the murder was caused by a knife wound, not a hit and run. If you want to, you can go ahead and arrest the driver, William Shelton. Though it's clear he didn't murder Pattison.
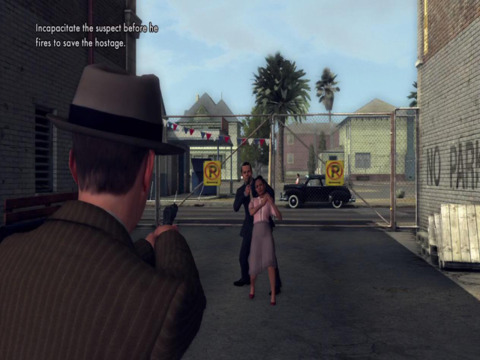
Return to the Pattison home and Sabo will kill Lorna. Chase down Sabo and attempt to shoot him on the run. If he gets far enough he will take a hostage. Aim carefully and kill Sabo without harming the hostage to end the case.
The Fallen Idol
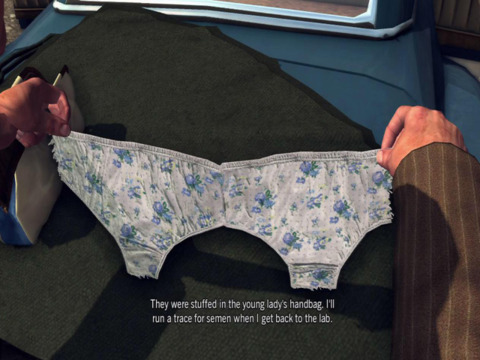
There has been an attempted murder, but both victims has survived with injuries. Explore the crash site to find that one of the victims is underage and may have been raped. You can also find a note from her mother asking her to come home.
Talk to the witness still at the scene: June Ballard. She will speak more about the other victim, Jessica Hamilton, along with a producer named Mark Bishop. June tends to lie, so press her for the truth, especially regarding Jessica's youth.

Next visit the police hospital and talk to Jessica directly. Ask her what she knows about both June and Bishop, along with the regards to her promising being in Hollywood. This will lead to more of a conflict between Bishop and June's husband McAfee.
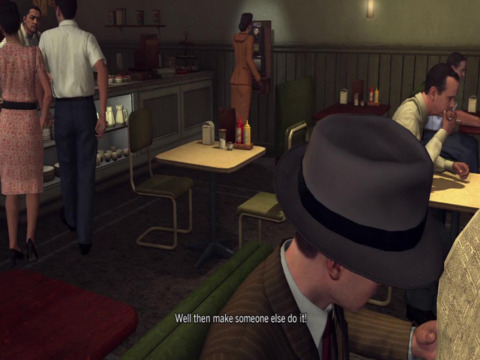
Tail June in your car and she will make a stop at a diner to make a call. Use stealth and go incognito to stay out of her view. You'll find out that the McAfees really have it in for the Bishops.
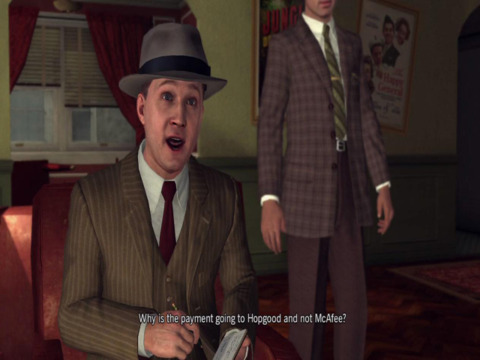
Head to the Bishop apartment and you'll find that MacAfee's men have already trashed the place. Search around to discover checks made out to a Hopgood, pictures of a movie set, and a one of a prop store. With this evidence question Mrs. Bishop about her knowledge of the June, MacAfee, and the checks. Before leaving, call the police station and find the address for Silver screen props.
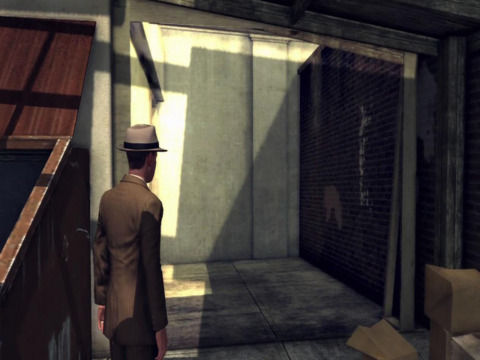
Travel to the prop shop and question Hopgood. Going around back will reveal a secret passage to the back room. You'll find evidence that Jessica and Mark had underage sex and that Hopgood was filming it all. Attempt to confront Hopgood, but fellow detective Roy Earle of Vice will arrive and reveal that Hopgood is free to go.
Exit the prop store and you'll be confronted by MacAfee's men. Run them off the road and track Bishop to the movie set from the photo. Chase after Bishop, climb over the broken structures and catch him near the top.
MacAfee's goons will arrive and fire at you. Protect Bishop while Bekowsky provides cover fire from below. Some of the enemies will drop shotguns and machineguns. Switch out your weapons as often as possible while killing bad guys. Make sure Bishop is always protected before entering the fray and blasting the enemies. At the bottom floor you'll gain more support from fellow LAPD officers. With the last gangster dead, the case will conclude.
The Red Lipstick Murderer
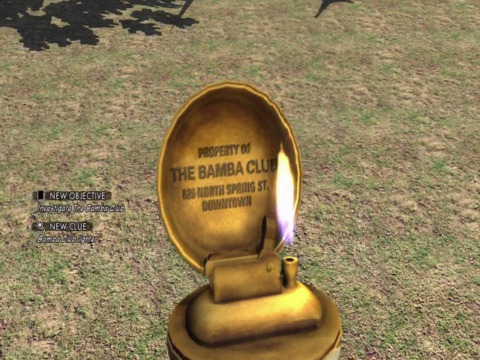
For the Homicide desk you will be paired with Rusty Galloway. Your first order of business is investigating the crime scene. You'll want to locate the lighter shaped as a globe. Line up the globe's four sections to gain an address to the Bamba Club.
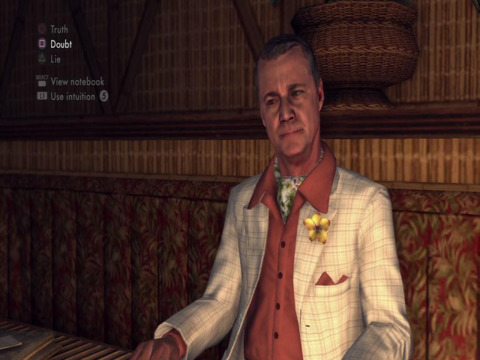
Head to the club and talk to the bartender, Garret Mason. He will point you towards McColl in the back who knew Celine Henry. McColl is rather honest, though he does fib a bit when it comes to his relationship to the deceased. He will at least lead you to husband's home address.
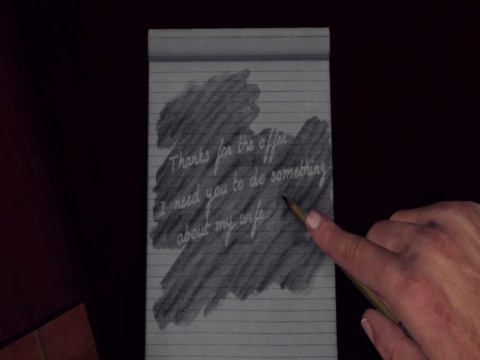
Go to the Henry house and confront Jacob inside. Explore the area for clues, including shading the note pad on the counter. This will reveal that Jacob had it out for Celine. Grill the husband about the failed marriage. Afterwards use the phone to send a squad car down. You can also get more info about the car at the scene: it belongs to Alonzo Mendez.
Travel to Mendez's apartment and search the area. You'll find bloody rags and the murder weapon. Mendez will enter his room and flee upon seeing you. Chase after him down and he'll eventually enter his car.
It will now become a car chase instead of on foot, but the goal remains to knock his car down. If you move in close enough Rusty will blast the car's tires and cause the suspect to crash. Once the chase is over, get out and arrest Mendez for the murder.
The Golden Butterfly
Search the dead body and find signs of strangulation, boot marks, and the victim's home address in her bag. Travel to the home and you'll discover the deceased's daughter.
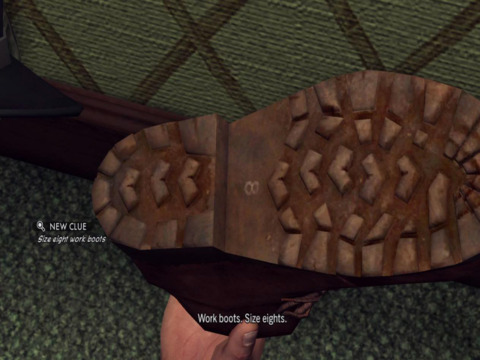
Search the home and discover another failed marriage, along with Mr. Moller's muddy shoe (a size 8 even). Once finding everything talk to Michelle Moller to find out even more that the place was not a happy home. Also you can learn about some of her mother's missing jewelry.

After finishing with Michelle, Hugo Moller will enter the house and can be questioned. He's very dodgy and mostly a lair, but you don't have enough to pin anything on him yet. Exit the house and talk to the neighbor across the street. During this time, Mr. Mollor will start burning his bloody shoe. Chase down Hugo and take him in for the murder of his wife.
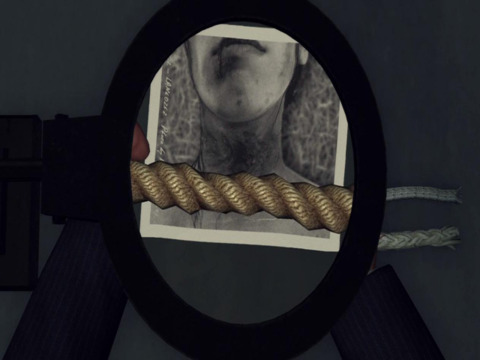
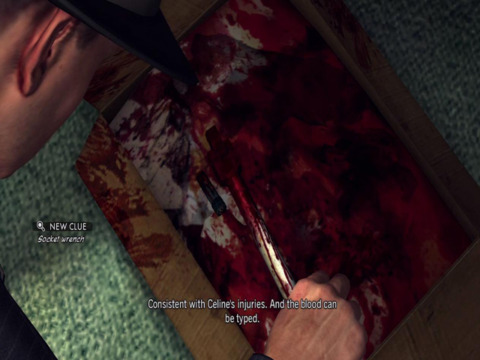
During this time you can also visit the morgue to study the wounds on Mrs. Moller. It seems that a type of ship rope was used to strangle her. Next follow the lead of exploring Michelle's school.
In this location you will find a child molester, Eli Rooney. Tackle him and bring him to justice. You can also explore the car in the parking lot to discover more evidence that links both the husband and the molester to the murder.
Head back to the police station and abuse both Rooney and Hugo. You can convict either one, but the captain would rather see Eli behind bars. You can catch the child molester with doubt options. If you can't seal the deal with Eli, go ahead and send Hugo Moller to the big house.
The Silk Stocking Murderer
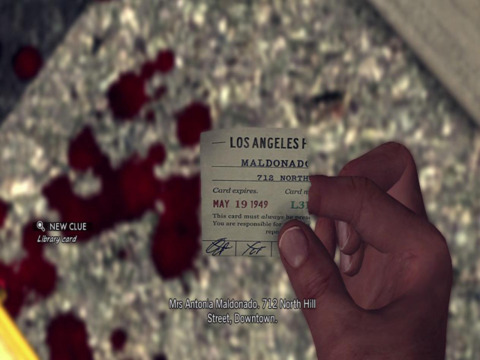
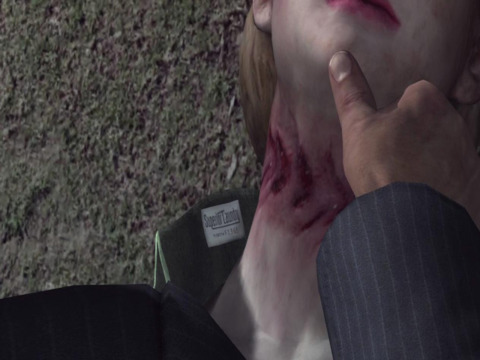
Search the body of the victim to discover half a library card. Follow the trail of blood to reach the roof tops and discovery the rest of the dead woman's identity: Antonia Maldonado and her home address.
It turns out to be a half-way house and you'll be able to talk to the land lady. Explore Antonia's room and discover that her room has been trashed. Be sure to look at the wedding photo with a charm bracelet and the broken window.
Return to the main floor and ask the land lady about Antonia's activities. You'll learn about the El Dorado Bar and how the victim wasn't getting along with her husband, Angel.

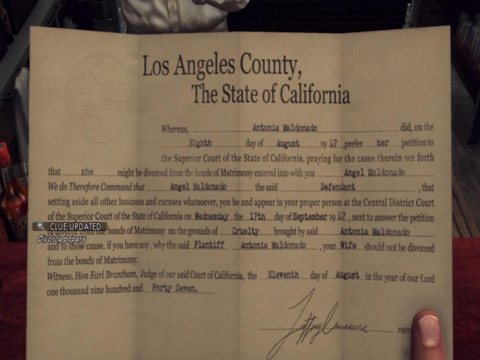
At the bar you'll find divorce papers that Antonia was going to serve Angel. You'll also get the husband's address by investigating further. Go and visit the residence and search the mail boxes to discover the apartment number.
You'll be assaulted by Angel and his brother. Knock out the brother while Rusty takes down the suspect. Once the suspects are taken, explore the home to find bloody clothes and signs of a fight. Head down the hall and talk to the neighbors to hear about what really happened the previous night.

Back at the police station interrogate Angel to get his side of the story. Most of the evidence doesn't add up, but it's still enough to keep him in the tank for now. You still have one more lead to check out: the fruit store near the bar.
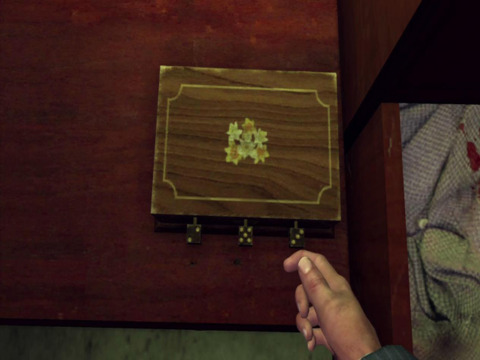
Talk to the clerk Clem, and he will allow you to look around. Smash open the gate on the left hand wall and you'll find Clem's stash of moonshine. Look inside the drawers to a locked chest. Enter the combination of 2-5-3 to open the case and find Antonia's missing jewelry.
Clem will flee in his truck. Give chase and crash into his vehicle to bring the bad guy to justice.
The White Shoe Slaying
Search the dead body and you'll see on her dress that there is a tag for Superior Dry cleaning. You'll also hear fro ma witness that a number of hobos and their leader have been swarming the nearby area.
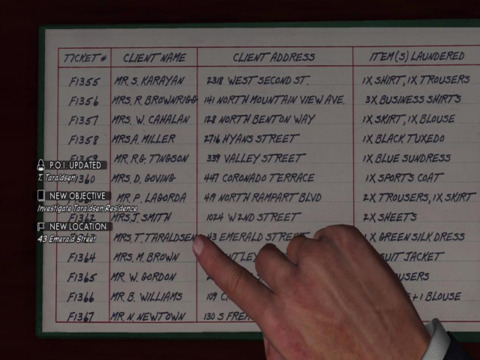
Call up R and I on the police phone to learn the location of the dry cleaner. Talk to the clerk and he'll give you the records for the night of the murder. The dress belonged to one T. Taraldsen and the address will be included.
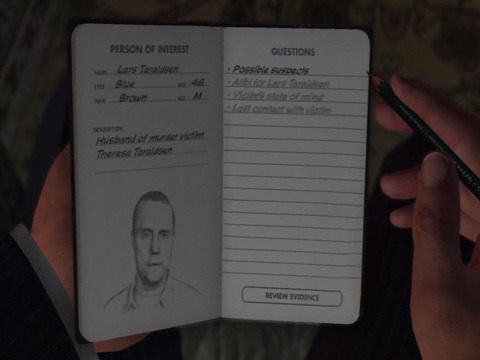
Go to the home and meet with the victim's husband Lars. Search around the home and discover some evidence that the husband was out at night, has the right size shoes and access to ship rope. Talk to the husband and ask him about his marriage. Turns out things aren't going so well and he will give you info about a bar his wife went to.
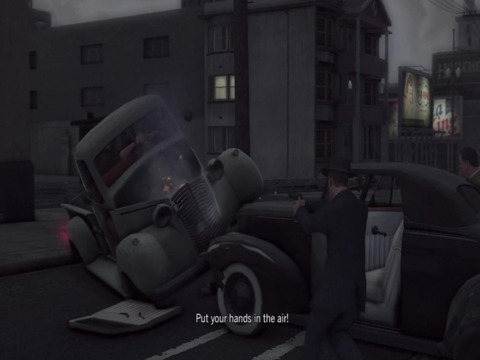
Travel to the bar and ask the bar tender what he knows. Theresa Taraldsen was talking to two people: a sailor and regular named Richard. Richard will flee the scene, so you'll need to track him down in your car and run him off the road.
You can ask Richard a few questions and bring him into the station. He will claim that it was the sailor who was last with Theresa.
Soon the sailor, James Jessop will turn himself in and answer questions due to his CO forcing him to. You already have three possible suspects, each pointing fingers at each other. However there is still one more lead: the hobo camp you hear about earlier.
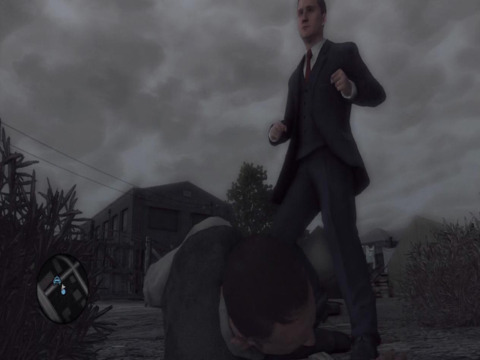
Travel to the hobo camp and duke it out with the leader: Stuart Ackerman. Rusty will deal with the rest of the homeless while you pound Ackerman senseless. Explore the hobo camp and you'll find the murder weapon and evidence that Ackerman at least tampered with the body.
Most of the evidence points to Ackerman so point out his lies to get him behind bars. If you make mistakes you can also go after Richard or James, but neither of those seems quite right.
The Studio Secretary Murder
Search over the body and you'll discover the identity of the victim: Evelyn Summers. You'll have some leads: including a bar that she frequents.
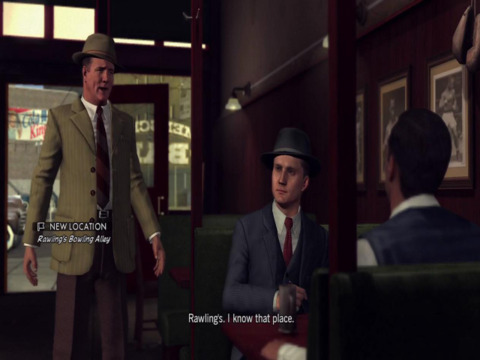
Travel to this bar and talk to the bar tender and one of the patrons, Grosvenor McCaffrey. You'll learn from the latter that he has a small criminal past and knows that the victim visits Rawling's Bowling Alley.
There is also another lead to a liquor store that Summers was staying at. Go check it out and talk to the owner named Robbins.
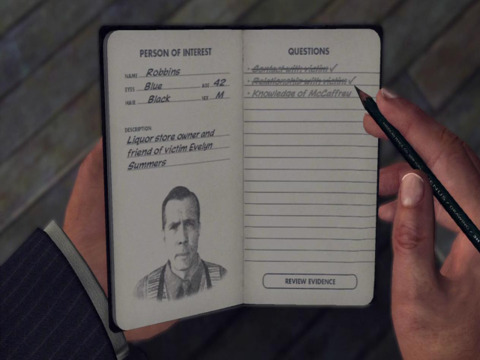
Robins is a very truthful man and doesn't have much to hide. Inside the backroom of the store it appears that Summers has been stealing, including a book owned by McCaffrey. Some of this can help pin the murder on Grosvenor, but there is still a lead at the bowling alley.
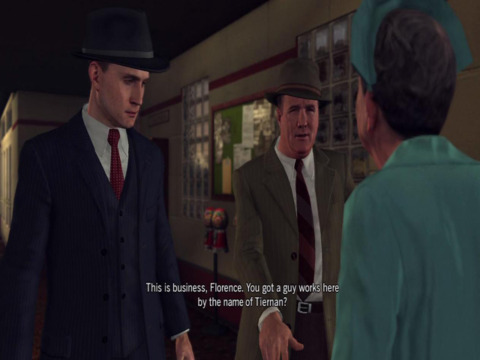
Ask the old lady at the counter about Summers' friend Tiernan and it will lead in a chase against the young man. Crash Tiernan's car and bring him into the station for questioning. While here you can also pick up the address of McCaffrey.
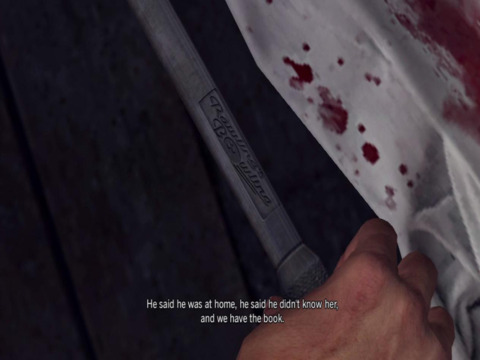
Go to the apartment and discover the murder weapon. This clearly points out the poet as the killer. Head to the roof and chase down McCaffrey with a tackle.
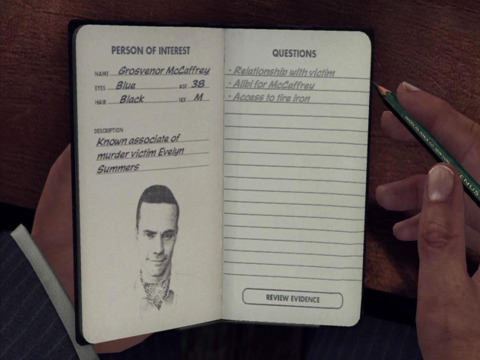
Back at the police station you can send either suspect to the slammer, although Grosvenor has more against him: a former criminal who had the murder weapon in his apartment. Grill either suspect and put them away to end the case.
The Quarter Moon Murders
It would seem that you might have just sent five innocent people to prison. The BD murder has sent you a number of clues to track him down for a final fight. Phelps will understand the first clue and send you to the Pershing Square.
Here will be the second clue. You can either drive around aimlessly and Phelps will announce the location after some time, or you can simply floor it to the Hall of Records.
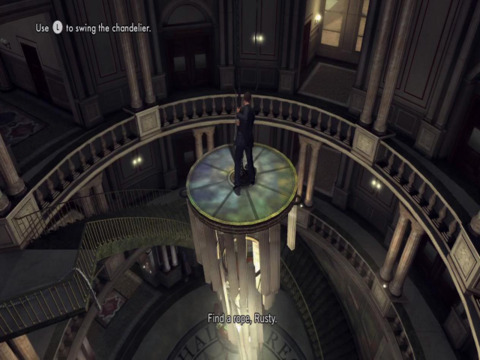
At the hall of records, travel to the second floor and up another ladder to reach the top of the chandelier. walk carefully over the chains and you'll find the third clue. The chains will then break and you'll be forced to swing to safety.
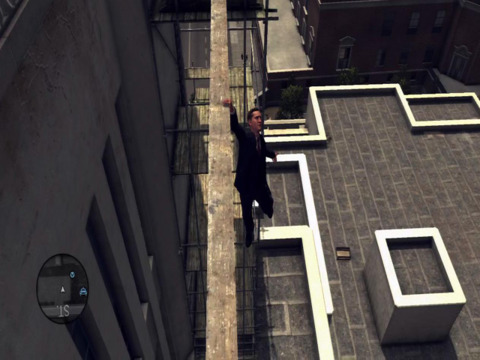
With this new clue you can once again let Phelps sort things out over time or go right to the Public Library. Once there, climb up the pipes and over the scaffolding. You will want to walk very carefully as a misplaced step can lead to death. Once on top of the roof you'll gain the fourth clue.
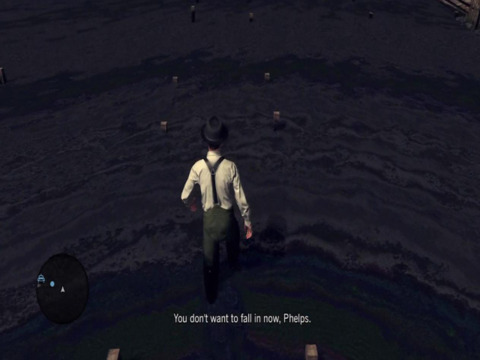
With this clue your next destination is the Westlake Tar Pits. Suit up in the overalls on the docks and enter the tar. Align the camera so that you can always see the half-sunken dock and walk to the small island to the north. If you slip off the dock you'll be dead in the water. Once on the island you'll find the fifth clue.
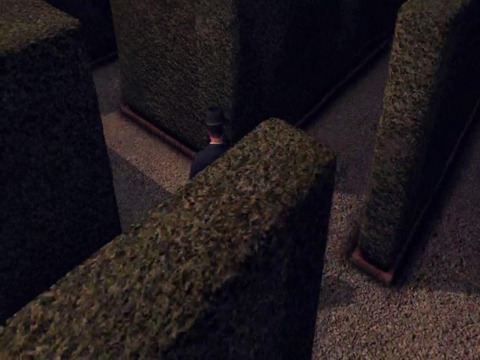
This clue will lead you to the Art Museum. You'll need to enter a hedge maze, but the solution is very easy. Keep moving forward around the winding corners and you will soon come to an intersection: at each of these splits you have to go left, right, left, and right one more time to wind up in the center. The next clue rests here.
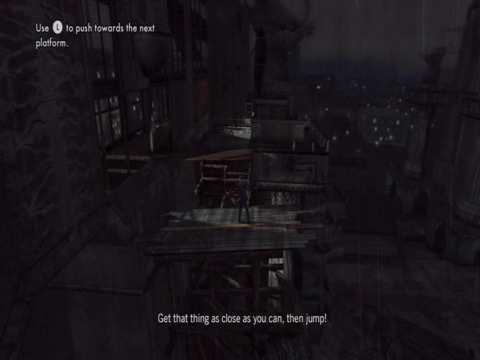
You'll now need to travel to the movie set back from your earlier Traffic Desk. Climb far up the stairs and the set will start to come apart. Balance on the broken pillar until Rusty clears a path. When this happens, smash into the newly deployed beam to land safely.
Quickly grab the last clue and escape the crumbling movie set before it's too late.
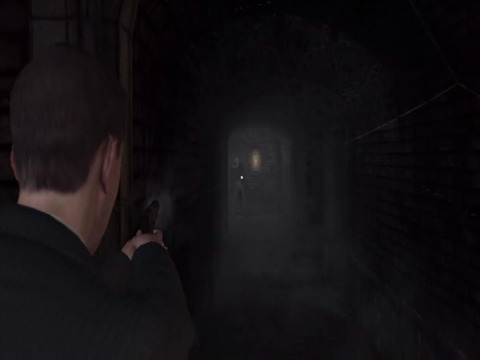
The final clue will lead you to the Abandoned Church. Here you will face the real killer of the last five murders: Garret Mason. Follow Mason down to the catacombs below and take cover to prevent being hit by his shotgun. Eventually you'll come to a single hallway where Mason will camp with his gun.
When this happens, pop out from your own cover and lay the law down with your six shooter. With Mason dead you'll finally complete the Homicide Desk.
The Black Caesar
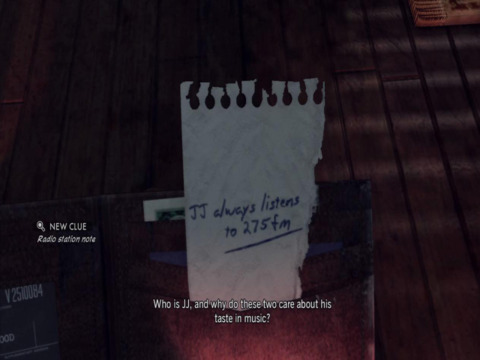
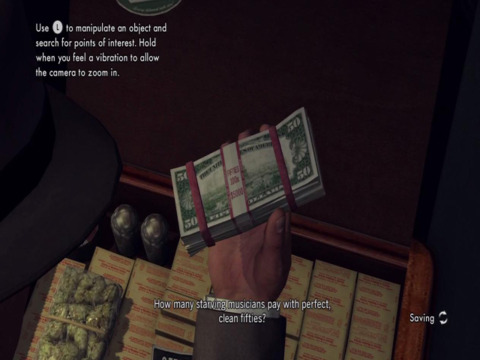
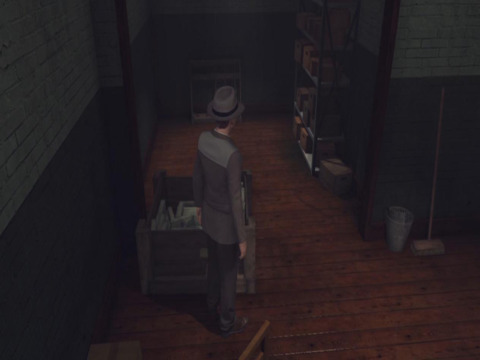
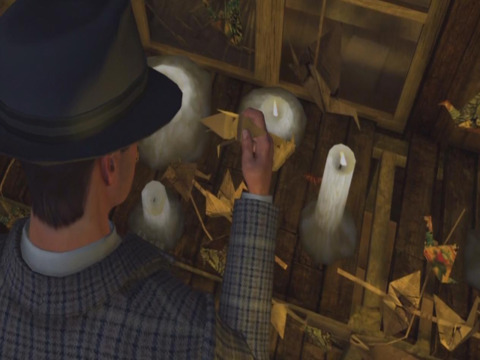
Roy Earle is your new partner while you're a member of the Vice Narcotics desk. For your first case you'll be examining the bodies of two dead dope fiends. On the body of Tyree you'll find a strange radio station note with "275 FM". In Lamont's wallet is a ticket for some kind of payout. Other evidence of interest include the strange doodle on the table and the weighted Black Caesar popcorn cup resting on the kitchen counter. Underneath this cup a taped box of morphine.
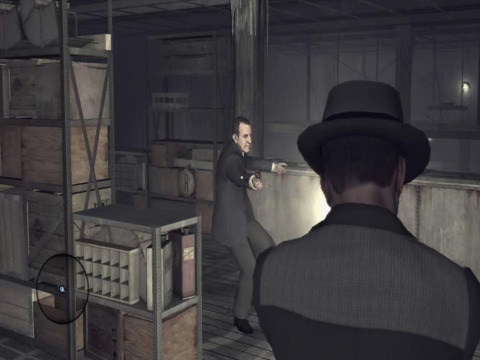
Your next stop is the Black Caesar food stand. The cook, Fleetwood Morgan, will make a run for it. Chase after him and beat him down with a standard block-counter hit combo to bring him to justice. Search the food stand to find a box filled with more drugs and a horn case with more pay outs for an "Ottie's", along with a ticket issued by Jermaine Jones.
Doubt Fleetwood and he will name Jones as the drug distributor. Head to the nearest phone and get Jones' address from R and I.
Inside Jones' place plug in the radio station number from before: 275 FM. This will open up Jones' stash filled with money, drugs, and more tickets to a pay out; the radio itself also has a sticker for Ramez Removals. Jones will send his goons after you, so beat them down just like every other fight. Now question Jones about the morphine and Ottie. You don't have much evidence for now, so stick to doubting. You'll gain more info about Ottie, who you will need to visit next.
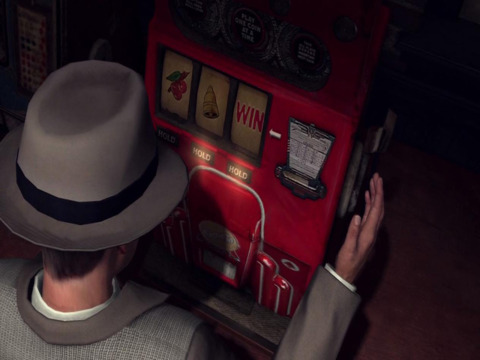
Travel to Ottie's and search around the area. The main piece of interest is the slot machine in the back. Check the strange doodle again and notice that the sketch is of a cheery, bell, and the word "WIN". Keep using the slot machine and using its hold buttons until gaining this combo. It will open Ottie's stash of drugs and money, linking him to the previous events.
Ottie will make a break for it, so you'll need to pursue him on foot. After tackling him down, you'll return to he's base for questioning. Be warned that Roy will not let you leave, and if you are lacking any evidence you'll be unable to solve this case correctly. Luckily, the testimony and evidence from both Jones and Morgan regarding Ottie's schemes will be enough to get information from him.
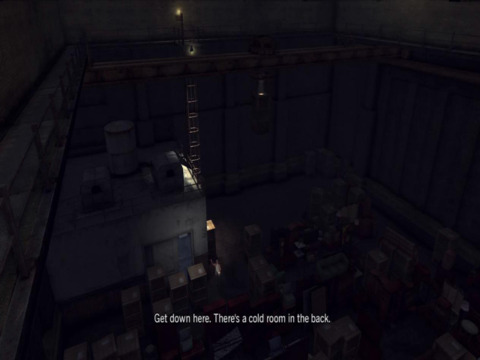
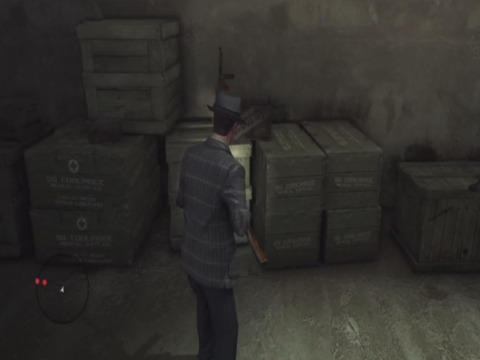
All of these will point towards Ramez Removals who has been sending drug filled furnishings to the various suspects. Head to the Removals and you will be required to gun down a fleeing truck. With the next set of suspects stopped, enter the warehouse and walk through the winding maze of crates and boxes.
On the other side will be a long ladder. Climb up to the top and use the crane controls. You can now move several boxes that had been blocking off your earlier route. Position the crane to the left hand side of the room and move the boxes blocking the freezer. Once Roy gives the word, head down and discover the drugs stored in ice.
As you exit the building, Ramez will break free, nab a shotgun, and start a killing spree. Enter back into the warehouse and move very carefully through cover. Ramez will attempt to plug you, but he can be killed with a few easy shots. Your new lead is Polar Bear Ice, so head there next.
At last you'll corner Lenny Finkelstein and his goons. Shoot down the first two gangsters and proceed into the next room. Hide under the bar here and take out the next enemy that is armed with a shotgun. Take this new weapon and use it on the next enemy around the right corner. Now enter the room on the right and kill the next shotgun wielding enemy.
Finally you'll be in the ice room. Take down the two enemies on the ground before moving to the top to face Lenny himself. He will shoot non-stop while you are out of cover, so your only option is to fire back and kill him before you're out of health. Once he's dead, move to the back area to discover the remaining stash of drugs, ending the case.
The Set Up
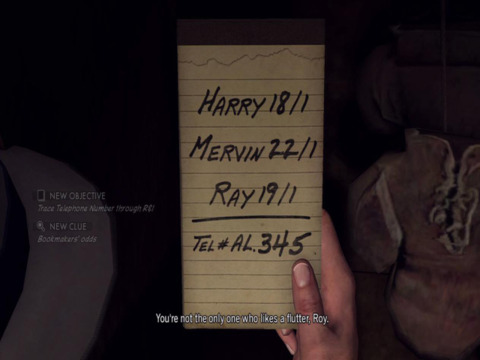
Hammond has cheated a lot of patrons--including Roy and a man named Carlo Arquero--by refusing to take a fall. Search the fighter's locker in the boxer's room to discover a memo pad with bookie info and a telephone number. Call up R and I on any phone and head to the hotel they give.
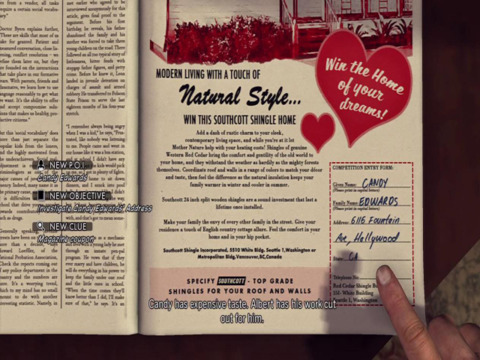
Check the guest list at the hotel and go to a room in the name of Winston Churchill in 207. Head up to the room and look around for evidence. Among the thins to look for include the telegram in the trash, the bookmaker's payout next to the bed, the ticket stub and box of chocolates on the drawer, and the hot can of beans on the table. However the most important thing here is the magazine with an ad for a Southcott Shingle Home. This will give you the name and address of a Candy Edwards. Time to look into miss Edwards location.
It's not an actual home, but instead the Aleve Motel. Talk to the lady behind the counter to learn that Candy is in suite 7. Inside beat down Carlo in a fist fight and search his pockets for a switch blade and a hit list filled with bookie names. Else where in the motel room are a ticket to Ohio and a Cunard Line post card.
With this new info wake up Candy and speak with her. Use the Southcott to call out her lie regarding Hammonds whereabouts, along with the bookie information to see what she knows about the numbers. Last use the telegram to try and get information about where the boxer is headed.
The next morning tail Candy by using stealth and going incognito. Hide behind the car in the large parking lot to avoid being detected. Next slide behind the fence on the right and wait for her to pass far enough ahead. Now hide by sitting in the shoe shine booth until Candy moves far enough. Duck behind the trees and mail boxes along the left side of the street and she will eventually make a right turn. She will make another left down an alley, followed by a second right. She will finally stop inside a bookmaker's office.
Meet up with Roy again and head into the building. Candy has already made her escape, but she has left an impression on the notepad near the pay phone: Examiner Drugstore. Head to this new address to follow the trail.
Talk to the manager of the Examiner and he will point you to Ray's shop. Head to this other bookmaker and you'll catch Candy getting into a cab. Fallow Candy's cab to the bus station and go incognito by reading a news paper.
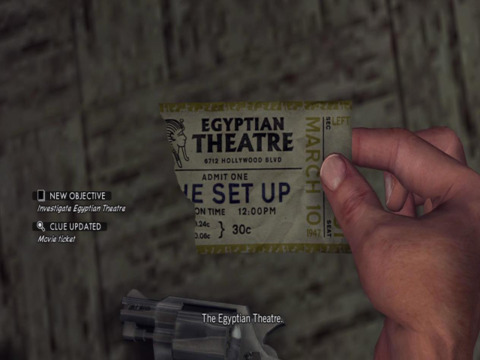
Eventually Candy will go to the ladies' room and a gun shot will go off. Enter the bath room and find that Candy is dead. Take from the scene of the crime the gun missing one bullet. There is also the other half of the ticket stub in her purse. This will lead you to the Egyptian Theatre. This will be the next point of interest.
Carlo and his men are already in the theatre and are armed to the teeth. First kill the enemy on the right side of the theatre, followed by the one that flees for the door on the left. Climb up the steps along the backstage to wind up on the balcony. This is a great vantage point to take on Carlo who now has a machinegun. Wait for him to stop and reload before popping out and capping him dead. With Carlo gone and Hammond safe, the case will finish.
Manifest Destiny
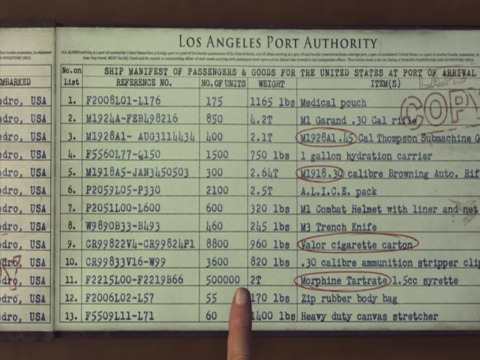
You'll be investigating the 111 Club along side some of the Homicide team. First examine the body of Bowe over by exhibit A to note him as a person of interest. Next move over to C and check out Bittleson, along with the drugs in his pocket. In the back room are a large case of Valor cigarettes that are worth taking note of. There are also some Browning Rifles with serial numbers in this room. Now go back to exhibit B where a horn case is located. Press down on each of the three horn pieces to find a secret compartment containing a ticket to the Blue room and more morphine.
You're now ready to talk to the Hostess of the club. Doubt her about what happened during the shooting and point out her lies regarding the club owner by using the contraband you discovered.
Return back to the police station and talked to the detective Harry to gain the LA port manifest. Search for who took the guns, morphine, and cigarettes. These include the murdered club boss and a few of Phelps' old buddies. With this new info head for the Blue Room.
Upon arriving in the club talk to Elsa Litchtmann. You won't have evidence to catch her lies, so doubt her twice in a row. After another cutscene tail Elsa's car to her apartment.
You'll gain control again at the club for a chat with Meyer Cohen. You once again will have no proof, so doubt what he has to say. After more scenes you'll want to head to the bus shoot out on North Bronson.
Wait for the gunman to unload his whole clip and reload. This will give you time to run around the right side and behind the building. Climb up the stairs and kill the shooter while Roy distracts him. Check the body to find a note with hit information, along with his Browning. After the shootout, talk to Felix. Doubt him first and then use the sniper's book to call out his lie.
Now, use the police phone to find Kelso and bring him to the police station. During the interrogation he will tell the truth regarding Eddie and the guns, but doubt him about the morphine and the robbery. Afterwards you'll be tracking down more gun men.
Chase down their car and they will eventually smash into a dead end. Take cover and shoot both assassins dead. On their body you will have a copy of the manifest and two places to look into: the post office and Chinese theatre. There is also a note that Shelton is meeting with the gangsters.
In the post office are three pistol gangsters along with another two riflemen. You'll have plenty of back up so killing them all will be no problem. Now check out the area to gain Lenny's business card from a dying Beckett, and a note on one of the gunmen. At the Chinese theatre the gunmen will make their escape, so chase them down and kill them; they provide nothing new, though.
Travel next to the meeting place and kill the three gangsters that assault you. Now turn the corner and take down the next four enemies, including two that drive up in a car. The next will try and run. Track them down and murder the last three felons. Next return to the station to talk with Shelton.

During the interrogation. Call out your former comrade by presenting the meeting note and use Beckett's confession when asking Sheldon about the robbery. The Vice desk will conclude once you're done with the suspect.
The Gas Man
Kingdom Come: Deliverance 2 - Official Cinematic Announcement Trailer Stellar Blade - BIBI ‘Eve’ Official Music Video Trailer | PS5 Apex Legends: Urban Assault Collection Event Trailer Total War: WARHAMMER III - Elspeth von Draken Gameplay Showcase Genshin Impact - "Arlecchino: Sleep in Peace" | Official Character Teaser Potionomics: Masterwork Edition - Official Announcement Trailer Snowbreak: Containment Zone - "Gradient of Souls" Version Trailer Harold Halibut GameSpot Video Review Nancy Drew: Mystery of the Seven Keys | World Premiere Official Trailer Modern Warfare III & Warzone - Official Cheech & Chong Bundle Gameplay Trailer SteamWorld Heist II – Official Reveal Gameplay Trailer Dead Island 2 – Official SoLA Expansion Gameplay Launch Trailer
Please enter your date of birth to view this video
By clicking 'enter', you agree to GameSpot's
Terms of Use and Privacy Policy
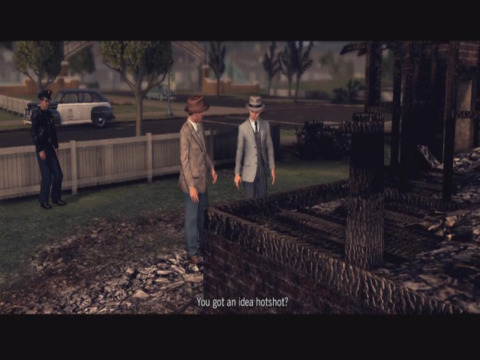
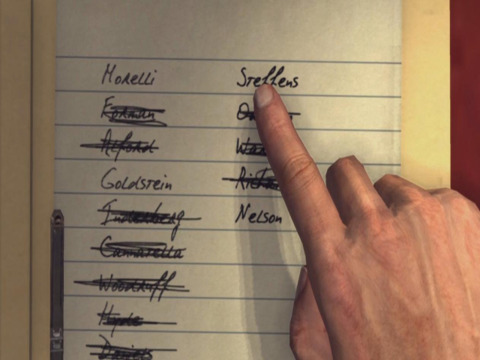
With your demotion comes a new partner in the form of Herschel Biggs. You'll need to check out two fires: one at the Steffens and the other at the Sawyers. For now visit the first.
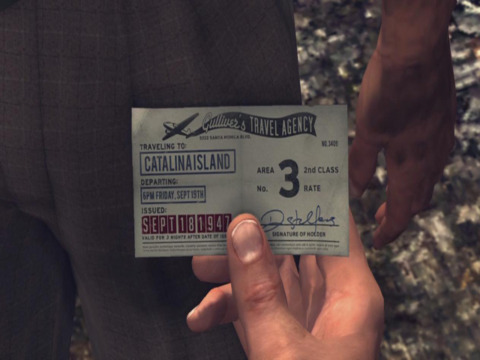
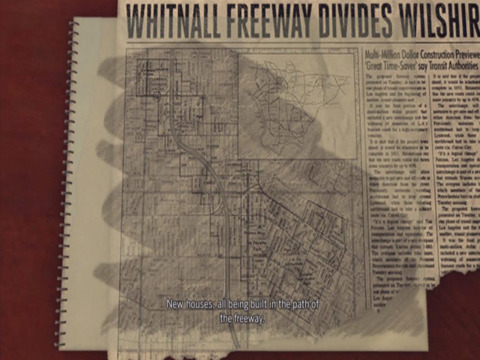
At the Steffans home you'll find a heater serviced by Ryan on the left of the house and a Competition Ticket from Gulliver's Travels. Talk to Don Steffens, trusting him about the competition and doubting what Suburban Redevelopment is.
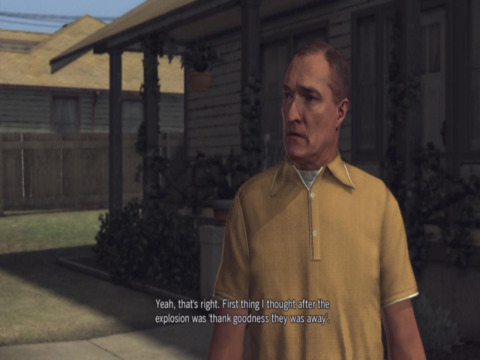
At the Sawyer home you can also find a regulator valve on the ground to the right of the house. After checking out the home you can chase down a suspect, Herbert Chapman. You can also get some more short info about the Sawyers from Joanna Alford, but you can't ask her questions.
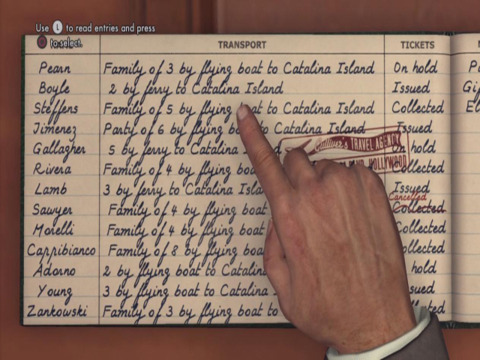
For now head to Gulliver's Travels and check the registry for the Steffans and Sawyer's details. Next to the clerk John Cunningham. He tells the truth regarding Suburban Redevelopment, but doubt his knowledge about the promotion. With this new info head over to Suburban Redevelopment.
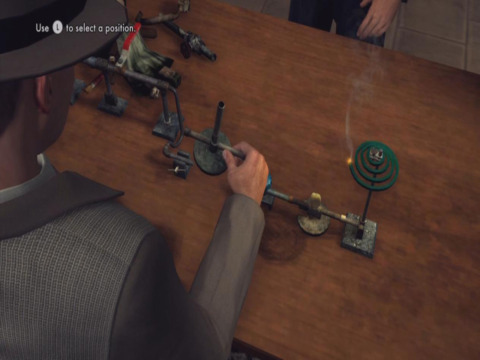
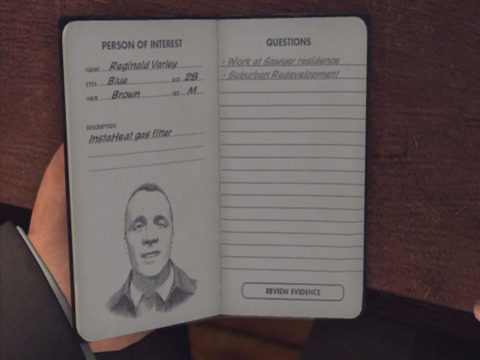
There isn't much to do here, but you will automatically gain a lead to Fire Station No 32, so head there now. Talk to Lynch and look at the Sawyer heater (serviced by Varley). Next line up the three pieces he gives you so the pilot light is on the far left and the gas balloon is on the right. Next go to the InstaHeat headquarters.
Once here talk to Ivan Rasic. Learn more about the valve and speak to him further. Doubt what he says about the Model 70 and point out his lies regarding his employees by mentioning Varley. Now use a phone and call R and I to cross check the employee list. You will get word to check out Clemens, Ryan, and Varley. Talk to Rasic again to get addresses.
Now check the lockers of all three workers. Both Clemens and Ryan have anarchist works among their possessions, and Varley has extra mosquito coil. Exit the headquarters and search for the suspects.
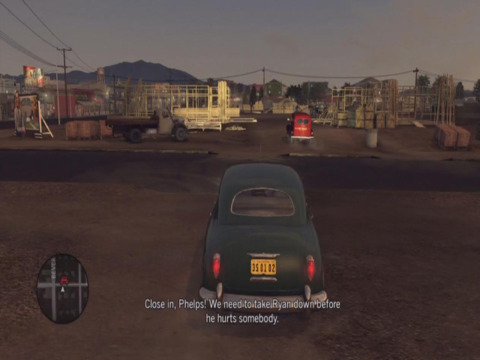
Herschel feels there isn't enough to take in Clemens; however you can doubt him about his knowledge of Varley and his employment, but you will need to use the anarchist literature to spot his lie about Ryan. For Ryan he will attempt escape by driving off in his van; same into him like all other chases to capture him. For Varley he will try to escape on foot. Aim at him with your gun to bring him to a stop.
Back at the station interview both suspects. For Ryan use the Anarchist literature to call out his first lie, use his bosses' statements to catch his second lie, doubt his knowledge of Suburban, and use his criminal record to disprove his last lie. For Varley use the heater he serviced to call out his first lie, Ryan's statement for the second lie, and the coils for the third lie.
Both look fairly guilty. Charge Ryan with the arson and send Varley back to Detroit to face his murder charge.
A Walk in Elysian Fields
Another arson, this time killing a whole family. First examine the two exhibits, moved bodies and a family photo. There are also some footprints by the neighbor's yard and the heater off to the right side of the house.
After Herschel runs out of the house have a chat with the next door neighbor Dudley Forman. Doubt his first answer about seeing what happened, doubt again about the demolitions, accept his statement about the contest, and doubt him one more time about who was outside. Herschel will hand over a an origami crane which you can unfold to find an ad for Elysian Fields. Head there next.
Here check out the scale models and talk to Monroe. First doubt what he says about the arsons, use the flyer to catch his next lie, and doubt his third question to get everything. Next talk to secretary to find a list of names, including Herbertt Chapmen. Now move to the first floor and call up R and I to learn about Chapmen.
Next head to Rancho Escondido where you will need to beat down two different brawlers. check the bricks of the walls to find that they are cheaply made. Chat a bit with Roy at the Blue Room and you'll meet up with Herschel on the streets. You'll soon get a call from dispatch about Chapman's location, so head over there.
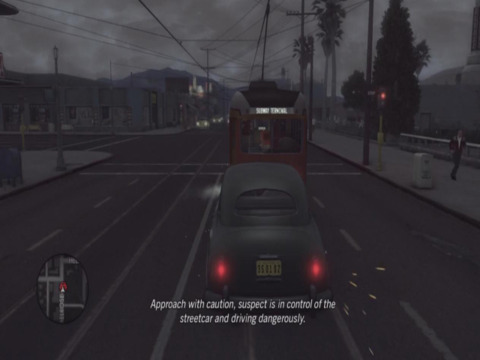
After talking with the neighbor search Chapman's car. You'll find coils, fliers, and bullets inside. Chapman will appear and steal a trolley. Run him off the road similar to any other car. He won't give up even when his vehicle is down. Get out of your own car, take cover and blast Champman dead.
House of Sticks
For this case you will play as Jack Kelso. Read the paper work from Elsa and look at the case file. You will now need to interview Elsa. Doubt her twice and accept the truth for the third. Now after another scene go to Elysian Fields.
Here there is a receipt for cement on the first desk, demolition orders and a memo from Monroe. Beat down the foreman outside and he'll lead you to the rubble of where Lou died.
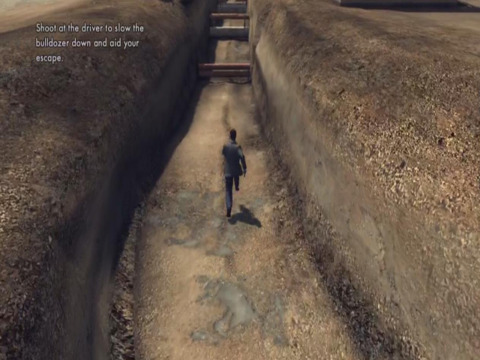
Look into the broken lumber next to the two workers on the far left corner of the house. This will reveal that the wood is from a movie studio. Next the foreman will try and run you over with a bulldozer. Quickly run and shoot at the driver to slow him down. You don't need to actually hit the driver, just the dozer itself to slow it everyone once in awhile. Once reaching the end of the trench go to a police phone and find the address to Keystone Studios.

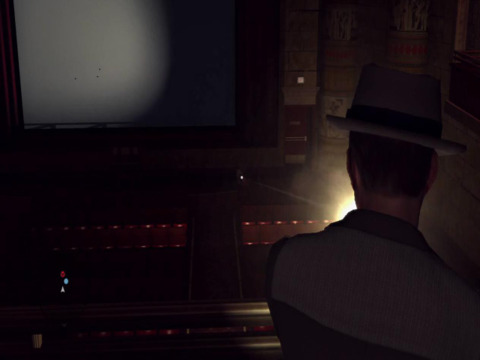
Bribe the guard and enter the lot by climbing over the gate, head into the theater on the left and mess with the film reel. Use the top knob to fix the focus and the bottom knob for the speed. Last hit the switch to play the film containing suspects Benson, Sandler, Fontaine, Monroe, Gordon, and Worrell. Before leaving check the table on the right with a film reel for Suburban Redevelopment Fund. Now use the phone to talk to Curtis Benson about what he knows.
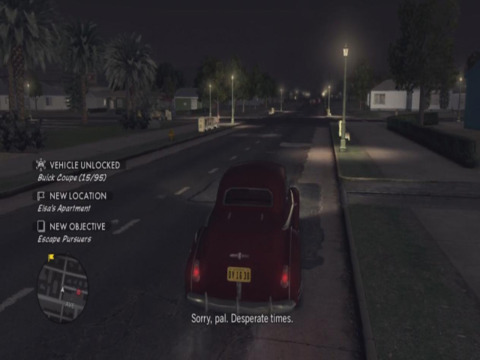
After another scene head to the second Elysian Fields site. Go to the top room where you will face three enemies at once. They can cheat during fighting by punching through your blocks and it's scripted that you loose anyway. After more scenes grab a car quickly and drive to Elsa's place. You'll be pursued by goons the whole way so drive as recklessly as needed to get to your goal.
A Polite Invitation
You'll be starting this case by heading to Benson's apartment, room 2. Among the things to look for include the insurance agreement for Rancho Escondido on the desk to the left and the share certificate on the glass table. When talking to Benson use the certificate to call out his lie about the fraud motive, the insurance agreement on his Suburban Redevelopment lie, and doubt his info about Lou's settlement. Once done with your former boss, head to Fire and Life.
Once arriving at the work place head up the elevator and into your office. Check Lou's file and look at the dependent land value. Now look at the latitude/longitude on the blue prints for another piece of evidence regarding Buchwalter. After a chat with Cole it's off to the Hall of Records.
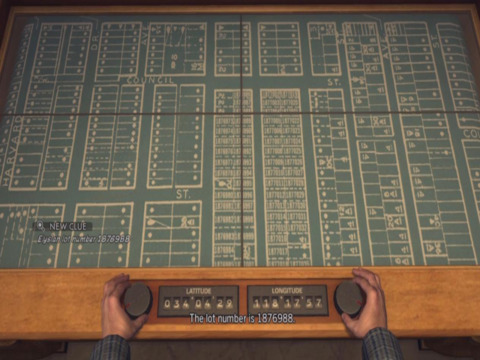
Once there head up to the land registry office and check the company records at shelf S. Go to page two and look at Suburban Redevelopment and look for Courtney Sheldon's name. Next head over to the city map in the center of the room. Plug in the number 34 degrees, 4 minutes, 29 seconds North and 118 degrees, 17 minutes, 58 seconds West. This will give you lot 1876988. Now in the next machine to the right punch in 1876988 and divide by 90000. You will be informed to add a one, so the final answer is 21. Now head over to shelf U and look in the land record book and look for lot 1876988.
You'll next get in a gun fight with three thugs. You can kill one from your current position, but dart to the left quick as another enemy is swooping around from the right. Take down this second foes and steal his shotgun. Quickly kill the machinegun wielder that approaches and duck back into cover. One last pistol user will rush you, but can be easily killed with the heavier weapons.
Back at Kelso's apartment answer the phone, then head to Monroe's place. Take out the first enemy down the path and move into cover on the left. Shoot down the next two enemies on the stairs to the right while your allies cover the other side. More reinforcements will spring up so kill the next three enemies that take cover behind the banisters. Now run up the stairs on the right and cap the last enemy hiding behind the columns. Keep running ahead and duck under the hedge right ahead. Kill the last two guards who wield machineguns to end the fight.
Bust down the door on the right and kill the two enemies inside. Stop to grab their shotgun and move on through the door to the left. There is one enemy in here so kill him quick. Move forward again for a scene, and left again once it's over. Now go through the next door ahead and kill the enemy on the left. Dash forward and get in cover before killing the next gangster on the left. Grab his shotgun and move towards the stairs straight in front. Dart back and take cover and kill the next two enemies that dash down from the second floor.
Head to the second floor, moving down the hall on the right side. Head to the door on the left to find Monroe. Check the safe for dirt on Fontaine, and payroll info. Next look at the desk for a list of house sellers. Last look at the picture and read the newspaper on the desk to end the case.
A Different Kind of War
The first order of business is to check Westlake Pest Control. You'll get some info about the suspect and it's off to Rancho Rincon for Kelso. However, you will once again take control of Phelps over at Fontaine's home.
Go the murder scene and look at the crystal ball on the floor to find a blood stain. Next look at the folder on the shelf near the entrance door. It contains a blackmail letter from the deceased; there is also a note pad on the desk you can shade on to find a freeway route. Back out of the current room and look in the cabinet on the left to find more morphine.
Next you'll be back in the saddle as Kelso at Rincon. Smash down the door and check the flamethrower on the right. Next head into the crane room to find origami, plans for the LA river, and last the picture on the wall.
Now back as Phelps, escort Kelso by smashing all of the cop cars along the way. Biggs won't use fire support, so you will have to use your own fenders to take down the enemy. They will start with two cars and increase to around three at once. Once making it to Ira's hideout you'll take control of Kelso again.
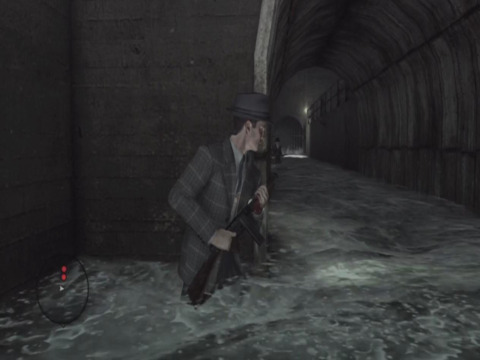
Kill the first three cops that attempt to shoot you down, wait a few seconds and fourth will attempt a rush. Kill him and dash forward. Take the machinegun from one of the dead guys and kill the fifth foes ahead. Make two lefts and into the water. Here kill two more men and continue forward, up the ladder on the right and quickly into cover. Kill the next guy on the right and move through the door on the left for a nice supply of fresh guns.
Exit back out and down the hall. Kill two more enemies. Make another right across the bridge and take out four more enemies: two on the adjacent bridge and two below. Head down the stairs on the right and kill three more enemies. Grab a new gun and head down into the water on the right.
The water will start to rise. Your only means of movement is to cross over the bridges in the center. On the other side climb the ladder on the right and kill the two enemies on the left. A third will descend as you advance, so kill him and head up the stairs. Kill one more enemy in front of you and a second to the left. March through the tunnel on the left to find Elsa and Ira, ending the game.
Film Reels
Film Reels are Collectables based classic movies from the past. There are fifty reels scattered around Los Angeles and are in locations that you may never travel to during your case work.
- The Big Sleep: West end of Hollywood Blvd where the train tracks form a loop
- Gilda: The Circle K gas station in Hollywood, between De Longpre Ave and Cahuenga Blvd
- In a Lonely Place: The Hawaii Golf course, tee eight. Near El Centro Ave
- The Letter: North of Crossroads of the World just a little ways from Selma Ave
- Brute Force: Between a short sidewalk and football field west of Schrader Blvd
- Odd Man Out: sitting on a house porch on St Andrews
- The Night of the Hunter: Near the pool of the Hillside Motel, next to the south enterance
- Nightmare Alley: Ivar Ave and Franklin Ave. Near some dumpsters under a large billboard
- Where the Sidewalk Ends: The Palladium theater at Sunset Blvd near Vine St.
- The Spiral Staircase: Next to a bird bath in the park next to Samuel's Deli just off Santa Monica Blvd
- The Woman in the Window: On a table near homes on Wilton Pl and Lemongrove
- Sunset Boulevard: Under a tree in a strip mall on Melrose Ave.
- The Narrow Margin: Near a garden fountain down past a garage and red mansion
- White Heat: An apartment building on Alexandria near Mariposa Ave. Climb up the stairs to the second floor
- Crossfire: Near a trailer in the The Southwestern Motors station on Helitrope and Melrose
- The Third Man: Next to a tree at the park at Hoover St in Wilshire
- The Lady from Shanghai: On the baseball field in Wilshire
- The Killers: The house without a roof in Elysien Housing Development at 1st St.
- M: Under a see-saw at Clinton and Rosewood
- Thieves Highway: On the counter of Joe's Diner on Maplewood
- Shadow of a Doubt: Inside the hanger at Wilshire airport
- Laura: On a picnic table on Wilshire's children's park
- The Set-Up: On the porch of a house at New Hampshire Ave and Berendo St
- The Killing: On the west side of the church on Hoover St and 6th
- Night and the City: On the gazebo in the lake at MacArthur Park
- Rififi: On the porch of a turquoise house off 6th
- Sweet Smell of Success: At a construction site just off 3rd and Union
- The Big Clock: on a white house on a street near Grand View and Alvarado in Wilshire
- The Naked City: East side of the two story home on Bonnie Brae and Beverly Blvd
- This Gun for Hire: The construction site near Beverly Blvd and 1st St
- Murder, My Sweet: enter the passage way at 9th and 8th street that leads to an exit at Burlington and Beacon. The reel is half way through this underground garage
- The Big Carnival: On the back side of a home at 9th and Figueroa
- Mildred Pierce: Under 4th St. You must enter a train tunnel that meets at Lucas and Glendale to acess this underground
- Key Largo: Sitting on Ira's ranch near the north tracks off Figueroa
- Leave Her to Heaven: The broken pool on the north-east end of Figueroa and Flower
- Touch of Evil: On top of the Los Angeles Theater at Broadway
- Strangers on a Train: Bell Systems Depot at Main St and 2nd St
- Angels with Dirty Faces: The construction site at Spring and 2nd St
- The Maltese Falcon: In the lot at Bakers on Grand Ave
- The Big Heat: North of Angel's Flight on 3rd St by Central
- Scarlet Street: In an alley near Palmetto near Alameda
- Gun Crazy: Far east end of 1st St in Central
- Body and Soul: The second level of the 7th St bridge. First enter the control channel below and then up the stairs
- House of Bamboo: Western Iron Works factory at Alameda and 1st
- Double Indemnity: The military base north of Olympic Blvd. The reel is on a table in the firing range
- The Asphalt Jungle: The train platforms at Main St Terminal
- Out of the Past: Inside the trolley station at the south end of Broadway and Hill
- Pickup on the South Street: At the gift shop in Union Station
- Detour: On the tracks near the rails cars at Bay st
- Notorious: Inside an office warehouse at the south-easter corner of Olympic
Xbox 360 Achievements
| Achievement Name | How To Earn | Reward |
|---|---|---|
| A Cop On Every Corner | Complete a single street crime case. | 15 |
| Asphalt Jungle | Chase down and tackle a fleeing suspect on foot as an LAPD Detective. | 15 |
| Auto Collector | Drive 40 different vehicles. | 15 |
| Auto Enthusiast | Drive 5 different vehicles. | 15 |
| Auto Fanatic | Drive every vehicle in the city. | 30 |
| Dead Men Are Heavier | Shoot and kill a total of 100 bad guys. | 15 |
| Golden Boy | Clear a case finding every clue as an LAPD Detective or Investigator. | 15 |
| Hollywoodland | Find and inspect all gold film reels. | 30 |
| Johnny On The Spot | Respond to 20 street crime cases. | 30 |
| Keep A Lid On | Complete a brawl without losing your hat as an LAPD Detective or Investigator. | 15 |
| Lead Foot | Keep the needle above 80mph for more than ten seconds while driving. | 15 |
| Magpie | Find and inspect 95% of all clues. | 80 |
| Miles On The Clock | Drive more than 194.7 miles. | 15 |
| Not So Hasty | Stop a fleeing suspect with a warning shot as an LAPD Detective. | 15 |
| On For The File | Find and inspect a clue as an LAPD Detective or Investigator. | 15 |
| Public Menace | Rack up $47,000 in penalties during a single story case. | 30 |
| Rosecoe And Friends | Kill at least one bad guy with every gun. | 15 |
| Shamus To The Stars | Complete all story cases with a five star rating. | 80 |
| Star Map | Discover all landmark locations around the city. | 15 |
| The Brass | Achieve maximum rank. | 30 |
| The City of The Angels | Reach 100% Game Complete. | 80 |
| The Hunch | Use four intuition points in a single interview session, correctly branching each question. | 30 |
| The Long Arm Of The Law | Complete all street crime cases. | 30 |
| The Moose | Follow Candy Edwards without using cover or incognito, except when starting or picking up the tail. | 15 |
| The Plot Thickens | Find and solve an inspection puzzle. | 15 |
| The Shadow | Tail a suspect without being spotted, in a single case. | 15 |
| The Straight Dope | Use evidence to prove a lie as an LAPD Detective or Investigator. | 15 |
| The Third Degree | Correctly branch every question in every interview in a single story case. | 30 |
| The Up And Up | Complete a story case with a five star rating. | 30 |
| Traffic Stop | Disable a suspect vehicle with help from your partner. | 15 |
| Wooden Overcoats | Bring down a total of 30 bad guys with head shots. | 30 |
| Huckster | At Elysian Fields, outwit Leland Monroe when discussing his developments or advertising campaign. | 15 |
| Moth To A Flame | Complete all cases on the Arson desk. | 70 |
| No Rest For The Wicked | Complete all cases on the Vice desk. | 15 |
| Paved With Good Intentions | Complete all cases on the Traffic desk. | 15 |
| Police Academy | Complete all cases on the Patrol desk. | 15 |
| Round Heels | At the Bamba Club, get Dick McColl to give up the license plate of Celine Henry's male companion. | 15 |
| Stab-Rite | At Ray's Cafe, find the bloodstained knife on your first sweep of the crime scene. | 15 |
| The Fighting Sixth | At the Bus Shooting, talk Felix Alvarro into giving up the Marines involved in the Coolridge heist. | 15 |
| The Simple Art of Murder | Complete all cases on the Homicide desk. | 15 |
PlayStation 3 Trophies
| Trophy Name | How To Earn | Reward |
|---|---|---|
| A Cop On Every Corner | Complete a single street crime case. | Bronze |
| Asphalt Jungle | Chase down and tackle a fleeing suspect on foot as an LAPD Detective. | Bronze |
| Auto Collector | Drive 40 different vehicles. | Bronze |
| Auto Enthusiast | Drive 5 different vehicles. | Bronze |
| Auto Fanatic | Drive every vehicle in the city. | Silver |
| Dead Men Are Heavier | Shoot and kill a total of 100 bad guys. | Bronze |
| Golden Boy | Clear a case finding every clue as an LAPD Detective or Investigator. | Bronze |
| Hollywoodland | Find and inspect all gold film reels. | Silver |
| Johnny On The Spot | Respond to 20 street crime cases. | Silver |
| Keep A Lid On | Complete a brawl without losing your hat as an LAPD Detective or Investigator. | Bronze |
| Lead Foot | Keep the needle above 80mph for more than ten seconds while driving. | Bronze |
| Magpie | Find and inspect 95% of all clues. | Gold |
| Miles On The Clock | Drive more than 194.7 miles. | Bronze |
| Not So Hasty | Stop a fleeing suspect with a warning shot as an LAPD Detective. | Bronze |
| On For The File | Find and inspect a clue as an LAPD Detective or Investigator. | Silver |
| Public Menace | Rack up $47,000 in penalties during a single story case. | Bronze |
| Rosecoe And Friends | Kill at least one bad guy with every gun. | Gold |
| Shamus To The Stars | Complete all story cases with a five star rating. | Bronze |
| Star Map | Discover all landmark locations around the city. | Silver |
| The Brass | Achieve maximum rank. | Silver |
| The City of The Angels | Reach 100% Game Complete. | Silver |
| The Hunch | Use four intuition points in a single interview session, correctly branching each question. | Bronze |
| The Long Arm Of The Law | Complete all street crime cases. | Gold |
| The Moose | Follow Candy Edwards without using cover or incognito, except when starting or picking up the tail. | Bronze |
| The Naked City of the Angeles | Reach 100% Game Complete. | Gold |
| The Plot Thickens | Find and solve an inspection puzzle. | Bronze |
| The Shadow | Tail a suspect without being spotted, in a single case. | Bronze |
| The Straight Dope | Use evidence to prove a lie as an LAPD Detective or Investigator. | Bronze |
| The Third Degree | Correctly branch every question in every interview in a single story case. | Silver |
| The Up And Up | Complete a story case with a five star rating. | Silver |
| Traffic Stop | Disable a suspect vehicle with help from your partner. | Bronze |
| Wooden Overcoats | Bring down a total of 30 bad guys with head shots. | Silver |
| Huckster | At Elysian Fields, outwit Leland Monroe when discussing his developments or advertising campaign. | Bronze |
| Moth To A Flame | Complete all cases on the Arson desk. | Gold |
| No Rest For The Wicked | Complete all cases on the Vice desk. | Bronze |
| Paved With Good Intentions | Complete all cases on the Traffic desk. | Bronze |
| Police Academy | Complete all cases on the Patrol desk. | Bronze |
| Round Heels | At the Bamba Club, get Dick McColl to give up the license plate of Celine Henry's male companion. | Bronze |
| Stab-Rite | At Ray's Cafe, find the bloodstained knife on your first sweep of the crime scene. | Bronze |
| The Fighting Sixth | At the Bus Shooting, talk Felix Alvarro into giving up the Marines involved in the Coolridge heist. | Bronze |
| The Simple Art of Murder | Complete all cases on the Homicide desk. | Bronze |
| Platinum Trophy | Collect all other Trophies to unlock. | Platinum |
Got a news tip or want to contact us directly? Email news@gamespot.com
Join the conversation