Dead Rising 2 Walkthrough
There is trouble in Fortune City and Chuck Greene is the only one who can save the day. Our Dead Rising 2 Walkthrough will show you how to complete all cases, rescue survivors, and defeat psychopaths.
There is trouble in Fortune City and Chuck Greene is the only one who can save the day. Our Dead Rising 2 Game Guide will show you how to complete all cases, rescue survivors, and defeat psychopaths.
- Meet Chuck: Learn the basics to start your zombie adventure
- Walkthrough: A full Walkthrough of all cases and messages
- Xbox 360 Achievements: Boost your gamerscore with these Achievements
- PlayStation 3 Trophies: Gather more Trophies for your collection
Meet Chuck: PP and Zombrex
Gaining PP
PP is the means for gaining new powers and abilities. As you level up, chuck will gain more attack power, speed, and item space. It's also the only way to gain new moves, such as the haymaker or jump kick.

The most common way of gaining PP is by killing zombies, rescuing survivors, and killing psychopaths. Calls from Stacey will typically point you in the right path.
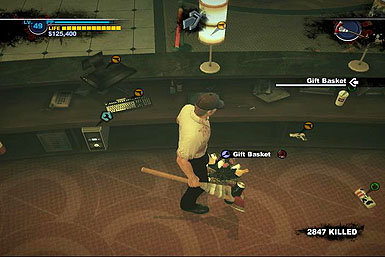
Gifts for Katey
You can further boost your PP score by giving Katey gifts. There are quite a few of these scattered just in the Royal Flush Plaza. Getting them right from the start will boost your PP to strong levels early on.

Here are some of the locations of the gifts:
- Stuffed Bull - Children's Castle
- Stuffed Elephant - Children's Castle
- Stuffed Donkey - Small Fry Duds
- Stuffed Rabbit - Moe's Maginations
- Water Gun - Moe's Maginations
- Marbles - Ye Olde Toybox
- Beach Ball - Ye Olde Toybox
- Horse Stick - Ye Olde Toybox
- Robot Bear - Brand New U
- Snowflake - Yucatan
Extra Zombrex
You'll need around eight cases of zombrex if you want to save other survivors besides Katey. The messages only give you so many, and buying zombrex from pawn shops can be expensive. There are however, several free boxes of zombrex lying around in the casinos.

The locations include:
- Americana - Enter the top floor of the BBQ Shack and platform across the hanging lights
- Slot Ranch - Behind the main stage
- Yucatan - On the highest point above the video roulette machine
- Underground - On the ramp outside the Atlantica's exit
Meet Chuck: Combo Weapons
Unlike Frank from the first Dead Rising, Chuck does not gain extra PP by taking photos. Instead, he can tape together weapons and collect combo cards. There are three main ways of acquiring cards: leveling up, finding poster, and completing messages from Stacey. Among the strongest weapons include the spiked bat, defiler, and knife gloves.
| Weapon Name | Combo | Obtained |
|---|---|---|
| Drill bucket | Power Drill + Bucket | Leveling |
| I.E.D. | Box of Nails + Propane Tank | Leveling |
| Molotov | Newspaper + Whiskey | Leveling |
| Pole Weapon | Machete + Push Broom | Leveling |
| Air Horn | Pylon + Spray Paint | Leveling |
| Gem Blower | Leaf Blower + Gems | Leveling |
| Fountain Lizard | Fountain Firework + Lizard Mask | Leveling |
| Hacker | Computer + Flash Light | Leveling |
| Ripper | Cement Saw + Saw Blade | Leveling |
| Electric Chair | Battery + Wheelchair | Leveling |
| Flaming Gloves | Boxing Gloves + Motor Oil | Leveling |
| Heliblade | Machete + Toy Helicopter | Leveling |
| Fire Spitter | Toy Spitball Gun + Tiki Torch | Leveling |
| Beer Hat | Beer + Construction Hat | Leveling |
| Sticky bomb | Lawn Dart + Dynamite | Leveling |
| Driller | Power Drill + Spear | Leveling |
| Defiler | Fire Axe + Sledge Hammer | Leveling |
| Hail Mary | Foot Ball + Grenade | Leveling |
| Freezer Bomb | Dynamite + Fire Extinguisher | Leveling |
| Knife Gloves | Boxing Gloves + Bowie Knife | Leveling |
| Roaring Thunder | Battery + Goblin Mask | Leveling |
| Super Slicer | Servbot Mask + Toy Helicopter | Leveling |
| Handy Chipper | Wheelchair + Lawnmower | Leveling |
| Dynameat | Dynamite + Hunk of Meat | Leveling |
| Electric Rake | Battery + Leaf Rake | Leveling |
| Parablower | Leaf Blower + Parasol | Leveling |
| Boomstick | Pitchfork + Shotgun | Case Zero Import |
| Auger | Drill Motor + Pitchfork | Leveling |
| Infernal Arms | Motor Oil + Training Sword | Leveling |
| Porta Mower | Two x Four + Lawnmower | Leveling |
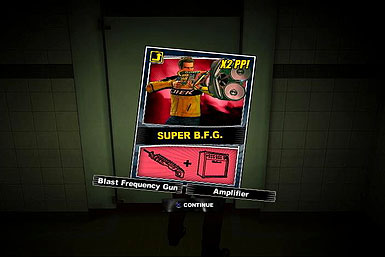
| Super B.F.G. | B.F.G. + Amp | Leveling |
| Tesla Ball | Battery + Bing Ball Cage | Leveling |
| Spear Launcher | Leaf Blower + Spear | Leveling |
| Blitzkrieg | LMG + Wheelchair | Overtime, Day 4 |
| Flamethrower | Gasoline + Water Gun | Everyone Knows Slappy, Day 2 |
| Rocket Launcher | Fireworks + Pipe | World's Most Dangerous Trick, Day 4 |
| Tenderizers | MMA Gloves + Box of Nails | Poster, Royal Flush Plaza |
| Plate Launcher | Cement Saw + Stack of Plates | Tape it or Die, Day 3 |
| Blazing Aces | Tennis Racket + Tiki Torch | Tape it or Die Part 2, Day 4 |
| Exsanguinator | Vacuum + Saw Blade | Tape it or Die Part 2, Day 4 |
| Power Guitar | Amp + Electric Guitar | Rock Heroes, Day 2 |
| Burring Skull | Bull Skull + Motor Oil | Fortune Teller, Silver Strip |
| Laser Sword | Gems + Flash Light | Poster, Platinum Strip Movie Theatre |
| Blambow | Bow and Arrow + Dynamite | Poster, Food court |
| Holy Arms | Training Sword + Bow of Nails | Poster, Atlantica |
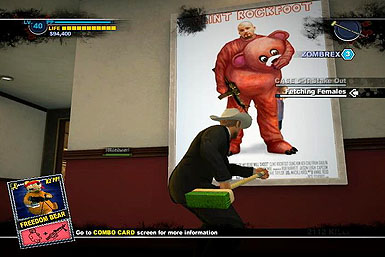
| Freedom Bear | Robot Bear + LMG | Poster, Yucatan |
| Paddlesaw | Chainsaw + Paddle | Poster, Silver Strip |
| Snowball Cannon | Water Gun + Fire Extinguisher | Poster, Palisades Mall |
| Spiked Bat | Box of Nails + Baseball Bat | Case 1, Day 1 |
| Wingman | Queen + Nectar | Upon Creation (Secret) |
Day 1: Terror in Reality
You'll start off the game playing a round of Slicycles, a Terror in Reality match from the multiplayer mode. It isn't required to come in first, though it can lead to a cash bonus. If you want to wreck in a high score, break before hitting the ramps, and turn quickly to run down more zombies.


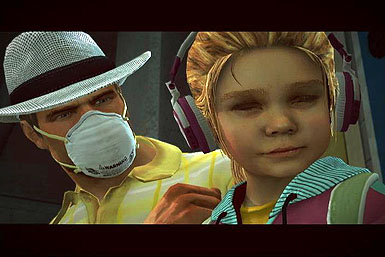
After the match, head up the elevator and witness the start of the zombie outbreak. There will be nearly ten survivors along the way, but they will all be too weak to save. Move towards the green room and save Katey.
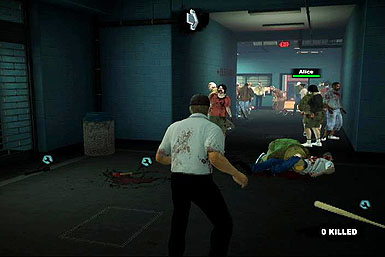
While carrying Katey--and all other survivors that require carrying--you will only be able to make basic kick attacks. However, you are also immune to grabs. Continue out towards the stadium's main entrance. You'll run passed another five survivors, but you won't have time to save any of them. After a brief scene you'll be inside the safe house, your base of operations. Come here anytime you need to touch base with people or drop off survivors.
- Katey - Located
- Anim - Located
- Kris - Located
- Leon - Located
- TK - Located
- Crystal - Located
- Amber - Located
- Alice - Deceased
- Noah - Deceased
- Tom - Deceased
- Shaun - Deceased
- Irwin - Deceased
- Lucas - Deceased
- Pat - Deceased
- Jeremiah - Deceased
- Kalee - Deceased
- Lance - Deceased
- Jenny - Deceased
- Drake - Deceased
- Adrian - Deceased
- Andrea - Deceased
- Helen - Deceased
- Chrystal - Located
- Tamara - Located
- Lulu - Located
- Kirby - Located
- Wade - Located
- Skylar - Located
- Stacey - Located
- Sullivan - Located
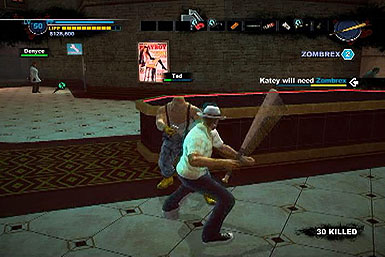
Day 1: Hunt for Zombrex
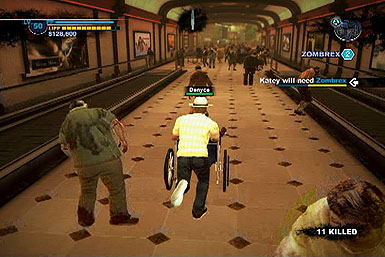
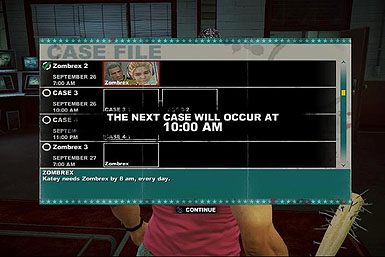
Katey will need Zombrex every 24 hours to prevent turning undead. You can gain Zombrex by completing certain messages, finding them through platforming, or even buy them from pawn shops.
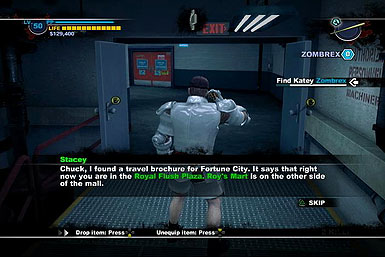

Stacey will inform you that there is some Zombrex in the Roy's Mart on the east side of Royal Flush Plaza. Exit the safe house and you'll be on the north west side of the Plaza. Grab a few melee weapons, such as the sledge hammer and bat along the way.
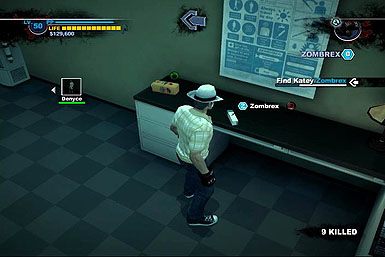
Upon entering Roy's Mart, you'll be attacked by a group of three looters. Each can be killed with one or two swings of your hammer. Be sure to take out one at a time, as it can be risky having them gang up on you. If you require healing, there is some orange juice on the east side of the room, which will restore three life bars each.
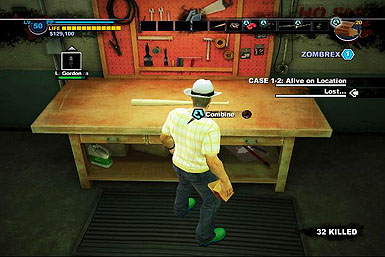
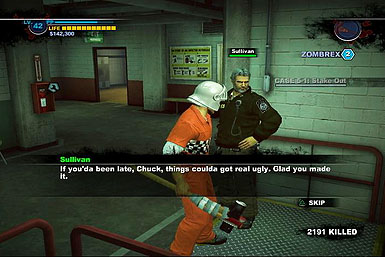
After the battle, rescue the pharmacist, Denyce, who was behind the counter. You'll gain a key that will unlock an employee lounge, where a box of Zombrex sits. Return to the safe house with Denyce and administer the drug to Katey at 7:00 AM. Afterwards, Sullivan will give you a maintenance room key, which will allow you to make Combo Weapons. You'll learn the first weapon, Spiked Bat, upon entering the room. It is a simple weapon made from a box of nails and a baseball bat.
- Denyce - Safe
Day 1: Early Morning Messages
Before heading to Case 1, you'll have a chance to complete a few messages given by Stacey. Sometimes you won't get a call, but can still openly save people or fight psychopaths along the way.
Happily Ever After…Sort Of
Upon entering into the Royal Flush Plaza, you'll spot LaShawndra defending herself at The Dark Bean. Come to her assistance and ward off any zombies around. She's armed with a lead pipe, so she is more than capable of protecting herself.

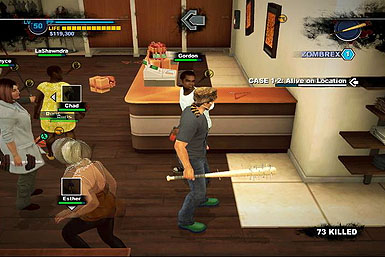
Move into Casual Gals to the north west and you'll locate LaShawndra's husband, Gordon. Talk to both of them and they'll tag along. Find a strong weapon to pass over to Gordon, as he joins unarmed.
Lost…
Outside the Paradise Platinum Screens, you'll spot Chad defending himself with a shotgun. Help him fend off the nearby zombies and talk to him to gain his aid.
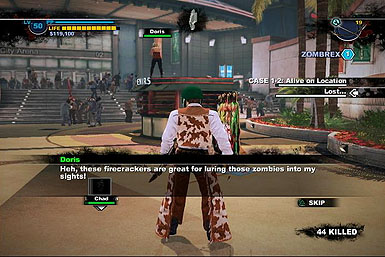
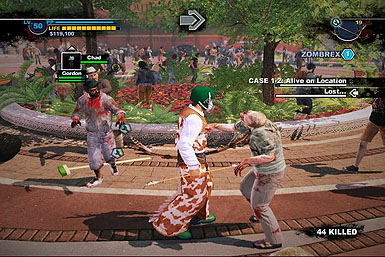
Take Chad further west of the Platinum Strip and you'll find his wife, Doris near the stadium. She has a handgun to attack zombies, but you'll still need to talk to her in order for her to join up.
Short Sighted
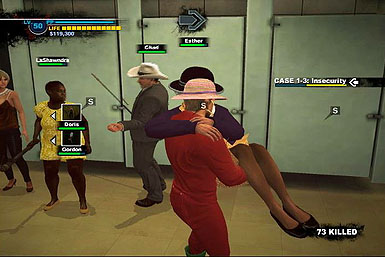
Inside Children's Castle on the second floor of the Royal Flush Plaza, you'll find the old lady, Esther. After talking to her a few times, she'll join.

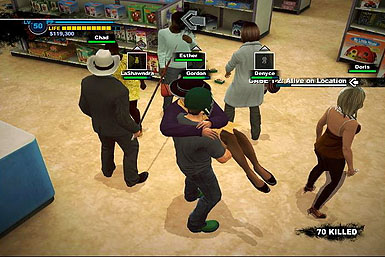
Much like Katey in the start of the game, you'll need to carry Esther to mover her around. It's best if you take her back to the Safe House right away.
One Man's Trash
There are several pawnshops in the game. The first one you'll receive news about is Moe's Maginations on the Platinum Strip.

Head over to the store and you'll be let inside by a lotter. If you acquire money, you can use it to buy weapons, items and even Zombrex.
Nice and Slow
Upon entering the Yucatan, you'll be captured by Ted, who will in turn attempt to feed you to snowflake. Ted himself is rather weak, only packing a handgun and doing little to damage you. A strong, yet fast weapon such as the Spiked Bat or Knife Gloves will take care of him with little problem.
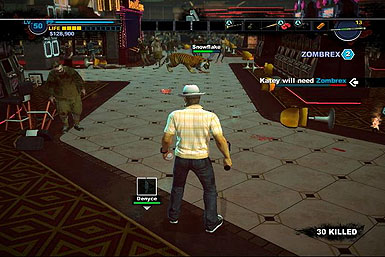
Afterwards, Snowflake is still on the loose. You have two options; either kill her off, or tame her. Taming her is the better option, as she counts as a survivor and a gift for Katey. You'll need to restore Snowflake's health by giving her steaks. Depending if you hurt her during the fight, you might need to give her between three to five pieces of meat. There are three right in the show room, and extra meat in Baron Von Brathaus to the north. Drop the steaks in front of Snowflake when she's walking slowly and she'll stop to eat them. With full health, Snowflake will join you.

If you manage to deal with Snowflake, you'll find Lenny in the lounge to the south. He'll show you a switch that will activate more machines in the Yucatan, including Mega Man 10, one of the best slot machines in the game. Putting $100 into a Mega Man 10 machine will reward you with $1,000.
- LaShawndra - Safe
- Gordon - Safe
- Chad - Safe
- Doris - Safe
- Esther- Safe
- Ted - Deceased
- Snowflake - Safe
- Lenny - Safe
Day 1: Case 1
Head to the Fortune City Hotel and you'll meet up with Rebecca. She's armed with a hand gun, so there is little need to watch her closely. Follow her to the bathroom and you'll have a chance to save.

Continue on and she'll unlock the gate to the Arena. Once inside, head to the security room for a scene. Rebecca will take off on her own. The last thing to do is head back to the safe house and rap up the case.
- Rebecca - Located
Day 1: Afternoon Messages
Welcome to the Family

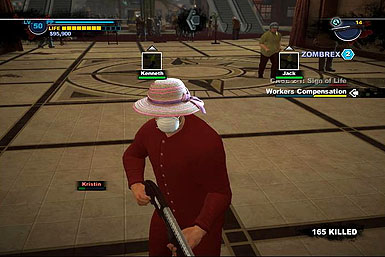
Kenneth and Jack will be in Shank's in the Palisades Mall. Saving Jack is very important, as he has a special piece of gear you can earn later in the game.
Worker's Compensation
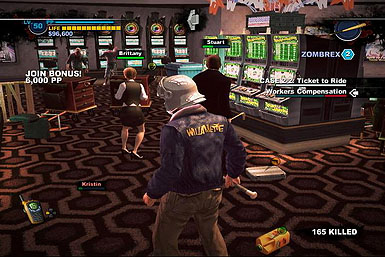
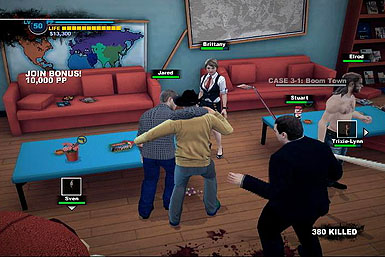
Stuart and Brittany have barricaded themselves inside the Americana. Stuart will attempt to attack you, so beat some sense into him. don't go over board, as you can outright kill him if you don't relent. Afterwards, the two will come to your side.
Lush-ious Lady
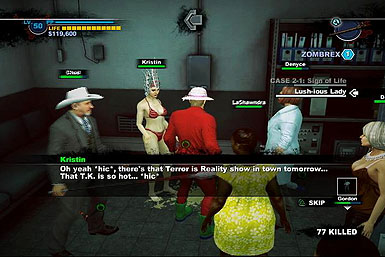
you'll find the drunken Kristin in the Americana's employee room. She can't stand properly, so you'll need to carry her. Like other survivors that need help, it's a good idea to take her back to the safe house right away.
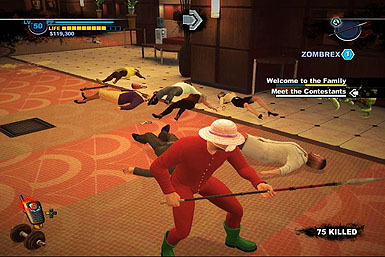
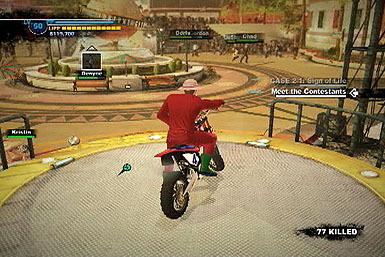
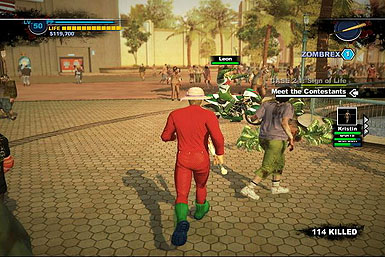
Meet the Contestants
You'll find the crazed Leon right outside of the Arena on the Platinum Strip. He'll hand you the keys to the motor bike, which is a great way to catch up to him. He'll be driving around the Fortune Park, killing zombies around him. Your goal is to lure him and force him to crash into a wall. This will stun him for a few seconds, allowing you do deal a lot of damage to him with melee weapons such as the Spiked Bat or Defiler. Be sure to move out of his way, as his bike can do a lot of damage if it hits you.
After the battle, you'll receive the keys to Leon's trailer on the silver Strip. Come here to create bike customizations. Among some designs include adding chainsaws or machine guns.
Brain over Brawn
Inside the south Plaza you'll find a group of four nerds playing pen and paper games. You'll need to talk to each of them several times to convince them to come along.
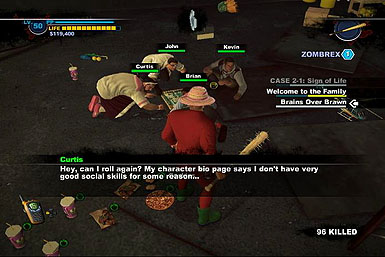
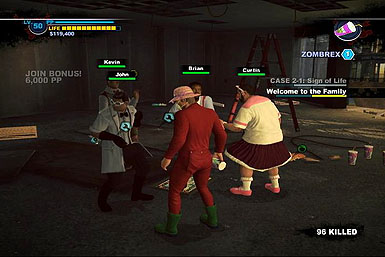
Each of them is capable of using weapons, so arm the nerds up with weapons so they can defend themselves.
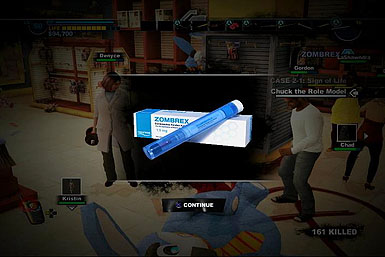
Chuck the Role Model
Head to the Americana's Bathroom and you'll discover Brandon and his prisoner, Vikki. Brandon has fast attacks and can get the jump on you from leaping from bathroom stalls. However, he is vulnerable after making an attack.
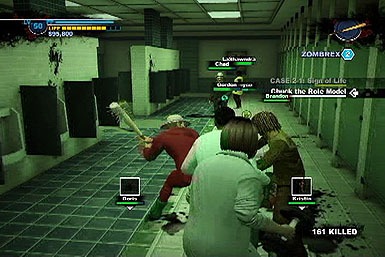

Dodge the swipes he makes and reprise with an attack. If you take too much damage, retreat and heal up with some food. This early on, the spiked Bat is among one of the best weapons to use on him. After taking out the CURE protester, free Vikki and take her back to the safe house.
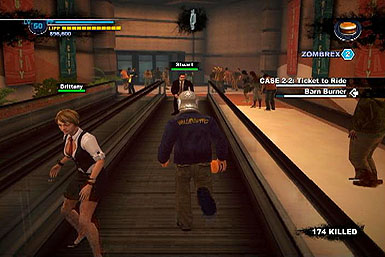
Barn Burner
Inside the Arena Green Room, Elrod and Tricia Lynn have blocked themselves off with a raging fire. Grab the nearby fire extinguisher and put out the flame.
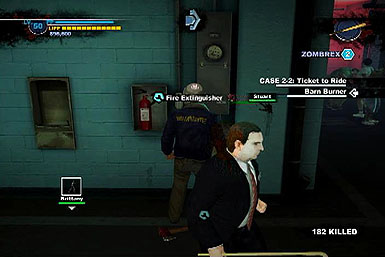

Elrod has a bat, so you only need to arm one of them. Take them both back with you to finish up the afternoon survivor list.
- Kenneth - Safe
- Jack - Safe
- Brittany - Safe
- Stuart - Located
- Kristin - Safe
- Carlos - Deceased
- Leon - Deceased
- Kevin - Safe
- Curtis - Safe
- Brian - Safe
- John - Safe
- Brandon - Deceased
- Vikki - Safe
- Elrod - Safe
- Tricia Lynn - Safe
Day 1: Case 2
There is trouble in the Underground. The only means to get down there is the unlocked door in the Royal Flush. Once below, you'll meet a new threat: Mercenaries. They are armed with machine guns, but they do very little damage. However, these guns fire fast and can get you trapped in a stun lock.

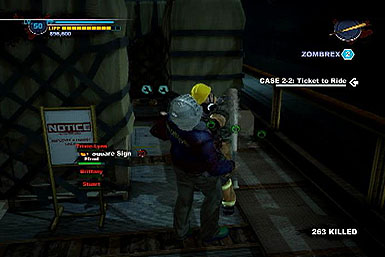
Kill the nearest merc with a melee assault and jack his gun. You can then use the limited ammo to blast the next merc, and so on. After a scene, grab a bike and ride across the ramps on either side of the tunnels. This will allow you to leap on top of the run away train. Once on board, kill the remaining guards and make your way to the first car. After a scene, you'll gain the keys to all underground access doors.
Day 1: Evening Messages
During the night, zombies will have increased strength and be resistant to damage. Take care during this time and be sure to stock up on extra food and weapons.
Once Bitten
Jared is inside Wily Travels on the second floor of the Royal Flush Plaza. Unfortunately, he's already been bitten and needs Zombrex.
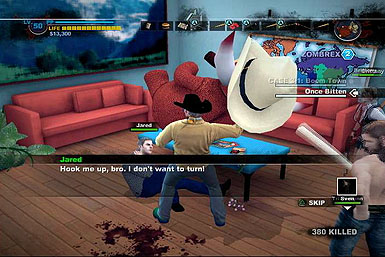
If you have the money, buy zombrex from the pawnshops. You can also give him the zombrex from Sven (below), however you might want to save that for Katey. If all else fails, locate one of the zombrex boxes hidden about Fortune City, including the Americana, Slot Ranch and Yucatan.
Code Blue
Sven will be inside the One Little Duck Bingo. He will attempt to save another survivor named Tim, but will fail.

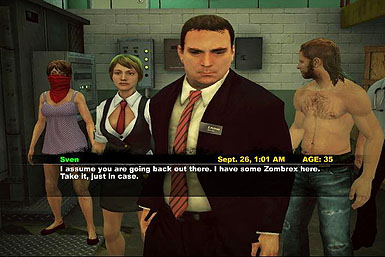
Convince him he still has what it takes to be a paramedic and he'll join. Upon returning him to the safe room he'll give you free zombrex. This can be useful for saving Katey or Jared.
Tastes Like Chicken
Inside the food court, you'll hear the screams of Jasper coming from the rafters. Climb up the vending machines on the east side and up to the top. Jasper will join up and ask you to look for Cinda in the Cucina Donnacci. Inside, you'll have to do battle with Antoine, the psychopath chef.
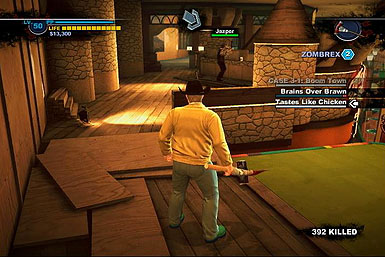

You may want to order Jasper to a safe spot, as he can die easily. Antoine himself is a tough boss, as he can constantly heal. This is one of the few battles where guns will be more helpful than melee weapons. You'll want to arm yourself with a shotgun (If you still have Chad's you'll be in great shape). Shoot Antoine as he races towards plates of food, this will prevent him from regenerating health. If you need to heal yourself, there is a table outside the Cucina with lots of pasta and wine, both great healing items. Once Antoine has fallen, reunite Jasper and Cinda. If Jasper died during the fight, Cinda will possibly not join you.
- Jared - Located
- Tim - Deceased
- Sven - Safe
- Antoine - Deceased
- Jasper - Safe
- Cinda- Safe
Day 2: Morning Messages
An Industrial Fashion
Willa and Terri are located in the South Plaza. Willa is hurt and will require you to carry her. However, Terri is able to protect you both with her weapon.
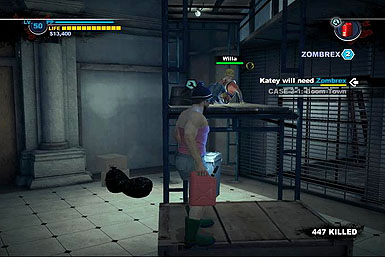
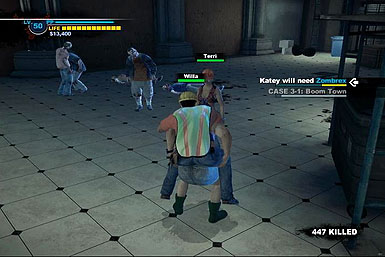
Take them both back to the safe house so you don't have to lug Willa around.
Rock Heroes
The band Angel Lust will be playing on the silver Strip. Talk to the lead singer Jeanna to get their attention. At this point all three members of the band will join.
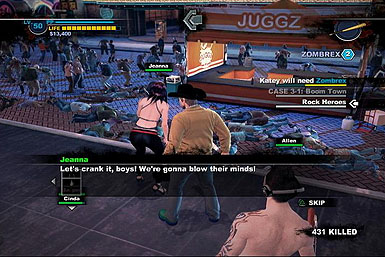

If you manage to save Floyd, he'll reward you with the Power Guitar Combo Card.
- Willa - Safe
- Terri - Safe
- Allen - Safe
- Jeanna - Safe
- Floyd - Safe
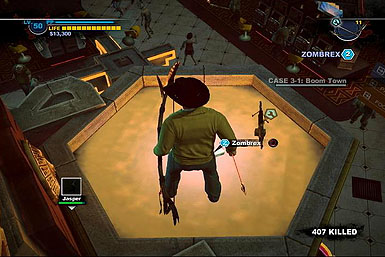
Day 2: Case 3
A short scene will play where queens are introduced. These bugs will destroy any zombies nearby.
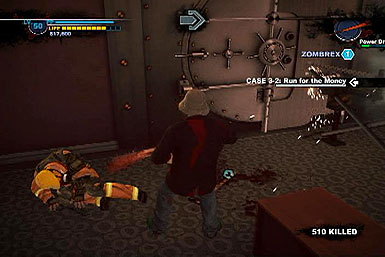
TK's men are robbing the casinos and you'll need to track them down. Start by investigating the vaults in the Slot Ranch and Yucatan. The mercs fight the same as the last case and are best killed with melee attacks from your spiked bat or defiler. After the guards are dealt with, destroy the drills burrowing into the vaults.
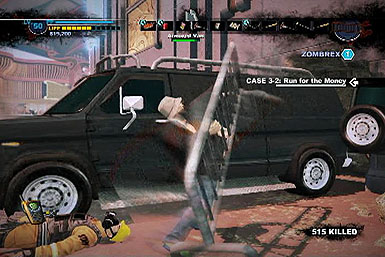
The last place TK is hitting is the Atlantica. This time you'll need to destroy a van instead of drills. The railings nearby are great means for destroying the van before the hordes of zombies over come you.
Day 2: Afternoon Messages
Shopping Spree
Erica, Rosa, and Bessie will be inside Kathy's Space on the second floor of the Royal Flush Plaza. They will come along with you if you are willing to carry their gifts.
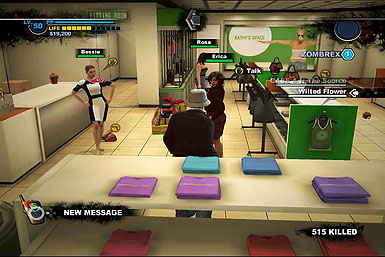
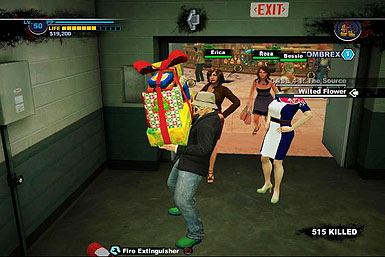
You won't even need to order the ladies, they will run to wherever you place the items. Still, you'll need to defend them along the way to the safe house, so stop to fight any zombies on the way. Drop off the package near the safe house and they will scamper along to safety.
Everyone Knows Slappy
You'll find a dead body outside Kid's Choice Clothing, which will in turn summon the psychopath Slappy. He's armed with flamethrowers and moves quickly with his skates. The best option is to move to the lower levels where there is more room to fight.


Wait for Slappy to use charge attacks which will force him into a wall, stunning him for a few seconds. This is a great time to pound him with a defiler. After the battle you'll gain the flamethrower card, and one will spawn where the corpses rested.
Wilted Flower
You'll find Linette in the back of the Venus Touch. Give her anything to drink--from vodka to strange mixed drinks--and she will gladly come with you. She does require being carried, though.
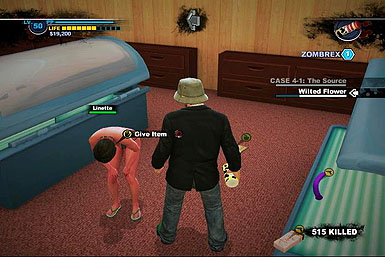

She will also show you a secret passage from Brand New U to the Royal Flush. This is a great means of transporting to the two locations instantly.
Here Comes the Groom
Inside the Swept Away you'll find Randy and his prisoner Danni. Randy is armed with a huge chainsaw, so a direct attack isn't a good idea. Lure him out into the open and wait for him to be winded: either from charging or using his string of attacks. When this happens, get behind him--a safe vantage point away from his saw--and beat him down.

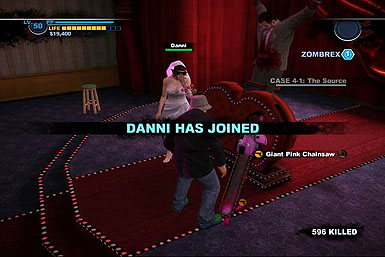
After the battle you can take the chainsaw and have Danni join you as a survivor.
Big Game Stakes
Janus will be standing outside the Atlantica and will request an escort. He wants you to find a gun--any gun, even a watergun--before he will go with you. Nabbing one from the zombie police officers is an easy enough task.

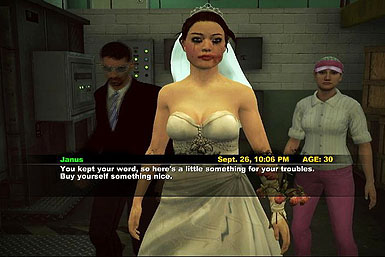
As Janus is armed with his briefcase, there is no way to supply him with food or other weapons. If you make it back to the safe house he will reward you with $50,000 in cash.
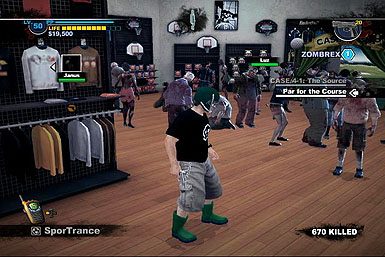
Par for the Course
You'll get word that Luz is trapped inside SporTrance. He's armed with a golf club and can use it as a normal melee weapon. Help her clear out the remaining zombies and she'll come along.

Stuart's Scheme
You'll get word that Stuart is riling up others to overthrow your lead. If you don't stop the uprising, several survivors will go missing.
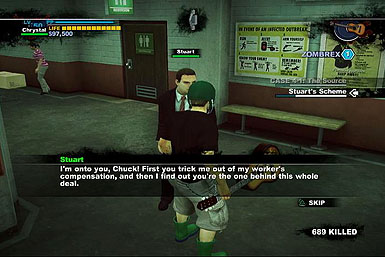
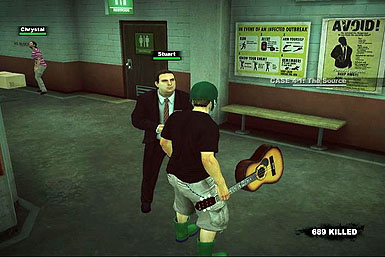
Enter the safe house and talk to Stuart a few times to stop the mutiny and gain bonus PP.
Mail Order Zombrex
A mail truck has broken down in the east side of the Royal Flush. Examining the car will alert Carl the crazed mail man. He's armed with a shotgun and throws explosives. However, he has terrible aim and is easy to attack when he loses control of his gun.
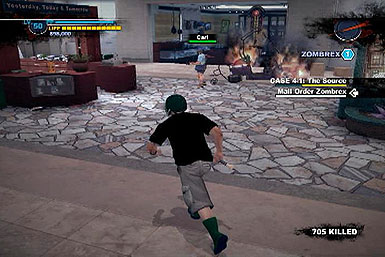
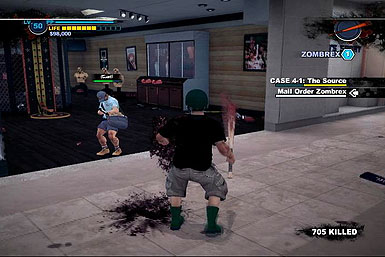
Move behind him--out of the way of fire--and bash him to death. After the battle you'll gain free zombrex and can arm yourself with his shotgun.
- Erica - Safe
- Rosa - Safe
- Bessie - Safe
- Brent - Deceased
- Louise - Deceased
- Linette - Safe
- Randy - Deceased
- Emmanuel - Deceased
- Danni - Safe
- Janus - Safe
- Luz - Safe
- Stuart - Safe
- Carl - Deceased
Day 2: Case 4
Stock up with food before hand and enter the Shoal Nightclub inside the Yucatan. There is beer inside, but drinking too much of it will make you sick, a terrible enfeeblement. You'll be pitted against the Bailey twins in a two on one match.
Even with their fancy moves, the twins aren't overly deadly. Dodge roll out of their way and smack them with your spiked bat or knife gloves. You should concentrate on only one, as killing both isn't required. After the battle, you can steal their katana blades.
- Crystal - Deceased
- Amber - Deceased
Day 3: Morning Messages
High Rollers
Enter the northern room of the Atlantica and you'll find three poker players. Gather up $100,000 to buy into their game. You saved Janus and Lenny you should already have great means of income. Otherwise, head to the casinos and jack some money from the ATMs.
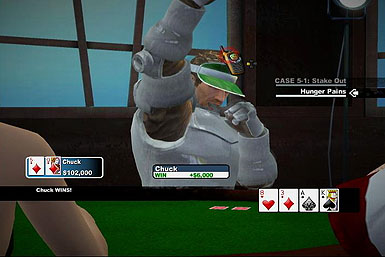

The game is Texas Hold'em and you'll need to knock out the other three. Going for an All in and winning with simple pairs is a great means for looting the cardsharps. You can also fold early and let the players do each other in, but this can leave the survivors with huge pots. After beating all three, they will tag along back to the safe house.
Hunger Pains
Richard is inside Dining at Davey's and searching for food. Hand him over anything you can find along the strip, from simple sidewalk hotdogs to sushi from Luaii.
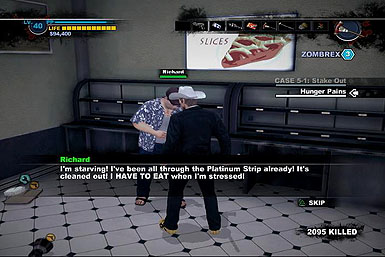

Take Richard back to the safe house and he'll give you a box of zombrex.
Fetching Females
Cora and he girls will be on top of the pool in the center of the Palisades mall. They will only tag along if you can pay for their "services".
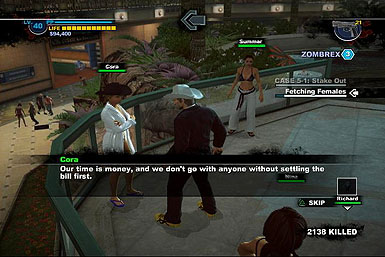

Hand them $10,000--a very small price if you saved Janus--and they will come along.
WWJWD?
In the South Plaza, Seymour the security guard is executing his own brand of justice. Put a stop to him with melee attacks and dodge rolls. Although this pig has a powerful, fast gun, he does very little in a close range fight. Close the distance quickly and he'll have no means of defending himself.

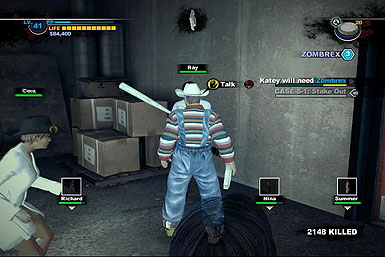
You can take Seymour's gun as a prize, a one of a kind revolver. Search the nearby rooms and you'll discover another survivor, Ray, who is grateful you stopped the guard.
Tape it or Die
If you have no other messages open, head to the KokoNutz in the Palisades mall. This will lead to the hide out of the Tape it or die crew. After some talking, Wallace will request parts for his new design.

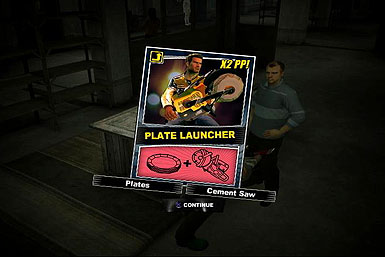
You'll need both a cement saw and a stack of plates, both of which hare easily found in the South Plaza maintenance rooms. Bring them back to Wallace and he'll award you the plate launcher Combo Card.
- Nevada - Safe
- Jacob - Safe
- Jessica - Safe
- Richard - Safe
- Cora - Safe
- Nina - Safe
- Summer - Safe
- Seymour - Deceased
- Justin - Deceased
- Ray - Safe
- Jonny Pipes - Located
- Wallace - Located
- Gretchen - Located
- Left Hand Lance - Located
Day 3: Afternoon Messages
Stop off in the safe room and give Katey more zombrex. If you saved both Richard and killed Carl you will have plenty to help your daughter. For now, there are a few more messages before heading to the next case.
Bank Run
Woodrow is jacking the ATMs in the Slot Ranch and Food Court. You can assist him by protecting him from any on coming zombies. Keep in mind that he can not be given food, so your offense is the only way to save him from damage. The pole weapon is a great means for clearing zombies, but be sure to not hit Woodrow in the process.
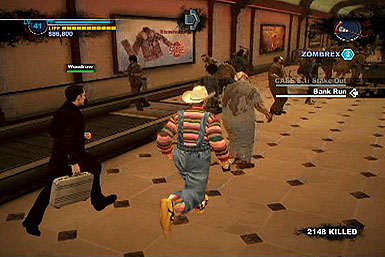
Taking Woodrow back to the safe house will give you yet another cash bonus, which may be needed in the messages ahead.
Ante Up
You can play poker with several survivors: Cora, Woodrow, Jack, Tricia Lynn, and Kristin. The main point is to strip your survivors and win extra PP. If you run out of clothes, head to the locker in the bathroom to redress.
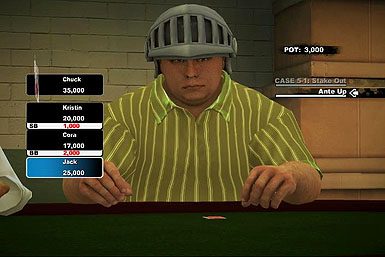

The strategy from the high rollers still applies: use folds and all ins to lure your survivors into bluffs. You can also win the Knight Helmet by beating Jack in Texas Hold'em.
Chemical Dependency
If you saved Jared he'll require more zombrex. If you fail to heal Jared, Sullivan will be forced to kill off this survivor.

If you saved Richard, you should have one spare zombrex. Otherwise, explore the casinos for secret locations.
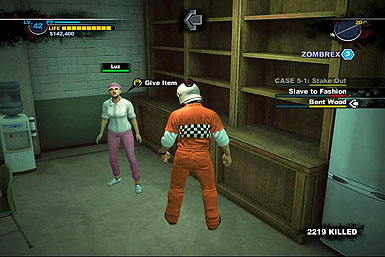
Slave to Fashion
Europa is trapped inside the Fortune City Hotel with only her underwear. She will only join if you strip down to your boxers. There is a clothing stand on the west side of the South Plaza, which you can use to change clothes.

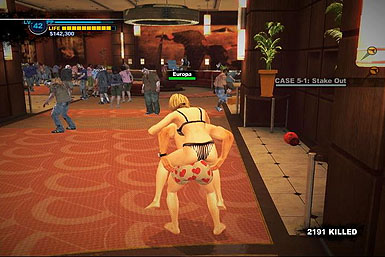
Comeback to her when you are down to commandos and she will come along. However, you will need to carry her.
Art Appreciation
Randolph is making a fuss inside the Cleroux Collection. No one has bought his works of art and has little motivation to continue. Pay him off and he will join.
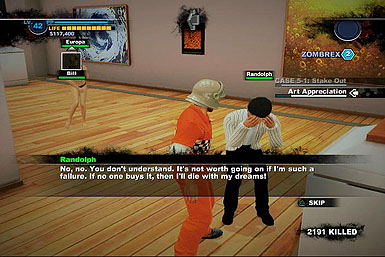

If you want, take the painting with you and give it to Katey for bonus PP.
Militia Men
Several snipers will appear outside along the Platinum Strip, Silver Stripe, and Fortune Park. They are on top of the Atlanica, Moe's, Platinum Screens, and Royal Flush. Killing them is needed if you plan on brining survivors through these open areas.

Instead of one-on-one sniper battles, make your way up the various ladders to the top of these buildings. The passage to the Atlantica is neat Hot Excitorama.
While the snipers have deadly shots with their rifles, they do very little in a close range battle. They will take out machetes and wing a few times before retreating for a shot. Any time is great chance to pound them with your knife gloves.
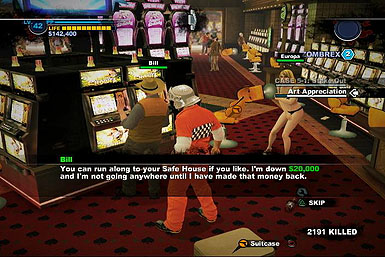
Know When to Fold'em
Bill can be found inside the Shamrock Casino playing slots. The only way to save him is to pay him twice. You should have enough money at this point, but if not just smash ATMs until you have enough.

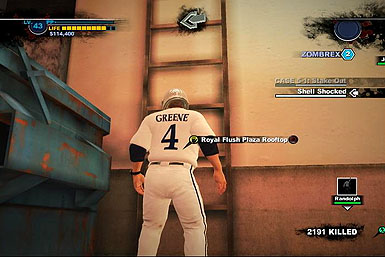
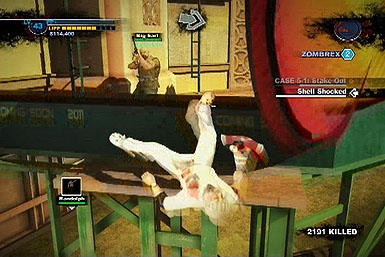
Shell Shocked
The next survivor can be a pain. To prepare, enter the Little Duck Bingo and grab the leadership magazine. With this item, any survivor will move at max speed.


Enter the Americana and you'll find Dean, a wounded veteran. He moves slow and will refuse direct assistance. However, with the magazine, Dean will move at normal rates, greatly lowering the burden of helping him.
- Woodrow - Safe
- Jared - Safe
- Europa - Safe
- Randolph - Safe
- Big Earl - Deceased
- Johnny - Deceased
- Big Earl - Deceased
- Derrick - Deceased
- Deetz - Deceased
- Bill - Safe
- Dean - Safe
Day 3: Case 5
Head to the safe house roof and you'll spy on TK. After a scene, rush to the Fortune City Hotel and you'll be overrun by TK's goons. They fight identical to the merc of earlier, so simply melee attacks are enough to kill them off. Take the elevator to the roof to confront TK himself.

TK will make off in a helicopter, but you'll grapple him down with a crane. Dodge the chopper's movements and gun fire and activate the crane's wench.
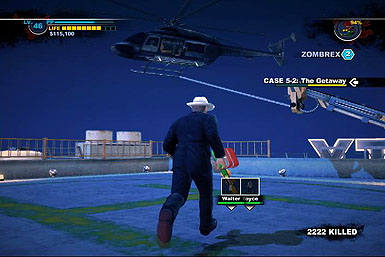
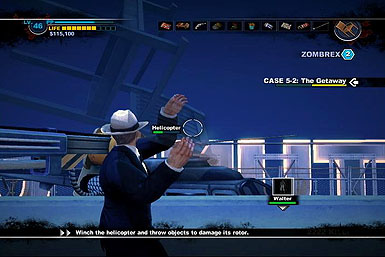
The copter will become trapped for a short time. During this point throw objects at it. Use anything you can get your hands on: chairs, light and weapons. After enough damage the case will end.
Day 3: Evening Messages
One Hit Wonder
Return to the Slot Ranch and you'll discover that the diva Bibi has taken hostages. You won't fight her directly, instead play it safe and as she says. Dress in a tuxedo from Three Club Monte and hand her a drink. Afterwards, lure in zombies to the stage to build a crowd.
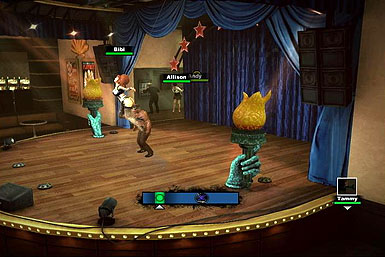

Finally, it's time to work the lights fro the show. Match the button presses with the rhythm and on screen commands. While you'll save the three captives, Bibi will be surrounded by her "fans". If you wish, save Bibi and she'll come to your side. Be warned, it takes very little effort to make her defect, so be careful escorting her.
Stranded Siren
Tammy will be tuck on the clam in the southern section of the Atlantica. Because of her fish tail feet, you'll need to carry her.
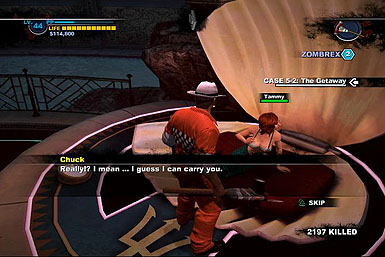
She is completely defenseless, even unable to push away zombies. Keep a close eye on her and take her to the passage inside Brand New U to reach the safe house quickly.
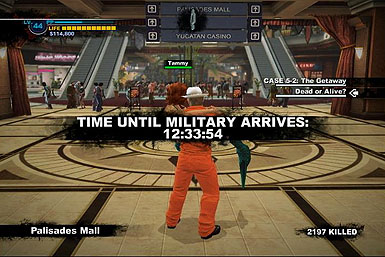
Dead or Alive?
You'll discover Andy on top of a row of slot machines in the Palisades mall. Talk to a him a few times and he'll come with you.
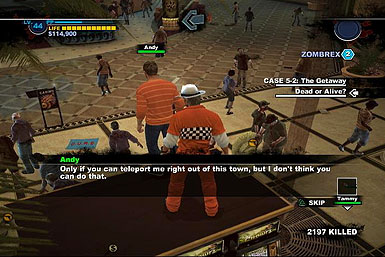
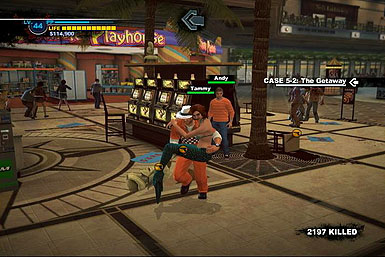
He's armed with a shotgun, which is a great means of self protection. It's even more handy of Andy if you still have Tammy with you.
Bent Wood
Luz will ask for a new club. You can pick one up from the same place you saved her: SporTrance in the Royal Flush.

Dropping off the club will net you a nice bonus of PP.
Two's a Company
Two wisecracker will be making terrible jokes inside Hot Excitorama. Hear both of their lame rants and then grab the statue on the counter. Award one of the comedians the prize and they will join up right way.
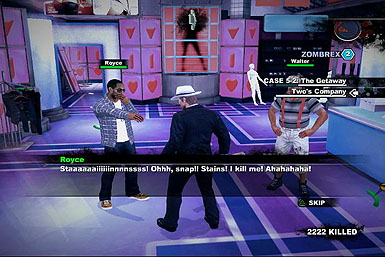

Note that the survivor will never give up his trophy, meaning he can't be healed. Talk to the loser and they will come along too.
- Cameron - Safe
- Alison - Safe
- Juan - Safe
- Bibi - Safe
- Tammy - Safe
- Andy - Safe
- Royce - Safe
- Walter - Safe
Day 4: Morning Messages
World's Most Dangerous Trick
Reed and Roger are waiting inside the Atlantica show room. Reed has a rocket launcher that can blind you and Roger with its blasts. Roger moves quickly and strikes with a pair of swords.
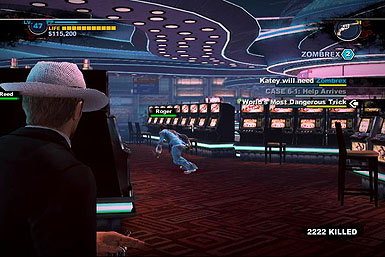
Reed is more of a nuisance, so kill him off first with knife gloves. After Reed is dead, consider using his cannon against Roger. Either way, you'll gain the rocket launcher combo card and will be able to grab the magician's dropped weapons.
Family Feud
Lillian is on top of the hotel and will inform you that she's lost her mother. She suggests checking the Atlantica.
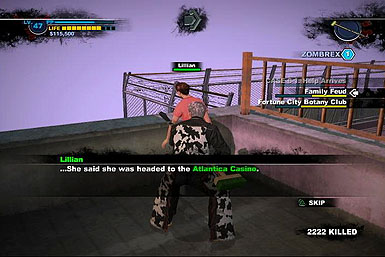
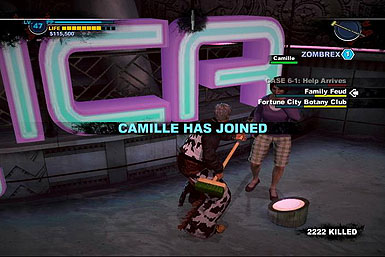
Enter the Atlantica's main doors and you'll discover Camille. Defend her from the hordes of zombies and she'll come to your side. Return to Lillian and the two of them will come along.
Fortune City Botany Club
Vikki will ask for a Peace Art from the Cleroux Club. It's simple enough to take the Brand New U passage and pick up the plant from the art show.
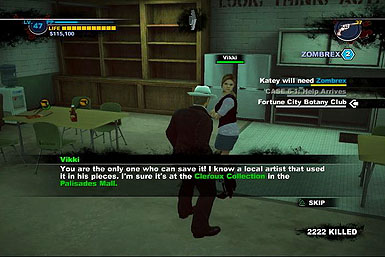

Hand Vikki the plant and you'll gain extra PP.
- Madison - Deceased
- Roger - Deceased
- Reed - Deceased
- Lillian - Safe
- Camille - Safe
Day 4: Case 6
Gas Zombies will be released, which are much more powerful than even night zombies. Sgt. Boykin will go nuts from the ensuing rampage and take Rebecca hostage. Head to the underground passage under the Palisades mall.
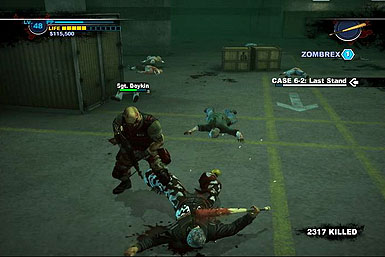
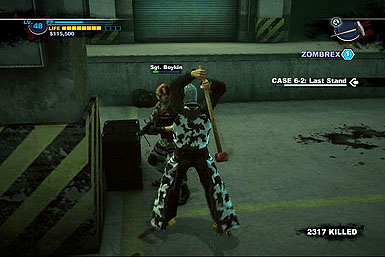
Boykin has a machine gun, but like all guns doesn't do a lot of damage. However, he close range melee and throws can be punishing. Wait for him to be distracted, either from reloading or firing out barrages. During these times, beat Boykin down with a defiler and he will soon be army toast. Escort Rebecca to the safe room. The nearby carts and ramp to the strip are a good means of moving her safely.
- Sgt. Boykin - Deceased
Day 4: Afternoon Messages
Delta Rescue
Two soldiers, Michael and Matthew are under siege in the center of Fortune Park. They will demand you throw down your guns, so compile and release your weapons. Talk to the two of them and they will come along to the safe house.
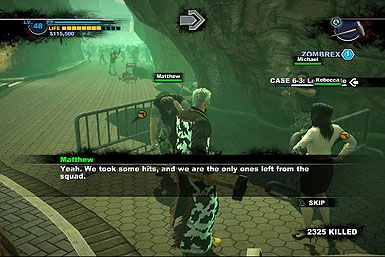
However, Matthew is injured and will require help to move faster. He however, can defend himself with his gun.
Tape it or Die 2
If you built the Plat Launcher for Wallace, you'll get a call that the Tape it or Die crew is in trouble. Head to KokoNutz and find the survivors fending off zombies. Help them out and escort them back to the safe house.

If you manage to save them all you'll receive more combo cards, including the Blazing Aces and Exsanguinator.
- Matthew - Safe
- Michael - Safe
- Johny Pipes - Safe
- Wallace - Safe
- Gretchen - Safe
- Left Hand Lance - Safe
Day 4: Case 7
The safe house will be flooded with zombies. Several of your survivors will try to defend the area, mainly the "free" survivors from the start of the game. They can die off if you take too long finishing your objective. Gather up the three parts needed to close the door and hook them up. Press the button on screen and the door will eventually close off. Don't worry about extra zombies, as they will clear out.

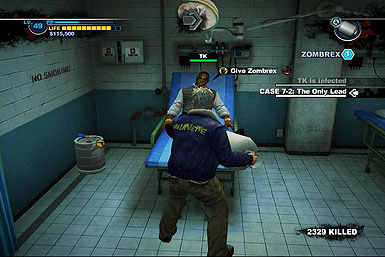
Hand TK zombrex to save him from turning undead. It might seem like a pain now, but it will be worth it later. If you are out of zombrex, remember that there are four cases around the casinos.
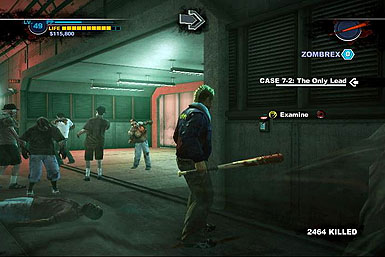
Head to the underground and locate the giant blast door under the Atlantica. Enter through this door and you'll discover queen harvesters. Shoot down the guards with their own guns or just use melee attacks.
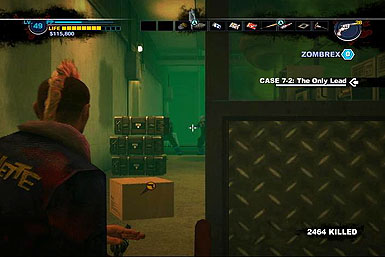
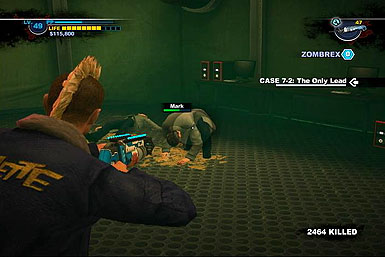
Explore the base a bit deeper and you'll encounter two scientists with pistols. Equip the B.F.G. on the right wall and use it take them down. The B.F.G. doesn't do direct damage, but will cause humans to vomit and be stunned for a short time. Use this time to murder both the scientists. Head back to the safe room to uncover the truth.
- Anim - Safe
- Kris - Safe
- Chrystal - Safe
- Tamara - Safe
- Lulu - Safe
- Kirby - Safe
- Wade - Safe
- Skylar - Safe
- Pierce - Deceased
- Mark - Deceased
Day 4: The Facts
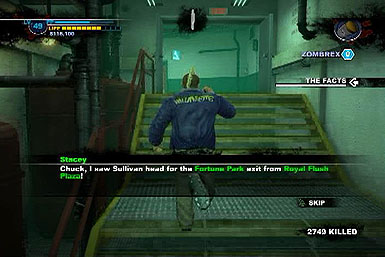
Sullivan will make a break for it and you'll need to track him down. As you move through the Royal Flush, Stacey will let you know that Sullivan was spotted on the Yucatan's roof. Fill your inventory with healing items, a few sniper rifles and dump all melee weapons.
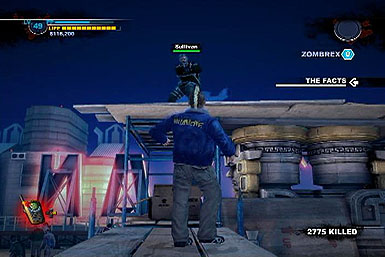
The roof itself is filled with juice, booze and even a lobster. This can be good means of recovering extra life if you need to. For the battle against Sullivan he will be blasting with a hand gun from high up. Climb to the top of his structure and he will switch to hand to hand style.
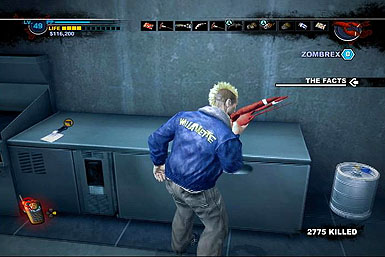

Do not use melee weapons, as Sullivan can disarm you and follow up with a deadly counter. Despite his dodging, you can use the sniper rifle to deal damage before he can evade. Once you run out of ammo, it's time to fight head on with fists. The double front kick and haymaker are your best options, as they do huge damage and stun Sullivan. Keep dodging and slamming the boss with strong attacks and he will eventually fall. You'll be awarded the first ending, but if you managed to get the best results, Overtime will start after the credits.
- Rebecca - Deceased
- Sullivan - Deceased
Overtime
If you finished all cases and gave TK zombrex you'll move on to Overtime. TK will demand that you go on various fetch quests around Fortune City, gathering up arbitrary items to pay tribute to him. Follow the arrows and you'll be pointed to the various locations.

With every item acquired, head to the main floor of the Arena for the final confrontation. Don't bother gathering up food or weapons, as you'll lose everything for this last fight.

TK will taunt you with Katey and Stacey's lives and you'll need to both save them and stop the mad man at the same time. Arm your self with the pipe on the upper left rafter and move back down before TK fires on you. There are boxes filled with juice, so break them open for extra healing.
TK is deadly and very resistant to stunning. Use quick swipes and avoid combos, as TK can easily counter attack will his own assault. Dodge out of the way of his charges, or use the structure in the middle to block his moves. When TK flees, use this time to quickly crank back the girls to safety. If your pipe should break, the haymaker and double front kick are still the best melee moves against this boss. Continue your dance of swift single hits and TK will be finished, concluding Overtime and all of Dead Rising 2.
- TK - Deceased
- Katey - Safe
- Stacey - Safe
Xbox 360 Achievements
| Achievement Name | How To Earn | Reward |
|---|---|---|
| Zombie Slaughter | Kill 500 zombies. | 20 |
| Zombie Destruction | Kill 5,000 zombies. | 20 |
| Z-Genocider 2: Genocide Harder | Kill 53,596 zombies. | 20 |
| Zombie Genocide Master | Kill 72,000 zombies. | 20 |
| Vigilante Justice | Defeat 5 psychopaths. | 20 |
| Duge, Jury, and Executinoer | Defeat 10 psychopaths. | 20 |
| Zombie Fu | Kill 1,000 zombies barehanded. | 20 |
| Wrong Kind of "Chopper" | Kill 1,000 zombies while riding a motorcycle. | 20 |
| He hasn't covered wars… | Use every type of firearm on a zombie. | 20 |
| Head Trauma | Use every type of melee weapon on a zombie. | 20 |
| Death From Afar | Use every type of ranged weapon on a zombie. | 20 |
| Explsovie Temper | Use every type of explosive on a zombie. | 20 |
| Slaughter - S = Laughter | Use every type of novelty weapon on a zombie. | 20 |
| Come on! Foolow me! | Escort 8 survivors at once. | 20 |
| Saving the Day | Save 10 survivors. | 20 |
| Hero of Fortune City | Save 50 survivors. | 20 |
| Needs more chainsaw | Create a combo weapon. | 20 |
| Duct Tape FTW | Create a combo weapon. | 20 |
| Apprentice Rising | Reach level 25. | 20 |
| Professional Rising | Reach level 50. | 20 |
| Fashion Aficionado | Change into 10 different pieces of clothing. | 20 |
| Chuck Greene: Cross Dresser? | Change into all the clothes in the game. | 20 |
| Clean Record | Complete The Facts. | 20 |
| Look at all the juice! | Create and consume all mixed drinks in the game. | 20 |
| Finally Full | Eat all types of food in the game. | 20 |
| Having A Gas | Kill 1,000 "special" zombies. | 20 |
| Father of the Month | Give Katey a gift. | 20 |
| Father of the Year | Give Katey every possible gift. | 20 |
| Justice Served | Complete Overtime Mode. | 20 |
| Better With Friend | Solve all case files in Co-op. | 20 |
| Don't you die on me! | Revive another player in Co-op. | 20 |
| Big Spender | Spend $6,000,000 in Fortune City. | 20 |
| Window Shopper | Enter all the stores in the game. | 20 |
| Masquerade | Have 10 zombies with masks on at once. | 20 |
| Improper Behavior | Spraypaint all Zombrex posters. | 20 |
| TK's Favoirte | Play and win in all 9 TIR events. | 20 |
| Rising Star | Come in first place in a single TIR event. | 20 |
| Win Big! | Finish in first place in a TIR episode. | 20 |
| Custom Finish | Give your bike a custom paint job. | 20 |
| Curiously Inventive | Collect all combo cards hidden in Fortune City. | 20 |
| Life Saver | Collect all survivor combo cards. | 20 |
| Tough Guy | Collect all combo cards from psychopaths. | 20 |
| Half Deck | Collect 25 combo cards. | 20 |
| Full Deck | Collect all combo cards. | 20 |
| Data Miner | Fill all entries in the notebook. | 20 |
| Smashy | Smash 100 zombies using the Smash skill move. | 20 |
| Stick 'em up | Stick it to a zombie by covering him in weapons and objects! | 20 |
| The Skill To Survive | Tame Snowflake. | 20 |
| Tape it or DIE! | Discovered The Secret Combo Card. | 20 |
Playstation 3 Trophy
| Trophy Name | How To Earn | Reward |
|---|---|---|
| Zombie Slaughter | Kill 500 zombies. | Bronze |
| Zombie Destruction | Kill 5,000 zombies. | Bronze |
| Z-Genocider 2: Genocide Harder | Kill 53,596 zombies. | Gold |
| Zombie Genocide Master | Kill 72,000 zombies. | Silver |
| Vigilante Justice | Defeat 5 psychopaths. | Bronze |
| Duge, Jury, and Executinoer | Defeat 10 psychopaths. | Bronze |
| Zombie Fu | Kill 1,000 zombies barehanded. | Bronze |
| Wrong Kind of "Chopper" | Kill 1,000 zombies while riding a motorcycle. | Bronze |
| He hasn't covered wars… | Use every type of firearm on a zombie. | Bronze |
| Head Trauma | Use every type of melee weapon on a zombie. | Bronze |
| Death From Afar | Use every type of ranged weapon on a zombie. | Bronze |
| Explsovie Temper | Use every type of explosive on a zombie. | Bronze |
| Slaughter - S = Laughter | Use every type of novelty weapon on a zombie. | Bronze |
| Come on! Foolow me! | Escort 8 survivors at once. | Bronze |
| Saving the Day | Save 10 survivors. | Bronze |
| Hero of Fortune City | Save 50 survivors. | Bronze |
| Needs more chainsaw | Create a combo weapon. | Bronze |
| Duct Tape FTW | Create a combo weapon. | Bronze |
| Apprentice Rising | Reach level 25. | Bronze |
| Professional Rising | Reach level 50. | Bronze |
| Fashion Aficionado | Change into 10 different pieces of clothing. | Bronze |
| Chuck Greene: Cross Dresser? | Change into all the clothes in the game. | Bronze |
| Clean Record | Complete The Facts. | Silver |
| Look at all the juice! | Create and consume all mixed drinks in the game. | Bronze |
| Finally Full | Eat all types of food in the game. | Bronze |
| Having A Gas | Kill 1,000 "special" zombies. | Bronze |
| Father of the Month | Give Katey a gift. | Bronze |
| Father of the Year | Give Katey every possible gift. | Bronze |
| Justice Served | Complete Overtime Mode. | Silver |
| Better With Friend | Solve all case files in Co-op. | Bronze |
| Don't you die on me! | Revive another player in Co-op. | Bronze |
| Big Spender | Spend $6,000,000 in Fortune City. | Bronze |
| Window Shopper | Enter all the stores in the game. | Bronze |
| Masquerade | Have 10 zombies with masks on at once. | Bronze |
| Improper Behavior | Spraypaint all Zombrex posters. | Bronze |
| TK's Favoirte | Play and win in all 9 TIR events. | Bronze |
| Rising Star | Come in first place in a single TIR event. | Bronze |
| Win Big! | Finish in first place in a TIR episode. | Bronze |
| Custom Finish | Give your bike a custom paint job. | Bronze |
| Curiously Inventive | Collect all combo cards hidden in Fortune City. | Bronze |
| Life Saver | Collect all survivor combo cards. | Bronze |
| Tough Guy | Collect all combo cards from psychopaths. | Bronze |
| Half Deck | Collect 25 combo cards. | Bronze |
| Full Deck | Collect all combo cards. | Gold |
| Data Miner | Fill all entries in the notebook. | Gold |
| Smashy | Smash 100 zombies using the Smash skill move. | Bronze |
| Stick 'em up | Stick it to a zombie by covering him in weapons and objects! | Bronze |
| The Skill To Survive | Tame Snowflake. | Bronze |
| Tape it or DIE! | Discovered The Secret Combo Card. | Silver |
| DR2 Trophy Master | You have acquired all the trophies in Dead Rising 2. | Platinum |
Got a news tip or want to contact us directly? Email news@gamespot.com
Join the conversation