Bioshock 2 Walkthrough
Would you kindly check our full walkthrough to Bioshock 2, including Achievement and Trophy lists?
Bioshock 2 is bigger, badder, and big daddier than its predecessor. Now that you're in control of a Big Daddy yourself, you have more tools than ever at your disposal when exploring the the derelict city of Rapture. But with these abilities come great responsibility and even greater danger.
Here's what you'll find in GameSpot's Bioshock 2 Game Guide:
- Walkthrough: Explore Rapture with confidence using our walkthrough.
- Xbox 360 Achievements: Find out what you need to do to earn these achievements.
- PS3 Trophies: Earn every trophy with our list!
Intro
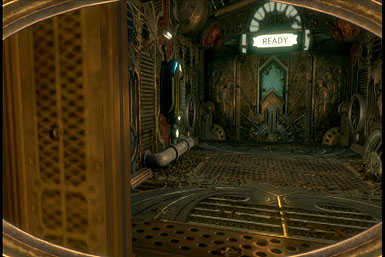
Start the Generator
The Vita Chamber
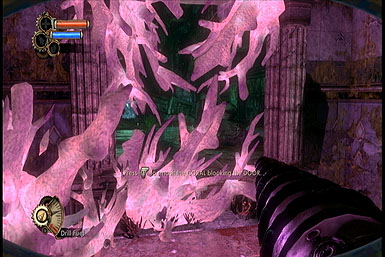
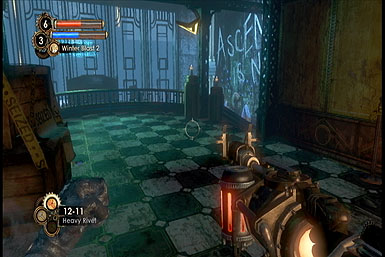
Proceed up the pink staircase ahead to find some coral blocking a pathway. Through the game recommends drilling through, it's better to melee through it instead to conserve fuel. Once past, crouch under the fallen pillar and continue into the Adonis Baths.
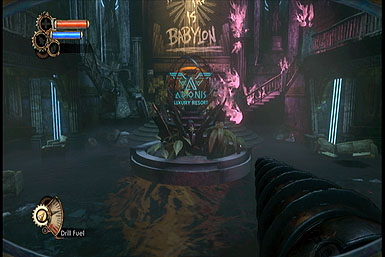
Adonis Baths
Cross to the other side of the room and enter Plasmid Therapies (you'll find some food and fuel just right of the entrance). As you clamber down the stairs inside the Plasma Therapies entrance, hang a left and get ready to drill a Splicer that emerges just after the corpse he throws.
Continue down the hall that the Splicer came from and interact with the Eve Dispenser behind the counter on the left. It's free, so go ahead and stock-up--you can hold up to 5. Now that you've loaded up on Eve, continue onward to the glowing vending machine in Plasmid Therapies just ahead.
Plasmid Therapies
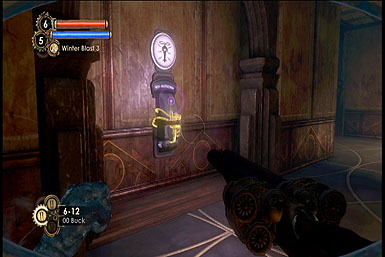
Interact with the vending machine to acquire the Electro Bolt Plasmid. This power can be used to stun enemies with a shock. And since it's electricity, it's particularly potent for any enemies standing in water--simply aim anywhere at the pool and fire to give them a shock. Now before chasing after the little girl who got snatched up, you may want to explore the two adjacent rooms first for some goods. Now head back down the hall from the direction you cam and try out your Electro Bolt plasmid on the control panel next to the closed door--this will power it up, opening the way. Climb the stairs beyond back into Adonis Baths.

Adonis Baths
As you step foot into Adonis Baths, you'll notice a splicer just ahead, though there's another just out of sight on the right. Electro Bolt the one ahead at a distance and run up and melee him while he's stunned for a quick kill, then immediately turn right and shock and melee another. With both Splicers down, Electro Bolt the yellow panel along the right wall to power-on the generator.
Find Tenenbaum
With the generator enabled, a Quest Arrow will now appear at the top--this handy tool pops up every now and then to point you in the right direction. Follow it into the Luxury Resort on the other side of the room. Upon entering, hang a right into the bathroom to find some goodies and a locked stall that you can open for $5--it's well worth the cost as you'll find more money inside. Just beware a Splicer who'll be waiting for you in the hall on the right as you exit if you do choose to open it. Now follow the hall past the giant glass windows to a door that'll open on approach.
When the door opens, you'll eye two Splicers arguing in the pool of water ahead. Fire an electro bolt into the pool to shock both at once, then run up and melee them--just try to avoid standing in the water as you electro bolt it to avoid shocking yourself!
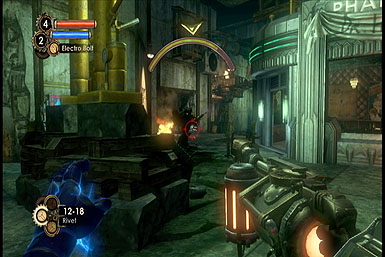
Enter the hall in the rear of the room and collect the Rivet Gun that's wedged between the floor and a door that can't quite shut. Once you have, the door will open, exposing a Splicer on the other side (there's another out of sight to his left). You may want to try out your new toy on him, then the girl that will follow. Once clear, there's a few things you should grab: the Eve from the chair on the left, the health pack in the hall just behind that chair, and some Rivets on the right. We also suggest climbing down the stairs on the right into Bathysphere Docking to find some goods, including Rivet Gun ammo! Just beware that a Splicer will be waiting for you back around the corner if you collect the goods there.
After loading up, climb the stairs leading into the Grand Foyer
Grand Foyer
Upon entering the Grand Foyer, a Big Sister will attack to keep you away from the girl. Now Big Sisters are tough, but luckily, you won't have to kill her completely--you just want to rough her up a bit so she goes crying home to mommy. Your basic plan of attack should be to use the Electro Bolt to stun her, allowing you to easily pop-off a few Rivet Gun shots while she's incapacitated. While doing so, we recommend circling the spherical statue near the room's entrance to shield yourself from her projectiles. Should you run out of Eve, forgo stunning her and just stick to shooting her (or if you run out of ammo, melee attacks will work as well). Before long, she'll let out a shriek and run out of the room, leaving you be.

After the Big Sister has departed, there are some good items to collect. Look for two First Aid Kits, one on a bar left of the staircase and the other on a table in the back, then grab the nearby Rivet Gun, among various other goods. After loading up, continue into the Banquet Hall to the left of the stairs.
Demeter's Banquet Hall
Grab the First Aid Kit from the chair ahead then follow the hall and drop into the next room. There a Big Sister will bust open the window, causing the current to sweep you into the ocean. The Quest Arrow will guide you through the murky depths--just keep an eye out for a corpse inside a small structure on the left that yields both a diary (noted below) and a First Aid Kit.


Continue into the airlock at the end and interact with the control panel to drain the room of water, completing the chapter.
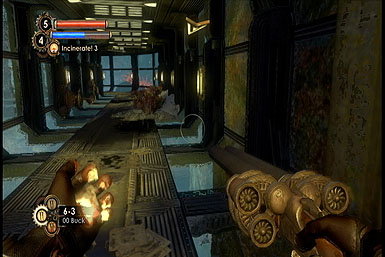
The Atlantic Express
Objective: Get to Brigid Tenenbaum
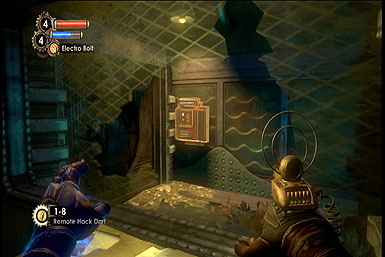
Continue through the door as soon as it opens and proceed down the hall, though you should explore the lockers along the way for some goodies. Climb the stairs in the room beyond and follow the walkway to find a Splicer that closes off the path. No worries, just enter Tool Storage room on the right and grab the Hack Tool from the table. This puppy allows you to disable security cameras and hack vending machines to obtain goods for cheap/free. With it in hand, grab the Hack Dart from the table, then stock up on some more via the vending machine on the right (they're free, so grab as many as you can hold!).
With the Hack Tool equipped, use it to fire a dart through the cracked window into the control panel on the other side. This will now start the hacking mini-game. You need to stop the needle at the bottom of the screen in a green zone (or a blue zone if there is one, as those will yield better rewards) twice to hack it; if you mis-time it, you will take damage. Alternatively, you can also pay the amount shown to simply disable it without dealing with the game, but the cost is rarely worth it. After successfully hacking it, the door will open allowing you to continue onward.

Just after stepping through the now-open door, you'll find a security bot just lying on the ground--hack it to convert it into an ally, who'll fly by your side and open fire on any enemies you engage. Now follow the corridor leading into the Train Workshop.
Train Workshop 6A
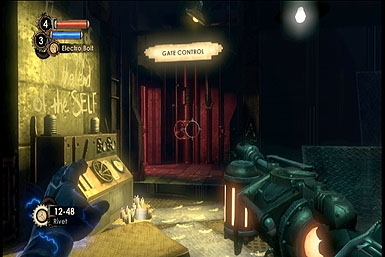
As you enter the Train Workshop, the suspended train unit ahead will drop to the ground--sit tight, as two enemies will attack afterward: one ahead, the other from the left. The security bot should take one down, leaving the other to you. Once clear, check out the workshop on the left for some goods before proceeding into the Gate Control room in the far right corner.
Interact with the glowing Gate Control panel to watch some stuff go down. Although the window will break open exposing you to some enemies on the other side, don't bother shooting them and instead just tough it out until you wind up dropping to the ocean floor.
Maintenance Runoff Pumping Station
Trudge along the ocean depths, ducking beneath a low object, to a staircase leading back inside. Climb it and dunk beneath the low barrier to enter Administrative Storage.
Atlantic Express Administrative Storage
Proceed through the room into the Drafting Office.
Atlantic Express Drafting Offices
Be careful, as a couple of Splicers and a security camera lurk nearby. We suggest hacking the security camera first thing using your Hack Tool from a distance--although this will alert the Splicers to your presence, your security bot should take care one of the threats, leaving you with the other. Now hurry into the main room and hack another the Security Bot there (before the camera resets) to put it under your control as well. Now explore the room for some money and a First Aid Kit on the main table.
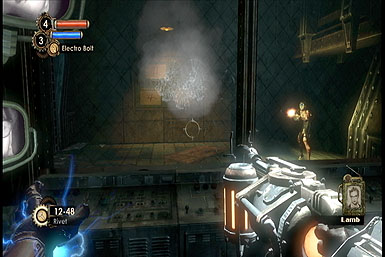
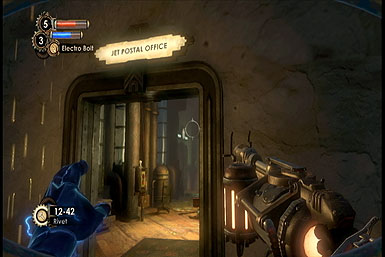
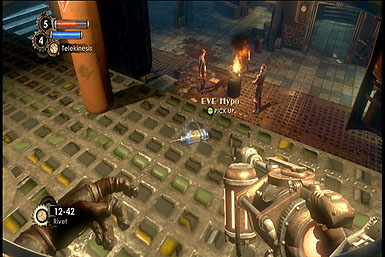
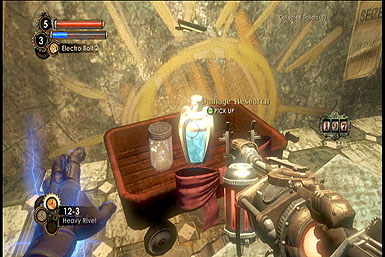
Continue unto the Jet Postal Office where you'll receive a message from a strange girl. After her message, grab the Telekinesis Plasmid from the wagon ahead--this power allows you to grab far away objects and use them as a shield or hurl them at others. Be sure to nab the Eve Hypo from the table on the right, then continue up the stairs in the back.

You'll emerge on a ledge overlooking a group of Splicers below--the nearby gas cannisters provides a quick method of taking them down. Use your Telekinesis power to pick up one of them up, then throw it into the center of the group. This should kill all three, though a few more Splicers will emerge--one from the Cafeteria entrance below, and another directly across from it. Quickly toss another container at each of them then let your Security Bots take care of the final Splicer wandering around. When clear, grab the Eve Hypo by the ledge then head downstairs to the main floor, where the Splicers were.
Train Workshop 6B
When on the lower level, you may want to explore the cafeteria to find some goodies, including a Health Station and Eve Dispenser--just beware of three enemies who'll appear in the room flooded with water after exploring the back room past the kitchen (since they're standing in water, simply electro bolt the ground to freeze them in place, then either shoot them or toss one of the nearby gas cannisters at them.)
Objective: Open the Deployment Bay Door
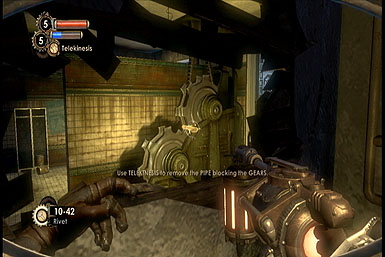
Now as you try and venture deeper into the Train Workshop, a gate will slam shut, blocking your path. Duck into the hall to the left of the door and look through the hole in the wall to spot a pipe clogging up some gears. Use Telekineses to pull it free, enabling the door to open and you to head inside.
Objective: Get to Brigid Tenenbaum
Past the door, make a right to find a vending machine (don't forget to hack it for a free first aid kit!), then clamber up the stairs leading to Switching Hub.
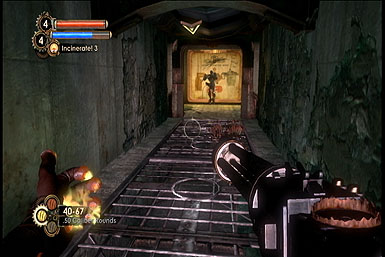
After climbing the stairs, ignore the Big Sister dancing around and instead use the Remote Hack Dart on the far camera (to the right) to covert it into a friendly. Now push forward up the corridor to the overturned desk just ahead--remain here for cover (ducking for protection), as some Splicers are inbound. Your Security Droids should take most of them down, though help them out either by shocking or shooting the baddies. Oh, there's also an explosive cannister just right of the camera that will set off a chain reaction inflicting massive damage--just be careful as it might destroy your droid buddies too! Once clear, follow the corridor up to an elevator on the right and ride it up a few floors--don't worry about the Splicers that subsequently appear, as they can't harm you from outside the lift.
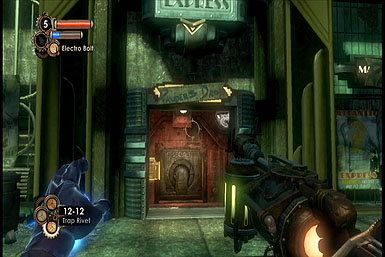
When the lift comes to a stop, zap the Splicer just ahead to take him down. As you climb the stairs ahead, you'll notice three beams of light emitting from something called a Trap Rivet. Go ahead and pick them up. Trap Rivets are a secondary ammo type for the Rivet Gun--you can plant them along any wall or floor, creating a beam of light that shoots anyone who dares to cross it. Anyway, continue explore the room for some goodies, including a First Aid Kit in the supply box, just left of the Ryan Amusements entrance, before heading through.
Inside the Ryan Amusements section, you may want to check out/hack the Vending Machine ahead before continuing through the door on the right leading to the Train Station.
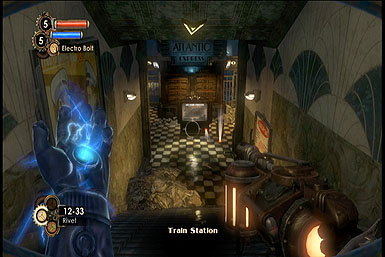
Train Station
Climb down the stairs then take down the Splicer on the right (the good ol' shock and melee combo should do nicely). Now interact with the Intercom Switch by the window on the right to speak with Brigid through it.
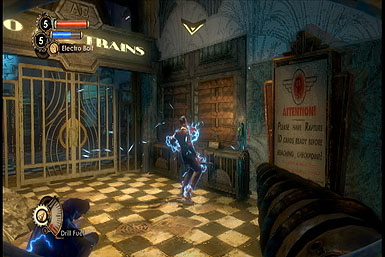
Objective: Hold Off Sofia Lamb's Splicers
Uh-oh, Splicers are en route! The easiest way to tackle them is to turn around and dart back up the stairs you came from (thereby funneling the enemies right to you). When there, plant as many Trap Rivets as you can near the base of the stairs, spanning the staircase's width (make sure to plant them on a flat section of wall so they face the right way). These will act as a safety back-up while you shock/shoot the inbound Splicers that'll come through either of the gates ahead--if you fail to take one down, the Trap Rivet will finish the job. Just keep in mind that there are more Splicers than Trap Rivets, so you'll have to kill at least a few. If things get dicey, you can back all the way up the stairs and duck behind either wall for cover.
Objective: Board the Train
Once you've cleared out all the Splicers, collect any unused Trap Rivets then approach the left gate. Just beyond it awaits a security camera along the left wall--hack it from afar using a Remote Hack Dart to convert it to your side. Now explore the room for some goods, including two Health Stations--one on either side of the room. Now continue onto the train on the right side.
Ryan Amusements
Objective: Get a Ticket
Disembark the train and check out the security booth ahead for some goodies, before proceeding into Ryan Amusements on the left. Climb the stairs there to the room at the top, grab the First Aid Kit from the table and interact with the Vending Machine if need be.


Now proceed into the next room where you'll find a single Splicer that you should take down, before venturing into the Security Wing, on the left.
Security Wing
The Security Wing will lead you to the first of several Weapon Upgrade Stations. We suggest upgrading whichever weapon you've been using the most, though we chose to upgrade the power of our rivet gun. Continue onward down the stairs into the Manager's Office.
Manager's Office
Inside the manager's office, open the door by firing a Remote Hack Dart at the control panel through the broken window. Head on through and grab the Ticket from the desk.
Objective: Get Into the Park
Alright, it's backtracking time (the Quest Arrow will lead you where you need to go). A short ways back, you'll come across a Splicer from behind--take him down (shock and melee should work) then grab the Machine Gun from the window it's stuck in. Now prepare for a battle as you open the door to Park Entrance.
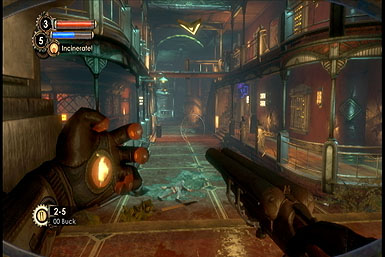
Park Entrance
As you open the door leading to Park Entrance (from the Security Wing), several Splicers will appear to run away before opening fire. Try to shock one as he's running, then take him out with either the Rivet or Machine gun (we prefer the former). Now we recommend hugging the left wall just inside the doorway for cover, then peeking around it just far enough to target a single enemy at a time with the old 'shock and shoot' combo. Repeat as necessary until everyone in the room is down. Once clear, insert your ticket in the machine on the left and continue through the door that opens.
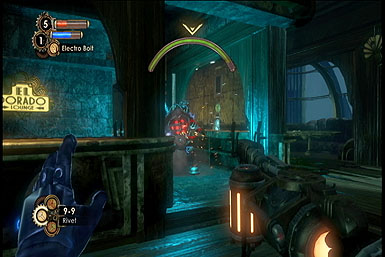
Objective: Find a Little Sister in the El Dorado
Rapture Museum
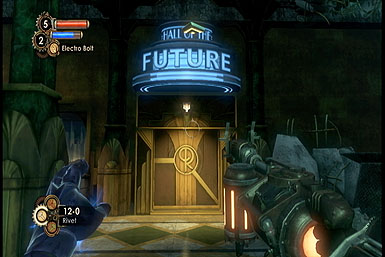
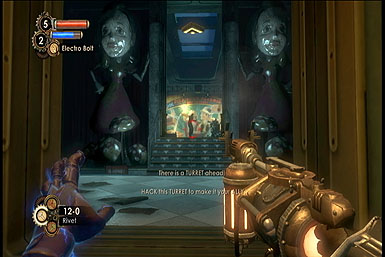
As soon as you enter the museum, grab the Gene Tonic from the table ahead and equip it for a speed boost! Now head left to enter the museum proper--you'll find several vending machines on the lower floor, as well as a First Aid Kit you can drop onto from a gap in the central walkway. Now although the Quest Arrow directs you to El Dorado Lounge, you may want to check out the Hall of the Future on the left and the Gift Shop on the right for various goodies (and diaries, listed below.) In the case of the Hall of the Future, you can hack a turret in the room ahead from the entrance which will clear out the enemies for you. As for the Gift Shop, use the ol' Shock and Shoot combo, but be ready for more Splicers to appear after exploring the bathroom. Once you've grabbed everything, proceed into the lounge.
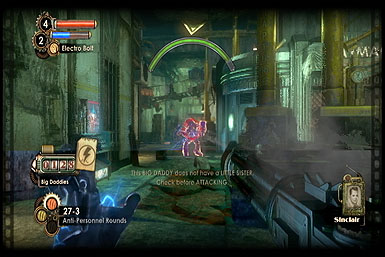
Inside the Longe, watch out for a Splicer roaming around, then grab the Gene Tonic from the wagon ahead before climbing the stairs to another door, leading into the Lounge proper, where you'll find a Big Daddy and a Little Sister.
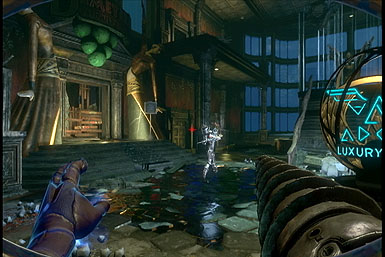
El Dorado Lounge
Objective: Kill the Big Daddy
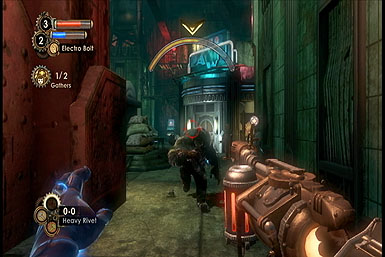
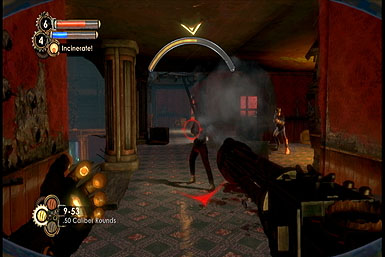
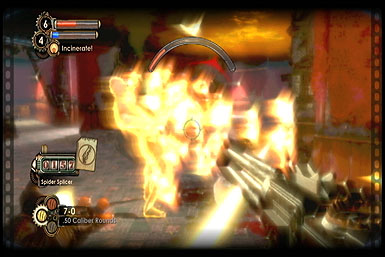
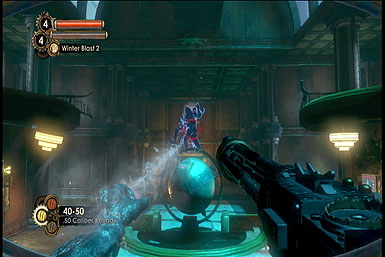
So you wanna kill a Big Daddy, huh? These guys are much stronger and tougher than the enemies you've faced thus far. Luckily, they won't attack unless provoked, so you have some time to explore the room, stock up on ammo via the vending machine in the bar (which you should do if you're low), then get into position to attack. Basically, you want to stay as far back as you can while shocking him with Electro Bolt, then laying into him with either the Rivet or Machine guns. Now beware that he doesn't stay shocked as long as the Splicers, so it's important to work quickly.
Of course, the Big Daddy won't just sit there and take it--instead, he'll actively hunt you down, which is why it's important to stay near hallways or corridors that you can back into after shooting him. While he'll mostly keep after you with a quick stride, get ready to dodge to the side if you see him stop for a moment in preparation of his charge attack. Now he's rather vulnerable afterward, so shock and shoot him as soon as you can before he can turn around. The Bid Daddy will also occassionally slam the ground, stunning you briefly--you can avoid this with a well-timed jump.
One strategy that we found to be particularly potent was to circle the statue in the center of the room continually, shocking the water on the floor whenever the Big Daddy is near to easily stun him. As long as you keep circling it, you should be able to evade his charge attacks.

Objective: Pick Up a Little Sister
Pick up the Little Sister! Come on, you really shouldn't need our help for this…
Objective: Gather Adam from Two Bodies (1/2)
Picked up the girl? Good--she'll direct you to corpses containing Adam (hold the button displayed on-screen to get her to do so). Follow the path shown--it'll lead you to a corpse on the lower floor of the museum. Just watch out for a Splicer along the way.
Rapture Museum
After locating the corpse on the lower floor, you may want to stock up on ammo and Eve via the vending machines before setting her down on the corpse, as the act of drawing Adam will summon Splicers. Consider placing a few Trap Rivets near the Little Girl, then take up residence against the door (facing the vending machines) giving you a clear view of the inbound enemies. Since most of the enemies are lacking firearms, your drill is very effective--just run up to each one asap and drill into them. But beware, at least one of the Splicers does have a gun--shock him if you can, then either drill or shoot him.
A little ways into the battle, the Splicers will begin to cut their way through the door just behind you--take cover to either side of it before it's blown off, then mow them down with the machine gun.


Objective: Pick Up a Little Sister
As soon as the Little Sister's finished gathering Adam, pick her up!
Objective: Gather Adam from Two Bodies (2/2)
With the girl riding piggyback, continue into the now-open door, grab the First Aid Kit from the desk on the left, then the Machine Gun ahead.
Journey to the Surface
After grabbing the Machine Gun, back up into the hall for a second or two to avoid some incoming gunfire, then take aim down the nearby staircase to kill a few inbound Splicers (like usual, shock and shoot techniques work best). Once clear, head for the ramp in the back.
As you start climbing the ramp, prepare for an enemy to charge at you after pushing he pushes an object down the ramp--watch out for another at the top. Look around the right corner for a First Aid Station. Now follow the track over some debris and kill a Splicer there.
Alright, so a lever in the opening on the left opens a door leading back to the museum--ignore it for now. Instead, head through the opening on the right where you'll find a Splicer tinkering with a turret--hack it from a distance to have it turn on the Splicer, allowing you to access the nearby Ammo and First Aid Stations. You'd better stock up, as one of the corpses here has the Adam you need. But as long as you hacked the turret, this should be a cinch! The turret will automatically target most of the inbound enemies, so take cover behind the pillar, near the Little Sister, and pick off any enemies it misses. We recommend using the Electro Bolt + Melee to do them in.
Objective: Get to the Sister Vent
After collecting the little sister, you'll have to escort her to a vent to unload the Adam. Proceed further up the street then down a series of staircases using the Little Sister's navigational powers to show you the way (you'll encounter a Splicer or two as well, but nothing you can't handle). Hack the First Aid Station along the way for a First Aid Kit (if you need one).
When you find the Sister Vent, grab the First Aid Kit from its base, then make the choice of whether to Rescue the girl or Harvest her. Rescuing her will net you less Adam, but a better ending if you rescue all of the other girls too. If you Harvest her, you'll gain more Adam, but you'll earn the "bad" ending.
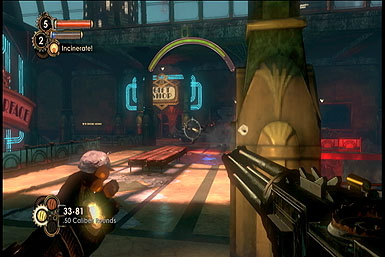
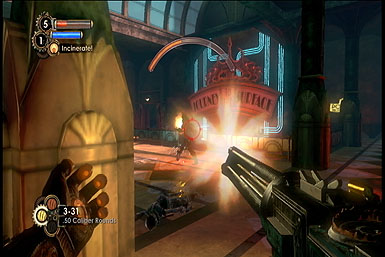
Objective: Buy the Incinerate! Plasmid at the Hall of the Future
With the girl taken care of, follow the Quest Arrow all the way back to the Hall of the Future. You'll face some heavy resistance along the way in two places: The workshop after climbing the stairs, then again as you re-enter the Museum. Either way, we recommend hanging back by the entrance for cover, then shocking & shooting the enemies if you're able to.
The Quest Arrow will lead you right to the Gatherer's Garden vending machine, where you can purchase new Plasmids and Tonics. Although the only item you need to purchase is the Incendiary Plasmid, you can purchase the additional Tonics if you wish--just be aware that another Gather's Garden is coming up soon with a few more options available.
Objective: Thaw the Frozen Door
Work your back up the hall, but be ready for a Splicer just around the first corner. Now try out your new Plasmid on the frozen entryway on the left side of the hall to find another Gatherer's Garden inside, as well as some frozen goodies you can dethaw.
As you near the Museum, we highly recommend stocking up on ammo and EVE Hypo if you're low on either at the kiosk along the way as a battle with a Big Sister awaits within. Now beware, as soon as you step foot in the hall beyond, the Big Sister will use her mind powers to pull you right into battle with her.
Objective: Kill the Big Sister
The Big Sister is fast and agile, but she tends to attack from a distance--which is good news for you! To start things off, we recommend taking cover behind the closest pillar on the upper walkway to shield you from her attacks (where she either throws rocks at you, or shoots flames your way). After dodging an attack, lean out and stun her with Electro Bolt, then lay into her with whatever you have available (we found the Rivet gun--particularly with Heavy Rivets, to be most effective), before retreating behind the column again. You should be able to do this several times before she attempts to get closer for an attack.
Once the Big Sister begins to get closer, try and back away and find a new pillar--or if you drop to the bottom floor, you can either circle the central structure, or reclimb the stairs back to the walkway. Remember, if you run out of ammo, there's a vending machine on the lower floor. Or if things turn really dire, melee attacks are surprisingly effective--we just hope you have some health kits on hand!
Objective: Thaw the Frozen Door
With the Big Sister down, make sure to check her corpse for some goods, then follow the Quest Arrow back through the Park Entrance to the train station. When there, melt the ice blocking the train using the Incendiary Plasmid.
Objective: Restart the Train Line
With the ice melted, head into the nearby control room to activate the train and allow your friend to board. However, several Splicers will also enter the area--try and target them from the doorway using Shock or Incendiary powers combined with good ol' fashioned gunfire. When done, board the train and flip the switch inside to complete the level.
Pauper's Drop
Objective: Go to the Sinclair Deluxe Hotel
Explore the train station before following the Quest Arrow through a couple of rooms (look for a Machine Gun inside one of them) before leading you to three Splicers facing away toward a vent. We recommend backing up into the hall leading up to them and use the doorway for cover as you tackle them from afar. Once done, continue around the corner into the Fishbowl.

The Fishbowl
Alright, so there's a Big Daddy and Little Sister roaming around the room--it's up to you whether you want to deal with them or not, but it's generally worth your while--but we'll worry about them later. First, there are two Splicers roaming around--assuming you head left, you'll find one by a fire first, then a second on a high ledge, just above a security camera (which you should also hack). With the Splicers down, explore the room (including the central diner area) for a ton of goods and money.
Okay, so if you want to tackle the Big Daddy, make sure you're well stocked up--there are several vending machine around that can provide you with Health, Eve, and ammo (you may also want to use Telekineses to grab an explosive cannister from the diner) . Now we found the best way to tackle the Big Daddy was to climb onto the roof of the central dining area via the wooden ramp. This provides an awesome location in which to target the Big Daddy without making yourself susceptible to his close-range attacks. We just recommend waiting to engage the Big Daddy until he's walked around to another side of the building, to prevent him from climbing up the ramp after you. Once you've engaged him in battle, strafe along the roof to evade his attacks, and use the nearby objects (such as the Neon sign) for cover. Target him with whatever you've got, though we were rather fond of Electro Bolts and Heavy Rivets (or explosive cannisters, if you grabbed one before).
With the Big Daddy down, you can either harvest or rescue the little girl (and potentially find additional Adam). The choice is yours, and for the purpose of this walkthrough, you're on your own if you wish to use her to collect additional Adam.
Either way, follow the Quest Arrow to the Sinclare Deluxe Hotel. Upon approach, a big burly creature, known as a Brute Splicer, will block off your path, at which point the man on the radio will inform you of a Research Camera that can provide assistance.
Objective: Search the Pawn Shop Downtown for the Research Camera
Follow the Quest Arrow back to the Fishbowl, then down the stairs to downtown.
Downtown
As you step into the downtown section, you'll find a Brute Splicer up ahead. Hang back and blast him from the alley, backing away if he charges--we found Electro Bolt combined with Heavy Rivets or machine gun to be effective. After he takes some damage, he'll burst through a wall on the right, revealing a few Splicers--mow them down before turning your attention back to the Brute.

With the area cleared, you'll find that your path into the Clinic is blocked by a locked door--you'll find the code inside the Diner.
Objective: Look for the Clinic Code in the Diner
Follow the Quest Arrow back to the Diner (in the Fishbowl area) and a check a corpse slumped in the corner to learn the code. Now as soon as you do, several Splicers will begin to drop in from the ceiling. We recommend shocking and shooting them (or if you have time, use a melee attack instead to conserve ammo). While doing so, try and stick to the left wall to avoid being shot through the gap in the wall. Once clear, follow the Quest Arrow back to the Downtown area and use the pass code to gain access to the Fontaine Clinic.
Objective: Retrieve the Research Camera From the Pawn Shop
Inside the clinic, grab the First Aid Kit from behind the counter, then watch out for a Splicer at the top of the stairs around the corner--shoot the explosive barrel by him for a quick victory. Now watch out for a camera that you should hack just beyond him that you should destroy. Now be careful as you exit through the door at the top, as there's a turret gunning for you on the other side--hack it from afar. With the turret taken care of, continue past it and drop the hole in the roof to drop inside the pawn shop and grab the Research Camera.
Objective: Research Splicers with the Research Camera
After grabbing the research camera, approach the door ahead and get ready to take a snapshot of a Splicer just outside. As soon as you have, lay into him with whatever Plasmids and Weapons you have available to complete the research and learn a tip. Prepare for a few more Splicers soon after, then follow the Quest Arrow to Skid Row.
Objective: Research Brute Splicers
Skid Row
As soon as you enter Skid Row, you'll spot a Big Daddy engaged in battle with a Big Daddy--leave them alone, as they'll inflict some heavy damage before he has the chance to kill them. While the Big Daddy's busy, use telekinesis to grab an explosive cannister on the right side of the room then lob it into him when the Splicers are down. Oh, and you may want to start researching him with the camera, before you finish him off with distance attacks--use the gold pipes in the center of the room for cover.
With the Big Daddy taken care of, follow the Quest Arrow to find a Brute Splicer facing toward a window. Sneak up behind him and snap his picture before laying into him. You may want to back down the hall you just came from while blasting him to give you some space--remember to switch up the Plasmids and Weapons you use to complete the research faster. Once the research is complete, you'll learn the Drill Dash maneuver.
Objective: Clear the Rubble at the Sinclare Deluxe
Now that you've learned the Drill Dash, follow the Quest Arrow back to Sinclair Deluxe, where your path was first blocked.
Sinclare Deluxe
Once back at the blocked hall in the Sinclair Deluxe, use your new Drill Dash (tap melee while drilling) to burst through the debris blocking the path ahead. Just be ready to tackle some Splicers immediately after--back into the hall for cover, if need be.
Objective: Go to Grace's Apartment
Follow the Quest Arrow through a dark hall until you emerge in a room with a waterfall--check the corpse on the table for the Freeze Drill power. Now continue up the wooden ramp and get ready to take on a Brute Splicer in a room on the left.
Shortly thereafter, prepare for a security camera as you exit into a hall, then continue to follow the Quest Arrow to Grace's apartment.
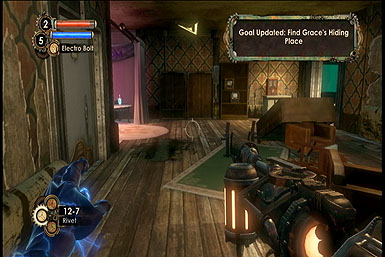
Objective: Find Grace's Hiding Place
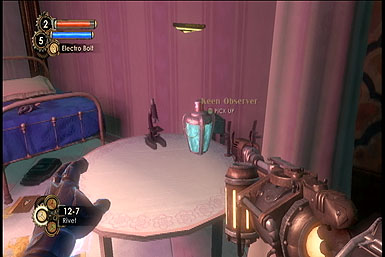
First, grab the Keen Observer power from the pink room on the left, then head into the bedroom and rip the poster from the wall to reveal a hidden switch. Activate it to open a passageway on the left that you should enter, then look through the window within. Grace will welcome you inside, allowing you to grab the Override Key from the table.
After grabbing the Override Key, follow the Quest Arrow all the way back to the train station, where you can activate it via the nearby control room before hopping aboard. Now beware, you will face heavy resistance as you reenter the Fishbowl. It's crucial you hack the rocket-launching bot dead-ahead first, before turning your attention to the nearby Splicers (including a Brute).
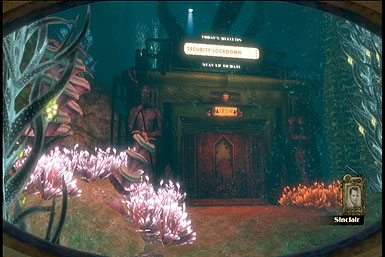
Siren Alley
Objective: Find Pumping Station #5
Trek along the ocean floor to the far airlock, but keep an out for some Adam along the way.
Little Eden Plaza
As you enter Little Eden Plaza, you'll find a Big Daddy going at it with some Splicers--leave them alone for now so that the Big Daddy is weakened, but also wipes out the Splicers for you. While they're going at it, you'll want to clear out the enemies from the corridor on the left--we suggest taking cover to either side and waiting for them to come to you. Once they're out of the way, it's up to you if you wish to take on the Big Daddy or not. If you do, we recommend taking to the walkway above and wait until the Big Daddy is almost directly below--you can dodge his attacks by strafing side to side. If we chases after you, just back away along the walkway and target him as he comes up the stairs.

Now follow the Quest Arrow to the Maintenance Area.
Maintenance Area
Activate the Security Bot on the ground then grab the Security Command tonic from the wagon. Now watch out for some Splicers and a turret on the upperwalkways of the following room before climbing your way up to a locked door.
Objective: Find the Keycode to Access Plaza Hedone
Upon reaching the locked door, check the nearby Diary by the door to learn your next objective.
Objective: Find Daniel Whales at the Pink Pearl
Follow the Quest Arrow back to the Plaza, then into the Pink Pearl (watch out for the Brute Splicer just outside--freeze plasmid works great!). Inside, grab the Speargun (and the nearby spears) then follow the Quest Arrow through the building. Be on the watch for a turret down one of the early halls--hack it as soon as you can. Aside from that, just use the corners for cover as you proceed through the building.
Upon reaching a large hole in one of the upper-floors, drop on in and get ready to hack two turrets in the room ahead, before taking down the nearby Splicer. Once clear, grab the Hacker's Delight 2 along the right wall. Now proceed into the next room, hang a right, hack the turret, then get ready to tackle Daniel Wells.
Objective: Defeat Daniel Wells
Daniel Wells has a lot of health, but that aside, he's not much more difficult than your average Splicer. Try to lure and keep him in the same hall as the turret you hacked so it can rip him to shreds while you attack from afar. If you have the Freeze Plasmid, consider freezing him in place before laying into him.
Objective: Use the Keycode to Access the Plaza Hedone
With Daniel down, the Quest Arrow will lead you to your next objective, though you may encounter a Big Daddy along the way. The easiest way to defeat him is to use the Freeze Plasmid (if you have it, and the Eve to spare) to freeze him in place, then just drill him for several seconds, repeating as necessary. Barring that, try to attack him from around corners or on an opposite walkway, so you can use the pillars for cover.
Objective: Defeat Simon's Followers
Alright, so the power's out and you'll have to hang tight for a few minutes and fend off Simon's minions. You have a few moments before they come, so we recommend lining both staircases with Trap Rivets if you have them, and mini-turrets (there's one already on the walkway). Now get ready to be proactive in taking the enemies down as they approach--the Freeze plasmid can be a useful tool to buy yourself some time.
Once the power comes back on, continue through the door. Now you'll likely find another Bid Daddy roaming the area--if you have Eve to spare, the easiest way is to just freeze him in place continually then drill him to death. Barring that, take to one of the raised walkways and attack him from above, strafing to evade his counter-attacks.
Now follow the Quest Arrow through the Temple of Lamb area down to Pump Station Access, where you'll find Simon Wells.
Pump Station Access
Objective: Defeat Simon Wells
Simon Wells is waiting for you on the lower level of this room, but he'll try and target you regardless. We recommend remaining on the upper walkway for now and take down the nearby Splicers as they attack. Oh, and try and hack the flying security droid as soon as you can to convert him to your side. Once they're down, we recommend dropping to the lower floor and using the Freeze plasmid to keep Simon in place while you wail on him. Once he's down, check his corpse for the key.
Objective: Divert the Emergency Pumps
Follow the quest arrow into the nearby Pump Room and use the key on the glowing console. Oh, and be sure to explore the room for a pair of First Aid Kits.
Objective: Get to Dionysus Park
Use the Quest Arrow to navigate to the Dionysus Park airlock. You won't face much resistance, except for a couple of seemingly dead Splicers that will come back to life.
Dionysus Park
Objective: Locate the Train
Cohen's Collection
Follow the Quest Arrow into a large room where you'll have your first run-in with a Houdini Splicer. These guys can warp around the room, so it's best to keep them in place either by freezing them or stunning them, then laying into them.
Objective: Meet Stanley in the Train Station
The Promenade
After entering the Promenade, check the corner left of the entrance for a First Aid Kit then follow the Quest Arrow to Maintenance Access.
Maintenance Access
After receiving the telepathic message from your daughter, you'll find a small room with a ton of gifts in a wagon, including a Launcher. Collect them all then continue to follow the quest arrow to the train station, where you'll find Stanley inside the control booth--talk to him through the window.
Objective: Rescue or Harvest Three Little Sisters
Alright, so Stanley wants you to rescue or harvest three little sisters. Since they roam around, it's pretty much impossible for us to us to provide a straight walkthrough. Instead, consult your map to find their locations, then battle them like you have before (as usual, we recommend the ol' freeze 'em and drill 'em routine). Remember, you can either rescue or harvest the sisters--either way is fine.
Objective: Board the Train to Fontaine Futuristics
After rescuing or harvesting the girls, return to the Train Station via the quest arrow and enter the control booth to decide Stanley's fate. Either way, board the train afterward to make way for Fontaine Futuristics.
Fontaine Futuristics
Objective: Break Into Fontaine Futuristics
Exit the train and follow the Quest Arrow through a series of rooms, but make sure to grab the Damage Research tonic from the wagon in the third room. Continue into the airlock then trek across the ocean floor to enter Fontaine Futuristics proper.
Objective: Find Gil Alexander's Next Recording
After crossing the ocean floor, you'll soon emerge in a room with a pair of Splicers ahead and a security bot nearby--hack it from afar and let it take care of the Splicers for you, but be ready for some Houdini ones that will soon follow.
Objective: Activate the Bioscan
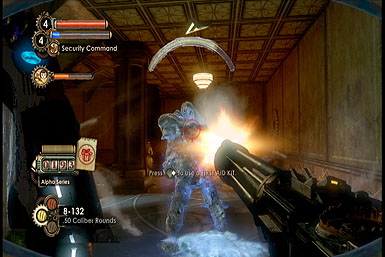
With the room cleared, climb the stairs up the gate and interact with the Bioscan console next to it, then get ready for a battle.
Objective: Defeat Gil's Security Guard
Gil's Security Guard is about to drop in on the globe in the center of the room. Like the Big Daddies and Big Sisters before him, he's highly vulnerable to being frozen. However, unlike the others, this guy will break apart afterward preventing you from looting his corpse. As such, we recommend freezing him just enough to dwindle about 60% of his health, then shoot him normally so you can reap his benefits (the machine gun's armor piercing rounds work great). If you don't have the Freeze plasmid, consider staying up on the balcony and shocking him from afar. After defeating him, the gate at the top of the stairs will open.
Objective: Access the Security Office
After the gate, open the panel next to the talking TV to obtain a diary (mentioned below), First Aid Kit, and eve., then continue through the voice-activate door ahead. Proceed to the backside of that room to find another voice-activate door you should attempt to open.
Objective: Break Gill's Control Over Security
After failing to open the second voice-activated door, the wall behind it will slide away revealing another room to venture into. Watch out for a pair of Splicers that'll attack then be prepared for a Big Daddy roaming the room (like usual, the old freeze and drill combo works great).

Once you've cleared the room, you'll want to look for the modified Bot-Shutdown switch in the rear of the lower floor. Interact with it to disable Gil's control of it. Immediately after doing so, some bots will be sent to attack; simply disable them by using that same But-Shutdown switch, then hack them to convert them to your side.
Objective: Destroy the Signal Relays
Okay, so with the first Signal Relay destroyed, you have three more to go. Head for the theater on the east side of this room--before heading inside though, we suggest hacking the nearby turret and grabbing the First Aid Kit just below.
Frank Fontaine's Plasmid Spectacular Theater
Prepare to sit back and watch a quick show on-stage, but be ready for the "volunteers" to attack. Once they're down, prepare for an Alpha Series unit to barge in from the left gate. With the room clear, interact with the Signal Relay in the center of the stage.
Frank Fontaine's Office
Now head back into the large multi-floor room and and access the Office of Frank Fontaine via the top level. Inside you'll find the third Signal Relay to destroy. Now a Quest Arrow should appear that leads to the final one.
The Quest Arrow will lead you right to the final Signal Relay in a flooded room containing a camera--either hack or destroy it, then deal with the Relay in the left corner.
Objective: Enter the Security Office
Follow the Quest Arrow back the the voice-activate Security Office which you can now open. Interact with the switch inside to gain access to the Plasmid Laboratory, but be sure to explore the room for some goodies before leaving, such as two First Aid Kits.
Objective: Head to the Plasmid Laboratory
The Quest Arrow will lead you right to the airlock, which you can use to access the ocean floor that you need to trek across.
Objective: Find the Entrance to the Hidden Plasmid Laboratory
Journey across the ocean's depths and down a hole into the next airlock, which leads to Fontaine's research and development laboratory.
Fontaine's Plasmid Research and Development
Follow the corridor, crouching when necessary, to enter the bowels of the research center
Objective: Find and Activate the Circuit Breakers
There are two circuit breakers scattered about the room (they glow and emit sparks). Interact with both to complete this objective.
Objective: Activate the Power Mains
Follow the Quest Arrow up to the Power Mains, located on a control console.
Objective: Collect 4 Adam-Infused Plants
Look for the first plant on the right half of the same control console where you flipped the Power Mains. Now follow the Quest Arrow down to the Test Subject Pacification Chamber, where you'll find the second in a corner. You'll find the third in the middle section of the Live Test Facility, and finally, the fourth can be found in one of the jail cells.
Objective: Lure Gill Out of Hiding
With the four plants collected, follow the Quest Arrow back to the Power Mains switch, but prepare for some heavy resistance along the way. After activating the switch again, a ton of enemies will appear--we found freeze and incendiary plasmids to be most effective.
Objective: Extract Gil's Genetic Key
With the room cleared, extract the sample by using the same console
Objective: Collect Gil's Genetic Key
Grab the key from the very same console (yeah, that console's multi-purpose), then follow the Quest Arrow to the airlock and venture back onto the ocean floor. Now plug the key into the slot on the left.
Objective: Take the Elevator Down
Follow the Quest Arrow down the path to another airlock and head inside.
Hidden Elevator
Inside, head for the elevator straight ahead to complete this level.
Persephone
Objective: Find Eleanor Lamb
Entryway
Work your way through the halls, collecting the goods you can along the way, including a First Aid Kit by the ammo vending machine.

Objective: Activate the Quarantine Chamber
The corridors will lead you right to the Quarantine Chamber--interact with the switch just outside to activate it.
Objective: Defeat the Big Sisters
You read that right--not just one big Sister, but two! Like usual, the freezing plasmid will be your best friend here. If you can, try to freeze both close together and periodically refreeze each of them while you wail on one of them at a time. If one of the Big Sisters does manage to get away, try to use the frozen one as a shield while you continue to freeze/beat on her.
Objective: Enter the the Quarantine Chamber
Head inside the Quarantine Chamber and watch some serious stuff go down.
Objective: Escape the Holding Cell
As the little sister, grab the Eve on the floor before climbing up into the vent.
Objective: Infiltrate Lamb's Office
Office of Sofia Lamb
Head for the vent the Quest Arrow directs you toward to enter Sofia's office.
Objective: Use the Security Release Lever
Follow the hall into Sofia's office and activate the lever on the wall just past her.


Objective: Find the Three Big Sister Suit Parts
Objective: Bring the Big Sister Suit to Eleanor
The Quest Arrow will lead you straight to Eleanor, so you can give her the suit.
Objective: Pick Up The Summon Eleanor Plasmid
Now that Eleanor's all suited up, grab the Plasmid she offers, allowing you to summon her for help whenever you like.
Objective: Exit the Area
Atrium
The exit's to the right, but you'll have to face some baddies first. Try out your new Summon Eleanor Plasmid for some help with the butt-kicking, then go ahead and exit the area.
Inner Persephone
Objective: Head to the Docking Platform
Like usual, the Quest Arrow will lead you there, but you'll find that the area has been locked down forcing you to head elsewhere for now.
Objective: Get to the Holding Wing
As you venture upstairs toward the holding wing, a few more enemies (and a turret) await. Hack the turret from a distance (if you can), then summon Eleanor to help you think out the crowd. When you reached the locked door, use the Hack Tool on the control panel visible through the bars.

Objective: Override the Security Curfew
Proceed down the hall to a locked door--interact with the button just left of it (on the other side of the gate) to find the Master Key.
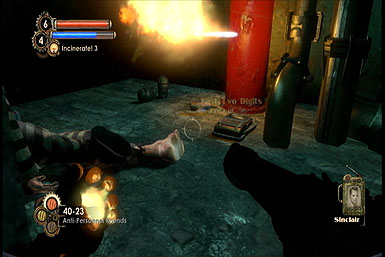
Objective: Get the Key From Sinclair
The door should now be unlocked, so head on through and chase after Sinclare! You'll face some resistance along the way, but as long as you summon Eleanore first thing, you shouldn't have any problem taking the enemies down. Before long, you'll find Sinclare in a locked room
Objective: Find the Keycode
The keycode can be found on two recordings--one in Cell Block C, the other in the South Quad Cell-Block. Check the boxes below to find them.

Once you have the passcode, return to Sinclare and use it to open the door. Now summon Eleanor to help take him down--we recommend using the incendiary plasmid since the room is coated in gasoline.
Objective: Use Sinclair's Key in the Tower
Interact with the control panel in the same room Sinclair was in to override security.
Objective: Return to the Docking Platform
You know the deal: follow the Quest Arrow back to the docking platform. You'll face some Alpha Series along the way, but with Eleanor's help (don't forget to summon her) and your freeze/incendiary plasmids, they'll go down without much of a fight.
Objective: Find and Secure the Pediatric Ward in the Therapy Wing
Oh man, so it seems you've got to round up the little sisters. Head for the Therapy Wing with the Quest Arrow's help. Once there, you'll have to secure the place--that is, murder everyone dead. Unfortunately, you can no longer summon Eleanor, so you're on your own! Try and hack the turret and droid in the far room if you can (there's a First Aid Station nearby too), then use Incendiary/Freeze plasmids to take down the enemies.
Objective: Signal Eleanor in the Therapy Pediatric Ward
Simply press the nearby Call Button.
Objective: Find and Secure the Pediatric Ward in the Infirmary Wing
Same deal--follow the Quest Arrow to the pediatric ward and secure it. There's a gas cannister around the back side that can be tossed into the Brute there with telekinesis. When clear, activate the call button at the base of the staircase in the back and make sure to grab the goodies from the supply box just across from it.
Objective: Return to the Docking Bay
Use the Quest Arrow to return to the Docking Bay, then when you're ready for the final battle, approach the glass window that Eleanore's behind.
Objective: Survive Lamb's Final Assault
Lamb's final assault consists of throwing as many enemies as she can your way, but truthfully, it's not really anything you haven't seen before. First off, make sure to summon Eleanor for assistance, then use the freeze/incendiary plasmids to help clear out the room. Since looting corpses serves little purpose, don't be afraid to shatter frozen enemies to death.
Objective: Throw the Vessel Release
As soon as the water has finished boiling, hurry upstairs and throw the switch!
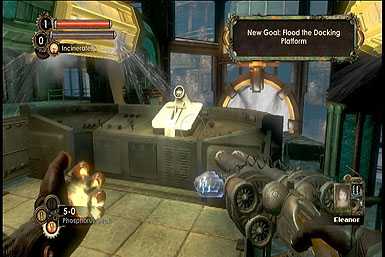
Objective: Flood the Docking Platform
To flood the docking platform, target the two yellow pipes just overhead. They're weak, so almost any weapon should be able to destroy them quickly.
Objective: Get to the Elevator
With the pipes destroyed, follow the Quest Arrow left along the walkway to the waiting elevator, which concludes your adventures in Rapture…for now.
Xbox 360 Achievements
Note that there are Spoilers on this list.
| Achievement Name | How To Earn | Reward |
|---|---|---|
| "Mr. Bubbles-- No!" | Take down your first Big Daddy in a non-private match. | 20 |
| Against All Odds | Finish the game on the hardest difficulty level. | 30 |
| All Plasmids | Find or purchase all 11 basic Plasmid types. | 20 |
| All Weapon Upgrades | Find all 14 Power to the People weapon upgrades in the game. | 20 |
| Big Brass Balls | Finish the game without using Vita-Chambers. | 25 |
| Big Spender | Spend 2000 dollars at Vending Machines. | 15 |
| Bought a Slot | Buy one Plasmid or Tonic Slot at a Gatherer's Garden. | 5 |
| Choose the Impossible | Achieve Rank 40. | 50 |
| Dealt with Every Little Sister | Either Harvest or Save every Little Sister in the game. | 50 |
| Disgusting Frankenstein | Become a Big Daddy for the first time in a non-private match. | 10 |
| First Research | Research a Splicer with the Research Camera. | 5 |
| Fully Upgraded a Plasmid | Fully upgrade one of your Plasmids to the level 3 version at a Gatherer's Garden | 10 |
| Fully Upgraded a Weapon | Install the third and final upgrade to any of your weapons. | 10 |
| Grand Daddy | Defeat 3 Big Daddies without dying during the fight | 25 |
| Little Moth | Achieve Rank 20. | 20 |
| Man About Town | Play at least one non-private match on each multiplayer map. | 10 |
| Master Gatherer | Gather 600 ADAM with Little Sisters. | 30 |
| Master Hacker | Hack 30 machines at a distance with the Hack Tool. | 20 |
| Master Protector | Get through a Gather with no damage and no one getting to the Little Sister. | 15 |
| Max Plasmid Slots | Fully upgrade to the maximum number of Plasmid Slots. | 10 |
| Mother Goose | Save your first Little Sister in a non-private match. | 20 |
| One Research Track | Max out one Research Track. | 20 |
| Parasite | Achieve Rank 10. | 10 |
| Prolific Hacker | Successfully hack at least one of every type of machin | 20 |
| Proving Grounds | Win your first non-private match. | 20 |
| Rapture Historian | Find 100 audio diaries. | 40 |
| Research Master | Max out research on all 9 research subjects. | 20 |
| Skin Job | Achieve Rank 30. | 20 |
| Trap Master | Kill 30 enemies using only Traps.B | 15 |
| Two-Bit Heroics | Complete your first trial in a non-private match. | 10 |
| Unnatural Selection | Score your first kill in a non-private match. | 10 |
| Upgraded a Weapon | Upgrade any weapon at a Power to the People Station. | 10 |
| Welcome to Rapture | Complete your first non-private match. | 10 |
PlayStation 3 Trophies
Note that there are Spoilers on this list.
| Achievement Name | How To Earn | Reward |
|---|---|---|
| "Mr. Bubbles-- No!" | Take down your first Big Daddy in a non-private match. | Bronze |
| Against All Odds | Finish the game on the hardest difficulty level. | Bronze |
| All Plasmids | Find or purchase all 11 basic Plasmid types. | Bronze |
| All Weapon Upgrades | Find all 14 Power to the People weapon upgrades in the game. | Bronze |
| Big Brass Balls | Finish the game without using Vita-Chambers. | Silver |
| Big Spender | Spend 2000 dollars at Vending Machines. | Bronze |
| Bought a Slot | Buy one Plasmid or Tonic Slot at a Gatherer's Garden. | Bronze |
| Choose the Impossible | Achieve Rank 40. | Gold |
| Dealt with Every Little Sister | Either Harvest or Save every Little Sister in the game. | Silver |
| Disgusting Frankenstein | Become a Big Daddy for the first time in a non-private match. | Bronze |
| First Research | Research a Splicer with the Research Camera. | Bronze |
| Fully Upgraded a Plasmid | Fully upgrade one of your Plasmids to the level 3 version at a Gatherer's Garden | Bronze |
| Fully Upgraded a Weapon | Install the third and final upgrade to any of your weapons. | Bronze |
| Grand Daddy | Defeat 3 Big Daddies without dying during the fight | Silver |
| Little Moth | Achieve Rank 20. | Bronze |
| Man About Town | Play at least one non-private match on each multiplayer map. | Bronze |
| Master Gatherer | Gather 600 ADAM with Little Sisters. | Silver |
| Master Hacker | Hack 30 machines at a distance with the Hack Tool. | Bronze |
| Master Protector | Get through a Gather with no damage and no one getting to the Little Sister. | Bronze |
| Max Plasmid Slots | Fully upgrade to the maximum number of Plasmid Slots. | Bronze |
| Mother Goose | Save your first Little Sister in a non-private match. | Bronze |
| One Research Track | Max out one Research Track. | Bronze |
| Parasite | Achieve Rank 10. | Bronze |
| Prolific Hacker | Successfully hack at least one of every type of machin | Bronze |
| Proving Grounds | Win your first non-private match. | Silver |
| Rapture Historian | Find 100 audio diaries. | Silver |
| Research Master | Max out research on all 9 research subjects. | Bronze |
| Skin Job | Achieve Rank 30. | Bronze |
| Trap Master | Kill 30 enemies using only Traps.B | Bronze |
| Two-Bit Heroics | Complete your first trial in a non-private match. | Bronze |
| Unnatural Selection | Score your first kill in a non-private match. | Bronze |
| Upgraded a Weapon | Upgrade any weapon at a Power to the People Station. | Bronze |
| Welcome to Rapture | Complete your first non-private match. | Bronze |
Got a news tip or want to contact us directly? Email news@gamespot.com
Join the conversation