Grand Theft Auto: Chinatown Wars Walkthrough
Avoid life in the slammer with our guide to Grand Theft Auto: Chinatown Wars.
Although Grand Theft Auto has found its way to the small screen, don't make the mistake of expecting a downgraded GTA just because it's on a portable console. Oh no, Chinatown Wars is a bona fide Grand Theft Auto game, complete with a full-fledged campaign, side-missions, and other diversions that are true to the series. Provided there's much ground to cover, there's ample opportunity to run into trouble, particularly for an amateur thug like yourself.
Here's what you'll find in our Grand Theft Auto: Chinatown Wars Game Guide:
- General Tips: Stealing cars and selling drugs isn't exactly easy. Find out how to avoid life in the slammer with our tips for each of the crime lords.
- Walkthrough: Having trouble? Our walkthrough covers every one of the 50+ story missions.
- PSP Missions: Grabbed the PSP version? Check out how to finish its exclusive missions!
General Tips
Missions
Grand Theft Auto has long been known for being a "sandbox" experience. That is, there are generally many things for you to see and do at any given time. However, the main story is pushed forward by a series of missions offered by any of your many contacts, such as your uncle Kenny, the eh ethically dubious, but well-meaning cop Heston, or the fat biker Lester. Whenever someone has a mission available to you, their icon will appear on your GPS unit. Pay them a visit to obtain your next mission.
The Police
As a gangster, you always run the risk of catching the cop's attention. Thankfully, they only seem to focus on high-level crimes, so don't worry about running red-lights or making illegal U-Turns. Instead, you need to make sure that you don't perform any horrendous crimes while a cop is on-screen, such as stealing a car, ramming into a police vehicle, or killing innocent bystanders (in fact, using your guns while a cop is on-screen is a bad idea in general).
If you catch the cops attention, you'll earn a Star--this is not a good thing. The more stars you gain, the harder the police will try to take you down. For instance, if you have one star, you'll only have to deal with a cop car or two who'll try and put an end to your rampage. But say, if you decide to kill a few officers, this will quickly escalate your star rating to 3 stars or more, at which point they start calling in helicopters and other heavy artillery, making it very difficult to escape.
If you get captured by the cops, they'll toss you in the slammer overnight, confiscate all of your weapons and drugs, and charge you $100 to be let free. In short, getting caught can be a very costly mistake. But there are several ways you can shake the cops off your tail:
- Keep a Low Profile
This generally only works if you have a single star. As long stay out of the cop's sight, by hiding in a secluded area such as a park or alley, the cops will soon forget all about you. It's best to do this as soon as you have a star rating so you don't escalate issues further. - Pay 'n' Spray
There are numerous Pay 'n" Spray locations throughout Liberty City. These car shops will paint and repair your car…for a price. As long as you enter one without being spotted by the cops, they'll be fooled by your paint job, and you'll be able to explore Liberty City star-free once more. - Disable Cop Cars
You can shake the cops off your tail by disabling the police cars chasing you down. However, disabling does not mean killing, so don't use your guns! Instead, try and ram the police cars into buildings, tree, or any other solid obstacle. The amount of police cars you need to take down is dependent on your star rating. If you have 1 star, disabling a single police car will lose the cops entirely. However, if you have two stars, you'll have to disable a pair of vehicles just in order to drop down to a single star. As such, this tactic can be handy during a mission, but if you're just roaming the city, you might be better off visiting a Pay 'n' Spray.
Drug Dealing
The biggest addition to Chinatown Wars over its console brethren is the addition of a drug trafficking mechanic. As you explore Liberty City, you'll come across various drug dealers in out-of-the-way locales, such as in parks, alleys, and other shady locations--they'll be marked on your radar whenever you get close. The trick is to buy drugs from those selling them at low prices, then resell them to others at high prices. Whenever you approach a dealer and check out his stash, the game will display the going rate for the drugs, and the amount of profit you can expect to make--sometimes it's a lot, and other times you'll take a loss, in which case you shouldn't buy the drugs at all. In general, we suggest against buying drugs unless you can expect a profit of at least a few hundred, if not thousand, dollars. But remember, carrying the drugs is a liability, and if you get caught by the cops, you'll lose all of your goods, putting you out whatever amount you put in, so tread carefully!
Kenny's Missions - Part 1
Getting Started (Reward: $50)
Survive the Kidnapping
After Huang Lee kills his captors, the car careens into the ocean, with him trapped inside! Quickly tap the glass on the touchscreen to break free! Having escaped, swim to the dock on the right (as marked on your map by the yellow dot).
Get a Car
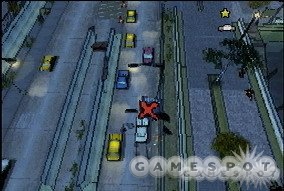
Now it's time to make way toward your uncle's house, but first, you need to find a ride. Thankfully, there's one nearby! Just follow the dock, right up to a parked car (marked on your map as a blue dot). Tap "X" when near to break inside.
Now since it's not your car, you don't exactly have the keys to start this baby, but thankfully, you're resourceful. Depending on the car, you may have to use different methods to hot wire it. In this case, insert the screwdriver into the igmition slot by dragging it over on the touchscreen, then rotate the stylus in the same direction as the arrow.
Meet Uncle Kenny at his Restaurant
With your sweet ride, it's time to head for your uncle's restaurant. Driving is simple! "B" accelerates, "Y" brakes (and reverses), "R" is the handbrake. Now just drive through the gate ahead and follow the yellow route highlighted on your GPS to locate your Uncle's restaurant. Once there, tap "X" to exit the vehicle and then proceed into restaurant, as marked by the yellow arrows.
Go to your Apartment
Having met with your Uncle, follow the highlighted route to your apartment (it's really close by--you can run there if you want). Your apartment is where you'll handle the more mundane tasks of a criminal, such as managing your drug inventory and saving your game. Your apartment also includes a garage, which can hold a single car for when you need it.
After scoping out your crib, return to your uncle's for your first, true mission.
Pursuit Farce (Reward: $50)
Take Kenny's Car and Check on his Crew
So you've just arrived in town and your uncle's already putting you to work--what a guy! Hop into his car, parked just outside, and follow the on-screen instructions to plot a GPS course to the crew you need to check on. Follow the highlighted route to meet with the crew…a lone woman who goes by the name Ling Shan.
Don't Get Busted by the Police
Shortly after your meeting, you'll be ambushed by the cops! Quickly turn around and flee the scene (take the road on the right for less resistance) and try to put some distance between you and the cops. If any cop cars wind up on your tail, try taking them down by ramming them into buildings or other structures. You may also want to try hiding low in an alley or other non-public area.
Go Back to your Apartment
Once you've lost your Wanted level, return to your apartment to complete the mission.
Under the Gun (Reward: $50)
It's time for you to get some gun training under your belt. Head to the nearby back alley, as marked on your radar. Once there, Ling will walk you through basic hand-to-hand combat, as well as how to handle a firearm.
Follow Ling to find a Weapon
Having completed your training, follow Ling to the nearby dumpster and press "Select" when by it to check it out on the touchscreen. Use the stylus to flick open the dumpster and toss aside the garbage bags to find a loaded weapon--sweet! Make sure to keep an eye for similar dumpsters around the city to find additional weapons.
Go with Ling Take Care of the Thugs Behind the Restaurant
Now that you're armed and loaded, meet with Ling and the restaurant owner around the next corner. After she's shot dead, head up the alley to teach the punks behind the restaurant a lesson! There's three of them in total, but luckily you can use the walls for protection and easily target one at a time, without exposing yourself to the others.
Get to the Rooftop to save the Manager
Once the thugs are dead, quickly climb the stairs and follow the rooftop to a fence you can jump--kill the thug on the other side to save the manager!
Payback (Reward: $50)
Go to the Gang's Hangout
Follow the route outlined on your GPS to a fenced in building. Hop the fence (using "Y") and approach the back door to meet with a gang member.
Chase the Gang Member Back to his Friends
Don't let the gang member escape! Chase him over the walls and up an alley, where his friends await.
Take Out all the Gang Members
Okay, initially there are three gang members, though they'll soon be joined by two more. Hang back and target a loner first, then move up to tackle the two behind the car. Use that very same car for cover as you target either of the next two gang members who appear.
Don't Let the Gang Leader Escape
The last standing gangster will hop into a car and try to get away! Hop into the only remaining car, but don't bother turning around. Instead, you can catch up to him by driving straight, then turning right, meeting him at the next intersection. Once you've caught up, you merely have to take him down. You can either ram him off the road or shoot him while driving by tapping "A." After you've busted his ride, he'll exit the vehicle and try to take you down on foot. Either run him over or shoot him up to take him down.
The Wheelman (Reward: $50)
Steal All Three Cars and Deliver Them to the Garage within 6 Hours
Alright, so there are three cars scattered about Liberty City that you'll have to steal and return to a central garage. The mission is pretty straight forward, with the only kink being that you you only have six-hours to snag them in--oh, and the cars obviously have to arrive intact, so try not to destroy them. Because this mission is timed, you'll want to grab a set of wheels to help track down the others; thankfully, there just so happens to be a car just across the street from your starting location, under the railroad tracks.
The three cars are marked on your map as blue dots. However, because time is of the essence, we strongly recommend enabling "Top Screen Radar" in "System Settings"--this will display the locations of the three cars right on the main screen, allowing you to more easily track them down without having to glance at the map. Speaking of which, we also strongly suggest ignoring the GPS for this mission--it will often have you follow convoluted routes that kill time. Instead, just use the on-screen indicators and plot your own route--they're mostly straight shots.
The order in which you grab the cars doesn't matter. But once you've located one, be ready to hotwire it via the touchscreen. Once you've secured it, take it back to the garage, as marked on your screen by the yellow dot. As you race back, be careful to avoid any major accidents, both so you don't catch the attention of the police, but also so you don't flip the car, because you'll fail the mission if you do. Now while you should hurry back at a brisk pace, there is some leeway time, so don't get too crazy. After delivering the car, you'll find two more rides nearby that can be used to reach the other cars that need stealing. So long as you grab all three before the designated time arrives, you'll complete the mission.
Kenny's Missions - Part 2
Tricks of the Triad
Some Samples Have Been Stashed at Your Apartment, Go There and Collect Them
After meeting with Kenny, return to your apartment (the green house on the map) and tap on the "Stash Box," resting on the table. This screen is where you can sort which drugs you want to carry with you and which to leave behind for later. Right now, you only have 5 Acid tabs--grab 'em all by tapping on them and clicking the checkmark. Normally you can adjust the quantity by using the up or down arrows, but in this case you need all 5, so there's no need. Once you're loaded, exit back onto the streets to find a dealer you can sell this stuff too.
Find Kenny's Dealer in East Island City
A blue briefcase on your GPS marks the location of Kenny's dealer, who you can unload these drugs onto. As you explore Liberty City, you'll come into contact with additional drug dealers, providing for an easy means to make some cash. For now, follow your GPS to find the dealer in basketball court. Approach him and press "Select" to initiate the actual trade. The drugs you currently posses are shown on the left--a green arrow pointing up means you'll make a profit selling them to this dealer. However, a red arrow pointing down means you stand to make a loss. In this case, it's all profit, so tap the Acid tabs to unload them for $25 each!
Find the Dealer Who Emailed you From Meadows Park
With the exchange complete, you'll receive an email from a dealer selling some coke for rock-bottom prices in Meadows Park. Tap the link at the bottom of the email to plot a GPS course directly to him. Once at the dealer, buy all the Coke he has, as the prices are crazy low!
Stash the Coke at Your Apartment Before You Get Busted
Uh-oh, the cops are onto you! Quickly turn around run away! Steal a car as soon as you can and hightail it back to your apartment, where you can stash the drugs safely inside your drug stash. Try not to get caught along the way, otherwise they'll confiscate your drugs! After safely dropping them off at your apartment, the mission will be complete. But more importantly, you are now able to buy or sell drugs whenever you like, so long as you're not currently on a mission! This can be a great way to make some money.
Having concluded your first drug purchase, you'll receive an email from Chan Jaoming, offering you a job--click the link in the email to plot a course direct to him.
Natural Burn Killer (Reward: $50)
Go to the Gas Station to Make Some Molotovs
This next job requires some explosives, so head for the nearby gas station, as marked on your GPS. Hop out of the car and walk up to the pump, then select the gas-type on the touchscreen. This time the gas free, but it will cost you in the future. Okay, so here's the deal: you want to fill as many bottles as you can, while spilling as little gas as possible (as it comes at the expense of filled bottles.) Drag the gas hose and position is so the gas stream fills the bottom--be aware that the stream's pressure changes, meaning you'll have to adjust its positioning on the fly. Once the bottle's full, a red arrow appears indicating it's time to hang up the pump. Now drag the rag from the bucket over to the bottle and swipe down twice to place it inside. Now repeat the process until you run out of gas. All in all, you should be able to fill at least 10 bottles.
Go to the Spanish Lord's Car Lot
Now that you've got some Molotovs ready to go, hop into your car and follow the GPS to the Spanish Lord's Car Lot (just be careful to avoid hitting the gas pump as you leave, as it'll explode). Once you arrive at the Car Lot, exit the car and jump the fence.
Use the Molotovs to Destroy the Cars
Inside, you'll find two cars that you'll need to destroy by throwing Molotovs--it'll take two direct hits each. To throw a Molotov, place your Stylus on the Molotov icon on the bottom screen, then slide it toward the car--a trajectory path on the top-screen indicates where the Molotov will land, so once it's properly lined up, lift the stylus off the touchscreen to throw it. Just make sure you stand back and toss them from a distance to avoid being hurt by the resulting explosion.
Firebomb the Store
With both cars destroyed, jump back over the fence and toss a few Molotovs at the store, just across the street (as marked on your GPS). The more you throw, the faster it'll burn to the ground. However, a fire truck will soon appear and attempt to douse the flames--stop it by stealing the truck and taking it elsewhere! Once the store's burned to the ground, $50 is yours.
Recruitment Drive (Reward: $50)
Save Hapless Crime Victims From Their Attackers Before Their Health Bar Depletes
Alright, so there are three crime victims scattered about the city, and you'll have to save all three, one after another, to complete this mission. Their health bar is located in the top-left corner of the upper screen, and it's decreasing fast! Use a vehicle to speed over there and take down the attackers. Once there, hop out of the vehicle and use your weaponry (machine guns work well) to tackle them on-foot. Once they're dead, hop back into the car and wait for the saved victim to hop into the passenger seat, before speeding off to do the same for the second and third victims.
You Have Enough Rookies. Take Them to the Tattoo Parlor
Now that you've recruited three new gang members, take them to the tattoo parlor, as marked on your GPS. Just watch out for some gang members along the way who might seek revenge.
Enter the Tattoo Parlor
Head inside the tattoo parlor and do your best to sketch out the tattoo yourself on the touchscreen. The trick is to fill in the entire shadowed area without going out of the lines--when you think you've filled it all in,lift the stylus for a moment to confirm--if nothing happens, put your pen back down and continue filling it in.
Carpe 'Dime' (Reward: $50)
Hijack the Dealer's Delivery of Stolen Merchandise
Drive toward the van, as marked by the red dot.
Force the Van to Stop Without Destroying It
Once you encounter the van, you need to stop it…without destroying it. Try ramming it into head-long into a wall or some other structure to stop it in its tracks. You can also try getting in front of it and slowing it down that way, though that's much more difficult.
Steal the Van
Having stopped the van, its passengers will exit and attempt to take you down--ignore them and steal the van while you've got a chance!
Take the Van Back to Kenny's Warehouse and Watch Your Back for Anyone Trying to Stop You
As you drive the van back to Kenny's warehouse, you'll have to evade a few goons along the way--try ramming into them to get them off your tail. Once you deliver the van, slide the stylus along the touchscreen as shown to reveal a secret compartment with an item inside.
Store Wars (Reward: $50)
You'll Need a Weapon to Defend the Store. Search the Dumpster
If you don't already have a weapon, check the nearby dumpster for one. If you do have one, this objective won't appear, and you'll be directed to get to the store.
Get to the Store Before the Spanish Lords
With weapon in tow, hurry up and get to the store! While the GPS route will take you there, there's a large field after the first couple of turns you can cut across that'll take you right there.
Park Vehicles in the Barricade Positions
Once at the store, four on-screen markers will appear, two at each end of the street. You have to park a car in each of those positions to barricade the entrance--and you have to do it quickly! Start off by using the car you took to get here, then look for three others nearby, such as on the street and in the alley. Just be careful that you don't bump into the cars you've already parked as you drive around, otherwise you may have to move them again.
The Spanish Lords Have Arrived. Defend the Store
Okay, so the Spanish Lords are hell-bent on destroying the store, and they'll do this by tossing Molotovs at it. Each one deals damage, as indicated by the meter on the top-screen--if it fills, it's game over. To prevent this, take down the gang members as soon you can, before they have a chance to toss a Molotov. The first group will roll up just in front of the store--the quickest way to battle them is to fight fire with fire, and toss a Molotov of your own at them just as they exit the car for a quick victory. Assuming you don't have any, use whatever weapons you have available. Should you run out of ammo, try running them over at high-speed, though this method is much tougher, so try and grab some weapons they drop them to target the next few groups.
More Spanish Lords are Here. Take Them Out
As soon as you kill the first batch, more will soon appear from the northern. Cut them off and get ready to battle them like those before.
Spanish Lords are Approaching From the South End if the Street. Take Them Out.
Same deal, greet them on the south side of the street.
Get Rid of the Remaining Spanish Lords
Check your map to rid the remaining Spanish lords from the area.
Kenny's Missions - Part 3
Copter Carnage (Reward: $400)
Protect Kenny's Merchandise and Take Out the Spanish Lords
The Spanish Lords are pissed and are going to take their anger out on the trucks Kenny has parked outside. If you don't have any weapons, quickly search the nearby dumpster for one and grab the body armor from behind the far truck. Now it's up to you to take down the attackers before they can inflict too much damage to the trucks. However, to complicate matters, they're being assisted by a helicopter armed with a minigun, which will rip you to shreds if left exposed. As such, you need to take cover (such as behind one of the large trucks) whenever it hovers nearby--if you see it or hear the whirring of its blades, that means it's time to act. Because the helicopter comes and goes periodically, you shouldn't stray too far from the area, otherwise you'll be left vulnerable. Instead, wait for the enemies to get relatively close, then mow them down (be sure to collect the weapons they drop if you're short on ammo). You also want to avoid any of them driving to the scene until they actually exit the car--try tossing a Molotov at them as they're exiting for a few quick kills.
The Spanish Lords are Fleeing. Follow the Helicopter
Once the on-foot gangsters are dead, grab a car (ideally one that's not on fire) and chase after the helicopter! Now being as it can fly and you can't, it'll cut across the bay--don't sweat it, just take the bridge and continue pursuit once on the other side. And don't worry about straying too far behind--we were quite a ways behind and didn't fail the mission. Once you close in on its landing point, $400 will become yours for a complete mission.
Kenny Strikes Back (Reward: $0)
Go to the Warehouse Compound
You know the deal--grab a car and follow your GPS to the warehouse. You may want to grab a gun on the way, if you don't already have one.
Get into the Compound by Unlocking the Gate
Once at the warehouse, approach the gate and unlock it using the touchscreen. That is, tap the screen to bash open the control panel, then move the wires closer together and twist them to complete the circuit, unlocking the gate.
Steal the Storage Van
With the gate unlocked, head inside and get ready to take down Spanish Lord en masse. Hang by the entrance for cover and target them from around the corner, one or two at a time. With the gang members down, look for a van in the back of the compound, to the left.
The Spanish Lords Have Locked the Gate. Take Them Out
Uh-oh, seems you've been locked in! Exit the van and take one or two down--until the gate's opened back up!
Take the Van Back to Kenny's Warehouse
Follow the GPS back to Kenny's warehouse. Along the way, you'll be harassed by the Spanish Lords in attacking cars--either veer around them, or into them to hopefully knock them off the road and off your tail. If you have the bullets to spare, you can also shoot at them while driving. Either way, as long as you keep moving, they shouldn't be able to do much damage.
Missed the Boat? (Reward: Heroin +10)
Get to the Boat of the Nearby Jetty
Quickly head for the dock and board the boat--you only have 2 hours! As such, ignore the GPS route and instead head right for the boat, as marked on your GPS--it's only a corner or two away.
Get to the Mobsters' Rendezvous Before They Leave
Hurry and pilot the boat dead-ahead, under the bridge, toward the blue dot.
Your Boat's Engine Stalled. Use the Pull Chord to Restart It
Quickly use the stylus on the touchscreen to spin the wheel and then pull the cord--repeat once or twice more to get the boat started and resume your route toward the Mobsters. Make sure to make a right-turn around the first corner, then head straight for the blue dot, as marked on your map. Ignore the pier along the way, and continue under the bridge shortly thereafter.
The Coast Guard Have Spotted You. Lose them
Easy enough! Just pilot the boat in a straight-line, away from the coast guard (it's best to head deeper into the ocean to avoid any obstacles that may slow you down). Keep in mind that your boat will fail again along the way, so have that stylus ready!
Take the Contraband to the Jetty
With the coast guard lost, head for the Jetty, as marked by the yellow dot on your GPS. Along the way, your boat may fail a few more times, and you want me run into the coast guard--lose 'em like before, then park at the dock to complete the mission.
Rat Race (Reward: $0)
Protect Kenny as He Drives to Hsin's Residence
Protect Kenny fwhile he drives toward Hsin's residence. Seeing as you're provided with a minigun with unlimited ammo, just hold down the fire button and don't let go--as long as you target the enemies as you see them, you shouldn't have any trouble. Oh, and be sure to destroy the cars blocking the path so Kenny can proceed (you may also want to destroy any other cars nearby as their explosion can quickly take down groups of foes).
Drive Kenny to Hsin's Residence
Alright, with your first vehicle wasted, you need to drive Kenny to Hsin's residence. But along the way, you'll be harassed by both other vehicles, and a helicopter! You should ignore the attacking vehicles for the most part, but the helicopter is much more challenging. As you drive, a crosshair will appear on-screen, a few feet ahead--if you're in the crosshair when the helicopter fires, you'll sustain heavy damage. So here's the trick: The crosshair always appears directly in front of your vehicle, and will move around for three seconds--once three seconds elapse, it'll stop moving and fire a shot at that location. As such, the trick is to drive on the far side of the road, count to 3, and make a sharp swerve toward the other direction to veer around the now-stationary crosshair--the shot should miss so long as you're in the crosshair. Simply keep this up until you reach your destination.
Chan's Missions - Part 1
Pimp His Ride (Reward: $50)
Go to the Street Race Champion's Garage
Hop into a car and follow the route outlined on the GPS toward the champion's garage.
Follow the Champion's Car Without Getting Too Close
As you close in on the Champion's garage, you'll spot his car racing off into the distance (as marked on your radar). Keep on his tail, but don't get too close, otherwise he'll spot you and the mission will be a failure--a message will appear on the top-screen if you're too close: heed it. The best way to do this is to focus on your map primarily--don't worry about keeping the car on the main screen, instead just follow the blue dot on your GPS.
Take the Car to Chan's Garage Quickly
Once the champ arrives at his destination, he'll exit the car, giving you a chance to steal it! Hop in and hotwire it, then haul ass to Chan's garage--you have to make it there and back within two hours, before a tow-truck arrives to collect it. The GPS route should be pretty direct, but try and not to bang the car up too much, otherwise you'll fail the mission. Once you pull into Chan's garage, you'll be able to use three tools to lay waste to the engine--sweet!
Return the Car to the Garage Before the Pickup Truck Arrives
After smashing up the car's engine, it's time to take it back where you got it from, before the tow truck arrives! Again, the GPS route should be pretty direct, just continue to be careful that you don't damage the car too much. This is made all the more difficult by the car's now-poor handling, so don't be alarmed if it suddenly turns all of it sudden--just counter-steer and you'll be okay. Once you've dropped it off, expect $50 as your reward.
Whack the Racers (Reward: $100)
Get a Fast Car and Head to the Starting Grid
Before heading to the race's start point, you need to grab a ride. A quick vehicle is preferable, but really anything will do--thankfully, there just so happens to be a Comet parked nearby, which is perfect for the challenge!
Barge the Rivals Out of Chan's Way
Once the race begins, you'll have to barge the other racers out of the way in order to help Chan take and maintain the lead. Chan's car is marked by a blue arrow, whereas the opponents are red. Simply race up to them and bump them either from behind or the side to spin them around. After slowing down one car, take off after the others ahead of Chan's. Once Chan has claimed first place, you need to ensure he keeps it! Slow down (but don't stop, as it can be difficult to get back up to speed if the other racers pass you) and watch your map for the competition to approach. Once they get close, try to block their path by getting in front of them, or slamming them off the road again. But don't get too caught up, as it's easy to get off course, which can really screw you up. If you do wind up off the main track, it's usually best to race backwards and try to head them off before they cross the finish line.
Jackin' Chan (Reward: $150)
Rescue Chan from His Kidnappers
Snag a car and quickly race to the dock where Chan is being held--take too long and he'll be killed! The GPS provides a good route to get there.
Chan's Car is on Fire. Get a Fire Truck
Uh-oh, Chan's car is on fire! Follow the GPS route to a fire truck you can steal!
Go to the Burning Vehicles
Got the fire truck? Good! Race back to the burning vehicles via the same route and use the fire hose to extinguish the flames. While holding "A" will automatically spray water to the right, you're best off using the touchscreen and aiming the nozzle manually, like the Molotov Cocktails.
Take Chan Back to His Garage
Once you've extinguished the flames, hop into Chan's car and drive him back to his garage. The GPS provides a decent route, but watch out for the kidnappers who'll seek their revenge on the way back--try ramming them from behind or the side whenever they come into view to take care of the problem.
Raw Deak (Reward: $200)
Take Chan to his Father's Club
After the deal goes awry, you'll have to protect Chan and take him to his father's club. The easiest way to do this is to hop in the nearby car (and wait for Chan to get in), then jet out of there, turning left at the intersection, and driving straight for the club. As long as you keep on the move, you shouldn't face much resistance. However, you will come across a few roadblocks you'll have to scoot around--try ramming the objects to push them out of the way.
Trail Blazer (Reward: $300)
Take the Tanker from the Local Gas Station
Follow the GPS to the gas station and hotwire the tanker you find there.
The Tanker's Leaking Gas. Get to the Gambling Den Before it Ignites
So here's the deal: The tanker's leaking gas, and a ball of flames is following closely behind. In short, you need to keep your speed up, otherwise the flames will catch up and blow the entire truck to pieces! Now while the game suggests avoiding any tight turns, we've found this to not be an issue, so long as you don't slow down too much doing so. Because the tanker turns slowly, try to begin your turn a second or two before you normally would.
Jump Out and Get Clear
Once you arrive at your destination, quickly hop out of the vehicle and let it roll over the destination point by itself, to ensure you avoid the resulting massive explosion.
Chan's Missions - Part 2
Sa-Boat-Age (Reward: Ecstasy +12)
Get on the Wet Ski
Come on, you read the objective, hop onto the Jet…err, "Wet" Ski.
Race Through the Checkpoints to Overtake Chan
There's not much to this, just gun it and drive through the checkpoints. It's easiest to do this by looking only at the GPS--just align yourself with each subsequent yellow dot and you'll overtake Chan in no time.
Protect Chan From the Spanish Lords Until Help Arrives
Okay, so Chan's boat had stalled, and a wave of Spanish Lords are about to attack on Wet Skis of their own. As such, it's up to you to take them down before they kill Chan! Thankfully, you're equipped with a gun that has infinite ammo--although it usually shoots dead-ahead, the game has a generous "auto-aim" feature that automatically targets anyone vaguely ahead of you, so don't worry about aiming too much. Also, you shouldn't venture far from Chan, otherwise it can be difficult to make it back in time if he starts taking fire. Instead, wait for the Lords to approach, and target whoever's closest to Chan. Oh, and remember to utilize the "quick turn" feature by holding "R," which can help you target the enemies significantly faster. Once you've killed all of the Lords, a helicopter will rescue Chan.
Counterfeit Gangster (Reward: $0)
Destroy Chan's Goods Before the FBI Arrives
Destroy the marked boxes before the FBI arrives. While you can find some Molotovs in the corner (which you should grab regardless), you can also just run your car into the boxes to destroy them, too.
The Area is Clean. Get to Another Location
With the area cleared, three more will pop up on your GPS. It doesn't matter which order you visit the three locations. One of the locations simply has more boxes you need to get rid of, like the first one--easy enough. Another requires you to use a crane to toss some cars into the ocean. The final location requires you to push more cars into the ocean using a heavy vehicle--thankfully, there happens to be two bulldozers nearby perfect for the job. Just make sure to move quickly as, there is a time-limit, though it's fair generous.
Slaying With Fire (Reward: $250)
Use Molotovs to Destroy the Fuel Tanker
Alright, with Chan manning the chopper, you only have to worry about hurling an infinite supply of Molotovs below. Toss them just like you would on-foot. Your first task is to destroy a tanker--chuck a Molotov at a couple of gas cannisters to the side of the tanker to quickly take it down.
Take Out the Traitors
With the tanker destroyed, you'll be given a series of tasks that pretty much all boil down to killing people. Because you have an unlimited supply of Molotovs, you should worry less about aiming them and more about tossing them at rapid-fire speeds in the general direction of the enemies. Eventually, the helicopter will take you to a dock--toss Molotovs at the entrance to prevent people from using it to reach the boats, then destroy the boats themselves when instructed. Soon after, you'll encounter a trio of rocket-launchers, one after another. They're marked by a red arrow (the first is on a rooftop, the second amongst some trees, and the third by the waterfront)--take them down ASAP. Finally, you'll have to destroy an attacking rival chopper--same deal, toss Molotovs and he'll go down soon enough.
Clear the Pier (Reward: $0)
Chain is Being Protected By His Men. Wipe Them Out
Grab the nearby weapon and grenades…even though you probably won't need them--think of them more as security. So while the game instructs you to wipe out the enemies, there is a ton of them--as such, it's much easier to just grab the car you rolled in on (or the nearby truck) and quickly drive past all the guards and dash into the warehouse at the end--easy stuff! If your car somehow gets destroyed on the way, there are several more inside the compound that you can grab.
Find Chan and Finish Him
Grab the body armor just left of the entrance, then work your way through the warehouse, battling the guards. Watch out for the many explosives (particularly the group of three by the first hallway--shoot them from a distance so they don't harm you)--you can use them to your advantage too, if any enemies are nearby. And don't be afraid to retreat back down the warehouse if you need protection.
Chan Has Made a Break For it. Don't Let Him Escape
After exiting the warehouse, Chan will escape in a car--you know what to do! Like the times before, you can either attempt to shoot him, or even easier, stop his car by ramming it into a building, then force him out of it by stealing it. With him now on foot, it's a simple matter of gunning or running him down.
Zhou's Missions - Part 1
Stealing the Show (Reward: $150)
Get in the Truck and Drive to the Gas Station
Hop inside the truck parked outside and follow the GPS to the gas station.
Throw Crates Onto the Back of the Truck
After sneaking onto the back of the shipment truck, it's up to you to chuck the boxes goods to the pickup truck tailing closely behind. The controls are identical to throwing molotovs, the only difference is you now have to aim them toward the truck. Thankfully, it mostly stays directly behind your vehicle, so chucking them straight ahead should work for the most part.
Take the Goods Back to Zhou's Club
Once you've tossed over enough boxes, hop back into the pickup truck and follow the GPS route back to Zhou's to reap $150 smackeroos.
Flatliner (Reward: $150)
Go to Francis International Airport
Grab some wheels and set course for the airport!
Steal the Ambulance that Uri is In
Once at the airport, head for the distant ambulance, as marked by the blue dot. There are several cops around, so try luring them away first, then go back and quickly steal the ambulance.
Take Uri Back to Shou's Lock-Up
Alright, so stealing an ambulance with a patient inside isn't exactly a misdemeanor, and as such, you now have three stars on your record. You're going to have to race back to Shou's place, while evading them. Even worse, Uri has a weak heart, and simply can't handle the intense action. If you hear him flat line, immediately drop what you're doing and tap the "heart" icon on the touch-screen several times to get it started again.
In this case, it's best to follow the GPS route and try to stay in the exact middle of the road--this will allow you to zip past most vehicles, but don't be afraid to ram the police around if they get close. Once you drop Uri off at Shou's, $150 is yours for the keeping.
Bomb Disposal (Reward: $200)
Get to the Stash Cars Before the Attack Begins
Grab a ride and quickly head for any of the Stash Cars, as marked on your radar (we suggest driving to either the far left or right ones first, and saving the middle one for later, to cut down on driving time). As you approach, you'll learn that the bombs have been set, and you only have 3-minutes to dismantle them! Quickly head to each car marked on your GPS and hop into the nearby van, which contains the bombs. Using the touchscreen, immediately unscrew the panel to gain access to the bomb. Now there are four colored wires, and you need to cut the right one in order to defuse the bomb--choose wrong and KABOOM. To check the voltage, select the voltmeter in the bottom left corner, then tap on each wire to read its voltage--whichever one's voltage reads the highest is the one you need to cut. Select the pliers, then choose that wire to cut it. With the bomb defused, use that same van (since it's fast than switching vehicles) and race to the other two locations and do the same. Oh, and while some henchmen will show up after each bombing, it's best to ignore them for now, as time is of the essence.
Hsin's Men are Attacking the Stash Cars. Stop Them
Once you've destroyed all three bombs, Hsin's men will begin attacking the Stash Cars directly. Quickly head toward them (as marked by the red dots on your GPS) and take them down--it's fastest to exit the vehicle and use guns if you have them, otherwise run them over.
Another One of Hsin's Bombs Has Been Armed. Defuse It Before It Detonates
With Hsin's men down, another bomb van will appear. If you're quick, you can actually take it down while it's en route with gunfire. Otherwise, wait for it to park and hop inside to disarm it before the minute-long timer expires.
Driven to Destruction (Reward: $250)
Go to Beechwood City
Hop in the truck and follow the GPS to the dealers in Beechwood City.
Drive Close to any Dealers You See, so Zhou Can Dispense of Them
As you close in on Beechwood city, you'll spot several enemies marked on your map, and your job is to take them all down. With your truck and Zhou's mounted gun, this shouldn't be a problem. Since Zhou will auto-target any nearby foes, we found it best to simply drive back and forth along the dealer-filled stretch, running them over with each pass, while Zhou guns the remaining ones down. Just be especially careful to avoid any exploding cars, as they'll inflict heavy damage on your vehicle (in fact, you'll fail the mission if your truck explodes). Once you've taken down a group of dealers, follow the GPS to the next batch.
Take Zhou Back to His Club
Once your carnage meter is full, follow the GPS route back to Zhou's club to complete the mission.
Cash & Burn (Reward: $0)
Zhou Has Left a Flamethrower For You to Collect in a Nearby Car
Head up the nearby ally and hop into the car to collect a flamethrower.
Gain Access to the Construction Site
Follow the route on the GPS to find the construction site. Once there, approach the gate and use slash the lock on the touchscreen to gain access.
Find and Incinerate the Building Supplies
Alright, so there are 18 large supply boxes you need to set aflame using the flamethrower, but it'll take several seconds of endured flames for each one before they catch fire. And even worse, after you destroy the first few, you'll come under attack by some gang members. Try to protect yourself by using the boxes for cover as you set them ablaze, then light up the enemies when you get the chance. While guns have a longer range, it's a pain to switch back and forth between them and your flamethrower, so we suggest sticking with it and just getting close enough to ignite them. And don't worry too much about your ammo--you've got plenty, and more can be found by the boxes, left of the building. Oh, and try your best not to light yourself on fire, as it hurts! If you go catch ablaze, roll to put the flames out. You can also find health on the right side of the building.
Zhou's Missions - Part 2
Dragon Haul Z (Reward: $1,000)
Zhou's Raid is Due to Start in 4 Hour. Intercept the Delivery Truck
Grab a car and head for the truck, as marked on your radar.
Stop the Truck, But Don't Destroy the Costume
Found the truck? Good, now you just need to stop it! The easiest way to do this is to jam it into a wall, then force the driver out by hijacking his truck.
Go to the Bank of Liberty
With the truck in your possession, use your GPS to find the bank.
Head for the Waypoint
So here's the deal: you need to use the disguise to participate in the parade without arousing the crowd's suspicion. To do this, cross over the waypoints as they appear. Now some of the Waypoints are red--these signal that the touchscreen has to be used to perform a stunt. For instance, if the red waypoint displays spinning arrows, you'll have to draw circles on the touchscreen to perform a spin. Similarly, if the red waypoint is empty, that means you'll have to breathe flames, either by blowing into the microphone, or repeatedly tapping the "fire" icon on the touchscreen. As long as you complete most of them without screwing up, you'll be able to escape in no time.
The Offshore Offload (Reward: $700)
Get to Hsin's Captured Men. You'll Need a Four Seater Car
Okay, so you need to go find Hsin's men, so you're going to need a four-seater car. Thankfully, there's a limousine parked just outside--hop in and race to the captured men before time expires.
Get to the NOOSE Van Without the Cops Spotting You
Looks like there's a lot of cops about--try approaching from the side alley and pull your limo right up to the van's. Once there, hop out and approach the van, using the touchscreen to plant the explosives, then back away before they go off.
Hsin's Accountant is in the Open with the Money. Collect Him
With the men freed, hop back into the limo and wait for them to board, then back out the alley and head for Hsin's accountant, as marked on your map by the blue dot. Now you probably have a 3-star rating at this point, so try to destroy a few cop cars along the way to lower your start rating, making it easier to collect the accountant. Once you find him, slow down so he can hop in.
Take the Gang to the Heliport
With everyone on-board, follow the GPS to the airport--just watch out for cops along the way.
The Fandom Menace (Reward: $200)
Drive Zhou to his Meeting at the Construction Yard
Hop in the car and start driving toward your destination. But before you venture more than a block, some member of the paparazzi will take your picture--you must now take him down, otherwise you'll fail the mission. Thankfully, he's on-foot, so it's easy enough to run him down, but others along the way may be on biles, which are ripe for a ramming. Once he's down, resume your journey.
Drive Zhou and Chan to the Meeting in the Triangle
Same deal--drive to the destination, and kill any paparazzi who snap your photo along the way.
Drive Everyone Back to Zhou's
Same deal--drive to the destination, and kill any paparazzi who snap your photo along the way.
Park in the Garage
Same deal--drive to the destination, and kill any paparazzi who snap your photo along the way.
So Near, Yet Sonar (Reward: Acid +15)
Board the Salvage Boat
Board the boat. Really, do you need help with this?
Find the Sunken Cargo Using the Sonar
Sail to the area designated on the map and then use your Sonar (either by tapping "A" or the button on the touchscreen) to find various objects under the water's surface, displayed on your map as "waves." Float over the wave and tap the cargo button to activate the salvage mini-game--rotate the wheel on the touchscreen to raise the object. Ideally, it'll be the cargo, but it might also be junk like a car or mine. Unfortunately, there's no way to know what's what until you've raised it, so sail from location to location and hope for the best.
Once you've found all four cargo boxes, return to the dock to complete the mission.
Hit from the Tong (Reward: 0)
Take Out Zhou's Bodyguards
After breaking into the compound, you'll have to take out Zhou's bodyguards. After getting their attention, try backing up around the corner to have three or so attack you-- a much more manageable amount. Now head around the far left building to attack the remaining enemies from the rear. Once they're down, interact with the lift to ride it to the roof.
Shoot Down Zhou's Helicopter
On the roof, you'll come under attack by a helicopter, which you'll have to take down. Grab the nearby rocket launcher and take cover behind the central structure. Lean out from the opposite side that the chopper's attack, and lock-on and launch a rocket. Now seek cover, as the chopper will attempt to mow you down with gunfire. After its run, it'll return to its previous tactic, allowing you to fire a second rocket. After the second hit, you'll have to return to the ground, fight some more guards, then take another lift up to a second rooftop where you'll do the same thing. And then you'll have to do the process one more time. You'll always find additional rockets on each roof, so don't sweat missing a shot.
Heston's Missions - Part 1
The Tow Job (Reward: $0)
Find the Korean's Car
Check your GPS to find the Korean's car.
Stop the Truck
Uh-oh, they're towing the car! You have to stop it by either damaging it enough (either by ramming it or shooting it) so the driver gets out, or you can force the driver out by stealing it--this is generally the easier option. Try to push the truck head-first into an obstacle to stop it, then hob inside!
Scare the Truck Driver Off
Once the truck driver exit the truck, scare him off by shooting him or running him over.
Get in the Truck, You Need More Room to Detach the Car
With the driver out of the picture, grab the truck and move it to an open area--anywhere away from a wall should be fine.
Release the Norean Gangbanger's Vehicle from the Tow Truck
Once you're in an open area, exit the truck and approach it from the right to find the crank that lowers the car.Spin it on the touchscreen to lower the car.
Get a 2 Star Wanted Level
With the car lowered, hop inside, as it's time to cause some trouble. You have to rack up a 2-Star wanted level, which is actually pretty easy. Try bumping into a police car for the first star, then lure the officer out of his car and run him over/kill him for the second.
Leave the Car Outside the Police Station
With two Wanted Stars, follow the route on the GPS to the police station where you can discard the car to complete the mission.
The Tail Bagging the Dogs (Reward: $0)
Get to the Police Station Before the Korean Gang Member is Released
Hurry and follow the GPS to the police station before they release the gang member.
Follow that Korean
Once at the station, tail the escaping gang member (as marked by the blue dot), but don't get too close, otherwise you'll fail the mission.
Take Out the Underboss Before the Korean Drives Too Far Away / Catch Up with That Korean Again
Okay, so here's the deal--you're going to have to alternate between killing the Underboss and then quickly tailing the Korean to the next one, and you'll wind up doing this four times in total. The easiest way to kill the Underbosses is to simply run them over--now one hit usually isn't enough, so back over them while they're still down. As soon as they're dead, catch up to the Korean (as marked on your map) and tail him to the next boss, where you'll do the same thing.
They know They're Being Followed. Take Them Out
After taking down all of the Underbosses, you'll have to take down the gang member himself. Try to ram him into buildings or other obstacles, or shoot at him if you have a weapon. If your vehicle is about on the verge of destruction, try trapping him and let the resulting explosion take him down.
Weapons of Mass Distraction (Reward: $0)
Head to the Koreans' Hangout
Grab a ride and take it to the Korean's Hangout, as marked on the GPS.
Destroy One of the Cars to Get the Gang's Attention
Once at the hangout, check the nearby dumpster for a weapon, then destroy any of the three cars to get their attention. If you don't want to waste the ammo shooting them, you can simply punch one to destruction, though it'll take about 30 seconds or so--just make sure to run away when it catches on fire to escape the explosion.
Take Out All the Attacking Gang Members
Now that you've got the gang's attention, take them all down! If you have a gun, use one of the cars for cover while attacking. If not, use a car to run them over, then gather whatever weapons they drop for the next objective.
Attach the Gang at Another Hangout
With the first batch of gang members down, follow the GPS to either of the yellow dots marked on your radar to find another hangout. Once you stumble upon a second gang hangout, you'll have to remove them from the property. Now there's quite a few them, but you'll also be continually ambushed by some gangsters in a car--ignore them, as they continually respawn and focus your efforts on the on-foot members. As such, the easiest way to take them down is to remain in the car (mostly for protection) and drive up and down the road, mowing them over. If they're in a hard-to-reach spot, try pull up next to them and firing at them through the window.
Create More Mayhem at Their Final Hangout
With the second hangout taken care of, follow the GPS to the third and use the same strategy.
Lure Them to a More Remote Location
As soon as this objective appears, hightail it to the pre-designated location, as marked on your GPS.
Get Into the Boat
As soon as you arrive at your destination, exit the car and hop off the ledge into the water and hop aboard the boat.
Get Away From Your Pursuers
Just power boat away and you're done!
Street of Rage (Reward: $200)
Meet Heston and His Squad
Consider searching the nearby dumpster for a gun, then grab a car and follow the GPS to the bridge, where you'll find Heston.
Protect Heston's Squad by Taking Out the Assassins
Upon reaching the bridge, you'll find some assassins you need to take down, and quickly, before they destroy Heston's squad. It's generally safest to run most of them over, saving your guns for the remaining few. Oh, if you need it, look for some body armor by the first parked car on the bridge.
Find a Way Through to Heston
With the enemies down, cross through the toll (but watch out for another enemy or to), then continue through the broken wall, as marked on your map. Once through, head right and follow the wall to the waterfront, where you'll find a Heston, as well as a final assassin equipped with a minigun.
Take Down the Last Assassin
Immediately seek cover behind a wall and don't move until the assassin stops to reload, as the minigun will tear you to shreds instantly. The moment he stops firing is your chance to counter-attack, so get on it! He's not much stronger than your average baddie, so a few direct hits should do him in. Make sure to collect the minigun he drops, too.
Get to Heston
Approach Heston to complete the mission.
One Shot, One Kill (Reward: $0)
Get to the Castle Gardens Hotel Before the Target Leaves
Hurry up and get to the hotel, you only have have three hours or so. Oh, and try not to catch the cops attention, as you'll have to lose your star rating before being allowed to go to the hotel.
Collect the Sniper Rifle
Head inside the hotel to emerge on a balcony, where you'll find a briefcase you can collect containing a sniper rifle.
Scan the Area. The Target is Dressed in a White Shirt and Jeans
Now that you've got the sniper rifle, it's time to use it for its intended purpose: killing targets. The one you're looking for is wearing a white shirt and blue jeans, and is walking around somewhere in the courtyard. Use the control-pad to change where you're aiming and use the L-button to zoom in (though this isn't necessary). Once you've located him, take him down.
Lose Your Wanted Level
After taking down the target, get the heck out of the hotel and grab a car, then try and lose your wanted level. The easiest way to do this is to simply ram into Cop Cars at high-speeds to take them down, or you can also try and find a Pay n Spray--just make sure the cops don't see you enter.
Avoid Police Detection
Now that you've lost your wanted level, simply keep out of trouble for a little bit to complete the mission.
Heston's Missions - Part 2
Operation Northwood (Reward: $200)
There's a Garage Nearby Where You Can Get a Bomb Fitted. Take the Car There
Before departing, you'll want to grab a fast car--thankfully, a hand pedestrian will park one nearby and leave it unattended--how nice! Now follow the route on the GPS to the garage; just make sure you don't catch the attention of any cops along the way. Once at the garage, follow the instructions on the touch-screen to assemble the bomb.
Stake out Heston's Dealer at the bar
With the bomb attached to the car, follow your GPS to the bar, where you'll find the dealer.
He's Getting Away. Don't lose him
As soon as you pull into the bar, you'll spot the dealer making a break for it. You need to follow him to his hideout, so keep on his tail! If you fall too bar behind, the mission will end. Thankfully, you don't have to worry about getting too close this time, but remember, your goal is to follow him, not destroy him (not yet, at least). Now the dealer will make a few odd-turns and cut through some alleys. The first alley he cuts through is on the left--you're best off skipping it and making a left at the next intersection, where you'll run into him again. Beyond that point, if he takes any more alley routes, or a turn you missed, it's almost always best to keep on going and turning when you can instead of turning around.
Park Outside the Dealer's Hideout Before IAD Arrives
After following the dealer to his hideout, park the car where shown, then back away a safe distance and tap the "detonator" icon on the touchscreen to set off the bomb, completing the mission.
Torpedo Run (Reward: $0)
Get to the Police Dock
You read the objective, head over to the nearby police dock!
Take the Police Boat
As you approach the dock, you'll spot some cops patrolling the nearby courtyard…and unfortunately, they'll open fire as soon as you get close. As such, it's actually best to avoid the courtyard entirely and hop over a nearby fence (adjacent to the courtyard) and just swim to the boat.
Find Zhou Ming's Boat Before it Reaches the Dock
See the red mark on your GPS? That's Zhou Ming's boat--hurry to it! As soon as it comes into view, open fire on it using your boat's missiles--just make sure to avoid the mines Ming's boat may drop in response (avoid staying directly behind to to easily evade the mines). It should only take a few direct hits to destroy the boat.
Head to the Jetty
Head toward the Jetty, as marked by the yellow dot on your GPS.
Don't Let the Van Get Away with the Shipment
After arriving at the Jetty, you'll spot a van making a run for it! Chase after it and try to stop it by ramming into it--just try to avoid driving on either side of it, as they'll open fire.
Destroy the Van and its Occupants
Once the van comes to a stop and its occupants exit, take them down either by running them over or gunning them down. With the gang members down, destroy the van--if you lack weaponry, just punch at it for 30 seconds or so.
By Myriads of Swords (Reward: $0)
Collect the Sword
Look for the sword inside a dumpster just around the corner, as marked on your map.
Eliminate Both of the Traitorous Dogs. Honor Triad Traditions and Use a Sword to Finish Them
With the sword in tow, there are two strongholds you need to break up, and kill the leader of each. They're both marked on your map. As you approach, the leader may try to escape--take him down before he can leave--if he takes off in a car, chase after him! Once you've caught up, you must kill him using the sword. Following that, you'll have to take down any nearby body guards before you can search the body for ID. Once you've got it, head for the second stronghold location and do the same thing.
Meet with Hsin at the Amusement Park
After killing both traitors, head to the amusement park to conclude the mission.
Scrambled (Reward: $0)
Locate the Scrambler and Destroy It
There's a scrambler nearby that you'll need to destroy, but the darn thing will render your GPS useless once you get anywhere close. However, there's a handy-handy meter in the top-left corner that shows how close to the scrambler you are--the more it fills, the closer you are. This will allow you to pinpoint where exactly it is. To start things off, follow the initial GPS route--it'll soon go haywire, but continue down that same road--you'll find the GPS unit in an alley on the left (where you'll also find some body armor, which you should grab). Take down the gang members there, then destroy the Scrambler van. If you're having trouble with the gang members, try grabbing some explosives (such as Molotovs from a gas station), then roll up in a car and chuck them at the gangsters for an easy victory.
In regards to destroying the van, explosives work best, but lacking those, pull a car up next to it, then punch the car (and not the van) until it catches fire, then back away and let the explosion take down the scrambler (the reason you shouldn't attack the van directly is that it offers no warning before it explodes, meaning it'll likely kill you in the process).
Unfortunately, there's another scrambler nearby. Exit down the alley closest to where the van was and make a left, then a right, then use the meter to find the next Scrambler van on a rooftop by a gas station. Run over a couple of guards on ground-level, then exit the vehicle and climb the stairs after grabbing the grenades at the base. Use the L-shaped pipe on the roof for cover while you chuck grenades at the enemies within. Once they're down, chuck a single grenade at the scrambler in the corner to destroy it.
Okay, two scramblers down and one more to go--but this one's on the move! Grab a vehicle and use your meter to help track it down. Now this part is a pain in the ass, as the vehicle containing the scrambler is also armed with machine guns, and they will take you down in seconds. As such, it's crucial you attack only from within a vehicle--and if it's close to being destroyed, ditch it and grab another. Once you have a suitable car, approach the van and lay into it with gunfire (remember, you'll have to approach it from the side since you can only shoot through your side-windows--alternatively, you can drive behind it, and then veer at an angle, so the side-windows are facing the van--in order to get off a few shots, while staying somewhat protected.
Steal the Wheels (Reward: $0)
Get into the Compound and Steal the Car
Use the GPS to find the compound. Once there, you'll find a ramp on the right side you can drive up, which drops you into the compound. Remain in the car and shoot the horde of attacking gang members through the windows.
Deliver the Car to D'Avanzo and Watch Out for Messina's Enforcers
Once the gang members are down, steal the marked car in the corner and follow the GPS back to Messina's. Although you'll be harassed by some enforcers along the way, you're best off ignoring them and just continuing on your merry way.
Heston's Missions - Part 3
Evidence Dash (Reward: $200)
Take Back Heston's Car Before His Squad Destroys It
Someone's driving Heston's car around and you need to go get it back. Thankfully, there's no need to try and steal it, as the driver will soon ditch it it in a public place, allowing you to hop in and take off.
Get the Car Repaired so Heston Won't Realize It's Been Damaged
After taking the car, follow the GPS to the Pay 'n' Spray to get it fixed!
Drive the Car and Park in a Secluded Area so you can Search it for Evidence
This might be the trickiest part of the mission, as finding a spot secluded enough can be difficult. We suggest parking in the middle of a large park--check your map to find one. Once you've found a good place (the game will tell you to get back in the car if it's not a suitable spot), approach the vehicle from the rear and use the touchscreen to discard the contents in the trunk and light them on fire.
Take the Car Back to Heston
With the car's contents dealt with, return the car to Heston to complete the mission.
A Rude Awakening (Reward: $0)
Locate D'Avanzo by Visiting His Previous Locations
There are three potential locations for D'Avanzo, as marked on your map--we found him at the center one. Once you locate him, head inside the store for some, umm, revealing details.
Take Down D'Avanzo
You've done this before--chase down D'Avanzo's car and take him down. If you have the ammo to spare, try shooting him up while driving (if you're behind him, drive at an angle every now and then so you can target him through your side windows). Alternatively, a potentially easier method is to slow or stop his car by ramming him into a wall, then quickly hijacking his ride, forcing him out, allowing you to easily gun him down. Once he's dead, the mission will end.
WI-FIND (Reward: $200)
Head Towards the FIB Building
Drive toward the building, as marked on your GPS.
Go to the Four Transfer Areas
Okay, so there are four transfer areas you'll have to visit, one after another. However, each location has two transmitters and you'll have to find the sweet spot--that is, the exact point between the two--in order to perform the transfer. The two meters on-screen show the signal strength of each transitter; you need to find the area between the two so that both are displaying a solid 5 bars. It's generally easiest to focus on one first, so that you have a full five bars, then begin driving toward the second location until that meter also displays 5, all without compromising the first set of bars. The sweet spot is generally in an alley, or some other off-beat location.
Now as you proceed, you'll start to catch the cops' attention. When it's only a few stars, it's easy enough to drive forward and back to escape the on-foot officers while staying in the "sweet spot," but once you have a few more stars, it's worth your while to take down a few cop cars to lower your wanted level. Thankfully, if your transmission process is interrupted, it'll pick up right where it left off as soon as you regain a signal.
Meet Up With Heston Without Any Police Attention
With the transmission complete, follow the GPS to Heston.
Salt in the Wound (Reward: $0)
Go to the Desalinization Plant
Before starting, ensure that you have plenty of ammo, and ideally, some grenades or Molotovs. When ready, grab a car and take Heston to the plant, as marked on your GPS.
Chase After Kenny and Protect Heston
As soon as the cutscene ends, gun down everyone nearby fast, before they inflict too much damage. Now push forward and grab the gun to the left. If you have grenades or Molotovs, stay behind the box (where the gun was) and use it, and the pipes, for cover as you lob explosives over them toward the enemies. Once you've reduced their count, peek around the objects to target the remaining foes one at a time--be sure to collect their dropped ammo and body armor, and grab the health power-up on the right.
Dodge the Rockets and Take Out the Guard
So a guard ahead is equipped with a rocket launcher. Quickly dart up the alley to the first set of alcoves on either side and take cover--wait here until the rocket launcher fires his first rocket, then retreats. Now step out and get ready to shoot him briefly when he runs into position to fire another rocket--after a few shots, immediately take cover again inside the alcove for protection from the rocket. Repeat this game of cat-and-mouse until he falls over, dead.
Find a Way Out of the Plant and Protect Heston
After taking down the rocket dude, you'll find some health on the left--grab it now if you're low on health, otherwise save it until you take down the enemies ahead. Speaking of which, they're taking behind the walls and pipes ahead--if you have grenades, take cover behind the closest wall (but not too close, otherwise the grenades won't clear the wall) and lob them over at them to easily take them down. If not, you're best off waiting behind the wall for either enemy to fire, then immedialy peeking around either the far left or right side (but not the center) and shoot them before they resume cover. Once both are down, push forward and repeat. Make sure to grab the body armor one of the foes drops, and also collect the health we mentioned before, if you haven't already.
Stop the Guards Reaching Heston
Check in with Heston by the gate to start the next portion of the mission, in which waves of enemies will run in from ahead and attempt to take both you and Heston down. In general, it's best to stay behind the two closest walls and peek out from either side to target the enemies coming your way. If more than two are coming from the same aisle, we suggest hanging back and waiting for them to approach so you can shoot them one at a time as they pass by. Keep a close eye on all three aisles to make sure you don't get surrounded by enemies.
Kenny's Escaping. Get to the Next Jitty
It's up to you to gun down the attacking enemies while Heston drives the boat. This is quite easy: just gun down the enemies as they come into view. Remember, you have unlimited ammo, so hold down the fire button at all times. An attack chopper will soon get in on the action as well: target it whenever it gets close (you'll know its within range if the circular lock-on icon appears around it), but relent when it takes back to the sky. Eventually, it'll hover low enough for a long-period of time--focus on it exclusively until it's destroyed. With the chopper down, take down the boat just ahead.
Go After Kenny
After the boat segment, grab a car and wait for Heston to get in, then take off after them. Now you have a four-star rating, which means you'll have a lot of cops on your tail. Don't worry about them, and don't even bother trying to take them down to lower your Wanted level--the journey's too short to make it worth your effort. Just avoid getting caught and head for the building Kenny parks at. Make sure to stick to the center of the road and avoid driving close to walls to make it difficult for the cops to stop you.
Take Out Huang to Avenge Your Father
Take him down however you like to complete the mission and the game!
Mel's Missions (PSP Only)
Dock'u'mental
Go to the Dock
Hop into the van with Mel and race to the docks within two hours. As long as you stay on the move, you should be able to make it in time. Although the GPS will direct you there, we recommend turning left on the street just past the one it recommends for a near straight-shot to the bridge.
Protect the Drugs Shipment
After parking the van, you'll have to protect the drugs being moved by your allies from the inbound thugs. First, grab the Body Armor near the crate, just right of the dock, then open fire on the enemies inbound from ahead. Thankfully, they'll be so pre-occupied with stopping the drugs, you can attack them from behind without fear of retaliation. Oh, and the scattered boxes can be shot, resulting in small explosions which kill nearby enemies.
With the first wave down, quickly run down the dock to intercept a second inbound via boat before they can do any harm. Now work your way back to Mel, as she's about to come under attack.
Protect Mel
If you have a machine gun, we recommend using it to quickly thin the enemies attacking Mel. Also, don't forget the nearby boxes can be detonated to also help clear them out.
Don't Let the Remaining Yardies Steal the Trucks
Now just defend the trucks from the remaining enemies--focus on defending just one or two, as you can still pass even if they capture one.
Check That Mel is Okay
With the area cleared, check in with Mel to complete the mission.
Factory Fun
Drive to the Factory in South Slopes
Hop into Mel's van and follow the route outlined by the GPS to find the factory.
Break Into the Factory
Once at the factory, explore the nearby dumpster for a gun before heading through the door, into the building.
Take Out the Guard
Once inside, shoot the guard dead and grab the baseball bat he drops.
Use the Baseball Bat to Break the Barricade
Equip the bat and use it to break open the barricade on the right side of the room. Once through, kill the guards inside (either with a gun or the bat), then bust through a second barricade as well.
Destroy Those Drug Crates
First, clear out the enemies from the room using your guns (or bat, if you run out of ammo), then destroy the marked crates in the room and adjacent hallway. Shortly thereafter, some more yardies will bust in through a wall--take them down before they harm Mel!
Lead Mel Up the Stairs to the First Floor
Head up the stairs with your gun equipped, ready to take down a flamethrower at the top--if you catch on fire, make sure to roll to put it out. Once he's down, grab his flamethrower, then use the bat to bust through another barricade into the next room.
Incinerate The Plants
Focus on taking down the enemies in the room first--it's best to use guns if you have ammo, though the flamethrower should work too. Once clear, use the flamethrower to destroy the plants with sustained fire (don't worry--you have unlimited ammo with it).
Destroy the Wall with Explosives
Grab the explosives in the adjacent room, via the doorway in the bottom-right corner of the plant room. Once you have them, plant them on the northern wall to blow a hole through and kill the guards on the other side.
Break the Barricade to get to the Factory Boss
With the room cleared, collected their dropped ammo and use the bat to bust through the barricade on the left wall.
Kill the Boss
Unfortunately, the boss's desk shields him from the flamethrower.
Break into the Safe
Half Cut
Take the Van to the Legal Marine Store
Hop into the van and follow the GPS to the Legal Marine Store.
Drop the Goods
Once at the store, toss some drugs to the junkies, just as if it were a Molotov.
Head to the Alley
After tossing the drugs, hightail it to the alley, using your GPS for the route. However, if the junkies manage to pull you out of the vehicle, take 'em down first.
Toss Out More Free Samples to the Users
Once at the alley, you may want to hop back over the wall to grab some body armor on the left first. Now back in the alley, head up it and toss drugs to each of the five groups. Now as you attempt to exit, they'll all come after both you and Mel--gun them down and then return to the van.
Head Over to South Slopes and Distribute Drugs
Take the van to the South Slopes, using the route outlined on your GPS. Once there, you'll find five blue dots on your radar. Drive up to each one and toss each group of people you find a sack of drugs.
Take Melanie Back to the Corpse Ride
After distributing the drugs, follow the GPS to the Corpse Ride. Along the way, some rival gangs will try to shut you down. Simply drive past them--if any pose a threat, just ram them off the road. Once you reach your destination, the mission will end.
Hsin Jaoming's Missions
A Shadow of a Doubt (Reward: $0)
Tell That Korean Gang Member to see Where He's Going
Follow that umbrella! The trick though is to avoid arousing suspicion, so don't get too close and make sure to avoid being seen--if either happens, the "suspicion" meter in the top-left of the screen will begin to fill. If it fills all the way, you'll fail the mission. Of course, it's not quite that easy, as the gang member will stop and turn around periodically, spotting you if you haven't taken cover. The first time he does this, a marker on-screen shows a great cover place, but for the rest, you're on your own. In general, it's best to hang back as far as you can (without letting him go off-screen) and hang back by each corner until he continues along. However, sometimes you'll be seemingly caught out in the open--seek cover behind a car or something fast--anything will do as long as it obscures his line-of-sight.
Plant a Bug on That Koreans' Car Quickly
After the Korean arrives at his destination, quickly run up to the marked car and use the touchscreen to plant the tracker--you only have 15 seconds!
Follow the Bug's Signal
With the bug planted, hop into the nearby car and follow the signal! Now although the game pretends that it's an actual signal emitted by the car, it's actually more like a series of checkpoints--get close enough and it'll trigger the next one. The trick is that you only have a few seconds to get to each one; take too long and you'll fail the mission. As such, it's important to pay close attention to the map and anticipate upcoming turns, as missing one might cost you more time than you can afford.
Friend or Foe? (Reward: $200)
Collect the Explosives
Before starting this mission, we strongly suggest stocking up on weapons and ammo, as you'll need it. When ready, hop in the van and head for the explosives as marked on your GPS. Once there, exit the van to grab them.
Drive to the Korean's Building
Get back in the van and follow the GPS to the Korean's Building.
Plant the Explosives While Hsin's Men Guard the Entrance
Approach the marked area in the corner and tap the "bomb" icon on the touchscreen to begin the bomb initialization sequence--it's pretty much Simon says, just tap the buttons in the same order they light up to plant the bomb.
Reverse the Van up to the Wall
You read it right, get in the van and back it up to the hole you blew open.
Defend Hsin's Men and the Van
Alright, so a boat load of enemies are about to roll in, and they'll take you to shreds if you're not prepared--hopefully you stocked up on weapons and ammo, as we suggested earlier (you can also check the nearby dumpster for a weapon). The first few will approach from the far road--greet them there and take them down as they exit their cars--this is is the easy part. You should also grab the body armor in the alcove to the right. Now a ton of enemies are about to storm in from the opposite side--hang back and use the walls for cover as you blast them from afar. If you have any Molotovs, now's the time to use them. Now you have to take them down before they destroy the van, so if you have the health to spare, it may be in your best interest to run in there, Rambo style, and shoot them to pieces.
Hsin's Men Have Got the Safe. Get Back in the Van and Get Out of There
Once everyone's dead, get back in the van and follow the GPS to your final destination.
Arms Out of Harm's Way (Reward: $200)
Go to the Docks
Grab a car and use the GPS to find the docks.
Stop the Arms Dealer
Once at the dock, exit the vehicle, grab the gun, and head through the fence opening and get ready to tackle a whole bunch of enemies. In short, you want to push forward slowly, only after the immediate threats are taken care of. There's a ton of cover along the way, such as structures, boxes, etc--use them! You should also consider retreating back to the previous corner of the central building for cover if the enemies get close. Thankfully, they'll drop a ton of ammo, so be sure to collect it, as there are quite a few enemies. Also, be sure to collect the body armor right by the first corner.
Get on the Wet Ski
With the enemies down, follow the dock down to the Wet Ski and hop aboard.
There are Weapons on That Boat. Destroy it
Easy enough! Head for the boat (as marked on your radar) and open fire on it as soon as it comes into view--it doesn't take much for it to catch on fire.
The Wages of Hsin (Reward: $2,500)
Blow Up The Koreans' Base of Operations
Head around the back of the building to collect the explosives, then grab a car and head for the Korean's base, as marked on your GPS.
Blow The Structures Weak Points
There are three weak points you need to explode, and they're all marked on your map. However, each time you destroy one, it'll block the path, forcing you down a different route, though this is really no bid deal. We suggest heading for the ones behind the building first, as there's body armor in the upper-left corner you can collect. Now as you traverse the grounds, you'll encounter numerous gang members. If you have a car, try driving around, shooting at them through the windows--barring that, just hang back and lay into them using an SMG, if you have one. Although there's a lot of them, they tend to attack from the same direction, making it relatively easy to take them down.
Detonate the Main Structure
Having destroyed the three weak points, you have one more bomb to plant on the main structure. Same deal, just prepare for a few more enemies along the way.
Escape from the Wreckage
Hurry up and run behind the structure and leap into the water, to the area marked on the radar to complete the misison.
Rudy D'Avanzo's Missions
Grave Situation (Reward: $250)
Help D'Avanzo Escape Capra's Ambush
Oh crap, it's an ambush! You'll have to protect D'Avanzo as you maneuver through the graveyard, taking down the attacking henchmen. D'Avanzo will move from cover point to cover point as you clear out the henchmen, but he won't move as long as long as any are nearby. Thankfully, he's generally pretty well protected at each point, so long as you can take down the attackers in a timely matter.
Now the attackers are well-armed, and they usually come in groups of 2 or 3--so it's important you tread carefully, otherwise they'll turn you into swiss cheese. The best way to go about this is to generally use the same wall D'Avanzo is for cover, then lock-on to an opponent (while behind cover), then strafe to the side and quickly take one down at a time, stepping back behind cover after each kill to lock onto the next one. Now D'Avanzo's cover-point isn't always the most ideal place to attack from, so consider moving to other nearby structures, such as some long walls that might provide better angles to shoot from.
Thankfully, the enemies will often drop ammo and, more importantly, body armor--collect these goodies after felling each batch of enemies, as you'll likely need it.
At the third cover-point, you'll find some grenades to your right--these can be handy for taking down a couple of foes at a time from behind cover--just make sure you stand far enough back from the wall so the grenade actually goes over it, otherwise it may bounce back, killing you instantly.
The World's a Stooge (Reward: $1,500)
Whack D'Avanzo's Three Rats
Three of D'Avanzo's rats are scattered about the city, and you'll have to take down each of them (they're all marked on your GPS). It doesn't matter which order you go after them in, so feel free to go for whichever tickles your fancy.
As you approach any of them, you'll first encounter some of their numerous body guards, who'll try and distract you while the Rat escapes. Stay in your car and gun down the guards as you drive toward the rat--it's important you catch up to him and take him down, otherwise you'll fail the mission (don't worry about leaving the body guards behind). Once the rat is taken down, head for the next one and do the same.
Oversights (Reward: $250)
Take D'Avanzo to the Meeting With Capra
Get in D'Avanzo's car and take him to his destination, as marked on your GPS. After dropping D'Avanzo off, you need to climb the stairs to the roof, and follow it to the sniper, you know, just in case something goes wrong (which they of course will).
D'Avanzo's Been Ambushed. Protect Him - Take Out Capra's Men
Alright, so D'Avanzo's in the middle of an ambush, and it's up to you to save him. Use the sniper and quickly pick-off the nearby enemies shooting him--you have infinite ammo, so let the bullets fly! If enemies are groped around the cars, try shooting those instead to explode them, killing anyone nearby (just make sure D'Avanzo's not close!). After a short while, cars containing more enemies will begin to pull-up--shoot the cars to quickly take down their occupants.
As you take down the enemies, D'Avanzo will push forward to different cover position--keep up with him and make sure he's not getting shot at. Keep an eye on his health meter to ensure he's not taking damage while you're targeting enemies elsewhere.
Lester's Missions
Double Trouble (Reward: $0)
Go to the Angels Of Death Hangout
Hop on Lester's Bike and follow the GPS route to the bikers' hangout. Keep in mind that this mission is timed, so try not to waste any time.
Impress the Bikers
Once you've found the bikers, you'll need to impress them to catch their attention. Perform a burnout by holding both brake and gas ("B" and "Y" buttons), then release the brake. With the bikers impressed,
Ride with Style Through the A.O.D. Turf
You're not done impressing people yet, now you need to show off your riding skills. Ride over the checkpoints that appear, using the handbrake to make any sharp turns--after a few, you'll be prompted to jump a ramp, into the gas station. Make sure you build up enough speed to clear the span!
'The Lost' Biker Gang Are on A.O.D. Turf. Them Them Out
Hop off your bike to take on the biker gang. Your best bet is to head around the perimeter, taking them down one at a time, and using the cars/objects they're behind for cover as you take down the next biker. As long as you stay behind cover, and stick to the perimeter, this shouldn't give you much trouble.
Rejoin the Route
With the gang taken care of, get back on your bike and resume the route, as marked on the GPS.
Attack 'The Lost' Bikers, But Leave One Alive to Tell the Tale
There are three bikers roaming around, and you need to take down two--and only two--of them. Catch up to them and lay into them with a hail of bullets. If you run out of ammo, or have trouble targeting them, consider stealing a car and ramming into them instead. But remember, keep one alive!
Meet Up With Lester at the Rendezvous Point
Follow the GPS to find Lester, who'll provide you with some explosives.
The Lost are Meeting in the Park. Go to the Monoglobe
After grabbing the explosives, head toward the park--you'll have to ride off a ramp at high speed in order to make it. Once there, quickly head to the Globe ahead, get off the bike, and plant the explosives by touching the icon on the touchscreen. Now arm them by repeating the activation sequence shown on the bomb--remember, time's ticking, so try not to screw up.
Faster Pusher Man! Sell! Sell! (Reward: Coke +10)
Offload Lester's Coke so he Passes the A.O.D. Initiation Test
Alright, so you've got a bag full of coke that you need to unload, and thankfully, there just so happens to be a ton of buyers in the area (marked on the map as blue dots). Uncomfortable, you've got some competition out there, and if they unload their bag first, you'll fail the mission. The meters in the upper-left corner display how much progress you've both made--you want to fill your meter before they do.
Now each buyer only wants one unit of coke, so if the competition gets to him first, you'd best find a new buyer. In order to beat the competition, you need to keep an eye on your GPS and plan your route. For instance, if you spot a competitor (red dot) heading for the same customer (blue dot) you are, and he's closer, it's best to forget that one and find a new customer--ideally a line of them that aren't near any other dealers.
To complicate matters, the dealers are ruthless and are gunning for you. You're better off avoiding them entirely instead of fighting them, as there are more of them than there are of you, and it's time-consuming, potentially losing you customers. However, if one is on your tail, the easiest way to deal with them is to steal their car! Oh, and if the other dealers destroy your ride, don't sweat it--you can still deliver drugs while on-foot, and finding another car isn't much of a hassle.
Once you've unloaded the drugs, follow the GPS back to Lester to complete the mission.
Convoy Conflict (Reward: $500)
Follow Lester
Make sure you have ample ammo before departing, as you'll need it. Anyway, hop onto Lester's spare bike (just behind him) and follow him to the dock.
Protect the Vans in the Convoy. Don't Let Any of Them Be Destroyed
It's up to you to escort the convoy to the drop-off location. To do this, follow the vehicles from behind, keeping about 2 car lengths between you and them. Many of the enemies will attack from behind, allowing you to easily open fire on them and take them out. However, the vans will also pass by several on-foot enemies on the road--while they are less of a threat, they should still be taken down. Keep an eye on the GPS to spot them ahead, then maneuver yourself into position (while staying behind the vans) to take them down as soon as they come into view.
Destroy the Road Block
As you near the end of your journey, a road block will be setup. Simply open fire on it to explode the cars and kill the nearby gang members.
See No Evil (Reward: $0)
Follow Lester, and Look Out for Trouble
Make sure you've got plenty of ammo before starting, as you're going to need it. Anyway, grab the nearby bike (as it allows you to shoot in all directions) and tail Lester's car as he heads for his destination. Several bikers will soon attempt to follow him--watch for them on your radar and take them down as they close in (f they get too close for too long, you'll fail the mission). You may even want to slow down a bit to take them down even earlier--just watch your map to make sure you follow Lester's route.
Stop the Bikers Getting into the Apartment
Alright, so there are three groups of bikers coming your way, one after the other, and you'll have to stop them from entering the apartment. It's generally best to stay near the apartment entrance (though you may want to head a little ways toward them, to partially head them off) and shoot them when they get close. Since they're riding in, they won't post much of a threat until they get off their bikes--use an SMG if you have one to mow them down quickly. Keep an eye on your radar to both make sure you've killed all of the bikers, and watch out for the next wave.
Miscellaneous Missions
Marcy's Situation (Reward: $200)
Give Marcy Some Cheap Thrills
Macy's on borrowed time and wants to make the most of her life. Give her some quick excitement by driving at high speeds, racking up near misses, and using ramps to get some airtime. It's generally best to drive at high-speeds down the dividing lane heading the wrong way to quickly add "excitement" to the meter. Just be careful not to destroy the car!
Drive Marcy to her Hospital Appointment
Once Marcy's had enough excitement, use the GPS to drop her off at the hospital.
The Hospital's Mistake (Reward: $200)
Take Marcy to Her Lawyer's Office
Simply follow the route outlined on the GPS to get Marcy to her destination.
Wilhelm (Reward: $250)
Make Sure Wilhelm Gets to the Foreclosure Auction in Time
Hop into the nearby car with William and race to the auction, using the GPS for guidance. You have plenty of time, so don't sweat it too much.
Got a news tip or want to contact us directly? Email news@gamespot.com
Join the conversation