Banjo-Kazooie: Nuts & Bolts Walkthrough
Finding all the jiggies driving you nuts? Check out our Banjo-Kazooie: Nuts & Bolts walkthrough for mission-specific tips on how to dominate every challenge.
Banjo's back, but now he's platforming in style. Instead of running and jumping, you'll be creating your very own vehicles to navigate huge environments that span all kinds of locales, such as tropic savannas, the insides of a game console, and even a virtual museum of past Banjo games. However, traversing these environments is anything but easy, since you'll often have to create a vehicle for each challenge--and that's where we come in. We'll help you craft the perfect vehicle for every situation, and heck, we'll even throw in some tips to ensure you can nab the trophy for every challenge.
Here's what you'll find in GameSpot's Banjo-Kazooie: Nuts & Bolts Game Guide:
- Creating a Vehicle: Don't know a "Liquid Squirter" from a "Spec-O-Spy"? We'll help you come to grips with creating vehicles.
- Walkthrough: Here it is, a complete guide to completing every mission and earning every Jiggy this game has to offer. Trophy tips included!
- Achievements: Want achievements? We've got the info you need here!
Vehicle Creation
So you want to create a vehicle, huh? Good thing, because you'll have to create quite a few if you want a chance at beating this game! You can create a vehicle at almost anytime, either by visiting Mumbo's Motors in Showdown Town, or simply clicking "Create Vehicle" before any mission. And luckily, the process is really quite easy and intuitive, but we're going to outline some tips to help you craft the perfect vehicle for whatever situation may arise.
The Basics
Your vehicle, regardless of whether it's land, water, or air based, needs at least three core components in order to function: A seat, engines, and fuel. Without those, your vehicle is more of an elaborate paperweight than anything else. But that's only the bare basics, depending on what type of vehicle you're creating, it will also need one of several other parts. If you're creating a land-based vehicle, such as a car, it will probably need wheels (there are actually a few other options available, but for most practical purposes, it's gonna need wheels). Building a boat? Slap some "floaters" on there so it doesn't sink like a rock. And if you want to build a vehicle that can fly, it's going to need either some wings, propellers, or strangely enough, even balloons.But that's just the beginning! The missions in Nuts and Bolts often require more than just the ability of traveling from Point A to Point B. Other objectives include carrying objects, using weapons to destroy or defend something, taxing other passengers around, and more. But don't worry, there are parts for every objective, and experimentation is key in learning which parts do what.
Vehicle Tips
Although it won't work for every mission, we found building a "jack-of-all-trades" vehicle around the "Storage Tray" item to be the quickest and easiest method to completing most of the game's objectives. With just a few tweaks (and upgrades, as more parts become available), it can become your go-to vehicle for trying out most challenges. The undercarriage is a great place to throw the essentials: Engines, Fuel, Ammo (if you have weapons) and the like, since it doesn't much matter where those parts go, so long as they're connected to the vehicle in some way. Weapons can be installed on the front, and wings or propellers to the sides (for propellers, you'll have to add a "Cube" extension on either side on which the propellers can rest). The back of the vehicle is an ideal place for the seat, as well as propellers if building a boat or jets if constructing a plane.But with so many parts, you might run into some weight-distribution issues. Specifically, if you have too much weight on one side your vehicle will tip in that direction, resulting in extremely poor handling. Luckily, each part is assigned a "weight value," which can be viewed by tapping the Right-Bumper whenever a part is selected. This should provide you with a good idea of where to place your objects. In general, heavier objects, like large engines and fuel tanks, should be confined to the center of the vehicle. If you're out of room and have to place a heavy object to the side, try counter-balancing it with either the same part, or one of equal weight value, on the opposite side to ensure your center-of-balance stays centered.
Now space is often a commodity on these vehicles, particularly when dealing with the smaller, more agile ones. Which is why it's important to go back and revise your blueprints whenever you unlock new parts. For instance, if you unlock a new fuel tank size, use it to replace the multiple smaller ones you're likely using. Also, try saving several different versions of the same vehicle, designed for different purposes. It doesn't make much sense to waste space on ammo and weapons if the mission's a simple race, for example. That room can instead be used for adding additional engines or fuel, both of which are crucial for races.
Whatever you end up building, try experimenting with different layouts and designs. There is no one way to win a mission, and half the fun of Nuts and Bolts is discovering for yourself what works and what doesn't. But if you do run into trouble, we've outlined specific vehicle tips for every one of this game's jiggy challenges, so keep an eye out for them as you read our walkthrough.
Nutty Acres: Act 1
Bangers 'N' Dash
Objective: Talk to Mumbo
Vehicle Advice: n/a
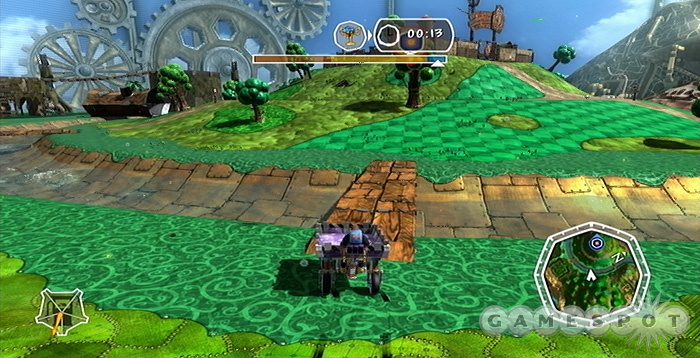
The absolute easiest way to finish this challenge it to simply follow the main path around the mountain to a bridge, then drive straight up the hill and into Mumbo's Nuts camp. Hop out of your vehicle and speak with Mumbo by his house to complete the challenge
T.T. Trophy Tips:
- From the get-go, drive over the hill on the right, cross the thin bridge, then enter Mumbo's Nuts camp through the gate and then speak with Mumbo over by his house.
Nutty Acres: Act 2
Tick, Tick, Bang!
Objective: Grab the bomb and take it to the drop-off point
Vehicle Advice: n/a
Grab the bomb and toss it into your vehicle, then drive over the ramp dead-ahead and follow the trail leading into the volcano and continue out the left tunnel, parking in the blue circle at the exit.
T.T. Trophy Tips:
- Toss the bomb into your cart quick--restart if you mess up.
- Follow the path outlined above--as long as you don't hit any obstacles, you shouldn't have any trouble grabbing the trophy.
Great Balls of Fire!
Objective: Dip the three smoldering boulders in water to cool them off
Vehicle Advice: Any vehicle with a storage tray should be sufficient.
The three fireballs are marked on your HUD. Drive to the one dead-ahead and load it into your vehicle, then work your way toward the fireball to the right. Stop by the river along the way and drop the fireball off there to cool it down, then drive to the one marked ahead. Grab it, drop it off in the same river, then make your way to the final fireball and dip it in the ocean just beyond.
T.T. Trophy Tips:
- Grab the fireballs in order of closest to furthers, or in other words: Middle, Right, Left.
- Since Banjo typically exits a vehicle on the right, approach the first fireball from the left so you can grab it more easily.
- When crossing the river toward the second fireball, avoid climbing the steep hill sections, as they'll only slow you down.
- Don't bother hopping out and manually dipping the final fireball in the water--just dive into the ocean and submerge the entire vehicle!
Coconut Circuits!
Objective: Beat T.T. in 2 out of 3 races
Vehicle Advice: n/a
You're going to have to prove who's the better driver by beating T.T. in 2 out of 3 races. As you race around the circuit, you'll have to drive through a series of checkpoints--miss one and you'll have to go back for it! Thankfully, the checkpoints are marked quite visibly on both your screen and on the map, so finding them shouldn't be a problem. As for T.T., he's not too aggressive in this challenge, though you can try to push him off the road if he gets too close.
T.T. Trophy Tips:
- To get the trophy, you have to beat T.T. within the first two races, as that's all the time you'll have.
- After the second checkpoint, cut across the side of the first mound to the next checkpoint, then drive over the second mound entirely to another.
- When you near the river during the second race, drive through the steel tube instead of taking the bridge.
- After crossing the river and triggering the next checkpoint during the second race, immediately turn around and ride around the farm to the next checkpoint, instead of following the main path. This will help you shave a second or two.
Nutty Acres: Act 3
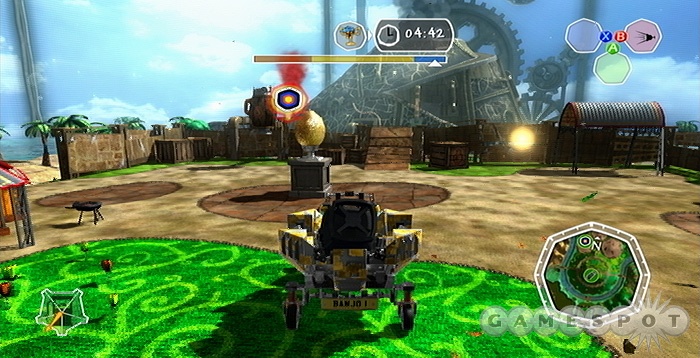
Grunty's Loco Coco
Objective: Knock the nut out of Grunty's truck
Vehicle Advice: Add a Weapon that uses ammo
Okay, so Grunty's gotten a hold of some giant nut and you need to knock it out of her truck before she gets away! Now while the game recommends using a large, heavy vehicle to bash it out of her, it's significantly easier to simply plant a weapon that uses ammo on your vehicle (a single egg shooter works great!) and just shoot up her truck a bit to knock it loose. It shouldn't take more than a few shots, resulting in what might be the easiest mission yet!
T.T. Trophy Tips:
- Get behind Grunty as she's driving straight and lay into her with your projectile for a quick victory.
Nutty Acres: Act 4
High Jinks
Objective: Complete Bottles' Flight Lesson
Vehicle Advice: n/a
Come on, this is a tutorial! Do you really need help with this? If you're looking to shave a few seconds though for the trophy, check out our tips below:
T.T. Trophy Tips:
- Although you may be tempted to fly straight-up to quickly reach the required altitude, this will put you much too far from your next objective. Instead, after taking off, aim a few degrees to the left (where the first ring appears) and make a smooth and gentle climb. Time it right, and the ring should appear will before you reach the required altitude, which will save you around 10 seconds.
- You can save a few seconds by turning as you go through each to set yourself up for the next one. Turn right through the first ring, then left through the next two.
- After passing through the fourth and final ring, immediately begin a nose-dive to build up some speed, then pull back on the stick to do the loop.
- Don't worry about making a nice landing--just drop in and jump out ASAP!
- After breaking open the boxes, revealing the two items, immediatly tap "X" after grabbing them with the wand to instantly add them to your vehicle--there's no need to carry them over
- When gunning down the four targets, aim for them in the order of left-right...except for the second one from the left, save that for last since it's the furthest away.
Vac-O-Nuts
Objective: Save 14 Coconuts
Vehicle Advice: n/a
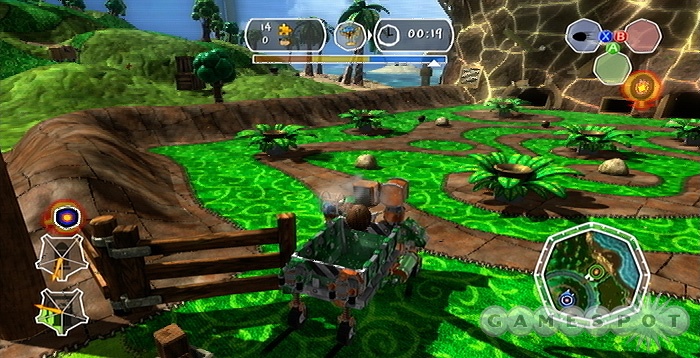
Using Klungo's Vac-O-Nuts, you need to grab 14 coconuts and return them to the hopper. Grabbing coconuts is easy enough--follow the marker to the fenced in area, then simply run over the coconuts to suck them into your trunk. You'll find the coconuts scattered all over, but there should be several near the entrance (and the nearby plants spit out more, too!). However, avoid sucking up the boulders, as they take up precious room in your flatbed! You can safely hold up to 10 coconuts (assuming no rocks)--once you've stocked up, bring them to the large machine (shaped like a barrel) near Klungo to stash them away, then return to the field for more. Oh, and don't even bother with the enemies in the field--as long as you keep on moving they won't bother you.
T.T. Trophy Tips:
- From the get-go, back-up, then break through the middle of the left wall for the quickest path to the coconuts.
- Avoid the rocks! These take up far too much room in your trunk--you're best off restarting if you accidently suck one up.
- You only have time to make two trips, so make them count. Grab at least 7 Coconuts each time (try to count them mentally as you suck them up), but no more than 10, as they may start to overflow at that point.
- You only have two minutes, so make sure each trip is taking you less than a minute each way.
Cheatin' Witch
Objective: Win the Race
Vehicle Advice: Build a fast vehicle
It's another land-based race--you know what to do. But if you need some help getting a good time, check our tips below.
T.T. Trophy Tips:
- Try to take an early lead so you don't have to fear your opponent getting in the way.
- Turn left inside the volcano for a huge shortcut.
Fighting Fit
Objective: Protect Mr. Fit
Vehicle Advice: Equip your vehicle with projectiles, such as the Egg Launcher. And add High-Grip tires.
You're going to protect Mr. Fit from the Gruntbots as he goes about his morning jog. As such, you need to use a vehicle that is capable of firing some kind of projectile--we suggest the Egg Launcher. Try to stay close by Mr. Fit's side at all times and keep an eye out for the Gruntbots that appear out of thin air, then blast 'em.
T.T. Trophy Tips:
- In order to get the trophy, Mr. Fit must finish his jog with most of his health.
- Don't shoot Mr. Fit--it hurts!
- You may want to try taking a more passive route to victory. You can do so by building a three-walled fortress (with a roof!) and surround Mr. Fit with it as he goes about his jog. This should keep the dumb enemies at bay.
Nutty Acres: Act 5
Save Our Statue
Objective: Protect the Statue
Vehicle Advice: Build a "flying fortress" that you can use to cover the statue
The statue is under attack from some flying Gruntbots! Now there's a couple of ways to tackle this challenge: Take to the air and shoot down the planes (hard) or our preferred method: build a giant fortress that you can drop onto the statue, protecting it completely from the kamikazes. We built a giant block using mostly "Light Cubes" and "Light Panels" measuring about 8 blocks wide by 6 deep, and 7 high--although the exact dimensions don't matter much, so long as it can cover the statue. Leave an opening in the bottom, obviously to fit the statue inside. You may also want to attach 4 Monster Wheels to the base to increases its height. Now it's time to make it capable of flight, simply strap on the strong motors you've got and the largest propellers you have on top (you may also want to add some to the back, to increase your forward momentum). With your vehicle ready to go, carefully maneuver it just over the statue and drop it on top, covering it completely! If you've built it right, the flying gruntbots won't be able to attack the statue, and will destroy themselves attacking your monstrosity instead--awesome! Oh, and for some added fun, try building the flying portion as a self-contained vehicle, then use a detacher to separate yourself from the fortress, allowing you to fly around and shoot down the enemies while the statue is completely protected.
T.T. Trophy Tips:
- To get a trophy, you just have to ensure the statue takes no more than a it or two--this won't be a problem using our method above.
Leaky Waterworks
Objective: Clog the Leaking Pipes
Vehicle Advice: A fast land-vehicle with storage room
There are three leaking pipes scattered about Nutty Acres, and you'll need to clog them with some kind of small object in order to stop them. For this mission, having a fast land-based vehicle with storage capabilities is very important. As soon as the mission starts, exit the vehicle and grab three of the nearby rocks and toss them in your storage unit--these are what you'll be using to clog the links. Now work your way to each of the three pipes in a counter-clockwise fashion, starting with the one to the right. Once there, simply grab a rock from your vehicle and drop it onto the pipe to stop the leak! Do the same for the next two, and the jiggy is yours!
T.T. Trophy Tips:
- Load up your vehicle with three rocks from the starting location and use them to clog the leaks.
- Don't worry about the enemies, as long as you're in and out of there fast, they'll mostly leave you alone.
Hard Boiled Egg
Objective: Cook the Egg in the Volcano and Bring it Back to Klungo
Vehicle Advice: Any vehicle-type is fine, as long as it's fast and has storage room!
Klungo wants a fried egg, and dag nabbit, he's gonna get it! For this mission, any vehicle is fine as long as it's fast and can carry objects, although using a flying vehicle is the easiest method. Either way, simply place the egg in your vehicle and head inside the volcano (if you're flying, simply dive in through the mouth of the volcano--the hole on top). Once there, drop the egg into the lava until you hear a "ding" sound, indicating the egg's done cooking! Now take it back to Klungo for your jiggy. The only problem you may face is damaging the egg; just avoid running into objects and dropping the egg, and you should be fine.
T.T. Trophy Tips:
- Use a Flying Vehicle and dive in through the mouth of the volcano--there are almost no hazards to worry about.
Beat the Fleet
Objective: Destroy All of the Naval Grunts
Vehicle Advice: Built a water-based vehicle with lots of weapons/ammo
It seems Gruntilda's minions are trying a new tactic: attacking from the water. Fight water with water and build your own boat, equipped to the gills with weapons and ammo. We suggest equipping 2 Egg-Shooters and 2 Bomb-Launchers, in side-by-side arrangements. Now take to the water and use the egg blasters to target the individual enemies, and save the bombs for the groups. Once you've cleared the initial pool around Mumbo, jet over the ramp to finish off those attacking the coast.
T.T. Trophy Tips:
- It's all about time--use the Egg Shooter on the single-enemies, but launch bombs at the enemy clusters.
Farmhand of the Year
Objective: Grab the Coconuts!
Vehicle Advice: Make a Flying Vehicle using a "Large Tray"
In this challenge, you'll have to fly over to the ledge containing the coconuts (park your vehicle on the bridge), stock up on as many as you can, then return them to the coconut-sucking machine by Mr. Fit. The larger the coconuts you grab, the more points you'll get! Now you only have time to make 2 or 3 trips, so you'll have to make them count. As such, it's best to build a flying vehicle with storage capabilities. If you use the small tray, it's best to stick to the small and medium-sized coconuts. But if you use the Large Tray (which you'll have to if you want the trophy), you can store 2 Large Coconuts, in addition to several other medium and small ones. Just make sure you outfit your Large Tray with sufficient engines and propellers to carry the load. Oh, and in the case of the large coconuts, you may have to manually take them out of the vehicle in order for the coconut-sucker to take them, as they're too large to fit underneath while in your vehicle.
T.T. Trophy Tips:
- Use the Large Tray! It can store 2-Large coconuts and numerous other medium and small ones at a time! With this, you can score enough points in just two trips!
- Cram as many coconuts as you can into your tray--sure, you may lose one or two along the way, but who cares?
Dud Dog, New Tricks
Objective: Destroy Mr. Patch's 12 Patches!
Vehicle Advice: Add balloons to a plane (for hovering) and egg launchers
The giant balloon animal, Patch, is threatening the local plant life and must be destroyed. You'll find 12 patches scattered all over his body, including one in his mouth. Any weapon can destroy the patches, though we found the Egg Gun to be the most effective. As for the vehicle, suggest using a plane equipped with balloons, allowing you to hover in place and target the patches more effectively. Be aware though, that as you bust his patches, the leaking air will cause him to move around, so keep that in mind as you circle his body. Oh, and if you're having trouble finding the last patch, make sure to look inside his mouth.
T.T. Trophy Tips:
- Add tons of ammo to your vehicle, that way you can spray the dino-balloon with projectiles.
Nutty Acres: Act 6
Air Coconut
Objective: Win the Race
Vehicle Advice: Build a Fast Plane
A simple aerial race is the name of the game. Your best bet is to build a fast plane-like vehicle--we just slapped some wings onto our trolley, added as many engines and fuel tanks as we could, and placed a couple of large propellers on the rear.
T.T. Trophy Tips:
- Try to take an early lead so the other racers don't post much of a problem.
- Once you learn the layout, make sure to aim yourself for the next ring as you pass through each one.
Riverbed Head to Head
- Objective: Win the Race
Vehicle Advice: Build a fast land-vehicle with good handling--long and narrow shape recommended.
This time it's a race through the river-bed, but you'll find yourself racing back and forth along the same stretch, meaning you'll sometimes be facing your competitors head-on! As such, it's best to drive a narrow (but fast) vehicle, and stick to the riverbed's side whenever you can. If you're hard-pressed for what to drive, we suggest using Mumbo's Land Vehicle 2 chasis and outfit it with several engines and fuel tanks, and you should be good to go.
T.T. Trophy Tips:
- Whenever you double-back on the main riverbed, stick to the sides of the track to avoid collisions with your competitors.
- Once you learn the layout, make sure to aim yourself for the next ring as you pass through each one.
Nuts to Go
Objective: Take the Coconuts to Mumbo, then to the Pier
Vehicle Advice: n/a
Okay, so you've got to haul the coconuts over to Mumbo on the beach for a quick inspection, then deliver them to the pier. Now the vehicle you're driving can be hard to control, so it's best to stick to the road whenever you can and avoid making sudden turns--otherwise you may spill some coconuts and you'll have to go back for them! From the start, follow the path across the bridge dead-ahead, then head along the beach to Mumbo. Once he's checked out your shipment, turn right and head across the dried riverbed carefully, then follow the road right, then left at the junction and head for the pier! Although some Gruntbots may hop into your truck bed, they don't seem to do a whole lot, so don't worry about them.
T.T. Trophy Tips:
- The vehicle can be hard to control, so try to take the path of least resistance. That is, drive straight as often as you can and avoid turning whenever possible.
Makin' Waves
Objective: Win the Race
Vehicle Advice: Build a Fast Boat
It's water-race this time, so you're going to want to have a fast boat on hand. Try using the the blueprint for Humba Boat 1 and slapping on several engines and fuel tanks. Anyway, the race course itself is pretty easy to navigated, though there are two things we would suggest. One: Go right around the second island--it'll save you some time. Two: When you come across the checkpoint behind the gears, go around the gears instead of through them--trust us.
T.T. Trophy Tips:
- Try to get an early lead so the other opponents don't get in your way.
- Go right around the second island to save a few seconds.
Freewheel Festival
Objective: Coast as Far as you Can
Vehicle Advice: Build a Heavy Monster Truck
The objective is simple: Coast as far as you can. The only problem is that you have no control over your vehicle aside from steering. That means no gas, no brakes, and no flying! As such, it's crucial that you build a vehicle that can maintain momentum. In this case, we suggest building a heavy monster truck. Specifically, we used a tray, then attach tons of "heavy blocks" all around it until your vehicle's weight gauge is pointed at 3 o'clock or so (try to maintain a low profile and a wide base, so your vehicle doesn't tip over). Now plant on four monster wheels and you're set!
Now the path you take is crucial--if you're just going for the jiggy, you can make a detour down the ramp inside the volcano, just off the runway. Hang a right inside and exit through the tunnel to grab your jiggy. But if you're going for the Trophy, you're going to need to take a different route: Roll on down to the airfield, then follow that to the right, around the volcano until you come across a dirt ramp leading down to a road. Follow the road to the dried river and roll on in and follow that as far as you can--this should net you the trophy.
Instead, coast down to the airfield, then follow that to the right, around the volcano until you come across a dirt .
T.T. Trophy Tips:
- Building a heavy vehicle is key--we suggest the Monster Truck as seen in our pictures.
- Don't go inside the volcano! Follow our route outlined in the walkthrough to ensure you get enough distance.
LogBox 720: Act 1
Workers Wipe Out
Objective: Rescue the two technicians
Vehicle Advice: Vehicle with Passenger Seats (ideally one that can hold two people)
You're going to need a vehicle with passenger seats for this challenge--although you technically only need a one-seater, that means you will have to make two trips, so try adding a bench that can hold two passengers. From the get-go, drive toward the passenger on ground-level dead-ahead. Veer around the structure to either side, though blast the enemies that appear to prevent them from giving you trouble as you pick up your first passenger from the center of the spinning DVD. Pull up close and wait for them to hop in the passenger seat, then drive up the nearby ramp on the right (assuming you're facing toward the Pig) and follow the path to the second passenger (kill the vacuum-type enemy along the way). Once you have both passengers, drive off the ledge toward the goal--if you have a rough landing, you may have to recollect the passengers if they're knocked from the vehicle.
T.T. Trophy Tips:
l- Outfit your vehicle so it can carry both passengers at the same time, that way you only have to make one trip.
- Avoid any strong bumps, otherwise your passengers will be thrown from the vehicle, wasting time.
- Blast the enemies as you work your way to each passenger to avoid them bumping you.
Dodgy Connection
Objective: Take the antenna high up
Vehicle Advice: Vehicle with storage ability, projectile weapon, high traction wheels, and quick speed

Grab the antenna and load it into your vehicle, then drive through the large door on the left and head straight up the ramp. Turn right at the top and blast the little vacume guy, then follow the golden road up a saran-wrapped ramp. Turn right at the top and continue up the saran-wrapped spiral, but be extremley careful if you haven't equipped high-traction tires as it's easy to slip off! Just follow the path straight to automatically complete the objective.
T.T. Trophy Tips:
- Add high-traction tires to give you more control as you climb the saran-wrapped walkways and spiral.
- Just after climbing the first ramp, blast the vacuum-like enemy, otherwise he may throw you off course.
- Still having trouble making the time? Try adding another (or bigger) engine to give you the speed you need!
LogBox 720: Act 2
Chip's Away
Objective: Win first place
Vehicle Advice: n/a
This is a straight-up three-lap race against three others. Unfortunately, you're stuck in a slow and a not-very-agile vehicle, but so are your opponents. The route itself is really simple to follow, the only problem are the other racers who'll try to ram you out of the way. The key to getting first is to take an early lead, which should prevent the others from interfering. To gain the lead, simply tap the other vehicles' in either corner of their rear bumper to cause them to spin out of control (just like cops do on the TV!), allowing you to easily pass them. Once you have first, it's not hard to maintain your lead so long as you can avoid hitting the scattered obstacles.
T.T. Trophy Tips:
- Take the lead early (using the ramming trick, mentioned above), which should then a hazard-free race to the trophy.
- Don't get cute and try to take any shortcuts--stick to the main path, there's less obstacles that way.
Dumb and Dimmer
Objective: Deactivate the three bulbs
Vehicle Advice: n/a
Scattered around the level are three light bulbs that you'll have to deactivate by flying to each one and triggering a switch. The mission itself isn't that difficult once you come to grips with the helicopter controls. The Right-Trigger causes to go up, while the Left-Trigger causes you to go down. Then simply tilt the control stick in the direction you wish to fly. However, while the basic controls are simple, we suggest taking it easy on the throttle, as this chopper can act a unpredictably at high speeds.
As for the bulbs, fly to the one on the left first, as it's the closest. After landing, grab the switch and rotate the control stick to deactivate the light. Now face toward the next two bulbs and fly toward the one on the left, since it's closer, then make your way to the distant third.
T.T. Trophy Tips:
- Take it easy on the throttle! You don't have to blaze through this, just come to grips with the handling and work your way from one bulb to the next.
- Visit the bulbs in order of closest-furthest. That is, head to the bulb on the left first, then fly alongside the wall to the next one, then finally dart over to the distant third.
LogBox 720: Act 3
Flush the Floater
Objective: Deactivate the three bulbs
Vehicle Advice: A fast vehicle. Try slapping on a couple of engines to the standard shopping cart, if you don't have anything else.
This time Grunty's challenges is a straight-up race, except you're on land, while she's on water. Simply race around the exterior of the arena, hitting all the checkpoints along the way, to beat her. Remember to slow down around the corners, and if you do land in the water, simply head for the next checkpoint instead of trying to get out first.
T.T. Trophy Tips:
- Slow down gently around the corners to maintain control of your vehicle.
- Try to avoid the water, but if you do submerge yourself, you're better off driving through it toward the next checkpoint instead of trying to return to land first.
LogBox 720: Act 4
Make the Weight
Objective: Depress the 5 Switches
Vehicle Advice: Build a very heavy, flying vehicle. The "weight" indicator should be pointing almost straight-up.
Scattered around the level are five switches that you'll have to depress; the only problem is that it'll take a lot of weight to depress them. As such, it's best to build a heavy vehicle (the "weight" indicator should be pointing almost straight-up, at least), allowing you to easily depress each switch. If you find yourself a bit short on weight, you can grab some of the nearby objects and throw them onto the switch, too. We created a giant flying cube, made-up of a stack of "Heavy Blocks" measuring 4 blocks high, 4 blocks deep, and 3 blocks wide. We then threw on two proppelers on either side and added a Strong Engine--it's slow, but it gets the job done. Now just fly from switch to switch, depressing each along the way. And don't forget you can use nearby objects to throw onto the switch too, if you need more weight.
T.T. Trophy Tips:
- Having a heavy vehicle is key--follow our advice above if you're stumped on what to make.
- The on-screen button markers are numbered. Go after them in this order: 1, 4, 3, 2, 5
Red Bear Racing
Objective: Win the Race
Vehicle Advice: A fast, but maneuverable aircraft!

It's another race, but this time it's in the air. Any fast aircraft should be fine, though we found slapping a couple of wings on the shopping card, a strong engine, and two propellers in the back to be an ideal choice. As for the race itself, just follow the arrows--they won't lead you astray!
T.T. Trophy Tips:
- Try to get an early lead, that way your opponent won't get in your way.
You Little Squirt
Objective: Spray Water on the Four Fans to Cool 'em Down
Vehicle Advice: n/a
Four fans scattered around are on fire, and it's up to you to put them out! Unfortunately, your vehicle only holds enough liquid to hose down two at a time--and just barely at that. Which means you're going to have to refill by dunking the entire vehicle in one of two liquid pools: one in the corner of the bottom floor, the other at the very top (where you raced Gruntilda)--this is the easier of the two to find. When you approach a fan, hover in place to steady your aim (by holding both triggers) then blast water anywhere on the fan--its icon will disappear when its cooled, meaning its time to fly toward the next fan.
T.T. Trophy Tips:
- Make every drop count! When cooling a fan, stop blasting liquid the moment the icon disappears from your screen, which means it's no longer on fire.
- We suggest heading around the room counter-clock. After cooling the second fan, you'll likely be out of liquid--refill in the pool at the top of the level.
- You only need to dunk yourself for a second in order to refill your tank--don't let the sound effect fool you.
Gunge-A-Sponge
Objective: Fill the Sponge with Water
Vehicle Advice: Helicopter w/2 Sprayers
The sponge has gone dry--oh no! While any vehicle type will work, we found the helicopter to offer the fastest means of getting around. Anyway, regardless of what vehicle you choose, you will have to outfit it with a "Liquid Squirter" in order to complete the mission. Since it begins full, fly up to the sponge then unleash all the liquid you have into it. Now one tank won't be enough, so you'll have to refill at the nearby pool--look for it in the left corner. Now return to the sponge and squirt it some more. Rinse and repeat until you've completed the mission.
T.T. Trophy Tips:
- Use two squirters! This will double the amount of liquid you can carry, thereby halving the amount of refills you'll have to make! Make sure to place them side-by-side so you don't waste any water when aiming.
Chip Chop
Objective: Kill the Gruntbots Attacking the Console's Chips
Vehicle Advice: Land Vehicle W/ Egg Launcher, Grenade Launcher, and lots of ammo
The LogBox's three processors are under attack from the Gruntbots and they must be stopped! As such, you need to equip your vehicle with several projectiles, and lots of ammo. From the get-go, follow the walkway to the pink pipe and climb the ramp to the first processor. Destroy the bots there, then drop to the bottom-floor and head for the second processor in the small corner-room. Once its clear, make your way up the small ramp to the third and final processor.
T.T. Trophy Tips:
- Outfit your vehicle with at least two different guns and use both when targeting the Grunt Bots
- Attack the processors in this order: Graphics Chip (far-right, top-most processor), processor in the small room on the bottom floor, then the one up the ramp.
LogBox 720: Act 5
Unstable Hardware
Objective: Make it to the Finish!
Vehicle Advice: n/a
The race is pretty straight-forward, and you're afforded ample time for the jiggy. The only tricky bit is the vehicle's poor handling, particularly around corners. As such, make sure to slow before each one and try to avoid any sudden turns...especially on the saran-wrapped walkways.
T.T. Trophy Tips:
- Slow down around the corners, otherwise you may tip.
System Update Required
Objective: Take Bottles to the CPU then grab the Laptop and do the Same
Vehicle Advice: n/a
So you've got a couple tasks in this mission: First, you'll have to give Bottles a lift to the CPU on the bottom floor. The easiest way to do this is to simply drop to the bottom-floor. However, even this can be tricky as Bottles will hop out if you hit anything on the way down. As such, we found it best to drop from the top-right portion of the platform onto the orange walkway below, then from there to the floor. Now drive up to the CPU core to begin the next part of the mission.
With Bottles' dropped-off, you have to climb back up and grab his CPU. From the start, head left and climb the ramp--now there's a vacume-type enemy at the top who'll stop you in your tracks. As such, we suggest jumping over the wall on the right (using the vehicle's spring) just before the top of the ramp. Now follow the orange walkway a short distance and leap to the slope above (with the purple liquid). Turn right at the top and follow the road up the spiraling walkway, then turn right at the junction to find the laptop. Toss it in your vehicle, then simply drop to the bottom floor and take it to Bottles.
T.T. Trophy Tips:
- When giving Bottles' a lift, simply drop to the bottom floor.
- When going for the laptop, make sure to jump to the slope above the orange walkway for a shortcut.
- Once you have the laptop, drop to the floor, like before, and return it to Bottles.
LogBox 720: Act 6
A Sight for Poor Eyes
Objective: Inspect the 5 Cameras
Vehicle Advice: n/a
So you have to haul the pig around to each of the 5 cameras so he can inspect them. This challenge is really easy--just fly within a few feet of each one and he'll complete the inspection.
T.T. Trophy Tips:
- Try heading clockwise around the room for the first three cameras, then hit up the final two in order of what's closest--this should net you rhe trophy.
Lap Happy
Objective: Win the Race
Vehicle Advice: Vehicle with high-acceleration and decent handling, with a rounded front-end
Although seemingly simple--the course is but a mere circle after all--this race can be surprisingly difficult due to the tight turns and spinning DVD. In general, it's best to have a vehicle with better handling than top-speed. In fact, we strongly suggest braking just before every turn. Oh, and the spinning DVD can mess with your handling--slow down as you go over the bump just before, then turn right and drive along the thin strip to avoid the DVD entirely!
We also ran into one other problem during the face: the other opponents getting hung up on our vehicle's front end, forcing us to push them around. ENsure your vehicle has a non-flat front-end to prevent this from happening.
T.T. Trophy Tips:
- Slow down before hitting the bump that precedes the DVD, then turn right and follow the thin strip of road.
Bug Ridden
Objective: Destroy 10 "Bugs"
Vehicle Advice: Vehicle with Large Storage Unit and Vacuum There are 10 bugs disrupting the CPU, and you've been assigned as the exterminator. Thankfully, there's a machine nearby that will electrocute the little buggers for you so long as you place them inside. Now if you're just going for the jiggy, then the easiest method available is to simply grab the bugs foot (one at a time) and manually drag them into the machine using Kazooie's wand--just make sure to activate the machine first! But if you're going for the trophy, then its going to require some smart vehicle usage. For grabbing the trophy, we built a vehicle based on the 'Large Storage Tray,' since the normal one is far too small to contain all 10. Surround the tray with blocks or panels to create a fence, thereby preventing the bugs from escaping. Now slap a vacuum and a couple of weapons onto the front and you're set. Once you reach the area containing the bugs, use your weapons to quickly destroy the Gruntbot, so he doesn't get in the way later. Now simply roam around the room, using the vacuum to easily suck up all of the little buggers (make sure to check the ramp and corners, too!). Once you've got them all, park your vehicle inside the extermination machine best you can (it may not fit completely--don't sweat it) then activate the machine to kill the buggers and claim your trophy.
T.T. Trophy Tips:
- Use the vacuum! Trust us--it's the only way. Combine that with the large trolley and you're set!
- Take a few seconds to kill the roaming gruntbot, it's worth it.
Glubber Hubbub
Objective: Take the Tablet to the Flavor Unit
Vehicle Advice: Build a vehicle with propellers on the back and detachable ones on top
Now this is an interesting challenge! You have to build a vehicle that can carry a capsule to the tube's entrance at the top of the level, then dive underwater and follow the tube to the flavor unit. Why is this so challenging? Because you have to somehow make a vehicle that can both fly and manuver underwater, without one function interfering with the other. We strongly urge you to try it out for yourself first and see what you come up with--figuring this out on your own can be quite rewarding.
Hmm, so you're back, huh? Okay, here's what we came up with: Start with a Storage Tray, then slap on a couple of propellers on the back, then two more on top--however, the ones on top should be built on top of "detatchers"--this way you can ditch them when it comes time to dive underwater, otherwise they would continually pull you up, to the surface.
Once the mission begins, load the tablet into your cart's storage tray, then fly to the purple pool at the very top of the level. Once there, position yourself so you're directly in the center, then detach the top-two propellers, causing you to drop into the liquid. Aim for the tube's opening as you sink, until you touch the bottom. Now simply drive through the liquid, along the path--you'll eventually emerge next to the flavor unit. Just crap the tablet and place it anywhere near the unit to complete the mission.
T.T. Trophy Tips:
- Just follow our walkthrough above--with no mistakes, you should be able to grab the trophy.
Critics Say No
Objective: Grab the Three Objects and Assemble Them in the Proper Order
Vehicle Advice: Build a vehicle using the "large tray" and add weapons
It's up to you to snag the three objects from the enemies and assemble them in the proper order. We suggest using the Large Tray vehicle so you can easily haul the trio of objects to their destination. Your first task is to acquire the three objects being held by the enemies--simply lay into them using whatever weapons you have to release the objects. Once you have all three, load 'em into your vehicle and haul them back to the starting location. Once there, you need to assemble them in the proper order: Cards, Dice, Controller. To do so, grab one (cards, for example), then while holding it with the wand, place it near the Dice object (a red electrical bolt will seemingly connect the two) then tap "B" to enter the creator mode. Now position it right next to the other Dice and tap "A" to cement it in place. Now grab the final object, Controller, and attach it to the Dice in the same manner. Once all three are in the proper order, grab the completed object and place it on the pedastol thing to complete the mission.
T.T. Trophy Tips:
- Use a large tray so you can carry the trio of objects in one go.
Banjo Land: Act 1
Ice to See You
Objective: Push George back up the snowman to his wife
Vehicle Advice: n/a
It seems George, the ice cube (yup, an ice cube!) has gotten himself stuck down hill. Drive down the giant snowman's scarf (dead-ahead, from the start) to find George at the base. Now drive into him to begin pushing him through the tunnel head, which eventually leads back to his wife. Just as you exit the tunnel, begin turning right to avoid slamming into a wall ahead. Now take it nice and easy as you push him along the path and up the snow, to reunite the two lovers.
- Avoid touching the walls, as pushing George away from one can be difficult and time-consuming.
Park Prix 1
Objective: Beat the clock!
Vehicle Advice: A quick vehicle is a must, but make sure it controls well. Consider adding high-grip tires--oh and make sure it has enough fuel tanks, too.
Race around the track, through the checkpoints and beat the clock for the jiggy! That's it! The race isn't even particulary difficult, though depending on what vehicle you have, steering may be. In general, it's a good idea to slow down before making any major turn, otherwise you may lose control of your vehicle (high-grip wheels can be handy). if you're looking for some time-saving tips, peep our T.T. tricks below:
T.T. Trophy Tips:
- Slow down before flying off the yellow ramp (with the checkpoint), otherwise you're liable to miss the checkpoint just after, and you may even lost some vehicle parts, too!.
- Make sure you build up enough speed to hit the checkpoints along the halfpipes.
You'll Go Blind you Clanker
Objective: Destroy the Enemies to Protect Clanker's Eyes
Vehicle Advice: Egg Turret FTW
In the mission, you have to battle off 12 Grunty Bots before they take Clanker' eyes! The easiest way to do this is to outfit your vehicle with an Egg Turret, then park it just in front of Clanker's face (so you have a good view of both eyes), then shoot the Gruntbots as they roll inbound. Once you've taken down 12, the jiggy's yours!
- Our walkthrough above is solid--follow it and the trophy's yours.
Banjo Land: Act 2
The Referee's an Aardvark
Objective: Score at least 4 Goals within the time limit!
Vehicle Advice: Build a vehicle using the standard tray (to hold one ball), then build a "catching" frame in front to push another.
The objective is simple: push at least four soccer balls into the goal on the opposite side of the field (if you're going for the trophy, you'll need 10). To get started, simply drive onto the large red button to start dispensing balls--we suggest dispensing all four (or more, just to be safe) now, that way you won't have to return to the switch later, killing precious time. Now if you're going for the bare minimum of 4 goals, the default "shopping cart" vehicle will work just fine--simply grab a ball and plop it in, then drive it right into the goal! If you're quick, you shouldn't have much trouble scoring the 4 points to earn a jiggy. However, a few enemies will eventually appear on the field, though they won't pose much of a threat as long as you don't lallygag.
T.T. Trophy Tips:
- You'll need to score 10 goals in order to get the trophy, and in order to do so, you're going to have to haul the balls across in pairs of two. We suggest building a vehicle similar to the one shown in our screen shot to achieve this.
- At the start, hold down the giant red button until 10 balls are spit into play, which saves you from having to return later.
- Don't sweat the enemies rolling around in the field--just make a beeline for the goal.
Wasting Away
Objective: Throw the 3 Pieces of Trash Away!
Vehicle Advice: Flying & Storage vehicle required. Try adding helicopter propellers to the shopping cart (make sure the propellers face upward)
You're going to need a vehicle capable of flight and storage for this mission. We found slapping a couple of propellers on the shopping cart to work quite nicely. Now simply grab one of the three pieces of garbage around the can and load it into your vehicle, then fly it on up to the top of the can. Simply swoop in close to have it automatically fall into the garbage can. Do the same for the other two trash items to pass this mission.
T.T. Trophy Tips:
- If you're using the "Tray" Storage Unit Try taking both the empty box and cupcake at the same time--they should both fit.
Banjo Land: Act 3
Clock Off!
Objective: Collect the Workers then Drop Them Off at the Drop Zone
Vehicle Advice: n/a
It's Craaaazy Taxi! Okay, so maybe it isn't, but the concept is the same. You need to pick up the three workers, then drop them off at the target location. The only trouble is that your vehicle can only hold two-passengers at a time, so you'll have to make two trips...or so you would think. Start off by driving through the tunnel, to the left-most worker (on top of Clanker). Now drive straight-up the snowy hill to find the second worker at the top. Now drive down the snowman's scarf where you'll encounter the third worker along the way. At this point, there's no room for you to carry him--instead, ram into him to knock him down the mountain, where you can easily collect him what you've dropped off the other two!
T.T. Trophy Tips:
- Avoid turning when driving up the snowy hill, as it's slippery!
- After collecting the first two workers (using our method above), ram the third worker off the snowman's scarf, where you'll then be able to easily grab him after dropping off the others.
Water Way to Go
Objective: Win the Race
Vehicle Advice: Build a Fast Boat
It's a straight-up race, except this time it's on water. All you need is a quick-boat and you're good to go. If you're stumped for ideas, try using the Boat Chassis Mumbo has available and just slap on a Strong Engine and a couple of fuel tanks and you're golden!
T.T. Trophy Tips:
- Try to take an early lead so the other opponents don't get in your way.
- Stick to the water and avoid trying to take any shortcuts--it's not worth it.
Get Protected
Objective: Turn On 3 Security Lights
Vehicle Advice: Use a Helicopter-type Vehicle
Mr. Fit--more like Mr. Scared, are we right? Okay, so here's the deal: You have to turn on three--any three--of the security lights by activating the nearby switches. Easy, right? The only problem is some of them are guarded by vacuum-like enemies which can blow the search lights over, rendering them useless. As such, it's best to avoid those ones entirely. Oh, and it's best to use a helicopter-type vehicle for this mission, since they're scattered all over the place. Here's the ones we suggest you aim for: The one on the far right (near some eggs), then the next one on the right (on Clanker's back), then finally fly over to the one on the ship on the opposite side.
T.T. Trophy Tips:
- Follow the order outlined in the walkthrough above--as long as you don't make any major mistakes, the trophy is yours!
Banjo Land: Act 4
Spring Break
Objective: Knock Grunty from her Vehicle
Vehicle Advice: Anything with Guns
This one's easy: all you have to do is knock Grunty from her vehicle. The easiest way to do this is pummel her vehicle with gunfire--if that alone doesn't take care of the job, her vehicle's legs should be damaged enough that she's closer to the ground, allowing you to go in and manually wreck her vehicle.
T.T. Trophy Tips:
- Attack her vehicle's legs until she's close to the ground, then hop out of the vehicle and nail her with melee attacks to quickly knock her loose.
Banjo Land: Act 5
Canned and Panned
Objective: Rescue 7 Sheep
Vehicle Advice: Build a vehicle using the large tray
You need to capture 7 sheep and bring them back to Bottles. As such, it's best to use a vehicle that can carry as many sheep as possible, and thus we suggest using the Large Tray, which can safely hold three. Just make sure to build some walls around the tray to hold the sheep in place. Once you're ready, roll on over to the sheep, grab three, then take 'em back to bottles. There are a few enemies along the way--either blast 'em or run over 'em.
T.T. Trophy Tips:
- Use the large tray, and build a fence around to to hold the sheep in place.
Checkpoint Charlies
Objective: Complete the Race
Vehicle Advice: n/a
This is a straight-up point-to-point race...except you're the only racer. The track is really straight-forward, and the only slightly unusual aspect is that you must cross through the checkpoints at a minimum speed (as shown on your speedometer)--if you don't, the checkpoint won't activate.
T.T. Trophy Tips:
- Just keep your vehicle at full-throttle whenever possible and you should have no trouble getting the trophy.
Land, Sea, Not Air
Objective: Win the Race
Vehicle Advice: n/a
This race takes place on both land and in the water. The course itself is pretty straight-forward, so there's really not much more we can say about it.
T.T. Trophy Tips:
- Try to take an early lead so the opponents don't get in your way.
Banjo Land: Act 6
Home Improvements: Igloo Edition
Objective: Destroy the Igloo and Push the Blocks Outside the Circle
Vehicle Advice: Build a Really Wide Vehicle
So Boggy's wife isn't a fan of the igloo and wants it destroyed. For this task, it's best to build a wide-vehicle--try adding a row of blocks on either side of your vehicle, then simply drive right into the igloo to knock it down, then backup and push the blocks out as necessary.
T.T. Trophy Tips:
- Use a wide vehicle with decent speed--this should allow you to easily push the blocks outside the circle.
Eggcellent Racing
Objective: Win the Race
Vehicle Advice: n/a
It's another race against Klungo, but this time on an icy field. The course itself is pretty easy to navigate...except for that pesky ice screwing with your handling. As such, we strongly suggest that you not drive at top-speed and instead throttle the gas carefully, and slow down immensely before checkpoints, so you can corner more tightly.
T.T. Trophy Tips:
- After passing the igloo, hang a left as you go through the next checkpoint and veer left around the structure (instead of following the signs around the right) to shave a few seconds.
Mumbo's Stunt Spectacular
Objective: Complete Mumbo's Stunts
Vehicle Advice: n/a
Well, this is a new one! Mumbo wants you to take his vehicle out for a spin, only this time you're going to have to perform several stunts in order to impress the onlookers. For the first objective, you'll have to drive up the mountain and leave skid marks on the field. The easiest way to do this is to drive in circles, thumping on and off the break. Afterward, Mumbo will task you with performing a flip in the air. Drive toward the ledge just below the archway and perform a jump just before going off. Now while in the air, hold "X" and hold back on the control stick to perform the flip! After landing in the snowfield below, you'll have to jump through several hoops--this is actually pretty easy, just drive towards whatever's closest and perform a jump to make it through.
After nailing the rings, mumbo will task you with performing a corkscrew--simply jump from anywhere and hold "X" and press left on the control stick! Mumbo will now give you a few more rings to drive/hop through--again, easy stuff. Now your final task is to get some major hangtime, so you're going to need a ramp and some speed. The easiest way is to drive toward the yellow ramp (if you're facing away from the "Glitter Gulch Mines", it's to the right) just to the north, then jump just before you fly off the ledge. As long as you have enough speed, and don't perform any stunts (since they slow you down), you should easily clear this challenge.
T.T. Trophy Tips:
- Try jumping up the first mountain to save several seconds (perform the jump as you drive between the two left-most platforms hanging off the mountain).
Mad Monster Mixup
Objective: Win the Race!
Vehicle Advice: Build a Fast Plane
Yup, time for another race. This one, too, is pretty simple. The key is to build a fast plane. We just slapped a couple of wings onto the storage tray, added as many engines and fuel tanks as we could, and took off!
T.T. Trophy Tips:
- Try to take an early lead so your opponents won't get in the way.
- Start your turn before each ring so you're lined up for the following one.
Baa for the Course
Objective: Get the Sheep-Ball into the Hole within 5 Shots
Vehicle Advice: Equip your vehicle with the "Boot in a Box"
So Mr. Fit has challenged you to a rather unusual game of golf, this one involving vehicles and sheep...how bizarre. At any rate, you're going to want to install the "Boot in a box" item to the front of your vehicle. Now get close and use the Boot in a Box to kick the sheep through the archway and down the hill (try aiming for the left-most third of the archway to setup your next shot). Now follow it down and do the same, but this time, aim for the goal! You've got 4 shots left to make it, so make 'em count.
T.T. Trophy Tips:
- Use the boot in a box item! With it, you can score the trophy in as few as 2 shots!
- Set up your shot! Seriously, take the time to make sue you're in positioned to shoot that ball exactly where you want it.
- Make sure there are no hazards blocking your shot--if so, try and move them using Kazooie's wand.
Even Older Dog, Newer Tricks
Objective: Slam Mr. Patch into the Giant Cactus 3 Times
Vehicle Advice: Add the "Sticky Ball" to a helicopter-type vehicle
Mr. Patch is back, and this time he's outfitted in a metallic suit--oh what's a bear to do? Thankfully, there just so happens to be a giant cactus nearby that can puncture even metal! Now the only tricky part is getting Mr. Patch to the catcus. We found the best way to do this is to build a helicopter-type vehicle and install the Sticky Ball either on either side (but not the front, since it can be difficult to see around Mr. Patch as you're dragging him). Once the mission begins, approach Mr. Patch from the side and launch the Sticky Ball at him--if it lands, you can now drag him around. Fly toward the cactus to slam him into it, puncturing him. Do this two more times and you got found yourself a jiggy!
T.T. Trophy Tips:
- Use the Sticky Ball-trust us, it's the easiest way.
- Sometimes Mr. Patch would stay attached to our sticky ball after puncture, allowing us to just hold him place by the cactus for two more easy punctures!
Jiggosseum: Act 1
Fat Blokes in Nappies
Objective: Push all the Sumo Blocks off the Dartboard
Vehicle Advice: A blunt front end made of blocks
This one's simple--and fun! Just knock all the statues off of the platform. For this reason, having a quick vehicle with a blunt front end is recommended. Oh, and to get up to the platform, simply drive up the ramp behind it. Now as for the ramming, you're best off driving dead-on into the stacked statues, then backing up as they fall, allowing you to then push several off at once.
T.T. Trophy Tips:
- If you've upgraded Banjo's Running/Strength stats, there's a super-easy way to complete this challenge. First, select a flying vehicle so you can quickly land on the billboard platform without having to drive up the ramp behind it. Now simply use Kazooie's want to grab each statue and manually toss them off the ledge--easy! For the statue stacks, always grab the bottom one, as it'll drag the rest of the stack with it (remember to use the bumpers to toggle between selected objects). And to better your time, try tossing the blocks off the platform as you're running toward the next statue.
Unhappy Landings
Objective: Use the Ramp to Jump Far
Vehicle Advice: Fast vehicle
Race down the slope and launch as far as you can from the ramp! As you probabley guessed, you're going to want a vehicle with a high top-speed. Try slapping on some medium sized engines and change your tires to "standard" for maximum speed. You shouldn't have any trouble nabbing the Jiggy, at least.
T.T. Trophy Tips:
- Try tipping your nose down at a 45 degree angle just before landing--this can cause you to go into a huge forward tumble, adding much distance to your jump.
Jiggosseum: Act 2
Burnin' Rubber
Objective: Win First Place
Vehicle Advice: Build a vehicle with a high top-speed and enough fuel to last the race
Okay, so this race is likely both the longest and hardest one you've faced yet. Because of the race's length, having ample fuel supplies are crucial (our vehicle had 1 Medium tank, and 3 small ones, which was just barely enough). As for the vehicle itself, there are two main options: build a very fast land-based vehicle, or a well-handling flying one. If you opt for the ground, slap on as many engines as you can, as you're going to need speed in order to take first (we placed 3-Medium engines on ours, but this guzzles fuel). You'll also want a quick vehicle so you can take first place quickly, as the other racers possess oil spills and ice rockets that can be a major pain to contend with if you're behind them. Finally, be careful of the obstacles and stick to the main track--if you get knocked off, drive toward the next checkpoint, keeping an eye out for the ramps you can use to reach the track.
If driving isn't working out for you, there is another option that you may want to consider: Build a flying vehicle. We slapped two propellers onto our Shopping Cart (one on top, the other on the back--no wings), which allowed us to fly from checkpoint to checkpoint, skipping the courses' hazards entirely (including your opponent's oil spills and ice rockets). This also allows you to cut across the center of the level to quickly reach the far-checkpoints (occurs after every 2nd checkpoint), saving a ton of time. Now controlling flying vehicles can be tricky, so make sure you approach the checkpoints low enough that you can clear them.
T.T. Trophy Tips:
- It's all about speed! Slap on as many engines & fuel tanks as you can and let 'er rip!
- Try to take the lead early on, that way you won't have to deal with your opponents' weapons.
Thumblin' Domies
Objective: Knock Over as Many Dominoes as you Can
Vehicle Advice: Either build a vehicle that can push balls, or design an aircraft with a huge structure underneath
Knocking over Dominoes may sound easy, but oh how mistaken you are. If you're just going for the jiggy, we suggest using a vehicle that can carry objects, such as the Tray. When the challenge begins, hop out of your vehicle and grab the red ball behind you and toss it in your vehicle. Now ram into the blocks at high-speed, and at a slight angle, to knock them over--the ball you were carrying/pushing should go on to knock over a few more, netting you the puzzle piece.
T.T. Trophy Tips:
- In order to get the Trophy, you're going to have to attach the dominoes from the center, so they'll fan out. And the only way to do this is with an aircraft. We suggest building a helicopter that has a huge block structure underneath (as shown in our video), then fly over the dominoes and dive into the center, ramming into those on the northern-half. As long as you hit enough stacks, you should get the trophy.
- In addition to the trick above, try attaching the huge-block structure to a "Detacher." Now fly toward the center and release the block-structure just before impact--this will allow it to knock over the same blocks it would have otherwise, but now your helicopter may also knock over a few more as it crashes to the ground.
Jiggosseum: Act 3
Heavy Balls and Hairy Pits
Objective: Hit the Ball as Far as you Can
Vehicle Advice: Build a vehicle using as many engines/jets that you have and add a Boot in a Box to the front
This mission is really all about speed, so slap on as many engines and jets as you can (we had one jet, two large engines, and several medium and small ones, too). Oh, and it's best to add a "Boot in a Box" to the front of the vehicle, to kick the ball with as you bash into it.
Before you start, here's an important tip: Pick up the ball and place it on the very edge of the platform. Because the distance-counter only tracks how far the ball goes after it has left the platform, you want to make every foot count. Now that the ball's in position, back up down the ramp as far as you can, then drive at the ball at full-speed, then kick it with the 'Boot in a Box" just before you reach it--this should net you the trophy.
T.T. Trophy Tips:
- Add as many engines to your vehicle as you can.
- Pick up the ball and place it on the edge of the platform before bashing into it.
- Back-up down the ramp before ramming into the ball to give you more room to accelerate.
- Aim for the tunnel on either side of the field on the far end--they're sloped just enough to give you the extra distance you need for the trophy.
A Load of Blocks
Objective: Win the Race!
Vehicle Advice: Use a Fast Plane
This race is pretty much identical to the first one you raced in this level, except now there are hurdles you have to jump...or not jump, with our preferred method. That's ridge--forget using a land based vehicle, it's all about places here. Not only will it keep you out of harm's way, but you can also cut right across the middle whenever the checkpoints on the other side. So slap on as many engines as you can and you're good to go.
T.T. Trophy Tips:
- Use a fast plane instead of a land-vehicle.
- Cut across the middle whenever a checkpoint's on the opposite side.
Brown Bears Can't Jump
Objective: Score Three Baskets
Vehicle Advice: Use a Helicopter with Sticky Ball installed
It's a game of basketball, and you're down by three! Now the basket is raised quite a few feet off the ground, and it'll go even higher after each basket, so you're going to need a flying vehicle. We suggest building a helicopter with Stick Ball installed. Now use the ball to grab a ball and fly right up to the basket--it doesn't matter if the ball goes in through the top or bottom, so long as it goes through the hoop. Once you've scored, drop down and return for another. One tip to keep in mind is that the basket is centered above the blue portion on the ground, so use that as a visual aid when flying upward.
T.T. Trophy Tips:
- Although the walkthrough above will net you your trophy plenty well, there is an even better option Build a vehicle using as many Large Trays and Boxes as you can. Each one can hold a single basketball. Once you've placed a basketball in each, just fly straight up into the hoop to score several points at once!
World's Strongest Bear
Objective: Place the Three Balls on Each of the Podiums
Vehicle Advice: Use a Helicopter with Sticky Ball installed
There are three balls nearby (one on the ground, another on the pedestal, and the third a few floors above) that need to be placed on each of the pedestals--the order they go in doesn't matter. We suggest using a helicopter with the Sticky Ball installed to grab the balls, then simply hover (or land if you have trouble aiming) above the pedestal and drop the ball onto it--they're indented, so the ball should stay put. Once you have all three, a jiggy will be yours.
T.T. Trophy Tips:
- Use the sticky ball! It's the easiest way.
Jiggosseum: Act 4
Who Left the Tap On?
Objective: Score 3 Points in Water Polo
Vehicle Advice: Build a Boat with Sticky Ball on the side
Man, Gruntilda's getting easier and easier. In this challenge, all you have to do is drag the balls through the goal for points...while Gruntilda sits around making waves or something. Anyways, the easiest way to drag the ball is to slap a Sticky Ball ont the side of your boat and use it to grab the balls, then haul them through the goal. Easy, easy stuff.
T.T. Trophy Tips:
- Use the sticky ball! It's the easiest way.
Jiggosseum: Act 5
9-Ball Nightmare
Objective: Prevent Grunty from Destroying 5 Balls
Vehicle Advice: Build a Helicopter with Sticky Ball on the front
Alright, so Gruntilda, for whatever reason, has decided to take her anger out on some helpless billiard balls. Thankfully, she only targets on a time, and that one is marked on your hud by an icon. If you let her get near it, she'll destroy it within seconds, which is a big no-no.
Now normally, you would think it best to grab the ball and keep it away from her, but that's actually much harder than simply grabbing Gruntilda herself and keeping her away from the ball! But how do you do that? Simple! Build a flying vehicle with a Sticky Ball attached to the front then chase after Gruntilda and nab her with the Sticky Ball. Now she's in your clutches, take to the air and do whatever you please with her until the round's timer counts down--and don't worry about her escaping your grasp, she's completely helpless in this state. Now although Gruntilda will drive straight at you at the start of the first few matches, making grabbing her quite easy, you will have to chase her down after a few rounds, so make sure your helicopter's got a decent top-speed.
T.T. Trophy Tips:
- In order to get the trophy, you're going to have to stop Gruntilda from destroying 7 balls. Use the method above for a sure-fire method of nabbing it..
Jiggosseum: Act 6
No Holds Beared
Objective: Push the Pig Out of the Arena 3 Times
Vehicle Advice: Build a very, very heavy vehicle that's low to the ground
The pig has challenged you to a sumo match--whoever pushes the other out of the arena three times wins! The key to winning this one is to make a very, very heavy vehicle that's low to the ground (so it doesn't tip), features a low front end (so the pig can't flip you), and has a ton of power, so add all the engines and jets you can. As long as you followed that outline, simple accelerate toward the pig and shove him out!
T.T. Trophy Tips:
- Follow out vehicle advice above and you'll have no trouble meeting the trophy's time limit.
Smashin' Time
Objective: Destroy the Dice to Earn Points
Vehicle Advice: Add the Laser (and tons of ammo) to your vehicle
You beat Gruntilda right, in Act 4, right? If so, add that laser to your vehicle, as it's a godsend for this mission. Just make sure to load your vehicle up with ammo, as it uses a ton! Now just sit back and blast the dice for some major points.
T.T. Trophy Tips:
- Follow our vehicle advice, then sit back and blast them for an easy trophy.
- If you run out of ammo, slam the dice into walls to destroy them.
Bear in a Ball
Objective: Complete the Circuit Within the Allotted Time
Vehicle Advice: n/a
As usual, the circuit is pretty easy to find your way around, but there are a couple of twists this time. For one, sections of the course are littered with dominoes, and you'll incur a 2-second time penalty anytime you knock one over. But even worse, your vehicle controls have been reversed! That is, pressing left turns you right and visa-versa--a true pain in the butt. But there is an easy way to overcome this: Turn the controller upside down, then use your right-thumb for steering and left thumb for gas. The only downside is that you can't reach the brake, but so long as you release gas whenever you need to brake, you should be okay.
The most difficult part of the track comes at the end, crossing the bridge lined with dominoes. Make sure to center yourself and take it slowly.
T.T. Trophy Tips:
- Having trouble steering? Try turning the controller upside down!
The Jiggosseum Torch
Objective: Grab the Wheels, then Light the Torch
Vehicle Advice: n/a
The goal is simple: Take the fire to the torch above. However, you're gonna need some wheels to do so, which you currently don't have--thankfully there's some in a pair of boxes just across the way. Boat over to them and ram the boxes to break then open, then quickly hold right-bumper to add the wheels to your bat (make sure you grab all 4). Now turn around and drive up the ramp on the direct opposite side and follow the thin path at the top to the torch. Voila! Jiggy!
T.T. Trophy Tips:
- Make sure to grab all 4 wheels, otherwise steering will be very difficult.
Up to the Oche
Objective: Score Enough Points
Vehicle Advice: Build a Fast Vehicle with Wings
In this mission, your vehicles acts as a dart, and you've gotta aim for the high-point markers. Now even though it's not marked explicitly, the bulls eye in the far 30-point zone is actually worth 150 points, and is crucial to getting the trophy, if you so desire. Now the hard part is actually landing where you want to--the key is to build a fast vehicle with wings, that way you can sort of maneuver after launching. If you don't have enough engines/jets to launch far enough, consider coming back later when you have more parts. If you're still having trouble, check out our trophy tips below.
T.T. Trophy Tips:
- Aim for the bulls-eye! It's worth 150 points and is the only way to get the trophy, short of landing in the 75pt zone all 5 times.
- Launch from the ramp at a slight upward include, but not too steep--just steep enough so you can glide just under the central structure to the bulls-eye, where you can then crash land into the bulls eye.
Half-Time Snacks
Objective: Deliver 4 Pizzas
Vehicle Advice: n/a
So you've been tasked with delivering pizzas to four hungry customers, but you have to get the pizzas first! From the start, move forward a few feet so you're parked under the pizza machine. Hop and spin the nearby switch until it won't spin anymore to dispense 4 pizzas. Now quickly drive through the tunnel ahead and head for the first customer on the ground, just up ahead. Now keep in mind that you only have to slow down to deliver a pizza, so don't stop completely! Now head for the next customer on a deck to the left and activate your wings (with "B") to fly to him, then head to another on a deck on the opposite side, then from there to the final customer at the top of the ramp! Now was that so hard?
T.T. Trophy Tips:
- When dispensing the pizzas, spin the control stick as fast as you can so no time is wasted.
- Head to the customers in the order outlined above: On the ground, dude on deck to the left, one on the opposite, then finally atop the ramp.
- Every second counts! Make sure not to hit walls when flying!
Terrarium of Terror: Act 1
Bear's Eye View
Objective: Reach the Destination
Vehicle Advice: n/a
So you've been given the all-time worst vehicle in order to climb a mountain reach the destination. The path itself is really easy--just drive up the spiraling mountain. The problem is that you'll reach several sections that are seemingly too steep to climb; in these instance, you must hop using your vehicle's built-in spring in order continue up the mountain. Once you reach the top, make a leap of faith to the goal!
T.T. Trophy Tips:
- Hop often to maintain speed--remember, the longer you hold the button, the higher you leap.
Need for Seed
Objective: Take the Seed to the Destination
Vehicle Advice: Build a Flying Storage Vehicle (using the retractable wings) with a Liquid-Squirter Facing Inward
The fate of a seed Klungo found is now in your hands. You've gotta haul it to the destination, but you've also got to keep it moist along the way, otherwise it will die. As such, you're vehicle is going to need a tray to hold the seed, and you need to attach a "Liquid Squirter" facing inward so you can water the seed whenever it starts to run dry. Finally, we suggest slapping on some wings so you can fly the final portion for an ultra-easy victory.
From the get-go, load up the seed, then turn around and drive through the tunnel--remember to water the seed whenever its on-screen health starts to drop. As you continue through the tunnel, it'll twist so that the floor becomes the ceiling, so if you find it hard to drive, move to the right a bit so you're driving on the floor, proper. After exiting the tunnel, it's a straight shot to your destination, so pop out your wings and fly there, including right through the glass pane seemingly blocking the way. Now just land in the flower pot to complete the mission.
T.T. Trophy Tips:
- Use a flying vehicle so you can glide over the final stretch, allowing you to grab the trophy with time to spare!
Terrarium of Terror: Act 2
Intergalactic Binman
Objective: Trash the 12 Pieces of Garbage
Vehicle Advice: Build a Wide Vehicle that can herd the garbage add add weapons
The goal's simple enough: Shove the 12 pieces of garbage into the airlock dead-ahead. But oh, what seems so simple is made near impossible by a pair of blowing-enemies by the airlock. You're going to have to take them down first! But even worse, they'll respawn after a short while, so you're going to have to move fast once they're down. As such, outfit your vehicle with whatever weapons you have--homing rockets work amazing, but Egg Launchers will work too. Once you've cleared the enemies, you need to shove the garbage into the airlock. For this reason, we suggest building a wide vehicle that can push the garbage all at once, just make sure you add enough engines, as your vehicle will be heavy.
T.T. Trophy Tips:
- The vehicle you use is crucial, as there's not much time afforded for the trophy. Weapon wise, we suggest outfitting your vehicle with at least one rocket-launcher and place it on either far side of the vehicle--you should be able to target both blowing-enemies from the start just by changing your angle a bit. Once they're down, you'll need a vehicle that can quickly push the garbage all at once into the airlock--use a vehicle similar to the ones in our video to make it through.
Germ Warfare
Objective: Destroy the Germs
Vehicle Advice: Enter the creator and move the rocket to the bottom of the ship
There's a germ ball running amok and it must be destroyed. However, once you do, it'll split into two, and those two will split into two more, resulting in 7 germs total you must destroy, each smaller than the last. Now the vehicle you're stuck with is not exactly up to the task--its balloons and single rocket make it difficult to steer, and it has almost no ammo. Thankfully, you can fix the steering issue--enter the in-game vehicle creator (by grabbing it with the want and pressing "B." Now move the rocket to the bottom of the ship--this will allow you to control your vertical ascent much easier than the balloons do. Now just fly up to the germ and lay into it with your egg-launcher, then go after the mini-germs that spawn.
T.T. Trophy Tips:
- Move the ship's rocket to the bottom of the craft using the in-game editor.
- Once the germ's in your aim, don't let up on the egg-firing until it's destroyed.
Great Balls of Gas
Objective: Take the Poisonous Ball to the Top
Vehicle Advice: Build a flying vehicle using the large tray and add several engines, propellers (facing upward) and/or jets (facing down) to easily carry the ball
So you've been tasked with hauling the poisonous ball to the top of this chamber. As such, you're going to need a vehicle that can not only hold it, but is strong enough to lift it, as the ball gets heavier the higher it goes. We suggest building a vehicle based around the "Large Tray," to hold the ball, then add several engines, some propellers on top (to provide lift), and add some rockets, too, facing down to provide additional lift.You may also want to build a pen using blocks/panels around the tray to better contain the ball. With your vehicle ready, load the ball on-board, then carefully begin your ascent. Stick close to the spiraling walkway, as your destination is just above. However, you will likely encounter a few overhangs along the way, so maneuver around as necessary to get around them.
T.T. Trophy Tips:
- Use the vehicle outlined above to easily pass this challenge.
- Stay close to the green, spiraling walkway, as your destination is just above.
The Saucer of Peril Returns
Objective: Score Enough Points to Earn the Jiggy
Vehicle Advice: n/a
It's not often we get frustrated, but this mission is a pain the rear. In short, all you have to do is aim (a really twitch) crosshair and fire at the balls. The different colors are worth different amounts of points:: Blue=3, Green=2, Red=1. As such, it's best to aim mostly for the Blue and Green ones and don't worry about the Red ones at all. Since you have infinite ammo, keep the fire button depressed at all times! Oh, and when you're underwater, it can be difficult to see the target's colors, so aim for the upper-three, which are usually blue or green.
T.T. Trophy Tips:
- Hold down the fire button and don't let go!
- Aim for the Blue and Green ones!
- Line up your shots so the screen's scrolling automatically sweeps your cursor over the targets--it'll take a few tries before you learn the timing.
- Shoot the occasional plant bulb to have it take down a few targets below.
Flash Fly-Off
Objective: Win the Race
Vehicle Advice: Build a fast, well handling ground vehicle with retractable propellers
We're not going to lie, this race is tough, particularly if you're going for the trophy! You'll also find that the vehicle you use is very important, and should have a good balance of speed and maneuvering. The vehicle we used was based on the Land Chassis 1--a narrow three-wheeled (1 in the front, 2 in the back) vehicle that had 2 large engines and two retractable propellers, one on top (to gain altitude) and one on the back (to push us forward). The key is to switch between the two during the appropriate times--in general, you'll move faster when on the ground, though the terrain isn't always ideal. As such, you may want to check out our trophy tips below to find out when you should be driving vs when you ought to be flying.
T.T. Trophy Tips:
- Drive around the lake at the start, instead if through--it won't save a lot of time, but it can add up.
- When driving through the first tunnel, stay to the right, then the left, to avoid a pair of columns.
- After exiting the tunnel, you'll have to take to the air for the next three checkpoints--turn left as you pass through all three to line yourself up for the next one.
- After flying to the second tunnel (third if you count the first one you drove through), drop the ground and drive through it instead--it's faster. Just make sure to move to the right as the tunnel twists to stay on level ground.
- As you exit the tunnel, take to the air again and fly straight to the next checkpoint, but approach it from the right so you're lined up for the next ones.
- We strongly suggest flying through the last few checkpoints--the ground's too uneven for land-based vehicles.
Taxi of Terror
Objective: Drop Off the Four Passengers
Vehicle Advice: Build a flying vehicle using retractable propellers and install four large passenger seats
So you're playing Mr. Taxi man again, but this time you have to take four passengers to their destination. As such, you're going to want to built a vehicle with four large passenger seats, so you can carry all four at once. In addition, slap on some retractable propellers (we used two on top and one on the back) so you can easily fly them to their destinations.
From the get-go, pick up all four passengers then head toward the first destination on the ground, just past the tunnel. Now fly straight-up from there to find the second zone on a leaf. Now fly through the glass ahead and land in the third zone behind the structure. Finally, retract your propellersand diver into the water and continue through a tunnel to find the final drop-off zone.
T.T. Trophy Tips:
- Build a vehicle with four large passenger seats, that way you can pick up all four passengers at once.
- Install retractable propellers so you can drive underwater.
- Follow the advice outlined in the walkthrough about to easily nab your trophy.
Berry Ripe Indeed
Objective: Water 10 BerriesVehicle Advice: Build a flying vehicle and install the "Suck-n-Blow"
Your task is to water 10 berries. Now your first idea that might come to might would be to use the "Liquid Squirter," and while it will work...eventually, it's much too slow. Instead, outfit a flying vehicle with the "Suck-n-Blow" allowing you to simply blow all of the berries into the water below, where they'll automatically ripen without any further intervention. Easy stuff! Make sure to fly to the central platform first, as it contains 7 berries, then just scout out a few others scattered around.
T.T. Trophy Tips:
- Use the Suck-n-Blow to blow the berries into the water for an almost too-easy-to-get trophy.
Terrarium of Terror: Act 3
Time for a Cuppa
Objective: Take Tea or Crumpets to the Four Hungry Researchers
Vehicle Advice: n/a
There are four hungry researchers who are craving some tea and crumpets, and it's up to you to bring it to them. Thankfully, they only require one item each--not both, meaning you only need to load four of them into your truck. After loading up. drive straight up the hill ahead and through the glass to find the first researcher. Now turn around and follow the purple walkway,, then drop off the far end to find the second researcher on a ledge. Now drive down the slope on the right and continue through the left tunnel to find researcher #3. Now backtrack through the same same and continue through another tunnel on the left to find the last one.
T.T. Trophy Tips:
- You only need to grab 4 food items--one per researcher.
- Follow the path outlined above to snag your trophy.
Super Sally
Objective: Complete the CourseVehicle Advice: n/a
Whoa man, this is surprisingly easy. All you have to do is climb the spiral--for the most part, you can just hold right on the control stick and simply adjust your acceleration as need be as you climb the mountain--so easy.
T.T. Trophy Tips:
- There's not much advice we can give here--just hold right and gas it!
Flower Power Shower
Objective: Blast 50 GruntbotsVehicle Advice: Equip your vehicle with an Egg Turret
The giant flower will launch an endless stream of Gruntbots, but you'll only have to destroy 50 to get the jiggy. We found the easiest way is to equip any vehicle with an egg turret. Then as soon as the mission starts, hop in the turret and shoot the Gruntbots out of the sky! It only takes 3 shots to destroy one, but they will drop after each shot, so try to kill them before they can drop, or follow them down with your cursor.
T.T. Trophy Tips:
- Use the Egg Turret--this way you don't have to worry about driving or anything.
- Hold the fire-button down--you have unlimited ammo, so no point letting go.
- Aim for groups of Gruntbots and wave your cursor around to damage them all at once--also try aiming for the bots as they launch out of the flower.
Family Misfortunes
Objective: Haul the Alien to the Drop-Off LocationVehicle Advice: Vehicle with Retractable Propellers and Storage Capacity
For this mission, you should create a retractable helicopter based around the storage tray. Once you're set, load the alien into your vehicle and drive through the tunnel ahead. Now use your propellers to float down through the hole (where the spiraling purple walkway is) to the area below and look for a small pond on the ground. Retract your propellers to dive underneath and follow the tunnel there to the drop-off location.
T.T. Trophy Tips:
- You have ample time to grab the trophy, so just follow our advice above and you should be golden.
Hovering Harvest
Objective: Harvest 4 FruitVehicle Advice: Helicopter with Sticky Ball
There's a lot of fruit floating directly above the starting location, and you're going to have to haul for them into the machine just ahead. For this purpose, we recommend building a helicopter type vehicle with Sticky Ball attachment--use it to grab one fruit at a time, then release it as you hover into the mouth of the fruit machine to have it suck it up. Do that three more times and you're golden.
T.T. Trophy Tips:
- You don't have to fly too high into the fruit collector machine--just get close then release the fruit to have it suck it up.
Terrarium of Terror: Act 4
No Armed Bandits
Objective: Destroy 10 EnemiesVehicle Advice: n/a
So there's a boat load of enemies driving around, and you'll have to destroy 10 of them in order to claim your prize. And your vehicle's more than up to the task as not only is it outfitted with a small amount of homing rockets, but it's also a great ramming machine. As such, it's best to save your rockets until you need them, such as for a distance enemy. From the get-go, drive off the starting platform to the ground below and begin ramming into the enemies--you should find 7 or 8 here. Once you've dwindled their numbers, either explore the nearby tunnel or climb the ramp to find enough to complete the mission.
T.T. Trophy Tips:
- Ram as many enemies as you can, and save your rockets to pick off the distant stragglers.
Uranus Mud Monsters
Objective: Save 10 Mud Monsters
Vehicle Advice: Use a vehicle using several large trays and add floaters
It's simple: The mud monsters hate water, so go grab them and toss them on dry land! It's really easy--heck, you don't even really need a vehicle except to drive to them quickly. Once you've found a group, just grab 'em with your wand and haul 'em out--just make sure they don't roll back into the water!
T.T. Trophy Tips:
- For the trophy, it's best to build a vehicle using as many Large Trays as you can, and add floaters to it can go in the water. Now just fill load the Mud Monsters into the trays (each tray can hold two), then let 'em go on land. Do the same for each pond you encounter and you'll have no trouble getting the trophy.
To Boldly Go Anywhere
Objective: Win the Race
Vehicle Advice: Build a vehicle that can drive, fly, and go underwater using two retractable propellers on top, and two permanent ones on the back
It's another race, but this time you're going to need a vehicle that can drive, fly, and go underwater! The vehicle we built used the tray as a base, then we slapped two small propellers on the back (for thrust underwater), two retractable ones on top toward the front (for flying), and wheels for driving.
From the start, drive through the first checkpoint, then activate your propellers to take to the air and glide down to the checkpoint below to shave a few seconds. We suggest flying through the next several checkpoints until you one just before the lake--return to the ground here and drive toward the right side of the lake, into the tunnel underwater. Stick to the right side in the underwater cavern, then turn left at the exit to reach the next checkpoint on land. Now return to the air for the next several, returning to land as you pass through the one in the lake to the one just beyond--this will allow you to turn tighter. Now fly through the remainder to complete the level.
T.T. Trophy Tips:
- Follow the walkthrough we've outlined above quickly to claim your trophy.
Space Bandit Ahoy!
Objective: Destroy the Four Gruntbots
Vehicle Advice: Use a vehicle with a large storage capacity (two or three large trays work great)
Your objective is to grab the four Gruntbots and take them to the airlock for termination. The easiest way to do this is to build a vehicle using as many Large Trays as you can (3 recommended, though any amount works), and outfit it with a couple of grenade launchers on the front. Once the missions starts, fire grenades at the Gruntbots ahead, which should stun at least two of them. Go pick them up and add them to your cart, then approach the remaining ones--don't get too close though, otherwise they'll roll away. Once they're in range, blast them too to stun 'em, then add them to your cart and haul them all back to the airlock for destruction.
T.T. Trophy Tips:
- Use grenade launchers to stun the enemies, then load 'em up into a vehicle that consists of three large trays.
Terrarium of Terror: Act 5
Unpleasant Fat Oaf
Objective: Separate Gruntilda from her VehicleVehicle Advice: Attach a laser to a flying vehicle
Gruntilda's up to her old tricks again, and as usual, they're not hard to thwart. In this case, she's flying a vehicle that can turn somewhat invisible (although she's still easy to see, and is marked on your screen if you roam too far), but more importantly, she also has a loud horn she'll blow on occasion that will push you far away. Anyway, all you have to do is shoot her up until she falls out of her vehicle. Any weapon will work, though the "laser" is byfar the best--just get behind her and fire it directly at her. A few seconds of sustained fire will finish her off, netting you jiggy, and in all probability, the trophy.
T.T. Trophy Tips:
- Use the laser for an instant win.
Spiral Mountain: Act 1
Six of the Best
Objective: Complete the Six EventsVehicle Advice: Build a fast vehicle with a normal storage tray, flight capability(using retractable propellers), and weapons (homing missile is best)
L.O.G's final challenge for you is actually six events in one--and you're stuck with the same vehicle throughout, so it's important the one you choose is well-rounded. We suggest a fast land-based vehicle build around a storage tray, with a Homing Rocket installed, and retractable propellers for flight. Now between rounds, L.O.G. will quiz you on various aspects of the game--for each question you answer right, he'll shave 5 seconds off your time, so study up!
The first event is simple: Stay inside the moving crown. Simply accelerate inside, then keep pace with it for 15 seconds. In the second event, you have to grab the large green gem and throw it away--after placing it in your storage tray, just follow the path to the dumpster by Banjo's house and toss it inside. The third task is to shoot the 5 floating targets. Take to the air and fly clockwise around Spiral Mountain to easily find the first four, then look for the fifth on top of Spiral Mountain itself--the Homing Missile makes this task a breeze as it'll home in on the targets. The fourth event has you driving/flying through a series of checkpoints--drive through the first few, then take to the air when you encounter the checkpoint in the water, and fly through the rest. During the fifth event, you'll have to retrieve the three honeycomb pieces from the tree stumps and take them to the top of Spiral Mountain--you'll find it's faster to turn around at the start to reach them faster. For the final event, you have to push a stack of blocks outside of the marked area. If your vehicle's not equipped for pushing, simply use Kazooie's want to drag all of of the blocks out manually.
T.T. Trophy Tips:
- As long as you answer the questions correctly, netting the trophy is a breeze.
Spiral Mountain Showdown
Objective: Destroy Grunty
Vehicle Advice: Build a land-based vehicle with retractable propellers (so it can fly), equip it with a sticky ball, laser, torpedo and as much ammo as you can muster. And slap on a

This is it, the final battle with Gruntilda. This battle's a five-parter, with Grunty switching vehicles after every defeat. Like before, the key is to separate her from her vehicle, and the easiest way to do this is with the Stick Ball. Why? Because most of her vehicles (specifically, the ones she uses during the 1st, 2nd, and 4th portions) are highly susceptible to water. As such, you can simply Sticky Ball her vehicle, then drag her over to into any body of water (such as the creek surrounding Spiral Mountain itself, or the lake by the dried waterfall) resulting in an instant win--it's almost too easy.
The first round begins with Gruntilda in a land-vehicle approaching from the right--if you're quick, you can intercept her on the road just ahead--like we mentioned above, Sticky Ball her, then drag her into the river. Next, she'll approach from the left in a transparent vehicle--grab her and dunk her. Now she'll take to the waters in a boat; try lasering the ship's center to quickly sink her. For part four, Grunty will take control of a large tank that can do some heavy damage, but even it can't resist the Sticky Ball dunk. For her final act, the witch will take to the skies on her broom, and this vehicle cannot be dunked. As such, it's best to fly in behind her and pelt her with homing torpedoes--it may take a while, but eventually her vehicle will fall apart
T.T. Trophy Tips:
- Sticky ball her in vehicles 1, 2, and 4 then drag her into the water for an instant win! For the boat, try to drown her by busting apart the center of her ship, causing her to flounder, then for the broom, target her from behind with torpedoes.
- When Grunty's riding her broom, try sticking ball her directly (as in, Grunty herself and not the vehicle). If you hit her just right, you'll separate her from the vehicle for an instant victory.
Xbox 360 Achievements
Note that there are Spoilers on this list.
| Achievement Name | How To Earn | Reward |
|---|---|---|
| Pointless Collector | Take part in the L.O.G. badge collecting challenge at the start of the game in Spiral Mountain | 10 |
| Open Nuts | Place the Nutty Acres Game Globe on its plinth in Showdown Town | 10 |
| Next-Next-Gen | Place the LOGBOX 720 Game Globe on its plinth in Showdown Town | 10 |
| History Lesson | Place the Banjoland Game Globe on its plinth in Showdown Town | 15 |
| Let the Games Begin | Place the Jiggosseum Game Globe on its plinth in Showdown Town | 15 |
| Super Banjo Universe | Place the Terrarium of Terror Game Globe on its plinth in Showdown Town | 20 |
| My First Bank | Bank your first Jiggy in Showdown Town | 10 |
| Little Banker | Bank 10 Jiggies in Showdown Town | 20 |
| Big Banker | Bank 30 Jiggies in Showdown Town | 30 |
| Shower of Gold | Bank 60 Jiggies in Showdown Town | 40 |
| Jiggillionaire! | Bank 131 Jiggies in Showdown Town | 50 |
| Pimped Up | Complete the Showdown Town Trolley with Parts won from Grunty battles | 20 |
| Witch Hunt | Defeat Grunty at the end of the game | 50 |
| My First Trophy | Earn a T.T. Trophy from any challenge | 10 |
| Few Trophy Pts | Earn 10 T.T. Trophies from any challenges | 20 |
| More Trophy Pts | Earn 30 T.T. Trophies from any challenges | 30 |
| A Lot of Trophy Pts | Earn 60 T.T. Trophies from any challenges | 40 |
| Be Crateful | Find and return two crates to Mumbo's Motors | 15 |
| Blueprint Buyout | Buy a blueprint from Humba in Showdown Town | 15 |
| Roid Rage | Train Banjo once in the Showdown Town gym | 15 |
| Start to Free the Showdown Six | Free and re-house a Jinjo in Showdown Town | 15 |
| Vigilante | Lock up a Minjo in Showdown Town | 15 |
| Bingo! | Complete a line on the Bingo card at King Jingaling's Palace | 20 |
| Stop 'n' Swop | Return a Stop 'n' Swop crate to Mumbo's Motors | 0 |
| BBQ Beef | In Nutty Acres, they like their steak well done | 20 |
| Massive Damage | Aim at the 10 legs for massive damage | 20 |
| Test Your Strength | Roll up, show the whole of Banjoland how strong you are | 20 |
| Great Balls of Fire | Take a heavy ball around the Jiggosseum and get a burning sensation | 20 |
| Ultimate Combo | More like a three-hit combo in the Terrarium of Terror | 20 |
| Floater in the Pipe | Eeurgh! That's not going to help the Test-O-Track plumbing | 20 |
| Burn the Witch! | Showdown Town witch hunt | 20 |
| Head for Heights | Find the best view in Showdown Town | 20 |
| Fuzz Off! | POP goes the Weasel! | 20 |
| Paint Your Wagon | Paint any part of your vehicle in Mumbo's Motors | 10 |
| Speedy of the Colossus | Build a vehicle with 200 blocks or more and go over a set speed | 25 |
| Minimalist | Build a vehicle with five blocks or less and go over a set speed | 25 |
| Whoa Nelly! | Travel in a vehicle over a set speed | 25 |
| Loose Change | Collect ALL the Showdown Town Loose Change | 20 |
| Arcade Pwner | Finish all levels of Klungo's Arcade game | 20 |
| Sunday League | Play in and complete a multiplayer game League | 20 |
| Premier League! | Play in and complete a marathon multiplayer game League (Every Race, Every Sport or Every Race and Sport) | 40 |
| What's That Smell? | Play an Xbox LIVE multiplayer game against a Banjo team member, or somebody who has already done so | 10 |
| Bit of Blue | Share a blueprint with another player or Friend over Xbox LIVE, or save 20 blueprints | 10 |
| Paparazzi | Take a photo and upload it to Xbox LIVE, or take five photos | 10 |
| Caught on Camera | Send a video replay to a Friend over Xbox LIVE, or save five replays | 10 |
| High Fives All Round | Be on the winning team in a ranked team game | 10 |
| All My Own Work | Win a ranked solo game with a custom vehicle | 20 |
| Too Easy! | Win a ranked solo race by reversing over the finish line | 10 |
| Too Easy Too! | Win a ranked solo race by running or swimming over the finish line | 20 |
| Are You Trophy Thomas? | Win 20 Xbox LIVE ranked multiplayer games in any mode | 40 |
Got a news tip or want to contact us directly? Email news@gamespot.com
Join the conversation