Devil May Cry 4 Walkthrough
Need help making that devil cry? Check GameSpot's Walkthrough for more tips than you'll know what to do with.
It's been almost three years since Capcom's superlative Devil May Cry 3 came out. DMC3 featured a refined version of the stylish action gameplay that had made previous games in the series so famous, but also brought along some brutally difficult bosses and very challenging gameplay.
Now that we're firmly entrenched in the current generation of consoles, Devil May Cry is finally making the leap forward. In Devil May Cry 4, you take control of Nero, a new character for the series, who has to grapple with the power of his demonic arm as he attempts to end the turmoil that has engulfed his nation. Along the way, he'll meet up with Dante, the hero of the first three Devil May Cry games.
Newcomers to the series will be happy to note that the difficulty in Devil May Cry 4 is toned down compared to DMC3. Luckily, the enemies also seem to move a bit more slowly, allowing the emphasis to be placed more squarely on butt-kicking than it is on dodging attacks. Whether you're new to the series or an old pro, though, our Game Guide for Devil May Cry 4 will hopefully give you some help!
Note: There's some information that we weren't able to uncover in DMC4 based on our playthrough, so we'll be updating this guide over the next week or so. Also note that the videos for the various boss fights may not be in this guide just yet; check back for them over the next day or so.
General Strategies
Boosting Your Style Meter
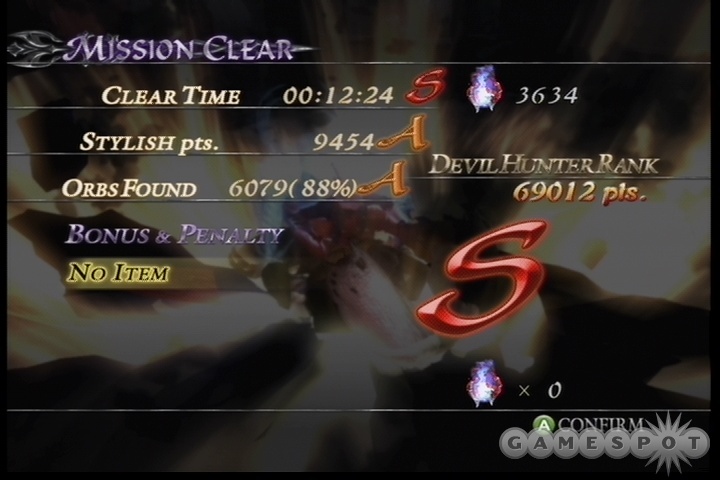
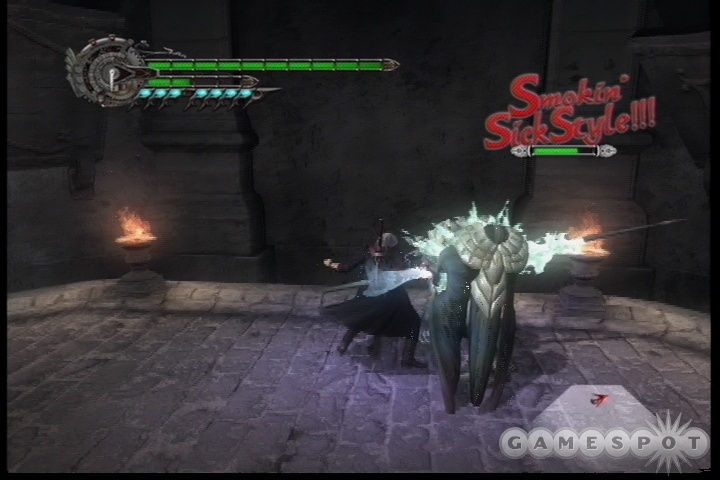
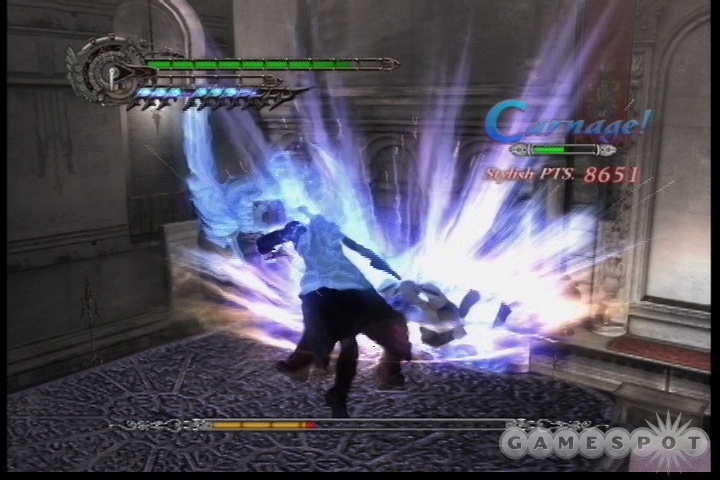
One of the most important aspects of Devil May Cry's combat system is the style meter. When you use attacks, you will notice it appear in the upper right corner of the screen. The meter ranges anywhere from D to SSS, with the S-ranks being the better range. Your goal in most combat situations is to get this meter as high as you possibly can, since that will give you more Style Points at the end of a mission, which in turn will net you more Proud Souls to spend on abilities.
There are a few different factors to getting a high Style ranking, which we'll talk about here.
Don't Get Hit: A single blow to your character will knock a couple of letter grades off of your style meter, so if you want to get up high, you'll have to ensure that he doesn't get hit throughout the combo. This is mostly a matter of being familiar with the enemies you're fighting against and being sure that they don't get a chance to impact you with their weapons.
Vary Your Attacks: After you perform a special attack or a combo, it ceases to count towards your style meter for a short period of time, so spamming out the basic combo for a weapon isn't going to get you very far up the ladder. If you want to max the meter, you'll need to use all of the combos and attacks for a weapon, while being sure to switch melee weapons occasionally for extra variety, if you're playing as Dante. Dante has an easier time of getting a high style meter on a single enemy, since he can switch weapons easily, but Nero can nab some decent style points from his Buster attacks.

Keep The Pressure On: If you stop attacking, your style meter will start dropping, so you'll need to keep up the heat on your enemies if you don't want it to fade away completely. You can afford to rest a bit and reposition - the meter will stick around for a while - but you can't go too long without attacking if you want to keep the combo going. DMC4 is a lot more forgiving in this aspect than DMC3 was, and in fact even if the meter disappears off your screen, you won't have to start all the way over with your next attack, unless you went through a screen transition or took an absurdly long time to hit your next foe.
Attack Multiple Enemies: By far the easiest way to get up to S or SSS rankings is to hit multiple enemies simultaneously and rapidly. There are plenty of rooms that offer you opportunities to hit multiple Scarecrows or other weak enemies, but your opportunities to hit multiple enemies here are somewhat diminished as compared to DMC3, mostly because the weapons that are available to you are more focused on single-enemy attacks. That said, if there are a few Scarecrows standing next to each other, simple sword combos that hit all of them will boost your style ranking quite a bit.
Items
One thing that the game allows you to do to compensate for the difficulty somewhat is purchase healing items and continues from the Divinity Statues scattered throughout the game, or in between missions. Here's a list of the purchaseable items:
| Item | Effect When Used |
|---|---|
| Vital Star S | Restores a small amount of health. |
| Vital Star M | Restores more health than a Vital Star S |
| Vital Star L | Restores your entire health bar. |
| Devil Star S | Restores a small amount of your Devil Trigger gauge. |
| Devil Star | Completely refills your DT gauge. |
| Holy Water | Damages all nearby enemies. |
| Blue Orb | Adds one bubble to your life bar. |
| Purple Orb | Adds one orb to your Devil Trigger meter. |
| Gold Orb | Allows you to continue when you die from the spot where you died, with full health. Handy for tough boss fights. |
Of these items, the ones you will want to spend most of your red orbs on are the Blue Orbs and Purple Orbs (which become unlocked a few missions into the game), both of which will constantly be useful. We managed to play through all of Devil Hunter difficulty without buying (or using) any healing items or Gold Orbs, but your mileage may vary.
Obtaining Proud Souls
Proud souls are the currency that you're going to be using to upgrade your abilities and unlock new moves for your weapons. The game rewards you Proud Souls based on your ranking at the end of a mission; having an A or S ranking will be important if you want to really rake in the Souls.
Luckily for you, you can replay missions as often as you like to gain more Proud Souls. You don't have to achieve a high score each time you play a mission to obtain more Proud Souls; just do well, and you can earn Souls every time you replay a mission.
The game is markedly easier if you engage in a bit of Soul-farming early on. Good missions to quickly replay for Proud Souls are missions eight and nine, which go by quickly and have relatively easy boss fights at the end of them. Just be sure to pick up as many of the Red Orbs in the levels as you can to boost that rating.
Red Queen Exceed Mode
This section is from the chapter on Nero's moves and abilities, but since we and other people have been a bit confused by Exceed, we figured we'd reprint it here.
Exceed allows Nero to power up his Red Queen, infusing the sword with fuel and setting it alight for more powerful attacks. In order to charge up the sword, press down on the left trigger on your controller; you should notice the gauge in the upper left corner of your screen move up a bit. If you press it down, release it and press it down again, you should be able to charge the sword with as many as three red bulbs. These designate the amount of fuel that your sword is charged up with.
The next time you swing your sword, that attack will deal a fair amount more damage than it would otherwise have done. You don't want to waste Exceed on normal combos, though; instead, you'll want to use it on the moves that have special Exceed versions of themselves. These are, as marked above, High Roller, Streak, Split, Calibur, and Shuffle. If you perform one of these moves while your sword is powered up, Red Queen will blaze with fire and the maneuver will be much more powerful than it normally is.
The only problem here is that it takes a while to charge up your Exceed meter if you stand there clicking on your left trigger button. There are a couple of ways around this problem. The first is a hard-to-find skill called EX-Act that is apparently available to you at the very beginning of the game, but which doesn't show up on your in-game skill list for whatever reason. (You can find it in the Library, however.) What it consists of is attacking, then tapping the left trigger just after your attack animation starts. The timing is tricky on this, but if performed correctly, you should be able to instantly boost your Exceed meter up to the first rank. You can perform this after any attack, even one that doesn't hit an opponent, so if you have time and can get used to the timing on the manuever, you can get to rank one Exceed by simply swinging your sword at the air and tapping the trigger.
There is also a Max ACT ability that you can purchase, which offers you the ability to instantly boost your Exceed meter all the way up to the third rank. This is performed in much the same manner as the other ability mentioned above, but the timing is much trickier to pull off, making it effectively a random bonus to your charging abilities unless you nail the timing perfectly through a lot of practice.
Lastly, there are also Exceed 2 and Exceed 3 abilities you can purchase which make your Exceed abilities much more powerful. If you have three bulbs in your Exceed meter, but haven't purchased Exceed 2 or 3, then you will perform a level one Exceed ability when you use an ability, and drain one bulb from your meter. If you have Exceed 3, you'll use up your entire Exceed meter but perform one of the more powerful maneuvers.
Exceed moves are powerful on their own, but if you combine them with Devil Trigger, the damage you're capable of dishing out becomes pretty incredible. It can be a pain to charge the meter, and it usually isn't needed during normal fights, but against bosses you can use it to inflict a lot of pain.
Nero Weapons and Abilities
Note that because DMC4 appears on both the 360 and the PS3 (as well as the PC), we can't give precise input commands for all versions of the game. Instead, we'll use M to stand in for Melee attack, G to stand in for Gun attack, and S to stand for Style attack. Find the buttons that these correspond to on your controller and go to town.
Red Queen
The Red Queen is Dante's sword, and the weapon you're going to be using throughout your time with him. He doesn't get any other swords to play around with, which is perhaps a tad disappointing, but in the end the Red Queen is a very solid sword that will serve your purposes as well as can be expected.
Combo A: M, M, M, M. A standard four-slash attack that will hit multiple enemies if they're close together.
Combo B: M, pause, M, tap M. If you pause after the first swing, Nero will start smashing his sword against the floor, causing heavy damage over a bit of time to a single foe. You can expect to get hit by other enemies if they're in the area, but this is still a fairly brutal-looking attack.
Combo C: M, M, pause, tap M. A combo that will slash at multiple enemies around Nero. Useful, but not always necessary.
Combo D: M, M, M, pause, M. A few slices and then a powerful finishing move.
Aerial Combo: While in midair, tap M for three slashes. Nothing incredible, but this will be all but required against many of the bosses. Against normal enemies, the third slash will knock them to the ground, so it's often better to hit them with two slashes, then use Buster.
Roulette Spin: While in midair, hit M, M, pause, M. Two slashes followed by a powerful spinning attack. The description claims that this allows you to gain altitude, and that's true to an extent, but don't expect to fly or anything. Even if you pull off multiple Roulette Spins in midair, you'll still eventually hit the ground.
Exceed 2: Allows you to use level 2 Exceed moves.
Exceed 3: Allows you to use level 3 Exceed moves.
High Roller (Exceed): Hold lockon, press backwards on the LAS, tap M. Launches an enemy up into the air. Hold down M to jump up after them, which will let you perform a Split or an aerial combo on them.
Streak (Exceed): Hold lockon, press forwards on the LAS, tap M. This will rocket you forward towards your foe, just like Dante's Stinger move. One of the most useful maneuvers you'll have, if only because it'll get you up close and personal with your enemy in the blink of an eye and allow you to move right into delivering combos. Against most smaller enemies, though, this attack will knock them backwards. This isn't always a bad thing, however; you can repeatedly use Streak to knock them around the area and separate a single enemy from a larger crowd.
Streak 2: A version of Streak with a longer range. Buy this as soon as you possibly can and use it often!
Split (Exceed): While in midair, hold lockon, press forward on the LAS, and tap M. This will send your blade downwards in a mighty chop towards your enemy. It's a handy move for following up on an Aerial Combo or simply for hitting a few enemies who are directly beneath you.
Calibur (Exceed): While in midair, hold lockon, tap the LAS backwards and then forwards, and hit M. This will cause Nero to fly through the air towards his opponent and deliver a sword attack. It's great for attacking aerial enemies that you're not close enough to hit with an Aerial Combo, especially since Snatching your way over there will usually take long enough for your enemies to reposition themselves, but it's worth noting that tapping the LAS from back to front can be wickedly difficult to do if you're playing in Automatic Off mode and your enemy is moving around.
Shuffle (Exceed): While on the ground, hold lockon, tap the LAS backwards and then forwards, and hit M. You will dash backwards, away from your foe, then move forward again to counterattack. Handy, but again, difficult to pull off in Automatic Off mode.
Red Queen Exceed Mode
A note on Exceed here, one of Nero's most mystifying abilities. Exceed allows Nero to power up his Red Queen, infusing the sword with fuel and setting it alight for more powerful attacks. In order to charge up the sword, press down on the left trigger on your controller; you should notice the gauge in the upper left corner of your screen move up a bit. If you press it down, release it and press it down again, you should be able to charge the sword with as many as three red bulbs. These designate the amount of fuel that your sword is charged up with.
The next time you swing your sword, that attack will deal a fair amount more damage than it would otherwise have done. You don't want to waste Exceed on normal combos, though; instead, you'll want to use it on the moves that have special Exceed versions of themselves. These are, as marked above, High Roller, Streak, Split, Calibur, and Shuffle. If you perform one of these moves while your sword is powered up, Red Queen will blaze with fire and the maneuver will be much more powerful than it normally is.
The only problem here is that it takes a while to charge up your Exceed meter if you stand there clicking on your left trigger button. There are a couple of ways around this problem. The first is a hard-to-find skill called EX-Act that is apparently available to you at the very beginning of the game, but which doesn't show up on your in-game skill list for whatever reason. (You can find it in the Library, however.) What it consists of is attacking, then tapping the left trigger just after your attack animation starts. The timing is tricky on this, but if performed correctly, you should be able to instantly boost your Exceed meter up to the first rank. You can perform this after any attack, even one that doesn't hit an opponent, so if you have time and can get used to the timing on the manuever, you can get to rank one Exceed by simply swinging your sword at the air and tapping the trigger.
There is also a Max ACT ability that you can purchase, which offers you the ability to instantly boost your Exceed meter all the way up to the third rank. This is performed in much the same manner as the other ability mentioned above, but the timing is much trickier to pull off, making it effectively a random bonus to your charging abilities unless you nail the timing perfectly through a lot of practice.
Lastly, there are also Exceed 2 and Exceed 3 abilities you can purchase which make your Exceed abilities much more powerful. If you have three bulbs in your Exceed meter, but haven't purchased Exceed 2 or 3, then you will perform a level one Exceed ability when you use an ability, and drain one bulb from your meter. If you have Exceed 3, you'll use up your entire Exceed meter but perform one of the more powerful maneuvers.
Exceed moves are powerful on their own, but if you combine them with Devil Trigger, the damage you're capable of dishing out becomes pretty incredible. It can be a pain to charge the meter, and it usually isn't needed during normal fights, but against bosses you can use it to inflict a lot of pain.
Blue Rose
The Blue Rose is Nero's gun, and isn't as important to his fighting style as Dante's guns are. You can use it to inflict ranged damage or keep your style meter up, but generally speaking you'll probably want to stick to his Red Queen to dish out most of the hurt.
The Blue Rose has very few upgradeable abilities, all of which revolve around charging your shots up before firing. It can make the weapon decent to use in a crowd, but again, most of your Proud Souls will probably be going to the Red Queen or your standard abilities. You can easily beat the game without ever upgrading the Blue Rose.
Devil Bringer
The Devil Bringer is Nero's demonic arm, and offers up the biggest gameplay difference between him and Dante. After playing around with it for a bit, it can actually be difficult to go back to playing as Dante, because the Devil Bringer winds up becoming incredibly handy, no pun intended. It can almost even be a crutch. Still, though, the abilities it offers you are incredible, so make good use of them while you're playing as Nero.
Buster: While near an enemy, tap S. This will grab the enemy and perform a special and specific throw, dealing heavy damage to the enemy, but also possibly leaving you unprotected for a few seconds. Given the general passivity of the enemies in DMC4 (as compared to DMC3), though, you will usually have plenty of time to complete a throw, and in some cases (like with Frosts or Assaults), you will actually be able to injure enemies around you while using Buster on one of their friends.
Buster also winds up being one of the more important boss-killing enemies, as many bosses will have special Busters that can be performed on them when they're stunned or otherwise incapacitated. It can take a bit of time before you recognize when these weak moments occur, but when you do, connect with a Buster for big-time damage.
Devil Buster: While in Devil Trigger mode, you can perform lengthier and more damaging Buster animations, both on bosses and on regular enemies.
Snatch: Snatch is arguably even more important to Nero than Buster is. When you use Snatch, you send your arm out towards an enemy, grab them, and either pull them to you or pull Nero to them, depending on how heavy they are. You will be using this an incredible amount of the time. Why run over to your enemy when you can simply bring them to you? The mobility and flexibility that this maneuver affords you is fantastic, and you can also use it on heavy opponents (such as bosses) to get yourself in prime opportunity to strike them.
The only upgradeable options for the Devil Bringer are two upgraded versions of Snatch, which will let you clutch enemies from a greater distance away. These are pretty much mandatory for Nero and should be bought as soon as possible.
Devil Snatch: When in Devil Trigger mode, your Snatch ability will bring in more than one enemy, assuming they're clustered together.
Hold: If you tap S for a Buster, but hold the button down, you will hold your enemy in front of you and use it as an impromptu shield. Works great with large enemies like the Mega Scarecrow. You can't perform any offensive actions while Holding, however, but you can charge up your Exceed meter.
Yamato
Yamato is a sword that offers Nero the opportunity to Devil Trigger, which lets him use stored-up energy to temporarily channel the demonic power of the blade. While in Devil Trigger mode, all of Nero's offensive maneuvers will deal more damage, his Buster attacks will display some new animations, and he'll regenerate health. Devil Triggering is an important part of being a skilled DMC4 player, and will also often be the only way to regenerate health during lengthy boss fights.
In addition to the benefits listed above, however, Yamato also offers a few purchaseable upgrades.
Trigger Heart: If you buy this, the DT Gauge depletes more slowly while your Devil Trigger is active. A must-have skill, so buy it when you have the cash.
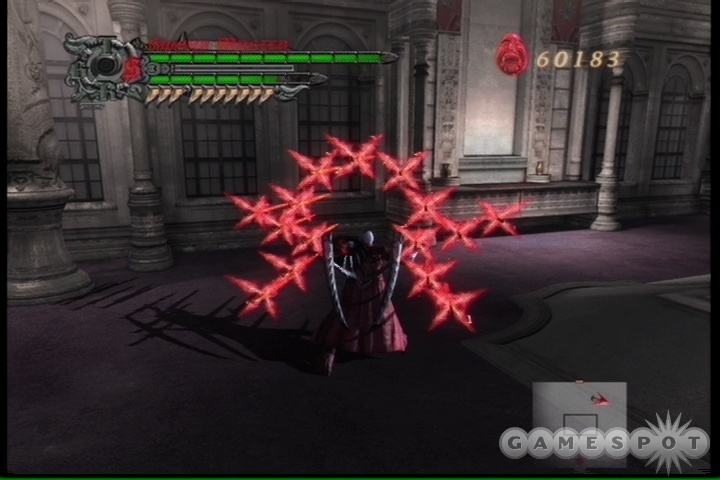
Summoned Swords: While in DT mode, if you fire your gun, extra blades will fly through the air towards your enemies. This requires no special action on your part; it's simply extra ranged damage.
Maximum Bet: Press lockon, hold back on LAS, hit M+S at the same time. Nero charges up an attack that deals a good amount of damage if it hits, but he has to stay perfectly still before the attack comes out. You'll generally be hit by enemies before performing this maneuver, making it less than useful in most fights.
Showdown: Press lockon, hold back on LAS, hit M+S at the same time. Another charge-up attack, and one that requires Nero to again stand still for around three seconds before it activates. If you get hit while it's charging, it won't go off, and what's worse is that the very first sword strike here has to hit the enemy, or the rest of the combo won't be performed. In other words, it's only handy against completely immobile enemies who aren't fighting back. This can happen in boss fights, but you'll want to use Busters in those cases. You can sometimes get this to activate against a knocked-down Faust or Mega Scarecrow, but not often enough to make this worth purchasing.
Abilities
Nero has a number of special abilities that can be purchased, some more useful than others.
Side Roll: This is a free ability. Hold lockon, move the LAS left or right, and tap Jump. This will let you roll to the left or right, avoiding an enemy attack. Handy maneuver, especially in boss fights.
Table Hopper: Although it's name doesn't make much sense, this skill will be handy if you're a pro player. It's performed exactly the same as a Side Roll, but you have to perform it at the last second before an enemy attack hits you. If your timing is right, you'll dash off to the side a bit instantly, avoiding the attack and freeing you up more quickly for counterattacks. Most players will be able to get along without this and instead jump away from attacks, but if you're a super stylish sort, you'll probably find it handy.
Table Hopper also has a couple of upgrades that will let you continue dashing around the battlefield after you perform the first dash away from your foe.
Speed: Speed is a pretty straightforward skill: if you run in one direction for a certain length of time, your character will suddenly burst into a sprint, moving about twice as fast as normal. Handy for long runs and for cutting down your time score in a mission. The camera angles will sometimes screw you over here, however, as a sudden camera change may force you to move in a different direction and wait for Speed to come back online.
MAX-Act: Allows Nero to instantly charge his red queen all the way up by tapping the left trigger just after an attack. The timing on this is very twitchy, so pulling it off will be more of a random occurance than something you'll be able to do with regularity. Still, it can be fun to try and shoot for the moon in a boss fight; you'll occasionally get lucky.
Rainbow: If you're in Speed mode, you can hit the Back or Select button on your controller to execute a drop kick on your foe. You'll pretty much never pull this off, if only because it's difficult to hit that button without pulling your thumb off of the LAS, and also because you'll rarely be Speeding around enemies.
Get More Orbs: A simple upgrade that will let Nero collect orbs from farther away. Handy, but not absolutely necessary.
Air Hike: Although somewhat expensive compared to other abilities, Air Hike is going to be something you should save up for early on in the game. After you jump, Air Hike will allow you to double jump by tappping X again while you're in midair; this will effectively double the maximum height of your jumps, allowing you to escape from tight spots and stay off the ground for a longer period of time. Incredibly useful; be sure to pick it up!
Enemy Step: If you jump up into the air near an enemy, then attempt to jump again, you will use their head as a stepping stone for a second jump. In most instances, though, Air Hike will go off before Enemy Step does, making this less than useful.
Dante Weapons and Abilities
Note that because DMC4 appears on both the 360 and the PS3 (as well as the PC), we can't give precise input commands for all versions of the game. Instead, we'll use M to stand in for Melee attack, G to stand in for Gun attack, and S to stand for Style attack. Find the buttons that these correspond to on your controller and go to town.
Devil Arms
Rebellion
The sword you begin the game with, the Rebellion, is a quick, yet powerful weapon that'll suit you well throughout the game. It's nice and quick and can hit multiple enemies with its default combos, provided they're grouped together.
Combo I: M, M, M. Simple three-swing maneuver that will usually knock weak enemies down. Continue to tap away for extra damage while they're on the ground. Excellent when used in the middle of a crowd of enemies; the wide swings will normally hit multiple foes.
Combo II: M, pause, M, M. Another forward-aiming combo with an extra swing.
High Time: Lock on, press back on the left analog stick, then hit M to launch your target up into the air. If you hold M, Dante will jump up after the target, allowing him to swing away in mid-air. Either variation can be a good starting point for a gun-assault; Ebony & Ivory can often juggle an enemy in mid-air indefinitely. Not all enemies will be launched upwards by this maneuver, though.
Helm Breaker: Hit M while in midair for a downward slash. This can be performed either after jumping or after holding down M to launch yourself during a High Time.
Stinger: Hold lock-on, press forward on the LAS, and hit M. Dante will launch himself forward towards his enemy with his sword outstretched; if he hits the enemy (he might not, if the enemy moves or if it's too far away), it'll usually be knocked backwards and onto the ground.
Stinger 2: This is an upgraded version of Stinger. When performed, Dante will hit with more power, and will be able to travel across a greater distance. A great weapon for spamming on weak enemies to knock them around and to create distance for yourself between you and a large mob.
Million Stab: While performing either a Stinger or at the end of a Combo II, start rapidly tapping M, and Dante will begin repeatedly stabbing forward with his sword. Although this move doesn't have much of an arc of damage, it will do massive damage to anyone in front of Dante, and if you keep hitting the button for a while, he'll eventually finish it off with a single powerful thrust.
Round Trip: Press and hold M. You will attack once, and then Rebellion will start to glow. When it charges up completely, let go of M to fling it at your foe. It will stay in place, cutting them to shreds, until you call it back to yourself by tapping M again. A handy way to focus your fire on one of your foes while using your guns on another, but it takes a while to throw the sword, making it less useful in fast-paced fights.
Rebellion (Full Sword Master Style)
Prop: Press S to flick your sword forward, twirling it around in front of Dante. Most demons will be thrown upward by this.
Shredder: Press S again immediately after performing Prop. You will appear to perform another Prop, but if you hold down S this time, the shredding animation will continue to occur for a few seconds. If you can knock an enemy up into the air with Prop, Shredder can often finish them off before they hit the ground, but be careful: you won't be able to move while Shredder is being performed. You can always drop it by letting go of the button, however.
Aerial Rave: Repeatedly press S while in midair to perform a four-strike combo. This can be done immediately after a High Time, rather than following that move up with a Helm Breaker, or simply after jumping. This will be an important skill for Dante to have, as beating many of the bosses rely on aerial attacks that Nero has by default.
Drive: If you use lockon, press backwards on the LAS, and tap S, Rebellion will begin to glow; releasing it will send a shockwave towards a nearby enemy. You can hold down S for a bigger charge on this attack.
Over Drive: Immediately after releasing a Drive, tap S again to send out two more shockwaves after the original Drive. You'll need to practice a bit to get the timing down on this.
Quick Drive: Press M and S at the same time on the ground. Starts with a slash and ends with a Drive that does less damage than a normal Drive. You also apparently can't use Over Drive after this maneuver.
Dance Macabre: Dance Macabre is essentially a long, automatic combo. By holding lockon, pressing forward on the LAS, then tapping S rapidly, you'll send out a dizzying array of weapon strikes that ends with a powerful sword strike. Great for building up your style meter on slow or stunned enemies.
Gilgamesh
Gilgamesh is the DMC4 version of Beowulf from DMC3. Like Beowulf, it's a powerful weapon, albeit one that is better used at close range against a single enemy. Your mobility is limited since you won't have Stinger to rely on,
Combo I: M, M, M, M. Standard four-attack combo. You can charge up any part of this combo by holding down the button, but it's usually best to simply let the whole thing come off and move on to your next attack.
Combo II: M, M, pause, M, M. This one's easy to pull off, but the flurry of kicks that comes with the third T has a tendency to push enemies away from you. You can, again, charge up any part of it by holding down the button.
Full House: While in midair, target an enemy and hit M to stab them in the head with your feet. This is one of the few aerial attacks that will actually move Dante towards his target, so it can be quite useful on those elusive, quick-moving foes.
Draw: While locked on to an enemy, press backwards on the LAS and hit S. You'll dash backwards, avoiding any attacks that might've been coming your way.
Straight: In DMC3, this was Beowulf's equivalent of Stinger, but in DMC4, it is instead a move that can only be used after a Draw. After performing a draw, tilt forward on the LAS and hit S to dash forward and counterattack. You can charge up the rocket punch by holding down the button.
Kick 13: A very handy skill. Use lockon, press forward on the LAS, and hit M. You'll unload a quick flurry of kicks into your enemy with a single button press. Unfortunately this combo can't be cancelled out of, so you won't always find it useful, but against large or slow-moving enemies it'll be quite handy.
Flush: Whenever you jump, enemies above you will take damage. Simple as that.
Gilgamesh (Full Sword Master Style)
Shock!: Hold S while you're on the ground, and you'll deal damage to all enemies around you. Hold down the button for an increase in damage and area of effect.
Shocking!: The same deal as Shock!, but performed while you're in midair. You can't charge this ability up.
Beast Uppercut: Hold lockon, press forward on LAS, and tap S to perform a devastating uppercut maneuver that'll knock your foes into the air.
Rising Dragon/Divine Dragon: While performing a Beast Uppercut, hold the S button until your fist glows either once or twice to perform one of the moves. They take a bit of stationary charging to pull off, but are worth a lot of style.
Real Impact: Hold lockon, press backwards on LAS, and tap S. You'll deliver a slow bodyblow to your target that will do a fair amount of damage. Apparently can't be charged.
Lucifer
Lucifer is the last sword you'll get, and is definitely the most difficult to use well. We're sure there's going to be a number of great Youtube videos of people getting SSS style combos with this weapon, and we look forward to seeing them, but we personally never mastered the art of using it.
At any rate, Lucifer is less a sword than an energy deliver system. It's basic combos will deal directly damage to enemies you strike, but most of the attacks revolve around filling the air with floating swords. These will stick to enemies when they run into them, or you can manipulate them to pierce your foes.
Lucifer Combo A-E: Lucifer has five basic combos attached to it, each of which requires slightly different button presses. Since the basic combo (spamming M) will cause your animations to loop, it can be difficult to get feedback on when to pause and input more commands. Your best bet may be to go into the Library feature in between missions and check out Dante's Actions in the Other category to see short videos of each of them.
Splash: Press M in mid-air to throw blades around your position.
Ecstasy: Hold lockon, press back on the LAS, and hit M. This will detonate all blades in your immediate area, including those that are stuck to enemies. Use this to finish off one of your voodoo doll-ed enemies or simply stun multiple foes who have been impaled.
Pin-Up: Hold lockon, press forward on the LAS, and hit M. This will cause five or six swords to display themselves in front of you, where they will impale any enemy that happens to hit them.
Lucifer (Full Sword Master Style)
Discipline: Press LAS in a direction and S. That will position the existing blades around Dante, then shoot them in the direction you were pointing.
Climax: Hold lockon, press back on LAS, and tap S. All blades in the immediate area will reposition themselves around you and detonate. Best used after throwing down a couple of Pin-Ups.
Bondage: Hold lockon, press forward on LAS, and tap S. All nearby blades will circle around an enemy and pierce it.
Guns
Ebony and Ivory (Full Gunslinger Style)
E&I are Dante's trademark guns, two handguns that work well for stunning enemies or firing on distant foes. You won't use them a huge amount, sticking with sword swings for the most part, but they can help you increase your style meter or juggle an opponent you've launched into the air.
The straight upgrades to Ebony and Ivory include the ability to charge up your shots to deal more damage. Nice, but nothing overwhelming. With Gunslinger Style, you also obtain the following maneuvers.
Twosome Time: By rapidly tapping S while standing on the ground, Dante will be able to fire Ebony & Ivory in two directions at once. One gun will always fire at the target you're locked onto, while the other can be aimed with the left analog stick. The relatively low power of Ebony & Ivory combined with the fact that you're held immobile while performing this attack makes it somewhat useless.
Honeycomb Fire: After performing a Twosome Time, let go of the lockon button and just start mashing S. You'll fire incredibly rapidly at a single target, but won't be able to move at all.
Rain Storm: After jumping into the air, press S to send Dante spinning around, firing upon all of the enemies below him. This move only lasts for a second, although it can be repeated multiple times before you hit the ground. Unfortunately it doesn't seem to be targetable - the only enemies that will be damaged are those immediately beneath you - rendering it less than amazing.
Coyote-A (Full Gunslinger Style)
This sawed-off shotgun deals a lot of damage to enemies at close range, but the spread of its shells renders it pretty inneffectual against more distant foes. As with the Ebony & Ivory, upgrading the Coyote-A will let you charge your shots to deal more damage, while using Gunslinger will net you these additional powers.
Fireworks: Press S while you're on the ground to deliver a full shot of buckload to enemies on all sides of you. Fairly inconsistent, in that some enemies will not be hit and will still wind up coming at you afterwards.
Fireworks Air: Same as Fireworks, but performed in the air. Will only hit other airborne targets. Not very useful.
Backslide: Hold lockon, press backwards on the LAS, and tap S. You'll fire behind Dante.
Gun Stinger: Hold lockon, press forwards on the LAS, and tap S. You'll perform what's essentially a short-range Stinger move that will unload your shotgun's barrels into your target. Nice damage.
Pandora (Full Gunslinger Style)
Pandora's box is a new gun in Devil May Cry 4, and definitely the weirdest of the bunch. It takes on the appearance of a suitcase, but it can change its form and functionality based on what commands you input to it. It also has a Disaster Gauge that appears between your lifebar and DT gauge. Filling it up by attakcing with it will allow you to use special moves in Gunslinger style.
Pandora has a couple of abilities available to it right off the bat, a couple more you can purchase, and the Gunslinger finishing moves.
PF013 Epidemic: Epidemic will shift Pandora into a bowgun that fires rockets. Deals nice damage, but the rockets will explode if they travel more than a few yards away from Dante, making this an up-close-and-personal attack exclusively.
PF262 Jealousy: If you fire Pandora while you're in the air, it'll fire a burst of gatling gun shells. Handy enough, but the bursts don't last long, forcing you to fire multiple times while falling if you want to deal any kind of decent damage.
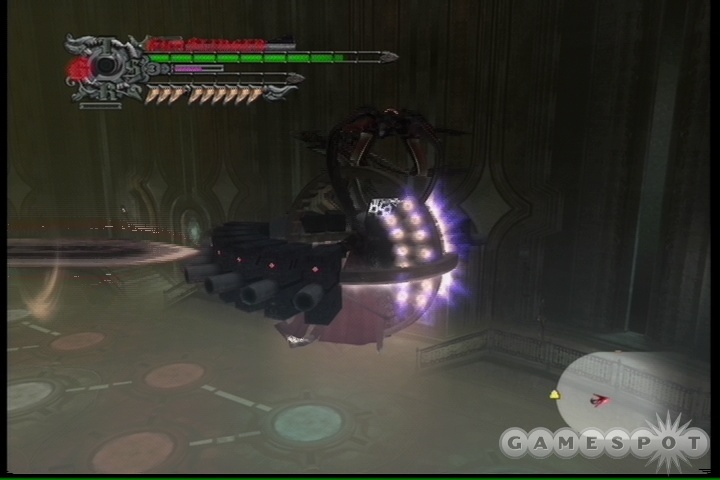
PF124 Hatred: Hold down the fire button while on the ground, then move the LAS back and forth from left to right a few times. That will change the Pandora into a bazooka that will fire a large rocket at your foes.
PF398 Revenge: After moving the LAS left to right to form a Hatred, make two spins of the LAS in either clockwise or counterclockwise directions to transform Pandora into a laser cannon. This deals a lot of damage to your target, but can still be dodged, and it takes a long time to shift into this form and finally fire the weapon.
All of these attacks, assuming they hit an enemy, will build up your Disaster Gauge. When you have a bit of juice in the meter (you don't need to max it out), you can switch to Gunslinger mode and use one of these abilities to deal more damage.
PF594 Argument: Press S while standing on the ground. Transforms Pandora into a huge floating battleship that will fire homing rockets at your foes. It looks neat, but as soon as you're hit once, you'll be knocked out of the ship and collapse back to the ground, rendering it more showy than useful.
PF422 Grief: Hold lockon, press backwards on the LAS, and hit S. You'll throw Pandora as a boomerang towards the targeted enemy. Has a good range, but the damage doesn't appear to be very substantial.
PF666 Omen: Hold lockon, press forwards on the LAS, and hit S. You'll go through a setup animation that will last a couple of seconds, after which Pandora will show its contents to all nearby enemies. This drains your Disaster Gauge entirely, but deals heavy damage to anyone nearby.
Styles
Dante's styles will let you unlock more abilities for your swords and weapons, and perform other miraculous maneuvers. We covered most of the Sword Master and Gunslinger moves in the respect weapon sections above, so we'll cover the Trickster and Royal Guard styles here.
If you want our advice, max out Swordmaster and Trickster styles before any of the others. Both of them are very handy, with Swordmaster perhaps being the most necessary one to use.
Trickster
Although it doesn't increase your offensive abilities like most of the other styles do, Trickster will allow you to be much more agile and mobile during gameplay, which will, in turn, let you avoid damage more often. In essence, using Trickster means that you'll take longer to kill enemies and you'll have a harder time getting your combo meter up high, but you'll have a much easier time getting out of the way of attacks, which is especially useful during the game's many boss fights. Trickster will also let you maneuver to out-of-the-way areas of levels much more easily than you would be able to with other styles.
Dash: If you press S while holding the left analog stick in a certain direction, Dante will dash across the ground much more rapidly than with his normal movement. It'll take a second to perform another dash after the first, and Dante will pause after completing this move, making it best for avoiding short-range attacks. DMC4 has eliminated the Double Dash and Triple Dash moves, so this isn't as useful as it was before, although you can still perform an endless succession of dashes while in Devil Trigger mode.
Sky Star: While in midair, press the left analog stick in a direction and tap S to cause Dante to perform something of a midair dash. We personally found this to be an endlessly useful maneuver, despite its simplicity, if only because Dante's great weakness is usually lateral movement; he just doesn't move tremendously fast when compared to some of the speedier enemy attacks. When going up against bosses, especially, combining Sky Star with the Air Hike manuever will let you get far away from wherever you're standing in a split-second, allowing you to avoid most any attack so long as you know it's coming. In Devil Trigger mode, you can perform two Sky Stars in a row.
Mustang: If you Dash into an enemy and hold down the S button, you'll perform a jump off of their body.
Flipper: If you get hit in midair or get knocked off your feet, hit S to return to the ground and land on your feet.
Air Trick: When you finally reach level three in Trickster, you'll be able to use your newfound talents to disappear and reappear at will. With Air Trick, you can press towards an enemy and then hit R1 + O to instantly appear in front of that enemy (or at least cover a certain amount of the distance, if you're too far away). This isn't quite as useful as Sky Star, but can be combined with that move to get in close to your enemy from a good ways away without ever needing to hit the ground.
Royal Guard
Royal Guard is an advanced style that will likely be unused unless you're a very skilled player, or one that's looking for a challenge. Royal Guard is all about blocking enemy attacks and absorbing the energy that your enemies are sending your way, then flipping it around and turning that energy into a destructive force. In general, you'll be better off dodging enemy attacks with Air Hike rather than attempting to block them. If you're very, very good, though, you can use Royal Block to absorb almost anything your foes throw at you.
Block: Hold S while on the ground. This will block incoming attacks. It won't reduce the damage from them entirely, but will reduce it somewhat. This accumulates power in the Royal Gauge.
Air Block: If you happen to be airborne while an attack comes your way, you can attempt to use Air Block to reduce the damage. This accumulates power in the Royal Gauge.
Royal Block: Royal Block requires you to press the S button just before an enemy attack hits you. If you do so, you'll avoid taking any damage and greatly charge up the Royal Gauge.
Release: Hold lockon, press forward on the LAS, and hit S. This will unload all of the energy in the Royal Gauge and deal heavy damage to them, depending on the amount of energy in the Gauge.
Air Release: A version of release that is performed while you're in mid-air.
Royal Release: Perform the Release maneuver just as an enemy is about to hit you, and you'll perform a Royal Release on the enemy. One of the most damaging moves in the game if you have a full Royal Gauge.
Dreadnaught: Hold lockon, press back on LAS, and tap S. This will turn Dante's body into a shell, preventing him from taking damage, but will drain your Royal Gauge over time until it runs out.
Dark Slayer
The Dark Slayer style only becomes available to Dante after you retrieve the Yamato, which occurs quite late in the game. The Yamato is a powerful sword…in cutscenes. When actually wielded, it's not nearly as impressive, unfortunately, although it is fairly flashy. You can use this style by double-selecting any of the normal styles. Just hit left twice on the d-pad, for instance.
You cannot upgrade the Dark Slayer style at the power-up screen, so the initial abilities are all you get.
Yamato Combo S: A basic three-swing combo. Tap S three times.
Aerial Rave V: While jumping, tap S twice to slash at anything near you.
Slash Dimension F: Hold lockon, press forward on the LAS, and tap S. This takes a moment to pull off, but deals decent damage to enemies in front of you.
Slash Dimension C: Hold lockon, press backward on the LAS, and tap S. A similar attack to F, but with the blades concentrated more closely to Dante.
General Abilities
Air Hike: Although somewhat expensive compared to other abilities, Air Hike is going to be something you should save up for early on in the game. After you jump, Air Hike will allow you to double jump by tappping X again while you're in midair; this will effectively double the maximum height of your jumps, allowing you to escape from tight spots and stay off the ground for a longer period of time. Incredibly useful; be sure to pick it up!
Side Roll: Hold lockon, press sideways on the LAS, then tap the jump button. This will roll your character to the side, allowing you to avoid oncoming attacks.
Speed: If you move forward for a bit of time, your character will suddenly double in speed and will remain moving at that speed until you move in another direction or attack. Handy for cutting the amount of time needed to run around in large areas.
Enemy Step: If you jump up into the air near an enemy, then attempt to jump again, you will use their head as a stepping stone for a second jump. In most instances, though, Air Hike will go off before Enemy Step does, making this less than useful.
Get More Orbs: A simple upgrade that will let Dante collect orbs from farther away. Handy, but not absolutely necessary.
Secret Missions
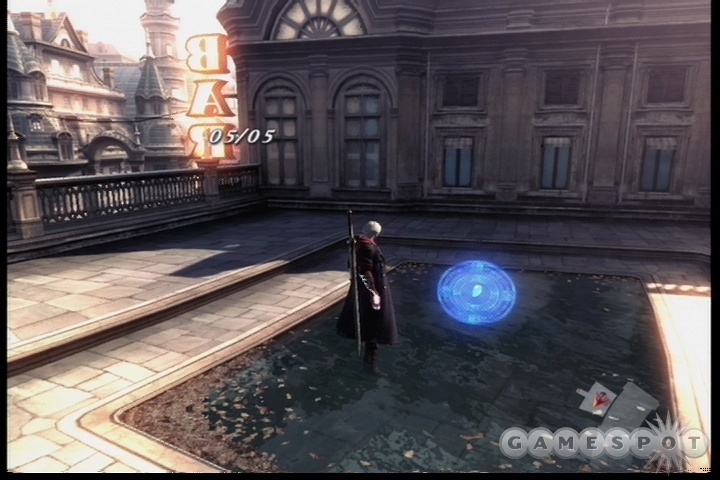
There are 12 secret missions in Devil May Cry 4. These secret missions are hidden throughout the game, and appear as pieces of red paper tacked to the wall. Using your jump or special attack button while standing near one will cause the secret mission to start.
Each secret mission has a different challenging task for you to perform. If you succeed, you will earn a Blue Orb Fragment. You can try each mission as often as you like, but keep in mind that you retain your health bar and DT gauge from attempt to attempt; if you take damage as you try these missions, you will eventually die unless you manage to heal yourself.
Also note that some of these missions are timed. If you don't want to wait for the timer to go all the way down to zero, and you know you can't complete the mission, simply look for a door in the area and head through it. That will automatically fail the mission and let you attempt to restart it.
Secret Mission 01: Annihilation
Location: Mission 02: La Porte De L'Enfer, Terrace/Business District
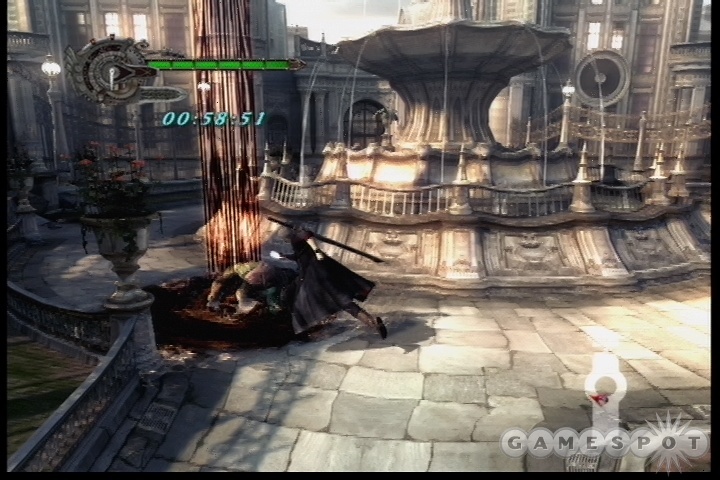
You have one minute to kill six or seven Scarecrow enemies here. It's definitely doable with the skills you started out with, even on Devil Hunter mode, but it will take a bit of luck, as the enemies will tend to spread out slowly instead of coming at you. The Slide maneuver will help you speed around the inner circle, although it can also tend to knock the enemies over the small railing, thus making them a bit more difficult to hit.
If you're having trouble with this, you may want to simply come back later when you have more powerful moves, such as higher ranks of Exceed.
Secret Mission 02: Alley-Oop
Location: Mission 04: Cold-Blooded, Dining Room
Your goal here is to perform five Busters in mid-air without ever touching the ground. The technique is easy: use a High Roller to launch one of the enemies into mid-air, use a Buster on them, then Snatch them up from the ground and repeat the process. If you do this quickly enough, you should lose little altitude during the entire maneuver. Your enemies will naturally cluster around your feet while you fly, so when your first target dies, you can simply lock onto another and Snatch them up and start again.
This can be a difficult mission if you haven't upgraded your Snatch ability to at least level two, however.
Secret Mission 03: Nonviolent Resistance
Location: Chapter 5/16, Soldier's Graveyard
The goal here is to raise your Style ranking without using any attacks at all. Hah. We found this to be pretty much impossible to pull off, but if you're going to try it, you will probably need to become very good at either using Table Hopper to avoid attacks and raise your stylish meter, or try to use Royal Guard on everything that comes your way. A single hit will erase most of the progress you've made, so we decided not to deal with the aggravation and simply focused on beating the game. Good luck if you attempt it, however.
One tip that we've gotten from multiple people involves using the Hold skill to help you out here. After completing Mission 8, you will be capable of using the Hold skill, which involves using a Buster on an enemy and holding down the button. If you do so, they'll be held in front of Nero and act as a sort of shield. If you grab one of the Scarecrows here and use it as a shield with Hold, the enemy attacks will usually hit the Scarecrow and cause your style meter to raise. You can also taunt the Scarecrow while holding it for an extra boost. It's still very difficult to pull off the mission even with this tactic, but it may be a bit easier than using Royal Guard.
Another tactic you can try here is to jump up into the air, use Snatch to pull an enemy towards you (which doesn't count as an attack), then use the Enemy Step ability to jump off of their head. Repeat this process without touching the ground, and your rank should increase a bit.
Secret Mission 04: Tracking Treasure Down
Location: Chapter 6, Angel Creation
This one is very frustrating. Your goal is to run around the Grand Hall, using your Rusalka Corpse to try and find the locations of hidden red orbs. The red orb locations are randomized, but usually seem to be near the southern door, behind a mirror on the upper portion of the southeastern balcony, behind the blue switch on the northeastern balcony, hidden behind a wall in the northeastern bottom floor, behind the Gyro Blade in the center-north of the room, or somewhere up in the air above the southwestern balcony.
The problem here isn't so much that the orbs are hidden, since your fist will glow and make sounds as you get close to them, eventually locking in with a very large glow that makes it obvious you're in the right place. The problem involves the fact that the orbs simply don't want to appear in most cases, even if you're in the right place. Even if you know for a fact that you're where you need to be to collect some orbs, you will often find yourself jumping around, using Snatch in mid-air, trying to find the orbs, but they simply won't appear. We don't know of any way to draw them into you automatically (although the Max Orbs ability may help here?), so you're left with a bit of frustrating trial and error where you simply have to jump around like an idiot and hope that the orbs decide to pop out of a wall.

We managed to clear this mission, but only on our tenth or so try, and then only by pretty random luck, it would seem. Avoid the random spawn near the ceiling in the southwest seems to be important, as we've never managed to have those orbs show up.
Secret Mission 05: Sky Scraper
Location: Chapter 7, Lapis River
You have to ascend to the top of the passage here, utilizing the Grim Grips and the bouncers to reach the Blue Orb Fragment at the end.The first two jumps involve using two grim grips quickly in succession to reach the next bouncer; the second jump involves a trickier Grim Grip jump, so if you have Air Hike, be prepared to use it here to save yourself from an error. From the third bouncer, underneath the fourth bouncer, which is surrounded by a gate; you can pass through it from below and hit it that way. At the fifth bouncer, use the Grim Grip to pull yourself onto the platform nearby, then line yourself up and use the Grip again to hit the bouncer and bounce up to the Fragment.
Having Snatch 3 can help you grab the Grips if you fall down from above, but it shouldn't be necessary if you do things right. Practice makes perfect here.
Secret Mission 06: Vermifuge
Location: Chapter 10/12, Security Corridor
At first this mission seems impossible, but it can certainly be done. Your goal is to keep the Scarecrow here alive until all of the Chimera are dead. You lose if the Scarecrow dies first or if any of the Chimeras manage to take over the Scarecrow.
You need to use Nero here. After beating Credo, you should have the Hold power available to you. This lets you perform a Buster action, but if you keep holding down the button, you will hold onto the enemy and not let them go. What you need to do here is Hold the Scarecrow as soon as it appears and start Air Hiking your way down the valley nearby to the southwest. The Chimera will be jumping at your feet, and if one of them hits you when you land, you'll probably lose the match, but if you try often enough, you will eventually make it past the Gyro Blade and up onto the platform there.
The Chimera can't make it up to the upper level of the platform, so walk the Scarecrow down the valley a bit (but don't walk to the next screen), then set him down with a Buster. You will have some time before he makes his way back to the Chimera, so quickly run back to them and start Bustering them to death. If you have a full Devil Trigger gauge, you can also use that on them to finish them off.
It'll take a few tries, but this is the best method for getting the Blue Orb Fragment in this level that we've tried.
Secret Mission 07: Free Running
Location: Chapter 10/12, Meeting Room
Another very difficult one. It's pretty much identical to the disappearing-platforms section in the Lost Forest, but you'll have to deal with more Mephistos and a much more confusing pattern of platforms, including a section where you're confined to a single tile for a while. Towards the end of it, the platforms will be appearing and disappearing very rapidly, so this is more of a game of memorization than it is anything else.
If you attempt to use the traditional method of approach here, stick with the Royal Guard style with Dante and simply block all incoming attacks. It'll hurt, but it'll usually prevent you from getting knocked around. You'll still have a hard time getting over there, though.
An easier method for nabbing the Blue Orb Fragment here is simple: cheat. Enter the level with a full Disaster Gauge from attacking enemies (you can start mission 12 and simply wail on the Scarecrows there), and use Gunslinger style to flip over to the Argument missile battery. Since it can fly, you can simply coast over to the Fragment without too many problems.
Secret Mission 08: Royal Blocker
Location: Chapter 7/14, Forest Entrance
A difficult mission. You're faced off against two Mephistos here, and must attempt to throw up five successful Royal Guards in a row. If you miss a Royal Guard and get hit, your counter will decrease, so, yes, you need to block five attacks in a row for the prize.
There isn't really a huge amount to say about this mission. You'll obviously need Dante to attempt it, since Nero can't use Royal Block. You'll have to be patient here and watch the enemy attacks and learn precisely when to hit the Royal Block button. This is purely a matter of skill and reflexes, which we can't really impart in a game guide. If you practice long enough, you'll eventually be able to nab your reward, but it may take longer than it winds up being worth.
A few readers have sent in the following tips: you should kill one of the Mephistos outright to make it easier to Royal Block the attacks of the remaining enemy. Apparently you can also just repeatedly mash the special attack button to constantly flip up the Royal Guard, which will often let you get credit for an RG despite not having the timing worked out perfectly.
Secret Mission 09: Unbreakable
Location: Chapter 15, Library, Bottom of Stairwell
This one is only accessible to Dante. The goal is to fight against a large group of enemies and defeat them all without taking any damage or being captured by a Fault.
And, well, it's really difficult. Surprise! The enemies here will consist of Assaults and Chimera Seeds, for the most part, and the two do not make a happy mixture. The Assaults do have some limited projectile maneuvers, which are difficult to avoid. This is purely a matter of skillful play and dodgeability. You may want to use Dante's Trickster mode to dash around the area. It doesn't matter how long it takes for you to kill the enemies, so long as they all die. You may also want to try entering this level with a full Disaster Gauge and attempt to use Pandora's flying mode while you're up high in the air, or, if you're willing to take a risk, the finishing move where the suitcase opens up and destroys all nearby enemies.
Secret Mission 10: Puppet Master
Location: Mission 05, Master's Chamber, behind the mirror above the fireplace
This one can be interesting. You need to hit five pillars scattered around the Large Hall map within two minutes by powering up a Gyro Blade and smashing it through them. As soon as the map loads, hit the Gyro Blade with a Buster, wait for it to power up, then hit it twice with your sword and smash it forward. Keep moving it forward until you reach the central room, where the second pillar is located. Use less powerful hits to hit the second pillar here.
The final three pillars are all clustered in the southeast. First, pound the Blade to the south and destroy the pillar down there, then bring it back up and destroy the pillar in the doorway. Move it from there into the gated area and use finesse hits on the Blade to maneuver it up the stairs for the final pillar. You should have about 20 seconds leeway to correct mistakes, but you do need to be quick, or you'll fail. It might help to just flub the first run and run around to check out all of the pillar locations, as the camera angles can kind of conceal them if you're anxiously looking around for them.
Secret Mission 11: Point of Impact
Location: Mission 16, Fortuna Castle Gate
This is one of the more devious secret missions to actually find. As you take Dante backwards through the castle and out into the snowy castle gate, proceed past the first group of Basilisks and start hopping your way up the windy path that leads you back to where Berial waits for you. If you jump around when you reach the westernmost part of the path, you should see a group of red orbs leading upward to the small platform that the secret mission is located on. You apparently can't jump to it, though; instead, head east a bit, double jump upwards, and use the Argument form of Pandora to fly over. (Thanks to James for sending this location in.)
The mission itself is relatively easy. You will need to have upgraded Pandora with the Hatred and Revenge skills, however. When you start, you'll have 30 seconds to destroy two statues in the area with your Pandora. Start with the southern one, in the hallway; just head down the steps until you're on the same level as it, whip out Pandora's Revenge form, and blast it from a distance. With that done, head north and proceed down the steps there (Speed will shorten your time a bit) and fire on the statue in the distance. Revenge will hit these statues from a mile away, so you just need to be on the same level as them, and you'll get them both.
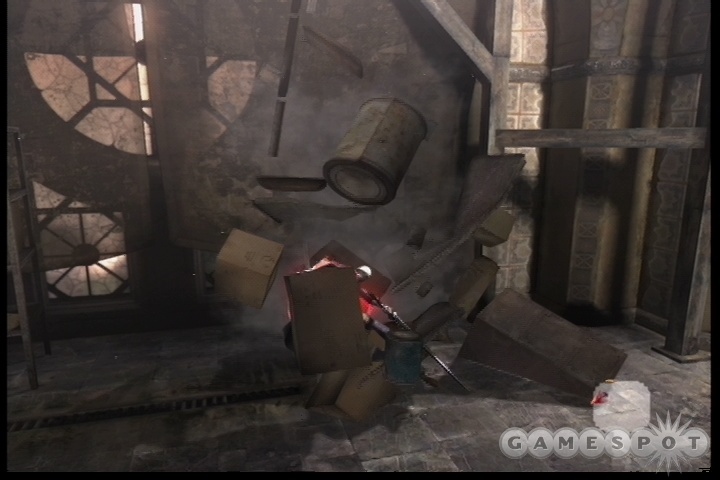
Secret Mission 12: Steeplechase
Location: Mission 17, Opera House Plaza
This mission is hidden away in the Opera House Plaza. You can find it after switching screens from the Business District. Smash the trashcan in the gated doorway nearby, and the marker will be hidden behind it.
Your goal is to reach the end of the path without getting hit by any of the electrical beams. For whatever reason, time slowing doesn't work here. It's difficult to jump over the path, but if you've upgraded your Gunslinger style, you have another option. Simply load up your Disaster Gauge on the packs of enemies nearby, come in with it almost full, then double jump above the laser beams and use Pandora's Argument mode, which can fly, to simply zoom to the right and avoid the lasers altogether. An easy Orb Fragment. Again, you may need to upgrade your Gunslinger mode to extend the Disaster Gauge long enough to make it all the way across the laser field.
Walkthrough
This walkthrough is written under the assumption that the player is playing on Devil Hunter difficulty with the Automatic setting set to Off. In other words, the hardest default difficulty settings; harder difficulties will be unlocked after you beat the game, but you're on your own for those!
Our goal when writing this walkthrough was to make it through each level on Devil Hunter difficulty without continuing or using any items. It's very possible, especially if you've played DMC3. As part of writing a guide, however, it was often necessary to play through each mission two or three times, which gave us a few more Proud Souls than you might get if you play straight through. If you're having a hard time getting through a mission, try replaying an earlier one for more Proud Souls and using them to upgrade your abilities!
Mission 01: Birds of a Feather
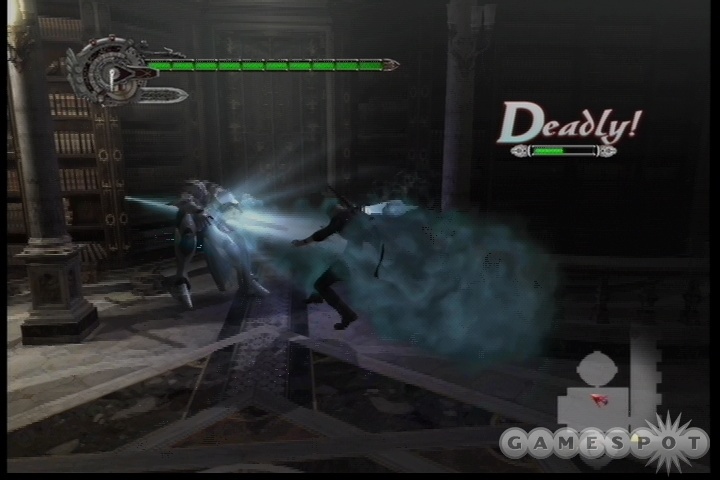
Not too much to say about this mission. It's a fairly straightforward tutorial combined with a boss fight against Dante. If it's your first time playing DMC4, be sure to play with tutorial mode on, as the tutorials will tell you what you need to do here. (Actually, even if you play with tutorials off, there'll still be plenty of hand-holding here.)
After completing all the tutorials, you'll have the opportunity to take on Dante himself. It's actually somewhat difficult to lose this fight, as it's intended to simply be an introduction to wrap up the tutorials that you've been learning. Since you don't have many combat abilities at this point, there won't be much that you can do aside from whacking him with your sword and using your Buster on him whenever you get close to him. Bustering him seems to be the best move here, as it'll often launch you into a special animation wherein you'll blast him for critical damage on his weak spot. Do your best to destroy the benches while you fight; your end rating depends on how many red orbs you find, and they're all hidden away inside the benches.
Mission 02: La Porte De L'Enfer
If you have the cash (you should've obtained around 100 Proud Souls for winning the first mission), go to the Power Up menu and buy the Streak ability under the Red Queen menu. Note that every other ability on this screen goes up in cost by 100 orbs when you buy this ability; that'll continue as you obtain more abilities, so you can look forward to a bit of inflation as you proceed.
Opera House Plaza
Not much to see here. Kill the Scarecrows that accost you and destroy the benches to find more red orbs.
Storehouse
After you enter this screen, walk up the steps that apparently lead to a smooth wall and double-jump upwards off of the wall above you. That'll lead you to a Gold Orb, which you can use to automatically continue when you die. It'll be helpful in the boss fight at the end of this level.
When you have the Gold Orb, head upstairs and kill the rest of the foes up there. If you haven't been using it much, try using your Buster move in the middle of a combo. You can also perform the High Roller move to launch an enemy up into the air, then use Buster on them while they're in midair. It'll take a while to get used to the ways in which you can meld your moves together, but practice makes perfect!
Terrace/Business District
The peons are rioting, but there's nothing you can do about it just yet.
Cathedral
Head to the bottom of this area and grab the item on the altar in front of you. It'll unlock your ability to use your Devil Bringer to grab items. You'll need to target something, then use the Devil Bringer button to send out a phantasmic hand to grab onto it. There's a Vital Star S in one of the small cells here; be sure to track it down and grab it through the bars.
When you're ready to move on, stand on the glowing blue platform, target the grapple point that appears, and hook onto it to move upward. Move on from here in the same manner to reach the exit. The large red orb you saw earlier is by the exit door; you can Devil Buster it over to you now before leaving.
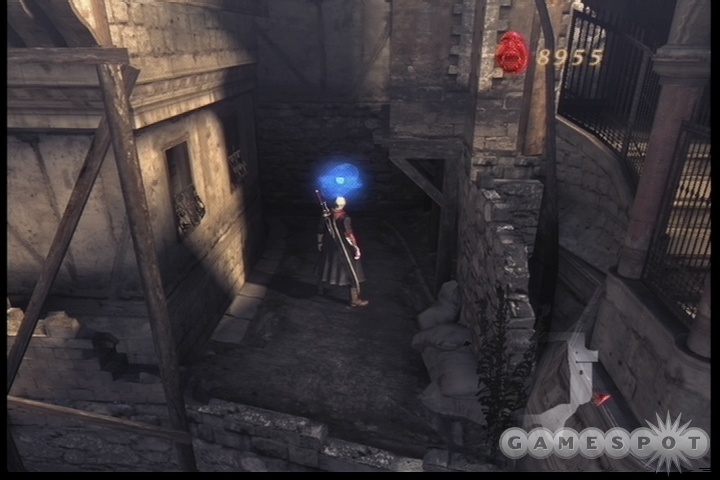
Terrace/Business District
Grapple your way across the street here. You'll find Secret Mission 01: Annihilation on the pillar just after you land. Check our section on the secret missions for details on beating it, but it's not difficult to figure out, although it may be difficult to do until you upgrade your abilities a bit more.
Apart from that, simply keep moving through the district at this point. You'll eventually come to a largish fight and be able to move on.
Residential District
Fight your way down the alleyways here until you come to a huge red orb. Strike it repeatedly to break it off into more red orbs for yourself. Nearby, a small trail of tiny red orbs will lead you up to the rooftops, where you can find a Blue Orb Fragment.
Port Caerula
There's a red orb that you can double-jump to just outside the exit of the first cave here. When you have it, head southwest and use the Devil Bringer to warp across the docks. Head through the doorway that you find.
Customs House
Kill the enemies here, then strike the glowing blue pedestal until you can move on. Head through the door at the top of the room, then examine the controls to drop the bridge.
Port Caerula
Kill your way back to the bridge and head across.
First Mining Area
Drop into the water near the beginning of this area to find a few red orbs, then snatch your way upwards. The creature chained to the floating pedestal nearby is a Combat Adjudicator; you need to hit her until you get up to a B style in order to unlock her goodies, which includes a bunch of red orbs and another Blue Orb Fragment.
There's a demon statue nearby, where you can cash in the red orbs you've been finding. You should have more than enough to buy a Blue Orb, if not two; spend as much cash as you can on them. Each Blue Orb that you buy will extend your life bar by one bubble, and that's going to be pretty handy as the game goes on.
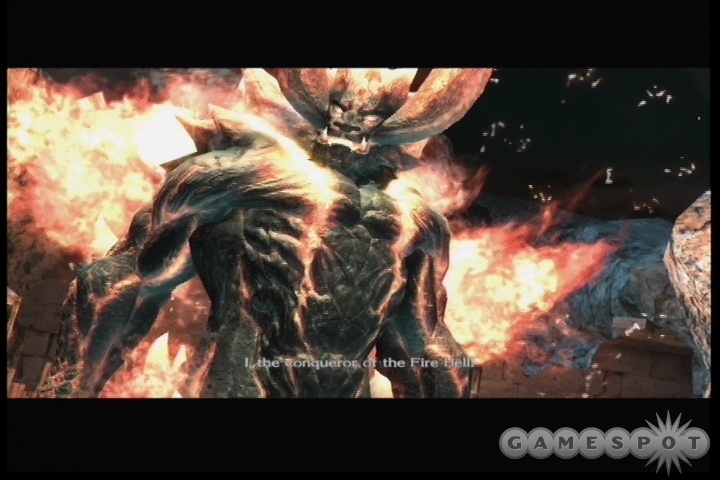
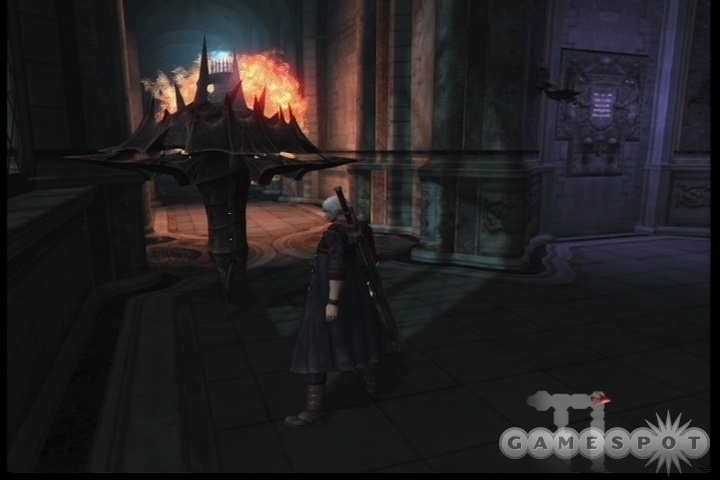
Boss Fight: Berial
Berial is one of the toughest of the early bosses, in that it's difficult to attack him without getting hit; his attacks are quick and difficult to dodge. Luckily, you have a bit of a crutch to work with here, as his attacks will constantly be destroying the buildings in the area, which will release green orbs to refill your health bar.
There isn't a huge amount to say about Berial's phases; he really doesn't have any discrete shifts in his tactics, although he will begin using more attacks later on in the fight. He begins the fight by slowly moving around and attacking you with sweeping and extremely fast sword strokes. In general, you want to try and jump over these strokes, but they often come down while you're attacking, making them difficult to dodge. Again, though, you won't have to worry too much about being hit, since there will be an awful lot of green orbs to work with here.
Early Phase
At the start of the fight, fire away at Berial with your gun and let him approach you; you want to lure him to one side of the small town here, so that his attacks won't destroy all of the buildings right off the bat. You can also charge your Exceed bar if you like, since the bullets won't do much damage. You want to leave some of the buildings behind and save them for later in the fight, when you'll need the green orbs that they drop.
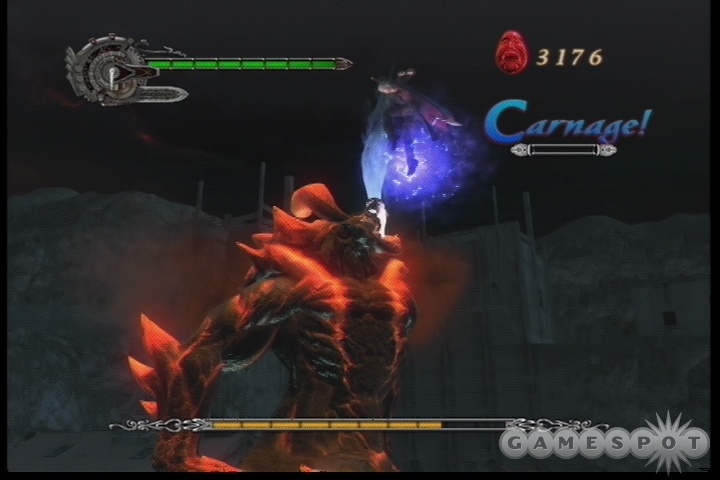
The best strategy for attacking Berial here appears to just be to launch yourself into the air at his face and whack him with your mid-air combo. If you like, you can try to get behind him and attack his haunches, but it can be difficult to maneuver here, especially since you want to keep him on one side of the area. He has three types of swings, including one that hits high, one that hits low, and one that strikes downward directly in front of him, but telling which one he's charging up is difficult in the amount of time that you have to try and dodge it; you will wind up getting hit quite a bit. That's not a bad thing, though, so long as you get back up to him and start swinging away. If you're having a lot of problems, try swinging your weapon at his feet to begin with, then jumping and attacking when he swings at you, as he'll likely swing low.
Powering Down
With enough damage done, Berial's flames will drop and he'll fall to the ground. At this point, quickly jump near his head and use your Devil Bringer; you'll automatically throw him back to the ground. If you have enough time, run back to his head and use the Devil Bringer while you're on the ground. The animation for the second attack is different, but they both do heavy damage.
When Berial's stun wears off, though, he'll resheathe himself in flames and cause big damage in a wide area around him; you need to run backwards away from him as soon as you see this animation beginning. This will likely destroy any remaining buildings in the area, so hurry around and heal yourself as needed.
Finishing Him Off
Berial will use some new attacks after his stun, including a pillar-of-flame motion where he'll pound the ground and cause three to four pillars of flame to shoot up out of it. He'll yell out "FIRE!" as he casts this spell. These appear directly underneath you and can't be dodged by jumping, so dodge them with your sideways roll maneuver if possible. He'll also introduce a forward foot-stomp ability that will knock you backwards.
Overall, though, this fight is similar to the first phase of the fight, so get up close and personal, swing away, and try to stun him again. You should be able to stun him twice and deal real damage to him before finishing him off with normal attacks.
Mission 03: Fortuna Castle
You should've netted a bunch of red orbs and perhaps 1,000 Proud Orbs for your fight through Mission Two. That'll be enough to buy a few more skills. Good ones to think about at the moment include the Red Queen's Combo B, Split, the Devil Bringer's Snatch 2, or the Ability Speed. You'll also probably eventually want to nab the Air Hike ability, as well, but that'll cost more money than you have at the moment.
If you wish, feel free to replay Mission 2 at this point for more Proud Orbs. It's helpful to have more abilities in your retinue as you move on.
Second Mining Area
Head down the hallway here and take a left; there's another red crystal behind some destroyable walls there. Kill all of the enemies nearby, then start grabbing your way to the top of the room. There is a Blue Orb Fragment at the very top of the mining shaft here. To get it, you'll probably want to have Air Hike, but it's doable without. If you get to the top of the chain of Grim Grips, jumping above the large red orb here will reveal another pair of Grips above you. If you chain yourself to the first and pull, then let yourself drop so that you fall a bit and grab onto the second Grip from below it, you can pull yourself almost straight up, then Air Hike upwards and make a blind lockon to another Grim Grip at the top of the shaft. If you can reach them, they'll lead you to the Orb Fragment. If you don't have air hike, you can attempt to latch onto the second Grip and use it to pull you into the vertical wall nearby, where you can wall jump upwards and hope to get up to the upper Grim Grips.
You can find a Vital Star S near the end of this room.
Fortuna Castle Gate
Grab the red orb near the beginning here, then start proceeding along the path. The small, single pillars contain green orbs, should you need any.
After the cutscene, you'll be facing off against Frosts. These enemies look intimidating, but aren't especially difficult. They will attempt to warp at you from a distance away, but they usually fly over your head, allowing you to grab them with a Buster and throw them around. They do have some special attacks, such as jumping into the air and crashing back down to the ground to cause ice to spray around them, and shooting ice at you from a distance away, but if you can keep them locked up with Buster moves, they won't be too hard to take down.
Head across the bridge to meet a new friend, then head into the castle.
Grand Hall
There isn't much to see here except for another Demon Statue. You can destroy the benches and chairs for red orbs.
When you're ready to move on, head through the door on the western side of the room.
Large Hall
You can destroy some of the mirrors here to find secret hiding spots, but apart from that, it's mostly just a bunch of Scarecrows running around. No need to kill them all if you don't want; just find the western door near where you enter this room and head through.
Torture Chamber
Defeat the enemies at the beginning here, then run up the steps at the back end of the room. You'll come out to a puzzle involving a number of grapple points that move and disappear. It's not difficult to get past them if you watch their patterns before attempting to grapple. If you fall down again, you'll have to fight the monsters all over, but that can make this a decent room for farming for orbs, if that strikes your fancy.
Grand Hall
Move north here. There's apparently a secret up on top of the area with the red orbs, but it's also apparently impossible to reach at this point, although you can double-jump on the right side to nab a Holy Water. Head north to the only door you can reach and proceed through.
Central Courtyard
Defeat the Frosts here and move on.
Foris Falls
There's a small pillar here; you can kickjump off of it and use snatch to grab the Vital Star S. There's also another reward pillar here, but it can't be used yet.
Central Courtyard
Pass through again and kill a couple more Frosts.
Grand Hall
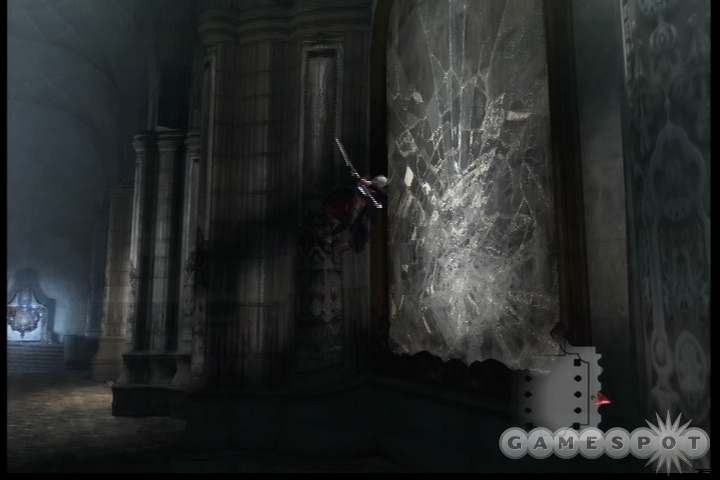
There's a blue switch you can pummel here: do so to drop the shielding around the area. Go past the door to the south and smash the window on the eastern wall to find a Blue Orb Fragment. When you have it, head back to the door and move on through.
Gallery
Another gauntlet here, but it's enclosed, and there should be plenty of health in the suits of armor and such around.
Library
The appearance of a demon statue here may make you think that a boss fight is imminent, but in reality, you're just going to be facing off against a new lesser demon enemy. These White Knights in shining armor use a lance and a shield in their attacks, but are only dangerous in large groups. Their attacks consist of a charge attack that will usually come down after they take to the air, but they can also shield against your attacks, stun you with a shield blow, then lance you afterward. If they block your attacks, quickly dodge to the side to avoid the counterattack.
Most frontal attacks will be blocked here, so it's easiest to attack from behind. Use snatch to grab onto them; that'll rocket you over their heads and usually land you behind them. You can attack them much more easily from behind; you can also use Buster to ram their spears through their chests and launch them across the room. Kill all of the enemies this way, then grab the Anima Mercury on the shelf in the next room to end the level.
Mission 04: Cold Blooded
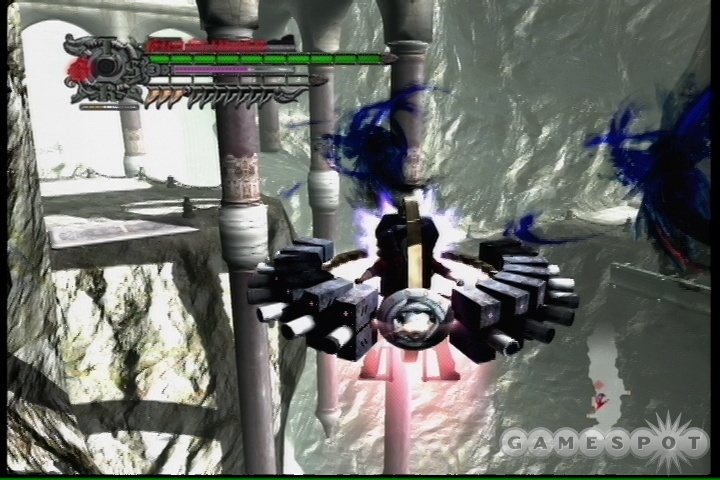
Library
Use the Devil Buster on the Gyro Blade in the cutscene to power it up, then hit it across the room to bust the seal on the door.
Gallery
Another fight here. Power up the Gyro Blade, hit it with your sword a couple of times to extend the blades, the punch it again with the Devil Buster to smash it around the room. Should create a lot of confusion and some easy style points!
Grand Hall
Drop down to the ground floor here and power up the Gyro Blade. You can smash the coffin in the middle of the room here if you like, but you won't be able to do anything with the seal underneath it for the moment. Head into one of the doorways on either side of the lower part of the Grand Hall, preferably the eastern one.
Large Hall
Ignore the Gyro Blades here for the moment. Instead, head into the eastern door in this hallway.
Dining Room
Kill the knights in the dining room, then move around and activate the Gyro Blade near the hallway. You can hit it down the long fireball hallway until it destroys the fire launcher there. You can find Secret Mission 02 there.
Grand Hall
Kill the enemies here and power up the Gyro Blade. Open the door leading on with the blue switch on the wall, then start hitting the Gyro blade allllll the way around to the southwestern portion of the hallway, where you'll need to smash through a blue barrier to unlock the fourth and final Gyro Blade. Move both Gyro Blades back to the empty pedastals on the northern part of this area to unlock the door leading on.
Central Courtyard
Boss Fight: Bael
Bael is one of those fights that you might have to try a few times before everything clicks. He can wipe you out fairly quickly, especially if he gets you in his mouth, but if you're lucky, you'll be able to pound him, stun him, and deal heavy damage.
Rusalka Phase
Two Rusalkas will appear here. You'll note the strings that attach them to Bael, but you won't be able to see Bael just yet. You'll need to wear the Rusalkas down before he pops out.
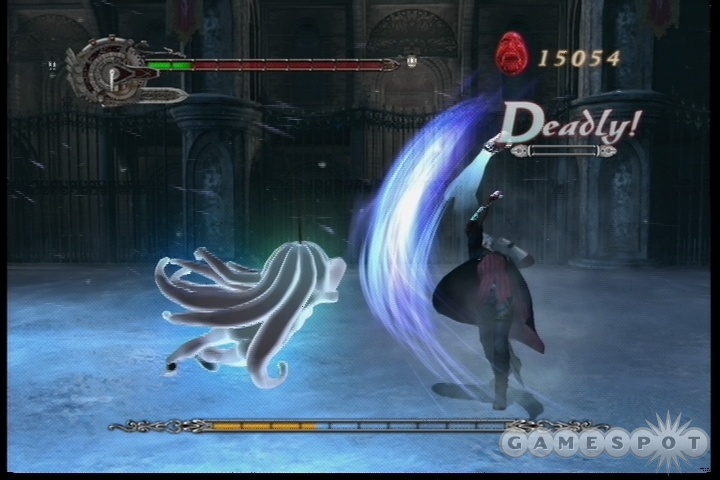
The Rusalkas are tricky customers and will dodge many of your attacks, particularly your Buster, Snatch, and High Roller. Your regular Red Queen combos will still go through as normal, so use your sword to wear them down over time. At the outset, the Rusalkas won't attack very often, but as the fight goes on and you switch back to this phase more often, you can expect them to become a lot more aggressive. Although they're kind of a side-show to the main battle, they can still hurt if they manage to get a few strikes in. On Devil Hunter mode, a single hit will take off one full bubble from your health bar.
To avoid their attacks, it's best to either stay elusive or simply go balls-to-the-wall and slice away at them with your default combo. By default, the two Rusalkas will stick pretty close to one another, which can make it annoying to try and attack one while the other attacks you, but if you consistently switch from one enemy to the other, you can disrupt their attacks before they land. Alternately, you can try to break them up by locking onto one of them and Sliding at her repeatedly. That should push her off to the edge of the screen and let you wail on her there. Be careful, though, as sometimes one of the Rusalkas will power up and spin around, which can hit you repeatedly if you don't run away.
If you beat down a Rusalka so badly that it goes dark and slumps to the ground, you can Buster it to pull Bael back out and start the main portion of the fight again. Also note that if you avoid the Rusalkas for too long and don't attack them, Bael will pop out and attempt to swallow you before dashing back into the darkness.
Bael Phase
After whacking on the Rusalkas for a bit, Bael will pop out. The first time this occurs, a cutscene will prevent you from taking any damage, but in the future, he'll pop out and try to either pop you into his mouth, which will cause massive damage, or swipe you with the Rusalkas. As soon as the screen switches to Bael in the background, start moving to one side of the arena and dodge at the last second, and you should avoid damage.
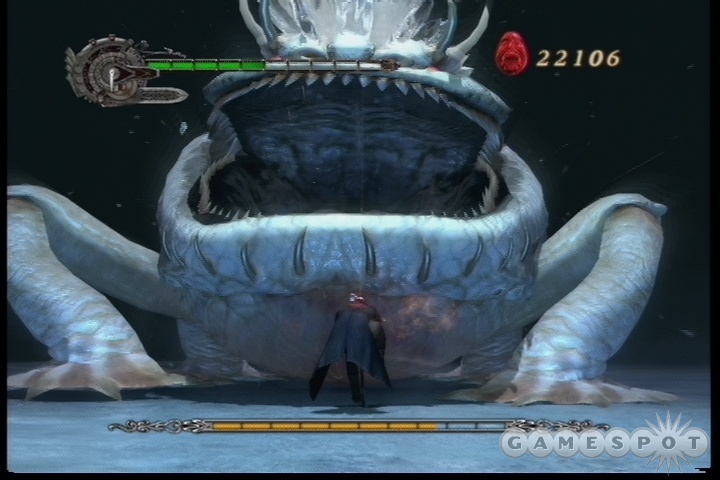
From then on, Bael becomes a somewhat aggravating fight. He's big, so he's hard to miss, but he's also rather mobile and will jump around fairly often. At the outset, the primary attacks he'll use include ice shards that jump out of his back and hit you from above (you can avoid them by running side-to-side, but attempting to dodge usually won't move you fast enough), and an ice breath that will cause him to shoot shards of ice along the ground. If you're hit by the latter attack, you'll be frozen in place.
Stay close to Bael while he uses these attacks. If you can dodge them, then you'll be in position to hit him a bunch while he preps his next attack, or Slide in if you got knocked back a bit. Avoid his attacks as best you can and get ready for him to be stunned. When he does fall on the ground, be ready with your Buster to deal a significant blow to his health.
In addition to this attack, Bael will also jump around quite a bit. Sometimes he'll simply reposition himself for more breath attacks, but he will occasionally attempt to land directly on you, forcing you to dodge out of the way.
Later in the fight, Bael will start to use the Rusalkas as weapons here, both by pounding them into the ground in front of him and swiping them from side to side. Position yourself on his side if possible, but if you still have plenty of health, you may not need to worry about these.
End Phase
When Bael is close to death, he will shift color to a reddish hue and begin acting oddly. He will periodically encase himself in ice, which is your cue to move out of way of his mouth, as he will quickly jump at you after a second or two. He'll use more swallowing attacks here, which is annoying, but if you can attack him from the side while he freezes himself, this should go relatively quickly, since he'll be on his last legs at this point. You may be able to attack the Rusalkas while he's frozen to gain some health orbs, but doing so puts you at the risk of being swallowed.
After defeating Bael, you'll receive a Rusalka Corpse, which is absorbed into your Devil Arm. That will let you automatically detect secret areas when you're near them. Pretty handy.
Mission 05: Trisagion
Soldier's Graveyard
You're going to have to fight against a couple of ghost-like enemies here named Mephistos. These guys are pretty annoying until you discover their secret. At first, they'll attempt to swipe at you with their scythes and shoot you with spikes, of all things; you can dodge the spikes and attack them while they're stuck to the ground for a bit of damage.
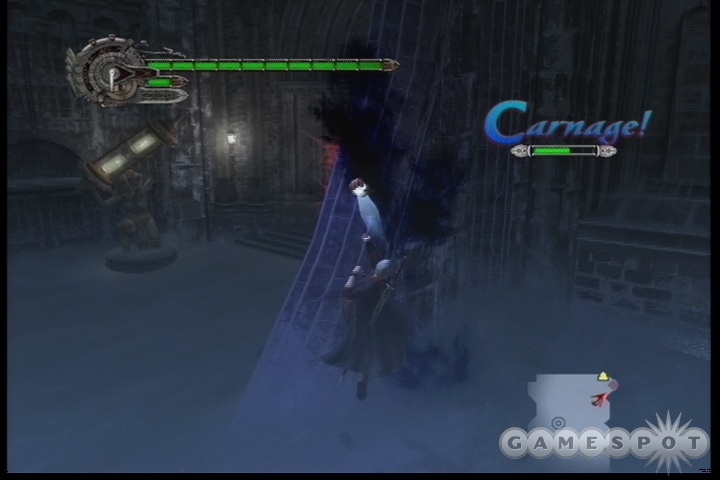
It's much easier to use your Buster attack on them though. The Buster won't work with them on the ground, but if you jump into the air and hit them, you'll snatch away a bit of their shroud. Hit the same Mephisto a second time with the Buster to rip their covering off entirely, resulting in a small spider-like enemy that'll fall to the ground. It'll be powerless for a few seconds, so pound it with attacks. It may regain its cloak after a while, but you can always repeat the process to finish it off.
This area has a few hidden features in it. Atop some of the small platforms near the wall, you can jump around and use your Snatch ability to grab some invisible red orbs. The statue atop the central pillar will also have a bunch of orbs if you smash it. Underneath the steps, behind the gate, is Secret Mission 03: Nonviolent Resistance, which asks you to raise your stylish ranking without using any attacks. It's a very difficult mission to complete until you unlock Dante or Table Hopper.
Lastly, there are some items hidden away on the upper level here; you can see them from atop the central pillar, if you destroy the statue there. These will be tough to reach until you unlock Dante later in the game.
Master's Chamber
A fight against White Knights here. Ignore them if you like; the exit to the door isn't locked. You can find Secret Mission 10 behind the mirror above the fireplace, however.
Torture Chamber
Hit the blue switch on the wall here to unlock the Gyro Blade. Smash it across the chain-link surface that drops down until you hit it into the Spiral Well.
Spiral Well
Defeat the two ghosts here and obtain the Wing Talisman from the receptacle nearby. That will give you access to a jump pad. Start riding the jump pads up to the top of the Well, stopping on each of the platforms that stick out from the wall. The first two will have orbs, while the third will have a Vital Star S that you can Snatch.
Torture Chamber/Large Hall/Grand Hall
Defeat any enemies that get in your path on your way back to the Grand Hall. When you reach it, you should be able to use the launchpad that was concealed beneath the coffin here. If you never destroyed the coffin, activate the Gyro Blade nearby and hit it into the coffin to do so. Launch yourself up onto the chandelier and slice at the neck of it to send it smashing into the painting on the wall, leading to the…
Underground Laboratory
Head all the way to the rear of this area for a lengthy cutscene and mission end.
Mission 06: Resurrection
Underground Laboratory
There's a Blue Orb Fragment near the beginning of this level; you should see it in the opening cutscene. Grab it before dropping to the bottom of the shaft here and passing through the door.

R&D Access
You'll encounter Cutlasses here. These annoying enemies will glide around beneath the floor, periodically jumping out to dive at you, or coming straight up from the ground underneath you. They're difficult to attack until you can drive them out of the ground. The easiest way to do this is to lock onto one of them and shoot them with your guns for a few seconds; eventually they'll flash red and slow down, indicating that you can then attempt to latch onto them with a Snatch, then Buster them up and out of the ground. As with Mephistos, these guys are a lot weaker when they're lying on the ground, and you'll be able to deliver combos as you like. It may be safer to simple Slide them over and over again to avoid the attacks of the other enemies in the area, however. The broken shards of door on the ground will have health in them if you need it.
Game Room
There's a large magical die here. If you read the panels on the walls, you'll learn your goal: you need to hit the die with your sword to roll it, which will move your game piece along the panels on the floor. White panels do nothing, while red panels will usually cause some enemies to spawn or something similarly annoying, and blue panels will have a beneficial effect. Yellow panels will cause you to jump backwards or forwards in the puzzle.
Despite the appearance of randomness, you can actually determine the number that the die will turn up with your Devil Arm. If you use a Buster to hit the die after it's on the ground, it will repeat the last number that you rolled. If you hit it with your sword, you can use Snatch on it as it rolls around; it will keep the last number that was facing upward on the die as you Snatched it will be the number that winds up hitting.
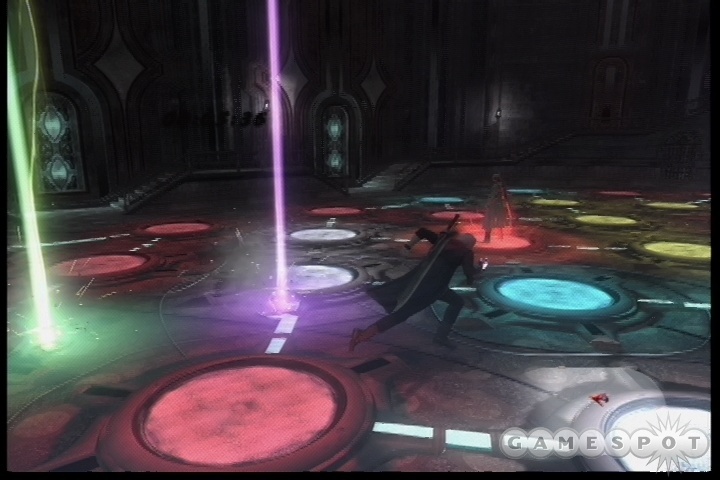
When you reach the end of the maze, head through the door for a boss fight.
Boss Fight: Containment Room
This isn't a fight against a boss, per se, as much as it's a fight against your environment. You're going to find yourself in a small circular room that's populated by flying swords called Gladiuses, with the royal researcher Agnus looking at you through a reinforced window. Your goal is to smash the window to get to him, but doing so is easier said than done.
Luckily, there aren't a huge number of phases to this fight or a bunch of stuff to remember. In fact, it's pretty simple. The spinning blades will, well, spin around. They will periodically start to spin, however, and launch themselves at you. They will either come at you straight-on, or will come at you and slash upward. You can jump over the straight attacks, while the slashing maneuvers should be dodged by moving around on the floor, or roll-dodging.
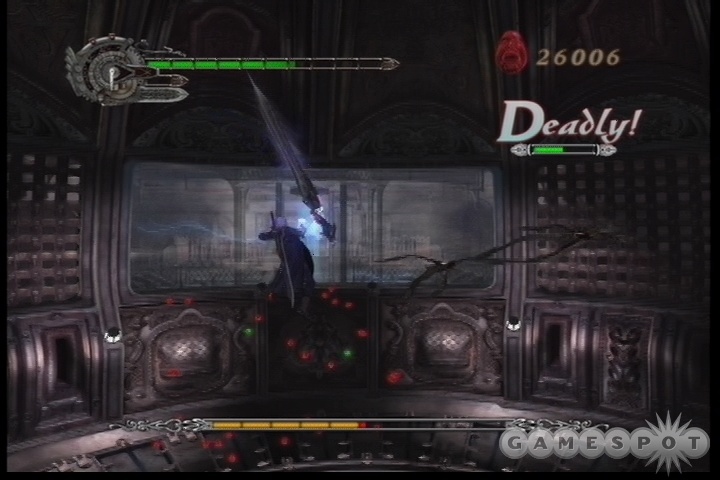
If you can avoid the swords often enough, then your other major challenge is the electrical floor. Every so often the Agnus will yell out "Time for another experiment!", and the floor will begin charging up. At this point, you need to get yourself onto the small platform in the middle of the room, which will be the only safe point for you. While you're on it, jump over any sword attacks, and you should be able to avoid damage.
In order to smash the window, you need to latch onto the swords with Snatch and then use Buster; that will automatically have Dante throw them into the window. You can also grab swords that have completed an attack with Buster, as they will have impacted into the ground for a moment. Using Buster takes a second or two, so you'll want to ensure that no other swords are about to attack you before you throw a sword of your own.
Containment Room, Continued
After you throw a couple dozen swords into the window, it will smash, initializing a looong cutscene that will result in the Devil Trigger ability becoming unlocked. You can fill your Devil Trigger by fighting, and when it's full, you can click the button assocated with it to activate the Trigger, which will let you deal quite a bit more damage for a small amount of time. Grab the hidden red orb in the blue beam of light before moving on.
Foris Falls
Use the blue switch here to stop the waterfall, then head upstairs. Before heading into the doorway, check out the balcony nearby; there's a Blue Orb Fragment out there. In order to get it, we had to use an Air Hiked double-jump with a Snatch at the end of it as we free-fell to grab it from midair. We had Snatch 3, and it wasn't long enough to grab it from the balcony. It'll take a few tries to get the timing right on this, but it is doable.
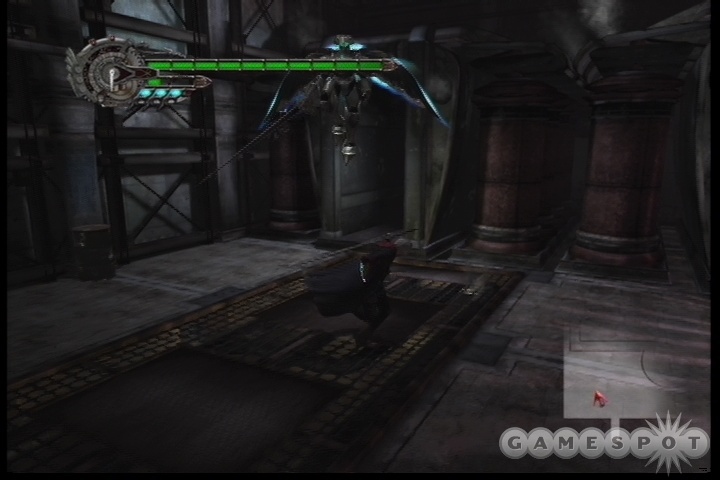
Angel Creation
Defeat the angels at the beginning of this level, then head to the northeast, near the three men suspended in cylinders, to find Secret Mission 04. The rest of this room is a series of fights against White Knights, which shouldn't be too bad. Don't hesitate to use the Devil Trigger after popping behind one of them; it won't last long, but it'll be helpful in making the fights go quicker.
Underground Laboratory
Start using the platforms to jump up to the top of the room here. You can land on the metal platforms on the side of the area, if you wish, but they only seem to contain some barrels with small amounts of orbs in them.
Grand Hall/Central Courtyard/Foris Falls
Head back to the Grand Hall at this point and use one of the doorways near the painting of His Holiness that you destroyed. That'll lead you to Foris Falls, where you can use the new bridge to reach the next area.
Forest Entrance
You move a hundred feet and all of a sudden it's daylight? Wha huh?
Mission 07: The She-Viper
Note that you can buy Purple Orbs at the Power Up screen here. These will extend the length of time that you can remain in Devil Trigger mode. Start buying them up; they're almost as useful as Blue Orbs are, and Blue Orbs are probably very expensive at this point.
Forest Entrance
There's a Secret Mission right near the beginning of this map which will be impossible to complete for the moment. There's also a red orb crystal nearby, under the tree.
Windswept Valley
You can find some Holy Water by jumping along the northern edge of this map. You'll encounter some new enemies here, the Chimera Seeds, who by themselves are absolute pushovers. You can kill them with a single Buster move, in fact. They'll become more dangerous in a moment.
Move off to the east and head through the door near the fountain.
Ruined Church
The Chimera Seeds will latch onto the Scarecrows here and transform into Chimerae, making them a bit more dangerous than they were. Mechanically killing them is not much more difficult, but the upgraded Scarecrows will periodically lash out with their blades, hitting you and knocking your style meter down a notch. It's impossible to predict when these blades will come out; they can hit you while you juggle them in the air, or latch on with Buster, or pretty much any other time when you're close to them, even if they're on the ground. The blades will only come out for a second, then retract for a while, so wait until just after their blades retract to hit them with combos.
You can break through the windows here to find a bunch of red orbs near the unusable statue, but apart from that all you can do is head upstairs and activate the switch. (The tree roots that block your passage on the bottom floor, assuming you find them, will be dealt with in a while.) Quickly run across the platform before it falls apart to move on.
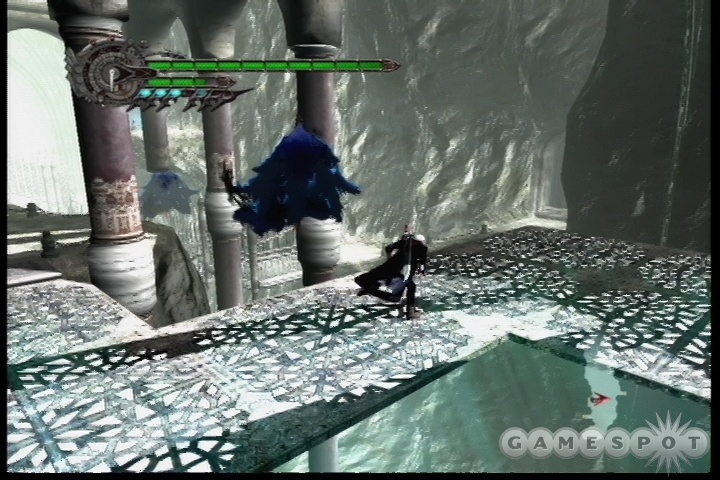
Ruined Valley
Use the Grim Grips to make it to the next blue switch, then activate it. You'll need to move across the platforms again, but two Mephistos will appear here and knock you off. Having Air Hike is very handy here, since you'll be able to jump straight up for a better chance at dodging their attacks if you can get a bit of an extension on your jumps. It may also be the only way to reach the Blue Orb Fragment that's suspended above the platform towards the end of the gauntlet here.
It's almost impossible to actually kill the Mephistos here, although you can try if you like. If you knock their cloaks off, then drop them off the platform, they'll immediately regenerate. You may be able to kill them with normal attacks, but that will take a while and you should probably concentrate on just avoiding their attacks and watching the platforms to avoid having anything from disappearing from under your feet. Feel free to hit them with a Buster while you jump, or Snatching their cloaks while you wait for the next platform to appear, but apart from that you should be ok to just ignore them. Be sure to jump over their slicing attack, though, as that will knock you back and probably force you to start over.
Lapis River
Plenty of seed pods here for you to bust open for orbs. You can also find Secret Mission 05: Sky Scraper on a tree in the southwest corner of the map. After trying it, head northwest.
Ancient Plaza
There's a fight here, but not much else.
Windswept Valley
More fun with Gyro Blades here. Smash through the barriers to move on.
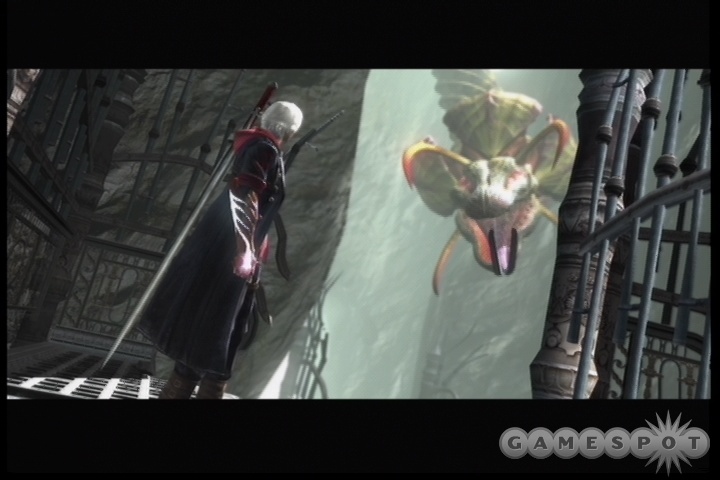
Ruined Valley
You'll get your first glimpse of the She-Viper here. She'll attempt to smash through the platforms that you're on as you move; you can jump over the pods that block your way or hit them with your sword to free your movement.
Forgotten Ruins
Get up to an A-rank with the Combat Adjudicator here to nab a Blue Orb Fragment. Proceed past the enemies here to find another demon statue. The seeds nearby will contain green health, so heal yourself up in preparation for the boss fight.
Den of the She-Viper
Boss Fight: Echidna
The Echidna fight is a fast-moving affair, and it can be difficult to avoid many of her attacks. Don't hesitate to use healing items if needed to survive, as the fight can be lengthy and there's no health to be found outside that which you'll get from Devil Triggering.
Phase One
Echidna has a few attacks here. In general, she'll appear as a woman, floating above the battlefield. Jump up into the air, use Snatch on her to pull yourself in, and whack away at her head. She will whip her tail around against the ground periodically, which you will be able to avoid if you stay off the ground. Just go to town with aerial combos here. The Calibur ability may be useful here to continually attack her without having to hit the ground. She can also whip around her head tentacles to hit you down from the air, unfortunately, but this does much less damage than the tail whip.
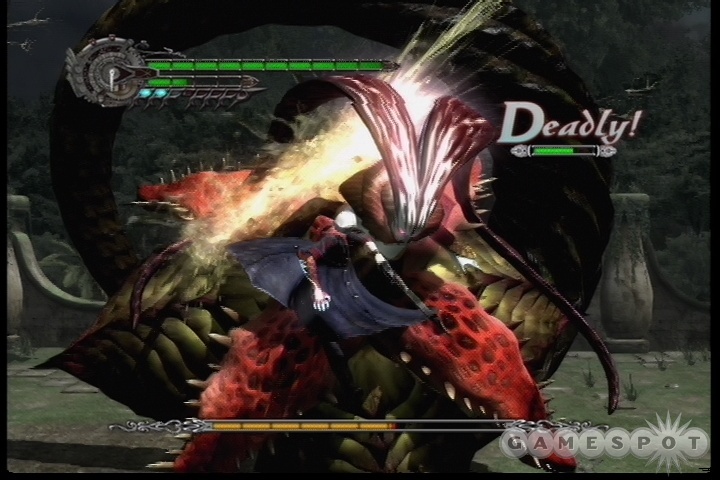
Every so often here, Echidna will swirl around and pause for a second in her dragon form and slither. This will signify that she's about to charge. If possible, get out of the way of her head and move off to the side. This is generally followed by a series of charges as she wanders out into the woods and attempts to ram you. Keep your lock-on active at this point so you can keep an eye on Echidna, and dodge to the side when she comes at you to avoid the attack.
After this occurs, she'll come back down to the playing field eventually, usually in a swirl of movement that you're best off just staying away from. She will either rear up and allow for some more head attacks, or more likely stick all of her legs into the ground and expose her underpod. The underpod will shoot down Chimera Seeds into the ground. Take this opportunity to hit her pod with a Buster, and you'll deal heavy damage to her.
These phases will repeat themselves a number of times. Your goal is to simply get up close to her head when she's kind of just floating there and pound her. If you deal enough damage, you will eventually slump her over, letting you grab her and deal a supercombo.
Phase Two
At around the half-health mark, Echidna will scream something about witnessing her true power, and change her body to a glowing yellow color. After this occurs, a good number of her powers will change to incorporate seed attacks, wherein she'll throw seeds at you from her body parts. This makes most of her attacks a bit more difficult to dodge, but be ready to dash to one side at a moment's notice.
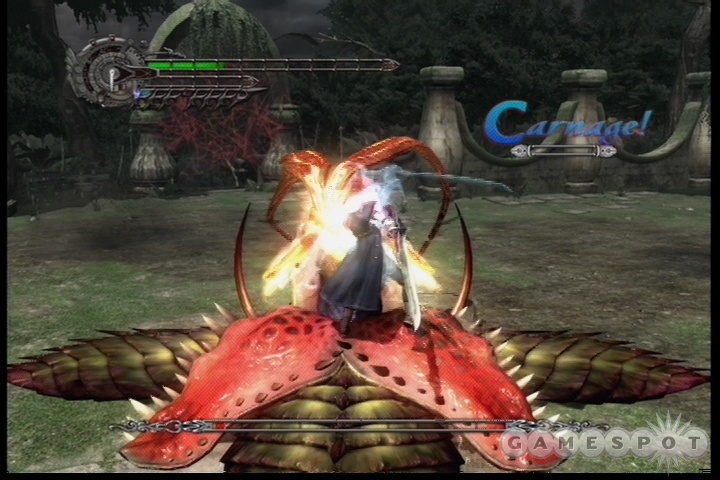
She'll start performing new actions around this time. She'll dig her entire body into the ground and leave only her humanoid form and petals showing. At this point, she's relatively easy to get to and attack, but she does cause a number of tentacles to pop up from the ground and swirl around, and avoiding them is somewhat difficult to do. She can also whip her hair around her body to repel you. Still, though, the best bet here is to get up close and wail away. If you have a Devil Trigger charge, feel free to use it up and hope you don't get knocked back.
If you manage to beat Echidna down while she's embedded in the ground, she will eventually slump over again, allowing you to use another Buster supermove on her. She'll repeat most of the maneuvers from Phase One as well, with the addition of seed blasts, but if you can get to her and attack her without taking too much damage, you should be able to finish her off.
Chapter 08: Profession Of Faith
Ancient Training Ground
Start following the path in front of you. When you reach the tunnel, jump up to the ceiling and smash the seed there to find a Blue Orb Fragment.
Lapis River
Use the Sephirotic Fruit on the tree here to drop the barrier from you. Head to the northwest to the Ancient Plaza.
Ancient Plaza
New enemies! These raptor-like lizardmen are called Assaults, and have shields and will lunge at you rather quickly, making them something of a combo of White Knights and Frosts. You can never be sure when they're about to attack you, making it easiest to just pound on them and hope for the best. If they shield up, quickly jump over them and attack them from behind. You can destroy their shields, but concentrating on one Assault will usually let the others attack you unfettered.
Windswept Valley/Ruined Church
Head back to the Ruined Church here. There's another tree section here that you can destroy with the Fruit. Do so and proceed on to the Lost Woods.
Lost Woods
The lost woods is similar to the famous Zelda maze, where the screen repeats itself as you pick exits and you're forced to choose the correct one. The pedestals in the center of this screen will give you some clues, about following the sun and avoiding the darkness.
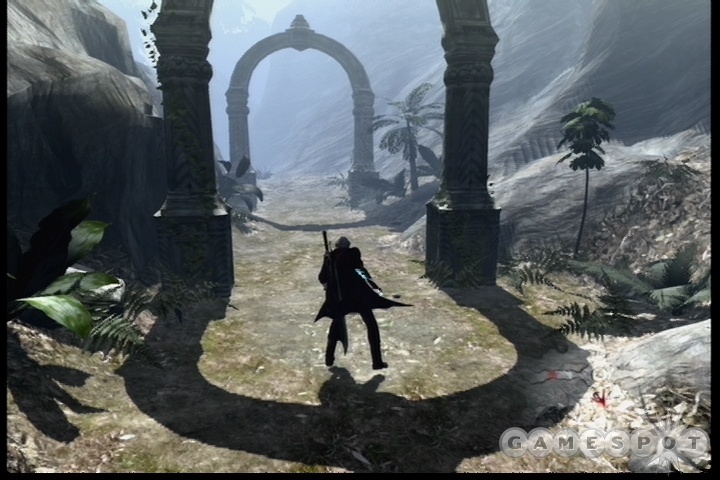
What you need to do here is to examine the shadows on the ground underneath the arches near each of the exits. One exit in each screen will have the shadows of the arch falling away from the sun, i.e. the arch's shadow will be extending towards the pillar in the middle of the screen. This is the path you want to take, obviously.
What you want to do first, however, is take the path heading into the shadows, where the shadows point towards the exit of the screen. This will lead to a screen where you have to fight off numerous enemies in order to escape, but if you jump around with Air Hike, you should be able to spot a Blue Orb Fragment in one of the trees nearby. Nab it, kill the enemies, and you'll return to the beginning of the maze. (Note that we found this on the enemy screen that results in heading east and then north; your mileage may vary.)
In layman's terms, heading east, south, and then north will lead you on to the next area.
Forgotten Ruins/Ancient Training Ground/Gran Album Bridge
Boss Fight: Angelo Credo
The first time you face Credo, he is going to kick your ass. The second time you might die, but it'll be a closer fight. After that, you should be familiar enough with his attacks and what you need to do in order to take him down. There aren't set phases here, and in general there isn't a real set pattern he goes through; he simply has a lot of moves that you need to recognize and learn how to avoid.
The thrust here will be to run around Angelo and attempt to hit him with your Buster attack. His problem is with your Demon Arm, so make sure he knows that that's what's beating him. Snatch 3 and Air Hike will be very helpful in this fight.
Abilities
Thrown Swords: Credo will charge up his swords when he has a bit of distance on you and throw them at you. He can throw as many as three of them, but he'll often throw only one or two. If he charges up a second sword after the first, it will come out a bit more quickly than the first one did.
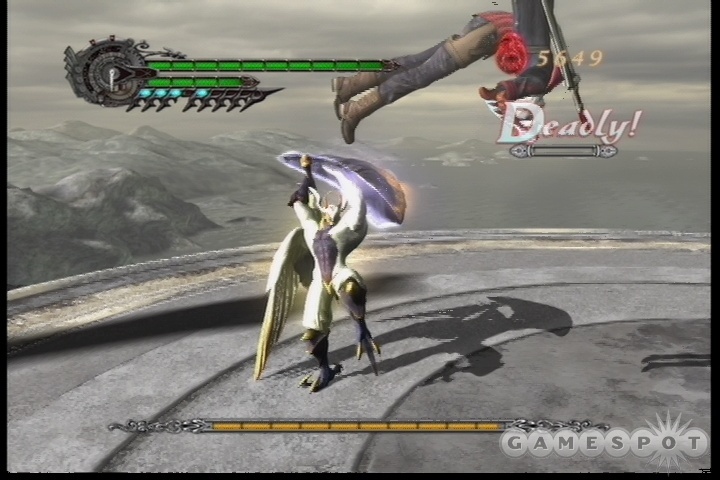
If you're far away when he starts these throws, you can easily roll-dodge away from them. If you're close to him, you can try to rush up and hit him with a Buster attack.
Sword Combos/Strikes: If you attack Credo's shields directly, he will retaliate with a few different sword combos. Most of these can be avoided by simply jumping straight up into the air and falling back down. These will also sometimes come out of their own accord.
Teleport: When you get close to Credo, he will often teleport away and begin a Slow Walk.
The Slow Walk: After throwing the swords or recovering from a weary stun, Credo will begin walking slowly towards you. There's no attack involved here, or at least there isn't one until he gets close to you. What you want to do here, though, is hit him with Snatch while he's still pretty far away. It will bounce of his shields, but he will immediately charge you with his shield leading the way, allowing you to roll to one side and either Slide or simply attack him from the back, if you're quick enough.
Aura of Swords: Near the end of the fight, Credo will begin taking to the air and say "Now take this!" That will be followed by the appearance of a large group of swords that will float around Nero. You need to strike them all before they converge on your body. The air combo seems to be the easiest way to do this.
Strategy
You need to be very fast here, as Credo moves quite quickly and will overwhelm you if you're not prepared.
The basic strategy is, again, to try and hit him with Buster, preferably after striking him with your sword a few times. What we preferred to do was to wait for his Long Walk to begin, then use Snatch on him from a ways away. (This might not be doable if you don't have an upgraded Snatch ability.) The Snatch will hit his shield and bounce off, but Credo will always charge you after this occurs. You can easily dodge this charge, and proceed to either attack Credo from behind, maybe with a Slide, or attempt to Buster him. A Buster at this point will usually be reflected off of his shield, which will cause a combo to begin. Air Hike up into the air to hopefully avoid the combo, then land near Credo and attempt to attack him from behind or Buster him again.
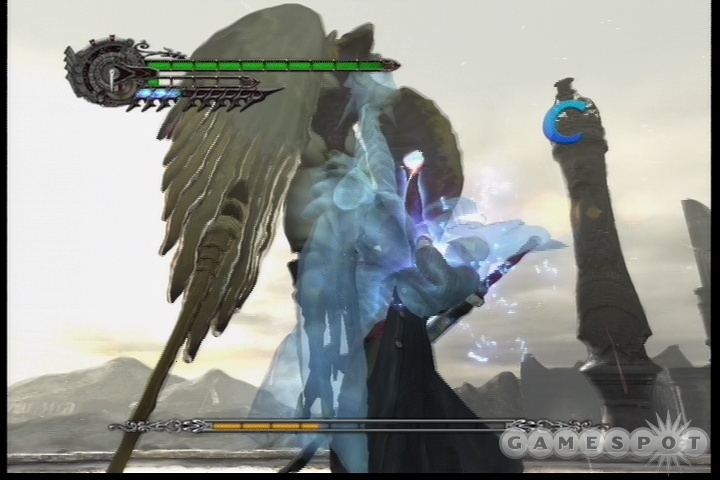
The thing to keep in mind here is that Credo will appear to be stunned fairly often. Usually he'll kind of appear dazed and appear to let his guard drop, but don't let appearances fool you: you might not be able to Buster him at all while he's dazed, and even if you do, it might be a normal Buster instead of a supercombo. Even if he drops to his knees and looks like he's primed for a buttkicking, you still might only pull off a normal Buster. Normal Busters involve your hand blasting into Credo's shield, which will knock him back and cause him to appear stunned; you will have a hard time getting to him before the stun wears off, however.
What you want to try and do to obtain the supercombo is to switch on your Devil Trigger mode while Credo is using the Long Walk, use Snatch to cause him to charge, dodge, then start attacking. If you can get three sword swings in, you have an excellent chance of following it up with a full-on Buster. If you can repeat this process a couple of times, you will eventually manage to start one of the two supercombos that will be the biggest source of damage in this fight.
Late in the fight, Credo will begin moving much more quickly and will take to the skies a bit more often; you'll need to basically spam him with attacks at this point to win. If you can avoid his earlier attacks, though, you should have a comfortable margin of error to work with.
Mission 09: For You
As a note, mission eight is a fine one to repeat a few times for extra orbs. It's fairly quick, and the boss fight at the end isn't too bad if you can learn it and repeat your success.
Gran Album Bridge
Head towards the HQ building, only to witness a new character descend from the skies, the Alto Angelo. This guy is an upgraded version of the White Knight, with some extra powerful attacks. Defeat his cronies first, then move on to the new fellow, as the Altos can raise the attack capabilities of nearby minions. Attempt to defeat him as you normally would, by Bustering him when you're behind him or when you can knock off his shield. When these guys are shieldless, they basically perform no actions, allowing you to wail on them as much as you like, but their shields eventually will respawn.
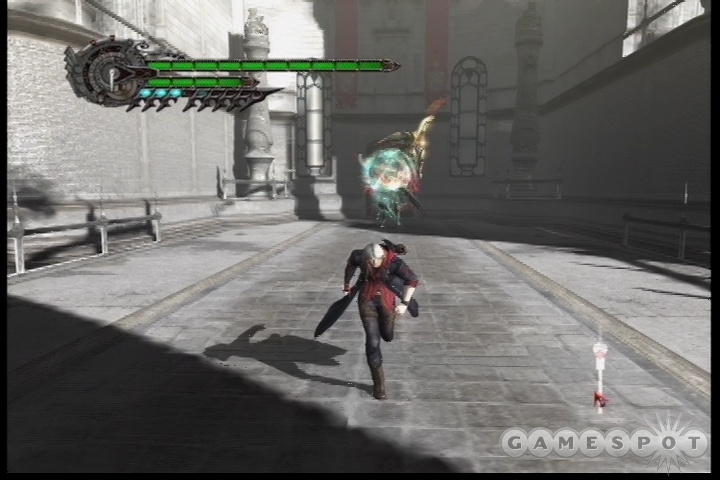
Note that the head angel here will periodically grab one of the White Knights and attempt to shoot a powerful ball at you. We haven't worked out the precise mechanics yet, but it's apparently possible to reflect it back towards your enemies in such a way that it automatically kills all of them and shoots you right up to an SSS style ranking. Apparently doing so will require you to either hit the ball as it comes your way with a Buster attack, or shoot at it with a charged-up shot from your gun. Good luck trying this technique out!
Grand Hall
There's a Devil Star S in the northwestern corner here and some red orbs in the southwest. There's another Combat Adjudicator in this first room; get up to an S marker with her and you'll nab a Blue Orb Fragment.
Proceed to the south and activate the pedestal you come to. It won't work, but it will cause a change in the room behind you. The lasers are nothing to worry about: simply drop down when they move past you and doublejump up the railing.
Key Chamber
Defeat another group of Alto + White Knights to obtain the Key of Cronus. Use it on the central pillar here to start—you guessed it—a time-slow maneuver. You're probably familiar with the concept from, oh, every action-adventure game ever made. You'll need to slow down time here to pass through the lasers that block you from the western passage.
The Gauntlet
What an ominous-sounding name for a room. Activate the blue switch and head into the room that drops down. Defeat the enemies to raise yourself up to the next level. Don't worry about the Fragment here; you can't get it yet.
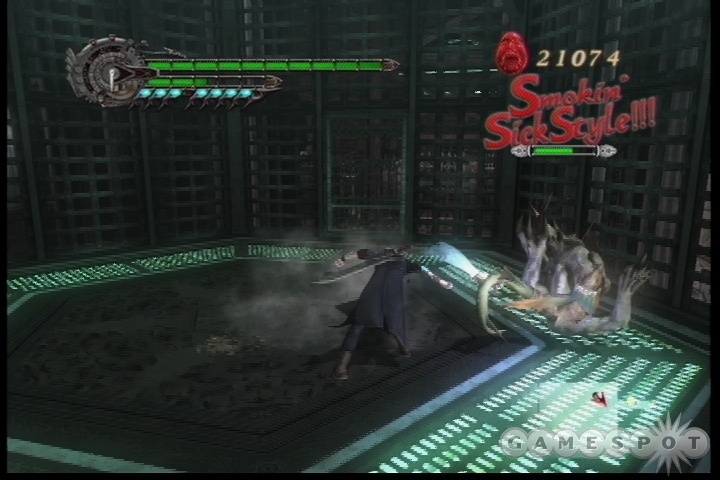
Use the pedestal to timewarp yourself through the laser beam to another gauntlet room, this time with multiple Freezes. Defeat them and the room will rise again. Instead of heading out the path to the next timewarp, look around for another open exit that appears to drop you down to nothing. It'll let you fall down to a platform where the Blue Orb Fragment is located.
Return to the Gauntlet here and pass through a bevy of Assaults to reach the top of the room.
Agnus' Room
Boss Fight: Angelo Agnus
Like Angelo Credo, there aren't really specific phases to the fight. Instead, you'll have to deal with Agnus' life-gaining abilities as well as his summoned creatures.
Abilities
Sword Attacks: Agnus has a few easily-dodged sword attacks. He'll use them when you're close, but will shift away from them as the fight progresses.
Gladius Summon: Agnus will summon three Gladiuses into the room, which fly about and attempt to zap you, just like they did in the Containment Room fight way back when. As you did then, you should attempt to Snatch these guys and Buster them to shoot them back into Agnus. It can be a bit more difficult to Snatch them than before, though, as your lockon will prefer to latch you onto Agnus instead of one of the swords. If need be, you can wait for them to attempt to spear you, then Buster them out of the ground.
Note that Gladiuses drop white orbs when they perish; these recharge your Devil Trigger gauge. You'll probably be capable of having an almost-constant Devil Trigger state on during portions of this fight if you kill the Gladiuses with regularity.
"Your Strength Will Be Mine!": As Agnus shouts this phrase, he'll start charging up an attack, then latch onto you and drain some of your health, feeding his own life bar. You can avoid this by hitting him while he charges up or jumping over him as he comes your way. You can also flip on Devil Trigger after he latches on to you to break free of his grip and restart fighting.
Fireball Attack: Agnus will summon a disc of energy that floats over his head and start shooting fireballs from it. He can't be interrupted during this attack, so just double-jump around and avoid the flames.
"Time To Die!": Another charging ability here, where Agnus will move to the center of the room, charge up his attack, then unleash a powerful ability that will drain your health. The move appears to be unavoidable, so quickly hit Agnus while he charges, either with your sword or with a Gladius. If you're across the room, use Snatch to pull yourself next to Agnus and go to town.
Cutlass Summoning: Later in the fight, Agnus will drop two Cutlasses into the ground, which will then pop up underneath you. Difficult to avoid, but if you keep moving they should miss you.
"I Will Crush You Until You Die!": Agnus will summon two Cutlasses and attach them to his arms. He'll swirl around for a bit, dealing damage to you if you're anywhere nearby, then throw the Cutlasses. The thrown blades are difficult to dodge since they move so quickly, but you can double-jump over them.
Strategy
In general, you need to keep up the pressure on Agnus during this fight by constantly whacking him with your sword and doing your best to grab any Gladiuses you see and throwing them at Agnus. Most of Agnus' moves are not difficult to dodge, luckily, especially after you attempt the fight for the first time and have something of an idea of what's going on. The main danger here are his life-stealing moves. If you let Agnus pull these off consistently, you will be at a marked disadvantage during the fight.
But apart from that, you simply need to stay on Agnus, avoid his sword attacks, grab and throw a Gladius as often as you can, and you should be well on the way to defeating him. Air Hike and Snatch 3 will be critical to success here. Also keep in mind that you should be rolling in Devil Trigger orbs here, so whenever it maxes out, be sure to trigger over to it and unleash a combo or three. Dealing enough damage to Agnus will cause him to slump. It can be difficult to tell when he's stunned because he never hits the ground, but if you hear him making those whimpering sounds he makes every time you hit him, he's stunned. Hit him with your Buster to initiate a supercombo.
Mission 10: Wrapped In Glory
Agnus' Room/The Gauntlet
You'll encounter a new enemy in the Gauntlet, a kind of King Mephisto with some new attacks, called the Faust. Procedurally, killing him is no different than the regular Mephistos: Snatch or Buster away his cloak, then kick his ass while his body flails on the ground.
Use the time-slowing power of yours to move past the laser traps and flip the blue switch. Pop it, then move back to the first laser trap and fall off the ledge there; that'll return you to the ground floor.
Key Chamber/Grand Hall
You can use the time-stop mechanic in the Key Chamber to kill off the Angelos there rather easily. Proceed back to the Grand Hall here, and don't forget about the Combat Adjudicator and the hidden red orbs down there. Move across the bridge.
Security Corridor
Activate the timeslow here and do your best to move past the lasers; you'll need to learn the pattern a bit, then start jumping over them. You can find Secret Mission 06 at the end of this hall here.
When you've tried to win Secret Mission 06, drop down to the bottom of the large room with spinning blades in it. Destroy the Mephistos to unlock the next chrono device, then trigger it to slow down the spinning blades in the middle of the room. Jump up them to reach the next door leading on.
Experiment Disposal
Kill off the Angelos here, then activate the lift at the rear of the area to move on. There's a Blue Orb Fragment near the ceiling of this room, above the lift. It's a bit easier to get to in a couple of levels, so you may want to just come back for it in Mission 12.
Meeting Room
Two Alto Angelos at one time here. Difficult, but not impossible to kill. We liked to Snatch onto them in midair and use air combos, since they're much more resistant to Buster attacks then their lesser minions are. There is a boss fight coming up, so try to avoid using up all of your Devil Trigger.
You can find Secret Mission 07 near the end of this hallway. You should avoid it at the moment, as it'll drain your health, and that's a bad thing when you're up against a boss.
Boss Fight: Dante
Dante is, as is getting to be a habit among these bosses, very quick. He can dodge many of your attacks and has plenty of sword combos to throw your way, most of which become unbreakable if the first strike lands on you. He has a few abilities now that you'll recognize from Devil May Cry 3, such as Trickster dashing and Royal Guard attack deflections. He also has plenty of the same combos from the previous game. He can be difficult and frustrating to hit, but luckily there's a pretty cheesy way to bring him down to zero health.
Abilities
Gunfire: Ebony and Ivory are singing their tunes. Usually Dante will start sweeping his guns across the room, which misses you, but then he'll lock on and start firing away you. This is difficult to avoid, but if you get on top of the dias in the middle of the room, they should hit it instead of you.
Sword Combos: Breakdown! You'll see plenty of sword combos here. In general, if one of the swings hits you, you're locked into the combo and can't break free. Stay away from Dante when he's on the ground.
Slider: Like Nero, Dante can slide across the room, sword-first, and attempt to stab you. Jump or dodge out of the way.
Dante has a few other abilities, but in general you probably won't need to worry about them too much. Why? Read on…
Strategy
Attempting to take Dante on head to head will lead to frustration. He can dodge many of your attacks and will counterattack ruthlessly. You should particularly avoid Sliding at him, as that will pretty much always miss and lead to a Split from Dante.
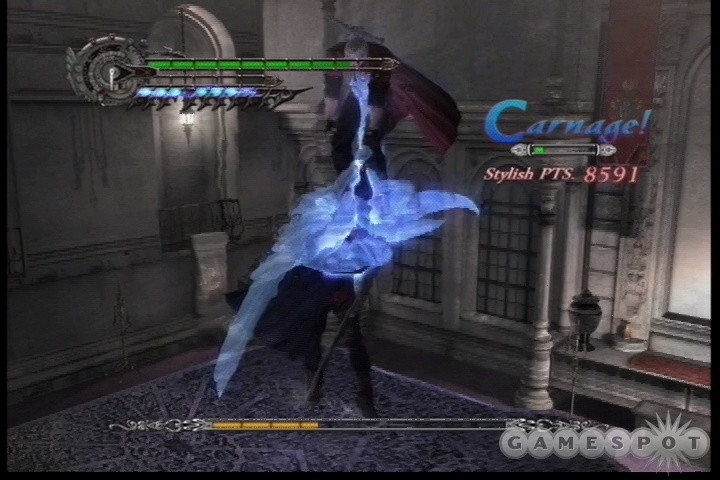
Instead, the easiest way to proceed here is to hop onto the dias in the center of the room. Dante walks around fairly slowly below you, so you should be able to see where he's heading. He'll attempt to hop onto the dias to join you and fight. While he's jumping, nab him with a Buster, and you'll slam him back to the ground. When he gets up and attempts to jump again, repeat the process.
That's really all you need to do here. Surprising, isn't it? You could probably make this into an epic fight of attacks and counterattacks if you really want to, but it's not really necessary. Dante can't avoid your Buster while he's jumping, and he has no other way to get onto the dias, so this technique will always work if you time it right. Bustering does a good amount of damage, too (over a full health bubble if you're in Devil Trigger), so the fight won't exactly last very long. You won't get a huge amount of style points for repeating the same move over and over again, but if it works, it works.
If you ever need to reset the encounter (if, say, Dante jumps onto the dias and starts wailing on you), simply drop to the ground, wait for Dante to drop as well, then jump back up.
Mission 11: The Ninth Circle
Advent Chamber
There's a Combat Adjudicator here that apparently requires you to get up to SSS ranking with her. It's very difficult to do this while only working on one enemy. Our recommendation is to move into the level a bit, work up a full Devil Trigger gauge, and come back. You should be able to get up to S or SS just through the use of your combos and regular attacks; when you get up to SS, try using one of the expensive Yamato moves like Showtime to bust up to the SSS ranking and get your Blue Orb Fragment.
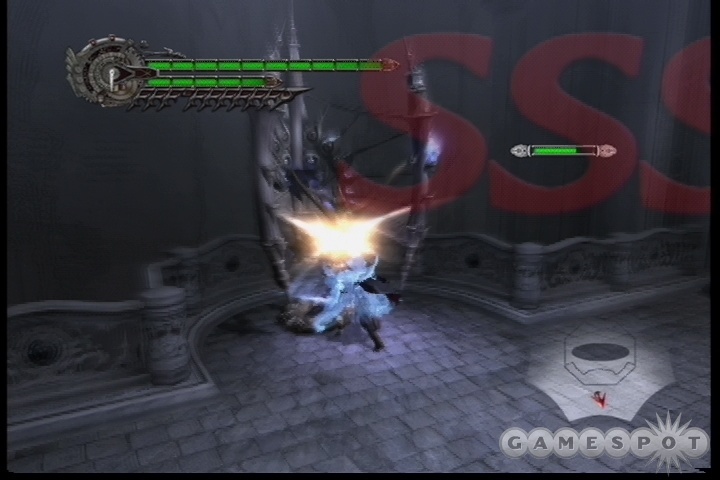
When you're ready to move up, find the blue switch here and activate it to spawn some Grim Grips. Ride them up top, defeat the Faust, and activate the elevator nearby.
Upper Level
The upper level here has a locked doorway that will only open if both pressure plates are depressed. Snatch one of the Scarecrows nearby and pull it to the door to move on.
There's a Grim Grip semi-puzzle beyond the demon statue here. Two Grim Grips are accessible to you here, but the far path is blocked off because it's too high. We've only managed to move on thanks to Air Hike, so we're not sure how you'd get past this area without it. Regardless, to do so, stand below the rightmost Grip, jump up once, use Snatch on the grip, then Air Hike over to the next walkway.
There are a few more Grip sections to get through until you reach a large platform where Angelos will attack you. When you reach it, you can defeat the Angelos and flip the red switch to drop a platform back near the demon statue. When you head back that way, you'll be inundated by enemies, with alternating phases of Scarecrows and Angelos of various sorts. Kill them if you like; this is apparently just a way to build style points, as there's no reward for beating everything. If you want to skip them, just head into the lift nearby and move on up to the boss fight.
Boss Fight: Sanctus/The Savior
Let's get ready to rumble! Sanctus will be a two-part fight. He will probably either seem pretty easy or simply drawn-out, depending on your experiences.
Phase One
In phase one of this fight, Sanctus will float above the ground, encased in a spherical shell. He has numerous attacks, most of which target the ground instead of you, so that's just fine.
Your goal here is to get up next to Sanctus and hit his shell with your sword attacks. Do so by Snatching the small orbs that Sanctus spits out from his shell; they don't have any purpose initially, but are simply there to be Snatched and allow you to get up close and personal with Sanctus. When you're in the air near his shell, whack him with your sword a few times. Eventually the shell will break in half, allowing you to repeat the process until it falls away entirely, forcing Sanctus to the ground. At this point you can drop down next to him and use a Buster to initiate a pretty rad supercombo.
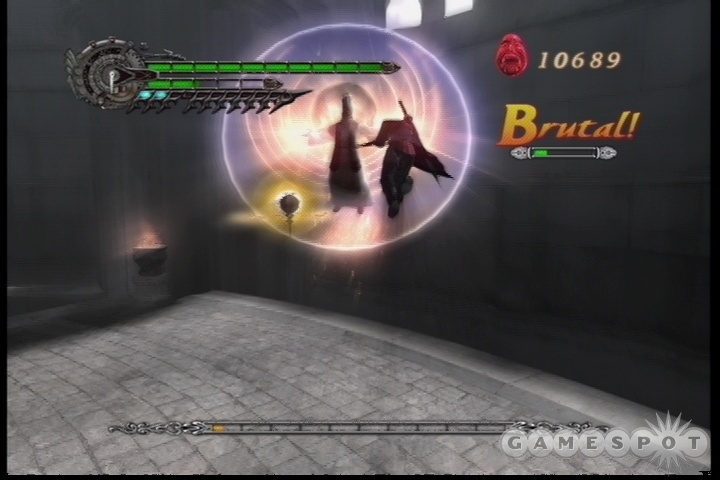
Of course, things won't always be this simple. The different attacks that Sanctus will send your way will usually be aimed at the ground, but the ones that aren't will be annoying to deal with. He has a few here, including: "The Savior is coming!", which will restore his shell when it's broken and cause damage to you if you're nearby; "I sentence you to death!", where a number of purple shards of energy pop up from the ground, which will likewise be tough to dodge if you're near him; and "Repent!/You will pay!", which sends a couple of fireballs along the ground and is easily dodgeable.
There are also a couple of attacks that feature grunts and yells, but no words, before they come down. The first one features a laser beam that hits the ground and spreads out, causing damage to you if you land. Stay in the air and keep swinging to avoid this. By far the most annoying attack of his, however, is the fireballs that he sometimes sends your way, which will come out after he yells "Burn!". The fireballs originate from inside of his shell and will pretty much always hit you if you're trying to attack him while they come out, knocking you to the ground. If he pulls this move off a few times in a row, it'll spell frustration for you.
Sanctus will attempt to move away from you as best he can, but he does have to stop in order to attack. Use that opening to claw your way close to him and attack. If you find that you're not having enough time to break his shell, use Devil Trigger while you're attacking from the air to get more hits in.
Phase Two
Eventually Sanctus will wake the Savior and cause him to attack you from afar. This fist attack is difficult to dodge because it comes down so quickly; try moving from the edge of the platform towards the wall. Eventually Sanctus will reemerge from the ground, however, allowing you to finish him off in the same fashion you were originally attacking him with.
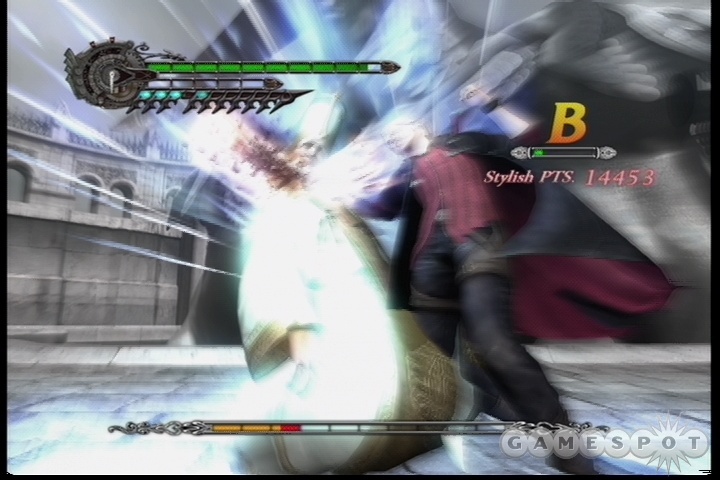
This section can either be really short or frustratingly lengthy, due to the fact that Sanctus will often disappear into the Savior after you halfway destroy his shell, preventing you from finishing him off. Given enough time, though, you'll eventually take him out.
Mission 12: A New Beginning
This is where the game becomes a bit less friendly to people who haven't played Devil May Cry 3. You take over as Dante at this point. Although DMC4 probably seemed very similar to DMC3 when you started playing it, flipping from Nero to Dante at this point will be difficult, especially as you have to come to grips with the lack of the Snatch mechanism.
As far as upgrading Dante goes, you'll want to purchase all of the moves for his Rebellion sword, as well as Air Hike and Speed, and Trigger Heart for Devil Trigger. As far as the Styles go, we had enough cash to fully upgrade Trickster and Swordmaster, two useful ones, but if you only have enough for one, go with Swordmaster for now. We played through all of DMC3 with Trickster, but DMC4 is much more about attacking your enemies than dodging their attacks, since many of them are fairly slow, so you can rest assured that an aggressive play style will work out just fine. Gunslinger and Royal Guard can be used if you recall being particularly adept with them in DMC3, but you can get along pretty easily without them.
Ascension Chamber
Take your time whaling away on the Scarecrows here; they're intended to give you a bit of an introduction back to the nuances of Dante combat. Kill everything that moves, then head out to the north.
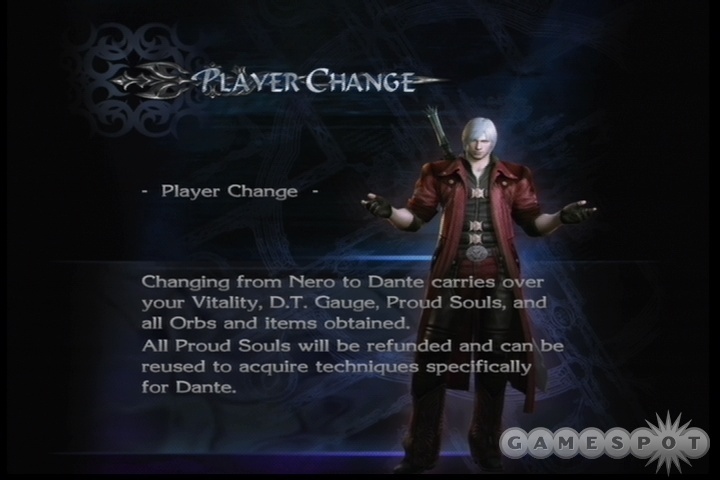
Meeting Room
You'll run into some new enemies here, the Mega Scarecrow, which are massive bladed creatures that move fairly slowly. They're not too difficult to juggle around and beat while they're prevented from attacking. The Blue Orb Fragment atop the lift is reachable, but it'll take some jumping. Use a Wall Hike on one of the pillars while you're standing on the bottom of the lift to reach the first upwards tier, then try your best to jump upwards from there to nab the orb. It'll probably be a blind jump.
Experiment Disposal
The building will begin to collapse at this point, giving you only ten minutes to escape. Drop down to the bottom of this room to find a Golden Orb. Hit the switch to drop the Gauntlet room, kill the Frosts, and exit out to the other side.
Security Corridor
Mephistos will attack you here. Without Buster, what are you going to do? Well, gunfire works well against their cloaks, too. Switch to the shotgun, get up close to the Mephistos, and blast them. You can use Gunslinger's special attack if you like; that should drop their cloak immediately, even if you haven't upgraded Gunslinger at all. Dispatch them the normal way after that and start climbing the blades again.
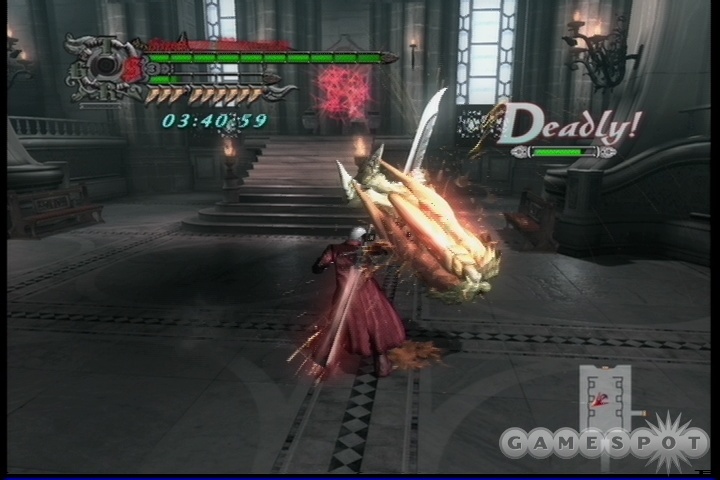
Grand Hall
You'll come to the doorway here and should have a few minutes to spare. Unfortunately, Angelos will appear and block you from the exit. Without Buster to help you out, they can be pretty difficult to kill, but if you use an upgraded Swordsman style, you have some options. Prop and Shredder are great ways to take out a stunned enemy; you can chuck them up into the air and then float them there until they fade away. Drive is also a good move to use on enemies that are far away.
Either way, you need to adjust and defeat the Angelos in order to exit the building. If you moved quickly you should have plenty of time to fight them.
If you still have a few minutes left after defeating the Angelos, you can head up the stairs to reach the Key Chamber and proceed from there into the Gauntlet room. Just ignore the Gladiuses in the Key Chamber. In the Gauntlet room, you can find a Dante-styled Combat Adjudicator that you need to bump up to a B ranking or so to nab a Blue Orb Fragment.
Gran Album Bridge
Cross the bridge to end the mission. If you're shaky on Dante's playstyle still, you will probably want to replay this mission a couple of times to get the hang of it.
Mission 13: The Devil Returns
You're traveling back through territory you've already been through in this level, so it should be somewhat familiar to you. Unfortunately much of it is blocked off from you, so you'll need to follow the voice of the forest to get to where you're going.
Ancient Training Ground
Leave through the eastern exit here. Any other exit will loop you back to the beginning of this screen. You can jump from the upper walkway to the ground below over the crack in the wall.
Forgotten Ruins
Jump off the balcony to your east here and head through the enemies to the clouds in the southeast.
Windswept Valleys
Ugh. The Assaults here have been infected by Chimera Seeds and are much quicker than they were before, and thus much more annoying. They'll also cut through the ground, Cutlass-style, and pop up beneath you. If you get frustrated here, a Devil Trigger followed by spamming Stinger 2 will do a good job on these guys with minimal risk to yourself.
Deal with them as best you can, then head to the east and up the stairs.
Ancient Plaza
The Assaults here are the regular sort, so they're much easier to beat than the Chimerassaults from before. Defeat them to move on to the northeast.
Lapis River
Defeat the Mephistos here if you like, then proceed through one of the portals underneath the bridge.
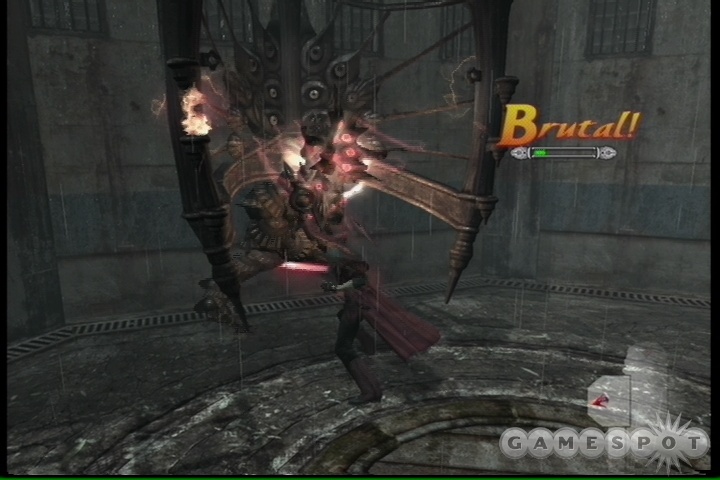
Windswept Valley/Ruined Church
Head into the Ruined Church and get up to an A ranking on the Combat Adjudicator to get a Blue Orb Fragment. If you skilled up the Swordmaster style, then pressing lockon+forward+the special attack button (B on the Xbox 360), then simply spamming the special attack button, will launch you into a lengthy combo that will get you most of the way up there. Head through the southeastern door, underneath the stairs.
Lost Forest
The Chimaerassaults are probably best avoided here; run past them into the eastern exit. The movements through the forest are different now than they were your first time around; you want to go east, then west, then south, and south again.
Forgotten Ruins
Time for another boss fight.
Boss Fight: Echidna 2
Echidna is mechanically identical to her previous form, but your techniques will have to be different in the absence of the Snatch move; it's going to be a lot more difficult to get up to Echidna's face to attack her.
Irregardless, that's what you need to do: get to her while she floats and pound her face in. She might be easiest to defeat with the Gunslinger style, but since we had upgraded the Trickster and Swordmaster, that was what we had to use. If you feel tricky, you can try to use the Trickster's shifting mechanism (forward+lockon+special attack button while in the air) to zoom into Echidna's face, then flip over to Swords and start using the mid-air combo that that style offers to you. Either way you go, hitting her early in the fight will be frustrating, as she tends to slowly back away from you, causing the latter half of your attacks to simply miss.
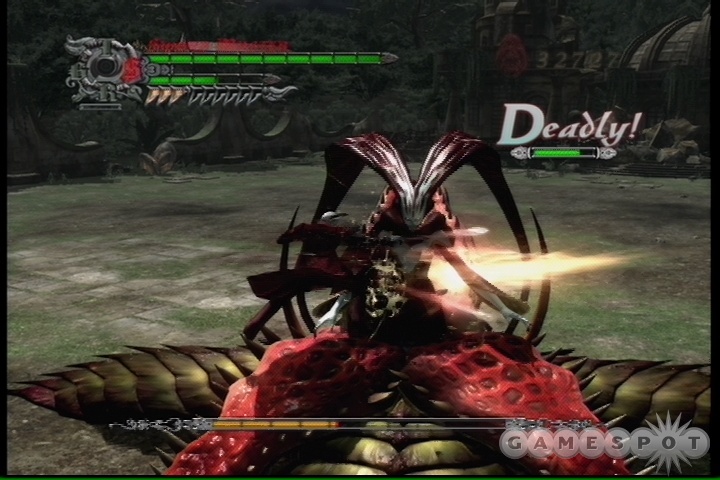
As annoying as that is, things get a little better later on, especially when Echidna starts to embed herself in the ground and attack you that way. This is when you want to flip on Devil Trigger and unload your combos on her; you should be able to pound away for a bit before she repels you.
But yeah, apart from the lack of Snatching and using Buster to unload supercombos, there's nothing very different about this fight than the first time you faced Echidna. You should have a few more health bulbs and correspondingly more offensive powers (even if you're still trying to suss out how to use them), so you have the advantage there. If you wish, you can simply stay in Trickster style the whole time and dodge her attacks while very slowly wearing her down.
Mission 14: Forest of Ruin
You've unlocked the Gilgamesh weapon now, which will remind you a lot of Beowulf from DMC3, because it's essentially the same weapon. Power it up as best you can before moving into this level.
Ancient Training Ground
Now that you've cleared out Echidna, the rest of the forest is available to you to move through. There's a new enemy here, the Fault, which appears from underground and attempts to eat you. They're easy to avoid and easy to kill, but will be annoying when they pop up during fights. Stay mobile and jump away from them when you hear the distinctive sound that they emit. If they get you, they'll suck you down into the Ruined Lowland and screw up your time score for the level.
Lapis River/Ancient Plaza/Windswept Valley
There are a couple of red-barrier fights in these areas. Get used to switching between the Gilgamesh and Rebellion to increase your style meter.
Forest Entrance
You can attempt the Royal Blocker secret mission here, if you're confident in your skills, but it's difficult. Try it if you like, but otherwise head on through to the exit from the forest.
Mission 15: Fortuna Castle
Foris Falls
There's a Combat Adjudicator for Dante here, up the stairs to the left. You need to get up to Smokin' Style here. It can be difficult to get up there without a Devil Trigger overpower move like Nero had, but with a little bit of work you can do it. If you have Swordsman powered up, then you can use the lockon, back, and special attack charged uppercut to get a bit of power there. The Drive move for Rebellion is also a high-style maneuver. Beating him will net you a Blue Orb Fragment.
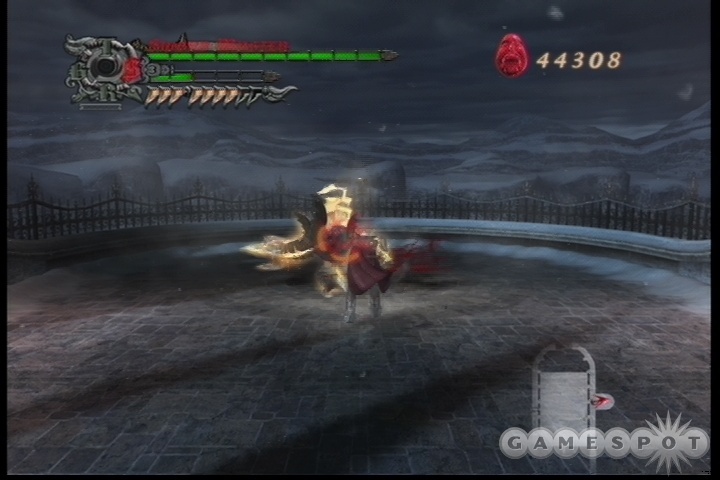
Central Courtyard
You will probably be forced to fight against a tough new lesser demon here, named the Blitz. These lightning-infused demons will teleport around the battlefield. Hitting them with melee weapons while they're charged up will cause you to take damage, so keep your distance and hit them with your guns instead. Eventually, you can knock the charge off of your foe and resort to your swords. You'll have to repeat this process a few times to finally defeat the enemy. If they manage to grab a hold of you and suck your life force, you'll take a lot of damage; switching to Devil Trigger mode may help you out here.
Keep in mind that when the demon is teleporting itself around the battlefield, it will usually wind up landing right in front of you and swiping you. It will also eventually start sweeping its electrical beam back and forth. Jump over this while continuing to fire on your foe, and he'll eventually disintegrate.
Grand Hall
There's only one available exit here, on the northeastern side of the room.
Gallery/Library
The library has a bit of a different configuration now, so after beating the Angelos, head down the new set of steps. You can find Secret Mission 09 at the bottom of the steps, hidden in an obscure camera angle.
Large Hall/Dining Room/Large Hall/Torture Chamber
Only one path to take here. In the dining room, you will have to fight off some Mega Scarecrows. Megas are great fun, since they wind up spending so much time stunned on the floor. Use your charged-up moves for Gilgamesh to give them a real pounding.
Spiral Well
You can now access the blue switch here. Flipping it will activate a new panel that will immediately launch you to the top of the room. Nab the red orbs floating around first, if you like.
Master's Chambers/Soldier's Graveyard
Defeat the enemies in the Chambers to reach the Graveyard. You can try the Secret Mission here again, if you like; it's a bit easier to raise the style meter now that you have Royal Guard. You can also now use Trickster to jump from the top of the statue in the middle of the graveyard to the items up atop the walkways above, letting you net a Golden Orb if you have a little patience.
Central Courtyard
Boss Fight: Dagon
We came very close to beating Dagon without being hit once the first time we tried him (when, of course, we weren't recording it). Regardless, you shouldn't have too many problems here.
As before, use your sword attacks against the Rusalkas when they show up. They will eventually attempt to freeze you, but even if they do, and even if you get swallowed by Dagon, it's of no concern; a quick flip to Devil Trigger will eject you from his mouth instantly.
Apart from that, this is a fairly straightforward smackdown. Get up close and personal with your weapons when Dagon is out and about, preferably attacking him from the side with your combos. The phases here are much the same, so you should be familiar with the fight from when you fought before. If he swallows you, Devil Trigger out of it and use your fine position to charge in and continue the assault. Eventually you'll wind up finishing him off and netting yourself the Pandora gun.
Mission 16: Inferno
Underground Laboratory/R&D Access
There's poison in the air. Not much you can do about it except run for your life! Unfortunately for you, Cutlasses will appear and start skimming the surface. These guys are going to be massively annoying for you to deal with since you can't rip them out of the ground with Buster. What you need to do is attempt to shoot them as best you can, preferably with the shotgun weapon since it does a lot of burst damage, then charge into them with Stinger when they glow red and slow down. That'll hopefully pop them out of the ground and let you attack them normally. No lie, though, this fight is super, super annoying.
Game Room
Gladiuses here. They're a bit easier to deal with than the Cutlasses were, thankfully. You can do a good job on them with the Rebellion's air combo in Swordsman style; just jump up and flail away in mid-air, and you'll wind up hitting a goodly number of the enemies, since they all come fairly close to you. Pandora can also be handy here, especially if one of the swords is charging up an attack while staying fairly close to you. Just hit it with a bazooka blast.
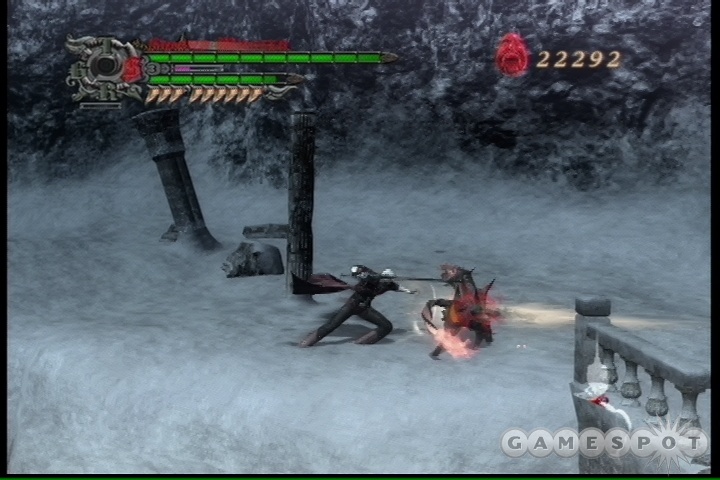
Containment Room
Go to town on the Gladiuses and the Angelos here, then head outside.
Foris Falls/Angel Creation
Beast Uppercuts or Divine Dragons make for great ways to quickly take out an Angelo that's lying on the ground.
Grand Hall/Fortuna Castle Gate
Collect some orbs from the chairs here, if you like, then head out to the castle gate. The devil dog enemies here are named Basilisks, and will hit you from afar with their fireballs; you can knock them to the ground with fire from Coyote-A, then kill them before they can react with repeated applications of Stinger 2. It's not the most stylish way to take them out, but it is the easiest.
Boss Fight: Belial 2
This should wind up being another spanking, but Belial can actually be one of the more difficult repeat fights. There's no health this time around, what with all the buildings having been destroyed in the first fight.
There's nothing crazy to say here: get close and start the beatdown. We preferred to use Rebellion for its Stinger 2 capabilities, which will help you get back in position to attack Belial when he swats you away. Following it up with Dance Macabre from Swordmaster style will let you put the pounding on, or you can switch to Gilgamesh for a spam of Kick 13 maneuvers. Simple combos will also work well, obviously.
At any rate, you should have a large enough Devil Trigger mode to last in it for quite a while. When you have a maxed-out DT gauge, flip over to it and start spamming quick attacks, such as Stinger 2 or Kick 13. Eventually you'll stun Belial, allowing you to unload with Dance Macabre or another high-damage combo.

For beating Belial, you'll obtain the Lucifer weapon, which fires small swords that hang in the air. It's a weapon that will probably mostly appear to specialists, as it's somewhat more difficult to use than the other two swords are.
Mission 17: Adagio For Strings
First Mining Area/Port Caerula/Residential District
Fight your way through these areas to reach…
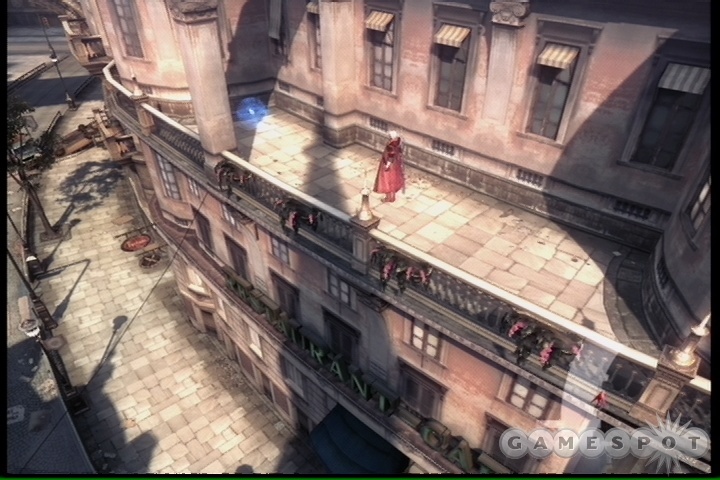
Business District/Terrace
Big fight at the beginning of this area, but nothing too difficult to handle. After defeating them, look along the left side of the street; you should see a small red orb near the Restaurant-Café. Jump up onto the awning there, and you'll be able to spot a Blue Orb Fragment. You can make the jump here, but just barely, and perhaps only if you've upgraded Trickster. What we did was to jump straight up from the awning (not tilting our analog stick at all), kickjump off of the wall, then Sky Star your way over to the balcony. You only get enough height to pull this off if you jump straight upwards and don't move your analog stick at all.
Opera House Plaza
You can find Secret Mission 12 near the beginning of this area, hidden behind one of the trash cans off in one of the gated-off doorways. It would seem to be impossible to try it without Nero, but we could be mistaken.
Fight off the Mephistos and the Angelos outside of the Opera House to move on to another boss fight.
Boss Fight: Angelo Angus
Another repeat boss fight! Go figure! Angus here differs very little from the last time you fought him, although he will not summon Gladiuses and Cutlasses to help him; instead, he'll warp in Basilisks from time to time. The Basilisks, when killed, will give you white orbs, allowing you more Devil Trigger power. You may want to spam them with Stinger 2 until they perish, as Angelo doesn't seem to summon more of them very often.
At any rate, the key here is to again disrupt Angus when he attempts to use the "Your strength will be mine!" and "Time to die!" maneuvers. The Rebellion mid-air combo with the Swordmaster style will be perfectly capable of doing so. Apart from that, hit him often with mid-air combos to wear him down, and he will eventually perish.
Mission 18: The Destroyer
You now have the ability to wield Yamato, the cursed sword that has the ability to seal the barrier between worlds. It is a Style, actually, not a weapon; attempting to re-select your current Style will flip you over to Yamato. Although it's a Style, it can't be powered up, and the abilities it offers you aren't incredibly powerful, so you won't need to use it very often.
Boss Fight: Savior 2
This mission is essentially one long boss fight. If you played God of War II, then you should be familiar with the basic small-dude-versus-huge-dude mechanic. The Savior is studded with soul diamonds, however, that will serve as his weak spot here.
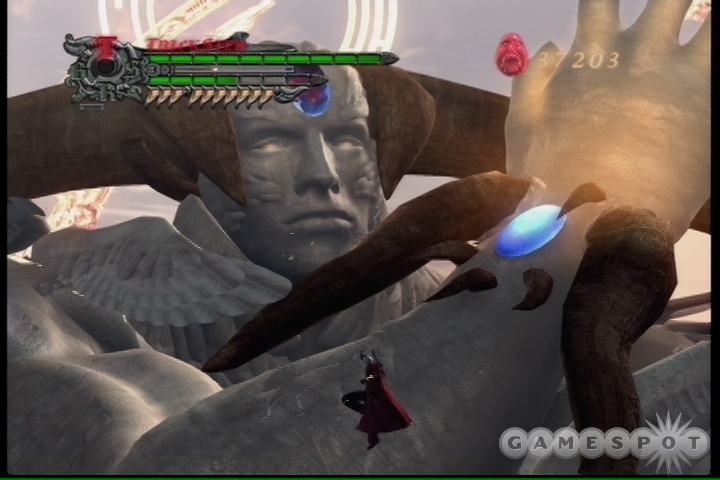
It's impossible to really map this area, so you can expect to do a lot of hopping around at the outset. The entire area seems to loop around if you follow a jumping path, but it can be a bit confusing to find where you're going. Keep in mind that if you take a bouncing path, then land next to another bouncer, it might not return you to where you're going; it may instead lead you to another part of the area.
Savior has a number of attacks that he'll use on you, but he'll usually stick with either energy attacks from a distance or physical attacks that see him slamming a limb into the platform that you're on. The energy attacks can be shot, in case of the four small homing balls, or simply Trickstered away from, in the case of the set of three massive energy balls that he'll fire. The physical attacks can be dodged by quickly moving, but again, Trickster is your best bet for supreme mobility, since the Sky Star ability will
Lasers and Arms
In order to take the Savior down, you're going to need to find three mechanisms that are scattered around the area, each of which has a blue switch attached to it. Two of these fire lasers, which will strike and stun the Savior when he attempts to smash the platform you're on. If you can fire these at him, quickly climb onto his arm via the hand! While you're on the arm, you can use Coyote-A to fire away at the weak spots. Keep in mind that Coyote-A fires much more rapidly while you're airborne, so jump before firing.
While you're on the arms, Savior will attempt to swipe you away. Keep Trickster equipped here and dash through the arm as it comes your way to avoid the hit. He'll also send those four energy balls at you as well, so be ready to either shoot them or take the hit; they won't knock you off the arm.
Your goal here, again, is to shoot the blue crystals on the elbows and shoulders of the arm. The Coyote-A is probably your best bet for burning them down quickly. Keep in mind that you will also be able to briefly target the crystal on Savior's forehead, as well. If you get the opportunity to shoot it, do so! We had a problem one time where we didn't manage to shoot the forehead crystal before we finished off both of the arm crystals on both arms, and after that it was almost impossible to shoot the forehead crystal except from long range with the Pandora.
The Cannon
There are two laser beams scattered around, but the cannon is located elsewhere; you'll know you're there when you find something that looks, well, like a cannon, and is pointed out towards the Savior. Charge it up, fire it, and the Savior will fall down temporarily.
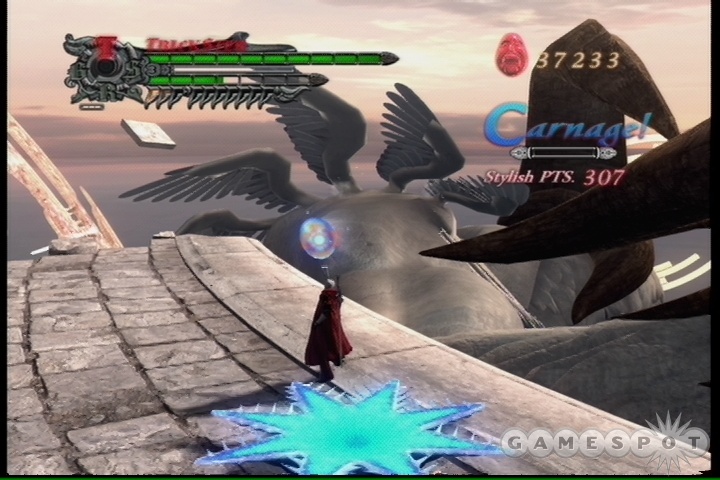
This gives you the opportunity to jump all over the place and start wailing away at the remaining crystals. Just take whatever jumper you find, and there'll usually be another crystal waiting for you when you get there. Don't be surprised if some of them are already smashed, as you will have already taken out a few of the arm crystals, but this will let you get to a few you can't reach by hitting the arms. (And, conversely, the arms will let you fire on the forehead crystal, whereas the cannon will not put it into easy position.)
Second Phase
Eventually, after you destroy all or enough of the crystals, you will enter a little cutscene that will show Dante flipping around on the platforms. This signals the beginning of the second phase of the fight, which will probably take a bit longer to complete. You'll also know that you've moved on due to the fact that Savior will begin firing huge, huge energy beams at you. These are easy to avoid by hitting the jumpers nearby. We're not sure what happens if it hits you, since we always managed to avoid it, but we're guessing it's not pleasant.
At any rate, your goal here is to destroy the crystal on Savior's chest. It's tough to get to, but with a little luck you'll be able to bring it to you.
While you stand on any of the platforms here, you can lock onto and shoot the crystal with either the Pandora's mid-air fire or the Ebony & Ivory. That will slowly but surely whittle the crystal down, but it'll take a long time to finish it off if that's all you really do. You can hasten the process by trying to find the highest platform in the area. It's a small, relatively flat platform that's a bit higher than the platforms around it. If you wait there, there's a chance that Savior will brush up against the platform, starting with his head. You can hurt his entire body, if minorly, so strike at his face as it goes past you to raise your style meter. When you get down to the crystal, take the moment that it's there to unload a couple of combos on it.
The Savior will quickly dash backwards away from the platform, forcing you to return to gunfire to fire on the crystal. He'll also probably smash the platform eventually, forcing you to reset yourself. It'll take a bit of time for the platform to reappear, so you won't be able to do much except fire away with your guns until it reappears. There's a chance that Savior will perform the brush-up manevuer on other platforms, but it seems to be a rare occurance.
At any rate, if you deal enough damage to the crystal, Savior will fall down again, letting you use a jumper to get right up next to the chest crystal. Take the opportunity to lock onto it and use a bunch of Devil Triggered combos on it. Just keep in mind that your attacks seem to slide off to the right of the crystal after a bit; you may need to readjust yourself to ensure that you actually stay on target in terms of hitting it.
Repeating these steps will eventually end the mission.
Mission 19: The Successor
Machina Ex Deus
This is apparently just a small holding facility for you. Move on!
Stairway to Heaven
Here's where things get kind of annoying. You remember the game room back in the Underground Lab? Where you had to hit the dice to move your character around the room? Well, hope you liked it, because that's pretty much all this mission consists of.
At any rate, start hitting dice! You should remember a bit of the drill: landing on blue squares will net you orbs, red squares will cause you to fight, and white squares will do nothing for you. The yellow squares will warp you to the exit from a level, as will landing on the purple square directly in front of it. The red squares are time-consuming, but the enemies within them will often have enough green orbs to refill your health, which is handy, since each of the tiers will have a boss fight in between them.
The first boss fight actually consists of an Alto Angelo and four Bianco Angelos, which can be an uphill battle if you don't start taking them down quickly. The second fight is Belial, who can whip you good if you don't go into the fight with plenty of health on you. The third and fourth fights are Dagon and Echidna. All of the bosses will be slightly easier than they were before, thanks to your upgraded abilities and extra health, but they're all still capable of delivering a beatdown. This is one of the best levels to bring a Golden Orb to two into. Lastly, you'll have to fight Angelo Agnus for the third time in order to reach the final platform.
When you do defeat Agnus, destroy the barrier in front of Savior's heart and head through to finish the level.
Mission 20: La Vita Nuova
One last boss fight…
Boss Fight: Sanctus Diabolica
Sanctus has become even more of a demon than he was before. Although this fight is mechanically much the same as the first fight against Sanctus, there are some new twists.
Strategy
Nothing different here: you need to get close to Sanctus and penetrate his shell, which will, again, go from whole to half to nonexistent. When Sanctus drops to the ground, you can attack him for a bit before using a Buster supercombo to deal heavy damage to him. The main problem here is that Sanctus has somehow managed to get much more annoying in the time he's spent inside Savior. Like we said, it's basically the same fight, but you can expect a fairly tougher time with it.
At the outset, the strategy from before will work well: wait for his "The Savior is coming!" speech to end, and Sanctus will have his shield up. After that, you can try to Grim Grip his little orbs, get close, and whack him with your mid-air combo. Breaking the outer shell will usually be fairly easy; it's what happens afterwards that will start to cause you problems.
First off, the "Burn!" shout and attendant fireballs will still annoy the bojangles out of you; it's in your best interest to simply avoid Sanctus when he cries this out. New annoyances, however, include his ability to teleport, which he'll usually do by disappearing from midair and appearing on the ground near you before attacking. If you can dodge this attack, you can counterattack while he remains on the ground and send him straight to Busterville, but it can be tricky to get the timing down, since he disappears fairly quickly after he swings at you.
Also, Sanctus will periodically raise his sword up and use it as a shield. He can do this on the ground or in the air, but will usually do it in the air. This will reflect all attacks that come his way, making further progress on his shield pretty much impossible. However, if you jump near him and use a straightforward Buster on him, the sword will drop, allowing you to jump back up and hit him with your sword to move on to the supercombo stage. You will probably have to jump from the ground to hit the initial Buster; using Snatch will usually fling you over Sanctus' head.
Second Phase
Eventually you will wear Sanctus down to the point where he is at the last third or so of his life bar. After destroying the outer shell, he will appear from beneath the ground in a cloud of red tentacles, yelling at you about he's going to show you the power of his sword. Indeed he does at this point, filling his sword with power and repeatedly attempting to run you through with it. Luckily for you, a simple roll dodge will be able to move you out of the way. You have enough time to roll dodge away from these strikes if you time it so that you dodge just before the sword strike starts coming your way, or even a bit afterwards, but if you wait too long, you will get hit, and it'll hurt. You'll need to learn the timing on these before you can dodge them regularly, since the last one will take a bit longer to come your way than the flurry that precedes it.
When the last sword strike comes your way, Sanctus will stand on the ground for a second, then jump into the air and regenerate his shield. When you see the final strike being charged up, walk backwards as you prepare to dodge it so that Sanctus will wind up near you after you dodge. You can attempt to strike him with sword blows on the ground if you wound up fairly close to him, but otherwise, simply jump up next to him and hit him in midair before he has a chance to regen the shield. That will drop him to the ground, allowing you to perform another supercombo.
We're not going to lie: this fight can be really annoying, especially if Sanctus chooses to send out those fireballs more often than you can deal with them. They don't deal a huge amount of damage, but are frustration incarnate to deal with. Eventually, though, and perhaps after a few tries, things will click and Sanctus Diabolica will go down.
Boss Fight: False Savior
After a couple of cutscenes, it will be Nero versus the False Savior for all the marbles. Luckily for you, this is a short fight. Keep in mind that you will carry over the amount of health you had from when you ended the fight with Sanctus. If you don't have very much of it, activate Devil Trigger or use a healing item.
At any rate, you need to use your Buster here on both of False Savior's hands. He'll attack with his right hand first, pounding it into the ground on top of you. You can dodge this by rolling away to your left just before it hits. Do so, then turn around and use Buster on the fist before it raises up off the ground. After that happens, he'll rear back with his left hand and swing it across your little area. You need to hit this fist in mid-swing as it comes your way. It can be difficult to time this, but if you double-jump as the elbow hits its farthest point away from you, then use Buster in mid-air, you should connect. You'll probably need to try it a few times before you pull it off.
When the head of the False Savior comes down, use Buster on it to finish it off and end the game. Congratulations! Note that there's a section that plays over the end credits where you have to protect Kyrie from rampaging Scarecrows. Stand near Kyrie and start Snatching the enemies towards you, then repelling them with Streak. If you can prevent her from getting hit for 90 seconds, you'll witness an extra cutscene featuring Dante, Trish, and Lady after the end credits.
Achievements and Unlockables
Achievements
The Achievements in Devil May Cry are somewhat parsimonious, and many of them are secret. As our copy wasn't retail, it didn't actually unlock any of the achievements at all, so all we can record here is the standard list, where many of them are still listed as Secret. Some of them are pretty obvious, such as the Circle ones, which obviously refer to the Bloody Circle survival game, but we'll update them as we unlock them with a retail copy of the game.
Note that you can also unlock these Achievements in the PS3 version of the game. We're assuming that this will at some point tie into the PS3's Home virtual world.
| Name of Achievement | Task | Point Reward |
|---|---|---|
| A Comfortable Pace | Beat mission 11 in Human difficulty | 10 |
| Easy Does It | Beat all missions in Human difficulty | 10 |
| Best of the Best | Beat all missions in Human difficulty with an S ranking | 20 |
| Half Way There | Beat mission 11 in Devil Hunter difficulty | 10 |
| Done and Done | Beat all missions in Devil Hunter difficulty | 20 |
| A Cut Above | Beat all missions in Devil Hunter difficulty with an S ranking | 30 |
| Smokin'! | Complete a rank S style combo | 10 |
| Smokin' Style!! | Complete a rank SS style combo | 10 |
| Smokin' Sick Style!!! | Complete a rank SSS style combo | 10 |
| Simply Spectacular | Complete a mission with an S ranking | 10 |
| River of Red | Obtain 10,000 Red Orbs | 10 |
| Filled With Pride | Obtain 10,000 Proud Souls | 10 |
| Rookie Devil Hunter | Defeat 100 enemies | 10 |
| Rock and a Hard Place | Secret | 10 |
| Hardly a Simple Task | Secret | 30 |
| Easier Said Than Done | Secret | 10 |
| All Bow Before You | Secret | 40 |
| Step Into The Light | Secret | 10 |
| Tonight, We Dine In Hell | Secret | 10 |
| A Stunning Feat | Secret | 40 |
| Never Say Die | Secret | 50 |
| A Throne Of Glory | Secret | 50 |
| Nothing Left Unsaid | Secret | 10 |
| The First Circle | Secret | 10 |
| The Second Circle | Secret | 10 |
| The Third Circle | Secret | 10 |
| The Fourth Circle | Secret | 10 |
| The Fifth Circle | Secret | 10 |
| The Sixth Circle | Secret | 10 |
| The Seventh Circle | Secret | 10 |
| The Eighth Circle | Secret | 10 |
| The Ninth Circle | Secret | 10 |
| Covered In Blood | Secret | 40 |
| King Of The Palace | Secret | 50 |
| Speak Of The Devil | Secret | 20 |
| Modus Vivendi | Secret | 10 |
| Bat Out Of Hell | Secret | 10 |
| Your Cup Runeth Over | Secret | 20 |
| Red Orb Millionaire | Secret | 40 |
| Brimming With Pride | Secret | 20 |
| Proud Millionaire | Secret | 40 |
| Skilled Devil Hunter | Secret | 30 |
| Legendary Devil Hunter | Secret | 50 |
| Item Collector | Secret | 50 |
| Skill Collector - Nero | Secret | 50 |
| Skill Collector - Dante | Secret | 50 |
Unlockables
This is a probably incomplete selection of unlockables. We've only ever beaten the game on Devil Hunter mode, so you will probably find that this selection doesn't match up if you've just beaten it on Human difficulty, and we imagine there's more to be unlocked on higher difficulties, as well. We'll update this list when we find out more. We're pretty sure there are at least two more difficulty settings to find.
Beat Game On Devil Hunter Difficulty
The Bloody Palace: This is a survival mode wherein you have to make your way through a number of different enemy configurations. The clock is constantly ticking downwards, but you can earn time bonuses for killing enemies (you get more time if you kill them while in the midst of a high-style combo), and finishing each stage. Finishing a stage will by default net you 15 seconds, but if you complete it without taking damage, you'll net 30 seconds. Use your Devil Trigger mode as often as possible to restore your health.
Game Clear Bonus Art: Extra art for the Gallery.
History of DMC: A historical look at the DMC storyline in the gallery. This plays out as a movie, so you won't be able to fastforward it or anything, making the act of watching it a bit tedious.
Son Of Sparda Difficulty: An extra unlockable difficulty setting for an extra challenge.
Got a news tip or want to contact us directly? Email news@gamespot.com
Join the conversation