Crysis Walkthrough
GameSpot's Walkthrough to Crysis will help you brave the soldiers, elements, and aliens that stand between you and victory.
It's finally here. After years of hype, Crysis has arrived on the PC amidst a flurry of nerds feverishly upgrading their video cards to ensure that they can run this latest system killer with all the bells and whistles. Read our review to see if the game is worth the cost of an 8800-class video card.
But if you're the sort that just wants to get right into the action, skip what even our critics have to say and read on. The following game guide covers all of the Crysis essentials, including key information on how to get the most out of your nanosuit, an overview of the enemies and weapons that you'll encounter, some general strategic tips, and, of course, a complete walkthrough of the solo campaign. About the only aspect of the game that isn't covered here is the multiplayer, and you should be able to pick up plenty of tips on that by checking out threads in our forums.
The following pages serve up the inside skinny on the following Crysis features:
Nanosuit
Interested in getting the most out of your spiffy, high-tech nanosuit? Look here for the lowdown.Weapons
Check this section for details on the instruments of death-dealing that Crysis has to offer.Vehicles
Driving around on a sunny island in the south seas is a snap with the tips included in this section of the guide.Enemies
North Koreans and aliens provide some tough opposition in Crysis. Get some essential information on how to gun them down here.General Strategies
In search of some quick advice? Read through this bullet-point list.Walkthrough
When the North Koreans get you down, turn here for detailed advice on how to foil their nefarious plans.
Nanosuit
Nothing says Crysis quite like your nano-powered battle suit. These groovy red-and-black threads are what the fashionable super-commando wears to go into battle against the North Korean army and any extraterrestrials that happen to be in the vicinity, and they're just as utilitarian as they are stylish.
All of the suit enhancements can be accessed with a click of the third mouse button and then selected by rotating a radial menu. Or you can flip them on directly with hotkeys. You'll want to learn the latter, as the radial menu is a bit clunky for quick access when you get into serious firefights.
Armor
Best used when in a big scrap with lots of enemies and no cover is readily available, maximum armor is a last resort power that gives you the ability to withstand more damage than normal. You can fire it up by choice right before attacking an enemy position head-on, though. It also clicks on by default whenever the power runs out when you have cloak activated.
When activated, Armor will let incoming bullets sap your energy levels instead of your health. When you run out of energy, your health will start to go down as normal, but this effectively gives you a second life bar, which will let you survive that much longer in a firefight. Armor will also let you regenerate health more quickly when you've been wounded.
Cloak
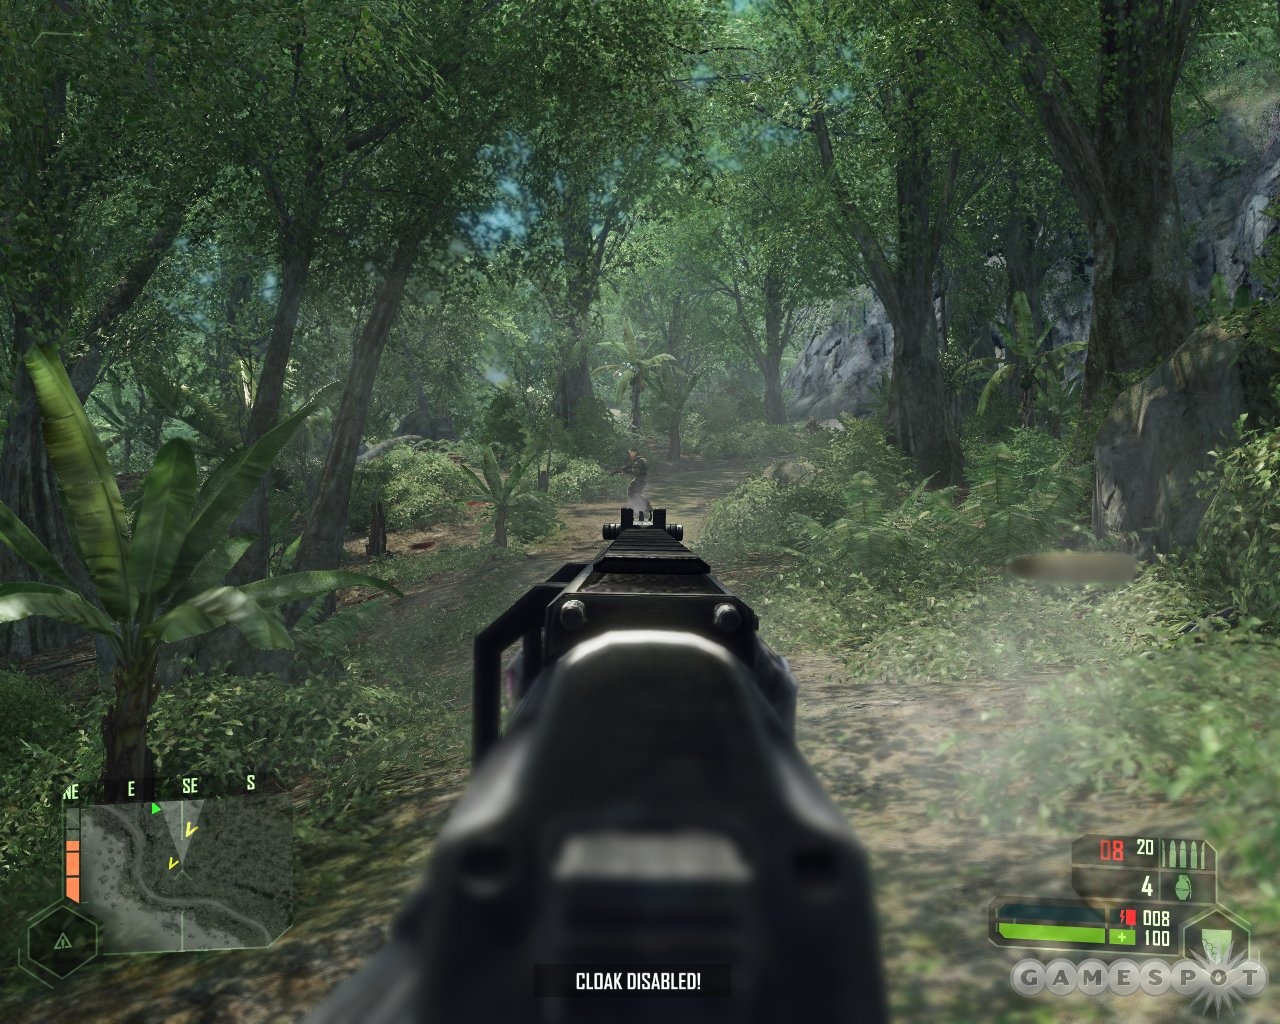
Given the massive number of enemies in Crysis, this power is the one that you will use the most. By which we mean all the freaking time. Cloak can be employed in all situations, although it is at its best when you want to pop up in the midst of a gang of enemies and take them by surprise, or when you need to sneak past an enemy patrol. It is also invaluable when approaching enemy positions like bases or machine-gun nests, as it gives you the ability to run across open stretches without being seen (and shot into itty bitty pieces).
The only drawback with cloak is its power draw. It sucks your suit dry in moments, especially if you're running, so you have to be careful that you don't run out of juice in mid-sneak and wind up turning visible in the middle of a clearing. Power consumption is really cut down if you're crawling, though. So if you've got the patience, drop into a prone position and creep forward. This will be rewarded with oodles more time to invisibly flank enemies. In other situations, you can always try to find a hidden corner away from enemy line of sight, turn off your cloak for a second, regain your energy, and flip it back on before resuming your movement.
Cloaking can also be used to escape enemy attention while you're inside one of their bases. If you cloak while an enemy is looking at you, they'll continue to fire, but if you can escape their line of sight (by ducking into a building or around a corner), activate your cloak, then quickly reposition yourself to another area, your foes will typically keep searching for you where they last saw you, allowing you to make your getaway. 
Speed
Another big-time power drain, maximum speed is best utilized when either attacking gangs of enemies or running away from gangs of enemies after realizing that you've bitten off more than you can chew. It is also a plus when you're trying to make good time running down roads. Doing this can sometimes cause you to race into trouble, though. You move so fast that you can easily wind up in the middle of an enemy patrol before you know it, with your suit running on empty. However, keeping speed activated without sprinting will also increase your movement speed by a small but noticeable amount if you keep your energy topped off.
Strength
Maximum strength is cooler in theory than it is in reality. Sure, it sounds awesome to be able to dial up super strength and choke the life out of North Koreans. But in reality, you're generally taking on so many enemies in firefights that getting up close and personal with one leaves a half-dozen or more with clear shots at your back.
The passive mode of maximum strength is more useful, as it allows you to make Jedi-like high jumps up walls, punch open stuck doors, and the like. Of course, it's not nearly as nifty as snapping necks, so you won't hear as much about it in the press releases. It can be pretty handy when infiltrating a base, as it'll let you jump over otherwise impassible low walls.
Weapons
Despite the futuristic setting, most weapons in Crysis are standard military hardware similar to what can be found in most other shooters. From the run-of-the-mill pistol to the de rigeur missile launcher, there aren't many surprises here.
Fists
If you tap your 1 key a couple of times, you'll switch from your pistol to your fists. You'll almost never use your fists during the game, but a single punch while you have Strength activated will kill a normal North Korean soldier. It can be a fun way to silently kill an enemy that can't see you. You can also use stealth to sneak up to an enemy, then quickly flip over to strength and pound them before they can react.
Pistol
Part of your default weapon load-out, this .45 lookalike is only noteworthy because you can duel-wield it, John Woo-style, after picking up a second one from a convenient North Korean corpse. Your pistols won't be used much, but they can be handy to detonate explosive barrels and the like if you don't want to use your main weapon's ammo.
SCAR Rifle
Another default weapon is the SCAR, a stock shooter submachine-gun that can be useful in close battles purely due to its rapid fire rate. Its bullets don't do a lot of damage, however, and their impact barely seem to slow down either aliens or North Koreans. Unfortunately ammo for the SCAR is pretty rare; the bullets for the FY71 aren't compatible with the SCAR. You may wish to simply use up the SCAR ammo early on, then drop it to go with a combination of the FY71 and another weapon.
FY71
This generic automatic rifle is a jack-of-all-trades through most of Crysis, as it seems to be the main weapon of the North Korean army. It can be switched over to single fire mode, scoped for use as a sniper rifle, quieted with a silencer, and tricked out with a flashlight. Its only drawback is fairly wimpy shot power. You need to fire quite a few rounds with the FY71 to take out the average KPA soldier, unless you skip right to the good stuff and shoot him in the head.
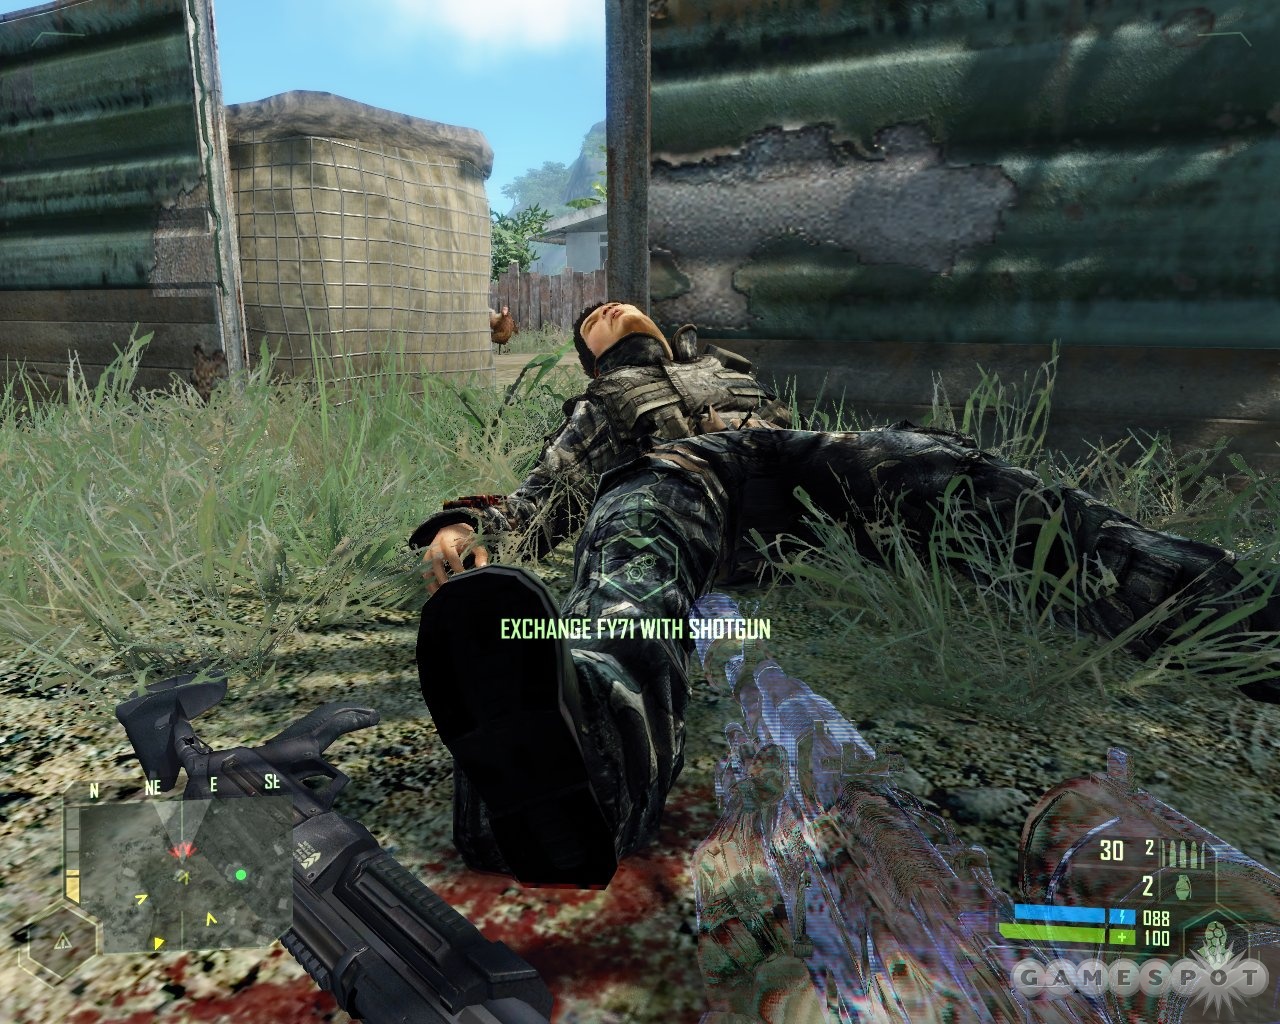
Shotgun
Perhaps the best weapon in the game due to its heavy damage and stopping power. Reload times are also impressive, making it the perfect weapon for close-quarters combat with North Koreans and aliens, but the spread will, of course, make it useless at long range. It can also be modified with a flashlight and a laser sight (after you pick up the North Korean SMG, of course).
North Korean SMG
Not much different than the SCAR, except for the laser sight that you can take from it and then adapt to your other weapons. This laser is more of a cosmetic upgrade (due to the way it glows eerily in nighttime battles) than a truly useful battle aid, however.
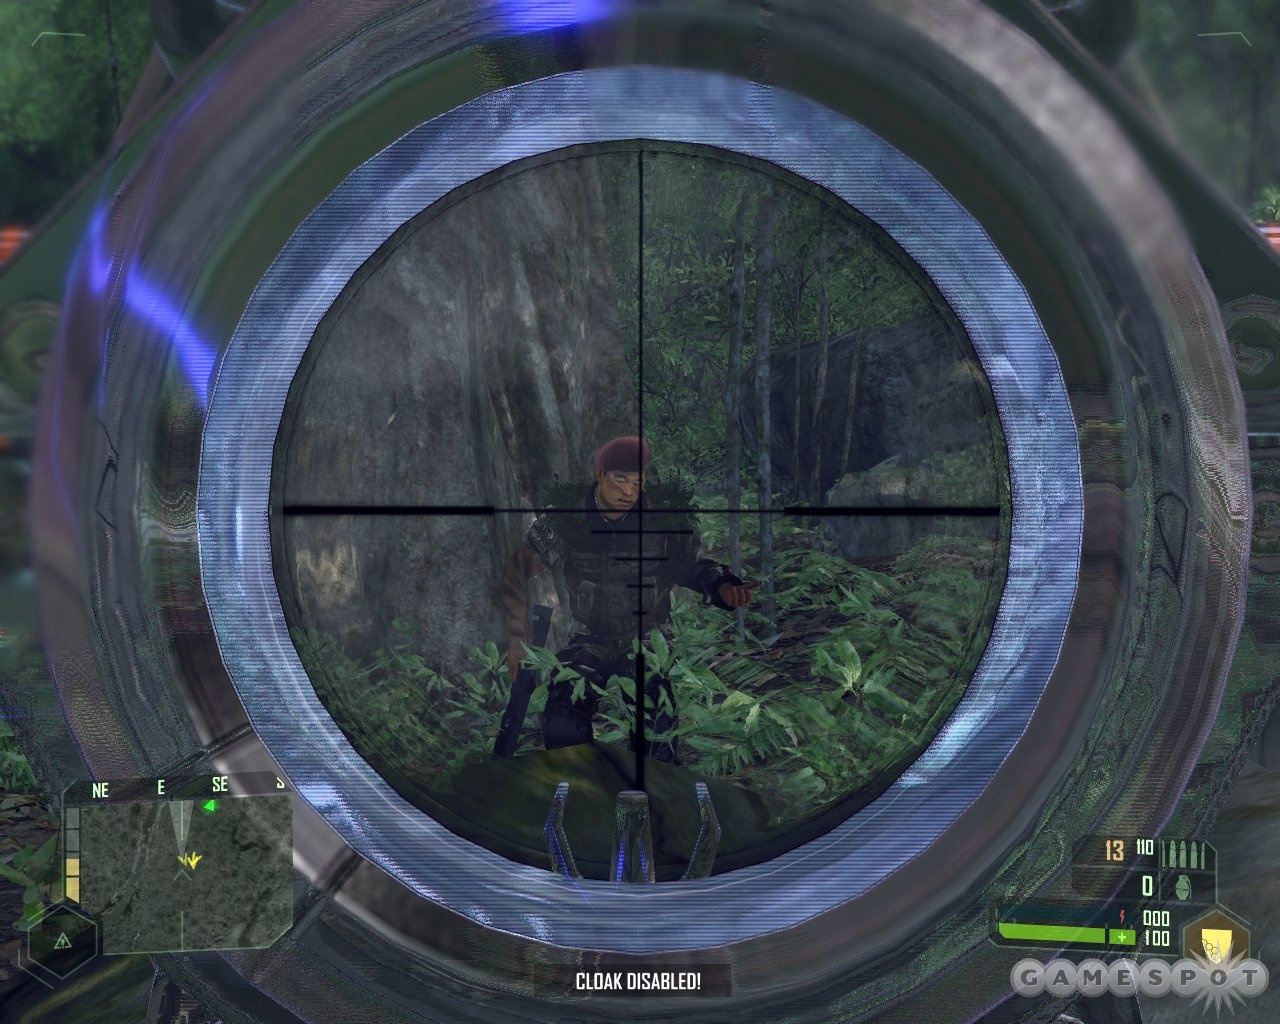
Precision Rifle
The precision rifle is Crysis's name for the sniper rifle; you'll find this weapon in many of the guard towers inside KPA outposts. It packs a wicked punch and is almost perfectly accurate at any range. You should be able to pull off one-hit kills on almost any KPA soldier that you hit with this.
Gauss Rifle
The Gauss Rifle is an experimental railgun-esque weapon that you'll find late in the game, after the US military gets involved with the fighting on the island. It's capable of one-shotting almost anything you hit, and has the same rock-solid accuracy of the precision rifle. Attach a scope to it for long-range fire, but you can also fire from the hip to hit aliens later in the game; most of them will fall after just two rounds.
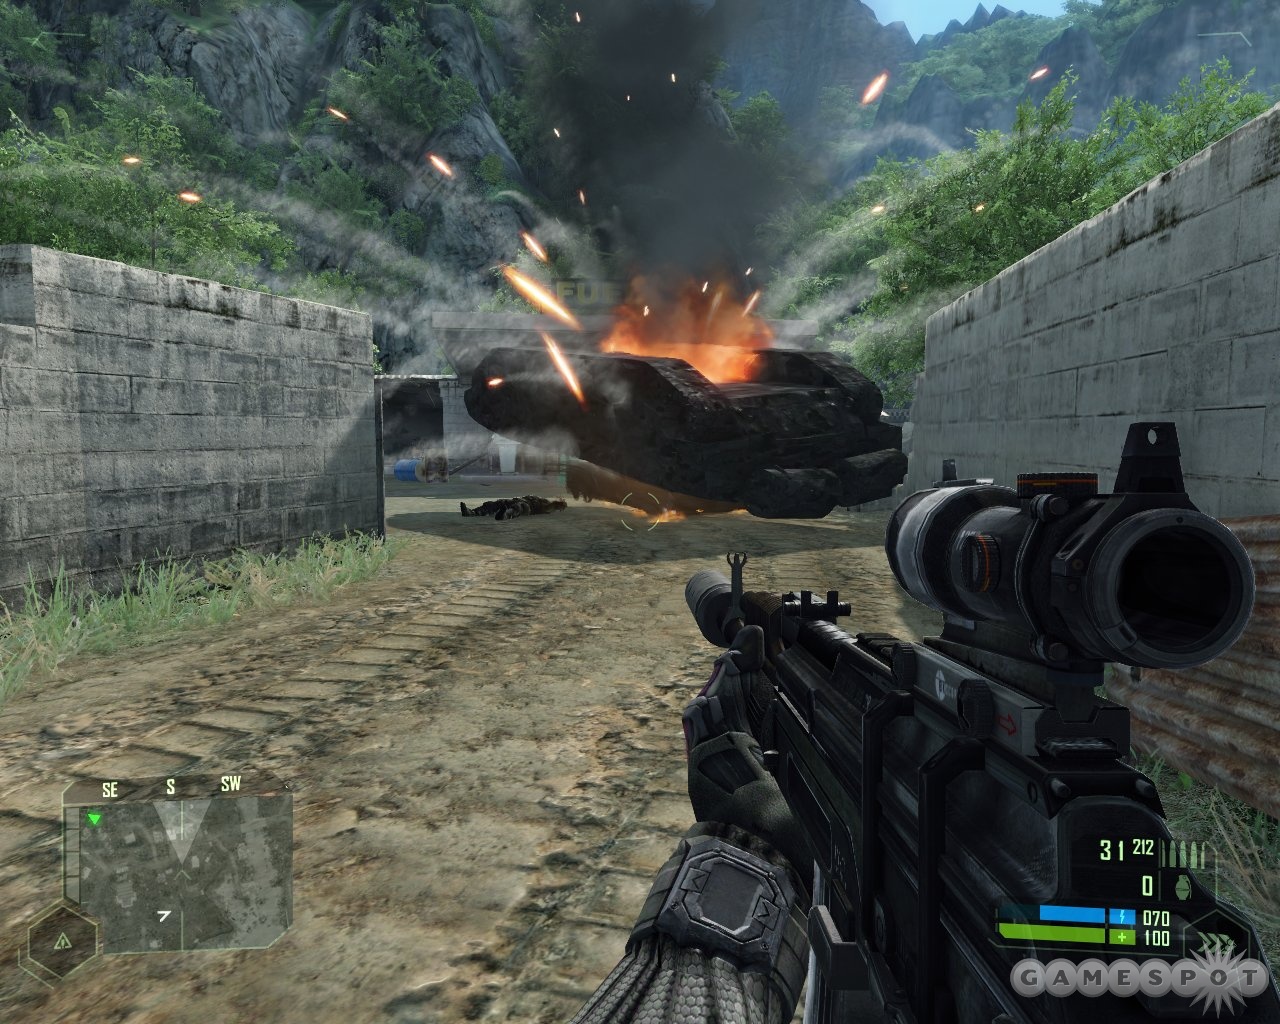
Missile Launcher
The weapon of choice when you need to take out a KPA helicopter or gunship. It also comes in handy towards the end of the game when assaulting enemy fortifications, or when you need to take down flying aliens quickly. Deeply satisfying to fire. You can aim the missile after firing by holding down the fire button and moving the mouse around; if you've played either Half-Life game, this should be familiar to you.
Minigun
Surprisingly not as useful as you might expect. It takes a long time to spin up, and it doesn't do as much damage as it should, especially against choppers and aliens. The minigun is still needed in scraps when you need to pile a lot of hurt on opponents, although it is tough to use when battling at close range with numerous enemies. It also weighs you down when running, which makes it a pain to deal with when fighting speedy alien fliers later in the game. If you don't need armor, you can activate your strength ability to steady your aim while firing the minigun. You can expect to chew through your ammo pretty quickly regardless of your firing method, however.
Alien MOAC
For a supposed alien super-weapon, the MOAC is kind of gutless. The gun has nifty rapid-fire action and unlimited ammo, but its icy projectiles don't carry much weight and plink off the armor of alien enemies. Overheating is another problem. At any rate, you only get to use it in levels eight and nine before Prophet takes it away, so at least you don't have much time to get annoyed with its poor performance.
TAC Cannon
Not really a weapon so much as the deus ex machina that lets you take on the boss at the end of the game, as it can't be used in any other battles. Very powerful, with only a single drawback in that it takes an eternity to lock onto a target.
Frag Grenades
Commonly found in the hands of the KPA throughout the game, frag grenades are really only useful when you're attacking a fixed enemy location or when you want to scatter an enemy patrol. KPA soldiers are almost always smart enough to scramble away from thrown grenades before they explode, and all of the aliens in the game are far too speedy for grenades to have any appreciable effect.
Smoke Grenades
You only encounter these a few times in the game. They can be useful when assaulting a tough KPA position, but they're pretty much a waste of time when you can turn invisible with the click of a button.
Vehicles
You can drive just about every vehicle you encounter in Crysis. Chances are good that you won't often want to get behind the wheel, however, as smart enemies typically turn them into sitting ducks. Stay in a truck too long and chances are awfully good that it'll be blown to bits along with your nanosuit-wearing self.
North Korean Trucks
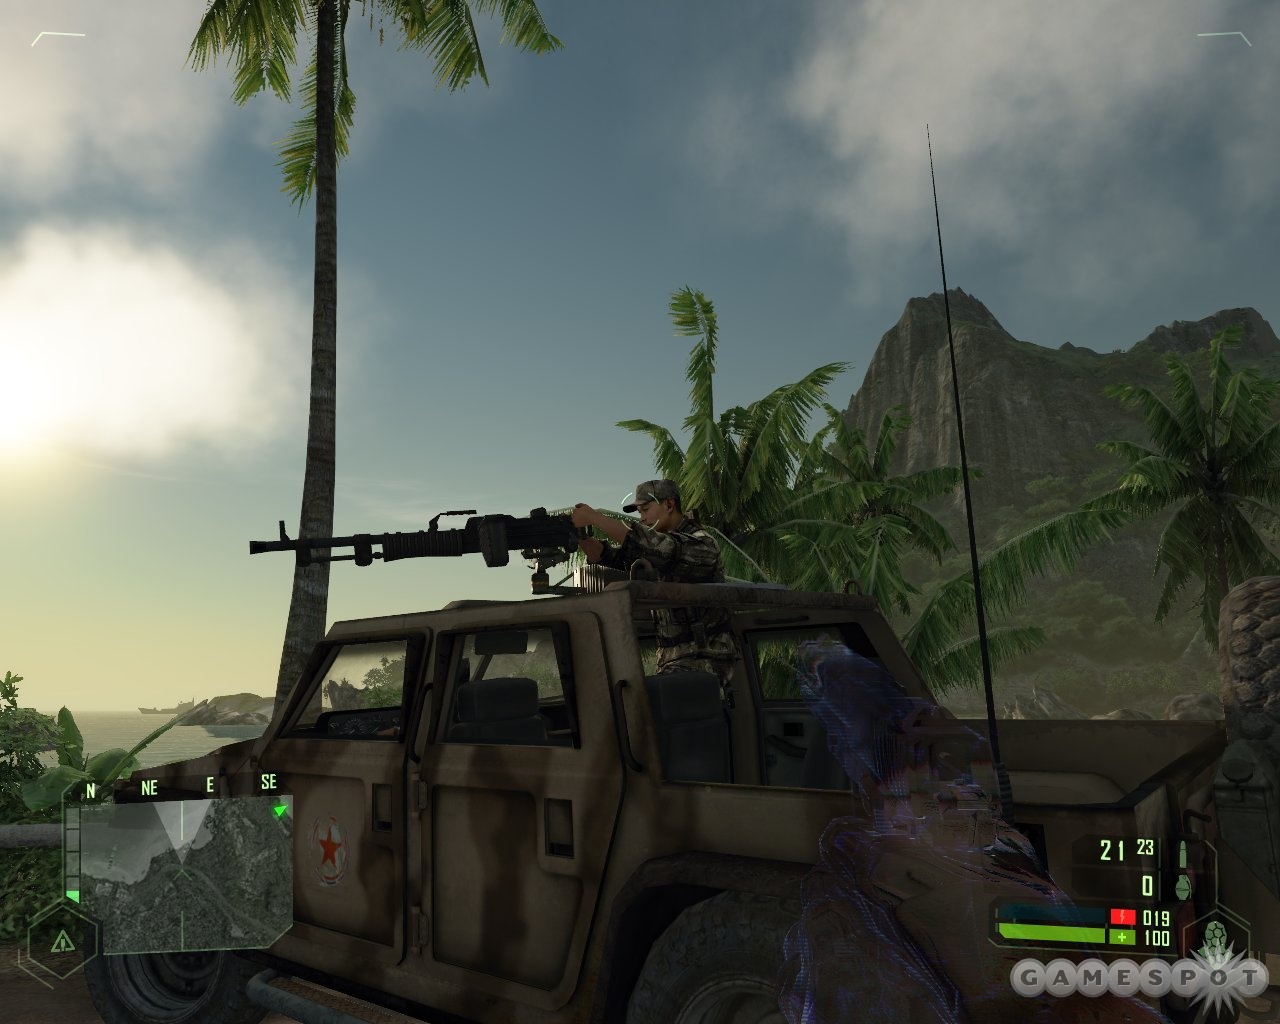
A variety of trucks can be found scattered around the North Korean camps and patrol locations on the island. The most popular model (aside from unarmed civilian pickups) is a jeep-like half-track with a gun turret mounted on the top, while you also frequently come across larger semi-style trucks with similar roof guns.
Neither is much use for driving, unless you want to cut down on travel time. Each get blown up pretty easily by enemy grenades and gunfire. It's best to just use these vehicles as gun turrets on wheels. Hop in them, go right to the main gun, and use it to blast any nearby KPA goons. Then get out before the North Koreans turn it into your coffin.
American and North Korean Tanks
Both an allied and an enemy tank can be driven in just a single level in the game, the tank-rush special called Onslaught. There isn't much to choose from between the two models. The American tank seems to be faster, while its North Korean counterpart seems to take more damage, although this is only a guess given how little time you spend in them. Both are pretty nimble for video-game tanks, meaning that they're fairly easy to drive unless you get all Evel Knievel on hills.
VTOL
Just like the tanks described above, an American VTOL can be flown in just a single mission, in this case the penultimate Ascension. And thank heavens for that. These clunky aircraft are like the Yugos of the sky. They turn painfully slowly, have pathetic top-end speed, aren't great with inclement weather, and don't stock much in the way of missiles. Just like the KPA's trucks, you're best off not trying to move a VTOL very far. Use it as a floating gun turret. Or better yet, just fly straight ahead as fast as you can and cross your fingers.
Enemies
If any aspect of Crysis feels skimpy, it's the rogues gallery of bad guys you get to shoot. The only foes in the game are North Korean soldiers, North Korean assault choppers, and two different types of alien. Great artificial intelligence and intense battles mean that you don't notice the lack of variety too often, thankfully.
KPA Soldier
Although they come in different uniforms and tote different weapons, the average Korean People's Army (KPA to their friends) soldier remains the same throughout Crysis. Each seems to possess the same intelligence and desire to kill the "American pig" invading his turf. Look for them to be outfitted for different situations accordingly. In levels set deep in the jungle, expect KPA patrols to be decked out in full camo outfits, while bases are staffed with grunts and officers in regular uniforms.
Generally, the KPA carry pistols, FY71s, shotguns, and SMGs. Some are scattered throughout the game with body armor that makes them harder to kill (although all North Koreans can take a pretty crazy amount of punishment before going down). And in select late-game levels, such as in the tank mission Onslaught, you run across KPA goons tricked out with missile launchers.
KPA Nanosuit Soldier
You only encounter these North Korean knockoffs of yourself on a few occasions in Crysis. A couple of them first show up in the cemetery at the end of level three, Relic, but most can be found in level six, Awakening, at the rock crusher and in the mine. The later nanosuit-wearing KPA also come equipped with miniguns, making them formidable opponents. They never seem to take much advantage of suit functions like cloak, however, which leaves them open to counter-attack.
KPA Assault Helicopter
A regular pain in the posterior, KPA choppers show up to harass you at numerous times throughout Crysis. They track your movements closely, forcing you to keep cloaked and crawl through the jungle. Remain visible to helicopters for too long and they'll rip you apart with machine-gun fire or incinerate you in seconds with a missile. Only handheld missile launchers do a good job of blasting these whirlybirds out of the sky, although you can take them out with miniguns in a pinch.
Alien Ectomorph
Only encountered on the alien ship in level seven, Core, these presumably organic creatures are fast and deadly. Some seem to shoot ice pellets at you, while others take the fight up close and personal and attack melee-style. You can be killed instantly by these rushing attacks.
Thankfully, these aliens often ignore you. Give them a wide berth on their ship and they simply go about their business for the most part. Only engage them when you absolutely have to, as you're at a serious disadvantage in the weightless alien ship.
Alien Trooper
These man-size mechanical fliers with robotic tentacles and bug-like faces are the shock troops of the alien army. They can shoot ice bullets at you from and do heavy damage with their tentacles. Most bullets plink off of their metal carapaces, although they can be stopped in their tracks by shotgun rounds. Speed is their biggest weapon, as they can leap on top of you and tear you to shreds before you have a chance to react.
Alien Hunter
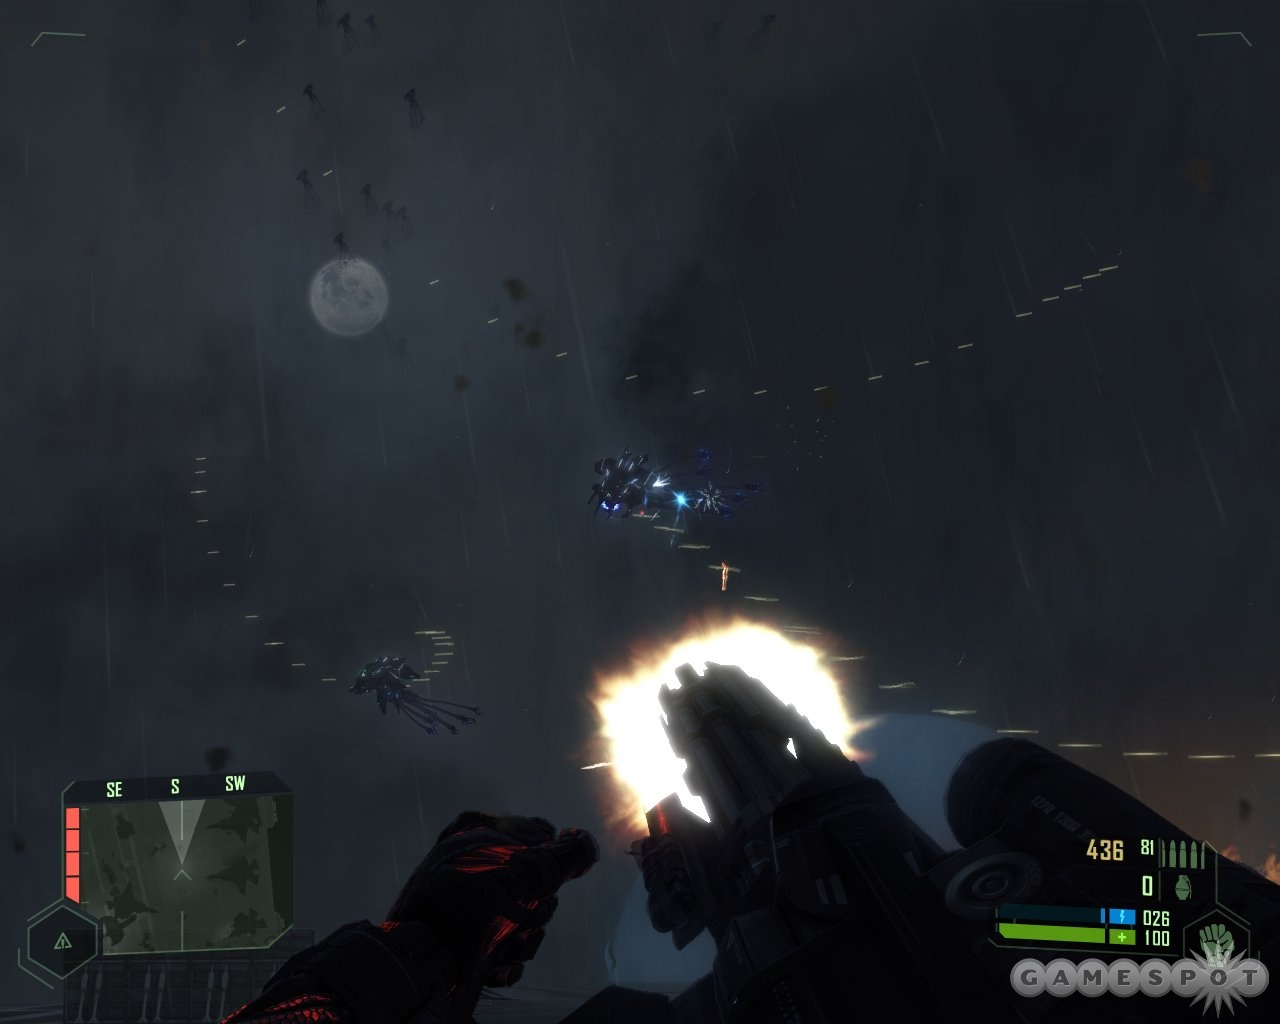
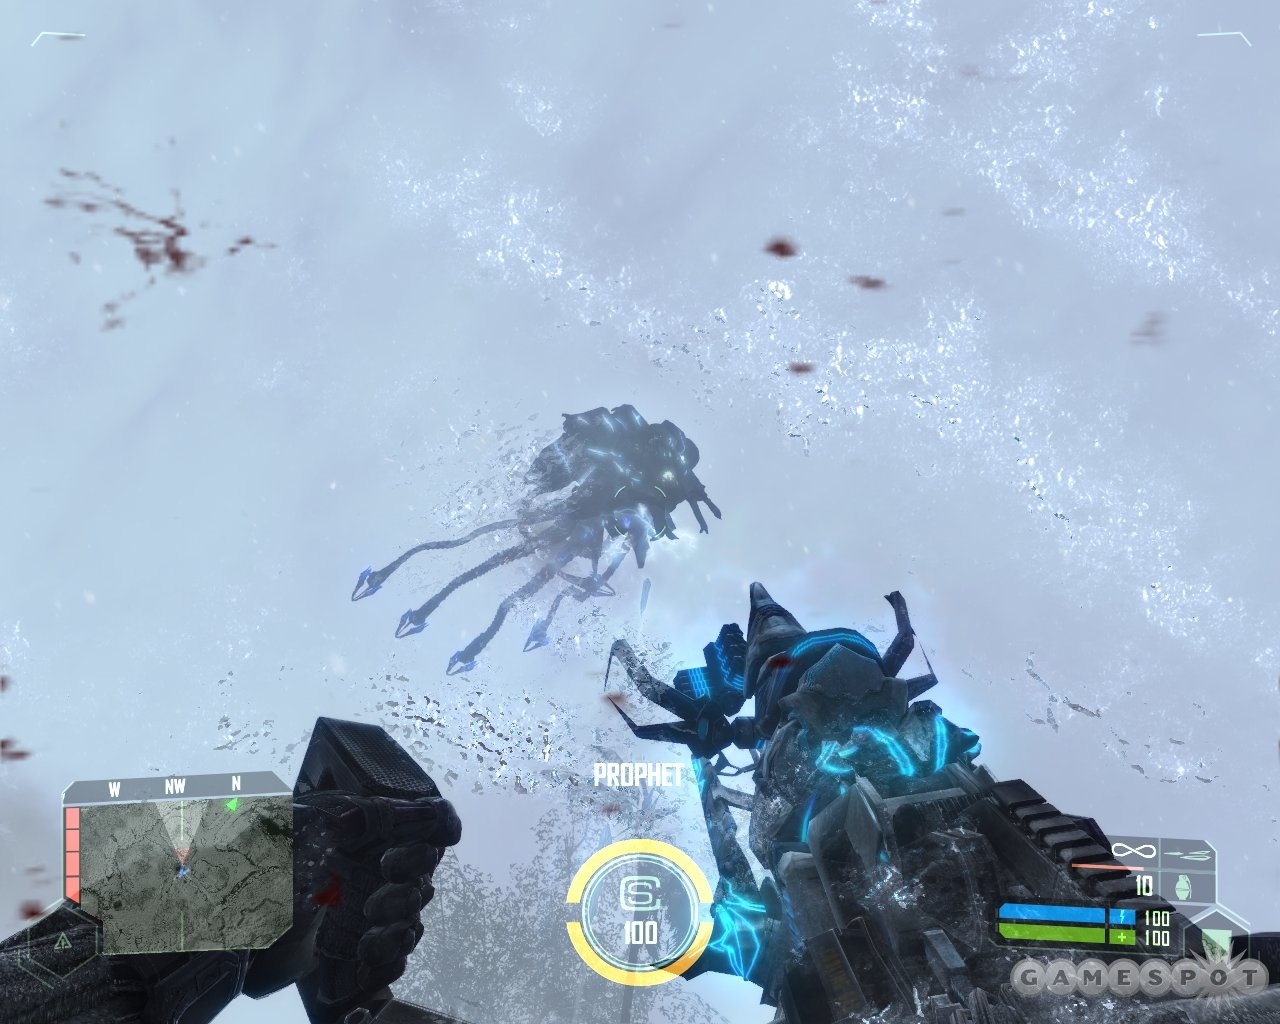
Hunters, which look a lot like robotic octopi, are the toughest opponents in Crysis, with the exception of the few boss monsters encountered at the end of the game. They look and move a lot like the drones that sliced up Morpheus's ship in The Matrix. Their biggest characteristic is speed, as they slither through the air very quickly and can fire both a freeze ray that can kill you in your tracks and a machine-gun-like barrage of ice. When these mechanical menaces get close to you, they can rip you apart with their tentacles, Doc Ock-style. Swarms of them can be found the later levels of the game, providing you with some extremely difficult battles.
Walkthrough
All of the below was written up based on a playthrough with Crysis set on Normal difficulty. So expect more trouble with those pesky North Koreans and weird-looking alien gizmos if you bump things up to Hard or Delta, although the basics should be similar across all four of the game's difficulty settings. The game design is also pretty fluid when it comes to enemy positioning, so don't expect either the KPA or the aliens to always be in the locations described below.
Also, the tips below generally cover just one way to kill the bad guys and reach all of the main and secondary objectives. There are lots more, of course. Your nifty battle suit provides many options when it comes to slaughtering everything that walks, runs, or slithers ominously through the air, and levels have been designed to accommodate different approaches to reaching goals. Experiment and see what works best for your particular playing style.
General Strategy Tips
- KPA soldiers are smart. Charging them head-on is suicide, so stick to the weeds and keep cloaked as often as possible.
- Be patient! Sit back and observe KPA positions when cloaked, or kill one and then hide while all of the enemy comes out to see what's going on. Many KPA are dressed in full camouflage, making them almost impossible to see in the jungle. Patience also applies when fighting aliens, but for different reasons. All aliens in the game, from the ghostly creatures on the alien ship to the flying robots, are very fast, so you have to make each shot count. Firing wildly will just get you killed, usually while you're reloading from a senseless bit of blasting away.
- Rely on your cloak. While it's easy to get caught up in the excitement of battle and forget about this essential power, be sure to monitor your suit's recharge levels and turn cloak on as often as possible when fighting.

- Attacking enemy bases requires some strategizing. Always try to whittle down KPA numbers from long distances using the FY71 and its scope. After you notch a few victims, consider moving in under cloak and mopping up the survivors with one-shot kills from the shotgun.
- Don't try to kill every enemy that you encounter. Some KPA patrols are so loaded for bear that it's better to cloak and sneak past them. The same goes for aliens. Trying to kill all of the organic aliens during the ship level, for instance, is dumb because most ignore your presence unless you open fire on them. And trying to kill all of the flying octopi during the VTOL escape is flat-out impossible. The better part of valor is a good idea in many levels. Don't bother playing Rambo.
01 — Contact
Get to the Beach
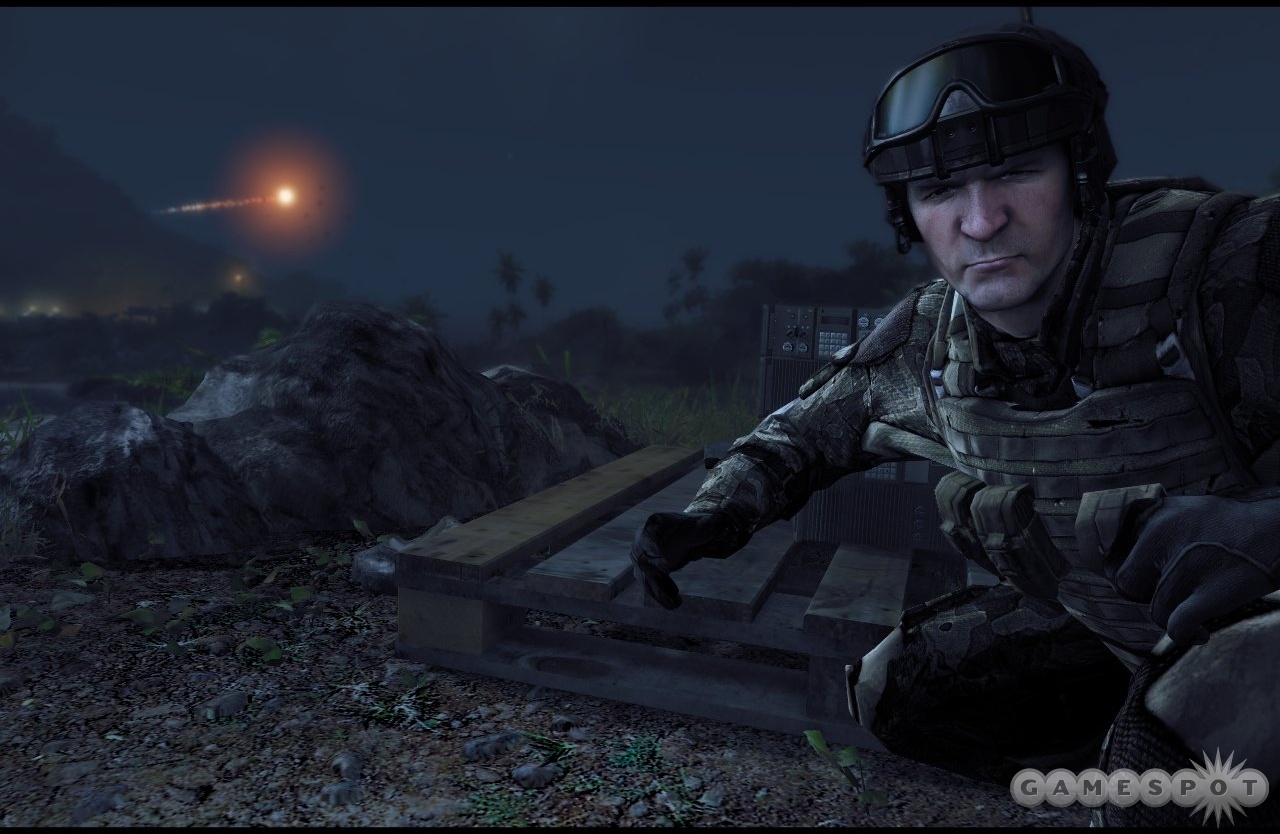
After a preamble about the North Koreans taking over the Lineshan Islands in the Philippines Sea and kidnapping the members of an archaeological team led by a Professor Rosenthal, you and your five-man team of American Special Forces super-commandos hit the silk. Your codename is Nomad (given name Jake Dunn), your boss is Prophet, and the other three are Psycho, Aztec, and Jester (don't get too attached to the latter two). It may be 2020, but all the usual military clichés are in evidence here, from the grizzled commander who's seen it all to the crazy guy with the Aussie accent.
It's a bit of a bumpy ride to terra firma, though, and only your suit saves you from death in the drink. You splash down pretty close to the shore, so begin with a short swim to the nearby beach and wait for a moment for your suit's power to come back online.
Rendezvous with Jester
With that done, say hi to the cute turtle and the crab and head up the narrow inlet. Go through the brief tutorial on how to crouch, crawl, grab things, and activate your suit functions. Seems pretty straightforward. Then get set for combat.

After Prophet gives you the heads up about nearby North Koreans, switch on cloak mode and make sure your weapon is silenced. Walk forward, look up on your right, and kill the first guard on the cliff. Then use the big rocks ahead for cover and move forward. A combination of cloak and cover will let you flank and easily take out the two KPA soldiers by the red flare. You might want to use your suit strength to throttle them, or shoot them with your pistol, as ammo is in somewhat short supply at the start of the game.
Continue down the beach. Head into the brush, checking the map for your target location. Hey there, Jester.
Assist Aztec
Listen to Aztec's radio message. Follow Jester. He flips his flashlight on, so he's easy to track in the pre-dawn gloom. Uh-oh, Aztec didn't make it. Prophet makes him go poof to keep the suit out of North Korean hands (though seeing as they can't grow their own food, it's hard to imagine that they'd be able to do much with sci-fi battle armor). Seems like something ripped the KPA goons apart, too, though. What the hell is going on here?
Disable GPS Jamming Device
Jester heads off, leaving you to tackle a KPA GPS jamming device interfering with your map system. Head forward, jumping rocks with the nanosuit on strength when needed. You soon come to a pleasant vista overlooking a beach, with the sun rising in the distance.
Unfortunately, this interlude is interrupted by KPA soldiers below you. Activate cloak and jump down. Go prone and crawl to the right towards a KPA truck. Kill the soldier manning the gun turret first, then the driver. Hop into the truck and turn the gun on the nearby guards.
Watch out for fire from patrolling gunboats, as they can kill you in a few seconds. Hit maximum speed. Run back to the portable GPS thingie by the ramshackle beach base and use it to shut it down. Collect the FY71 and pistol ammo from the shack before leaving the area.
Access KPA Tactical Information
Move up the beachside road past the two trucks. Engage the cloak and crawl in the bushes on the left. Terminate the two guards. Be sure to check them for weapons and ammo, as you're probably running low on supplies by now.
Activate max speed. Race up the road until it opens on the beach again, then use the cloak to hop between the big rocks. Stick to the right and stay under cover until you approach another KPA truck. Kill the soldiers here, hop into the turret, and blast their buddies.
Wait for a second truck that may come up behind you if you've made enough racket. Take it out with the turret as it approaches. If it doesn't drive up to you, activate stealth and creep around the bend in the road behind the first truck. Get up close and kill everyone in sight.
Move along the beachside road again. Another truck awaits. Keep in the brush on the right side again, flank the truck, and take it out. Hop in and use the turret gun to kill the KPA soldiers across the road. Be patient and wait for them to reveal themselves, as sometimes they don't all attack immediately and you can get ka-boomed by a grenade if you hop off the truck too quickly.
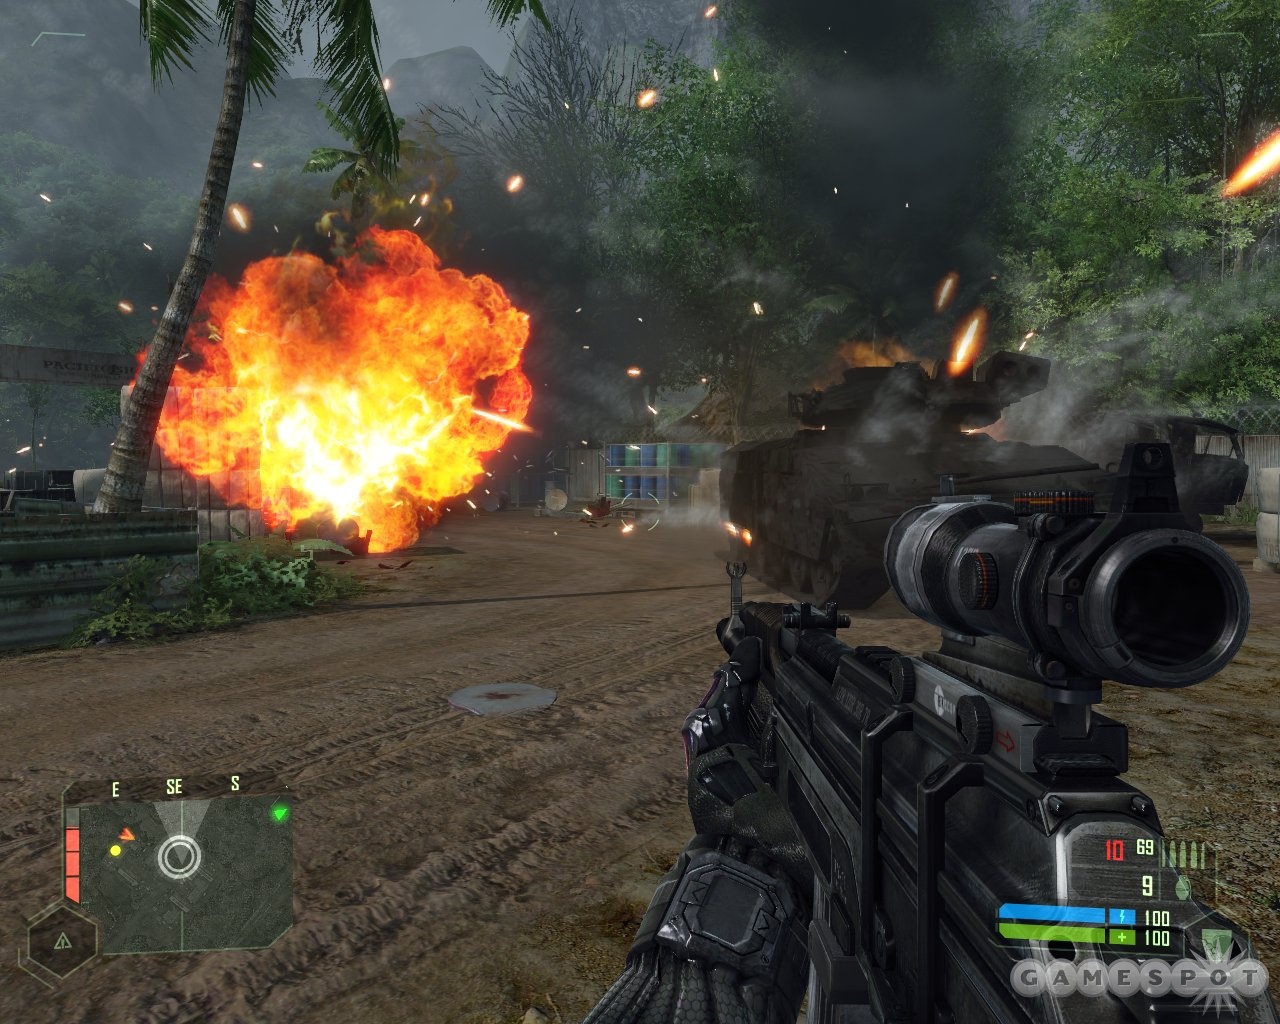
Attacking The Enemy Base
Use cloak to get close to the base up the road without being seen. Blow away the oncoming KPA goons by cloaking and taking cover behind rocks and weeds. You should have picked up a shotgun by now, which is perfect for close-range killing. Of course, you can also take the easy way out and drive the last truck you encountered into the base and strafe everything that moves.
Continue up the road, either cloaked or driving, killing every soldier on the way. Stop to laugh at how they announce their presence with goofy lines like "Die you American pig!" Drive up the hill to the command post. Stay in the gun turret and wait for the KPA to all reveal themselves. Kill them all.
Exit the truck and run into the base. Access the laptop and swipe the North Korean tactical info. Hmm. Seems like some top general named Kyong is running the show and is commanding some kick-ass special forces.
Move further into the base up the stairs. Activate cloak. Run into the midst of the KPA soldiers at the lookout and kill them all with extreme prejudice. Grab the nearby frag grenades. Watch out for fire from a gunboat patrolling the waters below. Don't bother opening up on it with the gun turrets nearby, as it seems impossible to destroy them this way.
Break Through the KPA Checkpoint
Do a little backtracking. Check your map and head up the hill towards the KPA checkpoint. Listen to Prophet's radio message about something weird up ahead. A machine-gun nest is your first problem, but it's easy to deal with. Either toss a few grenades or hit max speed and race up to the three KPA soldiers and blow them away.
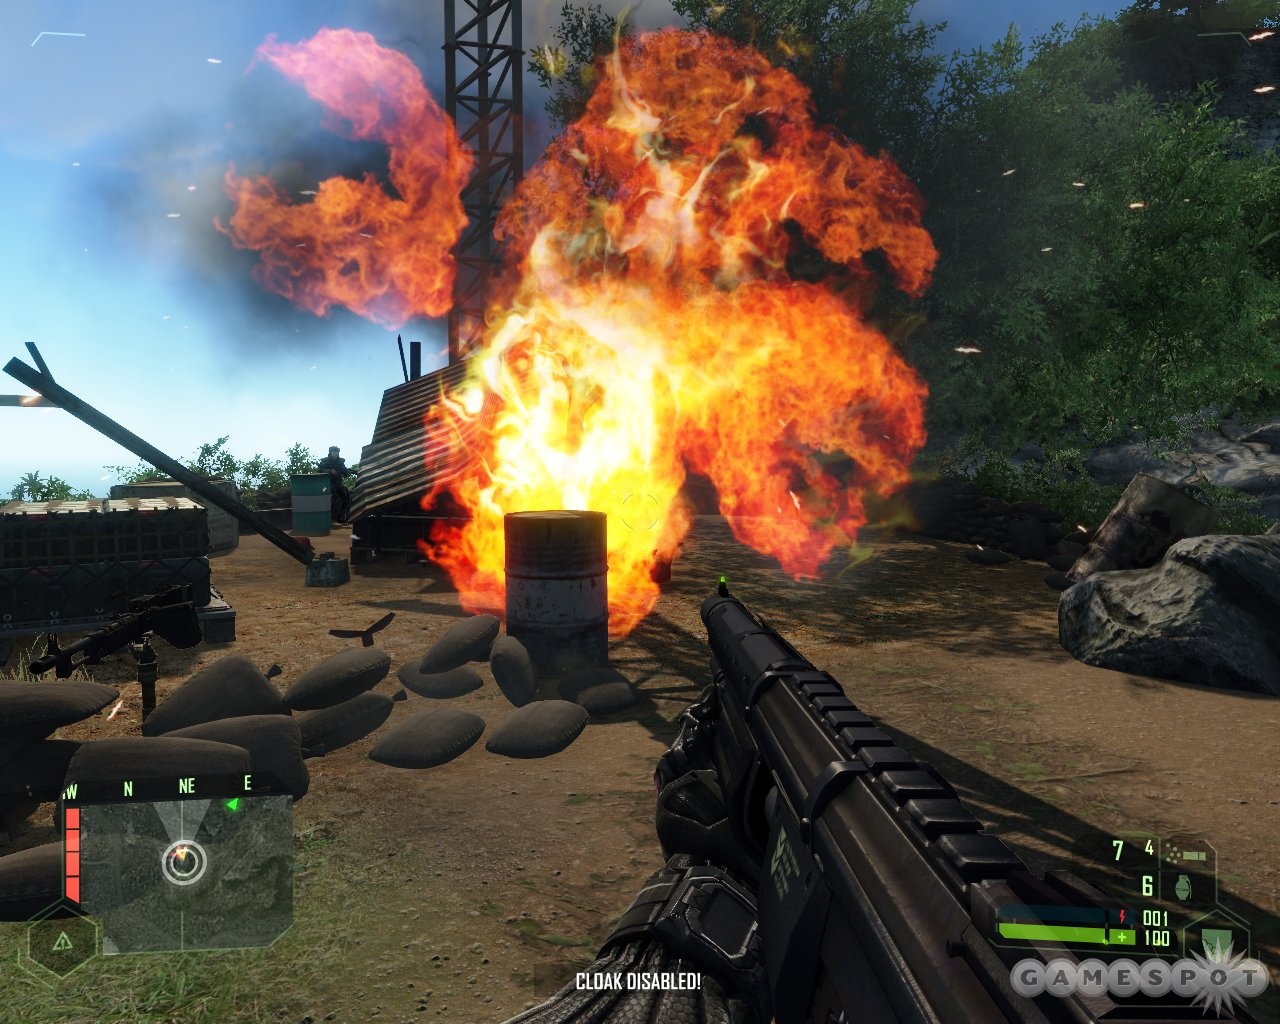
Head up the path. Three KPA approach. A grenade can take out all of them, or you can hit stealth and surprise them with a hail of shotgun fire. Keep going till you reach the top. Creep close and throw a couple of grenades into the checkpoint, then open fire on the survivors. An explosive barrel there can be detonated with a couple of shots, although it doesn't seem to have as much killing power as the grenades.
Rendezvous at Distress Signal
Turn on max speed. Race back down the path and enter a narrow crevice on the right. Use max strength to jump onto the cliffs. Prophet, Jester, and Psycho are just ahead. Hey, how'd that boat get here?
Watch the cutscene where everybody argues about what's really going on. Be properly freaked out when some strange metallic thing smashes through the boat and grabs Jester.
Find Jester
Run through the hole in the boat after the big tentacled creature and Jester. Follow Prophet and Psycho through the jungle, getting glimpses of the alien as it crashes through the brush and wipes out some hapless KPA troopers.
Discover Jester's remains. Say a prayer as Prophet vaporizes him just like he did Aztec.
02 — Recovery
Capture Communications Trailer
Not much to see here. Just move straight ahead and drop down, then Prophet will clear up your objective for you.
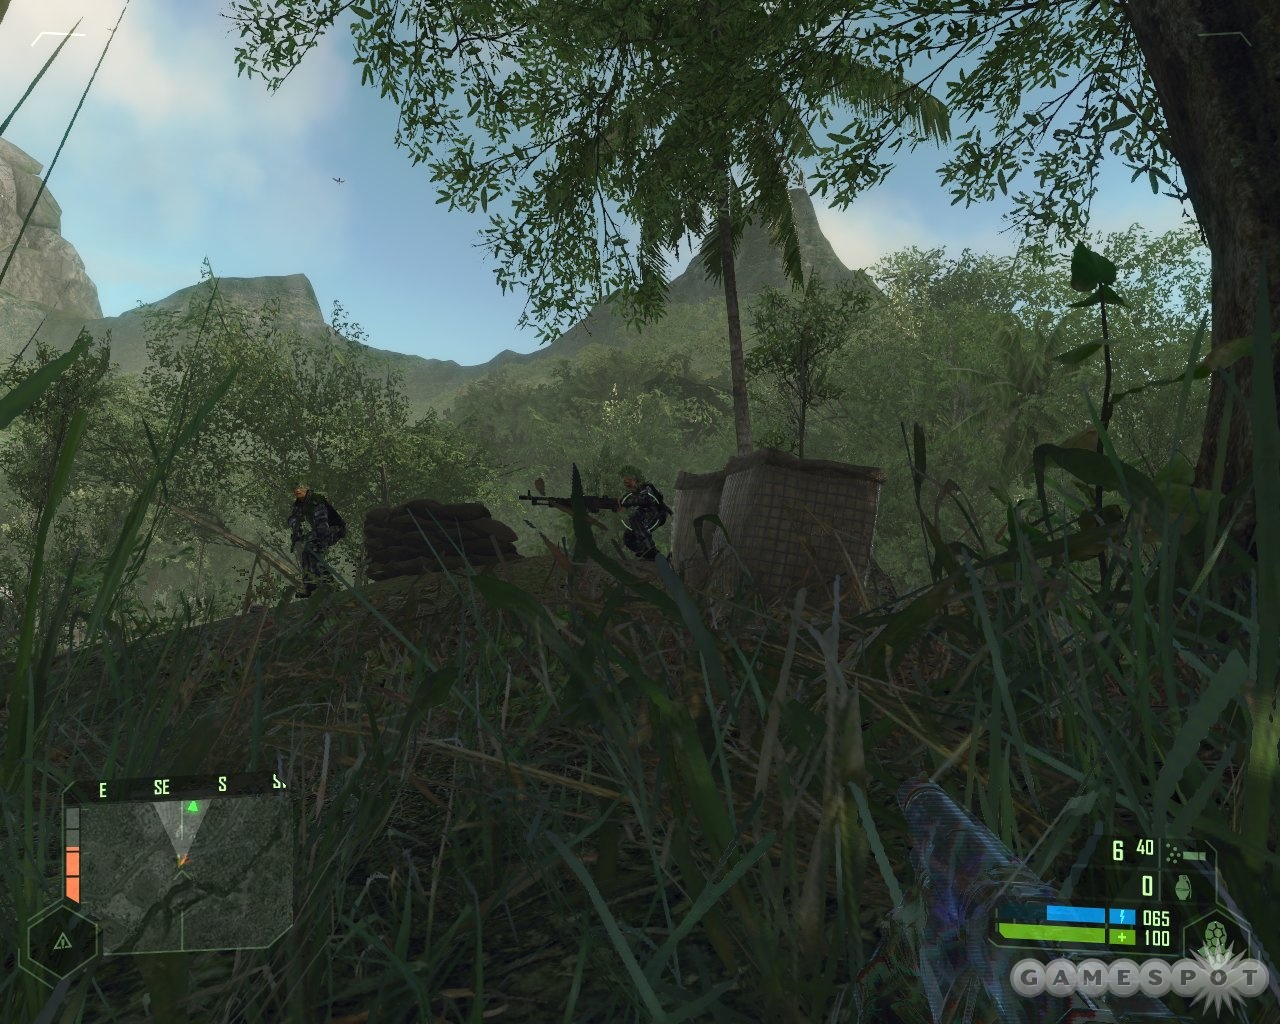
Find Hostage in the Village
Prophet lets you know that a hostage from the research team is being held in the village just ahead. Your goal is to rescue this person post-haste. By doing so, you'll get your first real taste of the outstanding squad combat featured in Crysis.
Begin by heading up the road. Hop in the nearby half-track and drive it a little ways forward. Go slow, as an enemy truck will be joining you shortly. Jump into your turret when it approaches and blow away the gunner and his buddies.
Exit the truck and proceed forward cautiously. Head up the first path you encounter on the right. KPA soldiers are everywhere, so use your cloak and move quickly from one rock to the next, or drop and crawl forward. By now you should know the drill.
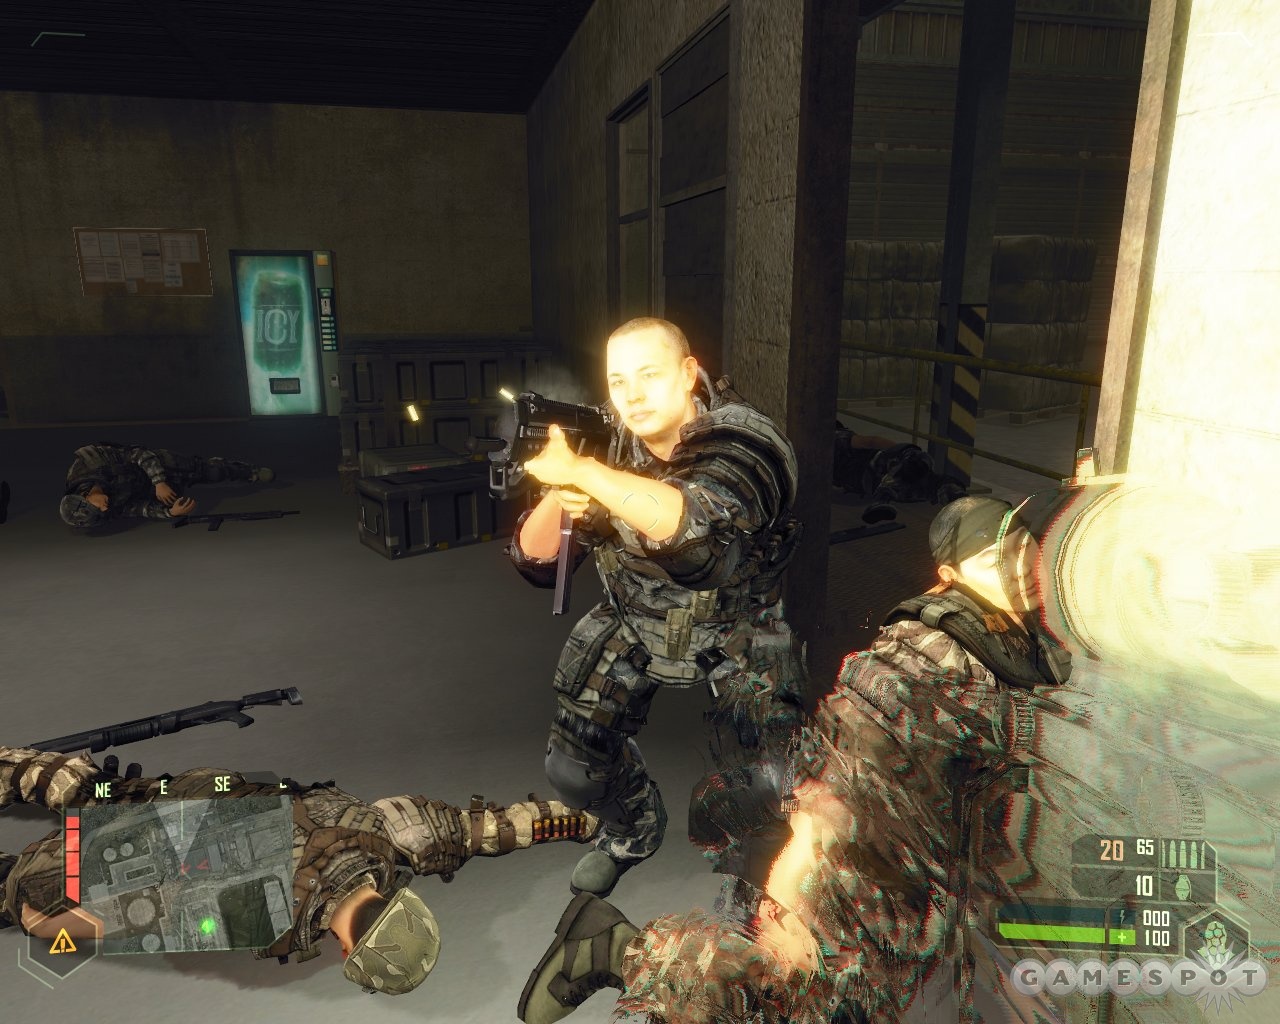
Wait until the North Koreans get close, then start blasting with the shotgun if you've got the ammo. Whatever you do, don't stop moving, as this crew is loaded with grenades and isn't shy about using them. Don't get cocky, either. The KPA use the brush really well for camouflage in this battle, so be absolutely sure that you've killed all of them before poking your head up. Nothing ruins Nomad's day faster than an unseen enemy with a shotgun.
Secondary: Access North Korean Tactical Network
Keep moving up this jungle path and Prophet will radio you about a North Korean base just ahead. He then gives you the secondary objective of accessing the KPA tactical network once again to determine what the bad guys are up to.
Use your cloak to get close to the base. Hide behind the buildings on the left, then move further up and hunker down behind the corrugated metal fence while your cloak regenerates. Crawl around the fence with your cloak activated. Creep up the path slowly. A patrol will come around the corner. Blast them when you get into a good shooting position.
Then proceed further and get close to the KPA in the station itself. Gun them down, too. Access the network just as you did before. Click on speed for a change and run around to the front of the base. Shoot the troops here and load up big time on FY71 ammo and grenades. A precision rifle and a rocket launcher that can come in handy down the road are also located here. Shame you can't carry everything.
Incidentally, you can take the easy way out and lob a grenade into the base. Unfortunately, this both kills all the KPA and blows up the tactical network hardware, causing you to fail the mission. So tread lightly unless you love cool ka-booms.
Find Hostage in the Village (Again)
A KPA truck may show up on the road below as you're leaving the base, so move cautiously. It's best to take a peek down from the outcropping looking over the road. If the truck shows up, pull up your scope and kill the gunner and his friends. Or drop some grenades. Six of one, half-dozen of the other.
Turn speed on when the way is clear and zip down the road and to the left toward the village. Cloak and clear out the patrol here. Psycho now radios to say that he'll provide backup when you enter the village. The first in a long line of unfulfilled promises.
Use cloak again to cross the bridge. Stay on the road, as there are mines to the left and right. Get ready for one huge firefight with half the North Korean army. Specific strategies don't work in this section, as you wind up being hunted by a dozen or so soldiers in this small shantytown of shacks, machine-gun nests, and a garage. Just be very cautious and use cover and cloak constantly. You can also set up shop in the garage, ducking inside to regenerate your cloak on a regular basis. Snipe as many enemies from long distance with the scope on the FY71 from this location, too.
When everybody's dead, scrounge ammo from the corpses and buildings. Then check out the town hall. It's the big building dead ahead (just look for the flag). Storm inside and blast the handful of guards, then check the computers upstairs for info on the hostage. It seems he or she is being interrogated in the town school. Collect the ammo and grenades upstairs, then move outside and back down the street towards the school.
Infiltrate the School and Find the Hostage
As with the town hall, the school is easy to locate as it's the only other big building in this flyspeck of a burg. Run around to the main entrance, then enter the building. Edge around the corner to the right and get ready to blow away the two KPA troops that will confront you on the stairwell.
Head upstairs. Listen carefully and you'll hear voices from a room down the hall to your right. Did somebody say CIA? Move up to the closed door there for a brief tutorial in North Korean interrogation techniques. Huh, thought it would be a lot more brutal than that.
Psycho appears. Gee, thanks for the assistance a few minutes ago, buddy. A cutscene depicts Psycho bursting into the room and freeing a female research assistant who had been working with Professor Rosenthal. She's pretty freaked out about how her team unearthed an ancient artifact. It first looked like a statue left behind by an unknown civilization, but turned out to be some kind of beacon that they apparently "woke up." At any rate, she's pretty sure that something on the island doesn't want people there, and flatly refuses to go back to the dig site.
Destroy the KPA Tanks
Just after the girl finishes her story, you get the depressing news that the KPA have rolled some tanks into town. Of course, Psycho tells you to take care of them while he stays behind looking after this comely former hostage. Gee, what a hero.
Head up to the roof of the school, grab the frag grenades there. They're of little or no use against armor, though, so follow up by leaving the building and heading towards the ocean. Use your cloak or max speed to make sure you survive the trip.
Right beside a couple of KPA metal trailers near the shore is a shack stocked with loads of ammo and two missile launchers. Grab one of the latter (you can only carry one at a time) and head back to the tank. Three rounds should blow it to kingdom come. Then go back for the other one and use it to detonate the second tank when it arrives.
Get to the Rendezvous Point
Psycho radios an all-clear when the second tank goes up in flames, which Prophet follows with a request for everyone to meet at a rendezvous point. Check your map, then leave the village using the exit opposite to where you entered. Move right into the jungle. Power jump twice up some rocks and head toward a waterfall. Prophet then tells you to join him.
Proceed to Prophet's Location
Move right of the waterfall. Jump up on more rocks. Head up another jungle path. Use cloak to get to a convenient rock just ahead and to the right. Hunker down and watch for the KPA to approach. Be very, very patient here. The brush cover is thick, which makes it tough to spot enemies, let alone actually shoot them. Cloak is invaluable here. Snipe the enemies with the scoped FY71, then move in to mop up at close range with the shotgun.
After you've killed everyone, you receive another message from Prophet. This time you're to hook up in the cave system farther up the path that you're currently on.
Head Upriver to the Cave System
Another KPA patrol arrives after you move just a few feet down the path. Repeat the tactics you just employed to slaughter their comrades, sticking close to the ground and using cloak as often as possible. After the battle ends, scrounge up some ammo. Most of the KPA troops here seem to be toting shotguns, so you should be able to max out your ammo pretty quickly.
Keep moving up the path until Prophet radios with a warning about more KPA just across the stream. Run down to the stream on your left before you get to the crossing. Don't reveal yourself here or you'll get blasted to bits by the North Koreans hiding in the high ground above the water. Instead, switch on your cloak and crawl forward. Cross the stream and move behind a huge rock to the right.
Wait for the KPA to reveal themselves and then start wasting them with the shotgun. The one-shot kills that the shotgun provides are a necessity here, due to the sheer number of enemies that will rush you. Use cloak whenever possible. Again, be cautious before moving out of cover. There are lots of North Korean soldiers here, including a couple that like to hide themselves in the reeds downstream, and they can take you out quickly with shotgun blasts of their own.
Once the carnage ends, take the path leading up and to the right. Head for the waterfall you glimpse through the trees. You soon find Prophet, who admits that the "research assistant" just rescued was actually a CIA agent keeping an eye on Professor Rosenthal. He doesn't seem to know what's actually going on here, though. The two of you head into the caves and the level comes to a close.
03 — Relic
Disable North Korean GPS Jamming Station
Immediately after Prophet complains about another North Korean jammer messing with the team's GPS data, he gets scooped up by what looks to be the same sort of thing that grabbed Jester. You don't get a chance to go after him, however, as you're immediately radioed by Major Strickland with command and offered a chance to get off this rock. You turn it down, of course, preferring to try and rescue the research team from the North Koreans, as the CIA agent has provided a good idea where they're being held captive.
First things first, though. There's a GPS jammer to take out. Move straight ahead and you'll run into a North Korean base almost immediately. It seems to have been set up in the middle of a farm, as the first thing you notice is a range of strange-looking palm trees that sort of functions like a cornfield.

Ignore the odd plants for the moment, though. A truck is right in front of you. Cloak and creep up to take out the gunner and crew. Resist the temptation to hop into the truck and use the gun turret; all this will do is make you a sitting duck for the hordes of KPA soldiers up ahead.
Instead, cloak and move into the "cornfield." Stalk the enemy troops here using cloak as needed. You can also move quickly toward the buildings on your left and use them for cover, moving in and out when you need a few moments to recharge your suit energy.
When it seems like most of the KPA have been cleared out, leave the building and head down the road. Cloak and move forward to the truck idling at the edge of the property. Kill everyone in sight, then jump into the half-track's gun turret and get ready to blast another incoming truck. You can make it go boom pretty impressively, which should immolate all the North Koreans in the vicinity.
Backtrack to the building you just left and look towards the center of the field to spot the GPS trailer. Access its controls just like you did with the GPS system in the first level to shut down the jamming and get your map back online.
Infiltrate the KPA Military Base and Gather Intelligence
Strickland radios you as soon as the jammer goes down with information about a KPA base on the nearby shoreline. Check its location on the map, then head south out of town. Three machine-gun nests block your way. Cloak and crawl to the right, flanking the machine-gun on the highest ground. Shoot the gunner in the head, take over the weapon, and blast the other machine-gun nests and the surrounding KPA grunts.
Get back on the road again. Take the path to the left. Two KPA soldiers lie in wait a little ways ahead, so cloak and get ready to introduce them to your shotgun.
Jump into the river and swim across to the base. Move uphill towards the enemy headquarters just as the setting sun starts to make everything hazy. It would be romantic if there weren't hundreds of crazed North Koreans trying to kill you. Lots of KPA line the road ahead and an assault helicopter soon joins the fun from above. Cloak early and often. Even a brief breather to recharge allows the chopper time to focus its guns on you, so don't stop for anything.
When you reach the KPA encampment, look for a metal trailer just ahead and to the left of the main entrance. Take cover from the chopper and the guards in there. Sneak in and out at will when cloaking to shotgun and snipe troops on the ground. Make sure to take out the enemy snipers in the watchtowers right away.
After clearing most or all of the grunts, check out the big truck right in front of the trailer and its great big gun. Run out, hop into the cab, leap into the gun turret, and blast that irritating chopper until it flies away or goes boom. As soon as the coast is clear, exit the truck and look for a trailer in the center of the base loaded with computer equipment. Access the main PC there to grab the information requested by HQ.
Proceed to the Excavation Site
Finally! According to command, the way to the dig site is finally clear. You're directed to head there right away and find out what Professor Rosenthal and the North Koreans are really up to.
Check your map and head out of the base. Cloak and move slowly, as you'll almost immediately encounter KPA troops with new weapons—SMGs with laser sights—alongside a truck. Aside from the cool way that the red lasers light up the gloom, though, the SMGs really aren't all that great. You can swap out an existing weapon for one, and use the laser sight on other weapons now, but both the shotgun and the FY71 are most useful.

After eliminating the North Koreans here, command recommends driving to the next objective. This is pretty much suicide, however, as a pack of KPA soldiers are waiting right around the first bend. Getting into a gun turret with that many enemies approaching is tantamount to painting a bullseye on your helmet. So skip getting behind the wheel for running up to the first bend in the road. Flip on your scope and snipe a few KPA, then cloak and run at them for some shotgun fun.
Continue down the road past the little farm, watching out for any KPA stragglers manning the machine-gun nest tucked away near the chicken coop. Keep going until you reach a stream and hear the familiar thumping of a chopper's rotors again. Swim across the stream to the dock, taking note of the boat tied up here, then cloak and hunt the KPA regulars in the vicinity. Use the boathouse for cover as you snipe and shotgun your enemies.
Infiltrate the Research Dome
Head up the road to the excavation site. Strickland soon radios and directs you to the research dome, where Rosenthal can probably be located and a lot of questions answered.
A veritable regiment of North Koreans is patrolling the jungle here, forcing you to proceed cautiously. Keep your cloak up as much as possible. Try to sneak by some enemies, as even your nanosuit isn't a match for five or six troopers all blasting away at you at the same time. Slipping past unnoticed is easier here, too, as some of the KPA spotlight their positions with laser-sighted SMGs and flashlights.
The excavation site itself is a large-scale version of the base infiltrated earlier, with even more watchtowers and machine-gun nests. You'll first need to take care of a machine-gun nest on the left across a shallow ravine. Cloak, get as close as you can, then use your scope to snipe the gunner in the head.
Hide in the brush until your suit-power regenerates, then cloak again and move to the main entrance of the dig site. Snipe the guard on the watchtower directly ahead and then scramble for cover behind the large containers to the left of the gateway. At this point you'll be into a huge scrap with a dozen or more KPA grunts. As usual, rely on the cloak and take cover often. Use the shotgun as much as possible, as you need to take enemies down with single shots to avoid getting swamped by their superior numbers.
Once everything has been cleared out, move further into the base and find the road leading down to the research dome. Watch for the machine-gun nests. Cloak and snipe the guard manning the gun on the left first, then take cover behind the corrugated metal wall and eliminate the remaining KPA as they attack. After this, cloak and move forward to take care of the other two nests on the right, as well as a watchtower off to the left.
Run into the dome, pausing briefly to shotgun the dimwitted KPA guard who runs directly at you out of the main doorway. Grab the FY71, shotgun, and pistol ammo in the corridor on the way to the actual dig site. Open the door and watch Professor Rosenthal arguing with a North Korean general via video uplink. Apparently the North Koreans are holding Rosenthal's daughter hostage and are engaged in dangerous experiments with what seem to be carbon-based machines that predate mankind by two million years.
After some ominous additional talk about these living fossils, everything goes haywire. An electrical surge of some sort flash-freezes Rosenthal and ices up the entire room. Command tells you to get the hell out of the dig site and get to a downriver extraction point marked on your map, and the brass apparently means it this time.

Proceed to the Extraction Point
Now you need to backtrack to the boat you spotted below the dig site. Lots of KPA stand in your way now, though, as reinforcements arrive just as you leave the research dome. Night has now fallen, making it even tougher to spot enemy soldiers.
The first crew of North Korean cannon fodder can be found just outside the excavation pit to the left. Cloak and blast them quickly with the shotgun. Stay cloaked and head back to the main entrance into the site encampment. More KPA can be found there, along with a half-track. Snipe the gunner, then take his place in the turret and kill his buddies.
Proceed back down the jungle road. You can take the truck if you want to try a kamikaze run through the KPA troops now lining the path, but you face so much firepower that your ride stands a good chance of getting blown to bits. Staying on foot makes the most sense, as does trying to keep out of sight.
Cloak and crawl through the brush on the right of the road. Watch for laser sights and flashlights, and try to avoid contact whenever possible. About two-thirds of the way back you can simply drop down to the shoreline and make your way to the boat. Thankfully, there are no KPA in the boathouse.
Hop in the boat and head off toward the point marked on your map. You won't get far, though, as you have to take the boat over a waterfall almost immediately. Even if you survive this without blowing up or getting jammed on the rocks, you have to abandon ship just up-river as the North Koreans have set up a barricade.
At any rate, keep low and keep cloaked as soon as you lose your boat. That damned chopper is back, too, so you need to stay down to avoid getting strafed or blown to kingdom come by a rocket. Climb onto the beach on the right side and cloak to creep past the guards and the trucks by the bridge. Don't bother trying to engage anybody here, as if the tons of KPA don't kill you, the chopper will.
Slip into the river on the other side of the bridge and run for your life. The chopper trails you all the way to the extraction point, forcing you to keep moving all the time. Keep the cloak up as much as possible, being sure to go prone and get under the cover of brush or long grass whenever you need a breather to regenerate suit power. At least the swampy terrain provides a lot of scrub to hide beneath.
Keep plowing through this marshy terrain and you'll eventually reach a spooky cemetery. Interesting spot for a pick-up.
Secure the Extraction Point So the VTOL Can Land
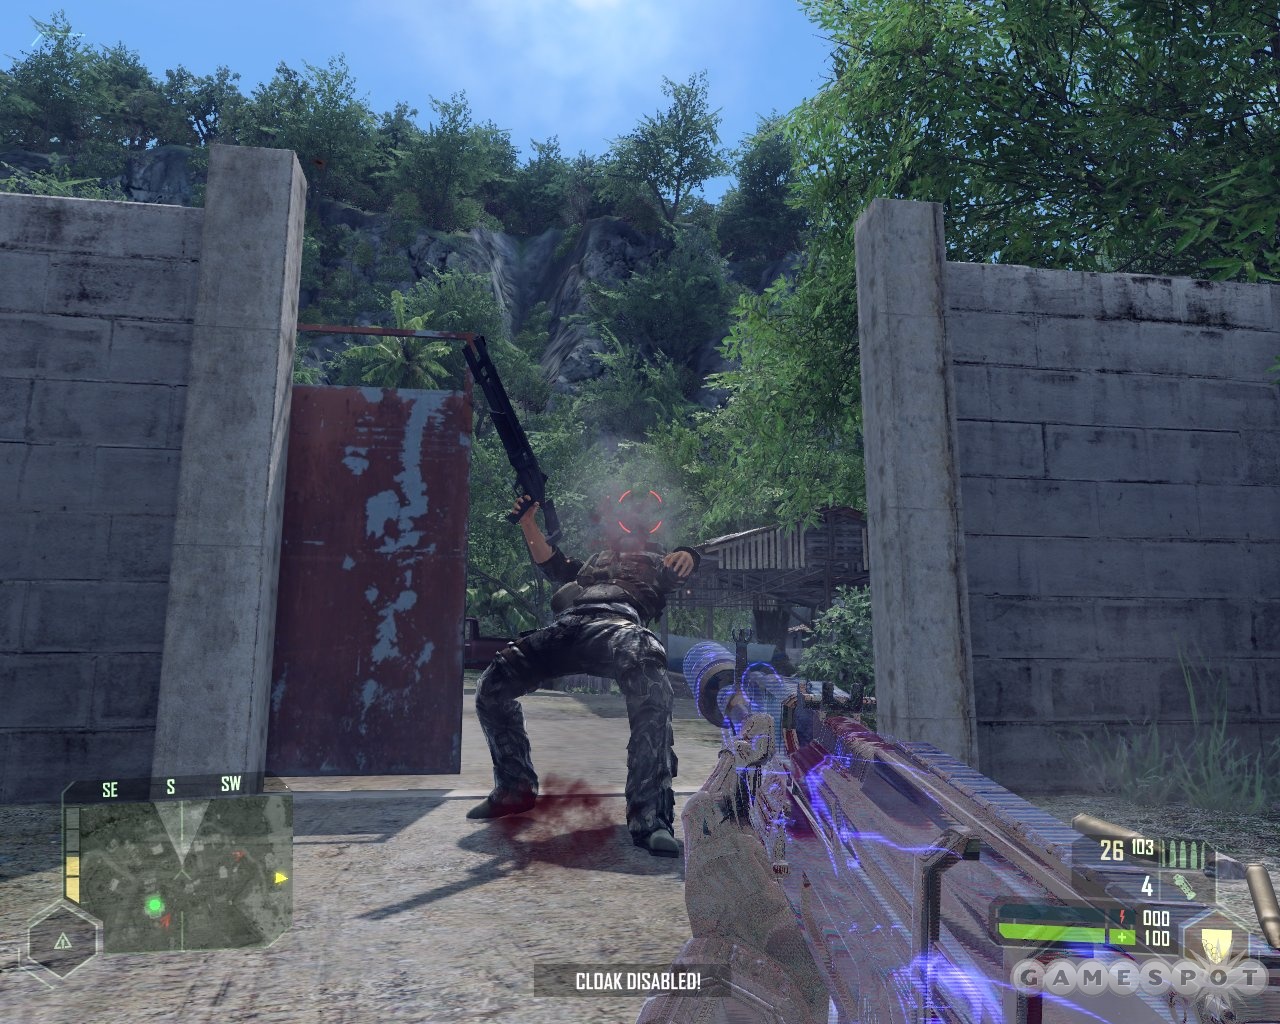
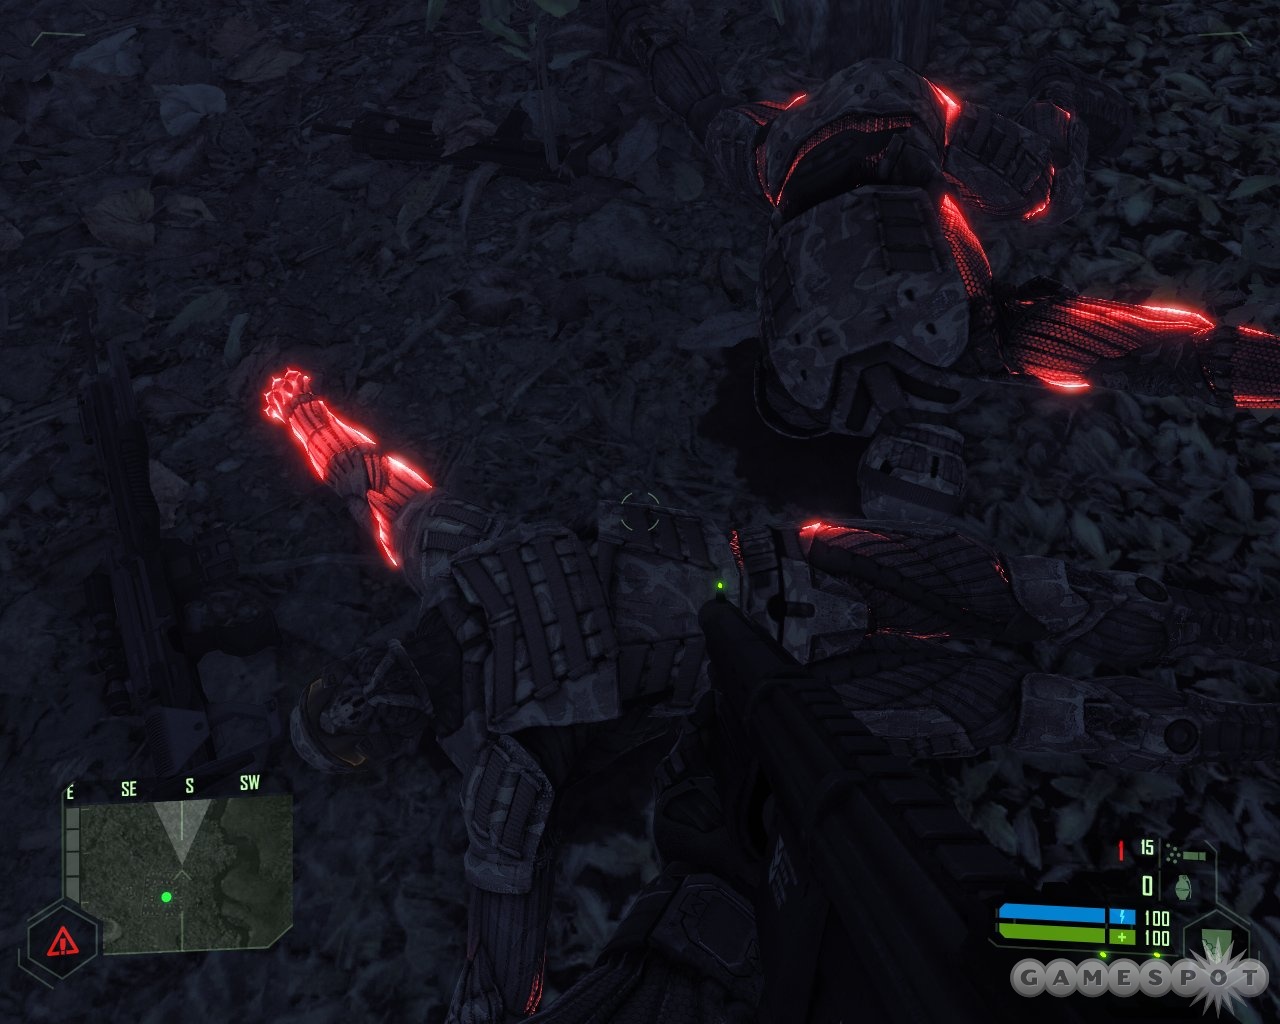
Your work isn't quite done yet. The LZ is still hot, so you have to clear the area before Vulture 26 can pick you up. Head to the far side of the cemetery wall to confront a brand-new enemy—KPA soldiers in nanosuits. Nomad tells command that they seem to be cut-rate nanosuits, but still, these guys can cloak just like he can, so they're a bit of a threat.
Well, they could have been a threat. As it is, however, the idiots wearing the suits seem to have a fetish for heights. So just sit back and wait for them to leap onto the big rocks outside the cemetery walls, then shotgun them at your leisure. Blast a handful of these nanosuit-clad goons and the VTOL will come down to whisk you away.
04 — Assault
Meet Lieutenant Bradley
Step out of the VTOL and into a war zone. Apparently your little covert operation against the North Koreans has erupted into a full-blown war with troops running all over the place, fighter planes crashing into the ground, and artillery blasting in the distance.
Follow the soldier in front of you to Lieutenant Bradley. He's stationed down by the water. Listen to him bitching about North Korean anti-aircraft guns, then stare in amazement as you volunteer to take them out single-handedly.
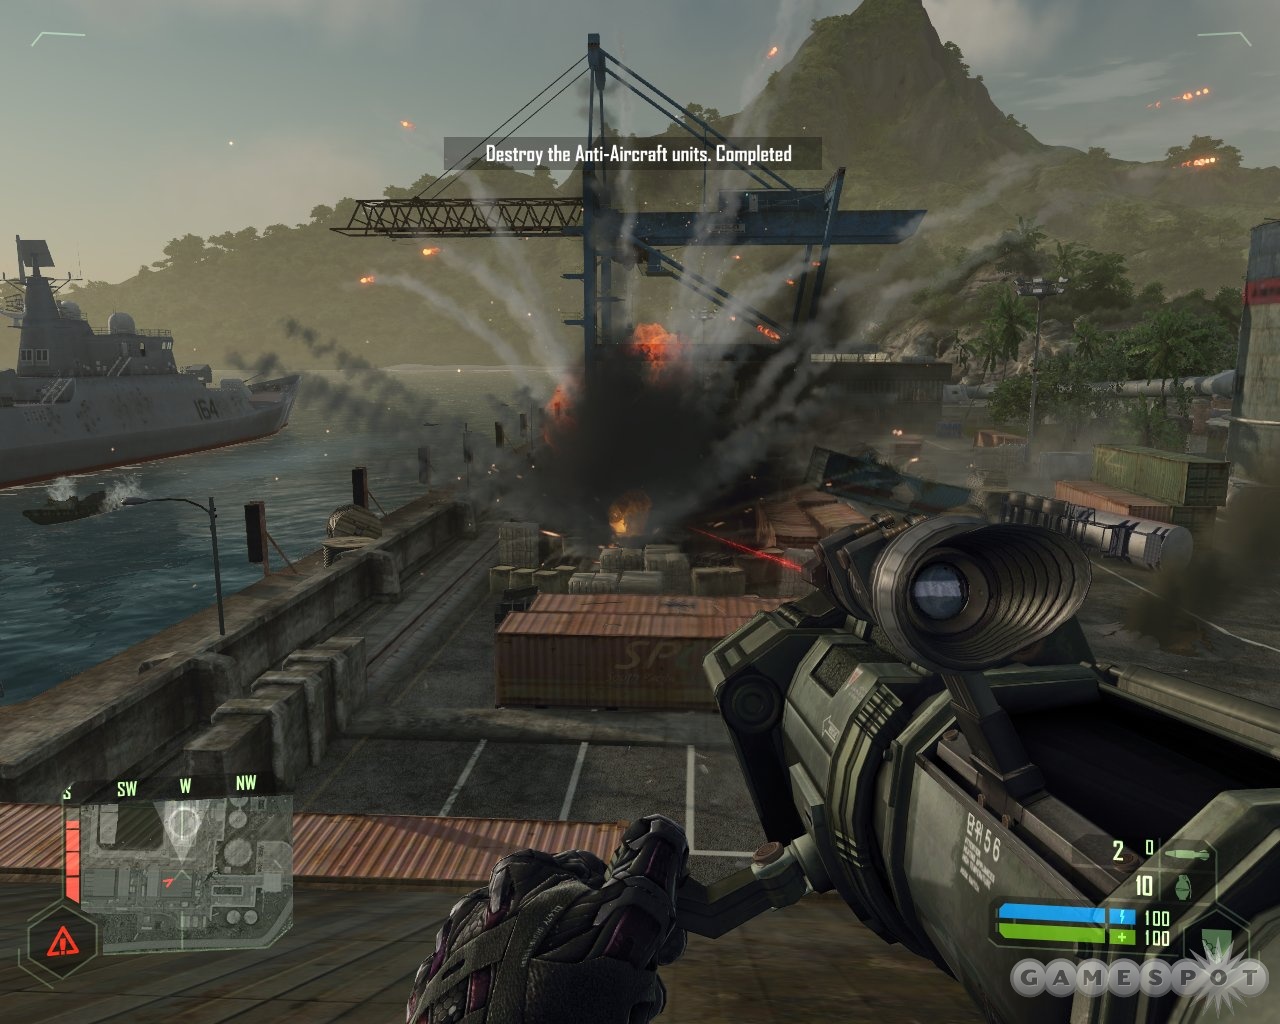
Destroy the Anti-Aircraft Units
Check the map and head back to the main road. Scrounge ammo off any dead KPA you find; you'll need it. Head to the first AA gun on your map, but take a quick detour down a dirt path towards a waterfall on the way. Loads of ammo is stored in the shack here by the green flare. Don't swap the shotgun for the SCAR automatic rifle, though. It's awfully similar to the FY71, and you need the one-shot stopping power of the shotgun in close quarters.
Backtrack to the paved road. Cloak and move into the brush on the left side of the road. Creep up to the KPA truck and blow away the gunner. Then take his place and blast his comrades as they approach. Be sure to watch your back, as three KPA can approach from the rear with SMGs at the ready.
Leave the truck and continue down the highway. Psycho radios something about being your eyes up above and looking for sniper roosts, but he's as useless here as he's been all along, so don't count on him providing any help. Cloak and get ready for the arrival of another truck. Shoot the crew as they drive past.
KPA patrols are all over the road ahead. Use the tall grass on the sides of the road for cover and cloak as often as possible. Snipe from a prone position in the weeds to thin their numbers, then cloak to creep up close and dispatch the survivors with your shotgun.
Crawl forward to the gas station. Use cloak to reach the metal fence near the speed-limit sign. Start killing the KPA in front of you, but keep an eye out for a patrol emerging from the jungle across the road. If KPA numbers are too heavy around the gas station, take a few shots at the pumps to blow up the entire place. Just make sure you're at a good distance, as the ensuing fireball is huge. After the smoke clears, go around the back of the gas station and load up on FY71 ammo.
Keep moving down the road until you reach a small town and a KPA checkpoint. There are lots of North Koreans here, but also lots of cover, so you shouldn't have too much trouble taking them out. As always, be sure to immediately kill anyone who tries to man the machine-gun nest.

Cross the road to the first AA gun. Grenades are useless, so pick up the nearby red explosive barrels and move them over to the base of the weapon. Then back off a little ways to clear the splash damage radius and detonate them with a couple of shots. Scratch one AA gun.
On to AA gun number two, further up the same road. This one is a lot tougher. First of all, you're shadowed every step of the way by another North Korean assault chopper. And second, there are gangs of KPA lining the road ahead, along with a gunboat pacing you in the water.
Be patient with your approach. Crawl in the tall grass and snipe enemies whenever possible, especially around the bridge. Try not to leave any KPA alive here, as they'll later hem you in after you blow up the second AA gun.
Speaking of that second AA gun, it can be found straight ahead up the dirt road, set into a trench guarded by a machine-gun emplacement. As always, go slow here and use your scope to make head shots as often as possible. Just be ready to scramble right after you shoot, as the chopper locks in on your position almost instantaneously and riddles you with bullets.
After clearing the opposition around the machine-gun, enter the trench and run past the AA gun. Take out the last KPA goon with your shotgun and grab a missile launcher from the ammo pile on the right. Now blow up that damned helicopter, which should feel really, really good. Take a moment to blast that irritating gunboat to hell, too. Then turn your sights on the AA gun and make it go boom.
Secondary: Gather Intel from KPA
Just as you start heading towards AA gun number three, Psycho radios with a request that you hit a KPA base to swipe some intel. The best way to get there is to check your map for the right heading, then drop into the water and swim over to the nearby beach. The base is just ahead, in the form of the usual rickety shantytown.

A huge KPA presence plus the arrival of yet another helicopter makes it best to cloak and sprint to the objective, a laptop that can be found in a shack to the right. After you've downloaded the goods, lead the chopper back to the trench where you destroyed the second AA gun. Grab another missile launcher from the ammo dump and incinerate this whirlybird as well. Mmm, still feels good, doesn't it?
Destroy the Anti-Aircraft Units (Again)
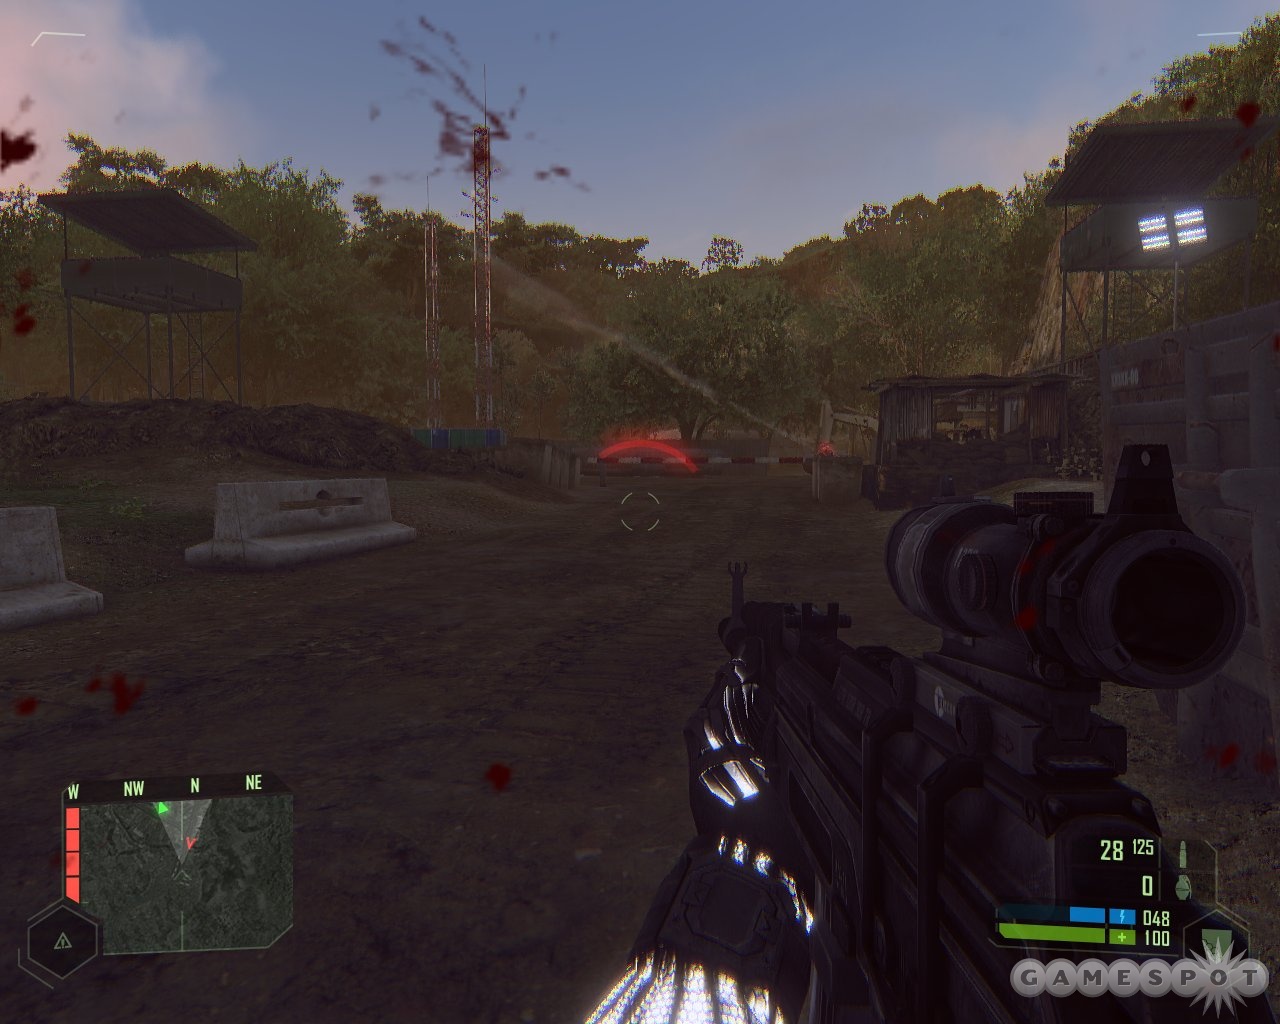
Finally, it's on to AA gun number three. It can be found in the middle of a shipping yard beside a dock currently playing host to a North Korean cruiser. Approach it by skirting around the beach on an adjacent island, then swimming across the narrow inlet.
Head into the heavy brush on the left. Look for a break in the fence surrounding the yard. Cloak and sneak through here, then blast the two KPA behind the containers to your left. Run into the big warehouse to your right. A platoon of KPA will be on your heels, so take cover as soon as you get inside. Go prone to make your cloak last longer and begin sniping North Koreans as they approach. Try for head shots, as their numbers mean you don't have any time to mess around riddling enemies with bullets. Steadily retreat as they press you, and don't be worried about moving out the back door onto the dock, as there is lots of cover there.
When the coast is clear, leave the warehouse and run across the yard past the burning wreckage. Cloak and check out the office building directly in front of you. Snipe the two gunners on the rooftop. Note the AA gun to the right. Cloak again and move forward very cautiously, as KPA are all over the place here. Use cover smartly and employ the shotgun for one-shot kills if you've got enough ammo to get away with this. Otherwise, try for scoped head shots with the FY71.
Enter the office building slowly, making sure to blow away all opposition on the inside. Go up the landing, enter the office, and head right into a virtual candy store of ammo. Just about everything is in here, including missile launchers. Grab one and go up to the roof. Guards seem to spawn in up here, so even if you killed the two gunners earlier, be ready to kill one or two more KPA grunts. After all opposition has been put down, walk to the edge of the roof, take aim at the rotating radar dish on the AA unit, and turn it into rubble. If there's a gunboat out on the water in the harbor, be sure to blast it, too.
Sabotage the Jammer on the North Korean Cruiser
Your work's not quite done, unfortunately. The North Koreans are once again jamming GPS systems, so now you need to take shut down the computer system on the cruiser docked right in front of you.
Resist the temptation to just walk over there. It looks quiet, but a dozen or more KPA and a truck appear out of nowhere as soon as you approach the ship. Jump down from the roof and move towards the vessel, but pull back as soon as you encounter any resistance. Race back to the office building, grab another missile launcher, and climb the stairs once more. Then blow up the truck and all adjacent North Koreans from the safety of this high perch.
When the flames and screams of pain have died down, head back down and grab another missile launcher. Leave from the main entrance and walk towards the ship. A truck will soon appear between a couple of storage containers, but it's no match for the missile launcher.
Use maximum strength to jump on board the ship near the stern. Whip out your shotgun and make short work of the KPA that can found just up the stairs inside the ship. Locate the GPS system and switch it off.
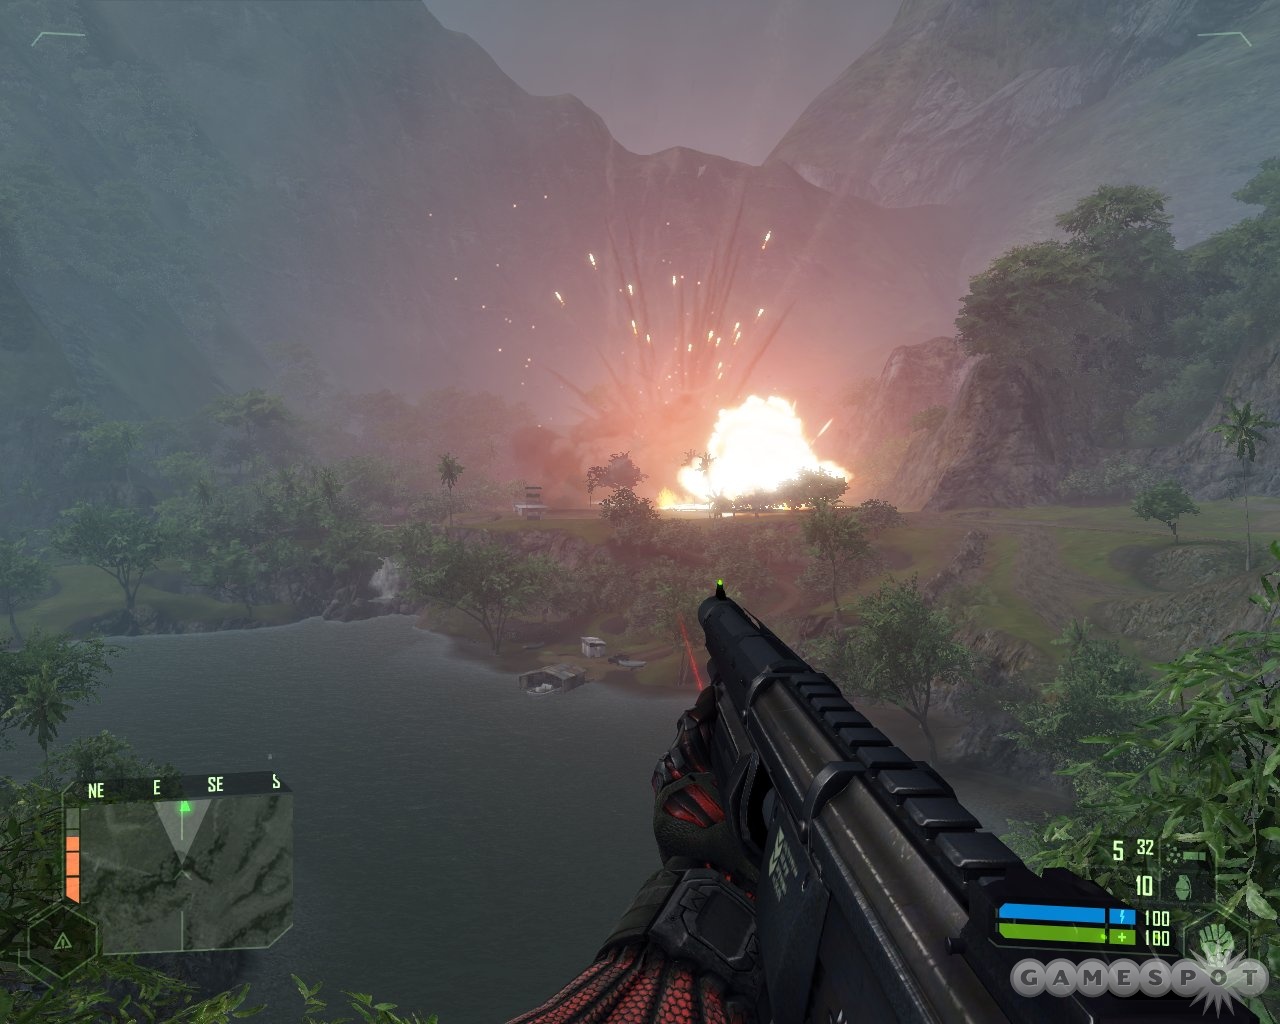
Paint Target for Air Strike
Psycho now radios in and says the way is clear for an air strike to sink the cruiser. You have to set it up, though, by painting the ship with a laser from your binoculars. Retreat back to the office rooftop once more, pausing on the way to grab another missile launcher. Train your binoculars on the ship and click the left mouse button to call in the fighters, then sit back and watch the fireworks.

Secure the Harbor
Just one more job awaits you. Another chopper arrives just as the cruiser starts sinking into Davy Jones' locker, and it's your task to clear the airspace so VTOL transports can land with heavy armor needed for the next step of the operation. So blow the chopper out of the sky with the missile launcher you just scarfed from downstairs, already.
Rendezvous with Major Strickland at the Railway Tunnel
Leave the office building and head right. Use maximum strength to power jump over the shipping yard fence. Head down the road to the railroad tracks. Make a quick pit stop in the shack on your left and stock up on FY71 ammo. Turn left at the tracks and say hello to Major Strickland and a whole bunch of tanks. Watch the cutscene of him blowing open the railway tunnel and get ready for an armored assault.
05 — Onslaught
Push Ahead to the Train Station
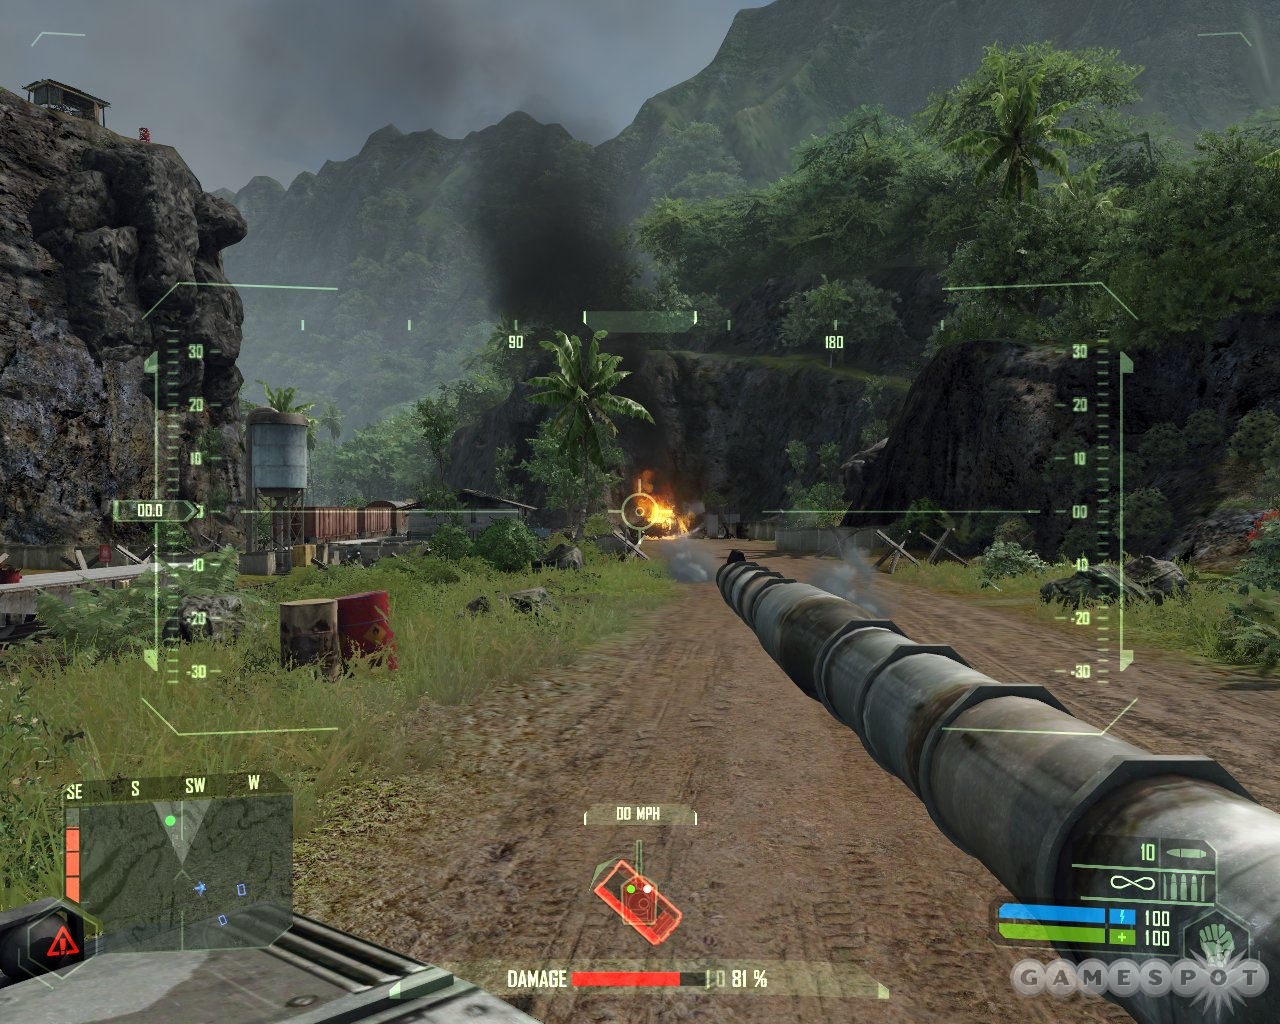
And now for something completely different. For this mission you get to cruise around in tanks. Unfortunately, this isn't a Sunday drive; it's a blitz through heavy North Korean defenses comprised of armor and RPG-toting KPA troops.
Start by rolling down the train tracks at full speed. Eliminate the enemy armor blocking the way. Go off road to the right. Do not slow down for anything. Ignore the KPA tanks and troops, as pausing to fight them will only get you pinned down by a murderous crossfire and blasted to scrap metal.
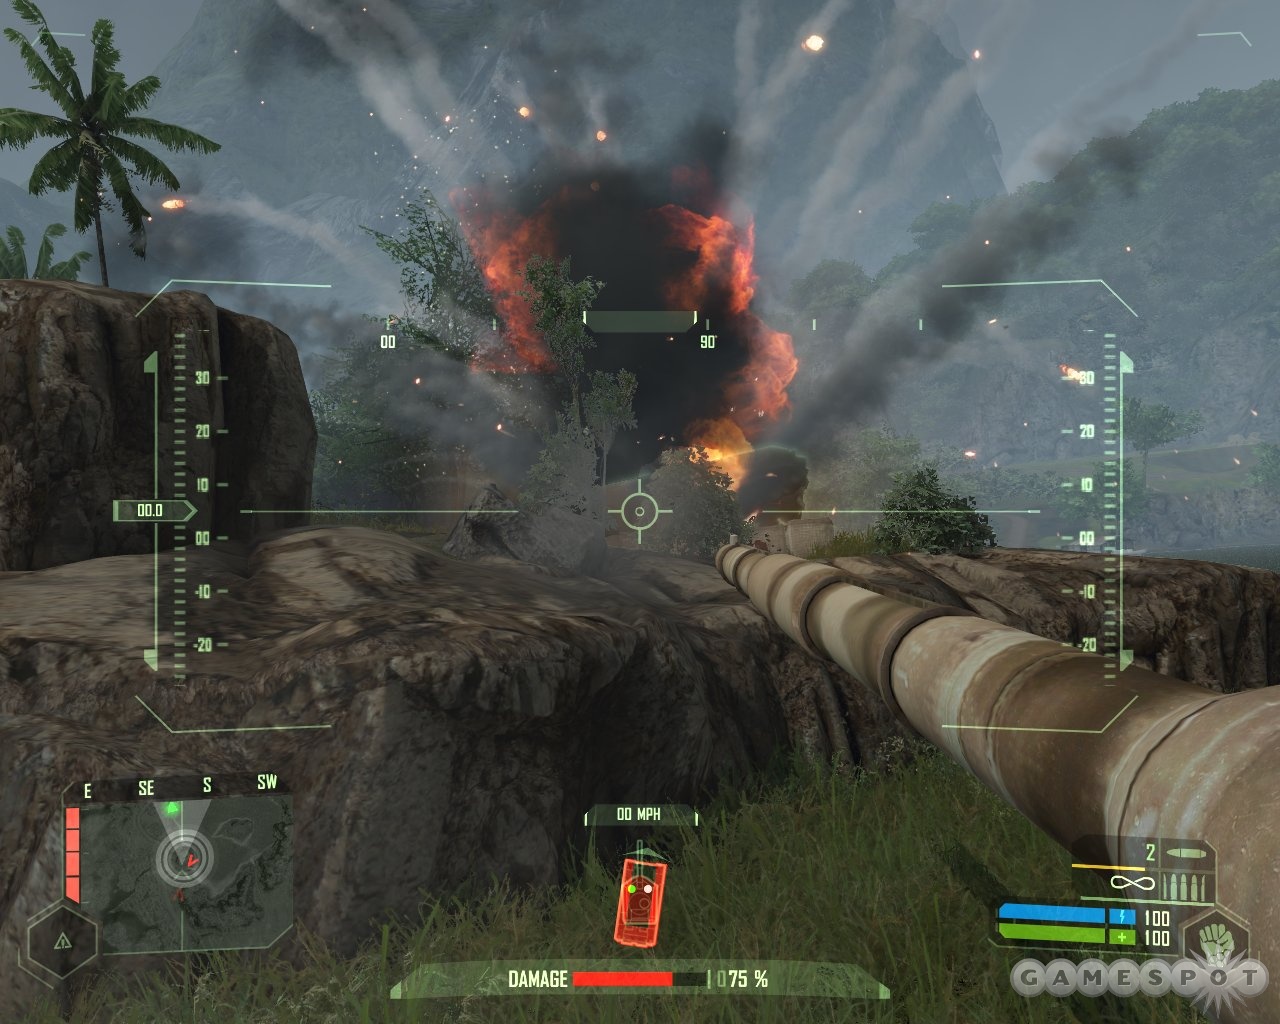
Roll forward with the pedal floored until you reach a small hill and some KPA armor on the right. Slow down here and take out the tank, then keep firing until the entire vicinity is a ball of flame. Don't let up, as the RPG-armed soldiers can destroy your ride in moments.
Push forward into the railway station dead ahead. Go slowly. Very slowly. RPG gunners are all over the place. Look for them in the watchtower straight in front of you on the hill, on the hill to the far left, in and around the boxcars, and to the right of the road. Basically, take your time and methodically blow up everything.
Even when things look to be clear, don't just rush into the station. Creep forward and get ready for more RPG troops to appear in the jungle along the rise overlooking the yard. Open up on this location with everything you've got, as the pesky little buggers have a habit of surviving precision shooting. Only when no more fire is coming from this ridgeline is it safe to occupy the train station. The all-clear seems to be signaled by an allied soldier running into the town ahead of your tank, so wait until you see this before rolling forward.
Secondary: Destroy the Boxcar
Now the way forward is blocked by a train. You're given orders to destroy it, which can be handled by a round from the main gun of your tank. If you're out of tank ammo (which is pretty likely given the amount of firing needed to kill all of those RPG jerks), check out the buildings on the left for C4 explosives and missile launchers.
Sabotage the North Korean Munitions Dump
Abandon your old tank for a North Korean one that's pulled up right behind you at the train tracks. It should be loaded with shells and damage-free.
Move forward in your new ride up the dirt road towards the KPA tank depot and ammo dump now noted on your map. A weird earthquake starts, causing huge chunks of rock to explode out of the side of the mountain straight ahead.
Secondary: Destroy the Anti-Aircraft Artillery
Just as you start off toward the depot, Major Strickland changes his mind and asks you to take out three AA guns. Remove these defenses and the way will be clear to destroy the depot and ammo dump with an airstrike.
Thankfully, this is a lot easier than the previous charge through the enemy lines. Start by heading west to the train tracks, then follow them south-southeast. This tackles the AA guns in a slightly backwards fashion, although going in this order lets you get a better handle on the terrain here, which is a bit confusing due to elevation changes.
Destroy the checkpoint set up on the tracks, being careful to kill all KPA soldiers quickly, as many carry RPGs. An enemy chopper appears here as well, but you can make short work of it with your main cannon.
Once the opposition has been eliminated, keep moving forward up the tracks until you spot the AA gun, once again distinguished by its rotating radar dish. Shoot it with your main gun. Turn around and go back the way you came. Slide to the right and drop down as soon as you can. The first AA gun is straight ahead by the water. It's guarded by a tank and a couple of KPA regulars, but a few long-distance shots from your cannon takes care of all opposition and the AA gun itself.
The last one is a little trickier. Lots of KPA soldiers guard this region. So take it slow and do a lot of machine gunning from long-range before moving in. The AA gun itself is situated behind a hill by the water, forcing you to leave the road and roll close to the shoreline to get a clear firing position. Make sure you've eliminated all opposition before sidling up to the AA gun, as this position you need to take to target it leaves you very vulnerable to attack.
Paint the Munitions Dump for an Airstrike
Go back the way you came, up the hill to the tracks. Follow it to a location just shy of where you detonated the first AA gun, then leave the tank and climb the hill overlooking the water and the tank depot. Use your binoculars to target the dump and watch American air power blow the KPA base to smithereens.
Proceed to the Mine
Now that the way ahead is clear, you're ordered to proceed to the mine. A secondary objective of picking up a gauss rifle is provided along the way, but it involves simply entering the parked VTOL you'll spot on the way and grabbing the weapon and its ammo out of the back. Unfortunately, the gauss isn't anything to write home about. If you want, drop it as soon as you complete the objective.
Run down the road leading past the depot. American marines will be in the process of mopping up any remaining KPA opposition. A roadblock up ahead causes some grief, but you can make short work of it by utilizing a missile launcher scrounged from a dead KPA soldier near a trailer to the left of the road.
Move beyond the checkpoint, pausing only to load up on ammo and grenades from dead enemies piled in the machine-gun nest to your right. The road is torn up from the earlier earthquake, however, so at this point command tells you that you're on your own again. Big surprise.
06 — Awakening
Proceed to the Landing Zone Next to the Crusher
Now it's finally time to see what the big mystery is all about. Head up the road to the left. A fresh quake hits, causing a sonic boom to blast past you. The mountain ahead seems to be coming apart, revealing a glowing blue-and-white structure apparently buried beneath the rock.
Secondary: Infiltrate the Office and Retrieve the Hostages
Move toward the mining complex straight ahead. Begin your assault by blowing up the explosive barrels on the back of the truck waiting to enter the compound. Cloak and dive into the weeds on the right side of the road. Snipe the soldiers manning the machine-gun nest and the watchtower. Then spin around and take care of the KPA coming out of the jungle behind you.
Cloak and enter the mining compound. Restock on ammo in the first building on the right. Consider swapping out the gauss rifle for the shotgun if you still have the gauss, as the former is far more effective in close quarters and has a faster firing rate. Be sure to pick up a missile launcher here for use against the North Korean tank patrolling the grounds. Grab another missile launcher once you use up the three shots of the first one on the enemy armor.
Proceed to run-and-gun through the rest of the KPA here. Duck into the buildings and behind cover when you need to regenerate suit power needed for the cloak. North Korean intel can be found in a building to the right of the main gate. Blast the KPA goons on the stairwell with your shotgun. Head upstairs into a big computer room and use the laptop in the corner to download the required information for Major Strickland.
Proceed to Landing Zone (Again)
Now get back to your main mission. Go to the back of the base and switch on maximum strength to vault the wall and razor wire. Walk a few feet through the jungle and drop down to a big industrial mining complex and rock crusher. This area is loaded with KPA, including a couple in nanosuits with a new weapon—a pretty devastating minigun that can shred you in seconds if you're not careful.
Begin by climbing up the hill right in front of you. Cloak and snipe some enemies. Try to kill at least one of the nanosuit soldiers, who should be standing on the closest conveyor belt. Take your time here. Be patient and wait for the KPA to reveal themselves, and snipe them from long distances as much as possible before engaging them directly.
After things settle down a bit, leave the hill and move to the left, where a number of objects can be used for cover. Be sure to keep a good distance from the explosive barrels and the big propane tank, though, as a couple of bullets sent your way at the wrong time can turn your lights out in a hurry.

Cloak and hop from one object to the other, gradually making your way to the refinery. Snipe the guards manning the machine-gun nests on the upper level of the building and the other soldier on the roof of the building to the far left. Keep an eye out for the other nanosuit-wearing KPA. When you spot him, cloak and get as close as possible, then hammer him with the shotgun until he drops. You can also sneak by everybody and climb the steps to the machine-gun nests, which can of course be turned against the KPA on the ground below.
Yet another North Korean assault chopper joins the party at this point. Knock it out of the sky with a couple of well-placed shots from the missile launcher. If you don't have a missile launcher, run to the far end of the crusher building and climb the steps. At the very top is a minigun and enough ammo to blow the whirlybird apart.
Infiltrate the Mining Complex
A pair of VTOLs arrive to mark the clearing of the landing site. They don't actually send out any troops to help you, of course, although you can hop in them for more gauss rifles and ammo. Whoopee.
Major Strickland now orders you to enter the mining complex proper. Check your map and make your way down a dirt track. Keep cloaked as much as possible. Run up to the KPA that approach and kill them with your shotgun.
You soon enter a mining quarry where a North Korean tank is patrolling back and forth. Go to the far end of it, then drop down to the pit floor where there are a lot of trailers and other objects that can be used for cover. Shotgun the two KPA troops by the truck directly in front of you, then creep forward to a stash of missile launchers on a crate under a camo cover. Terminate the tank with extreme prejudice, then grab another missile launcher.

Move on to another pit with features similar to the first. First, empty your new missile launcher on the North Korean tank found to the left near a group of trailers. Then cloak and slaughter the KPA grunts in the vicinity. As this will be close-range combat, feel free to fire up your shotgun. Scrounge ammo from the dead soldiers and a trailer after the smoke clears. Be sure to grab a missile launcher from one of your victims before leaving the scene.
Climb out of the quarry past the barbed-wire fence. Next up is a huge battle at the North Korean fortifications set up at the mine entrance. There are a couple of machine-gun nests and at least two nanosuit soldiers with miniguns here, all dug in behind concrete blocks and trenches. Thankfully, you can cloak and use these trenches for cover to get into shotgun killing range. As before, try and engage the nanosuit-wearing KPA from close distance with your shotgun. That way they won't even get the chance to spin up their miniguns.
Locate the Hostages
Enter the darkened mine. Flip on your night vision for a better look at the place, which seems to be falling apart. More nanosuit KPA are just inside with miniguns. Cloak and get close to play more sweet shotgun music. Swap out your shotgun for a minigun here if you're running low on shotgun ammo, as you won't find any more for a while.
Wander through the tunnel to an elevator shaft, then drop down to the lower floor. Go past the sparking light and down the tunnel with rickety floorboards. Cross a big cavern and hit maximum speed as soon as you hear the rocks falling from above. Zip forward and to the right to avoid being crushed instantly by the avalanche, then leap over the chasm.
Listen to voices up ahead. Sounds like the enigmatic General Kyong and his hostages. Watch a bit of the argument between Kyong and a young woman who must be Rosenthal's daughter Helena. Enjoy being knocked out and dragged to an audience with the general where he smacks you around. Hmm, he's a bit of a megalomaniac, isn't he? Take in the not-so-shocking murder and a blinding light show.
Eliminate General Kyong
Boss battles don't get much easier than this. Right after the electrical surges demolish the chamber, General Kyong grabs a minigun and attacks you. At this point, however, your suit comes back online, so all you have to do to avoid taking any damage is click on your cloak.
Lots of weapons and ammo litter the floor of the chamber. Grab an SMG right in front of you, then move forward to the darkened space behind Kyong. Stock up on ammo here, then kill the general with a steady stream of gunfire. Being on a slightly elevated landing seems to prevent him from seeing you even when your cloak is off, so you should be able to kill him almost instantly.
Evacuate the Hostage
After Kyong meets an untimely end, Helena Rosenthal waves you over to an elevator. Join her and she tells you about a way out. Unsurprisingly, the elevator jams en route to this unexciting departure. You call down a VTOL for a rescue, but it can't get close enough for a proper pick-up. While Helena leaps to safety by hurling herself out of the elevator and into the waiting arms of a dangling American soldier, you're out of luck. As the VTOL flies away, you ride the plummeting elevator back down to the cavern floor you just escaped.
07 — Core
Find A Way Out of the Cave
Exit the elevator and dig through the rubble for as much ammo as you can find. There isn't a lot, but you'll need every shell, so take a good look around. Ditch the sluggish minigun for the speedy SMG, as it will be much more useful in the quick-paced battles to come.
When you've collected all of the ammo, climb the stairs to where General Kyong tried to play god. Leave the cave through the disturbingly orifice-like portal. The terrain immediately changes to something icky and organic, like you're in the throat of some monstrous beast. Radio contact with command soon disappears and the temperature plummets so fast that your visor ices up. Gravity then vanishes, too, letting you're know that you're not in Kansas anymore.

Walls also virtually vanish at this point. Tiny motes of something that look like stars give the appearance that you're floating in a ship with clear walls in the middle of deep space, which makes it tough to get your bearings in spots. This landscape is surreal and disorienting, so don't expect to get from one end of it to the other without getting turned around a few times. Generally, though, you can get where you need to go by following the brightest lights and a yellow-glowing electrical tube that runs through the entire place.
Anyhow, a portal is now open on the right side of this big chamber. Take it and follow the tunnel to a grill that is broken open in front of you by the tentacles of some barely glimpsed creature. Go against the current that Nomad mentions until you reach a point where it is too strong to fight any longer. Shoot one of the glowing machines in front of you to clear the way forward.
Continue to follow the bluish lights and the yellow energy tube. Entering one portal kicks off a cutscene highlighting the arrival of an icky alien that seems like some kind of ectoplasmic squid. Blast it with your SMG and keep moving. You soon emerge in a huge room with a tunnel in its center. As before, though, the current prevents you from exiting through this passage. Float around and blast the machines ringing the perimeter of the room to ease off the current, taking care to avoid the aliens zipping around. They generally won't bother you too much if you keep your distance, which is a good thing since ammunition is in short supply at this point.
Head down the tunnels until you come out in the largest room yet, a massive circular chamber dominated by a machine that seems to be doing some sort of automated welding. Force fields go up and down as the big welder moves along, so you need to time your movements to get across the cavernous facility. Keep up towards the top of the room to avoid the aliens flitting around the bottom.
Past The Energy Shields
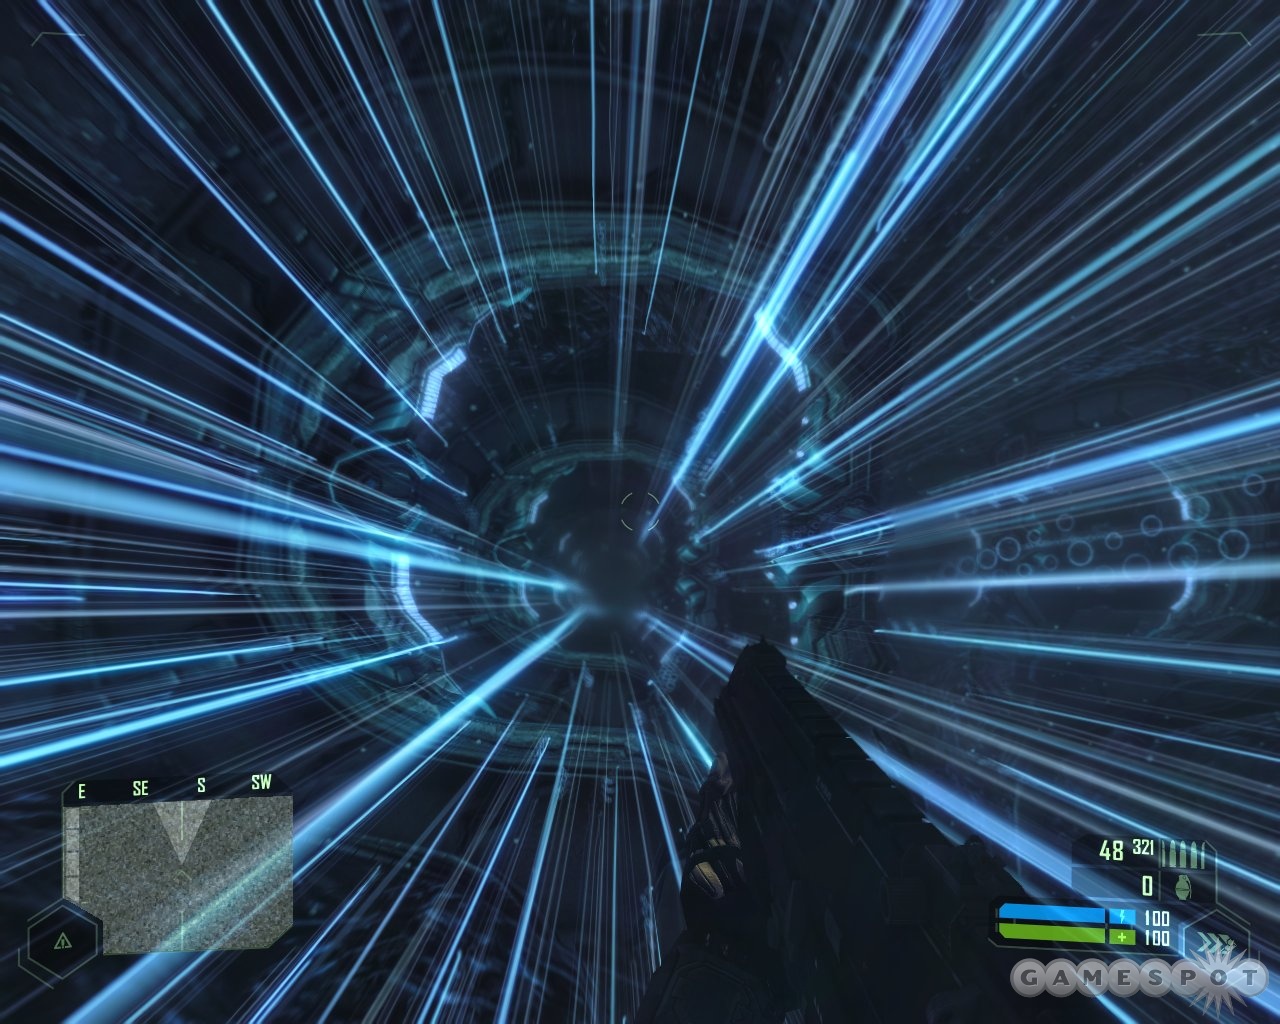
When you get past all three energy shields, look up and go through the portal on the left above the glowing yellow tube. Current may block you at first, but just wait it out. At this point it seems like you enter hyperspace. The tunnel around you flashes past and those tiny motes turn into bright streaks. It looks and feels a lot like the trip Jodie Foster took in Contact.
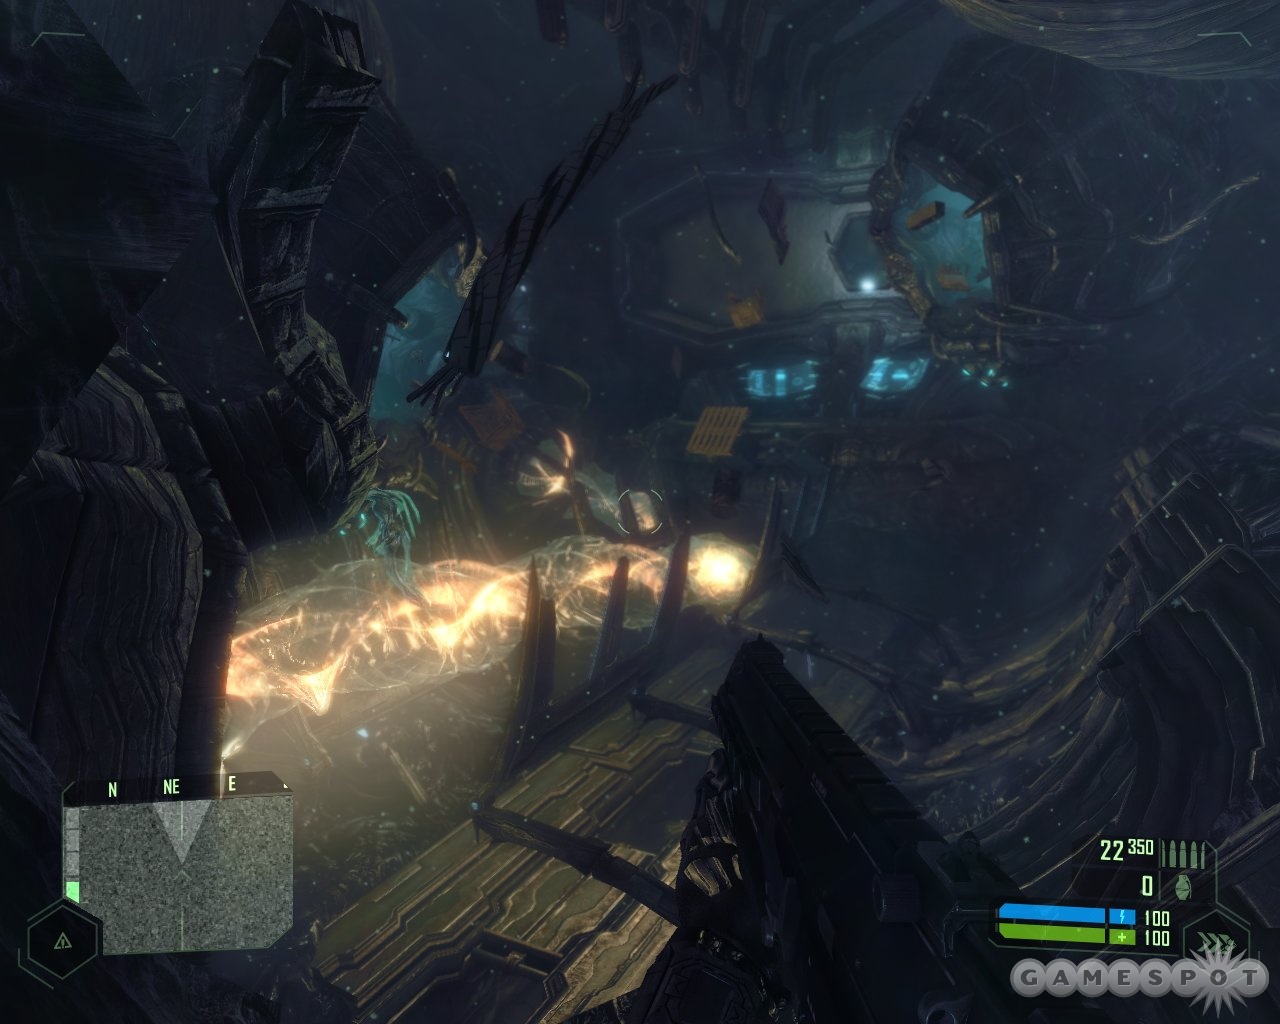
Eventually this surreal transit system dumps you in another huge room. Look out the windows to one side and you'll see dozens of those machine things that killed Jester and Prophet. Is somebody manufacturing an army? Check out the chamber and you'll see a couple of clouds of junk sucked up from the island floating around near two bright lights. Venture into them and collect ammo for the SMG and shotgun.
Move down the chamber to a huge doorway. It opens on a long cathedral-like hallway. Float down to the far end of it to trigger the lights going out and the arrival of more alien squid creatures. Start blasting them. Try to keep your back up against the side of the structure at all times, as the creatures will otherwise ambush you from all sides. Just one or two smacks from these aliens can kill you, so you have to be careful when avoiding their attacks. Use the shotgun here whenever possible, as a couple of blasts with it at close range can cause these monsters to explode. Even the pistol can scare them off, by the way, so don't give up if you run out of ammo for the better weapons.
After a few minutes of this, the machines in the room really start doing, uh, something, and generating a lot of electricity and smoke. You get a garbled communication from command that seems to indicate you're near an exit, and soon enough you find a tunnel that leads you back outside. Gee, that was, um, fun?
08 — Paradise Lost
Find the Missing Marines
Ah, it's good to be back in the sunny South Pacific. Or not. A blast of frigid air is expelled from the alien structure as Nomad crawls out, knocking his rescue VTOL out of the sky and turning this tropical paradise into instant Eskimo Pie. Major Strickland radios you asking for a situation report and to inform you that an evacuation order has been given. Man, about freaking time.
Of course, instead of just getting the hell off of Arctic Isle, you have to look for some missing marines. To begin this rescue mission, head down the mountain via the path on the right. Take a moment to enjoy this sudden winter wonderland. Just a moment, though, as you're being tracked by robotic bug-like creatures with flat, almost Kabuki-mask faces and the ability to shoot what seems to be some sort of ice daggers. Don't stand and fight them; you don't have the weapons or the ammo to take them on at this point. (If you do decide on a scrap, take note that all alien machines self-destruct after you've shot them down. Keep clear of their carcasses or you might get blown up with them.)

Instead, race down the mountain using max speed as often as possible. Take a second to observe how the flying robotic octopi (you'll now get a better look at these guys for the first time, and immediately recognize them from the snatch-and-grab moments from the beginning of the game) occasionally throw some of the smaller bug mechanisms into your path. Stop near the burning car and snag the shotgun ammo. It's still not enough to let you play Rambo, though, so keep moving.
Defend Prophet
Drop into a clearing at the bottom to discover that the missing marines have been turned into tastee pops. Just as a cutscene starts revealing how you're going to join them in the frozen treat aisle, Prophet jumps in out of nowhere and saves your ass with an alien weapon called a MOAC. He doesn't have time for long-winded explanations about how he survived his alien abduction, so you need to get to work right away blasting a few waves of robot bugs.
To survive this onslaught, duck into the nearby trailer for shotgun and SCAR ammo. Then move outside, keeping your back against the trailer doorway so you can't be easily flanked. Open up on the alien mechanisms. Prophet goes down with a suit malfunction before the battle ends, though, so he gives you the alien rifle during a brief respite. You now have to take out the last waves of aliens mostly by yourself, and do it quickly so that Prophet doesn't freeze to death in the cold weather. It's not wildly difficult with the MOAC, although this energy weapon doesn't pack much of a punch in comparison with the minigun or shotgun.
Escort Prophet Out of the Sphere
Even though the attack soon ends, Prophet isn't out of danger. You have to get him out of the alien sphere of frigid weather around the mountain. Lead your commander to the point marked on your map, making stops at various hunks of burning wreckage so he can warm up. His status is shown by a meter now located in the lower center of your suit HUD.
Robot octopi regularly swoop down from above, which can cause some trouble during this escort mission. At least you can leave Prophet in front of a cozy burning truck while you take cover elsewhere and destroy the aliens with the MOAC. The only iffy moment occurs when you're attacked by a trio of robot bugs in a narrow gully, but flaming helicopter wreckage is still close enough that you can get your pal warmed up in a hurry.

After destroying the spiders, cross into the small valley and you’re your way under the ruined bridge. Climb the hill on the left side and pause to let Prophet warm up again. Proceed to the top and watch in amazement as the alien ship that was apparently buried under that mountain for millions of years shakes off the last of its rocky covering and flies slowly away. Cross over the bridge to end the level.
09 — Exodus
Meet With Major Strickland's Recon Team
Follow Prophet over the bridge to a small house occupied by a squad of marines. He talks briefly with the soldier outside, who directs the two of you inside to Sergeant Keegan. This triggers a minor secondary objective of simply speaking to the sergeant. He gives you a pretty depressing lowdown on what's going on, which is naturally interrupted by another alien blitzkrieg.
Defend the Recon Team
When the weird noises indicate that more alien octopi are on the way, run out to the deck attached to the back of this building. Shoulder the alien MOAC and begin blasting away at the flying contraptions as they swoop down on you and the marines. A few robot bugs attack as well, but the marines can take care of them pretty handily, so you should concentrate on the bigger octopi threats.
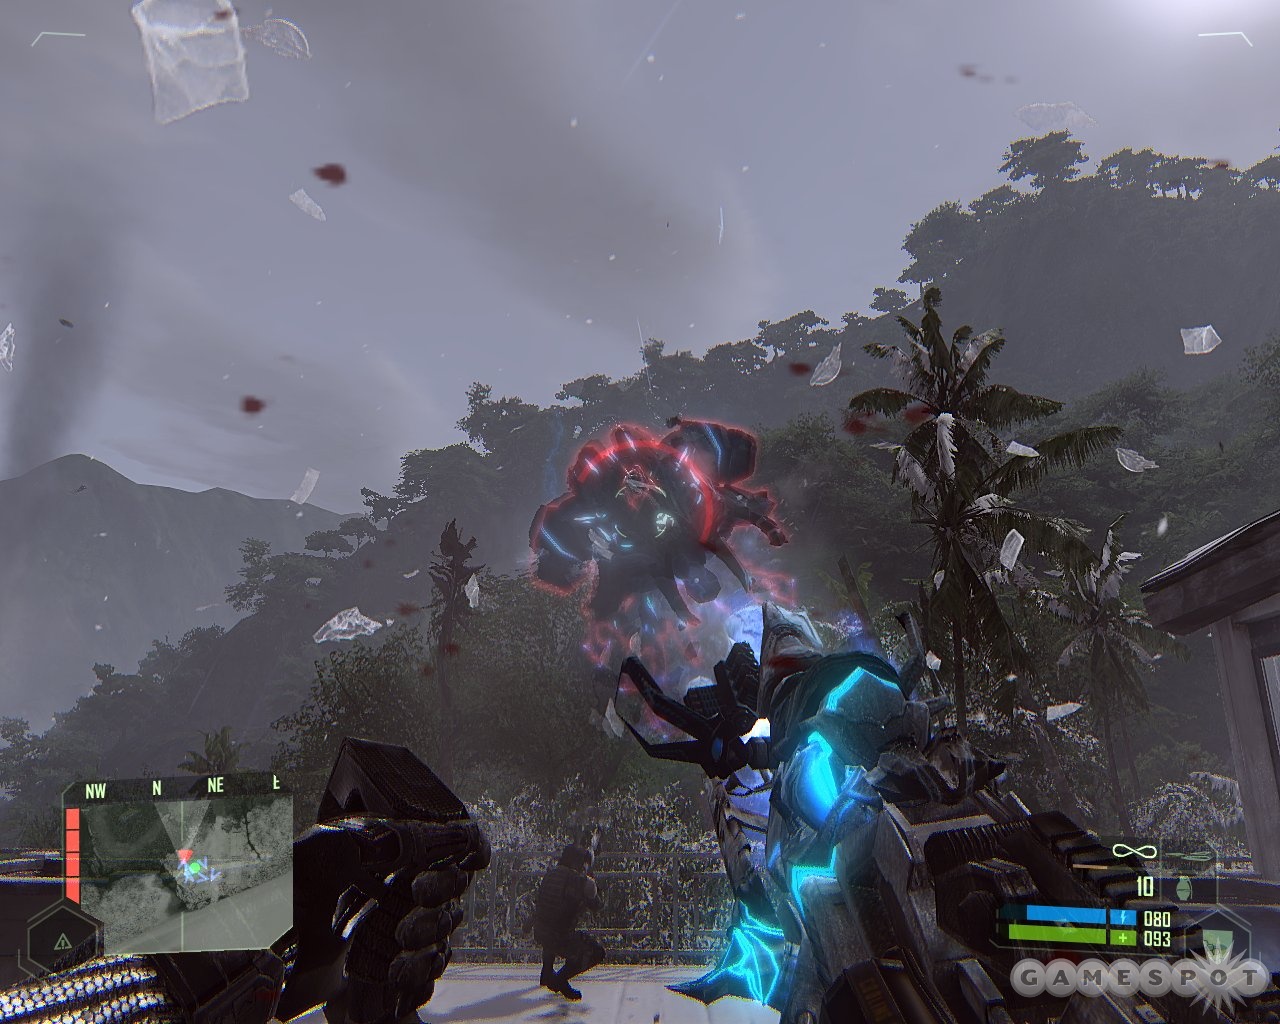
After an onslaught lasting about 10 minutes, the aliens stop coming and Prophet orders everybody into a evac convoy of LTV trucks.
Get Into the LTV
Go back to the front of the building and get into the gun turret in the LTV on the near side of the road. Swivel around to face the rear as Prophet guns the engine. Look back just in time to see that one of the trucks doesn't make it. Ah, the horrors of war.
Blast the robot octopi as they swoop down on the two surviving LTVs and pray that Prophet's horrible driving doesn't get you jammed against a tree and force you to reload a save. Also, be careful not to blast octopi when they're directly over the road ahead of you. They have a tendency to fall right in front of your convoy, causing the idiotic driving AI to simply stop and wait for the alien self-destruct function to blow you to kingdom come.
As you head down, look to your left to see your old buddy Vulture 26 in a lot of trouble. Robot octopi force his VTOL down, causing a crash and a mayday from his passenger, your former hostage buddy Helena Rosenthal.
Proceed to the VTOL Crash Site
Exit the LTV and drop into the crevice blasted in the road just ahead. Be ready for an attack from a pair of robot octopi. Keep under cover in the crevice and blast them with the MOAC.
Emerge only when the coast is clear and hook up with Prophet on the road on the other side of the crevice. Run forward and check out the crash site, marked by a red flare. Take note of the two octopi lazily circling overhead and open fire on them with the MOAC. This will draw them to your position, which isn't very defensible, so immediately retreat to the crevice and use the cover there to blast these ugly mechanisms out of the sky. After they've been downed, head to the crash site with Prophet.

Defend the Crash Site
It shouldn't come as a big surprise that more trouble awaits at the crashed VTOL. Helena is trapped inside and more octopi are inbound, leaving you to play defense while noble Prophet breaks the door open and rescues the damsel in distress.
As usual, you have to carry the heavy load. Robot octopi swarm in on you from all directions. A nearby North Korean AA gun is some help when battling this aerial assault, but the aliens hone in on it so quickly that you can generally only shoot down two or three of them before they blow it out from under you. Expect to die a good many times here, as there isn't a great deal of cover, your marine allies are totally useless, and the enemy numbers are out of this world.
After a good 20 minutes of non-stop fun with ET, you clear the airspace and Major Strickland sends in a rescue VTOL. Not for you, of course, but for Prophet and his new girlfriend. You're left to hump it out on foot to the position currently being held by the marine major and his boys.
Rendezvous With Major Strickland
Head straight forward down a road bordering on a stream. A huge mechanical spider (later identified as an alien exosuit, for reasons known only to the designers) comes stomping out of the jungle behind you. Don't bother trying to kill the massive contraption, as it's impervious to anything that you can throw at it.
Get to Strickland as soon as you can. He's straight up the road at the top of a little rise. Only a few robot bugs stand in your way, and the MOAC can make short work of them.
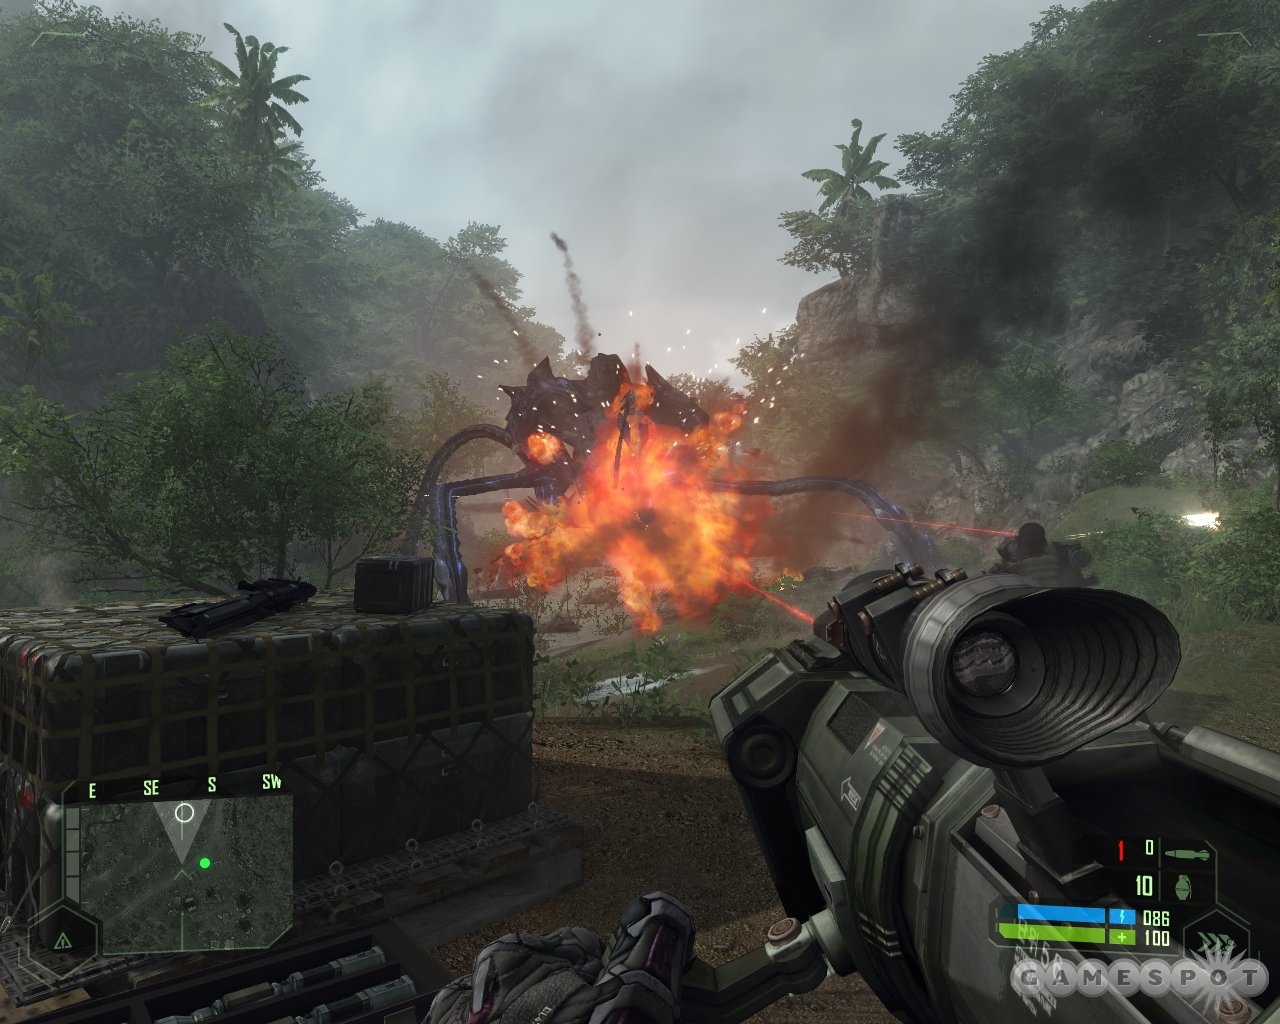
Things are a little tougher for the major. His position is about to be overrun by a combination of the giant spider and a squadron of flying octopi. An abandoned North Korean AA gun is of some help here as well, but again, it gets hammered quickly by alien fire. Keep an eye on the AA's damage meter and jump out once it moves above 95% or so.
After the skies have been cleared, Major Strickland orders you into the last evac VTOL. Marines are still blasting away at the giant spider, but the damn thing just can't be destroyed. So resist the temptation of diving into the nearby stash of missile launchers and opening up on the monstrosity.
Just get into the VTOL post-haste to trigger the closing cutscene of the level, a cheesy yet surprisingly emotional (the guy has been giving you radio orders for most of the game, after all) moment where Strickland sacrifices himself to give the ship time to take off.
10 — Ascension
Escape to the Aircraft Carrier
We've already had the tank level, so it shouldn't come as much of a surprise that now we're faced with a flying level. The VTOL comes under heavy fire almost as soon as it gets off the ground, so you're given the job of piloting the bird out to the USS Constitution, an aircraft carrier serving as the command center for this operation.
Expect a little turbulence. Begin by forming up to fly behind a few other VTOLs also evacuating troops from the island. Head off into the mist to the left. You need to follow this river valley all the way to the ocean and then out to the Constitution, waiting a couple of klicks offshore. Stay as low as you can most of the way, but keep an eye on the altitude meter on the left side of your scope and watch against going a little too low. Winds howl through the valley constantly, and can easily smash you right into the jungle floor if you're not careful.
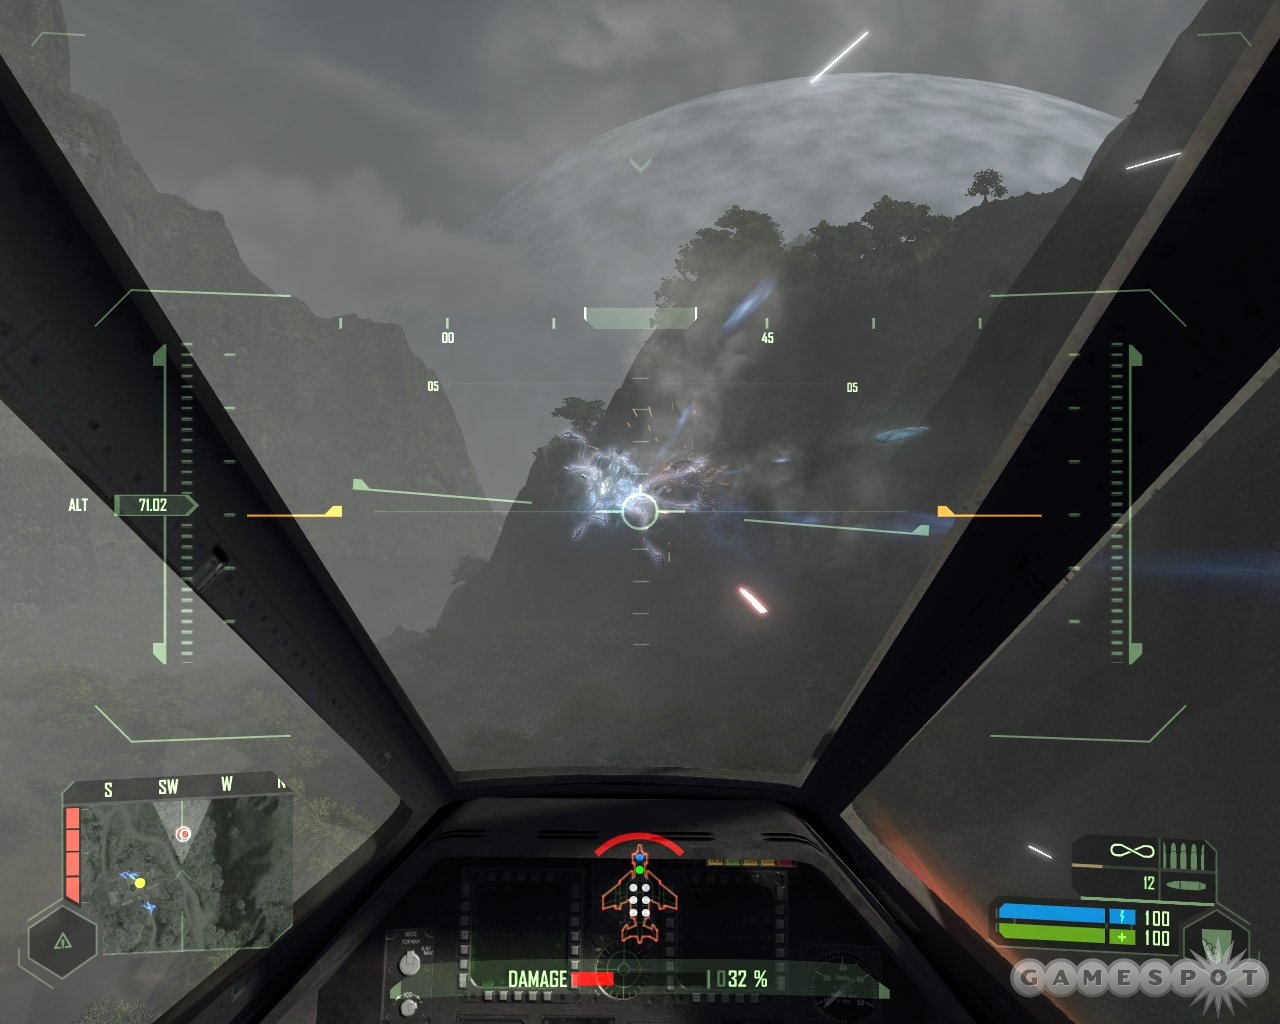
Secondary: Defend the Plateau
As you move out into the first clearing, one of the other VTOL pilots asks you to provide aerial cover while they evacuate troops on the ground. Easier said than done. VTOL's handle like flying breadboxes and the alien octopi are spectacularly quick. Don't get into any dogfights. You won't win.
Instead, treat the VTOL as a slightly mobile gun turret. Whenever you have to fight, get close to a valley wall so you can't readily be targeted from behind and then open up on the aliens when they come into sight. Stay as far back from enemy bogies as you can. Avoid turning whenever possible, as the aliens move so much faster than you that you'll only end up whirling in place taking heavy damage from enemies that you can never catch up with.
Here, fly forward just far enough to trigger the request from the other VTOL pilot. Then freeze in place at the entrance to the area and start blasting at the two octopi when they appear. Resist the temptation to fly in, as that will only get you a quick trip to Flaming Wreckage Town. (By the way, be sure that you do fly far enough into the clearing and receive the help request before shooting down any ETs. There seems to be a bug here that prevents you from completing the objective if you take down the enemies too early.)
Secondary: Defend the VTOLs
Second verse, same as the first. Fly to this location marked on your map and repeat the tactics outlined above. Take your sweet time getting there if you've taken damage, as the VTOL slowly regenerates. You don't want to start any battles with your damage above 60% or so.

The biggest problem can be just getting to the VTOLs that you need to protect. Winds are just crazy here. You get buffeted by all sorts of windy nastiness as soon as you round the bend in the river heading left, so keep the spacebar held down to maximize lift and steadily pound on your afterburner as well. Even then, you'll still likely crash into the jungle and get blown around until you go kaboom a dozen times before making it through to the objective.
Escape to the Aircraft Carrier (Again)
Following a brief secondary objective about defending a convoy that almost immediately gets destroyed (it doesn't seem like you can complete this goal, as you don't get a "mission failed" message), you're then ordered to get to the USS Constitution ASAP. You can reach it by jetting down the valley out to the ocean.
Lots of aliens are flying the unfriendly skies between you and the carrier. Don't bother trying to battle any of them unless you're a masochist. They're just too fast and chances are you're out of missiles by this point. Stay low and use your afterburner as much as possible, only firing on the aliens that are directly in front of you. Turn around to tackle any enemies in your rear and you'll get blasted to pieces.

There are two really tricky challenges in this run to the carrier. The first is another section of high winds as you round another bend in the river to the left. Cross your fingers and keep the spacebar held down. Eventually you'll make it, although expect a few crashes here as well. Whether or not the wind blows hard enough to take you down seems almost (if not entirely) random.
The second tough spot is at an opening into a clearing above a small town. Lots of octopi hit you head on here, and their blasts in combination with those of the aliens no doubt right on your six are enough to blow you to bits. To avoid this grisly fate, cut hard right as soon as you can and stay close to the jungle wall. Skirt around the bowl and then out over the river leading to the sea. You'll still take damage, but probably not enough to kill you.
Keep flying straight ahead. The aliens drop back and you soon get a radio message from Psycho that you're almost at the Constitution.
11 — Reckoning
Proceed to the CDC
Looks like the gang's all here. Land on the carrier and greet Psycho and Helena Rosenthal, who has some interesting ideas on the aliens. She thinks that they feed off available energy sources, a theory almost immediately proven when a captured machine suddenly sucks power out of the carrier conning tower and briefly comes back to life.
You're then summoned to the CDC for a meeting with Admiral Morrison. He tells you that the joint chiefs and president have authorized the use of a nuke on the island. Helena argues against this, but Morrison is having none of it. The two also discuss what the creatures could be. Helena notes that the island itself might be some kind of living creature, while the admiral says that it has been sending some sort of transmission to galaxy M33.

Proceed to the Armory
Join Helena, Psycho, Prophet, and a lovelorn geek in the armory after the admiral finishes his tirade. Prophet soon storms off to "finish" the job on the island, despite Psycho's objections. Helena does some work on your suit and mentions that she's intercepted a signal transmitted when the aliens draw energy. She thinks that maybe it could be altered so that the aliens suck back too much juice and self-destruct. Pretty amazing science coming from a woman who's supposed to be an archaeologist.
Be sure to pay attention to the blatant plot point handed out when the scientist mentions a new TAC cannon that can fire mini-nukes. He says you can't try it out, but of course you soon can.
Proceed to the Bridge
You're now ordered to the bridge to watch the nuke launch. Head up there just in time to see Prophet go AWOL and roar towards the island in a stolen VTOL. Unsurprisingly, the nuclear option doesn't work. Watch an ode to Independence Day as the nuke has no effect on the alien ice cone aside from pissing off ET and making it grow a lot bigger. Aliens then swarm the Constitution. Once the cutscene ends, the still spectacularly arrogant admiral orders you to protect the ship and start shooting extraterrestrials.
Defend the Flight Deck
Start by firing up maximum strength to punch open the jammed hatch door leading off the bridge. A pistol and gauss rifle can be found straight ahead. Go down the stairs. Grab the minigun at the bottom. Use max strength again to open a hatch door. Venture past the fires and corpses to the flight deck.

Things have changed a little bit since you were last here. Waves of robot octopi can be seen overhead in the moonlight, streaming off the island. Lots are also making life miserable for the poor sailors on the Constitution. Ammo for the minigun, gauss, and SCAR can be found just to the left in front of the trashed vehicles. Load up and go to town on the aliens.
This battle is awfully random and annoying. Your allies regularly shoot alien machines from the sky, so expect to be killed by junk falling out of the sky and exploding every so often even if you're taking care of business. All you can do is keep watching the skies and try to keep the ship wall directly behind you so you don't get caught in an ET crossfire. Don't take cover beside planes and vehicles. Aliens often blast them, causing a rollover that kills you instantly or an explosion that does the same trick.
Locate the Chief Engineer
After the shooting stops for a few moments, Admiral Morrison radios down with word of trouble in the reactor room. Run forward on the deck until the flight elevator takes you and some other soldiers down. Exit into a hangar bay. Go ahead into flooded compartments. Watch for an explosion in the corridor ahead. Use max speed to escape the deadly steam that pumps out in its aftermath.
When you find the engineer, you discover that the nuclear reactor is about to blow. You've got to take it offline. As usual with these sorts of things, you can't just hit a button.
Disable the Circuit Breakers
Run forward until you pass through a room with a red rotating light. Flip on your night vision. Move into another flooded compartment. Go up the stairs and use the panel to switch off the circuit breakers.
Shut Down the Reactor
Keep running through the flooded chambers. Use max speed to avoid taking damage from the sparking panel by the one corridor entrance. Jump up with max strength through the hole blasted in the ceiling. Climb the ladder here and crawl through the duct. Drop down at the end into the reactor control room.
Go to the main computer panel below the window overlooking the radiation room and hit the (what else?) big red button. Unsurprisingly, the radioactive control rods jam while retracting. Aliens then swarm into the room sucking energy from the reactor, but Helena shuts them down using that overload command she talked about earlier.
Lower the Control Rods
Enter the radiation-drenched control-rod room after the aliens get through with their temper tantrum. Hit max strength on your suit to give you the muscles to force down the rods. Do one rod at a time, taking breathers between them out in the control room to give your suit a chance to recharge. Trying to do even two at once gets you killed.
Return to the Flight Deck
Admiral Morrison congratulates you in a smarmy way on your work here, then demands that you return to the flight deck to battle yet another ET wave. Begin heading back topside, but an explosion soon forces you to take the long way around. Use the minigun to blast the attacking robot bugs who break down a door in front of you. Swap the gauss for the shotgun on the landing.
Hang back before entering the first flooded room with the elevator you need to go upstairs, as two robot bugs will rush you out of the shaft. If you've got a missile launcher, make short work of these wannabe Micronauts by firing a couple of rounds into the elevator shaft as soon as they appear. One more will be in the lift itself when it comes down; blast it with your shotgun.

Your destination is loaded with more of these insectoid machines. Move ahead slowly. Try to take them down with the shotgun, as it remains the most effective weapon at close quarters. Keep an eye on the rafters, as the aliens here like to cling to the ceilings and drop down on top of you. The next room features a similar complement of aliens, but also a couple of sailor allies on a small riser to the right stocked with shotgun and SCAR ammo.
Pause on the external landing right outside the last room to see a destroyer getting torpedoed and sunk. Doesn't seem like this battle is going very well for the good guys. Grab the ammo off the table before leaving the area.
As you move back inside and up the stairs, an alien bug bursts through the wall in front of you. Make short work of it with the shotgun or SCAR. Right at this point the order comes through to abandon ship, along with a radio call from the admiral who's refusing to let anyone leave the carrier. Nice guy. Helena tells you to get to the flight deck right away.
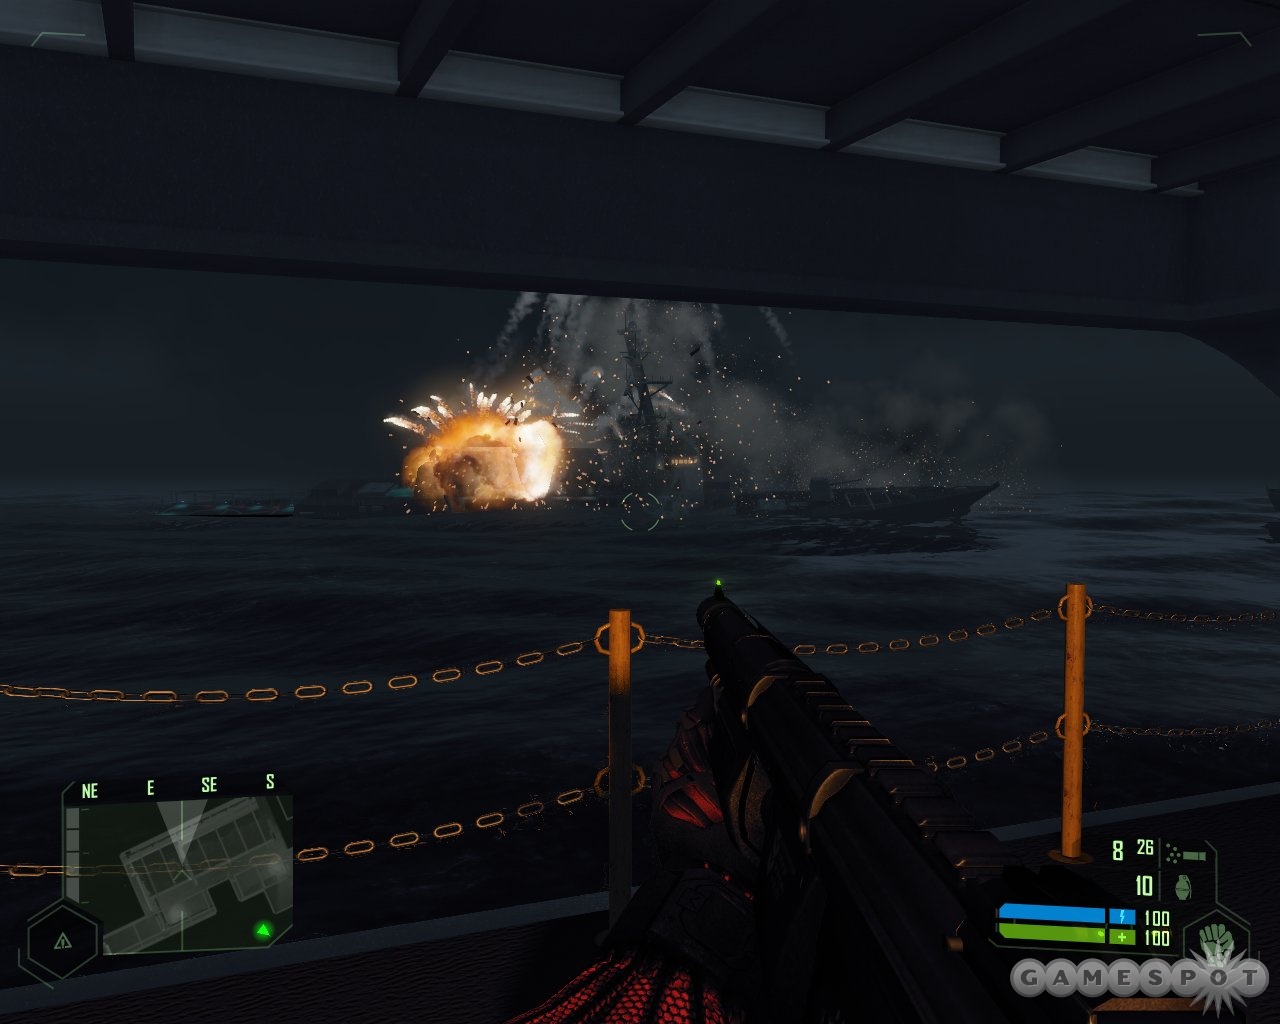
Go to the Armory
Just as you're about to get back topside, Nomad has a brainstorm about the TAC cannon he glimpsed earlier. He tells Morrison that he's making a pit stop to grab the weapon before going to the flight deck.
Only a handful of ET bugs stand between you and the TAC cannon. Race through them, letting your shotgun clear a path. Take the gun out of the cabinet where the tech placed it before, which is now conveniently hanging open.
Return to the Flight Deck (Again)
Psycho now radios in saying that he's swiped a VTOL and will wait for you with Helena on the flight deck. Head up to the bridge to see Admiral Morrison get spiked through the gut by one of the robot bugs. Gee, what a loss.
Destroy the Alien Exosuit
Exit the ship for the flight deck and come face to, uh, face with a familiar foe. It's hard to understand why this thing is called an "exosuit," as it looks exactly like a giant robot spider, but at any rate you should remember this monster from the jungle scene where Major Strickland bought it.
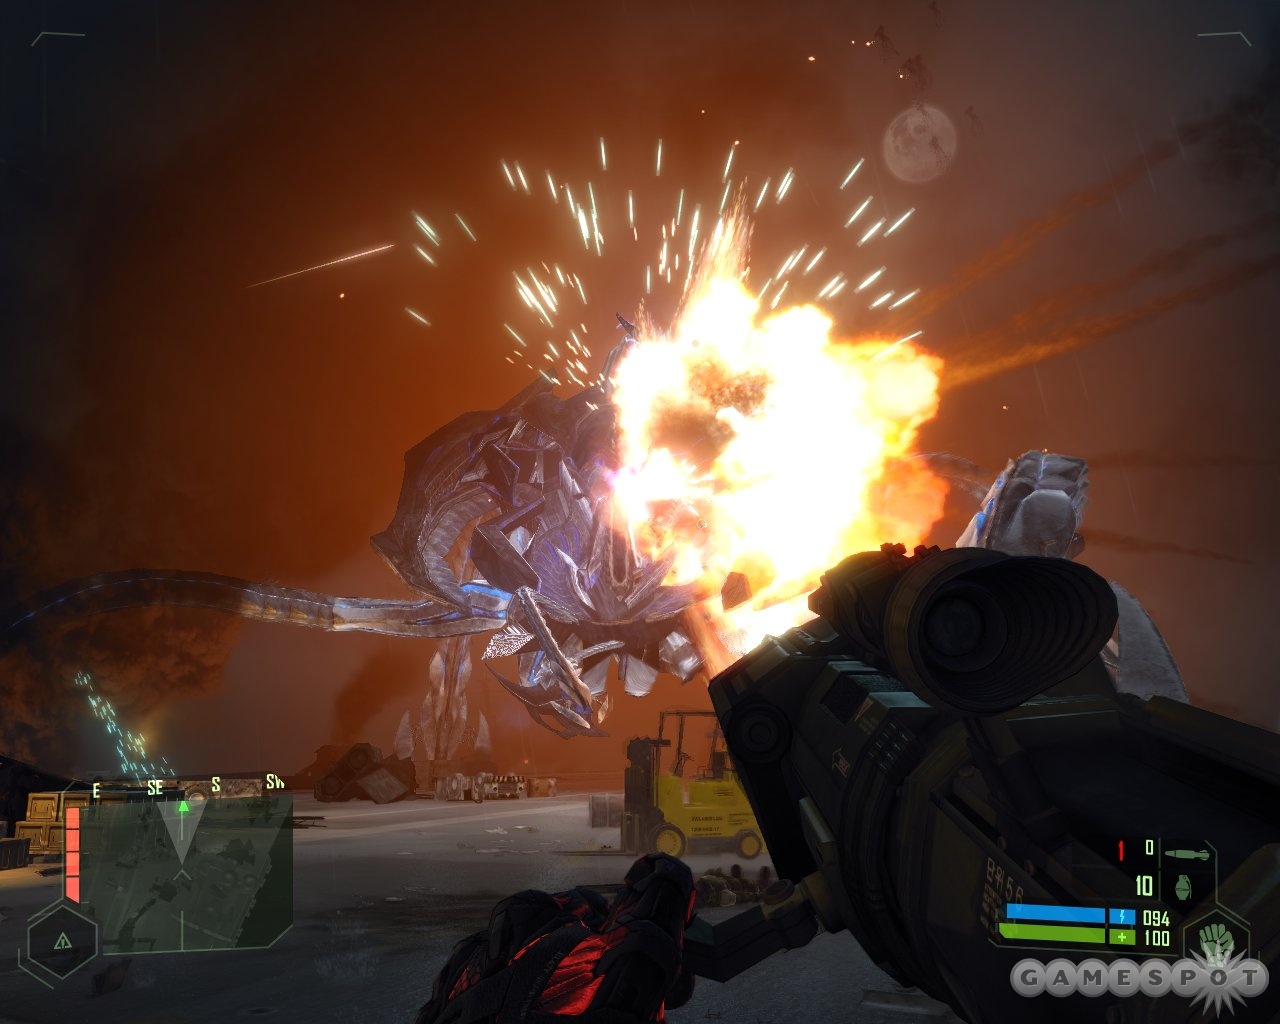
Back then it wasn't killable, but this time it is. Three cheers for video-game logic! Actually, the robot beastie is weak now because Helena is flying around in a VTOL with Psycho, hammering the thing with that energy overload signal she's devised to help lower alien defenses.
Grab all the minigun ammo you can find and open up on the exosuit as it advances across the flight deck. Missile launchers are also handy. A few minutes of steady blasting will take the thing down with a giant crash. Keep back a good distance to avoid getting killed when it self-destructs, and watch out for pieces of the thing falling from the sky.
Defeat the Alien War Ship
So, it all comes down to this. Just after the exosuit goes boom, the massive alien vessel that you saw flying away from the island earlier starts to rise over the deck of the carrier. Helena and Psycho tell you to start shooting, preferably at the four cannons stationed at the corners of the vessel.
Take cover behind the wrecked VTOL on your left. Focus on the cannons with your minigun and blast away till they explode. Dart in and out of cover to do so, hunkering down whenever the cannons start to fire at you. You can also make good use of the missile launchers still located near the door to the flight deck…but as it takes one launcher to take out each cannon, it's not worth the risk running over to pick them up. Even a couple of these trips will expose you to the alien ship's devastating beam weapon and freeze ray.

After the cannons have been destroyed, Helena and Psycho fly in and begin to use her program to take down the ship's shields. Robot octopi then arrive and start blasting away at you. Avoid both their rat-a-tat-tat salvoes and the big ship's beam weapon and freeze ray. It's hard to say exactly how to do this, as there are too many aliens in the sky to make any specific strategies worthwhile. Cover is a waste of time as the octopi simply fly around behind it. Just keep running and cloaking.
When the shields go down, Helena tells you to use the TAC cannon to target the arms on either side of the alien ship. Be aware that a bug sometimes kicks in here making your shots useless. If you don't see an immediate explosion when the TAC cannon shells hit the alien vessel, reload a save and try again. If things work properly, one shot to each side of the ship will trigger the end sequence.
At this point, the alien ship comes closer to the aircraft carrier. Grab a rocket launcher and fire a few rounds at the big circular hatch directly above you. It should pop right open. When it does, shoulder the TAC cannon again, give it a few seconds to lock on, and then fire a single round inside the vessel. A huge explosion takes place almost immediately.
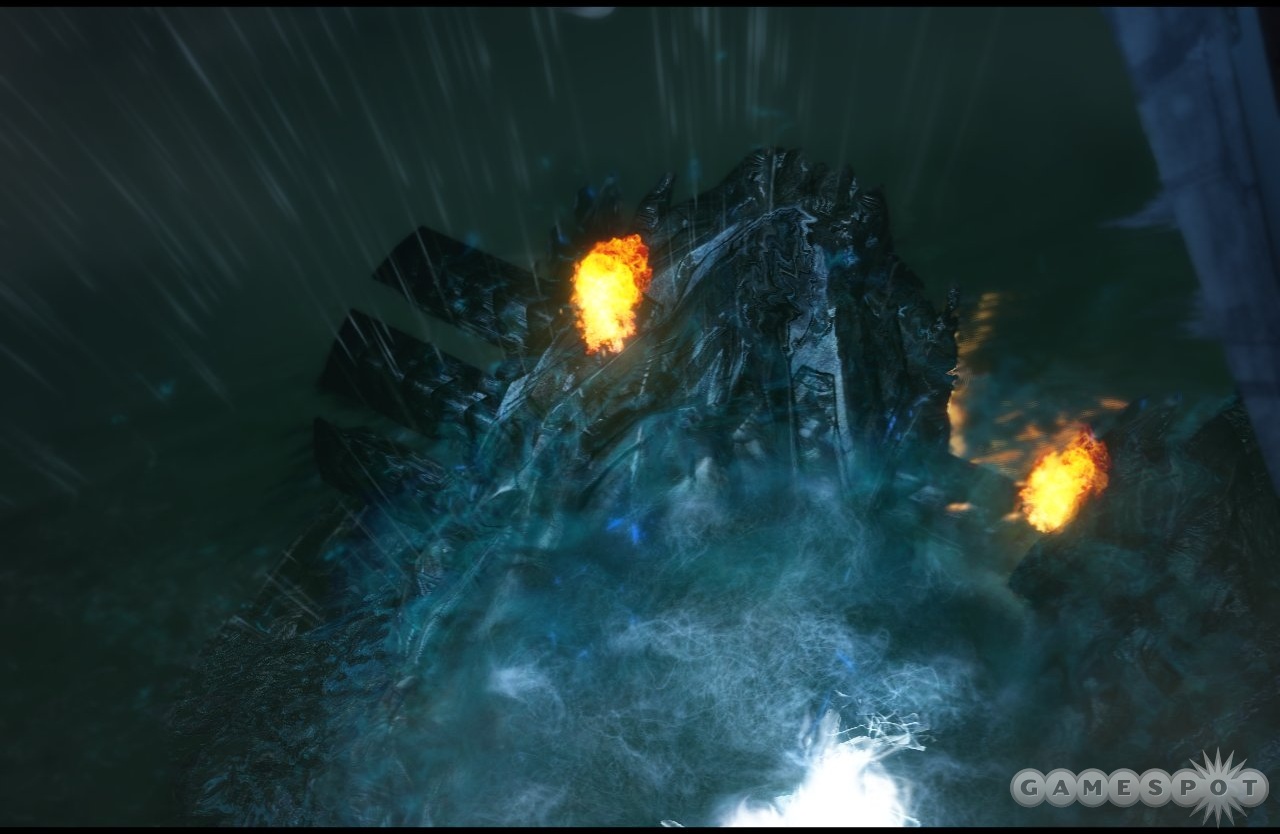
Both Helena and Psycho now tell you that the alien vessel is about to crash right into the Constitution. Run down the deck to your right and jump into the open hatch of the hovering VTOL. Watch the closing cutscene of the alien ship and the carrier getting sucked down into the ocean, and then listen to the good news that Prophet is still alive on the island. Nomad says that they've got to join him and continue the fight right away, but just as the VTOL heads toward the island the credits come up. Now begins the wait for the inevitable expansion pack.
Got a news tip or want to contact us directly? Email news@gamespot.com
Join the conversation