Assassin's Creed Walkthrough
Want to sweep the Templars from the Holy Land? GameSpot's Walkthrough will show you how.
Few nonsequel games are the subject of as much hype as Assassin's Creed has been. While games like Halo 3 are expected to garner their share of the headlines, Ubisoft has done a great job of keeping Assassin's Creed in front of gamers during the run-up to its release, whether by its secrecy about the game's sci-fi storyline, its long-time silence on whether or not it would appear on the Xbox 360, or by the somewhat controversial decision to set the game in real cities of the Middle East during the Crusades, an era of history that has interesting lessons for today's world.
Of course, it shouldn't be implied that Assassin's Creed is coming out of nowhere; it is, after all, developed by the massively talented Ubisoft Montreal studio, creators of the Splinter Cell and updated Prince of Persia games. It builds on the combat systems of the Prince of Persia games and melds them with next-gen graphics and a taut style of acrobatic, open-ended gameplay for a game that's quite a bit of fun to play.
GameSpot's Game Guide to Assassin's Creed features the following items:
Combat Tips
Want to know how to survive those intense fights? Check out our detailed descriptions of the weapons and moves that you have at your disposal.Walkthrough
A full walkthrough for the game's many assassinations.Xbox 360 Achievements
If you're looking to figure out how to unlock a particular achievement, check here.
Assassin's Creed Combat Tips
Weapons
You have five main weapons available to you in Assassin's Creed, each with different abilities tied to it. We'll discuss each of them here.
Fists
Your fists are the tools you'll use to beat on thugs and otherwise cause mayhem without killing anyone. You don't have a lot of combat abilities while using your fists; you can choose to grab enemies and throw them to the ground, or punch them in the face, but that's about it.
Note that attacking a civilian with your fists won't cause the guards to come running (which is handy when you're trying to perform an Interrogation mission), but any nearby thugs will stop to join in the fisticuffs. Thugs are the portly gentlemen you steal throwing knives from; they hit pretty hard, so you'll want to avoid them if you need to beat someone down.
Hidden Blade
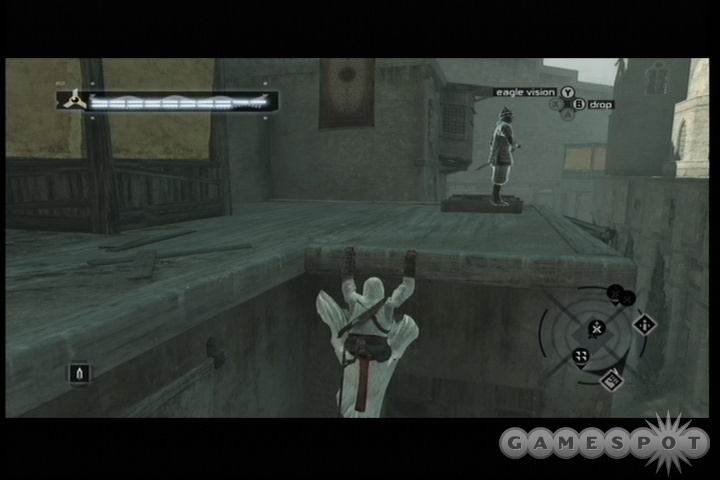
The hidden blade is your primary assassination tool. You have two methods of attacking with it: you can either walk up to someone in Low Profile mode and assassinate them from close range, or you can run at them in High Profile mode and perform a flashier kill.
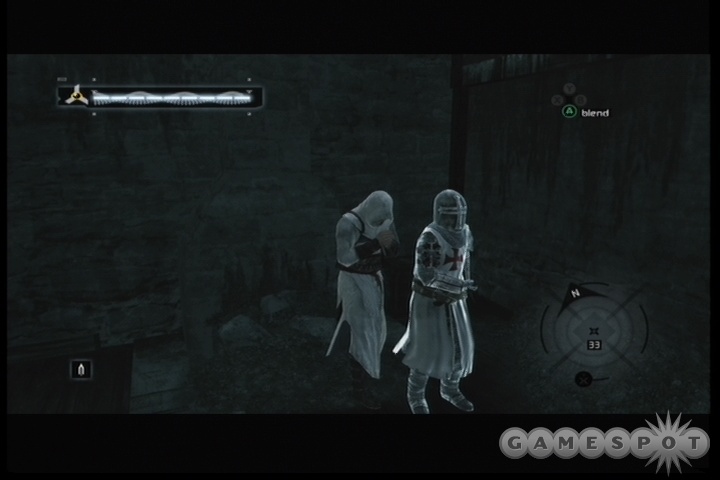
Low Profile assassinations are pretty easy to pull off on unsuspecting foes; simply get close and tap your button to take them down. This allows you to stealthily kill a target without alerting anyone nearby; even if a beggar is looking directly at you, they usually won't notice that you've just killed someone. You'll need to run away quickly, though, because if you stand around over a dead body the guards will make the obvious inference and run towards you. Guards that are in especially close proximity to one another will usually be alerted if one of them is stealthily killed, but in many cases you'll have time to hit a second target with your hidden blade before they can draw their swords to defend themselves.
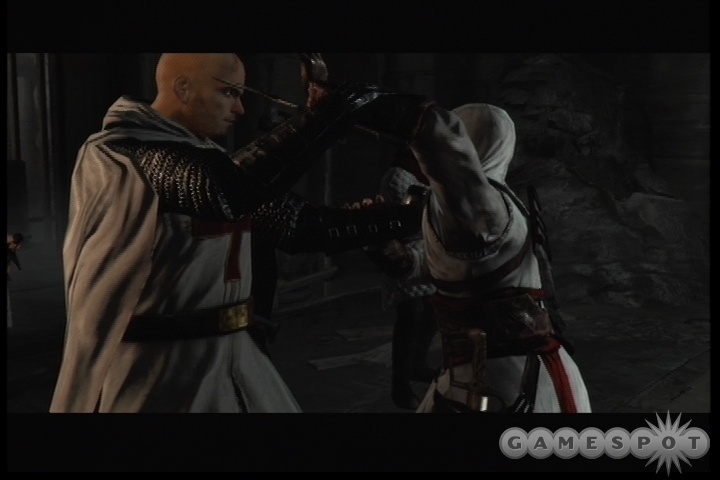
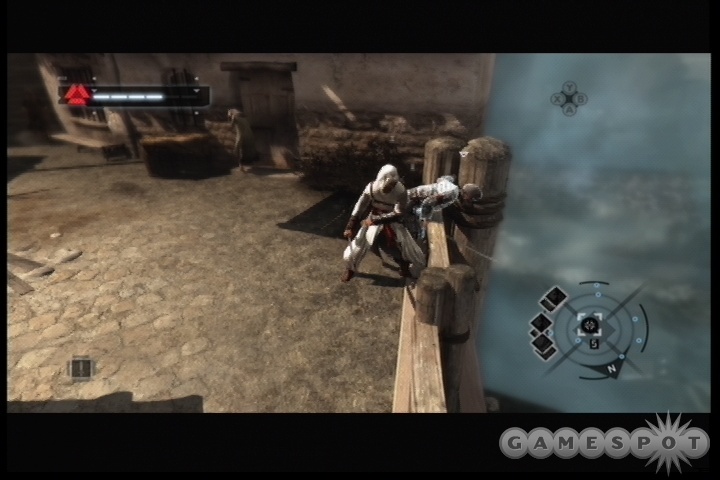
High Profile assassinations involve a bit of showmanship; you'll usually jump at your target and plunge your knife into his neck as the two of you tumble to the ground. This is an obvious kill and will alert all nearby citizens and guards to your presence. Since you can only run in High Profile, these kills are the only way to assassinate running targets; simply run behind your foe while locked onto them and tap your assassinate button when you get close to them. Eventually you'll catch up to them and ice them.
Whether you go for a stealth or obvious assassination, you shouldn't expect guards that are suspicious of you or that have their swords drawn to be killable with the hidden blades; they'll usually grab your arm or throw you to the ground if you attempt to pull off an assassination during a fight. That said, though, if you manage to knock an enemy to the ground, you can quickly switch to the hidden blade and assassinate them before they get up. This is easiest to do if you fight near a wall; just grab your foe, throw them into the wall, then assassinate them while they lay at your feet. Some counters will also knock your enemies down, making it easy to take them out with the blade, provided you can reach them before they get up.
Long Sword
Your long sword is going to be your best weapon for most full-fledged fights. It's solid, dependable, and can slice through multiple opponents while still providing you with excellent defenses.
Your basic abilities here are to guard yourself by holding down the right trigger (or the High Profile button); that will automatically guard you against incoming enemy attacks, so long as you're actually locked onto an enemy. You can swing with the attack button, as well.
Most of the additional abilities of the long sword will be covered in the Combat Maneuvers portion of this chapter.
Short Blade
The short blade is similar to the long blade, but allows for quicker attacks and has some flashier kill animations; most of the combat maneuvers are the same for either weapon. It's worth noting that the short blade has the same weapon shortcut as the throwing knives, which allows you to use the short blade as a defensive tool and to attack enemies in melee range. If an enemy is out of range, though, you'll automatically use a throwing knife to take them down, which can be handy to thin the ranks in large fights. Sometimes you can wind up wasting throwing knives, though, such as if you try to use the short blade to attack an enemy that's on the ground; you'll often wind up chucking a knife into the air instead of attacking with the blade.
It's worth noting that, even though the timing is trickier, if you pull off a counter with the short sword you will pretty much always perform an instant kill on almost any enemy, including the final bosses. It's a powerful tactic if you're good at countering blows with the normal sword and wish to try to exercise your skills a bit more.
Throwing Knives
Throwing knives are your sole method of dealing damage at range. When you're locked onto an enemy, you'll throw a knife directly at them, which will usually result in an instant kill. This can be done in combat or outside of combat, but if you're in combat and your enemy is close, you'll use the short blade instead. Some of the tougher enemies, like Templars or assassination targets, will be hit by the knives, but not killed, resulting in an alarm.
You'll also have a tough time hitting moving targets from a distance, but the knives are great for hitting stationary targets like archers or the guards around a citizen that needs to be saved. You can also drop a body onto the ground to lure over guards, then snipe anyone that investigates with your knives.
You only have a limited amount of knives on your person, however. If you run out, or need more, you can return to Masyaf, or find a thug to pickpocket. Thugs are the roaming, portly gentlemen with reverse fannypacks. While normal civilians won't be outlined in white as you move through a crowd, thugs will. Lock onto them and pickpocket them to restore five throwing knives per thug, per pickpocketing.
Combat Maneuvers
There are a number of combat maneuvers that you'll learn throughout the game, some more effective than others. You'll need to progress through the chapters to unlock them - most of them will not be available in Memory Block One, but after each assassination you'll get some new weapons and abilities. Here's a short list of the ones that you'll use consistently. Note that most enemies can use these same maneuvers against you - it'll be pretty frustrating when your foes start to use defense breaks!
Slow Attacks
Holding down the attack button will cause your character to unleash a slow but powerful attack against your foes. If it connects, it will often instantly kill weaker enemies. If you're surrounded by enemies, though, the length of the attack will almost always cause you to leave yourself open to enemy blows before it can hit. Stronger enemies will usually block it, regardless, although this will sometimes cause them to drop their guards.
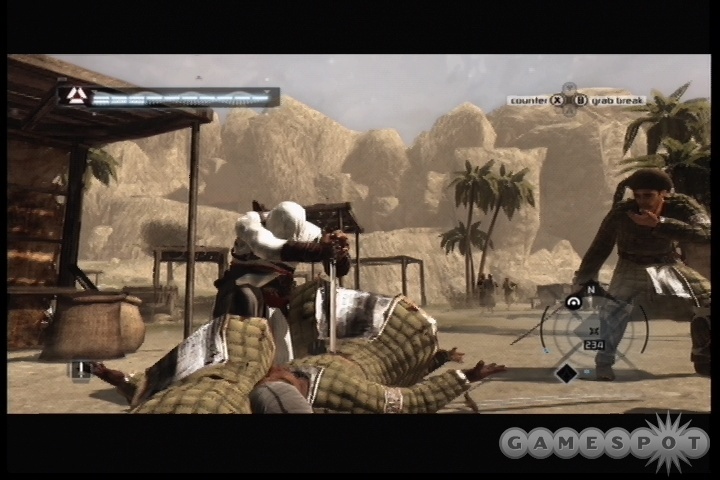
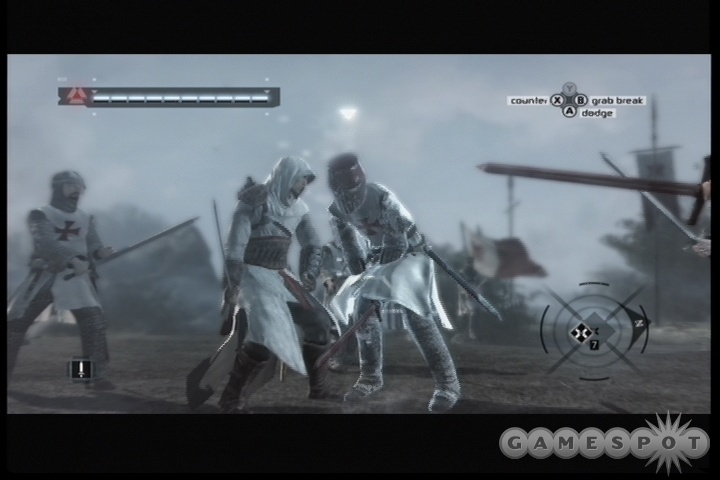
Counters

Countering is performed by standing in high profile mode while locked onto an enemy. If you press the counter button just as an enemy's attack is about to hit you, you'll counter it, taking no damage. The results can be mild (knocking your opponent to the ground) or severe (an instant kill on your foe.) If you knock an enemy to the ground, you can switch to your hidden blade to assassinate them (unwise in large groups of enemies) or swing at them with your sword to try and finish them off before they can get up.
Counters are going to be one of your primary methods of dealing with multiple enemies. When surrounded by foes, going on the offensive will put you at risk of getting hit by enemy blades (since you can't guard while attacking). Holding the high profile button will let you deflect incoming attacks by default, and also try to counter your enemy's attacks if you see an obvious one coming, giving you the best of both worlds. Since only one enemy will normally attack you at a time, you can make the most out of this ability, especially on weaker foes that will die from a single counter.
Note, however, that you if you press the counter button too early, you'll wind up missing the counter and taking the opponent's blow straight on. Enemies have a variety of quick, normal, and slow attacks, so it can be tricky to gauge the speed of incoming attacks and counter them, especially when you're surrounded by enemies of various strengths, as happens towards the end of the game. Still, practicing your counters will let you overcome large groups of foes with relatively little trouble.
Grabs and Throws
Holding the high profile button and then tapping the grab button will let you attempt to grapple and shove an opponent. (Note that if you're in combat, though, you need to release the high profile button, and thus lower your guard, in order to grapple someone.) When you grab onto someone, you can move the analog stick in a particular direction to shove them in that direction.
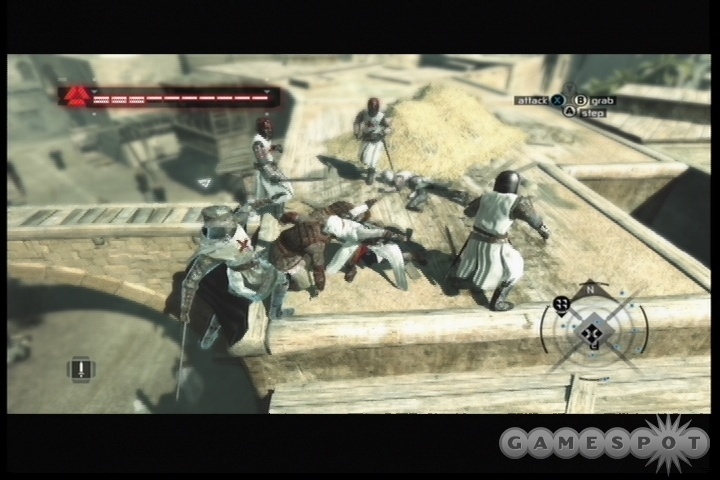
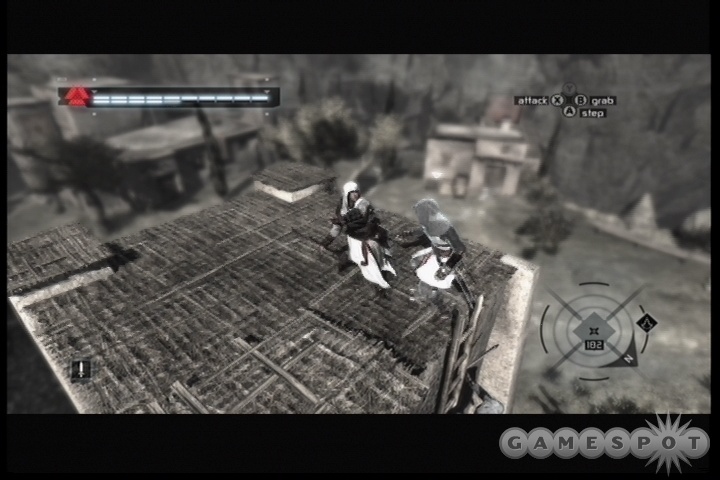
Grappling doesn't always work (strong enemies will break your grapple and knock you to the ground), but when it does, it can be very, very handy, especially on rooftops. If you lure a large number of guards to a tall rooftop, you can grab them one by one and throw them off the edge of the roof. If they fall far enough, it'll be an instant death. (Assassination targets are usually immune to falling damage, however.)
Grabbing enemies and throwing them will usually result in a bit of movement for Altair, too, especially throwing them to the sides. Whenever possible, try to throw your enemies straight ahead; this results in less movement for your character. It's possible to throw people off the roof, then fall yourself if you build up too much momentum. Grabbing enemies and throwing them into walls near your character will also let you quickly switch to the hidden blade and assassinate them, since they'll fall to the ground at your feet.
Combo Kills
Combo kills are simple in theory. When you attack an opponent, you can tap the attack button again when your sword hits your foe for a combo kill. If you time it right, your sword will attack once, then you'll attack again immediately for an instant kill. The second attack will occur whether your opponent takes or blocks your first strike, but it won't occur if they dodge it.
Combo kills are mostly handy against easier opponents; the tougher foes you'll face later in the game will mostly be immune to the combo kills and will deflect both of your blows. When you're surrounded by enemies, the time required to attack twice will also usually leave you open to incoming attacks, making counters a better maneuver. Still, there's some brutal animations here, as well as an achievement for using them often, so it's worth trying them out on the weaker foes you face.
Dodging
You can dodge an incoming attack by tapping the dodge button as it comes your way; that will let you dance backwards and attempt a counterattack. The timing is tricky on dodges, and there isn't much benefit for performing a dodge instead of a counter. We suppose you can chain dodge counterattacks into combo kills, but usually counters will still be your best bet.
Defense Break
A defense break can let you bust through an opponent's defense. To perform a defense break after you unlock the ability, let go of the high profile trigger, press the Step button, then attack as soon as the Step is complete. If you do it correctly, you'll attack once to shove your enemy's blade off to the side, and can then attack again to hit them while their guard is down, just like Darth Maul and Qui-Gon.
General Combat Tips
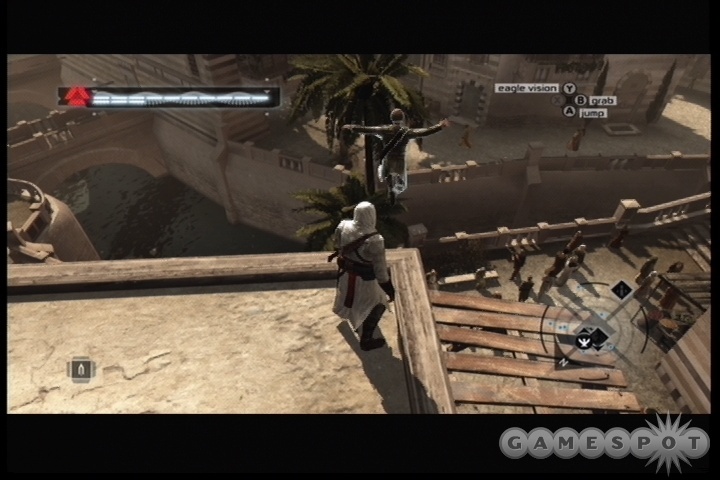
Fight In High Places
We've said this before, but whenever possible, lure your enemies up high and knock them to the ground through throws or sword blows. It's the easiest way to dispatch your foes, and even though you may get knocked off yourself, you take a lot less damage from falling than your opponents do, making it more likely that you'll survive and they'll die if you both fall.
Health Regeneration
Your synchronization bar will regenerate your health over time, even in combat. If you find yourself dangerously low on health, run away from your enemies for a bit to regain some health, or simply hide until it comes back.
Know Your Foes
As the game progresses, the guards you'll be fighting against will become progressively tougher. An easy way to spot the difference in guards at a glance is to look at their helmets: the more powerful the guard, the shinier their headware will be. In Damascus, the silver and gold-plated helmets will denote the toughest guards, while the red-plated helmets on Templars will tell you the ones to look out for.
When In Doubt, Run
You are much more agile than your opponents are. If you're cornered in a street fight, keep in mind that your best option, especially early in the game when you don't have many combat maneuvers unlocked, is to run. Untarget your opponent, enter high profile mode, and run up the nearest wall to see if there's a handhold; there almost always will be. If you can reach the rooftops, you'll have a few seconds before your opponents find a way to reach you, giving you time to draw your blade and strike them as they run up a ladder, or to simply run away and try to find a rooftop garden to hide in.
If you do attempt to run up a wall, though, your enemies won't give chace immediately. Instead, they'll try to throw rocks at you to knock you off the wall. Rocks will take off one health bar per hit, and they'll also knock you to the ground. If you have the Grab Ledge ability, you can attempt to arrest your fall before you hit the ground, but early on in the game you'll simply be knocked to the ground. Rough stuff.
Assassin's Creed Walkthrough
Tutorial
At the beginning of the game, you'll find yourself in a bizarre world, where instructions come at you at a mile a minute and strange voices talk to you. You don't need to do anything here; simply sit back, run around, and wait for the images to fade away.
The backstory here is pretty crazy, but it's best left for you to experience it for yourself. The tutorial that plays out will teach you about the various actions that you can partake in. The controls that you'll be using will obviously vary based on the platform that you're on, so pay attention!
Memory Block One
Solomon's Temple
Memory: Acquisition
The first mission you'll be sent on will take place underneath the Temple Mount in Jerusalem. Alongside Assassin novices Malik and Kadar, you're tasked with retrieving some kind of treasure hidden in Solomon's Temple here and returning it to your master, Al Mualim.
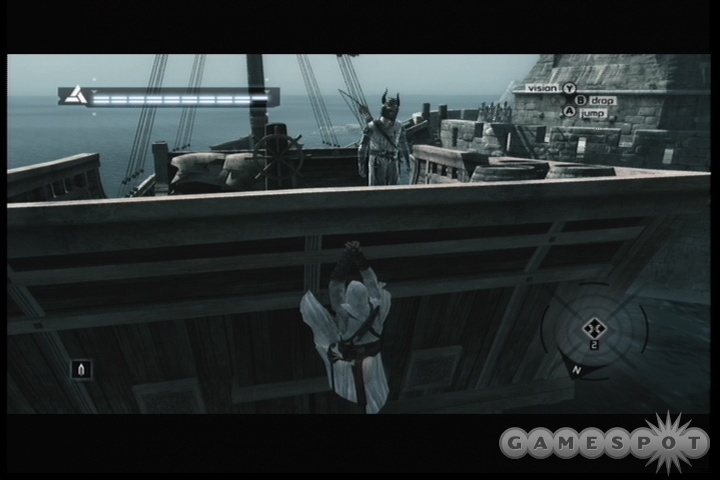
Use your jumping abilities to cross the first few obstacles in your way, then climb the ladder to reach an observation post from which you can see your goal. Climb down the ladders nearby and approach your foes to engage them in dialogue, then follow the instructions on your screen to attack! Your assault goes…poorly, and you'll soon need to escape the area. Do so by using the instructions on your screen, and you should be capable of escaping.
Memory: Failure
After escaping from Solomon's Temple, you'll return to to Al Mualim's mountain fortress. Head to the waypoint on your compass to find him inside the fortress; check the map on your start menu if you need a tip on how to reach him.
When you reach Mualim, he will be somewhat displeased with your failure. Soon enough you'll move on to the next phase of the chapter.
Memory: Guardian
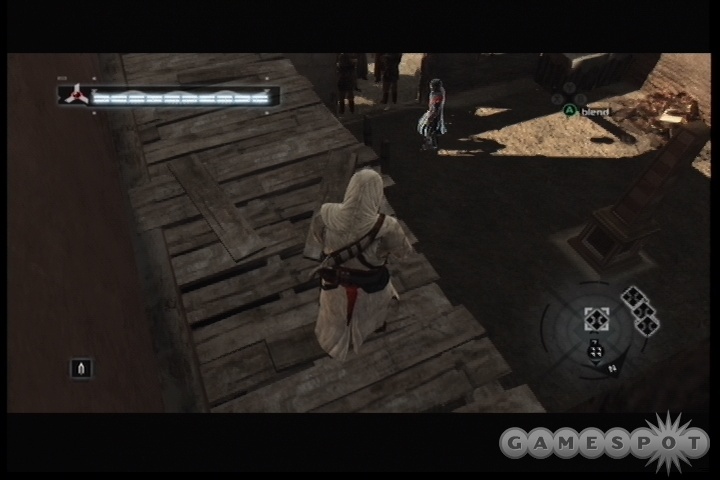
After reporting to Mualim, the Templars will attack Masyaf in full force. Your goal will be to head into the village and distract the Templars until your friends can evacuate the last of the villagers. To fight an enemy, you'll need to run up to them, use the left trigger to lock onto them, and then start swinging away. The fight mechanics can be complicated at first, so be sure to pay attention to the popup tips! If you want to get frisky, try locking on to an opponent, hold down the right trigger to enter high profile mode, and use the left button (X on the 360) to counter incoming blows for instant kills. You can also lock onto enemies, get close to them, then grab them and throw them to the ground, which will leave them defenseless and easily killable.
After fighting your way down to the village gates, you'll automatically be shifted over to the next part of the chapter.
Memory: Glory
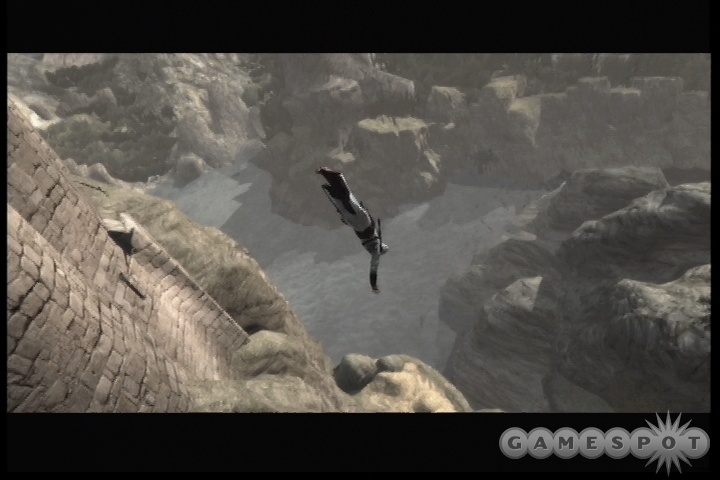
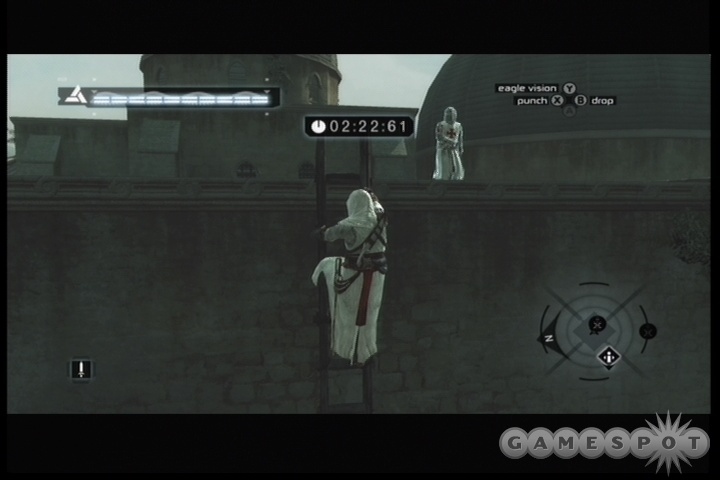
Follow your compatriot up the ladders here, and perform the Leap of Faith when commanded to do so. When you land, walk across the beams to reach a sheer wall and start climbing it. When you reach the tower above Robert, attack the wooden pillars, and you'll move on.
Interlude
Back in the Aperture Science facility, your captors will retreat to the conference room. Head into your bedroom's closet and eavesdrop on their conversation, then return to the main room. When you're told to head off to bed, do so and return to the table the next day to move on.
Memory Block 2
The Masyaf Traitor
Investigation
After Mualim's scolding, head out into the city and start tracking down the traitor. You've been stripped of your weapons, so you'll need to take a more stealthy approach. This section of the game is primarily intended to introduce you to the three primary modes of investigation that you'll be using in all future assassination missions.
Eavesdropping
Begin by following the waypoint here to the village market. When you find your target, walk to one of the nearby benches and sit on it by moving towards it. When that's done, follow the prompts on your screen to lock onto one of the eavesdropping targets, then hit the indicated button to eavesdrop on your target.
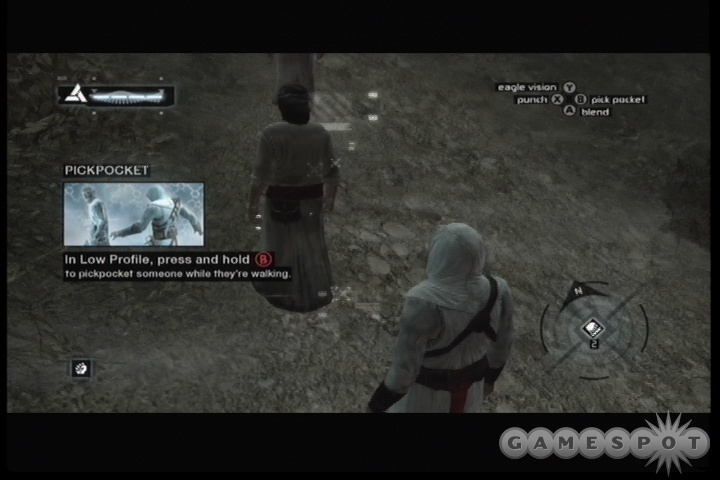
Pickpocketing After eavesdropping on the civilians, move to the next waypoint and begin the pickpocketing minigame. It's not difficult to pull it off.
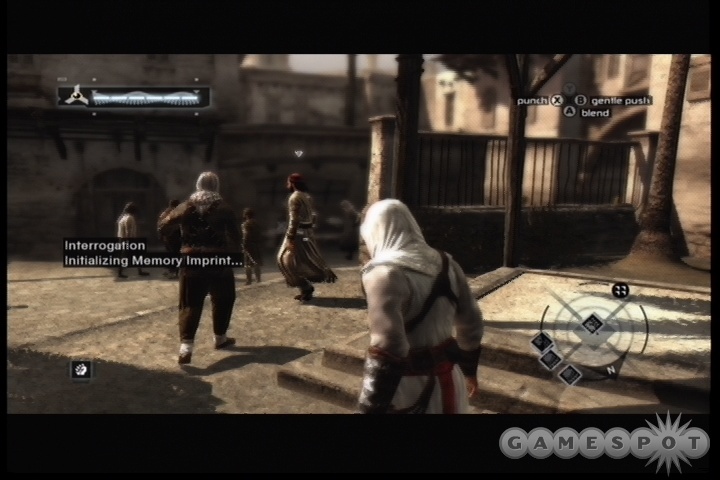
Interrogation
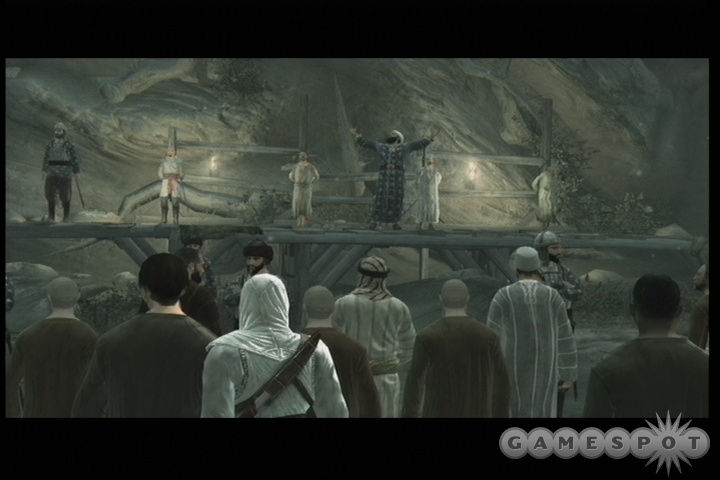
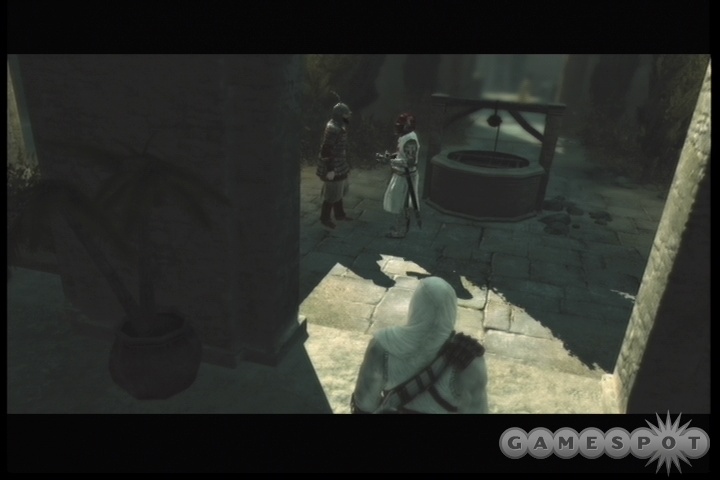
You can find Masun near the center of the village, giving a speech. Despite the fact that he's basically admitting his guilt, no one seems to react. After starting the minigame, wait for his speech to end, then follow him for a bit. When he reaches a secluded space, start beating him down. You can throw him to the ground and wait until he gets up to beat him from behind.
Off To Damascus
With Masun's execution, Mualim will ask you to head off to Damascus to begin your next assignment. He has a list of nine men that need killin', and wants you to start in that city, although your journey will take you far afield of it in time.
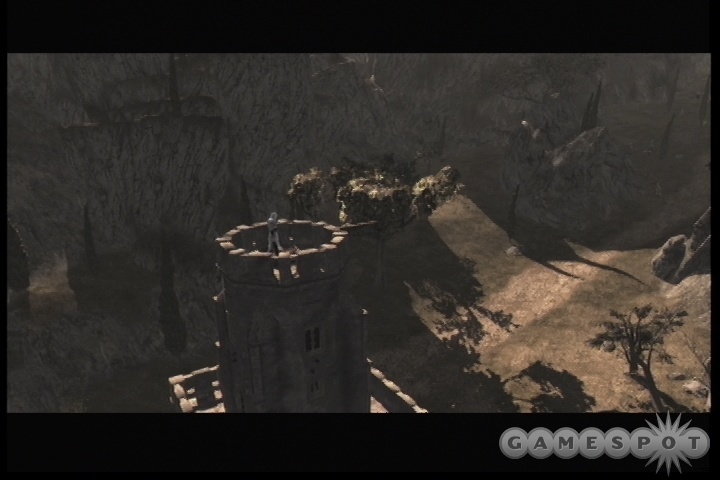
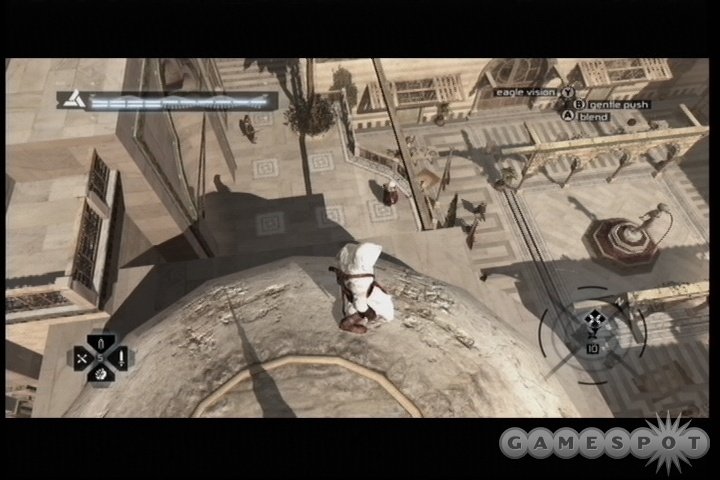
Head through Masyaf, picking up flags if you like, until you reach the main gates. A horse will be waiting for you there. Hop onto it and start galloping towards the Kingdom point on your map. When you reach the external Kingdom area (which acts as something of a no-man's-land between major cities), you'll come to a large tower on your left. Climb to the top and activate your Eagle View to clear a bit of the map around the area and reveal hiding spots.
There will be more Templar soldiers in the field here; Masyef was distinctly more friendly than any other area of the game will wind up being. Be sure to use your "blend" ability to walk past soldiers (your synchronization meter will beep if they're suspicious of you), or simply fight them. There are also some villages around, wherein you can find some of the 100 King Richard Flags that are scattered about. There are also going to be at least three more view points in between you and Damascus, so feel free to climb them and add them to your little collection.
Damascus: Poor District
On the outskirts of Damascus, you'll encounter your first imperiled citizen. These folks will help you if you rescue them from their soldier interlocutors. Do so by hopping off of your horse and starting the minigame, then fighting off the soldiers! It'll be more difficult to do so now than it was before, since you lost some of the moves that you previously had when you were demoted (especially the handy countering move), but still, it's possible to kill three soldiers without breaking too much of a sweat if you keep your block up and spam attacks when no one's attacking you. You can also, again, throw them to the ground (or into each other) and kill them when they try to get up, and can't block your blows.

With the civilian saved, you'll be able to hide in the group of Scholars and make your way in through the gate. As soon as you do so, you'll be in the Poor District of the city, where your first investigation and assassination will take place. You won't be able to move to the other districts just yet.
Side Activities
You have two types of repeatable activity here. There are nine View Points to find, and 12 citizens to rescue (not including the one outside the gates). Completing all of these actions is a good thing, as each one you do will count towards your synchronization, meaning that you'll eventually earn another lifebar section for doing them. They'll also help flesh out your map and help you run away from guards and the like in the future.
View Points
There are nine view points in the Poor District of Damascus, all of which are denoted on your map, or will be as you walk around. Find them, climb to the top, and use your eagle view to synchronize your map. That'll give you much more detail on it, and will point out nearby investigative activities.
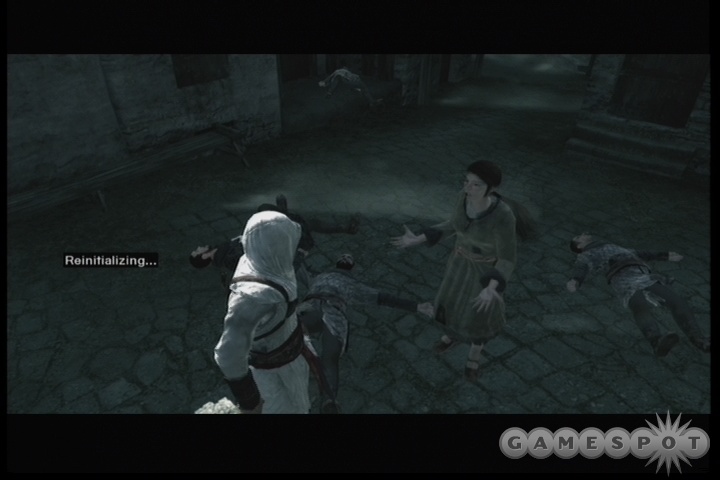
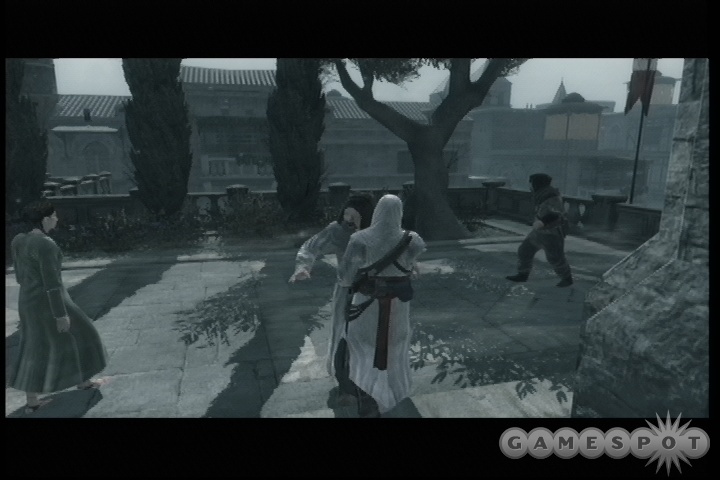
Rescue Citizens
There are 12 citizens in this quadrant of the city that are being harrassed by the guards. To rescue them, find them on your map, walk near them, and use your left trigger while looking at them or the guards to start fighting. If you kill all of the guards, you can speak to the citizen and gain a particular bonus. Usually a group of vigilantes will appear where you perform the rescue: these guys will harrass guards that become hostile to you, making these choke points a good spot to lose pursuers. Sometimes a group of scholars will appear if you happen to be close to a gate.
Fighting off five or six guards by yourself can be tough, so you'll usually want to start by using your hidden blade, getting close to one of the guards, killing him stealthily, then quickly targeting one of his friends for a high-profile kill before the rest of them have a chance to react. With that done, try to run for a ladder or otherwise get to the rooftops; the remaining guards will follow you up
Investigating Tamir
As you wander around the Poor District, a number of eavesdropping, pickpocketing, and interrogation missions will appear to you. Before you attempt any of them, though, head to the southwestern corner of the district to find the Assassin's Bureau. You'll want to speak to the man inside before starting your investigations.
After speaking with your bureau leader, you'll learn of a few locations where more information about Tamir can be obtained. You probably have all six investigations on your map, though, so you're unlikely to need his pointers.
You can complete as many of the investigations as you like, but only two are necessary to try the assassionation. Still, here's a list of them.
Investigation One: Northern Pickpocketing
You'll find two men in an alleyway; note the one carrying the letter, then pilfer it when he walks off. Keep in mind that you can only pickpocket while he's walking; he'll periodically stop and look around. If you're too close to him when he does so, he'll call the guards. You'll learn that Tamir is preparing a large shipment.
Investigation Two: Southeastern Eavesdropping
Eavesdrop on the three men to learn that Tamir has called a meeting. Sounds like he's within the souk, whatever that is.
Investigation Three: Southwestern Interrogation
Lock on to the man, wait for him to finish speaking, then follow him into the alleyway nearby and start throwing him around. He'll tell you that Tamir is preoccupied with the creation of weapons for someone other than Saladin.
Investigation Four: Middle Eavesdropping
Listen in to the two men in the market to learn about a weakness of Tamir's fortress: the beams across the central courtyard can be accessed.
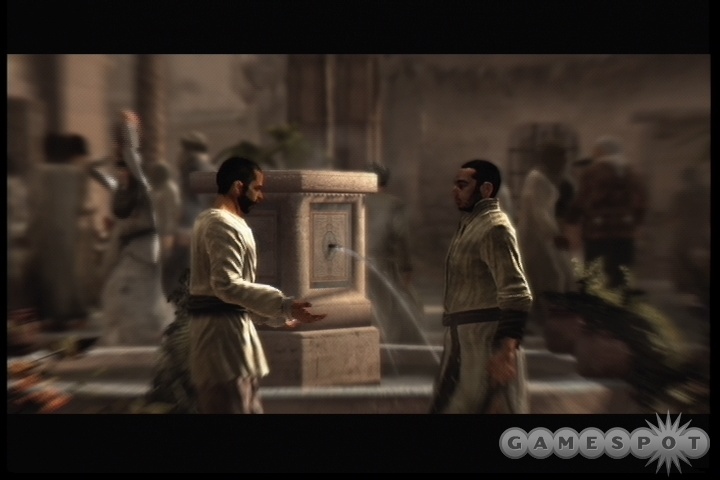
Investigation Five: Western Eavesdropping
Listening in on the two men by the fountain will tell you a bit about escaping guards: you need to find friends that will distract them while you run. This refers to the vigilantes, but gives you no useful information on Tamir.
Investigation Six: Eastern Pickpocketing
Lock on to the man by the fountain, overhear his conversation, then follow him as he walks off. Your reward here is a map that indicates that the northeastern rooftops link to the central courtyard of the souk.
Tamir Assassination
When you have your investigations complete, however many you like, return to the bureau leader and tell him of your investigations. He'll hand over Tamir's marker, giving you permission to assassinate him.
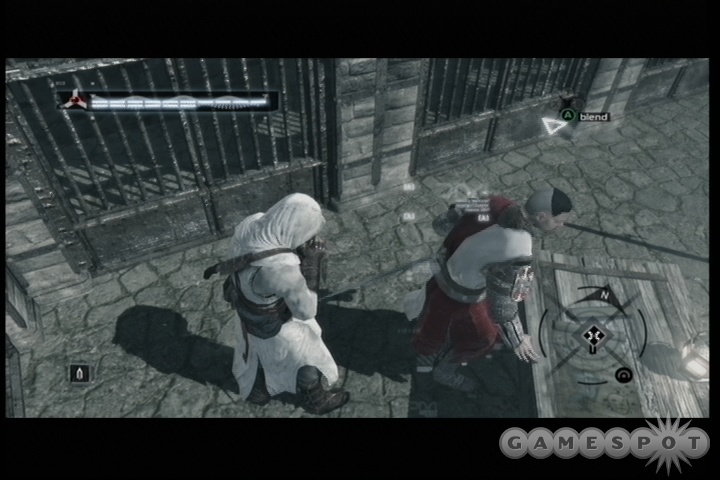
Travel to the souk, which will be marked on your map. Tamir is indeed there, and rather unpleased with one of his underlings. When he kills him, use the Blend command to prevent the guards here from becoming alerted to your presence. There'll be a beggar around that will be pestering you, but she'll give up after a few minutes.

You can be fancy and try to take Tamir out like a fancy boy, but the easiest way to take him down is to switch to your hidden blade, get behind him, and select the Assassination option, which will instantly kill him. This will, obviously enough, cause the guards nearby to go insane, so you'll have to do your best to make it back to the bureau without getting taken out. The souk has some fancy entrances that you may be able to free run through, but your best bet is to just cover as much ground as you can between the souk and the bureau before attempting to hide; the alert that's out for you here will not cease until you actually return to the bureau, so hiding near the souk is kind of pointless unless you can make it all the way back to the bureau on the rooftops, or in blend mode, which is very slow.
When you return to the bureau, hide enough to lose your current alert, then walk inside, you'll end the mission and be told to return to Mualim.
Memory Block Three
Interlude
Speak to Lucy a few times here, then interact with the computer on the Animus bed. Whoops, she left her email open! Sounds like Warren is one hell of a boss. When you're done reading the email, head back to bed. In the morning, hop onto the Animus to start your next missions.
Back to Mualim
When you return to Mualim, you'll earn new abilities, including the counter attack. Becoming capable of countering will make combat much easier, assuming you make good use of the ability. You'll also be capable of entering Mualim's private garden, where a couple of flags are hidden away.

Mualim will give you two new assignments in two new cities, Acre and Jerusalem, where you'll need to kill Garnier de Naplouse and Talal, respectively. You can tackle them in any order you like. Now will also be a good time to tackle all 12 of the View Points in the Kingdom area; it'll give you a much better idea of how the land is laid out, as well as counting towards your next life bar segment.
Acre Assassination: Garnier de Naplouse
Keep in mind as you approach Acre that the guards here are significantly tougher than those you fought in Damascus. You'll need to be on your best behavior to take them down, but with the countering ability that you've picked up, you should be much more capable of doing so.
To gain entrance to Acre, you'll need to rescue a citizen outside the gates to gain the trust of the Scholars, then sneak your way inside. Use your counters to get the best of your foes. These guys will also periodically stop and either taunt you or encourage their friends; if they drop their swords, get some quick jabs in with your own.
Inside the city, you'll be tasked with climbing more View Points and saving more citizens. Keep in mind that there are archers on some of the rooftops here that will take umbrage to your presence; this is a bad thing, since it makes it a bit more complicated to get around, but it's also a good thing, since you can grab them in high profile stance and throw them off the roofs, which is quite amusing. This also makes it easier to rescue the citizens: find a nice, high roof, use the trigger to lock onto one of the harrassers, then wait for them to come up to your rooftop and knock them off as they arrive. It's a lot simpler than fighting them all at once, and more fun to boot.
Investigation One: Northeastern Informer
The Informer missions are new ones. When you talk to an informer, they'll give you a physical challenge of some sort. This guy wants you to run along a course designated for you by the appearance of a number of flags. Collecting all of the flags and returning to the informer within the time limit will unlock their information. There isn't much that a text walkthrough can do to guide you through these, but for the most part, the routes are pretty obvious and the time cushion is generous, at least at this early portion of the game. Completing this mission will reveal that Garnier resides within the Hoteliers' fortress and rarely leaves. 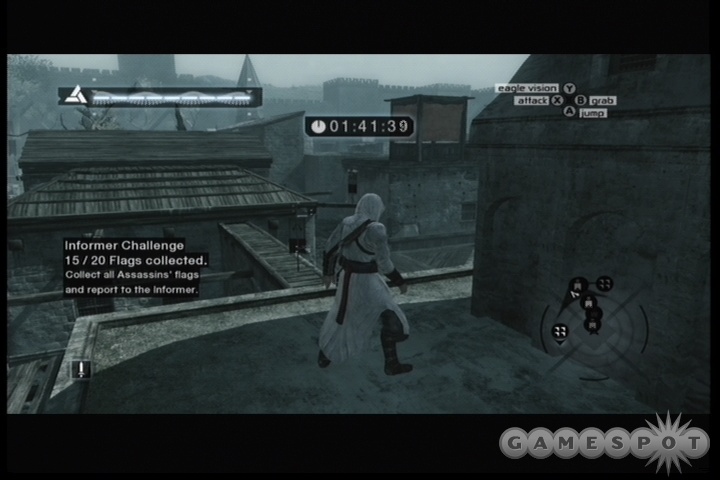
Investigation Two: Southern Interrogation
Interrogate the barker to learn that Garnier is a cruel man, and that he'll be most vulnerable when he attends to his patients.
Investigation Three: Central Pickpocketing
Pickpocketing the letter will result in your discovery of the connection between Garnier, Tamir of Damascus, and another man.
Investigation Four: Southeastern Pickpocketing
Picking the pocket of the worker will reveal that the candelabras within the Hoteliers' fortress are being replaced.
Investigation Five: Northern Eavesdropping
Eavesdrop on the two guards near the entrance gate to discover that some of the roof guards are AWOL.
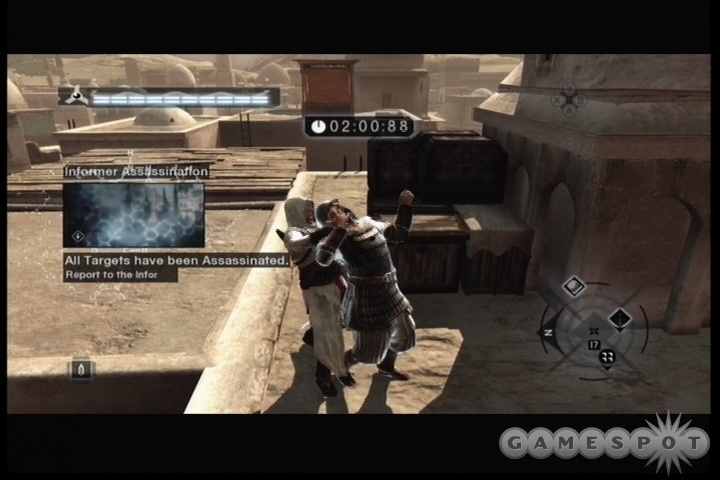
Investigation Six: Informer's Assassination

This informer asks that you assassinate two targets for him and return without causing an alarm. It's not too complicated. The first target is a Templar that hides in a building nearby; he's easy to assassinate without anyone spotting you. Be sure that your hidden blade is active, drop down behind him, and get him! The second target walks the streets nearby. It can be tougher to get him without getting spotted, so be sure that no beggars are bothering you, then hit him from behind with the hidden blade assassination and quickly run. If you're fast, you should be able to get away from him before anyone even knows he's dead.
The informer will tell you that Garnier allows patients to roam the halls of the hospital freely. Sneaking in should be easy.
Garnier Assassination
Entry
Garnier dwells in a hospital near the northern gates to the city. Two methods of entry are apparent: you can hide amongst the Scholars outside and make your way in, if you rescued the citizen there, or you can head to the rooftops and descend from above. There's a small building on the northeastern side of the hospital you can use to reach the roof; kill the archers up there, hide until you're unseen, and then descend by climbing down the main part of the hospital to move on.
Assassination
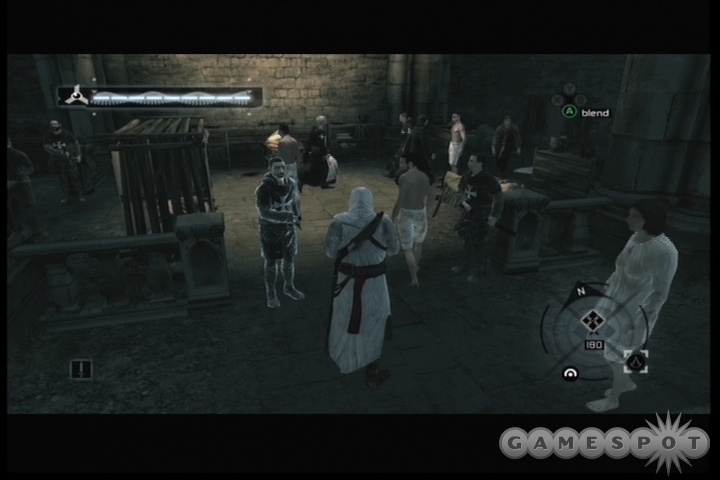
After the cutscene plays, walk into the hospital in Blend mode. You'll need to be pretty careful as you walk around here; the guards are pretty suspicious of your presence. It's not difficult to get close to Garnier, but unfortunately he'll be surrounded by madmen of the sort that like to randomly lash out at you. If they knock you out of Blend mode, that'll usually be enough to call down all of the guards in the hospital onto you, including Garnier, who's a tough old man and won't go down without a lengthy fight.
If you don't manage to pull off the hidden blade assassination, then a big fight will ensue. You can climb a ladder here to reach the rafters, where you'll be able to hit enemies that attempt to follow you up, or you can simply start countering the attacks of the enemies around you and attempting to thin their ranks a bit. Garnier is a tough nut to crack; you may want to attempt to throw him to the ground, then pounce on him with your hidden blade for a quick kill.
Escape
Egress from the hospital can be rough. There are a couple of cracked windows that you can reach if you head up to the rafters, which will make for a quick exit from the sickward that you'll likely kill Garnier in. Otherwise, you can try to bust out the front door. Climbing up the inner walls to the roof is a fool's errand, as you'll be hit with rocks before you can make it. Bust out and get back to the Bureau. Be sure to head back to Masyef and speak with Mualim before heading on to Jerusalem; you'll earn throwing daggers as a reward.
Jerusalem Assassination: Talal
The notable thing about the exterior of Jerusalem is the number of people leaving the city. As the city is soon to come under siege, they're perhaps the wisest of the bunch. Feel free to run them down with your horse; it's fun to play bowling with peons.
Talal dwells within the rich district of Jerusalem.
Investigation One: Northwestern Informer Assassination
Wander into the market and assassinate the two targets of the Informer. One of them is stationary while the other is mobile, but if you hit them from behind and run away, you should be fine as far as being detected goes. If you become observed, blend away as best you can.
Investigation Two: Eastern Interrogation
The barker near the city gates has some info for you: track him down and beat him to a pulp to learn that Talal keeps his slaves in a warehouse before shipping them off to Acre. It sounds as though he's in league with Garnier.
Investigation Three: Southern Pickpocketing
Picking this pocket will reveal the location of the guards in Talal's palace.
Investigation Four: Southeastern Pickpocketing
Pickpocket the man outside the temple to reveal where Talal will hide if he escapes from battle.
Investigation Five: Southeastern Informer
Another flag-running mission. There are eighteen flags this time around, and they should be run starting from the one on the wall near the informer. Follow the route and run well, and you should be able to get it done within a minute. The informer will tell you that Talal's bodyguards will sacrifice themselves if need be in order to buy him time to escape an attack.
Investigation Six: Northwestern Eavesdropping
You'll need to save the citizen near the exterior of the church here, then blend into Scholars and let them take you inside. Doing so will let you learn a critical piece of info: Talal is a master archer, and will attempt to hit you with a bow should you attack him.
Talal Assassination
Entrance
Talal makes his residence within a barbican in the northeastern corner of the Rich District. It's easiest to reach the barbican by approaching from the west, where there's a gap in the tall wall. You can stick to the rooftops, assassinate the archers as needed, and make your way to the northeastern corner of the barbican, which is apparently the only entrance.
Assassination
Talal is a trickster, and traps you when you enter the barbican. You can either choose to follow him immediately, or try and fight your way through his goons for a while before chasing him down. It's probably a bit easier to use counterattacks to thin the ranks of the soldiers before climbing the ladder and giving chase, but if you want to try escaping the warehouse immediately, do your best to get up the ladder, then jump across the two chandeliers to the other ladder that Talal escaped from.
When you reach the ladder and the roof of the barbican, freerun to where Talal waits for you, and have your hidden blade out and ready. As promised in your investigations, Talal will run from you when you catch him, and he's quite a speedy guy. If you attempt to sprint after him, you'll eventually wind up hitting someone and falling, letting him get a lead on you, but it's difficult for him to lose you entirely, thanks to the GPS marker that he has. If you did the smart thing, and saved all of the citizens in the district, then you should have a gang of Vigilantes in the middle of one of his routes. If you can stay on his tail until he hits the Vigilantes, they'll hold him, allowing you to quickly assassinate him. Otherwise, you'll probably have to try free-running behind him and attempting a difficult jump-and-assassinate maneuver as he runs from you.When Talal is dead, quickly return to the bureau to get back to the real world.
Memory Block Four
Interlude
When you return to your quarters, examine your locker; you'll find an access code that you'll be using in a future interlude. Sleep, then wake up. Before you lie down on the table, though, get behind the good doctor here and pick his pocket to pick up some kind of flash drive or access card. Nice! With that in hand, feel free to re-enter your memories.
Retun to Mualim
You've earned the Catch Ledge and Grab Break abilities here. Grab Break can be tricky to time, but if you mash on the button when you get grabbed, it will eventually become somewhat instinctive. Catch Ledge will make it very easy to grab onto buildings after getting knocked off by thrown rocks, which is really handy.
Damascus Assassination: Abu'l Nuqoud
Head to Damascus and check in at the bureau; you'll be told that Nuqoud dwells within the city's Rich District.
Investigation One: Western Interrogation
Following your target here can be difficult, since he’ll walk through a guard post when you’re supposed to follow him. If you’re decent at fighting, sneak past the guards and lure them onto a building before starting the interrogation, throw them to their deaths, then start the interrogation. Doing so will make it a bit easier to follow the guy you need to talk to. He’s a bit tougher than other interrogations, so make quick work of him if possible. The man will tell you that the best time to attack Nuqoud is when he addresses his guests at the party.

Investigation Two: Eastern Eavesdropping
Nuqoud is preparing for a great feast within his palace.
Investigation Three: Southwestern Pickpocketing
Another purloined letter will reveal that Nuqoud is planning a festival in his palace. Seems kind of redundant, but oh well.
Investigation Four: Southern Informer
The informer here will task you with stealth assassinating two targets within three minutes and returning to him. Not too difficult to do if you can avoid the crazy people and the beggars. Mark your targets, get close to them, stick a fork in them, and run before anyone spots you.
With both targets dead, the informer will hand over a map of the locations of Nuqoud’s personal guards.
Investigation Five: Eavesdropping
Two merchants will speak of a scaffolding within Nuqoud’s palace that may let you access his private quarters.
Investigation Six: Western Informer
The flag collection here can be tricky; some of the flags are placed so that you won’t reach them if you free run directly to them, and instead you’ll have to climb down to them from above (or perhaps we simply went along the path the wrong way). Regardless, you should have a lot of time to get all of them, so break a leg and return to the informer, who tells you that the central fountain in Noqoud’s palace can be climbed.
Nuqoud Assassination
Entry
Enter the palace grounds by climbing over the fence or killing the guards at the gate. The guards aren’t difficult to kill, but then, it’s also pretty easy to just climb over the fence. There’s apparently no way to get to the top of the palace here, although it’s also possible that we missed a hidden climbing spot. No matter.
Head into the main hall of the palace to hear Nuqoud’s speech to the men he’s assembled in his palace. Soon enough, chaos will break out, with the soldiers in Nuqoud’s employ having their way with the guests, and with you, if you’re not careful.
Assassination
There are two ways to proceed here. The first is to climb the fountain in the middle of the main hall, jump from there to the pillars that run along the hall, and run from there onto the balcony where Nuqoud is roaming. This can be difficult since the archers will be firing on you as you jump around, and the two bodyguards that Nuqoud has will also probably jump onto the rafters and attempt to knock you off. Still, with a little perserverance, you’ll reach Nuqoud’s balcony. Unfortunately, this will cause him to run from you, and he’s pretty speedy for such a big guy. He will eventually run out of the palace and into a gang of vigilantes, though, so you’ll be able to assassinate him at that point if you saved all the citizens. Otherwise you’ll just have to do your best to get close to him and use your hidden blade to take him out.
A perhaps simpler method is to head to the south a bit, away from the fountain. Around the corner is a chained gazebo of some sort that’s two stories tall. If you climb to the top of it, you can leap to the balcony nearby where the archer is firing at you from. Kill him, then look around. The doorway to the balcony that Nuqoud is on is locked, but if you look to the southern end of the area, you’ll find a path that you can climb to the roof. If you make it to the top, you can find the scaffolding, jump to one of the minarets on either side of Noqoud’s balcony, then drop down next to him and quickly assassinate him before he can escape.
Return To Mualim
Return to Masyef at this point and you’ll earn new abilities: you’ll gain more damage from sword attacks, and gain the ability to dodge incoming attacks and counter afterwards.
Acre Assassination: William de Montferrat
William dwells within the Rich District of Acre. Take to the skies, nab your View Points and Citizens, then start investigating.
Investigation One: Southern Informer
Another flag collection race. They’re all relatively close to the informer, but your jaunt on the rooftops may put you in conflict with the archers up there. Ignore them if possible and move on to collect the flags. The informer will tell you that William will retreat to the protected portion of his citadel after his encounter with Richard.
Investigation Two: Northwestern Pickpocketing
Mysterious goings-on in this letter. Apparently William is a figurehead, but one that may not be reliable in the future. Another mysterious man in the harbor is distancing himself from the plot. Two sides must unite to reclaim what’s been stolen. Presumably this will all come clear in the end.
Investigation Three: Central Interrogation
Lock onto the man on the church steps and follow him off to the side a bit. Beating on him will reveal that King Richard will be visiting William today, after which William will surely visit his men and lecture them.
Investigation Four: Northern Informer Assassination
If you kill the two knights that the informer points out to you, he’ll tell you that your only method of escape after the assassination is to climb the walls.
Investigation Five: Central Pickpocketing
Picking the old man’s pocket here will net you a map of William’s archers atop his tower.
Investigation Six: Eastern Pickpocketing
Dang, lots of pickpocketing here. The gentlemen with the letter you’re looking for is inside a small fort. If you anticipate any problems getting inside, kill the guards before starting the pickpocket. The map you gain will detail a route you can take to enter the citadel without harrassment.
William Assassination
Entry

If you head to William’s fort, you will indeed encounter him and Richard in the courtyard outside. This short scene will end with Richard riding off and William retreating back to the interior of the fort. Fortunately for you, it’s not difficult to get into the fort; you can walk through the main gates, so long as you’re not currently wanted or anything. One of the maps you pickpocketed will show you a route that you can take to the left of the gate if you want to jump a bit; taking it will let you eliminate many of the guards on the walls, which will make your escape easier, but it’s probably not necessary to do so.
Make your way to the western corner of the fort to find William’s training ground for his men. In order to make a stealthy approach, you need to get up on top of the roof that lines the corner of the fort’s wall. There are plenty of places to get up to the rooftops, but you may have to take out an archer to reach the area above William. No matter; so long as William himself isn’t alerted to your presence, you can kill as many of the guards in the fort as you like without having the gates shut. If you’re really intent on making a clean getaway, you can head up to the walls and clean out those guards now.
Assassination
William’s easy to take down if you have a little patience. When you get close to him, you’ll hear him yelling at his guards. This little speech will take two or three minutes to finish, so if you wish, you can roam around killing archers on the walls or in the fort itself while it plays out.
When the speech is over, William will send his men away and then turn to his studies. (You can skip the speech if you can manage to land an archer on the ground near enough to cause the soldiers near William to investigate, but this is tricky.) Anyway, when the soldiers are gone, get into the corner of the fort’s wall above William and look over the edge. His back is turned to the very small corner of the training area. Look over the edge and drop down to hang off of the ledge. Drop or climb your way down to the floor here (be sure to land quietly!), then hit William in the back with your hidden blade to ice him.
The Escape
With William’s death, the bells will ring and the gates of the fort will close; you’ll have to take the wall path to escape. From his body, head to the southeast and climb the scaffolding or the ladder there. Free run to the southeast along the fort wall until you find another ladder leading up to the top of the walls. From here, you can climb over the towers leading to the northwest (towards the View Point you may have already climbed up), and then to the northern corner of the fort. You should spot some birds on the edges of the northeastern wall; hop to their position, check the hay beds below you, and jump off. After that you can head off to the Bureau and return to Masyef.
Jerusalem Assassination: Majd Addin
Majd dwells within the poor district of Jerusalem. There are relatively few View Points and citizens to be rescued here, since the district is fairly small. Most of the buildings are also fairly low to the ground, which can make it difficult to engage in throwing people to their deaths, but the tactic still works if you look around for the tallest buildings.
Investigation One: Southeastern Interrogation
Interrogating this man reveals that Addin rules Jerusalem through fear. Say your thanks and kill the talker.
Investigation Two: Western Informer
Another pair of stealth assassinations here: kill them, then return to the informer to learn that a group of scholars periodically attempts to enter the execution area.
Investigation Three: Central Pickpocketing
The man you need to pickpocket here will quickly walk through a line of guards, making him difficult to follow. You’ll have enough time to nab his letter before he walks through, if you’re quick; otherwise you can just kill the guards and wait for the pickpocketing event to reset.
Investigation Four: Eastern Pickpocketing
This pickpocketing will reveal the location of Majd Addin’s guards during the execution.
Investigation Five: Southwestern Informer
This informer wants you to kill three soldiers that are searching for him. Nothing too complicated, but there are a lot of guards around the mosque that the soldiers patrol, so you may want to clear them out before starting the mission. One of the soldiers is on a rooftop, so climb up the little alcove below him, then hang onto the ledge below him before hopping up when he has his back turned and icing him.
Investigation Six: Southern Eavesdropping
You’ll learn that Majd Addin is performing an execution today if you listen in on this conversation.
Majd Addin Assassination
Entry
Addin’s executions take place in a large, open area, so it shouldn’t be too difficult to gain access to it. If you can’t get past the guards, take to the rooftops and use throwing arrows to ice some of the archers, then drop down into the crowd and make your way to the center of it.
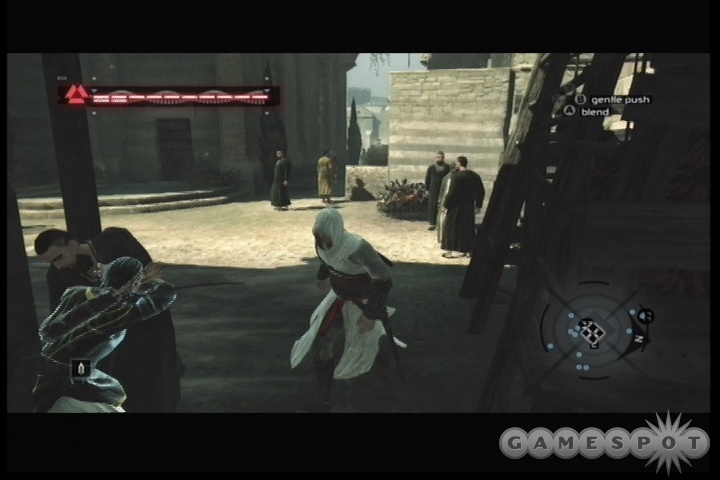
Assassination

Addin does indeed turn his back to the crowd while he lectures his victims, giving you an opportunity to strike. In order to get close to him, use gentle pushes to make your way through the crowd, then blend in with the scholars in the southern end of the square. They’re your distraction: they’ll push their way through the line of guards (who just let them through for some reason), allowing you to break off from them and stand at the base of the platform, behind the guards. Presumably someone finds this suspicious, but no matter: as long as you stay in blend stance, they won’t assault you, even if you’re not part of the Scholar group.
When you’re in position at the base of the platform, stay in blend mode and wait for Addin to turn his back. You may have to try a couple of times to learn when he turns around; if he sees you on the platform, you’ll be swimming in guards. (You can still kill him if you get his attention, if you run for a tall building and wait for him to follow you, but there’ll be 20 or 30 guards to contend with at the same time.) When you learn his pattern for speechifying, though, it’s not too difficult to get on the platform and plant your blade in his neck while he has his back turned.
Escape
You’ll be relatively close to the Bureau here, so you won’t have to run far, but you’ll have a ton of guards on your back. Get up high and start running along the rooftops as quickly as you can and try to break the line of sight when you’re near a rooftop garden. If you run quickly enough, you’ll lose your pursuers. It might be kind of fun to see how long you can keep the huge number of guards chasing after you, though.
Memory Block Five
Interlude
If you pickpocketed Vidic during the last interlude and obtained the passcode from your locker, you can head into your room, then immediately exit it by using the passcode. Head to Vidic’s computer and login with the pass and check his email. Some interesting stuff here, including a tidbit about Lucy’s missing friend Leila (she seems to think that Abstergo is responsible, somehow) and a rather odd deleted email.
Back To Mualim
Mualim will tell you more about the mysterious treasure that the Assassins stole from the Templars, and task you with killing two more targets in Acre and Damascus. You’ll gain the Defense Break ability here; you can press the attack button just after Stepping towards an opponent to break their guard and allow yourself to strike. It may come in handy, as the guards in the towns will now be much more willing to attack you, and there’ll be more of them.
Acre Assassination: Sibrand
The lighthouse in the harbor will be a tough-to-reach View Point. Kill the Templar on the northeastern end of the docks to get a save point, if needed, then hop very slowly across the posts in the water to reach the lighthouse. Climbing it can be another pain, since one of the paths apparently stops functioning when you get just below the grate that protects the flames. If you wrap around to the other side of the lighthouse you should be able to get up top.

Investigation One: Northwestern Eavesdropping
Sibrand hides in the docks, and seems to be understandably paranoid about the threat of assassination.
Investigation Two: Southern Pickpocketing
You can pickpocket this guy even if a beggar is locked onto you. Doing so will reveal that Sibrand will soon retreat to his own private vessel, presumably in the harbor.
Investigation Three: Eastern Interrogation
Beat the guy down here to learn of Sibrand's plans: he's planning to blockade the docks to prevent Richard from gaining more troops. But why?
Investigation Four: Northwestern Informer
Five full targets to stealth assassinate here, with a four-minute time limit. This can be tough, but so long as you don't try to kill anyone while your meter is flashing red, you should be ok. Try to hit the soldiers as they patrol, and hit them from behind! Before they fall to the ground, run like hell and move on to the next target. When they're all dead, return to the informer to net a map of Sibrand's guards.
Investigation Five: Eastern Informer
This one's tough, since the three targets here walk amongst a lot of other Teutonic knights, making the killings tough to pull off. You may want to simply ice a lot of the knights that are stationed in the area, then run away far enough for their bodies to disappear, then return to the questgiver to make your job a bit easier.
Investigation Six: Central Pickpocketing
Sibrand has no guards on the northern ends of the docks. Hmm….
Sibrand Assassination
Entry
Damn, yo. Although the priest that Sibrand kills is probably going to die because of your choice of disguise, there's still nothing you can do to save him. Oh well.
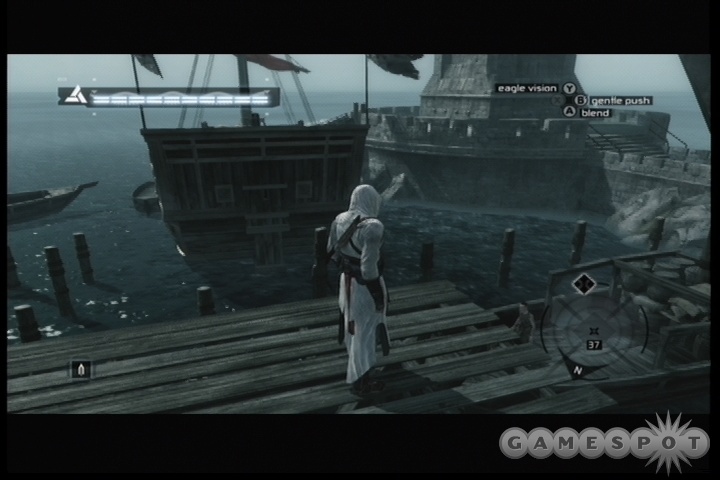
To reach Sibrand, you have to make for his boat, which lies near the southern edge of the docks here. It's the largest boat in the harbor, and has a tattered red sail. Periodically Sibrand will stand on the poop deck of his ship and fire arrows at the assassins that assail him. It's your job to get close enough to make him pay for the arrows with his life.
Approaching the ship via the water can be really, really annoying. The game doesn't register the mechanics of jumping from pole to pole very well, so you'll often wind up in the water if you try to get tricky with your jumps. You may wish to simply head along the southern spit of land and take out Sibrand's guards as you approach; that'll clear you a bit if he manages to make a run for it.
Assassination
When you get close to Sibrand's boat, you'll notice that there are three souls aboard: two guards and Sibrand himself, who wields a bow and arrow and has a wicked hat on. You can start fights with anyone in the harbor that's not on the boat without alerting Sibrand to your presence.
The best way to take out Sibrand involves jumping onto the rear portion of his boat from the tall pole that's near it. To do so, jump to the floating guard tower near the boat, kill the guard there, then hop onto the tall pole and leap from there to the boat itself. Wait for Sibrand to come up onto the poop deck. He'll fire three arrows into the air, then turn to head back down to the deck. Hop over and ice him before he can make it back down.
If anything goes wrong, Sibrand will flee for the city center, where he'll take up residence in a guard tower. If you can catch up to him while he runs, you can assassinate him with the stealth blade. If you approach from the gangplank, though, you can hit one of the guards on the boat with a throwing blade; since Sibrand runs up the gangplank when he escapes, you might be able to hit him with the hidden blade as he runs towards you and make your job a lot easier.
Escape
Escaping from the boat isn't too difficult if you managed the kill on the boat itself; the only guards that are alerted are the two bodyguards, allowing you to blend your way back to the dock exit and run from there to the Bureau.
Damascus Assassination: Jubair Al Hakim
Jubair is in the middle district of Damascus. Nothing special involved in exploring it, but as you may expect, the guard presence is somewhat ramped up by this point in the game.
Investigation One: Western Pickpocketing
Picking this pocket will reveal that Jubair is located inside the Madrasah Al-Kallasah, where he works to destroy all the written works within the city.
Investigation Two: Eastern Eavesdropping
Jubair holds daily meetings in the madrasah. Handy to know.
Investigation Three: Central Interrogation
The barker will reveal that all the books in the city are being destroyed. Yay for repetition.

Investigation Four: Northern Informer
Assassinate the targets within the time limit, and the informer will reward you with a map detailing where Jubair will be later on.
Investigation Five: Southwestern Informer
Three targets for you to kill here in three minutes. Nothing too complicated, but one of them is on the rooftops. Be sure to find a ladder to reach his level to ensure that the guards aren't too weirded out by your trickery. The informer will tell you that Jubair wears golden robes and has a large pouch that differentiates him from the other scholars of Damascus.
Investigation Six: Eastern Pickpocketing
Evading the crazies and picking the pocket here will reveal that Jubair waits within a garden inside the madrasah.
Jubair Al Hakim Assassination
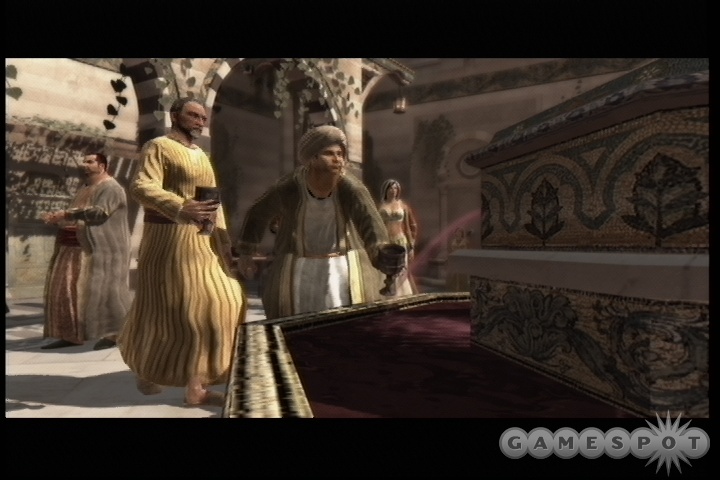
Entry

Scale to the top of the madrasah to witness the opening cutscene here. After Jubair leaves, your GPS will target a number of book piles on the streets in the area. Jubair himself takes to the streets and takes up a position near one of the book piles, intent on lecturing the citizens about why his mission is just. Unfortunately, the other book burners are dressed exactly the same as him, and have similar voices, making it difficult to tell which burner is Jubair and which is a follower.
Assassination
In order to check on the status of a burner before attacking them, use Eagle View; Jubair will appear as yellow, but all the other targets will be red. You can skip the red targets, unless you want to have a little fun killing them.
It's pretty difficult to get into a position where you can stealth kill the burners, but not impossible, if you approach from the rooftops. Ice the archers near the tops of the book piles, then climb down to the ground near the burners, using Blend to prevent the guards from attacking you. The burners don't appear to think you hostile, allowing you to get up close and ice them.
Luckily for you, Jubair seems to always appear as the southeasternmost burner on the map. You can climb down from the rooftops to the north of him via the ladders, wait for him to start speechifying, then drop down behind him and hit him with the hidden blade to finish him once and for all. If he gets wind of you, he'll run; get past the guards around him and quickly give chase to nab him before he escapes. Still, it's easier to just try to get him with the hidden blade and not have to worry about that.
Escape
Get back to the Bureau via the rooftops and lose as many followers as you can.
Memory Block Six
Interlude
Speak to Lucy at the Animus and also at Vidic's desk to learn more about what the Templars are plotting, then sleep and hop back into the machine.
Mualim
Your rewards now are more sword damage and more throwing knives. Mualim tells you to kill Robert De Sable in Jerusalem.
Jerusalem Assassination: Robert De Sable
The middle district of Jerusalem will be the unfriendliest yet. Plenty of guards, plenty of archers on the rooftops, and a populace that will be ever more wary of the antics of anyone who attempts to climb on the walls. Be wary.
Investigation One: Northwestern Eavesdropping
The crusaders are camped near a graveyard, preparing to attend a funeral.
Investigation Two: Northeastern Pickpocking
You'll obtain a map detailing the locations of the Jerusalem guard during the funeral here. You'll probably want to kill all of the guards at the doors of the little fort here before trying the pickpocketing.
Investigation Three: Central Interrogation
Keep in mind that this guy is pretty tough; he'll take off three health bars per hit. Take him down quickly and try to avoid getting any thugs involved. The barker has nothing useful to say save for reiterating that Robert wants peace in the land.
Investigation Four: Northeastern Informer
Five targets in five minutes, but their paths sometime cross, so it'll be difficult to take them all down. If you kill one, and the others find the body, it'll be tough to take them out in the crowd, so be quick and efficient in running from target to target, blending only when guards are looking at you suspiciously; hit a bench to get their eyes off of you. Keep in mind that an actual Templar is in one of the alleys around this area; he'll instantly call an alert if he spots you.
The informer will tell you that Robert's men are well organized. If you strike an alert, try to escape and return later to hit them one by one.
Investigation Five: Western Informer
Two targets here, but they're fairly far apart, and one of them is on the rooftops. Try to find a ladder below the path he patrols and pop up after he passes by, then head back to the ground to nail the other guy.
Investigation Six: Eastern Pickpocketing
Pickpocket the priest to obtain a map detailing Robert's position during the funeral.
Robert De Sable Assassination
Entry
There isn't any way to really head in stealthily here. Before entering the graveyard, though, be sure to clear out the nearby rooftops of archers, and if you spot any stationary guards, take them out as well.

Unfortunately, when you enter the graveyard, Robert de Sable will spot you. After the service is over, he and all of his men will come after you. The more guards you took out, the less you'll have to deal with.
Assassination
Taking out Robert is as simple as knocking him down and hitting him with your hidden blade. Unfortunately, with a dozen or more guards coming after you, including a number of Templars that will dish out two bars of health damage with each swing, this can be a tough fight to conclude. There's no hiding and no escaping, so you're forced to keep up the fight until Robert is dead.
The usual tactic of heading to high ground and knocking your foes to the street is recommended, although it can be difficult to stay in one place for long without getting swarmed by enemies. It'll take a while, but it can be helpful to try and get to the top of a tall ladder, turning around, swinging away at some of the enemies as they reach you, then running when you get surrounded and attempting to reach another part of the level. Alternately, you can try to find cover in a group of vigilantes and using them to break up the group of followers to make it easier to kill them. Finding high ground above a group of vigilantes will let you knock people off into the helpers, making for double fun.
Robert himself, he of the funny voice, cannot die due to falling damage, so you'll have to take him out with your blade. He's a fierce fighter and a tough nut to crack. Your best bets are to get him on the ground and quickly hit him with your hidden blade to finish the fight, as he'll be tough to kill with swords. You can do this after countering a move, or by grabbing him and throwing him into a wall nearby, where he'll fall without traveling too far from you.
Escape
It'll be tough, but eventually Robert will be…waitaminute. That's not Robert! Escape back to the Bureau to reveal what you must do next. You have to head to Arsuf to find Robert, for reals!
Arsuf Assassination: Robert De Sable

Arsuf is located near Acre, so warp there, then head out to the Kingdom to find the waypoint on your map. When you find Arsuf, head inside, then start making your way through the various challenges that await you. The battlefield here is littered with corpses, but there are many more live men that will challenge you. In most cases, you'll have to kill everyone to move on. The last group of Templars is the toughest, but you can kill most of the weaker enemies with combo kills.
When you find Richard and Robert, you'll wind up in a very, very tough battle. You need to beat Robert in a fight in order to move on, but before you can do that, a dozen Templars of various difficulties will engage you all at once. The unhelmeted ones are the easiest, so you may wish to try and take them with combo kills before dealing with the helmets, but this will be difficult since you'll often be interrupted by incoming attacks. The helmets will usually deal two damage per blow, and have a very wicked combo attack that can break through your guard, resulting in a total of six damage with a single flurry.
After all of the soldiers are dead (and it'll take a few tries without any tall places to knock them from), Robert himself will come after you. The easiest way to take him down is to, again, knock him down and hit him with your hidden blade. Try to position yourself so that he's in between you and one of the walls, then grab him and push him into the wall. If you can do so, he'll fall down and you can ice him just like that. Killing him with the blade will take longer, but is also doable.
Memory Block Seven
After killing Robert, you'll be ejected back into the real world again. Talk to Lucy after Vidic leaves the room, then sleep and get back on the table. If Vidic is so open about his plans to kill you, it seems like you might want to grab a chair and beat his brains out, but unfortunately that's not an option.
Masyaf: Al Mualim
The time has come to finish your journey. When you arrive in Masyaf, you'll find that Al Mualim has used the treasure on its populace, rendering them thralls in his service. There'll be a large number of soldiers up the hill that will force you to attack them. Do so and kill them all. The second group that attacks you will be larger in number, but you'll have more room to maneuver. Get on top of the large building nearby and knock them off the ladder until your Bureau friend from Jerusalem shows up.
Use gentle pushes to make your way through the crowd in front of Mualim's fortress, then fight your way to the rear courtyard.
Boss Fight

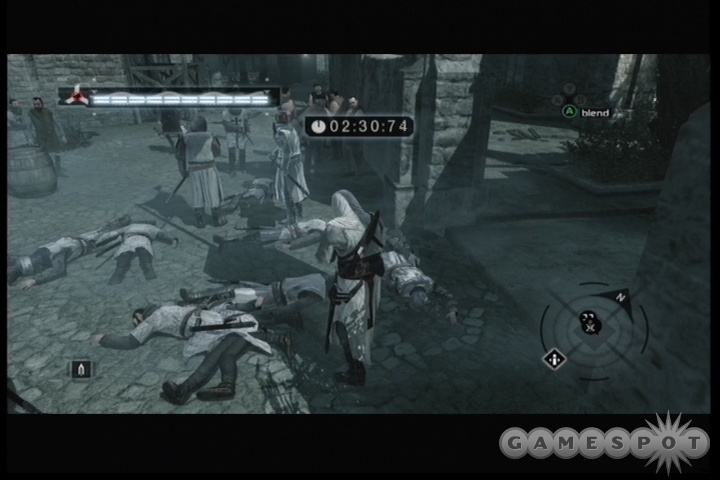
The first major fight you have here pits you against the nine bosses that you've assassinated thus far. Everyone from Tamil to Robert de Sable takes part in this little gang fight. This can be a tough challenge, since each of the bosses will hit for two bars of health per strike. Luckily, each of them will normally be killed by a single counterattack, so that's your best bet to survive: just hang back, keep your guard up, and counter when possible. Eventually the ranks will be thinned out and you can finish up the remaining forces.
If you're having a tough time here, try to run away a bit and use your throwing blades on the foes. They'll die, but it's important to keep most of your throwing blades for the next phase of the fight.
Multiple Mualims
After Mualim splits himself into multiple versions of himself, things get tougher. As before, you'll lose two bars of health to a successful hit, but these guys can't be killed with a single counter; they'll take a fair amount of damage.
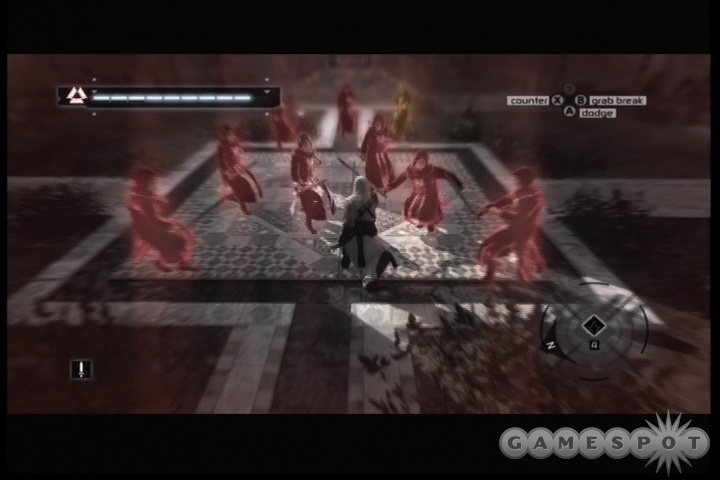
The real Mualim hides among his clones, and the fight only ends when you kill him. The only way of telling him from the crowd, however, is to use Eagle Vision. He will show up as a yellow assassination target while his clones appear in red. Your best bet here is to first do your best to take down some of the enemies in combat using counters. When you start to run low on health, run away by jumping over a balcony or two, turn around, and use your throwing knives to cut down some of the pursuers. You may get lucky and hit the real Mualim with a blade, as we did, which will end this phase quickly; otherwise you will thin the crowd and make it easier to complete the combat with counters.
If you have to fight with the sword here, try fighting near the uppermost level of the terrace, near where the fountain flows off the edge. You can throw your opponents off the edge to thin their ranks a bit, even if they do come right back up. If worst comes to worst, you can jump down to the pool, wait for your foes to follow, then climb back up over the stone fence. They'll follow you up the stairs, but will climb onto the fence and can be knocked off with your sword. Another good place to fight is at the top of one of the staircases, if you can get all the enemies at the bottom. That'll protect your back and prevent all the enemies from swinging on you at once.
Mualim Mambo
In the end, Mualim will fight you mano-a-mano, but with a twist; he'll disappear every time you hit him. At the outset, just get a counter on him to make him disappear, then start looking around for him; he can warp around the terrace at will. You'll eventually spot him elsewhere on the terrace; the glow of the yellow orb will make him visible from a ways away.
Before you engage him, though, note that your health bar has vanished. If you get close to Mualim and he hits you before you hit him, he'll instantly kill you. To prevent this from happening, be sure you get the first hit in; the easiest way to do this is to throw a knife at him from a distance. That'll force him to come after you, where you can counter him again to cause him to disappear.
Eventually Mualim will stop disappearing, and the graphical glitches in the area will stop occurring. This signals the final phase of the fight: you and Mualim, one on one! He's a predictably tough fighter, fond of defense breaks and dodging, but you can even the odds a bit by running away from him, forcing him to follow you in a straight line, then turning around and throwing your remaining throwing knives at him. In combat, counter him whenever possible and attempt to get him on the ground for an assassination.
Final Interlude
At the very end of the game, you won't be able to talk to anyone. You will, however, be able to use Eagle Vision now. Use it on the floor to check out the runes, then walk into your bedroom and use it there, as well.
After the credits roll, you can return to the Animus and check out the Memory Block Seven for a brief epilogue to the game, detailing Altair's adventures after defeating Mualim. Besides that, though, there's little to do…except wait for Assassin's Creed 2: Assassinate Harder, sure to be coming to a console near you in 2008.
Assassin's Creed Xbox 360 Achievement Guide
Hey, want to know more about how to unlock the achievements in Assassin's Creed? Then look no further.
| Name of Achievement | Task | Point Reward |
|---|---|---|
| Welcome to the Animus | Complete the Animus tutorial. | 20 |
| Hero of Masyaf | Defend Masyaf from the Templars. | 20 |
| The Punishment for Treason | Find the traitor and bring him before Mualim. | 20 |
| Blade In The Crowd | Kill an assassination target while standing behind them, with the hidden blade, without alerting the guards beforehand. | 30 |
| The Blood of a Corrupt Merchant | Slay Tamir. | 25 |
| The Blood of a Doctor | Slay Garnier de Naplouse. | 25 |
| The Blood of a Slave Trader | Slay Talal. | 25 |
| The Blood of The Merchant King | Slay Abul Nuqoud. | 25 |
| The Blood of a Liege-Lord | Slay William of Montferrat. | 25 |
| The Blood of a Regent | Slay Majd Addin. | 25 |
| The Blood of a Teutonic Leader | Slay Sibrand. | 25 |
| The Blood of a Scribe | Slay Jubair. | 25 |
| The Blood of a Nemesis | Slay Robert de Sable. | 25 |
| The Eagle and The Apple - 1191 | Complete Assassin's Creed | 100 |
| Visions of the Future | Sit through the end credits. | 50 |
| Disciple of the Creed | This is listed as forcing you to assassinate all of your targets with a full DNA bar, which means that you need to rescue all citizens, climb all view points, and complete all investigations before taking down your targets. | 30 |
| Defender of the People: Acre | Rescue all citizens in Acre. | 20 |
| Defender of the People: Damascus | Rescue all citizens in Damascus. | 20 |
| Defender of the People: Jerusalem | Rescue all citizens in Jerusalem. | 20 |
| Absolute Symbiosis | Gain all 20 synchronization bars on your life bar. Rescue all citizens and visit all View Points and this should be easy. | 45 |
| Eagle's Will | Remain undefeated for 100 separate battles. | 20 |
| Eagle's Swiftness | Kill enemies within sight of 100 different people. | 20 |
| Eagle's Dance | Perform 50 Leaps of Faith. | 10 |
| Eagle's Talon | Kill 50 people with the hidden blade. | 15 |
| Eagle's Prey | Kill 100 city guards in any of the cities. | 20 |
| Eagle's Eye | Kill 75 guards with throwing knives. | 15 |
| Eagle's Flight | Last 10 minutes in open conflict. This is all at once, not split up over time. Apparently this entails just getting a bunch of guards hostile to you and deflecting their blows for ten minutes. Alternately, you can use the gangs of vigilantes as well; just lure some guards into them and let the vigilantes hold onto them for 10 minutes. | 20 |
| Eagle's Challenge | Challenge 25 guards in a single fight and win. It's unclear if this means that you can't break line of sight, or simply cannot hide in between kills. Regardless, it's easiest to accomplish in the Kingdom area, where there aren't any Vigilantes to frustrate your efforts to group guards. Find a group of 10 soldiers on the march, run through them to get them aggravated, then run just in front of them towards more guards and try to get a bunch of soldiers attacking you at once. Take them to a guard tower and start chucking them over, and eventually the achievement will unlock. | 20 |
| Eagle's Dive | Perform 50 combo kills in fights. Apparently this is cumulative; it's tough to imagine that you have to do it all at once. | 20 |
| Fearless | Discover every View Point in the game. | 25 |
| Hungerer of Knowledge | Click through to watch at least 85% of the memory glitches during cutscenes. | 20 |
| Conversationalist | Go through every dialogue with Lucy. We could've sworn that we did so, but apparently we were mistaken, or we missed an opportunity to talk to her. Be sure to click on her multiple times during each interlude. | 20 |
| The Hands of a Thief | Pickpocket 200 throwing knives. | 15 |
| March of the Pious | Use Scholar blending 20 times. You just need to blend and leave; no need to go through a guard post or anything. | 5 |
| Enemy of the Poor | You know those annoying women who pester you for money? Go into High Profile mode, grab them, and throw them to the ground. Do it 25 times to earn this achievement. You can also grab the crazy people who shove you around. | 5 |
| Gifted Escapist. | Jump through 20 merchant stands. | 5 |
| Personal Vendetta | Kill every Templar. This means the 60 hidden Templars that are scattered around the game world, not people like Robert de Sable. | 40 |
| Keeper of the Lions Passant | Find all of Richard's Flags in the Kingdom. | 25 |
| Keeper of the Creed | Find all flags in Masyaf. | 10 |
| Keeper of the Four Gospels | Find all flags in Jerusalem. | 20 |
| Keeper of the Crescent | Find all flags in Damascus | 20 |
| Keeper of the Black Cross | Find all Teutonic flags in Acre. | 10 |
| Keeper of the Order | Find all Templar flags in Acre. | 10 |
| Keeper of the 8 Virtues | Find all Hospitalier flags in Acre. | 10 |
Got a news tip or want to contact us directly? Email news@gamespot.com
Join the conversation