Manhunt 2 Walkthrough
Trying to escape The Project? Let GameSpot's Walkthrough to Manhunt 2 show you how.
Rockstar’s Manhunt 2 had an infamous history before it was even released. Slapped with the retailer-unfriendly "AO" rating, Manhunt 2 needed a few trims, cuts, and blurs to reach store shelves. Fans of the original Manhunt know what to expect: stealth-based gameplay, a diverse array of killing tools, and the signature grisy executions.
We’ve compiled everything you need to survive the asylums, underground dungeons, and Hunter-filled warehouses, train yards, and neighborhoods. We cover specific strategies for stealth executions, gun battles, and provide a complete walk-through for the Manhunt 2 storyline.
GameSpot’s Game Guide to Manhunt 2 features the following content:
Tips and Hints
Some tips and hints on remaining stealthy or fighting your way through.Weapons and Items
Check this section for an overview of each weapon and item type.Walkthrough
This section provides a comprehensive walk-through of all story missions.
Chapter 1 - Tips and Hints
Although Manhunt 2 is primarily a stealth game, it’s certainly possible to play as a straight up action game. Possible is a relative term, though. Until your character locates a firearm, attempting to muscle your way through levels will be extremely difficult if not nearly impossible in some cases. Manhunt 2 is built for stealth. From the gory, "blurry" executions to the patterned enemy patrols, it pays off to remain patiently in shadows, utilize lures, and sneak up on enemies while attracting as little attention as possible.
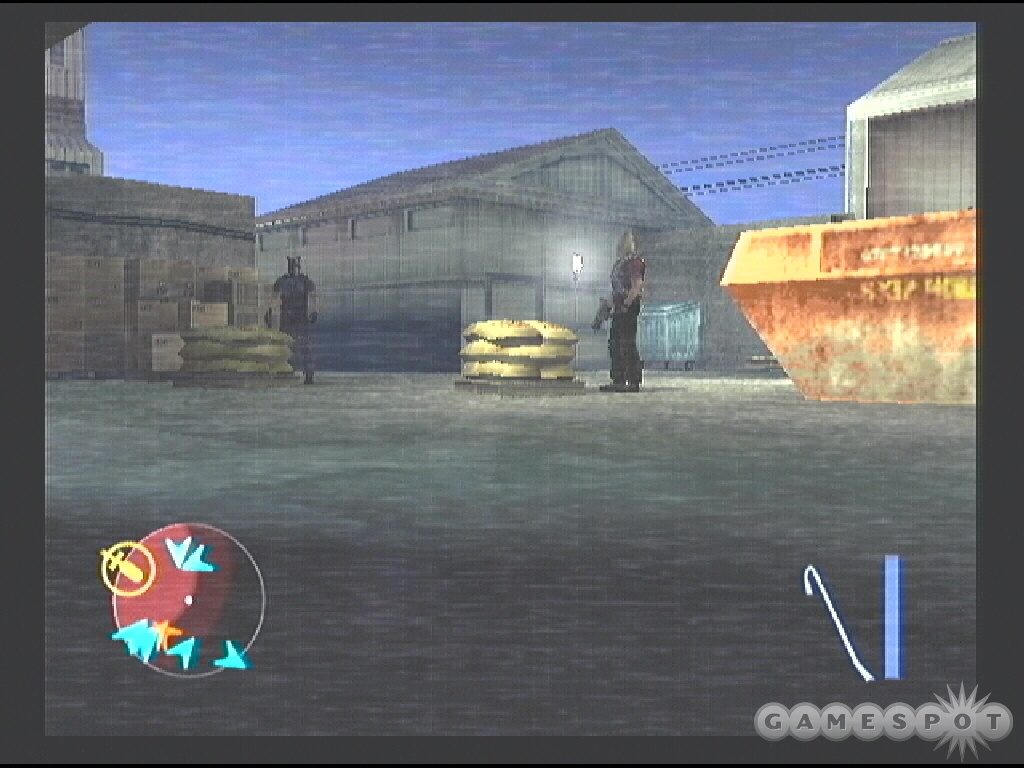
Unless you’re attempting the game on "Insane" difficulty, you’ll have the benefit of the radar, which will certainly prove invaluable over the course of the game. The radar indicates enemy position, which direction enemies are facing, enemy status, and ambient noises, both how much noise you’re creating and the noise level of other characters or objects.
Yellow enemies are idle. These enemies are standing at their post or currently moving on their patrol patterns—these enemies are essentially unaware of your presence. Orange enemies are suspicious. Perhaps you’ve made a sound, tossed a lure to make a noise, or the particularly enemy may have even seen a glimpse of you. Orange status enemies will divert off their patrol pattern to investigate the noise. Tougher "hunter" enemies will check shadows; if you’re inside, you may have to complete a button combination mini-game to avoid detection.
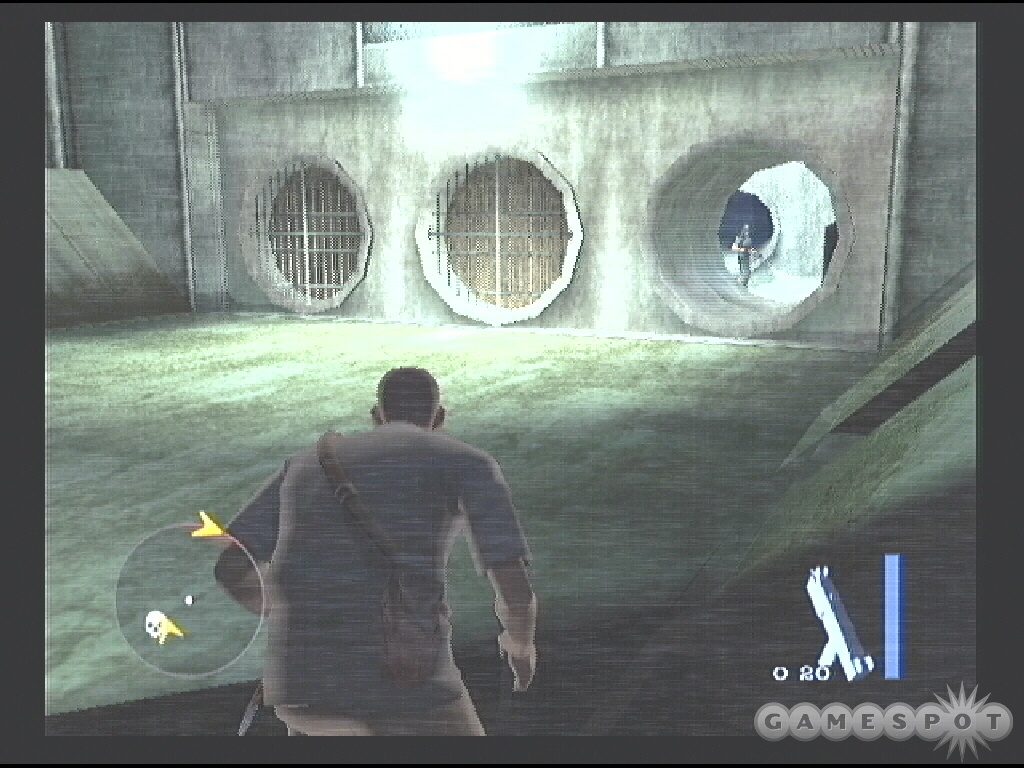
Red status enemies are aware of your presence and location. You’ve been spotted and are potentially in big trouble. If it’s just a single enemy, you shouldn’t have much trouble battling the enemy with melee strikes. But if multiple enemies detect you, it’s a difficult situation to overcome through melee fighting alone.
You can turn red status enemies back into orange by running away and taking cover in shadows or finding a good hiding spot and waiting it out. It’s not always effective but can work in certain circumstances. Enemies are persistent, though, and fairly quick and can maintain pursuit even if you’re running away at top speed. Obviously you should avoid making multiple enemies aware of your location…unless of course you’re carrying a firearm. If that’s the case then ignoring stealth and going straight-up action is a viable tactic.
Shadows are your best friend. When entering a new area, immediately scan around for dark areas. You may find safety in a corner or behind a dumpster. Your health bar turns blue when you’re clouded in shadow. You’re relatively safe from detection here although tougher enemies can scan shadow areas and detect your location if you fail to complete the mini-game sequence (you must quickly press the indicated button or button combination).
Hiding in shadows will keep you hidden but it won’t necessarily get you around dangerous enemies. You will likely have to get rid of an enemy to proceed in the game. This is where the shadow works offensively as well as defensively. There are a couple ways to lure an enemy toward your hiding place. You can smack the wall with a melee attack or you can use a lure (yellow items such as cans, bottles, and bricks).
Toss the lure toward where you want the enemy to investigate. You should toss the lure in a location where the enemy will have his back turned so you can approach from behind and perform the execution.
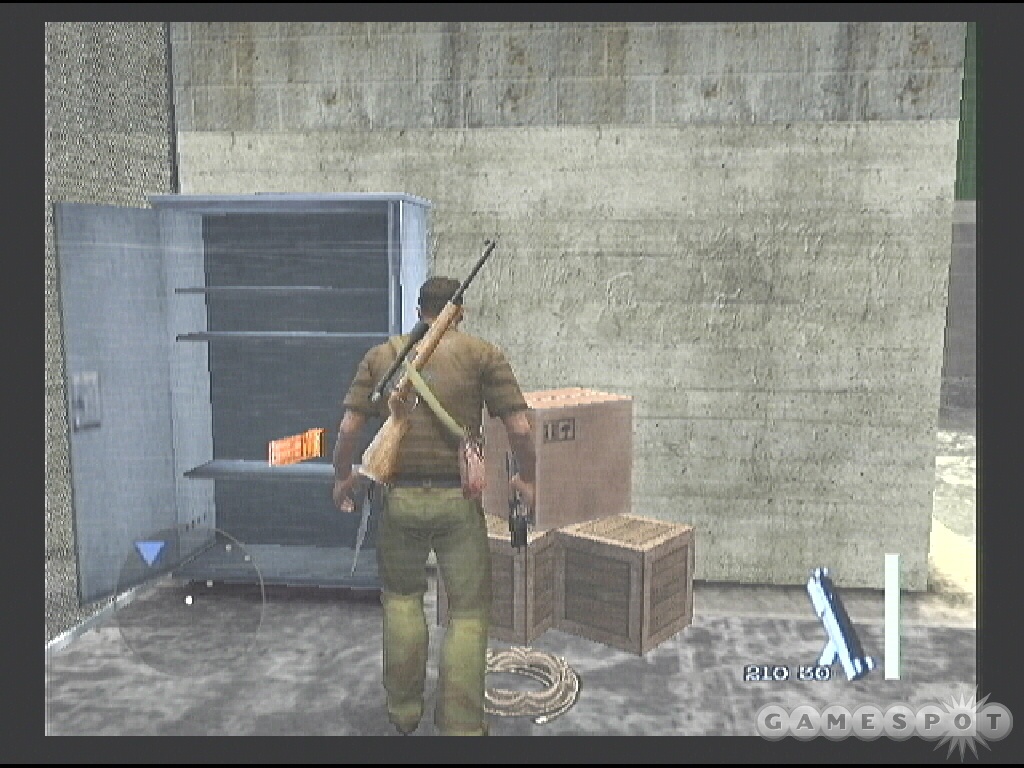
Once you recover a firearm, Manhunt 2 can become an action game. Pistols, shotguns, uzis, sniper rifles, and assault rifles—they’re all powerful and capable of eliminating enemies in quick fashion, especially if you aim for the head and score a headshot.
Although you can inflict a lot of damage with your firearm, your body can’t sustain much from enemy fire. You must still take cover, such as hugging a wall or taking cover behind a table. Pop in and out of cover to target and take shots on the enemy. Remain in cover while you need to reload. Stick close to corners because often you can carefully aim around the corner and target enemies before they can return fire.
Chapter 2 - Weapons and Items
The Manhunt 2 weapons and items are separated similar to the first game. Lures are yellow, one-use execution items are green, light melee and firearms are blue and heavy melee and firearms are red. You can carry one of each type for a total of four items. The light and heavy options allow you to carry two firearms at once. This section provides an overview of each type.
Yellow Items - Lures
The yellow items are lures and are primarily used to create a distraction for enemy guards. Toss the lure at a particular location and any guard within earshot (or visible range) will investigate. Position the lure carefully so you have the opportunity to sneak up behind the investigating guard and perform an execution. Ideally you should cause the guard to investigate close to your hiding spot so you have a short trip to the execution point.
Also try to lure the guard away from other enemies so you aren’t seen or heard. You could also use the lure to have an enemy move from their patrol pattern so you can sneak past without the execution…but where’s the fun in that? Below are some examples of lures you’ll find in the game.
Bricks and cans are similar lure items because they can be used more than once. After tossing a brick or can you can pick the item up again and use it a second (or more) time as a lure. A glass bottle, however, is a single-use lure item. Tossing the glass bottle causes it to break and it can’t be picked up again. In one mission, you’ll find small balls in the backyard of homes. You can toss these to cause guards to investigate the commotion.
Perhaps the most unique lure item is the head. Yep, the severed head. A few times during the course of the game you are required to obtain a severed head. You can accomplish this with weapons like the axe or sword by performing a gruesome execution or just attacking a corpse. The head will certainly get an enemy’s attention but it will make them suspicious…since, well, it’s a severed head after all.
Green Items
Green items are one-time use execution items. Once you have used the item, it disappears from your inventory. With the green item equipped, sneak up on an enemy and perform the execution. Utilize green execution items against guards you’ve lured away from the pack. Below are some examples of green one-use execution items.
The glass shard is an item you can actually create as well as find. When you break a window (or an enemy does it for you), a glass shard drops nearby. The syringe is one of the first items you’ll find in the game. Obviously once you’ve injected its contents into an enemy and the execution is complete, the syringe becomes useless and disappears from your inventory.
You can turn the ordinary household pen into a weapon—a one-time use execution weapon. Think of it like an ice pick with ink. Additional green one-time use execution items include the plastic bag and the barbed wire.
Blue Items
The blue items include tools and light weapons (which include light firearms). There are several times during the game where a tool is required. For instance, a crowbar is needed to break open padlocks on doors or open closed hatches. And pliers are used to peel open a chainlink fence. But tools have other purposes as well…namely executions. So just because you’re holding a crowbar to open locks doesn’t mean you can’t use it to pummel an enemy into submission.
Some other blue items include the police baton, sickle, and power saw. All of these can be used to enhance your standard melee attacks as well as performing silent executions. Equip the blue item, sneak up on an unsuspecting enemy, and perform the execution. Unlike green items, these blue items aren’t one-time use only.

There are also blue item firearms. Although you’ll use them primarily to attack from long-range, firearms can also be used in executions. Sneak up on an enemy as you would any other weapon and perform the execution. There are several types of pistols and handguns of various degrees of power. One unique handgun is the flare gun recovered a couple times during the game. Although it has little ammo and slow to use, it’s quite powerful. Hit an enemy with a flare to ignite the foe on fire. The tranquilizer gun is another special blue weapon you’ll find in a couple specific missions.
The uzi is an effective mid-range weapon. It fires quickly and capable of eliminating enemies in quick fashion but is less accurate than pistols. When possible, fire the uzi in short-controlled bursts and as always, aim for headshots for quicker kills. Because of its large clip and larger ammo supply, the uzi is a solid firearm and one that should be grabbed whenever found.
Red Items
The red items are heavy melee and firearms. Essentially these are the strongest weapons in the game. You can only hold one red type weapon at a time. Some of the red melee weapons include the baseball bat, fire axe, sledgehammer, stun prod, shovel, clippers, and sword. All of these weapons can be used in silent executions (and are particularly gruesome). Items like the fire axe and sword can be used to sever heads, which must be done to complete particular mission objectives. You can sever a head via gruesome execution or by hacking at a corpse.
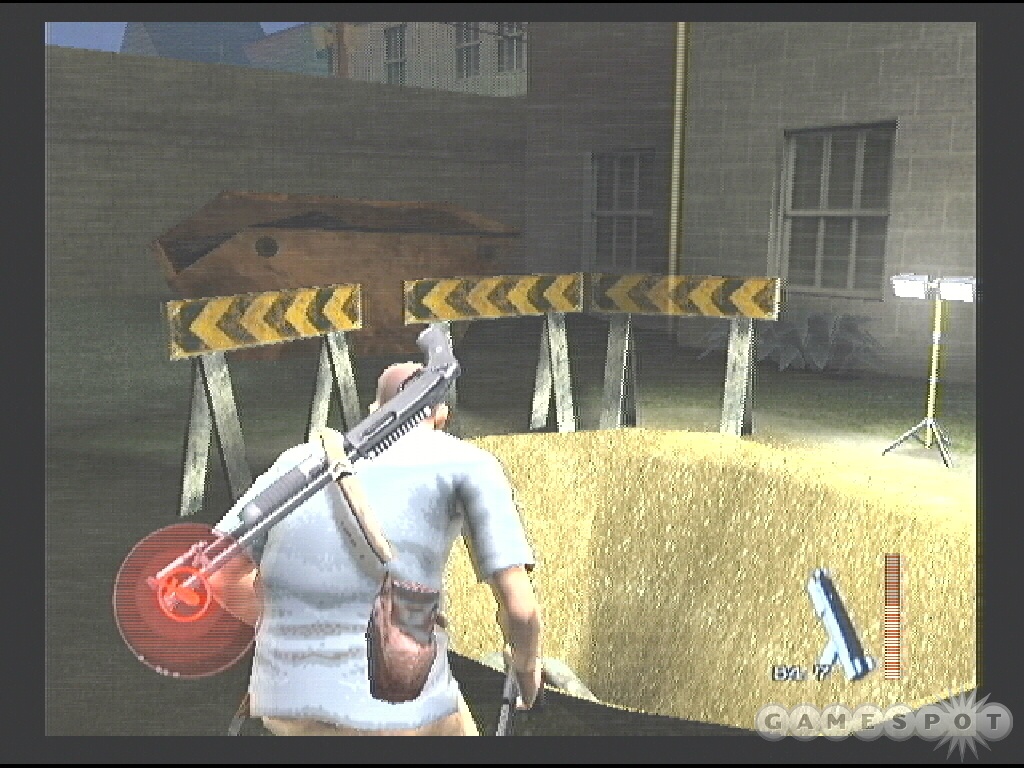
Red item firearms are equally potent. The available shotguns are devastating close-range weapons but certainly not as effective at longer range (use in combination with a blue pistol for a solid short and long combination). One shotgun blast at close range is enough to eliminate an enemy but the weapon’s spread really limited long-range effectiveness. The shotguns don’t hold many rounds so make sure you have cover available to reload.
The sniper rifle and crossbow are similar long-range weapons. Use this specialized weapon to target enemies at long and extremely long-range. Ammunition is somewhat limited so aim for headshots for one-shot kills. Crossbow bolts that miss their target can be picked up and reused.
You’ll acquire the assault rifle late in the game and it’s the best firearm available. It combines accurate, rate of fire, and firepower. Keep ammunition levels high by gathering ammunition dropped from slain enemies. Obviously you should still aim for headshots as often as possible to conserve ammo.
Like the blue firearms, you can use the red firearms for more than just shooting. Equip a red firearm and sneak up on an unsuspecting victim and perform the execution.
Chapter 3 - Walk-through
This section provides a complete walk-through for Manhunt 2. Note that the PlayStation 2 and Wii versions of the game differ slightly, mostly in the placement of particular items like medicine, ammunition, and execution items. The following walk-through is specific to the PlayStation 2 version so the location of some items may differ. The strategies and tactics cover both games.
Awakening
Objective: Get upstairs.
Move forward following Leo, who runs ahead to scout. Follow the instructions and remain in the shadows to avoid the lunatics in their cells. Sneak past the second cell as the guy faces away or suffer the fluid consequences. You receive a pat on the back if you get through without being seen. If you want, run past and get spotted; you’ll get some extra cut scenes that you may or may not enjoy.
Continue down the next hall and follow it around to the left. Leo tells you about the syringe weapon ahead; you’ll need it to get past the nurse. Walk over the syringe and sneak up behind the nurse. Follow the onscreen instructions to complete the execution move.
Go through the open door and head up the incline. Move into the next hallway. A psycho blocks your path. Target and use melee attacks to eliminate the problem. Hold the attack button for a heavy blow. After knocking the psycho down, use the attack button to assault the psycho while he’s down and finish him off. Follow the marked objective into a room on the left side of the hall to find first aid. Grab the syringe.

Exit toward the guard station and hide in the marked shadows on the right side. Punch the wall to lure the guard outside. When he faces away from you, sneak up behind and complete the syringe execution. Go inside the guard station and press the red button to open the exit.
Objective: Get into the elevator. Find a way out of the building.
Search the left side of the hall for a locker containing a pen. If you continue around the corner you’re told to return to your quarters and a nurse begins to search for a way to get to your position. Press the red button across from the hall entrance to open the elevator. Get inside and press the button to ascend.
Climb out into the hall. There’s another pen on the ground if you didn’t get the one from the locker. Proceed forward through the exit and hug the wall to glance around the corner. Peek around the corner and spot the patrolling patient. You can hide in shadows on the right side of the hall closer to the patient. Sneak up behind and execute with the pen. Run back and get the other pen at the elevator. Check the room on the left for first aid.
Press the button opening the next hallway. There’s a patrolling nurse here; hide in one of the cells and make some noise to get him close. Or sneak into the next cell (which contains first aid and a syringe) while he’s walking away toward the end of the hall. Wait for your chance when the nurse is walking away; sneak up behind and perform an execution.
Watch out for a psycho that escapes a cell at the bottom of the stairs. Sneak up and perform an execution (there’s a syringe on the ground) or pummel him with melee strikes. Search his cell for first aid. Check the closed cell rooms (one contains a glass shard) but then close all of the open doors to open the gate at the far end of the room.
Grab the first aid off the shelf. At the intersection, hide in the shadows on the right and wait for one of the nurses to pass from the staircase ahead. Search the locker on the side for a pen. At the top of the stairs, take cover in the shadow; the guard will come back. Wait until he leaves. Search the shelf and locker for first aid and a pen respectively. Proceed to the next door for another tutorial.
Sneak up behind the nurse carefully and perform an execution (using the syringe found here). Approach the window in the left corner of the room and break it using a punch. If you’re heard, quickly climb out and drop down.

Objective: Get inside the truck.
There’s some first aid and a couple shards nearby if you need health or a weapon. Watch for two patrolling nurses. Move to the left of the start position and hide behind one of the dumpsters when the nearby nurse moves away. You can take out the nurses or wait for them to both walk and look away from the truck. With the path cleared, approach the back of the garbage truck to complete the level.
Ghosts
Objective: Find the old house.
The Project’s "cleanup crew" got there before you did. When you gain control, follow the on-screen commands to avoid being detected by the hunter—he can detect you in shadows. After the hunter moves away, grab the paper bag near the trashcans and continue to the exit. Hide in the adjacent shadows and watch the hunter patrol outside. When he’s unaware, you can run across to the shadow, which contains another paper bag. You could also wait for him to pass, sneak up behind, and perform an execution.

Follow the path until prompted to jump over the wall. Climb over the wall and take cover in the shadows. Wait until the hunter moves away. There’s another weapon here, some barbed wire, if you need one. Exit to the right inside this area once the hunter moves away in the opposite direction. Grab the lure. Good hiding spots here if you want to eliminate that hunter on his return trip. You can take his crowbar for the effort. Crawl under the broken fence and over the dumpster into the next area.
Objective: Break into the house.
Cross the yard and approach the house. A chain locks the door. Equip the crowbar and use it to break the chain locking the door.
Objective: Investigate the house. Search the cabinets and trunks.
Continue into the house until Leo interrupts your search. Search a cabinet and trunk downstairs (one in the room with the televisions). Head upstairs and check the rooms for a couple weapons, some first aid, and a handful of cabinets. You’re told when the floor is cleared and when to proceed into the basement. Return downstairs and continue down to the basement (door adjacent to stairs).
A basement trunk contains your objective (plus you can find some weaponry and first aid if you need them).
Objective: Look for a syringe in the bathroom.
You’ve got company. Move quickly and you can take cover in shadows just across from the basement entrance. When the hunter moves inside, sneak up behind and execute. Grab the shard in the basement if you need a new weapon. The other hunter is on the top floor. Proceed up the staircase carefully.
You can sneak up into the top floor before reaching the top of the stairs; look on the left side and climb into a dark room. Make sure the hunter isn’t nearby before proceeding. Take cover in the shadows there. Wait for the hunter to move away from your position and make your move.

Enter the doorway closest to the stairs. Another hunter bursts through the window here. If you left the other hunters alive you will have to deal with them now—it’s much easier dealing with just one. Use your blocks and attacks to take him down.
Go through the open window to reach the rooftop. Go left and into the open window into the bathroom. Snag the first aid if needed. Pick up the syringe.
Objective: Meet Leo in the hallway. Kill all remaining hunters.
A hunter emerges below you. Perform a jump execution or just drop down and beat him to death. You will automatically meet Leo after taking out the hunter assuming all other hunters have been eliminated.
Sexual Deviants
Objective: Find a way into the club.
Grab the brick from the pile in the back corner of the alley. Look just to the right of the pile and find the glass window. Toss the brick throw the window to provide an entrance into the club. Pick up the piece of glass left behind.
Objective: Investigate the club.
Climb through the window and drop down into the bathroom. There’s a hunter inside…relieving himself. Sneak up behind the hunter and perform an execution using the toilet. Exit the bathroom.
The music is so loud in the club that the hunters can’t hear your movements or any attempts to lure them into an execution attempt.
Objective: Find and trigger the release mechanism for the stage door.
Watch the light patterns in the hall. There’s shadows along the left side but occasionally light from the club brightens the area in a red glow. If you get caught in the light, the hunters will scramble to investigate. Wait until the hall is dark and move forward to the next lit area. When it goes dark, run across. Locate the shard in the back corner and a nearby lure. A cut scene reveals the location to the stage door release.
Hide in the shadows in the corner as the hunters are now moving around since there’s no stage show to enjoy. With the music off, you can toss the brick to lure enemies into an execution. Wait for the hunters to move on patrol around the shadow and take them out. Hide the bodies inside the shadow. After eliminating two hunters, return to the bathroom and grab the syringe. Use a brick to lure the third and final hunter toward the shadow and execute him.
Search the bar area for some bottles, a shard, and a baseball bat next to the release mechanism. There’s also a storage area that leads back to the hallway. You need pressure to keep the switch down—something around the weight of a dead body. Pick up one of the dead bodies you left in the shadow and drop it onto the release mechanism. Get onto the stage and go through the open door.
Turn left in the new hallway and spot another baseball bat. There’s a hunter at the end of the hall. Sneak up on him and perform an execution. Grab the first aid off the counter. Proceed to the right and approach the double doors.
Objective: Gain access to the underground dungeon.
A hunter patrols the dance club to the right. Wait for him to look away and sneak into the shadow on the right side of the room. Use a lure (brick or bottle) to get the hunter’s attention close to the shadow. When he investigates, eliminate the hunter with the baseball bat and drag his body into the darkness.
The entrance into the underground dungeon is beyond the stage area. Approach the door in the back but you’re told only familiar faces get in. You’ll have to…acquire one.
Objective: Show a familiar face to the guard.
You need to get upstairs; the staircase is one the right side of the club. There are a couple hunters patrolling upstairs. You can lure them downstairs and hide in the shadows adjacent to the staircase. When they investigate, execute and drop their body in the shadow.
Search the upstairs area for first aid and a couple of fire axes (one behind a bar, another at the end of the hall with the staircase). You must break the glass using the bat then switch weapons to the axe.

There’s a fourth hunter that may hear the commotion and head up the stairs to investigate. Find cover and sneak up on him as he arrives or test out your new axe with melee attacks or an execution. An axe execution could net a severed head; otherwise, after dropping him, stand over the corpse and attack with the axe to gain your familiar face. It’s essentially a lure so switch out using the controller and grab the head.
Approach the back door and show the head to the guard. You gain access to the underground dungeon.
Objective: Investigate the underground dungeon.
Eliminate the guard that let you in by sneaking up on him. Go to the staircase in the back of the hall and descend. Continue through the door into the dungeon until a cut scene interrupts the action.
A hunter patrols the hall. Go to the first alcove on the right and bust the light with your axe. This alerts the hunter but also creates shadow. Take cover and grab the buzzsaw if you want. Once the hunter gets close and turns his back, perform an execution. There are a few more alcoves on the right side; break all the lights and grab other weapons if needed.
There are three cells on the opposite side of the hall. The middle cell features a mirror but it’s two-way and as you walk in, an axe-carrying hunter breaks it and attacks. Lure him out to shadows or just pummel him with your buzzsaw. Take note of the sign: all cell doors must be opened to cancel the dungeon lock down.
Open the last cell door; there’s a hunter inside. Sneak up behind him, lure him out, or just pummel him with your favorite weapon. Go through the door at the end of the hall. This room contains the door that’s under lockdown. Go right through the open gate.
This is a similar hall as the first: alcoves on one side containing breakable lights and cells on the opposite side. Break all of the lights then approach the last open cell on the left. Wait for the guard to turn around and perform an execution, which will utilize the iron maiden. Break the mirror in the room and hop over the wall; grab the shard if needed. Move to the next room, which observes the adjacent closed cell. Press the button to open the cell door.
Exit to the hall and, now that the cell is open, sneak up behind the hunter inside and eliminate him with the execution point. Continue to the final cell door, which contains the dentist chair. Open the door and carefully sneak behind the "dentist" and execute for the dentist chair execution. Return to the main hallway and go through the open door. Watch the concluding cut scene and receive the safe house key.
Red Light
Objective: Visit your old safe house in the derelict movie theater. Find an alternative route into the building.
The intersection contains motion detector security lights. You can break them with throwable objects, like the bottle in the alley on the left side. Go to the end of the street and grab the shovel and another bottle. Turn right and go forward until you reach the cut scene showing the thugs. The shadow around the truck provides good cover from them. Wait for the thug to reach the shadow (or lure him there) and execute.
You can search the building on the right side, though a second thug may be patrolling inside. There’s another lure object in there as well as a syringe. After eliminating the thugs, grab the pliers left behind. You’ll need the object to open the alternate route. Go to the end of the road and use the pliers on the chain fence to open a new route.

Cross the basketball court until a cut scene interrupts the action—more thugs emerge. You can eliminate in a variety of ways: use the swing out attack described in the tutorial or lure them out to the shadows near the manhole cover execution point. A bottle nearby can help you lure that guard close (or just rap the wall with your shovel). You have to be careful that the other guard, moving the opposite way, doesn’t spot you. Alternatively you could just wait until they pass, by hiding near the fence, and sneaking by and into the room they left behind.
There’s a third guard patrolling inside. Descend the stairs and take cover in the shadows near the stairs. Sneak up on this guard and eliminate him. Grab some first aid in a nearby room (containing the television) if you need to heal. Continue up the opposite staircase. Find a room with a few big boxes; climb onto the boxes and onto the balcony above. Go outside to reach the checkpoint.
Objective: Make your way through the porn shop.
Drop down off the balcony and take cover in the shadows. The cops seen in the cut scene are patrolling nearby. There’s a manhole cover here—perfect for that special execution. Depending on the cops’ movements you can sneak around the left side instead of engaging. There’s a bottle on the left side of the balcony can also help you lure them away so you can sneak by. When you’re finished, cross the street toward the Velvet Glove porn shop.

Searching the alleys and streets around the shop reveal some lure items and a glass shard. You can enter the shop through the front door or a back door. The front door means being spotted by hunters immediately, which entails a melee battle (or you can run and hide and wait for them to idle). Let’s check the back door.
There are shadows inside but lights can expose your location. Remain in the constant shadows. Look to the left and move behind the shelves. There’s a bottle here to use as a lure and shadows in a corner providing a good hiding spot to pounce on a hunter. Knocking the shelf with the shovel also works. If you haven’t alerted anyone, there’s a second hunter behind the counter. You can easily sneak up on him by sticking in the shadows.
Objective: Get upstairs.
Walk behind the counter (some first aid here) and enter the door. Start up the staircase. As you reach the second or third floor, a couple hunters appear behind you.
Objective: Find your old hideout.
They’re on to you. Sprint quickly outside and cross the balcony. Go over the wooden planks, which drop, and turn left. They’re now shooting at you! Go up the fire escape staircase and keep going until you can drop over a wall toward the movie theater hideout. The key to this section is to just keep moving. Don’t hestitate and get shot. Follow the path until the mission ends.
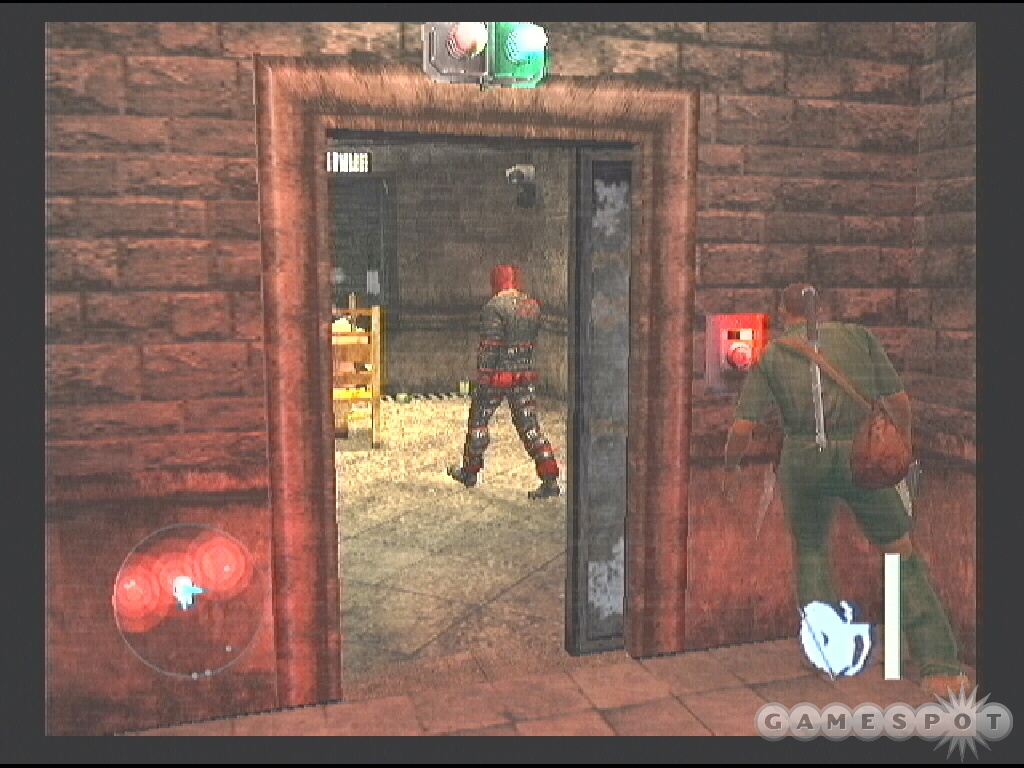
Best Friends
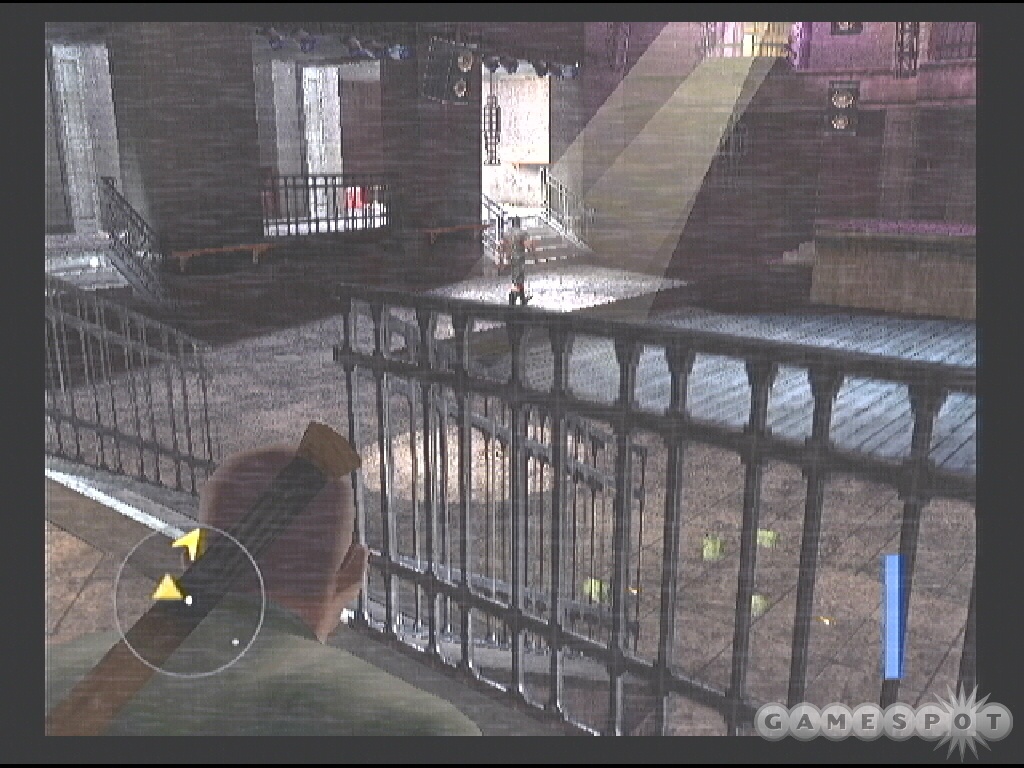
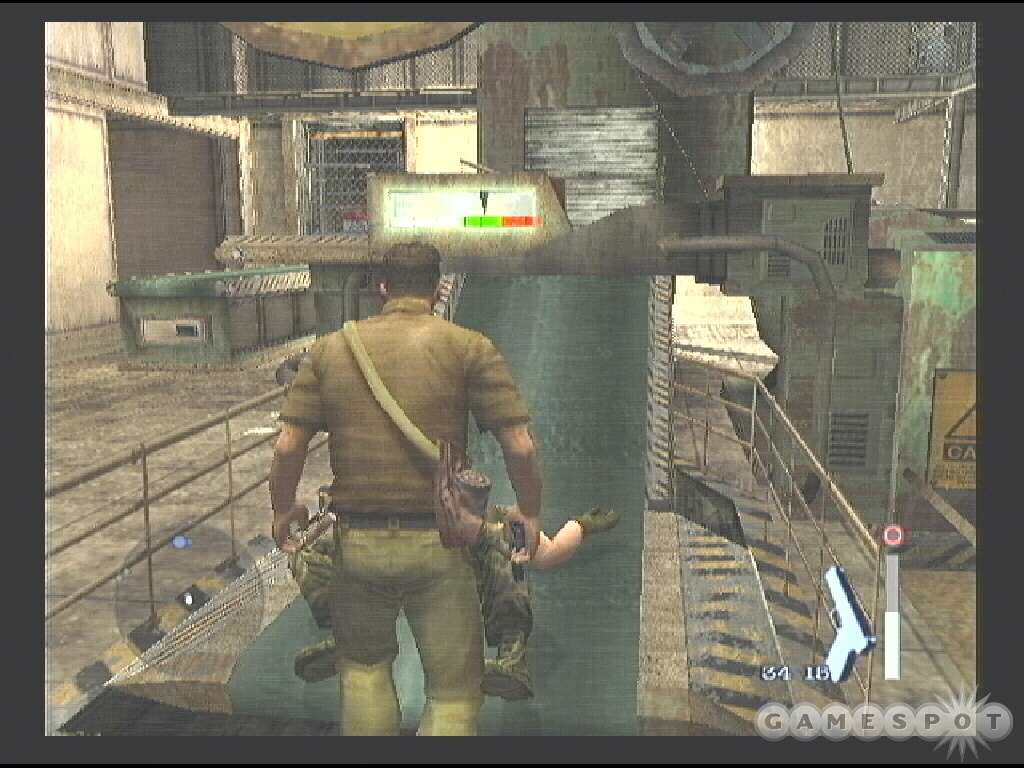
Objective: Chase Michael down. Get the boat key off Michael.
You’re immediately under attack from a helicopter—and it can inflict big damage in a short amount of time. Quickly run toward the staircase and ascend. There’s medicine on the ground floor but it’s better to keep moving unless you’re already near death. Enter the structure after a couple flights of stairs. Continue to pursue Michael over the catwalks and through a control room (a locker here contains first aid) until a cut scene interrupts the action.
Objective: Eliminate the Project operatives to get to Michael.
The room contains an execution point at the machine. Hit the switch on the left to start a second machine. Also grab a can (a few in the room) to lure a guard if necessary. Take cover in shadows near the machine and wait for the guard to get close. You can hide in shadows between the two machines and wait for the guard to get close to either side. Don’t get too close to the machines or you’ll pay the price.

Alternatively, head left through the closed gate (there’s another can here) and search the warehouse for a sickle. It’s behind some crates on the far right side of the room. Don’t go through the other door here. You need to eliminate operatives before going toward Michael. Return to the main machinery room and eliminate the guard there using a sickle execution.
After eliminating the first guard, a couple more charge into the room. Take cover in shadows and wait for your opportunity to strike. The sound of the machines can cover melee attacks if the guards are separated. Eliminate these two guards and then proceed back to the warehouse. You should find at least one more guard inside. You need to eliminate them all to trigger the checkpoint, which begins the next objective.
Objective: Kill the remaining Project operatives before they take the key off Michael.
Another operative emerges into the main machinery room. Return to the room quickly before he arrives and take cover in the shadow ahead and on the left. Grab a can on the way so you can use a lure if necessary. The guard should check the gate, providing an opportunity to sneak up and kill. Pick up the guard’s gun.
Continue through the double doors. Check the lockers for ammunition. Have your gun ready when you open the next doors. Shoot the guard holding Michael hostage. Search the area to the right for more ammunition (in shadows behind some crates). You can also find a bottle and barb wire (between dumpsters) here. Resume your pursuit of Michael to reach a checkpoint.
Objective: Michael lost you—pick up his trail again.
There are a couple guards around the corner to the right. You can hug the nearby wall and use the described technique to shoot around the wall. You can also use the can to lure them close to the shadows on the left side of the area. Grab their discarded weapon for ammunition and pick up the plastic bag on the right if necessary.
Beforing picking up the medicine ahead check the alley to the right and make sure the guard isn’t looking. Take cover past the alley. A guard patrols this alley; wait for him to walk away before sneaking up behind him and using the plastic bag or barbed wire to finish him off.
There are three more guards on the other side of the area. Wait for the guard closest to the alley exit to move away and then take cover in the shadows ahead. Execute this guard first using the plastic bag recovered from the previous fight. There are more weapons scattered around, including barbed wire and another plastic bag. Deposit this hunter in shadows.
The door you want is on the right side just past the alley. If you want to eliminate the remaining hunters, you can use the shadows on the opposite side of the area (past the fork lift) where you will find more weapons to use. After clearing the area, proceed through the door toward the marked blue objective.
Duck behind the short wall ahead of you—a couple guards are about to enter. Aim and shoot as the guards get close. Vault over the wall and snag the first aid before moving through the double doors on the right side. You can also grab a can from the room.
As soon as you move forward in the next room, a guard emerges; shoot him quickly with your pistol. Pick up his corpse and go to the right toward the conveyer belt. Drop the body on the conveyer and then press the button on the right side. The weight indicator should be in the green so you’re good to go—the corpse will get cubed. Proceed through the opened door.
Turn right and take the first open passage on the right. You’re moving toward the marked blue objective. Go around the left or the right path to find the opening on the opposite side.
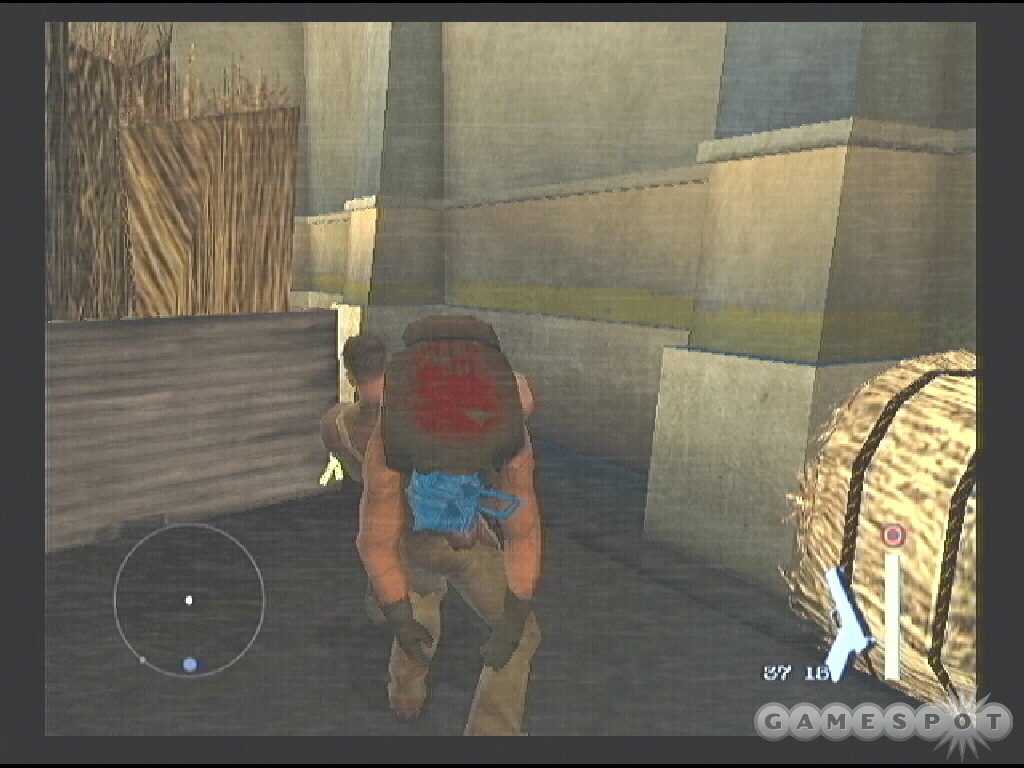
Objective: Follow Michael onto the roof.
Turn right and ascend the staircase to find Michael on the roof. Grab the ammo on the left side. Search the locker to the left for more ammo and first aid.
Michael is using a flare gun, which inflicts heavy damage. It can also light the hay bundles on fire. Use the bundles for cover but be ready to move quickly. Target Michael and fire your weapon until he retreats to the next location. Repeat until Michael is down.
Objective: Get back to the boat.
After Michael’s death, helicopters arrive—more Project scum. Time to retrace your steps back to the mission’s start location! Quickly get off the roof. Maneuver back through the bundles of hay and to the staircase. Descend the staircase. You can go left or right at the next intersection. The metal door here leads back outside and bypasses a lot of the warehouse interior.
Retrace your steps through this area back to the double doors. Check the lockers if you didn’t before. The door on the right leads to the warehouse (that contained the scythe) and the double doors lead back to the machinery room. There are guards in both rooms. The flare gun makes quick work of any guard so you can shoot your way out rather easily. Check the warehouse first and eliminate a solo guard. You may alert the others but that just means they’ll approach while you prepare to incinerate them with the flare gun.
Continue to retrace your steps through the building. Check the locker in the office area for first aid. Follow the path to the objective until you’re back outside on the staircase you climbed to avoid the helicopter. As you descend the staircase, four guards below appear on radar. Use the flare gun and fire on the guards from the very top of the staircase. This gives you plenty of retreat room if you’re being shot.
There’s a bottle of first aid by some crates on the bottom if you’re wounded. Finish off any remaining guards (though it’s better to take them out from higher ground) and follow the dock to the boat. Hop onto the back of the boat to complete the mission.
Safe House
Objective: Find a way out of the safe house.
You begin the mission with a firearm. Search a crate to the left and find a crowbar. A chain and lock barricades the exit to this room. You can grab the crowbar and use it to break the chain so you don’t have to fire the gun. After breaking the chain with the crowbar, return and switch back to the gun. Exit through the unlocked door.
Ascend the staircase a couple of flights. Follow the corridors carefully around to the right side. You’ll spot some crumbling walls next to the marked blue objective. When you reach the point, a couple hunters appear on radar. Eliminate them with your firearm. As soon as they’re down, collect their ammunition and any dropped first aid if you need healing.
A couple more hunters appear on radar; they’re coming from your previous position. Take cover behind the walls close to the corpses and eliminate the hunters as they arrive. Gather their discarded ammunition and first aid. Search a cabinet on the right side of the area for additional first aid.
Continue toward the marked blue objective, which triggers a couple more hunters—one carrying a shotgun. Take cover and eliminate them using your firearm. Grab the discarded ammo and shotgun. Search a chest on the right side for first aid. Take out a couple more hunters before descending the staircase.

Walk slowly down the staircase with your shotgun equipped. You will spot an idle hunter below. Target the shotgun and aim it at the hunter as you round the middle of the staircase. Eliminate the hunter in a single shotgun blast. Grab his discarded shotgun ammunition. Continue down the staircase to reach the checkpoint.
There’s a trio of hunters in the next room. Take cover at the bottom of the stairs. Equip the revolver and eliminate them if the hunters remain at a distance. You can carefully strafe to the edge of the doorway and take them out with headshots to minimize damage. Gather their ammunition. Search a cabinet in the back of the room for some medicine. Go to the alcove across from the cabinet; it’s around a corner in the back right of the room. There’s a hole in the floor that’s hard to see because there’s some debris in the way. Drop down the hole.
There’s a guard at the bottom of the stairs. Sneak up on the guard and perform a gun execution. Search the chest nearby for some first aid. Go through the doorway into the theater where a large gun battle is about to ensue. Try to ignore the movie!
Take cover behind some of the seats in the first row. You can make your stand there and target the closest hunters with your shotgun or revolver. You should have plenty of ammunition to take out all of the hunters (they continue to arrive as you kill each one). If you need healing, retreat to the first aid in the previous hall. Eliminate all of the hunters and exit through the rear doors of the theater to complete the level.
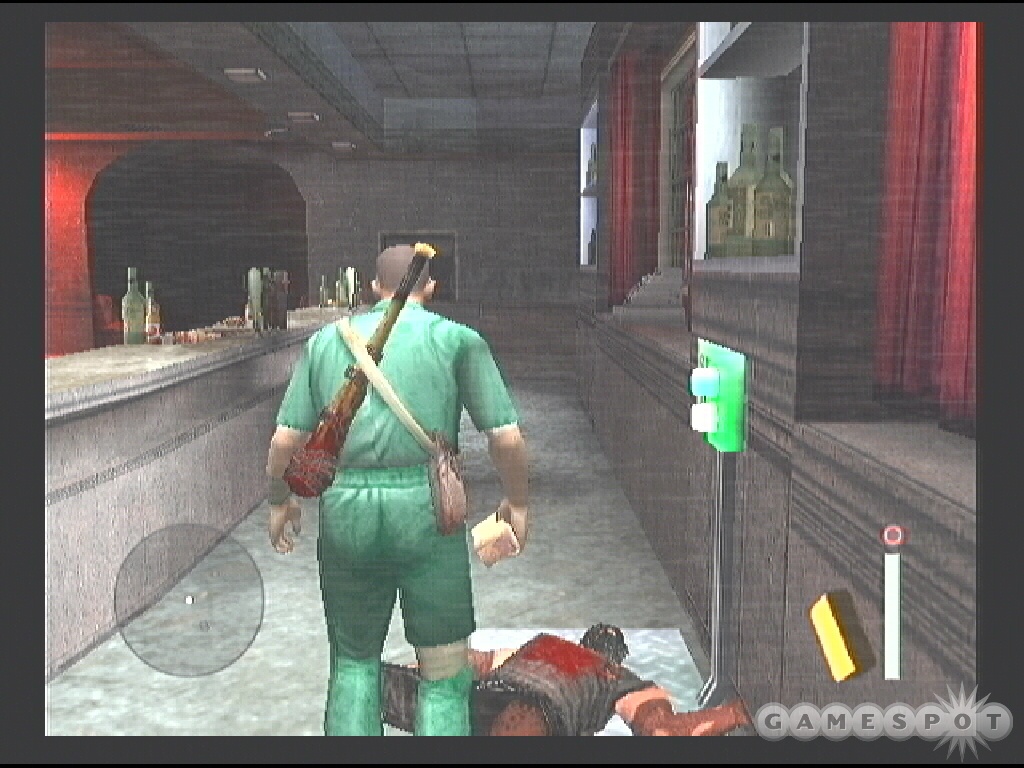
Bees’ Honey Pot
Objective: Find Judy in the building.
Hop over the counter and follow the manager into the office. If you give him too much time he’s going to grab a baseball bat. Execute him and you will utilize the nearby telephone for a special execution. Grab the baseball bat left behind. A locker inside the office contains a can. Search the adjacent locker room for a bottle inside one of the lockers. The power box in this room offers another special execution opportunity.
Look in the corner opposite of the power box; the light here flickers indicating that it can be destroyed. Smash the light with the baseball bat to provide cover. Smack the wall a few times with the hunter on radar and he’ll come downstairs to investigate. Take cover in the shadows provided by the broken light. While the hunter’s in front of the power box, perform the special execution.

Proceed upstairs. Start inside room 201. There’s a guard inside conducting repairs. The noisy distraction provides the perfect cover to sneak up behind the guard—perform an execution with the baseball bat. Grab his hammer if you want. If you need health, there’s first aid on the bedside table.
Go into room 202 and into the bathroom. Hop through the open window. Go to the end of the hallway. There’s glass to break that can get you inside the room. Break the glass during the noisy moments of the lap dance that’s happening inside the room. Breaking the window leaves behind a glass shard if you need another weapon. Search the lockers in the room for a pair of pliers.
You can alert the three guards in the room by smacking the wall with your sledgehammer but it’s better to avoid them. With pliers in hand, return through the bathroom and room 202. Return into room 201 and where the guard before was working near the wire mesh. Equip the pliers and open the mesh. This hits a checkpoint.
The sound alerts a guard; retreat across the room and hide in the shadows. When the shotgun-wielding guard enters, sneak up on him and execute. Pick up the shotgun. Sometimes this guard may not arrive and luring any of the three near room 204 could be a challenge, even if you continually smack the wall.

Crawl into the duct. It connects to the room and area containing the three guards. If they’re idle, you can wait until a patrolling guard turns his back and sneak up and execute. Wait until he’s one the left side so you can take cover in the shadows here.
Alternatively, wait until he moves right and quickly scamper into the shadows on the left and wait for your opportunity there. Get him as close to the shadows as possible because other guards, usually near the staircase on the right side of the hall, could see what’s happening.
One of the guards should be patrolling the stairwell and another waits inside room 204. You can use the shotgun recovered from the first guard to blast them both or use lures to get them close to the shadows inside the hallway. Go down the stairs and locate the switch on the right side. Take time to search the cabinet for a lure item if you need one. Press the switch and quickly run through the gate at the end of the hall (it closes after a few seconds so run fast).
There are a couple of guards here. Run into the storage room on the left side of the hall and take cover in the shadows. Use a can to lure a guard close. A bottle inside the room can also provide noise. Grab the shotgun for ammo. You can also wait until the guard moves into the adjacent locker room and ambush him there. Eliminate the second guard as he checks on the first. Search the lockers and dressers; one dresser in the joining hallway contains first aid.
Proceed into the room and the end of the hallway. Check inside for some items and first aid. The bathroom provides the exit but there are three guards outside that can see you from the window. Hop outside the window when the guards are looking away and take cover behind the low fence.
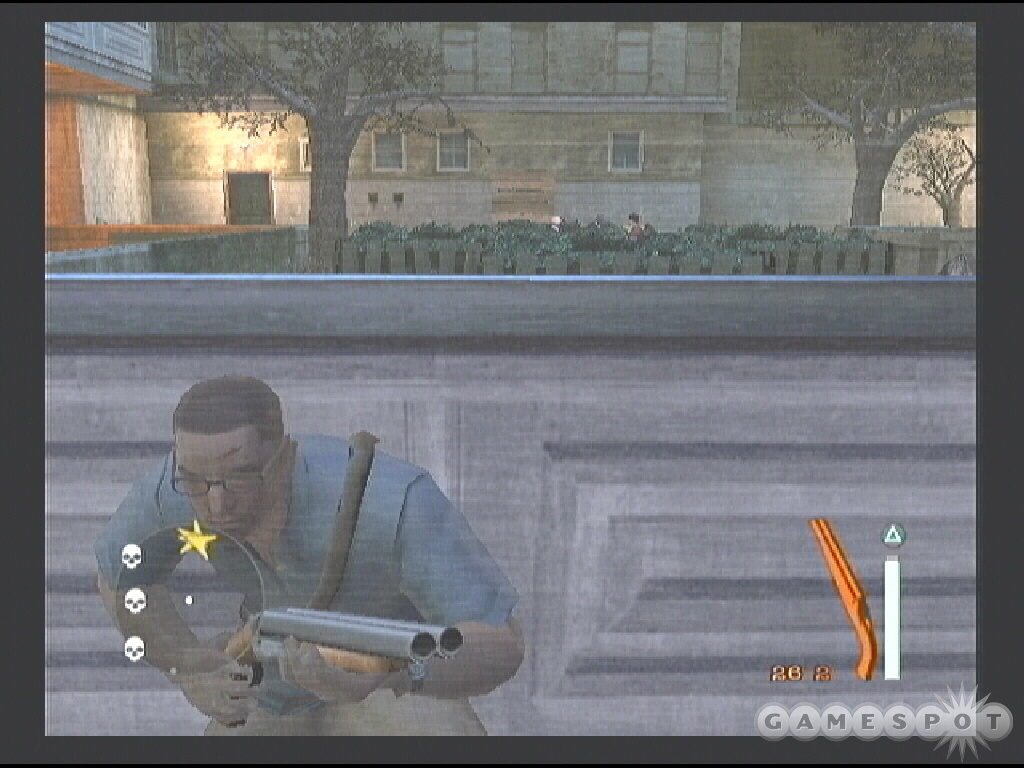
There’s shadow on the right side of this courtyard. You can use the area to lure the guards into your line of fire. If you only have the shotgun then you should wait until the enemy is as close as possible before firing. Take cover while you reload. Charge a shotgun-wielding enemy while he reloads. Get close and blow him away from close range.
After eliminating the three guards, two more enter. Take cover inside the courtyard and eliminate these two guards in a similar fashion. A third may appear in the courtyard after executing these two; sneak up on the guard and perform a gun execution to finish him off. Search the courtyard for first aid or return to the bathroom where there’s another bottle inside.
Proceed through the door in the building ahead and find another bottle of first aid (as well as a checkpoint). Watch for a guard to approach from the left. Blast him as he opens the door.
Enter the door on the left. Make your way through this room. There’s a patrolling guard in the next hallway. Take cover in the shadows on the left and lure him close. Since there are a few more guards around the end of the hall, try and be as quiet as possible so you don’t alert them. You can lure them as well or finish them off with your uzi or shotgun.
Ascend the staircase and stop at the cabinet to search it for first aid. Continue up to the second floor and then another flight of stairs up to floor three (the cabinet along the way contains some ammo).
There are three guards around the next corner. Take cover at the corner and carefully aim around the corner using the uzi. You can eliminate all three guards from long-range from the relatively safe position of this corner. Explore the room on the left side for uzi ammunition. Hop out through the open window and grab first aid.
Proceed to the end of the hall to trigger the cut scene. You spot Judy running into a room while three more guards are alerted to your position. Retreat and prepare to use your uzi from long-range. Two of the guards attack from the right side while a third remains close to the door Judy ran into. Eliminate all three using the uzi then move into the marked door.
Seach the cabinet on the left side of the room; it contains first aid. Face the mirror on the opposite side of the room. Break it and hop into the room (picking up the glass shard on the way). Crawl through the duct on the right side. You’ll reach an elevator shaft. Climb over the right side and drop onto the elevator. After the cut scene concludes, drop into the elevator.
Equip your shotgun and hug the left wall. When the hunters come around the corner, blast them with your shotgun. Scamper up the staircase and through the door on the right side to complete the mission and trigger the end cinematic.
Assassination
Objective: Gain access to the roof. Execute your escape plan.
A helicopter is about to target the window so you need to back off. The problem is there are a couple guys waiting for you in the hallway. Move back fast and into the hallway and shoot out the light on the right side of the hall using your pistol. This provides plenty of shadow. The guards will investigate the hall giving you a chance to execute or just shoot them with your pistol. Grab the can as you leave the first room and use it to lure guards into the hall. You could also use the sniper rifle from the shadows while aiming into the room that the guards are gathering within.
Grab the uzi dropped by a couple of the guards and gather some ammo. Search the locker near the copy machine for first aid. Exit through the opposite door and go through the hall into the office. Approach the window and break it using a melee attack. Climb out onto the lift, grabbing the shard along the way. Press the button.

Prepare your uzi to fire; a couple guards will enter the office once the window washer lift reaches the next floor. Grab their discarded ammo and reload the uzi to keep it ready for action. Search the locker in the adjacent hall for ammo and health. Return to the lift and press the button to ascend another floor.
A couple more guards wait in the office above. Shoot them as soon as they’re in your line of fire. Grab their discarded ammunition and search the locker in the hallway for more ammunition and health. Return to the lift and use the button to ride one more floor. This triggers a checkpoint but also means you’re under attack from an enemy sniper and a couple more guards.
Objective: Locate the escape point.
Break the glass and get into the office (the guards may break it for you). Take cover under the window and use the sniper rifle to pick off the guards on the opposite side of the rooftop. Aim for headshots to conserve sniper ammunition. Grab the first aid from inside the room.
Cross the lift and get onto the opposite roof. Gather up the ammunition left behind by the guards, particularly the sniper ammo. Ascend the staircase on the right side. At the top of the roof, there’s some shadow in an alcove on the left side. There are a couple guards patrolling here so take cover and lure them close.
There are three guards initially. You can attempt to lure them toward the shadow so you can use execution kills or just take out your uzi and eliminate them one by one. Be ready for a counter attack because two more guards arrive after you’ve eliminated the first three. Finally, there’s a sniper a few buildings over toward the marked blue objective. Go to the staircase on the left side of the roof and zoom in on the guard marked on your radar. Eliminate the guard with a couple sniper rounds.

Descend the staircase to the next rooftop. Approach the door to trigger a checkpoint. Go inside and move quickly to the left to avoid the sniper fire. Break the window (or wait for him to do it for you). Target the sniper; he’s standing on the billboard platform. Go downstairs into the hall and discover your escape route has been compromised. Open the locker to grab some first aid.
Objective: Avoid capture—locate a new escape route.
Return to the broken window where you eliminated the sniper. Climb out of the window. Don’t move forward. You’re on some ductwork and if you continue onward you will drop off the roof. Cross over to the next rooftop.
There’s a sniper up high; equip the sniper rifle and eliminate him. Two more guards are closer. You can switch to the uzi and eliminate them or use the sniper rifle again. Additional guards approach once these threats have been eliminated. Keep your weapon ready and aimed and eliminate each guard as he approaches.
Go around to the right side and enter the building. There’s a locker inside containing first aid. Climb the staircase inside the building. A couple guards appear behind you so be ready to eliminate them. Take cover at the corner of the wall and shoot them with your uzi. Continue to the end of the hall on the top floor and locate the window. Break the window with the butt of your gun and jump through to the checkpoint.
There are a couple snipers around the corner; a few are far enough away not to appear on your radar. Eliminate the closest sniper; he’s visible just over the edge of the balcony you’re currently positioned on. The other two are to the left and right of the sign in the distance. You can drop down to the lower balcony ahead of you to get a better shot on these targets.
After dropping down and eliminating the three enemies, the helicopter reappears as well as a few more enemy targets. Take cover from the helicopter fire (there’s a small niche across your current rooftop that provides ample cover). When the copter moves off, equip the sniper rifle and eliminate the guards (usually one on the left side and another patrolling on the right).

Drop down again, which triggers additional guards to appear behind your position. You can scamper up the staircase to the billboard platform, which provides a good firing spot on the incoming guards below. A total of four more guards arrive. Descend the stairs and resume course toward the marked objective.
Cross the red girders toward the objective. As you near the next building, four more guards (one with a sniper) appear ahead of you. Back up a little; you can eliminate these guards from a relatively safe distance. You can even aim for the guards in the back without them having a shot at you. Take out all four guards with the sniper rifle before dropping down. Gather their ammunition and any dropped first aid bottles. As you search the area, the helicopter arrives again. Duck into the staircase in the back right corner of the area.
Objective: Get down to street level.
You’re now on the ninth floor and heading down. Go to the end of the floor and spot the medicine and ammo. As you do, a couple guards appear behind you. Switch to the uzi and eliminate them. There’s a hole in the floor. Drop down on the left side of the hole to reach a checkpoint.
Check your radar; there’s a sniper just below your position. Eliminate him from the safety of your current location. Drop down and collect the ammo. Cross the floor to the next stairwell and descend slowly toward the sixth floor.
There are several guards around the corner to the right. Note that your noise on the previous floor may have alerted them to your presence. If so, use the boxes and crates as cover as you eliminate the guards as they exit the stairwell and approach your position. If there are more guards on the sixth floor, you can retreat up the stairwell and lure them into an ambush or use your uzi to carefully pick off each one as you round the corner. Take note that there’s a sniper on the far side of the floor; he’s on the right side.
Continue down to the next floor. A couple more guards, one is a sniper, are positioned behind some crates. Eliminate them then move to their former position because a couple more guards are coming from behind in an ambush attempt. Use the walkway on the left to exit onto the rooftop. Watch for the guard below then drop to the left. Climb over the wall and approach the door. This triggers a checkpoint. Check the left side of the building for a locker containing first aid and ammo.
Move carefully down the stairwell with your uzi aimed and ready. You will spot a trio of guards below you; they shouldn’t be alerted to your position. As you near the bottom of the stairs, one of the guards may patrol into your line of fire. Eliminate the guard with your uzi. Keep the weapon aimed at the same location and take out each guard that appears around the corner.
Objective: Enter the sewer system.
Resume course down the staircases until you reach an exit door on the left side of the hall. Four guards appear outside—three on the front line and a sniper in the back. Take cover at the corner and use the uzi to eliminate the first three guards then equip the sniper and eliminate the fourth with a headshot. With the area clear, run and drop into the hole in the ground. You drop down into the sewer system, which completes the level.
Most Wanted
Objective: Meet up with Leo at the train yard.
Go forward to the street—which springs the trap! A helicopter and a squad of enemy hunters arrive. Immediately run into the alley across the street. Hop onto the dumpster then onto the stack of crates to the right of the dumpster. Break the glass window with a melee attack and jump into the building. You’ll grab a glass shard from the broken window.
Objective: Find a backdoor way out of the joinery.
Pick up the crowbar from the table on the right side of the room. Turn left and spot the trapdoor on the floor. Walk to the trapdoor until you can use the crowbar to open its lock. Drop down into the crawlspace.
Crawl through going forward until you reach the end. Peek out of the crawlspace and spot a couple guards on the left side of this alley. Get outside into the shadow and trigger the cut scene and a checkpoint.
Objective: Get to the storm drain behind the yard.
The helicopter has moved to this location in an effort to find you. It’s using a searchlight to expose the shadows around the building. It’s currently moving toward your position so it’s wise to retreat into the crawlspace and observe the pattern of the helicopter’s light. It’s moving from left to right and around the area in a counterclockwise pattern. After the light passes, you’re free to maneuver through the shadows on the right side.
The noise from the copter will mask any sounds you’re making but the guards will still see you if you step out into the light. Follow the shadows around to the right. Watch the movement of the two patrolling guards and only advance through the light once they’re looking away.
Follow the shadow around until you reach the shadow behind the dumpster; there’s a paper bag here if you need another weapon. Wait here until the nearest guard moves away then run straight across to the next shadow. Turn right at the corner and stick along the fence on the left. Watch the patrolling guard ahead. Wait until he walks away. This is a perfect guy to get rid of because he’s carrying an uzi. Use the crowbar to break the lock on the fence around the corner then switch to the uzi. Go through the gate to trigger a cut scene and checkpoint.
Objective: Follow the storm drain.
As soon as you gain control in the storm drain, go left and locate the pipe heading down. If you hesitate, the helicopter may find you; plus there are a couple hunters in pursuit. After dropping into the drain, keep running into the drain on the left side and you will return outside. Take cover in the shadow on the left side. Turn around and spot the pursuing hunters searching for you. Unfortunately they’re using flashlights so hiding in the shadows may not work for much longer.
There’s another alcove just around the corner. You can get there quickly but make sure the hunters patrolling the far end of this area aren’t watching. You can hug the wall in this alcove and remain in the shadow while looking around the corner. The barrel just ahead is a special execution point.
Getting to this area’s exit, which is a door on the left wall about halfway down, is very difficult without alerting the current enemies. You may have to shoot your way out of here, which won’t be too difficult if you grabbed the uzi from earlier.
However, perhaps one of the best tactics would be to hide in the shadows to the left of the first pipe you descend (right after the area begins). Wait for the first hunter to go through then wait until the second walks past you. Sneak up on him and execute with the shard or paper bag. Grab his shotgun. Now you have two weapons. It seems like sometimes they guards run together which means this tactic won’t work—the two guards need to be further apart. You can sneak up on him in the second section; the guards slow down there.
At the next opening, use a lure to get one of the guards close to the pipe then take him out with the shotgun. Move quickly or you may have pursuers coming from behind. Eliminate the two other guards then quickly sneak into the door on the left side. You can get into the shadows if necessary.
If you reach the end of the area, there’s a pistol and ammo as well as first aid in the back right corner.
Objective: Find a way to lower the flood gate.
When you enter the door, quickly move into the shadows ahead of you. There’s a bottle nearby if you need a lure. Check the locker on the left in the stairwell for some uzi ammunition. Continue up through the next door and follow the catwalk to the wheel. Use the wheel to lower the gate.
Return across the catwalk and down to the previous area. Anyone you left behind should be gone but the helicopter dropped three more guards beyond the lowered gate.

Objective: Find a way to the train yard.
Run up to the car and take cover. This is a good place to fire from because it’s well in range of your uzi. Eliminate the three guards but be ready: as you eliminate the guards, two more arrive from the helicopter and another guard attempts to ambush you from behind. Turn around and blast him with the shotgun. Clear the area and gather all ammunition. If you explore the back left side of the area, there’s another hidden guard protecting some ammo. Proceed up the stairs and up the incline and find the hole in the wall. Crawl through to trigger the checkpoint.
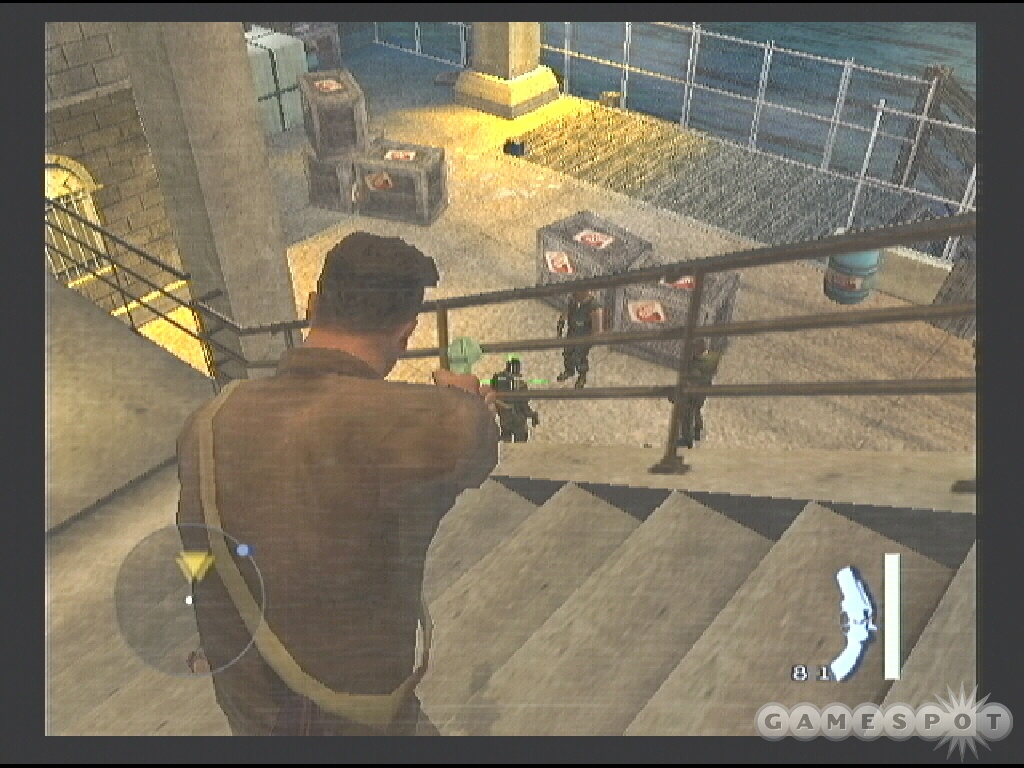
Objective: Get to a higher level to scout the area.
Follow the path until you reach the well-lit porch on the right side. Take cover at the porch to the left side of the stairs. Toss a lure on the porch to make the guard investigate. Shoot each guard from this location. Move forward only if you need a better shot. A couple more arrive down the path and move toward your position. Take them out as well.
Ascend the staircase at the next house and break the window at the top. Hop inside the residence. Cross the hall to the next window. Break it and hop through it to trigger a cut scene.
Objective: Take cover in the sewer pipe.
Quickly drop off of the house and spot the opening in the fence on the right side of the yard. Climb over this wall and turn left to find the hole into the sewer. Drop inside. Duck and crawl through the left side of the pipe. Crawl to the intersection and proceed to the left and trigger the checkpoint.
Follow the path on the only available path. You’ll finally reach a ladder. Note the guard above you marked on the radar. Pull yourself out of the hole and emerge into shadow. The area beneath the car makes a great staging ground to eliminate this guard, especially using the special execution spot. Search the lockers in the adjacent rooms for medicine and ammo. Exit and trigger a cut scene—more enemies arrive.
Objective: Fight through the Watchdogs to get to the train yard.
Take cover behind the cars and use the uzi to target each of the watchdogs. Reinforcements arrive from the same spot. Keep the watchdogs at a distance. Watch the radar to ensure none are attempting to get close on the right side of your position. Eliminate all of the watchdogs and cross the area to complete the mission.
Ritual Cleansing
Objective: Find the gasoline can.
Keep to the shadows on the left side. There’s an attendant at the station on the right side. Grab the bottle ahead of you. There’s also a can to the right of your start position if you would rather move there. The gas can is located on the opposite side of the truck. Watch the attendant’s movements and wait for him to move away. You can take cover behind the pumps then move around the attendant’s opposite side and pick up the can (marked green on your radar).
Objective: Break into the Project storage complex.
As indicated by the tutorial, the gas can offers its own unique execution. Pour gas onto the group, lure a hunter close, and then complete the execution. Proceed into the next area following the marked blue objective on the map. Grab a bottle if you need one and hug the shadows on the right wall. There’s a security guard patrolling the area.
There’s shadow on the left side near the bottom and to the left of the opening in the wall that leads to the area. Pour gas and use a lure to get the rent-a-cop close and complete the execution. Continue down the next alley. Pick up the barbed wire and hide in the shadows on the left side. Wait for the rent-a-cop to get close, lure him near, and then complete the execution. The second guard carries a police baton.
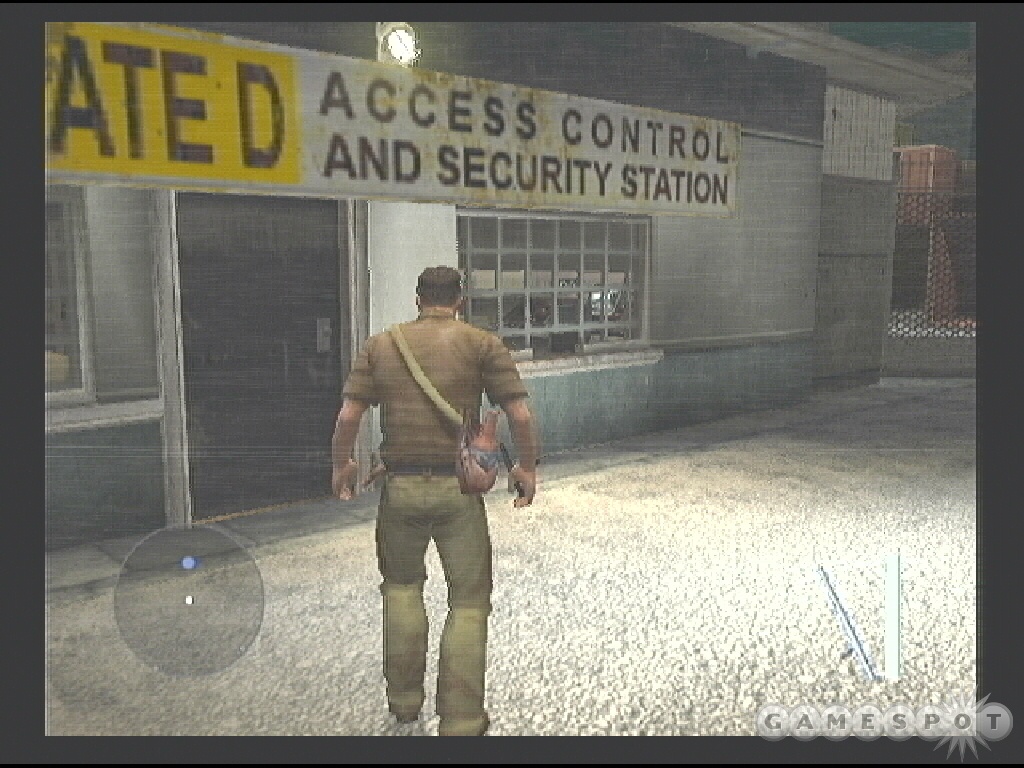
Continue through the alley toward the security station to complete the checkpoint.
Objective: Distract the guard by creating a fire.
Turn around and use the pile of papers behind you. It’s close to a truck and there’s plenty of shadow. Set the pile ablaze then take cover in the shadow behind the truck. The guard will come investigate. Wait for him to turn around then sneak up behind him and execute him with the police baton. Get inside the security station and hit the button. Go through the open gate outside to reach a checkpoint.
Objective: Find the main Project storage warehouse.
The shipping containers here provide shadow and cover from the patrolling guards. You can also find a bottle lure inside the one on the right side from your start position. Work your way slowly through the containers and take out each guard that gets close. If you’re spotted, run into some shadows and wait for the guards to idle.
Another guard will be located close to the warehouse entrance. You can hide inside a truck here and wait for him to leave or use the police baton to perform an execution. The path toward the objective is on the right side of the truck. Climb onto the crates and locate a hole. Pull yourself inside and drop down to the ckeckpoint.
The door to the left is locked. Ignore the gas can for now and go to the front of the truck. Climb onto the hood and over the right side of the truck into the adjacent area. Go through the double doors on the left side.
Once inside, take cover in the shadows; there’s a patrolling security guard inside. As the guard moves close to the marked special execution fuse box, take cover in the nearby shadows and wait for your opportunity to strike.
Search the office for a pen as well as the lockers for another pen and medicine. There’s another bottle of medicine in the building as well. Exit the building through the entrance you came in (the locked door has chains, which requires the crowbar) and approach the Cortex Storage doors on the left side. As you enter, the metal detector goes off. You also spot a crowbar and are instructed to destroy files.
Objective: Get a new gas can. Find Danny’s files and Leo’s files and burn them.
Take cover in the shadows and lure the closest security guard into an ambush. There’s another guard on the left side of the warehouse but there’s a metal detector in the way. If he’s far enough away he won’t hear you moving through. You can lure him to this side and execute him there or take your chances on the other side. There’s not much shadow there other than a corner inside the opposite building. A second gas can is found here.
You need to find the crowbar, which can be used to open the storage doors. Go to the left side of the first warehouse and climb the crates to the top of the first storage room (marked #3). Drop into the hole and locate the crowbar. Leo’s files are also in this room. Search the locker inside for medicine.
Grab the gas can from the adjacent section and burn Leo’s files. This triggers the fire alarm and the arrival of a couple more enemies. Use the shadows around storage room #3 to ambush the patrolling guards. These are tough adversaries so you do not want to alert them to your location and have to engage in melee battle against multiple opponents.
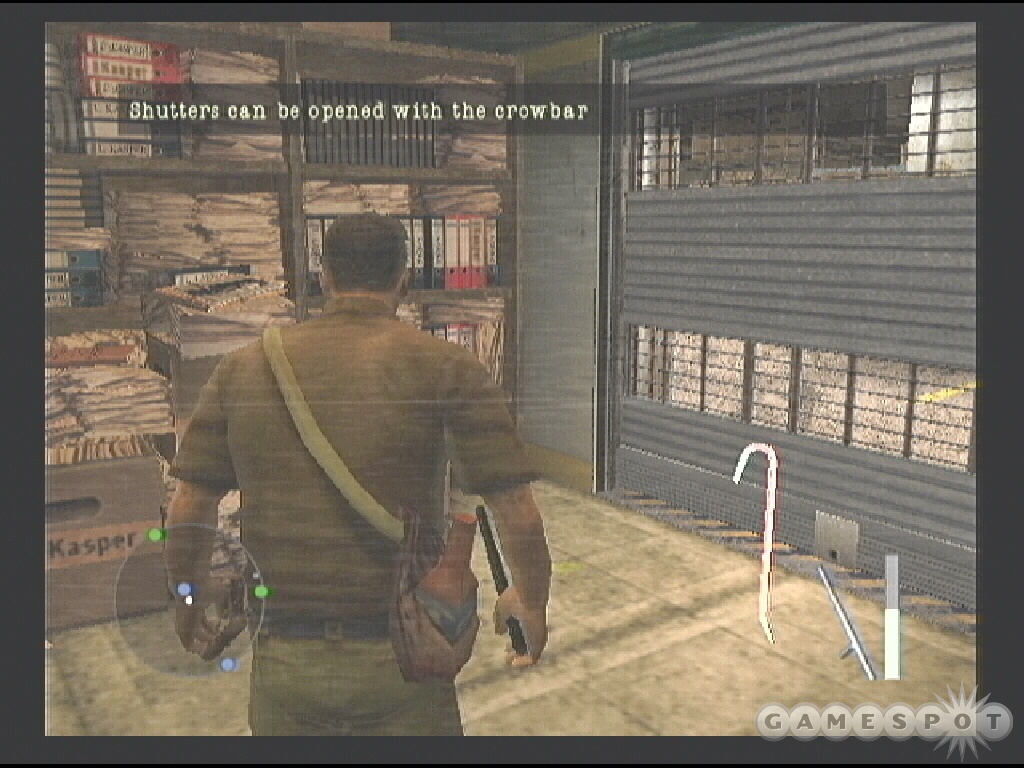
Work your way carefully through the warehouse. Opening storage shutters before buring the files is also good strategy because the added space means more hiding places. If you open the shutters after the guards arrive, realize that the action makes sound and could make the guards suspicious if they’re within earshot.
In order to burn Danny’s files, you must return to the original gas can and bring it back into the warehouse. Retrace your steps through the offices and security station. Go to the other door, which is locked by chain, and use the crowbar to open it. Grab the gas can outside and bring it back through the offices and into the warehouse.
To reach Danny’s files, you must open the storage shutter on room #8 and go through toward the marked objective. There’s a gate connecting the two sides but it’s locked by chain on the side containing Danny’s files. There’s also a special execution here if you still have a hunter patrolling the area. Douse Danny’s files in gasoline and light the match to erase history. Burning both files completes the mission.
Origins
Objective: Get into the building. Find Doctor Pickman.
Search the grounds for a lure; there are plenty. Walk to the dumpster and climb on top. Pull yourself onto the roof and grab the shard. If the hunter isn’t outside yet, toss a lure to get him to investigate. Remain on the rooftop and wait for him to get close before using the shard in a jump execution. Search the locker inside the office for a stun prod and grab the pen from the desk.
Objective: Find a way into the Veterinary Lab.
Look inside the office to find the cabinet across from the desk. Move this cabinet to the left; this exposes a vent. Crawl through and you emerge into the next area, which is crawling with watchdogs, just behind the shadow of a column.
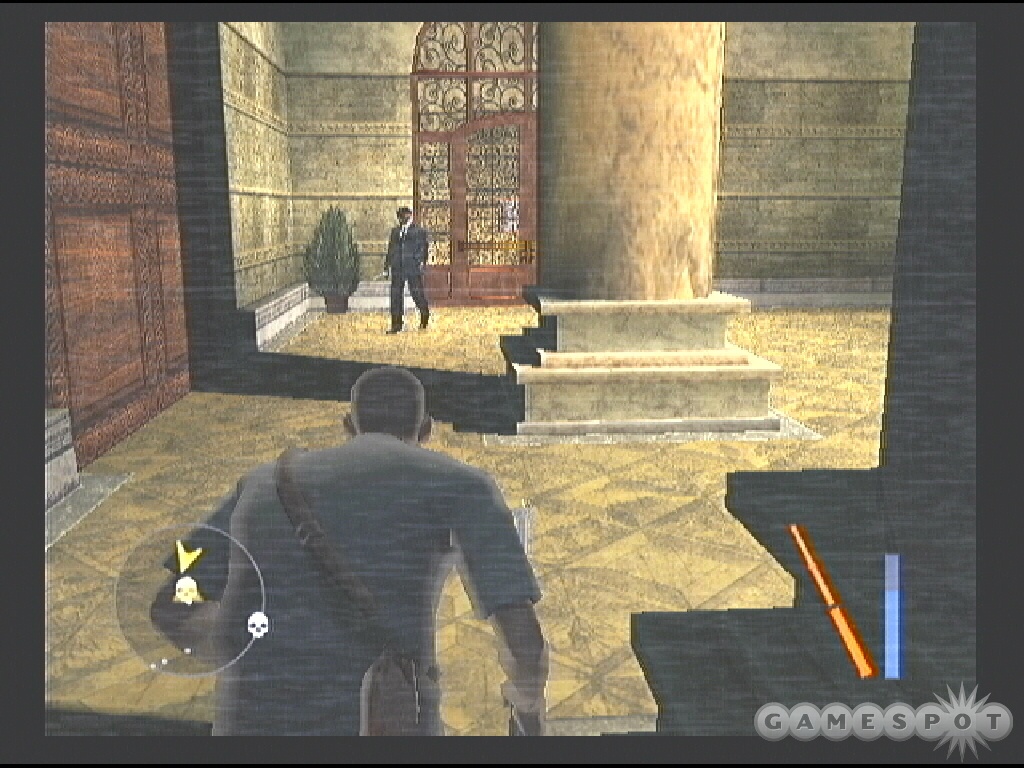
Wait until two guards move away—the one on the right remains at his post near the door. Toss a brick at the wall on the right and force him to come investigate. As he moves away, emerge from the shadow and execute him with the stun prod. Deposit his body in the shadow and return to your hiding place.
Face to the left and spot the other shadows and columns. Wait for that patrolling guard to move away then advance to each shadow until you’re close to the patrolling guard. Wait for him to turn his back and execute him. Go through the double doors that guard was patrolling through then continue through another doorway on the right side. Continue down the stairs to the lab. It’s locked.
If you check the top of the stairs, you can climb over the railing and onto a vent shaft. There’s a hatch here but you need the crowbar to open it. Return to the main room.
The guard upstairs carries the crowbar. If he’s the only guard left you can eliminate him with melee strikes or take cover in the shadow between the flights of stairs. Lure him close and execute him with the stun prod. Grab the crowbar. Check upstairs for items before returning to the vent shaft. Open the hatch with the crowbar and crawl through. Follow the shaft until you reach the open vent hatch on the right side. Drop into the room to reach the checkpoint.
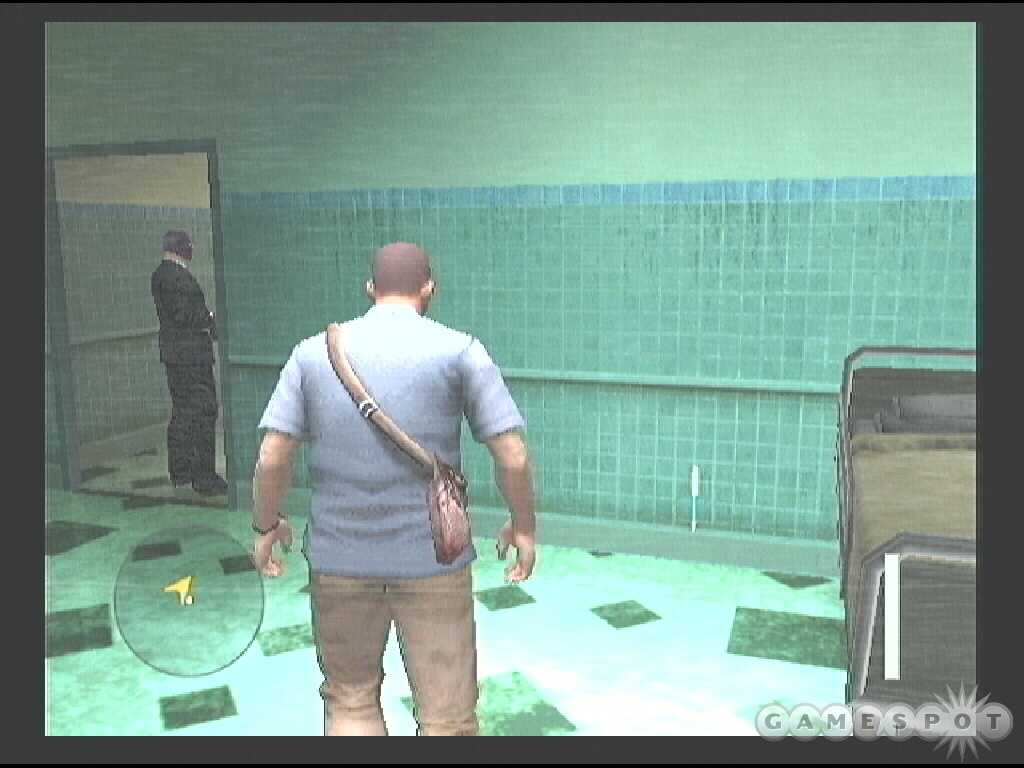
Objective: Bypass the security door.
The coast is clear initially but when you move, a dog in its kennel barks alerting nearby enemies. Back against the shadow along the wall and wait for the enemies to enter the room. Wait for the one with the saw to approach close, counter his search, and then when he turns around, go for the execution. As soon as he’s down, attack the other guard carrying the tranquilizer gun. Pick up the saw in exchange for the crowbar.

The security door is the green marked location on the radar. A retinal scan security device protects the door. You need some eyes! Use the saw to remove the head of one of the guards you just eliminated. Take the head to the scanner and use it. Proceed through the door and trigger the next cut scene and checkpoint.
Objective: Get past the defending watchdogs.
A watchdog is currently descending the staircase. Take cover in the shadow left of the stairs. Once the guard is down, sneak up on him and execute with the saw. Grab the shotgun.
Ascend the staircase and take cover behind the waste bin. A couple watchdogs approach. With shotgun armed, wait for the watchdog to get close then target and shoot. Eliminate the other guard before advancing. Additional watchdogs will arrive. Take cover on a wall or other object so you’re safely behind an obstruction then aim and fire when the target is within your line of fire. Gather all of the ammunition. Search a locker here for first aid. If you go right at the intersection and open the double doors, you’ll find a locker inside the room; it also contains medicine.
As you approach the door marked Auditorium, a couple watchdogs appear on the corridor to the right side. Take cover on the wall and slide close to the corner. When the guards are looking away, target and fire at them. Take cover between shots.
Go right at the Auditorium door and take the first door on the left into the stairwell. Enter the door to find the observation room. Descend onto the stage to trigger a cut scene.
Once it’s finished, turn to the left and go through the door. Grab some medicine from the locker then ascend the staircase until another cut scene interrupts the action.
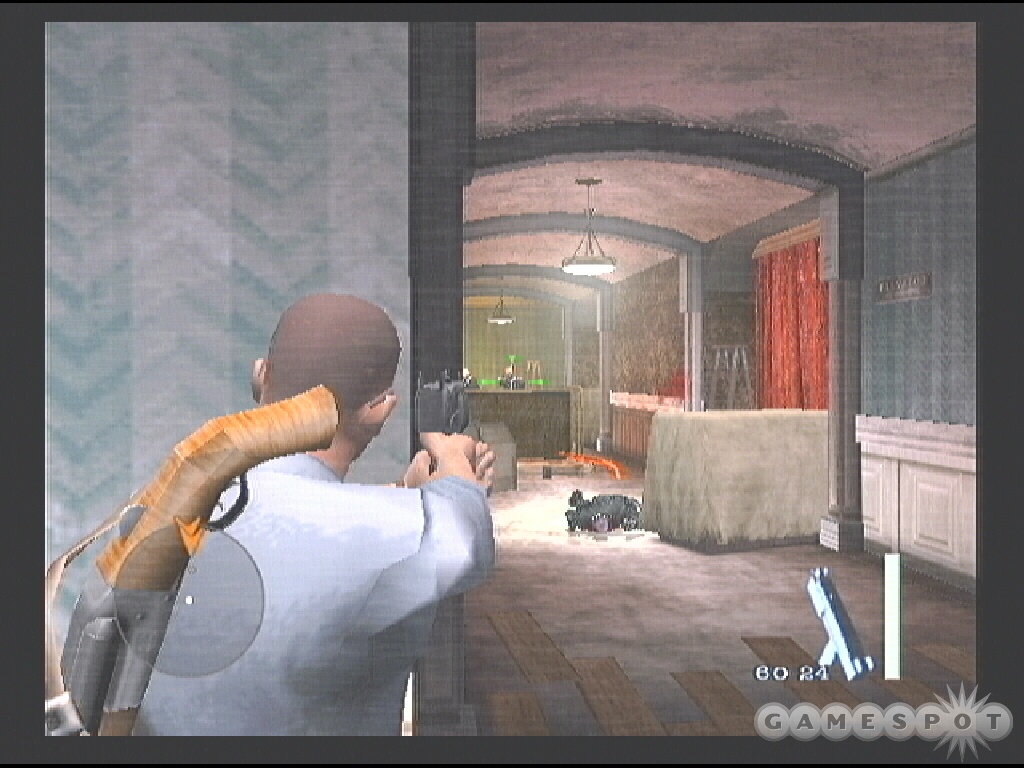
You’ve been captured in one of the hospital rooms. You have no weapons and a watchdog carrying a shotgun has you pinned down. Wait until the guard moves away. If you walk forward too soon he’ll open fire. Pick up the pen on the left side of the bed that’s closest to the exit. When the guard turns around to stand post at the door, take him out with the pen execution.
Pick up the shotgun and blast the doctor cowering nearby. When you go forward through the door, Doctor Pickman begins using the failsafe phrase again and you’re told to shoot the speakers. You only have a few seconds before the phrase causes Danny to black out which means restarting at the previous checkpoint.
In this first room, the speaker is on the wall to the right. The speakers are square white objects. Shoot it once with the shotgun to destroy it.
Cross the room and face the large glass window. Shoot it with the shotgun to break it apart. Press the button on the right side of the room to open the exit door.
The second speaker is in the room just in front of you. Press the red button to open the door. Destroy the speaker on the opposite side of the room. It’s up high near the ceiling.
Move into the morgue and aim at the right side; a watchdog appears here so blast him before he can react. As you move through, be prepared to shoot a second watchdog that emerges from a door on the right side.

Exit the door into the hallway. Start down the hall until you hear the speaker crackle on. A guard appears from the right side. Blast him then move into the intersection. Turn left and spot the speaker on top of the shelves. Destroy this third and final speaker.
Descend the staircase and go right at the bottom to the Auditorium door. There’s a nurse and Pickman inside. With the shotgun equipped, quickly turn left and blast the nurse with your shotgun. Grab the tranquilizer gun. Turn around and, hopefully while he’s still talking up a storm, shoot Doctor Pickman with the tranquilizer to complete the mission.
Broadcast Interrupted
Objective: Get out of the TV Studio alive.
Although you’re safely in shadow, things aren’t looking good. A squad of enemies has arrived and you have no weapon. There are a few options at the start. You can quickly turn around and run into the shadows near the fire extinguisher and attempt to get an execution there or you can break the glass with a melee attack and grab a shard and remain at your current position and wait for an opportunity to strike. Or you can combine both tactics and take the shard with you into the other area.
You must move quickly because they’re arriving into that room as you move. Quickly get into the shadow. There’s a lure nearby to aid in the situation.
Here’s a better route. Break the window and grab the shard in the process. Turn around and run through the opening on the left and toward the panels marked "Weather". There are shadows here to take cover. Get into the shadows and face to the left. You should see lights, corpses, and news equipment. There’s a sword there also!

Stick close to the right edge so you can go from shadow to shadow. Execute an enemy if necessary using the shard. When the enemies aren’t watching, grab the sword and return to shadow. You want to proceed toward the blue exit marker on the radar. Follow the maze-like walls and take cover in the shadows at the ends. There’s a side room containing first aid if needed. Watch for the patrols and use the sword to eliminate guards as necessary as you make your way to the staircase on the right side. The patrolling guards here carry weapons. You may even grab a pistol.
Exit the double doors on the right at the top of the stairs and start moving downstairs. At the bottom, take cover in the shadow—there are additional guards in this area.
Wait for a guard to get close to the fuse box and take him out. The other will patrol close (or may even spot his dead friend). Remain in the shadows and emerge to eliminate the guard when he’s turned around. Cross the area to the staircase ahead (the route to the exit is marked with signs as well). Reaching this spot triggers a checkpoint.
You can go left or right at this intersection. Although both routes lead to the same studio, the tactics will be different. Go left if you want to remain in shadows and lure enemies into your blade. If you managed to get a handgun, you may want to go right and take advantage of the elevated position to fire on enemies below. Beware of enemies attempting to flank you.
Get down to the studio once you have eliminated all of the enemies. Gather their ammunition. Search behind the stage for the crowbar. Swap it out for the handgun; you need the crowbar to open a chained door. Use it to unlock the door at the top of the studio then return and grab the handgun.
Watch the radar to avoid detection from the guards outside the door. Open the door and duck into shadows on the left. Wait for the patrolling guard to enter view and take him out silent-style with the sword or Rambo-style with the handgun. You should be able to recover an uzi from these guards. Swap it out for the handgun. Eliminate the two remaining guards and search the room on the left side for first aid. You can also grab a shard from any broken windows.
Resume course toward the exit. The next area contains a trio of guards which can be easily eliminated with the uzi. Gather their discarded ammunition. Search the lockers for first aid. There’s also a crowbar in here. You need to grab it and use it to break the chain on the exit door. Return and swap it out for the uzi. Go through the door to reach a checkpoint.
Enter Kids TV Studio 2. There’s very little cover here and three guards in the next area so it’s time to pull out the uzi. You can keep close to the obstructions and fire at the guards from long-range. Eliminate the three guards and collect the dropped ammo. Crawl through the opening on the left side and battle another squad of guards using the uzi. Search the adjacent room for a crowbar. Grab it and use it to break open the chain on the exit door. Return and grab your uzi. Enter the door into studio 3, which triggers a checkpoint.

There are three guards down the hall on the left side. You can use the crates as cover as you advance and blast them with your uzi. Follow the hall toward the marked exit. There’s first aid ahead but be careful because more enemies emerge from the opening on the right side.
You’re in the Five Past High Noon studio—and it’s quite the location for a shootout. There are plenty of guards here but also ample cover. Move into the buildings on the right side and battle the guards from that location. Some of the guards are using assault rifles. That’s the bad news; the good news is you’re going to get one after you blast those guards with your uzi!
Eliminate all of the guards. Search the control room for first aid. Grab an assault rifle (switches out with the sword) and gather all the ammunition. You need another crowbar to break open the chains locking the exit door. Find the chest in the center of the stage and open it; there’s a crowbar inside. Switch it out with your uzi. Break open the lock and return and grab the uzi. Exit and hit the red button to trigger a cut scene.
Objective: Kill all the hunters and escape.
This garage contains plenty of hunters but you also have the assault rifle: an excellent long-range weapon. Start targeting and eliminating hunters as you move out into the garage and take cover behind columns. Don’t get too close to the cars because if a car is shot a number of times it will explode.
You may run out of ammunition during the battle. If you’re quick enough, you can scurry through the garage and gather ammo from dropped assault rifles and then continue the battle. You can also switch to the uzi if needed, though it’s not as accurate at long-range. Defeat all of the hunters to complete the mission.
Altered State
Objective: Find a way out of the studio back lot.
You begin the mission with the assault rifle. Move forward and stick into the shadows on the left side. There’s barbed wire on the right. Use it to eliminate a guard so you can conserve ammunition. Hide in the shadows on the left or right side and lure a guard close. Some of the hunters carry weapons, such as the scythe and others carry crossbows, which must be exchanged with the assault rife. If you want you can use the crossbow to clear this area then return and grab your dropped assault rifle. Or even keep the crossbow, which operates similar to a sniper rifle.
Check the tube on the right side of the main path to find some extra crossbow bolts. Search the back area of the lot to find medicine and another barbed wire weapon.

Enter the church and locate a crowbar. Pick it up. This triggers the arrival of more enemies. Eliminate the pursuing hunters with the crossbow. Gather up their discarded ammo. Take the crowbar to the sewer pipe (marked on the radar at the blue point) and use it to open the pipe. Enter inside.
Objective: Get inside the barn.
Proceed forward to the checkpoint. You start in a relatively safe area to pick off the hunters in this area. Use your crossbow and aim for their heads. Gather up all of the dropped ammo.
To get inside the barn, you must use the crossbow to shoot the rope that holds up the big stone block. When the block falls to the ground, you can use it to climb into the barn. Note that there’s an special execution mark outside, though it’s better to just eliminate everyone with your crossbow.
Objective: Find your way out of the barn.
There’s an special execution spot inside the barn; it’s the barrel in a stable on the left. There are three hunters down here. Take them out silently (a glass shard nearby provides assistance) or use your crossbow. You can gather more ammo to keep the weapon stocked. Proceed upstairs.
Eliminate the guards up here. You can gain a pistol for your effort. Continue forward and cross the planks to the left. Go around to the left and find the ramp down out of the barn and toward the marked blue objective. This also triggers a checkpoint.
Objective: Make your way through the farm house.
As you enter the next area, the hunters retreat toward the farm house. This gives the enemies a height advantage over your advance. Use the crossbow to pick them off as they emerge over the hill. Gather their ammunition and missed bolts. Switch to the pistol if necessary but try to conserve the firearm and stick with the crossbow. There are additional guards inside the house and on the farm house’s second floor. Clear all of the enemies. Search the stables on the right for first aid.
Work your way through the house. Eliminate any guards lurking inside using the crossbow, pistol, or other weapon. You’ll reach the exit doors but they won’t budge. Break the window to the right and hop through. Continue forward into the next area. A checkpoint is triggered.
Objective: Get to the exit and escape.
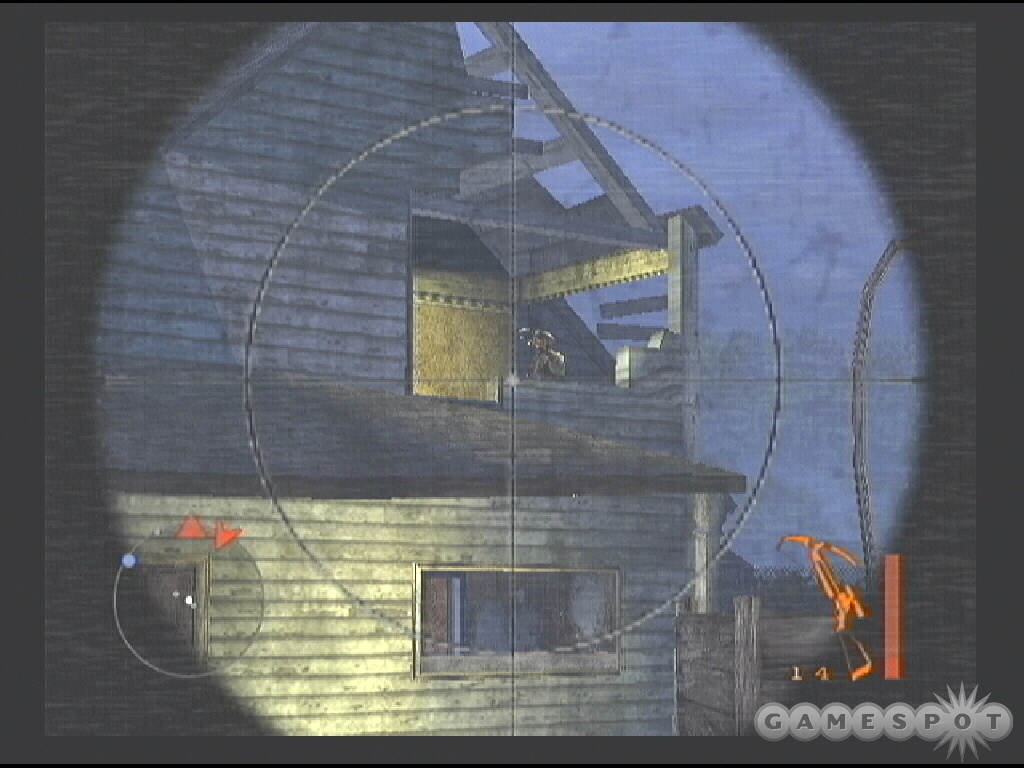
A couple hunters approach in the distance. Pick them off with the crossbow. Search the stables on the right side for first aid. Work your way toward the exit. You may encounter another hunter or two. Eventually a cut scene interrupts the action.
The passage to the exit has been closed. You must use a crank next to the gate to open the passage. However, the area is crawling with guards. You’re also surrounded. Equip the pistol. There are too many enemies for sniping at the moment. Retreat into a corner where you can’t be surrounded and you can pick off enemies as they get into your line of fire.
Take note that you can shoot the barrels in this area to create an explosion, which could help eliminate a guard or two. Gather discarded ammunition. If any guards remain behind near the gate, use the crossbow but makes sure there are no other guards close to your position. There’s first aid up near the gate. Clear all of the enemies before ascending the stairs and attempting to turn the crank. Open the gate and follow the passage to complete the level.
Domestic Disturbance
Objective: Get the pliers from one of the garages. Get through the fence.
Although there’s ample darkness around these houses, the place is crawling with police equipped with flashlights. There’s also a helicopter overhead. The copter does provide some noise cover but getting around the cops will be the toughest task. Grab the can ahead of you and hop over the fence.
The pliers could be in one of multiple locations marked as green objectives on the radar. As the cop patrols the first yard, use the can to distract him to the left side so you can grab the plastic bag neer the trashcans in front of you. Hide in the shadows around the tree and eliminate the cop. You can grab his flashlight.
Work your way around the left sideyard toward the front. You can also cause distractions by tossing lures at cars. You will trigger the car alarm and the cops will investigate. Leaving the corpse visible in the first area can actually help. It can preoccupy some of the cops long enough for you to sneak into one of the garages. Once inside a garage, search the container. You’ll either find clippers or pliers. It seems like the pliers is in the last garage you search—how convenient! Two garages are on your start location’s side of the street and the third is on the other side of the street.

Retrace your steps toward the mission’s start location and take a side route on the left side. Keep your position in the shadows to avoid detection. You’re moving toward the marked blue location on the radar. You can search the backyards for lures but you’ll have to go toward the front yard to cross the street.
The helicopter patrols the street. Don’t get caught in its spotlight. You can use a lure to try and get the cop patrolling the street to move away or just continue to hug the house on the right and its shadow. When the helicopter is moved away and the cop is looking away, run across the street. Take cover in the shadow by the tree. You can now search the garage over on this side.
Once you have the pliers, you need to cross the street and proceed over the fence on the right side (facing this side of the street). Get into the backyard. Avoid getting close to the house or you may trigger one of the homeowners. Use the pliers to open the fence and crawl through to the checkpoint.
Objective: Get to safety.
Some heavy firepower has arrived. Plus the helicopter is now on to you. You must run quickly. Don’t hesitate. Run forward and take the first right. Keep on the walkway on the right side and pull yourself over the fence. A cut scene reveals more heavily armed enemies approaching the street.
Quickly cross the street and get into the backyard. You must use the storage bins to pull yourself up and reach the top of the fence. Keep moving toward the marked objective. Go from yard to storage bin to over fence. You will finally reach the next checkpoint.
Objective: Get to the house.
Take cover in the shadow on the right side. There are several enemies here but you only need to kill one. Once you grab a shotgun you can handle the rest easily. Use a lure to get one of the guards close to the shadow then use the clippers to execute. Grab the shotgun and eliminate remaining enemies. Search the shed around the corner to find some first aid.
Hop over the fence into the adjacent yard. The police are protecting the front of this house. You can use lures to move them away but since there are a few first aid bottles and explosive police cars, fighting your way out is an option. If you recovered a shotgun!
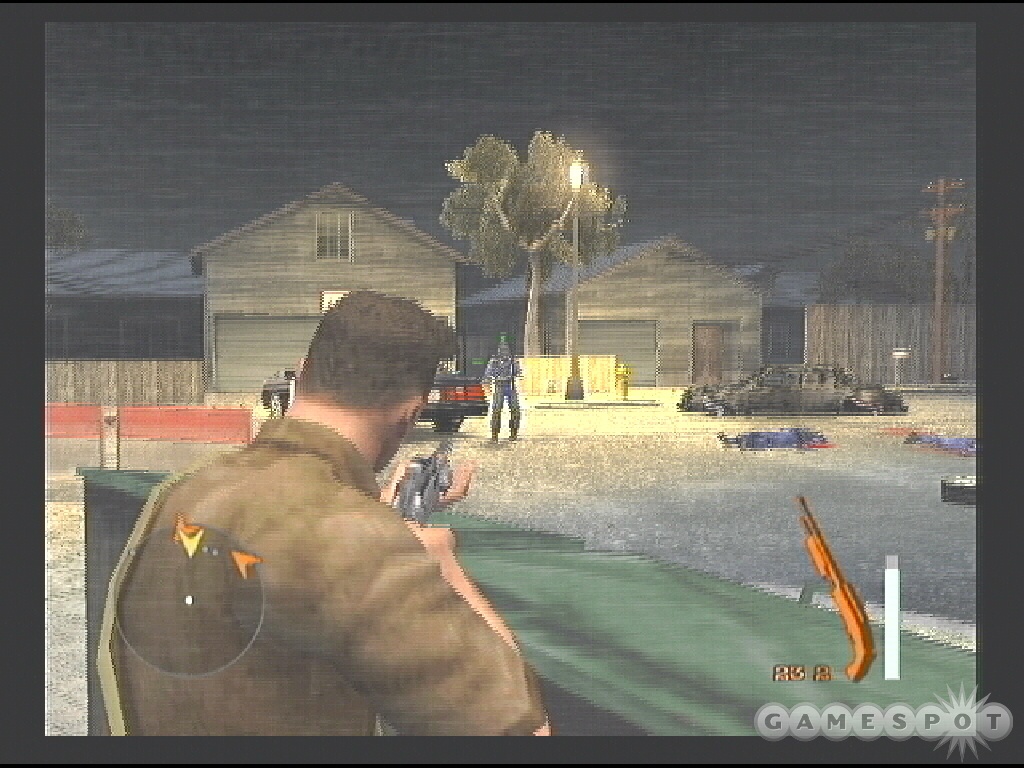
Position yourself across the street, which will likely alert the guards near the cars. Shoot the cars with the shotgun to cause an explosion. Take cover behind the barricades and target and fire on the enemies. Additional guards arrive as you eliminate each group.
There’s a bottle of first aid across the street as well as another near the houses. Gather their ammo and first aid as necessary. After clearing the street, resume course toward the marked location. Hop the fence on the right side of the car (there’s a plastic bag here). A few more guards will spawn in the back yard so be prepared to fire your shotgun. They arrive from the path on the right side.
Hop over the fence into the next yard on the furthest right side. There’s medicine here…plus you’re about to be ambushed. The yard gets flooded with enemies. If you’re caught out on the open, don’t hesitate to retreat and regroup. Gather any missed first aid before returning. The enemies won’t follow and you can come back and attempt the section again.
There are a few medicine bottles in this yard; check near the pool. Eliminate the enemies in the yard then locate the storage bin near the trash on the far side. Hop onto the bin then over the fence to reach the marked objective. Continue into the house to complete the mission.
Personality Clash
Objective: Defeat Leo and gain entry to the crypt.
This is one of two possible end levels. After Domestic Disturbance, if you start Release Therapy, skip ahead in this walk-through. After completing the game, you can use the "Revisit Scenes" option to play through the other level.
As the instructions indicate, you must use the syringe to weaken Leo’s hold over you. The syringe appears randomly over the small first aid kits. Basically there are three near the entrance (one middle, one left, one right), a couple near the central gazebo, and a final near the crypt exit. Grab the syringe.
Objective: Get Leo’s crowbar and use it to break the crypt door padlock.
Leo is moving around the cemetery area, though being not real has a tendency to appear and reappear along his path. Unfortunately, Leo doesn’t appear on radar--again, being not real and all. He can spot you like other guards and will attack with the crowbar. Leo is relentless when he does spot you. An ideal method of completing this task is to grab the syringe without triggering Leo and hiding inside the shadows within the gazebo.
Inside there you can use a lure (there’s a brick on the right side) or just hit the side of the gazebo with a melee attack to get Leo inside. After he investigates and starts to leave, sneak up behind him and perform the execution.

After finally eliminating Leo, grab the dropped crowbar. Proceed to the marked blue location on the radar. Find the chains locking the crypt and use the crowbar to open. This also triggers a checkpoint.
Objective: Escape through the crypt.
Take cover in the shadow on the left side just after entering through the door. Have the crowbar ready. Hit the wall with a melee attack to lure one of the enemies close to the passage. Wait for him to turn around and execute him. You can switch weapons with those dropped by the guards or keep the crowbar.
The second guard patrols closer to the crypt exit. There’s shadow on the left side. Take cover there and create some noise to lure the guard close. As he turns away and returns on his patrol down the hall, sneak up on the guard and execute. Follow the path toward the marked blue exit.
Objective: Locate the entrance to the underground catacombs.
There are a couple more watchdogs patrolling this exterior area. Watch the radar to ensure it’s safe to exit. Get into the shadow across from the exit and wait for one of the guards to patrol close. You can also use noise to get him close if necessary. Execute with the crowbar, shovel, or whatever weapon you’re currently holding. Eliminate the second guard in a similar fashion. If these guards see you, getting away can be tough. Run around the cemetery remaining in this same location and look for shadow to hide.
When you cross through the broken wall into the adjacent cemetery, a cut scene is triggered that releases two more previously defeated foes: Doctor Pickman and Michael. These enemies are armed with their usual weapons: a tranquilizer gun and a flare gun respectively.
Once again you must take cover in the shadows and lure these enemies close. Avoid getting seen so you aren’t taking shots from their firearms at long-range. If you are spotted, run around until they’re suspicious and take cover in the shadows. You can grab their weapons once you have eliminated these two enemies.
Proceed to the marked blue objective. It’s the catacombs entrance. But it’s a hatch that must be opened with the crowbar. Locate the crowbar on the other side of the entrance; it’s behind a couple tombstones. Pick up the crowbar, open the hatch and then return and pick up your weapon again. Take a shovel down into the catacombs with you; if you don’t have one you can grab it from the gravesite in the first cemetery area. Dropping into the hatch triggers a checkpoint.
Objective: Defeat 6 hunters to unlock the catacombs exit.
Although the objective requires you to defeat six enemies, there are actually more here. Expect to defeat them all before continuing onward. If you snagged the flare gun from Michael’s corpse during the previous objective then you should be able to snag three fairly easy kills. Carefully open the door and watch the radar movement. Equip and aim the flare gun at any approaching hunters. It’s difficult to remain in stealth mode here and it’s better to remain close to the start position to avoid being surrounded by the enemy.
Some of the enemies carry assault rifles—that’s bad news but you can use this to your advantage by killing one and grabbing the assault rifle. The flare gun likely has little ammo so you’ll need one of the assault rifles for the firepower to eliminate the remaining enemies. Gather dropped ammo if needed. Eliminate all of the hunters (the exit is revealed once you’ve killed six enemies).

Objective: Locate the catacombs exit.
Find first aid at the end of the right corridor. It’s close to the exit, which is found at the end of a ramp on the right side of the catacombs. Walk out to trigger the checkpoint.
Objective: Carry Danny’s wife’s corpse to her grave.
Danny’s wife’s corpse is the green marker on the radar. You must pick her up and carry her—which makes you move very slow—to her gravesite in the adjacent cemetery. The problem is that Leo attacks continuously until you fend him off. The assault rifle recovered from the catacombs is a must-have weapon. If you collected the dropped ammo from the previous objective you should have more than enough.
Grab your wife and start to carry her. When Leo shows up, drop her and aim and fire the assault rifle at Leo. Aim for the head. Once he’s eliminated, pick up your wife and resume course toward the marked blue objective. Repeat when Leo shows up again.
Objective: Break the cemetery gate lock from inside the graveyard.
Another problem: the gate into the adjacent cemetery is locked by chain. Drop your wife. If you need health, turn around and spot some inside a small crypt. You must get into the adjacent cemetery. Go around the right side of the gate and find a small wall clouded in shadow. Climb over. Go to the backside of the gate and spot the lock. Shoot the lock with your assault rifle. Go through the gate and grab your wife. Resume course toward her grave.
If Leo shows up again, take him out with the assault rifle. Find her grave in the back of the cemetery. Drop her body in the grave to complete the mission and the game.
Release Therapy
Objective: Get to Danny.
Release Therapy is an alternate level to end the game. You can play it after completing the game by selecting the "Revisit Scenes" option. Look at the bottom of the list to find Release Therapy.
Walk into the shadow on the right side of the cell. It’s right across from a barrel that provides a drowning execution. Wait for the guard to come in the cell and stand near the barrel then perform the execution. Grab his pistol.
Although the radar doesn’t show any threats there’s another guard outside. Hide in the shadow again and punch the wall to lure him inside. Perform an execution using the pistol; you can’t use the barrel again.
A couple more guards appear on radar. You can lure them inside (though you’d think the corpses would clue them in). Wait for them to start walking away then execute the one in the back. Shoot the other if he’s alerted. Otherwise you could exit the cell and hide in the shadows on the left side to remain undetected.

Move cautiously through the cellar and take cover along the sides. There are three more guards near the exit stairs. You can take them out aggressively with the pistol or take cover in shadows and use sound to lure them close for an execution. Either way, don’t forget to grab the dropped ammunition. Before proceeding up the stairs, check the alcove on the right side for a chest containing first aid.
Proceed up the staircase and trigger the checkpoint. Aim your pistol at the hallway on the left side; a guard is about to emerge with weapon drawn. Eliminate the guard quickly and grab his ammo.
Move down the hallway on the left and face the room containing the pool table. A squad of guards enters the opposite side of the room. Take cover at the doorway and begin targeting enemies and shooting with the pistol. These guards are using uzis so you must work quickly. Use cover along the wall in between attacks and to reload. Don’t hesitate to use all your ammo—you’re going to grab an uzi shortly. After clearing the room, grab the uzis and ammo. Search the cabinet on the right side of the room for medicine.
Exit on the right side into the next room. The double doors ahead are locked by chain. There’s a crowbar in a chest in the back right corner of the room. Or you can blast off the chain with the pistol or uzi.
When you open the door, you may spot a guard behind the dresser in front of you. There are two more guards in the room on the left. Eliminate these guards with the uzi. Gather the dropped assault rifle and ammo. Search the cabinet inside the room on the left for first aid.
The next battle is intense—there are numerous guards and many with assault rifles. Move forward through the double doors hitting the checkpoint. When you trigger the enemies, you have a couple options. You can retreat and eliminate the enemies from the previous hall. Or you can charge inside and take cover at the dresser just right of the entrance. From this location aim and fire the assault rifle at the enemies charging into the room from the door on the right. Gather all dropped weapons before continuing.
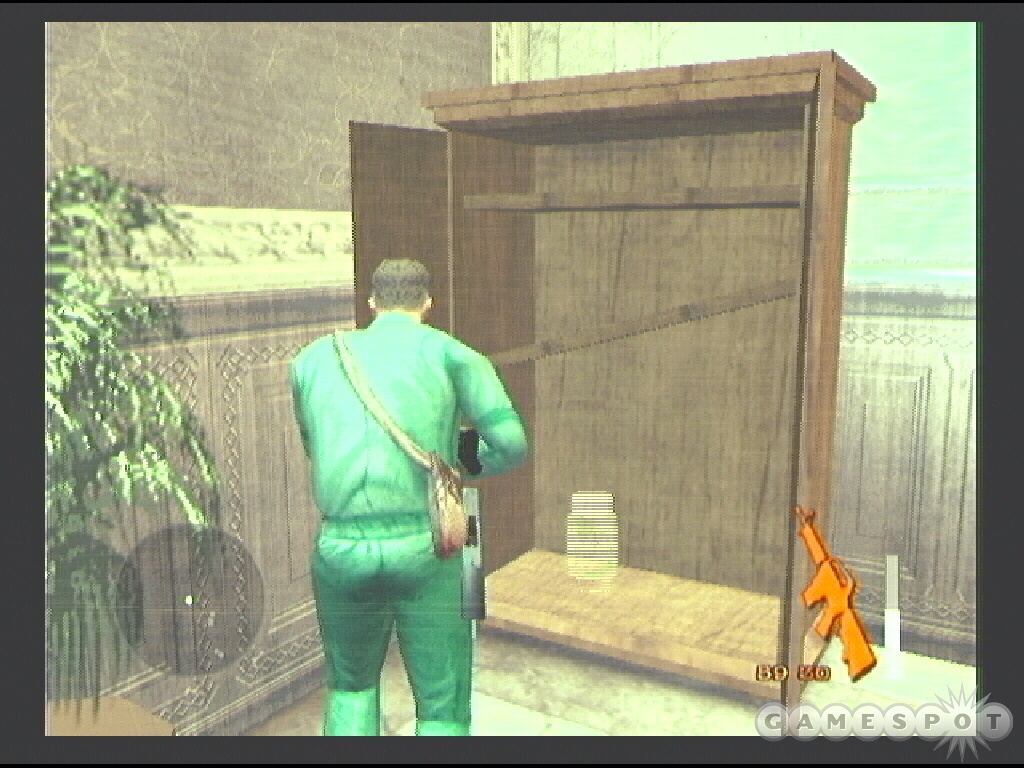
There are two entryways at the end of the hall. Check the pool table room on the right side for medicine. Target the enemies in the other room with the assault rifle. You should have plenty of room in the hall and the room behind you to retreat and reload as needed. Pick up the assault rifle for ammo. Search the cabinet on the left side of the room for first aid.
Eliminate the guards inside the library. They approach from the left and right sides. Back away into the piano room if necessary. Grab first aid in the back left corner of the library to mend any wounds. Proceed through the double doors then into the door on the left to find Danny.
Objective: Defeat Danny.
You’ve entered a circular chamber. There are plenty of medicine bottles scattered around (in the middle as well as the perimeter). There are large library bookshelves that can provide cover but they also provide a more important service: a clue to where Danny is moving.
Danny, being unreal, will appear and disappear. You can detect his movements by spotting the air disturbance as well as the ruffling of pages around the bookshelf that Danny is near. When you spot this sign, look for Danny close by. Aim the assault rifle and blast him as many times as possible before he disappears. Danny has his own weapon, an uzi, and is accurate enough to inflict decent damage in a short period of time.
After each firefight, check your health. If you’re under three-quarters to a half, grab first aid. There are plenty of bottles around the area. After grabbing health, resume looking for and firing at Danny. Aim for the chest and head. Danny can withstand a lot of damage, much more than usual enemies. Take cover on the opposite side of shelves if you need to reload. When Danny falls to your gunfire, the mission and the game are complete.
Got a news tip or want to contact us directly? Email news@gamespot.com
Join the conversation