Hellgate: London Walkthrough
Demons have overtaken London, but GameSpot's Walkthrough is here to help you kick them back out.
There's something to be said for games that foster a sense of addiction in their players. Whether you stay up all night trying to get another level in World of Warcraft or play Lineage II so long that you die, these games offer up a decidedly unhealthy, yet enthralling, gameplay experience.
Blizzard's World of Warcraft game wasn't its first exercise in free-time-stealing, however: Its Diablo and Diablo II games were arguably the progenitors of the category. Given randomized loot and the opportunity to obtain it quickly and repeatedly, the games encouraged players to make just one more Mephisto run in the hopes of finding that Buriza-Do Kyanon crossbow, to the point where people stayed up all night obsessively clicking on enemies.
The zombification of America's youth is apparently about to get another game proponent with the release of Hellgate: London, which was put together by a team led by veteran Blizzard developers. It's a slower gameplay experience than Diablo II was, but it still retains the same addictive qualities. Here's what to expect from GameSpot's Game Guide to Hellgate: London.
Class Descriptions
A basic rundown on each of the classes currently in the game and how they play.
General Tips
Some useful tips to help you play the game and a description of the status effects that you'll see.
Minigame Explanation
Want to earn more loot? Sure, we all do! This chapter explains the three-icon minigame that will probably be pretty puzzling to you at first.
Items and Mods
There's a lot to learn if you want to tackle item upgrades and mods. Check out this chapter to learn more.
Classes
Hellgate: London allows you to play as six different classes. (Rumors abound of a melee class that can use two-handed weapons that will be made available to subscribers, as well as a shapeshifter class, but they’re not in the game as of this writing.) This chapter will run you down through the various classes and give you a rough overview of their skills and abilities.
We haven’t had the chance to take a character of each class to the maximum level, and some skills are still being balanced as we write this (and will likely continue to be balanced after the game hits shelves), so don’t take all of this as being the gospel truth. These classes will change over time, rendering some of this information moot, but for now, here are some starter opinions on the various choices you have.
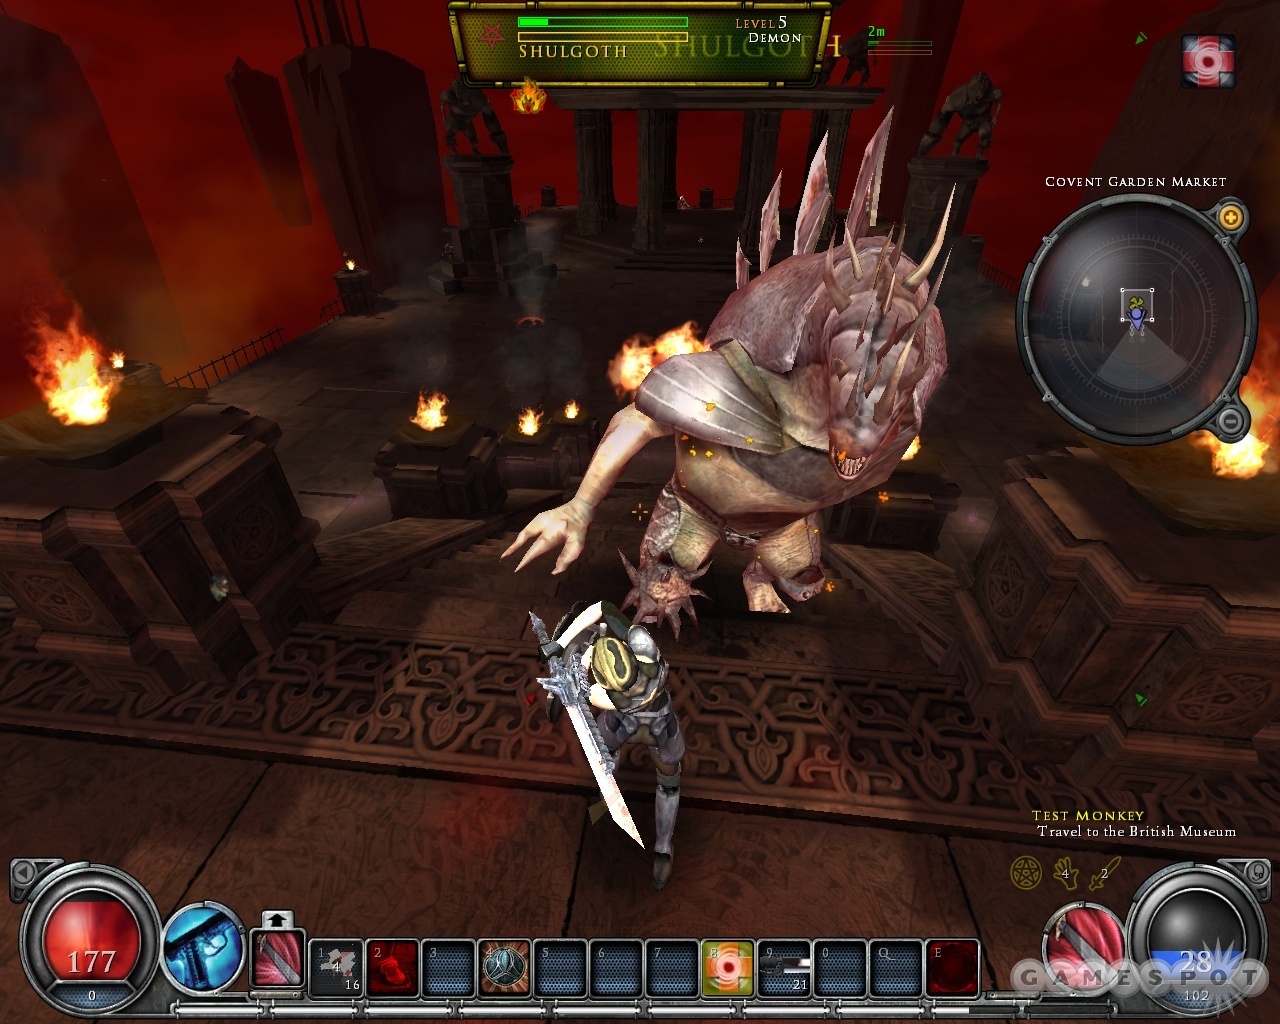
Guardian
The Guardian is the tank of Hellgate. Since they have the highest armor in the game, thanks to the fact that they wield a high-armor shield and sword combo, they’ll take a lot less damage in combat than their compatriots, making them handy in any kind of multiplayer game. They don’t skimp on the damage, either, making them effective soloers.
Equipment
The best sword and the best shield you can get are the order of the day here. You’ll want a variety of damage types and weapon speeds in your equipment sets characters that focus on Sword of Reckoning for massive damage will want to find the slowest, highest-attack sword they can get. If you’re focusing on shield bashing, though, you may want to try and get a few different shields with different damage types, making sure that you have a good fire-based shield for Igniting tough enemies.
When it comes to armor, you’ll be more likely to want items with high armor ratings rather than high shields. Since you’re going to be in the thick of things, and your auras will require you to be surrounded by foes, your shields will usually drop fairly quickly, whereas your armor will always be present and helping to mitigate damage.
Skills
Aura of Renewal will be your best friend at the earlier levels, as it will let you recharge a good amount of your health when surrounded by enemies. Sure, they’ll hit you, but if you load up on armor, you should be able to regenerate just as much if not more health than they can dish out. Later on, you may want to shift to Aura of Power and use Prayer of Healing or Health Injectors when you run low on health.
Apart from the myriad defensive and taunting skills, you won’t have a huge amount of offensive skills at your beck and call. Sword of Reckoning is great for quickly bursting down against a tough boss enemy, while Anchor will let you sit still and deal a lot more damage to enemies that are willing to come to you - combine this with Challenge to ensure that everyone gets a taste.
Since you’re going to be using a shield for most of the game, though, you’ll probably want to invest in the Shield Bash tree of skills. Although shields won’t deal as much damage as your swords likely will, they can still be incredibly useful when combined with these skills, especially Shield Turn, which will strike all enemies nearby and increase your chance to inflict a status effect on your foe. While most early shields will deal physical damage (and thus stun your foes), you will eventually start finding shields that deal other sorts of damage, such as spectral and fire. It’s quite fun to spin around and ignite all of the enemies that surround you, then watch them burn up without having to attack them personally. Bosses can fall to these attacks, as well; just find a good fire shield and spam Shield Bash at them until they catch on fire.
Blademaster
The blademaster is similar to the Guardian class in that it focuses on melee combat, but unlike the Guardian, the Blademaster can learn the fine art of wielding melee weapons in both hands, and will usually prefer to do so instead of wielding a sword and shield. As such, they can do an immense amount of up-close damage, but will take more damage than a Guardian would, and as such they’ll probably wind up churning through more health injectors than almost any other class.
Equipment
This isn’t too complicated; pick a couple of swords of different damage types and go to town on your foes. Your equipment will need to have a lot of armor to make up for the lack of a shield, so try to focus on that, as well as stuff like extra hit points and melee attack speed. As far as your swords go, you’ll also likely want to get some kind of shield penetration going on, as that’ll let you bypass some of the tougher enemy’s shields.
Skills

There are a lot of skills to choose from here, some of which are useful and some of which aren’t. Surges are the most unique aspect of the Blademaster; as you use them on enemies, you’ll gain buffs that apply to yourself for 15 or 20 seconds or so; you can stack these buffs for bigger effects. Surge of Restoration will be your best friend for the early portions of the game; it’ll greatly increase your health regeneration while you have it active on yourself. You’ll want to use it on every enemy you see until you get three stacks (denoted by three lines of blood that swirl around you); that maximizes its effect. When you have three stacks, periodically hit another enemy with the Surge of Restoration to refresh the timer. Unfortunately, it can be tough to spot the number of stacks on you in the middle of combat, and the countdown timer on the skill isn’t displayed, so managing this effect requires a bit of practice. You can use Aura of Power to ensure that you have enough power to continually use this ability.
Apart from that, your primary damage trees will consist of either Crosscutter (throwing swords), Sword of Reckoning/Charge, or Sword of Justice. Crosscutter and the other throwing swords skills are interesting, but probably not necessary, unless you find yourself frustrated by flying enemies. Sword of Justice is also somewhat lackluster, as it deals three quick strikes with your weapon, but cuts off around 70% of the damage dealt by each swing, meaning that the total damage adds up to be less than a normal regular strike, unless you dump a lot of points into the skill. Still, it can be a handy skill if you’re looking to proc Ignite onto an enemy; three attacks gives you three times the chances of it hitting.
Sword of Reckoning and Sword of Authority are probably going to be your best bets against the tougher enemies, though, as they’ll let you greatly multiply your weapon damage when going up against enemies with high armor or health. (Most normal enemies will fall to simple weapon strikes, anyway.) Charge is also an incredibly handy way to close ground on your foes, or to track down enemies that attempt to evade you, like Dunder Liches.
Marksman
The Marksman class is one that should appeal to characters that don’t like getting their hands dirty. Although most classes can deal damage at a distance, the Marksman specializes in weapons-based damage and obtaining critical hits, and has a wide variety of skills that can back up his or her abilities in that manner.
Equipment
Obviously enough, your weapons are going to be of paramount importance to your Marksman. You want high damage, obviously, but you also want a variety of damage and firing types. As you proceed along your game, look for a few different kinds of weapons: one rapid-firing weapon, such as a Zeus Rifle, for crowd control; one high-damage sniper rifle for single-target sniping at long range; and one alternate weapon of a different damage type to supplement your main weapons.
In point of fact, most Marksmen will probably want to spend some time farming bosses in the teen levels and hoping to find a high-quality Zeus Rifle. The constant fire and target-linking capabilities of them make them excellent weapons, so try to find a good one; if properly upgraded, it’ll last you a very long time. (The Zeus Rifles have reportedly been nerfed a great deal in between the beta and retail releases, so this may no longer be the case!)
Skills
Marksmen usually want to have a specialty within their trees, revolving around either using Sniper mode to deal high damage, or relying on the Rapid Fire skills to dish out the pain to nearby foes.
Increasing the efficacy of Sniper mode will let you fire on enemies that are farther away, but increasing the points spent there won’t let you fire any more rapidly, which is the real weakness in Sniper mode. As such, Sniping is perhaps best used in multiplayer, where you can rely on a Guardian to get up close and hold the enemies at bay while you bust out your sniper rifle and go to town. However, even a single point in Sniper will be handy for any player; the double damage bonus will make it useful for any type of weapon, with Zeus Rifles becoming extremely deadly when you’re in Sniper mode.

Rapid Fire can make any quick weapon deadly at close range, but it does rapidly degrade the accuracy of your gun, so you can’t expect to use it for distant enemies. (The Zeus Rifle is mostly immune to this accuracy degradation effect, however.) The rate of fire increase will be entirely useless on many sniper rifles and rocket launchers, however, so be sure you have an appropriate weapon equipped when you use it.
There are plenty of other useful skills here. Beacon is especially important to have in multiplayer, where it can allow your party to take down boss-level characters much more quickly, but it can be just as handy for solo players. Escape will let you get out of a tough situation, or can be used to prevent you from taking damage while you wait for your timer to count down on your health injectors or Rapid Fire. The grenades and Napalm Strike trees are handy for dealing elemental damage to targets that are weak to them (or for afflicting enemies with Ignite), but be warned: it can be quite difficult to get these to land where you want them, especially in wide-open maps.
Engineer
Engineers are something of a hybrid rifleman/summoner class. While they can fire ranged weapons, most of their skills revolve around summoning bots and drones of various sorts that will help them in combat. It’s a somewhat passive class, without a huge number of different actions that you’ll be performing in combat; most of the time you’ll simply be firing your weapon while your bots and drones help distract or wear down your enemies. The helpers that you get here will help you take on crowds of enemies with ease, but boss monsters can be a bit harder to handle. Also note that the added graphical strain of a half-dozen pets with their own attacks can be somewhat rough on lower-end machines.
Equipment
You’ll need to graba few different weapons of various damage types here. Try to find something capable of igniting opponents, obviously, and bring along a rapid-fire weapon and a sniper rifle. You can’t obtain the Sniper skill, but the Tactical Stance skill will still let you extend the range of your sniper rifle’s fire a good deal.
As far as your armor goes, you’ll want to try and find stuff that boosts the stats of your minions. If you poke around long enough, you’ll come across items that add to the armor and health of your minions, and perhaps even attack damage. This stuff will be pretty handy, especially if you invest heavily into your drone’s abilities.
Skills
Tactical Stance, Beacon, and Rapid Fire will all be handy here, but you don’t need to invest in them a huge amount; a couple points each will unlock the skill’s functionality and make them usable, but the bulk of your points will be going towards bots and drones.
Drone Skills: Your drone is going to be your primary minion here: you can only have one of them out at a time, but they’ll eventually become quite powerful, and you’ll even be able to upgrade them with new guns, swords, and armor. They’ll probably be taking a lot of damage, since they tend to rush forward and engage your enemies, so you’ll want to invest heavily into the core Construct Drone skill, as well as Repair Drone when it becomes available. Just two or three points in Repair Drone will let you cut the cooldown timer on the skill by half, which will come in especially handy during tough boss fights.

Apart from that, most of the skills here are pretty self-evident. You can probably avoid the Medpak Retrofit and Shield Generator Retrofit abilities unless you play in groups quite a bit; they’re not really worthwhile for solo play. You’ll need to invest quite a bit of points into the Gun, Sword, and Armor Retrofit skills, as well as the Master Engineer skill, to ensure that your drone can wield competitive equipment and stay alive in combat.
Although it’s not exactly intuitive, in order to equip weapons and armor to your drone, you need to summon it, press the Alt key, move your mouse up to the upper left corner of the screen, right-click on the drone’s portrait, and select Inventory. Initially there won’t be any inventory slots for you to add anything to; they’ll be unlocked as you invest points in your skills.
Bot Skills: Unlike your drone, you can have multiple bots out at the same time, with one set of bots from each tree being available. (I.e. you can have inhibitor bots or haste bots out, but not both.) Bots are unkillable, but their effects are somewhat more muted than the drones.
You start off with three Inhibitor Bots, which are helpful in that they’ll point out the locations of nearby enemies and slow them a bit. It’s probably not worth increasing your investment there, though, although you may have to to move down the tree; instead, start building up your Rocket Bots. Rocket Bots will deal more damage and can eventually learn the Molotov Assault skill, which will be handy when going up against tougher enemies that you need to Ignite.
Evoker
The Evoker is the most straightforward spellcaster of the classes. She foregoes any type of pet or minion, preferring to take on the forces of evil by herself, using her arcane talents to strike down enemies. It can be a difficult class to play solo, especially when taking on tough bosses, but can deal a lot of elemental damage in a small amount of time.
Equipment
The key thing to remember here is that not only do most of your spells require a focus item to be castable, but that their damage magnifies with the damage of the focus item that you wield. Higher damage on your focus item will increase the damage of the spells that you cast, in other words. Other mods to your focus items will also apply to your spells, like bonuses to status effect strengths, although the interplay between the items and the spells isn’t always spelled out clearly.
Until you hit level five, you may find the Evoker to be an annoying class to play as; your spells won’t do much damage, and you’ll find yourself constantly backing away from your enemies while they pound on you. When you reach level five, however, you can start using Dual Focus to wield focus items in both hands, and you should immediately see a boost to your spell power. Find two good focus items and keep them upgraded at all times! If you need a bonus of some sort, go for Shield Penetration; you can’t add status effects to your shielded foes, but shield penetration will let you bypass their shields and Ignite them up.
As far as your equipment goes, you’ll need lots of stamina and willpower, so be on the lookout for items that add to either of those stats. Apart from that, shields will be helpful to avoid damage. Also, be sure to stock up on powerpacks at the vendors; you’ll need them to restore your power levels during fights.
Skills
You have a lot of choices here, with skill trees for each of the five main types of damage. The fire tree will be an obvious good choice for soloers, as it’ll let you Ignite bosses and burn them down, but you’ll also want to find another specialty and split your points up accordingly.
Apart from the damaging spells, there are also a number of utility spells that are available to you. Brom’s Curse will be required at the outset of the game, and it will remain helpful throughout, as it can let you quickly regain lost life. It also works well when used in multiplayer games, as the percentage-based health restoration remains useful at any difficulty level. Drain Power is also going to be a necessary spell for most spellcasters, as it’ll get you out of a pinch when you’re running low on power.
Summoner
The Summoner is essentially the spellcasting equivalent of the Engineer, or the analog of the Necromancer from Diablo II. Having learned to bind small demons to her will, she can summon them into battle and then set them loose upon her foes. In addition to summoning minions, she has the ability to use her necromantic powers to restore health to herself and her allies.
Equipment
Unlike Evokers, Summoners have few offensive spells to cast; thus, they have little need of a Focus Item. (Although you will need one to cast Drain Life or Elemental Drain later in the skill tree, so keep one in an alternate equipment slot.) Instead, they’ll typically want to grab a nice ranged weapon that they can use from the background to help their minions deal damage. Anything that can quickly drop shields can be handy here. There are a number of heavy rifles that are nice to have, but it can be tricky alloting a lot of Accuracy points; you’re going to need a lot of Willpower if you want to summon any number of elementals.
You won’t be finding much armor on your equipment (which is fitting, since most of them seem to consist of a few straps of leather), so try to stock up on shields to protect yourself from the enemies that bypass your minions. Apart from that, Willpower will be a handy stat to gain on items, as will minion armor and minion health.
Skills
The Summoner’s skill tree is separated into roughly three areas: healing and power, elemental summoning, and minion summoning.
Healing: Healing is going to be a big aspect of multiplayer play for summoners, who are something of a support class in multiplayer. Afterlife is a fine spell for solo play, as it’ll let you easily convert clumps of corpses into mounds of health between battles, while Brom’s Curse is probably better for multiplayer or for boss fights.
Elementals: Elementals are small creatures that swarm around the summoner, dealing elemental damage of a given type. Elementals are relatively cheap to cast, and can be summoned instantly on a small cooldown, so they’re easy to replace when they’re killed (and the lower-level fire elementals are notoriously weak when they get hit by enemies). However, all of the elementals will also cause a drain on your Power pool, reducing your maximum amount of power while they’re summoned to the playing field. Fire elementals, for instance, reduce your Power pool by 17 points, so if you have 100 Power, you’ll be able to afford 5 Fire elementals. That will only leave you with 15 Power points, however, which will not be enough to let you resummon your minion if it should happen to die. You need to be sure that you either overload your Willpower stat to the point where you can summon as many elementals as you like, or throttle back your elemental summoning to the point where you can cast your other spells if need be. It can be a delicate balance, but it’ll come to you as you play.
There are five types of elementals, each corresponding to the basic damage types: fire, electricity, spectral, physical, and toxic. Each type of elemental will be able to confer their status effect on an opponent, making different elementals handy for different situations. Fire elementals are useful for inflicting Ignite on enemy bosses, for instance, while Force elementals can be used to stun swarms of opponents, allowing your minion an easier time taking them down.
Minions: Unlike elementals, you can only have one minion out at a time, so choose wisely. If you intend to use a later pet, like the Witch Doctor or the Warper, then you may have a tough time saving up your skill points for them unless you’re playing in multiplayer.
Your Carnagor is the best solo pet; it’s a big, bad beast that will hold your enemy’s attention while your elementals and your rifle go to town on it. Its triggered abilities will let you Enrage it for more damage and movement speed, or turn it into a Meat Shield, where it will taunt all nearby enemies into attacking it. Meat Shield will also regenerate some of the Carnagor’s health. Stack up on Carnagor skills if you’re going to be running solo a lot; otherwise, you may want to wait for a higher-level pet.
The Witch Doctor is your support minion. She’s primarily focused on healing yourself, your elementals, and your allies, if you’re in a party. This is not a strong solo companion, as your elementals will probably wind up popping into dust before the Doc can heal them if they get swarmed. It can be useful in party play, though.
Warpers will be the high-end damage pets, capable of rapidly issuing spell damage to nearby foes and perhaps phasing them. It won’t be capable of taking as much damage as the Carnagor, though, so you’ll need to do a good job of protecting it, or simply team up with a Guardian or Blademaster and let them take the damage.
Lastly, the Reaper can only be used for 20 seconds out of every five minutes at its first rank, making it an emergency-only skill, although an effective one.
General & Combat Tips
Status Effects
One of the important things to know about Hellgate’s combat system is the way in which status effects apply themselves, as well as what they do. There are five main status effects in the game.
Stun (Physical)
Stunning an enemy prevents them from moving or using any abilties, including attacking. It’s a handy effect when it can be applied, although it’s also greatly annoying when it happens to you. Physical weapons and spells can stun opponents.
Ignite (Fire)

Fire-based weapons and spells have a chance to ignite your foes. Ignition will cause an enemy to drain 5% of their total health every second for four or five seconds. Since this is a percentage-based attack, it retains its effectiveness against almost any opponent, meaning that if you can apply it to a boss, you’ll likely be able to do a lot more damage to them than you would with your attacks alone. Many boss-level enemies will be resistant to ignition, but if you can bust out two or three ignitions over the course of a long fight, it will often be enough to turn the battle in your favor.
Since ignition does percentage-based damage, though, it’s not going to be nearly as handy when used on groups of smaller, weaker opponents, at least not when compared to the amount of damage that your attacks will hopefully be doing.
Poison (Toxic)
Poison effects cause a minor life-draining debuff, but also prevents you from healing yourself while the debuff is applied to you. This is mostly going to be something you’ll need to worry about being applied to yourself, since most enemies aren’t going to be healing themselves (although the odd Rare or Epic monster may be capable of doing so). The damage drain usually isn’t fast enough to make this something you want to push for on your own weapons.
Note that the debuff prevents you from using health injectors and other direct heal effects; things like Surge of Restoration seem to work through the debuff and let you keep gaining life.
Phase (Spectral)

Spectral damage will sometimes cause your enemies to phase. While they’re phased, they’ll deal 50% less damage and take 50% more damage from all sources. This is probably the second-most important status effect for boss fights, after Ignite, but still remains relevant for normal enemies, since it’ll let you burst them down much more quickly. It can be applied to your character, as well, of course; when you see yourself glowing purple, you’ll want to immediately pop a health injector.
Shock (Electrical)
Shocked enemies are afflicted by a short stun, which wears off quickly, and then remain shocked for a few seconds in which they can’t use any spells or special abilities. They can still attack and use their weapons, however, which means that this won’t help you out in most fights. This seems to primarily be a debuff that you need to worry about getting applied to your character, as it can quickly shut down your useful abilities. You’ll still be able to use health injectors while shocked, however.
Don’t Knock The Explosives
The levels of Hellgate: London are littered with crates and explosive barrels. They contain gold and items, sometimes, but the explosives are also capable of damaging any enemies that are nearby when they explode. However, they can’t hurt you. If you’re fighting a tough opponent, try luring it over to a bunch of explosives then blow them while you and it are standing as close to them as possible. The damage from the barrels will often kill or seriously wound your foes.
Remapping Keys and Buttons
You have twelve main shortcut keys for using with your abilities here, the 1-10 number keys and the Q and E keys, which are nestled around your main movement keys. Your left and right mouse buttons are generally assigned to individually fire your weapons in alternate hands.
The problem with the default setup is that most characters will probably either be using a two-handed weapon, or will want to be attacking with both weapons at the same time. Luckily, if you open up your skill screen, you can drag a useful skill (like Tactical Stance for Marksmen) to the right-click slot at the bottom of your screen. If you do so, you can drag the icon with two guns in it to the left-click slot. That will let you fire both weapons you possess (or a single weapon if that’s all you’ve got) with the left-mouse button while using the right-click button for often-cast spells or abilities.
Likewise, having the number slots all filled up with spells can make it difficult to hit the far-right buttons in the middle of combat. You may want to try remapping the 6-10 buttons to the R, Z, X, and C keys. That’ll result in your spells being a bit closer to your left hand while you play and hopefully being more accessible to you.
Three-Icon Minigame
The minigame is one of the fun ways in which you’re encouraged to keep playing Hellgate. It’s something that can be completely ignored, if you wish, but if you keep track of what you’re doing, you can use it to get some nice rewards.
The minigame appears in the lower-right corner of the screen, near your power meter and quest tracking. It consists of three small icons; usually these icons will have numbers on them. If you can count the numbers on the icons down to zero and light all three of them up, you’ll instantly witness three or four high-quality items drop at your feet.
Of course, lighting up the icons is tough to do. There are a few ways in which you can light up icons:
- Killing monsters of a certain type.
- Looting items of a certain type.
- Completing a quest.
- Deal or receive damage of a certain type.
Say, for instance, that your three icons are a set of fangs, a sword, and a fire symbol. This would mean that you would need to kill Beast-type enemies (the fangs), pick up a melee weapon of some sort (the sword) and deal or receive fire damage (the fire icon). If you can do so repeatedly and often enough to drop the numbers on all of your icons to zero, then a hail of rare items will drop at your feet. At this point, the mini-game will reset, allowing you to start again.
Here’s a chart of the different icons that you can get in the mini-game.
| Icons | Description |
|---|---|
| Types of Monsters | |
 | Kill Beast-type enemies. |
 | Kill Demon-type enemies. |
 | Kill Spectral-type enemies. |
 | Kill Necro-type enemies. |
| Types of Damage | |
 | Deal critical damage. |
 | Deal or receive fire damage. |
 | Deal or receive electrical damage. |
 | Deal or receive spectral damage. |
 | Deal or receive toxic damage. |
 | Deal or receive physical damage. |
| Types of Items | |
 | Loot an enhanced items. Enhanced items are any item of green or better rarity. |
 | Loot a mod. |
 | Loot a ranged weapon. |
 | Loot a melee weapon. This can be difficult to achieve for ranged classes, since swords are fairly rare drops for them. |
 | Loot a piece of armor. |
| Other Icons | |
 | Quest Completion. You need to actually complete a quest to achieve this goal |
Items
As a loot-oriented game, Hellgate has a number of ways in which you can upgrade and otherwise interact with your weapons, armor, and other gear. It can take a bit of time to wrap your head around the myriad options that are available to you, so if you’re at all confused, read on.
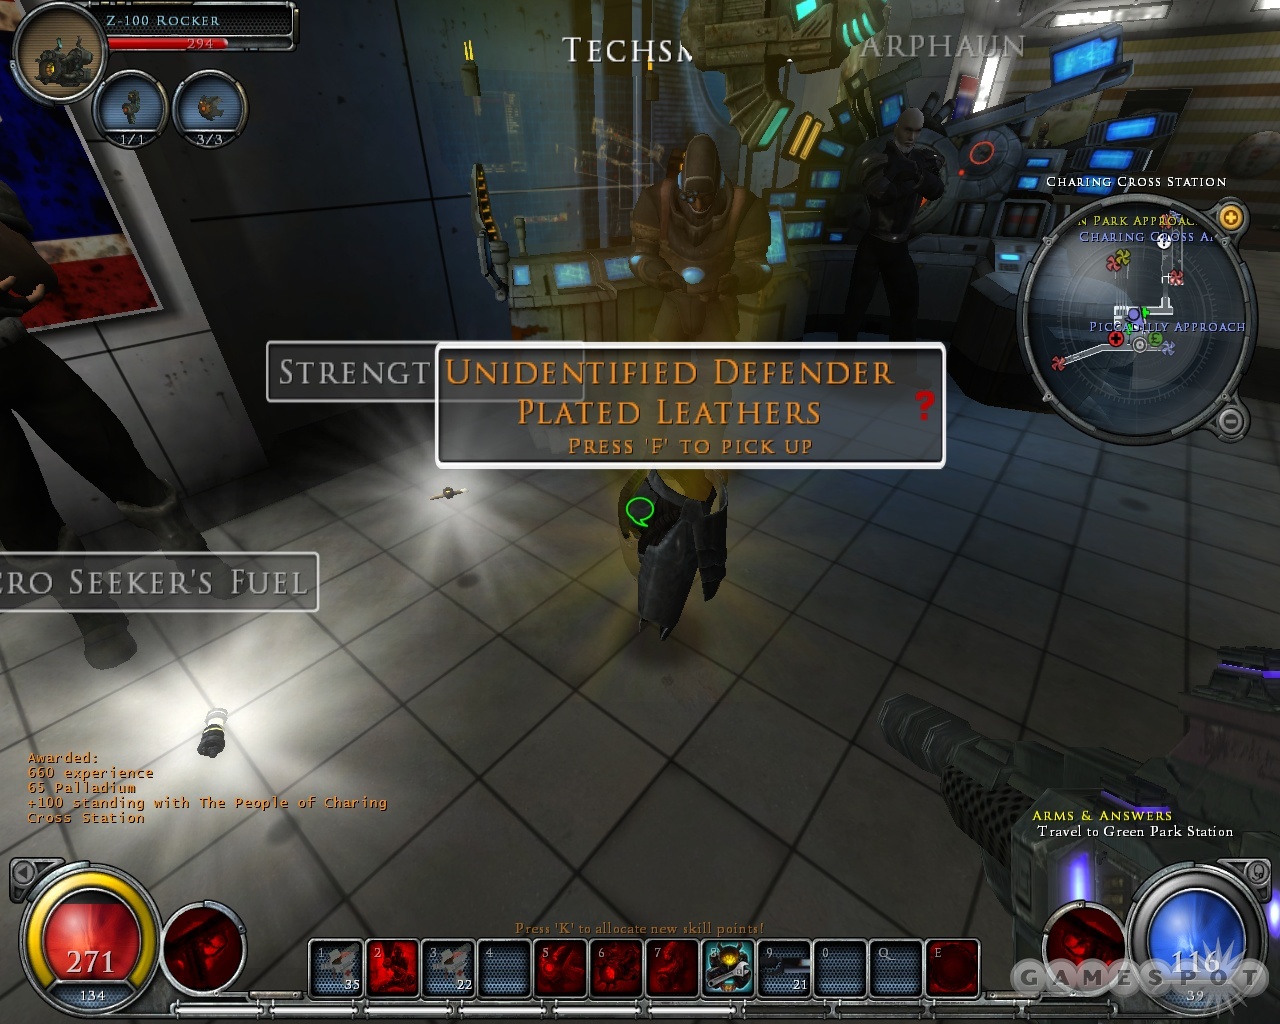
Finding and Identifying Items
As you kill enemies, smash barrels, open chests, and so on, you’ll be finding plenty of loot. Most of what drops will be cash, which is automatically picked up when you walk over it, but there’ll be plenty of items, as well, which will need to be manually picked up with the F button. There are a bunch of different things that can drop, including usable items like health injectors, armor, weapons, and mods.
We’ll get into the types of loot that you can find in a second, but first off, keep in mind that every item that drops has a few characteristics that you should know about.
Usability
There are a few icons that can appear in the lower-right corner of an item that tell you, at a glance, information about it.
Unidentified (Question Mark): If an item is unidentified, it’s unusable. Buy Analyzers at a shopkeeper and use one on an unidentified object to take a look at its hidden properties. You’re going to be using a lot of Analyzers as you proceed through the game, so you may want to drag them to one of your number keys and use that as a shortcut.
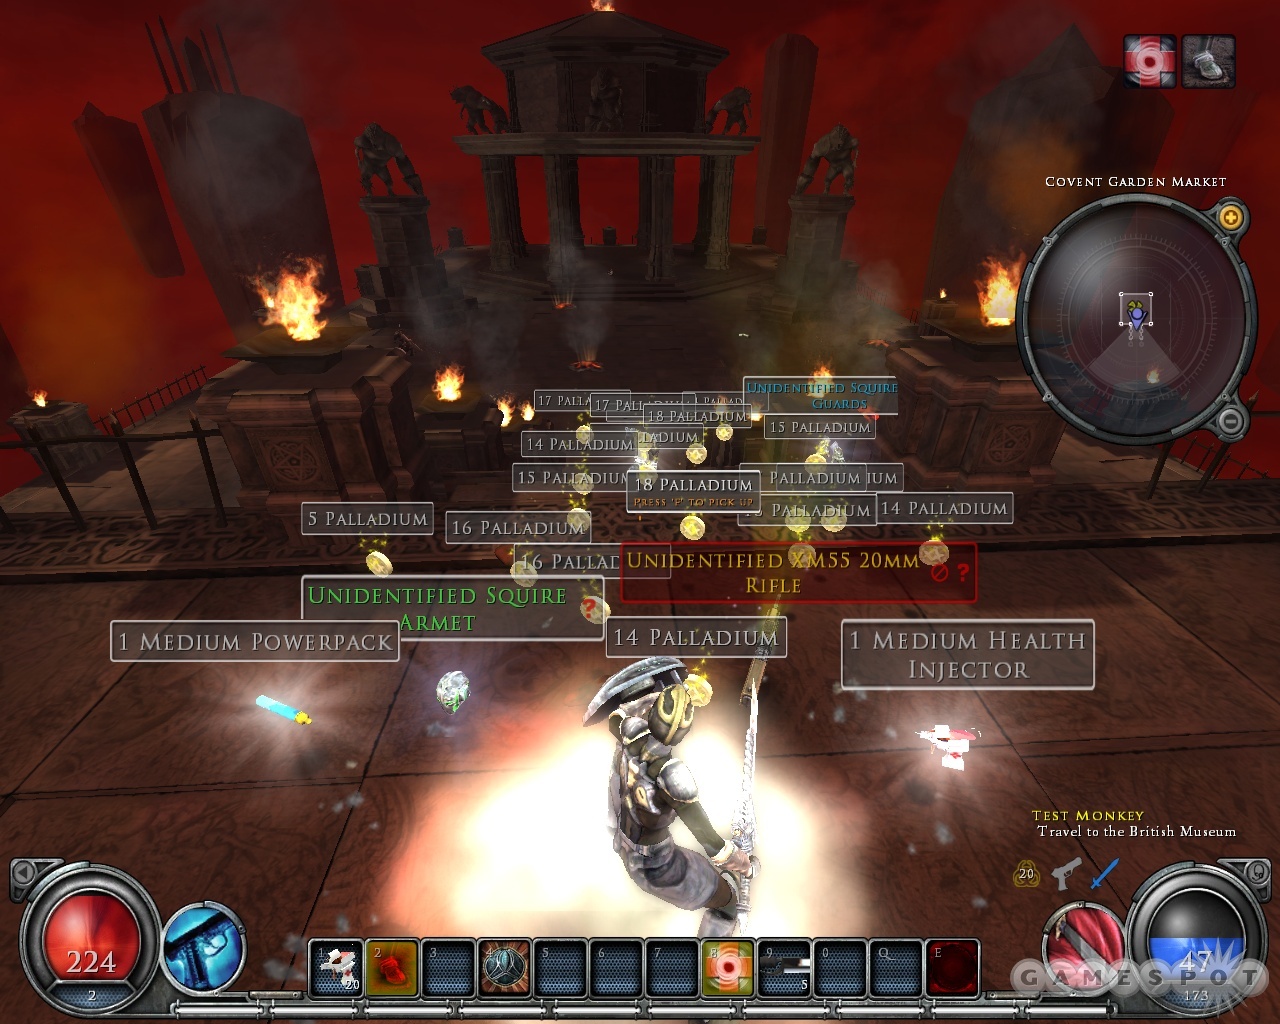
Unusable (Circle with line through it): Unusable items are intended for classes other than your own. Trade them, sell them, or break them down for components.
Unusable Due To Attributes (Minus symbol): Sometimes you’ll find armor or weapons that your class can use, but which you can’t currently equip. All items have minimum attribute requirements, so if you don’t currently meet the requirements, you’ll need to increase your attributes before you can use the item.
Rarity
Common (Grey): Common items have no special properties, and are all alike. If you find two common Tempest Rifles, for instance, they’ll have the exact same stats (in rare cases you may find common items with different mod slots). You’ll be using common items for the first few levels of a character’s existence, but eventually you’ll shed them all and not want to use them anymore. They’ll drop throughout the game, however, so you can feel free to break them down for components as they do so, or simply leave them on the ground and not bother with them.
Enhanced (Green): Enhanced items are superior versions of common items. They’ll typically have one special property and will deal more damage or have more armor by default, and will almost always give you rare components when broken down. Green items will be worn up until level 10 or so, but after that you’ll probably be replacing them with rares and legendary items.
Rare (Blue): Rare items are further enhanced from the enhanced items that came before them, and, as the name implies, they’ll be much more difficult to come across. Typically they’ll have two enhancements and will be more powerful yet than the enhanced items.
Legendary (Orange): Legendary items are the kings of the randomly-generated heap, with the capability of holding three or four special properties. They are, as you can imagine, quite rare, so be sure to examine them carefully when one drops.

Unique (Golden): Unique items are a bit different in Hellgate London than they were in, say, Diablo II. Instead of being premade by the game’s designers, uniques in HGL are randomized, just like lower-level loot: they will have unique names, however, and will usually be quite a bit more powerful than any other item that you’re likely to find. (Sometimes the randomness of these items can result in a bunch of mods that simply aren’t that useful; don’t hesitate to deconstruct a unique if it’s just not good enough for you.) If you find a unique item for a class that’s not your own, be sure to offer it up in chat channel to other players; you’re likely to earn quite a bit of cash for it.
Breaking Down Items Into Components
There are basically two kinds of currency at use in Hellgate: Palladium (cash) and components. Palladium is found throughout the game world; many enemies will drop it, and it’ll also be found in the barrels and boxes that you’ll wind up smashing. Components, however, can only be found in one way: by breaking down items that you find.
When you find an item that you don’t need or can’t use, hold down your right mouse button while hovering over it, then move your cursor up over the screw icon there. You’ll need to confirm that you wish to break down the item, because doing so completely destroys it. You’ll lose the item itself and gain raw components. (Low-level items will break down into palladium instead, but this is a pretty rare occurance at higher levels.)
Components come in a few varieties, including Tech Components, Runic Fragments, Blessed Shards, and Scrap Materials. Each of these varieties comes in common and rare forms, as well, with rarer items giving you more rare components when you break them down. So what can you do with them?
Creating and Upgrading Items
The game gives you a few different ways in which you can upgrade or create items with components or cash. Here’s a rundown on what you can use.
Nano Forge
The nano forge can be found in many friendly towns. It’s pretty easy to use (although the UI needs a bit of work): all you need to do is place an item into the left window nano forge, drag over the stacks of components that it asks you for, then click the Upgrade button and voila! Your item is magically better than it was before. Weapons do more damage, armor has more armor, and everyone’s happy.
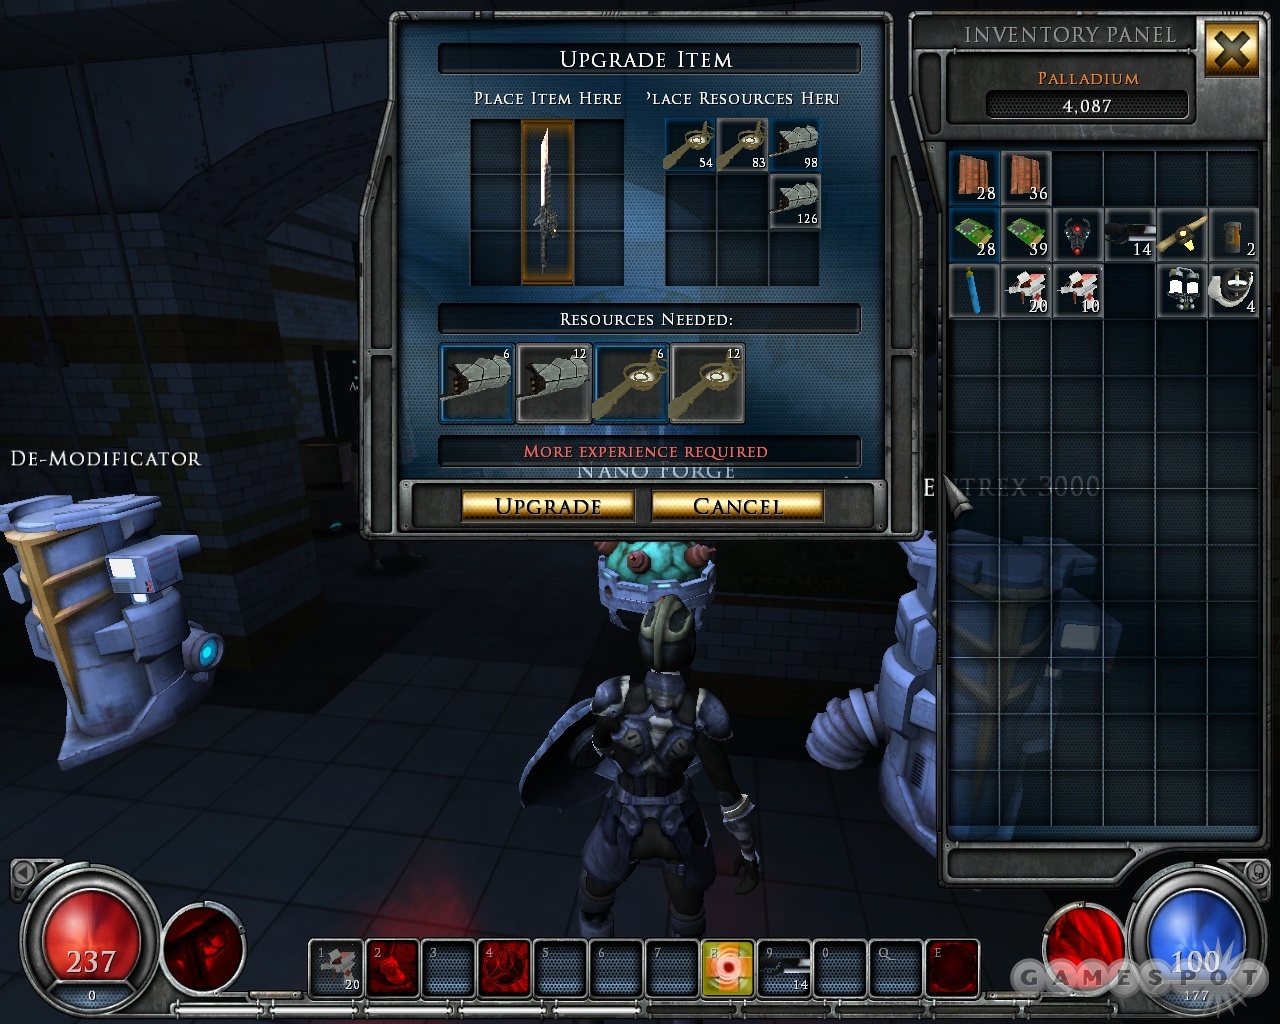
There are some side effects to the nano forge, though. Upgrading a weapon will increase its item level, which can have some deleterious effects: items can be upgraded to the point where you’re no longer a high enough level to use them, for instance. An item that gets upgraded may also wind up increasing its level beyond what the mods in it can handle. Each mod has a maximum item level on it; if you upgrade a weapon above this limit, the mod will cease to function.
Still, the nano forge is a great and relatively cheap way to keep a trusted weapon of yours competitive as you level up. Eventually you’ll want to trade in a weapon for a more advanced model, but if you’re having a hard time finding new equipment, don’t hesitate to hit the nano forge. It’s worth noting that it seems to be better at upgrading weapons than armor, however.
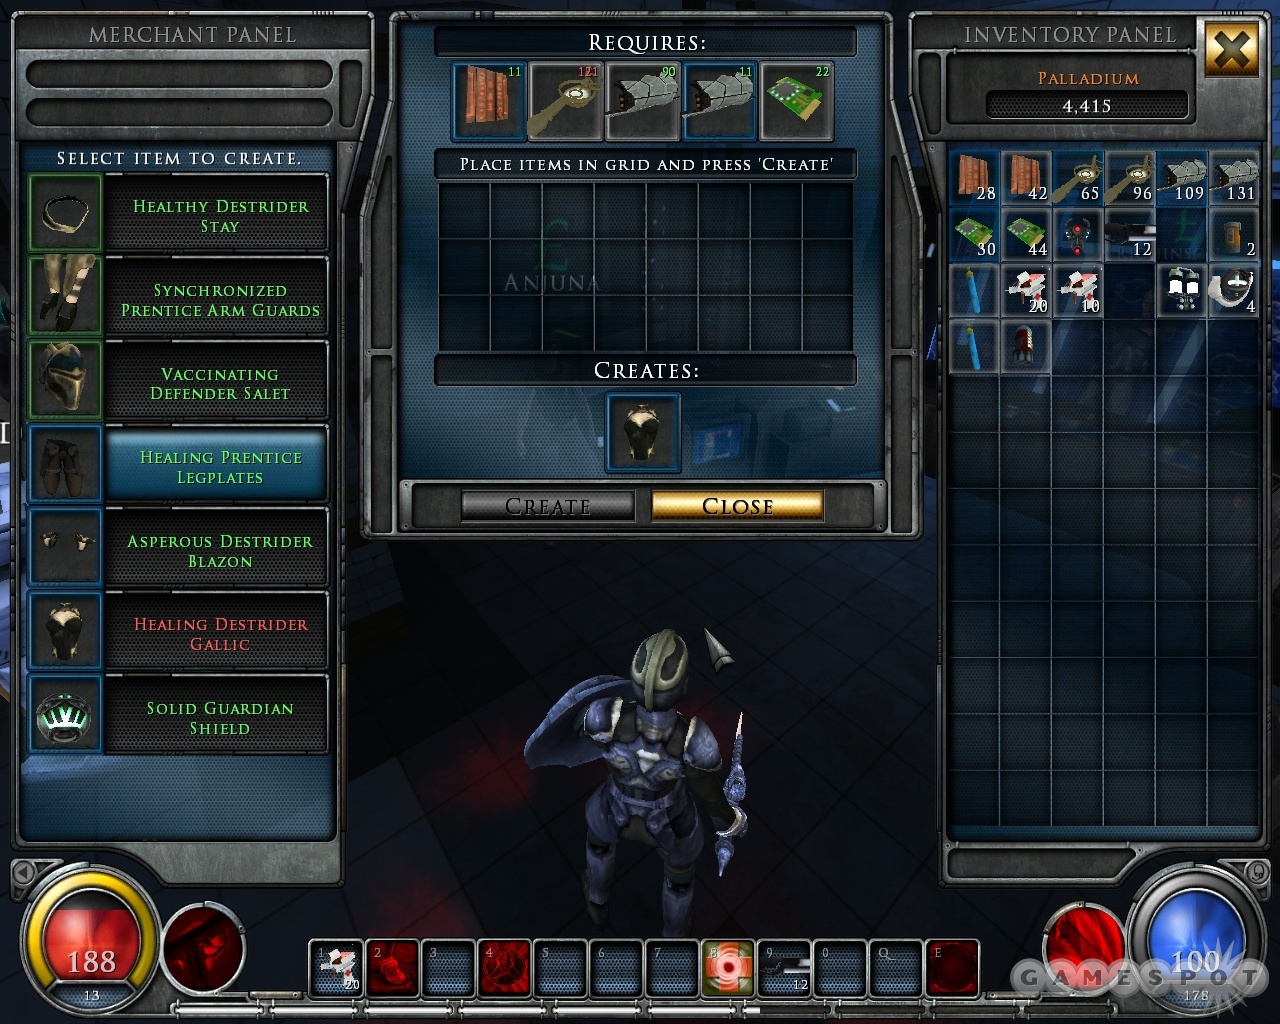
Item Crafter
Almost all towns will have two merchants: a buy-and-sell merchant that you’ll need to buy analyzers from, and an item crafter. When you speak to him or her, the item crafter will offer you a menu of items that you can create using your components. The items that are available are randomized, and will sometimes be completely useless to you. (Marksmen will sometimes get a menu full of swords, for instance. You can resort the list by leaving town and coming back, however.)
With that said, though, sometimes you’ll luck out and be able to create a really nice item at the crafter. She offers the ability to create legendary items on occasion, and very rarely will let you make a unique, which is something the buy-and-sell merchant can’t offer. However, these items will usually require a substantial amount of components to craft, to the point where you probably won’t have enough materials to make a new item more than once a level or two. Still, if you luck out, you’ll be able to use the item crafter to make some wicked armor and weapons. Be sure to check her inventory every time you hit town and hope for something great.
Augmentrix 3000
If you have a lot of spare cash, then the Augmentrix 3000 can be used to add new properties to a weapon or piece of armor, even if it already has a number of them already. You can choose to add common, rare, or legendary properties to anything you put in the augmentrix, with rapidly escalating prices. Even common properties can be beneficial, though; we’ve lucked out with +2% critical chance, +30% damage to demons, and other handy upgrades that were relatively cheap. At higher levels, though, you’ll have greater risk for greater reward, as the upgrades you can provide to your weapons will presumably be even more effective. There’s always the chance that the upgrade you get won’t be useful to you, however.
Each item can have up to five modifications, but it doesn’t appear that you can add more than three mods with the Augmentrix. Still, you probably won’t be spending much of your cash at the buy-and-sell merchant, so the Augmentrix is a great place to spend it if needed. Items upgraded at the Augmentrix also don’t increase their item level, which is handy.
Blueprints
One of the rarest ways to craft comes in the form of blueprints. Blueprints drop like any other item, off of monsters or treasure chests. When you find one, it’ll go into your inventory; right-click on it. That’ll pop up a crafting window which you can place components into and make whatever object the blueprints are for. If it’s something you like or need, feel free to make it; otherwise, you can trade it or sell it to a vendor.
Equipment and Mods
Weapons come with a number of enhancements to their base statistics (in the case of uncommon weapons). However, you can add more enhancements to weapons by inserting mods.
Using Mods
Mods are small devices that can be added to your weapons for a certain effect. To do so, simply pick up a mod from your inventory; any weapons that it can be inserted into will be highlighted. (You can only insert mods into your current weapon, though; you may need to tap F2 or F3 to change your current weapon set if you’re not currently holding the weapon you wish to upgrade.) After a mod is inserted into a weapon, its effect is immediately conveyed. If you ever decide to change modifications, you can do so by bringing a weapon to a Demodificator in town, which will remove all the mods in a weapon for a Palladium fee.
Mods can be put into any weapon that has an appropriate slot. Some classes will find certain types of mods more useful than others: melee classes, for instance, will insert batteries, fuel, and relics into their swords, but won’t have any use for ammo or rockets. Marksmen and Engineers will find a wider variety of mods for their weapons than will other classes, so they’ll want to hold on to just about everything. Like other items, there are varying degrees of rarity for mods: normal, enhanced, rare, legendary, and presumably unique.
Note that mods can only be inserted into a weapon of a given level. If your weapon has an item level of 30, and you find a mod that can be inserted into a weapon of level 20-29, then obviously you won’t be able to use the mod. This can also occur if you upgrade a weapon at a Nanoforge; it’s quite possible to upgrade a weapon to the point where the mods in it no longer work. At that point you’ll need to use the Demodificator to get them out.
Equipment and Mod Effects
Pieces of equipment, as mentioned, come with some enhancements built-in, and mods can add a number of additional effects. Here’s a list of what you can expect to find on your mods or items, and a description of what they do. We’re sure that there are more enhancements that we didn’t spot, but this should be a decent list for starting out the game.
Defensive Enhancements
- Attribute +X: Some weapons and equipment will come with a bonus to a certain attribute, like Strength or Accuracy. When equipped, you’ll immediately gain a bonus to that stat. Some pieces of armor will grant you a bonus to all of your attributes at once, and are highly prized.
- Adds X [Status Effect] Defense: If an item says that it adds to your Stun or Ignite defense, this means that it will help prevent you from being afflicted by the particular status effect that it guards against. As you proceed through the game, more enemies will resort to Igniting you, Phasing you, and so on, so these defenses are necessary, especially for guardians. Some items will add to all special damage effect defenses at once.
- Health Regeneration: Health regeneration will let you automatically restore lost health over time. Your character has zero health regeneration initially, so the only one you can regenerate health in the early going is with health injectors. Health regeneration will decrease your reliance on injectors, but it’s pretty slow; still, if you have a lot of downtime between fights, or can rely on minions to take most of the hits, you can still find this to be pretty useful.
- Hit Point Bonus: Some armors will give you either a percentage hit point bonus or a static number. The percentage bonuses are usually preferred, as a 10% bonus to hit points will result in bigger bonuses as you invest in Stamina.
- Power Point Bonus: We’ve only seen +X increases to power points; we’ve never noticed any percentage based increases here. Still, those enhancements might be out there#8230;
- Minion Damage/Minion Armor: Adds a percentage increase to your minion’s armor or damage. Pretty handy, but useless if your class can’t summon minions, obviously.
- +X Luck: Luck is essentially the Magic Find stat from Diablo II repeated. High luck stats will let you get more items from enemies and will increase the chance that enemies drop enhanced and rare goods. Only Flagship really knows how much Luck effects these variables, but if Diablo II is any indication, you’ll need a lot before the effects become clear.
- Increases Use of Class Skills by X%: This allows you to use your skills more often. Most activated skills have a cooldown on them. If you have a 10-second cooldown on an ability, for instance, and get a 20% Increased Use enhancement, that cooldown will be reduced to eight seconds.
- Decreases Power Cost of Class Skills by X%: All skills for the listed class will cost a few percent fewer power points to use.
- Movement Speed +X%: Although rare, this enhancement is pretty handy, as it will increase your default movement speed at all times.
- Melee Speed Bonus +X%: This increases your swing rate for all melee weapons. Usually this percentage will be pretty small.
- Thorns: Some armors will have a Thorns effect with a number after it, usually something small. This will deal damage of the amount and type listed to any enemy that strikes you. It’s a small amount, but it adds up, especially for Guardians.
Offensive Enhancements
Some weapons and mods can offer the enhancements listed above. Here are some of the offensive-exclusive enhancements.
- Increases damage by X%: All damage dealt by the weapon will be increased by the listed percent. Most mods that offer this ability have pretty small damage increases, but some can go up to 20% or higher. This stacks with elemental damage increases offered by other mods.
- Adds X% Elemental Damage: Usually a mod will let you add a small percent of elemental damage to your weapon. Although this doesn’t appear to increase the damage the weapon does (probably a display bug), it actually does. Say you have a weapon that deals 100 physical damage per shot, then add a +10% toxic damage mod. The weapon would henceforth deal 100 physical damage and 10 toxic damage per shot. These mods are decent ways to increase a weapon’s damage while also making it easier for you to deal damage that’ll reduce your minigame numbers.
- +X To [Status Effect] Attack Strength: If you have a weapon that deals a certain kind of damage, there’s usually a small chance for it to confer a status effect on your foes. For instance, fire-based weapons will sometimes cause an enemy to Ignite, causing them to lose 5% of their total health every second. If you can find a mod that adds +100 to Ignite attack strength, then you greatly increase the chance for this status effect to be applied with each hit. It’s unclear what the base chance of these effects going off is, and it’s likewise unclear how much your Attack Strength affects it (the game is pretty cagey about these stats). Note that adding an Ignite Attack Strength mod to a weapon that deals only electricity damage is useless; a weapon that deals only electrical damage will never cause an enemy to Ignite, even if you add a mod like this to it.
- +X% Damage to [Enemy Type]: Whatever damage you dealt will be increased by the listed percentage, but only against a particular type of enemy. This is less useful than mods that add a blanket increase to damage or increase damage of an elemental type, but can still be handy, especially if you want to farm a boss of a particular type.
- Critical Chance Multiplier [Enemy Type] +X%: The percentage increase here is pretty large, but in most cases the effect is actually fairly small. If you have a 1% base chance to achieve a critical strike, and a mod gives you a +80% chance to achieve a critical on Beasts, then your critical chance only goes up to 1.8%. In general, it’s best to wait until you find a mod with the following enhancement instead.
- Critical Chance Bonus +X%: Typically the bonuses here are pretty small, usually something like one or two percent. However, that’s because they add a chance to crit to all of your attacks, and are additive instead of multiplicative. If you find a mod that adds 2% critical chance, and only have the base 1% critical chance, then your critical chance will go up to 3% against all enemies. Pretty handy, especially for critting classes like some Marksmen or Blademasters.
- Critical Damage Bonus +X%:This number will typically be pretty large. If you happen to get a critical hit with a weapon with this stat, then the damage you deal on the hit will be increased by the given number. Every 100% here equates to a standard hit, so if you have 100% critical damage, you deal double damage on a crit; 200% is triple damage, and so on.
- Shield Overload:Shield overload acts much like critical damage, but is only applied to an enemy’s shields. If you have a 100% shield overload rating, then you deal twice as much damage as you normally would to an enemy’s shields on every hit. When the shields drop, or if an enemy doesn’t have shields, then this mod basically becomes useless, but still: plenty of enemies have shields.
- Shield Penetration: This stat will let a weapon’s damage actually avoid an enemy’s shields. If you have 30% shield penetration, then 30% of your damage will ignore the shields and hit an enemy directly. This is pretty handy, since some enemies have a lot more shielding than they do health, and even a small percentage of penetration can let you turn a tough fight into a pushover. Note that you also can’t apply status effect to shielded units; having shield penetration, however, will let your weapon punch through the shields and apply Phasing, Ignite, etc.
- Energy Consumption -X: Some weapons have constant energy drains, such as Nanodyne Firestarters and Zeus Rifles. These mods will allow these weapons to fire longer without draining themselves down to 50% damage.
- Splash Damage Radius Increase: For weapons that deal splash damage, this will increase the radius of the effect, letting you hit more enemies with a single shot.
- Accuracy Degradation Decrease:These mods, when applied, will let you reduce the amount of accuracy degradation that occurs with ranged weapons when you hold down the fire button. It may also apply to movement degradation.
- X% Chance to cause [Explosion Type] When It Kills An Enemy: When you kill an enemy with this mod equipped, you have a chance to issue forth an explosive effect of the type listed, like a Spectral Nova. Handy for dishing out the hurt against clumps of weaker enemies, but not as useful against tougher foes.
- X% Chance to cause [Explosion Type] When It Hits An Enemy: Same as the above, but has a chance to occur each time your weapon connects with an enemy. The percent chance for this to occur is usually much smaller than the per-kill effects above, however.
Got a news tip or want to contact us directly? Email news@gamespot.com
Join the conversation