Supreme Commander Walkthrough
Robots are made for blowing up--this is scientific fact. In GameSpot's Walkthrough to Supreme Commander, we'll show you how to do it right.
Design: Randall Montanari
The last year or so has seen a number of excellent real-time strategy games hit the market, from Company of Heroes to Star Wars: Empire At War. 2007 is shaping up to be no worse than 2006, though, with the impending release of Command & Conquer 3 looming large on the release schedule. Not content to be outshone by that game, though, Gas Powered Games has recently launched Supreme Commander, their long-awaited spiritual successor to Total Annihilation, one of the classics of the RTS genre.
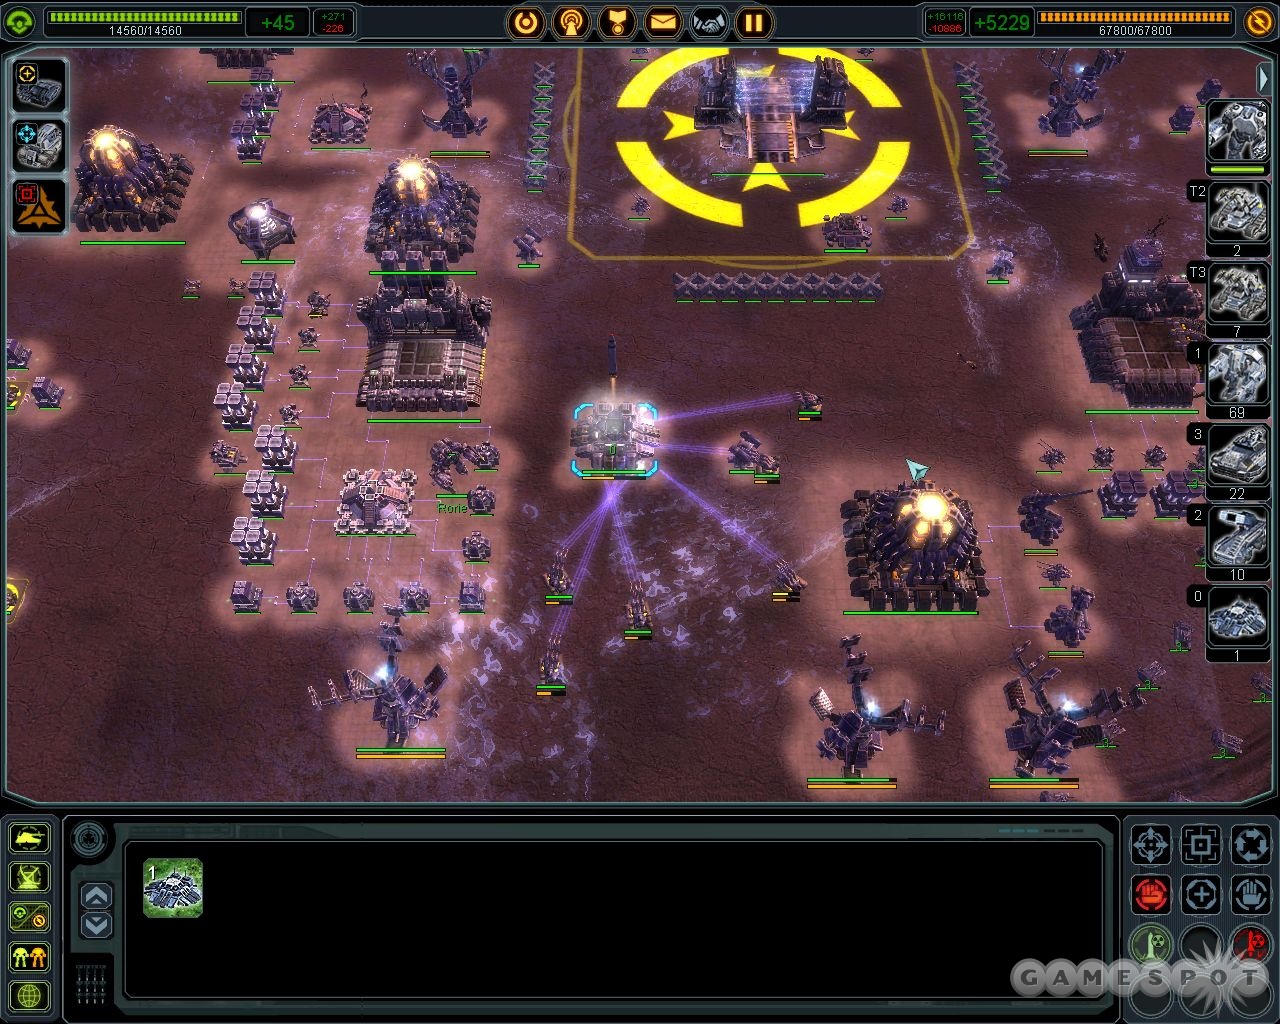
Total Annihilation was launched almost ten years ago, and featured two armies of robotic units fighting across vast landscapes in an eternal war. That theme is echoed in Supreme Commander, where three factions (the United Earth Federation, the Cybran Nation, and the Aeon Illuminate) wage an Infinite War for control of the galaxy, or their own destinies. Human soldiers aren't employed, however; instead, each side appropriates raw mass and energy to create large numbers of automated units that wage a war by proxy while the leaders of each faction bark orders from far away. Each side does have human champions, though, in the form of an Armored Command Unit, which is controlled by a pilot, and which has the ability to create entire armies of units and structures with their matter replicator technology.
In Supreme Commander, you take on the role of one of these ACU's, as you attempt to guide your faction to victory in the Infinite War. If you never played Total Annihilation, or even if you did, then you're in for a treat, as Supreme Commander takes some of the basic aspects of the RTS genre and blows the entire thing up to superhuman size. The maps are bigger than you've ever seen, the explosions are more deadly, and there are more units to pack into your army. It's quite a fun game, and GameSpot's Game Guide will get you started with it.
Factions
Although the three factions in Supreme Commander appear quite similar on the surface, there are some differences between them that definitely result in a different gameplay experience, especially when you build up the tech tree. This chapter is going to go over some of the aspects that makes each faction unique
UEF
The UEF is probably the first faction that you'll encounter when you play Supreme Commander's campaign. This zealous faction wants to restore the rule of law to the galaxy and isn't above destroying the opposing factions to do so. It plays an unsubtle game of sheer power, with few options for stealth.
Unique Units
T3 Heavy Gunship: An extremely powerful unit for the cost associated with it, this Tech 3 air unit is much more powerful, both offensively and defensively, than the T2 regular gunship. Although they will still be sliced up by SAM installations, they can shrug off flak cannon fire, for the most part, at least long enough to knock out that nuke installation that your opponent is constructing.
Fatboy Experimental Mobile Factory: The mobile factory packs short-range artillery firepower as its main offensive capability, and it's quite capable of chewing through ground-based units with ease when they get too close for comfort. It's also capable of acting as a mobile ground factory, allowing it to create more tanks and engineers for you as it rolls towards the enemy base. It can't create T3 units, though, except for T3 engineers. The units it can create, however, get created in around half the time as it would take a T3 land factory to make them, at a commensurately greater resource cost over time. The factory cannot construct units and move at the same time, however.
In addition to its firepower, the Fatboy has an excellent 25,000 point shield, allowing it to stave off a good amount of damage before it starts getting hit itself. It can also repair and refuel aircraft (you can even park a couple of strategic bombers on it and transport them towards an enemy base under its shields and immune to anti-aircraft fire), float onto bodies of water, fire torpedoes, and write NASCAR-themed Harlequin romance novels. All in all, it's one of the most well-rounded units in the game. It does have a constant 500 point energy drain, though.
Atlantis Experimental Submersible Aircraft Carrier: The Atlantis can be a devastating tool against enemy bases when you have it on your side of a fight. It can carry an extremely large number of planes in its berth, and since it itself is radar and sonor-shielded, you can submerge the carrier, slide it along the water's bottom up to an enemy base, then surprise them with an aerial bombardment that they had no way to see coming. The ship does need to be raised to the surface of the water to disembark its planes or repair and refuel them, but if you drop it back down underwater, it acts as a formidable underwater torpedo launcher, and will be difficult for your foes to take out unless they have a large number of submarines or torpedo planes.
The aircraft carrier is one of the cheapest experimental units in the game, but that's mostly because it's only useful if you manage to build a huge number of airplanes to fill it up with, which will take a good amount of time. An enemy that's shielded up and which has a large number of SAMs or air superiority fighters will be able to destroy your forces as they arrive, although if you're lucky, most of the defenses will be situated between the two bases; if you manage to sneak around to a location that's not as well guarded, a surprise attack can win you the game on occasion.

Mavor Experimental Strategic Artillery: Although massively expensive, the Mavor can fire highly explosive shells with virtually limitless range. Despite the "strategic" in the name, these shells aren't actually nuclear, as far as we can tell, but they do offer pinpoint precision, in that you can fire at a target and be assured that the shell will land directly on it, which isn't something any other of the long-range artillery units can claim. The Mavor will also fire very rapidly, usually launching three or four shells before the first one manages to hit the ground.
Of course, the major drawback to the Mavor, and what will prevent it from ever getting built by anyone, ever, is the fact that it requires an insanely long time to build. A single T3 engineer will require six or seven hours to build it. With a mass requirement of almost 400,000 units, and an energy requirement of almost 12,000,000 units, you're going to need some serious resources to even try and build it. Even in the tutorial game, where we had three fully-upgraded ACUs and a dozen engineers working on it, it took 15-20 minutes to build at a constant mass drain of around 700 and an energy drain that went up to around 27,000 before it was finished.
The Mavor will win the game for you, assuming you can keep it protected, but in the time it takes to build, you could probably build a dozen T3 Duke heavy artilleries which would perform just as well, if not better. It's kind of academic, because this thing will never be built in any truly competitive multiplayer game
Unit Differences
This list isn't meant to be all-inclusive; we're sure there are other small differences between these units and those of the other factions.
T2 Gunship: The T2 gunship of the UEF has a docking clamp that allows it to pick up a single small unit and transport it elsewhere on the map. Perfect for sneaking an engineer off to a secluded corner of the map.
T3 Strategic Bomber: The strategic bomber is equipped with light anti-air railguns, allowing it to shoot down pursuing fighters. It won't help much if air superiority fighters get on their tail, but it'll shoot down gunships and interceptors without too many problems.
T3 Heavy Shield Generator: The heavy shield generator of the UEF consumes more power than that of the Aeon, but has a much wider area of protection. It also winds up offering less protection than the Aeon heavy shield, however.
Missing Units
T3 Aircraft Carrier: The UEF navy cannot build the T3 aircraft carrier, which isn't a tragic loss or anything. If you really want an aircraft carrier, the experimental version isn't terrifically difficult to build.
Cybran Nation
The Cybrans started as humans, but have evolved beyond their biological limitations by enhancing themselves with technology, resulting in a race of near-cyborgs. The Cybrans are treated as second-class citizens by the UEF, however, which attempts to keep them docile with loyalty programming. The splinter Cybran Nation, led by the thousand-year-old Dr. Brackman, attempts to free their captive brethren from UEF rule and create a civilization for themselves.
Unique Units
T2 Mobile Stealth Field System: This mobile unit can mask the radar signatures of any close-by ground units, allowing you to (perhaps) sneak an engineer or three within range of your enemy's base and have them start building artillery or something. Stealth fields don't mask units from visual sighting, so if a scout plane flies overhead, the ruse will be uncovered.
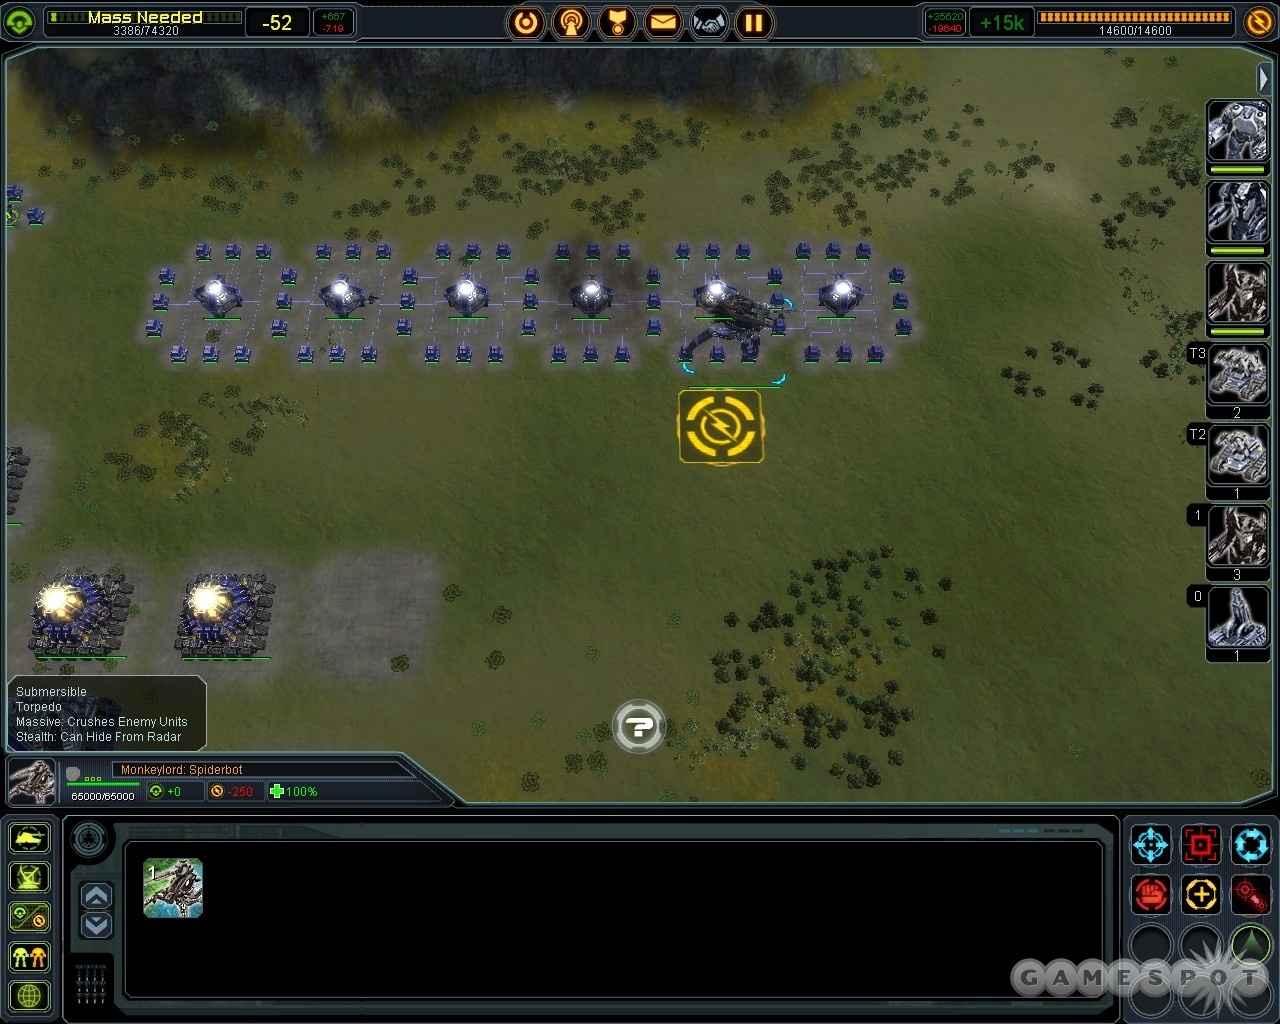
Monkeylord Experimental Spiderbot: The spiderbot is one of the most memorable units from the pre-release promotion for Supreme Commander; anyone who saw one of the videos for the game will remember these hulking behemoths with their white-hot laser that kills anything it touches. While not nearly as powerful as the Aeon Colossus, the Spiderbot costs less than half as many resources and moves a bit more quickly, and also has anti-air missiles that it will fire at any airships that come calling.
In addition to its microwave cannon (which can only fire at very short range, but which will almost instantly kill anything it hits), the Monkeylord fires longer-range shells at enemies in front of it, can submerge underwater and fire torpedos, and is also stealthed to hide from radar. It's also massive, so that it can walk over enemy walls and destroy them instead of having to bypass them. All in all, a relatively inexpensive unit that can act as the perfect feint maneuver while you prepare a larger assault elsewhere, and also a good base defense unit (due to its stealth capabilities).
Soul Ripper Experimental Gunship: Not much to say about the Soul Ripper. It's not too difficult to construct, and acts precisely as you might expect a super-powerful gunship to: it'll rip through ground forces as they approach your base (or anywhere else). It's not as powerful as the Monkeylord, either offensively or defensively, but has the advantage of being immune to the fire from ground forces. The Soul Ripper can't defend itself well against air superiority fighters (although it does have light anti-air capabilities), but has enough health to hopefully retreat to safety before it gets completely destroyed.
Scathis Experimental Mobile Rapid Fire Artillery: The Scathis is going to be one of the best units for assaulting an enemy base, assuming you can build it and protect it. With only 2,400 health, this is going to be a huge target for your enemy's bombers, so keep it shielded as best you can.
The Scathis is just what it says: a rapid-fire artillery piece that can move around on the battlefield, albeit slowly. When firing, it can launch a huge number of shells at targets quite a long ways away. Its range isn't quite enough to match a T3 heavy artillery piece, but the rate of fire is immense; it'll generally be able to launch a dozen or more shells before the first one hits the ground, even if it's wickedly inaccurate. Of course, this takes a huge amount of energy; the Scathis will enable a constant drain of 35,000 energy from your coffers while recharging, which it will constantly do while firing. If you run out of energy, it'll pause for a second until you can fire it again, then do so. Running out of energy will temporarily turn off all of your shields in your base, which can be problematic.
The Scathis can also be problematic if it keeps firing away at an enemy base while your troops are marching into it, or if its artificial intelligence tells it to get closer to an enemy base than is safe. Feel free to use the Hold Fire button (by clicking the "Return Fire" button) to prevent it from firing at units until you're ready for it to do so.
Unit Differences
Again, this isn't a comprehensive list, just some notable differences between the Cybran units and those of other factions. There are plenty more differences than just these.
T2 Shield Generator: The T2 shield generator for the Cybran faction is the only stationary shield generator that the Cybrans get; they're unable to build the T3 heavy shield generator. However, if you click on the T2 shield generator, you'll notice that its upgrade icon (in the same place as your commander's upgrade icon, to the right of the tech level buttons) is lit up. If you click on it, you can upgrade a T2 shield generator up to four times, with the highest level being bigger than the other faction's shield bubble, albeit at a higher energy cost and with a slightly less powerful shield rating (14,000 compared to 15k for the UEF and 18k for the Aeon).
T1 Mobile Anti-Air Gun: The T1 mobile anti-air unit for the Cybran nation can fire on enemy ground units as well, giving the Cybrans a bit of an edge in early-game rushes.
T3 Air Units: All of the T3 air units of the Cybran forces have built-in stealth fields. If you activate the stealth field, these units will suck up 20 energy per second in exchange for being invisible to enemy radar.
T2 Destroyer: The destroyer ship for the cybrans is actually amphibious; if you wish it to, it can crawl up onto land and walk around. It's painfully slow while moving across land, but this can still extend its range a bit if you're attacking a coastal base.
Missing Units
T2 Mobile Shield Generator: Doesn't appear here. Instead, the Cybrans get a mobile stealth field generator.
T3 Heavy Shield Generator: See the Unit Differences section above for an explanation of this.
Aeon Illuminate
The Aeon Illuminate is a religious faction, based on the theory of the Way, which was taught to the human followers of the faction by a race of aliens which was subsequently destroyed by xenophobic human soldiers. In their quest to convert the rest of humanity to the Way, the Aeons apparently started the Infinite War, and in Supreme Commander, they aim to end it.
Unique Units
T1 Attack Boat: The T1 attack boat naval unit is actually a drawback for the Aeon. Since their frigates can't fire at air units, they need attack boats to provide them with anti-air support in the early game. In other words, where the other factions would do fine with a frigate, the Aeon need to have both a frigate and an attack boat to provide the same functionality.
Tempest T4 Submersible Battleship: This fellow acts somewhat like the UEF Fatboy mobile factory, save for the fact that the Tempest is a sea-going variant. Like the Fatboy, this guy can create units up to a T3 engineer, but the Tempest creates sea units. Instead of tanks and anti-air units, the Tempest will crank out destroyers and cruisers for you. It also possesses six torpedo launchers that can fire while submerged or floating on the surface of the water, as well as an Oblivion Cannon that deals heavy damage, but takes a long time to recharge.
CZAR Experimental Flying Fortress: The CZAR is a flying saucer-esque unit, designed to slowly fly towards the enemy base, then disgorge huge numbers of airplanes. Like the ships in Independence Day, it can fire a beam cannon at the area directly underneath it, which, combined with the missiles it also launches (which act as depth charges to hit submerged units in water, by the way) will quickly destroy anything it flies above.
The main weakness here is lack of health; with only 5,000 health available to it, the CZAR will be killed fairly quickly if your enemy has concentrated SAM launchers in its path, or a good number of air superiority fighters. As with other aircraft carriers, another limitation is that you have to build a sizable fleet of aircraft to actually fill it up, which effectively extends the construction period for it to many, many times the actual building time.
Galactic Colossus: There's little that will scare your opponents more than the realization that a Colossus is about to reach their base. This is probably the most expensive non-artillery, non-missile unit in the game, and for good reason: it's completely badass.
The Colossus is something of a tip of the cap to the Krogoth, a massive unit in the Core Contingency expansion to Total Annihilation, which walked upright in humanoid form and contained the power of hundreds of smaller units. Like that unit, the Colossus is slow-moving and very, very powerful. The Colossus is only capable of hitting ground units (or air units that have landed on the ground), and has no anti-air defenses, but when it gets up close to a ground unit or structure, the phason laser that comes out of its chest will quickly destroy them. In addition, it has tractor beams in each of its arms which can suck up normal ground units and crush them.
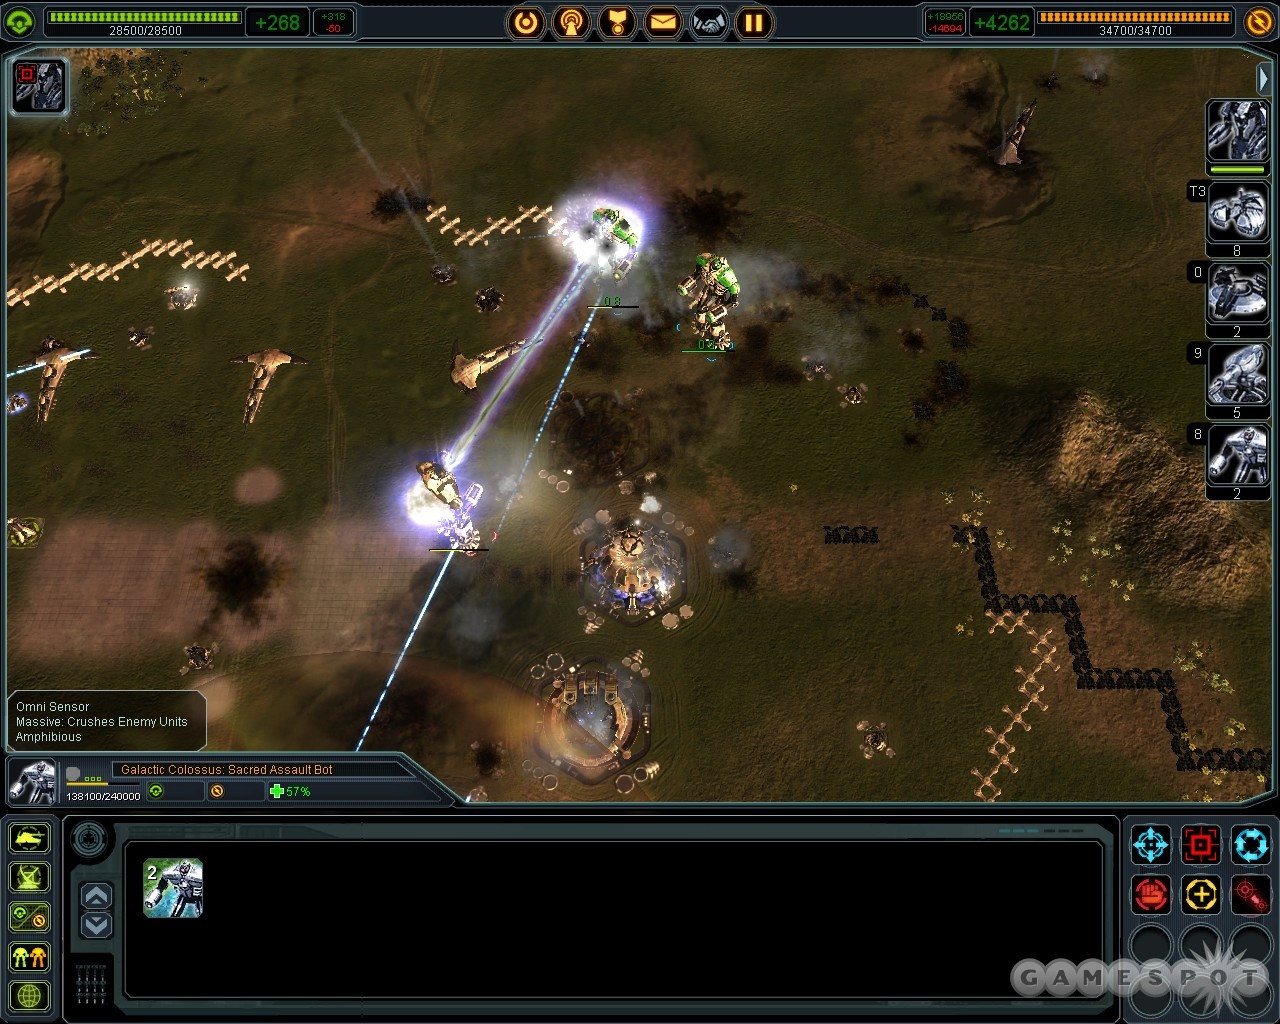
Water won't hold the Colossus back, as it can walk underwater (although it can't fire its phason laser while submerged). It also possesses a built-in Omni Sensor which doesn't drain any energy.
Although the Colossus is inordinantly powerful, with 240,000 total health, its slow speed will wind up being what gets it killed most of the time. Enemy artillery will be able to pelt it well before it gets within firing range of enemy units, and even well spread-out T2 point defenses will be able to wear down the Colossus before it manages to penetrate too far into a well-designed base. The speed will also make it difficult for the Colossus to cross large expanses of space to reach the enemy base without being noticed, and since it doesn't have any anti-air defenses, a few strategic bombers will be able to take it out. Even a few gunships can do the job, given enough time. The Colossus works better as a catch-all (literally) base defense that can take out pretty much any army that comes your way.
Unit Differences
Again, this isn't a comprehensive list, just some notable differences between the Aeon units and those of other factions. There are plenty more differences than just these.
T1 Light Tank: The Aurora light tank of the Aeon can hover, allowing it to quickly cross water. It'll be curious to see if Aeon players can take advantage of their T1 land units to make for quick rushes, perhaps across rivers or water barriers that the opposing players may think offer them protection.
T2 Land Unit Hovering: Both the T2 AA unit and the T2 shield generator can hover, allowing them to cross water.
T3 Mobile Heavy Artillery: The T3 mobile heavy artillery for the Aeon can fire while moving, unlike the artillery units for the other two factions. It doesn't seem to deal as much damage, but its ability to fire on the run will usually wind up making it a superior offensive weapon.
T3 Siege Bot: The siege bot of the Aeons can reclaim wreckage in the field to repair itself when damaged.
T3 Heavy Shield Generator: Although the heavy shield generator of the Aeon affects a smaller area than that of the UEF, it is more powerful, offering 18,000 points of protection as compared to 15,000 for the UEF.
Missing Units
Amphibious Tank: Many of the Aeon units are capable of hovering, but they do not receive the ability to build a T2 heavy tank clone that can cross water. The T2 heavy tank that they do have cannot hover or go across water.
General Tips
Assisting
A lot of games allow you to combine the efforts of construction units to help build objects more rapidly, but Supreme Commander places a higher emphasis on assisting than most games do. Almost any unit in the game can assist any other unit or structure (by selecting the unit that will assist, then right-clicking on the friendly unit that it wishes to assist), with a variety of effects. The most obvious use of assisting, though, will be to have your engineer units and your commander assist factories as they create units. Some units can take a long time to make, but if you have an engineer assist the factory, it will add its own constructing power to the factory, allowing the factory to build its units faster. You can have as many engineers as you like assist a single factory, but keep in mind that each additional engineer will take up more resources as the units are built. You can also have engineers assist units like tactical missile launchers as they construct missiles.
You can also have engineers assist other engineers! If you want to quickly build a lot of structures, like anti-air defenses, you can have a single engineer queue all of them up, then have another nearby engineers assist the first one. That way you can add jobs to the queue of that single engineer as needed, instead of having to select every engineer in the area, which oftentimes drags other nearby engineers away from their jobs in the base.
Spy planes and scout planes are other useful units for assisting. If you have an army of artillery units or battleships marching along and see enemy units on your radar, you can have spy planes assist the units in the front of your formation. They'll rotate in the air above the units and will be able to see much further than the units themselves will be able to do so, allowing you to prioritize your targeting to take out the most dangerous enemy units first.
Adjacency Bonus
Speaking of bases, you’ll want to take note of the energy and mass adjacency bonuses when you’re constructing your base. When you build a structure that uses mass or energy next to a structure that makes mass or energy, the buildings will link together, causing the amount of mass or energy that’s needed to be reduced. For instance, if you build a shield generator, which requires a large amount of energy, next to a power generator, the amount of energy that the shield generator requires to run will be reduced. The amount of the reduction depends on the size of the source, and on how many sides of the structure you build sources. For instance, if you have a large energy-draining building with a single, Tech 1 power generator on one side, you’re only going to shave off around two percent of the total energy requirements. If, however, you build a Tech 3 power generator on each side of the building, the structure will see its energy requirements cut by around 75%, which is a big bonus for structures like mass fabricators and Tech 3 radar systems.
Perhaps most useful, though, is the adjacency bonuses afforded to you by mass and energy storage units, especially mass storage. When you build storage units next to a structure that produces mass or energy, the production unit will see its output boosted, sometimes by quite a bit. For instance, take a T3 mass fabricator. It normally produces 24 units of mass, but each mass storage unit that you build next to it will increase this by one. Since you can build up to 12 mass storage units on its borders (three on each side), doing so will let you cheaply increase its output by 50%, up to 36 mass units per second. This trick also works for mass extractors, increasing the output of a T3 mass extractor from 12 to 18. It won't very well on lower-level extractors, though. Power generators can also be boosted in efficacy by ringing them with power storage structures, but power won't generally be as big of a deal for you as mass will.
Keep in mind that one building can supply adjacency bonuses to all bordering buildings at no reduction in effectiveness. For example, say that a power generator reduces the energy cost of an adjacent radar dish by 25%. If you built another radar dish on the other side of the power generator, it would also be reduced in power consumption by 25%.
All of these bonuses are simply that. Whether the power generator in the previous example is helping out adjacent structures or not, it will still generate the same amount of power. There aren't any penalties involved for buildings that supply these bonuses, in other words.
Patrolling
Patrolling is another aspect of RTS’s that Supreme Commander emphasizes more than other titles. When you tell a unit to patrol, it will move between two or more points on the map automatically. This can have a number of uses to you, but for the most part, the units you want to patrol are air units. If you need to keep an eye on what your enemy is up to, a patrol of scout planes can be just what the doctor ordered, as they’ll continue to fly above any avenues of attack until they get shot down. Offensive units will automatically attack anything that comes into their patrol lanes, as well, so ringing your base with patrolling fighter jets can help shoot down incoming bombers before they reach their targets, even if your attention is on a zone halfway across the map. Your engineers can also be told to patrol, as well; they won’t attack anything in their path, but they will reclaim any debris that they see, as well as repair wounded units or structures.
Unfortunately, most land units that you tell to patrol will eventually just stop in their tracks. This appears to be a bug, and will hopefully be patched at some point. We generally find it better to have a central location for your military units, and move them towards the enemy when they approach, instead of having them patrol around your base in the hopes of encountering them. Land scout units can be able patrollers, though, especially if your radar coverage isn't as good as you like, or you suspect the enemy of approaching with stealth field generators or something similar.
Transporting

One of the final basic aspects of Supreme Commander is transporting. Transport units are built at your airfield, and can be used to quickly transport your ground units across the map. Unfortunately, using transports can be a bit clunky, so here are some tips. First off, if you want to build units at a factory and instantly move them far across the map, set the factory’s move destination where you want the units to go, and then have a few transport units assist the factory. As units pop out of the factory, they’ll automatically move into the transports, which will then drop them off at the designated stopping point, then return for another load. Be sure that you have the right number of transports assisting the factory, based on the type of units you’re building, the speed of construction, and the distance they’re traveling. Having too many transports assigned to a factory will cause them to load very slowly, as the units disperse between all of the transports. Having too few transports assigned to a factory will cause units to pile up around it, instead of moving out to the destination. The quicker the construction times of the units you’re building, and the farther the distance to the destination, the more transports you want to assign to the factory.
Another way of moving units via a transport is by ferrying. If you click on a transport, click the ferry button, and click on a destination point on the map, a small purple ferry icon will appear on the ground underneath it. If you select ground units, then right-click on the ferry icon, the transport will start shuttling all of those units to the destination. This works well for small groups of units, but if you want to ferry a large group of units in multiple transports, you’ll need to use assisting. Begin by having a large group of transports assist a single transport, then use that single transport’s ferry command to point to the destination. This will result in a single ferry icon appearing on the ground, but all of the transports that are assisting will pick up units and ferry them alongside the assisted transport. Unfortunately, the AI of the ground units can get a little mixed up when attempting to board the transports, but you can solve this problem by moving them away from the transports a bit, then clicking on the ferry icon. This will force the transports to come to them, eliminating the AI bottlenecks that cause problems.
Com-Bomb!
One last trick to share is the controversial commander bomb, also known as the "com-bomb". In multiplayer games, you can take advantage of your commander’s explosive nature by using him as a first-strike unit. This trick, which is definitely not going to win you any friends in online play, involves loading up your commander into a tech 2 transport and flying it over your enemy’s base. When it gets above the base, your opponent’s automated anti-air units will shoot it down, which causes your commander to asplode big time. What’s more, if you can get it over the enemy commander, he’ll explode as well, causing irreparable damage to the enemy’s economy.
Miscellaneous Tips
- It can be difficult to get your planes to individually return to an air staging facility for repair and refueling. If you have them patrol anywhere near one, though, they'll land there automatically, then return to the patrol. If you have bombers that have been banged up from a bombing run, have them patrol over a staging facility until they're all ship-shape.
- Speaking of planes, they'll run out of fuel eventually, which will cause them to move much more slowly, which in turn will make them easier for enemy planes to shoot down. If your planes run out of fuel, you can park them on the ground, where they'll slowly regenerate fuel. This is especially important for interceptors early in the game, since you often won't have air staging facilities when you build them (which refuel planes). Just park them on the ground until they get a bit of fuel back, then have them resume their patrols.
- Don't forget that you can upgrade your commander unit! There's a small upgrade option (looks like a pair of gears, just to the right of where you'd switch between tech levels on a factory). If you click on this while you're controlling your commander, you can select various handy upgrades for it.
- One of the handiest shortcut commands is CTRL-K, which will suicide selected units. If you hit the unit cap, you can intentionally destroy older or redundant units to make room for new ones. Or, if you see one of your units about to be captured by an enemy engineer, you can suicide it to prevent them from taking control of it.
Cheat Codes
Supreme Commander has a few cheat codes you can use in Skirmish or Multiplayer. Set cheats to "on" in the setup screen, then use these commands to tweak the game as you play.
- Bling Bling: Hit CTRL-ALT-B to maximize your resources and increase the storage capacity of your resources.
- Spawn Menu: Hit ALT-F2 to spawn in units under any player's control.
- Toggle Opponent AI: Hit ALT-A to disable the enemy AI. All enemy AI will no longer function.
- Delete Units: Select a unit, then hit CTRL-DELETE to delete it.
- Toggle Damage: Hitting ALT-N will make all units in the game invulnerable, including those of the enemy.
UEF Walkthrough
As a note, this walkthrough is based on the Normal difficulty setting for the game.
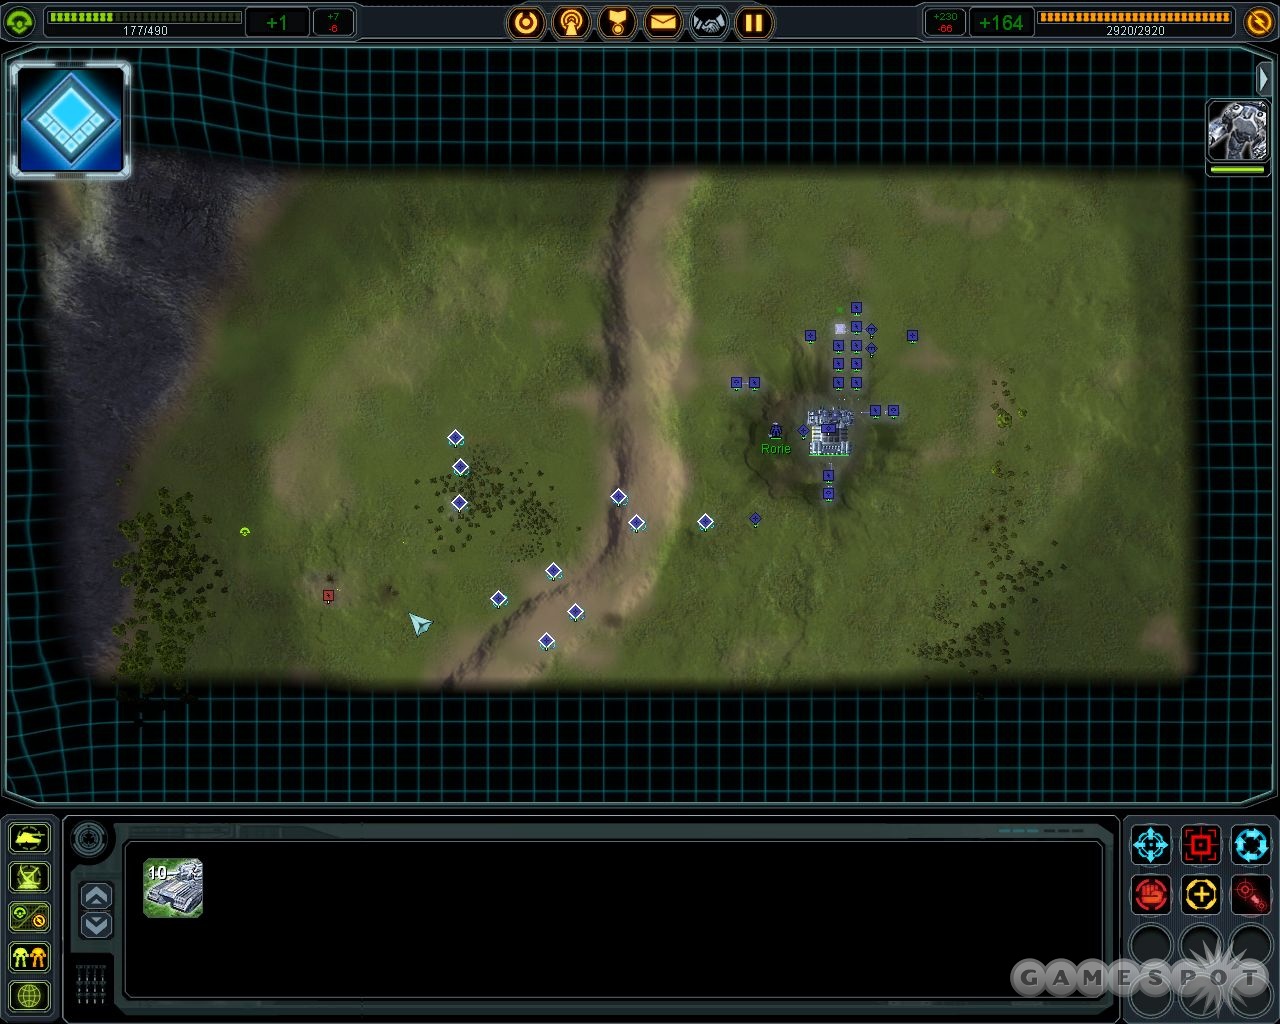
Mission One: Operation Black Earth
Your goal? Defend UEF science facilities from the Cybran threat. You’ll be under the command of a gruff soldier of the UEF, Colonel Arnold.
First Expansion
Your early goals aren’t complicated: build mass extractors and power generators. Build three of each, then go ahead and construct a land factory when you download the spec for it. Have your commander assist the factory when it’s built, then build a couple of Tech 1 Engineers. There’s no more metal deposits in the area, but they can build you another five or ten power generators that will supply your base with enough power to keep it going when things get hectic later on. If you wish, you can have them scatter point defense cannons around your base, but you won’t be getting attacked for a while yet. Still, you don’t have anything else to spend your resources on at this point.
With that in progress, start building up a few Striker tanks. Don’t bother settling for the minimum of three, though; go ahead and build ten. Nay, 20! Granted, that’s more than you’ll need, but if you set your ACU to assist the factory, they’ll pop out in no time and you’ll feel more powerful. Get used to assigning units to groups; to do so, select all of the tanks that you’ve built (you can double-click on a single tank to automatically select all of the tanks on the visible screen), then hit CTRL-1 to add them to the first group. From then on, hitting the 1 key will select all members of that group. You can also add units to a group by shift-clicking them, then hitting CTRL-1 again, or simply selecting another group of units and hitting CTRL-1 to override your previous unit selection.
Attacking The Air Factory
After the air factory becomes a target, you’ll have new units that you can construct. Make a small army of assault bots, light artillery, and anti-air units to go along with the tanks that you’ve constructed.
Note the different strengths of your units, though, before submitting to the urge to mash them together in one large group. You can do so, of course, and it won’t hurt you too badly here, but you may as well be disciplined from the get-go. Your tanks and assault bots and other direct-fire units can be grouped together easily, as it will be useful to command them all at once. Anti-air units can’t fire at targets on the ground, though, so it’s best to have them in a separate group that stays a bit behind the direct-fire units in the front, to shield them from enemy fire while keeping them in range of any enemy aircraft that come overhead. Lastly, artillery units should also be kept in a separate group, as that will let you focus their fire on base defenses and other hard targets that will chew up your direct-fire units. Artillery units can fire from much farther away than direct-fire units, but can’t defend themselves well against enemy direct-fire units.
So, for now, have your tanks and bots in group 1 at the front of your little army, with around ten artillery units in group 2, and another ten anti-air units in group 3. Don’t forget to build a land scout or two to give you radar coverage as you advance! Radar will let you see the position of enemy units on your map, which your artillery units will often be able to fire on before you’re even able to see them yourself. Using radar, have your artillery units clear out some of the wall sections that the Cybrans have built up in front of their base, then sweep through their area and take out the air factory. Be sure to have an engineer queue up mass extractors at all the empty ore spots.
Destroy the Defensive Line
There are a number of defensive towers on the line to the south of your base. The point defense turrets have a range similar to that of your artillery units, so you’ll probably have to sacrifice a few of them as you use the artillery to take them out. You’ve got plenty of resources, though, so build up around 20 or 25 of them and knock out the point defenses and anti-air turrets.
Defeat The Cybran Commander
With the turrets taken out, the map expands greatly, revealing an allied UEF research facility to the southeast and a large Cybran base to the south. Your goals here are to infiltrate the southern base and kill the UEF commander, as well as to capture one of the power generators in the Cybran base to the southwest and use that to power one of your artillery pieces in the research facility.
Begin by bringing down a few engineers from the north and constructing a land factory and an air factory near the defensive line that you just wiped out. You don’t have to worry about the research facility at all, at least on normal difficulty; the patrol bots there will repair all the point defenses, which will be more than enough to repel the attacks that head its way. There will be attacks coming north towards you, though, so build a small wall section with some point defenses and anti-air cannons of your own and use that to defend your secondary base while you build up a small army. When the army is built, either bypass or destroy the walls defending the western power generators, then kill the small amount of defenders. Send in an engineer to convert as many of the buildings there as possible to your side, starting with the Tech 2 Power Generators!
You’ll probably have to strike the coup de grace yourself, though. If you really want to, you can sneak around to the southern side of the base and attack from that direction, since there aren’t any point defenses there, but it’s probably simpler just to build up a bunch of artillery, clean out most of the point defenses on the northern side of the base, and rush it with a mass of units. To prepare for this strike, build two or three land factories and have them continually pumping out units, then send a couple hundred of them in all at once. When you spot the commander, focus all your fire on him to finish him off and win the round.
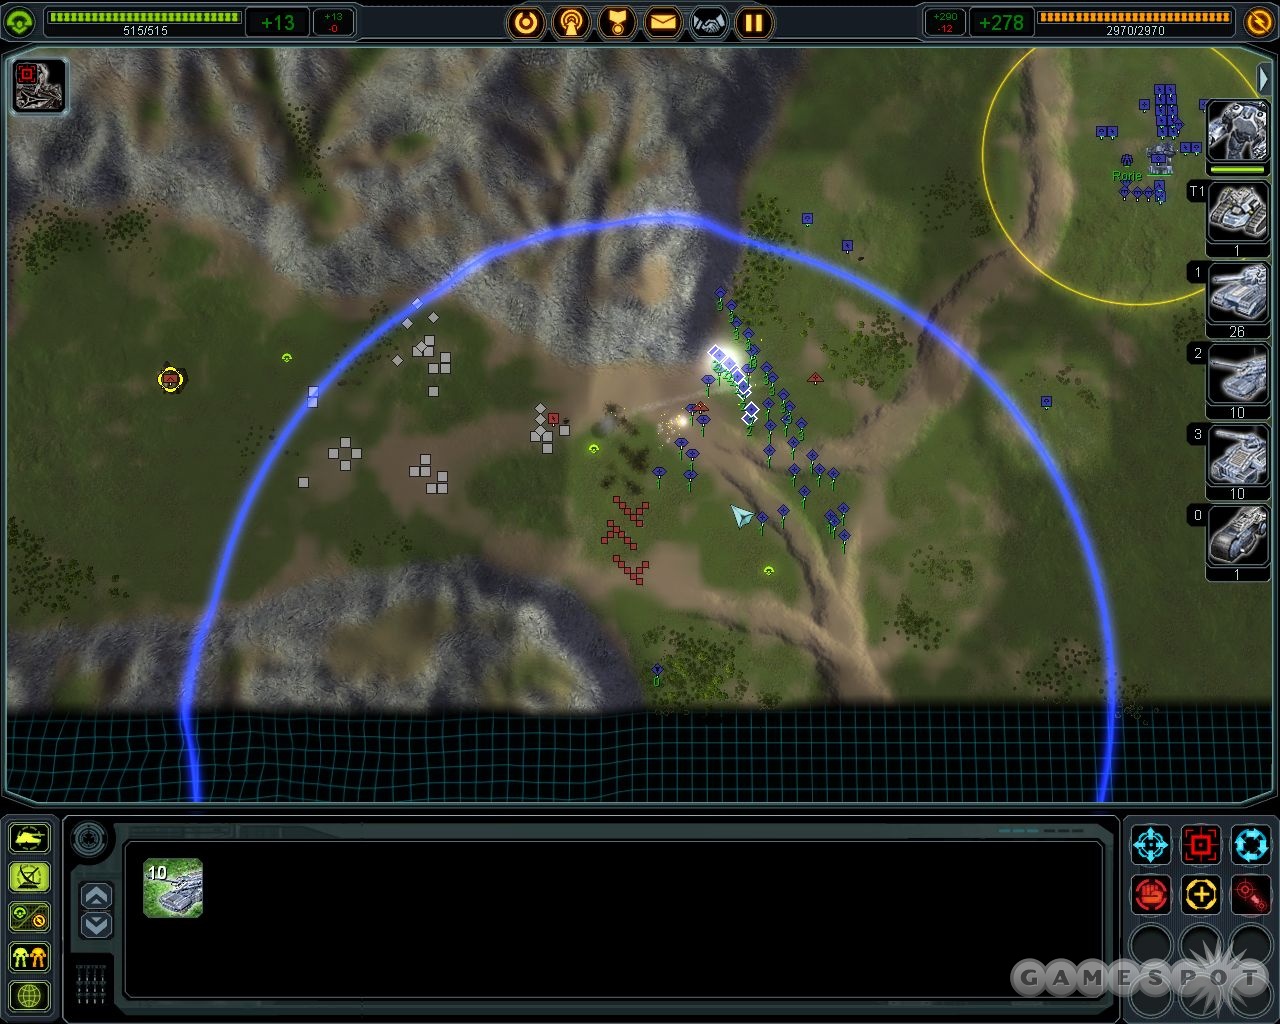
Mission Two: Operation Snow Blind
You’ve got a ticking clock on your hands at the outset of this mission: you have around half an hour to get an engineer over to the research station to the east and repair their power core, which will detonate if you don’t reach it in time.
Immediately queue up a three pairs of power generators and mass extractors, then build a land factory; ignore the order to build an air factory for the moment. The land factory, assisted by your ACU, should queue up a few engineers, which can then spread out and build on the nearby mass points and hydrocarbon factory locations (the large lightning bolt symbols on the ground). Another engineer can build a radar station as well as some point defenses and anti-air towers, while the factory moves onto building a few ground units. Since you’re going to be pressed for metal here, feel free to build a complex of mass fabricators. Build them in a honeycomb pattern, interspersed with power generators; that will reduce the energy drain that they hit you with.
In order to get to the research station, you’ll have to fly an engineer over to that base in a flying transport. Unfortunately, the path east is chock full of anti-aircraft vehicles; that’s what your ground army is for. You can probably clear out most of the units in between you and the station with nothing but heavy tanks, with a few AA vehicles thrown in for good measure. There’s no real need for artillery just yet. So build an army, then sweep off to the east until you clear out the northern passage for your engineer. There’s no real time pressure, as most of the enemy units here are anti-aircraft and thus can’t fire on your ground units. When you’ve eliminated the enemies here, quickly shuttle an engineer to the eastern base and repair the power core. Only clear out the northern passage, though; don’t worry about any units to the south of the small mountain range.
Defeat Aeon Assault
When you repair the power core in the eastern facility, all of its units and resources become yours, resulting in a large surplus of power and mass. Take the time to go around to your various Tech 1 Mass Extractors and upgrading them to Tech 2. It takes a lot of mass to do so (a drain of -10 per extractor), but it’ll triple their mass output when it’s done.
With the research facility under your grasp, you’re going to be warned of an impending Aeon attack. Unfortunately, the warning doesn’t specify where this attack will occur, but we’ll go ahead and spoil it for you: it’s at the research facility. Have your engineer there build a land factory, upgrade it to Tech 2, then pop out a Tech 2 engineer and begin building Tech 2 point defenses and anti-air on the southern side of the base. Have a few more engineers assist until you’re secure in your defenses. You have plenty of time before the attack occurs, so don’t stress yourself too much.
Evacuate Luthien Colony
Your goal now? Escort 15 supply trucks from Luthien Colony to Station Lima Foxtrot, in the northeastern corner of the map. This would be a good time to take a breather and build up some units, since the supply trucks don’t spawn at Luthien until you bring a bunch of units there. At this point, your northwestern base is pretty much free from attack, so feel free to move your commander and engineers down to Luthien, where they can start building new factories to supply your eventual attack to the south.
Anyway, you need to bring in a fairly large number of direct-fire units, anti-air units, and gunships to Luthien in order to make the supply trucks spawn. Gunships are a Tech 2 air factory unit that are fantastic for taking out ground units, but they move slowly and can’t defend themselves well against anti-air units.

Now, when the trucks pop up, you have a couple of options: you can either attempt to take them to Lima Foxtrot on the ground, or pick them up and put them into transport airplanes and fly them there. Of course, it won’t be easy to do either one, as there are tons of enemy ground units coming up from the south, as well as patrolling Interceptor airplanes and anti-air units that are roaming the skies. Still, it’s quite doable to transport them, especially if you load them up in gunships. Each gunship can carry a single unit underneath it, so loading all of them into gunships, then dumping them all in the landing zone is one solution. You’ll need to ensure that the gunships take a route that first leads north to your northwestern base, then east along the northern edge of the map to reach Lima Foxtrot. Be sure that they’re escorted by Interceptors of your own, though!
If you want to escort the trucks on the ground, then you simply need to build a very, very large army. Move the trucks in a separate group to the north of the army as it proceeds to the east, blocking the small passages leading north from the bottom of the map. With your army acting as a mobile wall, you can sneak the trucks around the large mountain chain to the west of Lima Foxtrot and get them up to the base.
Destroy The Aeon Commander
With the trucks secure, it’s time to take down the Aeon commander once and for all. Prepare for this by building up your base defenses at Luthien; it’ll be the site of repeated and heavy air and ground assaults. If you want to be clever, you can try walling of the end of the small mountain chains that lead from your base to the Aeon base; you won’t be attacking from that direction.
With Luthien well defended, have one of your air bases queue up an infinite string of scout planes and tell them to patrol the north side of the enemy base. They’ll get shot down as soon as they arrive, but they’ll let you know of any large troop movements leading north from the base. If you wish, you can have a Tech 2 engineer move out to the north there and construct a few point defenses to deal with any large armies that attempt to strike towards your northwestern base. This won’t happen very often, so if you prefer, you can simply set another airbase to continually create gunships that will patrol that area.
In order to take on the base, it’s best to attack from the southeastern corner, where the bulk of the power generators are located. Since so much of the base is shielded, taking out the generators will drop the shields for a spell, allowing you to attack them directly. Fly or move a few Tech 2 engineers to the extreme southeastern corner of the map, being sure not to let them be spotted by any of the Aeon forces, then build up a few defensive structures before constructing a pair of land factories. Each should have four of five engineer assistants, and each should start constructing units as soon as possible! Missile launchers will be the units you’re going to use most here, so a ratio of two missile launchers to one tank and one AA vehicle is fine.
There aren’t any point defenses on the southeastern corner of the base, so when you get some missile launchers constructed, move them out with AA vehicles to cover them from air attack and start pelting the generators that are unshielded. After you take most of them out, the shields in the rest of the base will begin to flicker on and off. At this point, you can either send in the heavy tanks, if you wish, or continue to use your missile launchers to pelt any structures that you can see. Eventually you should be able to spot the commander, who usually assists some of the factories on the southern side of the base. You can either missile him to death or send in your tanks! You should encounter relatively few ground units on this side of the base, so steamroll your way to victory.
Mission Three: Operation Metal Shark
Time to get busy with naval units! At the start of this mission, though, your focus should be on repairing the damaged structures around you and rebuilding your economy. Begin by having the naval factory build a few engineers, which can repair the power generators and rebuild mass extractors.
Here’s a tip: when you rebuild a structure over the site of a destroyed structure of the same time, your construction time will be cut almost in half. For example, have your ACU construct an air factory on top of the ruined factory near the power generators, and it’ll go up in no time. This only Your initial threats here will come from the air, so construct a few Interceptors to patrol the base, and have your engineers make plenty of anti-air defenses, as well.
When you have your base well defended, make another naval factory and start cranking out subs. Subs will be one of the best anti-naval units you can build, and will be able to take out the enemy frigates to the south without being detected. As soon as Arnold begins yelping about how hard he’s being hit, though, start making a few frigates, as well; they’ll protect you from the air assault that’ll be coming your way. Note that you earn the right to build Tech 2 power generators after Arnold bites the dust.
Sure enough, a group of gunships will arrive and begin pounding your base a few minutes later. You should be able to repel them if you built enough anti-air defenses. Next up is a wave of attack boats; your submarines will make quick work of them, if you have around ten of them. The third wave will first consist of air, then naval units from the south. The gunships in the first wave will pound most of what they encounter in the bay, so be sure to have Tech 2 anti-air turrets built on the shoreline!
Recover Arnold’s Black Box
After the map expands, start taking over the small islands to the south of you. The largest one has no defenses save some anti-air turrets, so if you send over a couple of Tech 2 engineers, they’ll be able to capture all of the structures, saving you the time of building them.
Your goal now is to recover Arnold’s black box, which is on the island to the southeast where he detonated. You have to head out and recover it! The island itself is not your problem, as it only has an anti-air turret; the waters between you and it, however, will be dense with ships and planes, while the island has four torpedo turrets scattered around it.
Begin by queueing up a number of torpedo planes, along with an obviously large number of subs and frigates. When you have the torpedo planes ready to go (around 25 would be good), have them attack the torpedo turrets around the island, focusing on the two to the northwest of the island. When they’re down, you can sweep the rest of your ships in close to the island to finish off the boats while your planes take down the remaining two turrets. Just keep in mind that the boats and planes are refreshed fairly often from the northeastern corner of the map, so you’ll want to have a goodly resupply of your own ships. Go ahead and build a pair of naval factories in the deeper waters to the south of the main base, near the southeastern island under your control, but be sure to defend them with torpedo launchers.
When the defenders are mostly wiped out, get an engineer or two onto the southeastern enemy island. If you wish, you can start the process of capturing the enemy structures here, or you can simply destroy them and rebuild when you take control of the island. Either way, nab the black box, but be sure to have the southern naval factories built first, each with four or five Tech 2 Engineers assisting it.
Destroy The Aeon Commander’s Main Base
When you have the black box, things get tricky. The map expands to the east, and the Aeons will reveal that they have Tech 2 naval units in play, which will far outclass your own navy. You need to immediately upgrade your naval factories to Tech 2 and start building cruisers and destroyers. Each of your bases should have a ton of anti-air, as they’ll constantly send those tough gunships your way. It couldn’t hurt to have an air factory or two pumping out interceptors, either, and have them patrol throughout your various bases. You should also gain access to an air staging facility around this time; building them in the path of your interceptors’ patrol route will let them land for extra fuel and health when they’re damaged.
With the Tech 2 naval units at your disposal, you can start defending yourself against the predations of the enemy. Note their attack routes and station the bulk of your defences in those spots. Note the presence of a small island to the northwest of their main base; it has some air staging platforms, as well as anti-air defenses and a couple of stationary artillery structures. The artillery will fire on your ships if you attack the enemy’s naval yards, so taking out this area should be a priority. You can do so with as little as ten gunships; just fly them over, have them knock out the anti-air as soon as possible, then wipe out the rest of the structures. If you bring over a T2 engineer to this little island, you can start making your own structures.
The final assault on the base should take place with a mixture of destroyers, cruisers, and submarines, with around 20 or 25 of each type of unit being ideal. Although the destroyers are billed as being partially anti-submarine units, they’re somewhat poor at the role, at least on this map; it’s better to simply rush enemy subs (and there are a lot of them roaming around) with subs of your own. Before you approach the island from the west, though, be sure to target the torpedo turrets there with your T2 ships. They’ll rip up any submarines that get close, so deal with them before moving your ships up to the coast of the island.
Your long-range fire from your ships will succeed in taking out most of the structures there. You can also focus on eliminating the naval bases to the north if you don’t want to have to deal with sub attacks. Either way, if you approached with enough units, you should have enough left to pelt the commander with rocket attacks from the coast when he comes into view, assuming you have an infinite number of spy planes flying over the island to allow your ships to spot him.
Mission Four: Operation Vaccine
You two goals at the outset, but the first should be to defend yourself from the base to the southwest. Although the river would seem to imply that you should build yourself nothing but anti-air units, that’s a fallacy: there exists, deep within the hearts of man, the ability to build amphibious tanks.
You heard us: tanks will be coming your way that can go underwater. That’s bad. You have plenty of time to prepare for them, though, so go ahead and build an air factory and some engineers. Have the engineers queue up a hydrocarbon factory near your base, along with a few more power generators and mass extractors for all the nearby mass points. Upgrade to a T2 factory as quickly as you can, build some engineers to help out with defenses, and build a few interceptors to deal with the low-level air traffic that’ll come your way.
When you have at least three T2 point defenses set up and overlooking the southwestern coast (move them back a bit so that their attack radii are just over the waterline; they can’t hit the tanks while they’re underwater), you’ll be secure from the attacks of the amphibious tanks, leaving only the bombers to do any serious damage to you. Interceptors and T2 flak cannons will take care of them when they arrive, leaving you plenty of time to build up your base. Build a couple of T2 power generators and plant a naval factory in the water off to the east. Build a couple of destroyers and cruisers, and use them to shell the southwestern base to dust. When you have it cleared out, take it over and build up some mass extractors there.
When the enemies at the southern research facility are taken out (gunships will do the job quickly), you’ll have as much time as you want to build up your base before the next map expansion. It’ll be wise to build some T2 point defenses and anti-air turrets on the eastern side of your base. There’s nothing there now, but there will be soon.
Capture The Science Facility
The kidnapped scientist is on the planet and is being forced to work in a facility nearby. Your goal here is to reach the station, capture it, then escort the scientist to the nearby quantum gate (which isn’t visible on your map just yet).
Take your time here. Over the next few minutes of gameplay, you’ll receive the download specs for the T3 air superiority fighter, the T2 artillery structure, the T2 tactical missile launcher, and the T2 shield generator, all of which will be a great boon to you if you like to play defensively. Unfortunately, most of them will become available to your opponent, as well, especially the tactical missiles. You’ll need to use the Buzzkill to prevent the enemy tacs from hitting your own units, but since both sides have the same range on their tacticals, you won’t need to defend your entire base. The enemy’s tactical missiles won’t be able to hit much of your original island, save for the extreme eastern edge. Tacticals can also be disrupted with shield generators, although two successive hits will knock the shield offline for a while.
Unfortunately, the fact that your enemy has four or five tactical missile installations around his facility makes it difficult to approach him. If you go in with ships, you’ll have to deal with torpedo turrets; pausing to take them out will likely allow him to fire his missiles at your ships. This isn’t problematic if you have dozens of ships, but maneuvering that many ships is a pain. Sending in air or land units will likely also be troublesome, since there’s plenty of AA and point defenses on his island.
We preferred to set up our own long-range attacks that were targeted at the enemy base. We began by clearing out most of the small defensive installations to the south of our position, and especially around the science facility that you have to capture. You can take a few engineers to that landmass, build a land factory, upgrade it to T2, then pump out a mobile shield generator. That will protect your T2 engineers as they creep over to the science facility. When they reach it, quickly build a Buzzkill anti-missile structure, a stationary shield generator, and a few anti-air turrets. When that’s done, start cranking out four or five T2 artillery pieces on the shoreline, with a radar behind them.
With that set up, you can take a few airplanes and ensure that the area between the facility and the southern edge of the map is clear. If it is, quickly capture the facility, then move the truck that pops out to the quantum gate to the south, just beyond where the border of the map was previously. Feel free to escort it with gunships or interceptors if you like.
Defeat The Aeon Commander
Believe it or not, but the Aeon commander on the eastern side of the map actually isn’t the final foe for you here, so there’s no need to get too fancy. As mentioned, he’s got tactical missiles that will knock your units out if you send them in too quickly, but there’s a couple ways around that.
If you built up some T2 artillery near the science facility and have them protected with a Buzzkill and a shield, then group them together and start taking out the point defenses and anti-air turrets inside the Aeon base. You can either focus on the point defenses, and wander in with a large group of amphibious tanks, since there won’t be many ground units in the area, or take out the various anti-air defenses, then sweep in with a group of gunships and interceptors. The gunships can take out any remaining anti-air units before concentrating their fire on the enemy commander, resulting in a swift victory.
Construct Three LR Radar Installations
With the commander out of the way, one way or another, your goal will shift to tracking down the final Aeon base. To do so, you’ll need to build and defend three T2 radars in three areas of the map. One is near your primary base, one is near the quantum gate to the south, and one is to the east, where the Aeon commander’s base was. This is a prime opportunity to send some engineers to the east and take over the Aeon’s mass points, although this will be difficult due to the influx of gunships that appear periodically. You likely won’t need to, though, as having T2 mass extractors on each point on the map would be overkill at this point. If you just want to lay down the radars, have your T3 air superiority fighters patrol over each of the radar points, build a mobile shield unit, and have it escort your T2 engineers to the various radar spots. Before you build the radar units, be sure to have at least a dozen or so T2 gunships stowed away somewhere.
Defeat the Spiderbot / Destroy the Convoy
When you build the radar units, you’ll reveal the location of Brackman’s base. This will also spawn the appearance of a Spiderbot, an experimental mechanized unit that will begin marauding towards your base, as well as a group of T3 engineers that will begin heading towards the quantum gate. Use your gunships to quickly destroy the engineers before they reach the gate! When they’re out of the way, you can focus all your available units (don’t forget about your artillery units!) on the spiderbot to take it out.
When the spiderbot’s down, you’re going to have to deal with Brackman’s base. It’s shielded, but very small, so either build up a few more artillery guns within range of it, or move your destroyers and cruisers into the nearby water to punch through the shields and finish it off.
Mission Five: Operation Forge
Oh, dear. Missions in RTS games where you start with a bunch of resources are kind of like open-book tests in college: you might feel like they’re going to be easy, but they usually wind up being maniacally difficult.
You start out here with one main base and three smaller bases. The main base will need to be defended at any cost, as that’s where the bulk of your production will be coming from. You’ll have to ensure that at least two of the three smaller bases survives the fight. If you ask us, it’s easiest to simply sacrifice one at the outset of the mission here and not build around it, instead focusing your resources on the other two bases, as well as your main base. As hard as it may be to believe, you’re going to be running low on resources in a minute, so it’s best to just concentrate on your main city and focus on keeping two of the sub-cities alive. If you want to try and keep all alive, though, feel free! Either way, be sure you have a T3 engineer spread out and build mass extractors on all the empty mass sites around your bases.
Begin by queueing up a few T3 engineers in all of your bases, save the one you want to die, if any. You want to immediately build T3 shield generators in each base, and build another one in your main city, which covers up the structures on the southeastern corner of it. Most of the attacks here will be focused on the main city, and will be coming from the southeast, so be sure to protect yourself in that direction. Having another T3 shield generator there will help, and you also want to ensure that that side of the base has at least half a dozen each of siege bots and T2 missile launchers, with some T2 point defenses also being a worthwhile addition. Each of the bases will want to have a three or four T3 SAM installations scattered around, as well.
In your main city, when you get done with the shield generator, you will want to build one or two more T3 power generators, as well as a T3 mass fabricator or two. You can also build one or two T2 artillery pieces if you want to hit incoming ground units from a long way away. Mass is going to run low shortly, so having more of it will be a damn good idea. Just be sure to concentrate on base defenses first, ensuring that your southeastern corner is secure from ground assaults, as they will be coming. You’ll also have plenty of planes flying overhead, so secure yourself that way.
Build Two Strategic Missile Defenses
Surprise! The Cybrans have the bomb, and they aren’t afraid to use it. You have to quickly build a pair of T3 strategic missile defenses here, at your smaller bases. These things take up a huge amount of mass, so you’ll probably want to suspend any other productions that are going on at the time. You need to build one missile defense structure at each of your bases. Keep in mind that you not only need to build the structure, but you then need to tell the structure to build missiles that will shoot down any incoming nukes! It’s here that you’ll start running low on mass, as each T3 engineer will greatly increase the mass drain on your economy; assisting the structures as they build missiles will speed up the process, but will also cause you to lose 35 mass per engineer that assists. Since you have a large mass reservoir in place, feel free to go into negative numbers here, but when you run out of mass, move some of your engineers away from the structures to get yourself back up to positive numbers. When each structure has one missile built, you can right-click it to tell it to fill up its inventory, then leave it alone without any engineers assisting it. It's unlikely that Arnold will be able to launch more than one missile at your bases, though.
Destroy Arnold’s Strategic Missile Launchers
When you have your missile defenses constructed, things equilibriate a bit, and the balance of power is mostly going to be equal, especially if you have a couple of T3 shield generators south of your main base. Air transports will begin dropping units off down to the south there, so if you can build anti-air defenses nearby, you can cause your foes to waste a goodly amount of effort there.

Anyway, your goal now is to blast the three missile launchers, part of which will entail taking out Arnold’s base to the southeast. The other two missile launchers, to the east, are a bit easier. A group of around 15 T3 heavy gunships can take out the easternmost base; first take out the two anti-air turrets, then have your way with the rest of the base as you like. The one that’s surrounded by planes is a bit trickier; the simplest way to deal with it is to expand your easternmost base a bit to the south by building another shield generator there. If you build far enough south, building T2 artillery structures on the southern edge of the shield should let you cover most of the base there. Try and build an artillery structure, see how close you need them to be, then build a T3 shield generator just far enough south to enclose a few artillery units. If you fly over the base with a spy plane, you should be able to pop the missile launcher there without a problem.
The last missile launcher is in Arnold’s base. While it may be tempting to build up a fleet of T3 bombers and take it out the new-fangled way, it’s probably better to sweep through with a horde of T3 siege bots. Their personal shielding will protect them from the first few salvoes of the T2 point defenses that ring the installation, allowing them to get close and take them out without too many problems. Be sure to back them up with mobile artillery, though, which can demolish the factories in the center of the base. If you wish to be a bit more careful in your attack, you can simply send an expeditionary force to the northeast of the enemy base and build more stationary artillery there until you get eyes on your targets.
Destroy The Cybran Heavy Artillery
After the third nuke has been taken out (try to destoy most of the base before destroying it, as you don’t want to leave any remnants behind to bother you), two Cybran heavy artillery pieces will begin shelling your bases. They’re an awful long way away, but not too difficult to deal with.
The artillery to the west isn’t guarded by a shield, and only has light defenses around it, so send over a dozen or so T3 gunships to knock it out. The gun to the northeast does have a shield, but is still lightly defended; a couple dozen siege bots will be more than enough to take it out.
Escort the Science Convoys to the Quantum Gate
After this point, things get markedly easier. Although it’s obvious that there are still plenty of enemies on the expanded map, your only real goal now is to escort the two convoys that pop out of your science bases and get them back to the quantum gate. You should have plenty of T3 air superiority fighters overlooking the lanes between your bases, but even then, there won’t be too much to worry about from your enemies, as they’re simply too far away to trouble you much. When the convoys pop out, move them to the gates to complete the Black Sun project.
You can end the map now, if you wish, by moving your ACU into the quantum gate as well. Optionally, though, you can take out the five Cybran bases, as well as the Aeon base to the southwest of your position. After scouting them out with spy planes, you can use your nukes to knock out the bases on the northern edge of the map. (If you run out of mass while constructing nukes, have a couple of engineers reclaim the scraps to the southeast of your base.) The main Cybran base to the west has a Buzzkill anti-missile setup on its eastern edge, but it isn’t protected by a shield; if you send over a few T3 heavy gunships, you can knock it out, allowing you to nuke the base, which in turn will destroy the commander, which should wipe out the bulk of the structures there.
The Aeon base to the southwest isn’t an objective, so you don’t need to worry about it. If you want to take it down, though, you’ll have to note the appearance of two Buzzkills underneath shields; you won’t be able to nuke it easily. Your land factories can create a T3 mobile artillery now, though, which will be able to fire away at the base from a long ways away.
Mission Six: Operation Stone Wall
Time for another fun ride here. Your goal is to oversee the final construction of Black Sun and its firing. You’re given another large base to work with, and will be able to unlock more T3 units, including the mighty battleship.
Luckily for you, one of the Black Sun components is lost when the mission begins. You need to head out to the island in the east and retrieve it. Don’t worry about it initially, though; just take your time building up your defenses to stave off the inevitable and frequent enemy attacks. At the outset, you have to worry about bomber runs from the northeast. Fortify the northeasternmost little set of structures with another shield generator (you can only build the T2 variant here), and more T3 anti-air units.
In addition, you’ll have numerous ships and bombers flying from the southeast over your naval factories. Your battleship will usually deal with the ships as they come in, but you want to have a bit of a buffer between it and your T2 units to prevent them from getting bombed by the bombers. If you set one of the factories to continually pump out submarines and place them in the ocean a bit off to the east, and continually toggle their dive buttons so that they raise up out of the water, they’ll be fired on by the bombers and ships as they arrive, allowing your more valuable units in the rear to stay alive and finish them off. Your other naval factories can build destroyers, cruisers, and another battleship or two (but these take quite a long time to build). Be sure to build some floating SAM units around your factories here to take out the bombers before they can reload and hit you again.
Lastly, perform some maintenance around your main base. You have strategic defense installation, but you need to tell them all to actually start building missiles, as they’re currently empty. You will probably also want to build a couple of mass fabricators near your power generators to up your mass resources a bit, since you don’t have any more mass points to expand to. Lastly, note that you have two commanders here. You can start upgrading them with the ability to generate more resources, as well, if you fool around with their systems upgrading menu.
Retrieve the Black Sun Component
When you’re ready to head out to the east and grab the component, be sure to come hard, with at least three battleships leading the way, followed by a number of cruisers to help deal with any airplanes that come around. There are two enemy battleships near the eastern island, so you’ll want to deal with them from long range. Your three battleships can focus fire on them to take them down, while taking damage in return, or you can attempt to use strategic bombers or even nukes to sink them.
Before you bring the component back to your base, it’ll be well worth your while to construct a nuke and equip it with at least one missile. Having ten or so strategic bombers squirrelled away somewhere is also a good idea.
Destroy The Aeon Commander’s Island Base
When the map expands, you’re going to be looking at a heavily fortified Aeon base to the southeast of your position. You now have new units to build: there’s a T3 submarine that can fire tactical missiles over long ranges, and which can also fire nukes if you build some. It won’t be greatly useful against the base, though, as it’s covered with tactical and strategic missile defenses. It also takes forever to build. In addition, a new experimental unit, the mobile factory, can be built; it'll be useful in fighting off the Cybran attack later on. Lastly, you also have access to the T3 shield generator, so begin upgrading all of the T2 generators that you have on hand.
There are a few enemy battleships patrolling the waters between your base and the enemy base. They’re accompanied by cruisers and destroyers, but you should have enough submarines to suicide those away. If you can submarine the cruisers and destroyers, you can finish off the battleships with your strategic bombers, or use your own battleships as a countermeasure.
There are four naval bases to the southwest of the enemy’s base. It’s unclear if they actually are used to make units, though; if you destroy them, they’ll simply be rebuilt, but won’t progress past T1 technology. Still, just in case, it might be wise to nuke them when they’re uncovered. If you aim at the westernmost factory, you should be able to take them all out.
Charge!
Your best bet for dealing with the island base itself is to roll up with one hell of a huge navy. Six or seven battleships can do most of the job by themselves if you send them to the southwest of the island and start shelling it. Note that the island is protected by T2 artillery installations which match the range of your battleships. These should be your first priority for destruction, not counting the Aeon commander, who may be walking around. If you spot him, take him out. Feel free to pause to shuffle out wounded battleships and return them to the north for repairs; just remove them from the battlegroup and let the others keep up the work.
Before you finish off all the structures on the island, though, it’s wise to really, really fortify your base. For reasons that will soon become clear, this includes building up a number of T3 shield generators all around the Black Sun device, in addition to hordes of SAM installations - we had around 70 scattered around our base when we were done building. Don’t worry overmuch about the northern reaches of your base; concentrate on fortifying around the walls that ring the Black Sun device itself. You’ll want some land units before you wipe out the Aeon, as well; build a couple dozen siege bots if you have the power to do so. Around 25-30 heavy gunships will also be extremely helpful; it’s a good idea to have an air factory around that’s doing nothing but cranking them out, assisted by a few T3 engineers, if not your ACU itself. Lastly, you’ll want to move around half of your naval forces to the northwestern corner of the map.
Defend Black Sun As It Charges
When the last of the Aeon structures are wiped out, things begin happening very, very quickly. Four Cybran spiderbots appear to the northeast of your base and begin marching into it, wiping out everything they see. If you act quickly, you should be able to take them down before they cause real damage, assuming you have a force of around 30 heavy gunships to work with, or a few mobile factory experimental units up there. That much firepower focused on one target will take it down rather quickly. Don’t worry about the apparent size of the army; it’s mostly T1 assault bots. Focus on the spiderbots, and let your point defenses do the rest.
From here on in, your only goal is to survive. You’re going to be facing mostly air assaults for the duration of the battle; hope you built up a large number of SAM installations and covered them up with shields! You should have one or two of your air factories churning out nothing but air superiority fighters and setting them up to patrol the perimeters of your base.
After the spiderbots go down, naval forces will appear on the edges of the map. If your navies look unprepared, move out your heavy gunships and use them to take out the battleships in the fleets. Sometimes you’ll get lucky and the Cybran and Aeon navies will begin destroying each other. Having these fleets around makes for a good opportunity to flood them with whatever destroyers you have floating around. They’re not going to be particularly useful in the last section of this battle, since they won’t be able to use their direct fire on land units, unlike your battleships, so you can clear them out by sending them, alone, towards enemy fleets to make room for other, more useful units.
50% Charge!

When Black Sun reaches a 50% charge, you’ll notice a large group of units that begin treading down from the northeastern corner of the map. These are Cybran army units, including a few more spiderbots which are invisible to radar. If you want to, you can try pegging one of the army groups with a nuke; you’ll need to lead them a bit in order to do so. Around the same time, you may be alarmed to hear four or five "Strategic Missile Launch Detected" warnings. Don’t fret too much; most of these will be hitting up around where the Cybran army is approaching from; apparently the Aeons are attempting to wipe them out for some reason. One or two may fall on a base of yours, but if you’ve stocked the defensive missile launchers with missiles, you should be safe.
At around 65%, another crisis occurs. Three experimental Cybran units come on the scene: two exceedinly powerful air units, and a submersible battleship. The two air units will be coming down from the north. If you still have around 40 heavy gunships (and don’t forget to be auto-producing them at an air factory with plenty of engineers assisting!), they should be able to take the experiments out before they do real damage. If you have a few battleships over on the other side, they can take down the experimental battleship also before it manages to reach shore.
Fire!
At 85% charge, the last threats will appear on your map. The first is a large experimental Aeon flying aircraft carrier. It only has 5,000 hit points, so swarm it with your heavy gunships or air superiority fighters and take it out. Shortly after that occurance, Arnold will warp into the planet and begin heading towards your base. Again, your swarm of gunships will deal with him without a problem.
When that’s done, the Black Sun is ready to fire. Select it as a unit and hit the fire button to end the campaign!
Cybran Campaign
Again, this walkthrough is based on the Normal difficulty setting. If you're playing it on Hard, some encounters may be different.
Mission One: Operation Liberation
The usual starting point here: building mass extractors and power generators. The initial mission here is much like the mission that starts the UEF campaign, so you shouldn’t have too many problems.
After going through the motions with your bombers, use a couple of engineers to capture the hydrocarbon plant and the rest of the facilities near the radar before grabbing the radar itself. The extra energy supplied should last you quite a while. While the units are being captured, build a few more bombers.
When the radar is on your side, it will reveal some mass units off to the northwest. Build around ten interceptors and use them to take out the enemy interceptors above the mass points, then bomb the mass extractors back to the stone age and build your own. (You can also just capture them, but this will take much longer to do.)
When you destroy the extractors, the map will expand to the east, revealing a lot more area to cover.
Defeat UEF Patrols
The UEF controls the ground to the east of you, so you’ll want to head that way and take them out. Before you do so, though, task an engineer or two to build mass extractors on all the points near your main base. Each of the defenses there will consist of a few interceptors flying around, a bomber, and a mixture of point defenses and anti-air defenses.
First off, build some anti-air units, around ten of them, and move them into the areas through which each patrol passes, which will let you knock them out of the sky. With that done, you can knock out the north and southern defenses with mobile light artillery, and the middle defenses with a few bombers. Use your light artillery to mop up any remaining defenses. Keep around 15 units in the group, though, as the point defenses will knock out some of your forces as you attack.
Destroy the UEF Base
After defeating the patrols and defenses, another base will pop up to your east. You have to destroy everything that moves in order to free your Cybran friends from the clutches of the UEF tyrannists. The easiest way to proceed here is to simply load up a transport with engineers and move it to the extreme southeastern corner of the map, hoping that it doesn’t get shot down. When it lands, you can set up a pair of land factories and begin pumping out the new heavy combat bots, as well as some artillery units and anti-air bots. (Note that you don’t really have to proceed from the south if you don’t want to; heading in from the west works just as well.)
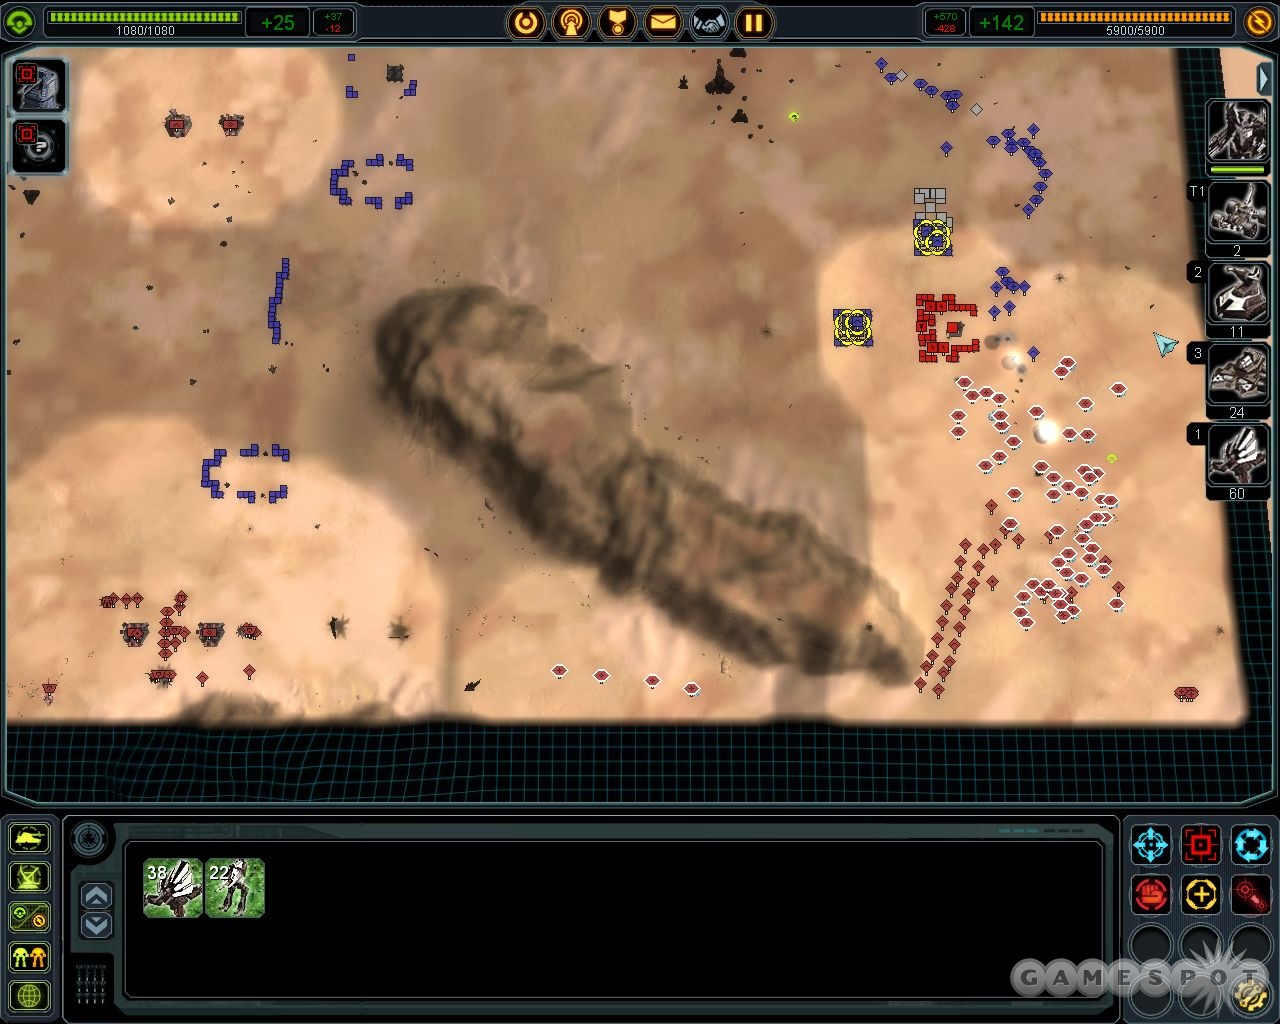
You will likely have a bunch of units in your old army that you want to bring along for the battle. If you want to try ferrying them over, you can construct five light transport units, then have four of them assist the fifth. If you click on the fifth transport, then click on the ferry icon, then left-click on the southeastern corner of the map, you’ll see a purple icon appear beneath the transport. Selecting your entire army and right-clicking into the purple icon will start loading up transports and shuffling your army off to meet the new group.
When you have enough units, start pushing your way north through the enemy defenses. You should have plenty of resources to construct units by this point, so just keep churning out heavy combat bots to overwhelm the defenses of the northern base when it comes time to attack it, focusing on the point defenses first. Sure, you’ll lose some units, perhaps even most of them, but when you attack with 60 units in your army backed up by 20 artillery pieces, it won’t really matter.
Defeat the Aeon Commander
One last expansion, to the south this time. Your goal here is to destroy the base, but what you should really focus on is killing the Aeon commander, as that’s what ends the mission. Roll in hard, with around 100 heavy combat bots, backed up by artillery and anti-air, and you should be able to steamroll through your opponent.
Mission Two: Operation Artifact
Go ahead and build a few mass extractor/power generator combos around your starting point. You’re in no rush, so build a land factory, crank out some engineers, then upgrade your factory to Tech 2. You will eventually be getting some interceptor flybys, so either construct some T2 mobile flak vehicles, or build anti-air defenses around your base.
When you want to find the first piece of Seraphim tech, simply build a few T2 tanks, then roll them to the northeast. The village there is populated solely by T1 units, so you shouldn’t have a problem with them. When they’ve been taken out, manually attack the temple nearby (click Attack, click the temple) until a Seraphim Tech pops out of it. A transport will come along to pick it up shortly afterwards.
Search Surrounding Temples For More Tech
There are a few more temples scattered around the area, but only one of them has any tech. It may be randomized, but we only noticed it dropping from the southeastern temple on the map. Be sure that you have at least ten mobile flak pieces backing up your T2 tanks before rolling up on it, and be sure that your main base has a few tanks and flak units, as well, or at least a good number of anti-air structures.
When you knock out the temple there, reinforcements will arrive for the Aeon, both near the temple and your base. Defeat them to grab the tech.
Destroy The Aeon Bases
Two Aeon bases will appear now, with one to your south and one to your east. The one to the south will only send naval units your way; a group of submarines protecting your bay will defeat anything that comes along, especially if they’re backed up by torpedo launchers or T2 point defenses on the shore. The eastern base will periodically send airplanes and large ground forces at you. Build T2 point defenses on the eastern side of your base to deal with them, but note that they’ll sometimes send transports around to the western side.
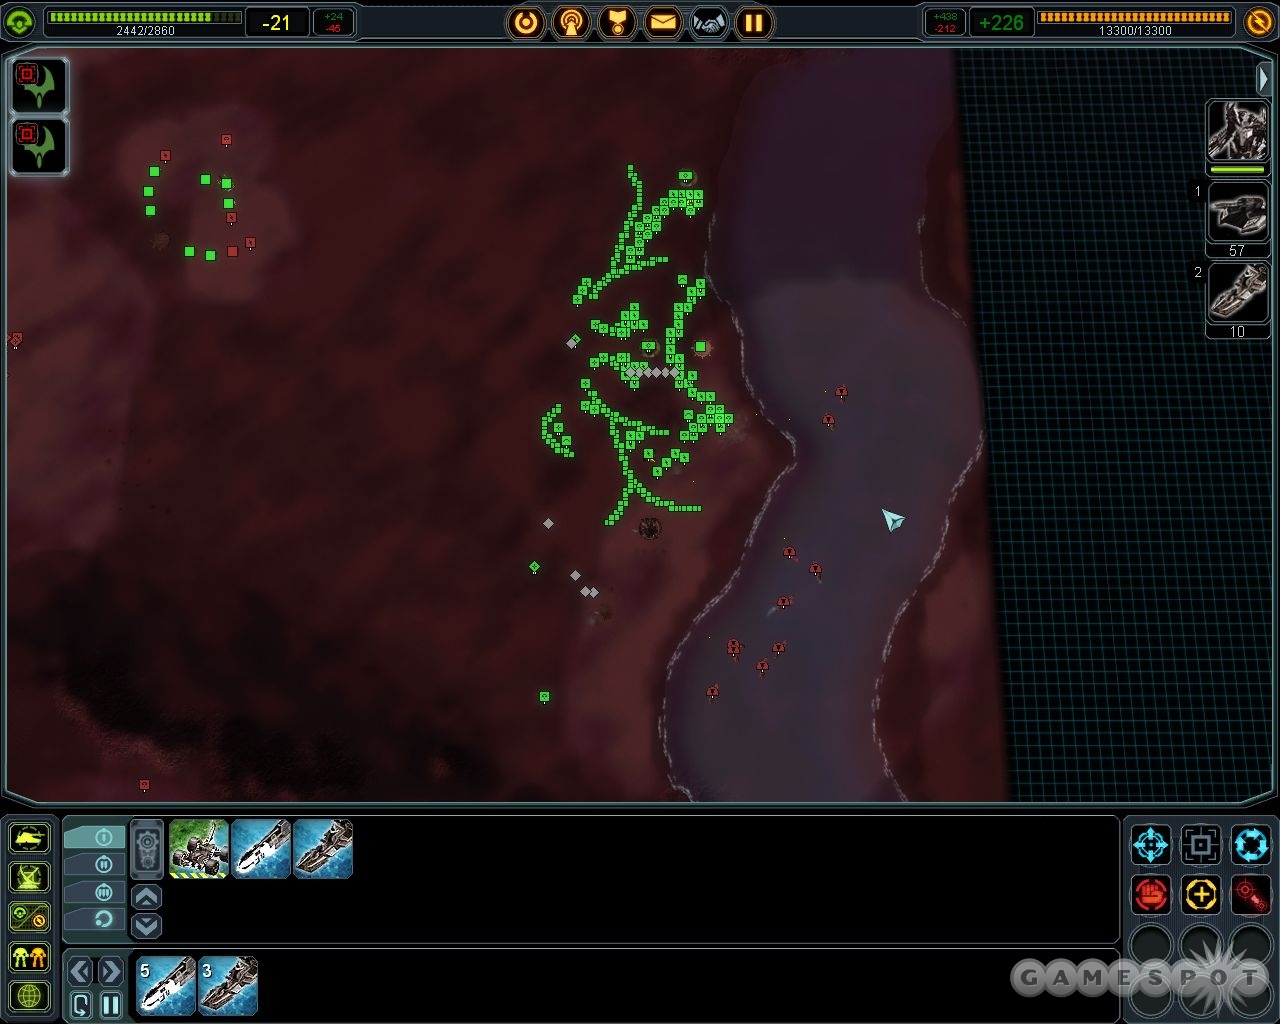
It’s easiest to start with the eastern base. After building up your defenses, sneak or transport an engineer or five to the southeastern corner of the map. Build a naval base and start cranking out five to ten frigates. When they’re done, you can move them up around the eastern base, on the river nearby, and start shelling it from the water; they won’t have any defenses against this. After destroying everything you can target, including the anti-air batteries and the land factories, you can finish off the base by building up a fleet of around 20 bombers and using them to first take out the remaining anti-air, then shelling the rest of the base. The number of point defenses in the base makes a unit assault look inadvisable.
The southern base can actually be defeated without any offensive units at all. The easiest way to proceed is to ferry in four or six T2 engineers to the eastern side of the base down there. As a naval base, it doesn’t have much in the way of land defenses, so this will let you set up a line of T2 point defenses just outside of town (be sure that you’re out of the way of the land unit patrols). Set them up, let them kill anything in range, then build another line of point defenses a bit further up. A few lines of these defenses will wipe out the base and the naval factories, letting you send in a swarm of subs to finish the job.
Defeat Mach
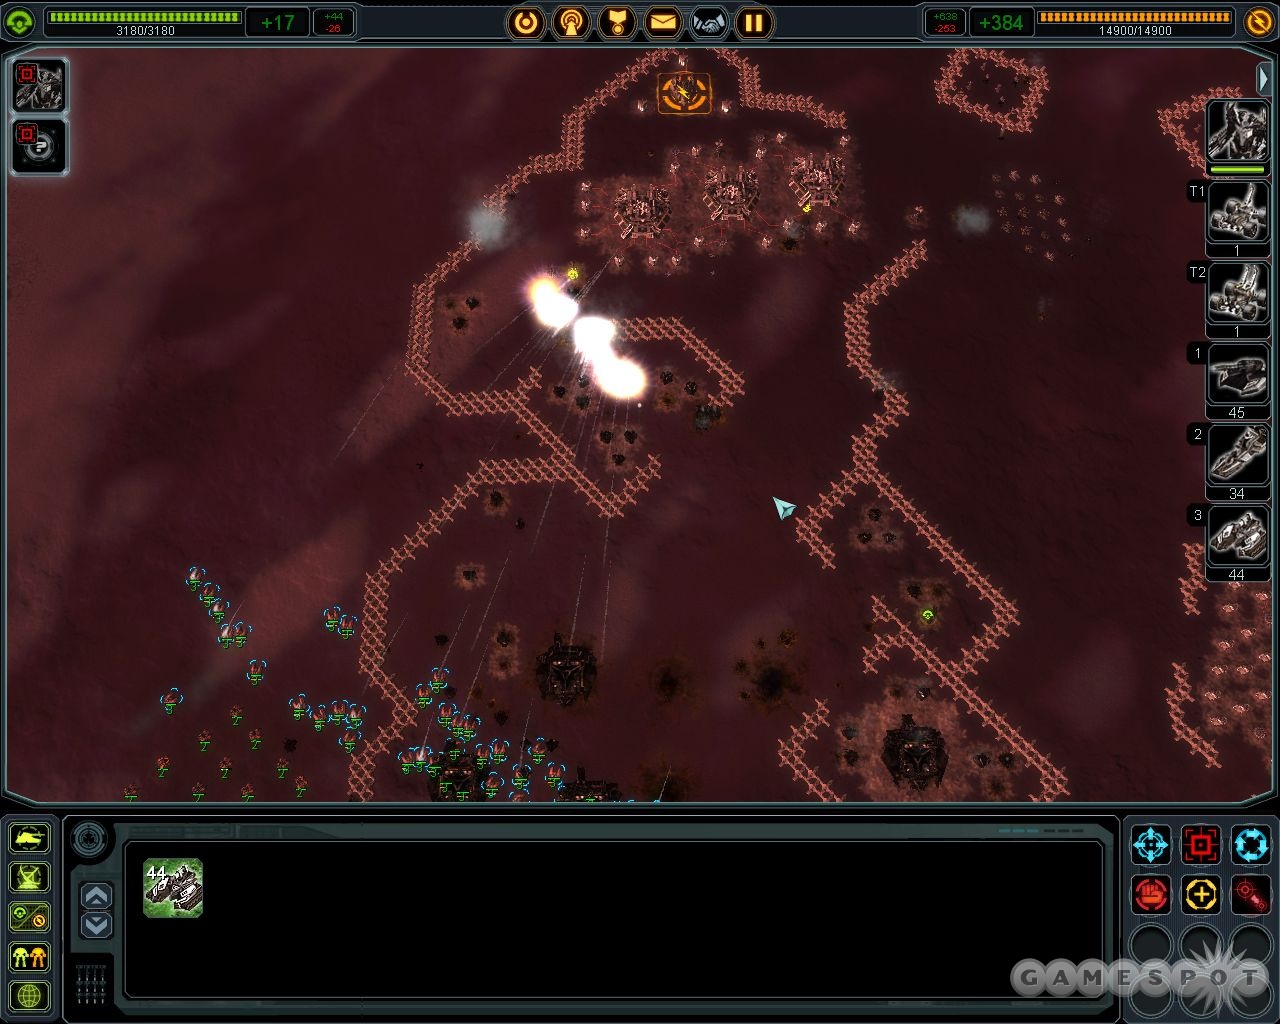
Mach has been brainwashed by the Seraphim tech, so you’ll have to defeat him in the southeastern corner of the map before moving to the quantum gate. This is a fairly easy task. Build a couple of T2 land factories on the spit of land to the southwest of his base and have them both start cranking out T2 land units, including a copious number of missile launchers, which are now available for construction. The T2 missile launchers will have a farther range of attack than anything Mach has in his base, save for a single T2 point defense. You can use them to shell the base from afar, then (after using them to clear out some of the wall segments), move them forward to target Mach himself, who’ll blow up real nicelike.
You can end the mission now by moving your commander to the quantum gate and heading through it. If you want to complete the optional objective of defeating the Aeon commander, you can send spy planes to the north, but don’t be surprised if she walks out of her base towards the quantum gate herself! Swarm her with your units and take her down before completing the mission. No need to destroy her base unless you wish to do so.
Mission Three: Operation Defrag
As soon as you gain control of your forces here, move all of your amphibious tanks across the river to the west. You’ll need to position them on the western side of the base, where a few T2 tanks of your enemies will be rolling in in an attempt to destroy the city. The point defenses there will slow them down, but not enough to prevent them from destroying the buildings if they get through. Get over there and defend the city while your commander builds a few mass extractors and a land factory.
Defeat the UEF Bases
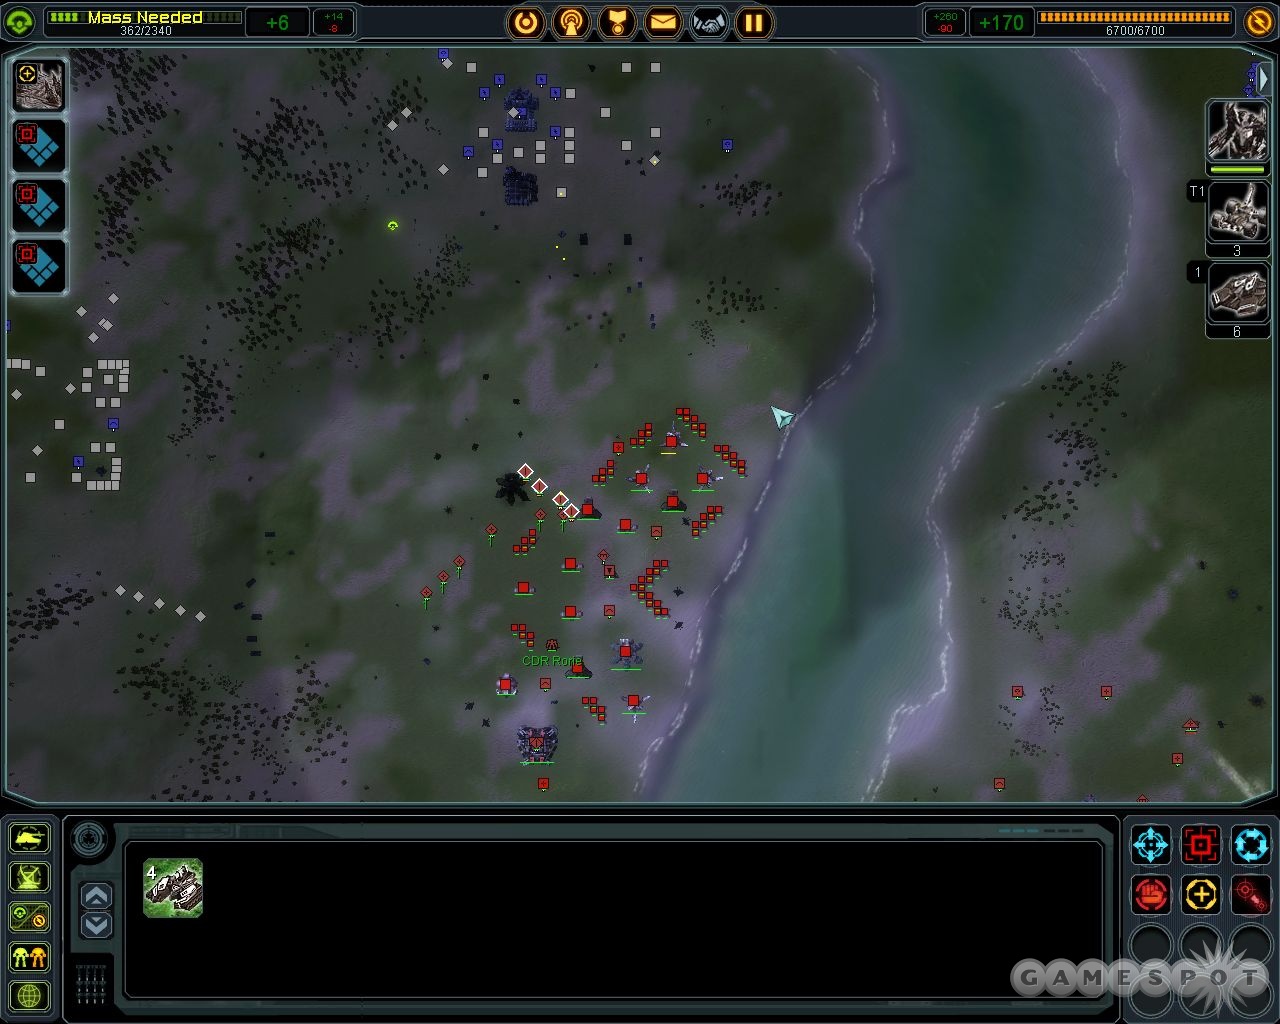
When you have the city secured, start building up your defenses and economy. Your southeastern town will be the easier one to defend, so build up at the nearby mass points, get five or six more power generators going, and build a few point defenses on the northeastern side of town to prevent the T1 units that will eventually approach from doing much damage. You’ll also want to send an engineer across to the western town and build a land factory there. Upgrade it to T2 when you have defended the city a bit with more point defenses (ensuring that your structures and builders aren’t in the range of the point defenses in the nearby sub-bases), and start building up some mobile missile launchers. They have much greater range than any of the enemy units scattered around, so they’ll be able to creep in and pound the bases without too many problems. If you want to save yourself some building costs later on, you can try to have them not hit the T2 mass extractors in the bases, then move in with an engineer to capture them, but this can be complicated. You can even try capturing the factories if you like.
Speaking of capturing factories...the easiest place to do this is in the northeastern base. Move up with a few T2 mobile missiles to knock out the southernmost factory, and support them with four or five T2 mobile flak vehicles to take out any nearby planes. There aren’t any point defenses in the area, and there shouldn’t be any land vehicles, so at this point (after withdrawing your missile launchers a bit), you can move north with your vehicles and capture a factory, giving you the ability to create UEF vehicles. Capturing all of the structures here will enable you to essentially "destroy" the base, so far as your objectives are concerned.
Defeat UEF Cruiser and Artillery Positions
Brackman’s base to the east is being shelled by artillery and cruise missiles. It’s up to you to prevent the base from being destroyed. In point of fact, Brackman’s building is apparently indestructible, so there’s not too much you have to worry about here, but still, it’s best to be cautious. Begin by having your mobile missile launchers move east and take out the first artillery gun there; it’s lightly defended. With that out of the way, you can ferry them and the rest of your army up to the northeast and work on the second gun.
After defeating the artillery, feel free to let the cruiser alone for a while while you build up your economy some more. You can now build T2 mass extractors and power generators, which will help you shore up any material shortages you may have been experiencing. You might also want to build some T2 flak cannons in the space to the northeast of the quantum gate, or plop down some T2 mobile flak cannons there.
When you’re ready to move on, use your mobile artillery to take out the cruiser.
Escort Convoy To The Quantum Gate
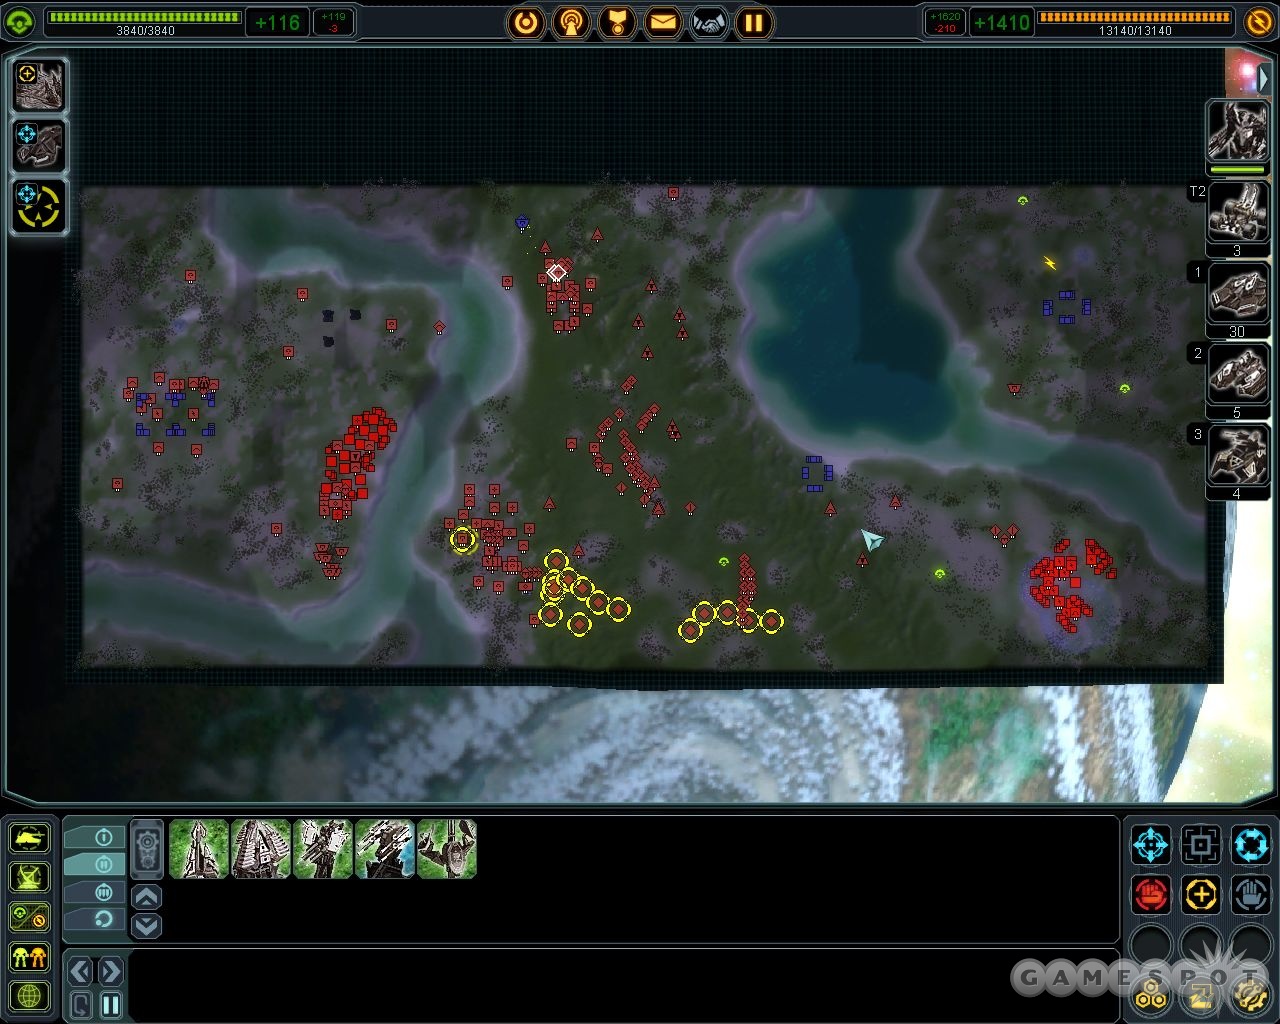
At this point, you’ll need to escort 15 science trucks from Brackman’s facility to the quantum gate to the west. This isn’t so hard to do, although the UEF will be sending down plenty of air units your way. Build up any anti-air defenses that you need, and you shouldn’t have to worry about them getting anywhere near the Brackman convoy. Building some flak cannons near the previous location of the UEF base where the ships come in will result in most of them getting shot down as they arrive.
Destroy the UEF Commander
With the trucks safely through the gate, the map will expand and you’ll be able to go after the UEF commander to the north. There’ll be plenty of patrolling planes coming your way, as well as a number of patrolling ships in the waters here. Build a naval factory in the southeastern waters and start cranking out submarines. When you have ten or so of them, move them into the path of the patrolling ships, and they’ll start wiping them out.
You’re not going to beat the UEF commander with T1 naval units, though. Instead, ferry an army to the western side of the island that he’s on, being sure to bring along some engineers and some T2 anti-air units to protect from gunship fire. You can build your own gunships now, which is nice, but you’ll still probably want to assault the base with ground forces, so build a couple of T2 land factories on the western side of the UEF island, protect them with flak cannons, and start cranking out units. You probably won’t need anything but T2 mobile missile launchers, though, as the base should be lightly defended in terms of the number of ground units present, especially if you attack from the west. If you’re really lucky, the commander will walk out the western side of his base, allowing you to pelt him from there, without having to deal with the base defenses.
Mission Four: Operation Mainframe Tango
You have a limited amount of landmass to worry about here, but you do have an Aeon base to your southwest. It’s across a body of water, so you don’t have to worry about land units, but you will need to build up some naval and air defenses. Begin by cranking out a few T2 engineers and having them build mass extractors, then start repairing the structures in your area and building new ones. You’ll want a sonar station in the water, and more anti-air units scattered around the base. If you start running out of mass, task one of your engineers to reclaim the destroyed factories to the north or south of your base until you get in the clear again.
The initial waves of attack will be air-only, but eventually you’ll be facing off against naval units. We’re no big fans of torpedo launchers, so we hung back and had our engineers help the naval factories build a dozen or so submarines and five or six destroyers to defend our installations. Don’t hesitate to send the submarines out to engage the enemy before they’re in firing range of your destroyers. If you weaken the enemy destroyers with subs, they’ll be much easier to take out when they come in range of your destroyers, thus saving a bit of health for them. Subs are cheap enough to be almost disposable to you, anyway. While you’re building your fleet, have around 20 or so interceptors start patrolling over your naval factories and out to see a bit, as the enemy air attacks will get slightly heavier. You can self-destruct them when they run out of fuel and build them again, or suicide them into the enemy base.
Recapture the Network Node
The Aeon commander has set up shop on the southwestern spit of land here. After building up your fleet a bit, you can begin the process of taking her out. Don’t forget to transport an engineer to the northwest to grab the mass points there.
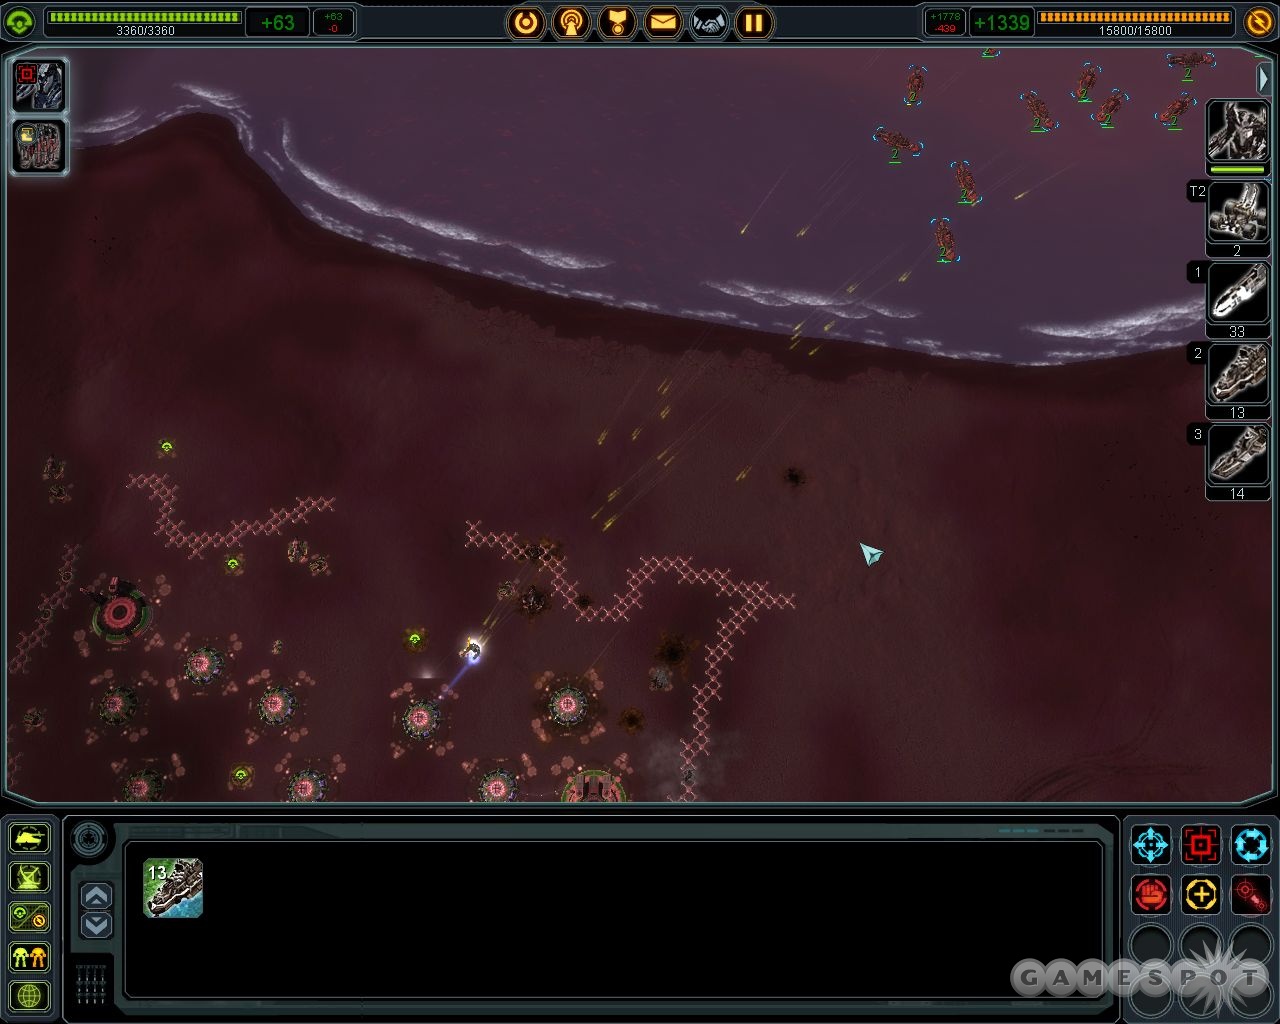
When you have at least ten destroyers in your fleet, along with a few frigates and perhaps 20 subs (to protect your destroyers), start moving out. Your destroyers will be able to fire on the enemy torpedo launchers from well out of their range, so start disabling them, then moving on to the naval factories. Feel free to have a few scout planes assist your destroyers to extend their range of sight a bit. There’ll be a couple of enemy destroyers and cruisers near the coast of the base, but if you rush in with your submarines they should go down quickly.
With the coastal defenses out of the way, bring your ships up to the coastline and start shelling away, taking down the T2 point defenses first, since they’ll be able to hit you.
When the bases are out of the way, you can transport over a couple of T2 engineers. Before you capture the node, you may want to build on the mass points and build a few dozen gunships at one of your air facilities, parking them on the western side of the map. Have a few T2 engineers loaded into a transport, as well.
Defend the Western Network Node
When you capture the network node, another will appear to the west, and it’ll soon come under attack from the Aeon. Quickly fly over your gunships to help ward off the attackers, and don’t forget to move over your submarines and destroyers as quickly as you can. The narrow river will probably cause some problems for you, so move the subs through first, take out the cruisers, and park them on the north side of the new network node. The destroyers are more problematic to move, since they will often insist on very slowly crawling across the land to reach their destination. Feel free to let them do so if you like.
When the node is secure, all the buildings there come under your control. Land as many of your T2 engineers in a transport inside the base and start building T2 anti-air defenses; also upgrade the land factory here to T2. You can build T2 shield generators now, if you wish to do so; they’ll help improve your defensive capabilities. Anyway, the first big charge here will be of air units towards the eastern side of the node base, so be ready for it! After that, you’ll have to deal with some ground units, but you should weather the storm well if you still have some T2 point defenses built.
Capture the Remaining Network Nodes
When you defend the node from attack, the map expands again, revealing another pair of network nodes, in the northeast and the northwest, as well as the main Aeon base in the center of the map. Don’t attack the main base!
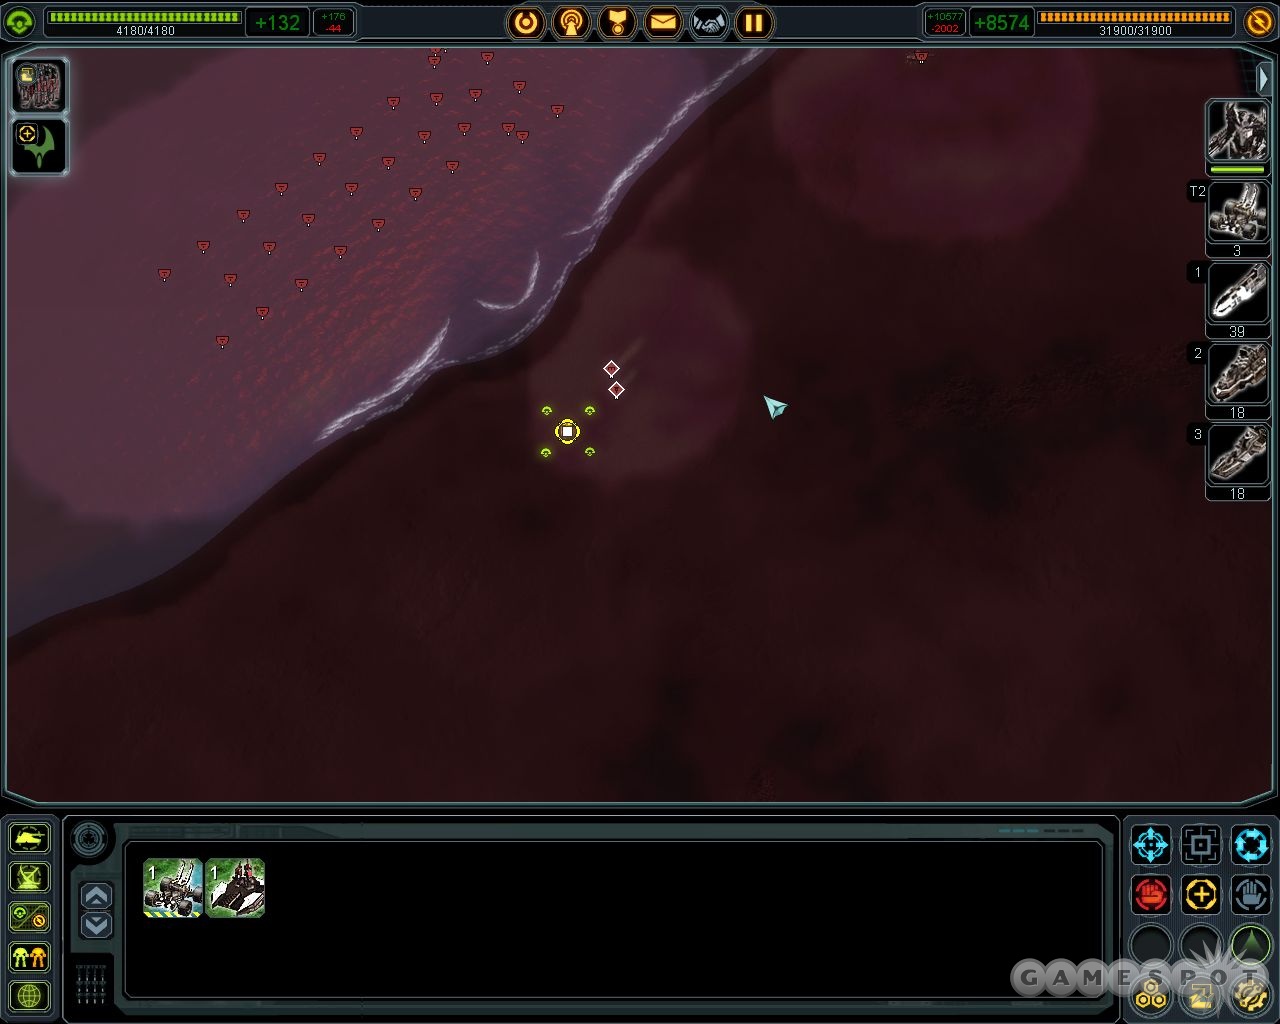
You’re allowed to either attack the forces surrounding the nodes, or attempt to capture them stealthy-like, by approaching them with an engineer and a T2 stealth land unit in a transport. If you moved your destroyers to the west, it’s easier to simply attack the land units near the northwestern node and then fly up an engineer to capture it.
Dealing with the northeastern node can be problematic if you moved most of your sea units to the west, but you should be able to capture it without alerting anyone if you use the stealth unit trick. Just load a T2 mobile stealth unit onto a transport, follow it up with an engineer, then move them towards the extreme northwestern corner of the map, scouting the area with a plane first to see where to avoid the enemies. If you fly over them, they’ll pursue you, so stick to the eastern edge of the map, offload the units, and capture the base.
BEFORE you do so, though, be sure you have at least ten or fifteen gunships under your control.
Destroy The Aeon Commander
When you capture the last network node, you’ll have 30 seconds before an EMP burst disables the bulk of the Aeon base. When it does, all of its defenses and units will cease responding, allowing you to sweep in with your gunships and attack the Aeon commander directly. She’ll blow up, which seems likely to also destroy your mainframe, which is what you’ve been trying to avoid...but whatever! Mission completed!
Mission Five: Operation Unlock
You can grab the keys to the Black Sun device here...if you’re willing to pay the price. A Cybran operative has the keys in his possession, but won’t hand them over until you help him bust into a prison where some of his friends are being held.
You’ll have to build your army from scratch here, so get to work. You’ll have a long time before the enemy starts to attack you, and even then they’ll start by throwing Tech 1 ground and air units your way, so take your time and proceed up the tech tree slowly but surely, devoting some time to build a line of T2 shield generators and power generators to the south of your base, along the line of three mass points there. Build up plenty of anti-air turrets within the bubbles, alongside T2 point defenses on the southern side of the shields. That should be enough to protect you from almost anything that comes along, but you’ll want to keep 30 to 50 interceptors patrolling the skies above your base to help shoot down bombers and gunships that come your way.
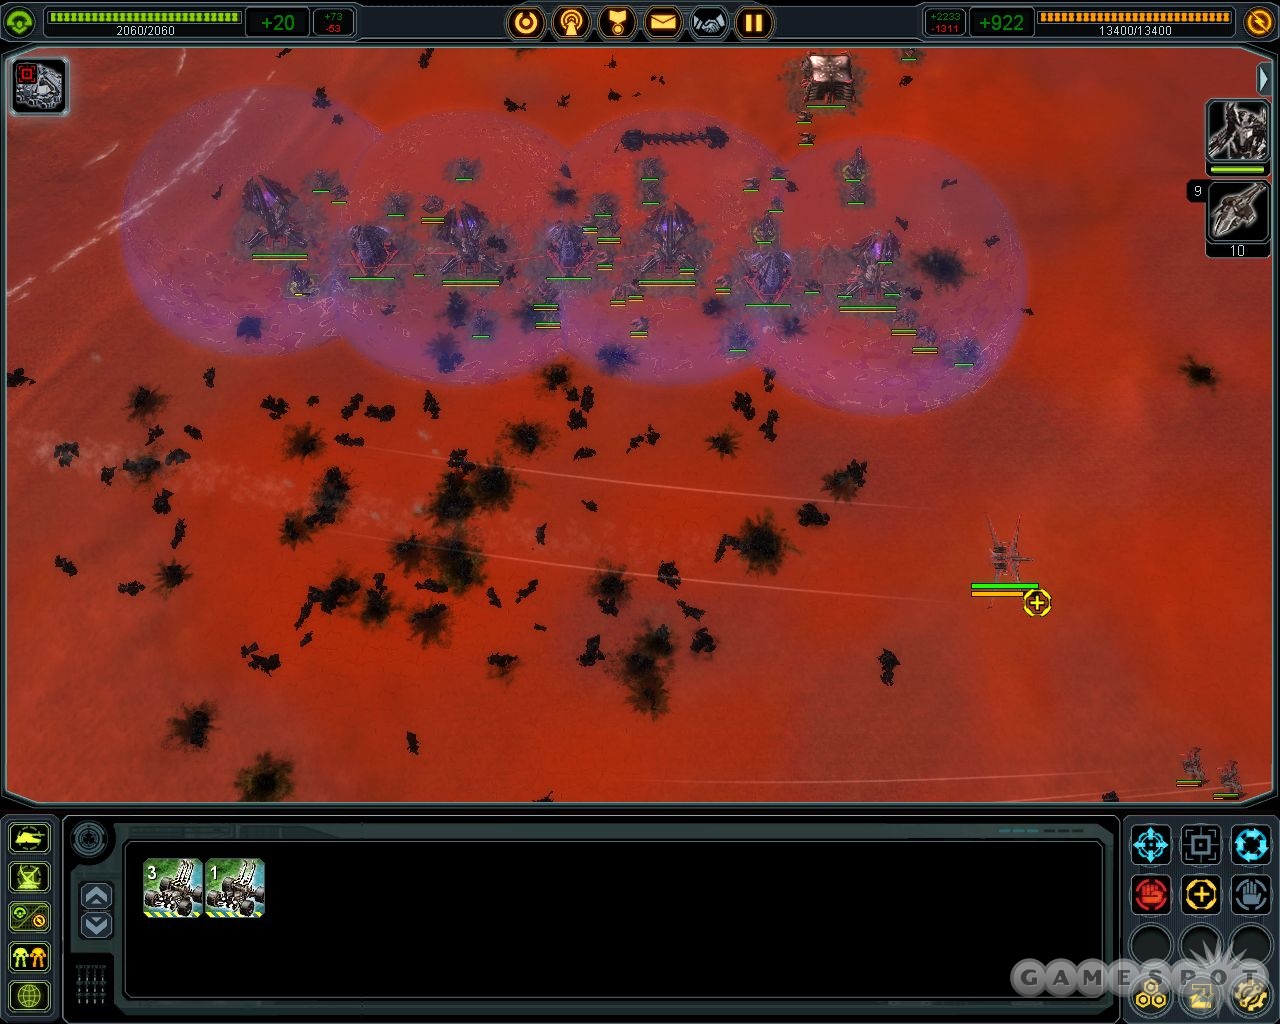
Your land and air factories can reach Tech 3, so upgrade one of those factories as far as it can go and construct a few T3 engineers to help you make T3 power generators and to assist your other factories, or to make or upgrade your mass extractors to T3. You can also use the T3 land factory to construct the Trebuchet mobile heavy artillery units, which launch what appear to be low-grade nuclear shells a good distance away. Feel free to construct a few and hide them in your bubbles to let them get some kills.
When you’re ready to drop the shields, head south with a large force consisting primarily of T2 mobile missile launchers and anti-air units, with a few heavy tanks to run interference if any land units get close. You can bring along Trebuchets if you like, but they’re fairly slow and unwieldy, so it’ll be quicker to just stick with missile launchers. Destroy the defenses from afar, then destroy the rest of the units in the area before destroying the generators. You might want to relocate some of your factories to this area and build on the mass points before expanding to the south, but if you’ve upgraded all of your mass extractors to T3 already, it might not be necessary.
Destroy UEF Omni-Sensors
After the power generators are taken offline, you’ll immediately be faced with around four times the map area after the expansion. Your goal now is to reach the UEF radar installations marked on your map and destroy those, as well, but your job will be made tougher by the reliance of the UEF on heavy gunships, which can deliver quite a pounding to your troops. Begin making use of the air superiority fighter spec that’s been made available to you, as well as the T3 SAM installation. Again, you’ll probably want to relocate some T3 engineers to where the power generators stood and build some more factories and support infrastructure there, but don’t neglect your northeastern base; it’ll be attacked by naval units and transported ground units with regularity.
When you manage to shore up your defenses against the T3 gunships (it can help to put T2 heavy tanks in their path from the south; they’ll attack them and probably destroy a few of them if they’re the first thing they see, but if you manage to back them up with SAM installations, they should survive. Alternately, you can just build a shield array to the south, but the concentrations of gunships that will be coming at you will be more than enough to knock them down. Whatever you do, start cranking out T3 air superiority fighters and have them patrol around your southern base.
When you’re ready to take out the southern Omni-Sensor, you can continue using the same army you had before (the defenses are relatively weak, save for the ever-oncoming gunships), or build a fleet of Gunther T2 artillery pieces underneath a shield with a firing radius that covers the entire enemy base. If you build it off to the northeast a bit, you should be able to avoid most of the enemy air patrols while building. Build it up with five or six T3 engineers to make it extra speedy, destroy the base (you’ll probably want around 10 Gunthers to ensure that the enemy shield drops and is destroyed), then suicide the Gunthers when they’re no longer useful to you.
With the base out of the way, you can head on to the naval factories, all three of which are clustered at the southern edge of the lake nearby. You can begin pelting the nearby power generators with Trebuchets, or just build some strategic bombers and begin taking the buildings apart. A fleet of ten or so strategic bombers will do a good job of taking out the naval bases, as well, if you’re willing to lose a couple of them to cruiser fire. When the naval factories are gone, start sweeping out the rest of the ships with your own navy.
The Last Omni-Sensors
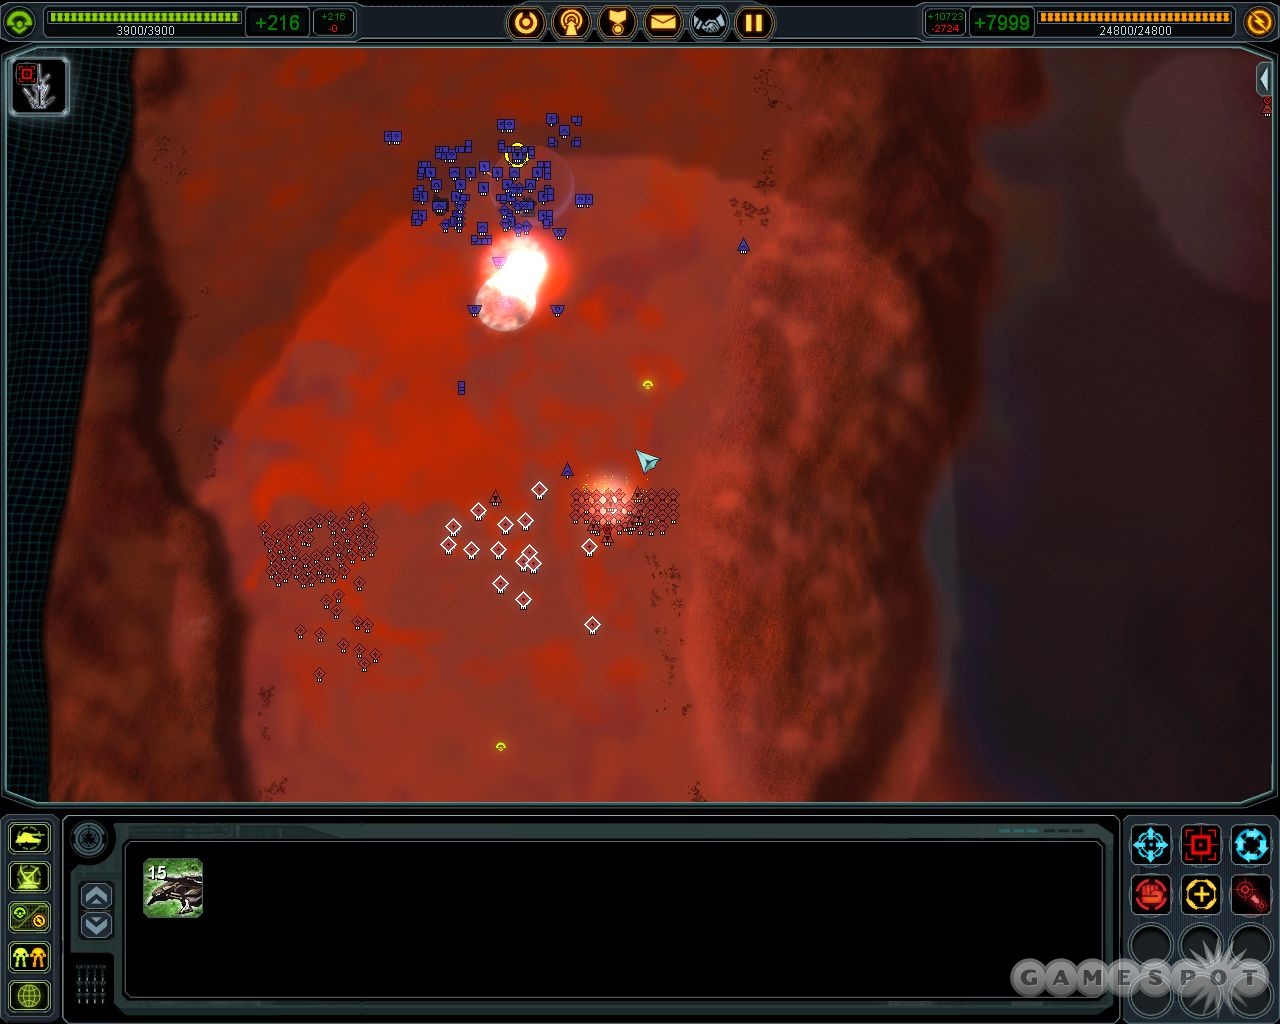
It’s perhaps easiest to simply land another set of T3 engineers on the southwestern island and build up another horde of Gunthers, if you wish to do so; air patrols will be scarce, but you’ll still want some defense against gunships. Otherwise, you can try to attack with destroyers, or simply ferry over your main army from the east and destroy the base.
Likewise, the last base, to the northwest, is most easily taken out with a land assault. After using strategic bombers to eliminate the artillery to the south, you can creep up mobile artillery and anti-air units to demolish the base from a safe distance.
Rendezvous With Hex5
With all of the Omni-Sensors knocked offline, Hex5 will fly to the battlefield and demand that your commander meet him at his landing pad. Go ahead and fly over that way, but be ready to defend your main base; when you meet Hex5, the UEF will attack in full force with gunships there. You probably already have strong defenses in place from the beginning of the mission, but if not, move some of your air superiority fighters there to help staunch the bleeding. From now on, you’re going to have to deal with gunships attacking your northeastern base, as well as whereever your troops are most densely clustered. Defend yourself appropriately.
Implant Gunship Virus
Luckily for you, QAI will download a virus to your engineers at this point. If you manage to capture one of the four airpads in the southeastern corner of the map, it will destroy all of the opponent’s gunships and prevent them from building anymore. This is an optional objective, but it’ll be helpful to do so and make it easier to assault the enemy commander.

You can try to sneak in an engineer through the eastern approach to the airpads (you’ll need to land it on the hill with a transport), but doing so will usually result in its destruction. There aren’t many ground defenses in the area, but there are some patrolling units that will destroy an engineer before it can manage to capture a landing pad. If you want to get tricky, have your engineer construct a few T2 point defenses so that their attack radiuses fall just short of the landing pads. If you can get them up quickly enough, you can take out the roaming units and leave your engineer a more free path to the landing pads. No guarantee that another unit won’t take it out, but it’s worth a shot; you may want to construct a land factory up here, just so you can build another engineer if yours dies.
If you manage to capture the landing pad, all gunships on the map will be destroyed, greatly reducing the UEF commander’s combat abilities. He’ll call for help, but don’t worry about it; he’s on his own.
Destroy UEF Commander
Time to go after the big dog. He’s holed up in the western side of the map, as you’ll discover if you scout with some spy planes. If you want, you can wade into the fight with your amassed army, but keep in mind that he has a few tactical missile launchers scattered around. It’s best to take them out with strategic bombers, if possible, before committing your troops to combat. You do have the ability to build T3 siege bots at this point, though, so feel free to try and swarm the base with their bodies. If you throw a hundred or so of them at the commander, he’ll die right quick, personal shielding or no. Better yet, combine a hundred siege bots with a fleet of strategic bombers. That’ll show him.
If you want to try out something a bit more subtle, check the ranges on your Gunthers and try to get five or six T3 engineers to build one just to the point where you can hit the middle missile launcher. Instead of completing it, though, immediately build a tactical missile defense structure, then build a T2 shield generator. Oddly enough (in what might be a bug), your own tactical missile defenses can’t fire through your own shields, so they won’t help you initially, but if the shield absorbs a missile impact, the missile defense will still be up and kicking if another missile comes your way. After building another shield or two and moving both Trebuchets and mobile AA behind the shields, you can build another missile defense just north of the shields, task one of the engineers to assist it (it’ll be attacked by ground units that patrol near you), and tell the rest to start building up 20 or so Gunthers, which can start ripping through the base until they manage to take out the commander. It’s more complicated, but perhaps a bit more satisfying because of it.
Mission Six
Not much to say here. Kill or be killed! Ultimate peril! Etc.!
Lots of stuff to deal with here, and you’re going to be somewhat pressed for time. You are going to need to turtle yourself up exceedingly well if you want to survive long enough to complete all of the objectives on this map.
First off, reassign your T3 engineers, which at the outset of the fight will be doing some pointless things. Here’s a small checklist of tasks to perform right away (you can pause the game and queue up all of these commands while the game is paused, if you like).
- Task engineers to build T3 mass extractors on all the mass points available to you. A pair of engineers can be queued up for the eastern points, and another pair can work on the western points. Don’t neglect the southern spots, either.
- Start building five or six SAM installations on the western side of your island, which is where the bulk of the incoming air attackers will be coming from. You may want to scatter a few of these near your naval factories and on the eastern side, as well.
- One of your air factories is building torpedo bombers. Cancel them and start building air superiority fighters instead. You’ll need at least 30 of them in a few minutes, so build them up now.
- Similarly, the naval factories are building cruisers and destroyers, which you probably won’t need, and which will sap your mass supply a great deal. You can keep one of the factories tasked on building high-level units, if you like, but we converted both of them to submarines, and told them to wait on the western side of the peninsula. Telling them to raise up out of the water will give any strategic bombers that come your way a cheaper target than your structures. You may want to back them up with 10 or 15 land scout units that will also act as a cheap diversion for bombers.
- Cancel the constructions at your land factories for the moment. Tell any AA flak vehicles that you’ve constructed to wait on the western side of the island, near the beach.
- When you have the resources to do so (probably after a few mass extractors are built, have your ACU start adding the Resource Allocation Systems and Engineering Suites as personal upgrades. Later on you can tell him to build the Microwave Laser Generator, which will help since he’ll probably be going into action at some point.
- You’ll want five or ten more T3 engineers at some point, to assist factories and build items around the base.
You’re going to run short on mass at the outset of the level here, at least until you start building more mass extractors. Don’t worry overmuch about it. When you have the resources to do so, though, you’ll want to build another T3 power generator (hopefully bordering the mass fabricator in the southwestern corner of the base, to reduce its power consumption), as well as another T3 mass fabricator to boost your mass generation a bit. Don’t forget that you can boost mass generation by gathering mass storage buildings around your mass fabricators! You can coax another ten or fifteen mass out of your fabricators (collectively) by ringing them with storage units.

Eventually you should start focusing on building up your fleet of air superiority fighters. Again, 30 will complete the task of taking down the Aeon saucer, but if you want to be on the safe side, build 40 or so. You should also have four or five engineers walking around building T2 artillery units scattered throughout the base; if you’re not building high-tech naval units, they’ll help shell enemy ships that come close, and will help when you’re attacked by ground units later on. It might be tempting to build a T3 Heavy Artillery Installation, but it takes forever to construct and it’ll probably be just as well to build five or six T2 artillery pieces instead.
Lastly, have Jericho start constructing an experimental Soul Ripper gunship, and have as many engineers as you can spare to assist him. If you run low on mass, be sure to construct a couple more mass fabricators in your base, or have engineers walk around reclaiming the fallen transport ships that should be scattered around your western shore by this point. It’ll take a while to build, but the resource demands aren’t insane, and it’ll help fend off the ground troops that will come your way later on. We managed to build two of these before the Czar took off, and they were quite helpful later on, even if we didn’t use them against the Czar itself.
Before you move on to the next part of the game, task one of your air factories to start cranking out strategic bombers. Having a few engineers or your commander to assist it might be wise. You also will want some T3 siege bots and heavy artillery units to start coming down to the southern edge of your base.
Destroy the CZAR
The Aeon commander on the island to your west is building an experimental unit called the Czar. It’s a mobile, flying aircraft carrier that spits out huge amounts of airplanes when it’s attacked. Given enough time, he’ll construct it, then fly it slowly across the ocean towards the Black Sun, in hopes of destroying it. If he does, it’s game over. You have two options here: destroy it while it’s being constructed, or shoot it down while it’s in midair. The easiest option is the latter.
Bombing Run
The former option is possible, theoretically, but very difficult, due to the fact that the unit is invisible to radar and thus can’t be targeted by your strategic bombers on their way over there. That said, if you want to give it a shot, build a small fleet of 15-20 strategic bombers (difficult in itself due to the time it takes to construct them), toggle their radar invisibility on, then move them up to the extreme northern edge of the map. If you can guide them along the northern map side, they should be able to reach the northwestern corner of the map. If you scout out the Aeon island with spy planes in this manner before sending over your strategic bombers, you’ll know where the ship is; it’s on the northern coast of the island. You won’t be able to see it unless you’re right on top of it, but if you’ve scouted the island, it’ll appear as a big hole where no structures are located.
Flying the bombers on top of it will be tricky, though, as they’ll likely drop their bombs on the naval factories to the north of the saucer and then not be recharged by the time they fly over the saucer itself, leaving the huge numbers of AA structures in the area to shoot them down. Still, even if they don’t manage to destroy the saucer, they’ll probably damage it, and that will make it weaker to shoot down later on.
Shooting It Down
If you don’t want to worry about wasting expensive bombers on the Czar (although you should be building strategic bombers anyway, as mentioned), you can instead use your fleet of air superiority fighters to take it down. Again, 30 or 40 will be required to take it out.
You’ll know the Czar is airborne because a particularly frantic-sounding operations manager will radio you and let you know. Your map will also expand at this point. (At this point, if you have enough fighters to shoot it down, shift your engineers to assist your land factories as they begin constructing more siege bots and heavy artillery units.) The Czar will head out in a straight line between its construction site and the Black Sun control tower, which now appears to the south of your base. It is, as mentioned, invisible to radar, so you’ll want to have a few spyplanes patrolling the sea lanes there to try and espy it. Otherwise, you can just have all of your fighters head down to the ocean and start looking around for it, although they’ll have less visual range than the spyplanes will.
When you do find the Czar, attack! It will spit out numerous planes as you do so, but 35 air superiority fighters will cut its health in half during their initial attack run, and will actually increase the speed of the damage they deal as they fly around it. It will go down quickly from there.
Download the QAI Module
When the Czar is destroyed, return your fighters to patrol above your base and get repaired. Have your commander build a Quantum Gate and walk into it, and the download will proceed. It will finish in a couple of minutes.
In the meantime, your base will come under attack from three directions. To the east, a small fleet of warships will appear and begin heading north. You likely haven’t had to defend that side of your base very much, so these guys can be problematic. There doesn’t appear to be any battleships in this fleet, though, so you can probably take all of them down with a goodly number of submarines, assuming you move them around quickly enough. Alternately, one or two Doomrippers will be able to demolish the fleet fairly quickly.
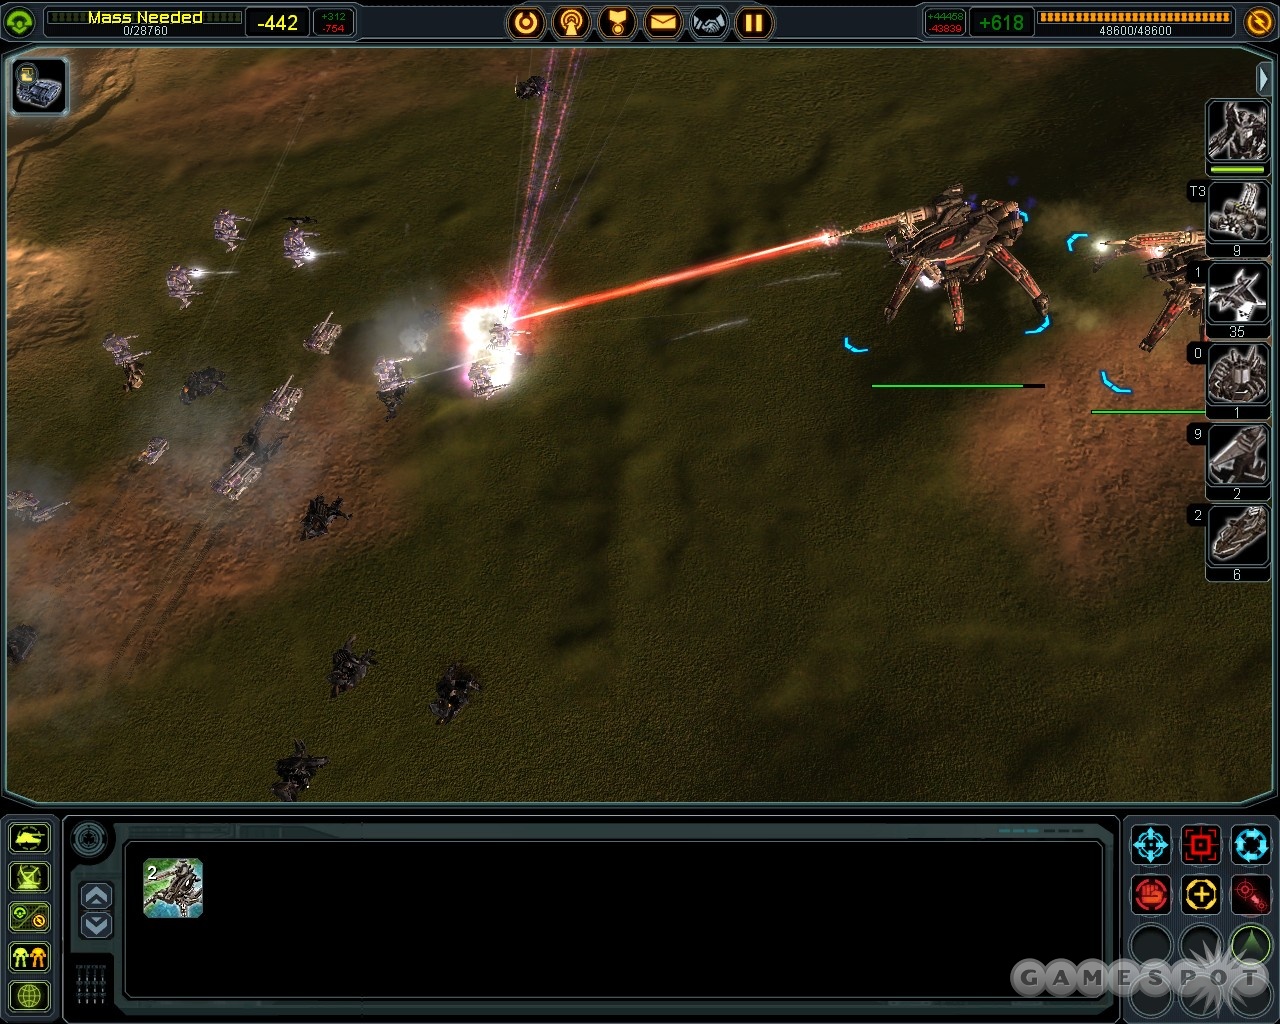
Along the ground to your south, hordes of UEF forces will be coming your way. Most of these are ground attack units which will hopefully get pummelled by your artillery and ground forces as they approach your base. However, there are also a few T3 engineers and mobile shield generators backing them up. They’ll start building walls and defensive structures on the hills above your base if you leave them alone. If you have Doomrippers, then they can wade above the incoming units and blast the hell out of them, then take down the shield generators and engineers before they really build anything of value.
Lastly, and most seriously, an experimental Aeon unit will be approaching from the west, through the ocean. It’s invisible to radar, but is surrounded by a group of light tanks; look for a very slow-moving armada out in the ocean, or scout it out with your spy planes, and you’ll be able to see it coming. If you haven’t prepared for it, then it will almost certainly end your game and force you to restart. The Sacred Assault Bot is basically indestructible if you rely on normal units, as it has 240,000 hit points and will shrug off most of the attacks from your base defenses. Even Doomrippers won’t do much damage to it, and your artillery will fire too slowly to prevent its assault. The only feasible way to take it out before it rips your base apart will be to use your strategic bombers. We had built around 20 of them by the time it attacked, and they were able to destroy it with a couple of attack runs. Luckily it’s only accompanied by a few ground units, and can’t attack air structures. Destroy it before it destroys you!
Upload the Virus to Black Sun
At this point, you should be able to defend yourself against the minor predations that come your way. Your goal now is to escort your commander south towards the Black Sun control tower and have him upload the virus there.
If you scout the control tower, however, you’ll see that it’s tightly defended, with multiple shield generators and a pair of mobile factories that continually pop out units. The factories are your primary obstacle here. They’re shielded too, though, and they’ll fire artillery at any ground units that approach, quickly taking out even spiderbots.
Anyway, take your time here and build some super expensive units to deal with the lower base. First off, queue up a few battleships and park them off the southwestern coast of your base; they’ll fire onto the units that approach from the south as they walk up the peninsula. If you built artillery around your base, they’ll do the same; some Trebuchets may be helpful to further eliminate the units that actually get close to your base, but if you built Doomrippers, they’ll be more than capable of eliminating them before they arrive. Speaking of experimental units, a Scathis experimental mobile artillery will be useful here. This beast sucks up 30,000 power each time it fires, so you’ll need to have a lot of power generators to get a constant stream of fire from it, but if you load it up with enough juice, it can fire artillery shells extremely quickly and extremely far. It can sometimes have AI problems where it insists on wandering down the peninsula towards the enemy base, so if you notice it straying from its designated spot, feel free to queue up a bunch of small movements to keep it in one place. It won’t fire while doing so, though.
Secondly, with the mass afforded you by mass fabricators and the mass extractors around your base, you can begin constructing one or two Disruptor heavy artillery pieces. When you first attempt to place them, you might not be impressed by their firing radius, which appears to be only slightly bigger than that of a T2 artillery piece. Fret not, though, as that’s actually the radius in which they can’t fire. Their exterior firing radius will be large enough to actually enclose most of the Aeon island to your west, and they’ll be able to cover all of the UEF control tower base to the south. They’re not very accurate, but they fire rapidly, so if you build two of them and tell them to fire on the mobile factories to your south, they will eventually drop the shields and blow them to bits.
Your artillery units will probably be able to destroy most of the southern base. The control tower is indestructible, so don’t worry overmuch about that. If you don’t want to use artillery on the mobile factories, you can use either three or four Doomrippers to knock them out, or send battleships to their western shore to fire on at least the westernmost one.
When you clear out most of the enemies around the UEF base, transport or walk most of your ground units down there and make another small base to the north of the walls that they’ve constructed, making sure to cluster the buildings close together and ring them with SAM installations. You may want another Omni-Sensor here; if you build one, you can shut down, reclaim, or self-destruct the one in your northern base. More enemy units will periodically walk up from the southern border of the screen, usually in large groups of siege bots and T3 mobile artillery, so you’ll want to have units around to deal with them. If you build a couple of spiderbots and back them up with Doomrippers, they should be able to take out anything that comes your way.
Before capturing the control tower, be sure that you have four or five T3 engineers ready to build in the middle of your bases.
Capture Black Sun
After the control tower is in your possession, the map will expand again, and you’ll be facing off against another UEF base to the south, ringing the main Black Sun structure, which you have to capture with your ACU. You get the ability to build strategic missile launchers, as well as strategic missile defenses, and you should go ahead and build the latter right away and start constructing missiles in them. The enemy will quickly launch four or five nukes, but they’ll all be headed to the Aeon island, which will quickly get wiped out, making this a mano-a-mano fight. (Interestingly, if you managed to take out the Aeon commander, it won’t fire these missiles, and probably won’t fire at you, either.)
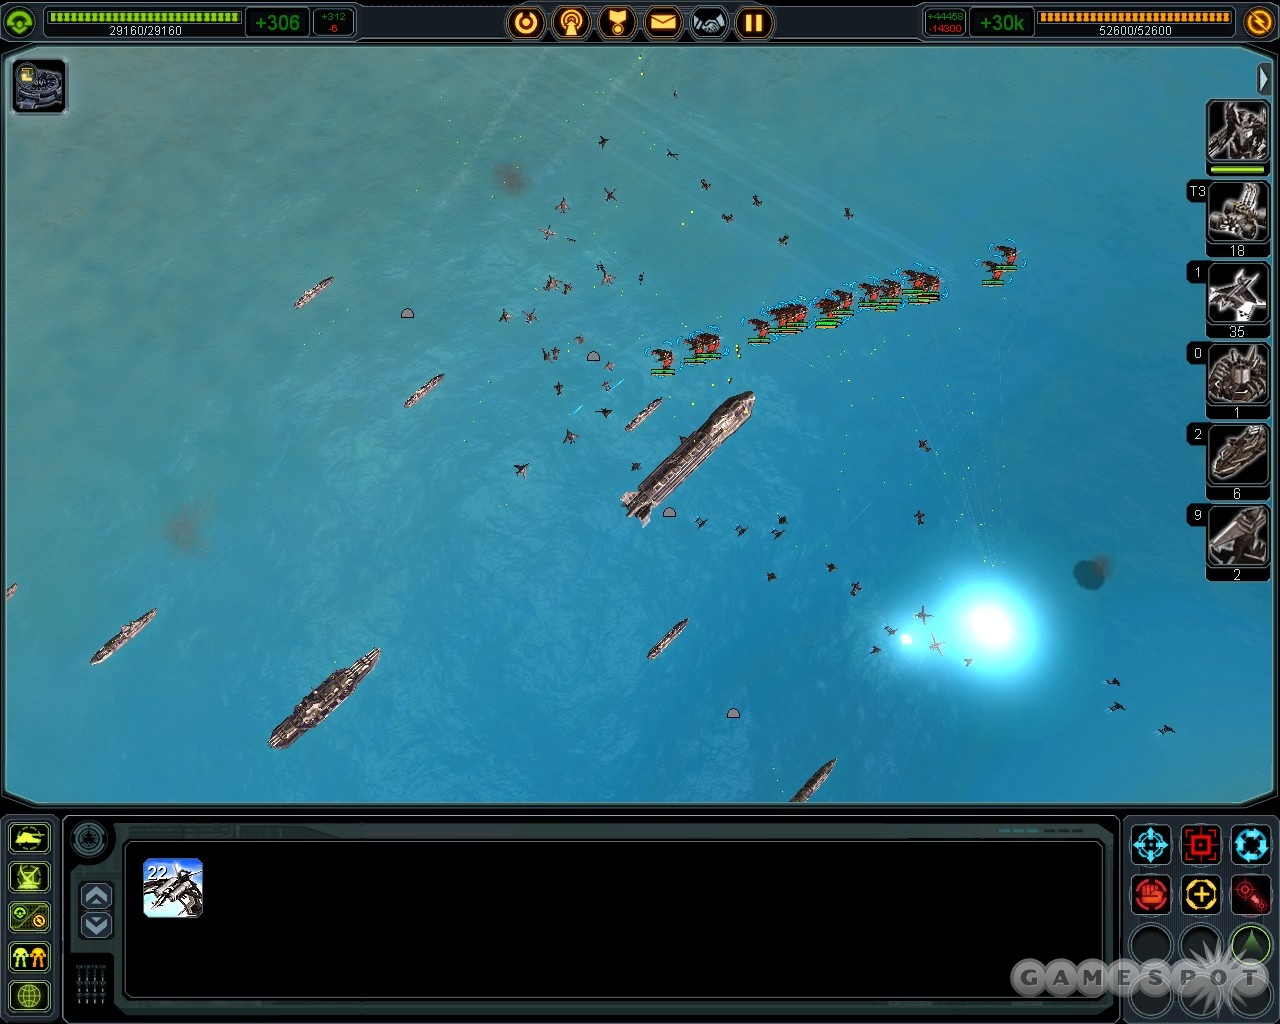
The first aggressive action that the UEF takes against you involves a large naval force that will creep up the eastern side of the base. This fleet includes an experimental submersible aircraft carrier, which will disgorge a huge number of planes when it reaches your coast. It’ll stay submerged until one of your units comes close, and only then rise to the surface and start spitting out its planes. Regardless of whether or not you can destroy the carrier itself, it’ll be best to track the progress of the fleet around it and fly over with a scout plane while it’s still well south of your base; this will cause it to spit out the planes, which will then mill about over the ocean. If you have strategic bombers left over from dealing with the Colossus, feel free to use them when it raises to the ocean surface and destroy it. Otherwise, it’ll submerge, forcing you to take it down with subs, destroyers, torpedo planes, and torpedo launchers, which will take some time. If it disgorges all of its planes, though, it won’t be a very big threat to your base, except maybe your naval factories.
Anyway, that will be the primary attack that the UEF throws your way. They’ll occasionally send planes and T3 combat units north from their base, so be on the watch for them.
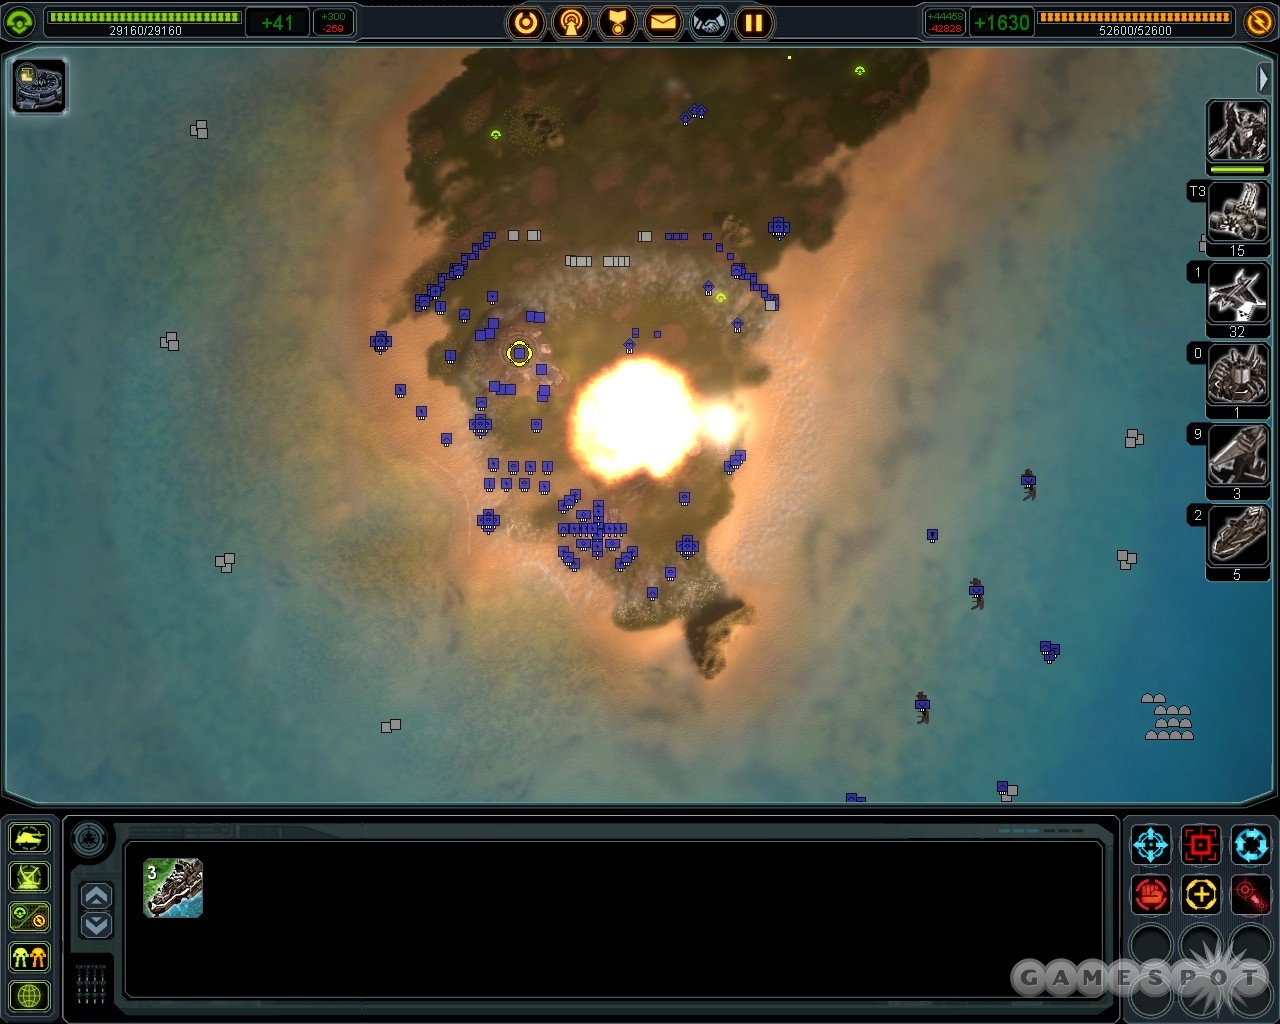
The easiest way to get your commander to the Black Sun facility is to completely destroy everything around it first. This will take some time, but if you build three or four Disruptors, you can scout the base with a spy plane or two, then have your Disruptors start firing away at the T3 power generators that are scattered around, which will reduce the rate at which the base can build units and also hopefully cause the shield generators that are scattered around to fail periodically, as well as cause some nice chain reaction explosions. Even if the shields stay up, though, a group of three or four Disruptors will be able to begin demolishing the base on their own firepower. If you manage to spot Commander Aiko, you can focus fire on her and attempt to take her out, which will demolish a good chunk of the base. You can feel free to send in your battleships to the eastern side of the base to help out with the shelling, if you like.
When the base has been sufficiently destroyed, mop up any remaining units or structures with your spiderbots and Doomrippers, then send in your commander to capture the Black Sun (it’ll take a while) to finish the campaign.
The Aeon Illuminate
Again, this walkthrough is based on the Normal difficulty setting.
Mission One: Operation Joust
The usual deal here. Build mass extractors and power generators, etc. Since the other two campaigns started you out with ground and air units, you’re going to deal with naval units here. Nothing too complicated, if you can remember that the frigates have no air defense; you’ll need to construct light attack boats to protect them from ship attacks.
Defeat The Junior UEF Commander
After a bit of travails, the map will greatly expand, revealing a large swath of units to your north, east, and northeast. You’re going to have to help Rhiza defeat the commander in the northeast, and you’ll do so by defeating a junior commander nearby.

First stop is the island to your north. It’s surrounded by air units and has anti-air structures on the ground, so head up at first with your attack boats to take out the planes. When you do, some ships will head your way, so be sure that you have some subs to take them out. At that point, you can either have your frigates shell the island, or (preferably) send an engineer up to capture all of the structures there. Capturing the air factory will let you make a UEF engineer, which in turn will let you make a UEF naval factory, which will be able to produce better (if more expensive) naval units than the Aeon factories can.
Next up is the naval factory to your east. Sweep in with subs to clear out the ships and the naval factory, then kill the air units that come your way before bombing or shelling the island to oblivion.
Lastly, take down the commander and the anti-air units to the northeast. Go in heavy with frigates, after your subs take out the torpedo launchers and ships, and start shelling the AA towers. The commander will be pacing on the shore, allowing you to either shell him or, if he enters the water, torpedo him to death. When he and the anti-air towers are destroyed, the mission will end with a bang.
Mission Two: Operation Machine Purse
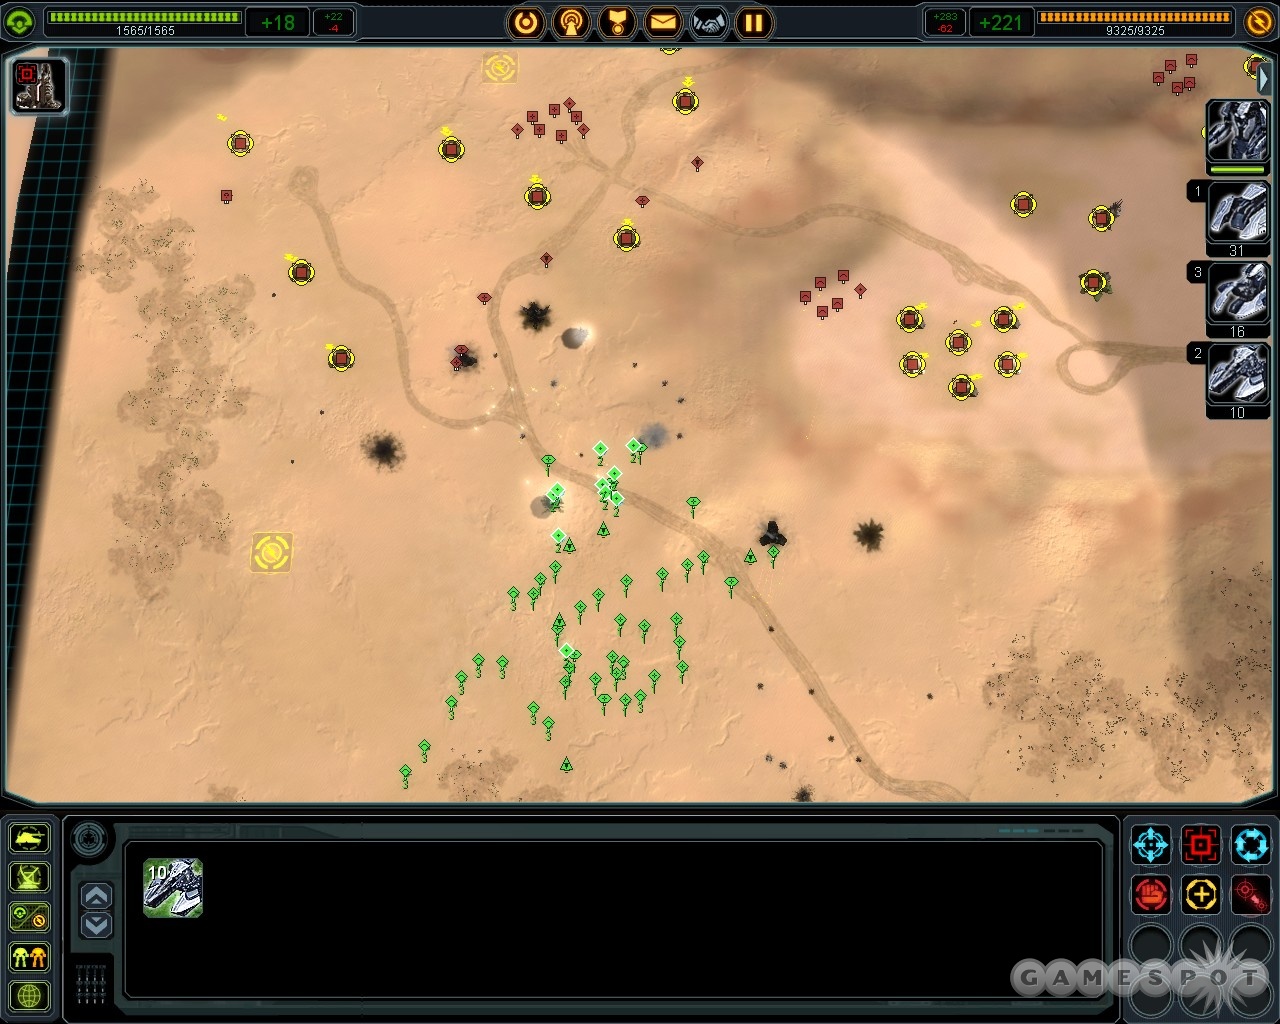
Begin by building up your base here. You won’t face many attacks for a good long while, but you may want to build a point defense to discourage scouts and an anti-air turret for the same purpose. When you have a nice set of buildings set up, go ahead and capture the enemy T2 mass extractor to the northeast of your position and begin building a small army. There will be a pushback at some point, so build up a defensive line with some point defenses and anti-air turrets to wait for it.
When it comes time to attack the enemy, head in with your light artillery leading the way; they’ll be able to hit buildings and units from a ways away. Since the enemy doesn’t have any radar, they won’t be able to return fire unless their own units get within line of sight of your own. Sweep through the facilities, destroying them as best you can, until the map expands. You may want to build a naval base in the small bay to the southeast of your base before you do so.
Destroy Cybran Bases
There are two Cybran bases on the map, one to your northeast and one to your east. Between them, on the larger island, is a human settlement, which you’re not to attack.
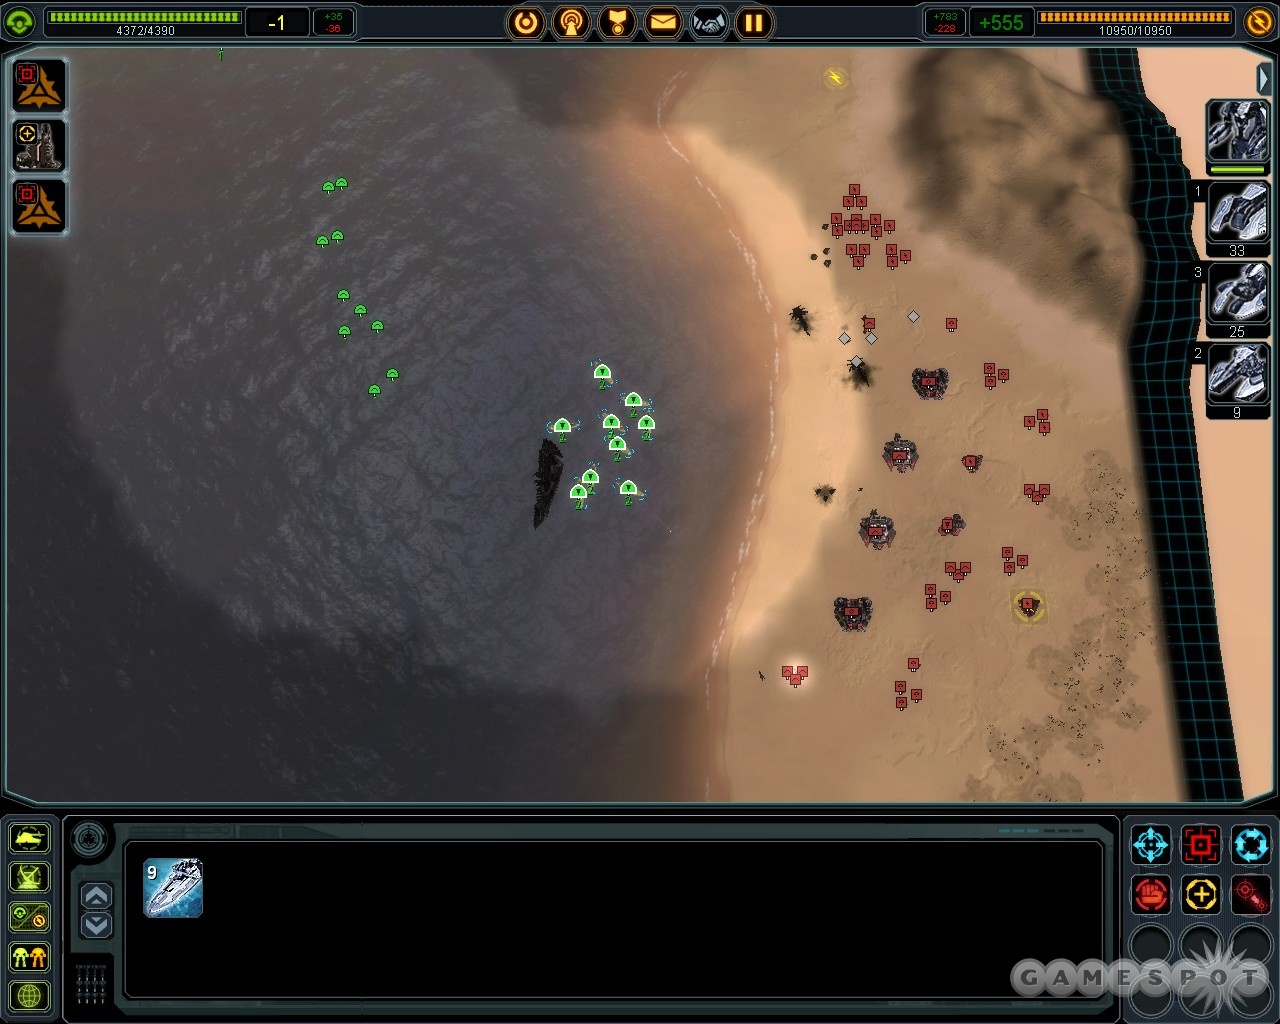
The first threat to you here is the naval base to your east. Your advisors recommend using torpedo planes, but those suckers are rarely worth the expense; it’s best to just have your naval base start cranking out tons of submarines while assisted by engineers and your commander. They’ll be able to stave off the attack from the east, when it comes, then strike out that direction and destroy the naval base there. Follow them up with gunboats and frigates, which can eliminate most of the buildings on the shores, including the factories. You’ll probably have to transport ground units to the island to finish the rest of the structures off.
When you have around 20 or 30 submarines, sweep them around to the north, taking out the torpedo launchers as you go, until you eliminate the northern naval factory and any submerged units around it. With that done, attack boats and frigates can finish off the base.
Destroy Cybran Commander
You gain the ability to build T2 Engineers now, from your air factories. They can build T2 point defenses, anti-air turrets, and mass extractors and power supplies. Start converting some of you T1 mass extractors to T2, just to get yourself up a few notches in mass.
If you have engineers or your commander up where the former northeastern Cybran base that you destroyed was located, they can build an air factory, upgrade it, and start making some T2 engineers. There are two bases to deal with here, with a small base to the east and the main base on an island to the west. The smaller, eastern base can be eliminated mostly with your naval units. Quickly take down the naval factories with your subs, and shoot down any planes with your attack boats. When the river crossing is clear, move some T2 engineers towards the artillery units and capture them, if you wish, to fire on the other nearby units; otherwise you can just destroy them with your ships. Repeat the process on the western base to destroy the commander; you might be able to lure him into the water and defeat him with your submarines.
Mission Three: Operation High Tide
Hope you enjoy naval battles here, because you will, again, find yourself on a fairly small island where you’ll have to reside for a goodly amount of time. Most of the buildings here are severely damaged, so you’ll need to task an engineer or two to go around and repair them. You only have a single T2 engineer at the outset, though, so task your T2 air factory to build five or so more, while the one you already control gets to work on a T2 power generator to shore up your construction abilities. You can turn off the T2 radar system in your base to earn a bit more energy to work with until it’s built, while the destroyed factories nearby can be reclaimed for a fair amount of mass.
Your first enemy here will be a wave of air units. Nothing major, just some scouts and bombers. Set one of the T2 engineers to build flak cannons all around your base. You will also want another unit to build mass extractors on the nearby mass points, as well as another engineer to build a wall enclosing perhaps half of the island for your little base; that’ll make it more difficult for the enemy ground units that will eventually head your way to reach you. Point defenses should also be built by some of the engineers, as they’ll be the best way to defend against the dropships.
You should have around ten to 12 each of the T2 point defenses and anti-air units scattered around your base. Keep in mind that you don’t need to defend the entire island; you can concentrate all of your defenses in the southeastern corner, scattered around your factories, if you want to focus on a smaller area. The enemies will bomb and destroy any northern mass extractors you have, but you shouldn’t need an insanely large number of them if you’re just building defenses. Needless to say, don’t worry about your naval units at this point.
The first wave is an easy air unit attack; repel it and make sure that you have point defenses scattered around the island. The second wave is going to be a much tougher transport unit wave, where transport ships will drop numerous units on the island in an attempt to roust you that way. Your anti-air units will shoot a good number of the transports down, and even if you haven’t built any ground units, the point defenses should be able to deal with them as they attempt to crawl around your walls.
Lastly, a naval attack will see you surrounded by frigates and destroyers. If you task each of your factories to build 20 or so subs, and have engineers assist them, you should have more than enough subs to deal with the threats. Unfortunately for you, this wave of naval units will be followed by a combined wave of naval, air, and ground units. You’ll lose some buildings here, but should be able to withstand the assault with enough defensive units.
Defeat Enemy Commander
The map expands now, and you’ll be able to build gunships at your air bases, and destroyers at your naval factories. Immediately start on four or five destroyers, pairing the factory up with five T2 engineers or so. You’ll need them to attack the southeastern island, where the enemy commander is located. The destroyers you build can deal with anything they encounter, including killing the T2 torpedo launchers from a distance, and they can even deal with enemy subs. You may want to scout the island with a scout plane before heading that way, though. If Arnold, the enemy commander, goes underwater, move your subs in to torpedo him until he disappears.
Next up is the aerial base to the southwest. Move attack ships into position under the flight paths of the circling bombers, then move in your destroyers to shell the island. The destroyers alone should be good enough to attack and destroy most of the northern island, as well.
Defeat Main Enemy Base
At this point, the map expands to the west. Nothing surprising here: an enemy base! It is, however, well-defended by enemy cruisers and destroyers. Queue up a large number of scout planes to fly over the area to give you line of sight on the enemy ships, and move in a large number of destroyers to take them out, protecting them from aerial assault with cruisers. When the naval forces are mostly destroyed, your destroyers will be able to sweep through the defenses and crush most of them. When you defeat all of the naval bases (send in your remaining subs to take down any new subs that they’ve launched), start taking out the structures near the coast of the enemy base. If you see Commander Arnold, take him down to end the mission.
Mission Four: Operation Entity
Pacify Nexus04
Begin building your base again here. (Sigh.) You’ve got a really, really long time before anyone comes knocking on your door, so don’t worry about building T1 units, except maybe an engineer or two; just get yourself to a T2 land factory and start building up engineers. All of the nearby mass points should be built up with T2 mass extractors. Be sure to get a couple of T2 power generators down, as well.
Although the enemy will mostly leave you alone for a good long while, they’ll eventually start harrassing you with aerial units, as well as some landing craft. Build up anti-air and point defenses around your base, and have interceptors patrol towards the northwest, near the node, which is where all the aerial units will be approaching from.
When you have a land factory that can pump out missile launchers, build ten or fifteen of them and have them head towards Nexus04 to the northeast. It’s ringed with point defenses and anti-air turrets; nothing you can’t handle. Be sure to hit the T2 radar system in the middle of the base, to prevent the artillery to your north from being able to spot you. (Scout the area first to reveal some battleships and the artillery so you know what you’re up against.) If you move from the southwest of the city to the southeast, then wrap north and to the west, you should be able to complete your objective relatively easily, although you will lose some units to the northern artillery. You can mop up with gunships, if you like.
The battleships here won’t move, and are difficult to take out since they’re on land. Build a tactical missile launcher that can hit them, then blow them away with a couple of hits each. You can repeat the process for the southernmost artillery unit, but beyond that, and you’ll generally be hit by the artillery before you can build the missile launcher and fire it on the artillery.
Destroy The Naval Base
The naval factories to your west will be problematic for you, as they’ll continually spit out cruisers and destroyers to thwart your progress. If you can build a naval factory in the small bay near your base, you should have as many engineers as you can spare start cranking out destroyers and cruisers at a 3:1 ratio. When you’re ready to head out (have at least nine or ten destroyers available), swarm to the west, killing any ships coming your way, then take out the naval factories there. You can shell the buildings to the south, if you like, or just try and get an engineer to head in and convert them. This is an optional objective, and you can leave the naval base alone if you like, but it’ll be much simpler to just take the whole operation out.
Capture The Node
The node to the northwest of your base is your objective now. It’s ringed with T2 artillery units, which will damage your ships as they approach, but if you have ten or 12 destroyers, you should be able to take them all down without losing more than a couple of them. When you deal with the artillery, as well as the tactical missile launchers, you can destroy all of the land factories and power generators, etc. If you wish, you can attempt to leave one of the air factories here intact, allowing your engineers to capture it.
Before you capture the node, check to ensure that there aren’t any more enemy structures around, and build as many mass extractors on empty nodes as you think you’ll need. The map is about to expand to the north, so you may want to build some more factories near the three artillery emplacements in the northeastern corner of the map and bring up your existing armies to that landmass. You have plenty of time to build up here, since there are no enemies on the map.
Capture and Defend Mainframe
The Cybran mainframe lies to your north. It and its defenses have been hacked into a neutral position by your engineers, meaning that none of the automated defenses will attack you when you get close. If you want to nab it right away, you can scout it out with a scout plane or ten, then send a transport ship laden with engineers to its northwestern corner, drop them off, then send them in to capture the building.
It’s far easier, however, to ignore the mainframe for the moment, and instead focus on capturing the two other nodes that have appeared on the map. You can’t see them initially, but one is located to the west of the mainframe, across the river, and another is located across the river to the southeast. Scout both of the positions out with scout planes, then deliver five or six engineers to both locations. Capture the nodes, start building anti-air defenses (you’ll want around 15 at each node), and retask interceptors to defend the nodes themselves. (Air staging platforms near the nodes will help them stay in position, and you might want to just go ahead and build an air factory nearby to replenish the supplies.)
When you do capture the mainframe, you’ll have to run a multi-pronged defensive strategy. Since you should have a few engineers under the shields at the mainframe, have them repair any damaged defenses in the structure while the artillery pieces here go to work on the tactical missile launcher nearby, then the base to the east. If you wish, you can move your destroyers up and around near the base to begin taking out the structures. Your nodes will also come under attack, so hopefully each of them is defended by around 10 T2 flak structures, as well as the remainder of your interceptors. No attacks will be coming to your main base until much later, so don’t worry about defending that overmuch.
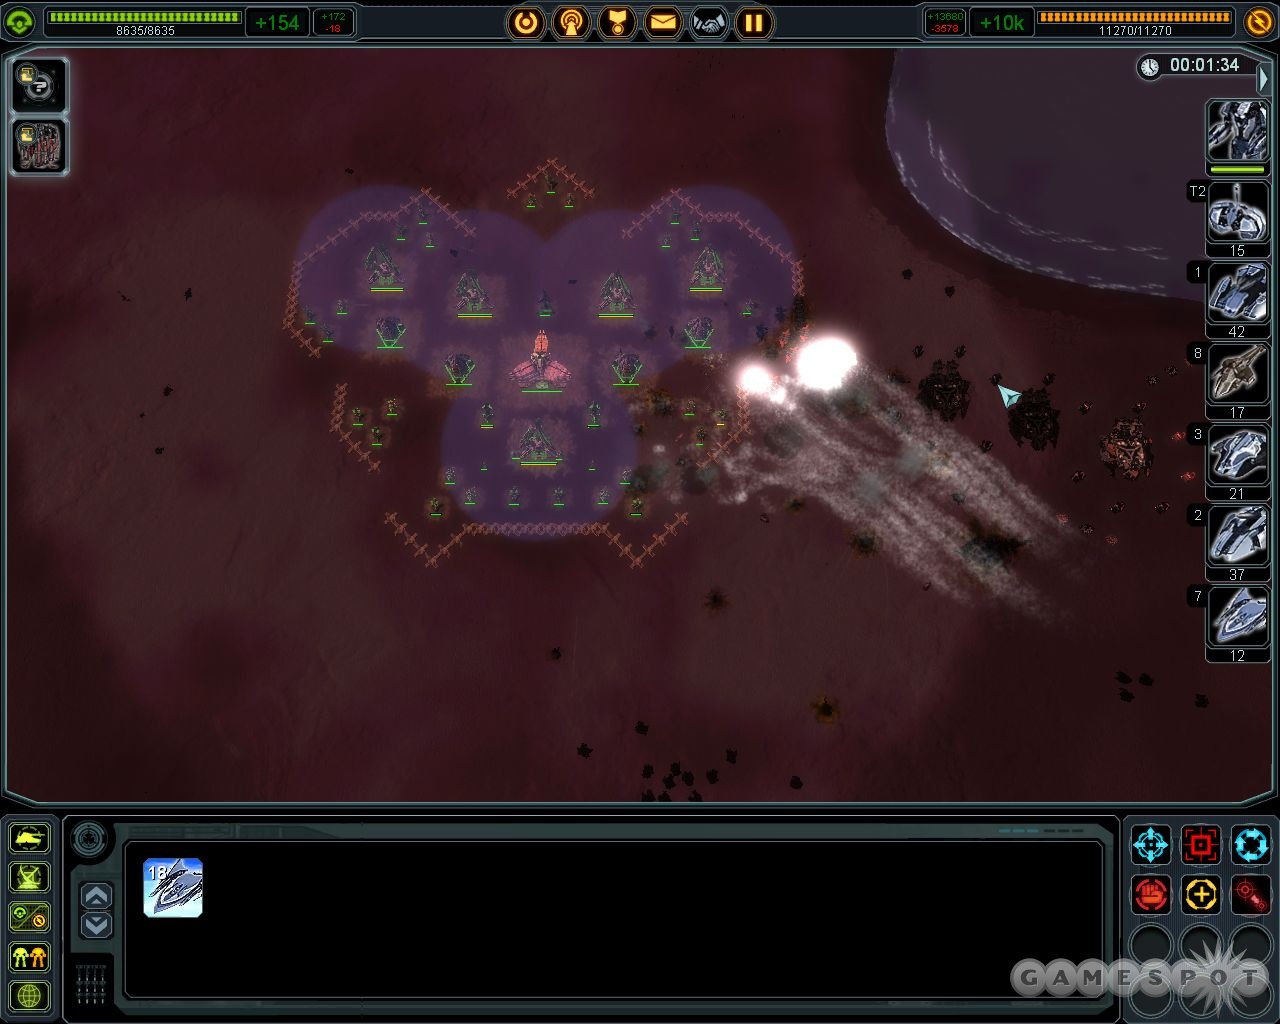
It’s the nodes that you have to worry about defending, especially the nodes in the east and northwest parts of the map. They’ll be getting hit predominantly by gunships and bombers, so you want to have each of them guarded by perhaps 15 T2 flak cannons total. You might also want to have air factories continually pumping out interceptors to defend them, as you’ll go through plenty of the fragile little planes as the bases are attacked. You can survive the mission if a node is destroyed, however, but it’s definitely possible to keep all of them alive. The node you captured earlier in the mission will only come under light attack from gunships, so you don’t have to worry too much about defending it, so long as you have flak cannons around it.
The eastern node will eventually come under attack from a number of ships; they’ll split off into two groups, with one group heading towards the mainframe and the other heading towards the node. The group that heads towards the mainframe will be tough to take down if you’re not already blockading the small passage leading that way, so be sure to park your ships up in that area and be ready to take the T2 sea units on.
After around 10 or fifteen minutes of defending the nodes and mainframe, the mission will suddenly end.
Mission Five: Operation Shining Star
An awkward mission here, as you’ll be told to fight against another Aeon commander that has sided with Marxon instead of the Princess. Hooray for more defending! Defending stuff, instead of attacking stuff, is the funnest thing. The previous statement was a lie.
Anyway, you have to defend two small groups of civilian buildings from attack here. If too many of the buildings are destroyed, you lose. Luckily for you, none of the early attacks here will be targeted at your main base; all of them will be heading towards the small colonies. That will allow you to focus your defenses there.
Begin by moving two engineers to each of the colonies in the transport ships, and tasking them to each build five or six T3 SAM installations around it. You’re going to be building a heavy shield generator in each of the colonies, so try to ensure that the SAMs are going to be within the radius of it. At the same time, have one of your factories start cranking out a few more engineers. A couple of these should begin building extractors on the mass points around the base, while another should begin constructing mass storage units around the four mass extractors inside the walls of your base. Mass is going to be in short supply here. Subcommander Rhiza should go ahead and start making two T3 mass fabricators, which can border the T3 power generators in the northeastern and northwestern corner of the base. Don’t forget to build mass storage units around them to boost their output.
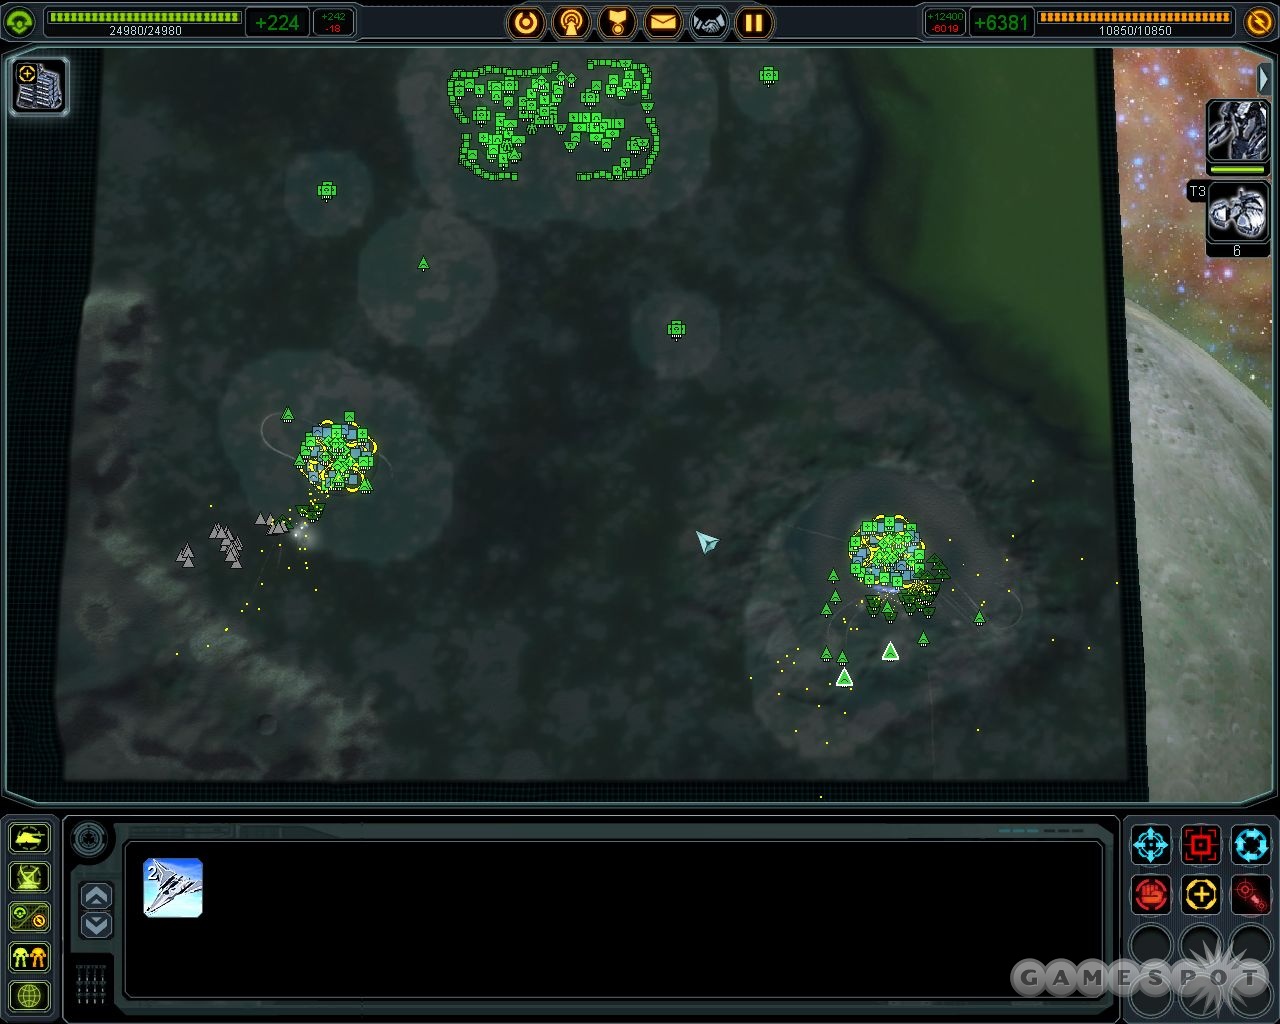
The key thing to realize here is that Ariel’s attacks don’t begin in force until you build the shield generators. They will be triggered eventually just on time elapsing (around 15 minutes of realtime), but if you build the shield generators as quickly as possible, the enemy bombers will start coming in before you’re ready. Before you build the shield generators, then, be sure to ring the colonies with around 10 SAM installations and a few point defenses, to boot. (You can check the radius of the shield generators by pretending to build one.) A few planes will fly overhead now and then, especially near the eastern colony, so be sure to have one of your engineers repair any of the civilian buildings that they damage. You might also want to begin upgrading your commander with increased building speed and resource generation mods. Lastly, your three air factories should begin constructing air superiority fighters, which should patrol various paths around the two colonies.
Anyway, Ariel will eventually yell "You should be fighting with me, not against me!" That’s your cue to have your engineers in the colonies begin building the shield generators. (You should be saving your game every few minutes to ensure that you don’t have to start over if she attacks when you don’t have the shields up, anyway.) When they’re done, Ariel will come in with a fleet of bombers, fighters, and gunships. If you have enough SAM installations, you’ll be able to defeat them. Quickly check the civilian buildings for damage and repair them. Your engineers seem to go into patrol mode when they’re told to repair a civilian building, and will helpfully begin repairing any other building in the immediate area.
Strategic Missile Defense
After repelling Ariel’s initial attack, she’ll begin constructing a nuke, or so you’re told. You’ll need to build strategic missile defenses in each of the colonies to protect them. These are obviously going to be what drains your mass more than anything else that you need to build, as each one will drain you of 35 mass per engineer as they’re being built. If you run out of mass, you may want to fly an engineer or two up to the destroyed colony to the northwest of your base and have them begin reclaiming. If you’ve built a large number of mass storage devices, though, and especially if you managed to build a couple of mass fabricators, you should hopefully be able to keep up a continual stream of construction juice, even if you dip into a negative flow of mass.
At this point, Ariel will continue to lay down a bit of pressure on your colonies, so keep repairing and defending them as best you can. If your defenses are intact, though, you should begin building up your main base a bit, with some T3 shield generators on its western side to cover up the factories there. Be sure to nest them well, so that if one drops, another one will be overlapping its coverage area so that nothing gets destroyed if one goes down.
Defeat Enemy Artillery Installations
After Ariel launches her nuke, the map will expand and you’ll be facing off against three T3 heavy artillery pieces, constructed by the UEF. One is located to the northwest, one to the southwest, and one to the southeast. The northwestern one is the only one that’s online at the moment, but the other two will soon be completed.
Your colonies no longer need to be defended, so move any engineers there back to the main base and start constructing more T3 shield generators, if needed, and upgrading your land factories to T3. You’re going to need around ten or fifteen of the T3 mobile artillery units to take down the artillery units, and having a goodly number of siege bots couldn’t hurt, either. Don’t forget to queue up around ten T2 air transport units, as well, to shuttle around your ground forces. You can also have your air factories build up strategic bombers, if you like, but those will only be a stopgap measure unless you can build a dozen of them, and that’s unlikely given the time constraints.
What you need to do is field a dozen or so T3 mobile artillery units, move them towards the northwestern artillery base (scout for it if need be), then get the artillery in place to fire on the Duke. There are some enemy siege bots here, so be sure to bring siege bots of your own for defense. The mobile artillery units can knock down the shields and kill the duke without too many problems, if you bring enough of them. If you don’t, the shield will regenerate before they can fire again. (You may want to use your siege bots and rush them towards the shield generator if this happens.) You can’t register the artillery as being destroyed until you destroy it and the engineers in the area; otherwise, the engineers will simply rebuild it when it’s taken out. The other structures are unimportant.
The southwestern artillery is mainly defended by ground defenses, although there are a few mobile flak vehicles in the area. Still, if you have six or seven strategic bombers, they should be able to knock out the Duke and force it to be rebuilt, giving you plenty of time to shuttle over your mobile artillery to knock it out for good. Note that the base is on a small ledge; you’ll need to drop your units on the top of the hill to get them into position to attack.
The same strategy applies for attacking the southeastern base. Land your units off to the east and shell it from afar. Note that there might be a pair of engineers off to the west of this base. If you can destroy the artillery and any defenses, you may be able to capture one of the engineers with an engineer of your own, which in turn will let you construct a UEF air factory, which can construct T3 heavy gunships.
Defeat Commander Blake
Commander Blake is off to the west of your base. His fortress is surrounded by some very heavy defenses, so scout it thoroughly before approaching. The artillery units on the ridge to the east of his base should be your first concern. There are five groups, with two artillery units each, backed up by a pair of T2 anti-air forces. If you want to enact a scorched-earth policy, build up around 30 T2 gunships (or some T3 heavy gunships if you managed to capture a UEF engineer), and sweep around through the artillery units to destroy them. Take out the anti-air first, of course.
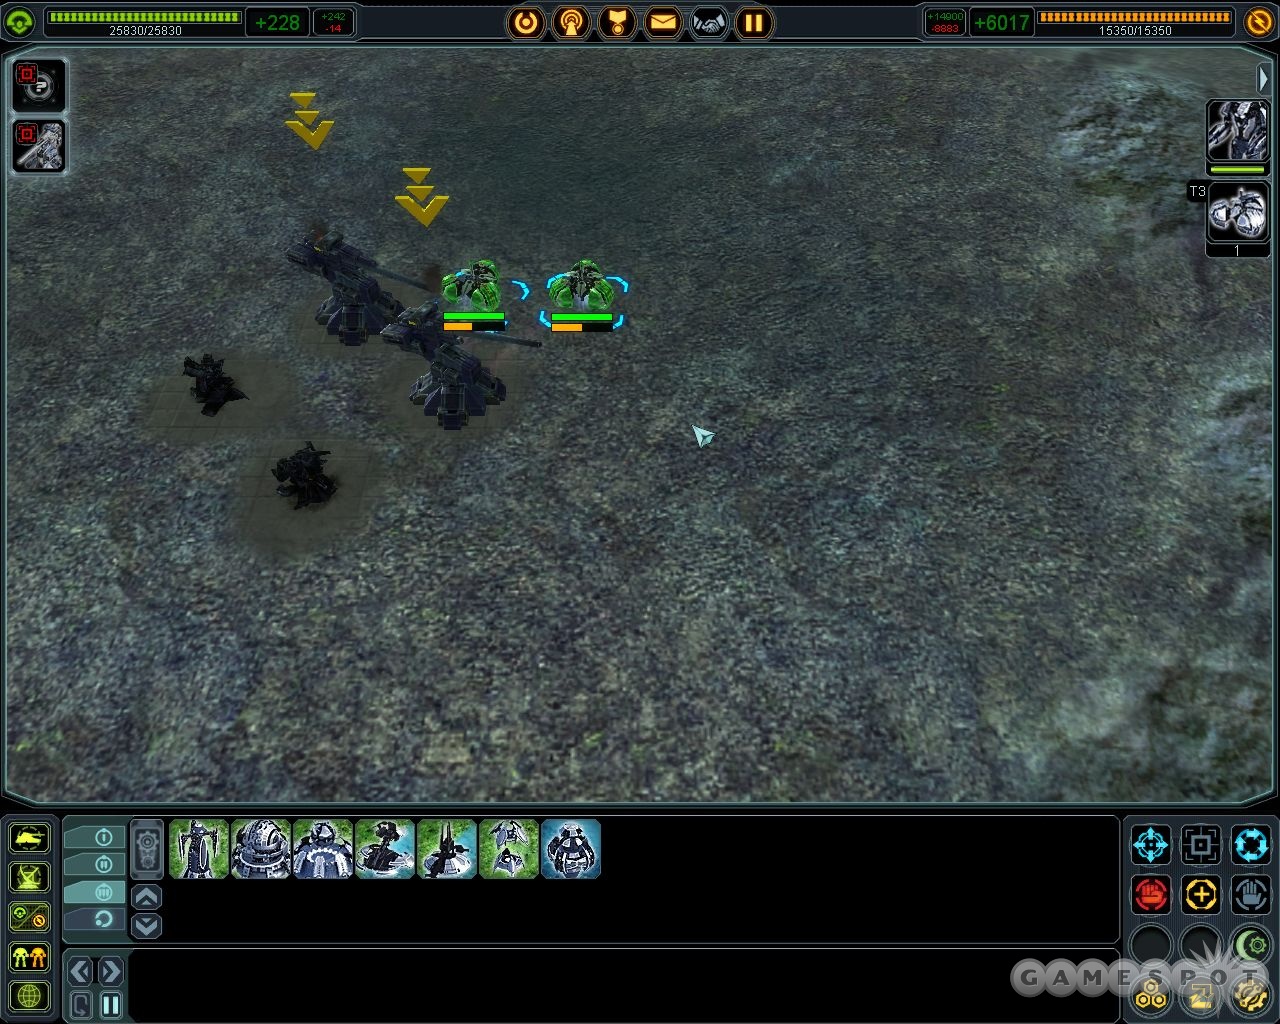
If you like, you can attempt to land engineers on the plateau and capture some of the artillery, but this won’t do you much good unless you capture the northwestern set of artillery pieces, which can actually hit some of Blake’s base. It’s probably easier to just clear all of the artillery out, then fly up some engineers to make a small base consisting of a shield generator and a radar to keep tabs on the mobile enemies in the area.
To destroy the base proper, ferry over a number of heavy mobile artillery units, siege bots, and mobile flak units. Land them to the south of the base and start moving up with your artillery, smashing as you go. If you smash into the southern side of the base and start taking out the power generators and other structures there, Blake will eventually come down and start rebuilding, allowing you to pelt him with your artillery units and eventually destroy him. You’ll want to sweep through the rest of the base to clear it out, though, as leaving it around and active will potentially make for some thorns in your side later on. If you wish, just send in your siege bots to clear out the rest of the units and factories; there aren’t any point defenses, so they’ll be a lot quicker at it than your mobile artillery.
Defeat Ariel
When Blake goes down, nukes will be added to your arsenal, and Ariel’s base will appear to your southwest. She’ll have built a Colossus by the time you uncover her, and will shortly begin sending it towards your base. Have a few spyplanes patrol along the river to the south of your base, and eventually it’ll come into view. Since it can’t attack aerial units, strategic bombers are the best way to take it out. Even a single bomber will do the trick, given enough time, since the dang thing is so damn slow.
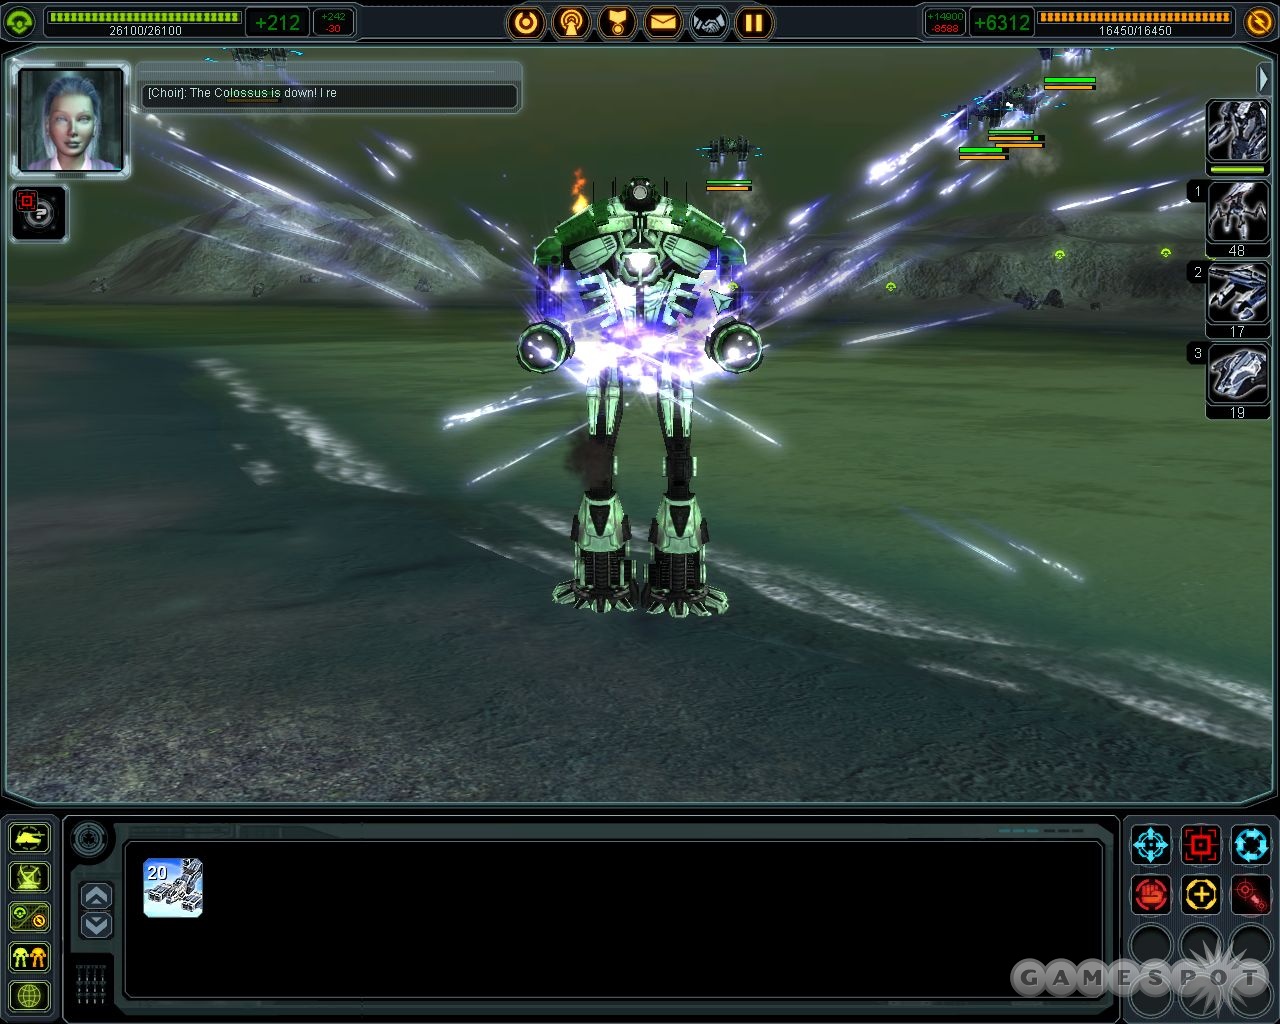
All that’s left now is Ariel. Outside of the occasional spurt of planes, she won’t attack you very often, giving you plenty of time to deal with her. The easiest way to take her down is to build your strategic missile launcher, while at the same time building up a fleet of 15 or so strategic bombers (but the more the merrier; 20 might be a more reasonable number), or heavy gunships if you managed to capture a UEF unit. With these units, you can attempt to sweep into Ariel’s base from the north (where it’s least protected by anti-air units) and take out her strategic missile defense. Needless to say, be sure to scout the base thoroughly before trying this out; you need to know precisely where the missile defense is before sending your planes in. (It’s icon is three small dots stacked vertically.)
Otherwise, if you want to do thing the hard way, you’ll have to clear out the southwestern corner of the map and ferry down ground units to the plateau the base is on, and attack from there. When Ariel dies, the mission ends.
Mission Six: Operation Beginnings
Time for the final surge towards Black Sun. You begin here with the barest beginnings of a base. Immediately crank out five or ten T3 engineers and set them to work. You’ll want to have a few build more mass extractors on the island, a couple build mass storage points around those extractors, a couple to build perhaps one T3 mass fabricator, ringed with mass storage, and at least two or three more to ring the island with SAM installations. Your naval factory should begin cranking out submarines; if you have some engineers to spare, feel free to have them assist it. Another T3 power generator will be a good idea when you have the resources to spare.
Most of the early attacks will come in the form of light aerial skirmishes, which the existing anti-air defenses will deal with until your SAMs are in place. You can build more air superiority fighters to ring your base, as well. Soon after that, though, ships will begin coming your way. Most of these will be frigates, but one or two each wave will be cruisers or destroyers. A fleet of 20 or 30 subs will be able to deal with these as they arrive, especially if you repair your torpedo launchers as they get damaged, but you’ll want to crank out a few battleships for some extra defense when possible. Later on, some T3 air units will begin attacking in small waves, but you’ll be able to take them down with your SAM launchers.
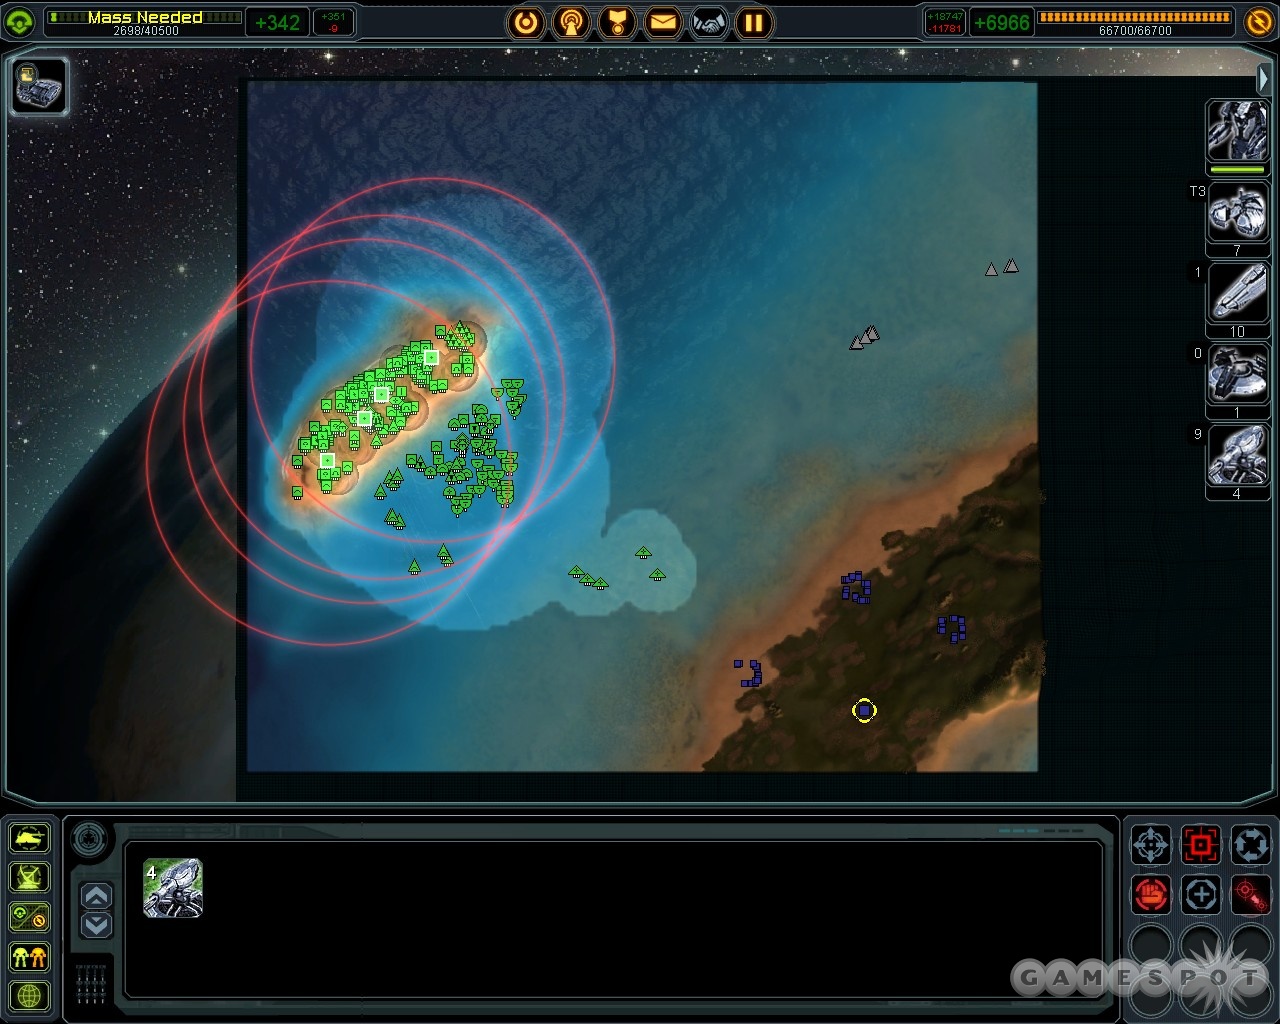
You have as much time as you like to capture the control tower here, so don’t worry overmuch about building an army or anything. Fortify your defenses with shield generators, upgrade your ACU, and build a nuke launcher, as well as a T3 heavy artillery or two. (Or three or four if you don’t mind taking some time to build them; we personally built five of them and found that they made the mission much easier than it would’ve been otherwise.) They’re big, they’re expensive, and they’re slow, but they can fire for miles and miles, which will be useful when the map expands. You may also want a strategic missile defense that covers most of your factories, although we never had the enemy fire a nuke at us. Another air factory and another naval factory would also be a good idea; try to have a fleet of around 10 battleships guarding the southern side of your island before moving on.
Capture the Black Sun Control Center
As you were required to do in the Cybran campaign, your goal after building up your base is to capture the Black Sun control center in the southeastern corner of the map. If you manage to build a few heavy artillery pieces, they’ll probably do most of the hard work themselves in terms of disabling the defenses of the small base surrounding the control center. If you need to, feel free to launch a nuke at the base; the control center is currently indestructible.
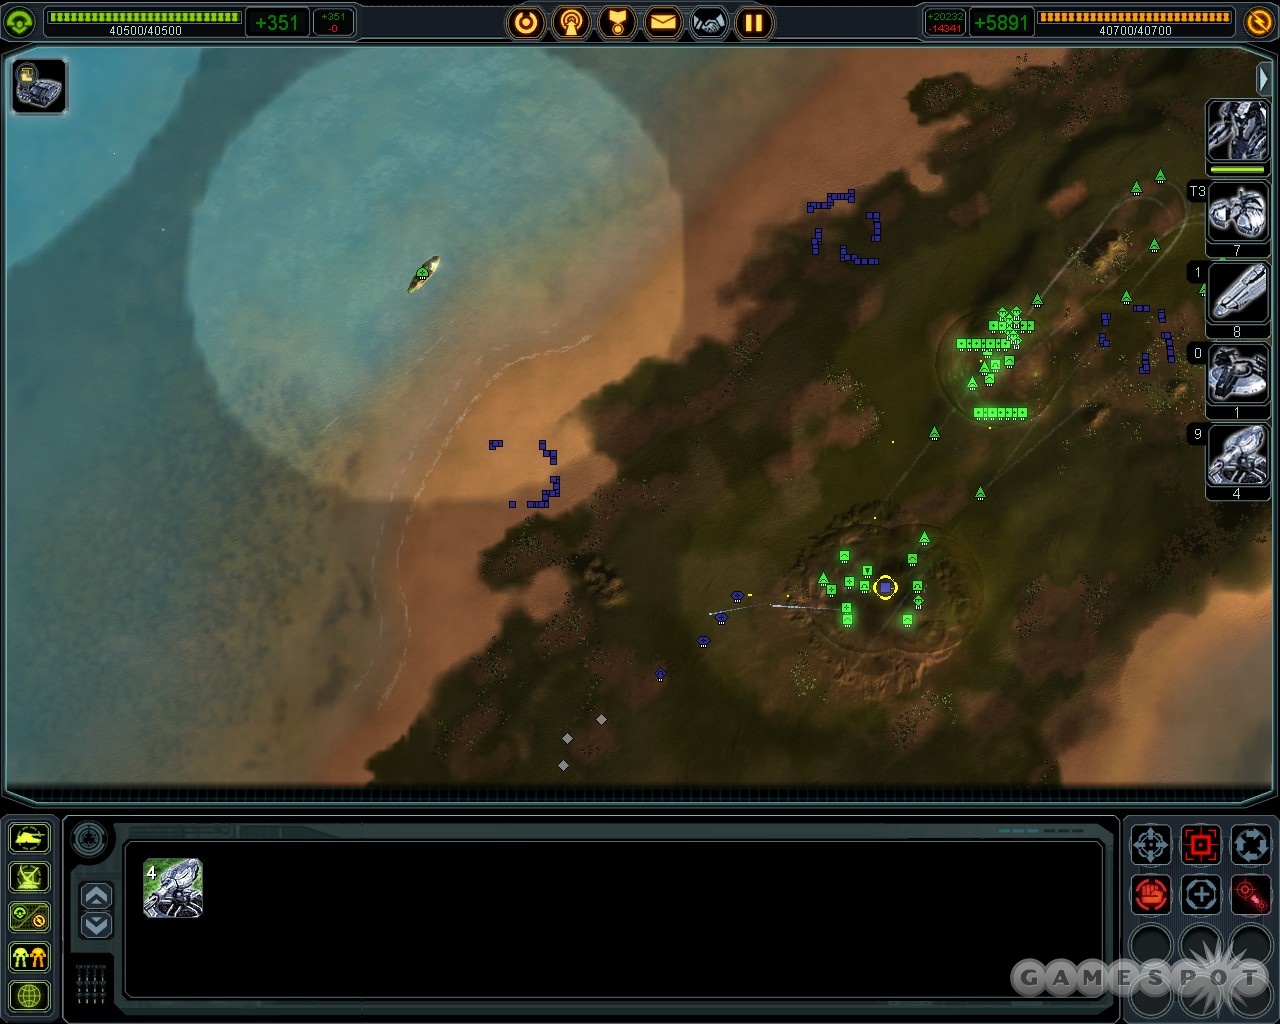
You have to capture the control tower, but be forewarned that you’ll subsequently have to defend it against a Cybran attack. Go in heavy with transports, landing five or six engineers at a minumum, and guard them with a number of siege bots. Before capturing the control tower, the engineers should immediately get to work building SAM installations (at least five), overlapping heavy shield generators to protect them, and perhaps point defenses or T2 artillery pieces as a line of defense in case the siege bots get overrun. An air repair station would be nice; you can move the air superiority fighters from your main island to patrol around here. Lastly, be sure to build an Omni Sensor under one of the shield generators.
Just keep in mind that the assault from the Cybran base that comes after you capture the control center will be quite heavy. We managed to defeat it by building around 20 T2 artillery pieces to the north of the control center, protected by heavy shield generators, but you can take it on in a number of ways, including a fleet of strategic bombers or parking a few battleships off the coast to the north of the tower. The assault will include at least two spiderbots, so be ready to take them down from long range; their lasers will make mincemeat out of any smaller units that get in their way. You can try to land a nuke in their path, but timing it right will be difficult. At any rate, since the assault doesn’t get underway until you capture the tower, you can take your time building up whatever kind of defense you wish.
Protect the Control Center / Defeat Cybran Commander
When the map expands, the Cybran base will appear to the northeast. Fly a spy plane or two over it to reveal the units that it holds, including the small army that’s about to head your way, as well the enemy commander. You gain the ability to build the Cybran special units now, so if you have excess materials, feel free to tell your home base to start building a saucer or a submersible battleship. If you want to build a Colossus, you can do so, but you should build it on the main land to prevent it from having to walk all the way across the ocean.
Now, at this point, you hopefully built up your defenses to the point where you can deal with the army, which will allow you to retask your heavy artillery pieces on the Cybran base. Now, it’s probably going to be wise to take down the incoming Cybran army before taking out their commander, for reasons that will become clear shortly, but that’s no reason not to start dismantling their base. Their strategic missile defense should get hit first, followed by their naval factory, followed by whatever else you like. When their assault is blunted or defeated, tell your heavy artillery units to bust a cap in the commander. With five artillery units blasting away at him, he should go down in a few minutes. If that doesn’t work, then concentrate on the strategic missile defense until it’s destroyed, then nuke the hell out of the base. If you really want to, you can attempt to build a ground army and storm the base; this will be easiest to accomplish if you build one or two Colossi and let them lead the way.
Defeat Marxon
When the Cybran commander goes down, Marxon’s base will appear to the south. Almost immediately, he’ll launch a huge naval attack at your main island. Although it looks intimidating, it will contain only two battleships, with most of the fleet consisting of T1 and T2 ships. If you have a goodly number of submarines left, send them down to whittle away the first groups of the fleet, while your battleships remain in reserve to pound away at any survivors. Have your naval factory construct submarines as best they can to finish off the fleet. You can even try lining up a nuke in its path, but again, that can be difficult to do.
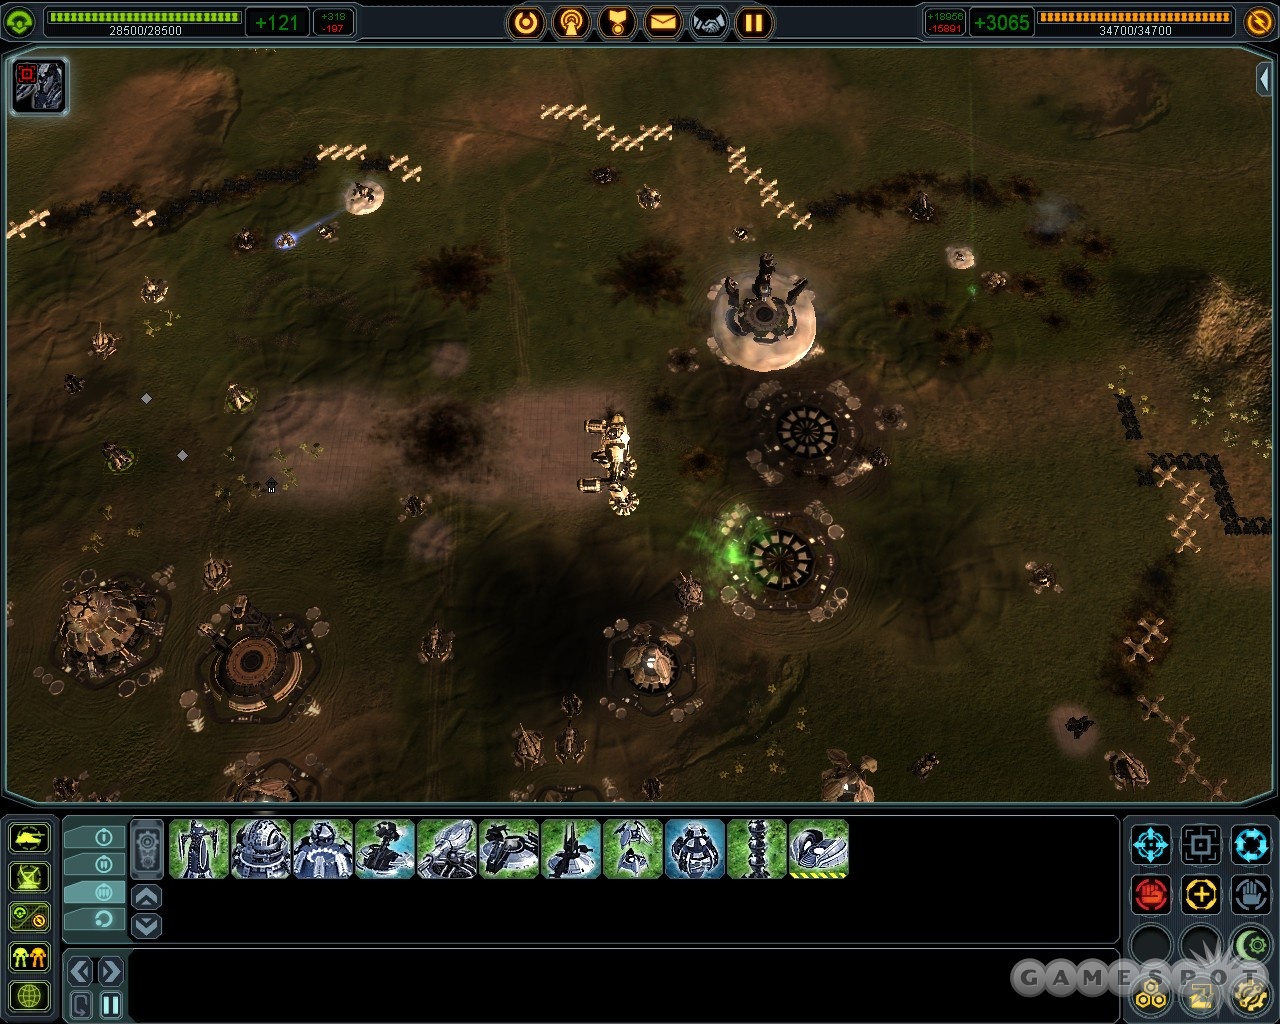
With the fleet taken out, the map is fairly open for you. Marxon’s forces don’t really antagonize you all that much, luckily, but you have to be careful, as they’re no doubt rebuilding and preparing for an attack. Fly your spy planes over the base to get a sense for what’s around. Most troublesome is the appearance of a Colossus at the northern edge of Marxon’s base. It’ll pace around for a good long while, instead of attacking, allowing you to build your own Colossus, or attempt to artillery or nuke it to death. There’s also a small island in the southeastern corner of the map, where engineers are busy working on another Colossus and a Saucer. Nuke it if you like, although they’ll take a good amount of time to get done with the units.
Anyway, to win here, you need to take down Marxon, who roams the Black Sun facility to the south. As with the Cybran commander, you can simply target him with your heavy artillery and fire away at him, if you like, or take out the strategic missile defenses and nuke the base to hell, or build a couple of Colossi and rampage through the base until you defeat Marxon. You can also extend the base around the control tower to the south a bit, build some shieldings, and build T2 artillery to shell the base there, including the Colossus. Regardless, by this point, you should have some way to take down Marxon and his defenses.
Got a news tip or want to contact us directly? Email news@gamespot.com
Join the conversation