Bully Walkthrough
It's time to deck the halls of Bullworth Academy in Rockstar's latest game. GameSpot's Walkthrough will get you straight to the head of the class.
Design: Randall Montanari
As soon as it was announced, Rockstar’s Bully was instantly branded as one of the most controversial games of all-time based solely on the company’s Grand Theft Auto reputation. A Rockstar game set in high school? Advocates had a new target. However, pundits expecting Bully’s fictional high school Bullworth Academy to be littered with guns and knives instead found the Academy’s kids using itching powder, stink bombs, bags of marbles, and slingshots...hardly Grand Theft Auto-esque. In the end, the teen-rated Bully is a sharp, well-written satire of high school cliques set within Rockstar’s typical open-ended gameplay.
As 15-year-old Jimmy Hopkins, you begin a new school year at Bullworth Academy trying to fit English, Chemistry, and Art classes into a daily routine of exploring nearby towns, pulling pranks, and befriending and bothering the school’s hierarchy of cliques. Bully’s leisurely, open-ended mission structure allows you to advance the story at your own pace while discovering numerous mini-games, races, and other extras.
GameSpot’s Game Guide to Bully offers a complete walk-through of the game’s hilarious story mode (including optional tasks), solutions to scoring a passing grade in all classes, and a collection of tips on completing Bully’s extra challenges.
- Walk-through: This is a complete walk-through of all Bully story tasks, including optional missions.
- Classes and Upgrades: Bring a cheat sheet to class with these solutions and strategies for all subjects.
- Extras: There’s a ton to complete in Bully. Check here for tips on arcade machines, carnival games, boxing, jobs, races, errands, yearbook, and finding collectibles.
Chapter 1 - Walk-through
This section provides a complete walk-through of Bully’s story tasks, including optional missions.
Chapter 1 - Making New Friends and Enemies
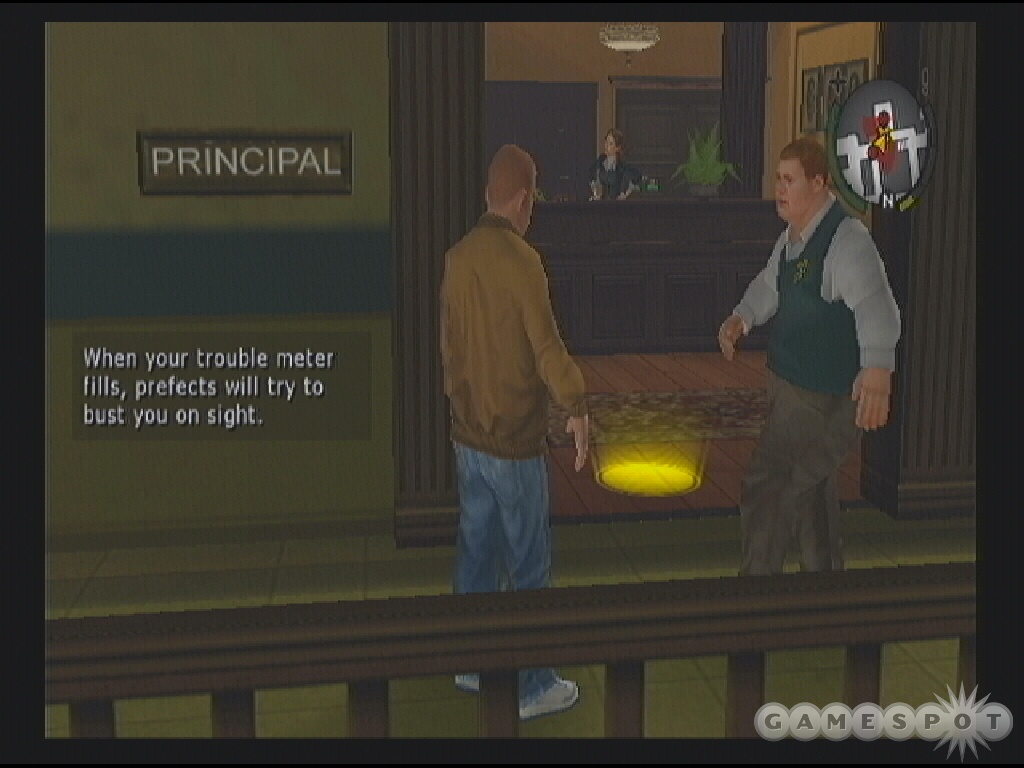
On the way to their honeymoon, your ungrateful mom and irritating stepdad drop you off at Bullworth Academy, your new home for the duration of the school year. Time to make your first of, likely, many visits to the principal’s office. The school’s headmaster, Mr. Crabblesnitch, is waiting for you in his office.
Welcome to Bullworth
Go to the principal’s office. Head straight into the school courtyard toward the "X" marked on your map. You can run as fast as you can or hang around some of the other "friendly" Bullworth students and hear what they have to say. Move to the main doorway (note the soda machine on the left for future health replenishment if necessary) and proceed inside.
Continue forward and up the staircase. The principal’s office is on the second floor--indicated by the triangular destination symbol on the mini-map. Enter the office.
Go to the dorm room. Turn around and exit the principal’s office. Look along the wall to the right to find one of 75 rubber bands scattered throughout the game. Return down the stairs and proceed north toward the "X" marking on the mini-map. Proceed to the intersection in the courtyard (with the big "B" on the ground) and turn right to spot the sign marking the Boy’s Dorm. Approach the boys looking for a fight.
You’ll receive a fight tutorial (blocking, combos, throws, ground attacks). After some instruction you’re left on your own to finish the job. Mix up your attacks and watch the opponent’s health meter at his feet. Perform a humiliation move after draining his health to finish the job.
After the cut scenes your task is to get a drink from the soda machine. Enter the room and turn right to find the soda machine. Buy a drink! Watch your health meter rise. Now it’s time to change into your uniform--you don’t want to anger the establishment! Exit this recreation room and follow the mini-map to the "X" (there’s a rubber band at the opposite end of the hall). Inside your dorm room, approach the wardrobe and change clothes. After the cut scene, walk over to your desk and save your game.
This is Your School
Exit the dorm room doors and turn left at the intersection. Return to the main building to begin this task. Gary is going to help you explore the school. Follow him (marked with the yellow arrow) around the corner toward the lockers where you encounter Russell. Play nice and apologize and bribe him to avoid a pummeling. After he leaves, Gary has a great idea: break into Russell’s locker!

Complete the lockpicking mini-game to steal from your "good pal" Russell. But it’s not the perfect crime as a prefect spots you. Once you gain control, hide in the garbage can and watch your trouble meter lower. After it has evaporated, resume the task by meeting up with Gary--his mark is moving around on your mini-map.
Gary takes you to "that weird chick" Eunice. Talk with Eunice. You learn someone has stolen her chocolates. The perpetrator is marked on your mini-map. He’s inside the boy’s bathroom at the other end of the long hallway. Looks like ole Constantinos is snacking on Eunice’s chocolates. After greeting him, either pay him off or pick a fight to get back the sweets. Pick up the chocolates and return them to Eunice. She "rewards" you with a kiss (it replenishes health at least!).
Follow Gary into the cafeteria. He introduces you to the nerds, preps, greasers, and the jocks and tells you where you’re likely to find them. The bell rings interrupting Gary’s lesson...time to get to class!
Get to Class
There’s now a clock on the screen--class starts at 9:00am! Use the mini-map and find the bell icon to enter Chemistry 1. Complete the class (see the Classes section of this game guide for tips and rewards for each class). Explore the school as you wish before your next class. Locate a save point in the principal’s office. Attend the second class, English 1, for the upgrade then proceed to the next task. Note that classes throughout the game are optional but rewarding. Check the Classes and Upgrades section of this guide for tips on all the classes. All class upgrades are also revealed in this section.
The Setup
Exit the school’s main doors and find the mark just before the steps to activate the task. After Crabblesnitch tries to convince you that the bullies and maniacs roaming Bullworth is just good ole school spirit, some degenerate named Davis pegs you with a slingshot.

Don’t let Davis get away. Run after him by tapping the "X" button repeatedly and hit the "Circle" button to jump over obstacles. Davis is marked on the mini-map with the red "X" and he’ll run all the way to the entrance to the auto shop. Pummel him into submission. You can follow the tutorial and use a grab attack to stuff him into a garbage can or just keep pounding until his health runs out.
Open the auto shop gate and resume your chase of Davis’ red "X". More fights await you inside. Defeat a series of bullies and continue through new gates. You’ll encounter a duo of miscreants while Davis looks on; you have to defeat both before you can challenge Davis. That coward Davis remains up high and attacks with his slingshot. To counter, pick up the bricks and garbage can lids scattered around the area and toss them at Davis. It’ll take three or so hits to defeat him. Once he’s down, snag your completion reward: earn the slingshot and bully respect -5%.
The Slingshot
Start this task inside the Boy’s Dorm. Trigger it at the entrance to the recreational room. You’ll find Gary and Pete inside the recreation room--poor Petey. Gary wants you to test out your new slingshot.
Follow Gary to the old school bus. He’s on the move again and indicated by the blue dot on the mini-map. Once you reach the bus Gary challenges you to knock out the windows. Use L1 to target a window and R1 to fire. If you get attacked during this time, just battle the bullies and resume your bombardment of the bus (watch out for prefects and your trouble meter though!). Once finished, follow Gary to the football field.
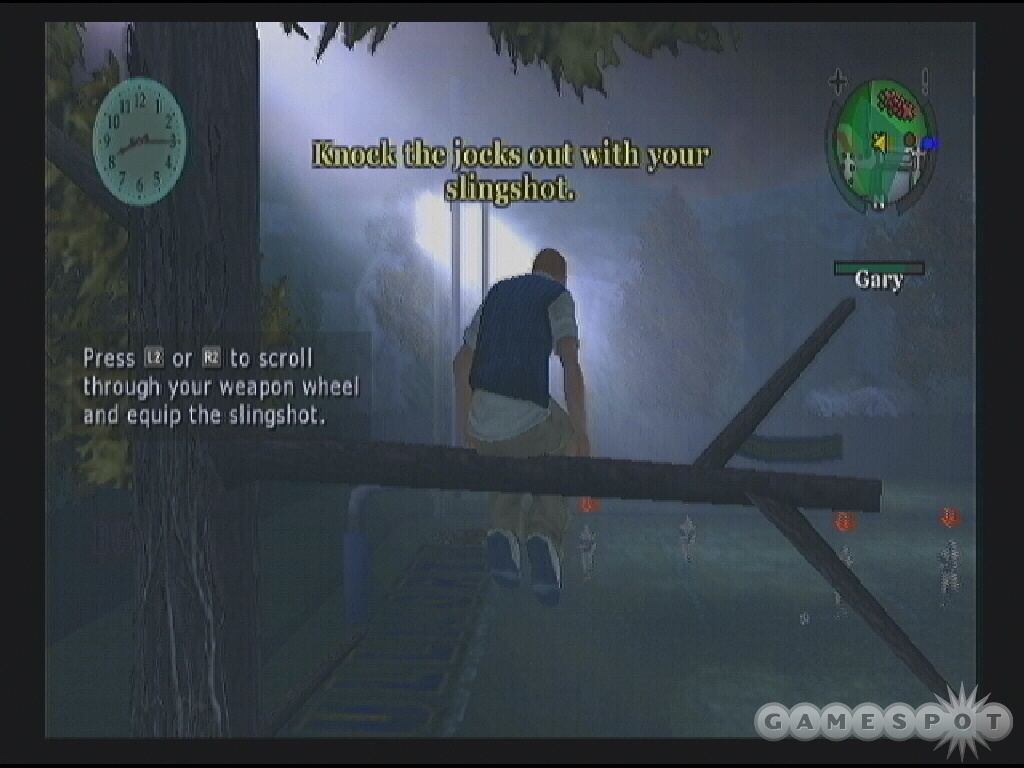
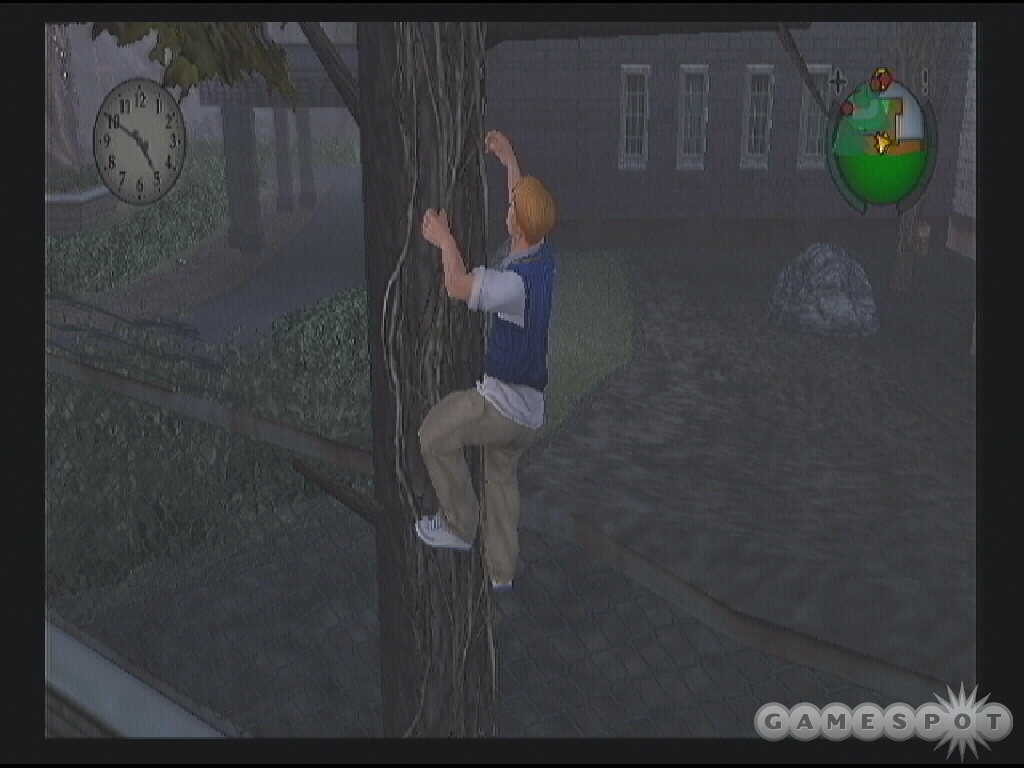
At the football field, Gary tells you to hide in a tree and wait for football practice to start. Head left to the tree and climb it. Sit on the branch and get ready to take out the jocks with your slingshot!
Select the slingshot and use L1 to target a new unfortunate member of the football team. Fire the slingshot using the R1 button. You can fire a stronger shot by holding down R1 for a few seconds before releasing it. Toggle through all the targets until all jocks are on the ground. Hop out of the tree to complete the task, which adds +5% to nerd respect.
A Little Help

Trigger this task in the Boy’s Dorm after the completion of Slingshot. Burgeoning troublemaker Gary continues to harass Pete and has a new victim in mind, some homeless guy hanging around campus.
First you need to look for the old hobo behind the school bus. Check your mini-map for the "X" marking the hobo’s location. Reach the school bus and press "Triangle" to enter and move through the bus to trigger the next cut scene. Gary and Pete leave but you stick around and chat. He offers to show you some army combat moves if you find a transistor for his radio.
The transistor is marked on the mini-map by an "X". It’s into the auto shop area. Weave through the alleys and garages and find the ladder. Climb the ladder using the "Triangle" button. Grab the transistor on this rooftop. Return to the hobo with transistor in hand to complete the task. He’ll teach you the first move: an uppercut. Check the Classes and Upgrades section of this guide for all transistor locations and hobo combat maneuvers.
Save Algie
Proceed to the Library on the eastern side of campus. Trigger this task at the Library entrance. You automatically find Algie inside the library: he has some books in his locker that need to be returned. The thing is he’s too scared to go by himself. He agrees to pay you $5 bucks to help him recover the books.
Start toward the school while Algie continues his stream of consciousness thought. A bully appears to your right after you reach the intersection. Take him down with combat moves or charge your slingshot a few times. Don’t let him escape when he runs off. Fire off a final charged round to lay him out.
Algie needs to go to the bathroom--he got nervous when that bully approached. A red circle around the clock indicates Algie’s...bladder. Enter the school (marked with an "X" on the mini-map). Head upstairs into the back northeastern corner to find the boy’s bathroom. Move inside and Algie starts his business. Your job is to keep the room clear.
Two bullies enter. Fire your slingshot a few times as they approach then take them down with combat moves (use some new ones learned at Gym or from the hobo). Now you need to take Algie to his locker (don’t worry about his zipper). Find his locker a couple rows down. Reach Algie’s locker to complete the task and receive a reward of $5 and -10% to bully respect and +5% to nerd respect.
That Bitch
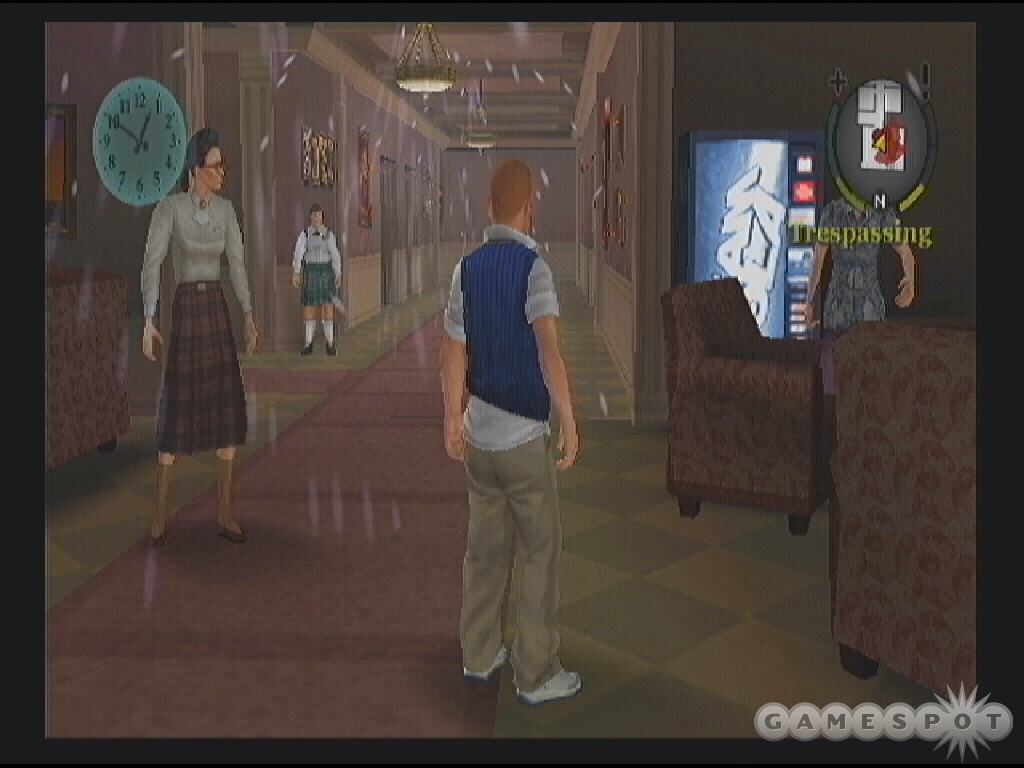
Locate the Girl’s Dorm. From the school, take a left at the intersection (opposite of the Boy’s Dorm). Once inside (you’re trespassing!) find the marker to trigger the task. You overhear the beginnings of a cat fight in one of the dorm rooms. A braces-laden girl asks for your help: Mandy stole her lab notes.
Proceed to the gym marked conveniently on the mini-map. Once there you’re told to break into Mandy’s locker and retrieve the lab notes. Move into the girls’ locker room--also known as trespassing--and complete the lock picking mini-game. Beware of prefects wandering around. If one gets close to the girls’ locker room, hide behind the other side of the lockers and wait for him to leave before resuming your recovery.
Once you have the notes in hand, it’s time to return them to Beatrice. Make your way from the gym back to the Girl’s Dorm. Find Beatrice at the marked location on the side of the dorm hall. You automatically hand her back the notes and receive a kiss. Plus, as a bonus Beatrice now likes you. Once a girl likes you, she’ll want to accept gifts and kiss you.
The Diary
Locate the trigger for this task outside the Girl’s Dorm; after school hours and if you completed That Bitch and helped out poor Beatrice. She’s upset again and needs your help. Not only are her cold sores acting up but her diary was confiscated by Mr. Hattrick. The bad news is Beatrice put a lot of gooey stuff about you in the diary...stuff that you don’t want public.
Your first objective is to enter the school through the rear window. Follow the marked area on the mini-map to a spot behind the main school building. The mark on the mini-map indicates a location higher than your own. Climb the stairs and find the spot in the middle that’s missing a section of railing. Use the "Circle" button to hop up onto the ledge where the railing is missing.
Walk toward the back of the ledge and find the marker indicating a climbable location. Start climbing to the upper balcony. Find the marked window and open it to get inside the school.
Instructions are to check the math room. Obviously it’s after school so you’re trespassing and the patrolling prefects will not be too happy about your invasion. The math room is marked on the map. Stay out of sight of the prefects. Watch their vision cones and avoid their line of sight.
Try to open the math room: it’s locked so it’s time to check the staff room. It’s down on the first floor. As you descend the stairs, watch for where the prefects are moving so you don’t drop down right in front of one. Go behind the staircase and proceed to the staff room. Get inside and find the diary at the marked location. Take a read at Beatrice’s fine prose before heading back.
You don’t have to exit through the same route. Just go right from the staff room to find an exit. If a prefect happens to be around, just outrun him or use one of your inventory toys to elude him. Make your way back to the Girl’s Dorm and find Beatrice around the side and return her diary. You automatically get the $20.00 reward money...and another kiss.
Defend Bucky
Trigger this task by entering the Boy’s Dorm and finding the marker in the hallway. It looks like Gary and Petey are at it again in the recreation room. Algie wanders in (zipper still down?) who tells you that Bucky went to the auto shop to pick up some parts but hasn’t come back.
You need to find Bucky and help him out. Look carefully and you can see Bucky’s health meter is already onscreen--and it’s lowering by the second. The bullies are already on him so move as quickly as possible toward the marked area on the mini-map. It’s the auto shop area.
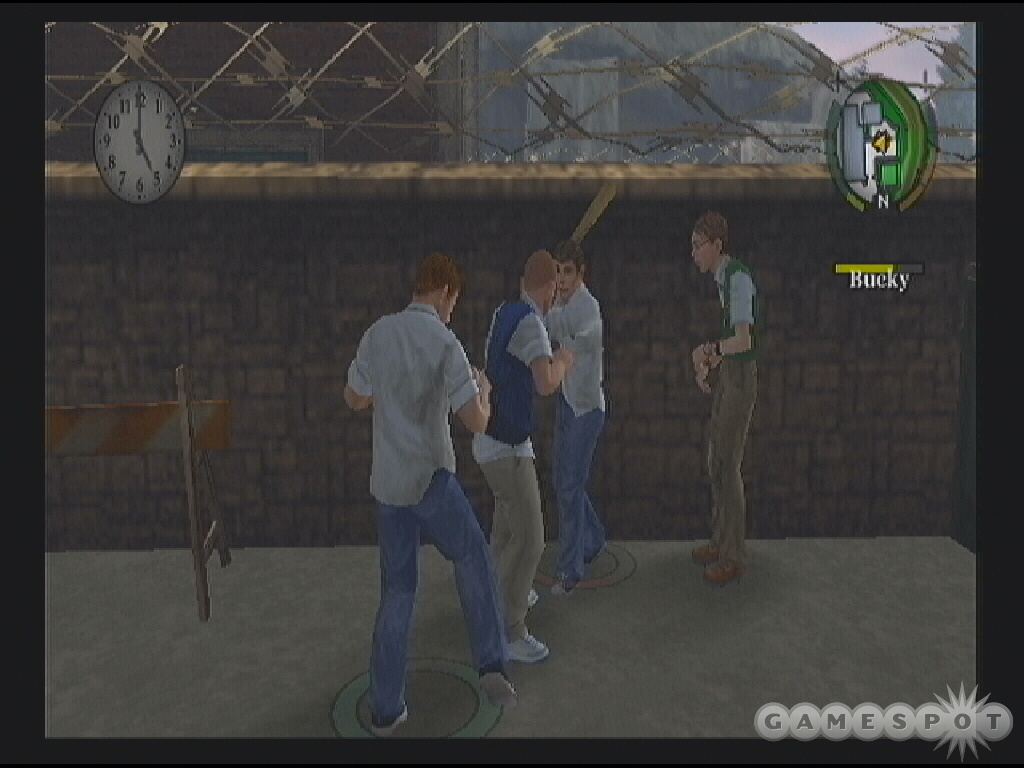
Two bullies are attacking Bucky--and one has a baseball bat. Nail him first with some of your attack moves. Once he’s down, pick up the bat and give the other a beating. You’ve saved Bucky and need to escort him into the garage. Two more attack as you move toward the garage. Continue to use your bat (though it probably won’t last long) and attack the bully also armed with a bat. Grab the new weapon and finish off the other.
Open the garage door and Bucky collects his items. Pick up the bat and make your escape. A couple more bullies attack as you leave. Keep using your bat! If it breaks, pummel the bully with his own bat (your future weapon) and grab it once dropped to finish off the other. Escape with Bucky and he rewards you with a skateboard and +5% to nerd respect and -10% to bully respect.
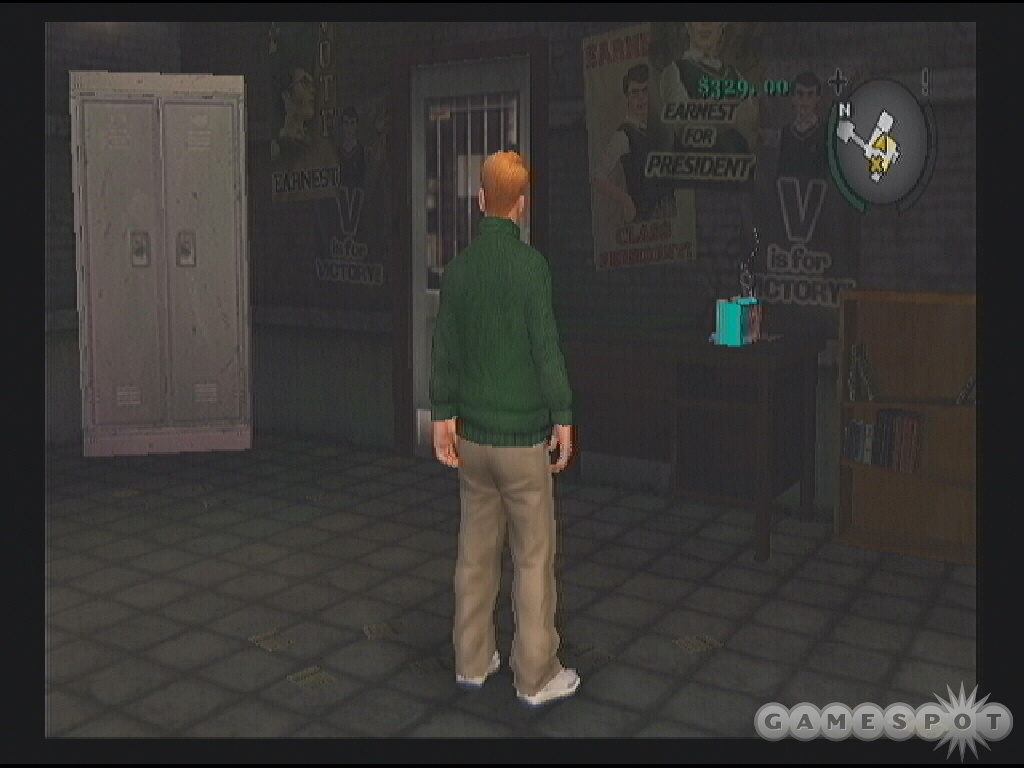
The Candidate
Find this task inside the main school building in the hall on the far left side. Earnest is hanging up some posters for his Class President campaign run when a few jocks give him a wedgie. Earnest wants your help...and he’ll pay you! He wants to hire you as security manager to ensure his speech goes off as planned.
You need to get to the auditorium balcony before Earnest completes his speech. Get upstairs as quickly as possible; the red circle around the clock indicates the time you have left. You want to go into the AV Room. Once inside you must protect Earnest while he gives the speech.
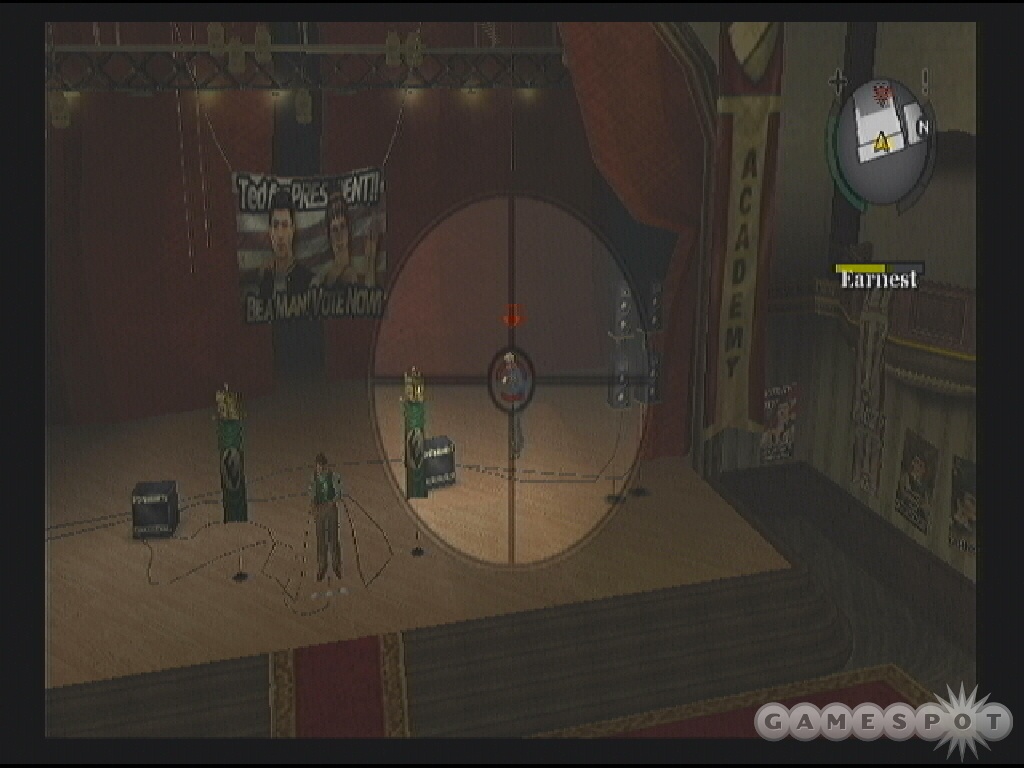
You’re armed with the super slingshot. You can zoom in and out using the directional pad but it’s probably safer to keep it zoomed out at first. Hold down R1 for a charged shot or just tap R1 for a normal shot. Nail the jocks and bullies before they have a chance to harm Earnest (his health meter is also on screen).
Watch the radar for incoming enemy locations. Spot them coming up the aisles, inside balconies, coming from offstage, and even above Earnest on the scaffolding. Look out for the mascot to come on stage. Hit him twice. Earnest must survive the onslaught to complete the task and receive your monetary reward and +5% to nerd respect and -5% to jock respect. Oh and the handy super slingshot stays in your inventory!
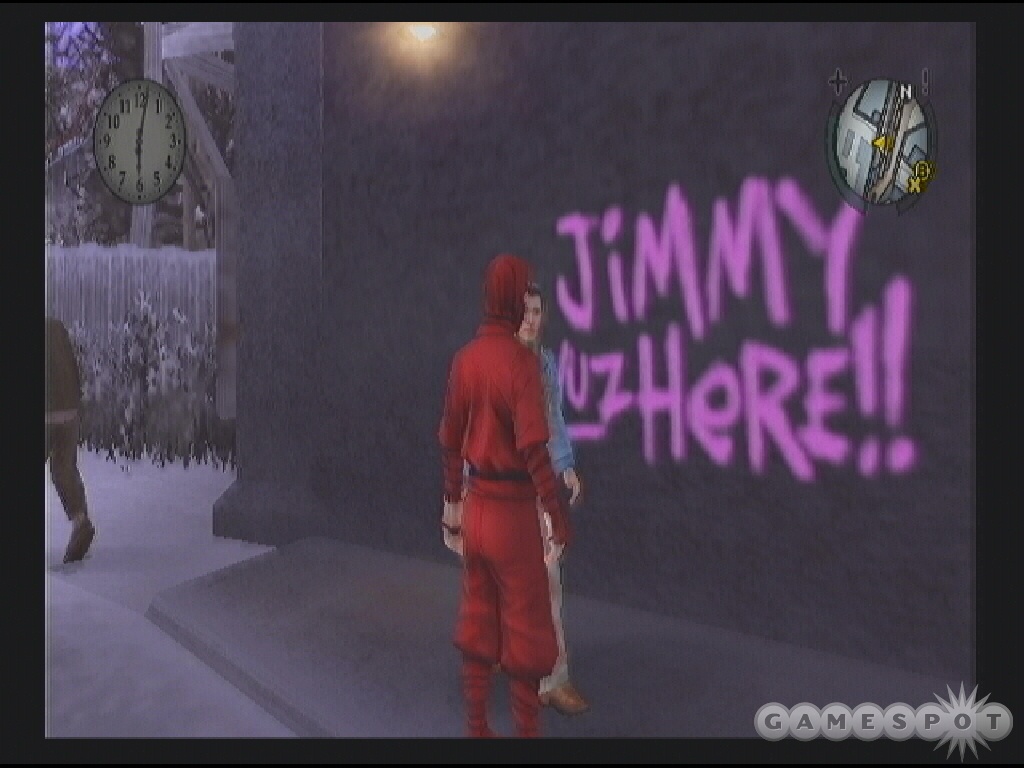
Halloween
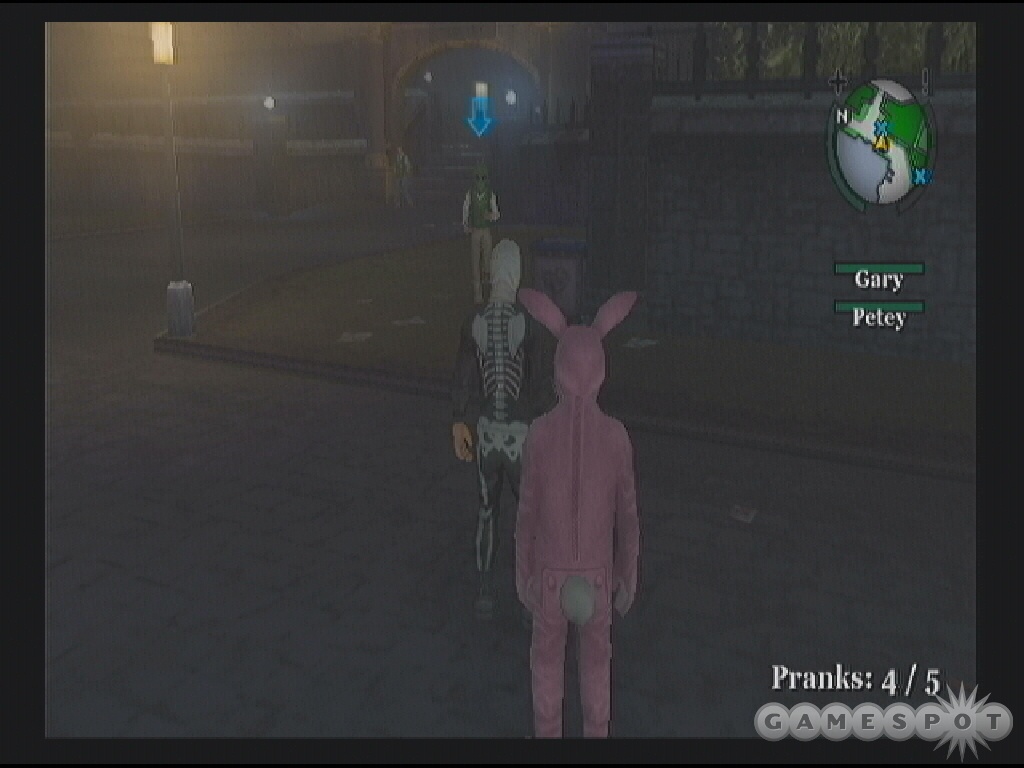
Return into your dorm room and find Gary lounging on your bed (in an appropriate costume!). He tells you to open your closet and find a costume he’s left for you. Trigger the marker at the wardrobe to start Halloween. You automatically put on the sweet looking Skeleton costume.
Gary wants you to find some pranks to play on other kids. First you have to rescue Pete--he’s that pink bunny in the trashcan. Exit the dorm room with Gary and Pete in tow.
Locate other students (also in costume) with blue arrows indicating they want you to do a favor--in other words, pull a prank. The mummy wants you to slap a "Kick Me" sign on someone. The demon guy wants you to egg three students. There’s a guy who wants you to trip up someone with marbles and another that wants you to toss some stink bombs at three students. Another wants you to light "Volcano 4000" near some students. Complete five pranks to complete Halloween and unlock "The Big Prank"--don’t go to sleep or you can’t complete it!
The Big Prank
Follow the map to the marked area in the school courtyard and trigger this task. Gary wants to feed Chad’s dog some rancid meat. Pete’s not keen on the idea so he bails. Gary chases after the dog. Chad emerges and you must beat him down to protect Gary’s plan. Afterward, Gary feeds the dog and prepares a "doggie bag" for the teacher’s lounge.
Proceed to the main school building and go inside. Go to the marked spot on the mini-map. Drop the bag in front of the staff room and let Gary perform his magic. Pull the fire alarm before time runs out! Complete the task and you receive the Red Ninja Costume.
Character Sheets
Begin this task by triggering the marker just outside the Library. Some ruffians stole Melvin’s Grottos and Gremlins character sheets--Melvin is totally distraught. To put it simply, Melvin is looking for a knight to complete a quest.
You must recover Melvin’s four character sheets. Locations are marked on the mini-map. Locate one just left of the Library entrance. You’ll have to get kicked where it hurts the most but just hit "Triangle" as fast as possible and you’ll get up and watch the bullies run off in fear. Grab the first character sheet.
Exit the Library area and find another bully to the right. You’ll have to give chase. Fire your slingshot into his back. Beware of prefects who won’t look kindly on weapon violence! If you catch up to him, give him some punches and force him to give up the prize.
Find the others near the Boy’s Dorm and inside the auto shop area. You’ll need your fists ready for these encounters. Battle one near the Boy’s Dorm and two within the auto shop area. After collecting all four character sheets, return to Melvin for your $10 reward.
Help Gary
Begin this task inside the hallway of the Boy’s Dorm room. Gary, who’s starting to sound more and more maniacal, has some "incredible" plan hatched. Your initial objective is to follow Gary. He’s running toward the old school bus...where three bullies await you. Gary takes on one while you are forced to battle the other two. Use one of your weapons or just practice some of your new gym maneuvers.
Once you’ve disposed of the bullies, Gary charges off toward the school basement--follow him! Stand at the basement door and enter. Your objective is to maneuver through the basement. Activate the first switch marked on the map. You can also take some time to bust open crates in search of random items. Proceed through the open door.
The next room holds a switch behind a locked gate. Move around the right side of the fence to find an opening. Leap through the opening using the "Circle" button then activate the switch. Bust up more crates if you want.
In the next room, the switch is behind another fence. However, there’s a broom conveniently nearby. Fire your super slingshot through the window in the gate and hit the broom. This will knock the broom over and activate the switch.
In the next room, there’s a hole in the fence on the far left side. Press the right analog stick down to crouch and crawl through the opening. Move toward the switch and activate it.
You’re inside the basement’s boiler room. Find a radio transistor on the right side of the room and grab it to give to the hobo later. Also, this room holds all those Halloween pumpkins that were placed around the school. Break them now if you wish.
Grab the fire extinguisher on the right side of the room (above the radio transistor). Stand in front of the furnace and fire the extinguisher to put out the flame. This eliminates steam blocking a staircase on the opposite side of the room. Once the steam is gone, move through the new route. Follow Gary into the new room--called "The Hole". This completes the task.
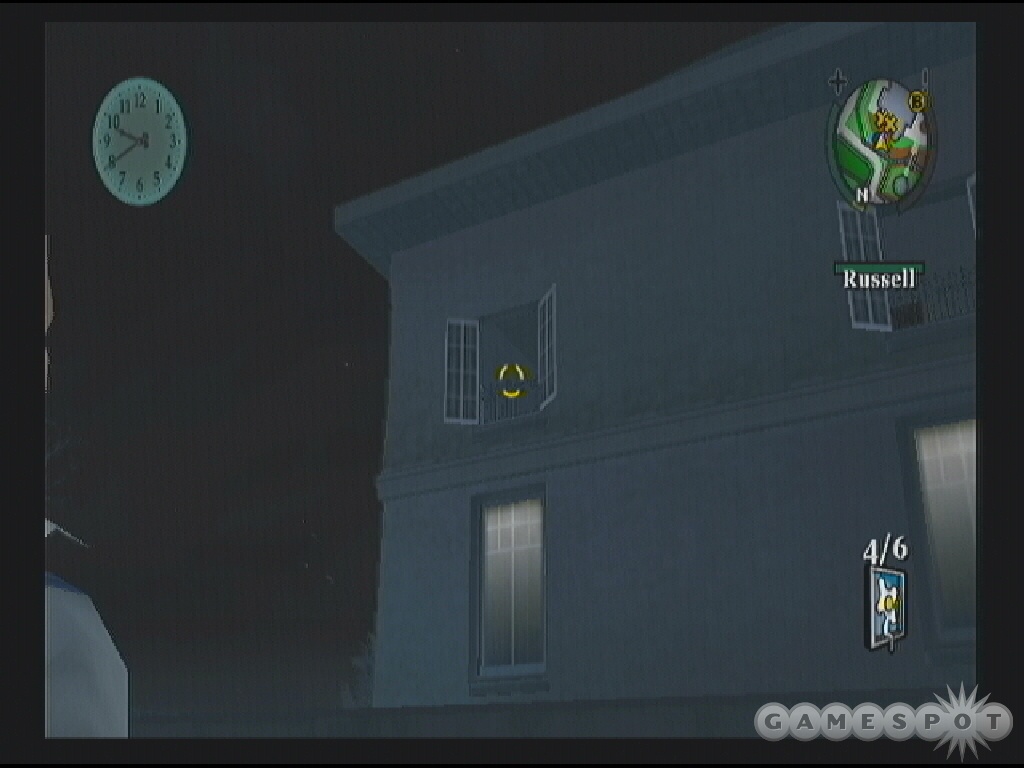
Russell in the Hole
Gary has essentially led you into a trap. You have to fight the massive Russell and Gary has got him good and wound up.
Avoid sticking close to Russell. Use hit and run attacks--move in, perform a punch combo, then retreat. Projectiles such as firecrackers will inflict damage on Russell but throw them at longer range so you don’t suffer damage from the blast radius.
Russell has a few maneuvers to look out for. Watch for him to show off his muscles to the adoring crowd. While he’s busy impressing the onlookers, perform a punch combo.
Also wait for Russell to get in a charge stance. Wait for him to start moving toward you then dodge out of the way. He’ll run into a wall and be vulnerable to one of your attacks. Make sure you dodge in time; otherwise he’ll charge into you and drive you into the wall inflicting significant damage. Defeat Russell to increase bully respect to 100% and +5% to nerd respect.
Chapter 2 - Rich Kid Blues
Your actions are beginning to draw attention. According to Crabblesnitch, your reputation as a fighter is growing. In fact, a preppy invites you to a gym in Old Bullworth Vale. Time to test your meddle as a pugilist.
Last Minute Shopping
Enter the school cafeteria (first floor) and find the marker on the left side. The husky, and entirely unsanitary school cook Edna needs a favor. She needs you to head into town and pick up some items: meat from Yum Yum Market, razor from the barber, and new knickers from Worn In. Edna offers up her bike for the trip.
Note the red circle around the clock: this is a timed mission so you must work quickly. Exit through the school entrance and continue north toward the Bullworth Gate. Get onto the bike.
Start right and pedal across the bridge heading north. Find Yum Yum Market straight ahead on the left side. Enter the store and grab the "discount" meat off of the counter. Exit and go across the street to The Happy Mullet. Snag Edna’s razor off of the small table. Two items down and one item to go! Get back on your bike.
Continue north then take the next right around the bend. You’ll find Worn In on the left side of the road. Hop off Edna’s bike and proceed into the store. Grab Edna’s clothes from the back of the store. Exit the store.
You’re told to take the bus back to school. The bus stop is marked with a "B" on the mini-map. Find it north of your current location. Activate the marker in front of the sign to hop on the bus back to school.
You will be dropped off in front of Bullworth Academy. Return inside the school and to the cafeteria to find Edna. Walk up to Edna to automatically return the items and receive your $15 reward. Completing this mission opens up a few money making opportunities: Paper Route Intro and Lawn Mowing: Park 1. For info on these jobs, see the Extras section of this game guide.
Hattrick vs. Galloway
Begin this task by triggering the marker in front of English class. Looks like Mr. Galloway has been caught with alcohol and came drunk to school...whoops! He’s in "a lot of pain" and nothing dulls that pain like a big bottle of Scotch. He enlists your help. You must find his hidden bottles; there are three in all.
Find the first bottle in the cafeteria. Go into the kitchen area (don’t worry about Edna’s ranting) and find the bottle on the right side of the storage room.
Proceed to the school’s second floor and into the girls’ bathroom. Run inside the bathroom (trespassing!) and find the bottle in the last stall on the right. Get out before you’re caught by the teacher for being somewhere you certainly shouldn’t be! If you’re caught just run around and hide in a trash can (tap "X" repeatedly to run faster) until the heat dies down.
The last bottle is in the trophy case outside of the principal’s office. With no prefects looking on, break the glass by punching it and snag the bottle from the right side of the case. Now you must take all three bottles to Ms. Phillips.
Exit the school and find Ms. Phillips near the old school bus (the one you busted the windows on earlier). She’s marked with an "X" on the mini-map. Approach her and you automatically hand over the three bottles. You receive a camera as you reward.
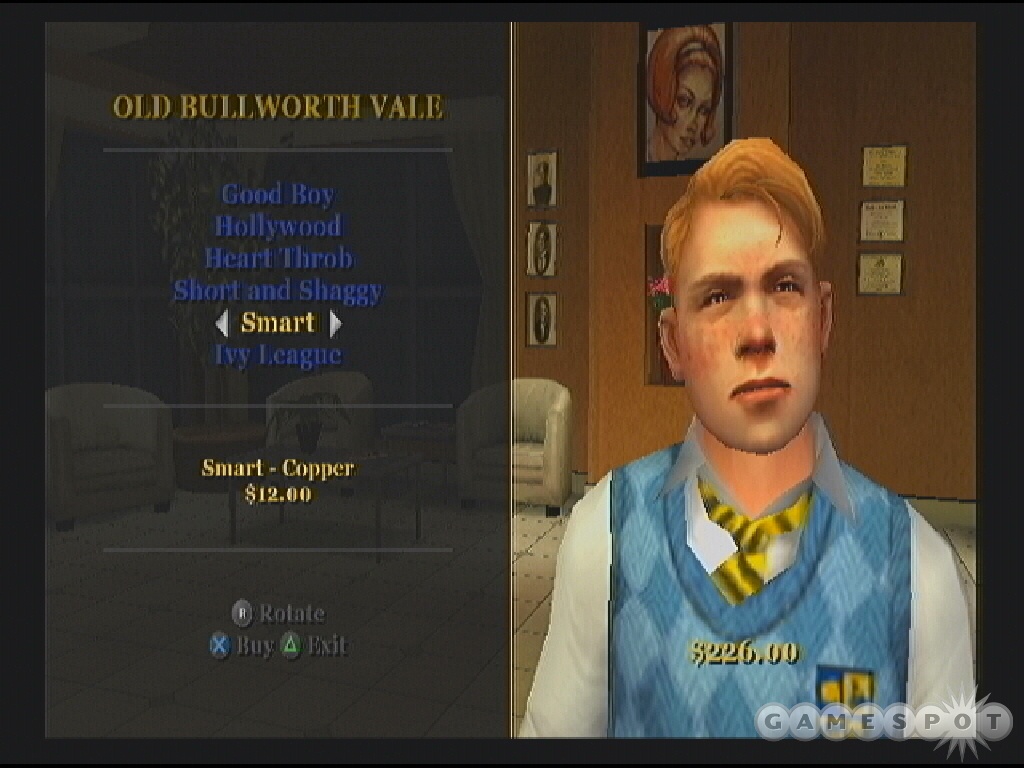
Prep Challenge
Follow up on the preppie’s challenge by heading out to Old Bullworth Vale and finding the gym marked by the red star on your mini-map. Once inside you can try some sparring matches by selecting the marker at the ring (late in the day) or proceed to the tournament poster in the back corner of the gym to initiate the challenge. Trying and winning the sparring matches increases your punch power.
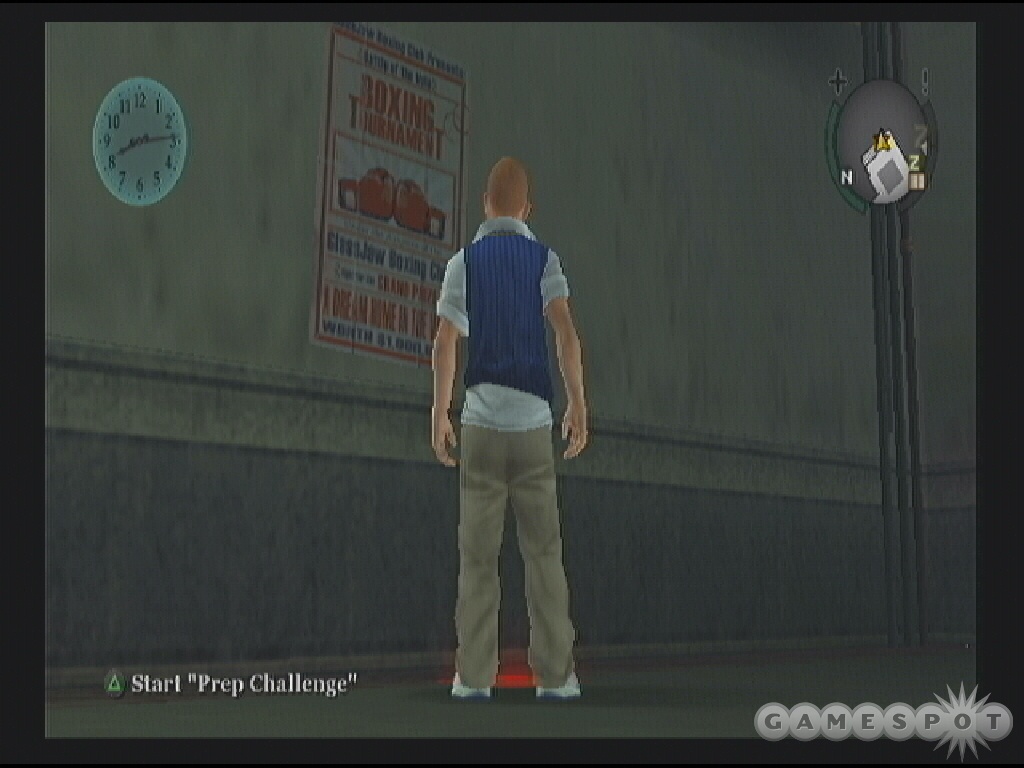
The boxing maneuvers are simple: hit "Square" to punch, "X" to dodge, and "L1" to block. After draining your opponent’s health, hold "Square" to perform a knockout punch.
An optimum strategy is to block or dodge your opponent’s attack, and then perform your own punch combination. When one of your blows hits, continue to press the "Square" button to unleash other punches for a full combination attack. After landing the combo, repeat by holding block or being ready to dodge. In this task you battle Chad, Justin, and Parker.
Unfortunately the preppies tricked you: the prize isn’t a million dollars and a dream home. Instead you get an abandoned beach house. The Beach Clubhouse can be used to save your game and also includes a new arcade game. Also, you get a boxing outfit in your wardrobe!
The Eggs
Trigger this task by ascending to the second floor of the Old Bullworth Gym. As soon as it starts you are told to dress appropriately...like a preppy. You have to go to the Aquaberry clothing store. It’s not far. Skateboard or grab a bike and head right and around the corner to find the mark on your mini-map.
Go to the back of the store and purchase clothes. Buy the Aquaberry Vest or Aquaberry Sweater (each sells for $17.50). Return to the gym. Alternatively you can purchase the clothing beforehand to save some time. This task doesn’t appear after 11:00 pm.
The preppies are planning a revenge on Hattrick--a good old fashioned egging! You’ve been tasked to go get the eggs. You may already have some in your inventory. Otherwise you could find some by breaking boxes or purchasing some at the Yum Yum Market.
With eggs in hand, you need to get to Tad’s house. It’s far so find a bike. Proceed through the old gardens and follow the main road around until you find the entrance on the left side of the street. Approach the troublemaking preppies to complete the objective.
Just when you’re starting to plan the egging, that psycho Gary shows up to ruin the fun. It doesn’t take long for the preppies to hate you. You need to find a way out of Tad’s yard fast! Run around the right side of Tad’s house and approach another preppie by the gate. You’re told to retrieve the gate key. Time to get unfriendly!
Beat the "gate keeper" into a pulp. Work as fast as you can before Tad and his friends show up. Grab the key and open the gate. Don’t worry about Tad’s gang just run like the wind. You receive a few rewards for escaping: eggs are now available in your room and you also gain -10% to preppy respect.
Movie Tickets
You’ll trigger this task at the movie theater. Exit Bullworth Academy and proceed west toward the marked area on the mini-map. Find the task marker in front of the movie posters at the theater.
A cute, pampered preppy girl named Pinky needs your help (doesn’t everyone?). You have a reputation for being a good fighter...and Gary has been spreading some unfortunate rumors as well. Pinky is afraid that she’ll have to sit in the back of the theater if she can’t get into the front of the line. You’ll have to clear the line without using violence.
Your first objective is to steal Gord’s bike to lure him away from the line. Locate his bike on the right side of the theater entrance. Get on the bike and start pedaling away. Gord and some pals (and maybe an officer) will give chance. Go far away and wait for Gord to leave. You may also need to stay away so your trouble meter returns to normal. Return to the theater when prompted.
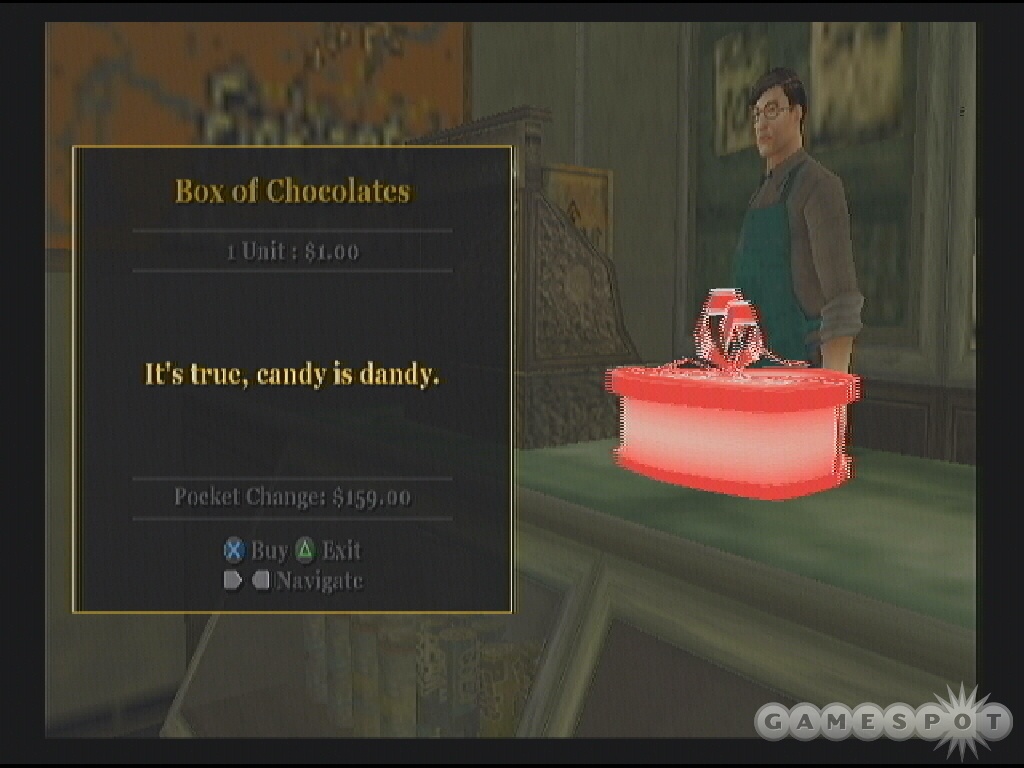
Eunice (you remember her don’t you?) is now at the front of the line. Talk with her. She wants a box of chocolates. You may have some in your inventory; if not, you’ll have to take a quick trip to the Yum Yum Market. It’s not far; ride Gord’s bike toward the river and down the street toward the marked location. Once inside, purchase the box of chocolates. Return the candy to Eunice.
Your next objective is to lead Eunice to a secluded spot. Walk slowly--hand in hand--with Eunice to the adjacent alley. At this secluded spot, you’ll get some Eunice-lovin’...whether you like it or not. Return to the theater.
Only two more in the theater line--approach Trent and Kirby. They run off and vacate the line. So now it’s just Pinky. She rewards you with some cash, $15, and you receive -5% to preppy respect.
Carnival Date
Trigger this task in front of the movie theater in Old Bullworth Vale. You’ll need some flowers before the task begins, however. You can purchase some at the Yum Yum Market nearby. Pinky wants your help again--Derby stood her up. You warm her over with some flowers and she agrees to go on a date with you instead. Time to head to the Carnival!
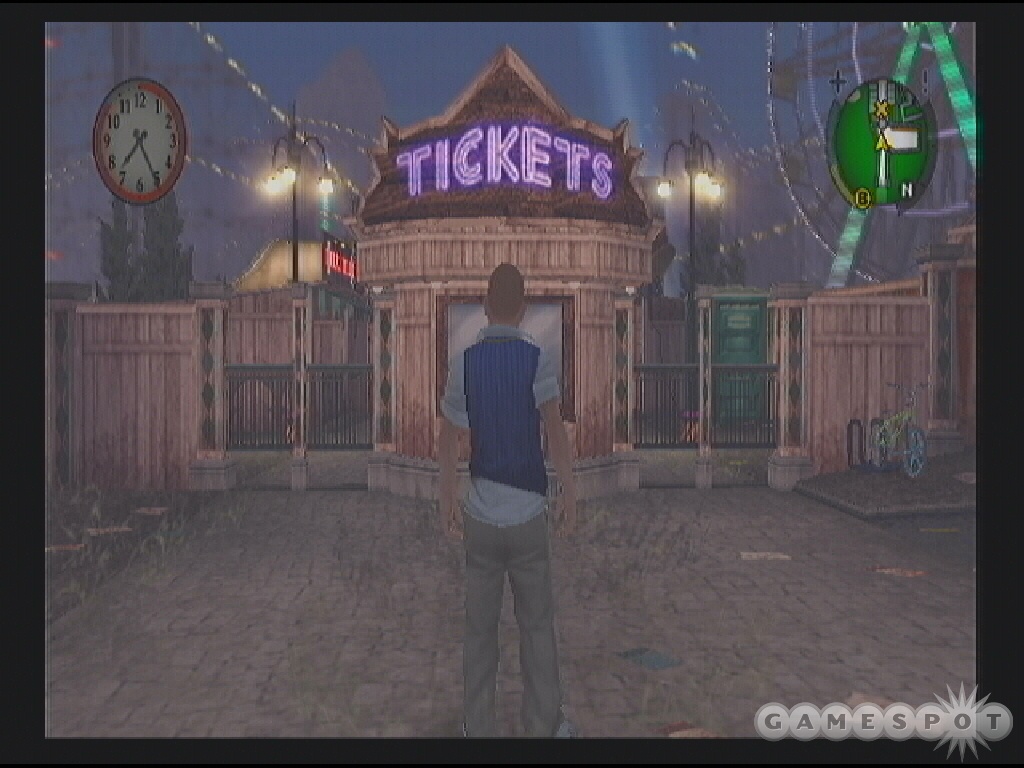
You must meet up with Pinky at the traveling carnival. Grab a bike because you’ll need some speed; there’s a red circle around the clock indicating a time crunch. Pedal west through the tunnel and follow the road as it bends to the south. The carnival is just up ahead.
Walk up to the ticket booth and purchase a ticket for $1. Proceed through any of the entrance gates. You encounter Pinky inside who’s happy you’re actually on time. Your next objective is to win 10 tickets by playing some of the carnival games--Pinky wants a teddy bear. There are numerous ways to gain these 10 tickets. Check the Extras section of this game guide on tips on each of the Carnival games.
After winning 10 tickets enter the Souvenir tent (across from Strike Out) and purchase the teddy bear. Exit the tent and you hand the prize over the elated Pinky. She now likes you!
Panty Raid
You’ll find this task after completing the Carnival Date. Check the "Come Hither" adult shop in town late at night. Find the marker at the entrance. Apparently the gym teacher has some extra curricular activities...what he calls "gathering research". He needs help with some laundry--specifically laundry from the girls’ dorm...hence the title of the task.
First you have to get to the girls’ dorm. Return to the academy and go around to the side of the girls’ dorm building. It’s the right side. You’ll find a climbable surface. Climb to the top and get into the dorm attic. Now you must collect the laundry. Note the special icon in the bottom right corner of the screen.
Cross the attic to the staircase and descend to the lower floor. The pieces of laundry are located on this floor. Note the wardrobe here. You can hide in these to avoid those pesky patrollers.
The center hall is the toughest area because it’s really easy to get spotted. Wait until the monitor moves or looks into a room before crossing. Hide anywhere you can once inside a girls’ room or the bathroom. You’ll find the "laundry" on the floor in each room. Scamper quickly to find it then hide and wait for the monitor to pass before crossing into the next room. If you are caught, the task isn’t over. You’re shoved out of the girls’ dorm and must climb back in and resume the task until you have the five pieces.
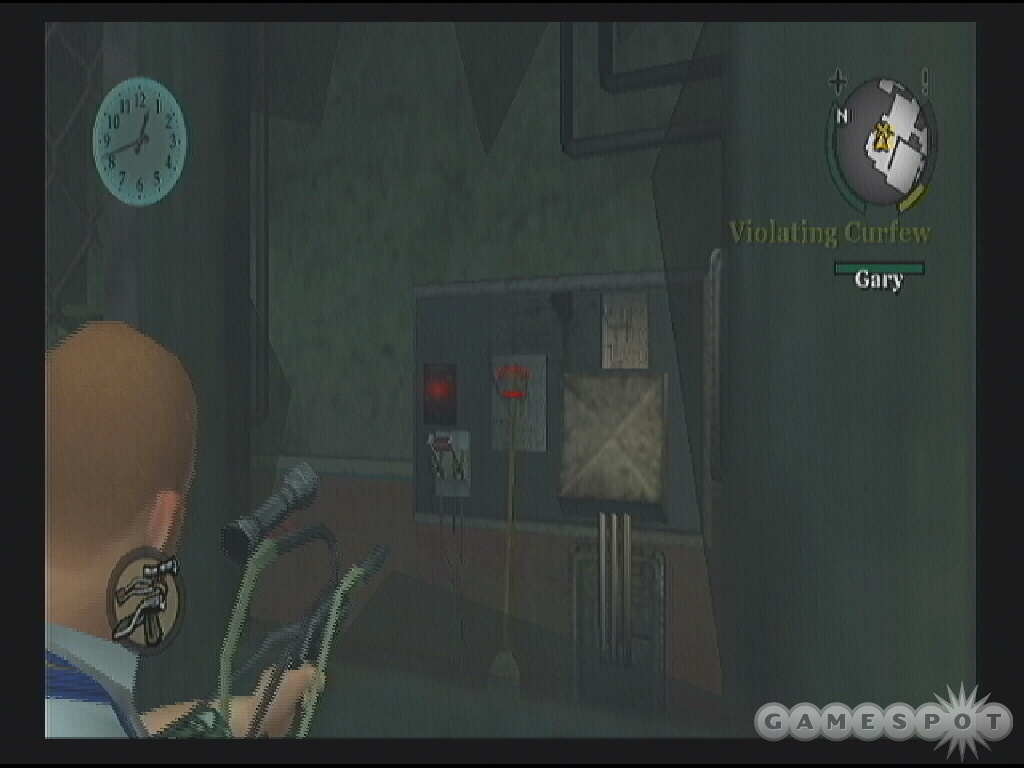
Once you snag the fifth piece of laundry, all chaos breaks loose. Run downstairs and proceed toward the exit door down the hall. Just keep moving--don’t stop! Exit the girls’ dorm. You’re probably breaking curfew, among other things, so beware of patrolling prefects as you return to Mr. Burton at the school entrance. If anyone is chasing you just keep running to Mr. Burton and they’ll be forced to stop. Mr. Burton pays you $30 bucks for your laundry delivery.
Race the Vale
Begin this task inside the Boy’s Dorm. You chat with Pete in the dorm and find out everyone’s at a bike race. Exit the dorm (Pete is already on a bike and way ahead of you by now) and get on the bike just right of your position. Exit the school grounds and take a left on the road. Cross the bridge and head toward the "X" marked on the mini-map. Follow the road along the shoreline and descend the staircase to the beach. Approach the racers to begin.
Pedal your bike as normal during the race. Press "X" repeatedly to go as fast as possible. You can use the L1 and R1 shoulder buttons to punch adjacent racers. Follow the markers on the raceway. Check your mini-map if you get disoriented. At tight corners, let off the pedaling to make your turn. Win the race for -10% to preppy respect and a reward of $15. You’re also told to stop by the shop (right where you end the task) for your trophy.
Beach Rumble
Start this task right after Race the Vale by using the marker just outside the shop. You enter and grab your trophy as a few preppies come in with their bad sweaters and big vocabularies. The preppies steal your trophy.
Ricky offers his help. Run toward the beach and the lighthouse that serves as the save point you unlocked earlier. Locate the thieving preppies here and start beating them to a pulp. Defeat all of the preppies to unlock the bike races, recover your trophy, and earn -10% to preppy respect.
Tad’s House
Find the marker for this task just outside the Yum Yum Market. Your new pal Russell is harassing the Yum Yum Market clerk. After you defuse the situation, the clerk suggests a revenge plan against Tad...more eggs! Tad’s parents aren’t home so it’s the perfect time to fire some yolk at Tad’s house.
Your first objective is to meet Russell at Tad’s house. It’s not close so find a bike somewhere and follow the mini-map to the marked location. You’ve been there before; go through the Old Bullworth Gardens and find Russell just outside Tad’s home.
Open the gate. Your orders are now to throw an egg through every open window of Tad’s house. The open windows are marked on your mini-map. Find an open window and use the directional pad to enter aim mode. Aim into the open window and press the R1 button to toss an egg. Check the icon in the lower right corner to determine if you were successful. Continue around the entire house and toss an egg in all open windows. Some preppies may come out and try to stop you; move near Russell and he’ll help you out.
After you have completed all six windows, run out of Tad’s yard through the open front gate. You receive a $15 reward as well as -15% to preppy respect.
Weed Killer
Start this task outside of the Biology class on the school’s second floor. The Biology teacher possesses an enormous Venus Flytrap...and so does Derby Harrington. The teacher doesn’t appreciate the competition. Kill the plant!
You must first disguise yourself as a preppy. You should have the appropriate gear in your wardrobe by now. Return to your dorm room and switch into the Aquaberry Sweater or Vest. But the clothing isn’t enough. You also need a preppy haircut, which you can accomplish from the salon in Old Bullworth Vale. The location is marked on the mini-map.
You must now enter Harrington House in your preppy disguise. Return to the Bullworth Academy and enter Harrington House. Once inside, approach Bif (what a great preppy name!) and speak with him (press L1 followed by X for a nice greeting). Time to destroy that plant!
Follow the map upstairs toward the marked location. Take a moment to listen to some of the preppy conversations; they’re a riot. Cross the final room and snag the poison sprayer on the shelf. The Crapula Maximum is just to the right. Enter aim mode using the directional pad and fire the sprayer with the R1 button. Just keep spraying until the plant has expired.
This, naturally, angers all those spoiler preppies in Harrington House. You’ll have to fight your way out. Eventually you’ll have to shoot your way out because you’re locked in. Use your slingshot to destroy the glass windows to the left or right of the doorway. Use your combat maneuvers to beat down the preppies. Use all of the new moves you may have learned by this point, such as the takedown moves and the leg sweep from the hobo.
Break the glass and make your way down the stairs until more preppy-filled rooms. Fight your way through and break the glass with your slingshot. The preppies are good fighters (remember those boxing matches); be sure to collect any soda dropped from knocked out preppies before advancing onward. Escape Harrington House and receive your $30 reward.
Boxing Challenge
Find this task on the pier near your beach clubhouse you acquired earlier in the chapter. You find Pete there. Together you brainstorm a way to conquer the preppies. The conclusion: a boxing match! You’re told to head to the boxing club.
Enter the Old Bullworth Gym where you boxed earlier in the chapter. You challenge Bif to a boxing match. The controls and tactics are similar to the other fights earlier in the game. Dominate Bif to complete the task and advance to the next encounter.
Dishonorable Fight
The final task in chapter two begins immediately after Boxing Challenge. Your goal is to defeat Derby but you’ll have to face off against other preppies as well. Derby immediately flees for a "beverage" while you are left with a couple preppy henchmen. Defeat them with your arsenal of combat moves. There’s a soda machine nearby if you need to replenish health. Proceed upstairs and face off against one more preppy before opening the door into the bar where Derby hides.
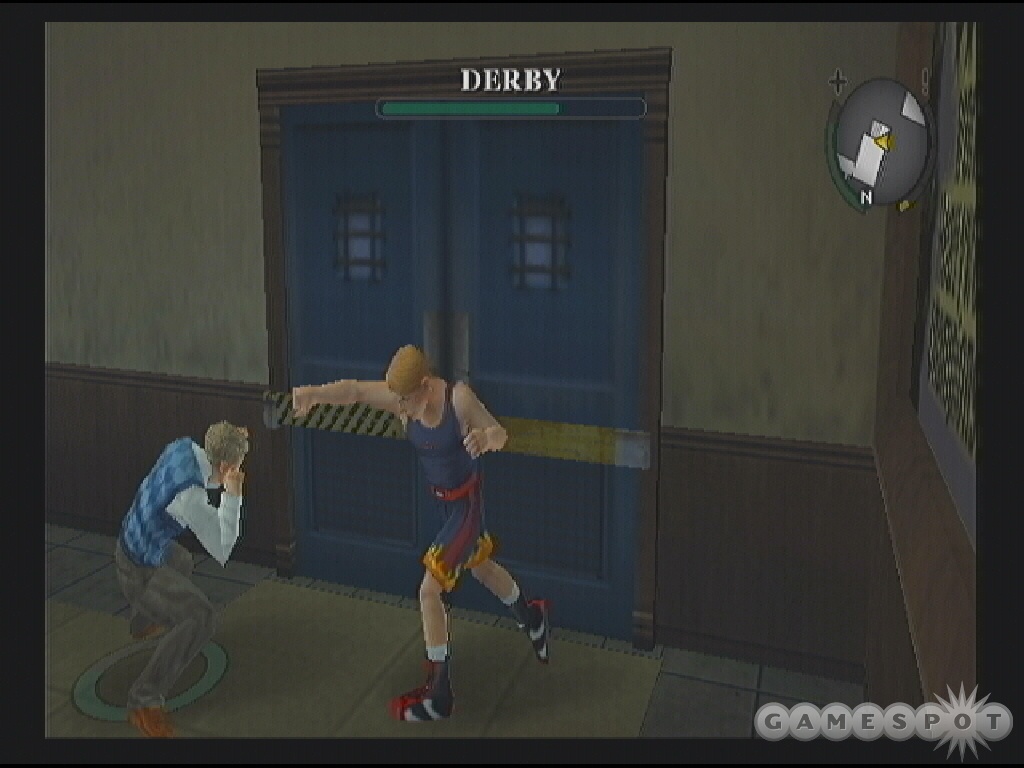
The following battle can be challenging if you allow Derby to continually call in his preppy minions. There are two entrances into the bar; both of these double doors can be permanently shut by lowering a locking bar adjacent to the doors. You’ll have to accomplish this during battle and you may get hit while trying but it is well worth the effort. While standing at the bar, hit the "Triangle" button to grab the bar and repeatedly hit "Triangle" to lower the bar into position.
With the doors locked, it’s just you and Derby (and whichever preppy or preppies happened to get into the room). You only have to defeat Derby to complete the task but you may have to eliminate the other preppies so you aren’t outnumbered. Derby is more skilled than the others and will actually block many of your moves. Mix up your attacks with takedowns and leg sweeps. Defeat Derby to complete the chapter and receive +10% to nerd respect and +100% to preppy respect.
Chapter 3 - Love Makes the World Go Around
It’s nearing Christmas time and love is in the air. But in terms of Edna the school chef and Johnny Vincent the greaser, that’s not necessarily a good thing.
Cook’s Crush
The cafeteria cook Edna has a crush (how sweet!) and she needs some items for her potential (wishful thinking!) date: she needs some perfume, candy, and sedatives...yes sedatives.
Let’s tackle the perfume. Exit the cafeteria and go left. The staff room is at the end of the hall. Looks like a group of teachers is standing in the way of your thievery--you’ll have to get them away from the staff room. You can accomplish this several ways. Try tossing eggs at the teachers or using your slingshot. The most important thing is you have to run after doing so! After committing violence against authority, sprint away as fast as possible and weave down halls and try to find somewhere to hide.
Wait for the trouble meter to decline. If there are still teachers hanging around the staff room door, repeat the process until all have given chase. Enter the staff room and grab the perfume marked with the arrow. Quickly get in and out...you are trespassing after all.

Locations for the candy and sedatives are marked on your mini-map. Ride your skateboard out of school and to the right into Bullworth. At the intersection across the bridge, go left and find the nerds hanging out in front of the Sweet Cavity. Hit L1 and press "X" to give him $5 for a box of chocolates.
Walk or ride to the final marked location. It’s an alley containing a homeless Santa and various trashcans that could contain the sedatives. Before rummaging through the trashcans, go to the end of the alley and look on the ground on the right side to find a radio transistor. Return the three items to Edna; she’s still in the cafeteria. If it’s after 7pm, realize that it’s trespassing to enter the school.
Cook’s Date
Edna wants to put those items to good use and actually go out on a date with Dr. Watts. She needs you to protect her from other school kids while she’s on the date.
The marker for this task is in Old Bullworth Vale. Exit the school and go left into the western section of Bullworth. Near the center of town you’ll find the marker by some benches and a tree.
You’re first told to not disturb the date and hide in the tree. Climb the tree quickly and get onto the branch using the triangle key. Mean kids now approach and try to disturb the date with a variety of insults.
Enter aim mode using the directional pad and select the slingshot. As kids approach to dish out their verbal attacks, move your targeting cursor and nail them with your super slingshot. Kids approach from the left and from the stairs above the dating couple (keep drinking that coffee Wattsie!). Edna’s "meter" reduces as kids stand near her. After nailing the kids with a slingshot, Edna’s meter will rise again. Don’t let the meter decrease all the way or the date is over. You receive a $50 reward for completing the task. At least Edna is generous!
Christmas Is Here
Sleep once in chapter three and you wait up at Christmas Is Here. You must take a trip to the principal’s office. Exit your dorm and proceed into the main school building. Go upstairs to the principal’s office and trigger the task. It appears your mom has sent you a Christmas present--a hideous sweater. There are no classes today so go complete some other tasks, help some people, or just cause some mischief.
Nerd Challenge
Locate the Dragon Wing Comics store in town and enter. Approach the clerk and trigger the marker to begin the task. The nerd club meeting is downstairs--looks like a little Grottos and Gremlins. The nerds will let you join the party if you can beat Fatty’s ConSumo high score of 1,010 lbs. Explore the nerd’s hangout for a radio transistor that can be taken back to the hobo for more combat training.
Walk up to the ConSumo arcade machine and trigger the marker to begin the challenge. Instructions are to get your sumo to grow as much as possible by eating good food and avoid eating bad food. The healthy food includes apples, fish, and rice; the bad food includes rotten apples, rotten fish, and rotten rice. Avoid the blowfish and watch out for the other sumo who bounces you around.
The food items begin small but grow larger and larger as the game progresses. The bigger the food item, the more poundage added to your sumo. Avoid the other sumo because they can bounce you around into bad food or into blowfish. Stay away from the edges if possible because you never know what could pop out. The middle is safer. Weave around bad items and snag good food and reach a score of over 1,010 lbs. Complete the challenge to earn the nerd clubhouse and the bottle rocket launcher.
Comic Klepto
Trigger this task late in the afternoon in front of Dragon Wing Comics. Some kid has stolen comics and the clerk tries to give chase but suffers an asthma attack. He’ll give you $5 bucks if you catch the thief.
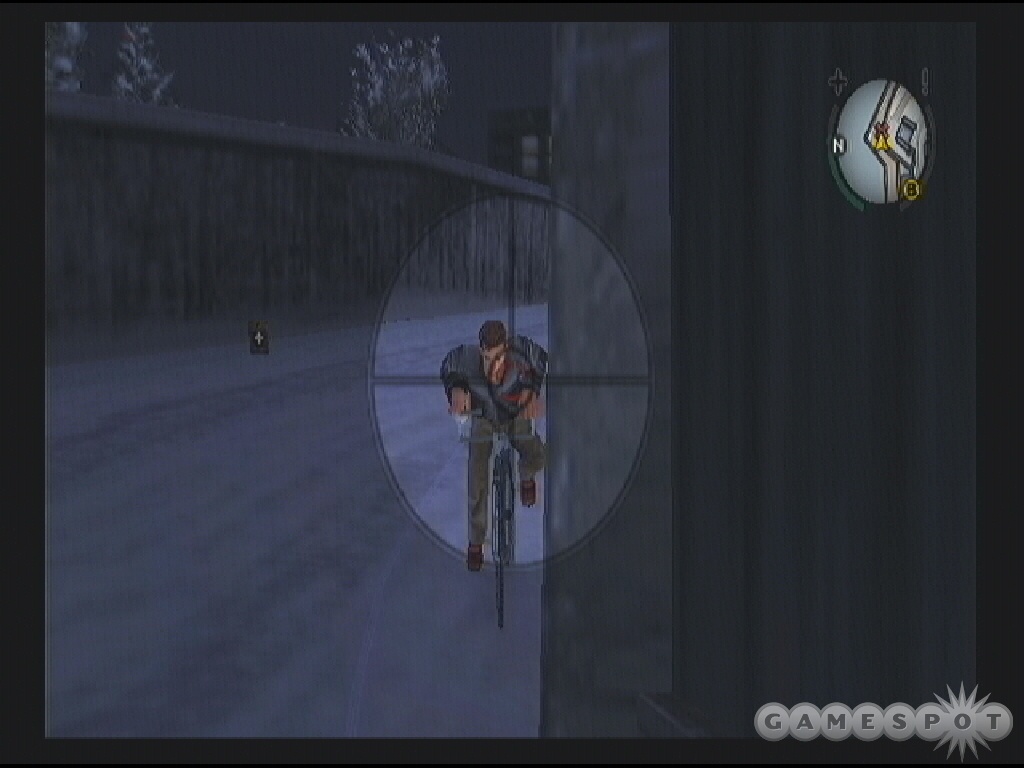
You must catch the thief before he returns to school. When you regain control you’re chasing him on a bike. You can punch left or right if you get beside him or use projectile weaponry to take him off the bike. Toss a firecracker at his back to knock the kid off of the bike. Note that he’ll be doing the same to you; watch out for the firecrackers he drops behind. After knocking him off the bike, finish the job and grab the comic. Return to Dragon Wing to get your reward, which turns into $30.
Jealous Johnny

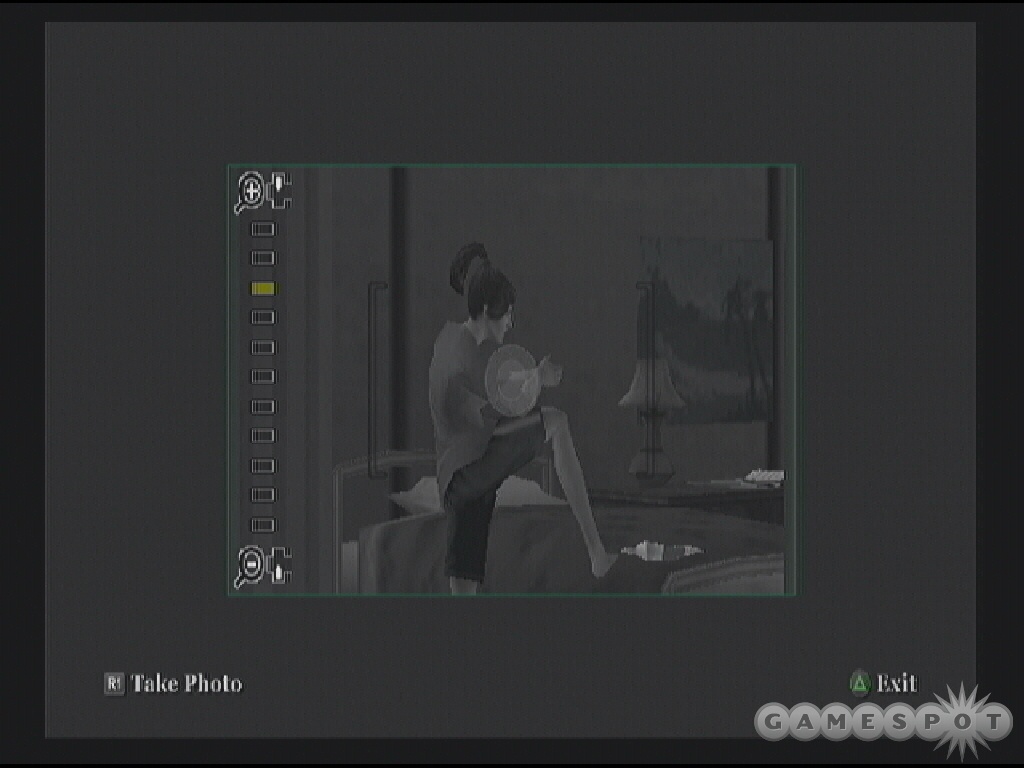
Locate the marker for this task at the entrance into New Coventry, the next part of the map opened up in this chapter. Johnny, whom you met at the opening of the chapter, wants your help. He thinks his love, Lola, is with some rich kid named Gord. He wants evidence--photographic evidence. You need to take photos of Lola kissing, holding hands, and getting gifts from Gord.
Lola and Gord are marked on the mini-map. Move toward their position. Remain at a distance and use your camera and its zoom function to snap shots of their cheating behavior. Don’t get too close and if they start toward you or look in your direction, back off.
You must take all three and you don’t have unlimited time. Your pictures must have a green square around them to be good. Even if someone is in the way, as long as it’s a "good photo" then you will have completed the objective. After obtaining all three photos, return to Johnny and receive $20 bucks and +5% to greaser respect.
Bait
This task appears at the same location as Jealous Johnny; find it at the entrance into New Coventry. Johnny decides to teach Gord a lesson. He wants you to lure Gord into an abandoned building. Your first objective is to find Gord. He’s in Bullworth town and marked on the mini-map.
Ride your skateboard (or grab a nearby bike) to the location marked on your mini-map. You’ll find Gord leisurely riding a bike around. You must provoke him and get him to follow you. Toss an egg into his back or knock him off his bike. Watch out for any police officers patrolling the area; they don’t look too kindly on random acts of violence.

As soon as you’ve knocked Gord around, get on a bike (either Gord or his friend’s bike) and start pedaling toward the marked location on the map. If you’re told you’re losing Gord, turn around and wait for him to appear. You can also press the left analog stick down to check behind you to ensure Gord is following. If for any reason you get knocked off the bike, get back on and go to the marked location with Gord close behind. Once there, go inside; it’s a bike park and Johnny is inside waiting.
Now you need to help Johnny beat up the preppies. There are bikes and firecrackers going off everywhere. Don’t stand still or it won’t take long for your health to drain under all the explosions. The greasers can do a lot of the work for you if you just want to lay low. While on your bike, target preppies and toss firecrackers or use your bottle rocket launcher if you completed the nerd challenge. You can also get on the ground and look for preppies off their bikes and beat them into submission. Complete the task for a $20 reward, -5% to preppy respect, +5% to greaser respect, and this current location, the bike park, gets unlocked.
Glass House
Begin this task at the English classroom inside the main school building after classes have ended. Looks like the English teacher is hitting the bottle again; he wants revenge against Mr. Hattrick. Your first objective is to proceed to the school parking lot; it’s marked on your mini-map. It’s the lot with the abandoned school bus.
Mr. Hattrick is about to pull out. You must follow him to his home. Equip your skateboard and quickly move in behind Hattrick’s vehicle. Hit the "Triangle" button once you’re close enough to grab the bumper and hitch a ride. Once you’re latched on, just enjoy the ride. You’ll automatically let go as Hattrick enters his property. Once you regain control, you’re told to get onto his property. Move quickly; this is a timed event.
You must now break as many windows and potted plants around Hattrick’s house as possible. There’s a greenhouse in Hattrick’s backyard. Windows are better than plans so use your slingshot to take out a bunch of windows. You can target more around the house.
Eventually the cops arrive and add a bit of pressure. They’ll begin patrolling the grounds looking for you; if you’re spotted, expect the officer to give chase. Don’t get caught. Keep running around. You can still shoulder tackle potted plants as you run from the police. Run around long enough and you’ll lose them then you can take out more windows or keep busting the plants. A meter on the right side of the screen reveals your damage. Fill it completely to finish the objective.
Time to run! You must get out of Hattrick’s yard. Go through the open front gate and avoid the police. You don’t have to get far to win the mission and receive the $40 reward money.
Tagging
Start this task in front of Harrington House on the school campus. You have a chat with the preppies about the situation between Johnny and Gord. He wants you to send a message to the greasers. You get spray paint in your inventory and are instructed to proceed to New Coventry.
Ride your skateboard out of school and go right into the town of Bullworth. Take the first right after the bridge and head toward New Coventry. When you reach the tunnel, it’s time to lay down your first tag.
Approach the mark on the wall and hit the "Triangle" button to start tagging. You need to hit "X" and move the left analog stick in the shape illustrated to complete the tag. Hit "X" again when prompted.
You’re told to buy more spray paint at the grocery store. Do so at the one in New Coventry--don’t leave New Coventry or you will fail the task. Proceed to the New Coventry Yum Yum Market and purchase another can of spray paint.
Once outside you’re instructed to lay down five more greaser insult tags. Tagging locations appear on your mini-map so head to the nearest five and start tagging. You’re told that the amount of your reward can depend on which locations you choose (tag the rooftop locations for a higher reward). Complete all five and receive the reward, -25% to greaser respect, +5% to preppy respect, and unlock tagging.
Greaser Challenge
Find the marked location on your mini-map in New Coventry (close to the tagging locations if you go there right after the Tagging task). You barge into the greaser hangout with fists flying. You are told to defeat all of the greasers. Put those gym and hobo moves to good work. Battle three first then a trio of reinforcements arrive. Use your grapples and combos. Engage one at a time and be sure to pick up any dropped sodas to replenish health. Defeat all greasers to unlock the Greaser Hideout as a save location. The room also contains a Monkey Fling arcade game.
Wrong Part of Town
Trigger this task at the Library on school grounds. You’re called over to a side table by a nerd. Apparently the greasers are after Algie for going after Lola...at least allegedly. You’re told to search for Cornelius, the scrawny kid in the acting club.
Return to the Boy’s Dorm and find Cornelius on the right side; greasers are getting ready to pound the poor drama kid to a pulp. Most of the greasers run off to find Algie but a couple remain. Defend Cornelius from the brutes. Beat them down in quick fashion with a couple combos. You learn that Algie is in New Coventry--find him!
Ride your skateboard off school ground and toward New Coventry (right out of the school then right after the bridge). Find Algie deep into New Coventry. Move toward the marked location on your mini-map to find him. You’ll discover Lola in an alley dumping some preppy--seems like both kids were led on by the seductive Lola.
The three of you hop on bikes but the greasers are close behind. You gain control in aim view. You’re sitting on the back of the bike and using your slingshot to nail chasing greasers. Aim the targeting cursor with the left analog stick and fire the slingshot with the R1 button. The hardest part is aligning the cursor while the bike continues to turn on its way back to Bullworth Academy. Shoot any greasers that get close but don’t hesitate to fire long-range if there are no immediate threats. You can hit greasers from a distance.
Survive back to school and you’ll have one more task--escort Algie back to Earnest. It could be after curfew at this point. Just run forward to Earnest while avoiding prefects to complete the task. You receive $20, -5% to greaser respect, and +5% to nerd respect.
Lola’s Race
Proceed to New Coventry near the Algie’s location in the previous task. The exact spot is marked on your mini-map. It would be wise to save your game at the greaser’s hideout before starting Lola’s Race. It’s nearby and will save time if you want to restart.
Lola instigates a bike race between you and Johnny. This is a challenging race against three other greasers. You can use punch attacks and toss projectiles but it’s just as important to be smart on the track. Watch for shortcuts. For instance, near the beginning after a couple small jumps, go through the area on the left side of the track--avoid the structures--and proceed to the next checkpoint. This avoids going around a slower curve to the right.
Also, there’s a short section where train cars are moving around. Avoid running into them; look for their position as you approach and move accordingly. After the tracks, watch the mini-map for paths that branch off the main route. For instance, after passing the mine shaft, look to the right for a shortcut. These aren’t vital since the greasers always seem to catch up but they could help.
Greasers will try and cheat by pushing over trees in your path. Move around the tree or bike jump over them. Win the race and receive -20% to greaser respect and the Lola’s affection.
The Tenements
Move to the entrance to New Coventry (where you first met Johnny) and trigger this task. Lola meets you here and wants a favor (how can you deny her?). She left all of her belongings in the abandoned tenements where the greasers hang out--she wants you to get them back.
Your first objective is to find and enter the abandoned tenements. Move to the northern section of New Coventry--the marked location on your mini-map. You’ll find a radio transistor at the entrance to the tenements. Open the window to enter.

It’s time to collect Lola’s items. This is a greaser hideout after all so you’ll have to muscle your way through the rooms in search of Lola’s gear. If you look to the right of your start position, you’ll notice a wall--you’re told to find a way to break these down. Move forward and eliminate a couple enemies. Grab their lumber and use the weapon against them. Pick up Lola’s address book in the room.
Climb the stairs. There’s a big hole in the floor so you’ll have to move on the exterior balcony to the left to get around it. Battle a couple more enemies here. On the other side, locate Lola’s Lipstick in the room.
Climb the next set of stairs. Three greasers with slingshots wait at the top. Drop them fast with a projectile or beat them to a pulp. Check the nearby bathroom for Lola’s Bag of Laundry...which triggers your meeting with Norton. He’s armed with a sledgehammer. Firecracker projectiles work well against them as do bottle rockets. You’ll find more firecrackers in boxes inside the room. Norton isn’t quick so just toss projectiles at him and use hit and run attacks. Grab his sledgehammer after you’ve eliminate Norton. Time to get the remaining items!
Bust the wall on the second floor to find Lola’s keys. Break the wall on the first floor to find Lola’s Perfume. With all five items in hand, it’s time to leave. Return to Lola near the New Coventry entrance and receive a reward of $20, -10% to greaser respect, and some good old-fashioned makin’ out.
The Rumble
Locate this task at the entrance into New Coventry (the same tunnel as in previous tasks). You find Lola in there who’s looking for someone to fight for her, as usual. When you regain control, it looks like there’s a riot going on. You’re told to find Peanut. Proceed to the marked location on the mini-map.
As you near Peanut, he’ll zoom off on his bike. Don’t worry; just keep moving toward his position. Peanut is leading you into an ambush. When you get close to Peanut, you’ll appear in an alley; three greasers are there ready to rumble. Demolish them with projectiles or your unlocked combat maneuvers.
Johnny starts roughing you up in the alley but the cops arrive. You begin on a bike fleeing the police. Just keep pedaling away from the cops until you find Johnny, which begins the next task.
Fighting Johnny Vincent
You begin this battle under heavy attack. Johnny Vincent moves around on his bike and smacks you around with a lead pipe. Several of his greaser pals line this battle arena and toss eggs and other projectiles at you. Pete is here to help but you’ll have to help him first. Your first objective is to get rid of the greasers around the battle arena so Pete can get to a crane that activates a magnet...this will take care of Johnny!
Note that there are several crates scattered around here that contain sodas should you need additional health. Hit the greasers around the arena with firecrackers or the bottle rocket launcher. Your slingshot will do but it takes more time. After clearing all of the greasers, Pete activates the magnet, which pulls Johnny off his bike. Engage with your fists to finish Johnny off; he’s not much of a match for your combinations. Completing the mission adds +100% to greaser respect and +10% to nerd respect. This should put you at 100% for every group except jocks and townies...at least for now.
Chapter 4 - A Healthy Mind in a Healthy Body, and Other Lies.
You’ve earned the respect of the preppies and greasers in recent battles but a new problem has arisen...the jocks! The pea-brained musclemen knock Pete to the ground--now have some new people to have fun with.
Here’s to you Ms. Philips
This task is unlocked after classes and if you completed Glass House in chapter three. Find the marker at the entrance to the Art class on the school’s second floor. Ms. Philips just completed her masterpiece, a painting of...a banana. She needs you to fetch some things for her--she has a date planned.
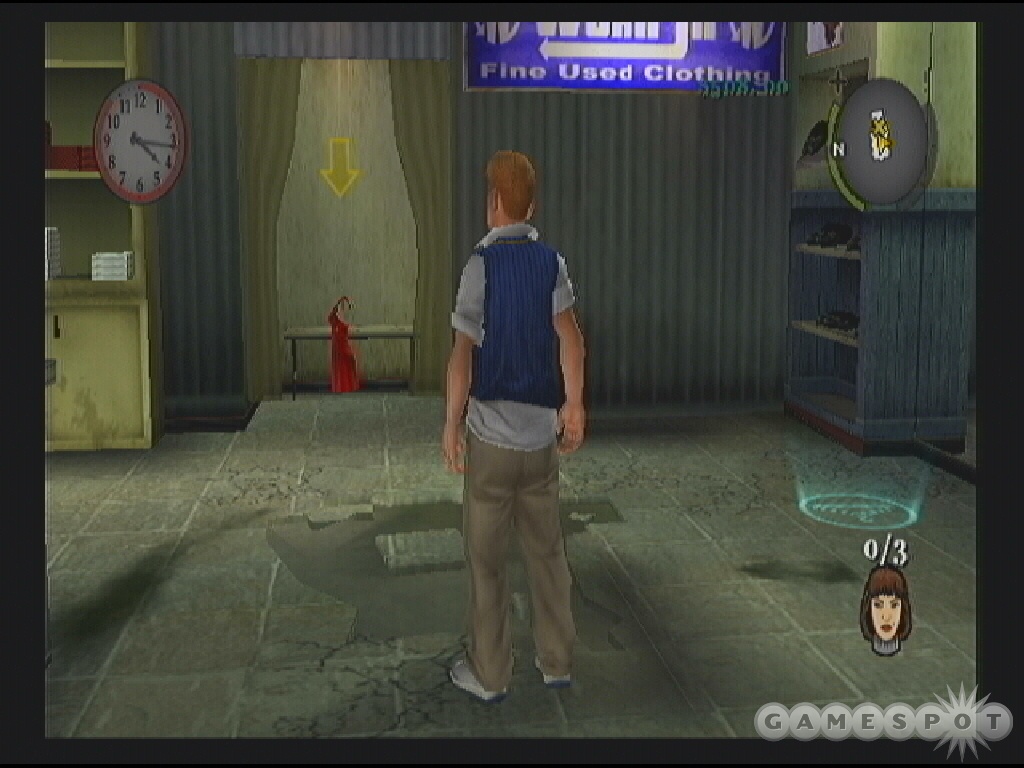
You have three items to fetch: a dress, some perfume, and a necklace. The red circle around the clock indicates your time limit. Ride your skateboard out of school and proceed into town by taking a right after you leave school grounds. Proceed to the marked location: Worn In Used Clothing. Enter the store and grab Ms. Philips red dress from the dressing room.
Exit the clothing store and head west into Old Bullworth Vale. It’s a long ride; look for a bike along the way. The first marked location should be the Hair, Nails, and Beauty store. Grab the bottle of perfume off of the counter. The next shop is just left up the stairs; it’s the Aquaberry store where you purchased your slick preppy vest. Enter and grab the necklace off of the counter.
Return to school on skateboard and bike and return to the second floor Art class room. Find Ms. Philips out front. Approach her to automatically hand over the items. You’re excited for your date...until you realize it is that drunk English teacher going out with Ms. Philips. You receive $50 as reward as well as a small loss of pride.
Stronghold Assault
Trigger this task in front of the school Library. You arrive asking the nerds for help against the jocks. Algie doesn’t seem interested. Pete suggests talking with Earnest, who controls the nerds. You need to show Earnest who is boss.
Ask the nerds about Earnest’s whereabouts. Talk with the nerd outside the library. Hold L1 and press "X" to ask him about Earnest. He won’t speak and actually looks like he wants to fight. Punch him a few times until he reveals Earnest is at the observatory. You’re told to search the side alley beside the Library.
Hop offer the wall to get to this alley. A nerd is stands guard at a locked gate. Punch the nerd a few times (they give up really easily) to get the gate’s key code. It’s 1138--the perfect nerd code! Proceed toward the observatory.
Nerds armed with firecrackers and bottle rocket launchers guard this route to the observatory. Run quickly up to the nerds and punch them into submission (it only takes a few hits) or use your own projectiles (bottle rockets, firecrackers, stink bombs, slingshots) to retaliate. Jump over the walls using the "Circle" button. The next area is also crawling with nerds. Battle the gang in a similar fashion. Grab any dropped soda cans to replenish health. Find nerds on higher ground in the next section. Use your bottle rocket launcher to eliminate them. Continue toward the final gate where a cut scene interrupts the action.

The nerds have a turret! Fortunately for you, the nerds reveal that the transformer is their weakness. Rocks and pillars provide cover against the nerds’ turret. Pummel the closest nerds while taking cover behind the boulders. A few more nerds stand near the turret. You can take them down from long-range or use the pillars as cover as you approach the wall underneath the turret (a safe spot from nerd fire). Eliminate the two nerds, equip your bottle rocket launcher, and enter aim mode. Shoot the transformer (the pole with the red light).
Now it’s your turn to get on the turret, also known as the spud cannon. Use the spud cannon to destroy the observatory doors. More nerds will attempt to stop you; they will appear in the windows and on the observatory’s balcony. Return fire with the cannon. Once the door is destroyed, you run inside and face off against Earnest. This mission also lowers nerd respect to 0%.
Nerd Boss Fight
Earnest has another spud cannon but it also has another weakness. You must destroy the two power generators on either side of the cannon. There are a few pillars in the room to provide cover. The spud cannon fires in four shot cycles. Wait for it to "reload" before making your move. You can hide behind the front two pillars and shoot the power generators with your bottle rocket launcher from relative safety. Wait for four shots, then move out of cover and shoot the generators in aim mode, then return to cover and repeat.
Destroy the power generators forces Earnest to move. He now tosses small bombs from his catwalk. There are two more generators to destroy. Use remaining rocket ammo then switch to the slingshot. Charge a shot and shoot the generator. Check the area for soda cans (break any crates as necessary).
Earnest uses his final weapon, a handheld spud cannon. Hide behind the two pillars and shoot two more generators. Wait for three shots then move out from cover to take your shot. Destroy both remaining generators to defeat Earnest. He hands you the portable spud gun and +50% to nerd respect.
Jocks Challenge
Enter the gym and find the red trigger marker to begin the task. The jocks offer a Dodgeball challenge. The game is exactly the same as gym class, though a tad more difficult. Win the game of Dodgeball to unlock the Jock Clubhouse as a save location; find it to the right of the the football field.
Galloway Away
Start this task in front of the art class. You must have completed "Here’s to you Ms. Philips" to open this task. You enter and speak with Ms. Philips about her date. It turns out Mr. Hattrick convinced Mr. Galloway to enter himself into an asylum to help control his drinking. You offer to help get Mr. Galloway out.
Your first task is to travel to the observatory tunnels. If you finished the Nerd Boss Fight, you know where you are going. From the school grounds, go toward the football field. Take a left and follow the path toward the marked location on the map. Walk through a couple tunnels before instructions are to meet Ms. Philips in front of the asylum. Walk to the marked location and you automatically meet with Ms. Philips.
You must now find a way inside Happy Volts Asylum. Walk around the right side of the asylum to the marked location--it’s a tree that’s conveniently close to the asylum fence. Climb the tree and hang on the branch. Move until you’re over the fence then drop down onto the asylum grounds. Some crazy patient greets you--don’t anger the watcher! You must find a way to destroy the statue power source. You must avoid the orderlies. You are trespassing after all!
Hug the fence so it’s on your left side. Stay crouched to avoid detection. Watch your mini-map to spot the location of orderlies and their field of vision. Your goal is to reach the small building ahead. On the other side of the building there’s a ladder. Climb it to the roof while making sure you aren’t spotted. Equip your slingshot and zoom in on the red light on the statue’s base (there’s an arrow pointing toward it). Shoot the light to disable the statue.
Go down the ladder and hug the fence again. While crouched, move along the fence (it’s on your right side) and notice the orderlies have moved a bit. The front door to the asylum is to your left. Wait for them to look away then sprint to the door and open it.
You must now sneak around and find Mr. Galloway. Check your mini-map. There’s an orderly to your right. Wait for him to move before opening the door ahead of you. Open the next door into A Block. Go left once in A Block and move to the end. Go around to the right and find Galloway in cell 5. Avoid the orderly on the right side of A Block. You rescue Mr. Galloway and receive a nice $60 reward.
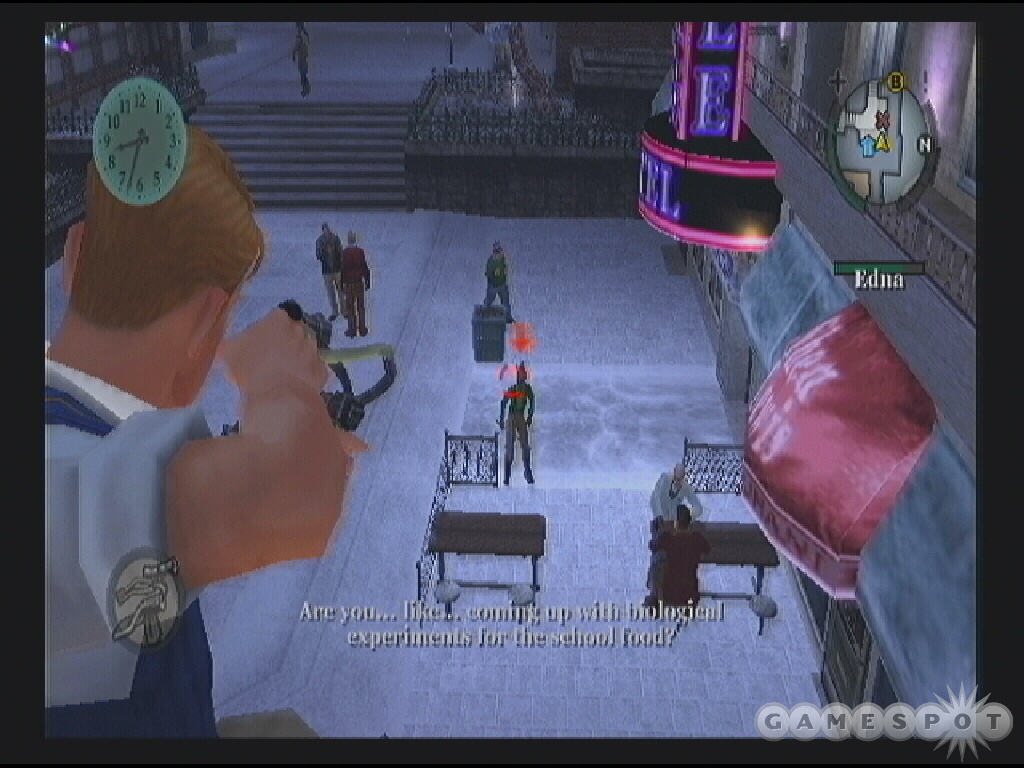
Paparazzi
Start this task in front of the observatory. Earnest has a plan to help take down the jocks. He suggests some "inappropriate" pictures of Mandy, the head cheerleader...Earnest promises they aren’t for him.
You need to take three pictures of Mandy. Proceed into the gym. The cheerleaders are practicing. Equip your camera and snap a shot of Mandy. Make sure you have a green square around the photo and it will be a successful shot (the measure of inappropriateness is up to you). Mandy leaves cheerleader practice to get cleaned up...off to the girls’ dorm!
Go around the right side of the girls’ dorm and climb into the attic (you know how to get in if you completed the Panty Raid mission). Descend the staircase and watch the monitor patrol the halls. Avoid the monitor’s line of sight. Wait for the monitor to enter a room so you can sprint over to the bathroom. Mandy is in one of the shower stalls. Remain in the bathroom area and zoom the camera onto the stall and snap a good shot.
One photo remains. Mandy retreats to her room. Move to the hallway and equip your camera. Zoom in on Mandy inside her room and snap a good picture. Exit the girls’ dorm through the entryway. Don’t slow down; the hall monitor will give chase! Once outside, return to the Library and hand over the shots to an eager Earnest. You receive -10% to jock respect, +5% to nerd respect, and $25.
Funhouse Fun
Enter the Library and find the trigger to start this task. You speak to Algie about your next quest. The nerds have taken over the Carnival funhouse--the jocks will be there this afternoon. Get to the Carnival funhouse as quickly as possible. This is a timed event so ride your skateboard and hitch a ride if possible (or find a bike). Take a left out of Bullworth Academy and follow the road along the shore. You’ll pass through a tunnel and reach the Carnival.
Purchase a ticket and enter. Move to the back left of the Carnival to find the fun house. Once inside you’re told to meet up with the nerds. Move forward and crouch at the small entrance over the narrow walkway. Save Bucky and Fatty from the jocks; punch the ones in the blue shirts!

Bucky and Fatty need your help. Escort them out of the fun house. Jump up onto the table to reach the blue book. Push the blue book to lower a nearby ladder. Drop down and climb the ladder.
Next you need to reach the graveyard control room. You’re running sideways now. Beware of the scythes. Time your movement through the graveyard once the nearest scythe has risen. Enter the control room then operate the reapers using the marked trigger.
The jocks are following the nerds through the graveyard. Press the "X" button when a jock gets under a scythe to knock the jock out. There are only three jocks. Time the scythe just before the jock gets underneath it. Exit the control room and use the marked location to enter a maze. Here you need to search for the nerds.
In the maze, open the door on the left. Go left then right through the opening. Follow the winding corridor to the open door at the end. Go around to the right and find Fatty. Retrace your steps until there’s a closed door on the right. Make sure Fatty gets close to you then hit the button on the right (it closes the door to the corridor you just left). Find Bucky inside this room. Now you must escort both out of the maze. Return to where you found Fatty and continue to the end of the hall and find the blue door.
You’re now in a mineshaft and you must disable the miners. The miners swing their shovels, which inflict heavy damage. Avoid the miners’ shovels while you move to the control room. Be extremely careful because if you get hit too many times and are struck down, you will fail and have to start the entire mission over again.
At the end, climb the ladder. Jocks stand at each control station. Beat them down with your combat moves or toss a projectile from a distance. Activate all three control stations to disable the miners. The nerds flee; drop down and follow them. In the next location you have to find the nerds again. Find each nerd to the right and left looking at the mirrors. Move up the staircase behind you then through the curtains on the left. Open the door at the end to complete the mission. You receive $25, -10% to jock respect, and +5% to nerd respect.
Defender of the Castle
Begin this task in front of the observatory. The nerds are preparing the observatory against an attack from the jocks (retaliation for the Mandy pictures). Earnest hands you a spud cannon to defend the nerds’ castle. You’re told to proceed to the barricade.

Move to the barricade and join the other nerds in its defense. Stand on the hill to the right of the barricade and repel the jock onslaught. You could also go toe-to-toe on ground level but expect to take more damage down here (collect any dropped sodas).
Some jocks will attack the barricade from close range while others use projectile attacks from longer range. Use aim mode to target the jocks. When instructed (which could be when the barricade falls; it seems inevitable) return to the observatory. It’s time to man the spud turret! Grab some sodas on the ground before heading up the stairs to the right of the observatory entrance. Use the turret!
You can’t let the jocks breach the observatory gates. Fire the turret at the jocks that are running toward the gate and not those hiding behind pillars (in other words, fire at the football uniforms with the red arrow, not the other jocks). You can line up your aim pretty tight to the columns on the left side and just keep firing at the jocks that round the corner toward the observatory. Don’t stop firing at an incoming jock until the red arrow disappears. You receive -10% to jock respect, +20% to nerd respect, and $25 for completing the task.
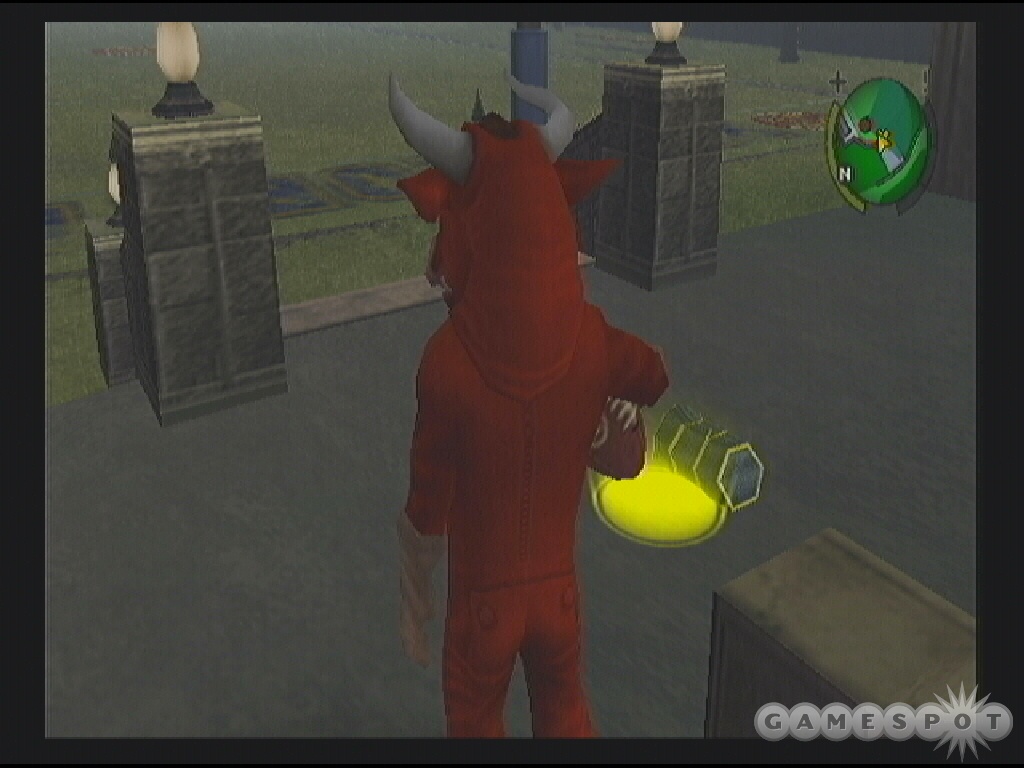
Nice Outfit
Find this task in front of the observatory. Earnest has another brilliant idea--steal the school mascot costume! You must travel to the football field and annoy the mascot! The jocks are, to put it mildly, not very friendly so you will attract a lot of attention wandering around the football field bothering the mascot.

If you want a big fight, you’ll get one. You can also use the tree from "The Slingshot" task back in chapter one. You may have to battle a jock to climb that tree but it’s worth the effort. Keep shooting, hitting, bothering, annoying, etc, the mascot until the meter on the right side of the screen fills completely.
Driving the mascot to full annoyance has its price: the jocks and the mascot chase you from the football field into the pool area. But it’s a trap laid by the nerds; your nerd friends ambush the jocks leaving you and the mascot along the in gym. Time for battle!
Put to use lessons learned in gym and from the hobo and beat the mascot into submission. Watch for the mascot’s bull rush attack; press "Triangle" rapidly when prompted then move out of the way of the charging bull. Take advantage of the mascot’s disorientation with more punches and kicks. Defeat the mascot and receive -10% to jock respect, +5% to nerd respect, and your own mascot outfit.
Discretion Assured
Locate the trigger for this mission inside the gym. You find Mandy on the gym bleachers; she’s upset about the "inappropriate" pictures (turned into posters!) going around town. Can you say, guilty? You offer to do something about those posters. It’s the least you can do, right?
You must tag over the posters of Mandy. The clock in the upper left corner of the screen indicates a timer so work quickly. Move forward and return to the main school building. The posters are marked on your mini-map. Spot several hooligans around the first poster. Approach the poster and press the "Triangle" button to tag. Use the left analog stick and follow the line to complete the tag.

Find the second poster near the Library: a couple nerds finding too much enjoyment out of the poster here. Hit the "Triangle" button and finish the tag. This resets the timer but presents a new task: do the same to the Mandy posters in the town of Bullworth.
Exit school grounds and go right. Skateboard into town and proceed straight north to the City Hall building. The posters on the wall just ahead--tag it using your spray paint. A short cut scene reveals another poster being put up.
Proceed south and find this newly minted poster next to the Dragon Wing Comic store. Battle the bat-wielding grunts checking out the nerds’ work. Skate directly east to the closed theater and tag the last poster. You’re told to meet Mandy by the dorm. Mandy rewards you with a kiss and -5% to nerd respect. She likes you!
The Big Game
Start this task in front of the nerd hangout, the observatory. Earnest is enjoying the latest issue when you walk in and surprise him. He says that Operation Trojan Cow is ready! Earnest tells you to rendezvous with his agents in the field.
You begin in front of Thad at the gate. You must perform the mascot "Cow Dance" to get by. Approach Thad and press "L1 + X" to initiate the dance. Follow the button sequence and Thad opens the gate. Proceed to the nerd agents--locations are marked on the mini-map.
As you leave the observatory area, you must perform the Cow Dance again for a group of jocks. Perform the button sequence then continue onward. Approach the first nerd agent behind the bleachers. He hands you a rigged football. You must put the rigged football in the marked bag. Find it near the jock clubhouse. If you’re stopped to do the Cow Dance, perform it again to avoid detection.
Talk to the next nerd agent behind the nearest bleachers. He hands you some glue--put it on the team bench to cause a "sticky situation". Approach the team benches. When told to perform the Cow Dance, do it! If you’re in the middle of the dance and asked again, you can press L1 + X and activate it then as well. Apply glue to all the marked bench locations.
Proceed north then east toward Harrington House to rendezvous with the next nerd agent. Algie tells you to "enhance" the jock’s sport drink in their cooler. Move toward and enter the gym. Perform the Cow Dance for the cheerleaders then the jocks downstairs. Use the marker near the cooler to perform your "enhancement" to their sport drink. Exit the gym.
Talk to the next nerd agent near auto shop. Melvin has your next quest: spread marbles on the football field. With the marbles equipped, press "R1" at the marked locations on the football field to complete the task.
There’s one final nerd agent. Go north to the statue. The text on the scoreboard has been reprogrammed--you just need to hit the switch. Return to the football field. Perform the Cow Dance as requested to avoid detection. Move to the right side of the scoreboard and use the switch. Completion provides $25 and -10% to jock respect rewards.
Jock Boss Fight
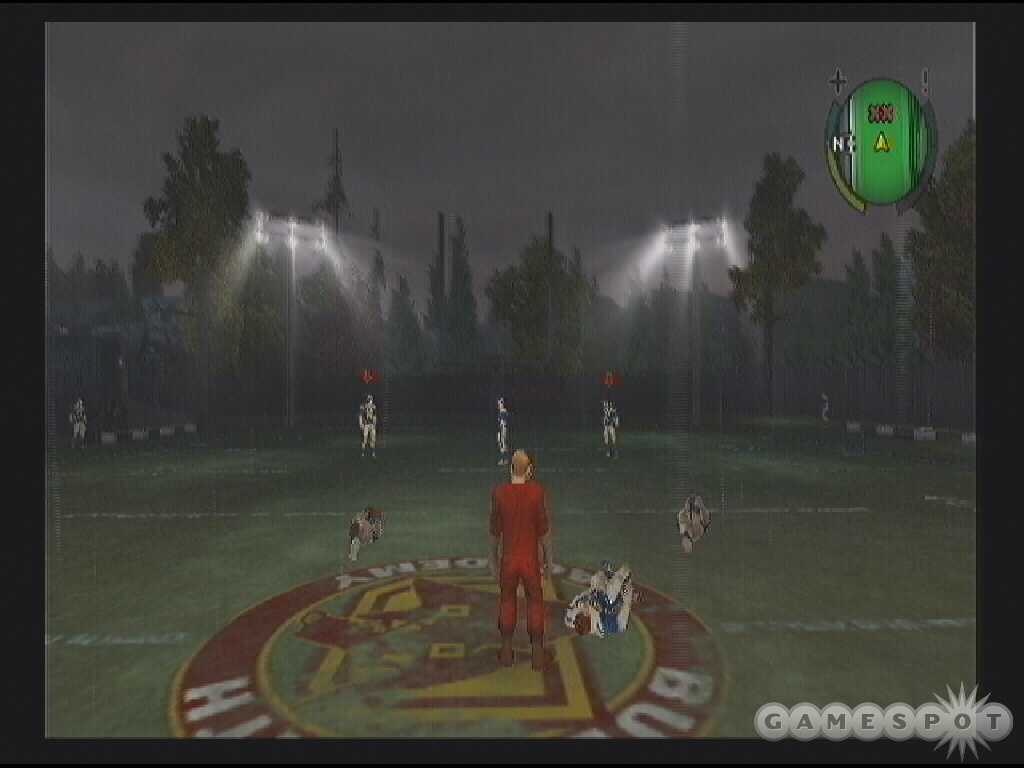
You reveal yourself to the jocks. It’s time for a fight! You’re told to dodge the balls the Ted throws then pick them up and toss them back. You’ll use the rigged ball against the offensive linemen. Dodge the incoming ball, grab it with the "Triangle" button then press R1 to fire the ball at one of the offensive linemen.
Take out the three offensive linemen with the rigged footballs. The quarterback will keep tossing more. After you knock out the three, Ted moves back and gets fresh guards and the process begins again. Occasionally you’ll have to deal with a football player running onto the field. Knock him out.
Eventually Ted gets into the end zone and is defenseless. He’ll make a run for it. You must sack the quarterback! Chase him down and knock him down with a tackle or a punch to complete the mission. You receive +100% to jock respect and +10% to nerd respect. You should now be at 100% for all except townies.
Chapter 5 - The Fall and Rise of Jimmy Hopkins, Aged 15
You laugh with all your new friends: nerds, greasers, jocks, and preppies. Even Mandy gives you a kiss. You are king of the school! And it seems to have gone to your head--things can only go down from here.
Cheating Time
Locate the trigger for this task in the school parking lot. You must have completed Galloway Away in Chapter Four to initiate this mission. Mr. Galloway is back at school...and drinking again. Galloway acclaims Mr. Hattrick is selling tests to rich students, such as that preppy Derby.
You’re instructed to get some evidence, first by climbing to the auto shop rooftop. Follow the mini-map to the marker. The ladder is on the left side of the building (the marker is a triangle, indicating it’s on the roof). You must take a photo of the preppy selling tests. Zoom in your camera on the action below you. Snap a good photo (green outline) to complete the objective. Off to the gym!
Enter the gym and go left, downstairs into the locker room. Cross it into the pool area. You’re told to hide in the pool stands. Climb the stairs on the right side of the pool to get to the marked location. When instructed, zoom in your camera on the jock and prep to get the exchange on film. Make sure you snap a successful shot.
You must now follow the preppy. Exit the double doors. Climb the ladder to the left of the door. You find the preppy and Mr. Hattrick making the monetary exchange. It’s time to return the evidence to Galloway. Return to the school parking lot to find Galloway and Hattrick speaking with the principal. Complete this task for $60 bucks.
Making a Mark
Start this task inside the Boy’s Dorm. Your worshippers suggest leaving a mark on City Hall. First you must travel to the Bullworth City Hall. Ride your skateboard into town and head straight north to the marked location. You may want to stop at Yum Yum to buy some spray paint in case you run out while tagging. Once at City Hall, go around the right side of the building and find the ladder. Climb a few ladders to read the top of City Hall and the tag location.

Perform three tags on City Hall to complete the word "Bullworthless". The townsfolk aren’t too impressed with your artistic display. You’re told to photograph your accomplishment from the street. Climb down the ladders--don’t jump off--to avoid injury.
You aren’t safe on the ground. The police have arrived and will try to arrest you--getting the picture won’t be easy. You don’t have to go all the way out into the mayhem in front of City Hall, however; after getting down off of the roof, go to the fence (hugging the left side). You can still zoom in on the tag from here and get a good photo. You don’t have to be at the marked spot.
Return to your dorm room. Pete’s there--he claims you have a load of problems. Gary’s up to something because everyone wants a fight. You pulled off a great stunt but this mission cost you -75% respect to nerds, jocks, preppies, and greasers. But it did give +25% respect to townies.
The Gym is Burning
Trigger this task at the entrance into the Athletics section on school grounds. Mr. Burton and some jocks are outside the gym--it’s on fire! And you’re being blamed!

You run inside the gym to help the trapped students. Start by grabbing the fire extinguisher; it’s on the left side near the stairs leading to the locker room. Approach the three fires and enter aim mode. Spray the fire extinguisher using the R1 button to clear all fires before the timer expires. Approach the fire as close as possible while spraying the extinguisher to ensure the flames expire.
After clearing the flames, help the students. Hit "Triangle" repeatedly to lift the metal structures trapping the students. The one near the basketball hoop will require additional assistance. Recover the fire extinguisher and use it to put out the fire trapping the student.
Rescuing the students triggers a cut scene with Mandy. Now you must hunt down the pyromaniac. Descend the stairs into the locker room and search the girls’ locker area. The perpetrator flees but you complete the mission successfully. It earns you $30 bucks and +15% to jock respect.
Rats in the Library
Start this mission in front of the school Library. The nerds are frantic outside of the Library: the Library is full of rats! Enter the library and find it, yep, full of rodents.
Dispose of the rats any manner you wish: firecrackers, slingshots, bottle rockets. Slingshot has unlimited ammo so it’s probably the easiest route but if you see the rats gathering in groups (they do so around the corner of the Library), toss a firecracker close. There are 20 in all and this is a timed event. Watch for the rats to stop in certain areas and fire the slingshot in aim mode close by to eliminate the rodent. Complete the mission for +15% to nerd respect and $30 bucks.
Finding Johnny Vincent
Proceed to the entrance into New Coventry to find the marker for this task. Apparently Johnny Vincent is missing. Someone said they saw a couple asylum orderlies driving up to his house. You offer to find Johnny.
You must first reach the asylum, which is on the southeastern section of the map--quite far from your current location. You can go the route you used in the previous task (if you completed it), go through the newly opened industrial park, or even take the railroad track (the long brown strip on the main map). Reach the track by moving to the eastern side. Find the ramp up to the tracks. It’s a long haul, though. At the end, drop off and double back across the wooden bridge. Follow the road to the right and up the incline to the asylum entrance.
Go around the right side of the asylum to a tree marked on the mini-map. Climb the tree, hang on the branch, and drop down onto the asylum grounds. Your next goal is the front door--beware of the orderly patrols. One orderly patrols the area in front of the door. Wait for him to walk away from your location. Crouch and sneak up to the front door and enter.
Inside the asylum, wait for the orderly to the right to move out of the way. Enter "A Block". Move down the right side of A Block until you hear talking. Duck into one of the cells to stay out of view. Wait for the orderly to pass by then exit and head east to the next set of doors.

Watch out for the orderly sleeping in front of you. Sneak around to the right side and go through the doors. Sneak forward while the orderly to the right is looking away. You’re now in "B Block". Beware of the orderly patrol. Wait for him to pass and go around him through "B Block" and speak with Johnny in his marked cell.
You must get to the laundry room and find an orderly outfit. Watch the nearby orderly patrol. Return to the entrance to "B Block" and enter the Employees Only door. Watch your mini-map and wait for the orderly in the next hall to move away. Enter the shower area. Be patient and wait for the orderly to move away. Use the wall as cover. When he moves on the right side of the room, go to the left and enter the door on the opposite side. Grab the orderly uniform inside.
You’re now dressed appropriately. Head to the marked location and speak with the orderly. You tell him to go on break. Enter the control room and use the switch to open the cell doors. Johnny escapes! Meet with him outside the control room. He suggests getting out the back way. Follow him. Avoid the crazy patients!
Reach a lockdown. You must find another way out. Move forward to the gate obstructing "C Block". Press "Triangle" to open the gate. Go along the left side of "C Block" and find the marked location on the upper right side. Stand at the Employees Only doorway to exit. You gain +25% to greaser respect and earn $30.
Townies Challenge
Locate this mission inside the industrial part on the southeastern side of the map. It should appear after you rescue Johnny Vincent from the asylum and won’t be far away.
Three dropouts lurk inside. Beat them up using any means. They charge you as a group, which is quite inviting for one of your projectile attacks. Eliminate the first three and a reinforcement trio arrives. Finish off all of the townies to complete the task. You receive the Townie’s Hangout, a new save location that includes a bed, wardrobe, and a video game.
Revenge on Mr. Burton
Find this task in the Blue Skies Industrial Park, newly opened area in chapter five. It’s by a decrepit looking house near the medical center. Check the mini-map and follow the road to the marked location.
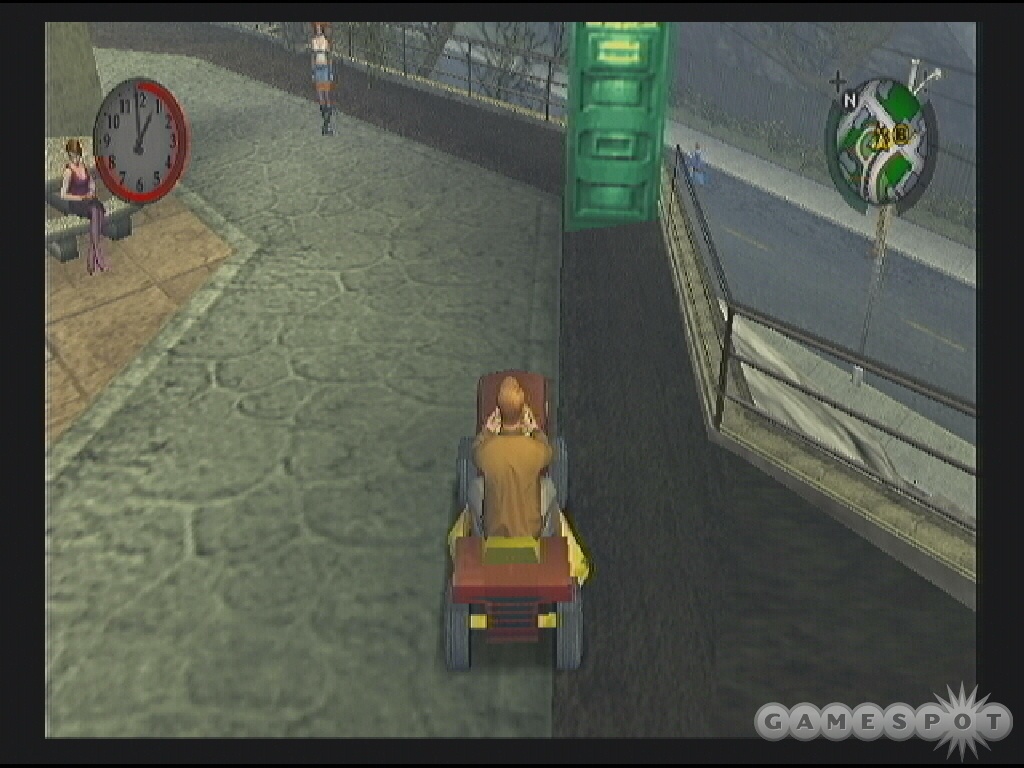
Meet the feisty Zoe (love the shorts!). She was at Bullworth once but got kicked out. Zoe doesn’t like Mr. Burton--something she shares in common with you. Zoe has a plan and you happily oblige. Your first objective is to travel to the hardware store in Bullworth town. Return north toward the town. Locate the hardware store--impossible to miss as if you are following main roads you’ll run right into it. Search the alley behind the store for the bolt cutters.
Next you must meet Zoe at the park in Old Bullworth Vale. Ride a skateboard or bike west toward Old Bullworth Vale. The park is the gardens you rode through a few times getting to the preppy house. Locate Zoe on the eastern side of the park near a port-a-potty. Approach her to receive your next task.
You must destroy three potties before Mr. Burton arrives; these are marked on your mini-map. This is timed so move quickly. To destroy a port-a-potty, just punch it a few times until the door falls of its hinges and the "X" marker on the mini-map disappears. Return to Zoe when the mission is completed.
Mr. Burton uses your port-a-potty, Zoe works her magic, and you’re told to ram the tractor into the potty! Hit "Triangle" to ride the tractor and press "X" to move it forward. Steer into the port-a-potty to complete the task. You receive $30 as a reward...and the sight of Mr. Burton really, really dirty.
Preppies Vandalized
Trigger this task inside the Old Bullworth Vale gym--where you boxed the preppies. It’s upstairs. Someone stole the preppies’ boxing trophies. The preppies blame the greasers but you have other suspicions. To maintain the peace, you volunteer to search for the stolen trophies.
Go to the greaser hangout in New Coventry. Proceed east from Old Bullworth Vale, pass the school, and move into New Coventry. Find three greasers in an alley at the marked location. They point you toward a warehouse in the Blues Skies Industrial Park.
Turn around and proceed directly south toward the Blue Skies Industrial Park. Follow the main road and take a right near Zoe’s house. Follow this road around to the south and locate the marked warehouse entrance.

You enter the warehouse and are instructed to look for the townies putting rats in crates and get photographic evidence (aha...the library rodent culprits!). Check the left wall for a bunch of tombstones. These are from the Halloween mission back in chapter one. You can destroy them all if you want.
Watch out for the townie patrols. Wait for the guards to move away from your location (check the mini-map for the townies’ green line of sight). Crouch and take cover behind boxes, crates, and shelves. You need to make your way to the back right side of the warehouse and find the staircase. Move up and hide behind the boxes just right of the stairs. Equip the camera and zoom in on the townies stuffing rats in boxes. You may have to move out a bit; ensure a green-outline good photo to complete the task.
The townies are burning preppy trophies at the docks. Descend the stairs and follow the running townies. Keep your distance and exit through the warehouse door. You can follow the townies just remain back. Follow them to the marked location. If a townie spots you, just run away or punch him out. It won’t affect the objective.
You must take more photographic evidence--this time of the burning trophies. Hug the left side of the dock with camera equipped. Avoid disturbing the nearby townie. Move until the burning trophies are in view. Zoom in and snap a successful photo. By this time you’ve probably alerted the nearest townie. Make a run for it back to the gym in Old Bullworth Vale. Find the preppies out front. You receive a reward of $30, -25% to townie respect and +15% to preppy respect.
Smash It Up
Check Zoe’s house again (seen in the task Revenge on Mr. Burton) late in the evening to trigger this mission. Zoe wants to have some fun. She leads you to a familiar location: the Spencer Shipping Warehouse. The rules of this game: whoever smashes up the most stuff wins! The more monetary damage you cause the better. And you better beat Zoe!
Look for unique items, such as tables, televisions, birdbaths, glass, etc. Ignore the crates and boxes. Look for ladders on the shelves. Climb them to find more valuable items at the top.

Basically you must get to items before Zoe does. If you’re good enough, you can keep her under $2500. If you’re slow, she’ll score upwards of $3200. Go for the items in the middle row (birdbaths, tables, televisions, glass) then work along the left side of the warehouse (chairs, tables). Eliminate the televisions in the office area. Don’t go up ladders yet. Instead go to the warehouse upper floor (up the stairs then up another incline). The room contains potted plants. Not much money each but a lot if you destroy them all. Zoe heads up here at some point so you want to get here before she does. She’ll lose valuable time running up and down--you’ve already cleared it out!
Return downstairs and cross the narrow plank to the upper shelf and destroy the statues and columns. Climb down and find anything else to beat up. You should have plenty of damage by now. See if you can beat $4200! Defeat Zoe at her game and you receive a reward of $60. Plus Zoe calls it the best date ever!
Go See the Principal
Walk into the principal’s office to initiate this task. Crabblesnitch does not have kind words for you. In fact, he tells you Bullworth is not for you. And calls Gary responsible! Not sure what’s worse. Crabblesnitch strips you of your school uniform and schedule and banishes you to the dorms. You have been expelled.
Busting In Part I
Exit the Boys’ Dorm and find the trigger to start this mission. Pete suggests trying to find out what’s going on and to find out Gary’s involvement. Pete says you should get the help of Russell, who may not hate you yet. Travel to Old Bullworth Vale to find Russell’s house. Approach his garage door to trigger the next objective.

Russell wants to destroy things. Hop on the scooter. Press "X" for gas, "Square" for brake, and "Circle" for horn. If you don’t have a helmet, you will alert the cops if they see your reckless driving. Beware of motorcycle cops especially. If they get in front of you, it could be over; you’ll be stuck and Russell won’t stop. Complete go-kart missions and you can earn a crash helmet (see the Extras section of this guide).
You can’t let Russell get too far away or you fail the mission. Drive carefully around corners; the scooter isn’t exactly known for its handling. Give it gas to move around corners quickly. If you let off the gas, the scooter turns very slowly.
Once you arrive in Blue Skies Industrial Park, Russell drives through the barricade. The next mission automatically begins.
Busting In Part II
Zoe finds you. The power plant generators are overloaded; you must reset the generator switches to restore the power. Zoe leads you to the switches but a couple dropouts guard the location. Eliminate them from long-range with one of your projectile weapons. Activate the switch on the right side. Duck under the obstruction and defeat a couple more townies. Go up the stairs on the right side and activate the second switch.
Proceed to the Red Star building. Zoe will lead the way. There’s a closed gate; Zoe says the switch is in the office. Enter through the door on the left. Press the switch in the back of the room (some spud gun ammo on the table). Next find your way into the chemical plant. Follow Zoe to the closed gate--she suggests finding a way through the train yards.
Go to the marked location on the mini-map in the train yard. Activate a series of levers to move the train car and open a new route. This leads to the other side of the locked gate. Defeat a couple dropouts on the way. Fire a projectile weapon before they can get close. Proceed to Zoe.

Move up the incline around the building. You’re looking for the switch that opens the gate keeping Zoe from advancing. Eliminate some more townies back here; a shot from your slingshot works well. Press the switch to let Zoe through.
Return down and go through the open gate on the left. Go up the stairs and around the right side to find Zoe in front of a squad of townies. Zoe distracts the squad while you keep going to find Omar and the key.
Go up the ramp on the right and get to the rooftop. Omar and a couple buddies are waiting at the top. Toss a projectile into the group. Defeat the townies and recover the key from Omar. Use the key on the nearby door.
Search the chemical plant for Edgar. Get to the bottom of the corridor and use the keypad. Run to the elevator just to see Edgar going down. Find a ladder on the right side. Slide down the ladder. Go to the opposite side of the catwalk and drop down onto the large containers. Crawl under the next series of pipes. Traverse the narrow pipe (rapidly press "Triangle" to pull yourself up if you fall).

Continue to another ladder and slide down. Traverse another long pipe and find the ladder just ahead taking you down another floor. Cross the room to find Edgar...he’s got a really big weapon.
Block his weapon using a makeshift shield (press the R1 button). Hurt Edgar with some of your projectile weaponry. After exhausting some of his health, he’ll flee down the stairs. Pick up his dropped pipe before going down. It’s now a deathmatch! Beat him down with the pipe. Circle strafe around him and just keep wailing on him. After the battle, you two compare notes and discover a common enemy: Gary. The task earns +100% to townie respect.
Complete Mayhem
Start this task in front of Zoe’s house in Blue Skies Industrial Park. Zoe tells you that every school faction is fighting each other. Love will have to wait--duty calls. You must first gain access to the Wonder Meats factory.
Proceed south in the industrial park and find cops around the Wonder Meats entrance. You’re trespassing when you go through the gates so expect the cops to respond. Nab a bike or the scooter nearby to move through the factory quickly to the building holding Russell. Approach Russell (he smells like meat!) and prepare for your escape.
Russell can run fast--that’s for sure. Equip your skateboard and follow him. You’ll stay ahead of the cops. After rescuing Russell, you automatically return to the school. You meet Edgar there to come up with a plan to stop the school fighting. Russell is the muscle...he likes to hurt people, for peace.
First order of business is to search the school buildings for the four faction leaders.
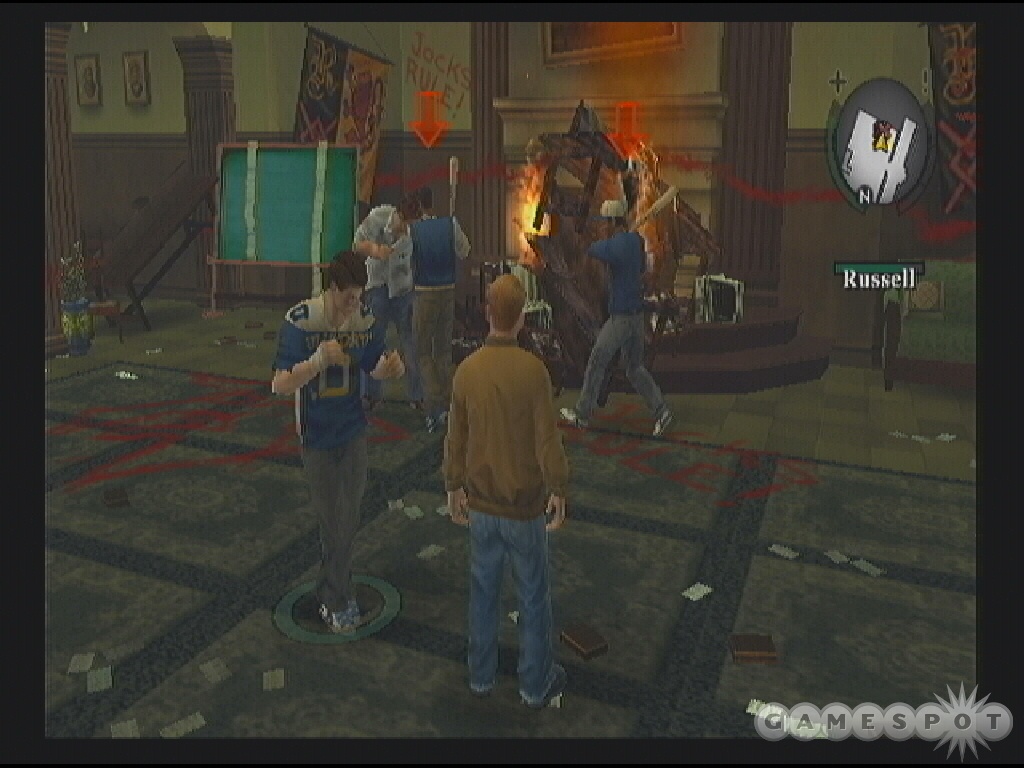
1) Go to the girls’ dorm. Johnny Vincent has ransacked the place. You and Russell beat down the three greasers. Use the nearby soda machine if you need to replenish health.
2) Enter the Library. Ted and the jocks are in control of the nerds’ former hangout. Crush the jocks with the help of Russell. Use their baseball bats against them.
3) Proceed to Harrington House. It’s Derby in his fashionable robe. Defeat the preppies. Try using the plates on the walls.
4) Get to the school gym. It’s Earnest and the nerds. It should only take a single combo to eliminate a nerd.
Meet Edgar inside the school. Go to the front entrance of the main school building to meet the objective. Prefects capture you...momentarily until Russell shows up...but the prefects do steal all of your weaponry. Gary makes his grand entrance and the final showdown begins.
Final Showdown
Your orders are to chase Gary. Get across the narrow wooden plank. If Gary knocks you off, use the "Triangle" button to get up quickly. Climb up the ladder. When Gary pushes over the concrete blocks, press the left analog stick to the right and avoid them.
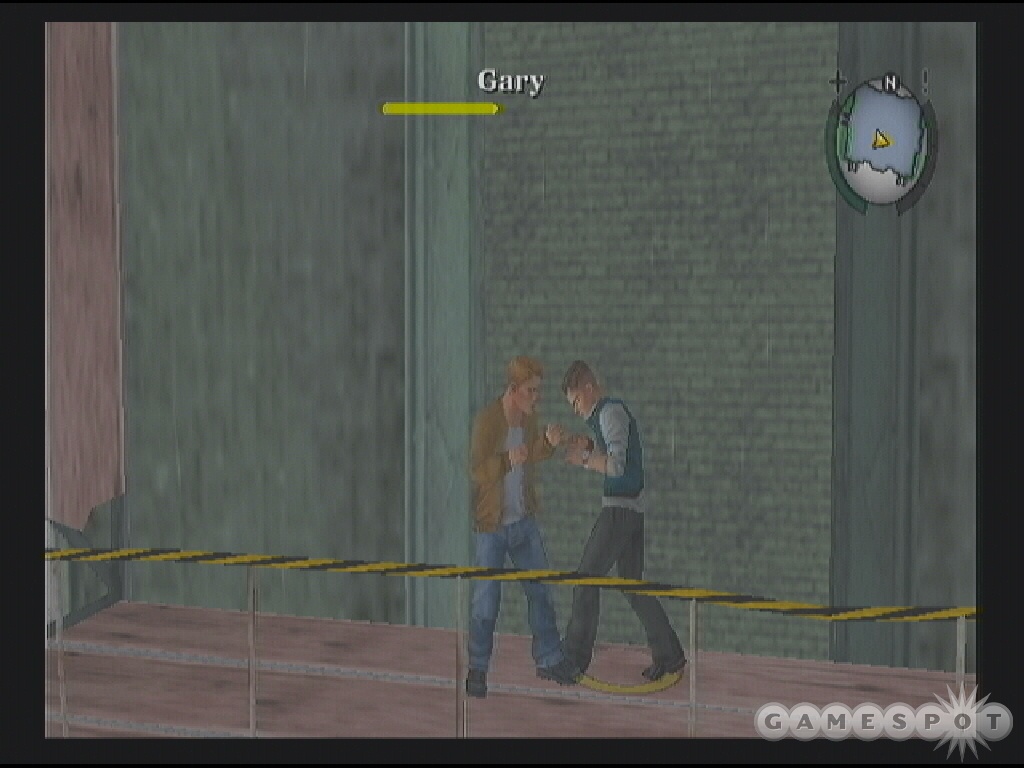
Cross another couple planks (grab the soda in between). Avoid the first tossed brick then start across. You’ll get to another ladder where Gary pushes over more concrete blocks. Move the left analog stick right to avoid them. Cross the larger plank to the stairs. Avoid the falling bells: go right then left and meet up with Gary.
The ultimate high school fistfight begins! Utilize your combos learned in gym and from that masterful hobo. Gary grabs you occasionally; press the "Triangle" key repeatedly to get out of his grasp. Unleash your combinations until Gary falls all the way into the principal’s office.
It’s time to set things right: get Zoe back in school, get Mr. Burton fired, and find a nice spot for Petey. You even get the girl and your respect goes to 100% for all factions.
Chapter 6 - Endless Summer
School is out. During Endless Summer you can complete all of the races, carnival games, collection items, classes, arcade machines, and other fun activities you didn’t have time for during the main storyline. Check the Extras section of this game guide for tips on many of these optional tasks.
Chapter 2 - Classes and Upgrades
Bullworth Academy offers its students a diverse curriculum that provides a well-rounded education...of mini-games! There are two classes per day and the classes go in a three-day cycle (though it takes until the second chapter of the storyline to see all of them). The first class begins at 9am and the second class starts at 1pm.
You aren’t forced to attend classes. You can skip and perform other missions or just run around town causing trouble. But completing classes does offer unique rewards only found in school (that sounds like a public service announcement!).
Each class has five levels of completion; completing each level provides an upgrade. Completing all five ends the class, though you can still keep attending for extra benefits (for instance, going to gym again can earn money).
This section covers all six classes: Chemistry, English, Art, Gym, Shop, and Photography. You’ll also find details on combat upgrades provided by the hobo who lives behind the broken down school bus on campus.
Chemistry
Finish the button sequence to complete "the experiment" and receive your upgrade. The button sequences get progressively harder with each class (by adding more buttons into the mix) Chemistry upgrades provide new projectile items for the chemistry set inside your dorm room.
Chemistry 1
Complete the button sequence. Uses Square, Circle, Triangle, and X buttons.
Upgrade: Fire crackers now available from chemistry set.
Chemistry 2
Complete the button sequence. Uses Square, Circle, Triangle, and X buttons.
Upgrade: Stink bombs now available from chemistry set.
Chemistry 3
Complete the button sequence. Uses Square, Circle, Triangle, and X buttons and adds the upper shoulder buttons.
Upgrade: Itching powder now available from chemistry set.
Chemistry 4
Complete the button sequence. Uses Square, Circle, Triangle, and X buttons and adds all shoulder buttons.
Upgrade: Full ammo is now available from chemistry set (double of everything).
Chemistry 5
Complete the button sequence. Uses Square, Circle, Triangle, and X buttons and adds all shoulder buttons.
Upgrade: Your chemistry set is no longer one use per day.
Art
The objective of art class is to draw boxes with your paintbrush to expose the hidden picture. Claim as much of the canvas as possible without getting in the path of enemies. You must connect your drawn lines to reveal the canvas.

There are three enemy types: the floater, crawler, and exploder. The floater is an eraser. It floats around the empty space and if it hits one of your drawing lines, you lose a paintbrush. The crawler is a pair of scissors that moves along the lines. Don’t let it come in contact with the paintbrush. The exploder detonates during the task--avoid it! There are a few power-ups that appear as well. Watch for the hand--it freezes enemies in place!
Watch the direction of the erasers. They won’t turn on a dime and go after you. When the erasers are moving away, make your paintbrush box. Obviously the larger the better but it’s more about creating successful boxes. Careful making too many small boxes, though; this takes time and allows the scissors to catch your position. Try to box in an eraser or scissors to destroy the enemy.
If you’re old enough, you may remember the old Taito arcade game Qix! I know that’s a weird name, and it was a weird game, but the Art class mini-game is quite similar to that old classic.
Art 1
After the class you have a chance to put the move on Angie. Follow the instructions to give her flowers then a kiss.
Upgrade: Earned ability to exchange gift for a kiss. +25% health bonus for kissing.
Art 2
Upgrade: Kiss a girl and you’ll get a 50% health bonus.
Art 3
This class adds another pair of scissors to avoid!
Upgrade: Kiss a girl and you’ll get a 75% health bonus.
Art 4
This class is a step up from the previous three. Expect to face three scissors, faster erasers.
Upgrade: Kiss a girl and you’ll get a 100% health bonus.
Art 5
Be prepared to dodge three erasers. Also, there’s now the exploder enemy in the middle.
Upgrade: You can kiss girls without having to give them a gift.
English
In English class you must find as many hidden words using the scrambled letters before class ends (essentially before the time limit at the top of the screen expires).
Each class has a set number of three-letter, four-letter, five-letter, and six-letter words that are made from the scrambled letter set. Here’s a good tip: the words are sorted by length and are in alphabetical order. Let’s take English 1 for example. If you see that the second word in the three-letter word list is Low but can’t figure out the first word, you know it must start with letter L or the letter E.
English 1
Scrambled Letters: LWLEMO
Time Limit: 3 minutes
Passing Percentage: 55%
Three-Letter Words: Elm, Low, Mew, Mow, Owe, Owl, Woe
Four-Letter Words: Meow, Mewl, Mole, Moll, Well
Six-Letter Word: Mellow
Upgrade: You’re earned the ability to apologize more effectively.
English 2
Scrambled Letters: TGFSHI
Time Limit: 2:45
Passing Percentage: 57%
Three-Letter Words: Fig, Fit, Ifs, Its, Hit, His
Four-Letter Words: Figs, Fish, Fist, Fits, Gift, Gist, Hits, This, Sift, Sigh
Five-Letter Words: Fight, Gifts, Shift, Sight
Six-Letter Word: Fights
Upgrade: You’ve learned the ability to give better shove taunts (L1 + Circle).
English 3
Scrambled Letters: SISMEL
Time Limit: 2:30
Passing Percentage: 56%
Three-Letter Words: Elm, Lei, Lie, Mil
Four-Letter Words: Elms, Isle, Leis, Less, Lies, Lime, Mess, Mile, Mise, Miss, Semi, Slim
Five-Letter Words: Isles, Limes, Miles, Seism, Slime, Slims, Smile
Six-Letter Words: Slimes, Smiles
Upgrade: Earned ability to apologize to prefects for small crimes.
English 4
Scrambled Letters: RYCOAN
Time Limit: 2:45
Passing Percentage: 55%
Three-Letter Words: Any, Arc, Can, Car, Cay, Con, Coy, Cry, Nay, Nor, Oar, Ran, Ray, Rya, Yon
Four-Letter Words: Cony, Corn, Cran, Cyan, Narc, Nary, Orca, Racy, Roan, Yarn
Five-Letter Words: Acorn, Carny, Corny, Crony, Rayon
Six-Letter Word: Crayon
Upgrade: You’ve learned the ability to give better taunts. You can now deal with bullies from a distance.
English 5
Scrambled Letters: GRGDEA
Time Limit: 2:40
Passing Percentage: 57%
Three-Letter Words: Age, Are, Dag, Ear, Egg, Era, Erg, Gad, Gag, Gar, Rad, Rag, Red
Four-Letter Words: Aged, Dare, Dear, Drag, Dreg, Egad, Gage, Gear, Grad, Rage, Read
Five-Letter Words: Agger, Gager, Grade, Raged
Six-Letter Words: Dagger, Ragged
Upgrade: Apologize to police for small crimes and they will leave you alone.
Gym
Bullworth Academy gym class is a mix of wrestling and Dodgeball (wasn’t yours?). In the wrestling class, you learn some new fighting moves to use during your extra curricular activities. Win the Dodgeball games and you receive an accuracy upgrade to your weapons.
Gym 1
Your first class is wrestling. Follow instructions to learn new moves
1) Grapple (Triangle) then Headbutt (Hold Square).
2) Grapple (Triangle) then Three Hit Charge Combo (Square, Square, Hold Square)
Defeat Fatty using your new maneuvers.
Upgrade: The maneuvers are added to your arsenal.
Gym 2
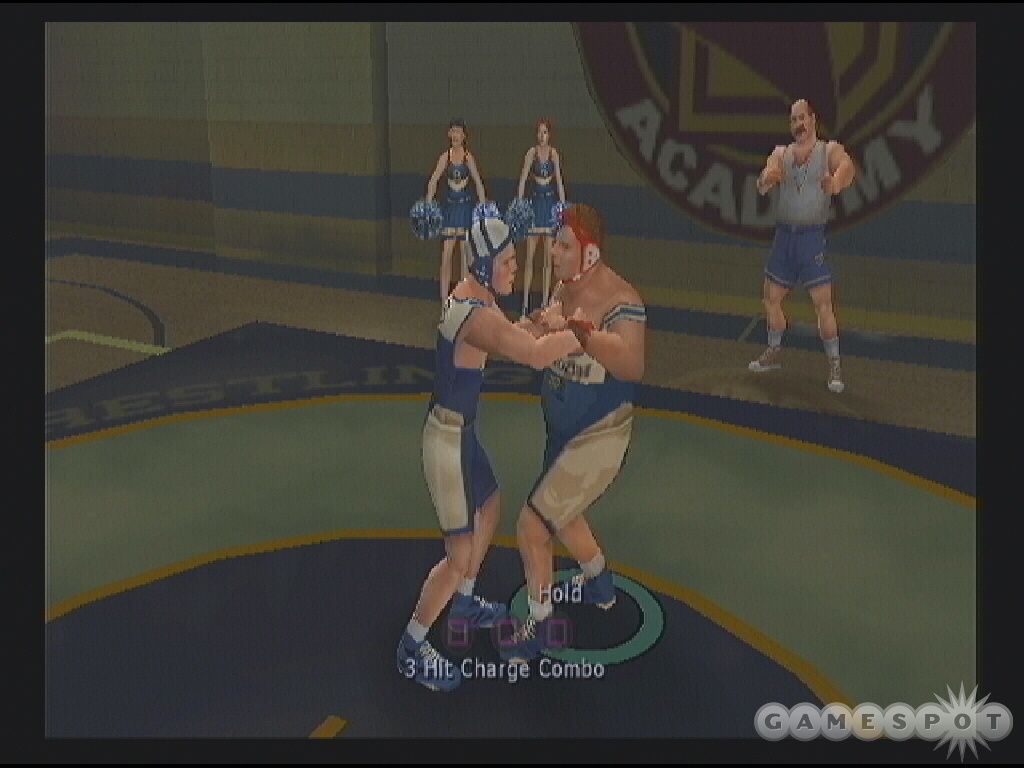
The second gym class is Dodgeball!
In case you don’t know how to play:
"Instructions: Defeat your opponents by hitting them with the ball. Dodge or catch enemy throws to gain possession. Use team work and execute combination moves to gain the upper hand."
While you’re holding the ball, press "X" to throw it, "Circle" to jump, and "Square" to pass the ball. When you aren’t the one holding the ball, press "X" to catch, "Circle" to dodge, and "Square" to switch player.
One of the best tactics seems to perform a jump before you throw the ball. For some reason, your opponent doesn’t know how to deal with it! Try different combos, like pass, jump, and then throw. If the other team holds the ball, be prepared to press "X" to catch.
Upgrade: Accuracy upgrade unlocked.
Gym 3
You’re back for some more wrestling instruction.
1) Grapple (Triangle) then Takedown (Circle)
2) After takedown, press "X" to dismount.
3) After takedown, press "Triangle" to pull up.
4) After takedown, press "Circle" to knee drop where it counts.
5) After takedown, press "Square, Square, Square" for combo attack.
Upgrade: You receive all those moves, labeled the Take Down Knee Strike.
Gym 4
Another round of Dodgeball--the instructions and tactics are similar to the previous class.
Upgrade: Accuracy upgrade unlocked.
Gym 5
A final round of Dodgeball as part of your gym class--instructions and strategies are similar to previous classes.
Upgrade: Accuracy upgrade unlocked.
Shop
The shop class is similar to chemistry--it’s all about matching the controller icons. This time, however, you must also use rotations of the left analog stick to complete the class. This can be tricky because the game will not give you credit for the rotation. It seems to help if you begin the rotation as quickly as possible. Don’t press in a direction and hold it for any amount of time. Make sure you continue the rotations and button presses until the icon stops blinking.
Shop 1
Upgrade: Basic BMX: Speed 2, Acceleration 2, Handling 4
Shop 2
Upgrade: new BMX: Speed 2, Acceleration 2, Handling 3
Shop 3
Upgrade: new BMX: Speed 3, Acceleration 2, Handling 4
Shop 4
Upgrade: new BMX: Speed 3, Acceleration 3, Handling 4
Shop 5
Upgrade; new BMX: Speed 4, Acceleration 4, Handling 5
Photography
The photography class (located in the Art classroom) begins after you obtain the camera. In each session, you’ll exit the class and be required to snap a certain number of photos of specific items before the timer expires.
Photography 1
Take pictures of the banners located around the school grounds.
- Above the main school entrance where you start.
- Near the girls’ dorm on the archway.
- Above the library.
- Above Harrington House.
- Above the shop class.
Return to the classroom after taking all five photographs.
Upgrade: You can save pictures to your photo album, located in the pause menu.
Photography 2
Take pictures of students for the yearbook.
Find any student with your camera equipped. Press the L1 button to target the student. You want to get a good photo, which means a headshot. Use the zoom feature to ensure a good photo. You need to take three pictures to complete the class. Return to the classroom after snapping the pictures.
Upgrade: You can now take photos of students for the Yearbook.
Photography 3

Take photos of hobos or dogs in New Coventry.
Skateboard into new Coventry. Locate hobos (bearded fellas usually) or dogs. The dogs will bite and probably chase you all around so it might be more enjoyable to look for the hobos (of course you can just kick the dog around). Take good photos (green border) then return to class. New Coventry is home to a lot of greasers so it’s wise to take this class after you have completed chapter three of the main storyline.
Upgrade: Extra photo album unlocked. You can now store 15 photos.
Photography 4
Go to the marked locations around town and take panoramic photos. Make sure the outline of the picture is green for a good photo.
- Inside the school grounds, take a picture of the main school building.
- The Bullworth Dam. Move onto the bridge connecting the town of Bullworth and Old Bullworth Vale.
- Old Bullworth Church. It’s on the northern side of Old Bullworth Vale. Follow the dirt road around to the north. Go through the iron gate through the cemetery to the marked location.
- Beach lighthouse. It’s the shoreline of Old Bullworth Vale.
- Carnival. You’ve been there during the story mode. Go along the shore and through the tunnel In Old Bullworth Vale.
After snapping five successful photos, return to the classroom.
Upgrade: Digital Camera. Use your digital camera to take color pictures.
Photography 5
Take photos of the freaks in the Carnival.
Proceed to the carnival and enter the "Freak Show" on the right side. To complete the task, you must take pictures of the following attractions.
- The Skeleton Man
- The Fat, Ugly Bearded Woman
- Siamese Sisters
- The Crazy Painted Man
- The Midget Wrestling
- The Last Mermaid
With successful photos in hand, return to the classroom.
Upgrade: Double tickets at the carnival games.
A Little Help
During the story mode, you help a hobo who lives behind a rundown school bus along the side of the school parking lot. You discover that if you return radio transistors to the hobo, in exchange he’ll teach you a new combat maneuver. Complete all six and watch the hobo finish his "project" and his unique exit from the game...guess that’s why he wanted all those transistors.
Radio Transistor 1
Complete the A Little Help task in story mode. Find the transistor on the rooftop near the auto shop area. It’s marked on the map as part of the mission.
Upgrade: Uppercut (hold Square)
Radio Transistor 2
Find the second transistor in the school basement boiler room. You’ll discover it during the Help Gary mission.
Upgrade: Leg Sweep combo: Square, Hold Square.
Radio Transistor 3
Locate the third transistor in the alley containing the homeless Santa and sedatives during the Cook’s Crush task.
Upgrade: Heavy Kick Combo: Square, Square, Hold Square
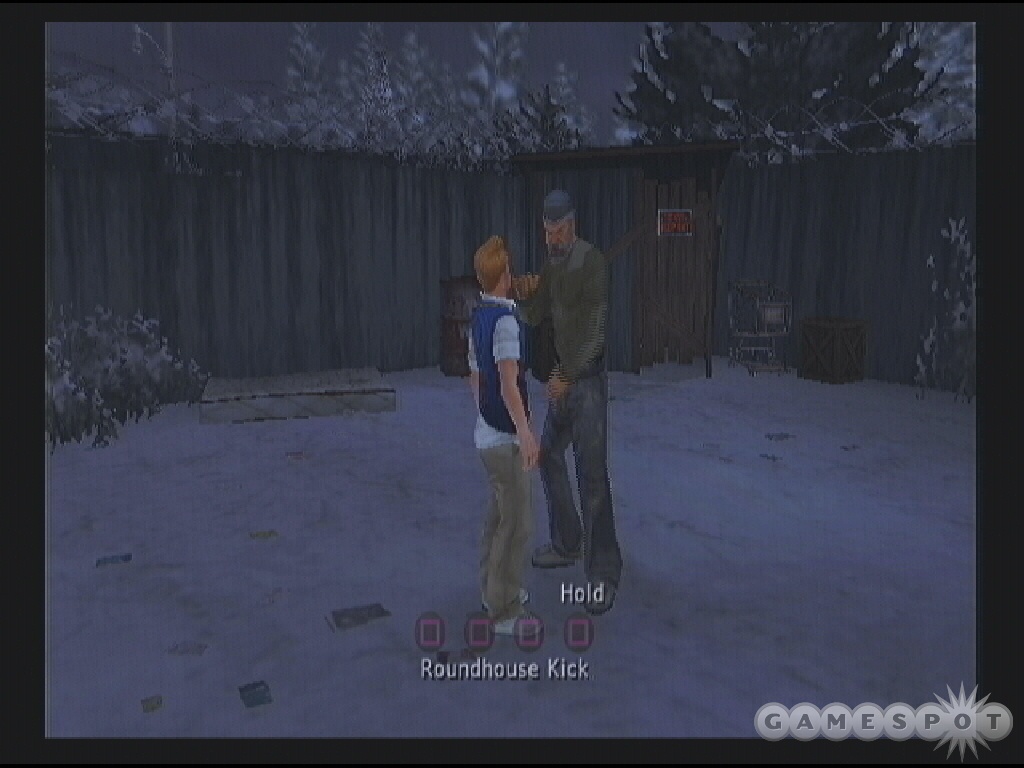
Radio Transistor 4
Find the fourth transistor downstairs in the Dragon Wing Comic store during the Nerd Challenge task.
Upgrade: 5-Hit Combo - Square, Square, Square, Square, Square
Radio Transistor 5
Locate the fifth transistor at the entrance to the abandoned tenements. It’s in the northern section of New Coventry and will be found during the task The Tenements.
Upgrade: Roundhouse Kick: Square, Square, Square, Hold Square
Radio Transistor 6
Find the sixth transistor on the Bullworth Dam at the far northern section of the river--between the Town and Vale on the map).
Upgrade: Overhead Punch: Square, Square, Square, Square, Hold Square
Chapter 3 - Extras
Like those other great Rockstar games, there are a lot of extra things to do in Bully. Earn extra cash by mowing lawns or racing go-karts and bikes. Visit the Carnival and earn tickets to win prizes for your dorm room or wardrobe collection. This section covers many of the extra games and optional tasks you can complete in Bully that aren’t part of the main storyline.
Errands
Early on in the main storyline you’re introduced to Errands. These are small optional missions that can earn you some extra cash and, on a few occasions, new clothing or items. Blue markers on the mini-map indicate errand opportunities. Search for errands all over the game world: inside the school building, on school campus, and all around the town locations at any time of the day.
Discover the first errand within the main storyline. You must take a package to Beatrice for Pete. Locate Beatrice at the marked location on the mini-map near the girl’s dorm and receive a $5 reward. The errand tasks are varied: you may be asked to pick three lockers, pull fire alarms, deliver packages, destroy items, or provide escort.

As mentioned, some of the errands offer more than just monetary rewards. For instance, check in front of burger joint in Old Bullworth Vale (near the shore). A guy asks you to make a few food deliveries. Deliver three packages of food to the marked locations. After completing the task, you receive some cash and a great (okay, it’s not that great) outfit!
There’s another errand in front of City Hall in the town of Bullworth. A police officer wants you to take a picture of his corrupt colleague. He points you toward the motel. Take a picture of the officer and unknown man in front of the motel then return to City Hall and receive a monetary reward and the Incognito Hat--shades and a fishing hat?
Check around the Dragon Wing Comics store in the town of Bullworth for a hobo looking for some spare change. Give him money (L1 + X) and he’ll reward you with a black cowboy hat.
Search the alley’s south of City Hall for a townie who wants to hit people with water balloons. Fill the water balloons at the marked location. You must climb to a rooftop and use the spigot there. Look over the rooftop and enter aim mode. Target a pedestrian and press R1 to launch the balloon. Fill another at the spigot and repeat until you’ve hit three. You can hit the same guy more than once. Be aware that it’s considered violence against adults. Complete the task for $20; it also unlocks water balloons!
A preppy near the lighthouse and beach clubhouse challenges you to swim around a buoy and back. Accept the challenge and quickly swim around the buoy and back to shore to receive money and the tiny swimsuit.
Penalty Shots and Keep-Ups

I’m certain Bullworth Academy doesn’t approve of gambling on school grounds...but it can be done if you search hard enough. After class hours, check the basketball court and in front of the football bleachers for two mini-games that can be used to earn extra cash through gambling.
Find Penalty Shots on the basketball court. You can wager up to $20 in this game where you’re trying to kick the ball into the hapless nerd. You have a limited number of balls and the nerd has a limited amount of health. Drain the nerd’s health completely to win the bet.
Hitting the nerd in different body parts inflicts different damage. The targeting cursor moves around wildly. Move the analog sticks to keep the targeting cursor moving as slowly as possible and near the nerd’s position. When the nerd stops to taunt, look for a chance to kick the ball when the targeting cursor is over a nerd’s body part.
Check in front of the football bleachers toward the observatory for Keep-Ups. This is an easier game to win than Penalty Shots (though neither is that difficult). Wager up to $20 that you can keep the ball off the ground through a series of kicks and headers. This amounts to a mini-game of following the left and right analog stick movements. Mimic the direction shown. Complete the sequence to win the bet.
Arcade Machines
There are a number of arcade machines scattered throughout the game. There’s one in the boy’s dorm, some at the various hideouts you’ll acquired throughout the story mode, and a whole collection inside the Souvenir tent at the Carnival. Beat the high scores (or beat the games that don’t feature scores) and all of the arcade games become free.
Future Street Race 2165
Imagine if Wipeout was 2D from an overhead perspective and it might look a little like Future Street Race 2165. The courses are fairly simple but be on the lookout for shortcuts. Energy fields block these areas so you can only use a shortcut when it’s unblocked--otherwise hitting the energy field will explode your vehicle and cost valuable time.
Don’t over steer the vehicle or you’ll pinball off of walls slowing your vehicle down. Utilize your rockets--there’s no limit--whenever there are opponents in front of your position. Don’t miss the boost pads! Find this game inside the boy’s dorm and the townie hangout. Place first in all three races to beat the game.
Consumo
Instructions are to get your sumo to grow as much as possible by eating good food and avoid eating bad food. The healthy food includes apples, fish, and rice; the bad food includes rotten apples, rotten fish, and rotten rice. Avoid the blowfish and watch out for the other sumo who bounces you around.
The food items begin small but grow larger and larger as the game progresses. The bigger the food item, the more poundage added to your sumo. Avoid the other sumo because they can bounce you around into bad food or into blowfish. Stay away from the edges if possible because you never know what could pop out. The middle is safer. Weave around bad items and snag good food and reach a score of over 1,010 lbs.
Future Street Race 3D
Imagine if Wipeout was 3D...wait. Okay, Future Street Race 3D is a lot like Wipeout. In fact, it’s the 2165 version of Future Street Race, just in 3D. The same strategies apply here. It’s a tad harder since you can’t tell where the other vehicles are in relation to your own (are they right behind you or do you have a big lead?).
Once again, look for shortcuts but avoid the energy fields blocking them. Keep your vehicle in the center of the track and don’t over steer into walls. Use plenty of rockets to keep opponents away from you. Find this game in the preppy hideout. Place first in all three races to beat the game.
Monkey Fling
Instructions are to fling your poo...that’s correct, your poo...at the spiders and bananas. Hitting a banana knocks them to the ground where you can eat the banana to earn more poo. Shoot the spiders before they hit the ground. Otherwise, the spiders crawl toward your position and could bite you!
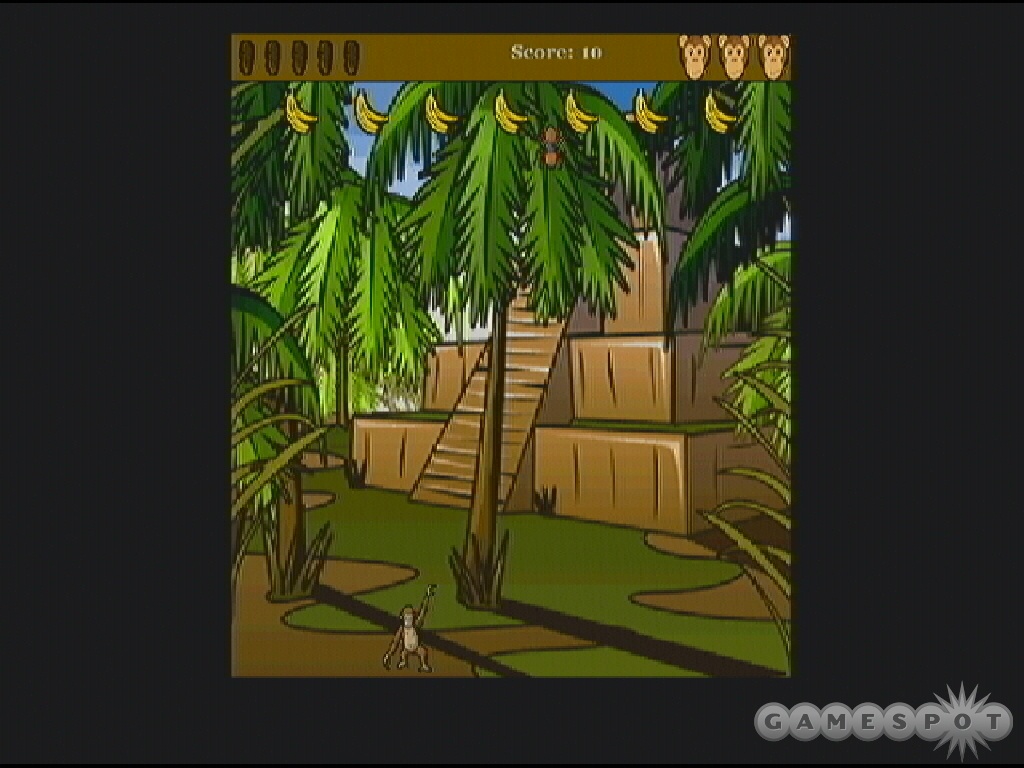
The Monkey Fling high score is 333. You get two points per spider shot and three points per banana eaten. When spiders reach the ground, they will disappear after a short time so move away from them. Even though you can avoid them, it’s still very dangerous to let spiders reach the ground because you won’t be able to move in that direction. This could mean more spiders reaching the ground--you will eventually be beaten!
A good strategy is to hit bananas to the ground but don’t eat them until you need them. Once you have shot all the poo, you will regenerate one but it’s slow so don’t neglect to shoot bananas to the ground. Keep three to four projectiles on hand at any given time. Use the rest to knock bananas to the ground. Find Monkey Fling in the greasers’ hideout and the Carnival.
Nut Shots
Nut Shots is similar to the numerous classic side-scrolling shooters we’ve all played many times before. You’re a flying squirrel launching nuts at hornets, bats, and eagles. Destroying 10 hornets releases a bat; destroying three bats releases an eagle. Hornets are 250 points each; bats are 500 points each; and eagles are 1,050 points each. You must earn a high score of 69,900 to beat the game.
Two things can kill you: hitting an enemy projectile or flying into the trees at the bottom of the screen. The biggest challenge of the game is that you slowly glide downward at all times so it can be tricky to avoid some of the projectiles, especially the smaller hornet stingers.
The bat’s sonic attack expands so be prepared to move up or down to avoid it. The eagle tosses a salmon in your direction. It follows your movements. As it gets near, move up or down sharply to avoid it. You can still hit the eagle while the salmon is in the air; likewise, though, the dead eagle or salmon can hit you as well so avoid it. Find Nut Shots at the Carnival.
Bullworth Shopping
You may be looking for something to do with that money burning a hole in your pocket. Check out the clothing stores in each part of town and add new apparel to your wardrobe.
Worn In is a used clothing store in the town of Bullworth. The items here are lower priced and more casual. Aquaberry in Old Bullworth Vale is for wealthier clientele. Clothing items here are higher priced and more formal (including a tuxedo!).

Visit the School Store inside the main school building at Bullworth Academy. Here you will find lower priced school branded items. Finally, visit The Final Cut in New Coventry (it’s marked as a barber shop on the map but it has clothing as well) for alternative gear. Pick up that creepy clown shirt you’ve always wanted. There are also items in the Souvenir shop at the Carnival to add to your wardrobe. You’ll have to win tickets to purchase them (see the Carnival section).
If you are wealthy enough you can purchase every piece of clothing in the game as well as unlock all clothing items from the Carnival Souvenir shop. You must acquire all pieces from the mentioned locations--do so and you unlock a special outfit, the Gold Suit. Now you truly are the King. Note that you will need upwards of $3,000 to purchase all of the clothing. So get to bike racing, lawn mowing, and errand running!
There are other clothing items that can be unlocked by performing certain game related tasks. For instance, travel a whole bunch on a bike and eventually you will unlock the bike shorts. Try failing a few classes and you’ll get the dunce cap. Start pulling fire alarms like crazy and you will unlock the firefighter’s helmet. Complete all levels of all classes and receive your graduation hat. Get sent to detention and complete all of the mini-games and receive a prison uniform. Search lockers for other items, including a couple masks after Halloween.
Boxing
Visit the gym in Old Bullworth Vale; during the story mode, the task "Prep Challenge" takes place here. Enter the gym late in the day and approach the ring. Trigger the mark to start "Boxing Challenger 1". These are optional fights that will enhance your punch power and even extra money if you keep fighting.
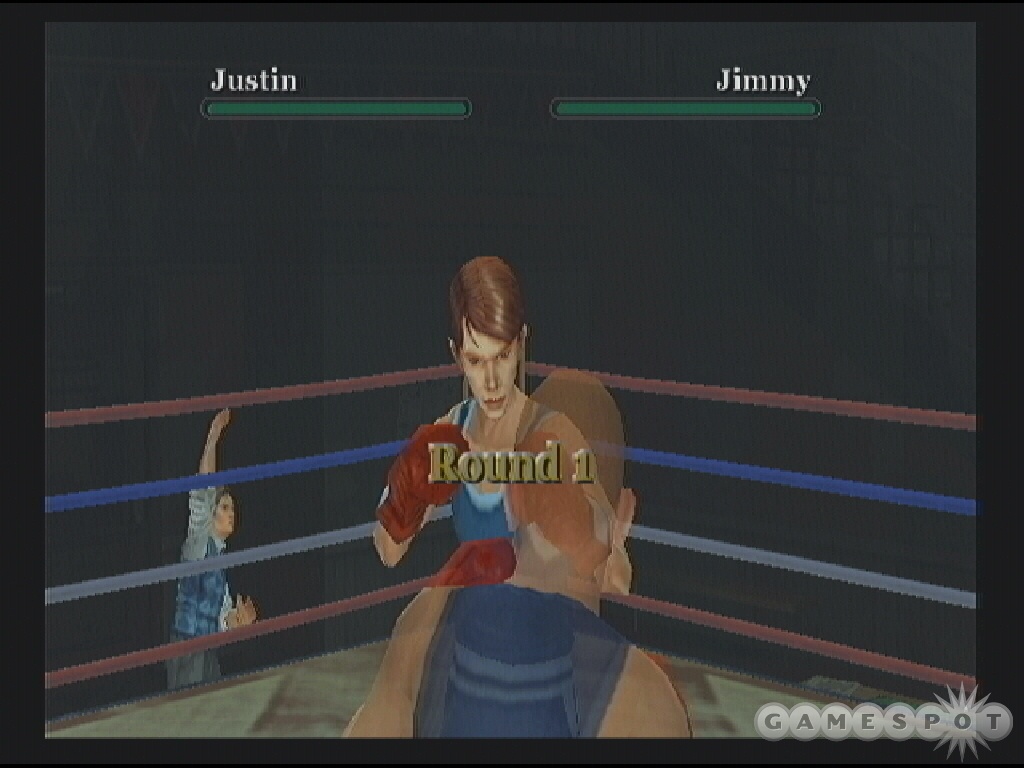
The controls are simple: "Square" to punch, "X" to dodge, and "L1" to block. After draining your opponent’s health, hold "Square" to unleash the knock out punch. You can battle four different preppy challengers: Chad, Justin, Parker, and Bryce. Winning each fight earns bonus punch power. Continue to fight random challengers for extra cash.
Block or dodge your opponent’s punches. When your opponent’s combo completes, start pressing "X" to punch until you complete your own combo. Repeat again and again. Block or dodge then combo punch.
Bike Races
Compete in bike races throughout town for cash prizes (and a few new clothing items). You can even take your own bike and use it in the race. Ride up on the bike then activate the race marker. Gain new bikes through the shop class or purchase bikes are the bike shops.

Mountain Bike: Speed 5, Acceleration 4, Handling 3 - $35
Racer - Speed 5, Acceleration 5, Handling 3 - $15
Aquaberry Cruiser - Speed 5, Acceleration 5, Handling 4 - $25
The mountain bike is a good choice for the bike races because many of the races contain segments on dirt roads.
Check the tables below for race prizes. Find the races near the bike shops in the respective towns. The Bullworth Academy race unlocks at the school parking lot.
| BULLWORTH VALE | 1ST PLACE CASH PRIZE | ADDITIONAL PRIZES |
|---|---|---|
| Race 1 | $20 | Bike helmet and jersey |
| Race 2 | $25 | - |
| Race 3 | $30 | - |
| Race 4 | $35 | - |
| Race 5 | $40 | - |
| Race 6 | $45 | - |
| Race 7 | $50 | Unlocks Bullworth Town bike races |
| BULLWORTH TOWN | 1ST PLACE CASH PRIZE | ADDITIONAL PRIZES |
|---|---|---|
| Race 1 | $20 | - |
| Race 2 | $25 | - |
| Race 3 | $30 | - |
| Race 4 | $35 | Unlocks New Coventry bike races |
| NEW COVENTRY | 1ST PLACE CASH PRIZE | ADDITIONAL PRIZES |
|---|---|---|
| Race 1 | $30 | - |
| Race 2 | $40 | - |
| BULLWORTH ACADEMY | 1ST PLACE CASH PRIZE | ADDITIONAL PRIZES |
|---|---|---|
| Race 1 | $50 | BMX helmet |
The Carnival
The storyline takes you through the Carnival but you aren’t forced to stick around for long. But there’s a lot to do here. Skip school a few days to enjoy the games and rides at the Carnival!
Strike Out
You have six baseballs and must get three strikes by hitting the catcher target. Don’t hit the umpire (an instant loss) or the batter. Watch for the golden glove; hitting it counts as a strike as well as earns an extra ticket.
Watch which way the targets move and position your targeting cursor at the opposite end so you have plenty of time to gauge what’s coming. After hitting a catcher, that row’s targets end. Look for the golden glove on the other two rows. As soon as you hit three strikes, the game is over and you win three tickets (six after completing Photography 5).
High Striker
It’s a strongman contest! Swing the mallet as hard as you can (press "X" quickly and repeatedly when prompted). Hit to 70-79 and receive one ticket; 80-99 to receive two tickets; and hit to 100 for three tickets. The ticket rewards double after completing Photography 5.
Splish Splash
This is your typical all-American dunk tank complete with a cranky, insult-spewing little person. Hit the bullseye to score a successful dunk and win three tickets (six after Photography 5).
The target moves around but can be somewhat controlled using the analog sticks (much like the Penalty Shots mini-game on the school campus). Move the target so hovers around the bullseye--such as moving left or right at the bullseye. Hit the "R1" button to toss the ball when the target is over the bullseye.
Shooting Range

Test your skills at an old fashioned shooting gallery. Shooting each target rewards specific points; score enough points to earn tickets. You aren’t limited by ammunition so start firing! Keep your targeting cursor around the same level and move right or left toward particular targets. The gold badge moves across one time.
The following chart reveals the point values for each target.
| TARGET | POINTS |
|---|---|
| Bottle | 5 |
| Bandit | 10 or 15 |
| Gold Badge | 50 |
| Damsel | -10 |
The table below reveals the tickets awarded for reaching specific scoring totals. Note that the ticket values are doubled if you have completed Photography 5.
| SCORE | TICKETS |
|---|---|
| 100 | 1 |
| 140 | 2 |
| 180 | 3 |
| 220 | 4 |
| 260 | 5 |
| 350 | 15 |
| 400 | 20 |
Souvenirs
Take your collection of tickets to the Souvenir tent located near the Carnival entrance. Some of these items are required if you want to purchase all the clothing in the game to earn the Gold Suit. If you buy the posters, they’ll end up in your dorm room. The arcade machines are also found in the Souvenir tent.
Here are the prizes and the corresponding ticket prices.
| PRIZE | TICKETS |
|---|---|
| Devil Horn Hair Band | 15 |
| Girlie / Car Poster | 10 |
| Some incredibly strange hat | 40 |
| Clown Trousers | 40 |
| Scooter | 75 |
| Clown Shoes | 40 |
| "I’m with Stupid" T-Shirt | 20 |
| Big Novelty Watch | 10 |
| Clown Wig | 40 |
| Rock Band Poster | 10 |
| Beaded Bracelet | 15 |
| Checkered Party Hat | 20 |
| Angel Halo Hair Band | 15 |
Amusement Rides
Take a ride on the ‘Round the World Ferris Wheel, the stomach churning Squid (riding this earns you a Grottos and Gremlins collectible card), and the Big Canyon Railway coaster.
Freak Show
You will visit this location as part of the Photography 5 class (finish that class to unlock double carnival tickets!). Look at all the attractions but make sure you visit the midget wrestling. You can place wagers here--up to $100--and it’s a quick way to earn money...if you’re right!
Go-Kart Races
Compete in the Carnival’s go-kart races for prizes. You will also unlock a series of street races for cash. Complete all of the races and you will unlock the go-kart as a usable vehicle! It appears in the school parking lot.
Winning the first Carnival race earns the crash helmet and some tickets. An optimum way to race is to hold your controller in such a way that you can easily hold down "X" for accelerate while tapping the "Square" button for the power slide. For instance, the second and third Carnival Races have a very sharp "180-degree" turn. Use the power slide for this turn; you can turn over the grass after the barrels. The fourth and fifth races retain the track but add additional racers. Avoid bumping into other racers. Don’t panic if you’re behind early--you can catch up!
Upon successful completion of the five Carnival go-kart races, look for the street races around town. Find the first in the northern section of Old Bullworth Vale, the second along the Vale shoreline, and the third near Wonder Meats in Blue Skies Industrial Park. Win these races for $20, $25, and $30 awards respectively. Win all three to unlock the go-kart. Cut corners liberally throughout these street races. You can go over dirt, sidewalks, and grass with no loss to speed.
Lawn Mowing and Paper Routes
Earn extra money with some after school (or during school if you’d rather) jobs. You can mow lawns or try a paper route.
The first lawn mowing jobs are in the Old Bullworth Gardens in Old Bullworth Vale. There are three jobs in total. In the first you must cut 70% of the grass, 80% in the second job, and 90% in the third. Cut 100% of the grass in each job and earn maximum money ($25 for the full job).
You’re on a time limit so you must work quickly. Mow in a pattern that keeps your mower moving forward as much as possible. You can work on the outer area and move in or go in rows. Avoid hitting the flowers, though some of the grass is positioned very close. As you near completion, look for areas you may have missed in the darker dirt areas.
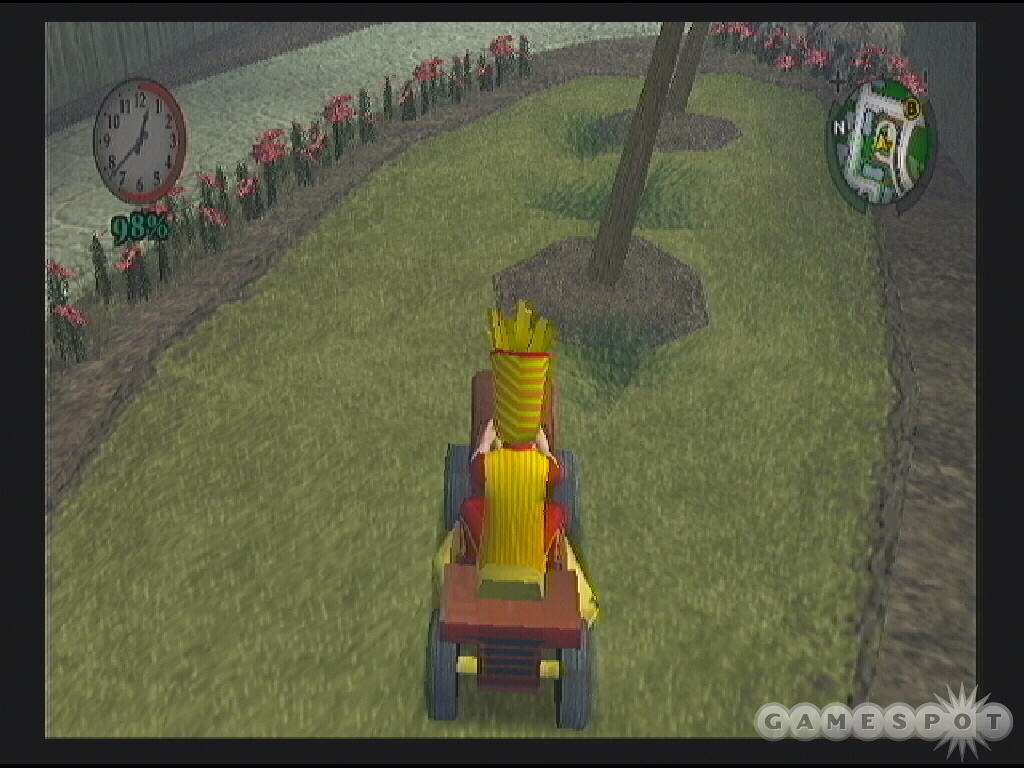
The second set of mowing jobs is found in the northwest section of Old Bullworth Vale. The area is larger but the task remains the same: three jobs and three sets of mowing percentages (70% through 90%). Cut the lawn to 100% and earn the maximum $40. You can bust the birdbaths and the gnome without penalty.
Find the newsstand in Old Bullworth Vale and start the paper route. Ride up the hill and collect the papers. Check the mini-map for the marked customer locations. Press and hold R1 as you near a mailbox to obtain target; release R1 to toss the newspaper. If you toss the paper in front of you then you were passed the mailbox; turn around and try again.
If this sounds like a version of the Atari classic arcade game Paperboy then you’re not far from the mark. Dogs and bystanders will attempt to impede your progress (expect to get egged by some preppies). In this version, though, you are a perfect shot with that newspaper as long as you have targeted correctly. There are five paper routes in total; check the chart below for customers and pay for each.
| ROUTE | CUSTOMERS | PAY |
|---|---|---|
| 1 | 7 | $14 |
| 2 | 10 | $20 |
| 3 | 14 | $28 |
| 4 | 19 | $38 |
| 5 | 24 | $48 |
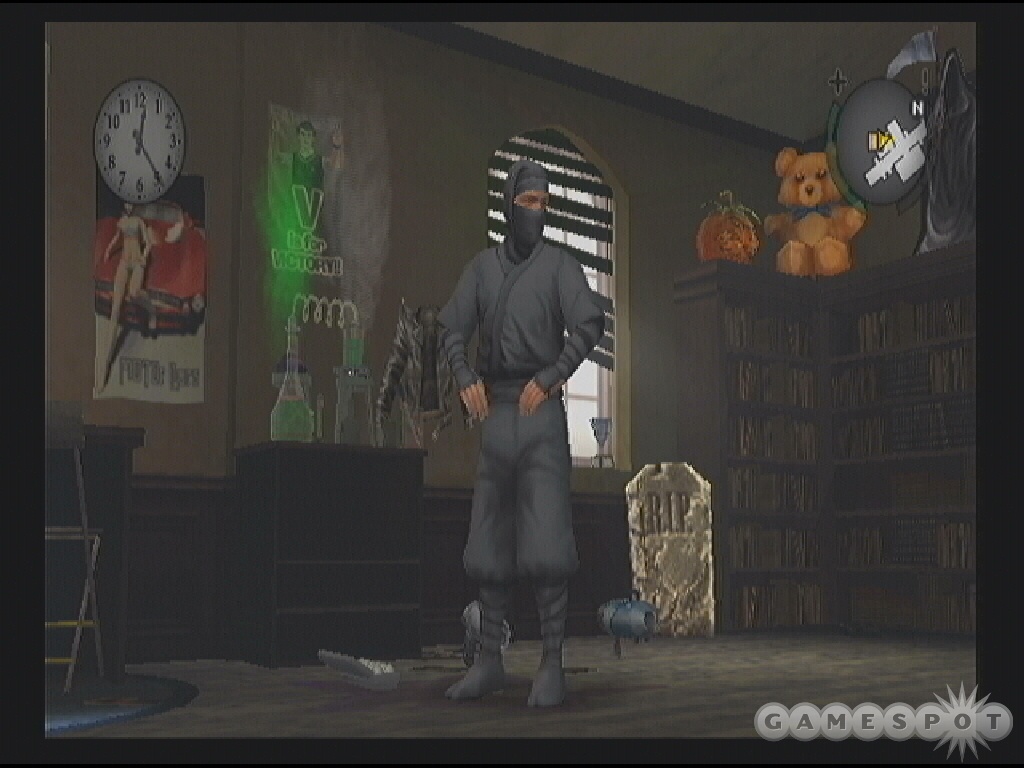
Yearbook
Finish Photography 2 and you unlock the Yearbook. Check the pause menu for your Yearbook photos. Some photos are added automatically (the faction bosses and other main characters of the game--you, Gary, and Pete for instance). It’s up to you to find the others. Some are obvious as they are characters you bump into during the main story tasks (such as Beatrice and Bucky) while others are a bit trickier.
The chart below segments each student into their affiliation. Typically you will find these students near their hangout, also listed in the chart. Description of the student is also provided but note that students can change clothes (expect to see pajamas in the morning for instance). If you can’t find someone, try going to sleep and checking again the next day. Faction leaders are added to the Yearbook after you complete the battles. Complete the yearbook to unlock the black ninja costume (you appear almost invisible to authority figures) and receive a hefty income of $300.
| STUDENT | FACTION | DESCRIPTION | HANGOUTS |
|---|---|---|---|
| Algernon | Nerd | The guy with his zipper down all the time. Really annoying laugh! | Dragon Wing Comics store, Library |
| Angie | None | Glasses and red bow pig tails. Dark green school outfit. | School |
| Beatrice | Nerd | Glasses and pink bow in her hair. Met her during story. | Dragon Wing Comics store, Library |
| Bif | Preppy | Bright-red hair. | Old Bullworth Gym, Harrington House, Beach Clubhouse |
| Bo | Jock | African-American, seen with a baseball cap. | School Gym, Football Field |
| Bryce | Preppy | Darker brown hair. | School |
| Bucky | Nerd | Shaggy brown hair and buck teeth. Met early in the story tasks. | Dragon Wing Comics store, Library |
| Casey | Jock | Shaggy blonde hair. | School Gym, Football Field |
| Chad | Preppy | African-American with bandage on hand. | Old Bullworth Gym, Harrington House, Beach Clubhouse |
| Christy | None | Bright red hair in a ponytail. Can be seen as a cheerleader. | School |
| Constantinos | None | Met during story and also in the Penalty Kicks mini-game. Nicely dressed with dark green sweater. | School |
| Cornelius | Nerd | Skinny African-American with glasses and light-green vest. | Dragon Wing Comics store, Library |
| Damon | Jock | African-American with "B" showing on his t-shirt under his letter jacket. | School Gym, Football Field |
| Dan | Jock | Bright red hair parted in center. A little short. | School Gym, Football Field |
| Derby | Preppy | Added after boss battle. Blonde-haired preppy. | Old Bullworth Gym, Harrington House, Beach Clubhouse |
| Davis | Bully | Chased during story tasks. Shorter bully with brown hair and untucked shirt. | School Grounds |
| Donald | Nerd | Shaggy hair and wears glasses and vest. Looks like Bucky. | Dragon Wing Comics store, Library |
| Earnest | Nerd | Added after the boss battle. | Dragon Wing Comics store, Library |
| Ethan | Bully | African-American with untucked shirt. | School Grounds |
| Eunice | None | Freckles, brown hair band, and large. Met during story tasks. | School |
| Fatty | Nerd | Plump and glasses. Taller version of Algernon. | Dragon Wing Comics store, Library |
| Gary | None | Added during story tasks. | School |
| Gloria | None | Short African-American girl with two hair buns and retro glasses. | School |
| Gord | Preppy | Brown-haired preppy. Hung around Lola during Jealous Johnny task. | Old Bullworth Gym, Harrington House, Beach Clubhouse |
| Gordon | None | Stern-looking red head in dark green sweater. | School |
| Hal | Greaser | Black leather jacket with blue shirt. A little overweight. | Auto Shop, New Coventry |
| Ivan | None | 80s’ looking hairdo (Flock of Seagulls-lite). Dark green sweater. | School |
| Jimmy | You! | Whatever you’re wearing. | Wherever you are. |
| Johnny | Greaser | Added after the boss battle. | Auto Shop, New Coventry |
| Juri | Jock | Closely trimmed brown hair and chiseled face. | School Gym, Football Field |
| Justin | Preppy | Nicely brushed brown hair--with one strand out of place. | Old Bullworth Gym, Harrington House, Beach Clubhouse |
| Karen | None | Short girl with blond pig tails. | School |
| Kirby | Jock | Short, auburn hair. | School Gym, Football Field |
| Lance | None | African-American, dark green sweater. | School |
| Lefty | Greaser | Denim jacket with light brown pants. | Auto Shop, New Coventry |
| Lola | Greaser | Johnny’s former girlfriend. | Auto Shop, New Coventry |
| Lucky | Greaser | Denim jacket and reddish hair. | Auto Shop, New Coventry |
| Luis | Jock | Dark hair, big and brawny. It’s the guy who plays Keep-Ups. | School Gym, Football Field |
| Mandy | Jock | The head cheerleader met during the story tasks. | School Gym, Football Field |
| Melody | None | Short, white hair band. Dark green outfit. | School |
| Melvin | Nerd | Loves Grottos and Gremlins! Wears vest and glasses. Nice hair. | Dragon Wing Comics store, Library |
| Norton | Greaser | African-American. Distinct hair. | Auto Shop, New Coventry |
| Parker | Preppy | Black stringy hair. | Old Bullworth Gym, Harrington House, Beach Clubhouse |
| Peanut | Greaser | Black leather jacket and blue shirt. Dark hair with one strand on forehead. | Auto Shop, New Coventry |
| Pedro | None | Short kid with untucked shirt, shorts, and pink shoes. | School |
| Petey | None | Added during story tasks. | School |
| Pinky | Preppy | Met her during the story tasks. Brown hair, stylish cut. | Old Bullworth Gym, Harrington House, Beach Clubhouse |
| Ray | None | Plump kid with light brown hair and dark green sweater. | School |
| Ricky | Greaser | Cigarette behind ear. Dark hair with some out of place. | Auto Shop, New Coventry |
| Russell | Bully | Added after boss battle. | School Grounds |
| Sheldon | None | Short African-American kid with dark green vest. Whiny voice. | School |
| Tad | Preppy | Short, muscular preppy. | Old Bullworth Gym, Harrington House, Beach Clubhouse |
| Ted | Jock | Added after boss battle. | School Gym, Football Field |
| Thad | Nerd | Glasses and red hair. | Dragon Wing Comics store, Library |
| Tom | Bully | Dark-haired bully. Was that a black eye? | School Grounds |
| Trent | Bully | Light blonde hair. Not the prettiest forehead on campus. | School Grounds |
| Trevor | None | African-American, short hair. Kind of whiny. | School |
| Troy | Bully | Light brown hair. Pimply forehead. | School Grounds |
| Vance | Greaser | Similar to peanut but redder hair and shorter. | Auto Shop, New Coventry |
| Wade | Bully | Short, auburn hair. Pimply face. | School Grounds |
| Zoe | Townie | Met during story tasks. Orange plaid skirt, boots, tattoos...typical bad girl. | Blue Skies Industrial Park (in Endless Summer, in town or even school) |

Thar Be Pirates!
Head over to Old Bullworth Vale and visit the pier (near the preppy hangout). Take a swim! Jimmy can swim surprisingly quick (maybe Bullworth needs a swim team!). Swim due south to the large island.
Keep moving to the island’s southern side and spot a sunken ship. Look on the beach and see the pirate! Approach him and he’ll attack. He’s not that tough--especially if you steal his...ruler weapon? Anyhow, defeat the pirate and you unlock the pirate hat. Aaarrrr!
G&G Cards
There are 40 Grottos and Gremlins cards scattered around the entire map. Find and pick up all 40 cards to unlock a special outfit, the Grotto Master. Now you can be at home with all of the nerds in the basement of the Dragon Wing Comics store! Check the accompanying map for locations of all 40 cards.
Rubber Bands
There are 75 Rubber Bands scattered throughout the entire game. Many are out in the open but some are tricky to find. Finding all 75 Rubber Bands unlocks the rubber band ball. Some of the trickier rubber bands include:
- Check the second floor of the Library.
- Search inside the fountain at school.
- In the Russell in the Hole fight, search the walkway above the hall and search a northwestern tunnel for a rubber band.
- On top of the closed theater in Bullworth Town.
- On top of the gas station in Bullworth Town.
- Inside the dressing area at Aquaberry.
- Swim to the southwest corner of the pirate island and traverse wooden planks.
- Beach east of the pirate island.
- On a tree bridge in the backwoods west of the observatory.
- A sinking boat accessible from the bridge connecting Bullworth Town and the school.
- Swim to a beach just east of the Carnival and go through a tunnel to find a rubber band on the other side of a narrow plank.
Gnomes

Locate and smash 25 gnomes to unlock the gnome costume. The gnomes are rather dark, which can make them tough to spot, especially at night. Most of the gnomes are found in Old Bullworth Vale in the yards of the wealthy. I guess they like their gnomes! One of the gnomes is on a barge in the water northeast of the school and northwest of the Industrial Park. Shoot it with your slingshot when you get close enough. Check the accompanying map for all 25 gnome locations.
Got a news tip or want to contact us directly? Email news@gamespot.com
Join the conversation