Prince of Persia: The Two Thrones Walkthrough
The third and concluding chapter in the Prince of Persia trilogy is finally here, and GameSpot's got a complete walkthrough for the game, including video for all the boss fights.
Design: Randall Montanari
When Prince of Persia: The Sands of Time hit store shelves in 2003, no one was quite sure of how good it would be. Although Ubisoft Montreal had hit it big with Splinter Cell the previous year, the world of acrobatic platformers had been dominated by increasingly disappointing Tomb Raider games, and the fact that they were reviving a franchise that had already seen a less-than-stellar 3D outing (1999's Prince of Persia 3D) didn't augur well. Luckily, Ubisoft's talented Canadians managed to put out an excellent game that managed to imbue players with a sense of power by allowing them to intuitively perform complex actions and solve some devious little puzzles. In Sands of Time, you took control of the titular Prince, who's tasked with undoing the damage caused by his foolish use of the Dagger of Time.
Last year, the success of Sands of Time was followed up with Prince of Persia: Warrior Within, a darker look at the Prince that saw him attempting to reach the location of the Empress of Time in an attempt to kill her, in the hopes that this would rid himself of the invincible Dahaka, a time monster that sought to destroy the Prince for his abuse of the Dagger of Time. In the end, he and the Empress managed to defeat the Dahaka and escape from her island dwelling, only to set sail for Babylon, the kingdom of the Prince's father.
And that's where Prince of Persia: The Two Thrones picks up. Like the other games in the series, you're going to have to maneuver through numerous puzzle and fiendish traps, while attempting to fight back against numerous sand-imbued enemies of various stripes, all in the name of restoring himself to the throne of his usurped kingdom. GameSpot's Game Guide to The Two Thrones features a complete walkthrough to the game, including the locations of all six hidden health upgrades, video for all the boss fights, as well as a few general tips to get you through the rough sections.
General Combat Tips
Veterans of Warrior Within should feel right at home with the combat system in Two Thrones, as it's mostly the same as is featured in that game. The inclusion of the Dark Prince adds some new twists to the formula, however, so here are some basic tips to get you started. The manual (and the pause menu) have specific information on weapon combos and the like, so be sure to refer to them as well for specific information as needed.
Catapulting
One of the easiest way to get kills with the Prince is to throw your foes off of tall buildings. To do so, face them without a secondary weapon, and press your secondary attack button two or three times. You'll vault your enemy and perform a vicious kick attack that will send them hurtling through the air. Although this attack doesn't do much damage, if you manage to throw your foe over a balcony or railing, they'll instantly die. This attack can't be performed if you have a secondary weapon, however, and the Dark Prince can't do it at all. Still, it's an ultra cheap maneuver for killing enemies when you happen to be up off the ground. If you're at ground level, though, it obviously won't do much except knock your foes over. They still stay down for a few seconds when you perform this maneuver, though, making it useful to break up crowds.

Wall Attacks
For both avoidance and powerful blows, your vertical wallrunning attacks are fairly useful. If you start a vertical wallrun and press one of your attack buttons, you should manage to leap off, automatically aiming towards one of your nearby foes, and deliver a powerful blow when you land. The secondary attack button works particularly well here, as it'll slash at multiple enemies when you land, often killing them instantly.
If you're in the mood for something quicker, than running towards a wall and pressing your primary attack button will result in the Prince jumping off of the wall and stabbing one of your foes with the dagger. Although this doesn't do a great deal of damage, it will usually knock down one of your enemies, thus letting you follow up with a ground attack or focus on one of your other foes.
Secondary Weapons
When fighting as the Prince, pick up secondary weapons to augment your dagger-fighting skills. Although you can't throw enemies while wielding a secondary weapon, and they tend to break easily, you'll be more capable of dealing with multiple foes at one time, and will be able to deal more damage. While there are multiple lengthy combos that can be initiated when you're holding two weapons, two of the simpler combos (primary attack/secondary attack and primary/primary/secondary) both work quite well, often resulting in instant decapitations on enemies around you. You can also throw your secondary weapon, or hold down its attack button to let loose with a powerful blow.
The Dark Prince
Although the Dark Prince is another form of the Prince himself, he wields a powerful weapon: the Daggertail chainwhip. This weapon can't be thrown, and prevents the Dark Prince from using other secondary weapons, but has plenty of power built right into it, especially since you can easily hit multiple enemies by rotating the whip around your body. Numerous combos allow you to do this, with the simplest being Blast of Sorrow (primary/secondary/secondary/secondary). Even if you don't kill any enemies with a combo here, you'll still usually at least hit all of them, causing them to stagger and interrupt any attacks that are headed your way.
The Dark Prince, in general, will have to remain on the offensive for most of his fights, since you'll need to constantly be killing enemies to restore your health to its maximum, since said health is constantly draining. Try working in more advanced combos as you encounter tougher enemies, such as the Oblivion Tornado and Typhoon of Torment.
Walkthrough
Note that we're writing this walkthrough based on a play-through of the normal difficulty level. The primary difference between the normal and hardest difficulties lies in the difficulty of combat; if you play on hard, you'll have to be more efficient with your combat strikes and work harder to penetrate the defenses of your foes.
Health Upgrades
As per usual, there are a number of health upgrades available in The Two Thrones. If you're interested in finding them without having to keep your eyes on a walkthrough throughout the entire game, check back when you hit the following levels: The Sewers, The Lower City Rooftops, The Temple, The Canal, The Palace Entrance, and the Middle Tower. Each of the locations is described in its own chapter.
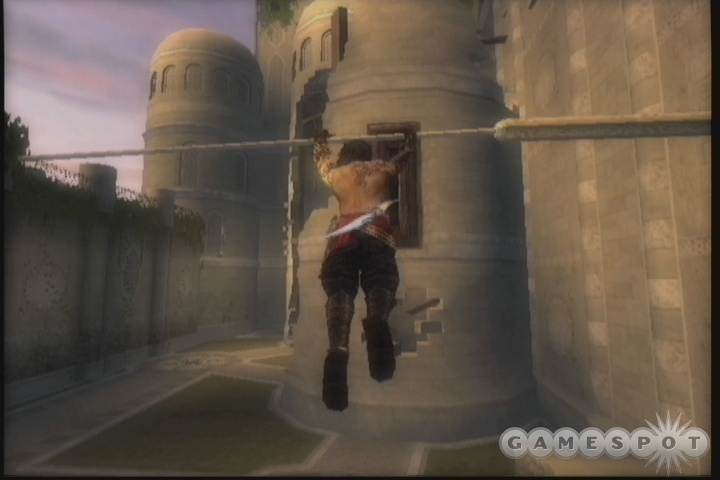
The Ramparts
Things go...poorly for the Prince as he attempts to return to his home city of Babylon. His people are missing, his home has been set alight, his girl gets dragged off by unknown brutes. Good thing he's got a healthy supply of badditude to rely on; he'll probably need it.
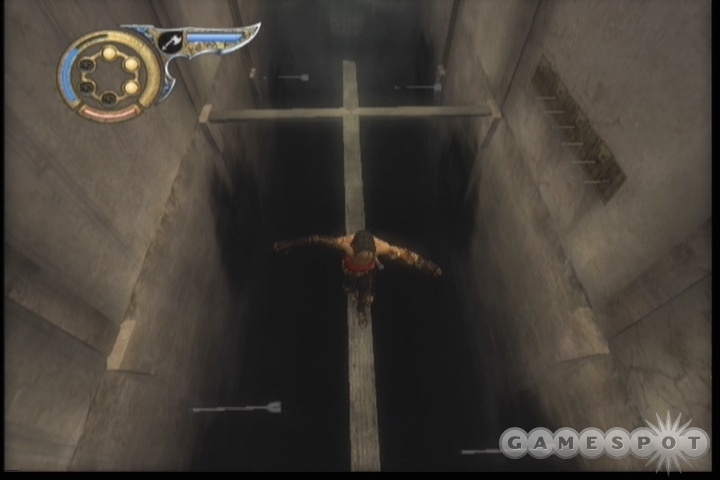
The first little area is the getting-to-know-you segment of the game; everything you probably need to know controls-wise will be displayed for you, so follow the prompts to find the path through the gatehouse. This sequence goes as follows: roll under the door, head left to find crates, climb atop them, jump across and circle around, wall-run across the wall, wall-run up to the ledge above you, and scootch around to the left until you've passed the fire.
The next room is a bit more complicated. There's only one column you can grab onto from the ground floor, so go from column A to column B, then jump back to column A before you can finally make the jump to one of the upper platforms here. From there, climb up onto the small raised platform, jump over the railing, then jump back to column A. Jump from there to the handhold on the wall, and drop down onto the small square surface nearby. Wallrun over to the small ledge, then jump up to the handhold to move on.
After climbing the ladder here, you'll find your first little knife. Time to get your kill on! The new silent kill action will let you instantly kill most enemies if you can approach them from behind; the specific buttons required to use it are dependent on your choice of console, obviously. After killing the first soldier here, drop down the pillar to off the second one; you can grab his weapon if you wish. After wallrunning to the far wall, you can use the handholds to move around to a nearby ladder; climbing down will get you into position to kill the third soldier in this area.
The next soldier you encounter is unstealthable, if that's a word; you'll have to take him on face to face. Take advantage of your two weapon buttons (assuming you have two weapons still), and your block button to repel his blows, and he should go down without too much of a fuss. You'll need to wallrun and jump to reach the next handhold; just hit your jump button at the end of your wallrun to clear the gap.
After wallrunning up to the next passageway, you'll see Kileena being escorted into the city by the guards that found her. You'll have to wallrun to the nearby banner to glide down to the courtyard, but this is done automatically after your wallrun. Unfortunately, you'll have to deal with three soldiers simultaneously when you reach this area. They can't block your attacks, though, so as long as you have two weapons you should be able to combo them pretty thoroughly. If you're stuck with just your dagger, try using the jump attack (jump, jump, attack) to swing over them and attack them on your way back down to the ground.
The Harbor District
After climbing the siege tower, you'll have to drop back down and climb over the ledge near the blocked doorway to move on. You'll spy an archer on the far side of the area where you can drop down again. If you're interested in getting a stealth kill, try to wallrun around to the ledge behind the archer and drop down from there.
In the next long hallway, you'll be facing off against a soldier and an archer at the same time. If possible, wallrun up to one of the ledges on either side of the corridor and wait for the soldier to face away from you before stealth killing him. You may be able to sneak up on the archer if he happens to face away from you and speedkill him as well.
After you hit the fountain and save your game, wallrun jump to the far platform, then sidle onto the ledge here. Drop down, then work your way around to the beam and cross over. You'll have a lengthy, but makeable jump when you reach the far side; clear the gap, then roll under the doorway to move on.
When you hit the next little jump, leap out to the upper beam, then drop down to the beam beneath it. From here, you should be able to start a speed kill on the soldier beneath you, leaving only the archer to deal with. You'll need to wallrun jump up to the beams nearby. At the top of this area, you'll have to make a leap of faith directly in front of you, but when you reach the interior of the two walls, the Prince will catch hold and you'll be able to slide down smoothly.
After defeating the soldiers here, make a few more jumps to reach more ledge-climbing areas. After sliding down another narrow gap, turn around with your analog stick to grab a stealth kill. The next small area features a soldier and an archer; always a difficult combo. After scaring the birds, wait for the soldier to take up his position underneath the beam across from you. If you jump across, you should be able to immediately enter into a stealth kill, and if you move quickly, then you should be able to sneak up behind the archer and silently kill him as well. If not, you'll have to fight them the old-fashioned way.
The Streets of Babylon
When you climb the ladder near these fools and kill one more archer, you'll be close to the next save point. The barrier at the end of this path is a bit of a red herring; you can't actually make the jump from your platform to the platform the guards are on. Instead, wallrun up the right side to find another rooftop, then wallrun along the wall and jump across to the beam above the enemies. When you hit the beam, one of the soldiers will turn around and pass underneath you, so nab him with a quick kill, then do the same for the archer.
After a bit more jumping, you'll come to a wall-jumping area. The procedure here is simple: just wallrun up one wall, jump off, then start hitting your jump button as soon as you hit the opposite walls to jump up higher. When you reach the top of the jumps, you'll come to another beam that seems to actually lead to an impossible leap to a far beam, but you can indeed make this jump. Leap across the beams until you reach another platform.
You'll notice a pair of soldiers beneath the railing here. You can drop down and fight them as per usual, if you wish, but if you hop the railing and jump across to the small ledge in the far building, you should be able to get a couple of quick kills from behind. From there, make your way across the first few easy jumps in the section above the water. The second water area is a bit tougher; you'll need to wallrun jump to the first beam, then jump from the beam to the wall and jump back off of the wall to reach the higher beam. When you're ready to jump to the next area, be sure to walk laterally across the beam that stretches from wall to wall; if you attempt to jump too early, you'll often go sideways and fall to your death.
The Palace Balcony
Wallrun and jump over to the palace balcony; hopefully the soldier here will move back on his patrol. Wallrun up to the ledge to kill him, but only after the archer here moves off to the side. Getting all three of the targets here with silent kills is possible, but only if you move quickly!
With the first soldier out of the way, move towards the hallway here. One of the archers should still be moving away from you, while the other will pivot in position. Wait until he's looking towards the wall, then sneak behind him into the small room near him. Wallrun and jump to the beam, then walk over to the archer and silent kill him; if you've moved quickly you should be able to reach the third archer and silent kill him before he turns around. If not, you'll have a fight on your hands!
Jump atop the pedestal near the third archer and do as the game says; wallrun and attack the wall to use your dagger as a handhold. Jump up and repeat the process, then jump across to the platform above the corridor. From here, you'll have to wallrun and jump diagonally off the shutter to reach the far walkway. From there, walk across the platform to open the door.
In the next room, wallrun, then stab the target to stop yourself before dropping down to the beam. The soldier here doesn't turn around, but you can jump across to the far target and stab yourself into it if you want to quietly drop down behind him. You'll be able to start a speed kill right from the target, as a matter of fact. There doesn't appear to be any way out of this area, but if you look around, you should see a beam near one of the two white pillars, so climb it and jump over.
If you want a stealth kill on the archer here, wallrun up to the ledge, then jump over his head to the gap and fall down. When you jump from the railing to the far beam, be ready to drop down for a speed kill when the soldier passes underneath your position. The next soldier is hidden atop a ledge; you'll need to destroy some items to get to him, which will alert him to your presence, but if you wait a few moments, he'll return to his previous position and you'll be able to wallrun up behind him for the speedkill.
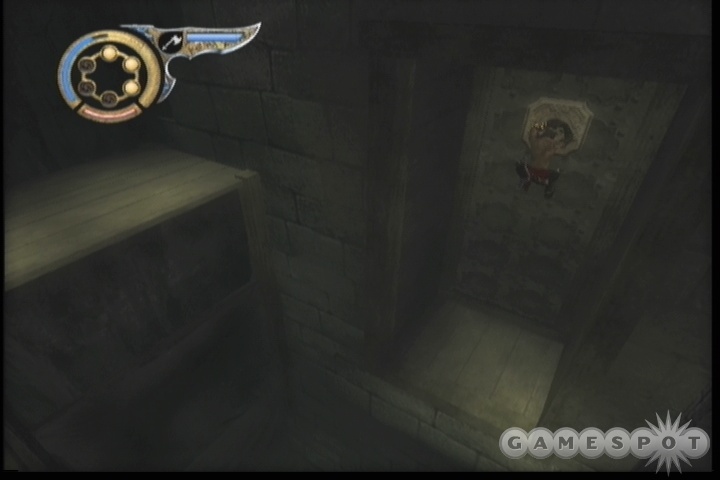
Getting to the archer above you will be more difficult. If you look around, you'll see dagger plates on one of the walls here. You can just barely reach the lowest plate if you jump up to it, and from there you should be able to reach the higher one. If you hold down your wallrun button and press your analog stick to the left, you should be able to reach the second dagger plate area. Stab yourself into it, then jump over to the far platform. From here, you'll need to jump up onto the table, wallrun to the shutter, then hit your speed kill button while you're on the shutter to speed kill the archer on the far side. That's keen!
From here, wallrun jump to the beam above you, then jump from there up into the ceiling. When you reach more solid ground, jump onto the table, hit the dagger plate, then wallrun and jump to the central wall here. One of the soldiers should start walking away at this point, so jump to the gap and pivot around to speed kill the archer. From there, head down the hallway to the table, jump atop it, and wallrun up to hop to the nearby beam. If you make some clean dagger plate hits, you should be able to repeat the process on the soldier nearby.
After scaling through the nearby room, make your wallrun jump off of the pressure plate on the wall and quickly jump through the door before it shuts to reach the next save point.
The Palace
The Prince's palace is embedded with numerous traps, as all good palaces are. It certainly makes stumbling to the bathroom in the middle of the night somewhat interesting. First up are spike traps; it's safest to just wallrun past these. Next up is a rotating saw; wait for the gap in the saw to appear, then roll forward through it.
At the next rolling log, wait for the spikes to disappear, then walk over the log and wallrun up to the ledge. From here, another wallrun is required, but you'll have to time it so that you pass through the gap in the saw that appears. Another wallrun puzzle follows; time it so that you can pass over the log, then jump off of the shutter to reach the next area. Another spike trap follows. Roll across the spikes when the log is about to flip to the flat side, then wallrun up and quickly climb the ledge.
After rolling through the next pair of saw traps, use the lever by the torch here to open a panel in the ceiling. This is a permanent switch, so no need to rush just yet. Instead, walk back to the odd-looking panel on the wall, wallrun up to it, then stab it with your dagger, like you would a dagger plate. After you fall down a bit, jump over to the block that's come out of the wall, then wallrun and jump up to the large room that you unlocked earlier. There's a fountain here if you want to save your game.
The Throne Room
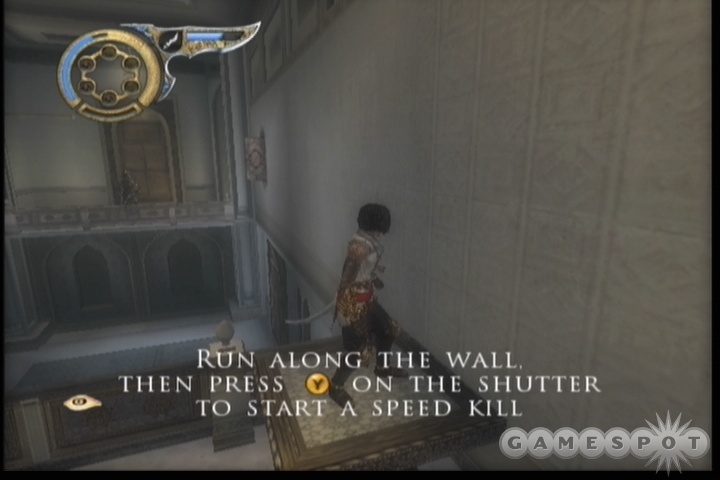
There's only one real path through the throne room here, and it's a fairly intricate one. To begin with, hit the fountain to save your game, then head to the nearest small horse pedestal on the right. You should note a dagger plate above it. Head up and stab it, then wallrun to the right to reach the platform there. The next archer along the path can actually be speed killed directly from the shutter; instead of hitting the jump button, hit your secondary attack button to start the speed kill while you're still on the wall. That's pretty awesome, if we do say so ourselves. If you miss, however, the archer will almost certainly be alerted to your presence, making it difficult to make a normal jump when you return to the platform.
Anyway, kill the archer, wallrun to the next platform, wallrun up to the platform above, then wallrun to the right and jump from the shutter to the pillar nearby. After jumping to the dagger plate, jump across to the ledge and beam nearby and make your way into the gap for another speedkill. Look around for something that's wall runnable, then hit the dagger plate in the wall above it before wallrunning off to the right.
There's another climbable pillar near here; if you time your climbing right, you should be able to jump from there to the throne dias while the archer is facing away from you and sneak behind him for the speed kill. You'll note that there are two soldiers blocking the path leading on. If you jump to the pillar near them, then jump into the gap above the rear soldier, you'll be able to initiate the oh-so-awesome double speed kill. After moving out into the balcony, a cutscene will begin to play, ending in your obtaining the Dagger of Time.
After you reach the lower levels of the palace, you'll have to start making your way through the ruins as the castle falls apart around you. Move quickly when you head down the first hallways here, as the floor will fall out beneath you. You do have a few recall charges available to you if you need to rewind time at all.
When you've passed by the door locked by a pressure plate, head to your right and quickly jump across the gap to reach some stable ground. From there, hit the dagger plate, and wallrun across to the corner of the room. From there, you can wallrun over to the tapestry and fall down to a save point.
The Trapped Hallway
This next area features one new trap; a spiked pillar that can move back and forth across the hallway. Still, nothing exceptionally puzzling here; just wait for your chance, then roll or wallrun past the obstacles.
When you reach the room beyond the locked door, move carefully across the floor to avoid the danger spots until you reach the sole pillar that's actually climbable. Head up, and jump from pillar to pillar until you reach the first ledge here, but move quickly to the right when you jump to it, as a section of it will fall away. The same goes for the next pillar you jump to, the middle dagger plate on the wall, and the last two pillars you have to reach before you jump to the last beam. Aggravating, to say the least, and you can expect to use a few of your sand charges here.
The Ruined Palace
After sliding down the tapestry to the save point, make your way through the traps in the hallway and move on. When you reach the larger area, you can smash the jars and bottles scattered around to find more sand charges, should you need to. Wallrun around to the soldier and kill him, then jump across to the ledge from the raised area and go to town on the two other soldiers that attack you. There's a treasure chest in their hallway that you can smash to earn 10 Sand Credits.
Jump up to the upper platform here, kill the soldier, then jump across to the dagger plate and head up. After some more wallrunning, including a difficult angled jump to a ledge, you'll reach the next save point.
The Royal Chambers
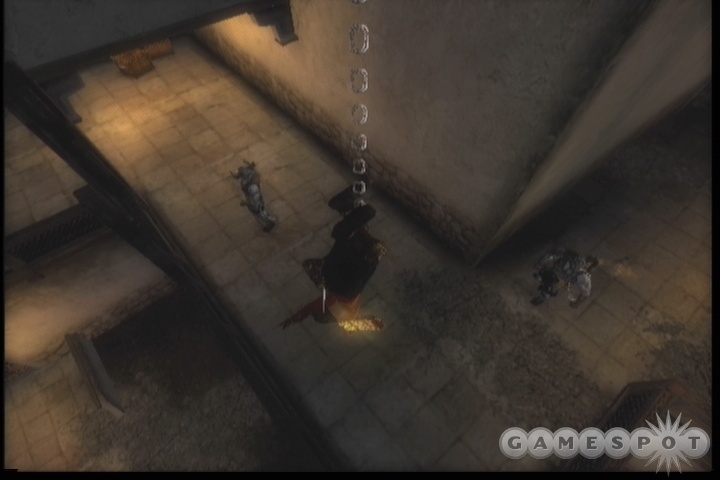
Oh, man. If you're going to spaz out, try not to do it when you're standing over a bottomless pit. After the Prince regains consciousness, you'll find yourself shirtless (at least it happens all at once instead of gradually like in Sands of Time) and in the sewers underneath the palace.
The Sewers
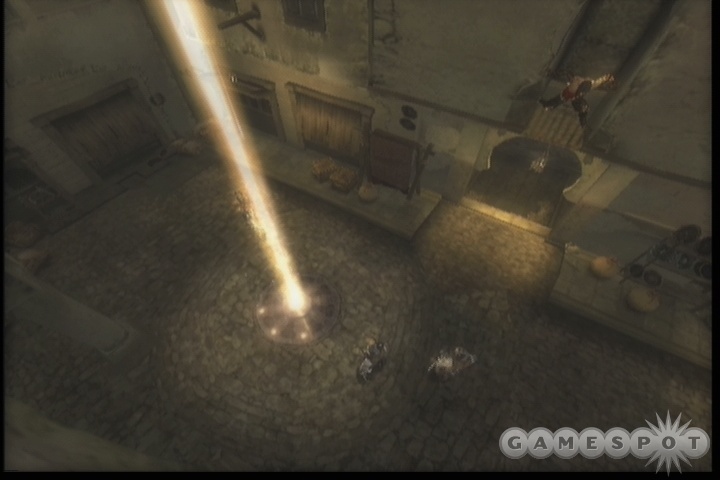
Jump across the beams in front of you, then jump over to the handpath and crawl around to the next platform. From there, jump up to the handhold and edge around to the gap. When you're over the gap, drop down to brace yourself within, then slide down to reach the first sand monsters of the game.
The sand creatures here aren't all that different than the enemies you've been facing thus far, but they don't seem to care much for the shaft of light that's dropping into the middle of the area. Try to lure them into it so that they recoil; they seem to be a bit weaker when they're in the light. When they're dead, head over to the switch on the wall and use your dagger to flip it, then drop down into the gap, jump to the beams, and drop from them to the floor.
When you're on the floor, destroy the pottery to find more Sand Credits, then wallrun up to the daggerplates and jump across to the handhold. From there, jump to the pillar, which retracts into the floor and opens up the door nearby. Slide down the gap here, then jump across to the handholds. When you can, jump out onto the pillar, which likewise falls down from the ceiling and prompts a nearby stone to start moving in and out of the wall. If you slide to the bottom of the pillar and jump to the gym bar, you can flip to the stone, stab the daggerplate, and wallrun over to the platform when it's flush with the surrounding wall. It's difficult to see from here, but there is a gap you can wallrun to.
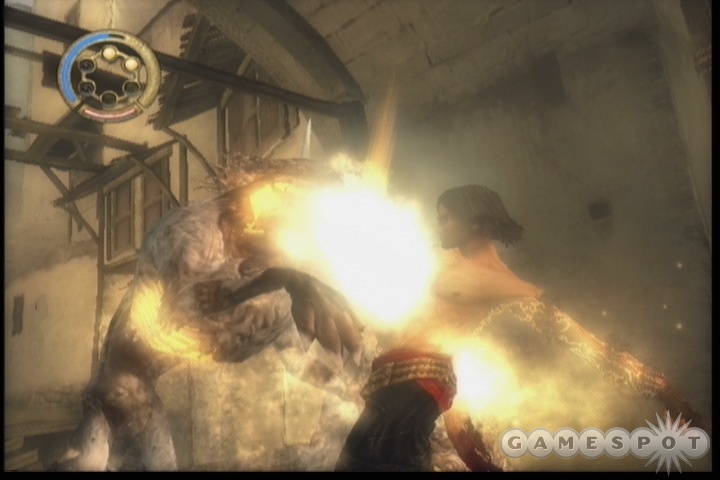
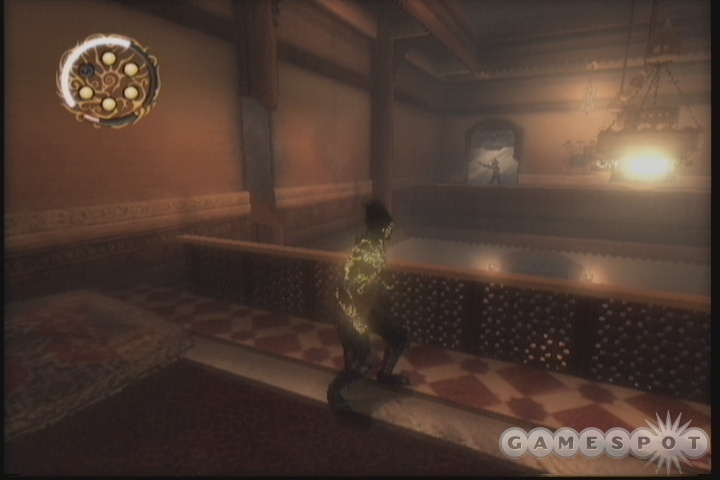
After you drop down to the bottom area here, you'll turn into the Dark Prince, a sand-infused version of the prince with a whiplike secondary weapon. The caveat to fighting as the Dark Prince is that you constantly lose health while in this form, and you'll need to find more sand capsules in order to refill your life force; luckily, a single piece of sand will completely restore your health, making it fairly easy to stay topped out, since you can find sand both in the jars scattered around the room and by killing the enemies here. There are going to be a lot of the latter, too, so be sure to check out your new combos in the menu and use some of them. You don't have a secondary weapon stamina bar to worry about, so anything's fair game.
After pulling out the stone across the way with your whip (press and hold secondary attack), jump across to the pillar and slide down to reach more enemies. There aren't any easy sand orbs here to find, so you'll need to kill your enemies fairly quickly. You can perform the May Day dance by lashing onto the pole with your whip and running around it, but this doesn't seem to be a particularly effective means of dealing damage. For our money, the primary attack - secondary - secondary combo (aka Blast of Sorrow) seems to be the best way to take down these little guys.
When you're ready to move on, move around the bend and use your chain jump (slashing at the beams as you jump towards them) to get across the rift in front of you. After falling down and killing more of the beasts, you'll have to whip out another stone, then retreat under the door that opens before it closes again.
After scaling the next little area, you'll have a tricky little sequence of jumps to make. First you have to use the wall switch to pull out the wall far enough to make the jump to the first bar here, but you'll need to jump as the wall is scooting outwards, as it'll retract fairly quickly. From the first bar, jump to the second, then wait for the logtrap to rotate around to its flat side. You'll have to quickly double jump off the walls here to reach the top before it rotates again and becomes unjumpable.
After you drop down to the bottom of the nearby gap, you'll revert back to the normal Prince. Jump up along the handholds, jump across to the dagger plate when it's in position, then wallrun across to meet up with more sand people. After killing them, find the wall switch here and stab it to open the nearby door and move on.
When you're through the door, you'll be able to either head to the right through a trap corridor, or to the left through some curtains. The curtain exit is a seeming dead end, but if you jump correctly, you'll eventually come to another fountain, which you can use to be transported to a fairly tough hallway. Although brief, you'll have to jump through saws and get past arrows to reach the end. (Don't forget that you can jump from one section of a beam to another, even over solid sections of it, which can help you outrun the arrow traps.) If you do manage to make it through the entire hallway, you'll earn a health bonus. From there, work your way back to the fork in the road, jump through the saws, and you'll come out to a save point.
The Tunnels
Wallrun jump and wallrun to the ladder here and start climbing. The arrow traps here are annoying, but not fatally so; so long as you're hanging from a ledge below where the arrows are aimed at, you can wait for them to fire, then jump up and pass by them.
After jumping across to defeat the archers (these are a tougher variant that can block your strikes), start making your way up the handholds and ledges in the area. Be prepared for ledges that shake and fall underneath you, and keep making your way up to the top of the tower here to reach...
The Fortress
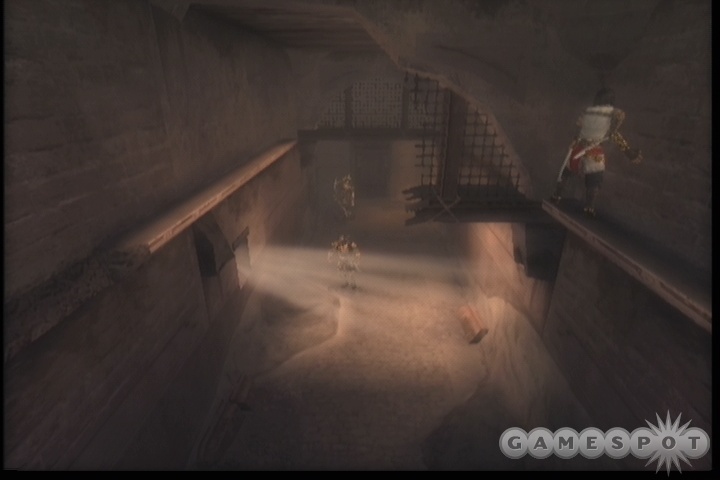
The fortress area is home to the fiercest warriors you've faced thus far; the sand warriors have armor and can take a ton more damage than the soldiers you've been fighting since the beginning of the game. You'll need to be a bit more creative than you have been when fighting them, but the first fight here should provide you with some opportunities to get crazy.
From the save point, jump into the gap and slide down until you reach the sand gate. The main guard here is somewhat reddish, and has sand pulses travelling from the gate to his body periodically. He's the one you want to focus on first, but if possible, let's try to get a speed kill on the second guard that paces around. If you wait for him at the bottom of the gap, he should pass underneath you and let you drop down to start a speed kill, but you'll notice that the timing on this is fairly hard to hit, especially on the second dagger strike; you'll only have a split second to tap your button before you get thrown to the ground. Still, if you can pull it off, you'll be ahead of the game.
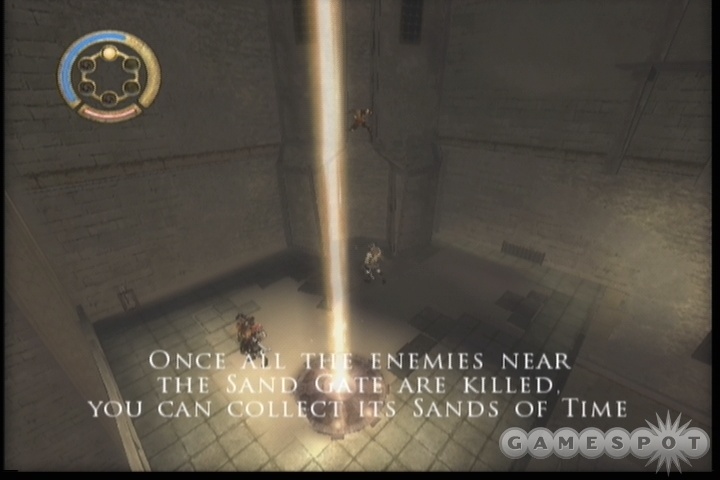
Regardless of whether you get your speed kills or not, you should try to prevent the sand guard from getting to the sand gate; if he manages to stab it, then you'll have to deal with numerous other guards that come through, around six in all. If you can keep him busy and kill him before he can call for reinforcements, then you'll be able to kill him and his friend, then absorb the sand gate itself.
If you do get overwhelmed, then it's a good idea to start using the Grab Throw technique to chuck the soldiers off the side of the platform, which will kill them without making you fight them. To do this, throw away your secondary weapon if you have one, then use your secondary attack button while standing close to a soldier. They'll need to be between you and the railing for you to successfully throw them over, since you jump over them then throw them in the direction you were facing, but they apparently can't block this attack, so it's fairly easy to perform.
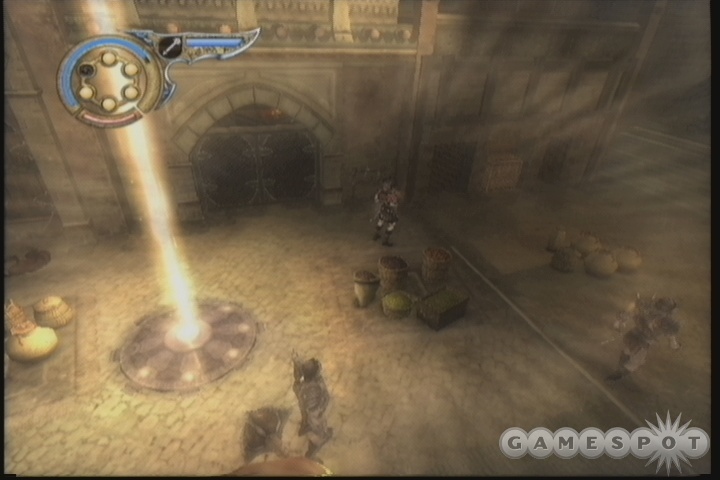
Anyway, when all the soldiers are dead here, head to the sand gate and absorb its power to earn a new sand slot. The sand gate will pop up an infinite number of sand charges, so go ahead and refill your meter and move on. Wallrun past the rotating spikelog, then jump to the beams and jump over to the archer. Again, speedkill if possible, but if not, your secondary attack move should be enough chuck him off the platform and kill him.
From there, jump to the chain and descend to see if you can't get another speed kill. If not, you'll want to at least kill the archer here, as he'll be firing at you when you try to leave this area. When you're ready to move on, jump to the daggerplate in the wall, then start making your way to the left. You'll have to doublejump off of the shutters to reach the next platform.
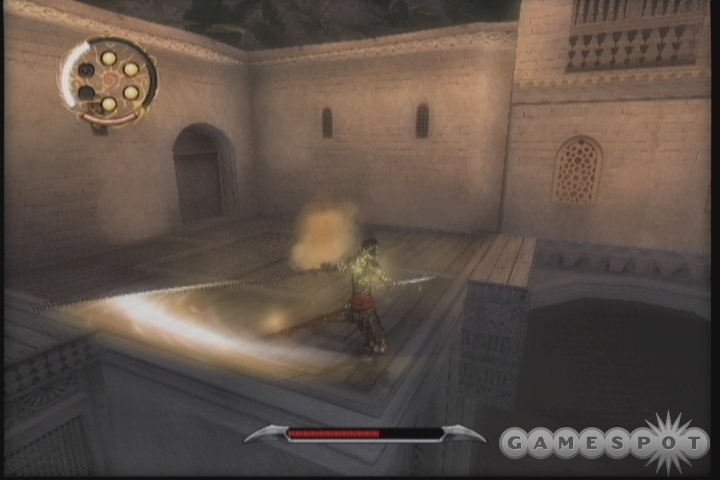
When you do complete the shutter jumps, though, climb up to the balcony overlooking this area and go to town on the soldiers here before moving the switch to open half of the gate below you. You'll need to wallrun across the spiketrap to move on, at which point you'll turn into the Dark Prince again. To move with him across the wall here, start a speedrun, press your secondary attack button while continuing to hold the speedrun button, then let go of the secondary attack button when you've hit the apex of your chain-assisted run. This should give you enough of a boost to get across the entire wall. Basically it's one long wall run with a chain assisted boost to it.
From there, chain jump over to the platform, then drop down and attempt a speed kill on the archer below you; don't forget that the Dark Prince needs to hit the secondary attack button to pull off speed kills. When you're done with the archer, climb the pedestal again, then follow the instructions on the screen to pull off the wallrun - chainrun - walljump combo required to get to the nearby chain. You should be able to get another speed kill at the bottom of the chain, but even if you speed kill the two soldiers in the courtyard, they'll probably still get a call for help out and you'll have to deal with more soldiers that come in waves. Like the Prince, though, the Dark Prince has an attack that can easily deal with most of these foes: the Blast of Sorrow. If you hit primary attack, the secondary, secondary, secondary, you should hit one of your foes, then swirl around and chop more of them in two. It's an instant kill on your first target in most cases, but we've managed to kill as many as three enemies with one combo, so it'll work!
When you're ready to move on, you'll have to find a way to get the gate open. There's a switch on one of the walls here, near the gate, but on the other side of a barrier. To reach it, you'll have to climb the pillar in the middle of the area, jump across a few beams, then land on the wall switch and plunge your dagger in to flip it. When that's done, the gate will open and you'll be able to pass on through. Be certain that you have all four sand slots filled up before you head under it, though, as you're likely going to need them.
Chariot Sequence
The first chariot sequence in Prince of Persia: The Two Thrones is going to be something of a matter of trial and error. Unless you have a full slot of sand charges, you're going to have a tough time completing the course on your first time through, as your chariot is fairly fragile and will pretty much disintegrate if you hit something too hard. What's more, you also have to deal with soldiers on the road, as well as a couple of other chariots.
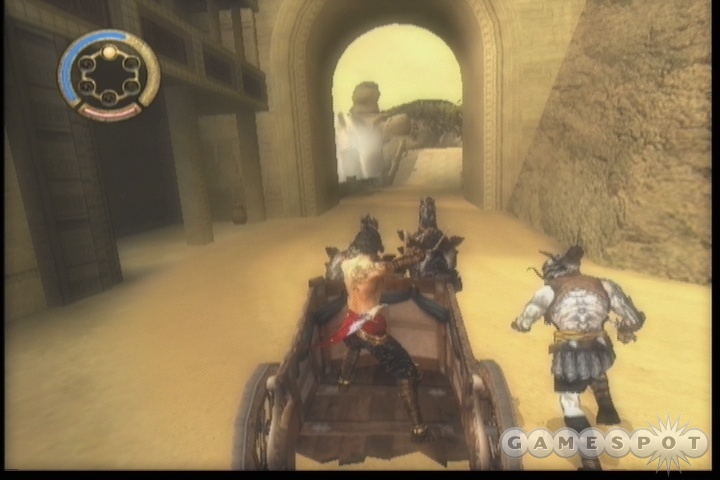
The first obstacle here is going to be another chariot. There's no way to kill it directly, or so it would appear; in order to get it off your tail, you'll have to "gently" nudge it into a wall or an arch. There's just such an arch a bit after you and the second chariot start jousting, so try to nudge it off to the left and and rub it into the arch when you pass under it. It's tricky to pull off, especially the first time you try it, and you'll probably wind up ramming yourself into the wall once or twice, but you do have the time rewind power to draw on if you happen to get destroyed, and you're going to need it.
When you've passed by the first chariot, you'll have to start making your way through the streets here. While the streets are fairly broad, they do occasionally narrow up, and there are lots of turns to maneuver. You can't bang off a wall with no ill effects, either; this ain't Burnout. A good shot against a wall will result in the destruction of your chariot, so be careful as you drive, and be prepared to retry this section if you run out of sand charges. Eventually you'll have to start picking paths based on the voice in your head's recommendations, so pay attention to what it says. This only occurs a couple of times, though, after which you'll almost be at the end of the race entirely.
The Lower City
You'll need to scale the narrow passages here before you reach the save point; there's nothing too complicated, however. When you do reach the save point, start leaping across the beams, then fall down to where the guard is peeking out of the window. Don't forget to drop down beneath his sight and use your hands to move laterally, or he'll spot you. He'll move away shortly, though, allowing you to jump across to the far platform. Wallrunning back to the shutter will allow you to start a speedkill on one of the guards; if it fails, just use your grap vault move to throw them both over the sides of the platform.
In order to move on, you'll need to drop down from this platform to a daggerplate, and either drop from there or attempt a speed kill on one of the guards that paces underneath. When you're ready to move on, jump to the gap and get ready for some tough fighting down below. You don't have any easy railing catapult kills here, so you're just going to have to get your kills the old fashioned way. From the bottom of the gap, though, you might be able to pull off a double speedkill, if you wait for one of the soldiers to move into position underneath you. The timing on the dagger strikes is as tough as ever, but it's definitely worth rewinding your time and giving it another shot if you mess up once or twice. Getting rid of these guys will be a big help before you go after the sand guard.
If you absolutely can't pull off the speed kill, go straight for the sand guard and try to get him away from the sandgate. There don't seem to be as many reinforcements that come out of this one compared to the last one, but again, you don't have any cheap catapult kills to work with. Indeed, killing these guys will require some finesse, especially if you have to deal with them en masse, as the Prince doesn't have many attacks that can deal with multiple targets. If you pick up a secondary weapon, the primary, secondary, secondary attack should sweep and slash all enemies on any side of him. It's still going to be difficult to fight off hordes of enemies here, so try to pick your spots and attack quickly. The primary attack off of a wall does light damage, but knocks enemies down, while the vertical wallrun/primary attack combo can decapitate them if done correctly.
Anyway, you probably don’t even need to kill all of the enemies here if you don't want to; you may be able to run through the alley behind the sand gate and jump up to the daggerplate in the wall and move on. (All you get for absorbing the sand gate is 100 Sand Credits, so it's not like you're missing out on something huge.) You will run into a pair of hellhounds when you jump over the wall, though. Although they're not incredibly difficult to kill, they do have powerful attacks, and can absorb sand charges from your meter when they inhale. They can be instakilled with a stab to the belly if you can flip them on their backs, though, so try using your primary attack off of a wall to flip them over and go to town.
After some rudimentary jump puzzling, you'll change into the Dark Prince and have to beat down more doggies. Again, your primary/secondary/secondary attack will be good here; it'll flip them over onto their backs and should automatically finish them off with a downward stab. Just don't forget that these guys don’t give off sand when they die; you'll need to smash the barrels around the area to heal yourself.
From this abattoir, chain jump across to the falling platforms and quickly run to the next beam to jump upwards. After killing the archer, you'll have chain-wallrun, then move around the platform and chainjump to the next ladder. This will finally lead you to another save point.
The Lower City Rooftops
Make your way along the rooftops, catapulting any archers you can't speedkill. You'll eventually double-jump off a pair of shutters, only to receive an assist from a mysterious friend. Eventually you'll reach a trio of archers on two buildings; if you speed kill the first, you can time your jump to the second building and wait on the handhold until both of their backs are turned before jumping up and speedkilling them, as well. Again, though, it's easy enough to vault them off with your secondary attack combo if you fail at the speed kills.
From there, jump down to the lower building from the uppermost roof, then wallrun and jump off the shutter to the chain. From there you can slide down, speedkill the archers, and move on. When you reach the next alleyway, wallrun to the daggerplate, drop down to the plate beneath it, then drop down to the floor. You'll need to clear out the area beneath the next daggerplate to wallrun up to it, so do so, then wallrun to the right to the daggerswitch on the wall. In order to hit it, you'll need to wallrun until you're on top of it, then let go of your wallrun button and hit your dagger.
Note that this opens up two doors in this area, one near the switch and one further down the ramp. If you run down the ramp and roll underneath the farther door, you'll come out to a minorly tricky area that will lead you to another puzzle hall, which in turn will lead to more bonus health. There's nothing too complicated here; just jump or fall down on the beams to avoid the arrows as they come out, and make your way to the far end of the beam paths. When you jump to the ledges, wait for the bottom one to appear before making the leap, then quickly jump up to the top before they all retract again, and you'll earn your extra health.
Make your way back to the door you rolled through to move on. You'll need to use the daggerswitch next to it to unlock it, then repeat the earlier daggerswitch to reach the next save point, but be absolutely sure you get as many sand charges as you can from the pottery here before moving under the door, as it's a one-way ticket. A secondary weapon might be handy, as well, if you have one. You should be able to see the first real boss fight coming up, so be sure to save and heal yourself!
The Arena
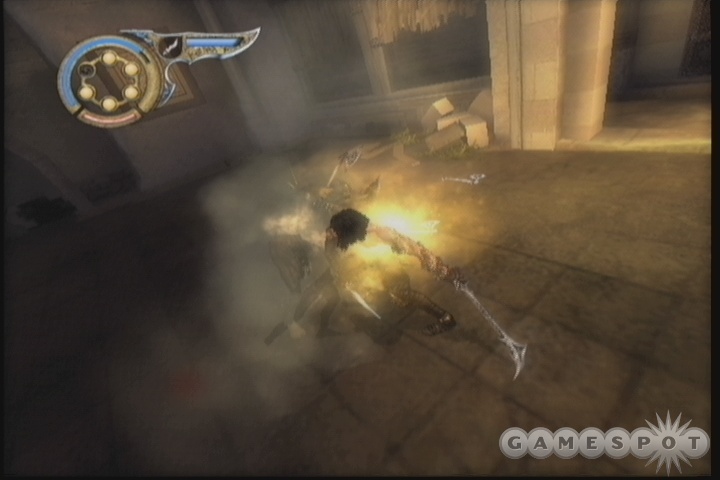
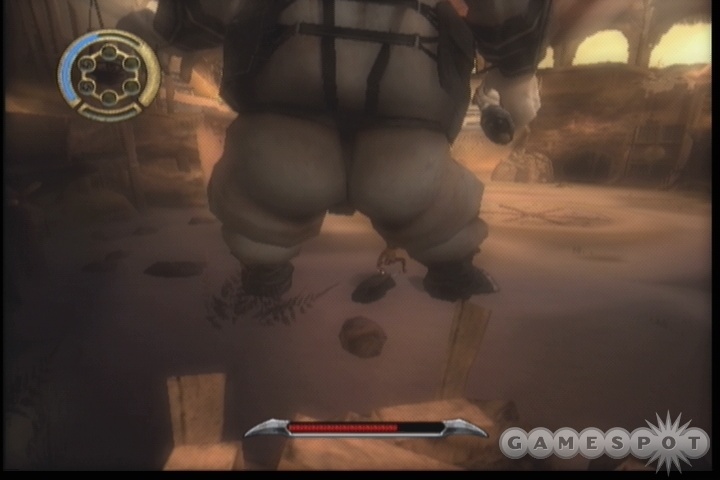
Your first major boss fight occurs now, against one of the soldiers that held you down while the Vizier killed Kaileena. He's been...changed somehow, into a massive, slobbering beast, with no lower jaw, and one massive sword that he's going to use to pummel you into submission. You'll have to take him down before that happens!
First Phase
Although Klompa (as he's known) is intimidating at the outset of the fight, he's not immediately dangerous so long as you keep moving and avoid his sword strikes. If you get too close to him, he'll pick you up and do severe damage to you, so don't try to attack him directly; just stay away from him and keep to the perimeter of the arena to keep out of his reach.
If you circle around the arena, you should see a pair of small ramps near a busted section of the wall. These both form paths that lead you up to the upper section of the structure. For the first, you'll need to wallrun up to a beam, then wait for Klompa to destroy the wall that's in your path before jumping from the beam to the platform nearby. From there, you should be able to make it to the highest level of the arena, where a small beam juts out. If you walk out onto this beam, you'll be able to start a speed kill combination. Just make sure you move quickly, or Klompa will swipe the platform with his sword and deal significant damage to you.
The second ramp will lead you to daggerplates. The same basic routine is done here: wallrun to the first daggerplate, wallrun to the second daggerplate, then wait for Klompa to destroy the wall before wallrunning to the next platform. From there, you can again move up to the third platform and start your speed kill.
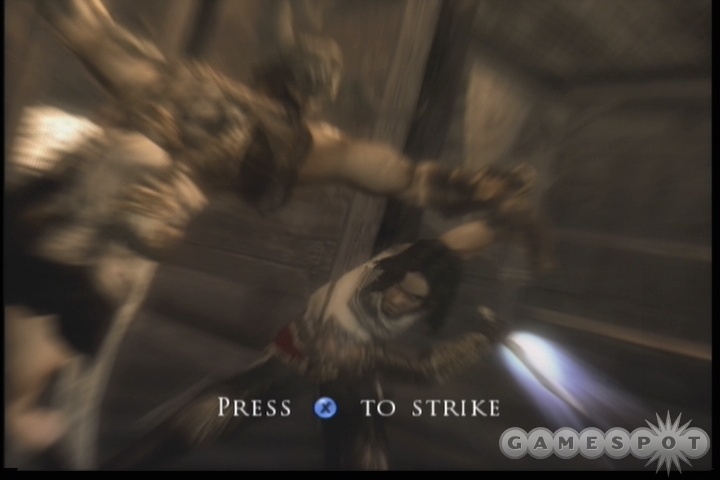
Both speed kill animations here, while superficially different, are fairly similar; you have one stab while you're in midair or just after landing, another stab when the hand comes to grab you, and one stab when you get close to Klompa's face and can go for his eyes.
Note that there is a pretty common bug in this area, where you'll start a speedkill on the Klompa and get the first strike in, but the screen flashes for the second dagger strike never appears. Apparently there are a couple of solutions. For the first sword flash, try waiting until the end of the flash before hitting the attack button. If you hit the button just as the flash appears, the second one never pops up. Alternately, when you're on the beam leading out to the Klompa, you can try to hit the start-speedkill button, then hold it down while hitting your normal attack button throughout the combo. Hopefully these will prevent you from missing the second dagger strike.
Second Phase
After both of the Klompa's eyes have been plucked out, you'll have to finish him off. It's here that things begin to get rather difficult, as Klompa's attacks become much more difficult to dodge and will do significant damage to you. The most treacherous of these is a movement where he'll issue a violent kick, then follow it with a sword flail that's difficult to dodge. If you're hit by this attack, you'll almost certainly die, so be sure to try and keep behind Klompa as often as possible during this segment. This basically entails rolling around on the ground a fair amount; when in doubt, roll directly under the monster and try to fit between his legs. Even if he steps on you, the damage is minimal compared to the kicking and sword swipes that he'll be sending your way.
Anyway, in order to actually damage Klompa here, you'll have to charge up towards his legs and slash at them with your weapons. This will, of course, alert the beast to your whereabouts, so you can expect it to try and lash out at you with kicks, which will be difficult to avoid at close range. Still, there isn't much else you can do except attempt to roll out of the way and attack from behind. The monster can pivot fairly quickly, though, so again, just attack, then roll through its legs as quickly as you can.
After you weaken the Klompa significantly, it'll raise one of its legs in pain; this is your cue to attack the other leg, which will send the beast to the floor, at which point you'll be able to enter your final speed kill animation. This involves one stab at the small of the Klompa's back, one while you're in midair, and a final strike at the base of its neck. If you miss one of these strikes, you'll be knocked off the beast, it'll gain a bit of health, and you'll be asked to try again. When you do make all three hits in a row, though, you'll kill the beast and be able to move on.
The Arena Tunnel
You'll have to move quickly here if you don't want to die; it's a ways to go until you can recharge your health, which will continually tick down, so get a move on! First wallrun across the gap, then wallrun up to the ledge in front of you. From there, edge your way around to the left and jump up onto the retracting ledge above it when it appears, and chainjump across to the beam nearby.
The next little area is difficult to maneuver past. The large stones that are set into the wall will attempt to crush you if you wait in front of them, so quickly chainjump to the beam off of the gap. (Alternately, you can roll past the blocks, hang on to the ledge, then jump backwards from there.) When you reach the beam, quickly make your way up the far wall, again avoiding the blocks that crush you, until you reach another corridor, where there'll finally be health waiting for you.
When you reach the ladder here, slide down to its bottom and use your chain to pull out the block on the opposite wall, beneath the corridor beyond. If you do, it'll open the door at the end of the corridor, so quickly climb up a bit and jump across to the corridor, and you should be able to just barely roll underneath the door as it closes.
When you're back in the city streets, chainwallrun across the wall to the far ledges, then chainjump back to the other handholds and jump back to the upper ledge here. You'll soon meet up with Farah again, who of course doesn't remember you, since you used the Dagger of Time to reverse most of the events of the first Prince of Persia game at the end of that title. Anyway, at least you know she's around.
The Balconies
Move on from the save point and start shanking your way through the guards on the rooftops. The second wallrun/shutter combo doesn't seem to lead into a speedkill, so just jump off of it and take the archer there down the oldfashioned way. After jumping off of the railing to the far platform, make your way over to the dagger plates and start working your way over to the wallrun - jump - chain area. Make your way down the chain, speedkill the guard, then reach the second chain.
Now, if you drop down to the bottom of the second chain and wait, you should be able to get both of the guards here into position for a double speedkill. Pulling one of these (or two individual speedkills, depending on the positions of the guards) off is the only way to sneak up on the sandguard near the sandgate here. If you don't pull off the whole speedkill, he'll call in backup to help you out, and without any cheap railing kills, you'll have to kill them all the old fashioned way. Still, whichever route you take, you'll need to grab the treasure from the sandgate, the Eye of the Stone power, to move on.
When you do have Eye of the Storm, return to the upper levels of the area via a wallrun up to a railing. You'll have to kill four enemies, two guards and two soldiers, before you can reach the wallplate that opens the door on the bottom level of the arena here. Your best bet is to move forward to spawn them all in, then backtrack onto the ramp a bit so that the soldiers follow you and try to take them down without having the archers fire at you. Be sure to use your new Eye of the Storm power, as well, by clicking on your left trigger button, to slow down time and make it a bit more difficult for your enemies to keep track of your positions.
When you're ready to move on, activate Eye of the Storm while you're standing underneath the wallplate, then wallrun up to it and quickly make your way down to the courtyard from the ledge nearby. If you move fast enough, you should be able to roll under the door just before it slams shut and move on. You have an endless number of sand charges, thanks to the sand gate, so feel free to try it again if you need to.
The Dark Alley

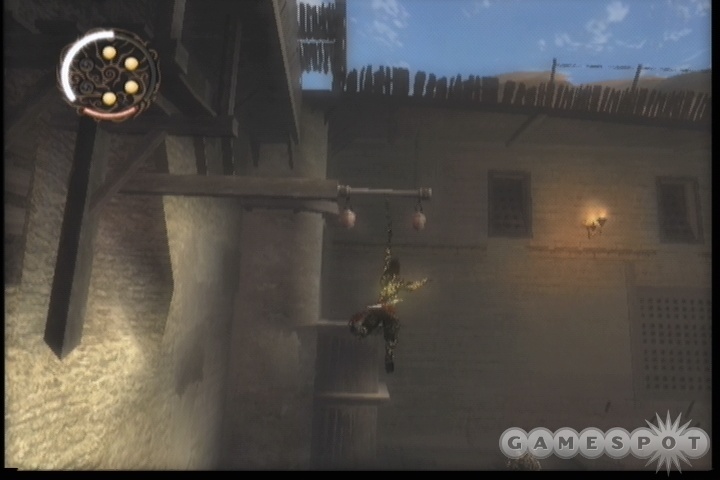
In the first area here, you'll have to jump from wall to wall over the weapons racks until you reach the daggerplate, then wallrun off from there. When you reach the rooftops, go to town on the archers. After meeting up with Farah, start killing off the rest of the soldiers on the rooftops. No need for anything fancy, just keep yourself down to one weapon and use your alternate attacks to fling them off the rooftops.
After Farah unlocks the door for you, head through and start making your way through the alleys beyond. There's nothing especially fancy required here; the jump from the gap can be accomplished by turning around to face the daggerplate and then just pressing your jump button. The only other tricky aspect is a jump from a tapestry; just slide down the tapestry with your knife, then hit your jump button when you're in position to make the leap. If you wait too long, you'll slide down to the end of the tapestry and die.
After that, it's a fairly simple matter to reach the next save point, after a bit of walljumping.
The Temple Rooftops
After a bit of contentious dialogue between Farah and the Prince, it'll be time to get inside the Temple itself, where the Vizier seems to be holing himself up. When you're done sniping at each other, drop down to encounter the first new enemy in quite a while: an Illusion. These are similar to soldiers, albeit a bit weaker, but with one large advantage: they have a Predator-like invisibility effect that makes them very difficult to see. They do still make sound, though, and they'll become visible when you hit them, so you may want to try either slashing about randomly, or use attacks that automatically lock onto your opponents, like the Wall Dive Attack. When they're visible, you can finish them off with your normal attack combos, or use stuff like the Angel Drop to get the drop on them.
When you're ready to move on, find the daggerplate in this area, run up to it, then run up to the handhold and work your way around the pillar until you can jump to another pillar. From there, daggerplate - shutter - jump to the platform above you. When Farah slices down the bell, jump down to its platform, push it to the left a bit until it's underneath the cracked wall, then wallrun up and flip the switch inside. You only have a few moments to reach the door you passed by earlier before it closes, so drop back down to the top of the bell and wallrun from it to the left to reach the door platform again.
Inside the temple, jump across to the first ledge, then start making your way through the area, jumping from ledge to daggerplate, wallrunning to the next ledge, and so on. You'll eventually come to a wallswitch; jump to it from the daggerplate opposite it, let it fully drop, then drop down to the handhold that you've made. You have barely enough time to scoot to the left, jump to the handhold on the opposite side of the gap, and jump from there to the ledge above you. It will instantly start to fall away, so quickly jump up to the higher handhold and start making your way around the area.
After jumping to the far side of the area, defeat the hellhounds nearby. There are going to be a lot of them, so don't hesitate to use your secondary weapon to flip them over and stab them while they're vulnerable. Another move that's good for this is the primary attack from a wall; just run up against a wall and press your primary attack button to jump off of it and slash at the nearest hound, which should flip it.
When you're ready to move on, hop onto the small stone underneath the beam that's visible to you, then wallrun to the right. This will take you onto the curved wall here, from which you'll eventually be able to leap off and grab the beam. From there, jump to the walltrigger to raise a platform nearby. After you've hopped onto the platform, wallrun to the right again, then make another wallrun leap to a higher beam. When you're on the beam, turn around, then rotate and jump until you reach the upper edge of the broken tower that you're in. From there, jump in the direction of the daggerplate on the far wall, and you should be able to land on the ledge nearby. After jumping up to the daggerplate, wallrun and jump to the beams, then work your way up to the balcony overlooking the nearby sandgate. When you hit the second beam (the one you can stand on), angle your camera so that you can look into the sandgate room, and wait for the guard there to look away before jumping to the balcony.
If you want to start a speedkill, you'll need to jump to the beam inside the room, then use the daggerplates and shutters to work your way around the room until you can't move on anymore. You'll be above one of the two guards here at this point. Wait for the other one to get into position, pull off the double speedkill, then kill the sandguard to get your fifth sand tank.
After you've defeated the sand guardians and claimed your reward, push the bell here to the opposite corner of the room, underneath the vertically aligned daggerplates. Jumping up to them will take you to a larger puzzle area, which you and Farah will have to maneuver through. The basic idea here is to use the switches to maneuver the uppermost walkways so that Farah can move around the perimeter of the area and hopefully open a door for you.
To begin with, jump from the railing near you to the first switch and push it once. You should be able to see the other two switches in the bird's-eye view while you do so, but they're tough to get to. To do so, hop down to the belltower near your position and wallrun up to the first daggerplate. After wallrunning to the next two, you'll be able to hop up to a broken area of the tower and fall down into the courtyard.
When you do reach the courtyard, push the switch nearest Farah (it was in the top-left corner of the screen in the bird's-eye view) once, then push the other switch three times. This will get Farah to the farthest tower, but will also spawn in more hellhounds, so kill them as best you can before returning to the very first switch (by wallrunning back into the gap in the tower you came from) and pushing it. (Alternately, you can just run past the hellhounds and wallrun back to the gap; they'll disappear when you hit the switch.) This will let Farah drop the bell, which you can push underneath the wallswitch and use to unlock the door.
After Farah moves on, use the switch again to open the door nearby, then hop over and head inside. Use the ledge to hop to the daggerplate, then wallrun to the bottom of the vertical passageway. A few jumps, and you'll finally reach the next save point.
The Temple
Time for another jaunt as the Dark Prince. The bulk of your initial efforts here will be platforming-related, with a few speed kills thrown in for good measure.
From the balcony where you change forms, jump across to the handhold, then drop down to the beams until you can hang above the guard on the platform. You can either speedkill him or kill him normally, but watch out for the hellhound that appear shortly after he dies. Be sure to leave some of the jars here intact until you kill the hellhound, and use them to refresh your life after the fight's over. When you're good to go, wallrun to the right to reach the ledge there. You'll need to start your wallrun before the edge of the platform that you're standing on, though, or you'll come up short of your target.
From the corner platform, you have to wallrun, then jump from the middle of the wall and use your chain to propel you across the middle of the room to another platform on the far side. When you reach it, wallrun and jump to the beams above the next platform, then speedkill the guards before taking on the hellhounds. Again, the Blast of Sorrow technique is usually going to be the most effective at taking these guys down, as it'll flip them, then automatically let you stab them in the chest.

When the hellhounds are dead, pull the stone out of the wall with your chain, wallrun to it, then wallrun jump to the platform above it. From there, drop down to the handhold, pull the block out of the wall, jump across to it, and start your chained wallruns. There are two of them, back to back, that lead to a pair of shutters. If you make both of these jumps, you'll come to a platform with a pair of guards on it. It's likely that they'll be alerted to your presence when you drop, but again, Blast of Sorrow will likely make quick work of them.
From this platform, you have to chainwallrun, then jump off the wall towards the beam in the middle of the next wall and use your chain to fling yourself to the platform in the corner of the room. You'll be near the two large statues here, so wallrun yourself into the gap behind the first statue. From there, jump forward (pressing the jump button without moving your stick should suffice), then chain the beam to get yourself into the second gap, from which you can land on the platform below you. Quickly wallrun to the left, underneath the upperplatform, then wallrun and jump off of the wall to reach the upper balcony here and kill the guards to get your health back up.
Wallrun to the nearby tapestry, but jump off of it when you hit and chainjump to the far tapestry, which terminates closer to the ground. When you land, you'll have to deal with a couple dozen of the chump-level sand enemies that you first encountered in the sewers, but by this point in the game, you shouldn't have too many problems with them. When you're through with them, hit the platform on the floor to open the door, then head through.
The next area features another pressure platform just beyond the door; stepping on it reveals a host of traps, but also unlocks the door at the top of the steps. You know the drill by now, most likely. After stepping on the platform, you can activate your speed slowdown power to easily navigate the traps and make it to the door well before it closes.
Although you may think that you're about to hit the Vizier, he actually vanishes just as you change back into the Prince. If you twist the switch here to shut off the water, though, you'll be treated to another new type of enemy: the Illusion. These creatures can quickly move about the room, and are rooted to the ground, preventing them from being thrown. To easily defeat, them, though, use your Eye of the Storm power to prevent them from escaping you and quickly hit them with multiple dagger strikes.
When you're done with the Illusions, wallrun up one of the corners of the room and jump off to reach the pillar. After jumping from pillar to pillar to platform, you'll be able to wallrun to reach a series of beams. Keep jumping up until you see the hole in the wall, slightly obscured by a flag. Jump through it to reach a platform. Wallrun over to the tapestry, then jump off of it when it terminates to reach the tapestry on the opposite wall. This hallway leads to the third life upgrade.
When you warp through the fountain portal, you'll find yourself facing off against a number of shutters on pillars ahead of you. As you jump from shutter to shutter, more trap-pillars will drop down, but it doesn't seem possible to actually hit them, so just continue on your merry way. Unfortunately, when you hit the end of the shutters, you'll jump to more pillars, of the weak variety; you can only hang on for five seconds or so before they fall, so you'll have to quickly time your jumps through the saws to reach the subsequent pillars until you manage to reach the life upgrade. As per usual, slowing down time will be a big help here.
With the extra life in hand, make your way back to the water room and start climbing it again. If you go past the hole in the wall, though, you'll eventually reach another room with tapestries in it. Falling down those wall coverings, then making your way through some more rudimentary acrobatic puzzles, will lead you to the next save point.
The Marketplace
After meeting up with Farah, follow the upper path here until it terminates. You'll have to wallrun along the wall to your left, but jump just before you hit the corner; you should land on the center platform handhold. From there, creep around until you can jump to the gap formed by the lattice. From there, slide down and turn around. Speed kill the guards here, if you wish, or kill them normally, the pull one of the large cloth baskets atop the pressure switch before running around the corner and wallrunning over the door.
If you jump to the pillars in the middle of the next three guards, you should be able to jump to one of the daggerplates nearby, which will let you start a sequence of chainkills, but it might be easier to just drop down and take them out the old-fashioned way. When everyone's dead, find the next cloth basket thing and push it around the corner, in front of the pair of recessed doorways. When that's done, jump atop it, then walk across the beam and jump to the daggerplate. If you make a perfect run from the daggerplate to the pair of shutters and manage to stab onto the daggerplate at the other end of the alley, you can get a double speedkill on the guards when they're in position; otherwise, just kill them normally before using the switch at the end of the corridor to free Farah.
After Farah helpfully drops another basket for you, place it on one of the two switches here, then hit the other one yourself to unlock the door nearby before rolling underneath it. Start making your way up the ladder, then jump to the daggerplate and jump from there to the handhold before rolling around to the left and jumping to the uppermost platform here.
From the platform, wallrun to the shutter, then jump to the daggerplate and hold on. Although it doesn't appear that there's much to do from here, if you wallrun to the right, you'll impact the wall and fall down to a ledge, from which you can crawl around to the right again to reach another daggerplate. Wallrunning from it and jumping will lead to another beam. Jump from there to the far beam, and from there to another daggerplate. Wallrunning to the left will let you jump off of a pair of shutters to another daggerplate, and from there you can wallrun to a beam, jump to another daggerplate, and then finally wallrun to another platform, where you'll find another save point.
The Market District
Fall down from the broken barrier, then wallrun along the wall and jump across to the ledge. You should be able to spot another sandgate below you, but there don't appear to be any guards...curious. Drop down to handhold onto the ledge and crawl around until you're on top of a daggerplate. From there, drop down and stab the plate, wallrun to the right to reach another daggerplate, then jump up to another handhold.
After Farah appears, crawl around along the handhold, jump up, walk across the beam, and jump into the gap across from your location. If you slide down and turn around, you'll be able to speedkill the soldier beneath you, but he's tough, and will require five full strikes to defeat. If you fail, then don't worry too much about it; just kill everyone as normal. If you do, though, you'll be able to climb the ladder nearby, jump across to the handhold, and shimmy around to the beam to set up a double speedkill on the remaining guards.
Whichever type of killing you prefer, eliminate the guards, then run up to the wallswitch and pull it down to reach the next area, then walk around and wallrun over the door to reach the sandgate, where the guards have finally appeared.
Now, if you're really interested in speedkilling all of these guys, then it's probably possible to do so by carefully monitoring their movement patterns, dropping down from the beams and daggerplates to pick them off one at a time, then returning to the daggerplates before the remaining guards turn to face you. In our experience, though, it's easiest to speedkill two of them and kill the other two as normal. To do so, jump from the beam to the first daggerplate, then wallrun across to the second daggerplate. Wait here until the guardian and the nearby soldier both turn away from the soldier beneath you, then drop down for the speedkill. If timed properly, the guardian should still be turned away from you, allowing you to sneak up behind him and speedkill him, leaving the final two normal soldiers to deal with.
If you're looking for all speedkills, though, try dropping from the beam to speedkill the first soldier, then quickly running up to the daggerplate before you're noticed. Dropping from the second daggerplate will net you another speedkill, after which you can return to the daggerplate and wallrun to the third. When the third normal guard is dead, close in on the guardian and take him out in turn. Regardless of your method, you'll be rewarded with 150 sand credits when you capture the gate. Joy.
When you're ready to move on, pull one of the baskets out from the chute across from the wall switch and put it underneath the switch, wallrunning to it and stabbing it to unlock the nearby door. Activate your speed slowdown power to clear the door, then climb the ladder and make your shutterjumps to reach the next level.
The Bowery
Wallrunning to the left and jumping will get you underneath the archer's roost here; shimmy around and wait for him to turn his back before hopping up and speedkilling him. From there, jump over the balcony to the beam and from the beam to the handhold, shimmying to the right to drop down to the platform, at which point you'll change into the Dark Prince. From this location, jump from the balcony and chain yourself across the gap to the handholds on the far side of the area before dropping down to the bottom.
You'll face more Illusions here; use your slowdown power and Blast of Sorrow to eliminate them. There's another handhold in one corner of the area, within wallrunning distance, so climb up to it, jump up again, then make the awkward jump backwards away from the wall and chain yourself to the far platform, which will allow you to enter the Bowery proper.
Activate a speed slowdown before you wallrun to the pressure plate here; the door nearby closes quite quickly. From the balcony, hop over, then drop down onto the tapestry to make your way to the floor. The next enemies you spot here are the Enchantresses. They're similar to Illusions, in that they can't be thrown, but have a tougher defense and don't drop sand when they die. If you're running out of life, there should be two objects to destroy near the central block of stone, but you'll need to quickly kill the enemies if you intend to live. After the Enchantresses are dead (again, Blast of Sorrow seems to work well on Normal difficulty), more Illusions will appear, so finish off the lot of them with your slowdown time power and get moving.
There's only one pillar you can climb here, so shimmy up until you can jump back onto the central stone, then move around to the left until you can lift yourself up. After jumping up to the level of the upper platforms, jump across and kill the archer near you, then wallrun over and defeat the Enchantresses that appear before wallrunning to the next platform and killing the last Archer in the room.
In the next small room, you'll have to wallrun up one of the walls near the closed door, then double-jump your way up to the area above, where an Archer stands guard. He's going to be a pain in the butt, but if you move quickly and flip the switch here, you'll be able to drop a beam in the middle of the room. There's no way to kill the archer, but if you activate your slowdown time power, you should be able to wallrun through the broken section of the railing and chainjump to the far balcony in between arrow shots. From where you land, move around through the curtain and wallrun to get behind the Archer before finishing him off.
Shortly thereafter, you'll return to the normal Prince state of affairs. After hopping the next ledge, you'll come into another trapped hallway; Eye of the Storm will let you maneuver through the spinning saws with relative ease. At the end of the hallway, start climbing up to reach the upper levels, where more Archers prowl. Wait until both of their backs are turned before activating your speed power, hopping over the ledge, and speedkilling both of them.
The Brothel
At least the game gives you the courtesy of knowing that there's a boss fight ahead; you can hop back down to where you first saw Farah to find more smashable crates for sand, as well as a secondary weapon rack.
Boss Fight: Mahasti
As with the last boss fight, this fight is divided into two halves, but this time, the first half of the fight is the tougher of the pair.
You begin here as the Prince, forced to deal with the Mahasti in hand-to-hand combat. This can be difficult to do, since she has some powerful attacks, but you have an unlimited amount of time to deal with her, so try to focus on staying away from her blows. She doesn't have any especially long-range attacks with her daggers (although she will throw them at you if you attempt to move to one of the other platforms here, so try to focus on low-risk attacks, like the primary attack off of a wall, or an Aerial Landing Slice, (where you face Mahasti, jump over her, and slash at her in midair), or the Tailspin Angel Drop, which is the result of a vertical wallrun and the secondary attack button.
If you are forced into regular attacking, be careful to keep your guard up as often as possible, as Mahasti can unleash a ten or twelve-blow combo with little warning. You can guard your way through the entire combo, if you wish, but she'll occasionally kick you clear off onto another platform, forcing you to jump or wallrun your way back to the Mahasti to engage her again. If you're bold, you can try hitting your primary attack button while blocking to counterattack during the Mahasti's combo; she has enough attacks that you have a good shot at landing a counterattack, but she may counter your own counter! It's best to just focus on the low-risk moves here, but don't get frustrated if you take damage, as you're about to get healed all the way.
Every once in a while, try to use your primary dagger attack on Mahasti; you'll probably get pulled into a sword clash animation where you and she attempt to overpower each other. At this point, just jam on the primary attack button to push the weapons back at her. If you manage to overpower her, you'll get a couple of free hits in; if she overpowers you, she'll throw you over the side of the platform. The reason this is important is that, after you take off around a quarter or a third of her life bar, entering one of these sword clashes will transform you into the Dark Prince, ushering in the second (and far easier) section of the fight.
Second Phase
The Mahasti doesn't seem too keen on dealing with you when you're the Dark Prince, and will indeed retreat to the far corner of the area and attempt to throw daggers at you for a while. These are fairly easy to avoid, so long as you keep moving. You'll have to wallrun or jump to one of the other corners to reach her, but you'll be confronted with an Illusion when you reach it. No worries; they're easy to kill and will offer up sand to restore your health with.
When you near the platform that the Mahasti's on, she'll attempt to jump off of it; in order to hit her, you'll have to use your Eye of the Storm power to slow down time just before you jump up to face her. With that done, you'll be able to close in on her and attack her with your weapons; you should be able to get a pair of combos in before the slowdown wears off and she escapes to the far platform, forcing you to do all this again. Still, though, you shouldn't be taking any damage during these sequences, aside from the damage you naturally take over time. The Illusions will still allow you to refresh your health through killing them, though, so you shouldn't be in any danger of dying.
When the Mahasti's health is almost at zero, she'll start jumping away from you when you attempt to attack her while time is slowed. When this begins to occur, jump onto her platform without activating Eye of the Storm. She won't escape from you this time! Just attack her until you enter into a sword clash, then overpower her to end the fight once and for all.
The Plaza
There's only one exit from the Mahasti's lair, so head to the open doorway, glide down the tapestry, and jump off before it terminates to reach the lower level. After restoring your health from the breakables, jump to the handholds and swing your way across the gap with your chain attack. When you reach the next solid ground, wallrun along the right side of the wall to reach the first shutter, then jump from shutter to shutter until you reach a handhold. The next gap can be wallrun past along the left wall, if you use your chain to assist you.
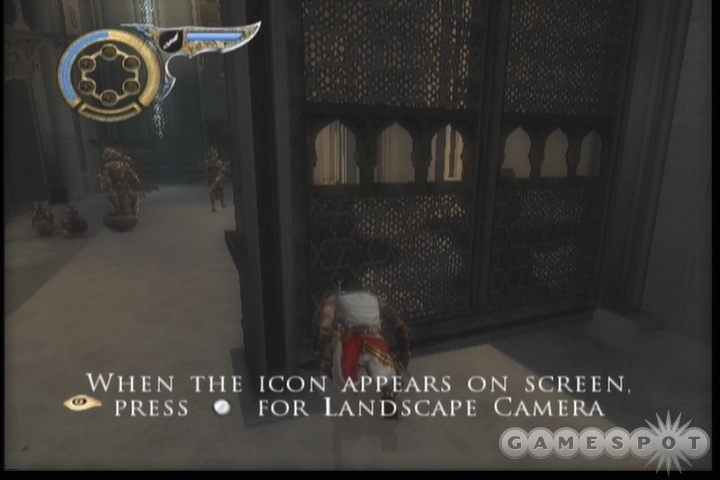
After defeating all of the enemies that come after you in the next courtyard, you might have a more difficult time moving on than you might imagine, at least until you realize what you have to do. The two pillars here are red herrings; they don't lead anywhere. If you poke around a bit, you'll realize that there's a bird's-eye cam available in one section of this area. Use it to reveal a beam sticking out of a wall. To utilize it, you'll have to wallrun up one of the walls nearby, jump off of the wall at the apex of your run, then chain along the beam to reach another beam nearby.
From the platform that you reach, you have to wallrun through the gap in the railing, chain yourself to the lamp to extend your wallrun, then jump off of the shutters to move around to the central ruins of the area, where you can shimmy around to reach another platform.
In the next room, wallrun along the wall, then jump off and chain yourself across to the handhold on the far side. Move around to the right, then jump away from the handhold and chainswing again to reach a real chain that's descending from the ceiling. You can garrote the guard underneath it with a speedkill before dropping down and finishing off his friend.
After wallrunning to the pressure plate here and opening the door, sneak underneath it and kill the other soldier in your way. You'll have to roll underneath the barrier in the path to move on, then follow Farah until you turn into the Prince again.
The Upper City
After saving your game, jump up onto the small wooden structure in this room. You can hop again to stand on top of the beam atop it, but it's not necessary yet; instead, wallrun to the right and jump to reach a balcony with a switch. Twist it one time to free the wooden structure from the barrier nearby it. You'll now be able to push and pull it. It only has one path to follow, though, so push it out of its hiding spot and pull it to the very end of the path. It should be parallel with the wooden shutters that closed when you flipped the switch.
When the structure's been moved as far as it'll go, climb atop it and jump from there to the switch balcony. If you throw the switch again, the wooden shutters will open up, allowing you to leap from the top of the structure to the gap beyond. Climb up, jump to the beam, walk across, jump to another gap, then climb that all the way up until you can't climb any more; at that point, you'll be able to turn around and leap onto the beams suspended above a pair of guards. If you wait for them to get into position, a double speedkill will commence.
After dropping down and flipping the switch, jump across to the handhold above the opened door, then drop down after the guard passes by for another speedkill. After a few shutter jumps, you'll encounter Farah again. When she runs away, wallrun and jump to the beam, then jump from there to the chain and drop down to encounter more of the basic sand monsters. When they're dead, wallrun to the pressure plate, then scoot underneath the door before it closes.
If you're adamant about using speedkills, then perform one on the first guard here before returning to the doorway and wallrunning up to the handhold. You can jump from there to the platform nearby, and wallrun/shutterjump from there to a set of beams. Watching the remaining pair of guards will clue you into their movements, allowing you to set up a double speedkill.
Regardless, climb to the top of the ladder here, then jump off the walls until you reach another platform. You'll have to wallrun and jump to reach the beam, but from there you should be able to reach the upper level here, overlooking another sandgate.

Wallrun to the far corner's platform, then sneak out onto the ledge and drop down to the platform beneath it. Wallrunning and using the shutters as jumping platforms will take you to a ledge. If you hang down off of it near where the soldier patrols, you'll be able to speedkill him, so do so, then wallrun and shutterjump to the far building above the sandgate. If you wait for the soldiers to resume their patrols after they get over their startlement by the birds, you'll be able to wallrun off to the right and jump onto a beam that juts out over the normal guards here. When everything's in position, double speedkill them, then sneak behind the guardian and speedkill him as well. Killing all of the guards will earn you the Winds of Sand power, which you can activate while you block to knock down any nearby opponents.
Use the pressureplate to open the door here, then climb the barrier, destroy the jars to reveal another basket, and pull it into position in front of the nearby wall to wallrun over it. From there, wallrun to the daggerplate, wallrun+jump to the daggerplate opposite it, then jump up to the handhold and move around to the upper corridor, where you'll find the next savepoint.
The City Gardens
Jump from the balcony to the beam, and from there to the daggerplate. Wallrunning to the right will lead you to another daggerplate, from which you can drop to reach a ledge. Shimmy around to the right and jump up to the handhold above, then continue shimmying to the right until you can drop down to another beam. Jump to the far beam, then start climbing up the handholds until you can jump out to another beam. A couple of wallruns from the daggerplates here will let you reach the upper level. Pop up and speedkill the guard, or just catapult him to his death.
Hop the railing and lead across to the next platform. Drop down when you hit the ledge and move around to the handhold. Drop down from there and leap across to the pillar nearby, then shimmy around to the right until you can jump to the tree. If you jump from tree to tree, you should eventually spot a ledge running along one of the walls here. Leap to it, then wait at its leftmost edge until you spot the two mobile guards get into position for a speedkill, and take them both out. When they're dead, sneak behind the pillar with the wall trigger on it, and speedkill the other fools before wallrunning and hitting the trigger.
The trigger will unlock a pair of beams on the pillar you initially shimmied around, so climb the trees to get back to it, then drop down to the beams and leap across. You'll come to another pillar; shimmy all the way around, then climb up to the ledge and leap across. Fall down to the daggerplate, and from there to the ground.
A trio of beams are your only path leading on from here, so leap from beam to beam until you reach the corner, then shimmy to your right and jump out to grab the narrow beam that juts from the wall. Jump atop it and jump to the highest beam here, then use your right trigger to rotate around it and jump from there to the wall nearby. (If you climb on top of the beam and make a standing jump, you'll likely miss the wall and fall to your death.)
You should be able to see another sandgate below you at this point. Jump from the beam to the tree here, then gently slide down until you can jump from it to the beam across the way; if you slide down too far, you'll be spotted by the guards. From the beam, jump to the daggerplates, then start making your way to the right until you reach the beam above the sandgate guardian. Drop down so that you're hanging by your hands, and wait for the pacing guard nearby to turn away before starting the speedkill.
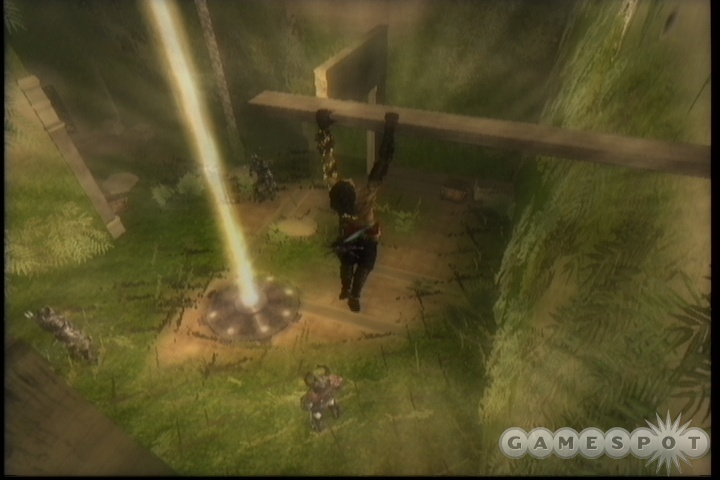
When the guardian's dead, quickly move towards the edge of the cliff nearby and hang down by your hands. If you shimmy to the left and wait behind the pillar until the nearest guard turns around, you should be able to speedkill the remaining foes; otherwise you can just dispatch them normally and pick up your reward, the sixth sand tank. Hit the walltrigger nearby, then climb the tree and jump across the platform that's just opened up. Jump from the beams to reach the pillar off to the left, then maneuver around it until you can drop down the handholds on the far side and speedkill one or both of the guards here. Even if you can't speedkill, them, it's a simple matter to throw them to their deaths.
Wallrun to the beam nearby and shimmy off to the right until you can make the jump to the ledge, then move around and double speedkill the guards above the waterfalls. Before dropping down, move off to the right and find the sand chest there to refill all of your sand tanks.
Boss Fight: Garden Monster
Well, this isn't really much of a boss fight; more of a boss annoyance. Still, the jolly green giant here can be annoying to deal with, so don't feel too frustrated if you have to retry the battle a couple of times.
In the first phase of the fight, the monster is going to act much the same as the boss in the Arena did, way back in the days of yore. He's much bigger than you, so he'll try to stomp and smash and kick at you. Like the Arena fight, you're going to want to roll away from his front side or between his legs, and attempt to slash at the back of his legs. (The front of his legs are armored, as you'll discover if you attack them.) Also as in the Arena fight, he'll attempt to stomp you, but this should only be light damage.
Anyway, with the slashing and the swording and the stabbing, you should eventually get the monster to take a knee (usually after some awkward animations on his part). What you need to do at this point isn't exactly clear, but if you try walking up to the leg that's lain on the ground, you'll automatically run up the creature's back. (You may need to approach the leg directly from behind, or this animation might not trigger.) When you get the flashy dagger that signals a speed kill, hit your attack button to hop up on the back of the creature, and giddy-up! It's time to take him out for a spin!
The basic rules here are the same as in a chariot race: if you hit a wall at too severe an angle, you're dead. That's really all you need to know, aside from the fact that you've got some really sluggish steering to deal with. Anyway, after bashing through the first door here, make a hard right, then turn left into the second door and get ready for some tight corridors. You hopefully have a few sand charges left, in case you ram into a wall, but most of the rest of the turns are relatively easy to see coming. At the end of the path, you'll spot another doorway which you can't avoid; just charge through it, and the beast dies. Yay.
The Canal
The first thing you're going to want to do here will be to pick up the next Bonus Health upgrade. To do so, roll through the small hole near the fountain here, work your way onto the ledges, then start moving down the passage until you reach the next fountain that leads into the trap area. You have some minorly tricky traps to avoid, but with your Eye of the Storm power, you should be able to avoid them and reach the health without too many problems.
After returning to the save point, climb up the pedestal nearby and walljump your way up to the upper level. Wallrun to the ledge, then jump over to the nearby ladder and scoot all the way down to the bottom, where another ledge is available. Jump from there to a bar, and from there to the next platform, where you'll find another save point.
The Promenade
If you want to shankify the first soldier here, climb up onto the wooden platform and jump from beam to beam until you're over his head. He'll require five blows, but the timing is a bit more forgiving than it is on the weaker soldiers. After he's dead, move the basket here to the corner of the pool area, near the scratches on the wall. You have to wallrun from here, jump off of the wall, then walljump until you reach the platform where the soldier is standing. Wait for him to turn, then shank him.
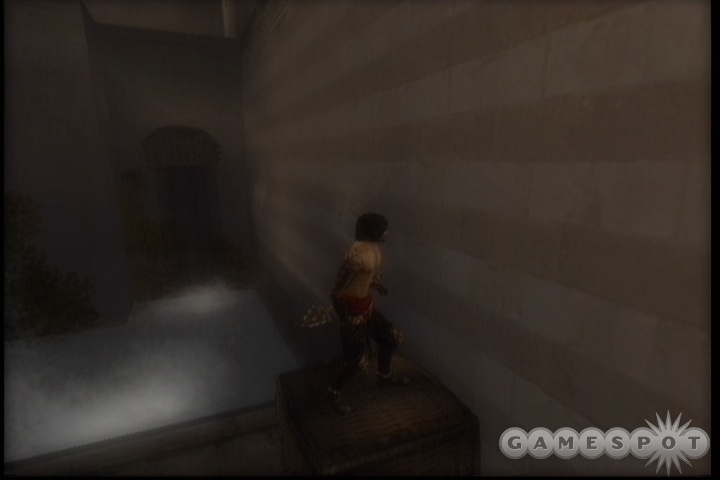
When that's done, wallrun to the switch, then quickly wallrun over the dropped door to hit the shutter on the far side; you'll be propelled to the ledge above where the basket was initially parked. Jump up to the higher ledge, then walljump back and forth until you reach the upper platform, where another pair of shutters will let you hit the far balcony.
After switching to the Dark Prince, descend via the chain and speedkill the sand warrior below you, but be ready for a pair of hellhounds that appear afterward. You have plenty of smashable items around, though, so you shouldn't be at any great risk. When you're done, hit the walltrigger nearby, then chainwallrun to the tapestry that's accessible. Before you hit the bottom of it, though, you'll have to jump off, then use your chain to swing yourself to the opposite platform, where a few enchantresses and a hellhound are waiting for you. You'll obviously want to slow down time to deal with these foes, but Blast of Sorrow should be fairly helpful.
After they're dispatched, hit the wall trigger nearby to lower the nearby wall coverings, then chainwallrun to the shutters until you land on a platform with another soldier. Kill him, then wallrun to the shutters and chainjump to another platform, where you'll have to kill a pair of soldiers and a pair of hellhounds. From there, wallrun off to the left to another platform, where a wallswitch is waiting. After triggering it, jump to the beam to the platform, and from there drop back down to the platform you were on before, then wallrun off the left wall to reach the second shutter that was raised.
From this platform, wallrun to the right and jump off when you're about to hit the corner; you can double-chainswing yourself to a nearby platform. Hop over the edge and shimmy around to the left before pulling the brick out of the wall. After jumping to it, wallrun to the nearby ladder and scoot down it towards another brick. Pull it, jump on top of it, then wallrun and jump to the fountain nearby to revert to the Prince.
From the fountain, jump to the handhold and jump from there to the upper platform, from which you can spot another sandgate. Jump out to the beams and swing your way across until you can spot a chain; hold onto it and drop down until you can speedkill the warrior underneath, but make sure the guardian is looking away from your position before doing so. With one speedkill under your belt, quickly move to the wooden platform nearby and wallrun up it until you reach the topmost floor. Use the bird's eye view here to spy on the guardian around the way.
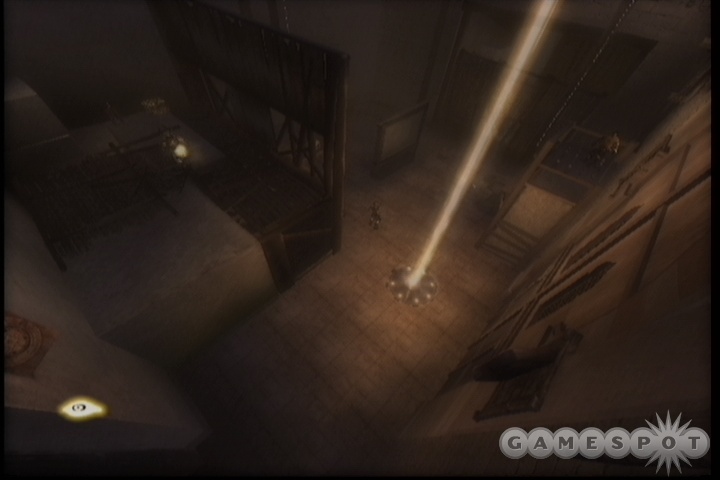
Now comes the tricky part: in order to get a speedkill on this guardian, you have to wait until he comes close to the edge of the platform nearest you, then shutter jump to the second shutter and start your speedkill from there. The timing on this is awfully sensitive, so you may have to just jump from the second shutter and hope you start your speedkill anyway; sometimes the trigger only appears for a split second. If you can pull it off, though, you'll have a 10-sand chest to your credit, as well as a secondary weapon rack.
If your speedkills are still intact, climb atop the stone pedestal nearby and wallrun to the wooden wall. Climb on top of it and jump to the chain and descend. After waiting for the second guardian to turn away, start your speedkill, then hide behind the wall and wallrun up it to reach the top. Jump to the beam jutting out from the wooden wall and wait for your opportunity to speedkill the second guardian. When that's done, grab the sandgate for your reward: 200 Sand Credits.
With that done, head into the recessed area near the first chain you dropped from and hop over the stones in your path. The next area is full of crushers and saws that run along the walls, but if you activate your Eye of the Storm power, you should be able to easily dodge the instruments of death; you can even climb atop the crushers and jump from one to another to avoid the saws. You'll reach the next save point soon afterwards.
The Royal Workshop
After running through the short scene that starts when you enter this location, run down to the statue of the king and grab hold of his scepter. Climb up the pole that it makes for you, then jump from there to the platform nearby. Wallrun from there to the rope, then shimmy along to the platform nearby, then wallrun to the platform in the corner. From there, you can wallrun to the gap between the wall and the statue.
While you're in the gap, climb all the way to the top and jump forward to land on another platform. From there, jump diagonally to the platform nearby, then drop down to the platform underneath it. When you see the bird's eye view marker, hit it to look up. To reach your destination, you need to wallrun into the gap above the fire, then walljump until you reach the ledge. If you're standing on it, drop down to hang on by your hands, then shimmy to your left until you can jump to a beam. From there, you can jump to the first switch in the room.
Well, there are actually only two switches here, each of which is paired with a wall trigger. One of the triggers causes the statue to move along the set of wooden logs that line the floor, while the other will rotate it around its axis. Your goal here is to move the large statue of the king from one end of the room to the other, but doing so will be complicated, due to the fact that it can get caught on any number of obstacles in its path. You'll need to use the switch that rotates it to maneuver it around the obstacles so that the switch that moves it forward will be able to do its job. It sounds complicated, and it kind of is, but with a little practice you should be able to figure out how it works. Note that the degree of complication that this puzzle takes on seems to depend on the difficulty setting of the game, so we can't guarantee that this solution will work for all difficulties.
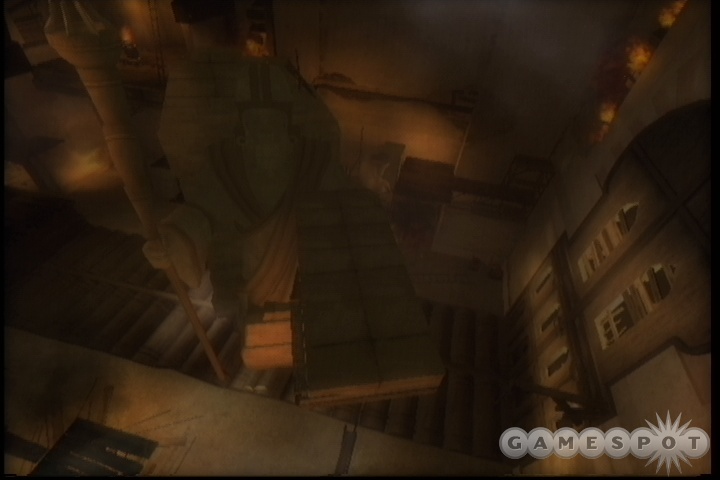
You should be standing near the switch/trigger combination that controls the movement of the statue along the floor. If so, the panels above the wall switch should include an arrow pointing left or right; by default, it should be pointing to the right, which is the direct we want the statue to move in. Go ahead and flip the walltrigger once to move the statue away from the wall a bit. You can only move it once at this point; trying to move it again will bang it against the wood that's hanging against the ceiling.
At this point, head up the ladder near here and descend the ladder on the far side to reach the second trigger combination. This is the trigger that controls the statue's axis of rotation. The arrow above the walltrigger should, by default, be oriented clockwise, so leave it there and pull the walltrigger twice to rotate the statue so that it's facing the wall it was originally stationed at. It should be completely turned around from its original orientation.
Now, return to the lateral movement switch and flip the walltrigger twice to move the statue further down the room. Return to the orientation switch and rotate the statue clockwise once. Now, return to the lateral movement switch and push the bar to change the switch from moving forwards to backwards, then use the wall trigger to move the statue backwards a bit. Now return to the rotation switch and use it to turn the statue clockwise. (It should now be facing the same direction as it originally was.)
Move the statue forward one move (after returning the lateral movement switch to the forward position), then clockwise one turn, then forward one space, then counter-clockwise one turn, then forward one space to bust through the wall and end this tedious puzzle exercise! You'll automatically leave the area after you bust through the wall.
If you prefer to have this puzzle solution in a handy list format, here you are:
- Forward move
- Clockwise turn
- Clockwise turn
- Forward move
- Forward move
- Clockwise turn
- Backward move
- Clockwise turn
- Forward move
- Clockwise turn
- Forward move
- Counterclockwise turn
- Forward move
The King's Road
Ugh, another chariot sequence. If it helps, think of this as another opportunity to curse at your television! But really, if you survived the last sequence, you can survive this one as well, although it'll probably take a few tries to get past the aggravating parts. You should hopefully have a full load of sand charges at the beginning of this chase, so you'll hopefully have plenty of opportunities to correct your mistakes, but if possible, save as many as you can for the boss fight that comes after this chariot sequence.
Boss Fight: Sword and Axe
For lack of a better word (or words), Sword and Axe are what we'll use to refer to the pair of bosses here, since...that's what they're going to use to kick your butt. And kick your butt they will. It's going to be kicked so hard that it'll grow a second, smaller butt, which will in turn be kicked itself. That's how bad these guys are.
Well, in truth, they're tough, but not impossible to defeat when you learn the trick to beating them. As mentioned, one of the soldiers here wields an axe, and one wields a sword. Beyond that, they're mostly identical; either of them can quickly and savagely dish out a huge amount of unblockable damage if you're not careful. Axe is the more dangerous of the two, though, since he can't be attacked directly, and will in fact kick-counter any attacks you send his way, plopping you to the ground.
Thus, you'll have to focus on Sword for most of the fight, as your inner child will let you know if you wait around long enough. If you keep attacking him with your dagger, you should be able to prevent him from attacking you by locking him up in recoil animations. You won't be able to actually hurt him, but if you press the attack, Axe will eventually come up behind you and attempt to slice you in two. When you see the subtle slo-mo effect come into play as he raises the axe upwards, quickly dodge out of the way to avoid the blow; Axe's axe will then be stuck into the ground, and he won't be able to defend himself.
At this point, you obviously have to start hitting Axe with all you've got. Unfortunately, his friend Sword won't take too kindly to this turn of events, and will usually take advantage of the fact that you're hitting his friend by coming up to you and unloading on you from behind. Now that's darn rude. There isn't much you can do to avoid, this, unfortunately; there's no magical obstacle you can use to keep him away from you. All you can really do is attempt to keep Axe between you and Sword in the hopes that Sword won't be able to reach you and strike at you. You can also jump over Axe and slash him on the way down if you need to quickly get on the other side of him, but Sword can and will hit you while you jump. We wish we could make this easier for you, but it's pretty difficult no matter how it shakes out. Luckily, Sword will occasionally just stop moving for a moment; when this occurs, go to town on Axe and try to land two or three dagger combos before he pulls up his weapon and the cycle starts over again.
Now, after you take off around a third of Axe's health, you'll get a speedkill prompt, so hit the appropriate buttons and do your thing to take off a significant amount of health from Sword and Axe both. When that's done, you'll have to repeat the same process of attacking Sword, then dodging Axe's chop and attacking him, until you get the prompt for another speedkill; after pulling the second speedkill animation off, you'll win the fight. The timing required to actually hit the dagger blows during the second speedkill is much tighter than it was for the first, though, so if possible, save one or two of your sand tanks to try and rewind time if you mess it up.
When the ensuing cutscene ends, you'll turn into the Dark Prince again. Fight your way through the hordes of enemies that appear until the door nearby unlocks, then proceed through, wallrun forward to reach the balcony, and scoot over until you can jump through the screen. After turning into the Prince again, you'll find the next save point.
The Palace Entrance
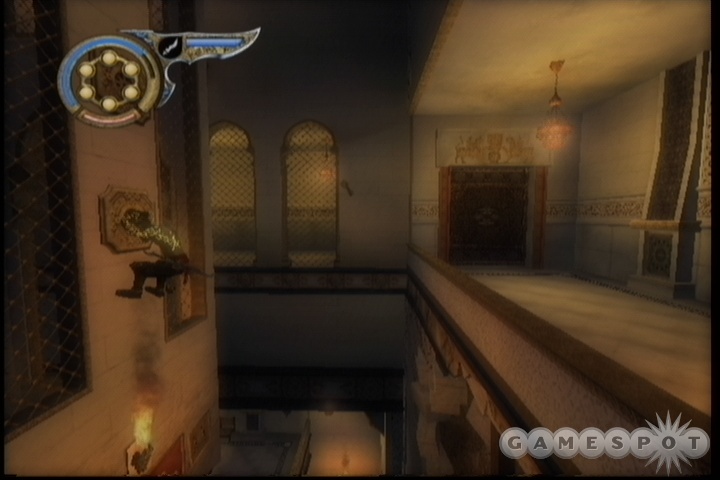
When you meet up with Farah again, wallrun to the shutter and jump off to reach a ledge. Jump from there to the gap opposite, climb up, then turn around and push the switch to open the door nearby. You'll come out near a hole across from a tapestry. Jump onto the tapestry, but jump off just before it ends; you'll wind up on a ledge. Shimmy around to the solid surface nearby and wallrun and walljump up to the top, where two soldiers await. Kill them, then wallrun to the left and jump to the beam inside the elevator shaft. From there, hop from beam to beam to daggerplate, then wallrun to the right to reach another platform.
After the interlude between the Prince and Farah, hop the railing to the daggerplate nearby. If you look to your right, you should see a metal plate that periodically juts out from the wall. If you activate Eye of the Storm, you should be able to wallrun to it, then wallrun up the wooden wall here and jump from wall to wall until you can latch on to the daggerplate above. From there, wallrun to the right, but jump from the wall before you hit the corner to reach a beam. Jump from there to the platform above you, kill the enemies, then rotate the gear to open the nearby door.
Before you go through the door, though, it's time to get your fifth and penultimate Health Bonus. To do so, hop the railing and jump off to the first daggerplate on the elevator shaft. Jump up to the third daggerplate, then leap off to the opposite wall and wall jump a couple of times until you hit the pressureplate here. A nearby door will open, and you'll fall down to the daggerplates. When you latch hold of one of them, activate Eye of the Storm, drop down to the first or second daggerplate, then jump across to the platform and head through the door that opened to reach the life upgrade trap hallway.
Three tough traps to deal with here, each made easier if you have some sand with you. For the first, dodge the saws and jump to the middle platform. If possible, jump so that you barely make the gap and have to grab hold with your hands before the log here turns spiky; it will knock you off the platform entirely and force you to use a sand charge to get past it if that occurs. When you're past that little obstacle, you have to scale a number of handhold/ledges that continuously retract and extract from the walls. You have barely enough time to make the jumps here (three up, jump to the far wall, two up, jump to the far platform) if you don't use Eye of the Storm, but if you have a sand charge, it becomes somewhat trivial.
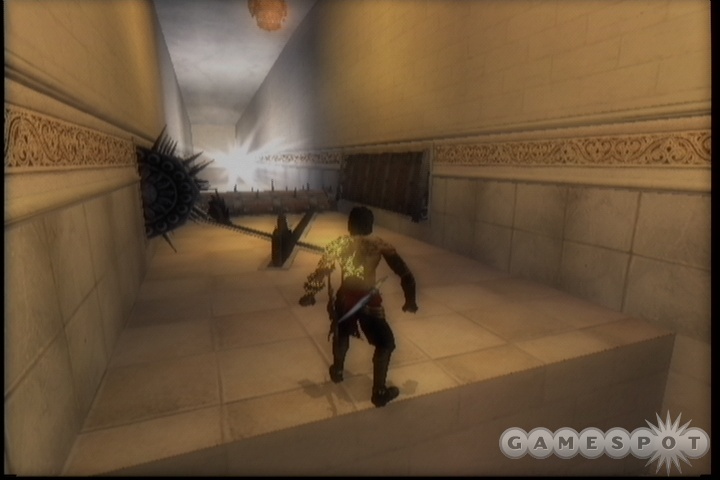
Lastly, you face a trap consisting of two saws and three log traps. You can try to run along one side of the wall, if you wish; if you time it right, you can even run along one of the spike traps when it's out in harm mode, if you manage to evade the saws as they run along the ground. If you get knocked down by any of the traps, just stay down; they won't hurt you until you get up again. When the timing seems right, roll forward towards the light and get your health reward.
When you have your extra health, return to the room that you opened with the switch, run up to the daggerplate, and jump from there to another platform. You'll be able to jump to a daggerplate, wallrun from there to another platform that sticks out from the wall, and leap from there to the ledge nearby, underneath the torch. From there, walljump up to the platform where the guards are, kill them, then wallrun back to the elevator shaft and jump from beam to beam. You'll see a daggerplate above you, but it's too high to hit from your jump off the beam; in order to reach it, you'll have to swing off the beam, hit the wall, then walljump once or twice until you're in position to stab the plate. From there, wallrun to the right, fall down to the ledge, then shimmy around to the right until you can jump to the platform across from you. Kill the enemies, then leap the barrier and jump to the elevator for another interlude with Farah.
After you enter the Hanging Gardens, kill the Enchantresses here, then flip the switch to start the nearby blocks pulsating. You can guess what comes next; you'll have to walljump up the gap formed by the retracting block before it pushes itself out again and kills you. Eye of the Storm will obviously be helpful here.
When you reach the next level, stab the daggerplate in the stone that pulsates, then wait until it's flush with the left wall before running along and stabbing the daggerplate there. You'll have to repeat this on the upper level; run out to stab the plate on the stone, wait for it to retract and then stick out again, then run along to the corner platform. From there, wallrun to the tapestry, then jump to the beam just as you're approaching the end. From the beam, walk around to the other beam, jump into the gap, crawl up, jump to the daggerplate, wallrun and jump to the other daggerplate, then wallrun to the handhold before shimmying around to the right and dropping down to the doorway. Wallrun along the right wall here, jump to the daggerplate, wallrun to another daggerplate, jump to the beam, jump from there to another daggerplate, then wallrun to the right when the wallplate is extracted to reach the next save point. Finally!
The Hanging Gardens
Drop down from the ledge here and make your way to the right. Don't worry about the daggerplate that you see; you can't drop to it just yet. Instead, keep heading right and jump up onto the ledge that you come to. After Farah drops the shutter on the wall, wallrun across and jump to the beam above the gap, then drop to the gap and slide down. If you wait until the far guard looks away, you can start a speedkill on the guard below you, then move over and speedkill the other one as well.
When that's done, wallrun to the daggerplate you spotted earlier, then keep an eye on the nearby stone and watch it as it comes in and out of the wall. You want to start your wallrun just as it starts to come out of the wall, jump to it, then quickly move across and leap to the beam before it retracts all the way. You should have plenty of time.
After jumping up to the top of the beams, leap across to the spike nearby, and jump from there to the platform beyond. After the cutscene, wallrun to the far platform, drop down into the gap, then turn around and wait for one of the sand guardians to come underneath you. The other sand guard and warrior should be looking away at this point, so quickly drop down for the speedkill, then speedkill the other sand guardian before it can turn around. The warrior will likely spot you after the second speedkill, but no matter; he's easily disposed of by throwing him off the ledge nearby.
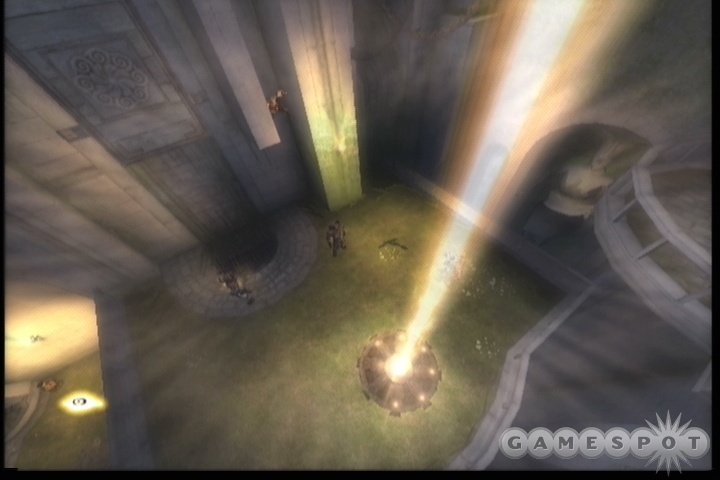
Jump over the railing here and grab hold of the daggerplate. After reaching the top daggerplate, wait for the stone nearby to stick out, then wallrun to the left and walljump from there back and forth off of the stone until you reach a handhold. Wait for the stone to retract and stick out again before wallrunning up to the handheld at the top of the gap. From there, shimmy around to the left, climb up to the uppermost handhold, then shimmy around to the gap and slide down. Face backwards, towards the stone wall, not the balcony. As soon as the two guards meet up underneath you, they'll turn around and start heading in opposite directions. Speedkill the one that's heading towards the wall, and you should be able to turn around and speedkill the one on the balcony before he turns around.
From there, wallrun from the balcony to the ledge across the way, then jump from the beam to the upper handhold. Shimmy around to the right and jump to the balcony to find a save point.
The Structure's Mind
Jump from the beam to the gap, and carefully make your way through the saw traps that block your progress; as per usual, Eye of the Storm will help you evade the traps if need be. At the bottom of the area, time your movement through the logs and arrows, and you should be able to make it through without using EotS, but it'll be almost mandatory for the quick-moving saws at the end of the area. Luckily there are some smashable objects for you to get sand charges from if you happen to need them.
The next large room contains another puzzle, this time involving three rotatable switches. If you look around, you should be able to spot Farah at the far end of an empty room; for the sake of clarity, we'll assume that facing her is equivalent to facing north, leaving you with switches to the south, east, and west. To finish the puzzle here, you'll have to move all of the platforms upward, but moving them will also slide smaller platforms from side to side, which will sometimes block their progress.
To begin with, head to the southern switch and raise it up once. Do the same for the western platform, once, then repeat the process on the eastern platform. All three platforms should now be one space off the ground.
Now, you need to get to the western platform, but it's a way up from the ground floor. To reach it, wallrun up the pillar in the corner of the room to reach one of the ledges there, then hop up until you can jump to one of the smaller platforms. Jump from there to the western switch and push it again to raise that platform as high as it'll go. Wallrun from this platform back to the corner and jump from there to the southern platform, bring it up one space, then wallrun to the other corner and jump to the eastern platform before raising that switch up one space.
That should result in all three platforms being at their maximum height, and a platform being raised allowing you to reach Farah. Wallrun to the corner and drop down and start crossing the platform to reach the next area.
The Well of Ancestors
You need to move quickly here, as you don't have a lot of opportunities to earn sand. Since you're the Dark Prince, that's a bad thing; your health will constantly be degrading. Hopefully you took the opportunity to find the previous health upgrades!
Wallrun from the balcony and use your chain to extend your distance to the next platform. Repeat the process to reach the second beam across the area. Chain jump from there to the chain across the way, drop down to the beam below it, then quickly walk to the secondary beam and jump to the platform nearby. Chainwallrun from there to reach some jars which you can smash for health.
Jump from this platform to the nearby beam and drop down to the platform below it. Chainwallrun to another platform in the corner, then chainwallrun to yet another platform. Wallrun from there to the ledge above the next platform, then drop down and kill some of the enemies there to restore your health. There's nothing in the room here, so wallrun to the left outside the room and drop down into the gap here. Slide down, kill more enemies, then chainjump across the middle of the room to reach the far platform. Chainwallrun from there to a set of beams across the room, and drop from there to another platform.
From here, chainwallrun four times to reach another platform, then chainjump across the gap and kill more sand monsters for health. Make your way around to the ledge nearby and start wallrunning from platform to platform. You'll eventually come to a pair of Illusions. Since they probably won't drop sand when killed, ignore them and run to the beam here, jump to the gap, and slide down into a little side corridor, where you'll finally find more jars to break.
You'll probably want to use an Eye of the Storm charge to get past the saws on the wall; if not, try to start your wallrun just before the farthest saw hits the bottom point of its apex. When you hit the ledge, drop down and shimmy to the right, then drop down to the yellow ledge below you. You'll probably grab on with your hands, so you'll have to quickly jump up so that you're standing on the ledge, move to your left, then jump across to the handhold before the ledge falls away. From the handhold, wait until the saw beneath you is directly underneath you and passing to the right before dropping down to the second handhold and shimmying around to the corridor. One last pair of saw traps stand between you and sweet, sweet sand.
From this corridor, chain jump across to the far platform, then wallrun up the right wall to reach a handhold. Scoot along to the right until you can jump across to the other wall, then drop down until you reach the lower corridor. Eye of the Storm your way through the saws here, grab some more health and sand charges, then, again, use EotS to speed your wallrun along the left side of the wall here (after the logs have turned over, of course), then jump from the shutter to a handhold. Jump up the handholds, jump across the gap, then carefully drop down to avoid the blades that are spinning out of the walls.
You'll come to what seems to be a dead end, but if you look up, you'll notice a handhold in the wall above the spinning blade near the edge of the gap. You'll need to use Eye of the Storm to slow down the blade enough to wallrun up to the handhold, but then you can shimmy over to the right, chain the block across the way out, jump to it, jump to the other handhold in the area, shimmy to the right again, then drop down to the last set of saw traps before Eye of the Storming through them and hitting the plate here to move into the room.
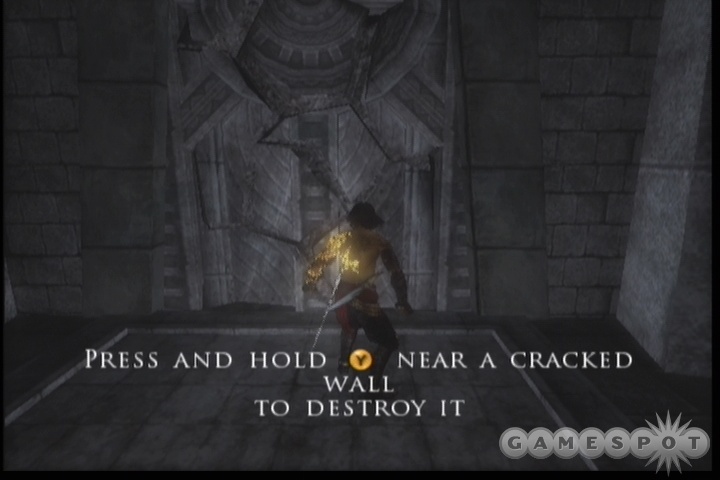
After the short cutscene that ensues, quickly destroy all of the sand monsters that come your way, then find the cracked wall and hold down your secondary attack button to destroy it. Save your game and move on.
Well of Ancestors, The Sequel
Although there's a save spot here, you're still technically in the Well of Ancestors. The sword of your father is going to be your only light source here, but you can't throw it away, and it doesn't degrade in strength, so you don't have to worry about losing it.
Walk forward and hang along the left wall before jumping across the gap. There are more invisible enemies in the area, so be cautious. After jumping across two more gaps, you'll have to turn around a bit and make a leap-of-faith wallrun. More wallruns will lead you to a gap that you can walljump up. From there, you have to make another leap-of-faith wallrun, and from there, more wallruns and gap-jumping will lead you to the next save spot. (If you're having trouble spotting your destination, turn the brightness on your television up.)
The Labyrinth
Oh, this sounds promising. When you reach the dead end, wallrun up the right side of the corridor to reach a handhold. Make your way along the handholds to the left until you reach the next spot of solid ground, then head through the door nearby. Jump out onto the beams and start swinging your way forward; you'll have to crawl from side to side once or twice until you reach the solid ground at the end of the passage. From there, jump up the handholds, then jump across to a beam. There are a series of beams and daggerplates in this area, none of which should be very difficult to figure out at this point in the game. Maneuver your way up to the top of the chasm, bust through the broken door, kill the enemies, then jump across to save your game.
The Underground Cave
From the save point, jump to the nearby pile of rubble and blast it with your secondary attack to break through. Quickly time your jump past the moving pillar of spikes, then wallrun up to the ledges above you and shimmy around to reach the upper corridor here. Blast the rubble, kill the enemies, then wallrun to the left to fall into the gap there.
Inside the gap, crawl upwards until you reach a platform, then pull yourself up. Jump to the daggerplate, drop down to the beam, then jump across to the ledge beyond. After jumping and walljumping up to the top of the platform, pull the walltrigger to cause a pair of nearby stones to begin popping out of the wall. In order to jump across them, you'll almost certainly have to use Eye of the Storm; when you have, start your wallrun just before the nearest block fully retracts into the wall. If you time your jump right, you'll land on the block as it reaches full extension, then have plenty of time to jump to the second block and from there to the platform before time runs out.
Pull the wall switch on the platform after killing the enemies, then jump out to the central pillar and wheel around to the left before dropping down two more ledges and jumping to another new platform. Bust it open, kill the enemies, then run up to the daggerplates and wallrun to the left to the third daggerplate. A series of daggerplate maneuvers will take you to the far end of the corridor, where more enemies await. Bust them up, then smash through the wall here. Find the wallrun area, then walljump up to the top of the platform. Wallrun out to the beams, then flip your way into the gap nearby before descending to reach more enemies.
After jumping across to the daggerplate here, use it and its kin to ascend a bit to the ground above. Jump from the beam to the pillar, and from the pillars to the platform nearby. Cut through the enemies, then smash the busted wall. Wallrunning down the right side of the next area will lead you to a daggerplate. You can't jump directly across from it, so continue your wallrun a bit more and leap from further down to reach the handhold. Shimmy around to the right, jump up a few ledges, then leap out to reach the beam there. From the beam, leap to the gap in the waterfall and start climbing up. When you reach a ledge, walljump up to the uppermost solid surface, where a trapped hallway awaits.
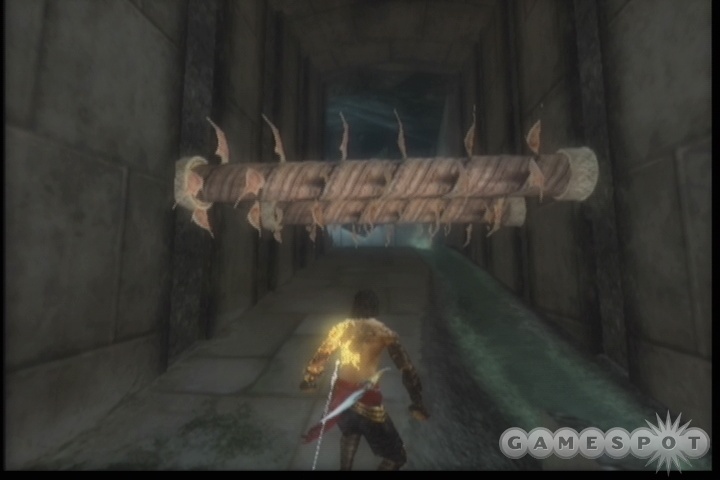
It can be difficult to escape the first group of spiked logs without taking damage; the first log is especially hazardous. Try to roll under it with Eye of the Storm activated, walk under the next two, then roll under the last one. Don't feel too bad if you take some hits; you're almost at a save point. The same goes for the trap around the corner; EotS your way past the saws, make sure you don't get hit by the smasher, then roll your way past the second set of saws to reach the end of the level. All you need are a couple of daggerplate jumps to hit the well.
The Royal Kitchen
Time to get your drink on, and your snack on. Or your fight on. Guess which is more likely.
After triggering the walltrigger and rolling through to the dining area, start working your way through the enemies that appear. Feel free to use a Sand Storm on the first collection of Enchantresses and dagger-throwers to get rid of them; you'll make up the sand by killing the warriors that start to drop down afterward. When you're done, find the daggerplates in one corner of the room, wallrun to the left and jump to the beams, then walk across the beams until you can jump to another daggerplate. Wallrun from there to another pole and swing from that to the balcony.
On the opposite side of the balcony, walk out onto the small beam and jump to the daggerplate, then wallrun and jump to the beams in the middle of the room. Jump from there to the daggerplate in front of you, wallrun to the left, over the pressure plate, and then drop down to head through the door.
The Secret Passage
Some elementary swinging and jumping will get you past the first gap here; just be sure to jump to the sliding handhold as soon as it extracts itself from the wall. You'll reach another save point quite quickly.
The Lower Tower
Well, you're moving up in the world, or so it would seem. You're in the Tower of Babylon now, and have to start your ascent to catch up with the Vizier.
Begin by wallrunning across the gap that you first come to and swinging from the beam to the nearby platform. After jumping up the ledges nearby, wallrun to the beam, scoot around to the left, then jump into the gap and slide down. Jump from the beam to the pole, swing across to the platform, kill the guard, then push the switch here once. Wallrun up the nearby wall to find a ledge, then jump across to the beam. Jump from the higher beam to the lower beam near the lower platform, then kill the illusions that attack. Jump from beam to beam here to reach the platform above you, then throw the switch here once, to raise the elevator even higher. Jump out to the beam the birds are sitting on and jump to the uppermost set of beams. From these, you can jump to the other side of the platform, where the open elevator door awaits you.
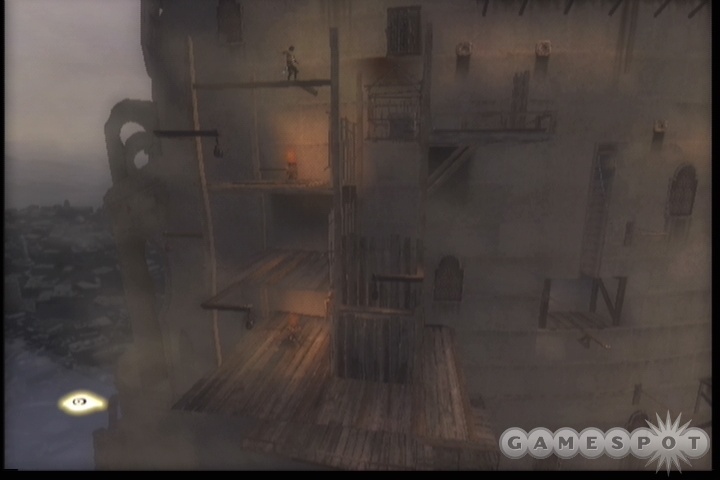
Drag the stone out of the elevator and position it underneath the daggerplate. Wallrun up to the daggerplate, wallrun to the right to another daggerplate, then wallrun to the right and jump off of the wall at the last second before you fall to reach a pole. Slide down and jump back to the wall to hit another daggerplate. Continue wallrunning to the right until you reach a beam, then jump up and turn around to hit another platform. Head to the end of this platform, jump up and turn around, then enter the Tower again.
If you time your first wallrun properly, you should be able to avoid the saw/log trap and make the shutter jumps, but the collection of traps in the next corridor will likely call for an Eye of the Storm to get through them, and even then you're probably going to take a bit of damage, if not a lot. Eventually you'll reach another bottomless pit, though, so jump to the daggerplate, wallrun to the shutters to your left, and jump up the daggerplates to reach a save point.
The Middle Tower
Hit the walltrigger opposite the door and head outside. After killing the enemies, wallrun up to the daggerplates, wallrun over to the platform above the door, wallrun up to the daggerplates, then wallrun to the shutter to the left and jump from there to the pole, and from there to the platform below you.
The same basic puzzle that you went through in the Lower Tower is replicated here. Flip the switch once to raise the elevator here, then jump up the beams to the platform above you. Pull the stone out of the elevator here and move it to the empty elevator before pulling the switch; the elevator that the stone is now in should go up one level. Jump from the nearby railing to the trio of beams that run up the wall; these will lead you to the uppermost platform. Kill all of the enemies here, then drag the stone out of the elevator and place it on the narrow elevator on the far side of the platform. Its weight will cause that platform to drop, and another one to rise. If you wallrun up to the ledge nearby, you'll be able to wallrun out along the tower's wall and jump to the elevator that you raised. Jump from it to the beam nearby to reach another platform.
Walljump up the gap here until you reach the top, then jump from the ledge out to the beam, and from there across to a platform. Wallrun up to a daggerplate, then wallrun to the left to reach more beams. After jumping across another pair of platforms, you'll reach another trapped interior hallway. Before you head inside, though, take the time to get the sixth and final health upgrade.
While standing on the platform leading to the trap hallway, head back towards the wooden platform you jumped from before, but don't jump to it. Instead, drop down off of the marble platform; you should see a wooden beam beneath you. Drop down to it, drop down once more, then jump to another wooden beam and walk off of it into another marble hallway. Some rudimentary jumping will lead you to the next fountain, where the last trapped hallway awaits.
For the first blade/log trap, you might want to just wallrun past the log; doing so will prevent the saw from hitting you. For the next trap, you have to wallrun past the saw's gap just as the logs beyond it are rotating into the wall, then quickly walljump up the gap between them before they come back out again. From there, wallrun through the saw gaps and jump to the beam. Drop down the beams and jump to the last solid surface here. The last trap is a pushover; just wait for the nearest log to flip over into the ground, then wallrun past the saw and second log to max out your health meter. From there, return to the beams you used to enter the marble hallway and return to the other trapped hallway above.
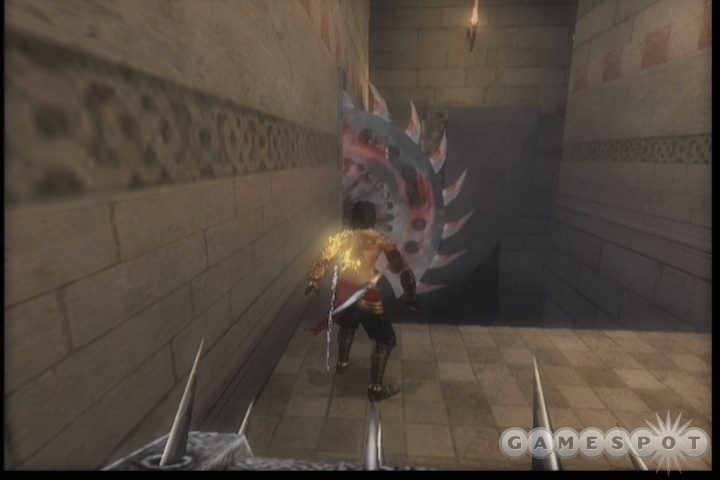
The first little pair of log traps are avoidable if you start your wallrun when they're still exposed and dangerous to you, but an Eye of the Storm will make things easier. Jump from the shutter to the daggerplates, and start your wallrun from the upper daggerplate as the saw nearby is heading up past you if you want to avoid it.
The next group of saws is a good deal trickier than the others; there are three of them, widely spaced, moving in syncopation. If you want to pull off the wallrun, you'll have to wait until the saw nearest you hits the bottom of its path before starting your run; if ever there was a time for Eye of the Storm, it'd be now. Make the shutter jumps at the end of the wallrun and jump from the daggerplate to the platform. Avoiding the rotating blade trap can be tricky, but again, Eye of the Storm helps; just be sure to not get hit by the log here, or you'll be knocked off into the hole. Jump up the daggerplates to the corridor above to reach an interior portion of the tower.
After killing the guards, wallrun to the beams and jump across to a ledge near the balcony. Wallrun along the exterior wall of the tower here to reach another platform, then wallrun up to the higher portion of the gap and jump over to the platform within. After killing the Enchantress, run up and jump over to the platform in the middle of the area, where another stone-and-elevator puzzle is to be found. Push the stone into the elevator, then jump from the railing to the nearby platform, and from that platform to the upper platform where more enemies are waiting. Kill them, then jump to the beam and jump from there to the platform with the switch on it.
After rotating the switch, move out onto the beam nearby and jump from it to the wooden platform across the way. Wallrun to the right and jump to the elevator, and jump from there to the balcony where the Enchantresses are cooing at you from. Kill them, then work your way around to the wooden platform at the end of the path. Jump up to the beam above your head, and jump from there to the top of the central platform. Drag the stone off of the elevator and put it into the other, smaller elevator nearby. This will raise one of the nearby elevators, allowing you to jump up to it and, from there, to another platform.
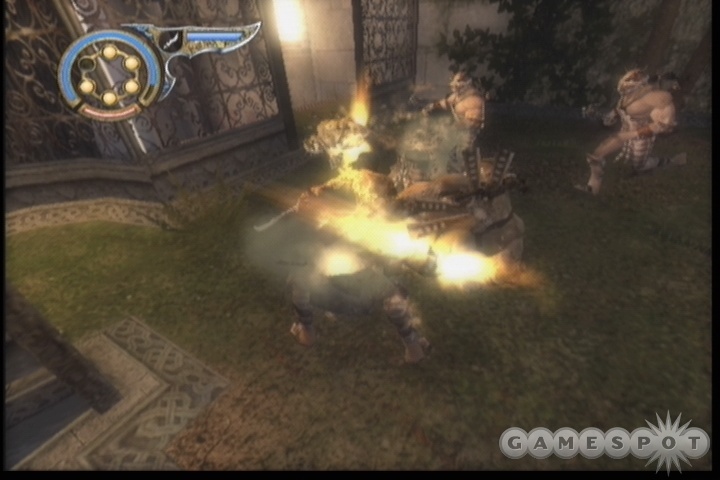
Kill the Enchantresses, jump to the beam, and jump up from there to the handholds above. When you reach the highest handhold, shimmy off to the left, then jump out to the pole hanging from the ceiling. Climb it up a ways until you spot a wooden platform within jumping distance. Jump there, then wallrun up to the daggerplate. Wallrun to the left to hit the shutter, and jump to the daggerplates on the cage-like wall. Wallrun, drop down, and fight the soldiers on the platform. There are four of them, so feel free to Sand Storm them all to death.
Find the daggerplate above one of the exterior platforms here, then make your way up and across the wall to reach the beam nearby. From there, jump to the wooden platform, walk out onto the beam nearby, drop down to the lower beam, and jump from there to the next wooden platform. Keep making your way to the daggerplates on the far wall, use them to reach a shutter, jump from there to a pole, and use the pole to climb up and jump to the ledge nearby to finally leave this damn room and find a save point.
The Upper Tower
Wallrun to the daggerplate, then wallrun further to reach the ledge. Walljump from the lower ledge to the upper, then jump to the daggerplates to reach the solid ground nearby. Jump from the beams to the far ledges, but be sure to scoot to the right before making the final jump, as the middle of the ledge periodically retracts. No need to use Eye of the Storm here, though, just time your movements to take into account the retraction of the ledges, and you should be fine. After another set of easy jumps, you'll come up to a gardenesque area where you can save your game again.
The Terrace
If you need sand orbs, check around for a 10-credit sand chest and fill yourself up before saving. There's a wall panel nearby that you need to hit. After doing so, head through the door it unlocks and start making your way to the nearby elevator, which will lead you up to the Vizier.
Boss Fight: Vizier
Like many boss fights in the game, there are going to be multiple phases of the Vizier fight to get through; in this case, you're going to have to fight through three distinct phases to actually defeat the game's final boss.
First Phase
The first phase of the fight can be frustrating, but it still likely the easiest of the three phases to fight through. In this phase, you and the Vizier will go toe to toe in armed combat; you'll have to strike at him with your swords and dodge or guard against the blows that he'll rain on you with his claws. He has two primary attacks, one of which is a simple strike from one side of his body. You can block this blow, but his other main attack, a two-claw sweep that is unblockable, but can be dodged if you roll to one side when you see it coming.
Since your goal here is to deal as much damage to the Vizier as possible, you'll have to get up close and personal. We found it best to just charge him as soon as the fight begins and start jamming out simple secondary button combos. Since you begin this combo with a strike from your sword, you'll get better range than you would with a dagger strike. Just hit the secondary button three times, and two of your strikes should connect. The third will be blocked by the Vizier, but he'll almost always counter it with a single-claw strike, which you in turn can block yourself. If you do, immediately start another secondary attack combo, get ready for the third attack to be blocked, block the incoming strike, etc. You should be able to repeat this combo two or three times each time the Vizier hits the floor. If you get unlucky enough to start taking the two-claw sweeps, try to roll to one side out of the way of one of them, then start your secondary attack combo.
Periodically, the Vizier will raise himself up off the ground and telekinetically throw a statue at you. Keep running from side to side when he lifts himself, and you should be able to dodge these by rolling out of the way as soon as they start to speed up.
Second Phase
After you deal enough damage to the Vizier, the second phase of the fight will begin. Instead of engaging you directly here, he'll periodically spit sand at you. These are easy enough to dodge, so long as you keep moving; more annoying will be the chunks of pillars that he'll cause to rotate around the arena. These move slowly in the middle of the area, but will move much more rapidly on the edges of the arena, which is precisely where you need to be. Unfortunately, you have a fixed camera angle to work with here, so you can expect some cheap hits from blocks that ambush you from the short side of the screen. If you really really feel the need to, you can use Eye of the Storm to dodge the blocks, but your sand charges will be better served for time rewinds with the upcoming speedkills.
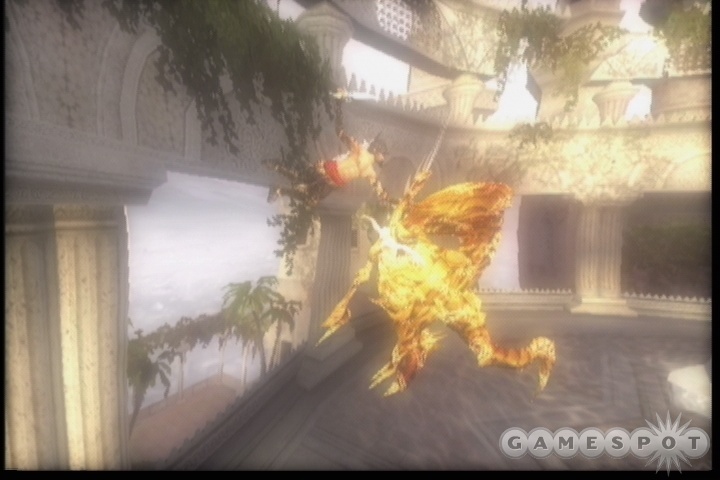
Speaking of speedkills; to initiate one, you have to jet over to where the Vizier is floating, wallrun up the pillar behind him, and start the speedkill when you see the screenflash. Usually it occurs just after you start your speedrun; just be sure you press the appropriate button for the speedkill while you're still holding down the button for the wallrun. You can't let go of the wallrun button and then hit the speedkill button; attempting to do so will just result in you falling off.
You'll need to speedkill the Vizier three times here; once for each wing of his, and then once to spear him in the face. Each time will require a different sequence of speedkill flashes. Check the video on this page for tips on pulling them off, should you need them. The timing isn't as precise as you might suspect, so try to wait for the blade to flash, and don't anticipate them; you'll usually wind up hitting the button too early and being forced to use a sand charge to rewind yourself.
Third Phase
After you manage to stab the Vizier in the face, he's still got a bit more fight in him, and will indeed be a pain in the butt to you here. Hopefully you still have a few sand charges left here, as you're probably going to need to rewind time more than once.
This section of the fight actually involves little actual fighting; instead, you have to jump and platform yourself up to the Vizier, who's situated himself far above the arena and forces you to reach him to finish him off. You'll have to do so by making your way up among the various pieces of stone and marble that he's raised up into the air. Begin by finding the lowest piece of stone, and wallrun up the nearby pillar and jump across to it.
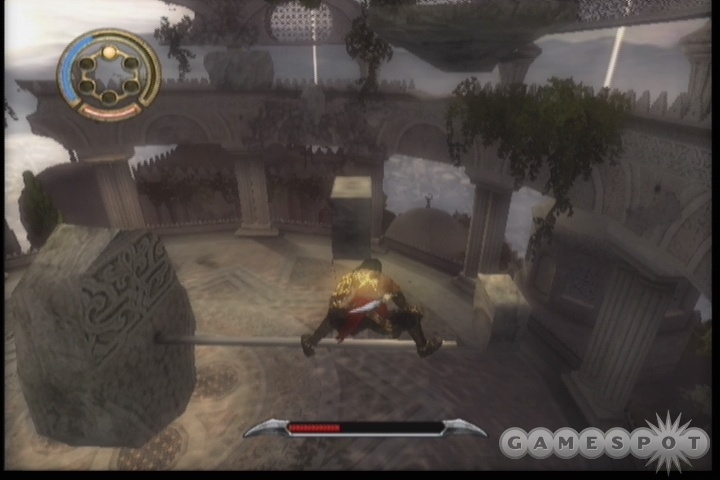
The thing to keep note of here is that the Vizier will often be spitting sand at you, preceded only by a short shout from him. If you're standing upright, then it's no big deal; you'll take a little damage and that'll be that. If you're hanging off of a beam or the side of a rock, though, these will cause you to fall, forcing you to use a rewind charge. If you happen to be forced to rewind, do so until you get back to the last place you were standing on solid ground, then wait for the sand to come your way and take the damage before making your jump in relative safety.
Anyway, from the first stone you jump to, jump up to the next-highest stone, then turn left and jump to the beam here. Don't swing around on it, though; quickly hit your jump button so that you're standing on it; this will hopefully cause you to simply fall down and grab the beam instead of getting knocked off entirely if you get hit with sand.
On the beam, turn yourself around and shimmy all the way out to the end of the beam, then jump up to the platform above you. Jump higher, then jump to the beam in the middle of the area. From here, your path is mostly obvious, at least until you get to a wallrunning puzzle. Just wallrun up the stone in front of you and jump out to grab the top of the higher stone. From there, jump across to the stone in front of the Vizier, walk to the edge, and jump out to start the final blow.
Instead of an elaborate speedkill animation here, all you really have to do is wait for the dagger to flash once. The Vizier apparently uses all of his sand-based powers to slow you down, though, because it'll take a while for the flash to appear; just be ready to hit that button when the dagger flashes, and you'll have beaten the end boss!
Innenwelt
Surprisingly, the fight with the Vizier isn't quite the very end of the game. After the cutscene that ensues here, you'll be facing off against your own inner demon: the Dark Prince.
There's really nothing to worry about, we're happy to report, since you apparently can't die in the next little level. Your first task is going to be to attack the Dark Prince; you'll notice that the world gets darker and darker as you do so. When you finally manage to turn the world pitch black, you'll fall into the floor and have to endure a lengthy platforming sequence.
Again, there's apparently no way to die here, so don't worry overmuch; if you fall off a platform, you just get reset right back to where you were. That said, none of these areas are particularly tricky; you'll have to deal with the normal array of wallrunning and jumping from platform to platform. Of course, this being a purely mental realm, you're going to have some odd events occur, mostly involving you being warped to areas from the previous two games in mid-jump. It's a trip down memory lane; what do you expect? Most of these warps are only temporary. If you're not automatically warped back to the mental realm, move up to the top of the screen and you should be able to move back. Whenever you see the Dark Prince, take a slash at him to make him disappear.
The platforming, as mentioned, isn't all that difficult at first, although there are a couple of blind jumps to be made, where you just have to jump forward and wait for a platform to raise itself up underneath your feet. The most confusing part of the whole area, though, (as you'll see in our video) comes when you reach a platfrom from which you can't conceivably jump, because the next platform is too far away. When you come to it, you'll have to jump backwards up to the previous platform to cause the lower platform to extend a bit before you can return to it and jump forwards.
Anyway, after a few minutes of mindgames, you'll eventually reach Farah, who will encourage you to ignore the Dark Prince and follow her up the stairs. That's what you should do; just leave the Dark Prince be, despite his pleas. As you head up the stairs behind him, he'll multiply into multiple copies of himself, but again, this is just a cry for help, so leave him alone and keep walking up the stairs to end the game.
Got a news tip or want to contact us directly? Email news@gamespot.com
Join the conversation