Dungeon Siege II Walkthrough
The sequel to one of 2002's most popular games is finally here, with more content, more quests, and more sheer gameplay than before. GameSpot's Walkthrough to Dungeon Siege II is all you need to get the most out of your time in Aranna.
Design by Randall Montanari
Dungeon Siege and its expansion, Legends of Aranna, elicited some mixed opinions from the computer RPG gaming crowd. Although they were immensely popular, selling over half a million copies between them, many people who played them were disappointed with the relatively small amount of interactivity you had with the game, as the AI for your party would often take over and fight battles on their own. For Dungeon Siege II, Gas Powered Games has gone back to the proverbial drawing board, and while the sequel retains the same obsessive-compulsive item-hunting of the original, the combat system has been overhauled, allowing your characters to switch spells on the fly and use a comprehensive skill and power systems, which lets you customize your party members as you see fit.
And, of course, there's a huge new storyline to delve into as well, which will probably take you anywhere from 25 to 50 hours to complete, depending on how many of the 40+ side quests you choose to do, and that's just on the first difficulty level. Luckily for you, GameSpot's Game Guide to Dungeon Siege II is here to help, with a complete walkthrough for the title, including all of the sidequests, as well as tips on party composition and battle tactics.
General Tips
Disbanding
If you happen to want to disband a party member, select that member and hit CTRL-D. You can also open their inventory screen and click on the small character icon with a red arrow next to it, in the upper-left hand corner of the screen.This is a difficult command to find in the in-game help system, but that's what it is.
You can only fit so many characters into your party at once, so on occasion you'll need to disband an old one to add a new one. (On Mercenary difficulty, for instance, the character limit is four; this goes up to five on Veteran and six on Elite.) When you disband a character, they'll return to the Inn, where they can be found if you want to add them to your party again. They'll retain all of the items on their person and in their inventory, so you don't have to worry about losing any valuables, although you may not want to keep a character with a lot of excellent equipment in your Inn all the time; it's better to move it to your treasure chest in town before disbanding them so that other characters can equip it while they stay with you.
If you want to bring a character back into your party, head to the Inn and speak to the innkeeper (the NPC with a candle above their head). You can select and choose any character you've previously disbanded this way, even pets. Unfortunately characters that sit around in the Inn aren't going to be getting any experience, so if you want to change your party later on, you may find that characters you haven't used in a while are substantially weaker than the ones you've constantly kept in your party. This isn't a big deal if you just need them along to complete one of their secondary quests, but if you want to get them back up to your level, then you'll need to get them some experience, which can be difficult to do...
Gaining Experience
Like any good RPG, Dungeon Siege II is all about gaining experience and increasing in level. The key thing to remember here, especially when dealing with characters that have been in your Inn for a long time, is that characters won't earn experience from killing monsters that are more than five levels above them or less than five levels below them, approximately. So if you have a level 10 character that you want to quickly soup up and get to level 40 like your main party, you won't be able to bring him or her to the final level of the game and gain massive amounts of experience. Instead, you'll have to go the long way and bring him up in level by fighting against enemies at level 12 or 13, slowly but surely increasing his level as you do so. You can speed this process up by reducing the number of characters in your party (which lets each remaining character claim a bigger share of the experience you gain), or you can try jumping to another difficulty level to automatically gain a few levels for him.
Always Save In Town
Before logging off, it's a good idea to warp back to town and save there. We're hopefully not being paranoid, but we've encountered a few instances where items suddenly disappeared from our inventory after saving in the wilderness and logging out of the game. Better safe than sorry....
Balance Your Party
This one's kind of elementary, but when you get to the point where you have four character slots, which should occur soon after the start of the game, try to get one representative of each class into your party, meaning that you should have a melee character, a ranged character, and one Nature and one Combat caster. This is by no means absolutely necessary (you can substitute another melee character for the ranged character with little ill effect), but it will help you more evenly distribute treasures between your party members when you don't have two characters of the same class fighting over the same items. Plus, you'll be able to have a more widely varied group of powers to draw on, which will help you adapt to different situations more readily.
It goes without saying that you don't want a party consisting of four melee characters, or four combat mages, or four of anything. Although it'd be fun to see what happens, the lack of versatility and the need to spread out the good equipment would quickly result in a sub-standard party that saw more than its fair share of deaths.
Control Your Fighter
Even if your main character is a spellcaster, you'll usually want to keep the melee character in your party as your active character, meaning the one that you normally control during combat. This makes it easier to see what's happening in a fight, due to the way that the camera locks on the active character; keeping it on an archer or spellcaster will mean that you'll have to watch the fight from ten or fifteen yards away, making it difficult to see what's going on. It's best to let your fighter choose whom you're targeting anyway, since they can more easily deal with the easiest enemies first, or go after the characters that are targeting the spellcasters.
Don't Be Afraid to Run
Although most of the game's fights are relatively easy, it's still going to be worth your while to run away from combat every once in a while. You'll find that even if you're a good distance from an unconscious party member, they'll still regenerate health and run back to you when they regain consciousness, so there's no particular point in guarding their bodies or anything like that. (Note, however, that your Nature mage does need to be within a particular distance to cast heals on unconscious party members.)
Running can also be useful if you want to draw enemies into a small zone to use one of your straight-line powers on them. If you have a character run forward, get the attention of a lot of monsters, then run back towards the rest of your party members, the monsters will naturally attempt to follow him, which will see them generally clump up into the line formed by his escape. This will make them group up, thus making them easier targets for a Thunderous Shot or Waves of Force power. This is especially true of dungeon encounters, where you can funnel groups of enemies through doorways, essentially making them sitting ducks for your powers.
Stick to Mirror Mode
Although you'll learn how to switch between mirror mode (where all party members will attack your active character's target) and rampage mode (where all characters attack targets of their choosing) pretty early in the game, you'll very rarely want to actually make much use of rampage mode, unless you're dealing with large numbers of low-level or weak enemies. Mirror mode is much more effective when dealing with groups of enemies near your level, as you can concentrate your fire on a single target, killing it quickly, then move to the next one, and so on. Even if it takes you the same amount of time to kill a group of foes in rampage mode (and it'll usually take you longer), your party will be taking more damage in that amount of time due to the fact that you won't be finishing off individual enemies as rapidly. Mirror mode will also keep your troops closer to your main character while you're travelling, helping prevent any individual party member from being targeted by a large group of enemies.
Bind Your Wait Command
Although the Wait command, which allows one character to split off from the group and travel on his own, isn't bound in the default settings, you can go into Options -> Input -> Hotkeys to bind it to a key, and you'll want to do so. While you'll use it less than Mirror mode, controlling one character individually can be quite helpful, especially when it's a hardy melee fighter that can run ahead and grab the attention of a large group of enemies before dragging them back to the party for the kill. This can also let you scout unexplored terrain, which is especially handy in areas where enemies can pop up out of the ground or from the sky with little warning.
The Mysterious Quest
Note that this section has numerous Spoilers, so you don't want to read this until you've encountered an enemy enigmatically named "???" or happened to find one of the Mysterious Items.
Still here? We warned you....
Ok then. The Mysterious Quest is an optional one that starts when you first encounter the item thief known only as ???. He'll begin popping up in Act II, and will drop rare items when you strike him with your weapons, and then he'll dive back into the ground and disappear. All's well at the outset; he's a good source of decent items the first few times you see him. (He pops up after you cause a certain amount of treasure to drop.) Later in the game, you'll have enough power to actually reduce his life point total all the way before he retreats, so use your single-target powers and "kill" him. He won't actually die, but he will drop a Mysterious Teleporter Stone before he retreats. This shows up on your Quest Items journal as the very last item, with the inscription "surotces surianmuloc" on it.
This teleporter stone does nothing by itself, but if you travel to an incantation shrine, hit Enter, and type the inscription into the chat box backwards, i.e. as "columnarius sectorus," you'll be transported to a Mysterious Cave. We told you this quest was mysterious!
Now that you're in the cave, though, you won't be able to proceed too much further without the Mysterious items. There are three of these in total. The Mysterious Bucket can be found hidden in the Elven Prison in the Lost Valley of the Azunites, near where Arinth the Mad is imprisoned. (See that quest from Act II for more details on its location.) If you head into the doorway leading to the prison, at the very bottom of the stairs, and examine the lamps on either side of the door, one of them should be clickable; lighting it will open a secret area a bit further up the stairs, where you'll find the Bucket.
The second item, the Mysterious Book, is a reward for the Lore of Aranna quest in Act III. You'll have to find all 20 books of the Books of Lore that the Scholar requests, and he'll give you the Mysterious Book as a reward if you speak to him twice.
The third item is the Mysterious Token. You obtain this by defeating all ten rounds of the Aman'lu Arena quest in Act II, then heading through the ninth treasure room, where a secret treasure room will be revealed.
When you have all three items on your person, head back to the Mysterious Cave and walk in. The items will let you unlock some of the doors that you pass, but your progress won't be unimpeded; there are going to be numerous level 40 prairie dogs that you'll be forced to kill to drop the shields in front of some of the doors. Eventually you'll reach a room full of the shades of your teammates, such as Deru and Vix; these guys are each going to be level 40, with around 40,000 hit points. You'll definitely want to try and lure them back to your party one or two at a time, by using your main warrior to run ahead with the Wait command activated.
After chopping through all of the shades (be sure to try and hear what they say; some of their quotes are pretty amusing), you should be able to pass through to the interactive credits. Each of the monsters and NPCs here is named after one of the game's designers. You'll eventually come to a pillow fight room where there's another locked room. Now, in order to get past this one, you have to decipher the code that's given to you by the three Mysterious Set items. If you equip them one at a time, you'll notice that there are three sets of number strings that pop up as the set bonuses for having one, two, or all three of them equipped: "5 2 6 4 3 9 2 8", "3 11 7", and "6 10 1 2 7." Each of them also has their own combination of the words "quit," "from," and "vex" on them. It seems that ebator from the Gamefaqs.com message boards was the first to recognize the significance of these, and decoded them to result in the chant "requo furtivum ixo".
If you chant that in front of the door here, you'll come into a treasure room where a monster immediately disappears as you enter. This seems to be as far as anyone's gotten in this quest...thus far. If you open the chests here, you can find some humorous unique items, such as pumpkin and buckets that go on your head. If you're looking for more information on this quest as it becomes available, check out Gulnaga's Mysterious Mystery FAQ on
Classes
Unlike in most RPGs, you don't pick a class when you create a character in Dungeon Siege II; instead, you start performing actions with a character, and they'll automatically become more proficient in the area of combat expertise related to that action. Want to make your character an archer? Find a bow and arrow and start shooting away. Want to be a Combat mage? Find a combat spell and start casting it. After a while you'll notice your character increasing in skill in their chosen profession. Note that this allows you to advance your character in multiple skills, should you wish to do so, but it's best not to; specialization in a single profession will ultimately result in more powerful characters. Since you have four character slots available to you, even on Mercenary difficulty, you can always have a representative of each profession in your party, should you wish to.
In this chapter, we're going to explain the basics of skills and power, and describe each of the four types of classes in fairly general language. There are too many skills and powers for each class for us to describe at length, but luckily for you, each of them is accompanied by pop-up text in the game, which will let you know precisely what you're getting when you invest in them.
Skills
Each class has different skills and powers available to it. Skills are the real building blocks of a character, and allow you to customize and specialize a party member even further than their class already has. Each time you level up a character in a class, you'll gain one more skill point to spend on the abilities in that class. Unlike a game like Diablo II, all of the skills in Dungeon Siege II are passive, meaning that they'll always affect the abilities of your character, without having to be activated or "used" in some manner. Skills can be also be supplemented by equipment; as you proceed in the game, you'll find more and more items that will add bonuses of +1, +2, or +3 to a few skills, or even some that add a bonus to all of your character's skills.
Note that although you can advance skills up to rank 20, most of them will have severely diminishing returns after rank 10 or so, often resulting in only a one or two percent increase in effectiveness for each skill point you invest. Although you'll need to invest in some skills when you aren't really gaining anything in order to advance your powers, you'll usually want to stop investing in skills that aren't getting you a good return for your skill points, and instead start concentrating on another area of your skill tree, to make your charcter more flexible. For instance, if you have a Combat Mage that's invested heavily into fire skills, to the point where she isn't gaining much by contributing to increase her skills in that area, you'll want to start pumping up death or lightning magic, which will help him or her be more effective when fighting against enemies that are resistant or immune to fire.
Powers
Powers, on the other hand, are active abilities that can quickly effect a change on the battlefield, usually by dishing out a huge amount of damage to a group of enemies, but which then need to be recharged before they can be used again. Powers are obtained as you invest your skill points, so as you specialize your character within a given class, they'll automatically obtain complementary powers to go along with those skills. For instance, if you start pumping up your Combat mage with fire skills, you'll earn fire powers, such as Flame Nexus or Detonation, whereas if you invest into lightning skills, such as Chain Lightning. Each power has three ranks that can be obtained. The first rank will usually be gained after investing a single point in one skill, but ranking up a power to level three will usually require a dozen or more points to be invested in at least three different skills. Only natural skill points count toward these requirements; if you achieve the requirements as a result of skill-adding items or equipment, you still won't earn the power.
Melee
Your melee characters are going to be invaluable to you during your time spent journeying through Aranna. While they probably won't deal as much damage as a good Combat mage, they can still dish out the hurt with their weapons, and they'll also be able to soak up punishment thanks to their high armor and health totals.
Archetypes
There are three primary kinds of melee characters: shield-users, who use a shield along with a single one-handed weapon; dual-wielders, who use two one-handed weapons; and those that choose to wield two-handed weapons.
Shield-users
Shield-users rely on the skills Barricade, Reinforced Armor, and Rebuke. With a shield in hand, these kind of fighters will be able to greatly increase their armor and their chance to block melee and ranged attacks. Their primary power is Provoke, which will temporarily boost their armor and force all nearby enemies to concentrate their fire on the shield-user, thus preventing them from attacking the spellcasters and allowing your healer to worry about only a single target. Since this power quickly recharges, you'll be able to use it in almost every fight against numerous foes.
Although using a shield to increase your defense and protect the weak members of your party isn't exactly a sexy choice, and isn't of much use on the default Mercenary difficulty due to the fact that most enemies are so easy to kill, it'll be a critical part of any strategy on the higher difficulty levels, where enemies take more damage and deal more damage.
Dual-wielders
Using two weapons at the same time allows dual-wielders to deal a significant amount of damage in a short amount of time. Since single-handed weapons attack more quickly than do two-handed ones will, dual-wielders can attack with blazing speed (especially after pumping their Alacrity skill, which further increases the speed of their attacks), and dish out large amounts of damage thanks to their Dual Wield skill, which gives a good bonus to damage dealt while using two weapons. Their primary power is Waves of Force, which sends out a number of small waves of, well, force in front of the fighter, dealing damage to all enemies caught within them.
In the end, dual-wielders deal more damage than any other archetype of fighter, although they won't gain the large armor bonuses from using a shield or the huge critical hits that a two-handed weapon user will.
Two-Handed Weapon Users
Two-handed weapons are bigger, slower, and usually capable of dealing more damage than a single one-handed weapon can. Melee characters that use two-handed weapons will want to pump up Overbear, which will add a large amount of damage to every swing, and Smite, which will very helpfully give you a chance to stun an enemy each time you swing your weapon. Their primary power is Staggering Blow, which deals a large amount of damage to all foes near the warrior and stuns them all for six to ten seconds, which is more than enough time for you to track them down and kill them.
Although using two-handed weapons will usually result in less damage over a given amount of time when compared to dual-wielding, two-handed weapons are still quite useful, especially when you have two melee characters in your party and don't want them to compete for the same weapons and equipment. Since each blow from a two-handed weapon is going to be more powerful than that from one-handed weapons, they're also resoundingly well-equipped for the Brutal Attack power, which lets you deal up to fifty times your normal damage in a single blow.
Ranged
Ranged characters focus on either bow, crossbow, or thrown weapon attacks, preferring to do their damage from the rear lines of a battle. Although they can't take the kind of damage that a melee character can, they usually make up for this with their selection of excellent powers and incredible damage output. Ranged weapons require no ammo, so they can be used as often as you like without needing to head back to town to stock up on arrows or bolts.
Archetypes
There are only two real choices for ranged characters. You can either focus on crossbows and bows (which are concentrated into the same skill) or use thrown weapons.
Crossbow/Bow Users
Crossbows and bows are going to be what most ranged characters are going to be concentrating on. Crossbows are the damage kings, but they fire more slowly than bows, whereas bows fire more rapidly but for less damage with each shot. This is analogous to the difference between single-handed and two-handed melee weapons; you want a bow for excellent damage over time, or you can use a crossbow for powering out massive damage with your percentage-damage-increase powers. For our ranged character, we almost always used a crossbow, simply because your other characters will usually be doing a good amount of damage when using normal attacks. When it comes time to pump out a Thunderous Shot or a Take Aim, though, a good crossbow will let you pop out a huge amount of damage in a single blow.
Thunderous Shot is also worth noting as being among the best crowd-control powers in the game. When fired, it'll let you deal up to 25 times the normal damage of your weapon to all enemies in a straight line; any enemies not killed outright by this power will then be stunned for a good amount of time. This power is notable for the distance that it travels; even when fired at a nearby enemy, it can still travel off the screen, killing and stunning enemies that you can't even see. It also recharges fairly quickly, letting you use it fairly often.
Thrown Weapon Users
There are a large variety of thrown weapons in the game, such as glaives, throwing knives, and the like. The strength of thrown weapons is the incredible speed with which they can be used; instead of gaining increased damage through skills, the thrown weapon skills focus on reducing the amount of time between throws. While this lets them throw more often, and thus increases the damage that they deal within a certain amount of time, it won't help them when they have to go for single damaging shots, such as with Take Aim. Other skills, like Bleed and Ricochet, will also help the overall amount of damage that you deal, without increasing the burst damage that so often becomes critical when dealing with single large enemies.
So in short, thrown weapons are the kings of damage over time with little burst damage, whereas bows and especially crossbows, when amplified with skills, are going to do excellent burst damage and still retain a good amount of damage over time.
Nature Magic
The healing arts are the primary domain of Nature mages, which allows them to cast healing spells on one or all party members. They're also able to buff the offensive and defensive capabilities of party members, summon monsters to help fight with the party, and use ice or non-elemental magic in direct offensive combat, making them versatile party members.
Archetypes
Unlike the other classes, there aren't multiple, distinct archetypes to follow for Nature mages; they're instead usually going to have a number of skill points spread out through multiple abilities, taking advantage of the diminishing returns to avoid over-investing in a single area of expertise.
Healing
There are two primary healing skills: Aquatic Affinity and Nurturing Gift, both of which increase the efficacy of healing spells, allowing you to pump out more health with each individual spell, thus saving you mana and letting you more quickly restore a character to full health. Since Nature mages are the only party members that can heal other characters, you'll probably want to make this your primary concern early on, while also putting points into Natural Bond to help reduce the cost of your healing spells (which are very expensive, mana-wise).
Ice Magic
Nature mages are really only going to be able to choose between two kinds of offensive magic: that which revolves around ice effects, and that which deals non-elemental damage, like Ripple. The ice spells are the only ones which gets specific skills, though, such as Arctic Mastery and Freezing, so they're the ones you're going to want to use most often. Freezing is especially useful in making up for the relative lack of damage output from these characters, as it will let your nature mages temporarily freeze an enemy in place for a couple of seconds when casting normal ice spells. Stunning and freezing effects are tremendously helpful in Dungeon Siege II, as they will prevent foes from attacking or moving during the duration of the effect.
Buffing Effects
After you up your healing and ice magic, you'll want to start working on your buffs. Nature mages are unique for their ability to cast buffs which affect all party members, usually by increasing their defensive or offensive abilities for a good amount of time. There are two kinds of buffs: defensive buffs, called Embraces, which are enhanced by the Enveloping Embrace skill, and offensive buffs, called Wraths, which are affected by the Feral Wrath skill. Each character can only have two buffs maximum on them at any given time, however, making your buff selection a fairly important choice.
In our opinion, Embraces are usually going to be more helpful than Wraths are. As defensive abilities, Embraces are more likely to affect all of your characters equally, especially when you use what we consider to the best two Embraces in the game, Earth Embrace and Wind Embrace. Earth Embrace adds a good amount of health to all of your party members, up to a +20% total with a lot of intelligence and a good Enveloping Embrace skill, and adding more health to your party is so obvious a benefit that it really shouldn't need to be explained. Wind Embrace is a bit more arcane, as it gives your party members a good chance to dodge physical and ranged attacks, which will reduce the amount of damage that they take in any given fight, thus making it easier for your Nature mage to heal them up. There are other Embraces, but they're usually less useful than these two, or don't affect all of your party members equally, such as Aquatic Embrace, which increases the mana regeneration rate for your casters, but which won't do much for fighters and ranged attackers.
Wraths are the more offense-oriented of the long-term buffs available to you, but again, like the more marginal Embraces, these are usually going to only benefit one or two types of classes, while barely affecting the other members of your party. An example is Wrath of the Bear, which adds extra damage each time a party member makes a critical hit. Since your spellcasters can't get critical hits, this is a wasted buff on them. Or take Wrath of Magic, which increases spellcasting damage; this is obviously beneficial to your Mages, but will have no effect on your ranged and melee party members.
(Note, however, that although these buffs automatically affect all party members when cast, you can separate your party members with the Wait command and cast buffs to affect individual members or groups of members, which can be helpful if you want to cast, say, Wrath of the Bear on your melee and ranged characters, and Wrath of Magic on your spellcasters. Just be sure to give your Nature mage her two buffs before she casts anything on the warriors, or she'll automatically buff herself with their buffs when she casts on them.)
In general, we found that our parties were perfectly capable of killing anything they came across, even without offensive buffs, but in many cases, the extra 20% health afforded to us by Earth Embrace saved our skins by allowing us to take a bit more damage before keeling over unconscious.
Summoning Creatures
Summoned creatures can be a big help in combat, even if they're usually only good for running up to enemies and distracting them from your primary characters. We never found it too useful to increase the skills related to summoning too far, as they'll usually get a few ranks from skill-increasing items, and you're better off buffing skills in areas that you know you're going to use a lot. That said, even if you don't buff your summoning skills, it's still worth summoning out a monster for most encounters, as they can and will run up to your foes and engage them in combat, thus taking some of the pressure off of your main tanks in big free-for-alls. Even if they die, you can just summon them again, which is easily done if they're in your auto-cast slot, although they can be rather expensive spells. Unfortunately, even with buffs, summoned creatures won't be a huge source of damage, even if what damage they do is essentially free and automatic, after you factor in the casting cost of the spell.
Powers
The two powers we used most often on our Nature mage were Invulnerabilty and Gravity Stone. Invulnerability is just obviously useful; when activated, it'll protect all of your party members from harm for six to ten seconds. Use this in boss fights to give your healer time to regenerate mana or to run away from a threat that you can't handle. Gravity Stone is useless on its own, but when dealing with large, dispersed groups of foes, you can use it to suck them all into a ball, then use another character's power, like Thunderous Shot or Detonation, to blast them all to bits before they escape.
Combat Magic
Combat mages are usually going to be the party members that deal more damage. They'll also be the characters with the smallest amount of health and armor, though, so you'll need to protect them from enemy attacks, or they'll go unconscious easily.
Archetypes
There are three primary types of Combat magic damage. You'll probably want your Combat mage to specialize in a specific type of damage at the beginning of the game, but when your skills start to hit diminishing returns, feel free to switch over to another type of magic to work your way around enemies with resistances and immunities to your primary damage.
Fire Mages
Fire damage is a good choice for beginning combat mages, as the spells are fairly diverse in effect and offer a good amount of damage. The skill upgrade to fire, called Ignite, will set enemies alight and burn them for extra damage over time, and although it doesn't seem like a huge amount of damage at low levels, it can quickly ramp up to become a few hundred more points of life when you approach rank 20. This is especially useful when using one of the Plasma Globes spells in a small area, since they have a habit of bouncing all over the place and impacting distant enemies well before you reach them yourself.
Lightning Mages
Lightning is another good choice for mages, as there's a wide variety of spells available. Although the Arcing ability probably won't wind up doing as much damage as Ignite will, due to the fact that Ignite burns over a few seconds' worth of time, it's better for dealing with smaller groups of foes due to the way that you can damage multiple enemies with a single-target spell.
Death Magic
Death Magic's special skill, Vampirism, will take some of the damage dealt by the mage's death spells and convert it into health. This sounds impressive, but isn't really all that great; in most cases, a Combat mage will either be taking small amounts of damage from one or two enemies, in which case she'll be able to use a healing potion or wait for a healing spell from the Nature mage, or she'll be getting mobbed by a group of enemies after accidentally casting a spell into their midst, and will keel over unconscious before this power can help her out. It's not completely useless, but there are other ways for a Combat mage to get healed, and in our opinion, the extra damage afforded by the lightning and fire skills make them better choices for primary damage dealing.
Curses
Curses are somewhat similar to a Nature mage's embraces and wraths, save that they're cast on enemies instead of your party members. We never found these to be very useful in normal combat, as most enemies won't be around for more than ten or fifteen seconds, even without a curse on them, and the only way to consistently cast them without having to switch spells manually is to put the curse in your autocast slot. Since this causes your Combat mage to throw out a curse everytime a new enemy wanders into range, which prevents them from casting offensive spells, this just cuts down on the amount of damage they're dealing over time.
Against bosses, though, curses can be a good way to reduce their effectiveness or even hurt them over time without having to re-cast the curse over and over again. You'll most often want to use something like Drown or Infect to deal a good amount of damage over each second of the curse (which can add up to over 1,000 damage over the course of a curse's duration) while also increasing their vulnerability to your elemental damage.
Summoning
Like Nature mages, Combat mages have the ability to summon magical creatures to help them in battle. While the Nature creatures are usually of the melee variety, Combat summons will generally use combat magic such as Leech Life or Firebolt, making them ranged threats. They're thus decent for a little extra damage, but we usually find the melee-oriented creatures that Nature mages summon to be a bit more useful in a fight. Still, if you don't have anything else in your Combat magician's autocast slot, you can do worse than putting a creature in there.
Pets
If you head to any of the three pet shops in Aranna, you'll be able to buy a pet, should you wish to. Pets are essentially characters that are added to your party, but instead of having a bunch of individual skills to increase or equipment slots to fill up with powerful equipment, they instead have to be fed items that you find in the game world to increase their size and powers. On the plus side, they always remain at the same level as your main character, even if you keep them in an inn most of the time, meaning that they'll always remain ready to serve at an appropriate level of power.
When you have a pet in your party (and they do take up a normal character slot that would otherwise go to a normal, controllable character), you'll note that they start out as a baby. In order to increase their maturity, which in turn increases the powers available to them and the damage they do in combat, you'll have to feed them numerous magical items, with more rare and valuable items being "worth" more, in the sense that a pet eating nothing but super-rare items will advance more quickly than a pet that eats nothing but mundane, non-magical items. The kind of stat advancements your pet gets when it increases in maturity depends on the type of items you feed to it; feeding it a bunch of spells, for instance, will increase its intelligence when it levels, while feeding it fighter weapons will increase its strength. (Your handbook has a complete listing of the effects of the different kinds of food.) Note that most pets have a level limit that they can reach before they can increase in maturity; if you win a Light Naiad, for instance, you'll need to wait until your main character gets into the mid-40's before you can completely mature it and earn its emanation.
Although every pet enters your service as a baby, with only an attack and perhaps a spell (if it can cast spells), increasing its maturity will quickly earn it a power that it can use. Pet powers are precisely like character powers, in that they can be used once, then have to wait to recharge before they can be used again, but unlike characters, pets only obtain a single power to use. If you can increase a pet's maturity all the way to Adult, it will also earn an emanation, which is essentially a buff that gets automatically cast on all party members while the pet is in your party. This doesn't count towards the two-buff limit, however, so you'll be able to use your Wrath and Embrace spells on top of the emanations without any problems.
The main drawback to having a pet along with your party is simply that they aren't real characters. While pets will often excel in one physical attribute, such as armor or intelligence, this rarely means that they'll actually be better in combat than a real character, especially since characters can equip armor and jewelry that will greatly enhance their battle prowess. Since you can't increase the skills of a pet, you won't be able to customize it at all, besides choosing what kind of items to feed it. And since they only have one kind of power, you won't be able to pick and choose among multiple options according to the needs of the moment.
Even if they're not terrifically potent in battle, though, pets can still be useful due to their emanations and special abilities, especially on higher difficulties, where you have more character slots available to you. This can be especially useful in the case of the Mythrilhorn, who can make all nearby enemies angry at him and then soak up most of the damage that he takes thanks to a high armor and health rating, which in turn will make large battles easier on your healer. Still, though, if you're looking for a party member that'll help you quickly take down enemies, then you'll usually want to just add another NPC character to your party, as their equipment, skills, and variable powers will usually make them more flexible and effective than a pet can ever be.
Pet List
Pack Mule
| Type | Melee |
| Attack | Kick (short-range melee attack) |
| Spell | None |
| Power | Staggering Kick (like Stunning Blow; does amplified damage to targets in a small radius and stuns them all.) |
| Emanation | Reveal Treasure (automatically opens all treasure chests, crate, and boxes in area around the Mule) |
| Notes | As the Pack Mule increases in maturity, the size of its inventory will grow larger, eventually become triple the normal size. You can flip between pages by clicking on the arrows where normal characters see the amount of cash they possess. |
Dire Wolf
| Type | Melee |
| Attack | Bite |
| Spell | None |
| Power | Furious Howl (deals a large amount of sonic damage to enemies in the cone of effect) |
| Emanation | Vicious Counter (reflects a large percentage of physical damage dealt to a character back onto enemy) |
| Notes | The Dire Wolf can only be obtained if you complete the pet shop quest in Act I. |
Mythrilhorn
| Type | Melee |
| Attack | Claw Strike (melee attack that can make targets Angry at the Mythrilhorn) |
| Spell | None |
| Power | Enrage (causes all nearby enemies to grow angry at the Mythrilhorn and attack it) |
| Emanation | Defense Aura (small bonus to armor for all nearby party members) |
| Notes | The Mythrilhorn is more oriented towards getting a huge armor and health reservoir than gaining a lot of offensive prowess. This can make it a great tank in higher difficulties, as it can repeatedly Enrage large groups of foes, then shrug off most of the damage it takes. Be sure to only feed it fighter armor when ranking it up! The Mythrilhorn can only be obtained after you complete the pet shop quest in Act II. |
Scorpion Queen
| Type | Ranged Attacker |
| Attack | Scorpion Sting (ranged attack) |
| Spell | None |
| Power | Explosive Sting (earthquake-like power that affects all nearby enemies, dealing large amounts of damage) |
| Emanation | Evasion Aura (all party members get a large boost to their chance to dodge attacks, presumably both physical and ranged) |
| Notes |
Dark Naiad
| Type | Nature Caster |
| Attack | Duskbeam (Ranged attack; listed as "night energy." Presumably this affects foes as death magic?) |
| Spell | Fade Wounds (heals one target, then jumps to other nearby targets, healing less with each jump) |
| Power | Arboreal Rejuvenation (automatically heals and revives nearby friendly targets) |
| Emanation | Regeneration (Greatly increases the health regeneration rate of party members) |
| Notes |
Light Naiad
| Type | Nature Caster |
| Attack | Duskbeam (Ranged attack; listed as "night energy." Presumably this affects foes as death magic?) |
| Spell | Abolish Wounds (heals one target, then jumps to other nearby targets, healing less with each jump) |
| Power | Arboreal Rejuvenation (automatically heals and revives nearby friendly targets) |
| Emanation | Regeneration (Greatly increases the health regeneration rate of party members) |
| Notes | The Light Naiad can only be bought after completing the Aman'lu Arena quest in Act II. It's mostly identical to the Dark Naiad, although theoretically it should be more powerful than its dark cousin. |
Ice Elemental
| Type | Combat Caster |
| Attack | Icestrike (ranged attack that deals cold damage and can freeze targets) |
| Spell | None |
| Power | Frost Aura (sends waves of cold out from the Elemental, dealing light damage to enemies and temporarily freezing them) |
| Emanation | Ice Resistance (gives a bonus to ice resistance and a large mana regeneration bonus to all party members) |
| Notes |
Lap Dragon
| Type | Nature Caster |
| Attack | Dragon Fire (small fireball that explodes when it hits) |
| Spell | Dragon Scales (this buff protects your party from curses; as the Dragon matures, it will eventually add lightning and death resistance as well as a power recharge rate increase) |
| Power | Draconic Inspiration (temporarily increases the damage dealt by the powers of other characters) |
| Emanation | Dragon Vitality (gives a good bonus to the dexterity, intelligence, and strength of all nearby party members, which should significantly increase their health totals, as well) |
| Notes | Note that the Dragon Scales buff does count against the two-buff limit for party members. |
Fire Elemental
| Type | Combat Caster |
| Attack | Firestrike (projectile fire attack that explodes on contact for minor splash damage) |
| Spell | None |
| Power | Inferno (spits out a beam of fire, dealing fire damage each second for five seconds) |
| Emanation | Fire Resistance (adds to all character's fire resistance and gives a small bonus to magical damage) |
| Notes |
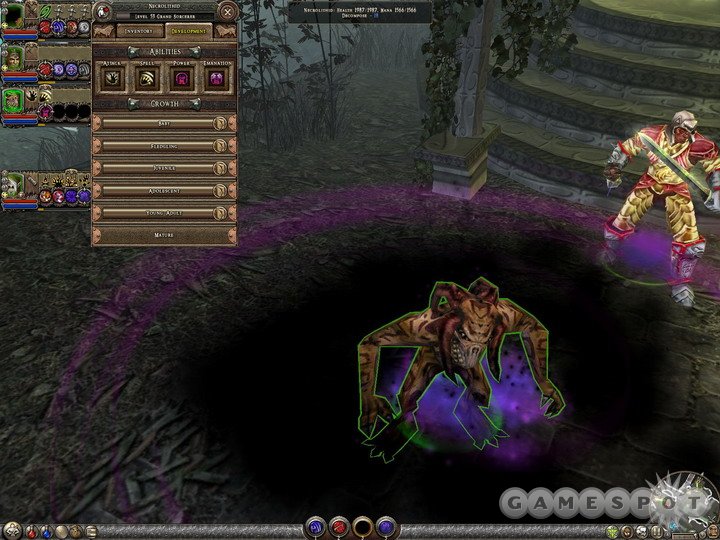
Necrolithid
| Type | Combat Caster |
| Attack | Deathstrike (death energy ranged attack) |
| Spell | Dissolution (curse that affects enemies, reducing armor and increasing their vulnerability to death and ice magic) |
| Power | Decompose (any enemies that approach the Necro while this power is activated will be infected; when they die, their health will be used to heal all party members) |
| Emanation | Mana Steal (gives all party members a small amount of mana steal on their attacks) |
| Notes |
Act I: Primary Quests
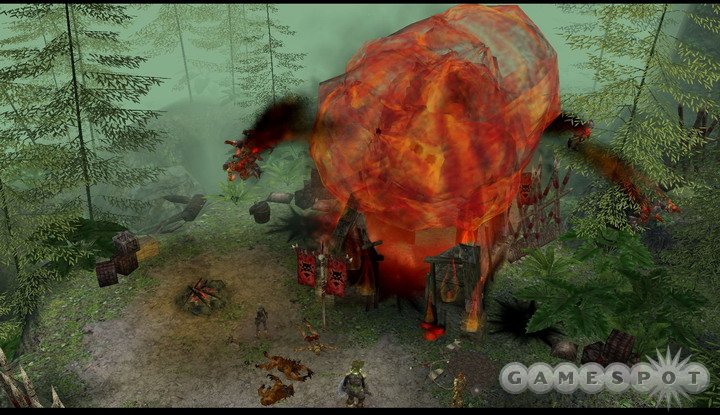
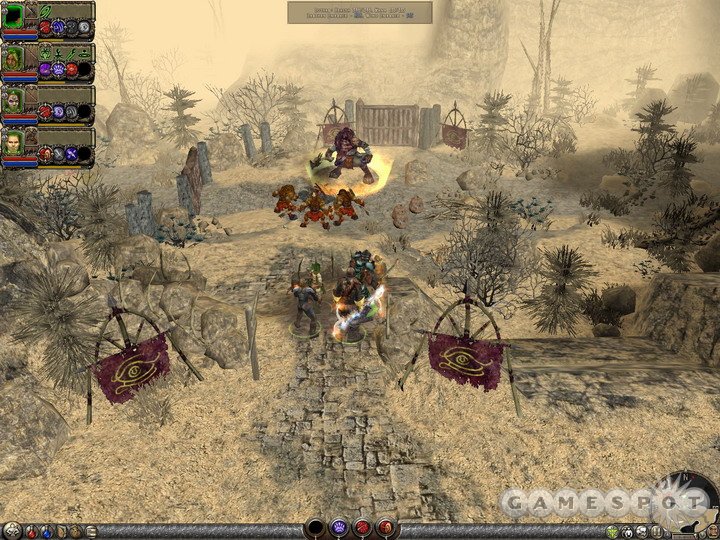
Chapter One: The Siege of Greilyn Beach
Ah, the adventure begins. You and your friend Drevin, an Elf warrior, have enlisted yourself into the service of the dark lord Valdis, a despot bent on ruling all of Aranna. Why? Well, it seemed like a good idea at the time - and the money's not half bad. Unfortunately, your armorer seems to have an odd sense of humor, having sent you into battle with nothing but a Rusty Dagger at your side. Go you.
Even if you played the first Dungeon Siege, you're going to find that much has changed in Dungeon Siege II, especially when it comes to the interface. Luckily, there are a huge number of tutorials available to help you out. As you encounter these tutorials, they'll automatically be entered into your journal for later perusal, so if you're ever curious about a certain subject and missed the tutorial on it, hit J and open up your journal to read back over the topic.
At the outset of this mission, you'll want to take a little time to go over these tutorials and figure out little stuff like how to move your character (left-click on the ground) and how to open chests, destroy barrels, and attack enemies (right-click on your target). Speaking of the latter, if you turn around immediately after you gain control of your characters and return to the interior of the dropship in which you landed, you can find a treasure chest filled with loot. Pop it open, then hit Z to pick up all the items that come out of it. There are also a couple of barrels to be destroyed elsewhere on the beachhead, so blow those open for some gloves, should you need them.
Another piece of information that you may need is that quicksaving can be effected by hitting CTRL-S. In point of fact, there aren't any real regular saves in Dungeon Siege II; all you can do is quick-save, and there only appears to be a single save point for each character that you create, so you won't be able to reload old saves to go back and replay your favorite boss encounters, even if you wanted to. It's important to note that quick-saves are only 100% effective when you're in town. If you save out in the wilderness before exiting the game, you may reload your game to find that items you found before saving have mysteriously vanished from your possession. This opening mission won't take too long to get through, though, so don't worry about this for now.
Task: Get Your Orders from Morden Lieutenant Jerind
When you're ready to move out from the opening area, head forward to speak to Morden Lieutenant Jerind, who guards the door leading into the trenches beyond this area. Note that, if you wish to speed up the pace of conversations in the game, you can left-click in the window that displays the character's speech, which will instantly display all of it, rather than forcing you to wait and listen to them actually say everything. You can also use the number keys to pick a response without having to click on them, but you may want to wait until you've heard everything a character has to say before choosing a response.
Task: Destroy Training Dummies
Anyway, after Jerind opens the door for you, you'll find yourself up against three other Morden officers that intend to teach you how to switch between melee, spell, and ranged attacks. You should still have your dagger equipped, so right click on the first set of targeting dummies to kill them off. After that, open your inventory, switch your dagger with your bow, and right click on the next set of dummies to destroy them. Lastly, click on either the Ice Bolt or Fire Bolt spell in your spell book (to the right of the weapon icon on your character portrait window) and right-click on the dummies.
If it seems awkward to switch between bows and melee weapons, that's mostly because it is; there doesn't appear to be any way to shorten this process up. For the most part, though, your characters will be sticking to one kind of weapon, if only because it allows them to become more specialized more quickly and earn more powerful abilities and skills. As another Morden points out to you, jacks of all trades wind up being weak and ineffectual, so pick an ability and go with it. If you want to be a melee character, then start whacking on stuff with your dagger; if you're focusing on ranged attacks, then go crazy with your bow.
Spells are a bit more complicated. In order to switch from spell to spell, it's usually easiest to pause your game (using the spacebar) then click on one of the spell icons on your character window (you can change which spells are displayed by opening your spellbook with the B shortcut and moving spell scrolls from the inventory to the top four slots), and that character will automatically start casting the spell you've selected. You don't actually have to pause, but in a pitched battle, you'll want to do so, if only to prevent anyone from getting wounded while you're not looking at their health bar.
If you to switch between spells more quickly, then you can set up hotkeys to rapidly switch between weapon and spell setups. To do so, pick a spell you use frequently, then hit CTRL-F7 to bind it as a hotkey, then go to another oft-used spell and hit CTRL-F8, and so on, all the way up to CTRL-F12. If you do so, then hitting F7, F8, and so on will revert your characters to the hotkey setting. Note that hotkeys memorize the spells and weapons being used by all of your party members. This isn't a big deal if you're teaming up with a melee or ranged character, but when you have multiple spellcasters, things can become a bit dicier.
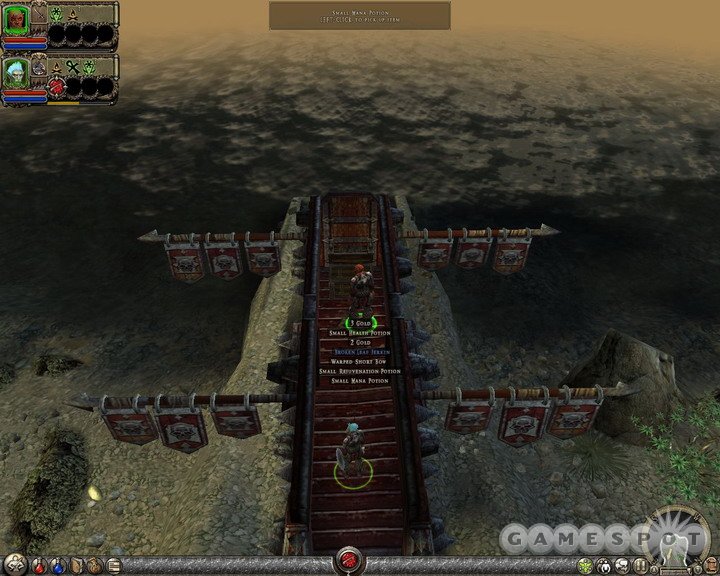
Task: Destroy the Bracken Shell
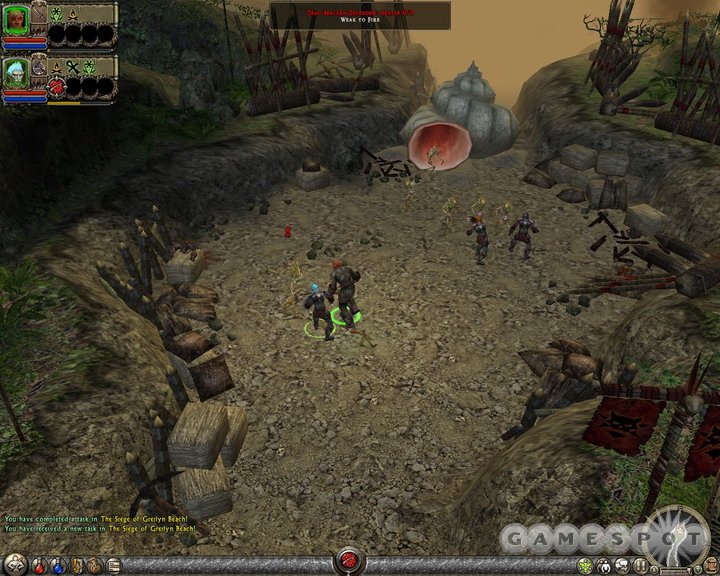
After defeating the fearsome target dummies, move through the gate near Kargack to meet up with your first real enemies. The Bracken here are obviously going to be among the weakest enemies you'll ever encounter, so don't worry too much about them; just start firing away at them, and when you reduce their numbers a bit, you can go straight for the Bracken Shell in the background and start whacking on that until it's destroyed. If you leave it alone, it'll continually bring out Brackens, which can be amusing, except...not so much. It actually will eventually stop issuing forth Brackens, so if you want to earn a few small potions, wait for them all to pop out before going after the shell.
Task: Reach the Front Lines
After the shell is destroyed, start walking through the trenches, killing everything that you see and examining any tutorial journal entries which interest you. Eventually, you'll come to a group of Forest Golems; around this time, you should earn your first character level, which means that you'll also earn your first skill point. Skill points can be allocated in the Specialties menu (hotkey P). See our Skills section for more info on this process, and don't delay; skills make you much more effective in combat. Depending on your choice of skill, you may also earn your first Power, about which see our Powers section or check the tutorial in the game.
If you just keep marching on and killing stuff, you'll eventually enter the Northern Trenches, where a triage unit has been set up for the mercenaries, a couple of whom are lying on the cots nearby. There are a few potions in the area, as well as a Rusty Short Sword, which actually isn't any better than your dagger, but looks bigger, so go ahead and equip it if you're a melee character. Also note that there's a Magic Bookcase here which you can right click to get a few Resurrect Scrolls from. After you pick up the scrolls, right click it again to get more scrolls, hit Z again, right-click again, etc. You won't need nearly as many of these things as you can obtain (in fact you probably won't need any during this quest), but hey, it's free stuff! Shortly thereafter, you'll come across Amren, an elf who decides to spare your life for some odd reason.
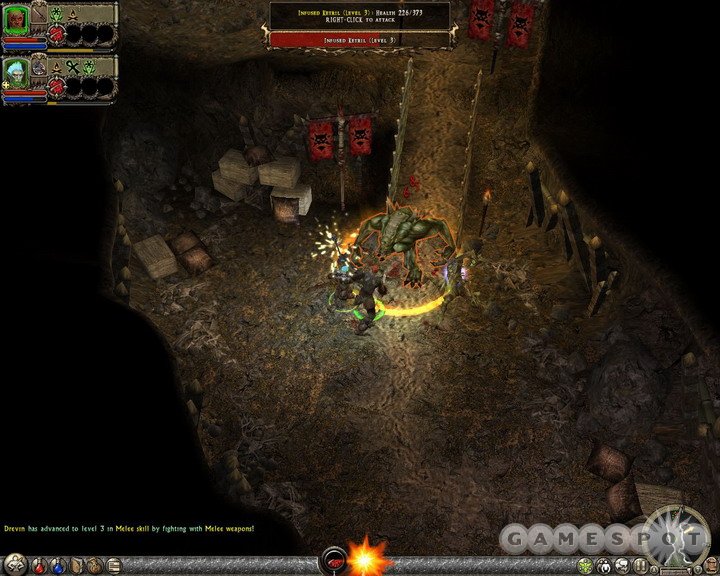
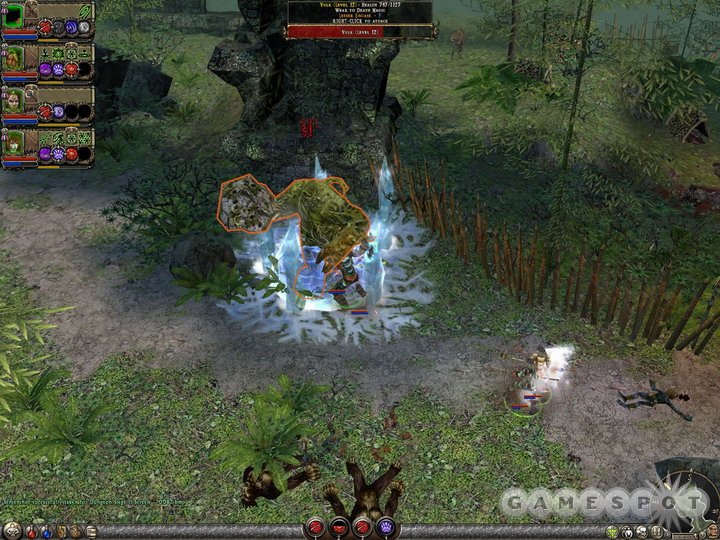
After that, you'll start hitting Ketrils, powerful beasts with over 150 hit points. When attacking these guys, be sure to take the game's advice and hit the 2 button to activate Drevin's Brutal Attack power, which will allow him to do ten times as much damage on his next blow. If your character has earned a power, then go ahead and use that as well when you hit the group of three Ketrils, or you may find yourself having a difficult time beating them. Don't forget to hit H whenever your health drops!
You'll eventually come across Morden Archer Pulk, who signifies the completion of this task. Around this time, Drevin will give you Drevin's Medallion, a Quest Item of some significance.
Task: Reinforce The Troops
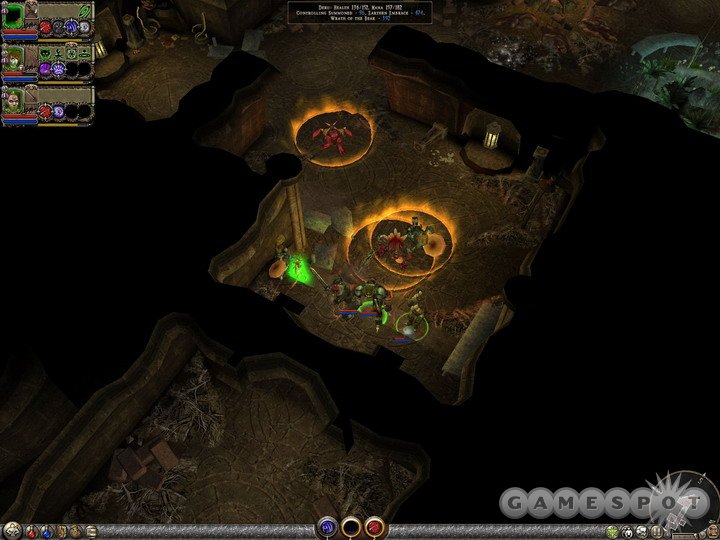
With Drevin by your side, start chopping through the enemies in the Narrow Tunnel here. One of the first enemies you come across will likely be an Infused Ketril, which glows with an orange ring around its body. This signifies that it's a miniboss, a powerful version of a normal foe. Minibosses will be much tougher to defeat than normal enemies, meaning that they're excellent targets for your powers, if you have one available. They do have a greater chance of dropping magical items, however, so they're worth killing. This one is guarded by only a pair of helpers, so kill them first, then focus your fire on the Ketril and take it down with powers.
After a bit more fighting, you'll come to Fricks, who stands near a gate beyond the exit from the cave. Speak to him to end this quest and begin the next.
Chapter Two: Prisoner of War
After you invade the Temple of the Coast, you'll wake up in the town of Eirulan, a prisoner of a Dryad named Celia. Celia is a harsh mistress, but after some coaxing by Amren, she'll agree to let you out of your cage should you happen to run some errands for her. You'll still be restrained by your deadly neck restraining device from hurting her or any of the dryads, so you'll be forced to play along for the moment. She'll give you a pair of easily-accomplished tasks that will consist the bulk of this primary quest, as well as a bunch of items to replace your confiscated inventory (which you'll get back later on in the game).
Task: Get the Basket of Sharpening Stones
Apprentice Telinu, in the middle of the merchant area across the bridge from the prison, has the basket of Sharpening Stones, which she'll give to you when you ask. She'll also prompt you to take up the Armorer's Apprentice secondary quest, so go ahead and accept that. Before you leave, speak to Enchantress Lumilla, who offers you the Lumilla's Salve secondary quest.
Task: Bring the Stones to the Dryad Outpost
The Dryad Outpost is located at the bottom of another set of lifts, near the signs marked Outpost, oddly enough. On your way out of town, you'll notice a pair of characters near the exit marked by three helmets above their heads. These are companions, whom you can ask to join you in your quest should you wish to. You only have one extra character slot at the moment, so you'll only be able to invite one of these guys. Deru is a dryad whom can either perform as a nature mage or a ranged attacker, whereas Lothar (of the Hill People) is a half-giant who'll be an excellent tank if your main character is focusing on something other than melee. Pick a character that will complement your main character's strength (i.e. if you're a mage, you'll want Lothar; if you're going melee, you'll want Deru) and head down to the wilderness. Note that Deru has no spells in her spellbook when you first bring her into your party; even if you intend to use her as a ranged attacker, you should still move Lesser Heal into one of her autocast spell slots, as that will let her heal both you and herself when necessary.
(As a side note, if your main character isn't a combat mage, then you may want to go the unorthodox route and flip Deru around to make her one. Although an elf combat mage would be better, Deru will do ok at it. This is important because, believe it or not, you won't find an NPC combat mage until you're a few quests into Act II, which is 10-15 hours of gameplay away. You can get along perfectly well without a combat mage until then, but it's kind of awkward having to sell all the equipment and spells that you find for them.)
When you reach the bottom of the lift leading to the Outpost, you'll meet up with guard Jera, who'll escort you to the outpost. Follow her along and talk to the other guards in the path to learn about potion-reaping and Chants. Potion harvesting is accomplished whenever you see blue and red bushes in your path; if you have the appropriate Ranged or Nature skills, numerous potions will pop out of these bushes when your party walks over them. (Deru will be able to harvest mana potions, if you have her in your party.)
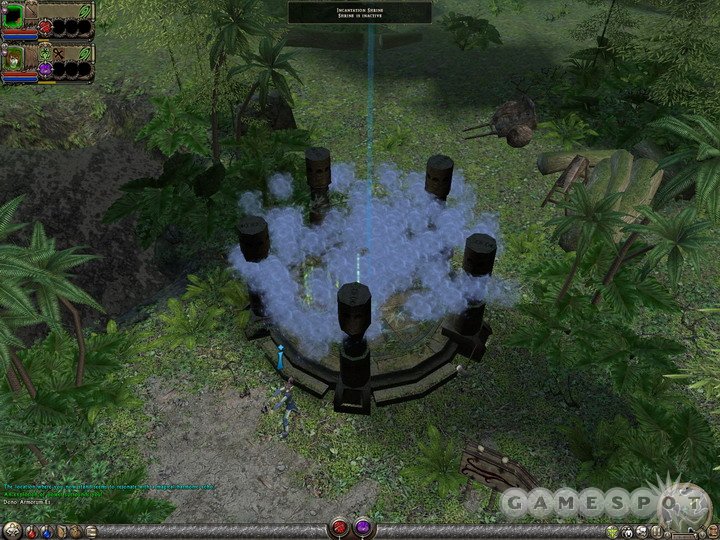
Chants are a bit more complicated, but not too difficult to understand. They're somewhat like the shrines that you encounter in Diablo II, but instead of being found and used immediately, you're going to be finding chants in numerous books across Aranna, then taking them to Incantation Shrines, such as the one you pass by on the way to the outpost. When you're inside a Shrine, you can open your journal and navigate to Lore - Chants, select a chant, and then recite it for the effect listed. Most often these will give you temporary boosts to your stats or some kind of other bonus. Only one chant can be used per shrine, though, so be sure to pick something relevant to the challenges surrounding you at the moment. If you speak to the guard near the Shrine here, she'll teach you a Chant of Lesser Fortitude, so go ahead and use it.
Task: Kill Morden Aggressors
You probably see a few paths open to you at the moment, but for now, just follow Jera to the outpost, where she'll quickly be cut down by Morden foes. You'll need to kill them in order to nab the Morden Gate Key, which you can use to free the Dryad prisoners that the Morden formerly took. Doing so will get you in good with Celia, but she won't free you yet. Instead, you'll wrap up this quest and be given the Morden Towers quest.
Chapter Three: The Morden Towers
After your rescue of the Dryads at the Dryad outpost outside Eirulan, Celia will give you one more task to complete before she grants you your freedom. She wants you to explore the forests outside of town, find four Morden towers that she believes are being built as a precursor to an attack on the town, and burn them to the ground.
Note: Around this time, you're going to start to earn more gold from the sale of items that you find in your travels. Note, however, that you should be saving this money rather than using it to buy more junk; your goal here is to get to 500 gold, which will let you purchase another character slot from the innkeeper in town, thus letting you expand your party to three members. The equipment you find as you walk along probably won't be fantastic, but it'll do the job until you can afford that third party slot.
Exploration Time!
Before you head out, though, there are some areas you passed by on your way to the Dryad Outpost that would be worth checking out, if only to gain a little bit of experience before you wander through the forest. If you return to the Incantation Shrine and head north, you should find a few tribes of Hak'u to kill; these diminutive foes are similar to the Fallen in Diablo II, in that they're not going to be much of a threat to you except in very large concentrations. For now, though, you should be able to handle their attacks, so start killing everything you see.
To the north of the shrine, you'll come across your first Sanctuary. Sanctuaries are essentially treasure rooms, each possessing Sanctuary Doors that can only be opened by using an appropriate kind of attack on it, similar to the training dummies you cut through earlier. There are four doors here, one each for melee, ranged, nature magic, and combat magic. If you've progressed far enough in your chosen area of expertise, you should be able to pass through at least one of these doors; your henchman may be able to get through another. You'll find treasure chests beyond, so grab your loot. There's also a Lectern here that will teach you the Lesser Chant of Dexterity. Grab what you can before returning to the forest above.
To the west of your location, you'll come across the Hak'u Cave, a smallish cave that wraps back around itself between two entrances quite near each other. You can take a wander through here for some cash and experience, if you wish. You'll come across a Ghostly Spirit inside, which stands guard over a bridge. You won't be able to extend the bridge at the moment, though; that will come later on.
Anyway, when you’re done poking around inside the cave, you can either return to town to sell off items, or simply head north through the gate at the outpost to be on your way.
Task: Find the First Morden Tower
Head north along the path until you find a Boarbeast beating up on some Hak'u Hunters. If you follow the beast down the path to the west, kill it, then use the Statue near it, you'll find a secret treasure chest. Yay! There's another of these hidden chests in another western path just to the north.
Moving on, you'll eventually run into more Morden, but these guys won't attack you on sight. If you parlay with Greknev, you can get past him without a fight by reminding him that you fought together on the beach, but it doesn't really matter, as you'll be forced into a confrontation with the next group of Morden down the road, so go ahead and kill him. There are villages of Hak'u in the hills above this area, so go ahead and clear them out if you wish.
The next group of Morden guard the first Morden Tower, and have also imprisoned a dryad named Nen in one of their cages. To destroy the tower, free Nen by clicking on her cage, click on the broken cage to find a Cage Fragment, equip it, click on the fire nearby, then finally click on the tower to set it ablaze. Doing so will destroy it completely, and also open the path leading further to the north.
Task: Find the Second Morden Tower
After the first Tower goes down, you can head on to the north; your first Teleporter will be nearby. If you need a cheap way to get back to town and sell stuff, feel free to click on it and warp back to Eirulan. As a reminder, you should only be selling stuff, not buying anything, until you get 500 gold and unlock that third party slot.
Move on to the northwest past the teleporter, slicing and dicing anything that stands in your way. Eventually, you'll run across Morain, who'll give you a secondary quest: The Hak'u. To the north of her position, you'll find the Hak'u Ritual Camp area, which probably features a miniboss at this point in time. There's nothing much else to see here at the moment, but get the map marker for it, as you'll be returning to complete a secondary quest in the future.
The second Morden Tower is fairly close to this location; just follow the path and you'll reach it eventually. It can be destroyed in the same manner as the first. There's even an empty cage should you need more wood to destroy it; how thoughtful!
Task: Find the Third Morden Tower
It's a relatively short distance between the second and third towers, but the path is going to be densely populated by Morden and Hak'u. One area to note is the Tranquil Cave, which is located to the right of the path, or to the west, depending on your frame of reference. When you spot a path leading down to some water, walk down, then pass underneath the waterfall there to find the cave. The Ghostly Spirit within is still incommunicado, as the previous one was, but you can find a treasure chest and a new chant within. The chant here isn't defined at first, but if you use it an incantation shrine, you'll discover that it spits out an item for you.
Anyway, the third tower is up the path from here. You may have found enough loot and cash to push yourself up to 500 gold by now, so if you have, you can return to town and speak to the Innkeeper there to unlock the next slot and pick up the party member you passed by earlier. They'll be relatively low-level compared to your current party members, but still, every little bit helps, and they'll quickly make up the lost ground.
The third tower will likely have a miniboss in front of it, surrounded by grunts, so if you have any powers that affect large groups of people, it'd be worth using them to thin out the crowd before concentrating on the miniboss himself. When you're through with them, though, fire the tower to move on.
Task: Find the Fourth Morden Tower
Shortly after busting through the third tower, you'll come to the Western Greilyn Forest zone. Immediately after you enter this zone, you can make a right to find the cave for the The Hak'u secondary quest, if you aim to complete it. Be careful in this zone, as the enemies are quite a bit tougher than before.
As you chop your way along the path, you'll eventually come to the fourth Morden Tower, which is unfortunately going to be guarded by two minibosses; an archer and a beast. If at all possible, try to lure one of these minibosses away from the other before engaging it. This is difficult to do, but if you command your party to Wait while you take your strongest member forward to try and pull it back to you. (You can find the Wait command in the Options - Input - Hotkeys menu; you'll have to bind it to a free key.)
Task: Return to Celia, Speak to Taar
When both of the minibosses have been destroyed, torch the tower to complete the penultimate task for this quest, then head up to the nearby Teleporter and return to town. If you speak to Celia on the Prison level of town, she'll refer you to Taar, who resides in the Great Hall on the Terrace of Wisdom, elsewhere in town. If you speak to her, she'll remove your prisoner ring, but will inform you that you've caught...the plague! She'll also give you back a few of the items that were confiscated from you when you were captured by the Dryads.
Chapter Four: The Plague
Exploration!
Now that you're no longer a prisoner, you'll be able to roam around the town and access areas that were previously inaccessible, which will also enable you to pick up a few new secondary quests. You can finish the Armorer's Apprentice quest if you haven't done so already by picking up the Tome of Smithing in the Great Hall. You can also obtain the Dire Wolf quest from Neda in the Pet Shop, the Secrets of the Elven Shrine quest from Laenne in her room on top of the Pet Shop, the Lelani's Sorrow quest from Lelani in her home southwest of the Pet Shop.
Task: Find the Elven Shrine
After Taar frees you from your prisoner ring, she'll inform you that you've caught the plague, and that the only possible cure for you is to travel to an ancient Elven Shrine in the woods, where hopefully the sacred waters will be able to rid you of your infection. To reach it, return to the Western Greilyn Woods teleporter and start following the path to the south. (If you head West, you can clear out a large number of Hak'u, find some new chants, and discover a locked Hak'u door that you'll have to return to as part of a secondary quest.)
Task: Locate the Elven Fountain
Continue past the Dryad outpost you come across and head deeper, deeper into the jungle. At the top of the hill near the outpost, you'll come to the Shrine, so head inside. The first thing you'll note is the appearance of more Sanctuary Doors inside here, which again can only be opened if your party members have advanced far enough in their particular weapon expertise. Proceed through the halls, chopping through the Hak'u that stand in your way, and be sure to move your mouse around inside each of the side rooms to find things like Magic Bookcases and Armor Stands.
(As a note, if you're doing the Secrets of the Elven Shrine secondary quest, you can find the hidden room needed for it at the bottom of the elevator which takes you down; there's a button on the wall nearby that opens a secret room.)
Eventually, you'll find yourself near a locked door with a few minibosses in the room in front of it; kill them all (preferably by luring them away from one another) to unlock the door leading to the Elven Fountain. After killing everything inside and finding a lectern with the Chant of Prosperity on it, you can use the fountain to heal yourself and grab a sample of the water for Taar. At this point, feel free to leave via the nearby teleporter and return to town.
When you return to Taar, she'll be overjoyed by the fact that you've been cured, and ask you to bring the vial of water to the Exile's colony, where plagued Dryads are forced to live, since they're unable to live in the main village. It's be a wise idea to bring her along after she asks to join your party, especially if you don't have an accomplished Nature magician in your group, as having her as a teammate will unlock another secondary quest. If your party is full, you can disband members with the CTRL-D command (be sure to grab their items before doing so; they'll go to the inn so that you can pick them up again later on), or you can pay the innkeeper another 1,500 gold to open up another slot.
Chapter Five: The Dryad Exile Colony
Task: Find the Exile Colony
Now, with your plague all cleared away, you can start to worry about the Dryad exiles that Taar wants you to aid. With your vial of water from the Elven Fountain, you may be able to aid a few of them. As mentioned, though, having Taar in your party will give you access to a new secondary quest, Taar's Investigation, which you can acquire in a house near the Great Hall if you wish to do so.
Regardless, you'll need to start heading down the path outside of town after leaving via the Southern Gate if you want to find the Exile Colony. A few secondary quests can be completed in the Southern and Eastern Greilyn Forests here, including Taar's Investigation, The Dire Wolf, and The Hak'u Part II, so we'll try to point those areas out to you as we go along. Speaking of which, the cave for Taar's Investigation is found immediately after leaving town. Convenient!
Anyway, keep walking up the path and thoroughly exploring anything that looks like it may be of interest. After the Garganturax cave, you'll start coming across more difficult enemies, so be ready for some tough fights; don't forget that you can pay the Innkeeper 1,500 gold to unlock another character slot for another party member or a pet if you need to. Be on the lookout for the Small Cave and Abandoned Ruins, two small side areas underground, quite close to one another. They'll likely be found shortly after your first encounter with a Vulk, and will have some decent treasures inside. Don't miss the secret room in the Ruins, which can be found by clicking on one of the chalices on the pedestals.
Shortly after you reach the Southern Greilyn teleporter, you'll be facing a tough fight against a group of Morden Spearmen and a miniboss, so if you need to, warp to an earlier teleporter, fight until your powers are recharged, then warp back and use them to clear the crowd. These guys happen to be guarding Razka's Ruins, a small dungeon with a locked door at the end. You don't have the key for it yet, but you can still explore it nonetheless.
If you head northeast from the Ruins, you'll run into another Small Cave, filled with Plagued Hak'u. This is the cave you need to travel through if you want to reach Rokhar's Rift Site, part of the Dire Wolf quest. Keep proceeding to the west, and you'll come to a Circle of Mushrooms on a outcropping; you won't be able to do much about it now, but you'll get a prompt telling you to ask Amren about it when you see him next.
After the next treasure tower, you should come to the Dryad Exile Colony, where you'll meet the Azunite Scholar for the first time. This will end this quest, and give you the next primary quest, along with a boatload of experience.
Chapter Six: Leaving Greilyn Isle
Task: Locate the Kithraya Cavern
Apparently, to leave Greilyn Isle, you'll have to find the shore, but to do so, you're going to need to head through the insect-infested Kithraya Cavern. Sounds like fun!
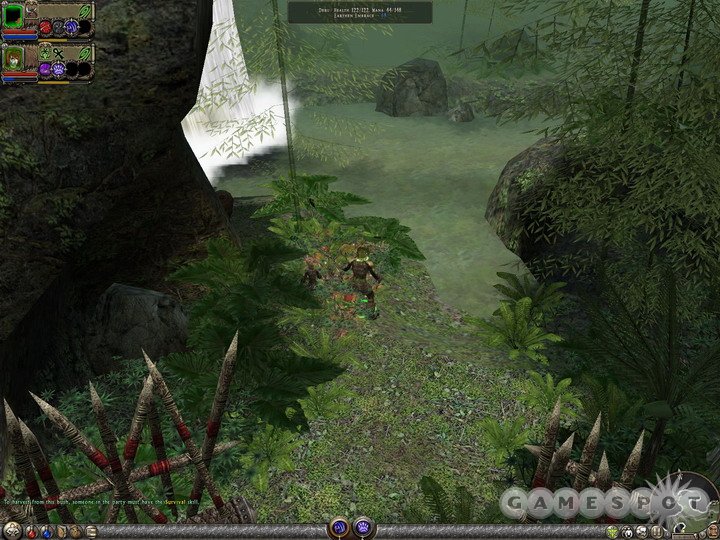
If you're interested in pursuing the Hak'u Part II quest, head southwest from the Dryad Colony and enter the Small Cave in the hills up there. Otherwise, follow the path to the east to find the Eastern Greilyn Isle teleporter. If you keep heading along the path, it'll eventually branch into three separate trails, leading to a cave in the north, a faded trail to the east, and a wooden bridge to the south. Since the arrow for your destination is pointing south, it'd be worthwhile to head to the other two destinations to see what's waiting for you before moving on. To the north or east, you'll find an Underground Shelter, which will let you pick up the Feldwyr the Blacksmith quest.
When you've scouted the shelter out to your satisfaction, head south across the bridge, where you'll soon come across a Narrow Cavern. This will quickly branch to the east and west, but the eastern branch is just a little cul-de-sac with some barrels in it. If you head west, you'll eventually come outside, where you meet Vix, a ranger that will tell you a bit about his adventures in the Kithraya Cavern. If you're looking for a good ranged attacker, this would be a good chance to pick one up. If you turn him down on his offer to accompany you, though, he'll run away, so if you want him in your party, but don't have room, try to accept his offer anyway and he should stick around until you disband someone else.
Task: Look for Survivors from Vix's Squad
Whether you bring Vix along or not, you'll come to the Upper Kithraya Cavern soon after you encounter him. This is a lengthier cavern than the caves you're probably used to, but linear nonetheless, so start chopping your way through the enemies here. If you walk long enough, you'll eventually come to a point with a few Plagued Kurtles where the path splits into three trails: one leading south, one leading southeast, and one being found via an elevator leading down. The elevator is broken, so you'll need to find another party member to fix it. For now, just ignore it.
The southern exit is another cul-de-sac with a miniboss, so explore it if you wish; the southeastern exit leads to the main area of the Kithraya Valley, and also features a teleporter immediately after you reach the next zone. It leads almost immediately into the Lower Kithraya Caverns, where the next part of your quest awaits.
Eventually, you'll come across a section of the cave where two Maltratar Overlords block the path. Kill the northern one first to find some gold and more enemies, then head through the southeastern passage and keep walking until you encounter a soon-to-be-zombified soldier who warns you away from your destination. Guess he didn't make the wise investment in ghost-proof armor.
Past the second field of poison geysers, the path will branch; the northeast leads to the Eastern Greilyn Beach, which is your ultimate destination, while the western path leads to a substantial number of optional enemies and the Kithraya Hive Queen, part of the Kithraya Hive secondary quest. If you wish to kill them, do so; otherwise, head down to the beach.
Task: Use the Azurite Portal
Your path will eventually be blocked by a large Shard; destroy it to move on. Eventually you'll reach the portal, which is being overwatched by the Azunite Scholar. Speaking to him will allow you to pass through the portal to the Azunite Desert, where you'll end this mission by speaking to Captain Suzor.
Chapter Seven: Secret of the Azunite Desert
Now that you've arrived on Aranna's mainland, it's time to help out the soldiers in the fort here with their task. It seems that there's a weapon hidden somewhere in the desert. To find the weapon, you'll need to find a map. To find the map, you'll need to bring together four Stelae, which are being guarded in different dwellings of the Skath, a "fierce desert race." Sounds like it's time to do some running around!
Exploration Time!
Before you follow Suzor's advice and head out to find the Stelae, it'd be worth your while to poke around the area. Instead of heading through the gate that she unlocked for you, head southwest out of the camp and up the hill there to find a Sanctuary Door requiring 13 Melee skill to break through; either your main character (if you're playing melee) or Lothar should have this by now. To the southeast, on the other hand, you'll come across a Ruined Crypt. Inside, you'll find a bunch of locked doors (which you shouldn't open - there are level 28ish foes beyond), as well as the Statue Guardian, which is responsible for opening the locked door behind himself. While you can't get through at the moment, if you answer his questions incorrectly, you can spawn in a level 16 miniboss that will always drop a magical or rare item; you can summon it five or six times in a row just by pressing the 1 key five times after talking to the statue for extra experience and loot.
Task: Find the Stela of Blindness
Task: Find the Stela of Life
When you're ready to start tracking down the map pieces, head down through the gate that Suzor opened up for you and talk to the Devoted Skath Avenger Stelae Guardian. No matter what you say here, it's apparently impossible to avoid a fight with this guy, so go ahead and chop him to pieces; he should give you the Stela of Blindness. You'll have the choice to go either north or west. Your first Stela is located to the west; after you pass underneath the bridge here, you'll come across an encampment. Kill the Stelae Guardian here to pick up the Stela of Life. So far, so good.
Task: Find the Stela of Death
Task: Find the Stela of Sight
Head back to where you killed the first Stelae Guardian and head north. At the top of the steps here, you'll find another tower with an elevator inside of it; head down the elevator to find Master Thestrin, who gives you the Family Heirloom secondary quest, and will give you the solution to the riddle in the Ruined Crypt. You can attempt to complete this mission now, if you wish, but it'll be tough; you'll have to avoid some level 28 enemies.
On top of the bridge that you passed by earlier, you'll find another Stelae Guardian which holds the Stela of Death. Beat it down! The fourth and final Stelae Guardian is at the bottom of some steps nearby, so that will net you the Stela of Sight.
Task: Place the Four Stelae and Learn the Location of the Azunite Vault
Now, you'll have to make a bit of a trip to get to where you need to plant the Stelae. For now, explore the cave near the Stela of Sight-dropping foe, which is truncated, then head back up the steps and into the Azunite Cavern there. You'll come across a signpost indicating that the Azunite Shrine is up a ramp to the east, but first explore the other areas nearby. Although the signpost indicates that you can reach the Windstone Fortress by heading north, the path is actually blocked, although you can kill a miniboss outside.
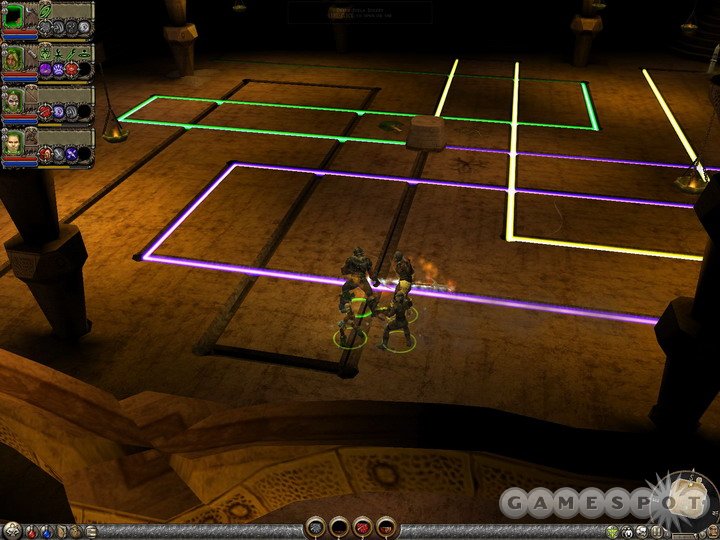
Immediately inside the Shrine (which is just a hundred yards or so along the path), you can depress the Bas Relief on the wall to open a secret area. As you traipse through this area, you'll eventually come to something of a treasure room; opening the two northernmost chests will open secret areas on the walls, each with minibosses, while the central chest will unlock two more secret areas, both with normal foes in them. The southwestern chest is normal, but the southeastern one is actually a Mimic, which players of Dungeons and Dragons should remember as a monster that imitates a treasure chest and waits until somone foolish enough to open them stumbles along. This guy is a tough fight, as it has over 5,000 health and some pretty damaging attacks, but it can't move, so if you back away when your melee characters go unconscious, you can regroup and try again until it pops. When it does so, it'll drop a substantial amount of treasure for your troubles.
Follow the elevators beyond this room until you reach The Inner Chamber of the Ancient Azunite Shrine. This is where you need to plant the four Stelae, but before you do so, pop open the Ranged Sanctuary Door, if you have the ability to do so, and grab the chant from the lectern on the eastern wall. After you've done that, plug all four Stelae into their sockets to obtain the Map of the Lost Vault of the Azunites and the Silver Mirror.
Chapter Eight: The Lost Azunite Artifact
Task: Find the Lost Vault of the Azunites
After you grab the items inside the Shrine, a door will unlock; take the elevators within up to the top floor, where you'll find the Lost Valley of the Azunites. Your quest arrow is pointing north, so feel free to explore the south first; you can find a Cave of the Phoenix, where you're apparently supposed to recite a chant to do...something. Guess we'll come back later, eh?
Anyway, keep following the path leading to the north until you reach the teleporter for this zone. There's a secret (and completely optional) area nearby, so head directly east from the teleporter until you reach a group of Skath camped near a trio of walls and a campfire. If you see the blue pattern on the ground here, you'll know you're in the right place. Look for a button on the bottom of one of the walls to activate the elevator beneath the pattern and enter the Lost Elven Ruins. Although there doesn't seem to be much here, if you head into the second room, you can find another button to press, which will open up another secret room in the ruins, which contains a chest. Hooray for treasure! What's more, there are more secret buttons to find; if you keep hittin' buttons, you'll eventually lead up to an Elven Prison, wherein Arinth the Mad is imprisoned. If you've completed the Arinth's Legendary Staff quest, then you can use the staff on the central pillar of the prison here to bust him out, which will lead to the Arinth the Mad quest.
With that out of the way, stay on the path until you reach another Azunite Cavern. Soon after reaching it, you'll come to a Small Canyon (which you may have explored before entering the Azunite Shrine, but now you'll be passing over it), which will subsequently lead back into the Cavern. You'll eventually come to a seemingly impassible bridge, but if you look around for a button on the small square of walls nearby, you can extend it and pass over to a secret area. Smashing the stone next to the hole in the ground will lead you down to the Tomb of Agarrus, which is part of a secondary quest in Act III.
Just keep following the path and you'll eventually come to an Azunite light puzzle that blocks your path forwards. Time for a challenge involving a beam of light and a set of mirrors! Gosh, we've never seen one of those before!
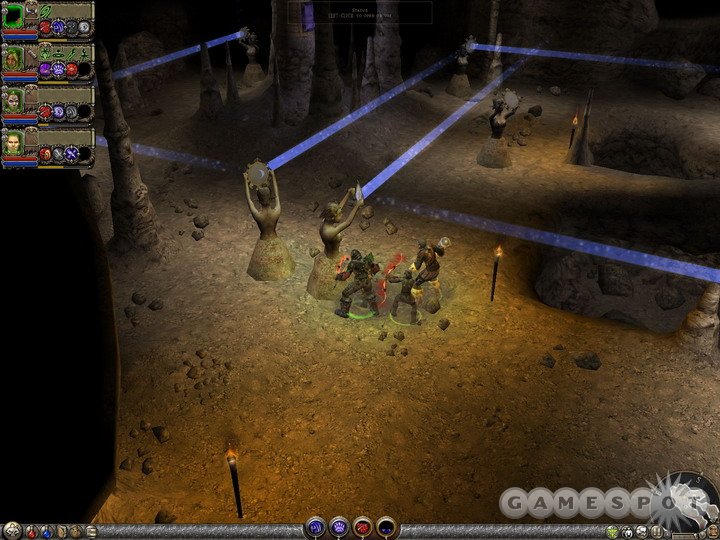
Anyway, this puzzle isn't so difficult. When you find the first statue in the sequence (to the rear of the central pillar; it has a beam of light shining on it), click on it to start the beam of light, then follow it to the next statue and twist it until it reflects the light, and so on. If you always go to the next closest statue that the beam of light hits and redirect it there, then it's not difficult to get past this puzzle. See the screenshot here if you need a hint.
Task: Retrieve the Azunite Weapon
Now that you've accessed the Lost Vault, you'll have to find the treasure that everyone's raving about. Doing so is not difficult; just walk down the steps that have been revealed to you and grab...a bowl. Yep, a bowl. Some weapon.
Anyway, fabulous secrets will be revealed to you, yadda yadda yadda, next quest please!
Chapter Nine: Windstone Fortress
Task: Take the Azunite Weapon to the Windstone Fortress
If you return to the light puzzle area, the Azunite ghost that you spoke to before will open a path to the Western Cliffs of Azunai, which is where you have to head to get to the Windstone Fortress. Walk down until you come to Isteru's Caverns. You can pass right through here to return to the Cliffs if you want, but if you look around, you should find a doorway leading to some ruins. After poking around a bit and cleaning out the place up to the Incantation Shrine, return to the area with the blue platform in the center of the room. You can go down to the Ancient Elven Reliquary if you wish, but you can't do much because the only inhabitant is a ghost, and you can't speak to them yet. In the room with the platform, though, if you find the two valves next to the small basins in the corners, you can unlock a secret area with a miniboss inside.
Barring that adventure, you can return to the Cavern and start making your way through it until you eventually reach the Eastern Cliffs of Azunai teleporter pillar. East from here leads to an Incantation Shrine, but the western path is the one you want to take after that, obviously enough, since it'll lead you ever closer to the Windstone Fortress, which you eventually will reach, only to learn that Valdis has managed to beat you there.
Task: Find the Person in Command
Enter the Eastern Windstone Fortress Gatehouse. Feel free to look around if you wish, but your goal lies along the slim corridor to the east of where you entered. If you check through all of the rooms here, you should find Private Banos, one of three soldiers who managed to get lost inside the fortress. If you want to pick up the Missing Squadron secondary quest, feel free to talk to him. Further down this corridor, in the room near the corner of the halls, is another Mimic, so feel free to kill it for some more massive loot. Since there are plenty of enemies here, it's best to run towards it (preferably with a Nature character's Invulnerability party activated), use all of your most powerful single-target powers, then run away and come back when your powers have recharged. After a few trips, it'll be dead and you'll have plenty of treasure.
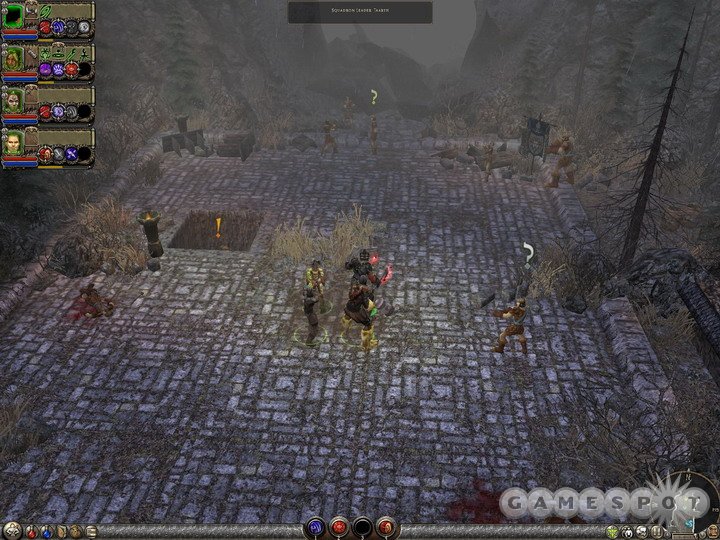
You can find a secret area just past the Sanctuary Door by clicking on the statue near the wall. Beyond it, you'll find doors leading to the west and the north. Head north first to find a miniboss and a seeming dead-end with a statue of an dual-wielding warrior. After grabbing the chant near the statue, click the button on its base to find another secret area before returning to the western passage. Following it will lead you back to the exterior portion of the fortress; head north from here to reach Captain Dathry. If you brought Banos along, you can drop him off with Squadron Leader Taarth.
Task: Enter the Outer Vault
After speaking to the soldiers near here and learning your task from Captain Dathry, you can head immediately to the east if you wish to proceed. If you want to finish up the Missing Squadron quest, though, you'll have to return to the south; the Western Gatehouse and Private Caiden are to the southwest, while the Barracks and Private Nolan are to the west of the teleporter here. Even if you don't normally like doing secondary quests, you should probably consider finishing off this one, since your reward will be a Dusty Key. This opens up a treasure room door shortly, so be sure to acquire it.
Task: Find the Inner Vault Key
Task: Enter the Inner Vault
When you're ready to move on, head to the east from Taarth to enter the Outer Vault. It will open thanks to the key you got from Dathry, so head and in and start knockin' heads. Soon enough you'll come to a series of Sight/Blindness/Death/Life doors, each of which will have to be unlocked by retrieving hexahedrons from near the pedestals and placing them in the slots.
After the Life door, you'll come to Lieutenant Namyek, who has been overridden by the ghost plague. You'll have to kill him to get the Inner Vault Key, so blast him before moving on. The Inner Vault is just nearby, so head inside, grab all the treasure, and click on the blue flame device to activate your Azunite Artifact. Nearby, you'll also find the entrance to the White Vault, which can only be opened with the Dusty Key you got from Taarth earlier. Heading inside and placing four Death cubes in the pedestals (they can be found inside the Inner Vault) will lead you to an optional treasure room.
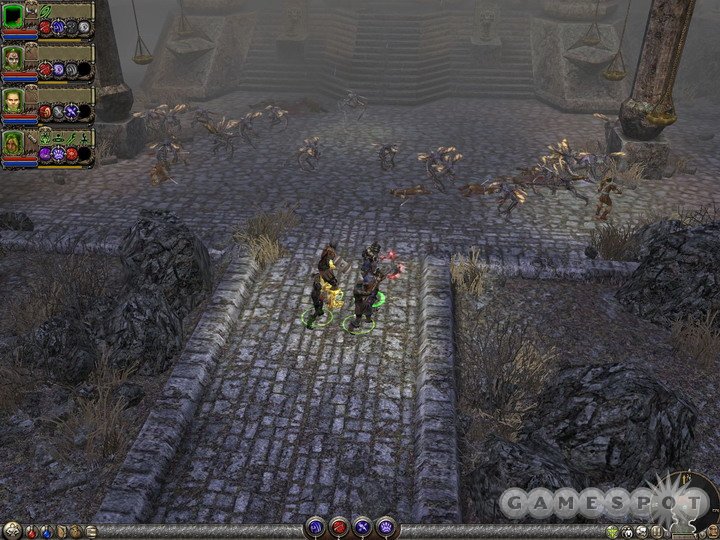
Task: Enter the Temple of Xeria
After Dathry blasts open the passage leading to the Temple, follow him in and kill the many demons that appear. It's easiest to do so if you lure them back towards the passage and use one of your powers on the group, like Thundering Shot or Waves of Force. When they're dead, head through and into the Temple to complete this quest.
Very soon after entering the Temple, you'll come to one of the locations for the secondary quest Secrets of Xeria's Temple. See the quest run-down for it to figure out what to do.
Chapter Ten: The Temple of Xeria
Task: Clear out the Temple of Xeria
It appears that numerous plagued soldiers are still running wild through the Temple; it's up to you to find them and destroy them before they manage to reinhabit the Windstone Fortress. Sounds easy enough.
And, in fact, it is. If you chop your way through everyone you see, you'll eventually come to a large blue statue; find and destroy all of the enemies nearby (including the ones in a subroom to the west), and you'll be able to place your Artifact on the statue, which will expel all of Valdis' ghosts from the Temple. (The cutscene here actually shows an upcoming courtyard, not the exterior of the temple you just came from, so don't bother backtracking.) Move on past the doors that were just unlocked. If you wheel around to the east of these doors, you can find a moveable statue that'll lead you to a secret area. There's also a substantial secret area near the Incantation Shrine to the north, also found by clicking on a statue; it leads to the Cavern of Earth, which is similar to the Cave of the Phoenix in that you won't be able to do much with it yet.
Task: Find the Shard
Now that you're able to move on, do so. Find the teleporter here, then head north from there to reach the Temple Courtyard, where the Shard is located. Unfortunately, your path to the Shard is going to be blocked by the toughest enemy you've yet come across - it appears that the ghosts in the Temple, when expelled, filled the body of a snake here in the courtyard, morphing it to gigantic proportions and giving it three heads: Malac, Vitalas, and Brune, who together form the Giant Trilisk.
Now, despite their fearsome appearance, the Trilisk aren't all that difficult to defeat, at least in our experience, mostly because they're just really passive. You may be expecting fireballs and massive physical attacks, but for the most part, they seem content to just let you sit back and whack on them, so...that's pretty much what you should do. If you need to, you can use the War Pedestals on either side of the boss to get your powers back up to snuff, then wade into the fray.
The Trilisk mostly uses area-of-effect attacks that, oddly, don't seem to be able to hit melee characters. Your rear casters and archers will be in the middle of the poison clouds and earthquake effect (which occurs when the beast sticks its tail in the ground), though, so you'll want to constantly watch their health, or just use health potions as soon as you see a poison cloud coming out. The earthquake effect is the worst of the bunch, so if you have an Invulnerability power queued up on a Nature mage, be sure to use it when it hits the ground.
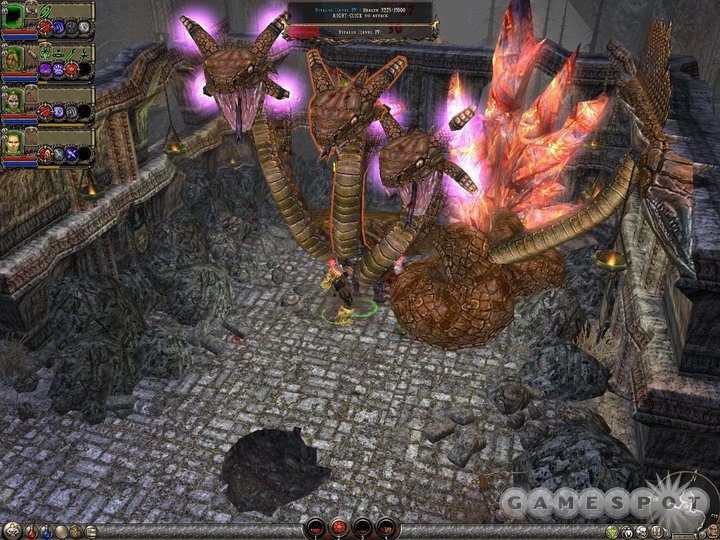
Although Vitalus has the most health (at a startling 15,000 HP), he's the one you should start banging on first, as, true to his name, he's the one that'll restore the life to his partner heads should they take damage. He apparently can't heal himself, so a minute or so of whacking and single-target powers should be enough to take him out. After he's gone, though, you'll have to focus on the other two. It doesn’t seem to matter which you take down first, so take a pick, concentrate your fire, then go after the other head to finish the beast off.
When the Trilisk is dead, it'll drop a boatload of loot and let you access the Shard, which is easily destroyed. After that's done, you'll be able to leave the area and head to Act II.
Act I: Secondary Quests
Quest One: The Armorer's Apprentice
Location: This is given to you by Apprentice Telinu, in the blacksmith's shop of Eirulan.
For this quest, Telinu requests that you go to the Great Hall in Eirulan, read the Tome of Smithing, and report back to her on the correct recipe for Dryad Armor, which she seems to have forgotten. When you first obtain this quest, you'll be unable to complete it, thanks to the fact that your prisoner ring prevents you from reaching the Wisdom Terrace where the Great Hall is located. If you don't care about "cheating," then go ahead and tell her that you know the recipe for her armor, and give her the third recipe on the list. Note that although recipes two and three appear to be almost exactly the same, they are slightly different, and only the third one will result in Telinu making the correct kind of armor, which she'll then give to you.
If you want to do things the hard way, then you'll need to complete the Morden Tower quest, enter the Great Hall, find the book, pick it up, read it, then return to Telinu and perform the steps above to complete the quest. Getting the book before returning to Telinu will net you a better piece of armor than would giving her the correct answer before picking the book.
Quest Two: Lumilla's Salve
Location: This is given to you by Enchantress Lumilla, in the magic shop of Eirulan.
Enchantress Lumilla offers to make you a special enchanting item should you happen to bring her back four Nettle Clusters from the forest outside Eirulan. These clusters can be difficult to come by; we managed to find a couple just lying on the ground (one of which was near the Garganturax cave in the Southern Greilyn Forest, another of which was past the Shard on the Eastern Greilyn Beach, and another of which was near a tower between the two Kithraya Caverns) with another couple coming from enemy drops, including one from an enemy that respawned in an area that was already cleared. They seem to drop with about the same frequency as other reagents, so you may have to depend on the luck of the draw to find them, although there is likely another one lying around that we missed. You might also be able to find them at the reagent vendor in town, or at the vendor in Act II, if you check with them. When you find four of them, return them to Lumilla for a bottle of her salve, which can be equipped to enchantable armor for +10 health and +5% health regeneration.
Quest Three: Lelani's Sorrow
Location: This is given to you by Lelani, who dwells in a house near the Pet Shop in Eirulan.
Lelani's daughter recently passed away, and Lelani is apparently so kook-a-nutty that she still wants to buy her a keepsake from Amon'lu. She'll give you a Child's Doll to barter in that town for something to fulfull her daughter's wishes with.
With the Doll in tow, head to the Falls section of town. (The only platform leading here is near the Inn.) Speak to Fenella in her little home at the beginning of the area to trade her the Doll for a bottle of Elven Ale. You can give that to Soldier Balamar in the Azunite Desert (in the little fort just beyond the Azunite Portal) in exchange for the Skath Cat Ribs. Giving these to Soldier Jordhan in the Inn in Eirulan will net you a Lucky Statuette of Xeria. Giving that to Soldier Kiernan in the Snowbrook Haven Dining Hall (which you won't reach until near the end of Act II) will net you a Morden Head on a Pike. Bring that to Alar'ithil on the southern side of Aman'lu to retrieve the Bottle of Elven Water. This goes to Prospector Garanth, who dwells in a set of ruins just to the southwest of the teleporter in the Northern Plain of Tears in Act III. He's across from a tower; find a secret button to descend to his location. With the Agallan Relic that Garanth gives you, return to Kalrathia and speak to Nalus, who'll give you a bundle of Harpy Feathers. Take those to Ithir'renne the Fletch, in the northern part of Aman'lu, and she'll give you an Aman'lu Orchid.
With the Orchid in hand, you can return to Lelani for your reward; it appears that she's willing to trade most of her earthly riches for a single little plant. Don't feel too guilty about it, though, as she'll likely drop some pretty decent stuff.
Quest Four: Secrets of the Elven Shrine
Location: This is given to you by Laenne, who lives on top of the Pet Shop in Eirulan. You'll find a ramp on the outside of the shop; follow it up to her home.
Laenne asks you to retrieve an artifact from the Elven Shrine, which is supposedly hidden inside a secret room within the complex. You'll be heading there as a part of the Plague quest, so feel free to grab this quest before doing that one.
When you reach the Elven Shrine, you'll eventually find a circular elevator platform that'll drop you down a couple stories. At the bottom of this elevator, check the western wall to find a button; press it to open up a secret room. Your goal here is to reach the bottom of the elevator shafts that you'll encounter within. Begin by picking up a Green Life Cube and putting it into the small indentation on the nearby platform. This will let you use the lever nearby to reveal another elevator. Ride this one down to the second floor, then press the button on the wall near where you wind up to reveal another secret room here. Pick up a few Yellow Sight Cubes, place one in the platform in the secret room, then pick up a few Red Blindness Cubes near this platform before flipping the switch again to ride down to the third floor.
Another button on the wall will reveal yet another secret room here. After placing a Blindness Cube in the appropriate slot, pick up a few more Purple Death Cube sand place one in the other platform to unlock a larger secret area. After a few more cube placements in here, another elevator will appear, this one finally leading to the Lost Sapphire Of The Elves, as well as some other treasures. Grab it and bring it back to Laenne for your reward.
Quest Five: The Kithraya Hive
Location: You'll have to speak with Tamari in the Falls section of Eirulan to receive this. The Falls are located near the Inn; ride the elevator down and walk across the bridges to find Tamari.
Tamari was recently frightened by an encounter with the Kithraya, a race of huge insects, and asks you to help quell her fears by entering the Kithraya Caverns and killing the Kithraya Hive Queen.
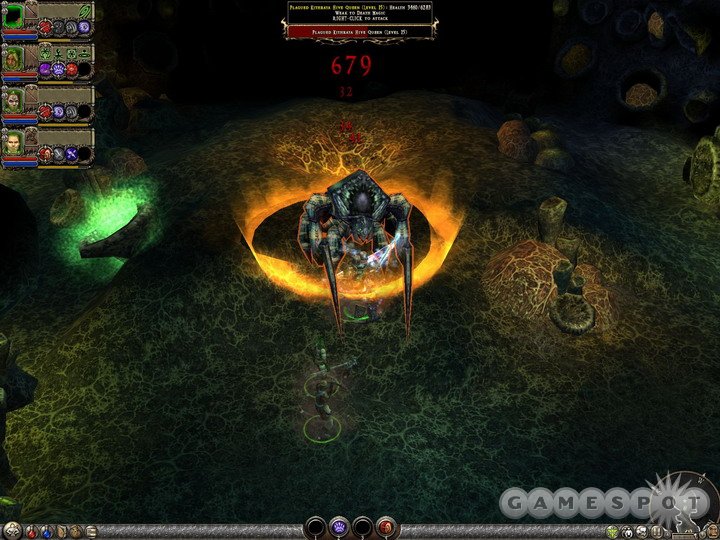
When you reach the Kithraya Caverns, you'll note that there's a branch in the path just before the exit to the Eastern Greilyn Beach. This is the path you need to take to reach the Hive Queen, but be prepared to exterminate most of her brood before getting to her, as they'll be spawning in hot and heavy. When you do get to her, she shouldn't be too tough to defeat; just get into her aggro radius and wait for her to come to you, as this will prevent the eggs around her from hatching, letting you take her on by herself. When you have her head, return it to Tamari to receive your reward.
Quest Six: The Hak'u
Location: During your traveling as part of the Morden Towers quest, you'll come across Morain in the Northern Greilyn Forest, who offers you this quest.
It seems that a niece of Morain's has been kidnapped by the Hak'u, and her best efforts to find the child have failed. She tells you that she believes that the child is being held in the Hak'u cave, two entrances to which are near Eirulan, but that she can't find her inside. In order to track down the child, you'll need to find the hidden rear entrance to the cave, which is near a couple of bridges, and before you reach the Western Greilyn Forest teleporter. We've found plenty of rear hidden entrances in our day, so this should be a piece of cake.
The cave entrance you're looking for is located after destroying the third Morden Tower, just after you reach the Western Greilyn Forest zone; it'll be down a ramp on the right side of the path. Getting inside isn't so difficult, but be careful, as the enemies within are mostly going to be level nine, which can make for some challenging fights. When you reach Tanzi, Morain's niece, though, she'll actually be set free by a sprightly little Hak'u named Hrawn. Curious. You'll be directed to head to Morain in the Eirulan Infirmirary to finish off this quest, although you won't be able to reach that area before you complete the Morden Towers quest.
When you return to Morain after the towers have fallen, she and Tanzi seem to be at cross-purposes. Tanzi asks you to find Hrawn and speak to him, while Morain wants you to kill Hrawn and the rest of the Hak'u. This leads into the next quest...
Quest Seven: The Hak'u, Part II
Location: Obtained from Morain in the Infirmirary after completing the quest The Hak'u.
In order to proceed with this quest, you'll need to head into the southern forest, which you won't be able to do until you've completed the Plague quest from Taar. When you've entered the southern forest and found the Dryad Colony, head southwest from there and enter the Small Cave up in the hills, wherein you'll find Hrawn. If you speak to him, you'll have the option to either kill him (for shame!) or kill the usurper that's joined with the Morden. If you choose to kill the usurper (which is decidedly the moral choice), then head to the Western Greilyn Forest teleporter, head into the hills to the west of it, find the Hak'u Door you passed by earlier, then run in and kill the beast! He's surrounded by lower-level Hak'u, so clear them out before concentrating your fire on him. He'll take a while to kill due to his high health stat, but he'll go down eventually once you get him into a one-on-three or one-on-four matchup.
Whichever path you choose to take, return to Morain in the Infirmirary when you're done with the killing for your reward.
Quest Eight: The Dire Wolf
Location: Obtained from Neda in the Pet Shop in Eirulan.
Neda is a pet wrangler in Eirulan, and she wants to offer Dire Wolves for sale, but needs a bit of assistance. If you offer to help her, she'll ask you to track down Rokhar, a Nature magician that is skilled in summoning beasts. He dwells in the Great Hall, so speak to him, and he'll ask you to meet him in the Southern Greilyn Forest. If you haven't completed the Plague quest yet, then you won't be able to head there just yet.
When you do gain access to the Southern Greilyn Forest, walk along the path until you pass Razka's Ruins, then head north through the Small Cave there to reach Rokhar's Rift Site. Rokhar is waiting for you, and asks you to defend him while you summons a Dire Wolf. As soon as he begins summoning, a horde of level 10 Nawl Beasts will come through the portal, so you'll have to act quickly if you want to take them down. Icicle Blast, Waves of Force, Staggering Blow, or other mass-effect powers are going to be handy if you want to quickly take these guys down.
When Rokhar has summoned the Dire Wolf, he'll send it to Neda at the Pet Shop. Return to her for your reward.
Quest Nine: Taar's Investigation
Location: Obtained from Arianne in her home near the Great Hall in Eirulan. Only available if you have Taar in your party.
If you speak to Arianne inside her house near the Great Hall while you have Taar in your group, she'll tell you a fantastic tale of a huge monster that lives out in the Souther Greilyn Forest, and asks you to investigate it.
Your first task is going to be to find some way to kill the beast. Apparently you'll need a Hak'u Ceremonial Blade, which can only be obtained from a Hak'u Ritual site. Hey - didn't we pass one of those earlier in the game? We did indeed! If you head back to the Northern Greilyn Forest teleportation checkpoint and walk north from there, you'll shortly run across a Health Shrine; from there it's a short walk to the Ritual Camp. After killing all the Hak'u there, grab the Ceremonial Blade from the pyramid and stow it in the inventory of your primary melee character.
Task: Slay the Garganturax
When you have the Blade in your possession, you can leave Eirulan via the South Gate to find yourself in the Southern Greilyn Forest. Shortly after leaving the village via this gate, you should find an offshoot from the path which leads to the Dark, Bone-Filled Cave where the monster awaits. This is a tough, tough fight, though, so you may want to wait until all of your characters are level 11 or 12 before attempting it. Even then, the monster's huge amount of hit points may still overwhelm you, forcing you to respawn multiple times before you can kill it. You'd be wise to open up a town portal with the Summon Teleporter spell before heading into the cave. That way, if your whole party dies, you can simply walk back into the portal in town to return to the cave instantly. Just don't forget to recast the teleporter spell when you revive yourself.
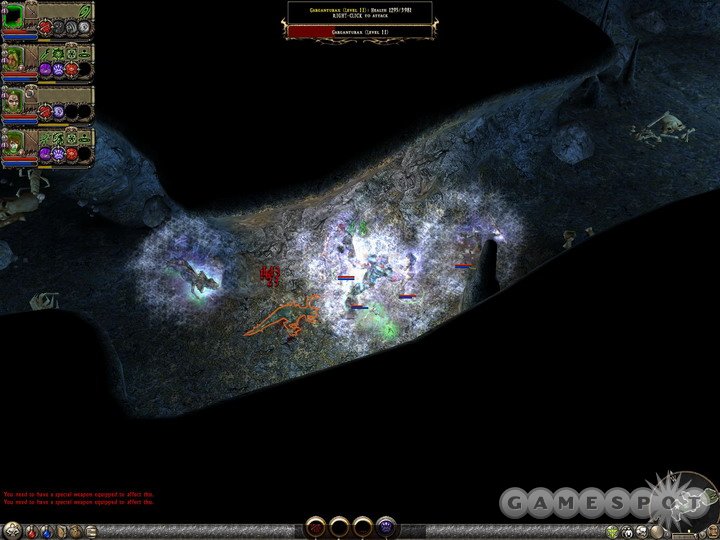
Now, the Garganturax doesn't regenerate health, even if you happen to die and return to town, so if you're willing to make a bit of a time investment, then you should be able to kill it eventually. It also refuses to leave the cave, so if you think you're about to get killed, feel free to leave the cave, heal up, restore your mana, summon new pets, and so on until you're ready to return. The thing about Garg here is that he's got almost 4,000 hit points, does more damage than anything you've yet encountered, and is immune to damage from your melee weapons, save for the Ceremonial Blade, which only does 3 to 7 damage per swing. So your melee characters are going to be mostly inert for this fight; luckily, magic does full damage, and he's weak to fire, so use your most powerful single-target spells on him to do the most damage over time. When Garg gets attracted to a spellcaster, run out of the cave to prevent him or her from dying, then repeat the process.
Eventually (and again, it may take a while, depending on the level of your party), Garg will keel over dead, netting you a little bit of gold and a Miniature Dinosaur quest item. If you bring it back to Arianne, she'll give you a more suitable reward in the form of magical items, probably including a unique.
Quest Ten: Feldwyr The Blacksmith
Location: Obtained by talking to the eponymous blacksmith, who dwells in An Underground Shelter, to the northeast of the Eastern Greilyn Forest teleportation marker.
When you find Feldwyr, he'll explain that Plagued Dryads overran his little smithy and stole all of his equipment. If you find his anvil and mithril ore, he promises to repay you handsomely. He says that the equipment is in the rooms at the bottom of the elevator near him, but that the monsters guarding it are quite powerful. We'll see about that...
If you head down into the unlocked rooms near Feldwyr, you'll note that it immediately branches to the left and the right. Head to the left first, where there's a bunch of semi-submerged rooms; one of the minibosses here should have the Anvil that Feldwyr seeks. There's also a secret room in the middle of the rectangle that's formed by the hallways; look for a lever on one end of the rectangle (it should appear on your minimap as a blue dot) and flip it to find a treasure chest.
As for the mithril ore, though, well...it looks like Feldwyr was right. Along the right branch of the path, you'll come to a level 24 miniboss, and although he's killable if you have enough health and mana potions, he guards access to a room that's filled with level 22 creatures. You'd be wise to save off attempting to breach this door for now, and come back later on, when you're stronger.
When your characters get up to level 22 or so, which will probably happen around the end of the first chapter, return to this area and start chopping through the tougher enemies here. One of the minibosses has the Mithril Ore on it, so grab that. You can also find a pair of secret rooms inside two of the four subrooms off the larger area where the Taclaks are congregating. One of them is triggered by a statue on the wall, while the other is opened with a button on a set of steps leading up to a dias.
Anyway, when you have the Ore, return to Feldwyr. You won't be able to reap the rewards for your deeds just yet, though, as another Taclak will bust through a wall nearby and steal his hammer, and it'll be up to you to retrieve it. Unfortunately there will be two minibosses in the cavern here, surrounded by a horde of Taclaks, so if you're attempting to do this quest before you've hit level 20 or so, you may find yourself overwhelmed. The Taclaks don't do a huge amount of damage, though, so you might want to just run into the room, get all of them agitated, then position yourself to do huge damage to the group with your powers. When you've cleared them out a bit, you can focus on the minibosses to kill them off and retrieve the hammer.
Unfortunately, after all that, you're still not done with the quest. Feldwyr can't get your weapon done immediately, so he'll have to send it to Aman'lu. When you travel to Act II, you can speak to Fryndolf, who's upstairs in the former weapons shop, to receive a unique weapon. Now, if you want to be a bit sneaky here, you can save your game before talking to Fryndolf, check out what he drops, then exit and reload the game until you get something that you really want. (This doesn't work if you have it autosave every time you complete a quest, obviously.)
Quest Eleven: The Family Heirloom
Location: Obtained by speaking to Master Thestrin, who resides at the bottom of the tower north of the first fort in the Azunite Desert.
When you speak to Thestrin, he'll ask you to retrieve a family heirloom from his family crypt elsewhere in the Azunite Desert. He says that it's guarded by a Sphinx-like statue that requests visitors to solve a riddle, and relates to you an old family saying: "War follows in the footsteps of men, and abstinence of peace leads to evil again."
When you find the Ruined Crypt (it's to the southeast of the soldier's fort with the Azunite Portal), head in and talk to the Statue Guardian within. If you answer his riddle incorrectly, he'll spawn a level 16 miniboss for you to tackle; if you do this multiple times, you can earn a bunch of rare and magical items from it. When you're ready to get past it, though, give the following answers: Azunai, Xeria, Elandir, and Zaramoth (which corresponds to numbers 3 - 3 - 1 - 2). This will unlock the door behind the statue, where you can walk in and find the Heirloom Sword.
Unfortunately, just walking in isn't so easy, as there are a few level 28 enemies inside the crypt here. If you command your group to Wait near the entrance to the crypt and walk in with only your most powerful Melee warrior, you might be able to grab the Sword and run out again before getting killed. Even if you do get knocked down, you can wait for the unconsciousness to wear off while controlling one of the waiting members, then quickly try to reassemble at the entrance to the crypt. Getting the Sword is all you need to do here; killing the enemies is not required, and is pretty much impossible to boot.
Now, you may have considered it to be somewhat weird that Thestrin forgot the password to his own family crypt, and if you bring the sword back to him, he'll cryptically ask you not to tell anyone else about it, especially after you get to Aman'Lu. If this strikes you as suspicious, then feel free to not give him the sword; he'll take off in a huff. It's probably best to just give it to him, as it doesn't do anything for you, since it's not powerful enough to use, and you'll get two Mysterious Chants for doing so.
After completing this quest, speak to Athelas in Aman'lu in Act II to continue the plot thread.
Quest Twelve: The Imprisoned Half-Giant
Location: Speak to Sartan, who's trapped in a hole near Captain Dathry in the Windstone Fortress.
It appears as though Sartan was imprisoned for what appeared to be an attempt on the life of Captain Dathry. Once Windstone Fortress is secure, you'll need to speak to the soldiers in order to try and convince them to free Sartan from his imprisonment.
After you activate your Azunite Artifact in the Inner Vault and return to Dathry, he'll blow the passage leading to the Temple of Xeria. After this occurs, you can convince him to let Sartan out of his cell. Your reward for this is the services of Sartan, should you wish to have another melee character in your party, that is.
Quest Thirteen: The Missing Squadron
Location: There are three lost soldiers in Windstone Keep. Speaking to any of them, or Squadron Leader Taarth, will net you this quest.
In order to complete this mission, you have to escort the three missing soldiers back to Squadron Leader Taarth. If you check around the side rooms in the Eastern Windstone Gatehouse, you should come across the first (although he's the second on the quest checklist), Private Banos. If you want to start the quest, feel free to bring him along; if you want to clear a path for him, feel free to leave him behind! It shouldn't be necessary, though, as enemies don't really seem to wish to fight him overmuch. If you change your mind later on, though, feel free to warp back to town and then come back; he'll stop following you if you do so, at least until you talk to him again.
After dropping off Banos, you can find Private Caiden pretty easily by entering the Western Windstone Gatehouse, which is essentially one big room. The Barracks are a bit more complicated. You can enter them by proceeding to the west of the teleporter near Taarth. If you head in via the northern entrance, you can find a secret area by pressing a button on the northern wall of the second room, which is filled with burning hay. This, in turn, has its own secret area, so look for another button within. If you head directly to the west of the hay room, you'll find Private Nolan.
When you've returned all three of the Privates to Taarth, he'll reward you with the Dusty Key. This theoretically will open a door somewhere deeper within the Fortress, so be sure to pick it up.
Quest Fourteen: Secrets of Xeria's Temple
Location: The Grizzled Bar Patron in the Inn in Eirulan.
Although you can obtain this quest as soon as you start walking around Eirulan, you won't be able to complete it until much later in Act I. The old man in the bar has something of a story to tell to you (which you can skip through by tapping your 1 button repeatedly), the jist of which involves a Stone of Life inside a Temple of Xeria that he once happened across. He asks you to insert the Stone of Life into a slot near where it fell and report back to him on what happens.
Shortly after entering the Temple, you'll find a large room with pedestals for Life Stones and Sight Stones, but you'll only be able to find Life Stones at the moment. Go ahead and grab a few of them (you'll need multiple stones of each kind, so just grab half a dozen of each and drop them when you're done with the quest), place one of them in the appropriate pedestal, which opens up a small side room where you can find Sight Stones. Pick up a couple of them, then place one back in the central room, which in turn opens up another secret room which has another pair of pedestals. Placing stones in each of these will in fact opens up two secret rooms, one of which has Blindness stones, and one of which has a Blindness pedestals. And those two rooms open up two rooms each, and those rooms open up two rooms each, and so on.
Ah, just kidding. You're actually pretty close to the end; when you unlock all of the pedestals in the room with one of each kind, you'll be able to put stones in each and find a treasure room. If you report back to the Bar Patron, he'll give you a reward.
Act II: Primary Quests
Chapter One: The Town of Aman'Lu
Task: Speak with Celeb'Hel the Elder
Well, in a turn of events that you probably saw coming a while back, Valdis and his Dark Wizards have destroyed much of Aman'Lu, your hometown. If you wish to explore a bit and check out the sights, feel free to. You can resolve the Feldwyr the Blacksmith quest here if you speak to the blacksmith's brother upstairs in the weapons shop. There are also a bunch of new sidequests to pick up here, of course, and you can also get Amren into your party if you encounter him in the Inn.
When you're done poking around, head to the town hall and speak to Celeb'hel to end this brief mission.
Chapter Two: Finala and the Broken Bridge
Task: Find Finala in the Hills North of Aman'lu
You'll need to find Finala in the hills above Aman'lu if you are to have any chance of repairing the bridge leading out of town. She resides in the hills north of Aman'lu, so head out through the gate there and start following the path. Feel free to explore if you wish; there are a few scattered homes here and there with treasure inside, but nothing of particular interest, although the home near the Health Shrine does have a secret room in its basement. Most of the enemies here should be two or three levels below you, so you shouldn't have any problems chopping your way through the crowd.
Eventually you'll run across Finala. Although she takes a rather sarcastic tone with you, it's easy to convince her to return to town and get to work on the bridge. In return for this, though, she'll ask you to activate the Prism of the Elves to put out the fires in town.
Chapter Three: The Elen'lu Isles
Task: Travel to the Elen'lu Isles
If you follow the path from Finala north, you'll eventually come to the Northern Vai'lutra Forest. To the northwest of the Incantation Shrine here, you can find a Damp Cave that the Taclaks apparently used to drag goods from the Elven homes to loot. Recover what you will. To the direct north of the shrine is a little glen which you can reach by descending into a riverbed; pressing the button next to the circular platform will take you down to another Ancient Elven Reliquary. Although you should have the quest involving these locations by now, you still can't do much inside of them, but you can press a button on the eastern wall of the main room to reveal a secret treasure room.
Task: Find and Replace the Prism's Refractor Crystals

If you follow the path, you'll eventually reach the Elen'lu Isles, which consists of a group of small islands connected to one another by bridges. Unfortunately, it seems that the Taclak inhabitants of the Isles have damaged the Prism of the Elves, so you'll need to hunt down and replace four of the refractor crystals used to power the device before you can activate it.
The first small refractor is on the corpse of a miniboss just in front of where you first enter the Isles. From his location, you can head to the east by activating the magical bridge nearby; just click on the arch in front of it to extend it. When you reach the next island, head north, then east again to reach an island with three magical bridges leading in different directions. If you're looking to complete the Viperclaw sidequest, then head north and enter the Flooded Chamber and exit it through the far side to find a Griffon Feather.
Otherwise, head south first to reach a dead-end island with a bunch of Taclaks on it, then go to the east to find the second small refractor from another miniboss. From there, head south three times, then move to the east on the same island and head north to find the first refractor. If you insert one of the crystals here, it'll activate; point it west to finish off one-fourth of your mission. These refractors are pretty easy to aim; when you have them pointing in the right direction, their laser will suddenly brighten by a large amount.
From the refractor, head south, then west and west again to find the third crystal. From there, head north, southeast, then east to find the second refractor. To reach the third refractor, head west, then north to return to the island you just left. Note the bridge leading to the central island here, but instead of taking it, go north again to find the fourth small crystal and keep following the path to find the fourth refractor.
Task: Find the Large Prism Crystal and Activate the Prism
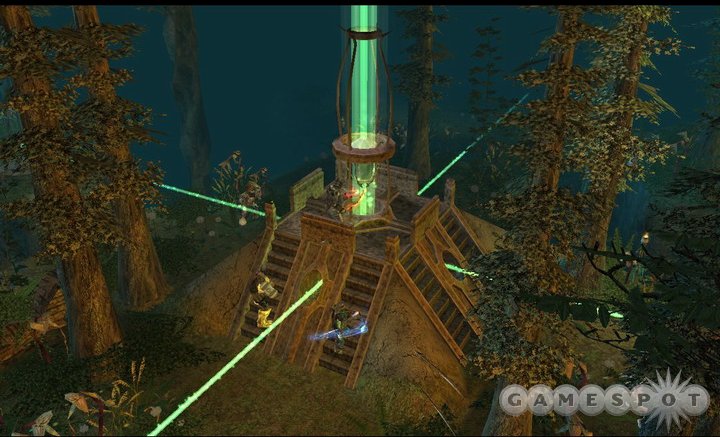
Now that the prism is primed and ready to go, return to the bridge leading to the central island and pop over to it, where another miniboss awaits. He predictably holds the large refractor crystal you need, so kill him, activate the prism, then rejoice in song and adulation when the magical fires in Aman'lu are put to bed by even more magical rain. Note that you'll immediately be surrounded by Taclaks as this cutscene begins to play; stick around and kill all of them, especially the miniboss that appears, as he seems to drop more loot than other minibosses normally would.
When you're ready to return to Aman'lu, do so and speak to Firala. She'll have repaired the bridge leading out of town for you, and will ask if she can join your party. If you don't already have a combat mage along for the ride, you might want to take her up on her offer.
Chapter Four: The Royal Caravan
Task: Find the Caravan
You know that the royal caravan left via this road, and you know the basic route they're taking, but you're still unsure how far ahead of you they are. If you leave Aman'lu via the bridge that Firala fixed, you're going to have to travel a bit to catch up to them.
You'll soon enter the Southern Vai'lutra Forest. Ah, nothing says "Fantasy with a capital F" like random apostrophes in the middle of words, doesn't it? Keep to the trail, exploring any deviations as you will. (There's a house with a couple of chants in it at the top of a set of stone steps, for instance.) Eventually you'll run into a thicker part of the forest, where the enemies finally start to become challenging again. Keeping on the path, you'll pass by Magrus' House, which is currently locked, and eventually come to the teleporter point, where there's another circle of mushrooms for Amren's secondary quest.
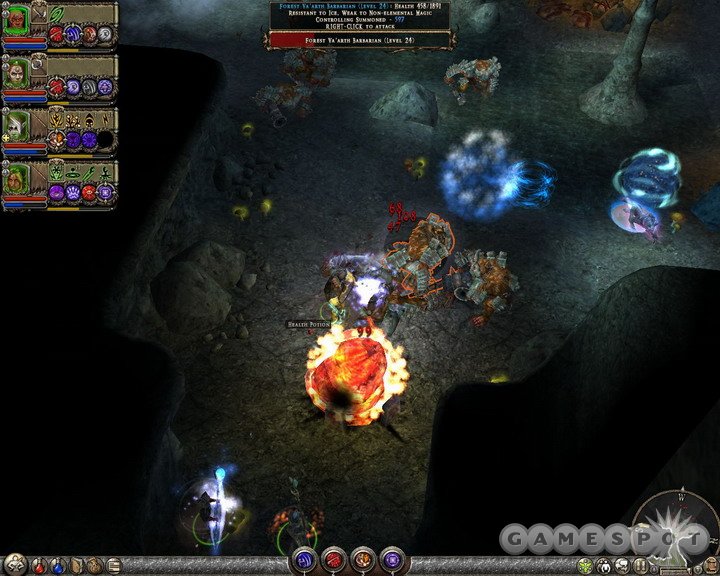
Eventually, you'll be able to take a little detour off the path into A Watery Cave, populated by a number of Va'arth enemies. You'll need your powers to chop through the large initial group. This is part of the Lothar's Innocence quest, but you'll probably want to head in whether or not you're doing that quest, as there's plenty of experience to be found within. There's also a not-so-Small Cave to the west of the Watery Cave, which has no quest importance but is still going to be a good source of experience due to all the Va'arth inside.
Just before you reach the caravan, you'll come to the Levreth Estate, which is actually located underground. There isn't much you can do down there, since you're not able to speak to the dead yet, but you can explore a bit to find a couple of chants and a secret area (the button is near one of the chant lecterns).
Task: Find the Vai'kesh Sanctuary
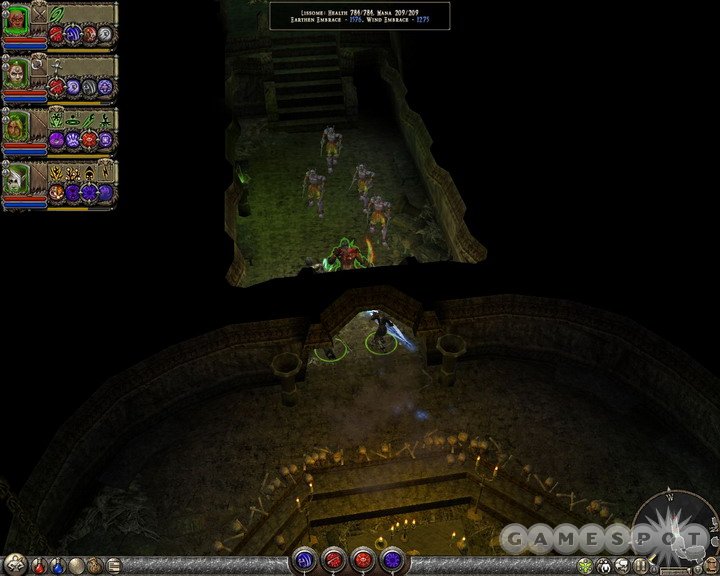
When you reach the caravan, you'll find that it has, of course, been routed and destroyed, with only a single member of the entourage alive enough to tell you the culprits: the evil Vai'kesh, who reside in a fortress nearby. You'll have to track them down to retrieve the Aegis. Note that the survivor here offers a secondary quest, but you don't currently have the party member required to obtain it, so leave it for now.
If you follow the path (which is starting to sound like a weary refrain, but this is a pretty linear game), you'll eventually come to a hollow tree which leads to a Flooded Chamber, inside of which you can find a Mysterious Chant.
Eventually you'll reach the Vai'kesh Forest, wherein the mysterious eponymous race resides. It's a short distance from the entrance to the Vai'kesh Sanctuary. Whether you choose to be nice to the guard at the door or not, you're eventually going to get into a fight; just go ahead and humor him, then walk inside and talk to the Prophet. The Aegis is on display beside him, but he has no intention of giving it up; you're going to have to take it.
Chapter Five: The Vai'kesh and the Aegis of Death
Task: Follow the Vai'kesh Prophet
Well, the Prophet has run off with the Aegis, leaving you to slaughter all of his followers, who gladly go to their deaths. After they're dead you can follow the Prophet through the door, but first, check out the upper section of his meeting room; there are a couple of sanctuary doors here, as well as a pair of secret rooms obtained by pressing buttons to the east. One of the buttons is on the wall, the other is behind a pillar. Each of these secret rooms will themselves have secret rooms beyond them, one of which will possess a Mimic.
When you do start to chase down the Prophet, you'll have to follow him through the back passage he escaped through until it comes back out to the Forest. You'll be on the other side of the gate you had to bypass earlier. After hitting the teleporter, you'll come to A Large Vai'kesh Cavern, through which you'll pass to reach the Forest yet again. There is one secret area in the Cavern, near the landbridge, which is fairly easy to spot.
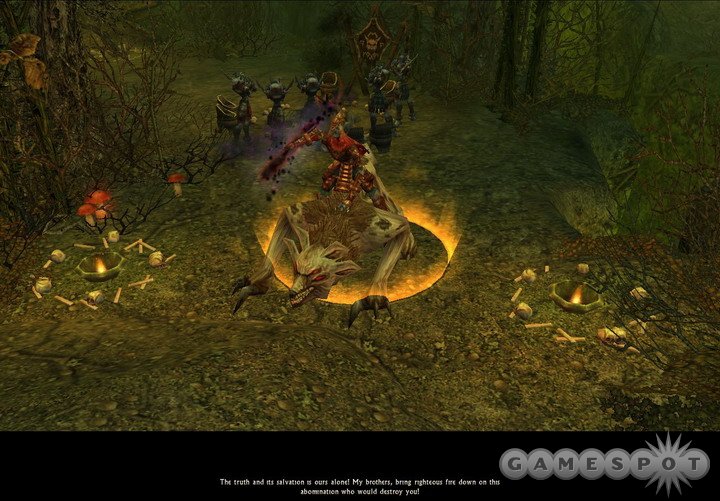
When you do pass back out to the Forest, you'll be quite close to the Prophet, but if you wish, you can head south to a Small Vai'kesh Prison, where Master Thestrin has finished summoning his Demon as part of A Family Heirloom, Part II. When you approach the Prophet, he'll ride off again, but before you give chase, enter the cave that his minions emerged from to witness the Vai'kesh ritual needed by Mage Lyssanore for the Dark Ohm quest.
Across the next bridge, you can find another Small Vai'kesh Cave to the west, which contains an Onyx Fragment you may need for the Viperclaw secondary quest. The door here is locked, so don't worry about it yet. Keep moving on until you reach the Western End of Arinth's Ravine teleporter. You may come across an odd beast here, called only ???, which, at level 100, is going to be impossible to kill. It seems to enjoy stealing items from your characters, or off the ground, so be sure to quickly pound on it; it'll drop whatever it's stolen before retreating back into the ground. This little guy is part of the Mysterious quest, which we cover in the General Tips section of the guide.
If you explore the Large Vai'kesh Cavern north of the trail, you'll find another door locked by a password. Hmm...nothing you can do about it now, so just take note of it and be ready to come back later on. Further on, you'll come to a Frozen Vai'kesh Cave, which is part of the Deru's Treasure Hunt secondary quest. Feel free to fight you way inside whether you have Deru or not; you can just warp back to town to add her when you need to open the Big Chest inside.
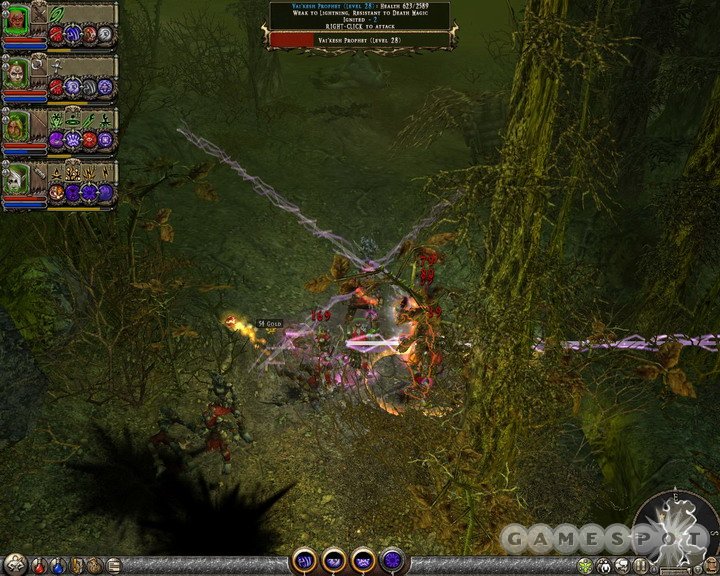
Shortly thereafter, you'll come across the Prophet yet again, who just refuses to face you in combat! The dastardly fiend! He'll send more troops after you, who fall easily. Exploring the cavern to the east will reveal yet another passworded door. This is getting kind of annoying.
Before long you'll reach the Eastern End of Arinth's Ravine teleporter, shortly beyond which the Prophet will finally give fight. He'll be surrounded by a bunch of Vai'kesh, and is something of a tough cookie on his own merits. Some of your powers might not work right due to the slope of the ground, so if you're going to use something like Waves of Force, be sure to lure the enemies onto flat ground before doing so. Also note that you can retreat as far as you like, so don't hesitate to hit and run to wipe out some of the opposing party members before focusing on the Prophet himself. Be sure to /spit on his corpse for making you run so far.
Task: Find the Aegis of Death
When the Prophet has finally been destroyed, you'll still need to follow the path in order to locate the Aegis of Death, which has apparently been sealed into one of the caves near the battleground on which you fought. The northern one just has a bunch of gold and treasure, as well as an incantation shrine. Use the Chant of the Dead here, and you'll be able to speak to the Ghostly Spirit inside the Vai'kesh Grotto nearby.
Exploring the Grotto will quickly lead you to a boss fight, against the Knotted Shambler.
Task: Defeat the Knotted Shambler
The fight against the Shambler is a bit more complicated than that against the Trilisk, but only marginally so. This beast has 25,000 hit points, so it's not going to go down quickly, and might not go down at all if you can't find a way to prevent it from regenerating its health. Whenever you attack it, it'll take a bit of damage, then call for the nearby leaves that crawl along the ground to attach themselves to it, thus replenishing its armor and health.
In order to prevent this from happening, you'll need to concentrate your fire on the six or seven Leaf Generators that are scattered around the chamber; these are what generate the leaves that regenerate the Shambler. If you take them out, there'll be no more leaves; if there are no more leaves, then the Shambler won't be able to regenerate itself; if the Shambler can't regenerate itself, it can't possibly withstand the might of your attack.
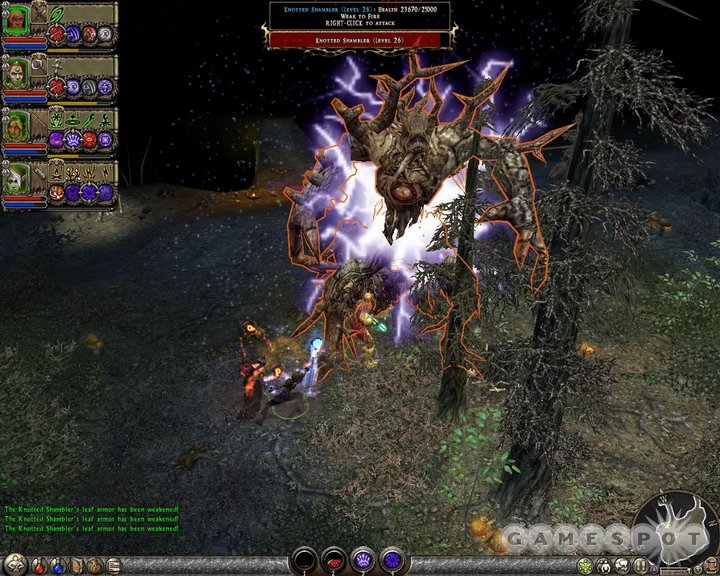
So, instead of going full-bore against the Shambler, just concentrate on the Generators first off. They only possess 5,000 hit points apiece, so they won't take many hits before they go down. When they do, you can go after the Shambler. Don't be surprised if it still attempts to regenerate; there'll be a few more leaves left on the ground after all of the Generators are destroyed, enough for him to get a few thousand hit points back, at a minimum. But they'll eventually run dry, allowing you to pound away without worry that your progress will eventually be wiped out.
The Shambler's most powerful attack comes in the form of a series of overhead slams from its fists. This can and will kill the weaker members of your party, so you might just want to run away as soon as you see the attack commencing. If you can avoid it, though, you shouldn't have a problem killing off the Shambler. When it's dead, grab the Aegis of Death and speak to the Azunite Scholar to gain your next quest.
Chapter Six: Princess Evangeline
Task: Find the Azunite Burial Grounds
Now that you know about Princess Evangeline leading the resistance, the Azunite Scholar will guilt-trip you into saving her from the clutches of the Dark Wizards. To do so, you'll need to find the Azunite Burial Grounds, so head through the Snowbrook Valley Portal to reach that zone.
You'll come out in the Garden of the Ancients. Before you head anywhere, let's find some treasure! To the east you'll find a Frozen Crypt, and in the southeast corner of that you can click a statue to reveal a secret area. When you move along the path, you'll soon come to a teleporter and a path that leads to the west, but before you follow it, it's worth knowing that you'll eventually be blocked by a guard that asks you to bring word of his three brothers before he'll allow you to pass on to the Azunite Burial Grounds. To complete his task, you'll have to find the Death Masks of his brothers, which are actually scattered in Frozen Crypts near this teleporter. Rather than backtrack later on, we might as well go ahead and grab the masks while we're in the area.
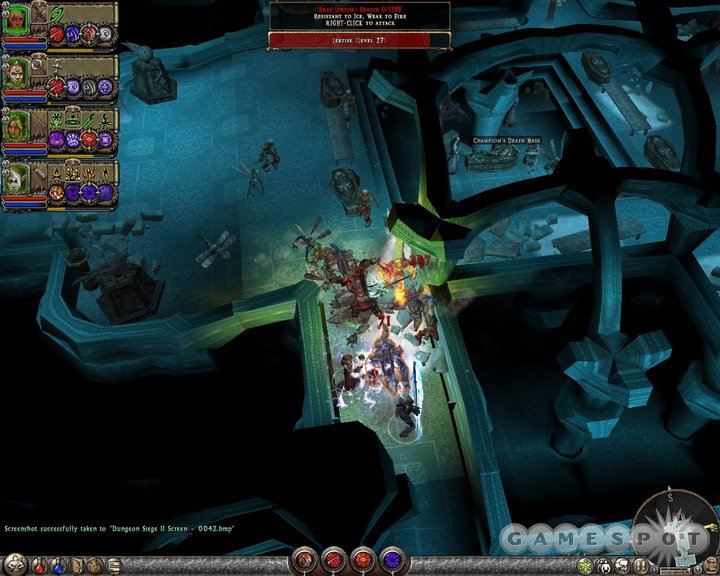
The first is directly to the south of the teleporter. Grab the Death Mask from the coffin in the center of the crypt, then check the three secret areas on its southern, eastern, and western walls. Another Crypt lies a short way to the east of this one, and also has three secret areas in it. The third Crypt is farther to the east.
When you have all three Death Masks, return to the teleporter and proceed to the west. You'll soon come across another Frozen Crypt...you know the drill. You'll eventually come to the Garden of the Ancients (South) teleporter, directly to the north of which is another of Amren's mushroom circles.
If you speak to Champion Rahvan, who stands near the teleporter, you'll be able to hand over the four Death Masks you've found, which will convince him that he's actually dead. This leads into the Rahvan's Curse secondary quest, but is necessary to do in order to gain access to the Azunite Burial Grounds, which Rahvan guards.
Task: Enter the Azunite Catacombs

If you proceed into the burial grounds, you'll immediately note a sequence of four glyphs on the ground, reading Death, Blindness, Sight, Life. Remember this sequence...there will be a test. You'll eventually come to a large, open room, with a cracking ice ceiling that falls onto the ground. Heading south will bring you to a teleporter, while heading west will bring you back to the surface world. Going west is optional, but it does reveal a ghost for the Spirits of Aranna sidequest.
After activating the teleporter, you'll come to the Azunite Catacombs, where a set of four pillars guards over a massive hole. Entering the correct sequence (black tree, purple eye, yellow eye, green tree) will open the way to the lower depths of the Catacombs.
Task: Find Princess Evangeline
Bringing yourself around to the south after you round the first corner here will bring you to the Lich's tomb and allow you to complete part of the Curse of Rahvan quest. From there, keep walking along the path until you reach a large, oval room where the gold star indicating your objective is located; this marks the location of Princess Evangeline, but she's not going to be rescued without a fight, and indeed, there is a big bad bossman here guarding her.
The Dark Wizard of Valdis is arguably the toughest boss fight you've yet encountered, since he possesses a lot of health, good defenses, and a lot of offensive tools, as well as spells that are just plain annoying.
To begin with, the Wizard will summon in a crystal shield to protect himself, which consists of three crystals that rotate around his body and protect him from harm. In order to hit the Wizard himself, you'll have to destroy the crystals, then aim for the body of your foe. In addition, he'll periodically summon three tough undead Azunite giant warriors; when these appear (such as at the beginning of the fight), it's best to just lure them away from the Wiz and deal with him individually.
Of course, the Dark Wizard isn't going to be sitting still while you pound on him. Most of his attacks are lightning based, with a single-target spell being what he'll use against anyone close enough to melee him, but his most annoying attack is a lightning field spell that he'll cast on your entire party at the same time. When you see circles of lightning surround everyone in your party, you'll have only a few seconds to move them before the fields collapse and deal a few hundred damage to each of them. Luckily, these fields can damage other enemies, so if you can back away from the undead Azunites when they're about to go off, they may wander into the fields and get zapped themselves.
Beyond that, all it takes to defeat the Dark Wizard is a little patience. You'll need to kill his crystals individually, then focus your attacks on him while his shields are down, using all of your powers. Eventually he'll re-raise the crystals and summon more skeletons, forcing you to run through everything again, but if you're getting up there on the power scale, you should be able to nearly kill him after two cycles of this. Towards the end of the fight he'll summon one massive crystal into the center of his little platform; while this is active, it'll cause small clouds of lightning to form over all of your party members, shocking them every few seconds. You can easily destroy this crystal, and thus the clouds, by attacking it, but the Wizard will usually just summon it back immediately, so it's better to just keep hitting the H button while concentrating all of your attacks on the Wizard to finish him off.
Chapter Seven: Snowbrook Haven
Task: Enter Snowbrook Haven Through the Servant's Quarters
After passing through the rest of the Catacombs via the passage that Eva opens up for you, you'll reach Snowbrook Valley, another icy wonderland. The path here leads primarily to the west, so follow it along, exploring any side paths that you find. Eventually you'll cross a narrow bridge, to the south of which is a Frigid Cave. If you still need a Rainbow Trinket for Twylis' Broken Staff, you can find one inside. To the north of that cave, next to the bridge, you can descend down a set of steps to reach an Ancient Elven Reliquary, part of the Arinth's Legendary Staff quest.
Keep movin' on, and you'll enter the Snowbrook Foothills, where you'll presumably find the servant's entrance to Snowbrook Haven itself. To the east of the transition point between the Valley and the Foothills, you'll find the second half of the Frigid Cave, where you can enter a sub-dungeon beneath the cave and find some loot - there are a pair of secret areas inside, if you happen to look around close enough. To the west, you'll find the Snowbrook Grotto, which initially just looks like any other frozen cave, but which is actually quite large, acting as kind of a secondary zone to the Foothills. If you head inside, you'll find five or six exits back up to the Foothills; you can actually go underneath the entire Foothills zone by walking through the Grotto. There are some Ancient Stone Doors within, as well, which you'll come back to for an Act III secondary quest.
If you're like us, you'll want to make sure that you explore thoroughly, so you can feel free to go through the entire Grotto, then go through the entire Foothills area as well, just to be sure you saw everything. The Foothills zone is substantially shorter than the Grotto, though, so if you're just looking to get through to the Haven as quickly as possible, the overland route is the way to go.
After crossing a bridge, you'll come to the Snowbrook Mountains, where the Haven's besiegers have set up their encampment. After you witness the pretty cutscene, you'll find the Eastern Face teleport location, which is close to the Servant's Quarters entrance to the Haven. By our calculation, the Haven's design requires the servants to march something like seven miles beyond the main gate, through the snow and past innumerable monsters, just to get here - but hey, it's their own special entrance! Lucky them!
Task: Find the Throne Room and the Display Case Key
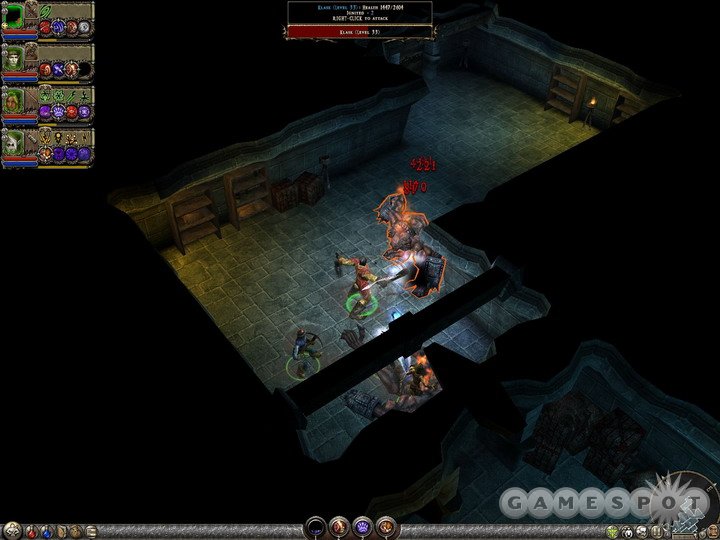
Start checking around the Servant's Quarters until you come to a sleeping area and barracks. Your general path here will lie to the east, past the small chapel area, but before you head there, check out the western rooms to find an incantation shrine. A ghost is nearby, so use the Chant of the Dead to speak with him. There's also a Cavern of Frost, as well, but you can't do anything there just yet.
Move on into the Living Quarters, which will quickly lead to the Throne Room. If you recall the enemies that chopped through your forces on the Greilyn Beach, then you can probably guess what's going to happen when you click on the throne and obtain the Display Case Key; don't worry, as these mini-guards aren't as fearsome as the ones you witnessed at the start of your journey.
Task: Locate the Snowbrook Haven Commander
After you pass the Living Quarters' teleporter, you'll come to a platform elevator; before using it, explore the nearby rooms to find another Mimic. The elevator will lead you up to the Snowbrook Haven Courtyard, where you'll find the Commander.
Chapter Eight: The Siege of Snowbrook Haven, Part II
Task: Destroy the Brall on Top of the Inner Keep
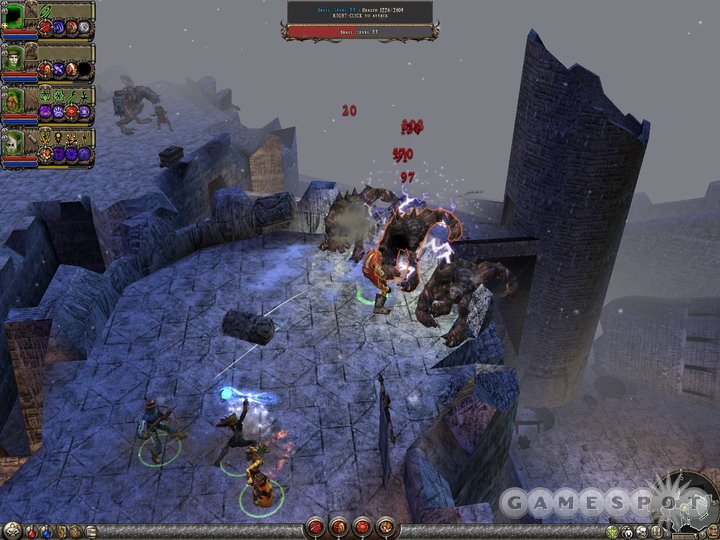
The Commander is being pinned down by rock-throwing creatures on top of the Inner Keep near her position; if you manage to get up there and destroy them, she'll be able to rally the troops and hopefully repel the invaders.
In the Dining Hall below the Commander, you'll find Soldier Kiernan, who fits into the still-ongoing Leilani's Sorrow secondary quest from Act I. If you still have the Lucky Statuette of Xeria on your person, you can give it to him in exchange for the Morden Head on a Pike. Yay!
After a long jaunt through the eastern castle halls, you'll come to the Inner Keep, where it's a simple matter to climb to the top of the walls and kill the Brall. Doing so will allow you to drop down via a nearby elevator (feel free to explore the Inner Keep, but there's not much to see), where you can speak to the Commander again.
Task: Defeat the Dragon
More Morden will break through the northern barricade, but with a few powers, they should be easily dispatched. Unfortunately, a more serious threat will soon appear, in the form of a Dragon that will perch itself atop the walls of the keep. Like any good delegator, the Commander is going to leave it up to you to take care of the beast. To do so, head back up to the Inner Keep and head towards the ballista on the walls.
Talon can, indeed, only be defeated with the ballista here; he keeps his distance from the platform it's on, so you won't be able to hit him with ranged weapons or spells. Killing him, then, is a matter of aiming the ballista and firing it at him while he sits in one of the five positions available to him. You can turn the ballista by clicking on the wheels on its left or right, while firing the ballista is accomplished by clicking on the contraption itself. You'll obviously need to be aiming directly at him to hit Talon, which can be difficult to accomplish given the fact that he'll be shooting fireballs at you the whole time.
The fireballs are going to be coming at you whether Talon's on the ground or in the air, and do a small amount of damage on impact. They're really going to be annoying with their secondary burning, however, which can cook your weaker characters if they happen to stand in one for too long; keep moving, then! These fireballs can also impact the ballista, preventing it from turning or firing. If it's too hot to touch (i.e. it looks like it's superheated or on fire), then you won't be able to use it. More often than not, some parts of it will be impacted while others will be usable, so even if you can't fire it, you'll usually still be able to turn it, and so on.
Each ballista arrow will take off around 15,000 of Talon's 100,000 hitpoints, so you'll have to go through this rigamarole quite a few times before you can actually kill the dragon. In the meantime, the catapults outside the castle walls will be dropping Durvlas onto the platform. These guys will only appear when Talon's in the air, so you won't have to worry about aiming the ballista and fighting them at the same time. Since you can't use your powers on Talon, use them on the Durvlas to quickly take them out.
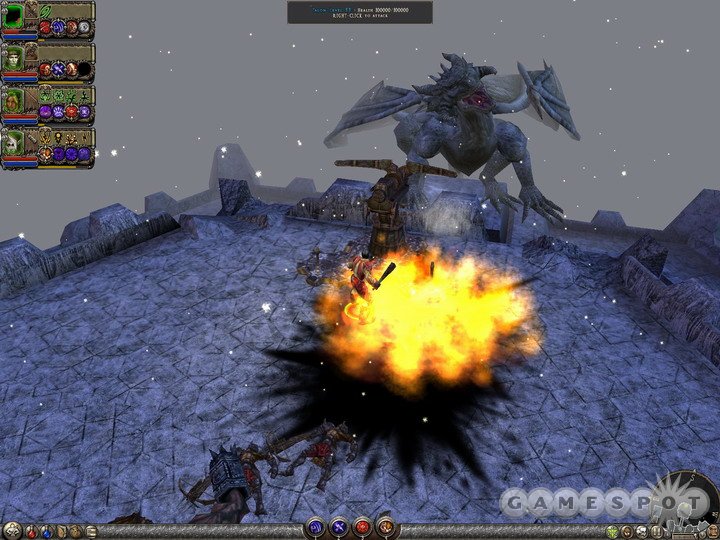
There are two tips to keep in mind here. One is that you should try to reposition the ballista so that it's pointing straight out to the middle of the five positions that Talon can use while he's in the air. If you fire at him while he's straight to the west and leave the ballista in that position, then you'll have a hard time re-aiming it if he happens to land all the way in the east. Keeping it in the middle will keep your aiming time down, and thus make it less likely that a fireball will fry the ballista while you're turning it.
Secondly, keep in mind that you don't have to bring your whole crew onto the platform with you. If you use the Wait command (bindable in the Hotkeys menu), you can select the character with the most health and/or fire resistance and use him to head out and aim the ballista. This reduces the chances of having a weaker character burned up by the flames, and you can still bring them forward to deal with the Durvlas with a quick Mirror command.
Task: Retrieve the Aegis of Blinding
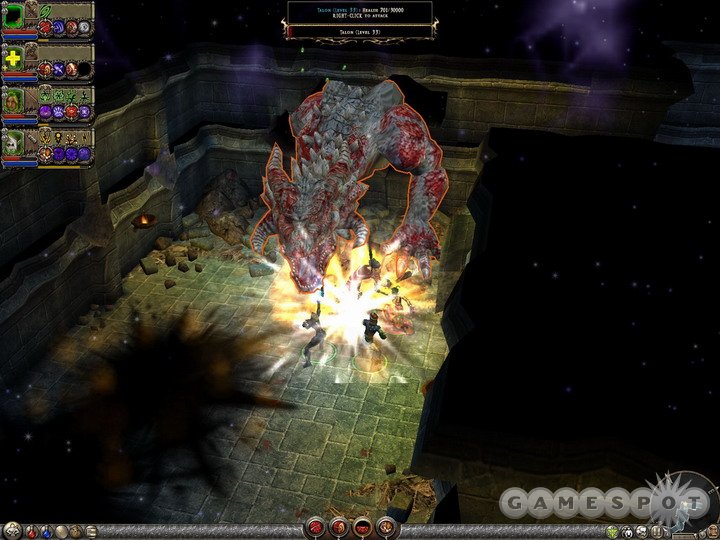
Although the Commander is soon to be dead, she'll entrust the Reliquary Key to your care, allowing you to head into the keep's vault in search of the Aegis within. Picking it up is easy, escaping from the vault is not, as you'll have to fight against Talon yet again, as he somehow manages to burrow his head through a solid brick wall in search of vengeance for the whole bolt-through-the-neck deal. This fight isn't quite as complicated as the last one was; just keep your party out of the fireball pools, tap H like a maniac, and use your powers to deal as much damage as possible to the beast while it's not shooting out fire from its mouth. If you need to heal up, retreat back to the room where you obtained the Aegis to get out of range of Talon's fireballs.
After speaking to the Azunite Scholar, you'll be able to leave via the teleporter nearby and reach Kalrathia, a human town that's been occupied by the Morden. Speaking to the leader of the town will launch you into Act III.
Act II Secondary Quests
Quest One: Twylis' Broken Staff
Location: Twylis gives you this when you speak to her in Aman'lu.
If you speak to Twylis, she'll explain to you that she has a staff of her grandfather's that doesn't seem to work properly. Apparently, it needs a certain kind of reagent as a headpiece before it can properly channel magic. Twylis doesn't remember what kind of reagent it was, only that it sparkled like a rainbow.
The reagent you require is a Rainbow Trinket. You can find one in a Frozen Cave in Snowbrook Valley. When you return one to Twylis, she'll hand over your reward, which is likely going to be a unique item. If you don't like what you get, try saving your game before turning in the trinket to Twylis and reloading when you see what she drops.
Quest Two: A Dark Ohm
Location: Mage Lyssanore gives you this when you speak to her in Aman'lu.
If you've been curious about how to speak with ghosts, then Mage Lyssanore can help. Unfortunately, she can't just spill the beans right away, because she doesn't quite know herself. Instead, she asks you to go into the Vai'kesh forest, find a Vai'kesh ritual chamber, and eavesdrop on their chanting; she believes that these chants are the key to communicating with the numerous spirits throughout the world.
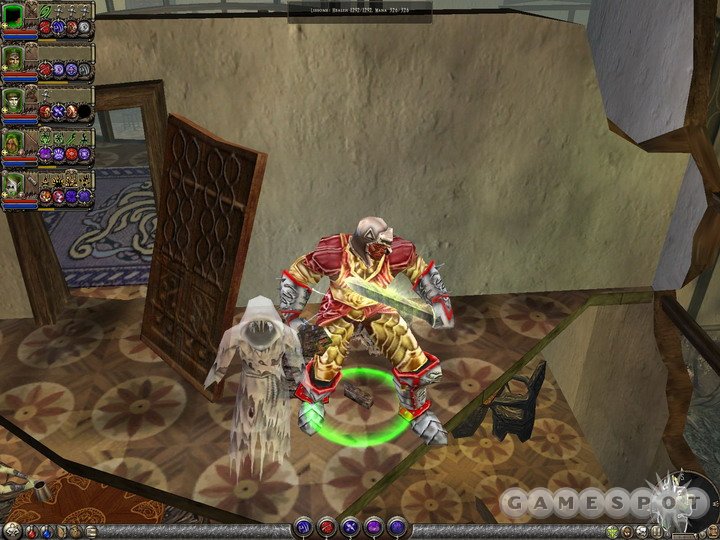
During your chase of the Vai'kesh Prophet, you'll eventually hit the Vai'kesh Forest (South) teleporter. Shortly beyond that point, you'll come to a cave where you'll overhear the chant after entering a room where a ritual is being performed. With it in tow, return to Lyssanore to complete the quest. Although this quest isn't directly related to other quests like Spirits of Aranna or Arinth's Legendary Staff, you'll need to complete it in order to speak to the ghosts in those quests.
Quest Three: Spirits of Aranna
Location: You'll gain this after you speak to any ghost while you possess the chant that allows you to do so.
There are eighteen Ghostly Spirits throughout Aranna, each with its own particular reason for remaining in the mortal realm. You won't be able to speak to them without possessing the Chant of the Dead, which you can obtain from Mage Lyssanore after reaching the Vai'kesh Forest. When you have it, speaking to any of the spirits will unlock this quest, which asks that you visit all of the spirits and put them all to rest by speaking to them. In most cases, this is going to be a simple matter of simply finding an incantation shrine, reciting the chant, and speaking to the ghost before it wears off (which takes five full minutes), but some ghosts will require special care. Each of the ghosts will appear on your map with a white star, so when you're in their vicinity you shouldn't have any trouble finding them.
Ghost One: The ghost here is at the very beginning of the Lost Valley of the Azunites, near where you entered it from the Ancient Azunite Shrine for the first time.
Ghost Two: The second ghost resides in the Hak'u Cave, just outside of Eirulan, near the bridge that you likely extended long ago.
Ghost Three: This one's just to the west of the Western Greilyn Forest teleporter, near the Hak'u door.
Ghost Four: Heading east from the Kithraya Valley teleporter will lead you to the Eastern Greilyn Beach. You'll have to head through the Lower Kithraya Caverns to get there. Alternately, you can use the Azunite teleporter that originally took you to the desert area and use that to warp right to the Eastern Greilyn Beach.
Ghost Five: This guy's one of the easiest to find; head to the Inn in Eirulan, then take the lift down to the falls and speak to him on the bridge.
Ghost Six: If you head west from the Temple of Xeria teleporter, then bend to the north to hit the incantation shrine, there's a secret area hidden there. Follow the stairs up to reach the ghost.
Ghost Seven: The Tranquil Cave is just beyond the second Morden Tower, behind a waterfall.
Ghost Eight: This guy's somewhat out of sequence, since he's in the Snowbrook Haven Servant's Quarters. He's behind a semi-hidden wall near the Cavern of Frost that will automatically pop open when you move through the room, spilling out Morden defenders.
Ghost Nine: After you defeat the Vai'kesh Prophet in the Arinth Ravine, you'll enter the Vai'kesh Grotto, where this ghost is located. The closest incantation shrine is in another cave nearby.
Ghost Ten: The ghost in the Aman'lu Inn is upstairs, on a balcony. (You can find an incantation shrine in the northeastern corner of town.)
Ghost Eleven: If you head downstairs into the cellar underneath Twylis' house, you'll find a secret area by clicking on one of the lamps. Head down until you reach an incantation shrine, then find the button on the wall opposite the door leading to the shrine to reach the ghost.
Ghost Twelve: When passing through the Azunite Burial Ground, you'll come to a large room with a cracking ice ceiling. Exploring the western side of this room will reveal a passage back up to the Garden of the Ancients, where the twelfth ghost resides.
Ghost Thirteen: This one's located just to the east of the teleporter in the Eastern Plain of Tears.
Ghost Fourteen: This ghost is situated on the walls of Kalrathia, in the southwestern corner of town. The nearest incantation shrine is just outside the northern gate.
Ghost Fifteen: In the Mines of Kaderak, just to the north of the Upper Mines of Kaderak (East) teleporter, you'll find this ghost. There's an incantation shrine to the east of his position, across a small bridge.
Ghost Sixteen: This ghost is located in the southeastern corner of Darthrul's main square. You'll need to have access to the Crossbow District to get to an incantation shrine and speak to him, though.
Ghost Seventeen: You can find the penultimate ghost during the waterway trials in Act III, in the Grallan trial beneath Kalrathia. A nearby incantation shrine will let you talk to him.
Ghost Eighteen: The final ghost is in Zaramoth's Horns, in an exterior area beyond the first teleporter there.
Upon finding the final ghost, you'll complete the quest, and earn a boatload of rare items, including possible a unique or set item or two.
Quest Four: Viperclaw
Location: Eumenidie gives you this when you speak to her in Aman'lu.
Eumenidie, when queried, will spill out an ancient tale about a powerful reagent called Viperclaw, and ask you to find three ingredients which, when combined, will form the reagent. She needs a jagged arrowhead, a Griffon feather, and an onyx fragment.
Each of these can be found as normal drops off of enemies, but with the number of reagents available to you, you might have to wait a while to find them. They can also be found in specific places, though, as well. Jagged Arrowheads can be located in the river north of Aman'lu, just south of the first bridge you encounter after leaving town. A Griffon Feather, on the other hand, can be located in the Elen'lu Isles, by heading east, north, east, and north from the entrance and passing through the Flooded Chamber there. The Onyx Fragment can be found in a Small Vai'kesh Cave near a bridge during your pursuit of the Vai'kesh Prophet.
When you have all three reagents, return to Eumenidie and you'll obtain a Viperclaw reagent, which adds around 20 min and max damage to an enchantable ranged weapon. If you actually enchant weapons, then this is one reagent you'll want to use.
Quest Five: Arinth's Legendary Staff
Location: Eolanda gives you this when you speak to her in Aman'lu.
Apparently, there was once a supremely powerful staff that belonged to a powerful Elven mage. If you want to recreate the staff and use it for yourself, you'll need to find a Jeweled Shaft, a Focusing Stone, and a Carved Rod. These are going to be scattered across locations throughout the game, so it'll take you quite a while to accumulate what you need.
The first part of the staff, the Focusing Stone, can be found back in the Cliffs of Azunai. If you head to the Western Cliffs of Azunai teleporter, then walk forward to reach Isteru's Caverns, you should shortly come across a section of the cave that has been transformed from rock into a more dungeon-like stone wall interior. Inside this area, you can press a button on a set of steps near an incantation shrine to reveal a portal leading downwards. If you use the Chant of Death at the incantation shrine, then head down into the Ancient Elven Reliquary at the bottom of the platform, you'll be able to speak to the ghost there, who'll allow you to open the chest which holds the Focusing Stone.
The Jeweled Shaft is found in the Snowbrook Valley. If you follow the path as it leads out of the Azunite Catacombs and head west, you'll eventually come to a narrow bridge that spans a chasm. Heading north from the western side of the bridge, you'll find a set of stone steps leading down to a circle with a difficult-to-spot lever next to it. You'll need to proceed farther along the path to the west in order to reach an incantation shrine, but when you do, return to the circle and descend to find the Shaft.
The Carved Rod is in the Northern Vai'lutra Forest, which unfortunately doesn't have a teleporter. To reach it you'll have to either warp to the Aman'lu Hills teleporter and head north, or go to the Elen'lu Isles teleporter and travel west. The Ancient Elven Reliquary here is located near the spot where the trail bends to the east, to the north of the incantation shrine. If you dip into a little dell on the northern end of a zone, you'll find another platform leading down into a reliquary, where you'll obtain the Rod.
If you bring all of these pieces back to Eolanda, she'll recreate Arinth's Staff for you, which is probably going to be the best weapon you've found thus far for your Combat mage, unless you've found the Chaos Grips of the Chaos' Avatar set.
Quest Six: Arinth the Mad
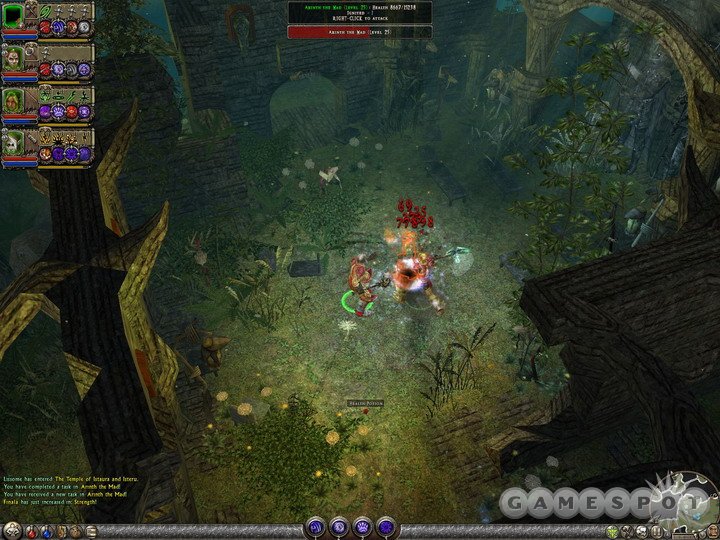
Location: Find the Elven Prison in the Lost Valley of the Azunites and free Arinth from his cage.
The Elven Prison is behind a number of secret doors in the Lost Elven Ruins, which is directly to the east of the teleporter in the Lost Valley of the Azunites. It initially doesn't seem to lead anywhere, but there are a number of secret buttons inside; if you press all of them, you'll come to the Elven Prison, where Arinth has been holed up for millenia. If you equip Arinth's Staff and use it on the central pillar of the prison, you can free him, and he'll immediately run off.
If you track him down in the Temple of Istaura and Isteru, near the Elen'lu Isles teleporter, he'll politely ask for his staff back. You'll be forced to kill him, sadly enough, which will net you a couple of skill points, as well as the decent Arinth's Robe, which will be usable on your Combat mage unless, again, you've found the robe from the Chaos' Avatar set.
Quest Seven: Mithrilhorn
Location: Pet Seller Galeron gives you this when you speak to him in Aman'lu.
When you talk to Galeron in Aman'lu, he'll tell you about a wonderful beast he saw a Morden mage summoning. Although he can't sell one to you, he tells you of someone who might know how to summon such a beast: Khartos the Wise, a powerful magician in his own right. He doesn't know precisely where Khartos is to be found, although he thinks he may have moved somewhere on the Greilyn Isle, and advises that you check around in Eirulan.
Don't bother; Eirulan seems to be something of a red herring, because no one there has ever heard of the guy, so far as we can tell. Khartos actually resides in the Inn in Kalrathia. If you travel there and defeat him in a duel, he'll agree to help you summon the Mithrilhorn, and give you directions to the rift site where such a task can be accomplished. To reach it, head to the Northern Plain of Tears teleportation site and proceed northeast past the large concentration of flies and Morden enemies near an elevated platform, and you'll reach Khartos soon enough.
As per the previous pet shop quest, you'll need to defend Khartos while he's summoning the beast through the Rift gate here. The influx of Durvlas here will be substantial, but with an area-of-effect power like Waves of Force or Thunderous Shot, you should be able to pop most of them off in one go, easily allowing Khartos to summon the Mithrilhorn. When that's done, return to the pet shop in Aman'lu for your reward.
Quest Eight: A Family Heirloom, Part II
Location: Speak to Athelas in the Inn in Aman'lu. This quest is only available if you complete A Family Heirloom in Act I.
Athelas will tell you that Master Thestrin is attempting to summon a demon into the world, and tricked you into obtaining the Heirloom Sword for him to further his aims. He asks you to join him in the Vai'Kesh Forest and defeat the demon.
When you reach the southern end of the Vai'kesh Forest (near the South Vai'kesh Forest teleporter), head south to find a Small Vai'kesh Prison where the demon has been summoned. You know what to do. After beating the demon, speak to Athelas nearby to finish this quest.
Quest Nine: Lothar's Innocence
Location: If you speak to Roland in the Inn of Aman'lu while Lothar is in your party, you'll pick this quest up.
Roland seems to believe that Lothar once stole a golden cloak of his and hid it in a cave in the forest. Roland's apparently not too bright, because if he was, he would realize that there's absolutely no point in doing something like that, but since he seems to be a bit of a dunderhead, we'll just go out to the cave and see what we'll see. Even before playing this quest, we're going to predict that it's Lothar's evil brother who's actually responsible.
Well, we're wrong; it's actually a half-giant named Magrus, whom you'll find in a Watery Cave in the Southern Vai'lutra Forest. If you speak to him, he'll immediately warp away, but will leave you a key to a house, which happens to be elsewhere in the forest, near the transition point where the forest thickens. When you find it, you'll be able to enter, defeat Magrus (who has a bunch of health points, around 7,000 or so), then return to town and explain to Roland what happened and get your reward.
Quest Ten: Deru's Treasure Hunt
Location: Speak to Prospector Albain, who's down the hill behind the pet shop in Aman'lu, while Deru is in your party.
If you speak to the prospector while Deru is in your group, he'll explain that he's been attempting to find some treasure that's been described on a map of his for half of his life, but has been unsuccessful. He'll give you the map, though, along with a Prospector's Key. If you examine the map in your Lore menu, you should recognize that it leads to Razka's Ruins, back near the Southern Greilyn Forest teleportation waypoint.
If you head back there with Deru in your party, you'll be able to explore Razka's Ruins, a smallish dungeon with a single large treasure chest as a distinguishing feature. Opening it will net you another key and a riddle: "Use the key in the frozen heart of the corrupted forest." Hmm...haven't seen any corrupted forests yet, have we?
Well, you will shortly enough, and when you explore the Arinth Ravine zone, you'll stumble across a Frozen Vai'kesh Cave within its boundaries. With Deru on hand, you can open a chest inside to reveal another key and another riddle: "In the sands of northern tears lies a timeless deception."
To solve this riddle, head to the Northern Vale of Tears and head east from the teleporter, heading off the path. If you keep walking east until you reach a the Magical Oasis, you'll be able to unlock the door near the lectern there. With Deru in your party, open the chest to reveal...some magical items. Yay? This chest marks the end of the treasure hunt; there's nothing particularly special inside, but we guess that's the lesson.
Quest Eleven: Mask of the Assassin
Location: Enter the house near the pet shop in the southeastern corner of Aman'lu and grab the mysterious stone on the table there.
When you grab the stone from this house, you'll be ambushed by an assassin, who almost kills you. An elf who witnessed the attack will clue you in on your sudden victimization; it appears that you've picked up a Lantiir Stone, which marks you as an assassin's target. Until you find a way to get rid of the stone - or get rid of the assassin - you won't be able to sleep easy at night.
Anyway, the elf recommends that you speak to Enchantress Valeria in Kalrathia to resolve your problem. You won't get there until the beginning of Act III, though, so for the moment you won't be able to proceed. When you do hit Act III, though, you'll be able to find Valeria in the magic shop in Kalrathia. If you explain your problem to her, she'll ask you to hit the Mines of Kaderak and bring her back a Dwarven Mithril Ring.
On the western end of the Upper Mines, near where you first enter, there's a suite of rooms at the top of a set of stairs which overlook the end of the cart trail. If you enter the southernmost of these rooms (the one closest to the top of the stairs), you'll find a small lever near the rear wall; pull it to reveal a hidden tomb, inside which you'll find the Mithril Ring. Bring it back to Valeria, and she'll give you the Dwarven Mithril Ring of Sight.
If you slip that onto one of your characters, then head upstairs to the Inn, you'll find Merchant Kendril in one of the rooms behind the innkeeper (the gentlemen where you switch party members). Speaking to him will cause the Assassin to reveal himself and attack you. Killing him, which should be a rather easy affair, will end the quest and net you a complete set of matched dual-wielding swords.
Quest Twelve: The Aman'lu Arena
Location: The bartender in Aman'lu inn will begin this quest.
He'll throw out a few tales of deeds you were supposed to have done, but deny that you know anything of what he's talking about, and he'll eventually ask you to take an elevator in the room behind him. Doing so, then walking down a long set of steps, will lead to the Aman'lu Arena, where Daesthai will begin the quest proper.
A lot of RPGs have featured this kind of arena battle, with Knights of the Old Republic being the most recent to spring to mind. It's pretty simple: you'll be able to fight against successive waves of enemies to attempt to earn prizes from each round. You'll have to pay Daesthai a token fee to enter the fight, but you'll usually earn that cash back from the boss that you kill, and you'll also get a key that unlocks one of the nine treasure rooms in the arena. If you can defeat all nine fights, you'll win a special prize. You don't have to fight all nine waves of enemies in a row, and in fact you won't be able to complete the entire arena the first time you encounter it, as the enemies quickly ramp up in level, forcing you to leave and come back. If you've done a good job levelling your party during the first act, then you should be able to reach and defeat the third tier of enemies, but going beyond that is pushing your luck.
- Round One: 24-level miniboss.
- Round Two: 26-level miniboss.
- Round Three: 28-level Vai'kesh miniboss. The soldiers here get angry if you attack the boss, so be sure to get your melee character to go after the boss before anyone else does.
- Round Four: 30-level miniboss.
- Round Five: Normal 33-level enemies, no miniboss.
- Round Six: Big jump here, as you'll be facing off against a level 38 miniboss and minions.
- Round Seven: The miniboss here is actually lower level than in round six, but the minions pack a large punch from range; it'll be helpful to have a mythrilhorn or a shield-using warrior here to Provoke these guys.
- Round Eight: 39-level miniboss, numerous minions.
- Round Nine: Large number of level 39 Qatall. All of these guys hate characters that use powers, so be sure to have your melee character do so before anyone else does.
- Championship Round: This is actually easier than round nine, in our opinion. There are two minibosses, but the minions are level 37 Rustguards that move quite slowly. Kill the minibosses with powers first, then use area-of-effect powers on the Rustguards to kill them.
After defeating the Championship Round, you'll be able to purchase the Light Naiad from Daesthai. You'll also earn the Golden Key, which can be used to open a door in the ninth treasure room which leads to yet another treasure chest. Inside you'll find another horde of treasure, along with a Mysterious Token. This is part of the Mysterious Quest, which we cover in the General Tips section of this guide.
Quest Thirteen: A Servant's Haunt
Location: After Finala repairs the bridge leading to the south portion of Aman'lu, speak to Eldoriath Wilwaren in one of the houses there.
Eldoriath spins a tale of his uncle, who was apparently put to death for a crime he didn't commit, and now haunts the estate of his former employer. He asks if you might be able to find any witnesses to the crime, examine their stories, and, if possible, speak to the ghost of his uncle to see what he has to say for himself.
When you obtain the Chant of the Dead via the Dark Ohm quest, return to the Lakreth Estate, which is located near the Southern Vai'lutra Forest (South) teleport. You'll need to use the incantation shrine near the ruined caravan, then descend into the estate, as there's no shrine within. Speaking to the ghost will then unlock the nearby door, allowing you to pick up a Portrait of the Lady of the Estate. If you keep on speaking to the ghost, he'll continue to unlock doors, leading you to find a Lock of Golden Hair, a letter, and the Jewels of the Estate, all of which contributes to prove that the servant had no part in the murder of his master.
Bringing all of this back to Eldoriath in Aman'lu will wrap up this quest, and open up the next one for you.
Quest Fourteen: A Servant's Haunt, Part II
Location: After completing A Servant's Haunt, speak to the ghost of Threnith in Eldoriath's house.
Threnith is glad that his name has been cleared, but he wants you to find out who really murdered his master and bring them to justice. You'll need to start by speaking to Lady Levreth, in the Inn in Eirulan. If you prod her, she'll quickly spill the beans, saying that it was her brother, Wethril of Aman'lu, who committed the murder. If you then return to Aman'lu and confront Wethril, who stands next to Celeb'hel in the main town hall, you'll be forced to kill him. You can then speak to Celeb'hel for your reward; be sure to save before talking to him, though, and you can leave the game and come back as often as you like until he drops something you actually want. You'll usually get one or two unique/set items out of it, so this is worth doing.
Quest Fifteen: Amren's Vision
Location: When you have Amren in your party, return to the circle of mushrooms in Eastern Greilyn Jungle, and you'll receive a vision of his.
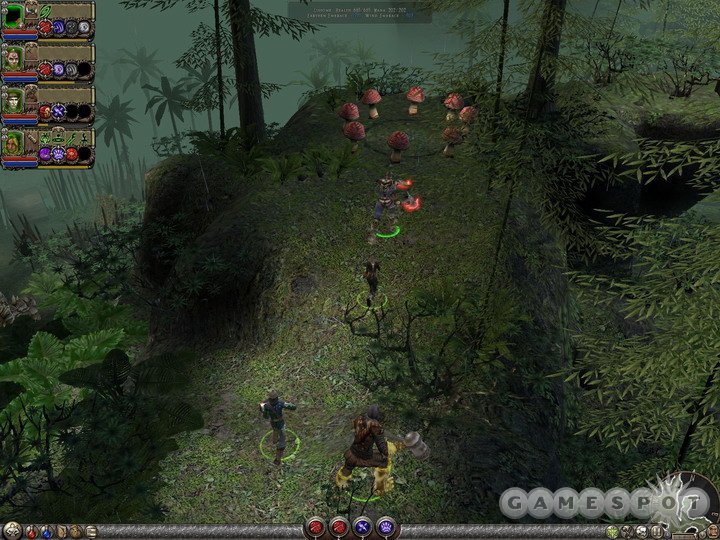
There are four mushroom circles scattered throughout Aranna, each of which has a secret shrine hidden underneath it. Amren's vision seems to indicate that a great treasure awaits you if you manage to find and explore each of these shrines, so get started!
Shrine of Life: The first shrine is located in the Eastern Greilyn Jungle, on a promontory between the entrance from the southern jungle and the Eastern teleporter. If you have Amren in your party, you can use one of the mushrooms to enter the shrine beneath the circle. You can then use him to click on the symbol atop the Tree of Life to polish off this shrine.
Shrine of Sight: This is on a promontory connected to the Southern Vai'lutra Forest (North) teleport location.
Shrine of Death: This is located north of the Garden of the Ancients (South) Teleporter.
Shrine of Blindness: Located near the transition between the Ruins of Okaym and the Eastern Plain of Tears.
After activating the statues in all four shrines, the portals in the center of each of them will open. They all lead to the same place, another Mysterious Shrine, which holds a large chest, inside which Amren will find the Virtuous Rebellion longbow and complete his journey.
Quest Sixteen: Finala's Contempt
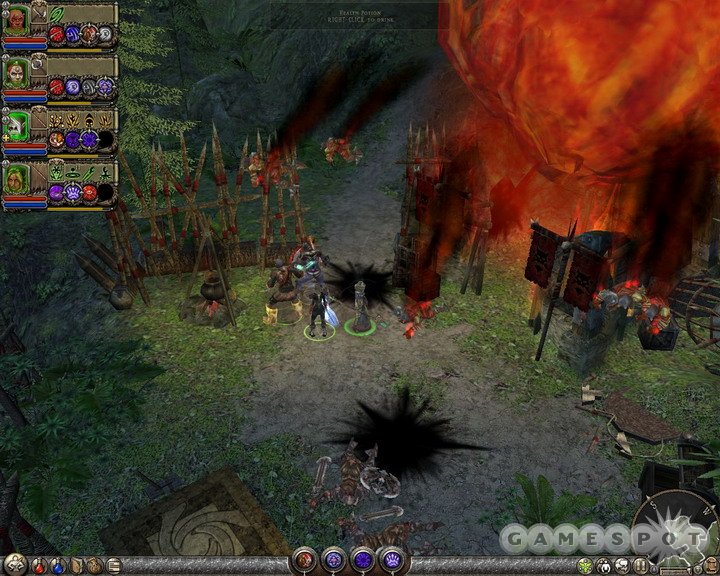
Location: When you obtain Finala's services, you can obtain this in the Upper Kithraya Caverns.
After you get Finala in your party, take her to the Kithraya Valley teleport waypoint and head backwards into the Kithraya Caverns nearby. You'll enter quite close to the broken lever that you had to pass by earlier; Finala is quite capable of fixing it though. If you enter the Morden Intelligence center, you can open the chest there to find documents detailing the location of four more Morden Towers, which are presumably still inhabited and thus still a threat to the Dryads. It's up to you to find those towers and bring them down!
In order to do so, you're going to need to keep Finala in your party. To begin with, head to the Southern Greilyn Forest teleporter and start walking back towards Eirulan from there. You'll see the star indicating the tower's location on your map, but you'll need to keep walking on until you reach a set of steps leading to some Abandoned Ruins before Finala can find the path leading to the tower.
The other three towers are all located behind the same wall, to the north of the Northern Greilyn Forest teleportation checkpoint. Firing them all will net you another map and a Morden Elevator Gear, but you won't be able to make good on your discovery until you reach the Morden city of Darthrul.
When you do finally enter Darthrul, you can find the hidden Durvla Hatchery by heading east from the city's main square and bringing Finala to the silver star on your map there; she'll automatically unlock the entrance to the hatchery and let your party head inside. All you need to do to "destroy" it is head inside, kill everything that moves, and loot the Big Chest at the end. Although the eggs seem to be as hardy as ever, this apparently prevents the Durvla from hatching, or something. You'll receive another piece of the Morden elevator in the chest, as well.
It'll be a little while before you reach the Northern Desert of Kaderak, but after you clear Kalrathia of Morden, you'll be able to warp to the southern part of the desert and walk north from there, where you'll find the Large Morden Intelligence Camp, which holds a number of Morden, obviously. They must've been starving, though, since the elevator was broken and the pieces were scattered all over Aranna.
Head inside and kill the Ripper Champion that's acting as a mini-boss; this will de-magicify the gate nearby and let you move on. Opening the chest at the end of the little cave there with Finala will complete the quest.
Quest Seventeen: Rahvan's Curse
Location: Speak to Rahvan near the Garden of the Ancients (South) teleporter.
After talking to Champion Rahvan, who stands near a crypt and blocks its entrance, he'll ask you to retrieve the Death Masks of his three fallen brothers, which reside in Frozen Crypts to the northeast. To his surprise, there are actually four Crypts, and four Death Masks, one of which belongs to him, since he's a thousand-year-dead ghost, enslaved by a Lich to act as a guard for the Lich's crypt. If you bring him back all of the Death Masks, he'll give you a Chant that will bring the Lich to light and allow you to destroy it.
After reaching the lower depths of the Azunite Catacombs, wheel around and head south to reach the tomb of Letiso. There's a large mark of Death on the floor that acts as an incantation shrine; if you recite Letiso's name (Rahvan's gave you it as a chant), you can summon the beast and engage it in combat. Letiso actually isn't all that difficult, especially if you can lure out the animals in his lair and take him on in four-on-one combat. Be careful of looting his lair, though, as you can spawn a Bone Minion in, which has around 30,000 hit points. Even that shouldn't be too difficult for you to beat at this point, though.
When you return to Rahvan with his soulstone (which you obtain automatically for defeating the Lich), he'll reward you with a pile of items before fading away into the aether.
Quest Eighteen: Evangeline's Folly
Location: After getting Evangeline into your party, return to the Southern Vai'lutra Forest (south) teleporter and speak to Mylandril.
It appears that the soldiers that were guarding the caravan that held the Aegis of Death were kidnapped by the Vai'kesh after the attack. Evangeline understandably wishes to retrieve them from their captivity, but you don't have many clues to go on; Mylandril mentions a Vai'kesh stronghold in the Vai'kesh forest, but doesn't have any specifics.
If you recall the portion of the game where you had to follow the Vai'kesh Prophet, then you may recall that there were three caves with locked doors in them which you weren't able to pass through, each of which was apparently guarded by a Vai'kesh on the other side. The first of these is in a Small Vai'kesh Cave near the end of the Vai'kesh Forest, almost equidistant to the Vai'kesh Forest (South) and Western End of the Arinth Ravine teleports, near a small, narrow bridge. If you head into this prison, kill the minibosses, and free the soldier inside, you'll learn a password.
To the east of the Western Arinth Ravine teleporter, you'll find a Large Vai'kesh Cavern, within which is the second prison. The soldier inside doesn't have any more information than the first one does, although she does repeat the same Mario reference as before. You can still loot the rest of the enemies here for a decent amount of treasure, though.
Directly to the north of the Eastern Arinth Ravine teleporter, you'll find the entrance to the third and final stronghold. Clearing out everything in here will allow you to rescue Jessic, which, in turn, will conclude the quest.
Act III: Primary Quests
Chapter One: Restore Kalrathia's Water
Task: Follow the Aqueduct
After speaking to Lord Kalrathia, the diminutive ruler of the town of the same name, he'll reveal that the Morden have disabled his town's water supply and set up a beast to guard the aqueducts that formerly supplied the dwelling with water. He'll ask you to wander out to the desert, slay the beast, and restore the water supply, as the first step towards a bit of rapprochement between you and he.
If you leave via the northern gate, you'll be able to follow the path for a ways until you come to a teleporter, where it branches to the north and to the east. To the southwest of the teleporter, there are some ruins near a tower; press the hidden button to find Prospector Garanth, who will progress your Lelani's Sorrow quest. To the east, you'll be able to pursue the Lost Jewels of Soranith, Mithrilhorn, and Deru's Treasure Hunt quests, but your final destination is to the north, inside the Water Chapel.
Task: Restore Kalrathia's Water
The Ganth that guards the aqueduct source is big and mean and all that, but he's still just one guy; you shouldn't have any trouble taking him out if you use your best single-target powers. When he falls, fight through the Morden to reach the interior of the Chapel, and press the button on the wall to restore water to the ducts. With that accomplished, pull the lever on the stone nearby to reveal a secret chest, then warp back to Kalrathia to confer with the Lord.
Chapter Two: The Morden Chief
Task: Enter the Morden City of Darthrul
Walk out into the Eastern Plain of Tears to head for Darthrul. If you search north of the path, you can find the Kalrathian Nexus, which you'll need to enter to complete that miniquest. Further to the east, though, is the Eastern Plain of Tears teleporter, which happens to have another Ghostly Spirit near it. As per usual, find the nearby incantation shrine (it's off further to the east), then return to the ghost to set it to rest, etc., etc. Further to the east, past the incantation shrine, there's a Mysterious Cave which houses Osric, the NPC that will let you advance in the Sartan's Suspicions quest.
Further down the path, you'll reach the Ruins of Okaym zone. To the northwest of the entrance to the zone, you can find the fourth and final Mysterious Shrine for the Amren's Vision quest. Further down the path you'll find the entrance to the Large Abandoned Shelter.
Exploration Time!
The Shelter is technically optional, so feel free to skip it if you wish to do so. Inside the Shelter, you'll soon come across a pile of stones: these are Stones of Life, so go ahead and pick up a couple, then keep walking until you reach a room with a number of magical beams of energy arcing back and forth. You'll note that there are four pillars here that are currently not part of the magical display, each of which has a symbol for one of the types of magic atop it. You can probably see where this is going.... Go ahead and place the Stone of Life atop the pillar with the tree on it, then start looking for the other three types of stones.
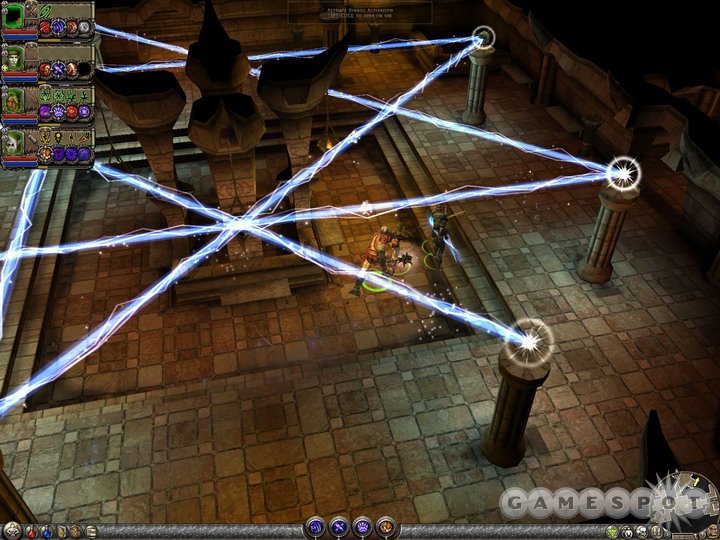
If you walk to the south, you'll eventually come to a rough cave area. Moving east at the fork will take you to a dead end with a pile of Stones of Sight. If you then backtrack and head west, you'll come to Stones of Blindness; picking one of these up will open a shortcut back to the magic room.
Head north now and you'll find yourself in a little maze of small rooms, which will eventually lead you to a Golden Chalice, the purpose of which is currently unclear. Picking it up will unlock another secret path, which eventually results in your being able to obtain Stones of Death.
After charging all four of the empty pillars, another passage will open up to the east. After all that hard work, your reward is...some treasure. Enjoy!
Back On Track
When you reach the Ruins of Okaym teleporter, you can head north to continue on towards Darthrul, or you can go west off the path to reach the Morden Arsenal that's part of the Sartan's Suspicion quest. From there, keep following the path until you reach Darthrul, where you'll be forced to kill the guard at the city gates to make your way inside. If you wish to do the Mage's Apprentice quest, then you'll need to head into the canal via the steps before the gate and head west along the dry canal bed.
Task: Speak with the Morden Chief
As you enter Darthrul, you'll notice a number of locked doors, each emblazoned with a symbol. You'll find a key to one of these doors shortly after you reach the city square, where a Patrol Leader will drop a Key of the Sword, which will unlock any doors leading to the District of the Sword. Note that you can head along the long eastern passage here to reach the Durvla Hatchery, part of the Finala's Contempt quest. You won't find it unless you have her in your party, though.
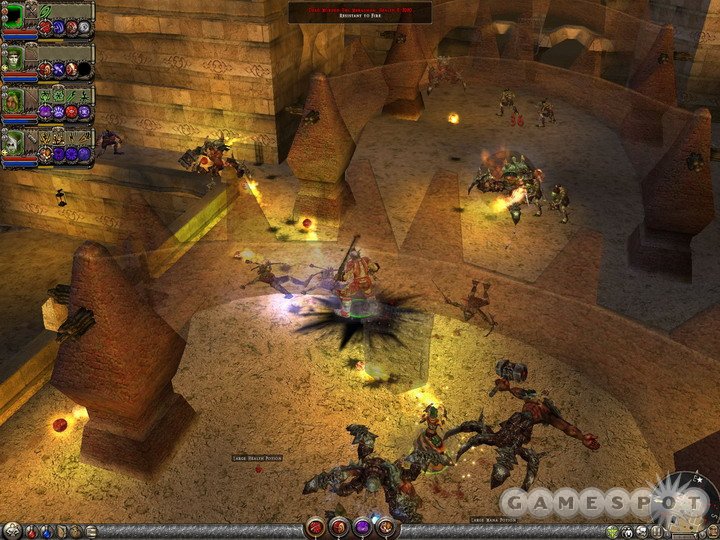
You can probably see where this is going, though: if there are a bunch of different districts with different locks, then you'll need to head into each district to find the key for the next. If that's what you're surmising, then you're right. Head into the District of the Sword first, rout the enemies, and kill the City Lieutenant within for a Crossbow District key. The Lieutenant inside the Crossbow District will drop a key to the Lance District; there's also an incantation shrine which you can use to speak with the ghost in the town's main square, if you wish, as well as a locked supply depot. In the District of the Lance, you'll get the Chief District key; you can also poke around to find the entrance to a Cellar Beneath Darthrul. If you kill the second Lieutenant down here, you'll obtain the key to the District of the Shield.
If you wish, you can just head straight to the District of the Chief to complete your objective, but most of you will probably be curious enough to check out the District of the Shield first. There doesn’t appear to be much of interest there at first glance (although you can find a Mimic in a dark corner near some spellcasters), but if you walk down the steps into one of the seemingly-empty pits, you'll find a button behind some brush; pressing it will take you down to the canal outside Darthrul, where you probably saw a miniboss on your way into town. If you follow the trail to the east, you can pick up the Morden Riders secondary quest.
When you do enter the District of the Chief to the north, however, you'll shortly come across the eponymous inhabitant.
Task: Defeat the Morden Chief

No matter what you say to him, the Chief won't find the fact that you've slaughtered a thousand of his troops very amusing, so you'll be forced to kill him. The easiest way to get rid of his men is to backtrack through the small doors that you walked through to reach him, then use area-of-effect powers on them when they chase you. (You might find this easiest to do if you command your troops to wait outside while your strongest character goes in to "chat" with the commander.) After the minions are done for, start slaughtering the commander and his bodyguard, then bring the head back to Lord Kalrathia. Don't forget to wrap it up in a pretty bow first.
Chapter Three: The Kalrathian Rebellion
Task: Kill all the Morden in Kalrathia
Now that the townspeople of Kalrathia have finally found their courage, thanks to you, you'll have to help them expel the Morden occupiers, preferably through brute force. And indeed, your first task is going to be to clear the town itself, so get cracking. There are around 30 enemies to be defeated, including a few minibosses; if you start running low on enemies to kill, then head up to the Northern Wall via the path by Telgrey the Scholar to find a few up on the top of the wall there. By this point, you should be cutting down foes like the proverbial knife through butter.
After returning to Lord Kalrathia, you'll receive the Aegis of Sight, and end this chapter of the Act. That was quick.
Chapter Four: The Mines of Kaderak
Task: Travel to the Desert of Kaderak
Admit it, you like saying "Kaderak." We know we sure do. Kaderak. Kaderak. Kaderak. It's fun!
Anyway, after completing the last chapter, you'll be able to warp directly to the Southern Desert of Kaderak from any teleporter in this Act. Doing so will take you to an area quite close to the four statues you're supposed to destroy to gain access to the Mines, but there are also offshoots to this area to the north, east, and west. The eastern and western branches are fairly small and terminate quickly, but the northern path leads to the northern part of the desert, which is where you can wind up the Finala's Contempt quest if you still have it on your docket. Otherwise, though, destroy the four statues that cover the entrance to the mines with a magical field, which will allow you to descend to the Upper Mines of Kaderak.
Chapter Five: The Mines of Kaderak, Part II
Task: Destroy the Giant Shard Cluster
Man, these chapters are just flying by, aren't they? Your goal here is to destroy a shard cluster that's blocking access to the lower mines. As you may have surmised by the cutscene you just witnessed, you'll only be able to do so by commandeering the explosives cart that the Uhn are using in the mines and moving it towards the cluster, then detonating it.
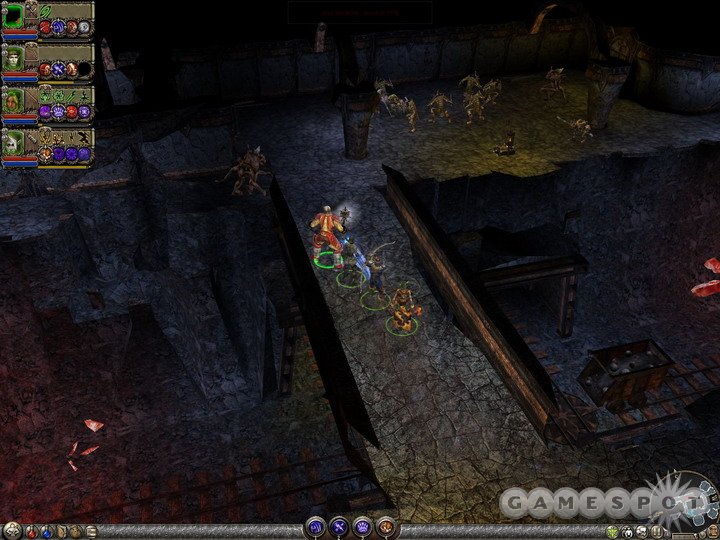
The ultimate path of the cart will lead it eastward, so climb the stairs leading to the west first and look around a bit; there are a few enemies up here, a few side rooms, and an archery sanctuary door. When you're ready to move on, proceed to the east and start looking for more rail levers. This isn't really a puzzle, per se, since you won't be able to move past a section until you've found the rail lever somewhere within it. Just be sure to explore each area's side rooms to get more experience and loot before moving on.
After the fourth or fifth lever, explore the northern side of the passage to find a room with an Ancient Dwarven Chest inside; this holds one of the three stanzas of the Dwarven Song of Ore, if you're doing that side quest. You'll eventually come to another teleporter, to the north of which is both another piece of the Song of Ore, as well as a ghost for the Spirits of Aranna quest. Past that is the final rail switch, which will fling the cart of explosives onto the shard cluster, destroying it. South of this area is the third stanza of the Dwarven Song of Ore, should you wish to find it; it's behind a secret wall
Task: Find the Dark Wizards
When the cluster has been explosivo'ed, you'll need to track down the Dark Wizards which guard the Aegis of Life, the final piece of the Shield of Azunai. After exploring the area south of where the shard cluster was, take the lift down to its detonation site, then head to the north to the Lower Mines of Kaderak. Your destination lies along the northern path, but if you take the eastern branch when it presents itself to you, you can pick up the Vix's Vengeance sidequest.
If you do proceed north, you'll eventually find the Lower Mines teleporter. Near it, you'll find an elevator leading to the ominously-titled Summit of the Dark Wizards. Time to break some mage skulls!
Task: Destroy the Dark Wizards
Well, if the Dark Wizard you faced earlier underestimated your strength, his compadres are going to do no such thing. Although the archmage doesn't deign to face you in battle just yet, his three remaining subordinates are going to face off against you simultaneously. Seven men enter; four men leave!
On the face of it, these Dark Wizards are going to be fairly similar to the one you faced earlier, what with the crystal shields and the zapping fields, and whatnot. Unfortunately, with their combined powers, they're going to be much, much tougher than the solo mage you fought earlier. You may even witness a few of your party members actually - gasp! - dying during the proceedings, so it's worth preparing a bit.
First off, if you don't normally use it (and you likely don't), get your Nature mage to pick up Spirit Embrace from the spell-seller in town and cast it on your party. Although increasing resistances isn't tremendously useful in the normal run of things, all the Dark Wizards here do is cast spells, and some of them do indeed use curses, so it's worth casting this instead of something like Wind Embrace. Earthen Embrace is, as ever, a good secondary buff for everyone in your party.
Anyway, the Dark Wizards here have three primary methods of dealing damage to you. The primary one is a combination of static fields that they'll lay atop your characters, a la the previous Dark Wizard. Instead of only having one effect, though, each Wizard will be able to lay down their own field, resulting in simultaneous fire, ice, and death (we think) damage being dealt to your party. As before, you can spot these being lain and run out of the area of effect, and indeed you'll have to do so, as they do nasty, nasty damage this time around. Unfortunately, if a character gets knocked unconscious by these fields, the Wizards will keep laying the fields down on top of their body until they actually die, so be sure your Nature mage has a good heal spell on auto-cast. (And you may want to have one of your melee or ranged characters have resurrection spells in their spellbook, just in case your Nature mage goes down.) It's better to just make sure that all of your characters have health potions on their person, though, and just jam that button as they run out of the fields to make sure that they're constantly getting healed.
Second, the Dark Wizards will occasionally shoot out beams of energy from their position towards your characters. These beams can hurt individually, but when they happen to meet (and there'll always be at least two of them launched simultaneously), they'll erupt into a small field, causing extra damage. Be sure to run when you see them coming your way.
Third, right at the beginning of the fight, the Wizards will join forces and summon the Xzeihoranth, a large beast constructed of pure magical energy. Oddly enough, this is when the group is at their least threatening, as they won't be able to cast their fields or their energy beams, leaving only the Xzeihoranth and its melee attacks to worry about. Although it is a powerful foe, you can kinda-sorta ignore it here and, instead of attacking it, attack the Dark Wizards to weaken them, making for an easier fight when they're actually out to kill you.
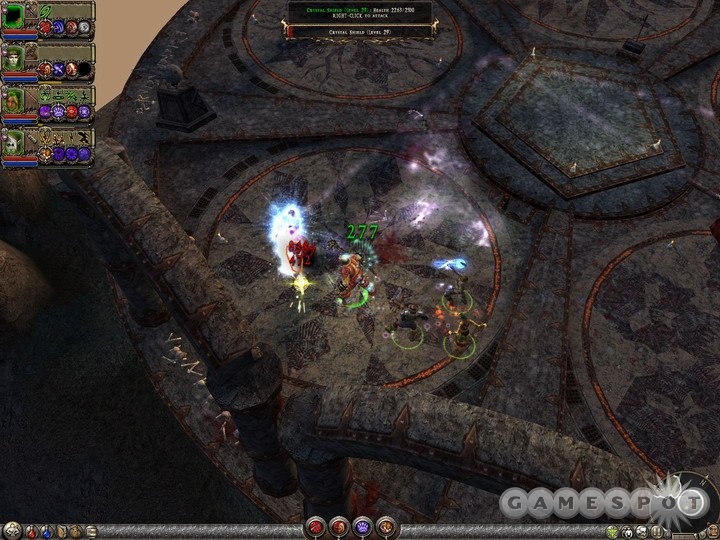
If you can get the Xzeihoranth angry at your primary melee character, then you should be able to easily heal or ignore the damage that it causes, allowing you to focus on the Dark Wizards. (If the Xzeihoranth attacks one of your spellcasters, though, then you'll want to run away before it kills them, which can occur in just a few hits.) While the Xzei is wailing away, try to run around and kill off all of the crystal shields for each Wizard; there are three apiece. It's helpful to do this now as opposed to when the Wizards are laying down fields and energy beams on you, since you'll be forced to keep running during that phase of the fight, making it harder to concentrate on a single target. If you can keep the Xzei off your casters and weak party members, then you can even try to take down the Wizards themselves, but the Xzei may disappear at this point, launching you into the second phase of the fight anyway.
When the Xzeihoranth is dead, then you'll have to deal with the Wizards themselves. If you did manage to kill off their crystal shields, then you'll have an easier time than you would otherwise; just wait for a lull in their offense, get close to one of the Wizards, then unload on it with all of your powers. There are war pedestals scattered around here, but your offensive characters should regenerate their powers quickly enough just by hitting the Wizards, so you may want to use them to quickly recharge your Nature Mage's Invulnerability power, which is going to be especially helpful when you're gunning to take down the first Wizard.
Oddly enough, this fight is actually at its apex of difficulty between when you kill the Xzeihoranth and when you kill the first Wizard; when all three of them are on the field, then they'll be able to lay down fields on you at the same time, causing severe damage if you're trapped in them; this is a good time to use your Invulnerability and concentrate on one of the Wizards. After one of them goes down, you'll find it a little easier to dodge the fields and beams, if only because they come out a bit less often.
When the Wizards are dead (which should happen shortly after Jordan comes back to join them - badabing!), bring the Aegis of Life back to Lord Kalrathia to end this chapter.
Chapter Six: The Agallan Trial
Task: Speak to Advisor Kynos
When you return to Kalrathia, you'll find him on death's door, the victim of an intrigue by Advisor Kynos. Kynos holds the Kalrathian Crystal, a quest item that you need in order to unlock the fountain in the town square; kill him quickly, then head to the fountain, use the statue near it, then head down to the Ancient Stairway Beneath Kalrathia. Speak to the Ancestor of the Azunites to get started on your trial. Before you go, you might want to use the Kalrathian House Key to open up Kynos' house in town, although the only thing inside is a normal chest.
Task: Restore Water to the Western Waterway
Proceed down the long hallway near the Ancestor's position to reach the westernmost waterway. This one is the easiest one to activate; all you need to do is open the floodgate, then walk behind it to click open the flow of water. One down, four to go.
Task: Restore Water to the Northern Waterway
You can either head north or south from the branch in the path nearby; since the northern waterway is the next in our journal, we'll go ahead and head up there. It's easy enough to get the water here flowing again; just walk down into the canal, open the floodgate, and flip the switch next to the old watermouth to get the juices flowing. Unfortunately, there's another floodgate blocking the path to the center of the area, so you'll need to get that down before you can polish off this waterway.

You'll have noticed the three Flow Gate Controllers atop the platform overlooking the waterway. These can be switched either up or down, and control the numerous floodgates in the complex beyond the water's mouth. Go ahead and depress the center and rightmost controllers, then move down into the complex next to the mouth, find the controller within the small rooms there, and hit that as well. That will open up the path leading to a final controller, which you'll be able to pop, which in turn will lead to a path that will eventually wind up leading to the last floodgate between the water flow and the center of the area, letting you check off another of the four waterways on your list.
(Note that if you're unsure about your ability to maneuver through these puzzles, you can split up your party with the "Wait" command, allowing you to bring one character into the smallish rooms while leaving the rest to manipulate the Flow Gate Controllers on the platform. This is kinda-sorta cheating, but it'll give you more options to work with if you happen to get stuck, and you'll be able to easily reassemble your party when you open the last floodgate.)
If you head around to the east here, you'll find that you're able to unlock the last floodgate between the eastern watermouth and the center of the area, but aren't able to get anywhere else just yet, making this a dead end, for the moment. Be sure to look for a secret button on the eastern wall of the upper level here, though, as it'll let you come back to this area much more quickly later on. After that, return to the branch in the path and head for the southern waterway.
Task: Restore Water to the Southern Waterway
You'll find the penultimate Ghostly Spirit as you walk to this waterway; an incantation shrine will allow you to speak to it.
When you reach the southern waterway (which is actually in the eastern end of the area, it's just more southern than the "east" waterway), you'll be able to unlock two floodgates between the center area and the watermouth, then head around, turn on the water, and open up another floodgate, leaving two more to unlock before the water flows freely once again. There are two Flow Gate Controllers here, overlooking four rooms below, each with another controller inside of it. If you depress the two controllers on the platform, then walk down and depress the controller in the southwesternmost of the four rooms below, you'll gain access to the final two floodgates for the southern waterway. Unlock them both.
Task: Restore Water to the Eastern Waterway
Return to the southwestern room and click the controller there, then click the controller in the northwestern room to gain access to another floodgate for the final waterway, leaving two more to go.
Now, getting past this little square of rooms can be tricky at this point. To begin with, go to the southwestern room and make sure the controller is depressed, i.e. the button is down. When it is, return to the southeastern room and depress the button there as well. With that done, exit that room and return to the eastern platform with the two controllers on it and raise the button on the rightmost one; this should open up the passage to the north that leads to the floodgates you can't reach yet. With it raised, return to the southwestern room, raise the button there, and follow the path that's now opened to the two floodgates and the watermouth. And that, as they say, should be that.
When you're done, return to the western waterway and take the path back up to the central vault. The path across to the Agallan portal should be open now, allowing you to warp out to the Agallan Peaks.
Chapter Seven: The Agallan Giants

Task: Investigate the Agallan Peaks
This is another of those short chapters that serves as a buffer between two longer ones. All you need to do is head into the large vaults of the Agallan Giants, speak to them, get the Shield of Azunai reforged, then take the nearby portal to the Horns of Zaramoth, where Valdis awaits your coming.
Chapter Eight: Zaramoth's Horns
Task: Ascend to the Top of the Mountain
Now, if you're tired after taking a long time to get through the waterway puzzle, then you'll just have to resist temptation and keep playing for the moment, at least until you reach a teleporter. If you quit now, then to return to Zaramoth's Horns you'll have to go into the fountain in Kalrathia, walk to the portal there, then walk to the portal in the Agallan Peaks, which'll take a few minutes. Unfortunately there isn't a teleporter near the portal that starts out Zaramoth's Horns, so you'll have to play for a little while longer to reach one.
In the first room after the entrance, you'll probably find a couple of minibosses, as well as assorted other enemies, so be ready with your powers. The Eye of Zaramoth here is essentially a trap that you can hit repeatedly to fire a laser beam straight ahead, killing anything in its way, but it's not that hard to kill them with your swords and spells, so you can safely ignore it if you wish. Also, note that the urns and other treasure items have different appearances here; the weapon racks, for instance, are now Arcane Armories, two of which appear near the far door.

Slice your way through the numerous enemies in your path until you reach a wooden elevator leading down into something of a prison area. You'll almost immediately come back up to another platform above it, where you'll encounter your first Agallan Obelisk. Using one of these Obelisks will grant you complete invulnerability to all attacks for 30 seconds. Feel free to use it now, if you like.
There are going to be three more platforms to choose from here, so head down on the northeastern elevator first. You'll find a couple of sanctuary doors, as well as an incantation shrine. When you're done poking around, take the southwestern passage to find another offshoot room, then go to the northwestern platform for another pair of sanctuary doors and the path leading on. You'll finally find the Lower Zaramoth's Horns teleporter here, so feel free to log off if you need to, once you've activated it.
Across the next bridge will be a difficult challenge for your party: a small room, with another pair of minibosses, as well as a number of Qatall minions. The spellcasters here are going to be difficult, as some of them use Call Lightning to harm multiple party members simultaneously, so be sure to keep your healer out of harm's way, if possible. You may want to send in your melee character by his or her lonesome to get all the monsters angry, then lure all of them back to the doorway so that you can use all of your powers on them at once.
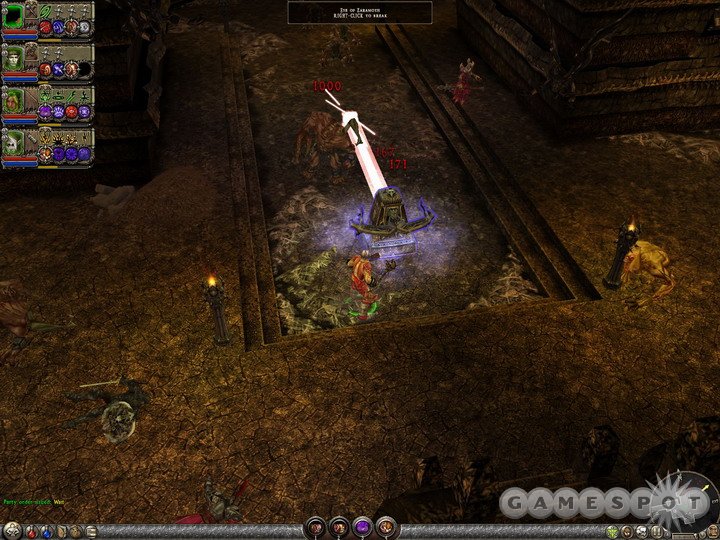
There are three doors here, with the eastern one leading up the stairs and on to the peak. Keep moving upwards until you reach another exterior area; the 18th and final Ghostly Spirit is located here, and there's another incantation shrine for you to use as well. There's also a secret area in the southeastern corner (click the lever near the pillar there to reveal a Mimic), as well as one to the east of the incantation shrine which will lead to the Chant of Chaotic Skill.
Taking the other door here will lead you on a fairly linear path. Eventually you'll come to another Obelisk; just go ahead and charge through the enemies in front of it, activate invulnerability, then take your time killing everything off. After passing through another exterior area, you'll come back to another statuary, with another Eye of Zaramoth waiting to be unleashed on the unsuspecting populace. Keep moving on, moving on until you reach the Upper Zaramoth's Horns teleporter.
Task: Defeat the Archmage
Depending on your power level and the amount of loot that you've obtained, you should find the Archmage to be an easier foe to take on than the previous Dark Wizards. Oddly enough, he's not capable of dealing much damage on his own, and although he has a lot of health (90,000), you should be able to wear him down without much trouble, especially if you act quickly.
The Archmage prefers to use area-of-effect powers instead of massively damaging single-target or beam effects. His first power covers the ground around him with white runes and arcane symbols; this acts as something like an earthquake spell, doing light damage to everyone caught on the floor. Nothing to worry about overmuch. He also possesses an odd purple field that emanates from his body outward, but this doesn't seem to do anything at all. His most powerful attack during this portion of the fight, though, is when he raises his body off the ground and covers himself in lightning, which begins to arc towards your characters, hitting one or more of them at a time. Although you can stay and keep swinging at him if you like, it's best to run towards one of the Agallan Obelisks when you see him start to levitate and get yourself invulnerable, which will obviously protect you from the effects of this.
During this first, easy phase of the fight, all you should be doing is wailing on the Archmage, using your most effective powers. If you have them, Charged Shots for your archer or Elemental Rage for a fighter are both excellent ways to get a tremendous amount of damage off of the Archmage, even if the damage that they deal is spread out over time somewhat. You do have war pedestals around as well, if you happen to need a quick recharge.
If you continue to pound on the Archmage long enough, you'll see a message pop up indicating that he's targeting an Agellan Obelisk and beginning to cast a crystal barrier spell. If you have him at one-third health or so, then don't worry about this; just keep blasting away at him with everything you've got, and you'll probably be able to finish him off before he gets any barriers up, since it takes a good amount of time between his casting and when they appear. If they do pop up, then you know what to do: blast them all, then get back on his case. Unfortunately, when he absorbs the power of an Agellan Obelisk in this manner, you'll have to keep an eye on them, because the Obelisks will periodically shoot out slow-moving projectiles that will instantly kill the first party member they hit. These projectiles travel in a straight line, so they're not overly difficult to dodge, but if the Archmage converts numerous Obelisks, they can sometimes start coming out too quickly and in such large numbers that it's only a matter of time before you get pelted. It's best to ensure that any non-spellcasters have Resurrection scrolls in their quickslots, just in case your Nature mage goes down for the count. You can disrupt his hold on the Obelisks by attacking them.
But yes, a straightforward tactic of unloading everything you have on the Archmage should be sufficient to see him dead before long. He'll drop a lot of goodies, so if you're still hankering for loot, save your game before attacking him and fight him a few times to see what he drops.
Chapter Nine: The Final Ascent
Task: Locate the Temple of Valdis
Start ascending through the rooms and passages that become available to you after the death of the Archmage, and be sure to check the rest of the room around him for chests and treasure.
As you proceed up the only path avaialble to you, you're going to find your way clogged by enemies, with many fights involving two or three simultaneous minibosses. Your powers are obviously going to be a big part of getting you up the stairs to the Temple of Valdis alive, and with the sheer number of foes that you're facing, you should be able to get them charged up again rather quickly after using them, so feel free to let loose as they recharge. You'll have the opportunity to recharge all of them before going after Valdis.
Task: Destroy Valdis
When you see Valdis' throne and the four war pedestals, you'll know you're almost at the final fight, so gear up in town with resurrection scrolls, buffs, and the like, then get ready to rumble.
Valdis: Phase One
Valdis, as befitting an enemy that leads an army and is completely invulnerable, etc., etc., is, in fact, completely invulnerable to your fire at the beginning of this fight. You'll note, however, a set of four Eyes of Zaramoth scattered around. Although they were borderline useless against the normal foes in Zaramoth's Horns, they're going to be the only way to harm Valdis in the first phase of this fight. You'll need to hit him with the Eyes three times before you can actually damage him, but positioning him so that they'll actually hit him when they discharge is somewhat difficult, both due to the fact that he moves fairly quickly and because it'll take a few swipes with a sword in order to fire an Eye.
The key here is to wait. Just sit in front of one of the Eyes and wait for Valdis to walk over to you and start performing one of his sword powers. These are powerful attacks, but they'll rarely kill any single member of your party, so you should have time to heal if you happen to get caught in one of them. Anyway, if you wait for Valdis in front of one of the pedestals, watch for him to begin one of his attack animations (which freezes him in place for a few seconds), then quickly activate the Eye, it should knock him off his feet. If you have a hard time activating the Eye in the short amount of time available to you, try using either a Brutal Attack or a Take Aim on it, which will instantly deal enough damage to open it, making it much more likely to hit Valdis in the time given.
After Valdis is hit by the first Eye, he'll summon in a horde of Qatall in an attempt to take you down. Between the minions and Valdis himself, it can be difficult to survive here, so this is a good time to go for the Agallan Obelisk and immunize yourself to their attacks and use your area of effect powers to chop through the minions. When that's done, you need to hit Valdis twice more with the Eyes of Zaramoth before you can move on in the fight.
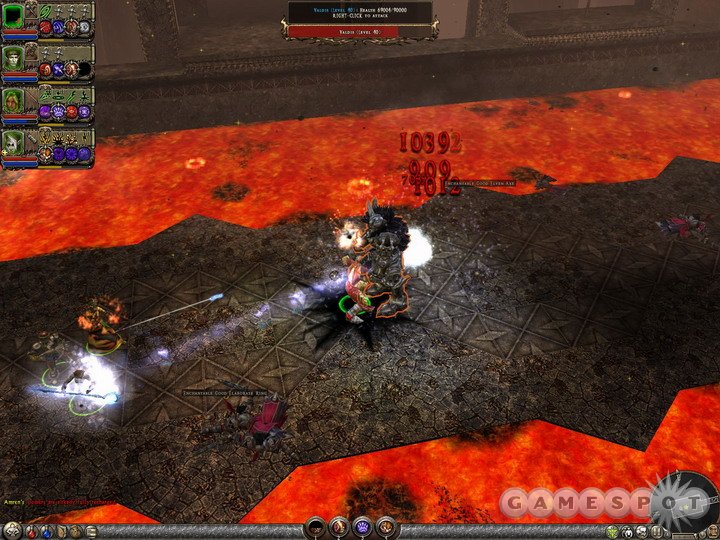
Valdis: Phase Two
After the no-way-could-you-possibly-have-predicted-this-treachery turn of events, half of the playing field will be covered in lava. This will, of course, hurt your characters should they stay in it, but not severely, so if you need to run into the lava to reposition yourself, feel free to do so; just don't stay too long.
Valdis' 90,000 hit points are now yours for the taking, and after each 30,000 damage you deal to him, another sub-phase of this fight will commence. Initially, it'll be just you and him, mano a mano (well, including your party), so take advantage of the unclutteredness of the battlefield to commence the beatdown. Valdis has a couple of attacks here, including a really, really powerful energy beam that he shoots out after he starts to glow yellow. When you see him glowing, then, move away from his front side, or you'll get cooked. Other attacks include a powerful leg-slam that causes rocks to fall, apparently from the sky itself, but if you look at the ground you should be able to spot the shadows and avoid their locations. Other than that, he'll occasionally use a forcefield attack that deals no damage, but repels all of your characters from his location; this can launch you into the lava if you're not careful about where you position yourself.
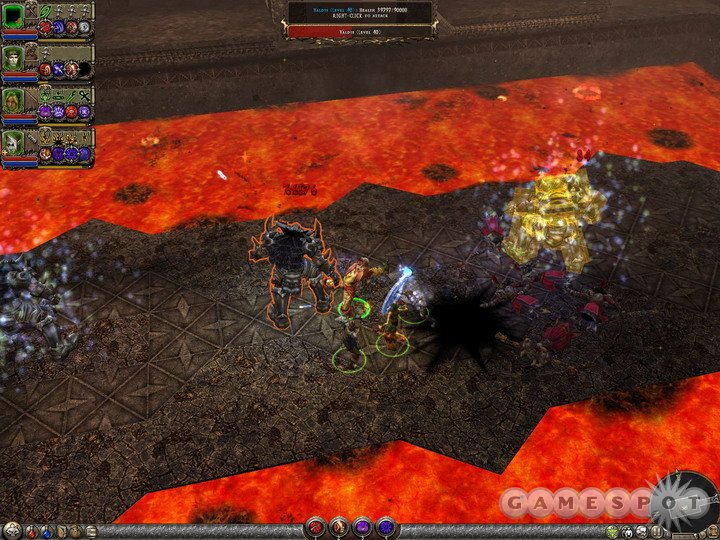
After you knock Valdis below 60,000 HP, he'll fall over and bring in another group of Qatall. Since there's no more Agallan Obelisk, you'll have to take them down while remaining vulnerable yourself (unless you use the Invulnerability power, naturally). You should definitely go for the Runecasters first, as they're the ones that will be doing the most damage to you; a group of them can be found at the southern end of the small spit of land that you're on. Use area of effect powers to get rid of them in large groups, but be on the lookout for Valdis, as well. He'll start to use a powerful fireball attack here that deals massive damage to your spellcasters.
By the time you've cleared out the Qatall and get back on Valdis' case, you may have noticed that he has regained some of the health you knocked off of him earlier. One of his abilities here is to regenerate his health, which he'll do by splitting himself into three copies spread out on the platform. If you attack a copy, then you'll essentially do nothing but allow Valdis to continue regenerating, but all you need to really do to break up this ability is attack all three copies; just send an arrow or two at each one to see if it staggers. If it sits there and takes your damage, then you're attacking a copy; if it staggers and the other copies vanish, then you've hit the real one and can continue to damage him.
Valdis: Phase Three
There isn't much difference in Valdis between 30,000 points and 1 point of health; you should be familiar with his attacks, so just go crazy on him. When he does reach one point of health, though, he'll erect a barrier around himself and become completely invulnerable to your attacks. In order to finish him off once and for all, you'll have to saunter over to the huge Eye of Zaramoth that's been revealed under the altar and use that on him. As before, it's simplest to do if you just stand in front of the Eye, wait for him to come over to you, then quickly use a power on the Eye to set it off before running out of the way and letting it pound Valdis to death. One shot is all it takes.
After Valdis dies, your game won't automatically end; you'll be able to grab the loot that Valdis drops, then warp back into town. If you need to complete any more secondary quests, then feel free to do so. If you want to start a new game at a higher difficulty level, then you'll need to save your game, exit to the main menu, then select New Game, select the main character from the party you just completed the game with, and select Veteran difficult.
Starting a New Game
Now, there are some wonky features you have to keep in mind when you create a new game on a higher difficulty level, the most aggravating of which is the fact that some of your party members are going to be useless throughout the entire second play-through of the game. Here's the run-down: when you start up a new game, all of your party members, including the characters in your Inn, will hold over, and keep all their stats and equipment (including the stuff in your town treasure chest). All of the NPCs will also still be in their original position in the real world, so, for instance, if you have Deru and Lothar in your Inn, then they'll also be by the gate in Eirulan again.
However, you won't be able to recruit them if you already have them in the inn, and if you were at all thorough in the first play-through, you should have all of them in your inn already. What's more, any character in your inn that has a character level less than 15 or so below your main character's level will gain either 20 levels or enough to match them with your main character's level minus two. So if your main character is level 40, say, when you enter a new Veteran-difficulty game, a character that had been sitting in your Inn during all of your Mercenary play-through and had only gotten up to level 10 would immediately be boosted to level 30. A character that had reached level 25 would be boosted to level 38. A character at level 28, say, wouldn't gain any levels at all.
You might think this is an all-right deal, but the problem with this is that the enemies in Veteran difficulty start at level 40, and your characters get no experience at all if they're not within five levels or so of the enemies that they defeat, presumably to prevent characters from getting rushed through multiplayer games by high-level players. So if you start a new Veteran difficulty game, and any of the characters in your Inn are at level 34 or below, they're basically stuck at that level for the rest of the game, possibly even after you flip to Elite difficulty, if they only get an extra 20 levels there, as well.
This might not be too huge of a deal to you; you'll definitely have at least four characters to work with in a new difficulty level, from the previous game, so you'll only need to have one new character of an appropriate level to add to your party. (The party size expands to five in Veteran and six in Elite difficulty modes.) However, it would've been nice to fire or release old characters and hire them anew, since you would've been able to reset all of their skills if you feel that you didn't do a good job with them the first time through. If you're just worried about levels, though, then be sure to stop at the end of Mercenary difficulty, take the low-level characters into your party, and power-level them by finding groups of enemies four or five levels above them and running through like mad. Alternately, if you're willing to wait a bit, you can start a Veteran game, level up your main characters a bit, then check back in at the Inn; if you get yourself high enough above your lower-level characters, they'll automatically gain the levels that they didn't at the beginning of the difficulty.
The Effects of Difficulty
The game doesn't change a great deal on higher difficulties, although it obviously becomes a bit more difficult to cruise through large groups of foes. The most obvious change is that most enemies will have ten times as many hit points as they did on normal difficulty or so, and many of the enemies that were previously resistant to a specific kind of damage (especially minibosses) will now be completely immune to it, forcing you to switch over to another type of magical damage to hurt them.
On the other hand, to counteract this increased difficulty, you'll be given an extra party slot at each new difficulty, allowing you to use five characters on Veteran difficulty and six on Elite difficulty. After going through Mercenary difficulty with one character from each class, we found it helpful to add another melee character to our party when starting Veteran difficulty to add a bit of meat and health to the front lines; a sword-and-shield user is a good choice here, thanks to their Provoke ability.
Lastly, the quality of items does indeed seem to keep increasing as your characters increase in level; there are new sets and unique items that will be found starting in Veteran difficulty, and we presume that this trend continues on into the Elite difficulty as well.
Act III: Secondary Quests
Quest One: Dwarven Song of Ore
Location: Historian Leontia, who sits near Lord Kalrathia, gives this quest.
If you speak to the scholar who sits near Lord Kalrathia, you can obtain this quest. Leontia requests that you venture out into the wild in search of a mythical Dwarven Song of Ore, which has apparently been split into three parts. You'll need to find all three parts to reunite the song, but they're all apparently located in the Mines of Kaderak, so at least you have that going for you.
The Silver Stanza of the Song is in the Upper Mines of Kaderak, on the northern side of the passage where you're escorting the explosives cart towards the shard cluster; it's inside a large, golden chest. Another one lies to the north of the Upper Mines of Kaderak (East) Teleporter that you'll reach soon enough, along with another Spirits of Aranna ghost.
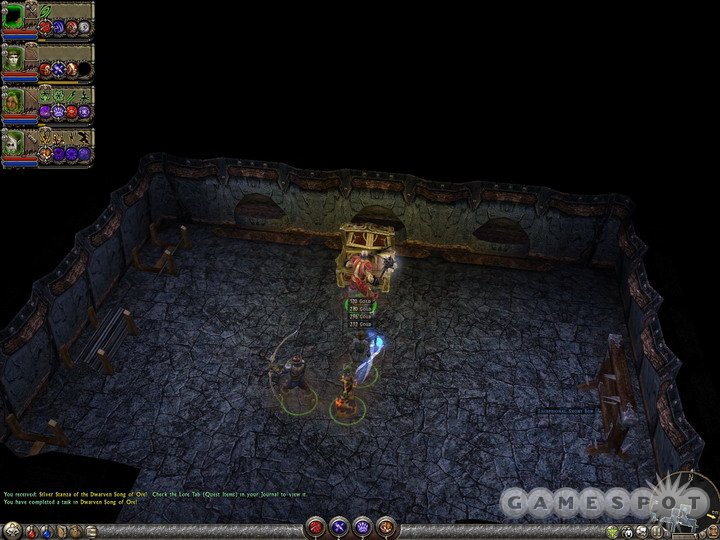
The final chest is to the south of the shard cluster that you destroy with the crate of explosives. Before heading down the lift that's been erected above it, head into the rooms to the south and you'll find a secret door that's opened with a lever. Inside you'll find the third Dwarven Chest.
Now, we'll be honest and say that we're not entirely sure what Leontia says if you bring her the three stanzas at this point, because we kept exploring the Mines after we obtained these three. If you proceed on into the Lower Mines of Kaderak, you'll come to a teleporter eventually, and there'll be another chest to the south of it, containing the Mithril Stanza of the song. If you bring that back to her as well as the other parts, you'll earn the Greater Chant of Prosperity.
Quest Two: The Lore of Aranna
Location: Telgrey the Scholar, who lives in the northeastern corner of Kalrathia, gives this quest.
Well, this is kind of a frustrating quest to complete, and you're unlikely to be able to do so unless you've been picking up everything you've seen. Telgrey wants you to complete a set of the Lore of Aranna for him, which consists of 20 books, all of which will have been entered into your Lore - Books menu as you've been picking them up. These are scattered far and wide across Aranna, but most of them will have been easily accessible to you as you moved through the game, although four of them would have only been found in the Mysterious Shrines that you've been visiting as a part of the Amren's Vision quest. The locations of each book aren't listed in your quest log, so if you haven't been picking up everything you see throughout your journey, you're likely going to have to chalk this one up as an incomplete quest. If you've been doing all the secondary quests, though, and exploring thoroughly, then you may have found all of them. (We'll update this guide with a complete list of books and their locations when we note them all down.)
That's unfortunate, because this quest is part of the larger Mysterious Quest that comes as a result of the ??? enemy that pops up every now and again. Although the scholar doesn't seem to give you anything when you first turn in the volumes to him, aside from a gag book, if you talk to him again he'll drop a metric ton of items, including a Mysterious Book. This is part of the three-item Mysterious Set that you need for the Mysterious Quest.
Quest Three: The Lost Jewels of Soranith
Location: Kevarre the Explorer, in the Inn in Kalrathia.
Kevarre will spin you a tail of an ancient vault that he happened upon in the desert. Although he didn't get a chance to explore the vault thoroughly, he believes that it contains the lost jewels of Soranith the Eldersmith, a craftsman of great repute. He offers to give you the amulet he found in the vault if you travel to it and explore the rest of it to see what he missed.
If you travel into the Northern Vale of Tears and head east at the fork in the path near the teleporter, you'll eventually come to stone tower standing in the desert. Descending on the elevator inside will lead you to the Mysterious Vault, where the first of the light puzzles that Kevarre mentioned is already solved, thanks to his earlier explorations. Moving past it a bit, you'll find the second puzzle (which is actually the first, according to your journal; the one that's already solved doesn't count).
First Puzzle
There are five pillars here, each of which can be lit by clicking on it. After you light a pillar, you'll need to click on another adjacent pillar to fill the channel between them with light. The goal is to fill the entire pattern with light without tracing the same path between two pillars twice.
If you orient yourself looking north, you'll find that the pillars are organized so that there's one on the north end, one in the center of the puzzle, one to the east, one to the southeast, and one to the southwest. One correct solution to the puzzle (there are likely more than one), is to go east, southeast, center, southwest, north, center, east, north, southeast. If you get stuck, use the Reset Statue to reset the puzzle and try again.
When you get past the first puzzle, open the door to the west to obtain Solanith's Silver Ring.
Second Puzzle
The second puzzle here is, predictably enough, going to be a bit more complicated than the first. There are nine nodes here, which you'll have to click fourteen times in order to affect the desired result. Start with the southernmost one, then go southwest, northwest (around the outside of the design), north, center, northeast, east, southeast, south, east, center, southwest, west, northwest. These directions aren't necessarily specific - the pillars aren't on the cardinal points of the compass - but they're hopefully close enough to get you an idea of how to proceed.
When you get the other Solanith ring, you can return to Kevarre to get the amulet as well and complete the quest. Although the jewelry pieces are individually powerful, they don't have a great set bonus for wearing them all at the same time, with a 40% greater chance to find magical items being the most noteworthy boon. It's better to give the gold ring to a fighter, the silver ring to an archer, and the amulet to a spellcaster, due to their large boosts to strength, dexterity, and intelligence, respectively.
Quest Four: The Mace of Agarrus
Location: Given by Bersebus, in the central square of Kalrathia.
Bersebus spins you a tale of Agarrus, supposedly the largest half-giant that ever lived, when you speak to her. She doesn't know much about him, but can point you towards others who might. Your first stop is to speak with Explorer Tai'esse in Aman'lu; if you inquire with her about what she knows, she'll give you a Stone Key. If you bring this to the Ancient Stone Doors in the Snowbrook Grotto, you'll be able to pass through and into the room beyond, where a Stone Tablet Fragment awaits you. If you bring this back to Tai'esse, she'll be able to combine the fragment with her own fragment to create a complete Stone Tablet, which, coincidentally, will act as a key to open up the Tomb of Agarrus, which resides in the Azunite Cavern where you found the Azunite Weapon lo those many hours of gameplay ago.
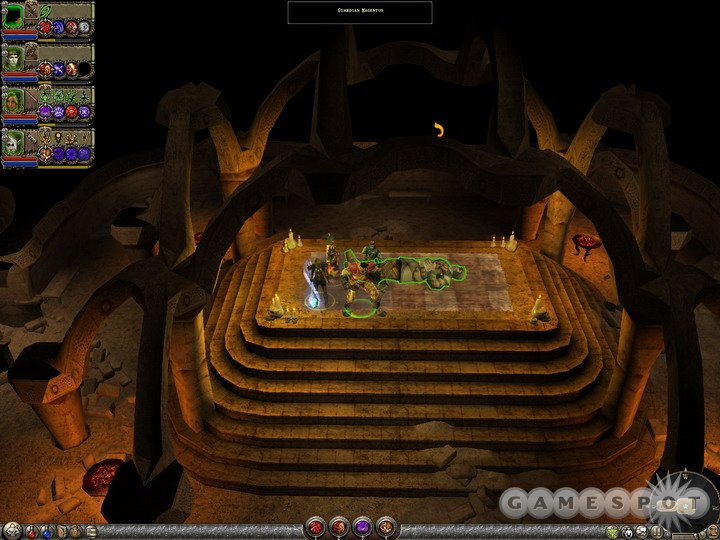
If you warp to the Western Cliffs of Azunai teleporter and walk back into the Cavern, you can find the Tomb of Agarrus by walking to the west and using the secret button near the bridge to extend it. If you head inside, you can use the Tablet to open the door, within which a Guardian awaits. If you speak to the Guardian, you can learn more about the genesis of the half-giants, as well as, of course, obtain the Mace of Agarrus itself, and a fierce weapon it is if you have any dual-wielding or sword-and-shield warriors among your group. With a max damage of 71, it's more powerful than many two-handed weapons, and will likely serve as a good one-handed weapon for the rest of the game.
Quest Five: The Mage's Apprentice
Location: Mage Boden, in the magic shop of Kalrathia.
Boden explains to you that his apprentice disappeared three days ago near the Morden city of Darthrul. Like every other NPC in the game, he seems bound to his location with some mystical spell that prevents him from actually moving out of the city to search for the apprentice himself, so he'll ask you to go ahead and perform the task for him.

The Ancient Ruins in which you should search are near the city of Darthrul, in the canal just outside the gates. If you head west along the canal, you can't miss the entrance. Inside, you'll find another large light puzzle, with locked doors to the north and the west. You need to divert the beam of light so that it points directly at a door to open it. The northern door conceals the apprentice, while the western door holds treasure; the latter will, of course, be a bit more difficult to open. Feel free to check out the screenshots on this page for clues on how to open them, though.
When you've unlocked the apprentice, he'll reveal a startling fact: Boden is a traitor who's been selling magical items to the Morden. He'll give you proof of this, and ask that you confront Boden and force him to leave town. Boden won't go quietly, though, so you'll be forced to kill him. Be sure to save your game between killing Boden and talking to the apprentice again, as you'll be able to reload if you don't like what he drops and try again. You'll always get a unique Spellbinder ring, though.
Quest Six: The Kalrathian Nexus
Location: Speak to Nora, in the central square of Kalrathia.
It seems that a Dark Wizard has sealed the Kalrathian Nexus, a mystical convergence of magical energy, from the wizards of Kalrathia. They wish to break the seal, and ask you to help them to do so. Nora will give you a Soulstaff, and ask you to use it to collect energy from each of the three ley lines that meet at the convergance; doing so should allow you to break the seal.
Breaking the seal is going to require you to travel around a bit, but by the time you reach Kalrathia, you'll probably have already found the Caverns of Frost, Earth, and the Phoenix, so all that's required of you is a bit of backtracking. The Frost node is located in the
The Cavern of the Phoenix was likely the first Cavern you came across; it's located in the Lost Valley of the Azunites. If you warp to the teleporter in that zone and proceed south along the trail, you'll eventually come to an incantation shrine; further to the south you'll find the Cavern. When you have a character holding the Soul Staff, use the Arcesso Arcanum chant while standing on top of the symbol in the middle of the room to gather the power from the cavern.
The Cavern of Earth is in the Temple of Xeria. If you warp to the teleporter there, then head west and north until you reach an incantation shrine, you can find a secret door nearby. Heading west from there will lead you to the cavern.
To reach the Cavern of Frost, head to the Snowbrook Haven Living Quarters teleporter and proceed northwest from there, through the throne room, up to the Servant's Quarters. After crossing the bridge, you should find the Cavern nearby, although it may be behind a secret door if you didn't unlock it earlier.
After sucking up the energy from all three caverns, you'll have to head to the Kalrathian Nexus to destroy the seal that covers its energy. To do so, head through the eastern gate of Kalrathia when it becomes possible to do so, travel a short ways out of town, and keep a lookout for a cave on the northern side of the path. When you do find it, use the staff to destroy the Seal (by equipping it and whacking the big block), then return to Nora to obtain the Soul Staff of the Nexus, a decentish staff for Nature mages.
Quest Seven: Sartan's Suspicion
Location: Speak to Feltan in the tavern in Kalrathia while you have Sartan in your party.
Feltan will tell you that Osric, the no-good filcher that ratted Sartan out in the Windstone Keep, is believed to be a spy for the Morden by the good townspeople of Kalrathia. Since Sartan still has a bit of a chip on his shoulder about being imprisoned in a pit, he'll want to track Osric down and see precisely what his story is.
Osric dwells in a Mysterious Cave in the Eastern Plain of Tears, directly to the east of the teleporter and incantation shrine in that area. When you bring Sartan to meet him by knocking on the door within the cave, he'll automatically kill Osric, only to learn that he was actually a good guy! Oh, those wacky half-giants; what kind of mischief will they get into next?
Anyway, after chopping Osric down, Sartan will have to make amends for his misdeed by finding a hidden Morden arsenal that's somewhere nearby. You won't get any clues beyond that, so you'll just have to keep your eyes open!

You can find the Morden Arsenal in the Ruins of Okaym, to the west of the teleporter, off the beaten path. Only Sartan can break down the front door of the arsenal, so bring him along and head inside to find three doors leading in three different directions. The northern room has a secret room concealed within with a bit of treasure, while the southern and western doors lead to the prison complex. If you poke around, you'll find the jail, and you'll be able to free all of the prisoners by shooting the bombs conveniently placed next to their doors. Be sure to hit them with ranged attacks!
With the prisoners rescued, you can grab the treasure from the cell, then return to the soldier that informed you of Osric's purpose in the Mysterious Cave. Doing so will end the quest.
Quest Eight: The Morden Riders
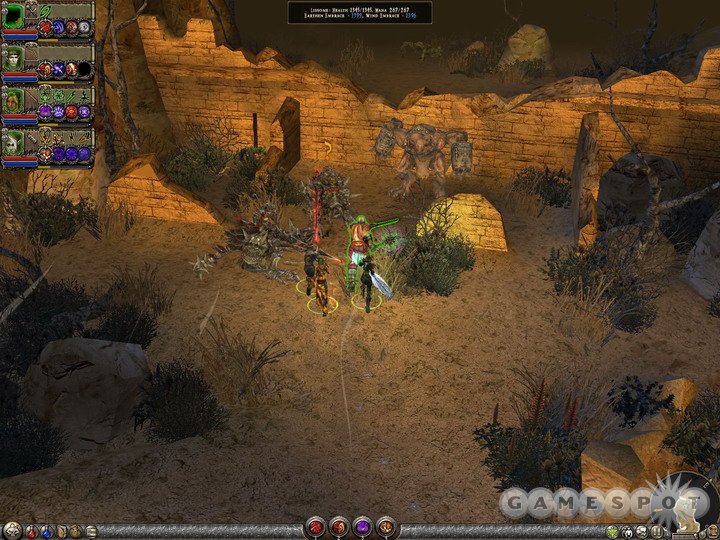
Location: Enter the District of the Shield in Darthrul, find the secret elevator in the depressed pit, then walk to the east along the canal until you find Nordax and Neilliok.
These two Morden riders have been banished from the army for their incompetence during the siege of Snowbrook Haven. Unfortunately, they need supplies if they’re going to survive a trip to greener pastures, but they had to leave Darthrul before they could find anything. They'll ask your party if you could be so kind as to return to the city and bring them back a tent, and rations for both themselves and their Klask pet. They'll also give you the Darthrul Supply Key.
If you recall, there were three supply rooms in Darthrul, one each in the Districts of the Lance, Shield, and Crossbow. If you head back there and find each of these rooms, you'll obtain the provisions that Nordax and Neilliok require. Return the supplies to them, and they'll knock down a wall leading to a treasure chest. Short and simple.
Quest Nine: Vix's Vengeance
Location: After destroying the shard cluster in the Upper Mines of Kaderak, head down into the Lower Mines and take the branch when it heads east. You'll come to a door; if you have Vix in your party, he'll bust through it, allowing you to proceed.
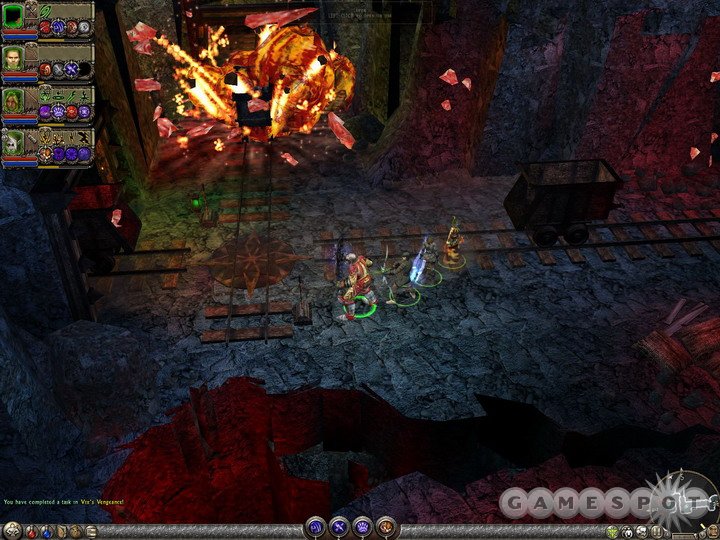
This mission is fairly straightforward: all you're asked to do is head into the mine area past the door and smash three shard clusters. Doing so is a pretty simple matter, as all you need to do is find a crate of explosives, flip a switch nearby to reorient the rail, then flip another switch to propel the crate. The only difficulty is keeping Vix alive if he hasn't been a part of your party for a while, as most of the enemies here will be able to kill him in one or two hits if he's still at level 20 or so, which he will be if you haven't levelled him up since you got him. Still, though, since he's a ranged attacker, you should be able to keep him back in the pack while your melee character goes forward to deal the real damage.
After the first two shards are destroyed, you'll need to cut your way through a substantially larger number of enemies to reach the third. Still, even if Vix winds up keeling over unconscious, your Nature mage should be able to heal him right back up, so just keep forging ahead towards the third shard and blow it. In the room that's revealed when you do, use Vix to open the large chest inside to finish the quest; you may also want to explore the shard area before returning to the Lower Mines, as there is another small section that leads back out to the desert before culminating in a dead end.
Got a news tip or want to contact us directly? Email news@gamespot.com
Join the conversation