Guild Wars Walkthrough
Guild Wars has finally hit the scene, and it's as popular as the proverbial hotcakes! GameSpot's Walkthrough for Guild Wars features tips for the game's PVP and PVE content.
Design by Collin Oguro
So far as PC games go, few titles in 2005 have generated as much buzz as Guild Wars has. This online-only multiplayer game incorporated MMORPG elements into a fast-paced, skill-based, combat-focused game that plays as something of a nouveau Diablo II, with some stunning graphics and addictive gameplay. In it, players will have to team up to overcome the vicious forces that wish to overwhelm the human kingdoms of Tyria, and fight their way from the blasted lands of Ascalon in the east over the mountains that block their passage to the western kingdoms of Kryta. Along the way, they'll chop through thousands of Charr, evil dwarves, golems, and undead foes, all in the hopes of eventually passing through the Ascension and taking their rightful place in the Hall of Heroes, where they'll battle for dominance in an eternal war. Fun!
GameSpot's Game Guide to Guild Wars serves as something of an entry-level guide to starting out in the world of Tyria. We're going to describe the basics of each class, run down how best to start your character's adventures, give you tips on crafting new items, and share some of our PVP experiences with you. Enjoy!
Classes
Warrior
Warriors are somewhat unique in the world of Ascalon, as they’re one of the only classes that can be reliably counted on in toe-to-toe combat. Every other class in the game is going to be attempting to stay away from enemies, for the most part, due to their focus on ranged spells and weapons and poor armor stats, but as a Warrior, you’re going to be expected to get toe-to-toe with your foes and wail on them with an axe, sword, or hammer. To that end, you’re going to be able to wield much thicker armor than other classes will, and will possess more health as well.
The prototypical Warrior secondary profession is Monk, which offers you up a number of healing spells which can let you quickly restore your health when you’re under the brunt of an enemy assault. Healing Wave, especially, is a relatively cheap (10 Energy) and quick-casting spell that can offer up a good amount of health regeneration, while later spells like Mending will let you trade in some of your Energy restoration for a constant amount of health restoration. The negative side of being a Monk is that you can sometimes find yourself with spells that you won’t use too often when you group up with an excellent primary Monk, since they’ll be healing you as best they cane, but your skills will serve as a useful backup in case you get overwhelmed.
Other useful secondary professions include Ranger, which can give you another useful healing spell in Troll Ungeunt and allow you to tame a wild beast to act as a secondary source of damage, and Necromancer, which offers a number of ways to restore your health, often while damaging enemies, as with spells like Life Siphon, Vampiric Gaze, and Vampiric Touch. There’s a common theme here: as a Warrior, you’ll likely want to grab a secondary class that can offer you some way to restore your own health. You know, just in case. Classes like Mesmer and Elementalist are therefore somewhat odd choices as a secondary class, if only because they lack a large number of relevant self-buffs and are also somewhat energy intensive.
The primary drawback of the warrior is his or her inability to quickly regenerate energy, and their overall lack of a large energy pool. Since Elementalists, Monks, and the like will usually gain bonuses to energy regeneration from equipment, and Warriors usually won’t, they’ll be held to the default two points of energy regeneration for quite a while, meaning that it’ll be more difficult for them to build energy back up during a fight. Their smaller energy pool will also restrict them in their use of high-cost powers, meaning that Warriors will have to choose a secondary profession with care, lest they wind up with something that offers powerful but high-cost abilities that can only be used a few times before they run dry of mana.
Luckily, Warriors aren’t required to use Energy for many of their own skills, and those that do use energy will rarely take more than five energy at a shot. Instead, they siphon their own adrenaline during battle and use that to power their attacks. Adrenaline can be built up at a rate of one point per successful strike in battle, but you won’t get a real numerical readout of your adrenaline reserves during combat; instead, your adrenaline-using skills will gradually light up from their normal blackened state as you hit things, and when you have enough adrenaline to use an ability (you can check the amount required on your skills window), they’ll light up completely, signifying that they’re ready to go. Many of the weapons-based skills will add status effects or have non-damaging effects on enemies, such as Bleeding, Deep Wounds, or knockdown. You can use them to vary up the pure-damage capabilities of the warrior a bit.
One thing to mind as a warrior is your aggro radius. You'll notice that there's a little white circle around your character on your compass in the upper-right corner of the screen; this indicates the distance at which enemies will notice you and start attacking. Since Warriors are often going to have to approach enemies, due to the fact that they use melee weapons, you'll need to be very, very careful that you don't accidentally aggravate more than one enemy group at a time. You might be able to survive such an encounter, but you need to recall that there are a bunch of teammates behind you that are very dependent on their energy to survive, since they have less health and armor than you do; taking on large groups of enemies when you could separate them out into smaller chunks isn't a good idea if you care about your teammates. And you do care, don't you?
Strength
Strength is the primary skill of the Warrior, and thus isn’t available to characters that take Warrior as a secondary class. Each point allocated here will allow your weapon strikes to ignore one percent of your opponent’s armor, and will also affect some of the appropriately strength-requiring skills, such as Power Attack.
Swordsmanship
Swordsmanship increases the damage you deal with swords, and also increases the likelihood of striking for a critical hit when you do land a blow with a sword. It’ll also increase the efficacy of your sword-based skills, like Sever Artery and Gash. Swords are exclusively one-handed, and deal less damage than hammers, but can be used with a shield.
Axe Mastery
Axe Mastery focuses around the art of wielding axes, increasing the damage from those weapons and upping the likelihood of a critical hit. Axes are generally going to have the lowest normal damage of melee weapons, and will rely on their adrenaline skills to compensate for this.
Hammer Mastery
Hammer Mastery, like the other two weapons-based skills, will boost the damage and critical chance of hammers. Hammers are always going to be two-handed, meaning that you’ll have to forgo the use of a shield while dealing damage, but you’re going to get higher damage in return.
Tactics
Tactics increases the efficacy of a Warrior’s Shouts and other support abilities. Shouts are primarily used to give a short-lived buff to the entire party at the cost of adrenaline or Energy, although some shouts will only work on the Warrior that casts them.
Monk
Monks often fit into the healing archetype that’s such an integral part of any party-based online combat system, and indeed can fulfill this role quite well; Monks are often going to be a required component in any cooperative mission, since they can quickly and ably heal teammates to counter the effects of incoming damage.
In addition to pure healing skills, though, of which there are many, Monks can also use Smiting magic and Protection spells. Smiting magic is often going to be a Monk’s sole offensive ability; these skills will usually deal Holy damage to enemies, which is especially handy against undead foes, which take double damage from Holy spells. You won’t be dealing as much damage as a good Elementalist in most situations, but you’ll at least have something to whip out when all of your teammates are well-healed. Protection spells are generally going to be buffs, in that you cast them on your teammates and they get the benefit of your spell, such as increased defense or blocking abilities, for a short duration.
The primary drawback of Monks is their low health total and poor armor, at least in comparison to some of the other, beefier classes, like Rangers and Warriors. Still, with the self-healing abilities of Healing Wave and Orison of Healing, this is rarely a drawback. It’s also somewhat difficult to solo as a pure healing Monk. You can grab a Warrior Henchmen, which are surprisingly durable thanks to their own self-healing capabilities, but you’ll always have a problem with pure damage dealing unless you pick up a good secondary class and allocate some skill points to pumping up damage. Mesmer is a popular secondary choice, as its Domination tree will let you lay down spells that will affect enemies over time without overly taxing your energy. You can also go with Elementalism if you wish, but many of the most effective spells there will take a lot of energy, and if you start to fall behind on the healing because you're going for offensive abilities, you can expect to annoy your (probably dead) teammates a great deal.
Divine Favor
Divine Favor is your primary skill, and is mostly going to be of use to Healing monks. Each point here will result in a blanket three health being restored whenever you cast a spell. For instance, if you have one point in Divine Favor and cast Heal Other on a teammate, they'll be gained for three health plus whatever Heal Other gave them. If you have five points in Divine Favor, then they'll gain 15 points of health, plus whatever Heal Other gives them. So it stacks with healing powers, but also works with non-healing abilities like Shielding Hands. Healing / Protection monks will want to emphasize their Healing attribute, but Divine Favor should be close behind.
In addition to adding a blanket healing bonus to your spells, there are also a few skills that are specifically tied to Divine Favor for increasing their effects, but it's a small and rather unremarkable bunch.
Healing Prayers
The Monk is the only class in the game that can heal other players in the party, save for some very limited abilities of the Necromancer and the Ranger; all classes get some way to heal themselves, but when you want a real healer, you're going to pick a Monk to round out the ranks of your party. Most Monks will, indeed, probably want to specialize in Healing prayers, as healing monks are in great demand for partying, especially when you get up to around Piken Square or so. The more points you put into your Healing attribute, the more effective your spells will be - it's as simple as that.
Smiting Prayers
The Smiting attribute is the school of offensive power for Monks, and mostly focuses around causing Holy damage to foes. Holy damage is a useful tool, especially when dealing with ghosts and the Undead that start popping up later in the game, but the sad fact of it is that most Monks aren't going to be chosen for their offensive prowess, and if you advertise yourself as a smiting Monk, you'll rarely be chosen in front of a Monk that can actually heal worth a damn, except perhaps when you start dealing with the Undead. Investing heavily in Smiting will prevent you from becoming too good at Healing, which is what most parties desire, although it will make you a bit more feasible while soloing.
Protection Prayers
Protection prayers are focused on preventing damage from reaching your allies and removing negative effects and hexes from them. There are some pretty neat spells in here, such as Shielding Hands, which will reduce all of the damage an opponent takes for the next ten seconds, and Vital Blessing, which is an enchantment that will boost a single ally's maximum health while you maintain it. Shielding Hands alone is probably worth investing a few points into Protection for, as it's great to cast on a character that's about to charge into a group of enemies, or that's getting pounded on too quickly for you to heal them.
Ranger
Almost all of the classes in Guild Wars have access to ranged or magical attacks, and good ones at that, making the Ranger perhaps less of a unique class than the Hunter in World of Warcraft or the Amazon in Diablo II is. But it’s still the only boat to row if you want to use skills that boost your bow attacks, and is also the only class that will let you set traps and tame animals to serve at your side.
One of the distinguishing features of the Ranger is that they can use their bow attacks from a good distance away, further in fact than most spellcasters will be able to hit you from. In party combat, this can make you a valuable puller, as you'll be able to position yourself behind your warrior, select a target, shout it out, then fire at it to pull it and its group towards you. With some help from a healer, you can easily survive the aggro generation of such a maneuver, and you'll be able to front-load your damage with things like Precision Shot, Power Shot, and preparation abilities like Apply Poison or Choking Gas, or lay down a trap between you and the opposing enemies and force them to run over it on their way to you.
One thing to remember as a Ranger is that you're going to be dealing a bit more damage if you're above your enemies. You gain a damage bonus from having the high ground, which is especially useful in PVP, so do your best to get above your enemies and fire down at them.
A number of professions mesh well with the Ranger. Ranger/Mesmers or Ranger/Necros can be devastating in PVP thanks to their ability to stack poison and health degeneration effects on a single target, or otherwise gimp foes with status effects, while Ranger/Monks offer up a number of support abilities to help your team carry the day in mortal combat.
Expertise
Expertise reduces the overall energy cost of most of your skills, with each extra point in Expertise resulting in a 4% reduction of energy costs for Preparation, Traps, and Attack skills. Note that this benefit doesn't round up, so you'll need to pump this enough to get a full energy point reduction in order to see any effect. E.g. an applicable skill that costs 10 Energy won't get any benefit from two points in Expertise, since this is only an 8% reduction, and thus amounts to less to a point; putting another point in Expertise, however, will result in a 12% reduction, and will thus drop the energy cost of the skill to nine points.
Expertise also affects skills that reduce Energy cost, skill recharge times, and your Ranger's chance to dodge attacks, such as Practiced Stance, Lightning Reflexes, and Dodge.
Beast Mastery
The Beast Mastery skill tree mostly revolves around buffing your animal companion, increasing its health recovery rate or armor or giving it added offensive capabilities. There are plenty of Call abilities, which generally last for 30 or 60 seconds, allowing you to put them up just before a fight starts and have them last throughout. There are also a number of skills here that affect Rangers themselves, allowing them to adopt the aspect of a certain beast for a short period of time, and which act as short-term self-buffs.
Marksmanship
Marksmanship skills revolve around increasing the efficacy and especially the speed of your bow attacks. Not many of these skills will result in outright damage increases, but many of them will let you fire more quickly, thus letting you pump out more damage per second. A lot of these skills will also let you interrupt enemy actions, forcing them to start casting their spell or performing that action again. Marksmanship rangers can thus be pretty annoying in PVP.
Wilderness Survival
Most of a Ranger's trap abilities are located in Wilderness Survival, along with the bulk of their Preparation abilities. Traps are great ways to start off fights, as they'll affect multiple enemies with status effects, as well as causing damage, while Preparation skills will allow you to add damage or an effect to all of your ranged attacks for the next dozen seconds or so.
Elementalist
As in many MMO’s, the Elementalist (read: Mage) in Guild Wars is going to be the heavy damage dealer of the party, with many of the most damaging spells, area-of-effect attacks, and elemental damage. While physically weak, elementalists get large energy reservoirs and plenty of energy restoration to go along with it, enabling them to cast plenty of spells with minimal downtimes.
As the name of the class implies, Elementalists are masters of elemental magic, in this case subdivided into Air, Fire, Earth, and Water. This is something of a drawback, as the four divisions of magic, when added to the Energy Storage primary power, mean that Elementalists have to choose from five attributes instead of four, thus meaning that each attribute will have somewhat fewer spells available to it than you’d find in other classes. Still, though, each attribute is going to be roughly equivalent to one another, with each having its own strengths and weaknesses.
Like in most games with elemental magic, you’re going to find that some enemies are going to be weaker to some forms of magic than others, especially when the foes you’re facing are themselves constructed out of an element. So, for instance, if you see an Ice Elemental running around, you’d be wise to use Fire magic on it; any Fire spells you use will do double damage. Using Ice magic on an Ice Elemental, however, will result in drastically lower damage than normal. Since it costs an awful lot of points to reach the higher level of an elemental skill, you’re probably going to want to try and specialize as much as you can in a single school of magic, and use your secondary profession to deal damage or otherwise hurt enemies that wind up being resistant to your elemental prowess. You can still realign your attributes when you reach an area where you think it'd be worthwhile to do so, such as by retasking to fire magic when you hit the snowy peaks around Yak's Bend.
The most popular secondary profession for Elementalists seems to be Mesmerism, with its wide array of support abilities that mesh well with Elementalism. Things like Backfire can be a big help when dealing with spellcasters, since it’ll harm them each time they cast a spell, while Phantasm can add some straight bleeding to their rear ends. Domination Mesmers can especially be nice, since they’re quick to cast and affect an enemy for a few seconds at a time. Monking can also be popular so that you can act as a secondary healer when needed, but you need to be careful not to spend too much energy on healing; most of what you want to be doing in combat is casting spells.
Energy Storage
Energy Storage is going to be a great skill to invest in, especially over the first few points, as each point will net you an extra three maximum energy. There are a lot of classes that would die for this kind of simple boon, but the Elementalist is arguably the one in most need of it, since they have the most expensive spells and need to cast spells to fulfill their role as a damage dealer. Some spells require upwards of 40 energy to cast, so you'll probably need a couple of points in Energy Storage just to use them, barring excellent equipment upgrades.
Fire Magic

Fire magic is obviously going to be best used against ice and snow creatures, but can be devastating against almost any enemy you face. Fire has a good mixture of single-target and area-of-effect spells, and can often set enemies on fire, resulting in extra damage over time. It is, however, an expensive school of magic, with many skills that cost 15 or 25 energy at a go.
Water Magic
Water magic incorporates both water and ice magics, resulting in a school that emphasizes slowing enemies and protecting you from harm. The damage here isn't as great as Fire magics are, but there are some noticeably good spells, such as Blurred Vision, which can cause all enemies in a group to miss with 50% of their attacks for 10-20 seconds. This is a great spell to open a fight with.
Earth Magic
Earth Magic focuses on knocking enemies down, and is especially useful for damaging enemies close to the caster and for increasing your resistance to physical attacks. Although it doesn't have quite as much offensive prowess as something like Fire does, Earth is notable for the relative cheapness of its spells, with most coming in at 10 energy or so.
Air Magic
Air magic doesn't have a particular effect associated with it; many of the spells just do good solid damage and leave it at that. It's also generally going to be the cheapest school of magic to specialize in, with only one 25-energy spell and no 40's at all.
Mesmer
Mesmers are manipulators, not focused on dealing outright damage, but rather with throwing out status ailments and twisting the efforts of their enemies back on themselves. It isn't an exceedingly popular choice as a primary profession, but is quite often seen backing up primary monks and elementalists on their journeys.
Mesmers have a bevy of manipulative spells at their disposal, and are especially useful at negating the powers of enemy spellcasters or at manipulating the raw energy of foes so that they can't access their skills and spells. There aren't a great number of super-awesome-DragonBallZ offensive powers here, but with practice, you can be quite annoying in combat.
As a Mesmer, you're going to want to pack along another spell-casting secondary class, such as Monk or Elementalist, to compensate for your lack of a purely defined role. Your Fast Casting attribute can supplement these abilities by allowing you to pump out damage or healing spells more quickly than primary Monks or Elementalists would be able to. Mesmer/Necros are especially deadly when dealing with single targets, as Conjure Phantasm combined with something like Blood Siphon or Faintheartedness can stack for massive health degeneration for a short duration, forcing enemy healers to work overtime to counteract the effects.
Oddly enough, although Mesmers is one of the least utile classes in PVE play, a well-played Mesmer can be devastating in PVP combat. If you can get close enough to your foes to cast a well-timed Chaos Storm or Backfire on their primary casters or Monks, you can shut them down for a good amount of time, or force them to cease casting until they can remove your hex. The tough part is going to be getting close enough to the back lines of your enemies to cast your stuff, since it'll typically be the warriors going in headfirst. Try to have your target lined up before the melee begins, though, and just run through the fight to cast your hexes; mesmers are usually a low-priority target for the opposing team, so you won't likely be getting hit too often.
Fast Casting
Fast Casting is the Mesmer's primary skill, and, well, lets you cast your skills a bit more quickly than you would otherwise. This skill doesn't list a set percentage bonus for casting times, so it's difficult to gauge its precise effect, and it's also difficult to know whether it rounds up or down, which is important for spells that already have a short casting time. Anyway, dump points here if you're looking to put more magic in the air, but be careful not to cast too fast or you'll run out of energy.
Domination
Domination mostly focuses on harrassing and interrupting enemy spellcasters. There are a number of powerful spells in this category, with two of our favorites being Backfire and Chaos Storm. Backfire is a single-target spell that hexes a single spellcaster for ten seconds; whenever that character casts a spell during that timeframe, he or she will take damage. If you pump up your Domination stat almost all the way, you can bump the damage up to over 100 points per spell, which is sometimes enough to kill enemies outright if they're not careful. This is especially useful on enemy Monks in PVP, since they have to constantly cast healing spells on everyone else. They'll either have to stop healing their teammates, or waste their energy on healing themselves.
Chaos Storm is another damaging spell, but one that affects a character and the area around them. In PVE play, you'll often come up against masses of enemies that stick close together; a Chaos Storm cast on one of them will deal a bit of damage every second for ten seconds to all enemies near your target, and also drain energy from spellcasting enemies when they cast a spell. Although you need to have a large number of attribute points in Domination to drain more than a couple points of energy with each hit, Chaos Storm is still pretty useful at any stage, as it'll cause your enemies to both take damage and lose energy.
If you're looking for a more straightforward version of Chaos Storm, you may want to try out Energy Burn. This skill starts out by draining your foe for 5 energy and dealing eight times that amount in health damage, but you can up the amount of energy lost by, again, increasing your Domination stat.
Illusion
Illusion magic is mostly intended to affect your opponent's minds, mostly by disrupting their attacks and throwing out numerous other status effects. There are some damage spells in here, mostly of the "target players loses X health per second" variety.
Inspiration
Inspiration skills typically revolve around the manipulation of energy, mostly by stealing the energy of enemies and transferring it to yourself, or adding energy cost to normal actions, such as attacking. Some of the skills here also revolve around manipulating the enchantments of enemy spellcasters, such as by removing them from the targets, allowing you to eliminate the buffs on certain characters.
Necromancer
Necromancers are the dark magicians of Guild Wars, focused on manipulating the powers of blood and death to their own nefarious ends. Strong necromancers can be a mighty asset to a party, as they have the ability to summon armies of mindless drones to distract foes and can convert bodies into extra health regeneration, or sacrifice their own life for added benefits. They also have plenty of skills revolving around the transferance of conditions, such as Bleeding or Deep Wounds, allowing them to transfer negative effects on themselves over to enemies.
Necromancers function as something of indirect damage dealers in PVE combat, with a number of support abilities that can help your entire party. Since they don't have an overwhelming number of direct damage spells, many Necromancers choose to take on Warrior as a secondary profession and use melee weapons in combat, relying on Blood Magic abilities to restore their health and afflict their enemies. Although this archetype is fairly common, many players also love grouping with Death Magic Necromancers, especially when you're questing in areas with large numbers of flesh targets, such as evil dwarves and Charr. Death Magicians can raise armies of the undead from corpses, which will take gradual damage until they die, but which will reduce the pressure on your healers and front-line troops by giving your enemies a number of essentially meaningless targets to beat on.
In PVP, the Necromancer's role is somewhat different. Since you can't rely on a steady stream of corpses, corpse-affecting spells are vastly reduced in effectiveness. However, you should have plenty of Blood Magic and Curse effects to spread the horror with; things like Faintheartedness, Enfeebling Blood, Shadow of Fear, and the like can all greatly reduce the effectiveness of specific enemies or enemy groups. And although you won't be able to raise undead armies, you may wish to examine the Well powers, such as Well of Suffering or Well of Blood. While you do need to kill an enemy before you can use these spells, they can effect drastic shifts in the balance of power, either by giving all of your teammates a good deal of health regeneration for around ten seconds or by afflicting all of your enemies with health degeneration. Also, don't overlook the spells that strip enemies of Enchantments, such as Chilblains and Strip Enchantment; most Warrior/Monks will be laying down Retribution or Mending on themselves which you'll be happy to be rid of, and you'll also be able to strip away a Monk's Healing Breeze if you're quick.
As mentioned, many Necromancers in the game take Warrior as a secondary profession, although this is far from a consensus choice. Necro/Elementalist and Necro/Mesmer are also popular choices, with Necro/Ranger and Necro/Monk being somewhat less common. With Soul Reaping, though, you should be able to fuel most spellcasting classes with the energy that you steal from enemies, so energy conservation isn't quite as pressing an issue as it is for, say, a primary Mesmer.
Soul Reaping
For each point you put into Soul Reaping, you'll gain one energy when a nearby enemy dies. Pretty handy, that, especially in large-scale PVE battles where you'll be mowing down enemies quickly. It's not quite as useful in PVP combat, though, where kills are going to obtained only after long slogs of fighting, and where your victory is usually almost assured after the first couple of kills, making the extra energy gained less than necessary.
Curses
Curses is a good support attribute for PVP players, as you'll be able to harry your opponents with slowing, interruptions, Hexes, and all kinds of nasty stuff like that. A number of the spells here will reduce the effectiveness of healing magic cast on your target for a period of time, allowing you to plop them down on an enemy warrior and go to town - just be sure your teammates know who you're casting on so that they can all target him or her.
Blood Magic
Blood Magic often involves some kind of sacrifice of the Necromancer's health to effect some kind of change on the target. A good early spell that Necrowarriors and Warrior/Necros will want to boost is Blood Renewal, which forces you to sacrifice 33% of your health, then nets you three health regeneration for ten seconds and a large health gain at the end of the spell. If you can get a Monk to cast Healing Breeze on you while you cast this spell, you'll be able to charge in with as much as 10 or 11 health regeneration, making you virtually undamagable for 10 seconds. Generally, though, it's best to cast it before combat, then take advantage of the regeneration to charge into combat and start swinging away.
If you happen to have access to them, Well of Blood and especially Well of Power (an elite skill) are great in PVP, since they'll let your teammates sit inside the radius of their effects and gain regeneration for 10 seconds. They don’t affect your enemies, and these effects can't be dispelled. Just be sure to let your party members know that you're casting them!
For PVP, you might also want to try using Spinal Shivers on critical enemies, like healing Monks. It will cause your target to be interrupted when hit by cold damage for a good length of time, up to 30 seconds. If you pair this with a wand that deals cold damage, it's conceivable that you could prevent an enemy from casting any spells for the duration of the effect, although you yourself would of course be almost useless to your team for the duration of this effect.
Death Magic
Death Magic, as previously mentioned, mostly revolves around the conversion of corpses into usable energy or effects, or with the maintenance of undead allies that you've raised. It can be useful in PVP, but you won't be able to rely on the undead armies of PVE; instead, you'll be using Death Magic for things like Soul Feast, Putrid Explosion, and Deadly Swarm. In PVE, though, undead masters are a great boon to a team, at least in areas where you can actually raise undead minions. Although they'll take damage over time and eventually die if you don't quickly move from enemy to enemy, they still confuse the enemies in the game and cause them to cease attacking the actual members of your team.
Getting Started
When you first step into the world of Tyria, it’ll probably take you a little while to get used to the somewhat odd way the game is set up, especially if you’re attempting to shift over from a "pure" MMO game like World of Warcraft. Things are a little bit different in Guild Wars, mostly in the sense of things being multiplayer, but much less massive. It’s really more akin to Diablo II than anything else, if you happened to play that game, save that the numerous chat channels are incorporated right into the game itself in the form of the towns. Like Diablo II, it’s going to be rare to play with more than a few other people at a time; only in the cities will you meet up with other players and attempt to group up for missions. When you do head out on a mission, the game will create a special zone for you and your party members (or just yourself if you’re playing solo) that will only features enemies in it; no other players outside your group will be able to access it. Thus, your chances of happening across a fellow player out of town and striking up a group will be nil, but likewise, you’re never going to be killed by some griefer who happens to enjoy taking advantage of the weakness of others.
In essence, though, Guild Wars does play a lot like an MMO, or any other type of RPG, since it has skill sets, classes, equipment upgrades, quests; all the trappings of a traditional RPG experience are here. Getting used to the game’s unique mechanics can be a bit daunting, but with a little time under your belt, you should pick up the pace pretty quickly. For those of you who are brand-new to this type of genre, though, we’re going to give you some tips to help get you started in Ascalon.
After Character Creation
After you’ve made a new character and sit through the opening cutscene, you’ll be deposited into Ascalon City, one of the capitals of Tyria. The storyline elements of the game are summed up by the cutscenes you’ll witness as you take quests, as well as in the opening cutscene, so if you’re interested in learning more about what’s happening in Tyria, play close attention; the manual also has a bunch of fiction for the game if you want to read that.

Anyway, here you are standing around in town. You’ll notice that one of the characters in front of you, the Town Cryer, has a green arrow over his head; this indicates that he has a quest for you. If you talk to him (by left-clicking on him) and accept the quest that he gives, called "Message For a Friend," it’ll be entered into your quest log, which you can check by hitting L. This is a simple quest; all you have to do to complete it is cross the bridge to your north and speak to Sir Tydus, who likewise has a green arrow above his head (which can also indicate that a character can give you a reward for completing a quest), you’ll complete the initial quest and earn your reward, netting you a little gold and experience. You’re off to a good start!
After you talk to Sir Tydus, he’ll offer you another quest right off the bat. This quest, "War Preparations," will involve you leaving town, so go ahead and do so. You’re likely going to see a lot of other players in the town square on your way out, but don’t worry about them yet; just walk down the ramp and into the large, glowing, white exit points on your left.
Adventuring and Earning Skills
When you leave town, you’ll see a short loading screen, and you’ll wind up in Lakeside County, an idyllic little area that’s devoid of any serious threats to you. Immediately outside the gates should be Gwen, a young girl, and your first quest trainer, the name of whom will change based on your chosen profession. Your trainer will definitely have a quest for you, and if Gwen’s there, she might have a quest for you as well. (One of the classes, Monks if we recall, actually have a quest to help rescue Gwen, who’s been trapped by monsters nearby, so she won’t be there for those players.)
Speak to your trainer first off. They’ll give you a simple quest to perform, after which they’ll reward you your first two skills. As you accept this quest, you’ll notice a little flair on your compass, in the upper right-hand corner of the screen, which resolves itself into a small green arrow in the corner of your mini-map; this is going to point you towards your quest objective. (If you missed the quest text, you can find it in your quest log and read it again.)
Now, most of these starting quests are going to involve killing Skale, which are goblin-like fish creatures that dwell near the river to the south of your location. Head there and start taking down Skale, then; you should be able to handily defeat them with your starting weapons. Most of these enemies won’t attack you unless you attack first, so you’ll be able to handily avoid combat if you just want to run past them, but you should definitely kill a few of them for experience and to gain some items. All you have to do to attack an enemy is left-click on it; if you want to get a little more complicated, you can use Tab to cycle through nearby enemies, then hit Space when you see a likely target. River Skale Tads are going to be your most likely target here, as they’re level 0 and will be able to take only a few hits before keeling over dead.
Most enemies in the game will drop some kind of item when killed, and these Skales are no exception. While enemies never drop usable armor, you may find weapons that are an upgrade over what you were initially given. To check your equipment, hit I and move your mouse over the weapon in your weapon slot; most of them will do something like 3-5 damage. If you’re using a one-handed weapon, like a sword or a cane, you’ll be able to equip another item in the shield slot below it. Warriors will want to put an actual shield here, while spellcasters will want to equip some kind of item that gives you extra energy, such as a chakra or an icon. Pop your inventory whenever you pick up an item and see if it isn’t something you can equip. (Note that many of the Skale will drop Skale Fins; be sure to pick these up.) If any of the items that drop have blue names, hold onto them; these are magical items. You’ll need an Identification Kit to identify them, but you’ll be able to get one of those later on.
When you’ve completed your initial quest given to you by your trainer, return to him or her for your quest reward. You can check on whether or not you’re done by examining the quest in your quest log; underneath the Quest Summary, you should see your objectives scratched out with the line "Return to (trainer) for your reward" entered in beneath it. With that done, return back to the gates of Ascalon City and talk to your trainer again; they’ll give you your first two skills in your primary profession. After that’s done, your trainer will return to the city, leaving Haversan in their place. Haversdan should have a couple of new quests for you, so pick those up.
Skills
Now that you have a couple of skills under your belt, we might explain what these do. Skills are essentially your spells; all classes have them, and all of them will need to use them in combat for maximum effectiveness.
You can collect an incredible number of skills in your travels, with most of them coming as quest rewards, just like you earned these two. You can only use eight skills at a time, though, and you won’t be able to change these eight skills during a mission. If you have more than eight skills (and it won’t take you long to acquire more than that), you’ll need to pick them while in town. You can open your skills menu by hitting K, and if you’re in town, you’ll be able to drag and drop skills onto your skill bar (at the bottom of the screen) to select the eight that you want to use.
If you want to obtain more skills for your character, then Haversdan should have given you a quest called "A New Ranger Trainer" or "A New Warrior Trainer" or whatever. If you follow the arrow given to you on your map (which will likely lead you outside of Lakeside County), you’ll eventually find another trainer for your profession, who’ll give you more quests and more skills. Yay! The more skills you have, the more flexible you’ll be in combat.
Note that most skills will have green numbers in their descriptions, which you can check in the Skills menu or by running your mouse over the skills on your skill bar. These indicate variables, or numbers which can be increased or reduced by allocating attribute points to your various attributes. Don’t worry about them yet; instead, just keep adventuring for the moment and we’ll discuss attributes later on.
Merchants
Now, if you return to Ascalon City, we’ll talk about the merchant characters you’ll encounter there. There are three types of merchants here: general merchants, weapons merchants, and crafters.
General Merchants are given the tag [Merchant], and can be found in pretty much every town in the game. These guys will sell you items, the most important of which are the identification kit and salvage kit. Both of these are described in detail in our Items chapter above, but to sum up: ID kits will let you identify magical items that drop, while salvage kits will let you break down junk items into useful crafting items that you can bring to a crafter to make more powerful equipment.
At the beginning of the game, though, the most important role of the merchant will be as a buyer; you can sell almost anything to him, and although he won’t pay you much more than five gold for most of the stuff you’re going to be finding in the early game, but since you start out with virtually no cash, every little bit will help, and indeed you’ll be finding enough junk items in the game so that the small amounts of cash you earn from item sales will definitely add up.
Weapons Merchants won’t be fully usable for a good long while. At the outset of the game, all they can really do is customize your weapons for you, which adds +20% damage to the weapon at the low cost of ten gold. This is worthwhile in and of itself (although it does prevent you from giving the weapon to another character for them to use), but later in the game, you’ll be able to add custom parts to your weapon to upgrade it further. For now, though, return to the Weapons vendor whenever you get a new weapon and customize it for the extra damage.
Crafters are similar to weapons merchants in that they won’t be tremendously useful until later in the game. Again, these are explained in greater detail in the Items chapter above, but for now, suffice to say that you can bring crafting items to these guys and have them convert them into better equipment. Most of the equipment that you can earn in Ascalon is barely worth making, though, so you’re better off not salvaging equipment, and instead just selling everything you can for cash at this point in the game.
Choosing a Secondary Profession
Now, at this point you can start exploring the countryside. If you wish, you can track down the next trainer for your profession, or attempt to earn a secondary profession. You’re going to need to earn a secondary profession before you can leave this first part of the game, so you’re going to want to start thinking about what you want to pick.
Luckily for you, you can feel free to try out multiple professions before settling down and picking one. When you find a secondary profession trainer, of which there’ll be five (one for each profession except your primary profession), they’ll give you a task to perform and loan you some of the skills of that class, which you can keep and try out while you’re on the quest that they give. In most cases, you’re going to be forced to use the skills that they’ve given you in order to pass through whatever quest that you’re tasked with. For instance, the Monk trainer will give you a healing spell, and then ask you to escort a guard through some poisonous water in the catacombs while he retrieves a sacred object. While he’s running through the water, you’ll need to heal both him and yourself, or you’ll die.
Anyway, if you wish, you can feel free to track down the secondary trainers and partake of their quests at no real risk. Each of their quests will net you 250 experience. After you complete their initial quest, you can return to them for the experience reward; they’ll then ask you if you wish to permanently take on their class as a secondary profession. This is a permanent choice and cannot be changed, ever. If you’re hesitant to commit to the secondary profession, just turn them down; you’ll keep the temporary skills you were given until you do another class’s beginning quest. If you want to take up the profession later on, you can simply return to the trainer again and accept the burden at that point.
Mesmer: Lady Althea, at the Actor’s Stage just outside of Ascalon City, will ask you to track down and kill a rogue bull. Find it on your map (it’s quite close to her) and use Conjure Phantasm to off it. You’ll need to use it three or four times; you can’t hurt it very much with physical attacks due to its high armor.
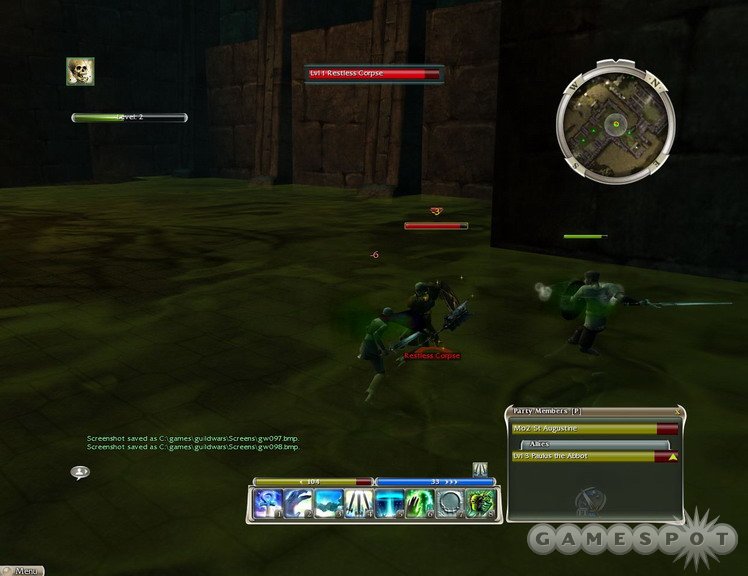
Monk: Brother Mhenlo resides in Ashford Abbey, a town that lies at the end of the road leading southwest from Ascalon City. If you accept his quest, you’ll be asked to escort an Abbey guard into the catacombs in order to retrieve an artifact. The only catch is that there’s poisonous water between you and your goal, so you’ll need to keep using your healing powers on yourself and the monk if you wish to stay alive.
Ranger: If you’re interested in ranging, then you’ll have to head to Regent Valley to meet up with Master Ranger Nente, who’ll instruct you on the art of obtaining a pet companion. To do so, head to the Melandru statue noted on your map, then use the Charm Animal skill on one of the Melandru Stalkers there to bind it to your will. With that done, return to Nente to become a full-fledged Ranger.
Elementalism: The secondary trainer for Elementalism is difficult to find. Aziure is going to be found near the tower in Wizard’s Folly, which is a zone found to the south of Ashford Abbey. If you happen to have picked up the quest "The Wayward Wizard" in Ascalon City, then that can be used to make your way down to the town of Foible’s Fair, which is right near the border between the lush greenlands and the snowy mountains to the south. The tower you’re looking for is actually in the mountains, to the southwest of Foible’s Fair, and is going to be guarded by level three Ice Elementals, so you may want to bring along a teammate or wait until you’ve gained a couple of levels before heading out.
When you meet up with Elementalist Aziure, she’ll ask you to protect her while she performs some magical ritual thingamabob. She’ll give you a few spells, including Glyph of Lesser Energy and Fire Storm. The basic idea here is to wait for the Ice Elementals that appear to gather around Aziure, then use the Glyph, then use Fire Storm to pound away at the Elementals. They’ll take double damage from the Fire Storm, so it should be able to kill them all relatively easily. While you’re waiting for it to recharge, attack them with normal spells or attacks, and be sure to stay above the 15 energy needed to cast Fire Storm again. When all the Elementals are dead, you can speak to Aziure again to take on Elementalist as a side profession, if you wish.
Necromancer: Necromancer Munne is found just inside the Catacombs, the entrance to which is inside Ashford Abbey. In order to complete her task, you’ll need to use the Animate Bone Horror skill which she gives you to create zombie-like creatures to do your bidding. She wants you to enter the tomb and kill a Nightmare that has been created within, but the path leading to it is blocked off by a number of flame traps. If you enter one of these flame traps, you’ll die, so instead, walk up to the edge of the trap and use the Bone Horror spell to summon a Horror; they’ll usually be summoned within the flame traps, and thus set them off, freeing you to pass by. The Nightmare is level four, but shouldn’t be too difficult to kill if you’re above level two or so and have some manner of healing yourself.
Warrior: To train as a secondary Warrior, talk to Warmaster Grast in Green Hills County, which you can find by following the road leading west out of Ascalon City. He’ll give you some sword skills, as well as a starter sword, and ask you to kill six Grall Invaders that have taken up position on the roads to the southwest. Do so, then return to him to become a full-fledged warrior, if you wish.
Keep Questing!
After you’ve gotten used to how the game plays, you’ll probably still have a bunch of unfinished quests in your logbook. At this point you’ll probably want to go out and do as many of them as you can - each of them will be worth 250 or 500 experience, and most of them will be easily soloable, except maybe for pure healing monks. Each quest may not add a significant amount to your level bar, but getting as much of the experience here before bumping yourself to post-Searing Ascalon will make the going a lot easier for you as opposed to people who leave at the minimum required level.
Moving On
When you think you've expended as much energy as you're willing to do so in Ascalon and its surroundings, it's time to move on to the next phase of the game. To do so, return to Ascalon City and talk to Tydus, by the gates to the Ascalon Academy. In order to get past him, you'll need to be at least level three and have two professions, but you're well advised to wait until you're at least level five to move on, and the higher the better. You should be able to get up to level seven or eight by doing all of the quests here, which will make for an easier time after the Searing. Keep in mind, again, that this is a permanent change, and that you won't be able to return to the Ascalon you know once you accept Tydus' mission.
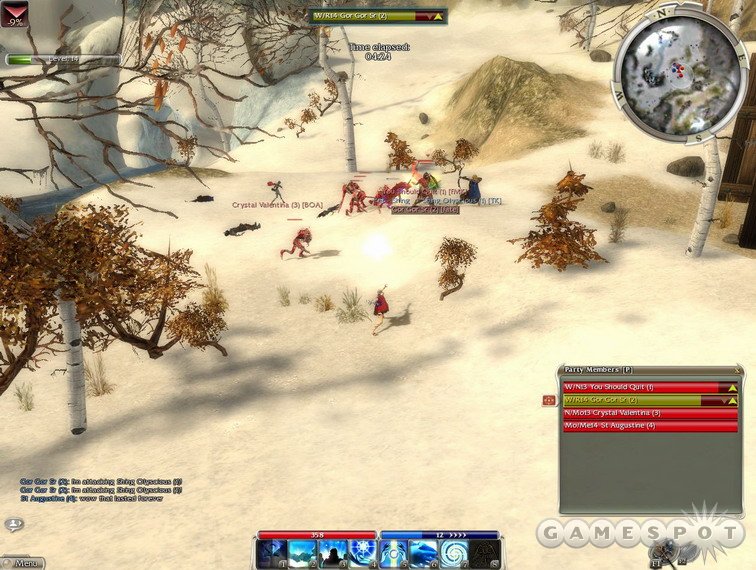
Anyway, the first task Tydus will give you will involve a quick PVP battle, which is somewhat jarring and confusing, since it arrives without any context whatsoever. Apparently each team here is asked to kill the other time; the first team to record nine kills or so will win the battle. Winning or losing has no real effect on you, though, so don't worry about this part of the mission overmuch.
After the PVP battle, your team of completely random individuals (which the server selects for you; you can't choose players to join, apparently, although you may try talking to Tydus while you're in a group and see if that works), you'll have to fight your way through a cave full of Charr and kill their leader. You'll have plenty of NPC helpers here, so you shouldn't have any problems dropping the beasts. When that's done, you'll get a rather interesting cutscene that will propel your character two years into the future, into post-Searing Ascalon.
Post-Searing Ascalon
Ascalon after the Searing is a much different beast than the world you knew beforehand. There are a number of new features waiting for you, just in Ascalon City itself, such as Henchmen, materials traders, and other new vendors, such as the skill vendor. The biggest change in post-Searing Ascalon is the inclusion of story-driven Cooperative missions and PVP-based Competitive missions.
Finding a Party
So far as the general game mechanics go, you'll find that it's not really possible to just run out into the world and kill monsters by yourself anymore. There are more monsters running around between the towns, and they're more difficult to kill, so if you go out all by your lonesome you're going to have a difficult go of it. Henchmen can help finish off some of these quests, but you're probably going to want to team up with real players for the more difficult ones.
The first and probably best way to find good people to group with is to join a guild. There are plenty of guilds running around spamming invites in Ascalon City most of the time, so if you're just looking for a random guild to join, it's not too difficult to find one. It might be better, though, to make a guild with friends, either from real life or people you know online, and then schedule times to get together and do your quests. Or, if your guild is sufficiently large, you should be able to find people online whenever you need help. Just be sure to help out people of lower level than you, or you'll find your own requests for assistance falling on deaf ears.
Another way to polish off quests is to ask for teammates in the general chat of the town nearest to where the quest is resolved. It's best to ask for teammates for a specific quest, rather than typing out all of the quests you have into the chat window and hoping for tells. Since you can't link or share quests, it's just easier to manage if you get strike teams together for one quest, or for all the quests in a zone, then head back to town for your rewards and to sell the loot that you picked up.
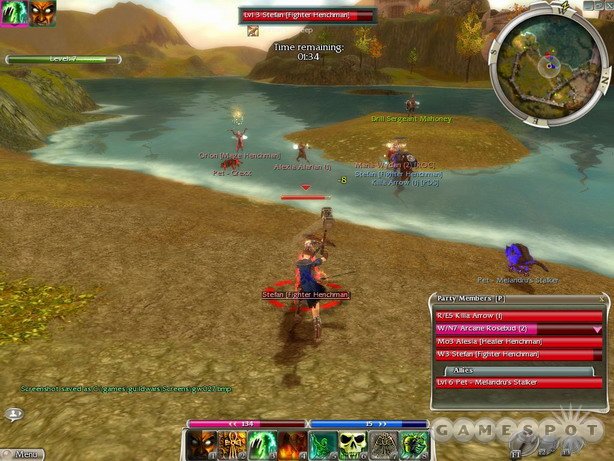
Using Henchmen
Henchmen can be fantastic tools to finish off old quests that you never managed to get around to doing, but their weakness lies in their being just that: tools. They’re not particularly brilliant, can't adapt as quickly as human players can, and won't be able to bring all the unique skills that a human player might. That said, they still work well enough for dealing with most of the random 500-experience quests that you'll come across after you pass through the Searing, so long as you don't expect them to fight all of your battles for you.
You can hire henchmen in any post-Searing town by finding them in the city (they're always grouped together, so look for four or more green dots clumped around each other), then clicking on them and clicking on the green plus sign in your party window. You can fill out a whole party with henchmen, if you wish, or you can just hire one or two to come along with you.

Henchmen affect you as would the presence of other real players: experience is split between yourself and them, as is gold, and they'll also prevent you from obtaining massive amounts of items. Instead of items dropping and being "claimed" by your henchmen, though, as they would be for real players, they just won't drop. On the plus side, though, all items that do drop will be available for you to pick up.
Luckily, henchmen are bright enough to team up on the same target, so when you pick a target and fire on it, you can expect all of your henchmen to go for the same enemy. (Note that this is sometimes beyond even the abilities of human players...) You can use this concentration of fire to go through your targets in an orderly fashion, taking down enemy healers first, then going for the big guns.
One thing that henchmen are poor at is defending themselves; this isn't because they're not aggressive enough, but rather because they're sometimes too aggressive, especially in the case of enemies that can't really be hit. This is mostly a nuisance in areas where enemies are above or below you, such as when you cross a bridge or come up to a cliff; the enemies will notice you when you come within their aggro radius, then start using ranged attacks and spells on you, forcing your henchmen to try and find a (usually non-existant) path to the enemies, thus confusing them and diffusing your party. Sometimes you can force them to follow you by just moving ahead, but this is still pretty annoying.
Use Party Targeting
One of the most exasperating aspects of partying with real live humans is the way that very few people, at least in this early portion of the game's history, know how to use the game's auto-targeting system to combine their fire on one target. If you have six people in your party and are trying to take on an opposing group of eight enemies, then you need to have all of your party members targeting the same target. If you do so, you can kill individual enemies in seconds, then move on to the next target, and so on. If, on the other hand, each member of your party is aiming at their own separate targets, then it'll take you much, much longer to kill things, and you stand a greater chance of seeing your targets get healing from an enemy spellcaster. This isn't a game of niceties: gang up on a single target, kill it, then move on to the next.
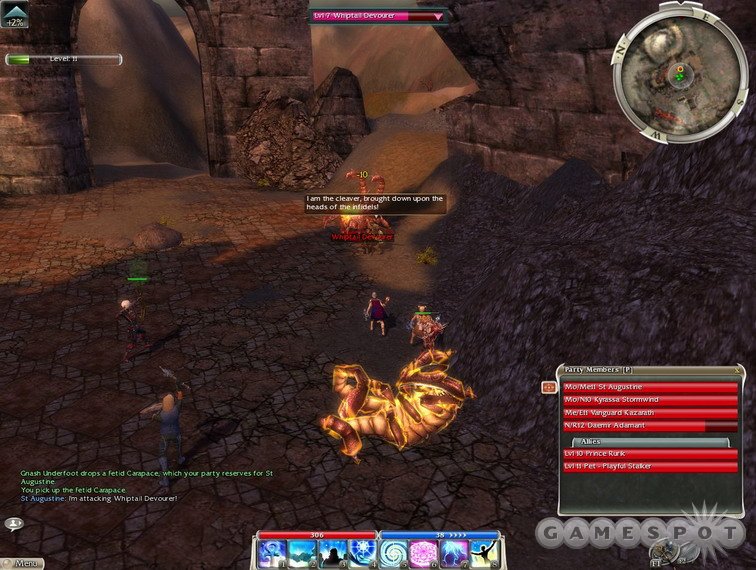
The real bummer about most people's inability or refusal to use targeting is that it's incredibly easy to put it to use. All you need to do is select one person in your party to be the designated targeter. This is usually going to be one of your Warriors, since they'll be in the thick of things and will be able to cycle through targets quickly and will hopefully be able to go for any targets of interest, such as healers or spellcasters. When your targeter has a target lined up, they can let everyone else in the party know who they're targeting by hitting Ctrl - Space. This will result in a shout in the Team channel (e.g. "St. Augustine: I'm attacking Whiptail Devourer!") and will pop up a little targeting icon by the name of the targeter in the Party window.
Now, when you see that your targeter has selected a target and has shouted it out, all you have to do to combine your firepower on that target is hit T, and you'll automatically target it and open fire with your bow or staff or melee weapon. See? That's easy, isn't it? Trust us when we say that proper use of targeting will greatly increase your efficiency in party-based combat, by channeling the firepower of your entire team onto one target. Without party targeting, your party's damage will be diffused throughout a group of enemies, thus resulting in longer fights and a greater chance that your casters will run out of energy. And that's not a good thing.
Of course, you don't always have to use party targeting. Elementalists and other classes with area-of-effect powers might want to switch away from the targeted enemy when using an area-of-effect spell. For instance, if your warrior has targeted an enemy warrior-type foe that he's going toe-to-toe with, while a larger group of enemies is clustered together behind him, you may want to bust out with your Fire Storm or Chaos Storm on the tighter group of enemies, since you'll be doing more net damage with those spells back there. Just be sure to switch back to the primary target when you start chucking out energy balls from your weapon.
Obtaining New Skills
One of the primary reasons for playing the PVE game is to acquire new skills which will let you dominate the battlefield when you finally reach level 20 and start to play PVP games against other high-level players. As you travel, then, you'll want to obtain as many new skills as possible, and there are a few diffeent ways to do so.
Quests: As in pre-Searing Ascalon, many of the skills that you're going to be obtaining will be available as the result of questing. Get every quest you possibly can, then, and check their quest descriptions to see if they're going to result in any new skills for your character; different classes will get skill rewards for different quests, depending on the profession of the character that gives the quest. The bulk of your skills will be coming as a result of questing, so be sure to be extra careful to check each quest for new skills listed among the rewards, and do them as soon as you're able to.
Skill Vendors: Many towns feature NPCs that sell skills to you. In order to obtain them, you'll need to give them gold, as well as relinquish a Skill Point. Skill Points are earned by obtaining experience, but only very slowly; you also gain them as a resulting of completing the many Cooperative Missions in the game. The important thing to remember about skill vendors is that skills will become more expensive to buy as you buy more of them; the first costs 10 gold, the second costs 20, and so on, until you find yourself paying hundreds of gold for each skill. Skill points themselves are fairly scarce over the life of a character, so don't bother buying every skill available to you at a vendor, unless you're a completionist. Rather, it's best to just purchase the ones you're absolutely sure that you're going to use on a regular basis, and leave the rest behind to ensure that you'll have enough gold and skill points to buy the critical skills later on.
Signet of Capture: The Signet of Capture can be bought from skill vendors in Quarrel Falls and the Henge of Denravi, and can be used to obtain skills directly from enemies. In order to use it, you'll have to equip it as a normal skill, then find a boss creature that's using a skill from one of your two professions. After the boss uses a skill that you'd like to obtain, click on the Signet of Capture to steal the skill from the boss; at this point, the Signet will be removed from your skill bar (permanently) and replaced by the stolen skill. You can cancel this capturing procedure if you click on the Signet again, if you find that you're capturing something you don't really care for.
The Signet of Capture is unique because it will let you access Elite skills. Elite skills are rare skills that are almost exclusively available through the Signet of Capture. They're not always incredible improvements over the common skills that you'll run across, but in most cases they will be upgrades, so if you're interested in getting the upper hand in PVP you'll definitely want to try and track them down.
Cooperative Missions
There are a number of Cooperative Missions in post-Searing Ascalon, starting at the Great Northern Wall, which is adjacent to Ascalon City itself. Cooperative missions will require a group of four to eight players to complete, and will usually take anywhere from half an hour to an hour of time. This are objective-based missions, much like the ones ordinarily given to you by NPCs, but a bit more in-depth and detailed. The rewards are greater, as well, with each mission being worth 1,000 experience and a single skill point, which you can use at a skill vendor to purchase new abilities. In addition to the main quest, each cooperative mission will have a Bonus quest associated with it. Finishing the Bonus quest will net you another 1,000 experience, so it's well worth the time to track them down and finish them off.
The best thing about cooperative missions is that they'll often end by warping your party to a new town, and sometimes right to the next cooperative mission zone.
We're not going to be able to give you details on all of the cooperative missions - most of them are fairly straightforward hack-n-slashes anyway - but we are going to include mini-walkthroughs for the first four missions. Completing all of these will take you to Yak's Bend, the second major town in post-Searing Ascalon.
The Great Northern Wall
The Great Northern Wall is a fairly straightforward kill mission: all you have to do is cut your swath through a number of foes until you reach an outpost a bit north of the wall. Head left when you hit the tarpit and go up the ramps. You'll know you're there when you cut down a Charr boss enemy. When you reach the outpost, the mission automatically ends. Congratulations, you just managed to cause the breach of Ascalon's defensive wall! Way to go!
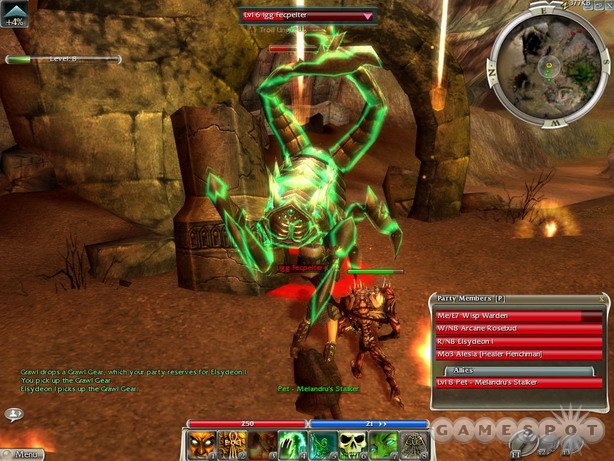
Bonus: A ghostly warrior is off on the northern end of the mission map. When you find him, he'll ask you to bring him four pieces of his armor that were lost long ago so that he can gain passage to the afterworld. These armor pieces are scattered around in Wreckage piles around the map, so be sure to hit them all and prod your teammates to pick up these items when they happen to be reserved for them. You can keep the armor pieces through multiple mission attempts, and apparently all you need are four pieces, not all four separate parts, so eventually you should be able to pull this one off, even if you have to grab all the pieces yourself across multiple missions. It's not that difficult to do in a single try, though, if you have a decent team.
Fort Ranik
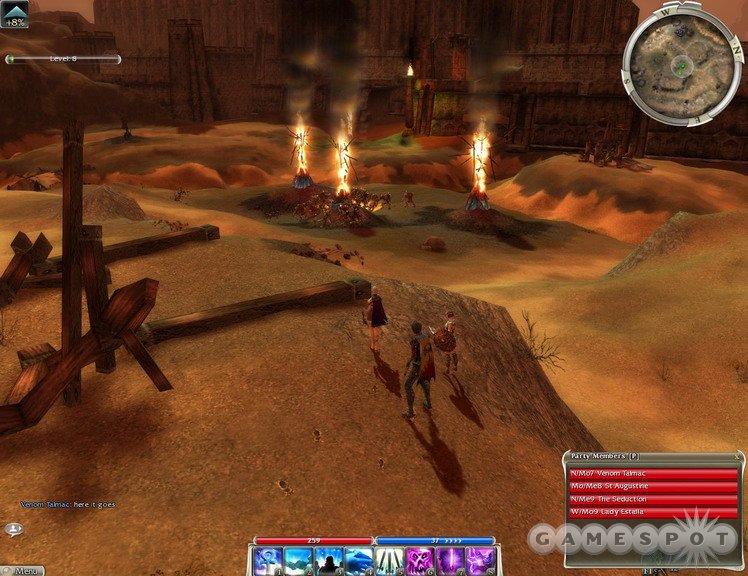
Fort Ranik is another fairly straightforward mission, where your goal is to push your way through many, many Charr until you reach the armies that have broken through the Northern Wall and into Ascalon, then push them back across the wall or just destroy them outright. Most of this level is hack-and-slash, but when you reach the plain at the end of the mission, you'll have to reassemble one of the broken trebuchets with parts found from nearby wrecked catapults and use that to destroy the mass of enemies waiting for you. There's another trebuchet closer to the wall; if you have a hearty Monk or Warrior that doesn't mind dying for the cause, they can run up to the ramp leading up the wall, grab aggro on all the enemies, then lure them back to the fire near the bottom of the ramp. While the Charr are wailing on your sacrificial lamb, fling the trebuchet at the fire and you should take out the entire group. Since you're near the end of the mission anyway, you can just res your dead ally (they'll get killed by the explosion if they're anywhere near it), run up the ramp, kill any remaining enemies, then end the mission.
Bonus: We recall this as being fairly simple. There's an NPC trapped in a cage by two Charr Overseers; he's up a switchback ramp near the canyon that leads to the trebuchet field. You should spot him on your map while you're running around, so head up the ramp and free him for your bonus experience.
Ruins of Surmia
(Note that Fort Ranik doesn't take you to the Ruins of Surmia. In order to reach it, you need to leave from the Frontier Gate, walk north across the Wall, then wrap around to the west until you find the mission zone. There is a quest called, oddly enough, Ruins of Surmia which will take you from the first zone to the Ruins. It's a fairly short walk.)
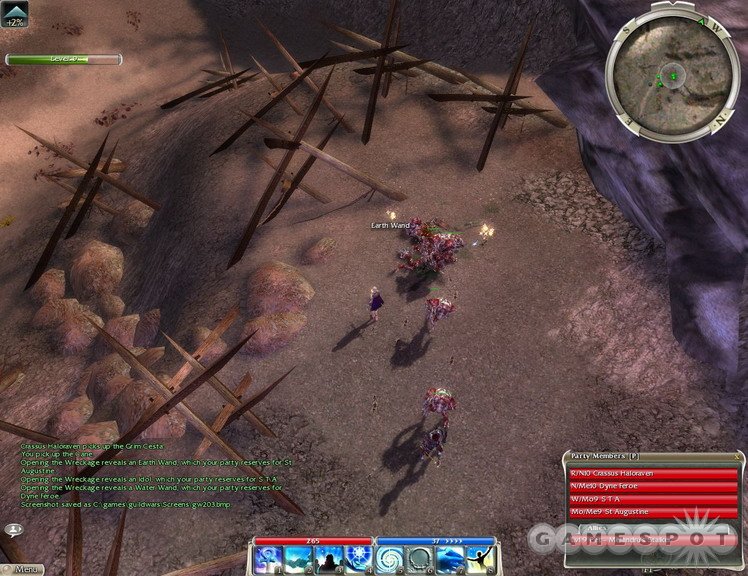
This is where the missions start becoming fairly lengthy. Most of this mission is fairly straightforward, as Prince Rurik will be around to shephard you towards the many corrals in which the Ascalon soldiers have been penned up. In one of them, you'll find Erol, who'll run you up to the ruins of a destroyed castle. While Rurik and Erol wait for your party, you'll need to run down to the water below and follow the path around to the far side of the moat and kill the enemies there before dropping the drawbridge with the lever by the door. (Feel free to kill the enemies in the area before dropping the bridge, if you want experience and loot.) At that point, the dynamic duo will cross the bridge and hatch a plan to escape from the castle, by freeing more captive mages and using them to open a teleport to the Nolani Academy.
Bonus: The bonus here is given you to by a soldier standing watch over the road near the watery moat, after you guide Runik to the raised bridge; you'll probably be able to spot him on your map as you're running around. She'll ask you to track down some Flame Keepers and kill them. As you get this quest, you'll notice some Charr walking down behind you. These Ember Bearers may appear to be ripe for the picking, but if you want to successfully complete the mission, you'll have to just follow them from a distance and wait for them to open a wooden gate across the water. When the gate's open, charge through, slaughter the Ember Bearers, then track down the Flame Keepers near the temple and slay them for your bonus experience.
Nolani Academy
Your initial goal here is to defend the Academy from the siege that it's under by the Charr. There are two ways to go about doing this. The first is to take the northeastern passage out of the Academy, wrap around to the east, head south, then eventually flank and ambush the Charr outside the gates. This can take a while; if you just want to get on with the mission, you can also choose to just open the gates and let the Charr come in. The mages standing around will deal some damage to them, while Rurik himself is an able distraction. The Charr will come in in waves, so it's not all that difficult to defeat them if you have good healing.
After the Academy is safe, guide Rurik to the south to the ruins of Rin. He'll blow a big ol' horn, which has the Incredible Magical Effect of...making it rain. Yay? Anyway, with the flames of the Charr smited, you'll be able to sweep into the city relatively unmolested. After you meet up with the King, you'll end the mission and be on your way to Yak's Bend, the next major part of the game.
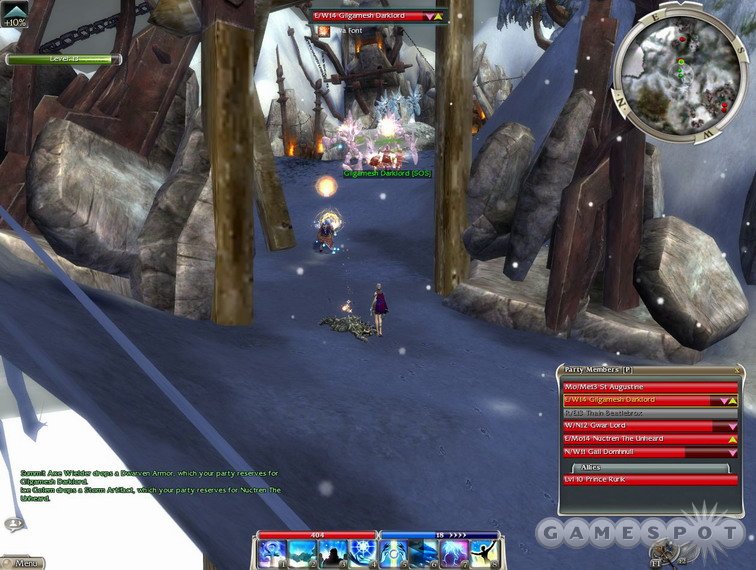
Bonus: The bonus here is acquired by following the northeastern path out of the Academy. There's a man in a valley to the east of the main road who bears a book; when you talk to him, he'll give one of your party members the book to carry, and ask you to bring it to the graveyard elsewhere in the level, to the southeast of the Academy, if we recall correctly. You'll know you're near it when you spot the Spirit of the Fallen enemies. These lvl 10 ghosts are devastating in large numbers, so try to split them up into more manageable groups. We hear that Holy damage lays the hurt out on them, so you may want to get your Monks to bring along one of their offensive spells if they can fit it in their task bar.
When you cut through the ghosts, you'll have to find a graveyard monument in a small crevasse with steps leading down to it. If the book-carrier clicks on the monument, you'll get your bonus experience.
Items
One of the unique (and sometimes frustrating) aspects of Guild Wars is that, for a good bulk of your character’s early life, you’re going to be finding virtually nothing of worth on the enemies that you kill. If you’re used to upgrading your items from enemy drops in games like World of Warcraft or Diablo II, then this system can be frustrating, as you’re going to have to wait a while and invest a goodly number of hours in the game before you can start to really get the good loot that’s often the point of these games. Enemies don’t start to drop rare items until you’re into the teen levels, and early magical items (which are represented by blue names when they drop) are often only marginally better than their vendor trash counterparts.
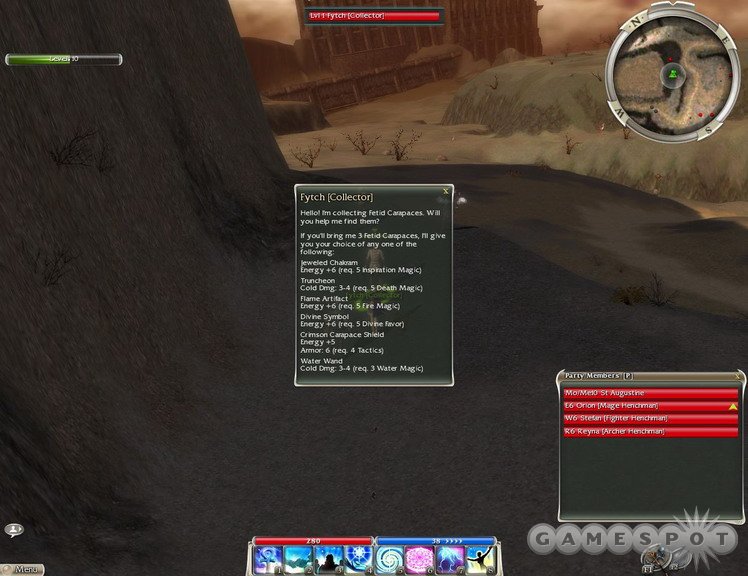
Collectors
Early-game items are going to be best obtained through running quests, and by hitting collectors. In pre-Searing Ascalon, the only way to obtain armor will be to run and find the various collectors that dwell outside the towns. These collectors will ask for a certain number of a certain item, and let you know what they’ll give you in return when you first approach them. For instance, Brownlow, who’s just outside the walls of Ascalon, will request that you bring him five Skale Fins, which drop off of the River Skales and River Skale Tads in the river south of his location. When you return, he’ll offer you a Belt Pouch, which will give you five extra inventory slots.
There are many collectors scattered throughout the lands, sometimes in difficult-to-reach places (although most of them are pretty easy to reach before the Searing). The key thing to remember here is that collectors are initially the only way to upgrade your armor, so if you’re intent on getting away from the initial armor sets, you might want to try tracking down some of the collectors and upgrading your look. If you don't want to worry about upgrading your armor before the Searing, then don't; it's relatively easy to make the initial armor upgrades in Ascalon City post-Searing, which are going to be better than the stuff the collectors offer you for a good long while. Unfortunately, in post-Searing Ascalon, the collectors will generally give you fairly underwhelming stuff, but you may still want to check their offerings and see what they have available for you. Also note that the offerings of collectors will change based on your primary profession in most situations.
(One notable collector in post-Searing Ascalon is Innis the White in Old Ascalon, near Ambassador Zain. If you bring him four Singed Gargoyle Skulls (found on the many Gargoyles in the area), he'll offer up a War Hammer that does 11-17 damage, with a massive +25 damage bonus to Charr enemies. Most Warriors will want to pick one of these up for the many missions that will pit you against Charr forces.)
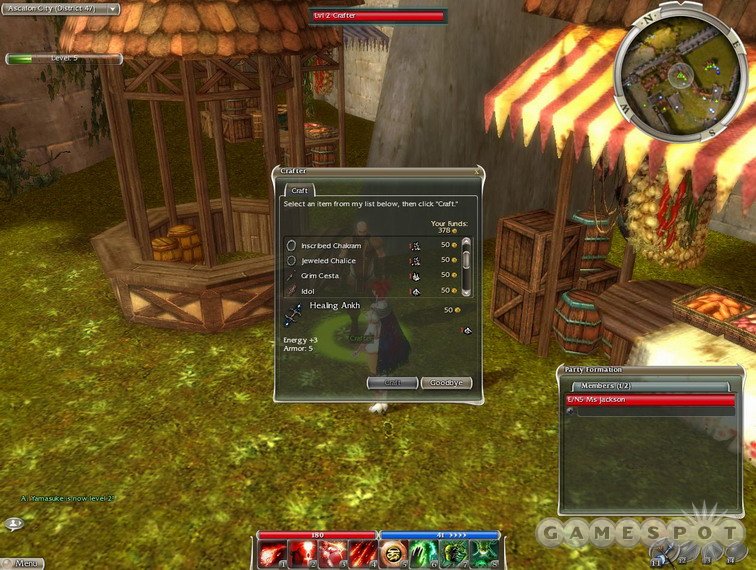
Crafting
In addition to collectors, you can also try your hand at crafting new items when you get past the searing and wind up in the ruined portion of Ascalon City. Crafting before you encounter the Searing is a bit of a pain, and isn’t very rewarding, but immediately after the Searing you should be able to effect some pretty big defensive improvements by hitting up the armorers in Ascalon City and using them to make some new armor.
In order to craft armor, you’re going to need to have a goodly amount of gold (150 per piece is the going rate, it seems), but you’ll also need to have crafting materials, such as Wood Planks, Bolts of Cloth, and so on. (If an item can be used in crafting, it’ll say so in it’s mouse-over description.) Some of these will drop naturally off of enemies, but for the most part, you’re going to have to make your own crafting items by using a Salvage kit on other items that drop. For instance, as you run around killing things, you’ll be picking up plenty of crappy hammers, swords, and pieces of unusable armor off of your enemies. When you buy a Salvage Kit and use it on these pieces of vendor trash, it’ll be converted into some kind of crafting item. (Usually, anyway; some items can’t be salvaged and can only be sold.)
When you have a bunch of crafting items stored away, hit the armorers and see what you need for a certain piece of armor. Most classes will need something corresponding to the type of armor that they wear, so Warriors will need Iron Ingots and the like to construct their chainmail, while less-armorific classes will have to make do with Leather Squares or Bolts of Cloth. Anyway, when you have the required number of crafting items to make an item, you can drag them to the armorer and pay him to put the thing together for you, and voila, a new piece of armor.
Rare Crafting Items
Things get a little more complicated when we start thinking about rare crafting items and item transmutations. In order to make some of the better craftable equipment, you’ll need to have rare crafting items, but these can be difficult to find (as is probably obvious, considering that they're rare). In order to obtain rare items, you'll need to either head to a Materialist, or find them yourself with the Expert Salvage Kit.
Materialists are special vendors that can convert Common Crafting Items into Rare Crafting Items, for a price. With your crafting materials in your inventory, you can walk up to a Materialist, hand over your items and some cash and get your sweet, sweet rare crafting materials. The Materialists that we know of dwell just outside the exit from Fort Ranik and the Sanitarium (where the Abbey was pre-Searing), and there's also an advanced one in the Ascalon Foothills, to the southeast of Yak's Bend.
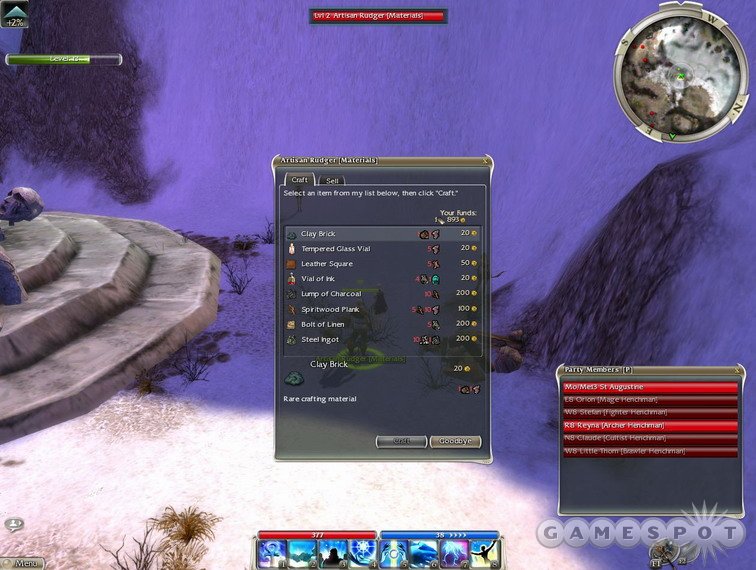
This latter vendor is the object of the Missing Artisan quest given to you in Yak's Bend, and can produce Clay Bricks, Tempered Glass Vials, Leather Square, Vial of Ink, Lump of Charcoal, Spiritwood Plank, Bolt of Linen, and Steel Ingots, all in a one-stop shopping experience. He's going to be really tough to get to for most players, though, since he's surrounded by level 10 Hydra. He is, however, relatively close to the entrance from Traveler's Vale to the Foothills, so if you load up a team full of henchmen, clear your way to the entrance, then just make a break for the Materialist, your henchmen should be able to distract the Hydra long enough for you to get to the Materialist and make your transaction. It obviously helps to have some kind of healing here, as you may get killed shortly after you reach him. If you manage to open up his trade window before you die, though, it should be open and ready to go after you resurrect back at the shrine, allowing you to cheat death yet again.
So the basic recipe for crafting items that need rare ingredients is to find out what you need, obtain the common crafting items by converting vendor trash with a Salvage Kit, then hitting up a Materialist to get the rare items that you need. (If you're having trouble finding the common crafting items, then you can return to Ascalon City and talk to the Materials Trader there, who'll usually have a bunch of common items up for sale.)
Expert Salvage Kits will also allow you to nab rare crafting materials. When you obtain Expert Salvage Kits (which you can buy off the merchant in Yak's Bend when you reach that town, or have guildmates buy for you if you're not that far), you can use them just like a normal salvage kit, but Expert kits will give you a small chance to retrieve rare parts from the crap you salvage. Not everything can yield rare crafting items, though; indeed, most of the vendor trash and salvage items that drop in the areas around Ascalon will never yield rare items, no matter how often you break them down. It's best to reserve your Expert kits for items that you find around Yak's Bend and beyond if you don't want to waste their significant cost (400 gold a pop).
Upgrading
Another type of vendor that you'll find in the cities of Tyria are Weapons vendors. These guys offer up numerous substandard weapons for sale, if you're in the mood to pick up something terrible, but will more importantly give you the chance to customize weapons. Customizing a weapon will prevent anyone but you from using it, and will add 20% to the total damage, for the low low cost of 10 gold.
In addition to straightforward upgrading, you can also happen to find runes and upgrade parts when you use your Expert Salvage Kit on certain salvage items and weapons. These runes and upgrades will list their effects on their tooltip when you mouse over them; if you think you can make immediate use of these items, doubleclick on them to apply them to a piece of armor or another item. Since you replace your armor only very rarely, it's best to throw runes onto armor; weapon upgrades obviously have to have to be used on weapons themselves, so be sure you have something useful in hand before using one, as using an upgrade permanently removes it from your inventory.
Note that many of these upgrades will list themselves as being "unlocked" when you first find them; this means that, should you decide to create a PVP-exclusive character at the character creation screen, you'll be able to apply these runes and upgrades to your equipment free of charge.
PVP Tips
One of the main draws of Guild Wars is its strong PVP component, in which you can jump right into a fight with a minimal wait, fight for a few minutes, then keep going or go back to the PVE content if you wish. PVP in Guild Wars is a fun, fast-paced experience, but one that's quite a bit different than PVE and will require a bit of customization on your part if you want to get the most out of the experience. This section of the guide isn't intended to be the be-all-and-end-all of PVP tippery (tippage? Tipology?) but hopefully we can provide a few pointers to get you on your way towards battlefield dominance.
There are a few PVP battlegrounds in Guild Wars, including those in Ascalon City, Yak's Bend, and one at Fort Koga at game's end. If you enter one of these zones, you'll be able to choose Start Mission to warp yourself into a PVP game with three random other players. After that, you'll have 25 seconds to get steeled up for the fight, at which points the gates open and it's kill-or-be-killed action. You do get experience for winning in PVP, even though you don't get gold or items, so it can be a way to improve your character while having fun at the same time.
Use Resurrection Signets
Resurrection Signets are non-optional in PVP combat. Sorry, but they're not; all of your party members should have them on their skill bar when they enter a game. You obviously can't control your human teammates' skill choices, but at the very least be sure to have Resurrection Signet good to go when you enter a PVP round. It only takes three seconds to cast, and will restore your target to full life when used. Of course, you can only use it once, but it's one of the only ways for non-Monks to resurrect a teammate.
Monks do have the option of using Resurrect or Restore Life multiple times in a PVP battle, but you probably shouldn't do so. Each of these requires eight full seconds to cast, making it quite likely that you'll be interrupted or knocked down by an enemy while casting them. Although they do have the lure of being theoretically usable as often as you like, in practice you’re unlikely to be able to get even one off. Resurrection Signet also has the bonus of being free to cast, making it easily usable even when you're running low on energy.
Signet of Capture
One of the reasons that players who go through the PVE content before jumping into the end-game PVP will be so powerful is because of the Signet of Capture, which lets you obtain Elite skills from boss monsters scattered around the game world. To obtain a Signet of Capture, make your way to Quarrel Falls and buy one from the skills vendor there. Each Signet of Capture will cost you one skill point, but the gold required to buy it will be calculated separately from your normal skills, meaning that it should be much cheaper to obtain.
With a Signet of Capture in your inventory, you can equip it to your skill bar before heading out into the wilderness. When you fight boss enemies (the ones that are outlined in color), check what they're casting by watching their status bar, and capture one of their skills by using the Signet immediately after they cast something you want. You'll lose your Signet of Capture when you capture a skill, but you can buy as many of them as you want and carry them around like inventory items (although you'll still only be able to equip them in town, like normal skills).
The important thing about Signet of Capture is that it's the only way to net Elite skills, which will have a direct impact on your efficiency in PVP. Elite skills aren't necessarily overpowering, but in many cases they are going to be strictly better than normal skills, or have powerful effects that you won't find on skills you can buy from a skills vendor. If you want to be great in PVP, then you'll probably want to continue to search out boss enemies and steal their skills with Signet of Capture in PVE, even after you hit level 20 and have "beaten" the game.
Avoid Pre-Made Characters
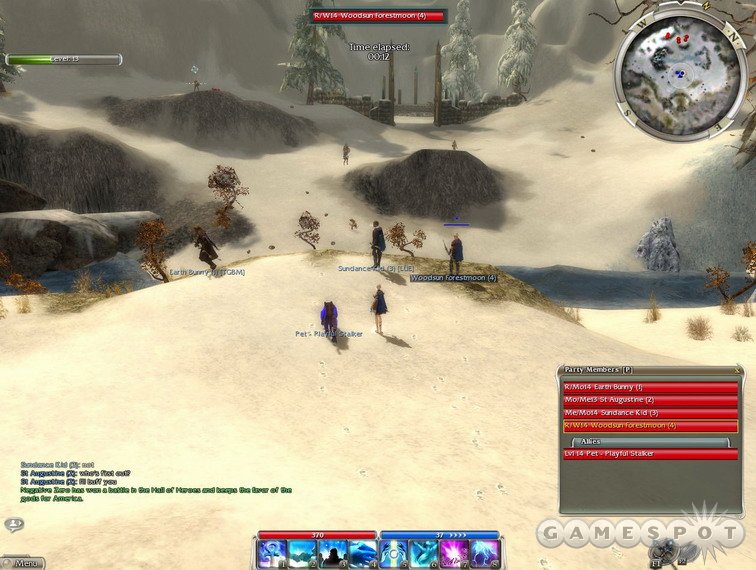
If you're serious about playing PVP, then you may be tempted to use the PVP-Only Character option at the character creation screen. PVP-Only characters come pre-loaded to level 20 with some decent equipment, but they're weak in a lot of respects. For one thing, most of the skills in the game will be locked off to your PVP characters until you find them with a Roleplaying Character, meaning that you'll only have a dozen or so skills to your name if you make a PVP character as soon as you install the game. You also won't have the benefit of runes or weapon upgrades.
If you really want a prime PVP experience, then, be sure not to create a PVP character right off the bat; instead, you'll probably want to play through the roleplaying game and find as much Phat Lewt as possible, and unlock as many skills as possible, before ascending to the Hall of the Gods and going crazy in PVP combat there. You can probably contribute with a pre-made PVP character, but you're going to be at a severe disadvantage compared to the grognards who've pumped their characters up with runes and have found dozens of elite skills.
Customize Your Skills
The neat thing about PVP play is that the skillset you choose for PVE isn't going to be quite as effective as you might think. Warriors and the like will often spec for pure damage in PVE play, but in PVP things like interrupting and hexing your opponents becomes awfully important as well.
Finding the perfect balance of skills is going to take a little trial-and-error; you just have to learn to be flexible and sometimes dump that totally killtacular skill in favor of one with a more subtle, but more useful effect. If you're planning on playing PVP for a while, then you might even want to consider refocusing your attributes or equipment to allow for more effective play. For example, Blood Magic is probably a bit more useful in PVP than is Death Magic for Necros (no offense, Death Necros), thanks to its ability to cause massive health loss over time for your opponents, so you might want to just take away some of your Death Magic points and pump them into Blood Magic before a furious bout of PVP action gets going. You'll use up one Attribute Refund point for each point you take off, but you gain another one back for each 250 experience you earn in PVE combat, so you'll normally be running around with the maximum amount of points here anyway. Mesmers are going to need to be especially careful in switching their spells around, as they have plenty of spells that are too narrow to be of much use in PVE, but which are powerhouses in PVP, when you're assured of going up against casters.
Equipment changes aren't usually so drastic, but Warriors may find that they like to use one type of weapon in PVP and another type in PVE, perhaps due to the fact that they have a larger number of skills for Swords than for Hammers, but have a big Hammer that's useful in PVE beatdowns. (Although, while we're on the topic, the Warrior's Hammer Bash skill is one of the best ways to prevent casters from casting spells in PVP.) Casters may also want to change their wands and off-hand items as the situation dictates, since many of them have bonuses that are tied to their attribute points.
Customize Your Interface
Another aspect of the PVP game that you may want to modify to suit your style is the interface. There are a few features in the interface that you don't necessarily need to have on your screen in PVP battle, such as your experience bar, the trade button, and, if you only use one type of weapon, the weapons bar. If you want to reduce screen clutter, feel free to eliminate anything you don't find yourself using in PVP battles; you can always restore them later if you feel like it.
By clicking on the "Edit Interface" button in the Customize tab in the Menu, you'll also be able to move screen elements around. We found it helpful to move the Effects Monitor closer to the center of the screen from its starting position, to help us monitor harmful Hexes that were being placed on us, but again, feel free to mix and match as you like.
Go For The Healers
Speaking as people who play primarily as a healing Monk, there's nothing we like more than when a group of enemies ignores us and lets us do our healing from behind the front lines. When we don't have to worry about our own health, we can safely sit back, cast Healing Breeze over and over again, and when things go rough, we have a large reservoir of health to convert into healing with Infuse Health. Infuse Health is a skill that takes half of the Monk's current health and transfers it to the target ally, with a percentage boost tacked on top of it. Any decent Monk that's gone through a significant amount of the game's PVE content will have unlocked this skill, so you can bet that it'll pop up during PVP play as well. When a Monk is left alone, it essentially lets him or her instantly heal a single ally to full health, when they've boosted their Healing attribute a good way up, and that's pretty damn powerful for something that only costs 10 Energy. If you consistently harry and harrass Monks, though, the effectiveness of Infuse Health is reduced, since it works off of their current health total. Drop their health, and Infuse Health becomes a non-factor in a fight.
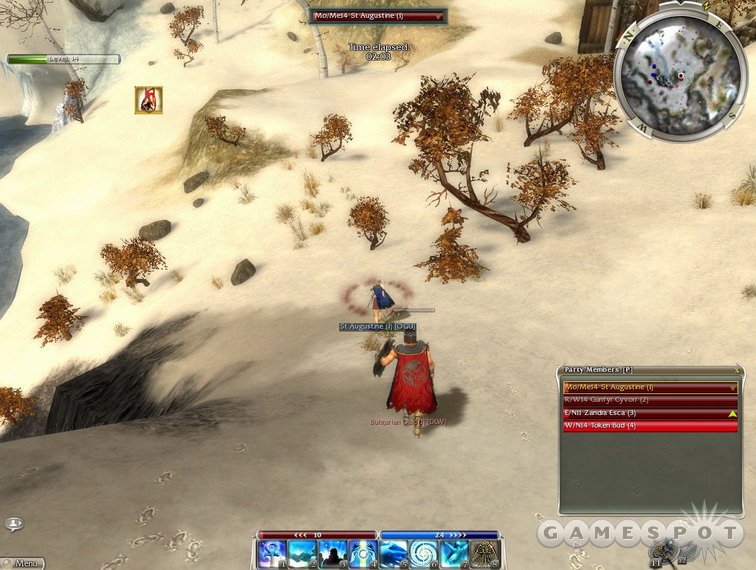
What's more, it's just plain annoying to get beat on when you're a Monk. As long as we have energy, we'll usually be able to survive for a good long while, but we'll have to focus a large amount of our energy towards healing ourselves rather than our teammates. When you beat on a Monk, you can expect them to use Healing Breeze fairly often, and when you get towards the end of the game, you can expect this to give them six-eight ticks of health regeneration, which is going to be enough to counteract a single warrior's damage in most cases. If you have any methods of eliminating enchantments, then, it'd be wise to concentrate fire on the Monk and blast away their Healing Breeze before it works too well. Mesmer skills are especially annoying to Monks, with things like Backfire being tremendously effective in shutting them down.
Anyway, if you get rid of a Monk, then you'll definitely have an easier time beating the rest of a PVP team. You'll have to kill the Monk twice, or perhaps three times in some fights, due to Resurrection Signets, but after they come back to life they'll won't have much energy in the tank, so hit them again before they can build it back up and get back into the fight. You shouldn't exclusively focus on a Monk, but you'll probably want to dedicate at least two of your players to killing them.
This is all contingent on there actually being a healing Monk on the other team, of course; many times there won't be. In that case you can aim for whomever you like. We find Necromancers and Rangers to be ideal primary targets in these cases, due to their ability to cast area heals for their party members like Well of Blood.
You know what? Again, speaking as people who primarily play as Healing Monks, forget all that. We were just kidding. Leave us alone and let us heal.
Mesmerism FTW
Although Mesmers aren't necessarily a powerhouse class in PVE, they can be justly feared in PVP combat by casters and warriors alike. Since you stand a good chance of facing off against casters in any given PVP battle, though, you're going to want to ensure that you have plenty of skills on your taskbar as a Mesmer to deal with them.
Most casters will naturally be using their wands to fill up the deadspace between spellcasting, so Spirit Shackle can be valuable in penalizing them for not paying attention to their buff bar, since it'll drain them of five energy each time they attack. (This is of course also quite valuable when used on Warriors, since it'll likely drain their energy completely if it has a boosted duration.) If you're interested in stealing energy from an enemy, then Energy Tap and Energy Drain are both good for ripping your enemy's resources away from them. They do virtually the same thing, save that Energy Drain has a slightly shorter casting time and is Elite. The virtue in using both of them, though, is that they both have a 20 second cooldown time, meaning that you won't be able to use Energy Tap more than three times a minute. Adding Energy Drain will allow you to steal energy twice as often, and since these skills are effectively free (since you steal more than they cost, assuming you don't get interrupted), you can feel free to cast them on enemy spellcasters as often as you wish.
Other useful spells for PVP are Shatter Enchantment and Drain Enchantment, both of which strip enchantment spells from a target foe, and either damage that foe or restore energy to the Mesmer. If your team prefers to gang up on a single target, then be sure to cast one of these as soon as you spot a Healing Breeze effect pop onto the enemy, as this is the spell that many Monks will be relying on to deal their damage.
In addition to their anti-energy spells, Mesmers have a lot of ways to deal with physical damage. Soothing Images is a specifically anti-Warrior spell, in that it prevents the target from gaining adrenaline for a goodly length of time, effectively preventing them from using any of their Warrior combat skills for the duration. If one of the members of your team is running away from an attacker (or if you yourself are getting pounded), you can lay down Imagined Burden to cut the attacker's movement speed in half for a few seconds, long enough to let them effect their getaway.
This is just a basic toot-of-the-horn for Mesmers. It's a difficult profession to be good at, and many of their skills are less than overwhelming in PVE combat, but a well-played Mesmer in PVP is a valuable addition to any team.
Charrrrge!
In most PVP matches, there's going to be a period of waiting at the outset. After the gates open, most teams will pause for a second, tab through the enemy ranks, and pick their targets. If your team has won a few rounds together, then you may be able to increase your chances of winning by just running towards your enemies pell-mell and smashing into them before they have time to pick their targets. This works best when you have a single able player that's good at locking on to the weakest member of an enemy team and whom can lead a team with targetting, preferably a warrior. If you work together as a team, you can just switch on autorun, follow your leader into the enemy group, and start chopping before they get situated. This is especially helpful when taking on enemy groups that are in their first game and haven't had time to mesh.
You Win Some, You Lose Some
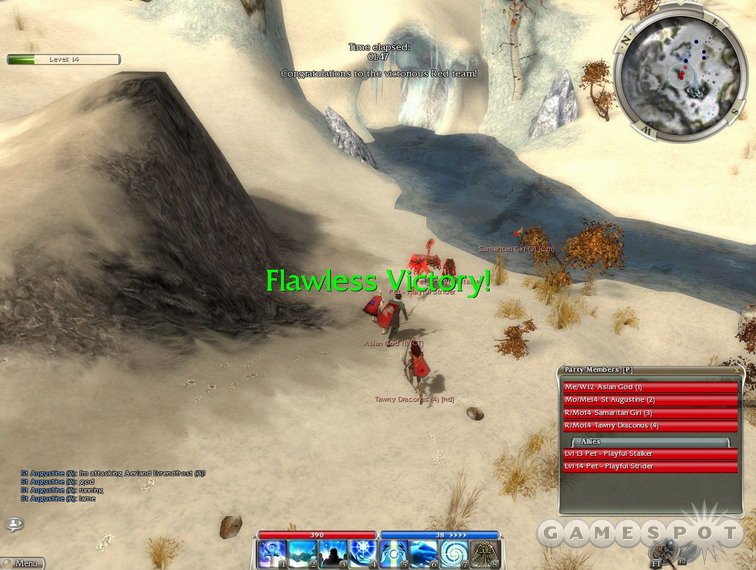
The thing to remember about PVP in Guild Wars is that, due to the fact that your groups are randomized in most of the arenas, you stand an even chance of being put into a pretty poorly composed group. You know the ones: all Mesmers, all Elementalists and Necromancers, or so on. You really do need variety in a group to succeed, so when you come up into a poorly-composed group, you should play to win, but a lot of the times you're kind of doomed from the start, with player ability being an X factor.
On the flip side, no matter how good your group is, there's always going to be another group out there that's a little better, whether in terms of group dynamics or composition. There are enough Warrior/Monks out there in the game world to make it an even bet that you'll eventually come across a group with three of them and another character. We faced off against a group once that was three Warrior/Monks and a Monk/Warrior, and we're pretty sure that that kind of group can keep going until one of the members has to quit.
So, in short, don't get frustrated if you lose a few times in a row; it happens to everyone. Eventually you'll find a group that meshes, and you'll be off on a 15-0 tear. And when that happens, it makes for some pretty memorable gameplay!
Acknowledgements
Thanks to GameSpot forum users Cold-Fusion, twisted_by_dezign, Pug_of_Crydee, and especially F1_2004 for their contributions to the PVP section of this guide.
Got a news tip or want to contact us directly? Email news@gamespot.com
Join the conversation