Psychonauts Walkthrough
Someone is stealing the brains of the students at a secret psychic summer camp, and it's up to you to find them! To do so, you'll have to delve into the brains of numerous camp residents and insane asylum inmates to help learn more about the plot. GameSpot's Walkthrough features complete walkthroughs for the game's many missions, as well as tips on tracking down all of the cobwebs, vaults, psi cards, and miscellaneous other items in the game.
Design by Collin Oguro
In Psychonauts, you're going to take on the role of Razputin, a circus performer cum psychic savant, who, in an inversion on the typical direction of things, has run away from the circus to join a super-secret summer camp for mentally gifted youngsters. Your initial goal is to become a Psychonaut in the two or three days you have before your parents come to retrieve you, but you'll quickly find yourself caught up in intrigue, as kidnappings begin to occur, the other students start having their brains stolen, and the adults in the camp quickly begin to vanish. It'll be up to you to figure out what the heck is going on, and to do so, you'll need to dive directly into the brains of numerous enemies you come across!
Besides the core gameplay here, though, Psychonauts also has a number of other challenges for players looking for a test. In addition to charging through the main game, there are numerous items to collect, from Psi Cards and Psi Markers to scavenger hunt items and the pickled brains of your fellow campers. Thus, in addition to a walkthrough for the game, complete with boss tips and tactics, we've added a separate chapter detailing the locations of all of these hidden items. Enjoy!
Walkthrough
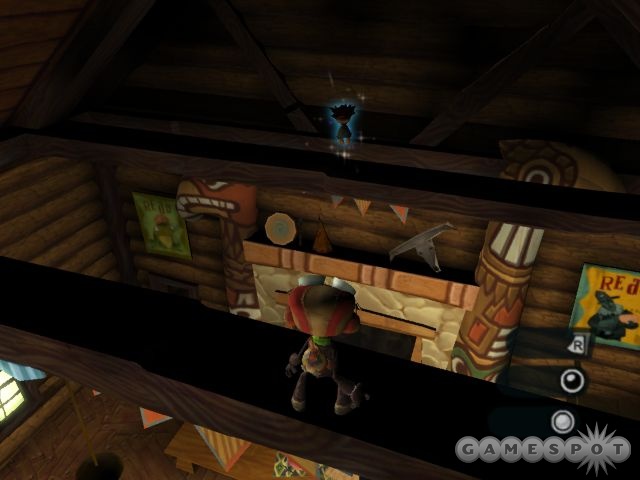
Kid's Cabins

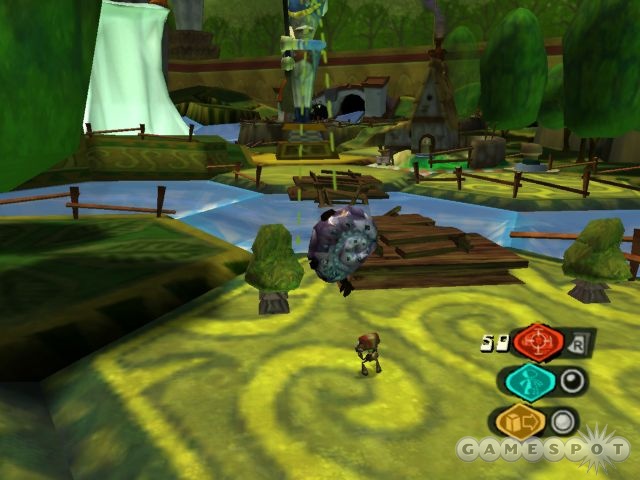
After you first enter the world of Psychonauts - under your own power, at any rate - you'll be able to explore the Kid's Cabins area of the summer camp as long as you like. Take a moment to get used to your controls, and talk to your fellow campers around the area. Check our Item Hunting section to track down the miscellaneous Psi Cards in the area.
Your main goal here is to meet up with Coach and make it through Basic Braining, which will give you a good idea of what Raz is capable of. Even before you head up the wooden ramp leading to Braining, though, you should take a few moments and explore the area and find Psitanium Arrowheads and Psi Cards. Psi Cards float above the ground, whereas Arrowheads are buried (but still give off a purple glow above their positions) and have to be dug up.
When you've explored the area thoroughly, head up the wooden ramp to meet up with Coach and begin Basic Braining.
Coach Oleander's Basic Braining
The Trenches
Basic Braining is about what it seems: a little training course designed to get you used to Psychonaut's controls and gameplay mechanics. At the outset, there's nothing too difficult to worry about: just jumping around. After you collect your first figment of Coach's imagination, you'll also come to his first emotional baggage, locked away in a steamer trunk. The Steamer Trunk Key is a single double-jump away, so grab it, then return to the trunk to grab it. You can check your progress on collecting all of these items in your journal.
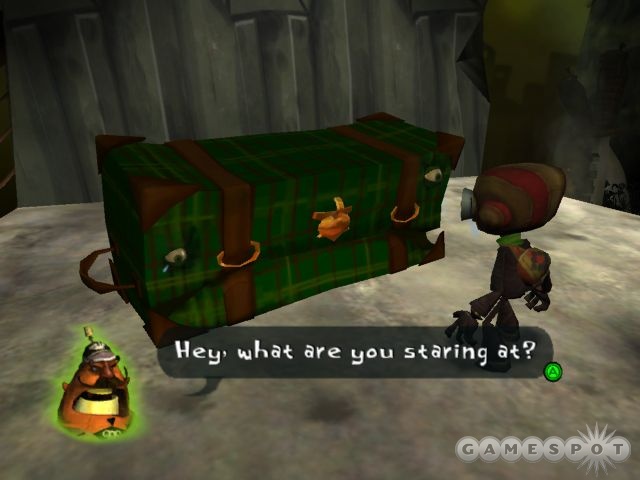
Soon after you lock away the Steamer Trunk, you'll have to head up and down a set of ladders, which will net you the Suitcase Tag. Climb up the pole nearby (after grabbing all the figments, of course); you'll soon come to another ladder, this one interspersed with fire-spouts. You'll have to time your passage to avoid getting roasted, of course, but even when you do reach the bottom, you'll be thrown into trouble by one of your mischievous classmates. All problems will soon be corrected, however, allowing you to move on. You have two choices of paths here; you can either jump around climb to the far wooden platform, around the upturned rocket and jump across the moving platforms there, or you can scout around on the lower level to find the "classified route." If you intend to find all of the figments here, you'll need to travel through both paths, as they both hold a number of them.
After you reach the end of your chosen path, you'll have to jump up to a ledge underneath a pair of large cannons and shimmy along it until you're past them. After you're past the cannons, you can jump on some trampolines to move on, but first, drop down to the lower level of this area to find the Suitcase that the Suitcase Tag unlocks. With that unlocked, head back to the trampolines, grab the figments that are bouncing around, then start climbing up the net wall beyond. Explosions on this wall will prevent you from taking certain paths, but they can't hurt you, so climb on, climb on!
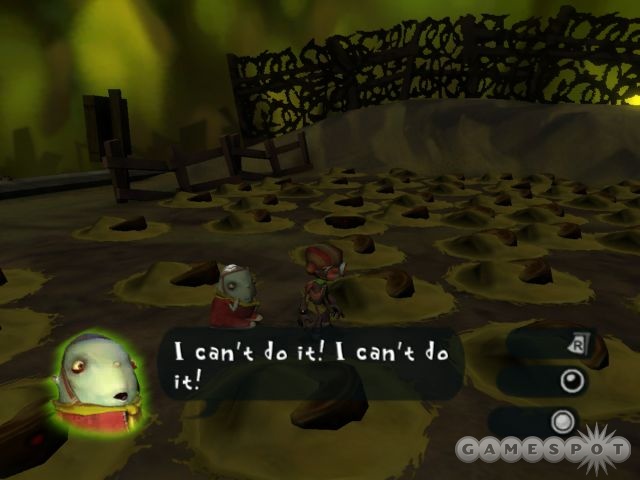
At the top of the wall, you'll come across Dogen, who's standing next to a mental minefield. If you want to help him cross it, feel free to, but you'll probably want to cross by yourself first to grab the figments from the field. When you're ready to help Dogen out, talk to him at the beginning of the field, then start shepherding him through the gaps in the mines, along the right side of the area. He'll occasionally get frightened and say that he can't go on, but if you talk to him before he runs away, he'll chill out and resume following you. If you can get to the far side of the minefield with him in tow, he'll give you five arrowheads for your pains!
When you reach the far side of the field, you'll need to jump onto the flagpole and push the flag there up to the top of the pole to unlock the passage on to the next area. When you reach the airplane cabin, grab the figments, then punch out the door to reach the next area. (The student's story here apparently goes on forever, or at least until he's sucked out of the airplane.)
The Cannon
In order to get out of the little starting area here, you're going to have to play through a little shooting gallery game. It's not difficult, though; just do an airfist on the button to start the game (jump over it, then hit attack in midair), and enemy panels will start popping up. Hit the enemies, don't hit the baby panels, and you shouldn't have a problem getting the required points within the time limit.
After you complete the first game, Coach will open the gate leading on, but if you wish, you can play the game again, multiple times, for extra arrowheads. At least, we're guessing the rewards is always arrowheads; we were frankly incapable of getting past the 40-points-in-75-seconds contest, which penalizes you a point each time you miss a target. Tough!
Nearby, you'll come across your first mental vault, which contain's Oleander's Pride. Punch it open to receive the flashcards within, then move on. You can use the teleporter creature, if you wish, but there shouldn't be any real need to do so.
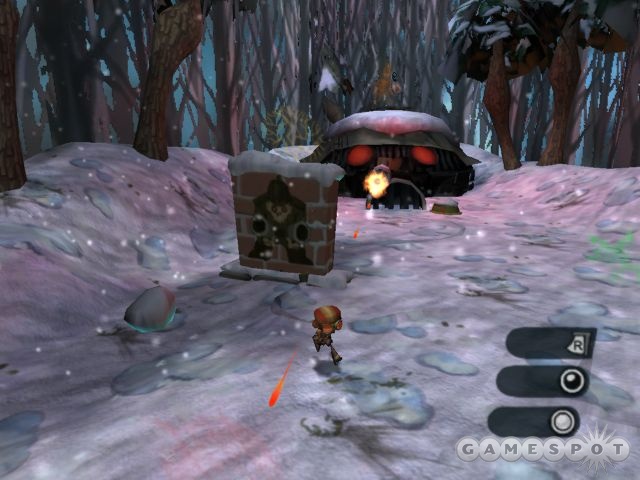
After you beat down the large wall near the teleporter, you'll come across this screen's eponymous cannon, a machinegun which covers a long approach. In order to safely get across the intervening land, you're going to have to punch down the various obstacles in your way, then quickly move laterally before the machinegun locks onto you. You can find both the Hatbox and its Hatbox Tag in this area. Don't worry about the figments, though; once you get close enough to the machinegun, it'll cease firing, allowing you to move back through the area and grab everything around. Don't forget to smash the snowmen and any suspicious-looking snow piles to find health power-ups.
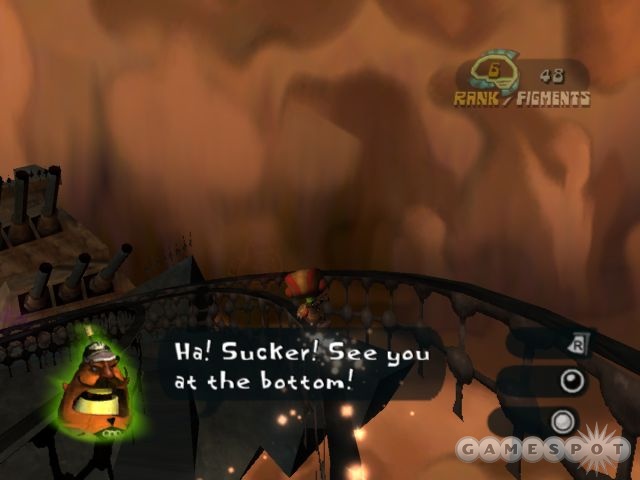
On top of the cannon, you'll get the Dufflebag Tag. After busting through the planks atop the structure (with another jump + punch move), head down to raise the next flag, then ride the chute down to the next major setpiece, which sees Raz take on a gaggle of swing-spikes while he tries to dodge flames. In truth, the flame-dodging isn't so hard, so just start swinging your way up to the top of the area. You'll eventually come to a set of highwires. You'll need to swing from the first set to the second, and jump from the second set to the third before punching your way through another wall to reach the trapeze.
The second vault is located here, but it's unfortunately trapped behind one of the spiderwebs that you can't remove yet. All you can do, thus is head across the many trapeze swings in your path. After the second trapeze, climb the ladder up, then jump onto the plane wreckage to your right to reach the Purse, which you should've found the tag for shortly beforehand. Unlocking all five pieces of baggage will net you the Primal Visions memory, which is essentially concept art for many of the characters you've met thus far.
At the end of the trapeze sets, you're going to come to a long railing that you have to slide down. It'll eventually split into three rails, and although you can jump back and forth between them, you're still almost guaranteed not to grab all of the figments on them in one go. You'll also need to smash through obstacles on your path with your attack button, or jump over them; this will include Bobby, who'll attempt to knock you off near the end.
Obstacle Course Finale
Although Oleander says that the log-rolling bit of this level is difficult, it really isn't. Just don't go too fast, or you'll find yourself sliding off the logs. It is tricky to get the figments that float about, however, without performing a few suicide jumps. As you've discovered, though, falling doesn't result in any real negative consequences, so feel free to jump around for as many of the figments as you wish. A few of these figments are worth 20% of a rank, so if you can't get them now, remember to come back for them when you have Levitation.
When you're through the logrolling exercise, you'll come out to the core of Oleander's psyche. He's not around, though, so head down the white hallway nearby to trigger the final portion of this level.
Back to the Kid's Cabins
When you return to the Camp, you'll be visited by one of the Psychonauts you first saw during the opening cinematic. He'll give you a button, and tell you to return to his secret lab for some...advanced testing?
If you wish, you can check around with the kids and Oleander to see what they think of the button, but only Oleander has anything really useful to say. When you're done with him, scout around for more Arrowheads, then head towards the Main Campgrounds. You'll have to pay a toll before you head through, of one whole arrowhead, but that's a minor cost.
Main Campgrounds
Well, what kind of summer camp would it be if it didn't feature a scavenger hunt? The hunt that you're sent on when you first enter the main campgrounds is going to net you eight Psi ranks, assuming you can find all sixteen items on the list. When you have the hunt in your journal, feel free to explore the campgrounds a bit, talking to students and digging up arrowheads. There are no fewer than 18 Psi Cards in the area, all but one of which are immediately accessible.
Note that you now have access to all of the areas of the summer camp, including the GPC and Wilderness, Boathouse, and Reception Area. The Reception Area is actually completely optional, as there isn't any real content here as it applies to the main quest in the game, so if you want to check it out and retrieve the large numbers of Psi Cards there, feel free to do so now. It'll remain open throughout the game, so feel free to wait on it as well, as you like!
Lodge
Before you move off to Sasha Nein's lab, it's time to convert some of the arrowheads you've been picking up into more useful items. Head into the Lodge, which is inside the large building near the exit to the Kid's Cabins. Inside, you'll find the shopkeeper Ford, who'll sell you a bunch of stuff that you probably can't afford yet...but he also sells Psi Cores, which you can use on all the Psi Cards you've been finding to make new Psi Markers, effectively converting each collection of nine cards into a new Psi Rank for you. If you've found all of the cards that have been available thus far, you should have 28, enough for three ranks, so go ahead and buy three Psi Cores. (You'll actually have the opportunity to find a few more cards before you reach Ford, so go ahead and buy five Cores if you have the scratch.) You can't do anything with them yet, but you'll be able to combine them with your cards when you reach Nein's secret lab.
In addition, you can also find the Voodoo Doll scavenger hunt item in the Lodge. To reach it, you'll need to jump from a bookshelf to the area above Ford's store, and from there to the rafters of the room. From there you can jump across the rafters to reach the doll.
When you're finally ready to head out to Nein's lab, head to the east of the Lodge and head into the "GPC and Wilderness" area.
GPC And Wilderness
Entering the GPC
When you're ready to meet up with Sasha Nein, head to the GPC and punch out the panel on the central structure. This will free the student who had been trapped inside, and let you head inside, as well. You'll notice that one of the buttons appears to be missing; if you select the button that Sasha gave you from your inventory and use it on the flashing panel, you'll head into Nein's laboratory.
Sasha Nein's Laboratory
When you're done scouting around Nein's Laboratory, talk to him and step into his Brain Tumbler, which will send Raz into his own psyche.
Brain Tumbler Experiment
When you reach the gypsy cart, gather the figments in the area, and don't miss the Vault hiding in the shadows; it contains the memories of Rasputin's escape to the camp. When you're ready to move on, head into the caravan and punch the walls until you find yourself in another area of your unconscious, The Hatching Grounds.
Inside the woods, you'll be asked to follow a white rabbit up a slope. Before you do so, though, check the area for a Purse Tag. Further up the path, you'll come to a Steamer Trunk tag. You won't be able to do anything with either of these at the moment, though, as you're going to be attacked by some kind of demon before you get too far up the path. Be sure to knock everything you see for extra arrowheads.
When you're returned to Sasha's Lab, he'll instruct you to take a trip to meet up with Ford Cruller, ancient leader of the Psychonauts. To reach his inner sanctum, hop into the treestump in the corner of Sasha's lab.
Ford Cruller's Laboratory
Cards: Two cards, neither particularly difficult to find. One's on the lowest level, near the machinery, while another is hovering on a platform near the top of the chamber.
When you first meet up with Ford Cruller, you'll probably have enough ranks to earn your Pyrokinesis power; Cruller will walk you through the basics of using it. After you obtain that, you'll return to his lab, where you can talk to him to learn more about Whispering Wood, and obtain your Marksmanship Badge, which you can bring back to Sasha to learn Psi Blast. He'll also give you a piece of Bacon, which apparently can be used to summon Ford's psyche to you at any time. Phew.
When you're done talking to Ford, head back down to the lowest level to learn about the machinery that you can use here. One of them will convert your Psi Cards and Cores into new Markers; if you've found all the cards listed so far, you should have enough to make five markers and thus earn five Psi Ranks right away, assuming you bought that many cores back at the Lodge.
When you have the Marksmanship Merit Badge and your Pyrokinesis power, you can return to Sasha Nien's Lab to learn more about your Psi Blast power.
Sasha's Shooting Gallery
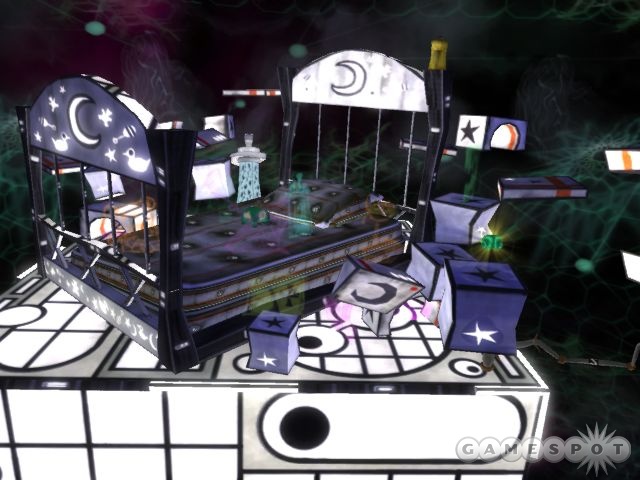
In order to fully appreciate the Psi Blast power, Sasha is going to take you to target practice, where he'll start a machine that generates an infinite number of mental censors for you to defeat. Take your time defeating the first few that pop out, to get used to the lock-on controls and the Psi Blast power itself. When you're ready to move on, head to the machine in the middle of your square and start flipping the lever on it. It can go up to six, but if you use it again, Raz will psychically force it off the charts, causing all kinds of chaos to start happening. For instance, a giant bed will appear from inside the cube that represents Sasha's mind. You're going to have to travel through a number of these mental tableaux in order to shut down the machines that are now really generating infinite censors, presumably before Sasha's mind is taken over by his inhibitive impulses.
First Screen: Bedroom
In order to get past each of these screens, you're going to have to jump around and shut down two of the censor valves by targeting them and hitting them with a Psi Blast. Each time you shut down a pair of them, the screen you're on will disappear, so be sure to explore them thoroughly and get all of the figments, baggage, and vaults before moving on to the next.
In the bedroom, you can find a Dufflebag Tag on the pillowcase of the bed, as well as a Hatbox Tag on a small perch nearby. The bed itself is also home to the first vault, so punch it to nab the first of Sasha's traumatic memories. The Dufflebag is on the ground floor of this screen, but the Hatbox is on one of the bedposts; you'll need to jump around to reach it.
When you have all of the figments and anything else that you can spot, jump towards the first censor valve and hit it with a Psi Blast. Another one will quickly pop up; when you blast that one, you'll move on to the second screen.
Second Screen: Pillars
On one of the lower pillars here, you can find the Purse Tag. The Censors here are more powerful than those in the bedroom, in that they can take more damage, and have a long-range projectile attack, so use your Psi Blast powers to take them down from a distance. Hit the first censor valve when you spot it, then head up to the uppermost platform to reach the Purse. After unlocking it, hit the second valve to move on.
(Note that you can probably jump to the mobiles to reach another couple of figments here, but it's exceedingly difficult to do so.)
Third Screen: Shoeboxes
Another new enemy appears here; orange bomb-things that will detonate when they get close to you. Again, use your Psi Blast to pop them from a distance; they should drop enough ammo and health for you to recharge yourself.
The Steamer Trunk Tag can be found on the ground floor here, and the trunk itself is resting on a pedestal further up. Also, the second vault can also be found around this time; it'll roam around the cube, so you may have to look around for it a bit. When you have the baggage and the vault collected, head to the two valves and shut them both down.
Fourth Screen: Flaming Inferno
The Suitcase Tag can be found on one of the lower levels of the steps leading up the inferno here, while the suitcase itself can be found a bit further up. When you've unlocked it, and have all of the figments that you can get your hands on, head to the censor valve and hit it. There's only one here.
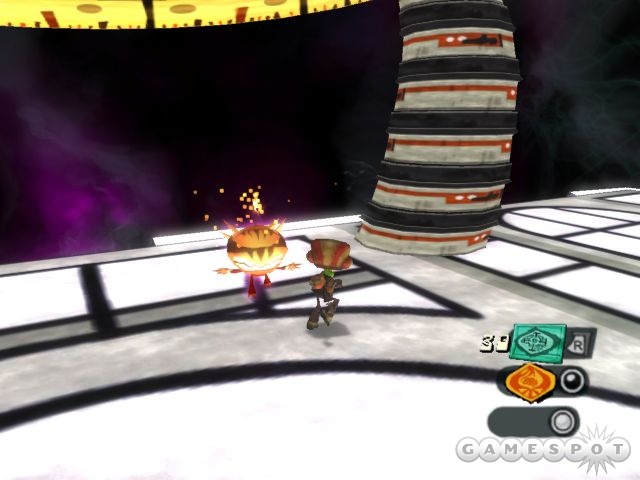
Boss Fight: Mega Censor
Your first boss fight is going to be tough, but not incredibly so if you stay mobile. The key to remember initially is that the Mega Censor can't be harmed until you shut down all five of the censor valves; they shoot out mini-Censors that will be absorbed into the Mega Censor, restoring his health. Five of the faces of the cube have valves on them, so quickly run around and shoot them all to start the boss fight in earnest.
When all of the valves have been disabled, the influx of mini-Censors will actually continue, but they won't be absorbed into the Mega Censor; instead, they'll start coming after you! As a tradeoff, though, the Mega Censor's speed will be greatly reduced, allowing you to speed away from him fairly easily. The rest of the boss fight basically consists of you shooting the Mega Censor with a few psi blasts (and taking damage from the mini-Censors while doing so), running away a bit, defeating a bunch of mini-Censors with your psychic fist attack, grabbing ammo and health from them, then repeating the process until the Mega Censor goes down. Repeating this process a few times will wipe out the Mega Censor, and earn you the real Marksmanship Merit Badge. Hooray!
Return to Raz's Psyche
Now that you have the tools you need to take on the demon in your head, you can immediately head into the Brain Tumbler, if you wish. If you happened to get to rank 20 during your time in the head of Nein, though, you'll want to head back to Ford and receive the Telekinesis power. You may also want to head back to the Lodge and pick up the Dowsing Rod, which will let you find Deep Arrowheads. To use it, just pick it out of your inventory, run around until the pitch on the rod's sound goes really high, then start tapping the designated button to find ultra-valuable arrowheads. It's relatively easy to make enough cash to buy both the Cobweb Duster and the Mental Magic Merit Badge from the shop. The Cobweb Duster will let you convert the cobwebs you find in people's psyches into Psi Cards, while the Mental Magic badge will let you suck in useful powerups (such as ammo and health) towards yourself while in someone's mind. Handy!
When you're ready to get back into your head, return to Sasha and use the Brain Tumbler again. You'll find yourself back in the area where you were blocked by your inner demon, so follow the rabbit back up to it and slam it with a couple of Psi Blasts; it'll keel right over.
In the area where the demon was staying, you should be able to find the Purse, which you already have the key for, so pick it up. There's also a Cobweb in this area, so if you got the Duster, then suck it up. After you jump up to the next area, you should hear the Steamer Trunk, so go ahead and unlock that as well. Two luggages down....
Drop down to the ground further on to find the Duffelbag Tag and, further on, the Suitcase Tag. When you have both of them, backtrack to the ledge on which you found the Steamer Trunk. If you face along the path, you should spot a trapeze stick in front of you. In order to reach some high-value figments and another piece of luggage, you'll need to hit two trapeze sticks, then a trapeze swing, which you'll use to latch onto a stalagmite; jump from there onto another trapeze swing, which will take you to solid land. From the ledge you're on, you'll need to make a semi-difficult jump to another trapeze swing; aim for the portion of it that hangs the lowest, rather than the portion that looks like it's closest to you. From there, you'll be able to hit another large stalagmite, covered with vines. Crawl around to the far platform, on which you'l find the Dufflebag, as well as another Cobweb. At the bottom of the set of platforms, you can also find the Suitcase. When you have all of those, backtrack along the lower path to get any figments you missed before resuming your pursuit of the rabbit.
In the next little corridor, you'll find the Hatbox Tag and another Cobweb. Around the corner, you'll eventually come to a thorn tower, at the top of which Dogen is about to get lobotomized! You've got to help him! But, not, you know, finding the Hatbox, another Vault, another Cobweb, and an increase to your maximum life on the ground floor below it. If you then follow the path up the exterior of the tower, you'll automatically be booted out of your head, due to your want of Levitation.
Boathouse and Beach
In order to obtain your Levitation Powers, you're going to need to head down to the beach, which can be found near the Lodge. Before you head out, meet up with Ford to obtain a new power, if you hit rank 30; you may also want to travel around and see any new conversations that might've appeared around camp.
When you do reach the beach, a couple of conversations will occur when you reach the water, including one between you and Dogen; apparently your vision was true, and Dogen has been completely debrainified! The horror! You have no choice but to continue with your Levitation training, though, and attempt to get his brain back.
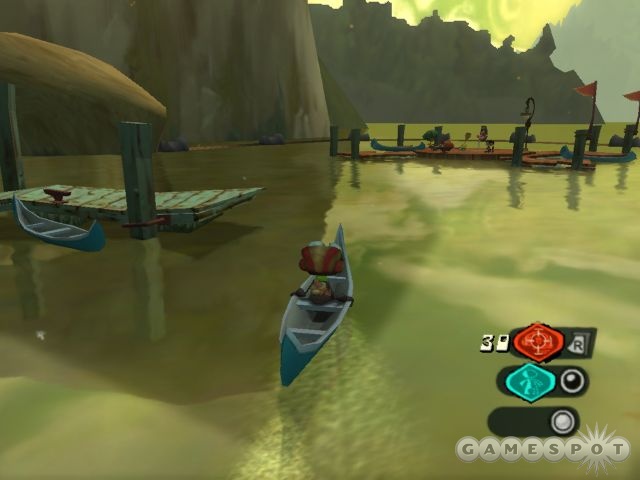
In order to get yourself a boat, speak to the Admiral in the Boathouse; he'll loan you a canoe. (It's apparently impossible to get past Bobby Zilch on the docks at the moment, although if you speak to the psychic kid on the pier, then speak to Bobby, you can witness an amusing little scene.) With the canoe, paddle out to the pier where Milla Vodello is teaching her kids all about Levitation. In order to get said power, you'll need to enter her mind! Her groovy mind, that is.
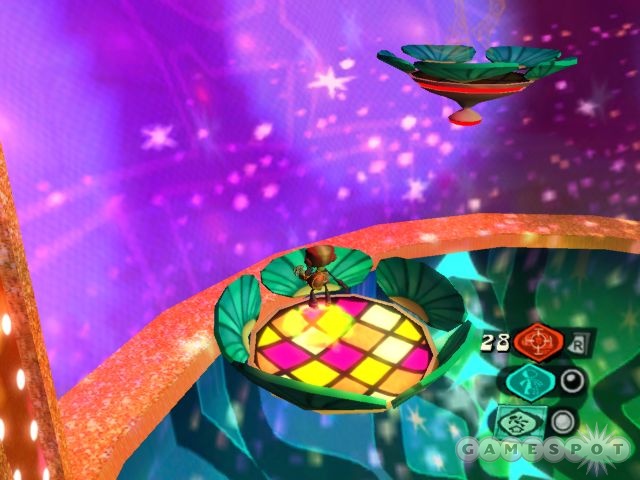
Milla's Dance Party
Milla's psyche is like something out of a Dee-Lite video, complete with swirling psychedelic colors and Austin Powersish kitschecanery. Your main purpose in here is to learn how to use your Levitation power. It's not too difficult to do so; effectively it just lets you jump a bit higher than you normally would, and you can also use it as a balloon to float across larger gaps than you normally would be able to. Use it to jump across the first gap, then jump and float through the rings above the second gap to unlock the bouncer's arms. Before you head through, though, grab the Dufflebag Tag and the first Cobweb near his feet.
Next up is the levitation bowl. In order to jump into the rings here, you'll need to build up speed by levitating in the bottom of the bowl, then jumping through. When all three rings are spinning, a path leading up to the upper floor will appear, so jump up! (There are plenty of figments in this area, so be sure to check around thoroughly for them if you intend to grab them all.) On the second platform here, you'll find the Dufflebag, so go ahead and unlock it.
After floating through the three rings off the side of the platform, you'll be warped up to the top of the room, where you'll have to hold float to glide in the middle of the flower-strewn wind stream that appears. This will take you to the Steamer Trunk Tag. At the top of the stairs nearby, you can nab the Hatbox Tag, as well. There's also a Cobweb near these steps.
(Before you head up the steps, you might want to look around the room here; there should be a little balcony with a figment on it, leading to a hidden room with the first Vault, as well as the entrance to Milla's nightmares. If you want to find out about them, hit the large chest and jump inside. We didn't find this room until we came back through Milla's psyche for a second time, so it might not be open the first time you come through.)
In order to reach the next area, you're going to need to walk into the pinball-esque puncher while you have your levitation active. Before you float to the next set of jumping panels, though, float around to the lounge area that rings the room, where there are numerous figments and the Steamer Trunk.
When you do reach the pinball deflectors that bump you up to the top of the room, you'll find the third and final Cobweb for this level, as well as the Hatbox. With those in hand, grind the railing here until all of the rings are spinning, then jump onto the platform to reach the highest level of this room. After grabbing the figments there, jump across to the doorway on the far platform and hit it open. You'll find the Purse Tag within.
The bottom of the next area will feature Milla's second Vault, so go ahead and punch it open before jumping up to the chainlink fence that surrounds the area and climbing up. When you jump to the central platform, you'll get a handy lesson; while levitating, you're immune to damage from assorted environmental threats, such as fire, poison, and electricity. Handy! Jump over the spikes to the central pole, then climb up that until you can reach another platform. After a couple of jumps, you'll be in position to bust through another door, but before you do so, jump higher to reach some pinball repellers, which will take you to the Purse. With that in hand, return to the door and bust it down to reach the next area of Milla's mind.
The Race!
Alright, it's time to get down and dirty! In order to proceed past this area, you're going to have to beat Bobby and a group of other kids down a loooong ramp race while levitating. Bobby is really the only character that you have to compete against, as the other two kids will quickly fall behind and stay there. Bobby will slow down if he gets too far ahead, but does a good job of staying neck-and-neck when you catch up, so getting to the finish line first will require a little finesse. If you lose to him, though, you can repeat the race as many times as you like to try and beat him. You'll definitely have to repeat it a bunch of times to get all of the figments here, if you're one of those crazy people, but most of the figments are only worth a 1% of a rank, so it's not worth doing too many times just for the ranking purposes.
The primary feature of the races that you're going to need to learn are the gates. As you ride along, you'll notice numerous arches in the playing field; the large, white, figment-like booster devices within will give you a significant speed boost for a few seconds. Hitting enough of them will let you charge out to an easy lead, but hitting obstacles will result in Raz coming to a standstill, so be careful!
Near the end of the race, there's a branch, where you can head right to enter a secret tunnel. If you can avoid the many censors within the tunnel (by riding up along the wall), you'll come out to more pinball bumpers that will dash you over the finish line, which should result in an instant win if you already have a bit of a lead on Bobby.
There aren't any vaults or cobwebs to worry about here, so just get through the race as best you can.
Fan Room

After you beat Bobby, you'll come out to the final portion of Milla's psyche. There's a Cobweb immediately beneath the platform you arrive on, and plenty of figments in the bottom of the room. You can also get the Suitcase Tag on the middle of the large platform in the center of the room.
Your goal here is to ride the many air shafts leading upward to reach a platform where the switch for the fan is located (it's got a big fist in the middle of it). Before you grab it, though, glide to a platform across the room to reach an ammo upgrade for your Psi Blast power, which will let you carry more ammo.
When you switch on the fan, you'll have to ride the central air shaft up through the three rings in the center of the room to unlock the final door. The rings can be flown through either up or down, so it may be easier to fly up to the top and glide downwards through them to unlock the door. The Suitcase is on the platform near the door, so unlock it to receive the Primal Memories movie, then head through to meet up with Milla. Before you jump to her platform, though, grab any figments in the area, as well as the final Cobweb at the bottom of the room. (You should get an "All Mental Cobwebs Clear!" popup if you nabbed them all across all three areas.)
Return to the Boathouse
Now that you have your Levitation Power, you can jump to the top of the Boathouse and nab the remaining Psi Cards and the second Scavenger Hunt item. You can also use Levitation to nab the last remaining Psi Cards in the Main Campgrounds and Kid's Cabins areas. Some new conversations are available, such as with the crazy kids on top of the Lounge, so feel free to walk around and check out some of them.
Around this time, you may also be ready to turn in the first half of the Scavenger Hunt items, so talk to Ranger Cruller in the GPC area to do so; you'll earn an automatic rank increase. Don't forget to turn any extra Cobwebs you've found for Psi Cards in Cruller's lab, and also don't forget to use the Cores and Cards to gain new ranks at his other machine! There's also a particularly funny story from the uh, story-telling kid (we're so bad with names), in the TV room at the Lounge.
When you're ready to move on, return to the Brain Tumbler and hop back inside. Before you return to Raz's mind, though, you may want to head into Sasha's Shooting Gallery again and use your Cobweb Duster to collect all the cobwebs in there. Collecting cobwebs is optional, but if you're going to do it, you might as well do it now.
Also note that you may want to buy some Dream Fluffs from Ford in the Lounge before heading through these next boss fights, as they can be somewhat difficult to pull off in a single health bar.
Raz's Psyche
As soon as you enter Raz's mind again, you'll be deposited near the large tower you couldn't scale the last time you were inside. If you hit the large sack of gas near where you start, you'll be able to float up to find another Cobweb; this should be the last one if you were diligent in collecting them last time.
After you scale the tower and float to the top, you'll have to follow Dogen's brain down the chute it's been disposed in. After you do so, you'll be launched into battle against the fearsome Blueprint Tank, which is using Dogen's brain as an energy source!
Boss Fight: Brain Tank
The Brain Tank has two forms, the first of which is much easier to defeat. You're going to want to use Psi Blast and Invisibility to defeat it. (Invisibility is optional, if you haven't obtained it yet, but it'll be very helpful.)
The tank is going to come at you with cannon shots, for the most part; it'll attempt to target, then lock onto you before firing. To disrupt its targeting, you can hide behind the many pillars in the arena, if you wish, but an easier method to use is to just wait for it to lock on, then activate and deactivate Invisibility, which will cause the tank to lose its lock. In addition to cannon shots, the tank will use Confusion bombs to try and blind you; stay away from these if possible.
Every once in a while, the tank won't attempt to target you, and instead will stand up on its rear treads, revealing a green underbelly. When this occurs, quickly lock onto it and hit it with a Psi Blast; this will flip the tank over, allowing you to run up and punch its underside with your fist. When it flips back over, run away, go invisible, hide behind a pillar, etc.; eventually you'll be able to repeat the cycle until the tank blows up.
After the tank is destroyed, you should be able to nab a complete life bar from the destruction of all the pillars in the room. These will slowly pop back up, but will usually be destroyed by the brain of the tank, which survives the explosion and starts coming after you on its own. It can still fire confusion grenades, but it has a more deadly attack in the form of a scanning laser which sweeps around the room, and which will take off around three-quarters of a mental life each time it connects. Luckily, the brain itself doesn't have much health, so jump over the beams and try to charge in when it starts moving slowly. After a few good fist combos, then brain will explode, jettisoning you out to Nein's Laboratory.
Back to the World
It's nighttime in the camp now, but there's not much you can really do at this point. Avoid the cougar-like enemies that have appeared in some zones, as they're awfully tough and can use pyrokinesis on you. Stock up on Dream Fluffs before heading to the beach to meet up with Lili.
Unfortunately, Lili's going to be kidnapped as soon as you enter the lake area. In order to rescue her, you'll need to jump into the bathysphere at the end of the pier, then head down, down, down underneath the water, to where a curious air bubble allows you to breath. After smashing through some green glass/coral stuff, climb to the bell tower and jump onto the rope nearby to summon in the lungfish.
Boss Fight: Mutated Lungfish
The Mutated Lungfish is likely going to be the longest boss fight you've yet encountered. The first phase isn't difficult to defeat, luckily. While he's sucking the air into his mouth, find and hit the boxes of nails that are scattered around to wound him; while he's blowing air back into the bubble, avoid the detritus that comes your way. After a couple of rounds of this, he'll move onto the second phase.
Somehow, the lungfish is able to move the air bubble across the lake floor; you won't have any recourse but to move along with it, attempting to stay on dry land as the bubble moves around. For the most part, you can just run straight away from the screen, but you will occasionally have to move side to side or engage in some quick platforming to stay out of the water. (Even if you do wind up in the drink, though, you'll quickly respawn and get to try this section over, so no harm done.)
After one more nail-box-smashing segment and some more platforming, you'll eventually wind up in a sunken town where the lungfish will come after you for real. Its whip-like tentacle does good damage, and it's immune to Psi Blast, so you're going to have to engage in some trickery to defeat it. In order to do so, find an open oyster and stand behind the top part of the shell. When the lungfish comes over to swipe at you, its tentacle will get caught in the oyster, allowing you to run up and hit it a few times with your first. After a few rounds of this, you'll have beaten the lungfish into submission, leaving nothing to do but enter its brain and attempt to smash the implant that Coach apparently inserted there. You'll need to use the small doorway you stole from Sasha Nein's lab to get inside the beast's head.
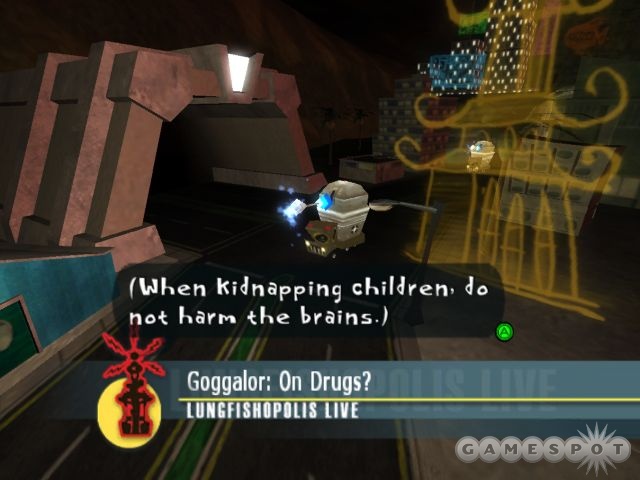
Lungfishopolis
Ah, Lungfishopolis. A peaceful city, full of ordinary citizens going about their day...until you come along, that is. As Goggalor, destroyer of worlds, it'll be up to you to smash every single thing you see, including the buildings and defenses of the city. Blessed carnage!
Of course, not everything's quite as simple as that; in order to proceed through this area, you're going to need some allies, which come in the form of pint-sized rebels who are attempting to overthrow the reign of the evil Kochamara. After moving up the path a bit and smashing open a prison holding more dissidents, you'll obtain the Shield power. Bind it to one of your action buttons; you'll be able to use it to protect yourself from the many tanks and other dangers of the city. Just hit it whenever you're about to be struck, then take it off again when you're safe.
With the Shield power in hand, head towards the laser-lined corridor and step inside. You'll almost immediately be hit with dozens of lasers, but if you throw up Shield before they come out, you'll reflect the lasers into the walls, destroying the laser setup entirely. Proceed from there into the prison area, grab the Dufflebag Tag, the first Cobweb, and the first Vault (which depicts Kochamara's invasion of the city), then bust open the prison to free the dissident pilot, who's the only one that can fly the zeppelin which is so conveniently tethered near the building.
When the pilot is free, take the Dufflebag tag and use it to open the Dufflebag, which is back across the water towards where you entered the area. You may have also noticed the Purse near the prison; you can find the Purse Tag by climbing the large building near the crane here. There's also another Cobweb behind this same building.
While you're climbing the building with the Purse Tag atop it, you'll probably get another newsflash that will depict a new weapon of the city's defenders: laser tanks. These guys hit pretty hard, so you may want to bind Invisibility to help you approach them.
Near the end of the path to the dam, you'll be threatened with the Anti-Monster Turrets. Again, your Shield power will be enough to get you close enough to kill this thing; just shield yourself when you're targeted, run up a bit, and repeat until you can smash the turret. With that out of the way, you can jump atop the blimp to reach a second level of the town.
Above the Dam
As soon as you land on the upper level of the town, you'll obtain the Hatbox Tag. You can find said Hatbox by walking along the upper edge of the Dam; another Cobweb is also up there.
As you travel through this denser section of town, be sure to scale one of the buildings for another aggression upgrade, and also keep an eye out for the Steamer Trunk Tag, found near the harbor. You're going to want to take out the ships here, or they'll continually fire homing missiles at you.
Eventually, the path will branch. The left path will lead to a little peninsula connected to a rail line, with a Cobweb in the small city there and the Suitcase Tag on the rail line, while the right will take you across a suspension bridge into another small city, itself with a Cobweb and the Steamer Trunk atop a building. The second Vault should also be traipsing around this latter area. You're probably going to want to explore both paths thoroughly for figments anyway, so feel free to pick one and then backtrack. They both lead to the same area.

Said area, the final segment of the city, is going to be overrun with airplanes. You'll need to destroy them all before your dissident buddies can take their ships into position to get you across the channel. To do so, climb to the top of one of the towers here and start hitting them with Psi Blast. You should've gotten an upgrade by now to let your Blast hit three targets at once, meaning you'll only have to do this a couple of times before you finish off all the planes. They will attempt to kamikaze you to drive you off the buildings, but that's not such a big deal, as you can just reclimb them, and they'll be down a plane after they do so.
When the planes are cleared out, grab the Suitcase on top of one of the buildings to clear out the last baggage and obtain the Primal Memories for this stage. With that out of the way, grab any remaining figments before crossing the channel to take on Kochamara.
Boss Fight: Kochamara
Kochamara, though massively entertaining, isn't very difficult to take down, so don't worry if you don't have any Dream Fluffs on hand. Be sure to have Shield close at hand before heading in; if you do, then you're all but unbeatable.

Kochamara begins with some aerial attacks, of which he has two. You can't use Psi Blast on him, so don't bother. Instead, use Shield to block his Ram and Triangle Beam attacks. The Triangle Beam will reflect back to him and cause light damage. (If you're having trouble timing your shield, try switching on captions to get a better idea of when to flip it on.)
After you deal enough damage to Kochamara's aerial form, he'll hit the ground, where he'll use a ram attack, a combo melee attack, and an area attack to deal damage. The key here is to block his two physical attacks, and get close to him when he uses his area attack. If you shield yourself during it, then you'll be able to lay down a fist combo on him afterwards and deal a good amount of damage.
After flipping through aerial and ground forms a couple of times, Kochamara will eventually go down, at which point you can climb the radio tower to finish the level off.
Thorney Towers Home For the Disturbed
After you get out of the Lungfish's mind, she'll offer to take you where she took Lili: the spooky TTHftD. Thorney Towers is an abandoned insane asylum, and is apparently where Coach and his scientist pal have been de-braining the many students here. You'll need to explore the area to get to the bottom of what's really going on.
In addition to exploration, note that a new type of item can be found. Mmmm...braiinnnnsss! Many of the areas have been stocked with the brains of your fellow students, so be on the lookout for them. You can also pick up Lili's Bracelet immediately near where you arrive after being dropped off by Linda, so climb the rocks there to meet up with the guard of the asylum, who's not so mentally healthy himself....
When you reach the front gates, you're going to have to figure out a way to get through. The secret lies in the guard, the mind of whom you'll have to enter, using the same miniature psychic doorway that you stole from Nein's laboratory. When you're inside, you'll be able to open up the refrigerator to access the Clairvoyance power, which you can use on the guard to reveal that the Milkman is buried in the graveyard.
The Milkman Conspiracy
All right, here's where things get pretty weird. After you leave Boyd's house, you're going to find yourself in the mind of a genuinely crazy person, complete with paranoid fantasies. The primary gameplay conceit here involves the presence of numerous agents, which will guard access to various parts of the level until you find some kind of disguise to wear. These agents will be guarding territory marked by a yellow outline; if you head inside without the proper disguise, you'll be captured and interrogated. Thus, to get past agents that are holding garden clippers, you'll need to find a pair of clippers yourself and have them in your hand, and so on.
You can also enter all of the homes here, although they almost invariably hold nothing but figments and some arrowheads in the fridge. Your first disguise, the Sign, is found in a car next to the second house after leaving Boyd's place; equip it, and you'll be able to bypass the road workers up the path a bit. (The first Cobweb can be found in front of the house near the road workers.)

After grabbing the Sign any getting past the workers, hop onto the house to your left to find the Purse Tag. There are two restricted zones here; one requiring a phone, and one requiring hedge trimmers. You have neither at this point, so stand near the mailbox by the phone worker and jump to the next section of road. The first house you encounter has nothing of interest besides figments, but the second will conceal the Steamer Trunk Tag in its backyard and the Hedge Trimmers in the trunk of the car (punch it to open it up). You can't do anything with the trimmers at the moment, so leave them be.
Up the road, you'll come to the sewers; the barrier of the agents here isn't wide enough to block the road, so head around it and past. You'll find the second Cobweb on the house to your left; you don't have the tag for the Hat Box yet, though. If you head down the road, you'll come to the graveyard. The first Vault is on the outside of the walls, as is the Dufflebag which, again, you don't have the tag for.
When you've obtained the Vault, head back to the entrance to the graveyard and jump to the nearby road. You'll come out to a house guarded by agents with watering cans. Further up the road on the right is the Arboretum. You're going to need to find the Flowers here, which will let you access the graveyard. To do so, head left and punch out the crow sitting on some rocks, then grab the Crow Feather if you don't already have one. This guy will clue you in on the pattern for the middle door here. In order to keep it open, you'll need to head through the left gate so that it flips open, then walk towards the rocks until the middle gate opens (use Clairvoyance while holding the feather to verify this), then jump over the left gate so that it doesn't close. Doing all this will let you nab the flowers.
Now, before heading back to the graveyard, head out of the arboretum and take a right to continue along the road you were on before. The second house on your left, the one with a car in its driveway, has the Duffle Bag Tag in it, so grab that. The first house on the right has the third Cobweb.
If you keep walking on, you'll come to the post office. Hit the car here to grab the Watering Can from its trunk. When you've got it, walk up to the keypad by the entrance to the post office and attempt to use it (it may not light up, but you should be able to use it nonetheless). After punching a random code in and attempting to Enter it, you'll be denied access, but an Agent will quickly come out the door to investigate. Use Clairvoyance on him to reveal the code to the door (2059), then enter it in and head inside.
Inside the Post Office's waiting room, you'll find the Suitcase (again, you don't have the tag), as well as another Cobweb. Nabbing the cobweb will let you through to a darkened room, with only the whirring of security cameras to keep you company. You'll likely get lost in here if you attempt to maneuver on your own, so use Clairvoyance on the cameras to spot the obstacles, then head to the rear of the room and nab the Plunger.
Ok, now that you have the Plunger, feel free to leave the Post Office. You're going to be grabbed by some kind of inner demon on your way out; to defeat it, you'll need to shoot it with Psi Blast until it spits out a bunch of bombs, then quickly use Telekinesis to chuck one of the bombs back into its mouth before it completely regenerates its health. This will freeze it in place, allowing you to destroy it with a single punch. Yay.

Back in the neighborhood, head back up the street until you reach the house guarded by water can agents. Use your own water can to get inside and grab the Rolling Pin, but be sure to flip back to your water can before heading outside again. Use the teleporter by the Post Office to return to Boyd's House. Walk back past the road crew until you reach the phone guarded by the hedge trimmers, then equip your own pair of trimmers to get past them. The Suitcase Tag is in the backyard of this building, and inside you can find the Purse. Use your rolling pin to grab the figments and Ammo Up upgrade from inside the rolling pin area.
Now that you've done all that, head back to the graveyard and go around the back to unlock the Dufflebag. With the Flowers in hand, you'll be able to get into the graveyard and use Pyrokinesis on the hedge in front of the Milkman's tomb. After busting through the door and grabbing the book inside, you'll automatically be returned to Boyd's House, where he'll give you the Rifle.
Use the teleporter by Boyd's house to return to the post office, then head inside and unlock the Suitcase. You should've been able to unlock the Dufflebag, the Purse, and the Suitcase, and you should have the Steamer Trunk Key, as well. We know where the Hatbox is, so now we need to find the Steamer Trunk and the Hatbox Key to finish off the baggage here.
Anyway, with all this done, head to the sewer workers, equip your plunger, and drop down into the hole inside their little area.
Book Depository
Uh-oh, there's a sniper in the book depository! In order to get across the parking lot, you'll need to use your Rifle and your Invisibility or Shield power to avoid being shot. When you do reach the building, though, head around to its back side to find the Steamer Trunk, which you should be able to unlock without a problem. With that in hand, head back around to the front of the building and grab the final Cobweb from the door.
After you head upstairs, you'll be able to grab the Helicopter Helmet. With it, you'll be able to use Clairvoyance on one of the swooping helicopters; this will give you an idea of where the Milkman is, and will also result in your picking up the Phone after you watch the entire cutscene.
With the Rifle in hand, head back across the parking lot; you'll need to defeat another inner demon before you can get to the telephone pole, though. After dispatching it, equip your Phone to climb the telephone pole. You're going to need to ride across the long phone lines here to reach the Milkman. Watch out for the connections to other poles, as you can be shocked and knocked off the wires there. There are also plenty of figments on each wire, so you'll probably want to go back and forth on each one to collect them all.
(Now, if you're a completionist like us, you may note that you haven't found a second vault and are missing one piece of baggage. To find these items, you'll need to head way back to the beginning of the level, near where you got past the road workers with your Sign. There's another telephone pole there, that will lead to the second Vault, the Hatbox Tag, and a maximum life upgrade. The Hatbox, you'll recall, is in the garage of a house near the entrance to the sewers.)
When you reach the Milkman's house, collect all the figments in the yard, then bind your Invisibility power and knock on the door. If you're invisible when the girl answers, she'll unlock the door and head outside, allowing you to jump over her and into the house.
Boss Fight: Den Mother
In order to beat the Den Mother, you're going to need Clairvoyance, Shield, and Telekinesis. In the first portion of the fight, she'll warp around from stage to stage, throwing out explosive boxes of candy and attempting to fling an electrified knitting pattern at you. These attacks will always alternate in a box, knitting, box, knitting pattern, so you should always know what's coming next. She's relatively easy to harm here; just Shield yourself from the knitting attacks, then quickly grab one of the boxes of cookies and chuck it at her with Telekinesis.
After a couple of hits, though, the Mother will flip over to her second form, which...is pretty much identical to the first, save for the fact that she darkens the lights in the room. She'll drop a knitting pattern at this point, though, which you can pick up and use with your Clairvoyance power to get eyes on things. The main difference here is that you'll have to fight from her perspective, which will make it difficult to accurately throw the boxes at her, but with a few more hits, you should be able to get yourself through the fight, which will result in the unlocking of the door leading to the real-world Insane Asylum.
The Insane Asylum Courtyard
Now that you have access to the courtyard, you're going to have to get inside the asylum itself and see where Loboto, the mad doctor, has taken Lili. Along the way, you're going to run into more asylum inmates, so be prepared for some crazy adventures in head-crawling.
Now, before you go around picking up the brains here, feel free to return to Cruller and talk to him for a somber invocation of sworn duty on his part, and a bit of an explanation for the whole one-person-many-identities deal. If you do pick up the brains before talking to him, you'll skip this cutscene, but it's really not such a big deal. When you bring brains back to him, he'll replace them in the students' heads, which will have a small but noticeable impact on your overall health.
If you don't want to head back, feel free to move on. You can't get through the main door yet, so smash through the obstacle near the fountain to reach a cliffside path, where you'll meet Gloria. This inmate is a bit...touched in the head, shall we say, so take out your Psycho-Portal and jump inside of her head.
Gloria's Theater
After you get through the opening rigamarole with Becky and the Critic here, start jumping around for figments and miscellaneous items. You can find the Steamer Trunk Tag by the ladder leading to the spotlight. If you climb up to the spotlight, then jump or float over to the second level of spectator boxes, you can find a Cobweb and an Ammo Up. Dropping back down to the floor underneath the Critic will reveal a pair of Cobwebs. You can also find the Purse Tag in the backstage area, near Becky, along with another Cobweb nearby, which covers the Suitcase. You can use the Purse Tag to unlock the Purse, which is on the stage just below the Critic.
Another Cobweb will cover the entrance to the backstage area, where Bonita's dressing room is. In order to make it all the way down the hall, you'll need to activate your Invisibility. After talking to her, she'll agree to come out on stage, but only if the spotlight is lit up; you'll need to find a candle for it in the store room.
Inside the storeroom, you should have an easy time finding the Steamer Trunk, the final two Cobwebs, and the Suitcase Tag, as well as the Candle that you need. Head back to the stage and unlock the Suitcase that you uncovered earlier. With that done, head up to the stagelight, plop the Candle in, and light it with Pyrokinesis. With the play and stage set, all you need is a script...which you can get from Jasper, the critic. Nab it from him, then return to Becky and give it to her. She'll give you a megaphone which you can use to restart the play at any time you wish.

The thing to understand here is that there are two different sets you can use, as well as two different kinds of mood lighting. You can revolve between the sets by entering the portal on the lowest level of either one. There's one that features water at the bottom, and one that's dry. The light will also switch between happy or sad moods, so that you wind up with four different combinations: happy/dry, happy/water, sad/dry, and sad/water. Each of these will have their own figments, so if you're a figment collector, you may want to flip through them and grab all of them before you start running through the plays.
After you drop Jasper's play off with Becky, flip over to the sad/water stage, which should have a large dragon on the backdrop. Start the play "Knight of Joy" here, which will destroy the dragon, allowing you to climb up atop it and grab the "Day the Mail Boat Finally Came" play. Now, you can run this play on either the happy/water or sad/water sets; when you do so, you'll be able to jump on the boat that arrives to set sail to the right, to a secondary stage. There are happy and sad versions of this particular set (each with their own figments), but only one copy of "Goodbye Hagatha Home." When you have this final play, drop it off with Becky, then flip over to the sad/dry set. Run the Goodbye Hagatha Home play here to drop the balloon prop on the upper level, then climb up the trapeze sticks to the top of the stage and hop in. Phew.
The Catwalks
While you're on the catwalks, you'll probably want to have Invisibility active, as the Phantom will attempt to lock onto you with a spotlight and then drop counterweights on you. If you activate your invisibility when you see the spotlight locking on, then you should be able to avoid the damage.
After a bit of platforming, you'll come to a curtain you can ride to another section of the catwalks; you'll soon come across a large Censor. Beat him to pick up the Dufflebag Tag, then jump through the slicers to reach more trampolines. (Don't forget that you can pop open the deflated counterweights to grab ammo and health.)
Eventually, you'll pass by a number of trapeze sticks, then jump from a counterweight rope to a catwalk that heads both up and down. Head down to grab the Hatbox Tag, quickly defeat the ultra-censors, then drop down to the platform below you to find the Hatbox and the second Vault for the level. Kill them all, then climb the ladder back up to reach more trapezes, which will lead to the Dufflebag, which should be the last piece of baggage you have to deal with in this particular psyche.
After you reach the elevator leading up, you'll need to pass down the catwalks a bit until you can grab the Candle from the box across from the Phantom, then walk around to insert it into the spotlight there before using Pyrokinesis to light it. This'll cause the Phantom to scurry back around to the doorway behind him. Jump across with Levitation to follow him.
Boss Fight: Jasper
Jasper, like so many worms, doesn't respond well to the harsh glare of light. In order to defeat him, then, you'll need to grab the three candles from the case near where you spawn into this boss fight, then jump back to the orchestra pit and float up the notes to the upper walkways here. He'll be attempting to fling projectiles at you, so you'll have to bob and weave while floating to avoid them.
When you're at the uppermost level, whip out your candles and place one into each of the three spotlights, then light one of them with Pyrokinesis. This will cause Jasper to crash to the ground, where he'll summon in a few peons to protect him. Do away with them quickly (hopefully you have a chainable Psi Blast by this point), then run over to Jasper and pound on him with your first until he takes off again.
You'll need to repeat this process at least three times to kill off Jasper. If you happen to wait too long to hit him on the third instance, he'll pop up again, but the candles in the spotlights will apparently reappear at this point, allowing you to try to take him down one last time.
For defeating Jasper, you'll nab Gloria's Trophy when you return to the real world.
Insane Asylum Courtyard
The courtyard here is home to Edgar, who's obsessed with his past glory as a bullfighter, and Fred, who's under the delusion that he just may be Napolean. There's also an orderly here who will initially mistake you for Loboto, but quickly realize that he's wrong and tell you precisely what Loboto usually wears when he visits his laboratory. It'll be up to you to find the material required for your disguise in order to get past him. You might as well get through Fred and Edgar's levels first, though.
Waterloo World
Wow, 243 figments in here! Should be a relatively large world we're dealing with...but initially, all you see is a single room, with Fred and Napolean apparenly deliberating over the world's slowest game of Risk. If you talk to either of them, you'll be able to pick up the Hatbox Tag. In order to move on, you'll have to jump onto the game surface and drop down onto the playing field, where you'll give Fred a hand at beating the genetic memory of his ancestor.
In order to win the game here, you're going to need to proceed through a few steps. Your ultimate goal here is to get a Knight into Napolean's castle, but you can't field a Knight until you have a Militia. You can field a Militia, but you can't move it around the field because Napolean keeps on breaking the bridges; to repair them, you'll need to recruit a Carpenter.
The Carpenter
Before you do anything here, jump around and track down the figments and the Suitcase Tag behind one of the buildings. Your goal here is to first recruit the Carpenter, who can be found in a large blue building with a hammer on the flag above it. Head over there and use the building to shrink down even further, until you're at a proportionally correct size relevant to the building. Before you head up and knock on the door, though, grab the figments around the grounds, as well as the first Cobweb near the door.
When you knock on the Carpenter's door, he'll accuse you of being a burglar; apparently there are Censors walking around atop his roof and they're spooking him. In order to enlist him to Fred's side of the battle, you'll have to scare off the Censors.
To do so, leave the grounds of the Carpenter's hut and head towards the large brown wooden guillotine nearby. You may run across one of Napoleon's cannons during your travels; these guys are difficult to kill with normal means, but can be easily dispatched by Telekinesising them into the river. When you reach the guillotine, grab the second Cobweb from the side of it, then head inside to unlock the Suitcase. With that out of the way, leave the guillotine and find the peasant's house next to it. You can knock on the peasant's door now, if you wish, but your real goal here is to climb the ladder on the side of the building and reach the trampolines atop it. If you jump from the trampolines into the chimney smoke, you can float across to the upper ledge of the guillotine.
When you reach the top of the guillotine, you'll need to activate Invisibility to prevent the blade from snapping down when you walk out to the highwire. If you cross the highwire, though, you'll come out near the top of a little farm building, with the Duffle Bag inside. You don't have the key for it yet, so leave it be. Head across to the top of the carpenter's building and defeat all of the censors there before punching open the first Vault. With that done, you'll be able to return to the bottom of the carpenter's building and recruit him to your cause.

With the carpenter on your side, you're going to need to move him near the destroyed bridge to repair it. You won't be able to do so at your current size, though, so you'll need to find some way of restoring yourself to the medium size here. To do so, run to one of the cork-like structures that dot the landscape and punch it, revealing a champagne spray; jump into this and float to return to the medium size. While you're roughly the same size as the carpenter, you'll be able to use your Telekinesis to fling him across the map to a spot near the broken bridge, which he'll automatically repair. Yay!
The Militias
Now that you've repaired the bridge, it's time to start making it safe for your knight to storm the castle. The knight can't really fight against normal soldiers - he's a specialized unit designed for siege warfare - so you're going to need to field militia units to defeat Napolean's soldiers and clear the path to the castle itself.
Begin by returning to the building next to the guillotine and knocking on the door. This guy's going to refuse to fight for Fred until he has some form of proof that Fred actually cares about the little people; in order to obtain this proof, you'll need to return to Fred and talk to him. To do that, return to medium size, then find the ladder near one end of the river and climb back up to Fred. Speaking to him will net you the Fred's Letter item, which you can give to the peasant to field them into your militia. With a militia piece on your side, return to medium size and use your telekinesis to fling it over next to Napoleon's soldier. They'll both die, unfortunately, and Napoleon will recruit another soldier and destroy another bridge.
In order to fix the bridge, you'll have to use Telekinesis to move the Salt Shaker on your side of it, then move your carpenter towards the bridge again. With that done, jump over the river and examine the house of the next peasant. Before you speak to him, climb around to the side of his house and get on top of it to find the Duffle Bag Tag. With it in hand, return to the guillotine, cross the highwire again, and unlock the Duffle Bag in the upper level of the farm building. While you're collecting baggage, head down to the large building immediately adjacent to this little silo; you can find a set of steps on one side of it leading to the third Cobweb and the Hatbox.
Anyway, the next peasant you need to recruit isn't going to settle for some dorky letter; he wants cold, hard cash for his services. To get some money, return to Fred, who'll tell you that he recently attempted to melt down a valuable coin he inherited. Said coin is in the fireplace, so nab it with Telekinesis and return to the peasant, then fling him towards the second of Napoleon's soldiers.
One final soldier will remain, so you'll need to recruit one last militiaman. You can find him near Napoleon's castle, so shrink yourself down. As usual, you should explore the area before talking to him. You can find an Ammo Up by climbing atop the waterwheel next to the house, flinging yourself up the trapeze sticks, then floating in the chimney smoke up to the flag atop the home. The arch-like structure nearby possesses an upgrade to your Projection Depth, as well as the Purse Tag and the fourth Cobweb.
When you're ready to nab the final militiaman, knock on his door; he'll ask you to retrieve a weapon that he happened to bury inside some hay in one of the watchtowers of Napoleon's castle. We're obviously dealing with a master strategist here, but we're going to need him nonetheless, so head over to the castle. The tower that you need to enter is sealed, so head to the adjacent tower; you can get into it by sucking up the fifth Cobweb. When you're inside, use the trapeze sticks and the highwire to get yourself up to where you can find the Purse. With that unlocked, drop down so that you're hanging from the ledge by your hands, then creep along to the right until you reach a wooden platform. From there, walk the highwire out to the flagpole, then climb up that and jump off to float back to the tower's roof.
You're going to need to Levitate yourself over to the far side of the roof to reach the upper portion of the tower that you need to enter. Suck up the sixth Cobweb to get inside, then grab the Steamer Trunk Tag, then drop down to the lowest level and use Pyrokinesis to burn the haystack to find the Musket. You can then burn down the door here to leave, give the musket to the peasant, and finish off the last of Napoleon's soldiers.
Lower the Drawbridge
Unfortunately for you, Napoleon will immediately raise his drawbridge, and throw a device into the gears to jam it. In order to clear the path for your knight, you'll need to find some way to lower the drawbridge.
Begin by walking up to the castle's bridge in your smallest form, then Levitating up to the final Cobweb and sucking it up. With that done, jump atop the highwires here and use them to make your way across the moat; you're going to get hit by cannons a few times, so you may want to use Invisibility to protect you on your journey. After defeating the Censors on the far side of the lake, jump up to reach the Steamer Trunk, which should be your final piece of luggage.
From the little ledge that the Trunk is on, jump around to the ladder around the corner, then start making your way around to the far corner of the castle. Eventually you'll reach a highwire that terminates at some kind of sword sticking out of the castle; if you wait here for the cannon on the tower nearby to fire at you, you should be able to jump over the sword, then float down to the tower before it fires again. After Telekinesising it out of the way, repeat the process on the cannon on the far tower, then use Telekinesis to remove the blockage in the gears, which will lower the drawbridge. With that done, Levitate up into the central portion of the castle to find the second Vault.

Recruit a Knight to Storm the Castle
With the castle open for conquest, your last remaining task is to recruit a Knight to take it. Start by heading to the restaurant across the river; the Knight there will ask that you find some Escargot to feed him. To find the snails, head to the snail farm where you found the second peasant, shrink yourself down, then use your Telekinesis power to pull all ten of the snails towards you. With all of them on your side, you'll get the Escargot playing piece; fling this over by the restaurant to recruit the Knight.
When you have the Knight piece, move it into Napoleon's castle to win the game! You'll retrieve the Straightjacket from Fred in the real world, allowing you to move on to Edgar's problems.
Black Velvetopia
Here's where things start to get really confusing, if you weren't already thoroughly perplexed by some of the worlds that you've already visited. Edgar is going to need you to find four cards from the deck that he's using to build his tower leading up to the mysterious lady in the sky. Soon after your conversation with him, you'll be forced into the narrow streets of Pamplona by the red bull that haunts him, and it's there that you'll have to track down the cards.
The most obvious pain in the butt in this level is that the bull passes down the main street once every five seconds or so; if you're on the street when he comes down, you're going to be knocked back to the last alley you passed. There are plenty of these alleys, though, and there's always some way to reach the next one. Some of the trickery here comes in the form of pictures, which a number of dogs will sell you; when you find a nail to hang your pictures on, you'll have to do so to either gain some other kind of item or open up a passageway. For instance, the dog near where you start out here is going to sell you both a Rose Painting and an Archway Painting. Use the Rose Painting on the nail first to obtain the Rose, then use the Archway Painting to find the path leading back to the street.
In order to move on, you're going to have to start running up the street in the direction that the bull is coming; you can follow him down to the right, but there's nothing there. The first alleyway you reach has the Steamer Trunk, which you don't have the key for. In order to move on, climb the pole and use the awnings as trampolines to reach the balconies in the street. Jump from them to the next alley, grab the figments there, then return to the street and wait for the bull to pass by before running up to the next alley. (You may want to use the Levitation ball to increase your speed here). The next alley is blocked off, but you'll be able to wait in the small gap near the gate until the bull passes by again. You should see the Steamer Trunk Tag on the other side of this alley; to reach it, you'll need to use Telekinesis to throw the garbage can here on top of the yellow switch. That will open the gate, allowing you to grab the tag, so return to the Steamer Trunk and open it.
The alley across the street here is also blocked, but you can jump over this. Unfortunately, there's not much in the alley except another closed door, so return to the street and use Levitate to jump to one of the balconies nearby, where you'll find the Dufflebag Tag. Jump from there to the next alley, which will unlock the door to the one you were just in.
Just up the street, in the next small alcove, you'll find your first Queen card. In order to get it, though, you'll have to fight for it...
Boss Fight: Tiger
Each of the wrestlers that guards the cards has a particular attack pattern and psi power weakness. You'll want to have yourself set up with Telekinesis and Shield when taking on Tiger. If you're quick, then you should be able to finish him off without ever getting hit, by Telekinesising him quickly, then hitting him once when he sits down, then repeating the process multiple times. If he manages to slip away from your Telekinesis, though, he'll pounce at you shortly thereafter, so use your Shield power to protect you while he does so, then hit him while he's lying on the ground.
When Tiger's down for the count, you'll be returned to Edgar's house of cards. You can give him the card, as well as track down both the Purse Tag (on a balcony) and the Purse (on the ground). When you've done that, find the painting featuring the Tiger and hop back through it.
Moving On
Back on the street, climb the ladder near the Tiger painting and work your way onto the trapeze swings above the street. You'll notice that the small flagpoles are blown back by the passage of El Odio, so you'll need to time your jumps to coincide with the lull in his movement pattern. You don't need to swing all the way around to jump again; just hit the jump button as soon as you hit a flagpole, and you should move right on.
When you reach the end of the trapeze swings, jump down to the street and duck into the alleyway. There's another Queen card across the street, so turn around and head in for another boss fight.
Boss Fight: Dragon
The Dragon's weakness, oddly enough, is fire, so equip Shield and Pyrokinesis. If you use Pyrokinesis on the Dragon, then he'll be set on fire for a goodly length of time and take plenty of damage, leaving you with little to do but Shield yourself against his attacks. Repeat this process a few times and you'll obtain another Queen to return to Edgar.
Back to the Street
With the Dragon taken care of, hop through the dragon painting to return to the street. Notice the nail hanging by the painting; you'll need to find something to hang here. To do so, head across the alleyway to meet a border collie, who's selling a Guitar Painting and another Rose Painting. Buy them both and return to the nail. Use the Rose Painting first to obtain another Rose, then use the Guitar Painting to create a ladder leading up to the upper rooms here.
After nabbing the first Cobweb, head through the rooms until you reach the street. There's a One Way sign pointing in the direction from which El Odio comes, but first, head left to the balconies near the Dragon painting and use the lever on the uppermost one to roll down the ladder to street level. With that in place, you can retrieve the Guitar Painting from the wall before moving on.
Further down the street, you'll come a pair of trapeze swings suspended above; only the uppermost is going to be high enough to get you out of Odio's range, though. Jump up to it, wait for him to pass underneath, then quickly return to the street and run up until you reach the manhole leading to the sewers.
The Sewers
After cleaning out the figments in the first hallway here, grab the second Cobweb from the doorway, then head through. You'll come out near another ladder, but before you head up, find the third Cobweb and the first Vault in this corridor. When you hit the vault, climb the ladder and buy the Vine Painting and the Window Painting from the dog in the alleyway, then climb back down into the sewers. At the end of one of these sewers, you'll find another grate; use Telekinesis to throw the trashcan on top of the yellow switch here to open it. You'll wind up near another ladder, so climn up it and you'll come out to an alleyway. Pyro the branches nearby to find the Dufflebag.
At the end of the alleyway with the sewer entrance in it, you'll find another nail; hang the Window Painting here for a hidden figment (if you're looking for all of them, note that the nail that you hung the Guitar Painting will also net you a figment if you hang the Window there), then hang the Vine painting to reach a hidden garden where the second Vault is located. The garden will also feature numerous plants and pots, each of which will net you an arrowhead when you smash it, so recharge your cash here if you need to.
With the second vault taken care of, return to the dog you bought the Vine and Window Paintings from, then climb the pole near the dog and walk around the walkways until you notice a nail; don't hang anything on it yet, though. Instead, continue around until you reach the balconies on the street where El Odio is running, then drop down to the first one and lower the ladder. You'll come out near the third Queen card, so head inside for another boss fight.
Boss Fight: Eagle
Eagle doesn't have any particular weaknesses, save to fist attacks. His primary attacks come in the form of a simple melee combo which you can shield yourself against, as well as an aerial dive-bombing routine which, likewise, can be shielded against. (Wait until you see his shadow becoming large, so that you know he's on his way down, before shielding.) You should have a moment to strike after he misses his landing from the aerial attack, or you can repeat the Telekinesis - hit - Telekinesis - hit routine to wear him down while he's standing.
After delivering the card to Edgar, return via the Eagle painting, then head back the alleyway to reach the nail on the ledge above; the Hatbox Tag will have magically appeared nearby. There's no way to get up the street that the bull is running through, but if you hang the Window painting on the nail, it'll open a portal further up the street and automatically warp you through.
You'll instantly gain a maximum depth projection increase, as well as the fourth Cobweb when you come out on the other side. With those in hand, jump down to where the next dog painter is standing, right next to the fourth Queen. Do NOT jump into the Queen card at the moment, though, as you cannot win the fight inside. Instead, climb up the ladder to reach the matador's apartment. Grab the fifth Cobweb from the entrance, then nab the Suitcase Tag from the apartment itself. Before talking to the matador, grab the sixth and seventh (and final) Cobwebs from the fireplace passage, then ride the rail at the end to reach the Suitcase, which should leave you with only the Hatbox as the last major pickup for the level; oddly enough, you can find it back in the matador's bedroom, so grab it before speaking to him.
After talking to the Matador, you'll nab the Confusion power, which should be the last Psi Power in your book, unless you've been really terrible about gaining ranks. With that in hand, return to the queen below and step into the painting for the last wrestling fight.
Boss Fight: Cobra
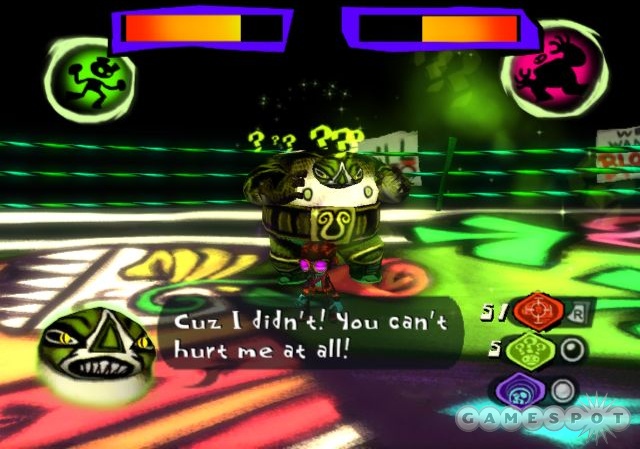
Cobra's a cinch when you have Confusion on your side; just target him, throw a confusion grenade, and run in to paste him with fist attacks while he's confused. Shield should be your secondary power while fighting him, as he'll sometimes break free of the confusion and attack you. He'll drop more confusion grenades when you smack him, though, so you shouldn't have a problem repeating this cycle until you finish him off.
With the final card in hand, climb Edgar's tower and give it to him. He'll disappear, leaving you to move on to the final boss fight by climbing to the top of the tower.
Boss Fight: Edgar / El Odio
Edgar and El Odio are both going to be defeated using a combination of Shield, Telekinesis, and Confusion. You're going to start out fighting Edgar himself (as the bull), so equip yourself with Shield and Telekinesis. When he charges you, use Shield to avoid being damaged, then use Telekinesis on the banderillas in the ring to fling them at Edgar. After you hit him with four or five banderillas, he'll keel over, resulting in the next stage of the fight.
As Edgar begins his raging quest to kill El Odio, you're going to need to reverse the damage that you did in the first part of the fight by walking up to him and using Telekinesis to remove the banderillas you threw at him; doing so will restore his health a great deal, allowing you to focus on El Odio. El Odio is immune to Psi Blast and normal fist attacks, as per usual, meaning that you'll have to throw banderillas at him to kill him; unfortunately, he'll warp away as soon as you launch one. To counteract this tendency, use Confusion Grenades on him to stun him, then start wearing him down. If you run out of Confusion, hit the many bouquets that are constantly being thrown into the ring to restore your supply.
After El Odio has been destroyed, the real-world Edgar will reward you with Loboto's Portrait which, along with Gloria's Trophy and the Straightjacket, will complete the Loboto disguise that you need to bypass the orderly. Equip them all and speak to the orderly again to access the elevator.
Back to Oleander's Mind
If you're looking to complete all of the Vaults and Cobwebs in the game, then you may want to return to Oleander's mind at this point, as you didn't have the Cobweb Duster when you went through before, and thus weren't able to find the second Vault in his brain, since it's behind a cobweb.

There are no cobwebs in the Trenches area, so head straight for the Cannon area. When you get past the cannon and reach the obstacle course with all of the trapeze spikes, make your way up the wall to find the first cobweb below the highwires. The second cobweb is near the trapeze swing puzzle, and holds the second vaults behind it, so open that as well. The third cobweb here is visible at the bottom of the trapeze swing puzzle; you'll need to use your Levitation float to coast down to it.
The finale of the area, after the end of the rail, will hold two more cobwebs, one at the end of the logrolling puzzle, and one near the white hallway, which is now curiously blocked off. With everything in hand, return to the real world and move on.
Asylum - Upper Floors
There's a bunch of Psi Cards and Brains in this section of the asylum - check that section of the guide for details on all their locations. Moreover, it's just a long slog of platforming to reach Loboto's laboratory. Your only enemies here are going to be psychic death rats, which attempt to close in on your location and explode, doing heavy damage and confusing you for a bit. To get them, keep Psi Blast and Shield handy. If you spot them coming from a ways away, use Psi Blast; if they get close, just Shield yourself and wait for them to explore. You'll still be confused, but at least you won't take any damage.
The first section of the Asylum is fairly straightforware; you will, for the most part, be traveling upwards, so if you seem to get stuck, check the ceilings for holes and try to jump upwards. Eventually you'll reach portions of the asylum that have somehow been twisted; you'll wind up walking on the walls, with the ceiling and floors on your left and right, and so on. Shortly after this area, you'll come to a bubbling pit of green ooze, which is the base for a very, very large room that goes up for quite a long time.
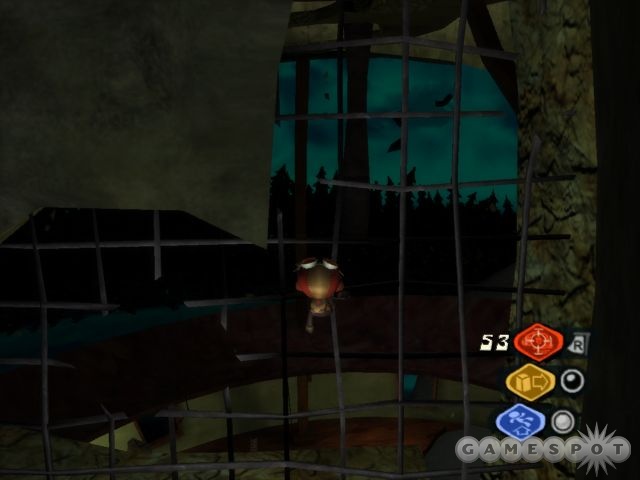
Explaining each jump here in writing would take a few pages, so suffice to say: your goal is to head straight up. If you get stuck in this area, look for a pipe leading up, or some rebar inside of a wall to climb on, or try doing a levitation jump and floating to a higher platform. The one real puzzle here comes when you reach a pair of locked doors; in order to pass by, you'll need to get into a position where you can see the chair that's holding one of the doors shut, then use Telekinesis on it through the window to move it out of the way. Doing so will let you move on upwards.
When you reach the elevator at the end of the level, take it up to Loboto's Lab.
Loboto's Laboratory
In order to get by the bird that guards the steps, you'll need to turn invisible. When you do so, you'll be able to head up to Loboto's lab, where he's working on perfecting his brain-tank experiments. He doesn't seem to be too concerned with your presence, so feel free to look around for what should be the very last Psi Cards and Brains you need to collect. You can also find Lili and the de-brained Sasha and Milla in his little tearoom above the lab, alongside his cowering assistant, Sheegor, who begs you to free poor Mr. Pokeylope from his habitrail prison before Loboto makes good on his threat to roast the turtle. You can also find the Birthday Cake on the table here, so grab it.
Now, before you head down to deal with Loboto, note the presence of another elevator near the tearoom; this will return you all the way to the first level of the Asylum, near where Boyd is standing. If you head down, you'll be able to easily return to Ford and rebrain all of the students, convert the cobwebs you've collected, and get some ranks with the Psi Cards. Don't forget to stock up on Dream Fluffs if you happen to need any. Go ahead and do all of that, then return.
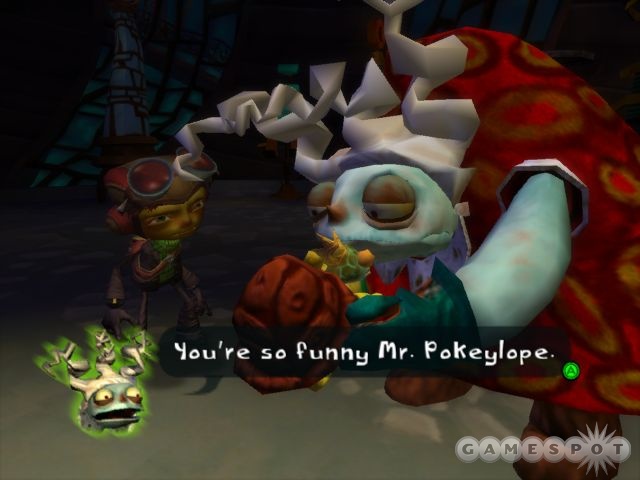
In order to get Pokeylope out of his cage, you have to equip the Birthday Cake, then walk near him; he'll crawl towards the cake, allowing you to use Telekinesis to chuck him out and pick him up. With Pokeylope in hand, return to Sheegor; after the cutscene, use Telekinesis to chuck Pokeylope's brain into the brain tank in Loboto's lab. After doing that, free Lili from her restraints via Psi Blast, which will bring up the ominous Point of No Return autosave, and launch you into a lengthy cutscene, which will conclude with a melee against a Brain Tank commanded by none other than Oleander himself!
Boss Fight: Psychoblaster Death Tank!
Now, you're going to be unable to damage Oleander's tank directly with your powers, due to its powerful telekinetic defenses, but if you use the right combination of powers you should be able to start cracking open the shell that protects Oleander's brain. Begin by equipping Telekinesis and Pyrokinesis, then start using your Telekinesis to fling the outer, stationary blocks towards the interior, floating blocks. If you do this quickly enough, you should be able to make a gap in Oleander's stone protection large enough to run up and Pyrokinesis his wooden shielding. He'll restore the stone barrier quite rapidly, though, so you'll need to be quick about all this.
When you've Pyro'd enough of the wooden fence to open a gap between yourself and the front of Oleander's tank, use Telekinesis to fling a stone atop the tank's shell, cracking it a bit. Repeat this three times to open a hole; you can then use Telekinesis on your own brain to fling yourself towards the shell, resulting in some kind of unholy mind-meld between yourself and Oleander.
The Meat Circus
Since your brains are doing the horizontal tango with those of Oleander, you're going to be stuck in a mental world that's a combination of Raz's childhood memories and those of the Coach. You're going to be escorting the Coach's inner child for much of this level, and your task is to protect it from damage as much as possible; if it dies, you die.

Begin by following Oly into the gypsy coach and grabbing the two Cobwebs in the hallway. You'll come out in Tent City, where Oly will automatically run away into a nearby circus tent. Don't follow him right away, though; instead, grab all the figments in this area, note the presence of the Steamer Trunk, and grab the Hatbox Tag and the Confusion ammo upgrade behind it. One of the robot gypsies here will act as a one-stop shop for cobweb conversion and Psi Card upgrades; hope you brought plenty of Psi Cores! You can find the Steamer Trunk Tag on top of the awning above the circus tent, so Levitate up to it and grab the Steamer Trunk.
The Big Top
When you're ready to move on, head into the yellow glow to reach the interior of the big circus tent that Oly is inside. Now, this area can be a bit confusing thanks to everything that's going on at once. In order to proceed up to the top of the room here, you're going to need to protect Oly from the mutated rabbit killers that are trying to track him down; they possess no particular defenses, so just run up to them and hit them. Oly won't move on without his rabbit, though, so you'll need to pick it up and give it to him. To get it to stand still, target it with a confusion grenade and grab it while it's confused. Doing so will force Oly up to a higher platform, and restore his health. Don't even worry about the figments in this area; if you're a completionist, then you'll be able to return to the bottom of the room when you escort Oly safely out. Your priority here should be to get to the top of the room with Oly before he gets killed.
When you first warp in, notice the presence of the Suitcase Tag on the lowest level of the area; grab it before stunning the bunny and giving it to Oly. With that done, climb to the highwire suspended over the meat grinder and jump to the platform nearby. Use the fat lady there as a trampoline to reach the next platform that Oly's on. Unlock the Hatbox here before sending Oly on to the next platform.
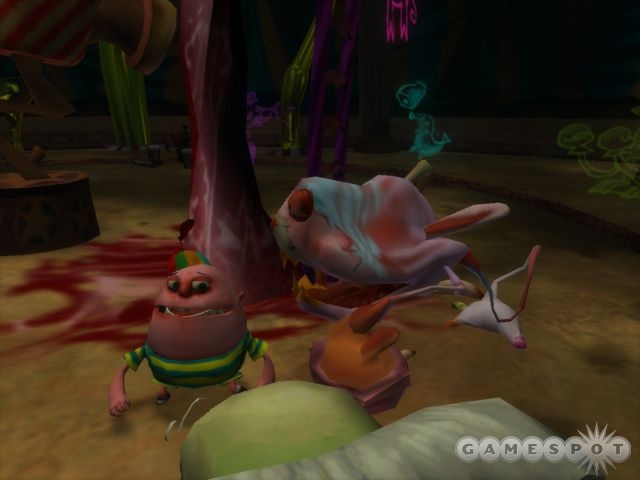
It's here that things get complicated. Oly's going to be taking attacks from two rabbits at the same time now, so you'll have less time to get to him, and you'll also have a harder path. After following the trapeze path up the side of meat to the higher platforms, you'll have to work your way around to the rotating knife-thrower's target board and get the knife-chucker to aim at you with his knifes. When he places a knife in his mouth, you'll need to jump up and dodge it so that it hits the board instead of you; this will plunk the sword into the board, allowing you to jump to it on the next go-round and use it as a trapeze. Start swinging towards the platform to your right and use a telekinesis float to land on it, or at least grab it so that you can pull yourself up to it. This is a pretty tough task to perform in the time alloted to you; you might want to check the video on this page to see what we're talking about here.
You'll have to repeat the same process to get to the fourth platform of Oly's, but that's the last one; when you save him from there, he'll move over to the final platform of the room, which is a simple levitation jump away. You can the Purse Tag by the exit to the next room, as well as the only Vault of the level.
The Tunnel of Love
Before you hop on the rail slide here, find both the Purse and the Suitcase on the platform where you begin and unlock them. Only one baggage left...
When you hop onto the railing, you'll be forced to make your way along the loooong slide it begins. There are numerous gaps in the rail, and also a few uphill curves, so you'll need to press forward on your analog stick to go as fast as possible while also jumping over the gaps. You're going to fall off a couple of times along the way, no doubt, so you may want to save your game before you start this little rail and reload if you lose too many lives. You'll find the Dufflebag Tag on the rail itself, and the Dufflebag itself on the end platform.
Boss Fight: Butcher
Alright, it's time to take on Oly's inner demon, and a nasty one it is! The Butcher is a rather large brute, but luckily for you, all you need to defeat him is the trusty Shield power and your handy fists. He has a few attacks, which are all pretty powerful, but you can Shield yourself against them without a problem. If you do so long enough, he'll eventually take an over-powerful swing at you with his right arm and plant one of his axes in the ground; when this occurs, run up his side to hit him in the head. (You may need to not Shield yourself against these swings and instead run side-to-side to avoid them to cause them to plant themselves in the ground.) Three occurances of this are enough to take him down.
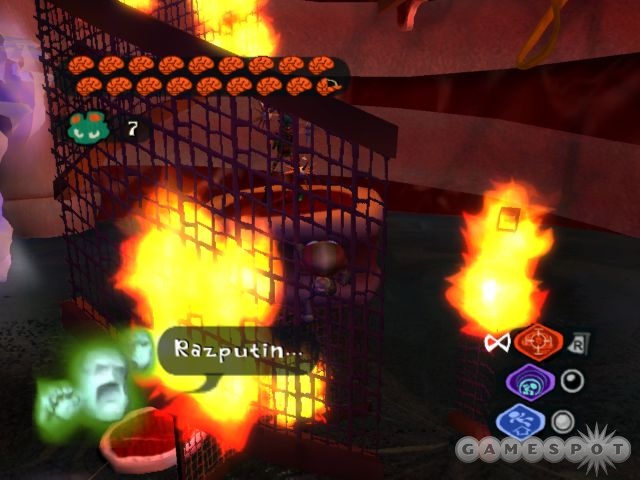
Life In the Bigtop!
Now that Raz's own worst nightmare - his mental image of his father - has come to bug him, you'll have to deal with two of your worst fears: the fear of drowning and the fear of not measuring up. This room will soon be filled with water, which will rise from the bottom of the level and quickly start moving up to the top. You'll need to stay above it by maneuvering through the trapeze swings, highwires, ladders, and such before you drown. To make matters more complicated, Raz's father will be swinging around, throwing flaming darts at him, but this is more of a nuisance than a real threat, as the darts only do half a brain of damage and can't knock you off of highwires, even if you run right into them.
There's only one real path to follow here, but it'll have to be followed quickly if you don't want to wind up in the drink. There's nothing too terribly complicated to do, but you won't be able to cheat yourself up to higher areas with Levitate due to the fact that everything's so spread out, so keep the movement on as best you can. You'll know you're near the end when you reach the ladder. When you hit it, press down on your analog pad, no matter which way the screen orients itself, and you'll soon reach the end of the level and be forced to take down the next iteration of the Butcher.
Boss Fight: Butcher Two
The second Butcher fight is similar to the first, save with one complication; your father is going to be throwing mines onto the field, forcing you to avoid them and the Butcher's strikes at the same time. Luckily, though, these mines also allow you to damage the Butcher. Pick them up with Telekinesis and chuck them at the Butcher's knees to force him to keel over; these won't always connect, but when they do, the Butcher will be hittable with your fist. Repeat this process a few times to polish him off.
Final Boss Fight: Father/Butcher Aggregate
With the furious forces of your mental father and the Butcher combined into one hideous beast, it's going to take a good amount of effort to finish the monster. With the psychic energy of your real father constantly being channeled into you, though, all you really have to do here is wail on the dude when you're in your psychic shell. You'll need to punch through his defenses, but when you do so, you should have a free ride on damaging the beast. Your shell only lasts a few seconds, though, so when it's recharging, you'll have to run away and use Shield to repel the beast's attacks. With a minute or so of this, you'll polish off your inner demon once and for all, your brain and the Coach's will be separated, and you'll be back in the real world, a full fledged Psychonaut at last.
Be sure to watch the credits as they roll, as they will portray some of the aftermath of your adventures in both the real world and the psychic levels you've been adventuring in.
Item Hunting
This section of the guide is our attempt to point you towards as many of the collectible items in the game as possible. Note that some of the directions here have north, south, east, and west headings given; these are given with the assumption that the top of your screen on the map is north.
The one omission from this guide is the location of figments inside each character's psyche. To be honest, tracking down all of them - and there are literally thousands of them - is a bit beyond the scope of this guide. Apparently obtaining rank 100 and obtaining the extra scene for doing so requires you to track down all of the figments in the game, so if that's your goal, then good luck!
Psi Upgrades
Whenever you increase your rank a certain amount (either by finding figments or by combining Psi Cards with Psi Cores in Ford Cruller's lab), you'll gain a new power. Here are the powers along with the rank at which you obtain them. Thanks to Greg Smith for supplying this list.
- Rank 10: Pyrokinesis
- Rank 20: Telekinesis
- Rank 30: Improved Palm Bomb
- Rank 35: Chain Blast
- Rank 40: Wrecking Ball Levitation (Levitation ball will damage enemies and obstacles when it strikes them at full speed.)
- Rank 45: Thermal Detonation (Pyrokinesis hits all targets in an area around the prime target.)
- Rank 50: Offensive Shield
- Rank 55: Advanced Invisibility
- Rank 60: Telekinesis range extended
- Rank 65: Super Chain Blast
- Rank 70: Wrecking Ball Levitation (Same as before, save that it activates immediately when you raise the Levitation bubble.)
- Rank 75: Shield (Reflects damage back to melee attackers.)
- Rank 80: Confusion (Lasts twice as long.)
- Rank 90: Health Regenerates
- Rank 95: Infinite Ammo
- Rank 100: Extra cutscene
Kid's Cabins
Psi Cards
- Three of them are on ground level, including one by the boy's cabin.
- One is on top of the speaker tower near Dagon.
- One is in the outhouse. (Use the door to open it.)
- There are two on top of two of the cabins.
- If you walk along the highwire between the two cabins, you can drop down to hang on it with your cancel button. If you swing from there to the trapeze, then swing from there to the trampoline, another Psi Card can be found.
- If you jump from the top of the boy's cabin to the wooden trapezes there, you can jump up to find a cave. You can't do anything with the safe therein, but you can find three more cards inside.
- After Levitate: After you retrieve the Levitate power, you can head to the beginning of the cave, then float across to some netting on a rock nearby. Jump from that netting to another set of netting, then double-jump to the highwire strung along behind it to grab the last card.
Psi Marker
Jump from the highwire to the trapeze to the trampoline, then climbing all the way up to the top of the ladder there.
Scavenger Hunt
Turkey Sandwich: At the end of the cave found above the cabins, there's a safe with a block of ice in it. When you get the Pyrokinesis power, return to the ice and melt it to retrieve the sandwich.
Main Campgrounds
Psi Cards
- One is located behind a gap in the fence to the west of the Russian student near the entrance to the area.
- Climb the speaker tower to the north of the cabin for another.
- Walk across the highwire suspended to that tower to find another card near where the wire meets the Lodge building.
- Keep on walking on the wire to get another card near the suspiciously enthusiastic students on the next speaker tower.
- Walk back to the roof of the Lodge and jump onto it. There's another card on the roof.
- While standing near the location of the card on the roof (the card, not the marker), face east and jump onto the wooden sub-roof of the Lodge; another card awaits you.
- Another card hides behind a tree to the south of the Lodge, near the mountains.
- Head to ground level and walk around the crossroads to the west of the Lodge. A card is floating around the walkway leading up to the building.
- Atop the speaker tower southwest of the crossroads.
- On the path leading from the Lodge to the parking lot.
- Ground level in the parking lot.
- Another awaits in the outhouse near the parking lot.
- Jump up to the basketball hoop in the parking lot to reach another card.
- Jump from the tree stump to the Jeep-like vehicle in the parking lot, then bounce on its roof to another card.
- After you get Levitate, jump to the main camp sign in the middle of the parking lot and grab the card atop it.
This is fourteen cards (not including the one that requires Levitate). To get the three remaining accessible ones, you'll need to head back to the crossroads. There are a group of rocks on the southern side of the path between it and the parking lot, near a trashcan. If you carefully jump atop these rocks, you'll eventually reach another elevated platform. One card is near the platform, another one is found on another platform that you can swing to from there, and the third is found by following the highwire all the way to the parking lot. If you have trouble finding these rocks, follow the highwire back from the large sign near the parking lot to the trapeze, then jump on the most obvious-looking rocks to the east of that location.
Psi Markers
The Psi Marker here is atop the lodge's roof.
Scavenger Hunt
- Gold Doubloon: Underneath the Lodge on its south side.
- Eagle Claw: Found by jumping atop the rocks to find the Psi Cards mentioned in the paragraph above
- Voodoo Doll: Inside the Lodge, atop the rafters above the band. You'll need to jump up there from the bookshelf in the opposite corner of the room.
GPC And Wilderness Area
Psi Cards
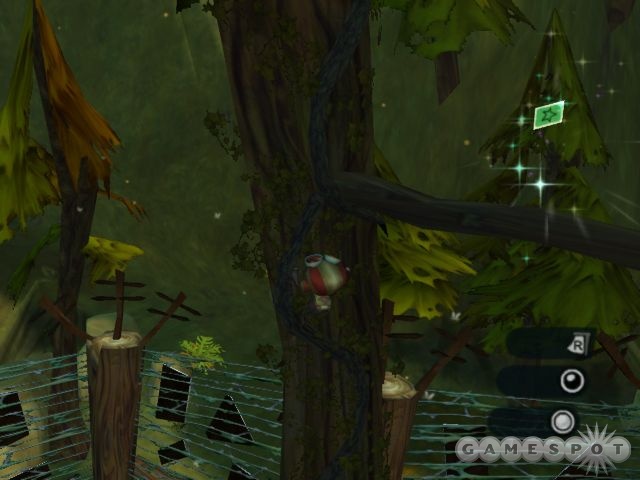
- Head to the cave in the southeast leading to the boathouse and jump atop it.
- To the east of this cave, another card is hidden behind a tree on the hill; you can jump to it, though, if you walk far enough up the hill before doing so.
- Two cards can be found near trees on the east side of the GPC, outside the fence.
- Near the outside of the GPC fence, to its northeast.
- Near the bear on the north side of the GPC.
- Two cards are atop the rocks to the northwest of the GPC.
- There's a decrepit hut to the west of the GPC. Jump to the student on the rocks nearby to find another card.
- Jump from the student's location to the log crossing the river.
- Head back to the student, then find the wooden trapeze behind him. Use it to move up to a platform above the hut.
- From the platform, jump into the hollowed log; there's a card that you'll pick up as you slide down.
- Another card should be easily distinguishable across the river after you leave the log.
- Underneath one of the GPC walkways, on ground level.
- Jump on top of central GPC core structure, where another student is crying.
- From the central GPC structure, you'll notice a pair of trees with branches covering their trunks. Each of these will lead you to a card if you jump to them.
- From the southern card that you leaped to from the GPC, you can keep following the path to reach another card.
Psi Markers
There are two Psi Markers here. One's inside the decrepit hut, which you'll need to enter by jumping to the roof and falling down. Another is reachable from atop the GPC; jump to the southern tree, climb it, walk to another climbable tree, then climb to the top of that to reach the Marker.
Scavenger Hunt
- Pirate Scope: This is atop some rocks to the east of the cave. If you remember jumping to a card here, you'll need to repeat that step, then jump to some roots that act as a handhold, then climb up to the top of the rocks, where the Pirate Scope awaits.
- Glass Eye: Located behind a grate at the river's end, underneath the GPC. You'll need Telekinesis to suck it towards you.
- Golden Acorn: When you have the Invisibility power, activate it, then run towards the acorn that the squirrel guards in the southeastern corner of the map to grab it.
- Miner's Skull: This is located in one of the two Geysers here. To pop it out, you'll need to stand atop the geyser that's actually spitting water and plug it with your Shield power. This will dislodge the Skull and allow you to grab it.
Reception Area
Psi Cards
- On the hill south of Janitor, near the beehive.
- Further up the same hill, behind some gravestones.
- Jump onto the rocks northeast of the Janitor's trailer.
- Jump onto the lower branch of the large tree to the northeast of the Janitor.
- Another card awaits on the rocks east of this tree.
- There's an abandoned treehouse to the south of the entrance to the underground tram. Climb up and walk across the highwire to find two cards.
- Near the waterfall by the swamp, there are two cards atop the rocks.
- There's one card inside the cave behind the waterfall.
- One near the decrepit car in the northeastern corner of the map.
- There are two on the large tree mound near the swamp; one atop the mound, one on a small ledge near the northern river.
In addition to these, there are also eight cards in or around the cave with the broken railroads. One is near the entrance, three more are in the cave itself, one is on top of the cave's exit, and one can be found by gliding along the rails at the exit. The final two are across the map from the rails, and are apparently intended to be jumped towards after you're done sliding along the rails. We found it much easier to just wait until you had Levitation and use that to jump to them.
Psi Markers
The Psi Marker here is at the end of the broken railings. You can theoretically jump to it by sliding along the railings, but it's easier to just levitate to it when you have that power.
Scavenger Hunt Items
- Fertility Idol: Knock down the beehive near the Janitor's trailer with Psi Blast to find this.
- Dinosaur Bone: Jump to the top of the tree to the northeast of the Janitor with Levitation.
- Condor Egg: This is high on a stump in the middle of the swamp. It may be obtainable without Levitation, but it's difficult to do so.
- Cherry Pipe: Found on the ground near the decrepit car in the northeastern corner of the zone.
Boathouse and Beach
Psi Cards
- Northwest corner, under steps leading to Main Campgrounds.
- Eastern end of the beach, near the large rock.
- Jump from the beach to the path leading along the northern wall.
- Further up the path, you'll find another card.
- Stand on rock above cave leading to the GPC area and trapeze across to a card.
- Keep on trapezing to reach another card on a far platform.
- Under the walkway leading from the beach to the cave.
- In the shrubbery near the boathouse.
- Jump from the beach to the northeast piers and grab the card there.
- When standing near the student communing with the fishes, jump towards the card on the rock out in the lake. You won't be able to make it, but you should be able to get a boost from the lake monster to reach it.
- Levitation required for the rest: Jump from the path to the top of the boathouse, then jump to the cave along the mountains to find on.
- Atop the mast on top of the boathouse.
- Along the highwire near the lower mast.
- On the covered roof above Bobby.
- Atop the roof covering the bathysphere.
- At the end of the pier near the bathysphere.
Psi Markers
The only Psi Marker here is atop the rocks at the eastern end of the beach. You'll need to levitate to jump to it, though.
Scavenger Hunt
- Psychonauts Comic #1: Easily found along the path leading from the beach along the northern wall.
- Diver's Helmet: Jump on top of the boathouse with Levitate, then jump to the cave in the wall.
Sasha Nein's Laboratory
Psi Cards
There are two cards here, neither of which are particularly hard to find.
Scavenger Hunt
Fossil: On a ledge near the top of the room. You'll need to double-jump atop some books to jump to it.
Ford Cruller's Laboratory
Psi Cards
Two cards, neither particularly difficult to find. One's on the lowest level, near the machinery, while another is hovering on a platform near the top of the chamber.
Thorney Towers Grounds
Psi Cards
- Near the shore where Linda first drops you off, on the cliffs.
- After you unlock the door leading to the courtyard, Levitate and jump up to one of the large pillars immediately inside the door
- After the doors open, find Boyd, standing near the doors with a molotov in hand. The card is nearby.
- After breaking through the barrier to the cliffside path, turn right and grab the card.
Psi Markers
You can jump to the sole Marker here with Levitation while standing near the guard by the front gates.
Scavenger Hunt
Gold Watch: Levitate and jump up to the top of the fountain in the main courtyard.
Brains
- J.T.: In a small alcove near the fountain.
- Franke: On a ledge next to Boyd.
- Kitty: On the path from the fountain to Gloria.
Thorney Towers: Asylum Courtyard
Psi Cards
- On a pillar near the top of the elevator car.
- Jump to the door above Napolean, then jump again to the ledge above it.
- On another ledge above Napolean.
- In Edgar's little room at the top of the area.
Psi Marker
In the rafters above Edgar; you'll need to Levitate up to it.
Brains
- Milka: This is the brain in the basket that the birds continually shuttle up and down near Napolean. In order to get it, you apparently need to wait until they bring it to ground level, then turn invisible, run towards it, and jump on top it it. This will cause it to stay on the ground when the birds fly back up. Alternately, you may want to quickly try and do a jump-attack move to smash it open.
- Chloe: On a ledge across from the bed that you can use as a trampoline. You'll need to Levitate-jump up to it.
- Maloof: On a ledge near Chloe's brain. Use the two trapeze sticks to swing to it.
- Chops: On a ledge above Napolean.
Asylum Upper Floors
Psi Cards
- At the end of the lowest hallway, after you first arrive via the elevator.
- Inside one of the second floor dorms; smash through the planks near the top of the steps leading from the first floor.
- Inside the real elevator shaft.
- When you climb through the hole after the pipe-rail across the gap, two cards will be easily spotted.
- Inside the dorms with busted walls that are open to the outside.
- On top of a pillar in the busted exterior dorms.
- On the uppermost level of the exterior dorms.
- Inside one of the rooms when you reach the top of the twisted staircase.
- Found after crossing the green sludge in the upper levels.
- Found after climbing the ladder just beyond the green sludge.
- On top of a wooden ledge high above the green sludge.
- On a concrete ledge somewhat below the last card. You'll need to swing across a couple trapezes, then climb a pipe downward to reach it.
- Near Phoebe and Dogen's brains. Climb the fencing in the rebar of the wall up and grab the card.
- Immediately next to Crystal's brain on the platform after climbing the rebar.
- After using Telekinesis to enter a room at the top of the asylum, you'll be able to ride a pipe around to the outside of the area, where you'll automatically find a card.
Psi Marker
After climbing the rebar above the green sludge, you should be able to see this floating in the air near some piping. You'll have to levitate and jump to it.
Brains
- Benny: Inside a bathroom on the second floor, near the second Psi Card listed above.
- Bobby Zilch: After climbing through the elevator shaft, you'll come to a pipe laid across a gap; jump into the dorms to the left to find this brain.
- Elka Doom: On top of a pillar in the exterior-open dorms.
- Quentin: On a ledge in the green sludge room.
- Phoebe and Dogen: After swinging across the two trapezes, then climbing up the rebar, you'll come to a wooden platform.Walk across the highwire there, then turn around and jump and float to the platforms on the outside of the wall to find these brains.
- Crystal: After climbing to the top of the rebar in the green sludge area, levitate and jump over to the brain on the platform nearby.
- Clem: After using telekinesis on the chair to get through the door at the way top end of the sludge room, jump up, then drop down into the other room to find Clem's brain.
- Nils: After finding Clem's brain, return to the room with all the wheelchairs, ride the pipe to the outside wall, then climb the rebar to find Nils' brain.
Lab of Dr. Loboto
Psi Cards
- Found immediately near the guard-bird at the beginning of the level.
- Near Dr. Loboto's force field of evil.
- Cards three and four are on the upper ledge, near where Lili is being held captive.
Brains
- Vernon: Found near the guard-bird at the beginning of the level.
- Mikhail and Elton: On the upper platform, near where Lili is being held.
Got a news tip or want to contact us directly? Email news@gamespot.com
Join the conversation