Tom Clancy's Splinter Cell Chaos Theory Walkthrough
The world is on the brink of war once again, and only Sam Fisher can pull it back. Splinter Cell: Chaos Theory sends him around the world, from Panama to the Koreas to Japan, in an attempt to trace the ultimate source of a technological terror attack. Hopefully he's read this Walkthrough, which offers up a complete walkthrough for the game, as well as numerous tips on how to use your weapons and how to deal with enemy guards.
Design by Marty Smith
It seems like every time international affairs are tidied up by Sam Fisher, the U.S. government's one-man intelligence bureau, someone comes along to mess things up again. In Chaos Theory, the main thrust of the story is that someone is using the incredible power of the Masse kernels (algorithms that allow their users to hack into almost any computer system, no matter how secure) in an attempt to start a war in Asia. Given Sam Fisher's intimate familiarity with the power of the Masse algorithms, he's sent into the area to find out who's behind the rising tide of war, and to shut them down for good.
As with the earlier games in the series, Chaos Theory pits Fisher against large numbers of enemies, but doesn't ask him to rip through them all with an automatic weapon; the emphasis here is on stealth, secrecy, and plausible deniability - you're given the freedom to kill as needed to complete your objectives, but in most cases, it's best to just avoid enemies or knock them out to avoid unnecessary complications. Should you decide to get in on the stealthy kill action, though, Chaos Theory is much more forgiving than earlier games in the series; Sam now carries a knife which can be used for nearly instant lethal kills at close range, and leaving massive numbers of corpses in your wake will no longer automatically trip alarms later in the mission, so long as you take precautions to hide them from roving guards.
GameSpot's Game Guide to Splinter Cell: Chaos Theory offers up a complete walkthrough for the game, complete with tips on how best to lure guards off of their patrols, how to get high success ratings after each mission, where to find all of the opportunity objectives in the missions, and tips for the game's multiplayer modes.
Gameplay Tips
Dealing With Guards
Every mission that Sam is sent on will pit him against dozens of enemy soldiers. Sometimes you can kill them, sometimes you're restricted to dealing with them in a non-lethal fashion. Some missions also have civilians in them; killing these guys usually results in an instant failure for the mission. This section is just a basic primer on how to deal with guards, whether you intend to kill or disable.
Stealth Takedowns
If you're attempting to get through the game with a minimum of dead bodies left in your wake, then you'll have to either avoid or disable the numerous characters in the game without killing them. The game offers up a bevy of techniques which you can use to do so, however, so you should have a number of options for dealing with any given situation. This isn't meant to be an exhaustive list, mind; there are going to be more situation-specific takedowns based on each level's unique environment.
Melee Takedowns
There are two methods to incapacitate enemies at close range without killing them, both involving the alt-fire attack. The first is simple enough to use; when you get up close to an enemy, just hit your alt-fire and Sam will either punch them in the neck, or knee them in the chest, or send a fist right into their face, depending on the relative positions of he and his target. Of course, if you just attempt to run up to an enemy and hit them, they'll usually either hear you or see you, so you'll need to take care to be stealthy while you make your approach. Shooting out lights and creeping slowly along behind the guards to get into position makes both grabbing them or just punching them a lot easier.
Also, if you intend to just punch someone's face in without grabbing or interrogating them, you'll probably want to get used to just clicking the button over and over again as you get close to them. You have to be fairly close to actually start the hitting animation; if you click while you're too far away, nothing will happen, but if you don't click until you walk up behind them, you may wind up brushing up against them and alerting them. If you just keep clicking as you approach, you should be able to pull off the move as soon as you get into range.
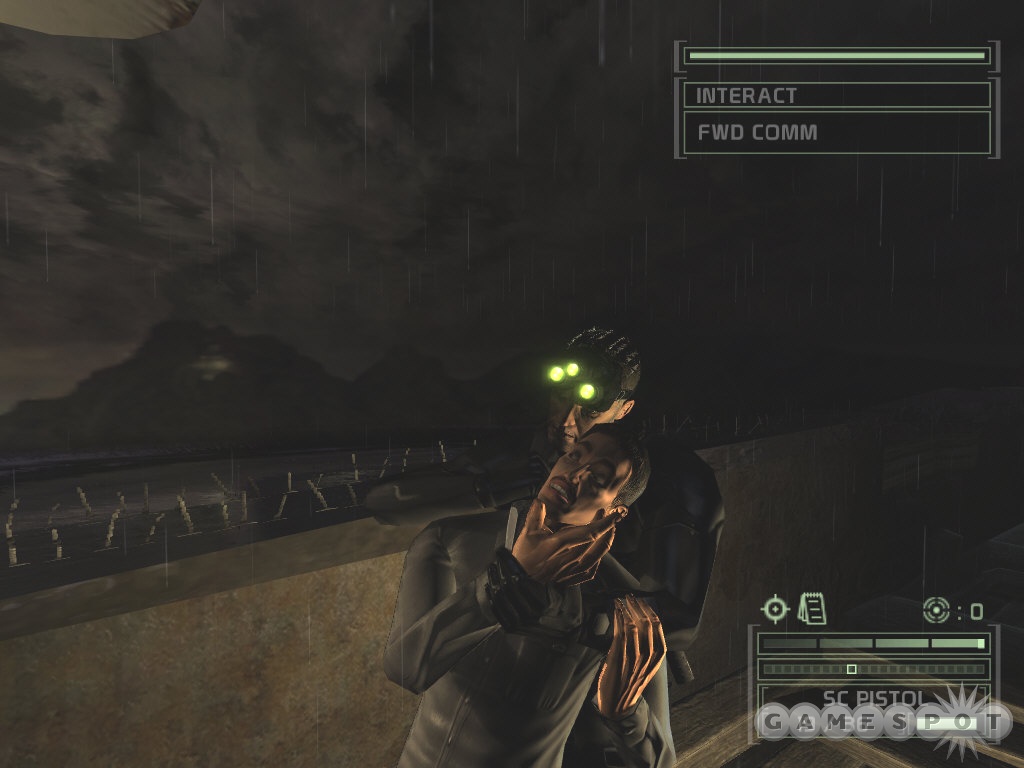
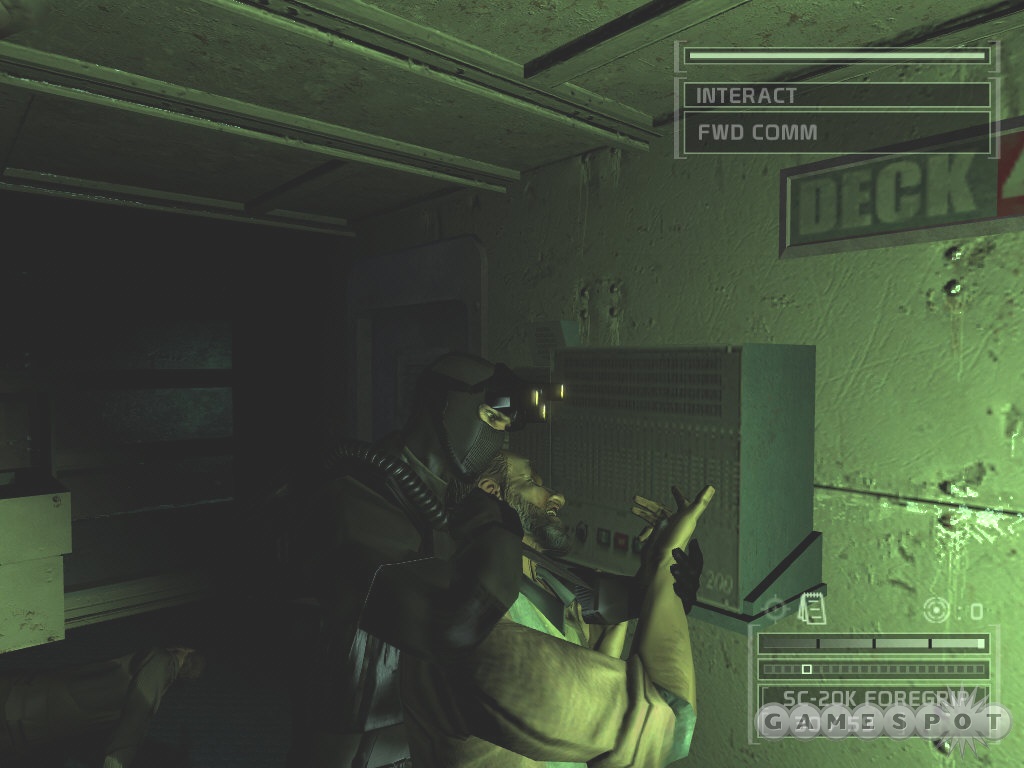
Alternately, you can also attempt to grab and interrogate a soldier before disabling him. Grabbing a character can only be performed when you're immediately behind a soldier, and shows up as an interaction. While a soldier is held, you can perform a disabling action with your alt-fire, perhaps after herding the guard so that his body will fall into a shadowy spot or into a hole in the ground. If you hold down the alt-fire button after disabling the guard, then Sam will automatically pick up his body, allowing you to move it somewhere out-of-the-way.
(Keep in mind that you can injure or kill a guard by accident if you drop their unconscious body from too far of a height. E.g. if you render a foe unconscious, then pick up his body and chuck it off a building, then that'll count as a kill. Less severe heights can count as injuries, which will hurt your post-mission success rating.)
These two maneuvers, and especially the latter, will be your primary form of guard elimination if you intend to play through the game as stealthily as possible. Keep in mind, though, that an unconscious guard can be awoken by another guard if his body happens to be found; you'll always want to move bodies into the deeply shadows spots, or in obscure spots like bathroom stalls or small rooms to reduce the chances that they'll be stumbled across.
Non-Melee Stunning Takedowns
Door Bashing: Although difficult to pull off, door bashes are among the most entertaining methods of taking opponents down. To perform one, you have to wait until an enemy is immediately on the other side of a door from you, then select the Bash Door interaction from the Interact menu. When done while your enemy is properly placed, you'll knock them out instantly. The key things to remember here is that bashing doors makes a lot of noise, and that you'll rarely just happen to stumble across an enemy standing right next to a door; you'll probably have to lure them back to you with noise or whistling, which can be difficult to do with some of the more solid doors.
The best place to do a door bash is in bathroom stalls, where you have the benefit of easy noise-making opportunities (due to the gaps at the top and bottom of the stalls). You can also keep track of your foe's position by looking at their shadows on the ground, assuming the lights are positioned correctly. For some of the thinner bathroom doors, you can also use heatvision to see through the door and get an even better idea of when to bash the door.
Note that there is a flipside to this coin, and that's that Sam can be the victim of a doorbash himself. If you're on the other side of a door from a guard, and the guard has reason to believe that you're there (either because you attempted to open it and it banged into him or because of overt noise), he'll often choose to bash it open. You can tell when one of these is coming due to the fact that all of the interactions in the door menu will be greyed out, so get out of the way! Getting hit by a doorbash is an instant kill.
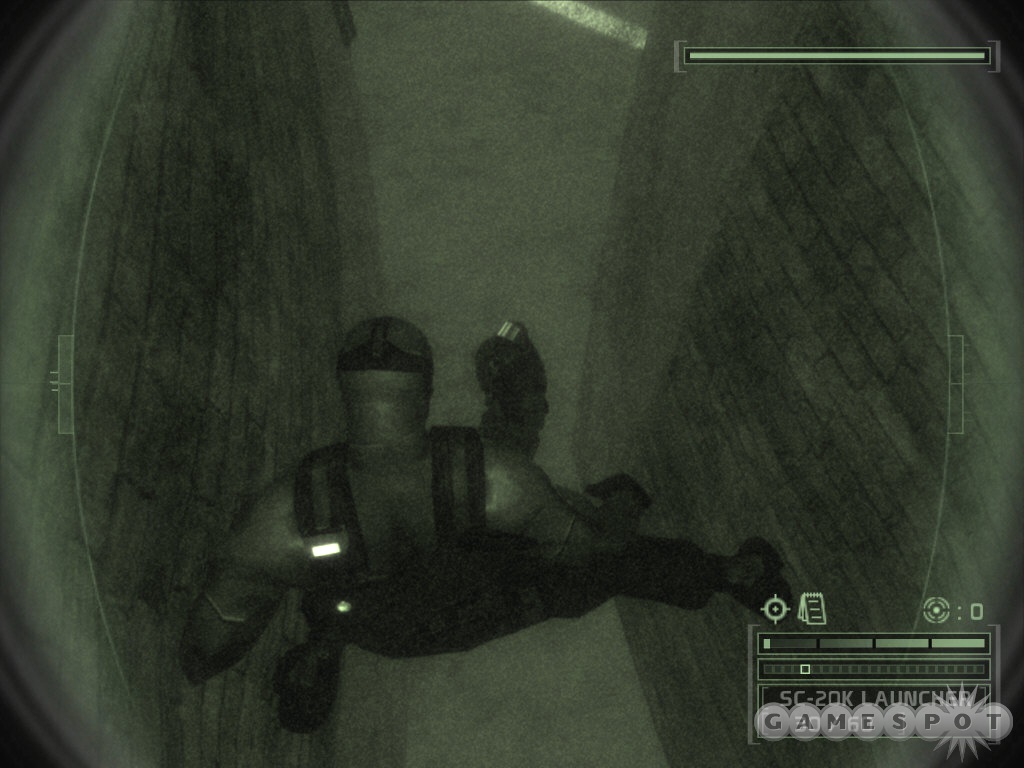
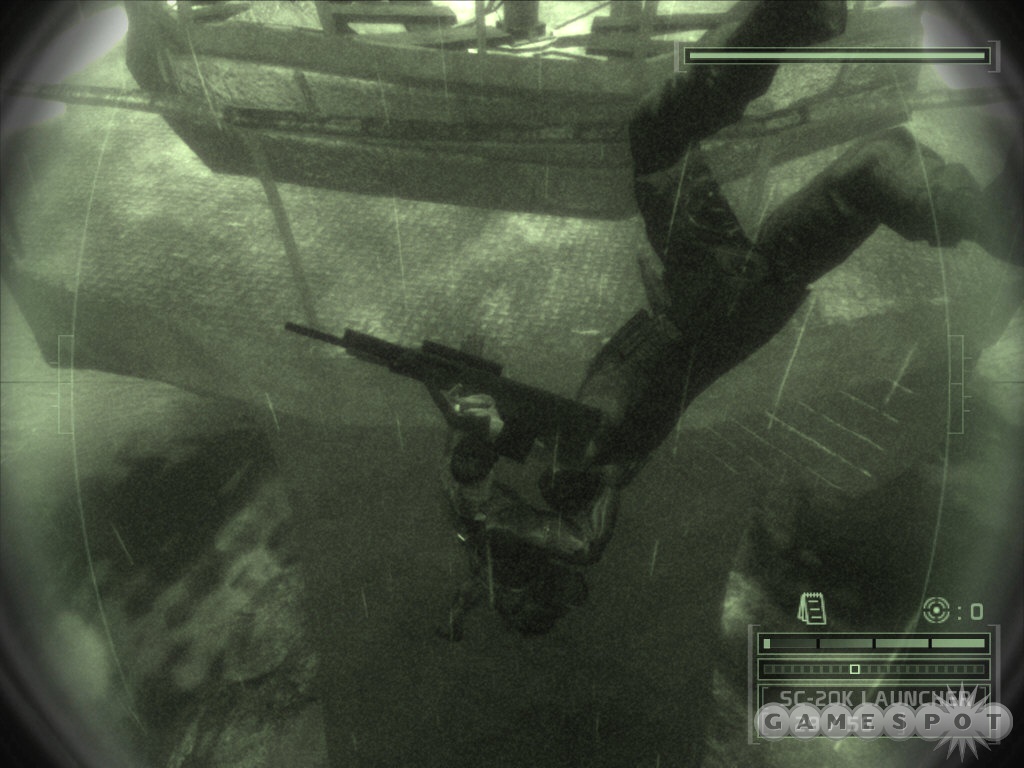
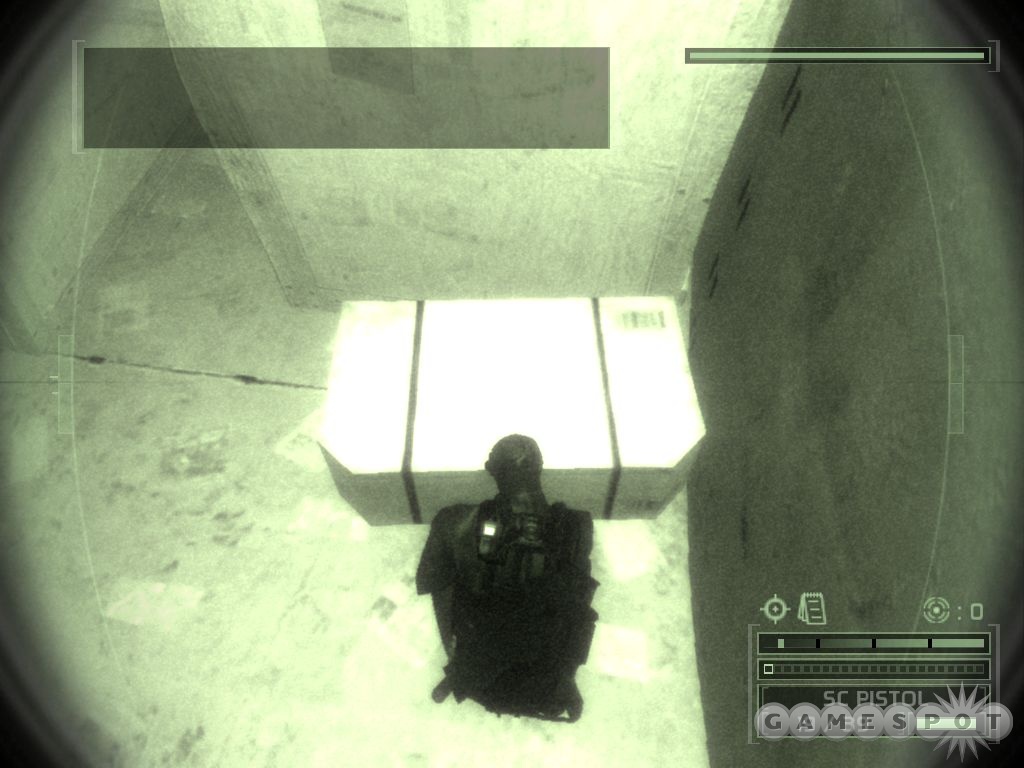
Falling: Although awkward and usually impractical, you can also knock out an enemy by falling down onto him from above. This involves either waiting for a soldier to run a route underneath a raised walkway and jumping or falling over the railing onto him, or doing one of the goofy-looking walljumps to get Sam suspended above a hallway and waiting for someone to come along to fall onto. (Walljumps can be automatically performed in a hallway of the correct width by pressing against one of the walls and hitting the jump key.) When you're above an enemy, you can hit the crouch key to drop from your position and cause some severe cranial injuries.
The Hang-And-Grab: If you hang from a pipe and get above an enemy soldier, you will eventually get the Grab Character interaction to pop up. Using it will cause Sam to drop down and suffocate the foe temporarily, causing him to lose consciousness.
Ranged Takedowns
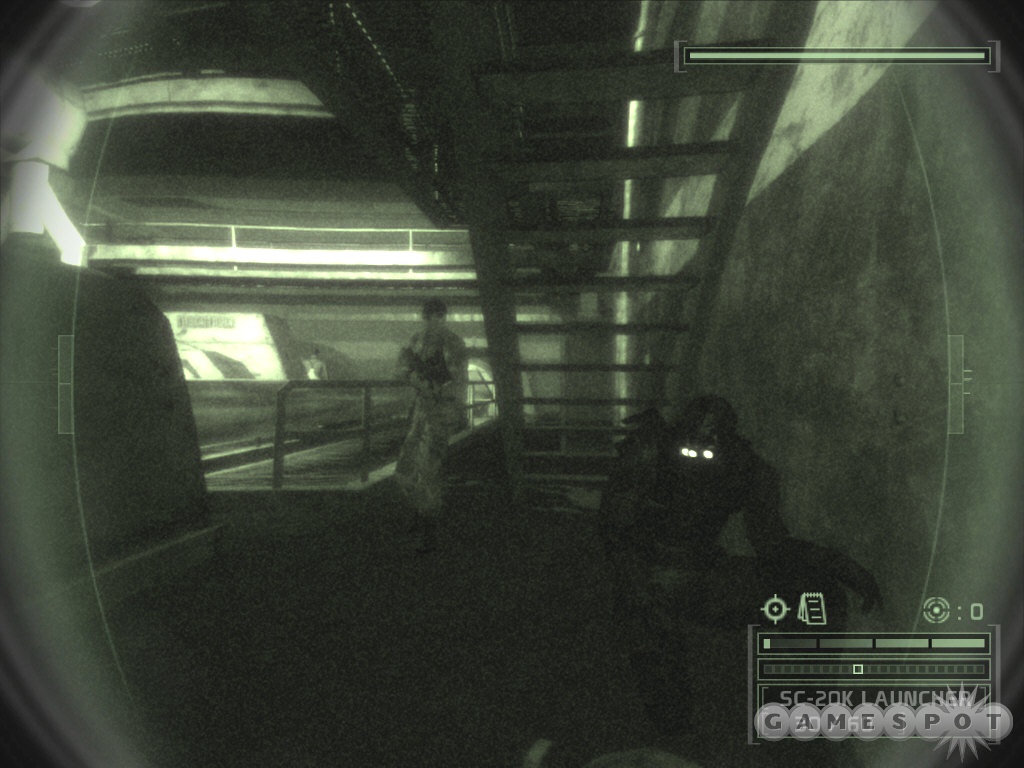
When you want to pop a soldier from range without killing him, then you have a few options, most of them revolving around your SC-20k's launcher attachment. The sticky shocker, sticky camera, airfoil round, and gas grenade are all great at taking down opponents without invoking Sam's fifth freedom, but you'll need to be cautious when using them, as improper use of these weapons can lead to trouble. All of them are detailed in our weapons section below, but the common thread between them is that you want to be careful to use them only in circumstances where other soldiers won't be able to directly witness the incapacitation of your target.
If, for instance, two soldiers are engaged in a conversation, and you happen to zap one with a sticky shocker, then the other soldier will immediately be alerted to your presence in most instances. He may not know precisely where you are, but he'll come gunning for you if he happened to see a muzzle flash. Likewise, if you zap a soldier that's near a light source, and another soldier happens to have had a line-of-sight to him, then he'll go on alert and possibly sound an alarm. (Non-lethal takedowns are less likely to cause alarms than real kills, though, if it's any consolation.)
Lethal Takedowns
There aren't as many lethal takedowns in the game as there are non-lethals, if only because the game generally seems to encourage you to keep as low a profile as possible.
Melee Kills
As with non-lethal takedowns, there are two kinds of lethal melee takedowns. The first involves approaching an enemy and pressing your primary attack button; if you get into the correct distance from the target, then Sam will use his knife in some sort of especially cool-looking fashion to instantly kill the enemy without him even getting the chance to utter a dying scream. If you use a lethal knife attack from behind, you can also hold down the button to automatically pick up your dead foe and move his body.
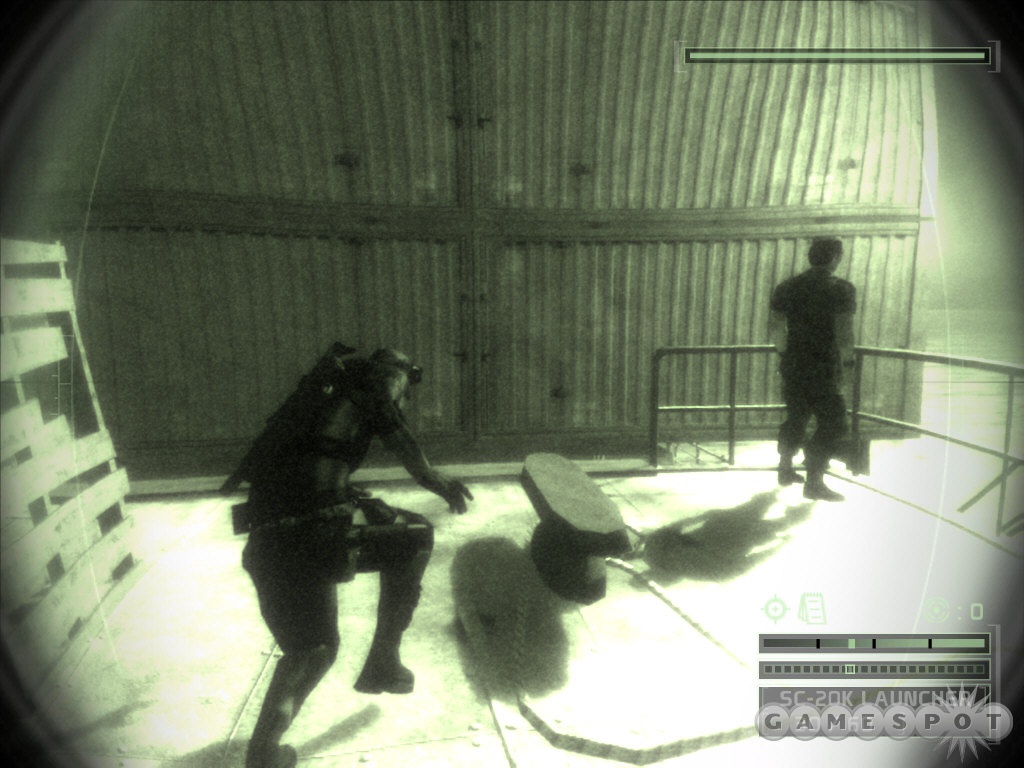
Alternately, if you first grab an opponent, then feel free to herd them somewhere nice and dark before hitting the primary fire button; this will send Sam's knee directly into your foe's spine, snapping it and killing the soldier instantly. Ouch. If you perform this move while facing out over a waist-high railing, then you'll chuck the guard over the railing into the air beyond; this is especially fun to do at the upper floors of the New York penthouse you visit.
Non-Melee Kills
There are relatively few non-melee kills in the game. The one that we enjoyed the most was seen in a few of the trailers for the game.
Falling: Although awkward and usually impractical, you can also knock out an enemy by falling down onto him from above. This involves either waiting for a soldier to run a route underneath a raised walkway and jumping or falling over the railing onto him, or doing one of the goofy-looking walljumps to get Sam suspended above a hallway and waiting for someone to come along to fall onto. (Walljumps can be automatically performed in a hallway of the correct width by pressing against one of the walls and hitting the jump key.) When you're above an enemy, you can hit the crouch key to drop from your position and cause some severe cranial injuries.
Railing Kill!: Everyone's favorite B-movie action cliché is alive and well in Splinter Cell: Chaos Theory, but with a new twist. If you can get Sam to hang from the lower edge of a walkway and wait for an enemy to walk by, then you should get the Grab Character interaction choice, which will cause Sam to reach up, grab the foe, then fling them over the railing to their death at the bottom of wherever you're hanging. It's fun, but it can be difficult to get into position for this kill without being spotted.
Ranged Kills
Well, duh. If you want to kill someone from a distance away, you're going to use your guns. The primary choices here are the silenced pistol, which is best used against stationary enemies that you can get close to, and the SC-20k rifle with foregrip attachment.
If you can get right up next to an enemy, then your pistol should be able to drop them with a single shot to the head. The good thing about using the pistol as a killing tool is that it's really quiet; although it does make some sound, it generally won't alert any other soldiers unless they're standing quite close to your target. The bad things about it are its accuracy (you're going to need to be really close to hit your target; a missed headshot will almost certainly cause an alarm) and the lack of ammo, especially on loadouts other than Assault. You're going to be using your pistol a lot to shoot out lights, which can cause you to run down ammo if you also use it for headshots.
The foregrip attachment to your rifle is another great way to pick off enemies. The rifle itself can perform headshots with any of the attachments, but the foregrip will let you drastically increase your accuracy, both when aiming down the crosshairs and when using the scope. The benefit here is range, in that the rifle can pop off shots at a good distance away with decent accuracy, while the drawback is noise. Although the rifle is silenced, it's still noisier than the pistol, and will often alert enemies close to your targets, especially if you accidentally hold the button down longer than intended and shift into automatic fire mode.
Other than those, you also have the shotgun and sniper rifle attachments for the rifle. We found both of these to be a bit too noisy for our style of play, but if you want to run-and-gun and don't mind a few alarms here and there, then there's no reason not to use these powerful weapons.
Lastly, frag grenades can kill enemies at range, although it's difficult to do so. Most enemies will run as soon as they hear or see a frag bounding towards them, and the kill radius isn't substantial, so you'll usually wind up wasting frags unless you can chuck them at enemies in tight quarters.
Herding Enemies
One of the finer points of Chaos Theory lies in "herding" your foes; this refers to the art of luring guards away from their default positions to where you can more stealthily take them down, and also to splitting up groups of foes so that you can dispatch them one by one without having them spot you and sound an alarm. Herding requires you to utilize both aural and visual clues to get your foes interested in you, but not interested enough to sound that damn alarm.
Sound Clues
There are a bunch of ways to utilize sound clues in Chaos Theory. If you make a sound that's loud enough to be distinguishable from any nearby ambient noises, enemies will usually come to investigate the source of the sound. If you intentionally make a sound while in a shadowy or poorly-lit area, then you can silently move a bit, wait for your foe to investigate, then kill them or disable them without having to worry about moving their body around.
The built-in sound feature is whistling. If you're hiding out somewhere, and you want enemies to come to your position, then you can hit the whistle button to send out a whisper or whistle sound. This is easy to do, since it's a simple button press, but isn't very flexible. The untrained soldiers early in the game will come to investigate these like the dupes they are, but as you get around to facing the more well-trained mercs and government soldiers, the whistle won't be so useful, as the experienced soldiers will recognize it for a trap and refuse to get too close to the source of the whisper. 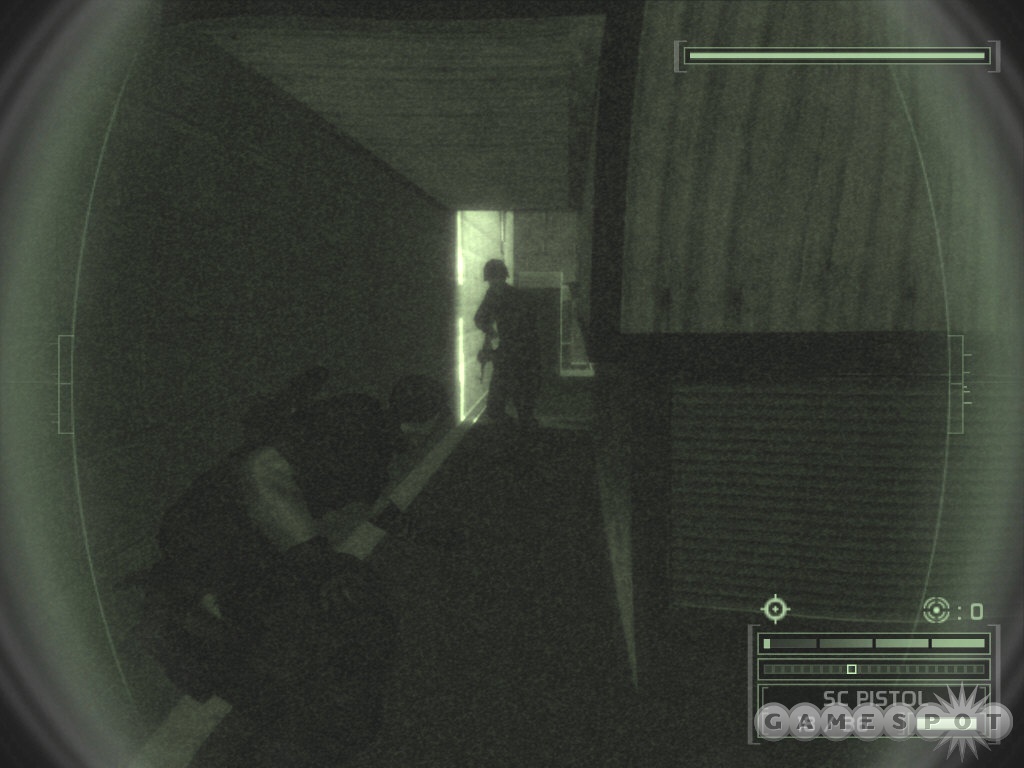
Perhaps a better source of sound is your footsteps. If you accelerate for a second while standing in the shadows, you should be able to make footsteps that rise above any ambient sound, which will almost always attract guards to the source.
A situational form of noise maintenance comes in the form of objects that can be picked up and thrown across a room. There are plenty of varieties of these, such as plastic water bottles, soda cans, liquor bottles, etc. You need to be careful when using these objects, though, as if you accidentally hit your foe instead of throwing it near him, they'll sometimes start shooting at you right off, and even if they don't, this can sometimes count as an "injury" on the end-game mission success screen, causing you precious success points.
Visual Clues
Although getting seen is generally a Bad Thing for Sam, there is something of a twilight zone of lightedness in the first half of your light meter. If you're a good distance away from the enemy, and manage to walk into a light source so that you're only partially lit, but lit well enough to be seen, then your foe will usually decide that something's up and start walking over, but won't call in for backup or trip an alarm. This is arguably one of the best ways to lure foes in, but you'll need to make sure that you don't get too well lit, or they'll signal for help, and you'll also need to make sure that there's only one enemy that can spot you, or you may have to deal with two guards at the same time.
Weapons
Given the exceedingly dangerous nature of his missions, you can expect Sam Fisher to be given the best of the best in terms of equipment. This section will give you a little run-down on what sort of items you can lug along on missions, and what they're useful.
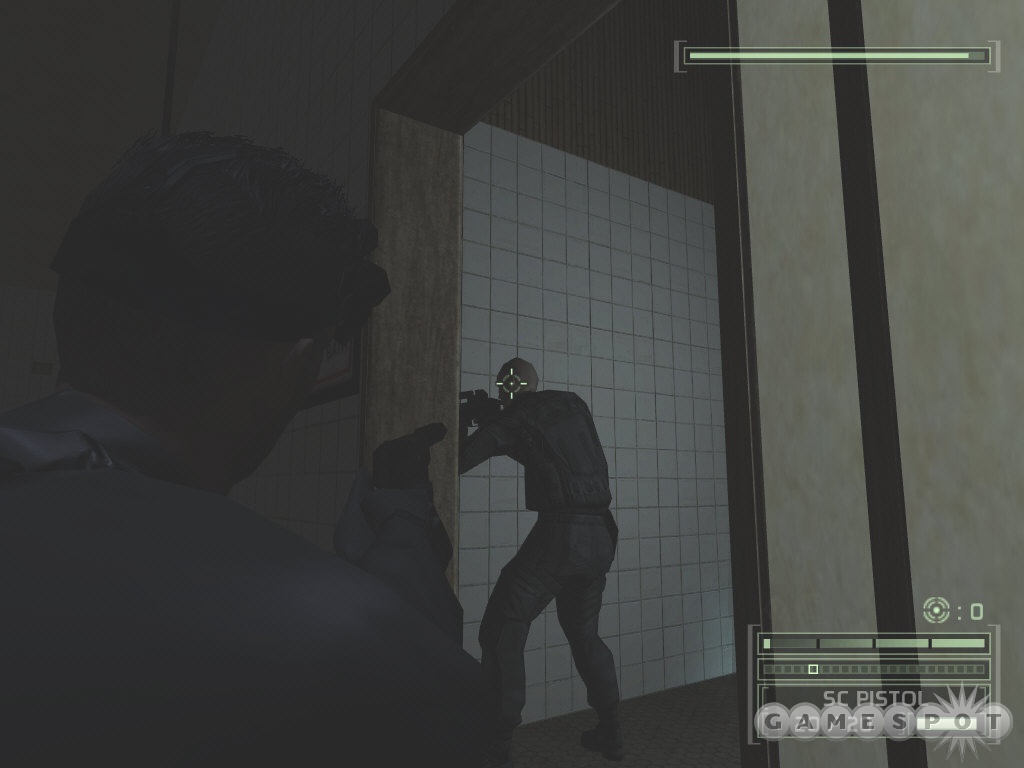
SC Pistol
The pistol is going to be your best friend if you intend to sneak through the single-player game without killing everything in your path. It's much quieter than the SC-20K rifle you'll be packing, so you'll be able to use it while relatively close to your enemies without them noticing you.
For stealth players, you'll usually be using the pistol's fire to shoot out inconvenient lights, so that your chosen path of approach is nicely shrouded in darkness. For small targets like individual lightbulbs, you'll need to be relatively close to hit it accurately (a missed shot will be much more likely to alert the guards to your presence), but most light sources are decently large, and you can hit these anywhere along their lit portion to blow them out.
The pistol also has a unique alternate-fire mode, the OCP, which is also good for taking out light sources. When you use the OCP while aiming at a light, it will flicker out and remain cold for 20 or 30 seconds, at which point it will come back on. Although it may sound like shooting out a light is the better deal, since shot lights remain out permanently, the OCP has the benefit of being completely soundless and almost perfectly accurate, allowing you to pop out lights from a good distance away without having to worry about anyone hearing you. (There's also something to be said for the purity of completing a mission without firing off a single round.)
The OCP can also be used on other electronic devices, such as computers and surveillance cameras. Indeed, cameras will usually only be bypassable with your OCP; you normally can't shoot them out. A non-light device that's been afflicted by the OCP will normally produce whirring sounds that can mask your movement; these are especially acute in mechanical objects like computers.
If you need to kill someone quietly, then the pistol is a better choice than the rifle. You are going to need to be pretty close to your target to hit them accurately, though; crouching and standing still for a few moments will let you tighten your aim considerably. A missed headshot will almost certainly alert your foe to your presence, though, resulting in a return of fire and a probable alarm. Also keep in mind that a few of the levels feature foes with metal helmets; these guys are much more difficult to get headshots on than non-helmeted foes, since their helmets will usually deflect the low-caliber bullets from your pistol.
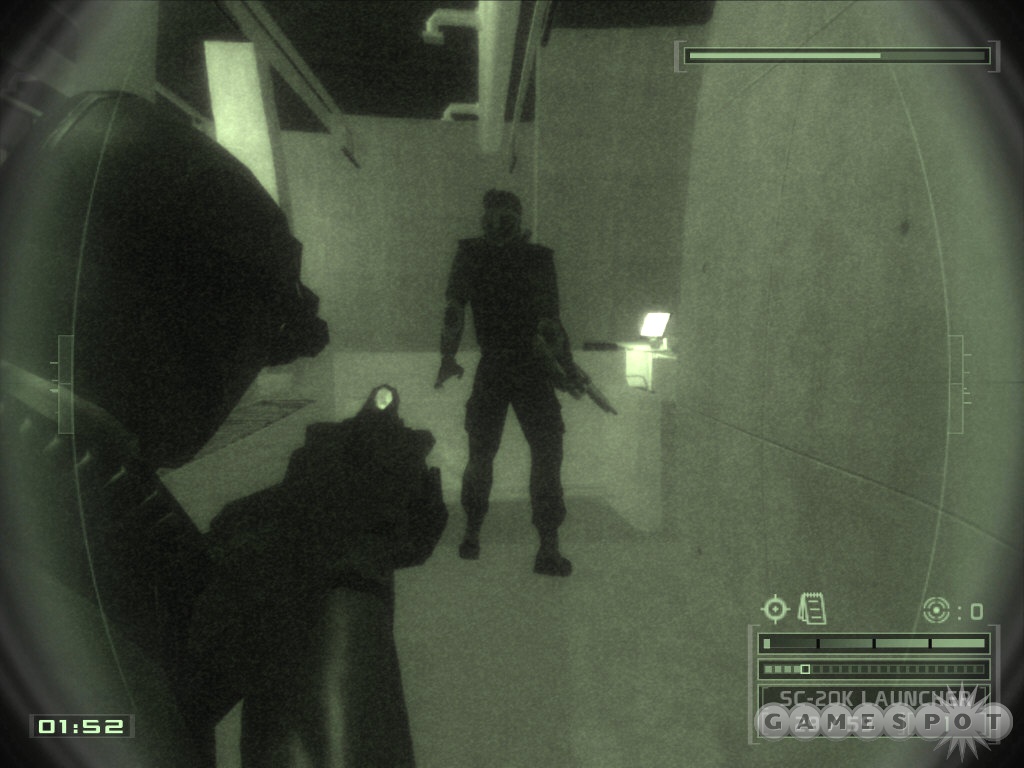
SC-20K Rifle
The SC-20K is a compact assault rifle complete with silencer and muzzle-flash suppressor for maximum stealth application. Your primary fire here is a pressure-sensitive fire that will fire off a single round if you tap the button, but which will shift to automatic fire if the button is held down. If you have the foregrip attachment equipped to your rifle, then you can acquire decent accuracy, but when anything else is equipped, you're going to find that automatic fire will spray bullets all around your crosshairs, resulting in poor killing efficacy at anything other than extremely close range. Of course, headshots are just as deadly from the rifle as from the gun, but again, if you have more than one target in sight, rifle fire is more likely to alert the friends of the guy you take out.
If you want to use the SC-20K as a semi-sniper rifle, you can do so by switching to your EFF view while aiming it. As in previous Splinter Cell games, the scope drift here is going to be insane; to steady your grip for a moment, use your alt-fire button to hold Sam's breath for a moment and freeze your crosshairs.
Foregrip Attachment
The foregrip attachment is the basic attachment for your rifle and, while not too flashy, will greatly increase your ability to accurately fire your rifle. It doesn't give you any kind of alt-fire mode; instead, it just tightens up your crosshairs for your normal fire, letting you get headshots from further away without having to flip over to zoomed aiming. Your automatic fire will also suffer from less spread when you've got the foregrip attached.
Shotgun Attachment
The shotgun attachment to the SC-20K adds, well, a shotgun. It's fairly powerful at close range, and can punch through thin materials like tent walls and plastic sheeting relatively easily, but is very, very noisy. Using this when there are multiple enemies around is a sure way to set off alarms. You'll also need to be pretty close to your opponents to do much damage, as the spread of the shot here is pretty extreme.
Sniper Attachment
As with the shotgun attachment, you can opt to put a sniper attachment on your rifle with the assault loadout on some missions. This will transform the normal 1.5 zoom of the unmodified rifle zoom to a 3.0 zoom, allowing you to pick off enemies from farther away. Unfortunately, it's also quite noisy, and will attract a lot of attention to yourself.
Launcher Attachment
The launcher attachment to your SC-20K is probably going to be equipped almost all the time; the four projectiles it can fire are going to be incredibly useful in stealthily taking down enemies. All of them can be fired silently, and won't result in a guard spotting you unless he's right next to you when you attempt to launch one.
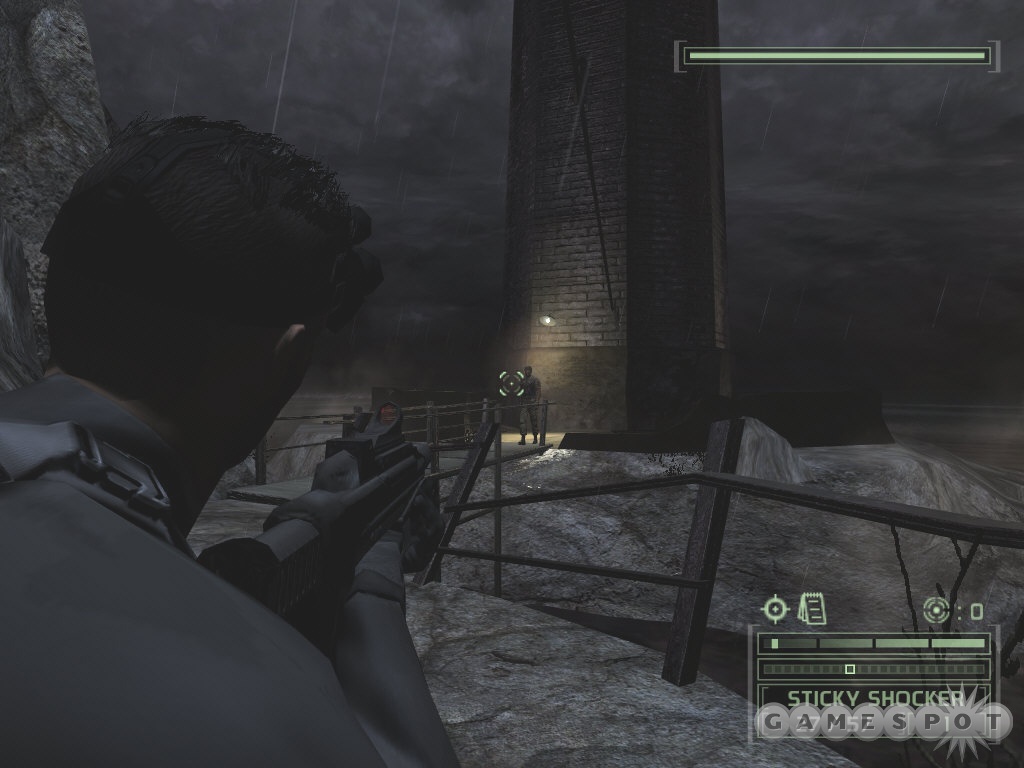
Sticky Shocker
The shocker is arguably the single best weapon Sam has at his disposal. It's essentially a one-shot takedown on any enemy you can accurately fire it; the projectile has no dip in its arc, so far as we can tell, so it can hit enemies a good distance away so long as you wait for your targeting cursor to stabilize. When you hit an enemy with a sticky shocker, they'll go down like a lump of meat, having been shocked into submission by the massive electrical jolt carried by the projectile. In previous games, a sticky shocker could disable multiple enemies if fired into a pool of water that they were all standing in, but this situation doesn't occur too often in Chaos Theory.
Airfoil Round
The airfoil is similar to sticky shockers, in that a successful hit with one will knock an enemy to the ground almost without fail. These are silent-firing, like shockers, but do have a noticeable dip in their trajectory beyond 20 feet or so, so you'll want to be pretty close to your foe before you use one.
Sticky Cameras
The sticky camera is a bit more situational than other weapons in the launcher arsenal, and really isn't going to be necessary for most stealth-oriented characters; you can avoid most enemies in the game, and those you can't can be dispatched with shockers and airfoils much more easily than they can with cameras. That said, if you're on some insane quest to get through the game without ever attracting any attention or hurting a single opponent, then sticky cameras might be useful. When fired at a wall or flat surface, they'll impact and start relaying video data back to Sam, allowing him to see a good area around the camera's position. While in the camera view, you can use the alt-fire button to make a clicking sound, which will attract guards to the camera (and presumably away from Sam), while the primary fire will unleash a cloud of nerve gas that will incapacitate your foe. Unfortunately, the nerve gas firing is fairly noisy in and of itself, and will likely attract the attention of other nearby foes, which can cause problems if they find the body of the guy you just knocked out.
If you fire a sticky camera and don't use the gas feature, you can walk over to its location and pick it up to re-use it. Were this a purely first-person game, they'd thus be pretty useful for scouting around corners, but since you can simply adjust your view to peek around most obstacles, their utility as purely observational devices is fairly minimal.
Gas Grenades
You won't have access to gas grenades until a few missions into Chaos Theory, and it's doubtful that you'll use them all that much even after you gain access to them. These can be fired silently towards a group of enemies; you'll want to aim at their feet. After a few seconds, the grenade will go off, releasing nerve gas at all nearby foes, knocking them unconscious. Unfortunately, the gas release is fairly noisy, which will alert nearby enemies (a la the sticky camera), so you can only really do this when you're fairly sure that your targets are the only enemies around. This is one of the few weapons that let you take down multiple foes at a time, but most of the time, troops are going to be fairly spaced out, unless they're in conversation.
Grenades
Flashbang Grenades
Flashbangs are a staple of many action games, and in Splinter Cell, you'll be able to use them to temporarily stun enemies, allowing you to close in and take them down while they're staggered. To use them, just chuck them at the feet of an enemy, turn your head until you hear it go off, then charge in and take the target down. The good thing about flashbangs is that they rarely cause enemies to run away from the grenade, as they will from frag grenades; the bad thing about them is that the stunning effect is exceedingly short, on the order of four to five seconds, leaving you precious little time to pull off your super-spy maneuver. It's going to be difficult to chuck a flashbang at a distant enemy, then run up to them and disable them before the effect wears off.
Perhaps the best use for flashbangs is to freeze multiple enemies in place while chucking frags, in fact. Since enemies will spot and run from frag grenades, it's tough to get large groups of them caught in a blast; if you chuck a flashbang, then immediately follow it with a frag, you can get larger groups of foes with a single frag.
Frag Grenades
I guess we already told you most of what you need to know about the frag grenade. These portable explosive devices can be thrown a decent distance, and will kill any nearby enemies when they explode, but if you just throw this at an enemy, they'll run out of the way, making it difficult to get kills unless your foe is already in a fairly confined space. Speaking as people who went through on maximum-stealthability mode, we never found frags to be all that useful; there are much quieter and subtler ways to kill people.
Smoke Grenades
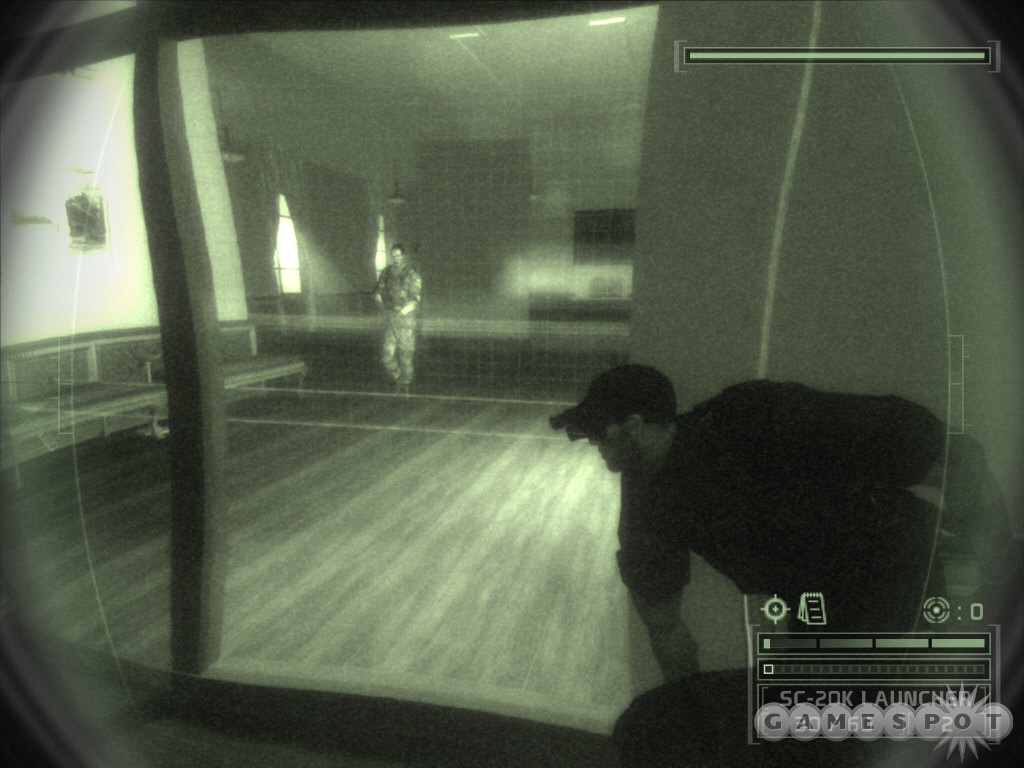
Smoke ‘em if you got ‘em, as they say. Smoke grenades aren't going to be pandemically useful to Sam, even when you're going through the missions in pure stealth mode, but they do have their applications. When you throw them into an area, they'll "explode" and cover a good amount of space with smoke cover that prevents enemies from spotting you. You, however, can still spot enemies in the smoke by using your heatvision, allowing you to sneak up to them and quickly incapacitate them with your fists or knife. In tight quarters, you can even use them to capture a single soldier, drag him off around a corner, and interrogate him while his friend's still trying to figure out what's going on.
In most cases, though, smoke grenades are going to be unnecessary, as you can simply shoot out lights or OCP them to give you the cover that you need. When dealing with multiple enemies in rooms with numerous light sources, though, you may want to lay down a little smoke before heading in. In some situations you can even use it to avoid enemies entirely.
Walkthrough
Difficulty and Success Rating
Before you start a new game of Splinter Cell: Chaos Theory, you'll be asked to choose your difficulty setting. Higher difficulties will allow Sam to take less damage before he dies, and will slightly modify enemy AI to make for a more challenging experience. (E.g. on Expert, enemies will occasionally come to your position when you OCP a light, rather than examining the light itself.) With the benefit of quicksaving and quickloading, you may want to just head straight to Expert difficulty if you're using a PC; otherwise, Hard should provide plenty of challenge for console players.
A new addition to the Splinter Cell series is the inclusion of post-mission ranking screens which rates your performance against an ultra-stealthy ideal. Getting a low or high score here doesn't affect your progress in the game and doesn't appear to net you any unlockables, so it's really just for fun.
Every time you launch a new mission, you'll start with a 100% success rating, which will drop if you start screwing up. If you want to keep your high score, then you'll need to avoid being detected by guards as an intruder. Getting their attention through sounds and herding them off of their patrol routes is all right, but if they spot you and open fire, then they've spotted you for real, which will result in a loss of points. Alarms also act in the same way.
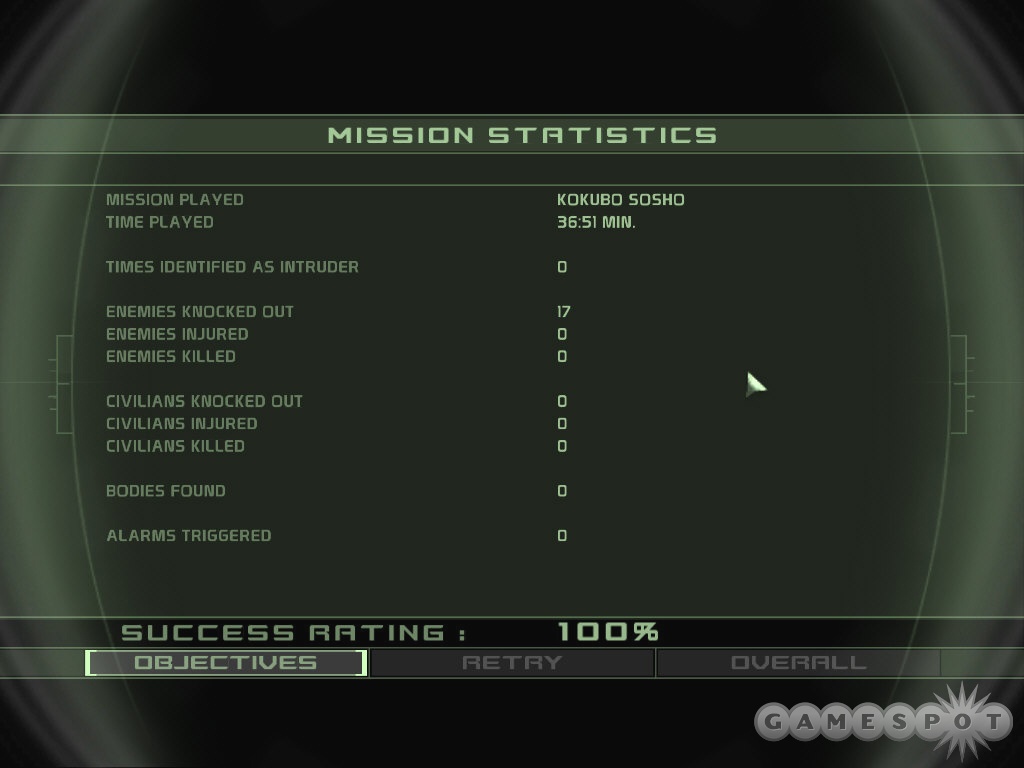
So far as the guards themselves are concerned, unnecessary kills will result in substantial points losses, as well. There are only a few enemies in the game that you're ordered to kill, so most of the grunt-level foes should be taken down with non-lethal attacks if you're aiming for a 100% success rating. Avoiding them entirely is also a worthwhile possibility, but it does seem to be impossible to complete the game without disabling at least some foes. Completion of your primary, secondary, and opportunity objectives would also seem to impact your final success ranking, so be sure to track down all of the opportunity objective goals before heading to your extraction.
For the purposes of this walkthrough, we went through on Hard mode, and attempted to complete each mission while killing as few enemies as possible. We managed to interrogate almost every guard in the game that it's possible to do so, so hopefully this walkthrough will help you get your talk on should you find it necessary.
Mission 1: Lighthouse
Primary Objectives
Recover or Destroy Information About The Masse Kernels
Rescue Morgenholt
Secondary Objectives
Eliminate Hugo Lacerda
Opportunity Objectives
Scan the SSCC Bar Code of the Delivered Crates
You begin this mission on the beach below the lighthouse and the series of caves that run underneath it. There isn't anything to bother you save for the bats; there aren't any enemies here, so feel free to run around, figure out your controls, learn how to use your weapons, and so on. Each version of Chaos Theory has a bunch of buttons you'll need to learn how to use, so feel free to get your footings here, before you enter a combat situation.
When you're ready to move out, find the rocky path leading up from the beach and follow it into the caves. You'll need to press through a tight corridor, as well as crawl through a crawlspace, but eventually you'll reach the first large cave, where a secondary objective will pop up, regarding the guerillas and their suspiciously sophisticated equipment.
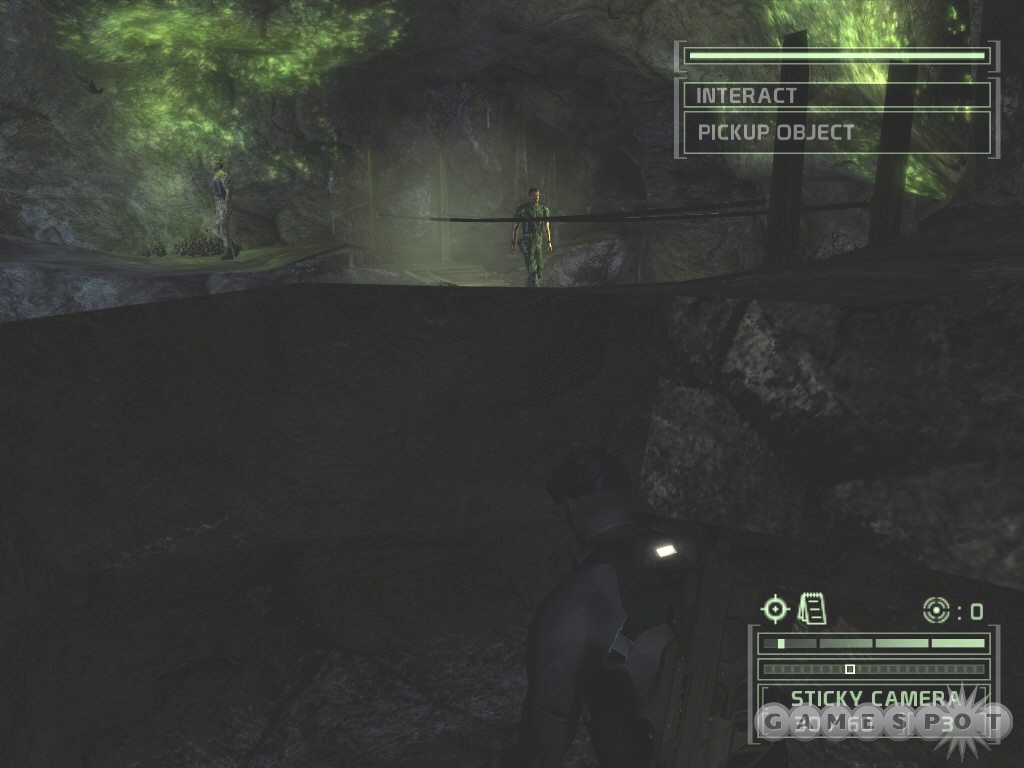
When you jump up into the cave with the suspended wooden bridge, a pair of soldiers will appear from across the way and start patrolling. They don't suspect your presence - yet - so be careful to avoid alerting them. If you wait long enough, one will head back along the path they came through, leaving the other one for you to eliminate. If you creep up stealthily enough, you'll be able to grab him and interrogate him, but he doesn't have anything tremendously useful to say.
The First Crate
Now that you've made it into the caves, it's time to infiltrate the keep itself. You'll note that there are two entrances: one across the wooden bridge, and one at the end of a path leading down. We prefer to go in via the lower path; this will take you into the room where the gunfire you're hearing is coming from. If you crawl in quietly, then you should be able to creep around to the right side of the room without the guard here noticing you (just make sure he's walking down the other corridor away from you before moving), then switch off the generator and wait for him to investigate. If you're up against the wall on either side of the entry to the generator area, then it's a simple matter to grab and interrogate him before eliminating him.
The first crate of the guerilla's weapons are next to the generator, so take note of them. You'll need to find five of these throughout the level to complete your secondary objective.
Around the corner is a set of steps leading up to a storage area with a large number of barrels. Another guard is patrolling there, and he'll likely see if you attempt to creep up to him, thanks to the swinging light overhead. The easiest way to approach him is to shoot out the light, which will let you get almost to the top of the stairs without entering any lighted areas, at which time you can just wait to wait for the guard to turn around before creeping up and grabbing him. There's another crate of weapons here, as well, so be sure to scan them before continuing up the steps. Unfortunately, this is the crate that seems to start up the side objective, so you'll need to return down the steps to the first crate and scan them again to have them count towards your total.
Morgenholt
The room at the top of the steps is where the soldiers are "interrogating" Morgenholt. Don't worry overmuch about the stuff you're hearing; you can't do anything to save the poor fool. What you want to do is creep down to the bottom of the ramp, hide in a suitably dark spot, and wait for one of the soldiers to go for a walk. He should head directly up the ramp you just descended, allowing you to follow him and grab him (leaving the door at the top of the ramp open will get his attention). There's a medkit at the top of the ramp, so grab it if you've taken any hits.
If you want to play it rough with the other torturer, be our guest, but if you want to be stealthy, you can crawl down the lighted hallway into the interrogation room, then sneak up behind the guard, who should be sitting down at a desk. Regardless, Morganholt is dead, forcing you to cancel one of your objectives for the island. You still need to find whatever records the soldiers took of their interrogation and prevent the knowledge from falling into the wrong hands.
The Camp
Follow the corridor leading away from the interrogation cell until you reach a locked door. Pick it, then stealth open the door to reveal a floodlight overlooking a pair of tents. With your heatvision, you should be able to detect the presence of a soldier inside the nearest tent, so get behind it, cut through it with your knife, then sneak in and interrogate him. He'll reveal that Lacerda has left the island, thus cancelling another of your objectives.
Stow the body somewhere out of sight, then either eliminate or bypass the other guard to reach the second tent, where you'll find another crate of weapons to scan.
From this area, you'll have to pass through a well-lit hallway to reach another open part of the keep. You'll probably want to shoot the light in this hallway, just to prevent the two soldiers ahead of you from spotting you. These guys go through a rather poetical discussion, then break off into solo patrols. Well, one of them will patrol, anyway; the other just sits around with his back to a set of crates. After picking off the patrol and scanning the weapons crate, you can sneak around to the right of the remaining soldier, climb up onto the crates, then eliminate him by dropping down on top of him.
Infiltrating the Lighthouse

Next up is the makeshift barracks at the top of the nearby steps. There are two guards here; one wide awake and listening to music, with his back conveniently turned to you, and the other asleep on a cot. The awake guard can be eliminated by sneaking up behind him, but you can't interact with the sleeping one, apparently, so if you want to take him down you'll need to shoot him. There's some ammo for your pistol near the medkit here, as well as a single frag grenade. If you don't want to get those items, though, you may as well leave the soldiers alone and continue on the path.
After walking across the ramparts, you'll come to a small computer setup; watch for the soldier here with heat vision as you walk in, as he's difficult to see otherwise. With him out of the way, you can access the computer, which will polish off the Masse Kernals objective.
Around the bend are another pair of soldiers, reminiscining about old times. The one from Grenada has an interesting interrogation if you can get to him alive, so you may want to wait for them to finish their conversation, wait for them to return downstairs, then sticky shocker the one furthest out before sneaking down and grabbing the remaining one. This isn't necessary, of course, so eliminate them however you see fit before scanning the last crate of weapons here.
The Gate
At the bottom of the steps near all the cannons is a gate, watched over by a single guard. The gate itself is broken, so you won't need to worry about it, so just shock or airfoil the guard to take him down. You have two routes to choose from for an approach to the lighthouse. One is located near the guard's position; if you break the planks in the small hole in the wall, you'll find a rope that you can ride all the way down to the base of the lighthouse. The only problem is that you'll land right underneath a light, making this a risky proposition, but if you can time it so that you land while the guard has his back turned, it'll work. Alternately, you can keep following the path near the gate until you reach the wooden bridge leading to the lighthouse. Whichever way you go, eliminate the guard (if you can grab him from behind, then you can chuck him into the water by facing one of the rails on the bridge), then sneak around to the door at the back of the lighthouse.
The conversation between the radio operator here and the Maria Narcissa will finish off the last objective you have, regarding precisely where the guerillas got their weapons. Now all you need to do is make it to the top of the lighthouse for exfil. There is a single guard up near the lights, so if you want to pull off one of those flashy grab-his-feet-and-throw-him-off moves, you'll need to reach the top of the ladder, take advantage of the high noise to swiftly leave the room, then crawl over the railing and hang down before rotating around until you find the guard and use the interaction menu to grab him.
Mission 2: Cargo Ship
Primary Objectives
Eliminate Hugo Lacerda
Secondary Objectives
Find the Name of Lacerda's Panamanian Contact
Opportunity Objectives
Place Tracking Devices On Any Illegal Weapons Crates
Getting Inside
There are four soldiers located before the first door here. You don't have to eliminate them all, but you're going to need to take down at least a couple of them if you want to traverse the deck safely. There are two near your starting point, with one that stands upright near the southern set of steps and another that will patrol over to the north. The latter should be your first drop. If you can sneak up behind him and grab him, then you can walk over to the railing and push him overboard by facing the railing and pressing your primary attack button. No bodies means no bodies to be found, obviously enough.
The guard by the steps will soon be joined by another guard for a bit of chat. The second guard here has a wide patrol lane that takes him up and down both of the lower railings of the ship, so after offing the guard by the steps, you can either wait for him to walk by to eliminate him as well, or just wait for him to patrol the northern side of the ship and bypass him entirely.
As you walk down the southern side of the ship (use your zoom view to get a compass), you'll come to a set of steps leading down. Depending on the amount of noise you've made thus far, the guard here will either be walking around, or asleep in his chair. If he walks up the steps, he'll usually turn around and head east, allowing you to sneak up behind him and throw him overboard, but if he's asleep, you may need to plug him in the head.
The Cargo
Head through the door near the last guard to reach cargo room S2-A. Don't worry about the lights or noise; there aren't any guards around. If you can find the gap in the wall near the rear of the room, you'll be able to slide through to S2-B, where the first weapons crate can be found. You don't want to scan these, though; your goal is to place tracking devices on them so that your handlers can trace whom they're being sold to. It all boils down to the same button pushes, though, so get up close and use the crate before climbing the ladder to the door nearby.
As you leave the hold, you'll be radioed with some information. Apparently the Maria Narcissa is taking on water, or has at least developed a problem involving flooding in the lower compartments, and, like all ships carrying weapons and terrorists, has sent out a call for an escort. Makes perfect sense. In order to get into and search the compartments, you'll need to activate the bilge pump in the lower machine room. To reach it, head down to the end of the hall, where you can hear some kind of machinery working, then slide open the door and eliminate the worker inside before crawling through the crawlspace on the wall. You'll wind up in the machine room.
Bilge and Purge
There are two soldiers in the machine room, with one on the upper railing and one trying to get the pump to work. They're going to engage in a little conversation, so you'll want to wait until it's over before you work on taking them out. We found it easiest to jump up onto the pipe, then crawl along until Sam is hanging over the soldier on the walkway. When the soldier below says "Easy for you to say," you can grab the upper soldier and knock him out by using the Grab Character interaction, then quickly drop down to the walkway and jump over to the railing to knock out the soldier below while he's examining the pump. Like buttah.
Retrieve the Bill of Lading for Lacerda's Arms Shipments
After you've activated the bilge pump and it's done its job, you can slide the door open and move on. Your goal is to find the bill of lading on one of the crates in the first cargo hold you come across, on the right side of the hall. Grab them, then quickly return to the corridor and resume your trip.
Find the Ledger for Lacerda's shipment
Now that you have the bill of lading, you're going to need to find the ledger to see precisely where the shipments are coming from and headed. As you walk down the corridor, though, you're going to notice a pair of soldiers coming your way. These guys are killable, of course, but it's easiest just to avoid them by dropping down into one of the hatches on your right, crawling underneath the walkway, then resurfacing when you can't travel any further.
The next room on is the engine room, and unfortunately, it's filled with fumes - a single shot from your weapons will ignite the whole place. This includes things like airfoils and sticky shots, so you're going to need to get up close and personal with your foes if you want to get through this place alive. If they spot you and take a shot, the same explosive occurances will result, so you'll need to ensure that they don't.
There's a worker on the lower level here, as well as a pair of guards up above. You can probably avoid the worker altogether by just taking a right as soon you enter the room and head behind the turbines to reach the far corner of the room, underneath the stairs leading to the walkways. It's all right if one of the guards gets a glimpse of you while you walk, so long as he doesn't open fire. This will encourage him to come down the steps and check you out, allowing you to hug the wall underneath the steps and grab him when he walks past. You can then either whistle the second guard down after him, or head up the steps and take him down as well.
Another set of steps leads up from the walkways to a doorway, leading to deck S-1. Another crate of weapons can be found here, although some subterfuge will be required. If you're quick, you'll notice a soldier heading through a doorway down the corridor to the right of where you exited from the engine room. He'll be difficult to sneak up on, but his patrol route will bring him all the way back to the stairs, so wait in the shadows underneath it until you can grab him. With him out of the way, head down the hallway he was patrolling to reach the soldier's bunks, and another crate of weapons.
The Office
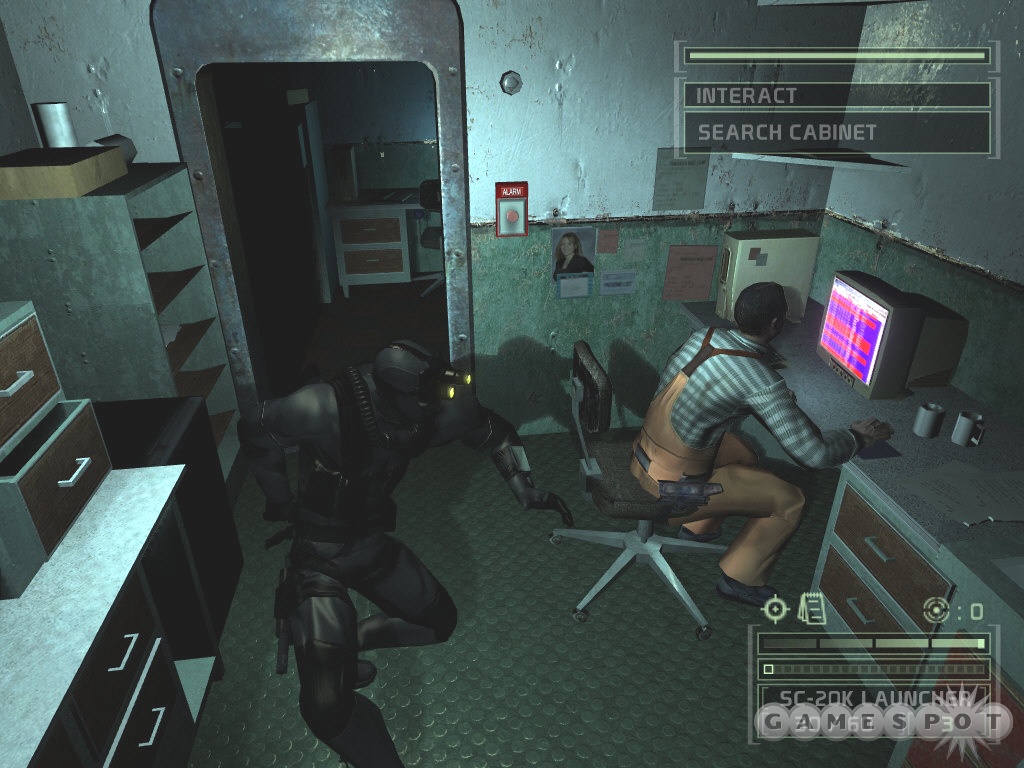
Taking the stairs here will lead you to the ship's office, where you'll find the ledger you're looking for. There'll also be a couple of soldiers talking. The one sitting at the computer won't move unless you rouse him, but after the conversation, the standing one will walk towards the stairs you came up via and stand there. You can avoid him entirely by crawling into the crawlspace near the first computer, if you wish, but you'll want to be careful when approaching the soldier at the computer, as he'll be alerted to your presence if he sees your shadow on the wall. Stick to the left and you can search the cabinet to retrieve the ledger without him even being aware of it. If you take him out, then the computer will reveal the same information.
Find Out Which Cabin Lacerda is in
Your new goal is to find and eliminate Lacerda. In order to figure out where he is, though, you'll need to reach the ship's bridge and question the captain.
The door on the lefthand side of the corridor beyond the office is the medical bay. There isn't anything in here besides a medkit and another soldier, so unless you're looking to get healed or kill everything aboard, ignore it. The door at the end of the hallway, however, will lead you back to the exterior of the ship. The third weapons crate has been stowed underneath the steps here, so plant your tracker before you start climbing up.
The first landing has a door that leads to the mess, on Deck 2. There are going to be two soldiers within the first room here, with a difficult patrol route and lighting to deal with. We found the best way to take them on was to close the door leading to the landing, shoot out the light in the hallway, then find a way to lure them both back to you (the broken light alone will probably do the trick) before using either your lethal or nonlethal melee attacks to drop them. If they're more than a few feet away from each other, you should be able to drop one without the other knowing about it.
In the hallway near the fire extinguisher in the cafeteria, you'll find the fourth weapons crate, so tag it, then move back out to the other hallway and round the corner. You'll start to hear a couple of soldiers talking about coffee at this point. If you want to take them down, you'll need to shoot out the light in the hallway, then creep down along the right wall here until you get the Switch Object interaction, which will shut off the light above the two soldiers, rousting them and forcing them down the hall to look for you. You can probably kill or disable them both with your melee attacks.
After heading up the nearby stairs to Deck 3, look around for the fifth weapons crate near the railing at the top of the steps. Deck 3 doesn't contain much of interest to you at the moment. The captain's quarters are near the crate (his private bathroom has a medkit), with a hallway of more private berths nearby. Only one of them is occupied, by a soldier listening to the radio, but none of them have anything useful, so don't bother looking around.
Getting To The Captain
Now, in order to find out where Lacerda is, you'll need to make it to the bridge on Deck 4 and interrogate the captain. The easiest way to get there is to walk down the hallway with the private berths and use the stairs at the end of it; this will lead you straight up to the bridge. Don't go all the way up the steps right away, though. Instead, wait for the captain and the sailor to finish their conversation, then wait for the captain to walk over to the windows before sneaking up behind him and grabbing him. With a little prompting, he'll tell you that Lacerda is stowing away in the captain's quarters. Although he wasn't there before, he'll magically appear there when you learn this little tidbit.
If you can't manage to interrogate the captain, then you'll probably have to kill him. This will make your task a bit more difficult, as you'll then have to head up to the radio tower on the ship's deck, one level above the bridge, to hack into the computer there to find where Lacerda is. There are three or four soldiers roaming around up there, but there's plenty of shadows to hide in, so wait for their conversations to die down before analyzing their movement patterns and striking. Don't forget that you can usually throw them overboard if you grab them and press up against the railing before using your attack button.
Finishing Off Lacerda
With Lacerda's whereabouts confirmed, it's time to go down and finish him off. As mentioned, he's in the captain's quarters on deck three, along with a couple of mercenary bodyguards with some pretty nice weaponry. When you locate the captain's quarters (near the fifth weapons crate), head in through the door, then shoot out the light in the bathroom with your pistol; this shouldn't create enough noise to cause Lacerda and his men to react. All you have to do then is wait. Eventually Lacerda will stop haranguing his guards and announce that he needs another drink. When he enters the small kitchen, he'll either stoop into the minifridge, allowing you to grab him, or notice the busted light and enter the hallway, also allowing you to grab him. Interrogate him if you wish - he yields no useful information - before killing him to complete the objective.
Find The Last Weapons Crate Before Exfiltrating
Now that Lacerda's dead, you can leave the boat via the emergency launch at the rear of the ship. The easiest way to get there is to get back to the bridge and leave via the southern door there - that will take you to the top of the exterior ladder you were climbing before. If you make your way along the southern rail of the ship to the east (being careful to avoid the guard on patrol around there), you can eventually walk up to the northern edge and wrap around to the ladder leading to the stern of the ship, where the launch is kept.
Mission 3: Bank
Primary Objectives
Enter The Bank
Determine Who MCAS Bank Purchased The Arms For
Steal $50,000,000 In French Governmental Bearer Bonds
Secondary Objectives
Eliminate Hugo Lacerda
Opportunity Objectives
Scan the SSCC Bar Code of the Delivered Crates
The Bank Grounds
Now that you know where Lacerda was getting the funds for his kidnapping of Morganholt, you're going to have to crack the bank where the funds came from and figure out specifically who put down the cash for the operation. To ensure that you don't spook the financiers, you're going to be covering your tracks by stealing fifty million dollars in bearer bonds that the French government is storing here, for some reason.
You'll begin the mission in the courtyard of the bank, which has three guards on circular patrols. In order to access the bank's interior, you're going to have to get past them and around to the right side of the bank. There are motion sensor lights on the walls here, so if you get too close to them, they'll flash on and alert the guards to the fact that something's wrong. They're unlikely to actually see you, though, especially if you stay near the curb between the grass and the paved part of the courtyard; this will be just outside the light of the motion sensor lamps. If you head across the courtyard and walk around the left side of the bank, you'll find a junction box which you can use to shut down all of the courtyard lights, giving you plenty of cover with which to move around to the right side while the guards walk around in an attempt to figure out what's going on.
There aren't any more guards on the right side of the bank, but there is a security camera on the wall, so wait for it to pan away from you, then crawl underneath it and jump to the ladder on the side of the building - you can't get through the doorway here. On the roof, you'll need to locate a junction box in a shed to shut down the magnetically-sealed skylights. The shed's locked, but since no one's in earshot, you can go ahead and break it.
Heading Inside
When you reach the skylight, you'll find that the bank apparently left a rope hanging from it which reaches all the way to the teller desks below - that's awfully kind of them! Slide down until you reach the floor, then use your EFF to hack one of the nearby computers and shut down the laser grid around you.
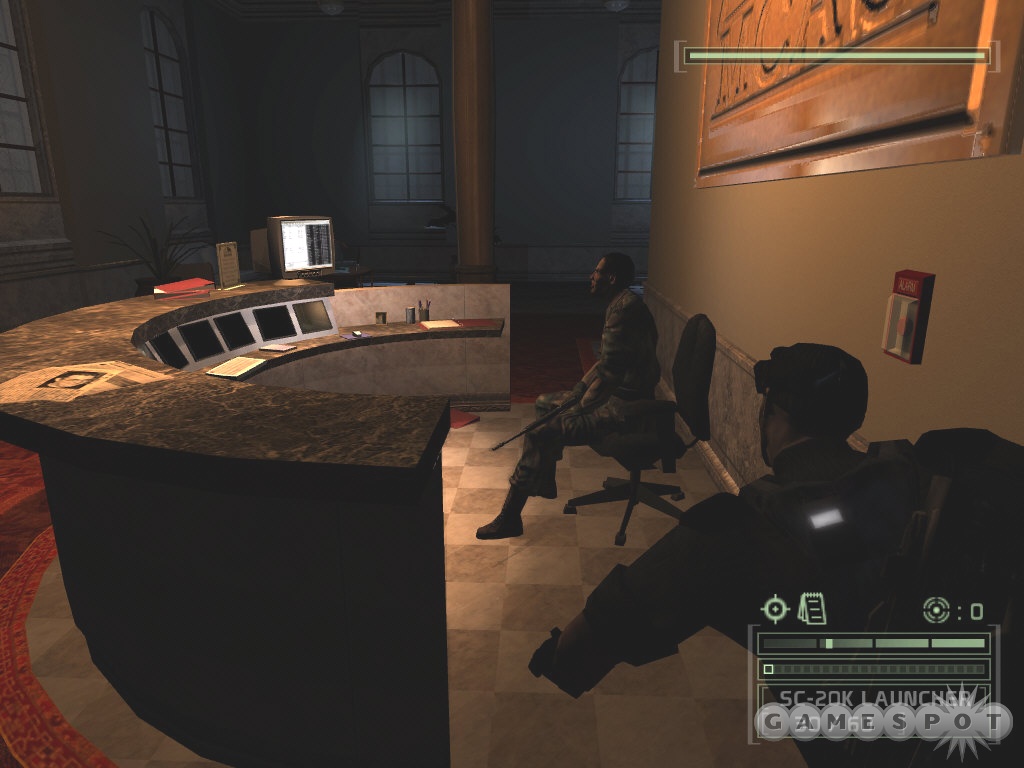
Now that you're safely inside, you can start working on your objectives. Most of these will fall into place as you scout around, but the opportunity objective - planting false emails - will require a lot of work, since you'll need to hack into eight different computers in the building. To begin with, though, there's a sleeping security guard outside the tellers' island, so deal with him as you see fit. When he's safely out of the way, creep around to the main doors to the bank to the north. There's a security desk there, so if you want to hack the computer, you'll need to deal with the security guard. He won't notice you so long as you don't get too close, so he's easy enough to take out with a headshot, shocker, or some such.
With access to the main computer, you can read the emails, learning the security code for a couple of the doors here (3624), as well as attempt to hack the computer to enable full security access. This mini-game isn't all that difficult; just click on the numbers in the lower-right corner of the screen as they're highlighted. If you can lock all four correct numbers of the IP address, then you'll gain full security access to the computer and will be able to upload the first fake email.
Head back to the teller stations. With the keycode in hand, you'll be able to enter the lighted room off to the left, subdue the guard (who should be standing underneath the camera, facing the door - he's not a very good guard), then use the code to unlock the door. There is another guard in the camera room here, so if you don't want to enter and chance alerting him, head down to the door to the right of this one and shoot him through the small hole in the service window in the next corridor. Regardless of how you proceed, you'll want to enter the camera room and hack the computer there, which will net you the keycode to the security room (2306) and let you upload the second fake email.
Gaining Access
Your mole has tipped you off to the process required to gain access to the main vault by now: you'll need to access security panels in the bank president's office, the treasurer's office, and in the main security room. So let's begin!
Leave the camera room and return to the teller stations. (The door across the way from the camera room is the restroom, of little concern to you unless you need a medkit.) You'll need to hack the optical sensor near the right door here to gain access to the rear offices of the bank, if you didn't use the guard to unlock it earlier. It leads into a long, dark corridor with a security camera in the middle. The door to the right, underneath the exit sign, leads back to the exterior of the bank, while the door to the left leads to a utility closet connected to the restroom via a crawlspace. Neither of them are very interesting, in other words. A guard is on patrol around the far corner. If you can manage to interrogate him, he'll let spill with one of the security codes to the door to the treasurer's office (8645). (He's pretty easy to capture if you shoot out the exit sign and wait for him to come investigate.)
Around the corner from here is the aforementioned treasurer's office, on the right side of the hall. Enter the code and head on in. (If Paco the guard didn't manage to fix the code entry machine before you offed him, you'll have to head further down the hall to the backyard and enter through the crawlspace there.) There are three tasks for you to complete here: use the panel on the wall to enable access to the main vault; search the cabinet for suspicious transactions (your secondary objective for the level); and hack into the computer to plant another fake email. With that done, head back to the hallway.

There's one last room to clear out on this floor, and you'll find it around the corner. It's a security office with two guards and some kind of overseer inside. If you can sneak up to the door and unlock it (3624), you can probably sneak inside and grab the bossman and drag him back through the door without the guards even hearing you. If you drag him all the way back to the darkened corridor where you shot the exit sign, his body is unlikely to be found. From there, you can return to the office and either shoot the guards, or try to lure them out by either shooting the lights in the hallway or by flipping the lightswitch inside the office itself. With everyone out of the way, you'll be able to hack the computer in the office and upload the fourth email.
Second Floor
Now that you've more or less cleared out the first floor, it's time to take your act upstairs. You've got two ways to go here; you can either climb up to the balcony overlooking the rear courtyard of the bank and crawl through a bunch of crawlspaces to reach the security office, or you can take the stairs. The former approach has its virtues, one of them being the opportunity to overhear a radio conversation of a security guard if you hang around in the back yard (which can be accessed through the door at the end of the hall containing the treasurer's office). If you do listen in, you'll get what sounds like the security code to the president's office (3490). If you don't listen in...well, we guess we just told it to you anyway. If you do decide to crawl through the crawlspaces, you can find a pipe near the door to the backyard and climb up. When you reach the fan overlooking the office space, you'll need to shoot out or use your pistol's alt-fire to EMP the computer on the desk below you to stop it from spinning and jump down.
The longer (and the safer) way to the security office is via the stairs. If you return to the foyer between the camera room and the restroom and head south through the door there; you should find a set of stairs leading up. You'll find another laser field at the top. These are triggered to turn off when a guard passes through them, based on sensors sewn into the guard's suit. Thus, in order to get past, you'll need to be standing next to a guard, or at least holding one of their bodies. This is easy enough to accomplish; just wait for the guard to get close to the door and turn around, then walk up and grab him. You can off him if you wish, but be sure to use your alt-fire kill and hold it down to pick up the body. Wheel it around to behind the desk on the right and hack the computer to upload the fifth email before moving on.
Another set of laser grids is in the next room. If the guard here is walking away from you when you reach it, shoot out the light and wait for him to come and investigate before grabbing him and using his body to cross to the kitchen. Around the corner is the security office.
Disabling the Security
Whether you approached the security office from the vents or from the stairs, you're going to have two soldiers to deal with. They're going to be easier to take out if you approached from the stairs; just lure them out of the office with noises and shoot out the lights across from the security camera to give you some breathing room while you subdue them.
With the guards out of the way, you'll be able to access the security room, either via the door (2306) or by smashing one of the glass panes by standing next to it and hitting your primary attack button. In addition to the second vault access panel, there are three computers here. One has nothing but an amusing email, but the others will let you upload the sixth fake email and shut down the security camera system when you hack them. Do so, then move on.
The door at the end of the room here leads to the president's office, so the keycode you might have overheard earlier (3490) will let you inside. The secretary's computer contains nothing of interest, so pick or break the lock to the president's office and hack his computer to upload the seventh fake email. The panel on the wall will net you access to the outer vault, at long last. When you've flipped it, you can take a shortcut to the entrance by jumping over the balcony and dropping down to the backyard. If you didn't open the door here earlier, it'll be locked, but you can interrogate the guard for the keycode (3901).
Accessing the Vault
Now that the pod to the vault is open, you can of course head through to access it. It's near the security room where you dispatched the three guards earlier. Proceed through, then take a right to pick up the equipment that your vaultcracking friend left for you; it includes some charges and a telemetric lockpick that will let you pick both of the locks on the main vault simultaneously. Bring them down the steps and get picking, then; this works just like a normal lockpick, save that you need to wait around five seconds after each pin to let the telemetric pin across the room mimic your actions. When the lock has been picked, you can feel free to place the charges, step back, and detonate them to open the main vault.
Inside the vault, you'll gain access to a physically secure computer that holds the MCAS records you've been looking for. Use it to unlock the main storage unit in the middle of the room and grab the bearer bonds; you can also hack into it to upload the eighth and final false email. With everything done, all that's left is to proceed to your extraction point.
A nasty little surprise will be waiting for you as you exit the vault, however, in the form of a waist-high laser tripwire. It's difficult to spot until you're on top of it, but the emitters on either side of the vault's circular door should be visible. Suppress one of them with your pistol's EMP function to get past it, then head upstairs and leave via the door underneath the exit sign that you shot out earlier.
Mission 4: Penthouse
Primary Objectives
Get To Zherkezhi's Penthouse In The Adjacent Building
Access Zherkezhi's Server To Determine Who Dvorak Is
Secondary Objectives
Discover Who Is In Charge of the Zherkezhi Protection Detail
Opportunity Objectives
Tap The Penthouse Video Cameras
Your only lead in this whole affair is a man who apparently worked with Morganholt in the past, who goes by the name of Zherkhesi. He has a penthouse suite in New York that you'll need to access, to figure out just who he's working for.
The caveat here is that you'll have to start on ground level and work your way up. Due to the blackout in Manhattan, the National Guard have been sent in to keep order, and since they don't need to know about covert government operatives, they ain't gonna be told. If they spot you, they won't know who you are, and like all good weekend warriors, they're going to shoot first and ask questions later. Unfortunately, since they're nominally on your side of the whole balance-of-power equation, you can't just slaughter them like you would, say, innocent bank guards. You're going to need to avoid them as best you can, and if you do happen to need to bring them down, you'll need to use non-lethal techniques to do it.
Beat the Streets
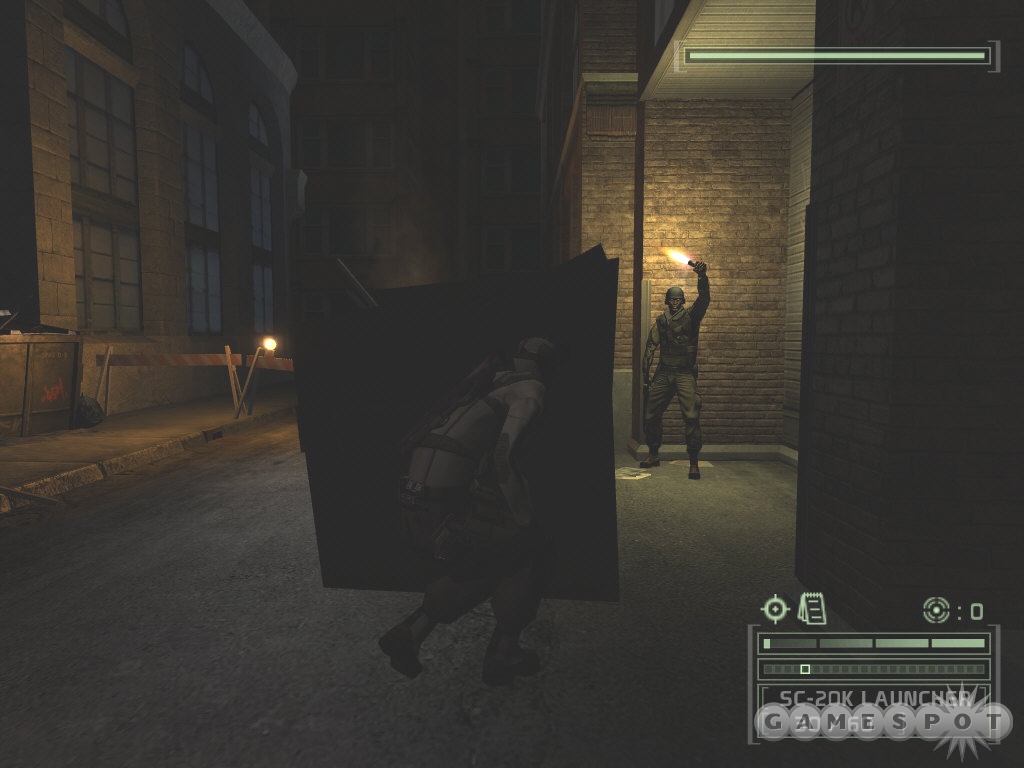
There are going to be a half-dozen or so Guardsmen outside Zherkhesi's building, to which you can gain access through a street-level door down the road. In order to get there, you'll want to bypass as many Guardsmen as you can; although there are only a couple of lights here, they all pack flares or flashlights, and will use them to investigate any suspicious noises. You have a couple of options here: you can either attempt to stay on the street and damp the lights with your pistol's EMP alt-fire to sneak around, or you can walk over to the right side of the street, jump up to the fire escape, then crawl around to the pipe snaking down the side of the building and use that to get yourself into some shadows. From there, you need to creep a bit further down the road until you see an open door with light coming through it. That's where you need to be.
After passing through the door (which you'll probably want to close behind you), you'll find two more Guardsmen. One of them is hard at work at repairing the elevator, while the other one will patrol around the hallways. You can either disable the elevator worker (who has an amusing interrogation if you grab him), or let him finish his work to take the elevator. You'll know he's done when you see the elevator door close. If you happen to disable him before he's done working, you'll have to climb all the way up the elevator shaft to the uppermost level. As a note, you can find a flashbang grenade in one of the rooms on this floor, should you like to use those.
The Upper Levels
The elevator only goes to one floor, near the roof of the building. A single guard patrols the little storehouse here, so evade or disable him, then head up topside. There are going to be three soldiers up here, but two of them will still be incoming on a helicopter when you open the door leading outside. If you're quick, you can open the door, head left, then take a right into the first pool of light to attract the attention of the guard standing on the walkway nearby. If you can do this before the guards on the chopper get off of it, then the guard there will come over by his lonesome to investigate, allowing you to bring him down without a problem.
With that out of the way, you can sneak around to the left behind the building the pipes are connected to. There's a switch here, and if you throw it, a good number of the lights around the chopper pad will be shut down, allowing you to grab and disable the remaining guards at your leisure.
When they're down, you'll need to climb up the ladder near the neon sign here and slide across to the far building on the electrical lines.
Getting To the Penthouse
Around the corner from the large billboard you land under, you'll find another guard, but this one's a merc, not a Guardsman, so you can feel free to take him down. First, though, you'll want to get around behind him and interrogate him; he'll tell you that he works for Displace, International, a security company apparently run by a friend of Sam's. Ruh-roh. After he squeals, chuck him over the railing just to watch him die.
Two more guards are inside, with one attempting to open the door to another elevator. You can wait for him to complete his task, if you wish, and it'll make your job easier, as he'll then lean against the wall by the plastic sheeting nearby, allowing you to sneak along it and grab him. Quickly hide the body, though, as the second guard runs a patrol that takes him across the elevator door. The easiest way to deal with him is to shoot or EMP the light above the elevator, then grab him when he comes to investigate.
Now, you have two ways of accessing the penthouse itself. You can either crawl into the half-open elevator and use that to access the ground floor, or you can stay on this level and take a right to reach the architect's computer and keep on going past it. Since the architect's computer should be one of your secondary objectives, we'll assume you proceed along the latter route.
Getting to the computer is easy. There's a soldier in the chair in front of it, but it's a simple matter to pop him in the head or grab him and take him out. Hacking into the computer will let you know about a hardened panic room that Zherkhesi has had installed off of his bedroom, as well as some work he's apparently been doing in a building adjacent to the one you're in now. Hmm....
Outside the door near the computer, you'll find a stairwell leading up to the rear of the penthouse, as well as your first security camera. These have nightvision installed on them, so they'll be able to spot you in the dark. These guys form your opportunity objectives for the level; you'll need to find six of them, then walk up underneath them and run a tap on the wire. This won't disable the camera, so you'll still need to avoid their line of sight, but it will let your home team keep taps on Zherkhesi.
Penthouse - Level One
Taking the stairs will lead you to a pair of doors. The door across from the top of the stairs leads to the roof, but you can't go through yet; the door to the left, however, leads to a guest bedroom, where a guard is sitting and jamming to more of that crappy music they seem to love listening to. You can easily take him down by creeping up to the bed, then jumping on top of it and grabbing him. Drag him around to the darkened mini-corridor at the rear of the room before dumping his body.
With him out of the way, you'll need to lure another guard into the room and take him down as well. We found it easiest to do so by shutting off the light (the switch is near the door you came in from) and shooting the radio. Actually, shooting the radio was just something we wanted to do, but it should help lure the guard into the room, where you can grab him and dispose of him.
There's another guard patrolling the balcony outside the window from this room. If you can interrogate him, he'll tell you who's heading up the security detail assigned to Zherkhesi, so try to lure him down near the open window by whistling, then hiding until his back is turned and jumping through to grab him. When you have the required intel, feel free to chuck him off the railing. It never gets old! When he's down, jam the camera near the potted plant at the end of the balcony with your EMP before heading over and tapping it - that's two down.
The next door here will lead to the kitchen. There shouldn't be any enemies on patrol through here, so head around to the hallway. There'll be a bathroom on your left side, and the hallway leading to the elevator on your right. Open the door to the bathroom, then sneak around to the guard standing by the pillar and grab him, if possible. If you can, you can drag him into the bathroom and dump him there. There are two more cameras here, so tap them both before heading upstairs.
Penthouse - Level Two
The large stairwell in the living room here will take you up to the second floor of Zherkeshi's penthouse. Another security camera - the fifth - watches over the first room here, so you're going to need to EMP it a few times to get around it and tap it. The computer in this room is something of a red herring; there's nothing important in it. Instead of trying to hack it, head around the glass divider near the couch here and open the hard-to-see wooden door to find the panic room. There's no one inside, so head on in and access the computer to gain access to Zherkhesi's files. The important intel here is a location on Dvorak, Zherkhesi's employer - he could be as close as the next building over, so you'll have to check it out. The email here also clues you in to some kind of passcode: 0280. Mark it and move back to the room with the camera. Accessing the computer will also open the maglocks leading to the next building.
The final security camera is in Zherkhesi's greenhouse, which is located at the end of the hallway near the fifth camera here. When you approach the door, you'll overhear the two mercs in the greenhouse talking about their experience working for their company - when they stop talking, one of them will come through the door and start patrolling down the hall, while the other will just stare out the window of the greenhouse. If you disable the one in the hallway, you can open the door to the greenhouse and sneak around to the camera to tap it without alerting the other guard there. He has nothing critical to say in an interrogation, so leave him be if you don't want to kill him.
Now that the doors to the next building have been unlocked, you'll need to head all the way back to the guest bedroom you first used to access the penthouse and head back outside. The stairs here have another door at their top, which leads to the door that was formerly magnetically locked.
Prowling The Rooftops
Through the maglocked door, you're going to find another squalid rooftop area, patrolled by a single guard, but with two more in the windows across the way that'll shoot at you if you get too rowdy. Your best bet to sneak by undetected will be to shoot out the light atop the far door here so that the area below is shrouded in darkness; this will let you prowl around until you get the guard and disable him, and will prevent the snipers from seeing you. At this point, you can either access their building through the door, which is the safer route, or jump onto the ramp leading up to one of the snipers, disable the wall mine near him, then take him out and infiltrate that way. The door is the safer route, so we'll assume you take it.
Beyond the door, you'll find a darkened corridor leading to another door. If you set down an optic cable here, you'll notice a soldier standing directly on the other side, so choose to bash the door open and knock him out. If you want to dispose of the body, just pick it up and drop it down the nearby elevator shaft.
Around the corner from here is the door leading to where Dvorak supposedly is. You should have the door code from Zherkhesi's panic room computer (0280), but if you want to make things difficult, you can go upstairs, kill the snipers, and find a crawlspace underneath a wallmine that'll take you past the door. (Wallmines can be disabled by approaching them very slowly and using them when the interaction pops up.) There's also a computer near one of the snipers, that will tell you who the project manager is for Displace, if you didn't grab the intel from an interrogation earlier.
Dvorak
However you get to him, you'll find Dvorak in the room behind the locked door. In point of fact, he's not a man, it's a machine, guarded over by a crazy old dude who'll whisper sweet nothings if you talk to him. Feel free to converse if you like, at least until he tells you that the nest of servers is in fact Dvorak. In order to get the information Grim needs from the computer, you'll have to activate it ("Start Main Server"), then run around to each of the subservers as their tubes overheat and burn out, magically replacing them with the antiquated computer tubes that Sam carries with him on every mission. You can tell when a tube is overheating by the sound it makes and by the smoke that issues out of it.
After all of the tubes have been replaced in the correct order, you'll be able to grab the punchcards that Dvorak outputs. That's the last task for you at this point, so all you need to do now is work your way back to the exfiltration point, which is located in the elevator leading up to the penthouse. Check your map if you don't recall where this is and get out of there.
Mission 5: Displace
Primary Objectives
Retrieve The Server Access Algorithm
Access The Central Server In The Server Room
Don't Kill Anyone
Secondary Objectives
Discover The Real Identity of Milan Nedich
Opportunity Objectives
Insert Tracer Programs Into Displace's Division Servers
Infiltration
In order to accomplish your infiltration of Displace, you'll first need to find a nice, quiet way to get inside. The ventilation system sounds like a good idea...unfortunately, it's been on the fritz since the blackout, so there's a guard and a technician working on it. The guard will eventually start patrolling if you wait for him, allowing you to sneak up and disable him; the technician can be taken out without any noise by climbing the fence behind him.
With the two individuals here taken out, you'll be able to flip the switch near the technician, which will stop the ventilation shaft's fan. With that out of the way, head to the fan, pick the lock on the trap, then rappel down the shaft until you reach the bottom. Another set of shafts will lead you a space above Displace's main conference room. And the fun begins...
Displacement
While you're in the vents, you'll be able to overhear a conversation between a Displace executive and one of the New York City Council members. They'll talk for a few seconds, then leave the room, letting Grimsdottir clue you in on one of your primary objectives: in order to access the central servers on the first floor of this building, you're going to need to wirelessly hack into the executive's laptop (the gray briefcase that he carries around) to get his codes. Since they've left the room, you'll have to track them down and get a bead on his laptop.

(Note that, if you reload an earlier save game, you can whip out your EFF and hack into the briefcase through the slats in the venting trap above the conference room, thus obviating the need to track down the executive later on. Since this isn't what you're supposed to do, but merely a helpful workaround, we'll assume that you don't do so and are forced to find the executive after he leaves the room.)
After the executive and the councilman head out of the room, open the trap and drop down. They'll be moving down a nearby hallway and around the corner, through a locked room, but there's no need to be too quick about following them; they don't start their little triggered conversation until you catch up to them, so feel free to look around a bit.
You're currently on level two of Displace's underground lair. Head across the little walkway here and into the area marked "Operations Room." Grim will radio in and ask you to upload a tracer program to each division's main server; this is going to be your opportunity objective for the level. The server in the ops room is on the uppermost level of the steps inside. You'll be able to tell which computers have actual pertinent information by looking at their screens; anything with a star-like badge flashing right to left on it will be something you're probably going to want to hack into. The technician here is in front of another such computer, so feel free to knock him out and access it. After hacking it, you can access something called the "VIPDetailReport." It's listed as an objective for you, but doesn't seem pertinent to anything yet.
Hacking The Laptop
Now that you have the first server tracer uploaded, you can start tracking down the executive and his laptop. There are two routes to follow here. You can either walk to the bottom of the ops room, find the corridors beneath it, then interrogate the guard in the break room to learn the door code for the lower door (8136) and walk up the steps behind it, or just hack through the door that the executive walked through on level two and follow them that way.
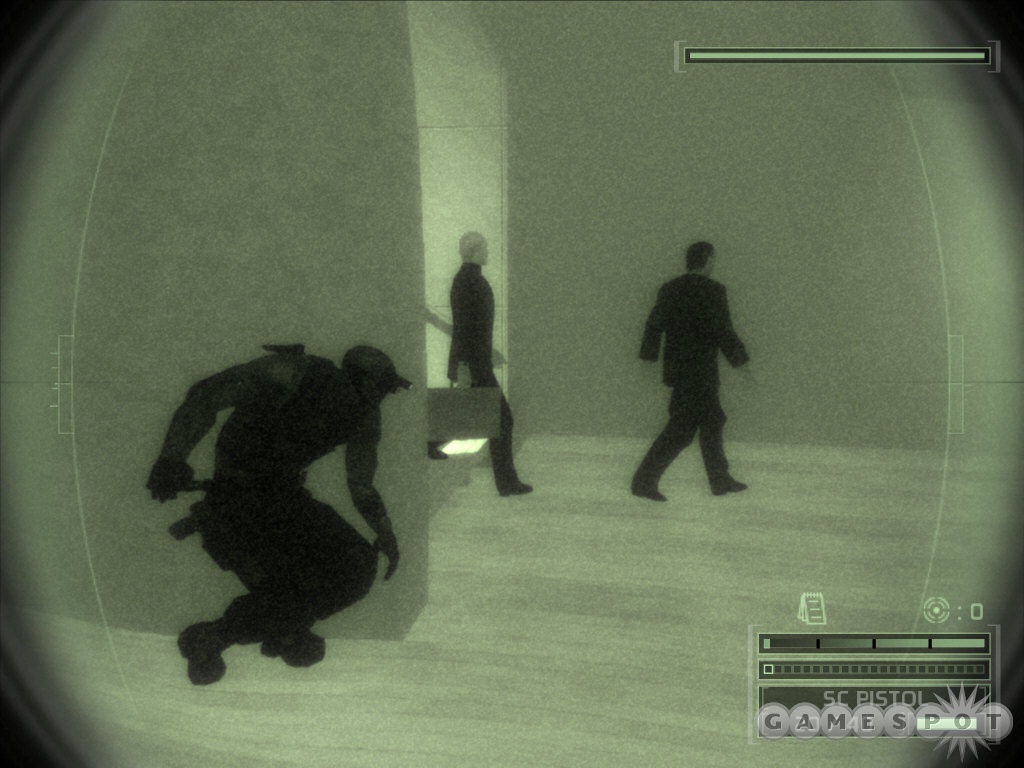
Although it sounds more difficult, the second way is actually easier; you can get the doorcode fairly quickly (or just use it, since we already told it to you), and then head through the locked door on level one, near the restrooms. The executive and councilman will soon come down the nearby steps, with the executive in the rear. If you wait for them to hit the bottom of the steps, then quickly grab the executive, he'll drop his briefcase, allowing you to subdue him in a darkened corner before hacking into the laptop. The councilman will apparently not think anything strange about this arrangement, and will just stand around the corner from the action unperturbed.
With the server algorithm in hand, you need to find some way to access the main server. Although the doors leading to it are ostensibly here on the first floor, they're going to be locked due to the power outage, forcing you to find another way around. Said passageway is going to be found in the R&D labs up on the second floor.
Research And Development
When you reach the top of the stairs leading to the second floor, you'll be confronted with a long open hallway with elevators to your right. A guard is sitting at the desk on the far end, but he'll spot you if you move around under the lights near the couches. There's also a security camera posted between the elevators.
One way to approach this is to lure the guard away from his position by dancing in the lights for a second, then disabling him when he's out of view of the cameras. A more pure method of getting down the hall will be to OCP the lights above the cube statue, walk across to the right side of the hallway, wait for the camera to pan towards the guard, then jump over the railing and use your hands to crawl sideways to the far side of the ledge. When you're at the end, you'll hear the guard get up and walk away; he'll either go into the bathroom here, or go into the Training Gym nearby.
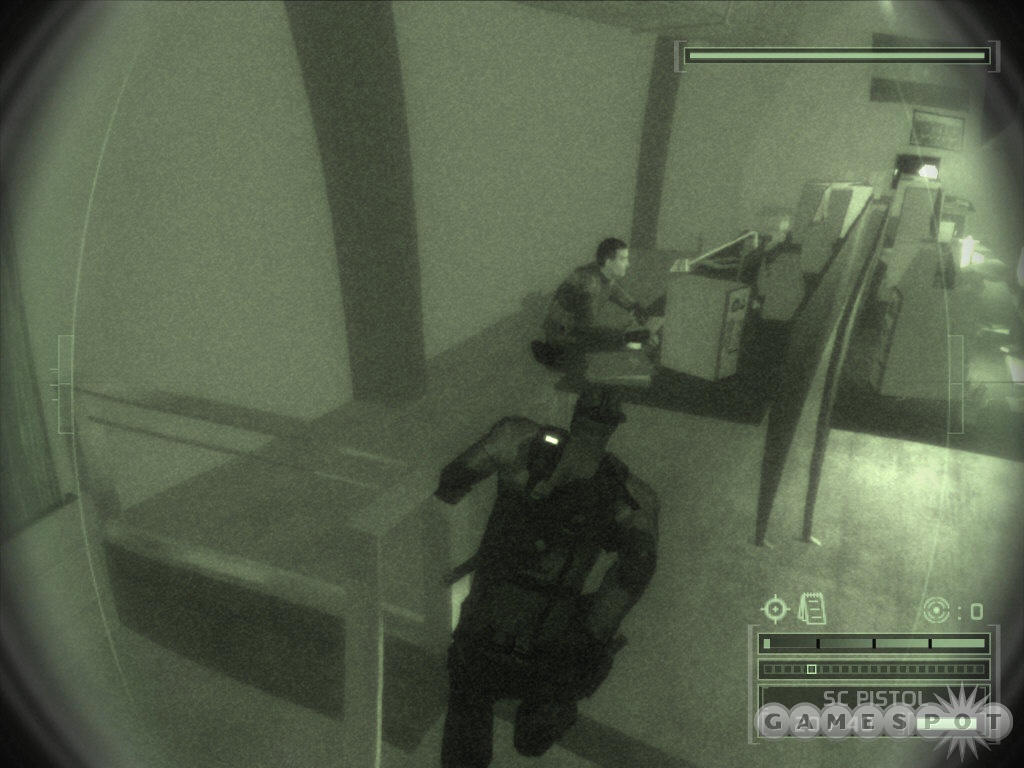
If he goes into the bathroom, then grab him and use him to access the retinal scanner near the station; this will unlock it and eliminate any need for him, so you can subdue him at that point. You don't want to just rush into R&D yet, though, as one of the divisional servers that Grim has asked you to hack is in the training gym, of all places. If you walk in there, you should note a soldier sitting at a computer and one on a treadmill. You can subdue the soldier at the computer by creeping up the steps next to him and very quickly grabbing him, if you don't want to use one of your shockers or airfoils. The guy on the treadmill can either be left alone, or grabbed, or subdued in any other way you see fit.
Actually getting into R&D is a bit more complex. If you want, you can hack or force a guard into the retinal scanner near the guard station, then use his body to get you past the laser fields in the corridor there, but the easier way to go is to just crawl through the crawlspace on the floor of the corner of the lockerroom. You'll come out near a pair of soldiers talking about the radness and badditude of the new Prince of Persia title, also by Ubisoft; if you wait until they're done talking, you should be able to quickly shuffle across the room and grab the soldier that walks away before he gets to the door. If you can't, just get the guy by the sink (or leave him alone), and head through the door near the medkit.
Accessing the Mainframe
R&D is a noisy place; they seem to be conducting turret tests which may help mask your movement here. Anyway, there's at least one technician working on a computer across the room, and if you weren't able to prevent the first soldier from reaching this area after you left the crawlspace, then he'll be upstairs from your position. OCP'ing the utility light near the pipes should let you reach both of them relatively unimpeded.
The third and final divisional server is located behind a locked door at the top of the steps. It doesn't appear possible to find the keycode for it, so if that bothers you, head down to the dummy at the end of the turret firing chamber and climb into the pipes there and look for a crawlspace leading to the room. If it doesn't, just hack the keypad and hack the server to make Grimdottir all happy.
The pipes above the dummy are actually where you need to be anyway; at the end of them, you'll find a handy rope leading down into the central server area of the base. You can hack it as you like, but there won't be anything important on it - all the data you need has been uploaded to the PC of one Milan Nedich. Bad goes to worse, though, as the power soon comes back on after you hack the mainframe; if you don't want to be spotted, start climbing that rope as soon as you hack the computer.
When the soldier below you is safely ensconced on the mainframe and is tapping away, climb back down and interrogate him or subdue him, then creep back out the doors, OCP the lights, and take down his friend.
The doorways here lead back to the first floor elevators, where the city councilman is likely still waiting for the executive to catch up with him. There are four lights ("THERE...ARE...FOUR...LIGHTS!") above the doorway leading to the elevators, so you won't be able to OCP them all before opening it. Regardless, anyone on the other side (there may also be a guard roaming around) won't get a good glimpse at you when you open it, so you can probably punch them unconscious when they come to investigate. If you wish, of course, you can shoot the lights out and use the room as one big lure by whistling and such.
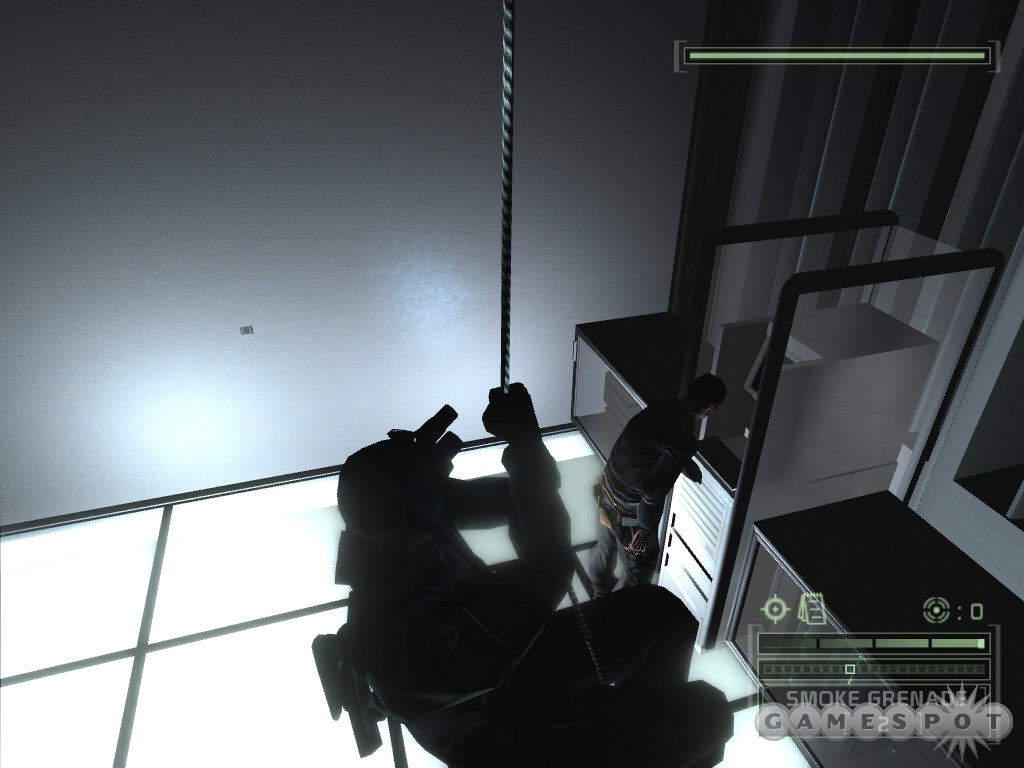
Executive Level
When you're in the clear, hop into the now-functional elevator and ride it to the top floor. This is Displace's executive level, where you hope to find more on the mysterious Milan Nedich. Luckily, you can overhear a conversation between two guards as you exit the elevator; they'll give you the door code to the VIP Meeting Room (2346). You can also get this via interrogating one of them, or by hacking one of the computers on this level. After they're done talking, they'll break off into patrols. If you hop over the railing near the Administration sign on the wall, then wait for a bit, one should pass by you, allowing you to take him down, then search out and disable the other. Don't forget to switch off any lights that you see.
Elsewhere in this first area, you'll overhear an executive and a guard discussing his latest assignment. The executive will let slip the real name of Milan Nedich, one of your objectives, but just overhearing it apparently doesn't complete the objective in your Goals screen - in order to satisfy that objective, you'll need to whip out your EEV and record the conversation. After this conversation is over, the guard will head to one of the nearby offices and sit down, while the executive will stay in the coffee room. Take them out as you please. Oddly enough, the light switch for the coffee room is outside the door, allowing you to confuse them by switching it off in mid-conversation.
With all of these guys out of the way, find the locked door with the security cam over it and unlock it with the code. One of the meeting rooms here features another executive, who, with a little persuasion, will give you the code for the CEO's office (2609). Take it and use it on the door nearby. Inside the office, you'll need to access the main computer to get both intel on your next mission and the door code for the fire door (3485). With that done, you can make it back to the fire door in the first set of offices on this floor, use the code, and head upstairs to your extraction.
Mission 6: Hokkaido
Primary Objectives
Abduct Abrahim Zherkezhi
Discover The Real Identity of Milan Nedich
Eliminate Milan Nedich
Well, it's time to meet Mr. Sparkle in Japan. Your mission objectives? Kidnap Zherkhesi, and pop a cap in Milan Nedich.
You begin at the bottom of a little picturesque stream, overwatched by a guard. You can shoot out or OCP the lamp swinging from the tree branch, but not the larger one by the guard himself, so it'll be tough to actually get close enough to grab him; it's best to just go ahead and use one of your shocker rounds to take him out, or just shoot him. If you really want to interrogate him, shoot the hanging lamp, creep up the side of the ravine, then wait for him to go and investigate the lamp before creeping up and around to grab him. He doesn't have much information for you, but suspects that Zherkhesi might be in the tea house on the far side of the compound.

Around the corner you'll come to the first structure in the compound. A soldier will be lighting a candle inside as you approach; if you wait for him to start walking out of the room, then you should be able to walk around and blow it out, which will probably attract the attention of one of the guards outside. Disable or kill him, then work on the second one. There's plenty of noise outside, and not much light, so you should be able to grab or kill the other one without too much trouble. They both have the same interrogation - revealing that Nedich is somewhere in the central palace - so don't feel compelled to grab them both.
Redding will ask you to scan the license plates of both of the cars here with your EFF; you can also do it by getting up close, if you wish. When you've done so, he'll inform you of the real identity of Nedich; he's apparently one Milos Nowak, a ruthless soldier from Bosnial, famous for scalping priosoners during the war there.
Into the Compound
Past the car park area, you'll come across your first large buildings. There are two guards here, as usual, who will begin talking about ninjas if you let them begin their conversation, leading to an amusing interrogation if you can capture one. The easiest way to deal with these guys is to let them finish talking, sneak up and grab the guy looking out over the cars, hide his body, then wait for the second soldier to patrol back and grab him as well. You can also avoid them entirely, either by crawling through the crawlspace in the darkened room, or by crouching underneath the flooring where they had their conversation, which will let you pop up further into the building.
Any way you go, you're going to come out in a cluster of rooms where there's a guard on patrol, and another one looking for hidden mics alluded to by the Japanese officer in your pre-mission briefing. These are going to be the opportunity objective for this mission: you'll need to find and disable six mics in the building. They can be spotted with either your heatvision or EFF vision, but the latter is probably the better choice. The first mic is located behind the wall scroll near the potted plant by the scanning soldier, so grab it and move on.
Around the corner, you're going to find a small, empty bathtub near a light and a hallway that's illuminated by the sunlight coming from outside. A soldier will likely pop up as you attempt to move down here, so if you want to remain concealed, you'll want to OCP the light and cut through the fabric near the small window. Actually getting through the next "door" will be more difficult, as it's obscured by a piece of flowing red fabric. Before you head through, then, you'll want to lure the soldier back to your location by whistling and then disabling him. He doesn't have anything useful to say in an interrogation, save that there are medical supplies in the kitchen.
More Microphones
The next couple of rooms past the red doorway are empty, so keep moving on until you reach another exterior area where a couple of guards will be discussing microphones. Eliminate them both, as you please, then search the room for another mic behind the print near the telephone.
Moving on, you'll come to an enclosed courtyard with a pair of guards and one of the civilians that your boss told you about - you can't kill any of these guys. The guards don't yield any useful intel upon interrogation, just that Milos is in the central palace, so feel free to dispatch them as you please. If you insist on up-close takedowns, then you should be able to manipulate them by whistling them into the kitchen or OCPing the lamp in the corner of the courtyard and dispatching them there.
Milos To Go Before I Sleep
Now that you have a bead on Milos, it's time to take him down. He's protected by three guards, though, so it'll be difficult to take him down on the quiet. You should be able to hear him as you prowl through the next little suite of rooms, so find where he and his men are conferencing, then crawl into the crawlspace into his little private bath and wait for the meeting to split up. His men will walk back to the area you were in previously, while Milos himself will retire to the bath and lean back against one of the paper walls here. If you care to interrogate him before you cap him, you can actually sneak up and grab him through the wall, which is pretty cool, if we do say so ourselves. Otherwise, just get behind him and use the shadow or your heatvision to line up one good shot to the head to bring him down.
With Milos out of the way, you'll probably want to creep around and take out his men. One will have taken up position in the bedroom, another by the giant golden Buddha, and the third will roam. None of them yield anything interesting under duress, so do with them what you will. The third mic is found by the phone in the bedroom here.
Sweeping the Bedrooms
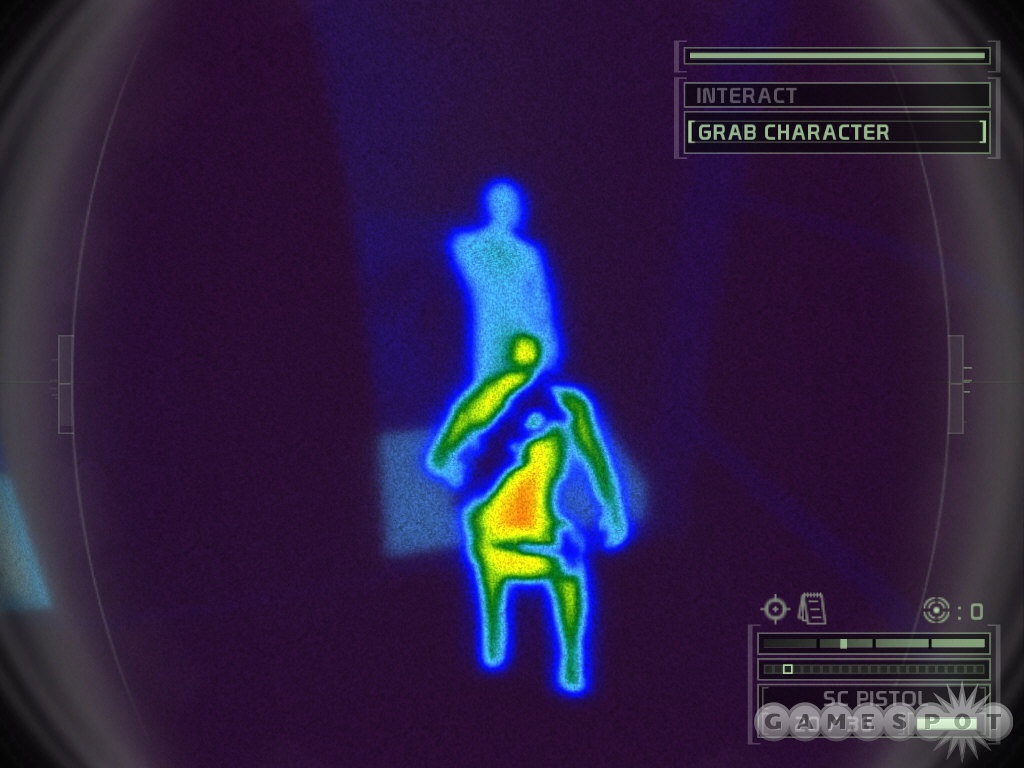
The only way to leave Milos' quarters appears to be to climb through the crawlspace near the golden Buddha, so do so to reach a little indoor garden. A single guard patrols this area, and you can lure him back to your position by shooting the little lamp nearby, or by flipping on the sprinklers. He can't be interrogated, so leave his body somewhere it won't be found.
Next up are a pair of guards in the living quarters. One of these guys is watching tv, while another is visiting the civilian in the nearby bathroom, so flip the light switch in the hallway, then wait for the latter guard to move into the bedroom before grabbing him and dumping his body in the corner. The fourth microphone is in this bed, near the phone, so disable it. The civilian in the bathroom isn't going to hurt anything, so leave him be, or subdue him if you wish. The guard that's been watching TV all this time is easily dispatched if you approach from the rear. There's another microphone on the wall behind him - the fifth total, leaving one remaining.
Around the corner from the TV room, you'll find another little exterior area with stairs leading up and a door leading to a bedroom below. If you shoot out or OCP the light at the top of the stairs, you'll be able to sneak over to the door on the bottom floor and flip the switch directly to the left of the doorway, then start luring the two guards here down to the darkened bedroom with whistling, if they don't come of their own accord due to the lights. Dispatch them both, then pop the sixth and final microphone on the wall by the phone to finish off your opportunity objective.
Shetlannnndddd!!!!
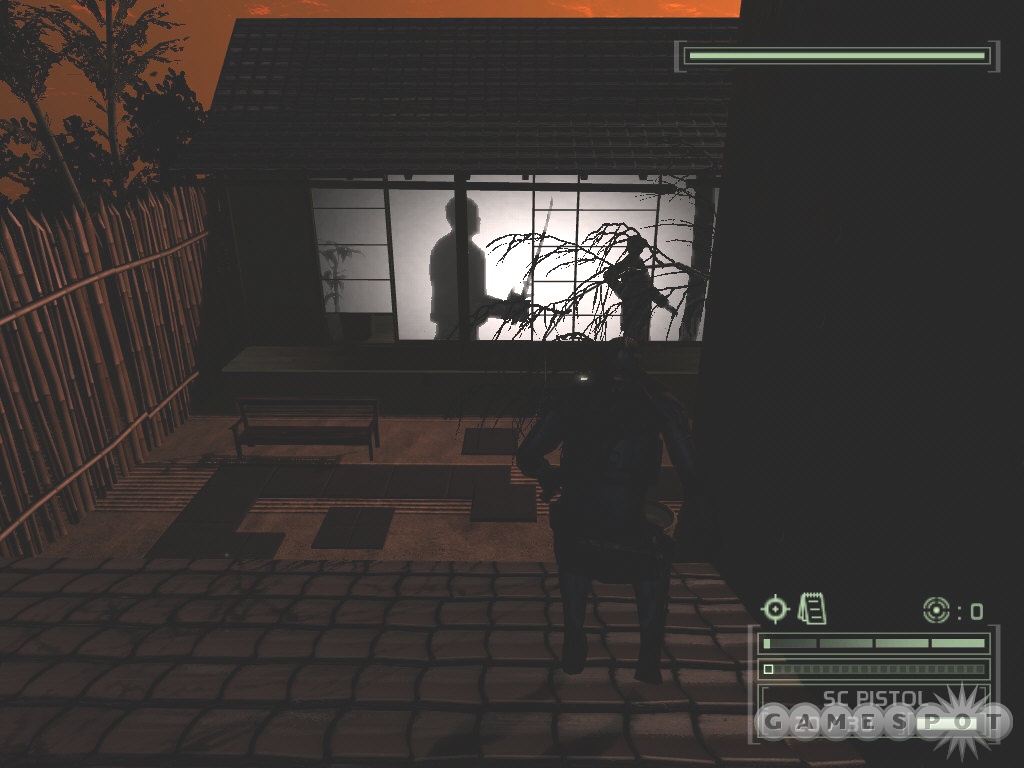
All you can do now is crawl through the crawlspace in the utility closet at the back of this suite of bedrooms. It'll lead you to a rooftop overlooking the teahouse where Zherkhesi is staying; it seems that he's meeting up with Shetland. There's nothing you can do to stop the events that unfold, so when their conversation is done, hop down to the ground, dispatch the guard, then attempt to follow Shetland as best you can. There are going to be three guards near the carlot, so dispatch them or avoid them to reach the exfiltration point and leave the mission.
Mission 7: Battery
Primary Objectives
Determine If The Koreans Intentionally Launched The Missile
Tap The Launcher Bios For A Fingerprint of Dvorak Algorithm Fragments
Opportunity Objectives
Recover The Shipping and Repair Logs
Well, it's time to figure out just how premeditated the attack on the USS Walsh was; in order to do so, you're going to have to infiltrate the North Korean battery that launched the missile. Cool.

You'll start out in some kind of underground garage or delivery area, where two workers are bickering over a shipment. If you want to capture them and interrogate them, you can grab the keycode to a bunker door nearby (1879), but it's far easier to just walk around to the front of the truck, avoiding both of the workers, and drop down into the lowered floor underneath the truck and start creeping through the crawlspaces down there. The end of the path will take you to a guard station behind the locked door. The only source of illumination will be a computer here, where there may be a guard; if there isn't one, then he's likely patrolling, so switch it off to fill the room in darkness and wait for him.
Inside
With the guard out of the way, you can start working your way down the hallway and into the surplus computer room around the corner. (If you spot a camera, then you're heading the wrong way; that path leads back to the garage.) There's a guard either in the shadows to the left of the entrance or at one of the computers on the far side of the room, so you may need to whistle him around or OCP the lights to stir him. Beware, though, any shots will alert the guard in the small office off to the left to your presence.
When both of the guards have gone down, you'll need to access the lit computer in the office to access the shipping and maintenance logs for Redding. This is the first of your four opportunity objectives for the level.
Next up are the barracks, where a couple of soldiers are sleeping something or other off. You can dispatch both of these guys rather easily, if you're in the mood for killing; if you're trying to get through with a non-lethal approach to your job, you can alt-attack the guy lying down on the bed to knock him out...more than he was when he was asleep. The soldier in the chair is impossible to grab, and he's exceedingly likely to yell if you attempt to use a melee attack on him, so if you wish, just switch off the lights and leave him be.
Missiles
If you open up the double doors near the kitchen area, you may be able to lure the soldier in the storage room beyond back to the barracks and disable him. Otherwise, shoot out the lights near the camera and get rid of him somehow. If you disable him, he'll tell you about a grate in the corner of the room that will lead underneath the missile delivery room, but you can find that out anyway.
One of the small rooms off of the storage room, near the top of the stairs, holds the computer with the second shipping and repair log, so enter that and hack the computer before moving down the stairs or into the grate. It's probably going to be easier to just head down the stairs, as the grate exit will take you out to a fairly well-lighted spot. If you do take the stairs, wait for the soldiers to finish their conversations before you move in. One will sit on the chair above the radio, while the other will patrol around the truck on the dock.
Getting either of these guys to interrogate them will be difficult, but it's certainly doable. Unfortunately, neither of them will yield any really telling information. Regardless, in order to avoid alarms, you'll want to shut down the lights in the area before disabling them. Begin by OCPing the light near the camera by the metal doors, then creep around the room to the right until you come to a red panel near the crates here; this controls the lights for the entire room. Flipping it will obviously attract the guards, but they won't be able to see you unless you get caught in their flashlight beams, so you can feel free to creep around and grab, disable, or kill as you see fit. Just be sure to be outside of any light source's realm of illumination if they happen to get to the switch and flip the lights back on.
Following The Bomb
Now that the guards are out of the way, you'll be able to access the missile storage area of the base. To do so, ensure that all of the lights are out, then head back to the truck and bypass the red circuit near it. This will start shuttling the missile towards its final destination, and allow you to follow it. To do so, you'll need to mantle up onto the roof of the truck's cab and grab the pipe that the missile slides along. Climb along until you reach the corridor behind the locked metal doors.
You're going to have three potential routes as soon as you land here. There are both eastern and western missile bays that you can access through the grate on the floor, if you wish, or you can head straight into the missile bay control rooms. There are a couple of computers in the control rooms, but neither of them have shipping and repair logs. In the missile bays themselves, there are a pair of missiles with their casings off, allowing you to fuse their wiring or somesuch, in what appears to be an objective so shadowy that it doesn't even appear on your goals list. If something goes awry, then Grim and her team will be able to destroy the battery with the nukes. Be careful of the new cameras in the bays, though; they appear in lamp casings near the door, so that you aren't able to tell which direction they're facing.
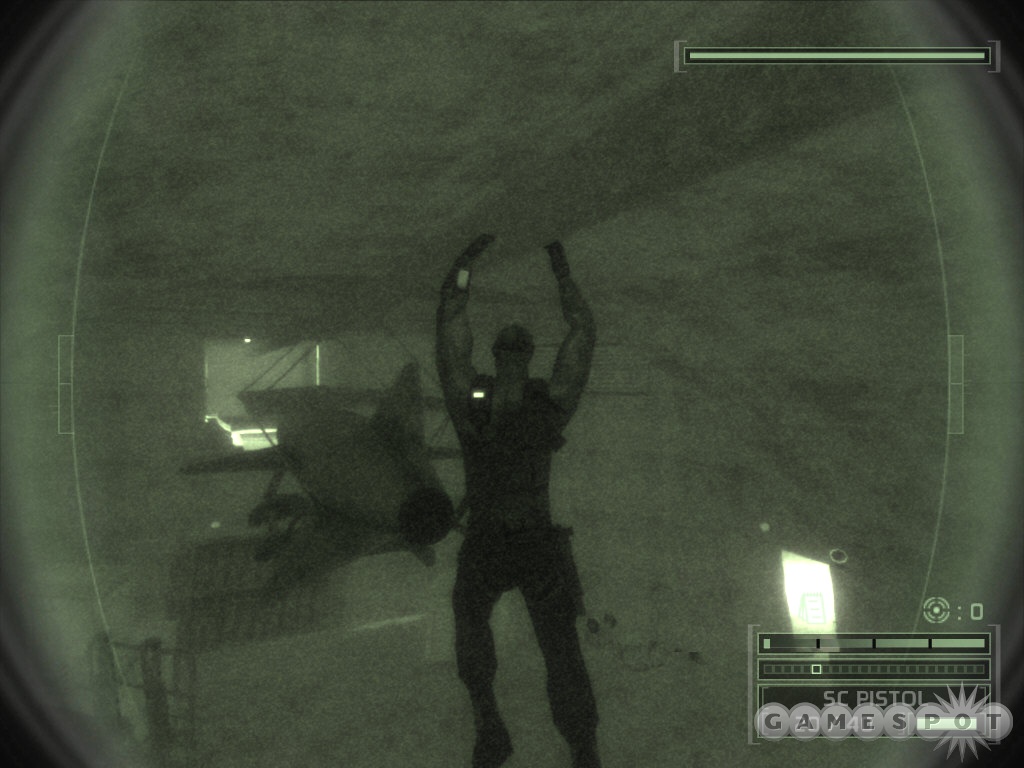
With the missiles hacked (if you want to do so; it's quite optional), you can ride the elevator to the command center. It's apparently impossible to find the code for it, but if you can't hack the keypad, you can find a grate in the ceiling of the western missile bay control room and climb into the shaft itself and bypass the circuit to force it to rise.
Command Center
It's actually a lot easier to gain access to the command center if you just hop on top of the elevator through the shaft; you'll wind up near a crawlspace that can either take you to a corridor behind the optical scanner guarding the command center, or to the command center itself. The latter course of action is your best bet; when you're ensconced behind the blue warroom screens, you'll be able to overhear the conversation between the commander and his men, which ends in a rather abrupt demotion.
After things have calmed down a bit, and the commander has returned to his office, you'll have to start infiltrating the room. Assuming you want to do as Grim asked earlier and find out some intel on the relative troop strengths, you'll need to interrogate the commander, but the rest of the guys here are just meat, so don't feel compelled to keep them alive or interrogate them; they have nothing useful to say. It'll be easiest to get into the room if you just start shooting out the light sources, such as the display screens; when things are suitably dim, drop down and start the wetworks.
If you can grab the commander and interrogate him, he'll reveal that the North Korean forces have a preponderance of force along the DMZ, on the order of an eight-to-one advantage over the Americans. Assuming you take his word on it, that's...bad news. You still have to nab the BIOS from the launcher, but before you leave the command room, access the computers at the rear of the room to nab the third shipping and repair log for Redding.
BIOS!
With all of those affairs out of the way, return to the elevator and ride it back down to the missile bays. One of the large covers in the western bay will have rolled away since you've been gone, giving you access to the launcher used to destroy the Walsh. When you reach it, disable the soldier manning the upper level, then examine the launcher to learn from Grim that you're going to need to remove the casing in order to check the BIOS.
In order to remove the casing, you'll need to head down the stairs on either side of the launcher and access its control room. Two soldiers here, neither of them interrogatable. Take them both down, access the computer by the window to get the fourth and final repair log, then bypass the circuit one of the soldiers was working on to crack the casing. Head back up and use the computer inside the launcher to check its BIOS - sure enough, the North Koreans didn't launch the missile, but it won't stop them from launching a lot more shortly.
Go Skyward, Missile
Uh-oh; a missile is about to be launched from the launcher on the far side of the base, near the eastern bay. You're going to have to get over there and stop the launch before the missile goes up. (Congratulations if you get the "Go skyward, missile" reference, by the way.)
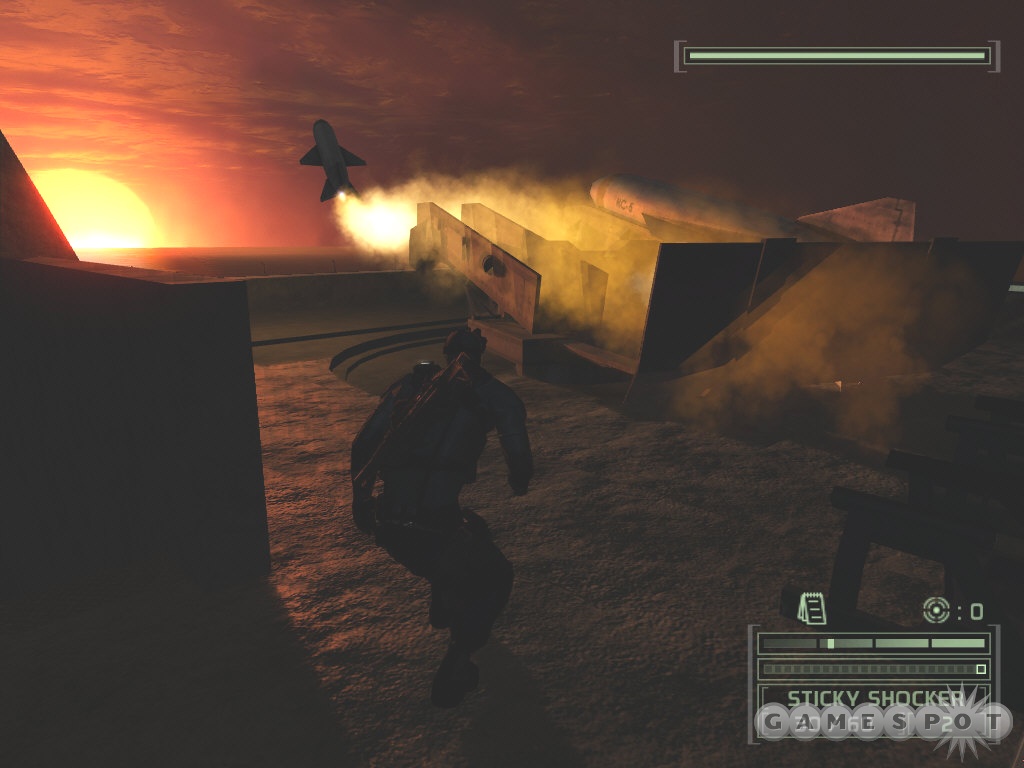
Unfortunately, just as you hack through the door leading to the launcher, the missile will take off, leaving you sitting on your thumbs. All you can do now is attempt to abort the warhead on the missile before it reaches its target. You'll only have three minutes, so get to work!
The first key here is getting the abort codes from a computer in the launcher command room, down one of the stairs from the launcher. There are three soldiers here, with one either sitting at the computer or pacing around, and two more reading out a bunch of technical-sounding information as they track the missile. No need to deal with the duo; just pop or stun the soldier at the computer, then use it to gain the abort codes. With those in hand, you'll have to return to the missible bay computers (check your map) to enter the abort override and prevent the detonation of the warhead.
Woot. You've saved a few hundred sailors all by your lonesome. With that burden off your shoulders, return to either of the launchers and head to the ladders leading down to the coast to extract.
Mission 8: Seoul
Primary Objectives
Locate And Retrieve Data Drives From The NDT
Opportunity Objectives
Stop The North Korean Propaganda Broadcasts
Well, it appears that the hack that enabled the missile to launch from the NK battery without the North Koreans themselves being aware of it originated in Seoul. Since Seoul is currently in the process of being overrun by the North Korean army, you're going to have to infiltrate a war zone in order to find drives from the National Data Trunk on the outskirts of Seoul.
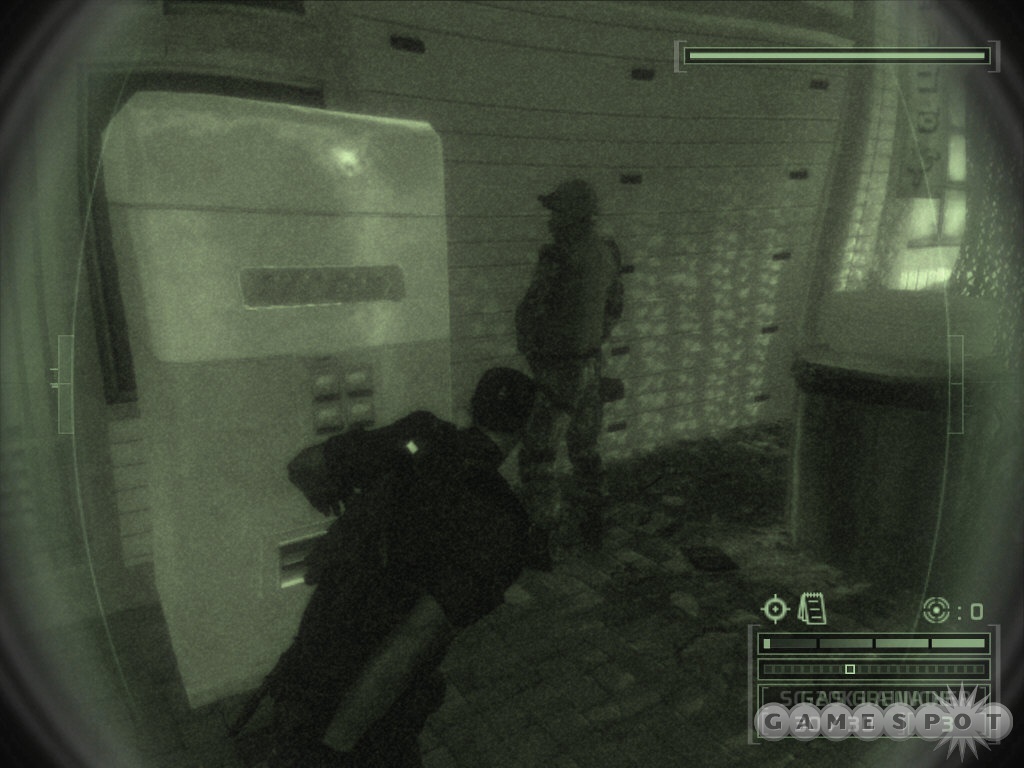
The first thing you'll want to do is leave the apartment building you've used to infiltrate the city. Rappeling down the wall should be a cinch for you, so reach the streets and round the corner. As you sneak up and dismantle the wall mine, Lambert will radio you with a new objective: you'll have to capture and interrogate one of the Special Forces soldiers on the other side of the wall here in order to find out where they moved a VIP to. It's easy enough to do; just wait for one of them to take a leak, then sneak up behind him and grab him. The interrogation should last just long enough for the other soldier to get curious, so don't forget that you can use your pistol while you have a hostage in your arms.
Before you leave this area, listen up for the NK propaganda broadcasts and use your electronic-seeking vision to clue yourself in on the location of the speaker. Your opportunity objective for the level is to take out all of these speakers by bypassing the circuits underneath them, so go ahead and get started.
Mobile Command
The gate at the end of this street is locked, so you'll have to climb the pipe to the left to reach the fire escape. Your goal here is to infiltrate the mobile command truck and access the computer inside, but there are two soldiers around the truck, with another one on a balcony nearby. The main problems here will be the headlights of the truck, so feel free to shoot them and start herding the soldiers around with sound. You may want to start with the guy on the balcony; you can reach him either by some scaffolding near the exit from the fire escape, or via a pipe on the far side of the truck. With him out of the way, you won't have to worry about any sniping should you be discovered when you're near the truck. There's some shotgun ammo on the wooden planks near the end of the truck.

The second and third propaganda stations are both in this area. One is in the corner, near the umbrella, while the other is at the top of the ladder leading to the crawlspace that can get you into the NDT building. Be sure to disable the wallmine on the crate near the ladder before you go up!
Getting the Drives
The NDT building is next door to the mobile command center. You can either infiltrate via the door, which will require you to jump to a pipe to clear some burning debris (wait at the end of the pipe for the soldier to pass underneath you to engage in some neck-snapping goodness) to get inside, or you can climb a pipe to the right of the door and head in via a crawlspace. The crawlspace will take you right to the main server room of the NDT, allowing you to grab the drives right away; if you head in through the door, you'll have to wait for the soldiers inside to blow the door leading to the server room before you can infiltrate. (If you do go in through the crawlspace, they'll still blow the door, so be careful of the blast.)
Whichever method of infiltration you choose, you'll need to grab the drives from the main server room computer, and then proceed to the elevator at the end of one of the upper hallways. There will be two soldiers that pop out of it when it arrives, so be ready for them. Neither of them have any interrogations, so just take them down and head up to the roof to start the next phase of the mission.
Seoul - Part 2
Primary Objectives
Get To The EA-68 Crash Site
Prevent Data Aboard The EA-68 From Being Recovered By North Korea
Opportunity Objectives
Gain Information About NK UAV's
Disable Portable Radar Reconnaisance Receivers
New Problems
After the intermezzo, you'll regain control of Sam on the rooftop of the NDT building. There's a single soldier roaming around, as well as a new foe, a UAV. This aerial vehicle hovers around the rooftops, with a nightvision searchlight and machinegun, just waiting to spot Sam and riddle him with holes. You can destroy them if you happened to bring along the sniper rifle;otherwise, you can use your pistol's OCP to shut them down for a few moments if you suspect that one's about to find you.
To deal with the soldier, jump over the railing near your start point and creep around to the left until you can shoot out the light above the door; this should attract his attention. With the UAV stunned by your pistol, grab him and disable him; note that the UAV doesn't seem to react to bodies. Keep the UAV stunned while you access the computer station the soldier was manning. Shutting down the radar from these stations is the opportunity objective for this level; there are five total, including the one you just took out.
With that done, grab the zip wire near the computer and ride it to the next building, then schooch to the right and climb over the chainlink fence to reach another rooftop alleyway. There's a wallmine here, so creep up to it and disable it. Watch your back as you proceed, as a UAV will come up along the path behind you.
UAV Driveby
This next P3R, along with the presence of three soldiers and two unshootable lights, is going to cause some problems for you in the next area. To get there, you'll need to climb along a pipe on the left side of the wall, which will land you atop a little shack. There's a little space underneath where you land where you can hide in the shadows and out of sight of the UAV's nightvision, so take advantage of it. The UAV here will run a route that will take it back out to the wallmined alleyway, giving you a bit of time to work with every minute or so. You'll note that one of the soldiers here runs a patrol route out to your little shack, so do your best to lure him back to the shack and hide his body underneath the eave, or perhaps chuck him over the nearby railing if you think you can get away with it, just because it's fun.
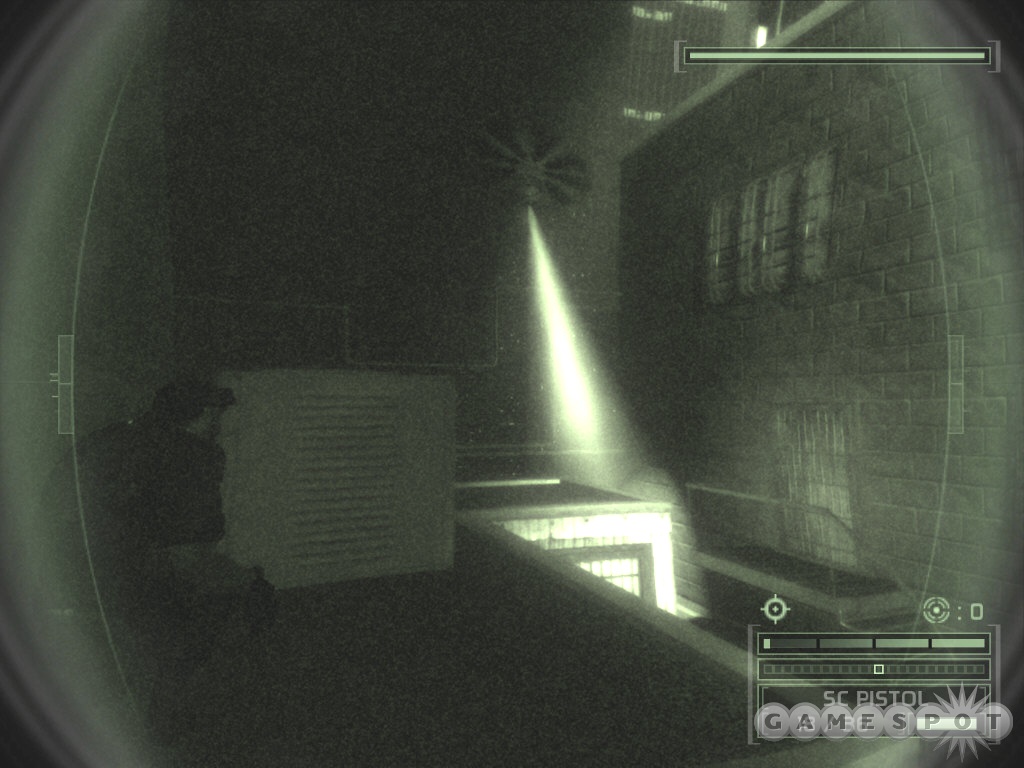
Dealing with the next two soldiers will be a bit more difficult, especially if you like taking a hands-on approach. It is possible to get both of them disabled by grabbing them, but doing so will require a lot of waiting for the proper alignment of their and the UAV's patrols. The moonlight and gravel here will also make it difficult to obtain full stealthiness. If you insist on grabbing at them, try waiting for the UAV to leave the area, then jumping atop the building to the right and sliding behind the air conditioner, then dropping down and breaking the lock on the door to the left, assuming the guard that comes through it has been lured away by a sound or sighting. Inside the room there, you can wait for the guard to come back, disable him, then wait for the UAV to leave before heading back outside and creeping up the stairs to nab the remaining guard while he uses the radar.
None of this is required, of course, and indeed a much easier way to go is to just climb atop the building, use a sticky shocker on the upper soldier, then drop down to disable the lower guard before climbing to the radar station and disabling it. Since the UAV isn't alerted by bodies, there's no need to hide them.
Back to the Streets
Whether you bust through the door or crawl to the window via the radar station, you'll eventually wind up inside another building. Find the doorway here that leads to the bathroom; you'll find yourself looking out over another building, due to the fact that the structure you're in has been partially destroyed. Another UAV roams here, but there aren't any soldiers, at least not initially, so just disable the flier with your OCP while you descend to the lowest level of the building you're in before jumping across to the radar station.
Unfortunately, a soldier will be popping out of the door behind the radar station soon after you make the jump, so work your way around to the right and into the shadows on the ledge. If you interrogate him, he'll tell you about a dud bomb that apparently landed elsewhere in the building. Disable the radar station before moving on; this would be the third of five.
Bombs, Away?
Inside the door here, you'll learn what the last soldier was talking about: apparently that bomb ripped through all the floors of the building and eventually impacted in the basement. You'll need to carefully work your way down the hole until you reach it, but be sure to wait for the soldiers there to finish their conversation first, as that will prompt them to leave the immediate area of the bomb, letting you drop down and shoot out the nearby lights. One of the soldiers will be inputting data to the P3R computer, while the other will patrol, allowing you to easily divide and conquer.
With the soldiers out of the way, use the computer to gain the UAV specs for Redding, one of your primary objectives. You can leave either via some steps leading to a basement, where there's a Medkit, or via the door, which leads to a firefight between NK and South Korean forces. The South Korean soldier will win, so do your best not to shoot him, if only just for the sake of being a nice guy. You can pick up more ammo behind the truck here, but your next objective lies over the chainlink fence at the end of the alley.
Firefight
Unfortunately, the passage to the next objective is blocked by a little street war between South Korean troops and NK forces. These latter are supported by an anti-infantry vehicle to the left, around the corner, so you'll need to be quite careful as you move up it.
You have two basic routes here: you can either go straight up the street, or take an end-around behind the truck to your right, climb up to the upper platforms above the street, then attempt to get behind the vehicle. We personally preferred the direct approach, as even when your light meter indicates that you're in pitch black, the turret on the vehicle seems to be easily able to spot you as you traverse the higher platforms.

To approach along the street, you'll first want to knock out or kill both of the South Koreans that are fighting near the truck. You can sneak up and bash them in the head when they retreat behind the truck or behind the brick wall nearby. When they're both down, the single NK infantryman will come to investigate, and so long as you stay in the shadows, you shouldn't have a problem disabling him as well, leaving you only the vehicle to deal with. To get to it, you'll want to OCP the covered light on the right side of the street, then get to a position where you can disable or kill the soldier in the turret. If you wish, you can attempt to destroy the vehicle by angling a grenade into the seat where the gunner was, but you don't really gain anything by doing so, so leave it be and head towards the ladder behind it. If you don't want to kill the soldier, just OCP the light near the ladder and head on up. You'll find the fourth radar station at the top, leaving you one more to go.
MCC
Another Mobile Command Center is set up on the street you come to. Watching over it are three soldiers and a UAV. Before heading down to street level, shoot out all of the signs to give yourself some breathing room. The UAV has a couple of branches of its patrol that take it off the main street, so use that to grab the two soldiers near the car and hide their bodies underneath the awning. If you interrogate one, they'll tell you than another IFV is on its way to the crash site, so that's fun. The third soldier, sitting at a table near the MCC, can be whistled away from his position or just shot in the head. Hack into the MCC and move on.
De Plane, Boss
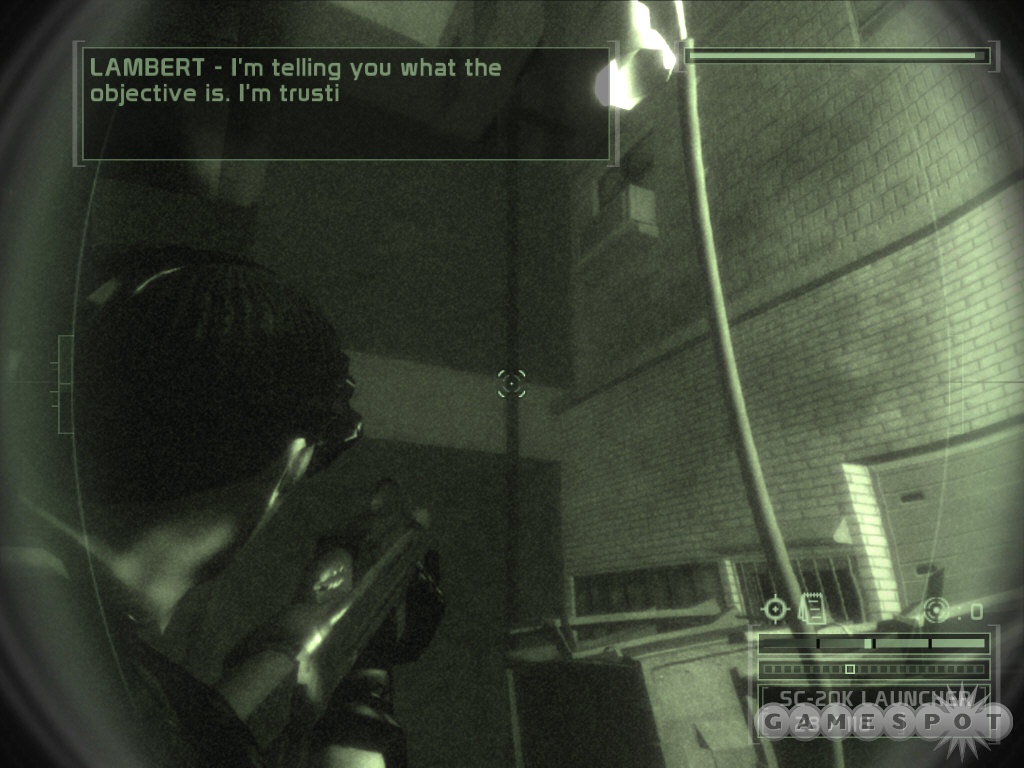
Your final objective is to secure the data from the wreckage of the plane. As you round the corner from the MCC, you'll spot another IFV and a pair of soldiers. Take them down as you like, then run to the right to find the plane itself. Lambert and Fisher will start sparring now, over the fate of the two pilots near the plane. If you want to save them, carry their bodies back to the alley near the flashing light; Lambert will radio you and let you know that they'll be safe from the blast there. Find a pipe near the plane's broken tail and climb it to find the fifth and final P3R radar controller, hack it, then slip across the zipwire to reach the platfrom from which you can paint the wreckage of the plane. End of mission.
Mission 9: Bathhouse
Primary Objectives
Gain Entry To The Bathhouse
Discover Who Shetland's Contact Is
Secondary Objectives
Find Out Who Gave the I-SDF Assault Team Their Orders
Opportunity Objectives
Tap The Bathhouse Telephone Lines
The data from South Korea has pointed you elsewhere, as data is wont to do; in this case, you're heading to Japan, where Shetland is apparently about to meet with his mysterious partners in crime. Your goal is to infiltrate the bathhouse where the meeting is being held, eavesdrop on the conversation, then put Shetland down.
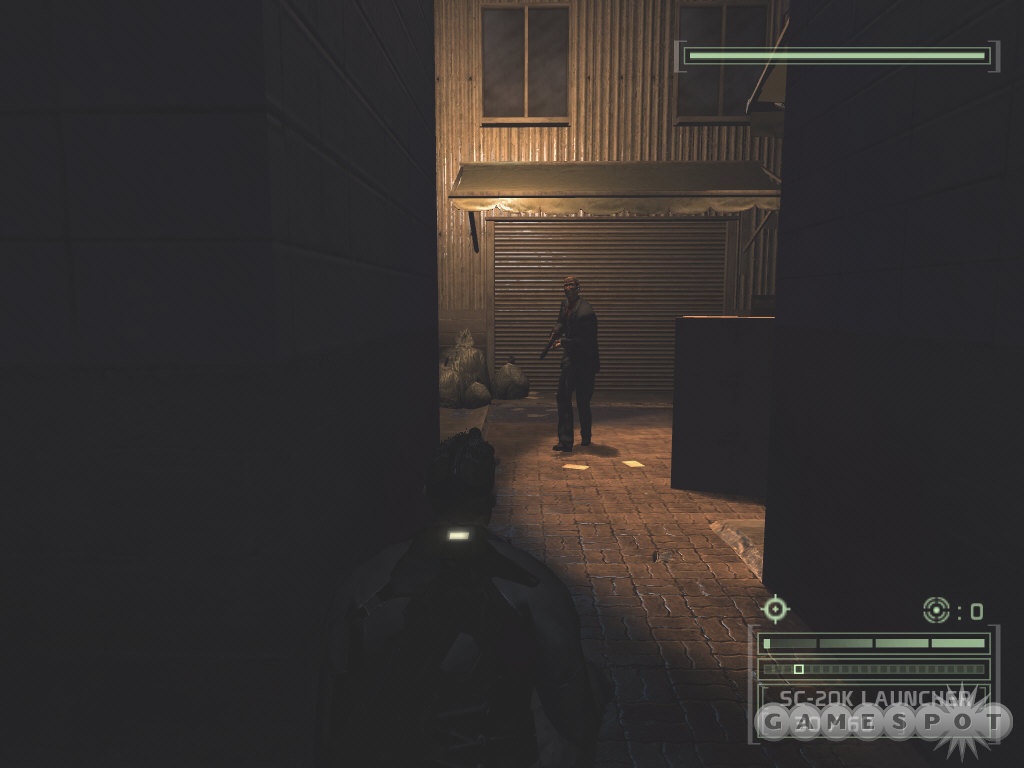
As a note, this is a long mission with a lot of targets, so you will probably only want to take the stealth loadout if you're really, really good at avoiding light sources. The 20 rounds for your pistol won't be enough to shoot out every light in your path, and there are plenty of large rooms with more lights than you can OCP out. We recommend the recommended loadout; funny how that works out.
Back Alleys
You'll begin in an alley with access to the piping underneath the sewer. You can grab the technician across the way, but doing so with the lights on will almost certainly rile the guards down the street. Regardless, you'll probably need to disable them all. None of them have critical interrogations; the technician will tell you about Shetland's plans to set up an unhackable wireless network.
Before you jump into the sewers, check near the stairwell on the street for the first phone junction box. Your opportunity objective on this level is to access and hack as many of these boxes as you can, inside and outside the bathhouse. Grab this one, then find the sewer entrance and drop down.
The Basement
As you wend your way through the sewers, you'll be reminded by Lambert of the presence of civilians in the bathhouse, so be on your guard. After you find the trap leading up to the basement, quickly cross the floor and disable the guard at the door before he can flip on the lights. The next room is the laundry room, where the guard will likely be sitting in a chair to the left of the entrance. If you're trying to take him down quietly, you can dash across to the large laundry bins and hide behind them, then pop up to show your head off, which should lure him over.
Heading Upstairs
At the end of the nearby steps, you'll find the main bunk area of the spa, where all the good criminals get to spend their days reclining. The door opens up next to a reception area and a light switch. There are two guards and a civilian walking around, so your best bet for quiet takedowns is to flip the lights off and wait for the guards to come and check things out. The reception desk should give you a good buffer that you can use to maneuver around them.
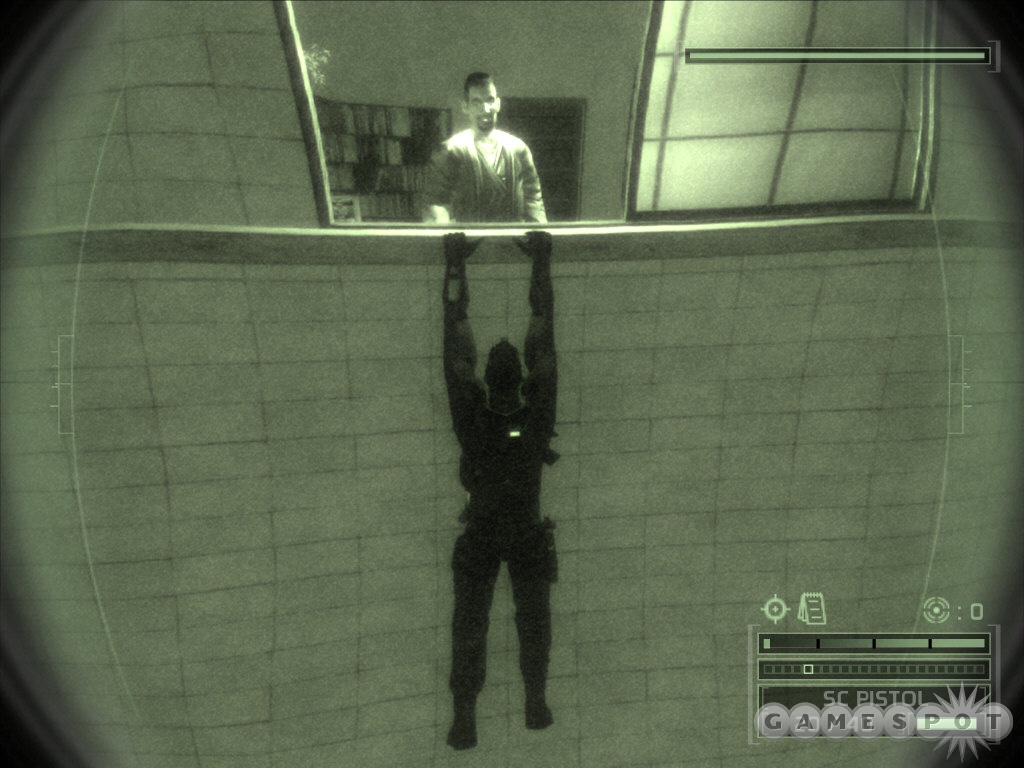
With the guards out of the way, you'll need to head north, through the corridor near the reception area, to reach the offices. If you haven't made too much noise yet, you'll likely encounter a pair of guards there, discussing the guard situation in the offices and the street outside. One of these guys will leave to take up position on the street, while the other will start patrolling the stairs. Your options to reach the offices are pretty simple: you can either walk straight up the steps, or head out to the street and find the pipe leading up to the building across the way and use the zipwire there to dash across to one of the open windows. If you follow the latter course, wait for the civilian in the room to go to sleep before hopping in and switching the lights off. Either way you go, there'll be another guard in the upper hallway, so be ready for him. There's also a camera in the hallway, overlooking the stairs, which you can disable via the computer downstairs, near the exit to the street.
(Note that the civilian in the room here actually has some interesting info if you interrogate him, including the keycode to the locked door in this hallway. It's difficult to interrogate him unless you actually walk up the interior steps, though.)
Now, the door to the main office here is locked with a keypad; unless you managed to interrogate the civilian in the room here, you'll have to hack it, but be quick, as it's a tough hack and you probably won't be able to lock down all the numbers; a bit of guesswork might be required.
When you've hacked through the door, search the cabinet or the computer within to learn that Shetland seems to be meeting with the Red Nishin. Seems to be, at least; the computer information seems to indicate that the Red Nishin don't want to be disturbed by Shetland & Co. Hmm.... You can crawl through the crawlspace in the corner of this room to meet up with some I-SDF troopers who're apparently intent on crashing the party.
Choice of Paths
Return to the main bunkroom and head east into the lockers. A sole guard is here watching over the bathtowels, so wait for him to patrol, or just OCP the lights and take him down. Around the corner from the bathroom is a choice of paths; you can either go left through the pool, or right into the dry bath area. One of the soldiers from the right will likely patrol this hallway if you stand here too long, so be on guard. The pool path is probably a bit easier, as well as offering you the more amusing overheard conversation. ("Heterosexual men have been bathing naked together since time immemorial.")
To dispatch the guards in the bath, you'll want to either OCP the floodlights in the corner of the pool, or just hop down there and shut off the generator. This will force you to trade off between masking noise or light, but the shadows will be much more helpful to you in tracking down and disabling the guards. Neither of them are interrogatable, so just dump their bodies into the pool. The second phone line is in the corner of this area, near the floodlights, so tap it before moving on.
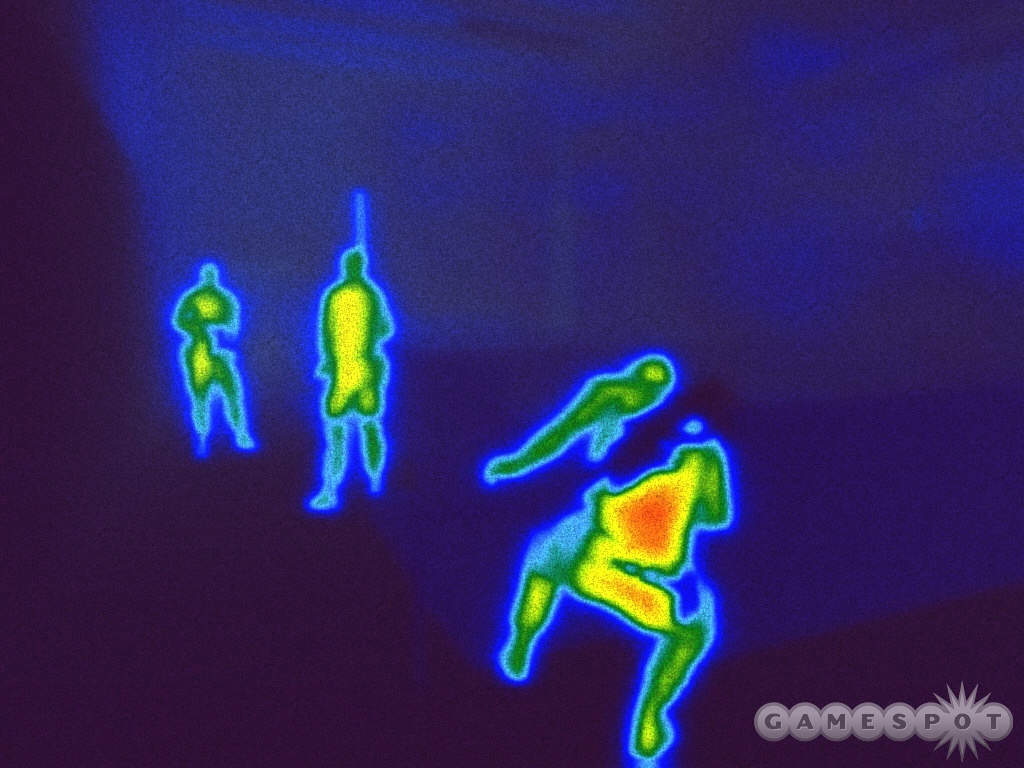
The cold bath room is up next. It's full of fog that obscures the vision of the two guards within. It's not quite as good as pure dark, but it should prevent them from seeing you from across the room, even if you're well lit-up. You'll need to get past them and head for the steam bath room to the south. To the west are the massage and dry bath rooms which you bypassed earlier; there's some ammo for your rifle in the massage room, but it's difficult to sneak in there without getting detected, thanks to the candlelight.
Electronic Friends
Shetland's company has set up an automated turret in the steam room. It appears to activate based on thermal sensing, making a sauna the perfect place to set it up. To bypass it, lure the guard into the hall and disable him, then run into the room and take a hard left to find the steam valve. Cranking it once will fill the room with steam, allowing you to dance around the turret all you like without fear.
Next up is the private bathhouse that Shetland's apparently meeting his friends in. The reception area is up first. If you blow out the candle near it, you should be able to lure the guard on patrol back to your location and take him out, assuming he doesn't have his thermal vision on. The third and final phone junction is here, so tap it to finish off your opportunity objectives.
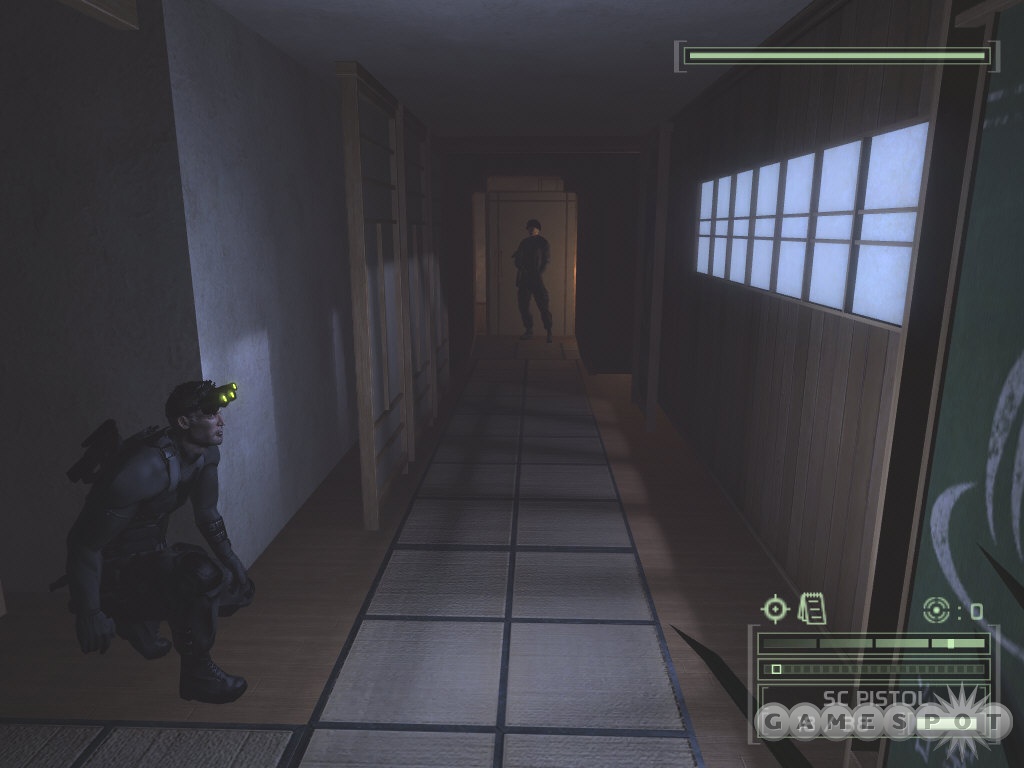
Around the corner you'll find a pair of paths. To the left, you'll find a corridor leading to the main hall before the private baths, while the right path will divert you through a bathroom before leading to the same hall. If you head through the bathroom, you can switch off the lights there, then slam open one of the toilet stall doors to cause some of the soldiers in the hall to come running. If you can grab them, then you'll be able to dispose of their bodies in the stalls and close the doors to prevent anyone from finding them. There'll be two soldiers in the hall, with another in the main bath area here.
After the soldiers have been taken out, head into the baths and find the crawlspace hidden behind the plants behind the glass window. Through it, you'll be able to eavesdrop on the conversation between Shetland and his contact in the I-SDF, a man by the name of Kaneda. There's a neat little Akira reference here, but it'll end badly, as Shetland kills his contact and open war erupts between the I-SDF and the Displace soldiers. Ruh-roh. You'll have to fight through them to reach and kill Shetland.
All Hell Breaks Loose
The I-SDF and Displace soldiers are going to be getting pretty busy back in the main hallway. Stepping into the crossfire here is a death ticket, so your best bet is going to be to crawl through the crawlspace at the edge of the water and attempt to run across the back of the Displacers and hope that they don't spot you. If you can get past without getting too seriously wounded, you can run around to the bathrooms and cross the hall again into the private bath where Shetland killed Kaneda. There'll be a medkit here, if you need one, as well as some ammo on the bench near the corpses, including a flash and a frag grenade. Just make sure you disable the camera above the entrance to the bath with your OCP before heading in.
Around the corner from the changing room is a wallmine, so grab it, then get ready for a tough fight. There are three Displace soldiers here, all with heat vision, so they'll be able to spot you quite readily. Two of them are hiding near the shower stalls to the left of the entrance, while the third is off to the right a bit. Use your heatvision through the paper door to get an idea of where they are.
Now, there are multiple ways to get past these guys, some of which are better than others. If you're going the stealthy no-kills route, then the best solution might be to just chuck a smoke grenade near the central sitting area and bounce another one off the rear wall, near the far door. This should let you just run through the room without being spotted. A more lethal alternative, you can chuck a smoke grenade near the central sitting area, run over and plant the wallmine you just picked up on the side that faces the right side of the room, then run back to cover and attract the attention of the soldiers. Two of them should attempt to flank you from that side, and they'll both get blown away from the wallmine. Lastly, since you have both a flashbang and a frag, you can chuck the flashbang in between the two soldiers to the left, then throw the frag in afterwards. If they're stunned from the flash, they won't be able to run from the bang, letting you kill two of them with one stone.
The Mad Bomber
Around the corner from these guys is Shetland. He's booby-trapped the furnace room of the bathhouse, so you'll have to wander around and find the three bombs that he's planted before they blow. He won't plant the second until you've found the first, so head around the corner from the locked grate door, avoiding the stairs for the moment, and crawl through the pipes to reach the bomb. You should be able to locate it by the flashes of light it gives off, and the beeping sound.
The trick here is that, although Shetland won't attack you during these intervals (he just yammers on about how you're being manipulated), defusing the first two bombs will trigger the appearance of highly-equipped Displace mercs from the door you came through. These guys have heat vision and gas masks, making it difficult to hide from them, even if you happen to shoot out the lights. Only one will spawn after the first bomb, and although he'll give off signals like he knows where you are, you can likely lose his attention by just remaining still. If you wait for a few seconds, he'll start walking up the stairs, allowing you to blast him with an airfoil or sticky shocker and take him down.
The second bomb will be found by heading up the stairs, running around the first walkway, then jumping over a railing near where the path turns left. Defusing this will cause two Displace mercs to appear from the far door. It's almost impossible to take both of these guys down non-lethally without being spotted by one or both of them, at least not within the 1:30 timer that you're on to defuse the next bomb. What we found helpful was to plant one of our wallmines on the furnace at the top of the steps near the door through which you entered. When you're done defusing the second bomb, you can attract the mercs by firing a few rounds of your rifle into something metallic, which will cause them to run to your location. (If they're walking around on patrol, they'll usually be slow enough to avoid setting off the bomb.) This should clear out both of them, unless one of them is lagging behind, so keep an ear out for footsteps on the metal railings. If you're really set on nonlethal and undetected takedowns, then you may want to try climbing up to the railing and setting a smokebomb down at your feet, then waiting for the soldiers to come to you. You can also wait for them to walk by and use sticky shockers on them from below the railing.
You'll have to jump to the third bomb, but before you start to defuse it, you may want to shoot out the lights behind you, as its defusal will presage the appearance of another merc at the rear door near it. You'll have a couple of seconds to get out of his line of sight after defusing it, so if you want to take him down stealthily, drop down to the floor and try to get him to come to you; otherwise, just wait for the door to open and blast the guy with a sniper round or a sticky shocker.
Old Friends
Shetland waits for you at the top of the ladders through the rear door here. After a lengthy conversation, he'll dare you to shoot him, so...shoot him. (If you choose not to shoot him, you can instead drop your gun and knife him instead.)
Mission 10: Kokubo Sosho
Primary Objectives
Do Not Kill Anyone
Contact the Detained American Officers
Capture Otomo Alive
Infiltration
Time to get busy and find out precisely how deep Otomo's peculiar brand of madness runs. In order to do so, you'll need to infiltrate the I-SDF's main headquarters in Japan. Until you can determine whether or not Otomo's actions are being sanctioned by the Japanese government, though, you won't be able to kill any of the soldiers you see. Nonlethals only for the moment, in other words: avoid and evade.
To begin with, open the door to the truck access, after waiting for the two soldiers inside to start their route back to the other end of the corridor. If you want to incapacitate or spook them, flip the light switch to the right of the entrance, but if you just want to get past them undetected, wait for them to walk past the camera, OCP it, then head through the left doorway to find a crawlspace leading to the bathrooms. (If you're interested in skipping some of the interior of the building, you can also walk further down the hall to find a small hatch and pipe that'll take you directly to the soldiers hidden away on the third floor, but it'll be difficult to get past the guards mopping the floor without using some of your shockers or air foils.)
As you enter the bathroom, a soldier should be just finishing up taking a leak, so walk over to his stall and bash the door in to knock him out. There aren't any other soldiers around, so no need to worry about the noise. From there, you can sneak out along the hallway to the right to find the building's exceedingly large foyer. Who needs office space when you can have a bunch of empty room hanging around?
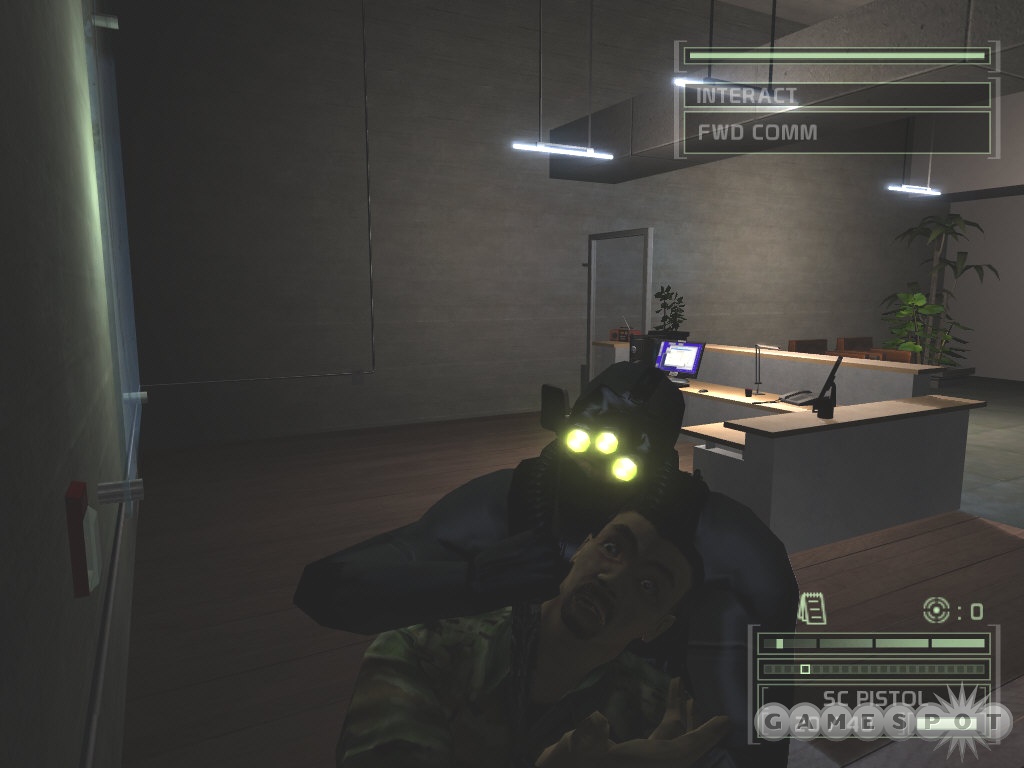
There are two guarded desks here, one to the left of the large central wall and one to the right. Don't worry about shooting out the lights near the couches and the artificial waterfall; you can keep your light sensor all the way in the black if you carefully creep through the pools of light on the floor. Although the desk on the left is closer, the soldier there will spot you if you attempt to walk up to him, so instead, head right and turn the corner. If you OCP the camera above the desk here, you'll be able to grab and interrogate the guard. Don't forget to dump his body underneath the camera, so that it won't trigger an alarm later on.
With that done, head through the crawlspace behind the desk (the computer yields nothing useful when hacked). You'll come out near the other desk, in perfect position to grab the guard there and drag him to the corner of the room, behind the art installation. There's another guard that's walking up and down the steps across the room, who might see you when you grab his friend, but this is actually a good thing, as it'll attract him down the stairs and across the room, allowing you to grab him as well and dump his body; otherwise he's somewhat difficult to pull down off the steps, and grabbing him as he walks his patrol is rather difficult.
Finding The Officers
With the guards out of the way, hack the computer at the desk to learn the code to the server rooms (1945). The American officers that you've been ordered to contact are held on the third floor of this building, so walk up the steps, then take a right at the top and round the corner. Around the second corner is a guard facing your way, but if you OCP the light in the corner, you should be able to sidle up to the wall, get around him, then grab him and drag him around the corner again before interrogating him - he says his orders aren't coming from Otomo, but rather some unnamed General. Interesting...
After the second guard here has finished haranguing the captives, he'll take up a position further down the hall facing away from you, so creep up to him and take him down as well, then creep into the press room here and OCP the camera before sneaking up behind the captives and talking to them. Be sure that you're in a spot the camera doesn't pan through before initiating the conversation, as it's kind of lengthy.
Hacking The Servers
One of the soldiers will reveal that the doors to the war room on the first floor should be open now, so head back down that way and proceed to the door between the two hand-scanners. As promised, it'll open and reveal a long set of moving walkways with three guards at the end. There's a camera set up directly above them, so using a gas grenade is ill-advised. Instead, you may want to try and lure them up the walkways by walking into one of the lights, then returning to the top and flipping the switch to shut off all the lights when they're on their way. You'll probably only draw one of them up to the top, so interrogate him if you wish; he'll reveal that they're using nonlethal weapons. Hmm...wonder what would happen if one of them zapped you?
If you happen to get spotted by a guard and hit with a non-lethal round, Sam will wake up in a makeshift interrogation room, being beaten on by a pair of Japanese guards. The Pick Cuffs interaction will pop up, but you won't have enough time to finish the job until one of the guards leaves the room. When the other one has his back turned to you, pick the cuffs (with whatever buttons you normally use for picking locks), then grab the guy in the room and disable him before bashing the door open to take down his friend. Your equipment is in a crate in the storage room, and you'll be able to escape via the door and enter the server room to the left to enter the war room.
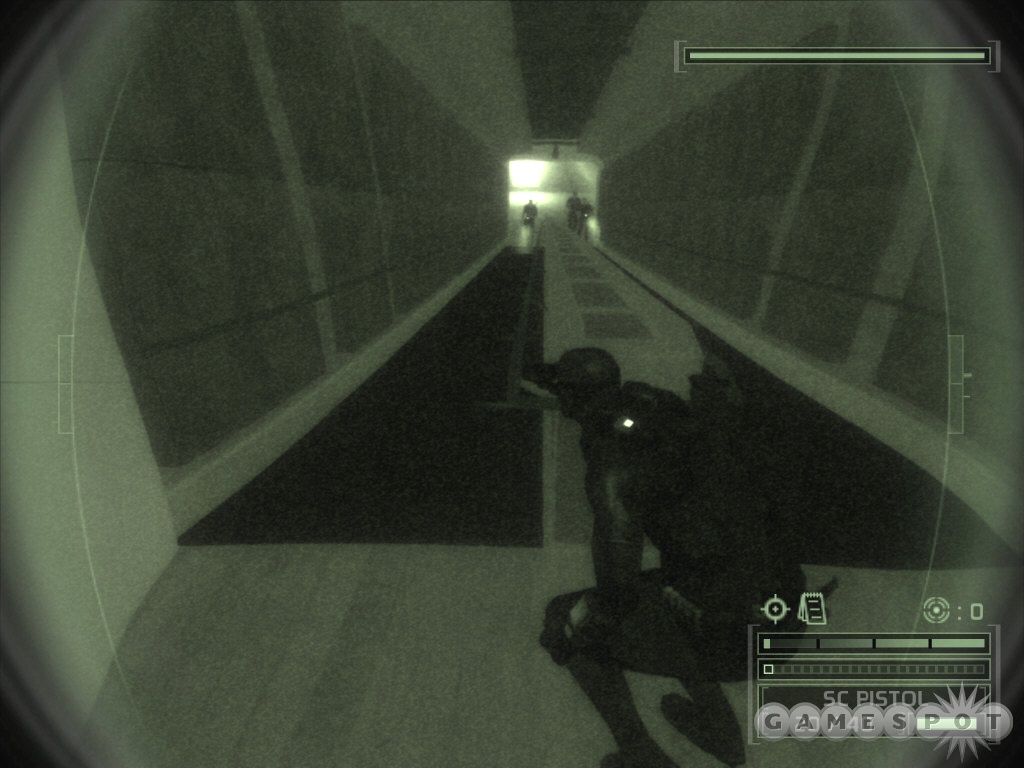
Unfortunately, this course of events will lead you straight to Alarm Level Four, which will bulk up some of the enemy defenses. It's best to avoid getting zapped, then! To do so, OCP the rotating camera near the lit-up sign at the bottom of the walkways (you can shoot the sign if you want to drop the light levels, but it isn't necessary; you can crawl around to the left without being spotted), then creep around to the elevators. Now, there should be two guards left to deal with, so shoot out the lights above the elevators and start disabling one. The tricky thing here is that, if you happen to disable all of the guards, then you can get stuck in the level without any way to proceed so far as we can tell. In order to get into the locked war room, you need to get past the biometric scanner somehow, which entails either getting shocked by a round and breaking out of the interrogation room, or grabbing one of the guards and moving him around to the optical scanner and passing through that way. On our copy of the game, the scanner was unhackable; even when we got the correct code it would still trigger an alarm when selected, leaving us stuck. So if you're trying to get through the door, be sure to keep a guard upright, then grab him and take him to the optical scanner to get to the server room.
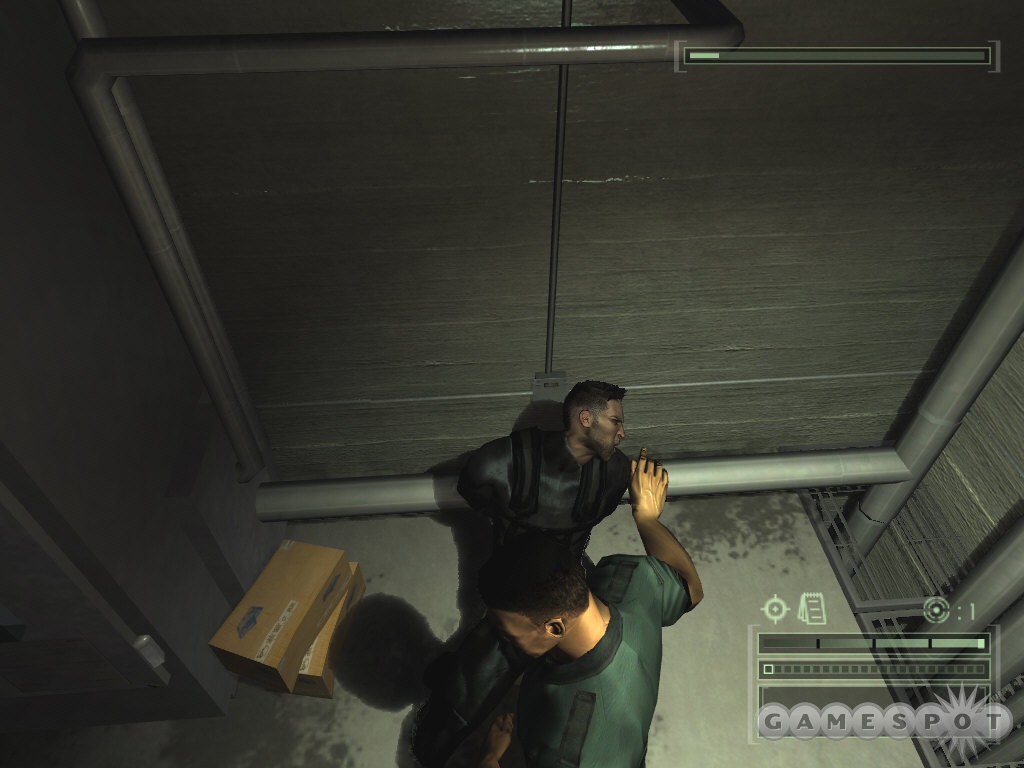
When you're past the optical scanner, you can break into the storage room to the right to interrogate the guards there, if you wish, but it's best to leave them be for now, just in case you need them later. The server room itself is at the end of the hall. Use the keycode 1945 to get inside, then disable the nightvision camera nearest the door and sneak up to use the blue computer underneath it. This will unlock the doors to the war room, back near the elevators, allowing you to walk inside. Note that the servers here will retract into the floor if one of the cameras spots you; if this occurs, you'll need to grab one of the guards from the storage room and drag them back here to use the optical scanner in the corner to pop them back up.
War Room
With the war room unlocked, head back to the elevators and head inside the doors opposite them. This is the shell of the war room, which is electronically and materially shielded from surveillance, but which has an awfully convenient vent opening up directly over it. To get there, you'll need to head down one of the side corridors, OCP the security camera (these things come back fairly quickly, though), then disable or avoid the guard there. If you happen to grab one, be sure to quickly drag the body back around to the doors so that the cameras can't spot it.
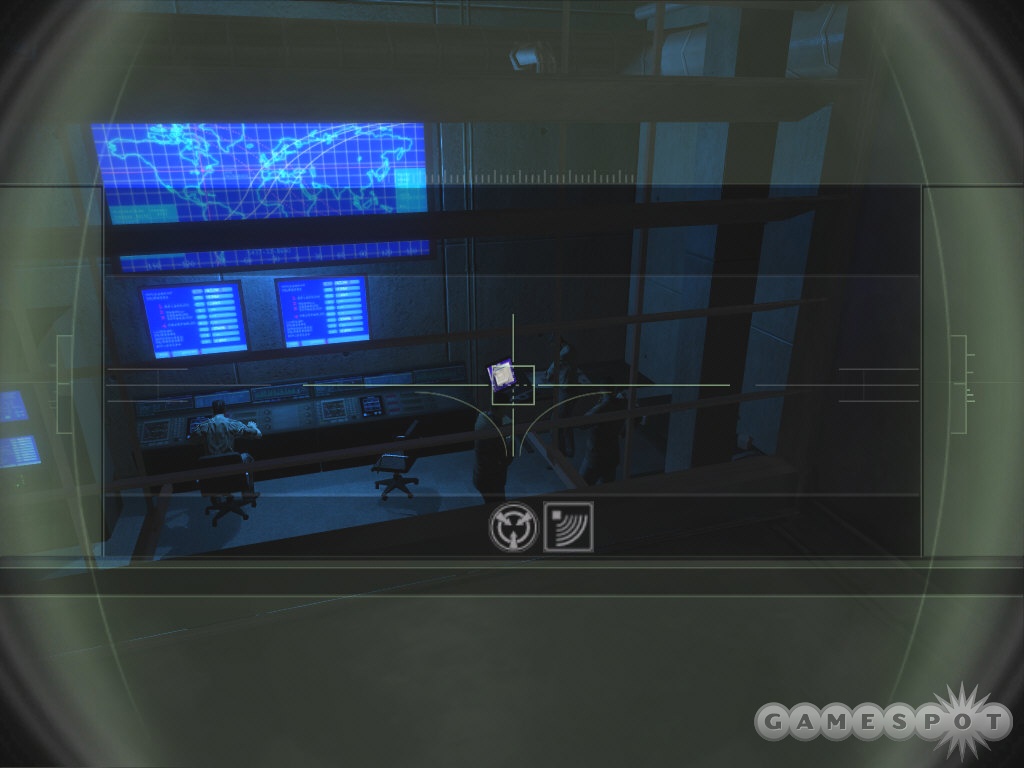
After the guards are out of the way (although you only really need to take down one), hop up onto the elevated platform at the rear of the room and locate the vent. Crawling into the crawlspace there will lead you over the war room, where you'll be able to listen in as Otomo makes his demands: he's staging a military coup, and is threatening to nuke one of Japan's cities with a faked North Korean missile launch unless all control is relinquished to him and his group. When prompted, use your EFF to eavesdrop on the laptop in the right corner of the room; you'll get to listen in on a failed attempt by the generals here to take out Otomo, which aggravates him to no end. You'll need to get to his servers and destroy them before he can manage to use the Masse kernals to launch World War III.
Saving The World - Again
Now that you know your mission, you'll have to penetrate Otomo's bunker in the basement of the building. To do so, leave the war room and head back to the elevators, which are now functional. The power will get shut down halfway through your trip, though, so you'll need to fall through the trap in the floor and start falling down step by step until you reach the bottom of the shaft. You shouldn't have any enemies in the immediate area when you reach the floor, but you will get a message from Lambert, letting you know that Otomo's going to be launching in three minutes unless you can trash his servers. Deadlines are a bitch.
After you hop up to the main floor here, you'll have to deal with three soldiers. You can either head left or right from the spot where you jumped up; the soldiers are going to be moving to the right, so...head left. They're all moving in unison, so if you wish, you can just creep along behind them until you reach the door leading on and avoid their attention altogether. Or, if you're a sadistic bastard, just creep around until you can see one of the wallmines, then shoot it. The resulting explosion should remove all of the soldiers from the map.
Next up is a narrow corridor filled with laser tripwires. These can be avoided if you have your nightvision on, so weave up and down the corridor as best you can; if you hit one of the wires, then a turret will pop down from the ceiling and blast you, ending your mission right quick.

Past this room, though, is the server room, currently patrolled by a pair of soldiers hidden behind fortifications and a sliding turret on the ceiling. The turret can be disabled with your OCP, allowing you to sneak behind the soldiers, either by climbing over the railing to the right of the door and sneaking around the computers or by heading along the left wall a bit and finding the awfully convenient crawlspace that runs along the room and lets you pop up behind the soldiers. When you're behind them, you can kill or disable them as you like with a minimum of problems.
If you have time, hack into Otomo's server to get some I-SDF data; this isn't an objective, but may be worth some extra success points at the end of the mission. When that's done, place your charge on the server, step away from it, then blow it. Crisis averted.
Take Down Otomo
After the servers have been destroyed, it's time to take in Otomo - but you'll need him alive to answer for his crimes. Two more soldiers will have arrived across the room after the destruction of the servers, but the turret, at least, should be out of commission. If you have any sticky shockers left in your arsenal, you can flip on your heatvision to take these guys down at long range; otherwise, you can creep back around the left side of the room, near the computer banks, and get behind them to interrogate or otherwise disable them.
Next up is Otomo. You won't be able to get to him initially; all you can do is sit around and wait for him to commit seppuku. Oh noes! Since you need him alive, you're gonna have to find a way into his office to stabilize him. You can find a passage in the server room across from his office; drop down into the crawlspace, then resurface in Otomo's office and take the wicked knife out of his stomach.
With Otomo at least somewhat stable, it's time to get out of Dodge. Lambert's genius plan is for you to place a charge on the window nearby, blow it, then swim through the water up to the surface where you can be rescued by a waiting helicopter. Sam's reaction pretty much echoes our own thoughts on the matter, but if you've gotta do it, you've gotta do it. Place the charge behind his computer, then wait for the countdown to tick off to finish the game. Congratulations, Sam; you've averted another world war.
Multiplayer Tips
Co-Op Tips
Chaos Theory's co-op mode offers up some new challenges for two players at a time in one of five completely new mission areas. The story inside these co-op levels ties in with the storyline of the single-player game, and at times ties in with it directly.
The tutorial here should clue you in on most of the new features of the co-op mode, the most important of which is the context-sensitive co-op action button, which will cause you to perform some movement with your teammate that's exclusive to the co-op mode. Knowing your repertoire and when to use each move is going to be important in the actual missions, so you may want to run through the training mode a couple of times until you're used to your skill set and know when and where to use them.
One of the most important aspects of co-op mode is to not get separated. Most missions won't require you to split up, so you shouldn't! Since you don't have any kind of map or heads-up display of your partner's location in co-op, it's quite easy to become completely lost when you lose sight of each other. If possible, stay together or within one room of each other at all times to avoid complications.
This doesn't mean that you need to stay side-by-side at all times, of course; it's wise to have one teammate a bit in front of the other to scout for upcoming enemies and to head through doorways while the other stays back with his automatic rifle at the ready. If the fore soldier hits trouble, you can quickly retreat and let the rear soldier take down any threats that you spot.
Sticking together is also going to be required if you happen to hit trouble and die. If one of your soldiers goes down, the other only has 30 seconds or so to get to him and use his adrenaline syringe to bring him back to life. The farther away you are from each other, the more difficult this'll be.
Versus Tips
The Mercs and Spies are back for more cutthroat action in Chaos Theory, building on the neck-snapping antics of Pandora Tomorrow. The basic goals of the game should be familiar; the spies are tasked with infiltrating a building and accomplishing some task (theft, sabotage, or neutralization of a computer by hacking into it), while the mercenaries are tasked with guarding the objectives that the spies are going after. Each side of the conflict will have their own special abilities and equipment, making this almost like two games in one.
Mercenary Side: If you're playing as a mercenary, then you're going to have to both guard the objectives placed under your care and also patrol for enemy spies. Since you're usually going to have more objectives to guard than players on your team, you'll need to utilize your equipment to the maximum possible effect. If you choose to go roving for enemies, in other words, then you'll probably want to lay down your sticky mines near the access points to the objectives.
Although you may feel compelled to put down mines directly next to an objective, it's usually better to plop them down a bit further away. An ideal spot for them is on the inside of a doorway leading to the objective. Spies will usually start moving slowly and scanning for mines when they get close to an objective, so placing them a bit further away or in the middle of a chokepoint may get a spy caught in your trap more easily than if you just slapped it on a wall immediately adjacent to the target.
Since mines don't recognize mercenaries and only detonate for spies, then you may just want to place them in well-travelled hallways and hope to reap their benefits at some point in the future. Placing them on the sides of crates and other obstacles in the halls, if possible, is best; the only problem with this is that most spies will be using vents and subfloors to move around in, which only they can access. In general, your best bet is to place them somewhere near an objective, but far enough away to not be too obvious.
Spy Side: Your primary asset as a spy is your maneuverability; you can reach parts of each level that mercenaries can't. You need to balance that with the need to reach your objective within the time limit forced on you by the level, though; if you have to sneak around for five minutes to safely reach your first objective, then you're probably not going to have enough time remaining to complete any other objectives. A balance of speed and stealth are going to be required.
Luckily, you do have the ability to move through parts of the level that mercenaries don't. Although they can crouch, they can't pull themselves up to elevated ventilation shafts or up over obstacles, which will mostly force them to stick to the ground level or whatever parts of a level they can access via stairs and elevators. Being able to move in shafts and tunnels doesn't protect you completely, though; a merc that knows a level well may spot you going in and head to the exit to ambush you.
You're going to have both heatvision and nightvision at your disposal, so be sure to use both to scope out the area around an objective before rushing in to access it. Mercs will sometimes camp around an objective, so if you spot one, or suspect one is hiding, use a sticky camera's alt-fire to gas them into unconsciousness. If there aren't any mercs around, they'll usually have stuck a sticky mine on the wall somewhere, so do your best to spot them with your electronics vision. If one is around, you can avoid its blast by walking slowly past it.
Got a news tip or want to contact us directly? Email news@gamespot.com
Join the conversation