Star Wars Republic Commando Walkthrough
In the latest Star Wars-themed first-person shooter, you take on the role of an elite Republic commando, tasked with going behind enemy lines and causing a whole bunch of mayhem. GameSpot's Walkthrough will give you a full walkthrough, tips for controlling your squad, and detailed looks at all of the game's many weapons and enemies.
Table of Contents
- Weapons And Enemies
- Combat Tactics
- Walkthrough: Geonosis
- Extreme Prejudice
- Infiltrate The Droid Foundry
- Destroy The Droid Factory
- Advance To The Core Ship
- Infiltration Of The Core Ship
- Walkthrough: RAS Prosecutor
- Walkthrough: Kashyyyk
- The Rescue of Tarfful
- Obliterate The Outpost
- The Bridge At Kachirho
- The Wookiee Resistance
- Search And Destroy
- Multiplayer Tips
Design by Marty Smith
Star Wars: Republic Commando is a rarity in Star Wars gaming, in that it features no Jedi, no lightsabers, no major characters from the films, and yet still manages to create a compelling adventure despite the lack of most of the elements people normally associate with the Star Wars license, thanks to gameplay that's tightly focused on squad-based combat and tactical combat solving.
In it, you take on the role of RP-1138, an elite member of a commando squadron of the Republic Army. Unlike most of the members of the clone army, you've distinguished yourself in training and have molded yourself into a perfect combat machine. Your commanders have recognized that mere gruntwork would be a waste of your talents, and have thus assigned you to lead a team consisting of yourself and three other highly-trained and talented soldiers. Your mission? To strike deep behind enemy lines, assassinate enemy leaders, disable their infrastructure, and generally harry their abilities to make war on the Republic.
GameSpot's Game Guide to Star Wars: Republic Commando gives you all the info you'll need to take on the Separatist armies and survive. In addition to a detailed look at all of the game's many weapons and enemies, we'll supply you with tips on managing your squad and a complete walkthrough, including videos detailing how best to go through the game's most difficult moments. Enjoy!
Weapons And Enemies
Weapons
Melee Attacks
When you're especially pressed for ammo, or just want to get in your opponent's faces, there's nothing quite like a good melee attack. When wielding your normal weapons (i.e. the blaster rifle, or the sniper or anti-armor attachments), your melee attack will take the form of a quick fist to your enemy, with the damage boosted by the presence of an extending blade on your hand. This is going to be instantly lethal to most grunt-level enemies, such as battle droids, Trando mercs and slavers, or Geonosian soldiers, but will only do minor damage to most of the tougher enemies in the game. If you're using a pick-up weapon that dropped from an enemy, than the melee attack animation will differ, and will sometimes be more or less powerful than the sword-fist one.
Melee attacks are great to use on the PC version of the game, but if you're going into battle on the Xbox, they're a bit more unwieldy, thanks to the fact that you can't aim and use them at the same time (due to the fact that they'll both require your thumb).
DC-15s Sidearm Blaster
The sidearm pistol, as in most FPS games, is going to be rarely used in Republic Commando. Although it has a self-charging energy core for an essentially infinite supply of ammo, it recharges at a slower rate than you can fire it at, meaning that you can easily run through its entire charge in a couple of second's worth of sustained shooting, after which you'll have to wait for it to recharge before you can use it again. If you can restrain yourself to firing once a second or so, then you can keep up such a pace indefinitely, but the sidearm is never going to match the damage output of your blaster rifle or other weapons. One thing it is good for, though, is conserving ammo when you have to fire at an explodable obstacle or an explosive device next to an enemy, although you won't normally run so low on ammo for your other weapons that you'll be forced to use the sidearm for such tasks.
DC-17m Blaster Rifle
Each Republic clone trooper becomes intimately familiar with the workings of his blaster rifle during the course of their many long campaigns against the Separatists, and commandos are no exception. Their DC-17m weapon is modelled on the same weapon that normal infantry use, but has been upgraded with modular capabilities, allowing the commandos to use sniper and anti-armor attachments as the situation dictates.
At its most basic, though, the regular blaster rifle is a versatile weapon for any circumstance. Equally effective against droids and organic enemies, and coming with a large clip of sixty rounds, it'll be your weapon of choice for most of the game. It doesn't hurt that ammo clips for it are scattered liberally throughout the many missions and levels of the game, whereas ammo for the sniper and anti-armor attachments can sometimes be difficult to find. It's definitely more useful against some enemies than others - it has a difficult time broaching the armor plating on super battle droids, for instance--but with enough time, it's capable of taking down almost anything.
One thing to note about the blaster rifle is that it's markedly more accurate when you're aiming down the sights than it is while fired from the hip, so when you're firing at something that's a good distance away, hit that zoom key to tighten up your grouping.
Sniper Attachment
There's not much to say about the sniper rifle. It's arguably the most lethal of the basic weapons that you'll come across in the game, thanks to the fact that it'll be a one-hit kill against most of the grunt-level foes you'll encounter. Although it can only hold five rounds in a clip, that's usually more than enough to put even tough enemies like the super battle droid on the ground. You don't want to use it against crowds, though, or against enemies that are too close, as the reload animation is longer than that for the blaster rifle, meaning that the enemies that you're fighting against will get some free shots off at you while you're attempting to jam another clip into place.

It's worth noting that the sniper attachment doesn't lose accuracy when fired while it's unzoomed; you can shoot it while unzoomed and still hit things a good distance away, especially if you wait until your crosshairs turn red to indicate that you're on target. At medium range, you can repeatedly use the sniper rifle to blast weaker targets if you're out of blaster rifle ammo, or if you're just feeling peckish. The interval between firing will usually let your enemies get close to you before you manage to take them all down, though.
Anti-Armor Attachment
The second attachment for the DC-17m that you'll find is anti-armor ordnance. Oftentimes the most deadly forces arrayed against infantry are armored enemies that are difficult if not impossible to damage with blasters; when you meet up with enemies like super battle droids, or spider droids, it's helpful to have a full load of anti-armor rounds at your side.
The most notable limitation of the anti-armor attachment is its small ammo clip; you can only hold four rounds at a time, with a short reload animation after the first two are fired. This is going to force you to be frugal with the ammo here, since you won't be finding boxes of it all over the place. In other words, you'll want to save it for enemies that really require AA shells to be killed, the most noteworthy of which are the super battle droids. SBD's can be killed by blaster fire, sure, although it takes forever. Sniper rounds can also do the job, but they also take a little while to work their magic. A single anti-armor round, however, will kill even a full-health SBD in one big boom if you land a direct hit. There is a significant amount of splash damage, as well, so if you don't manage to land your round directly on your target, you may want to follow it with some blaster fire or an EC grenade until you finish it off, rather than overkill it with another AA round.
Another tricky aspect to using the anti-armor is mastering the way that the shells arc through the air rather than flying straight ahead; this is no rocket launcher. You'll need to compensate for your distance to the target by aiming well above their heads in most instances, so a bit of practice will be required before you can land your shots accurately.
Geonosian Elite Laser

The dreaded Geonosian Elites wield this weapon with great effectiveness against your commandos. Luckily, when they die, they'll drop it, allowing you to snatch it and use it for your own nefarious purposes. Anyone who's familiar with Quake's lightning gun or Halo 2's beam gun should be familiar with the basics here; if you hold down the fire button, a laser beam will shoot out of the end of the weapon, allowing you to light up foes until the ammo runs out. It deals a terrific amount of damage on organic foes, but has limited effectiveness against droids, and requires a lengthy charge-up period when first fired before it actually shoots. Given the relative rarity of Elites, you won't be seeing this weapon very often, so if you like it, use it whenever you have a chance.
LS-150 Heavy Repeater
The favored weapon of the Trandoshan HAM, the Heavy Repeater is essentially Republic Commando's analogy for the M-60 machine gun that appears in many other FPS's. Although individual rounds do only light damage, the HP makes up for this by putting a lot of them in the air. It packs decent accuracy for its power, but you do run through ammo quite quickly when you hold down the button, it has a lengthy reload time, and it's almost useless against droids. Still, against Trando mercs and slavers, you're not going to find a more effective means of crowd control.
ACP Array Gun

The favored gun of the Trandoshan slavers is the APC Array Gun, a shotgunesque creation that fires multiple pellets at its target. Most FPS shotguns are fairly similar, in that they're devestating at close range, but lack the accuracy required to kill at long range. The Array Gun has the weakness, but doesn't pack enough of a punch to really make up for it; you really do have to be standing right next to your target in order to get a one-shot kill with this weapon, thanks to the horrifically large spread of the pellets. That said, there's plentiful ammo for it, so in dire straights you might want to use it to off weaker enemies to preserve ammo for your blaster rifle.
Trandoshan SMG
Although the Trandoshan mercenaries are fiercesome foes, their SMGs leave a lot to be desired, which is probably why you're going to be slaughtering Trandos by the bushel whenever you encounter them. Although it holds a good amount of ammo (160 rounds altogether), the SMG is woefully inaccurate and isn't very powerful when its fire does land on a foe. Although it's an acceptable weapon when used in close combat against organic foes, you'll almost have to be in melee range before your shots consistently hit, begging the question of why you wouldn't just use your melee attack for the instant kill. To its credit, Trando mercs will be your primary foes for long stretches of the game, meaning that you'll have plenty of ammo for the SMG, should you like to keep it by your side.
Wookiee Rocket Launcher
Although bulky and cumbersome, the Wookiee rocket launcher doesn't quite make up for this with utility. Sure, it's powerful, but is usually going to be too unwieldy to be of much use to you.
Although this is called a rocket launcher, it's actually a homing rocket launcher; when you press the button, nothing will happen until you release it. If you haven't locked on to a target (by floating the targeting cursor over something), a single rocket will dummy-fire straight ahead, resulting in a large explosion wherever you were aiming. If you do manage to lock on to something, though, you can continue to hold down the button to shift more rockets into position before releasing the button, allowing you to shoot multiple projectiles at one time.
The drawbacks to the WRL, though, are pretty severe. For one thing, it's slow to fire, especially if you want to queue up multiple rockets. While this isn't a big deal on lower difficulty levels, on hard mode it's a big liability, as you'll need to stay within sight of your target before you can lock on, which will let them take free aim at you. For another thing, the enemies you'll most want to use homing rockets on are aerial foes, like Geonosian Elites and Grievous' bodyguard (when they jump), but these are paradoxically the most difficult to hit with the rockets; when you fire at something in midair, your rockets will often get caught in orbit around the target, and will continue to revolve around it until it moves and they can finally hit it. What's more is that it's not even as powerful as the anti-armor attachment in all circumstances; an SBD, for instance, can survive a direct hit with a rocket, whereas a single AA round will knock it out.
Granted, its power does make the WRL a nice sidearm to pack, especially since there are so few weapons that come anywhere close to the anti-armor attachment's power level when dealing with armored foes (and although the WRL isn't quite there, it is at least in the ballpark). It's also worth nothing that the ability to send out multiple projectiles at once can be quite handy when used against slow-moving enemies, especially the Spider Droids that you'll frequently encounter in the late stages of the game. A full load of four or five rockets, fired simultaneously, will be enough to instantly kill a Spider Droid, or at least reduce its health to the point where your team can kill it quickly.
Wookiee Bowcaster
We honestly never found the bowcaster to be worth picking up. Although it has some neat features, such as a sniper zoom and the ability to bounce its bolts off of walls, these never quite got beyond the "gimmick" stage of appreciation for us. If you insist on using it, though, you'll find that it's only really effective when you hold down the fire button for a couple of seconds and let the weapon charge fully before releasing it to fire. If you do so, then you'll probably be able to get some one-shot kills on your enemies, and even if you miss, the bolt will bounce around until it hits something. Unfortunately, you'll only be able to fire off one of these bolts every couple of seconds, making this a pretty poor choice of weapon for intense firefights.
Concussion Rifle
The fearsome concussion rifle utilizes sonic energy to create large shockwaves at its target, resulting in explosions of sound that can heavily damage organic enemies caught in the blast. Most grunt-level enemies will be killed if they're anywhere near the blast when it goes off, making this an effective anti-infantry tool for you (and for the Trandoshan enemies that wield it). Again, though, it doesn't work very well against droids, and you do stand a good chance of being hurt by your own blast if you accidentally hit an obstacle in front of you or aim at something too close.
Grenades
Thermal Detonators: The most famous hand grenade in sci-fi mythology is a welcome backup weapon for your commando squadron. Although they aren't overweeningly powerful, thermals do a good job of clearing out packs of grunt-level enemies, like battle droids, Geonosian soldiers, and Trando slavers and mercs. Most of the organic enemies are smart enough to dive away from the grenade when it's thrown at their feet, but they'll usually take substantial splash damage from the blast anyway.
EC Grenades: EC grenades are going to be an absolute lifesaver when you're facing off against mechanized enemies. The electrical charge that they send out will drain any droid enemy of health over time, as well as stun them for a good period, with longer stuns being the reward for more accurate placement of the grenade. Although one grenade won't be enough to take down tougher foes like SBD's or droidekas, the stunning effect will usually last long enough for you to get up close and take down the target with blaster or sniper fire, or with your melee attack, if you're feeling adventurous.

EC grenades also work on organic enemies, but they won't do much damage; instead, they'll merely get the stunning effect for a short period of time.
Sonic Grenades: Sonic grenades are somewhat unique among the grenades in Republic Commando, in that they're not detonated according to a timer, but rather based on proximity, and due to the fact that they can stick to walls and the floor. When thrown, they'll either detonate immediately if they land near an enemy, or stay in one place until an enemy runs by, at which point they'll blow up. (They'll automatically self-destruct if no one comes in range within 15 seconds or so, though.) Just the fact that they immediately detonate when thrown at a target makes them more useful when used against biological enemies than thermal dets, but they do almost no damage to droids. Also note that their proximity trigger can be tripped by corpses, so if you're trying to lay one down where you suspect enemies might be moving, it will likely explode immediately if there are already fallen foes in the area.
Flashbangs: Although flashbangs don't do any damage themselves, they will temporarily stun any and all organic enemies that happen to see the bang when the grenade detonates; this effect will also temporarily muddle your vision if you happen to be looking at the blast, but it won't completely blind you, nor will it prevent you from moving as normal. (It will stun your teammates, though, so be careful where you throw it.) This is best used when dealing with an overwhelming number of organic enemies, such as Trandoshan slavers, since it'll let you sweep into their ranks unmolested and finish them off with your melee attacks. It can also work against singular powerful enemies, like the Trandoshan HAM, but has little effect on droids.
Enemies
Droids
Battle Droids
Battle Droids are the weak sisters of the Separatist armies; while they possess the strength of numbers, individually they're astoundingly weak and will fall apart with little more than a nudge from your blaster rifle. Thermal detonators, although ineffectual against most droids, can destroy multiple battle droids when thrown into the middle of a group.
Super Battle Droids
Among the most annoying enemies in the game, SBD's are the droid army's equivalent of tanks; they're slow, but pack a powerful punch and are heavily armored. Although you start out the game seeing only single SBD's at a time, the game will quickly ramp up the difficulty by throwing multiple SBD's at you, or even laying down SBD dispensers, which pop out an infinite number of the things until destroyed.
The best way to get rid of an SBD is to hit it with an anti-armor round; a single round, if it hits the SBD directly, will instantly destroy it, so if possible, try to get one of your commandos into an anti-armor position when facing off against SBD's. Failing that, you can use EC grenades to stun them and gradually drain their life. If you place the grenade at the SBD's feet, you can compound the damage by unloading on it with blaster fire. Although the SBD's armor is highly resistant to blaster damage, you'll still usually hurt it enough to kill it, when you factor in the additional damage from the EC grenade. EC grenades are also useful for taking down multiple SBD's, especially when they're bunched up together.

If you're in truly dire straights, then you can also attempt to kill SBD's with your sniper rifle or thermal detonators. SBD's are vulnerable to position damage, meaning that you can shoot off various pieces of their armor and even their left arms, but this doesn't seem to make them any less deadly. It'll take you four or five shots to the head to kill an SBD with a sniper rifle, making this an inefficient method of disposal, but when you have a sniper position around, even a single soldier can usually hold off multiple SBDs for a good period of time. Thermals can also wear them down, but you'll notice that SBD's do have an energy shield that they'll put up when they spot a grenade incoming. Although EC grenades penetrate the shield, thermals do not, so you'll have to throw them a bit behind the SBD if you want them to take any damage. It'll still take four or five thermals to kill a single SBD, making them, again, fairly inefficient.
When it comes to offense, SBD's are among the most powerful enemies you're going to face off against. Their normal blaster fire can tear through your shield in seconds on hard mode, and they also wield a pair of more powerful attacks, both of which they have to "wind up" for. The most noticeable one occurs after they go to one knee for a second; if you see an SBD doing this, it's your cue to get behind cover. They can also smash you pretty good if you're within melee range. Even after they're dead, they can still hurt you; their upper bodies will often detach from their legs after they fall to the ground and continue firing, but luckily, these remnants are easily dispatched with normal blaster fire.
Droidekas
Although droidekas appear intimidating--few other droids could cause Jedi to run away, after all--they're less of a problem than you might think, at least in the world of Republic Commando. Obviously, they pack a bit of a punch thanks to their quad blaster array, but they aren't as damaging as SBD's are, and while their energy shield will protect them from damage, it can be overwhelmed with normal blaster fire. In this sense, their shield can be thought of as simply an extension of their normal health bar; if you shoot at them long enough, it'll drop, and you'll be able to finish off the robot inside with minimal trouble.
Of course, if you have the ammo reserves, you might also want to just use EC grenades on them; this will temporarily stun them and reduce the amount of blaster fire required to kill them. Anti-armor rounds can, of course, kill a droideka in one hit, but this is usually overkill, and you're better off saving those rounds for fights with SBD's.
Spider Droids
The fiercest droids that you'll be coming up against in Republic Commando are the massive spider droids, which appear only rarely, but are always a challenge to defeat. This is mostly due to their insane health and armor; it'll take you a good minute or two to kill them off, even if your whole squad is able to concentrate on them.

The spider droid doesn't possess any normal blaster attacks; instead, it uses its main cannon for single, powerful shots, as well as a pair of missile launchers for extra damage. Luckily, you can disable its ability to use the missiles by firing on the laser-sighting mechanism that pops up out of its back every once in a while. When you spot the red scanner that rotates around the droid, fire on its source to knock it out; this will prevent the droid from using missiles for the duration of the fight. Its primary cannon fire is still quite powerful, though, so you'll want to stay behind cover in most spider droid encounters and let your teammates do the work.
Luckily for you, each spider droid encounter will occur somewhere where there's multiple positions for your teammates to maneuver. The best maneuver for them will be anti-armor, but you'll often find grenadier or sniper positions around spider droids, as well, so don't hesitate to be diverse. When your squaddies are in position, all you normally have to do to finish the beast off is to just wait and watch your teammates fire away. They'll take damage, sure, but since they'll be behind cover, they'll usually survive long enough to take the baddie down, and even if one does get incapacitated, you'll usually have enough time to get to them, revive them, and get them back into position before the next soldier goes down.
That said, if you have one, a Wookiee rocket launcher will make short work of spider droids, so don't hesitate to use it if you have one.
Scavenger Droids
These lithe little enemies are the favored companions of Trandoshans; they're quite capable of killing things, and are also pretty handy at cleaning up their own mess. Their attack pattern isn't difficult to figure out; when they spot you, they'll shoot their laser beams at you as they rotate in the air around you. When hit, they'll rear back and start up a suicide run and attempt to impact you for extra damage. If they get close, they can also latch onto your helmet and drain your shields and health that way; use your fire button to wrench them off and throw them to the floor.
The main problem with scav droids is that they're wickedly difficult to hit, especially on the Xbox without auto-aim on. They do a really good job of avoiding incoming fire by bobbing and weaving; your best bet to hit them is usually to have a soldier in sniper position, if at all possible, as a single shot will blow them out of the sky.
Grievous Guards
Grievous' dread bodyguards are exceedingly rare enemies, but when they do appear, they're going to cause fairly big problems for you. They usually attack at close range with an electrically-charged baton, which can cut through your shields and take you down with just a couple of swings. Luckily, your teammates are more capable of resisting this damage, so you'll want to try and stay away from these guys and hope that they go after another member of your squad. They also pack homing missiles, similar in effect to the spider droid's missiles, which they'll fire after going to one knee and charging up. You'll want to be behind cover when this animation starts, if you suspect the missiles are coming your way.
Actually taking down a guard is a task in and of itself, thanks to the fact that they're highly mobile, acting more like Geonosian soldiers than your typical clanker, and due to their immense health reserves. Most guard fights take place in areas with multiple sniper and anti-armor positions, so you'll want to have your teammates set themselves up into these, with sniper positions probably being the most preferable option available. They're obviously not going to take much damage from blaster fire, so when you spot a guard, your best bet for dealing damage to it is to either unload anti-armor shells into it (assuming it's not directly next to one of your teammates) or by chucking EC grenades at its feet, assuming you can get it to stand still long enough for an accurate placement. This latter is probably the best method for draining their health, as you can use it while a guard is wailing on one of your teammates without him taking too much damage, and because it'll freeze the guard in place while your snipers get a few shots on it. It's normally easy for them to miss their shots due to the speed with which the guards can move.
Geonosians
Soldiers
The Geonosian grunts are going to be among the more annoying enemies you face in the game. They're not particularly tough to kill, but their ability to fly and their hard-hitting melee attacks can be difficult to deal with.
In most instances, Geo soldiers will appear en masse and attempt to overwhelm you with sheer numbers, and they're fairly good at doing so, thanks to the fact that they'll usually charge in and hit you with their cudgels. A single blow from a cudgel will usually reduce you to half health or lower on hard mode, making it easy for them to take you out if you don't exercise a great amount of caution. A single melee attack will usually kill them, but their flight abilities can make it difficult to actually hit them until they're already in range for their own melee swings. Their flight also makes Geonosians less susceptible to grenade fire.
Your best bet for taking down soldiers lies in getting a commando into a snipe position; a single sniper round will pop a soldier in two. Unassigned commandos will do a decent job of taking down hostiles with their blaster fire, and can also counterattack the soldier's melee attacks automatically, but if you don't provide adequate cover fire, soldiers will often surround your squadmate and start beating him down, so keep an eye on their health meters during firefights.
Elites
Geonosian Elites, although rare, are incredibly aggravating enemies for a number of reasons, foremost of which is their devastating laser attack. The Elite laser is one of the most powerful weapons in the game, and will rip through your squadmates and yourself if you take it directly; when it's aimed at you, your best bet is to keep moving and get an obstacle or wall between yourself and the Elite. Your squadmates are going to be worse off, though. Even if they're in a position where they have cover, Elites will usually fly above them and fire so that the cover is effectively negated.

Unfortunately, Elites have boosted health to go along with their powerful attacks, and can withstand multiple sniper shots without dying. That said, sniping is still usually going to be your weapon of choice against these guys, if only because they're even more resistant to most other forms of damage. Since they never touch the ground, anti-armor shells and grenades are mostly useless against them (unless you can stick a sonic detonator to a wall you think they'll fly near), and blaster fire is a bit too weak to really hurt them. Most areas that feature Elites will also feature multiple sniper positions for your teammates, though, so try and get them all into one. Most Elites will take around six sniper shots before going down, so the instakills that you'll have gotten on the soldiers will be a thing of the past, but this is still the most efficient manner of killing them.
Trandoshans
Slaver
Slavers are the Trando equivalent of battle droids: they hunt in packs, but aren't physically very difficult to be rid of. They wield ACP Array Guns, which can be crippling if you let them get in close, but which possess only a small chance of actually hitting anything when fired at anything other than point-blank range. You have to be careful, though, as if you damage them enough, they'll drop their shotguns and switch over to knives, at which point they'll close in on you and attempt to damage you with melee attacks. Still, though, as befitting grunts, most any weapon will kill them without much of a problem. A favorite tactic of ours was to stun groups of them with flashbang grenades before running up and slaughtering the lot with melee attacks to the face, but we're just naughty like that.
Mercenary
Although theoretically military-trained, Trando mercs aren't that much more dangerous than their slaver brethren. While their SMG weapons are capable of putting out a much more constant stream of fire in the air, they're not tremendously damaging, or even very accurate outside of close range. They also can't take much more damage than slavers; they're still instantly killed by a melee attack or a sniper round, for instance, so you shouldn't need to use any special tactics to get kills on these guys.
On fun aspect of the mercenary is their habit of wearing Boba Fett-ish jetpacks on their backs. Although they regretfully never use them in the game (which would've been pretty awesome), you can still have a little fun with these by shooting them, which will cause the merc to fly up into the air and instantly die. Heck, you can even do this after killing a merc; just shoot the rocket pack on their corpse and watch the fireworks. It never gets old!
Heavily-Armored Mercenary
The Trandoshan HAM is one of the rarest, yet fiercest enemies in the game. These bulky warriors are armored from feet to chest in mostly impenetrable metal, but they do leave one weak spot unexposed: their head. If you can get a clean shot at their head, then you should be able to take them down in three or four sniper hits. The problem, of course, is actually hitting them without getting torn to shreds by their Repeater Guns; these babies can bring you down in no time flat if you're not behind cover. The best opportunity for taking down a HAM is by stunning it with a flashbang grenade; if you can do that, then you should be able to take your time aiming and firing your sniper rifle and finish the beastie off.
Combat Tactics
Although parts of Republic Commando see you heading out on your own to complete solo objectives, the bulk of the game will put you in command of one to three elite Republic Commandos whose combat abilities match and often exceed your own. If you attempt to play this game as a regular FPS, in which you charge ahead and attempt to kill every enemy by yourself, you're going to die--a lot. Success depends on your ability to maximize the effectiveness of your comrades.
Commanding Your Squad
As squad leader, you'll have five general commands to issue to your team.
Search And Destroy: In S&D mode, your squad will head out a short distance in front of you, scouting territory and opening fire on enemies that they see. They don't get too far from you, which lets you keep an eye on them, at least. We personally didn't find this to be too useful of a command, for a variety of reasons. Mostly, this is because we just liked to be in front of our squad, scouting for dangers and enemies in the path and assigning them to positions as we saw them become available. It does have the benefit of increasing your own survivability, though, since your teammates can take a lot more damage than you can, and are thus much more capable of surviving an unexpected assault than you are.
Form Up: In Form Up formation, your squaddies will attempt to stay near you when you're standing still, but will follow behind you when you're moving. We used this far more often than S&D, but it really is going to be a personal preference as to which one you'll choose. We found that this let us trigger in enemy spawns and get an idea of what was going to happen in a given fight before issuing further commands to our troopers or getting them to move forward and fire on the enemies. If you do use Form Up, you can expect to have to retreat quite a bit, just to get behind your more expendable squadmates, but this isn't something that you'll be immune to in S&D mode, either.
Secure Sector: Secure essentially means "Stay Put!" When your soldiers are issued this command, they'll hold up in the position to which you're pointing when you first issue the command. This is most useful for keeping them well out of the line of fire while you move forward and scout or have to move somewhere where you just don't want them to follow you. Like obedient pets, they'll stay where you tell them to and let you go about your business unfettered. You can also use this to issue a more specific Search and Destroy command, by pointing to a distant spot of land and telling them to stay there; they'll move across the intervening terrain, triggering any enemy spawns on the way, and firing on any enemies that they see. Since they're so much more resilient than you are, you can use this to put them into harm's way while you stay back and assess the situation, i.e. hide like a coward. Sometimes discretion really is the better part of valor, etc., etc.
Concentrate Fire: When you press your use key while you have an enemy in your crosshairs, you'll instruct your squaddies to ignore all other targets and concentrate all their fire on your chosen target. This can be pretty handy when it comes to taking down armored enemies like SBD's or just hearty ones like Geonosian Elites. Squadmates who are in
Cancel: The cancel command will disengage your squadmates from any maneuvers that you've ordered them to pursue, such as maneuvers, getting bacta, breaching a door, etc. When you issue the cancel command, they'll revert to the previous S&D, Form Up, or Secure command. If you're in the habit of telling your soldiers to stay behind with Secure while you scout ahead for maneuver positions, you may want to also get in the habit of tapping either the S&D or Form Up button immediately after cancelling their commands. Otherwise, your soldiers may run back into a previous room where they were waiting when you issued their position command.
Using Maneuvers
Maneuvers are going to be the key to maximizing the effectiveness of your soldiers in combat. They're perfectly capable of killing things on their own, but when you place them into a maneuver position, you'll find that their lethality will be greatly amplified. With them, you can order your squadmates to use weapons that they normally won't. Although Sev and Scorch will occasionally use the sniper rifle or grenades, respectively, this is very rare; your teammates will almost always use their regular blaster rifle, no matter what the weakness of the particular enemy you're facing off against. Thus, you'll want to use maneuvers to help adapt to each situation.
One important note about maneuvers is that enemy grenades can cause your teammates to run for cover. When this occurs while they're in a position, they'll often not automatically return to the position, forcing you to disengage them and order them back in before they return to their task.
Sniper Position: Sniper positions are generally going to be the most common and the most desirable maneuver position in Republic Commando. When placed in a sniper spot, your teammates will become true engines of destruction, rapidly sending out devastating sniper rounds towards every enemy within view. Although some enemies, like the SBD and droideka, will be killed more quickly when your squaddie is in an anti-armor position, but sniping is never a bad choice, and indeed will rip through grunt-level enemies in one shot.
Grenadier Position: When a soldier is in a grenadier position, he will throw out context-sensitive grenades every seven or eight seconds: when there are droids in sight, EC grenades will be chucked, while organic enemies will get thermal detonators or sonic grenades. (Note that they'll call out "Thermal det!" no matter what kind of grenade they're throwing.) This can be a big help against large groups of enemies, but you'll need to stay clear of the area of effect of the grenades, lest you want to wind up caught in the blast. Note that the large targeting circle that appears on the ground when you look at a grenadier spot isn't the only place that grenades will be thrown; the grenadier can track enemies and attempt to throw grenades at enemies that have moved out of his designated targeting range. Indeed, you'll need to be careful, as your grenadier will sometimes overenthusiastically attempt to hit enemies behind cover by throwing grenades at the wall or other obstacle behind which they're hiding, which can sometimes reflect them back onto your party.
Anti-Armor Position: Anti-armor fire can devastate droid enemies, but these positions are unfortunately one of the more problematic in the game. Although your teammates can deal a lot of damage with their anti-armor attachments, you'll need to babysit them in order for them to reach their full effectiveness in these positions.
The main reason for this is that, whether by design or due to a bug, your teammates will not fire as soon as they've reloaded their weapon while in an AA spot. In fact, they'll wait five or six seconds before refiring, greatly reducing the amount of aggregate damage that they deal, and leaving them open to fire from enemies. If you want to increase their rate of fire, then place them in position, watch them fire, then wait for their reloading animation to end (it consists of them going to one knee, shoving another round in the weapon, then standing back up). After all this is done, order them to leave the position, then immediately tell them to get back into it. When you do so, they'll fire again immediately, allowing you to repeat the process over and over again. They'll easily fire twice as often as they do normally when you do this, allowing you to clear out enemies without having to use your own precious anti-armor ammo.
Turrets: Now we're talking! Getting your soldiers into turrets will let them blast away at incoming enemies with an unlimited amount of rockets, laser ammo, or what have you. In most cases, you'll have to remove the current occupant of the turret before you're able to place one of your own soldiers inside it; this will usually require a quick sniper shot to the head, as blaster fire is often going to be deflected by the energy shield protecting most turrets. Of course, said energy shields don't protect your teammates very well, and in most turrets, they'll be just as vulnerable to fire as if they were standing around in the middle of an open area, but this is made up for thanks to the immense firepower of turrets, which can usually kill off enemies before they're able to return fire.
Door Breach / Door Slice: There are a lot, and we mean a lot of locked doors in Republic Commando. When you face off against one, you'll often be given a choice between slicing it (hacking the lock open) or breaching it (placing an explosive on the door and blasting it open). There are pros and cons to each method.
When you breach a door, your teammates will take up positions on either side of it first. When the charge goes off, they'll throw a grenade into the room beyond and move in, ready to fire. The primary advantage of this is that it's quick (it can be done immediately, while slicing takes ten seconds) and that you get an essentially free grenade in the bargain. The drawbacks are that all of the enemies on the opposite side of the door will be alerted to your presence, which will shift their positions in the room and bring them closer to the door than if you had sliced it. You'll also be unable to command your soldiers for a second or two after the breach while they're moving in, so if you see a sniper position on the far side, you'll have to wait a second or two before you can set a soldier there.
Slicing the door is generally going to be the better alternative on hard mode, as it won't alert any of the enemies on the far side of the door, and you'll be able to proceed in on your own pace, instead of having to follow your soldiers in. Although you miss out on the free grenade from a breach, and you will have to wait ten seconds for the slice to go through, the extra control you gain over your passage through the door is usually going to be worth it.
If you want to see which flavor suits you best, try loading up a level of the game and going through it once with all breaches and once with all slices and see what the differences are. There are some doors that cause turrets to activate when you breach, but remain inert when you slice, and so forth; a lot of these differences depend on the specific door and situation.
Walkthrough
Zero Hour--Clone Wars--Geonosis
Extreme Prejudice
After you hit the surface of the gladiatoral arena, you'll have to begin your journey towards Sun Fac on your own; don't worry, you'll be meeting up with your redoutable squadmates soon enough. For now, though, you'll have to maneuver through the trenches of the oddly corridor-ized arena--it sure looked a lot flatter in Episode II.
A few moments after you set down, you'll take a bit of damage from an "anti-infantry round" that seemingly came out of nowhere. This is unavoidable, but getting healed up is no great chore; just walk around the corner from the drop location and use the convenient bacta dispenser! You're going to find these things all over the place, luckily, even in the middle of Geonosian facilities populated entirely by robots, oddly enough. If you can find one in an area without a large enemy population, then you'll be able to heal yourself and your entire squad to full health. For now, just get yourself healed up and help the nearby troopers in their battle with the droids atop the walls.
Secure Area Around Crash

Your first objective is to bypass the droids and work your way along the path until you come to a crashed troop transport; the area is crawling with droids, and your task is to eliminate them until they die from it. There's an explosive barrel in the midst of the droids which you can use to blast a bunch of them; you can finish the rest off with your blaster or with your melee attack, which performs an instant kill when it hits a droid.
After the transport is safe, another path will open, leading to a little tunnel system. Fight your way through the droids--by now you'll have discovered that they only deal light damage to your shields, and aren't difficult to destroy, until you get your next objective.
Destroy Gun Emplacement With Grenades
Apparently there's a large artillery piece further down the trench; your only hope of destroying it is by picking up the thermal detonators from the ammo pallet and throwing one into the gun's open ventilation-shaft-looking-thing. You should get a red targeting reticule when you're aiming at the correct location, so chuck a grenade into the hole and watch the fun. The destruction of the gun will open up a new path; follow it to meet up with Delta 62.
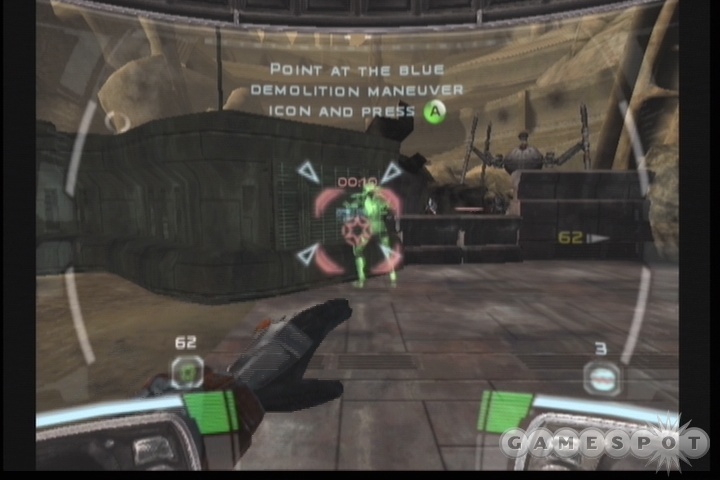
Now that you have a squadmate along for the ride, you'll be able to destroy one of the walls blocking you from the Geonosian spire, which is your ultimate objective here. Command 62 to place a charge on the wall that the Advisor targets for you, then cover him while he does so--it'll take him ten seconds, so be sure no Geonosians hit him in the back. When that's done, you'll be able to detonate the charge and proceed through. A dropship will be required to blast through one last obstacle in your path--apparently the Clone Army was never given that critical "climbing over things" training--but it'll be called in automatically when needed.
Into the Hive
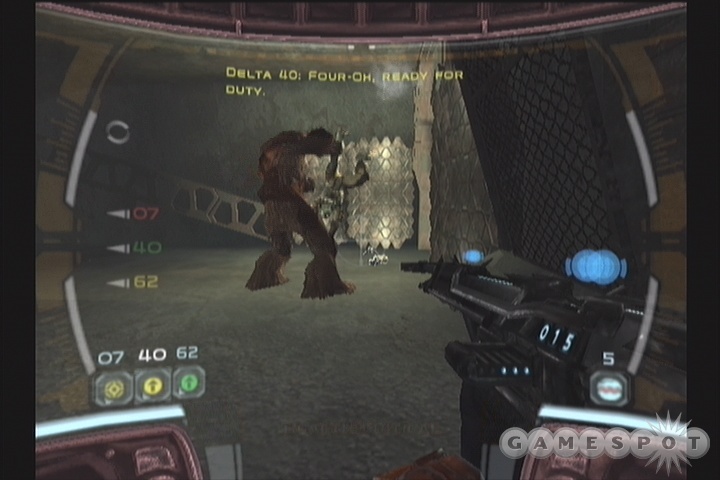
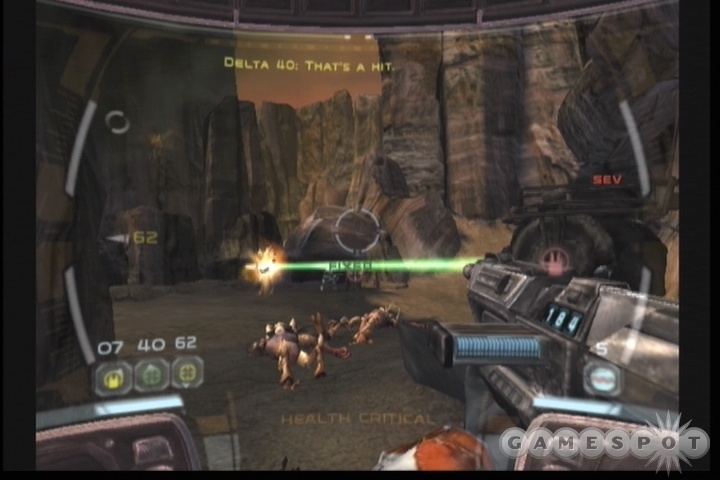
Rendezvous with Delta Four-Zero
Great, a bug hunt. The Geos aren't tremendously fearsome enemies, although they are mildly tougher than the battle droids you've been fighting so far. Anyway, in order to reach 40, you'll have to blast through another door; do so to meet up Fixer, another member of your squad. He's going to be able to slice doors and consoles for you, such as the one immediately next to his location. He's also likely to be injured when you meet up with him, so command him to heal himself at the bacta tank after you slice through the security door.
After you slice through the door leading to the hangar, you'll have to fight your way through battle droids and Geos until you spot a pair of Geonosian fighter craft; Advisor will ask you to blow them up with a charge, which you should do, since they're blocking the exit from the room. Most of the enemies here are going to be difficult to close in on due to the gaps in the floor, so don't forget to use your zoom feature to make your blaster fire that much more accurate when firing from a distance.
Next up is a darkened passage; you'll need to flip to your nightvision visor to see what's going on. The passage isn't very long, but the battle droids you're fighting against will be a bit more damaging than in the introductory level, so proceed slowly and use the crates scattered around as cover from their fire.
Eventually you'll reach another hangar, wherein there are yet more boxes to block your path. After tasking one of your commandoes with detonation duty, you'll need to stick close to him to prevent the Geonosians from bludgeoning him to death during the ten seconds he needs to place the charge before clearing out the rest of the room and moving on.
The Strength of Brothers
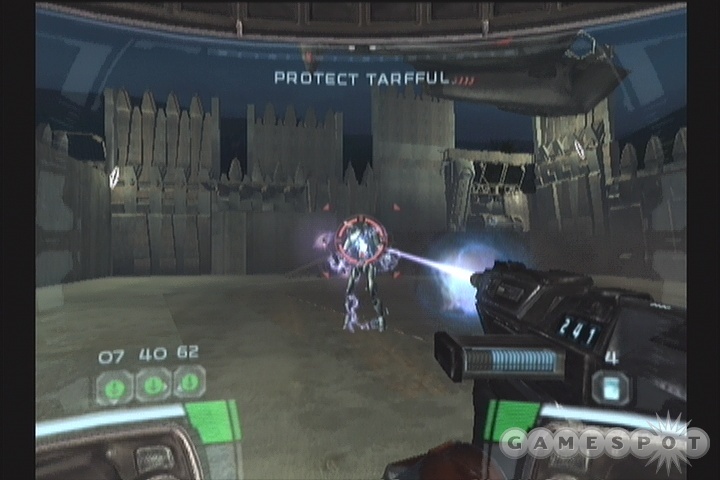
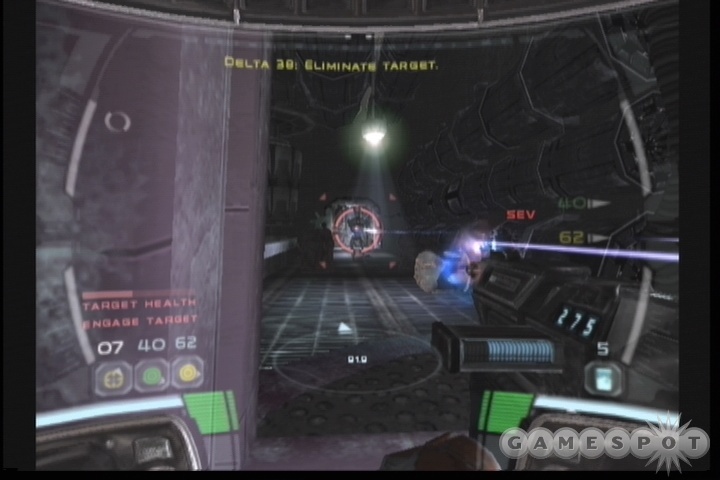
Eliminate Sun Fac
After you start this level, you'll automatically meet up with Delta 07 ("Sev"), your designated sniper. Sun Fac is in the room beyond his location, so shoot the glass and move after him. He'll start running, of course, after seeing the badasses that are on his tail, and you can't do much to catch him at the moment, so don't feel compelled to run after him. Just take it slowly and clear out the first room before approaching the door beyond.
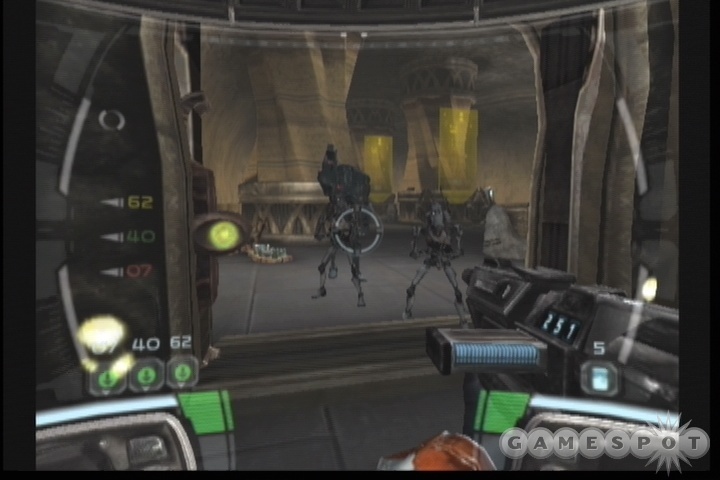
Unfortunately, the second room here features not one but two Super Battle Droids. Luckily, you can take the one by the door on first, so command your team to target their fire on it with your use key so that everyone is aiming at it at once. You should also have EC grenades by now--if not, there's a box by the door--and you can use these to temporarily stun to SBD's, allowing you to take their health down much more rapidly. Eliminate both of them before healing up and placing a charge on the door inside the room.
Sun Fac is in the room beyond, but he'll quickly bring up a shielded door on the path leading to his landing dock, preventing you from following him to his ship. Luckily for you, there's a balcony above the docking bay, where you'll be able to set up Sev in sniping position; if you give him enough cover, he'll snipe away at Fac's ship until it explodes, finishing off your first major objective on Geonosis. Shortly thereafter, a strange ship can be seen blasting off from the planet. Hmm....
When you're ready to move on, find the elevator leading down further into the planet's interior. It appears that there's a droid factory under the surface that's continually spitting out reinforcements to the battle topside; your mission is to shut it down.
Infiltrate The Droid Factory
Locate Jamming Device
Unfortunately, your communications with Advisor are being jammed by some kind of interference device within the droid factory; your first task here is to find it and destroy it. Luckily for you, you're going to get your first weapons upgrade shortly after you begin the level, in the form of a sniper rifle attachment for your blaster rifle. With it, you can snipe away at any distant enemies with much greater accuracy than your normal blaster. Why this was hidden away in an underground droid factory rather than given to you at the outset of your mission is a mystery to us, though.

Immediately after you breach the first door and proceed through the corridor beyond, use the sniper rifle to destroy the explosive barrel on the bridge across the chasm; this will destroy the bridge and most of the Geonosians on it. From there, start heading down into the Geonosian birthing chamber. You'll note that there's a sniping position near the entrance to the egg chamber; set up Sev there and place the other troopers on guard duty nearby. Most of the eggs here have baby Geonosians inside of them, which will spit acid at you when they hatch, so switch over to your sidearm weapon and start blasting them from the distance; you can also shoot the barrels to blow multiple eggs at once. Sev will be able to easily hit the Geos after they hatch, making your path through the chamber that much easier.
Disable Jamming Device Shield
After you actually find the jamming device, you'll have to destroy it, but unfortunately for you, it's shielded, so you'll first have to destroy the shield before you can destroy the device itself. A twisted web, indeed! Unfortunately, there are a couple of spots from which Geonosians will be infinitely flowing in this room, so you'll need to keep a tight leash on your group in order to complete your objective.
To begin with, have one of your soldiers take up a position at the grenadier spot above the jamming device, then order the remainders of your squad to take up a position near him. When they're all stationary, help them kill off any remaining battle droids in the area before cancelling their orders and forming them up on your position, then move around the large rock to your right.

The console control for the shield that protects the jamming device is on a ledge at the far end of this room, so quickly skirt the right side until you spot a pair of sniping locations where you can position two of your squadmates. You'll want to get here fast, because you will have passed a spot that triggers the spawning of bugs; getting the snipers in place will let you take them down from long range. When they're set up, take the remaining teammate and head towards the console. Use the last teammate to slice said console while you watch his back. When the shield comes down, return to your snipers and prepare for the assault on the jamming device itself.
Destroy Jamming Device
Now that the shield has come down, you'll notice that a new sniping spot has appeared directly across from the charge-laying spot for the jamming device. This is where you want to group your soldiers up for the next little phase of the battle here.
As soon as you order someone to lay a charge on the jammer, a horde of droids and bugs will spawn in, so what you really want to do here is tell all of your soldiers to form up behind the sniping spot (with one of them actually manning it), then command one of your soldiers to lay a charge; when he gets close enough to cause the enemies to spawn in, though, cancel the order and draw him back to your position, then kill all of the enemies until the room is completely clear. It'll take a minute or two to do so, but will allow your squadmate to lay the charge unmolested, since he won't have any enemies on his tail. You can also just attempt to lay the charge while your squad is still taking fire, of course, but you'll have to be sure that none of the bugs can whack your squadmate while he's placing the explosives.
The Heart of the Machine
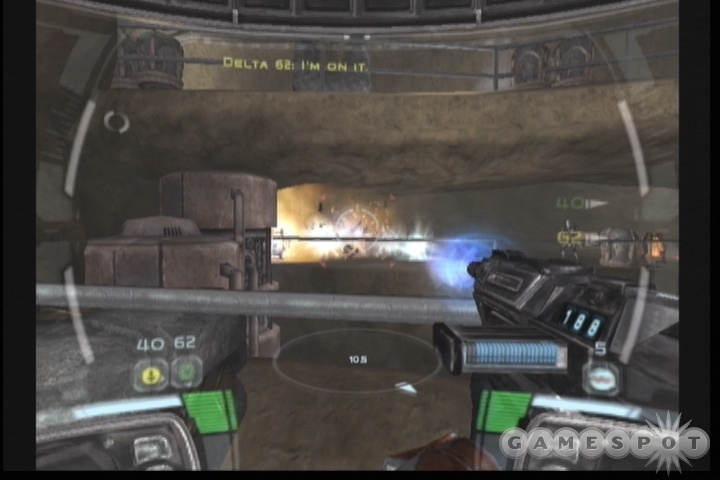
Cross Spire to Factory Vent
Now that the jammer's out of the picture, your goal is to incapacitate the droid factory and prevent it from making more droid troops. Before you can do so, though, you'll need to cross the interior of the spire to reach a vent leading into the factory proper.
Begin by heading down the hallway near your start point, but don't run into the chasm nearby all willy-nilly. Instead, whip out your sniper attachment and use it to blast any bugs and explosive barrels you can see. Especially important is the barrel near the turret off to the right of the path beyond the tunnel you're in; if you can hit the barrel, the turret will blow as well, leaving you with one less thing to worry about in the battle to come.
Now, the main thing you're going to have to worry about here is the appearance of a Geonosian Elite soldier. These are essentially the Geonosian equivalent of a Super Battle Droid, in that they're much tougher than the normal Geos and pack a much greater punch as well. Instead of a melee weapon, they wield a laser that can quickly cut through your shields and kill you if it gets even just a couple of seconds of unfettered fire on you, so you'll obviously want to keep well away from it! The best solution here seems to be to hang back in the tunnel, walking slowly forward until you can spot the two sniper spots just outside the exit from the same, then task two of your soldiers to those spots before bringing everyone up and focusing their fire on the Elite. There will be other Geos in the area, of course, but the Elite is by far the most dangerous, so try to get it to fire at you, then hide behind the stone pillar between the sniper spots while it blasts its laser at you. There are actually going to be three Elites here, with one popping up after the first one dies, so you may want to task your third squaddie to the sniper spot near the bacta dispenser nearby and use all three of them to destroy the influx of enemies. This is a pretty tough fight, so don't be disappointed if you wind up dying before you get past. If worst comes to worst, try moving forward far enough to trigger the appearance of the Elites, then draw them back into the tunnel at the beginning of the level; they may be a little easier to take down from there.

On the bridge leading across the spire, there are a pair of detonation spots, so start pulling your team off the sniper spots (after making sure that they're all fully healed) and wending your way down the path. There are two barricades to bust through, but there are also a number of sniping spots on the bridge itself, meaning that you'll be able to keep your cover fire up pretty easily as you command your troopers to move up. You'll want to engage in classic bunny-hopping formations, where you send troops forward to sniping spots, then cancel the sniping acts of the troopers furthest to the rear before sending them to the front. Try to make sure that two of your troopers are in snipe position while one of them is moving from the rear to the fore, so that every squaddie that moves has plenty of cover. This also holds true for when a squaddie is placing explosives, of course. If you keep at least two squaddies in sniping mode at all times, then you shouldn't have to fire your gun at all.
Bomb The Tower To Reach The Far Side of the Spire
After the second barricade is detonated, you'll find yourself in a large, open room overlooking another platform with a tower off to the right. There's going to be another Elite popping up shortly, so try to get your guys into position quickly; there are two sniping spots, and a turret off to the left that can be manned, as well as a bacta dispenser for any wounded soldiers, or for yourself if you need it.
When everyone's in place, move out onto the platform until you get a dispatch from Advisor, then back up a bit until you're behind the foremost sniper. In order to move on, you'll have to get someone to place charges on the tower. You can either detach the foremost sniper (who's the target of most of the Geonosian charges) or the turreteer and have one of them place the explosives, but be sure to give them plenty of cover fire, as there are going to be a lot of enemies to deal with here.
When the charges are set, blow the tower to create a makeshift bridge across the spire, then run to the other side to enter the factory.
Destroy The Factory
Find Factory Computer
After you reach the factory, you'll have to blow through a vent cover, crawl through a set of conveniantly-big-enough-to-move-around-in ventilation shafts (send your troops on ahead of you, as the last room here features a large group of battle droids), then blow or slice through another door to reach the factory computer.
Now, you can feel free to go ahead and slice the computer, but be advised that doing so will open the force fields near the other door in this room. Behind one of these fields are a pair of Super Battle Droids, and you're going to have to take them on with only two squaddies at the outset, since one of them is going to be slicing the console (unless you want to cancel the slice as soon as the fields drop, of course). Obviously enough, EC grenades are going to be a big help here, since there aren't any sniping positions, so you might want to just command your squaddies to stand directly in front of the droid forcefield before slicing the console; the droids will automatically target them, allowing you to throw a couple of grenades their way without fear of getting blasted. The grenades will effect your squadmates as well, of course, but there aren't any other enemies to worry about here, and you'll have a bacta tank at your disposal as soon as the SBD's are dead. If you're running low on EC grenades, then you can find a box of them next to the bacta dispenser.
Destroy First Power Conduit
After the computer's been sliced, you'll be able to blast through the far door of this room; another SBD is awaiting beyond, but you shouldn't need to use an EC grenade on it if you place a soldier at the sniping point. Even if it does deal a bit of damage to you, it's a short walk to the bacta dispenser, so don't waste any ammo you don't have to.

Where you are going to want to use an EC grenade is in the hallway beyond the door behind the SBD; there's a small army of battle droids here who'll become sitting ducks if you hit them with a grenade at the right time. After they're dead, take up sniping positions to cover the soldier who has to slice the computer on the far end of the room. When it's down, you'll be able to grab a Geonosian Elite laser weapon from the small antechamber that opens up. This is going to be your SBD killer for a while now, thanks to its immensely powerful beam. Unfortunately, it only has a limited amount of ammunition, and the amount remaining isn't displayed on the weapon, so you won't be able to use it without reservation. When it runs out, it'll be discarded; you probably have around 20 seconds or so of pure beamy goodness to work with, though, which should be enough to cut down a few baddies.
After you retrieve the laser, start making your way down the ventilation shafts until you come to a room with a murderhole overlooking an SBD. If you concentrate your squad's fire on the baddie, then switch over to sniper mode and start blasting it, you should be able to kill it without resorting to laser fire. After moving down the ramp, you'll come to the first power conduit, which is an obvious target for an explosive charge. Be careful, though, as its detonation will trigger the appearance of more droids, including another SBD. Feel free to use your laser on this one, if you wish; you can afford to be a little reckless since there are more bacta dispensers beyond the fallen force field.
Destroy Second Power Conduit
After the destruction of the first power conduit, you'll have to move on and destroy another one before the factory is shut down for good. To do so, open the door near the bacta dispensers, kill the battle droids, then place one of your soldiers at the sniping spot off to the left, near the ammo cache. This soldier will spot a pair of SBD's coming your way through the hallway nearby; this is a perfect spot to use your laser or EC grenades. When they've been blown, though, you'll be able to move another soldier to the sniping spot in the hallway, giving your third squaddie plenty of cover while he slices the forcefield leading to the power conduit.
When you've sliced the forcefield, the same squaddie can be moved around the corner to place a charge on the conduit itself. When that's done, blow it, then withdraw back to the bacta dispenser to heal your soldiers up before moving to exit the level through the ventilation shaft near the conduit.
Advance to the Core Ship
Locate Passage To Next Canyon
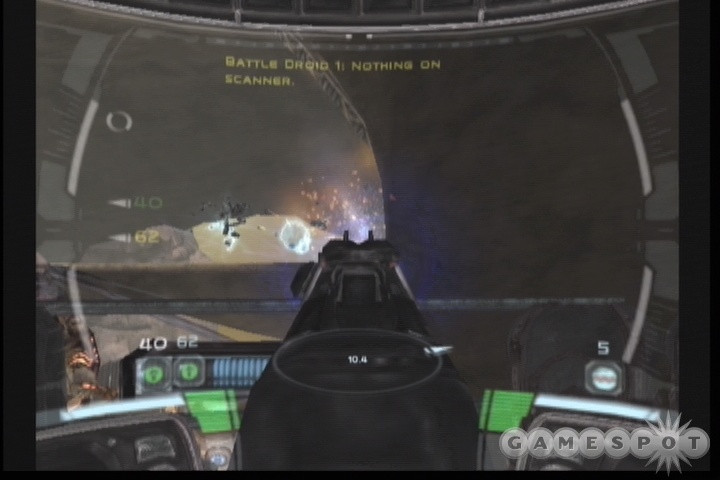
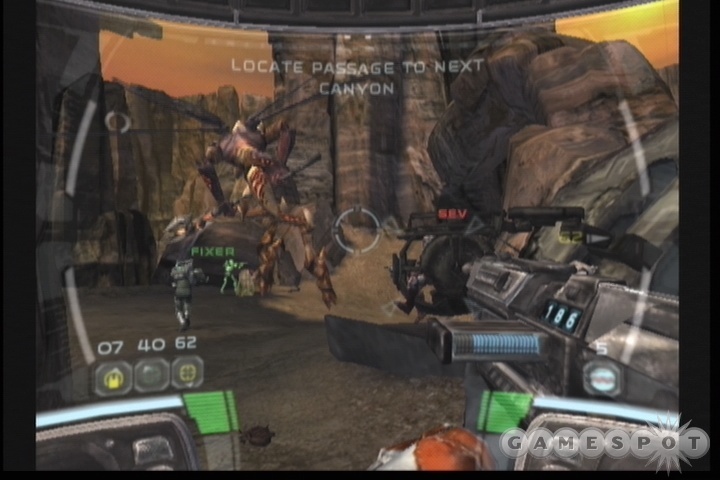
Now that you've killed half of the droid army almost single-handedly, your group's task is to infiltrate a disabled Separatist core ship. In order to reach it, though, you'll have to maneuver through a series of canyons on Geonosis' surface; there's a large anti-air turret that prevents your dropships from getting close to the ship.
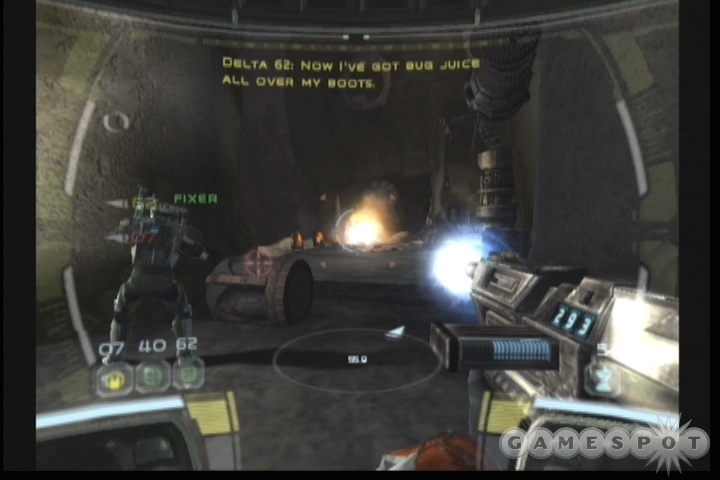
Soon after you start your journey, you'll come to a sheer brick wall; assign a squaddie to blow it while the other two provide covering fire against the Geonosian attack. When that's done, you'll be able to make your way forward to a crashed dropship. You'll want to rush to this position as quickly as possible, since the laser turret on the ship will provide you with a heck of a lot of firepower when placed in the hands of one of your squadmates. (You can also use it yourself, if you wish, but you'll find that your squaddies are much better at using it than you are.) There are also two sniping positions near the ship, so try to make sure that all of your squaddies are positioned behind cover.
When they're all in place, all you really have to do is wait; eventually the influx of Geos will cease a bit. When you notice that no more bugs are appearing, heal up your soldier, but leave one of them in the turret and another in the sniping position near the ship before moving on. Your passage down the canyon will trigger another influx of bugs, which you'll be much more able to deal with if you have the sniper and turret on your side; just run up a bit, then retreat back to the dropship. There's going to be one Elite near the rock arch, so grab him, then kill the rest of the bugs before moving on to find another Elite. Again, lure this one back to the dropship for an easier kill before finally cancelling your squad's orders and forming up.
When you reach the next bacta dispenser, get one of your squaddies into the sniping spot, then order anyone who's wounded to heal themselves before walking up; doing so will trigger yet more Geonosians to appear, so keep killing them until the influx ceases. When this occurs, heal up again, then leave your sniper in position while the rest of the squad proceed to the end of the canyon and destroys the rock wall blocking the exit from the level. After it's been blown, you'll be able to access the mission end, so ignore any remaining enemies and run to it. Before you head down, though, make sure all of your squadmates are at full health, and that you have a full reservoir of ammo at your disposal.
Canyons of Death
Advance to Coreship
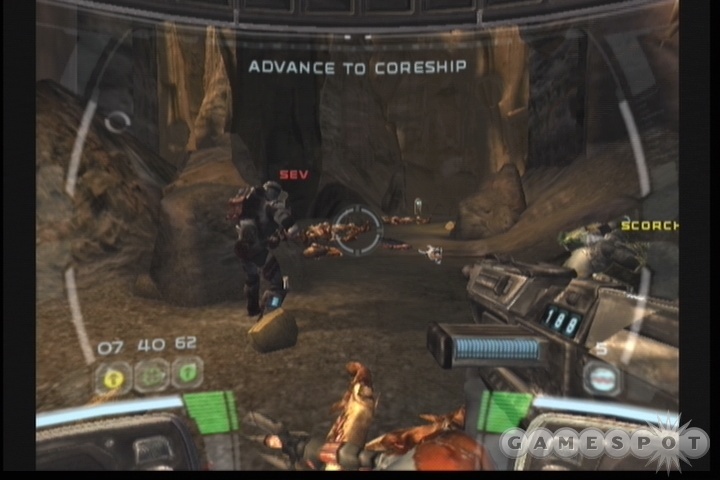
The opening to this level is going to be the scene of a pretty fierce firefight; all you have to your advantage is a single sniping spot, while the Geonosians have numbers and the ability to fly on their side. All you can really do is position one of your guys at the sniping spot, place the other two near him, then try and outlast the enemies as they come in. The real trouble here is the appearance of an Elite about halfway through the firefight. If possible, try to move a bit forward down the canyon before it appears, to get him to target you, then use your own Elite laser on him (if you still have one). It can be difficult to train your laser on him while attempting to avoid his, but this is really your best shot at dispatching him without letting the rest of your squad get killed by the other Geonosians in the area.
When the first little melee is over, start commanding your squaddies to run down to the bacta dispenser near the bend in the canyon. As they're healing, command any healthy teammates to man the two sniping positions nearby, as there'll be droids and bugs incoming shortly. Wait in your current positions until the flood stops, then re-heal everyone before you move on.
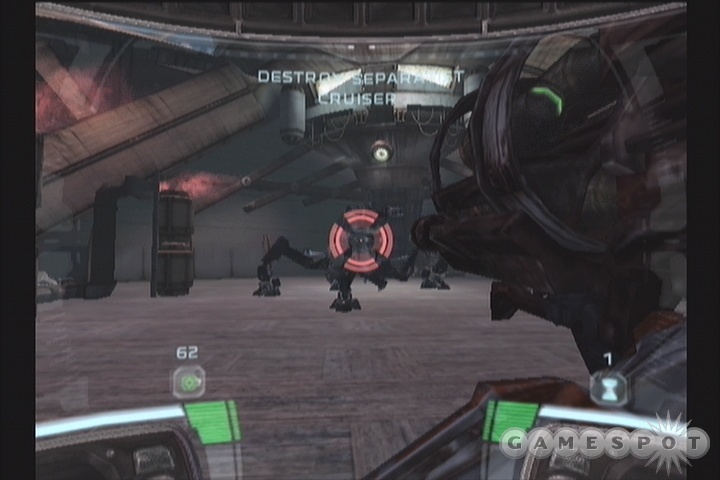
Before you can make it to the Coreship, you'll have to eliminate the anti-aircraft bunker that's destroying your ability to get resupplied. Unfortunately, it is heavily guarded by multiple SBD's, so be cautious when rounding the corner that leads to it. It's probably best to leave your squadmates back a bit while you approach it, just so you can trigger its defenses and know what the heck is going to happen when you send your squadmates around. Actually, approaching it will also activate a pair of anti-personnel turrets above the entrance to the bunker, which is good, because you'll then be able to pick them out from the corner and snipe them out before you lead your squad through. You should attempt to snipe away any of the SBDs in the area, as well, before you move the rest of your squad up and into the grenadier and sniper spots along the walled corridor leading to the bunker.
When you have two of your squaddies in position there, you'll be able to take the third and round the bend leading to the bunker. Unfortunately, two more SBD's stand in your way, so you'll need to have either Thermal or EC grenades to dispatch them. When they're dead, though, the enemies will cease coming out of the bunker, allowing you to form up and prepare to head inside.
To Own the Skies
Disable Anti-Aircraft Turret
In order to shut down the AA turret, you'll need to make your way through the bunker and reach the control room for the installation. Begin by maneuvering through the hallways near your start point (there are two, but they both lead to the same room), but be careful of the two SBD's that'll attempt to impede your path. When they're both dead, move into the large room where the halls meet up and place explosives on the piping near the wall. Detonating this will let you through the nearby door, but be sure all of your squadmates are fully healed before you blow it.
Locate Turret Controls

When the door's open, quickly shuffle your squaddies into the room beyond and instruct one of them to slice the console by the window. The Geonosians, apparently having been too dumb to take up guard positions inside the bunker itself, have to resort to smashing the window open and flying through; slicing the terminal will close the blast shields, preventing them from accessing the interior and giving you a nice squishy feeling, as well.
At the top of the nearby ramp, you'll have to take down two more SBD's, so whip out your EC grenades and put them into service. Beyond the next door is a room with not one, but two separate windows that you'll need to slice, so charge in and quickly task two of your squaddies to slicing. If you wait too long, an Elite will fly up outside one of the windows and start blasting, so get your squadmates into position and cover their backs until the blast shields close. Even if they take a bit of damage, you'll have a bacta dispenser at your disposal to heal them with after you're in the clear.
When you proceed out the doorway here, you'll come to the upper level of the room you blew up before; it appears that the turret controls are still kicking, so you'll need to place another charge on the platform here to finally destroy the place once and for all. Before you do so, though, take out the SBD and the battle droids on the ground below, then heal your team up completely.
Exit Bunker
When you blow the last charge, the doorway near the turret controls will automatically open, revealing a squad of battle droids and a pair of SBD's. There are more battle droids behind the SBD's that'll attempt to open the two windows in the room so that the Geonosians can enter. You can't really hope to stop these guys (at least, not without getting killed by the SBD's, which is a bad thing), but you'll still want to enter the room speedily and start hacking the window consoles. The best bet here is to throw two or three EC detonators at the SBD's, finish them off with blaster fire, then charge into the room like you did previously, tasking two soldiers to slice and fending off the Geonosians with the remaining soldier. Again, there'll be another Elite outside one of the windows, so move quickly before it can blast you all to pieces.
Now that you have the bunker neutralized, all that's left is your exfiltration. There'll be three more SBD's in the hallways leading to the exit from the facility, but you shouldn't need to do anything too special to terminate them. Remember that you have a bacta dispenser in the last window room, so try to let your squadmates do most of the damage to prevent you from expending too much of your grenade ammo.
Territory
Advance to Coreship
You know the drill by now; set your squaddie in the sniping position near the start of this level, place the other two in position nearby, then start running ahead to trigger the spawning of bugs. When the dust has settled, you'll be able to heal up with the bacta dispenser nearby and refill your ammo, as well.
As you proceed down the canyon, you'll come to another sniping spot that looks out over a chasm, on the other side of which is a squad of battle droids. Let Sev do his thing at the spot while you and your team deal with any Geonosians that pop up from the chasm itself--these guys are in every nook and cranny on the planet, it seems.
Around the bend from that little melee, you'll come to another crashed dropship. When you advance close enough to it, you'll find that the turret on its side is usable, so quickly send a trooper into it, and another one to the snipe spot nearby; they'll be able to handily disable all of the SBD's and battle droids that are coming your way. As per usual, you should run forward a bit to lure any more SBD's back into the turret's line of fire before disengaging your troopers and moving on.
Oddly enough, yet another crashed dropship appears. There's another turret here, and although it's less powerful than the green-laser one you used earlier, it'll still get the job done on the three SBD's in the area, as well as the ones coming out of the Coreship corridor at the end of the canyon. Set up a soldier in the turret and another in the snipe spot nearby, then advance slowly towards the corridor with the remaining trooper, letting your emplaced squaddies kill anything that comes out. When you get close enough to the corridor, it'll stop spawning enemies, allowing you to enter, which will only reveal a shielded door. You'll have to find another way into the ship. Before you move on, though, don't forget to grab the anti-armor attachment for your gun near the crashed ship; it'll come in handy against most large targets that you're going to be running into.

Luckily, there's a fragile set of rocks in the valley where your emplaced troopers are, so return there. Another sniping spot has appeared, as well, immediately near the rocks, so set your third squaddie there and disengage the turret gunner and the other sniper; they won't have a line of fire into the next area from their positions. When the explosives are set, position your guys behind the sniper and blow them. There are plenty of baddies in the area beyond, so let them come to you and kill them as they approach, but let your squaddies do the heavy lifting; there's no sense in expending too much ammo or grenades on the foes when your squadmates can kill them all fairly handily.
Now, when the coast appears clear, you can start moving into the little arena here. There are two sniping positions, so immediately get your teammates into them, but stay behind the rocks here, as a Spider Droid is going to be coming out of one of the passages here. There isn't much your snipers can do against it, and it's only vulnerable in a small designated target area. The trick to beating it is waiting until you call out for an anti-armor position; when this occurs, you'll be able to command one of your squaddies to set up shop near the sniping position by the bacta dispenser. After that's done, all you really need to do is wait for him to blow the damn thing up. He will be taking fire from the tank, though, so try and stay behind him and help him out by using anti-armor rounds on the droid, or by sniping at the red ocular cluster from a safe distance away.
Hold Position For Gunship Support
After the Spider Droid's been dispatched, you'll be able to move up to the shielded doorway elsewhere in the area to trigger a conversation with Advisor that'll lead to the approach of a gunship. Unlike the rest of its brethren, this one won't crash to the ground and give you the convenient use of its turret; instead, it'll actually blow the doorway, allowing you to get in, but also allowing the hordes of droids within to leave. Only one of your snipers--the one closest to the doorway--will have a clean shot at these guys, so take the other two and start making your way towards the door and inside.
When you've sliced through the first interior door, you'll have to face off with another group of droids that are positioned on the far side of a long gap from you. They're far enough away to be pretty inaccurate, so set up one of your squaddies at the sniping spot and let him start wailing on the targets. The other pair of squaddies can help him out, but you'll eventually want one of them to start slicing the panel that'll extend the bridge. This will bring the droids closer to you, allowing you to finish them off before healing up and moving on.
Infiltration of the Core Ship
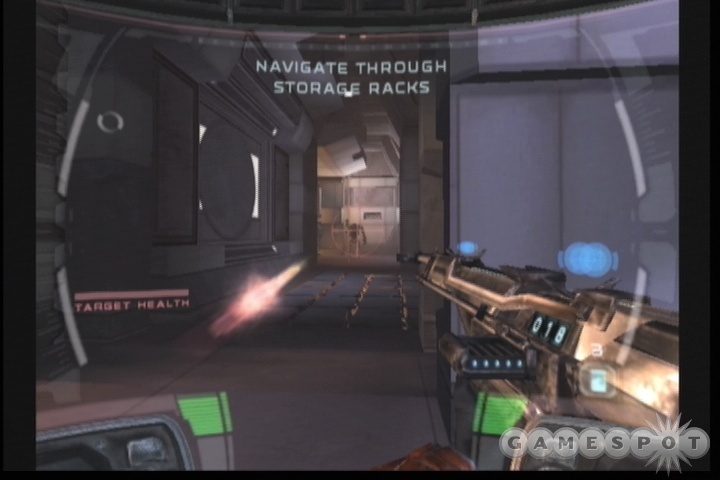
Navigate Through Storage Racks
Now that you've successfully managed to get on board the Coreship, your squad is going to be split up, with each of you responsible for destroying one of the ship's key components. Your task, for instance, will be to navigate through the storage racks holding the Super Battle Droids and shut them down. There are going to be a LOT of SBD's in the area, obviously, but luckily for you, most of them are in storage and dormant. They can be woken up, though, if you happen to bump into them or damage them, so try not to use any grenades until you're in the clear.
The first difficulty here will come in the form of a turret that'll fire at you from one of the walls; when you spot it, destroy it and proceed onwards a bit, but don't rush blindly ahead, because the destruction of the turret will have awoken one of the SBD's. Again, grenades are a bad idea here, so you'll probably want to run back to some cover, then use your sniper attachment to strafe out and pop the droid with headshots. When it falls, you'll be able to proceed through the gap it left in the storage racks and move on.
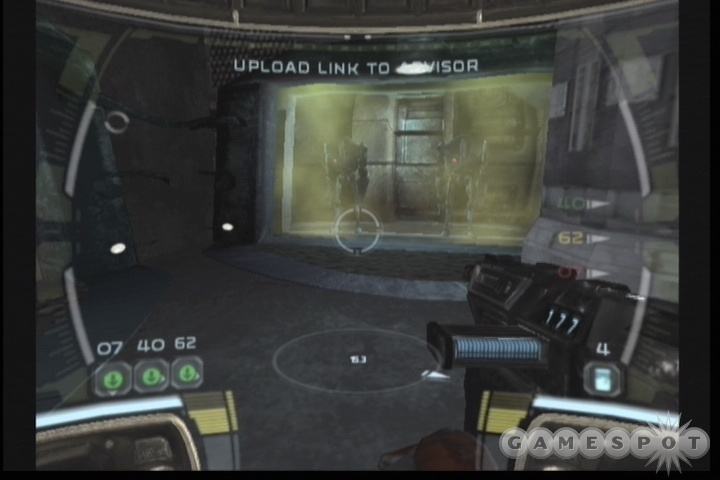
Eventually, you'll come to a bacta dispenser. The large hallway beyond this landmark seems nice and barren, but if you check the ceiling, you'll notice a turret above you, so destroy it. Although this'll set off the alarms in the area, they would've been set off after the turret noticed you anyway. Regardless, you'll have to deal with the appearance of a Geonosian Elite outside the window, so mark it with your use key to get its health readout before engaging in more strafing exercises with the wall. The Elite won't fly into the hallway, so you'll have ample cover, and you can easily backtrack to the bacta if you get hurt. When both the Elite and the turret are taken care of, plant explosives on the grate at the end of the hallway and move on.
Locate Storage Rack Control Room
Sabotage Storage Rack Controls
As soon as you enter the elevator at the end of the hall, you'll skip over the whole "Locate Storage Rack" objective and move right on to the whole sabotaging thing. The slicable console is at around the corner from your location, but proceed slowly, as there are a few battle droids in the area. Although they're easy to cut through when you have a whole squad at your disposal, they're more dangerous when they're all firing at you at once, so use cover and take them down one by one before accessing the console.
When the sabotage is complete, find the next small elevator and ride up to the rendezvous with your squadmates. Of course, nothing is simple about moving around on a heavily-defended Coreship, so you'll have to face off against more of the SBD defenders, but most of them should be damaged by your sabotage attempts, allowing you to finish them off with grenades and blaster fire. You'll need to destroy two before you come to a junction that requires a detonation charge; laying the charge and blowing it will destroy the SBD on the other side without requiring you to fire at it.
After that, you have a short sprint to the finish line, which consists of another elevator. There are two more SBDs in your way, unfortunately, but if you wish, you can just run past them. The one in the middle of the corridor will be crushed by a swinging piece of infrastructure, conveniently enough, but be careful not to get hit by it yourself, as it is an instant kill.
Waking the Giant
Rendezvous With Squad
Now that you've all completed your individual objectives, it's time to get your squad back together and get the launch codes for the ship before the whole place goes sky-high. To begin with, let the first squad of battle droids run past the elevator; they'll all be crushed by a piece of machinery down the hall. You can't get so lucky with the next squad that you encounter, but feel free to take them all out with thermal detonators, since there's another box of them around the corner from this little firefight.
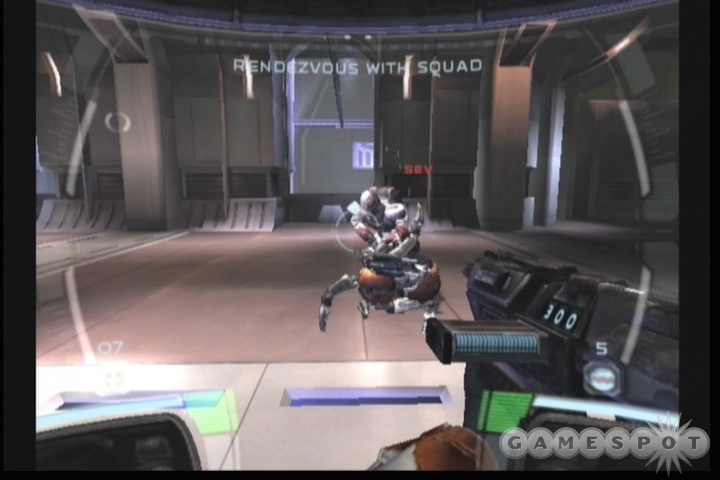
Further down the hallway, you'll meet up with Sev, who'll handily dispose of a droideka that's rolling along the path. Soon enough, though, its teammates will roll back to your position and open fire. Droidekas are unique among the enemy droids in that they have personal shielding, which makes them difficult to kill with simple rifle fire. EC grenades are thus your weapon of course, or at least they should be, since they overload the shields and let you fire directly at the mechanical guts of the beast. Failing that, thermal detonators will also do a good bit of damage in their own right.
When the two droidekas are down, start taking out the rest of the droids further down the hallway and move on. You'll eventually come to another squadron of droids at an intersection that have 40 and 62 pinned down. Another EC grenade in the middle of the group will let you slice and dice them quite nicely, and you'll be able to refill your supply of said grenades nearby, so feel free to use all of them up, if you wish.
Locate Loading Substation
When you have your squad back together, it's time to pay the back taxes for the orphanage. Er, it's time to set one of your squaddies in sniping mode, then trigger the appearance of more droids by walking down the hallway nearby. If you proceed far enough, you'll run into a droideka, but so long as you have the sniper set up back down the hallway, you should be able to wear it down with simple blaster fire.
When that's done, move beyond its wreckage and quickly set up two of your squaddies in the sniping spots you find. One of the droid dispensers will quickly come out to play at this point and will spit out an infinite number of battle droids if you don't take it down. To do so, command your third squaddie to lay a charge on the dispenser, then give him cover fire while he does so; between yourself and the two snipers, you should be able to cover him without a problem. Destroy the dispenser to move on.
Beyond the next room, there's another small squad of battle droids, along with an SBD, so be ready for a fight after you slice through the door. There's an even worse fight on the way, though, so after the SBD is down, heal up all of your guys and set them to guard a position near the door before moving on yourself. Doing so will trigger the appearance of a few more battle droids, as well as a Geonosian Elite; the latter will be trouble for you, since there's not much available cover in the area. Still, with four soldiers blasting away at him, he shouldn't last too long. If you happen to still have one of the Elite lasers from earlier, feel free to use it on him, then pick up the one that he drops for a refill of ammunition.
Slice Substation Terminal
After the Elite has gone down, you should have the room to yourself momentarily. Unfortunately, you'll soon trigger the appearance of two more, so you'll again want to heal up your troops before moving through the substation room. When you're ready to move on, put Sev and one of your other soldiers in the two sniping spots in the room, but leave the anti-armor position vacant for the moment. The substation terminal is located on the small central walkway suspended above the middle of the room, so head up there and start slicing the console yourself, but as soon as you hear the sound of bugs, cancel the slice and turn around to take them down.
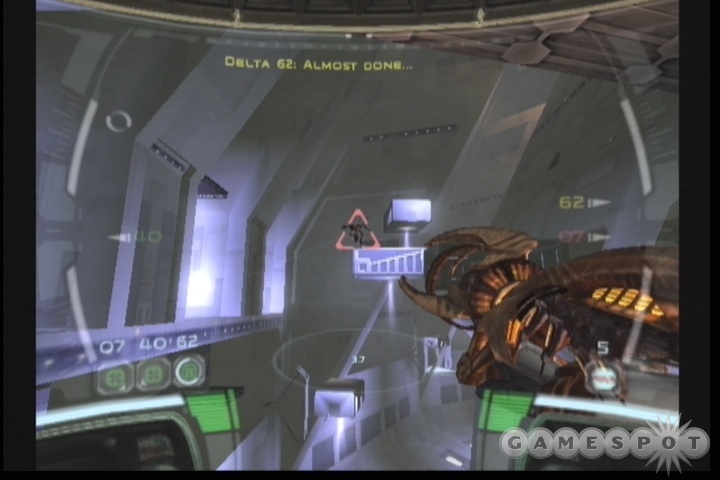
With two snipers, you should be able to concentrate your fire on one of the Elites and take it down relatively quickly, then repeat the process on the other one. Someone's going to get roasted, though, so don't be too worried if a squadmate goes down; just finish off the second Elite before healing everyone up and getting ready for the next phase of the fight. When everyone's set, place the third squaddie in the anti-armor position and slice the terminal yourself. Doing so will open the door on the floor, but don't head through just yet.
Before you enter the corridor, take stock of any ammo supplies in the room. There should be a set of Thermal Detonators near the door through which you entered (assuming you didn't pick them up before), as well as a box of EC Detonators near the door that you just sliced. Heading into the corridor will trigger the appearance of another spider droid, so it'll be useful to know precisely what you have to use on it before you try to take it down. Obviously enough, saving your game at this point would be a good idea, because a single spider droid can kill you in just a couple of hits.
Luckily, though, your squaddies will be able to distract it from you with their fire, and indeed at least one or two of them will probably keel over dead before the droid gets destroyed. It'll probably start firing at the sniper near the bacta dispensers first, as it'll see him before it sees the anti-armor position, so take advantage of that by unloading any spare thermal or EC grenades on it as it walks up the corridor (assuming you still have boxes of them left to pick up; the objective is to have a full loadout of grenades after you kill the spider droid, not to pick up everything and use them on it for only minor damage).
Beyond that, your anti-armor position should be able to do most of the damage needed to take out the spider droid. Feel free to contribute what you can by sniping the ocular cluster from a distance away, or by using your anti-armor shells. It's probably better to save the latter for the upcoming fights, though.
Access Main Elevator
When the spider droid has been dispatched, pick up any ammo left in the room and completely heal your squad. The only remaining room before the Main Elevator is fairly packed with droids, so you may want to slice it and keep the squad back before you chuck in an EC grenade to temporarily disable the first SBD within; this will let you send your squadmates into the room in force to blow it for good. After the second SBD is off to that great robotic afterlife, return to a bacta dispenser to heal them all before riding the elevator up to the bridge.
Belly Of The Beast
Gain Access to Bridge
Hope you're ready for a fight, because this level is definitely going to be one of the toughest of the game thus far, both because of the number of enemies and because of the fact that you'll only have five minutes to reach the bridge, grab the launch codes, and exfiltrate. Unfortunately, slicing the computer on the bridge takes a full minute, so you'll be exceedingly pressed for time. A proper balance of survivability and speed will be required here, so make a save at the beginning of the level, immediately after the first four droids are taken out; this will be your backup in case something goes terribly wrong.
After you breach the first doorway here and take down the droids, be sure to grab the anti-armor ammo lying next to the door before you charge through. As you head down the hallway here, you'll be accosted by a Droideka and numerous battle droids. There's a box of EC grenades behind them, so use all of yours to take the enemies down and quickly retrieve the grenades before moving on. If you need to heal, there's a bacta dispenser here, and it'll be the last one for a while, so quickly make use of it.
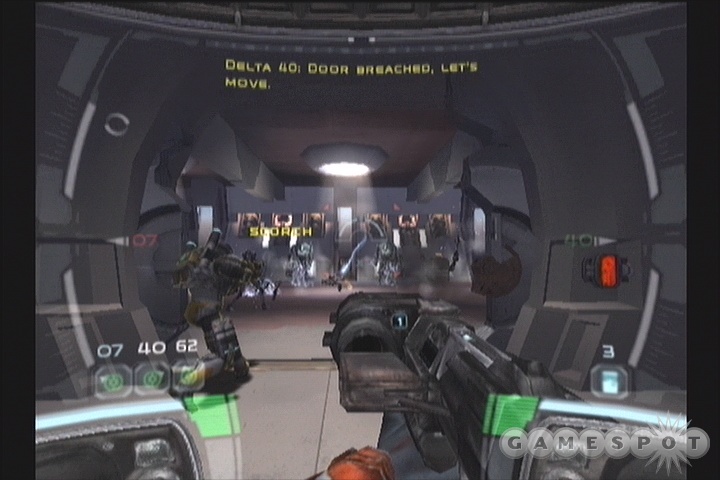
The next curved hallway seems a pair of droidekas coming at you. Laying an EC grenade at their feet will let you disable their shields; focusing your squad's fire on one of them will quickly dispatch them without further explosives. At the end of the hallway, though, are a pair of tougher enemies, in the form of two SBD's. This is where you'll want to use your anti-armor ammo; a pair of shells at their feet should take out the duo without a problem, leaving you with a door to blast open. Yet another pair of SBDs will be waiting in the room beyond, so be ready with an explosive solution; it's probably best to just use up the remaining pair of anti-armor shells to quickly get them out of the way, but there is a box of thermal detonators in this room, so feel free to use up any of those that you have, as well.
There's no bacta here, so if you're wounded, you'll just have to grin and bear it. One final corridor is all that stands between you and the bridge, but it'll be absolutely full of droids, including an SBD at the very far end. If you have any remaining grenades, this is probably where you're going to want to use them, as your priority should be to clean the enemies out as quickly as possible and get to the bridge foyer, where you can finally heal up and get ready for the assault on the bridge itself. The SBD is going to be your primary concern here, so try to nail it with an EC grenade before commanding all of your squaddies to blast it to be bits.
The door to the bridge is, of course, locked, but before you blast it open, command any of your squaddies to heal up at the bacta dispenser nearby; you're going to need to be at full health for the next little melee. The quickest you could possibly get to the door without dying is around two minutes, leaving you three in which to infiltrate the bridge, download the codes, and leave the ship. You can do it with around a minute and a half remaining, if you took longer than expected to get here, but it's going to be pretty tough.
Download Launch Codes
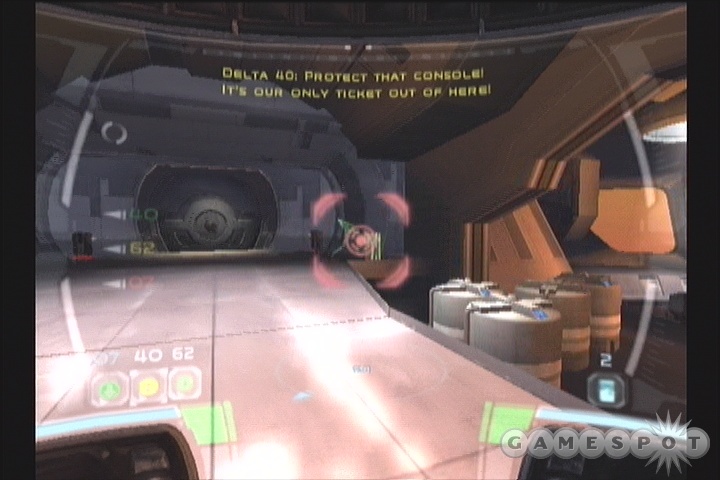
After slicing or blasting the door, send your squaddies inside and get them to target the three ceiling turrets in succession. There are numerous battle droids here, but none are of the Super variety, meaning that they're far less dangerous to you than the turrets are. After they're destroyed, get rid of any remaining droids in the area, then, if you have two minutes or more remaining, start placing mines on the small pillars near the two doors leading into this area. Mines only take a second to attach, so you can perform this task yourself if you want to get your teammates healed up at the same time. If you're under two minutes by the time the turrets are destroyed, you can safely ignore this step and instead command your team to start healing themselves up at the bacta dispensers near the console. At any rate, you should be sure to grab the EC grenades and the extra anti-armor ammo from the small platform across from the console; this will come in handy quite soon.
When you're all healed up and ready to proceed, set two of your squaddies into sniping positions along the walkway while a third is tasked with slicing the console itself. As you might imagine, the droids on the ship don't take too kindly to your hacking, and will start charging the bridge. Initially, only a pair of droidekas appear, but these will quickly be supplemented by no fewer than four SBD's, two for each doorway. The mines won't be too effective, although they can deal extra damage to the baddies, especially if you shoot them when an SBD is walking by. Beyond those sources of damage, though, you'll want to use up all of your anti-armor ammo on the SBDs, as well as the EC grenades, to protect your trooper as he takes a full sixty seconds to hack the console. If he goes down, retask one of your snipers to finish the job.
When the launch codes are in your possession, your squad will automatically disengage from their positions and start moving towards the aft door, around the spire from the console. Do so yourself and run to the dropship that appears to finally get out of this level.
Day 367--Clone Wars--The Chaykin Cluster
Ghost Ship Recon
Access Aft Data Core
As soon as you hit the ground, start making your way into the ship. Along the port exhaust that you've landed in, you'll find a small room with a hackable terminal. If you slice through it, you'll open the exhaust vent completely, giving you access to the interior of the ship, as well as revealing--Mynocks? You have to say it like Princess Leia does over and over again, until the word connotes things deeply mysterious. Try it; it's fun!
After 38 makes the dubious claim that the Mynocks can somehow damage the ship to where it "won't be worth its weight in scrap," start making your way into the belly of the ship. You'll eventually come to a darkened vent that you'll have to crawl into. Note Fixer's use of the term "frelling" in his communication to you--someone at LucasArts is apparently a Farscape fan. Things are going to start going wrong for your squad pretty quickly here, but there isn't much you can do about it beyond continue moving forward. You'll eventually come to a trooper who'll open another vent for you, just before he meets an untimely end--apparently there are mechanical killer drones on board. Fun.

After the commando opens the vent for you, crawl through and activate your nightvision. You're going to meet up with your first drones here, and annoying little buggers they are, too. They fly, for one thing, so you'll need to keep an eye on the sky to prevent any of them from getting the drop on you. When they attack from a distance, they'll use a cutting beam that will quickly drain your shields. It's not so powerful against your health, but can still be a nuisance when more than one or two are focusing on you. They'll also come in for a kamikaze attack when they've taken enough damage, or can attach to your helmet like a good little headcrab and damage you from close range. They're going to be pretty annoying if you're playing on the Xbox with auto-aim off, but they can't take too much damage, so if you can get a few blaster bolts into their side, they'll go down without a fight. It's easiest to do this when you can spot them while they're attached to the wiring and shoot them before they come off, but they can be difficult to spot in the dark due to the poor contrast of the nightvision visor.
Don't worry too much about damage here, as you'll come to a bacta dispenser as soon as you get out of the vent. Unfortunately, you'll have to slice through a terminal to pass through the droid access corridor, but beginning the slice will spawn in three of the drones, and they can quickly kill you if you don't get rid of them immediately. We found it helpful to just blast them with an anti-armor round as soon as they appeared, but a grenade will likely work just as well. When they're down, hack into the console to open the droid access corridor and move on.
Delta Down
Find Delta 07
Delta 07 is in the starboard data core, but as soon as you spot him, he'll be taken down by Trandoshans, of all things. We could've sworn that Bossk was taller than these guys, but they're still pretty fiercesome for short dudes, as their treatment of 07 will attest to. He'll probably be all right--probably--but you're still going to want to get to his position ASAP.
Access Starboard Data Core
To begin with, another droid access corridor is located near the viewport, so head in and duck underneath it to move on. Trandoshans will be coming down the hall after you, and you don't want to have to deal with them in tight surroundings like this, so just ignore them and get moving; they won't be able to follow you into the access corridor. There is one drone within the corridor, as well as another one outside the exit, but taken solo, they shouldn't be much of a problem for you.

Another drone will be attached to the ceiling as you walk down the corridor, so look around when your visor goes fuzzy and blast it. Further down the hall, you'll be surprised to encounter more Trandoshans, of the knife-wielding variety; apparently they're able to overtake a heavily armed Republic warship, but can't be bothered to pack small arms for keeping the ship under control. They move more quickly than you can backpedal, but doing so will give you more time to fire on them before you need to use your melee attack, so do so.
Two more Trans will attack as you head down the ramp, so kill them quickly before heading further down the ramp for a resupply of Thermals and blaster ammo, then move on. After another droid access corridor, you'll come to a shotgun-wielding Trandoshan. At close range, these weapons can put a severe hurting on you, so whenever possible, try to take these guys down from a distance. You won't be able to grab one of these weapons--yet--so keep moving on until you spot a pair of troopers getting taken out by a mine. In order to disable any of these that you see, you'll need to crouch until you get right next to them, then hit your use key to dislodge the mine. A mine that can only detect things taller than four feet? Brilliant!
Anyway, beyond this corridor is the starboard data core, although 07 is nowhere to be found. You'll finally gain access to a bacta dispenser here, so grab a heal from it, then save your game before heading up the ramp.

The game here doesn't even have the decency to let you start your slice before sending in the clowns; as soon as you reach the top of one of the ramps, two scavenger droids will pop in from the ceiling and a gaggle of shotgun-wielding Trandoshans will blast through the far door. On hard mode, you can die in a couple of seconds from the combined fire of these guys, so your best bet for survival is to immediately backtrack into the corridor you just came from and use the doorway there for cover while you start dispatching your enemies. Keep in mind that a single sniper round to the head of a Trandoshan will end its adventure in piracy immediately. Sniper rounds are also decent one-shot kills when used on the droids, but they'll obviously be a bit tougher to hit due to the way they bob and weave.
Anyway, after you take down six or eight Trandoshans, and the pair of droids, you'll be able to slice the core here unmolested and retrieve the data that you're looking for. There's still another data core that you need to access, though, so no rest for the weary.
Unwelcome Visitors
Access Aft Data Core
The aft data core access corridor is overrun with Trandoshans, of course, but you do run into a spot of luck here; the defensive turrets in the hallways are still active and working to repel the invaders, leaving a bit of a safe zone in which a number of troopers have holed up, one of whom will try to get mouthy with you. We decided to discipline him the old-fashioned way--with a bullet to the head--and then repeated the treatment for all of his squad, just to teach them a lesson.
If you let the Trandoshans access the turret control console at the end of the hall, they'll subvert their targeting routines Deus Ex-style and start them firing at you. You obviously don't want this to happen, so shoot any baddies you spot going for a console before they can cause any mischief.
After moving on a bit, you'll come to a large open room. If you head inside, you'll notice a bunch of Trandoshans assaulting a trooper. There are too many for you to safely assault head-on, so backtrack a bit into the previous corridor and use the cover it affords to set up some sniper shots; your sniper attachment will place you well out of range of the shotgun blasts, and the Trans won't run towards you so long as they have a ranged weapon available, letting you easily pick them off one by one. One of these guys will drop a box of Thermals, as well, so feel free to use those on them if you're looking for some explosive fun.

At the end of this large room, you'll come to another corridor. Save your game before heading through the doorway, if possible, because doing so will trigger an event. If you spot the Trandoshan running down the hallway, shoot him as quickly as possible; if he reaches the turn, another two or three baddies will spawn in, which is bad news in these kind of close quarters. A sniper shot to the back of the head will probably take the dude down without a problem; if he's dead, then you won't have to deal with the baddies. However, four Trans will appear in the second section of the hallway no matter what you do. There's a box of flash grenades near the bacta dispenser at the beginning of these corridors, so feel free to use them on this little group of guys to stun them while you get up close and personal with your APC array gun.
Around the second corner here, you'll have to take down a pair of ceiling-mounted turrets. Wait until the Trans nearby are dead, then engage in your standard strafe-out-of-cover maneuver, and they'll go down fairly quickly. Soon afterward, you'll come to a pair of deactivated turrets, which will form the basis for the next little challenging triggered event.
There's a turret control console in the aft data core room, so head in there and start slicing it. As soon as you complete the slice, a huge number of Trans will start spawning in and coming at you; the absolute safest place to be here is directly underneath the turrets themselves. Feel free to lend a hand in the killing with your APC gun; ammo is probably going to be running short for the rest of your weapons, but you'll have plenty of it for the shotgun, thanks to all of the instances of that weapon that'll be dropping on the ground. The Trans apparently can't re-hack the console to flip the turrets back to their side, so don't worry about that. Note that, although the flash grenades are apparently only for biological targets, they will blind the turrets as well, leaving you temporarily defenseless if you use one. So don't.
Rescue the Squad
Rendezvous With Delta Squad Find the Exit To the Landing Gear
So, you've gotten cut off from two of your squaddies, who may be dead. You have the flight records you came for, though, so now's your opportunity to find out what happened to your incommunicado commandos. You're going to have some pretty tough fights before you can reach them, however, starting with a little melee in the guts of the ship.
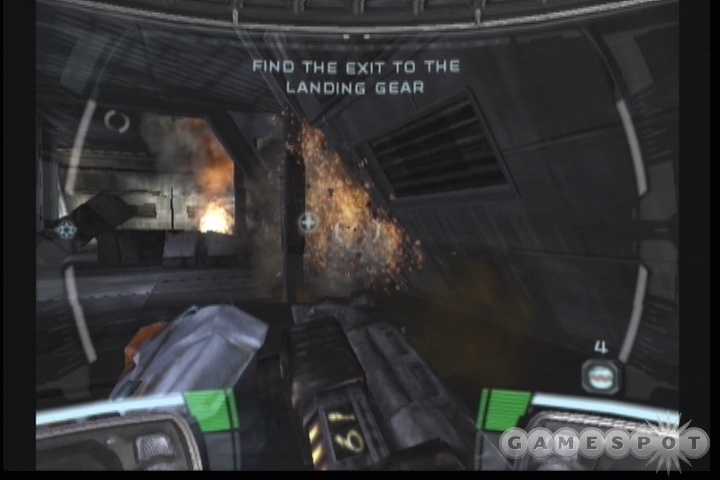
All we can really say about this level is to proceed extremely slowly. There are a number of Trandoshans and scavenger droids that will be coming after you, but they won't appear until you run past certain trigger spots on the ground, so a good plan of action is to run forward a bit until you either hear shots or the battle music, then backtrack behind cover to scope out the situation. There are plenty of explosive barrels scattered around, so feel free to use grenades to set them off for extra explosivey goodness. The droids are, as usual, going to be the biggest annoyance here, but if you can land a thermal or EC grenade underneath them, they should go down without a hitch. If they're really distant from you, then a sniper round will do the trick as well, but you may not have enough ammo for it to go around using it all willy-nilly.
When you hit the first ramp leading up, blow the explosives at the top to clear out any Trans waiting for you, then start walking up the ramp backwards; there's another Tran waiting on a platform overlooking the ramp to shoot you, so you'll want to get the drop on him. There's also a turret in a small alcove at the top of the ramp. After you get its position, throw an EC grenade or two underneath it to disable it before placing your charge on the debris nearby.
Luckily, the turret's position also holds a bacta dispenser, which you can use as an insurance policy while you're fighting your way to the next ramp. Feel free to use any remaining blaster ammo you have on the enemies here, including the turret that's barely visible at the top of the far ramp, as you'll be finding another box of it just before the ramp itself. When you've got that, fight your way up the ramp and to the end zone. You'll be able to grab a glimpse of a very fiercesome-looking Trandoshan as you top the last ramp, but you won't be able to kill him--yet.
Alone
Advance Through Breach Door
Your first big challenge here will be to get past a room in which four Trandoshans drop out of the ceiling and attempt to ambush you. Your best bet for survival is to walk far enough in to trigger the drop, then backtrack back to the previous corridor and start chucking in Thermal Detonators at them; one of them will drop another box, so you might as well use up your supply now.
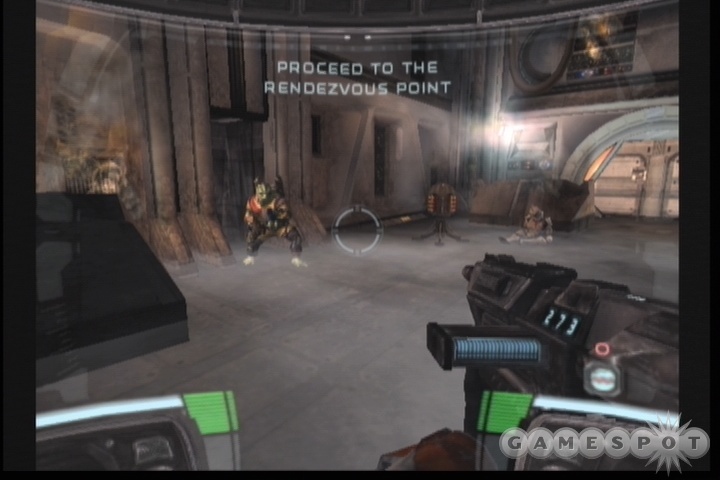
Another pair of Trandos will be guarding the corridor leading to the breach door, so kill them, then move into the corridor and heal up before breaching or slicing through the locked door. The room beyond the door is an obvious ambush setup, so save your game before going in. Sure enough, a pair of Trandos will pop out of the walls as you walk in, so kill them and grab the flashbang grenades before moving on.
Proceed to Rendezvous Point
Next up are (guess what?) more Trandoshans. They'll start to lay mines in your path, so be mindful of the red circles of death on the ground; when you spot them, clear out any nearby Trandos, then crouch to the mine and disable it. Luckily, there aren't usually any triggered spawnings when you attempt to bring up a mine, letting you go about your business unfettered.
At the end of the hallway here, you'll run into some very welcome sniper rounds and anti-armor shells, so load up on ammo and heal yourself before grabbing the next mine in your path. A quicksave here would be beneficial. After the next corner, you'll come to a barricade. You can either bust through it (the preferred path) or take a detour through the vent nearby to bypass it without having to detonate it. (There's also a little bit of commentary from 38 on the lightsaber that you find in the vent, if you're interested in that sort of thing.)

As you round the corner, you'll come across your first Trandoshan Heavily Armored Mercenary (HAM), which is in the process of completely eliminating a squad of troopers. You have a couple seconds to get yourself situated before taking it out, so be sure that your sniper rifle has a full clip and that you have flashbang grenades queued up. If you don't have flashbangs, there's no need to worry; they just make taking down the Elite a bit easier. In order to kill it, you'll need to pop it in the head with three or four sniper shots; the rest of its body is heavily armored, enough to allow it to withstand a full four anti-armor blasts and survive. If you can lay a flashbang at its feet (do this while it's pointing at you), you should be able to get your shots off before it brings its head back up. If it does get a bead on you, then your only hope of surviving its fire is to stun it by shooting it in the head; this will pause its fire for a second and give you time to line up another shot. The repeater weapon that these guys pack is incredibly devastating, and will kill you quickly, so try to stay behind cover while it's firing.
When the Trando is dead, grab the LS-150 Heavy ACP Repeater--essentially a machine gun--from its body. This badass weapon spits out shells at an incredible rate, and can hold a good amount of ammo in its clip. It's almost useless against droids, though, and will slow you down while you wield it, so try to save it for groups of Trandos. Speaking of which, there's one coming up....
After you blast through the barricade and head down the door, dispatch the scavs and the Trandos that are blocking your path to the rendezvous point. Unfortunately, the door leading onwards is jammed, so you'll have to wait for Fixer to slice through, and he'll take a few seconds. In the meantime, a droid dispenser will have popped up behind your position, leaving you with a gaggle of enemies to fend off. You do have a box of EC grenades to use on them, but we found it best just to hide behind one of the pillars near the door and fire at anything that comes to you, rather than being overly aggressive. When Fixer gets through the door, follow him through to end the level. You can destroy the droid dispenser if you wish, but there's no particular reason to.
Troika
Locate Delta 07

After the initial pair of Trandos here, you're going to come into a large room where more Trandos insist on taking up positions directly next to explosive barrels. Not the brightest scum around.... Anyway, this is going to be a good place to whip out your ACP Repeater, as it has decent accuracy at long range, and you'll be able to fire on the Trandos while 40 draws their fire, especially if you send him into the room ahead of you.
Soon enough, you'll come to a control room where you'll observer Sev getting the snot kicked out of him. You can't help him yet, so heal up and head down the ramp nearby. You'll come to a set of turrets overlooking a long corridor; feel free to use up any sniper ammo you have on them, as you'll be grabbing a box of it down the hall.
Shortly beyond the sniper rounds and bacta dispenser, you'll find another turret. Place your squaddie within, then help him staunch the flow of Trandos by shooting away with your sidearm pistol--there's no sense in wasting ammo on these guys when you have a bacta dispenser so close by. If anyone of the Trandos get up next to the turret, finish them off with a melee attack.
You'll come to the sealed door that blocks you from reaching Sev soon enough. Rather than breach it without the proper personnel, slice it open, then walk through guns blazing; again, this is a good time to whip out the ol' ACP Repeater. After placing Fixer in the snipe point near the door, sweep through the room and kill off every Trando you find. That'll learn ‘em for kicking Sev in the head.

Reviving Sev will spawn another appearance of a Trando Elite unit, but with a sniper in place, you should be able to take him down without having everyone die; feel free to join in with the sniping fun yourself, if you wish, but it's probably not necessary. Someone's going to take damage from his gun, but there's a bacta dispenser right here in the room with you, so it's a simple matter to heal up before proceeding to the end of the level.
Jailbreak
Locate Incapacitated Squadmate
Delta 62 is the last member of your team that you'll need to find. He's located in the ship's brig, which is under heavy guard, but that shouldn't matter now that you have your squad mostly assembled. To begin with, have Sev take up a sniping position behind the barricade at the start of the level, then move down the nearby hallway a bit until you trigger more Trando appearances. This is kind of a running theme in the game, if you haven't noticed: let your teammates snipe while you run forward and trigger an influx, then wait until all the enemies are dead before moving on and repeating the process. You'll be doing this a lot in the brig level, but thankfully there are plenty of sniping points for your killing pleasure. Not sure why a brig would be set up for close-quarters combat, but hey--if it works, it works.

Watch the side hallways for more Trandos as you proceed. You'll eventually come to an intersection where you can either disable a mine or blast through a barricade to proceed--blast the barricade, as attempting to take the mine out will leave you open to turret fire. After wending your way around the barricade, you'll find a bacta dispenser, as well as a side passage that'll let you get up behind the turrets, allowing you to take them down from close range without worrying about their fire.
After the turrets are down, place a soldier in the snipe spot below them and walk forward to trigger the predictable enemy barrage; the first set of foes is battle droids, while walking further down the hall will trigger a bunch of Trandos to bust through the viewport above. After both of them are dead, you'll be able to move up to the blast door that prevents you from accessing 62's cell. Before breaching through it, though, head up the path near the bacta dispenser to reach another viewpoint of the room beyond the door. Since there's sniper ammo up here, use whatever you have remaining to snipe out the turrets in the room before topping yourself off with the ammo box, then return to the door and slice through.
When the door is clear, be certain that your team doesn't charge through it; there's a mine on the far side. The safest thing to do here is to keep your team back, then crouch forward and click on the mine yourself; this will initiate the influx of Trandos into the area. When you hear them coming, immediately back up to the other side of the door. In their haste to follow you, the Trandos will trip the mine and kill themselves, or at least some of them. Heal yourself up before heading back in and killing the rest. (Alternately, you can slice the door, then return to the viewpoint from which you sniped the turrets and command one of your teammates to get the mine. Doing so will allow you to cover him with your sniper rifle and issue commands to both of your teammates.)
Locate The Elevator to the Bridge
When you've cleared out the brig, you'll be able to slice the console here and locate 62's cell, which is just around the corner from your location. Before you go to retrieve him, though, be sure there's a sniper in place across from the barricade near the console, as it'll soon be blown, leading to an assault of the droids. The battle droids will come to you, but the SBD's won't; they'll remain in the hallway leading to the exit from the level. You can probably kill the first two with a single EC grenade and the combined blaster fire of your squad, but the one nearest the exit is probably best just avoided; stun it with an EC grenade, then run past it to reach the exit.
Tactical Supremacy
Proceed Through Hallways To The Bridge
Now that you're near the bridge, you're going to have to make your way through the predictably difficult fights to reach it--you remember that whole thing at the end of the Coreship, right? Well, this is similar, but you won't have the ticking clock hanging over your head, so feel free to take your time and do things right.
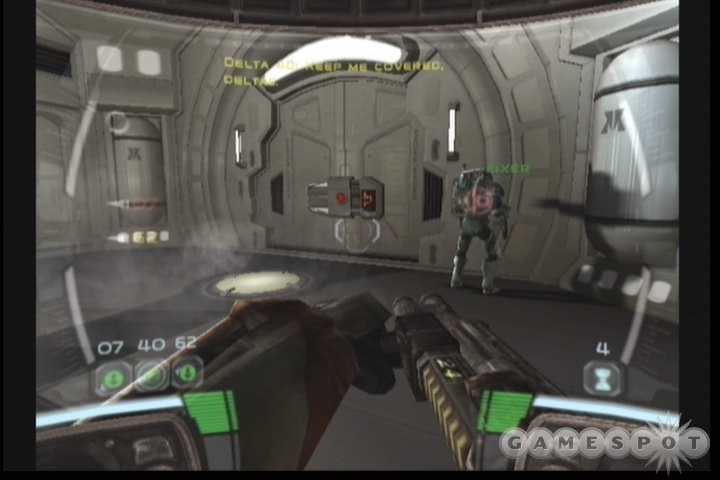
As soon as you begin the level, your squaddies will be breaching a doorway, but try to hold them back before they enter the hallway nearby, as there's a bunch of baddies there that can put a hurting on them if you rush in uncoordinated. The bulk of the Trandos are located around the corner to the left. If you have any flashbang grenades, you'd be well advised to bank one off the wall into that portion of the hallway, then command your troopers to secure that area. They'll rush in and start jacking the fools while they're still dizzy from the flashbang. Be sure to order one of your squaddies to snipe, then head down the opposite hallway to clear out the rest of the Trandos before the next breachable door.
Now, there's no need to hurry here, so feel free to slice through these doors if you want to take things quietly. It's usually the better option, as you'll be able to get the first shot off at the enemies beyond, and the turrets don't seem to react to your presence at all if you slice through the doors, letting you blast them without having to deal with their shooting you in return. Nice.
The next pressing area comes at the breachable door beyond the room with four ceiling turrets; heading through there will lead you to another droid dispenser, one that is further guarded by two SBD's. The SBD's are obviously going to be your primary concern, but you can't discount the threat posed by the infinite battle droids, so set one squaddie into snipe mode while another sets a charge on the dispenser. After the dispenser's been taken out, you'll be more able to focus on the SBD's, whether with EC grenades or anti-armor rounds, or just by focusing your team's fire on one at a time. You're near a bacta dispenser, so there's no need to unload all of your ammo on these guys, and in fact it's a good idea not too, as you're going to be facing a roomful of these guys shortly.
Locate the Trandoshan Jamming Device
Now, when you get to the door to the bridge, you'll hopefully have either an EC grenade or an anti-armor round left to your name, preferably the latter; either one will make the assault here a much easier task. The only way through the door is to breach it, so command your squad to do so. As soon as it pops open, target the SBD inside with your weapon of choice and try to take him down as quickly as possible. When the coast is clear, pop one of your squadmates on the sniper spot nearby, then command the other two to enter the snipe spots on the far side of the room, but be sure to select the ones on the lower level. They're going to take fire while they run across the room--there are three or four other SBD's around here--but they should be able to survive the trip, especially since they'll outrun the thermal detonators that the Trandos are going to be chucking at them. Having snipers on each side of the room will let you set up a nice little crossfire, and while your teammates are ducked behind cover, they should be mostly safe from the SBD fire that'll be coming their way.

If you can't quickly take out the first SBD, though, the other ones in the area will start coming towards the doorway and clogging it up, forcing you to make your stand there. This isn't as impossible as it may sound, especially if you keep someone sniping at all times, but it is difficult to beat all of them at once, especially if you're out of EC grenades or AA rounds. Still, it can be done, and indeed will have to be, since you need to access the bridge to finish the level.
When you've succeeded in clearing out most of the SBD's, heal up your teammates, but then return them to sniping positions; all three of them should be in the sniping spots at the far end of the bridge, underneath the platform that holds the jammer. If you set them up on the upper level, they seem to have a hard time shooting the SBD's that are going to come pouring through the door when you get near the jammer. Said SBD's are more of a nuisance than a real threat, though; you can safely sit back and watch your snipers take them down from afar.
Attack of the Clones
Defend Bridge From Counterattack
Soon after you regain control of yourself after the mission briefing at the beginning of this level, the bridge will come under fire from the forces of badditude in the form of Trandoshan mercenaries. These guys are more along the lines of Bossk than the former knife-wielding baddies, in that they're a bit taller and have jetpacks, which can be shot independently of the Trandos for instant (and quite amusing) kills. So long as you have two of your squaddies set up in the sniper positions on the upper platform of the bridge, you should be able to eliminate all of the enemies without a problem, although you may have to wait for the Trandos to start climbing the ramps before your teammates can shoot them.
Return To The Elevator
As you exit the bridge, you'll have to fight your way through yet more Trandos in the hallways beyond. You'll eventually reach a room with three snipe spots inside, but, in a twist, you actually don't want to put all your squaddies in all of them. Instead, man the position closest to the door and the position in the right corridor; this will give you a good amount of cover for the incoming Trandos. If you set a trooper in the left corridor, he wouldn't have anything to fire at, and would likely get pounded by all of the enemies that are soon going to be flowing out of the door behind that position.
Speaking of doors, the right hallway has a mine in it; set the unassigned trooper to disable it while the snipers are busy killing everything in sight. In the room beyond the mine, you're going to find a veritable cornucopia of armamentary memorabilia. We got therm grenades, we got EC grenades, we got no fewer than three separate ammo packs for your anti-armor gun. We're pretty much set on ammo. There's also a bacta dispenser here, so heal your team up before heading back out into the hall.
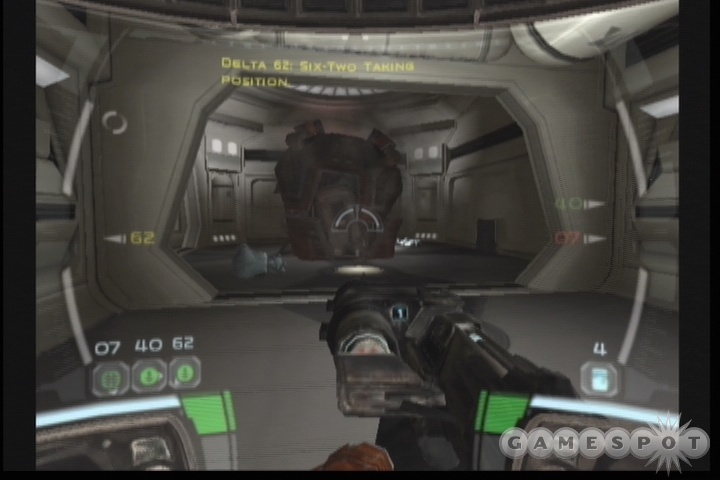
By this point, you'll have probably noticed the droid dispenser at the end of the hall. This is no ordinary dispenser, though; it'll be popping out SBD's instead of regular battle droids. Yeah, sounds like fun, right? Well, thanks to your anti-armor shells, you should be able to get close enough to blow it. What you're going to want to do is set up a sniper at the far end of the hallway, then bring two of your teammates down to the dispenser and use one of them to blow it. After clearing out the baddies in the hallway with your anti-armor attachment, you should be able to get fairly close to the dispenser itself, allowing you to dispatch any other SBD's that pop out of the dispenser while your teammate is working on setting a charge. The guys do go through a lengthy discharging animation, though, and they'll be immune to your fire until they're done with it, so be sure to wait for them to actually start aiming at you before you let loose with your precious anti-armor rounds. If you run out of AA rounds (entirely possible, since the charge takes 20 seconds to set), start using your EC grenades to fry the droids. When the charge is completely set, though, immediately blow the dispenser and sprint back to the ammo room to heal yourself and your teammates up. The sniper can take care of any remaining SBD's in the hallway. When the coast is clear, pick up any ammo that you can from the ammo room, heal everyone up, and resume your trip.
The next little stumbling block isn't too hard to get past. You'll notice a set of sniper positions off to the right after one of the subsequent doors here. Unfortunately, the path leading to them is blocked by a mine; set one of your troopers to disable it, then get the other two into sniping position before crossing the hall to trigger the influx of Trandoshans. You know, rappelling in from the skylights is one of those things that sounds cool when you're discussing it with your buddies back on the bounty hunter ship, but all it seems to do for these guys is earn them a one-way trip to meet the Scorekeeper. Your snipers can easily handle any enemies that appear from the far side of the room; when the coast seems clear, form up and make sure the other rooms there are empty before returning to the barricade in front of the other door and blowing it.

The last challenge waiting for you before the elevator is similarly non-threatening. You'll come to another pair of sniping points near some of the high-yield explosive barrels. Shoot the barrels to prevent them from blowing later, then set up two of your squaddies in the two sniping points before running down the hall to trigger the appearance of Trandoshans. The only catch here is that more Trandos will appear from the skylight above your snipers after enough of their ground-based brethren get killed, but if you stand underneath them as they rappel down, you can easily take them out with your melee attack before they have a chance to fire at all. When that's done, you can form up and bust through to the elevator. A pair of Trandos guard it, but at this point, that shouldn't give you pause.
Saving The Ship
Fix The Detention Center Lockdown System
After your elevator runs into some unfortunate booby-traps, you and your squad will be forced to fight your way through the detention center (again) in order to repair three circuits. When all of them are patched up, you'll be able to activate the area's lockdown system, which should enable you to prevent any of the Trandos here from leaving.
There's a pretty basic floorplan here, consisting of multiple corridors at right angles to one another, with guard stations at each intersection. The guard stations can often be used as sniping spots, and you can also find the corridors leading up to the overwatch portals in the corridors; these will usually have some kind of ammo within, and there'll often be a bacta dispenser in the corridor as well.

After heading through the first corridor to the first intersection, you'll find the first circuit. Set someone in snipe position at the guard station while someone else hacks the circuit, and protect them both from fire until the hacking is done. At the next intersection, you won't find a circuit, but you spot something much more ominous: if you zoom in your sniper rifle all the way down the hall, you'll spot a wicked-looking turret that's been set up. The best way to proceed here is to keep all of your soldiers behind you while you slowly creep down the hallway, sniping Trandos in the head from long range; you can definitely get the guy standing behind the turret from a distance, even if you can't clearly see his head. When he falls, though, another Trando will come up shortly thereafter and attempt to man the turret again, so be prepared for it.
As mentioned, the second circuit is in the middle of this long hallway, so repair it before heading down to the turret position. Said turret isn't going to be tremendously useful to you, due to its huge area of effect and inability to turn completely down the next hallway, but feel free to task a soldier to it during the next wave of enemies. Regardless, though, you'll have to proceed down two more hallways to find the last circuit; fix it, then return to the turret and locate the newfound charge spot in the hallway near it; you can blast this to exit the level and head down to the garbage level.
The Wrath of the Republic
Exit the Garbage Airlock Advance to Hangar A
Wow, a whole lotta clone's have been dispatched by the Trandoshans, it would seem. Time to make them pay for their crimes against the Republic!
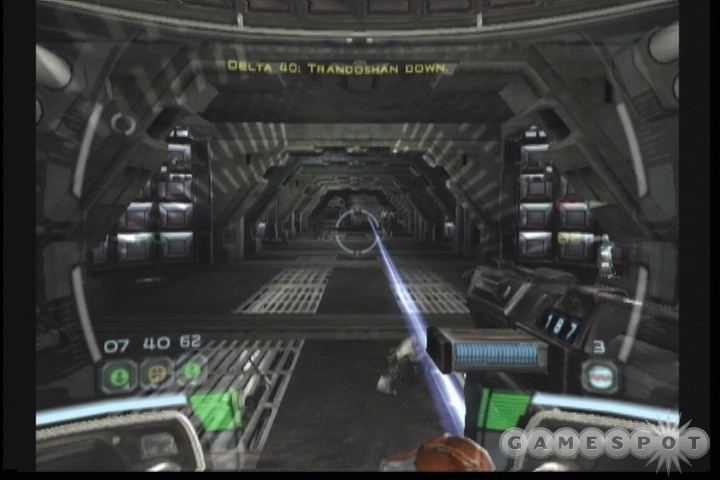
As you exit the garbage dump, send your troopers up the ramp ahead of you; there are going to be a lot of scavs here, and it's obviously better to have them aiming for your friends than for you. You'll want to set one of your soldiers into sniping position by the crate while another starts slicing the console to the rear of the corridor; when hacked, this will instruct the turrets to fire on all hostile targets, including the scavs and the Trandos, so walk up the hallway a bit to cause some of those enemies to spawn in. When the coast seems clear, walk into the opposite trash dump to pick up some thermal detonators (if you need any), and move on.
Around the corner from the end of the turrets is another set of Trandos, with one of them attempting to hack a console. You can't get too close to this guy due to a mine in the path, but you need to stop him from hacking the turrets, so pop him with a sniper round or just chuck a grenade at his feet before disabling the mine and hacking the turret your own self. This will let you pass through to Hangar A, where yet more Trandos are waiting for you.
Eliminate All Trandoshans
It's regretful that the Trandoshan community is undoubtably going to sue LucasArts for inciting violence against them, because this mission is kind of fun. In order to complete the level, you're going to need to destroy the Trando dropship that's positioned in Hangar A. You'll note that there are two entrances to the hangar, with one of them on the upper level of the ramp and one farther down. To begin with, enter the upper level, kill the Trandos there, then set up a sniper behind the box before you start chucking thermals and using your blaster to kill the Trandos on the lower level. They'll quickly respawn, but you might make a little dent in them before you head to the lower portion of the hangar to blow the ship. Leave your sniper up here before you head down the ramp; he'll quickly be able to take out the grenadier that appears on the far right walkway of the hangar. This grenadier will be very annoying if he hangs around while you try to move around on the lower level.
On your way down the ramp, you'll have to kill another Trando with a new weapon; in this instance, he'll be packing a Concussion Rifle, which creates a devastating shockwave when it hits. There'll be plenty of ammo for it in the hangar, so feel free to use it on any Trandos you see, but be aware that you can be hurt by your own fire if the projectile lands too close to you. It's most useful in taking out the turret gunners here.

When you enter the lower level of the hangar, you'll note the rocket turrets that are set up on either side, underneath the balcony. As with most rocket turrets, the gunners can be killed, but soon after you take them out, another Trando will pop into the turret and start using it again, so you'll need to kill the turret gunners three times in each turret before you can be assured of safe passage. Luckily, your concussion rifle is quite accurate and its blast will destroy the gunners in one shot. With it equipped, place your squaddies in the hall by telling them to secure a position near the blaster ammo, then you're your way into the hangar and start shelling the turret. After the leftmost turret has been taken out three times, you can aim through the small gap in the boxes and hit the second one without having to worry about retaliation. One of the side effects of this level of caution is that the mine that prevents you from accessing the first turret will likely be tripped by Trandoshans, obviating the need to pull it up yourself while you're under heavy fire.
When the two turrets have been disabled, you can return to the upper level for a bacta refresher, should you need it. If you're ready to head into the hangar, though, cancel all trooper orders and get them to form up on you. Walk in, place a sniper at the snipe spot near the door, then move around and quickly get the other two commandos into the turrets. Your primary difficulty here will be more Trandos with concussion rifles; as you'll find out, these things can pack quite a punch when they hit you. To avoid the worst effects of the blast, keep moving around, and try to listen for the distinctive sound the rifle makes before taking out its owners.
After both of the turrets start firing on the ship, it'll be destroyed in less than 20 seconds, at which point the level will end.
Saving The Ship
Advance to Hangar B Prepare Hangar Defense
The next pair of levels will involve killing a whole lot of droids; the Federation has arrived to take possession of the ship, and your squad is the only one that can stop them. To effect their desires, they've started sending droid dispensers into the ship's three main hangar bays. Your goal is to defend these bays and prevent the droids from gaining a foothold on the ship, or, failing that, destroy the droids and prevent any more from coming aboard.
Your first goal is to reach Hangar B and defend it. After passing through a long maintenance tunnel, you'll come to a small room with some anti-armor shells and EC grenades; you'd be wise to make a full save here, since the upcoming fight can be rather tricky.
In the hangar beyond, you're going to come up against a huge number of sniper positions, charge placements, and explosive barrels, all of which will have context-specific commands for your troopers. Most of these are just distractions, and won't come into play during the upcoming fight. The only really critical placement here is to place three proximity mines on the barrels nearest the hangar's force field, and to place a charge on the crate near the field control coil (the large purple shaft in the corner of the hangar). Beyond that, you don't need to worry about much, beyond getting one of your squaddies into the grenadier position in the hangar and another into the anti-armor position in the middle of the room. The third squaddie should be in form up position, so that he sticks near you.

As the battle begins, a droid dispenser will come floating through the field and land right near the proximity mines you laid on the three barrels; the resulting explosion will take it out. The second droid dispenser, though, is one that'll discharge SBD's, and you won't be able to destroy it so easily. As it lands, though, Advisor will key you into the fact that you can shut the hangar down for good by placing a charge on the field coil, so try to be standing by the coil before the SBD dispenser comes in, then immediately task the remaining squaddie to set the charge as soon as the spot becomes active. While he's doing that, you should have one sniper firing away at the droids, while your grenadier will be chucking EC charges at them as well. This still won't prevent them from coming out, though, so feel free to trip the crate charge you laid earlier when an SBD is standing near it, and use your anti-armor charges on the baddies, as well; there's another box full of ammo for your AA attachment near one of the snipe spots in the middle of the hangar which you can use for refill duty.
It'll take 20 seconds to place the charge on the coil; when it's ready to go, hit it immediately, then start running out of the hangar into the corridor leading to the next one. The SBD's will occasionally pelt you with some kind of massively-damaging electrical ranged attack that can kill you instantly, so be sure to clear out any that are hanging around the dispenser with an EC grenade or an AA round before you start running. You can leave the squaddies in their positions to cover your retreat. The next hallway will quickly result in the end-of-level loading screen, so they'll automatically be warped on after you reach it, even if they're dead.
Holding the Line
Advance to Hangar C
The Trade Federation has had more time to deal with the upcoming hangars, thanks to the way they were able to keep you busy in Hangar B. Thus, there'll already be a droid dispenser waiting for you here when you reach it. If you move quickly, though, you should be able to get around it and disable the force field without having everyone die.
Unfortunately, the only way to reach the hangar is to pass over the upper balcony. Take the opportunity to heal up any members of your squad that need it; while they're doing so, chuck a grenade or two down below to destroy the explosive barrels. They're only going to cause problems for you when you need to pass through that area in a second. Disregard the placement positions on the balcony, as well; when everyone's healed, tell them all to form up and head down the ramp on the far side of the balcony to reach the lower level of the room.

When you're in, you'll need to command each of your squaddies to perform a task. One of them should be assigned to the snipe point just inside the room's entrance, while the other two will follow you to the other side of the room. When you reach it, command one of them to start laying a charge on the field coil, while the other goes to work on the console underneath the balcony, near the broken speeder. While all this is going on, get up next to the droid dispenser and start killing them as they pop out with your melee attack; this will prevent them from going to town on the guy laying the charge.
After you get the head's up from the slicer that the console's been hacked, though, get away from the dispenser; the speeder will shoot out towards it, instantly blowing it away. Pretty handy, that! At about this time, the field coil charge should be about ready to go, so blow it and start the retreat. An SBD dispenser will likely have dropped during all of this, but you don't need to kill them to move on, so leave your sniper in place and take the other troopers and head back to the ramp corridor, where the door to the next part of the level will have opened up.
Overwhelming Odds
Advance to Hangar D
Ok, here's where the real fun begins. Hangar D has been fortified with droid and SBD dispensers, leaving you with the monumental task of taking out an enemy that's entrenched and has the advantage of numbers. What's worse is that droidekas have been dispatched to monitor the hallways leading up to the hangar, meaning that you'll have to fight your way to the fight, if you get our meaning.
To begin with, you'll find a sniping position, then a room full of explosives and a breachable door, behind which lurk three SBDs. There are a few ways to deal with this situation: either you can place charges on all of the explosives, then command all of your guys to hide behind the sniping spot while you breach the door yourself, then lure the SBDs back to the entryway, where they'll get blown by the explosives; or you can breach the door, then use the cover on either side to destroy the droids with anti-armor charges or EC grenades. The first is definitely more ammo-friendly, but it's worth noting that you're going to find more of both EC grenades and anti-armor shells shortly, so if you want the quick out, just save your game and try taking them all down yourself.

Next up is another hallway that's completely packed with explosives. It's important that you don't move too far up the hallway here; instead, just start pointing your teammates towards the barrels and tell them to plant as many charges as is physically possible. You don't need to have a charge on every single barrel, but try to make sure that each small group has one barrel with a proximity mine on it, and don't miss the pair near the crates. Eventually, you'll notice some droidekas moving around the hallway nearby. When one of your teammates tells you that they're coming back, drop back behind the sniper spot, set Sev up to start blasting away, and watch the fun begin. As the droidekas come down the hall, they'll trip the proximity mines and get blown away. If they don't get hit, then your sniper will be able to take them down; you can help out by hitting them with EC grenades or your blaster.
When the droids stop coming, grab the AA rounds from the hallway and head down to the bacta dispenser. There are a few SBD's in the hallway to the right, so use the AA gun to blow them away, then retreat down the leftmost hallway to find yet more AA rounds and some EC grenades. When you're ready for the real fight, save your game and head through the door behind the wreckage of the SBDs.
Take Up Defensive Positions At the Rear of the Hangar
Alright, now you see what you're up against. Inside the hangar, there's a droid dispenser, a droideka dispenser, and no fewer than two SBD dispensers. It's gonna get sloppy!

Before you head in, be sure to have EC grenades primed and ready to go, with your blaster rifle as a sidearm. You should have a full loadout of EC grenades and AA ammo from the previous ammo drops, so you'll have some weapons at your disposal, but your initial goal here isn't to destroy everything that moves; it's to get to the rear of the hangar bay by taking a right turn from the door, then taking up defensive positions there. The only challenge lies in getting there alive, which is obviously difficult due to the number of SBDs in the area, and the proliferation of explosive barrels, which, when detonated accidentally near your squad, will usually be the cause for a quickload. Your real objective here is to just run forward along the wall to the right of the doorway, shooting barrels that you see before you get into their area of effect and stunning any SBDs or droidekas with EC grenades. Your teammates, as usual, will be more resilient in the face of damage than you are, so you may want to just point them towards the rear of the room and follow in their wake; they'll draw fire from the droids in the way, but this will prevent you from using grenades, lest you want to blow your own team to shreds. Be prepared to try this run a few times; it's pretty easy to get blown up during it.
When you do reach the rear of the hangar, though, you'll be instructed to slice a terminal so that Advisor can deliver some "ordinance." The terminal is, of course, completely exposed to fire, so you're going to have to protect the slicer from the numerous droids in the area. You'll notice a turret in the corner across from the terminal, as well as a sniper spot and a grenadier spot. Place one soldier in the turret, one in the grenade spot, and get the last working on hacking the terminal. The turret should be able to deal with most of the regular battle droids as they pop out of the dispenser, while the grenadier will mostly disable the foremost SBD's with EC grenades. The prime sticking point for the hacker, then, will be a droideka that will take up position in the far corner of the hangar, near the field coil. You're going to have disable this guy if you want your slicer to live through the agonizing 30 seconds it'll take him to slice the console. If you have any EC grenades left, it's perhaps easiest to just chuck one in the rear corner every time you hear the distinctive droideka firing sound and notice the stream of lasers impacting your slicer. You can also use AA rounds, as well, but getting the correct angle of fire can be difficult at long distance. Luckily, you should have a complete clip of AA rounds from the hallway before this hangar, and there are more waiting for you behind the sniper position nearby.

Beyond the droideka, you'll want to periodically check the SBD dispenser near the slicer to ensure that none of the baddies issued forth from there are pounding him in the back. If the slicer does go down, it'll probably be easier to disengage the turret gunner and retask him than reviving the downed friend. If there are only a couple of seconds left on the slicing timer when the commando goes down, you can even try to complete the slice yourself.
After the terminal has been sliced, you'll have to wait for around 20 seconds for the ordinance to arrive, so keep your troopers in place, and retask the slicer to the snipe spot, if he's still alive. When it does come, though, your prayers will finally have been answered; a full Republic walker will have come in on the lift, which you can use to destroy pretty much everything in the hangar. You won't be able to see any access points, but if you get up next to the ladder underneath the walker, you'll be able to climb aboard. Do so, then use the turrets to shoot out the field coil. You can also destroy all of the dispensers, if you wish. After everything's kablooie, exit the walker, and Advisor will drop the lift and let you into the exit from the level.
Deus Ex Machina
Exit Maintenance Tunnels
Advance to Gun Control Station
As with the escape from the Coreship at the end of the Geonosis levels, you're going to be on a timer in this level, as the Federation battleship is attempting to destroy the Prosecutor by firing on it directly. Instead of a strict countdown, though, you'll get periodic notifications of hull strength; you'll have to find a way to prevent the destruction of the ship by disabling or destroying the Federation control ship before your hull strength reaches zero.
Unfortunately, there's approximately a billion droids between you and the gun control station that you're trying to get to. After you reach the end of the maintenance tunnel, save your game and head down the corridor to your right. You'll come across a long hallway that's filled with battle droids, SBD's, and hostile turrets; you'll have to fight your way through all of them in order to reach the next room. Luckily for you, there's three snipe spots in the hallway, as well as plentiful blaster ammo and two boxes of EC grenades in the small room just before the first sniper spot. Use any EC grenades you have left in your inventory to cover your approach to this room, then heal up and head back out to start making your way down.
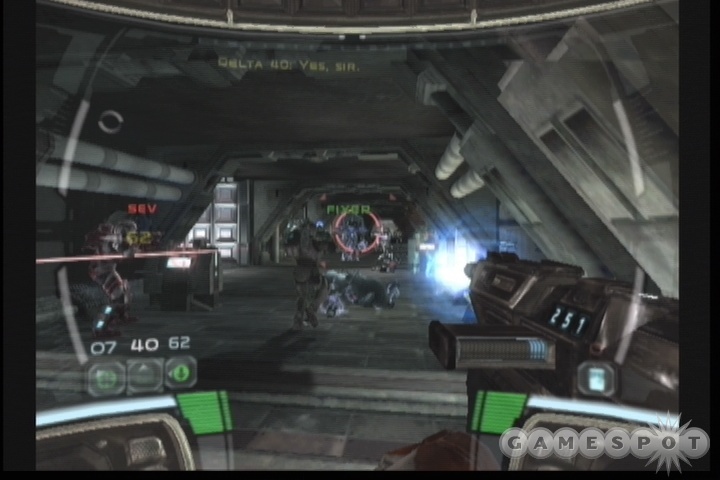
With ten EC grenades at your disposal, you should be able to stun or kill most of the enemies in your path. The turrets are going to be extremely bothersome here; they're not difficult to kill, but they will dish out quite a bit of damage to your snipers as they move up the hall. Luckily, they'll usually take damage from the EC grenades that you'll be throwing up the hall, which should let your troopers kill them on their way to the forward snipe spots. This all makes it sound a lot easier than it is, of course. For maximum effectiveness, order your commandos to man one snipe position at a time. When the first one is manned, chuck a grenade into the hallway so that it lands just beyond the next snipe spot; this will damage the ceiling turrets there, and stun or destroy any guns in the vicinity, allowing you to command your next trooper forward to the next sniping spot. Repeat the process until the first two positions are manned, then order your third squaddie to stand his ground at the rear of the hallway, near the first snipe spot. Chuck any remaining grenades down the hall, towards wherever you suspect any turrets are remaining, then return for the last box and heal yourself. ,
With two snipers in place and a decent supply of grenades, it's time to make a charge for the end of the hallway. You'll need to keep at least two grenades for when you reach the door, but you'll have three that you can use to stun the incoming droids. There are a pair of droidekas that will come towards your position, but they shouldn't be overly difficult to take down, thanks to your snipers. After both of them are dead, you should start running towards the door; the death of the second droideka will have caused a pair of SBD's to spawn in in the far room, but the remaining grenades can be used to stun them while you form up your squad and charge through to the gun control station.
Slice All Three Consoles
In the gun control room, you'll notice a pair of bacta dispensers; get your guys healed up before charging up the ramp to the gun controls themselves. When you arrive, you'll be able to stock up on AA ammo and EC grenades, which you're going to need, because the three consoles here will have to be hacked simultaneously, for a solid minute apiece. Obviously enough, you're going to have to situate your troopers here while you use your wiles and guns to watch their backs.
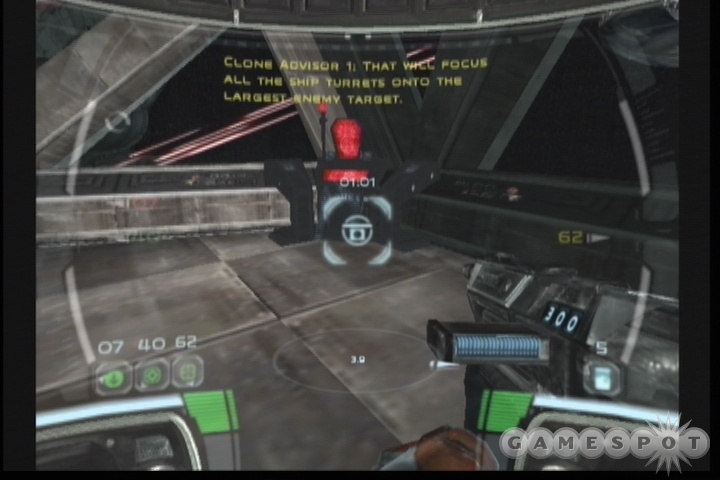
Oddly enough, the real challenge here comes from the blaster droids, not the SBD's. The regular droids will be the ones to charge up the ramp and start shooting your teammates in the back, while the SBD's are content to sit down at the bottom of the ramp and fire away at you. As such, you'll want to be careful to take down the battle droids as they charge up the ramp, but be sure to keep an eye on your shields, as you won't have anyone around to draw fire; if the shields go down, you'll have to crouch behind one of the sniper positions here and give them a moment to recharge before you go back to work. Your EC grenades can be used to disable the SBD's, if you wish.
After a full minute of simultaneous slicing, your troopers will be returned to your control, allowing you to place them in the sniper and anti-armor slots near the consoles. Your only goal now is to wait; after around 30 seconds of fire from the Republic ships, the Federation control ship will be destroyed, resulting in the destruction of all the droids on the Prosecutor, and the end of the level. Watch the side ramps here to ensure that none of the battle droids make it up to the control area, and chuck down the last of your grenades to clear out any remaining droids before ducking for cover and waiting for the next mission to start.
Day 765--Clone Wars - Kashyyyk
The Rescue of Tarfful
Find Slaver Camp
After you make landfall here, you'll have to start maneuvering through the suspiciously corridor-like underbrush of Kashyyyk towards the slaver camp. After you dispatch a pair of sentries, you'll come to it; there are a pair of sniper spots overlooking the main door, along with a rocket turret off to the right. You'll need to kill the Trando manning this turret with your sniper rifle if you want to place one of your troopers inside, but if you do so, you'll have two snipers and a turret on your side, allowing you to breach the door in relative safety.
Infiltrate Slaver Camp

Although it'll appear that the main threat will be coming out of the main door here, in actuality, you're going to be facing an influx of baddies from the side of the sniper positions, so stay near that wall and start shooting them as the Trandos come over. Your rocket turret will do most of the heavy lifting, so concentrate your fire on anyone who gets set into a position to threaten your snipers. When the hostiles have been eliminated, your teammates will automatically leave their positions, allowing you to walk into the camp without a problem.
Ha, ha; if only that were the case. As you walk down the corridor leading to the camp, you'll be trapped by falling walls behind and in front of you. When Advisor gives you the location for charges, instruct someone to lay them down, then blow the wall and head through to reach the next level.
Hard Contact
Secure Landing Pad

In order to get into the slaver facility, you'll need to secure a kind of beachead on the landing pad near your start point here. To do so, crawl out of the small tunnel, shoot out the spotlight, and place your squaddies in the two sniper spots in the area. They'll help you take down the annoying scav droids, which will soon start popping up over the walls here. Soon enough, you'll get another charge point, so instruct your free squaddie to place explosives. You're going to have to deal with the scavs in the meantime, and although your snipers are good shots, they're not always going to hit, so keep your blaster by your side and shoot down any scavs that manage to get behind your teammates.
When the charge is ready to go, blow the wall, then chuck all of your thermal detonators into the corridor beyond; there's another box on the far side that'll fill you right back up. Be sure to kill the Trandos on the catwalks before charging in, though, as they're able to shoot down through their floor to hit you from above.
Around the next corner, you'll come across your first Wookiee, and a big guy he is, too. I guess Chewbacca was unnaturally skinny for his race, because these guys are huge! This first Wookiee will disappear pretty quickly, but he'll leave behind his bowcaster, should you desire one. Anyone familiar with the bowcaster of the Jedi Knight games will be familiar with the basic functions of this weapon; clicking fire will send out a low-power bolt, while holding down the button will charge the weapon, allowing you to shoot out a more powerful projectile that can pin your enemies to walls (a la the stake gun in Painkiller) or bounce off of walls to hit enemies around corners. It's a nice pickup, and will probably be more useful than either of the Trando weapons that you've come across so far.
Identify Incoming Ship

After the Wookiee takes off, you'll have to move around the corner from whence he came and penetrate the tower nearby to get a glimpse of the incoming ship for Advisor. The entrance to the tower is going to be crawling with a seemingly endless supply of Trandos, but since you have a box of thermals at hand, feel free to charge in after throwing them into the entrance. It's just like a breach, save without those annoying doors. Inside, you'll find a trio of bacta dispensers, which is going to be useful, considering you haven't seen one since the beginning of the level.
When you're fresh and ready to go, run up the ramp here and get an eyeball of the incoming ship. When you're ready to move on, place a charge on the nearby barricade and get ready to finish off the level. There will be plenty of scav droids coming at you while the charge is being laid, though, so after you blow it, return your party down to the bacta dispensers and heal them up before running through the exit.
From The Shadows
Penetrate Detention Center
As soon as this level begins, instruct all of your teammates to head down towards the grenade position, with one of them actually manning it; you yourself, however, should stay down at the start position. Soon enough, Trandos will begin appearing where you rappelled down and will start to rappell after you; if you hit them with thermals as they line up, you can kill the lot before they hit the ground. Your teammates will take down the rest of the enemies with their blasters.
When you're clear, slice the door near the grenade position. Be sure not to blast it open! Slicing it will merely open the door, revealing the Trando HAM (heavily armored mercenary) within. Your grenadier will start pelting it with sonic grenades, allowing you to finish it off with sniper shots to the head. Be sure your other two teammates are out of sight, as the HAM will probably start shooting at them if it can see them, and it'll make quick work of their health.
Free Imprisoned Wookiees
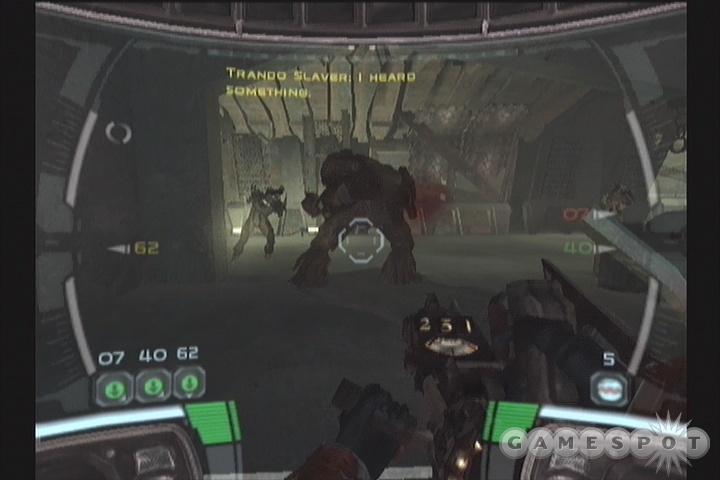
Now that the HAM is out of the way, you'll have to move through the door to the right of his position and clear out more slavers before you find your first imprisoned wookiee. Obviously, it's going to be locked up nice and tight, so you'll need to slice a terminal in order to free it; as you do so, more Trandos will be coming at you from the doorway beyond the barricade here, so cover the slicer until the Wookiee's free, then set a charge on the wall to bust through. The Wookiee's mad--real mad--and he'll do all the hard work of killing your enemies if you just let him run in. He can die, and probably will in the next room, but for now, just let him go crazy and work out some of that pent-up aggression.
After you walk into the next room, shoot the explosive barrel near the anti-armor position, then walk towards it, but be ready to retreat; a thermal detonator will be chucked at you shortly, and it's best to be elsewhere when it explodes. After it goes off, though, task a soldier to the position, then let the Wookiee get up close and personal with the Trando HAM here. Your anti-armor won't fire while the Wookiee is between it and the HAM, so whip out your sniper rifle and start getting your headshots while it's occupied. The mercs in the corner of the room near the door will continue to chuck out grenades, so you may want to just throw one at them pre-emptively.
Even if the Wookiee survives all this, he'll stay behind at this point, but don't worry; there's another Wookiee in a cell in the next room that you can free. He'll push away the barricade leading outside, so follow him out and kill your way up the tower to the next level.
The Bodyguards
Rescue Tarfful
It appears that Tarfful has been taken from the prison by General Grievous for some reason or another; your job is to get to him and rescue him before he's taken off-planet. Begin by shooting out the spotlight above your spawn point, then start working your way around the corner and killing everyone you see. You have a couple of boxes of thermals in the area, so feel free to use up your current supply as you go through.
After you reach the bacta dispensers, breach the door beyond, then kill everyone in the room there before slicing the terminal. You'll come out to a Wookiee who will sadly depart this mortal coil shortly after kicking all kinds of ass on the Trandos attempting to subdue him--yet another object lesson as to why it's unwise to decorate your pillars with numerous deathly spikes.
Verify Grievous Presence on Kashyyyk
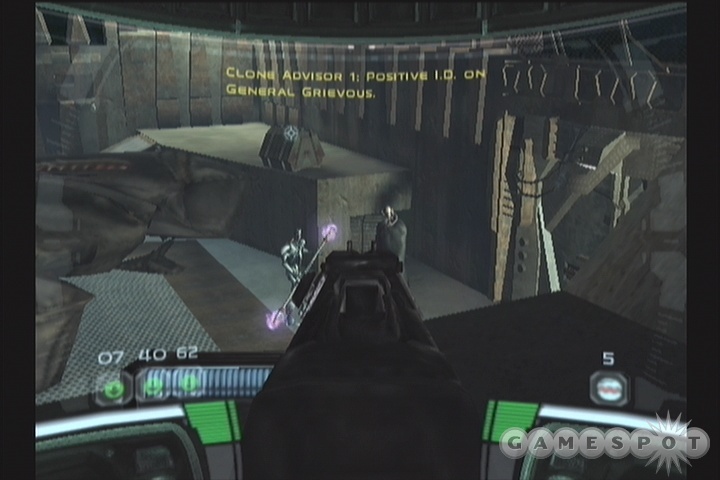
After the Wookiee dies off, you'll be commanded to verify that Grievous is indeed planetside. Doing so is a simple matter of walking up to a viewport on the upper level of this room and looking out the window; you'll see Grievous along with one of his dreadguards in the landing pad below. Unfortunately, you'll be spotted, which should lend a sense of urgency to your movements; if you don't get down to Tarfful soon, he'll be taken off planet and you won't be able to rescue him.
To get to him, you'll need to place a charge near the window, then place another on the forcefield lining Tarfful's cage nearby. As this charge is being laid, numerous Trandos will be coming at you from the far end of the corridor, so whip out your sniper rifle and start blasting them.
Protect Tarfful
When you've reached Tarfful, you'll need to quickly slice or breach the door next to him to reach the landing pad. Breaching it is the preferred method; although your teammate will chuck in an EC grenade at Grievous' bodyguard and miss, you can improve on his aim by throwing an EC grenade of your own at the droid's feet; since it jumps to avoid the first one, it'll land right on top of your own grenade, stunning it long enough to let your guys get inside the room.
Now, there are two of these bodyguards, but luckily only one will appear at a time. They're maniacally tough to kill with your normal weapons, so you'll want to set up your troopers in the sniping and anti-armor spots in the landing pad. Hopefully they can get there while the bodyguard is flipping around in the air, as having people in those two positions is crucial to actually winning the fight. The trick here is that sometimes Tarfful's scripting will break, and he won't follow you into the arena for the fight, so you'll have to take on both bodyguards with just your troopers. It's tough, but not overwhelmingly so.
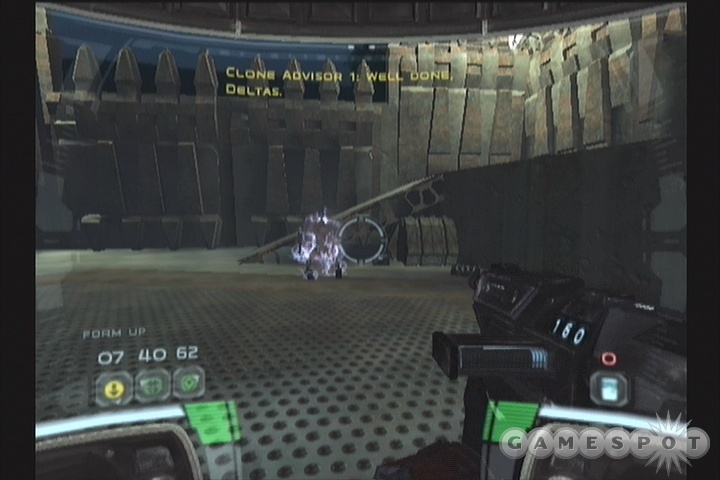
After both of your troopers are in position, you can have the third one attempt to lure the bodyguard in for close combat. Your first priority, though, should be to stay the hell away from these guys; your troopers are pretty resilient, but they'll cut through your armor and health with just a few swings of their batons. The general jist of the fight, though, will entail you sitting back while your sniper does his thing on the baddie. If it does get entangled in close-quarters combat with a commando or Tarfful, chuck an EC grenade at their feet to momentarily stun the foe, then start pelting it with blaster fire.
Note that the second bodyguard will almost always land in the same place when he jumps into the arena (which usually occurs immediately after the first one dies). If you plant an EC grenade just before he hits the ground, near the blaster ammo by the anti-armor position, you should be able to get a headstart on killing him thanks to the stun effect. If you have more than one grenade, chuck them all at his feet and he'll probably stay stunned long enough for you to kill him before he has a chance to move.
Obliterate The Outpost
Locate Trandoshan Compound Breach Perimeter Defense

Walk down the path here until you come to the outer edge of the compound. There'll be a single soldier up in a tower overlooking the minefield here; regretfully, he's chosen to haul an explosive barrel into the tower for companionship, allowing you to destroy the entire tower with a single shot. After it goes up, task one of your soldiers with disabling the first mine, then back up. A whole horde of Trando berserkers will be coming for you soon. They'll trip their own mines, thankfully enough, but will still need to be taken out before they deal too much damage to your teammates.
Penetrate Outer Defenses
When the coast is clear, start working your way down the path towards the base. You'll come across some battle droid opposition, but nothing you shouldn't be able to handle easily. After you clear the trenches, you'll come to a sniper position; set up one of your teammates there, but stay back, as the rocket turret nearby will open fire. You'll want to edge yourself over behind the sniper and use your own sniper rifle to eliminate the turret gunner, then walk forward a bit to trigger another wave of berserkers.
There are actually three separate triggers here, if you follow the path laid down for you instead of jumping over them. The first is a barrage of grenades from over the wall, which are difficult to evade if you don't start moving backwards as soon as you spot the first one. The second will be a wave of three or four berserkers, while the third will trigger as you near the charge-placement spot across from the ramp leading up to the turret. If you just keep your teammates formed up on you during all of this, you should be able to survive quite handily, but if you wish, task one of them to the turret to cover you while another soldier sets the charge that'll get you inside.
Aim For The Heart
Destroy Landing Pad
Droids...why'd it have to be droids? Regardless of your existential dilemmas, you're going to have to penetrate through quite a number of mechanical menaces to reach your ultimate goal: a pair of landing pads that the Separatists are using to resupply the Trandoshans.

To begin with, walk down the hallway here a little bit and jump up and down to catch view of a turret nearby. Luckily, these Trandos are awfully fond of their explosives, so you'll be able to shoot the barrel next to the turret to de-man it, allowing you to commandeer it with one of your soldiers. The rest of this little area is custom-designed to let you withstand the upcoming counterattack; if you place charges and proximity mines on the barrels and crates near the gap in the wall, you'll be able to detonate them when the droidekas appear. Another charge on the detritus near the bacta dispensers will net you some anti-armor rounds, which will be handy to use against the four SBDs that follow hard upon the droidekas.
After the SBD's are taken care of, move up and destroy the crates nearby to grab your first Wookiee Rocket Launcher. This homing rocket launcher is going to be essentially a supplementary anti-armor device; it can home onto anything (simply hold down the button while aiming at your target to lock on, then release to fire), but it's best saved for large concentrations of enemies or exceptionally armored targets.

Speaking of, there's going to be a droid dispenser to worry about around the corner from the rocket launcher pick-up. It's a relatively easy matter to command one of your troopers to place a charge on it, but you'll need to give him plenty of cover, since there'll be plenty of scav droids coming in to cause problems. If you stand back well away from the dispenser and command the rest of your squad to hold position near the guy placing the charge, then the scavs should target them instead of you, allowing you to zoom in with your blaster rifle and harry them from a distance. There are going to be a lot of them, so concentrate on getting the dispenser blown before letting your soldiers start taking them down. They're going to be plenty hurt by the end of this little escapade, so blow the crates on the left side of the area to reveal a bacta dispenser.
After blowing the crate that blocks your passage up the ramp, you'll come to a minefield. The controls that will disable the mines are behind the forcefield here, so you'll need to blast it open, kill the droid controller, then slice the console so that the mines activate when the droidekas roll on top of them, rather than when you attempt to move on.
Around the corner from the minefield is the first landing pad. In order to take it out, it's best to walk forward a bit to trigger the appearance of the Trandos, clear as many of them out as possible, then instruct your entire team to get to the area of the charge, with one of them instructed to plant it. If you stand underneath the plank above the charge area, you'll be able to kill the rappelling Trandos as they hit the ground with your melee strikes. When the charge is set, blow it and move around the landing pad to find the base's lower level.
Critical Strike
Destroy Supplies
It's time to put these Trandoshans out of business once and for all. There's still the matter of all the other Trandoshans on the planet, but for now, we'll worry about these guys.
At the outset of the level, you'll have four Trandos coming at you from over the barricade, so take them out before planting the charge. When it's set, kill any remaining Trandos before healing up and moving towards the far set of crates; they'll blow automatically, revealing a pair of SBD's in the hollow beyond. If you have any EC grenades, use them on the SBD's, as you'll be picking up another box of them shortly.
Near the SBD's, you'll find a grenadier position, but before you send someone running down there, edge your way down the ramp and snipe out the Trando manning the turret off to the left. When that's done, set your guys up in the grenadier spot, the snipe spot, and the turret; they'll start blasting away at the flood of battle droids that'll be coming your way.

Before you move on, be sure that you have a full load of EC grenades; there's a box of them near the bacta dispenser here. When you move on a bit, you'll come to another barricade; unfortunately, an SBD dispenser will drop in front of it, and you don't have any anti-armor positions or turrets to deal with these guys. Luckily enough, though, there's a crate swinging to and fro directly above it; if you wait until it swings out over the dispenser itself, then shoot the winch that's holding it up, it'll land on the dispenser and destroy it immediately. Pretty handy!
After the next group of Trandos has been eliminated, breach the door they're guarding to encounter a rather nasty surprise, in the form of a spider droid guarding the last landing pad you have to destroy. Unfortunately, there's again no anti-armor or even a snipe position with which to take it out; all you have is a console to slice. When it's fully sliced, though, a crane will drop a crate atop the droid, taking it out once and for all.
The Bridge At Kachirho
Advance To The Center Span

Now that the Separatists have arrived in full force, it's Delta Squad's duty to prevent them from crossing one of the massive bridges near a Wookiee citadel. This all kind of begs the question of why, if the other side of the bridge is so important, didn't the Seperatists just land there when shuttling down from space? Dubious plans aside, your task will involve making your way to the center of the bridge, where there's a convenient weak spot, and blow it up.
The first obstacle you'll come up against are a set of scav droids. Rather than get killed, tell your troopers to Search and Destroy in front of you and let them walk ahead until the scavs come through the windows, then shoot the droids while they're firing on your teammates. Heck, it's their job to place themselves at risk, not yours. They like it.
Next up, you'll have to find a path around a bulkhead that the Wookiees have sealed. You don't have much choice in the matter, since it's one long straight hallway. At the end, though, you'll be ambushed by Trando mercs that break through a previously sealed bulkhead; you'll need to through three thermal detonators into the breach in order to seal it. After that, you can make a break for the end of the level, nearby.
Frontline
Advance To The Center Span
No one said getting to the middle of the bridge would be easy; the advance scouting parties of the Trandos and Separatists will be dogging you every step of the way. For example, they've set up grenadier positions in the trade concourse. Luckily for you, you've got a multitude of sniping and anti-armor spots to choose from. Your team should be able to make short work of the grenadiers when they're in position. The rest of the enemies here are triggered by movement, so if you wish to heal your squad up, now would be a good time.

When you're ready to trigger the next wave of enemies, get your guys into position. One should be on the snipe spot atop the crates, near the bacta dispensers; one should be in an anti-armor position along the groove at the bottom of the concourse; and one should be in one of the foremost sniping spots, preferably the one on the right when you look at them from the bacta dispensers. With all of these guys in place, walk forward until the bulkhead across the way is breached. In order to close it, you'll have to shoot down the targeted tree branch above the gap. Anything will do, even blaster fire, so wail on it until it comes down and seales the breach. Shortly afterwards, the left corridor will bust open, revealing a Trando HAM, but with two snipers and an anti-armor position, you should be able to deal with him easily.
After that threat is taken out, breach the door near the bulkhead, kill the Trandos inside, then heal everyone up before moving to the exit.
The Gauntlet
Advance To The Center Span
There's a whole lot of center span advancement going on here, but there's a bit of a roadblock in your way at the beginning of this level, in the form of darkened hallways with mines. Your nightvision visor can obviously deal with the darkness, while Scorch would love the opportunity to pull up some mines; just ask him! After you get past the second one, take out the Trando waiting by the window. You can grab a concussion rifle nearby, if you'd like one.

When you reach the exterior of the bridge again, you'll have to deal with a rather well-coordinated Trando ambush. The critical thing here is to take out the gunners of the turret off to the left. Begin by placing a sniper in position near the doorway to cover the oncoming troops, then head right underneath the liddle archway formed by crates to find an anti-armor position. If you set one of your troopers there, he'll be able to shellack the turret with AA rounds, letting you keep it unmanned. (You can also snipe the turreteer, of course, as well as the replacement mercs that will come running towards it when it's unmanned.) After the turret is unmanned, get someone in there, move your AA gunner over to the second snipe spot, then run to the barricade and plant a charge on it.
The second half of the bridge is much the same as the first; anti-armor position, meet turret. After killing everything that moves, head into the next small set of rooms. There'll be a Trando HAM waiting for you, and the only position here (an anti-armor) isn't in place to actually hit him, so you'll need to stun him with the thoughtfully-supplied flashbang grenades before shooting him in the head with your sniper rifle.
Detour
Advance To The Center Span
Don't worry about Advisor's constant harrassment regarding your speed of movement; this isn't a timed mission, a la the final mission aboard the Coreship. Proceed at your own pace.
To begin with here, take up the mine in your path, then kill all of the Trandos that come in before you proceed up the ramp nearby. There are a couple of snipe spots in the windows here, but you'll only be able to use one at a time. When you reach the second one, place someone there and keep them there while you take the rest of the team across the bridge and breach the doorway there. Kill everyone inside, then heal your guys up before moving down the ramp here.
In the next little area, you'll have two sniping spots to set up in, at the bottom of the groove that runs along the middle of the bridge. Do so, eliminate all of the enemies, then heal your guys up before you move to the end of the level.
A Bridge Too Far
Reach The Bridge
Hope you're ready for some fun, because the fight to secure the bridge span is easily going to be the most difficult part of the game so far. You have to proceed across the bridge and take down two separate SBD dispensers before you're able to even place the charge. It's gonna get messy!
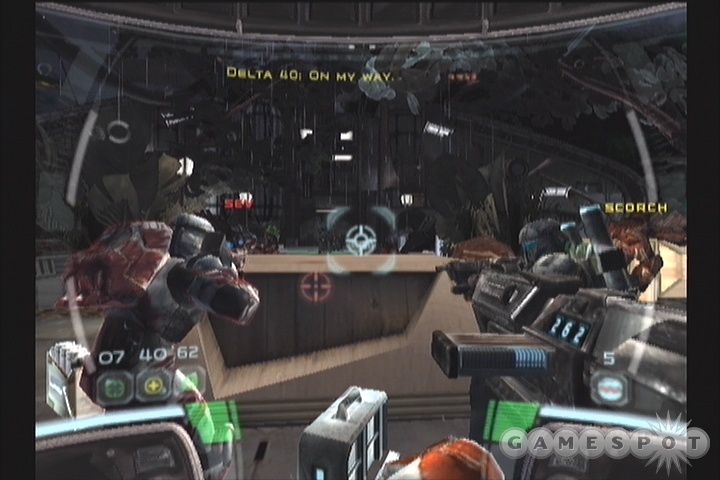
At the outset, you'll need to move out to the span and take down the forces that are already on the bridge, which includes three SBD's. Place one of your soldiers in the snipe spot here, but hold the other two back behind him with a Secure Position command. These enemies are their own separate wave, so after they're dead, you'll be able to heal your team up without fear of reprisals.
The next groups of enemies are both on triggers. If you start slowly moving down the ramp, you'll notice that the door on the far side will open up, causing a number of normal battle droids to spill out, and that more battle droids will start using the turret off to the left, near the SBD dispensers (which are thankfully dormant at this point in the fight). The key here is that the trigger that spawns the turret gunners is a bit further down the bridge than the door-opening trigger, meaning that you should be able to walk forward until the door opens, backtrack and take down the droids, then walk forward again and trigger the turret gunner spawns, then use your sniper rifle to deal with that threat.
There are three turret gunner droids in all; one will spawn after the first one is killed, then the last will spawn after the second one goes down. By far the easiest way to deal with them is to snipe them in the head when they're in position, but you might want to be behind another commando during this exchange, as the laser fire from the turret is incredibly damaging, especially when you're playing on hard mode.
Destroy the SBD Dispensers
After the third gunner goes down, though, the fun is just beginning, as each SBD dispenser will begin spawning its troops. As mentioned, you'll need to take them both out before you can deal with the charge-setting for the bridge itself. Luckily, there are a couple of boxes of EC grenades to work with, as well as three or four boxes of anti-armor ammo, so you won't be hurting for tools. Your first objective is to blow the dispenser on the right side of the bridge, but you'll need to be quite coordinated for this to work.

What you'll want to do is move your squad up the bridge during one of the lulls in the fighting, which will occur every once in a while due to the way the dispensers pause occasionally. Since you're going to be taking out the rightmost dispenser first, you'll want to have your troops in position to cover the soldier doing the charge-laying, meaning that you'll probably want to set one up in the turret, with another in the anti-armor position on the right side of the bridge. This position has better sightlines to the left dispenser, which will hopefully prevent the soldier there from firing on the right dispenser, which causes significant collateral damage to the chargelayer. The third soldier is obviously going to lay the charge, while you should take up a position near the anti-armor soldier with EC grenades and an anti-armor launcher of your own.
The turreteer here will be taking a lot of fire, so you'll want to get that charge laid before he dies. To that end, protect the chargelayer with EC grenades (recall that the timer still ticks down even if the chargelayer is stunned by an EC grenade), but keep an eye on the leftmost dispenser and take down any droids that aren't being fired on with your anti-armor launcher. The chargelayer has a better than average chance of getting killed, though. If there's only a few seconds left on the timer when this occurs, you can run up and finish it off yourself, or just retask the anti-armor soldier to finish the job.
After the first dispenser is down, you'll want to order a general retreat. Revive any wounded soldiers, if possible, then get them all back to the opposite side of the bridge and start healing them. On your way back across the bridge, try to restock your anti-armor shells and EC grenades, if possible. A single soldier in the sniping spot here can hold off the oncoming SBD's while you take turns healing up.
When you're ready to get back down there and destroy the second dispenser, start moving your squaddies back down the bridge, destroying the SBD's that have spawned in your absence. Now, it may be unorthodox, but we like to take out the second dispenser the old fashioned way. You'll notice that there's an anti-armor position near the dispenser that you've already destroyed; if you position soldiers there, in the anti-armor position you had them in before, and in the turret, then they'll continue to fire on the dispenser until it's destroyed, with no charge required. This will take a minute or two, but you're going to have some downtime after this fight, so even if the turret gunner gets killed, you're going to be able to heal them back up again after the dispenser goes up in smoke. Of course, you can also attempt to place a charge on the dispenser, but this is difficult to do while covering it with anti-armor.
Destroy the Bridge
After the second dispenser goes down, you'll finally have the ability to place a charge on the bridge, which promptly fizzles and misfires. It doesn't seem like it would've done much damage, anyway, having been placed on the top of the span instead of at the foundation or the supports, but what do we know.
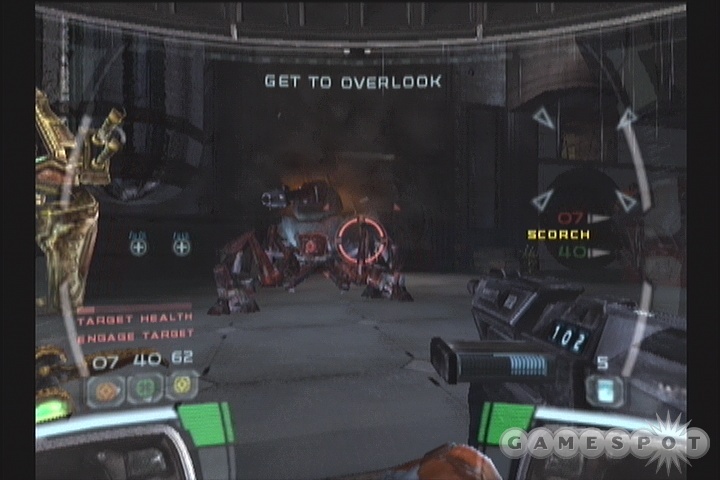
Anyway, after the charge fizzles out, you'll be commanded to fire a rocket at the fuel line underneath the bridge. To do so, you'll need to slice into the large door near the destroyed dispensers. Rather than forming up, though, start assuming that something big, say like a spider droid, will be coming out of the door when you slice through. You'll want two of your guys in the forward anti-armor positions on the bridge, with the third in the snipe spot back on the far side of the bridge. The AA position directly adjacent to the door will be too close to fire on the spider droid when it comes through, so leave it empty and move the soldier there over behind the dead Wookiee on the bridge.
After the spider droid comes through the door, it'll start wreaking havoc on one of your squaddies, but that's no big deal; you can just revive him later on. If you hide behind the little crate where the charge was supposed to be place, you'll be able to quickly command the two anti-armor soldiers to leave and re-enter their positions; this will let them fire much more quickly than they would if you just kept them in place the whole time. You can also pop your head out occasionally and snipe at the ocular cluster to wear it down further, or use your anti-armor shells on the beast if you know that there's another box around waiting to be picked up.
Detonate Fuel Line
When the spider's dead, move into the doorway, kill the droids blocking your path to the window, and fire a rocket at the highlighted spot underneath the bridge. Ka-boom!
The Wookiee Resistance
Advance To The End Of The Bridge
Now that the Separatists have been cut off from the main part of the Wookiee city, it's time to press on and rout their forces. This is really more of a job for infantry than commandos, if you ask us, but hey--you're already on the ground.
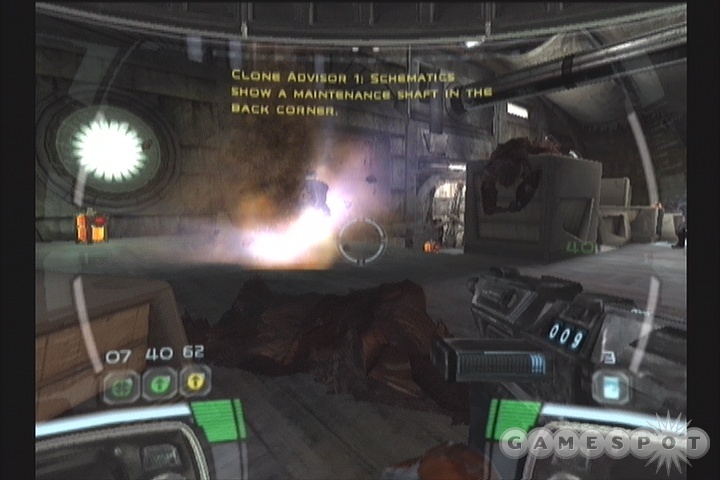
When you reach the tunnel again, a new path will be formed by Trandoshan explosives, so kill them, then follow their makeshift path until you reach a mine. This little area is going to be filled with Trandos, many of whom will enjoy the finer points of tossed Thermals, so you'll want to bring up your sniper rifle and take them down from a distance, if possible. Luckily, one of them will trip the second mine here, allowing you to proceed forward afterwards.
There's a charge spot on the far side of the room, but before you hit it, be sure that you've lain proximity mines on all of the explosives and healed up, because a minor Trando counterattack will form when you start the laying the explosives. They're just Trandos, though, so take them out before finishing the explosive-laying and moving on.
Behind Enemy Lines
Advance To Next Sector
Now that you've made it to the maintenance area underneath the bridge, you'll be able to bypass some of the concentrated enemy forces and proceed silently, without any bloodshed whatsoever. Hah.

Of course, as soon as you proceed down the hallway, more Trandos will pop in; apparently they've been waiting in the vents for you to appear. They'll first pop out in front of you; when they do, a snipe position will appear, so task one of your soldiers to it immediately. Soon thereafter, though, they'll start popping out from behind your position, as well. Although an anti-armor position appears that can cover these guys, we found it easiest to just leave the sniper in place with the other soldiers backing him up, then stand underneath the rear vent and melee the Trandos that pop out as they hit the ground. Easy as pie!
When you've reached the locked door around the corner, start slicing the console, but be ready to place a soldier in the anti-armor position that appears, as another ambush will be imminent. Kill the Trandos, heal up, then complete the slice to move on.
The underbridge in the next room is apparently being held by a single Wookiee, and he's doing a good job of it, by the look of things. Still, feel free to help him out by placing two soldiers in the sniper positions here, but hang back near the door, as three Trandos will come in behind you. When the coast is clear, set a soldier to slice the far terminal, which triggers the appearance of more Scav droids. When they've been sniped out, feel free to move on.

After the checkpoint, you'll come to a set of steps, at the top of which will be three Trandos. Killing them will trigger the appearance of a droideka in the same place, so concentrate your fire on it and take it out before moving your troops up and into the hallway. There are two anti-armor positions here, which is overkill when it comes to taking down the second droideka, but still, AA is AA. The real task here, though, is to round the corner and clear out all of the Trandos in the area; they'll chuck grenades at you when they spot you. Lots of grenades. The easiest way to deal with these guys is to instruct your teammates to stay back near the tree at the end of the corridor while you strafe out and start sniping at these guys from long range. If you strafe out far enough, you should see a pair of explosive barrels behind the tree that the grenadiers are set up in front of; if you shoot one of them, you'll probably be able to take down a few of the Trandos in one shot. There's some sniper ammo near the bacta dispensers here if you're running low.
When you're ready to move on, bring your squaddies up and take down the droideka before instructing one of them to grab the anti-armor position near its corpse, as there'll be more droidekas down the hallway to the left. They're easy enough to deal with, though, so dispatch the troops there, then head to the end of the level.
V.I.W.
Locate Tarfful
After starting this level, you'll have to fight your way through a couple of Trandos and a room full of battle droids before you reach the door that'll see you meeting up with Tarfful--in a sense, anyway. He's on the upper level of the bridge, while you're on the lower, so you'll have to find a ramp leading up to him before you can get him out of danger.

Before you proceed, though, be prepared for the inevitable Trando ambush in the large room where you first see Tarfful. With a soldier in the anti-armor spot, you shouldn't have any problems dispatching the enemies across the way, so stand back near the crates in the rear of the room and stab the Trandos there as they hop over before moving across to the broken glass and jumping through. A soldier in the sniper spot is all you'll really need to deal with the SBD's here.
After you make your way back to the concourse, take up sniping positions and start eliminating the Trandos as they make their way in via the vents and the skylights. When they're out of the way, meet up with the Wookiee around the corner; he'll take you up to meet Tarfful, and dispatch most of the droids along the way.
Escort Tarfful To The End of the Bridge
After you find Tarfful, you'll have to bring him to the end of the level. No major challenges await, but breach the door you come to after the Trandos, as there's an SBD on the other side. The stunning effect of the EC grenade should allow you to take it down in short order, thanks to concentrated fire.
Saving Ammo
Escort Tarfful To The Rendezvous Spot Advance To Loading Dock A
Tarfful wants to meet up with his followers, but unfortunately there's another pressing matter to attend to along the way. Apparently the Separatists are attempting to destroy a Wookiee ammo cache; your goal is to get there and protect the ammo, and hopefully kill any Separatists in the area at the same time.
Unfortunately, your trip is going to hit a snag almost immediately, as you'll run across a pair of droid dispensers. Your first task here will obviously be to deal with the SBD dispenser, and luckily, it should be dormant for a few seconds after it drops in, allowing you to set up a sniper and anti-armor position near it, then command the third squaddie to place a charge on it. There will be battle droids coming out of the other dispenser to your rear, but they won't seriously hurt your teammates, so you can ignore them if you wish. When the charge is set, blow the SBD dispenser, kill any remaining SBD's in the area, then repeat the process for the regular dispenser and move on.
If you breach the door near the SBD dispenser, you'll come into another room with a pair of SBDs. If you have any EC grenades or anti-armor rounds left, feel free to use them all, as there are boxes of each in the room, as well as bacta dispensers.
In the next large room, you'll have to disable a pair of SBD's from long range. Luckily, there are grenadier and sniping spots available for you, so move your troopers into position, then help them out by firing an anti-armor or EC grenade at the SBD's. Another one will pop out of the door at the end of the hall when you move far enough that way, so keep your guys in position until you're sure you're ready to move on.
Slice Demolitions Charges On Ammo Crates
The next large area will feature a large group of ammo crates; your goal is to secure them by slicing the explosives that have been placed on them before they go off. The first set of crates is up the ramp to your left, so take out the droids there, being mindful of the one in the turret, then get yourself up to the crates. Trandos will drop in while you slice, so you may want to just set all of our troopers into the two sniper positions and the turret while you yourself do the slicing. The grenadier position here is too far removed from the action to be worth filling, so leave it empty.
After you've sliced both of the consoles, you'll need to get to the far side of the room and destroy the SBD dispenser there. Technically this isn't required, but it'll obviously make it easier to get out of this room without getting shot up. With all three of your soldiers in the sniper positions and turret, you should begin by making your way across the room solo until you trigger in a spawn of Trandos that'll appear behind the dispenser. The SBD's are obviously infinite in number, but the Trandos aren't; taking them down now will make it easier to plant your charge on the dispenser.

Now, technically, if you want, you can just let your sniper and your turreteer continue to fire on the dispenser until it blows up. It'll take a few minutes, thanks to the fact that they also fire on the SBD's themselves, but if you want to find a hiding spot and leave the game running while you go to the bathroom or make a sandwich, the dispenser will probably be destroyed, or at least heavily smoking, by the time you get back. You can also, of course, disengage one of the snipers and move him up to plant a charge on the dispenser; this isn't difficult to do, and is quite a bit quicker than the other method. After the dispenser is out of commission, blow the barricade to move on.
Live Ordnance
Advance to Loading Dock B
Before you reach the second loading dock, you'll have to cut your way through a horde of Trandoshans when they attack you. There's a bacta container near the door you come through here, so there's no need to be subtle in your attack; just set your sniper into position near the door, then wait for the baddies to come to you before offing them. There are a lot of positions here, but only the sniping one is really necessary.
You'll want to save before heading through the next door, though, as time becomes essential when you do so. When you reach the loading dock, you'll need to slice a couple more consoles to save the ammo. The trick here is knowing which caches will explode first; the Wookiee near the doorway discovers that his has a short timer in an unfortunate way. There are only two more caches here that can be saved, each of which have two of the crates attached to them; the one-crate cache across from the blown-up Wookiee will be destroyed before you take the ten seconds to slice it.
So, as soon as you reach the dock, take a left, command one soldier to enter the sniping spot overlooking the SBD dispenser, command another to slice the nearby terminal, then get the last soldier into the sniping spot near the turret before you head back to the bacta dispensers and slice the terminal there for the win. After you get done slicing, retask the free soldier to the sniping position near the door you just came through, not to the grenadier position near the other snipers. He won't be of much use for the moment, but he'll be needed in a short space of time.

With two caches secure, it's time to move down to the SBD dispenser and take it out. Sort of. With two snipers and a turret (Turfful will man this latter one, albeit not very well), you should have enough cover to get to the charge placement on the dispenser, so run up to it and plant a charge. As soon as you go through the animation where the charge is placed on the dispenser, though, disengage from the bomb and run back to the turret; exactly 13 seconds after anyone starts placing a charge here, four Geonosian Elites will appear in waves of two, and anyone standing near their spawn point is going to be dead mighty quick.
In point of fact, they'll probably take out two if not all three of your party members. With three snipers, you should be able to deal plenty of damage in return, though, so be sure to use your concentrate fire command to get them on a single Elite at a time while firing on them yourself with your sniper rifle or a Wookiee rocket launcher, if you have one. Of course the SBD's will be coming at you this whole time, but they should move slowly enough for you to eliminate the Elites before they reach the ramp leading up to the turret.
After all four of the Elites are dead, the sniping positions will vanish, so you'll have to revive and heal your team before blowing the SBD dispenser the old fashioned way. Lead the charge and clear out any SBD's in the area with your anti-armor gun before commanding one of your peons to place the explosive, then cover him with EC grenades, if you have any, before setting the explosives off and getting out of this hellhole.
Fate of the Resistance
Proceed to Wookiee Rendezvous Point
The fight to get Tarfful to the rendezvous is going to be one of the most difficult you've encountered thus far, mostly due to the presence of numerous SBD's and a metric tonne of concussion rifle-wielding Trandoshans.
As soon as you step out into the middle of the room, you'll be beaten down by two SBD's on either side of you. If you have AA rounds, then use them to destroy both of the SBD's from cover; if not, then you can send your squadmates ahead of you to the snipe point nearby, then walk to the right of the archway to find a box of AA ammo and start using that. After the first two SBD's are dead, start getting your squads into the three positions; there are two snipe spots and one anti-armor spot. Although the anti-armor position doesn't look like it'll be firing at anything, the soldier there can hit things behind him with his AA gun, so quickly tap him off and back onto the spot after each time he fires, and he'll deal with the rest of the SBD's on the ground floor.
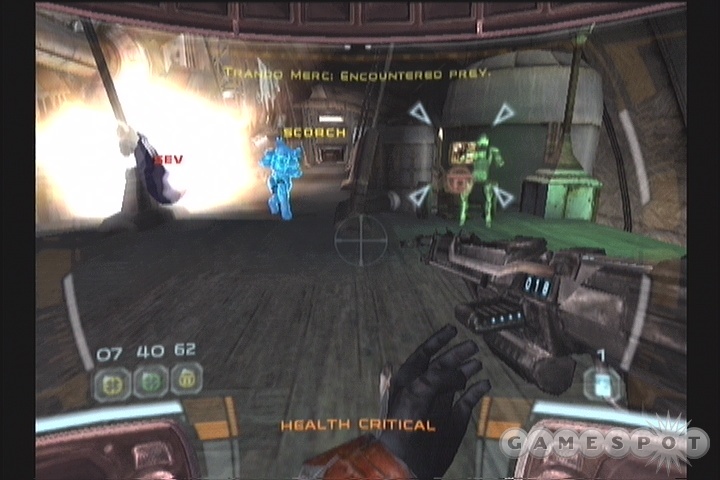
Before you head up the ramp at the far end of the room, heal yourself and your squad completely; you're going to be taking damage here. When you're ready, form up your squad and start sprinting along the catwalks. There are two sniper spots in the middle of the little layout up there, so place two soldiers into them, then keep running along, with the third soldier on your tail. Your goal is to get all the way around to the end of the catwalk before you get shot up by the concussion rifles that all of the Trandos here use. Your best bet to avoid taking damage is to just keep moving; the concussion blasts take a second to go off, and if you keep moving, you'll avoid most of the damage from blasts that go off behind you.
When you reach the terminal, you'll be out of view of all of the concussion rifleists, who'll start wailing on your two snipers instead. Leave them be, and command your teammate to slice the terminal while you cover him by blasting the Trandos that'll appear in the nearby window. He'll need 20 seconds to complete the slice, but you'll be able to easily kill the Trandos as they walk to get into firing position.
After the terminal is sliced, Tarfful will walk up to the catwalks and start moving on. Let him go, though, and revive any teammates that still need it and return to the bacta dispensers on the lower level to make sure everyone's healed up before following him to the rendezvous point.
Kill The Guards
When you do reach the rendezvous point, you'll make an unpleasant discovery: all of Tarfful's resistance fighters have been slain, presumably by the Trando slavers in the area. Let Tarfful kill them off while you send soldiers into the sniping and anti-armor spots here. It's important that you don't head up the ramp yet, though; a Grievous bodyguard will appear, so use the lower two positions to take it out. No need to worry about taking damage here, as there are plenty of bacta dispensers in the area, so kill it, then heal everyone in your squad before placing them back into the two positions.
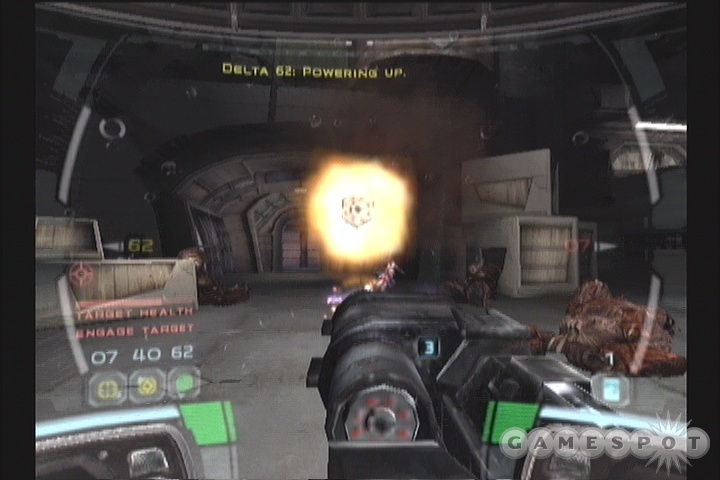
When you're ready for the second bodyguard, send one of your troopers up to the anti-armor position above the ramp; doing so will cause the second baddie to spawn in. (You can also try to send the squaddie to the sniper position above the ramp, but they seem to run into a pathing error and will usually get stuck on the ramp, making them easy prey for the guard. With three soldiers in different positions, you should be able to dish out enough damage to quickly take down the guard, after which you'll be able to move to the next level.
Search and Destroy
Locate Separatist Cruiser
Your Wookiee guide unfortunately won't last too long, so you'll have to proceed on your own. After a couple of hallways full of droids, you'll come to a nasty surprise: an interior spider droid. There aren't any special positions for your soldiers here, so you'll have to make some by shooting the gas tanks around the droid. When you do so, get them into an anti-armor, grenadier, and sniper position, then do your best to help whittle down the beast's health from the sidelines.
After the spider droid, you'll have to deal with a number of SBD's in the next hallway, so bring along some anti-armor charges or EC grenades before moving on. In the next long hallway, you'll find an anti-armor and snipe position, so place your soldiers there before moving on to trigger the droideka spawn. When they're down, return to the bacta dispensers, then move further up the hall to take on another spider droid. No secret here; just get your guys into position and repeatedly reposition the anti-armor soldier so that he fires rapidly. One or two of your soldiers will likely get incapacitated, so be quick to bring them back to the land of the living when that occurs.
You'll want to try and hang on to your EC grenades and anti-armor shells during the fight with the spider droid, though, as you'll have to bang through another four SBD's in the hallway beyond. You will have the opportunity to refresh your health after this fight, though, so heal up before moving into the Wookiee room.
Eliminate Dispensers
Your goal here is to destroy two droid dispensers before they manage to kill your Wookiee friends. It's possible to get them both before either of the Wookiees goes down, but extremely unlikely; one of them is fairly exposed. The second one is in hiding, though, and will survive for a good amount of time.
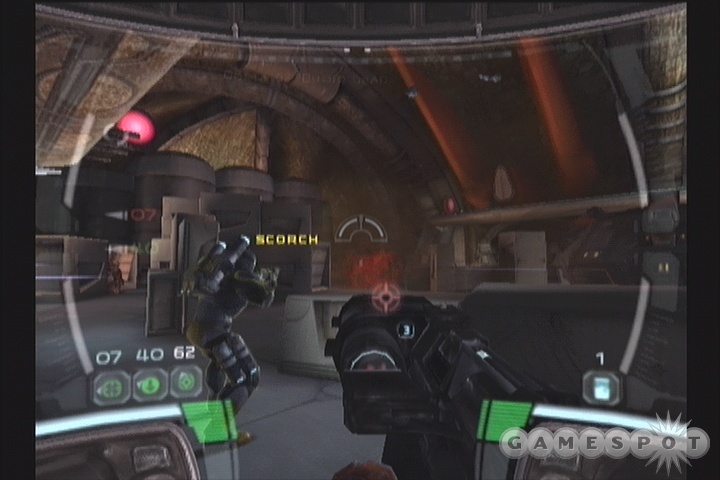
To begin with, the SBD dispenser is going to be your first priority. Move into the room, using your AA launcher to destroy any hostiles, then set your team up in the AA position and the snipe position, with the third soldier setting a charge on the dispenser. You'll need to be mindful of the soldier in the snipe position, though, as a droideka will eventually roll up behind him and start shooting him in the back; these guys have no sense of honor! If you can handle that threat, though, your teammates should be able to keep the rest of the droids at bay while the charge is being set, especially if you continually retask the anti-armor soldier.
With the SBD dispenser out of the way, it's time to move your troops over to the droideka dispenser. The sniper can remain in position, but the anti-armor soldier likely won't have line of sight to any of the droidekas, so you may wish to just have him form up on you and attempt to take down droidekas with anti-armor or blaster fire. (There's another box of anti-armor rounds to the left of the door through which you came in, near the second Wookiee.)
When both dispensers are dead, you'll have to blow one of the empty fuel tanks here to move on. Don't forget to heal up before you exit to the next level.
Heart of the Citadel
Secure Wroshyr Garden
There's no great mystery to the first segment of the Wroshyr Garden; just keep moving forward, putting your soldiers into the positions that become available, and make sure none of the Trandos can get behind you. There are three Trando HAMs in the area, so save your sniper rounds and flashbangs for them. There aren't any bacta dispensers here, so you'll have to be mindful of your teammates health and revive them when they happen to get incapacitated.
Find Generator Console Alpha
After blasting through the door, heal your guys up, place one in the sniper position near the next door, then blast through and clean out the room beyond. You'll find two anti-armor positions here, so get people in both of them before moving into the next room, where you'll find a Trando HAM. Like all good-hearted Trandoshans, he'll be more than happy to follow you back to the anti-armor room, where you'll be able to get your teammates to take him down while you chip in with sniper fire.
After the Trando's down, grab his ACP Repeater, then move through the room beyond and heal your teammates up again. Another locked door stands between you and Console Alpha, so slice it open, then rush your soldiers into the sniper and anti-armor positions here to take down yet another HAM. Add his ACP Repeater ammo to your own, then heal your guys up at the bacta dispensers in the last corridor before attempting to slice the generator console.
Slice Generator Console Alpha
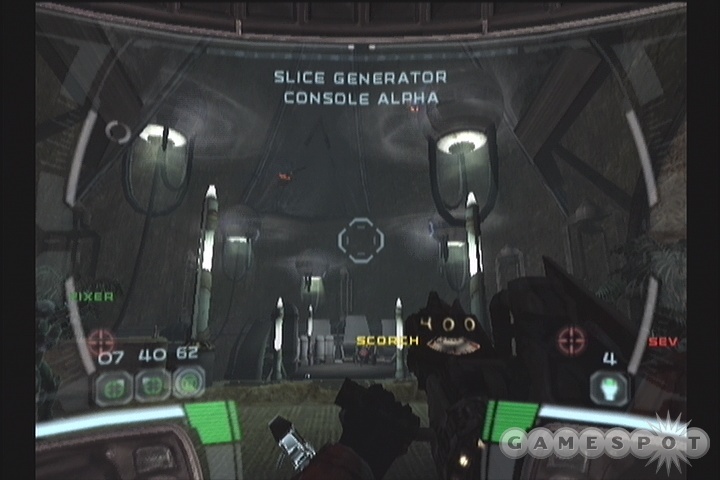
Now, as the multitude of sniper positions might intimate here, you're going to have a little fight on your hands while you attempt to slice the console. Set up two soldiers in the spots on either side of the walkway here, then send in your other soldier to slice, but be careful; you're going to have a solid minute of fighting against Geonosian Elites here. It's a Herculean task, especially on hard mode. The only tips we really have to offer is that the ACP Repeater Gun works well on the Elites when they happen to stand still for a minute, and that the large electrical orbs in the upper reaches of the generator will instantly kill an Elite when you shoot them while one is flying by. Beyond that, surviving the fight is a matter of reviving your fallen soldiers and hoping that the Elites don't happen to target your slicer; if he can complete his slice, then all of the Elites in the generator will be instantly killed.
Slice Generator Console Beta
Console Beta is in a similar room to Alpha, save for the fact that there's only a single sniper position at the outset; if you want another one, you'll need to destroy the fuel tanks near the console itself. We found that keeping one soldier on the snipe point near the door with another one near the console gave us pretty good coverage on the Elites as they flew up, but don't forget that you can task all three soldiers to the snipe spots while you slice the console yourself, if you wish.
Moving Upstream
Locate Separatist Cruiser
You're going to find yourself in the middle of a difficult fight at the beginning of this level, as both droidekas and SBD's will have overrun the next room over from where you start. If you can establish a beachhead with AA shells or EC grenades, though, you should be able to work your way through the room, and get your troops into positions that ring the door leading on. When all of the enemies that are going to come through have done so (the last spawns are a pair of droidekas), run around the room until you find a recharge of EC grenades, then form up and move through the door to take on an SBD dispenser. With a soldier tasked to laying charges, you can focus on taking down the SBD's themselves with the grenades.
Secure Hangar
There are a couple more SBD's in the next hallway. Instead of avoiding them by breaching the door to the left, take them on; after killing them, a Wookiee will appear in the far doorway, who'll lead you around to another locked door. Slice this one, and you'll gain access to three sniper positions which you can use to snipe away at the oncoming droid forces, who were going to try and ambush you. The positions will be able to kill them quite handily, so just stay back and make sure that you're not in your teammate's line of fire.
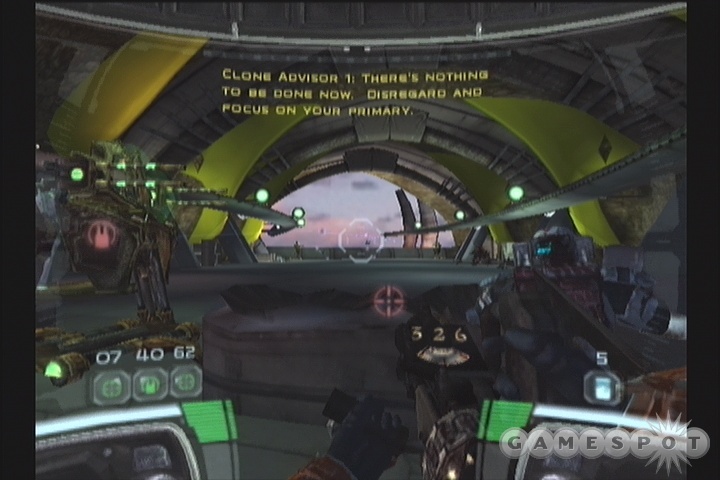
When you reach the nearby hangar, you'll soon be ambushed by a trio of Grievous guards. Luckily for you, there are a pair of Wookiees here who will take most of the hate, assuming you positioned yourself properly. You'll notice a turret flanked by a pair of fuel tanks near your end of the room; if you shoot these out, then you'll have a pair of sniper spots and the turret in which to position your team, which should allow them to kill off the guards from long range. If they start closing in on the Wookiee nearest your position, then throw EC grenades at the lot to stun them all and wear their health down further. Before moving on, check the hangar for more ammo.
Find And Secure Elevator
Another long fight is going to ensue as you attempt to scale the ramp leading to the elevator. To begin with, help the Wookiees fight off the initial charge of battle droids, but be ready to task one of your soldiers to place a charge on the SBD dispenser in the middle of the ramp when the hotspot becomes available. The Wookiees should get close enough to start engaging the SBD's as they pop out, letting you save your grenades and ammo for the rest of the ramp.

After the dispenser is blown, start moving back up the ramp, chucking thermal grenades to disperse the second mass of battle droids that will have appeared. More AA ammo can be found in the cache along the rightmost wall of the ramp here, so grab it and use one or two rounds on the droidekas that appear. After the droidekas are gone, then three SBD's will likely charge out of the door behind them, so use any remaining AA ammo and EC grenades on them. Phew! It's a long fight, like we said, so you'll need to practice some ammo management if you want to have enough EC grenades and anti-armor charges to last through the whole deal.
When you reach the elevator itself, you'll need to destroy the fuel tanks across from it to reveal a pair of sniper spots; situate your soldiers in these to clear out the SBD's and battle droids before moving up to the next level.
The Final Strike
Destroy Separatist Cruiser
The time has come for you to dispatch the Separatists from Kashyyyk once and for all...or at least until Episode III hits theaters. To do so, you're going to need to take your team through the top of the spire, deposting each of them into a separate dual missile launcher. Thus, in a nice little echo of the game's first couple of missions, you'll find your squad steadily diminishing in strength, until you're left by yourself for the home stretch.
Guards!
The first fight here is going to be among the toughest, though. Let's see, a spider droid, a Grievous guard, some droidekas, some SBD's...sounds like fun! Luckily, these guys don't all come at once, but it's still going to be a difficult fight to survive.
The spider droid is up first; you'll be able to see it immediately after you pass through the doors leading away from the elevator. If you get its attention with some blaster fire, it'll shoot up its missile scanner, so take that out with your sniper rifle, then get one of your soldiers into the snipe spot here, but instead of sending the rest of your soldiers out into the rest of the room, pack them into the same little area behind the tank here, so that they can hide from the spider droid's fire with the sniper. Soon enough, the guard will pop down from the balcony above the spider droid, and he'll be the one you want to take out first.
With all of your soldiers grouped together in one little circle, the guard should take the bait and start moving in, baton wailing. Thanks to your squadmates' super-hardiness, though, you should be able to drop an EC grenade into the middle of the crowd without damaging them too much, but it'll do a boatload of damage to the guard. You should have two EC grenades from the beginning of the level, so use them both on the guard and take it down before turning your attention back to the spider droid.
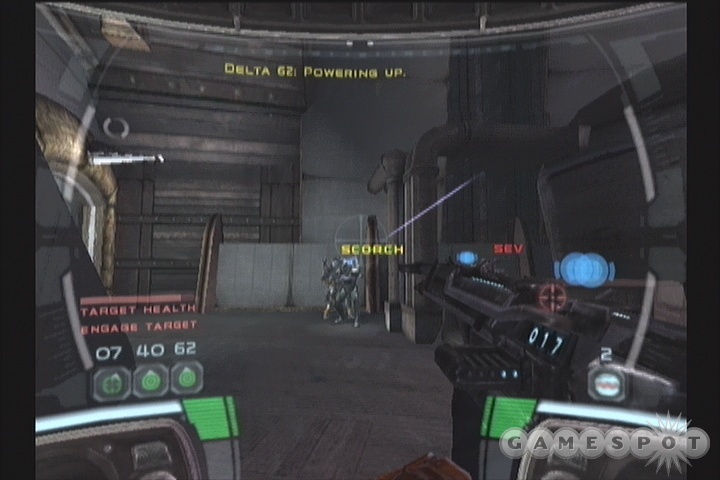
Spider Droid, Et Al
When the guard's dead, it's time to get the spider droid. With all of the positions in the room, this guy should be a routine kill. If you wish, you can use the Wookiee Rocket Launcher near the elevator to destroy the spider droid quickly, but it's far better to save it for another spider droid that'll pop up later in the level.
You'll want to have your teammates in the anti-armor and grenadier positions in the room before you polish the spider off, as doing so will trigger two droidekas and three SBD's to appear in the room behind the droid. Guess the separatists are beginning to appreciate the threat you pose to their little operations here. You'll probably also want to move the sniper over to the second anti-armor position near the door before unleashing your rockets. If everyone's in a position, though, then the droids after the spider should go down relatively quickly.
When you reach the hallway beyond the spider droid, use an EC grenade to dispatch the two droidekas, then slice the locked door; don't breach it. There are more droidekas and SBD's beyond, but you'll have a full EC grenade and AA ammo refill waiting for you at the top of the ramp, so feel free to burn through that ammo during the fight. Soon after, you'll lose Sev; he'll take off and man the first dual missile turret.
Behind Door Number Two...
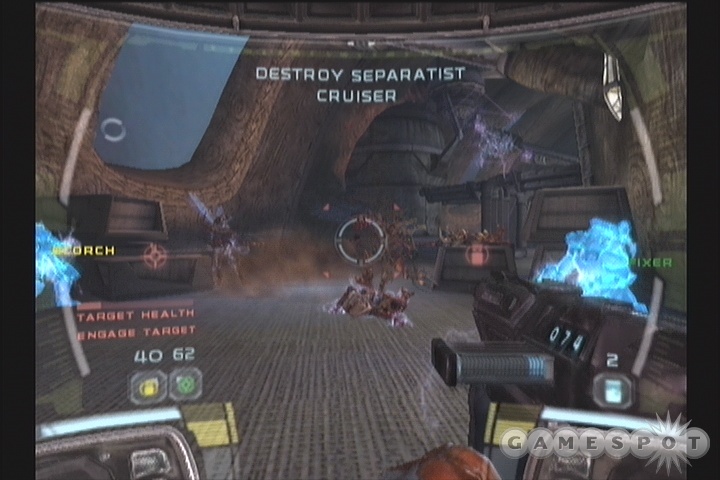
Next is--guess what?--another challenging fight. When you slice through the door near Sev's turret, you'll come up behind a pair of fleeing Geonosians. Soon afterward, you'll hit anti-armor and grenadier positions. Although the sniper positions nearby look tempting, avoid them; instead, walk forward to trigger a massive influx of Geonosians, along with the appearance of a Grievous guard. With your troops in the AA and grenade positions, you should have a handle on the Geonosians, at least, but you'll want to give them a hand with the guard by pelting it with EC grenades and AA rounds of your own as it approaches your position.
When all hostiles are down, proceed cautiously out the far room; there are a pair of SBD's waiting for you. You'll lose Fixer at this point, so heal up before slicing through the next door.
Door Number Three
More SBD's and droidekas await you beyond Fixer's turret. You'll get a resupply of AA and EC ammo, though, of course, so you should be able to make it down the ramp without a problem. After the curve, in fact, you can start shooting the explosive barrels off the walls to start a little chain reaction that'll kill off most of the droids without requiring you to fire at them.
Beyond the next door is...another spider droid??? Wow, with only one partner along to help you, you can expect to face a major challenge in taking this guy out. To make matters worse, you're going to have Geonosian soldiers along for the ride; they'll spawn in in pairs and harass you and your partner. You're going to have to use every trick in the book to survive this one.
To begin the fight, open the room, shoot the fuel tanks to the left, and set your soldier up in the anti-armor position there while you take out the droid's scanning laser to prevent it from firing missiles. At this point, a long game of cat and mouse will start to play out. In the arena here, you'll have refills of thermal dets, sonic grenades, anti-armor rounds, sniper ammo, and blaster rifle ammo. Before you start picking it up, though, you'll want to start rotating around the spider droid and unloading whatever ammo you brought into the fight on it, so that you don't waste any when you grab the ammo refills. Your goal is to distract the droid and hopefully cause it to indefinitely rotate around as it tracks you; this will let you keep chucking grenades and rounds at it while letting your teammate do the same from his position. It's important to keep your teammate alive, though, since you won't have a chance to resurrect him if he dies, so periodically task him to the bacta dispensers in the corner. By the same token, if he's alright, but the tank is focused on him, feel free to make a pit stop yourself, but be careful of the Geonosians if you attempt to do so.
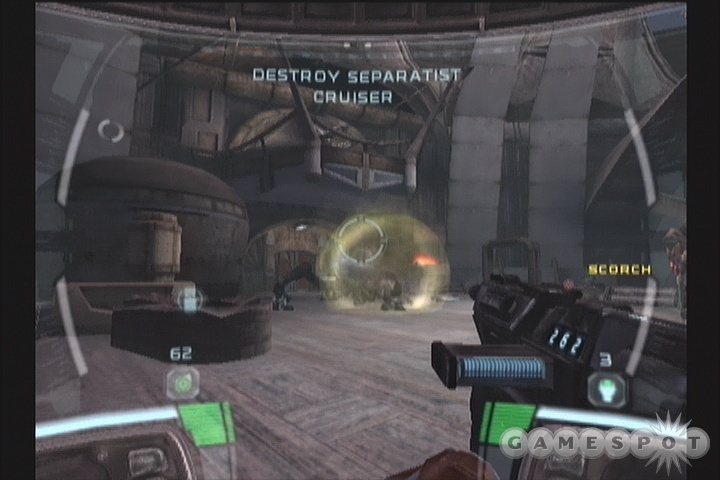
When you're out of ammo, start grabbing the boxes around the arena and repeat the process again. We're not saying this is an easy fight--on hard mode, it'll be among the most difficult in the game. If you happen to have kept the Wookiee Rocket Launcher from the first part of this level, then by all means, use it now and put this thing out of its misery. Otherwise, you'll just have to wear it down and hope it doesn't kill you.
Moving On
After breaching the next door, pause for a second for the explosives on the other side to go off before entering with your nightvision goggles and slaughtering the Geonosians inside. Be sure to pick up the Wookiee Rocket Launcher near the far door before moving out, as yet another spider droid awaits you. Luckily, the WRL you just got will take off the bulk of its health, allowing you to place your squaddie in the anti-armor position near the door and whittle off what remains with AA rounds and grenades.
The Final Charge
After you get through the next door and get Scorch into his turret, it'll be time for you to find yours and destroy the Separatist ship once and for all. Heal up and grab the sonic detonators before breaching the door near Scorch's turret.
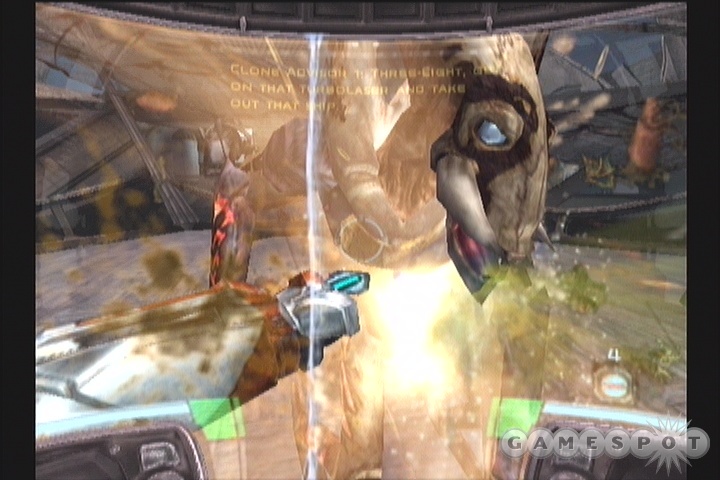
The room here has been taken over by the Geonosians and has apparently been used as a breeding ground; there are multiple egg chutes suspended from the ceiling, along with a few Geonosian soldiers. You shouldn't have to worry about them too much, though; if you just keep moving, you'll be able to avoid the fire from the spawn and get to the far door without too many problems. When you do so, turn around and start chucking sonic grenades behind you; this will disintegrate most of your foes, save for those standing around near your turret.
When everyone's dead, grab the turret and start firing away. There are three separate spots on the Separatist ship that you'll need to hit in order to destroy it, so use the targeting cursors and go to town! You have unlimited ammo, so just keep firing until the cruiser is all blown away.
When that's done, well, so is the game. An ambivalent ending leaves a few questions unanswered: What was Grievous doing on Kashyyyk? What fate awaits the Wookiees? Guess we'll just have to wait until Episode III to find out.
Multiplayer Tips
We're not going to pretend like Republic Commando multiplayer is the greatest thing since sliced bread; there are only four gametypes, after all, none of which are particularly original. If you've played Halo 2, then you're probably not going to switch over to Republic Commando for the bulk of your online multiplayer needs. That said, the MP in RC isn't all that bad, and can definitely be enjoyable when taken on its own.
This section of the guide isn't intended to cover every single aspect of Republic Commando's multiplayer--if you've played a multiplayer game before, then you'll probably be pretty comfortable with what's offered here--but instead will consist of just what the chapter heading states: some tips.
Carrying The Flag: In CTF and Assault modes, you'll probably wind up carrying the "flag" at one point or another. As in most variants of these venerable gametypes, you aren't going to be able to use your primary weapon while carrying the flag, but you'll still be able to throw grenades, and your movement speed won't be noticeably impacted, a la Halo 2.
One thing you might not know, though, is that you can drop the flag at any time by pressing your fire button; this will let you switch back over to your primary weapon and use that on anyone who's attacking you. Of course, this isn't going to be very useful in normal CTF, where your attacker will likely run for the flag to get the quick return, but in Assault, where your enemies can't automatically return the flag to your base, you might find this useful to defend yourself or even to throw the flag towards another teammate (although there isn't much forward momentum imparted to the flag with this maneuver).
Weapon Selection: Republic Commando's multiplayer mode makes an odd executive decision by limiting each player to two weapons, besides their grenades. (If you bring up the pistol, you can switch it out for a second weapon.) You'll start each life with either the Trando SMG (if you're playing as a Trando; unlucky sods!) or the blaster rifle (if you're a commando; everyone gets one in regular Deathmatch), but you'll want to upgrade that when possible. Most of the weapons from the normal game can be found in the multiplayer maps, but there's definitely a heirarchy of usefulness here, with the ACP Array Gun (Trando shotgun) being at the bottom of the pile and the ACP Repeater and anti-armor attachment near the top. Personal preferences will come into play here, obviously, but if you want to nab a good weapon, you'll have to know where they spawn on the map and run there as soon as a round begins. You can also pick weapons up off the corpses of dead enemies, but their ammo supplies will usually be diminished, and they'll fade away shortly after their owners are killed, so be quick about it.
Making Melee Useful: If you're playing on the Xbox, then you may have noticed that it can be difficult to land a melee blow on a target that's moving quickly, thanks to the fact that your right hand is required both to aim and to press the melee attack button. We found it helpful to remap our controls so that the grenade button and melee attack buttons were switched. Throwing grenades generally doesn't require the tight precision that melee attacking will.
Super Speed: The heavier weapons in the game, such as the Wookiee Rocket Launcher and the ACP Repeater, will dramatically slow your movement speed. If you want to get a little burst of speed, and perhaps also lure enemies in by appearing weak, switch over to your blaster pistol; you'll move much faster than you normally do, even when you're using a light weapon like the blaster rifle, and enemies might think that you're an easy kill and close in, allowing you to finish them off with your super weapon when they get close.
Got a news tip or want to contact us directly? Email news@gamespot.com
Join the conversation