Resident Evil 4 Walkthrough
Leon Kennedy is dead set on rescuing the President's daughter from the clutches of the evil Saddler, but he'll need some help! This guide for Resident Evil 4 will provide you with a detailed walkthrough, stats on all of the weapons, and strategies, as well as walkthroughs and tips for the bonus unlockable games.
Most game franchises coast along for years after the spark of passion has gone out of them. Too many well-known game series are simply the same game, repeated in different environments, with small changes to gameplay. When Resident Evil 4 hit the scene in 2005, however, Capcom made it clear that they were intent on avoiding the same trap. A radical reimagining of the Resident Evil gameplay, RE4 eliminated almost all of the off-putting aspects of the previous games in the series and delivered one of the most polished gaming experiences of the last generation of consoles. The game was an easy choice for GameSpot's Game of the Year for 2005.
In Resident Evil 4, you take on the role of Leon S. Kennedy, a government agent who previously appeared in Resident Evil 2. Tasked to rescue the President's daughter, who's been kidnapped by mysterious villains, you find yourself chasing leads in the backcountry of Spain, where a sinister threat arises, not just against a single kidnapped girl, but against the entire world. Although the Umbrella Corporation is a thing of the past, as are the zombies that infested the previous games, you'll still have plenty of people in your way here.
In GameSpot's guide to Resident Evil 4, you'll find some general strategies to help you out, as well as a complete walkthrough for the game, complete with video coverage of all of the major boss fights. In addition, the unlockable features here are all covered, including the secret weapons and the two major additional gameplay modes: Assignment Ada and the incredibly fun Mercenaries.
Since this guide was originally written for the GameCube version of the game, the Separate Ways content is not covered. Note that most of the mentions of the controls are also based on the GameCube version, so you may need to adapt a bit if you're playing on the Playstation 2 or the Wii. For the most part, though, the content should still be applicable. Enjoy!
General Strategies
The world of Resident Evil 4 will require a lot of on-the-job training, and as such, you can refer to our walkthrough for some tried-and-true strategies that'll cover individual situations. For general tips, though, you can refer to this section.
Combat Strategies
Ammo Conservation: Resident Evil 4 is blessedly not quite as intent on making you hoard ammo as previous titles in the series have been. Due to the fact that your enemies will often drop ammo when they die, and that ammo is more abundant overall, you're not going to have to worry too much about it. If you don't have to, though, it's best not to go hog wild with your ammo expenditure, especially for weapons like your Broken Butterfly and TMP, because those are the ones which you're most likely to use during boss fights.

In order to conserve ammo during normal fights, you can take advantage of two of Leon's more obscure assets; his kicking ability, and his knife. When facing off against a single enemy, you can usually wind up killing them with just a single bullet, if you can land it in their face or on their head. When you do make a successful headshot, most human enemies will stagger for a moment or two; if you run up to them and press the A button while their staggering animation is playing, Leon will let loose with a devastating roundhouse kick. This kick will knock the enemy to the ground; any other nearby enemies will also be knocked to the ground, or will at least pause for a second, depending on how close they were to the kickee.
When you have a single enemy, though, you can run up to them while they're on the ground and start stabbing them. If you press your L trigger button, you'll whip out your knife; attacking with it will cause Leon to slash at their prone bodies. The knife doesn't do a whole lot of damage, but any damage you deal will just mean fewer bullets you'll have to use on the enemy when it gets up. If you continually attempt to slash away at its head, you can even cause it to stagger again just as it completes the standing-up animation, leading to another kick, leading to another set of knife slashes while it lays down. Be sure to cackle maniacally while all this is going on.
Using Chokepoints: The one thing you're going to need to learn to really be successful in Resident Evil 4 is the art of positioning. Your foes aren't going to politely wait for you to face them before they attack you; if you run into the middle of a group of foes, you're going to find your ass getting kicked well and good by the enemies behind you unless you find some way to get all of your targets on one side of you. The best way to do this is to find some kind of bottleneck or chokepoint and position yourself on the opposite side of it from your enemies.
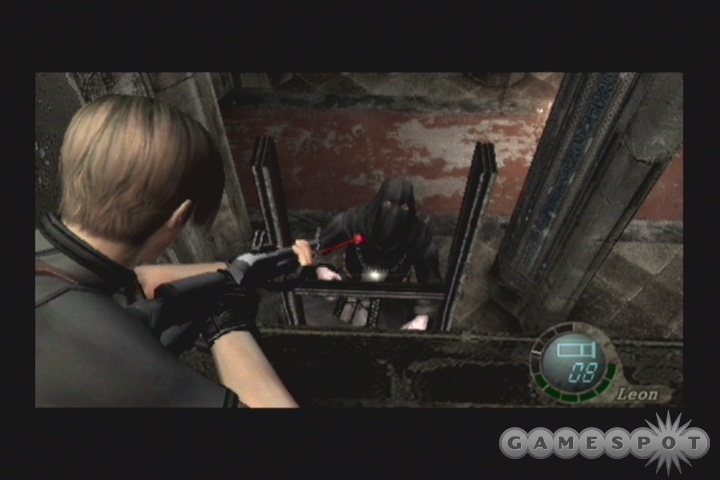
Doorways are ideal for this purpose, especially when there's only one entrance to the room or hallway in which you're standing; since everyone will be coming at you from the same entrance, you'll be able to easily anticipate where they'll be after it opens up and position yourself to shoot them accordingly. What's more, the ganado door-opening animation is almost always the same, save for special enemies like chainsaw freaks and chaingunners; they'll tap on the door, bang on it twice in rapid succession, then slam it open. Since this takes a few seconds, there'll be more time for the rest of the enemies on the other side to group together around the door; if you're standing on the opposite side of it with your shotgun at the ready, you should be able to blast everyone there in the head before they get a chance to attack you.
(Note that if you want to head through a door into a room that you suspect holds enemies, you can double-tap A while standing next to it to kick it open, instead of using the normal pushing animation. This is quicker, but louder. If any enemies are standing immediately next to the door, though, they'll take a small amount of damage and be staggered for a second, giving you a chance to gauge their positions and react accordingly.)
Narrow hallways and corridors can also act as chokepoints, but you'll have a smaller chance of getting all of your enemies in one tight group, since some will run at you and some will walk. You'll also have to be more careful of axe-throwing or crossbow-using enemies in the rear; they can fire through the enemies closer to you and hit you without a problem.
Dealing With Tentacles: After you have a few chapters under your belt, you'll start running across Plagas-infested ganados. When you hurt these guys enough to kill them, they won't die; instead, they'll sprout a giant tentacle out of their head, looking like something straight out of the seamier side of an anime shop. While these fellows will take a bit more ammo to kill than normal, there are some tips you can use to help you deal with them.
The first rule is to keep your distance. This shouldn't be too hard to accomplish, though, because you'll hear a distinctive sound when a tentacle sprouts, and will be able to run during the interval between it popping out of the neck of the ganados and when it achieves its full form; during this time it won't be able to damage you. When it does reach full size, though, most tentacles are capable of attacking from a distance, so you'll want to be well away from the ganado before this occurs.
The second rule is that tentacles dislike light. Thus, a flash grenade will automatically kill any tentacle creatures within radius of the blast. If you've managed to sprout a bunch of tentacles, then flash grenades are a great way to deal with them all in one fell swoop. (They'll rarely occur in numbers larger than two, though.)
The third rule is that, although tentacles look intimidating, they're really not that much more difficult to deal with than ganados. They can't move much more quickly than at a slow shuffle, so as long as you have room to maneuver, you should be able to keep them away from you without a trouble, and they're still susceptible to the same ammo that their mundane zombie-like friends are. The main trouble occurs when you hit tentacles on the neck portion of their body; this can cause them to stagger in unpredictable ways, and sometimes they'll stumble forward into a position where they'll be able to attack you, even if you were previously out of range. Be careful!
Stay, Ashley! Good Girl!
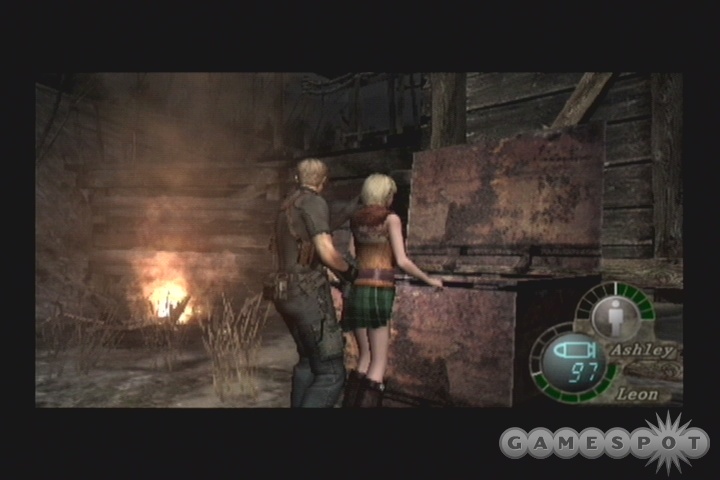
Large portions of the game will see you escorting Ashley, the President's daughter, as Leon and she attempt to escape from the carnival of horror that Saddler has managed to set up. There's really only one command you can give her, though; by using the X button, you can toggle her between Wait and Follow mode. Switching between these modes is crucial to getting through the firefights that ensue without either of you dying.
Follow mode is fairly self-explanatory; when Ashley's following you, she'll stick pretty close to your backside. The main drawback here is that, although enemies won't attack her directly, she'll be vulnerable to wild shots that were meant for you, such as thrown axes, crossbow bolts, dynamite that lands at your feet, and so on. She'll have her own health bar, and will usually be able to take at least one good shot without dying, but if you suspect that you're going to have to face off against numerous enemies, it's a good idea to try out that Wait command.
After you initiate the wait command, Ashley will stay at the spot you use it at until you call for her again. This will usually keep her safe from harm, but you'll want to be careful not to leave her too close to any exits from a zone, as the primary thought in many of the ganados/cultists/soldiers' heads when they see Ashley will be to nab her and drag her back to Saddler. When they get close to her, they'll pick her up in a fireman's carry and will start walking towards the nearest zone exit; if they get there with her, it's game over for you. This is reason enough to park Ashley somewhere safe (since most enemies will be more likely to be attracted to Leon than to her), but somewhere far away from any exits to the zone you're currently in.
If Ashley does get picked up, she'll start screaming for help. Actually, she'll start screaming when enemies get near her, so when you hear her yelling, you should start making your way back to her, using your shotgun to knock down any enemies in your way. (Sometimes she'll yell when enemies are on the other side of a wall from her, but this is fairly rare.) If you get back to her too late, and she's been nabbed, you'll have to rescue her by shooting the legs of the enemy that's carrying her off. You can try to shoot higher up, but if you hit Ashley, she'll likely die right away, and that's an automatic end to your mission, so…yeah, not a good outcome. With a little scouting and planning, though, you should be able to keep Ashley well out of harm's way.
Inventory Management
One of the more aggravating aspects of Resident Evil 4 will be dealing with the limited amount of space in Leon's attache case. There are a few common-sense practices that you can keep in mind to help maximize the amount of free space you have, though.
Buy New Cases: Well, duh. The merchants in the game will occasionally offer up new attache cases for purchase. There's a Medium (77 boxes at 30,000 pesetas); a Large (96 boxes at 40,000 pesetas); and an Extra Large (120 boxes at 73,000 pesetas). You'll generally want to buy these cases as soon as you can afford them, as they'll let you carry around that much more loot than you would be able to otherwise.
Sell Old Crap: Your definition of "old crap" will vary from ours, no doubt, but if you notice that you've had something in your inventory for forever and haven't used it, then chances are you'd be better off just selling it and freeing up the inventory space. When we played, we usually found that we stockpiled grenades and rarely used them, so those were a good source of extra cash.
Healing items can also be sold back to vendors, especially when you have more than you could ever hope to actually need during a fight. Keeping five full-heal items on you at any given time is a good idea, and should see you through even the roughest boss fights. If you do sell back restoratives, then try to prioritize First Aid Sprays; they have the exact same effect as R+G Herbs, but will sell back for over twice as much. Towards the end of the game, yellow herbs can also be good items to sell, especially if you max out your health bar.
Mix Them Herbs: If you ever run out of inventory space and want to add something else to your case, the first thing you should check on is excess herbs. You'll probably be picking up herbs like a madman during some portions of the game, and if you notice that you have red and yellow herbs in your case, combining them with greens will free up a couple of spaces instantaneously.
Also, don't forget that you can combine red, yellow, and green herbs into one large superherb that even Snoop Dogg would be proud to own. These act as both a full heal and a life bar extender.
Weapons
You'll run across a number of weapons in Resident Evil 4. A few of these will be found in your travels, but most of them will only be found at one of the many weapon merchants you'll run across; you'll be forced to buy and sell weapons there to get rid of old weapons and obtain new ones. For instance, you start the game with the normal Handgun, but later on, you'll be able to trade it in for a Punisher, Red9, or Blacktail model of pistol. Each kind of a type of weapon has its own unique strengths and weaknesses, but in general, the best weapons aren't going to be available until later in the game.
The weapons merchant will also allow you to upgrade your weapons to make them more powerful. There are four categories of upgrades: firepower, which increases the damage each round or shell fired does; firing speed, which allows you to pop off shots with less downtime between each of them; reload speed, which will let you switch out clips more rapidly; and capacity, which determines how many bullets a weapon can fire before having to reload. Firepower is going to be your first priority for most weapons, followed by capacity (fitting more rounds in a weapon will help you conserve inventory space, and will allow you to reload less often), firing speed, and reloading speed.
In addition to these upgrades, most weapons have an Exclusive upgrade that's only available when you've completely upgraded the weapon to its maximum power. These super-expensive upgrades have a number of different effects, and are listed at the bottom of the following weapon sections.
If you want to buy a new weapon, but are reluctant to do so because you've already upgraded your old one a bit, you shouldn't worry too much about it; the merchant will give you back 50% of the cash value of a weapon when you sell it back to him, including the original purchase price of the weapon, all of the upgrades you've bought for it, and any ammo in the weapon. Thus, you won't take a complete wash when selling back a weapon you've upgraded a bit.
Pistols
Pistol ammo is probably the most commonly-found type during the first four chapters of the game, so you can expect to be using your pistol quite a bit during them. While your pistol will never be as powerful as a shotgun or fire as rapidly as your TMP, it does have a good balance of speed and accuracy, and will let you conserve ammo for your more powerful weapons until you really need it.
In most cases, you're going to want to use your pistol for single enemies, or when a pair of enemies comes in through a narrow space, or to finish off enemies lying on the ground. It's relatively easy to get headshots with the pistol, due to the slow speed of most of the ganados; when you shoot a ganado in the head, he or she will stagger momentarily, allowing you to run up and kick them to the ground. While they're lying prone, you can either zoom in on their head and squeeze off a few more shots to kill them, or whip out your knife and slash them until they get up again. When facing off against three or more enemies, or against more powerful foes, you'll want to trade up for a shotgun; the pistol is decidedly poorer than that weapon at stunning the big baddies in the game.
Handgun
The basic handgun that Leon starts the game with is an able weapon, albeit one that lacks punch. For the purposes of getting headshots on ganados, though, it'll serve you well, at least until you manage to find or buy a more powerful pistol.
Inventory Spaces Required: 3x2
Firepower
| Rank: 1 | 1.0 |
| Rank: 2 | 1.2 |
| Rank: 3 | 1.4 |
| Rank: 4 | 1.6 |
| Rank: 5 | 1.8 |
| Rank: 6 | 2.0 |
Firing Speed
| Rank: 1 | 0.47 |
| Rank: 2 | 0.40 |
| Rank: 3 | 0.33 |
Reload Speed
| Rank: 1 | 1.73 |
| Rank: 2 | 1.47 |
| Rank: 3 | 0.87 |
Capacity
| Rank: 1 | 10 |
| Rank: 2 | 13 |
| Rank: 3 | 16 |
| Rank: 4 | 19 |
| Rank: 5 | 22 |
| Rank: 6 | 25 |
Exclusive: Weapon gets five times the chance to strike a critical headshot.
Punisher The Punisher is going to be one of the few weapons that you can actually acquire for free during the game (by completing the mindlessly easy shoot-the-medallions mini-game in chapters one and two). Its special ability allows rounds fired from it to penetrate one target and pass through to the next. This alone makes it better than the normal handgun, as you'll only trade off a very small amount of firepower (five-ten percent) for this special ability, but it's still not anything you're going to want to keep once you have access to the Blacktail and Red9.Inventory Space Required: 3x2
Firepower
| Rank: 1 | 0.9 |
| Rank: 2 | 1.1 |
| Rank: 3 | 1.3 |
| Rank: 4 | 1.5 |
| Rank: 5 | 1.7 |
| Rank: 6 | 1.9 |
Firing Speed
| Rank: 1 | 0.47 |
| Rank: 2 | 0.40 |
| Rank: 3 | 0.33 |
Reload
| Rank: 1 | 1.70 |
| Rank: 2 | 1.47 |
| Rank: 3 | 0.83 |
Capacity
| Rank: 1 | 10 |
| Rank: 2 | 13 |
| Rank: 3 | 16 |
| Rank: 4 | 20 |
| Rank: 5 | 24 |
| Rank: 6 | 28 |
Exclusive: Shots from the Punisher will penetrate up to five bodies.
Red9
You'll need to buy the Red9 from a merchant if you want to possess it; it won't be found anywhere in the game world. This ornate weapon is immediately more powerful than the standard handgun, and will indeed be the most powerful pistol in the game after a bit of upgrading; its exclusive upgrade is especially impressive to behold, and will make the tougher enemies in the late game much easier to take down with headshots. Its main drawbacks (it has to have some, after all) are an increased size in your attache case and a slow reloading speed.
Inventory Spaces Required: 4x2
Firepower
| Rank: 1 | 1.4 |
| Rank: 2 | 1.7 |
| Rank: 3 | 2.0 |
| Rank: 4 | 2.4 |
| Rank: 5 | 2.8 |
| Rank: 6 | 3.5 |
Firing Speed
| Rank: 1 | 0.53 |
| Rank: 2 | 0.47 |
| Rank: 3 | 0.40 |
Reload
| Rank: 1 | 2.37 |
| Rank: 2 | 2.20 |
| Rank: 3 | 1.67 |
Capacity
| Rank: 1 | 8 |
| Rank: 2 | 10 |
| Rank: 3 | 12 |
| Rank: 4 | 15 |
| Rank: 5 | 18 |
Exclusive: Increases the firepower to 5.0.
BlacktailThe Blacktail is the last pistol that'll be available to you; like the Red9, you'll have to buy it if you want to use it. Although the Red9 outshines it in terms of pure firepower after you spend a little time upgrading it, the Blacktail beats it in the other three categories, making it a much more well-rounded weapon overall. The reload speeds are blindingly fast, especially after a couple of upgrades. Still, the Red9 has that 30% power advantage, making it a tough choice. If we had to pick only one, we'd probably go with the Red9, since the ability to switch between weapons during combat makes reloading times somewhat inconsequential, and the increased power will save you ammo over time.
Inventory Spaces Required: 3x2
Firepower
| Rank: 1 | 1.6 |
| Rank: 2 | 1.8 |
| Rank: 3 | 2.0 |
| Rank: 4 | 2.3 |
| Rank: 5 | 2.7 |
| Rank: 6 | 3.0 |
Firing Speed
| Rank: 1 | 0.47 |
| Rank: 2 | 0.40 |
| Rank: 3 | 0.27 |
Reload
| Rank: 1 | 1.70 |
| Rank: 2 | 1.47 |
| Rank: 3 | 0.83 |
Capacity
| Rank: 1 | 15 |
| Rank: 2 | 18 |
| Rank: 3 | 21 |
| Rank: 4 | 25 |
| Rank: 5 | 30 |
| Rank: 6 | 35 |
Exclusive: Increases firepower to 3.4.
Matilda
The Matilda is one of the weapons that'll be unlocked after you finish off the game for the first time; after you start a new game with the previous save game (by loading the Game Complete save from the loading screen), you'll have the option of buying the Matilda from the merchant. This is essentially a burst-fire automatic pistol; when you press the fire button, you'll squeeze off three shots in quick succession. If you hold the button down, then rounds will continue to pop out at a very good clip, much as with a TMP. You'll chew through a bunch of ammo with the Matilda, but if you depress the button very lightly, you can restrict yourself to single shots, making this quite a versatile weapon.
Inventory Spaces Required: 3x2
Firepower
| Rank: 1 | 1.0 |
| Rank: 2 | 1.2 |
| Rank: 3 | 1.4 |
| Rank: 4 | 1.6 |
| Rank: 5 | 1.8 |
| Rank: 6 | 2.0 |
Firing Speed
| Rank: 1 | 0.47 |
Reload
| Rank: 1 | 1.73 |
| Rank: 2 | 1.47 |
| Rank: 3 | 0.87 |
Capacity
| Rank: 1 | 15 |
| Rank: 2 | 18 |
| Rank: 3 | 21 |
| Rank: 4 | 24 |
| Rank: 5 | 27 |
| Rank: 6 | 30 |
Exclusive: Increases ammo capacity up to 100 rounds.
Magnums
Magnums are going to be the weapon of choice when you need to punch a hole clean through a wall or something like that; these are the bruisers of the game, and although you won't find much ammo for them, you'll find them indispensable in the later boss fights, since they offer you the greatest amount of damage in the shortest amount of time.
Since ammo is so scarce for the magnum weapons, though, you'll want to take advantage of the ammo capacity upgrades available at the weapon merchants. If you manage to deplete a full barrel of ammo in one of these weapons, don't reload it right away; if you bring it to a vendor and upgrade the ammo capacity, you'll get a full clip for free. For instance, if you upgrade the Butterfly from six capacity to eight, then it'll automatically be refilled to eight rounds of ammo, regardless of whether it had a full clip before or was at zero. Thus, you'll generally be best served by firing off a full clip into a boss, then just not reloading it; if you were going to upgrade the ammo capacity on your gun anyway, then you effectively won't be using up any of your ammo. This works for other weapons, as well, but it's most important for magnums, since ammo is so hard to find for them.
Broken Butterfly
The Broken Butterfly is going to be your boss-killer. Although you can buy one from the vendor, you don't have to; you'll find one for free near the beginning of chapter 4-1, and it'll suit you just fine. Although it doesn't fire or reload as fast as a pistol, and ammo will be much more scarce, the Broken Butterfly will be the most powerful gun you can find for a long time, save for perhaps the rocket launcher or the Killer7. (Although if you manage to unlock its Exclusive upgrade, you'll probably be able to match even a rocket launcher in terms of pure power.) When you're facing off against a boss, find their weak spot, whip out the Butterfly, and use it for the kill. That's what it's meant for, so don't go around using it on normal enemies; ammo will be much too scarce to spare any for such mundane purposes.
The Butterfly also has the coolest reloading animation in the game, so that's a bonus.
Inventory Spaces Required: 4x2
Firepower
| Rank: 1 | 13.0 |
| Rank: 2 | 15.0 |
| Rank: 3 | 17.0 |
| Rank: 4 | 20.0 |
| Rank: 5 | 24.0 |
| Rank: 6 | 28.0 |
Firing Speed
(The firing speed of the Butterfly can't be upgraded.)
| Rank: 1 | 0.70 |
Reload
| Rank: 1 | 3.67 |
| Rank: 2 | 3.00 |
| Rank: 3 | 2.33 |
Capacity
| Rank: 1 | 6 |
| Rank: 2 | 8 |
| Rank: 3 | 10 |
| Rank: 4 | 12 |
Exclusive: Increases firepower to 50.0 (Omgwtfpwned!)
Killer7
The Killer7 isn't available until late in the game, and is something of a luxury item by the time it does roll around; your cash will probably be going towards unlocking the Exclusive upgrades on your other weapons, rather than shelling out the big bucks for this badass gun. This is the kind of thing people hunt and kill large deer with. Its main advantages are increased power and decreased reloading speed, but note that if you have the cash for the Butterfly's exclusive upgrade, that weapon will still easily outclass this one in terms of sheer firepower. The Killer7 has no exclusive upgrade.
Inventory Spaces Required: 4x2
Firepower
| Rank: 1 | 25.0 |
| Rank: 2 | 30.0 |
| Rank: 3 | 35.0 |
Firing Speed
| Rank: 1 | 0.70 |
Reload
| Rank: 1 | 1.83 |
| Rank: 2 | 1.53 |
| Rank: 3 | 0.93 |
Capacity
| Rank: 1 | 7 |
| Rank: 2 | 10 |
| Rank: 3 | 14 |
Shotguns
Shotguns are your crowd control weapons, or are used against single powerful enemies at close range. They're perfect for dealing with three, four, or a dozen enemies when you can crowd them into a small space, such as a narrow corridor or a doorway; it's relatively to aim in the general area of their heads at this point and dish out massive damage to the entire group. Where shotguns really shine is in their ability to knock over enemies; when shot at close range with a shotgun blast, an enemy will pretty much always be knocked down to the ground, thus giving you six or seven seconds to maim their bodies before they get back up again.
Shotguns are the only weapons to deal a different amount of damage based on the range of the enemies. When shooting enemies at close range, the numbers below are accurate; when your target is more than ten feet or so away, though, these numbers usually drop down to around a third of the normal amount. The lesson is to let your enemy approach you before you start wailing on him!
Shotgun The trusty boomstick is going to be your only shotgun for a good length of time at the beginning of the game, and a fine weapon it is. It fires rounds in a tight group, and, well, is fun to use when aiming at a ganado's head at close range. Know it, love it.
Inventory Spaces Required: 8x2
Firepower
| Rank: 1 | 4.0 |
| Rank: 2 | 4.5 |
| Rank: 3 | 5.0 |
| Rank: 4 | 6.0 |
| Rank: 5 | 7.0 |
| Rank: 6 | 8.0 |
Firing Speed
| Rank: 1 | 1.53 |
Reload
| Rank: 1 | 3.03 |
| Rank: 2 | 2.43 |
| Rank: 3 | 1.50 |
Capacity
| Rank: 1 | 6 |
| Rank: 2 | 8 |
| Rank: 3 | 10 |
| Rank: 4 | 12 |
| Rank: 5 | 15 |
| Rank: 6 | 18 |
Exclusive: Enables the Shotgun to deal extra damage against distant foes.
Riot Gun
The Riot Gun is a fairly marginal improvement over the shotgun. It seems to have a tighter spread, but beyond that, the gains in firepower and ammo capacity are minor at best. If you don't mind the Striker's wide spread, then keep the Shotgun until you're able to buy that weapon; otherwise, you can do just fine with the normal Shotgun throughout the entire game. If you're going for the Exclusive upgrades, though, the Riot Gun's is a bit better.
Inventory Spaces Required: 8x2
Firepower
| Rank: 1 | 5.0 |
| Rank: 2 | 5.5 |
| Rank: 3 | 6.0 |
| Rank: 4 | 6.5 |
| Rank: 5 | 7.0 |
| Rank: 6 | 8.0 |
Firing Speed
| Rank: 1 | 1.53 |
Reload
| Rank: 1 | 3.03 |
| Rank: 2 | 2.43 |
| Rank: 3 | 1.50 |
Capacity
| Rank: 1 | 7 |
| Rank: 2 | 9 |
| Rank: 3 | 11 |
| Rank: 4 | 13 |
| Rank: 5 | 15 |
| Rank: 6 | 17 |
Exclusive: Increases Firepower to 10.0.
Striker
The Striker - sounds like a car from Grand Theft Auto or something. Anyway, the ultimate shotgun in the game has a number of advantages in its favor. The most telling is the significant size difference between it and the other shotguns; it'll take up a full six fewer blocks of attache case, allowing you to carry three more first aid sprays, grenades, ammo containers, or what have you. Secondly, the firepower upgrades will let it deal more damage than either of the other shotguns, even when you consider the Riot Gun's Exclusive upgrade. The Exclusive upgrade for the Striker is also rather unique; it allows the weapon to carry up to 100 rounds of ammo in a single barrel. This isn't tremendously useful in combat - you'll rarely run through even ten rounds without having a chance to reload - but it will save you a tremendous amount of inventory space, since shotgun ammo only stacks to a maximum of 15 rounds before you have to start a new stack.
The Striker also has a distinctly wider spread of fire than the other guns do; this will let you hit more enemies at once, especially in open areas, but can also mute the damage dealing capabilities of the weapon a bit, especially in cases where you don't want to run right up next to an enemy, such as when a tentacle enemy is slashing away at you.
Inventory Spaces Required: 5x2
Firepower
| Rank: 1 | 6.0 |
| Rank: 2 | 7.0 |
| Rank: 3 | 8.0 |
| Rank: 4 | 9.0 |
| Rank: 5 | 10.0 |
| Rank: 6 | 12.0 |
Firing Speed
| Rank: 1 | 0.73 |
Reload
| Rank: 1 | 3.00 |
| Rank: 2 | 2.4 |
| Rank: 3 | 1.5 |
Capacity
| Rank: 1 | 12 |
| Rank: 2 | 14 |
| Rank: 3 | 16 |
| Rank: 4 | 20 |
| Rank: 5 | 24 |
| Rank: 6 | 28 |
Exclusive: Increases maximum ammo capacity to 100 rounds.
Rifles
We'll be honest and say that we never found rifles to be tremendously useful; they'll let you kill enemies from a long way away, sure, but we always got antsy about the ammo or cash that said enemies drop fading away before we could reach it. There is one point late in the game where you'll pretty much be required to have a rifle to defeat some tough enemies, but we managed to get through pretty much the entirety of the game without one, so it's definitely less necessary than the other weapons in your arsenal. Still, if you're the sniping sort, then having a good rifle by your side will be a must, as a headshot from a scope at 200 meters is pretty satisfying. It should be said that you'll rarely see your enemies from that far away, though.
Rifles come with built-in scopes of limited power; with them, you can zoom in and out with the C-stick (the little yellow one). These will suit your purposes in most instances, but if you care to buy a more powerful scope and equip it to your rifle, then you'll be able to fire from much farther away and with greater accuracy at medium range.
Rifle
The bolt-action rifle will be the only one available to you for much of the game, but it's still good enough to pop the heads off of many a ganado. It's dissimilar to the rest of the weapons in the game, mostly due to the fact that you'll be looking down a scope instead of firing with a laser sight, but you'll also have to get used to the long times required both to raise the weapon up to your shoulder, to reload it after each shot, and to finally drop the weapon when you want to start running away. Needless to say, this is best suited for situations where you aren't under immediate duress and can time your shots as you see fit.
Inventory Spaces Required: 9x1
Firepower
| Rank: 1 | 4.0 |
| Rank: 2 | 5.0 |
| Rank: 3 | 6.0 |
| Rank: 4 | 8.0 |
| Rank: 5 | 10.0 |
| Rank: 6 | 12.0 |
Firing Speed
| Rank: 1 | 0.67 (this is what the game lists, but it seems a bit longer) |
Reload
| Rank: 1 | 4.00 |
| Rank: 2 | 3.23 |
| Rank: 3 | 2.33 |
Capacity
| Rank: 1 | 5 |
| Rank: 2 | 7 |
| Rank: 3 | 9 |
| Rank: 4 | 12 |
| Rank: 5 | 15 |
| Rank: 6 | 18 |
Exclusive: Increases firepower to 18.0.
Rifle (Semi-Auto)
The semi-automatic rifle is mostly the same thing as the bolt-action rifle, save for the fact that you can fire multiple shots from it without having to leave the aiming scope. (The bolt-action requires you to…perform an action on the bolt…thing…to get another round in the chamber, which will cause you to stop aiming momentarily.) Although the firing power isn't much greater than the bolt-action, the semi-automatic action here makes this a worthwhile upgrade if you find yourself using rifles a lot.
Inventory Spaces Required: 7x2
Firepower
| Rank: 1 | 7.0 |
| Rank: 2 | 8.0 |
| Rank: 3 | 9.0 |
| Rank: 4 | 11.0 |
| Rank: 5 | 13.0 |
| Rank: 6 | 15.0 |
Firing Speed
| Rank: 1 | 1.43 |
Reload
| Rank: 1 | 2.33 |
| Rank: 2 | 1.90 |
| Rank: 3 | 1.33 |
Capacity
| Rank: 1 | 10 |
| Rank: 2 | 12 |
| Rank: 3 | 14 |
| Rank: 4 | 17 |
| Rank: 5 | 20 |
| Rank: 6 | 24 |
Exclusive: Decreases the firing speed to 0.40.
Other Weapons
TMP
The TMP is going to be the third of the trio of weapons that you're going to be consistently using, along with your shotgun and pistol. This automatic weapon puts a lot of metal in the air, and even though each round is individually insignificant, the damage can quickly add up, thanks to the fact that there's almost no pause in between each bullet; you'll be firing ten of them every second. If you're willing to expend the ammo for it, the TMP can also be used to hit difficult or moving targets, especially areas of bosses that you need to hit in order to expose a weakness. For instance, a boss might have an eye that you need to shoot to open up its weak spot; if the eye moves around a lot, you can just fire away with the TMP and send out a stream of bullets at it. It's often much easier to hit targets like these with the TMP than it is with weapons with longer gaps between shots.
The TMP can also be useful in cases where all you need is one bullet to do something, such as crack a barrel or chest, shooting enemies off of ladders, or stunning a ganado with a headshot to set up a kick. Although TMP ammo is scarcer than pistol rounds, it's still fairly easy to find, and popping off a single shot here and there won't significantly drain your resources.
Note that, if you use the TMP a lot, you're going to want to purchase the optional stock upgrade for more stability. Although this doesn't have much impact when you're firing at something right next to you, sending a river of bullets at a distant target will be much easier to do when you don't have to deal with recoil forces.
Inventory Spaces Required: 3x2
Firepower
| Rank: 1 | 0.4 |
| Rank: 2 | 0.5 |
| Rank: 3 | 0.6 |
| Rank: 4 | 0.8 |
| Rank: 5 | 1.0 |
| Rank: 6 | 1.2 |
Firing Speed
| Rank: 1 | 0.10 |
Reload
| Rank: 1 | 2.37 |
| Rank: 2 | 1.93 |
| Rank: 3 | 1.17 |
Capacity
| Rank: 1 | 30 |
| Rank: 2 | 50 |
| Rank: 3 | 100 |
| Rank: 4 | 150 |
| Rank: 5 | 200 |
| Rank: 6 | 250 |
Exclusive: Increases firepower to 1.8.
Mine Thrower
The Mine Thrower is an interesting, if severely flawed weapon. When you fire a mine dart at a target, it'll attach, wait three or four seconds, then explode. The main problems with this are the delay, which will sometimes allow your target to close in on you, meaning that you'll be caught in the blast as well, and the sheer lack of ammo. The game may cause mine darts to drop only when you have the mine thrower in your inventory, but we had it in our case for an entire level and saw only two darts drop, making this something that will usually just take up space in your inventory. It's still kind of useful for taking out groups of enemies, especially when you can see them at long range, but the firing speed is too long to allow you to use the weapon during most boss fights, especially since it takes so long to get back to running mode after firing.
Inventory Spaces Required: 5x2
Firepower
(The firepower ranking for the Mine Thrower doesn't actually increase the damage its bolts do; it instead increases the radius in which enemies will be hurt when the darts explode. The values given are in meters.)
| Rank: 1 | 2.0 |
| Rank: 2 | 4.0 |
| Rank: 3 | 6.0 |
Firing Speed
| Rank: 1 | 1.33 |
Reload
| Rank: 1 | 3.43 |
| Rank: 2 | 2.57 |
Capacity
| Rank: 1 | 5 |
| Rank: 2 | 7 |
| Rank: 3 | 10 |
Exclusive: Further increases the blast radius of the darts and allows them to home in on targets.
Rocket Launcher
The rocket launcher, obtainable from the vendor, is a single-fire weapon; after you use it once, Leon will drop it, and you'll be forced to buy another one if you want to use it again. At 30,000 pesetas, this is an awfully expensive solution to your problems, but certain boss fights and enemy encounters can be made quite a bit simpler with the accurate placement of a single rocket launcher shell.
Inventory Spaces Required: 8x2
Chicago Typewriter The Chicago Typewriter becomes available in the single-player when you beat the Assignment: Ada mini-game. Although it, like the Infinite Launcher, will require 1,000,000 pesetas to buy, it has infinite ammo, and will thus make most encounters with the ganados a piece of cake. Heck, even bosses will fall before you pretty quickly when you put out 100 firepower every second.
Firepower
| Rank: 1 | 10.0 |
Firing Speed
| Rank: 1 | 0.10 |
Reload
| Rank: 1 | 1.63 |
Capacity
| Rank: 1 | Infinite |
Walkthrough
Chapter 1-1
Six years have passed since that horrendous incident, it seems - check the opening cutscene for more info on what incident we're talking about. You could also watch the Resident Evil films, if you wish, but, well, those are more difficult to survive with your sanity than the previous games in the series are.
In Resident Evil 4, you take the role of Leon, a man searching for the daughter of the president, who's been recently kidnapped by a shadowy group of people. You begin your little quest on the outskirts of a rural village in an unnamed European country. Judging by the fact that your upcoming assailants speak Spanish, we're going to guess that it's Spain, but we'll leave the final determination to the experts.
After you gain control of Leon, you'll have to head towards the nearby house. Before you move too far, though, you'll want to take a little target practice by shooting the blackbirds on the path in front of you. If you get them all, you should be able to check their bodies for some money and a nice little gem; these'll come in handy when you meet up with weapons merchants later on. You'll thus want to kill birds when you spot them; they're one-shot kills, but they will fly away if you startle them, so try to land your shots accurately. They carry all kinds of stuff, from cash to hand grenades (which makes perfect sense), so off them for easy pickups.

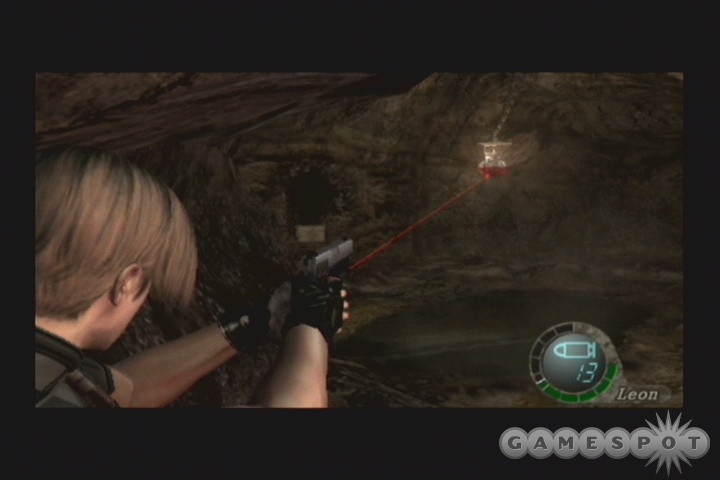
One of the locals will confront you when you enter the house here. He doesn't appear to be a zombie, but axe-wielding bad guys still deserve a bullet or two in the head, if you ask us; the fact that he's got half a dozen maggot-infested skulls drying out underneath his stairwell seems to lend weight to that opinion. Take him down with your trusty pistol, slash him with your knife, kick him to death; try to get used to the controls here. The fact that you can easily skip the opening intro scenes makes it easy to get back here if you die, so this fight and the upcoming fight against three more dudes should act as something of a trial-by-fire for you; if you die, just start a new game and try again.
After killing the initial assailant, the aforementioned three guys will appear outside the house. They can't get in, but you can't kill them without leaving, making for something of a stalemate. Check the corpse of your slain foe for any items, then run upstairs and grab the handgun ammo from the table on the second floor. When you have that, you can either jump out of the second-floor window (you don't take damage from this), or hop from the first-floor window to get outside. The second-floor option is probably the better of the two, as it'll let you maneuver during the upcoming fight. If you want to, you can try slashing out the window with your knife (hold L trigger, then use A to swing your knife), then shooting the guys outside, but it'll be difficult to get a clear shot while doing so.
Regardless, you'll need to put everyone outside out of their respective miseries. Your best bet here is to run away from the house, use your quick-turn maneuver (press down on the analog stick and hit B), then fire away at them until they get close, then repeating the maneuver. If the three targets clump together, try and get a headshot on one of them, then run up and use your Kick command (tap A while you don't have your gun aimed) to knock them all down. The kick doesn't do much damage, but it'll keep the bad guys off your back for a second or two, and you may be able to get a headshot in while they're lying prone.
Before leaving the vicinity of the house, check the cart behind it for a crate; you can open these by swinging your knife at them. The contents are random (like the items that the non-zombie enemies drop, for the most part), but you should still check, obviously.
A little bit further down the road is a small hut with a typewriter in it; you can use these to save your game.
Approaching Pueblo
As you walk down the path, you'll come to a dog caught in a bear trap; you can either help it or shoot it, depending on your demeanor. As you may suspect, it'll come in handy later on if you save it, and save your butt during a particularly hard boss fight, so we'll encourage you to get it out of the trap. Near the second guidepost nearby, you can find a Red Herb if you walk to the southern wall of the zone, but be careful, as there are more beartraps lain down in the grass; getting caught in one will take off one and a half bars of health. There are more traps ahead, as well, including some tripwires laid out across trees; if you hit the dynamite, you'll take plenty of damage, but you can either avoid it or shoot it. There's also a beartrap in between the tripwire traps, but you can also shoot that to trip it before passing by.
After you pass by these traps, it's a fairly simple walk to the village, albeit one infested with homicidal maniacs.
The Pueblo Fight
You'll be able to scout out Pueble after you enter the zone it's in. The inhabitants sure exhibit the signs of zombiedom, or at least madness; they leave corpses burning alive in the middle of the town square, they leave rotting food on the table, they mutter curses to themselves, they listen to political talk radio, and so on.
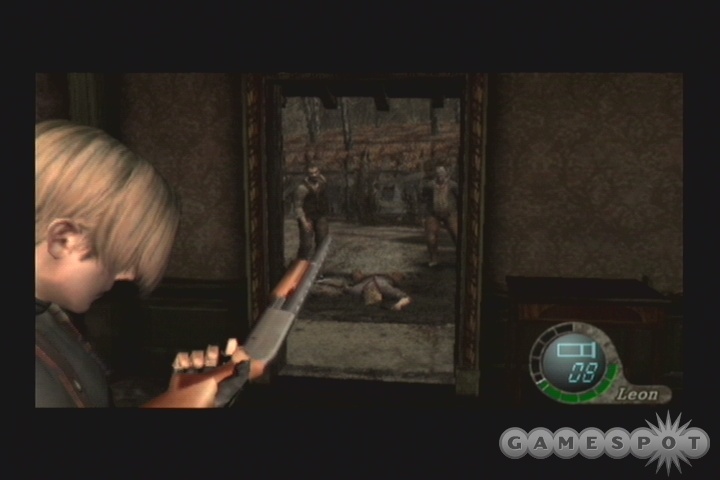
Unfortunately for you, stealth isn't really an option here. You can approach the upcoming fight in a number of ways, though, thanks to the open layout of the village. If you check your map, you can see that your destination is off to the northeast; there also happens to be a fairly large, two-story building in that direction. If you can enter it without getting killed, Leon will barricade himself inside. There happens to be a shotgun in there, which will let you pick off the ganados as they gradually manage to bust into the house, but you'll only have six or eight shots for it. If you're willing to try and back yourself into a corner, such as underneath the stairwell in the same house as where you obtained the shotgun, you can attempt to mow them down as they flood the home; the shotgun works great for this, since it has such a huge spread; a single blast can easily knock down half a dozen ganados at a go, giving you plenty of time to reload and be ready for the rest. It doesn't have a huge amount of killing power, though, except at close range, so you may want to flip over to any hand grenades that you've picked up after knocking down a bunch of enemies and use that to finish them off.
Your best, though, is going to be to leave the house and attempt to enter the home immediately to the south of it on your map. You can do so by heading to the second floor of the shotgun home, finding the southern window, pushing the ladder there over, then jumping out the window; this will land you right near the door to the southern home. If you head there, then blow the lock off the door leading to the second room inside, you'll have a perfect redoubt to use to hold off the numerous enemies coming after you. Best of all, the two crates in that room will give you around 15 more shotgun rounds to use.
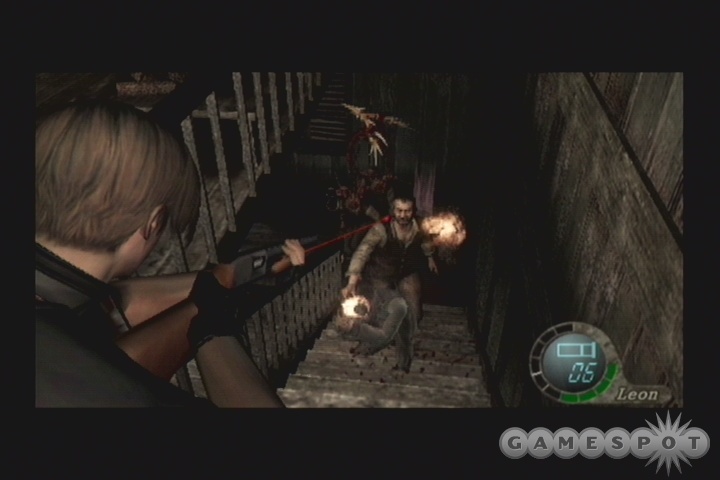
Your primary opponent here is going to be a chainsaw-wielding baddie with a bag over his head; this guy can take a tremendous amount of punishment, making him essentially a mini-boss. He'll mix in with the rest of the normal ganados and try to get in close; if he does, he'll likely get a one-hit decapitation kill on you, so you'll obviously need to keep him back with your shotgun. If you manage to drop him, try taking him out with shotgun or pistol shots to the head.
You'll note that many of your enemies during this fight will be dropping items; these will disappear over time, so if you want to grab the extra ammo and cash these guys are putting down, you'll need to run up and grab them before they vanish. This is obviously easiest to do after you use a grenade or shotgun blast to knock down any enemies nearby, but don't try to be a hero; you can easily get cash elsewhere. The one exception to this is the chainsaw-wielding foe; he'll drop 10,000 pesetas when he dies, so you'll probably want to risk grabbing his loot.
There are two cutscenes during this little fight; the first will show more villagers coming in from outside the town to join the ranks of the mob. This indicates that you're about halfway through the fight. After killing more enemies, you'll see them suddenly break off the attack and head towards the church elsewhere in the village, muttering something about "Lord Sadler." Hmm…. This will indicate the end of your battle; you can feel free to roam about the village, looting like a madman.
(Note that you don't have to go through all this rigamarole if you don't wish to. So long as you don't enter the house here after entering the village, you'll be able to fight your way through to the church cutscene if you manage to kill off enough villagers. You won't be able to use the shotgun, obviously, but you should have plenty of ammo for your pistol, so if you can maneuver them to a chokepoint, such as in the house in the southwestern corner of the village, you should be able to kill enough to finish off the encounter. You won't have to deal with the chainsaw freak if you do it this way, but you also won't get the 10,000 pesetas he drops.)
Pueblo Looting
Now, after killing half the population of a small town, you'll be able to run around Pueblo and grab many of the items that its inhabitants so kindly left laying about for you. They're ganados, or at least in thrall to some dark god, so it's not like they need them any more.
Start in the house with the shotgun. You should've found the shotgun, of course, as well as the shells, money, and grenade up on the second floor; there's also handgun ammo and a couple of crates on the first floor. If you jump out of one of the windows on the second floor, you can reach the roof of a nearby building, where you can find handgun ammo on one of the chimneys. If you then wrap around to the eastern side of the shotgun house, you can find a Spinel; these are small gems that you can sell to weapons vendors later on.
Drop down to the ground and check out the northwestern home to find some more handgun ammo; there are also red and green herbs in some of the sheds along the northern edge of town. From there, start heading northeast towards the destination marker on your map; there are two more little huts here, one of which will have the Alert Order, which will spell out where "the prisoner" is, as well as give you an idea as to why all of the villagers have been attacking on sight.
Before you head out to the farm, though, check the rest of the village. In the southwestern corner, you can find another red herb, as well as a crate that seems to always drop a yellow herb; combine this with a green herb and ingest the results for a permanent increase in your life bar, yay! You can also enter the house near the barn here; there's a locked door inside, so shoot the lock off with your handgun and loot the interior. Check the southwesternmost hut for a couple of crates, then check the northern side of the church exit for handgun ammo, then climb the tower to grab yet more shotgun ammo; that should about clear the town out. You can't exit to the church (as if you'd want to follow the horde of ganados) or to the southwest, so head northeast to the farm.
El Farmo, Comprende?After entering the Farm, check your map for the location of a nearby typewriter and save your game. You should see a tattered blue poster on the tree nearby; grab it to learn about the medallion mini-game. There are 15 medallions suspended throughou the Farm and the Cemetary; apparently, if you find more than ten of them, you'll be rewarded somehow. Hmm…. In order to "find" them, of course, you need to shoot them. Luckily for you, all of these are clearly marked on your map with blue dots, making them a cinch to find. Actually shooting them can be a bit more difficult, but if you thoroughly looted the Village, you should have around 100 rounds for your handgun, leaving you in no danger of running out if you need to pop a few caps to hit the medallions.

Near the hut with the typewriter, there's a medallion suspended above some stagnant water; you can either shoot it to make it drop down, then grab the Dirty Pearl Medallion, or shoot the wooden plank holding the well cover up, then shoot down the medallion; this will get you a generic Pearl Medallion.
Whichever item you get, you'll be able to sell to a vendor for some cash; the regular Pearl Medallion is more valuable than the dirty one, so that's the one you want! Start scouting the rest of the area for goods, but be mindful of villagers; there are a half-dozen or so scattered around. The southeastern farmhouse is going to be where most of the goods are stashed; there are a few small cabinets that you can open for more goodies. There's also a small hut on the eastern side of this house; in order to get inside, you'll need to destroy the cabinet blocking your way with your shotgun or a grenade. Doing so will net you the Beerstein, though, so it's all good. If you don't want to waste ammo destroying the cabinet, you can also head up to the second level of the adjacent farmhouse and drop down from the ledge there to the area behind the cabinet, then push it out of the way.
After examining the area and checking your map to make sure that you've gotten all the medallions (the most difficult of these to obtain is suspended from a windmill; you can actually shoot it without lighting it up with your laser, so don't hesitate to pop off a clip or two if you think you're almost on target), head southeast. Before you leave this area, return to the village and pick up the Gold Chicken Egg which has appeared near the bonfire; it'll completely restore your health when you use it. There may be other eggs when you return to the farm, as well.
Dodging the Boulder
As you walk down the path past the exit from this area (only of the exits is actually usable), three villagers will push a boulder behind you, which will conveniently start rolling along as if it weighed next to nothing, despite being about twelve feet in diameter. You'll need to rapidly tap the A button to outrun it; towards the end of the path, you'll have to dodge it as well, but the button combinations vary, so you can expect to have to Continue here a few times. After you dodge the boulder, it'll break open the door leading to a tunnel, where you can shoot a couple of Spinels out of the ceiling.
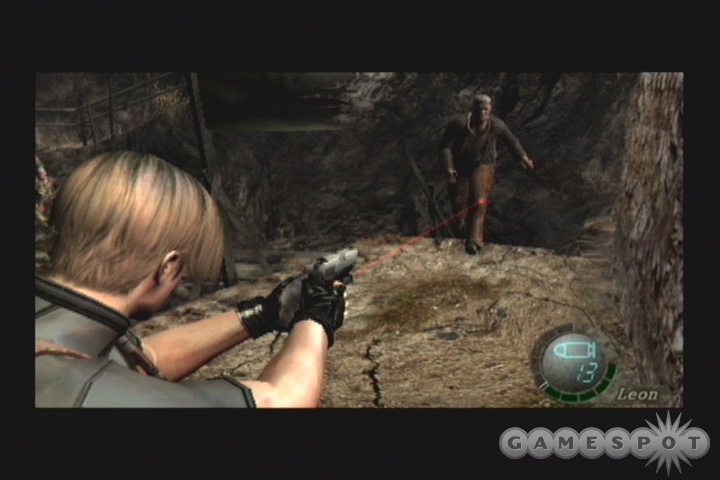
Now, the small collection of houses to the east will pose a formidable challenge to you, mostly due to the fact that the inhabitants apparently enjoy chucking dynamite at anyone who comes nearby. That of course includes Leon, so you'll need to approach with caution, using your pistol to take them down from as far away as possible; they don't seem to want to approach you, and they can't throw the dynamite too far, so stay out of range and unload your clips onto them. If you can hit the dynamite after they hold it up, you can blow them away with a single shot, but this is pretty difficult to do from long range.

After the first dynamiter is dead, it's probably going to be best if you maneuver to the southern end of the house here; you'll need to shoot a beartrap or two to pass by safely. Doing so will let you approach the house from the east; there will still be a normal villager and at least one dynamiter inside. If you kill the dynamite dude, he'll probably kill the other guy when he drops his wares; only then should you hop inside and collect the goodies. There's yet another explosive zombie to the north, so head back outside through the window and take him down before exploring the rest of the zone for goods. Save the home with the padlocked door for last.
Finishing off the Chapter
After entering the padlocked home, save your game and look around. There's more handgun ammo on the tables, some money in a cabinet nearby, more money on a table further in, and a green herb inside a cabinet in the room with the dynamite traps. Take everything before pushing aside the cabinet that blocks the passage and unlocking the wardrobe elsewhere in the house.
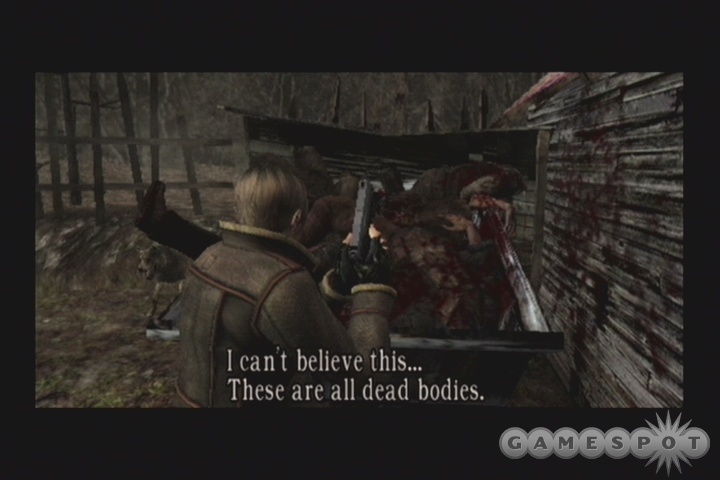
Meet Luis. Meet Big Bad Enemy Guy. Welcome to the end of chapter 1-1.
Chapter 1-2
The Cliffs
Vague recollections are all that remain from Leon's period of unconsciousness; after you escape from the axe-wielding zombie (the keys should be L+R), you'll discover that the bad guys neglected to empty your inventory, meaning that you still have all of your weapons. If you walk outside, you'll have your first encounter with the weapons merchant; he'll offer to sell you a number of items, as well as upgrade your existing weapons, assuming you have the cash. You can sell all of your Spinels to him for 2000 pesetas apiece, as well as the Dirty Pearl Medallion; you'll be able to upgrade the Beerstein later on to make it more valuable, though, so you may want to hold onto it. If you kept your First Aid Spray from the beginning of the game, you may want to sell that as well, since it'll net you 3000 more pesetas than a G+R medicine will, and has the same effect. If you have the money, then an upgraded attache case might be a good purchase, as well as upgraded firepower and capacity on your handgun. You can also buy a rifle here for long-range encounters.
After you upgrade or buy new weaponry, you might want to save over your last game, because as you make your way to the exit from this little area (check around for crates first, naturally), you'll spot a dozen or so baddies wandering the bridges beyond. Well, you'll see a dozen or so, but there are many more hidden away in some alternate universe, ready to pop in when you enter their little domain or bypass certain trigger points; all told, you'll have to kill around 30 if you want to end the flow of baddies. To begin with, it's fairly easy to stand right by the door leading into the suspended bridges and start shooting at the nearby people; the set of steps leading up to the earthen area there make for a perfect choke point at which to blast them with your shotgun. The dynamite villagers can also be dispatched by luring them down to the bottom of the stairs, then standing back near the door; they'll throw their dynamite from there, but it'll land close to them, and will usually kill them and anyone else nearby without requiring any effort on your part.
As mentioned, though, enemies will spawn as you move about here, so you'll have to keep an eye on your backside, as areas that you thought you cleared will sometimes see four or five enemies appear simultaneously and ambush you.

In order to escape from the area, you'll need two halves of an Emblem. These are both found in treasure chests; one's up the cliffside path to the southeast; the other's on top of the structure in the western corner of the area. There are plenty more items in the area, of course, including a Yellow Herb in the small shed near the northeastern gate; you'll need to open a locker to find it. After you have the two halves of the Emblem, you can combine them in the Keys/Treasures part of your inventory, then use them to open the gate. You might want to return to the weapons vendor to spend any cash that you picked up here before moving out.
Factory
As you make your way through the factory, keep an eye out for more crates - there are a few in various areas. After the first three or four villagers or dispatched, you'll reach an area with two windows. If you jump through immediately, you're likely going to get blown up real good by a pair of dynamiters; instead, try to line up a shot on the rightmost dynamite guy and use either your rifle or handgun to drop him. He should take out any nearby enemies when he blows up.
After fighting your way around to where the dynamiters were (watch out for the bear traps on the floor!), open the nearby ovens for some items, then walk through the door and blast through the wooden planks covering the nearby window. This'll let you jump through and pick up the Elegant Mask. If you head down the nearby stairs, you'll come to a ladder leading back up to the light; you can also head down the nearby ladder to land in a fish hatchery where a few items are scattered. If you shoot the fish, you'll be able to pick up some restorative items.
Next Area
After leaving the well, find the flashy item to your left; as with the Pearl Medallion you found before, you can shoot the well cover here, then shoot the item to gain the Brass Pocketwatch. Inside the large house nearby, you'll have to rotate a crystal so that the pattern matches that on the door it resides in; turning it up once and left once should do the trick. This will let you into what appears to be Lord Saddler's chambers; you can grab the Insignia Key from the lockbox here, as well as the Chief's Note from the bed, handgun ammo in the desk drawer, and some cash from the wardrobe. Grab everything before leaving the room; this is the end of chapter 1-2.
Chapter 1-3
The Woman in Red
If you head back through the doorway you just stepped through, you'll be treated to what seems to be an optional cutscene. Afterward, you can start checking the rest of the house for goodies; there's a green herb in a cabinet just outside the door here, a brown egg in the oven, a grenade in a glass case, etc. Check everything for goodies, then save your game and head outside.
As soon as you open the door near the typewriter, another chainsaw maniac will appear, but he'll have only a couple of friends. Using your shotgun and the door as a chokepoint, you should be able to continually knock him down and eventually kill him - he'll drop a Ruby when you do so. Kill the rest of the villagers barring your way back to town, then head in.
You'll need to kill another group of enemies in the town here, although there won't be a chainsaw-wielder among them, thankfully. Use the path in front of you for a choke point, then finish off any remainders with your pistol before opening the door to the secret path that'll lead you to the Cemetary. (You might also want to check this area and the farm to see if there are any more chicken eggs scattered about; we found a Gold one in the farm, but they may be random. You should also make sure that you've shot all the medallions at the farm before proceeding.)
The Secret Path
As soon as you open the door here, you'll be able to save your game at a typewriter. Do so, then head through the nearby door and shoot the lantern suspended from the ceiling to grab a Spinel. (Be sure to stand back, though, as it explodes into flames when shot.) After jumping down the hole here, you'll soon come to another lantern; there are also some Spinels and an Elegant Headress embedded in the cave's ceiling, which is of course the first place one would look for fine headwear. You'll run into a merchant near the end of the cave; you'll be returning to him shortly, so no need to upgrade yet if you don't want to.
You'll notice a few birds located near the entrance to the cemetary; if they get startled by the appearance of enemies, you can probably respawn them by leaving the area and then returning. You can also find the rest of the medallions here; you can actually shoot all 15 if you keep going past the church (one is located below the bridge, near the gap; the other is farther off but is still hittable with your pistol). When you get 10 or more, you can return to the last merchant, who'll give you a Punisher pistol for free; nabbing all 15 will also net you the first firepower upgrade for the weapon. Shots fired from this pistol will penetrate one enemy and hit anyone behind it. It's less powerful than your normal gun and takes longer to reload, so you may just want to sell it back for 10,000 dineros.
The church doors are locked, so you won't be able to go in just yet. You can, however, solve the puzzle behind the church to obtain a rare Green Catseye gem. To solve it, you'll need to examine the graves in the cemetary; three of them are twin graves, and have distinctive sigils. If you find the three unique sigils, you can manipulate the puzzle machine to light them up, giving you the gem. (The solution is 3, 3, 3, 4, 4, 4, 3.)
Now, in order to find the key to the church, you're going to have to jump the gap in the bridge; easy enough to do with your action commands. The little shack beyond the gap holds some notes explaining what you'll have to do to retrieve the key; apparently it's being guarded by some ominous foe. One of the crates here also contains a snake, so be careful as you open them up.
The Lake
As you enter this zone, you'll notice a large number of birds on the ground in front of you. If you're willing to keep leaving and re-entering the zone, you should be able to kill all of them with your shotgun in a few trips; they'll leave behind plenty of gold if you do so. If you want to save or use a merchant, check your map for the correct path; otherwise, head through the doors leading down to the lake. You'll need to fight your way through a number of ganados before you can actually get there; if you want to conserve ammo, try and let them run into the dynamite traps scattered around the area, or just shoot the dynamite if you notice a zombie standing next to it. After you head a bit into the swamp area, more ganados will spawn behind you, so keep an eye on your backside. There'll also be a few snakes in the area, including a couple in crates; don't forget that you can kill them to earn minor restorative items.
After you reach the lake area proper, take a left to witness a disturbing scene, as well as to grab a red herb; elsewhere you'll find a yellow herb, as well as a typewriter. Save your game before heading down to the boat and facing off against the first real boss of the game.
Boss Fight: Del Lago
We're not sure whether "Del Lago" refers to the lake or the monster in it, but, as with Frankenstein, quibbling about terminology doesn't really make much sense: all you need to know is that the thing is big and it wants to eat you. It's pretty similar to a fight from Silent Hill 2, or 3, or whichever one had the fight with the big swimmy thing that also wanted to eat you. It's also fairly difficult, but so long as you have some restoratives, you should be able to survive. You're almost certainly going to die within a minute after the start the first time through, but the fish gets easier as you learn its patterns, so keep at it and you'll win eventually.
Del Lago has a few means of dealing damage to you. In the first, he'll attempt to drag your boat into one of the giant pieces of driftwood that are, well, drifting around the center of the lake; hitting one of these will take off about half your life, and knock you out of the boat, forcing you to swim back by madly tapping the A button. If you don't tap fast enough, Del Lago will swim up beneath you and eat you, so you'll have to relive your Track & Field glory days if you don't want the fight to end real quick. In order to avoid the driftwood, you'll have to use your analog stick to steer the boat around them, but you won't be able to steer while you're holding up a harpoon.
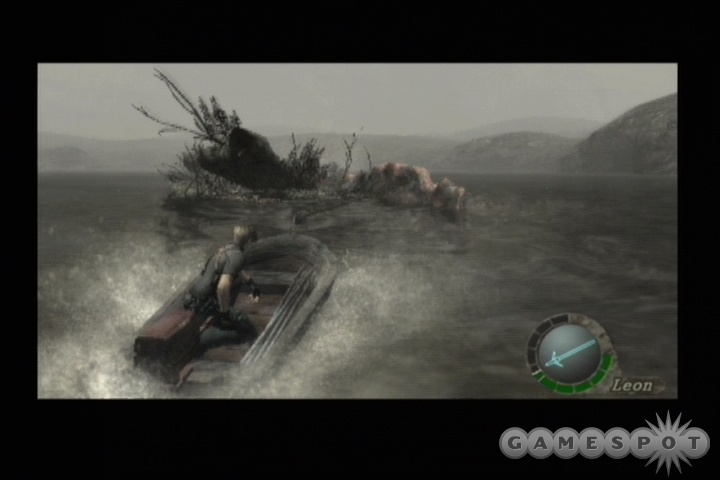
Secondly, Del Lago will occasionally dive beneath the water and immediately resurface, attempting to come up beneath your boat and knock you off. When you spot him attempting to do this, you should immediately bank hard to port or starboard and attempt to avoid the knock; so long as you can avoid his body, you'll be good. Again, if you get knocked off, you'll have to tap like a madman to get back on; you seem to be knocked further away from your boat than when you're hit with driftwood.
Thirdly, ol' Del will sometimes dive down deep and disappear, leaving your boat floating in the water. This is probably the easiest attack to deal with; after the arrows indicate the direction from which he's approaching, line him up and throw a harpoon into his mouth. It seems as though a single harpoon is all it takes to avoid his attack; he'll instead dive beneath your boat, allowing you to perhaps plunge another harpoon into his back while he passes underneath. (How he manages to get free of your anchor to do this, then magically become reattached to it after he dives again is beyond us.)
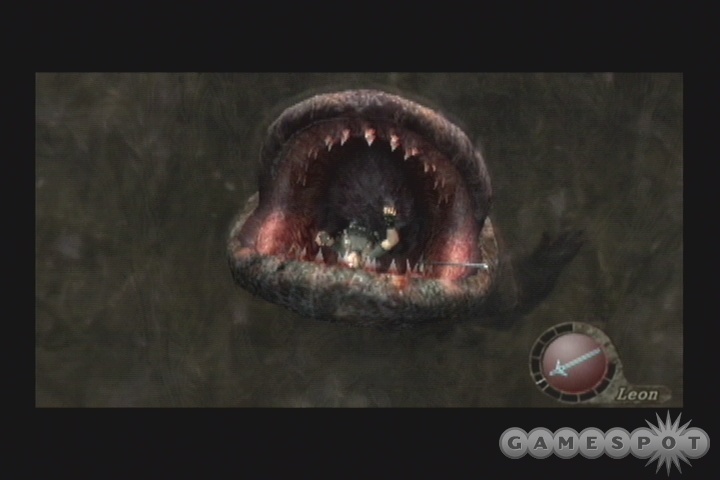
As you may've surmised, you'll have to finish off Del Lago with your harpoons. You have an infinite number of these, but it takes a while to "reload" so you'll need to make your shots count. Leon pulls a bit to the left, it seems, so you'll do well to aim a bit off to the right when attempting to line up a shot on the baddie. You'll need around a dozen harpoons, perhaps 15, before you polish him off. It's possible to do the entire fight without taking damage, but unlikely; hopefully you picked up those chicken eggs from the snakes in the swamp, as they're great for minor heals.
Chapter 2
Chapter 2-1
All you can do after waking up from your "dream" is head out of the cabin (after checking for items, natch), and enter the nearby zone. You can't cross back across the lake, but hey - would you even want to?
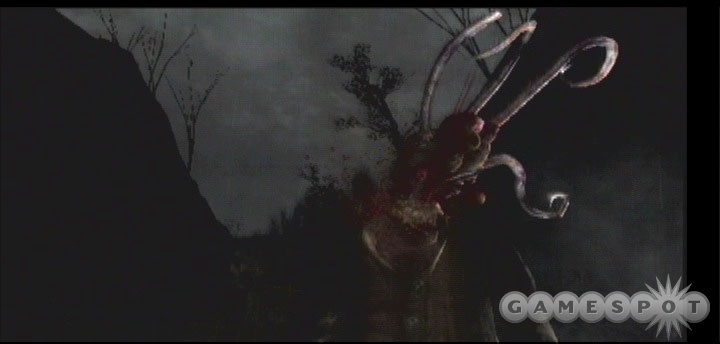
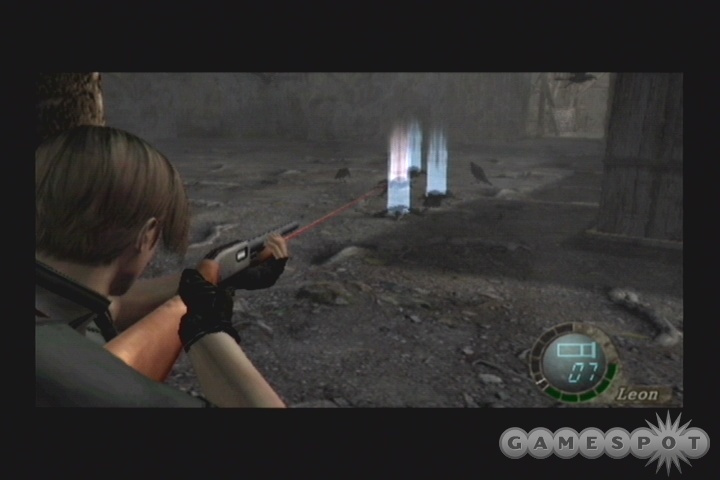
After entering the dam area, you'll run up against one of your first new enemies; they appear to be normal zombie villagers, but can spontaneously explode their heads off to reveal a multi-tentacled extra appendage that'll slash at you from a fairly good distance away. Shotgunning these guys is the best way to deal with them, as you can likely kill them in as few as two shots. Whatever weapon you want to use, you'll have to stay well away from them if you want to avoid taking damage. Note that the second guy you see, although apparently normal, can also sprout a tentacle if you blast his head off.
After moving down to the dam, you'll have to shoot down three suspended crates in order to make a passable path to the lever that'll shut down the flow of water. You can also find an Amber Ring on a rafter near the waterfall, and a Spinel. The Spinel is tough to track down; you'll have to be standing on one of the elevated platforms and look back towards where you climbed the rope down to spot it. It'll be tough to hit without a rifle.
When you have your little crate bridge made, climb the far tower and pull the lever there to reveal a cavern behind the waterfall. After moving towards it, though, more ganados will spawn in. It's best to backtrack towards the lever-tower before taking them on; you can shoot them as they jump across the crates, if you wish, but it's better to wait until they're on the same little spit of land as you are, as this'll let you pick up any items that they drop after they die. If you shoot them on the crates, they're likely to fall into the water.
Head into the cave to grab the Round Insignia. The path beyond will lead you back to the merchant in the cavern before the lake, so save your game and upgrade your weapons before heading back to the church. Or, at least, part of the way back to the church; you're going to have another boss fight before you can get there.
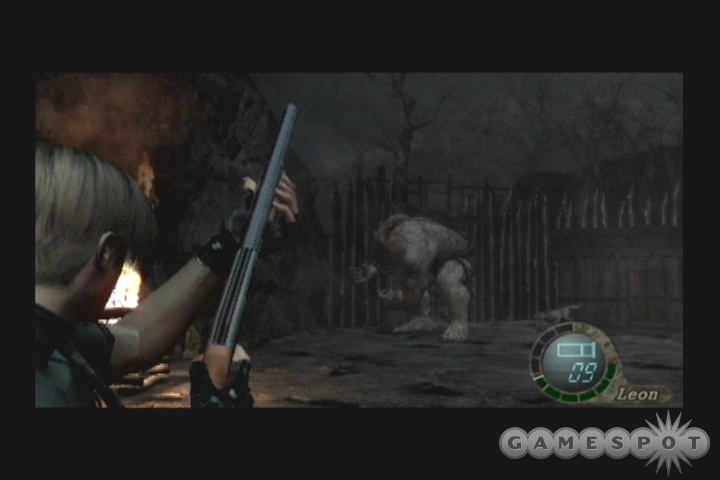
Boss Fight: El Gigante
Although the little trap the villagers set for you doesn't go off quite as planned - they all get killed before the troll even notices you. But notice you it will, and you'll be forced to take it down. Luckily, though, there aren't any silly little tricks you have to perform; this is a fairly straightforward run-n-gun battle. Before you enter the pit here, try to make sure that all of your weapons are fully loaded, especially your shotgun and TMP, if you have one. If you have the scratch to buy an ammo capacity expansion for the TMP, this would also be a good time to get it.
El Gigante is, well, a giant biped, possessed of preternatural strength and an inhuman ability to take damage. As mentioned, all you're going to have at your disposal here are your normal weapons; your pistol and TMP will be useful for forcing the giant to its knees, while your shotgun will be best used for dealing the really damaging blows while your foe is vulnerable.
Attacks
First, though, the various attacks that the giant will use, and there are a few. Its most common attacks are simple punches and kicks; as you maneuver your way around the little pit, the giant will continually follow you. If it manages to catch up to you, it'll either punch you into the pavement for severe damage, or kick you down; sometimes it'll actually punch you, then kick you as you're getting up, which is no fun at all. In order to dodge these attacks, you'll just have to stay away from the beast. A large part of this is not attempting to use your shotgun or rifle unless you're well away from it, as the ejecting-shells animation will usually give it enough time to close in from medium range and hit you. Your handguns and TMP won't have this problem; you can fire away with them, then let go of your R trigger and start running almost immediately.
Next up is the grab; if the giant closes in and manages to pick you up, you'll have to slash at its wrists before it squeezes the life out of you. If you manage to rotate the left analog stick quickly in a clockwise motion, you should be able to avoid severe damage here; we've managed to get out of the grip with only a couple of life bars gone. If you're not adept at rotating, though, you can expect a bit more damage from this. After you do escape, you'll be standing right next to El Gigante, so don't try to fire off any shots; just get your distance.
Last up are the dodgeable attacks. El Gigante has three of these. The first involves him picking up a rock from the northern end of the quarry and chucking it at you. This doesn't appear to be something that you have to press a button to dodge; you just have to maneuver out of the way. We really wouldn't know, because we always ran for the shelter afforded by the small wooden hut on the eastern wall; if you hide behind that, the rock will never impact you.
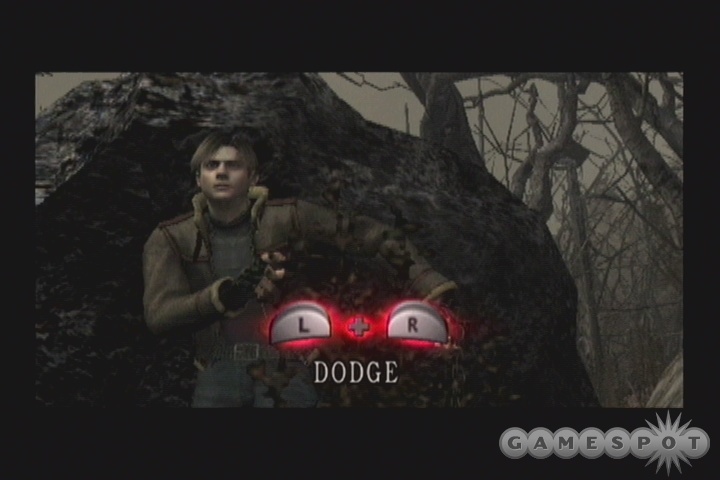
The other dodgeables are avoidable by using the L+R trigger buttons in unison. In the first, El Gigante will raise its arms above its head and charge forward headfirst; it can be difficult to tell when this is coming your way, since you'll usually be running away from it and will have your back turned. If you do spot it coming, you can either move left or right out of the way, or just wait for the trigger buttons to appear on the screen and dodge it. The second involves the giant picking up a tree and coming at you; he'll slow down a bit when he's carrying a tree, so whip out your TMP or Pistol and get your headshots in while you can. When he stops, drop your weapon and wait for the L+R prompt to come up, then dodge it. The timing on this is tricky, but after you experience it a couple of times, you'll get it down.
Damage here is pretty much unavoidable, unless you're some kind of RE4 genius. Don't worry too much about using restorative items here, but try to save them until you're in the red zone on health to maximize their effects.
Plan of AttackIn order to kill El Gigante, you'll need to shoot it. A lot. Headshots seem to work marginally better than body shots, but take what you can get; you'll rarely have more than a few seconds at a time to shoot it. As mentioned, your pistol and TMP are better choices for weakening up the beast, as the shotgun will leave you open to attack until you eject the shell. Your technique here will involve running away - a lot - until the monster leaves himself open to attack, usually as the result of a missed attack of its own. If it charges at you and rams into a wall, for instance, run away, do a quick turn, fire a few shots off, then resume running away until you can get into position for another attack. You're only marginally faster than El Gigante when you're running, so you'll rarely get enough time for more than a few seconds of gunfire before he catches up to you.
Luckily for you, you might get a bit of help during this fight. Remember that dog in the bear trap way back towards the beginning of the game? Well, Old Yeller will return here, if you helped him out; he'll kindly help distract El Gigante, allowing you to shoot away with impunity for a dozen seconds or so. This distraction may be better spent actually looting, though; you'll notice that the houses on the southern end of the quarry have been restocked with goodies. If you wait too long to grab them, the items on the tables will be destroyed when El Gigante smashes through the homes, usually as the result of a missed charge. It's best just to loot them while he's facing off against the dog - don't worry, the dog will dodge all of its attacks - then return outside and get back to the business of killing.

After you deal enough damage to El Gigante, a cutscene will play, showing a little tentacle-thing popping out of its back. This is its weak spot; get as close as you need to get a good shotgun or rifle shot off, and pop the tentacle with a massive blast of firepower, or you can try climbing up atop him and slashing at the tentacle with your knife. After hitting it once, it'll retract back inside El Gigante's body, forcing you to deal more damage to it before it goes to its knees and shows the tentacle again. You'll need to go through this four or five times before you polish off El Gigante once and for all - congratulations! He'll drop 15,000 pesetas, so if you want, you can return to the weapons vendor and upgrade again before heading back to the church. You might also want to make another save game here if you're low on health and restoratives.
One other technique is to attempt to use frag grenades to stun El Gigante temporarily, which combined with your shotgun can let you take him down without using much TMP ammo. If you have a frag equipped just before you enter the boss fight, then quickly throw it underneath his legs when the cutscene ends, you can switch over to your shotgun and should be able to bring EG down to his knees with three shots. Before you jump up to slash at his tentacle, though, switch back to grenades; when you jump off of him, repeat the process until he goes down. If you rescued the dog earlier, you can probably get by without using a third grenade; just finish him off with shotgun rounds.
Lastly, you might also want to try running through El Gigante's legs, if you're feeling daring. If you time this right, you can run through the legs, turn around, then shoot him a few times before dodging his attack and repeating the process. Back to the Church
Equip your shotgun as you make your way back to the church area - there are some devil dogs waiting outside it which can deal heavy damage unless you put them down quickly. They're tough to see in the darkness, so proceed slowly once you reach the walls. There are three of them in total, so kill them all. Before going into the church proper, you might also want to check the shed at the bottom of the cemetary, which has been restocked with ammo. You can also find a Spinel by shooting the small bird's nest in the tree just south of the entrance to the cemetary.
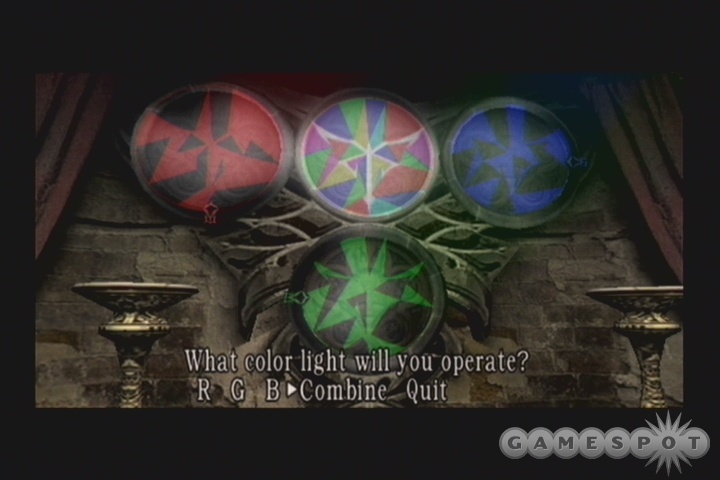
You can scout around the interior of the church when you reach it; there's some money near the altar, and a crate in one of the wings off to one side. When you're content, climb up the ladder here and jump onto the church's chandelier; in order to make it to the far side, you'll need to jump again when the arc of your swing tops out towards the far ledge, near the three colored plates. You'll arrive near a little operating console; this controls the colored lights below, which form something of a locking mechanism for the doors up here. Each of the three plates has a pointer on its outside edge. To form the correct combination, manipulate red so that its pointer heads down, turn green's pointer to the left, then turn blue's pointer to the right, then combine them all. This will unlock the grates, allowing you to pass through.
Meet Ashley. Soon after, meet Lord Saddler, a cackling crackpot, who's apparently just in it for the money. End of chapter.
Chapter 2-2
Busting Out All Over
Now that you have Ashley in your party, your trip to the extraction point is going to be a good deal more difficult. Thankfully, you'll be able to command her to Wait or Follow with the X button; this will help you keep her out of danger, such as when you exit the little shed behind the church. There are a half-dozen baddies waiting in the graveyard for you, so command Ashley to wait near the door while you head out to deal with them yourself.

Luckily, you'll have a bit of an edge, thanks to the explosive barrels on the cart in front of the gate leading to the cemetary. If you get the attention of the ganados, then shoot the barrels with your shotgun, they'll catch alight and should destroy a couple of your enemies, leaving you with mere cleanup duty. Get Ash to follow you again and make your way down to the underground tunnel, checking the trees for more bird's nests.
In the tunnel, you'll be able to meet up with the vendor again, who's offering more tuneups, as well as a new pistol, the Red 9. Obviously named after the X-Wing that Lieutenant Naytaan flew at Clak'dor VII, the Red 9 is a much more powerful gun than your Handgun, but it fires much more slowly, and takes longer to reload. If you've been upgrading your normal handgun, there's no real reason to trade it in for the newer model.
After making your way through the tunnel, save your game and head back out towards the village.
Spooky Times
A small alert will be raised when you return to the village. The best place for Ashley to be here is likely at the top of the tower, so get her up there, tell her to wait, then jump down and start dispatching anyone you see. There are perhaps a dozen villagers all told, with a few of the glowy-eyed freaks that morph into tentacle heads, so proceed with caution, and keep an eye out for traps on the paths; they're tough to see due to the lack of light. The village has been restocked with the usual ammo and cash goodies, so check around before calling Ashley down from the tower (you'll need to Catch her at the bottom of the ladder) and heading up towards the farm. Try to avoid using shotgun ammo here, as you're going to need it soon.
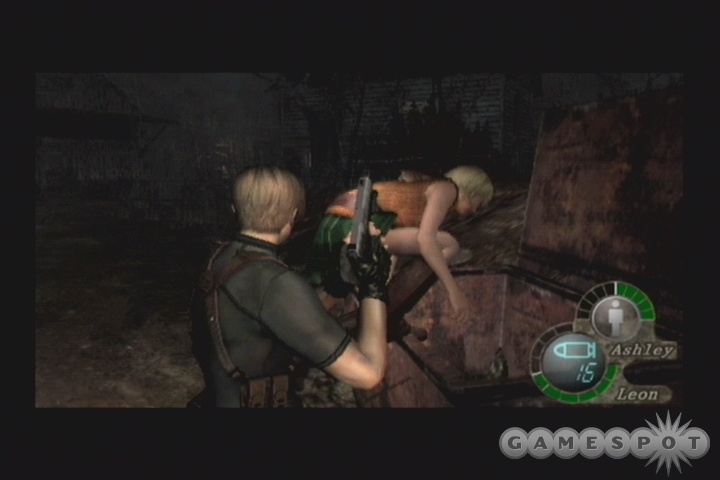
When you do enter the farm zone, tell Ashley to hide in the dumpster near the entrance; for the president's daughter, she's surprisingly compliant. Try telling Jenna Bush to do the same and see what happens. You'll be able to save your game nearby, as well as find another internal memo that's been haphazardly left lying about; apparently there's a way to remove the viral eggs from a body before they hatch and turn you into drones. Yay! More goodies and ganados await; clear the path to the northeastern gate, being mindful of the traps, before calling Ashley over. With your help, she'll be able to climb over and open the way.
Chapter 2-3
Now That's Classic Zombie Behavior
After you enter the next zone beyond the farm, you're going to be forced to barricade yourself into a house while ganados attack from all sides. Luckily, Luis will be along for the ride, and he's unkillable, allowing you to let him be a target for most of the ganados while you sit back and take them out. Still, cramped quarters abound, so you'll need to stay on your toes.
At the outset, you'll be defending the bottom floor of the house; you can push the three cabinets in front of the boarded-up windows to buy yourself a bit of time to pick up the items in the house, but the baddies will inevitably flood in after a bit of time. Luis will stay on the first floor no matter what, but you should situate yourself on the steps, about halfway up. This will let you cover the bottom of the steps with your shotgun; you should be able to prevent anyone from getting to you by doing so. Whether the ganados are killed by yourself or Leon, though, they'll still drop gold, meaning that you'll probably have to run around the table here to pick it all up every once in a while before returning to your position. Just try not to get killed.
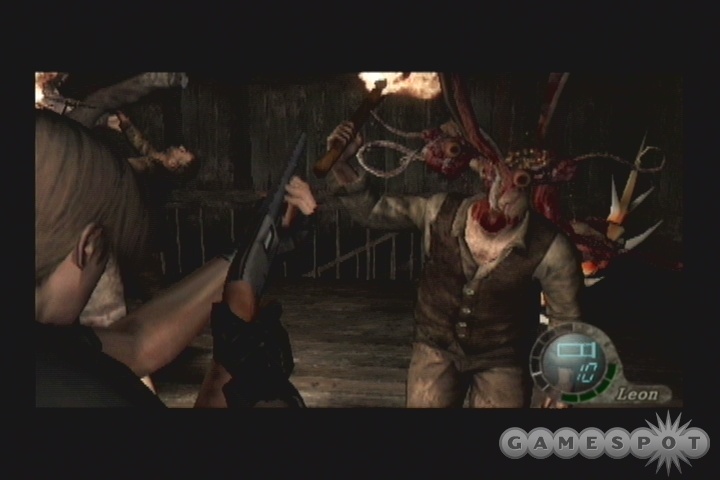
After a while, Luis will call you up to the upper floor of the building, where things get a bit more difficult. In addition to the steps up from the bottom floor, the ganados will attempt ingress from the three windows via ladders. In one corner of this room is the cabinet that Ashley's hiding in; if you stand next to it, you should be able to push the ladders out of the two nearby windows with relative ease. They'll constantly be reset, of course, but it only takes a moment to push them away, and you're immune to attack during the pushing animation. Luis should be able to at least slow down the flow of enemies from the other side of the room while you do this, but you will need to occasionally send a shotgun blast or two that way to help him out.
As with the first little melee in the village at the beginning of the game, you'll be saved by the bell here, as the ganados will just up and run after a bit. Luis will run off as well.
The Choice of RoutesWhen the ganados run off, you can loot any items remaining in the house; check around for dropped ammo or cash before it disappears. There's also some TMP ammo on a stack of logs outside, as well as some handgun ammo behind the house. You can use the weapons vendor before saving your game.
The note near the typewriter will spell out your choice for you; you can either head through the left gate and face off against a "large number of Ganados" (so that's what we should've been calling the ganados all along), or head through the right and take on El Gigante again. Dunno about you, but we prefer our chances with the ganados. You can choose whichever route you want, though; they lead to the same area. El Gigante will is harder, but will provide you with a bit more cashola.
El Gigante
Assuming you do actually want to fight El Gigante again, take the rightmost gate. He'll appear after you walk a short way, and you won't have a huge amount of room to manuever in. Ashley will be a tremendous annoyance here, as Gigante will pick her up and crush her with depressing regularity, especially if you attempt to leave her behind; you'll need to shoot at his hands to force him to drop her, then heal her up with restorative items before she can be tackled again. He also has his normal suite of attacks that he'll use on you.
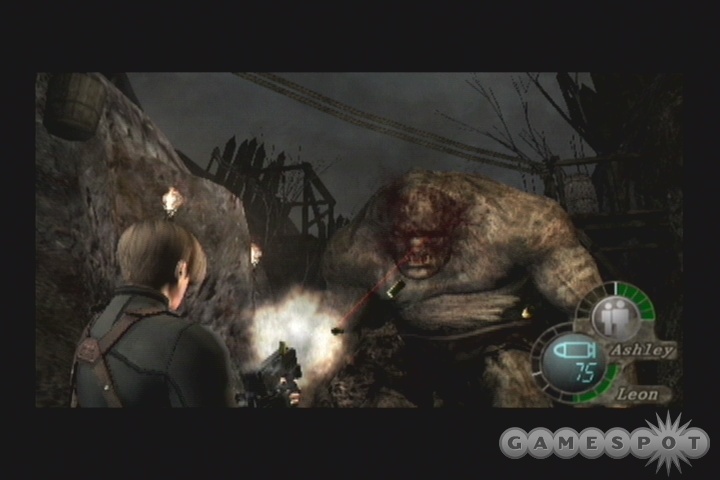
At the beginning of the fight, Ashley will point out a precipitously placed boulder above Gigante; if you can shoot out the struts beneath it at the right time, you can drop it on his head and stun him for a moment. This may let you get behind him and bust through the door beyond, but we preferred to just take him out head on. This is only really possible if you have a couple hundred rounds of TPM ammo and have upgraded it to hold 100 rounds of ammo at a time; otherwise, you're on your own here, as he'll probably wipe the floor with you. If you do meet these criteria, though, start blasting away at his head while he walks towards you; you'll need 50 or 60 rounds to stagger him. When he falls to his knees, take a moment to reload, then get close to him and jump on him; you'll be able to use either the A or B buttons to cut away at the tentacle coming out of his back. You'll need to repeat this process at least three times before he goes down for the count, and you'll likely take a bit of damage in the process (if not more than a bit), but after he does die, you'll get 15,000 pesetas, and will be able to scour the huts beyond the first locked gate for plenty of ammo and more Spinels. There's also a Purple Gem suspended above the huts; look for something flashing and shoot it down.
Zombie Path
As soon as you regain control of Leon after entering the zombie camp, shoot the explosive barrels on the cart to remove any nearby threats, then get Ashley into the dumpster nearby before taking out the rest of the enemies. You'll have to move around to the large enclosed pit in this area, but do not jump down. Instead, walk around the pathways until you see a ladder leading down to a mining cart and jump down there. You can find some shotgun ammo, which will come in handy during the upcoming fight.
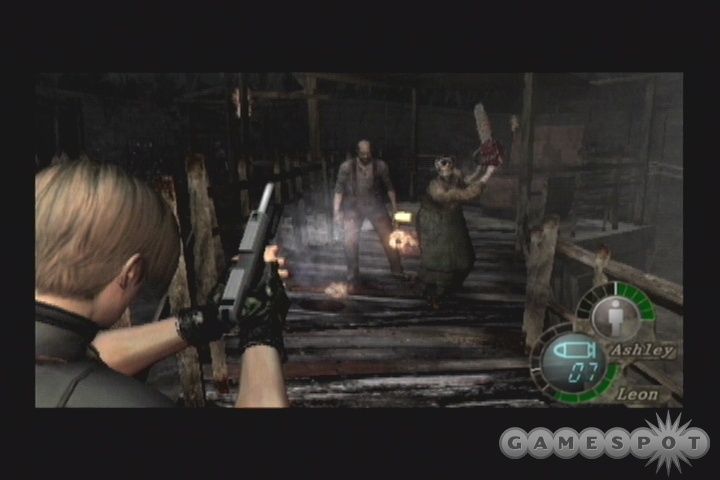
When you're ready to take down some chainsaw ganados, walk around to the eastern side of the pit, where there's both a ladder and a space for jumping down. Kick the ladder into the pit, then jump down to spawn in all of the ganados. There will be two fair maidens with chainsaws that will be your obvious targets, as well as a bunch of other baddies. The last place you want to be while fighting them is in the pit, though, so climb up the western ladder and backtrack to the southwest, near where you initially reached the elevated surface; this will give you something of a choke point to use to take down the baddies. Shotgunning the chainsaw freaks will be a must, obviously, but you can also use your TMP on them if you run low on ammo. One of them will drop a Ruby, the other will drop the Camp Key.
After you finish off any stragglers, use the Camp Key on the door in the pit and move on. There are more baddies waiting for you by the exit from the area. Far and away the best plan for dealing with these guys is to lure them back to the pit area and climbing one of the ladders; even if both of them are up, they'll still congregate around whichever one you're closest to, allowing you to pick them off after repeatedly shoving the ladder back down onto them. When everyone's dead, call Ashley back to you and move on.
Meeting UpWhether you fought El Gigante or the horde, you'll wind up in an area with a weapons merchant and a save point. Near the save point, you'll find the Village's Last Defense document, detailing the cult's plans for dealing with you.
After you save your game, you'll have to take a platform ride down across a gaping cliff. If you don't have a TPM and a bunch of ammo, you can expect to take a bunch of damage here, as villagers riding in the opposite direction will throw weapons at you as you attempt to head down. If you do have a TPM, though, it's a relatively simple matter to shoot the guys off their platforms from a distance. It can be difficult to line up your laser sight with the baddies, though, so don't hesitate to spam out shots; each guy here will only take one bullet to "kill."
When you reach the bottom of the lift, check the lockers in the control room to find some ammo, then head down the steps and walk into the cave nearby. If you fight your way to the end, you'll find a chest with a Yellow Catseye inside of it. If you still have the Purple Gem and Green Catseye and either the Elegant Headdress or the Beerstein, you can combine the gems with one of the other objects to greatly multiply their value. There's a vendor back near the steps beneath the control room; grab the ammo near him, upgrade or buy anything you want, then save your game and continue on the path beyond. Make sure all of your weapons are fully loaded and that you've combined any herbs in your inventory; it's boss fight time.
Boss Fight: The Chief
The Chief isn't a horrendously difficult boss to kill, but you will need to stay extremely mobile while you take him on if you don't want to take a pounding. As soon as you enter the house here, in fact, you'll have to dodge one of his attacks; this seems to be locked to B+A, but be sure to hit whatever comes up immediately, or Chief will kill you automatically.
First Form: After you do manage to dodge his initial attack, Chief will morph into his first form, a slow-moving behemoth that'll swipe at you when he gets close. There are two ladders in this area, one in the southwestern corner and one on the northern side. Your route here should take you from the southwestern ladder up to the second floor of the barn, then around the barn, then back down to the ground floor by jumping from the eastern side of the upper floor. There are plenty of items to grab here, including ammunition, but since you likely have a bunch of ammo for your handgun, that's what you'll likely want to use on Chief's first form.
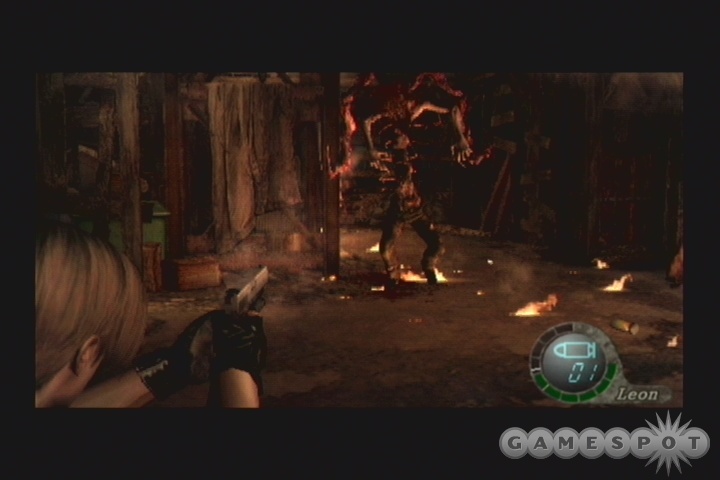
As you maneuver through the building, Chief will try and track you around in the vain hope of hitting you. He's pretty easy to avoid while on the ground, since he moves so slowly; when you're on the second floor, he'll extend a mandible and try to swing at you, but if you keep moving you should be able to dodge this. If you continually circle the building like we told you to, you'll usually have five or six seconds to shoot him without having to worry about any counterattacks; one of these spots is in the southern end of the barn. If you wait by the ladder, you'll be able to temporarily immunify yourself to his attacks by climbing it. After you do climb up, pause by the top of the northern ladder and take advantage of his slow shuffle to pop him again from up there before running around, dropping back down, and repeating the cycle. You should be able to avoid taking too many hits by doing this.
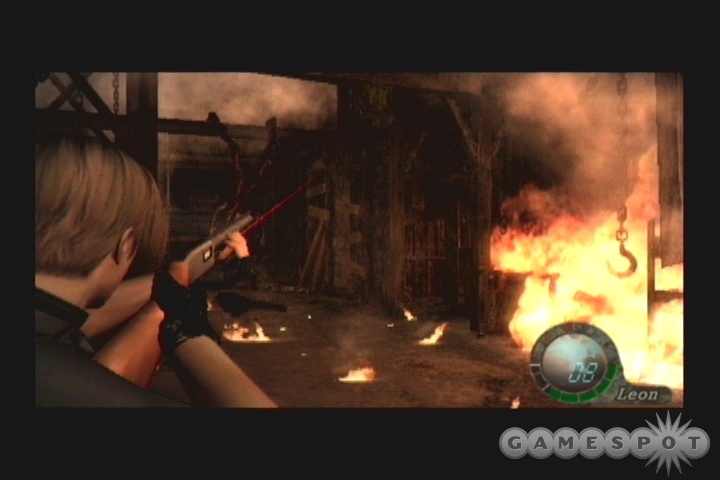
Second Form: After you kill Chief's first form, he'll abandon his lower body and start hopping around the area with just his arms. There are plenty of handholds for him, and he moves much more quickly in this form, but the basic tactic is the same: stay mobile, take your shots while he's far away, and run when he gets close. He doesn't have any ranged attacks, so as long as you don't stick around when he lands next to you, you should be able to pick him off from a distance without any worries, although you'll have to move fairly often. We found that staying on the ground floor gave you the greatest amount of flexibility here. Just run from one end of the building to the other, do a quick turn, unload on Chief with your shotgun or TMP (or pistol if that's all you have ammo for), then run away when he gets close and repeat the process. After a few rounds of this, he'll fall to the ground and drop the False Eye, as well as 30,000 pesetas. Before leaving, check the hut for any items that you missed (there's a Spinel inside the explosive barrel on the ground floor). Return back to the far side of the lift and use the Eye to open the locked gate there.
Onto the Castle
After you unlock the doorway, you'll come out to a narrow little corridor populated by three villagers. As you approach, though, an unwelcome arrival will start strolling down the path: a truck! You'll have to shoot it a few times to either pop the driver's head or set the engine alight; if you're successful, the truck will swerve into a wall and overturn. After this happens, run around the left side of the truck (with Ashley in tow), and quickly grab the items that the ganados dropped before turning around and dealing with the villages that are running from the truck. You'll soon hit the end of the chapter.
Chapter 3
Chapter 3-1
Before you head into the merchant's shop here, smash all the crates and check behind his hut to find a treasure chest. You should have a good amount of cash from the Chief and any other stuff you have to sell, which is good, because the merchant here has a host of crap for sale, including the large attache case, a treasure map for the castle, a new pistol, new shotgun, new rifle, new "mine thrower," etc. Make your purchases before saving and heading through the door to the next area - it's time for the spooky castle funride.
Cannoneering
After you reach the next zone, walk around until a cutscene starts; you'll be standing near a crate, so stay there and get the attention of the two cultists nearby with your pistol. Tell Ashley to stay where she is, then walk around to the right and take out the enemies as they attempt to come down. You'll have to dodge the catapult fire as you cross the next zone, so make sure that Ashley's still hanging back and not following you; she can die pretty easily here. After you walk out into the courtyard a bit, the initial volley will come down, wrecking the little fountain across the way. Although nothing appears out of the ordinary, you can check the center of the fountain for a Spinel.

In order to safely cross this little courtyard, try dashing around to the wooden crates near where the fountain was until one volley is completed, then quickly running around to where the cultists were pacing before you shot them. There should be a large cannon inside a room here; this is where you want to call Ashley back to you. The catapults won't fire at her if she's alone, so just wait by the cannon until she reaches you, then tell her to wait again.
After she's safely stowed away, head back up to the courtyard and turn west underneath the little archway there; you should be able to spot the red-robed cultist above you. Off to his left a bit is an explosive barrel which you should barely be able to spot the tip of; if you shoot this, the entire catapult structure will explode. You'll need to repeat this process for a few other catapults before you can safely move on, but first, head up the stairs here, then double back. Walking up the stairs will trigger the appearance of a pair of cultists from where you entered the zone; they'll make a beeline for Ashley and start dragging her back to the entrance, but you should be able to cut them off well before they get to her. If you're particularly devious, you might even want to try crossing the courtyard at the same time they do; they might get caught in one of the catapult blasts if you time it right.
When Ashley's safe, you'll have to head up the steps, scope out the remaining catapult positions, and blow their explosive barrels before they can smash you to bits. The two near the exit will be the most difficult; only one has a barrel nearby, so far the one in the northeast corner, you'll have to cross over to the eastern crenallations and hide in the small tower, and attempt to pick off the catapulteer from there. He's a one-shot kill, so it shouldn't be too difficult, especially if you have a rifle.
When all of the enemies here are dead, including the guy in the house up here, check the south side of the house for a Gold Bangle, then use the machine on top of the building with the cannon in it to raise it all the way to the roof. You'll then be able to fire it at the gate, opening the way to the next zone.
Swords And Sorcery…But Mostly Just Swords
After you enter the cramped quarters of the next room, grab the Platinum Sword from the plate on the wall, the tell Ashley to wait nearby while you lure the cultists above onto the stairs and finish them off. After they're dead (there should be three of them, including one that'll turn into an extra-tentacly baddie when you blow his head off), you'll need to take Ashley upstairs and defend yourself against the rest of the guys that are coming from behind you. There won't be any easy way to defend yourself here - they'll be at the top of the steps before you can fight them, preventing you from bottlenecking them there - so try and use your shotgun to keep them on the ground while you manuever Ashley into a safe corner before finishing them off. The red-robed leader at the bottom of the steps appears to be bugged, and will refuse to move or fight you, so get your headshots in and kill him before taking the Gold Sword from upstairs and placing each sword in its correct receptacle (gold downstairs, platinum up). This will unlock the door here, allowing you to move on.
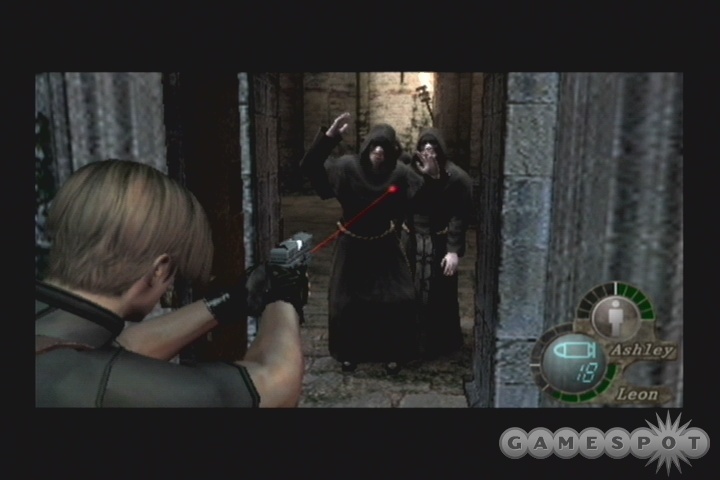
After you reach the next area and meet up with Luis again, bring Ashley back to the door you came through and tell her to wait there while you investigate the far door. Four or five cultists will be coming through it shortly, including a couple of tentacle guys, so use it as a bottleneck to kill them off. If you have to retreat, don't hesitate to do so; the archway back near the door makes for a good fallback point. Head through the door and kill off any baddies remaining in the first room as well as the crossbowman above the archway before calling Ashley back to you.
You'll have to deal with two shield-bearers before you can reach the southwestern room here; these guys are fairly similar to the riot guards in a Metal Gear Solid game, but you can thankfully bust right through their shields with a shotgun blast at close range. After busting through their shields, they're just normal cultists, so bust a cap and head into the room here.
After you grab the Castle Gate Key from the chest, you'll immediately be plunged into combat with numerous cultists that run into the room. If you're really good, you'll be able to hit the explosive barrel in the corner as a pair of the cultists run by it; if not, blast one set of them down with your shotgun, then run past them back to the archway where the crossbowman was and use that as a chokepoint to deal with the rest.
Little Lord ZombieroyAfter heading into castle proper, you'll meet up with Salazar, the diminutive master of the keep. Vague threats follow, but you don't have to worry about him just yet. After the cutscene ends, walk up the steps, smash the vases for some items, then check the wall above the arch to find a Green Gem.
The only path open to you after you save leads to the prison, but you won't be able to head there just yet. Instead, walk down the carpeted hallway (you can Check a painting of Lord Saddler to find 5,000 pesetas), then grab the Capture Luis Sera document from the wall. You can't head through the flames here, obviously, so grab the Prison Key from the painting to their right instead and use it to unlock the door you passed earlier. Leave Ashley upstairs before you head down, and make sure all of your weapons are fully loaded. If you look to the left into the prison from the carpeted hallway, you can also see a box of shotgun shells which you can shoot off of the rafter; do so before you head down and grab them.
Boss Fight: The Garrador
The garrador here is really more of a mini-boss than a real boss, but he's still a handful to deal with if you don't know how to handle him, and can dish out a good beating. When you learn his patterns, though, it's not beyond the pale to kill him without taking any damage yourself.
The main reason for this is the fact that he only has a pair of attacks; one in which he'll swing away like a complete spaz with his bigass claws, and one in which he'll charge at you and imbed himself into the wall for a few seconds if he misses. Actually, he'll charge with both of these attacks, more or less, but you can tell which attack he's using by the position of his claws; if he intends to swing away, he'll keep them both down, but if he's going for a full charge, he'll keep one of them up in the air. If you start moving off to the side as soon as you see the garrador charging at you, you should be able to avoid both of these attacks with ease.
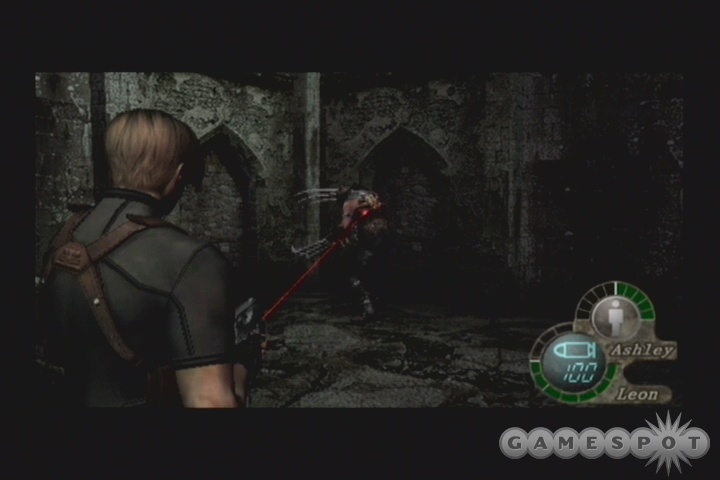
The only way to really deal damage to the garrador is to hit him on the yellowish spot on his back, which is where his tentacle resides. Needless to say, hitting him on the back is difficult to do when he's charging at you, so the best time to pump a shotgun round into him is when he's impacted on a wall after you dodge one of his charges. He'll be defenseless until he can get his claw unstuck, leaving you a few seconds in which to pump a round into his back. The garrador is also possessed of poor eyesight, so if you avoid his normal swinging and stay out of sight for a second (or just stay across the room from him), he'll sheathe his claws and start wandering around, looking for you. By the same token, he'll have an easier time locating you if you run instead of walk, so keep the pace down. If you have a rifle or a magnum, this might be a good time to dish out a single powerful shot at him. Lather, rinse, repeat until dead.
As a note, the bells in this little area can be used to distract the garrador and force him to lodge his claw into a wall. Since he relies on hearing to track you, if you shoot one of the bells and make it ring, the garrador will run headlong into it and stick his claw into the wall, giving you a free shot at his back. You can do this twice, once with each bell, because he destroys them after he hits them, but still, it's free damage.
After El Garradoro is dead, grab his cash and flip the switch next to his previous domicile. This'll shut off the flames up stairs, allowing you to head back that way, but more cultists will appear before you can reach it. If you didn't shoot the lantern here earlier, you can do so to douse them with flames. Around the corner, you'll reprise your adventures with the dynamite throwers of lore; the easiest way to kill him and his crossbow friends is to shoot the dynamite before he throws it, of course. Clearing a path to the end of the zone will allow you to move on, but you'll almost certainly want to save your game before so doing, as the next room can be rather tricky.
Super Smash Cultist MeleeIt's easy to be rather shocked at the sheer number of cultists waiting for you here; in addition to a red-robed badass, there are numerous shield guards, mace-wielders, and not a few crossbow peeps in addition. Obviously enough, your survival depends on finding cover, and right fast. Your best bet for survival here is to equip your shotgun, take an immediate left or right, and try to circle around the edge of the room with Ashley until you reach the stairs leading down, using your shotgun to blast anyone in your way. Don't aim for the head; just knock them down, then run past. You'll find a room in the center of the lower floor here, where the door will form a perfect bottleneck if you can get inside. If Ashley gets picked up, you're going to have an incredibly difficult time getting her back, so try to rush inside and park her near the back wall before using grenades and your shotgun on the hordes of cultists approaching. The only thing that you need to be careful of is the fact that occasionally - very occasionally - cultists will drop from the hole in the ceiling of this room, and will either slash at or attempt to capture Ashley. You'll need to keep an ear out for her screams and immediately move to protect her when she's in danger, or you can find yourself having to repeat the room after surviving ten minutes or so of combat.
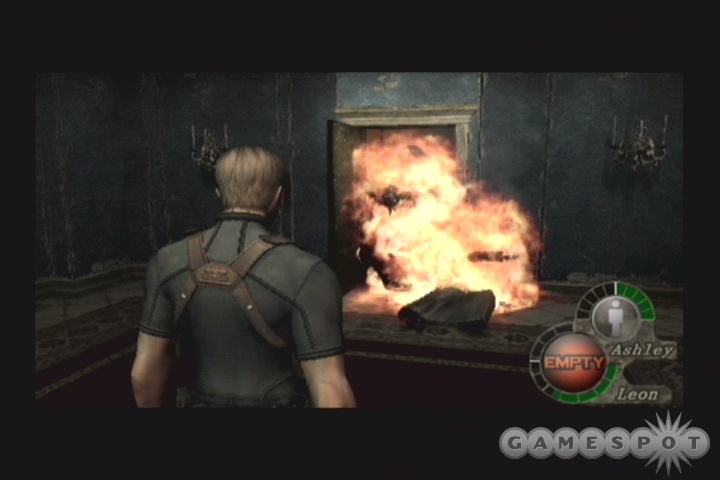
You'll notice more shield-bearers and guards popping out of doors after you kill enough of the initial batch; if you're hiding away in the room, they may now know where you are, and you'll be forced to leave the room for a second to get their attention. When you've gotten most of the guys in the large room, you can activate the pressure plates in the smaller room by having Ashley wait on top of one of them, then moving Leon onto the other one; this will raise a pedestal with a rotating lever on it back in the main room, but will also initiate a flood of yet more cultists. Kill them off, then head up to the main room and rotate the lever to lower the steps to the upper half of this room; yet more cultists!
After you've killed every last son of a bitch around, you'll have to head up the steps and clear the path to the door. Unfortunately, it's on the far side of an indoor lake, and the only means of dropping the stepping stones are on a ledge that's above your grasp. Actually, it looks like you could easily jump and pull yourself up, but for the sake of ultra-dramatic gameplay, you'll need to hoist Ashley up to the ledge and simultaneously protect her while she turns the cranks and protect yourself from more cultists who'll be coming at you. There are two doors that the cultists will be able to drag Ashley to, but all it takes is a single bullet at their feet to get her back on task. Use your shotgun to protect yourself first; after a few ganados come your way, they'll taper off and let you get back to protecting Ashley. The TMP is the best bet for this task, as it's more precise than the shotgun, but fires much more rapidly than the pistol. None of the ganados will attempt to hurt Ashley, so don't worry about that; just try to buy her enough time to get her job done. If she gets picked up, shoot the cultist in the legs to free her.
After Ashley's turned both cranks, she'll head back to one side of the area and wait for you to catch her. Do so; you can then either head straightaway for the exit, or wait for the rest of the cultists to drop down and kill them for whatever ammo or cash they'll drop.
Virtua Leon
In the room beyond, you'll notice a rather peculiar architectural embellishment, in that the statuary here is suspended from the ceiling. Rather odd, that, and to compound the confusion, one of them actually has a Spinel in its eye. No matter; check the room for ammo and goodies before upgrading at the merchant and saving your game.
The door to the left of the merchant leads to the optional Target Practice mini-game. In order to start a round of the game, talk to the merchant-looking guy behind the counter here; he'll outfit you with either "sniping" weapons (9MM and Rifle) or "rapid-fire" weapons (shotgun and TMP). You'll have infinite ammo for these weapons while you remain in the target practice room; even if you run out of ammo in your inventory, it'll automatically fill up again whenever you have to reload. Your choice of weapon doesn't make a difference on your score, for the most part, but some of the target practice games are easier to pass with one weapon setup or the other.
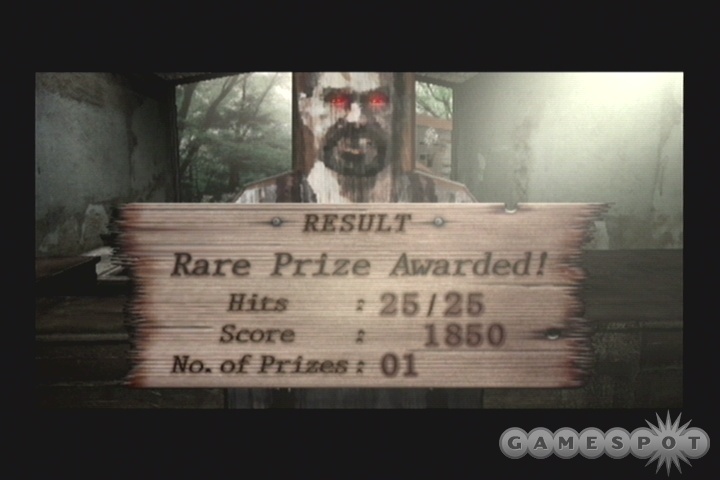
In order to "win," you'll have to score 3,000 or more points during a round. Your goal is both to score a lot of points by hitting targets and to not miss. Although the game doesn't show you how many times you miss during a round, it does appear to take misses into consideration when tallying up your score; missing will also prevent you from obtaining the coveted Salazar target, which appears way in the end of the room and is worth 500 points when hit. It'll only appear after you make five straight hits, so it's definitely worth trying to avoid missing as often as possible.
After you fool around in the target practice room for a bit, walk down the hallway next to the real merchant to end the chapter.
Chapter 3-2
Sewer Time!
After Ashley makes her getaway through a solid wall, find the doorway nearby and head through to reach the sewers. Yay.
The sewers are home to ominous insect creatures. The first will appear as you walk down the hallways and attack you head-on; you'll definitely want to have your shotgun handy, as it's a big old beast, and will deal heavy damage to you unless you can knock it off its feet. Oh, and it can attach itself to the walls. And turn invisible. Yeah.
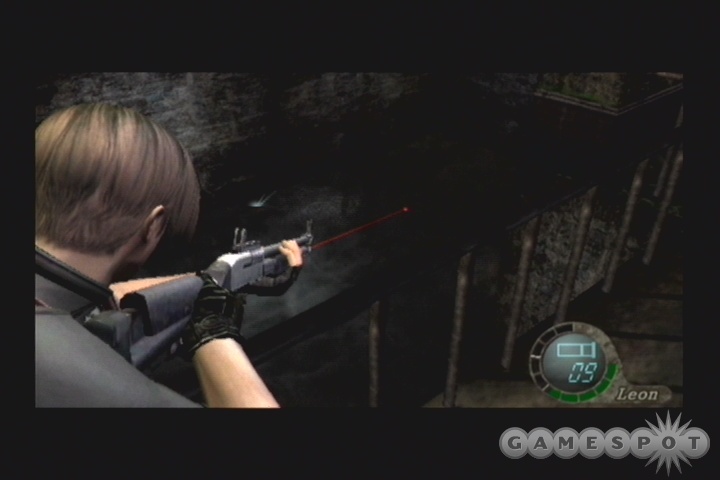
After dispatching the first insect, you'll come to a pit of water in which two more reside. If you can get their attention, try dropping a grenade into the water from next to the railing, then finishing them off with your pistol. After killing them, collect their eyes and the rest of the goodies in the water before heading through the door nearby to reach the castle dungeon. There are at least four more insects here, as well as a bunch of goodies in the cells, but try not to get boxed into a cell while the insects are still alive, as their ability to climb walls can let them move a bit too quickly for you to track them.
(As a note, if you're short on shotgun ammo, then you can attempt to use your rifle to pop the insects in the head. If you creep slowly along the sewers and zoom in on where you suspect an insect may be stationed, you'll be able to see their breath issuing from their heads. If you pop them in the head, you'll usually be able to pull off a single-shot kill. This is a bit more ammo-friendly than unloading on them with your shotgun, but is of course only possible if you have a rifle, and won't be possible for all of the insects in the area, since some of them have appearances that are triggered by your movements through the zone.)
In order to move on, you'll have to move around to the control room and turn the valve to drain the water nearby. Don't forget the Butterfly Lamp before moving on. More insects will, predictably enough, ambush you as you make your way to the now-drained doorway. As you head through said doorway, an insect will drop down beside you, so whip around and finish it off. There's a Violet Blue in the water beyond the door, near the broken grate by the stairs; grab it before heading up to the giant-swinging-axes room, which all castles in video games are required to have. It's the law.
Giant Swinging Axes, Oh My! Luckily, the axes aren't too difficult to dodge; just use their shadows as guidelines for how far up you want to approach, wait for them to pass by, then dash through. You can jump past the second one in a similar manner; the third and fourth may pass over the same area, but they should move in sync, allowing you to dash past them without a problem.
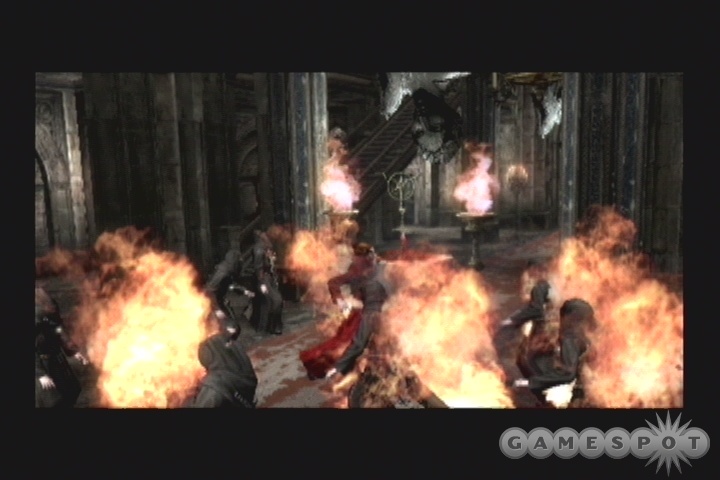
Back in the hallway where the target practice room was, you'll stumble across a Los Illuminados ritual in progress. Now, every single one of the guys in black here will drop a Spinel when he dies; the guy in red will drop an Illuminados Pendant worth over 10,000 pesetas; the catch is that they'll all run away as soon as they spot you, leaving you with nothing at all if you happen to just jump down to the ground floor. In order to actually get the goods, you'll have to damage them from the balcony and prevent them from running away. The best way to do this is to chuck down a flash grenade, should you have one; this should blind pretty much all of them, letting you follow up with a grenade and/or an RPG round, or just with strafed rounds from the TPAS. If you can knock as many of them down as possible, they'll start attempting to climb the ladder up to you, letting you easily knock them back down with pistol rounds to the head. If you kill them all, you'll wind up with around 30,000 pesetas worth of jewelry, so it's definitely worth attempting to kill as many of them as possible!
After the melee with the cultists (or not; you can, as mentioned, just drop down to watch them all scurry away if you're short on ammo), climb back up the ladder and swing across the gap on the chandelier. Swing back across on the other chandelier to find the Elegant Mask and a switch that'll open the path leading to the other door on the upper level, where another merchant awaits. If you still have the Butterfly Lamp and all the eyes you obtained from the insects in the sewers, try insetting one red, one green, and one blue eye in there for a lamp worth 32,000 pesetas, from components that would've net you 10k had they been sold separately. Sell any other items you have for cashola before heading through to start your quest to find Ashley.
Chain-Gunning Zombies After you maneuver through the little salon here, you'll come to another room with one of the red-robed boss cultists, with a rather ostentatious key slung round his neck. You'll have to fight your way through the room until you reach him; it'll involve going through another room across the way, up a set of stairs, around the balconies, then shooting a red barrel to clear out his compatriots before finally jumping down to his little area. After all that, he'll just run away like a baby, unlocking a couple of semi-secret passages on the way. If you follow him (with your shotgun out, as the second door he heads through will have respawned a shield-bearer), he'll eventually pop up with a chaingun in hand, ready to pump you full of lead.
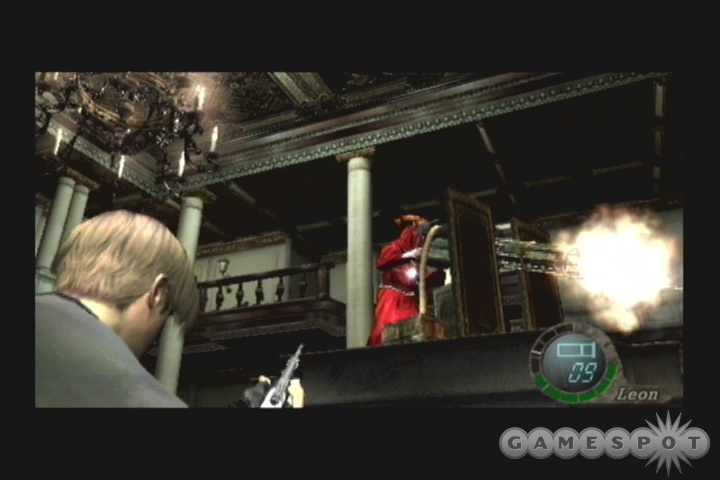
The easiest way to take out this guy is to just get right up close to his little pedestal and start blasting away at point-blank range; so long as you move when he starts firing, you'll be able to get behind him while he's reloading and get a free shot. It's exceedingly easy to avoid his fire when you're right next to him, due to the slow speed at which he rotates. He can take a bunch of damage, since it's relatively difficult to get headshots on, but you won't really have to worry about taking damage yourself here, so use whatever weapon you have the most ammo for and finish him off. He'll drop the Gallery Key.
The World's Richest GothSalazar apparently enjoys collecting pictures of human suffering; in order to get through the next room, you'll have to flip over the paintings so that six instances of death are showing. Each painting has two sides, with either one, two, or three deaths occuring; since there are four paintings, you're going to need to have two paintings showing two deaths and two paintings showing one death. To do so, hit the switches in this order: two, one, four, three, OK. That'll get you past the paintings. Don't miss the Spinel atop the deer head here before moving on.
Hey, guess what - there are more cultists in the room beyond! After your conversation with Salazar, then, take a hard right and duck into the little room that has conveniently remained unlocked. You can use it as a base from which to take out the scythe-wielding baddies that have appeared, but eventually a bunch of crossbowmen will pop out from the walls and start running around on the second floor. If you start chasing them down, you'll notice a couple more cultists with rocket launchers appear in a makeshift pillbox behind a painting; you can safely ignore them, if you wish, by just keep running after the little cutscene that features them appears. They'll even occasionally take out crossbowmen if you let them fire away.
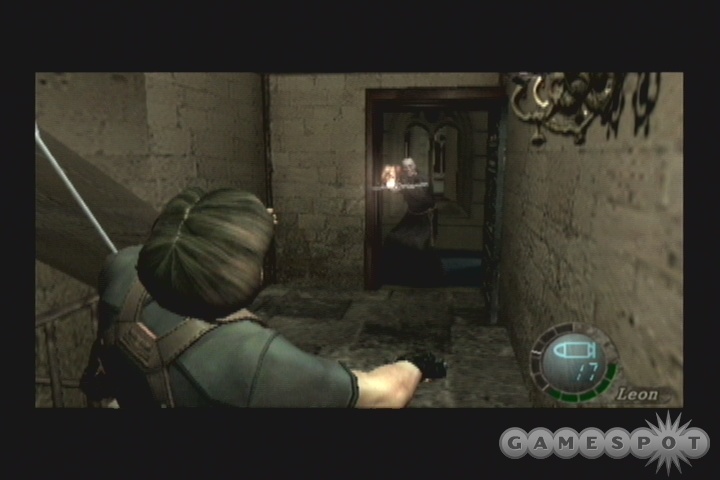
In order to move on, you'll need to flip two switches: there's one by the door on the western side of the room and one hidden beneath a vase in the southern hallway. Flipping them both will lead you to the chest that contains the Goat Ornament. If there aren't any crossbowmen around, then flipping the latter switch may also spawn in a bunch of scythe-wielders; you can leave a single bowman alive if you don't want to have to deal with them. Whether they appear or not, though, a pair of RPG guys will always appear by the chest after the latter switch is hit, so be careful to avoid their fire as you exit the room.
The Garden Maze
The little area beyond here is a bit of a respite; no enemies to speak of save birds. The first flock you come across will be unkillable, for the most part, but the birds in the fountain are good for target practice, and they'll also drop a little cash if you hit them. Grab that and the jewels from the fountain, then head out to the garden maze.
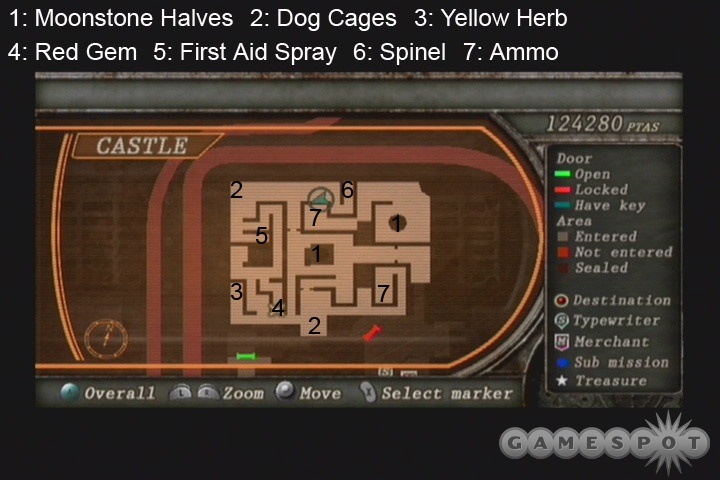
Although Salazar will complain that even he gets lost in the maze, despite his prodigious intellect, he's probably functionally retarded, because it's not too difficult to find your way around. What is difficult is avoiding damage from the devil dogs in the maze; these guys will jump on you and try to rip out your throat if you get too close, and the tentacled ones will be able to whip you from a distance. Your pistol isn't going to do the job here, so keep either your TMP or shotgun by your side as you maneuver through the maze. Even if you think you're safe, you aren't: the doggies can actually jump through the hedges, which is an unpleasant surprise the first time it happens to you, so you'll need to keep an ear out for any sudden sounds from behind you. If someone does pop in at your rear, it's best to try and run and turn a couple of corners before doing a quick turn and popping them a good one.
You'll need to find two halves of a moonstone here; each of them is lying next to one of the ornate fountains. Be careful when you pick them up, though, as that usually triggers an influx of dogs, as does picking up most of the other loot in the area, for that matter. The worst trigger is for the moonstone half in the northeastern corner of the garden, which will be followed by no fewer than four dogs.
After you have both moonstone halves, combine them to make the Blue Moonstone, which will unlock the door you passed by earlier. You'll meet up with Ada here, perhaps for the second time if you witnessed an earlier cutscene with her and the Chief way back at the beginning of chapter 1-3.
Chapter 3-3
Back on Track
After the diversions in the garden and with Ada, you'll finally be able to get back on Ashley's trail here. Search the bedroom for goodies (there's an expensive mirror in a cabinet behind the merchant), then upgrade your weapons and save your game before moving on.
Now, the next room features a bit of a branch in the path; the southern hallway and door leads to some goodies, but is just a way for you to return to the garden; you'll be using it later on, but you can grab the items down there now if you wish. In order to reach the eastern exit, you'll have to ring the bell at the end of the long hallway, then shoot the bottle of wine on the picture that appears.
The chest in the room here may appear tempting, but it's actually a deathtrap; as soon as you get close to it, a cage will drop down from the ceiling, trapping you inside with cultists and another garrador, with a few more cultists on the outside of the cage to swing at you when you get too close to the edge. Now, if you're suicidal, you can try to deal with these guys from inside the cage, but a far, far better approach is to get the hell out of dodge ASAP. In order to do so, you'll need to shoot the lock off of one of the doors. They're hardy locks, though, so the only weapon that'll really do the job is the TMP, mostly because of the rapidity of its firing; trying it with your shotgun or pistol will require more time, thus increasing the chances that the gimp will come along and slice and dice you. Since the garrador jumps down in front of where you regain control of Leon, you'll want to immediately turn to the left and fire at the door there; you should be able to blast the lock off just before the gimp comes around and takes a swing at you.
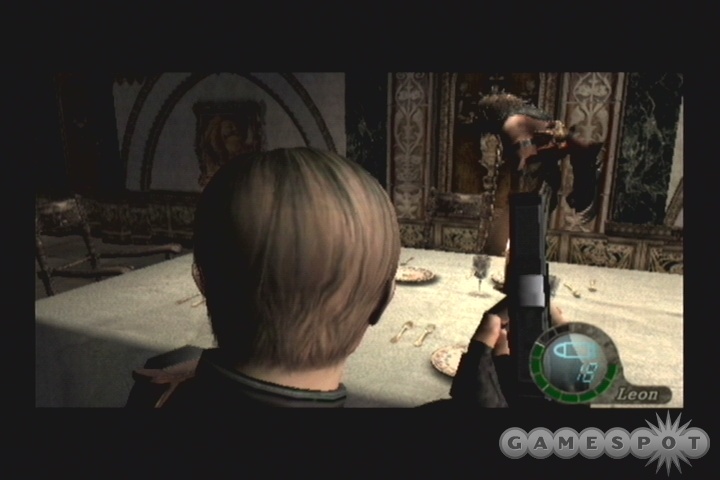
After the lock's off, get the heck out of the cage and return to the room nearby with all of the dining tables. The doorway here will act as a chokepoint, letting you shotgun the cultists as they chase you down; kill as many as you like, but be aware that there will always be at least one cultist here until you manage to kill the garrador himself. Luckily for you, the tables act as a perfect obstacle with which to block his attacks; if you can keep him on the far side of one, you'll have plenty of time to wait for him to start slowly walking before shooting him in the back. Since we had a lot of pistol ammo, we managed to take him down using only that; it took a while, but die he did. Of course, if you have a rifle or another powerful weapon that you want to use, feel free to do so. This strategy has the added bonus of keeping you far enough away from the cage so that any new cultists that appear there won't be hip to your presence; they'll stay in the cage, letting you take your time with the gimp.
After everyone's dead, grab the treasure from the chest in the cage, then walk down the hallway that the painting was in to grab some Magnum ammo before moving on.
Waiter, There's A Bug In My Zombie
In the next room over, you'll have to drop down to flip the switch that will extend the walkway leading across to the far platform. Of course, there are going to be plenty of enemies to contend with, including four in the bottom portion of the room (easily taken out by shooting them as they climb the ladder), a pair that will pop out of the door through which you came after you flip the switch, some shield bearers that will pop out of a door on the far side of the platform after it's raised, and sundry others on the other side of the room. These last are kind of optional, but you'll probably want to kill them off to get to the stash they protect, which includes various ammo and a free rocket launcher. If you don't have room for the latter, there's a merchant near the exit from this area, who will either sell you a larger attache case or buy any excess items you have. You don't technically need the rocket launcher, but hey - it's free.
One of the new enemies you might run into here are the fly tentacles. These guys don't seem to have the long-range slashing attacks of previous tentacles, but when you kill their host body, the fly will detach from it and attack you on its own, necessitating more killing. On the plus side, you have two opportunities for item drops with these guys, so enjoy.
After you leave the room, the chapter will end.
Chapter 3-4
It's Ashley!
When the fireworks at the beginning of this cutscene are over, grab everything you can from the periphery of the room; there's 5,000 pesetas behind the portrait of Lord Saddler on the wall, if you check it. Ashley's here, finally, but she'll need a bit of help to get free of her restraints. In order to pop her out, you'll have to shoot them off. This is obviously easiest if you have a rifle, but if you don't, you'll have to use a pistol. Very, very gently. Aim off to the side, obviously enough, as a single bullet is all it takes to kill her.
After Ashley's free, you'll have to contend with two waves of enemies. The first is a simple bout of three cultists; shoot them down from your perch before they can haul off Ashley. The second includes a near-infinite flow of cultists, a pair of crossbowmen, and a red-robed leader with a key around his chest. You'll need to prevent the cultists from hauling off Ashley, protect yourself from the crossbowmen, and kill the red cultist so that Ashley can get his key. Until you kill the red guy, the black cultists will continue to flow in, so he should definitely be a priority for you.
Interlude
After Ashley does get the key and escapes from the room, you'll take over as her. For this little section of gameplay, you're obviously not going to have any weapons, so you'll have to enter combat with an eye towards improvisation. To begin with, pick up the Spinel and Yellow Herb in the room where you begin, then save your game before heading up to meet with the cultist near the fireplace.
Now, these guys obviously aren't going to go easy on you just because you're a girl; they seem to have missed the memo stating that you're to be taken alive, so they will indeed attempt to kill you. You'll just have to try and kill them back. In order to do so, you're gonna need to throw the lanterns scattered around at them. There are three for each cultists, and you'll need to land three hits to finish them off, leaving you with no real margin for error. You can yourself be hurt by the flames of the lanterns, making this a risky proposition indeed, but they will sometimes drop green herbs when killed.
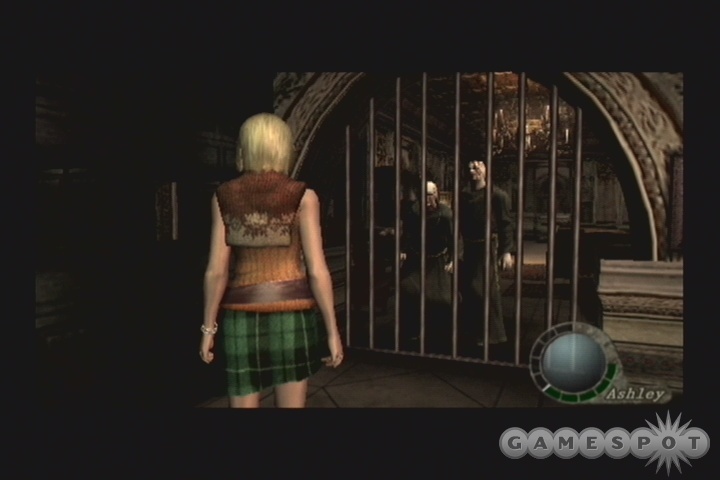
Luckily, you only have to deal with one cultist at a time, as they're separated by a wrought iron gate. You can use this to your advantage, and indeed the easiest way to proceed here is to just trap them both on one side of the gate and shut yourself off from them. To do so, you'll need to find the crawlspace leading from one side of the gate to the other; it's behind a cabinet on the right side. If you crawl through, flip the switch to open the gate, then get the attention of both cultists and run them all the way back to the first room, you should be able to run down the long line of desks, crawl underneath the one closest to the gate (making sure you're not facing off against a Throw prompt first), get through the gate and shut it before they can get back around the desks. This will let you loot the far room (there's some money in the one of the cabinets) and rotate the levers here to open the next corridor in peace.
Puzzling
As you head down the corridor here, you'll come to a door on the left, which apparently leads to the butler's chambers; there's nothing you can do here yet, but you should be able to pick up some gems and some handgun ammo by rooting around in the cabinets and furniture. You'll be coming back later, so grab the red herb from the hallway and proceed to the next area.
In order to proceed through this room, you'll have to maneuver through a series of gates which are controlled by pushbuttons. The first is located in the northwestern corner of the room; push it to gain access to the middle area, then grab the Stone Tablet from above the fireplace and push the button nearby. This will open the gate leading back to the beginning of the room. A seeming dead-end, but not if you push the cabinet near the door out of the way. This will reveal another switch; hit it to raise the red gate and give you a free path to the far door. Grab any items from the cabinets there before heading through.

The next little puzzle is a bruiser, but isn't too difficult to do when you realize that the start pieces aren't randomized; they'll be in the same place every game. If you happen to screw around with the puzzle, though, then leave and come back, they'll be in whatever position you left them in after messing around; if this happens, then you're kind of on your own. You should be able to eventually get the puzzle worked out on your own, but if you don't want to have to, you can use our screenshot and this solution. If you start at the upper left corner of the puzzle and start numbering the tiles from left to right (i.e. like the numbers on a telephone pad or a computer's number pad), the solution is as follows: 6, 3, 2, 5, 4, 7, 8, 9, 6, 5, 2, 1, 4, 7, 8, 5, 6, 9. After the last move, you'll be able to place the Stone Tablet to gain access to the room nearby.
Inside, grab the Gold Bangle from the chest and the Spinel from the cabinet before examining the painting; this will net you the Salazar Family Insignia and the Serpent Ornament. It'll also rouse the suits of armor from their slumber; they'll attack you with their huge axes, but can rather easily be dodged thanks to their huge wind-up time. We're not entirely sure how a viral organism can account for reanimating pieces of metal, but hey - you don't play Resident Evil games looking for crap like sense or reason. In order to escape, though, you'll need to both outrun the armor - and they're plenty fast - and dodge the attacks of three upcoming stationary armor suits. We mean a capital-d Dodge here, too; it'll either be the B+A buttons or the L+R buttons, since it's random. After you get past the three of them, you'll be able to return to the butler's room and use the Insignia on the post there. Doing so, then pushing the dias, will reunite you with Leon.
Chapter 4
Chapter 4-1

Now that you have Ashley with you, you'll finally be able to get through the door on the north side of the room here. Before you do, though, it's time to backtrack a bit; if you remember the room with the garrador and the cage (it's to the west of where you are), return there, then exit through the south to reach the exterior area you passed through before heading to the garden. If you do so, then you'll be able to access the treasure room by the fountain; use Ashley to piggyback your way up to the open window nearby. Inside is an Elegant Perfume Bottle, a Red Herb, and the awesome Broken Butterfly Magnum.
NOTE: The Broken Butterfly is going to make the fight with the boss at the end of chapter four much, much easier. If you have the cash, try to spend a bit of it every now and again upgrading its power and capacity; you'll have a semi-difficult fight waiting for you if you don't. You're never going to find much ammo for it, as a note, so try not to use it until you reach the end of chapter 4-4. Consider yourself warned!
After returning to the room where Ashley was restrained, head north to find a save point. There's a tram here that'll lead back to one of the first interior rooms that you came across, but you can't do anything there for now. Instead, head further north, riding the machine across the lava, to reach the castle's foundry.
Lava Bad
Don't get your knickers bunched, here; there's no way to fall into the lava, although you will have to avoid some flame damage. As you proceed along the path, you'll notice a cultist appear in a large, flame-spewing horse…thing off to one side. Before it reaches you and starts roasting you - and not in a pleasant, celebrity-roast-with-Shaquille-O'Neal kind of way - pop out your rifle or pistol and shoot the guy. It only takes one shot to off him.
After you maneuver through the jumping puzzle, you're going to have to take out a number of cultists as well as another horse-riding flamethrower. We preferred to deal with the cultists first, and there are a number of ways to do so: you can hide beneath the little doorway they come out of and shoot them as they arrive, if you have plenty of ammo; you can run around and hope that one of the flamethrowers kills them as they follow you; or you can hide near where the two remaining flamethrower's paths overlap, then get headshots and attempt to kick them into a place where they'll be roasted. Regardless, the flow of enemies will stop after the eighth cultist or so, so it's a relatively easy matter to dispense with them.

The two remaining flamethrowers will require a bit of running to take out. One traverses the length of the little pathway that you're on, but it moves relatively slowly, allowing you to run from one end to the other, then turn around and snipe out the driver as he's attempting to follow you. The other has a more circumscribed arc of travel, but you have plenty of protection from him thanks to the large walls on either side of the path leading up to his mouth. Try to run to one corner of the little platform, so that he has to tilt to one side to fire at you, then run to the other while he's blasting to get a shot off at him while he adjusts.
After you've dispatched the last horse, you'll obtain the Lion Ornament. You should still have the Goat Ornament and the Serpent Ornament, so bring them back to Ashley's position and ride the tram back to the room where you first encountered Salazar. You'll be able to place all of the ornaments in the large mural here to open the passage leading on. Before heading through the door to the north, check the dead end to the right; you can find some cash behind a picture of Saddler, as well as an item in the vase across from it.
A Toast To Our Royal Majesty
In order to reach Salazar's little sanctum sanctorum, you'll have to maneuver through two separate side wings and obtain some more keys. Before doing so, though, locate the merchant on your map and buy/sell/upgrade before saving your game. There's another shooting range nearby, if you wish to try your hand at it again.
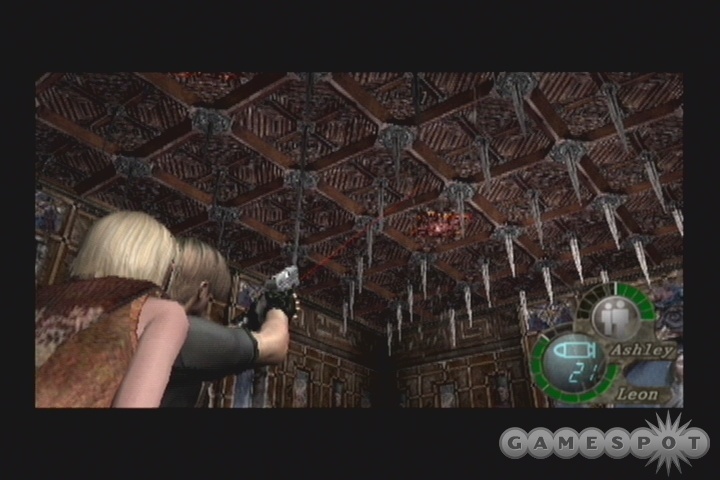
To begin finding the keys, head through the western exit first. There are a few easy puzzles to solve here. In the first room, push the knight statues onto two of the pressure plates, then trigger the other two with Ashley (on wait mode) and Leon. In the next room, Salazar will again just kind of selectively ignore Saddler's wish to have the girl alive and instead trap both of you underneath a ceiling that will slowly crush you to death; shoot the four red targets to disable the trap. Lastly, Ashley will be trapped in a long hallway as a mine machine comes out of nowhere in an attempt to crush her; you'll have to shoot the two drivers, which somehow manages to trigger the door here (it's probably tied to machinery that constantly monitors their heartbeats, or something), allowing Ashley to reach you again before she's pulped. Grab the goodies from the storeroom, including the Queen's Grail and the Elegant Chessboard in the cupboard, before moving back to the central area and heading east.
The eastern abattoir will pit you against a number of knights. The first two are of the dodge-the-attack-with-your-buttons variety, but after you grab the King's Grail from the pedestal in the inner chamber, you'll have to contend with knights of the mobile variety, complete with tentacle heads and their immunity to stunning. These guys are pretty tough, but they still move fairly slowly, allowing you to run from one side of the area to the other, flip and use your shotgun (aim for the head, even if they don't respond to it), and repeat this action numerous times until they finally expose their tentacles. The tentacles are the weak spot, so blast them until the knights crumble to dust. Try to stow Ashley in one corner of the room during all this; the knights won't attack her. You'll have to deal with two waves of knights before you can finally escape from the pit.
Now, before you can use the Grails in their respective holders, you'll have to fight your way through six opponents in the northern hallway. This is an ideal fight in which to use a mine thrower or a rifle, since the cultists won't be able to spot you until you get relatively close to them. Regardless of how you do it, kill them all, then place the grails in their slots and head through the door.
Bugs…Why'd It Have To Be BugsGrab all of the items in the next little hallway. One of the vases to your right will house a snake; if you're interested in a cheap restorative item, you can keep killing it over and over until you get a Gold Chicken Egg from it, due to the fact that the continue point is right next to it. It'll randomly drop either a normal, brown, or golden egg, with the latter two being preferable to the first. If you have enough restoratives already, don't bother.
In the large dome at the end of the hallway, you'll notice a huge, quivering hive suspended above the ruined walkways. Before you walk out underneath it, unload enough ammo into it to destroy it. It'll take something like 50 combined power to do the job; this is one round from a rocket launcher, 50 rounds from a TPM, and somewhere in between for your shotgun and pistol. It won't fight back at you, so just keep shooting away until it falls off of the ceiling. On the good side, this will cause a number of insect eyes to fall to the ground underneath it; on the bad side, it won't prevent Ashley from being snatched away from you as you attempt to walk across the ledge.
After the Ashley-napping, you'll be forced to deal with six to eight insects. These guys are a bit different than their brethren in the sewers of lo those many hours of gameplay ago, in that they can't turn invisible, but can fly, making it a relatively simple matter for them to get around you. Your best bet here is to immediately turn around and walk back towards the hallway you just came through; the doors will have closed, so kick them open by double-tapping A, head inside a bit, then turn around and use the doorway as a bottleneck. Your shottie or TPM will make quick work of the insects, if you can keep them off of you.
After you pick up all of the insect eyes, return to the hallway and jump out the window near the door. This will lead to a path ringing the dome; at the end is another Butterfly Lamp, which you can insert the eyes into before reaching the next vendor for some serious cashola. Flip the switch in the dome to drop the bridge; you'll need to shoot the chains that prevent it from coming all the way down before you can move on. If you can, buy a rocket launcher from the merchant before heading outside.
The Clocktower
You've got one more area to pass through before you can reach Ashley and Salazar. Supe up your weapons at the merchant, then head outside to the clock tower. As soon as you approach it, you'll come under catapult fire; apparently Salazar has one of those castles where all the battlements point inwards. Makes sense. Anyway, you should be able to avoid the fire if you just keep moving; it'll have the added benefit of killing off the cultists that block your entrance to the clock tower if they get caught in the blast. As you head up to the second floor, the catapults will tend to start pelting the doorway into the interior of the tower, so wait for one of their barrages to land before heading in.
On the inside of the clock tower, you'll have to find and destroy three wooden blocks that have been inserted into the gears to prevent them from turning. There are three in all, so scan around with your pistol as you climb the tower, shoot them all, then turn the crank on the top floor to activate the tower. After you do so, the lower levels will be populated by crossbowmen. After you reach the lowest floor, more enemies will pop in; the thing to do here is immediately turn around, climb the ladder back up, kill the cultists on the second floor, then return to the ladder and shoot the rest of them off as they attempt to climb up.
Assaulting The Bridge
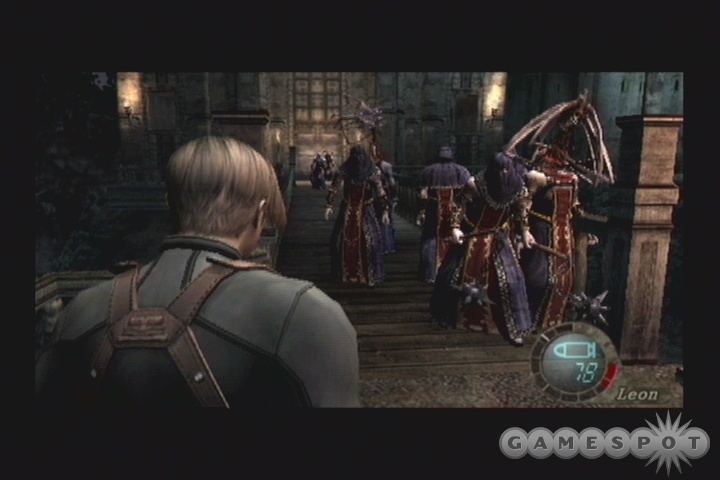
After reaching the exterior of the clocktower, kill the three shieldbearers, then get ready for the bridge assault. This is going to be a mighty tricky place to get past if you don't have sufficient shotgun ammo, as there are a bunch of cultists in a very small space waiting for you. Three pop in behind you, with another eight or so on the bridge in front, including one with a rocket launcher. Mr. RL will be your first target, obviously enough, but he's surrounded by enough guys to make him difficult to hit. If you managed to pick up a grenade in the clocktower, this would be a perfect opportunity to use it; have it equipped before you walk across the bridge, then when the cutscene hits and everyone starts pouring out at you, tilt your aim upwards and chuck it. If he gets knocked down, he seems to drop the rocket launcher, meaning that you won't have to worry about it. If you have no grenades, you might also want to try running a little closer and using a couple of shotgun blasts to do the trick. You may be tempted to use a rocket launcher here, but if possible, avoid doing so; the next area on will see you needing it much more than this one does.
(Note that, if you're feeling lucky, you can just stay in the middle of the bridge here and wait for the rocket launcher dude to fire; it may miss you and impact the rear wall.)
When the rocket launcher is no longer a threat, you're going to want to try and bottleneck the rest of the enemies. The easiest way to do this is to run back to the door through which you entered the area, shotgun the heads of the enemies there, then turn your back to the door and start mowing down the enemies as they approach you. One or two of them will turn into fly tentacles after you shoot their heads off, so be careful to mind their spit and their after-death detachment. After killing everything that moves, head into the fortress beyond.
Garradory
Inside, you'll spot two cultists and two - yes, two - garradors waiting for you. There aren't a huge number of obstacles around which to hide here, so killing the garradors is going to be trouble. If you did manage to pick up the rocket launcher we mentioned earlier, though, you should be able to kill one and seriously wound the other one by aiming it at the door between them and firing. They'll each drop 15,000 pesetas, so your net outlay for these kills will be nil, since your 30k for the rocket launcher will be reimbursed. More cultists will appear as you head up the steps to the garrador area, so watch your back. If you don't have a rocket launcher, then your best bet is to hide in the hallway off to the side, kill all of the cultists, and then try to run around the area and take advantage of the garrador's poor eyesight to get in a position where you can land a shot on their back.
After you reach Salazar, get ready to hit the B+A buttons; he's going to get Leon with the oldest trick in the book.
More SewersLeon will find himself in the dusky catacombs of the castle after his run-in with Salazar. There's plenty of loot to be had down here, courtesy of the numerous cultists that apparently earned the diminutive tyrant's displeasure in the past. Grab everything, buy and sell at the merchant (he'll now offer you an upgraded shotgun), then climb up the ladder and start heading down the hallway. You can find a Violet Blue in the first little pipe you see, and a Spinel further on.
The next area will feature your fight against the beast that's been tracking you - Salazar's so-called "right hand." This guy is tough - tough enough to be apparently unkillable. Thus, this winds up being something of an endurance competition, where you're forced to survive for four minutes against a devestatingly agile and powerful boss.
Boss Fight: Right Hand
To begin with, head into the two off-shoot corridors to find some items, including handgun and TMP ammo. The elevator at the end of the first corridor is powered down; you'll need to power it up again to get past this area. As you walk north to find the power switch, you'll notice that something keeps poking its tail at you from the ceiling; you'll need to dodge these swipes fairly often, so get used to keeping your fingers atop the L+R buttons. There are also occasions where you'll be prompted to crouch with the A+B buttons, but we found that tapping L+R here would still get you out of the way; your mileage may vary.
In the room at the end of the northern hallway, you'll finally find the power switch, as well as an herb and some shotgun ammo; throw the switch, then return to the door and hit "Yes" to open the shutter. It won't open immediately; like the elevator, you're going to have to wait a minute or so before it does and you can escape. After you check the door, though, your enemy will appear in full force and show his face for the first time. Spooky.
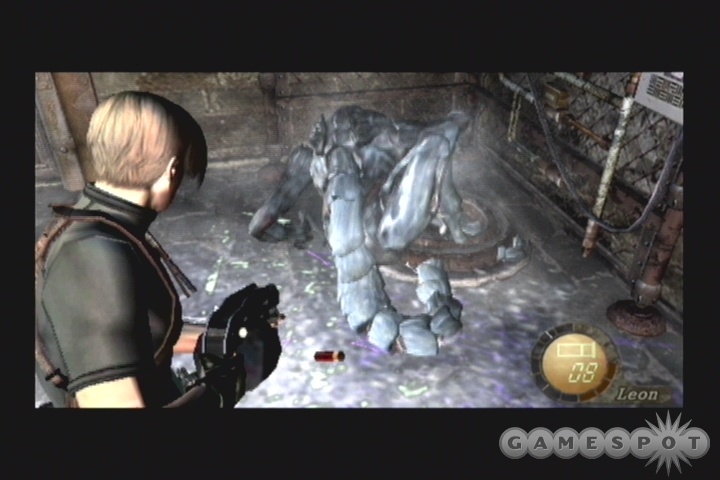
After Right Hand appears, you're going to have to keep him busy until the door opens up. His primary form of attack, beyond ordinary melee slashes, will involve a charging blow which you can avoid with the L+R buttons. If you can get around him, you can run up to the liquid nitrogen container elsewhere in the room and tip it over; this will coat him in ice and slow him down for a good long while. While the beastie is slowed, continually run around the square set of corridors in the rear of the room; even when he's freed, you should be able to keep this up and continue to dodge his blows until the door opens up.
When the door is opened, run through it and start tipping over more nitrogen canisters. Don't bother wasting ammo on this guy; just tip the canisters and run away. Their only point is to slow him down long enough for the elevator to arrive, at which point you'll be able to use it and escape. We found it best to skip tipping the canister in the hallway when you first pass by it, and instead save it for last, using the other two canisters first. Just wait for the Hand to get close, tip it over, then move on. Saving the canister in the hallway for last will let you milk a tad bit more time out of the freezing effects of the nitrogen. If you manage to tip over all four before the elevator arrives (a distinct possibility), all you can really do is run and dodge his attacks until it does come up. When you get the cutscene showing it arriving, book it for the elevator and take it down to end the chapter.
(Note that Right Hand is actually killable; if you hit him with enough firepower while he's frozen, he will die and drop the Crown Jewel. A single rocket launcher hit will do the job, but otherwise, it'll take more ammo than you will probably want to expend. Feel free to try it, but we found it easier just to avoid him and move on - he doesn't show up later, whether you kill him or not.)
Chapter 4-2
Underground Cattle
Upgrade, save your game, use the target practice range, etcetera. Then move on into the mine, where - yay! - you finally get to switch back to the Ganados enemies. The cultists were apparently too good to work in the mines, so the cattle have been sent down for the heavy lifting. Check for a Velvet Blue in one of the carts near the first two enemies here.
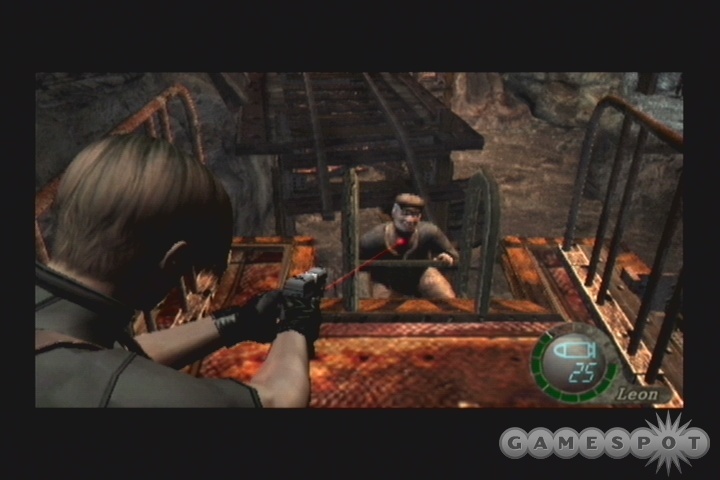
When you reach the a large, open area, drop down to the lower level and look for a switch nearby; this will bring the mining cart down to your level, but only halfway, as the power will quickly short out. (There's a Violet Blue in the wrecked cart nearby, as well.) The circuit breaker is in the southern part of the room, so climb the ladders leading to it and flip it, being mindful of the fact that ganados will be popping into the room from unseen entrances above you. What's worse is the fact that a chainsaw freak will pop in as you make your way back to the mining cart; as per usual, shotgun blasts to the face are the best way to deal with these guys. He will have a few helpers, though, so try to work them into a chokepoint before dispatching them.
After taking care of the chainsaw freak, you can continue to lower the minecart and grab the dynamite from it. You can use this on the boulder that's blocking your path to blow it and gain access to the next funroom. Don't miss the barrels by the door; one contains a whopping five rounds for your Magnum, and you'll need it either immediately or at the end of the chapter, depending on how willing you are to save it.
They Laugh Alike, They Walk Alike, At Times They Even Talk Alike Fun times here, as you'll have to take on two (2) El Gigantes at the same time. They'll pop into the room when you attempt to leave through the far door; before you head over there, though, you'll want to check the periphery of this little abattoir for items. There's some shotgun ammo, first aid spray, and a flash grenade. This last will be the only thing you need to kill one of the Gigantes, if you can believe it, but the other one will have to be taken down old-school.
After the cutscene showing the Gigante's entrance, run back across the large circle in the middle of the room and rotate so that you can follow the movement of the Gigantes. When one of them is in the middle of the circle, run over to the switch nearby and operate it; you'll need to hit A twice to get it done. This will drop the trap door here, sending the Gigante into the lava, thus leaving you with only a single baddie to contend with. Be careful, though, as the melting Gigante can grab you and pull you into the lava if you get too close; you'll want to wait for the trap to reset itself before move around in the center of the room, or you can find yourself insta-killed by something you thought was dead. 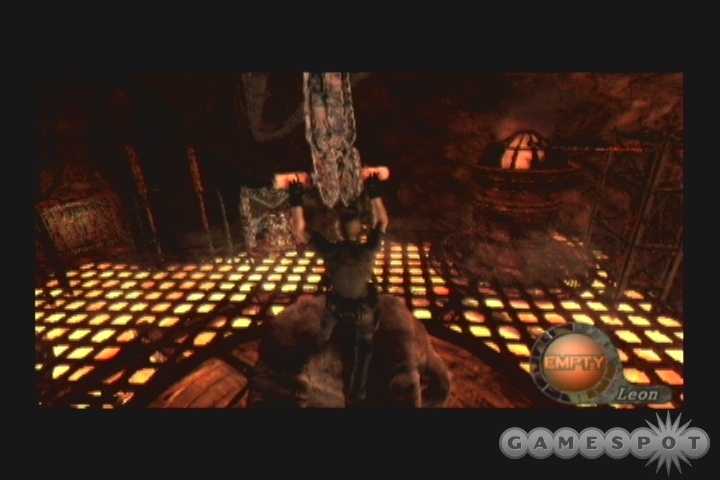
There isn't much in the way of distractions for you to use on the second Gigante, so this will be a classic game of cat and mouse. You can, however, use the large scaffolding on one side of the room and the handslide to quickly maneuver from one end of the room to the other, which will often give you a couple of seconds to freely shoot at the Gigante while it makes its way back over to you. He has all the usual attacks, including the lovely charging attack, so stay on your toes. If possible, try to stand next to the ladder of the scaffolding and attack from there until he gets really close; if you manage to hit the A button to climb it before he gets an attack off, you'll instantly become immune to attacks while you perform the climbing animation.
How Insectful
In the next open area, you'll have to deal with a rather large influx of flying insects, of the ilk that previously kidnapped Ashley. Check your map here; you should notice a pair of dead-end rooms to the east and west of the area. Each of these has a switch inside of it, and you'll need to hit both switches in order to unlock the door to the south. Your best bet here is to equip your shotgun, but ignore the insects until you enter one of the rooms and hit the switch; you'll find that this gets their attention pretty quickly, and that they'll flood into the room behind you, giving you a good opportunity to beat them all down with your boomgun as they come in. Just be careful not to get surrounded by enemies while you're walking on the exterior walkways, as they will completely own you if they manage to do so.
After you've hit both buttons, a door will be melted, leading to a little hallway full of smashers. These guys aren't too difficult to avoid, really; just wait for them to drop, then rub up against them and start running. When you manage to clear them, you'll automatically proceed forward. The only tricky spot comes before the third smasher; flip the switch on the wall to stop the middle smasher of the three here, then pause underneath it while dodging the other two. Grab the Royal Insignia from the tomb at the end of the path, then head up to end the chapter.
Chapter 4-3
The merchant near the beginning of this level should have a number of new upgrades for you, so cash in your chips (or your jewels, at least) and upgrade whichever weapons you use most often. This chapter will feature a good number of Ganados, so your pistol and shotgun should be your first choices.
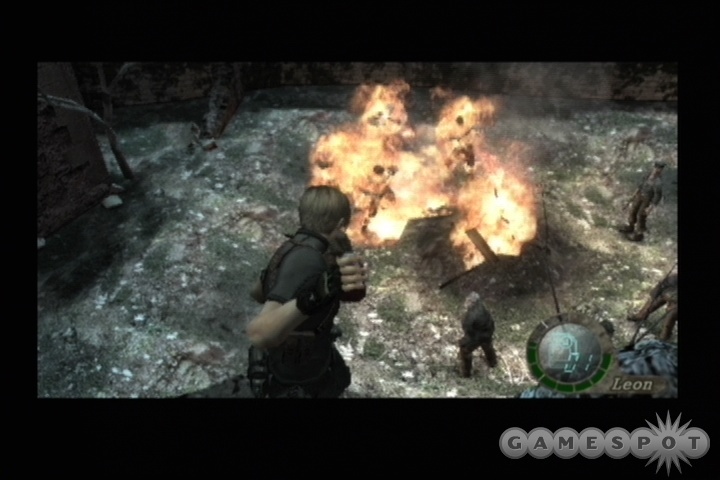
Speaking of Ganados, there's a congregation of torch-wielding enemies near a bonfire further down the path. They look like they're preparing to storm Castle Frankenstein or something, so you'd better take them out before they cause too much trouble. There are two platforms with ladders leading to them; your best bet is to climb up one of them, get the cattle's attention, then start picking them off as they climb the ladder to get to you, being careful to avoid any axe-throwers. When they're dead, loot the bodies and the area (there's a Violet Blue in a well near one of the ladders, so don't miss it), then hop through one of the windows in the wooden hut near the rear and turn the crank there to reach the catacombs.
The Catacombs
The first room of the catacombs has a number of dangers, mostly coming from the bear traps - if you have the Striker shotgun, you should be able to get two or three of these at a time with it - and the chainsaw freak who's waiting for you in the room to the left. Before you head after him, though, make a detour and work your way into the small chamber down the steps to the west; you'll find a valuable Staff of Royalty there.

Although you only hear one chainsaw, there are actually two freaks here; one in the upper level of the antechamber, one on the lower. If possible, it's best to go up the ladder to the second story and kill the upper chainsaw dude first; this will prevent you from having to deal with both of them simultaneously. Of course, as soon as you get close to the key up here, more Ganados will appear out of nowhere down below and immediately start climbing up the ladder to get to you, requiring you to either constantly push the ladder over, or just get into a corner and start blasting at the entire group as they come up.
When you have the Key To The Mine safe in hand and have disposed of all of your enemies, use the key on the locked door down below to move on. Next up is another crushy-ceiling room; it's stopped in the same manner as the last one, by shooting four targets on it, but you'll also have to deal with little rodentia-tentacle-things that'll accumulate around your feet as you do your deed. We found it best to shoot two targets, blast the rodents with your shotgun, then immediately get the other two targets before more beasts appear. When the ceiling stops, the beasts stop spawning, so it's a win-win situation. There's also a crypt on the side of this room that you can open; check it for a bunch of cash.
Indyyyyyyyy!
No trip through a mine would be complete without a trip in a minecar, and that's what RE4 delivers after you move on a bit. In order to get the car rolling, hop down into it, then shoot the lever nearby. You'll probably want to be in the rear car for most of this, but you can always jump from car to car as you see fit.
As you roll along, numerous Ganados will attempt to jump into the three cars that you're riding in. If you manage to shoot them before they jump, they'll harmlessly fall into the path of the cars and get crushed, but if not, you'll have to deal with them as they try to throw axes at you and otherwise attempt to kill you. It's relatively easy to shoot them before they jump, though, especially if you upgraded to the wide-firing Striker shotgun, but if you do let them jump down into the cars, you might get extra cash and items from their corpses.
Eventually, you'll come to a roadblock, where a dozen or so Ganados and a chainsaw freak will jump into your ride. Obviously enough, you're going to want to be in either the front or rear car; we found the front one advantageous, because there's some handgun and shotgun ammo on either side of the tracks here, and if you're in the back, you might accidentally shoot the switch that'll restart your car before you can get to it. You can only restart the car after the chainsaw freak is dead, though, so whip out your shotgun while standing on one end of the set of cars and use it to knock everyone down. The flow of Ganados will soon cease after the chainsaw freak is dead, but be mindful of them while they're jumping down, as a few will inevitably sprout tentacles when you blast them, and you don't have much room to dodge their slashes.

When you've restarted the car, you'll have to start dealing with planks that are set in the middle of the path; you can either shoot these as you see them, or dodge them as they come along. It's much easier to shoot them, so try to stay in the rear car, which will let you look forward as you travel. Another chainsaw freak will eventually drop down into your vehicle; if you want the 10,000 pesetas that he drops, get in the same car as him and start blasting away. You'll soon be prevented from shifting cars, and there's nothing more agonizing than having to watch 10,000 cash fade away.
Or, more precisely, drop away into a chasm, which is what will happen shortly after your car starts rattling and picks up speed. You'll have to jump when it's about to fall - with either L+R or B+A - unless you want to go through the whole trip again. Pull yourself up when you reach the far side of the gaping hole, then grab the Stone of Sacrifice and move back out to the first part of the chapter. Put the stone in the door there to move on. If you want to upgrade, feel free to backtrack to the merchant here.
Chapter 4-4
That's Salazarific!
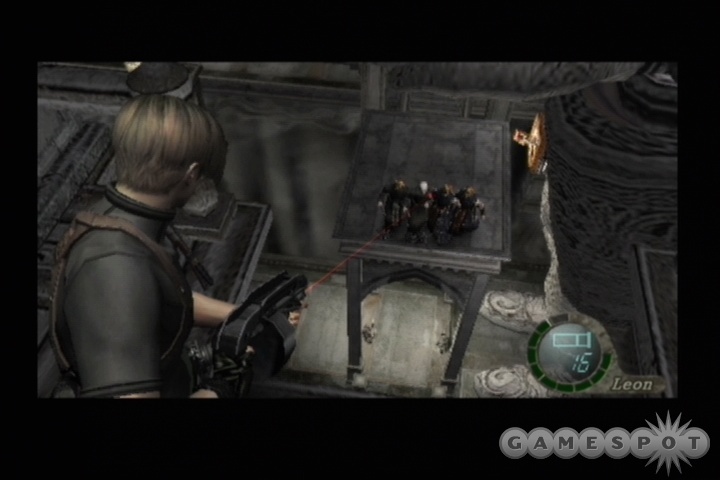
After saving your game and grabbing the handgun ammo, walk east a bit to encounter a massive statue of Salazar. Yeah, like that baby's not coming alive at some point here…. To get it activated, walk along the path leading north a bit; the path will be submerged by a cultist, and the hands of the statue will start moving up and down. Only one hand will move at a time; to manipulate them, you can either use or shoot the switch at Salazar's belly-button-level. In order to raise the path again, you'll need to flip switches on the top floor of the eastern side of the room and on the lowest level of the western side. After you get them both, you can expect more enemies to spawn in, so be ready for them. If you want to look around a bit, you can find a switch on the back of the statue's head by reaching the uppermost floor of the western side; flipping it will let both hands move at the same time.
Now, after you've managed to raise the platforms again, you'll still have to walk it, and attempting to do so will, as promised, wake up the statue and cause it to enter pursuit mode. Your A button is sprint mode here, while L and R will let you dodge the falling pillars. After you shoot the lock off the door and head outside, you'll have to continue sprinting for a bit before you can jump to the far side of the chasm and leave the statue in the dust.
Barrel Roll
After your little encounter with Salazar in the next room, you'll have to climb the tower, but you won't have an unobstructed path, of course. (There's a Yellow Herb behind the crates on the first floor here, so be sure to grab it.) As you climb the steps, the cultists will start flinging barrels down the steps, which will deal heavy damage if they manage to impact you. You can shoot them as they arrive, but you can't dodge them, so run up the steps until you reach the wooden planks suspended across the middle of the room. Walk across these to reach the ladder leading up to the switch that controls the barrels; doing so will spawn in a bunch of enemies back down by the entrance, but you can kill a few of them by sending barrels down yourself, but the rest you'll probably have to take down manually by running to the bottom of the steps. There's another of the bugged cultist leaders down here that doesn't seem to want to attack, so kill him off and grab the substantial cash he drops before moving back up.

When you return to the lift area, you'll need to kill the cultist that's chucking dynamite at you before you can push the boxes off the lift and start moving back up. This will instigate a kind of gauntlet, where you'll have to take on both red-robed cultists that drop into the middle of the cage as well as a couple of crossbowmen outside. These latter should be your first concern, so beat them down with your TMP or pistol after knocking the reds down with a shotgun blast, then get yourself into a corner of the cage and start killing off the waves of red-robes. If possible, try to shoot them into the far corner, as shooting them off the cage entirely will obviously make it difficult to grab the ammo and cash that they drop.
Now, after you manage to leave the cage, start smashing every barrel that you see; they'll drop a significant amount of ammo for you. After taking the next lift up, grab all of the ammo by the merchant, then upgrade your weaponry. If you have a good amount of ammo for it (and hopefully you do), try upgrading the power on the Broken Butterfly, as it'll come in handy during the next fight. If you don't have one of those, you might want to invest in a rocket launcher.
Boss Fight: Salazar
Remember our note regarding the Broken Butterfly at the beginning of this chapter? Well, here's where the damn thing comes in handy. If you use it properly, and have fully upgraded it (its max power at this point is 24.0, almost ten times the power of a fully-upgraded Blacktail), you can use it to kill Salazar in as little as nine rounds. If you don't have one, then you can still beat Salazar, but you'll have to expend a good amount of ammo to do so.
To begin with, Salazar's attacks: You'll notice that he has three main tentacles here. His main tentacle is the one in the middle, with the eyeball on it. This one has a pair of attacks: in the first, it'll start slamming the platform that you're on, working its way from one side to the other; in the next, it'll open up its maw and attempt to gobble you whole. The first attack deals a lot of damage, but the second is an instant kill, so you'll probably want to just run forward or to the side and jump off of the platform when you see it coming.
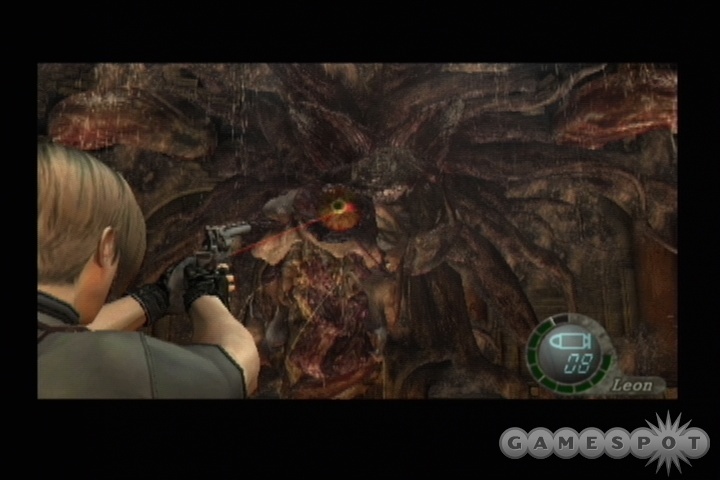
The other two tentacles are less devastating, but will attack more often. When they do, you'll notice a prompt to dodge them; if you don't do so, they'll usually pick you up and slam you into the ground on the lower level of the room. When you land here, your first priority will be to get back up to the upper platform, mostly because of the annoying tentacle creatures that pop up and follow you around. Yeah, there are crates down here, but they'll still be here after you kill Salazar, so unless you're desperately short on healing items or ammo, you can leave them be until you're done with the boss. The tentacles will also sometimes slam you as you walk around down here, but there appears to be no way to dodge this, or even tell when such an attack is coming. If you're low on life after getting thrown down here, then heal yourself up before running towards a ladder.
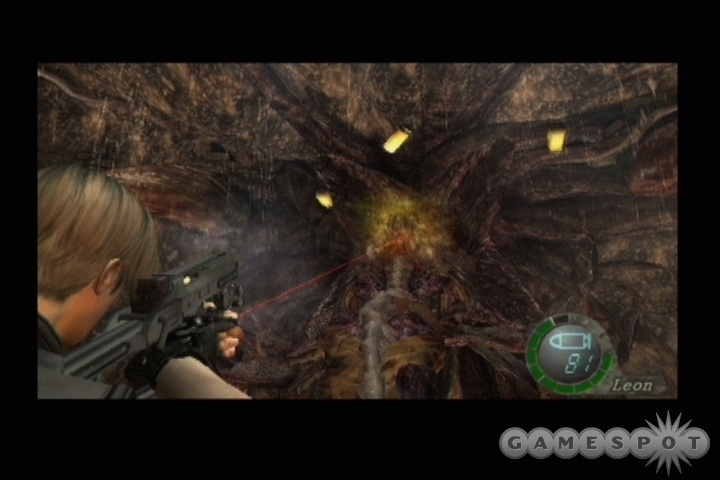
Now, so far as killing Salazar, that's mercifully not too complicated. His weak spot is the eyeball on the middle tentacle; when you shoot this baby for enough damage (somewhere around 20 power all told), it'll drop to the ground, and Salazar's little shell will open up, giving you a couple seconds of uninterrupted target practice on him. He can't attack during this time, but his side tentacles can still swipe at you, so be prepared to dodge if you notice a prompt. When his shell is open, just blast him with four or five shots from your Butterfly until the tentacle comes back up. If you have an upgraded Butterfly, then you'll need to land nine shots on him to finish him off, and it's not difficult to do so, since he barely moves while his shell is open; this would be where you'll want to use a rocket launcher if you happen to have one. Getting the eyeball is the more difficult part of this, since the tentacle its on will bob and weave a bit; we preferred using the TMP to the Butterfly when shooting at it, since we had 300+ rounds of ammo for it, but if you can land a Butterfly shot on the eye, then one round should be enough to drop it back down.
If you don't have a Butterfly, then you may have problems with this fight, as Salazar can take a lot of damage. In this scenario, you may want to switch to your shotgun to blast at the eye, then use your TMP to take on Salazar, or use the TMP for both if you have enough ammo for it. (There's a full hundred rounds for it in one of the barrels at the bottom-right of Salazar.)
Gotta Find Ashley - Again
When Salazar's dead, you'll be able to run through the area and pick up any items you didn't get earlier, including the 50,000 pesetas that Salazar leaves behind. Keep moving on to encounter another merchant, then head down to the docks to find Ada waiting for you in a boat.
Chapter 5
Chapter 5-1
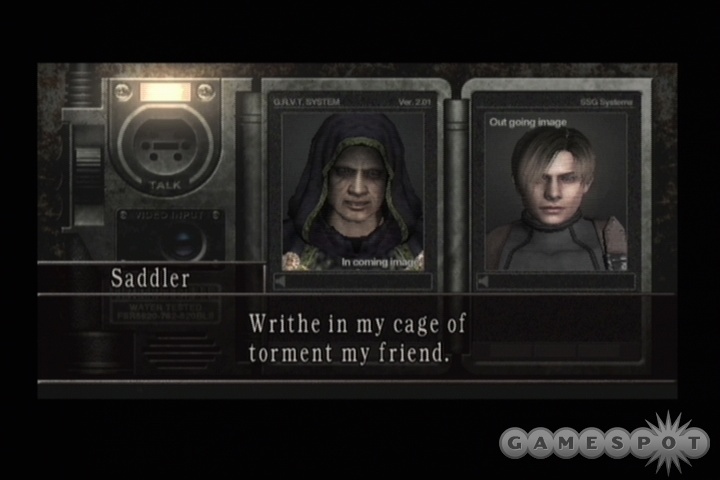
As a note, chapter five will probably be more taxing on your cash and your ammo than any chapter previous to this. As you traverse the island, then, you'll want to be sure to try and take guys out with as little ammo as possible, and to try to always put them in a position where you can grab any cash that they drop after you kill them. On the plus side, if you've found the game to be less than challenging so far, it's about to ramp up a bit. For all of these reasons, we're going to take this walkthrough into full ammo-conservation mode, and attempt to get through each encounter with the minimum required expenditure of such. You'll have an easier time of it if you attempt to blast through everyone you see, but you may have difficulties later on.
You'll note a branch in the path as you head down it; take the leftmost path first, as it leads to a deadend with a couple of crates, then return and head right to reach the beachhead. Apparently Saddler's Plagas have managed to find their way into some kind of military base/prison/research facility, so you're now going to be facing off soldiers and various freakazoids. The same tactics from all previous fights against human enemies apply, though; shoot for the head. Before you jump across the little gap leading to the island, shoot out the searchlight; if you don't, it'll lock onto you when you do jump and cause a few enemies to spawn.
We Shall Fight Them On The Beaches
After shooting the searchlight, you can hop across the gap unmolested; there's only a single soldier here to fight you, at least initially. One thing you'll notice if you shoot him from a ways away is that his running speed is much faster than that of the ganados or cultists; these guys can really book it. This particular soldier has a better-than-good chance of sprouting a tentacle when you shoot his head off, so be mindful of that. Before heading through the little gap here, climb the ladder near where the soldier was stationed and get ready for a harder fight.

When you search the upper level here and move around a bit, you'll trigger the appearance of a chaingunner, who's essentially the soldier variant of the chainsaw freak, albeit a little harder to kill. Like a garrador, these guys can't be knocked down, only stunned, so you'll need to get up close and personal and start unloading rounds into his head until he goes down; with constant fire, you can prevent him from firing even a single shot, which is good, because he'll hurt you pretty badly with his minigun. Either your shotgun or your Butterfly will be what you want here; we preferred the Butterfly, because it'll only take four or five rounds to the head to kill him (assuming you've upgraded its power), and you'll find three rounds for it on this little platform. You can use your shotgun in much the same way, and will still be able to kill him with repeated blasts to the head, but will expend much more ammo, and you're going to need it to get to the research facility here, since there are so many enemies.
In Hot Pursuit
Now, after the chaingunner is dead, you'll have to deal with a few more enemies that'll pop out of the door through which he came. The easiest (albeit slowest) way to off them is to just stay put; after they catch wind of you, they'll attempt to come around to the ladder and climb up, allowing you to knife them repeatedly, which will knock them off the ladder and eventually kill them. This has the added benefit of being ammo-friendly, with the exception of tentacles, which will usually require a shotgun blast to deal with. Be mindful of your back, though; one of the soldiers coming through the door will wield a crossbow. There are more soldiers stationed in the bunkers nearby, so you may want to just run over in that direction and get them all hostile to you before doing one big knifing-fest on the platform.
When you're ready and able to move on, flip the switch next to the door to activate a laser beam. In order to unlock the door, you'll have to position the reflectors so as to reflect the laser back at the sensor on the opposite side of the door. It's not tremendously difficult to do so, since there are only two reflectors; rotate the first so that it points to the second, then rotate the second so that the laser beam is aimed directly at the sensor (the small orange disc next to the door). You'll need to keep it there for a second or two before the door opens up. When it does, proceed along the cliffside path, being mindful of boulders dropped from above, until you reach a ladder leading up; this will lead you to the next area.
The CliffsWhen you pop into this area, immediately hang a right and grab the Emerald from the boxes there; you'll need every little bit of cash to get the items that the merchants are selling later on. There's a soldier nearby, but he's flying solo, so use your pistol, knife, and kicking attacks to take him down with a minimum of ammo expenditure.
After jumping the gap nearby, you'll start to be assailed by crossbowmen; before you deal with them, duck into the cave here and take out the three taser-wielding enemies within. There's a red herb here, as well as an explosive barrel; shoot the latter to make a path to a Golden Lynx, which will sell for big bucks when you finally reach a merchant.
Now, the next little part is difficult. There's a rocket launcher goon waiting for you as you attempt to scale the cliffside path, as well as at least three crossbowmen and sundry other soldiers. You have two explosives at your disposal here: the red barrel on the wooden bridge, and the barrel-filled cart at the end of the path. There are plenty of ways to attempt this little segment, with perhaps the most prudent being to start from a way back and use your rifle to pick off the crossbowmen before charging ahead, but you can also try to just run into the area with your shotgun equipped, taking the path to the left that leads up into a small cave; you'll find a green herb and some shotgun ammo here, making it a nice little redoubt in which to kill off anyone who pursues you. The main problem here is that few of the defenders will actually choose to pursue you, especially the crossbowmen, who are more or less locked into place, so you'll be forced to periodically return to the bridge and pick off anyone who yells at you.
Another wave of enemies will appear when all the crossbowmen are dead, so be ready for them. By this point, you can probably work your way up behind the cart; when people attempt to follow you, shoot one of the barrels to cause the cart to roll downhill, killing anyone it runs into before exploding.
(As a note, if you're exceedingly short on ammo, or just don't want to bother with killing all of these guys, you can bypass most of the fight by just running from the entrance to the rear of the cart, shooting it, then opening the door here and running down to the merchant/save area. If you shotgun the group of enemies in the narrow corridor beyond, you can easily reach the exit door from the area without a hassle.)
Facilities
After you enter the research lab, you'll have to start proceeding through a good, old-fashioned corridor crawl. There's only light habitation here, but keep your weapons ready to go just in case. There's even a cheap Doom 3-esque scare right after you spot a few sides of beef hanging from the ceiling; the nearby oven will pop open, revealing a flaming zombie that'll attempt to latch onto you. If you run to the right side, you can usually avoid him.
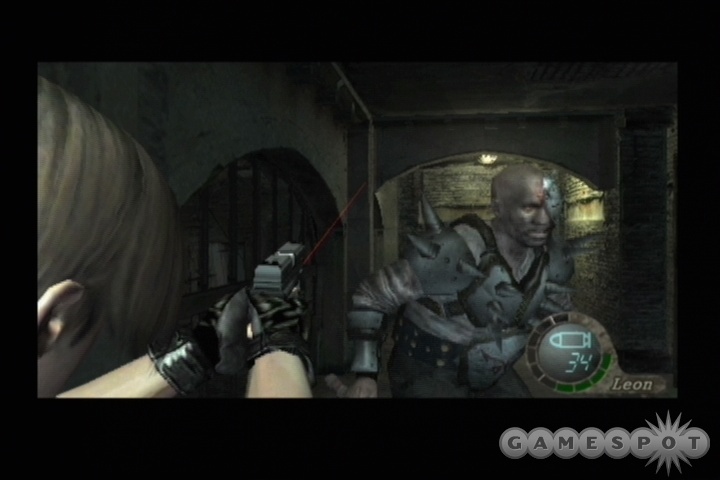
After you pass through to the next area, you'll come across your first of the Mad Max-esque axe-wielding brutes. These guys are big, and possess a bit of armor on their chest, but will usually be found solo, enabling you to go through the motions of shooting them in the head, kicking them, knifing them on the ground, and repeating until they pass away. They do have a mean axe to grind, though, so try and stay away from them when they're up and running. The first one you spot may also get some support from a crossbowman in the room below; that area is optional - your real goal is through the door to your left - but if you're willing to head down there and kill the enemies, you can find the Red Stone of Faith in a briefcase, as well as a yellow herb in a barrel underneath the stairs.
When you pass through the door here, you'll finally learn that Ashley is seemingly healthy, and being well cared for. Check this room for items - there's a locker you can open for 5,000 pesetas - head on through to meet up with another merchant and to find the final target practice area. This merchant will be the first to sell the Tactical Vest, which is a wise investment at 60,000 pesetas, as it'll cut all the damage that Leon takes by 30%.
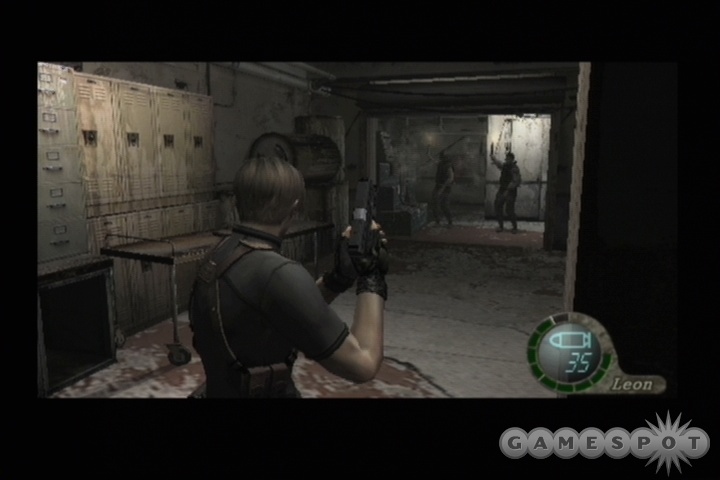
The door that's blocking your path is controlled by a switch on the far side of a little observation peephole. Unfortunately, there's apparently no way to shoot said switch, so you'll have to trigger the opening of the door by killing everyone on the other side. As you approach it, it'll pop up and down, revealing numerous enemies, the first of which will be dynamiters. Shoot their dynamite just as it leaves their hands to blow them to pieces. The next time you open the door, three crossbowmen will appear; these guys are going to be more difficult to kill, thanks to their distance from you and the fact that they all wear helmets; if you have enough TMP ammo, that's the weapon of choice for them. When they're dead, the door should pop open and stay that way, allowing you to pass through, but before you do, check the file cabinet to your left to find an Emerald.
Close Encounters of the Annoying KindIn the next area, you'll be able to save your game; grab the Brass Pocketwatch in the crate by the typewriter before heading up the stairs. You'll notice a sign pointing to the left towards the Operating Room, but first, head right, where you can find an emerald in a briefcase and some rifle ammo in a red, mounted container. Grab all the loot you can see, then head into the Operating Room.
When you reach the operation area, you'll come across two locked doors; one of them can be opened by manipulating the keypad. The correct combination is Blue, Green, Green, Red, Red, Red. Inside, you'll find Luis' Memo 3, some TMP ammo, and the Freezer Key Card. When you attempt to leave the room, though, you'll come up against your first Regenerator enemy; this guy will drop 5,000 pesetas if you can kill it, but to do so at this point would likely require a boatload of shotgun ammo, so for now, you should just blow off one of its legs with your shotgun, grab the Emerald in the autopsy room (it's inside the glass case there), then run towards the exit from the area. As their name implies, the Regenerators will be able to quickly restore their body parts after they've been shot off, so you'll need to be hasty in grabbing the Emerald and getting out.
Another Regenerator will await you in the hallway you passed through before; again, your best bet is to just shoot off a leg and run by him, being careful to avoid his prone body, as these guys have a tendency to jump up off of the ground and bite into your neck. If you don't have some sort of rifle at this point in the game, then you might want to return to the nearest merchant and buy one; even a simple bolt-action thingamabob will come in handy during the upcoming segments of the game.
The Freezer - And Beyond

When you reach the freezer room (should show on your map as a flashing blue door), you'll be able to enter it with your key card. Do so, then head into the small room to the right of the entrance and use the keycard changer there to grab the Waste Disposal Key Card, then shut off the cryogenic device nearby. Doing so will let you grab the Infrared Scope in a safe elsewhere in the room (there's also a green herb behind some frozen glass, so look around a bit).
The reason you'll want a rifle here is that the Scope you just picked up can only be outfitted to a .223 rifle. If you have one, though, and attach the scope to it, you'll be able to zoom in on the bodies of the Regenerators and detect the location of the parasites inside of them. Since Regenerators can only be killed by precisely shooting the parasites, this will let you handle them much, much more easily than you would be able to with any other weapon. You can still kill them without a rifle, but doing so generally involves using a ton of ammo to shoot them all over their bodies; it's much more efficient to just save your rifle ammo for the Regenerators and use it on them, thus freeing up most of your ammo for the other enemies you'll spot. Regenerators move fairly slowly, for the most part, meaning that all you really need to do is get far enough away from them to fire your rifle and start pecking away at them.
For example, one of the corpses in the freezer will reanimate after you grab the scope, and the door will lock at the same time. If you have a rifle on you, you can start running around the center autopsy area to get a little distance between yourself and the Regenerator and use your rifle to kill off the parasites. There were three parasites here for us, but the number may be random, and the position definitely appears to vary from subject to subject. If you don't have a rifle, then you're going to just have to outrun the enemy for a bit; the door will unlock after 60 seconds or so have passed.
Out in the hallway, you'll have two Regenerators to deal with: the one that you passed by earlier, and a new one in the corridor leading up to the waste disposal area. If you want to take them out, you should have plenty of room to do so; you can even return to the autopsy area and kill the enemy there with your new scope, if you want the cash. (It'd be a wise idea to do so, if you think you have the chops; every 5,000 pesetas you find will make a difference, and there's going to be more rifle ammo then you need coming up.) Otherwise, just blow the leg off of the Regenerator blocking your path and get around him into the waste disposal area.
Finding Ashley 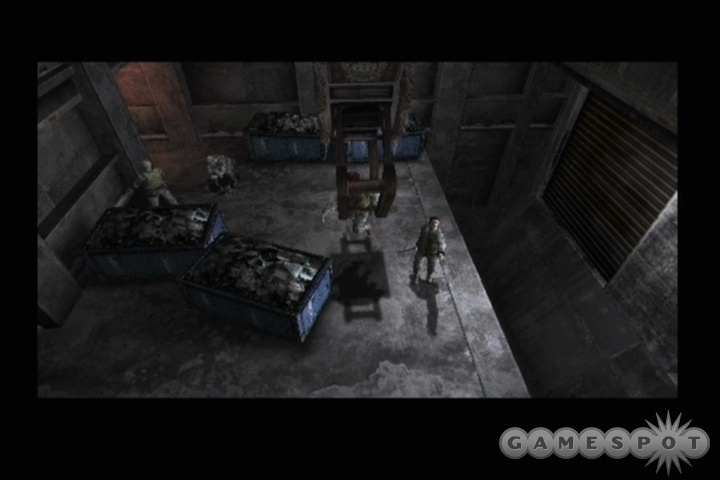
After entering Waste Disposal, you'll soon come to an operating panel; if you use it, you'll be able to pick up the soldiers below, just like in one of those cheesy arcade games that wind up eating all your money because your girlfriend wants the biggest damn plush doll ever made at the fair. You know the ones we're talking about. Getting the crossbowman with the crane is a wise move; you might be better off shooting the rest of the guys, in the hope that they drop cash. You can use your rifle from next to the operating panel after they hide to get one or two of them. Before moving on from the dumpsters, check for an Emerald in one of them; its invisible, but you'll know you're in the right place when you see the Take prompt pop up. In the next little locker room, grab the yellow herb and the item from the locker before moving on.
Ashley's little makeshift prison is in the next area, but she's guarded by a pair of brutes, and it's locked anyway. You'll want to lure the brutes away from the door to avoid accidentally shooting Ashley, then kill them; if you've been hoarding shotgun ammo, now would be a good time to put it to use. There's nothing you can do for Ashley at the moment, so leave her behind and head through the door to the north. This will lead you to some kind of office, which contains a host of baddies; the door here is a natural chokepoint, so lure them back and start shotgunning anyone who comes through. If you manage to attract their attention, you should be able to hit a bunch of them at once. There's a flash grenade on one of the tables here, as well as some magnum ammo on a shelf below the steps, so grab everything before saving your game at the typewriter.
Finding Card Keys Has Never Been So Fun
Now, the doorway near the typewriter will lead to another research lab, where another badass Regenerator will appear. This guy is a bit of an advanced model, though, and will prove to be a much tougher fight than the previous foes, mostly because of the fact that he has five parasites inside of him instead of the normal three. His spikiness allows him to attack in a few new ways, as well, but if you can get past him initially, you should have plenty of room with which to work thanks to the numerous little paths around here.
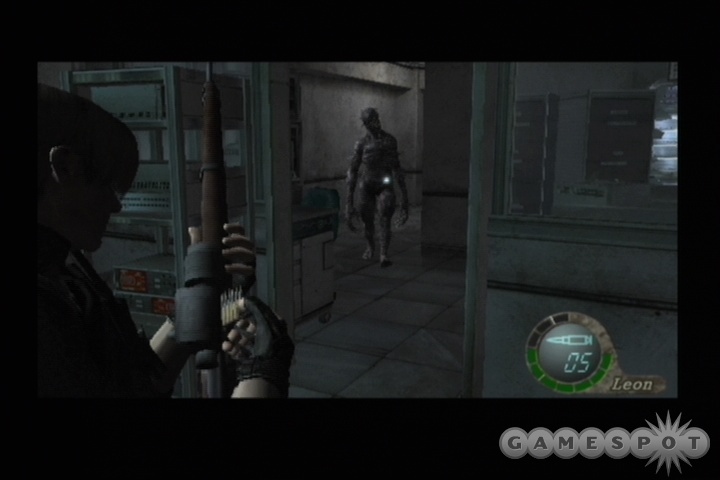
Killing him is the same process as with the previous Regenerators, at least for four of the parasites. The fifth one, you see, is on this guy's back, making it pretty much impossible to hit while he's walking towards you. To actually hit it, you'll need to shoot off one of its legs with your shotgun, then whip out your rifle and quickly hit the final target before the Reg can either hop at you or get back up. It's difficult to do so; you may want to try shooting the leg off from a distance with either your rifle, if you've been upgrading it, or your Butterfly, then aiming from there.
Regardless, you have to kill this guy to get the Storage Area Card Key, even if you don't have a rifle with which to do it. (In the latter case, it's going to require a whole lot of shotgun ammo to finish him off, or something like a rocket launcher.) When you have it, you can explore the rest of the lab to grab more ammo and items. In the main science area, there are some herbs behind glass, rifle ammo in a wheel-opened safe, and an Emerald in the four vertical storage areas; smash the latter with your knife to take it.
If you check your map, you'll notice what appears to be a dead end area to the southeast. If you head out there, you'll be able to find a merchant, some barrels (one of which contains a yellow herb), and a lift leading to a radio tower. You won't be able to use the radio yet, but if you head up that way, you can find some shotgun shells. More importantly, though, the girders at the beginning of the area hold a number of birds. If you can kill them (which is easy enough to do with the pistol), you should find that one of them will drop 5,000 pesetas. Nice.
Escape!
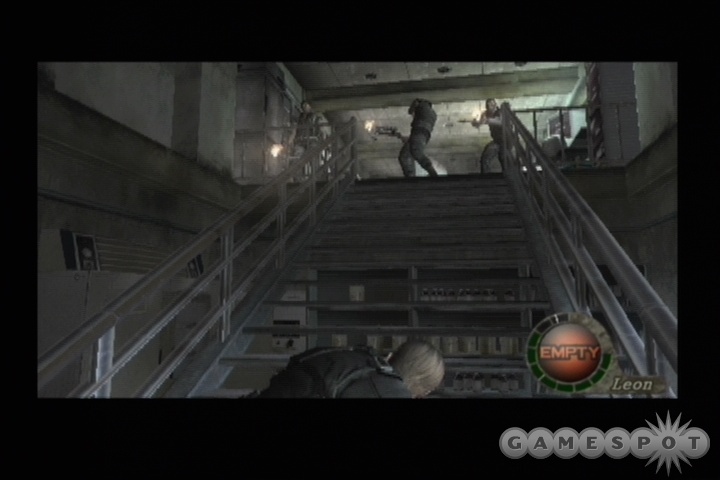
When you're ready to head back towards Ashley, start doing so. You won't have an unfettered trip, of course; there are three crossbowmen waiting for you in the science station, with a couple of soldiers nearby. The easiest way to get past them is to either use your rifle to pick off the crossbowmen from near the door (one of them has a helmet on, so be careful), then wait for the rest of them from behind the door, or just rush them and throw a flash grenade when you get about halfway up the steps. You don't need to kill them all if you don't wish to; all you need to do is get to the doorway leading to Ashley. When you finally reach her, it'll be the end of the chapter.
Chapter 5-2
As soon as you regain control of Leon, park Ashley in the far rear corner of the room, pick up Ada's note, then walk outside the door to get aggro on the enemies beyond; there's a brute here, as well as sundry soldiers, a couple of whom will turn into fly tentacles. The doorway here can be used to hold them at bay with your shotgun, so finish them off, then check your map to learn your next destination: the waste disposal area.
Immediately after you exit the first area, though, you'll come into a little ambush, where a group of soldiers will hit a security button door to lock you in with them. Tell Ashley to wait by the door through which you enter while you take care of them (it's best to have your shotgun equipped as soon as you step through), then hit the switch to open the door; skipping the cutscene that follows will let you quickly turn around and shoot the incoming soldiers before they're standing right on top of you. After they're dead, head into the waste disposal area and you'll automatically jump down with Ashley.
What a Wonderful Smell You've Discovered…

After you pick yourself up, grab Ashley and flip the switch near where you begin; this will cause the nearby spiky Regenerator to pick himself up off the floor and start coming towards you. Luckily, you can relatively easily lock the gate behind you with the switch on the inside. There's another gate on the far side of this little area, so open it, head through, and shut that one as well. From there, you can relatively easily pick off the first four parasites in the Regenerator's body; the fifth one will be more difficult to hit, but if you shoot off a leg, you'll have a few seconds to aim. You might want to let it get closer before attempting to shoot the final parasite; the gates will open by themselves after a short period of time, and the monster will come through and rub itself up against the second gate if you let it.
When the Regenerator's dead, it'll drop 20,000 pesetas; a substantial reward. Another one will appear when you push the nearby crate into the water. You'll need Ashley's help to do this, so push it in, then repeat the business with the gates on the second Regenerator to get the extra cashola. If you're a quick shot, then you can probably hit the parasite on the rear of the second Regenerator as it's walking across the bridge immediately after you push the crate into the water.
Always Wanted To Try That
Your strategy in the next room will depend on the amount of shotgun ammo you have in reserve. Immediately after you enter, you'll be hostiled by three enemies, including a brute; if you're running low on boomgun ammo, then you'll need to be creative in dealing with them. You'll want to have at least ten to fifteen rounds for the little puzzle coming up; if you have more than that, then you should be golden. Luckily, there's ten rounds in one of the crates here, so that'll do you right fine.
When you jump down to the underground wrecking ball (seriously now, a wrecking ball underground? What the heck do they use it for?), you'll start spawning in apparently infinite waves of enemies. Your goal here is to use the wrecking ball to open up the path leading to the next door, but of course the bad guys will have something to say about that. The control for the ball is in the small control room nearby, so that'll be your first goal.
Obviously enough, due to the number of enemies, you'll have to be using your shotgun here. Your goal isn't to kill, but merely to knock anyone in your way down to the ground so that you can get past them. The basic plan is to run to the control panel, use it to flick the ball into the wall, then run out of the control room and circle the lava pit before returning and repeating the action. You have to wait for the ball to settle before you can use it again, but one round trip should be enough for this. The controls also let you choose either Ashley or Leon for using them; if you choose Ashley, then she'll go into Wait mode after using them, which is a bad thing - you want her on your tail during all of this, or she'll get picked up and carried away by the bad guys. Three swings of the ball are all you need to open up the door. When it's clear, get to it and get the heck out of this deathtrap.
More RegeneratorsAs soon as you head through the door, a Regenerator will appear in front of you; you have enough time to kill it if you have a fully-loaded rifle. If not, try heading down the hall to your right and grabbing the ammo in a container there before taking it on. Another one pops up further down the hall. Ten rifle rounds should be enough to take them both out, but if that's all you've got, then you'll need to be pretty close to perfect to get them both.
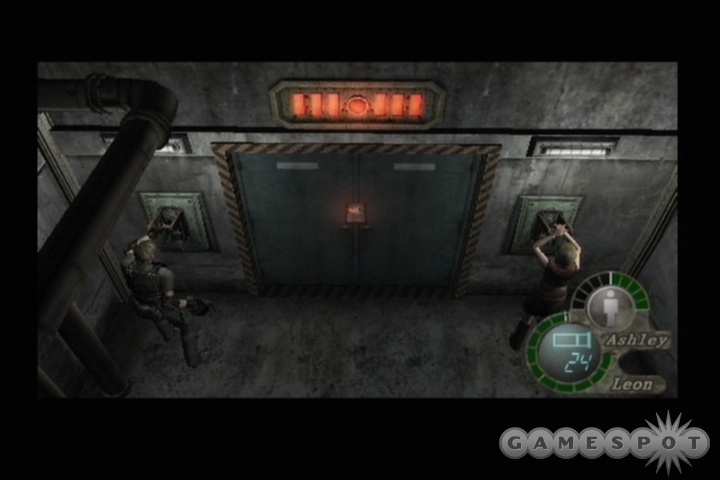
After your foes are vanquished, check the eastern room to find some shotgun ammo in a locker and a switch; hit it to activate the auxiliary power. This will open a nearby shutter just far enough for Ashley to crawl through. Send her, then head down the hallway and use the merchant and typewriter in the adjoining room before moving on to the long hallway on your map. To get through, you'll need to have Ashley wait near one of the levers while Leon heads to the other one; checking it at this point will start a countdown. When the middle light on the countdown signal lights up, use the levers to get through.
Dozer Daze
You'll come out to an area with a huge bulldozer; apparently Ashley's been trained in the proper and safe usage of construction equipment, though, so it's all good. She'll hop into the cab and start driving away through the incredibly narrow road down here. As with the previous rail adventures, you'll have to protect her by shooting off ganados as they arrive; they'll always come from behind, though, so you'll have plenty of warning. Sticking to your shotgun is your best bet here, so just wait for them to jump up, then blast them in the head. The only real sticking point here is a trailer car; when you see it, shoot its engine block to set it alight. When it comes back, repeat the step again to blow it for good.
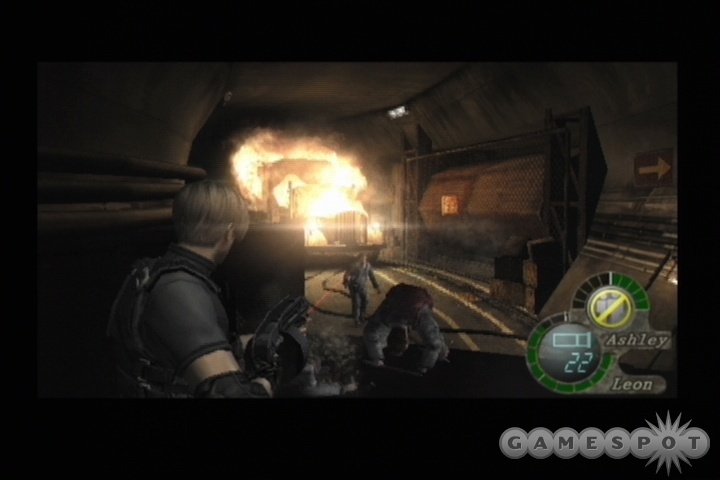
You'll come to an elevator eventually, where you'll have to leave the truck to flip the switch on the upper platform. If you just run up to the switch, though, ganados will plop down into the truckbed and gut Ashley, which is obviously a Bad Thing. The thing to realize here is that the enemies don't infinitely respawn; there are a only a certain number of them, making it relatively easy to lure them out by climbing one of the ladders, then returning to the truckbed and killing them until they stop coming. When the flow stops, you can reclimb the ladders, finish off any stragglers, grab the items from the crates near the switch, then flip the switch and resume your upward climb.
Another brief rail session will ensue when you reach the upper end of the elevator. Kill off everyone that attempts to jump into the truck, then turn around when you hear the oncoming truck's horn (nice of them to warn you) and blast it with your shotgun. You won't be able to prevent Ashley from driving into a brick wall, though. Search the room beyond where you wind up for items, upgrade at the merchant, save your game, then move into the next room to end the chapter.
Chapter 5-3
Now, you're going to have two significant boss fights in this subchapter, so try to conserve your ammo as much as possible. You'll need plenty of magnum and TMP rounds for the boss at the end, but there's one in the middle that might tax you a bit, as well, so, well, save up on everything. Normal enemies should be taken out with headshots and kicks, if at all possible.
In the room in which you begin the chapter, you can find 5,000 pesetas off to the left of the stairs, and the ominous "Our Plan" document which Saddler thoughtfully left behind for you. Typical stuff: we shall crush the Rebellion in one swift stroke, etc.
As the fadeout when you exit the room implies, a rather odd cutscene will play. You won't have much time to worry about it, though, as you'll soon be barreling through soldiers. There's a metal door at the bottom of the first stairwell here, so use that as your chokepoint. Both of the masked freaks that'll be coming through have a better than good chance of turning into slasher tentacles, so be careful. You don't necessarily have to kill everyone here, but if you do, you'll be able to search out some reserves of cash and ammo in both the room at the top of the stairs and the storage room before moving on to the next zone.
An Old Friend
You'll meet up with Krauser as soon as you enter the next room. This isn't your typical boss fight - that'll come later - but is, instead, set up to be really, really annoying for those of you trying to get through the game without ever having to continue. Your little mano-a-mano duel takes place entirely within a cutscene; you're going to have to fend off death not with your weapons, but with your ability to hit the dodge buttons as quickly as possible.
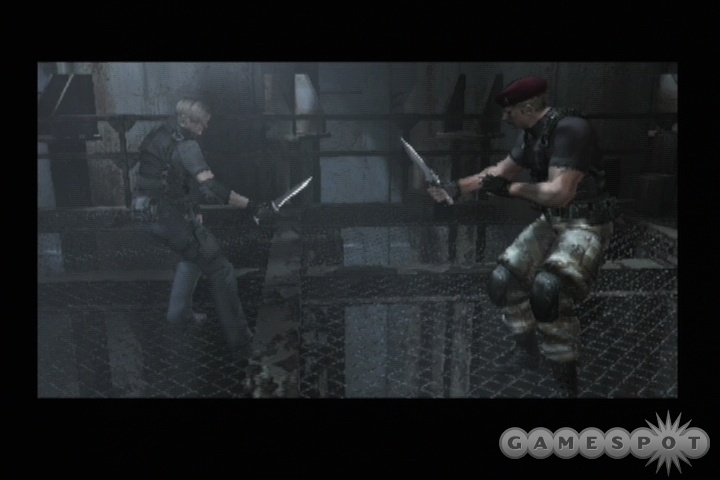
In case you haven't picked up on this yet, the dodge combinations are always going to be either B+A or L+R; it's randomized each time you play through this little vignette, and you'll have half a dozen or so dodges here, so you'll be best served by putting your fingers in such a position as to have both combinations readily accessible. We found that putting our right thumb over the B+A and then having the index fingers on L+R worked pretty well, and, well, we guess that's pretty much the way you're going to be playing the game normally anyway. Just find some way to comfortably hold the controller without sacrificing your ability to quickly hit the buttons, and you should do all right.
If you miss even a single dodge prompt, then you're dead; don't pass go, don't collect 200 dollars, don't make pithy references to Monopoly. While the prompt buttons are random, though, the prompts themselves will always appear during the same parts of your conversations with Krauzer - and he will attack you during the middle of a talk, make no mistake - so if you replay the fight a couple of times, you should get pretty handy at knowing when the prompts are coming up.
At the end of the fight, immediately after Krauzer mentions Umbrella - you knew they'd be popping up at some point, didn't you? - he'll jump on you and force you to rapidly tap the A and B buttons in succession to prevent his knife from plunging into your heart. If you do so, the encounter will end shortly thereafter.
No More Movie References, Please
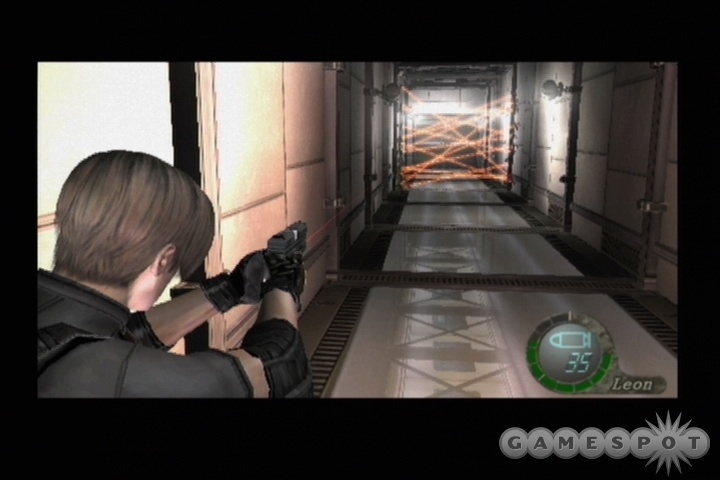
In the little hallway leading up to Saddler's inner sanctum, you'll have to deal with a number of laser traps, in a sequence quite reminiscent of the first Resident Evil film. The first two are manually avoidable; just walk through when there's enough room for Leon to pass by unharmed. The last three are all dodges, though, but luckily, they all appear to be hardwired to the L+R buttons, meaning that you don't have to have your fingers hovering over the B+A buttons. The game may just auto-adjust the difficulty of the dodges based on your past performance, though - we'll admit to having died and continued a few times during the Krauser bit - so be careful. Anyway, you'll have to dodge one laser trap, then the second trap will require you to dodge it twice. The third laser trap is activated when you flip the switch by the far door. It will slowly come down the hallway towards you, then rapidly accelerate when it gets close to the door; it's much easier to hit the dodge buttons here if you actually run towards it a bit, so that it doesn't get the chance to run you over.
In Saddler's little throne room, you can find both an Emerald on his chair, and an Elegant Headress dangling from the ceiling above the door you entered from. You can sit on the throne if you wish, but your real objective is the lift behind it. It'll lead you down to a little cavern; grab the herb and the emerald from beneath the stairs, then grab the loot around the merchant (be sure to grab the five magnum rounds in the room behind him), upgrade, and save your game before heading outside.
More Beastly OppositionAs you wind your way along the cliffs, grab any items you spot. There's a yellow herb inside a broken cage - if you've already maxed out your health, then save this to resell to a vendor, as it's worth 3,000 pesetas.
Eventually, you'll find Ashley's transmitter, as well as the "it" to which Saddler was referring when he last contacted you. This badass monster has its own little playground in which to roam; a set of storage crates and tight corridors, suspended for no apparent reason above a canyon. You'll need to wend your way through three of these little boxes and drop them down into the canyon before you can escape the monster's wrath.
Boss Fight: It
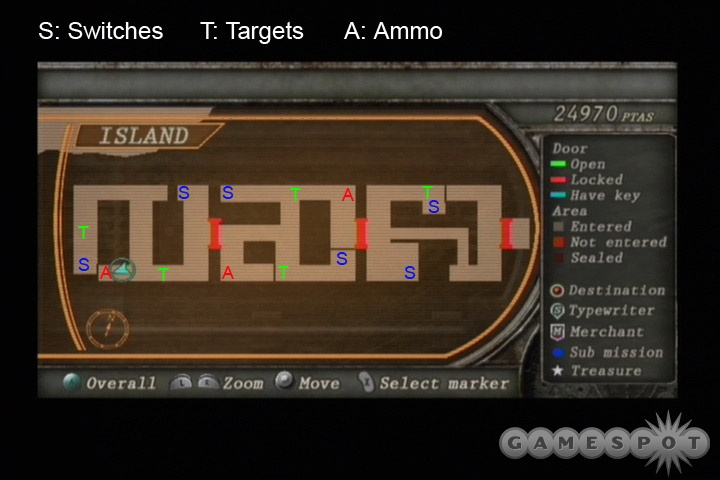
Of course, you're not going to be alone in this little fight: It's going to be right on your ass every step of the way. Unfortunately, you can't kill It, at least not yet; when it appears, all you can really do is deal enough damage to It to force it to jump up into the rafters of the area. It has numerous attacks, though, so getting through the entire area without taking damage is going to be nearly impossible.
To begin with, check our screenshot for a map of the area: A stands for Ammo, T stands for Target, and S stands for switch. In order to get through each of the three cubes, you're going to have to shoot out the targets, which will usually open up doors giving you access to the switches. When you press both switches in a cube, you'll have 30 seconds to escape to the next cube before it falls into the void. While doing so, you have to avoid It's attacks. The most annoying of these come from above; while it crawls around in the rafters, it will periodically try to grapple you; you'll need to hit either L+R or B+A to avoid these attacks, as usual. If you don't, It will grab you and you'll be forced to shake off.
It's frontal attacks are even more devestating, but these have the benefit of at least being a bit more avoidable. When it drops down onto your level of the playing field, you'll need to deal a bit of damage to it before it heads back up. Actually, that's not entirely true; if it attempts to use a grapple attack and you dodge it, it'll generally jump up straightaway, but otherwise, you'll want to have your shotgun close at hand and try to fire off rounds at its abdomen or head to get it to recoil. Sometimes it'll recoil and then just come right back at you, but most of the time it'll jump back up to the rafters and be out of your hair for a few seconds. If it gets close enough for a melee swing, you can expect to take severe damage.
Remember, you can't kill It, so don't try. Just deal enough damage to force it up into the rafters and attempt to get the heck out of this deathtrap before you, well, die.
First Cube: The first cube is the easiest to deal with, as both of the targets are positioned directly next to the doors that they open. When you gain control of Leon, shoot It quickly before it can damage you, then head north and west to find the first target, door, and switch. Hit the switch, then start moving east towards the next switch; you can expect to be met with a couple of attacks from above during this trip. After you hit the second switch, you can expect It to be waiting for you by the door; ignore it if possible and just use the door to move on.
Second Cube: Grab the grenade to your right after entering this cube, then head towards the middle. It appears automatically when you do so, so be ready with your shotgun. (Note that you can use your magnum here to instantly force it back to the rafters, but at this point in the game, magnum ammo is probably more valuable than restoratives, especially if you have a very small amount.) Head south first, blow the elevated target, then flip the switch and return to the central corridor. The northern target is well off the ground, so look up to spot it, then hit the second switch and get out.
Third Cube: At this point, It will make an unpleasant transformation, and sprout a pair of razor-sharp wings from its back with which it'll slash you. If you're willing to expend a single Butterfly round in this thing's head to get rid of it after flipping the first switch, we'll look the other way; it becomes more difficult to get it to recoil with the shotgun at this point. To hit the second switch, you'll need to travel through the middle hallway (it can still attack you from above through the ceiling here, so be on your toes), work your way around to the northeastern corridor, shoot the target, then work your way all the way back to the second switch and hit it before making your escape.
Boss Fight: It, Part 2
Now, even after you manage to chuck it into the nether world at the bottom of the canyon here, It proves its resilience by climbing up the rock wall and trapping you inside a ready-made death arena, where you'll have to fight it to escape. There's fairly little trickery involved here; if you want to win, you'll just have to start blasting away at its head and deal enough damage to finish it off.
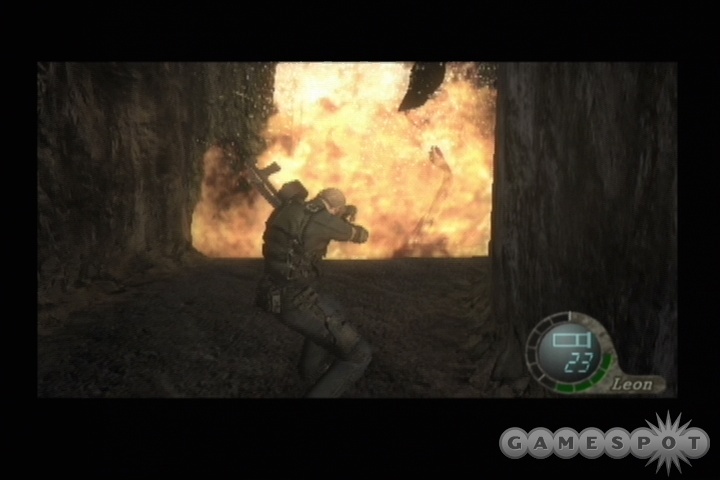
If you've been successful in saving up magnum ammo, then the beginning of this fight is going to be a good time to use it; if you just unload on its head with your Butterfly, you can do a good amount of damage, and it'll continually recoil from the blows, which will prevent it from ever attacking you. As we mentioned, there is another boss fight coming up at the end of this chapter, so don't use up all your ammo here; it's actually a wiser idea to unload an entire clip, but save one bullet in the chamber, then switch over to the shotgun or TMP. This way, you'll be able to buy a capacity upgrade for it at the upcoming merchant and get 9 or 11 free bullets.
When you run down a clip of Butterfly ammo, switch over to your shotgun. Its attacks during this portion of the fight are similar to its attacks in the storage crates; it'll attempt to slash at you with its wings if it gets really close, or it'll burrow underground and perform dodgeable attacks from underneath your feet. Your goal is, again, to just blast away at it when it pops up out of the ground until it keels over. If you did manage to unload a lot of Magnum rounds at it, it should be severely weakened, though, allowing you to finish it off with just a few shots from your shotgun or a sustained burst of TMP rounds.
If you couldn't spare any magnum rounds, then you'll have to work this boss the old fashioned way; deal a crapload of damage to it, wait for it to burrow underground, reload your weapons, and repeat. You do have a couple of items at your disposal here. If you can catch it walking past one of the explosive barrels, then you can obviously shoot the barrel to deal extra damage to it. There's also a pair of lever-operated gates in the northeastern corner of the area, leading to a joined hallway; if you can lure It inside, you may be able to trap it within to get some free potshots, but it's likely to just burrow its way out again.
Regardless, you'll have to deal a lot of damage to It before it dies off. There's one fake death animation about two-thirds of the way through the fight, where it'll sigh and slump to the ground, but don't get complacent, as it'll rear back up pretty soon afterwards. You'll know you've killed it when you flip over to a real cutscene death.
After you beat It for real, head out through the doorway to reach the lift you had to pass by earlier. There's a green herb underneath the stairs leading to it. If you take the lift back across the chasm, you can find another green herb on the other side, but your real goal is the ladder near the eastern terminal.
Don't Stand Next To Explosives!
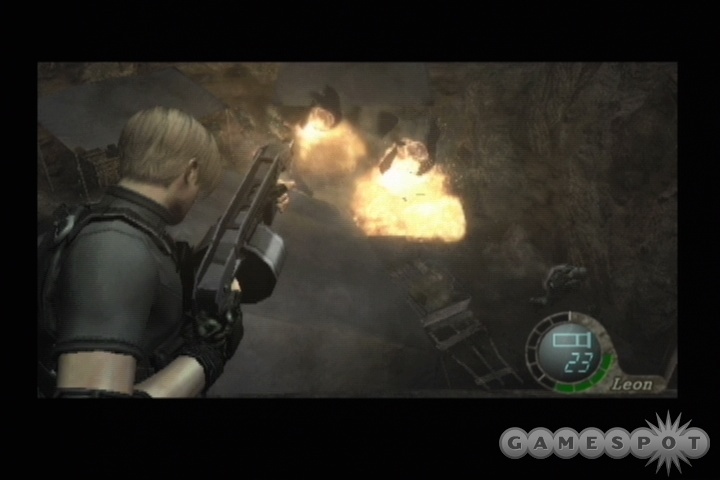
When you reach the next area, at the top of the ladder, grab the shotgun ammo and the hand grenade from the first room (the latter is in a cabinet), then head outside to meet up with a little camp full of soldiers. You can easily kill most of these guys by shooting one of the red barrels inside the camp; they'll explode, predictably enough, letting you jump down, finish off any stragglers, grab all of the items from the crates and barrels, then jump down the hole inside the tent to move on.
Check the offshoots of the cave tunnel here for some cash and the Blue Stone of Treason. Save your game, upgrade at the merchant (don't forget to upgrade the ammo capacity of the Butterfly if you only have one round in the barrel), then head upstairs to pass through to the next area.
Boss Fight: Krauzer
Now, if the whole flame-lit, tight-path-through-stony-ruins thing doesn't tip you off that there's a boss fight coming, then we don't know what will. Sure enough, Krauzer will appear in full Rambo warpaint soon enough and start yapping at you. His bite's worse than his bark, though, by a long shot, and he'll soon open fire. One note to keep in mind here is that there are items strewn about (including a green herb in a semi-concealed barrel just after you first enter this area); you're not going to be able to explore the area after the boss fight, so if you see something you want, grab it while you can.
If you're aching to use your magnum ammo, don't be too hasty to do so; like It, Krauzer can't initially be killed. As he intimates during the opening cutscene of the fight, you'll need to gather two pieces of a key that will unlock the gate here during this fight. Krauzer himself has the third part of the key, but will only be killable after you get the first two. That doesn't mean that you can entirely avoid combat with him, though, as there'll be a couple of encounters where you're forced to go one-on-one with him, usually just to run out a bit of time until a gate unlocks and you can pass on. When this occurs, he'll escape the fights with a flash grenade, just like The End from Metal Gear Solid 3.
Krauzer's attacks run the gamut of what you'd expect from a guerilla warrior. At long range, he'll either use an explosive arrow or his machine pistol to fire away at you, or chuck grenades (dodgeable with L+R). At close range, he favors knife fighting, and has a number of confusing movement patterns to deal with; sometimes he'll close in with dodgeable attacks (a la the good old L+R or B+A buttons; there can be as many as four or five of these in a row), and sometimes he'll just come in and slash you. There's little you can do about the latter save shoot him before he gets close, but he also has lightning reflexes, and will usually dart out of the way as soon as he detects a laser sight on him. Still, shooting him is going to be the only way to deal enough damage to get him to disappear. We preferred using our shotgun on him, but your TMP might also do the trick; it's just less likely to stun him immediately unless you shoot him in the head. Either weapon will do a good job of dishing out the hurt, or at least enough to cause him to flash grenade his way to safety.
First Phase
After your initial cutscene with Krauzer, you'll be trapped in a two-story minaret with a ladder. Grab all of the items here as quickly as you can, because Krauzer will quickly arrive for a little fight. You can't get through the gate below until you dish out enough hurt on him to force him to run away. With our fully-upgraded TMP, it took around 150 bullets to do so; just remember to aim at his head when he gets in close, and you should be able to consistently stagger him. The tight quarters will mean that he's almost certainly going to get a few good slices in on you, so don't hesitate to use green herbs or full restoratives when you need health.
When you do manage to get him to flash out of there, the gate beneath you will unlock. Head outside and start walking to the northeast; you can expect Krauzer to jump from behind a wall and attack you, though. If he gets you in a headlock, shake out of it, then use your L+R buttons to bust him to the ground before he can slice you a new windpipe. Don't bother attempting to shoot him, though, as there aren't any gates in your path to the next area. All you need to do is grab any items that you see before you reach the first Piece of the Beast.
If you can outrun Krauzer, then hop into the little building you spot after you cross the bridge (check our video for this segment if you're having trouble maneuvering). There are items on the ground floor and upper floor here; you can grab them all, then hop down from the roof and resume your eastward journey towards the steps leading up to the Piece of the Holy Beast, Panther, which you'll grab automatically when you reach it.
Second Phase 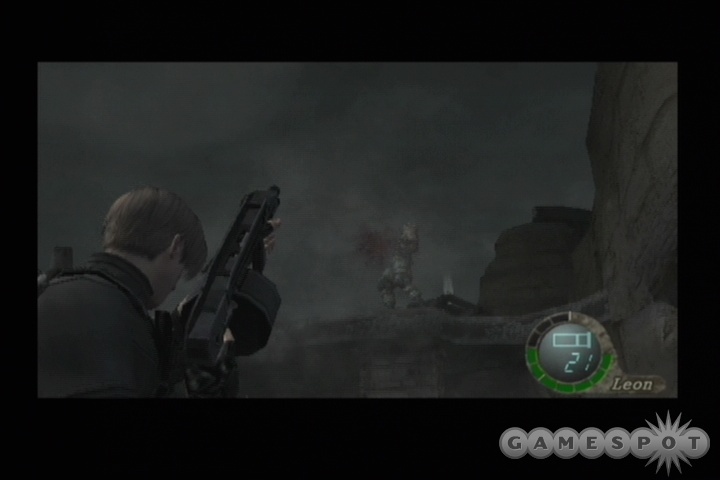
After you obtain the first Piece, you'll have to duel with Krauzer again. The openness of this area will give him a couple more tricks. When he jumps to the ledge above the arena, you can expect him to either start chucking grenades at you (again, dodge with L+R) or shoot you with his machine gun. You can avoid the latter by hiding behind one of the walls in the middle of the area. Otherwise, this fight is the same as the one before; you'll need to deal a good amount of damage to him before he runs off and lets you maneuver the little pressure plate puzzle to unlock the gate.
Said puzzle really isn't difficult; when the statue pops up, push it north so that it clears both of the walls here, push it west a bit, then push it south onto the second pressure plate. This will unlock the lever near the gate, as well as the lever near the building you passed by earlier. Return to this latter switch to open the path to the lowest portion of the area (but watch out for Krauzer's patented ganking-from-behind maneuver as you approach it).
After you flip the switch and hop down, you'll have to shoot your way through a bunch of Krauzer's mechanical henchmen; these guys aren't too difficult to deal with, as they explode with a single shot, but they can deal damage to you either with guns or with their death explosions, so be careful. When you proceed far enough, Krauser will reappear and engage you in a bit of conversation; two robots will appear immediately afterwards, so take them down before heading up the tower here for the final showdown.
Third Phase
When you reach the uppermost platform here, hang a left to grab the magnum ammo and an herb, then find the Piece of the Holy Beast, Eagle to start the final portion of the fight. Krauzer here will drop his gun, bust out a big Plagas tentacle from his arm, a la Nightmare in Soul Calibur. Immediately after doing so, he'll jump onto you, forcing you to dodge his attack or get knocked off the platform; if you do get knocked off, tap A to climb back up before he grinds your hand.
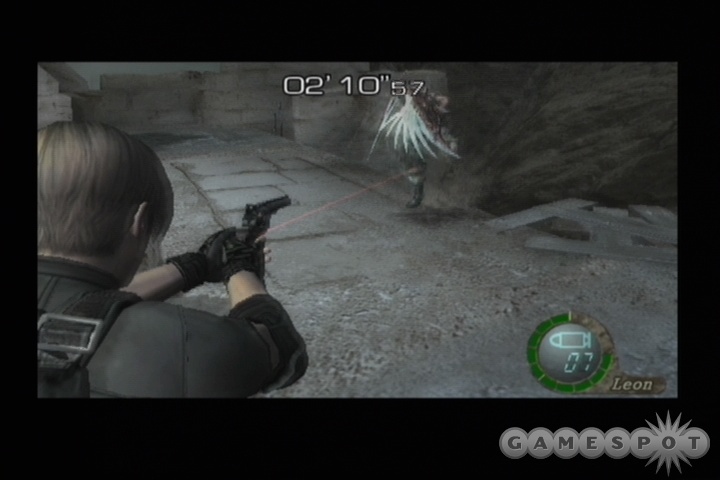
This form of Krauzer is similar to his previous forms, in that he'll attempt to dance his way into close range and slice at you. He also has a boatload of dodgeable attacks, most of which will be linked to your L+R buttons. Damaging him is pretty straightforward as well, but your routine will vary depending on your weapon. If you've been saving up Magnum ammo, as we told you to do do, then you can kill him with as few as 15-20 rounds. His arm will now shield him from ballistic attacks, so you'll probably want to try shooting him in the legs to make him stagger, then shooting him in the chest and head while he's down on one knee.
If you don't have a Butterfly, or don't have any ammo for it, then your TMP will be your best bet here. You'll have a much harder time damaging him through his arm than with the Butterfly, so you'll pretty much be forced to aim at his legs; if you have a stock for the weapon, though, this shouldn't be too hard to do, especially if you can force him to jump away from you, which can lead to a series of leg-shots and head-shots at long range, as he futilely attempts to avoid your fire. When he comes in close, be ready to dodge whatever attack he throws at you, then immediately start busting away at him; he's almost always open for attack immediately after you dodge one of his blows, although you might have to wait for him to stop flipping backwards before you open fire.
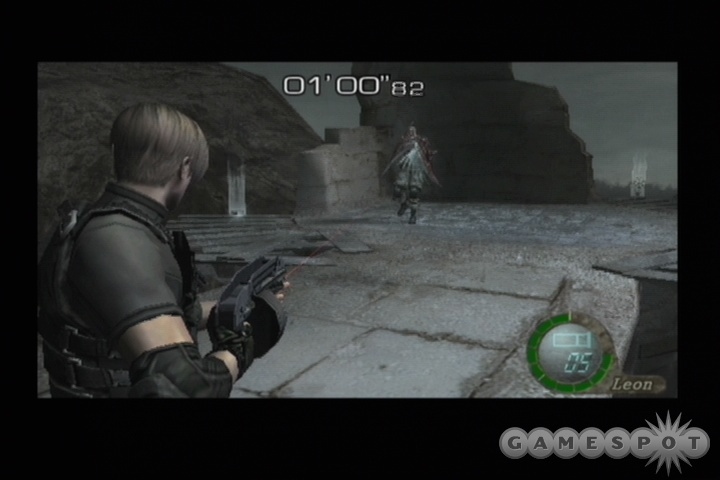
The shotgun is going to be one of the more difficult weapons to use here, especially if you have the Striker, due to its wide range of fire. You'll need to rely on dodgeable attacks for him to get close enough to hit; if you shoot at medium range, then you'll be unlikely to stagger him very often. The pistol and the rifle can be safely discounted as serious weapons during this fight; if you're forced to rely on them, then you've definitely got a long battle ahead of you. Alternately, you can try to use your knife on him, which is actually fairly powerful, but it works best if you can hit him in the knees and drop him into a kneeling position before slicing him. You'll obviously need to dodge his attacks if you attempt to pursue this method of attacking, though.
Note that you're on a three-minute timer here, so you'll have to finish off Krauzer fairly quickly. With the Butterfly, you can do it in as little as a minute and a half, but you should have enough time to kill him, jump down the steps, then walk out the now-opened gate before the dynamite explodes. When you reach the locked gate leading to the next area, grab the handgun ammo off to the west, then use the three Pieces of the Beast on the gate to unlock it. Finis Krauzer, and welcome to another chapter.
Chapter 5-4
After saving your game, walk up the path to stumble across a group of soldiers that are going to be seriously gunning for you. These guys have fortified themselves into a number of bunkers, and possess a few chaingun emplacements which they'll use to blast you, but luckily for you, you have a helicopter along to do most of the killing.
Getting To The First Gate
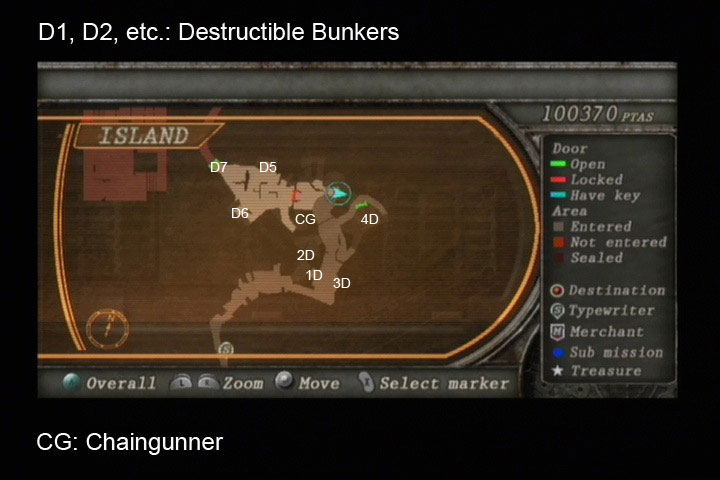
As you run through the area, you'll have a number of small cutscenes pop up; these will let you know what areas the helicopter will be able to destroy if you wait long enough. When you come across a cutscene, the best course of action is usually to just find a good hiding spot, cover the entrance with your shotgun, and wait for your helicopter friend to yell "Take cover!" This will portend the arrival of some air-to-surface missiles, and the destruction of the bunker. The first of these areas is easily found by walking up the path; marked 1D on our map, you'll be able to easily take cover by ducking into the tent to your left. Wait there until the bunker's destroyed by the helicopter before moving on.
Now, your ultimate goal here is to follow the path down to 3D and bypass that; if you want to grab an extra green herb, and whatever cash and items the defenders of 2D drop, then you can approach it until you see the cutscene there, backtrack a bit, then wait for the helicopter to take it out. Just make sure you don't stay too close, though, as one of the soldiers there will be packing a rocket launcher. This is optional, though; the better path to 4D will lie down the road beyond 3D, but again, if you want to grab the items the defenders drop, feel free to explore. You'll find that the helicopter will kill many of the foes in the area as you hide, since it'll do strafing runs with its machine guns, so sometimes you may notice ammo or cash lying around; it's worth taking a break from the path here to pick these up, when possible. The only set items are a hand grenade in the ruins of 1D and the aforementioned green herb in 2D, so if you don't need those, it's probably not worth making the trip.
Anyway, if you hide away in the southeastern corner below 3D, you can wait there until it's destroyed, then shoot the lock off the gate on the road beneath it and head into the tunnel beneath 4D. Be careful of shield-bearing enemies, of which there'll be a couple on the path behind 4D. You'll also have to be careful of soldiers you bypassed coming up in the tunnels behind you; they can be difficult to hear with all the commotion. When the tower's shot out by the helicopter, you can climb up and use the switch inside the ruins there to open the nearby door.
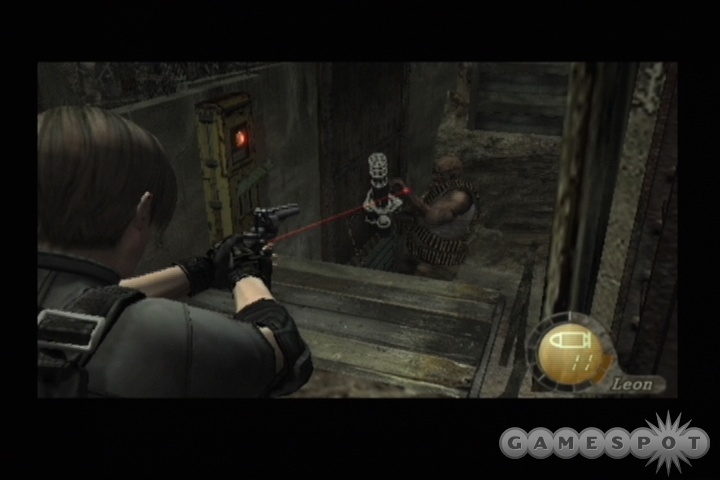
Through that door lies the first gate here, as well as another chaingun soldier. This guy is in a position to be unkillable by the helicopter gunship, so you're going to have to take him down yourself. First, you'll have to have a path cleared for you, so run up the path nearby until you find a small area where you'll be safe from the chaingun fire; wait here for the soldiers on the steps above you to come down, where they'll be killed, either by the helicopter or by your shotgun. When the steps are clear, head up and use the handslide to glide over to the chaingunner's position; you should be right on top of him, so you can either use your Magnum or shotgun blasts to the head to finish him off. Near his position will be the gate's lock, so flip it. Before heading through, though, drop down to the area with two tents; you can find red and yellow herbs here, along with some TMP ammo and 5,000 pesetas.
Through the Second Gate
Getting to the second gate is a lot like getting to the first gate, save for the fact that all of the defensive positions of the soldiers are compressed into one little area. Gotta say, though, at least Saddler's showing respect for your skillz; he's fortified his base enough to hold off an army, let alone a single guy. There are three turrets here, two elevated on either side, and one down on the lower level near the gate. The two elevated turrets are helicopter targets, and each guard the path to one of the two switches required to open the gate; the third destructible target is the bunker above the gate itself, where numerous soldiers will come from as you attempt to reach the switches.
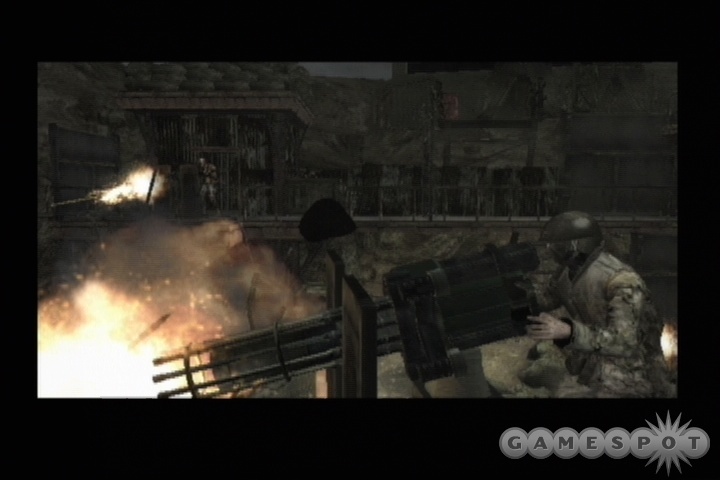
This place can be a major moneymaker for you, if you're willing to run out into the thick of fire and grab the cash that the soldiers drop after you or the helicopter takes them down. This is obviously going to get you hurt quite a bit, but if you've gotten through the area without too many nicks and bruises thus far, you should have plenty of green herbs to use, and you can easily make 10,000 pesetas here just from soldier drops. If you spot cash on one of the elevated platforms; you'll need to climb up a ladder to reach it. The ladder for the western platform is on its southern end; the ladder for the northeastern platform is actually located in the tunnel to the south of the gate through which you enter. You'll need to get up through both platforms to reach the switches, so you can either get to them while the turrets are still active, or just run into the tunnel and wait near the ladder while the helicopter takes care of business. Even in the latter plan of action, plenty of soldiers will be coming for you, so keep your shotgun near at hand.
(Alternately, you can try to climb the ladder in the tunnel, work your way around to the turret at point D5, kill the gunner there, then use a rifle to get a headshot on the gunner of D4. Since the turret on the lower level will be deprived of its gunner by the helicopter shortly after you enter this area, this will remove any source of danger to you save for that posed by the soldiers.)
After flipping both switches and checking the area for loot and drops, head through the gate to move on.
Alas, We Hardly Knew YeYour helicopter support will be dispatched shortly after you enter the next area. Bid your friend a fond adieu, grab any cash the soldiers dropped, then hit the barrel in the small gap here before shooting the Emerald down from one of the pillars and moving on. In the next area, you can grab a Pearl Pendent before meeting up with Ada, who'll suggest splitting up. Whatever, lady - not like you were ever helping me anyway.
When you reach the typewriter, check the drawers and containers nearby for some magnum and shotgun ammo, then get ready to face the Regenerator that's coming down the hallway for you. If you still have a rifle and thermal scope, feel free to kill it; although it's not of the spiky variety, it does have five parasites inside of it. If not, do your best to avoid it while checking the other rooms for goodies, then climb up the side of the ruined staircase at the south end of the room and move on.
Hordes Upon Hordes The next room here can be a little tricky, if only because there's a metric ton of enemies within. To begin with, you'll have to round the corner and start killing them off. If you're short on ammo, try getting underneath the southwestern control room and waiting for enemies to come down the ladder there before blasting the explosive barrel; this should kill a few in one fell swoop.
You'll need to off around half a dozen of these gents to spur the appearance of a chaingunner. Again, either shotgun blasts or magnum rounds from short range are going to be your best bet for taking him down. When he does die, grab the cash from him, then kill anyone else in the area before grabbing the items in the numerous barrels and containers. A few of the rooms here have lockers, as well, so don't forget to open them when prompted.
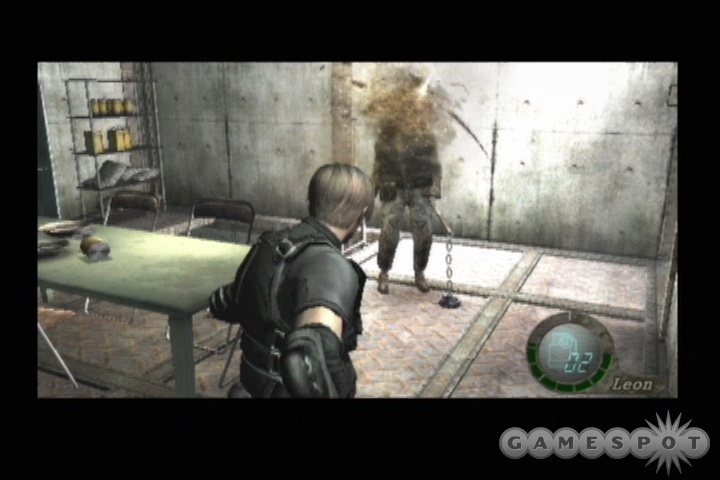
When you're ready for the next batch of baddies, examine the machine in the southwestern control room; a card will pop out elsewhere, but a soldier will grab it. You'll need to start killing everyone you see in order to find it. So, get to work; the safest place to be is probably in the same room you hit the machine in. Everyone will know where you are when they spawn in, so all you need to do is wait for them to come to you. Don't forget that flash grenades will instantly kill slicer tentacles; a few of the soldiers will morph into these.
When everyone's dead, grab the loot they leave behind, examine the rest of the rooms for goodies, then take the card key to the uppermost room in the northwestern corner of the zone. If you use the machine there, you'll disable the emergency shutdown on the two locks; flipping both of them will subsequently unlock the door leading to the next zone.
Finally!
After the cutscene, you'll be able to escape to a smallish zone where you finally meet up with another merchant. You should have plenty of crap to sell at this point, and you can take advantage of the opportunity to upgrade your weaponry. If you head into the hallway nearby, you'll find a few enemies, as well as a closed door leading to the operating room; before you head in there, though, find the doorway that leads back to the room that Ashley was being held in and check it for ammo and supplies; there are five rounds of magnum ammo in the control room here, so rock on. When you're done there, return to the access corridor and head into the operating room (which should show up on your map as a red destination) to end the chapter.
The Final Chapter
As you might expect, the final chapter here is the end of the game - funny how that kind of stuff works out. Your final merchant is here, so take advantage of the opportunity to upgrade your weapons one last time. Keep in mind that you'll be able to keep your weapons and play the game again after you beat the final boss, so you may want to hold onto anything that you were otherwise planning on selling. That said, you will need to have enough room in your inventory for a rocket launcher to beat the upcoming boss, so you may want to sell off your rifle and scope if you still have one; they're not going to be very useful here. By the same token, if you have insettable gems, you can save them until you find something to set them in next game round.
Boss Fight: Saddler
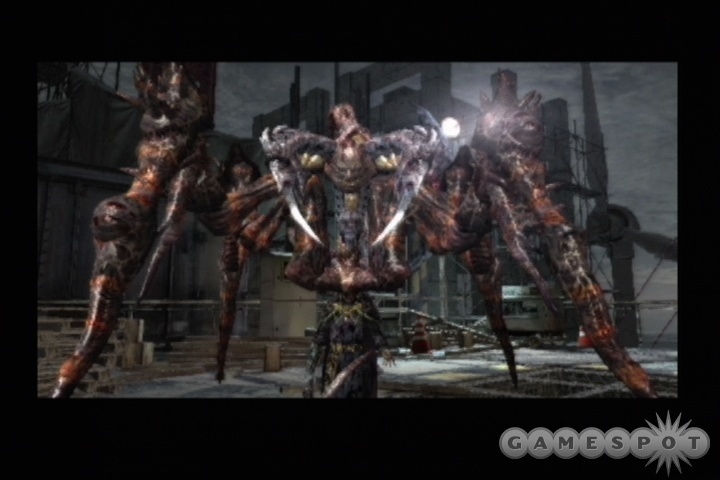
Ruh-roh; the bad man is angry. Luckily for you, there's no meddling about with different forms here; Saddler will immediately bust out his badass spider form, and all you have to do to win is kill that. It's not overweeningly hard to do so, but, as you might expect, you're going to need a little bit of skill and a few restorative items in your inventory before you can really hope to succeed. Luckily, you won't need much in the way of ammo, so if you're running low, then you should be able to spare the rod and still spoil the child, and we can certainly all agree that Saddler has been a bad boy indeed.
The Layout
There are three main areas that encompass the Saddler boss fight. The first is the large open area in which you begin. You'll want to avoid this area as much as possible, as it'll be difficult to get around Saddler if he blocks your exit. The primary focus here will be on the two platforms nearby. Each of these is connected to the other by a pair of retractable bridges; these are seemingly busted, though, and will flip up and down throughout the fight. When they're up, you can just barely run across if you start as soon as they come up. If you're caught in the middle when they drop, you'll have to jump to the far side with the L+R buttons, then climb up by tapping A. While you do this (it takes a few seconds), you'll almost always give Saddler enough time to leap from platform to platform and land right in front of you, so…that's fun. Still, you'll have to do this a few times during the fight to avoid Saddler, so try to wait until just after the platforms lock in place to walk across.
Attacks
Saddler has a few attacks at his disposal. If he gets close to you, he will, of course, slash at you and stomp you into the ground. This is where most of the hurt here is going to come from, but luckily, he's not a very fast boss, meaning that you should be able to outrun him most of the time. He's big enough to take up most of the space on either platform while he moves, so on occasion you won't have much choice but to try and run around him on either side and hope he doesn't hit you; you can even walk underneath his legs if necessary. If you're standing on one of the elevated areas at the end of either platform, Saddler's main mouth will occasionally pick you up and slam you into the ground.
Besides his close-range attacks, Saddler has two main unique attacks. The first will come when he launches himself into the air and attempts to land on you. This is tough to see coming - he'll just jump, with a minim of preleminary animation - but so long as you're not caught with a weapon out, you can either run forward or start backing up and stand a good chance of getting out of the zone of punishment.
Next up is Saddler's charge attack. When he's about to burst forward, he'll start clanging his legs into the ground; after he's done this three or four times, he'll start coming at you. Although he doesn't move too fast - this is really more of a sidle than a charge - Saddler can turn while charging, making this difficult to avoid without running from one platform to the other, which is the best course of action when you see this one coming.
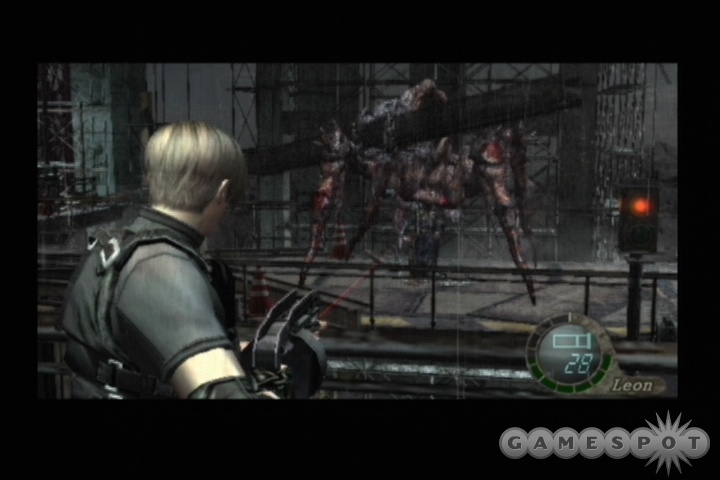
Lastly, Saddler does have some environment-based attacks. The first time you run to one end of a platform while Saddler's on the other side, he'll push over the upright girders and throw them at you. Depending on the distance between you and him, this can be almost impossible to dodge, so you'll likely wind up eating a bit of damage. Luckily, you'll only have to deal with it a couple of times during the fight. Secondly, when you're on one platform while Saddler's on the other, he'll pick up fallen girders and chuck them at you. These are a bit easier to dodge, although the timing is still pretty tricky, especially if you're moving along the platform and don't have him in your field of vision; you can get some warning from sound cues, but it's still a dicey affair on the whole.
Finish Him!Saddler plays somewhat similarly to an El Gigante; in order to really damage him, you'll have to hurt an ancillary part of his body, then strike at his exposed weak spot when it pops up. His weak spots are the eyes on his various legs; these open and close seemingly at random, but will get blown out with a single bullet, even from a TMP. The best time to shoot them is when Saddler's walking slowly towards you; whip out your TMP or shotgun and wait for one of the eyes to open before blasting it. This will cause Saddler to crash to the ground for a moment, and will let you strike at his innermost eye.
In addition to shooting out his eyes, though, you do have four one-shot attempts at causing Saddler's defenses to drop. Each platform has an explosive barrel on it somewhere; if you shoot these while Saddler's walking past, then he'll expose his inner eye. Secondly, each platform has a small raised area with a switch at the end of it. If you climb up onto these, then flip the switch when Saddler is standing directly next to the raised area, he'll get hit with a bunch of girders and will be temporarily stunned. Lastly, you'll find a hand grenade on the uppermost platform; if you chuck this in Saddler's general direction, he'll go down on his knees, allowing you to strike at his central eye. You can, of course, use any other grenades you have in your inventory to the same end; if you have a Mine Thrower, you can also use that to drop him to his knees and jump atop him.
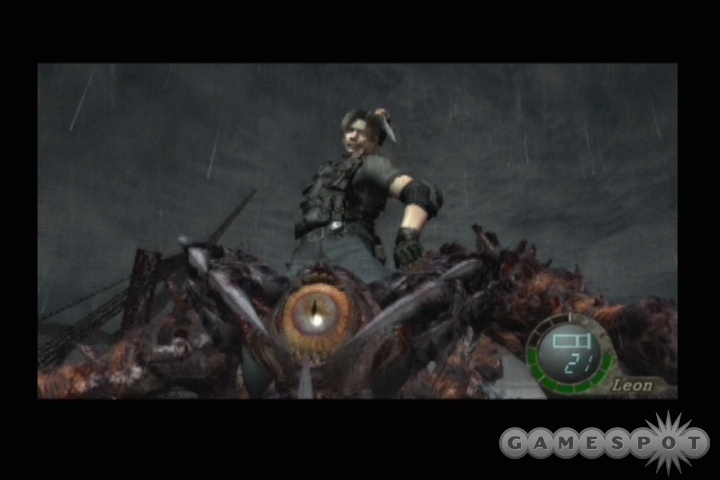
When Saddler's been weakened with one of the above methodologies, your time to start striking at his heart has come. He'll almost always flop down on the ground and lower his central tentacle at this point, exposing the biggest eye of all. In order to damage him, you'll have to damage this eye. As with the El Gigante, you can climb up on Saddler and deal a knife strike right to the eye; this will always succeed, without any button pressing required. If you have Butterfly ammo, though, you might want to instead use that, as you'll be able to hit the eye two or three times before he retracts it and reverts to his normal behavior.
After you knife or shoot Saddler's central eye four or five times, Ada will appear in a short cutscene and throw a rocket launcher onto the upper platform. Thanks, Ada; maybe you could've, I don't know, used it on him? Whatever; you'll have to cross the bridge to the upper platform, grab the rocket launcher, and use it on Saddler to finish him off. You only seem to get one of these, and you do indeed have to be aiming in Saddler's general direction to actually hit him; if your shot's too far off, the rocket launcher will be expended and, well, you'll be kind of screwed, since you need it to kill him. Time to load your last save game.
Note that Saddler only has a set number of eyes on him, and a couple of them are on his rear legs are are thus going to be awfully difficult to hit. If you somehow manage to use the grenade, the explosive barrels, the girders, and shoot off his leg eyeballs without triggering the Ada cutscene, then either you haven't been shooting the primary eye while it's been exposed or you're just extremely unlucky. If all of this occurs, the central eye will periodically open up while Saddler is in his unweakened form; you'll need to track it and shoot it to temporarily cripple him, then shoot it again when it flops down to the floor.
After the Game
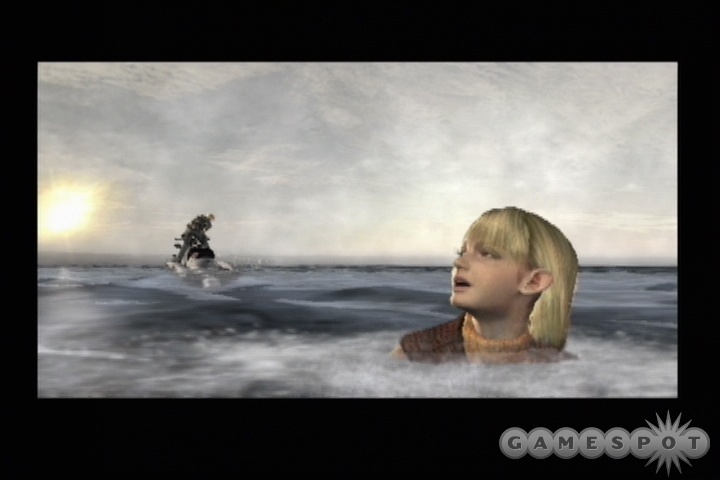
Well, after Ada somehow manages to jump into a helicopter through its rapidly spinning blades - last we checked, this would be enough to shred most corporeal beings - you'll have to quickly return to Ashley and get off the island, as it's going to explode, as islands are wont to do. Returning to Ashley will automatically launch you on the quest for the jet ski, upon which you'll have to escape. This entire ending segment is a straight line, so there's little chance of getting lost; you will have to dodge a few barriers while riding out of the cave, but the obstacles appear in the same place every time, so at the very least you'll be able to replay them a few times before you can get through the little mini-game. When that's done, you can bask in a job well done. Yay.
Of course, it wouldn't be a Capcom game if there weren't some unlockable features after you beat it, and indeed there are. Check our Extras and Cheats section for more info on these.
Extras and Cheats
Extra Features
Costumes
After you complete the game once, new costumes will become available at the beginning of a new game. Leon will wear his S.T.A.R.S. police uniform, Ada will wear her Assignment Ada outfit, and Ashley will be bedecked in full Britney Spears regalia. Tantalizing….
Professional Mode
If you opt to make a new game after you beat Saddler, you'll have the option of choosing Professional Mode, which is a more difficult game variant. Enemies will take a lot more damage, so you'll have to be much more sparing on the ammo. Good luck!
New Round
If you opted to save your game after beating Saddler, then you load it from the load menu, you'll be able to start a new game, but will retain all of the weapons and items you had on you at the end of the last one. Want to go through the village fight again, but with a rocket launcher? Feel free to do so.
New Weapons
On subsequent play-throughs of the game, you'll be able to purchase both the Matilda and the Infinite Launcher from the merchant. The Matilda is an automatic pistol, while the Infinite Launcher is a multi-use rocket launcher; in fact, you can fire it an infinite number of times! Of course, it will set you back a million pesetas to buy it, but you get what you pay for. The Chicago Typewriter and the Handcannon can both be unlocked by playing through the two mini-games that are unlocked.
Assignment Ada
Assignment Ada is a mini-game revolving around Ada's activities on Saddler's island. As you'll recall, she jumps out of the boat she and Leon are riding in at the beginning of Chapter 5-1 in the main game's campaign; this little side chapter will reveal her activities shortly afterward.
Ada's main goal is to infiltrate Saddler's medical laboratory, retrieve five Plagas samples, and then exfiltrate aboard a chopper. There's no time limit to all of this, but there are some restrictions in place. For one, Ada has no knife, so when she comes across a crate or barrel, she'll have to shoot it to discover what's inside (after you enter the facility, though, most items will be lying about, making this less of a problem). Secondly, Ada has a limited amount of inventory space, and since she comes onto the island with a pistol, a TMP, and a rifle w/ scope, she's going to have a hard time fitting all five Plagas samples into her case along with her weapons.
We'll cross that bridge when we come to it, though; for now, your only goal is to get into the base.
The Beachhead
As you wander around the path from where Ada starts the game, you'll be treated to a view of the distant set of bunkers. You can spot one soldier waiting there; zoom in and pick him off with your rifle to avoid dealing with him later. You'll encounter more soldiers along the path. You can start taking them down with your weapons, if you wish, or just run past all of them, stunning them with headshots if you need to, then take a left near where the path branches. This'll take you up to a couple of ledges you can climb to reach a Yellow Herb and a grenade; when the soldiers cluster up at the bottom of the ledges (they can't climb up), chuck the grenade down to take them all out.
After crossing the bridge, pause before you have to jump over to the bunker area. You should be able to spot at least two more enemies near the far gate if you zoom in with your rifle, so scope them out and pop their heads before jumping across. As he did with Leon in the main game, a chaingunner will appear when you pass a bit ahead, so before you do so, pause and take care of any soldiers in the first half of this little spit of land. You should also head to the southwestern corner of the zone and see if you can spot any stragglers to the north; shooting them with your rifle will make the upcoming fight a bit easier.
Sergeant Slaughter
As when Leon passed through this area, a chaingunner will appear, and in precisely the same trigger spot, apparently. Now, Ada doesn't have a shotgun or a Butterfly, so it'll be difficult for her to stand up against this guy in close quarters combat. You have two real options here. In the first, you can climb up atop the same platform that we recommended you park Leon on in the walkthough; it's to the north of where you jump to this area, so climb the ladder and move around a bit to spawn the appearance of the chaingunner. Instead of the door to the west, though, he'll pop out the gate to the north of you this time; if you sidle up to the ledge on the northern side of the platform, then, you'll be able to pop him in the head with the rifle. This will indeed stagger him, causing him to reel for a second; keep hitting him with the rifle until he goes down! During this time, you'll notice a lot of soldiers coming towards you, but if you're quick, you should be able to kill the chaingunner before any of them are able to climb the ladder, then use it as a chokepoint, shooting or grenading them to death as they mill about its bottom.
In the second variation of this, you can use the chaingunner to clear out the rest of the soldiers before dealing with him. You'll need to run around a bit to effect this solution, though; try getting the chaingunners attention, then hiding before he starts firing. He'll fire for a few good seconds, and any soldiers he hits during his fusillade will be killed, giving you fewer opponents to deal with. When you've cleared out as many soldiers as you can, or as the chaingunner can, rather, whip out your rifle and start shooting him to death. He'll require five or six shots, so you'll need to be clear of enemy fire before you do this.
After you've killed the chaingunner, look around the area to find more goodies before moving through the gate through which he appeared. Immediately beyond the gate there are some sandbags; look behind them to find another yellow herb. Make your way down the path - recall that your Punisher can penetrate the wooden shield one of the soldiers here carries - then climb up the steps to reach the second area.
Cliffside RambleAfter you enter the second screen here, more soldiers will be alerted to your presence. You can either attempt to mow them down with your TMP, or lure them back to the area near the ladder and headshot/fan kick them to death. Luring enemies back to you will be a good strategy throughout this entire area, since it allows you to split enemies up (some are situated on ledges, and won't follow you, even if they know where you are).
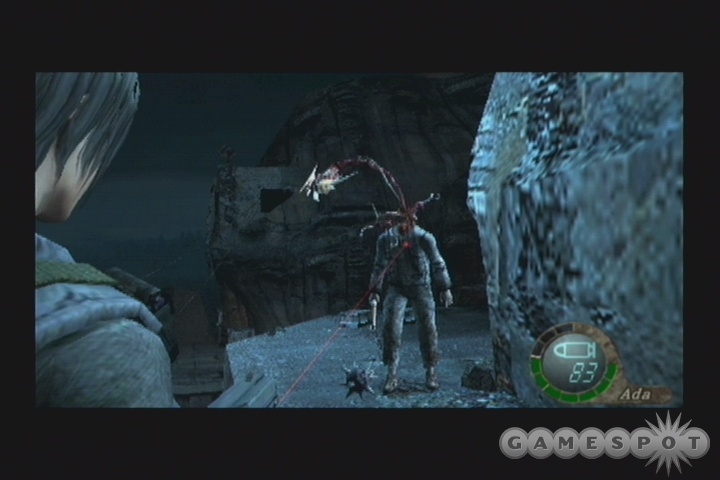
If you head into the cave near the entrance, you can find a Hand Grenade in the same chest Leon found a piece of treasure in, by blowing the red barrel near the stones. Proceeding further up the cliffs will require a good number of kills, though, so try and scout ahead with the rifle and take down the enemies on the ledges before you get within range of their dynamite attacks. There are a couple of shieldbearers near the far gate, so be sure to use your Punisher to penetrate the wood and take them down - you should have plenty of ammo for it by this point.
After you bypass the gate at the top of the path, head down to where the merchant was and grab the herb there; this should trigger the appearance of three more soldiers behind you, so turn around and take them out before heading back along the path to the facility. There are two crossbowmen who will try to stop you; rifle the uppermost one, then charge the guy below him while he's ducking out of sight and kill him. Climb the ladder nearby to reach the interior of the facility.
We All Like To Be Inside
None of the doors downstairs from where you enter can be opened, but there is a soldier down there, so take him out first before scoping the rest of the interior. You can also find some TMP ammo and a crate in a storage room off to the side. Note that your map is marked with stars now; each of these stars represents the location of one of the Plagas samples.
The first one you should go for is in the autopsy room to the southeast of your starting location, where you first encountered a Regenerator in the main campaign. There isn't one there now, thankfully; only a few soldiers. Kill them, grab the Plagas sample (its in the hands of the dead scientist), then fight your way back to the door. The freezer will hold your next sample. It's about here that inventory management will start to be a bit more of a concern; if you find yourself with a ton of a certain kind of ammo, feel free to dump some of it. Discarding green herbs is also a good way to build up a bit of space, but try to keep at least one on hand to combine with yellow or reds that you find.
After you leave the freezer, you'll be met with a bit of a challenge; there's a bunch of shield-bearing soldiers and a couple of Brutes prowling the hallways here. Your best bet is to avoid them as much as possible; if you head right as you leave the freezer, you'll start down the hallway leading to the waste disposal area. Shooting through the shield with your TMP should stun the first soldier, while getting a single bullet to the head of the brute there should do the same to him. Feel free to follow this up with a fan kick and run past them to the door; there's no point in killing all of these guys, as you're unlikely to make back the ammo you expend, unless you can group them together for a convenient grenade.
Taking Out The TrashAfter fighting your way into the waste disposal control room, whip out your rifle and start headshotting the chaingunner in the room below you. (You can't use the crane here.) The rest of the soldiers below will either start heading towards you or firing crossbow bolts at you, so kill them, then jump down towards the dumpsters, being ready for the pair of dynamite-chuckers that will appear.
The next room is the security station. You don't get locked into it initially, but one of the soldiers here will indeed hit the switch; when you try to flip it to unlock the far door, a gaggle of enemies will run in and rush you, so be sure to have your TMP fully loaded before doing so. When you can, hit a few of them with headshots, then find yourself a quiet corner of the room to defend and take the rest of them down, or just head out the door.
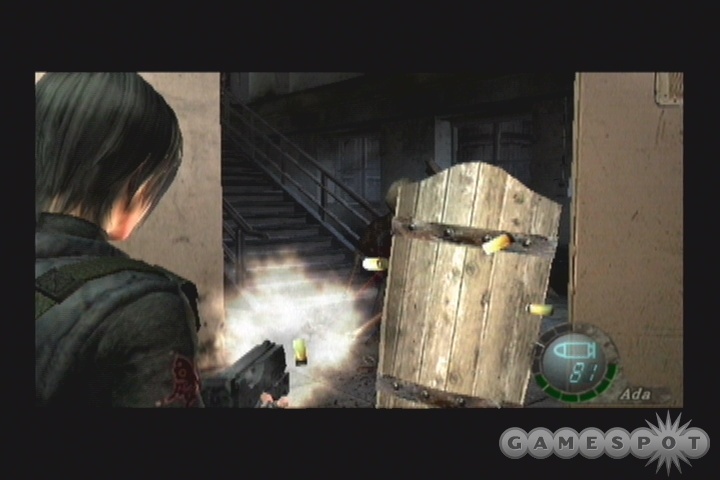
When you leave, head around to the storage area where Ashley was being held and grab the Plagas sample there, then start moving towards the southeast. The large room with the staircase will be the site of another chaingunner ambush when you attempt to leave through the southwestern door. In order to fight him, you should either attempt to lure the shieldbearers down the steps and take them out with your TMP, or just grenade the whole lot to clear the rabble before rifling the chaingunner in the head multiple times. You can use the small alcove which the southwestern door fits into to hide from the chaingun fire if the gunner spots you from above the steps; otherwise it'll be difficult to get out of the way. After dispatching the dynamiters at the end of the hallway beyond this room, head into the main research lab.
Lockdown!
The research lab is only lightly guarded, but there's a reason for this; after you grab the Plagas sample (it's in one of the glass cases), the security doors will lock down and a bunch of soldiers will start flooding the room. There's only one exit to the lab at this point, through the broken window, so use it as your chokepoint and start taking them out. Note that you're going to need a lot of TMP ammo shortly, so try to use that weapon as little as possible.
When you kill the soldiers and flip the switch that controls the security doors, yet more enemies will arrive, including a pair of brutes. If you just want to leave the area, try flipping through the window back into the lab and using the unlocked door there, which exits directly next to the door leading to the communications tower. Otherwise, try getting headshots on the brutes, or use up your remaining rifle ammo to deal heavy damage to everyone who's coming at you. You won't have any need of the rifle after this, so feel free to discard it and its scope if you need more space.
And So We Play Our Dangerous Game Once Again
The communications tower will feature your last major challenge of this mini-game: a fight against Krauzer. Not the loving, caring Krauzer of the knife fight portions of the game, either, but the badass Plagas-morphed Krauzer with the shield arm. You don't have to deal nearly as much damage to him as Leon did to beat him, but this will still be a tough fight, especially if you've skipped out on the yellow herbs you've been running across or don't have enough TMP ammo. You'll need at least a couple hundred rounds to take down Krauzer.

To begin with, head along the platform, but pause before you come to the barrels. Krauzer's appearance is triggered when you reach these; to make your life easier later on, shoot them from the left side of the walkway, and then walk forward to trigger the Krauzer cutscene. If you press start to skip past this, you'll get an extra second or so to start shooting at him, and shoot you must. If you're using your TMP, the same tactic you used in Leon's fight with Krauzer will work; shoot at his feet while he's approaching you, then blast away at his head when he goes down on one knee. He'll still be as dodgy as ever, though, and you won't have as much health as Leon did when he fought this guy, so when Krauzer gets close, sometimes it's best to just stop firing and concentrate on dodging his attack, if possible. If you run out of TMP ammo, then you can attempt to emulate the same style of takedown with your pistol, but you'll have a rough time of it.
When Krauzer busts out his flash grenade, you can finally use the lift to contact your chopper. Heading off the island will end the mini-game and unlock the Chicago Typewriter for use in the main game.
Mercenaries
The Mercenaries is an incredibly fun mini-game that, like Assignment Ada, becomes playable only after you beat the main single-player game at least once. In it, you'll have to take one of five characters out for a bit of a stroll, a walk in the park, a jog by the beach…only, you know, with zombies and stuff.
At the outset, only Leon is selectable as a character, but he'll be able to play all four of the maps available for the game right away. You can unlock more characters by getting a score of more than 30,000 points on each of the maps; each map will unlock a new playable character. If you manage to get a score of 60,000 with each character on each map (i.e. get 20 five-star ratings), you'll unlock the Handcannon in the single-player game. The Handcannon uses a unique type of ammo, so although it's very powerful, it's not going to be immediately useful to you. If you manage to upgrade it completely, though, and then purchase its Exclusive upgrade, it will turn into a monster of a weapon, with 100 firepower and infinite ammo. Getting five stars on every map will be a chore, though, especially with HUNK.
Clock Management
Mercenaries isn't so much a game of fighting against enemies, although you do need to survive to win, but rather a game where you play against the clock. You only have two minutes initially in which to kill as many enemies as possible; at the end of this time your round will be over. You can extend this time by picking up time bonuses (big orange pillars of light) that are scattered around the level. These will add anywhere from 30 to 90 seconds to your clock. Some players might want to try running around a level grabbing all of the time bonuses as soon as a round begins - they show up on your map as stars - while others might want to try grabbing them as they go; try each method and see how it works for you. Either way, you'll need to get these things: more time equals more kills, and more kills equals more points.
Scoring
You gain points for killing enemies, obviously enough; the tougher the enemy, the more points you get. The bulk of your points, however, will come from killing a lot of enemies in a very short period of time; as you kill multiple foes, you'll notice a counter in the upper right hand corner of the screen counting up. Each time you kill an opponent, you'll have around five seconds to kill another one before this counter goes away. When you do finally run out of people to kill, bonus points will be awarded to you based on the number of successive kills that you pulled off. At low numbers, the benefit isn't all that great, but when you start bypassing 20 successive kills, it can start to be many thousands of points.
All of the maps will also have treasure chests scattered around; when you open these, you'll be able to obtain an hourglass treasure. These will net you 1,000 bonus points for each kill that you make for the next 30 seconds, so try to get a large group of enemies together before you open the chest, then take them out with a grenade or a special move. It's best to save these items for times when you're not facing off against a boss enemy, as it's much easier to get large numbers of quick kills when you're facing off against normal ganados.
Techniques
Group Enemies Together: Most characters will have an easier time dealing with enemies when they're in a large group; if you have room to maneuver, try to run around and get a bunch of enemies on your tail. When they're all about to nab you, whip out whatever mass-attack weapon you have and take them all out in one fell swoop. Every character has some way to deal damage to groups of foes, whether it's via a weapon like Leon's shotgun or Wesker's rifle, a grenade, or a special move like Krauzer's arm-blade-killy thing. This will also have the side benefit of giving you a big bonus to your combat multiplier.
Scoring: After completing a round, you'll be awarded a rank of one to five stars. Getting four stars or higher (i.e. 30,000 points or more) on a map will unlock another character; getting five stars (60,000 points or more) with each character (on any map) will unlock a new weapon, the Handcannon, for the main game.
Characters
Leon S. Kennedy
Leon begins his round with a Riot Gun, a Blacktail pistol, ammo for each, and a First Aid Spray, as well as his knife. He's the only character you're going to have until you unlock the others, and is probably best suited for the Village and Waterworld levels. He'll have trouble with the big enemies in each level, due to the lack of pure killing power, but can decimate groups of normal ganados with his shotgun spray. His best bet for big killing sprees is to force enemies to come to him, preferably in large groups, and take them out with shotgun hits to the head; when boss enemies come along, you can either unload shotgun blasts to the head to take them out, use grenades if you find any, or just run away.
Ada Wong
Ada is a difficult character to use properly, as she has few tools to let her quickly stun or dispatch a group of enemies when she gets cornered. She'll begin a round with her Punisher pistol (fully upgraded to punch through up to five enemies), a TMP, and a Rifle (Semi-Auto) (with the Exclusive upgrade to fire at the 0.4 second rate), as well as incendiary grenades. Without a shotgun, her only resort when cornered is her grenade attacks, unless you want to attempt to use the TMP to spray everyone in the head before escaping. She's much better suited for controlled takedowns of enemies as they come to her; the rifle here will be your primary killing method, as it can fire quite rapidly, and will punch through enemies in a row, Punisher-style, often netting you multiple kills if your foes are lined up, which you can encourage by climbing to the top of a ladder or by luring them through a doorway. She's low on health, but will move more quickly than most other characters.
You can unlock Ada by getting a score of 30,000 or more on the Village level.
Jack Krauser
The indomitable Krauser is one of the most powerful of the five mercenaries here, both in terms of his offensive prowess and his damage-taking capabilities; he's the only mercenary of the bunch to have a full ten health bars available to him. He also seems to move a bit more quickly than the other mercs. His primary weapon is Krauser's Bow, which fires off arrows with deadly precision; this will more often than not kill an enemy with a body shot, and is capable of stunning and killing boss enemies fairly rapidly as well. In addition, there's no need to reload it, since all the arrows are stored in a single quiver. (Speaking in gameplay terms; they'll still be grouped into bunches in your inventory screen.)

In addition to his bow, Krauser has two other powerful attacks. After stunning an enemy with a headshot or a flash grenade, Krauser's able to run up to them and deliver a pair of powerful kicks, which will usually kill a normal ganado. In addition, you'll be able to transform his right arm into a powerful Plagas weapon when it glows red; if you do so with the X button, then hit the A button, he'll dash forward and kill everything within 15 feet or so in a straight line in front of him. If you've been holding off enemies at a chokepoint, then this will wipe them all out. What's better, though, is that it acts as an instant kill on boss enemies, too, letting you quickly take care of chainsaw freaks or chaingunners without breaking a sweat. You'll have to wait a while in between uses, though, so be sure to make it count! Krauser also packs a knife for opening crates or last-ditch kills.
You can unlock Krauser by getting 30,000 points or higher on the Castle map.
HUNK

Hunk is a tactical commando from a previous title in the Resident Evil series, and is probably the hardest character of all the mercs to get a high score with. He brings only a TMP into battle, as well as a few grenades; beyond that, he has precious little to deal with crowds, save his wits. He only has five or six health bars, and moves at normal speed. His only special ability is his Neckbreaker move, which, when performed on an enemy who's been stunned by a headshot, will let Hunk kill them automatically. The main problem with this is that Hunk will wind up standing whereever the enemy was while they were staggering, and since the animation takes a couple of seconds, this will usually let any nearby enemies get a free hit on Hunk. So, it's pretty much useless in our opinion. You can theoretically chain Necksnappers together when you're in the middle of a crowd, but the middle of a crowd is pretty much the last place Hunk wants to be, since he has no weapons capable of instant kills or even knocking enemies down.
You can unlock HUNK by getting 30,000 points or higher on the Mercenary Camp map.
Albert Wesker

Hot holy heck, Wesker's awesome! This guy plays somewhat similarly to Ada, only much more so; like Ada, he brings a pistol (modified to have a greater chance of doing critical damage from a headshot), and a rifle (modified to fire 2.5 times a second, and can penetrate full lines of enemies) to the party. In addition, though, he also packs a wallop with his Killer7 magnum pistol (with a firepower rating of 30), and a full suite of grenades. In addition to all that, though, he's also got a killer Thrust maneuver which he can perform on staggering enemies; when executed, it'll push the target away at lightning speed, will almost always kill the target, and will stun nearby enemies as well. In short, he's a complete badass, and is probably your best bet for racking up huge scores.
One thing that can cause problems for Weskerites is his inventory; he'll start with almost all of your inventory slots filled, and if you don't immediately start using grenades, you may find that it'll fill up in short order. One of the items that's completely discardable is the silencer for his pistol. It's nice and cool and whatnot, but not really necessary; most of your enemies are going to know where you are anyway.
You can unlock Wesker by getting 30,000 points or higher on the Waterworld map.
Maps
Village
The village can be a tough place to rack up points in, mostly thanks to quick-spawning chainsaw enemies and the general density of foes and relative lack of ammo pickups. The two biggest time pickups are located behind the tower (you'll have to reach this one by heading up the steps leading to the secret passage and taking a left; it's in a little area that isn't there in the single-player campaign) and in the northwestern barn (which similarly isn't openable in the single-player campaign). One of the best places to rack up big kill totals in in this northwestern barn, where you can climb up to the upper level and shoot away at the enemies as they attempt to reach you. The only entrance to this place is the ladder, which you can continually kick down on top of the enemies while raining holy hell on them from above. They'll naturally tend to pool around the base of the ladder, letting you grenade them for a huge bonus to your kill total. Note that this may actually end your streak, as it'll wipe out any enemies below, and if no one else charges through the door, you're going to wipe your streak within five seconds or so.
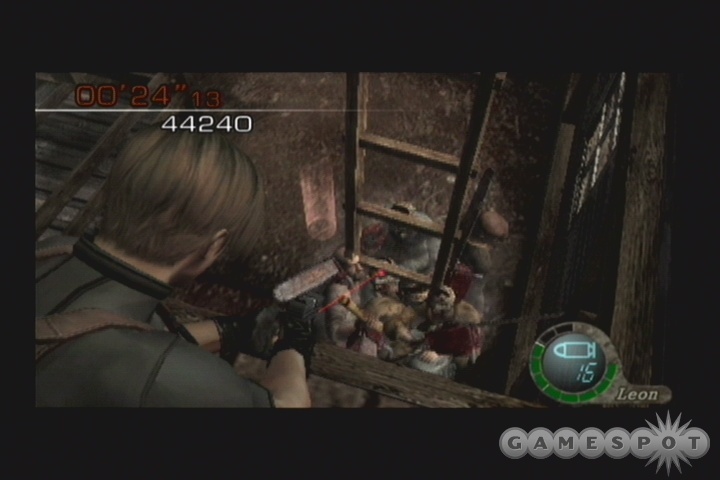
The boss monsters here are chainsaw-wielding women. These will spawn in greater numbers than the boss monsters on other maps - we've managed to get five after us at one time - but are no less tough to kill for it. They can take an absolutely astounding amount of damage, so you may want to resort to incendiary grenades or headshots while they're lying prone to finish them off.
Castle
The castle map is almost undoubtably the toughest to get a high score on. The layout is a bit exposed, making you a sitting duck for the crossbowmen that infest the upper reaches; accessing most of the time extensions will require you to run into enemies while other enemies chase you; and the boss monster here is a garrador, which is by far the hardest of all the boss monsters on the Mercenaries stages to kill.
In order to get a good score here, you'll probably want to have either Wesker or Krauzer as your character; both can deal with the hordes of enemies that'll be coming your way, and both can take out the Garrador without too much of a hassle. Krauzer's got his super-arm, which will slice right through it, while Wesker can incinerate it with incendiary or normal grenades, then finish it off with a Magnum shot to the back while everyone around is feeling the effects of a flash grenade. Other characters will have no real shot at killing it, although Ada might be able to put something together with her incendiary grenades, if she manages to save them until it shows up.
Beyond that, try to stick yourself in the northeastern corner of the courtyard near where you start the map and pick off enemies as they arrive; you'll be in a position here to kill anyone that comes along without having to worry about anyone spawning nearby. Alternately, you can climb up the southwestern tower and try to access the northernmost room on the map, where you'll find a 90 second time extender, a bonus hourglass, ammo, and an herb. This is also where the garrador will appear, though, so you can quickly go from sitting pretty to sitting on the ground without a head if you're not careful. This is a perfect spot for Krauzer to camp, though, especially if he's managed to grab most of the other time extenders on the map.
Mercenary Camp
The mercenary camp is laid out quite similarly to the camp you encounter in the single-player campaign, save for the fact that most of the destructible towers are still intact, and that there are some new tunnels linking areas that weren't linked before. The primary area for getting a prime number of kills seems to be atop the southwestern and northeastern towers; since enemies will have to climb to get to you, you'll have the ability to shoot them off ladders, grenade them from above, and so on. There are no fewer than a dozen time extenders on this map, giving you plenty of time to roam about and rack up kill strings.

The boss monster here is a chaingunner. This is probably the weakest of all of the boss monsters for the Mercenaries maps, although it's still a tough contender. It can be easily staggered by most characters, save for HUNK, and has no automatic kill attack as the chainsaw wielders do. It might even help you out by killing off a few of the soldiers when it unloads its shot into a crowd.
Waterworld
For lack of a better word…. The waterworld map is the only one of the bunch to not be based on an area of the singleplayer campaign; it's all-new. It's also pretty damn huge, with more pure land space than any other map save perhaps the mercenary camp. It just feels bigger than that map, though, mostly because the upper levels are all visible from one another. Ada and Wesker do well here, as their rifles allow them to pick off enemies from a great distance away, or kill off enemies as they line up during their approach; Krauzer will be his usual dominant self, as well, thanks to the advantages that this map offers to mobile characters.
The bossman here is a unique (and huge) chainsaw freak who wields a double-bladed chainsaw, as ridiculous as that sounds. As with most other chainsaw opponents, you'll want to stay far away from this guy, as a single slice is all it takes to end your game right quick.
Got a news tip or want to contact us directly? Email news@gamespot.com
Join the conversation