The Legend of Zelda: The Minish Cap Walkthrough
The land of Hyrule and Princess Zelda are in trouble again, this time imperiled by an evil wizard named Vaati. This walkthrough includes a full walkthrough, as well as a full rundown of heart container locations and other extras.
Design by Marty Smith
It’s unlikely that anyone reading this needs any introduction to the series of Legend Of Zelda series of games. It’s one of video gaming’s most classic franchises, with a history that spans the length of modern console gaming, including GameSpot’s 2003 Game of the Year, The Legend of Zelda: The Wind Waker.
The Legend of Zelda: The Minish Cap is the latest entry into the series, and is available exclusively on the Game Boy Advance. Developed by Capcom’s devilishly talented Flagship team (also responsible for the Oracle of Ages, Oracle of Seasons, and Four Swords Zelda adventures on the Game Boy), it pits a young boy against a powerful magician who’s bent on ruling all of Hyrule. Your quest? Well, rescue the princess, of course! The primary game conceit here is the concept of miniaturization; much of your time in the game world will be spent shrunk down to a tiny size, which will enable you to explore the hidden paths and areas that would normally be inaccessible - and unnoticeable - while you run around at human-size. In addition, a bevy of new items and maneuvers are available to you.
GameSpot’s game guide for the Minish Cap includes a full walk-through, of course, as well as tips on obtaining the hidden item upgrades and heart pieces scattered around the game world.
Table of Contents
Walk-throughDeepwood Shrine
Journey to Mount Crenel
Cave of Flame
Find the Elemental Sanctuary
Find the Pegasus Boots
Find the Wind Ruins
Fortress of Winds
More Minish Madness
Small Quests
South Hyrule Field, Eastern Hills, and Castor Fields
Mt. Crenel, Trilby Highlands and Western Woods
North Hyrule Field, Minish Woods, and Sand Cave
Veil Falls, Lon-Lon Ranch, and Lake Hylia
Back to the Elemental Sanctuary
Meeting With Gustaf
To the Cloud Tops
Palace of Winds
Restoring the Picori Blade
Dark Hyrule Castle
Kinstone Fusions
Figurines
Walk-through
In the Beginning...
Link begins his adventure in a small hut outside the walls of the town of Hyrule, along with his dad/roommate/whatever, the Master Smith. After Princess Zelda comes calling, the two of you will head out to the fair, but not before the Smith gives you a package to deliver.
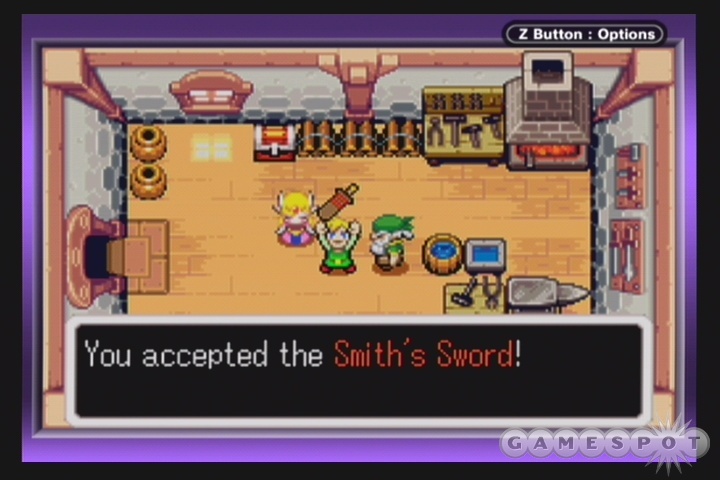
When you reach Hyrule and the Picori Festival, Zelda will promptly ditch you, leaving you to fend for yourself in the vicious underworld of carnies and poorly-maintained rollercoasters. Well, that’s not entirely true; Zelda will run off, but you’ll be able to easily catch up with her. If you pursue her long enough, she’ll eventually give you a Small Shield and will offer to escort you to Hyrule Castle so that you can complete your delivery.
Hyrule Castle is to the north of your current position, but before you can reach it, you’ll have to deal with a Business Scrub which is spitting nuts out at passersby. Since your yourself are a passerby, you’ll need to find a way to get around it without getting hurt. Your newfound shield is just the thing; stand in front of the Scrub and use your shield to reflect the nut back at the Scrub, which will clear the path for you to proceed. If you then head into Hyrule Castle and drop off the sword with the minister, you’ll be invited to attend the award ceremony for the yearly swordplay competition, which you were regretfully not invited to participate in. You’ll show them, though...you’ll show them all....
So, yeah, strange mysterious man, dressed all in black, with a habit of chuckling sinisterly to himself, given the rare privelege of touching the sword that locks the chest that contains an ultimate evil...yeah, that’ll turn out well. Sure enough, Vaati releases all of the monsters that were sealed inside the chest, apparently because he was looking for something within it. He subsequently stonifies the Princess, and if there’s one thing that’s certifiably true in the Zelda universe, it’s that no Princess can go unsaved.
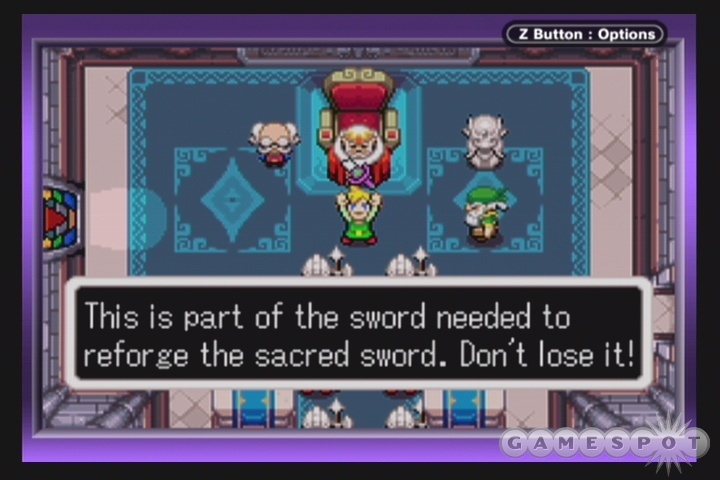
After you wake up from your little nap, you’ll be tasked by the King to enter the Minish Woods and convince the Picori, a race of super-small people/things/fairies that only reveal themselves to children, to reforge the Picori Blade, which should be able to remove the petrification effect from the Princess. Apparently the item shop is out of Soft, so you have no choice but to accept the task and get going.
There isn’t much to see between the Castle and the Minish Woods. The paths to the other parts of the game world are mostly obstructed, including the path leading back into town, so there won’t be much you can do save head straight for the Woods. Now that you have your sword and shield, though, you can defend yourself against the numerous monsters in the fields now, as well as cut through the grasses and shrubs that you come across, in the hopes that you might find some Rupees within. You’ll have to head through the Lon Lon Ranch and the Eastern Hills to reach the Minish Woods.
Minish Woods
Inside the Minish Woods, your path will still be circumscribed to a single linear passageway, so follow it until you reach the Deepwood Shrine that the King mentioned. You won’t be able to do much here right away, but you will see a little scene with Ezlo, an odd little guy who’s being hassled by monsters. Rather than help him right away, though, grab the Piece of Heart to the left a bit and then return to Ezlo’s location. After you kill the monsters, he’ll come along for the ride - literally. After you travel with him for a short bit, he’ll teach you how to use the size portals, and you’ll be miniaturized. In a situation that you’re no doubt familiar with, though, you still only have one path to choose from, so head through the hollow log, take a ride on a floating petal, and walk through the small path to the north until you reach the Picori Village.
Unfortunately, no one in the village can actually speak your language save for Festari, who lives in the ostentatious blue house on the northern side of the area. He’ll tell you to track down a Jabber Nut, which will allow you to speak the Picori language. There’s one in the barrel house to the southeast of the blue house, but before you head that way, exit the screen to the east of the blue house to find another Piece of Heart. When you’re ready to move on, though, head to the hollowed-out log house, push the block out of the path, and eat the Jabber Nut, which will allow you to speak to the Picori.
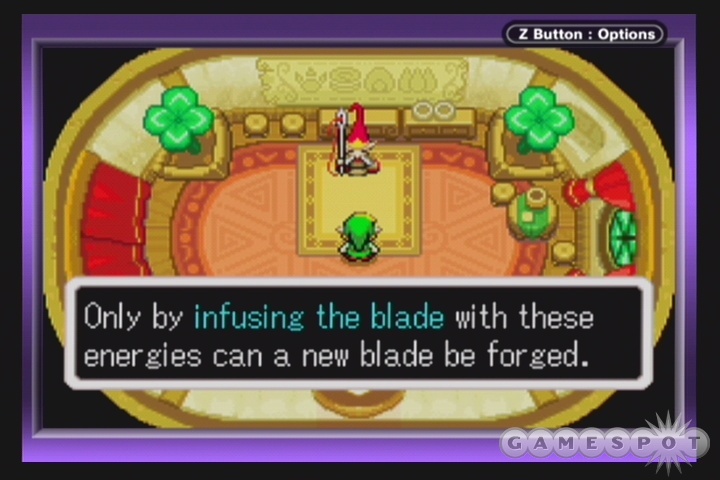
Most of the Picori have generally uninteresting villager-speak random comments for you, so don’t feel compelled to speak to all of them. The first important figure to speak to is the Elder, who lives in a yellow house in the northwestern corner of the zone, and whom will tell you what you need to do before the Picori Blade can be reforged. It seems that you’ll need to track down four Elemental essences and return them to the smith; without them, he can’t do anything with the bits and pieces of the sword that you’ve brought him.
After you’re done with the smith, return to Festari, who’ll show you the path to the Deepwood Shrine, which is the first major dungeon of the game.
The Deepwood Shrine
Deepwood Shrine, B1
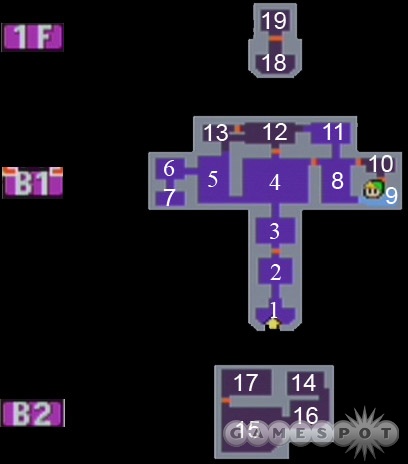
To begin with here, bypass the blocked path on the northern side of the first room by pushing the block one square to the left. This will let you into the second room, where you’ll have to find a hidden key by stepping on the four blocks near the torches; after all the torches are lit, a chest will appear which has a Small Key inside of it. You can only use these keys within the dungeon you find them in, so go ahead and use it to unlock the door on the north side of the room.
The next screen up introduces you to the concept of pulling. In order to extend the bridge leading to the central island, you’ll need to grab onto the lever on the northern end of the room with your R button and pull it backwards. Don’t worry about rushing across the bridge, though; pulling the cord out of the wall appears to extend it permanently. A similar concept comes into play with the mushroom on the island; if you pull it back to the end of the track marks on the floor, it’ll propel you across the water to the other side. Note that you have no way to get back across the water; looks like it’s time to do or die.
The fourth screen here is the site of your first big puzzle. The empty barrel in the middle of the room should theoretically rotate around its axis, but is currently locked into place thanks to the roots that have grown onto it from the east and west. In order to unlock it, you’ll need to burn off the roots. The eastern set are easy enough to burn; just climb the stairs beneath the eastern platform and hit the button to set them alight. Be sure to avoid the enemies here, though, as they’re unkillable. When you have that done, pass through the barrel (using your roll maneuver to climb the far side), then work your way around to the western platform. When you reach it, push the statue onto the northern button, then hit the southern one to burn off the rest of the roots and unlock the barrel.
Now that you can move the barrel, head back inside of it and start running towards its bottom side so that the lower left exit is available to you. This will let you exit the room to the left side.
Another mushroom launcher is available in the room to the west here, but this one has two separate track marks behind it. If you pull it back a couple of spaces, it’ll launch you to the exit leading west, but first, pull it back to the very end of the tracks and launch yourself across both of the little rivers in your way. If you do so, you’ll be able to climb the stairs near where you land and find the Dungeon Map, which will display all of the rooms of the dungeon on your start-menu map. Pretty handy, that. When you’ve got the map, return to the mushroom launcher and jump one river and head west.
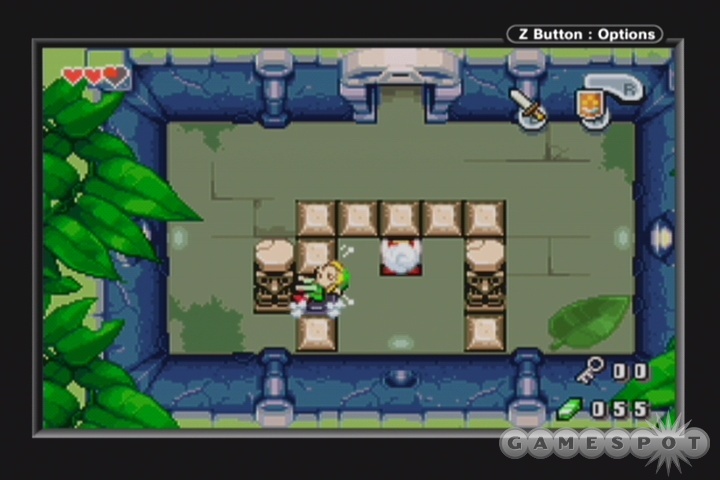
In the next room, push the pot from left to right until it rests atop the switch; this will extend the bridge leading to a southern dead-end. The dead-end room contains another hidden chest, though; in order to find it, you’ll need to pull one of the statues away from the central stones, move into the circle of stones, then pull both of the statues onto the switches so that the chest appears. Another Small Key is inside.
With key in hand, return to the barrel room and rotate the inside of the barrel so that the upper right exit is available to you. This will lead you to the northeastern exit from the room, which is locked. Use your key to open it and head east. You’ll need to use another pair of mushroom launchers to get to the southern end of room eight, from which you can access room nine.
Room nine features another switch puzzle, but it’s not too difficult to figure out. Instead of heading towards the door immediately, take the southern path around the room and pull the first statue to the right of the switch, then return to the northwestern corner of the room and push the leftmost statue onto the switch. This will both unlock the door and give you enough room to get past the statue and into room 10. Room 10 doesn’t have any puzzles, but it will drop in three Mulldozers for you to deal with; after killing them all, you’ll gain another Small Key.
Mini-Boss: Madderpillar
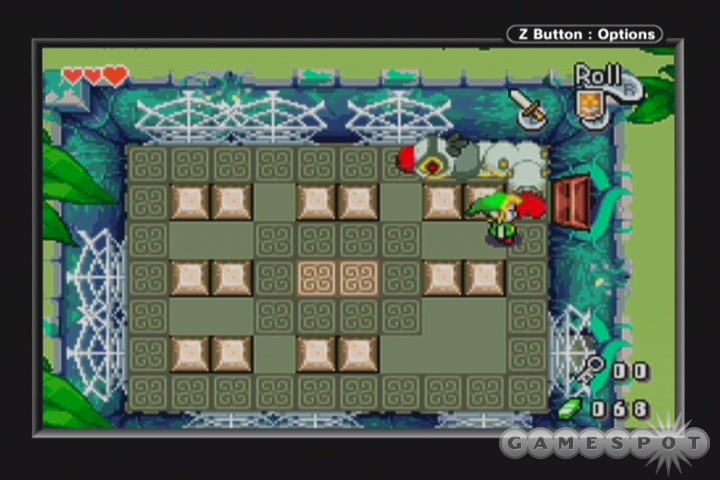
After returning to room eight, maneuver your way north and west until you hit room 13; you’ll need to use your key to unlock the door in room 12 before you can access it. When you do, though, you’ll be locked into mano-a-pillar combat with the Madderpillar, the guardian of the Gust Jar. This guy has two weak spots; one on his nose, and one on his butt. In order to damage him, then, you’ll need to get in front of him, whack him once on his face so that he freezes, then get behind him and spam sword swings on his butt, which changes from a candle to a heart when he’s vulnerable. You should be able to get a good half-dozen swings in each time, but be careful, as he becomes enraged after his stasis wears off, and will roll around the room with a bit more speed than normal. You’ll need to repeat this process three or four times before the Madderpillar finally dies out, but when he does, you’ll get what you came for: the Gust Jar. With it, you can suck in items and shoot them back out again; try it out on the spiderwebs around the room.
The exit on the southern side of the room is your first destination; if you suck off the spiderwebs that block it, you’ll be able to pass through and into room five, where a little cul-de-sac hides a Piece of Heart. If you return to room 12 afterwards, you can start using your Gust Jar to suck up all the little pieces of dust on the ground to reveal more switches. There are three hidden switches in all; two reveal hidden chests that contain Mysterious Shells, while one will activate a warp on the platform above, near the other Piece of Heart, if you already hit the other switch nearby. It’s still inaccessible for the moment, but now you’ll be able to exit the warp if you find the warp that it’s linked to. If you wish, now that you have the Gust Jar you can explore level B1 a bit more to find more hidden chests with Shells in them; there are chests in both room four and room 11. When you’re ready to move on, though, take the stairs in room 11 downwards.
Deepwood Shrine, Floor B2
There isn’t a huge amount you can do here at the moment, save grab the Compass. In order to find it, stand next to the blocks beneath the blue chest and move them out of the way. You need to move the rightmost block up one space, then push the left block over to the left in order to clear the path. The Compass doesn’t do a whole lot for you, but it will let you access chests that might otherwise go unfound; you can check your map in the start menu to see any chests lying around that you haven’t found yet. There’s one here in room 14, but you can’t access it just yet; instead, return to room four and use your Gust Jar to suck up the spiderweb inside. If you then rotate the barrel, you should note that the spiderwebbed portal will coincide with a small hole in the barrel when it’s at the very bottom point; drop down into this to find yourself back on floor B2, in room 15.
Your goal now is to use your Gust Jar to maneuver the lilypad around the river here. To begin with, suck it towards you by pressing the button assigned to your Jar, then climb aboard and start moving yourself by tapping the button while aiming in the opposite direction of where you want to go; the gusts of air will push you away from your target, giving you some control over where you go. Your ultimate destination lies back in room 14, so start heading that way. Before you get there, you’ll need to climb a ladder and position a jar atop a small switch to raise one of the barricades in room 16, but after you do reach room 14, you’ll be able to position your lilypad directly to the right of the flames there, which will let you place a jar on the switch to the north and then walk around to the south and grab the Small Key from the chest. The only place that this is currently usable is the door leading to room 17, so hop back aboard the lilypad and retrace your steps until you reach it.
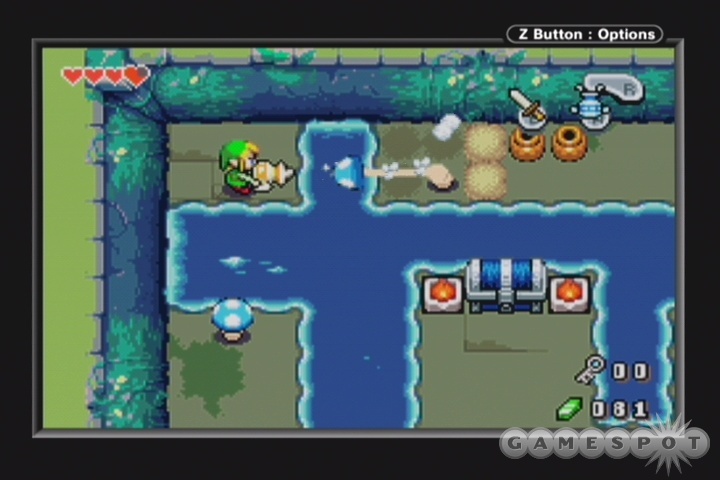
Room 17 features numerous mushroom launchers that are seemingly impossible to reach; all you need to do to use them is to suck them in with your Gust Jar, though. Maneuver your way around the room until you find the Big Key in the chest, then step on the block nearby to open a warp leading back to the room one. You’ll notice that there’s a blue warp nearby; if you step on it, you’ll be warped back to the hidden Piece of Heart in room 12, so grab that before returning.
Deepwood Shrine, Floor 1F
You’ll notice that there are two doorways leading up from room one. The first one you should uncover is on the left side of the room; all you can do when you head up is push over the stone beneath the chest here to reveal the path to 20 Rupees. After you grab it, return to room one, uncover the stairs on the right, then head back up to room 18 and use the mushroom launchers to maneuver yourself around to the big door on the northern side. This obviously leads to a boss fight, so save your game before unlocking it.
Boss Fight: Chuchu
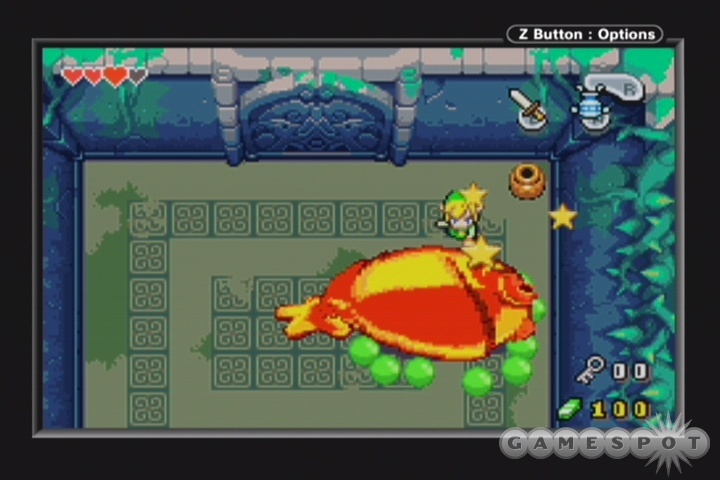
The massive Chuchu fight isn’t too terribly difficult when you learn your enemy’s pattern. As you might surmise, you’ll need to use the Gust Jar in order to defeat it. As it lumbers around the room, you can aim the Gust Jar at its "feet" to suck up the goop down there; you’ll notice the goo becoming smaller and smaller as you suck it up. You’ll need to keep as far away from the Chuchu as possible while doing this, though, as it can sometimes jump on you before you’re able to release the Gust Jar and roll away. When you’ve sucked up all of the goo from the Chuchu’s feet, it’ll stagger around for a bit before falling on its side; take advantage of this to whack it something good with your sword. You should be able to get four or five good whacks in on it before it gets back on its feet, but after you manage it once, you should be able to easily repeat the process a few times to polish it off. You’ll know it’s nearly dead when it starts jumping repeatedly; if you get whacked a few times yourself, you can destroy one of the barrels in the corner of the room for a heart.
After the boss is dead, you’ll obtain both the Earth Element and a full Heart Container, which should bring your total up to five. Bring your new Element back to the Elder of the Picori Village, who will tell you to meet a man named Melari at Mount Crenel.
Journey to Mount Crenel
After leaving the Picori Village, you’ll soon encounter Belari in a house near the exit from the Elder’s dwelling. This guy seems to be a bit in awe of you, and will offer to give you a Bomb Bag and a bunch of bombs. Before escorting him to Guantanamo for the rest of his natural life, accept his explosive offer and take the bombs, since they’ll come in fairly handy during the rest of your journey. Use the stump nearby to revert to human-size, then blast through the rocks that block your path back to the Eastern Hills.
As per usual, your path through the woods is fairly linear, since you don’t have the tools required to bypass many of the obstacles in your path. You will come across a rocky cave which you can bomb through to find some more Mysterious Shells, though.
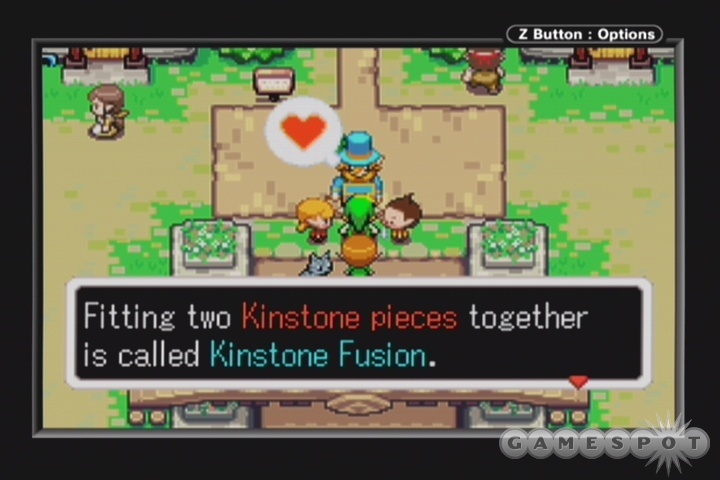
Your goal now is to head back to Hyrule Town and get your Kinstone Bag; this is a free item you’ll gain from a mysterious guy as soon as you enter the gates. He’ll teach you a bit about Kinstone Fusion; when you see someone with a big bubble over their head, you can approach them and hit the L button to attempt a Kinstone Fusion. If you have a Kinstone that matches theirs, you’ll be able to fuse them together. You’ll have to fuse all Kinstones for great justice! Well, fusing Kinstones is usually optional - if you persist in fusing with everyone you see, though, you can unlock some pretty good stuff, such as equipment upgrades or Pieces of Heart. We’re not going to mention every possible fusion during this walk-through - only the really important ones.
Your initial fusion here will unlock one of the thorny paths in the South Hyrule Field, but stick around in town for now and do some of the events that are now available to you.
Buy A Wallet: Your first task here should be to buy a new wallet at the item store (the house with the big rupee above it). It’ll set you back 80 Rupees, but is a wise investment, since it will let you carry up to 300 rupees at a time, thus bypassing the 100 rupee limit. You may also note the appearance of a Boomerang in the shop after you buy a wallet; this is purchasable for 300 rupees, but it’ll be difficult to get that much cash without first traveling to Mount Crenel. It’s not necessary for the moment, but if you find that you do somehow collect 300 rupees, feel free to return and buy the boomerang.
Collect the Coocoos: If you speak to the girl in front of the house in the southeastern corner of town, you’ll be able to participate in a little mini-game that involves you running around town attempting to pick up escaped chickens and returning them to the fenced-in yard that the girl is standing in front of. In order to return a chicken, you’ll need to grab it with the R button, then throw it back into the yard with the same button while facing the girl. The white chickens are easy enough to return, but the yellow ones will escape from your grasp when they see the fence, so you’ll need to throw them from pretty far to the left of the girl. If you do it properly, they’ll either glide through the girl into the fenced-in area, or land at her feet, allowing you to roll over, pick them up, and quickly throw them in before they escape again. 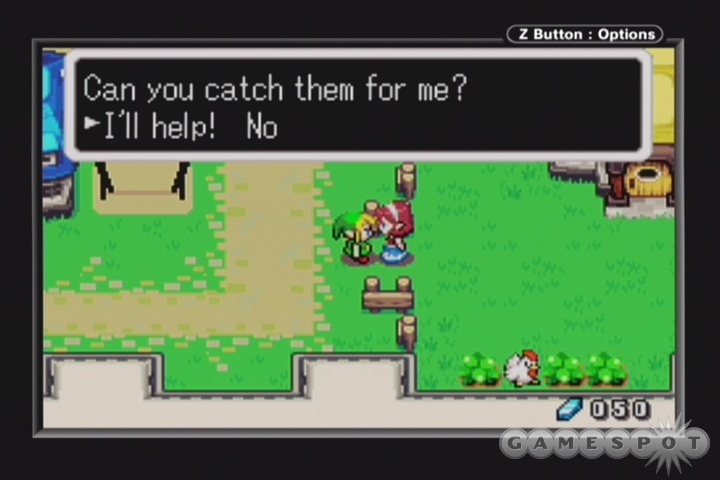
In all, the first four tiers of the game should be completable if you utilize your roll as often as possible; you’ll need the extra speed it affords you in order to complete the task within the given amount of time. The first two tiers will net you 10 Shells apiece, while the third and fourth tiers will each give you 20 Shells. You’ll also gain rupees for each chicken that you return; white chickens are worth 10 rupees, while yellow ones are worth 50. If you polish off the first four rounds (the fifth is theoretically doable at this point, but is pretty difficult), you might be able to afford the boomerang in the item shop, perhaps after a bit of running around in the field to cut grass for extra cash.
There are further tiers of the mini-game beyond the fifth, but at this point you won’t stand a chance to beat them. You’ll need to have extra equipment before attempting them, so we’ll need to come back later.
Learn the Spin Attack: You can head to Swiftblade’s dojo in the southwestern corner of town for your first swordplay lesson. He’ll automatically teach you the Spin Attack maneuver, so...great. That’s all he can teach you at the moment, but you’ll be able to return to him when you find a new sword for extra lessons.
Fuse With the Mayor: If you want to sow some seeds for events later in the game, you can find a Red-3 Kinstone in the basement of the Mayor’s house (rectangular house with an old guy in front and a set of stairs in the yard). You can use the Kinstone to fuse with the Mayor himself, which will drain a pool in the Lon Lon ranch. You can’t actually head there yet, but getting it done now means one fewer thing to do later.
After you have these tasks done (almost all of them are optional, mind), head back to South Hyrule Field and find the thorny passage that you de-blocked when you fused with the guy who gave you the Kinstone Bag. Inside, you’ll find another Piece of Heart. When you have that, return to Hyrule Town, head to the guard blocking the northwestern passage out of town, which heads into the Trilby Highlands.
Trilby Highlands
Although you can start heading out to Mount Crenel immediately after gaining access to the Trilby Highlands, it’ll be worth your while to check out the ladder near the exit from town. The cave below doesn’t appear to contain anything of interest, but if you check the eastern wall, you’ll notice that part of it is made of rubble. If you blow it open with a bomb, you’ll come across a seemingly empty room; one of the shrubs here is actually a capital-S Shrub, of the nut-spewing variety. If you reflect one of the projectiles back at it with your shield, you’ll be able to talk to the Shrub, who’ll then give you your first Bottle. Bottles can hold most anything, and if you’ve played a Zelda game before, you might want to return to the Fairy cave in South Hyrule Field and grab a Fairy for it, but leave it empty for now, and make your way to Mt. Crenel’s Base.
Mt. Crenel’s Base
The rubblish cave here holds nothing of interest to you; there’s a Shrub within, but all he has for you is info which will lead you back to the other Shrub with the Bottle, which you already have, so you can save your bomb if you don’t feel like using one to blow the cave open.
In the main field, though, you’ll notice a series of ladder-esque plants that are growing out of the watery shallows on the ground. There’s another plant nearby that hasn’t grown at all, though; guess what you need to do? That’s right; head to the lake on the southern side of the screen, equip the bottle, and use it to grab some water from the lake. If you then sprinkle the water on the fallow plant, it’ll immediately sprout up and give you access to the upper level of the screen. Mmm...that’s good water.
After climbing up the newly-extended plant, make your way around to the left until you come to another bombable cave. Inside, you’ll find a few rupees, as well as more Fairies. Remember the location of this cave, as it’ll act as a quick restorative if you get badly hurt.
Next up, head south from this cave and turn right. You’ll come to a sign that tells you to beware crumbling walls! Your goal being to destroy as much stuff as possible, though, you can safely ignore this warning and lay a bomb in between the two fence sections here. Although the rock face is seemingly flat, there’s still a secret entrance here, so head through, go up to the top of the small plateau, use the portal to miniaturize yourself, then head into the little path off to the right and grab some Mt. Crenel Mineral Water from the green pool at the end. You’ll need to empty your bottle if you happened to fill it with anything since the last time you grew a plant.
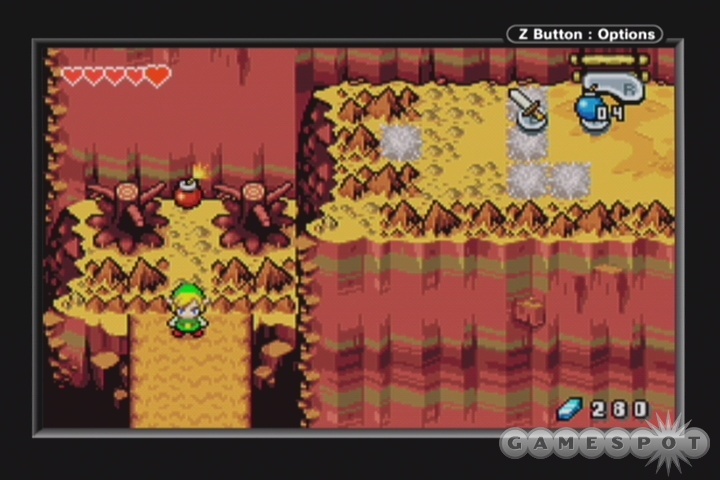
There’s another open cave to the southwest of this position, containing another Shrub who’ll offer to sell you ten bombs for 30 rupees; you’ll need to take him up on the offer if you don’t have any bombs, because the path leading on is blocked by another rubble-covered cave nearby. You’ll have to pass through the cave to reach the upper level here; you’ll emerge near one of the whirlwinds you saw previously. If you jump into the whirlwind, you’ll take flight for a few moments, so glide over to the right and try to hit the ground near the whirlwind on that edge of the screen. There’s a set of steps near where you land, but before you head up, take the western path and follow it until you reach a sheer cliff wall (after you transition to the Mt. Crenel area). Although the rockface here isn’t made of rubble, you can still blow it open with a bomb; inside, there are two treasure chests and a Piece of Heart, but you’ll need three more bombs to access them. Don’t hesitate to spend the 30 rupees to grab some bombs from the Business Scrub you passed by earlier if you need to; you’ll make them back with the rupees you get from one of the chests, and it’s well worth the money to obtain another Heart piece. The other chest contains a Kinstone.
When you’re ready to move on, climb up the ladder and start sucking up the spiky dirt pieces with your Gust Jar. You should eventually reveal a hole in the ground, as well as a miniaturization portal. Hop on the portal, then drop down into the hole you uncovered to meet another Picori. He’ll tell you that the green-seed plants can only grow with a special type of mineral water. You can also grab a red Kinstone from the chest here.
In a complete coincidence, there happens to be a green seed nearby. While you’re still minaturized, find the small path leading to the seed, pick it up (you can do so even though it’s ten times as big as you), then bring it back to the overworld map and drop it into the hold in the ground near the cliff wall. Before restoring yourself to full size, though, climb the miniature vine off to the right of this area and maneuver through the small dungeon within to find a blue Kinstone.
Now that you’ve polished off all of your miniaturized quests, flip back to full size and dump your Mt. Crenel Mineral Water on the green seed; it’ll open up the path to the next area.
Mt. Crenel
Your first goal here is to find another Piece of Heart. You can do so by climbing the stairs to the north of where you enter the screen, then bombing the rock face four squares to the right of the sign reading "Crenel Wall". This will open up another Fairy room, where the aforementioned Piece of Heart resides.
Next up is another hidden passageway. In order to find it, head back down the ladder, then proceed all the way to the right until you reach a wooden bridge leading north. It’ll come to a seeming dead-end, but you can again bomb the wall to reveal a cave. Within, you’ll find another blue Kinstone, as well as your first metallic Chuchu enemies. These guys will usually repel your initial attack by turning spiky, but can be damaged by your sword just after they revert to their normal form. In order to get past the little block barrier here, bomb the rightmost of the crumbling block, then push the rightmost solid block and the upper block to the north. Hop through the whirlwind to your left to find another ladder near a sign indicating that the path leads to the Crenel Mines.
There’s not much for you to do on the next screen save maneuver through the many enemies. Some of them may appear to be indestructible, but you should find that your Gust Jar can penetrate any special defenses on the enemies you’re encountering up to now. In order to proceed from here, you’ll need to blast open a cave on the eastern end of the screen, which will reveal a Business Scrub who’s selling a Grip Ring for 40 rupees. If you don’t have the scratch (perhaps because you backtracked to buy the Boomerang from the general store in Hyrule Town), you’ll need to do an awful lot of grass cutting to find the funds, but you’ll have to do so, since you need the Ring to proceed.
Neither of the nearby cliffs will be of any use to you at this point, so ignore them and head to the left and climb the ladder down one screen. The cliff you should be looking for is the Crenel Wall; it’s to the left of the last Fairy cave that you opened. You’ll have to be mindful of falling rocks while you climb, but you can shimmy to the left and right much more quickly than you can climb upwards, so you should be able to dodge them if you spot them falling.
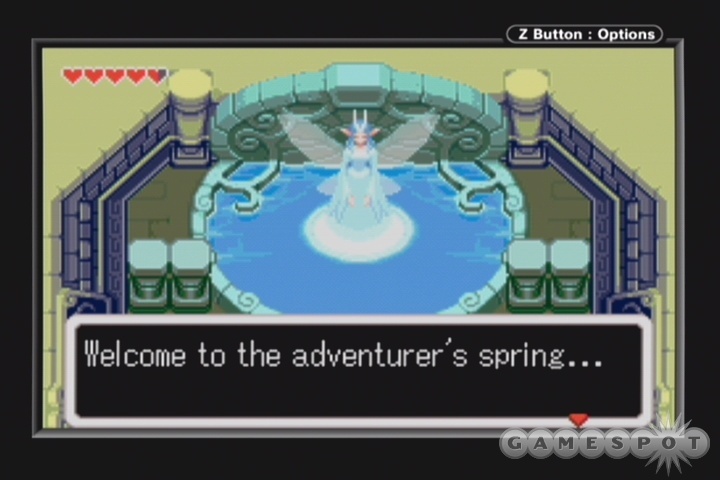
On the second screen up, shimmy over to the right and get off on the ledge where there’s a sign. It reads "No bomb throwing!" so of course you should start laying bombs; there’s a hidden cave immediately to the right. If you head inside, you’ll come to the adventurer’s spring; drop a bomb, pick it up with the R button, then throw it into the spring with R to summon some kind of adventuer’s fairy godmother. If you answer "Neither" to her question, you’ll get a bigger Bomb Bag, which will let you hold up to 30 bombs at a time.
After you have that in hand, climb to the top of the cliffside and you’ll eventually reach the peak of the mountain. Head to the left and climb down the ladder to meet up with the Crenel Hermit. He’s got some brilliant advice for you: maybe you should try bombing sections of wall that look weakened! Thanks, grandpa, but I think we covered that with the two dozen blasted walls we’ve already done. You can attempt to fuse Kinstones with him if you have enough of the green variety; if you do so, you’ll drain a pool in the South Hyrule Fields.
When you’re done with the hermit, return to the mountiain peak and use the mushroom launcher to propel yourself over to the eastern side of the cliff. Apparently the ten feet difference between locations is enough for some pretty severe variations in weather, as this side of the cliff is seeing a heavy downpour. Use the miniaturizer here to turn yourself small, then walk through the southern passage (using your roll to avoid the raindrops) before returning yourself to normal size on the far side.
In order to reach the mines (the ladder to which is nearby), you’ll need to maneuver the boulders in the area to clear your path. The first one is easy enough to find; just head west from the miniaturizer and push the boulder one square to the left, so that it fits into the hole. The second boulder is off to the east a ways; in order to move it out of the rocky area, you’ll need to push it one square left, two squares up, one square left, two squares up, and then maneuver it into the remaining boulder hole near the ladder. You can’t pull boulders, so if you get it stuck in a corner, you’ll have to shrink yourself back down and enter the pathway again to reset their positions.
Inside the cave here, you’ll have to maneuver your way through a little push-block puzzle before you can reach the exit. (Use your Gust Jar to dispatch the annoying enemies that dash about here.) It doesn’t appear possible to get stuck here, so just keep pushing each block you come across until you find the exit. You can also check our screenshot for a bit of a hint.
In the next cave (after a short outdoors interlude), you’ll eventually come to a seemingly broken bridge; in order to get past it, you’ll have to grab one of the jars from behind the blocks and throw it at the switch to the south of the bridge. Following the trail beyond that, you’ll come to and throw it at the switch to the south of the bridge. Following the trail beyond that, you’ll come to yet another cave. Enough caves already!, you’re no doubt saying, but, alas, your misfortune is bound to continue on. There’s a simple boulder-rolling puzzle on the upper level of this cave, while the bottom level has another stone-pushing puzzle that blocks your access to a blue Kinstone. You only need to push three blocks to reach it; start with the bottommost block you can hit, then push the stone above that up one space. The path should be clear after that.
Outside this last cave, you’ll come to a miniaturization point, so shrink down and follow the nearby path to reach Melani’s Mines.
Melani’s Mines
There isn’t much to see or do here save talk with Melani, who’ll take the broken Picoli Blade from you and start reforging it. Of course, he’ll need more than the one element you have available to you to do so, so you’ll have to hop out and head into the nearby dungeon to find the Fire Element.
Cave of Flame
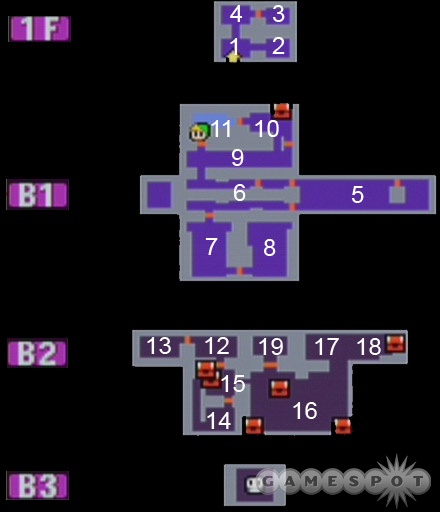
Floor 1F
To start off, head one screen to the right and start dispatching the bomb enemies here. After striking them once, they’ll start running around like headless chickens; try to avoid them while they’re doing this, because they’ll eventually explode. Screen three will feature Spiked Beetles; if you run into them with your shield, you’ll flip them over, after which point you’ll be able to swing away with your sword and kill them off. Killing them both will reveal a chest that contains the Compass, woop woop. The next screen to the left contains a few rupees, but beware; one of them is a Mimic-like enemy that will capture Link and attempt to squeeze him to death. Oddly enough, the monster seems to have skipped the whole "to death" part of basic training, because Link doesn’t take any damage from this, although it will steal rupees from you. Squirm around and tap your buttons until you break free, then whack the monster with your sword until it dies. It can take a lot of hits, but it is vulnerable.
Floor B1
Down the steps, you’ll come into the very large fifth room of the dungeon. There aren’t any branches to your path here, so follow it along until you come to a minecart, which you’ll have to jump into. The mine cart essentially acts as a warp to a distant portion of the dungeon, as the doors that you pass under as you roll will close behind you and become unpassable while you roll around on foot.
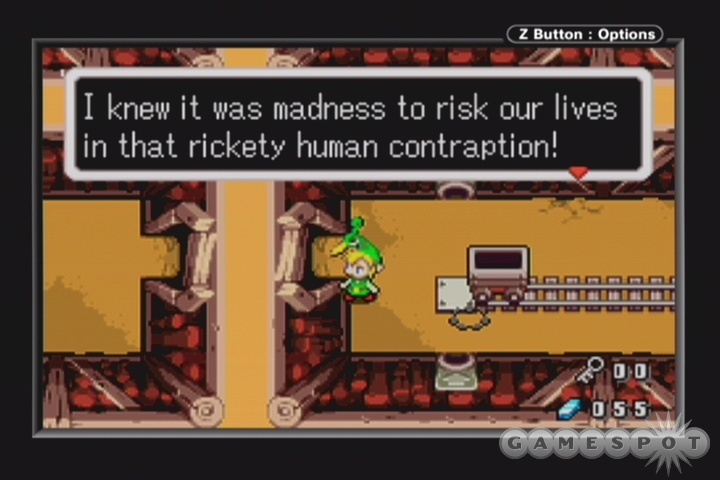
Anyway, the mine cart will take you to the southern half of room six, where there is again only a linear path to follow until you reach a bombable wall on the western edge of the room. Bomb through it to reach room seven, which contains a bevy of Helmasaurs, which you’ll need to kill before a miniaturization portal will appear. Do so with your Gust Jar, then shrink yourself down and head through the smaller portal here. There’s only one path to take here, so avoid the monsters in your path and wrap through room six until you reach room seven; you’ll know you’re in the right place when you spot a large blue chest.
When you’re in room seven, walk southwest and check the little stones along the upper ledge for a tiny gap; if you head into said gap, you’ll be able to fall down to the lower level and resizify yourself. You’ll note an abundance of flames on the ground here; like grass, you can "cut" these with your sword to eliminate them. Head north up the ladder after you’ve tried it out to grab the Dungeon Map.
Your path here will lead to the south, across the crusty platforms; these will disintegrate as you pass over them, but you should have plenty of time to get where you’re going. Head for the chest first, as it’ll containa blue Kinstone, then flip the switch nearby to open the southern door before heading for it.
You’ll come out into room eight, where you’ll have to ride another platform to the western side of the screen. The roly-poly enemies here are unkillable, but are useful nonetheless; when struck with your sword, they become makeshift boulders, and can be inserted into the slots on the floor to allow you to walk over them. Use one to access the chest here (50 rupees), and another to get to the jars to the north that block your access to the ladder there.
When you’re on the upper part of the room, jump into the whirlwind, then maneuver your way south to the second whirlwind and from there to the eastern portion of the room, being sure not to get caught up on the rocks. When you do come out to where you need to be, flip the switch that’ll unlock the northern door, then push the pedestaled chest to the left so that it falls into the hole; you’ll nab a Small Key from it.
If you head through the northern door after grabbing the key, you’ll find yourself near the mining cart you rode in earlier; use it to return to its point of origin, where there’s a conveniently locked door nearby. Passing through it, you’ll find a lever; hit it with your sword to flip the rail tracks and then return to the rail car to find a path leading to room nine.
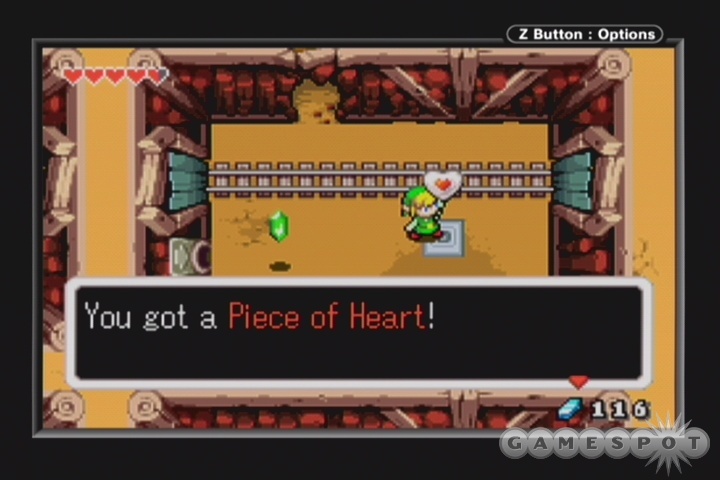
In room nine, you’ll have to head east along some elevated rail lines until you come to a set of jars blocking off a bombable wall to the south; blast it and head through to collect another Piece of Heart, which should be your eighth total, meaning that you get a new Heart container to call your very own. Congratulations! With that extra bit of verve under your belt, head north into room ten. Your only path here will lead to a little arena with eight or nine spiky Chuchus; you’ll need to kill them all to obtain the Cane of Pacci. To do so easily, get yourself into the lower left corner, facing up, and just spam out sword swipes as they jump at you, and you should be able to finish them off without a problem.
The Cane is this dungeon’s unique item; it has the formidable flipping-things-over power. You’ll have to use it to escape from room eleven; use the cane on the second lava platform to flip it over so that you can walk on it, then fire it into the small hole nearby to propel yourself upwards towards the exit to room six. You’ll notice when you return to said room that there’s an overturned rail car here that you had to bypass earlier; now that you have the Cane, though, you can flip it over and ride its track until you get to another Small Key, which you can use to unlock the door in room 11 and head down to floor B2.
Floor B2
In room 12, make sure the rail tracks are laid so that you’ll be able to make it to the spike traps after you smallify yourself. You’ll need to run through the traps into room 13, then make yourself big again, work your way back through another set of spike traps, then flip the rail car and ride it back to room 12, where you’ll be able to flip the switch again to send it down into room 14.
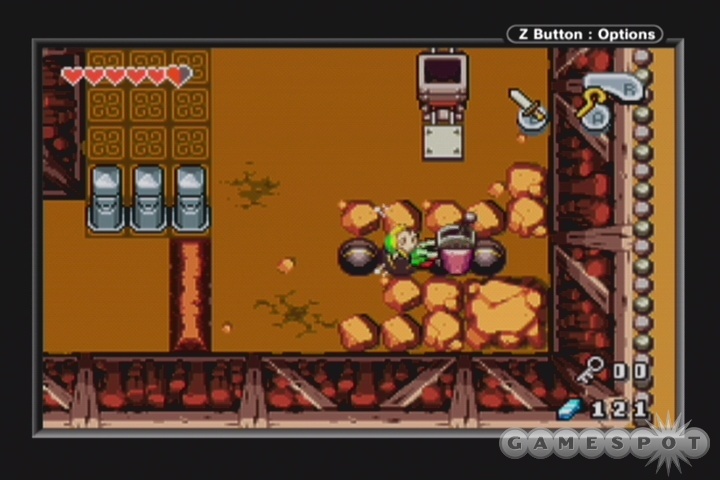
Room 14 has a little puzzle involving roly-polies; you’ll need to hit all four of them to make them into quasi-boulders, then chuck them all into the holes leading to the switch on a pedestal. This will let you pull the pedestal out from behind the holes in the ground and push it into the other hole in the room. Hitting it with your sword will then retract the statues in the floor, letting you into room 15. There are two chests here, so flip yourself off of the platform to the north first to grab a blue Kinstone, then use your cane on one of the holes in the ground here to reach the other chest, which contains a green Kinstone. Neither of these are necessary, of course, but they’re handy to have nonetheless.
In room 16, you’ll have to start maneuvering past the lava platforms, after using your cane to flip over the spiky ones. First off, take the moving platform north to find a warp to the first room of the dungeon; if you’re running low on life, the jars here are guaranteed to drop hearts. You can then return to 16 and start maneuvering your way along the platforms until you reach room 17. The platforms here can be tricky; at one point you’ll need to use your Gust Jar to clean out a group of jars before you hop onto a platform that takes you to their platform.
After reaching room 17, flip yourself down to the lower level and maneuver past the spike traps in room 18 to find another Kinstone. You’ll probably take a bit of damage here, but not enough to make you worry; just roll out of the way of the spike traps after they pass behind you. Return to room 17 and use your cane on the northern hole to flip yourself over to the western side of the room. This will open up an aerial path with plenty of whirlwinds; you’ll eventually find yourself back in room 16. You can use the whirlwinds here to maneuver around the room. In the southeastern corner, there’s a chest with 100 rupees; in the southwest, you’ll find another Kinstone Piece; and if you maneuver yourself to the dead center of the room, you’ll find the Big Key. After you have that, you can drop down off the northern side of the platform and head to the big locked door on the northern side of the room.
Room 19 is the last room before the big boss of the dungeon. If you don’t have anything useful in your bottle, then break the jars in the corners of the room until a Fairy comes out and catch it before dropping into the hole to meet the baddie.
Boss Fight: Gleerok
Gleerok, as befitting someone who lives in a mine/volcano, is a firebreathing, stone-encrusted dragon that’s nearly impervious to your assaults. As per usual, the item you found in the dungeon will be the key to beating him. Although his stony shell (as well as the lava in which he sits) protects him from your attacks, the Cane of Pacci can flip it over when it strikes properly. He’ll use his neck and head to ward off your shots, though, so in order to actually connect with the shell, you’ll need to quickly roll around him and attempt to blast him while he’s still shooting fire at wherever you were previously. His fire attack is his only real way of doing damage, but even that’s mitigated by the fact that you can slash at the small squares of fire that are left behind for the occasional heart - it’s very difficult to die here, in other words.
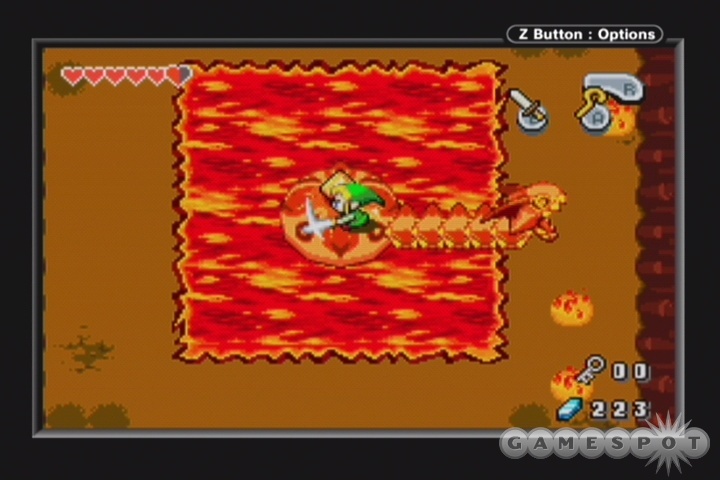
So, when you’ve successfully managed to flip over Gleerok’s shell, he’ll lay his head down on the ground, allowing you to walk along his neck and slash at the small exposed crystal on his back with your sword. You should be able to get six or seven shots in at a time, assuming you’re quick to reach the crystal. After he shrugs off the stunning effect, though, Gleerok will withdraw into the lava, causing it to expand while rocks drop from the ceiling. The rocks and lava are easily avoided, though; just stand in a corner of the room and watch for the shadows of the rocks, sidestepping them when one’s about to land on your head.
After a few rounds of this, Gleerok will detonate, leaving you in possession of the Fire Element and a brand new Heart Container. Woop! Return to Melani with the good news. He’ll give you the White Blade, an upgrade over the sword your grandfather made, and will tell you to go to the Elemental Sanctuary if you wish to infuse it with elemental power. The Sanctuary is said to exist somewhere between the Minish and human worlds, which we suppose would make it around two feet high or so; it’s supposedly hidden somewhere in Hyrule Castle.
Find the Elemental Sanctuary
Now that you have one more piece of the Elements, it’s time to try and track down the Elemental Sanctuary. However, thanks to the Cane of Pacci and some changes to the landscape, you’ll also be able to explore around a bit more and obtain some new items. Before you head back to town, though, you may want to return to either the Crenel Hermit or the Business Scrub that attempted to sell you bombs and try another Kinstone fusion with them if you weren’t able to before; you probably found quite a few Kinstones in the Cave of Flames, and you may be successful in your attempts now.
To begin with, head back to the Trilby Highlands, but instead of walking back into Hyrule Town, head north across the bridge near the sign pointing to the Royal Valley. This’ll take you out into the North Hyrule Field, where you can use your Cane to hop up to a switch and extend the bridge leading across the river. From there, you can wrap your way around into the forest between Hyrule Town and Hyrule Castle until you find an explodable block on the left side; this will lead to a multi-storied set of caves. You can’t do much in the caves yet, but on the bottommost level, there’ll be a Piece of Heart.
Next up, exit from the southeastern corner of the North Hyrule Field to reach the Lon Lon Ranch. If you Canejump out of the hole near this exit, you’ll come to Veil Falls, where there’s a short walk to reach another Piece of Heart.
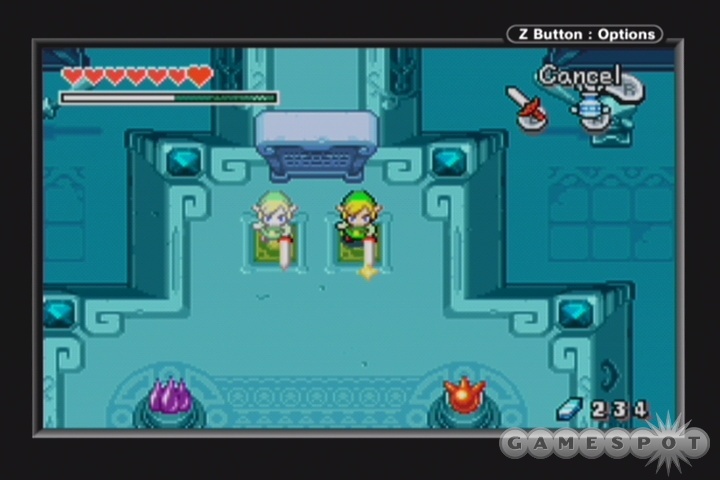
After you have both of those, you can enter Hyrule Castle and attempt to track down the Elemental Sanctuary. It’s not difficult to find, surprisingly enough; the previously blocked doors are now open, and lead into the basement, where you can find a seemingly subterranean courtyard with a glowing door. Head inside to reach the Elemental Sanctuary. All you can do here is jam your sword into the central pedestal, but the rewards are significant: Link will gain the ability to split himself in two when he sees glowing panels on the floor; all you need to do to activate this ability is to hold down your sword button until you’re fully charged, then step on two of the panels. A second, shadow Link will appear. By doing so, you’ll be able to flip two switches simultaneously, as you’ll need to do to escape from the Sanctuary.
After you return to the North Hyrule Field, you’ll learn a bit more about the stories of both Vaati and Ezlo before and after a fight with a pair of large, spear-wielding enemies. These guys can only be hurt if you slash them on their backs, but this shouldn’t be difficult to accomplish since they have a habit of charging past you and slamming into the far walls. After defeating them and learning of Vaati’s true origins, Ezlo will tell you to head out to the Castor Fields to find the next element.
More Running Around
Before you do so, you should of course return to Hyrule Town, where there will be a whole bunch of people just dying to fuse Kinstones with you. Check out Kinstone Fusion appendix for more details on these; the main point of returning to town, though, is to obtain more training from Swiftblade, who will teach you the Rock Breaker technique, which will let you smash through jars and rocks with just your sword. You should also use your Gust Jar to clear out the cobwebs from one of the vendor stalls in the central area; if you do so, another vendor will appear later on and sell treasure-finding items to you.
Other important things to do involve running around in miniature mode. Your Cane of Pacci will let you flip over the vases in many of the houses, which function as miniaturization portals when flipped. The most important item to nab in Minish mode is another Piece of Heart; you can find it by miniaturizing yourself in the purple house south of the well, walking outside and heading northeast, climbing the vine near the ladder next to the shop that’s perenially closed for business, then walking around to the rear of the same house and entering it through the tiny path that’s encompassed by a pair of lines of flowers. Inside you’ll find the Heart piece.
If you miniaturize yourself in the Inn, you can also walk outside and head left across the broken bridge. Speaking to the dog here (they only respond to you if you’re miniaturized) will force him out of the way, allowing you to look around the area in normal size, as well.
Now that you have the ability to split Link into two entities, you can find another Piece of Heart and grab some more training in the mountains of Mt. Crenel. If you return to the cave where you bought the Grip Ring and climb the exposed rock nearby, you’ll be able to split yourself in two and hit two switches at the same time, letting you find Greyblade, a trainer who’ll teach you the Roll Attack. You’ll also find 100 rupees in chests here, as well as another Piece of Heart.
Before heading out to the Castor Fields, you can also find some more stuff in the southeastern corner of the map. Many of the Kinstone Fusions you’ve been performing in town were likely unlocking areas in the Minish Fields map, but even if you haven’t done any fusions at all, you’ll still be able to upgrade your wallet size. To do so, head to the Eastern Fields, Cane-jump from the hole in the northeastern corner of that zone, then walk east to find another adventurer’s spring. When the fairy asks you to throw all of your rupees into the pool, agree to do so; she won’t actually take any money from you, but will instead upgrade your wallet to let you carry more cash around.
Another newly-accessible area is in the cave where you initially bough your first Bottle, in the Trilby Highlands. If you charge your sword up and create a double of Link, then push on the large stone to the left of the colored squares, you’ll be able to double your strength and push it out of the way. This will let you out into a grassy field; blast through the wall nearby to find another red Kinstone. A travelling poet, Percy, is ensconced in the little tree/cave to the south; if you can fuse a Kinstone with him, a tree will be un-bent in the Western Wood, where you’ll soon be, so it’s worth doing so if you happen to have the correct Kinstone on you. You won’t be able to actually complete the little event that ensues at this point, but you might as well unlock it while you’re here. There’s also a hidden cave which you can find by setting a bomb between two rocks to the east of the tree in which Percy is dwelling; this will let you nab another Fairy for your bottle if it happens to be empty, but doesn’t contain anything of import.
Find the Pegasus Boots
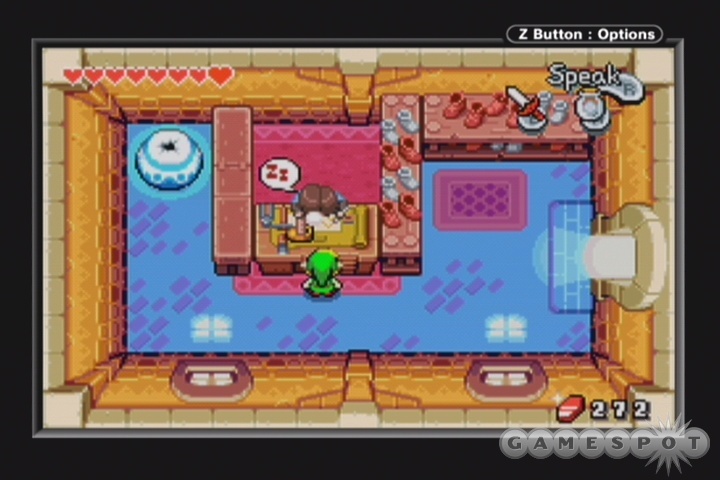
If you walk through the Western Woods and attempt to enter the Castor Wilds, you’ll find that just can’t walk quickly enough to get across the quicksand in the area. In order to reach the next element, you’re going to thus have to find some way to increase your movement speed a bit. In order to do so, return to Hyrule Town and enter the shoe shop there. As you do, Rem will fall asleep and knock a pair of shoes off of his workbench, allowing you to miniaturize yourself and talk to the Minish atop it. They’ll point you towards Syrup’s hut in the Minish Woods, so book it over there.
Actually, before you head out, you might want to check out the central vendor area and see if the Dhalsim-like Picolyte vendor has appeared. If he has, you’ll be able to buy Picolytes from him, assuming you have an empty bottle. When consumed, these potions will allow you to find a greater number of a particular item when you’re slashing through grass in the field. The most important of these is the White Picolyte, which will greatly increase the chances of finding Kinstones. If you have the 200 rupees required to purchase a bottle, do so, then return to the large field near Percy’s little tree/cave in the Trilby Highlands. If you ingest the White Picolyte while standing in the middle of all the grass here, then start slashing away at it with your sword, you should be able to find a good number of green and blue Kinstones while the effect lasts (it’ll wear off in around 30 seconds). Doing so can help you avoid having to backtrack to people later on if you’re missing a required Kinstone when you first encounter them. The rarer red Kinstones don’t appear to drop via this method, but most other kinds will drop in large numbers.
As you passed through the Western Woods, you probably noticed a cutscene involving Vaati possessing the King and ordering all of his troops out into the field to track down the Triforce. This action has fortuitously opened up the eastern half of the Hyrule Castle Gardens to your roaming pleasure, so head up there and check them out. The most important item here is contained in the southeastern corner of the gardens; if you cut the grasses with your sword, you’ll reveal a ladder heading down to a master weapon trainer. Although you can’t train with him at the moment, you can pick up a Piece of Heart in his room. This should complete a new heart container for you, so congrats on that. If you managed to drain the pool in the northeastern corner of the gardens via a Kinstone fusion (in our game, this was done by the Town Minish in the carpenter’s hut in Hyrule Town), you can also descend the steps there for another Piece of Heart.
Before you leave Hyrule Town again, you should set in motion a chain of events that will lead to you picking up a second bottle. If you shrink yourself in the inn, then walk up to the rafters and walk across to the item shop, you’ll be able to drop yourself down and restore your size behind the counter of the shop. If you attempt to grab the Bottle behind the vendor, he’ll tell you you can have it, but only if you feed his dog in the Lake Hylia section of the overworld map. You haven’t been there yet, but you’re about to unlock the path to it, so go ahead and accept his offer.
Maneuvering through the Lon Lon Ranch
If you head out to the Lon Lon Ranch area, you should be able to access the Ranch itself at this point in the game. If you shrink yourself down in the backyard, then head into the house and smash the jars, you’ll be rewarded with the Lon Lon Ranch Key. If you take it outside and show it to the guy running around in front, he’ll let you pass through his house. If you happened to drain one of the pools in the ranch via a Kinstone fusion earlier, you’ll be able to climb down the stairs and grab a bigger wallet from the chest there.
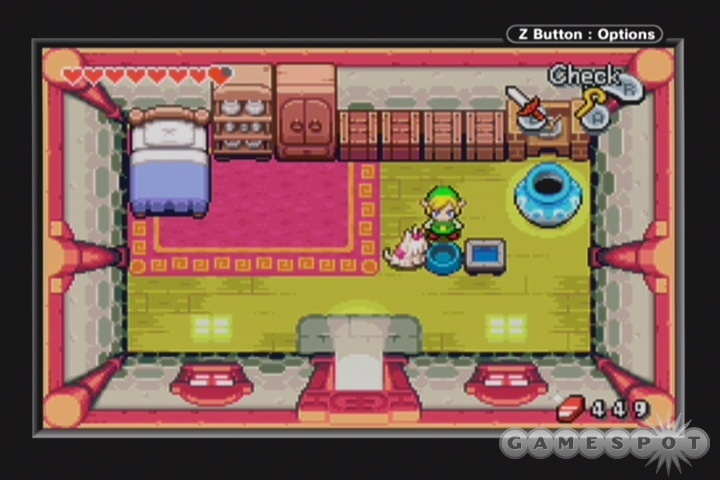
This backyard path will also let you access the Hyrule Town item vendor’s house in Lake Hylia; if you picked up the bottle of dog food from him earlier, you can empty it out in the dog dish and grab your second Bottle. Nice.
Elsewhere in the Lon Lon Ranch, you’ll be able to Canejump up to a platform on the north end; you can either shrink yourself down and walk across the narrow path to find a rare red Kinstone, or hop onto the whirlwind and start flying yourself towards the southeastern corner of the Lon Lon Ranch’s map section. This will lead you into a tiny bit of Lake Hylia, which will then connect to the northern end of the Minish Woods. If you explore the left section of the path after you reach Minish, you can find another Piece of Heart. After that, head to Syrup the Witch’s house and buy a Wake-Up Mushroom from her. If you return to Rem’s house in Hyrule Town and use it on him, he’ll wake up and finish up your Pegasus Boots for you.
Finding the Wind Ruins
Now that you have the ability to bypass the swampy water in the Castor Fields (use the Pegasus Boots to run over it), you can finally get back on task and attempt to find the third Element. Your first goal in the Fields will be to grab another Kinstone; this one is a rare gold one, however, that you’ll need later on. In order to find it, head northwest from the point after you bypass the swampy water; you’ll come to a cave entrance surrounded by viny undergrowth. Cut the vines away with your sword and head down into the basement to encounter a fierce sword-and-shield wielding opponent. If you match up against him with your own sword and shield, you should be able to block his attacks, then counterattack after he swings and catch him while he’s defenseless. After you hit him half a dozen times or so, he’ll poof away, leaving behind only the chest that contains the Kinstone.
With the golden Kinstone in hand, leave the cave and climb the vine nearby, then head to the platform to the northeast and climb down again. Your path is again circumscribed here, so keep moving until you reach a miniaturization platform. After you hit it, follow along the path to the left (using your Gust Jar to maneuver the lilypad to the northern end), then kill all of the baddies in the cave beyond it to find your very own Bow. Yay!
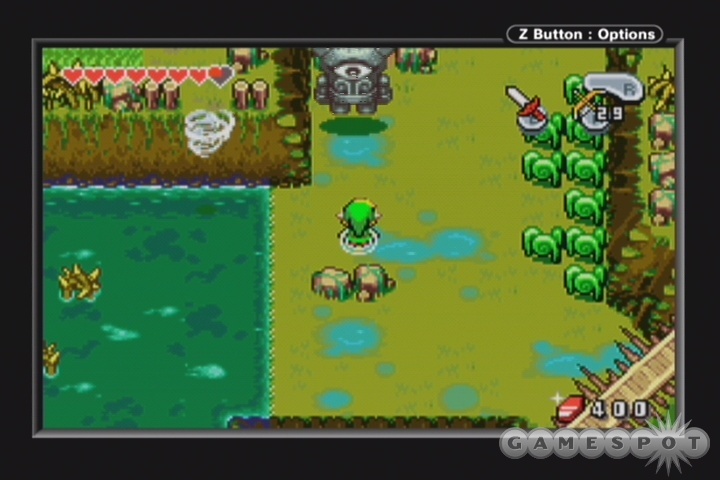
Now that you have your bow, you’ll be able to shoot the cyclopean statues in the area and force them to move. There’s one near the area where you miniaturized yourself, but where you want to go first is back to one of the elevated platforms here (the ones with the wooden bridges running between them), then find the statue in the northeastern corner and shoot it in the eye. After you get behind it, you’ll find a cave with another golden Kinstone inside of it. Stash it for now; they’ll be useful in a bit.
When you have the second golden Kinstone, return back to the northwestern corner and find another cyclops statue standing in front of a vine, near a whirlwind. If you pop it in the eye, it’ll move away from the vine, so climb it and hop into the whirlwind to float southwesterly onto another large land mass. If you explore a bit, you’ll note what appears to be a large red gravestone surrounded by vines. If you cut the vines away and push on the grave, you’ll drop down into the dojo of Swiftblade the First, Spirit of the Swordsman. He won’t be able to teach you anything until you obtain all seven Tiger Scrolls (you only have three at this point), but you will be able to find a Piece of Heart in his lair, so grab it.
After maneuvering through the swamp to the southeast, you’ll come to another cyclops statue. Kill it, then use the walkway to find another whirlwind; if you ride the wind to the southeast, you’ll come to one last cave and one last golden Kinstone piece. There’s one last piece of treasure to get before you’ll actually want to use the Kinstones, though; if you zoom in on your map of the Wilds, you’ll note that there’s one raised area that you haven’t been to yet; it’s the one farthest to the west. If you climb atop one of the other raised areas and make your way towards it, you can kill the statue with your bow to reach a treasure chest containing a blue Kinstone. Avoid the rupees that appear, though, as they’re actually monsters that will drain your cash reserves.
After you’ve done that, it’s time to use your golden Kinstones. In the far southwestern corner of the map, across more swampy water, there are three Mysterious Statues. If you fuse the golden Kinstones with them, the path to to the Wind Ruins will open.
The Wind Ruins
The path of the Wind Ruins is blessedly much more linear than that through the Castor Fields. To begin with, blast a hole in the wall on the first screen to find a blue Kinstone, then defeat the stone guardian to move on. These guys are similar to the cyclopses of the Castor Fields, but won’t wake up when shot with arrows; they only animate when you approach them. If you want to fight them, swing your sword at them as they move around; if not, just let them run towards you and get around them.
The second guardian soldier that blocks your path is inactive, and therefore won’t move from your path. In order to turn it on, you’ll need to shrink yourself down and climb up into its head, then flip the switch there with your sword. After grabbing the red Kinstone from the Minish hole nearby, revert to your normal size, then bypass the guardian and continue on your way.
Kill all of the enemies that you meet; you’ll eventually come to another shrink station and another deactivated guardian. Rather than making your way right towards it after shrinking yourself, though, head left and start climbing the tiny vines back down a few screens. On the screen with three vines heading down, take the middle one to find a small cave with another Piece of Heart. Grab it, then head back up and reactivate the guardian.
After defeating that guy, you’ll soon come to a room with no fewer than four guardians in it. One will immediately block off a passageway leading south, but if you trigger and kill the other three, you’ll gain access to a pair of chests nearby. In order to get past the other guardian, all you need to do is smallify yourself, deactivate it after crawling inside, then revert back to normal size and move on. In order to bypass the statues at the end of the next path, you’ll need to kill all of the enemies on the screen. This includes a few bugs that are hidden underneath the boulders here, so use your sword to smash everything you see, and you’ll eventually come to the Fortress of Winds.
Fortress of Winds
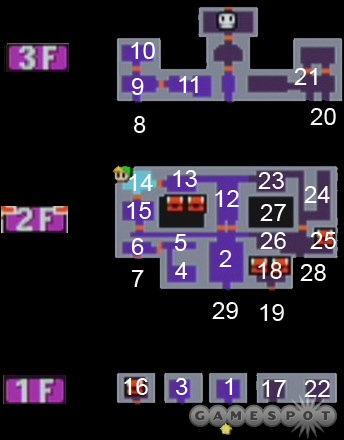
Luckily for you, the Fortress of Winds will almost immediately serve up the Dungeon Map as soon as you enter. All you need to do is go straight ahead and climb the steps into room two. Defeat the skeletons here (dodge their jumping attack and slash them twice on the back), then kill either (or both) of the cyclops statues nearby and mount the central pedestal from the rear. The blue chest here contains the dungeon map, so grab it and return to the first floor.
When you reach the entrance to the dungeon again, head left and take the set of stairs from room three. This will lead you to rooms four and five; in room five, shoot the target on the left wall with your bow to open the door leading to room six. In order to escape from six, you’ll need to kill four skeletons simultaneously. These guys will probably land a hit or two on you before you get past them, but you should have plenty of health to spare, so just spam out sword swings and head through the south exit when the doors unlock.
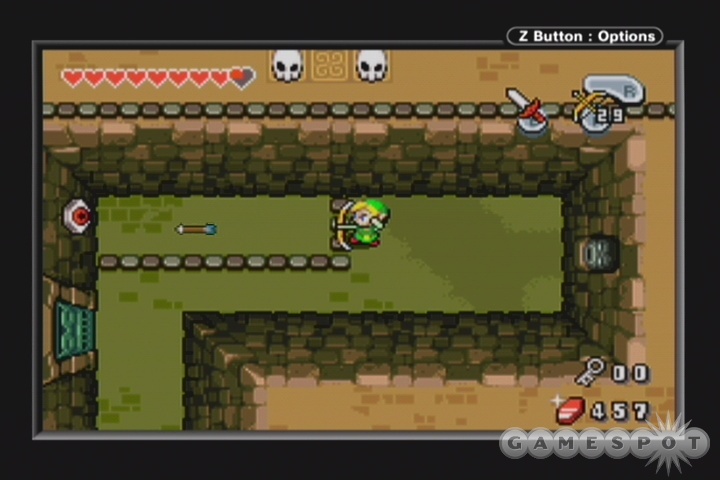
This is where things start to get complicated, as the rooms here are not only different in style than the normal dungeon rooms, but also don’t appear on the map. For now, they’re very linear, so proceed through rooms seven and eight until you come out to room nine, where a series of moving platforms are your only path through the room. In order to pass through either of the doors here, you’ll need to hit the targets on either side of them while shooting from one of the platforms. First off, head north into room ten, use your split-Link feature to press both buttons, then kill both of the cyclops statues to reveal the Compass for the dungeon.
In room 11 to the southeast, you’ll need to clear off more flashing panels to use your split-Link again. In order to get to the lever elsewhere in the room, you’ll need to use both Links to push the northern block all the way to the right wall, then push the southern block one space to the left. After that’s done, abandon your shadow, but split-Link yourself again in the opposite direction to push the northern block all the way to the upper wall, which will let you access the lever. After you pull it out, you’ll notice a key falling all the way back down to room three, so head back down there and grab it before returning to room two, where two locked door await you. If you don’t want to backtrack all the way down, you can jump into the same hole the key fell through to wind up right next to the Small Key.
Finding the Mitts
When you return to room two, open the locked door on the left side of the northern wall to reach room 12. Ride the platform to the north, avoiding the stones in the path, and head left into room 13. In order to extend the bridge here, you’ll have to shoot the two targets on the left wall, but you’ll need to move quickly; if you stand still for too long, a giant red hand will drop from the ceiling, pick you up, and drop you back at the entrance to the dungeon. Ouch.
In room 14, you’ll have to fight against another armored knight; the same technique as before will apply, though, so use your shield to block his attacks, then slash at him after he overswings. After he dies, a warp to the exit to the dungeon will appear, but your goal is actually south. In room 15, you’ll have to maneuver your way around a set of spike traps until you can hit the switch; if you want to avoid damage, just roll counterclockwise, hit the switch, then make your way to the door and exit to the south.
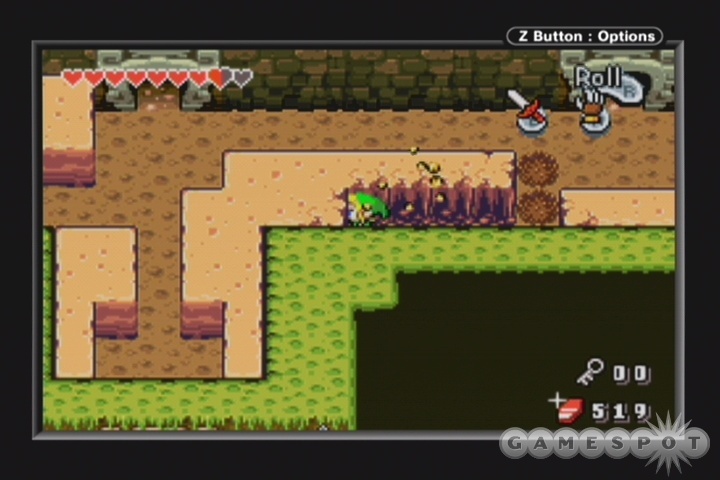
You’ll find yourself on the northern ledge of rooms five and six here, which is apparently a dead end. If you place a bomb between the two skulls at the top of room five, though, you’ll find a semi-secret room that will contain the Mole Mitts. With these, you’ll be able to dig through the porous rock that permeates many of the rooms, such as the one in which you’re standing now. If you equip them and dig your way to the right, you’ll find a chest with 100 rupees in it. Mmm...rupees.
Now that you have the Mole Mitts, you can use them on any of these rock formations that you see, such as the entirety of the entrance cavern. Although it’s unmarked on our map (and the Dungeon Map you found earlier), the entrance to the dungeon is in fact one long hallway, so head back there and start digging through the rocks on the far western side of the corridor. You can find both room 16 (which contains a chest with 80 Mysterious Shells if you beat two wizards), as well as a chest with a blue Kinstone in the far northwestern corner of the hallway if you dig to it. You can also find some 50 rupees in the northeastern corner of the hall.
The Next Key
Head into the second room from the right on the first floor and head up to room 18. Pulling both of the levers here will reveal both a pair of chests (each with blue Kinstones in them), as well as unlocking a door leading south. Room 19 is similarly invisible on the dungeon map, but you’ll find a chest containing a red Kinstone if you dig through the rock, as well as a ladder leading upwards to room 20. In the latter room, another red Kinstone awaits.
Room 21 is multi-chambered, but is indeed one large room. This is your first opportunity to miniaturize yourself, so head left, kill the active guardian, then split Link in two and activate the two panels that are furthest apart, starting with the one on the right. This will let you flip the two switches near where you entered the room, which will net you access to a Minish portal. After shrinking yourself, activate the other guardian, then resize yourself and pull the lever behind it to reveal another key. Before dropping down after it, though, shrink yourself again; doing so will let you walk through the small path on the right wall of room 17 and into room 22, where you can grab a Piece of Heart. One of the stones on the left side of the structure here can be pushed down, allowing you to leave the room and return to 17 to grab the Small Key.
Finding the Big Key
With key in hand, return to room two and unlock the other door on its north side. The right side of room 12 features a bit of a speed test; after pulling out the lever and extending the bridge, you’ll need to roll across it before it retracts under your feet. In room 23 here, you’ll have to kill all three of the blue hands in order to reveal another Minish portal. Just let them approach you while you spam out sword swings, and they’ll wind up killing themselves.
You don’t have much use for the Minish portal at the moment, so head to the right and into room 24. In order to unlock the southern door here, you’ll have to maneuver through the flash-panel puzzle on the right side. In order to get there, walk south and hide in the holes as the rolling spike-logs pass over you. When you reach the pressure plates, pull one of the statues onto the upper-left corner and one onto the lower-right corner, then charge up your sword and activate the lower-left and upper-right plates. This should let you maneuver yourself and your shadow through the narrow passageway and onto the remaining pressure plates, which will drop down a key for your unlocking pleasure.
After unlocking the door that leads to room 25, return to the Minish portal you previously unlocked and shrink yourself, and then start making your way to room 26. The small Minish path on the northern wall here will lead to the hidden room 27, where you can resize yourself and start digging through the walls. If you hit the switch below the portal hear, the last Small Key will appear, so grab it and return to room 26 in Minish size. If you leap off through the tiny gap above, you can resize yourself below, kill the blue hands, work your way towards room 28, then take the ladder up to the right half of room 20. When you find yourself back in room 21 (getting dizzy yet?), unlock the door, then drop down into the right eye of the skull here, not the left one. This will let you grab the Big Key and head back towards room two. Heading out the southern exit here will take you to the unprecedented room 29. If you want the chest here, dig the pedestal out of the rock and push it onto the switch to get a blue Kinstone.
From there, it’s a straight shot to the boss fight. Before you unlock the door with the Big Key, though, push the out-of-place block back into position to open the portal to the beginning of the dungeon and save your game. Before you can finally say goodbye to this aggravating dungeon behind, you’ll have to fight one last boss.
Boss Fight: Mazaal
Mazaal is a great big Incan-style boss monster, consisting of a big head and two detached hands. It’s the hands that are both its initial weakspot and means of attack. As you dodge their blows, wait for one of the hands to face you with its palm open; when it pauses for a second, hit the exposed wiring on it with an arrow. This will cause the hand to drop to the ground for a moment, letting you run up to it and start wailing away on it with your sword. After a barrage of sword thrusts, the hand will start jetting out smoke. Repeat the process for the second hand and Mazaal’s head will hit the ground. When this occurs, use one of the Minish portals and enter the head through the small gap directly in its middle, then swing away at the pillar that’s lit up.
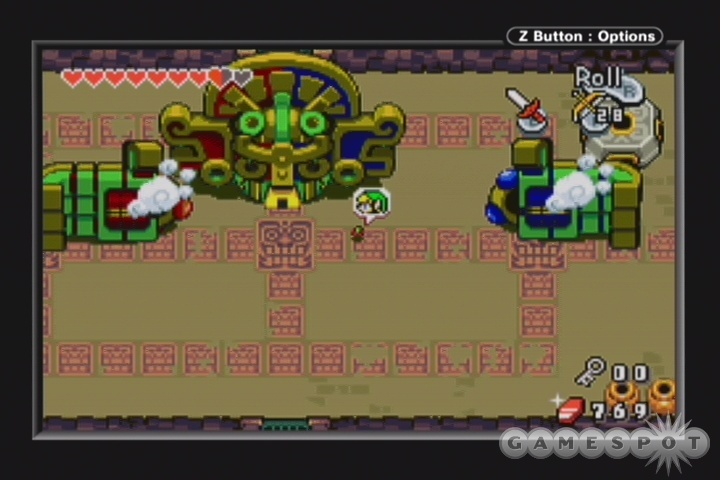
After completing this process once, you’ll be ejected from Mazaal’s head and will have to quickly resize yourself up and repeat the technique. The second and third times you do so, Mazaal’s innards will be protected by porous rock, so use your Mole Mitts and dig the pillars out until you find the one that’s flashing. After the third iteration, though, the baddie will blow up, leaving behind a heart container, but not a single Wind Element, so far as you can tell. Instead, if you walk out the door to the north, you’ll get the Ocarina of Wind, and learn that the Wind tribe has taken their Wind Element and retreated to the safety and sanctity of the clouds. But hey, you need it! For now, you won’t be able to do much about it, but the Ocarina will let you warp yourself around to any of the wind shrines that you’ve uncovered in your journeys. Your next objective is Lake Hylia, so if you have a wind crest available to you there, use the Ocarina of Wind and jet over that way.
More Minish Madness
After you reach Lake Hylia, you’ll have to shrink yourself down and talk to the Minish inside the little hut nearby; he’ll point you towards the library in Hyrule Town. Head there (it’s to the northwest of the town bell, and is now unlocked) and walk up to the roof to shrink yourself down to Minish size. If you walk up to the shelf inside with all the scratches on the floor, you’ll be told that the path to the Elder Librari has been dismantled, thanks to humans who’ve checked books out and never returned them. If you speak to the librarian on the first floor, she’ll point you to a girl, a girl with a cat in her house. Pretty vague clue, even if you have visited all of the homes in Hyrule Town.
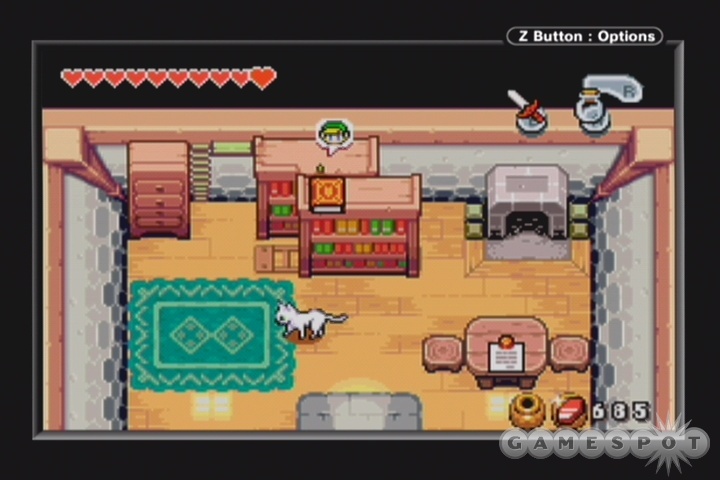
The First Book: The house you’re looking for is in the southeastern part of town; it’s the blue house connected to a purple one with a Minish-size block of wood on the roofs. The girl isn’t home at the moment; she’s actually next door, in said purple house. In order to reach the book, though, you’ll have to find a way to get up the chimney in the purple house, which is obviously going to be difficult with the fire blazing away there. What you have to do is grab some water from the river elsewhere in the town, put it in a bottle, then bring the bottle back to the purple house and douse the flames. You’ll then be able to Minish yourself, walk into the chimney, move over to the blue house, and push the book off the bookshelf onto the floor. You can then resize yourself and grab it.
The Second Book: The next book you need to grab is the Legend of the Picori, which was checked out by the scholar in the southwestern corner of the town. If you haven’t talked to the dog guarding the ladder leading down to that area, you’ll need to Minish yourself at the bar on the other side of the river and walk across in order to talk to him; this will let you access that part of town. After you’re able to get to the scholar’s house (which is directly to the left of the ladder), walk on in to learn that the scholar hasn’t seen the book in a few days, but is certain that it’s somewhere in his house. In order to find it, though, you’re going to need to grab another item.
First up, you’ll need to douse the fire in the scholar’s home with another bottle of river water. Then, Minish yourself in the carpenter’s house nearby, then walk back to the scholar’s domicile and enter it as a mini-Link. If you climb the chimney, you’ll be able to pass through Stranger’s house, cross the river on the small bridge, then maneuver past the two cats in the little garden nearby. When you reach the cave near the fountain below, you’ll be able to fight through a set of rooms to grab the Power Bracelets, which will let you push around large items, even while you’re tiny. You can’t grab the Piece of Heart here just yet, so leave them be and return to the scholar’s house.
When you reach the house again, you should now be able to push the two bookshelves on the northern wall up against the fireplace, which will let you walk up to the Minish hanging around on the rafters. In order to return the Legend of the Picori back to ground level, you’ll need to use your Gust Jar to remove the dust on the far left end of the screen, then split Link in a vertical pair via the panels that are revealed. If you then walk over to the right side of the room and stand near the Minish that’s jumping atop the book, it’ll fall down onto the floor, where you can resize yourself and retrieve it.
The Third Book: The last book you need is A History of Masks, which has been checked out by the Mayor. Hagen’s rather vague about the whole affair, insisting that you talk to the collection of masks on the shelves behind him to learn more. Whoever ran against this guy in the election must’ve been pretty nutty if Hagen actually managed to beat them.... Anyway, you don’t actually have to talk to the masks, just destroy them; if you run into the wall while being boosted by your Pegasus Boots, you’ll blast the masks off of the wall and onto the ground. After they’ve all been destroyed, talk to the Minish in the wall to learn that the Mayor brought the book to his cabin by Lake Hylia, and didn’t bring it back with him when he returned.
In order to get to the Mayor’s place, you’ll need to retrace your path to Syrup’s hut from the Lon Lon Ranch. Before you reach Syrup, though, you’ll note a seemingly blocked-off cave near a sign. If you equip your Mole Mitts and dig through the rock in the cave entrance, though, you’ll bust through into a little subterranean cavern. A few goodies await you here. First off, if you dig to the left of the entrance, you’ll find a chest with a blue Kinstone in it. Secondly, if you head right when the path branches and thoroughly dig out that area of the cave, you’ll find a Mysterious Wall in the northeastern corner. If you do a Kinstone fusion with it, a new cave will open up in the Lon Lon Ranch area.
After you leave the cave through the ladder, you’ll be near the Mayor’s cabin. The book inside will be inaccessible to you at the moment, though; in order to reach it, you’ll need to use your Pegasus Boots on the small clump of trees to the north of the cabin, which will open a Minish portal. If you shrink yourself down and enter the Mayor’s house from the north, you’ll be able to push one of the shelves there to the right and then climb up to push the book onto the floor. Congrats! If you uncovered the wind crest in Hyrule Town, you can warp yourself right back there and return the book to the library, which will finally open the path to the Elder Librari Minish on the bookshelf on the second floor. He’ll require you to pass a little trial to get the item that he guards...
The Trial: There isn’t much to this little dungeon; walk one screen south, use your Gust Jar to suck up the mushroom launcher on the other side of the river, then head north and defeat the two beetles in the room there to obtain the Flippers. In order to kill the beetles, you’ll need to either strike them on the side, or wait for them to launch their little pincers at you, after which point they’ll be weakened until the pincers reattach. After they’re both dead, a chest will appear with the Flippers, so grab them and swim south until you find yourself back in the Hyrule Town river, after which point you’ll be able to resize yourself atop the library and get back to business.
A Billion Little Quests
A few new people have appeared in Hyrule Town, and a few new buildings have also opened up; your new items will also let you explore the game world more thoroughly. There’s thus a ton of new stuff that you can do before you head out for the Temple of Droplets, so get going. One thing we’re not going to cover here are the new Kinstone fusions; brush up against everyone you encounter to see if you can fusion with them.
Hyrule Town
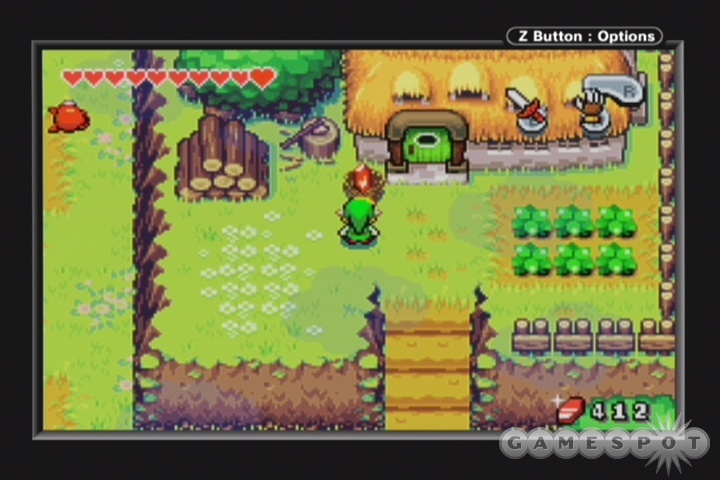
Super Secret Ultra Money Trick: This isn’t actually in Hyrule Town, but we’re going to mention it here because it’ll help you out while you’re running around here. If you head one screen south to Master Smith’s house, you’ll be able to find a limitless amount of money by digging up the ground one space to the left of the door to the house with your Mole Mitts. Each time you dig, you should find a 20 rupee piece; you can then enter the house and exit again to immediately dig another 20 rupee piece up. You can do this as much as you want, so try maxing out your cash at 999. If you don’t get any cash while doing this, head up to Link’s room and examine the southwest corner to get a little question from Ezlo, then try again.
Fuse With the Stranger: If you haven’t done so yet, you should have a red Kinstone piece required to fuse with the Stranger (the guy inside the house just to the south of the post office). (If you don’t, do the Sand Cave event below, and check the jars inside the inn, then come back and try again.) If you do so, a strange warp will appear in the South Hyrule Field.
If you walk to the warp and jump onto it, you’ll find yourself in an odd building with a few treasure chests, but without any exits. Grab the Kinstones from the chests, then walk until you find a bedroom where a man is being possessed by a ghost. If you get all Ghosbustery on him and help him out by sucking the ghost into your Gust Jar (you’ll need to move around in order to suck it long enough), he’ll reward you with 100 Mysterious Shells. He’ll give you something even better later on, but for now, this is all you get.
A Home for the Sisters: If you fusion with Farore, one of the three sisters in the Inn (the large building on the eastern side of town), a man will appear near the empty building elsewhere in Hyrule town. If you don’t have the correct kind of Kinstone, check the pots in the room to the right of them; one of them should drop a red Kinstone which may match with her. If she doesn’t pop up as fusionable, then check back with her later.
After Gorman appears near the house, you’ll be able to return to the Inn and offer the house to one of the three girls. You’ll only be able to offer houses to two of them; the two you’ll likely want to choose are the red and green girls. This is due to the fact that each of the girls will offer you charms that can fit into empty bottles after you get them houses: the red girl will give you a charm that will temporarily increase your attack power; the blue girl will temporarily increase your strength; and the green girl will temporarily increase both your attack and defense. If you’re of a more defensive bent, then choose the blue girl for one of the homes.
After the first home is inhabited, fuse with the carpenter who’s standing next to the post office in the northwestern corner of town, if you can, then enter and exit the town a couple of times, after which point a new home will be built just south of the post office. If you talk to Gorman again, you’ll be able to choose a second girl to inhabit the house.
Simon’s Simulations: One of the newly-open buildings in town is Simon’s Simulations on the left side of the main square. If you pay him ten rupees, then fight off a gaggle of monsters without dying, you’ll earn a Piece of Heart. Subsequent fights will earn you Kinstones or extra Rupees. These fights are a perfect opportunity to use the Charms you obtained from the girls that you found homes for during the above quest, since you can just visit them again immediately afterwards and get another one.
The Treasure Shop: The treasure shop on the southeastern corner of the main square has likewise opened up. If you go inside and sit through the proprietor’s long-winded speech, you’ll have the opportunity to play a 50/50 game of double-your-money. Each round of the game, you’ll have to choose between two different chests, one of which will double your prize money, the other of which will knock you out of the game. It’s theoretically possible to string together a bunch of wins and max out your money here, but you’re much more likely to just lose everything in the second or third round, so don’t bother with it. The Mole Mitts have opened up a much more reliable way to get money for you in the South Hyrule Field, which we’ll explain momentarily.
The Cuccoo Game: Now that you have the Pegasus Boots and the Flippers, you can theoretically finish off the cuccoo collection game given by the girl in the southeastern corner of town. We personally found these almost impossible to get past, but if you manage to complete all ten rounds of the game, you’ll earn three red Kinstones and a Piece of Heart. Good luck.
The Sand Cave: There’s a sand cave just underneath the Mayor’s house here. If you dig into it and start poking around, you’ll find three red Kinstones on the upper level and a chest with 100 rupees on the lower level. You won’t be able to complete the boulder-pushing puzzle near the chest just yet, so leave it be for now.
Buy New Stuff: There should be both an expanded Quiver (for more arrows) and a bigger Bomb Bag for sale at the item shop. These are both going to set you back 600 rupees, but you should be able to easily afford that by heading to Master Smith’s house in South Hyrule Field and digging up the 20 rupees there over and over again.
South Hyrule Field
Find the Heart Piece: If you travel to the southwestern corner of this zone, you’ll be able to ram into a grove of trees with your Pegasus Boots and turn it into a Minish portal. You can fuse Kinstones with the Minish in the hut nearby, if you wish, but you’ll definitely want to cross the bridge and climb down the vine into the river. If you then go north and find the tiny Minish cave above, you’ll grab a Piece of Heart.
The Third Bottle: Walk into your house and initiate a fusion with your grandpop. He’ll require a red wedge piece. After the fusion, a chest will appear in the Eastern Hills, so head over that way and pop it open for your third bottle.
Eastern Hills
More Loot: If you travel all the way to the southwestern corner of this zone, you’ll come to a Minish hiding away in one of their little huts. If you fuse Kinstones with him, a huge beanstalk will grow nearby, extending all the way up into the clouds. If you climb it, you’ll find 200 rupees, 200 Mysterious Shells, and a Piece of Heart.
More Gorons: You probably recall fusing with a Mysterious Wall in the sand cave underneath Syrup’s hut. This let the Goron in the Lon Lon Ranch break through the wall there. You can help him out even more with a couple of fusions here. If you head to the northeastern corner of this zone, you’ll be able to fuse with Eenie, one of the farmers, which will let the Goron proceed further into the cave. Another Mysterious Wall is in the sand cave near Eenie, which will send another Goron to help the other two.
Castor Fields
If you’ve been Kinstoning with the people in Hyrule Town and elsewhere, you’ll likely have a few new areas to explore here. Most of them will require you to enter Minish mode in the northwestern corner of the zone and then use the lilypads to get around. In addition to those, though, there are a few other goods around.
Red Kinstones: If you fly to the wind crest here, then head east into the water, you can swim to the northeast until you come to three thorny vines that will block your passage. If you dive (B button) in the middle of them, you’ll find a red Kinstone piece. If you stay underwater while swimming south, you’ll find two more.
Another Red Kinstone: If you look near the entrance from the Trilby Highlands, you’ll find a sand cave. Dig around inside of it to find 50 shells and a red Kinstones.
Piece of Heart: In the northeastern corner of the zone, there’s a small cave surrounded by water. If you push around the blocks on the right side of the room inside, you’ll gain another Piece of Heart.
Mt. Crenel
Fuse with Melari: If you head to Mt. Crenel and fuse with Melari, the smith there, a beanstalk will grow on the northwestern corner of the zone. (You can also fuse with more of the Minish workers here, as well, if you wish.) If you climb up to it (you’ll need to backtrack down the mountain a bit), you’ll find another Piece of Heart and a bunch of rupees.
Sand Cave & Another Mysterious Wall: If you climb the western cliffs and return to the Crenel Hermit, you’ll notice a sand cave nearby. Dig through the rubble within to find a Piece of Heart, then dig through to the end of the cave and uncover a Mysterious Wall. Fuse with it to send another Goron to the Lon Lon cave.
Trilby Highlands
Sand Cave: The Sand Cave in the northwestern corner of the zone can now be opened. (The cave off to the right a bit may also be accessible, if you’ve done enough fusing.) Inside, you’ll find a pair of blue Kinstones, and can also dig through the stone near the northern wall to find another Mysterious Wall to fuse with. If you continue up via the ladder, you’ll be able to meet another Minish; fuse with him to reveal a set of stairs near the grassy field to the south. If you head down to them, you’ll net 75 rupees.
Western Woods
Red Kinstone: If you shrink yourself at the Minish portal in the southwestern corner of this zone, then fuse with the Minish in the hut nearby, a beanstalk will grow up to the east. Head up for a couple hundred rupees and a red Kinstone.
North Hyrule Field
Watery Chests: In the upper-central portion of this zone, near the river, you can walk down a ladder to reach the water. If you swim to the northwest, you’ll eventually reach the southwestern portion of the Hyrule Castle Garden; there are two chests here, one with 100 shells, one with 200 rupees.
Minish Woods
Cave Trio: After taking the wind crest to the Minish Woods, use the Minish portal nearby and start walking to the northwest. Since you can bypass the water hazard now, you can cross the bridge and reach three small caves. The rightmost and middle caves each contain blue Kinstones, while the left contains a red Kinstone and a Piece of Heart, assuming you can maneuver your way past the ice.
Lon-Lon Milk: If you speak to the Minish in the barrel hut in Minish Town a couple of times, one of them will request Lon-Lon Milk. If you bring him some from Hyrule Town, you’ll eventually be able to buy blue Picolyte from the vendor there; this will let you more easily find items in grass, like arrow and bomb replenishments. This is optional, and probably unnecessary.
Sand Cave: There’s another sand cave to the northeast of the Deepwood Shrine; opening it will light your path to a blue Kinstone and 50 rupees.
Veil Falls
Sand Cave: If you enter Veil Falls from the northwestern corner of the Lon-Lon Ranch, you’ll be able to jump into the water and find another Sand Cave. Digging into the stone there will net you 50 shells and 50 rupees.
Piece of Heart: If you enter from the northeastern corner of the North Hyrule Field, though, you’ll be able to jump into the water and grab a Piece of Heart.
Lon-Lon Ranch
Piece of Heart: If you head into the field where the cows are grazing, you’ll notice another Minish portal covered by leaves. Pegasus Boot it to reveal the portal, then head east into the Minish path at the north end of the field, where a Piece of Heart is waiting for you. You can also walk around and talk to the moo-cows, if you wish, but none of them appear to be Kinstonable.
The Goron Cave: By this point, you should have been able to summon a total of five Gorons to the Goron cave in the southwestern corner of this zone. If you missed one, here’s the list again:
1: Fuse with Eenie, a farmer in the Eastern Fields.
2: Fuse with a Mysterious Wall in the sand cave near Eenie.
3: Fuse with a Mysterious Wall in the sand cave in the northwestern corner of the Twilby Highlands.
4: Fuse with a Mysterious Wall in the sand cave near the Crenel Hermit on Mt. Crenel.
5: Fuse with a Mysterious Wall in the sand cave that led to the Mayor’s cabin, near Syrup’s hut.
These are likely not in the same order as we outlined them up, but the order doesn’t matter. After you have all five of these guys in place, you can enter the Goron cave and retrieve 200 rupees. There’s still one more Goron to find, but you can’t reach him just yet, so stow your curiousity for the moment.
Lake Hylia
Now that you’ve gotten that absurd number of item hunts done with, use your ocarina and head out to Lake Hylia. Head north and find the stairs leading down to the water, which you can now of course swim across. There are a few more things to do here before you head into the Temple of Droplets.
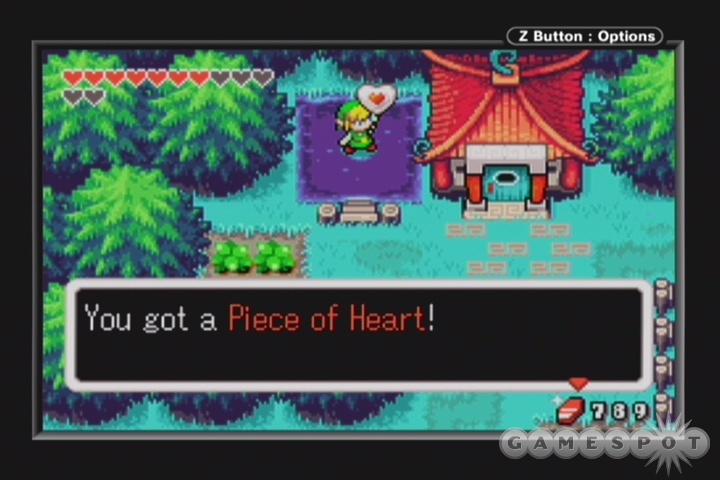
Piece of Heart: If you head towards the home of the Hyrule Town shopkeeper (where you fed his dog to receive the second bottle), you can dive into the pool of water nearby to find a hidden Piece of Heart.
Red Kinstone: If you shrink yourself down at the Minish portal near the Mayor’s cabin, you can swim back north until you find the small cave in the northwestern corner of the water. It’s darkened, but if you maneuver through it, you’ll find a chest with a red Kinstone in it.
Minish Fusion: South of the cave, there’ll be a vine leading up to a Minish hut. If you fuse with the Minish there, a beanstalk will grow up, albeit one that’s currently inaccessible to you.
Another Piece of Heart: If you swim to the southern end of the lake, you’ll find another Piece of Heart sitting on some land.
The Peril Beam: If you head to the left of the Mayor’s cabin and climb the steps and ladder there, you’ll find Waveblade in a hut there. He’ll teach you the Peril Beam if you have more than ten hearts to your name (and you should). You can also gain another Piece of Heart in his quarters.
After you’ve obtained all of those items, you can swim to the Temple of Droplets and head inside. Note that you’ll be miniaturized to enter it, which means that you won’t have any size puzzles to deal with while you’re inside. Yay!
Temple of Droplets
The First Key
Ok, more fun with ice here. You’re going to have to stay on your toes if you don’t want to fall off of the ice here, but it’s not too difficult; if you find yourself getting close to the edge, just run the other way. You can arrest your momentum pretty quickly by doing this.
Make your way down to room four - it’s at the end of the only path that’s open to you - and push the lever there to the left to open up a shaft of sunlight onto the ice nearby. This also opened up a hole in the floor of room three, so head back up there and drop down. It’s possible to misplace the block of ice here if you’re not careful, so get on its upper side and push it down once, then to the right. This should position it underneath the shaft of light, which will melt it. Grab the Small Key and head back upstairs.
The Big Key
After unlocking the door to room five, drop down into the hole there to find...the Big Key? Seems pretty early for that, and it definitely is. In order to retrieve it, you’ll need to use all three of the blocks here to get it underneath the sunlight. Here’s a list of the required moves.
Bottom Block: Push it up once into the Big Key block, then push it left.
Top Block: Push it left.
Big Key: Push left, up, then left again.
Top Block: Push down, then left.
Big Key: Push down, left, up, then right.
Doing all of this in order will net you the Big Key. Now that you have it, flip the lever nearby and return to room one, where a locked door can now be opened.
Moving Along...
You can’t do anything in room seven at the moment, although you will be able to spot the Element of Water, frozen in a gigantic block of ice. Later on, you’ll be opening up a mighty big sunroof to unlock it, but it’s inaccessible to you for the moment. Head to room eight, then, and then take an immediate south turn to grab the Dungeon Map. Yar.
Head back north and dive underneath the rolling block until you come to room 10. Climb the ladder and swim to the east, then south. You’ll come to a blocked portion of the little river you’re in, so use your Gust Jar to suck in the mushroom launcher which’ll give you access to the switch. Hit it and drop down.
At the bottom of room 11, you’ll find another switch, so tap it, read the nearby inscription, then swim right to room 12. If you dive around at the bottom of the "jar" here, you’ll uncover a Small Key. Bring it all the way back up to room eight and unlock the door there to find yourself a lilypad, which is what you’re going to be riding for quite a while.
Using your Gust Jar, maneuver the lilypad all the way back to room 12 and hit the switch there. Head east to room 13, kill the centipede monster, then head north to room 14 to find the Compass. After you have that, backtrack to room 12 and head out through the northern exit. Hit the switch here to move on, but jump off when you reach the large central ice island.
On the northern end of the island here, you’ll find a chest with 50 rupees, big whoop. The trickier part of this island is the little pressure-panel puzzle on its left side. In order to trigger the panel, you’ll have to maneuver a block so that it comes to rest on it. This will require a little bit of work, obviously. If you number the blocks from one to six in order from the top of the screen to the bottom, then here’s the solution:
Block one: Push it down into block four, then push it left into the wall.
Block three: Push it left, where it should come to rest against block one.
Block five: Push it up, where it should come to rest against block three.
Block four: Push it left into block five.
At this point you can push either block two or block four over the switch; it doesn’t matter which one. This will lower the gate, allowing you to maneuver your lilypad around to the exit to room 16.
Room 16 has one distinctive characteristic: there aren’t any lights. You’ll only be able to see one square in any direction, so carefully hug the northern wall until you reach the exit to 17. The steps here will lead to 18, where you’ll have to fight off three beetles in order to pass. Do so, then walk through room 19 back to room seven. If you split Link in two here, you’ll be able to push the large lever, which will open half of the sunroof above the Water Element. This won’t melt the ice there quite yet, but it will melt the door in the southeastern corner of the room, giving you access to room 20, which connects up with room 19 again. This will let you pass through to room 21, where you’ll have to maneuver through a long ice platform to reach the southern end. Room 22 will connect back up with room 20, so head that way and take the stairs leading down.
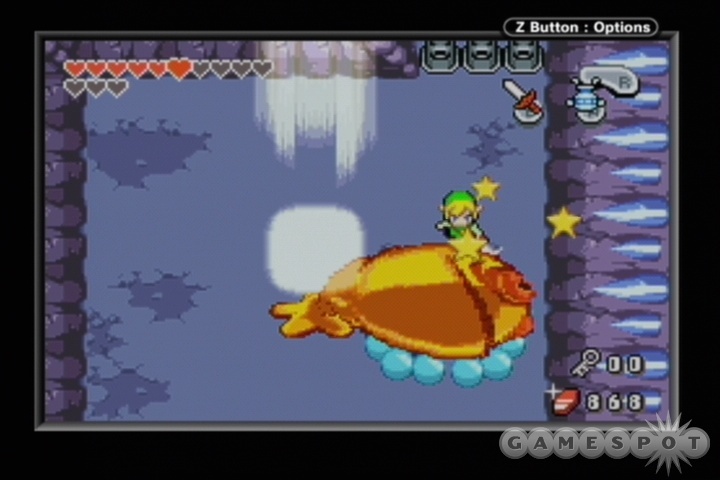
Room 23 is a mere leeward stop; take the stairs on down to room 24 (the only room on the B3 level), and push the lever there. Nothing will happen, so you’ll need to return to room 23, flip the lever there, then drop back down to 24 and push the lever again to unlock another Small Key. Use it on the locked door in room 22 to enter room 25, where you’ll have to fight off another Giant Chu Chu. This guy is precisely the same as the end boss of the first dungeon you went through, save for the fact that he’s somehow electrified. He’ll Volginate you if you touch him while he’s electrified, so you’ll be forced to do nothing but avoid him during these periods. When he isn’t electrified, though, the old Gust-Jar-on-the-feet trick will eventually topple him over, so whack him with your sword during these periods to finish him off. You’ll earn the Flame Lantern for your efforts, so yay for you. Use it to melt the ice blocks in room 22; if you need more health, you can repeatedly enter and exit this room and break the jars here for two hearts each time.
Unlocking the Element
Now that you have your Flame Lantern, you’ll have to return to the large room upstairs and unlock the second part of the sunroof to de-meltify the Water Element. To begin with, take the stairs down to room 14 and melt through the ice blocks until you reach room 26, where three beetles are waiting for you. Note that your lantern will let you light the torches here; you don’t actually need to do so, though, as your only goal is to defeat the beetles. Doing so will let you pass through to room 27.
Said room 27 is another completely darkened room. In order to pass through, you’ll need to maneuver your way through the maze, lighting torches as you see them. Each torch you light will drop one of the barriers in your path, letting you pass further into the maze. Eventually you’ll come to a bombable doorway in the left wall, leading into the hidden room 28; if you kill all of the enemies here, you’ll nab another Small Key. As your compass indicates, there are three treasure chests in the maze room, so be sure to find them all before unlocking room 29 and moving on.
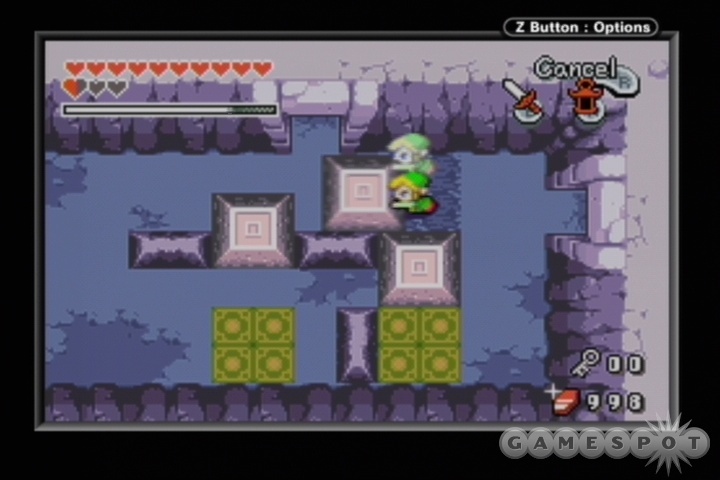
After heading one room left and one room up, you’ll come to room 30, where another split-Link puzzle will be awaiting you. To begin with, make a vertical pair of Links and push the northern block two spaces to the left, then make a horizontal pair and push the southern block up against the southern wall; it’ll completely cover the flashing panels, but that’s no big deal. Head to the other set of panels and make another horizontal set of Links, then push the westernmost block down one space, so that it’s flush with the rock barrier, but not covering any of the other panels. If you then make another vertical set of Links, you’ll be able to push the northernmost block one space to the right, letting you pass up to room 31.
Room 31 features another split-Link puzzle, following hard upon the last one. This one’s fairly simple as well, though. To begin with, head to the left end of the room and push the block there down and to the left so that it covers one of the three switches along the western wall. Then, find the rightmost block either to the left or right so that it’s out of the way. You’ll have noticed that the two remaining switches are three spaces apart, so form a pair of Links that’ll fit onto both switches and run down the room to flip them before you run out of time. You’ll need to maneuver your way past a rock barrier, but that should only be a minor detour.
All you need to do to get through room 32 is push the northeastern block one space to the north; avoid contact with the flame creatures, though, as you can’t hurt them. Room 33 features another split-Link puzzle, albeit not a very difficult one. Melt the ice cube in the northwestern corner of the room, make a vertical pair of Links, then push the obscured block underneath the ice bridge to the right until you can reach the stairs leading to room 34.
34 features one of the more aggravating puzzles you’re going to run across in the dungeon. In order to unlock the door here, you’re going to have to light up all nine torches here, with the caveat being that they will eventually start to go out if you wait too long. Since the floor’s icy, it’ll be difficult to control your movement. We found it best to start from the central torch, then head up, then right, and then circle the remaining torches in a clockwise motion. You have enough time to make perhaps one mistake here, but if you fail to move fast enough, you’ll have to wait for all the torches to go out before trying again.
Rooms 35 and 36 are thankfully simple; just dodge or dive underneath the rolling logs and enemies in room 35, then kill everything in room 36 and re-enter the room over and over again for a full health refill. (There should be at least two hearts in the jars here.) Flipping the switch in 36 will open up the red portal back to the entrance of the dungeon, indicating that this would be a good time to save your game. When you’ve done that, bomb the northern wall to enter the hidden room 37. Killing both of the enemies will open the path to the upper level of room 33, which in turn will lead you to room 38, which in turn will lead you back up to the room where the Water Element is hidden away. Use the lever there to fully melt the ice surrounding it, as well as the Octorock nearby. It’ll steal the Water Element, forcing you to give chase and battle it for the win. Be sure to completely heal yourself with the hearts near the entrance to this room before heading in, as Octorock is quite a bruiser.
Boss Fight: Octorock
As with most of the other bosses, Octorock can only be hurt in a specific way during his main form. To do so, wait until he shoots boulders at you from his nose, then attempt to deflect them back towards him with your sword. The catch here is that the beast will sometimes suck you into his mouth instead of shooting out boulders at you, which will be a guaranteed one heart of damage to you. There’s seemingly no way to tell which attack he’s priming when he pauses, and it’s exceedingly difficult to get out of the sucked-in air column when he’s sucking, so the best advice we have to give is to keep your distance.
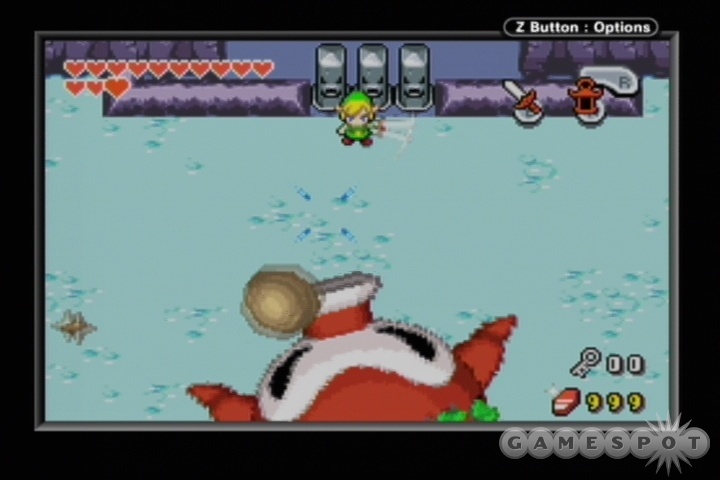
After you hit Octorock with three boulders, he’ll suddenly freeze the entire room. In order to damage him now, you’ll need to hit the flower on his rear side with your lit Flame Lanter. Doing so is incredibly annoying, though, due to the way that Octorock will spin around, and due to the fact that you’ll be attempting to do so while gliding around on ice. It’s best to try and position yourself for the lighting immediately after Octorock is hit by the third boulder and is in the process of freezing; if you can do so, then you won’t have to worry about continually rotating around him.
After the second flower-lighting, Octorock will display some new techniques. For one, he’ll occasionally suck up all the light in the room, forcing you to keep your Flame Lantern lit just so you can see where you’re going. He’ll also occasionally ram into a wall, sending rocks raining down on you, but these are easily avoided by rolling away. Luckily, though, you don’t have to light his flower again; after the second time, all that’s required to finish him off is three more boulders to the face, letting you nab the Water Element and a Heart Container.
Before you leave the dungeon, check your map; there are still two chests remaining. If you head to the second basement level and maneuver your lilypad around the large central area, you’ll be able to release them from their icy prisons, resulting in a bonus of 100 shells and a red Kinstone.
Back to the Elemental Sanctuary
After leaving the Temple of Droplets, you’ll be accosted by the ghost of one of Hyrule’s past kings - apparently incorporeal immortality runs in the royal bloodlines. He’ll ask you to come to a mark on your map and speak to him, but before you do so, you should return to the Elemental Sanctuary and fuse the Water Element with your sword. You can’t actually enter the Castle, though, so you’ll need to head to the Castle Gardens instead. You’ll note that the western portion of the gardens have been opened, although they’re under careful watch by a series of guards on patrol. You have to maneuver your way through the garden without being spotted by the guards; when you reach the end of the path, you can slash away the grass with your sword to reveal a ladder. Climb down to reach the Elemental Sanctuary and infuse your blade with the Water Element; you’ll now be able to split yourself into three copies. Head back to the garden and get caught by one of the guards to get warped back to the entrance.
Miscellaneous Running Around
With both the three-split technique and the Flame Lantern under your belt, there are some new avenues of exploration open to you.
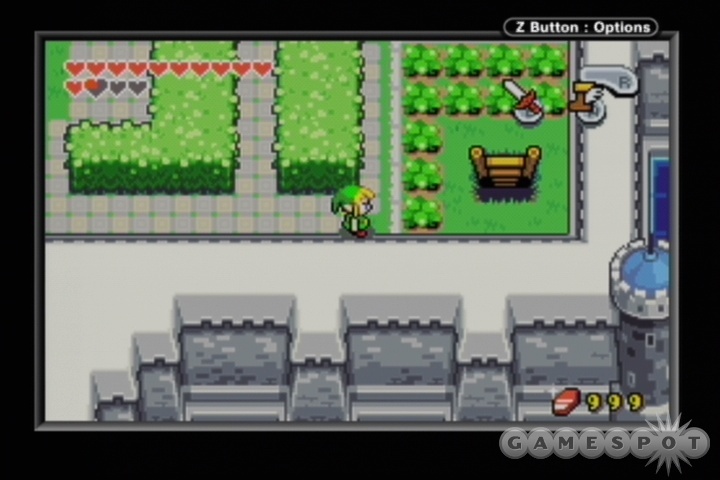
Grimblade’s Training: You may recall a weapons trainer hidden away in the southeastern corner of the Hyrule Castle Garden. If you head back to his location and light up the lanterns on either side of him, he’ll teach you the Sword Beam technique. There’s also a Minish located in the northeastern corner of the garden; to reach him, you’ll need to use your Pegasus Boots on the concealed Minish portal nearby.
Explore the Hyrule School: The school near the northern exit from Hyrule town is now accessible to you. There isn’t much to see inside, but if you shrink yourself down at the pot, then walk outside, you’ll be able to climb to the roof for a red Kinstone. There’s also a Minish path in the recess area; if you’ve been fusing with everyone you see, you may be able to find another Kinstone within a chest there. There’s nothing else you can do in that path at this point, though.
Red Kinstone: If you head to the top of the inn in Hyrule Town and light the two lanterns there, the door leading to the balcony will unlock, allowing you to access the chest there, which contains a red Kinstone.
Mo Money: If you’re willing to scout a bit underground, then you can find some rupees in the cavern underneath the Mayor’s house. You’ll need to enter from both the sand cave, the ladder next to his house, and from the well (hold down while standing above it) in order to push all of the stones into place, but when you do so, you should find 300 rupees in chests there.
Percy’s House: If you return to Percy’s house in the Western Wood, you can finally light up the lanterns inside, which will reveal the usurper of the home as a Moblin. He’ll give you 50 rupees for not saying anything to Percy, while Percy will give you 100 shells for restoring him to his home.
Remote Bombs: Return to the Minish Village and fuse Kinstones with the elder there. After you do so, the Minish in the little hut just to the left of the village itself (on the overworld map), will get an idea.... If you go speak to Belari, you’ll be able to trade your normal bombs for remote bombs, which only go off when you manually detonate them. You can also trade back for normal bombs, if you wish.
More Picolyte: If you speak to the Minish in the barrel home in the Minish village, you should be able to complete more running around to enable him to make more varieties of Picolyte, which will let you more easily find rupees or fairies when cutting through obstacles. This is extremely optional, though; we never found any use for the Picolytes save that of the white variety, and by this point in the game, you should have more than enough Kinstones in your bag to serve you through the end of the game.
Meeting with Gustaf
When you’re ready to meet up with a long-dead king, head into the North Hyrule Field and find the cave in the northwestern corner. If you drop down into it, you’ll be able to split yourself into three Links and push the large stone out of your way. This will let you through the path and into the Royal Valley.
Immediately after entering the Valley, find the steps leading down and bomb the rock wall to the right in between the two fence stumps; another adventurer’s spring is waiting for you. The fairy within will pump you with five questions; answer no, no, yes, no, no to receive a larger quiver.
Elsewhere in the Valley, you’ll come to a darkened maze, hearkening back to the very first Legend of Zelda on the NES. Although each screen is functionally the same, you can easily get lost if you take a wrong turn. Thankfully, there’s a sign on each screen that will point you towards your next destination. Go up, left, left, up, right, and up to leave the maze.
In the next screen of the valley, you’ll have to head northeast to meet up with Dampe, the gravedigger. One wouldn’t presume that a royal valley would need a full-time gravedigger, unless there’s more regicide in Hyrule than we’re led to believe, but whatever. Dampe will give you the Graveyard Key, which is promptly stolen from you by a bird when you exit his hut. In order to get it back, equip both your Flame Lantern and the Pegasus Boots, then start checking all of the trees in the area until you notice one with the bird and key. When you locate it, ram into it with your boots; this will knock the key onto the ground, allowing you to grab it again. When you have it, return to Dampe next to the graveyard gate, and he’ll open said gate for you.
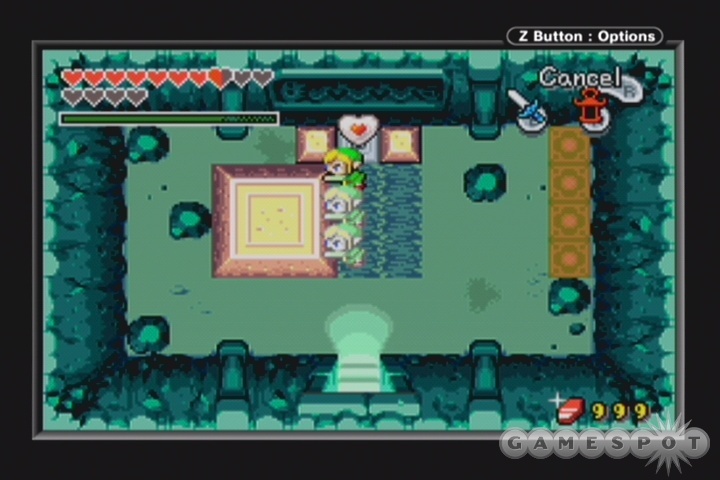
In the graveyard proper, you can fuse kinstones with the ghost twice for a couple of changes to Hyrule Town. There’s also a grave just to the north of the graveyard entrance which you can push up, so get that out of the way, even if the results aren’t immediately obvious. After that’s done, cut through the stones on the right end of the screen to find some flashing panels. Split Link into three copies, then wrap around the graveyard to the left and hit the pressure panels near the large northern grave. Before heading inside, though, push the northwestern gravestone up and head below to retrieve a Piece of Heart.
The Royal Crypt
The Royal Crypt is a little mini-dungeon, apparently not even worth the effort of mapping. Grab the Small Key from one of the mummies in the first room, then ride the leftmost mushroom launcher in the second room and unlock the central door there. On the second floor, you’ll need to split Link into three copies a couple of times in order to unlock a pair of Small Keys; use these on the central blocks here to unlock access to the third floor. When you find the room with four unlit lanterns, light them all and defeat the zombies to proceed to Gustaf’s room. He’ll give you a Kinstone that is said to reveal the "Source of the Flow."
To the Cloud Tops
Now, if you never fused with the Stranger in Hyrule Town and followed the warp he opens up, now would be an excellent time to do so. After fusing with him, take the warp in the South Hyrule Field and find yourself in a house where an old man is being haunted; if you use your Gust Jar to suck up the ghost, you’ll be rewarded later on.
Now, head to the North Hyrule Field and enter the Veil Falls area from the northwestern exit. You’ll come out very close to an imposing grey door; if you use the Kinstone that Gustaf gave you to fuse with it, it’ll open up, giving you access to a cave. On the second floor, you can bomb your way through to a secret passageway; if you follow it along to the end, you’ll find up to 150 shells. If you’re not interested in shells, then just walk out the southern exit of the second room. You’ll find a sheer rock wall, so climb up that and enter the room at the northern end of the plateau there.
The room here has a couple of dead ends, but if you want to explore, check out the stairs leading down or bomb the wall on the right side to find some shells. The stairs or the ladder up will lead you back to the exterior of Veil Falls, where you’ll eventually find a huge whirlwind. Jump in to reach the Cloud Tops area.
Cloud Tops
After you reach the Cloud Tops area, fuse with Hailey and Gale nearby. Hailey’s fusion is another rupee-dropping monster, but Gale will likely open up a waterfall cave down in the Veil Falls. If you head back and examine it, you’ll find another Piece of Heart.
Regardless, you’ll have to explore the Cloud Tops quite a bit to find all of the golden Kinstones here. Head through the red whirlwind near Gale and open the chest there to find the first Kinstone, then fall into the gap nearby to reach another area of the zone. You’ll come across your first shark enemy here, so kill it, then take the northern red whirlwind. You’ll have to dig through the compactified snow here to reach the next area of the platform; if you dig all the way to the northeast, you’ll find another red Kinstone. Off to the left, drop down into the hole and fuse kinstones with the Mysterious Cloud nearby, which will start one of the windmills back near Hailey a-tilting.
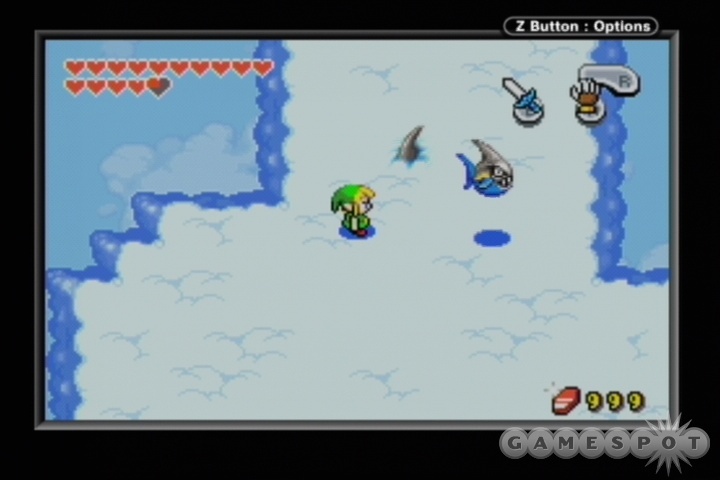
After riding the red whirlwind back up, jumping to the grey whirlwind and fly off to the platform to your left; you’ll need to hop into a couple of whirlwinds to reach it. When you do, drop down into the hole, kill the two sharks there, then pick up the golden Kinstone. Returning topside, fly up to the northwestern corner of the zone to find another golden Kinstone, as well as a couple of chests with shells inside them.
Fly to the platform immediately south of you, then fall down the hole and use your Gust Jar to defeat the Lakitu. Fuse with the Mysterious Cloud nearby to start another windmill going, then return south and ride the red whirlwind back up. When you’re back up topside, take the whirlwinds to the far southwestern corner of the zone and land on the cloud there. Check the chest for some shells, then drop down the hole to find another another Mysterious Cloud and a pair of new red whirlwinds. Fuse with the cloud, then ride the northernmost whirlwind to find another golden Kinstone, as well as a blue one hidden in the snow, before dropping back down and taking the red whirlwind to the southeast. This will lead to another drop-off point, so head down to a seeming deadend. Kill all of the enemies here to grab another golden Kinstone, then take the northernmost red whirlwind up.
You now have all of the Kinstones, but you still need to find the remaining Mysterious Clouds. To begin with, fly south, land on the small island, then dig through the snow to find a single-square hole, which you should drop down through. This path is linear, and will lead to the fourth Mysterious Cloud, so fuse with it.
Now, the final Mysterious Cloud is back with Hailey and Gale, and you can either choose to retrace your steps until you reach them again, or take the easy way out and just use your Ocarina to reach the Veil Falls wind crest and make your way back from there.
Castles In The Sky
After fusing with the final Mysterious Cloud, the whirlwind leading to the very top level of the Cloud Tops will open up, so jump into it and enter the house you find. If you fused with Stranger earlier and completed the little mini-quest involving the possessed grandfather, you’ll be able to speak to him on the second floor and obtain the Light Arrows, which will increase the attack power of your bow, so good on you.
If you head up to the fourth floor and speak to the elder there, he’ll grant you access to the Palace of Winds. Head up to the roof of the castle to reach the whirlwind leading up.
Palace of Winds
Now, we’ll be honest with you - the Palace of Winds is a long, difficult dungeon. There are a lot of enemies to contend with, so if you’re not exceedingly careful, you can find yourself burning through most of the 15 or so Heart Containers you should have by now before you reach the first warp. If you haven’t already, you might want to head to the Minish village and Kinstone fuse with the Minish inside the barrel hut there; doing so should open up a Red Potion at Syrup’s hut. If you fill a bottle with this new potion, you’ll be able to completely restore your health whenever you like - a big improvement over the three or four hearts that a Fairy gives you. You might still want to take a Fairy along with you during your travels here, just in case an enemy kills you before you can sip your potion, but you’ll probably want at least one red potion in your inventory. They do cost 150 rupees apiece, though, so if you’re running short on cash, try digging up more near the door of Master Smith’s house in the South Hyrule Fields.
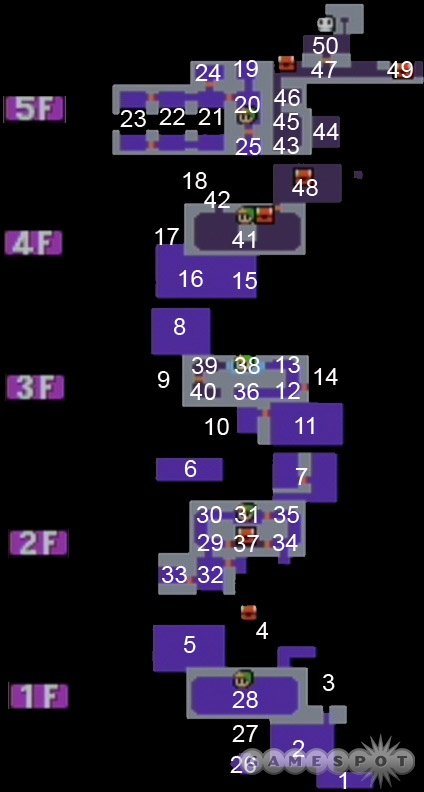
Again, this is a long dungeon, and the map can be a bit confusing at times, due to the way that it has to deal with both exterior and interior areas. Hopefully our numbered map will help cut down on misinterpretations, though.
The Roc’s Cape
You’ll have to hit the switches in room two with your sword to extend the bridges in your path. Nothing too confusing, but you’ll need to use your bow in a couple of spots to hit switches that are on a separate platform from you. At the end of the room, split-Link to push the block out of the way to reach room three, where you’ll have to dodge flying bomb-like enemies as the moving platform here wends its way north. Room four features a treasure chest, but you can’t get to it yet, so just leave it be for now and concetrate on dodging the bombs and flames. See what we mean about it being easy to lose life here?
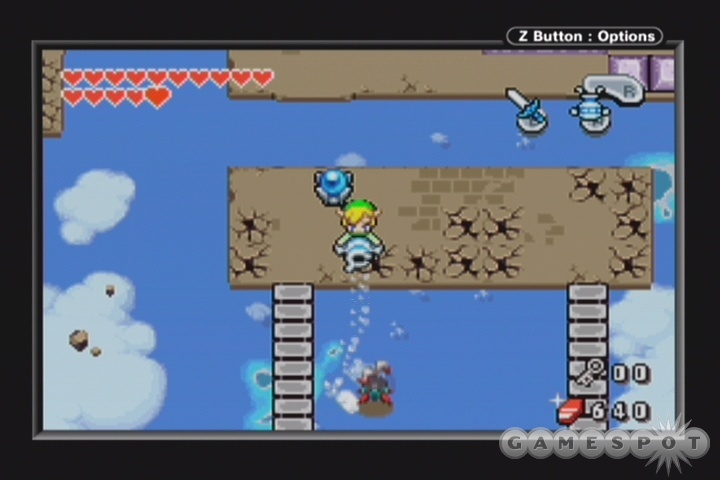
In room five, shoot the switch to the south with an arrow to extend the bridge, then run to it and slash it to make your way to the west. There isn’t another switch on the southwestern platform, though, so you’ll have to lay a bomb next to this one before running across the bridge. This will let you head to the northwestern platform. You’ll have to fend off three waves of Magicians here; if you have a surfeit of bombs, try laying them as they materialize and you might get some easy kills. After they’re all dead, you’ll get your last usable inventory item (save for the fourth bottle): the Roc’s Cape.
Upward and...Upward
Now that you can finally fly, or at least jump, equip the cape and use it to to return to the first platform of this room. You can now reach the platforms that extend upwards, by jumping underneath them. Although they appear to be extending to the north, they’re actually stacked on top of one another, so stand beneath the first one, jump straight up, then repeat the process for the next one, and so on.
As soon as you reach room six, jump off your platform, lest you get knocked back down by the birds. The Chu Chus here are electrified, so ignore them and jump to the eastern platform to room seven. In order to flip the four switches on the south side of this room, you’ll need to split Link into three (using the southernmost three panels), then position a Link in between each of the button pairs and use a sword swing to light them all at once. You’ll probably need to be one space above the buttons to hit them all simultaneously. When you hit them, a pair of turtles will drop down, so use your Cane to flip them over and finish them off.
After the turtles are dead, you’ll be able to pass onto the eastern half of the room. The gales here will attempt to push you off into the nebulous air below, so time your movements to avoid them. You’ll have to jump at the northernmost point, then make your way back south until you reach a hole you can canejump from. This will lead you to the southern end of room six, where you’ll be introduced to a new mechanic; when you see the square outlines on the chain-link gratings, you can jump atop them to fall through. You’ll eventually come to another set of clouds; jump up them to reach room eight.
Room eight features another split-Link puzzle. In order to push the large block on the southern end of the room, you’re going to have to charge up your sword, start making a vertical stack of links, but then wait until the last moment before the platform approaches before completing the splitting process. If you do it properly, then stand on the eastern edge of the platform as it moves to the southeast, you should be able to get to the block with just enough time to push it off to the left before your clones disappear. This will likely take you a couple tries to perfect, but you’ll get it eventually.
Room nine is perhaps even more aggravating; you’ll need to jump from one platform to another to dodge the walls that will otherwise push you off, but you’ll have to do so while birds dive-bomb you from one side of the airy pit. Try to jump as soon as possible, and you’ll hopefully fly over most of them. Room ten is thankfully simpler, consisting only of a series of jumps, sans enemies.
Use your Cane of Pacci to flip over the central wall in room 11, then use the flashing panels to flip the three switches, revealing a Minish portal. Shrink yourself down and head through the path to the south. The puzzle here can be a bit tricky, but if you make a bad move, all you need to do to reset it is head north of the portal, leave the screen, then come back. Check our screenshot for our jar numbers.
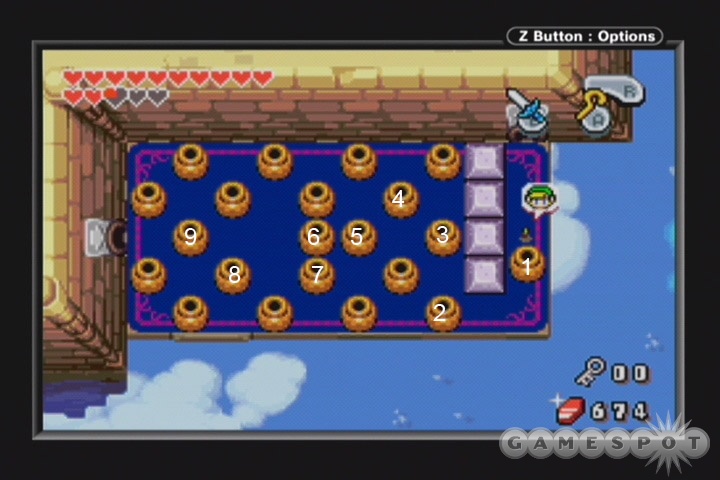
Push block one south off the platform. Block two gets pushed one square to the left. Blocks three and four go one square up. Push five south one square, then six to the left one square. Push seven down one square, then six up one square. Pushing eight down one square, then nine up one square will get you to the exit. Move north from there to reach room 12, but pass immediately through it to reach room 13, where you can resize yourself to normal. Hitting the switch in room 12 with an arrow will both unlock the eastern door and net you a Small Key.
You’re Not Even Halfway Done Yet!
Take the small key and return to room 11, where you can unlock a door and head upwards to room 15 on the fourth floor. Room 16 will have an aggravating gust setup; if you wait until the first two machines are done gusting, then go for a long glide off the western edge of the broken bridge, you should be able to make it all the way to the far platform, even if the other gust machines knock you around a bit. You’ll have to push your way through the blocks you find on the top of the platform, then jump over the spikes to reach another gust machine. Use its boost to clear the long gap to the west to reach room 17. In order to get through there, equip both the Cane of Pacci and your Roc’s Cape. Use the Cane on the enemies off to the side of the platforms while jumping to the north.
In room 18, use the cloud platforms to make your way to the east, stopping to climb the ladder to the south to find a blue Kinstone. Climb up the easternmost platforms to reach room 19.
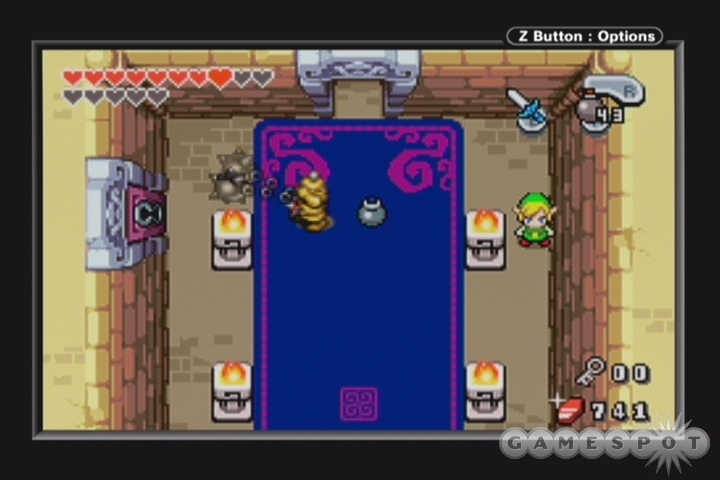
Room 20 features a pair of incredibly annoying enemies that’ll attack you with maces. In order to kill them, you’ll have to bait them into thrusting their mace out at you; standing in front of them for a moment or two is usually enough to do the trick. After they swing the mace and retract it, they’ll stand still for a moment, allowing you to get up close and personal with your sword or a remote bomb. Just be sure to avoid the maces when they come after you, as they’ll whip off two health containers with each swing.
After the knights are dead, you’ll gain a Small Key. Use it to start heading west. In the northern half of room 22, you’ll have to use one of the jars to depress a pressure plate while flipping the rest with your split-Link. Room 23 will have you flipping another switch to activate a gust machine; fly across the channel to reach the southern half of the room, where you’ll have to fight off some Moblins and a pair of wizards. If you have the remote bombs, try using them to set traps for the enemies here. After they’re all dead, head west and wrap back around to the northern half of room 21, where you can find another Small Key. Use it to unlock the door to room 24, where you’ll find the Big Key. If you then head to room 25, you’ll be able to completely refill your health by exiting and re-entering the room and smashing the jars there, which each contain a health-up. All you can do then is drop off the southern part of the room, which will take you all the way back down to the first floor.
Room 26 is something of a mini-boss fight, but it’s the same big knight-with-shield that you’ve seen numerous times before. The standard block-with-shield, retaliate-with-sword tactic will wear him down over time, but you’ll have to watch out for one of his charge attacks, which will punch through your shields and deal heavy damage. If you’re more of a strategist, try using remote bombs to stun the knight and hit him quickly. Regardless, his death will finally open up the first portal back to the entrance to the Palace, making this a great spot to save your game.
Back Up The Tower
Head up to room 28 and examine the ladder to the right of the entrance to find the Compass before walking up the steps to the left. You can also use the skulls here to restore your health if you were wounded by the knight. In room 29, head up and right to room 31, where you can drop down the center hole to find a chest back in room 28 with a Small Key inside. Return to room 29 and head south to reach room 32. You’ll need to form another split-Link trio to flip the sword-pressure switches on the south end of the room; when you unlock the door on the western side, head to room 34 and jump over the rolling traps to find another chest with a Small Key inside. With that in tow (you should have two now), unlock the door in room 32 and head east. You’ll have to use the whirlwinds in room 33 to maneuver to the eastern platform.
In room 35, you can hit a pair of switches with a spin attack to unlock the door leading back to room 31; this will let you bypass the jumping puzzle in room 33 if you ever need to backtrack. Head upstairs via room 34, then head west one room to reach 36. Drop into the hole here and kill the wizards in room 37 to obtain a red Kinstone, then head back up the steps in room 34 and wrap around north to room 38. The wizards here, when defeated, will allow you to finally obtain the Dungeon Map.
Wrap your way around to room 40, then head up the stairs to reach the large room 41. You can obtain a Piece of Heart by heading northwest from where you enter, then pushing the blocks you find into the hole there. If you then jump across the gap with your Roc’s Cape and return to room 18, you can find the Piece of Heart sitting at the end of a path; easy enough. When you return to room 41, you’ll need to either use a boomerang or an arrow to kill the flying bomb while it’s near the broken blocks on the far side of the gap to the right of the entrance; this will destroy the blocks and allow you to pass with your Roc’s Cape. On the far side, head straight up and flip the switch you find with either a properly twisted boomerang or a thrown bomb; if you then wrap back around to the door that opened up, you’ll be able to nab 200 rupees. You can also light the two lanterns in the northeastern corner of the room to open the red warp back to the entrance of the dungeon.
Unlock the room leading to 43 and head up. You can’t head north here, so bomb the doorway leading to 44, walk north, and set another bomb on the northern side of room 44 to lead you back into room 45. (There won’t be a broken wall to guide you, so you might have to lay a few bombs before you hit the right spot.)
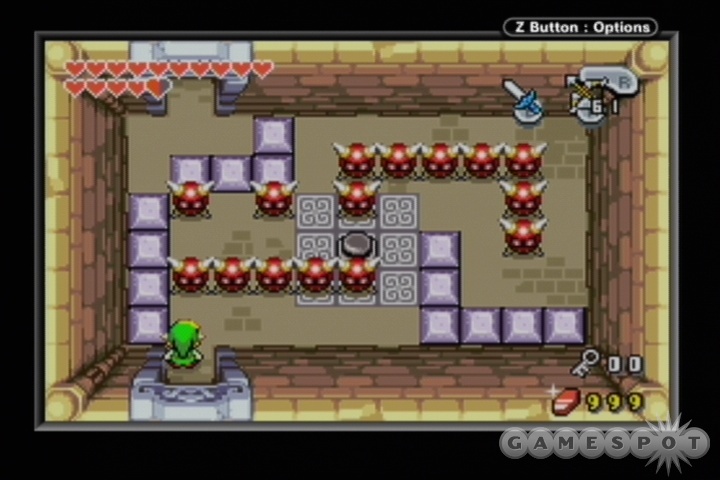
When you reach room 46, you’ll have to maneuver your way through a bunch of floating bombs to reach the exit; if you hit even one of them, you’ll need to leave the room and come back to reset the puzzle. It’s not difficult to get through, though, assuming you can walk in a straight line. When you reach the exit, push the blocks out of the way to reach the open door, then head up to 47 and get the Small Key. You can use it on the locked door in room 41, but in order to reach it, you’ll need to stand on some of the broken bits of floor in room 45 and wait for one of them to fall out from under you.
Room 48 is a large puzzle/maze; in order to get around, you’ll need to use your Roc’s Cape to jump over the numerous spike traps. If you want a blue Kinstone, head right and find the chest at the dead end; otherwise, head up from the entrance to the room and walk around to the southeastern corner; you can push the blocks there into the void to make a path for you to jump across to the eastern side of the room. You’ll notice that there are two cloud-ladders leading up; if you want a red Kinstone, jump up the western one a few steps, then jump over to the eastern one and take it up. Otherwise, just continue up the western one until you reach room 50. Fill up on hearts from the skulls here before heading up in the giant whirlwind to meet the boss.
Boss Fight: Gyorgs
Your last element is guarded by a pair of fearsome Gyorgs, manta-like creatures that fly high above the Palace of Wind. Luckily, they’re not incredibly difficult to beat - they’re actually a bit easier than Octorock, although you’ll still take plenty of damage during this fight, so hopefully you still have a potion or fairy in your bottle.
As with most boss fights, you’ll need to hurt each of the Gyorgs three times in order to defeat them. You’ll likely start with the bigger of the two, but you’ll need to move from manta to manta, so keep your Roc’s Cape equipped; it’ll let you jump off of one onto the other. The bigger one is the more difficult to hurt; it has a few flashing panels on its back, along with eight eyes. It’ll pop up three eyes at a time; when you see the patten, split Link into a trio that matches and hit all three eyes simultaneously. This will pop open all eight eyes, allowing you to spam out sword swings in the hopes of hitting all of them at once; just mash the button here to lay on the damage thick and heavy. In the later rounds, you’re likely to lose your split due to projectiles that’ll be flying around; when this occurs, just continue to swing away with your main Link and start the process over when another set of three eyes pops up.
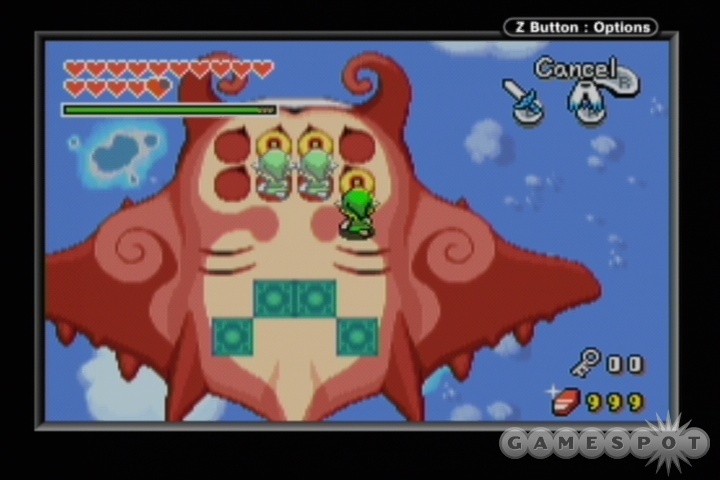
The small Gyorg has a different pattern. When you jump onto it, you’ll notice four eyes, with one in each corner of the square, as well as a tail. The eyes will open periodically, but only for a second or so, so get your swings in while you can. After each successful hit, the tail will swing around to swipe at you, so jump straight up to avoid it. In later rounds, you’ll also have to contend with smaller flying projectiles while you do this; you can slash at these with your sword to prevent them from hitting you.
After you defeat both of the Gyorgs, you will, as predicted, nab a new Heart Container and the Wind Element.
Restoring the Picori Blade
More Running Around
Before you head back to Hyrule, walk through the Wind Tribe’s castle and attempt to fuse Kinstones with the inhabitants; you should find that many of them will now let you.
Final Training: Now that you have all of your equipment, you’ll be able to finally complete all of your swordsman training. If you return to Swiftblade in Hyrule Town, he’ll teach you the Dash Attack and the Down Thrust. This should bring your total number of Tiger Scrolls up to seven, meaning that you can return to Swiftblade the First (underneath the gravestone on the western edge of the Castor Wilds) and learn the Great Spin Attack.
When you have all eight scrolls (including the one from Swiftblade the First), you can then return to the other hidden trainers and fuse Kinstones with them to reveal yet more hidden trainers.
Greyblade: Greyblade is in Mt. Crenel; you can reach him by heading to Mt. Crenel’s Base, then climbing the wall in the northeastern corner of that zone and continuing to climb up the eastern side of Mt. Crenel until you come to an entrance. If you fuse a red Kinstone with him, he’ll open up a waterfall cave in the northeastern corner of Castor Wilds. Train with Scarblade will let you use your Spin Attack more quickly than you could previously.

Waveblade: Waveblade is located near the Temple of Droplets in Lake Hylia, inside a small tree hut to the south. Fusing with him will open up a waterfall cave in North Hyrule Field. If you train with Greatblade within, you’ll be able to extend the length of your Great Spin Attack.
Grimblade: Grimblade is in the southeastern corner of the Hyrule Castle Gardens. Fuse with him to open a waterfall cave in Veil Falls. If you head there (via the northwestern corner of the Lon Lon Ranch), you can train with Spiritblade, who’ll let you form split-Links more quickly than before.
The Magical Boomerang: By this point in the game, you may be able to get the Magical Boomerang. To begin doing so, fuse Kinstones with Tingle, who appears to the east of your house in the South Hyrule Field. Doing so will open up one of the four central trees in the North Hyrule Field. If you find and fuse with his three brothers, then the rest of the trees will open up, allowing you to enter them and obtain the Magical Boomerang.
Now, the three brothers can be kind of weird...if you go to one of these locations, and there’s no one there (you’ll know you’re in the correct spot when you see a tree stump on the ground), then check the other locations. Sometimes they just don’t seem to show up. Regardless, if you want to give it a shot, fuse with Tingle, then track down the brothers in the Lon Lon Ranch (located through the cave in the cow field), the northern half of Lake Hylia, and in the Trilby Highlands (dig through a sand cave). If you fuse with all of them, then manipulate the switches inside the trees, a path will open up in the middle of the field leading down to the Magical Boomerang.
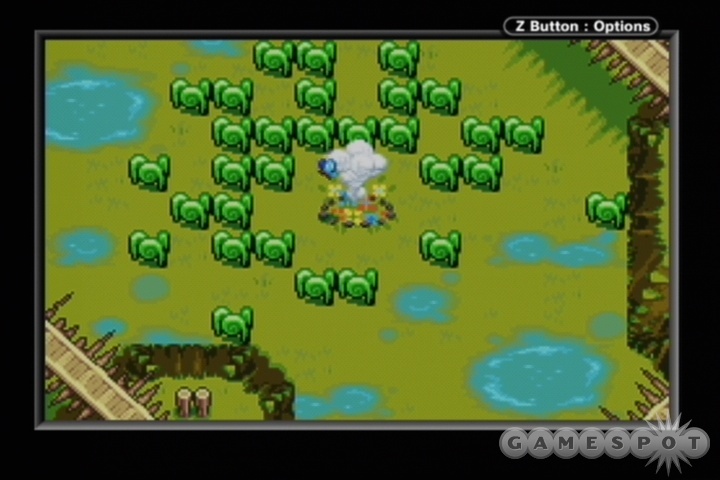
Upgrade Butterflies: If you fuse with each of the three sisters that were previously in the Inn (the ones who were looking for houses), you can reveal special Butterflies that will upgrade your abilities. There are three total: one in the Castor Fields, which will increase your digging speed with the Mole Mitts; one in the Wind Ruins area to the south of the Castor Fields, which will let you shoot arrows faster; and one in the Royal Graveyard, which will let you swim faster. The first two are easy to obtain, but you’ll have to go through the whole darkened-maze bit again to get to the third, for only a marginal gain, so you might just want to skip it.
Heart Pieces: There are some Pieces of Heart that are now accessible to you, thanks to your Roc’s Cape. The first is located in the large bell in Hyrule Town; jump up underneath it to drop it down. The second is in the same little dungeon where you got the Power Bracelets. To find it, Minish yourself in the carpenter’s house, then weave your way back up to the little field with cats in it. If you drop down into the dungeon there, you can jump to the left to pick up the Piece of Heart. Lastly, there’s a Piece of Heart on an island in Lake Hylia that you can grab at this point.
Lake Hylia Sand Cave: After grabbing the Piece of Heart in Lake Hylia, make the diagonal jump to the northeast, then jump north to reach a previously inaccessible. Inside, start digging to the right; if you follow the path to the end, you’ll find a giant beanstalk. (Assuming you Kinstone fused with the Minish around Lake Hylia; if it’s not there, you may have to Minish yourself near the Mayor’s Hut and look around for the correct Forest Minish.) At the top of the beanstalk, you’ll find 200 rupees, 200 shells, and a Piece of Heart. If you then head southwest of the entrance, you’ll be able to dig out some chests, as well as another Mysterious Wall. Fusing with it will send the sixth Goron to the Goron cave in Lon Lon Ranch. Heading directly west of the entrance will lead to more chests and another Piece of Heart.
The Fourth Bottle: If you’ve uncovered all six Gorons, you can head to the Goron cave in the Lon Lon Ranch and walk to the end to find the fourth bottle. Good on you. You can also Kinstone fuse with one of the Gorons to reveal a Kinstone vendor in Hyrule Town. Check the appendix on Kinstone fusions if you can’t find the Gorons.
A Full Heart Container: Return to Minish Village and take the exit in the northeastern corner of town. Jump into the water and swim to the house on the far side. Enter and exit multiple times to Kinstone fuse with him (he can fuse more than once). When he opens a crack in the ground near the wind crest in Lake Hylia; if you head through the cave there, you’ll find Librari in a hut, who’ll give you a full Heart Container. Not bad!
Back to the Elemental Sanctuary
Return to the Elemental Sanctuary underneath Hyrule Castle and fuse the Wind Element with your sword, turning it into the Four Sword. With it, you’ll be able to shoot out beams of energy when you perform a Spin Attack; this will break Vaati’s curses, and will also destroy the large panel on the northern end of the room, allowing you to access a chamber with stained-glass windows. If you read the windows, they’ll reveal that the Light Force is embodied in Princess Zelda. Unfortunately, Vaati will appear and knock you unconscious. After he disappears, get up and start making your way back outside, unfreezing the guards and the Minister by hitting them with a charged Spin Attack. If you unlock the southern exit, you’ll come out to the Hyrule Castle, save that it’s been...changed, somehow, by the power of Vaati’s magic. It’s now the Dark Hyrule Castle, and you’ll need to fight your way to the top to reach Vaati and free the Princess.
Dark Hyrule Castle
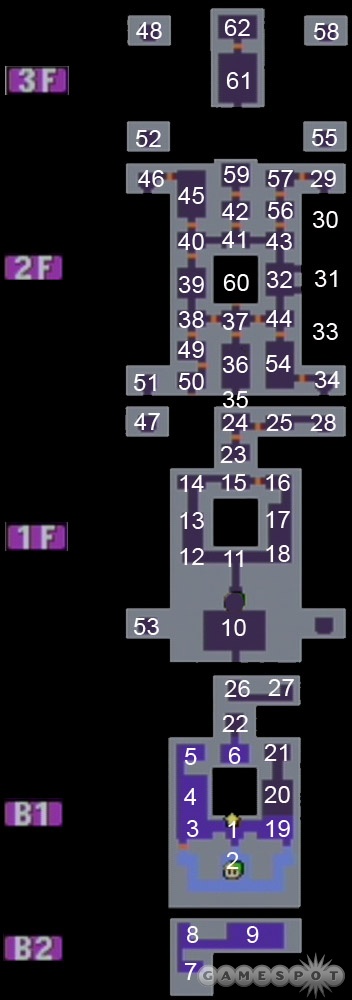
Finding the Dungeon Map
The first thing you’ll want to do here is to find the Dungeon Map, which is located relatively close to the beginning of the castle entrance. To begin with, head south to room two, where you can fill up your health and ammo by slashing at the jars. Continue to do so while jumping between that room and room one until you’re set to go, then walk all the way up to room five. You can kill the enemies here, if you wish (the little sprite-link creatures can be taken out with a boomerang), but what you really need to do is bomb the passageway leading east. You’ll find a Minish portal in room six, so shrinkify yourself, then return to room four and drop down the hole there. Walk up and through the Minish path in room eight to reach the castle prisons. If you resize yourself, you’ll be able to flip the switch here, which opens the prison cell’s gate (because all prisons have large switches that allow the inmates to let themselves out whenever they like, obviously). You can free the King from his stupor now; he’ll give you a Small Key.
Return to room three and unlock the southern door there. (The other locked doors you see on your way back are fake.) This’ll lead you back to the southern part of room two, where you’ll find a large blue chest with the Dungeon Map. Grab it before taking the stairs up to room 10. As promised, you’ll be able to leave the castle from here, simply by exiting south. Do so.
Exterior Events
Now, before you complete the final dungeon, it’s worth your time to grab a few more items. One more Heart Container has been unlocked; if you head to the school in Hyrule Town, you can shrink yourself down, then head to the end of the Minish path to push a big block out of the way. You’ll grab a Piece of Heart there, as well as three red Kinstones.
This would also be a good time to fill up your bottles with red potions from Syrup’s house, if you haven’t already. You may also want to check out the Piece of Heart appendix later in the guide to see if there are any missing. Don’t worry if you don’t have 20 Heart Containers; some of the Pieces of Heart aren’t available until after you beat the game’s end boss (which makes perfect sense, of course), and some are only available as the result of random Kinfusions. You don’t need anywhere near 20 Heart Containers to beat Vaati, especially if you get those red potions that we mentioned.
Back Inside the Castle
Return to the Dark Hyrule Castle and wrap your way around to room 13, where four cannons are firing southwards. You’ll need to use your sword to reflect the shells back at the cannons, but in order to unlock the passage to the north, you’ll have to defeat them all simultaneously. To do so, charge up your spirit meter by holding your sword button down, then quickly activate all of the four flashing panels immediately after a volley of shots from the cannons. If you time this properly (start from one end and walk across the room), the Spin Attack that flashes after you make your copies should reflect the shots back at the cannons, letting you pass through.
Room 15 has another little puzzle; in order to unlock the far door, you’ll have to change all of the panels here from blue to red without stepping on the same tile twice. To do so, head right from the starting point until you reach the far wall, head one tile up, head left for the next row, and so on. When you reach the end of the fourth row, head up two steps to meet the northern walland zigzag up and down the fifth and six rows; this should let you complete the puzzle and move on.
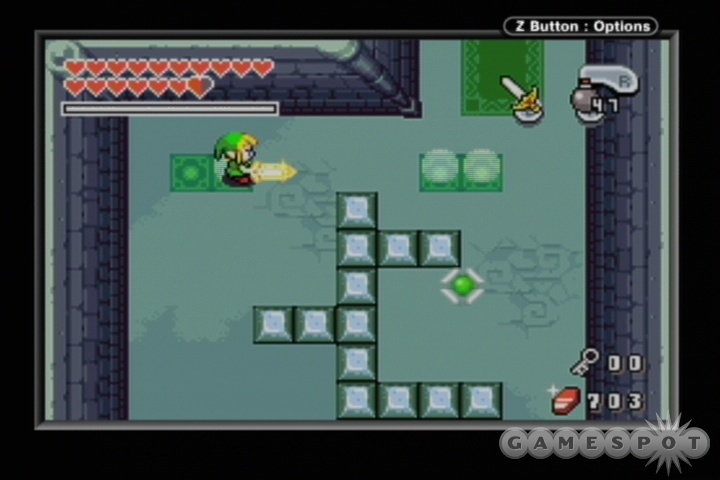
The next puzzle comes in room 17. In order to reveal the chest here, you’ll have to form a split-Link and maneuver your clones to the southern end of the room, but the razortrap that’s maneuvering its way around the central rocks will have a thing or two to say about that. If you wait until it’s approaching the upper-right corner of the rocks, just to the south of where the flashing panels are located, you should be able to avoid it and reveal the chest with a Small Key. Return to room 10 and unlock the door there to return to floor B1.
Make your way back through room two to reach room 20. The cannons here are aligned on either side of the corridor, but you can easily deal with them by making a vertical stack of Links, then using a Spin Attack in the middle of the aisle to reflect their shots back at them, revealing the passage to 21. There are a bunch of enemies here, but a Great Spin Attack should let you clear out most or all of them in one fell swoop. Although the room appears to be a dead end, you can drop a bomb in the lower-left corner to reveal a passage back to room six.
Leave room six to the north and climb the steps leading up to room 23. Room 24 will feature another annoying big-ass knight enemy; once again, the best way to beat him is with the sword and shield. If he thrusts at you, take it with your shield; if he slashes diagonally, block it and swing at him while he’s exposed; and if he charges up his sword for a powerful blow, get out of the way. After he’s done for, head right to room 25 to retrieve the Compass, then push the throne in room 24 to either side to find a passageway heading down. This will let you get to room 28, where you’ll find the stairs leading up to the second floor, which has a floorplan that should intimidate you.
Ever Higher
Room 29 will lead to you the exterior room 30, which doesn’t appear on your map. Use the whirlwinds to maneuver around the cannons and hop to room 31, where you’ll be able to re-enter the castle’s interior. You’ll have to deal with another split-Link puzzle in room 32; wait until the rotating flames are pointing directly north before completing your clone creation process, then avoid the flames and push the large block here to the south to return to room 31. If you scootch your way to the southern end of room 33, you’ll be able to enter room 34, but only briefly; use the jars here to refill your arrows and such if you need to.
Room 35 likewise doesn’t appear on your map; you’ll need to shoot a switch here with an arrow to extend the bridge, then head back inside to room 36. A simple switch puzzle is all that’s here, so hit them with your cloned swords and make your way to room 37, where a pair of mace-wielding knights awaits you. These guys are exceedingly annoying to deal with due to the cramped quarters; in order to kill the first one, you might want to try using remote bombs or throwing bombs at them. After you kill one, the second can be easily dispatched by baiting him into throwing his mace, then running up to him and slashing him repeatedly. Killing them both will open a portal back to the entrance to the dungeon. This would probably be a good idea to return to room two to restock on bombs, arrows and health, if you’re running low.
After you’re done there, head back to room 37 and walk towards room 39. In order to get through this room, you’ll need to hop onto the platform, then jump onto the platform extended across the room and hit the two switches with your boomerang. To actually get to the door, though, you’ll need to blow up the blocks that prevent you from reaching it. To do so, you’ll need to either throw a bomb at them, or brush up against the blocks and lay down a remote bomb and detonate it when you’re clear.
When you reach room 41, hit the electrified orbs with a boomerang to produce a stream of Fairies, which should completely restore your health. That’ll come in handy when you head to room 42, where another sword-and-shield knight is waiting for you. This is the ultimate evolution of the night, so the old shield-then-slash technique will no longer work; they recover too quickly from their stunnedness to be hit by the retaliation blow. The only real way to get them is with the Great Spin Attack; if you charge it up and then keep tapping the button, you should be able to keep spinning long enough to get around them or on one side of them and get a hit or two in. If you don’t have the GSA, then you’re going to be in trouble, as the knight is pretty much invulnerable to everything except sword slashes, and he’ll block most of the ones that you send at him. If you must, try using your Pegasus Boots to run through the knight and strike him from behind.
Retrieving The Keys
After you kill the first knight, you’ll notice a gaggle of them appearing in rooms 38, 40, 43, and 44. Luckily, these aren’t of the super-hard variety, so you can kill them with the old methods. Start with the one in room 40, then head north into room 45. In order to pass through, you’ll have to shoot the four targets along the northern wall with arrows; this’ll let you into room 46. Push the blocks aside, then fall down into the hole. Take the stairs back up. (The switch here will open the passage leading south, but there’s nothing there save for a couple of jars.) Take the stairs up again to reach one of the four Small Keys you need.
Next up, head south to room 38 and kill the knights there with your Great Spin Attack, then head down to room 49. The path to light up all the panels here is: down as far as you can go, right, up, right one square, up, up, left, up, right, right, down all the way, right, right, right, up, left, up, left, up, right, up, right, down, down, down, right. Phew. Kill the ghosts in room 50 (only one of them is real) to reach room 35 again.
Head up to room 52 to grab another Small Key, then head down to room 53 if you need an arrow and bomb restock. In room 54, you’ll have to make a split-Link stack with all four corners of one of the squares of flashing panels, then use your clones with a Spin Attack near the switches to open the door leading to room 55, where another Small Key is yours for the taking. Room 56 features a light-all-the-lanterns puzzle; follow the flame trap around clockwise, and you should have plenty of time to get them all. The last key is in room 58, so grab it and return to 41 to completely heal yourself by boomeranging the electrical enemies. Grab the Big Key in room 59 by unlocking the blocks, then making a vertical stack of Links and pushing the block to one side.
Facing Vaati
Now would obviously be a good time to save your game, if not actually leave the dungeon and stock up on red healing potions from Syrup. After doing so, return to room 37 and unlock the big door there. The mace-wielding foe in room 60 is intended to deal big damage to you, and he definitely will if you try to get within sword range. Instead of doing that, whip out your bombs and throw them at him until he keels over. In room 61, walk forward and Great Spin Attack all the of the enemies before using the flashing panels to open the door to the boss room.
As soon as you enter the boss room, note the jars to the left and right of the door; these both contain hearts, so slash at them and then leave the room and reenter as often as it takes to fill your help up. Don’t forget to leave the room one last time to reset them afterwards, so that they’ll be available during your fight with the three Knights that appear after you set foot on the green carpet here. As per usual, the Great Spin Attack is your best bet for dealing with these guys; if you don’t have that, then you’re going to be in a lot of trouble.
Boss Fight: Vaati, First Form
All of Vaati’s forms use the same basic concept: there’s a large, central red eye protected by smaller eyes. In order to hit the central eye and thus actually hurt Vaati, you have to destroy the smaller eyes.

In his first form, Vaati will take a recognizably humanoid shape, albeit one a bit larger than his normal body. The smaller eyes will rotate around him clockwise to protect him; he begins with two, but will quickly pump himself up to four. In order to kill them, all you need to do is slash them with your sword; when all four of the eyes have been taken out, you can run up to the central eye which opens on Vaati’s body and slash at it. You’ll need to do this four or five times to kill him off.
Of course, Vaati doesn’t stay the same throughout the fight. The main difficulty here will lie in the way that he begins covering his protective eyes with their own protective covering - this will prevent you from hitting them with a sword. In order to counteract this effect, you’ll have to use your Gust Jar and suck the coverings off of the eyes, then resume your normal slashing methodologies. It’s also around this time that Vaati will begin warping around the room when his central eye is exposed. It can be tremendously annoying to track him down and hit his eye, but you seem to have an unlimited amount of time in which to do so, so no worries. Vaati’s attacks here aren’t particularly troublesome; if you take damage, you can check the jars around the room for some extra health. The one in the lower-right corner holds a fairy for a more significant health boost.
Boss Fight: Vaati, Second Form
After the preliminary round is done with, it’s time for the real deal. Vaati now essentially becomes one giant eye with a number of smaller eyes around him, as you can see in our screenshots. Your tools here will include the sword - as always - and your bow. In order to force the eyes around Vaati to open up, you have to hit them with an arrow. As you do so, you’ll notice that some of them turn blue and remain closed, while others will turn red and open up - these latter will obviously be your primary targets.
When you uncover four red eyes (they’ll always appear in a row of four, so it shouldn’t take more than two hits to discover which side of Vaati they’re on), you’ll need to use the flashing panels in the middle of the room to form a split-Link that matches up with the row of eyes. If you then hit all four eyes at the same time, the central eye will be exposed, allowing you to run up and slash it.
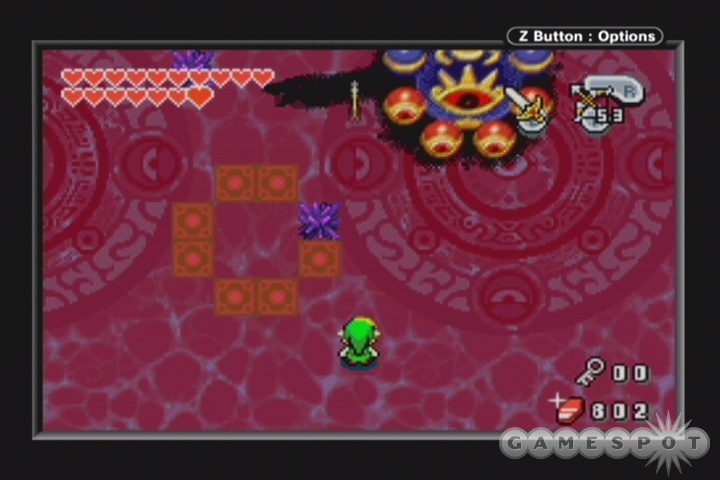
Of course, this is much easier to say than to actually do. Vaati has three primary forms of attack here: in one, he’ll send out electrical balls; in another, he’ll jump up and down, causing a large number of bricks to fall down from the ceiling; in the last (and most common), he’ll send out a swirl of small spiky squares all around him; these can either damage you when they’re being flung, or they can hurt you when you hit them while you’re running around, as they stick to the floor and clump together. Still, they can come in handy, as they’ll occasionally drop more arrows and hearts when you destroy them with your sword.
Getting in close to Vaati with your clones isn’t too difficult in the earlier part of the fight isn’t too difficult, but getting the last couple of hits in is going to be very frustrating, as he’ll start to just rotate around the room very quickly, forcing you to dodge the numerous spike clumps on the ground to get into position. It’s perhaps easiest to wait for him to pause before jumping up and down to hit him; you might also want to try getting charging up your spirit Link and hitting three of the four panels, then using your "real" Link to dodge Vaati’s fire while waiting for an opportune moment to strike. It’s much easier to dodge the various projectiles coming your way while you’re a single Link; if you have to do so while attempting to control four of yourself, you’ll never get close enough to Vaati to hurt him.
We’re not going to lie - this battle is pretty annoying and frustrating, but none of Vaati’s attacks are particularly powerful, meaning that it’s usually just a matter of waiting for the right moment to hit him. If you persist, you’ll eventually get through and deal the final blow. After you do so, you’ll be able to return to Zelda and free her from the stone with your Spin Attack, which one would think would signify the end of the game. Not so fast, though; you’ll have to return to the Elemental Sanctuary for one last fight with Vaati. (Before you reach it, you should duck back into the northern side of room two to stock up on health from the Fairies there; if you use a health potion in the earlier fights, you can also fill your bottles with them.)
Boss Fight: Vaati, Final Form
The first portion of the final final battle (for real this time!) is fairly easy, so long as you remember to stay above Vaati. It doesn’t look like there’s a lot of room up there, but you should be able to maneuver, and you’ll take a lot less damage up north than you will if you stay below Vaati. If you wander around above him long enough, he’ll shoot one of his arms into the ground, where it’ll disappear and come back up underneath you. When this occurs, hit it with the Cane of Pacci to flip it over, then quickly hit the Minish portal and walk into the small gap at the bottom of the now-overturned arm to get inside it.
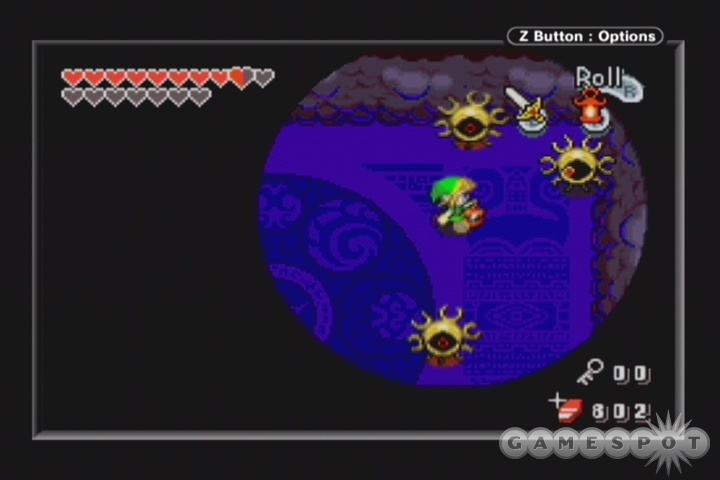
While inside the arm, you’ll be confronted with a dozen or so smaller eyes; one of these will be slightly different than the others in the coloration of its eye. (The eye’s smaller eye, that is - you’ll know what we mean when you see them in action.) Check around until you see the eye with a slightly more orange central orifice; this is your target. Concentrate all of your firepower on this eye until it’s destroyed; doing so will result in the destruction of the entire arm. You’ll have to repeat the process for the second arm as well. The only difference with that arm will be the fact that its interior is darkened; switch your Cane of Pacci out for your Flame Lantern to see what you’re doing.
After both arms have been destroyed, Vaati will take on a form similar to that in the last fight, where he has a central eye and four smaller eyes that protect him. In order to hurt him now, you’ll need to wait until the four smaller eyes charge up an electricity blast, then use a split-Link set of clones to reflect the electricity back to all four eyes at the same time. The main problem here will be dodging the electricity that Vaati’s main body will periodically send out; it sweeps across the entire platform that you’re standing on, so it’ll be quite difficult to avoid it if you’ve already cloned yourself. A better method is to hit three of the panels, then wait for the lower eyes to start charging up before hitting the fourth panel and completing your spirit link; if Vaati’s near the flashing panels, you should be able to get underneath the eyes and reflec their blast, but you won’t have a large margin for error due to how quickly the eyes go from charging to firing.
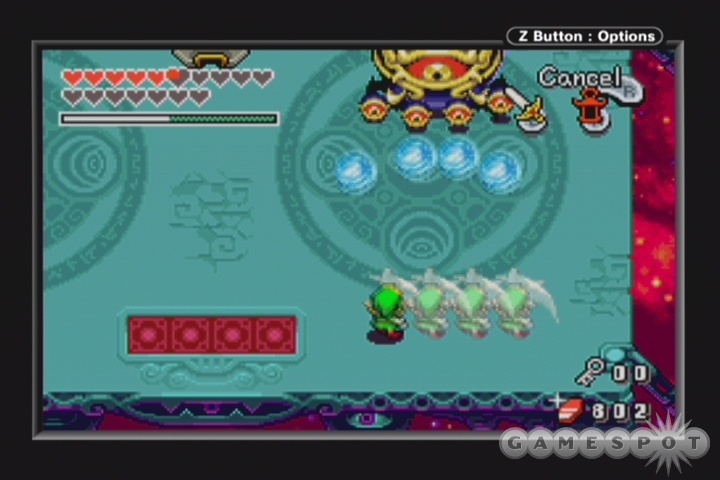
Another difficulty here lies in the odd bounciness of the eyes’ electricity; you won’t always be able to reflect it back so that it hits all of them simultaneously, even if you’re correctly positioned and hit them all at the same time. Sometimes the electricity will hit the front eyes first, other times one ball will deflect off to the side. The best method seems to be to stand around three floor tiles to the south of Vaati before waiting for the electricity; this should minimize the chance for a mistake when hitting the electricity back.
After the four eyes are shut, you’ll have to approach Vaati’s main eye and hit it with your sword a few times before the smaller eyes are reconstituted. Repeating this process a few times will net you the victory you no doubt richly deserve.
After Vaati
After you beat Vaati and the credits roll, you’ll be asked whether or not you wish to save your game. If you don’t, then you’ll be able to replay Vaati and relive the ending. If you do save, though, then load up your save game from the start menu, well, you’ll still be able to replay Vaati and the ending, but a couple of extra events occur as well. You can, of course, continue to collect Kinfusions and Pieces of Heart, if you wish, but there’s little point to it.
If you fuse with one of the Gorons in the Goron cave at this point, a huge Goron will appear at the top of Veil Falls. If you head up there and talk to him, he’ll ask to eat your shield. As gross as it sounds, you should let him do so. If you then wander around the game world for a while and return to him, he’ll give you the Mirror Shield. Lots of good it’ll do you now that you’ve beaten the game, but hey.
Secondly, if you’ve been collecting figurines, then you’ll be able to return to Carlov in Hyrule Town and obtain six more figurines from him, bringing your potential total up to 136. If you manage to collect all of them, you’ll receive the Carlov Medal. Show it to the man sitting at the table outside the café to gain access to the last locked house in Hyrule Town (the one with the golden statue atop it). This’ll net you the last possible Piece of Heart in the game, as well as some other goodies.
Beyond that, there isn’t much to do in the game that you haven’t already done, so...time to put this game to rest.
Pieces of Heart
There are 44 passively-named Pieces of Heart in Minish Cap, spread all across the game world. It might help to print out this checklist as you play the game to keep track of which Pieces you’ve found; otherwise it can be difficult to track them when you’re looking for the last few you need. Note that at least one isn’t available until after you beat the final boss, so getting them all isn’t possible before you actually beat the game. This makes perfect sense, obviously, and you’re a fool if you think it doesn’t.
Exterior Zones
South Hyrule Field
[ ] After making a Kinstone fusion with the Hurdy-Gurdy Man (the guy who gives you your Kinstone Bag in Hyrule Town, a thorny tree will open up here. Head inside to find a Piece.
[ ] When you have the flippers and the Pegasus Boots, use the latter on the flashy tree in the southwestern corner of the zone to reveal a Minish portal. Use it, jump into the river, then swim northeast until you find a small Minish cave; inside is your Piece.
Hyrule Town
[ ] After obtaining the Cane of Pacci, Minishize yourself inside one of the homes on the southern side of the zone and climb up to the rear of the Inn on the eastern edge of town. If you find the flower path on its northern side, you’ll be able to enter and grab a Piece.
[ ] Later in the game, when Simon’s Simulations unlocks (check after each dungeon), head inside and defeat one wave of enemies for another piece.
[ ] After obtaining the Roc’s Cape in the Palace of Wind, return to town and Minishize yourself in the Carpenter’s house. Travel north through the scholar’s fireplace, walk across the small bridge, maneuver your way past the cats, and head inside the cave near the fountain. Jump to the east to obtain a Piece.
[ ] Use the Roc’s Cape to jump into the bell on the northern end of town. A Piece will fall down.
[ ] When you fuse the Wind Element into your sword, you’ll be able to split into four Links. Return to the school, Minish yourself, then enter the Minish path in the courtyard. If you push the block out of the way, you’ll obtain another Piece.
[ ] If you complete the collecting cuccoos mini-game that the girl in the southeastern corner of the zone gives you, you’ll earn another Piece.
[ ] After beating Vaati, you’ll be able to earn extra figurines from the collector in the southwestern corner. If you have all 136, you’ll be able to give the Carlov Medal to the guy sitting next to the café; he’ll unlock a house elsewhere in town that’ll contain another Piece.
North Hyrule Field
[ ] If you jump into the river in the southwestern corner of the map, you’ll be able to swim to a cave where a Piece is waiting.
Hyrule Castle Garden
[ ] Cutting away the grass in the southeastern corner of the zone will reveal a ladder to a hidden trainer, who holds a Piece in his dojo.
[ ] The northeastern well will dry up as a result of a random Kinstone fusion. Walk down to get a Piece.
Eastern Hills
[ ] There’s a Forest Minish living in the southwestern corner of this zone; if you fuse with him, a beanstalk will appear, allowing you to climb up to a cloud platform where a Piece awaits. You won’t be able to fuse with him until later in the game, so come back after each dungeon and try again.
Minish Woods
[ ] A Piece of Heart is waiting for you in front of the Deepwood Shrine.
[ ] Head to the northeastern corner of the Minish Village, then exit right to the docks to find another Piece.
[ ] When you’re able to reach Syrup’s Hut later on, walk to the southeast and find another Piece by the water.
[ ] When you’re able to swim, enter the Woods via the southwestern entrance (or use your Ocarina), then shrink yourself down and head towards the three Minish caves nestled in the woods to the north of the portal. The leftmost of these will hold a Piece.
Trilby Highlands
[ ] There aren’t any! Ha!
Western Wood
[ ] After you obtain the Ocarina of Wind, use it and warp to Lake Hylia. If you fuse with the Minish inside the hut on the same plateau as the Wind Crest, he’ll open up a tree in the Western Woods. Head there to grab a Piece.
Lon Lon Ranch
[ ] After you have the Pegasus Boots, you’ll be able to uncover a Minish portal in the cow field here. Knock the leaves off of it, shrink down, then enter the Minish path nearby to find a Piece.
Mt. Crenel’s Base
[ ] None again.
Mt. Crenel
[ ] In the extreme southwestern corner of the zone (only accessible from the northwestern corner of Mt. Crenel’s Base), there’s a hidden cave between two trees. Inside is the Piece.
[ ] In the less-extreme southwestern corner (above where you climb a green vine to access this zone from Mt. Crenel’s Base), you’ll find a sign near a cliff, reading "Mt. Crenel Wall (watch out for falling rocks!)." If you set a bomb in the small hole to the right of the sign, a hidden cave will open; enter for another Piece.
[ ] After climbing all the way up Mt. Crenel Wall, head left and go down the ladder to the Crenel Hermit’s cave. Instead of going in there, though, head left and dig through the sand cave to find another Piece. This is only doable after you have the Mole Mitts, obviously.
[ ] If you climb up from the southeastern rock walls, you’ll eventually reach another cave with a hidden sword trainer. Grab the Piece from his dojo. You’ll need to have at least three elements infused into your blade to get through the split puzzle.
[ ] Later in the game, you’ll be able to fuse with Melari, the Minish smith. If you do so, a beanstalk will grow from atop the mountain; climb it to find your Piece.
Castor Wilds
[ ] There’s a large grave in the southwestern corner of the field. Cut away the grass and push the grave north to reveal a hidden trainer and a Piece of Heart.
[ ] In the northeastern corner of the zone, there’s a cave surrounded by water. After you get the Flippers, you’ll be able to pass through to grab a Heart.
[ ] You’ll need to fuse with a few people to unlock the lilypads in this area. After you unlock the one to the south of the Minish portal in the northwestern corner of the zone, you should be able to take it and head all the way across the map until you reach the southeastern pool of water. Find the Minish cave here and enter it for another Piece.
Wind Ruins
[ ] After climbing two ladders and a stairwell, you’ll hit a screen transition. Use the Minish Portal here, then head back a screen and climb the vines down until you reach a Minish cave; inside is the Piece.
Lake Hylia
[ ] When you have the Flippers, you can dive into the pool next to the Hyrule Town item seller’s house (the one with just a dog in it) to retrieve a Piece.
[ ] Another Piece is available by jumping with the Roc’s Cape across the platforms on the northern end of the Lake.
[ ] There’s a piece of the southern end of the lake that you can swim to.
[ ] In the southwestern corner of the lake, you’ll find a ladder leading to a tree hut. Walk into this hut to find another hidden trainer and a Piece of Heart.
[ ] Another Piece of Heart is available through the sand cave on the northern end of the lake, although you’ll need the Roc’s Cape before you can reach it. Head left and explore to find another exit from the cave, which’ll lead to another Piece.
[ ] If you head right from the entrance of the same cave, you’ll eventually come to an open area with a beanstalk in it. (This is formed by Kinstone fusing with one of the Minish living around Lake Hylia.) Climb it for another Piece.
Royal Valley
[ ] The northwestern grave in the graveyard can be pushed up to reach a cave; enter it to find another Piece.
Veil Falls
[ ] After you get the Cane of Pacci, find a hole in Lon Lon Ranch and shoot it to reach the southwestern corner of the Falls. A Piece will be available to you.
[ ] If you jump into the water above the southernmost waterfall (you’ll need to enter from the North Hyrule Field), you’ll be able to grab another Piece.
[ ] After fusing with a random person, a spit of land will appear near the Piece of Heart outlined above, giving you access to a sand cave. Head in to grab another Piece.
[ ] Fuse with Gale in the Cloud Tops area to open a waterfall here, then head back and into the cave to receive another Piece.
Dungeons
Deepwood Shrine
[ ] After beating the Maderpillar and obtaining the Gust Jar, use it to head south and grab the Piece of Heart there.
[ ] Head one room right from the Maderpillar and clear off the dust with the Gust Jar. After activating the blue warp, use it to find the next Piece of Heart.
Cave of Flames
[ ] When you come to the overturned mine cart, head right across the rail tracks, then bomb the southern wall here to reach the Piece.
Fortress of Winds
[ ] This one takes a little bit of work. You’ll need to fall down as a mini-Link from the upper levels of the dungeon to the rightmost room on floor 1F. Check our walk-through for tips on how to get to room #22.
Palace of Winds
[ ] After scaling the exterior of the Palace, falling all the way back down, then heading back up the interior, you’ll eventually reach room 41 on the fourth floor. Exit to the northeast to reach room 42, where a Piece of Heart awaits for you.
Kinstone Fusions
There are a hundred different people (or walls/doors) that you can Kinstone fuse with. Many of these will have set effects, but many are random. Luckily, when you perform a Kinstone fusion, the effects will be marked on your map, allowing you to check back after completing a few fusions and know which ones you haven’t followed up on yet. Getting all 100 Kinstone fusions doesn’t net you any special rewards, but you’ll want to perform as many as possible to obtain upgraded items and extra Pieces of Heart. If you want to know how many fusions you’ve performed, you can talk to any of the Tingle brothers when they appear around the game world; there’s one that will appear next to the east of your house in the South Hyrule Fields, for instance.
Finding Kinstones
Earlier on in the game, you may find it difficult to fuse with everyone you meet, due to a lack of Kinstones. There are three different colors of Kinstones: green, blue, and red. (There are also golden Kinstones, but those are quest-related and rarely appear except when you need them to unlock a barrier.) Green are the most common variety, and will commonly be found when cutting through grass in the field or by killing normal enemies. Blues are slightly less common, but you should find plenty of them in chests. Reds are the rarest of all, and you’ll have to pass up more than a few red Kinstone fusions early in the game due to a lack of stones, but later on, you’ll find plenty in dungeon chests, chests that appear as a result of lower-level Fusions, and elsewhere. By the end of the game, it won’t be a problem to fuse with anyone you see.
If you’re running low on Kinstones early in the game, use your Gust Jar to suck away the dust from the southeastern stall in the central merchant square in Hyrule Town. If you do so, you’ll be able to return later to find a new merchant there; this one sells Picolytes. If you buy a white Picolyte from him and have it fill a jar, you’ll be able to increase your chances of finding Kinstones while cutting through grass in the field. If you drink the Picolyte while standing near a bunch of grass (such as in the Trilby Highlands), you should find hordes of green Kinstones, and even the occasional blue or red.
Even later in the game, after you’ve managed to unlock all of the Gorons in the Goron Cave in the Lon Lon Ranch (see below), you’ll be able to fuse with one of them to unlock another vendor in Hyrule Town, one that will sell random Kinstones to you. They’re expensive, and you’ll likely have more than enough Kinstones by that point in the game, but if you need them, there they are.
Important Non-Random Fusions
Again, many fusions aren’t necessary to complete; they’ll often lead to rupees, or extra shells, or other Kinstones. The ones that lead to Pieces of Heart and item upgrades are the really important ones, so we’ll list those here. If you’re interested in a complete list of all 100 kinstone fusions, visit the Minish Cap page at gamefaqs.gamespot.com. At the end of this section, we’ll group some of the quests that bridge multiple map areas into sections, as well.
South Hyrule Field
Smith: If you fuse with grandpops, you’ll be able to uncover a chest with an extra bottle. This isn’t available until after you proceed through a few dungeons, so keep checking back with him.
Hyrule Town
Hurdy-Gurdy Man: The first fusion you make after you receive the Kinstone Bag will be with the Hurdy-Gurdy Man. It’ll unlock a tree in the southeastern corner of the South Hyrule Fields. Head in to find a Piece of Heart.
Mayor Hagen: Fusing with the Mayor will drain a pool of water in the Lon Lon Ranch. Entering the cave there will lead to a bigger wallet.
Stranger: The Stranger lives in a hut in the northwestern corner of town. Fuse with him to open a portal leading to the Cloud Tops, then use your Gust Jar to suck up the ghost that’s possessing the old man in the bed. Doing so will net you the Light Arrows later in the game.
Wind Ruins
Forest Minish: If you shrink yourself at the Minish portal here and head inside the nearby crack in the wall, you’ll be able to fuse with the Minish inside. (Although perhaps not the first time you see him.) Doing so will open a beanstalk; take it up to find an upgraded quiver, allowing you to carry more arrows.
Cloud Tops
Gale: When you enter the Cloud Tops for the first time, you’ll be able to fuse with Gale. Do that, then return to the cave that opens up in the Veil Falls to find a Piece of Heart.
Lake Hylia
Forest Minish: One of the Forest Minish that lives in the northwestern corner of the lake (you’ll need to shrink down and swim to him) will grow a beanstalk when you fuse with him. After you have the Roc’s Cape, jump to the sand cave on the northern end of the lake and climb the stalk for another Piece of Heart.
Minish Woods
Belari: The Minish dude who originally gave you the bombs (he’s just to the left of the Minish Village), will eventually be fusable. Do so to open a path to a bigger Bomb Bag, allowing you to carry more bombs.
Forest Minish: Near the end of the game, you’ll be able to exit from the northeastern corner of the Minish Village to reach a small lake one screen over from the town proper. If you fuse with the Forest Minish inside multiple times, he’ll eventually open a cracked floor tile in Lake Hylia. Head inside and meet up with Librari again to receive a full Heart Container.
Mt. Crenel
Melari: If you fuse with Melari, the head blacksmith in Melari’s Mines, he’ll unlock the path to a Piece of Heart. You won’t be able to fuse with him the first time you see him, so come back after completing a couple more dungeons.
Lon Lon Ranch
Goron: There are two Gorons you can fuse with after you obtain all six of them (one may not be immediately fusable, though.) One will cause a Goron merchant to appear in town, while the other will cause a bigass Goron to appear at the top of Veil Falls. This latter Goron will upgrade your shield.
The Fourth Bottle
There are a series of fusions that you need to perform before you can unlock the fourth bottle in the Goron Cave in the Lon Lon Ranch. Not all of these are available early on - you won’t be able to get all six before you get the Roc’s Cape in the Palace of Winds - but when they are, you’ll be able to grab that bottle. Note that these can be done in any order. 1: Fuse with Eenie, a farmer in the Eastern Fields.
2: Fuse with a Mysterious Wall in the sand cave near Eenie.
3: Fuse with a Mysterious Wall in the sand cave in the northwestern corner of the Twilby Highlands.
4: Fuse with a Mysterious Wall in the sand cave near the Crenel Hermit on Mt. Crenel.
5: Fuse with a Mysterious Wall in the sand cave that led to the Mayor’s cabin, near Syrup’s hut.
6: Fuse with a Mysterious Wall in the sand cave on the northern end of Lake Hylia.
The Magical Boomerang
In order to grab the Magical Boomerang, you’ll need to fuse with four of the Tingle Brothers. Getting to one of these guys will require the Mole Mitts, so you won’t be able to get to all of them before you have that item. Including Tingle, who appears on a tree stump to the east of your house in the South Hyrule Fields, the other brothers are in the Lon Lon Ranch (located through the cave in the cow field), the northern half of Lake Hylia, and in the Trilby Highlands (dig through a sand cave). If you fuse with all of them, then manipulate the switches inside the trees that open in the North Hyrule Field, a path will open up in the middle of the field leading down to the Magical Boomerang.
The Even-More-Hidden Hidden Trainers
When you have all eight Tiger Scrolls (including the one from Swiftblade the First), you can then return to the other hidden trainers and fuse Kinstones with them to reveal yet more hidden trainers.
Greyblade: Greyblade is in Mt. Crenel; you can reach him by heading to Mt. Crenel’s Base, then climbing the wall in the northeastern corner of that zone and continuing to climb up the eastern side of Mt. Crenel until you come to an entrance. If you fuse a red Kinstone with him, he’ll open up a waterfall cave in the northeastern corner of Castor Wilds. Train with Scarblade will let you use your Spin Attack more quickly than you could previously.
Waveblade: Waveblade is located near the Temple of Droplets in Lake Hylia, inside a small tree hut to the south. Fusing with him will open up a waterfall cave in North Hyrule Field. If you train with Greatblade within, you’ll be able to extend the length of your Great Spin Attack.
Grimblade: Grimblade is in the southeastern corner of the Hyrule Castle Gardens. Fuse with him to open a waterfall cave in Veil Falls. If you head there (via the northwestern corner of the Lon Lon Ranch), you can train with Spiritblade, who’ll let you form split-Links more quickly than before.
Figurines
The figurine mini-collection game in Minish Cap is emphatically optional, unless you’re a horrendous completeness nerd: you don’t have to collect all of the figurines in the game, but if you do, you’ll be rewarded with an extra Piece of Heart.
To collect figurines, you’ll need to access the southwestern corner of Hyrule Town, which is only possible after you obtain the Cane of Pacci and can talk to the dog guarding the steps leading down there. In the tree hut to the south, you’ll be able to talk to the guy who makes figurines; he’ll offer to trade you figurines for Mysterious Shells, which will constantly be dropping. There are 136 in all; new ones become unlocked as you beat dungeons and enemies around the game world. If you want to find all of them, then, you’ll need to kill everything you see!
The figurine maker will initially give you figurines for as few as one shell, but as you collect more, you’ll have to give him more and more shells in order to increase your probability of finding new ones. For example, the first time you give him a single shell, you’ll have a 100% chance of finding a new figurine. After that, trading him a single shell will get you a 98% chance of getting a new figurine, and the chances will drop after that. You can increase your chances of obtaining a new figurine by offering him more shells, but as you gain more figurines for your collection, he’ll start requiring absurd numbers of shells for even a 50% chance of getting a new figurine. You’ll always have a chance of getting a duplicate figurine when you trade him shells, meaning that you’ll want to save your game before every trade, especially as you start offering up more shells, and reloading if you get duplicates, since your only goal is to get 136 unique figurines. Doing so will only be possible after you’ve beaten the final boss and saved your game, though; when you have all of them, you’ll earn a special medal you can give to the man sitting near the café in Hyrule Town. After you do so, you’ll earn a Piece of Heart, which will likely be the last Piece of Heart in the game for you.
Got a news tip or want to contact us directly? Email news@gamespot.com
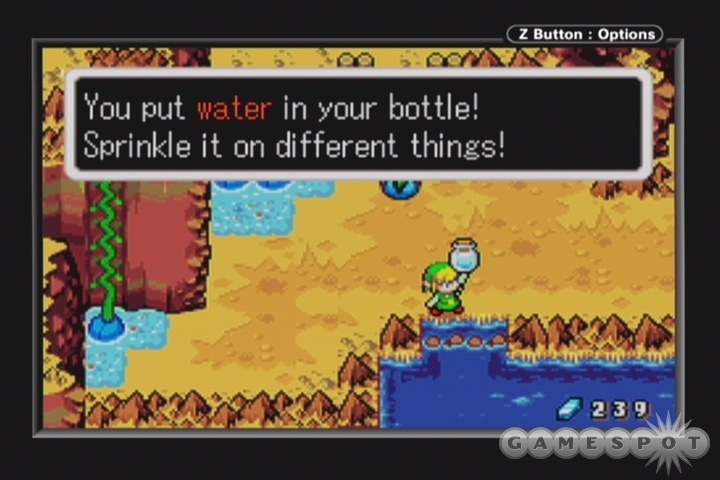
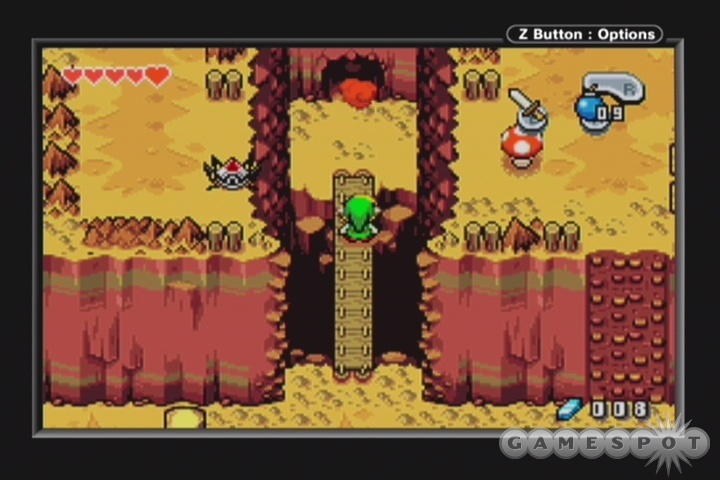
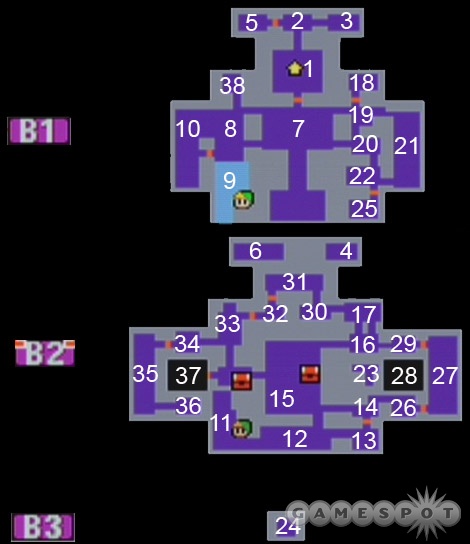
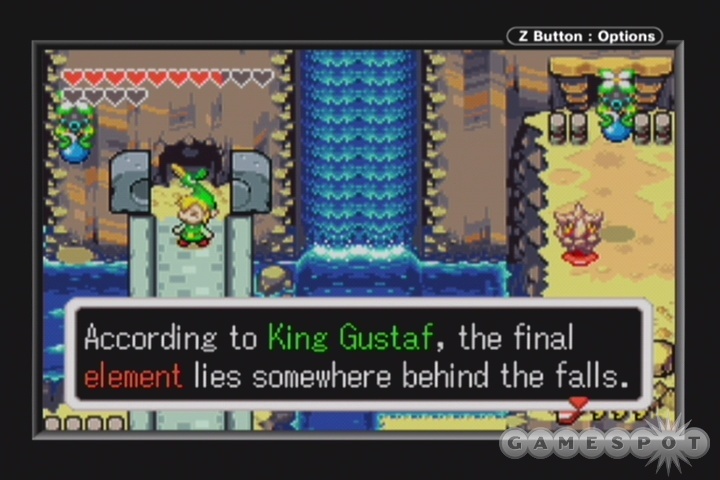
Join the conversation