Half-Life 2 Walkthrough
This walkthrough includes a full walkthrough of Half-Life 2's campaign, tips on getting by each enemy, and more than a dozen different instructional videos to help you navigate through the game's toughest parts.
Design by Collin Oguro
Anyone who played FPS games in 1998 will have fond memories of their first play-through of Half-Life. Many of us probably recall sleepless nights shortly before our Thanksgiving break of that year, as we struggled to get through just one more encounter with ruthless government troops or horrific alien entities before finally getting to bed. No one can seriously counter the claim that Half-Life was a watershed moment in gaming history, and indeed, its popularity is part of that legacy, as it spawned the most fertile mod community in the modern FPS community.
Now, six years later, Half-Life 2 is upon us, and it's unbelievably and almost unbearably good. Although it sticks pretty closely to the formula laid down by its predecessor, the sheer weight of technical advancements made in the last six years have opened up new vistas of storytelling (e.g. the innovative use of full-face animation) and gameplay (e.g. the compelling new environmental interactions made possible by the Source engine), and Valve has proven themselves to be quite adaptable to these sea changes, incorporating them into a genuinely compelling adventure through the streets of a city defeated and oppressed by alien aggressors.
Luckily for Gordon Freeman, though, he's not alone in his travels; he'll have you along, and you'll have this guide to help you out! Included within are a bestiary, a weapons rundown, combat tips, and, of course, a full walk-through, complete with video guides to the game's most challenging sections.
Table of Contents
EnemiesZombies
Combine Forces and Antlions
Manhacks, Turrets, Gunships, and Striders
.357 Magnum, SMG, Pulse Rifle, and Shotgun
Crossbow, Grenades, Rocket Launcher, and Pheropods
Walk-through
Route Kanal
Water Hazard
Black Mesa East and Ravenholm
Highway 17
Sandtraps
Nova Prospekt
Entanglement
Anticitizen One
Follow Freeman
Our Benefactors
Dark Energy
Enemies
Although many of the enemies from Half-Life have returned, many don't, while some make only cameo appearances. There are, of course, plenty of new foes to face off against; check this section for a description of each.
Barnacles
The large man-traps known only as Barnacles are a repeat enemy from the first game, and as in Half-Life, you shouldn't have any problems defeating them or getting around them. In fact, you should have an even easier time killing them in most instances, due to their new and improved behavior.
As in the first game, Barnacles will latch on to any organic entities that come into contact with their adhesive-coated tongues, and slowly draw their prey up into their maws. This includes Overwatch forces, for the most part, the occasional headcrab, and of course Gordon himself. You shouldn't have too many problems spotting the Barnacles from a distance, though, as their tongues are pretty easy to spot, save in darkened rooms. When you do notice a tongue, killing the beast is a simple matter of popping the Barnacle's main body with eight or nine shots from your pistol; they're immobile, so they can't dodge your fire.

A new tactic for bypassing Barnacles arises from Half-Life 2's new physics engine; now that you have the ability to manipulate items in the game world, you can trick the Barnacle into thinking that it has some tender prize by throwing an inorganic item into its tongue. A barrel or crate usually does the trick; the Barnacle will retract its tongue in the anticipation of a tasty treat, allowing you to pass underneath it without needing to waste any ammo. Explosive barrels do the trick quite nicely; if you wait until the barrel has nearly reached the Barnacle, then shoot it until it explodes, it'll kill off the Barnacle, as well as any other Barnacles nearby, making this an efficient way to destroy the Barnacle nests you'll sometimes encounter in the earliest portions of the game.
Headcrabs
The headcrab was perhaps the most distinctive enemy in Half-Life, inspiring countless startled jumps as they would hop out of darkened hiding spots in an attempt to eat your brains. They were, of course, never successful, but being creatures of instinct, they never quite learned to leave you alone, and indeed, are back in Half-Life 2 to make your travels difficult. What's more, there are now three different kinds of headcrabs to deal with, each with their own special traits.
Headcrabs
The old-school headcrab is much the same as it was in Half-Life; they'll creep along in search of prey, and when they get close enough, they'll leap and deal a bit of damage when they impact you. If you spot them while they're crawling, you can easily take them out with a few shots from your pistol, but they're rarely visible to you before they get into jumping range; they're more often positioned near a corner or the top of a ladder or in some other cramped location, where they'll get a free jump at you before you can react. You can sometimes get a bit of forewarning by listening for their distinctive muttering, but this is rarely audible before they've spotted you.
Luckily, headcrabs don't do too much damage, and can't take much, either, letting you kill them off with pistol shots or by shoving a crate at them with your gravity gun. They're most dangerous when encountered in groups of three or four, where they can corner you and prevent you from getting away by pressing on you from all sides; in these instances, you'll probably want to use either a shotgun or an SMG to quickly clear a path out of the maelstrom.
Quick Headcrabs
For lack of a better nomenclature, we'll call these guys quick headcrabs. They're similar in appearance to normal headcrabs, save for somewhat longer legs, and skitter rapidly about the floor, making them difficult to shoot. Besides their increased speed, though, they don't contain any other noticeable upgrades over their less-fleet counterparts; they deal roughly the same amount of damage and can be killed in the same manner, although in this case, you're going to want to go straight for the SMG or the shotgun, as they're difficult to hit with your pistol unless you can fire without fear of them attacking you.
Toxic Headcrabs
Now, these guys are annoying. Toxic headcrabs are black, and a bit stouter than the normal variety, and a lot tougher. They sport the ability to take much more damage than the other varieties - on hard mode, you'll need two magnum rounds to do the job - but what's worse is their attack; when they hit you, they'll instantly reduce you to one health due to their potent neurotoxin. You'll regain all of the health you lost, eventually, but the damage is still real, and if you get hit by anything while you're weakened, you'll still die. Luckily, the toxic crabs are less agile than either of the other varieties, and move relatively slowly when they're not actively pursuing you, letting you pick them off from a distance. When they get the jump on you, though, you can quickly find yourself reaching for the quickload key, so try to find a nice quiet place to hide while you recover from the effects of the poison.
Zombies
Zombies were never a huge threat to you in Half-Life, but they've been upgraded slightly in Half-Life 2, making for some dangerous enemies. As with the headcrabs, there are a couple of new variants here, corresponding to the new heacrab entries in the bestiary.
One common trait between all the zombies is the way that the headcrabs will sometimes detach themselves from the body of a zombie when it's killed. Since zombies often appear in groups, it can be difficult to monitor each individual zombie to make sure that its headcrab dies along with it; you'll need to be mindful of this in large melees to avoid getting ambushed from vectors you thought were clear. This occurs less often if you can hit the head of your foe while firing at it, so it's sometimes advantageous to let zombies get close before killing them with a shotgun blast aimed directly at the headcrab that's controlling them.
Zombies
The old-school zombies are slow-moving and fairly weak, and are one of the game's most minor threats. Their only advantage is in numbers, and they'll often swarm you and attempt to surround you before beating you to death with their hands. They have no distance attacks, though, so you can easily kill them with pistol shots to the head or with your gravity gun, depending on the surroundings.
Quick Zombies
Humans who've been converted to the zombie floods by quick headcrabs will take on the abilities of their master. Although they give up some of the pure mass of normal zombies, and appear to be almost spectrally thin, they possess great speed, and are able to close in on you from multiple directions thanks to their great jumping abilities. They're not much tougher than their normal counterparts, but are much more difficult to hit thanks to their speed; in most cases, you won't be able to do much more than wait for them to get in close before unleashing a dual shotgun blast to their heads.
Toxic Zombies
Toxic Zombies are among the most physically redoubtable enemies in the game, possessing more pure health than any other bipedal foe you'll come across. On hard mode, they can even take a few crossbow bolts to the chest before going down, when even the Overwatch elites can only take a single bolt before being flung across the room. Unfortunately, they match their defensive capabilities with one of the more potent offensive displays in the game. They don't seem to possess any real offensive attacks of their own (maybe they hit you if you get close, but don't ask us - we never approached one), but instead host numerous toxic headcrabs on their upper bodies. When they've got a clear shot at you, the zombie will bend over, allowing one of the headcrabs to make a jump straight at you; this greatly increases the range at which the headcrabs can hit you.
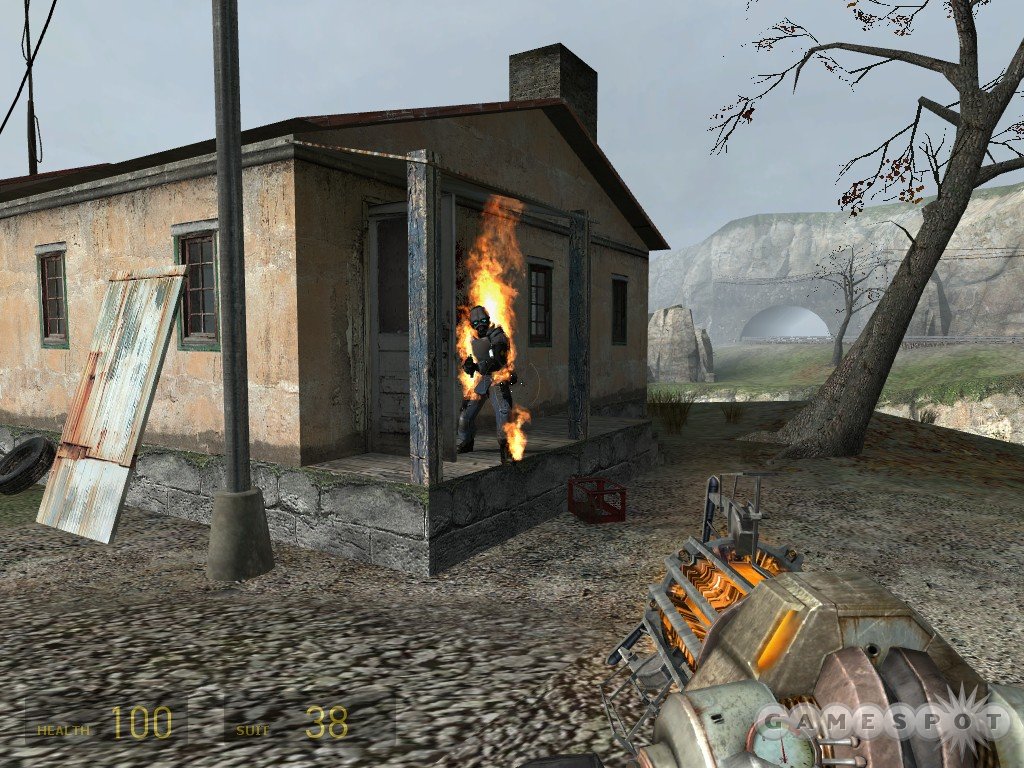
Unfortunately, killing a toxic zombie is just the beginning of your problems, since, as mentioned, they host numerous headcrabs, all of which will detach from their host when it's killed and start scurrying around, eager to envenom you when you get too close. If possible, then you're going to want to kill a toxic zombie by setting it on fire, as with the old gravity gun/oxygen canister combination; this will have the beneficial side effect of setting all of the crabs on it on fire as well. If that's not an option, try to whittle down its health some with normal fire, then perform the coup de grace with some kind of explosive, such as an explosive barrel or an SMG grenade. Killing it with normal fire will almost surely leave you with numerous toxic headcrabs to deal with.
Combine Forces
For the bulk of the game, the transhuman forces of Civil Protection and the Overwatch are going to be your primary nemeses. These guys are somewhat analogous to the Commandos in Half-Life, but are generally smarter and better armed. They usually attack in force, appearing in groups of four or five, especially in the game's open areas, and will attempt to overwhelm you by force of arms.
Your best bets for dealing with the humanoid opponents are to engage them at close range, using cover to protect you, and to go for headshots. The first piece of advice is dependent on the situation, of course, but in general, you don't want to engage a force of Overwatch at long range due to the inaccuracy of your primary weapons, the SMG and the pulse rifle. When you're forced to use these weapons at long range, you won't be able to hit very often. Of course, neither will your enemies, but half a dozen soldiers not hitting very often will always trump a single man not hitting very often, and they'll be able to whittle down your health while you vainly try to kill off one or two of them. Luckily for you, your foes will generally charge towards you when you've been spotted, allowing you to hide behind a corner and wait for them to arrive before slamming them with shotgun rounds or SMG bullets to the head.
Headshots are another part of your toolkit here, as the CP and Overwatch forces are more susceptible to headshots than any other enemy in the game. Or, taken another way, they're simply too well armored for body shots to make much of an impact on them, especially in the Overwatch and elite variants. You'll need to get headshots in as much as possible to drop them quickly, which will, in turn, reduce the amount of damage you take from their attacks. This ties in to the first tip, as well, since you can more easily hit headshots when your enemies are fairly close to you.
As with zombies and headcrabs, there are three variety of transhumans you'll be dealing with.
Civil Protection
The Civil Protection forces are essentially cops; they patrol the streets of City 17, looking for civilians to beat, and generally act like thugs, especially when you insist on throwing bottles at their heads. In combat, these guys are only lightly armored, letting you take them down with shots to the body without much effort. They pack both pistols and SMGs.
Overwatch
You'll probably see more Overwatch than you will any other kind of enemies; they're legion throughout most of the last two-thirds of the game. The main difference between the Overwatch and the Civil Protection forces (besides their supremely disinterested and cool radio squawks) are the fact that they boast improved body armor and better weaponry; they'll wield SMGs, pulse rifles, and shotguns in battle, and will quickly become notorious for their grenade skills. They also seem to be able to organize themselves a bit better than the CP troops, and will use squad tactics to gang up on Gordon and attack him all at once from multiple positions.
The most dangerous members of the Overwatch are usually going to be those who use shotguns, since they'll be able to do a whole lot of damage when they get into close contact with you, so target them first when you're facing off against a crowd, unless you're firing from long distance. Any individual Overwatch can use grenades, though, which are definitely worth keeping an eye (and ear) out for; grenades are easy to distinguish from the background, thanks to the red tracer laser attached to them, and emit a distinctive countdown pulse after they land. In a pitched battle, though, it's easy to miss both of these signals, and thus be seriously injured when a grenade goes off. If you do notice a grenade landing, you can either run away, or use your gravity gun to pick it up and chuck it back at your attackers (or anywhere else but where you are). You only have a couple of seconds either way, so make up your mind quick!
Overwatch Elite
The high-end Overwatch forces are known only as Overwatch elites, and make rare appearances towards the end of the game. These soldiers are dressed in white, apparently not caring for the way this makes them stand out during urban combat, and exclusively wield pulse rifles. In addition to the normal fire mode, though, they'll also use the pulse rifle's alt-fire, which sends out an unstable core. Luckily, this doesn't automatically disintegrate you, as your own pulse rifle is capable of doing, but will deal heavy damage and knock you around a bit.
Elites are heavily armored, making headshots or explosives your best bet when dealing with them. They'll almost always drop cores when killed, so if you spot one, try to grab some ammo for your pulse rifle and use it on the next elite that you see. (Unfortunately, when you disintegrate something with your own pulse rifle, no ammo will drop, so you won't be able to string these kills together forever.) Elites will still die with one crossbow bolt, though, so feel free to use them when you think you can get a clean shot off.
Antlions
Antlions are fairly stupid enemies, but deadly nonetheless, if only because of their numbers. These insect-like creatures are found exclusively on the coast of wherever the heck Gordon is running around, and will pop up out of the ground when disturbed by any seismic disturbances (i.e. footsteps, a car), and proceed to attack Gordon at close range with their mandibles. While they're not precisely quick opponents, they will attempt to close any distance between themselves and Gordon with a short-range flying ability before attacking. They're dangerous in groups, but can quickly be killed by shotgun blasts.
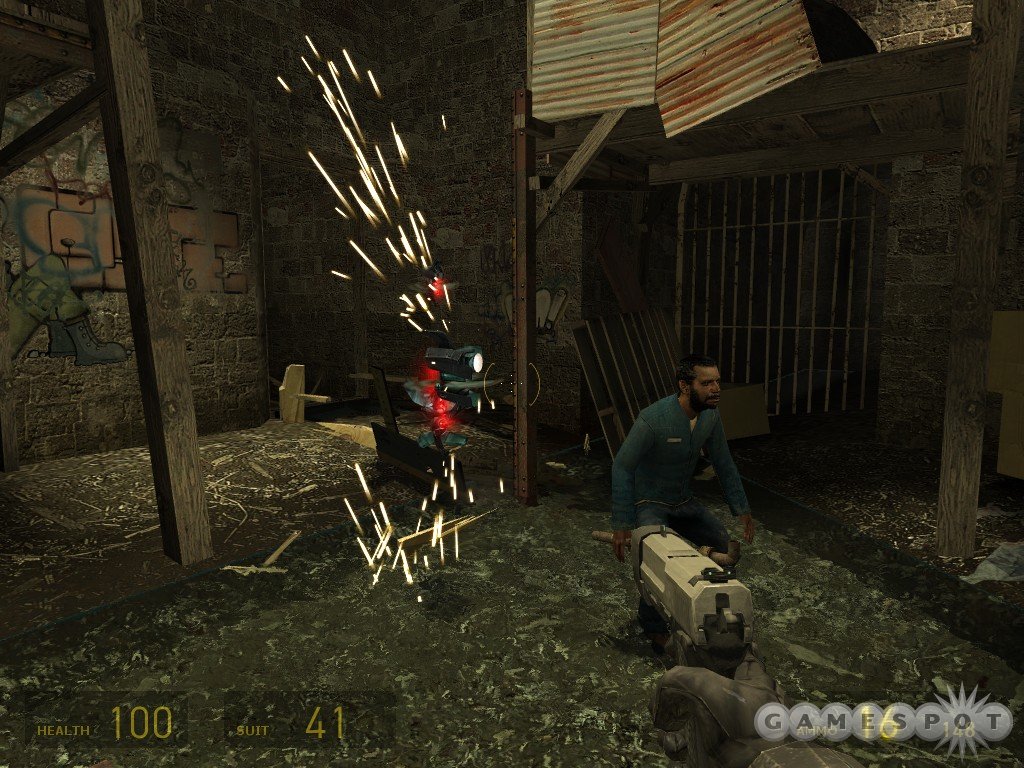
Manhacks
These little drone robots are more annoying than anything, although they do occasionally appear in numbers sufficient to be actually threatening. These little spinning balls of death feature razor-sharp blades, and will attempt to bump into you and whittle down your life; when they approach in large groups, they can also corner you and prevent you from moving. All told, they're very similar to airborne headcrabs.
Early in the game, you won't have many effective measures to deal with manhacks; pistol fire works decently well, if you have a steady hand and can aim accurately enough to overcome the hacks' bobbing and weaving. Your crowbar can also make a handy tool to whack these guys out of the sky, but you'll need to let them get awfully close before you can do so, leaving you open to damage. Your best bet, though, is the grav gun; when you finally obtain it, you can use it to suck up the manhacks and then punch them into a wall, which will usually destroy them outright, or to just chuck barrels or other debris at the hacks as they approach.
Turrets
Turrets are most numerous in the prison level, although they make sporadic appearances throughout the latter half of the game. They're not too difficult to deal with, although they're almost always going to be annoyingly set up so that they can fire on you before you get close enough to take them out. The problem here is that they're just really difficult to kill without getting close to them - in order to disable a turret, you need to knock it off its feet so that it tips over, but they're heavily weighted and are tough to budge with most weapons. Explosives are pretty much your only way to get a turret down - grenades work really well for this purpose - although your gravity gun can do the trick, if you can get close enough to use it. (Needless to say, most turrets are positioned so that you can't use your grav gun on them unless you're willing to take a whole lotta bullets first.) Note, though, that turrets cannot be destroyed; if you chuck a grenade at one, and it flips around so that it lands on its feet again (admittedly an extremely rare occurance), it'll still be active and fire at you if you move within its field of vision (a roughly 90-degree angle in front of it).
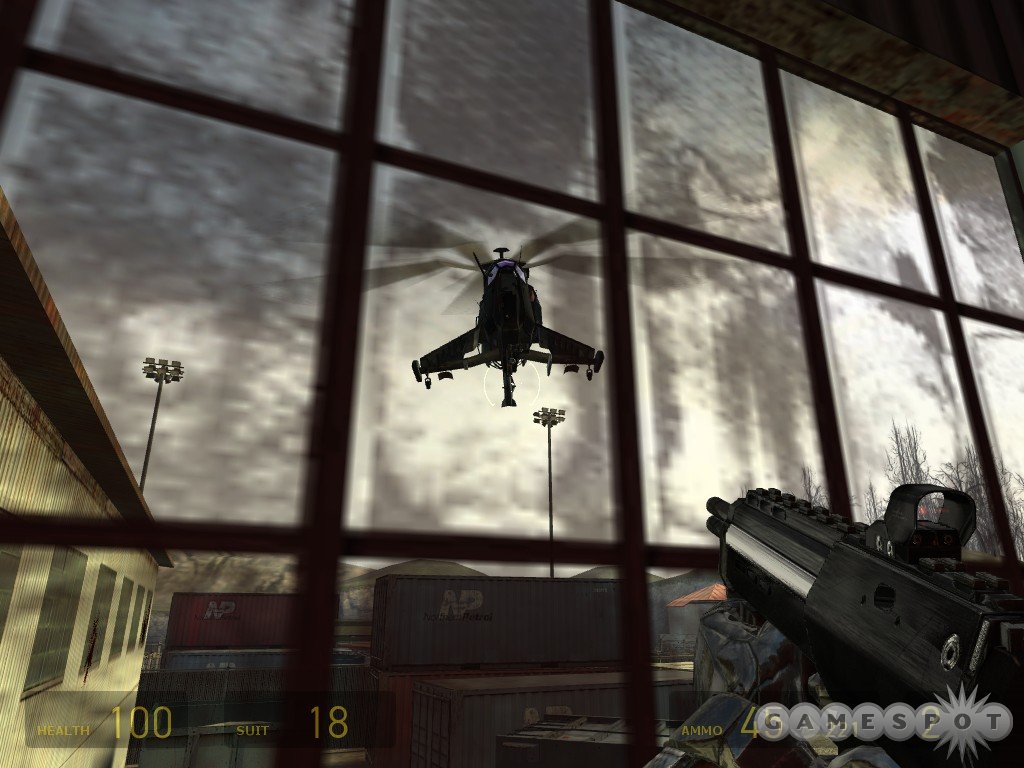
Gunships
Combine gunships, whether they're actually piloted or are discrete alien entities, are pretty damn frightening either way. They'll glide around an area that you're in, rotating in a circle over your head, and attempt to pound you with their turrets - and, for the record, turrets hurt.
Gunships are completely impervious to small arms fire, so far as we can tell, but, in what can only be a huge coincidence that the developers never intended, you're always going to find a box of infinite rocket ammo when you have to deal with a gunship, so get close to it and use your rockets to blow the thing out of the sky.
With a little practice, you should get the hang of a gunship's attack cycle; it'll fire its turret for a few seconds, lay off the guns for an equal amount of time, then open fire again. They prefer to fire at Gordon to the exclusion of anything else, but if you hide out of sight, then it will fire at other targets of opportunity, such as friendly soldiers in the area. If there aren't any other friendlies about, though, as is usually the case, they will consistently fire at wherever you're hiding, and since they rotate around the area, they'll usually find some way to hit you eventually. Luckily for you, they also fire on incoming rockets, in an attempt to shoot them down, and you can use this to your advantage. If you fire a rocket up into the sky while you're behind cover, the gunship will start to fire at it, even though it really doesn't stand a chance to hit it unless the rocket is heading straight for itself. In order to make the rocket hit the gunship, then, you'll need to weave it around the sky in a disordered pattern to prevent the gunship from shooting it down, then paint the rocket's laser designator on the gunship while it's recharging its turrets. If you've overshot your target and need to make the rocket move back towards the gunship, move your targeting laser over a nearby building until you see it streaking back towards you, then repeat the process; rockets have a heck of a lot of fuel, so you can keep this up for quite a while, if need be.
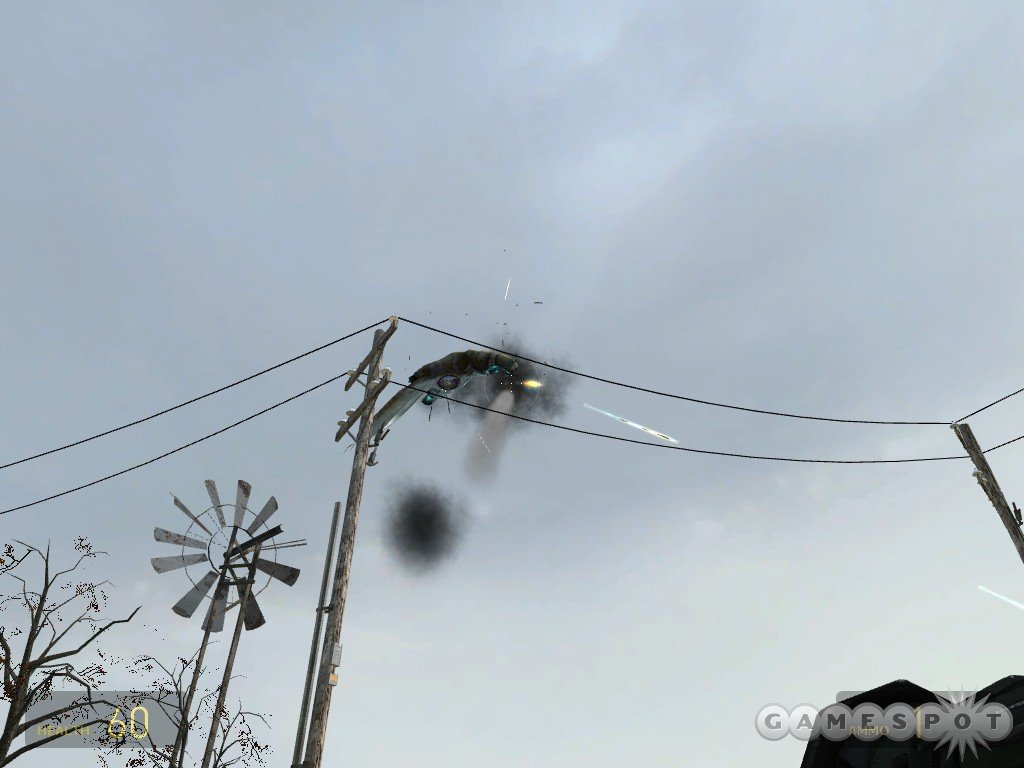
After a gunship gets hit, though, it'll quickly retask its turrets on you, so if possible, get under cover immediately after landing a rocket, before repeating the process all over again. On hard mode, a gunship can take half a dozen or more direct hits before it finally starts falling apart, and it will shoot down some of your rockets, so you'll probably have to make a few trips back to the ammo box before you can take one down, but if you stick to cover as much as possible, there's no need for you to take much damage while doing so.
Striders
These hulking tanks - which are apparently organic - appear only rarely through most of the game, but show up more frequently in the last level of the game that actually takes place in City 17. As with the gunships, they're armed with a turret with which they'll do most of their hurting, but they also pack some kind of energy beam that can knock through walls and kill you instantly (at least in theory; in the game, this is mostly used to open a new path for you, or destroy some of the environement, and rarely actually manages to damage you). Judging from the gameplay movies, they're also supposedly capable of spearing people with their feet, but we never noticed this occur, either to use or our squadmates, during our battles, so it's probably not something you have to worry about.
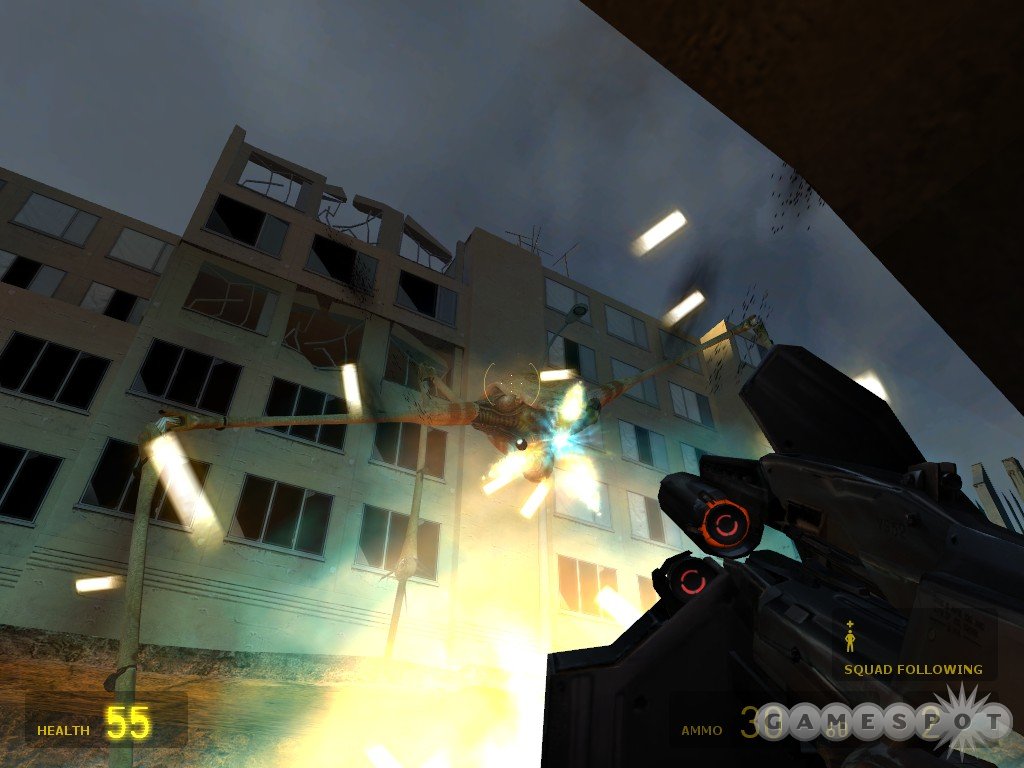
Also like gunships, you're going to find boxes of rocket ammo whenever you really need to take down a Strider, but you're going to have a harder time doing so unscathed, as Striders don't share their airborne friends' proclivity for shooting down rockets, preferring to keep up a constant barrage of turret fire on yourself and your friends. Thus, it's much more important for you to time your rocket fire to coincide with their turret's cooldown period, or to ensure that the Strider is firing on another target before you duck out of cover to launch a missile. (Luckily, Striders are usually encountered in areas where there are plenty of freedom fighters waiting to martyr themselves for the cause.)
Striders will usually take half a dozen or so rocket rounds before they let out one last unearthly whine and keel over, but there will usually be friendly forces going to town with rocket launchers of their own, so you usually won't have to do all of the heavy lifting yourself.
Weapons
Many of the old favorite weapons from Half-Life return, but many are missing - the game's city setting doesn't really favor the inclusion of such oddities like the Hornet gun or Snarks. The biggest change, though, are the restrictive max ammo settings; you'll find that many weapons will only be able to hold a few clip's worth of ammo before running out, so you'll have to switch between weapons more often than you might like.
Crowbar
Well, it's a crowbar. You can hit things with it, or break open crates without having to use ammo. Although much-beloved due to its iconic status as the representation of all violence in Half-Life, you're pretty much never going to use your crowbar after you get the gravity gun.
Gravity Gun
Coolest. Weapon. Ever. Bar none. There's just no competition here; the grav gun, in addition to being the perfect way to show off the Source engine's implementation of physics, is just incredibly fun to use.
The primary fire here isn't going to be used very often, but it is useful in its own way. When you're close to an object that it can manipulate, hitting it will shoot out a burst of zero-point energy, blasting the object across the screen with force commensurate to the mass of the object. I.e. small objects will be flung quite a ways; larger objects (such as cars) will be moved in a less drastic manner. (If an object is too big to manipulate, you simply won't be able to fire the gun.) When used properly, this can kill enemies due to the sheer weight of the objects that are hitting them, but you'll rarely be in a position where a suitable object is directly between yourself and your foe. Thus, you'll most often use the primary fire only after sucking an object in with the alt-fire button.
Said alt-fire will draw in almost anything towards the grav gun and hold it in place in front of you; the exceptions are organic enemies (such as Combine troops, headcrabs, zombies, and, well, almost all of the enemies you come across except turrets, manhacks, and scanners) and objects that are too massive for it to handle, such as everything car-size and above. Everything else is fair game, and there's a whole lot of stuff in the "everything else" category, from crates to barrels to tires to radiators to wine bottles to dusty old mattresses to...well, you get the picture.
Anyway, the secondary fire draws stuff towards you, the primary fire shoots it out again, and the marriage of these functions will undoubtably soon be the stuff of gaming legends. There are so many applications here that it's difficult to even begin to describe them all. The most obvious are the ability to suck in helpful items, such as medpacks and ammo, from across gaps that you can't get past, and the ability to pick up large items and throw them at your enemies.

Depending on the mass of the object, you'll usually be able to kill an enemy with a single well-thrown object; little wood chips and cardboard boxes aren't going to do much damage, but few enough enemies are capable of withstanding a 100 mph cinder block to the head. There are other items that have special effects when propelled from the gravity gun, most of which can be found in the Ravenholm area of the game; these include cans of paint (to give your foe a new look), saw blades (which almost invariably cut a target in half), explosive barrels (which explode on contact, dealing massive damage in a large area of effect), and oxygen canisters (which set your targets alight, resulting in a slower, but infinitely more satisfying death; zombies are especially fun to burn "alive").
Of course, the grav gun has more utility than just those examples; you can also use it to smash supply crates without wasting ammo (by picking them up and flinging them against the wall), to make a path across a hazardous area (by picking up items and placing them so that you can cross, say, an electrified pool), or to push a car over an enemy standing behind it, crushing it instantly. It is, perhaps, the most versatile weapon/tool to ever appear in an FPS, and while you'll obviously have to use other guns to get past the tough fights, you'll still have a lot of fun with the grav gun in areas that are filled with manipulatable objects.
Pistol
The good old pistol will be the only ranged weapon you have for a long stretch in the early game. It'll soon be outclassed by the SMG and other, more powerful guns, but it's still something you'll be whipping out from time to time throughout the game, if only because you'll probably have plenty of ammo for it, and it is fairly accurate, allowing you to hit targets at long range without much of a problem. In most cases, though, you'll only want to use it on headcrabs, zombies, or other slow-moving targets on which you don't want to waste your more precious ammo.
.357 Magnum
The much-beloved magnum returns from the first game, and while it isn't quite as useful as it was in Half-Life, you'll still be using it fairly often, if not for the purposes you probably think. Its basic abilities remain the same, in that it fires single rounds that pack a whole lot of punch. Most targets will still require a couple of magnum shots to the body before they go down, though, which, combined with the fact that your aim gets knocked around when you take fire, makes this a poor weapon to use against Combine forces. Against enemies without ranged attacks, though, like zombies, the magnum can help you drop them quickly without using a lot of ammo for your more useful weapons.
It's worth pointing out that the magnum can be used as a makeshift sniper rifle when you see a distant Combine trooper that's standing still, thanks to the fact that it's perfectly accurate (and is probably the only projectile weapon in the game that we can say that about). Since you have zoom functionality built into your suit (bound to the "suit zoom" key in your controls section in the options menu), you can zoom in with that, align your targeting cursor over the target's head, then retract to the normal view and get your headshot. The weapon won't fire unless you retract your view, but you'll have to be careful not to jostle your aiming when you hit the fire key.
SMG
For much of the game, the SMG is going to be your primary weapon of choice, due to its fully automatic fire (its one of only two weapons that boast this feature). The fact that you can hold your fire button down to let loose with a steady stream of bullets will let you kill enemies in intense firefights that much more easily, and will let you more easily make your headshots, at least at close range. The main drawback to it are the relatively small clip size, which you can breeze through with only a few seconds of fire, and horrendous accuracy at anything approaching medium range. If you can see blood on the wall behind your target, though, you'll know you're hitting your target, though, so feel free to flip through clips and keep firing until it goes down.
The alt-fire on the SMG is the truly kickass SMG grenade launcher. Although it's pretty easy to spaz out and send this thing into a wall or obstacle and wind up knocking off half your health, when you can land it in the middle of a bunch of Combine troopers, you'll feel pretty good about yourself, since it's almost always going to kill anything within a few feet of where it lands. It detonates on impact, as well, unlike a regular grenade, making it one of the most powerful offensive tools in the game, but ammo for the grenade launcher is really rare.
Overwatch Pulse Rifle
The other weapon with pure automatic fire is the Overwatch pulse rifle, found exclusively in the hands of Overwatch soldiers and their elite counterparts. Its primary fire is similar to the SMG, although it seems to deal slightly more damage; you'll need to weight this against even worse accuracy problems, though, and a horrendously limited supply of ammo. You can only carry a total of three clips for the damn thing, which can be used up in the opening barrages of a single firefight if you're not careful.
The alt-fire here sends out an exposed fusion core, which disentegrates every organic entity in its path, and what's cooler about it is the fact that it bounces off the first dozen or so surfaces it touches, killing everything else that it hits after the first impact, before finally dissolving. In practice, it's difficult to get multiple kills with this unless your targets are in an enclosed space, but it's still somewhat fun to use. Note that Combine targets you kill with the alt-fire won't drop any weapons or extra ammo, so take that into consideration if you're running short on the bare essentials.
Shotgun
For close-range encounters, nothing kills quite like the alt-fire from the shotgun. The weapon plays essentially the same as in the first game: the primary fire is a single-shell shot, decently accurate at short to medium range, while the alt-fire sends out two shells at once, and will pretty much automatically kill anything that's standing within a few feet of Gordon. One of the most startling disconnects between the first game and the second, though, lies in the fact that the shotgun now only carries six shells at a go, rather than eight. This obviously makes it more likely that you'll run out of ammo during firefights, so we hope you're used to ducking behind cover and reloading.
Crossbow
The crossbow is really your only option for long-range killing. Even on hard mode, it'll still kill almost anything (save toxic zombies) in one hit, even if it impacts your target's chest. (You might even get some neat Painkiller stakegun effects if your target is standing close to a wall.) What's better is that it has an actual scope attachment, letting you zoom while aiming, allowing you to get a better idea of where to aim in order to actually hit your target. Unfortunately, the crossbow bolts do have a bit of a dip in their trajectory, meaning that you'll have to aim above your target's head when firing at long ranges unless you want your shot to fall short.
The other main drawback isn't really specific to the crossbow, but it is among the weapons that are most affected by it: since your aiming reticule is jostled upward when you're hit by enemy fire, you're much more likely to miss with the crossbow if you attempt to use it in the middle of a firefight, especially when your targets are, say, across a large room. At close range you can usually compensate for this jerking around, but when you're dealing with long-range targets that are aware of your presence, you may want to just close the distance to them and take them down with a more conventional weapon. If you're dealing with only a single target, try waiting for them to reload, then wait for them to come back out to their normal firing position, where they'll usually stand for a few seconds. Of course, the bolts don't travel to their target instantaneously, meaning that if your enemy moves around while the bolt is in the air, you're going to waste a shot, and since ammo is fairly rare for the crossbow, this isn't something you really want to be doing.
Grenades
Half-Life 2 has one of the neater grenade implementations of the recent FPS generation. They're neat not because they're particularly easy to use (they're not), but more because of the way they look and sound, which we suppose isn't exactly a ringing endorsement; they're pretty, but they're not often very useful, especially against Combine troops. The thing about the grenades here is that there's a delay of a couple of seconds between the time that they impact the ground and their detonation, and that they are fully a part of the game's physics system, meaning that they tend to roll quite a ways beyond where they land. Both of these factors mean that it's pretty difficult to actually land a grenade near a concentration of Combine troops and then have them all remain there until the grenade blows up; you're better off just chucking a few grenades at a time and hoping that one of them gets to where it needs to go. You can only hold five grenades at one time, so don't get too trigger happy; there are generally plenty more to be found in the game world, including on dead Combine troops.
The primary fire for grenades will lob them towards distant targets, while the alt-fire will underhand one a short distance.
Rocket Launcher
The RPG in Half-Life 2 brings back the distinctive laser-designation system that made Half-Life multiplayer so bizarrely fun, and, in fact, completely eliminates the conventional dummy-fire system that every other game uses; here, you're either going to manually aim your rocket, or not use it at all. The specifics of the system can only be learned through use, as it's a bit tricky to describe, but we'll try to give you some of the basics.

In essence, your projectile, when fired from the RPG, will travel towards whatever point you paint with your laser designator. If you aim at the sky, for instance, the rocket will start travelling away from you at a good clip; if you then move your laser and point it at your feet, the rocket will turn around and streak back towards you. (This is actually a useful way to prevent rockets from travelling beyond a target you want to hit.) If you move your targeting reticule around while the rocket's in flight, it'll follow your movements, which will allow you to bypass the defenses of your gunship foes.
This bizarro targeting system will let you squeak rockets around barriers that most projectiles wouldn't be able to bypass, but you'll rarely want to waste your rockets on non-critical targets, since you can only carry three rockets at a time.
Pheropods
The pheropods are only useful in a small portion of the game, but during that portion, they can essentially replace most of your arsenal. When used while you have an antlion retinue, you'll be able to command said antlions to target any specific soldier or general area for attack; your primary fire will launch one of the pheropods, and when it lands, any nearby antlions will make a beeline for that location and attack any hostiles nearby. If you manage to land a pheropod directly on a Combine soldier, he'll also flail about for a few seconds, preventing him from attacking. The secondary fire here recalls any nearby antlions to your side; if you move far enough away from them after using the primary fire, though, they'll recall themselves automatically anyway.
General Combat Tips
Use Your Ammo Boxes
One of the new additions to Half-Life's gameplay is the inclusion of ammo boxes throughout the game world. You'll know these when you spot them; they're big, green boxes, with the icon of a specific weapon or ammo type on its side. When you open them up, you'll get a full refill for that weapon's ammo supply, and they don't run out, letting you return to them as often as you wish to keep fill up.
In the case of the SMG ammo boxes, this isn't all that noteworthy; you're going to be finding plenty of SMG ammo on the bodies of the Combine troops you kill. When you find rocket or grenade boxes, though, you can bet the developers put it there for a reason, so get yourself outfitted and start looking around for something to blow up. In the case of rocket ammo, you'll probably already be under attack by gunships or Striders by the time you find a box, so there's no mystery there; grenades are less situation-specific, but there may be something you have to blast through near a grenade box, or just a whole bunch of Combine who'll be easier to kill with explosives than your guns. After you kill whatever target the ammo's intended for, though, don't forget to return to the box and fill up again before moving on.
To a lesser extent, normal ammo drops will occur in similar situations. Crossbow ammo, in particular, is often found immediately before situations where you'll be facing off against distant troops, so be sure to max it out whenever you see it!
I Would Die For You, Man!
In the later portions of the game, you'll be given command over small groups of friendly soldiers in a mechanism that should be familiar to anyone who played the underrated game Freedom Fighters. Although you don't have to rely on your squad, they can make life a lot easier for you, if only because enemies will shoot at them instead of you!
You don't have to stress out about finding extra friends to come along with you, though; they'll automatically appear as you go through the game and will join up of their own accord. If the game detects that your party is understrength, it'll actually spawn in extra party members in your path, so that you may notice soldiers appearing in different places if you replay the levels over again.
When you do have squad members, you can order them around with your squad movement key (check your key bindings to find out where this is bound). Pressing the key once will send your squad out to wherever your reticule is pointing towards; you can either use this to send your group ahead as a means to distract enemies and prevent them from firing at you, or to send them to a point behind you when you know that there's danger ahead and you wish to deal with it alone. Tapping the key twice will bring all of the squad members back to your location; as with antlions, though, they'll automatically return to your location after a set amount of time.
The most important aspect of running a good squad is keeping them healthy and giving them access to items that they need. The medics that come along with you do a good job of healing both yourself and your teammates; they have an infinite number of medpacks that they'll use, so try to give everyone a minute to rest now and again, and watch the medic do his thing. They can only give them out so fast, though, so if you need more than one medpack, you might need to grab one, walk away from the medic, then walk back and wait for him or her to give you another.
The main thing to remember here is that your medics can't heal themselves. If you have two medics in your party, then they can heal each other, but a more likely source of healing comes in the form of medpacks that are found in the game world. If you smash open a supply crate and notice a bunch of medpacks in it, try to avoid picking them up unless you're in dire need of health. Instead, stand near them with your teammates, and anyone that needs one will walk over and pick one up.
In addition to medpacks, though, your teammates can also exchange their weapons for anything better that's lying around. In practice, this doesn't have a huge impact on the game, since they'll almost always go from SMG to pulse rifle; they don't seem to want to pick up shotguns, unfortunately. They might also upgrade to rocket launchers, when available, but these are in awfully short supply in the levels where you have squad members.
Bunny Hop-Hop
One of the oddities that seem to pop up with every new FPS game is the bunny hop phenomenon. Every game seems to have some method of circumventing your maximum movement speed (in Half-Life, you could just strafe while standing next to a wall to pick up a good amount of extra speed), and Half-Life 2 is no exception.
The technique is fairly simple, but can be difficult to pull off correctly. When moving forward, start jumping; at the precise moment that Gordon lands, hit jump again. If you can string together jumps in this manner, you should be able to pick up a good amount of extra speed, but if you don't hit jump at the correct moment, you'll have to start all over again. If you get going, you can move almost as fast as you do when you're sprinting, but without the corresponding loss of Auxiliary Power. Sprinting is still your best bet for emergency movement, as you have more control and can immediately start out at full speed, whereas bunny hopping requires a bit of start-up time.
Walk-through
Note that, wherever possible, this is a spoiler-free walk-through, so we're not going to describe what occurs during cutscenes except where it's relevant to the gameplay (which is rare). We also assume that you're playing through on hard mode.
Point Insertion / A Red Letter Day
The Trainstation
Welcome to City 17, "Where It's Safer." In case your surroundings didn't clue you in, you can talk to the other blue-jumpsuited inhabitants to confirm that this is, indeed, Squalor Central. It could use a good dose of Carol Channing, if you ask us, but instead, the G-Man has chosen to send you, Gordon Freeman, into the fray, for reasons unbeknownest to us. You're not exactly full of pep.
You can prove your misanthropy, if you wish, by fooling around with the objects and debris strewn about the train station. You can pick up almost all of the trash, boxes, suitcases, etc. that you see with your E button and throw it with your attack button (by default, mouse one). Fool around as long as you wish, but when you're ready to proceed, you'll have to head into the Combine checkpoint. There's nothing to worry about, though, as you'll soon be reunited with none other than the man himself, Barney the security guard. Although his appearance in the original Half Life would often precede a gaping head wound (at least when we played), you're unfortunately unarmed at this point, so you'll have to listen to his conversation with Dr. Kleiner before escaping through the storage room behind the interrogation room. To do so, climb the ladder in the room and stack the two boxes atop one another underneath the window, then jump out.
The Plaza

After proceeding through the door (your manipulate key will open it), you'll soon find yourself in another part of the station. Walk through it until you reach the plaza, where you can take a look at the impressive spire that the Combine has apparently constructed in the middle of the city. You can also listen to one of Dr. Breen's little lectures on reproductive rights, if you wish, but when you're ready to move on, head to the right from the station exit and find the alleyway with the ladder above the dumpster. Jump up to the ladder, then head round the corner and into the building beyond the decrepit playground.
Combine troops are apparently raiding the building, but you won't have much to worry about here; your ability to move around will be circumscribed by the troops themselves, so you'll only have one real route to move through. Once you reach the third floor, you'll have to start running, as the raid begins in earnest, and the CP troops will begin chasing you, and rather quickly, at that.

When you reach the attic of the building, move out onto the rooftops and start running from building to building. Your path can be difficult to discern in a couple of spots, but so long as you keep moving in a more or less straight line, you should come to a pair of open windows; head inside to meet up with the creepily attractive (for a computer character, at least) Alyx for the first time. She'll escort you to Dr. Kleiner's lab, where you'll get your very own HEV suit!
After the teleportation gone bad, you'll finally get to engage in some combat, although you'll initially only have your trusty crowbar at your side. It's not going to be of much use against the CP troops, since they'll be behind a secure layer of fencing, so just quicksave before you head into the railyard and run through it as quickly as possible. You're going to need your crowbar to bust through a few of the obstacles in the cars themselves. As you make your mad dash to the safety of the sewers on the far side of the tracks, you'll undoubtably take a bit of damage due to the pursuing CP troops, but fret not, for there's a medical station immediately after the start of....
Route Kanal
The Joy Of Physics
You'll gain your first pistol shortly after you begin this level, as you'll have to take down a couple of CP bastards that're harrassing a pair of civilians. Both of them will drop pistols, giving you a bit of ammo with which to fight your way through the other CP on the stairs beyond.

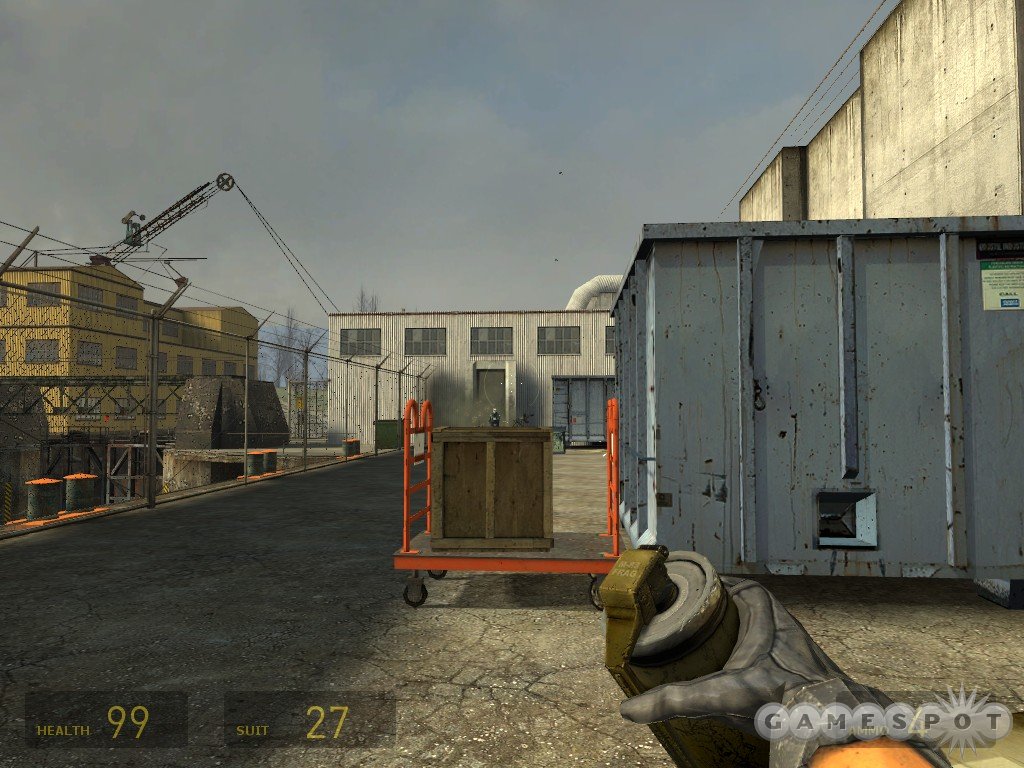
After jumping the train to the ruined building, bust your way into it and through it (being careful of the explosive barrels within - they make for an easy way to clear the door but can do a lot of damage if they explode near you. After you get through the house, make your way over the busted fence before crawling through the small pipe. Note the small Half-Life symbol above the pipe itself; this is going to notify you of the correct path in the levels ahead, as well as point you towards caches of itemy goodness here and there.
When you clear the pipe, drop back down onto the train tracks and start making your way through the small corridors; these eventually will lead you to the other side of the blue forcefield. Note that the force field only prevents your body from passing through; bullets can traverse it without a problem. If you see a CP cop on the other side of a field, then, feel free to bust a cap; they'll do the same for you without hesitation.
Eventually you'll come out to the end of a canal, which you'll have to jump into. This will take you another cell in the underground railroad, where you'll confirm that the big alien presence in Dr. Vance's lab wasn't just a figment of your imagination or a weird by-product of the teleportation accident; apparently the underground resistance has teamed up with the Vortigaunts. This is never really explained, so far as we can tell; weren't these guys trying to kill you in the last game?
Fun With Turrets
Regardless of that little twist, you'll have to continue along the tracks until you come to what used to be another railroad cell; it's unfortunately been the victim of a roll-up operation by the Civil Protection boys, who've set up a turret overlooking most of the canal. A little damage is unavoidable here, so use your sprint key to dash up around the corner and into the tunnel to the right; this will let you get behind the turret and take out the CP troops manning it. As you may surmise, this'll give you an opportunity to take control of the turret yourself, so plow through the incoming troops, who just happen to stand near explosive barrels or on top of wooden planks that you can destroy to force them to fall to their deaths. The real danger here will arrive in the form of a CP riot truck, which will attempt to shell you with heat-seeking missiles; when it drives up, you'll have to leave the turret and proceed down the walkway along the right side of the wall (after using the turret to destroy the wooden planks; this will drop the metal plank across the gap, allowing you to pass over it.)
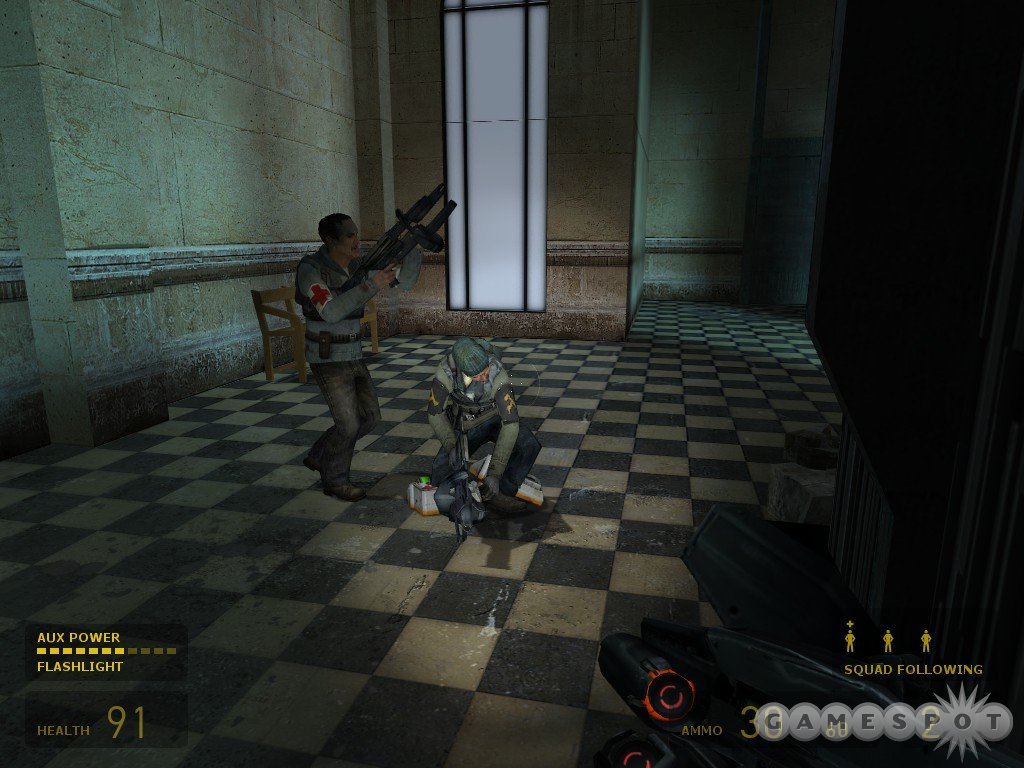
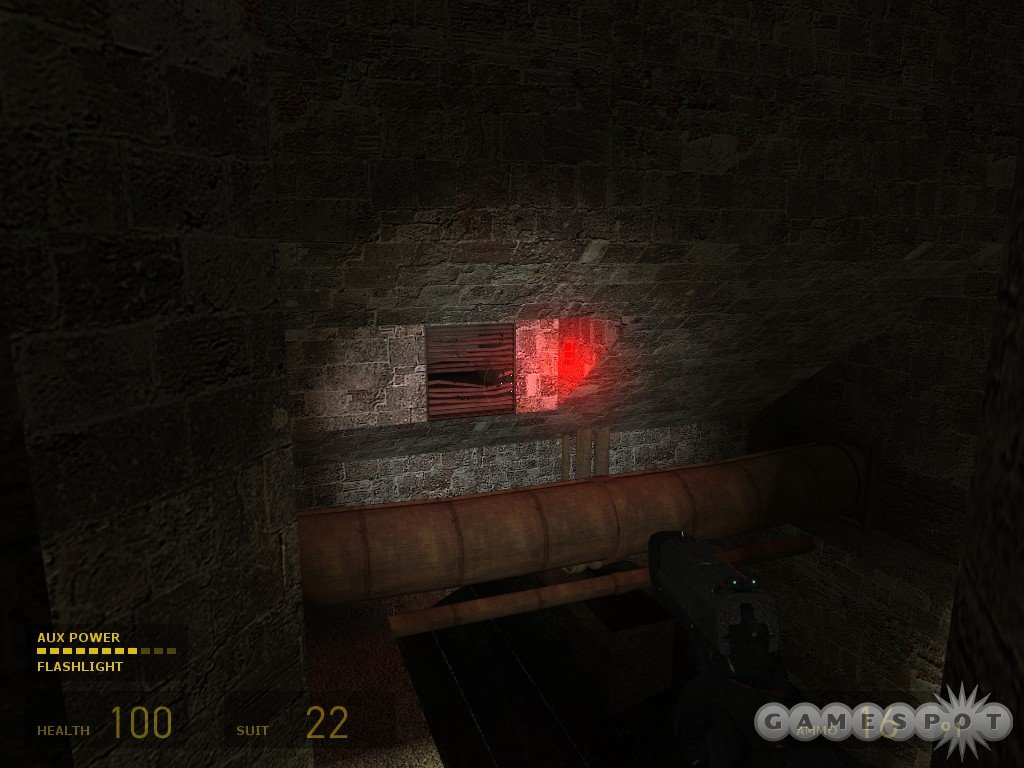
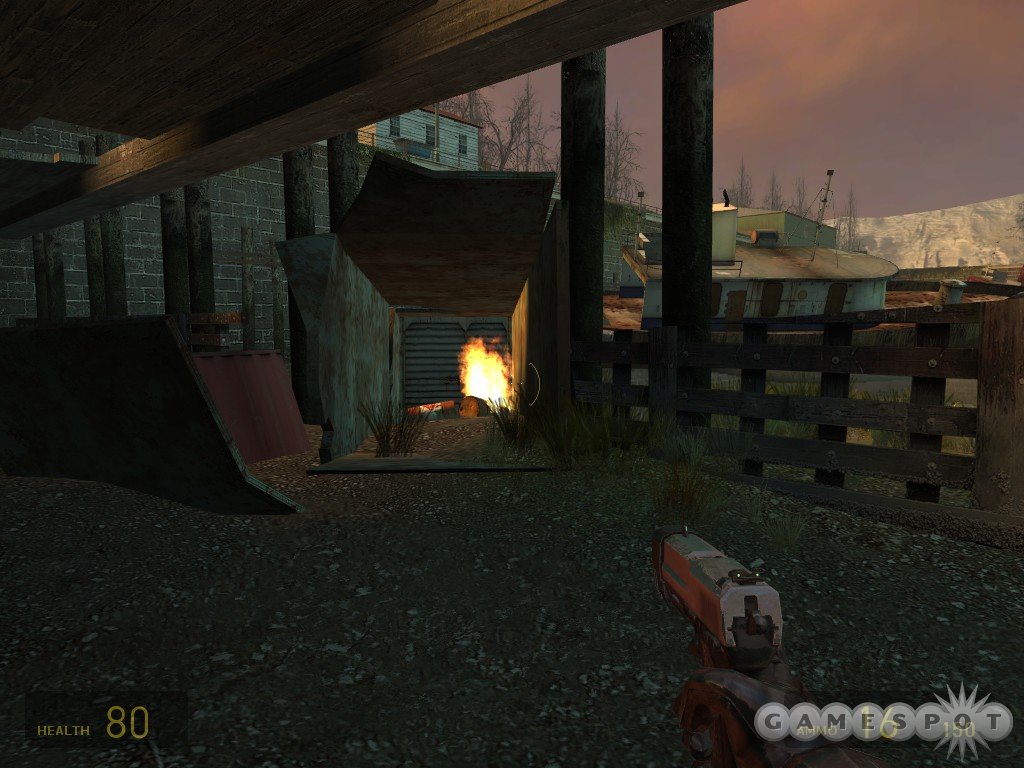
In the debris-filled tunnel beyond the turret trap, you'll come across your first Barnacles. You'll remember these from Half-Life; when you step into the little flypaper tongue that they drop beneath them, you'll be slowly drawn up into their maw and devoured. You should just be able to avoid their tongues at the moment, but if you wish, you can use your pistol to kill them off; each one will require six or seven rounds to kill. (There are some much neater ways to deal with these guys, but we'll get to those later.) If you're short on health, jump over the red car near the first Barnacle to find a bunch of supplies in a crate.
After your encounter with the railroad member, you'll have to pass through a pair of sewers; the CP units above will attempt to instigate a bit of death from above with their makeshift depth charges: burning barrels tipped into the sewers from the surface above. There isn't much you can do save dive underneath the water and wait for all of the barrels to explode. You'll probably take a bit of suffocation damage, but you regain all of this health when you surface again; that's obviously preferably to taking massive amounts of "real" damage from the barrels themselves.
The explosions will rip open one of the nearby grates, so dash through and into the tunnel. More CP will be issuing into the canal beyond the end of said tunnel, but you should be able to slice through them with your pistol, especially if you use it to blow the explosive barrels at the base of the bridge when they appear upon it.
Blow The Barnacles
In order to move on, you'll have to bust through the barrels that block the passageway beyond the bridge; just pick them up and throw them down the slope beyond. If you do so, you'll notice an odd property of the Barnacles; they'll pick up any objects that make contact with their tongues, not just Gordon and other living creatures. You can use this little factoid to get past them fairly easily; just throw a barrel underneath them, wait for their tongues to bring it up towards their mouths, then sneak past underneath them. You can also get even trickier by throwing explosive barrels at them, then igniting the barrels with a pair of gunshots just before they spit them back out. When the barrels blow, it's goodbye Barnacles.

You'll come to another waterway soon enough, with this one featuring more Fun With Barrels, courtesy of your local Civil Protection forces. These guy apparently have an endless supply of conveniently explosive barrels lying around, and they'll use them to try and blow you up while you swim towards the barrier here. If you're playing it safe, just swim along until you see the barrels hit the water, then submerge and swim backwards; you should have a few seconds before the barrels explode, letting you get out of the blast radius before they do. If you float on the water, you should also be able to snipe out a few barrels of your own near the bridge, and perhaps off a few of the CP while you're at it. The second half of the waterway has a similar theme, but your best bet here is to just hit the ramp and run through all of the gunfire and explosions until you reach the broken grate.
The first of a few different little physics-based puzzles pops up here; in order to get through the sewers, you'll have to find a way to raise the ramp high enough to jump to the upper ledge. The solution is somewhat implicit, in that the only items lying around are concrete bricks; stack these up on the far side of the seesaw to weigh it down, then jump across and be on your way.
The First Helicopter
You'll come across your first helicopter here; as in the first Half-Life, these guys are pretty much impervious to small arms fire, and since all you have is a pistol, there won't be much you can do to damage it. Thus, you'll have to satisfy yourself with running like a little girl; there's a blue door around the corner to the left that you'll need to reach, but you can use your sprint key to dash from cover to cover until you make it there. The helicopter's main attack is fairly easy to get a handle for; before it unloads its turrets on you, it'll make a distinct charging sound. When you hear that, head for some kind of cover and duck until the turret stops firing, then repeat.
Inside the tunnel beyond the blue door, you'll have more Barnacles to deal with, but you should also have plenty of explosive barrels and other debris to feed them. Before you reach your first set of flytraps, though, you'll have two quasi-hidden caches of items; one's near the HL symbol on the wall beneath the metal walkway inside the door, and the other one is available by crouching through the small gap near the floor of the dead-end before the first set of Barnacles. If you're full up on health and ammo, you can skip them.
Beyond the Barnacles, another doorway leads back out to the canal. The helicopter is still present, but you should be able to dash down to the left to reach another set of sewer tunnels.
Manhacks!
Shortly after the loading screen, you'll reach another railroad member; this one will introduce you to the joy of manhacks. These little drones are really more annoying than anything else at this stage of the game, as they can be relatively easily avoided and swatted down with your crowbar; it's when they appear in groups of five or six that they really start to become a threat. For now, though, you'll have a friend along to give them a second target, so bash all of the manhacks down before climbing the ladder here to collect the guy's supplies.
You'll have to fight through more sets of manhacks in the hallways beyond, so use your pistol liberally when you spot them, then switch over to the crowbar when they close in on you. You'll eventually come to a small exterior area; you can either blow through all the enemies here or just clear out the opposite doorway to move on, but the manhacks will follow you if you don't destroy them.
The next canal beyond the exterior area features a hidden cache of ammo. If you destroy the grate shown in our screenshot, then crawl through, you should find enough ammo to top yourself out, along with a bit of health.
Finally, a Real Gun
After dropping down, you'll get your first close encounter with the SMG, as a few CP boys wielding it will rappel down into the sewers and confront you. Although they pack a bit more punch than normal, these are still normal grunts, so get your headshots in and take them down before nabbing their weapons. You can also run into your first Crabhead zombie and get your first grenade if you head into the crawlspace that's blocked off by an explosive barrel.
After you find the underwater tunnel near the rotary filtration system and swim through it, you'll come into another small skirmish with CP forces. Deal with them as best you can before jumping atop the pipe and walking back along the hallway. You'll have to deal with steam bursts here, which are incredibly damaging, but which can be avoided rather easily. You don't just want to dash over them, though, as there are Barnacles beyond. Instead, move over to the right after passing over the first steam jet, then use the explosive barrel to kill off all of the Barnacles before moving on, and don't miss the ammo nearby.
When you reach the end of the pipe, smash the wooden planks, then crawl back underneath the pipe to find another little cache before moving on. You'll come to another CP ambush when you resurface from the water; your best bet here is to charge forward and use your SMG to blow the explosive barrels before they all issue forth from the rear of the truck; if you're quick enough, you can tag the two CP beside the truck, leaving you only three to deal with around the corner. You're going to want to kill all of them, or at least the two on the ground, otherwise they'll follow you down the corridor nearby, leaving you sandwiched between a rock (the CP) and a hard place (five or six manhacks).
Beyond the manhacks, though, you'll come to another devilish room, where another influx of manhacks will be paired with a truly stupendous number of explosive barrels. Since your survivability chance is minimal if you stick around near the barrels, your best bet here is to watch for the manhacks to arrive, fire a pair of pistol shots at one of the barrels to set it alight, then use the ladder to get yourself down below the water and hope that the manhacks get destroyed along with the barrels. You'll likely have to deal with at least a few of them, so keep your pistol handy. Note that the manhacks can't submerge themselves, so if you want a free shot at them, just stay below the water's surface and shoot at them as they skim it.
The Water Puzzle
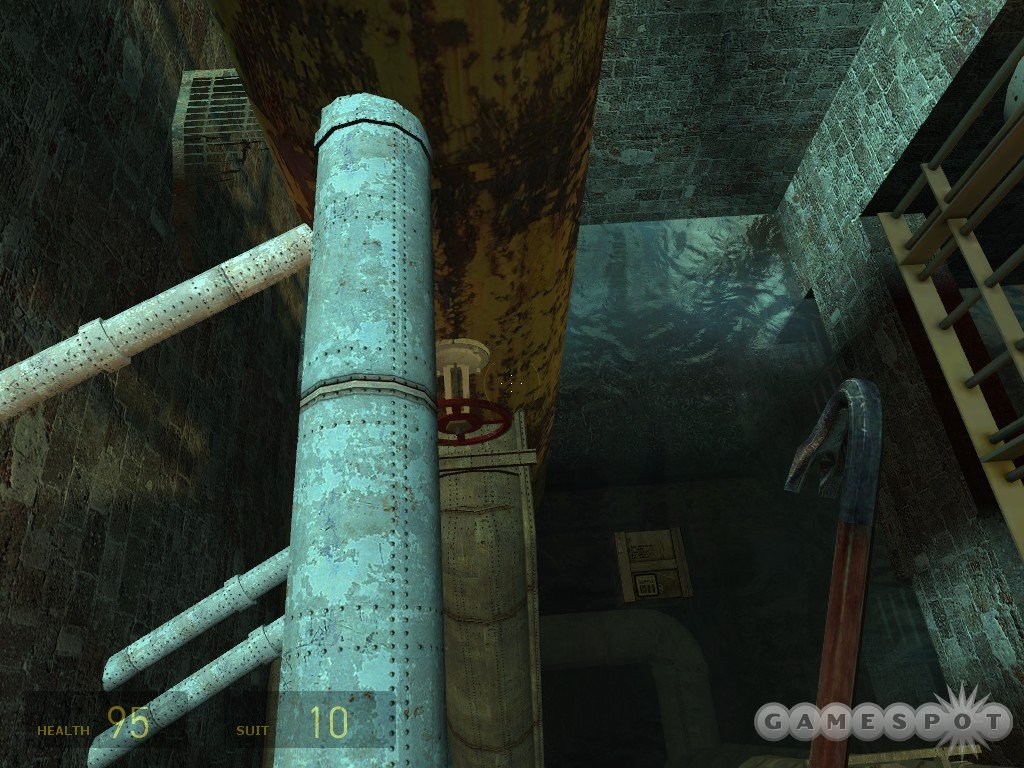
When you're free and clear of any manhack entaglements, use the ladder to reach the pipe that spans the room and move on to the next corridor. There's a water puzzle here, and one that can be somewhat tricky to figure out. In the first area here, you'll have to reach a red valve on one of the pipes; this is more easily accomplished if you attempt to descend towards it from above rather than trying to climb up from below. It's tough to reach either way, but if you're dropping down to it, you can mash your use key and trigger it even if you happen to fall past it. Regardless, you'll need to activate it to trigger an influx of water, then return to the ladder in the first room and descend into the pit where you hid out from the effects of the barrels; you can now reach the small tunnel here, so swim through and into the second part of the valve room.
This appears to be a dead end, at first; you can climb up to one side of the room, but the opposite platform is clearly too far away to reach via jumping. The trick here lies underneath the water; if you look down, you'll notice a series of planks that are holding back floatable objects. You can either use your pistol to destroy the planks or put your crowbar to its intended work; either way, you'll need to get the crates and such up to the surface of the water, then use them to jump across to the far platform. This jump can be frustrating to make, if only because the detritus in the water tends to move around as you gambol across, but you should be able to clear it eventually.
Radiation - That's Got To Be Healthy
After the loading screen, there are a straightforward series of sewers and corridors, populated by CP and manhacks, after which you'll come to an irradiated toxic waste area; you'll know you're there when your suit's Geiger counter starts ticking. You can hit the ground safely enough, but you'll want to avoid any pools of icky water, as they'll instantly and severely damage you.
When you bypass the railroad conductor, you'll get your first introduction to an old friend: the headcrab. You should be familiar with these guy's basic behavior: they'll attempt to close within range of you before leaping at you. Your suit apparently protects you from zombification, but they can still cause a lot of damage when they hit you. What's more, you're on soil, which will allow them to burrow into the ground, and they don't make any of those obvious little mounds like they did in Half-Life, so you won't have much choice save to walk up to them, force them to dig themselves out of the ground, then mow them down. They're vulnerable while they're unburrowing, so your SMG should be able to swiftly kill them off. If you're paranoid about getting jumped, you can walk around with a barrel in front of you; this will protect you from any random jumps, or at least, those that come from your front side.
Proceed through the little headcrab minefield until you reach the electrified wire hanging down; it's better to take a bit of damage from the radiated water than to hit the wire, so don't feel bad if you do so. Beyond the wire, though, there's a whole trailer that's got a current; you should use your pistol to destroy all of the crates inside before moving through, if only to make your traverse a bit easier. Needless to say, touching the walls of the trailer will cause damage, but you can use this to your advantage, as another headcrab missile lands just beyond the exit. If you approach it slowly, and immediately stop as the headcrabs appear, they'll attempt to jump at you, but will instead impact the trailer, the current of which will instantly kill them.
After a couple more headcrabs and zombies, you'll come to a lovely lady whom will supply you with some kind of ghetto hovercraft that you can use to jet around on the water with. To end the chapter, you'll have to boat out until you reach a barrier, then dismount the boat and use the crank near the barrier to raise it before passing on through.
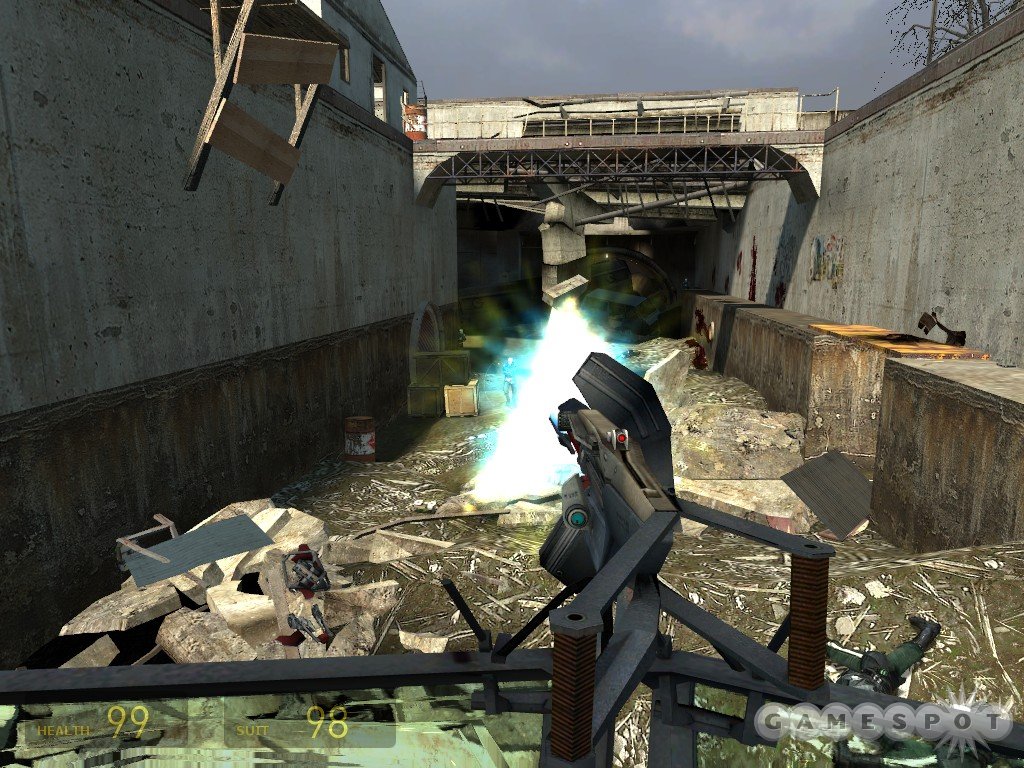
Water Hazard

The controls of the boat aren't too difficult to get used to; your normal movement keys control the front/back and turning, but you won't be able to strafe as you can on foot, obviously. The movement is also a bit twitchy, so if you think you're going to have problems controlling the boat, you might want to try coasting around a bit in a safe area and mastering the fine art of turning, as you'll need to do a lot of sharp turns in the level ahead. Also, be sure to keep an eye out for the lambda symbol that'll appear on walls and pillars in your path as you jet through the waterways; this still symbolizes some form of hidden cache, so you can get out of your vehicle at these points to get a little extra health or ammo.
Also, for the record: you can blast through crates and other debris in your way, but you will take damage if you hit something while going too fast, especially in the case of walls. You can also pick up items that float on the water without having to leave your boat, so if you see a supply crate in your path, drive over it to get whatever goodies are inside. You can also kill any CP troops that you spot by running them down, which is a good thing, since the hovercraft has no weapons.
The first noticeable landmark you'll come to will be what appears to be a shiploading facility, marked with the lambda graffiti, and which features a cameo appearance by the G-Man on its upper levels as you approach. If you're good on ammo and health, feel free to pass on by, but if you need some supplies, feel free to head on up and look around. It appears that the underground sympathizers here were the victim of a headcrab missile, as there aren't any inhabitants save zombies, but if you walk up to the rafters and proceed across the boards that are laid down there, you'll eventually reach a winch that's been stuck in place with a barrel. Use your crowbar to pry the barrel loose to get at the goods in the suspended crate before proceeding on your way.
Another Physics Puzzle
After you get back into your boat, you'll come to a gentleman who'll drop yet more supplies to you from a bridge. Jet over the supplies to pick them up. Afterward, you'll come to another little physics puzzle; in order to raise the ramp high enough to jump across the chasm, you'll have to get four canisters of air into the little trap in the water underneath the ramp. There are two near the ramp and another two accessible through a little sewer tunnel nearby, so try to get them all into the trap without carping too much on whether Gordon would physically be able to drag them underwater. (Hint: he wouldn't, not unless he suddenly has super-strength.)
Beyond the jump, though, you're suddenly going to have to start dealing with CP troops that've been airlifted into the waterway. Your best bet here is to just floor it and run right over them; they'll die instantly if you hit them hard enough, and you should have plenty of health from all of the supply caches before the last ramp. There is another hidden cache in a pipe near the first set of CP troops; you'll need to position a barrel in front of the pipe to climb in.
Eventually, you'll come to a dead-end, so dismount from the boat and find the ladder nearby, which will take you into what appears to be a canal lock station. You'll have to fight your way through to get to the lock controls.
Assault the Canal Station
The first building isn't too difficult; you should find plenty of ammo around, along with more grenades, including a whole box of them in the last room here, so apply liberally to irritants. You will have to bypass a manned turret after you exit from the building, but again, you should have an almost limitless supply of grenades, so feel free to chuck them at the turret and try to get the soldier to disengage; after he ceases to control the turret itself (which he will after a grenade lands near him), he'll be much easier to take down. Chuck the rest of your grenades through the door leading to the second building before heading in for mop-up.
There's another box of grenades in the second building (as well as a SMG grenade atop one of the blue hydro-generators), so resupply before heading outside to discover that...the lock controls are busted! OH NOES! Fret not, dear reader; as they are wont to do, the explosive barrels through the gate will help you get past the barrier; shoot them to send a convenient little ram through the gate, which will propel it open.
You'll now have to backtrack all the way back to your boat, but not without some stiff opposition. The turret you bypassed earlier will now let you blow through a small platoon of CP opposition, but you can also use your neat-o grenades for the same effect, since you have so many of them available to you. After you clear out the enemies in the exterior area, though, you're likely to have taken some damage to your shields; climb into the blue dumpster nearby to grab a small armor pickup.
The Gauntlet
After fighting your way through the rest of the forces in the first building, backtrack through and grab any health pickups that you might've missed, and be sure to drain the health recharger near the second box of grenades in the first building; you're going to need a lot of health for the next sequence. You see, as you exit the lock, you're going to be thrust into a rough little gauntlet, with CP troops rappelling from bridges as you past underneath and riot trucks attempting to blast you with their rockets as you pass by them. Even if you start out with 100 health, you're likely to get knocked down below 20 or so, especially on the hardest difficulty, but there isn't much to do about it save jam on the accelerator and try to avoid the rockets as they come to you, since they're the most damaging aspect of this whole affair. The CP fire is more of a nickel-and-dime affair, so you can safely ignore them, or attempt to run them down as they drop off the bridges.
Luckily for you, you'll find another lambda cache at the end of the gauntlet. In order to reach it, get out of your boat, then remove the cinderblocks from the basket on the ground; this will reduce its weight, allowing the basket it's connected to to fall downward, letting you get to the sweet treats inside. Mmm...medpacks.
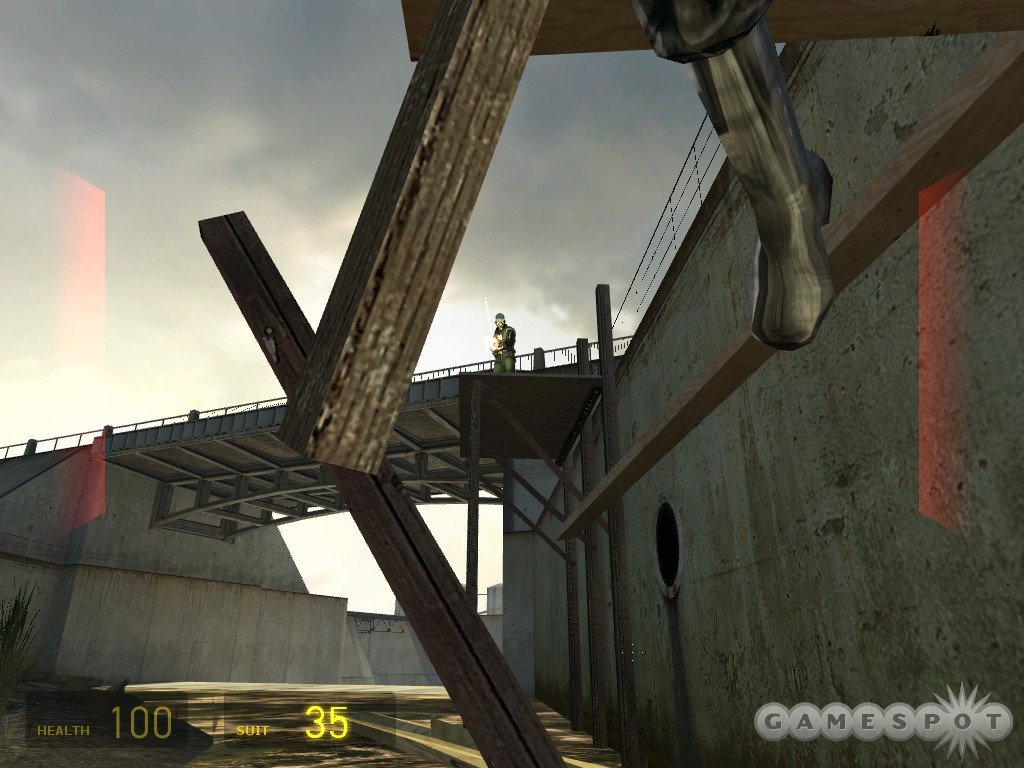
You're going to need all the health you can get - again - because you've got another big challenge coming up. Eventually you'll come to another canal lock, and just from the appearance of it, you can tell that no mere ram will get you through. In order to reach its controls, though, you'll have to fight your way through - again - a phalanx of CP troops, except this time you're going to be doing most of your combat while a helicopter plies its wares at you.
The Compound
First off, though, you'll have to find a way into the compound; you can do so by approaching the door across the canal from the wrecked ship and using your crowbar to pop the lock off. Inside the room here, you'll get your first taste of some sweet, sweet magnum action. All told, though, the recoil of the magnum and the fact that your aim is thrown off every time an enemy hits you will make it kind of useless against the SMG-wielding CP troops, so stow it for now and blast through them with your own SMG.
When you reach the exterior area above, which is strewn with shipping containers, the foretold helicopter appears, forcing you to hide out while you make your way through the maze-like morass of containers. You'll eventually reach an interior segment of the compound, but this won't afford you much relief, as there are CP troops all over the place, on each side of the room. Your best bet here, and it's truly the lesser of a number of evils, may be to run into the empty shipping container on the right side of the room and use it for cover while the troops attempt to come to you. If you have a decent amount of health (there are some pickups in the container), you can also try to use the Magnum on the troops, since they're far enough away to prevent them from consistently screwing up your aim.
After you clear out the guards, you'll have to walk up the steps here, which, of course, spawns in another wave of guards, totalling five in all. Kill them all, then retrace your path up the steps and jump across the shipping containers to reach another section of the building. If you're running low on health here, use a crowbar to bust through the crates, then bounce grenades off the wall inside and down the steps to kill off the guards. When everything's dead, you'll have access to a health and armor replenishment station. It's a good thing, too, because a bit of damage in this next segment is unavoidable.
To begin with, leave the resupply stations and walk out into the courtyard; there's a supply box around the corner to your right, if you're interested. You'll need to make your way past the shipping containers and into the pillbox/control station in the corner of the compound, but you'll have to kill two CP cops on the ground and two in the control station before you can access it, all while dealing with the helicopter fire, against which you'll have no cover. Your primary option here is just to rush it, using your SMG to blow away the two guys outside, and then chucking a grenade up into the pillbox when you reach the ladder leading up to it.
Inside the pillbox, you'll have two turrets to use against the helicopter. Unfortunately, you apparently can't destroy it, but if you deal enough damage to it (while avoiding its periodic fusillades), it'll take off over the horizon and will trouble you no more. You can use the control station nearby to open the troublesome Gate 5 and be on your way.
More Helicopter Annoyances
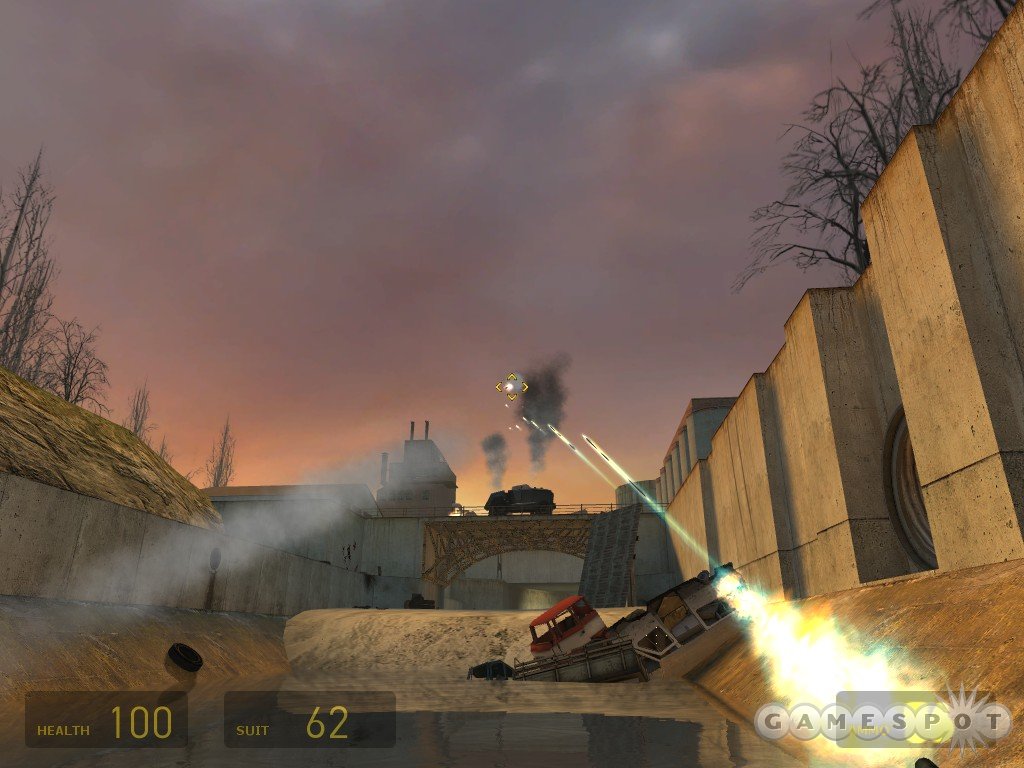
Although we were technically correct about the helicopter not troubling you, we're going to let ourselves off on a technicality: we never said that other helicopters wouldn't trouble you, and indeed, another friendly heli will appear as soon as you pass through the gate. This one will introduce you to its surface charges, and we're not talking about flaming barrels anymore; these little explosives will be dropped in your path, and will run down a short timer before exploding. You shouldn't have any trouble avoiding them during the first little chase, since you'll have to turn fairly often, but after you come out through the tunnel and enter the river, you're going to have a tougher time dealing with them. Try to stick to the sides of the river; the helicopter seems to prefer dropping them towards the middle, although it will occasionally veer into your path.

So far as the river goes, just avoid hitting any wooden dams (or the bombs, of course), and you'll eventually make it to a series of pipes which will give you some cover from the incoming fire. In the covered room beyond, look around for another lambda symbol and run into the wooden pillars below it to release a couple of supply crates. The room beyond features a frankly ridiculous set of pipe jumps; just stick to the middle of the first set of pipes and try not to slide off before you reach the next tunnel.
After you clear the tunnel, you'll be in a much more traditional type of canal. The key to not getting pounded here is to vary up your speed; if you just floor it while travelling here, you'll often set yourself up for a collision with a charge. If, however, you slow down occasionally, you'll force the helicopter to double back and return towards you, at which point you can jam on the gas again and get past it while it's attempting to hunt you down.
You'll come to another ramp/jump eventually; this one will land you near a warehouse-type building, so steer your hovercraft into the building and use the supply crates and resupply stations to get your health and armor back before lowering your vehicle back down to the canal with the elevator. (You'll need to activate it by hand, so lower your craft down first before jumping down after it.)
Timmmmmber!
Up next is a fun little scripted sequence involving a missile that topples one of the two smokestacks next to the river. Try as you might, you can't make it underneath the smokestack before it impacts; if you try, you're going to be crushed. Instead, move forward enough for the script to start playing itself out, then retreat a bit before using the crushed stack as a ramp to get by. Next up, all you have to do is get past a missile-firing riot truck and the helicopter before you reach the safety of another tunnel.
Another little physics problem ensues, but luckily it doesn't involve finding the coefficient of friction on a surface, because man those are rough. You'll need to raise another ramp by weighing down the elevator-like platform nearby. After releasing the platform (by using the small lever immediately next to it), you can start chucking barrels, cinderblocks and the like into it, but you won't be able to raise the ramp all the way until you climb up the ladder between the nearby pipes and drop the washing machine into the platform.
Although you might see the little waystation up ahead and think that you're about to get out of the airboat once and for all, you're mistaken - it's actually just a sidestop, and you'll only be walking around long enough for your ride to get equipped with a turret. Still, though, it is a turret, and one with infinite ammo besides; it'll display as 100 rounds, but it'll quickly recharge after you use all of them up.
Vengeance!
As soon as you leave the waystation, you'll see the helicopter up ahead. It obviously wasn't expecting you to come along and blast it, though, because it'll pull off and retreat as soon as it takes a little damage, forcing you to follow it. The first task you'll be compelled to complete will involve a little CP ambush on you after you wade into a killzone. Your turret absolutely owns these troops, though, so you shouldn't have a problem clearing them out and moving on.
Next up is another riot truck, but this guy isn't nearly as difficult as it may seem, mostly due to the way you can use your turret to deflect its rockets in mid-air. You're probably going to run out of ammo if you just blast away at it, so a better tactic is to just pause in the middle of the water, tap out the necessary rounds to deflect the rockets, and click your fire button to whittle down the truck's health over time. This should prevent you from running out of ammo while the rockets fly.
After the first truck is down, you'll have to cut your way through more CP troops until you reach another one. The second truck has a bit of help in the form of CP troops off to its left, but you can dispatch that threat by getting close and destroying the barrels near them, then retreat and do the same repel missile/fire on truck maneuver that you did before.
The next small canal features a fly-by from a dropship; you can destroy the riot truck that it's carrying, but it doesn't appear to impact the rest of the level. Around the corner from that are a couple of semi-secret areas; head into the corridor to the right of the first Barnacles to find some magnum ammo, and proceed up into the dead-end behind the CP trooper to find some other goodies.
Next up is a CP ambush; they'll extend a flame barrier across the water and will attempt to drop explosive barrels down onto you while you maneuver the ramp. You should be able to avoid the flames by approaching on the extreme right side, and the barrels can be easily destroyed before they reach you, or simply avoided.
One of the level's more significant challenges lies ahead, as two riot trucks will gang up on you as you enter another shipping area. These guys are annoying to deal with at the same time, so our recommendation is to scootch up to the ramp on the left side of the entrance to the area and move forward slowly until you see one of the riot trucks; if you're in the correct position, you shouldn't take any damage, because truck won't even fire at you! You can then easily destroy it and use the same tactics you used before on the other truck.
When you're ready to move on, you'll have to get off of your boat and head into one of the shipping containers on the lower level. If you sneak around to its rear side, you'll note some barrels inside; destroy them to make a passageway through, then return to your boat and hit the ramp.
The Helicopter's Last Flight
Now that you've obtained a turret, the helicopter shouldn't pose too much of a threat to you. Even on the hardest combat settings, its own turret doesn't deal too much damage, and you'll be able to shoot out the charges it drops as it makes its fly-bys, or after they hit the ground, which should help prevent taking any damage from it. If you enter this fight with low health, zoom around the area and look for supply crates; there are a few scattered here and there which should help recharge you a bit before you go for the money.
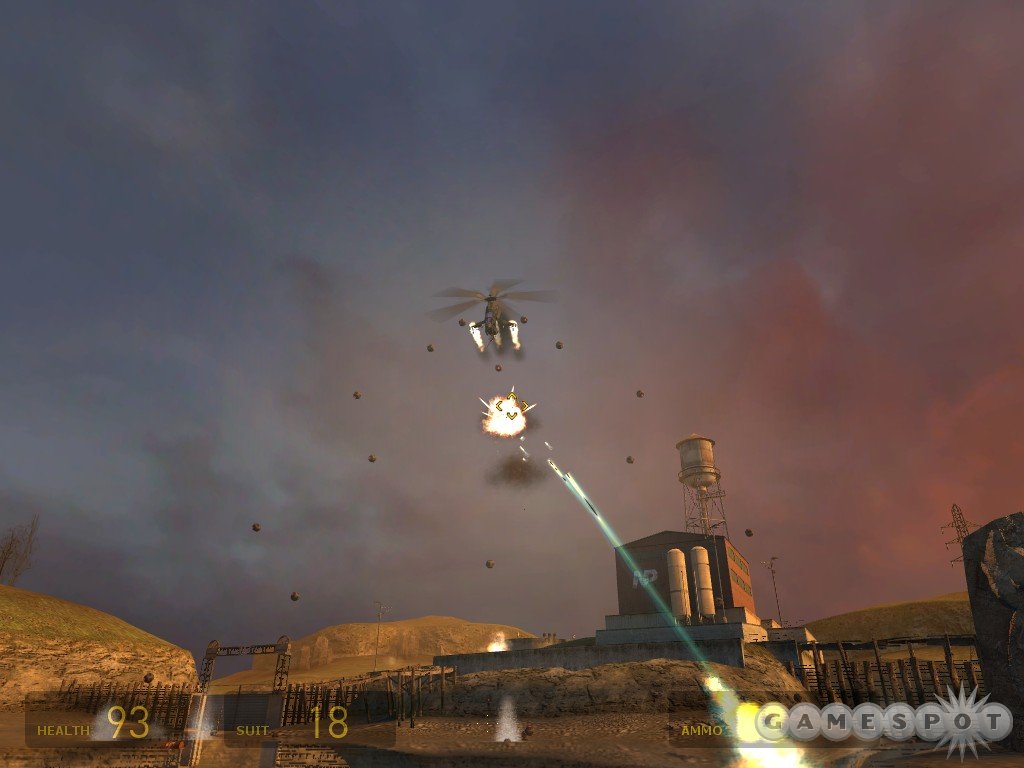
So far as actual technique goes, the Helicopter doesn't require any special strategies; just keep moving while continuing to fire on it. Feel free to harass it when it's at long range, but you'll do most of your damage when it gets close, due to the spread of your turret's fire. It can't take too much fire, so keep up the pressure and hide behind the rocky pillars when you think it's about to use its turret. Whatever you do, stay out of the large body of water that's filled with explosive barrels; if one of them catches alight due to the charges, you can quickly find yourself getting blown to pieces.
After the heli's down, raise the barrier to the left of the large building and head through. You'll need to get up to the helipad area, fight through the CP troops guarding the building (inside which you'll find plenty of health, armor, and ammo), then walk out onto the bridge and raise one of the gates there before returning to your boat and jumping through the dam.
Black Mesa East
In order to track down Eli, Alyx, and the rest of the Black Mesa crew, disembark from your boat near the lambda symbol and walk around to the back of the power station. You'll soon find yourself in an airlock, from which you'll be escorted to Dr. Vance, who promises to get you "out of that hazard suit and back into a lab coat, where you belong." Yeah, right.
Eventually, Alyx will appear and escort you out to the scrapyard, where you'll get to play around with the Zero Point Energy Field Manipulator, aka the gravity gun, aka the coolest. Weapon. Ever. Perfect for capturing the Incredibles, it also works great when you need to pick up an item and throw it at someone. Alyx will walk you through the basics of its use, as well as introduce you to Dog, her imaginatively named pet. When Dog throws items at you, move your reticule over them and use your alt-fire to snatch them out of midair. There isn't much else you can do in this segment; after a set amount of time, you'll have to book it back to Black Mesa East, where Dog will escort you to the tunnel leading to Ravenholme. The ladder leading up to the down is locked, so blast the padlock with a gun before heading up.
"We Don't Go To Ravenholm..."
Time to put your new gravity gun to the test! Ravenholm is essentially a playground for its use; even in the first building, you're going to be able to pick up explosive barrels and use them (instadeath), air canisters (causes the zombies to catch alight), rotary blades (chops them in two), and perhaps our favorite, cans of paint (coats the zombies in a fabulous eggshell color). There are plenty of targets in Ravenholm, so you may want to get one of the rotary blades and keep reusing it on the zombies; you aren't going to get a whole lot of ammo resupplies here, so it pays to make use of the free kills that the gravity gun affords you.
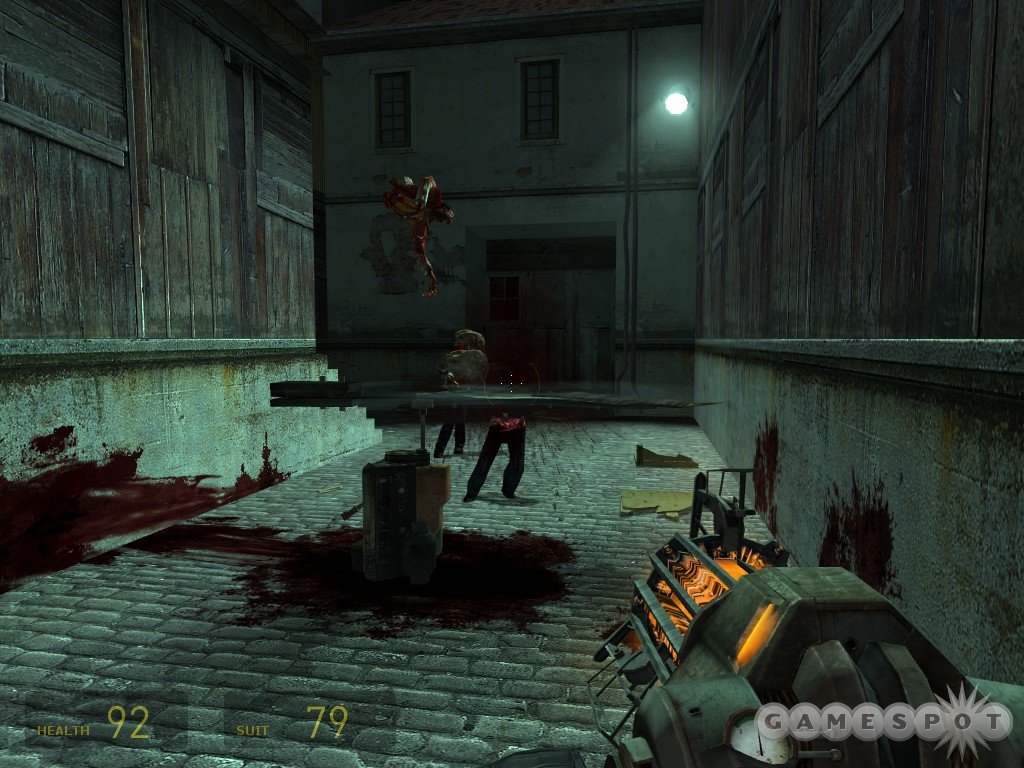
The first part of Ravenholm isn't so tricky; there's only one real path to follow, so chop through the zombies in your way. You can use the propeller traps to do your dirty work for you; when the zombies step into the spinning blades, they instantly die. Even if a trap is deactivated (you can switch them off by ducking underneath the blades and flipping the handle), you can still use your primary fire on the grav gun to spin them up, forcing the same effect.
Eventually, you'll come to a building where the madman that's been cackling at you will appear; you'll know you're there when you see the conflagration of burning zombies. This is where the puzzles begin, and they're sometimes rather tricky.
I Love The Smell Of Burning Zombies In The Morning
In this instance, you'll have to find a way to disable the various traps before you can move on to the next area. To begin with, find the propane tanks here and disable them by using their red valves; this will dissipate the flames, allowing you access into the building. Inside the building, you'll find a pair of generators, and a stairwell leading up. On the top floor, inside the room where the mutant headcrabs dwell, you'll find a switch that disables the electrical trap. If you want, you can head straight for the de-electrified fence; you can also climb up atop one of the generators in the main room of the building to find a small vent to crawl through. This leads to a small cache with a grenade, an SMG grenade, and some ammo.
When you clear the previously electrified fence, you'll meet up with Father Gregori again, who'll deliver another little aphoristic saying before shuffling you through to the next area. Jump down to the planks below his position to move on.
Although you can drop down as soon as you enter the next building, it'd be unwise to do so, because there are four headcrabs and a zombie waiting for you down there. You can use a grenade if you wish, or use your gravity gun to throw down all of the compressed air canisters before shooting them.
Outside the building, you'll come across some of Gregori's car traps; use the levers to drop the cars when they're suspended above a zombie, and watch it go splat! In order to move on, though, you'll need to drop the second car with the lever, then jump on it before it can begin rising again. You can find some health, armor, and a grenade by jumping from the car to the darkened room by the lambda symbol; afterwards, though, you'll need to jump from the car to the planks to get Gregori to introduce himself.
Well, Actually, It's Kind of Nauseating
After reaching the exterior of the building you're in, stay on the platforms above the street and pop off the explosive barrels below. Zombies, zombies, burning bright, in the cities of the night! The barrels will also probably set most of the headcrabs alight, as well, which is handy since there are so many of them. You can finish off any stragglers with your pistol or with the gravity gun before descending and making your way up the ladder at the far end of the street. The platforms above street level will take you either left, into another small cache of items (guarded by one of the quick mutant headcrabs) or right, into what appears to be some kind of zombie autopsy center.
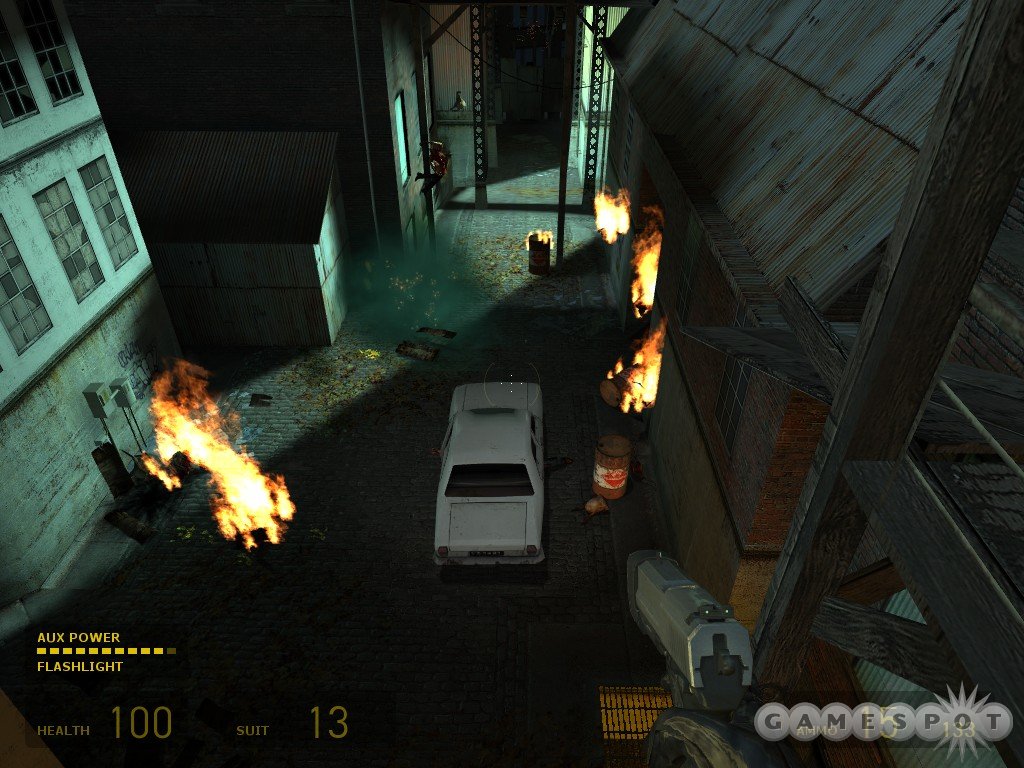
Before heading down, grab another sawblade and use it to pop through the zombies coming up the stairs; you should be able to get four or five of them at a go.
After the next checkpoint, head out to meet up with some of the new and improved zombies. When the quickest varient of headcrab attaches itself to a human, the result is a zombie that's devestatingly quick, both in terms of movement and attack, and also more resistant to damage than normal zombies. You'll have to kill one of them as it approaches you; if you still have a sawblade attached to your grav gun, then that'll do the job. Otherwise, an SMG aiming at their heads should be suitable.
Before you move into the building here, you'd do well to clear out the streets around it; there are plenty of headcrabs and a few zombies milling about, and they're easy enough to kill with your grav gun and any appropriately heavy item. Inside the building, you'll want to move up the stairs, but you'll likely want to use your SMG instead of a grav gun due to the close quarters and frequency of headcrab appearances. Better safe than sorry!
This Is My BOOMGun!
When you make it to the roof of the building, Gregori will reward you with your very own shotgun; every boy's dream! Shortly thereafter, your position will be assaulted by the speedy zombies; let Gregori take them down while you attempt to avoid damage, then jump into the water reservoir across the way. You're going to be on your own against the zombies when you reach the next roof, but you should be able to kill them as they come up the drain pipes with the shotgun. There are two drainpipes to worry about, with one on the building across the way and one leading up to the roof you're on. The sound should clue you in as to which pipe enemies are climbing; the one on your roof will also shake side to side as the zombies climb, so let them get close to you before offing them with headshots when they're near the roof.
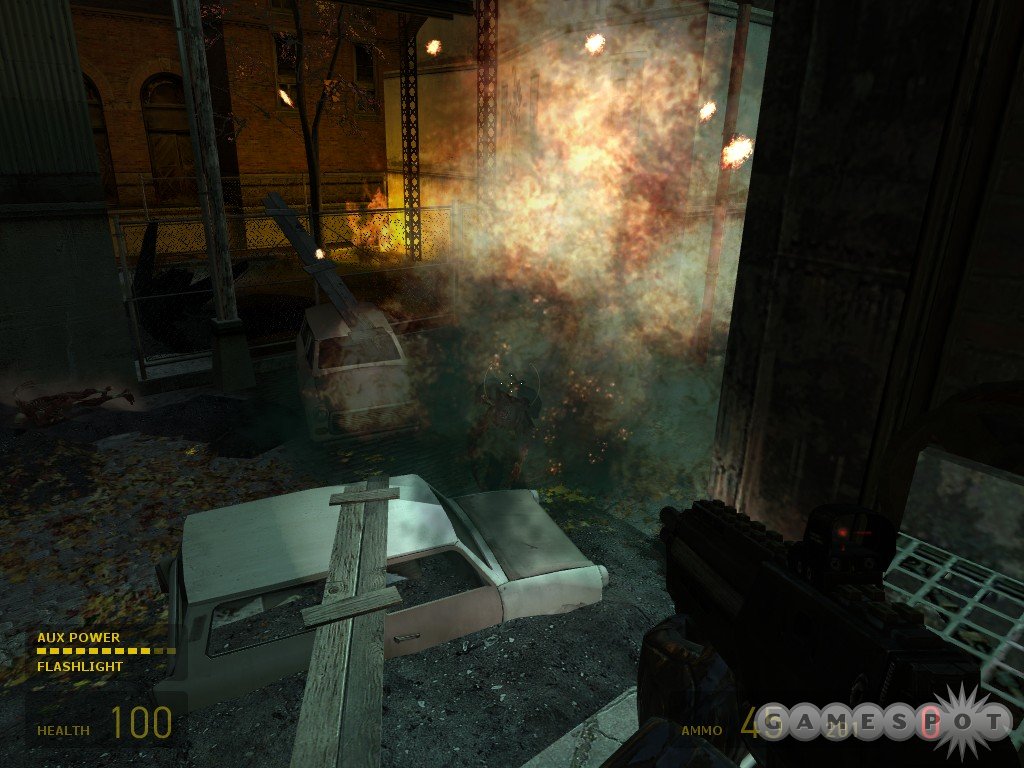
As you lower the lift inside the room near the roof, you'll come across your first toxic zombie, so called because they've been completely taken over by the toxic headcrabs. If you've come across the toxic crabs before, you'll know that they drop you down to one health with each hit, thanks to a potent little toxin. You'll regain the health eventually, in a fashion similar to drowning damage, but it's still real damage, meaning that the next attack you take will kill you while you're at one health. The toxic zombies are actually infested by three or four toxic headcrabs apiece, which lets them throw them at you from a distance. They're also a lot hardier than normal zombies, and are able to take a couple of SMG grenades apiece before dropping. It is usually best to kill them off with explosives after wearing them down a bit; this will have the beneficial side effect of destroying any remaining headcrabs on them. Otherwise, the headcrabs will drop off and start crawling about; they're easy enough to kill with a magnum, though, since they move fairly slowly.
Some Platforming - Literally
The next area is overflowing with zombies; they seem to be set to infinitely spawn, so don't bother using any ammo on them. This place can be a bit confusing if you don't know precisely where to go, so pay attention!
First, head down the street until you reach the propeller trap, then turn right into the alleyway with two flammable barrels. Pass those barrels by and walk up the steps into the building until you reach a small balcony. There should be a switch here; flip it to send the suspended platform across the way, then return to the propeller trap.
From the propeller trap, you're going to want to walk down the slope of the street and head into the alleyway on the right. There'll likely be a toxic zombie here, so watch for flying crabs! In the alley, you need to jump onto the stacked crates to reach the roof of the small building, then jump across the gap to the ladder, then work your way around to the walkways above the streets, where the platform you moved will now let you jump across to the far roofs, where you can fight through the quick zombies to reach another checkpoint. Phew! All of this is rather involved, of course; you might want to check the video on this page for a more concise walk-through of the steps involved.
Meeting Up With Gregori
Fight your way through the building here, using sawblades to get massive kills on the zombies involved, and work your way up to the attic, where you'll find a door leading outside. Walk across the walkways until you reach a factory, then drop down and head up the stairs until you find a doorway leading inside. Stock up on ammo and health, then head to the roof, where Gregori will send a cart across to meet you. While the cart's in transit, though, you'll have to fend off the quick zombies that'll attempt to swarm you. When they make it to the roof, you're going to have a tough time killing them, so try to shoot them as they climb the pipes.

When you cross over in the cart, Gregori will show you to the mines, which apparently are the only way to get to the coast. As he escorts you, you'll be attacked fairly often, but Gregori himself is unkillable, so let the enemies swarm him while you conserve ammo by using the gravity gun to kill off enemies. The trip through the graveyard is fairly easy because of his invulnerability, but still massively fun.
The Mines
After you reach the chasm that leads down into the mines, tip the explosive barrel into it (without setting it alight), then start dropping from beam to beam until you reach the bottom. Before you hit the ground, though, scope it out to find that the whole damn place is overrun with headcrabs of a wide variety. There are plenty of barrels around, so shoot at them from the walkways and you'll hopefully thin out the ranks a bit. You still shouldn't drop down just yet, though; instead, drop onto the medpacks and use the walkways to maneuver yourself towards the supply crates in the small room nearby.
When you're ready to leave the headcrabs behind, drop onto the floor and quickly run to the mining tunnel entrance. It's blocked off by a gate, so you'll have to climb back onto the walkways nearby and jump onto the wooden shorings above it, then drop back down. From there, you'll find another chasm, but one into which you can freely jump; there's plenty of water down below, so you won't take any damage from the fall.
You'll come to a wooden barrier that you'll have to jump over. (There's also a Barnacle here, which you can grab onto if you want to grab some items; just let it lift you up until you spot the guy's body, then use your grav gun to draw them to you.) You now have one last trap to use before you escape from the mines; activate the mining car to send it careening up and down the track, but be sure to duck before it comes by you, as the blades on it will slice through you just as easily as the zombies.
The First Overwatch
When you reach the surface world, check around for some more ammo before heading down the train tracks. The first obstacle here will come in the form of a sniper perched above the tracks; you'll notice him picking off the zombies ahead of you, but he'll be just as happy to shoot you if you walk out in front of him. You can find grenades in the supply crate beneath his position; if you use one while your reticule is directly over his window, you should be able to land one in there and blow him away.
There's another sniper ahead of this position, though, and he'll be facing backwards towards you, which will make him a much more difficult nut to crack. You'll have to creep along, dodging his fire, until you reach a flatbed train car with a barrel on it; the sniper will blow the barrel, forcing debris onto the train tracks, which means that you'll have to crawl underneath the car until you clear the debris. Once you reach the far side, there isn't much you can do save dart out and dash for the cover of the next car, which will let you get underneath the sniper's position and bypass him. If you want, you can enter this last car to find a couple of grenades, but half of the roof is missing, meaning that the sniper will get an easy shot at you unless you kill him first.
Beyond the second sniper, you'll run into your first Overwatch troops; these guys are essentially bigger and beefier CP units. One of them will pack the Overwatch Standard Issue, a pulse rifle, so grab it before moving on. The next little battle against the Overwatch is going to be somewhat taxing, so you'll probably want to be near maximum health before you move on. If you can't find any more medpacks, then you'll be able to grab some in the broken-down van near the junkyard here, but grabbing them will instigate an Overwatch attack.
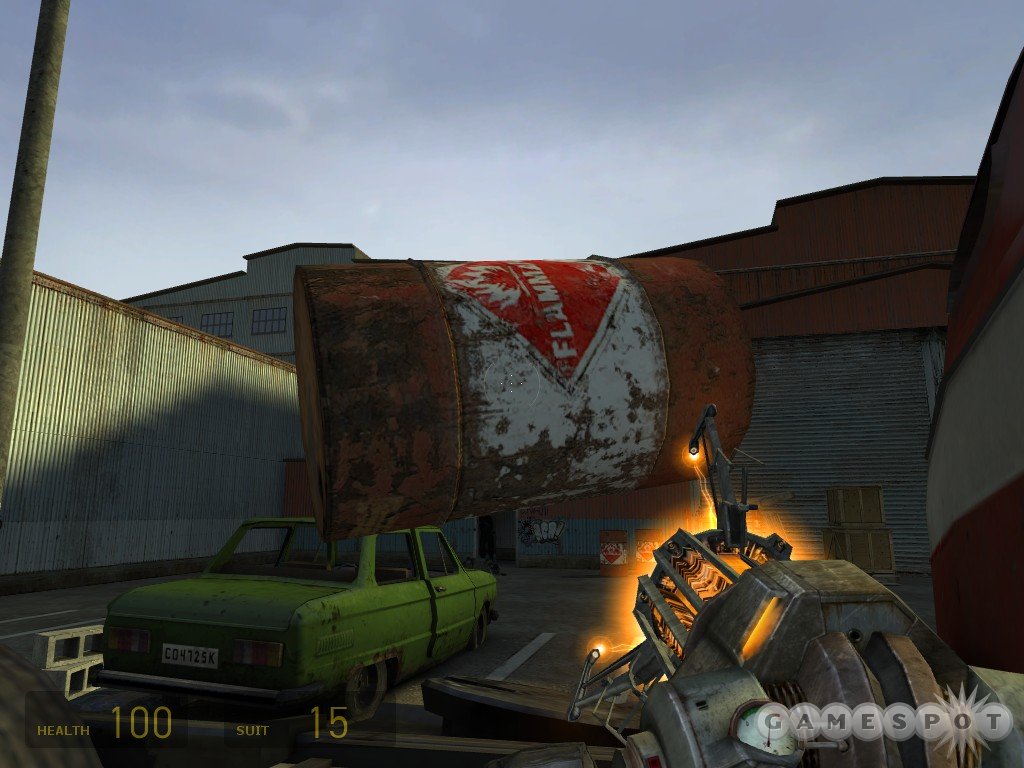
A better plan of action for the junkyard assault is to sidle up against the chainlink fence and walk along it until you spot a pair of Overwatch near an explosive barrel, which you should of course shoot immediately before they move away from it. Kill the third overwatch near the trains, then walk around them to get to the junkyard itself. More Overwatch will likely issue forth from the door near where you blew away the first two troopers, so grab a barrel with the grav gun and shoot it in there to blast them to bits. More overwatch are engaging in battle with some of your underground friends inside the building, so flank them and take them out with your pulse rifle.
Shortly after you meet up with the undergrounders, you'll find yourself hopping aboard a buggy and heading along the coast road to meet up with Alyx.
Highway 17
Of course, nothing ever goes quite as well as planned in Half-Life, so you'll find yourself in an overturned car after the magnet on the crane fails. In order to right it, you'll need to hop out and hit it with your grav gun, but the antlions around you will have a thing or two to say about that, of course; your best bet is to run in circles until the turrets above clear them out a bit.
In order to hit the coastal road, you'll need to head down to the beach, then hang a right and follow the path that leads up the hill near the pier. It can be tough to see if you don't know where it is, but it is somewhat paved, and a different color than the sand, so keep an eye out and you'll spot it. As soon as you top the hill, though, you'll need to use your turbo to clear the jump ahead of you (which should be bound to the same button as your sprint key). When you do get across, you'll come to a small guard station with some health packs inside, if you care to dismount and grab them.
When you pass through the tunnel, you'll emerge at a placid-looking stretch of beach. Looks can be deceiving, though, and generally are in Half-Life, so you can expect to be welcomed by more antlions as you drive along. You'll come to your first thumper fairly soon, though; these seismic generators will form a protective barrier against antlion attacks, and will let you safely dismount from your vehicle to check out the structures along the coast.
The second building you come to will host a few Overwatch troopers, so kill them all! Note the appearance of gas canisters outside the building; you can grav gun these at the troopers to set them alight, if you're of a sinister bent. When they're dead, use the mounted binoculars inside to get a view of what appears to be an undergrounder base, complete with a G-Man appearance. You'll come upon it soon enough if you follow the coast.
My First Gunship
When you do reach the base, be sure to destroy all of the explosive barrels within it; it'll make the following fight a bit easier to survive. Not much easier, but perhaps a wee bit so. You see, soon after you meet up with the Colonol in the basement of the main building here, a gunship will attack the base, and you'll be asked to shoot it down with your newly-obtained RPG. There isn't a dumbfire mode for the rocket launcher, as there was in the first game; all you have at your disposal is the laser-guiding system. You'll need it, though, since the gunship will bob and weave its way around the base, and dish out some incredible hurt on its inhabitants. Luckily for you, you'll have a few friendly soldiers on your side who will give you ammo when you run low, as well as a medic that'll pass along medpacks as needed. You won't be able to stand up to the gunship's fire for too long, though, so try to find a good place to get some cover in between rocket blasts.

Using the rocket itself is a tricky proposition, and is likely going to require some practice, so feel free to quickload if you're having trouble and try again. You do have pretty good control over the rocket in flight, but it's difficult to make a rocket move backwards towards the gunship if it passes by, so you're going to have to try and land your blows before the rocket moves too far; otherwise, you'll have to point your laser at a nearby building and try to coax it back towards you before re-aiming it at the gunship. This is easiest to accomplish if you hide and let the gunship acquire another target before moving out and shooting; if you fire while the gunship is blasting you, your rocket is likely to get shot down before it reaches its target.
On the hardest combat setting, the gunship will take four or five direct rocket hits before it goes down, but eventually it will be destroyed, and you'll be able to pass through the gate and make your way further down the coast.
The Crane
After you pass underneath the aqueduct, you'll come to some Combine troops attempt to escape from an overturned riot truck. Blast them with your vehicle's weapon, then kill off the antlions in the area before getting out of your car and activating the thumper with your use key. (It's switched off when you arrive.) As you make your way up the planks, get ready for an incoming Overwatch assault group, including a soldier with a shotgun that'll quickly put the kibosh on your adventure if you don't kill him immediately after you spot him.
Make your way over to the crane (using your magnum to kill off the soldier up there from long range), then climb into the control tower to actually use the thing. You'll need to move your buggy up from the beach over to the pier behind you, but the crane controls are a bit touchy. Use your strafe keys to line up the crane with the car, then use the forward and back keys to extend the arm so that it's over the target; you can use the shadow to judge how accurate your placement is, but you might need to wait a moment for the magnet to stop swinging. When it's in place, hit fire to drop the magnet and pick up the car.
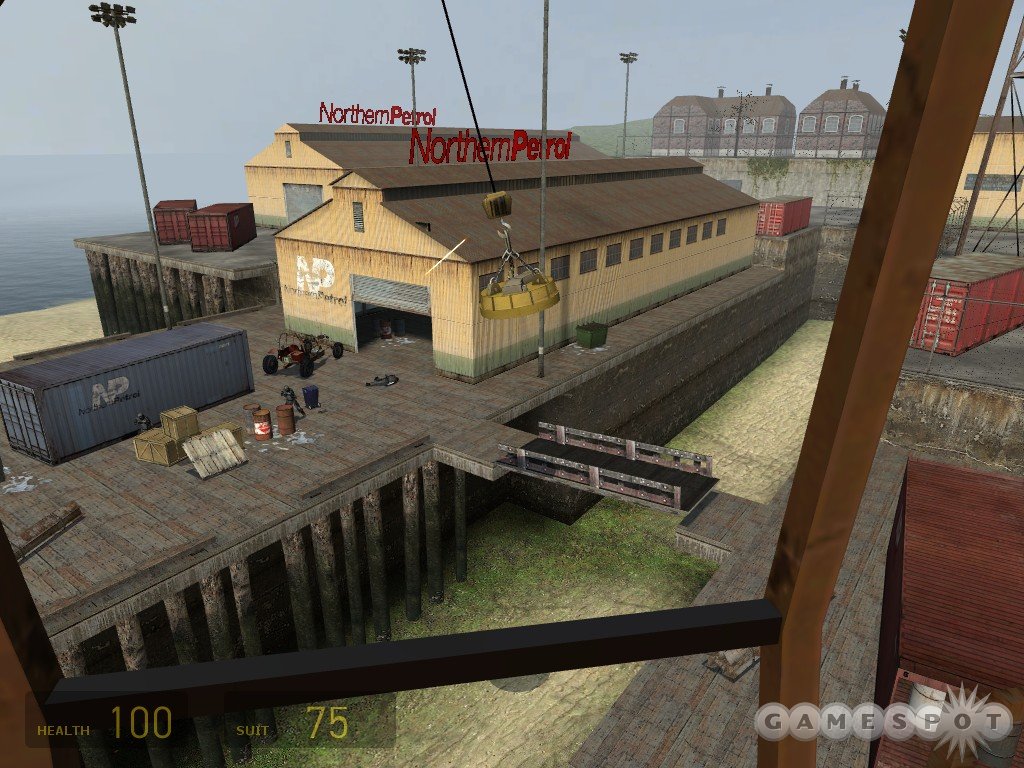
As you move the car around to the right, though, a few more Overwatch will appear on the pier. You may be able to drop the car onto one or two of them, but if not, just exit the crane and use your magnum to drop them all. They won't be able to hit you because of how far away they are, but your magnum is perfectly precise. When they're dead, use the crane again to drop the bridge connecting your area with the pier; this may be easier to do if you have the car still attached, but is doable with just the magnet. You'll have to swing the whole thing from left to right, and hit the magnet drop at the right time so that it hits the bridge and tilts it over.
When you pass over to the far side of the pier, into the Northern Petrol building, clear out the guards and raise the door via the switch in the room on the far side of the warehouse. More guards will spawn outside, but you can blast through them without much problem, or even just ignore them as you take the car and jump through one of the large windows here to reach the roadway again. Of course, another problem will appear soon enough, in the form of another gunship. It's immune to the fire from your buggy, so turbo across the aqueduct's jump, then get out of your vehicle when you hit the roadblock. You'll need to use your rocket launcher at this point to dispatch the gunship; you can find more ammo near the semi at the corner of the road, as well as a whole infinite box of it inside a white van. The same tactics from the first fight apply here, so duck behind cars and pop out only long enough to blast the gunship with a rocket before hiding again, and soon enough it'll plummet to earth. You can then use your grav gun's primary fire to move the cars out of the roadway, allowing you to proceed.
Sticky Mines
After proceeding through the tunnel, you'll come across a few odd homing devices which will attach themselves to your car. These don't appear to damage you (at least, not while you're in the car), but they will occasionally pulse your car with electricity, which can make it difficult to steer. They're not difficult to get rid of, though; just exit the car, then use the grav gun to detach them and shoot them out into the water.
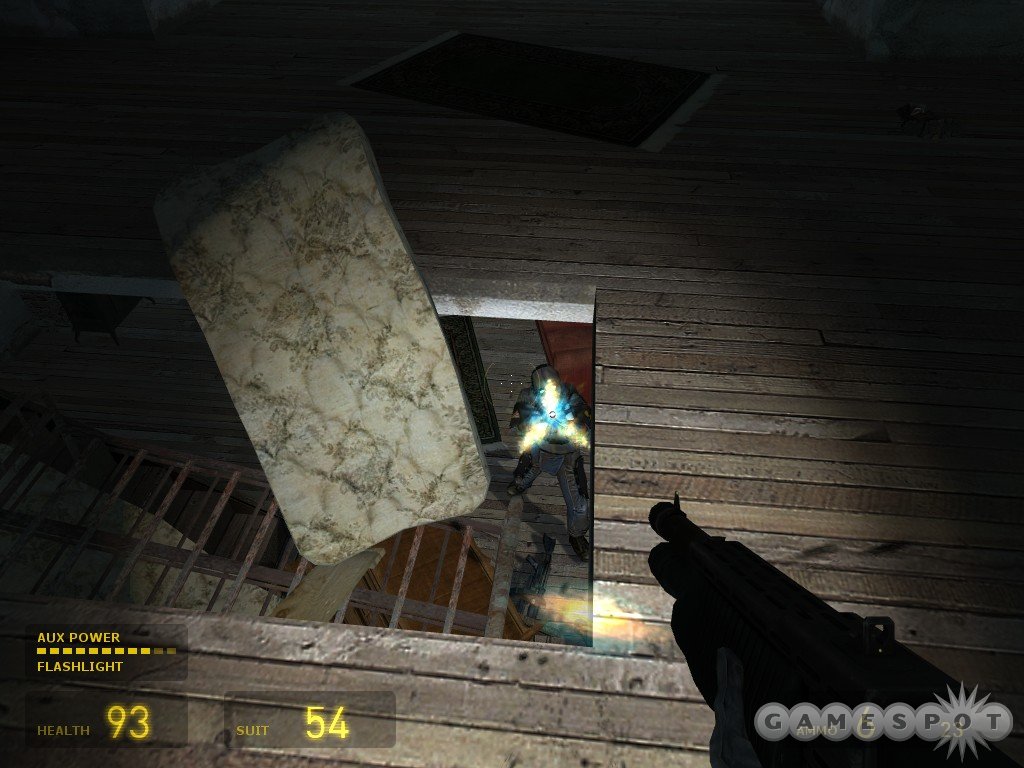
You'll eventually come to an Overwatch ambush, which they'll initiate by blocking off part of the road. You can jet past them if you want, or get on foot and start blowing through them. Note that if you head up to the second floor of the larger building here, more Overwatch will spawn in and start heading towards you. It can be kind of fun to block off the stairs with items, then wait for them to congregate below before dropping a few grenades down there.
Beyond the ambush, you'll come to a truck blocking the way; destroy it by shooting the barrels around it, then proceed on until you come to another roadblock. You can clear this with your grav gun, but there's no point just yet, as the path ahead is blocked by a forcefield. Instead, grab the crossbow and ammo on top of the hill to the right of the roadblock and start sniping away at the Overwatch in the little collection of buildings nearby. Note that there is an ever-so-slight dip in the trajectory of your bolts as they travel through the air, especially when shooting at long range; take this into consideration when firing.
After penetrating into the buildings, you'll have to clear out a whole lot of Overwatch fools. The simplest way to do this is to grab a barrel, rush around the corner of the street, and start chucking explosives at them as they come out of the building in which they're holed up; they're a bit too tough to take down with conventional fire, at least on hard mode. When they're dead, though, you can disrupt the forcefield by moving the riot truck that's powering it. You can either use the primary fire of your grav gun to blow it away, or just pull out the stoppers behind the rear wheels to let it roll down into the ravine below.
Infinite Rocket Ammo = Cool!
The next tunnel will lead you through to another little collection of buildings in the shadow of a bridge. As per usual, you'll have to kill off any number of Overwatch bastards to feel at peace, but you can take advantage of the fact that there are an infinite number of rocket rounds inside a box near one of the buildings here to make your job a bit easier. You can also find plenty of crossbow ammo on the second floor of the large building here, but you'll need to use your grav gun to put something at the bottom of the stairs before you can head up.
Your ultimate goal is to get your buggy across the bridge, but the forcefields on it will make that impossible for now. To deactivate them, you'll need to reach the rooms below the bridge. There's a door leading to them below the cliff on the side of town closest to the bridge; it's pretty easy to find if you just walk up to the fence and look below you. You can then drop down and head on through, being careful not to rile the toxic zombie behind you.
Riding The Rafters
When you reach the undermatter of the bridge, you can start hopping across the rafters to reach the other side. There are a couple boxes of rocket ammo here, so don't be stingy with your explosives.
To begin with, walk up the stairs and hop across the broken walkways to the second pillar, where you'll have to climb up a ladder to reach the upper room. Beware of headcrabs as you enter these rooms, as they often lie in wait. After blowing away the Overwatch troops with your launcher, reload it and move along via the walkways until you reach the far side of the bridge.
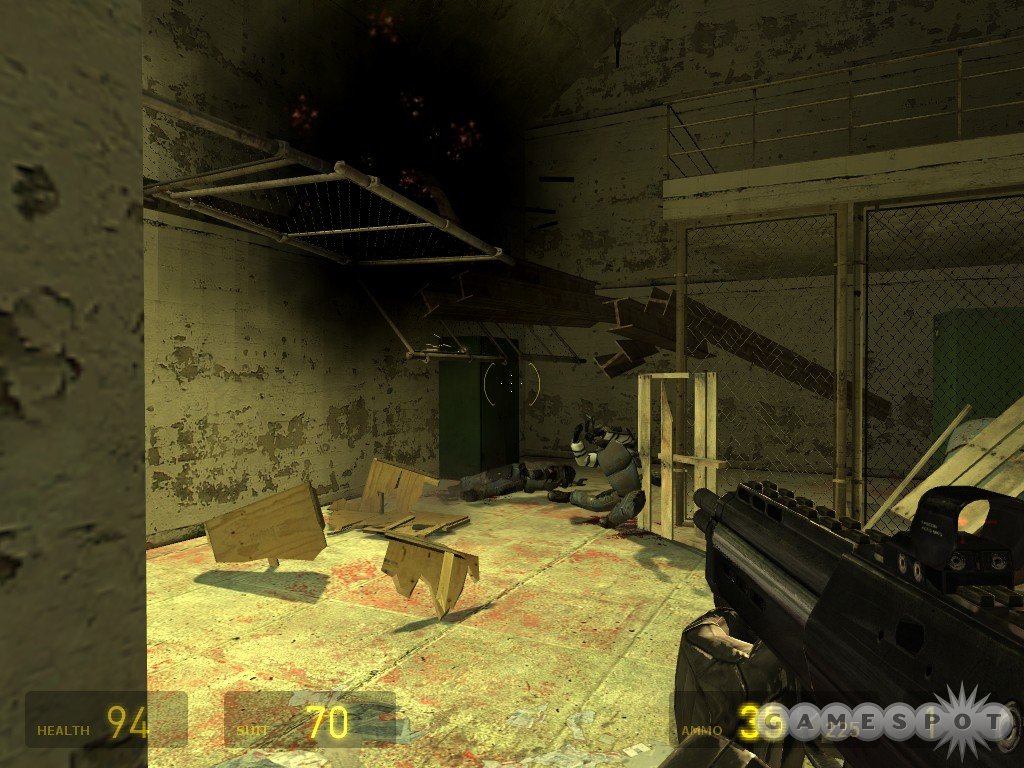
When you're in the next large structure, you'll need to fight your way to the top. Begin by entering the storage room and blowing the barrel near the beams; this will destroy part of the gate and give you access to the exterior area. Kill the guard that snipes you from the bridge before heading upstairs, mowing down all the Overwatchmen, and disabling the forcefields. The first forcefield can be turned off by using your grav gun to unplug it, then you can use the control panel beyond to shut down all of the fields on the bridge.
Shutting down the fields is a positive thing, no doubt about it, but it unfortunately spawns in a gunship that'll be positively difficult to deal with without the infinite rocket ammo which you recently enjoyed. The solution is, of course, to return to the last rocket box, but it's a tough road back. Don't forget about your sprint key, which you can use while you dash back over the bridge's walkways. When you do reach the rockets, hide in the small room nearby and try to blast the gunship as it passes underneath the bridge; it seems less likely to shoot your rockets down when it's moving quickly. When it's destroyed, use the ladder across from the ammo box to reach the upper level of the rafters and return back the way you came.
When you reach the town again, you'll find that it's the scene of a pitched battle betwixt Overwatch and antlions. No matter who wins, you lose, as the saying goes, so just book it back to the buggy and get up on the bridge. You won't be able to go too far, however, as an oncoming train will force you to reverse and get onto the other side of the tracks until it passes you by. When it moves on, though, you'll be able to get through the tunnel beyond and into the next level.
Sandtraps
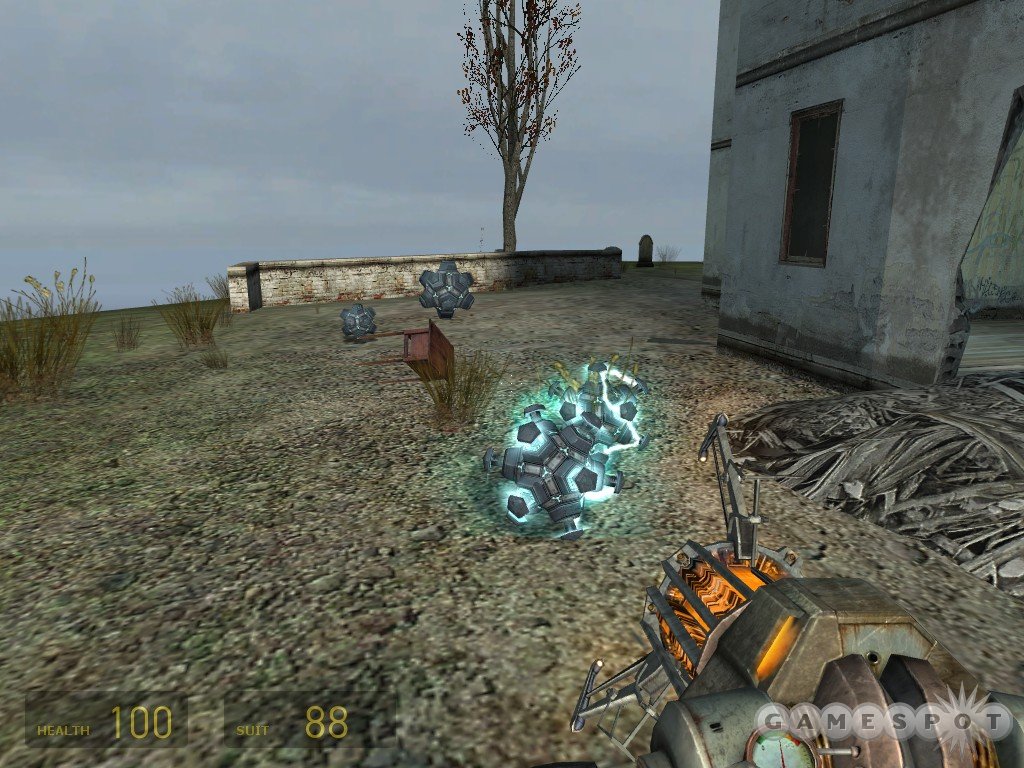
Time for Gordon to play some golf, apparently. Before he can hit the links, though, you'll have to fight your way through a zombie roadblock. Kill off everything here, check out the room on the right side of the tunnel (accessible through a small vent), then use your grav gun to clear the cars off to the side and proceed. You'll come to a house soon enough, controlled only by a couple of Overwatch sentries. There's nothing of particular note in the house, save some crossbow ammo on the top floor; as soon as you get this last, though, you'll have to run from five or six rolling mines that drop from the roof. If you get badly hurt, check behind the beached ship nearby for a couple of medpacks. This is all optional, of course; if you just want to be on your way, keep following the road and bypass the house altogether.
Your first big challenge here comes in the form of an Overwatch checkpoint. There isn't anything too taxing within, though. If you attempt to rush through it, your car will likely be overturned by ramps that spring up from the road, so dismount before you hit the first gate, approach the town from the side, kill everyone within, then take your car through as smoothly as you please. There are half a dozen Overwatch inside, but you should be able to handle them.
The next ghost town is initially impassible; there's a gate blocking the way with no obvious lever or handle to manipulate. What you have to do here (after killing off the Overwatch that land, naturally) is find a couple of batteries and insert them into the machine that's powering the gate. There's only one building here, and the machine is inside it, so that shouldn't be difficult to find, but locating the batteries can be trouble. There's one in a blue-grey car up on cinderblocks outside the building (look in the engine block; it's easier to lift this out by hand than to use the gravity gun), and another one underneath an overturned bathtub on the otherside of the building; use your grav gun to push the tub off of it. When you insert both of them into the machine, the gate will rise, letting you pass through.
Not Enough Gunship
Time to say goodbye to your buggy, because you'll be ditching it at the next outpost you reach; this one, luckily, is filled with underground troops who're about to fend off an Overwatch assault. You'll have to help, so save your game and make sure your shotgun is fully loaded.
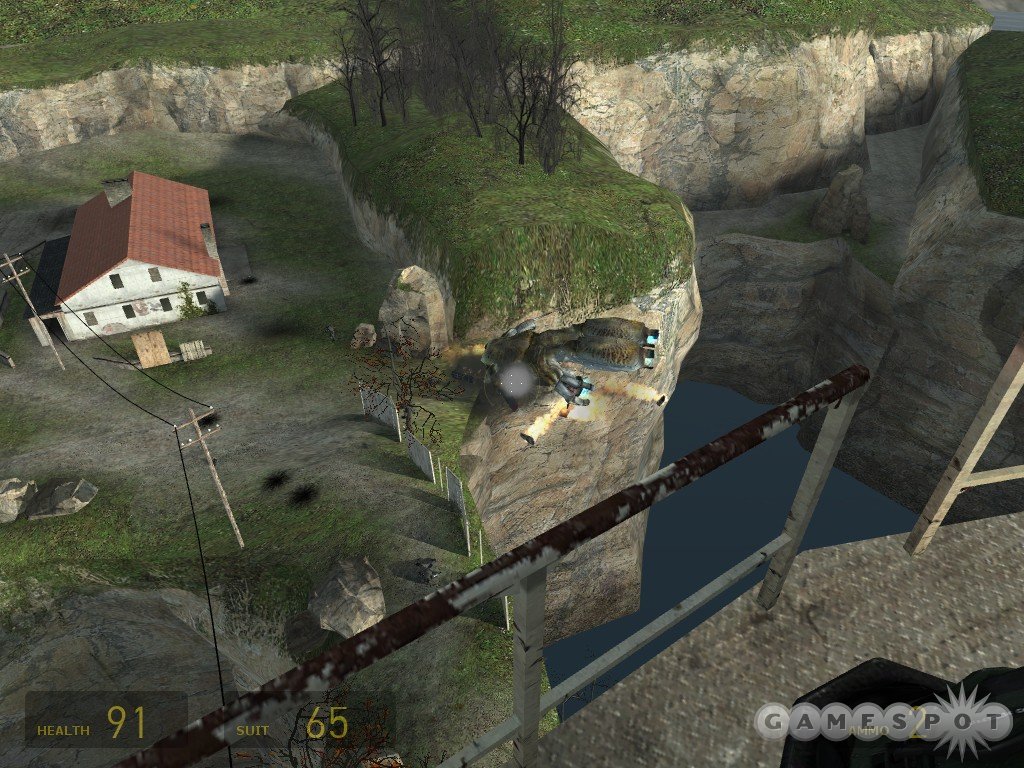
The Overwatch troops come in in a series of four dropships which'll unload troops on each side of town, but they only come in one at a time, leaving you with only four or five soldiers to deal with at a time. Your squadmates will do a decent job of giving them secondary targets, especially if you hole up inside one of the buildings and force the Overwatch to come to you. Be sure to stay away from windows, no matter how tempting the prospect of sniping the Overwatch is; the dropships are well-armed with turrets, and will blast you they get you in their sights. You should be able to find plenty of ammo on the Overwatch and in supply crates, especially in the largest building, so this essentially becomes a game of waiting them out. If you prefer to work alone, you can run up to the lighthouse on the cliffside edge of town and go in there; your teammates will likely have a hard time following you, but this makes it a bit easier to kill the Overwatch as they arrive, since there's only one door.
After the fourth dropship (which lands at the lighthouse), a gunship will appear. The only source of infinite rocket ammo is a box on one of the upper levels of the lighthouse, so head upstairs and get bucked down! The gunship, as per usual, isn't too horrifically difficult to take out; just shoot your rockets straight up from the stairs before heading up to the roof, then guide them back to the gunship as it attempts to shoot them down. Check our video if you're having trouble!
When the gunship's destroyed, you'll be escorted to a secret cliffside path that's located in the basement of the lighthouse. Take the path through a dark tunnel to reach the next loading screen.
Antlions...Why'd It Have To Be Antlions
Your encounter with the two underground members will serve as a quick introduction to the mechanic of this next segment; as in the film Tremors (which we're sure you've all seen), if you step on the sand or loose soil, you'll rile the antlions, and cause a few to come out and attack you. Thus, you'll want to stay on the rock as much as possible, and avoid any sidetrips that aren't absolutely necessary. The designers will tempt you with luscious supply crates and other pickups that will wink at you lasciviously from well off the beaten path; if you can't pull these to you with the grav gun, then you're advised to just ignore them. You can make little walking paths by using your grav gun to draw in the discarded flotsam and jetsam on the sane, but you'd be advised to do so only in emergencies; there's a lot of loot around the area, but you can be quickly swarmed by half a dozen antlions if you take one wrong step.
After a few leaps, you'll come to the beach. You can either head left to find some goodies, or right to proceed along the path; we'll assume that you're heading right. Your next major obstacle is going to be a makeshift see-saw; you'll need to (delicately) maneuver the boxes around so that the seesaw is correctly weighed so as to allow you to jump over to the next set of rocks. It's worth making the detour here that leads down to the little hut near the water, as there are numerous supply crates within grav gun range of it; when you want to head back, you can draw in some of the debris on the beach to make a path leading back to the rock connected to the pier you jumped from to get here. When you do get back to the rock, you can construct a little walking path with your grav gun until you're in range of the supply crates near the rocks further down the beach; they contain enough shotgun ammo to top you out, and there are also a pair of shield powerups nearby.
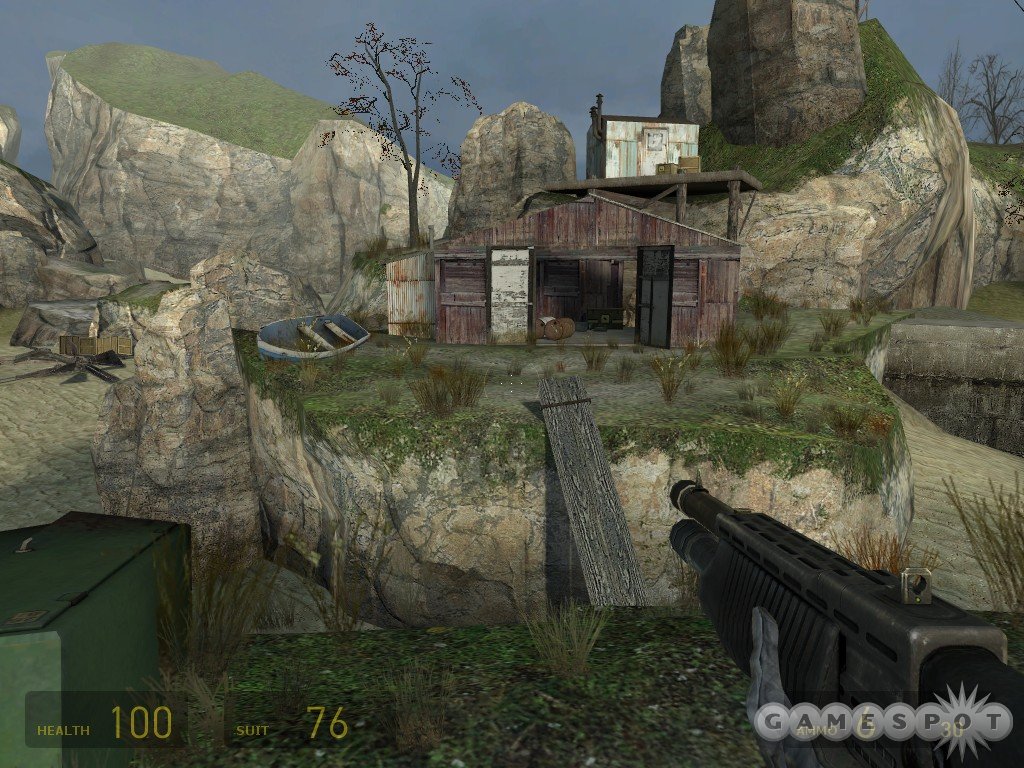
Making your way along the rocks will lead you to a small chasm before a shack that's apparently unjumpable. If you look around, you'll find an extended piece of wood; if you lay this into the chasm so that one end of it is barely jutting up on the far side, you can use it as the focal point of a sprinting jump. If you hit the end of the driftwood square on, it should give you enough traction to make it to the far side. There isn't much of interest in the shack beyond it. Although you can pile up stuff to make a jumping platform to reach the area above the house, there isn't much of interest up there, either; you can drag down the only supply crate above by aiming your grav gun through the roof of the house.
From the house, you'll be forced to start making your way across the beach by making little debris-paths with your grav gun. There are a few little side stops to make, if you wish, but your primary goal will be the house with the small generator behind it; activating this will turn on the thumper on the beach. At this point, you can either carefully construct another walking path from the rocks to the thumper and beyond, or just rush out to the thumper, grab any items from the crates around it, then dash back across the sand to the outcropping that marks the end of the beach. The antlions will follow you, of course, but as soon as you're on rock, you can turn around and blast them with your shotgun.
The King of the Antlions!
After the flight across the beach, you won't have much of a respite, as you'll immediately drop into a sandy area sans rock to walk on. As you might surmise, this is the scene of something of a boss fight, which pits you against an antlion bull. These are essentially just big antlions; instead of attempting to flight around and claw at you, it'll charge at you across the sand and butt you with its head.
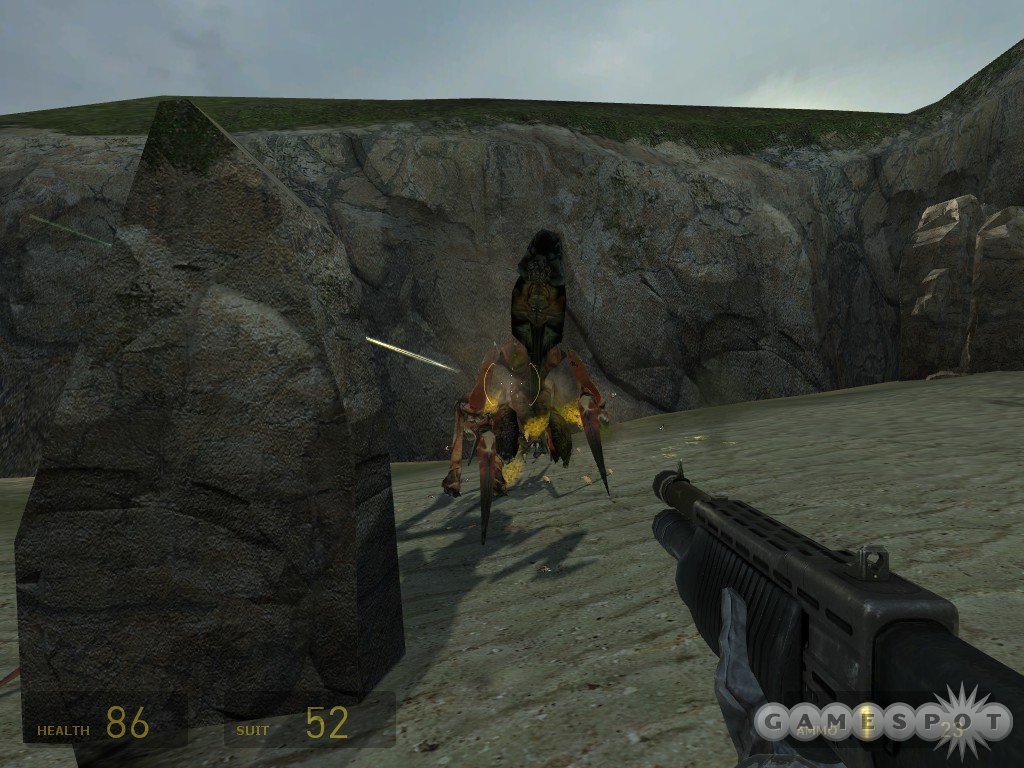
Fortunately, you don't actually have to fight it; there's an underground soldier manning a turret at the far end of the area, so rush down that way and situate yourself near the large rock pillar in the middle of the zone; this is going to be your primary defensive position. All you really need to do is protect yourself from the bull's charge attack - it has no ranged abilities - by rotating around the pillar, keeping it between you and the boss, and wait for the turret to do its job. The bull will summon up more antlions, though, so keep your shotgun handy. After the bull is dead, an underground alien will extract one of its pherapods for you to hold on to. Grab it and love it - you're going to be using it a lot in the upcoming segments of the game.
Your trip through the small underground base will include a basic tutorial on its use. When you have antlion followers, you can throw the pherapod to encourage them to move towards a certain spot or attack a particular target - you can use this to distract enemies, allowing you to pass by turrets and the like a bit easier. Your alt-fire will squeeze the pherapod, which will encourage all of your antlion friends to return to your position. They'll also return to you naturally if you throw a pherapod and then wait for a bit. You have an infinite number of antlions at your disposal; as they die, more will pop up out of the ground. They spawn a bit behind you, though, meaning that one won't instantaneously take the place of one that falls.
The Assault Begins
As you proceed along the beach, you'll need to climb into the thumpers and deactivate them from the control panel on their upper platforms - this'll let your peons follow you through the canyon. After the second thumper, you'll come across the first of many Overwatch pillboxes. Your antlions can easily take out the guards here, though, so just round the corner until you see the troops, throw your pherapod, and watch the fun begin! The whole thing is fairly similar to Freedom Fighters, if you ever played that game.
You should hang back while the combat is ongoing; your antlions will easily take out the troops, so there's no need for you to take damage. The second pillbox can be eliminated in the same manner, but don't take out the thumper beforehand. Your antlions will be able to reach the pillbox while it's still active, so wait until it's been cleaned out, then use the turret inside of it to kill off the reinforcements that arrive.

The second stretch of beach is more problematic, featuring, as it does, a set of pillboxes that are impregnable and which your antlions can't reach. You can't do much here except use your sprint key to dash from cover to cover, using your pherapods in an attempt to kill off any troops ahead of you and to distract the turrets. Your first stop will be the small rock with lights atop it; from there, head to the small incline near where the troopers were. As you proceed along the beach, more troopers will arrive from a little canyon; after using your antlions to destroy them, trace their path back up into the hills above the beach to ambush the pillbox from behind, then proceed into the bunker nearby to avoid any more shooting galleries, which are only fun if you're the one doing the shooting.
Inside the bunker, you'll have to deal with more Overwatch troops, but as your antlions are expendable, feel free to blow the explosive barrels without regard for their safety. There's only one little hidden area here, which is located in a small crawlspace obscured by a barrel; if you don't have any crossbow ammo, you'll want to get some here.
After reaching the exterior again, use your bugbait and the crossbow to take down any troops you see; the soldier manning the turret in the far pillbox is particularly prime bait for an arrow between the eyes. You'll need to proceed through a pair of pillbox setups until you reach a stretch of land leading up to a stretch of cliffs upon which Nova Prospect is set; you'll know you're there when you see a dropship hovering above a small white enclosed area. As soon as you step out of the pillbox overlooking this area, you'll trigger an influx of Overwatch. Unfortunately, you can't use your turret to deal with these guys, as they possess infinite numbers until the dropship takes off, which it won't until you move forward towards the bunker opposite your pillbox. The best strategy, then, is to rush forward to the bunker with your sprint key, using your pheropod to give the Overwatch something to shoot at; if you can make it to the bunker before the Overwatch do, you'll prevent them from accessing the turret inside of it, making it harder for them to kill the antlions.
After clearing out this last redoubt, you can make your way along the cliff's edge and start proceeding up along the narrow paths. When you reach the zombies, knock out the pillars holding up the ladder to proceed up, then use your pherapods to take out the soldiers on the walkways near the sewage pipes. Make your way up the pipes via the ladder, then jump back out onto the cliffs when you spot the supply crates and walk up to the sewage pipe that'll take you inside Nova Prospect's courtyard.
Breaching Nova Prospekt

When you hit the courtyard, take a right and get behind the building there. It should afford you perfect cover from which to start chucking your bugbait at the towers; you're going to want to let your antlions do the heavy lifting here. If you're looking for a challenge, you can try to take out all of the soldiers with your magnum and crossbow, but it's not necessary to do so; just stick to the wall and circle around the courtyard, using each guard tower as a shield to protect you from the next tower's fire.
After the towers are dead, the real trouble begins. One gunship will appear after the guards at the top of the nearby stairs send up a flare, with another one arriving shortly afterwards. The long and short of it is that you'll have to fight your way past all of the guard towers and guard stations, using your antlions to do the bulk of the work, before coming to one final little corner of a wall where you'll find a pack of rocket ammo, and use that to destroy both of the gunships. The gunship's fire can be avoided somewhat while you're making your way to the rocket ammo, so concentrate on killing off any troopers you see; there are a pair inside a surface-level room where you can find health and armor resupply machines, so get yourself fully geared up before making a quicksave.
Around the corner from the resupply stations are the stairs leading to the rocket ammo. The most important thing to remember here is to destroy any explosive barrels you see. You're going to have to duck and weave a bit to avoid incoming gunship fire, and the last thing you feel is a barrel exploding while it's right beside you. When the area is clear, you can start the task of taking out the gunships. This is superficially similar to the fight atop the lighthouse, save for the multiple targets and the lack of cover. The dumpster in the middle of the area is going to be your best bet, cover-wise, but you'll also have to deal with the annoying presence of your antlion friends, whom may crowd around you and prevent you from moving freely. Every time you go to restore your rocket ammo, then, you may want to throw a pherapod onto the buildings across the way; this will get the antlions out of your hair as well as give the gunships another target to shoot at.
If you can distract the gunships with rockets long enough to kill them both, you'll find that one of them has destroyed a large propane tank around the corner from the rocket ammo. You can't destroy this yourself and thus avoid the fight with the gunships, by the way; it'll only get destroyed by gunship fire a set amount of time after your fight with them begins. Head inside to reach the bowels of Nova Prospekt. (You can use the valves on the pipes to disable the fire traps.)
Nova Prospekt
Your antlions won't follow you into Nova Prospekt, but you'll get more soon enough. After making your way through the first cellblock, use your grav gun to disable the automatic turret. These guys are a lot hardier than they were in the first Half-Life; instead of taking them out with direct damage, you'll only be able to disable them by toppling them over, and they're apparently weighted down, because most guns will be incapable of moving them. Your best bet, as mentioned, is the grav gun, but when you're too far away to use that, the SMG alt-fire grenades or hand grenades will do the job just as well.
After making your way up the stairs and crawling through the gap in the gate, you'll find a guard station with welcome refills to your health and armor. Beyond that, a pair of turrets are stationed in the hallway, but they don't cover your approach. (You may have noticed that you could see these in the guard station monitors; they often give you a glimpse of what's to come.)
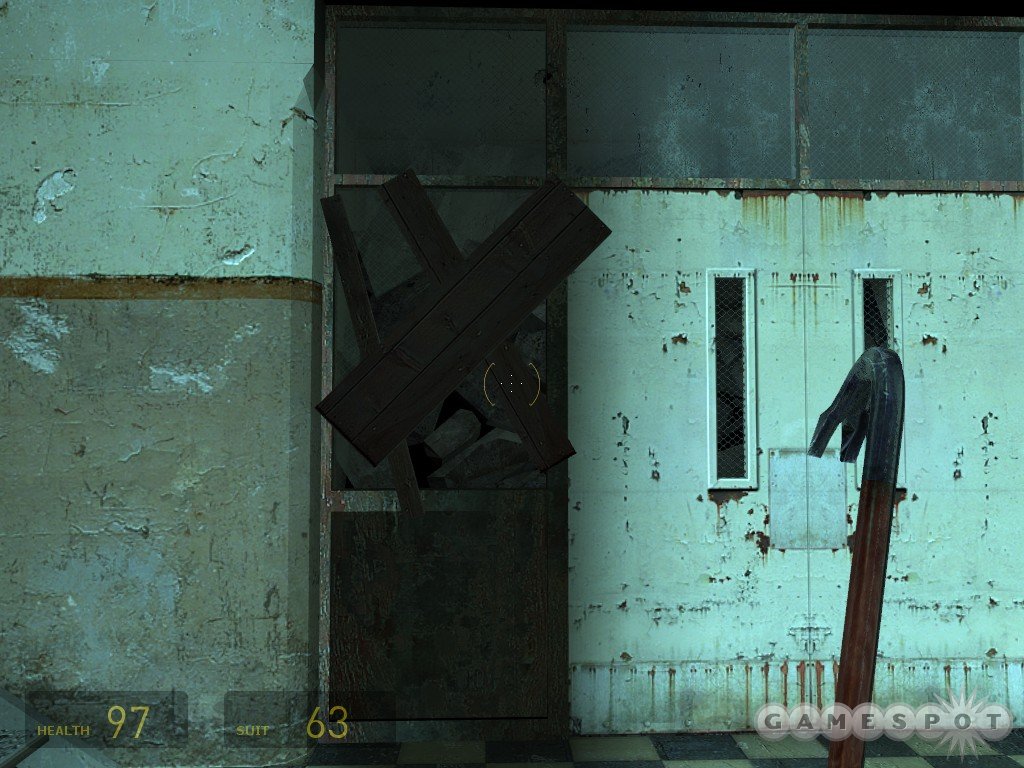
Beyond the turrets, you'll need to make your way through a flooded room - mind the Barnacles! - and a little headcrab ambush before you can reach the next cellblock. Inside you'll find a pair of turrets overlook a set of steps leading up. If you sprint across the floor to reach the wall underneath them, they won't fire at you, giving you plenty of time to back up and use your grav gun to chuck barrels at them. Before you move through the hallway nearby, though, smash through the boarded-up window near the doorway on the second level of the room, then crawl through to find a whole lot of armor pickups.
Back On the Block
Immediately after you drop down into the shower area, an antlion bull will pop up and attack. The same basic rules apply from the first time you fought one of these guys, save for the fact that you don't have a turret to help you out. In order to make your fight easier, crawl through the crack in the wall in the first room, then proceed into the main toilet/washroom area, where you'll have a large bank of sinks to rotate around. There will be plenty of barrels, toilets and sinks to throw at the antlion king, so use your grav gun, dodge its charges, and dance your little dance of death until it keels over. Its death will inaugurate a new era, one in which Gordon Freeman reigns supreme over all the antlions!
Yes, you now have more antlion minions to do your bidding, and bid you shall, because there are plenty more enemies in your way. After unblocking the door that leads away from the bathrooms, you'll have to start making your way through various rooms full of troops and turrets. For the first little cul-de-sac, your antlions will be able to do most of the heavy lifting, but you might want to plop a grenade next to the turret by the door, if only to give your antlions an easier time to move around.
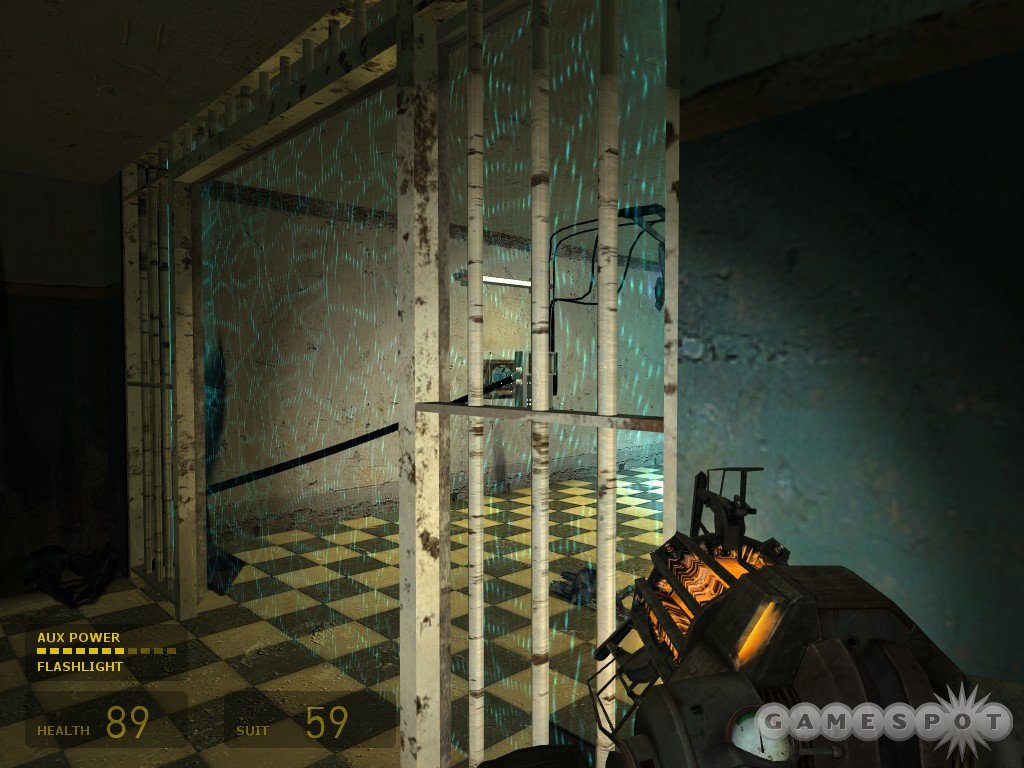
After clearing out the first area, the cellblock door leading further into the prison will open, so chuck a pherapod inside and watch the fun. There are manhacks here; if you haven't had the pleasure of doing so yet, you'll find that your grav gun makes a great way to send one manhack into another, which usually kills them both. There's a forcefield at the end of the hallway here; use your grav gun to pull the plug on it, then head into the guard station and flip the switch to unlock the door leading to the stairwell. Before you head up the stairs, though, smash through the crates stowed underneath them to find another round of ammo for your pulse rifle's secondary fire.
At the top of the steps, you'll come across your very first laser tripwire bomb! Yay! You can either shoot the bomb it's attached to, or send one of your antlions across with a pherapod to detonate it, then flip the switch in the guard station to unlock the cellblock door below. Before descending, though, check the second level of cells for more ammo and armor.
Circumvention
Through the door, you'll come to another forcefield that's lorded over by more turrets, as well as a soldier or two. In order to even see the forcefield, you'll have to destroy the turret across from the door; an SMG grenade or hand grenade will be your best shot at doing this cleanly. After that's destroyed, play your flashlight across the far wall until you see a grate at the bottom; this is your destination. Shoot it with one of your weapons while you're still behind cover, then dash across and duck through.
Inside the vent, you'll come to a large fan; pick up the items in its little room and chuck them through the blades until you get them to catch. (If you run out of items, start pulling them back through from the other side of the fan.) After the fan has been disabled, you'll be able to head through to the rear side of the forcefield and unplug it with your grav gun, then destroy the turrets that are chewing through your antlions. (As a side note, how cool is it that the turrets continue to function even if you pick them up with your grav gun? They'll still shoot your antlions and everything. If you can find an edge about waist-height, you can even set them back up again after they've been knocked down by picking them up with your grav gun and then dropping them in a certain way. This isn't very useful, since they only fire at you and your friends, but it's still pretty neat.)
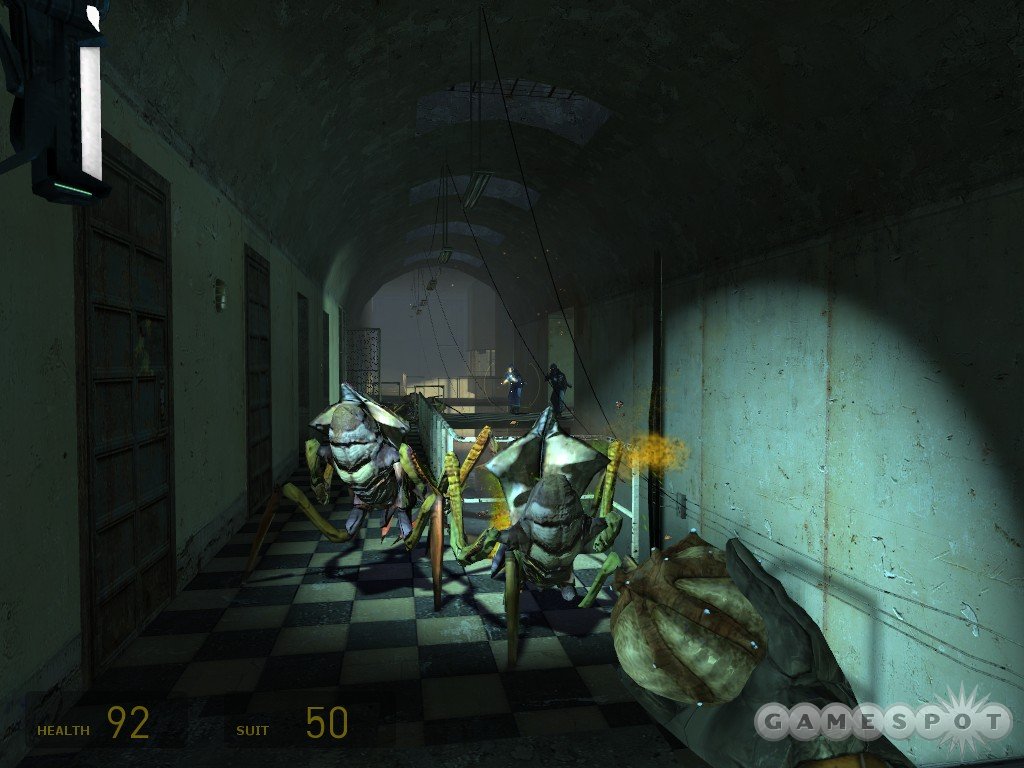
The assault on the next cellblock is a simple matter; just chuck your bugbait through the doors and let your antlions do the rest. As the fight goes on, you may get snippets of Dr. Breen's little lecture to the Overwatch, whom he seems to be disappointed in for their failure to capture you. He also mentions - vaguely - what happened with Gordon in between the Black Mesa incident and City 17. He doesn't go into specifics, but he does say that it wouldn't have allowed you to gain any further combat knowledge. Hmm....
Anyway, you'll need to make your way up the cellblock in order to proceed, liberally applying bugbait to any Overwatch troopers that get in your way. The top floor here features a few locked doors; in order to get through the gates, you'll need to make your way into another guard station, which itself is locked. However, in a truly stupid maneuver, the Overwatch within will forsake the safety of the bulletproof glass behind which they're situated, unlocking the door and giving you access. Make your way in and use the switch inside to unlock the door opposite the station.
Doing The Laundry
After making your way past the guards and another set of turrets, you'll find yourself in the laundry room, which is truly overrun with Overwatch. There are too many of them for your antlions to overwhelm, and more will issue forth from the rear of the room when the originals die, so you'll have to find a way around.
To begin with, you might want to take out the turret here; if you have any rocket ammo, you can wait until one of your antlions enters the room and distracts the guard, then fire away at it. If you can't destroy the turret, though, no worries; just enter the room and sprint into the small alleyway off to the right. This will let you circle around and flank the Overwatch, but you'll have to deal with a toxic zombie before you can get there. If you have any rounds for it, the Overwatch pulse rifle's alt-fire does a great job of taking these guys down; it's a one-shot kill on a really tough enemy, so it's pretty much what they're made for.
After cleaning out the laundry room (pardon the semi-pun), you'll have to fight your way through the kitchens. Note the presence of a pair of turrets in a darkened hallway near the first tripwire; there's a pair of pulse rifle alt-fire ammo pods in a supply crate here. A tougher challenge will involve the first kitchen area, where three turrets away you and where a fire will likely erupt. The turrets are a bit too far away to safely get your antlions to, so you might want to just use normal grenades to blow them over from long distance.
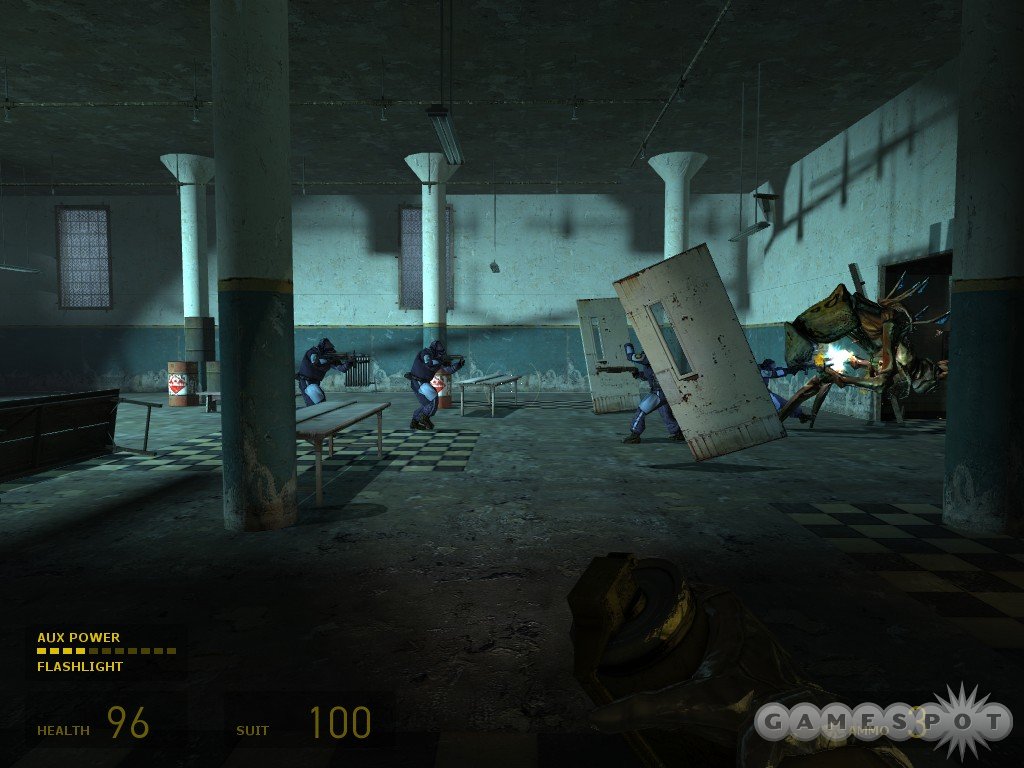
Make your way around the fire and through the troops in the room beyond - you should hear a train chugging away around this point. After recharging your health and armor, you'll find yourself in a close-quarters combat with another bull. There isn't any trick to beating this guy; you just have to do plenty of damage, and hope that you can kill it before it destroys all of the pillars behind which you can hide. While it's still occupied with the Overwatch, you might want to just unload any remaining rockets or SMG grenades onto it, then switch over to your shotgun for the alt-fire ownage at close range. It'll die soon enough.
After the bull's dead, make your way through the blocked doorway leading to cellblock C3, next to the metallic blue wall. This whole area acts as kind of a Combine garbage-crusher (although we suppose it's merely intended to expand the Combine's little blue base of operations), so stack up some boxes beneath the hole in the left wall and climb through to end the level.
Entanglement
You'll finally meet up with Alyx at the beginning of this level, but she won't stick around for long. You'll need to escort her upstairs, past a few Overwatch troops, until you reach a loading platform where you can speak with Dr. Vance again. Be careful, though, as Alyx is killable, and her death = game over for you. She can take a bit of a beating, so you shouldn't have to worry too much about her, but you can't sit back and let her kill off the Overwatch, or she'll probably keel over halfway through. Try to stay ahead of her and keep the pressure up.
Eventually, though, you'll meet up with Eli, at which point Alyx will leave you behind, preferring to stay behind and guide you from her security console. She'll walk you through the first locked gate, after which you'll have to find a vent to crawl through - be careful of headcrabs while you do so. The room you come out to is likewise full of crabs, so use your pistol or SMG to dispose of them. You'll note another tripwire located immediately below your vent; you can use a grenade to destroy it from a ways back in the vent, or drag in a barrel with your grav gun for the same effect.
Before moving on from this room, note the presence of a pair of turrets behind the bulletproof glass to the right of the vent. Although you can't shoot them, you can angle a grenade through the missing pane of glass in the upper-right corner; if you land it right, you won't have to worry about the turrets later on.
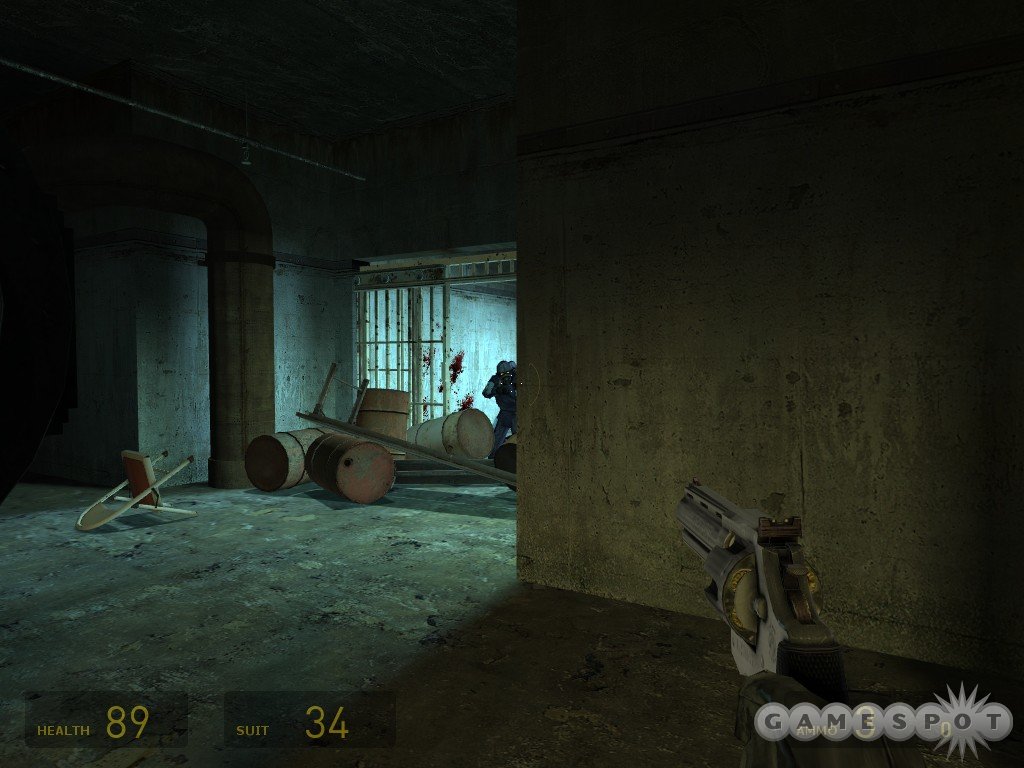
The next room that Alyx unlocks for you features another control room, but save your game before you go in; as soon as you do, another cellblock door will open up, and half a dozen Overwatch will issue forth. Your best bet here, if you don't want to get pounded, is to stack up all the barrels you can find in front of the door before you trigger the influx; this will prevent them from coming through and will let you more easily take them out by the old strafe-and-shoot method. Use grenades liberally, as you have a box full of them in the control room, but be careful not to blow your makeshift barricade out of the way.
After you clear out the turrets, you can again use your grenades to full effect as you fight your way through the tight corridors leading to another forcefield. This field has a power plug, but it's inaccessible to your grav gun; what you have to do is bounce a grenade through the field and into the small room next to it, where its explosion will knock the plug out of its socket. If you managed to destroy the turrets with a grenade through the window earlier, you should have a clear path to the next area of the prison.
Alyx is a l33t h4xx0r
Soon after you hit the checkpoint, you'll come to another control station. Kill the guards here, then open the container on one side of the room to begin the first little turret game. This one isn't so difficult; it's the next one that'll really have you tearing out your hair.
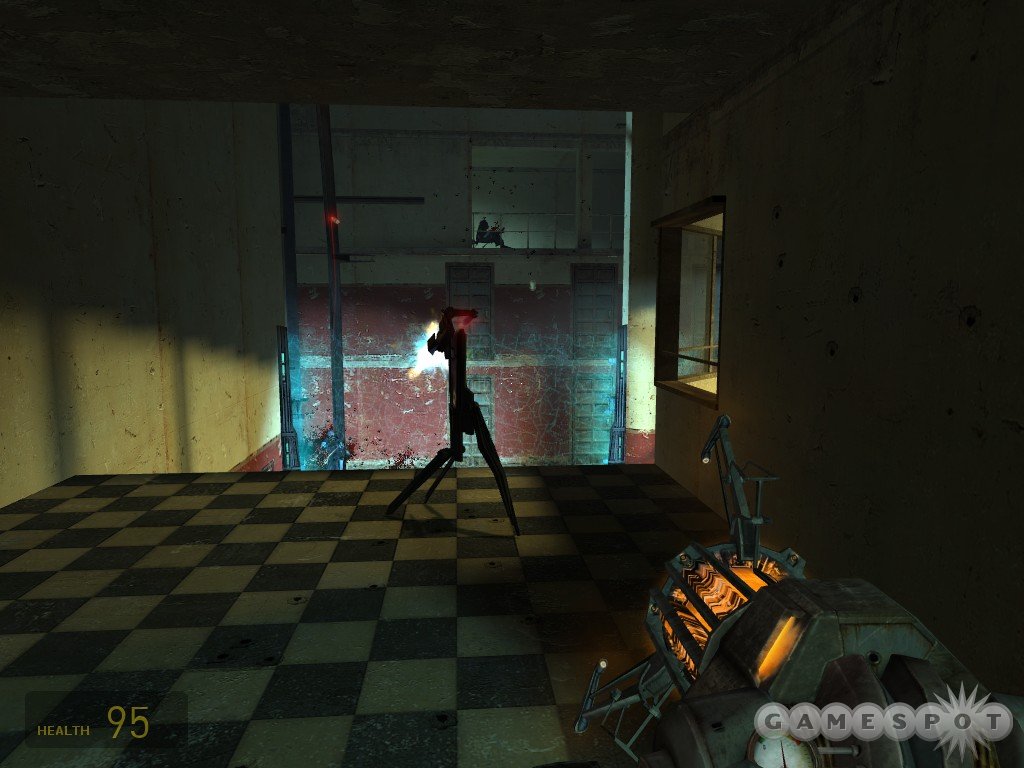
To begin with, grab the two turrets and place them on the upper level, near the stairs, overlooking the forcefields below. You'll have to fend off Overwatch troopers that are coming from both directions, but the turrets will do their job fairly well. When you have them both set up, in fact, you can feel free to sit back, watch for any troops that get underneath the turrets, and use your grav gun to destroy any manhacks that fly into the zone. After a couple dozen kills, Alyx will appear from a grate above the control room and instigate a series of events that will lead to an unfortunate discovery, after which she'll disable the forcefields, allowing you to proceed.
At the bottom of the nearby stairs, you'll run across a room full of electrified water. There isn't anything you can do to turn off the electricity, so you'll need to make your own little path across the water with the blue barrels in order to proceed. As in the sandtrap area with all of the antlions, the easiest way to proceed is to lay down a few barrels in the water, jump out as far as you can go, then grab one of the barrels behind you and move it around so that you have a jumping path to the next area.
The Infamous Turret Mini-Game
Alright...what can we say about this little turret puzzle/killzone/deathtrap? Not much, really, save to emphasize that it can be a lot easier to survive if you place your turrets correctly and use the barrels and crates in the area to create a barricade in the correct spot.
To begin with, the ground rules: you have unlimited SMG ammo (thanks to the ammo box), three barrels and a few boxes with which to create a barricade, and three turrets to help protect you. The soldiers will come in from at least three vectors, not including the second floor of the cellblock near the health/ammo recharges. They have a much easier time overturning your turrets with their shotguns, especially at close range, and will also chuck grenades at them to flip them over. Luckily, your turrets aren't destroyable, have infinite ammo, and can easily be reset to their shooting position with your grav gun or pickup key. (In either case, you'll need to move your reticule up above the ground to orient their feet downwards before dropping them.) The soldiers begin heading towards your position the instant you drop the third turret in place, but not before, so you have as much time to plan as you wish.
The easiest way to go here is to build a barricade on one end of the hallway with the SMG ammo in it, preferably on the side of the hall where there are open cells with goodies inside (if only because that's the way that we did it). The barrels should be on the outside of the hallway, because they can't be destroyed; try to stack them so that no one can enter the hall without walking through them, then push all of the crates behind them to keep them in place. The only trick now will be to keep yourself out of sight of the soldiers that will be passing by the barricade; if they spot you, they'll be more likely to try and run through it. If you notice people coming through, you'll have to make some hasty repairs to the barricade before your battle plan completely falls apart.

So far as the turrets go, you'll want to position them in the hallway on the far side of the barricade (i.e. in the hallway with the control panels in it). Each of the two forcefielded doors should get their own turrets, while another one should be oriented to fire down the hallway containing the health and armor stations. This will give you a crossfire zone if anyone manages to get through that hallway. Check our screenshots and video for more accurate placement details; it's honestly painful to try and describe all of this! You'll have a much better idea of what we're talking about if you just check out our media.
Anyway, when you have the turrets set up, the soldiers will automatically start coming you. As mentioned, they'll try to topple the turrets as best they can, mostly with grenades, so you'll need to be quick on the grav gun if you want to prevent that from occuring. Most of the time, the grenades will be easy to spot and pick up, but if they land directly underneath a turret, you'll sometimes pick up the turret instead. Don't panic when this occurs; just wait for the grenade to explode, then run over and return the turret to its former location.
Alyx will give you some vague pointers on when soldiers are incoming (e.g. "More soldiers!"), but you can ignore these for the most part; you can pretty much assume a constant influx of troops, with only brief pauses. It's when she starts talking about the motherlode of soldiers that you should perk up and pay attention, because this wave does consist of a verifiably greater number of enemies than previous waves did. If you can survive that, though, Alyx should appear shortly thereafter.
Find The Mossman
After you leave the abattoir behind (if you have your graphical settings set to high, you should see about a bazillion bulletholes in all of the walls here), you'll need to recharge your health and escort Alyx to Dr. Mossman's location. There's going to be a big firefight in the sub-basement through which you travel, after the Overwatch shut off the lights and send in a few flares to confuse the matter. The distance between yourself and the opposite troops give them the advantage; they might not be all that precise, but there'll be enough of them to ensure that you'll be constantly taking damage. If you have any, this would be a good time to whip out the SMG grenades, the pulse rifle's alt-fire, hand grenades, or even rocket rounds.
Before you can get out of the level, you'll have to engage in one last turret battle. As per the last fight, you only have three turrets with which to fend off attacks from multiple vectors. You don't have anything with which to barricade any of the doors, but you can rest assured that no Overwatch will be following you through the door through which you entered the teleportation room, so there's no need to set up a turret there.
Besides that entrance, though, there are four entrances to the room, which luckily funnel into three due to the series of forcefields behind the teleport. The black door furthest from the teleport will be the first to open; let's call this entrance one. The second door is on the same side of the room as the first, but it's set closer to the teleport, with a small gap in the bulletproof glass ensuring that you'll have a clean shot at it if you stand right next to the teleport platform. There's also a blue forcefield right behind the teleport from which Overwatch will come; they'll funnel over to this gap during the assault, meaning that the gap itself will see more soldiers than the other doors will, so we'll refer to that gap as entrance two. Entrance three is the blue forcefield that's set into the same wall as the health and armor resupplies; this is probably the easiest door to defend.
Since you have three turrets here, and three main entrances, you should be able to handle this fight relatively easily. To begin with, set up a turret looking directly into entrance three; barring a lucky grenade, you shouldn't have to worry about this entrance during the fight, as the Overwatch entering through the door are fairly few in number. The more pressing concerns will be entrances one and two.
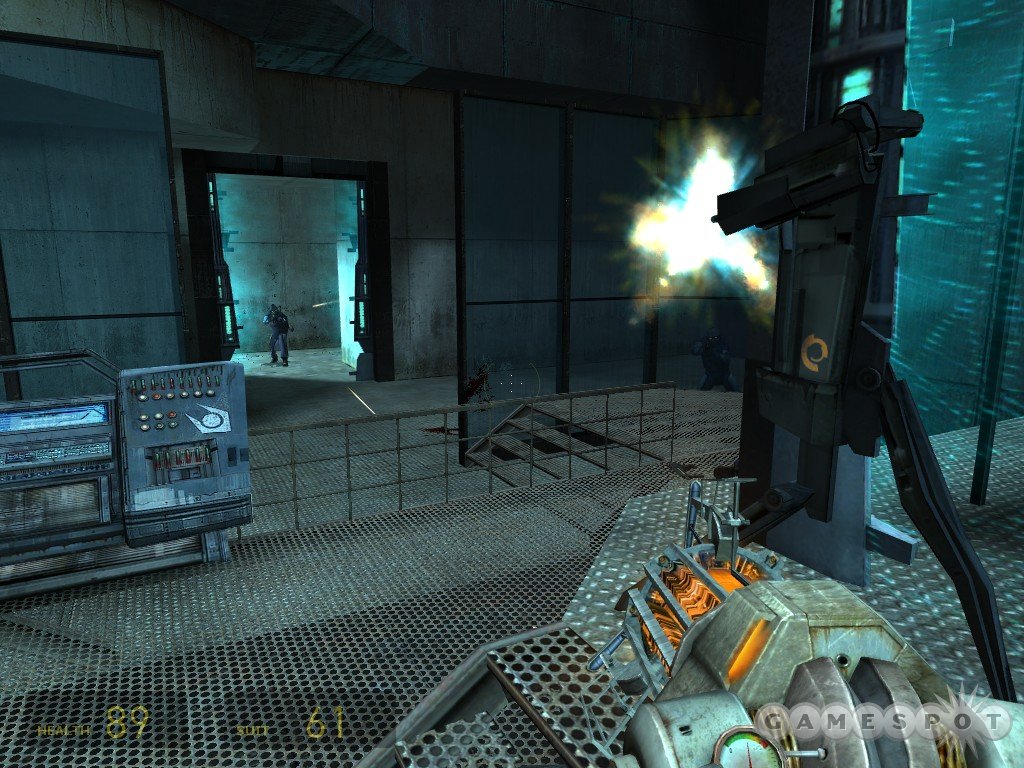
For the beginning of the fight, you'll probably want to dedicate a turret to each of these entrances. If you set up a turret for entrance one in the middle of the room, near the charging chamber for the teleport that runs beneath the floor, it'll take longer to kill the soldiers coming through there (since it'll be less likely to hit due to the distance), but won't be as likely to get tipped over by shotgun fire. As the fight progresses, though, you can feel free to move this turret so that it looks down the hallway leading to entrance two; you can set up a bit of a crossfire in this manner that will let you easily handle the influx of troops to entrance two. Speaking of entrance two, we find that the best placement for the turret here is actually on the platform immediately next to the teleport; this will prevent any soldiers from getting close enough to tip it manually or with their shotguns. The only danger here will be grenades; they can sometimes slip underneath the teleport platform, where you can't extract them with your grav gun, forcing you to just wait for the turret to tip and right it.
Luckily, this fight is a bit shorter than the earlier turret battle. You can check your progress by examining the green laser's progress along the charging chamber; the closer it gets to the teleport, the closer you are to being done. When the platform descends to ground level, hop in and get ready for a shock.
Anticitizen One
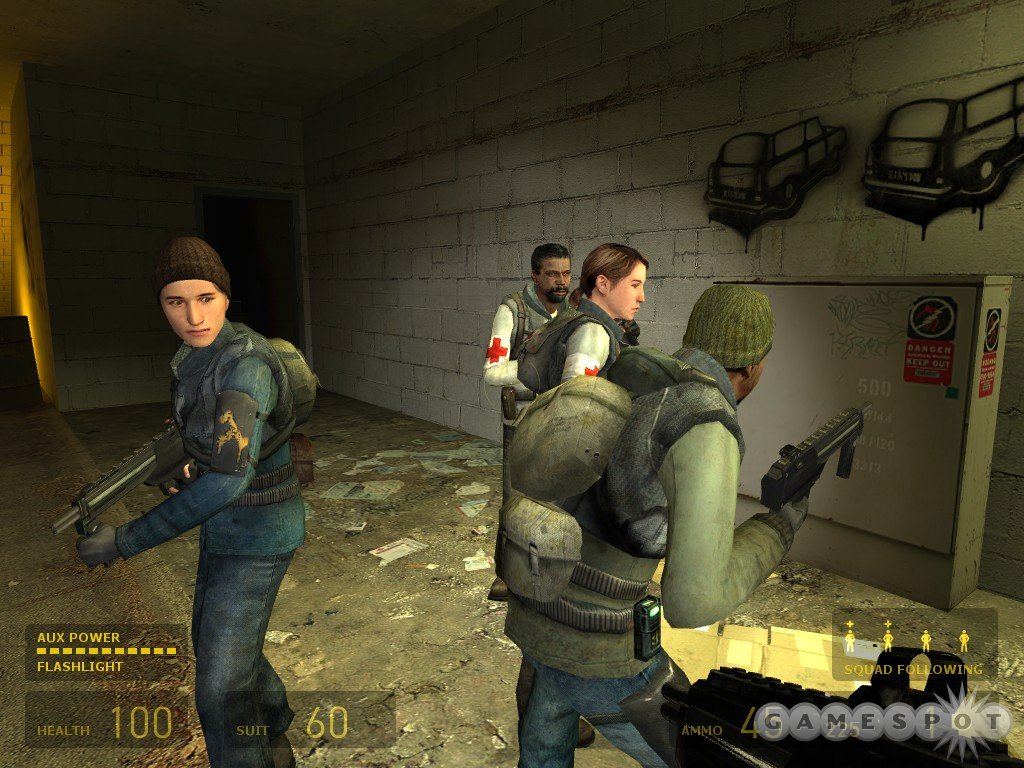
After you arrive in Dr. Kleiner's lab, you and Alyx will split up, with you heading back out to City 17 under the watchful eye of Dog. Dog won't be around for too long, although he'll treat you to a pretty damn cool scripted sequence before he goes. After he opens the Citadel gate for you, hop over the fence and enter the ruined building nearby; a pile of rubble in the hallway here is just low enough for you to crawl through, leading you back outside, where you'll meet up with a few members of the underground, ready to fight by your side. Take a moment to check your key bindings and see where you've bound your squad movement key. The controls are easy to learn; hitting your squad key once will instruct them to move towards wherever you're reticule is aiming at, while hitting it twice will return them to your side. Your teammates can die, and don't automatically come back like the antlions do; if you lose one, you'll have to use your diminished squad until you run across another soldier.
Hoppers
Before you go too far, you'll come to a courtyard full of hoppers, which are landmines that are impervious to your weapon fire. The only way to get rid of them is to dig them up with the gravity gun and then shoot them at a surface; they explode on contact, making them something like hardier explosive barrels. Although your teammates will urge you to use them against the Combine, you should probably just ignore them and destroy every one that you see, unless you spot an obvious target for a launch.
After clearing out the courtyard (it'll take a while; there are a lot of hoppers around), you'll come across your first Strider. You can't damage it at this point, even with rockets, so let it go about its business until it's out of sight. A medic will also join your little band here; medics are essentially soldiers with the added ability to heal you or your teammates, so they automatically replace soldiers when they appear.
Sweep the hoppers off the road here, then head through the small corridor and through the courtyards beyond, while keeping an eye out for hoppers in dark spots and around corners. The first courtyard here, the one with the explosive barrels, contains a small ammo cache, including a couple of grenades, hidden behind a metal plank near a lamdba symbol.
More Team Members
After reaching the interior of a building, you can climb the stairs if you wish, but all that awaits you is a zombie in the uppermost apartment. The real action's outside, where more hoppers are being laid. Destroy them before moving around to the right, where another medic will join your party. You'll have to fight your way through an apartment building until you reach the street again; try to order your teammates to hang back by aiming them at a wall while you drop down and clear out the turrets below with your grav gun.
You'll note that there's a little CP redoubt at the end of the street. The troops here continuously respawn, so you can't kill all of them off, so, well, don't try to. What you really need to do here is find a way to flank the CP, which you can do by sticking to the right side of the street, smashing through the windows of a building further up near the base, then running across the street in front of the CP position into a little bombed-out structure. If you're good on health and armor, you can just rush through to this point, then double tap your squad key to get them to follow you after you're far enough inside the building. If both of your medics survive, then they can heal up your squadmates and each other.
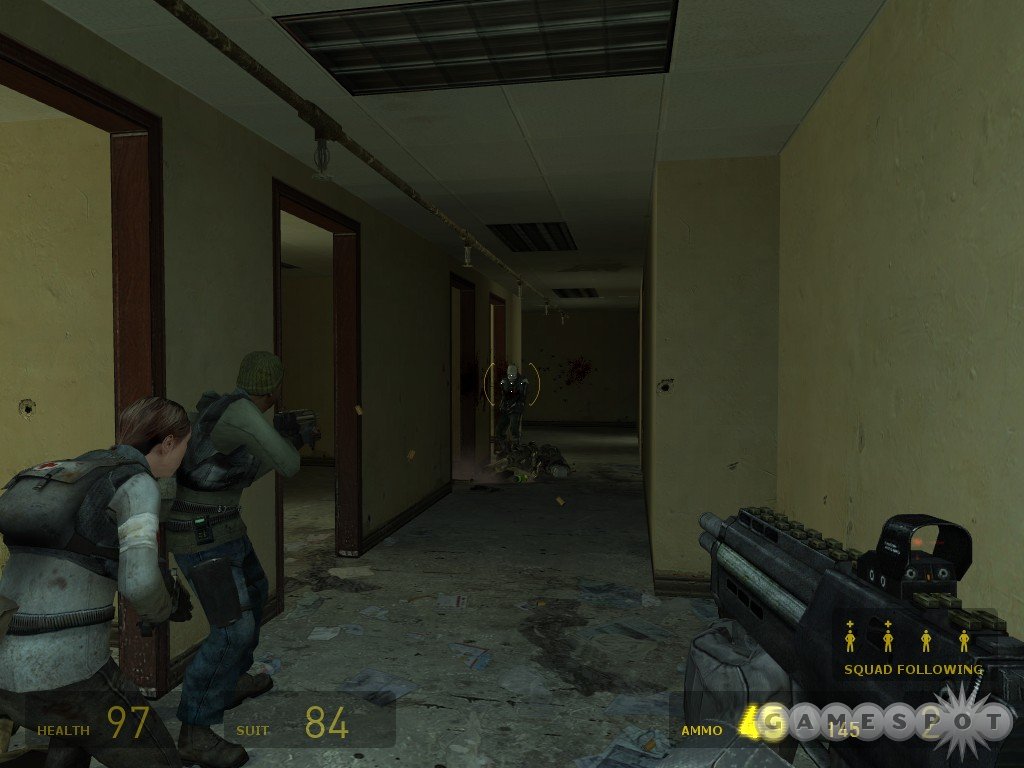
After you reach the building, though, you'll be able to work your way through and eventually wind up behind the CP fort. Kill everything that moves, then run up the stairs to enter the apartment building across the way; this will launch you into a set of three hallways, each crawling with CP. Do your best to stay in front of your squad members, as they can die if they get trapped in close quarters combat. This is especially true on the second floor, where manhacks will join the fray; you're advised to use any SMG grenades you have to thin out the crowd in front of you before your teammates get swarmed.
The bottom floor of the building is filled with turrets, so use your grav gun to eliminate them. They were apparently being used to defend the stairwell leading outside; you can find a few boxes of supplies in the courtyard above them if you need some health and ammo. They're behind a fence, but you can use your grav gun to destroy the crates, then draw their contents to you. The hallway at the bottom of the stairs will lead to a tunnel, though, and that's your ultimate destination.
Quantum Tunneling
Inside the tunnel, you'll soon be ambushed by a bunch of hacks. No need to get fancy here, or waste any ammo; just let them come to you, grab them with your grav gun, and chuck them against a pillar for an instant kill. Another group will attempt to swarm you as you pass underneath the unroofed portion of the tunnel, so send your squad to a point behind you before heading under there, then walk out to trigger their appearance before eliminating them in the same manner.
Beyond the debris and overturned cars at the end of the tunnel, you'll come to a locked gate. Shoot the padlock to open the gate and proceed. Another wave of hacks will appear and attempt to wipe you out, but again, the grav gun should make short work of them.
A tougher group of enemies lie ahead, as the CP has set up a pair of turrets to block your progress. The turrets are going to chew through your teammates in no time at all, so you can't rely on them to help you bust through. There are plenty of explosive barrels around, though, which should make it a bit easier to destroy the troops manning the turrets. What we like to do is crouch behind the white car near the door and push it along in front of us with the grav gun; you can even crush the two CP that move about if you slam it into them at close range. When you're as near the turrets as you're going to get, you can either use an explosive barrel to blast them, or just chuck some grenades behind the protective barriers.
You'll come across a medic behind some rubble near the turrets; he's going to have to plant a charge to clear the barrier, leaving you to fend for yourself for a minute or so. Since you have the turrets, you can use them to blast the hacks and CP troopers that come along the road towards you until the path is clear.
Before you and the medic can escape from the tunnel, you'll need to navigate through one more stretch of it, one that's filled with radioactive waste. You can make your way into the truck near the edge of the "water" by jumping on the giant wooden wheel nearby, then construct a path with both of the wheels to the far right corner of the room. Keep your shotgun handy, though, as there will be plenty of zombies coming at you when you hit the small central island here. When you reach the far side of the room, though, climb up the pipes against the wall, smash into one of the vents, then drop down and let the medic through the door before heading up.
Back In The Real World
You'll meet up with another soldier near a van; kill off the headcrabs, grab the armor in the van, then head into the alleyway to get word on the situation. There isn't much you can do now save make your way through the apartments. Don't bother shooting at the Overwatch troopers from the windows; they'll leave you alone if you return the favor. Just keep moving, until you come to the pair of soldiers consoling each other on a couch. (Apparently someone forgot that they used this same conversation in the first chapter of the game.) Grab the grenades from their kitchen if you need any, then head outside to meet up with the soldier you passed by earlier. "What's the password?" "PASSWORD!" Heh.
The stairwells here are your reintroduction to the Overwatch; up until this point, you've only been fighting the CP. These guys have shotguns, which can rip through your armor, especially at close range, so your best bet is to get them first. Don't forget that the alt-fire on the shotgun sends out two shells simultaneously, which will cut down pretty much anyone in your path. At the top of the building, you'll have to descend into a hole; get used to sending your squadmates down first with your squad movement key, because there's often going to be things waiting for you below.
After crossing over the makeshift bridge, make your way through the apartments beyond until you reach some supply crates. Make a quicksave here; the ensuing firefight is going to be pretty tough.
As soon as you walk out of the doorway here, you're going to spawn in an Overwatch on the wall across from it, as well as one on the building to the right. Your primary problem here is going to be grenades, which can kill off your teammates before you're even aware that they've hit the ground, so keep your grav gun active as much as possible; you'll need it to clear out the hoppers anyway, so try and use those to kill the Overwatch fools that pop up. Eventually, you'll have to claw through a burnt-out building, onto one of the upper floors of said building, then drop a bridge and head across, all while taking heavy fire. Your SMG grenades are great for clearing a path, but make sure none of your teammates step into your path before you launch one.
After you lower the bridge, another Overwatch will spawn and come towards you; try to clear out the rest of the troops before you do so. When you enter the building, more troopers start spawning in, so keep your shotgun at the ready. Note the appearance of medkits on the floor; if you still have a medic along, you'll probably want to let him grab one or two of them to heal himself rather than hogging them to restore your own health. He has an infinite supply of medpacks, but he can't heal himself, so it's best to restore his health here. More Overwatch await you in the apartment building, so keep your squad safe as you move through.
I Am Become Alyx, Destroyer of Combines
You'll come up on a zombie slaughterhouse here. Wait for the turrets to do their work, then drop down and zap them with your grav gun. You'll meet up with Alyx soon afterward; she's apparently managed to chop through an entire platoon of Overwatch with just her pistol. Pretty handy, that one. Heal up with the resupply stations before moving out. As a note, if you don't still have a medic in your party, then you're probably going to have a really rough time with an upcoming fight; you might want to revert back to a previous autosave if that's the case and try to take better care of the one you find after the trip through the radioactive ooze.
If you look down the hallway here, you'll notice another pair of resupplies at the end of it; the only reason you'd hit supply stations so soon together would be if there's a mighty big fight coming up, and indeed, as soon as you start walking towards the stations, you'll find yourself facing off against half a dozen Overwatch. Since you know you've got some healing coming up, get up close and personal with them, using your shotgun to blow them away, so as to protect your teammates from an unfortunate death.
After you clean out the command center below, you'll definitely want to return to the resupply stations and get as much armor back as possible before moving on. The fight in the crossroads here is going to be quite difficult, especially on hard mode, so you'll need to have as much health and armor beforehand as possible. It's also wise to go ahead and make a full save before you head out, just in case you manage to make some bad quicksaves during the battle.
The Crossroads
When you enter the crossroads, some CP will attack you, but you should be able to handle them without a problem. It's the Overwatch that will be coming from the two forcefields that are going to be the real bastards here, so as soon as the CP go down, grab the hoppers with your grav gun and start laying them down near the entrances. Even if these only get one soldier apiece, that's still going to be one less soldier that you have to kill yourself.
Although the Overwatch only come in from two entrances, they arrive in numbers sufficient to quickly overwhelm you if you don't play smart. This the fight that we were mentioning earlier, where you'll have a much easier time of it if you have a medic; although there are armor and health resupply stations in the little fortification where Alyx is staying, and you should use them, it'll be easier to get your health if you have a medic in the trenches with you.
To begin with, take stock of your ammo; you'll find a good amount of stuff in the supply crates around the fountain, including a number of hand grenades. Smash all of them open before the big battle begins, and periodically run over the area where they are during; you'll automatically pick up anything you need.
Soon enough, you'll spot a couple of dropships head behind either of the forcefields; this will begin the influx of troops. All we can really say about this is that you're going to be much better off if you stay behind the small wall around the fountain and duck beneath it for cover when you're not shooting at the troops. None of your automatic weapons are going to be really accurate enough to efficiently kill off the soldiers as they come in, so try to use your grenades as they clump up near the gates; this should at least weaken them up a bit. Your teammates will also fire away, of course, and they're smart enough to take cover from the incoming fire, so as long as your medic stays healthy, they should be able to stick around for a while.
Listen to Alyx's updates as the battle goes on. She'll have to lower the external shields, then the internal shields, after which she'll say "It's almost ready!" At this point, you're going to want to whip out the big guns and use your rocket launcher, if you have any rounds for it, to destroy the incoming shock troopers; you'll know these guys from the white suits that they wear. The overall pressure from the baddies will increase, as well, so do your best to hold them off. If all else fails, just retreat to the little cubbyhole that Alyx was holed up in, quickly get whatever health and armor you can coax out of the resupply stations, then use your grav gun to destroy the generator's core. By the time you're able to do this, you're probably going to be knee deep in Overwatch, so use your sprint button to get through the gate that Alyx has opened!
After Alyx runs off, drop yourself into the canal and head down the steps to reach the next loading screen.
More Sewers
The first door you reach here is seemingly impassible; what you need to do is grab the bar on the opposite side with your grav gun, lift it out of its cradle, then shoot it away. After passing through there, you'll find yourself at another seeming dead end, but if you pull the barrels out from underneath all of the boxes, you should be able to make yourself a path up to the pipes above. Watch out for a manhack ambush; they'll come at you from the window off to your left side, which apparently leads to heaven, given the unearthly white light that issues forth from it.
On the other side of the vent, you'll drop down and be ambushed again by manhacks. Look down the hallway from which they appear for some health, and you can also find an SMG grenade on the upper shelf here, in a supply crate beneath all the cardboard boxes.
At the bottom of the stairwell in the next room, you'll find another doorway that's locked by a bar, so head into the room next to it to grab the bar with your grav gun. (FYI, there's also some SMG ammo hidden away near the vents below the lowest walkway of the stairwell.) The area beyond the doorway is the scene of some intense fighting between Overwatch, zombies, and headcrabs; let the Overwatch do whatever damage they can, then clean up the rest of the baddies. There are a couple of hidden stashes around here, mostly off in their own dead-end hallways and passages, including a lambda-sign cache near a toxic zombie.
The Factory Fight
Eventually, though, you'll wind up at the bottom of a factory. You're going to want to make a full save here; there are lots of opportunities here to make a quicksave in a spot just before you get slaughtered in this room, so you'll want to have something to fall back on in case that occurs.
To begin with, start walking up the pipes towards the walkway extending across the lower portion of the room; a grenade will magically appear and destroy the walkway, but you'll still be able to jump across and head over the busted doorway on the far side. (Just be sure to either kill the Barnacle above it or feed it something to distract it while you pass.) When you head into the control shed here, flip the switch that'll activate the slowest-moving lift you'll ever see, then use either your SMG or your pulse rifle to kill off the Overwatch that will appear above your head. You'll find some crossbow ammo in the crate here, but try to save it until you start seeing the white-clad elites, whom will be difficult to kill with any of your other weapons. When the lift finally reaches the end of its path, refill your health and armor as much as possible from the resupply stations, then hit the switch again and get on board. This is where things get tricky....
As the platform starts moving, get rid of the explosive barrel on it; you're going to come under fire from two Overwatch during your ride, and a stray bullet could end your trip real quick. The first Overwatch appears behind your direction of travel, so quickly eliminate him with your pulse rifle, and the second will pop up in front of you. If you want to deal with him easily, just crouch down behind one of the barrels on the lift and wait for him to get in range of an alt-fire shotgun blast.
There's a ladder leading above the white fuel tanks here, but as you climb up, the aforementioned elites will rappel down from the skylight to the highest walkway here. Your best bet to avoid major damage from their fire is to immediately descend back down the ladder and hide out underneath the walkway. From this position, you can slowly walk out towards the edge of the room and snipe them with your crossbow.
After the two elites are dead, make your way back up the ladder and cross the room via the metal guide that the platform rides along. Another Overwatch will appear below you in the control room; he's not much of a threat at this distance, but will tag you a few times as you move through the room if you don't take him out. You might want to use an SMG grenade on him, if you happen to have one. Another elite will also appear overhead as you make your way towards the second ladder, and two more will appear when you actually climb it, so keep your crossbow handy!
After disavowing the elites, climb the ladder all the way to the top of the room and use the explosive barrels to kill off the Overwatch on the balcony across the way. This balcony is your ultimate destination, so clear out the hopper thereon and drop down to complete the level.
"Follow Freeman!"
You begin this here little level with a little dodge-the-sniper game. You'll have to cover a pair of long roadways that are lorded over by Overwatch snipers, and you're likely to take some hits along the way, but just remember to use your sprint key to move from cover to cover, and to strafe back and forth a bit (the snipers will anticipate your movement if you run in one direction), and you should be able to make it to the first intersection without a problem. If you want, you can get below the first sniper and take him out with a grenade, but it's not entirely necessary. What you need to do is break one of the windows in the shop near the interesection, then rush through there to meet up with a couple of soldiers. You can send these guys ahead of you to act as sniper bait, if you wish; you can't kill the second sniper, so they're exceedingly unlikely to make it to the building near the rubble pile at the end of the street.
Said building is where Barney resides, but he's pinned down by snipers as well. After heading through the basement and up the steps, you'll come across a box of grenades; use these to kill off the snipers that plague Barney and be on your way. The only really difficult one here is the one directly across from Barney's position; in order to get close enough to accurately land a grenade, you may have to sprint across the exposed railing near him. You'll take a hit or two, but since you can't move on until you kill the guy, you don't really have much choice.
The Gods Must Be Crazy
After Barney guides you through the Overwatch gate, clear out the little courtyard beyond - you can use the explosive barrels to dislodge the turret at the top of the steps, as well as kill the Overwatch that follow it. You'll get a few teammates at this point, including a medic, so try and take care of them as best you can.
When you hit street level, you'll have to start a not-so-fun dodge-the-hellfire-that-drops-from-above game. There isn't anything you can do about the suppressor device - not yet, anyway - so all you need to concentrate on is sprinting like hell. You'll be able to spot the suppressor's target before it fires, as it lights up the ground quite clearly, so avoid it as best you can. It has a huge damage radius, so stay back as far as possible, but try to sprint ahead of your teammates when possible. Since the suppressor targets you, it's best to have them be a bit behind your position while you're getting shelled.
Your first bit of succor will come in the form of an enclosed building at the end of the rubble-filled street here; the suppression device won't fire at you while you're indoors, so take a moment to refill your health and let your medic patch up anyone that's injured. The rest of your little jaunt through the courtyard will take a similar form, where you sprint headlong across open patches of ground towards anything that's enclosed. Your first goal upon leaving this building will be a small, bunker-life facility out in the open, while your second is another true building. If you can enter this building and prevent the guards from killing the prisoners inside, you'll be able to get another party member or two. Again, use it to rest and rehabilitate before moving outside. Don't forget to let your medic grab the medkits if he needs them.
After you leave the second building, you won't have to deal with the suppression device any more; your challenge here will come in the form of Combine troops. Proceed slowly, kill off the guards on the steps of the building, and then make your way towards the entrance. As you do so, the doors will explode, and more troops will arrive. If you have any SMG grenades, target the elite with them, then mop up the rest of your enemies before disabling the forcefield nearby and heading into the bank.
I'd Like To Make a Deposit - of Bullets!

Inside the bank, you'll come across your first tripwire/turret combination. Get used to seeing these, as they're all over the place here. They're not too tough to kill, though; just walk through a tripwire, get next to the turret, and roll a grenade beneath it (using the alt-fire button). Grenade explodes, no more turret. Be sure to command your squad to hide around the corner, though, as they're liable to get pounded by the turrets you come across if they're just following you along.
After the first turret, you'll come into the bank's main hall. You'll need to get through another set of turrets to proceed, but before you can do so, a couple of Overwatch will come at you from one of the hallways that are blocked off by a forcefield. Kill them, then draw the supply crates nearby to you with your grav gun to get their contents, letting your teammates grab the medkits, as necessary.
The set of turrets here is a bit tricky due to the way that their sensors overlap; if you charge into the room, you'll likely to get offed by one of the turrets as you disable the other one, if not by the Overwatch behind them. An easier way to proceed is to set off the tripwire, chuck a grenade at the first turret, then wait for it to explode before proceeding. Even though the tripwires disappear, the second turret will still pop up, so be ready for it. Move up the stairs at the rear of the room.
The Second Floor
On the second floor of the bank, you'll spot some more tripwires, but before you go through, head into the room across the way; you may find another medic locked up here, and two medics in your party = good times. Do the same procedure for the turrets - place your team safely out of the way, roll grenades in - then disable the generator with your grav gun. As soon as Barney gives his little line about Overwatch owning the roof, a set of troopers will spawn on the first floor and start making their way towards you; wait for them by the stairs and kill them as they arrive.
You've got two more generators to take down before you can make it to the roof, both on the second floor, on either side of the first generator. You can do these in either order, so pick a bridge and head across. One of the generators is preceded by a little trap room, where you'll be locked inside and forced to defend yourself against Overwatch as they cut through the doors. Use the hoppers here to guard each door, and try to open each fight with a SMG grenade or the pulse rifle's alt-fire. The second generator is guarded by a massive tripwire room; if you touch a wire, you'll get baked by turrets. Make your way through the room, jumping atop the pipes and cabinets, until you can disable the tripwires; you'll want to clear out the hoppers as well so that your troops can come through. The hoppers don't disrupt the tripwires if you suck them through, so feel free to clear them out as you make your jumps.
After all three generators are disabled, you'll have to fight your way through a bunch of Overwatch in the main hall. If you got the rocket ammo that was in the hallway from which they're coming, go ahead and pound them into submission with that; otherwise, you'll have to get them with SMG grenades or one of your automatic weapons. You may want to instruct your teammates to hang back here, so that they stay fresh during the battle for the roof. Barney will stay by your side, though, so use him as a distraction while you pick off the Overwatch.
Rooftop Antics
When you hit the roof, take note of the infinite rocket ammo box nearby. This, of course, means that a gunship attack is imminent, but in the meantime, you can use the rockets to kill off the Overwatch on the roof. Don't worry too much about keeping your squad members alive here, as they're going to all die when the gunship appears anyway. Its arrival is triggered when you move down to the lower level of the roof, so move forward until it comes, then backtrack to the ammo box and use the rockets to take it out.
Next up is more Overwatch; they'll arrive on a gunship and mass behind the black gate before coming through. You should spot a couple of inactive hoppers nearby, so place them near the gate and hope for a couple of lucky kills. Since you're still pretty close to the infinite rockets, use those to clear out the rest of the rabble, then refresh your rockets and move on.
Before you can clear the roof, you'll have to extend a skybridge here and fight your way through a whole lot of Overwatch. You will get some squad replacements at this point, so you won't be fighting alone, but the sheer density of Overwatch can make this a difficult chokepoint to breach. You'll note that there are some supply crates near the bridge switch, though; smash these and grab the SMG grenades inside to make your assault much easier. Go ahead and use up all of your SMG grenades and pulse rifle cores to clear the bridge.
Striders!
The courtyard of the bank has gotten a heck of a lot more chaotic since the last time you were here. Although the suppressor's been shut down, its been replaced by a threat far more concrete: Striders. You've seen these guys throughout the game, but will now finally be able to kill them, thanks to your infinite rocket ammo.
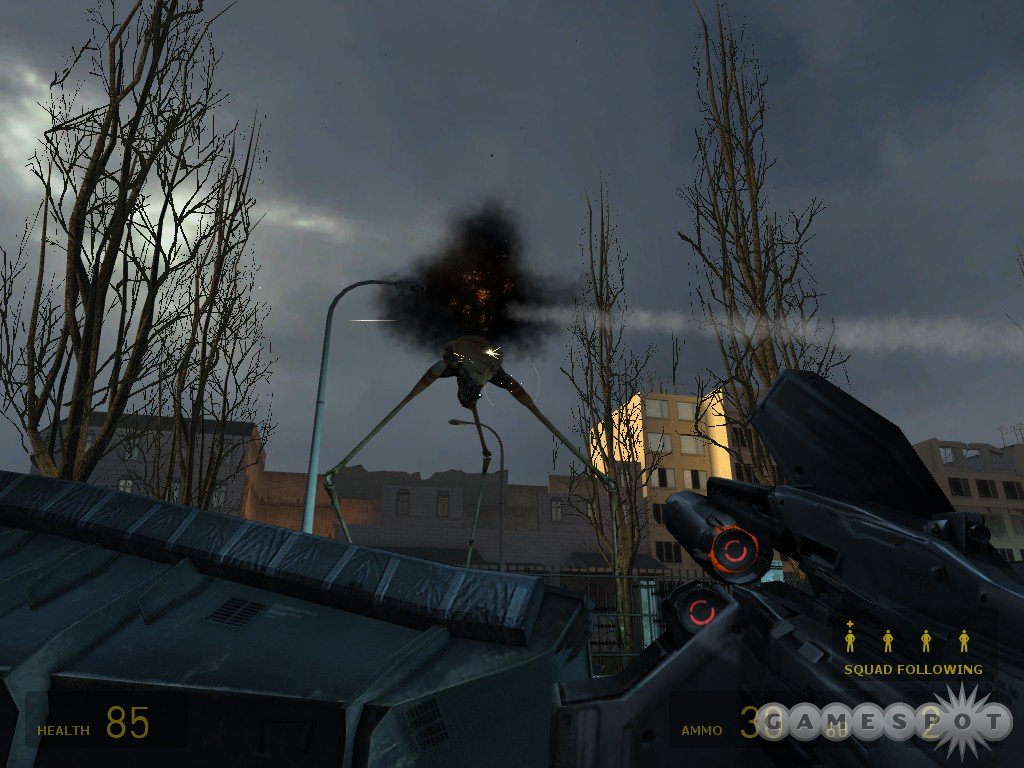
Of course, before you can use the infinite rocket ammo, you're going to need to find it, and that means trekking across the now-cratered courtyard. The route is essentially the same as that you took to reach the bank, save for being reversed and somewhat truncated due to the craters. You'll actually need to pass underneath a large section of the plaza via a tunnel, then backtrack up a slope to the bunker in the middle of the area, before you can cross to the street on the other side and make it to the rocket ammo. When you do get there, though, you can start shelling the Striders from below. You'll need to kill four of them before you can move on down the street, where the gate leading out of the courtyard is being watched over by Combine troops. Kill them and descend the stairs to reach a tunnel leading away.
How'd That Strider Get Down Here?
The first you'll notice when you hit the tunnel here will be the Overwatch trooper at the far end; he's easy enough to kill with a crossbow bolt, though. The second thing you'll notice is the appearance of a Strider behind you when you're halfway to the exit. It'll quickly kill your teammates if they're following you, so you're better served by actually sending them ahead, to where the Overwatch was, then sprinting up to catch them and making and quick left into the shelled-out building here. They should all survive the encounter if you do so.
Now that you've entered the building, you'll need to start making your way up, with more Overwatch and the annoying Scanners as your only foes. Not including the Strider, of course, which'll take potshots at you as you pass by open windows. The upper levels of the building will be the most dangerous, as the Strider will have nearly free shots at you, but it'll turn out for the best, as it'll eventually blow down one of the structural beams, giving you a method to get to the upper end of the stairwell, which leads to the building next door. Although you'll find a box of infinite rocket ammo here, we encourage you to just ignore the Strider and be on your way.
Pavlov's House Redux
Here's where some people are obviously going to have trouble. Your goal here is to fight your way through hordes of Overwatch up to the top of the building at the center of the square set of streets, but, well...there are hordes of Overwatch around. On the plus side, you do have a seemingly infinite number of followers, so if you lose a few, you can expect more to follow along shortly afterwards to take their place.

The first battle takes place in an underground garage, and it's a doozy. Try to get your teammates to go in ahead of you, and use them as meat shields while you take out the Overwatch from the safety of a hiding spot, such as behind a car. If any survive, you can take them up the ramp here (after busting out the health and shields from the crate) to lure out the three elites in the shop across the way. After another trip underground and into another shop, you'll need to run towards what appears to be a dead end; a Strider will luckily pop up from beneath the wrecked cars and clear the path to another underground garage.
The Overwatch are apparently getting a bit tricky, because they'll try and trap you in a sinkhole via the creative use of explosives, if you let them. You should be able to hear the bomb ticking away, though, so walk forward until it sounds like it's about to explode (rapid beeps), then sprint backwards and hide behind a pillar, using it as cover to kill off the soldiers before moving on. This will take you into the lower levels of the building itself.
Your fight through the building's various levels to reach the roof is, for lack of a better word, intense. You'll have a continually incoming stream of followers to help you out, though, as well as a few stashes of goods in various safe zones, so you shouldn't waste your time taking out every single Overwatch trooper you see. In point of fact, you should avoid any that you can't immediately kill with an alt-fire shotgun blast, and just head for corners in which you can hide, outside of enemy fire.
O Strider, My Strider!
If that doesn't sound like a thrilling plan, it has the benefit of being a necessary one, because you're going to have to wait for the Striders to knock some holes into the building's various walls before you can move on. After you come across your first elite within the building, kill him and hide near his body; one Strider blast should soon follow. Make your way to the corner of the building nearby and repeat the process of hiding and waiting. Another Strider blast will open your path to the second level of the building, where you can run for cover. When you see the bank of elevators and the resupply stations, you'll know you're where you need to be.
In order to move on, you're going to have to take out the two Striders that are circling your position. There's a box of rocket ammo on the roof, but it's fairly exposed; your best bet is to grab some ammo, retreat to the stairwell, and use that as your staging ground for the assault. You should have enough friendly soldiers streaming past you to make for a good set of distractions, allowing you to peg the Striders without taking too much damage. Even if you do get hurt, there should be a good number of medics coming to your position, so grab medkits from them whenever you're low on health.
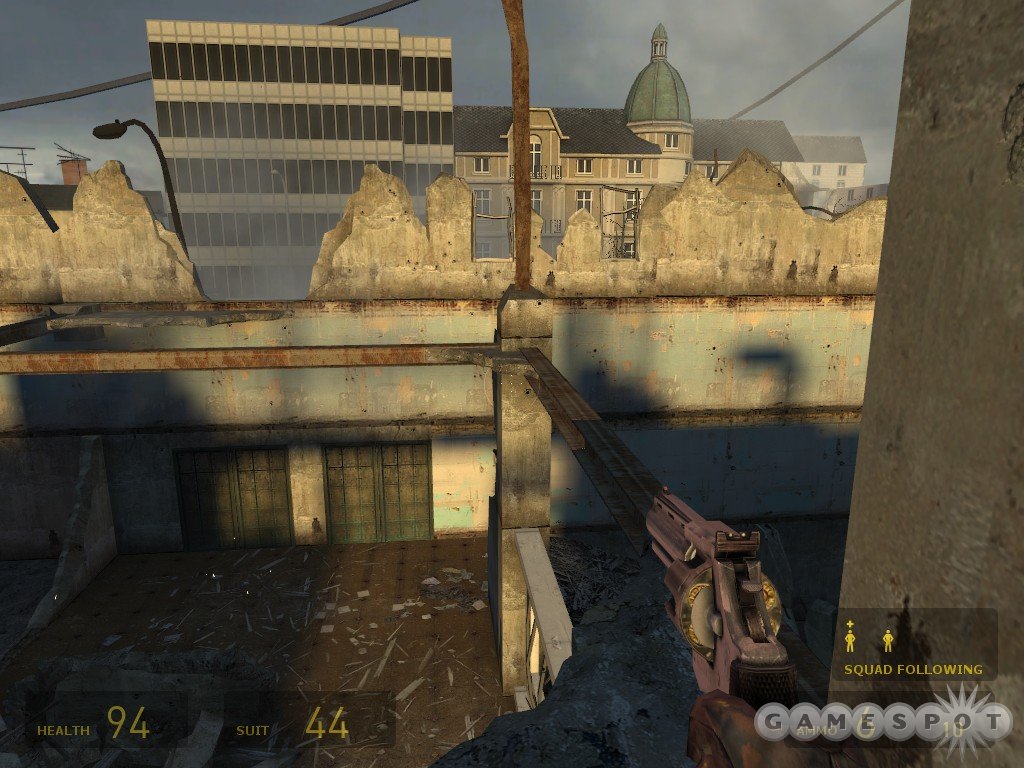
After both of the Striders are toppled, you'll have to head out towards the equestrian statue beyond the edges of the city block that you're in. You'll need to walk along a couple of building beams in order to reach it, but when you do, you'll come across Barney and Dog, who'll make a path for you into the Combine Citadel.
"Our Benefactors"
If you were looking forward to a Xen-like set of jumping puzzles at the end of Half-Life 2 (and we know you all were), you're going to be somewhat disappointed by the last couple of levels here - there are only scant opportunities to get airborne. To begin with, though, you will have to maneuver through the bowels of the Citadel, so hop across the rocks to the slope nearby (being careful not to slide off the end), and jump across to the building itself and work your way inside. You won't have many options when it comes to paths here, as most of the understructure of the facility is surrounded only by a precipitous drop, so jump when necessary to find a path, but you should only need to clear one semi-difficult jump before you come to a people-pod cleaning station. There are two sets of pod lines here, one of which takes the pods off into the distance, one of which brings them underneath the lightning machine. The latter choice will obviously fry you, so get near one of the pods on the other line and use it to hop in.
The Tram
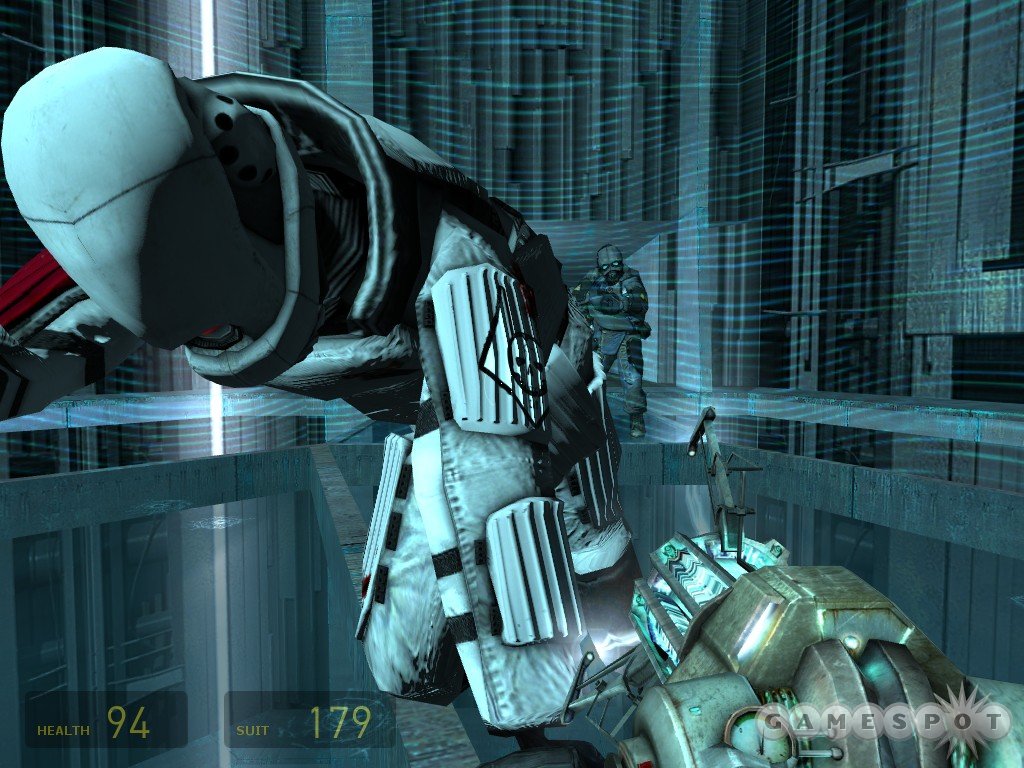
What follows is a counterpart to the little tram ride you went through at the beginning of the original Half-Life; all you can really do here is watch the scenery during the few minutes it'll take for you to arrive at your destination. When you do arrive, though, you'll have an unpleasant surprise in store for you, as all of your weapons are confiscated and destroyed - all save one, that is. Your gravity gun will stick around, and will, in fact, be supercharged by its encounter with the disentegrators, allowing you to suck in living creatures, such as the Overwatch troops coming to subdue you. Your alt-fire will grab them from a good distance away, and your primary fire can indeed zap them as well, but you'll need to be rather close for that to work. You'll also be able to charge your armor up to 200 with any of the recharge stations scattered around the Citadel, but there are enough troops here to still make survival difficult; get used to sucking up a fallen soldier and walking around with his body in front of you to absorb bullets.
A straightforward corridor crawl ensues from this point. You'll rarely have to deal with any branching paths here; you'll only be able to go in one direction, due to the forcefields that will block all other corridors from you. You will also come to apparent dead ends on occasion, but these can be circumvented by using your grav gun to draw the exposed cores from the generators on the other side of the force fields. There are also streams of these cores in many of the rooms; when you draw one in and shoot it with your grav gun's primary fire, the effect will be similar to that of the pulse rifle's alt-fire charge, so you can use it when you need a straight-firing projectile for distant enemies.
Eventually you'll arrive at a large elevator platform; you'll need to flip the switch here and wait for the platform to descend from the top of the room. Hordes of Overwatch and manhacks will assault you while you're waiting, but if you stick by the armor station on one side of the room, you should be able to refresh yourself quite easily. When the elevator platform arrives, the assaults will stop, letting you ride the elevator in peace.
The Elevator
Or not; this is actually one of the more difficult segments of the chapter, since troopers will constantly fire on you from different directions as you rise, and you have very little cover to use to protect yourself. Your best bet for survival here is to combine core firings, from the strings of pearls that line most of the elevator shaft, with purely defensive crouching, while you use a corpse to protect yourself from fire. Be mindful of grenades, though, as the soldiers will sometimes chuck one onto the platform, and supershields or no, grenades at close range will still sting a bit.
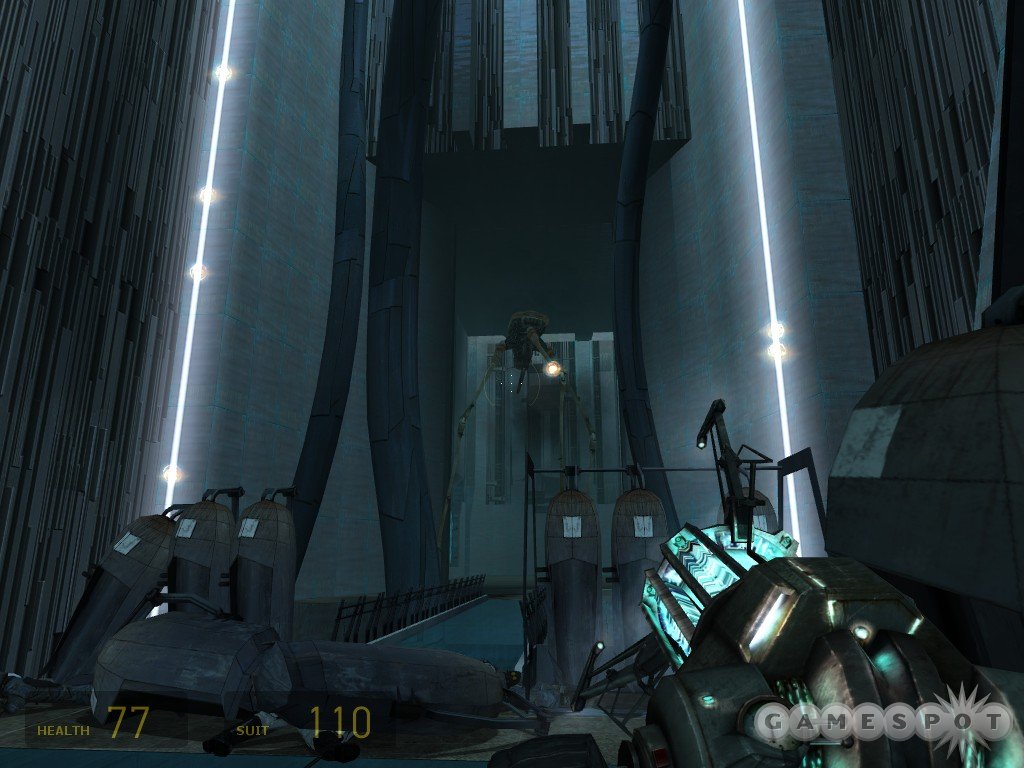
After you reach the top of the elevator (using your grav gun to disable the generator that prevents you from getting off), you'll eventually come to a huge chasmic corridor, replete with Overwatch, and lined on either side with the pods the Combine apparently stores dissidents in. The pods here make for excellent shielding when you pick them up with your grav gun; the Overwatch usually won't even shoot at you when you have one up in front of you. Make your way down the corridor until you run into a Strider; you'll need to get close enough to grab the cores from the strings nearby, then use those to shoot it down. You'll soon find another people pod line, so hop aboard.
Dark Energy
After a long conversation with Drs. Breen, Mossman, and Vance, you'll find yourself in the awkward position of destroying the Combine's dark fusion reactor. This isn't so much a jumping puzzle as it is a plain where-the-heck-do-I-go-now puzzle.
To begin with, wait for Dr. Breen to get through his little spiel. When he starts talking about how he'll soon be in another universe, head through the small chamber that opens up near the consoles, then walk around to the tripartite generator and start grabbing cores out of their restraining fields and throwing them at the soldiers who begin shooting at you. You don't have to worry too much about taking damage here, as there'll be a recharge station coming up; just get the cores out of your path and move on.
After the cores are out of your way, find the lift that'll take you up to the level above you, but watch out for the troopers on the upper level that'll shoot at you as you rise. When you reach it, you'll need to follow the path all the way around to the right until you reach another small platform leading up; hop off it when it peaks out, grab a recharge from the station, then hop another lift immediately to the left to reach another level higher above. Here, you'll need to head out of the central area of the room towards a forcefield, then take a left and wait for the lift that'll rise you up to the topmost level of the room.

Your task now is to destroy the portal's machinery before it can fully open. As you reach the uppermost level, you'll notice the portal beginning to blossom in the middle of the chamber, restrained only by a set of restrictive metal containers; you need to suck in the exposed cores from the strings near you, then shoot them at the panels until they're all destroyed. You'll come under fire from gunships as you do so, but you should be at almost full health, so don't worry about them, just focus on pummeling the machinery until it's completely destroyed, then send one last core into the portal itself to destroy it.
And...that's the end. We obviously won't spoil the game's "ending" for you, but we will point out that there is a very short scene at the end of the credits if you wish to watch through them. Enjoy!
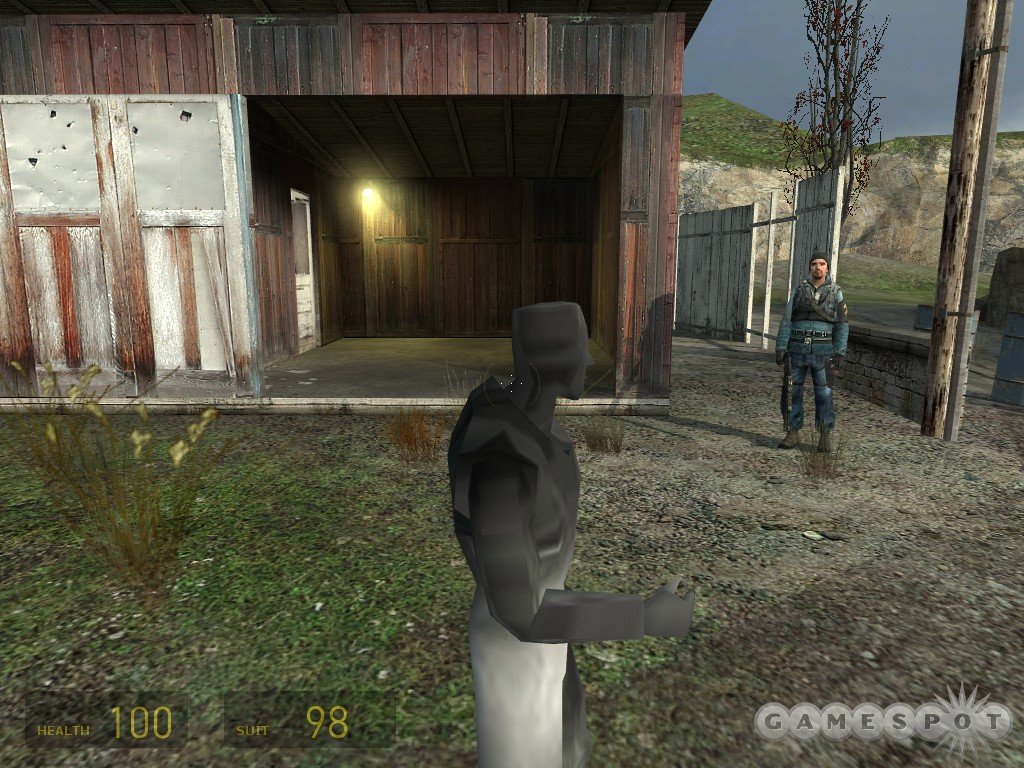
Cheat Codes
The cheat codes in Half-Life 2 need to be inserted via the console. To enable the console, open up the Options menu, go to Keyboard > Advanced and check the "Enable developer console" option. For a more thorough selection of cheats, check gamespot.com.
| Enable cheats | sv_cheats 1 |
| Set Gravity (Add number in place of #) | sv_gravity # |
| Shows FPS Rate | cl_showfps 1 |
| Shows all available levels | Maps * |
| Load specified map | map nameofmap.bsp |
| Walk through walls | Noclip |
| NPCs can't see you, won't fire at you, etc. | notarget |
| Spawn a buggy | Impulse 82 |
| Give yourself all weapons | Impulse 101 |
| God mode | God |
| First person view | Firstperson |
| Third person view | Thirdperson (causes general movement wonkiness) |
| See through walls | Mat_depthbias_normal 1 |
| Change difficulty level | Skill # (1, 2, or 3) |
Got a news tip or want to contact us directly? Email news@gamespot.com
Join the conversation