The Sims 2 Walkthrough
Sometimes putting other people's lives in order is more fun than managing your own. This guide to the Sims 2 will help you do that, with tips on building your sim, creating your house, and managing your sims.
Design by Collin Oguro
The Sims needs no introduction--it's only the most successful PC game, well, ever. It sold around a gazillion copies, spawned a truly absurd number of expansion packs, and introduced the world of "real" PC gaming to millions of people who might never have encountered it otherwise.
And now, we have the debut of The Sims 2. This sequel sticks to the tried-and-true formula of the original game: you're still required to guide your Sim through the hazardous world of careers, romance, and family, all while attempting to satisfy his or her most basic desires, such as those for food or sleep. A number of additions have been made, though, ranging from the large, such as multi-story housing, a full life cycle for your Sims, and a new Aspiration system, to the small, such as alien impregnations.
Whether you're an old hand at The Sims, or are new to the series, GameSpot's unofficial guide to The Sims 2 is intended to be a complete resource for the game, detailing all of the major features in the game. Within these pages, you'll discover what impact a Sim's traits have on his behavior; how much money you'll make as you advance in any given career; how to get your children into that elite private school; how to throw a party; and the proverbial much, much more.
Table of Contents
Your SimNeeds
Aspirations and Wants
Aspiration Rewards
Skills
Body, Logic, Creativity, and Cleaning
Socializing and Relationships
Romance
Parties
Careers
Career Advancement
Career Rewards
Part Time Jobs
Career Requirements
Culinary, Law Enforcement, Medical, and Military
Politics, Science, and Slacker
Kitchens and Dining Rooms
The Living Room
Bathrooms, Bedrooms, and Outside
Neighborhood Mode
Pleasantview
Strangetown
Veronaville
Your Sim's Personality
Traits - What Makes Your Sim Tick
Every Sim has his or her own unique personality, which is made up of ten individual traits. These traits will determine what kind of career your Sim will excel in, how quickly they'll improve their skills, how successfully they'll interact with other Sims, and in general will affect all aspects of their lives. Most of the Sims in the Story Mode will have pre-generated traits, which you cannot change, but if you wish to generate your own Sims, it's worth having a knowledge of how these traits will impact your playing experience.Although there are ten traits in the game, each of these is paired off with another to form five axes along which your Sim is scored. For instance, the Neat and Sloppy traits form one axis; an individual Sim can be obsessive-compulsively neat, for instance, or fratboyishly sloppy, or somewhere in between. Again, you can't change this attribute once it's set; telling a Sloppy Sim to clean his or her house over and over again won't stop them from leaving the dishes on the table when you leave them unattended. The exception to this is that older Sims can encourage younger Sims to "improve" their traits through social interactions. Depending on the difference in ages between the Sims (an elder Sim is generally better at training than a mere adult), the power of the relationship between the two Sims, and the older Sim's own rank in the trait he or she is attempting to train, you can increase a trait by a single point with in two to five interactions.
Note that these trait axes are oriented so that each axis has one "negative" trait aligned across from a "positive" trait. Although the negative traits might have a poor real-world connotation, there are some benefits to be gained from having any of them, while even the positive traits have some disadvantages, and vice versa.
Sloppy/Neat
In the previous Sims game, it was almost always preferable to have a Sloppy Sim than a Neat one, as the primary benefit to being Neat was that your Sim would automatically clean up messes when they appeared around the house. Since maid service was fairly cheap (and still is, compared to the time it saves your Sims), it was better to let your Sims leave their trash all over the house, since it would be cleaned up every day anyway, and focus them on making new friends and improving their skills. 
In the Sims 2, though, a number of changes have been made that actually make it somewhat less of a disadvantage to have a Neat Sim. They will still lose a bit of time when they automatically clean up messes (both those that they've made and those made by other people in the house), but the inclusion of the Cleaning skill means that they won't be spending this time doing absolutely nothing; each time they clean up a mess, they'll gain a bit of experience in Cleaning, which in turn can help them further their career goals. They'll also improve their Cleaning skill much faster than will Sloppy Sims.
There are also penalties for being Sloppy. In exchange for gaining more "me time" by never automatically cleaning up messes, Sloppy Sims will bleed Hygiene more quickly than their Neat counterparts, and will have a variety of somewhat disgusting habits, such as taking sponge baths, eating out of the trash, and eating food with the poorest table manners possible, which can lead to negative reactions from other Sims or even illnesses.
On balance, it's generally better to have a median score in Neat/Sloppy than to have a tendency to an extreme. If you're willing to micromanage your Sim's activities, then going all-out towards the Neat extremity will give you plenty of benefits; if you can manage to prevent them from spending all of their free time cleaning, then these benefits will arrive without much in the way of penalty.
Shy/Outgoing
Every Sim will have to interact with other Sims in order to advance in their careers and achieve their Wants, and the Shy/Outgoing axis determines their ability to do so, to a large extent.Outgoing Sims are better suited to almost all gameplay situations than Shy Sims are, if only because they're less likely to suffer from negative interactions when they socialize with other Sims, which is one of the bedrocks of the game. This, alone, makes a highly Outgoing Sim better able to function in the game than a Shy one. Since being Outgoing will make it easier for your Sim to quickly make new friends, which every career path will require, and, well...that's pretty much automatically great, in and of itself. You can't understress the importance of socialization in this game, so a high Outgoing score is almost universally desirable. Highly Outgoing Sims will require more socialization to fill up their Social Need, which will also decay more quickly than it will for Shy Sims, but this is hardly a drawback, considering the amount of socialization you'll likely be doing, regardless of where your Sim lies on this continuum. Sims with high Outgoing scores are less likely to be perturbed when another Sim walks in on them while they're using the bathroom; they also have a good chance to strip naked when they get into the hot tub.
The only real exception to this rule is in the case of Sims with the Knowledge Aspiration. Since this Aspiration generally pops up Wants related to gaining skill points, your Sim will have to spend more time focusing on these skills, leaving him or her less time to spend socializing. Having a Shy Sim will let you invest the time required to build up these skills, without having to worry too much about your Social Need. Almost every other Aspiration will benefit from a high Outgoing score, particularly the Popularity, Romance, and Family Aspirations.
Lazy/Active
The primary differences between Lazy and Active Sims come in the form of quicker need decay. Active Sims will require more carbs to keep up their high-impact lifestyle, meaning that they'll need to fulfill the already-tricky Hunger need more often than other Sims. Lazy Sims, on the other hand, dissipate their Energy and Comfort needs rapidly, which can lead them to automatically nap when they feel run-down.Beyond those basic differences, though, it's generally better to have an Active Sim than a Lazy one. There aren't any social consequences to being one or the other, although it can affect what kind of Fun activities your Sim prefers; Lazy Sims like to watch TV, while Active Sims will prefer physical Fun activities. Active Sims, however, will have an easier time progressing in a number of careers (laziness rarely being much of a virtue in the workplace), and will be able to more quickly improve their Body skill. Lazy Sims, on the other hand, have the aforementioned napping tendency, will sometimes miss work due to sleeping through their alarm (you can override this with manual control if you're attentive, though), and will tend towards the lower end of the Fitness scale.
In short, the only real drawback to being Active is that you'll require a bit more food than lazy Sims will, but this is relatively inconsequential compared to the numerous benefits that a high score in this trait gives you.
Serious/Playful
The Serious/Playful dichotomy is perhaps the only trait axis that is truly balanced between the extremes, in that it's usually better to be somewhere in the middle of the axis, rather than have your Sim be extremely Serious or too Playful for his own good.Being Playful allows your Sim to acquire Creativity at a faster rate than Serious Sims, who in turn are better at boosting their powers of Logic. Their inquisitive nature encourages Playful Sims to seek out Fun in a variety of activities, but this need decays more quickly for them. Serious Sims get a bit of a boost in the Science, Law Enforcement, and Medical career tracks, but Playful Sims will have an edge when it comes to socializing, particularly when they have to deal with multiple Sims at the same time; being Playful allows a Sim to engage almost any similarly happy Sim in a wide variety of Fun activities.
Grouchy/Nice
Although most of the trait dichotomies tend to give at least some small benefit to your Sim if you choose to emphasize the negative side of the continuum, it's just objectively better to be Nice than to be Grouchy. Unless you're a green puppet that lives in a trash can, no one finds surliness endearing, and the population of Simsville is no exception; Grouches are fantastic at self-sabotaging their relationships and generally annoying everyone around them to no end. 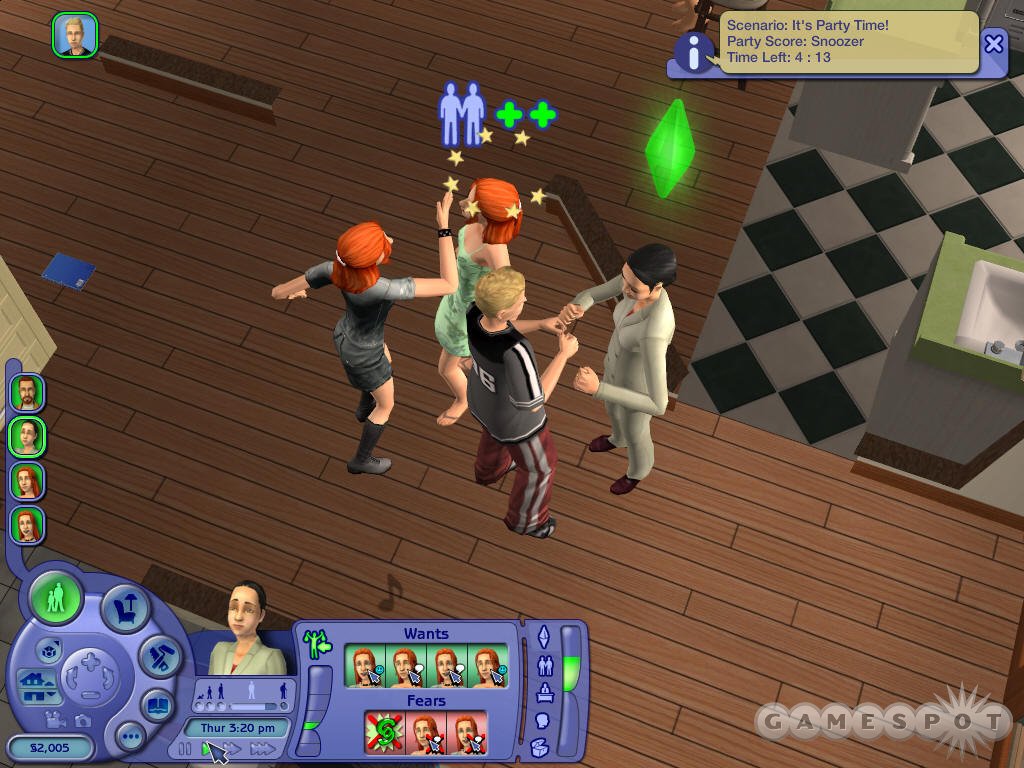
The benefits of being Nice are self-evident: Nice Sims are more likely to succeed with their social interactions, which in turn lets them more rapidly make friends, which is just obviously a desirable thing in a game like the Sims. Being a Grouch, on the other hand, will make your Sim less likely to accept positive socializations, and, if you leave them to their own devices, will actually result in all-around jerk-like behavior. A Grouchy Sim that's under the control of the AI will quickly manage to destroy any positive relationships that you've managed to work up; for an example of this, check the Pleasant family in Pleasantview and let the AI run Lilith for a bit. She has three points above being a complete grouch, but will still tend to initiate arguments and irritate the rest of her family, unless you are constantly override her commands. Having a Grouch in the family won't affect the rest of the family members' relationships with each other, but it will make it difficult to gain and keep the friendships that are required for career advancement.
Being Grouchy or Nice doesn't affect need decay, skill learning, or career advancement (aside from the previously mentioned difficulties in making friends), but it's still very difficult to have a Grouchy Sim be a success in life. On the other hand, if you're looking for a challenge, see if you can get a Grouchy Sim to the highest level of a career--it's harder than it will be for almost any other type of Sim.
(As a note, many of the more difficult social interactions, such as the various Proposals, are much easier to pull off if you have ten points in Nice. This isn't a requirement--you can still perform any of the interactions if you're willing to work a little harder on your Daily and Lifetime relationship scores--but can make things proceed much more quickly for Romantic or Family-oriented Sims, if you can afford the points.)
Needs
If you played The Sims, then you should be familiar with the Needs system. These are, as the name implies, the basic needs of your Sim; if you want your Sims to succeed in their personal and professional lives, you're going to need to ensure that their Needs are taken care of.There are eight Needs in total: Food, Comfort, Hygiene, Bladder, Energy, Fun, Social, and Environment (formerly Room). Your Sims have a different score in each Need; taken together, their overall Need fulfillment will be combined to form their Mood, which is something of an overall barometer of happiness for the Sim. You will need to constantly monitor these Needs as you progress through your Sim's daily life, as an unhappy Sim will be less likely to successfully socialize and will perform poorly at work or school.
Each Need will constantly degrade over time, no matter what actions your Sim performs, although some activities will hasten the decay of specific motives. Using the bathroom or exercising, for instance, will have more of an impact on your Hygiene Need than will watching television. The goal isn't to keep each Need constantly maxed out, though; this is actually impossible, and attempting to do so will prevent your Sim from going to work or achieving their Wants. A more feasible goal is to keep every Need above two-thirds or so, which should keep them happy enough to obey your commands and be successful in most of their interactions with other Sims. Needs that are extremely low have a disproportionately large affect on your Mood, so it's usually best to concentrate on the lowest Needs first.
Luckily, in Sims 2, the AI for your Sims has been improved over that found in the first Sims game. Now, if your Sims are left to their own devices, they'll automatically attempt to work on their most pressing Need, rather than choose one at random. This will let you let the AI control your Sims a bit more efficiently than they did in the first game; you'll still want to guide them as often as possible, of course, but you'll be able to let them go a bit longer without direct control if you want to concentrate on another Sim.
Bladder
Bladder is the simplest Need to take care of: simply steer your Sim towards a toilet, let him or her use it for a few minutes, and you'll be taken care of. This refills completely when you manage to make it to a toilet, and doesn't take long to completely max out, no matter what kind of toilet you use, so feel free to let your Bladder Need drop fairly low before you bother to deal with it. Just don't forget about it, or prevent your Sim from reaching a bathroom in time, as a completely depleted Bladder will result in a messy situation, and one seriously unhygienic and unhappy Sim. 
In addition to degrading naturally over time, Bladder will also be degraded when your Sim eats. Relieving the Bladder will cause your Hygiene score to decrease, so you might want to save your bath or shower until after you hit the toilet. Some of the nicer toilets will also give your Sim an appreciable Comfort boost while they relieve themselves; Comfort can be difficult to come across outside of sleeping, so these extravagant commodes are definitely worth your money.
Sims that gravitate towards the Shy end of the Shy/Outgoing trait line will refuse to go to the bathroom if there's another Sim in the same room as the toilet, and will in fact throw a fit, wasting precious time out of everyone's day. For this reason, it's always best to enclose your toilet in a small space, with a sink being the only other required item. If you intend to throw parties, two bathrooms are essentially a requisite; these should ideally be placed near the main socialization area.
Note that your Sloppy Sims will gain a small amount of Bladder replenishment when they take a shower. Just don't tell their housemates.
Comfort
You'll rarely have to explicitly instruct your Sim to worry about his or her Comfort Need; in most cases it will be taken care of as your Sim goes about his or her daily routine, thanks to the many items which satisfy Comfort while also taking care of other Needs. If a chair offers your Sim a Comfort bonus, for instance, and you sit in it while eating a meal, you'll gain the Comfort boost while also obtaining the Hunger bonus for the meal. In this manner, you can easily boost Comfort while sitting on a nice toilet, watching TV from a sofa, or sleeping. Sleeping will generally be the best way to get large Comfort boosts, as beds offer good Comfort scores, and you'll be in them for quite a while while you sleep anyway.
Hunger
Hunger, obviously enough, is replenished by instructing your Sim to sit down and eat. It sounds simple, but Hunger will often be the most aggravating Need to fulfill, if only because it takes a rather long time for your Sim to prepare and eat a full meal (on the order of an hour or so), which generally won't even fill their Hunger bar all the way up. Luckily, the Hunger motive decays less quickly than do other motives, so one full meal a day should be all you need to keep your Sim up and running.There are a lot more food options in Sims 2 when compared to the first Sims, but the same basic choices are still around: you can instruct your Sim to grab a full meal (which requires preparation and is very filling; there are recipes you can choose between this time around), a quick meal (which doesn't require any preparation, but isn't as fulfilling as a full meal), or to call for delivery, which doesn't require any preparation, but will take a while to arrive and will cost money. Alternatively, you can instruct one of your Sims to Serve a meal; they'll make a number of servings of whatever recipe you choose, which your other Sims can grab and eat without any prep time whatsoever. The individual servings here are a bit less filling than full, self-prepared meals, but the time savings are generally worth the effort. Serving is especially useful when you have large households and can rangle everyone into the kitchen at the same time, as everyone will be able to socialize at the table while they eat. If one of your Sims has a high Cooking skill, they'll be able to provide everyone with a nutritious meal, letting each other member of the household move on to more pressing Needs and Wants.
Sims that attempt to cook a meal when they have a low Cooking skill score may start a fire in the kitchen; the resulting trip from a Fireman will drain you of a bit of cash. It's safer to learn Cooking from a nice television or from a bookshelf; when you reach rank one or two, you can try again with less fear of failure. Microwaves are also unblowupable, so they can be used in place of a stove if you're afraid of fires. (Or if a Fire is one of your Sim's Fears; in this case it's best to stick on the safe side and avoid stoves if your Sim is a poor cook.)
Needless to say, a low Hunger Need is a bad thing for any Sim to have; if it drops all the way to the bottom of the meter, your Sim will starve to death. Luckily, there's an incredible amount of leeway in terms of getting some food for your Sim before this unfortunate eventuality occurs; your Hunger meter will usually drop almost to the bottom, then stay there for as many as 12 hours or so, giving you plenty of time to prepare a meal or ten before time's winged chariot swoops down to pluck you from this mortal coil, etc. In short, it's difficult to die of starvation unless you're actively trying to kill off one of your Sims.
For more info on efficient food preparation, check out the Kitchen section of the Building Tips chapter of this guide.
Fun
Although your Sim needs the basic necessities of life, like sleep and food, he or she also desires the intangibles, such as Fun. This is usually combinable with Social, in that many of the objects that work to increase your Fun score can be used by more than one Sim at a time, allowing you to gain Social, Fun, and perhaps relationship points all in one fell swoop.The classic Fun item is the television. If you place a television in front of a couch, two or three Sims will be able to watch at the same time; they'll converse about the program they're watching, while gaining Fun, Social, and Comfort from their sitting arrangements. (The safest channel choice is usually SBN, which teens, adults, and elders all tolerate. Kids won't like it, but there should be fewer of them than any other age group.) The more expensive the television, the more Fun that you'll be gaining.
Another good option are the game systems. Both the Maxis Game Simulator and the It's MYSHUNO! game will give you an excellent amount of Fun and Social, as well as Comfort, if you place them near good seating. If you have to play them solo, one Sim can use them to gain back Fun, but this obviously won't improve your Social Need at all.
Dancing is also a good source of Fun, especially at parties, where you'll need to gain plenty of relationship points in order to have a successful shindig. Dancing with other Sims gets you plenty of relationship points, so you should make this the focus of your parties; get a good stereo system, along with plenty of speakers, and you should have plenty of room in which to dance the night away.
Energy
Energy is the one of the most straightforward Needs in the Sims 2. Every Sim needs to have a little get-up-and-go in them, or they're prone to poor performance at work and unscheduled napping. If you let your Energy fall too low, in fact, your Sim will drowsily shrug off all of your commands and fall asleep on the floor! The solution, of course, is massive infusions of trucker drugs.Well, no, it isn't; what your Sims need is sleep, and plenty of it. Sleeping requires a lot of time, and it obviously disallows any other actions on the part of your Sim, so once a day you'll need to drop what your Sim is doing and shove him or her off to bed for eight hours or so. There are other methods of supplying Energy, notably napping on a couch or drinking espresso, but these are uniformly inefficient when compared to some solid REM time. Energy will drain at a fairly good rate during the day, no matter what you do, but, again, there's not much you can do about it except to just take the mood hit and focus on your other Needs. If you really need to get your Sim in a good mood for a special occasion, such as a party or an important romantic proposal, try to get some sleep immediately beforehand to ensure that your Energy Need is well satisfied.
One thing to take note of is that your Sims will often stay in bed even after they've reached maximum Energy. They will get up eventually, of course, but if you want to reach maximum efficiency, you'll want to monitor your Sims as they sleep and prompt them to cancel the sleep action when they've topped off their Energy bar.
Social
Your Social Need is similar to Comfort in that it will likely be satisfied in the course of your everday activities. Since the Social meter is boosted by interactions with other Sims, most of the Sims in the game will keep their Social Need almost full just by going about the process of fulfilling their Wants. The Popularity, Family, Growing Up, and Romantic Aspirations are full of socialization-based Wants, and even the Knowledge and Fortune archetypes will see their fair share of interactions pop up, especially if you can manage to get the Sim to fall in love with another character. If you can feasibly go after these Wants, do so, as you'll be giving both your Social meter and your Aspiration meter a boost at the same time. 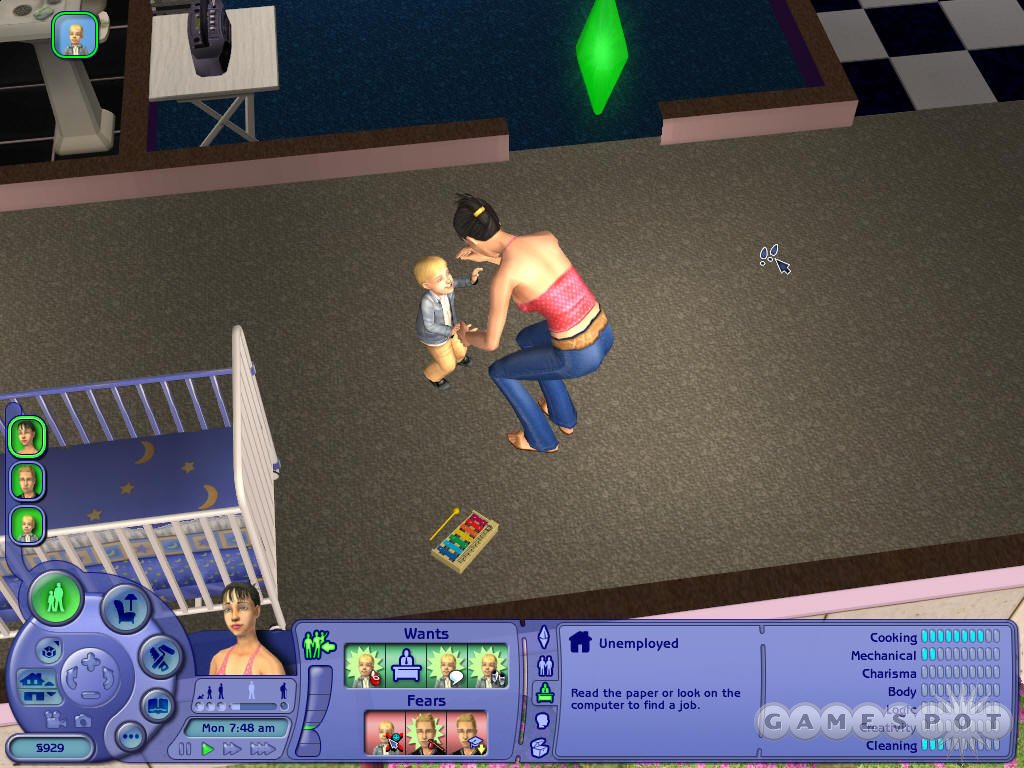
If your Social motive falls too close to the bottom of the bar, your Sim will begin hallucinating, which will create a magical Social Bunny which will attempt to cheer your Sim up by offering a few special, high-Social interactions. None of the other Sims in the household will be able to see the Bunny, so they may consider the fact that your Sim is talking to nothing a tad odd, but they obviously don't care so much about your Sim anyway, if they let his Social rating get so low in the first place.
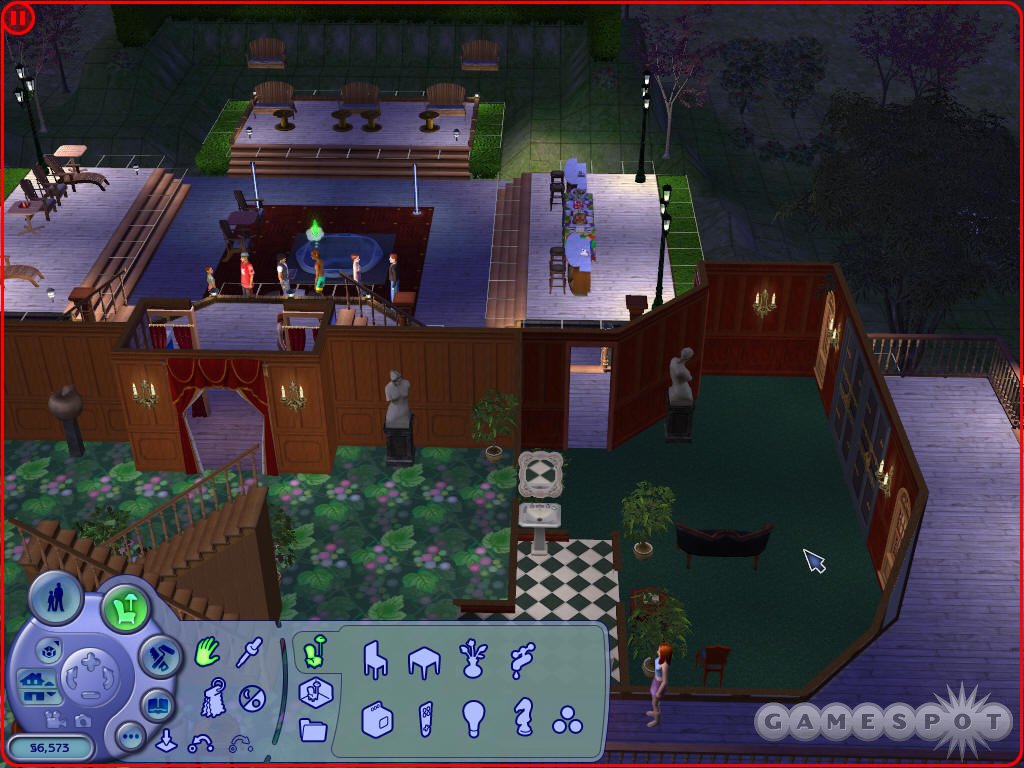
Environment
Environment is the Need that is the most difficult to directly influence. Your Sims are attentive to the environment around them, and prefers to dwell in comfortable, attractive surroundings. Their Environment score will reflect this level of satisfaction, for better or for worse; if you plop them down in a bland hovel, you can expect them to be distinctly depressed about their residence most of the time. You'll need to spruce up their living area with decorations in order to make them feel better about where they live.In the early game, you can help your Environment score by instructing your Sims to clean up after themselves, as overflowing showers and dirty plates stacked up on the kitchen table will quickly begin to offend them. (You can also hire a maid via the telephone to clean up your residence.) This is only a bandaid effect, though, as you will never be able to bypass the maximum Environment limit that's set by the quality of your items, no matter how obsessively you polish the silver. As such, Environment becomes the money Need in the mid-game (if such a term even applies to a game like the Sims): the more disposable income you have, the easier it will be to buy the expensive decorations required to appeal to your Sims' sense of aesthetics.
Before resorting to pure decorative items, though, you should scout through the catalogs to find items that have Environment boosts tacked on to more utilitarian purposes. For example, many of the more expensive seating options will have the same Comfort scores as the more thrifty choices, but will also give your Sims something to admire from across the room. Some consumer electronics, such as big-screen televisions, will also have appreciable prettification factors. Non-decorative items that add to Environment are generally quite expensive when compared to purely utilitarian choices, though, so you may want to just spend your cash on simple decorations.
Decorations come in many different forms, although the "best" are those that can fulfill your Environment Needs without taking up precious floorspace. Paintings are obviously great for this, although they can be quite expensive for the amount of Environment that they supply. You can expect to pay over 100 Simoleans for each point of Environment that you gain; some of the more reasonably-priced items are Transcendence by Joan Schnitzel (6 Environment for 800 Simoleans) and The Meaning of Fruit (10 Environment for 1,500 Simoleans). (These are easily found in the menu due to the fact that they're the only paintings that feature bowls of fruit on them.)
Sculptures are also a good choice for Environment, although they as well will be somewhat inefficient for Environment, especially towards the more expensive end of the spectrum. The Pink Flamingo no longer gives Environment bonuses, unfortunately; the cheapest option for that now is the yard Gnome. A better choice here is the Immobile Chimes Mobile In Steel sculpture, which offers 10 Environment for 1,500 Simoleans, but which will take up a few squares of floor space.
Lastly, note that Environmental scores outside the home are judged in small areas; there isn't one Environment score that will affect the entire outside of your home. For this reason, you'll want to have the area near where you hop onto the schoolbus or carpool the mostly brightly decorated part of your yard.
Hygiene
Hygiene, like Bladder, can be raised from low to full quite quickly. It will lower naturally over the course of a day's exertions, but your depletion rate will accelerate when you perform strenuous or messy activities, such as exercising, eating, or going to the bathroom.The simplest way to refill your Hygiene is to take a shower or bath. A shower is usually the quickest way to get your Hygiene back up to spec, but these have a tendency to leak all over the bathroom floor, harming your Environment Needs, and don't give you the bonus Comfort that taking a bath does. In general, though, showers are still preferable to baths, if only because they do save time, the messes are easily left for the maid to clean, and the lost Comfort when compared to a bath will easily be made good when you hit the sack.
Since your primary source of Hygiene penalization will usually involve emptying your Bladder, it's best to save your Hygiene replenishment until immediately after you use the bathroom. Most bathrooms in the storymode will come ready-equipped with both a toilet and a shower or bath, so it's not difficult to instruct your Sim to do one and then the other; afterward, they should have these two Needs satisfied for the rest of the day.
This doesn't mean that you always have to satisfy your Hygiene score after you relieve yourself, obviously; you'll likely want to have your Sims make a quick trip to the bathroom in the middle of the day to boost their Bladder, but it's not often worth the time investment to take a shower afterwards. If you do manage to top out your Bladder sometime in the afternoon, you can generally save your next bathroom trip until you get out of bed the next morning. A morning routine of waking up, using the bathroom, and then showering is the best way to ensure that your Sims have a good head start on the rest of their Needs.
Aspirations and Wants
One of the most obvious additions to the Sims is the inclusion of the Aspiration systems. Your Sims are no longer slaves to their basest desires, and no longer move through their days seeking only to live in a rut of eating and sleeping--they now have hopes and dreams that they wish to fulfill. While you still have to satisfy the primary needs of your Sims, they will now also strive towards higher goals, based on their overall Aspiration. This works in a similar fashion to the needs system--satisfying your wants will give you a boost to your Aspiration Meter, which will in turn degrade over time.Your Sim's Aspirations are either preset, in the case of the pregenerated families in Story Mode, or set by the player during character creation, in the case of player-generated Sims. You can choose from one of five different Aspirations for your Sim, which are detailed below. (The Grow Up Aspiration is automatically given to toddler and child Sims; you'll be able to choose from one of the mature Aspirations when the child matures into a teenager.)
Wants work like objectives or tasks; your Sim will have some specific desire in mind, and when he obtains that desire, he'll gain a boost to his Aspiration meter. The easily-performed objectives will give small boosts to the meter, while more involved or long-term Wants will have correspondingly larger rewards. Your Sim's Aspiration will determine what kind of wants that Sim has--a Sim with the Fortune Aspiration, for instance, will have a lot of wants that revolve around making money, gaining promotions at work, and buying expensive items.
The Aspiration meter isn't just a gauge, though; there are specific benefits from having a high ranking in your meter. If you manage to nearly top off your meter, in fact, to where it becomes platinum, you'll notice that your Mood will also become platinum. When this occurs, your Sim is essentially unfazable; her Mood will be considered to be at the maximum number, which means that she'll obey all of your commands, will increase her job performance by a large amount if she goes to work, will use skill-increasing items without fussing, and so on. Individual Needs can still go into failure while the platinum Mood is ongoing, so you'll still need to keep an eye on them.
The next highest Aspiration level is gold. When your Sim has a golden meter, he or she can use the Aspiration reward items without fear of malfunction. (See the end of this chapter for a description of these items and info on how to obtain them.)
When your Sim's Aspiration meter is green, she is feeling merely content with life. You won't gain any special benefits or penalties from being in this state.
It's when your Sim is near the bottom of the meter that things begin to get interesting. The Aspiration meter becomes more of an index of mental health at this point than anything else; your Sims will begin to display increasingly erratic and immature behavior as their meter starts approaching the bottom of the barrel. Toddlers, children, and teens can't actually suffer a nervous breakdown because of a poor Aspiration score; they will, however, start to lash out with increasingly negative behaviors, such as Annoy and Fight, as their score lowers. It's the adult and elder members of your household that you really have to worry about, as they will begin to frequently stop what they're doing to worry and weep over their misfortune. If you let things slide far enough, the Sim will eventually have a manic episode. Their specific behavior will depend on their Aspiration--a Family Sim will start cuddling a sack of flour as if it were a child, for instance--but the end result is the same: you've gone coocoo for Cocoa Nuts. If you can't get some Wants done right away, you might have to get a visit from the Sim Shrink, who'll hopefully coax your Sim back into normal working condition.
Growing Up
All Toddlers and Children possess the Growing Up Aspiration; you don't get to choose or change this. For Toddlers, you're going to want to get the big bonuses from the Wants regarding learning to Walk, Talk, or Potty Trained. While these take a fair amount of time to successfully complete, they will give huge bonuses to the Toddler's Aspiration meter, and will usually do the same for the adult who's doing the teacher, especially if he or she has the Family Aspiration. Most of the rest of the Wants revolve around less time-intensive social interactions with other members of the family, though, so there should always be something you can do.Children, though, will have a broader array of Wants available to them. As they'll be beginning school, they'll have to start worrying about their grades and learning how to study, and they'll also start to want making friends outside the family. In addition to these, they'll begin obtaining some more mature Wants, such as Skill-building and inviting other Sims over to their house.
Family
The Family Aspiration is based around interactions with members of your Sim's family. If your Sim has no family, he or she will attempt to find a mate (Family-oriented Teens will have to settle for Going Steady and lots of social interactions), get married or joined, have children, and start growing a clan. After the children start popping up, you'll need to constantly be interacting with them; the big Wants at this stage are related to teaching them various skills, helping them with their homework, encouraging them to do well in school, and so on. Many of these Wants will also be had by the children, so you'll often gain mutual Aspiration points upon completing them. 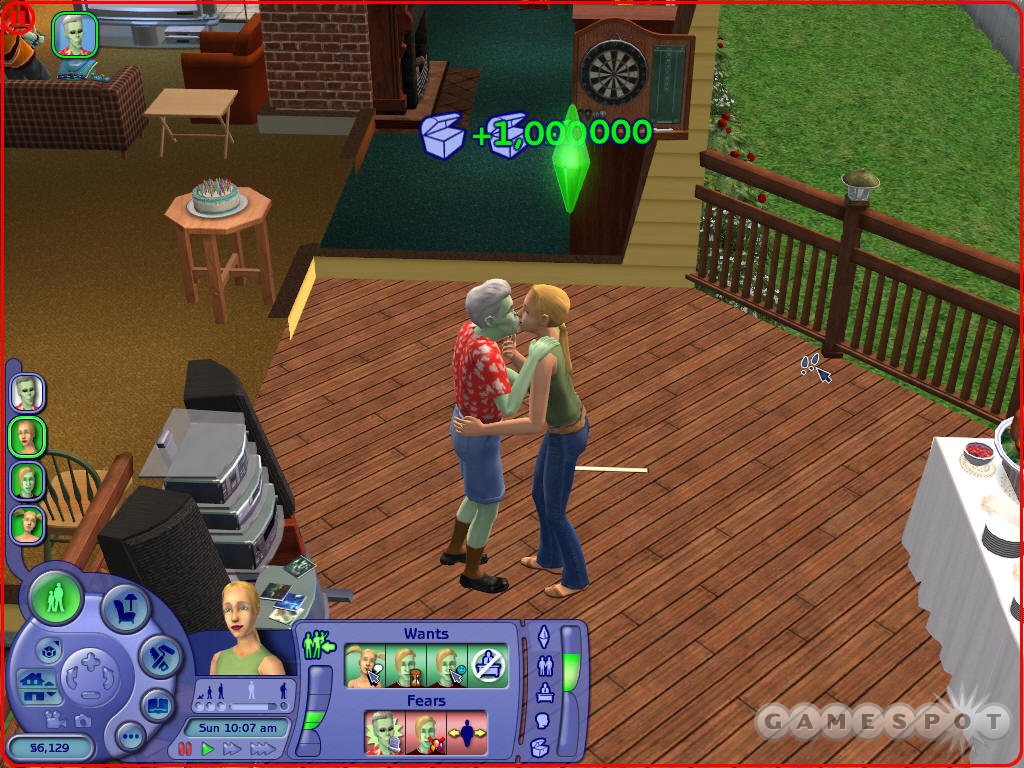
In addition to keeping his kids happy, many adult Family-oriented Sims, particularly those with high relationship scores with their significant other, will want to pursue Flirting, Kissing, and other romantic interactions with their partner. If these Wants are mutual (perhaps because your partner is also Family-oriented), you should have an easy way to get quick (albeit small) boosts to your Aspiration meters.
Romance
Love is always in the air in a household with a Romance-oriented Sim. These libidinous individuals want nothing more than to have multiple romantic partners and, if possible, to make Woohoo with multiple partners, as well. Living in a blissfully STD-free world as they do, the only thing they really have to worry about is jealousy. Their insatiable desires can lead to friction within a household, though, especially if they're partnered up with a Family-oriented Sim.So far as specific Fears go, though, Romantic Sims will have a congenital dislike for the heavier side of relationships; they don't want to have children, get married, or even to Go Steady while they're teenagers. Anything that ties them down to a single person will be repulsive to them. Again, this makes them terrible mates for Family Sims, since one partner's Wants will often be the other's partners Fears.
Fortune
A Sim that desires nothing more than Fortune will, of necessity, have to focus on their career first and family second, if at all. Most of their Wants will come in the form of gaining promotions, making money, and buying expensive items for the house; in short, they want to live the high life. Their most powerful Wants involve the upper echelons of wealth. Whether they marry into money, or simply earn an astounding amount of it through their own sweat and toil, nothing less than a bank account full of Simoleans will satisfy these Sims.Luckily, the Fortune Aspiration is easily compatible with those of other Sims, so they are good choices for marriage partners and breadwinners. Most of the Fears of the Fortune Aspiration are commonsensical things that won't translate into Wants for any other type of Aspiration; things like having items repossessed or stolen or being fired from work will reduce your Aspiration meter, but then, you should be avoiding these events in the case of all of your Sims, not just the ones with dollar signs in their eyes.
Popularity
Some Sims are concerned more with being the center of attention than anything else; these characters usually possess the Popularity Aspiration. These Sims desire two things above all others: to have a lot of friends, and to throw fantastic parties. Thus, most of their wants revolve around these two activities. If you plan out your house for efficient socializing and so that parties can go off without a hitch, you should be able to satisfy many of these wants without a problem.Popularity comes somewhere in between the Romance and Family Aspirations when it comes to how much you're going to be socializing and with whom. You will need to keep in touch with friends from outside the family if you wish to achieve some of the higher-end Wants, which require a lot of friends, but you can also benefit from having strong relationships with other members of your family. Note also that most of your wants will require mere friendships with other Sims; romantic entanglements are left for the Romance and Family Sims, while a Popular Sim can function just as well as a celibate as they can if they're wantonly promiscuous. Since you can gain many of your Wants by just having Friends, this is a good Aspiration to pair up against a Romantic Sim. If you're sharing a house, the Romantic Sim can attempt to woo all of your guests, while the Popularity Sim can socialize and make friends with all of them, without risking a terrible amount of jealousy between the two.
Knowledge
The writer in his garret, the scholar in the ivory tower, the Sim trying really, really hard to learn how to clean up messes; these are all examples of individuals with the Knowledge aspiration. In Sims terms, though, the intellectuals require nothing so much as they do constant skill increases. They do want some other things in life, including obscure experiences, such as seeing a ghost or having a near-death experience, but in general, a Knowledge Sim will see his routine involve a whole lot of skill training.Since skills require quite a bit of time to increase, though, a Sim with the Knowledge Aspiration will require high Need scores so that they don't autonomously break off their studies and choose to do other things. If you want to have your would-be scholars concentrate on their books, then, you'll need to be sure that they have enough time to work on their Needs, as well. As such, it's best if they don't have a job; it's possible to juggle constant skill-ups with obtaining Needs and holding down a job, but it's difficult at best, especially when you have to go above and beyond the skill acquisitions required for your career. If you do decide to enter the workplace, though, you'll probably have an easy time getting promotions if you keep your job performance up.
Since Knowledge Sims will spend so much time on their skill improvements, they won't have many Wants related to romance or social interactions. Thus, they perform well as single Sims, without the hassles of family life interfering with their quest for truth.
Aspiration Rewards
Aspiration rewards act somewhat differently than do Career rewards. You can unlock Aspiration rewards based on the number of Aspiration points you've obtained via completing Wants. If you perform a Want that nets you +5,000 Aspiration points, for instance, you'll be able to use those points to "buy" these items; if you subsequently enact a Fear for -2,000 points, though, you'll lose some of your purchasing power. The natural degredation of your Aspiration meter doesn't affect your Aspiration points for the purpose of obtaining these items.Note that Aspiration reward items can only be used successfully if you have a gold or platinum Aspiration rating. If you attempt to use them when you're in the green or red zones, you'll likely fail, which can result in some tragic misfires!
Money Tree: 3,000 Aspiration points
The Money Tree has a function that's fairly obvious, judging by the name; if watered regularly, you'll be able to harvest Simoleans from it. You won't get a whole lot of money from each harvesting--only 40 bucks--but you can purchase multiple Money Trees and group them together for mass harvesting, if you wish. Some players have reportedly been able to make a daily income of 3,000 Simoleans or more just from Money Trees, but this takes a whole lot of game time.
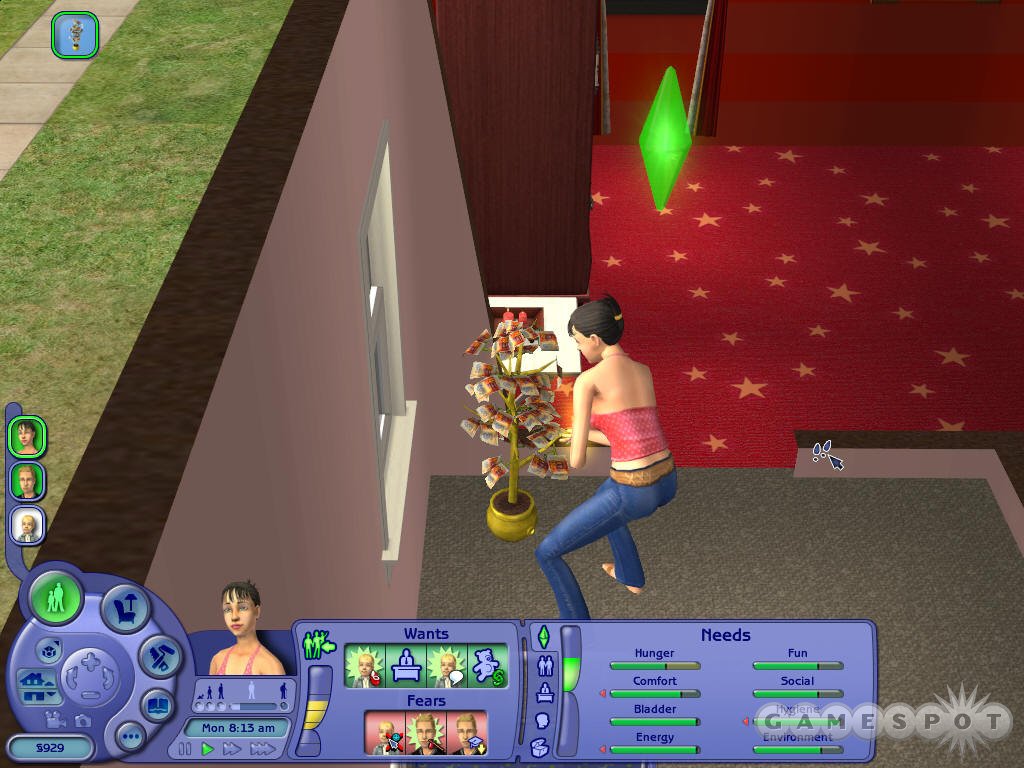
If a Money Tree isn't watered regularly, it'll wither and die. Also note that your guests will usually make a beeline for your Money Trees and nab your money if possible; you may want to remove any doors leading to the Tree if you have guests in your house. If you use a Money Tree with a low Aspiration meter, you'll only gain a single Simolean.
Noodlesoother: 5,000 Aspiration points
When you use the Noodlesoother, your Mood will automatically be increased by 50 points (about one-quarter of the full meter). Your Needs will decay more quickly, though. If you fail at using it, you'll pass out from a complete lack of Energy, and your Mood will obviously take a concurrent nosedive.
Pasteur's HomoGenius Smart Milk: 7,500 Aspiration points
The Smart Milk can only be used five times. When you feed it to a toddler, he or she will be able to learn skills (especially the important potty training/walking/talking) at an accelerated rate. If you fail at making the Milk, the bottle will turn red and will cause the baby to lose a skill point. If this occurs, cancel the feeding before your Sim reaches the baby.
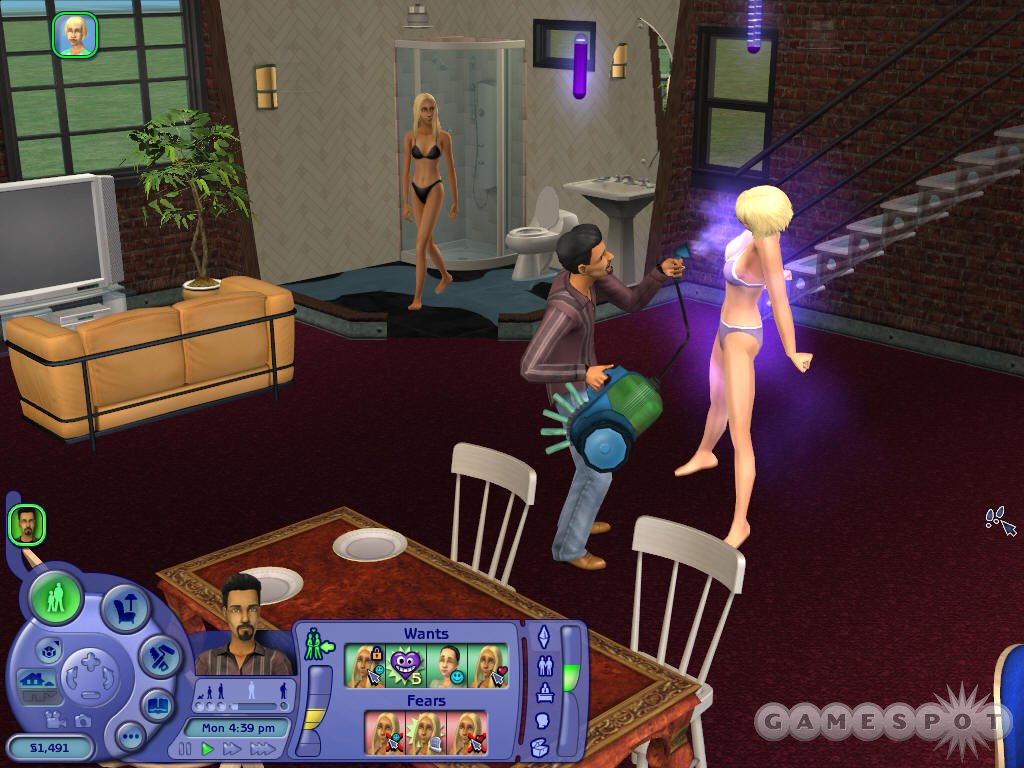
Cool Shades: 10,000 Aspiration points You get five sets of Shades when you spend the points required to obtain this item. After you put a pair on, the next social interaction you perform will be greatly increased, in terms of how it adds or subtracts from your relationship points. You can turn a base hit into a home run with this item, but you also face the risk of getting beaned in the head and irrepairably damaging your relationship if your interaction gets rejected.
The Eclectic and Enigmatic Energizer: 14,000 Aspiration points
Although this item can only be used five times, it has one of the most impressive effects in the game. When used, all of your Needs will have an immediate and substantial boost; this should also have an incredibly positive effect on your Mood. If you're below the gold level of your Aspiration meter, though, the opposite will occur: you'll lose a substantial portion of all of your Needs. This can't kill you, but it'll take you a couple days of game time to make good the losses.
Thinking Cap: 16,000 Aspiration points
The Thinking Cap only lasts for 24 hours, but in that time, all of your skill-building activities will see their efficacy doubled, which means that you'll obtain each new skill point in half the normal time. If you fail while using it, though, your Sim passes out due to a complete loss of Energy and loses a random skill point.
SimVac: 17,500 Aspiration points
The devestating SimVac can either transfer Aspiration points (up to 3,000 per use) or a random skill point from the target Sim to the user Sim for each use, and contains up to five uses. This isn't a very nice thing to do, though, so you can expect to greatly harm your relationship when you attempt to use the SimVac on someone. Therefore, pick someone you already dislike! If you fail at using the Simvac, you will transfer the Aspiration points or a skill point to the target, instead of vice versa, and your Needs will get penalized.
Love Tub: 20,000 Aspiration points
The Love Tub is one of the more durable special items, in that it spawns a completely functional hot tub that will stick around permanently. The kicker is that, for the first four hours after you place the Love Tub, all social interactions are more easily accepted by their targets, and the relationship score rewards are greatly increased. This is a pretty short window in which to gain points, but you should be able to move at least one other Sim from a mere acquaintance to a dedicated lover within this time frame, if you work hard and ensure that both Sims enter in a good mood.
Elixir of Life: 30,580
Although the Elixir of Life is incredibly expensive, its effects are commensurately powerful: when used, your next age transition will be set back by three days. You can use each instance of the Elixir up to five times, meaning that you can artificially extend your lifespan by up to fifteen days. If you manage to earn up enough Aspiration points to buy another Elixir during this time, you can theoretically extend your life indefinitely! If you fail at using it, though, you will be instantly aged three days. This can kill you if you're close to death of old age.
Skills
There are seven main skills that your Sim can attempt to learn in Sims 2: Cooking, Mechanical, Charisma, Body, Logic, Creativity, and Cleaning takes up the rear as a new inclusion. These are important to your Sim because of the fact that the careers in the game will require you to possess skills of a certain level before you can advance to the next promotion level, but they also have an impact on many other areas of your Sim's life.So far as your careers are concerned though, each career will have three primary skills that it will emphasize. If you want to reach the highest level of promotion in a career (level 10), you'll almost always have to maximize at least one skill (also to level 10); the other two skills will either have to be maximized or raised fairly high themselves, so you will have to spend some serious time studying if you want to reach the pinnacle of your chosen field. (See the Careers section for specific skill requirements.)
Cooking
The Cooking skill has gained newfound importance in the Sims 2. While it still helps prevent your Sim from starting fires (try to get up to Cooking level two before you go crazy at the stove), you're now able to learn new recipes as you proceed upwards and onwards with your Cooking skill. As always, the primary benefit of a high Cooking skill is that your Sim will be able to produce meals that will more quickly satisfy not only his own Hunger score, but also that of any other Sims that he cooks for. Having a Sim with a high Cooking score can thus eliminate the need for everyone else in your household to prepare their own food, if you manage to time their routines so that they all eat at roughly the same time. This will also help their relationships, as Sims naturally gravitate towards the same seating area and talk when they eat concurrently.To raise your Cooking skill, you can obviously just prepare food over and over again, but this isn't very practical, just because you'll create huge messes of uneaten food and/or reduce everyone else's Fitness score by stuffing them with food that they don't need, and that's not even mentioning the fact that you actually have to buy food to stock your fridge with now. A better choice, especially at low levels, is to select a bookshelf and choose to Study cooking, but you can also watch cooking shows on television or, if you've advanced far enough into the Culinary career track, use the Chocolate Manufacturing Facility to create salable chocolates. This last choice is likely the best, as you'll gain your precious skill points while creating a bit of income for your household.
Mechanical
Mechanical isn't the most useful of skills, outside of using it for job requirements. In everyday life, a Sim can use her Mechanical skill to repair broken appliances (which also raises the skill), but this comes with risks: if you manage to seriously bungle a repair job on an electrical item, for instance, your Sim may be electrocuted, which will screw around with your Need levels quite a bit, and may even result in the loss of a skill point, or even instant death!In point of fact, though, most quality items won't break down that often, so you shouldn't bother training up Mechanical unless you need it for a career promotion qualification. (If something does break, you can always call a Mechanic on the phone if you don't want to bother repairing it yourself.) If that's the case, though, you can study at a bookshelf, try to tune a piano, or use the Surgical Training Station that's a reward for moving up the ladder in the Medical career.
Charisma
Charisma, like Mechanical, is almost completely useless outside of careers. It does influence some interactions, such as Joke, but a lack of Charisma won't impair your Sim socially. Unfortunately, there aren't all that many ways to improve Charisma, outside of using a mirror to practice. This can make for slow training if your Sim isn't packed with points in the Outgoing trait, but once you manage to unlock either the Execuputter reward in the Business track, or the Enterprise Teleprompter from Politics, you should have an easier go of it.
Body
There are quite a few different ways in which a high Body score is a good thing for your Sim. First off, the obvious benefit is that it helps you out in a few careers, but it will also improve your chances to win in a fight, your ability to dive off a diving board, and in general perform well in any interactions that require some degree of physical acumen. Perhaps the most intriguing aspect of Body is that, upon increasing your skill to level three or higher, you'll unlock the Yoga self-interaction.To begin, though, you'll need to get your Body skill up. There is a cheap exercise machine that you can purchase if you wish to get a good workout, or you can settle for working out via the TV or a stereo if you can't afford the space. Swimming is also an option, if you're willing to head out to a Community Lot and spend a few hours or so in the pool, although this can be a bit time-consuming (in real as well as Sim life), compared to the benefits. After you proceed upwards into the Military and Athletic tracks, you'll unlock the Exerto Exercise Machine, Punching Bag, and the Obstacle Course, all of which are great ways to get a bit of an extra boost to your Body.
As mentioned, though, Yoga should start appearing as a self-interaction when you reach level three in the Body skill. This is something of a hidden sub-skill, in that you can improve your Yoga abilities when you perform the interaction itself (which also increases your Body skill as well). Yoga is more of a cool thing to show off with than it is functional, but as you keep performing it, you'll eventually unlock more interesting animations (such as those shown in the opening cinematic for the Sims).
Logic
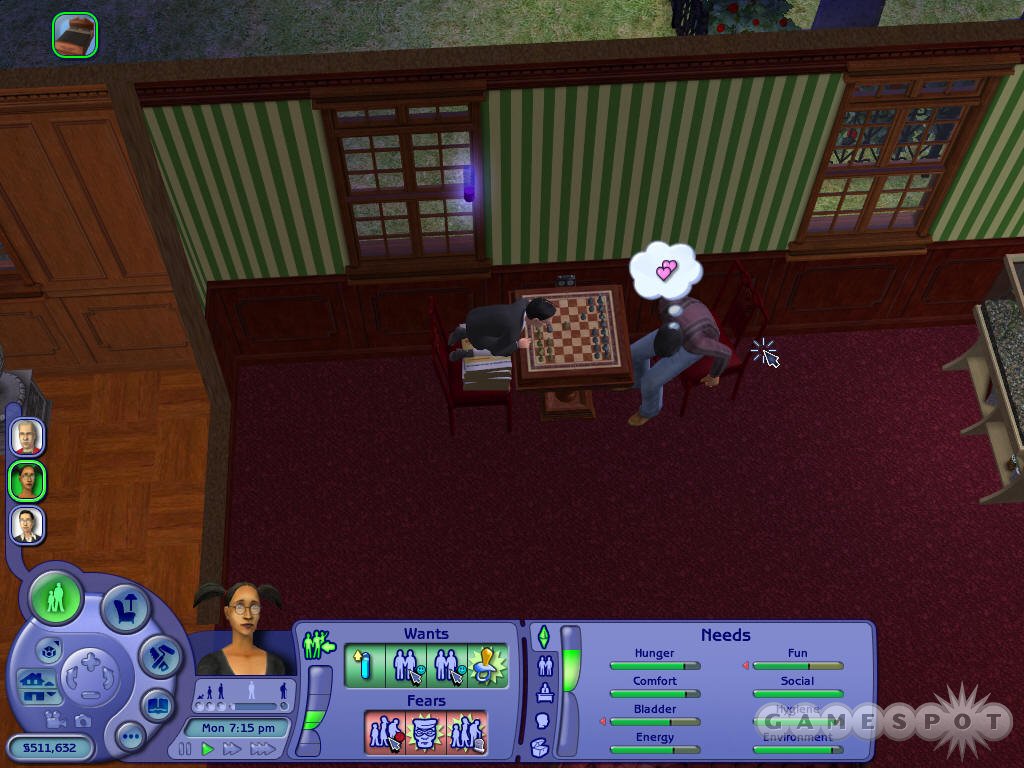
Logic doesn't have many applications outside of careers, although it can increase your chances of winning a chess match, or when you play the Game Simulator against another Sim. You can increase your Logic via using a telescope (just don't get abducted by aliens while doing so!), via playing chess, or with either the Prints Charming Fingerprint Scanner or the Simsanto Biotech Station, which are unlockable in the Law Enforcement and Science careers, respectively.
If you raise your Logic up to level three, you'll gain the ability to Meditate. Meditating is similar to Yoga, in that it's a quasi-hidden skill with differing abilities based on how long you perform it, but Meditation offers you some extra self-interactions with actual utility. To begin with, your Needs and Mood will freeze while you Meditate, which can be quite useful. If you've built up your Mood enough to ensure positive interactions, you can Meditate while another member of the household calls over whomever you intend to woo or interact with; or you can freeze your Mood before heading off to work if you're edging for a promotion. Later on, you'll gain the ability to levitate while you concentrate, or even to teleport to distant locations on your lot! No mind bullets, unfortunately, but we'll take what we can get.
Creativity
If you want to have a shot at making a bit of extra cash without having to having to deal with the muss and fuss of actually going to work, your Sim can try to earn her keep by using the Creativity skill to create art which can then be sold. If you use a computer to Write A Novel, you'll have to spend a bit of time on it before it's completed (30 hours of Sim time), but you'll gain Creativity all the while. Alternatively, you can try to use an easel to paint; the paintings that result will be salable as well. You won't necessarily make a lot of money doing this, mind, and you almost certainly won't make as much cash as if you were working on advancing along a job track, but these are decent ways to spend your time if your Sim is unemployed or taking care of a child. The amount of money you get for a novel or painting is dependent on your Creativity score; paintings also become more valuable over time, if you keep them around the house. When the painter dies, the paintings get an immediate boost in value.Besides the aforementioned easel and computer, you can also use a piano to boost your Creativity score, or the Simsanto Biotech Station (Science reward), or the AquaGreen Hydroponic Garden (Slacker reward).
Cleaning
Well, we suppose that being good at Cleaning is something to be proud of...at any rate, it's something you can now improve upon in Sims 2. There isn't much you can do to improve your Cleaning beyond actually performing the act; when you have a mess around the house, tell your Sim to tidy up, and she'll automatically gain Cleaning. You can also learn Cleaning from a bookcase, which is the preferred method. A higher Cleaning skill will let you clean objects more quickly, but unless your job requires this skill, you're always going to be better off with a Maid, if you can afford one.
Socializing And Relationships
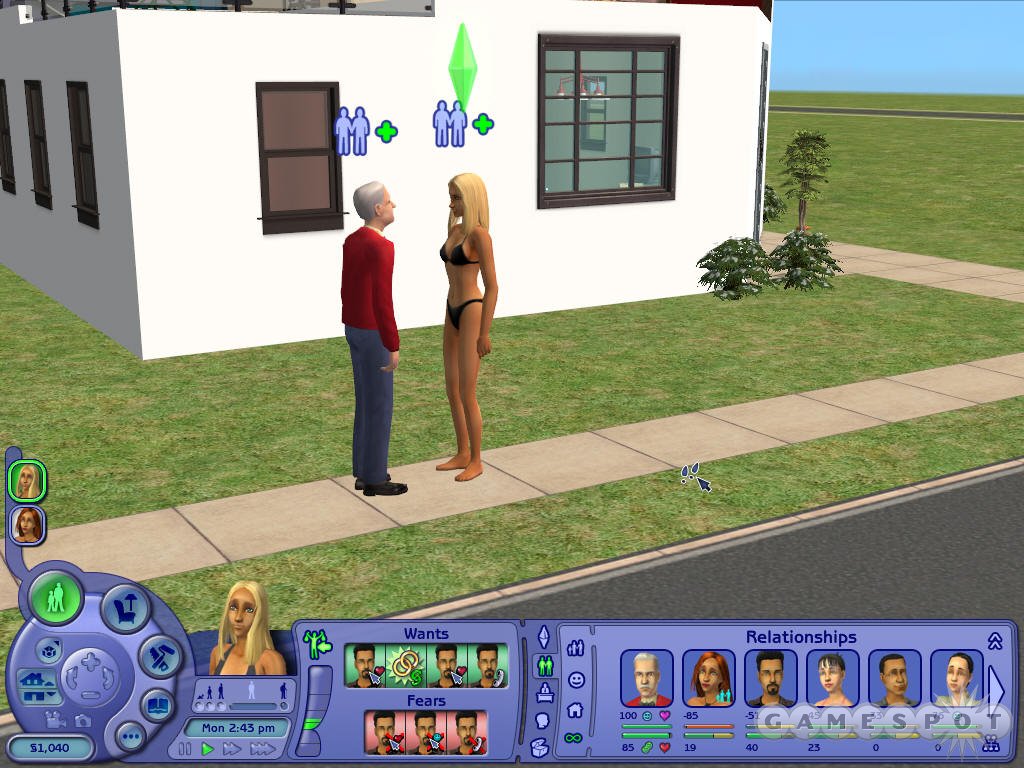
Many of the gameplay mechanisms built into the Sims engine revolve around making friends and building relationships. Although your Sim can lead a celibate, solitary life if you wish, it's preferable to have a large network of friends, even if you're only concerned about having a more diverse gaming experience. In practical terms, making friends is important due to the way that careers work: in order to get promotions at your job, you'll often have to have a set number of friends in your relationships menu.Your feelings toward another Sim are placed on a point axis, and can range from hateful (-100) to deeply loving (100), with most relationships falling somewhere in between. One of the new additions in the Sims 2 is the Lifetime relationship score; your relationships are now based on both short-term feelings (the Daily score) and the Lifetime score. The Lifetime score measures the health of your long-term relationship, and thus won't change quite as quickly as the Daily score. Putting in the effort required to get a high score in the Lifetime relationship meter will give you new interactions, some nice benefits, especially for Sims with the Romance and Popularity Aspirations, and will let you bounce back rather easily from any social mishaps that might befall any given couple.
Meeting Sims
If you want your Sims to have a healthy and diverse set of basic acquaintances on which to base their friendships and loves, you'll need to get other Sims into your relationship database. You can do this by simply finding a Sim that you haven't met yet and introducing yourself to them. If an unknown Sim drops by your house (this will occur a few times a day, although the Sims that do stop by may already be known to you), you can make their acquaintance by walking out and greeting them; this will give you a basic relationship of zero points.(If you ever feel that you need to make some new acquaintances, and don't want to wait for people to stop by your house, get your Sim into a good mood and head out to a Community Lot in the mid-afternoon. Depending on the speed of your computer, there can be as many as seven or eight other Sims in the community lot, randomly chosen from the inhabitants of the other houses in your neighborhood and some generic NPCs. This is a good way to make some basic acquaintances; try to build up your relationship score to the mid-20's with a few of them, if possible, if only to better the chances that they'll respond to a telephoned invitation to drop by your house.)
After you make a new acquaintance, you can start trying to boost your relationship score by interacting with the other Sim. This is accomplished by clicking on the Sim and choosing one of the social options from the pop-up radial menu. When you have a basic relationship of 0 points with a Sim, you won't have many options to choose from; in many cases you'll only have the basic Talk or Chat options. These basic interactions won't give you a super-huge boost, but they're good to use to get your relationship into the 20's or so, which is when more complex interactions become available.
It's worth noting that you'll only be able to tell how your Sim feels about another character, not how that character feels in return, unless you're checking relationships between members of the same household. If Joe Sim is madly in love with Jane Sim, for example, she won't necessarily feel the same way towards him. In general, though, these relationship scores are fairly analogous, so you can feel safe in using your own relationship scores as a barometer to gauge how the other party feels about you as well. Whenever you feel that you're using interactions that should be succeeding, but aren't, however, you may want to stick to some safer interactions until the other party is a bit more receptive.
Getting To Know All About You...
After you get acquainted with a Sim, and have gotten a few relationship points with him or her, you can attempt to start building up a solid friendship. There are a huge number of possible interactions you can use in Sims 2, but you don't want to overextend yourself; if you try for a difficult interaction with a Sim your character barely knows, you're likely to be rejected, which will cause you to lose relationship points with that Sim and lose some of your Social Need, as well. It's best to be cautious with interactions by choosing the less risky ones until you're fairly sure that an advanced one can be attempted.In general, the more romantically oriented an interaction is, the less likely it is to succeed with a Sim you're not friendly with. At low levels, things like Hug: Friendly or Appreciate: Admire are good ways to get some easy points. If you have a decent Charisma score, telling a Joke is also a good choice. Dancing is generally going to be the best way to boost your relationships without risking romance; the potential positive boost is more than double the negative penalty from a refused interaction.
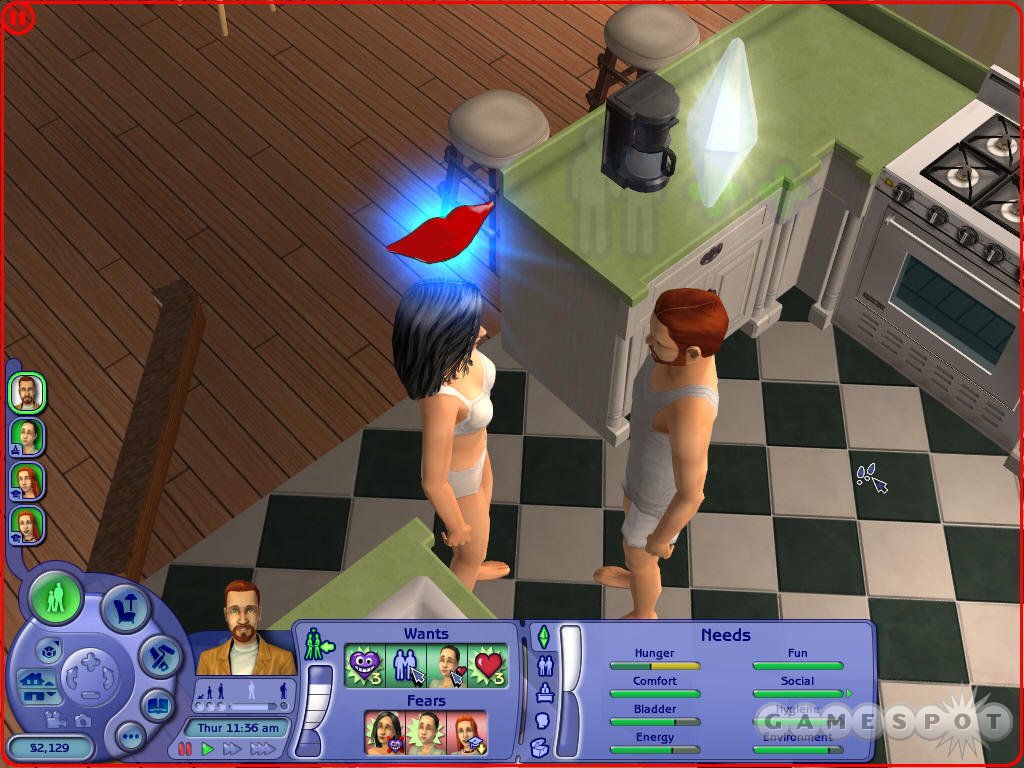
When A Man Loves A Woman
Once you become friends with the Sim, which occurs when you have a Daily relationship score of fifty or more, you can start working with the romantic interactions. You'll need to start with something simple, like a Kiss: Peck, so that your Sims get a crush on each other; from then on, you can start attempting progressively more daring interactions.(It's worth noting here that all of the Sims in the game are bisexual, in that you can attempt a romantic interaction between any same-sex couple and have the same chances of it succeeding as if it were an opposite-sex couple. You cannot, however, initiate any romantic interactions between an Adult or Elder and anyone Teen or younger; Teens can only have romances with other Teens.)
As you proceed further along the relationship bar, you'll be able to try the aggressive actions. It's difficult to fail with timid interactions like Kiss: Peck, or Hug: Romantic, but you'll need to have a Daily score of at least 65 if you wish to succeed with things like Kiss: Tender or Flirt: Hit On. The Mood of your target is of primary importance in these kinds of interactions, so it's best if you save the riskiest interactions until you've fed the Sim and allowed him or her to take a trip to the bathroom, if they seem to desire one. Unfortunately, you can't tell what the Mood of a visitor to your household will be at any given time, so you might want to use a simple interaction like Kiss: Peck to gauge their receptiveness to romance. If they reject your relatively safe interaction, you won't have much of a chance to get a riskier interaction through.
Woohoos
When you've managed to get your hooks deep into another Sim, you can attempt to perform The Act with your lover.A Woohoo is the Sim terminology for, uh, tender loving care. You'll need to have a bed or a hot tub in order to Woohoo, and your Sims will need a bit of privacy as well. (If you're of an exhibitionist bent, you can head out to a Community Lot and try to lure another Sim into a dressing booth with you for some public Woohooing.)
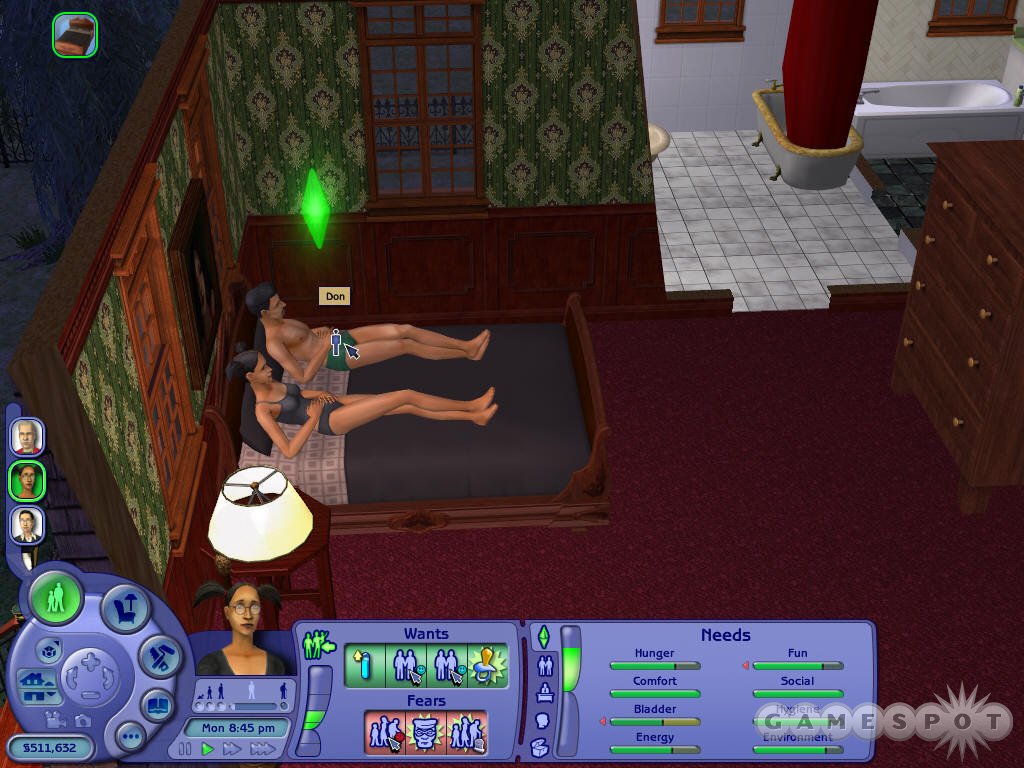
In order to Woohoo, you'll need to maneuver your Sim into the hot tub, or have her Relax on a bed. After you're in position, find your love target and select Ask To Join from the radial menu. When they've arrived, you can select Woohoo from the radial menu on the bed, or go from Cuddling to Woohoo in a hot tub. Woohooing isn't easy, though; in most cases, you'll have to have a Lifetime relationship score of at least 65, and the other Sim will have to be in a good mood. Otherwise, if you're up to a Daily relationship of 90 or so, you should be able to get a Woohoo off regardless of any other factors.
In addition to Woohooing, you can also select Try For Baby from the menu. This has the same chances of succeeding as a Woohoo, but will increase the likelihood that a baby will result from your congress. This is obviously only available for heterosexual couples; same-sex couples that want a baby will have to save up a few thousand Simoleans and call for an adoption.
If you manage to pull off a Woohoo, you should be forewarned that any other Sims within eyesight will have strong reactions to the act, especially if they have a crush or are in love with either of the Sims doing the deed. If this is the case, you can expect some slap-fests to occur after you both get out of bed or the hot tub, with some concurrently bad memories for everyone involved. In point of fact, your various loves can find out about your indiscretions even if they don't witness it directly; Sims who do witness a Woohoo are often liable to Gossip about it to other Sims, especially if they're Grouchy. If your significant others hear about a Woohoo through the proverbial grapevine, they'll react just as strongly to the news as if they had seen it first-hand. Your best bet is to do your best to ensure that no other Sims are able to watch you while you Woohoo; if you have to, enter the Build mode and move any doorways leading to the bed or hot tub to another area of the house.
Proposals
There are a number of different proposals in Sims 2, from the relatively innocuous, to the expressions of utmost commitment. If you have a Proposal available between yourself and other Sim, the option will appear on the radial menu; if it isn't there, then you'll need to work on your Daily and Lifetime scores a bit more before you can try for one, and be sure that the target Sim is in a good Mood! (Again, note that having a Nice score of 10 will make many of these almost automatic if you have the required Lifetime relationship score.)Teens have the ability to initiate a few Proposals, such as Sleep Over or Sneak Out, but the most important one is Go Steady. This is a Want for many young Sims, regardless of their Aspirations. (Although Romantic Sims may have it as a Fear, instead.) It can be difficult to pull off, though, unless your target's Mood is above three-quarters full or your Sim is extremely Nice.
The first important adult proposal is Move In. Be aware that, if this proposal works, the target Sim will join the household of the proposing Sim. This can make for some crowded homes, especially if no one moves out at the same time. If you're ready for the commitment, though, be sure that your Lifetime is above 60 and that your Daily score is above 70 before you try for this.

The next rung up the ladder is an Engagement. This doesn't have too many gameplay effects; the two Sims will act much like any other pair of lovers. If you want to try to get engaged, you'll want to have both your Lifetime and Daily scores above 75.
If you do get engaged, though, you can try to achieve the ne plus ultra of Sims interactions: a Marriage. (Sims of the same sex will have to settle for a Joining; no doubt there are enterprising modders working on a Civil Union patch as we type this.) Marriage requires a Lifetime score of at least 75, making this the culmination of a long sequence of socializations; most Sims will in fact require a Lifetime and Daily score of more than 80. A successful Marriage comes with all the baggage of a Move In, but you do gain a bit of cash, which can be helpful, especially if the Sim you're marrying is especially wealthy.
Parties
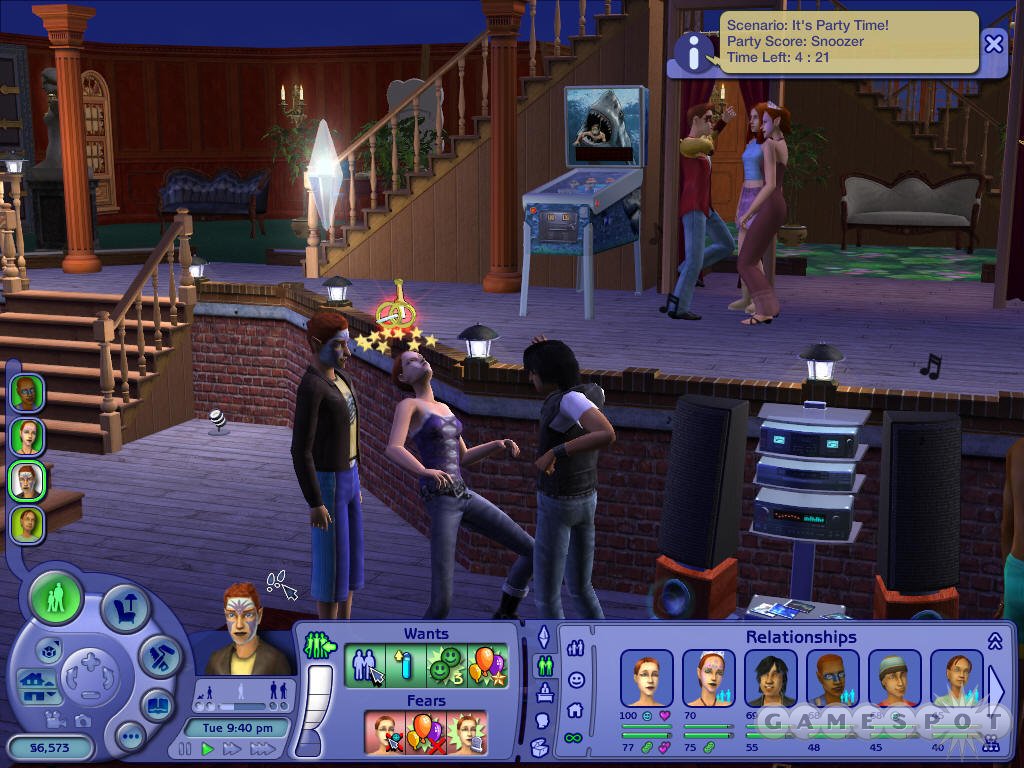
Parties return to The Sims 2 with a few new twists. Now, instead of just attempting to entertain all of your guests, you'll have to ensure that they have a fun time socializing with each other in order to obtain a good party score. That's right, parties are now ranked based on their success!In order to throw a party, you'll have to use the phone to initiate one. You'll be able to invite a few Sims over; the higher your relationship score with a Sim, the more likely they are to appear. As the guests arrive, you'll need to start working on their Moods.
All Sims will appear on your lot with a low Hunger score, so the absolute first thing you need to worry about is making some Food. If you have a household Sim with a high Cooking skill, get him or her to start Serving the best dish that they can make well, preferably two or three batches if you have room for all of the plates and enough seating to ensure that everyone can eat comfortably. (If needed, you can buy extra countertops, chairs, or dining tables explicitly for the party, then sell them back afterwards. You won't lose any depreciation money if you sell them the same day you buy them.) If you can, get this started before you call to start the party. Most food will last for six hours, while a party will only last five, so you don't have to worry about spoilage.
After they stuff their faces, your guests will probably want to move on to their Bladder. Since you'll have as many as eight people at a party, depending on your computer's specs, you'll definitely need to have at least two easily-accessible bathrooms near the kitchen; you don't want your guests walking all over the house in order to find a toilet. Again, small bathrooms are easily constructed for party purposes, then sold again afterwards, if they're unnecessary for the day-to-day needs of the household. All you need is a 2x1 slot with a toilet! Just make sure that you have a couple of sinks around for your guests to wash up with.
After these rudimentary Needs are taken care of, it'll be time to move on to the core of a party: Fun and Socializing. You'll have noticed by this time the large Party window in the upper-right corner of the screen; this will indicate how much longer the party will last and how successful it is at the moment you check. Parties are given a textual rank, from the worst (A Total Disaster) to best (A Roof-Raiser). This score is based by taking the amount of Daily relationship points that each guest or household member has gained, adding all of them up, and then dividing them by the number of people on the lot. So, in order for a party to succeed, you'll need to ensure that everyone on the lot is partaking in positive socialization!
(In addition to Fun, Social, Bladder, and Hunger, your guests will also want to increase their Comfort and Energy. The former is easily taken care of with decent seating; the second can only be helped with servings of Coffee or Espresso. You can socialize by talking while you drink or eat, so be sure to get some nice, comfy chairs for this purpose.)
One of the easiest way to do this is to have all of the Sims under your control move towards a Stereo and start dancing, then Calling Over all of your guests, one by one. Dancing with Sims gives you a good amount of relationship points, while also providing Fun, which should encourage your Sims to keep dancing even longer. Not all Sims will enjoy dancing, though, so you'll also want to have a nice television turned on, or perhaps a game machine, so that the Lazier Sims can do something that they enjoy as well. If you notice your guests wandering off in search of their own Fun, be sure to have one of your household Sims tag along and join them in whatever they do; it doesn't matter if your guests are in a great mood, if they're not socializing with anyone! Note that your guests cannot turn on stereos or televisions; if they want to watch TV, you'll have to turn one on for them ahead of time.
Besides gaining a lot of relationship points, you should also be sure not to let your Sims lose massive amounts of them. This most often occurs when Sims witness one of their lovers getting romantically involved with someone else, so you'll have to be careful that this doesn't occur. Dancing is a fairly safe activity that doesn't involve any jealousy penalties, but you'll have to be careful that your Sims don't attempt any autonomous actions that might spark a fight. While lover's spats might make for memorable parties, they won't be very successful in most cases. On the other extreme, you'll need to prevent Sims with mutual Daily Relationships of 100 from socializing too much; they might be successful with every interaction, but this won't help your party score at all.
At the end of the five-hour party, you'll receive a ranking. This doesn't have any effect on anything, unless your Sim had a Want or Fear based on it. Family Sims often want their children to have good parties, while Popular Sims want to throw highly successful parties for their own selfish reasons.
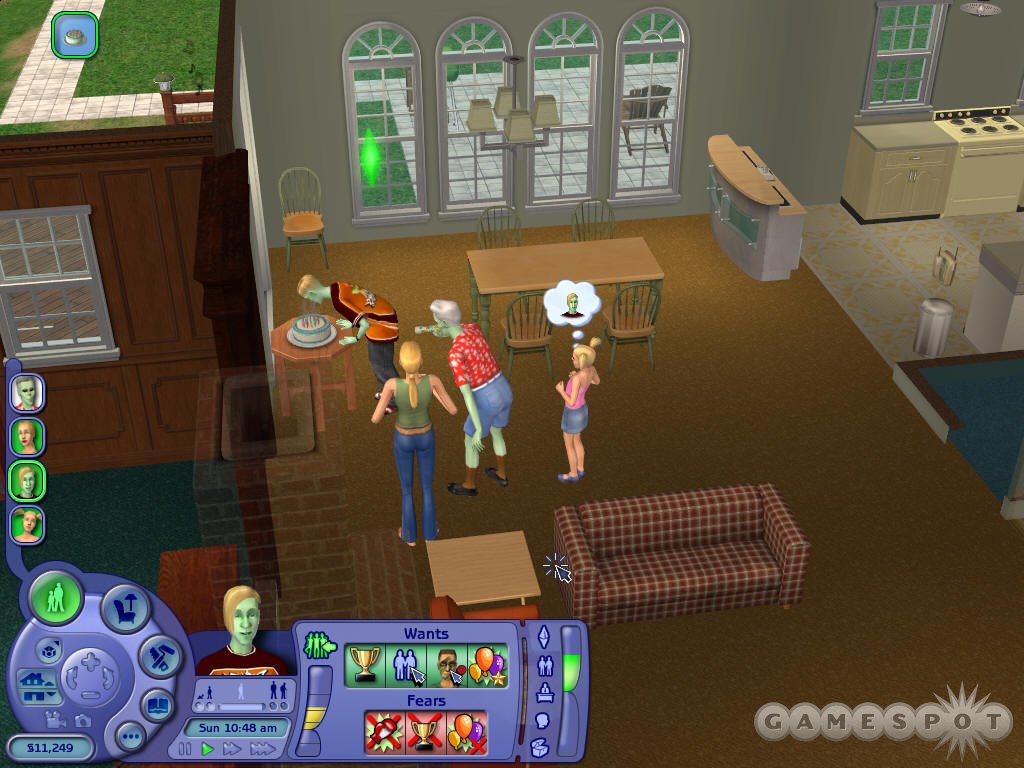
Birthday Parties
If your Sim is about to make an age transition, you can throw a birthday party. For most purposes, these are identical to normal parties, save for the fact that your guests will be expecting the Sim to become an adult, or elder, or what have you before the party ends.The best way to do this is to obtain a birthday cake and have the Sim perform the "Blow Out Candles" interaction around the three and a half hour mark of the party. They'll automatically make the transition to the next stage of life, and everyone will get to have cake! The cutscene that appears for age transitions during a birthday party are also different than those when you make the transition without throwing a party.
Wedding Parties
Wedding parties, like birthday parties, are essentially normal parties, save for the fact that two people are expected to be wed by the end of the event. If the wedding doesn't occur, or if the wedding proposal is rejected, the party will be a distinctive stinker in the memories of everyone involved. All of the guests will appear in their formal wear, though, which is a nice touch.When you're ready to tie the knot, you can get your couple together and engage in a Proposal: Marriage, or interact with a Wedding Arch. The Wedding Arch will let you obtain a unique cinematic for the marriage, and will show the other guests at the party looking on from any nearby chairs, if available.
If your Sims get married during a wedding party, they'll also get to go off on a honeymoon, which will take them off the lot for a few hours, and return them with a nice little increase in their Mood scores.
If you have two elder members of a household that were both married when they were adults, you can also throw an Anniversary party, if you wish. This is essentially a normal party, save that everyone will show up in their formalwear.
Birth, Growth, and Death
The major addition to The Sims 2 is the inclusion of a complete life cycle for your Sims. There are six ages that your Sims will progress through now, each with its own unique demands, tasks, and social interactions.When your Sim is almost ready to make the transition to a new age, you'll get a small pop-up window letting you know that the change is imminent. This will show up two days before the natural transition day, but when it does appear, you'll be able to make the transition at any time via the "Grow Up" self-interaction, or by blowing out the candles on a birthday cake. In most cases, you'll want to save this transition until the final day, as transitioning early will simply shorten your lifespan. Babies and toddlers, though, being awkward to take care of, should be transitioned as quickly as possible until they become more autonomous children. If you haven't made the transition by 7 p.m. on transition day, it'll occur automatically.
Baby
Babies are only babies for three days, but you'll be able to make them transition on the second day of their little existences by having a grownup interact with a birthday cake on their behalf. Babies are difficult to take care of, since they sleep at odd hours and require constant care. You'll have to feed them by getting bottles from the fridge, change their diapers when they mess themselves, play with them to increase their social, and ensure that they get a couple of long naps each day. On the plus side, they're unkillable! They can't die from fire or fly attack or hunger. Superbabies though they may be, if you neglect your baby (reduce its Social or Hunger needs all the way to zero), a social worker will come along and take away all of your kids.
Toddlers
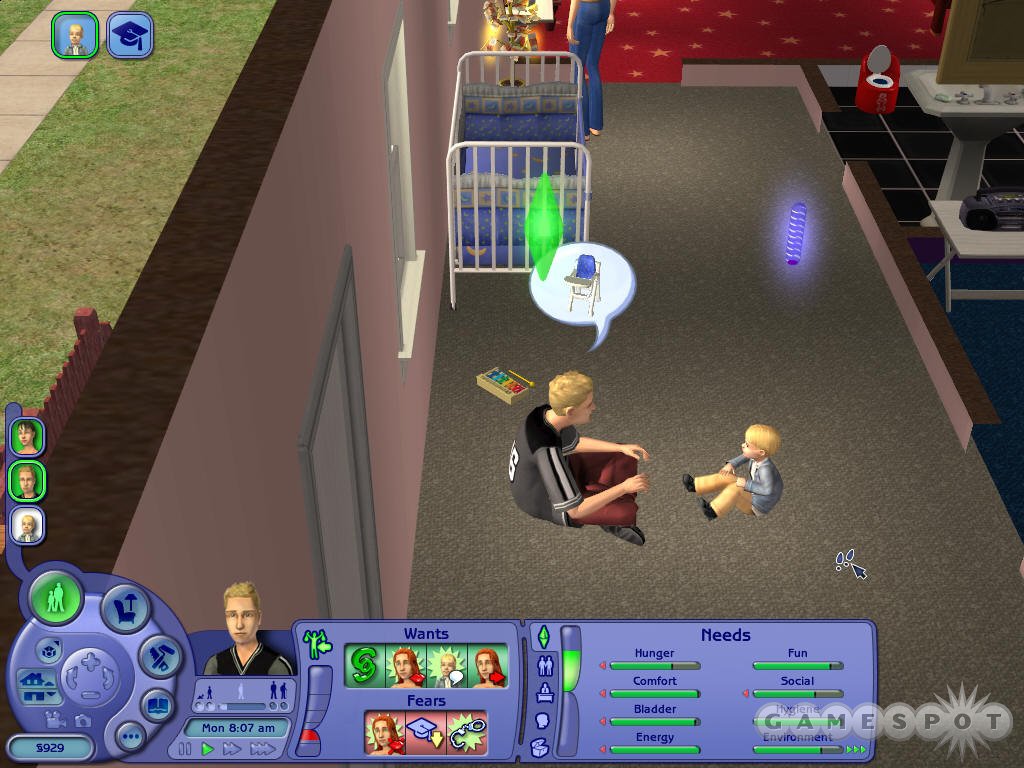
Toddlers exist in this state for up to four days, during which you'll have some important Wants related to their training. If you can teach them potty-training, you won't have to deal with diapers anymore; you can also teach them to walk and talk if you wish for them to be a bit more autonomous. Since they only stay toddlers for four days, however, you'll be hard-pressed to train them in all three of their vital skills without the HomoGenius Smart Milk Aspiration reward item. If you don't manage to get all of their training done, don't worry; this has no impact on their future lives. Children that weren't potty-trained aren't going to wet the bed, for instance. However, completing these Wants will let them make the age transition with a good Aspiration score, which will make for a positive memory.
Children
When your toddlers become children, they suddenly become much easier to deal with. For one thing, they'll actually sleep in one long block of time, like the older members of your family, instead of two chunks. They'll also start going to school, which will take them out of the house for a goodly amount of time each day. One of the primary tasks of children should be learning how to study; once this is done, they'll be able to do their homework much more quickly, which will let them improve their grades at school and hopefully get into private school that much more easily. You'll also start needing to gain friends for Want-related purposes, so start socializing; if you make friends at this stage of life, you'll have an easier time meeting your friends requirements for your career tracks during the teen and adult years. Children remain children for eight days. Children are also the first group of Sims that can die, albeit only from fire, disease, or drowning.
Teenagers
When a Sim becomes a teenager, his adult life can be truly said to have begun. You won't be able to perform the truly adult interactions, like the Woohoo, but you will be able to start dating and exploring the world of romance. (And they'll almost all want to!) They also start becoming more able to accept responsibility, which will let them train and teach toddlers and children in the household, and will enable them to take on a part-time job, if they wish. Your Sims will remain teens for 15 days, which should give you plenty of time to develop more friendships and get to level three in a career track.
Adults
Achieving adulthood unlocks the most advanced interactions for your character; you're now free to pursue Woohoos, Engagements, Marriage, and so on. In addition, you'll leave school behind and start concentrating on a real career, if you so desire. You remain an adult for 29 days. It's important to note that having a good Aspiration score when you make the transition to elder status will increase your lifetime. If you can make it all the way to platinum when you become an elder, you'll live ten days longer than you normally would!
Elder
In the twilight years of life, your Sim will be able to retire, if you wish. You can do this by calling work and announcing your intention to live the leisurely lifestyle; you'll thereafter gain a daily pension of one-half of your former weekly pay. The important thing to note here is that you won't know precisely how many days of life you have left; the meter that formerly noted how many days remained until your next transition will now only read out how many days your character has lived. Death from old age can thus occur at any time, without your knowledge! Since the inheritance for your survivors depends on your Aspiration score at the instant of death, do your best to keep achieving your Wants.
Careers
One of the most important aspects of your Sim's life will be her career. Not every Sim needs to find gainful employment, but if your household is devoid of breadwinners, you'll quickly find yourself getting behind on your bills and having to fend off the Repo Man. You'll need some source of income to keep your family afloat, and a good job is the most reliable and efficient method of money.Finding Gainful Employment
There are two ways to get a job: through the newspaper, which is periodically delivered to your front door, and via a computer. The job listings in the newspaper are very limited; you'll only be offered three job listings per browse, all of which are level one. The computer listings are much more comprehensive, and better in quality to boot; you'll get five listings per browse, and you'll be able to enter a career track above level one if you happen to fit the skill and friend requirements for that track. You won't necessarily go straight to the job level that you're most qualified for--you may start a couple of levels lower--but you should have an easier time reaching the level at which you can best fulfill the Peter Principle.
If you don't have a computer, you should definitely get one before you attempt to find a job. If you're tight on cash, you can buy a computer, have your Sim use it to find a career, then sell it back before the day is over for the full resale value. Just make up something about the RAM not being defragged, and you won't incur any financial penalty from the transaction.
Career Advancement
Getting Promoted
Just having a job isn't the difficult part; your real goal in a career is to gain promotions and ascend to ever more lucrative positions. In order to do so, you'll need to steadily increase your skills. Each career will have three primary skills that you'll need to work on, with most careers requiring at least one skill to be maximized if you wish to reach the highest level on the job track. You can find more on skills and how to increase them in the chapter appropriately entitled "Skills." You can check what skills will be required for the next level of your career on the career tab for your Sim; skills you already have will have show in white, while the skill levels you need will be greyed out and highlighted.In addition to skills, though, your Sim will need to be thoroughly networked, which means that you'll need to have plenty of friends available to you. Luckily, the game is fairly lenient in this regard, in that both friends and best friends count towards your total, and that both the friends of your Sim, and the friends of anyone else in the household count towards your career count. So if your Sim has three friends, and your housemate has four, you'll be able to proceed in your career track up to whichever level requires seven friends. (Assuming you meet the skill requirements, of course.) Your friends also show up on your career tab; the number of friends you currently have is located next to a smilie, while the number of friends required for your next promotion is beneath that In blue.
You'll also need to ensure that your Sim is in a good enough mood to do well at work. You'll notice another meter on the career tab; this gives you a bit of visual feedback as to how well your Sim is performing on the job. You want this to be towards the upper end of the spectrum, if possible; as this gets below the halfway mark, you stand a chance of being demoted. You can improve your job performance by simply showing up for work in a good mood, so be sure to satisfy your Sim's most dire Needs when you get the notification that the carpool or other transportation will be shortly showing up. Your Sim's ride will show up for work an hour before the beginning of the shift, and you'll receive the notification an hour before that, so you'll have around an hour and 45 minutes to work on any of your pressing Needs to ensure that your Mood rating is high. Grab some quick chow, go to the bathroom and take a shower, hit the couch for a power nap, or whatever; the point is to go to work in the best Mood possible. The higher your Mood, the more your job performance meter will increase for the day.
If you meet the skill, friends, and job performance requirements for the next level of your career, you should gain a promotion when you arrive home from work. This isn't automatically so, though; it can sometimes take a day or three to earn a promotion, so just keep going to work in a good mood until you nab it.
Workplace Troubles
Of course, not everything is always rosy in the working world. If your Sim performs poorly, he or she risks getting demoted or even fired from the job. This is mainly a concern if you consistenly fail to show up for work (see Attendance below) or go to work in a foul mood often enough to lower your job performance below the halfway mark.Demotions are relatively easy to deal with. If your job performance drops low enough to cause a demotion, all you need to do is work hard on your Mood before you go to work the next day to gain the level right back. Since you should already have the friends and skills required to gain the level (as you already obtained before), you should get another new promotion (along with the cash bonus that comes along with it). From there, you can proceed as you were doing before. If you're unable to quickly stabilize your Mood, though, you face the risk of further demotions.
If your job performance meter drops all the way to the bottom, or if you miss two days in a row without calling in sick, you'll get fired. Being fired is much worse than getting demoted, as you won't be able to regain your previous level in the job very quickly. You'll have to search back through the job listings until you find a job in the same track as the one you were fired from; unfortunately, this will almost always be at least two job levels below your level when you were fired, and could be even lower if you haven't maintained all of the friends required to get to the level you were at previously. It's fairly difficult to get fired unless you're actually trying to do so, however, so you shouldn't have to worry overmuch about this turn of events.
Attendance
Every job track will have different hours and days of attendance. In general, the lower levels of each track will require your Sim to work longer hours, which is motivation enough to get a few promotions under your belt; you'll also probably find that your Sim will get an extra day or two off of work each work week.Note that you don't always have to attend work, though. There are a bunch of different ways to miss work, some more penalizing than others.

Absent: If you just don't show up for work, your job performance rating will decrease, and you won't be paid for the day's work. If you absent yourself from your job twice in a row, you'll get fired.
Vacation: Your Sim accrues vacation at a rate of .15 days per day worked. When you have a vacation day saved up, you can feel free to ignore your carpool and take a day off. You won't lose job performance for this missed day, but you will get paid.
Calling In Sick: You can call in sick if you wish to take a day off without having to expend a vacation day. Taking a sick day won't reduce your job performance level, but you won't get paid for the day. If your Sim is truly sick, this sick call will always be accepted by the company. If you aren't sick, then you'll need to have a very high job performance rating for your excuse to be believed. If your meter is over 75% full, then you should be able to get away with calling in sick; if it's less than that, though, there's a chance that they won't buy your excuses and will assume that you're Absent, with the normal penalties of poor job performance and possible firing. You can attempt to call in sick up to an hour after you miss your carpool.
Maternity Leave: If your female Sim gets pregnant (or your adult male Sim gets abducted by aliens), then you'll automatically get paid days off until the child arrives. After the baby is born, you'll receive extra paid vacation days which should help you train your toddler to walk and talk. If you wish, you can save the vacation days for later, but be sure that the baby is well taken care of, or it might be taken by Child Services.
Career Rewards
In addition to the Aspiration rewards, Sims 2 also lets your Sims unlock career rewards upon reaching a certain level of a career track. These are usually unlocked between levels four and six of a career, and are Skill-building items. You can buy any number of Skill-building items from the Buy menu, obviously, but the career rewards are going to let you raise your Skills a tad bit faster than anything you can buy, and are free to boot. Some of these items also have other Need bonuses; click on them in the career reward segment of your menu to give them a thorough looking-at. You can find their information there even if you haven't unlocked them yet.
| Career | Object | Skill |
| Athletic | Exerto Punching Bag | Body |
| Business | Execuputter | Charisma |
| Criminal | SensoTwitch Lie Finder | Mechanical |
| Culinary | Schokolade 890 Chocolate Manufacturing Facility | Cooking |
| Law Enforcement | Prints Charming Fingerprinting Scanner | Cleaning |
| Medical | TraumaTime Surgical Training Station | Mechanical |
| Military | Exerto Selfflog Obstacle Course | Body |
| Politics | Enterprise Office Concepts Bushmaster Teleprompter | Charisma |
| Science | Simsanto Inc. Biotech Station | Creativity |
| Slacker | AquaGreen Hydroponic Garden | Cooking |
Part-Time Jobs
Although adults are always going to have the highest-paying jobs, since they can devote more time to their occupations, your kids can also get jobs now, if they're teenagers. These junior members of your household can work part-time after school, if they wish; the hours for these jobs aren't as demanding as adult jobs, and the pay is commensurately smaller, but you can use these skills to fulfill Fortune Wants, make a small amount of cash, or get a headstart on the skills needed for an adult career. If you have an unemployed elder member of your family, they, too, can take one of these part-time jobs if they wish to re-enter the work force. (If an adult with a job becomes an elder, he or she will continue on with their same vocation unless they choose to retire; they don't automatically get knocked down to a part-time job.)
There are only three levels to each of the teen/elder job tracks. If you manage to get a teen Sim up to level three of his or her career, they'll shift over to the adult version of that career at level two when they reach adulthood.
Career Requirements
Athletic
Pros- Highest-paying career at level 10!
- Very consistent schedule.
- Low pay at lower levels.
| Title | Friends | Logic | Crea. | Mech. | Char. | Body | Cook. | Clean. | Hours | Days Off | Salary |
| Team Mascot | 0 | 0 | 0 | 0 | 0 | 0 | 0 | 0 | 3p-9p | 2 | 154 |
| Minor Leaguer | 0 | 0 | 0 | 0 | 0 | 1 | 0 | 0 | 9a-3p | 2 | 238 |
| Rookie | 0 | 0 | 0 | 0 | 0 | 2 | 0 | 0 | 9a-3p | 2 | 322 |
| Starter | 1 | 0 | 0 | 0 | 1 | 3 | 0 | 0 | 9a-3p | 2 | 420 |
| All Star | 2 | 0 | 0 | 0 | 2 | 6 | 0 | 0 | 9a-3p | 2 | 539 |
| MVP | 3 | 0 | 0 | 1 | 3 | 8 | 0 | 0 | 9a-3p | 3 | 893 |
| Superstar | 4 | 0 | 0 | 2 | 4 | 10 | 0 | 0 | 9a-4p | 3 | 1,190 |
| Assistant Coach | 5 | 0 | 0 | 4 | 5 | 10 | 0 | 0 | 9a-2p | 3 | 1,488 |
| Coach | 6 | 0 | 0 | 7 | 7 | 10 | 0 | 0 | 9a-3p | 3 | 1,750 |
| Hall of Famer | 8 | 0 | 0 | 7 | 10 | 10 | 0 | 0 | 11a-5p | 4 | 3,033 |
Teen/Elder Athletic Career
| Title | Friends | Logic | Crea. | Mech. | Char. | Body | Cook. | Clean. | Hours | Salary |
| Waterperson | 0 | 0 | 0 | 0 | 0 | 0 | 0 | 0 | 3p-6p | 97 |
| Locker Room Attendant | 1 | 0 | 0 | 1 | 0 | 1 | 0 | 0 | 3p-6p | 110 |
| Team Mascot | 0 | 0 | 0 | 2 | 1 | 2 | 0 | 0 | 3p-6p | 125 |
Business
Pros- Excellent pay at higher levels.
- You only need one friend for most of your promotions; this is useful if you're in a small household.
- Fewer days off than most classes, and the hours are longer on average.
| Title | Friends | Logic | Crea. | Mech. | Char. | Body | Cook. | Clean. | Hours | Days Off | Salary |
| Mailroom Technician | 0 | 0 | 0 | 0 | 0 | 0 | 0 | 0 | 9a-3p | 2 | 168 |
| Executive Assistant | 0 | 0 | 0 | 0 | 1 | 0 | 0 | 0 | 9a-4p | 2 | 252 |
| Field Sales Rep | 0 | 0 | 0 | 0 | 2 | 0 | 0 | 0 | 9a-4p | 2 | 350 |
| Junior Executive | 1 | 0 | 1 | 0 | 2 | 0 | 0 | 0 | 9a-4p | 2 | 448 |
| Executive | 1 | 2 | 1 | 0 | 4 | 0 | 0 | 0 | 8a-3p | 2 | 560 |
| Senior Manager | 2 | 3 | 3 | 0 | 4 | 0 | 0 | 0 | 8a-3p | 2 | 728 |
| Vice President | 1 | 4 | 3 | 0 | 5 | 0 | 0 | 0 | 8a-4p | 2 | 924 |
| President | 1 | 6 | 4 | 0 | 5 | 0 | 0 | 0 | 8a-4p | 3 | 1,400 |
| CEO | 1 | 7 | 6 | 0 | 6 | 0 | 0 | 0 | 9a-4p | 3 | 1,663 |
| Business Tycoon | 1 | 9 | 7 | 0 | 8 | 0 | 0 | 0 | 10a-4p | 3 | 2,100 |
Teen/Elder Business Career
| Title | Friends | Logic | Crea. | Mech. | Char. | Body | Cook. | Clean. | Hours | Salary |
| Gofer | 0 | 0 | 0 | 0 | 0 | 0 | 0 | 0 | 3p-6p | 52 |
| Mailroom Technician | 1 | 1 | 0 | 0 | 0 | 0 | 0 | 0 | 3p-6p | 76 |
| Executive Assistant | 1 | 1 | 1 | 0 | 1 | 0 | 0 | 0 | 3p-7p | 98 |
Criminal
Pros- You generally get the neatest outfits.
- Very inconsistent hours from level to level.
| Title | Friends | Logic | Crea. | Mech. | Char. | Body | Cook. | Clean. | Hours | Days Off | Salary |
| Pickpocket | 0 | 0 | 0 | 0 | 0 | 0 | 0 | 0 | 11a-5p | 2 | 196 |
| Bagman | 0 | 0 | 0 | 0 | 0 | 0 | 0 | 0 | 5p-1a | 2 | 280 |
| Bookie | 0 | 0 | 1 | 0 | 0 | 0 | 0 | 0 | 11a-6p | 2 | 385 |
| Con Artist | 1 | 0 | 3 | 0 | 0 | 0 | 0 | 0 | 9a-3p | 2 | 490 |
| Getaway Driver | 2 | 0 | 4 | 2 | 0 | 1 | 0 | 0 | 10p-6a | 2 | 595 |
| Bank Robber | 3 | 0 | 5 | 4 | 0 | 2 | 0 | 0 | 3p-11p | 2 | 742 |
| Cat Burgler | 3 | 0 | 7 | 4 | 0 | 5 | 0 | 0 | 9p-3a | 2 | 896 |
| Counterfeiter | 4 | 0 | 7 | 7 | 0 | 6 | 0 | 0 | 9a-3p | 3 | 1,064 |
| Smuggler | 5 | 0 | 9 | 7 | 0 | 7 | 0 | 0 | 2a-8a | 3 | 1,575 |
| Criminal Mastermind | 7 | 0 | 10 | 10 | 0 | 8 | 0 | 0 | 5p-11p | 3 | 1,925 |
Teen/Elder Criminal Career
| Title | Friends | Logic | Crea. | Mech. | Char. | Body | Cook. | Clean. | Hours | Salary |
| Street Hawker | 0 | 0 | 0 | 0 | 0 | 0 | 0 | 0 | 3p-6p | 50 |
| Numbers Runner | 1 | 0 | 1 | 0 | 0 | 0 | 0 | 0 | 3p-6p | 62 |
| Pickpocket | 1 | 0 | 2 | 1 | 0 | 1 | 0 | 0 | 3p-7p | 105 |
Culinary
Pros
- Excellent pay at higher levels.
- You only need one friend for most of your promotions; this is useful if you're in a small household.
- Fewer days off than most classes, and the hours are longer on average.
| Title | Friends | Logic | Crea. | Mech. | Char. | Body | Cook. | Clean. | Hours | Days Off | Salary |
| Dishwasher | 0 | 0 | 0 | 0 | 0 | 0 | 0 | 0 | 2p-10p | 2 | 126 |
| Drive-through Clerk | 0 | 0 | 0 | 0 | 0 | 0 | 0 | 0 | 5p-9p | 2 | 168 |
| Fast Food Shift Manager | 0 | 0 | 1 | 0 | 0 | 0 | 0 | 0 | 5p-10p | 2 | 182 |
| Host or Hostess | 1 | 1 | 2 | 0 | 0 | 0 | 0 | 0 | 10a-4p | 2 | 242 |
| Waiter or Waitress | 2 | 3 | 2 | 0 | 0 | 0 | 0 | 0 | 2p-7p | 2 | 308 |
| Prep Cook | 2 | 3 | 2 | 0 | 0 | 0 | 3 | 0 | 9a-3p | 2 | 469 |
| Sous Chef | 3 | 4 | 4 | 0 | 0 | 0 | 4 | 0 | 2p-9p | 2 | 812 |
| Executive Chef | 4 | 6 | 5 | 0 | 0 | 0 | 5 | 0 | 9a-3p | 3 | 1,208 |
| Restauranteur | 6 | 7 | 7 | 0 | 0 | 0 | 8 | 0 | 2p-10p | 3 | 1,330 |
| Celebrity Chef (BAM) | 7 | 8 | 10 | 0 | 0 | 0 | 10 | 0 | 3p-8p | 4 | 2,170 |
Teen/Elder Culinary Career
| Title | Friends | Logic | Crea. | Mech. | Char. | Body | Cook. | Clean. | Hours | Salary |
| Dishwasher | 0 | 0 | 0 | 0 | 0 | 0 | 0 | 0 | 3p-6p | 63 |
| Drive-through Clerk | 1 | 0 | 0 | 0 | 0 | 0 | 1 | 0 | 5p-9p | 84 |
| Fast Food Shiftman | 4 | 1 | 1 | 0 | 0 | 0 | 1 | 0 | 5p-10p | 91 |
Law Enforcement
Pros- Great pay at low levels; Law Enforcement is a good starting profession for this reason.
- Very poor pay at high levels.
| Title | Friends | Logic | Crea. | Mech. | Char. | Body | Cook. | Clean. | Hours | Days Off | Salary |
| Security Guard | 0 | 0 | 0 | 0 | 0 | 0 | 0 | 0 | 8p-2a | 2 | 336 |
| Cadet | 0 | 0 | 0 | 0 | 0 | 1 | 0 | 0 | 9a-3p | 2 | 448 |
| Patrol Officer | 0 | 0 | 0 | 0 | 0 | 2 | 0 | 0 | 3p-11p | 2 | 552 |
| Desk Sergeant | 1 | 1 | 0 | 0 | 0 | 2 | 0 | 0 | 9a-3p | 2 | 616 |
| Vice Squad | 2 | 1 | 0 | 0 | 0 | 3 | 0 | 0 | 10a-4p | 2 | 686 |
| Detective | 3 | 4 | 0 | 0 | 0 | 3 | 0 | 2 | 9a-3p | 2 | 756 |
| Lieutenant | 5 | 5 | 0 | 0 | 0 | 4 | 0 | 4 | 9a-3p | 2 | 825 |
| SWAT Team Leader | 6 | 6 | 0 | 0 | 0 | 5 | 0 | 6 | 11a-6p | 2 | 875 |
| Police Chief | 8 | 9 | 0 | 0 | 0 | 7 | 0 | 7 | 8a-4p | 3 | 910 |
| Captain Hero | 10 | 9 | 0 | 0 | 0 | 10 | 0 | 8 | 10a-4p | 3 | 1,225 |
Teen/Elder Law Enforcement Career
| Title | Friends | Logic | Crea. | Mech. | Char. | Body | Cook. | Clean. | Hours | Salary |
| School Crossing Guard | 0 | 0 | 0 | 0 | 0 | 0 | 0 | 0 | 3p-6p | 45 |
| Parking Lot Attendant | 1 | 1 | 0 | 0 | 0 | 1 | 0 | 0 | 6p-9p | 75 |
| Security Guard | 3 | 1 | 0 | 0 | 0 | 2 | 0 | 0 | 9p-1a | 125 |
Medical
Pros- Well...you'll be every mother-in-law's dream.
- Substandard pay.
- Very demanding in terms of skills.
| Title | Friends | Logic | Crea. | Mech. | Char. | Body | Cook. | Clean. | Hours | Days Off | Salary |
| Emergency Medical Technician | 0 | 0 | 0 | 0 | 0 | 0 | 0 | 0 | 8a-2p | 2 | 280 |
| Paramedic | 0 | 0 | 0 | 0 | 0 | 0 | 0 | 1 | 8p-2a | 2 | 385 |
| Nurse | 0 | 1 | 0 | 0 | 0 | 0 | 0 | 2 | 7a-2p | 2 | 476 |
| Intern | 1 | 2 | 0 | 2 | 0 | 0 | 0 | 4 | 9a-6p | 2 | 574 |
| Resident | 2 | 3 | 0 | 3 | 0 | 0 | 0 | 5 | 6p-1a | 2 | 672 |
| General Practitioner | 3 | 4 | 0 | 4 | 0 | 0 | 0 | 6 | 10a-6p | 2 | 770 |
| Specialist | 4 | 5 | 0 | 7 | 0 | 0 | 0 | 7 | 10a-4p | 2 | 875 |
| Surgeon | 5 | 7 | 0 | 9 | 0 | 0 | 0 | 8 | 10a-4p | 2 | 980 |
| Medical Researcher | 7 | 8 | 0 | 10 | 0 | 0 | 0 | 9 | 11a-6p | 3 | 1,356 |
| Chief of Staff | 9 | 10 | 0 | 10 | 0 | 0 | 0 | 10 | 9a-4p | 3 | 1,488 |
Teen/Elder Medical Career
| Title | Friends | Logic | Crea. | Mech. | Char. | Body | Cook. | Clean. | Hours | Salary |
| Nursing Home Attendant | 0 | 0 | 0 | 0 | 0 | 0 | 0 | 0 | 3p-6p | 65 |
| Orderly | 1 | 0 | 0 | 0 | 0 | 0 | 0 | 1 | 3p-6p | 87 |
| Emergency Medical Technician | 3 | 0 | 0 | 2 | 0 | 0 | 0 | 2 | 7p-10p | 125 |
Military
Pros- Great pay at low levels, just like Law Enforcement.
- Also like Law Enforcement, the pay starts to fall below average around level five.
| Title | Friends | Logic | Crea. | Mech. | Char. | Body | Cook. | Clean. | Hours | Days Off | Salary |
| Recruit | 0 | 0 | 0 | 0 | 0 | 0 | 0 | 0 | 7a-1p | 2 | 350 |
| Elite Forces | 0 | 0 | 0 | 0 | 0 | 0 | 0 | 0 | 7a-1p | 2 | 455 |
| Drill Instructor | 0 | 0 | 0 | 1 | 0 | 1 | 0 | 0 | 7a-1p | 2 | 560 |
| Junior Officer | 0 | 0 | 0 | 2 | 1 | 1 | 0 | 0 | 7a-1p | 2 | 630 |
| Counter Intelligence | 0 | 0 | 0 | 2 | 2 | 4 | 0 | 0 | 8a-2p | 2 | 700 |
| Flight Officer | 1 | 0 | 0 | 4 | 3 | 5 | 0 | 0 | 9a-3p | 2 | 770 |
| Senior Officer | 3 | 0 | 0 | 5 | 3 | 6 | 0 | 0 | 8a-2p | 2 | 812 |
| Commander | 4 | 0 | 0 | 5 | 5 | 7 | 0 | 0 | 9a-3p | 2 | 840 |
| Astronaut | 5 | 0 | 0 | 6 | 5 | 10 | 0 | 0 | 9a-3p | 3 | 1,094 |
| General | 6 | 0 | 0 | 8 | 7 | 10 | 0 | 0 | 10a-4p | 3 | 1,138 |
Teen/Elder Military Career
| Title | Friends | Logic | Crea. | Mech. | Char. | Body | Cook. | Clean. | Hours | Salary |
| Paintball Attendant | 0 | 0 | 0 | 0 | 0 | 0 | 0 | 0 | 3p-6p | 57 |
| Recruit Training Corps | 1 | 0 | 0 | 0 | 1 | 0 | 0 | 0 | 3p-6p | 77 |
| Recruit | 1 | 0 | 0 | 0 | 1 | 1 | 0 | 0 | 3p-6p | 100 |
Politics
Pros- Good pay at low levels, with small friends/skill requirements.
- Long hours, with a couple of levels featuring nine-hour shifts.
- Skill and friends requirements become difficult to meet at higher levels.
| Title | Friends | Logic | Crea. | Mech. | Char. | Body | Cook. | Clean. | Hours | Days Off | Salary |
| Campaign Worker | 0 | 0 | 0 | 0 | 0 | 0 | 0 | 0 | 9a-6p | 2 | 308 |
| Intern | 0 | 0 | 0 | 0 | 0 | 0 | 0 | 0 | 9a-3p | 2 | 420 |
| Lobbyist | 0 | 0 | 0 | 0 | 0 | 0 | 0 | 0 | 8a-2p | 2 | 504 |
| Campaign Manager | 1 | 1 | 1 | 0 | 0 | 0 | 0 | 0 | 8a-5p | 2 | 602 |
| City Council Member | 2 | 2 | 2 | 0 | 2 | 0 | 0 | 0 | 9a-3p | 2 | 679 |
| State Assemblyperson | 3 | 3 | 2 | 0 | 4 | 0 | 0 | 0 | 9a-4p | 2 | 756 |
| Congressperson | 5 | 4 | 3 | 0 | 6 | 0 | 0 | 0 | 9a-3p | 2 | 840 |
| Judge | 6 | 7 | 3 | 0 | 8 | 0 | 0 | 0 | 10a-2p | 3 | 1,138 |
| Senator | 8 | 8 | 5 | 0 | 9 | 0 | 0 | 0 | 9a-6p | 3 | 1,225 |
| Mayor | 10 | 10 | 7 | 0 | 10 | 0 | 0 | 0 | 10a-4p | 3 | 1,313 |
Teen/Elder Politics Career
| Title | Friends | Logic | Crea. | Mech. | Char. | Body | Cook. | Clean. | Hours | Salary |
| Door to Door Poller | 0 | 0 | 0 | 0 | 0 | 0 | 0 | 0 | 5p-9p | 53 |
| Campaign Worker | 2 | 0 | 0 | 0 | 1 | 0 | 0 | 0 | 3p-6p | 72 |
| Intern | 4 | 1 | 1 | 0 | 1 | 0 | 0 | 0 | 3p-6p | 112 |
Science
Pros- Fantastic money at higher levels, especially when compared to the short hours worked.
- You'll need to spend plenty of early-game time training skills if you want to earn promotions quickly.
| Title | Friends | Logic | Crea. | Mech. | Char. | Body | Cook. | Clean. | Hours | Days Off | Salary |
| Test Subject | 0 | 0 | 0 | 0 | 0 | 0 | 0 | 0 | 11a-5p | 2 | 217 |
| Lab Assistant | 0 | 0 | 0 | 0 | 0 | 0 | 1 | 1 | 4p-10p | 2 | 322 |
| Field Reseacher | 0 | 1 | 0 | 0 | 0 | 0 | 1 | 3 | 9a-3p | 2 | 448 |
| Science Teacher | 1 | 1 | 0 | 0 | 0 | 0 | 2 | 5 | 8a-3p | 2 | 525 |
| Project Leader | 2 | 2 | 0 | 0 | 0 | 0 | 3 | 6 | 10a-5p | 2 | 630 |
| Inventor | 3 | 4 | 0 | 0 | 0 | 0 | 4 | 6 | 10a-7p | 2 | 756 |
| Scholar | 3 | 5 | 0 | 0 | 0 | 0 | 5 | 7 | 8a-1p | 2 | 896 |
| Top Secret Researcher | 3 | 8 | 0 | 0 | 0 | 0 | 6 | 7 | 10a-3p | 2 | 1,036 |
| Theorist | 5 | 9 | 0 | 0 | 0 | 0 | 7 | 9 | 10a-2p | 3 | 1,522 |
| Mad Scientist | 8 | 10 | 0 | 0 | 0 | 0 | 9 | 10 | 10p-2a | 4 | 2,333 |
Teen/Elder Science Career
| Title | Friends | Logic | Crea. | Mech. | Char. | Body | Cook. | Clean. | Hours | Salary |
| Golf Caddy | 0 | 0 | 0 | 0 | 0 | 0 | 0 | 0 | 3p-6p | 45 |
| Gas Station Attendant | 2 | 0 | 0 | 1 | 0 | 0 | 0 | 0 | 3p-6p | 71 |
| Convenience Store Clerk | 4 | 0 | 1 | 1 | 1 | 0 | 0 | 0 | 3p-6p | 96 |
Slacker - Adult
Pros- Shortest shifts of any profession on average, leaving you plenty of time to pursue relationships and Wants.
- Awful money throughout the entire range of career levels.
- You're going to need a lot of friends to achieve the last promotion; this will be difficult unless your household is fairly sizable.
| Title | Friends | Logic | Crea. | Mech. | Char. | Body | Cook. | Clean. | Hours | Days Off | Salary |
| Golf Caddy | 0 | 0 | 0 | 0 | 0 | 0 | 0 | 0 | 5a-10a | 2 | 126 |
| Gas Station Attendant | 0 | 0 | 0 | 0 | 0 | 0 | 0 | 0 | 10p-3a | 2 | 154 |
| Convenience Store Clerk | 0 | 0 | 0 | 1 | 0 | 0 | 0 | 0 | 9a-3p | 2 | 210 |
| Record Store Clerk | 0 | 0 | 0 | 1 | 1 | 0 | 0 | 0 | 10a-3p | 2 | 252 |
| Party D.J. | 2 | 0 | 1 | 1 | 2 | 0 | 0 | 0 | 11p-4a | 3 | 385 |
| Projectionist | 4 | 0 | 1 | 3 | 2 | 0 | 0 | 0 | 6p-1a | 2 | 392 |
| Home Video Editor | 5 | 0 | 2 | 4 | 2 | 0 | 0 | 0 | 11a-5p | 3 | 613 |
| Freelance Photographer | 7 | 0 | 3 | 4 | 3 | 0 | 0 | 0 | 2p-7p | 3 | 788 |
| Freelance Web Designer | 10 | 0 | 4 | 4 | 4 | 0 | 0 | 0 | 10a-3p | 4 | 933 |
| Professional Party Guest | 13 | 0 | 5 | 4 | 5 | 0 | 0 | 0 | 10p-2a | 4 | 1,400 |
Teen/Elder Slacker Career
| Title | Friends | Logic | Crea. | Mech. | Char. | Body | Cook. | Clean. | Hours | Salary |
| Golf Caddy | 0 | 0 | 0 | 0 | 0 | 0 | 0 | 0 | 3p-6p | 45 |
| Gas Station Attendant | 2 | 0 | 0 | 1 | 0 | 0 | 0 | 0 | 3p-6p | 71 |
| Convenience Store Clerk | 4 | 0 | 1 | 1 | 1 | 0 | 0 | 0 | 5p-9p | 96 |
School
Children and Teens will have to go to school every day of the week, from Monday through Friday. This acts a lot like a Career, in that they have a job performance rating (their grades), which they have to be in a good mood before they leave to increase, and that they have some off-hours tasks they need to perform in order to do well in school (namely, their homework).If you want your child or teen to do well in school, there are three things you need to focus on. The first is their Mood. If they're in a good Mood before they go to school, then chances are they'll gain a plus mark after their grade display. If they go in a bad mood, they'll often earn a minus mark.
Secondly is the aforementioned homework. Homework initially takes a long time to do, but if you ask for and receive help with homework from an adult, you'll eventually be able to do it twice as fast. When you have completed all your homework, you'll receive a one-letter increase in grade level after your next day of school.
Lastly, you'll have to ensure that you attend school every day. If you miss school, you'll lose a letter grade for every day that you're absent. If you fall all the way down to an F, you'll get fired from your job, if you have one. If your Sim gets an F two days in a row, she'll be removed from the lot by the dreaded Social Worker.
Getting into Private School
In addition to the normal public schooling, you can also attempt to get into private school. There are a number of advantages to private schooling. For one, teenagers will be able to start a new part-time job at level two instead of level one. The hours are also slightly shorter for teens. You also don't have as much Need degredation from a day at private school if you compare it to a day at public school.Of course, getting into private school isn't a matter of just applying; you have to have good grades (a C or better) and you have to invite the headmaster over and impress him. You can call him up on the telephone; he'll usually arrive at five PM on the same or the following day, depending on how late you call him.
When the headmaster arrives, you'll have up to six hours to impress him, by accumulating 100 points on his impression meter, or whatever you choose to call it. In order to do so, you'll need to serve him a meal (have the Sim with the best Cooking score do this), then give him a tour of the house. This tour will take you from room to room; when you reach a high-Environment area, click on the headmaster and select Show Room. You'll gain points in each room based on its Environment score.
Lastly, you'll have to schmooze with the headmaster. Any member of the household can attempt to do this by interacting with him; if you manage to build up a healthy Daily Relationship with him, you'll gain points here. This would be a good time to use something like The Eclectic Energizer; the better Mood your Sim is in, the more likely you are to successfully knock out a positive interaction. You can also gain bonus points by luring the headmaster into a hot tub, serving him coffee, or by getting him a drink from a bar.
If you manage to sufficiently impress the headmaster, he'll let you know that your kids have been accepted into his school. As of the next day, all of the kids in the house with C grades or better will begin attending private school. If you didn't succeed in impressing him, you can keep calling him back as often as you like until you succeed.
Basic Building Tips
A well-designed living space will make it much more easier for you to satisfy your Sims' Needs. Since you aren't constrained by any kind of time limit in the game, you can feel free to be as fanciful or as efficient as you wish with the layout of your house, but opting for efficiency will reduce the amount of time required for your Sims to satisfy their basic motives, giving them more time to strive towards achieving their Wants. If you're willing to take another step towards the perfect living space, you can design your house around the Aspirations that are most difficult to easily fulfill. A Romantic Sim, for instance, will have to do his or her Clintonesque best to juggle multiple dalliances, all while keeping each affair secret from each other Sim they're involved with. In this case, you're definitely going to want to have a Hot Tub or bed in an enclosed area within easy reach of your main living space. Since a Sim that's in love with you will get upset if they see you smooving on another Sim, it's best to try and ensure that you're alone with the object of your affections before you begin your conquest. Each Aspiration will have its own particular design requirements, however, and it's not always possible to equally appease everyone in a family, especially when you're just starting out and don't have much money to spend.Since each Sim in your household will share the same basic Needs, however, it's a good idea to attempt to construct or re-shape your house so that they will have an easy time fulfilling them, and worry about their Wants as opportunities arise. This chapter is designed to give you a few tips on how best to accomplish this. Keep in mind, though, that most of the Story Mode houses will have fairly constrained finances when you first hop into them, so you may not be able to effect all of these changes right away. Since the Sims 2 lets you track the progress of your Sims over many generations, though, home improvements will benefit anyone who happens to live in your household in the future, regardless of whether or not they've even been bored when you start shuffling things around.
The Entrance
You can have doors on every side of your home, if you wish, but visitors will naturally gravitate to the doorway that exists closest to the sidewalk; this can be considered to be "the entrance." On some of the preconstructed lots, the entrance is set rather far back from the sidewalk; if you're building a lot from the ground up, or have plenty of money with which to reshape your floor plan, you'll want to build your home outwards on the first floor so that the doorway is as close to the sidewalk as possible. This will give your visitors a shorter walk to the entrance, and will make it easier for your Sims to get the mail, pick up the paper, go to work, and so on.
Beyond that simple locationary caveat, it's important to get a double door at your entrance to allow full freedom of movement for the many Sims that will be coming and going. A single doorway at the front of your house is a natural bottleneck, and will create a lot of congestion in your foot traffic, especially when you have a lot of visitors, such as when you throw a party. You don't need anything fancy here; if you're on a budget, just buy two of the cheapest doors and place them side-by-side. There are some pre-made double doors in the building menu if you wish to use one of those, but be careful when selecting them; the most expensive doorways are generally just large singles, so be sure that what you're buying will actually give you two discrete entrances.
The third major aspect of planning your entrance is to ensure that it allows your guest to move directly to the kitchen after they come inside. When you have guests over, their Hunger and Fun Needs are the ones in most dire need of satisfaction, so giving them only a small area to traverse to grab a quick snack will help you keep them around longer, and will keep them in a better mood while they're on your lot.
Kitchen And Dining Area
Kitchen Design
Speaking of kitchens.... This is one of the most critical rooms in your house, planning-wise. Your Hunger Need is going to be one of the most time-consuming Needs to satisfy, so you want to ensure that you can do so efficiently and with a minimum of fuss!
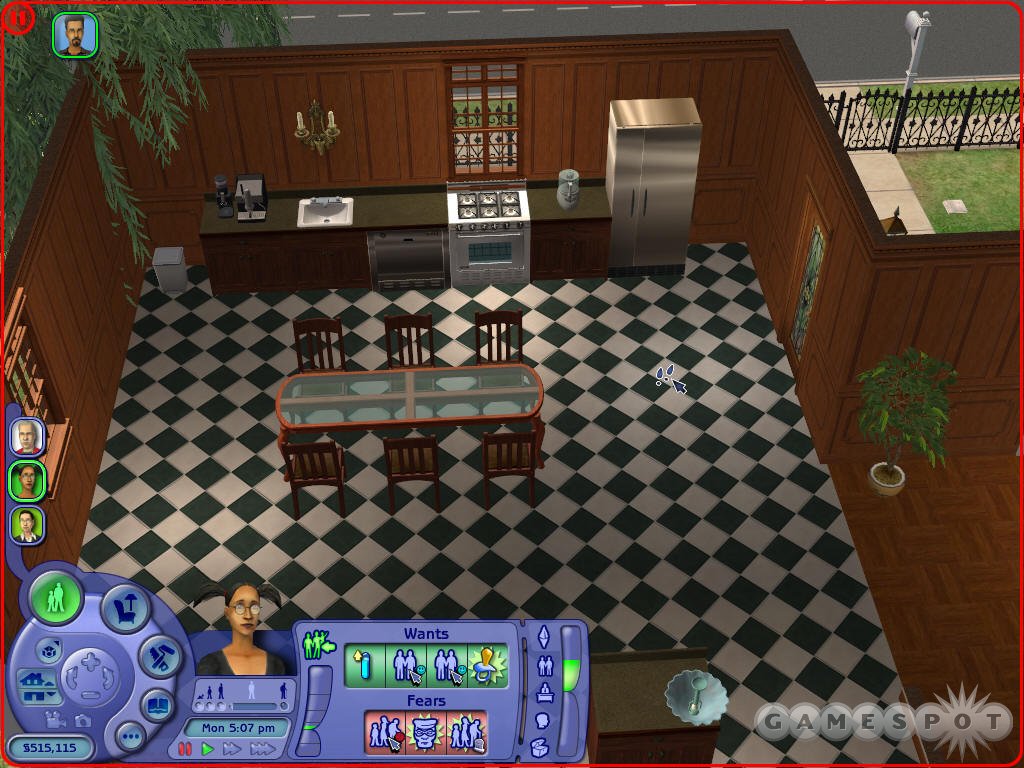
When your Sim goes to prepare a meal, they'll grab the ingredients from the refrigerator, prepare the ingredients (you can use a Food Processor to reduce the time this takes), cook them on a stovetop or a range, then make some final prep on the food on a flat surfacetop before bringing the meal to the nearest chair and munching away. Thus, it's best to have all of these objects in a line in your kitchen, with enough space for your Sims to maneuver between the lineup of appliances and the seating arrangements. (Note that not all recipes use all of the appliances. Low-hassle recipes, such as Cereal, are quicker to make, but won't replenish your Hunger as much as something more elaborate. You may need to improve your Sim's Cooking skill in order to unlock recipes that can actually use all of the items in your kitchen. Note also that the quality of your countertops will increase the speed of food preparation and the quality of the food!)
The quality of your appliances does have an impact on the quality of your recipes. The main exception to this are the refrigerators. Since there are only two models available as of this writing, and both satisfy the same Hunger requirements, you shouldn't feel compelled to upgrade to the more expensive Ciao Time model before you can safely afford it. There's also only one kind of food processor, so there isn't much you can do in that arena.
Your stove can make a huge difference in the quality of your food, however, and there are a few choices here. If your Sims cook their meals with any regularity, you'll want to plunk down the dollars for an Elegant Chef Flamebay Gas Range as soon as you can feasibly afford it; it offers ten times the Hunger satisfaction of the cheapest model at just over twice the price, and will let any chefs in the household easily fill up their roommate's Hunger needs with a single gourmet meal. You can also choose to "cook" foods in a microwave or toaster oven, but these are very inefficient when you compare the results to the time it takes to use the appliances and eat the meals.
If you plan to throw parties or entertain often, you'll also want to have a coffee or espresso machine somewhere near the seating area. Coffee packs a bit less oomph than espresso does, but more servings can be made. Your guests can't use these machines on their own, so you'll need to choose the Serve option in order to make a separate portion for your guests.
Last, but not least, is the dishwasher. It's a good idea to spring for a dishwasher if you can afford one, as they're much more efficient timewise than manually washing dishes in a sink. The less expensive model, the Wishy-Washer, is noisy enough to wake up Sims sleeping nearby, and also has a higher chance to leak than the Whisp-Aire. Either model will fit into a countertop, thus letting you place a small appliance, such as your food processor, atop it.
If you have room left over after all of this, it's always worth your while to ensure that there are two or three flat surfaces near your stove and seating area. These will let you make multiple trays of food or coffee for parties, without having to worry about cluttering up your dining room table.
Dining Room
When your Sim has prepared a meal, he or she will head for the nearest chair/table combo to sit down and eat. Although it may appeal to your sense of aesthetics to have a separate dining room that's separated from the kitchen area, in practical terms this isn't a good idea, as it will increase the amount of time it takes to eat a meal, which is already time-consuming enough. Instead, try to get your dining room table as close to the stove or countertop where meals are served as possible, but leave enough room for guests to maneuver. Having two spaces between the countertop and the first row of chairs at the table is a good rule of thumb, although you can drop down to one space if necessary. (If the chairs are flush up against the countertop, then the row of appliances will be useless.)
Since it takes so long for your Sims to eat, you'll want to ensure that you're fulfilling their Comfort Need as they do so. To do so, buy the most expensive chairs you can afford, checking to ensure that they have a decent Comfort replenishment score. Chairs are very expensive for items with such little functionality, though, so you may not be able to go all-out in this area. If you can only afford one or two nice dining room chairs, place them on the side of the table closest to the food preparation area, and place any cheaper chairs on the far side; this will ensure that your Sims use the nice chairs during their everyday lives, while you'll still have plenty of seating for guests.
So far as the table itself goes, you can afford to go cheap here; the table doesn't provide any Comfort at all. The more expensive tables will give you some Environment, but even the cheapest table will be able to seat plenty of guests. The most efficient seating arrangement is usually a 2x2 table with eight chairs around it; Sims will share a corner of the table with another Sim, so this should be suitable for all but the most raucous of parties.
Living Room and Entertainment Center
Your Sims desire entertainment and fun! Whether you're planning ahead for guests, or just want your household Sims to have a place to relax, it's important to ensure that you give everyone a bit of space to satisfy their Fun and Social desires, preferably at the same time.Your first choice regarding the living room revolves around whether or not you want to place it in the same room as the kitchen/dining area. If you put all of these into one open space, you'll be able to combine their Environment scores, which can be either a good or bad thing, depending on your ability to keep everything clean and neat. The kitchen is more often the source of poor Environment scores, due to messy dishes and such, but if you can keep it clean via a maid or let one of your Neat Sims go to town after everyone gets done eating, this shouldn't be too much of a problem.
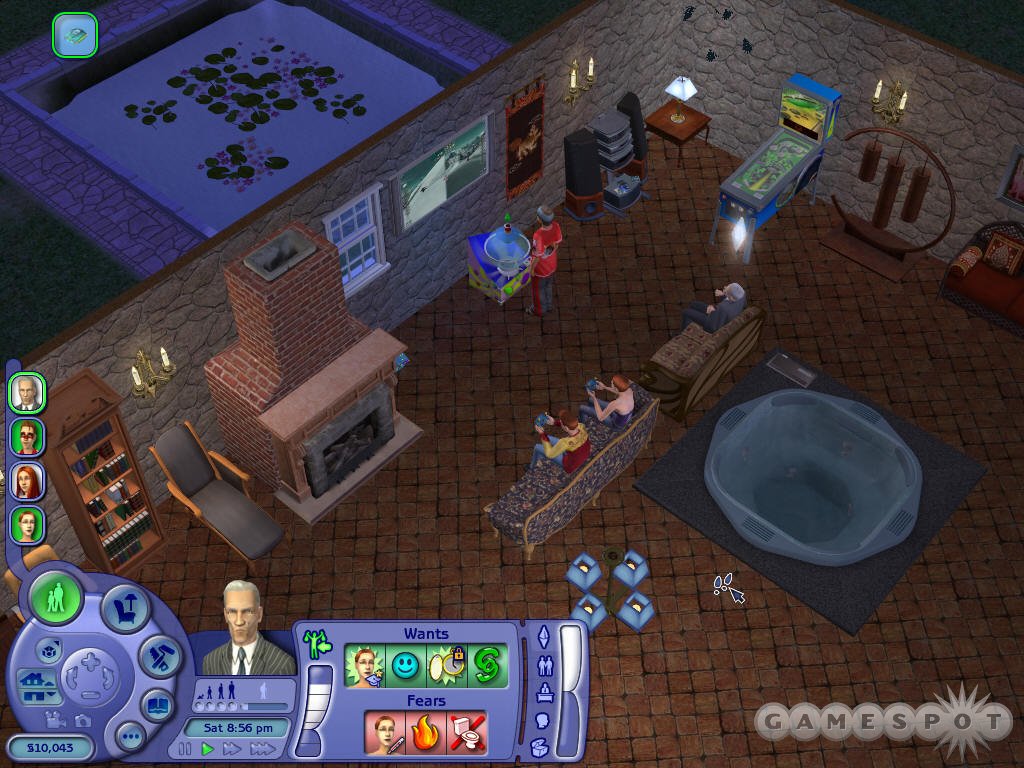
As mentioned, though, you'll want to have some kind of item that lets your guests or roommates entertain themselves while socializing with each other. The obvious choice here would be one of the television sets, but these actually serve to drain your Sim's Energy while they watch, which is a Bad Thing. If you don't have any other options, let your Sims plunk down on the couch and watch SBN, which teens, adults, and elders will all find satisfying. (Toddlers and Children won't be as enthralled by all the Sim news, so you may want to find something else for them to watch if they're solo.)
A far better item to spend your money on is the Maxis Game Simulator, which actually gives an equivalent amount of Fun to your Sims regardless of whether they're playing or just watching. If two people are playing, or if a Sim is watching, they'll also gain Social while they continue to do so. Don't forget to buy a nice couch as well, as that will let you gain back some Comfort while you sit.
Another good choice for a living room is a decent stereo. While these can't get your Fun motive as high as the Game Simulator can, some Wants revolve around dancing with other Sims, especially for Sims with the Romance Aspiration. This is only possible if you've got the groove, so put a decent stereo somewhere near the main socialization area; many Sims will dance autonomously at parties. There's not much of a functional difference between the Fun-Kadelic Stereo and the Soma Audiogeek, so feel free to go with the less expensive option.
One last object of note is the good old hot tub. These are great for socializing purposes; as many as four different Sims can get into a hottub at the same time, and each will satisfy Comfort, Fun, and give you a sizable Environment boost as well. If multiple Sims get in together and start talking to each other, you'll also get a bit of Social. The main drawback to the hot tubs is that they're very large; if you want to plop one down, you'll have to clear out a 3x3 space, and ensure that you give a bit of buffer room around it to let Sims change and submerge. The VaporWare Spa is better for central placement, as Sims can enter on any side; the Bubble-Up is more suitable for corner placement, as it can only be entered on two sides.
Of course, these are only a few of the many, many different objects that can satisfy Fun, so don't hesitate to search through the Build mode and see what piques your interest.
Everything Else
Bathrooms
Your bathrooms will be the smallest rooms in your house, but you'll almost certainly want to have a few of them, especially if you plan on throwing parties. Every guest or resident will need to use the bathroom once or twice a day; when you have a party, though, everyone will want to hit the bathroom after they eat, so you will have quite a few people trying to get into them all at once. Thus, you're going to want to have them easily accessible. 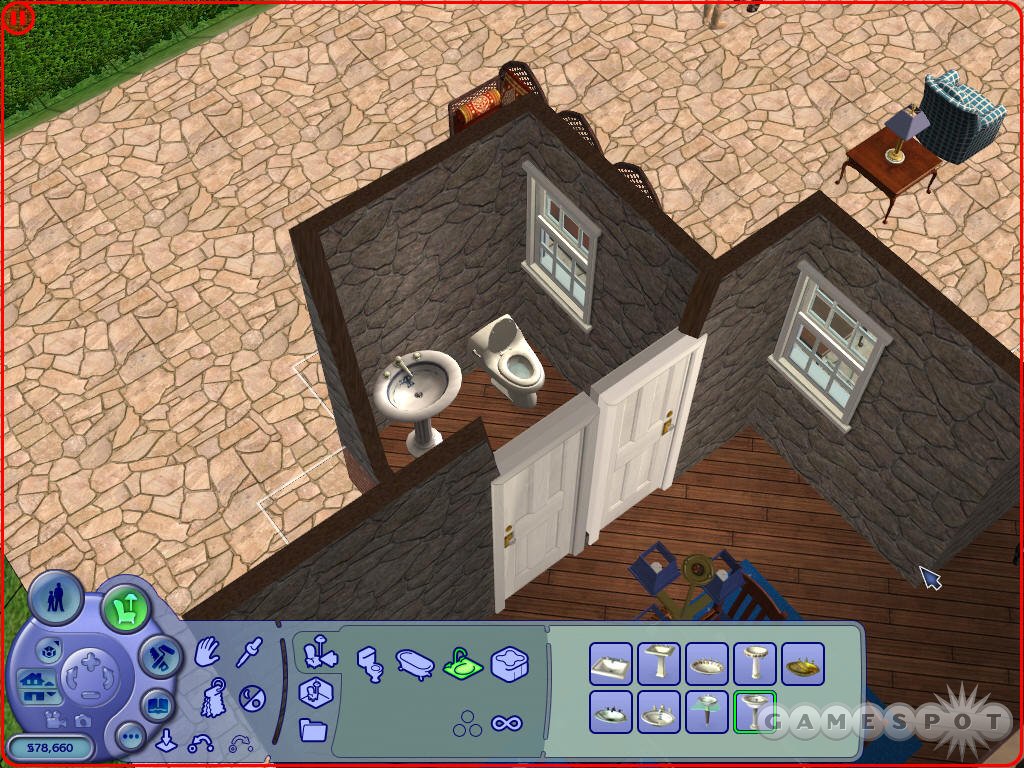
At its most basic, a bathroom is a simple 2x2 room with a toilet and a sink. Even the sink isn't absolutely necessary if there's one available somewhere nearby, such as in the kitchen. If you want to just have simple stalls, either via the ResiStall Astro Divider or by building up a 1x2 room around a toilet, feel free to do so, but remember that your guests will usually want to wash their hands after they do their business, so give them some means of doing so.
So far as toilets go, there are only three to choose from at this point. Either of the more expensive options is better than the Sewage Brothers cheapy model, which is less reliable and offers no comfort. The ResiStall offers the same Need benefits as the Mentionable toilet--both give you a large bonus to Comfort while your Sim is sitting--but the ResiStall offers built-in privacy. Remember that most Sims won't use the bathroom unless they're not within eyesight of another Sim; a ResiStall will solve this problem, but it does require a lot of space to install, being 1x3 while the other toilets are 1x1. If you have enough space for a large communal bathroom near your kitchen area, though, a line of ResiStalls may be just the solution!
Unfortunately, the Sims 2 does not as yet have one of the nifty sonic showers that were available in some versions of the previous game, so your Sims will have to resort to the low-tech liquid versions. For the most part, showers are better to take than baths, if only because they're quicker. Baths will restore some of your Comfort need, but again, this is rarely something that will drop critically low if you've invested in a decent bed and some good seating for your dining room and living room. If you have the scratch, the Colonial ComboCleen is the best bathing bet for the money, as it will let you choose to take a shower or bath. Toddlers can only be bathed by a grownup in a functional bathtub, so it's worth getting one of these combo models if you plan on having kids. (Newborn babies can only be bathed in a sink.)
You don't need to worry about putting a shower or bath in every bathroom; only those close to your main bedrooms should have them. Guests won't ever satisfy their hygiene requirement via bathing, unless you invite them to spend the night, so placing bathtubs in the common bathrooms will just waste space.
Bedrooms
Bedrooms are the simplest rooms to design; all you really need is a bed! Your Sim won't be spending much time here, so feel free to splurge on an expensive bed, but you won't need much else in one of these, save perhaps a dresser. If you plan on Woohooing a lot in your bed, though, you might want to boost your Environment score here a bit with some decorative items. Beyond that specific act, though, you won't have to worry about your Environment score here, or even your Mood at all, since you'll normally only be sleeping in your bedroom. If your Sim is sleeping alone, and you want to have an efficient way to get them through the morning routine, you can get them a shower and toilet and plop them down right into the bedroom; you'll just need to be careful about making messes.
Outside The House
The exterior of your home won't be as important as its interior, but that doesn't mean that you should completely ignore it. At the very least, you'll want to make sure that it has a decent Environment score. If you find that it's lagging behind the interior of your home in this area, you might want to consider knocking down a wall that leads indoors, especially if you're planning on throwing a party outside. The Environment of the outside of your house will also affect the Mood of your Sims immediately before they go to work or school, so you might need to spend some money on prettification if it's consistently bringing them down.
Neighborhood Mode
If you're unwilling or unable to create your own family, The Sims 2 has plenty of pre-made families and homes from which to choose. If you just want to get down to the business of playing the game, feel free to select one of these families and get right to it! This chapter will give you an idea of what you can expect from each scenario, along with a few tips on how to rearrange the houses so that they're a bit more manageable. Of course, with a game like The Sims, everything can change in any given scenario quite quickly. All we can offer are some early-game tips on how to make daily household life proceed a bit more smoothly; feel free to ignore them if you don't mind the houses the way they are!
Pleasantview
The Lotharios
The Lothario abode is home to only a single Sim--Don. This libidinous bachelor is a Romantic sort, and thus loves to woo the ladies; most of his Wants revolve around gaining love relationships, making out, and convincing women to Woohoo with him. Since Woohoos are fairly easy to obtain, due to Don's high starting relationships with the Caliente sisters, Cassandra Goth, and even the maid, it's not too difficult to keep Don's Aspiration meter in the gold. Thus, this is a good starting house if you're new to the Sims, or just don't want to deal with a large household. The main drawback of managing Don is that he doesn't start with much money, or indeed make much at his low-rung job on the Medical track, so you'll want to upgrade his skills as soon as possible and get him some promotions. Tips
You may not want to hire a maid for Don. Since he's romantically involved with her, having her walk around the house every day is a good way to have your illicit Woohoos discovered. He'll need the Cleaning skill to advance in the Medical track, anyway, so it may be worth having him take the time to clean up his own messes.
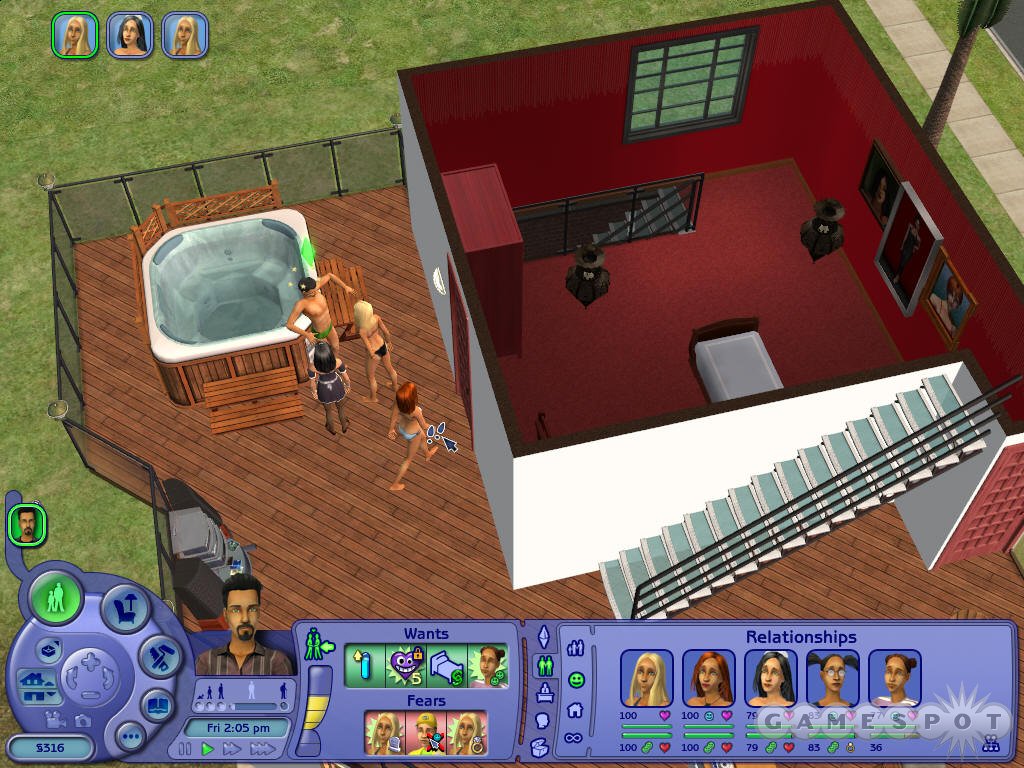
The primary hotspots for socialization here are the hot tub and the bed. (Well, Don's kind of socialization, anyway; the TV is also state of the art, so upgrade the sofa when you have some spare cash.) Unfortunately, the path to the hot tub leads through the bedroom, which isn't ideal--many of your affairs will be walked in on by revelers heading to the baths. You'll want to move the hot tub downstairs, perhaps outside, near the front door, where you'll be able to greet visitors and hop right into the jacuzzi immediately afterwards. If you have enough money, you'll probably want to build a separate enclosure for the jacuzzi near the front door, to avoid being observed. If you're truly desperate for cash, or want to consolidate the house as much as possible, you can demolish the entire second floor and construct a smaller bedroom, and perhaps a second bathroom, on the ground floor.
Don will also require Logic for his career, but the telescope is way up on the roof of his house. Move it down to the sidewalk so that he can use it before the carpool arrives. The deck chairs on the balcony are also rarely used, so you can sell them or move them as you wish. The wooden countertop can be placed near the mailbox to make it easier to retrieve your bills.
The Goths
Mortimer Goth returns! This aged Sim is reportedly heartbroken over the disappearance of his wife Bella, although he now has company in the form of Cassandra and Alexander Goth.Mortimer's Wants revolve around Knowledge, so he'll require new experiences (such as witnessing the ghost infestation of the mansion), skill increases, and other such activities to raise his Aspiration meter. In addition to these hard-hearted tasks, he'll also obtain a few Wants revolving around interactions with his grandson Alexander. These are typically low-reward, quick Wants, so they should be a low priority for you, but can be fulfilled when Alexander requires a bit of Social Need fulfillment. Although Mortimer is retired, he can obtain a job if you wish; the Goth family is flush with cash, though, so this isn't really required.
Cassandra wishes nothing more than to have a happy family life, and to that end she'll attempt to convince Don Lothario to give up his philandering ways and commit. They're engaged at the start of the scenario, but they don't necessarily have to remain that way if you want to choose another lover for Cassandra. (Don will, of course, have a hard time constraining himself to a single paramour anyway.) If you wish to immediately try to get Cassandra knocked up (if this is one of her current Wants), you can spend a little time wooing Don (who should be present when you first enter the household) and then lure him up to the double bed on the second floor of the mansion and Try For Baby. You begin with a strong relationship, so it shouldn't be too much trouble to get Don in the mood for lovin', and he may even get a strong boost to his Aspiration meter, as well, depending on his current Wants. You won't necessarily get Cassandra pregnant right away, but it's good to at least try early on, when the circumstances are fortuitous.
Alexander, being a precocious tot, wishes only to Grow Up, and as such, his Wants will revolve around simple interactions with his family, doing well in school, and the occasional skill-up. When Alexander and Mortimer are both in a good Mood, try to get them to interact as much as possible, as they both have many Wants relating to each other, and you can even get Mortimer to pass along some of his cronish wisdom to the next generation via some special interactions; if you have the time, let Mortimer teach Alexander how to be Nice and Neat. These lessons will have a positive impact on his traits when he matures into a teenager. Tips
You have an obscene amount of cash to spend when you control the Goths, so go crazy! If you want to radically alter the floorplan of your new mansion, you shouldn't have any financial obstacles in your path, so feel free to demolish floors, add a pool, go bling bling on the accoutrements, and basically spend like a king. Just be forewarned that your bills will be commensurately higher than those of less wealthy households, so don't use up all your cash reserves, lest you force Mortimer to abandon his life of leisure and re-enter the workplace.
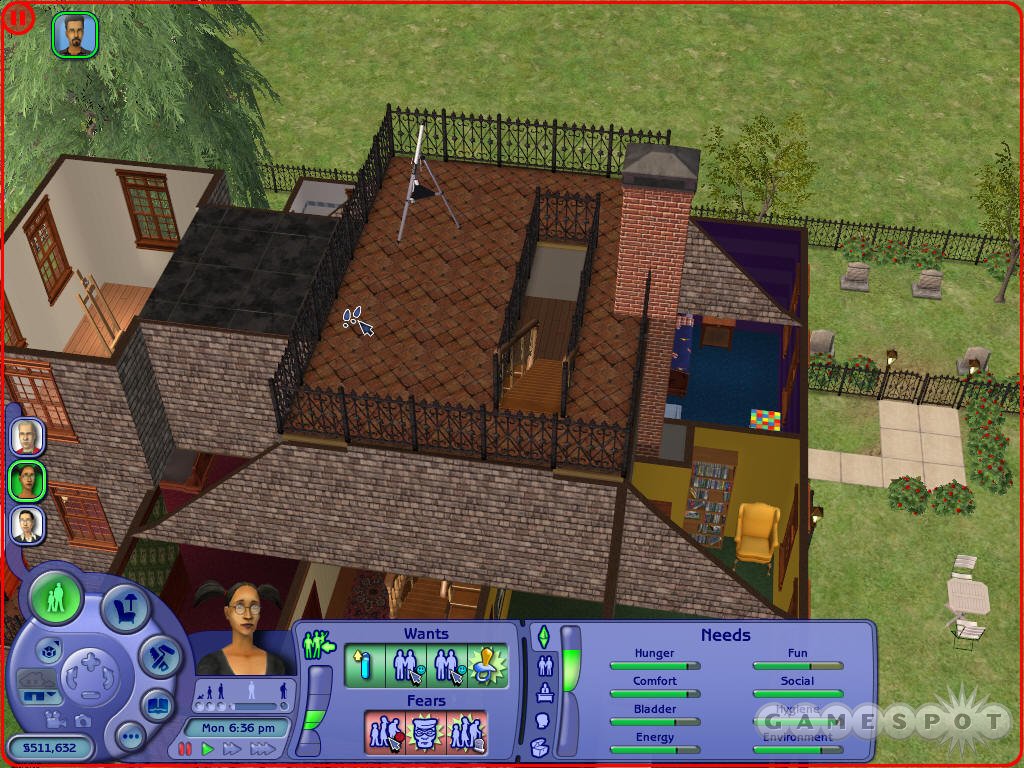
The first rearrangement you should focus on is moving the easel and telescope from the upper floors of the mansion. Leaving these objects where they are will force your Sims to make a long and unnecessary walk to use them; as with most skill-building objects, they can be safely moved down to the sidewalk outside the house, or to one of the rooms on the first floor.
If you wish, you can completely demolish the third and fourth levels of the house and re-roof the house afterwards, capping it above the bedrooms. You won't make much cash from this, save from selling the staircases, and you may ruin the décor, but there's little of interest on these floors, and no reason for your Sims to visit them, unless you choose to move or buy objects and place them up there. It may be a bit more expensive to add new rooms on the ground floor, but it will save your Sims a heaping helping of time, which is always the most precious of the many commodities in the game. Build upward, not upward.
The Brokes
Hard times have befallen Brandi Broke and her sons Dustin and Beau. Brandi herself is unemployed, Dustin is a poor student (and has taken up a career in crime besides), while Beau requires a lot of time-intensive training if he's ever going to learn how to talk, read, and use the toilet. To top it off, the accessories in Brandi's house are uniformly poor in quality, and you won't have enough cash to afford much of a rehaul, so you'll have a very difficult time fulfilling everyone's Needs in an efficient manner. 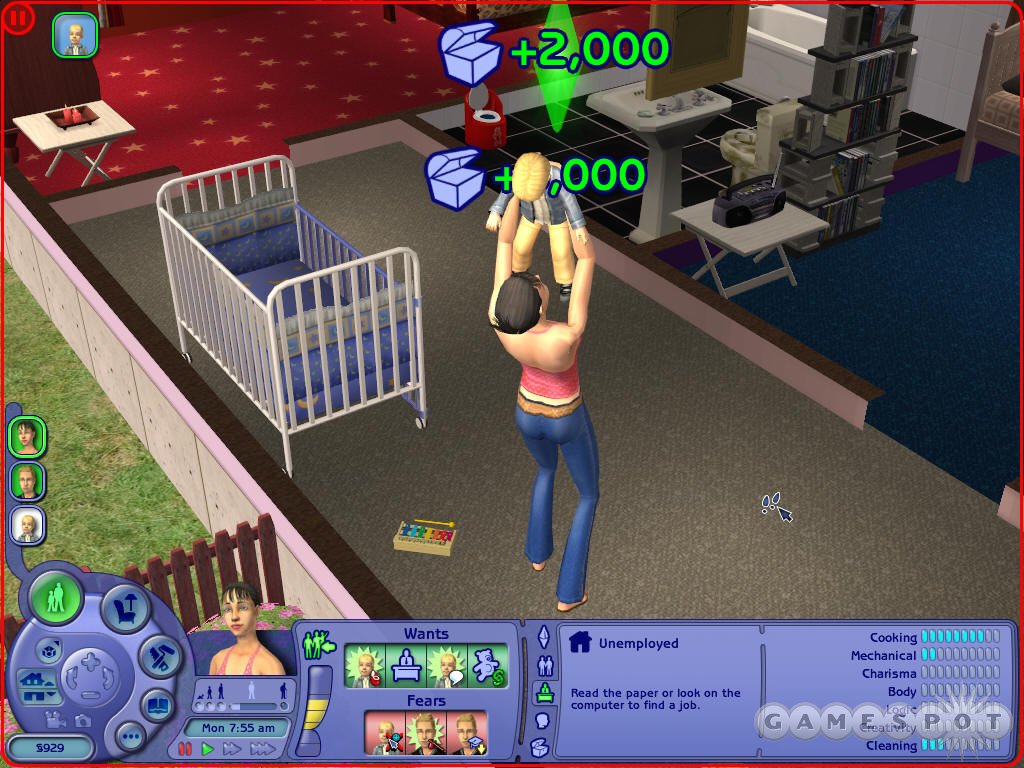
At the outset, though, you can at least get Brandi and Beau's Aspiration meters up by teaching him the various skills that he'll need later in life. She doesn't have anything better to do, being unemployed, and they both gain massive bonuses when you do manage to teach him one of these skills. If you can get Brandi into the platinum realm on her Aspiration meter, you'll be able to safely ignore her Needs for a while, which will let you continue on with Beau's training without having to worry overmuch about her Mood. (Just make sure neither of them pee on the floor or die of starvation.)
Dustin's main goal in life is to make money, but many of his Wants will also rely on his relationship with Angela, his schoolgirl crush. You can rather easily fulfill most of these interaction Wants, due to their already-strong relationship, but his financial goals will be rather more difficult, as it'll be a while before he becomes an adult and can stop going to school.
Tips
In construction and layout terms, there isn't much you can do to the Broke household with the kind of cash reserves that you'll have to work with. If you're willing to sell a few of the pricier objects, like the paintings in Brandi's bedroom or the trees in the backyard, you should manage to net a few hundred dollars to work with, on top of whatever's in your account when you load up the house. This should be enough for a few simple modifications, such as upgrading the toilet (otherwise you'll need to constantly clean it) and moving the front door so that it's closer to the sidewalk. The kitchen will need to be rearranged a bit for this latter eventuality, but doing so will make entertaining and greeting guests a bit easier. After you get Brandi a job and earn a bit of money, you can focus on buying better appliances and perhaps adding a room to the house.
The Dreamers

Darren and Dirk Dreamer live in a comfortable two-story house. Darren, the father, is a creative sort, and would like to make a living by selling his paintings, but unfortunately, reality will likely force him to take up a more conventional trade before his items start getting repossessed. Anything is better than being unemployed, and he will have a few low-level Wants that will be fulfilled by obtaining regular employment. If you want to try and make a bit of cash on the side, you can move the easel down from the second floor downstairs or out to the curb and have him work on still lives in idle time. When the paintings are complete, sell them with the Buy menu and you should rack up a few Simoleans.
Dirk, like Dustin Broke, has the difficult combination of schoolwork and the Fortune Aspiration to deal with. You'll need to get him a job if you want to achieve any of the cash-related Wants that pop up, so try to find one with short hours that don't conflict with his trips to school.
Tips
The Dreamer house is actually well laid out, so you won't have to do any major construction. You'll find it a bit cramped when you have to entertain visitors, so as you get a bit of money, you'll want to invest in a larger dining room table and perhaps a longer couch.
The Calientes
Nina and Dina Caliente are young, independent women, living together (although they sometimes aren't very friendly towards each other) in a modern three-story building. Dina is the golddigger of the two, with her primary goal being to marry a rich Sim. When you see this Want pop up, lock it in and start working on building your relationship up with Mortimer; you'll need to get your day relationship up to 100 before you can safely propose an engagement or marriage. When you do lock your claws into old Mort, though, he'll move into your house, and bring with him around 50,000 Simoleans, which should help offset any financial troubles you've endured during your wooing.Nina is more concerned with Romance than with making a link with any specific Sim, rich or otherwise, so you'll need to do a lot of inviting and entertaining if you want to keep knocking out Wants. She's the one that will require most of the household remodelling, as the house as-is isn't very well suited towards polyamorous activities.
Tips
You'll need to remodel the house to let Nina quickly engage in Woohoos if you wish to get her high-level Wants. It's a bit of a hike to the beds from the front door, not to mention to the hot tub on the roof, so, if it's possible, you should try to add a room to the ground floor and move the jacuzzi down to it. If you're strapped for cash, you can simply place the hot tub outside, but you'll need to use Dina as crowd control in this case. Have Dina invite Nina's many lovers into the house, then have Dina invite a single target into the hot tub for a Woohoo. This is still dangerous, though, as the AI on Dina's lovers will have them naturally gravitate towards her, so you'll probably wind up with a few catfighting episodes or slapfests.
The Pleasants
The Pleasant family is something of the prototypical nuclear family, replete with a dad that's trying to get the maid into bed, a goth and preppy daughter, and a mom that's focused solely on bringing home enough money to support everyone. 
Fulfilling Daniel's romantic Wants will be difficult with the house being as full as it is. Luckily, his main obstacle in obtaining surreptitious dalliances is Mary-Sue, who's under your control, allowing you to divert her into other areas of the house while he and his various consorts retire to the master bedroom. Mary-Sue herself has the Fortune Aspiration, which is not quite as difficult to pair with Romance as the Family one is, so there shouldn't be too much friction between the two partners if you can keep her ignorant of his extramarital funtimes.
Lilith and Angela are unique in that they are the only pre-made Sims in Pleasantview with the Popularity Aspiration. This plays similarly to the Romance Aspiration, save for that you can concentrate on more general interactions, rather than having to Make Out and Woohoo all the time. Parties are also primary Wants for these crazy kids--luckily, you can throw a party anytime you want, and the Wants generally don't have to be successful to net the point reward. This means that you can use the phone to throw a party, get the points, then just ignore everyone who shows up, if you wish. Be careful that you don't have any party-related Fears when you do this, though; you can often lose more points than you gained if your party turns out poorly. (It's better to have Daniel and Mary-Sue take care of the annoying party setup aspects, such as food preparation, and let the kids socialize. Make sure you choose your party guests appropriately though, as if you invite people your Sim doesn't know, they're unlikely to actually show up.)
Tips
At the outset, the centerpiece of your house will be the large Soma television set, which offers your party guests an outstanding method of satisfying their Fun Need. You may want to consider moving it closer to the kitchen, so that party guests can shift over to it immediately after getting their initial food supplies.
Strangetown
The Specters
Only two Sims dwell in this household: Olive, with the Knowledge Aspiration, and Ophelia, who's oriented towards Family goals. There's not a lot of love in this house; Olive leans heavily towards the Grumpy side of the equation and will take a lot of delight in aggravating any visitors that come along. Ophelia is a bit more kind-hearted, so you should focus your socializing efforts on her, while trying to minimize the damage that Olive can do. Tips
So far as the house goes, this, like the Grunt household, has a doorway that's set well away from the front of the lot. If you can afford to do so, you may wish to shift the gate over to the left a bit and build another entrance to the house that's closer to the sidewalk.
The first thing you'll want to do for this house in order to make it livable is to get it some items that build up Fun--it's incredibly low on them in its default state.
The Smiths
Ah, the gloriously average Smith family. Your normal, happy clan: mom and pop still in love with each other after all these years, son Johnny on the cusp of adulthood, little Jill wanting nothing more than to be like her big brother. Oh, and the dad and son are aliens. Yeah, there's that.
Luckily, upon first entering the household, you should be able to get a few Wants completed for just about everyone. Pollinator Tech and Jenny are both Family-oriented Sims, which is a wondrous congruence in this game, as many of their normal romantic interactions will give them Aspiration points. If you want to, you can throw a party for Johnny and have him invite his friends over; it won't be too hard to have a good party as soon as you enter the house. If you just want to send him packing, though, you can just tell him to blow out the candles on the cake (it's near the door leading to the deck), and he'll grow up instantaneously. If you wish to keep him in the household, feel free, but you might benefit from having him move out, if possible.
Tips
One of the things that you can get rid of if you wish to have a bit more money is the pool. Pools are unnecessary for most homes; they're nice enough, but they can distract guests and fragment your parties. If you want to sell the pool, though, you'll gain an easy 4,000 Simoleans or so.
You may want to shuffle the layout of the first floor around a bit so that the kitchen and master bedroom switch locations. It's always worthwhile to have your kitchen near the main entrance to your house.
The Curiouses
The Brothers Curious, Pascal, Laslo, and Vidcurd, are all oriented towards the Knowledge Aspiration, making this a rather studious household, albeit one without many friends. One of the main problems with the Curiouses, in fact, is that there are only about three friends between the brothers when you first start out. You'll therefore need to take advantage of every opportunity for social bonding that arises in the course of the Curious's days; eventually you may want to bite the bullet and start a party. There's a large outdoor area that is easily gussied-up for a large gathering, if you're willing to manually move some of your Hunger and Fun items out-of-doors, along with enough seating for everyone. Tips
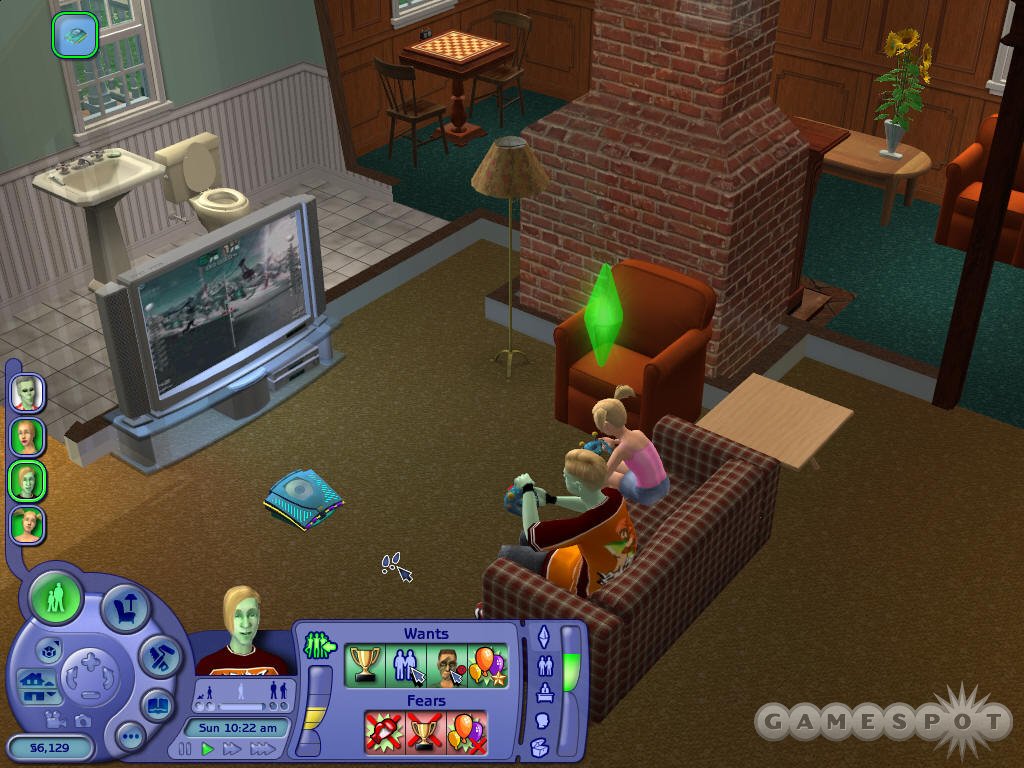
The huge set of walkways leading up to the telescope atop the house looks interesting, but it's actually quite pointless, and in fact causes your Sims to sometimes walk well out of their way to get to that sole item. Move it down to the ground near one of the doors, or near where the carpool arrives, and sell off as much of the staircase as you can. If you want to keep it for the cool factor, you can at least sell the pillars, which are worth quite a bit of money.
Note that there are two expensive televisions right on top of each other; this obviously isn't a very efficient use of space. Since you'll be rather strapped for cash upon first entering this scenario, you should sell the cheaper one; if you want to keep it, you should move it to another "fun" area, perhaps near the seats and grill outside.
One thing that the house is lacking are Environmental items; everything included is intended to be functional. Thus, a large portion of your early paychecks should go towards paintings, decorations, flowers, and the like, so that your visitors aren't consistently moping about in a sterile techno wonderland.
The Grunts
If you followed any of the gameplay trailers for the Sims 2, you'll recognize Buzz Grunt from the movie that featured the alien tensions in Veronaville. Although that trailer ended on a positive note, with Pollinator Tech inviting Buzz over for a barbecue, things are unlikely to go so well in the real game, as Buzz is quite a Grouchy fellow, with an intense antipathy for both Pollinator and Olive Specter. (He may even have Wants related to beating those Sims in a fight.) The rest of the family is fairly screwed-up, as well, with each of the male sons having his own unique reaction to the stifling influence of their father. The one who'll be in the worst shape at the beginning of the scenario will be Ripp, but you should be able to quickly boost his Aspiration meter by inviting over Ophelia Negri and getting that all-important First Kiss. Be sure to wait until you actually have a Want for this before you initiate the First Kiss, though; doing it when the Want isn't up will make for a big boost to the daily relationship, but won't impact your Aspiration meter. Tips
As you may have done with the Specter house, you might want to shift the main entrance to the house closer to the street. The Grunt household has one of the simplest designs in the game--it's just a rectangle--so feel free to knock down interior walls and move things around. There's a telescope stand in the backyard which is fairly pointless, so feel free to demolish it for cash.
The Beakers
The Beakers are a charming little family, what with the imprisonment of Nervous Subject and the forced human experimentation and all. After you play with the family for a little while, though, all the rage at this heinous act will fade from your body, leaving you with only a dull understanding of how Circe and Locke could do such a thing: Subject is one of the most annoying Sims in the entire game.The reason for this is easily discerned by looking at his traits. It's clear that Subject's family has been living in the shallow end of the gene pool for a while, as he only has points in Active; everything else is set to zero, so he's a Grouch, and Sloppy, and Shy, and incredibly Serious. And Sneezy, too. This all has a rather deleterious effect on his socializing and controllability. The first thing you'll notice is that, due to his high Active score, he'll need more food than normal, and due to his incredible Sloppiness, he'll choose to Stuff Face at the fridge rather than actually make a meal. What's more, he's very difficult to dissuade when he gets his mind onto food; you can attempt to cancel out his interactions with the fridge all you like, but he will usually pop another one back up as soon as the first one disappears. So, that's fun. If you enjoy a challenge, feel free to stick with Subject; if not, try to move him out to a cheap lot, or just have him walk outside of the house and build a set of walls around him so that he can slowly die.
Tips
The layout of the Beaker house is actually pretty decent; they have the benefit of having a few of the nice career reward Skill-building items automatically installed. The only real sticking point here is the walk to the sidewalk, but there's little you can do about that.
Veronaville
The Montys
The leaders of this little clan, Patrizio and Isabella, are unfortunately not that far away from death, and are content to do nothing more than live out their lives, basking in the glow of family life. The odd thing is that they're not even in love with each other; they're only friends when you first enter the scenario, so get them smooching as soon as you can; this will replace some of their sometimes awkward Family Wants with romanticW between themselves, which are quite easy to pull off.Mercutio and Romeo are the sons, and are somewhat competitive, but luckily won't be fighting over the same girl (unless you encourage them to do so). Romeo only has eyes for Juliette Capp (at the moment; he'll have eyes for lots of girls when he gets older, thanks to his Romance Aspiration), while Mercutio is pursuing Hermia Capp. Note that Puck Summerdream is also wooing Hermia; there's nothing wrong with this, of course, but you'll want to be sure that the two don't meet up with each other while Hermia's around, lest one pair or the other gets involved in an indiscretion.
Tips
This European-style home isn't too difficult to get around in, but you may want to eliminate some of the walls between adjacent rooms, such as the kitchen and the dining area. The central courtyard is also underemphasized; you can eliminate the little spot of water with the terrain-levelling tool, then use the space to throw down a hot tub or even a small pool. Don't forget to throw up an expensive television and gaming system somewhere; the house as is is low on Fun items.
The Capps
The second of the two Family Feud contestants, the Capps live on an imposingly large estate that's set well back from the sidewalk. Consort, the paterfamilias, is an elder Sim, but is still robust and is going strong in his Business career track. You can have him Retire if you wish to concentrate on his Wants, but he's still an able breadwinner. Tips
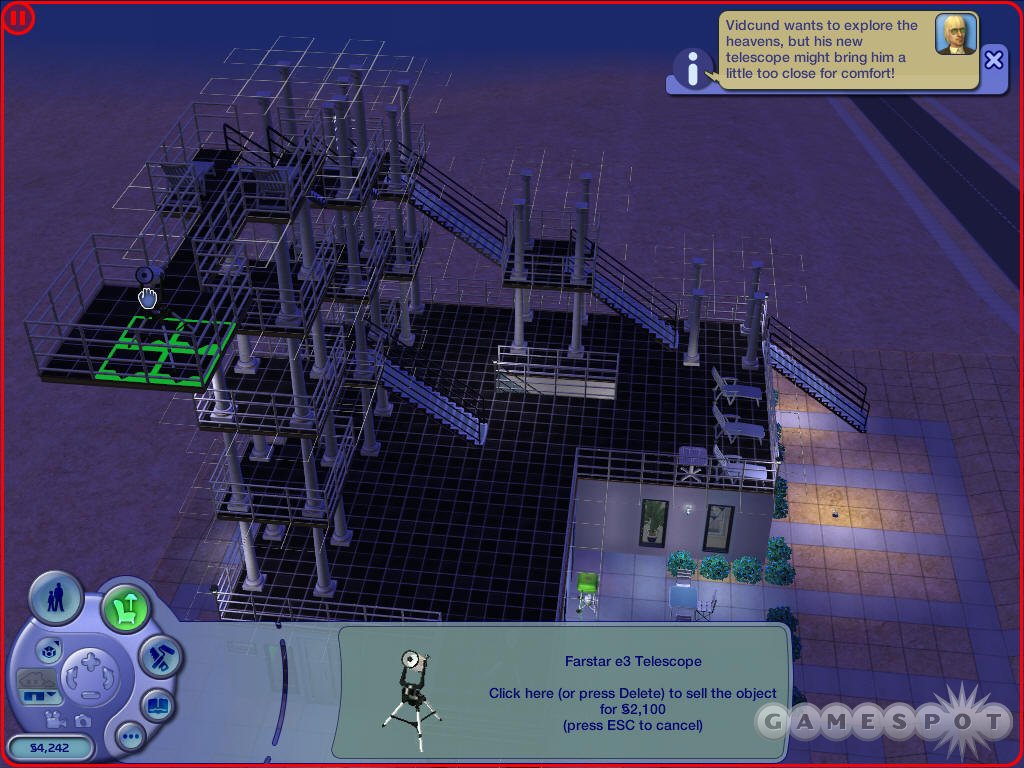
The real problem with the Capp household aren't the Sims, but the lot itself. The house is large and expensive, yes, but it's set an incredible distance away from the sidewalk, meaning that it takes quite a while for people to make their way to and from the front door. If you're willing to put a little time into it, this is a great lot for constructing a new house! Just sell off as much of the existing house as you're able to, move the appliances down next to the mailbox, then flatten the land and start laying a foundation. You don't need anything hideously extravagant, but you stand to gain a lot of efficiency for your working and school-going Sims by relocating the household, even if the new house is a bit plain.
The Summerdreams
The Summerdreams have one of the most impressive houses in the Sims 2--it's well laid-out, fairly efficient, and it benefits from a number of expensive decorations by giving some truly impressive Environment boosts to the Sims that come to visit. It's rather easy to entertain here, especially if you make some minor changes to the layout of the house. In point of fact, there's a party going on as soon as you enter, with a few easy chances to get some of the Summerdreams' Wants fulfilled. Tips
As should be becoming second nature to you, you'll want to make a new doorway, leading up to the main statuary room, immediately across from the mailbox and trashcan. If you do so, you might want to consider shuffling some of the items around and converting the room with the flower-pattern carpet into your main entertaining area, with the kitchen items along one side and a few high-Fun items nearby. You'll have to work around the stairs, but that shouldn't be too much trouble; you can always knock down a few walls if you need more space.
Cheats And Miscellaneous
Miscellaneous Information
This section describes random events and some oddball information about Sims 2. It didn't fit anywhere else, so here it goes!
Alien Abductions
Any Sim can be abducted by aliens if you're not careful. This occurs if you use the most expensive telescope somewhat often. If your character uses the telescope between 10 PM, and 5 AM, you'll have a five percent chance of being abducted during each hour. ExtrasFor most Sims, this is merely an interesting diversion, but if the Sim that's abducted is an adult male, he will always come back pregnant. That's right, pregnant! This works just like a normal female pregnancy, save for the fact that the baby is, well, a half-alien baby. He or she will grow up and function normally, except for their big eyes and green skin.
Deaths and Illnesses
Your Sim can get sick in The Sims 2. If you do get sick, your Sim will need to get plenty of rest by lying down in bed. Luckily, you can call in sick with a 100% chance of success if you're actually sick. There are a few different kinds of sicknesses:Cold: You have a 1% chance of returning from school or work with a cold every day. A cold is the only non-fatal disease; you can leave it untreated if you wish, but it will eventually mutate into something much more nasty.
Pneumonia: Pneumonia is what a cold evolves into. Leave it untreated, and you'll die.
Flu: When your house is infested with roaches, you have a small chance of getting infected with the flu if you get too close to them.
Food Poisoning: Your Sim can get food poisoning by eating spoiled food. If it has flies whirling around over it, it's probably bad for you; in this case, you should clean it up rather than eat it. Most food will spoil around six hours after it's made.
Virus: If you use the Simsanto Biotech Station long enough, you'll probably make a virus eventually. Don't drink it, or you'll probably come down with something nasty!
In addition to the fatal diseases, there are also a number of other ways for your Sim to die. Note that you can sometimes be brought back to life if another Sim is willing to plead with the Death NPC that appears. If the other Sim has a very good relationship with the deceased Sim, you may be brought back from death's door, but this is a fairly rare occurrence.
Electrocution: Don't attempt to repair electrical appliances, such as television sets, unless you have a high Mechanical skill. If you do, you're likely to get electrocuted, which will probably kill you unless your Needs are quite high.
Fire: If a fire breaks out, you'll want your Sim to get away from the flames before they catch alight.
Starvation: It takes a long time to starve, but it is possible to do so if you persist in disallowing a Sim to fulfill their Hunger Needs.
Space Debris: If you spend too much time stargazing with a telescope or looking at clouds, you have a very small chance of getting hit by a falling satellite.
Old Age: This is, alas, unavoidable, unless you cheat.
Drowning: If you're in a pool when your Energy Need runs all the way down to the bottom of the scale, you'll drown. Other Sims won't be able to plead with Death if this occurs.
Ghost Scare: If you get scared by a ghost so badly that three of your Needs are reduced almost to zero, you'll probably come back as a ghost yourself soon enough.
Fly Swarm: Don't leave too many dirty dishes around, or the masses of flies may congregate into a super-deadly swarm and eat one of your Sims alive.
Efficient Item Management
There are two things to remember about the Buy/Build Modes that can make your Sim's virtual life much more easy. The first is that items can be bought, used for a short while, then sold back on the same day for the same price at which you bought them. (Some of the Party items, such as food platters, are exceptions to this rule.) This comes in especially handy during parties, when you'll need to ensure that there's a lot of comfortable chairs and high-Fun items. If you have a bit of extra cash, you can buy whatever you need for the party, throw a smashup get-together, then sell everything back at no cost to you. There are some lenient vendors in Simsville! 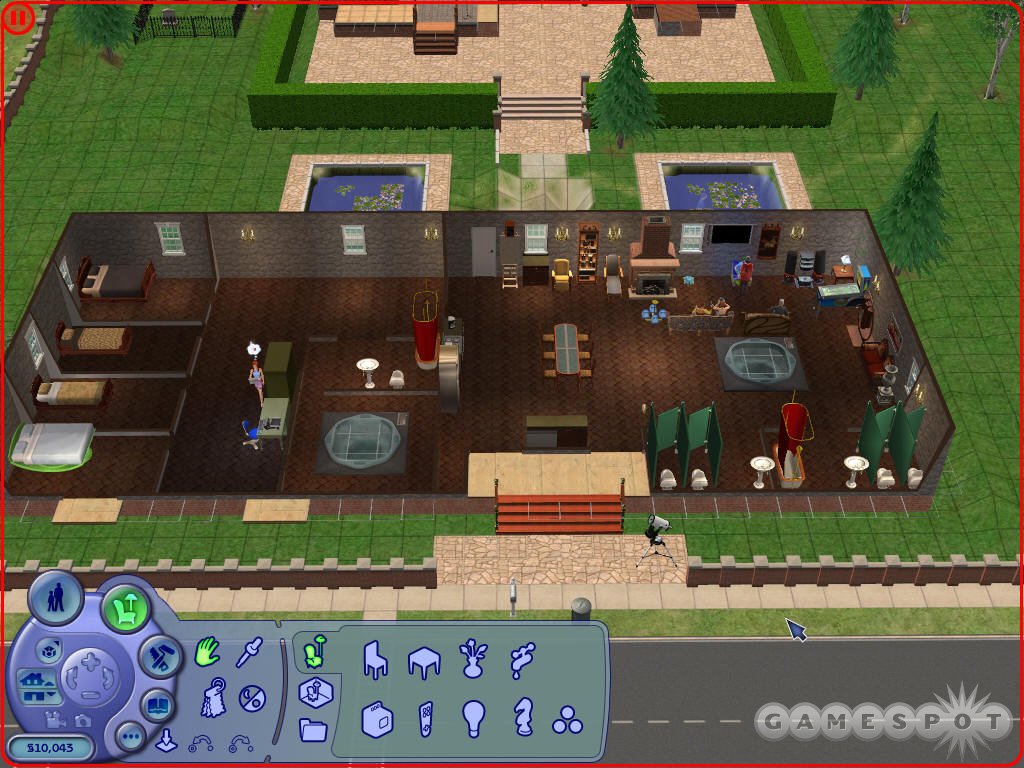
The second little tip revolves around the Hand tool. So long as an item isn't being used (or so long as a Sim isn't proceeding towards an item with the intent to use it), it can be moved. If you're willing to micromanage your Sims a bit, you can use this to greatly reduce the time required for them to satisfy their Needs and Wants. For instance, if you Sim wants to invite another Sim over, and is across the house from the phone, use the Hand tool to move it next to him! Or, if they really have to use the bathroom, and are alone in a room, move a toilet over to where they are. You can move almost anything you wish, so long as you can find room for it near where you desire to move it.
Cheats
In order to enter cheats, you'll need to open the cheat window. You can do this by holding down CTRL + SHIFT + C while playing.Aging On/Off: Disables or enables aging in your Sims. If you want to turn it off, for instance, you'd type "aging off".
Kaching: 1,000 Simoleans are deposited into the household bank account.
Motherlode: 50,000 Simoleans are deposited into the household bank account.
DeleteAllCharacters: If you type this in while you're at the Neighborhood view, all Sims in all of the households will be removed. Use with caution!
MoveObjects: Allows you to use the hand tool in Buy/Build mode to move normally immobile objects (such as objects that are currently being used). This can cause problems with your game, however.
Help: Use this to pop up a list of other commands that can be used with the cheat window.
Got a news tip or want to contact us directly? Email news@gamespot.com
Join the conversation