Doom 3 Walkthrough
Mars is overrun with hellspawn again. Our Doom 3 walkthrough includes a full walkthrough and tips on every weapon, as well as lists of cheat codes, cabinet codes, and easter eggs.
Design by Marty Smith
id Software's Doom is one of the most influential games of all-time. It was Doom that put the term first-person shooter on the gamer map. After years of anticipation, id Software returns to Mars for a lone marine's battle against the demons of Hell. Doom 3 combines the best graphics ever with the intense shooter action Doom fans were craving for. This game guide covers everything you need to know to conquer id Software's latest creation.
This GameSpot Game Guide to Doom 3 includes:
- General Strategies: This chapter provides general strategies for exploration, combat, and conquering Doom 3's single player missions.
- Weapons: Check here for tips on using Doom 3's weapon arsenal.
- Enemies: Battle Doom 3's enemies effectively. Know what weapon to use against each foe for maximum damage and results.
- Walk-through: This section offers a complete walkthrough of Doom 3's single player missions. You'll find solutions for every objective, locations of PDAs, cabinets, and supply stashes, and strategies for defeating tough sections and bosses.
- Multiplayer: This section covers Doom 3 multiplayer map strategies.
- Cabinet Codes: A chart reveals all locked cabinets and their codes.
- Cheat Codes: Need extra help? Look here for Doom 3 cheat codes.
- Easter Eggs: Discover some Doom 3 Easter eggs, including the id Software PDA.
Table of Contents
General StrategiesWeapons
Machine Gun, Chain Gun, Plasma Gun, and Grenades
Rocket Launcher, BFG 9000, and Soul Cube
Wraith, Demon, Maggot, Revenant, Trite and Tick
Cherub, Lost Souls, Mancubus, Cacodemon, Arch Vile, and Hell Knight
Bosses
Mars City
Administration
Alpha Labs - Sector 1
Alpha Labs - Sector 2
Alpha Labs - Sector 3
Alpha Labs - Sector 4
Enpro Plant
Communications Transfer
Communications
Recycling - Sector 1
Recycling - Sector 2
Monorail
Delta Labs - Level 1
Delta Labs - Sector 2a
Delta Labs - Sector 2b
Delta Labs - Sector 3
Delta Labs - Sector 4
Hell
Delta Labs - Sector 5
Central Processing
Central Server Banks
Site 3
Caverns Area 1
Caverns Area 2
Primary Excavation
Cabinet Codes
Cheat Codes
Easter Eggs
Chapter 1 - General Strategies
This chapter provides some general strategies for conquering Doom 3's single-player missions.
- Personal data assistants are your primary source of information inside the huge UAC complex. These PDAs look like small red tablets and they're often found--but certainly not limited to--offices on top of consoles or desks. But on occasion a PDA might be hidden in a dark corner or down a hard-to-navigate hallway. PDAs include emails and audio logs of current (though probably part of the undead at this point) UAC employees and provide background story and, more importantly, cabinet codes. You'll find locked cabinets throughout the game. Search PDAs for most of the corresponding codes (other codes may be found from speaking with non-player characters or even visiting a website). In general, most PDAs-with-code are found in the same room as the cabinet.
- Practice effective weapons management. Check the weapon and enemies section of this game guide for details on the best weapons to use against particular enemies. For instance, conserve ammunition against weak enemies like zombies. Use a single shotgun blast up close or even just the pistol if there are no other dangers around. Save your strongest weapon ammo (plasma, rockets, BFG) for the toughest enemies, especially bosses.
- As you clear out and move through corridors and rooms, check dark corners for ammo, health, or armor. Stock up before pressing on. Pick up med kits and armor strategically. If you have 95 health, save the large med kit on the ground and return to it after suffering more damage. Note the location of health machines and return to them repeatedly if needed. Look underneath desks, behind crates, and even in monster hiding spots for supplies. It pays to explore.
- The "ambush" is one of the best tactics against most Doom 3 enemies. Let's say you move into a new hall and spot an imp appear in the distance. Instead of remaining in the hall and dodging projectiles and returning fire, retreat around the corner into the previous hall or room. The imp follows. He'll maneuver to that corner in hope of trashing you with his ranged shot or melee claws. But as soon as he turns the corner, move up close and blast the imp with the shotgun. This is a good way to lure armed soldiers too. It can be hazardous fighting them from long-range. But up close your shotgun has the advantage!
- Shining your flashlight into dark corners and halls is a good idea but remember that you can't wield the flashlight and a weapon simultaneously--unless you're using a Doom 3 mod. Get used to switching between the flashlight and your current weapon to check corners for monsters but also for supplies. When you spot an enemy and return to your weapon, you can expect the enemy to close in to your position. Just fire straight where your flashlight was pointed to defeat the enemy.
- Here are a few tips to keep in mind. Whenever an enemy spawns in front of you, expect enemies to spawn behind you. Check your back for enemies attempting to sneak up behind and perform their own version of the ambush. Explosive barrels have been around since the original Doom. Look for opportunities to shoot an explosive barrel to cause blast damage against nearby foes.
Chapter 2 - Weapons
This section offers tips on using Doom 3's weapon arsenal.
Melee - Flashlight and Fists
As a last resort, the Doom marine does feature a couple melee attacks. You can smack an enemy with the flashlight or switch to your fists. Neither is very strong, however; in fact, you'd be lucky to defeat a slow-moving zombie with either tactic and you're basically dead against most of Doom 3's enemies.
But your firsts can be extremely powerful when enhanced by the berserk power-up. You'll find the berserk power-up a couple times during the single-player campaign. While in berserk mode, your punches obliterate enemies. Explode a zombie in a single punch or knock back in imp with a berserk-powered right cross. You really should never have to resort to either weapon in standard combat. If you're running low on ammunition, search for more instead of attempting to defeat tough enemies with a flashlight or your fists.
Chainsaw
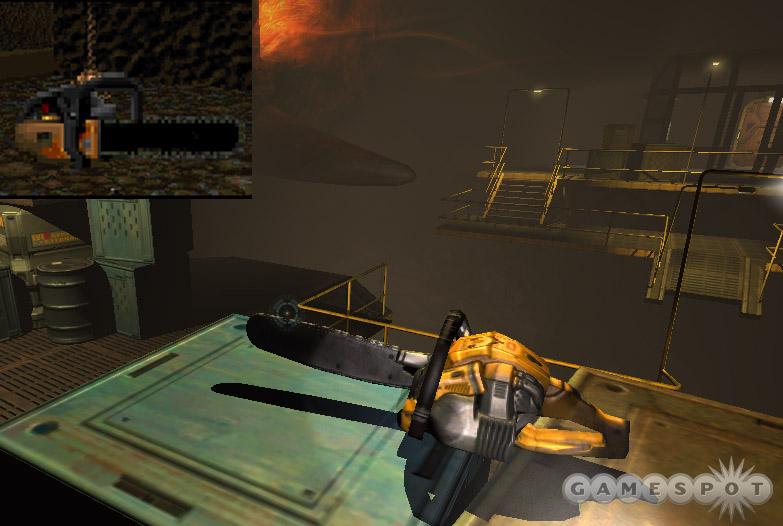
A Doom sequel just wouldn't be the same without the chainsaw. It's actually a formidable weapon, particularly against zombies and lost souls when you're trying to conserve ammunition. Against other enemies, for instance imps or wraiths, the chainsaw isn't quite as useful because while you're grinding the enemy with the blade, the enemy is ripping you to sheds with its claws. Also be careful against enemies that leap at you, such as cherubs and ticks. You'll suffer knock-back damage before you can connect blade with skin.
Zombies are fairly slow, though, so you should be able to move in, slice and dice, and back out before getting struck. Lost souls swoop in from a distance. Point the chainsaw in front of you and grind the lost soul as it approaches. If your aim is true, the lost soul dissipates before striking you. Again it's a good way to conserve ammunition for tougher enemies.
Pistol
The standard issue pistol is a typical "first weapon" first-person shooter weapon. It'll keep you alive during the early going but once you begin to acquire more powerful arms (first the shotgun then the machine and chain gun), the pistol becomes all-but unnecessary. It's useful against slow-moving zombies because you can reserve your other ammunition for tougher foes.
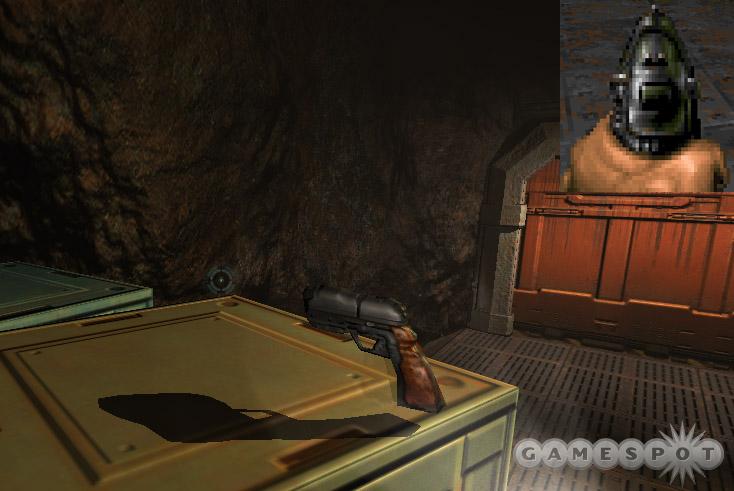
It can also be effective against enemies at long-range that can't reach you. For instance, use against an imp on a balcony or adjacent catwalk. Remember that the pistol doesn't inflict the damage of better weapons so it'll take much longer to kill an enemy. Be ready to strafe and dodge the imp's projectiles repeatedly as you maintain your crosshair on the target.
Shotgun
The shotgun is the ultimate close-range weapon and since Doom 3 consists of a lot of corridor fighting, it's one of the better overall weapons in the game. Just don't bother at long-range. You'll use it frequently against zombies, soldiers, imps, wraiths, ticks, and cherubs. At close-range, an accurate shotgun blast can eliminate these enemies in a single blast. The problem arises if you aren't so accurate and the creature remains alive. The shotgun's "recharge time" (the amount of time it takes to fire the weapon again) is rather long. Meanwhile that imp you tried to blast at close-range is mauling you with its claws.
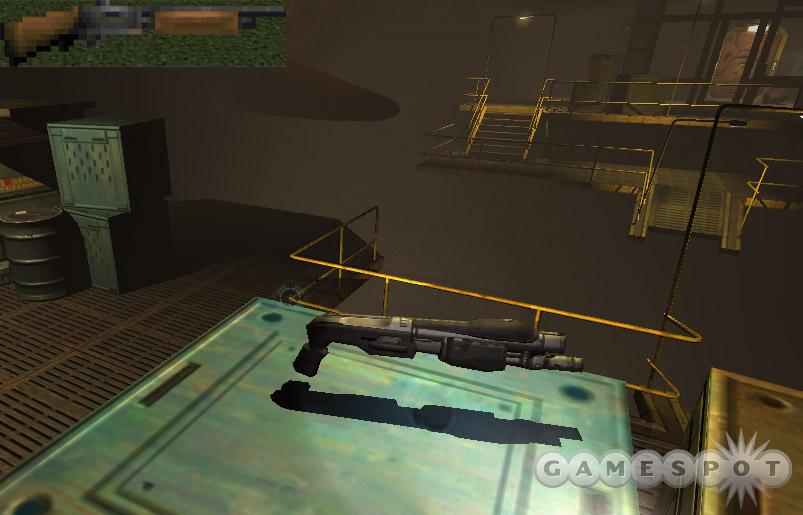
Another downside is the shotgun only holds eight rounds at a time. In a frantic firefight, you may find yourself reloading too often giving your enemies a chance to reach your position. When facing an imp, maneuver as close as possible and aim the shotgun at the imp's upper torso. Use the same method against wraiths, zombies, and many soldiers. You shouldn't advance at armed soldiers. Take cover behind a cover or other object and lure the soldier to your position. When the soldier is close, move out of cover and blast the enemy with your shotgun.
It's possible to use the shotgun against stronger enemies, such as the revenant or hell knight, but you won't be able to take down these beasts in one hit much less several hits. It will require much more agile maneuvering and strafing to avoid these enemies' attacks. Use if there's available cover or a route to retreat through. You may need to move away from these enemies and require a safe place to reload.
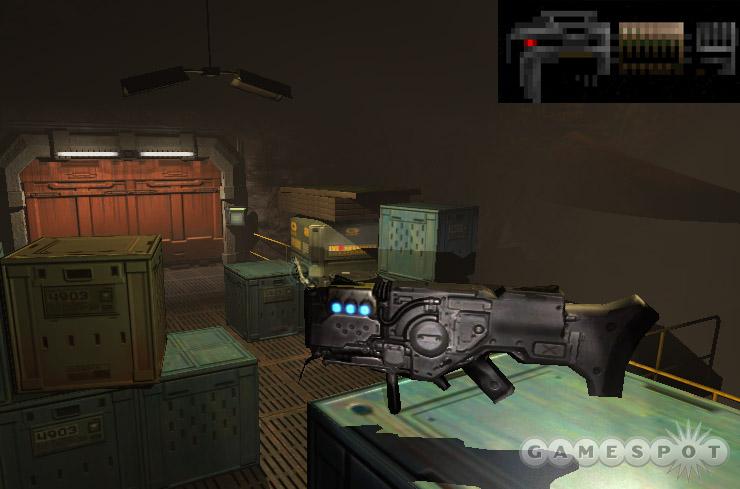
Machine Gun
Doom 3's new machine gun is a solid weapon and fairly accurate at longer range. It possesses decent damage, rate of fire, and clip-size. While it's not going to mow down the toughest enemies quickly, the machine gun is good enough to go toe-to-toe with most foes at medium-to-long range. Shoot cacodemons out of the air, blast soldiers at long-range, or fire in burst shots to clear out ticks and lost souls. When battling humanoid enemies, aim for the head for fastest killing results.
At closer range the machine gun is effective but not likely to kill something fast enough so you avoid suffering damage. Maintain the crosshair on the enemies head if you are using the weapon at close-range so you minimize possible damage. The shotgun is a better bet at close-range but if you stick with the machine gun, aim for the head.
One of the most important aspects of the machine gun is keeping it reloaded. It's a relatively slow reload time. Don't turn corners or enter new rooms with just five bullets left in the clip. Reload after battles or whenever there's a safe moment. If you hear the low clip sound warning, retreat to a safe location and reload. Don't get caught reloading in a frantic battle against multiple enemies.
Chain Gun
Doom 3's chain gun is essentially a high-powered machine gun. It offers increased damage and quick rate of fire but with some downsides. For example, the chain gun is much more inaccurate at longer range than the machine gun. Avoid long-range battles. It's nearly a waste of ammunition. This is a powerful weapon and worth saving for closer encounters. Save up to use against a hell knight and you can mow down the beast in a single ammo belt.

Also, the chain gun takes a few moments to "warm up". When you press the trigger, the chain gun begins to spin and moments later the weapon starts to fire. This fraction of a second could pose a problem if you're trying to hold off a leaping cherub or an approaching hell knight. Since it does have the warm up time, the chain gun isn't as useful in blasting ticks or lost souls. You can't really fire in burst mode because of the lag between blasts.
Like the machine gun, keep the chain gun reloaded. Don't turn corners or enter new rooms with just five rounds left. Reload after battles or whenever there's a safe moment. If you hear the low clip sound warning, retreat to a safe location and reload. Don't get caught reloading in a frantic battle.
Plasma Gun
The plasma gun offers an excellent balance of damage, rate of fire, and accuracy. It fires plasma bolts in a straight line, making it useful at longer ranges against enemies you don't expect to move much (such as an approaching hell knight or a charging commando soldier). Against even tougher enemies, a single cell (50 plasma bolts) should be enough to defeat the enemy as long as you maintain accurate crosshairs.
The downsides to the plasma gun are reload time and ammunition availability. There are cells scattered all over the place so if you use the plasma gun frequently, expect to be without ammunition for stretches at a time. It certainly isn't as scarce as BFG cells but finding plasma cells will often be a reward for extra exploration or discovering a cabinet code. Use the plasma gun against just about anything in the game but it's best to save the cells for the toughest foes, such as hell knights, revenants, mancubus, or arch viles.
Grenades
Using grenades is simple: just select the grenade and hold down the fire button to throw. The longer you hold down, the farther the toss. Throw grenades around corners to wound or kill enemies. Lure enemies into a chokepoint, such as a narrow doorway, and toss a grenade to inflict explosive damage. They can also be used to damage or kill enemies that are above your current position, such as an imp patrolling a balcony above. Grenades are good against monsters that run straight toward your position, like demons or commando soldiers. A stationary imp is also an inviting target.
Rocket Launcher
id Software made the rocket launcher famous; this weapon is a staple of the first-person genre. Unlike previous games, Doom 3's rocket launcher requires reloading, which makes it more difficult to wield. There are only five rockets in each pack. After five shots you must endure the rocket launcher's reload time in order to resume the battle.
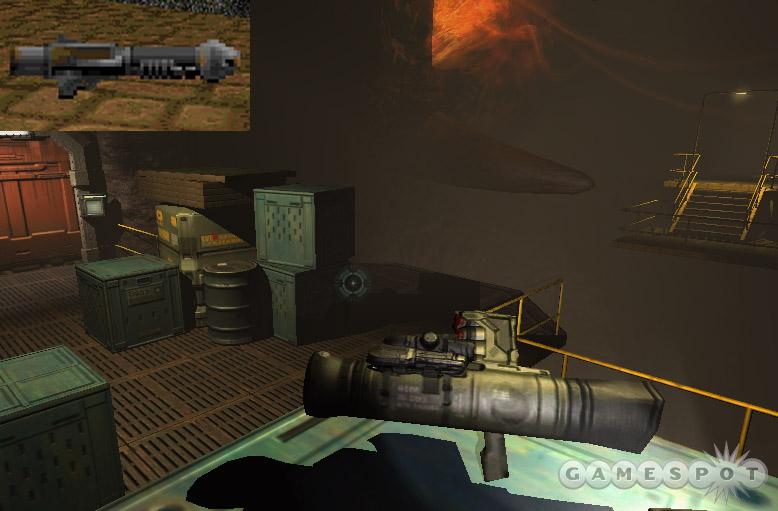
But it is certainly powerful and as accurate as you are. The rocket launcher should kill most "lesser" enemies (such as imps, soldiers, wraiths) in a single well-placed projectile. It's also strong against tougher foes but you may need to reload so it's wise to have cover or a retreat route available. It's wise to save the ammunition for tougher foes but if you need to kill an imp fast, there's not really a better substitute.
You can still rocket jump with Doom 3's rocket launcher. Point the rocket launcher at the ground, shoot and jump. The blast propels you much higher than a normal jump. You can use the rocket jump to reach places quickly (for instance, eschewing a lift and just rocket jumping up to the higher catwalk) but the blast does inflict self damage.
BFG 9000
The BFG 9000 is Doom's ultimate weapon. It fires a green ball of death that actually inflicts damage to anything in sight as it moves through the air. And if the green ball strikes, it inflicts even more damage. You can hold down the fire button to charge the BFG for greater damage; the weapon holds four BFG cells before requiring reload. But be careful. If you charge the BFG too long, it explodes in your hands--likely instant death.
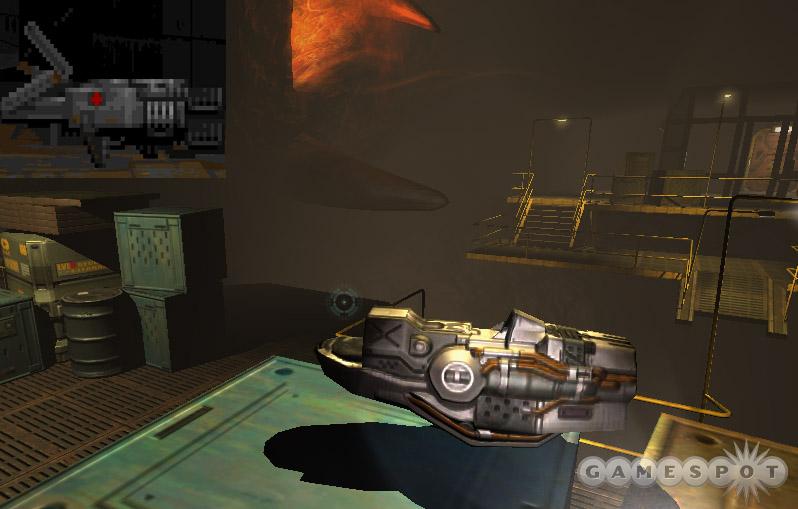
BFG cells are the rarest ammunition in the game. It's certainly best to save up the ammo for the toughest battles, primarily boss fights, multiple hell knights, or even an irritating arch vile. With the premium on ammunition, make your BFG shot count. It's a slow-moving projectile so it certainly isn't a given that the shot will connect. Aim true and let ‘er rip. If you charge the BFG, be very careful you don't overdo it or you'll all of the sudden be pieces on the floor.
Soul Cube
The soul cube is a primary focus of Doom 3's single-player storyline. It's a weapon acquired late in the game and offers some unique properties. For starters, you can't use it whenever you want. The soul cube tells you when it can be used----after you've killed five demon enemies. Firing the soul cube will kill one on-screen enemy and transfer its life essence into your health.
When the soul cube announces its availability, you don't have to use it immediately. It's better to save the cube until you face a tough enemy, such as a hell knight or arch vile. But if you're drastically low on health, it's likely a wise idea to use the soul cube as soon as possible if you're under attack from several enemies.
Chapter 3 - Enemies
This section offers tips on combating Doom 3's enemies.
Zombies
The zombies are a diverse set of enemies. You may find some carrying flashlights, others carrying wrenches, and even some overweight zombies. For the most part, zombies are a pushover. They move slow and most are only dangerous up close where the zombie can maul you with its brute melee strength. In the early stages of the game, the zombie can pose problems because it can absorb a lot of damage from your pistol.
But once you acquire the shotgun, the zombies become less threatening. Often a single up-close blast eliminates a zombie threat, though two might be required. Watch yourself around a room's dark corners where zombies like to hide and ambush. If you encounter a group of zombies, don't get surrounded. Move to a corner or other position; here you can place the zombies in front--and in front of your weapon's crosshairs--instead of waiting for the zombie to inch up behind you.
Once you obtain the chainsaw, use it against zombies to save ammo from other weapons. Strike a zombie just after it attacks. The chainsaw can grind up zombie flesh in remarkably quick fashion. Don't waste strong weapon ammo on slow zombies.
Soldier
Like zombies, the term "soldier" encompasses a lot of enemy types. These include the "z-sec" and commando variety. They certainly appear gruesome like zombies but they're quicker, often smarter (can perform some occasional dodging), and carry a weapon. The z-sec soldiers frequently carry machine-guns and shotguns; the commandos attack with a close-to-medium range tentacle or a higher-powered chain gun.
Most of the z-sec soldiers will approach your position and attempt to attack you at closer range so it's best to lure them into an ambush. When you spot a soldier, hide behind cover or a corner and wait for the z-sec to approach. Ready your shotgun (the best close-range weapon) and fire when the z-sec enters into your line of fire. Battling these soldiers at long-range can be tricky. The z-sec might duck in and out of cover and when they are in sight, they're a pretty darn good shot. If the z-sec doesn't approach, a grenade isn't a bad option.
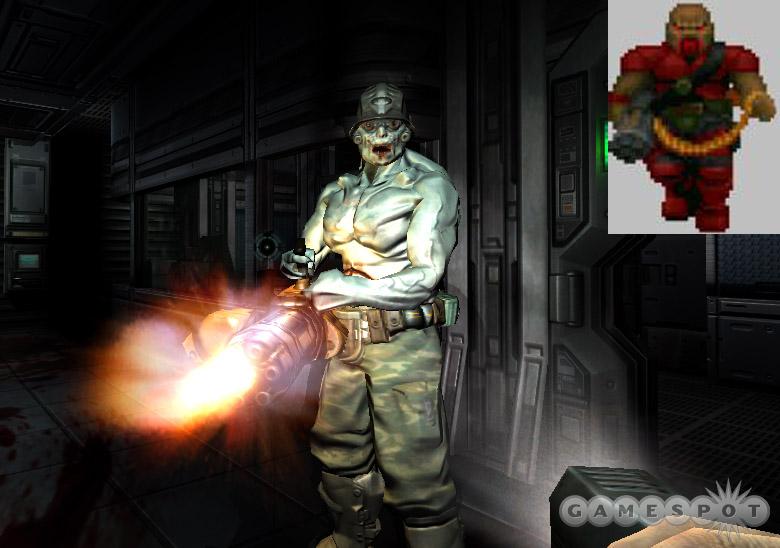
The tentacle-wielding commando will charge your position. A good counter would be the plasma or chain gun (as the commando gets closer). A shotgun at close range will certainly be effective but the commando will have gotten off a couple tentacle strikes before you're within optimum firing distance. The commando with chain gun is similar to the z-sec soldier; he'll take cover occasionally and can certain inflict decent damage with the high rate-of-fire chain gun. Eliminate from a distance with the plasma gun or rocket launcher ideally.
Imp
The imp is the enemy you can expect to face the most in Doom 3. From early in the game all the way to the last battle, there are imps--many, many imps. The imp tosses projectiles from long-range and uses its claws as a close-range melee attack. Allowing an imp to enter close-range isn't a good idea. Its melee attack is very quick and capable of knocking you around silly while other enemies reach your position.
The imps are easier to deal with at longer range. The projectile attack isn't particularly quick so it's easy to dodge. Point your crosshairs on the imp and strafe left or right to avoid the projectile while maintaining your crosshairs and weapons fire on the imp's upper torso or head. At medium-range, develop a pattern. Blast the imp, watch for the projectile arm motion begin, strafe to dodge the projectile, and then resume firing against the imp.
A shotgun blast at close-range can defeat an imp in a single blast. Just get close enough without the imp engaging its melee attack and, if possible, do so when there aren't several other enemies in the area to distract or harm you. Also, as is the rule with most combat situations, when you spot imps arriving in front of you expect there to be some arriving behind you.
Like zombies, imps often hide in ambush points--in dark corners, behind hidden panels, and even at the entrance to new rooms. The imp can lunge itself at your position (often when it's waiting behind a door); the strike is often too fast to dodge or counter. If you suspect an imp is ahead, open the door by positioning yourself at the side of the door. That way the imp lunges and hits the door jam.
Wraith
The wraith looks similar to an imp but it's hunched over its long, blade-like arms. It also teleport around the area; the creature performs a series of teleports as it moves close to your position. The best time to blast the wraith is when it comes out of its teleport adjacent to your position. Greet the wraith with a shotgun blast aimed directly at its head. You can take down the wraith in a single shotgun blast if you connect. But get ready if you miss; the wraith uses its long, bladed arms as a vicious melee attack. Wraiths often travel in numbers so be careful waiting for one to move close; there could be another wraith teleporting in behind you.
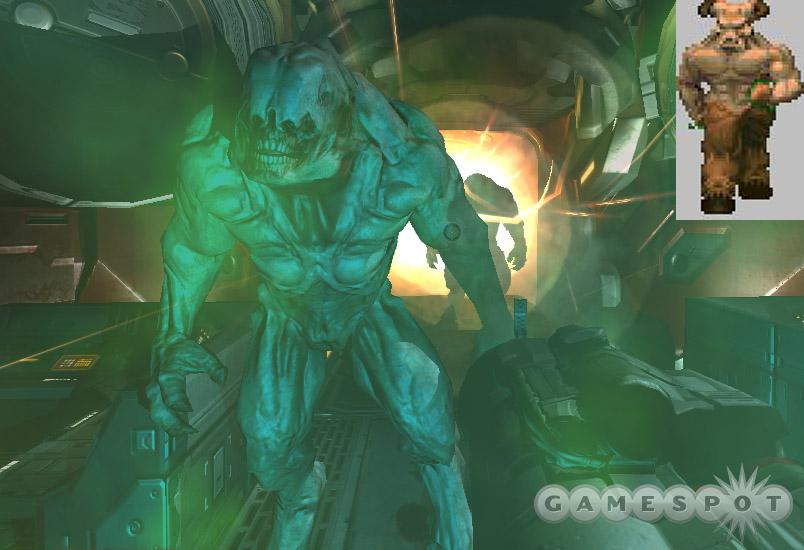
Demon
This ferocious beast somewhat resembles a gigantic dog...or perhaps a lion without fur...or a bull with a mechanical torso. Whatever it looks like, it's nasty. This is an update of the original Doom's demon, which was nicknamed pinky for its not-so-ferocious color scheme. The demon's first appearance in Doom 3 is magnificent and one of the greatest enemy entrances of all time. The demon is fast and lacks ranged ability; it will charge you on sight and gore you like a bull.

Your best counter is a powerful weapon that excels at both long and short ranges. Once recovered, the plasma gun is a good option. The chain gun lacks long range accuracy but should be sufficient to cripple the demon. And certainly the rocket launcher has the power to take down the pinky beast. Early on, you're likely stuck with the shotgun or machine gun only. The shotgun does work but you'll have to be agile to avoid the demon's gnarly bite. Circle strafe around the beast and pump him full of lead.
Maggot
The maggot is a two-headed creature that looks like a cross between an imp and a wraith. Like the wraith, the maggot huddles close to the ground and attacks with a melee strike only--but it will also leap at you like the imp. A maggot's quickness is its strongest attribute. If you spot one in the area, consider looking around you because there's likely another running up behind you. The maggots can be handled rather easily from long-range with a machine gun or stronger weapon but a patient, and daring, player could eliminate the maggot from close-range with a single shotgun blast. Aim for the upper body and head.
Revenant
This armored skeleton brandishes a rocket launcher on each shoulder. Not only that but this bony beast, called a revenant, fires homing rockets that are fairly adept at skirting around corners. Note that it is possible to shoot down the rockets, which can also be a slight problem too. When firing at the revenant from long-range, the rockets can serve as a shield to block your attack--at least momentarily.

Revenants are deadly, especially in numbers. If there's more than one, expect them to be at opposite corners of the area, which creates a difficult fight with rockets flying in from multiple locations. Retreat to a single hallway so you can deal with the revenants from the same direction. It's possible, but tough, to dodge the incoming homing rockets up-close as you would an imp projectile. That way you can eliminate the revenant with several shotgun blasts. Otherwise, long-range weapons are better: equip the plasma gun, chain gun, rocket launcher, or even machine gun (though that will take longer to finish the revenant off).
Trite and Tick
The trites and ticks are small spider-like creatures. Though not dangerous as a single unit, the trites and ticks are intimidating in large numbers. These creatures lunge at you like an imp. The resulting blow knocks you around and can cause disorientation. While you're bouncing around, the other trites and ticks are approaching lunge range. Within seconds you're pounded by every single one of them in the room.
So it's important to prevent these creatures from getting close. The machine gun is one of the best weapons because it's accurate and able to strike the trites and ticks from longer range. The shotgun can kill more than one at a time but its slow "recharge rate" (the amount of time required to fire another round) is too long; by the time you can fire another shell, the trites and ticks are even closer around you.
Cherub
Don't let the baby face fool you--the cherub is a vicious little creature. Combining the face of a child with the wings of an insect, and the claws of a badger, the cherub scoots along the ground until it reaches attack range where it lunges at you. The cherubs are tough because they're so small and offer little surface area in which to cause damage. A shotgun blast could kill the cherub in a single hit but most of your projectiles may miss the creature. By the time you can fire again, the cherub has reached your position and knocked you around with its lunge strike.
The plasma gun works great but its ammunition is fairly valuable. The machine gun is a decent substitute, just be sure your aim is true since it'll take longer to kill the cherubs with the lower powered weapon. As with most Doom 3 enemies, expect to face more than one cherub. Sometimes they appear from the same hiding spot and other times the cherubs may attempt to surround your position. Keep your eyes peeled for more baby faces before lettings your guard down.
Lost Souls
The lost souls are fiery heads that swoop through the air and attack with a virtual "headbutt" attack. They'll float around the area, line up their attack, and come in with fury. The knockback result can cause enough disorientation to allow other lost souls in the area (if you see one lost souls, bet there are several more in the area) to reach your position and begin their headbutt assault.
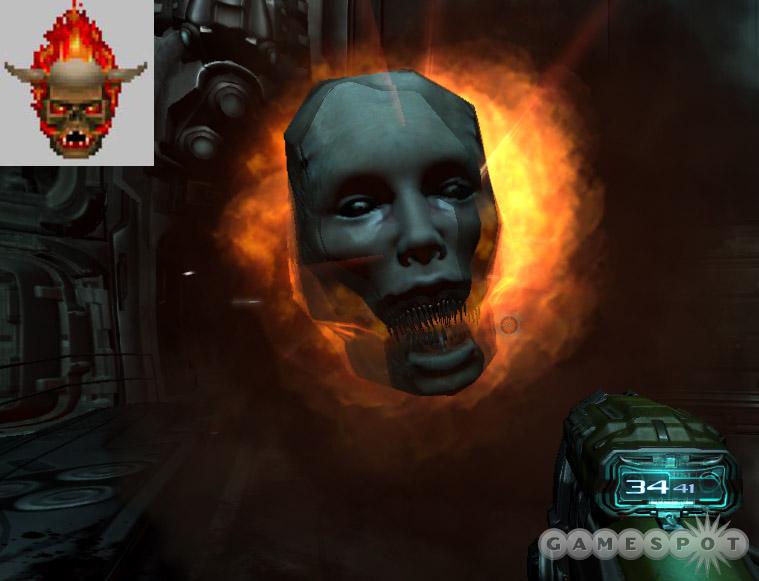
But the lost souls aren't particularly strong. A few accurate machine gun bullets are enough to explode a lost soul. Don't waste strong weapon ammunition on these enemies. In fact, it's even possible to use the chainsaw instead. Line up your chainsaw with the approaching lost soul and grind the flaming head into oblivion. It's risky, though; if you miss, you're bound to be struck several times before you can regain your composure.
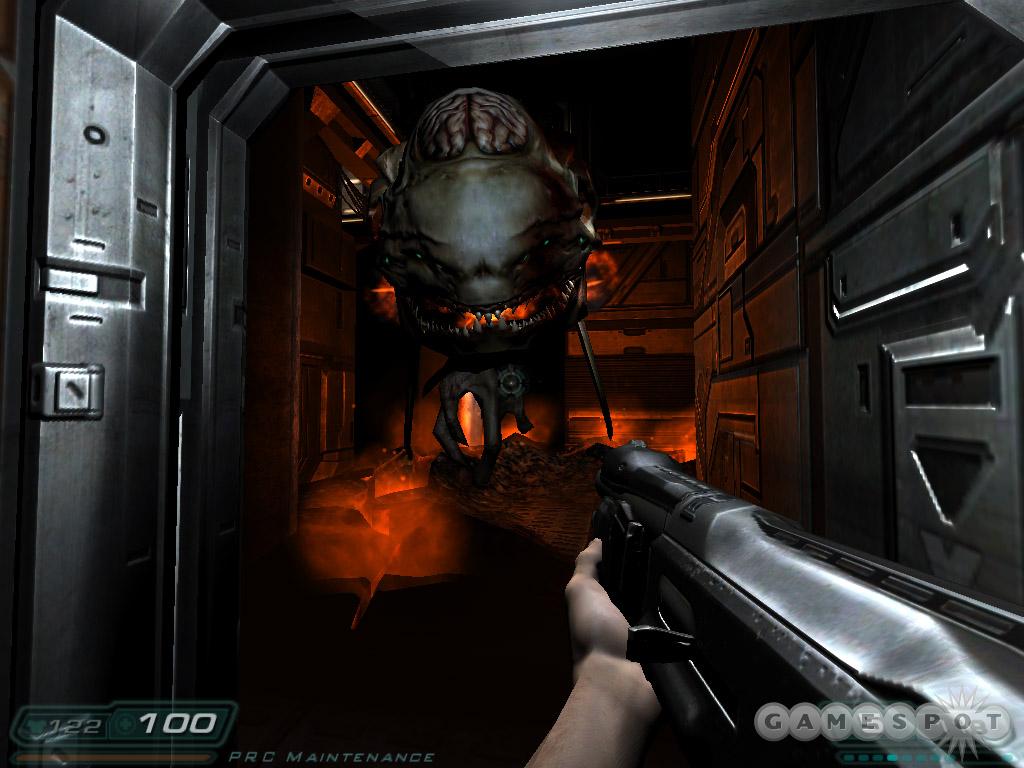
Mancubus
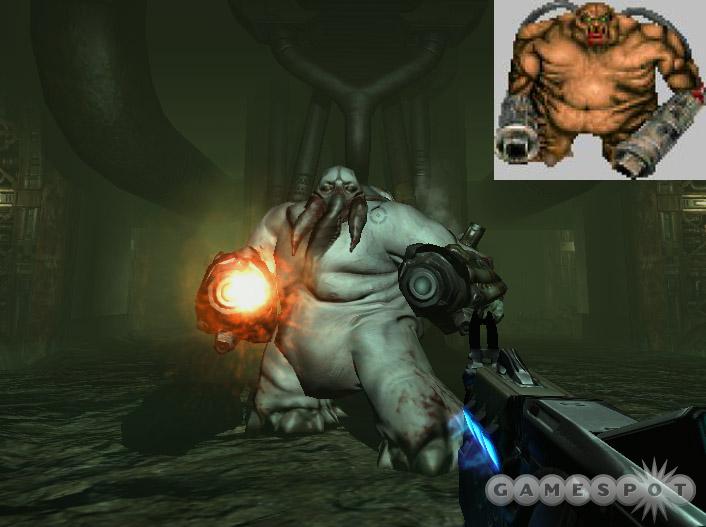
The mancubus is a gigantic, blubbery beast armed with two projectile cannons (one mounted on each arm). The mancubus' large surface area makes it an easy target for nearly any weapon. But its powerful and fast firing cannons mean you should keep your distance. It's much easier to dodge those projectiles at longer range. Use the rocket launcher or plasma gun ideally. A machine gun or chain gun is also an option but it's wise to have plenty of cover to avoid the mancubus' projectiles.
Cacodemon
The cacodemon resembles a floating demon head; it hovers high above and around you and launches a fireball from its mouth. It's a relatively large target and can be taken down with the machine gun, chain gun, or plasma gun. If the creature maneuvers close, the shotgun is certainly an option since you can rest assured most of the shotgun's projectiles will connect. Don't waste rockets on the cacodemon; it's hard to be that precise firing at an aerial target.
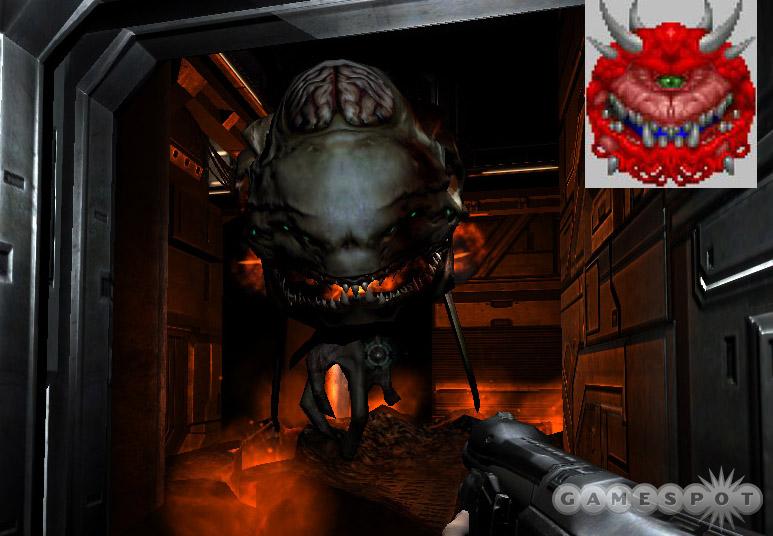
Expect to face cacodemons in numbers. Although they're hovering, the cacodemons can be lured into chokepoints like doorways and halls. If you're facing more than one, retreat through a doorway and fire from under the safety of a roof. Your weapons fire knocks the cacodemon around. You'll have to adjust your crosshairs to keep up with the creature's movements.
Arch Vile
In Doom 2, the sight of an arch vile sent shivers down even the toughest veteran marine's spine. He's nearly as deadly in Doom 3 but not quite the menace he was in this game's successor. The arch vile makes a grand entrance each time he's spotted and can spawn other monsters into the room. Therefore, allowing him to remain alive is dangerous every second he remains in existence.
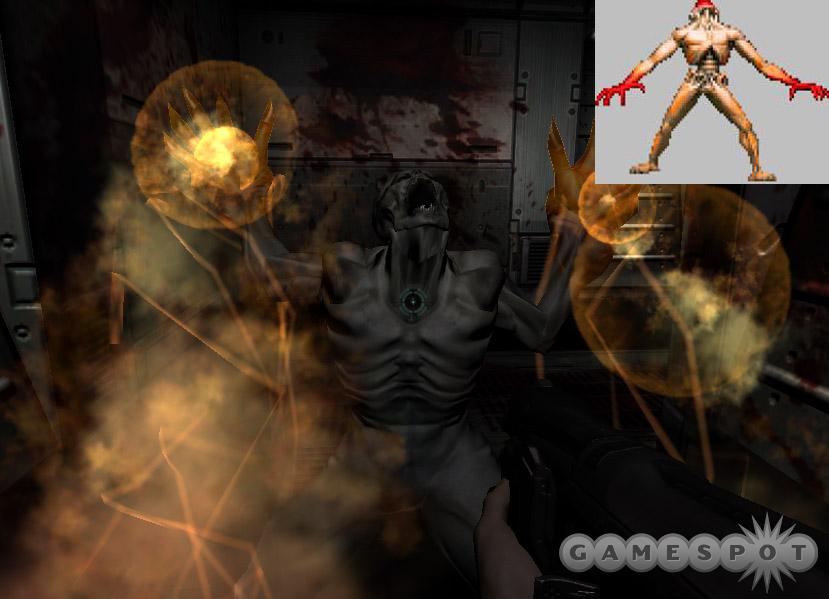
Though his entrance is grand, it's also long. As soon as you see the arch vile teleport into the room, use a plasma gun, rocket launcher, or even a chain gun to blast him. The arch vile stands in place presenting an inviting target. Be ready to move once the arch vile fires its ground flame attack. Kill the arch vile first then concentrate on any enemies the arch vile spawned into the room.
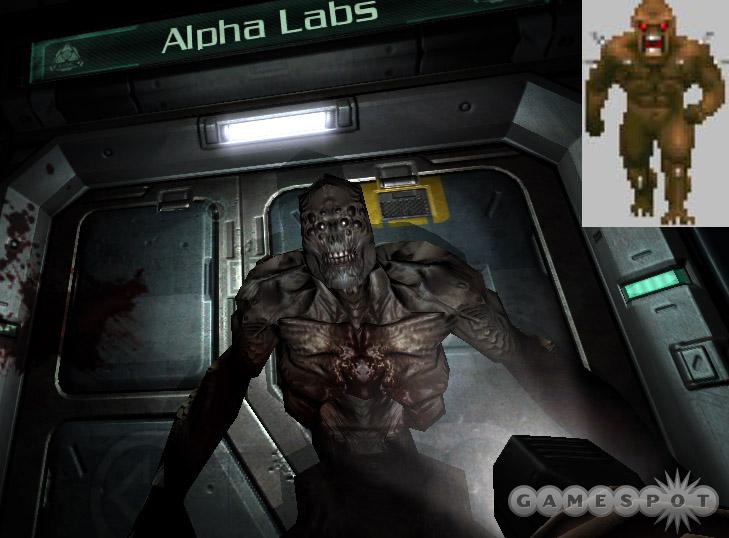
Hell Knight
The hell knight is a menacing humanoid giant. You could compare it to a mammoth imp but that's not doing the hell knight much justice. Like the imp, the hell knight tosses a projectile attack from long-range and engages with brute melee force at close-range. Of course both attacks are far more potent than the lowly imp. Furthermore, the hell knight possesses much stronger skin; a single shotgun blast is what the hell knight calls a "tickle".
When dodging the hell knight's projectile, don't stand too close to a wall. The projectile has good splash damage so you're likely to take some splash damage if you're too close. But it's wise to keep the hell knight at a distance. Its melee attacks are too strong. The good news is you're much faster than the hell knight. In a room with pillars, it's easy to circle strafe around the cover and pelt the hell knight with shotgun blasts, chain gun rounds, or plasma bolts and slowly eliminate the beast. Late in the game, it's wise to save your soul cube to easily eliminate a hell knight.
Vagary (Boss)
You'll face the Vagary at the end of Alpha Labs - Sector 4. Time to battle the Vagary--it's half-humanoid, half-spider, and all-nasty. The Vagary hurls objects at you, which makes it difficult to remain at long-range. Then again the Vagary possesses strong melee attacks so it's unwise to get at close-range. Since the Vagary is hurling objects at you constantly, it pays to defeat the beast as quickly as possible. Toss grenades at the Vagary, fill it full of chain gun lead, or use the plasma gun if you scored it early through thorough exploration. Crush the Vagary to continue to the next level.
Sabaoth (Boss)
You'll battle the Saboath in the Central Server Banks. The Saboath is like one-third tank, one-third cyborg, and one-third BFG. Yes, this boss fires the BFG. You can detonate the BFG blast using your own weaponry--as you learned from the instructional video--and it's a wise tactic to avoid suffering damage from the flying BFG projectile. Fire some rockets immediately to detonate the first BFG blast then try to keep cover between you and the Saboath. Watch for side doors to open with new supplies. After defeating the Sabaoth, grab the BFG 9000.
Guardian (Boss)
You must battle the guardian and its seekers. Three seekers hover around the guardian. In order to inflict damage on the guardian, you must kill all three seekers. When you do, the guardian remains in place and a blue orb appears above him. During this time, the guardian creates more seekers. But most importantly, the guardian is vulnerable to your attack.
So defeat the seekers using the plasma gun (it's the most accurate and fast firing weapon for the job). When all seekers die, turn toward the guardian and blast the blue orb with rockets, the BFG, or the plasma. Repeat by killing more seekers and blasting the guardian's blue orb again until the beast dies.
Cyberdemon (Boss)
You reach a circular area where the battle against Doom 3's final boss, the cyberdemon, begins. Take advantage of the circular area by constantly moving. Just back pedal and watch the cyberdemon follow. Stay well away from this monstrosity. Keep him slightly out of the line of fire for most of the battle so you don't suffer the massive blast of his rocket projectiles. You'll need to use the soul cube to take him out. As you back pedal around the area, watch out for maggots and imps that emerge from the fiery center. Keep moving backward and switch to the machine gun to defeat your pursuers.
The main tactic is keeping your distance and constantly moving backward around the circular path. The cyberdemon will follow you. Keep enough distance between you and the demon so you can slide along the center edge and take cover against the cyberdemon's projectiles. Defeat the cyberdemon to complete the game.
Chapter 4 - Walk-through
This section provides the complete walkthrough for Doom 3's single-player game. Here you'll find solutions for every objective and locations of weapons (including hidden weaponry), PDAs, and ammo and armor caches. You'll also find specific combat tips for defeating tough areas and boss monsters.
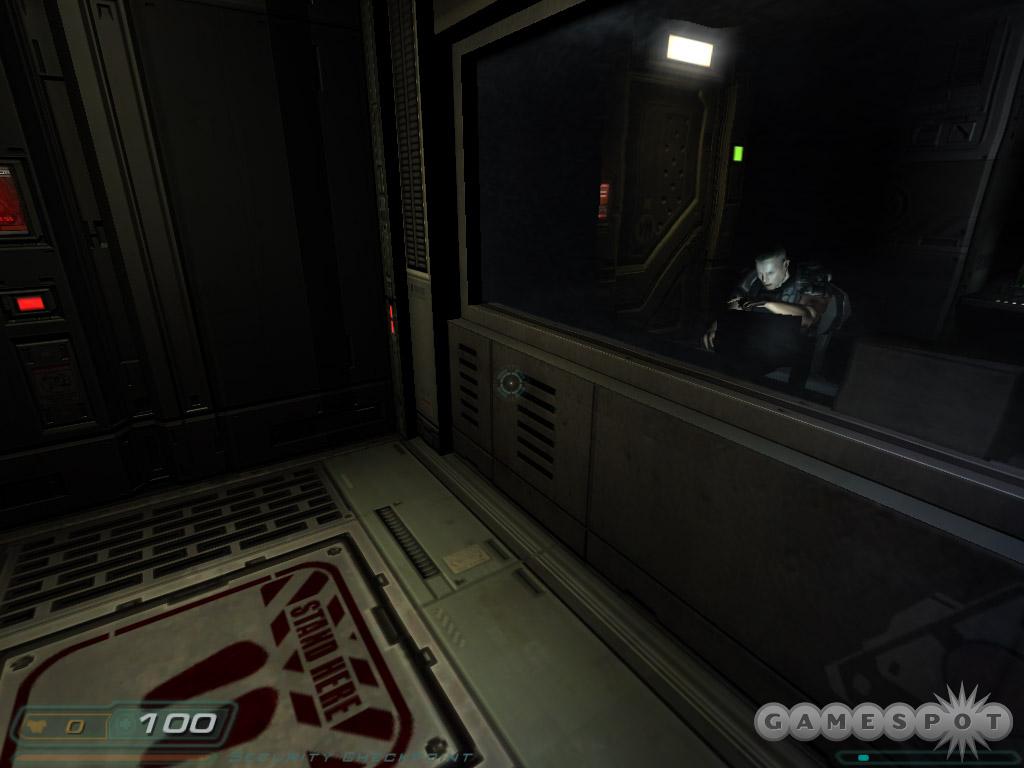
Disembark the drop ship into the hanger. You can talk to R. Cooper if you wish; he ushers you toward reception. M. Caseon up ahead isn't too thrilled with Mars and warns you to watch your back if you plan to stick around. Move through the door and into the checkpoint. Stand on the red square and be scanned. After the scan, move into the departure lounge.
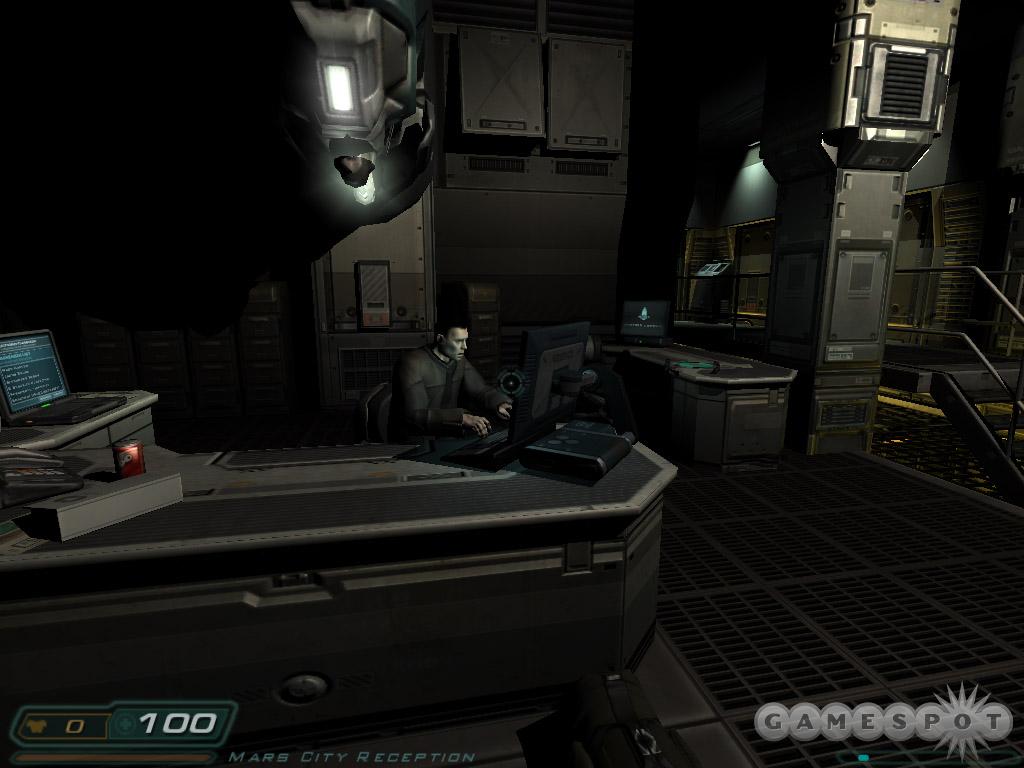
Check out the information kiosk if you wish. Nothing much you can do here just yet. Follow the arrows toward reception; it's through the door straight ahead. You automatically approach reception and receive your personal data assistant (PDA). Explore your PDA and read your emails and view the Marine Command Briefing video disk. For an Easter egg, read the monitor of the guy typing...just keep reading...keep reading some more.
Objectives: Report to Marine command. Speak with Sergeant Kelly in Marine Command HQ.

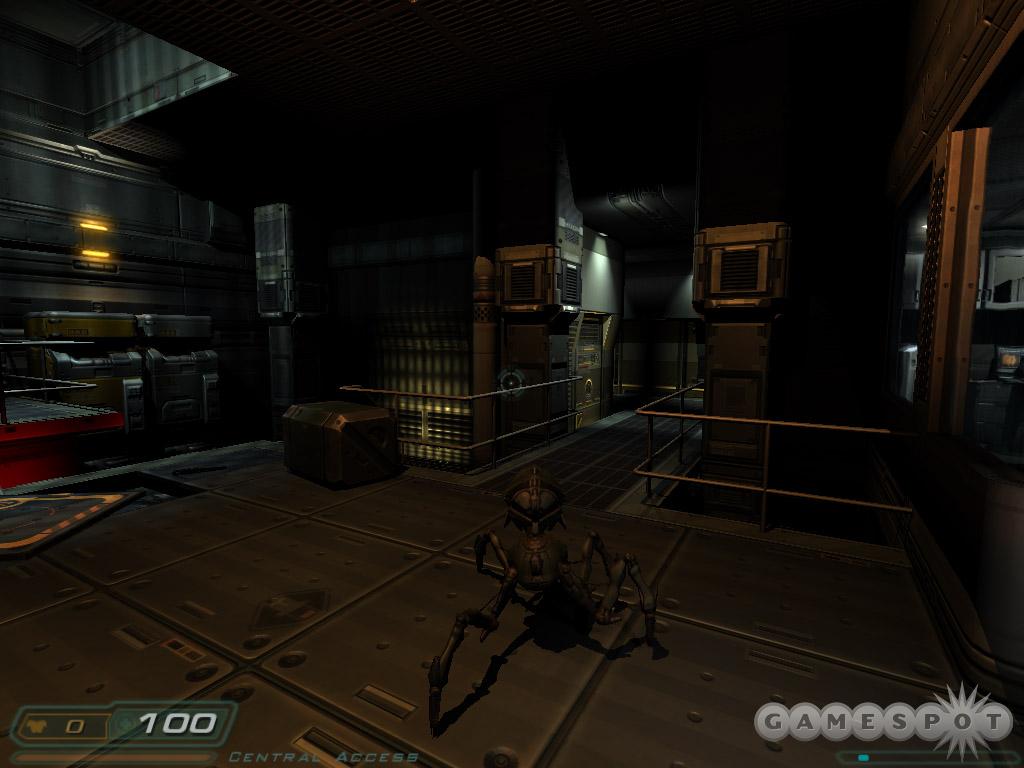
Note the information kiosk in the room. Now that you possess a PDA you can download information from these kiosks. Return to the previous room and download an email from the kiosk there as well. Search the desk behind reception for a video disk. Exit reception up the catwalk in the back. Speak with A. Chang as you move along toward the door marked Monorail Station. You're now in the central access. There's a guard posted near a door to your right; can't go there yet. Instead, continue straight down the hall across from your start position.
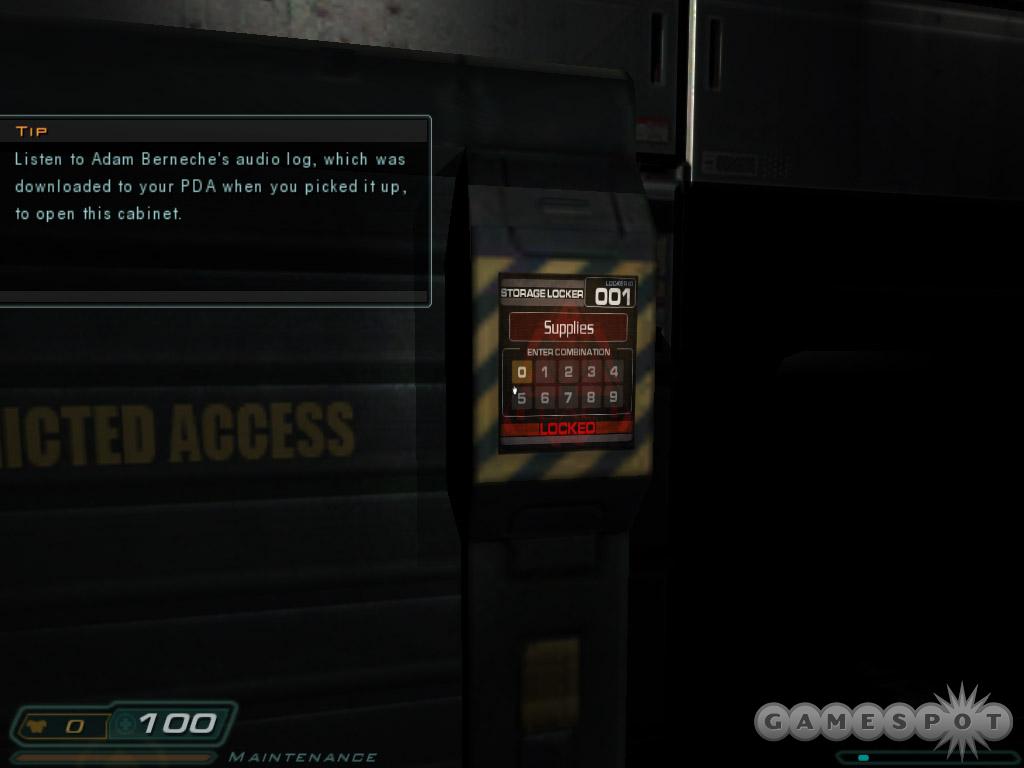
Speak with the guy exiting the bathroom and explore inside if you wish. Continue straight into the kitchen area. Snag Adam Berneche's PDA off of the counter; listen to the audio file and read the emails. He reveals a code to access his tools--396--storage locker near maintenance elevator. Return to the hall and enter the door on the right into the marine command access.
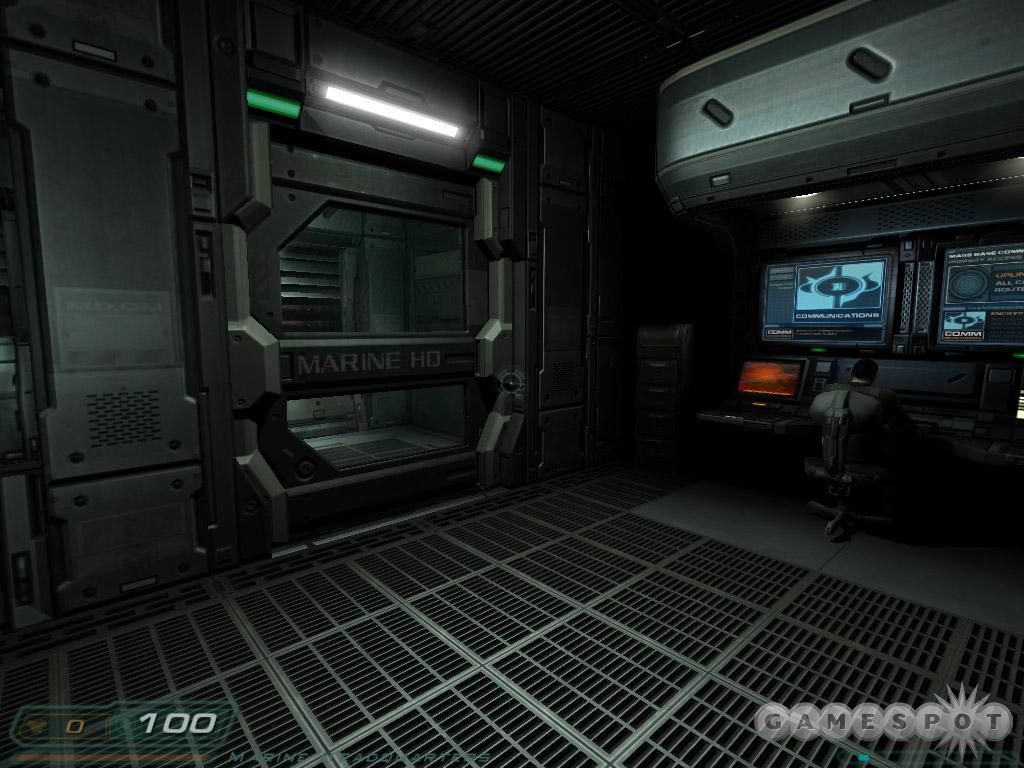
Explore the area (some info to download and repair guys to annoy) before moving through the door into marine command. A marine ahead points the way into HQ. Proceed to the right and find the door up ahead. Speak with the nearby marines if you want then enter headquarters, which completes your objective and initiates another.
Objectives: Locate maintenance entrance. Follow the sentry bot to the elevator that leads to the lower maintenance levels.
Approach the sentry bot. Stick close and just follow him to your objective. It'll backtrack to near the level's start position and usher you into maintenance. Find the storage locker down below. Use the code--396--from your stolen PDA to find ammo inside. Enter and use the elevator.
Mars City Underground
Main Objective: Find the missing scientist.
The Mars City sublevel was one of the first multi-purpose installations built on Mars. Housing storage, environmental systems, localized energy production, communications arrays, and rudimentary research systems, the aging facility is vital to keeping mars city operational.
Walk forward and speak with security. Walk to the right and grab armor and weaponry before continuing onward.
Objective: Reach old comm. building. Make your way to the old communications building. The missing scientist was last seen heading that way.
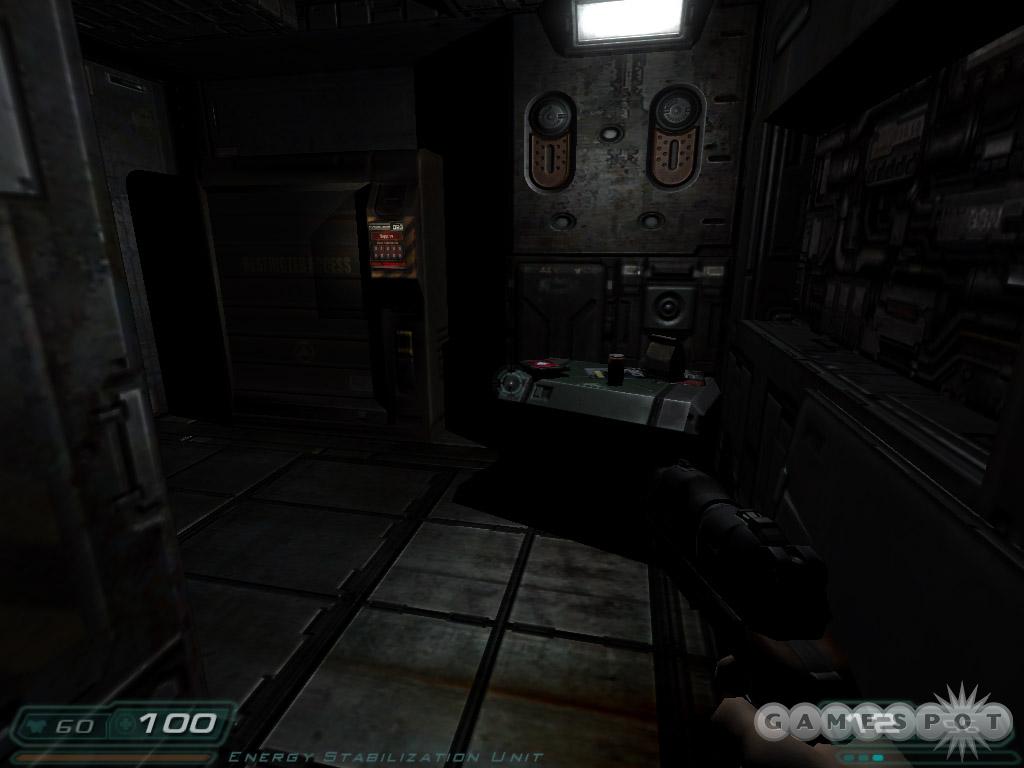
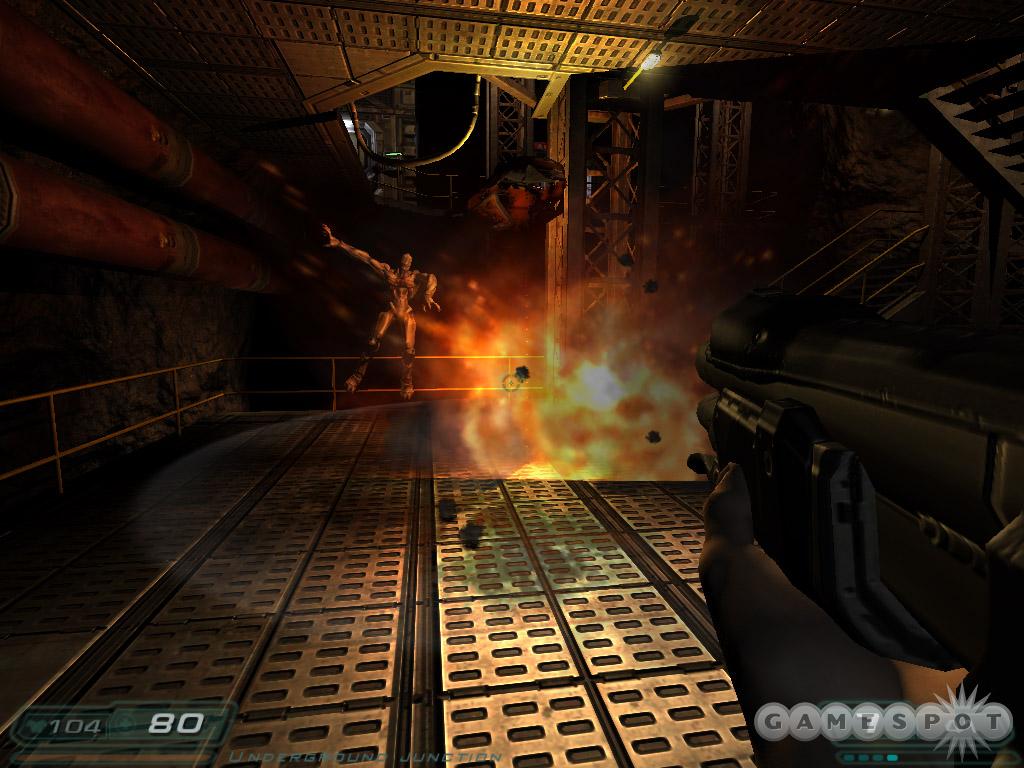
Move into the underground junction. Follow the catwalk down the stairs and toward energy stabilization. Find C. Rodgers behind some crates down the next staircase. He seems to have some intriguing information regarding the scientist but won't divulge. Look under the stairs for some armor shards before going through the door marked convergence chamber.
Follow the only path toward the next door marked convergence chamber two. Speak with anyone you wish and be sure to check a room just to the left of the door into convergence chamber two. Grab Grant Baston's PDA here and read the emails to learn the storage code--531. Open the locker for ammo and armor. Listen to the audio file in your new PDA.

Maneuver through the next chamber and listen to the conversation up ahead. Proceed toward the door on the left. Before entering, drop down into a niche along the right wall and find armor. Go through the door and speak with I. Sinclair. Enter the maintenance area on the left. As you move inside, the lights switch off. Activate your flashlight and proceed.
Enter the underground garage. Speak with M. Ryan. He describes your trek to the comm. station. Grab some ammo off the crate nearby then use the button to the marine's left to cycle the airlock. Maneuver out onto the surface. This quickly depletes your oxygen so scamper quickly across the catwalk to the far airlock (you'll pick up an air canister along the way that replenishes some of your oxygen). Activate and enter the airlock.
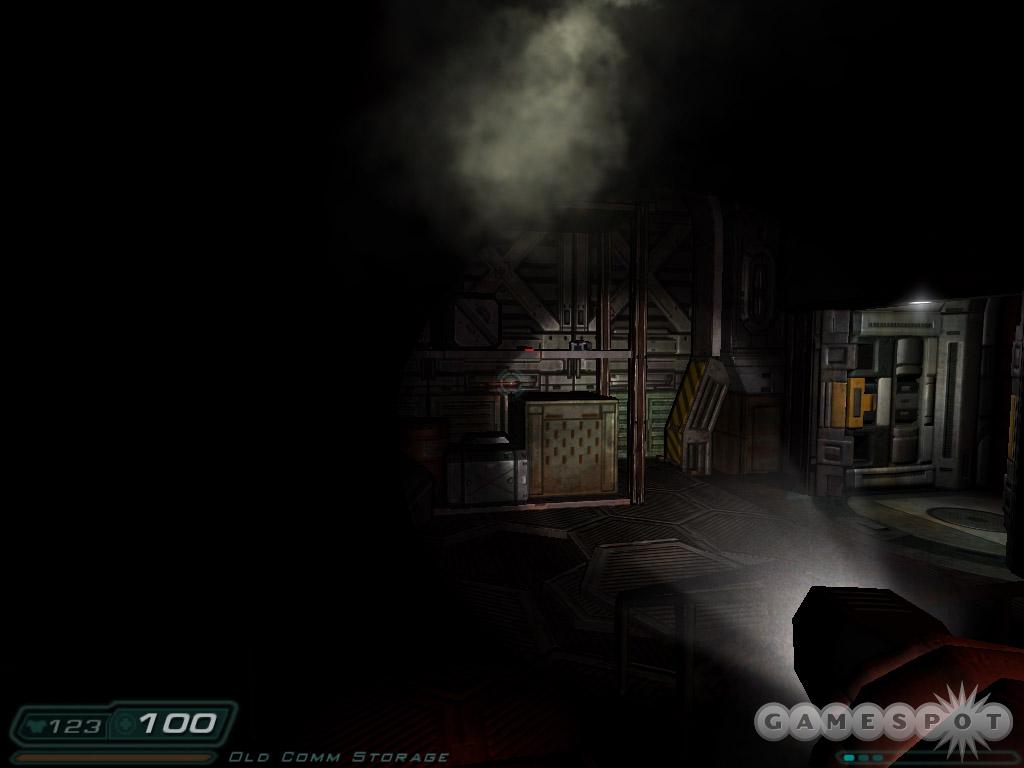
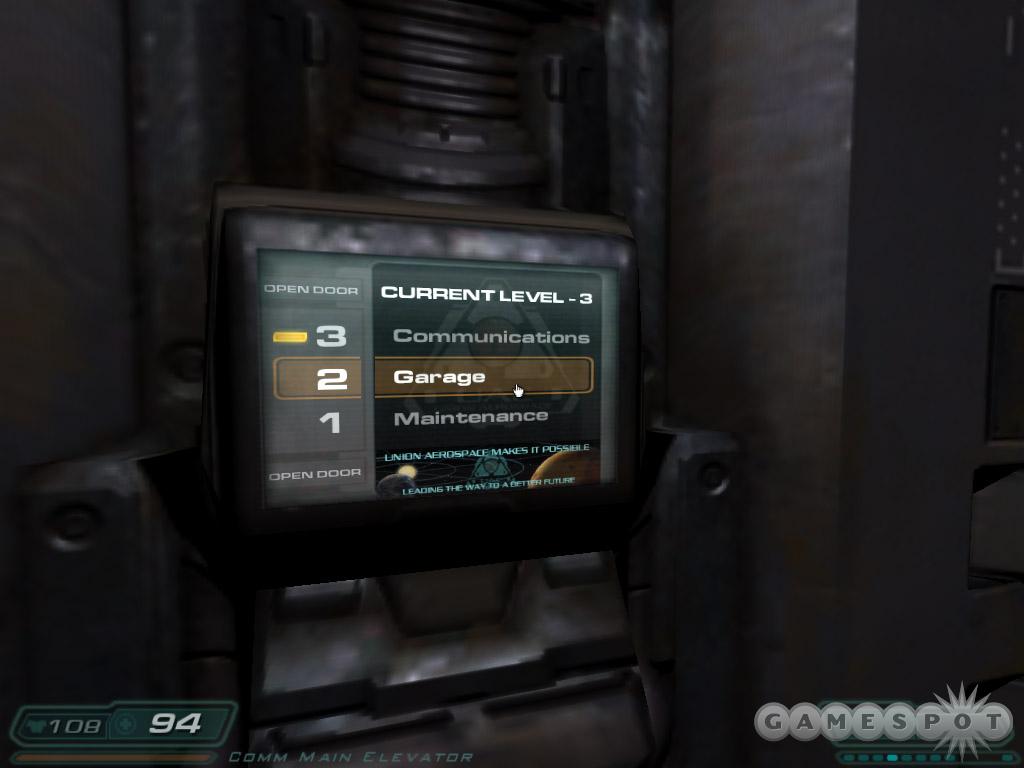
Search the shelves on the right for armor (leap onto the crate behind the shelf to reach the goods). Enter the lift and proceed to level two, communications. You're now in the old comm. building. Maneuver around to the far door to initiate the cut scene. You've located the scientist. Then all hell breaks loose.
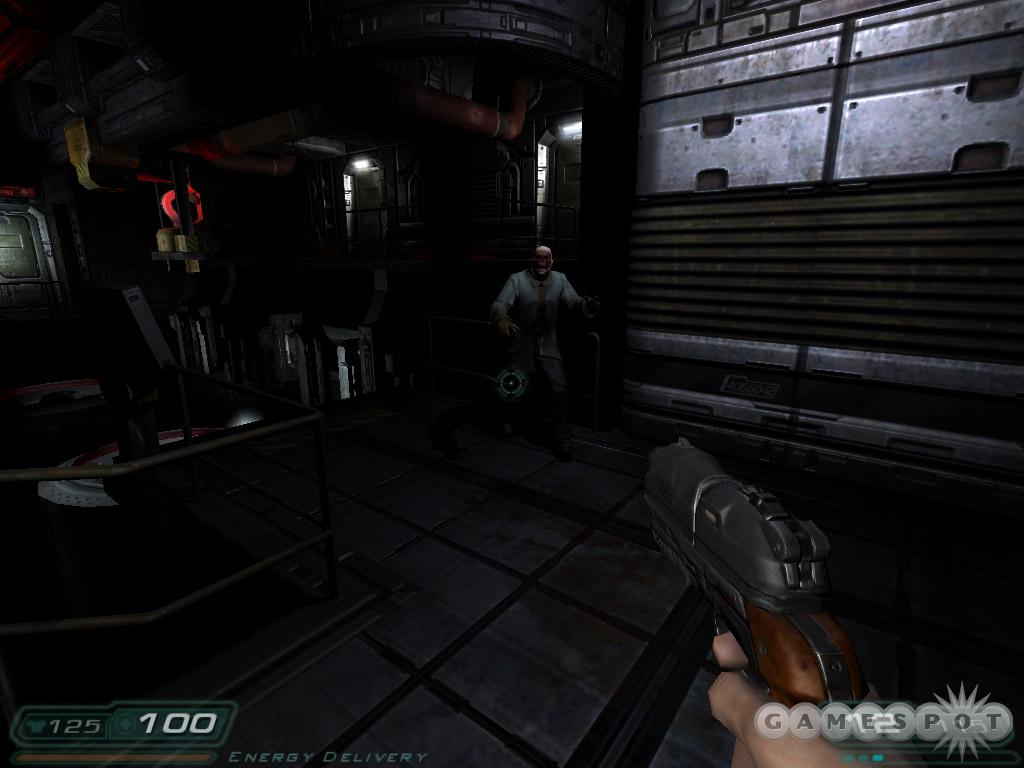
Shoot the scientist then face the door behind you. Another possessed guard attacks. Gather the ammo and health from the room. Be sure to use the monitor on the console for an optional video. Exit through the door the guard arrived from.
Objective: Back to security checkpoint. Make your way back to the security checkpoint. From there you can take the elevator back up to mars city.
Blast another zombie around the next hall. Drop down toward the elevator and get inside. Proceed to surface access. Exit the elevator once you've reached the destination. You're back in the initial room of the communications station. The lights pop off. Proceed to the airlock. Open it and return across the surface to the next airlock (mention the armor and ammo side trip to the left).
The airlock gets stuck open on the other side; you spot a zombie moving by. Exit and take him down with your pistol. Move up to the left side of the room. Be ready to take out a maintenance worker (fully zombie now) on the other side of the door. Leap up the staircase and ascend. Go through door at the top.
A zombie ascends a ladder ahead of you. Take him out then use the console on the left to extend the service bridge. Be ready to take out a guard hiding in an alcove to the right ahead of you. Go into energy processing. Take out another guard from long-range then a second that crawls from a hole near the console in the left corner.
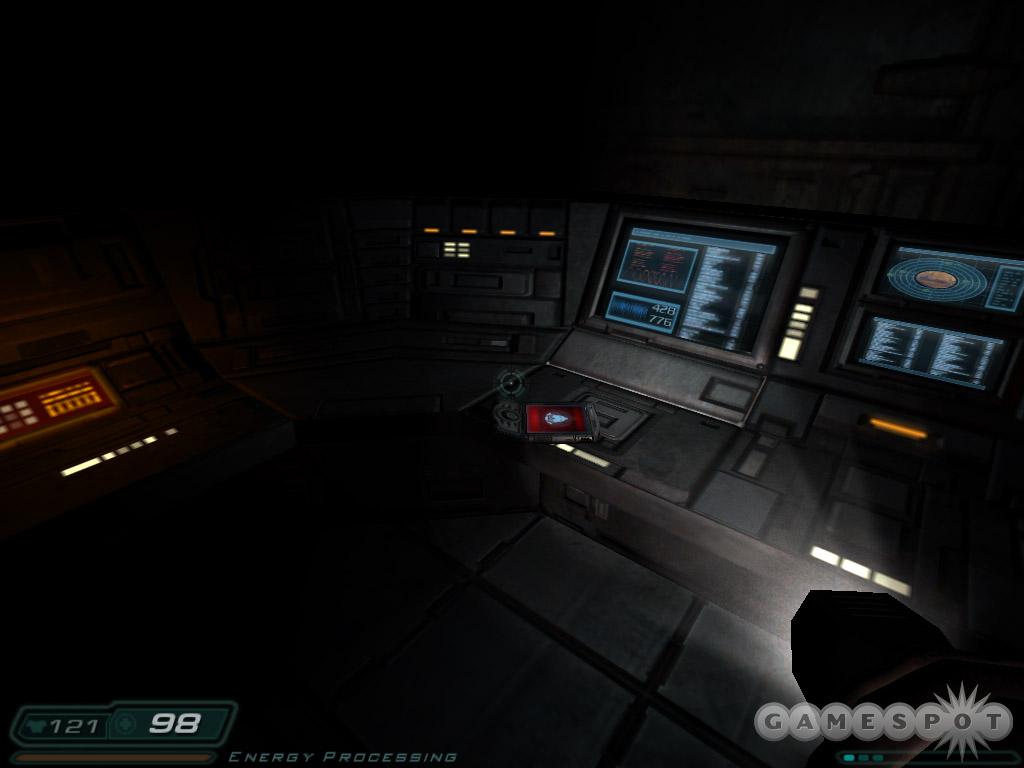
Take Frank Delahue's PDA off of the console. Read his emails and listen to the audio logs. There's also some hidden ammo, health, and armor in the room. Push a crate to the right side of the console and jump up into the alcove. Also look in a niche at the top of the curved pipe.
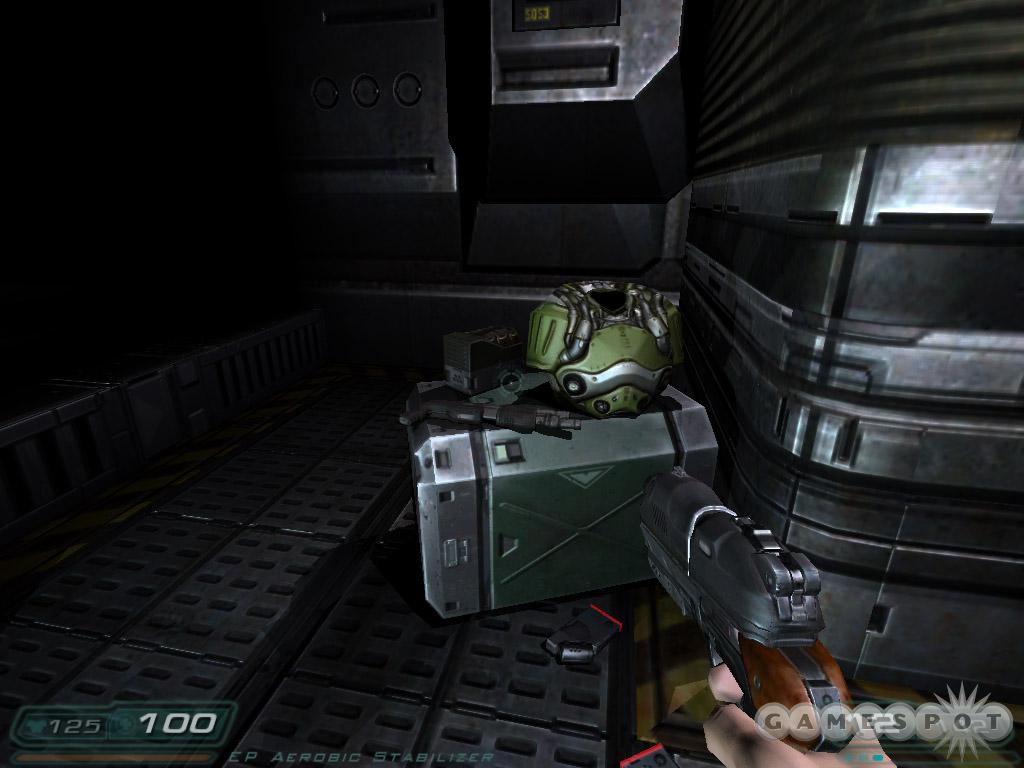
Open the security door into the next area. A zombie patrols the top floor and another hides in a corner in a right alcove ahead of you. Grab the items there before using the door on the left. Enter the EP aerobic stabilizer room. Go down to the right and find the shotgun and some armor. Be ready though; it's a trap. When you grab the weapon, the floor lowers and three zombies appear. Blast them. Snag more items in the corner and find even more across the room in the lit corner. Exit through the next hallway and into the EP control unit.
Grab ammo and armor from the right. Cross the room and be ready to combat a trio of zombies up the stairs to the left. Before exiting, drop down under the stairs and find some shells and health.
Advance slowly down the next hall until you hear the door open. Turn around and find a zombie about to ambush you. Kill him and check his alcove for shells. Kill a second zombie now behind you then search the storage shelves for ammo. There's also a health station in the right corner. Move through the door and enter the door on the right.
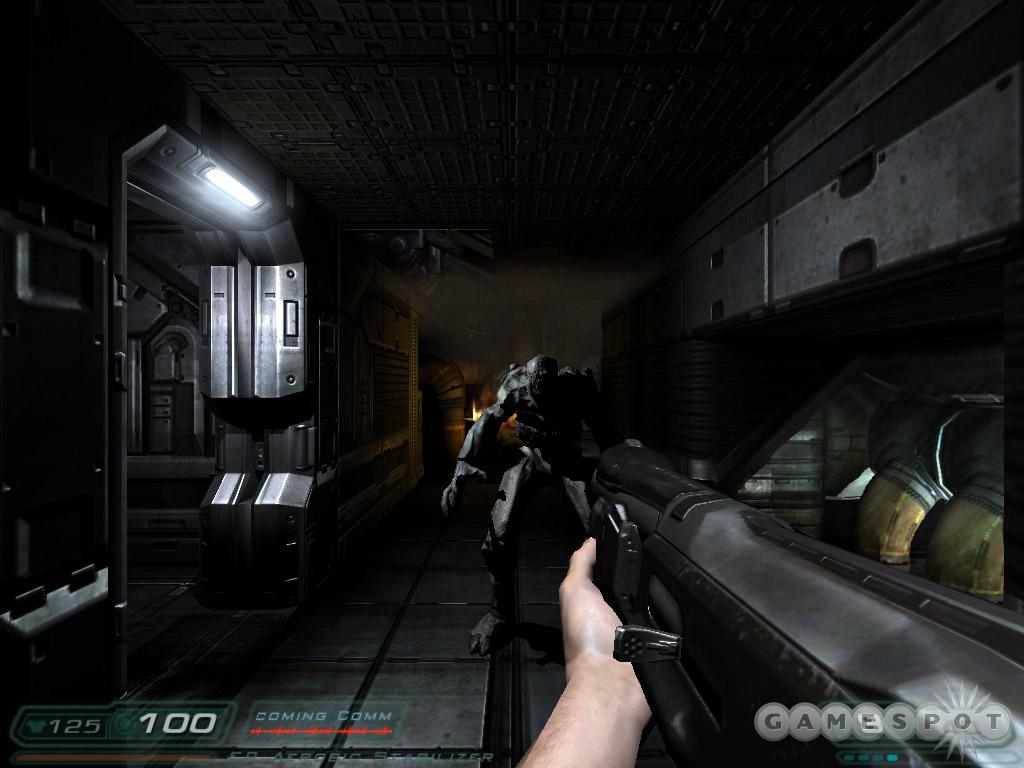
When you do, an imp appears. Blast him while dodging his projectiles. Don't let him get close! The shotgun is your best weapon in this situation. Continue through processing and face another imp followed by a zombie. Return to the health station if necessary.
The next room contains a zombie in the corner ahead of you. He'll pop out as you enter near the med kit; an imp appears behind you as well. Search the alcove where the zombie stood for shells. Enter energy delivery. You're overlooking the bridge extended earlier. Go to the left and through the door.
There's a half-full health station to the left. As you move ahead and toward the corner, an imp busts out of the wall. Back off and blast him with the shotgun. Take down a zombie before going through the door in the right corner. Go left along the catwalk into convergence chamber two.
Cross convergence chamber two to the far door. Ready the shotgun. As the door opens, blast the imp that leaps at you. Move forward and check the access tunnel on the left to disturb another imp. Cross the room to convergence chamber one.
As you move through, don't get too startled by the slumped corpse. In the next room, beware of the imp that pops out from under the stairs. Open the door at the top. When the imp appears ahead of you, shoot the red barrel to cause an explosion--killing the imp.
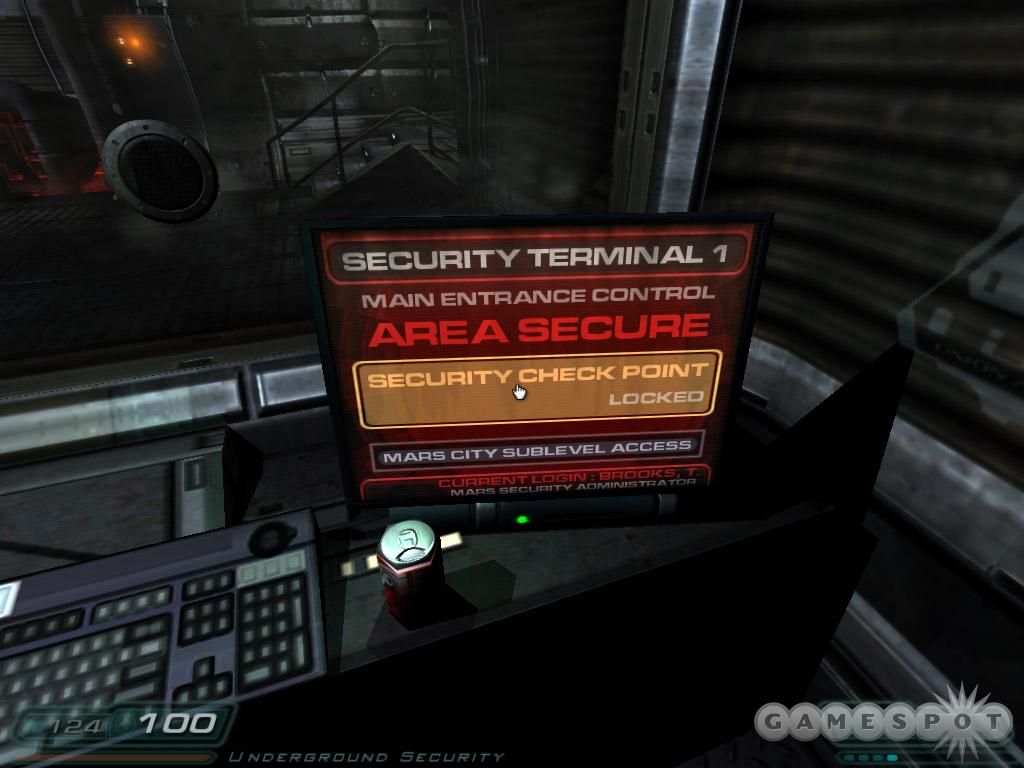
Ascend to the top of these catwalks and move toward the unlocked door. Battle another imp. Enter the security office with shotgun armed to defeat the guard on console in the left corner. Use the health station and gather the items from the room. Use the computer on the other side to unlock the checkpoint.
Ready your pistol and exit. Another shotgun guard waits outside; he's far away so the pistol performs better at this distance. Eliminate him, gather dropped ammo, and then enter the checkpoint to the left. Cautiously move inside until the imp drops down. Defeat him then enter the lift and use the controls.
Mars City
Main Objective: Return to Mars City.
Mars City is the gateway to all of Union Aerospace's Mars base. All arriving personnel are processed here before moving to their assigned posts. Mars City houses the primary marine operations control room as well as the main administrator's office.
Objective: Marine Comm. Center. Return to the command Message Center for a status update from Sergeant Kelly.
Beware of a guard behind the crate ahead. Approach the ladder in the left corner; a friend from above lowers it. Climb the ladder and speak with R. Roland. Crawl into the vent shaft and grab the armor. Wait for the pipes to bust then continue through. Drop down the other side.
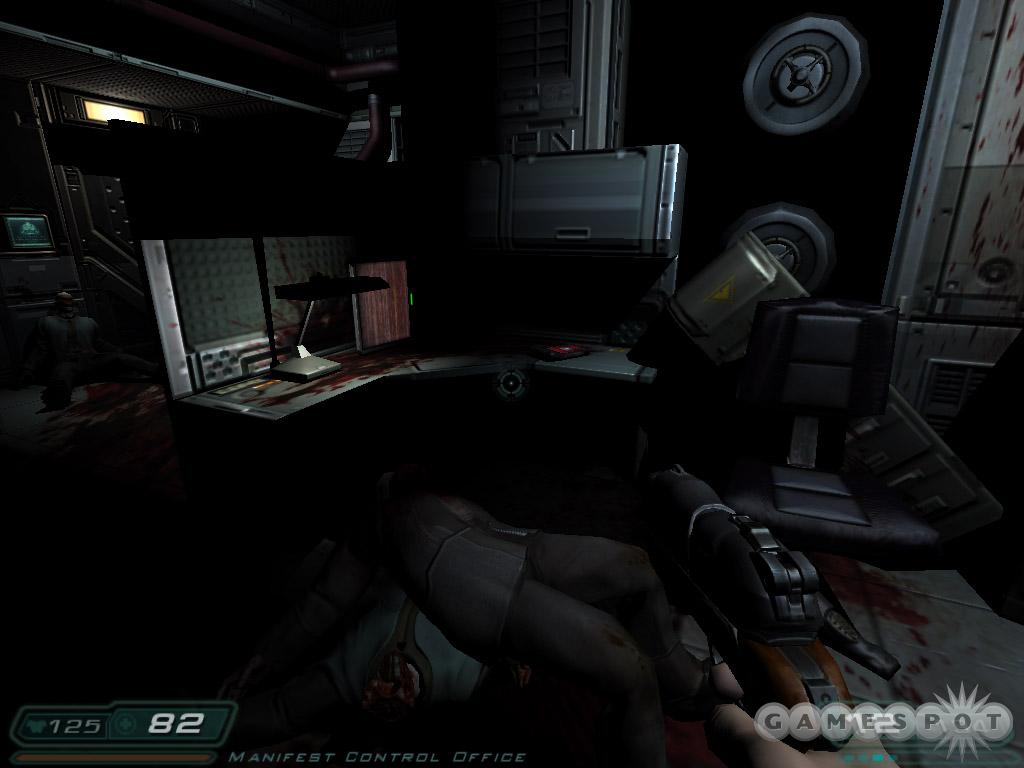
Enter the manifest control office and scurry to the right corner and turn around to defeat the zombies in the room. Grab Marcus' Stanton's PDA from the desk. Duck under the flames to grab the armor. Approach the exit door. Spot the guard entering from the door on the right. Back into the corner and wait for him to enter the doorway. Kill him! Another guard enters from the door on the right--defeat him and grab the machinegun. Check the door on the far left for a new objective.
Objective: ACO Card. Obtain an ACO key card for access.
Return to the opposite door and move through. You're inside reception processing. Grab the ACO card from the desk. Return to the locked door and use the ACO card. Enter the conference room and defeat the two pistol guards. Exit through the door on the left.
Move into sec ops processing--the lights go out, which cues the zombies. Beware of one behind you. Back up to take on the two ahead but remember there's a third behind you. Search the left corner for armor and ammo but beware of more zombies near here. The path to the right leads into security operations, where you'll encounter a couple guards and find some armor and health. Return to the previous room and the opposite exit door.
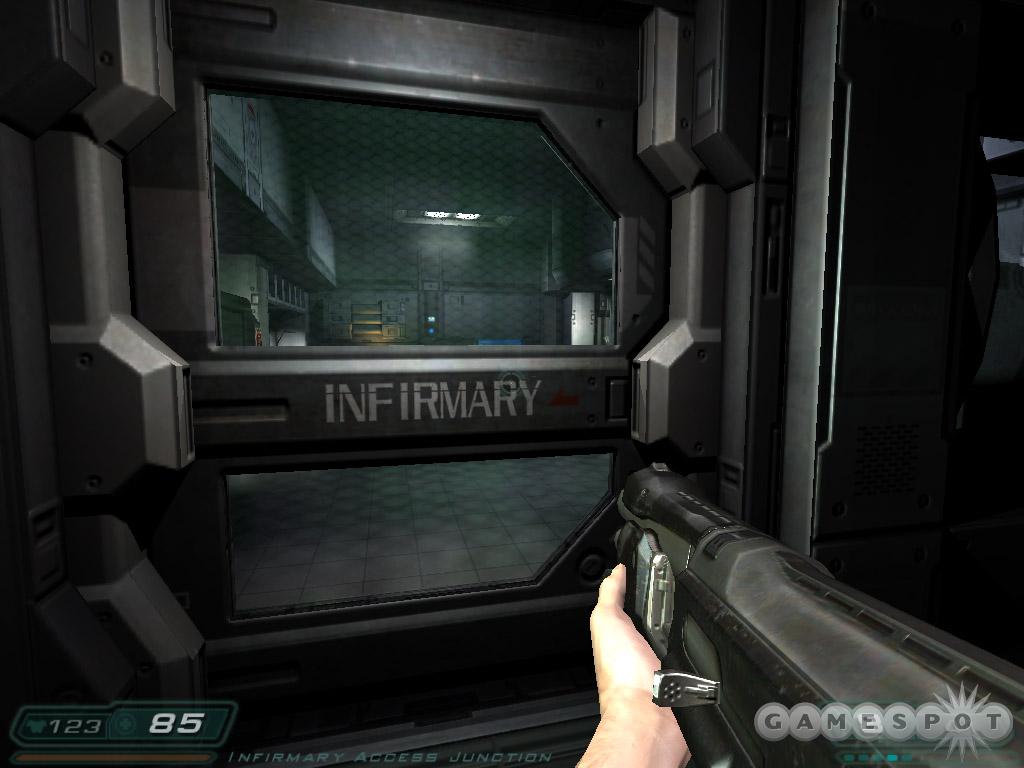
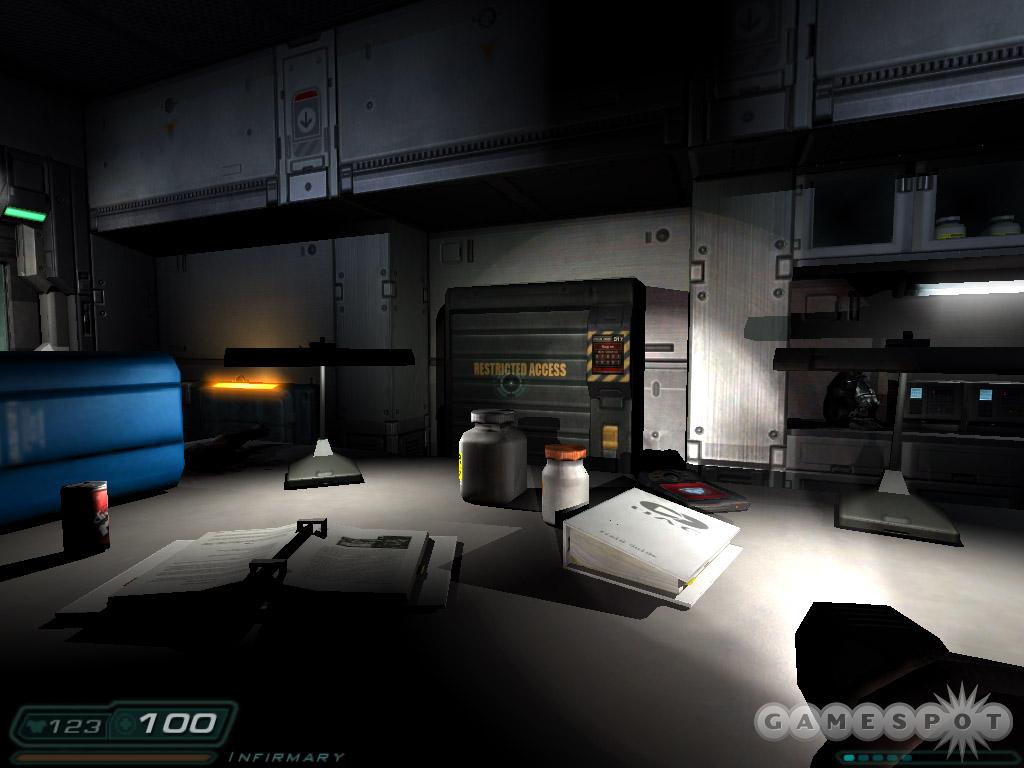
Kill the zombie to the left in this junction hallway then enter the infirmary access on the right. Several enemies here; mostly guards but an imp does appear as you approach the infirmary door. Also beware of the bloated zombie behind you (search his alcove for armor shards). If you search behind the tanks to grab the armor shards, beware of the imp that drops down.

Check the room across from the infirmary for some machinegun ammo. Enter the infirmary and grab Mark Caseon's PDA. Read his emails and listen to the audio logs. The logs reveal the code to the storage locker inside the room--347. Grab the supplies inside and exit.
Eliminate the crazed patient and two subsequent guards. Search the room then exit out the far side. Take the path to the right and kill another zombie ahead. Approach the console on the right to receive a video uplink.
Objective: Alpha Labs Administration. Join up with Bravo Team in Alpha Labs. Go through Administration for entry into the Alpha Labs Sector.
Return to the hall and go left. A couple machinegun guards approach. Hide behind the corner and ambush them. You can return to the infirmary area for health. Also go ahead and duck around the fire for items. Follow the hall to its end for Bill Tyson's PDA. In it is the weapons storage code for Marine Command: 584.
Move down the unexplored hallway and open the door into marine command access. Kill the guard inside. Search the left corner for health (and a zombie) then move into the next hall. Several guards await you here. Hide behind corners and wait for them to pounce so you can blast them at close range with your shotgun. Explore the kitchen for ammo and more zombies. Enter the bathroom for a good scare but beware of the imp that appears at the entrance. Grab some armor and health before exiting.
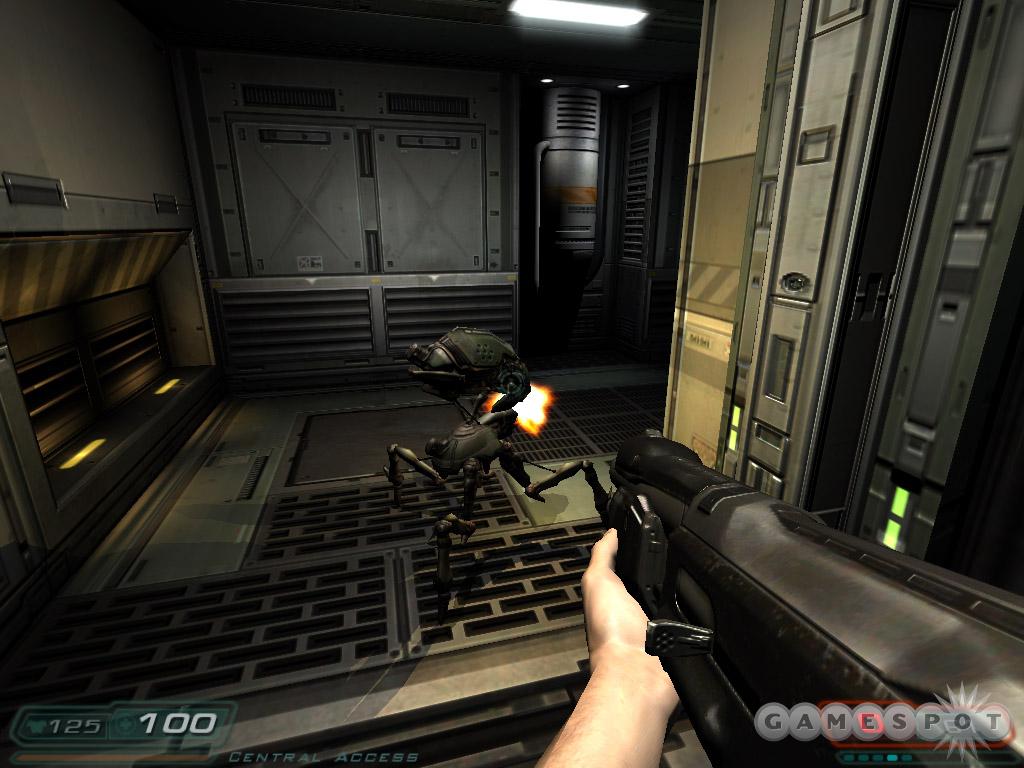
In the next area you'll encounter a sentry bot. Follow it through the subsequent rooms and halls. It'll handle many enemies for you; assist the bot. Gather discarded ammo as the bot leads you into the ACO lift junction. Before using the lift, find a vent entrance in the right corner of the room. Follow it to a ladder and up to the room's balcony overlook. On it you'll find Duncan Mathews' PDA as well as some armor and health. Return down and use the lift.
Administration
Main Objective: Gain entrance to the Alpha Labs.
The Administration Facility is the corporate presence on Mars. Union Aerospace executives located in the upper level offices are responsible for all local and interplanetary administrative tasks. The facility also houses data archives and a global network access station.
Exit the elevator and watch the cut scene. Beware of the zombie and guard on the left side of the lobby. Walk behind the desk and watch the video screen and grab the med kit off of the console. Also there's some armor and ammo in the dark corners on the left side of the room. Enter the door marked Alpha Labs. Kill the imp and a couple machinegun guards ahead. Back up and tackle the imp first then lure the guards toward a corner to blast them up close with the shotgun.

Go inside the room on the right. Grab the PDA off of the desk but beware of the zombie behind you. Alan Dorweiler's PDA has some emails; one includes a storage code: 586. Another includes a web address: www.martianbuddy.com. There's also a video disk on the table. It's the same intro as you watched in the lobby. Open the storage cabinet with the code and grab armor and grenades. Search corners for more armor and ammo and use the health station before leaving.
Proceed to the next door marked Alpha Labs (search a dark corner on the right for armor). Ready your shotgun and open the door. An imp pounces immediately. Move down the hall and beware of another imp in a lab on the left side. Jump through the broken glass and search the room for grenades, ammo, and health. Move into the adjacent room and speak with the wounded marine. Try to use the door panel and receive a new objective.
Objective: Obtain Security Clearance. Locate the PDA of William Banks for Alpha Labs clearance.
Retrace your steps back to the administration lobby. You'll face an imp along the way then two more in the lobby. Move into the passage opened by the imps. Face two more imps. Back out and don't face them all at once. Go through the hall and to the door on the right. A guard waits on the other side so be ready.
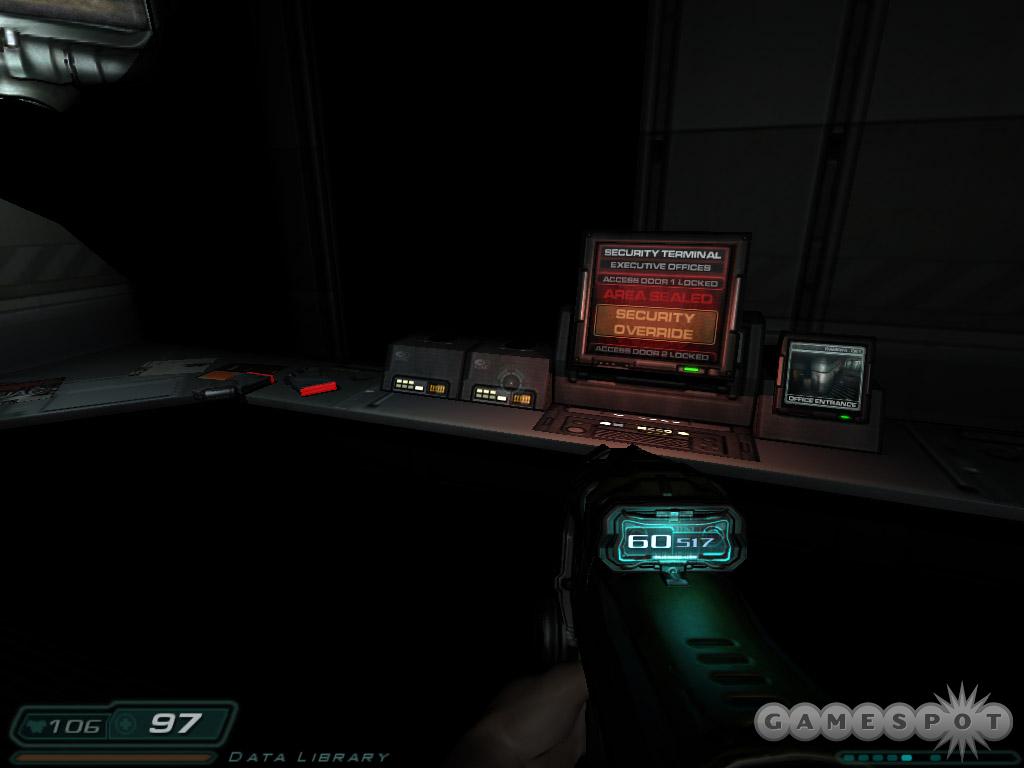
Enter the office ahead of you for ammo. Beware of the imp that appears behind you. Move through the hall and kill the guard. Approach the door into the data library. Move into the office on the right and use the console--which triggers the arrival of the demon. It attempts to bust open the door; when it fails, it moves on to the glass. When it bursts into the room, defeat it. Avoid standing in front of it. Strafe around the creature and fire your machinegun or shotgun. An imp appears outside as well. Eliminate it.
 |  |
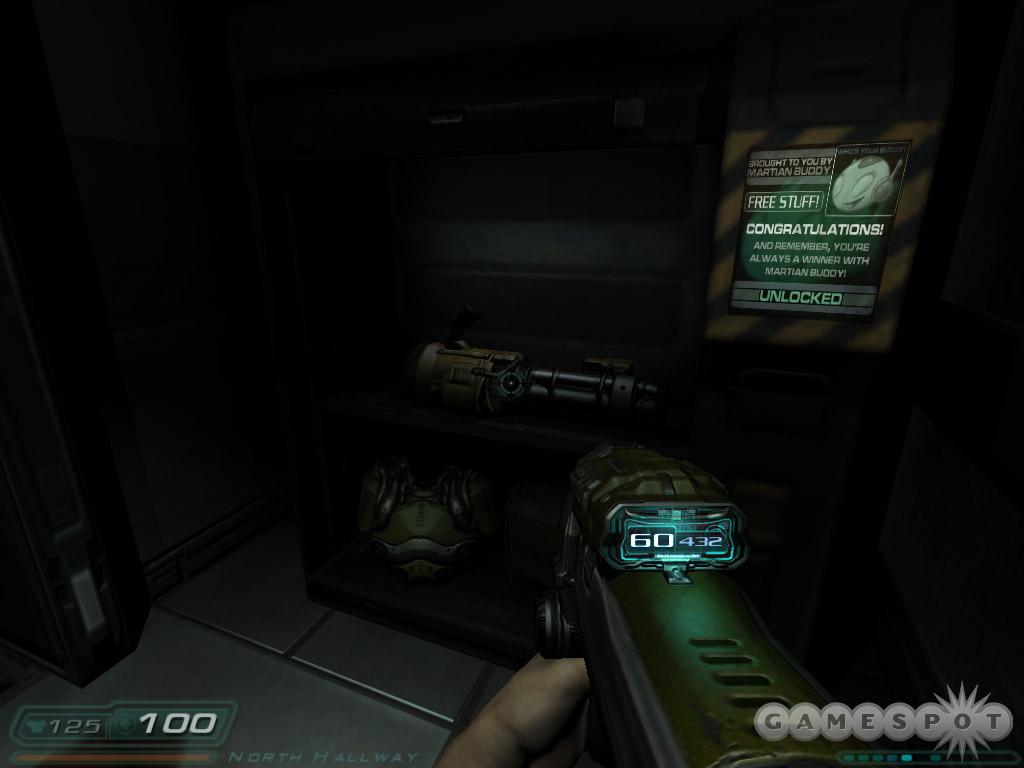
Enter the door marked executive offices. Turn the corner and defeat the demon and guard. Quickly turn around to spot the imp. Gather the ammo and armor from their location. Move to the right and find a PDA on the desk near a storage locker. Examine Jonathan Moses' PDA for another email with the martianbuddy.com link. He received a box from them. Find the code online at www.martianbuddy.com. Open the cabinet using the code: 0508. Open the cabinet to find a chain gun, ammo, and armor inside.
Cross the hall and move to the upper balcony of the data library. Snag some stuff off of the crate and continue toward the executive offices. Beware of the imp that emerges. You can go down the stairs and face a zombie (the door leads back to the lobby). Instead, go through the door at the top of the stairs into the offices.
Look to the right to see what those nefarious guys are up to. Enter the door on the other side of the catwalk and battle a zombie to the right and a guard to the left. Cross the hall to the far room to find some sort of disturbing ritual. Grab William Banks' PDA off of the ground and prepare for battle. An imp appears at the room's center and another emerges behind you.
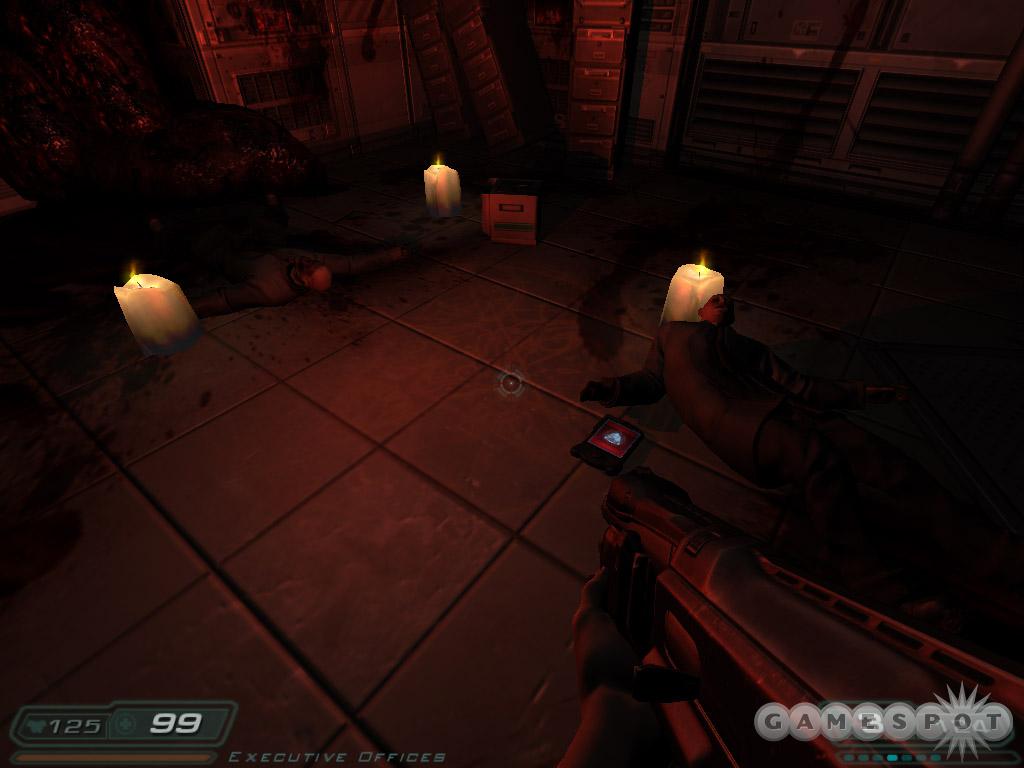
Read William Banks' email for information; there are also a couple audio logs. A third imp appears near the other office door. Search Banks' office for health and ammo before retracing your steps back toward the lobby. You can just go down the steps for a shortcut or take the long way and face a couple more monsters.
Go into the side office that contained a storage locker. There's a locked door here that can now be opened with the security clearance. Inside grab the items from the shelf and go right into the global network terminal. You should recognize this place from when you moved above it. Beware of the imp that enters behind you.
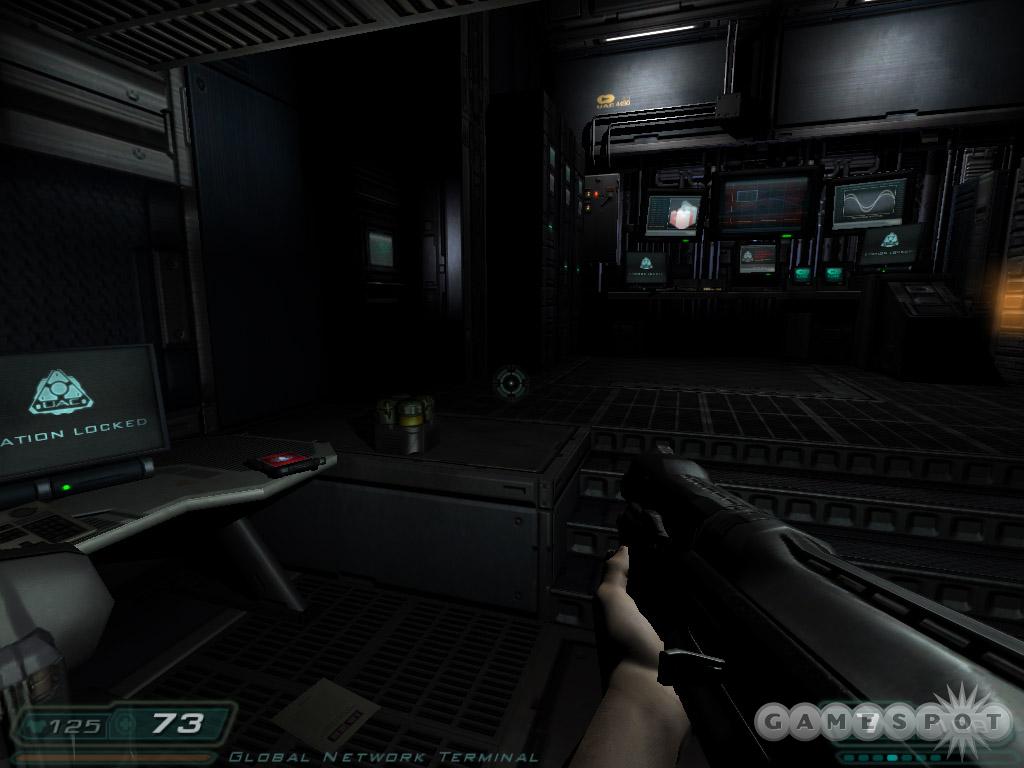
Pick up Paul Simons' PDA and read the emails and listen to the audio log. You can attempt to use the network login computer but it won't work. You can go up the ladder and check out the empty balcony. Otherwise, return to the main hall and proceed toward the alpha labs entrance. Open the main door and proceed through.
Alpha Labs - Sector 1
Main Objective: Attempt to locate Bravo team.
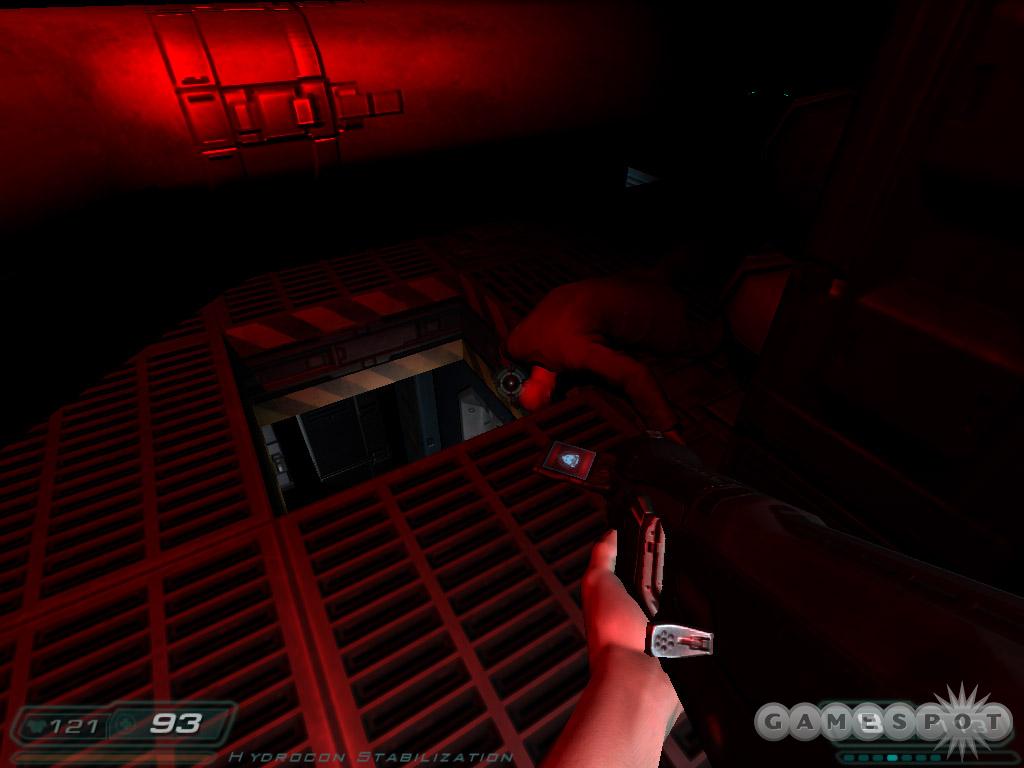
Alpha Labs - Sector 1 houses the elemental phase deconstructor and hydrocon systems, a revolutionary new technology that transforms raw materials native to Mars into useable resources. The primary EPD reactor feeds into the hydrocon processing system for transport to sector 2 MFS refinement and storage.
Objective: Alpha Access Elevator. Find the personnel elevator that leads to Alpha Labs level 2.
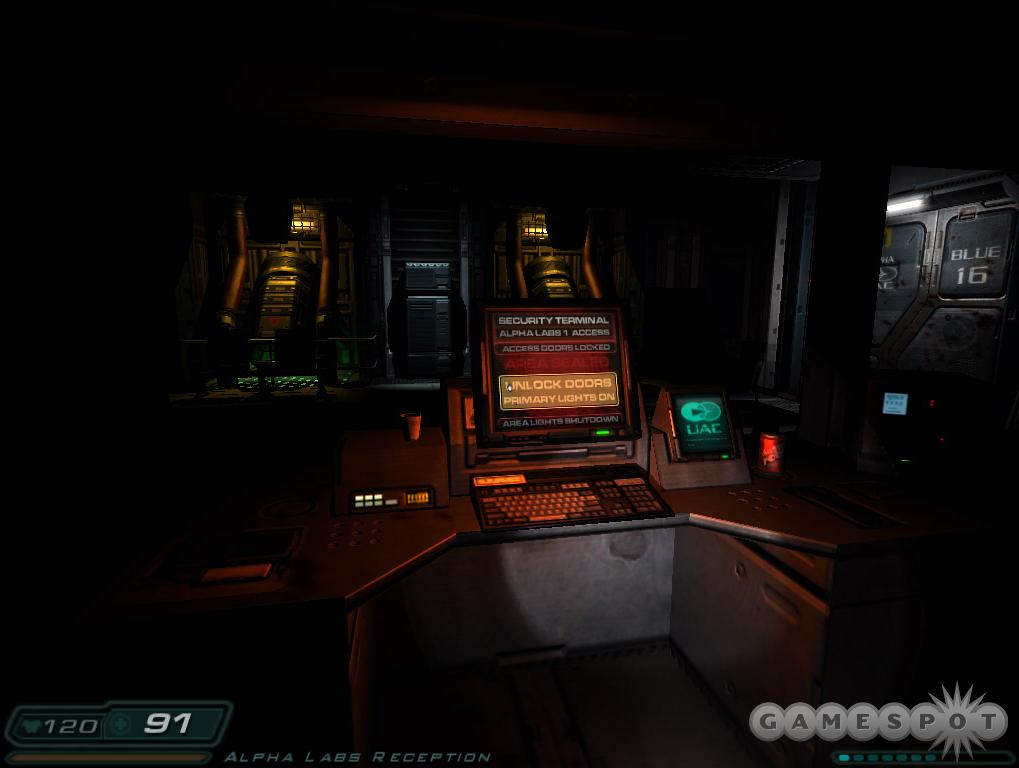
Open the transfer door and enter alpha labs reception. It's dark. The console behind the desk unlocks doors and enables lights. Beware of plentiful zombies lurking behind there though. Grab the armor and use the health station if needed. Enter the stabilization hub.
A couple armed guards patrol the room. Eliminate them and continue on toward the left side. Battle the zombie then a leaping imp behind the next door. An additional duo of guards also waits down the hall.

Leap down through the window toward the EPD. A couple imps teleport in so be ready. Maneuver up the steps into the office. Blast the zombie and guard. After a scary "episode" another imp arrives. Clear the room before starting to search for supplies and clues.
Grab the video disk on the desk (it's about the elemental phase deconstructor). Also pick up Kyle Berger's PDA. The audio log reveals the cabinet code: 752. Exit the office through the opposite door.
An imp drops down so move around quickly to line up your shot. Move to the left and use the console to open the gate. Beware of a guard across the way; take him out with the machinegun. Return to the EPD and wait for the beam to shut off. Scamper quickly and carefully through the open gate and reach the tunnel's end. Open the conduit to the right and duck through.
Blast the guard patrolling the other side. Proceed left then down to the right killing a couple zombies blocking your path. Grab the armor off the desk before going through the door into EPD junction 2. Proceed to the right.
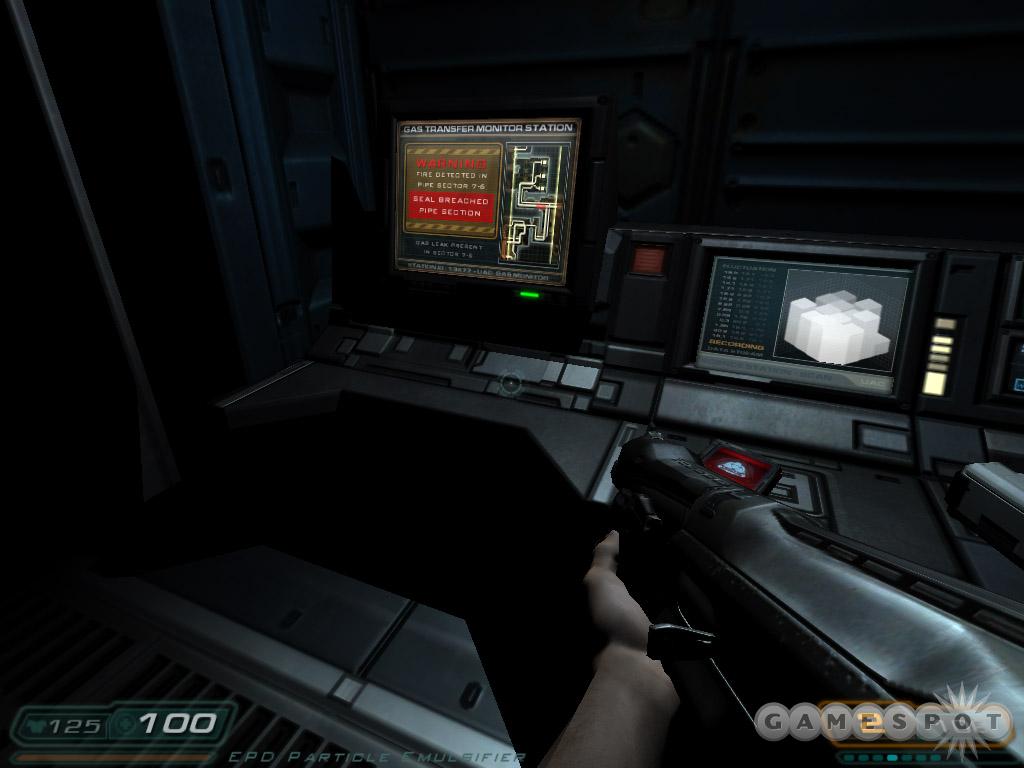
Defeat the emerging imp. The lights flicker off, which summons a few zombies in the room below. Go to the right and through the zombie-infested all to locate a console up some steps and to the left. Grab Jack Smith's PDA and check it out. Use the gas transfer monitor station console and seal the gas leak.
Return to the junction and go to the door across the room. Watch out for a few guards and an imp. Cross the room to the far left corner. Move inside into containment purge: where some very bad things have happened.
After the cut scene, four maggots attack you. You can't stay close or you'll be cut to shreds. Maneuver into a corner and blast them from a short distance. Keep moving and keep the beasts in your targeting sight. A panel on the floor breaks providing access to a crawl way. Navigate the narrow tunnel. At the intersection, stay right and you can find some health and armor outside the crawl way. Return left and get out. Defeat some zombies then follow the new path.
You enter the hydrogen condenser. Shoot the explosive barrels to obliterate the guard ahead. This summons another that enters from the right side. Continue through and watch out for the thrown barrels from above. Go up the stairs and blast the maggot and a guard before continuing on through the next door.
You can use the console on the right to backup files. Go up the stairs to the left and be ready for a couple imps (one teleports in behind you). Keep moving up the next stairs and through the door at the top.
Collect the ammo near the corpse then go into the room on the right. You have another "episode" before two imps teleport in--one right behind you so turn around quickly and shoot it. Cross this junction into hydrocon control. Shoot the zombie hiding to the left. Grab the video disk off of the console; there's ammo on the other.
You don't have clearance for the door on the right side so go through the left. Open the door quietly and spot the creature before it spots you. Kill it with the machinegun. Enter the siphon and defeat the remaining monsters, including an imp. Use the console to back up files then go up the ladder in the room's back corner.
Maneuver along the catwalk and through the narrow space and find G. Kreitman. Talk with him. Move into the adjacent office (avoid being smashed!) and pick up Bernie Lipsitz's PDA off of the ground. This provides the security clearance you need. Drop down the hole and use the door panel to open a new route.
Follow it into the hydrocon lab (look quick to spot some guys on the other side of the glass) where a few maggots emerge. Back up into the hall and use your machine or chain gun from that point. Cross the room to the next doorway. Shoot the maggot inside and pick up the supplies from the shelf. Use the health station as needed then enter the alpha labs junction.
You can check past the door marked blue 19 but the passage is locked. Go through the door marked blue 20. Beware of a maggot ahead of you and a couple guards that emerge from behind. Cross through door 22. Move into the sector junction and be ready for a big fight.
A group of maggots emerge and there's no exit. The chain gun certainly helps here. Avoid being surrounded if possible and blast anything in your sight with the chain gun. Search the room for ammo and health then use the elevator.
Alpha Labs - Sector 2
Alpha labs - Sector 2 processes and stores hydrogen fuel through the facility's primary system, the molecular fuel storage compactor. The sublevel section houses the coolant control system needed for proper hydrogen fuel refinement.
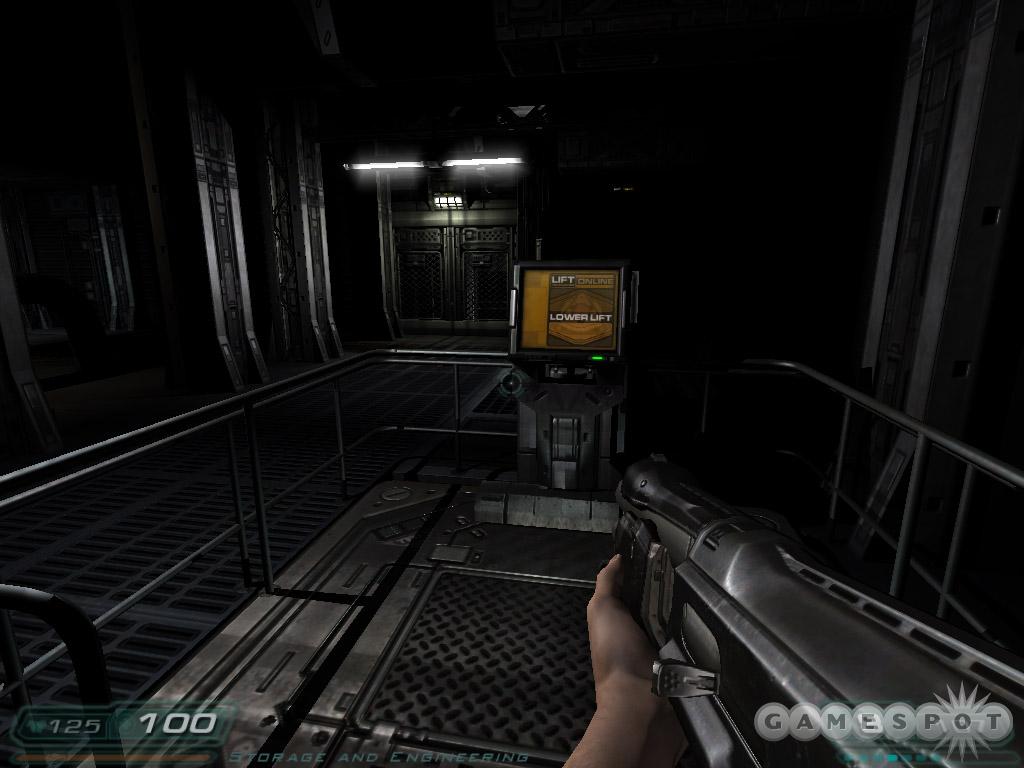
Objective: Alpha Labs Sector 3. Head through engineering and find the entrance to Alpha Labs Sector 3.
Exit the lift and grab supplies. Watch the floating body on the right then battle a couple imps that teleport in. Move through the door in the back--beware of another imp that appears behind you. Enter the dark restroom on the right. Battle the zombies inside. Go to the back corner, which triggers a maggot. Defeat it then ascend the ladder.
Start crawling through the vent duct and receive a message from a scientist. He's locked himself in a storage room. At the vent intersection, search the right side for ammo but beware of the hidden maggot. Resume course through the vent. Drop out into engineering security.
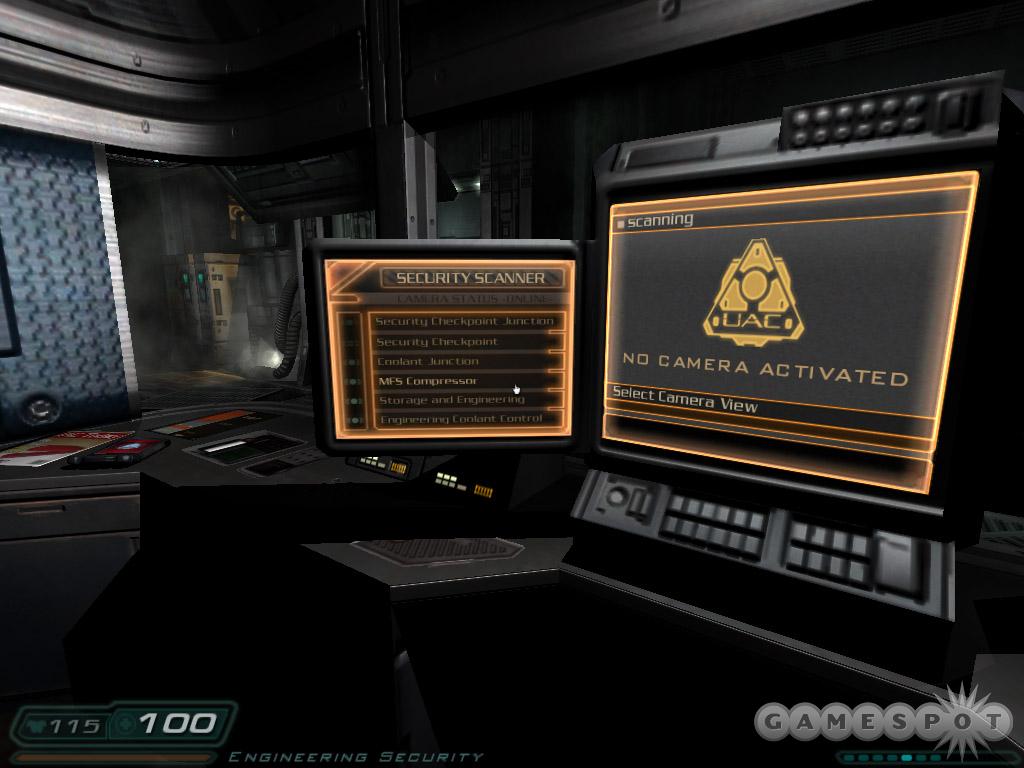
Crush the imp nearby then go right. Battle another imp around the corner then check the security station. View the cameras (spot someone on the last one) and pick up Andrew Chin's PDA. The emails include a code for storage locker #038--the code is 409.
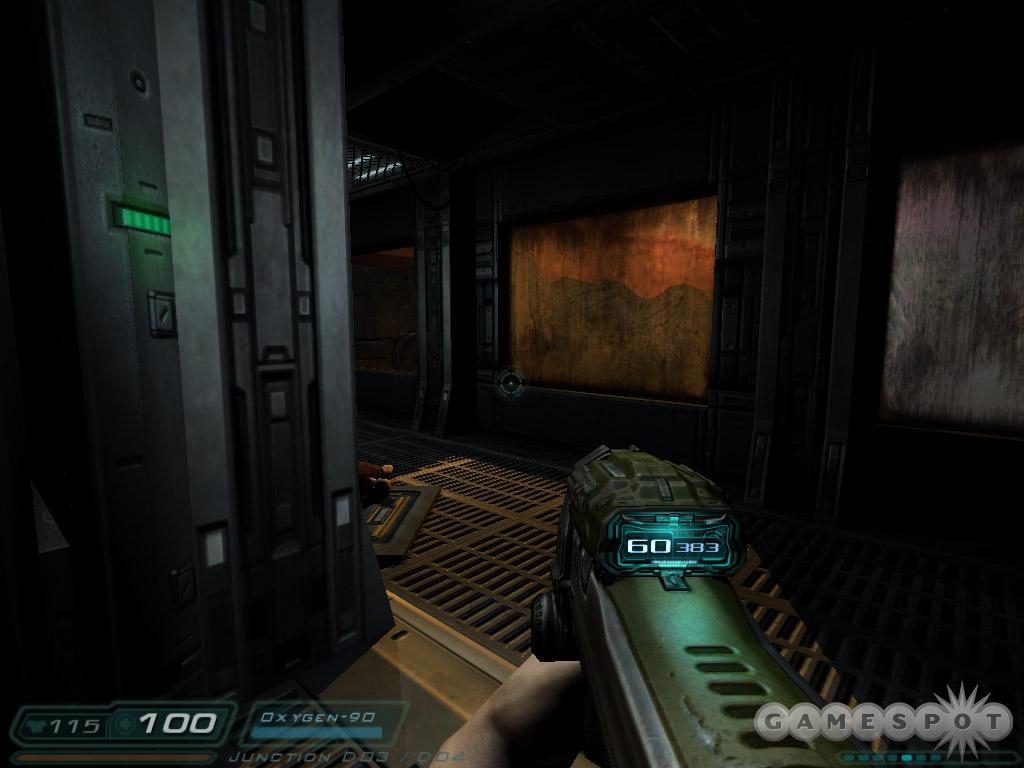
Move through the only available exit. You reach a vista; note your depleting oxygen. Defeat the maggot and imp then return to the security station to recover your oxygen then cross the vista hall to the other airlock area.
An imp appears in the next room; shoot him with the machinegun then battle another guard through the new path. Cross the MFS compressor room. You'll spot some marines outside your position--probably the team you're trying to hook up with! Continue into the MFS compressor room and battle a group of enemies before finding the storage locker behind the compressor. Its code is 409.
Return to the console and grab the video disk and Walter Conners' PDA. It includes code for cabinet #039--the code is 102. Move through the nearby door marked engineering. Battle a collection of enemies--some guards hiding behind cover across the hall, an imp and maggot to the right--before moving to the lift. Use the lift.
Have your machinegun ready. A maggot appears along the wall on your way down. There's also an imp to contend with at the bottom. Comb the room for armor and health then exit through the nearby door.
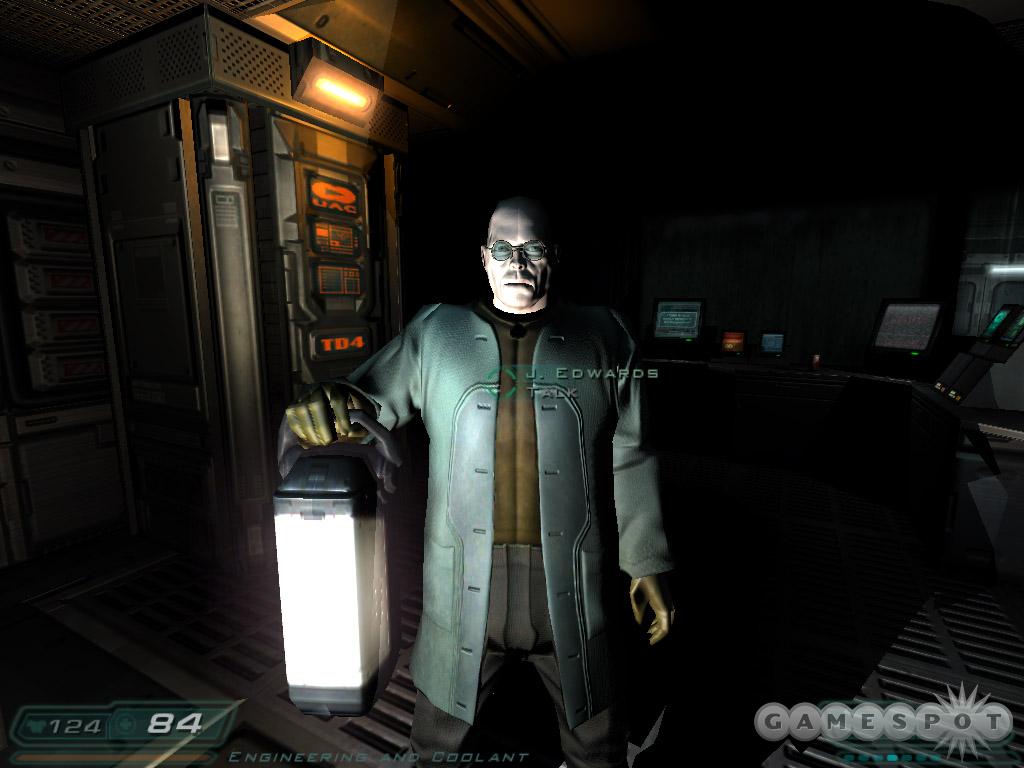
You've reached J. Edwards. You saw him on the cameras. Speak with him and then follow him. There's another console in his office to back up files. Follow him along the engineering catwalks. A couple imps materialize. Defeat them then resume. Beware of the maggot that emerges from behind. Approach the ladder at the end. The lights flicker out, your pal is mangled, and a couple imps turn their sight on you. Eliminate them and climb the ladder. Open the storage locker here with the code 102.

Exit into the next hall. Go right and spot the health items in the recess below. Drop down and crawl through the tunnel on the right. Follow it into lower MFS control. Battle the spider then gather armor and health (from the station). That one spider has friends, though.
Press the button to extend the ladder, which jams. A bunch of spiders enter. Fend them off with your shotgun while you wait for the ladder to extend. Scurry up the ladder, defeat more spiders, and then go left through the transfer bay into the next level.
Alpha Labs - Sector 3
Alpha Labs - Sector 3 contains the secondary coolant control system for the molecular fuel storage compactor. Waste material from the MFS system is also processed here, and sent to the recycling plant for post-refinement and disposal.
Exit and observe the guard ahead of you. Round the corner and attempt to use the barrel to eliminate the foes. If not just shoot them! At the intersection, turn left and face off against a maggot and some spiders. The door here is locked. Return to the main hall.
Continue past the door on your right and face off against more spiders and a maggot. Approach the door at the end. You can't go inside because of toxins.
Objective: Contaiminated Chamber. Remove the barrels leaking toxic gasses in the chamber.
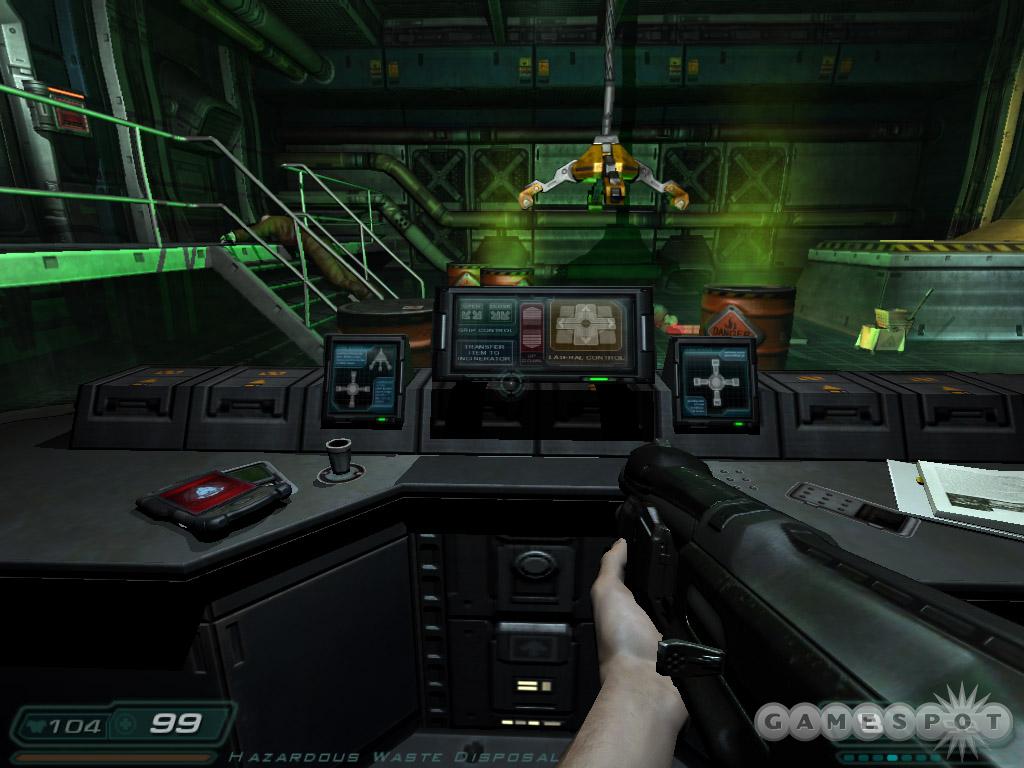
Return to the hall and go into the door on the left. Grab Mark Lamia's PDA off of the desk. Listen to the audio logs to receive a cabinet code: 123. Use the controls to grab two toxic barrels and drop them into the disposal chute on the far left. After you drop the first barrel (successfully or not), a couple guards emerge behind you. Drop both barrels to unlock the door.
Objective: Alpha Labs Sector 4. Locate the entrance to Alpha Labs Sector 4.
Go inside and pick up the maintenance key off of the ground. Continue through the next door to find the storage locker mentioned in the PDA. Open it to recover some items. There's also George Poota's PDA on the floor nearby, some chain gun ammo on a cart, and you can use the console to raise the lift. This ushers in some monsters (easily defeated by shooting the barrel) as well as some armor.
Return to the hall with the locked door; battle some guards along the way. Use the keycard to unlock the door. Beware of a spider that appears behind you. Move cautiously into coolant monitoring until the imp appears. Back into the previous hall and defeat it as well as a group of spiders. Open the storage locker using code 123 for some ammo (including plasma gun ammo).
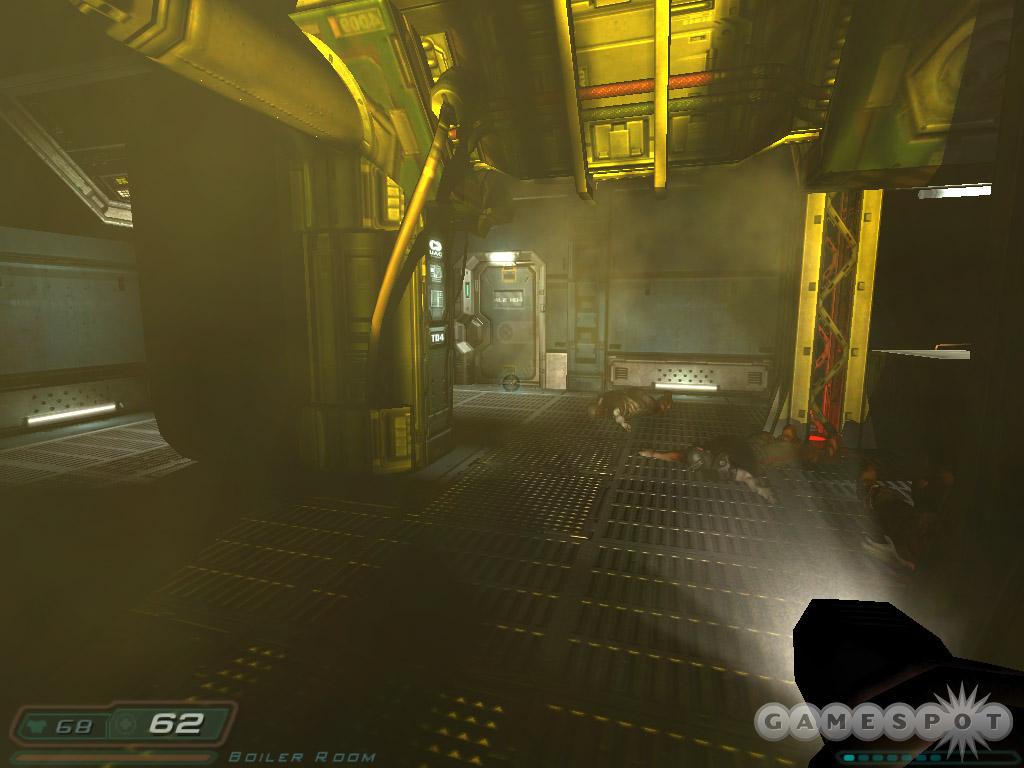
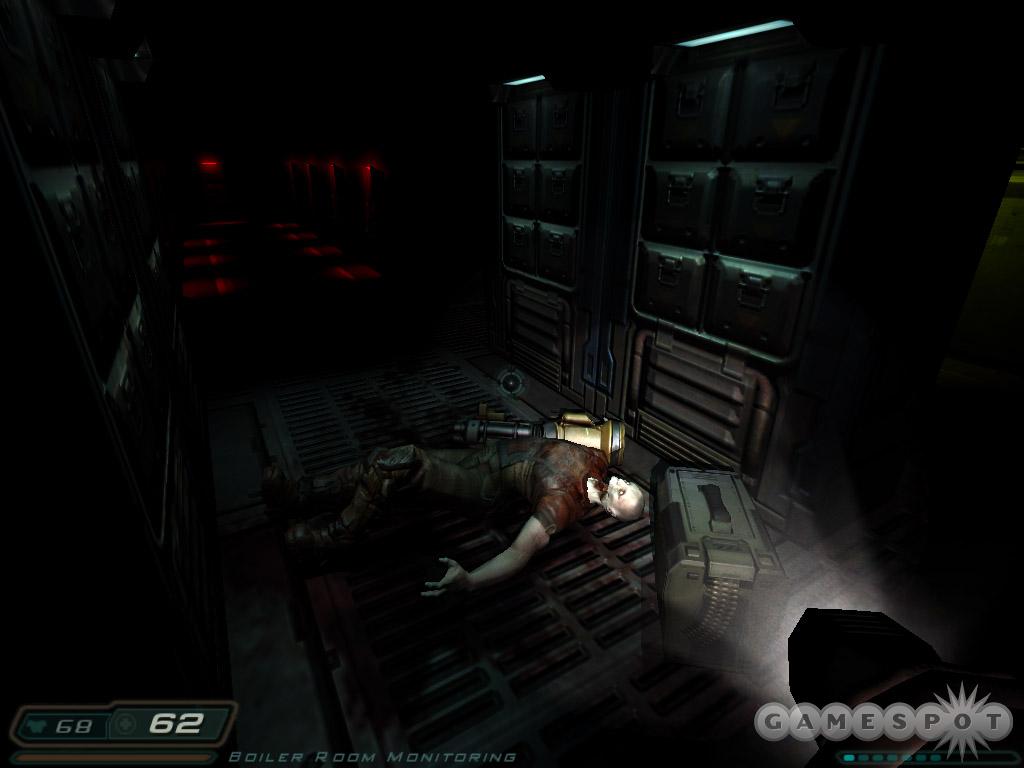
Ascend the stairs, defeat the maggot that drops down then open the door. It's the boiler room. An imp teleports in near the room's middle; two guards flank either side. Tackle the imp then the guards. Search the room for health. Eventually spiders enter. Back into a corner and defeat them. The room's locked door also opens revealing a couple guards. Eliminate them and move inside.
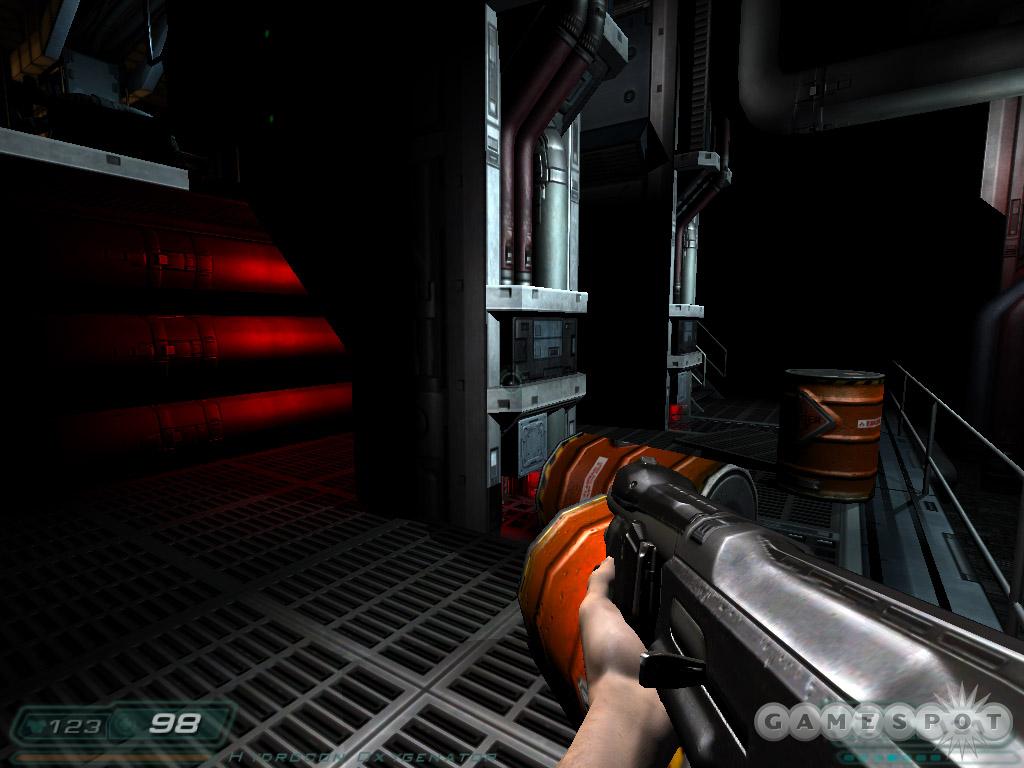
Defeat a couple zombies. Use the console on the right to open access grate 3. Search the dark, red-lit hallway and find a chain gun at its end. There's also a niche with armor. Getting it comes with a price. Walls close around you and when they open, a gang of imps and zombies have arrived. Fight your way back to the main room. Don't forget to search the exposed alcoves for ammo, health, and armor.
Go through the door. Walking onto the catwalk triggers a few spiders from either side. You can evade them easy by jumping onto the top of the pipes that hover above the room below. Find health in the back corner then use the lift to go down.
The lift malfunctions near the bottom. Switch to your chain gun and remain on the broken lift. Defeat the imps and maggots that appear. You may also want to utilize a grenade in the room's center against the first batch of monsters. Search the room for health then exit into the heavy water runoff area.
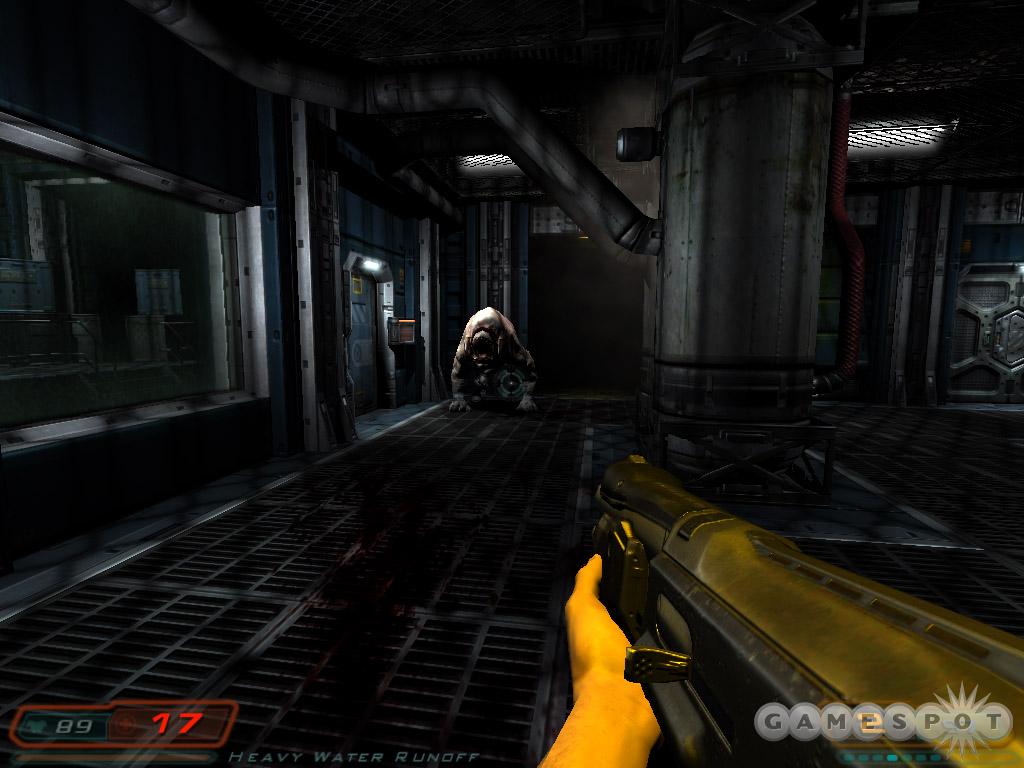
As the approach the far door, two demons appear from either side. Back up and tear them apart with the chain gun (or risk up-close shots with the shotgun). A third comes in after the first two are dead. Finally a team of imps comes in. Finish all the monsters off then proceed onward. The door is locked so shoot the window from long-range. Jump through and use the code 123 to open the storage locker. Grab all items from room (search behind the crates too) then open the bay door into the next level.
Alpha Labs - Sector 4
Alpha Labs - Sector 4 seals and prepares shipments of processed hydrogen fuel for dropship distribution to UAC bases and subspace platforms. The system is fully automated and personnel access is limited due to open machinery hazards.
Objective: Enpro Plant. Reach the Enpro Plant as quickly as possible.
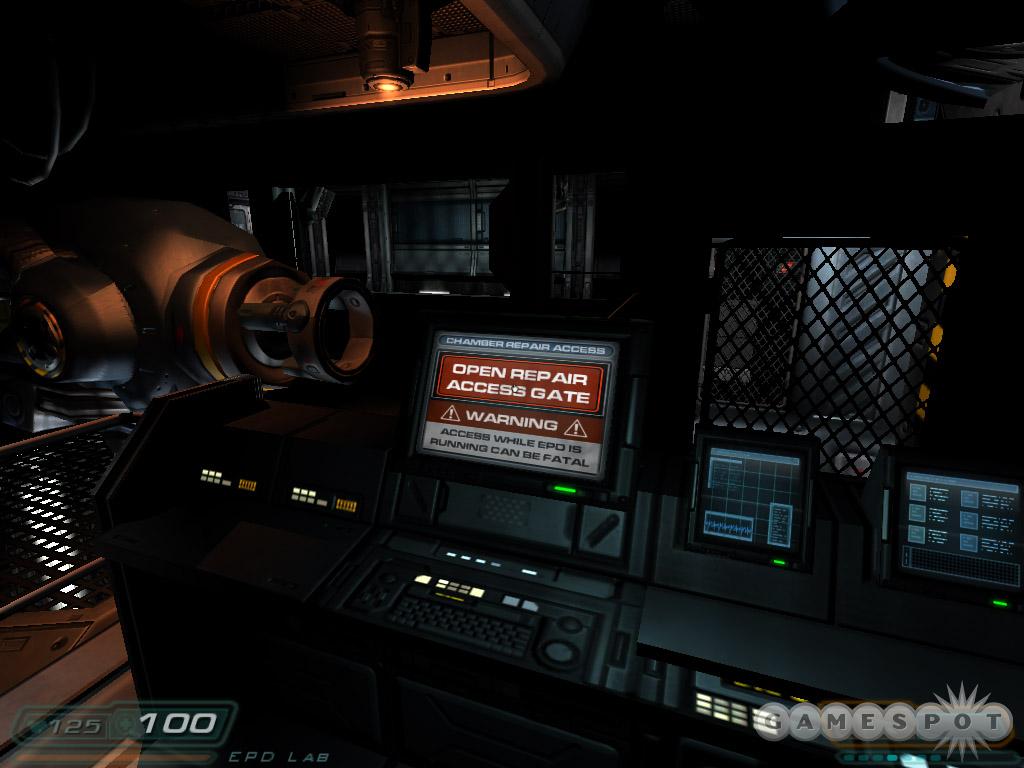
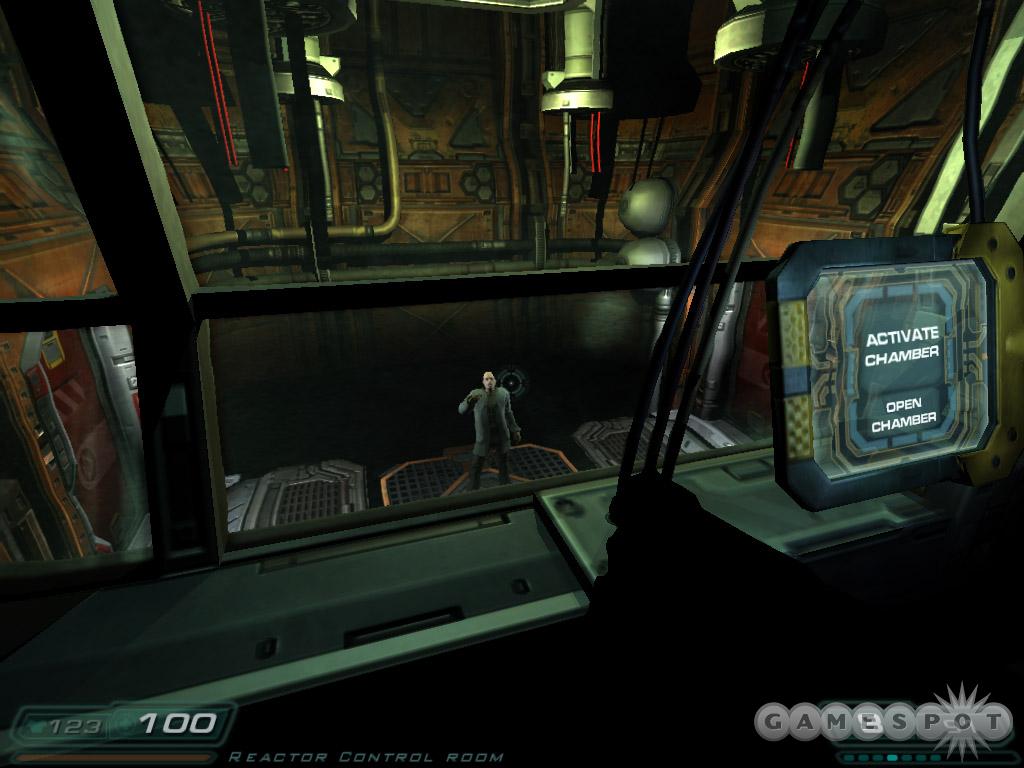
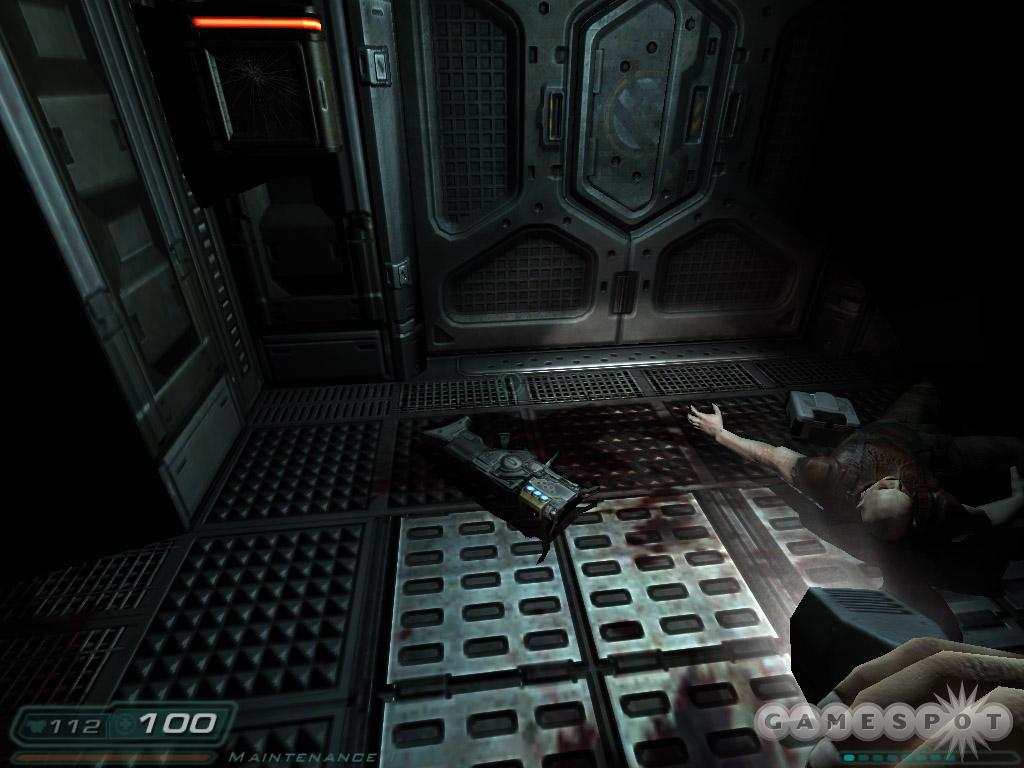
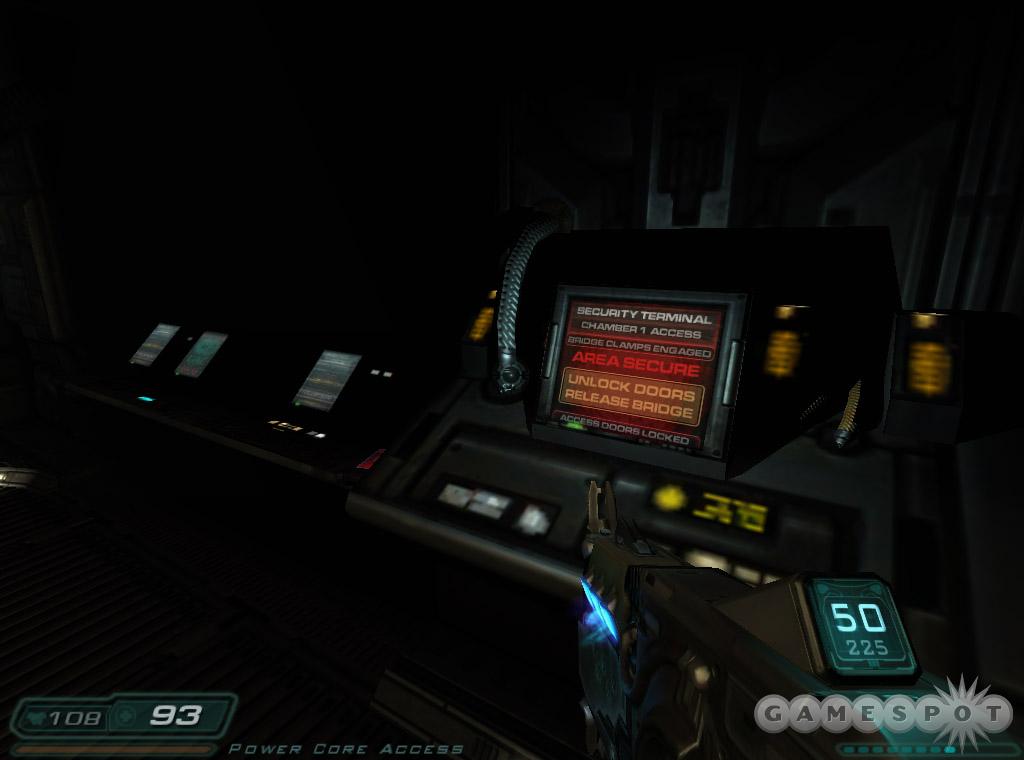
Use the health station, locate some armor behind the crates, grab ammo off the console then move through the door into reactor control. Approach the main console and listen to the guy's plea for help. Unlock the doors to help him or activate the chamber if you're just a mean fellow. Help him, though, and you'll meet him again in a moment and you'll have a chance to restock weaponry.
Exit and approach the man you helped. Follow him into the office. Grab Michael Abrams' PDA, a video disk, and then use the console to disable the security lock holding the nearby arsenal. The audio log talks about the BFG-9000 in this guy's office. The code he gives is 901. However, read the email to discover the code is now 931. Exit and cross the chamber (where you saved the guy) and move through the junction.
The next hall contains a trio of guards. Use a grenade to dispatch the guards on the balcony above. Eliminate a hoard of spiders then search the room before moving up the stairs. Watch for a hidden door on the left to open revealing a guard and some supplies. Defeat more spiders that follow you up. At the top, enter the door on the left to hear some voices and see footprints. But the door is locked. Return to the door on the right.
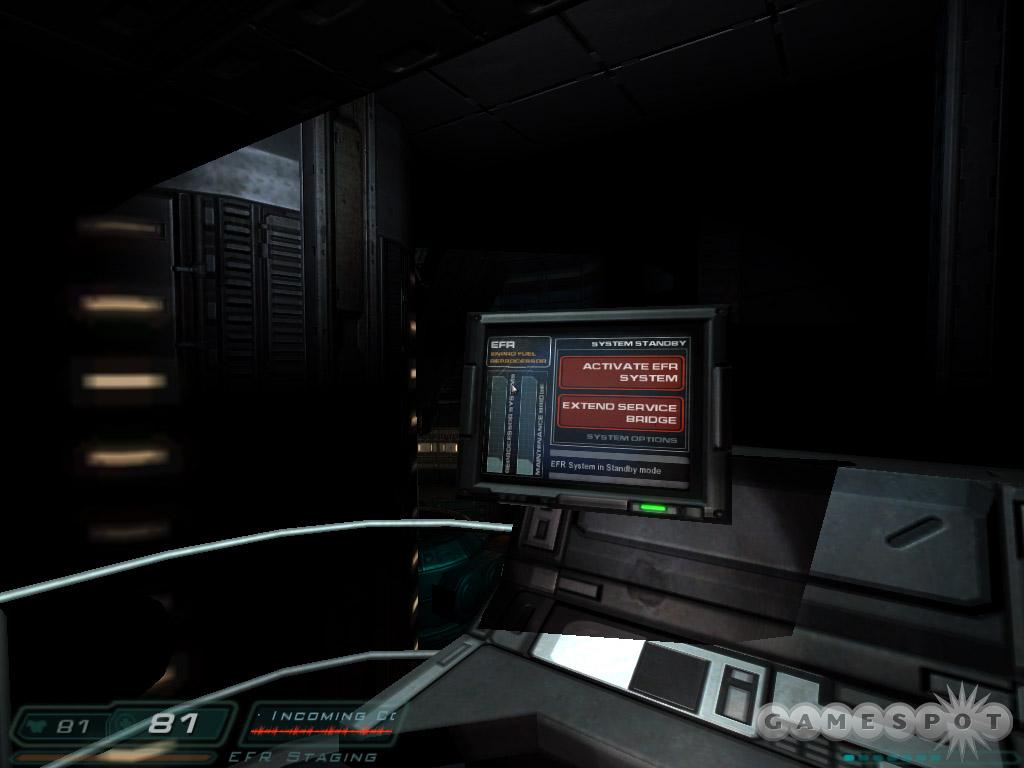
Listen to your radio for info on your upcoming choice. Face the console on the right and pick up Henry Nelson's PDA. Read the email for the code to cabinet #064--the code is 651.
If you extend the bridge, you'll cross it to the far door. It's dark and an imp duo (and some spiders) appear at the corner. Plus, some guards ambush from behind and from the front.
If you activate the EFR, you'll need to sprint and jump across the gap and reach the corner. Wait for the rotating platform to reach you, hop on, and get off at the unlocked door. Move inside the substation and restart the system. Return to the rotating platform and get off on the next unlocked door. Fight the maggots during your trek. It's possible to fall into the staging area below. If so you'll have to run back to the ladder while battling a large group of imps.

Move into the EFR junction and go left. Engage several guards at this point. As you search the storage room, some maggots teleport in behind you. Return to the main hall and watch the moving platform.
Face right to spot the approaching platform. Sprint and jump to the platform and then onto the red pipe. Scamper to the alcove and find a hidden plasma gun. Get back on the moving platform and ride it to its end. Duck underneath dangers as you move along. Enter the room and defeat the imp and spiders to the left.
Use the console to activate the magnetic field discharge. Move to the left side of the room and observe the pattern of the spinning mechanisms. Sprint and jump on the ledges between them and to the far side. Beware of imps here. Use the health station.
Exit onto another conveyer. Ride it to the group of soldiers. Defeat them and find some armor behind the crates. As you continue down the hall, watch for an ambush guard behind you. Follow the halls (searching for items as you go) until you reach a window overlooking a room below. Someone inside discharges what looks like the BFG. Continue onward.
Watch out for a hidden imp on the right side of the hall. At the next room, gather the supplies on the left before entering the door on the right.
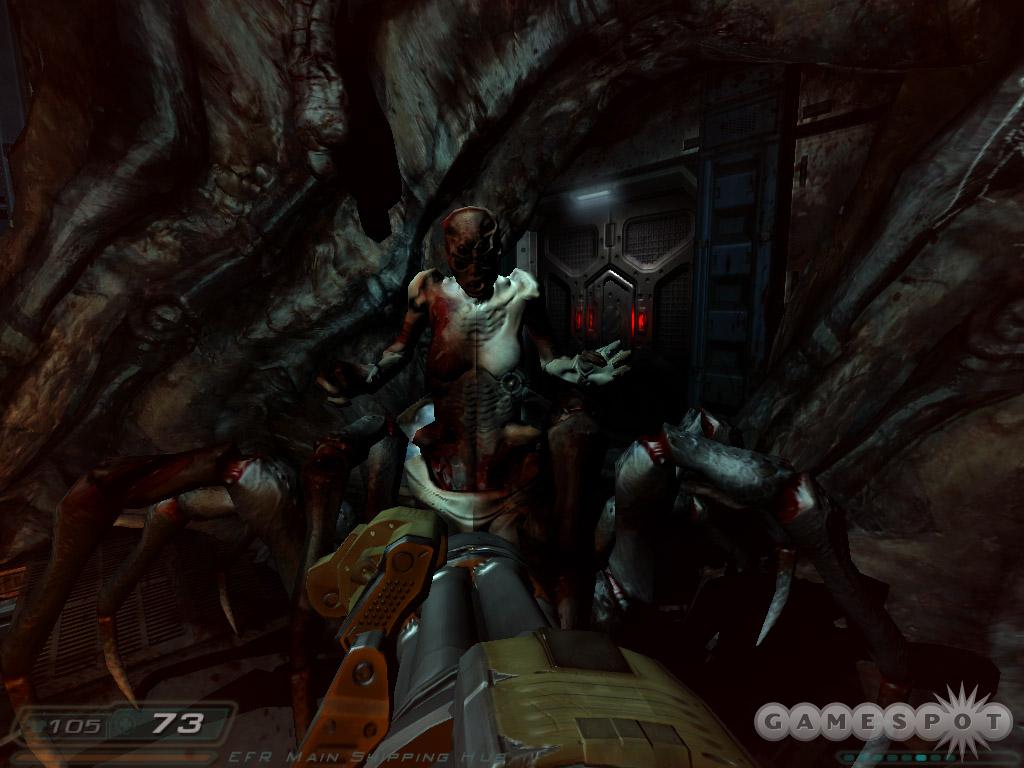
Time to battle the Vagary--it's half-humanoid, half-spider, and all-nasty. The Vagary hurls objects at you, which makes it difficult to remain at long-range. Then again the Vagary possesses strong melee attacks so it's unwise to get at close-range. Since the Vagary is hurling objects at you constantly, it pays to defeat the beast as quickly as possible. Toss grenades at the Vagary, fill it full of chain gun lead, or use the plasma gun if you scored it early through thorough exploration. Crush the Vagary to continue to the next level.
Enpro Plant
Main Objective: Locate the military transmission card.
The EnPro plant provides primary power to the Communications Tower and backup power to the entire Mars UAC Facility. Plasma canisters are also manufactured here from the RC power production byproduct.
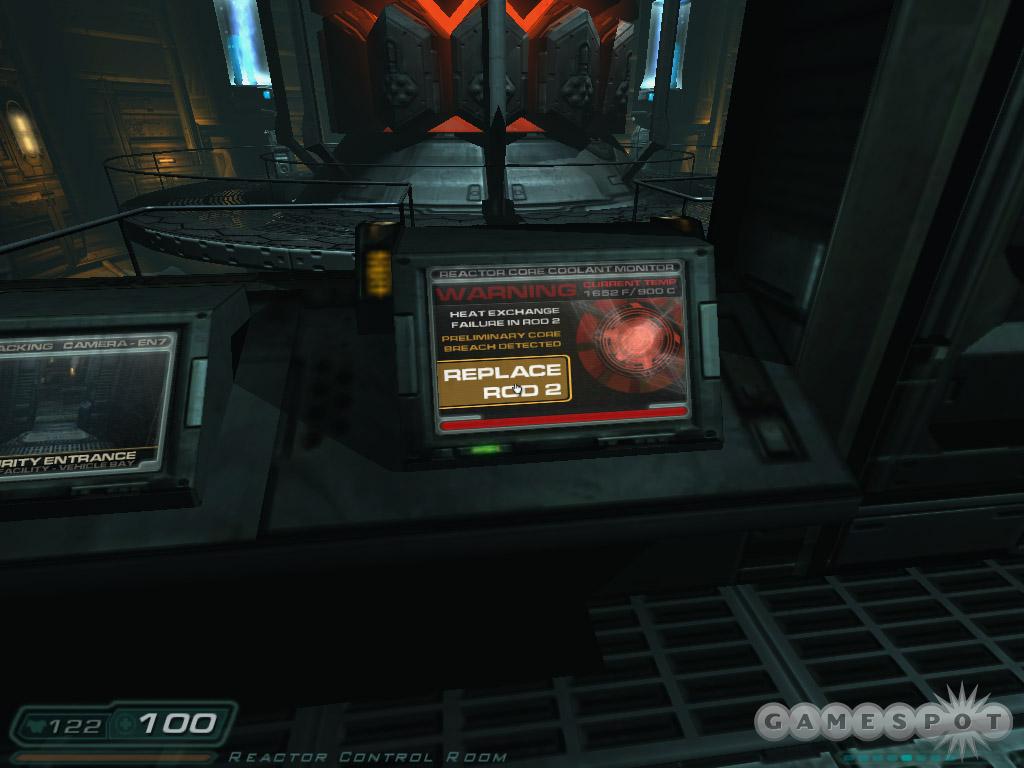
Objective: Coolant Rod 2. Reach Reactor Control Room and replace coolant rod 2.
Move forward to the entrance. Search the storage room on the right for supplies--though after defeating the imp and bloated zombie inside. Approach the sentry bot and follow it through the next hallways. Support it against the beasts you encounter. Reach control 1 and search the console on the right for Paul Raad's PDA. Check the console to the left and use the panel to activate the valve routing procedure.
Resume following the bot. Encounter several imps. Be sure to check the storage area here for some ammo and health. At the intersection, go left and down some steps to find another plasma gun. Defeat the materializing monster before resuming course behind the sentry bot. As you work your way through maintenance 1, a large group of imps teleports in around you. Help the bot defeat them. Enter power core access where the bot comes to a rest.
Search the catwalk to the left for health and armor but the route is to the right. Climb the ladder. Continue to the room on the right where you encounter a woman. She doesn't last long and transforms into a lost soul. Defeat it. Pick up Theresa Chaser's PDA, read its emails, and listen to the logs. The audio contains the code for the nearby cabinet: 972. Open it to find a plasma gun and ammo. Use the console to unlock the door and release the bridge.
Exit toward the bridge and defeat more lost souls. Cross and enter the upper chamber. More lost souls lurk about. Cross the catwalk to the unlocked door and into the storage hall. Grab ammo before opening the opposite door where an imp awaits you. Traverse this next chamber defeating lost souls and imps as you work to the lift on the other side. Descend the main elevator shaft.
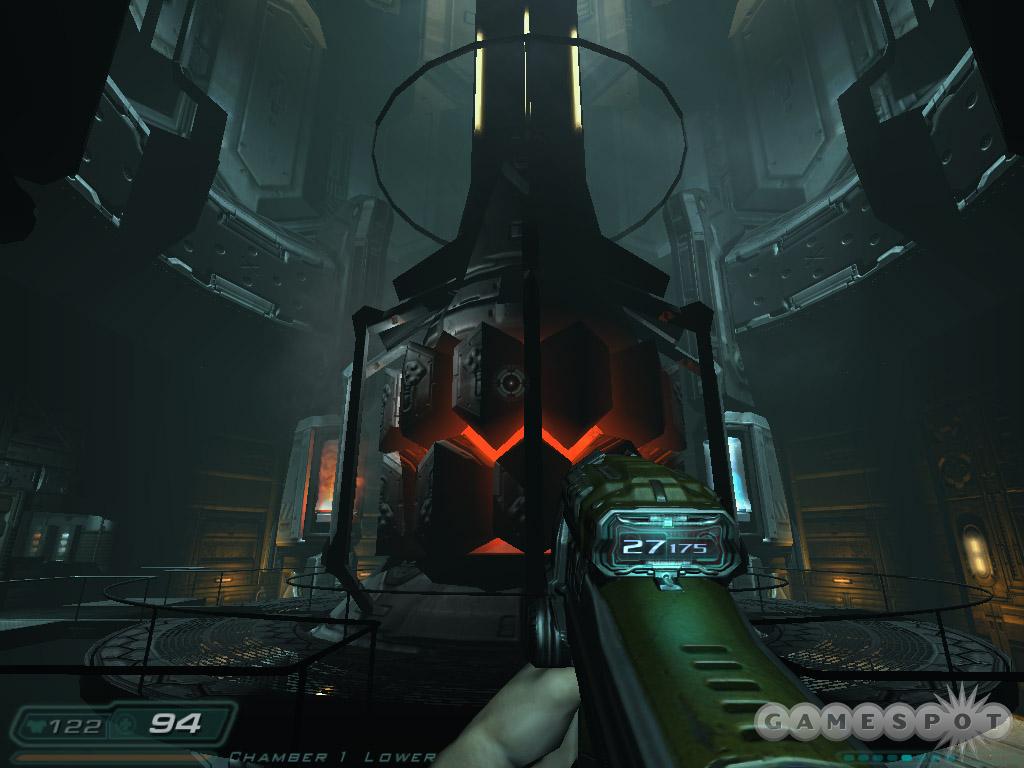
Battle lost souls and imps and work to the right to find the next door. You're in another storage hall where more imps materialize. Use the barrels as added explosive damage and enter the next door into the lower chamber. Enter the control room on the left and use the console to replace the rod. Gather ammo and health from the room.
Exit to the chamber but then move back into the room. A large squad of lost souls appears and its best to fight them at a chokepoint. Return up the lift. Retrace your steps to the upper chamber where the hazard door is now open. Enter control room 2. Defeat its inhabitants and find some health to the left side. Go down the stairs on the right. At the bottom, beware of the maggots. Use the barrels to help. Gather armor on the left side.
Go to the right and check under the stairs for health and ammo--and a maggot. Ascend the stairs and enter door on the left and traverse plasma control. Battle a zombie and imp through the next door. Move through the maintenance halls. When lost souls appear, back into a previous hall and wait for them to come to you. Reach the next large room and spot the locked plasma storage door. Ignore it for now.
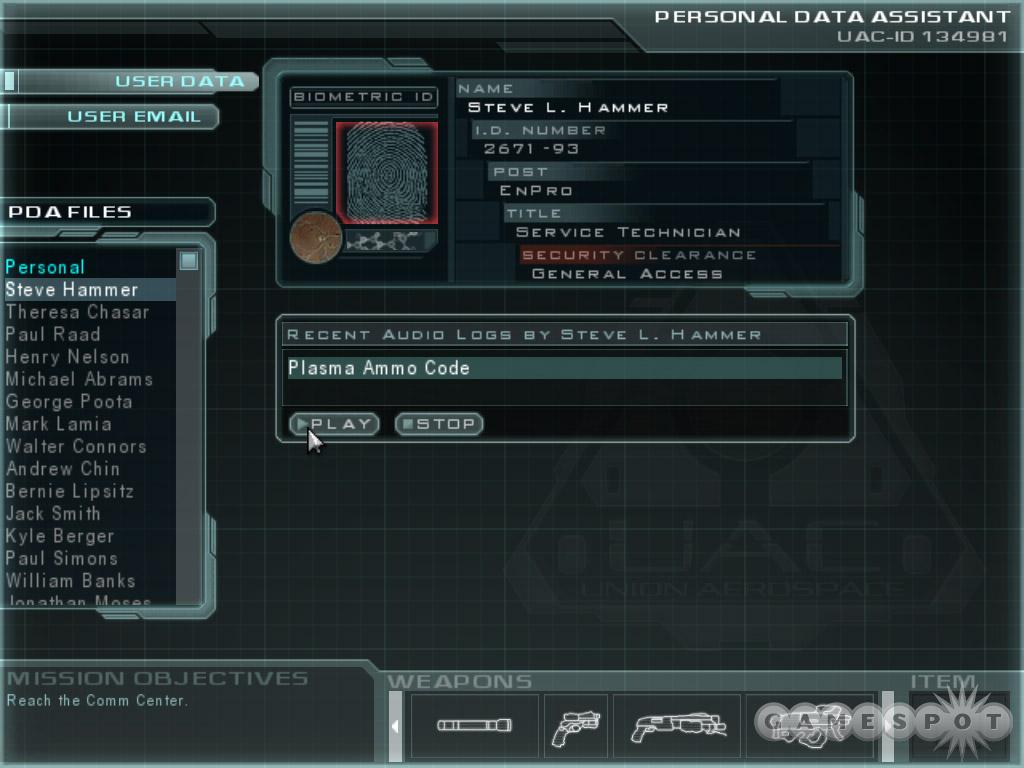
Cross the room and enter the door leading to garage exit. A cut scene interrupts the action; you receive the transmission card. Look inside the room to find Steve Hammer's PDA for the code to the plasma storage room: 734. Find the airlock controls in the back corner. Use them to proceed to the next level.
Communications Transfer
Main Objective: Reach the communications facility.
Communications Transfer connects EnPro and Communications, and acts as a multipurpose facility for power distribution, equipment repair, and cargo transfer to other base sectors. Due to the frequency of broken pressure seals, oxygen tanks are well stocked in this sector.

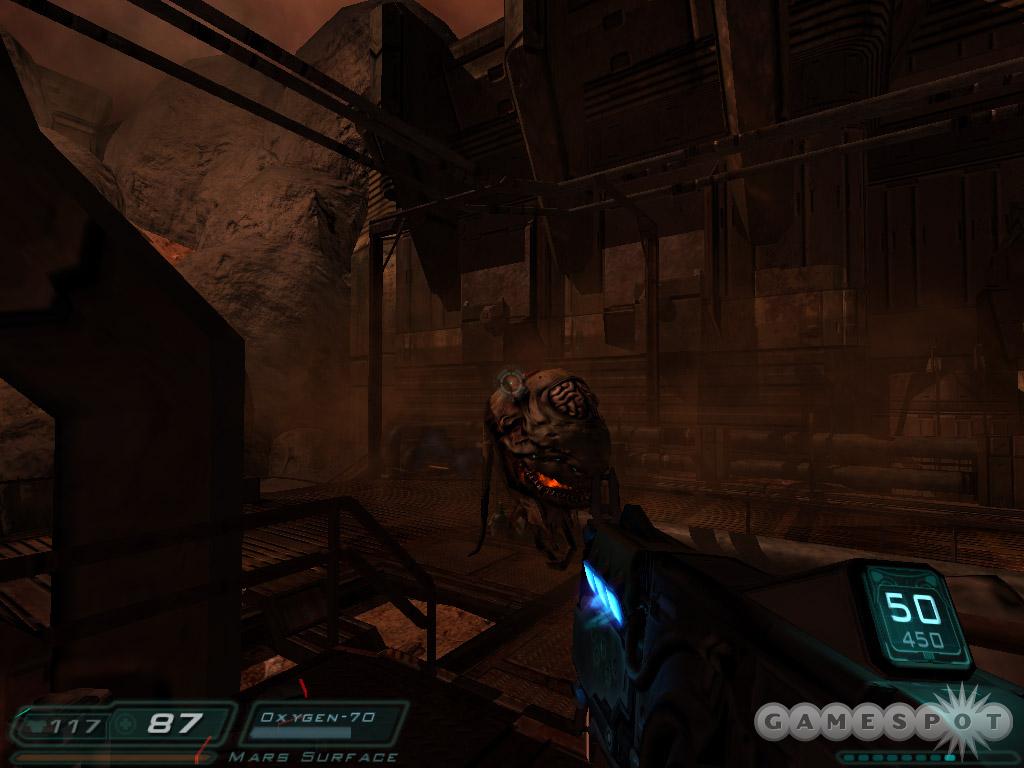
Cycle the airlock, which opens you to the surface. Take note of your oxygen meter. A cacodemon flies overhead. Gather the ammo (some cells on top of the crates) and cross the area. Pick up oxygen and find the next airlock in the back right corner. Battle the imps and guards in the next room. Comb the room for health and items, including some beneath the staircase.
Move into service room 1b and descend the staircase. Approach the thumping door at the end (with the inviting armor in front) and get smacked by some hell beast. Crush the imps then cross the room to the back corner where you'll find the maintenance crawlspace. Reach the surface access door. Climb down the ladder and back outside.
Battle the spiders ahead. Walk around to the left and pick up oxygen as you move. Find the lift on the right side at the end (where more spiders lurk). Quickly get on and raise the lift into the airlock shaft. Enter the surface tunnels. Defeat a guard below and an imp up behind you. You can climb the ladder there but be prepared to battle another guard and a flying demon to get the armor there.
The next hall contains several cacodemons. Crawl under the bay door on the right and grab health inside. You can also use it as a hiding spot to kill the enemies. Go around to the left side to find boxes and boxes of chainsaws. You can't open the door marked "Power Routing/Control" here so turn around and enter the opposite door.
Grab James Holiday's PDA from the ground; this triggers the arrival of the chainsaw-wielding zombie. Defeat him and grab the weapon for yourself. Return to the storage area (where more enemies await) and cross the locked door. You now have clearance.
Maneuver into this ominous hallway. Defeat the imp. Beware of a demon that appears behind you as you continue through. Search the hall for items and return to a door that is initially locked but soon becomes open. In the next hall, there's health to the left but also a demon. Go to the right. Kill the flying demon in the crumbling room then climb the ladder. Another waits at the top. Move to the yellow lift station.
Objective: Service Lift. Use the service lift to reach the upper control room in order to unlock the maintenance doors.
You need a maintenance PDA to unlock the lift. You can move around to the right to find some armor and ammo but this triggers an imp. Go to the left of the lift station to find the route. Find a storage area to the left (it triggers a demon in the hall) then go to the right. At the end, there's a recessed area on the left with ammo and health; this summons an imp. Use the large door here and beware of the leaping imp on the other side.
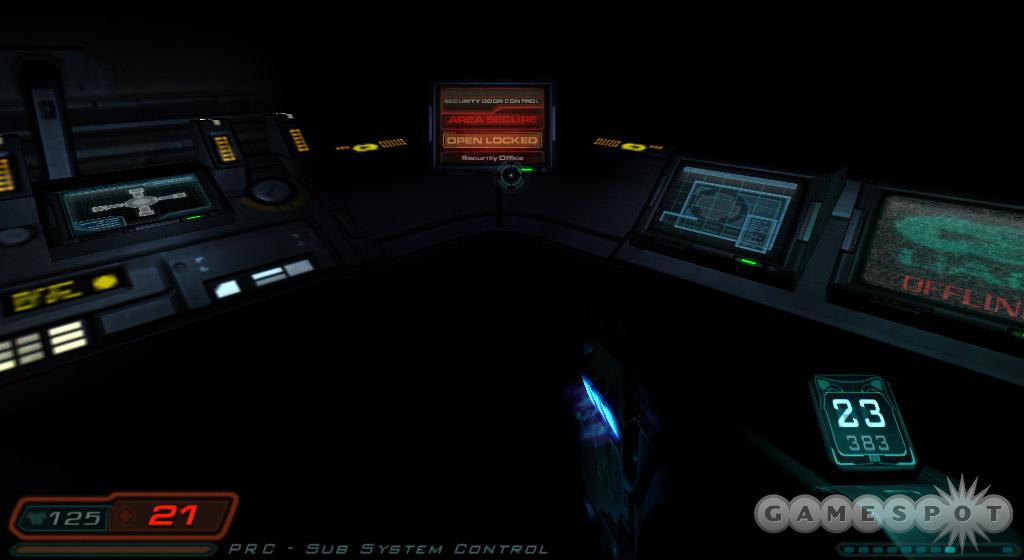
Inside you'll find the PDA of Ron Ridge. Use the lift station to call the lift. Move it to station 3. As you move through two, beware of the cacodemon and nearby guards. Get off at three and battle a cacodemon and imp. At station 3, drop down into the room below. Gather supplies and climb up the ladder. Enter the subsystem control room and open the security door using the console.
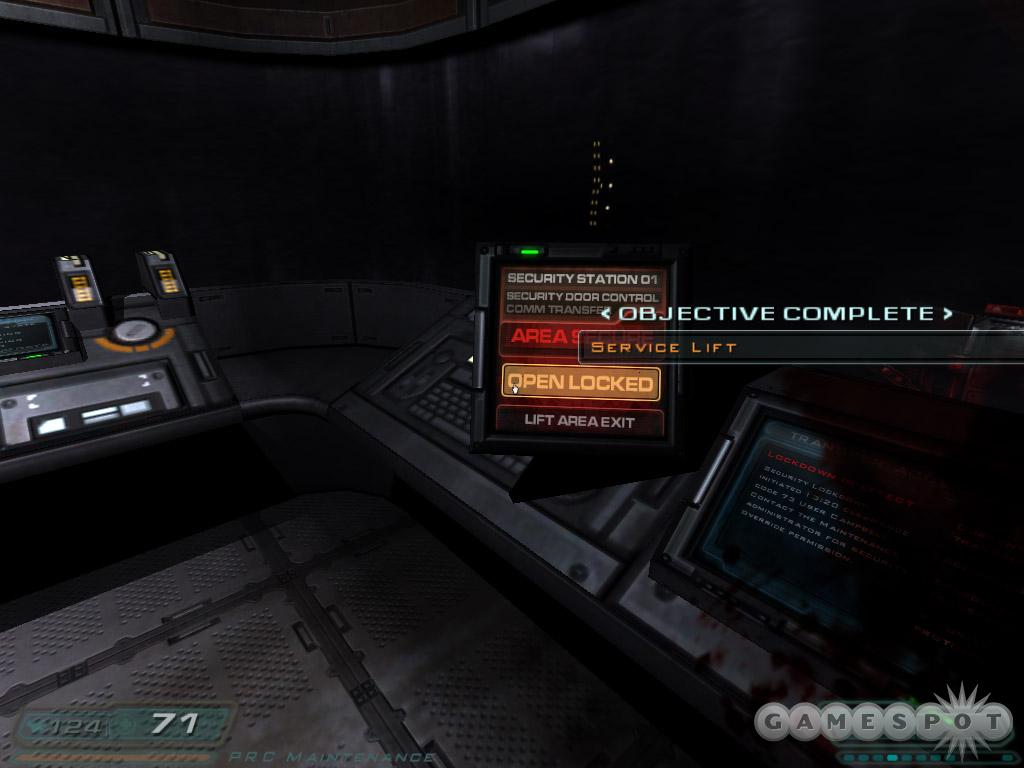
Exit through the unlocked door. Call the lift at the station. Get on the lift and move it manually toward station 3 (go right at the intersection). When you spot the walkway above you, raise the lift and leap onto the catwalk. Go right and locate the control room; defeat the monsters inside. Open the lift exit using the console. Return to the lift and send it to station 3. Hop off and move through the unlocked door.
Approach the door at the tunnel's end. The floor drops. Turn around and spot the berserk power-up. Grab it and pummel all zombies with your fists. Kill all of them to trigger the stairs back up. Open the door and kill the chainsaw zombie to the left. Find the airlock and return outside. A couple cacodemons hover above. Grab the oxygen tanks as you move across and to the next airlock to the left of the bay door. Enter it to proceed to the next level.
Communications
Main Objective: Send distress transmission to orbital fleet.
The communications tower is the primary link for off-planet communications. Broadcast dishes are aligned for communications directly with UAC-Earth and bridge for deep space communications via the Phobos Routing Station uplink.
Objective: Main Communications Room. Locate the main communications room.
Watch out for the cacodemon that emerges from the right. Gather armor from the room and use the health station in the corner. Approach the lift, which triggers a second cacodemon. Kill it and get into the elevator. Ride it up to the third floor: communications.
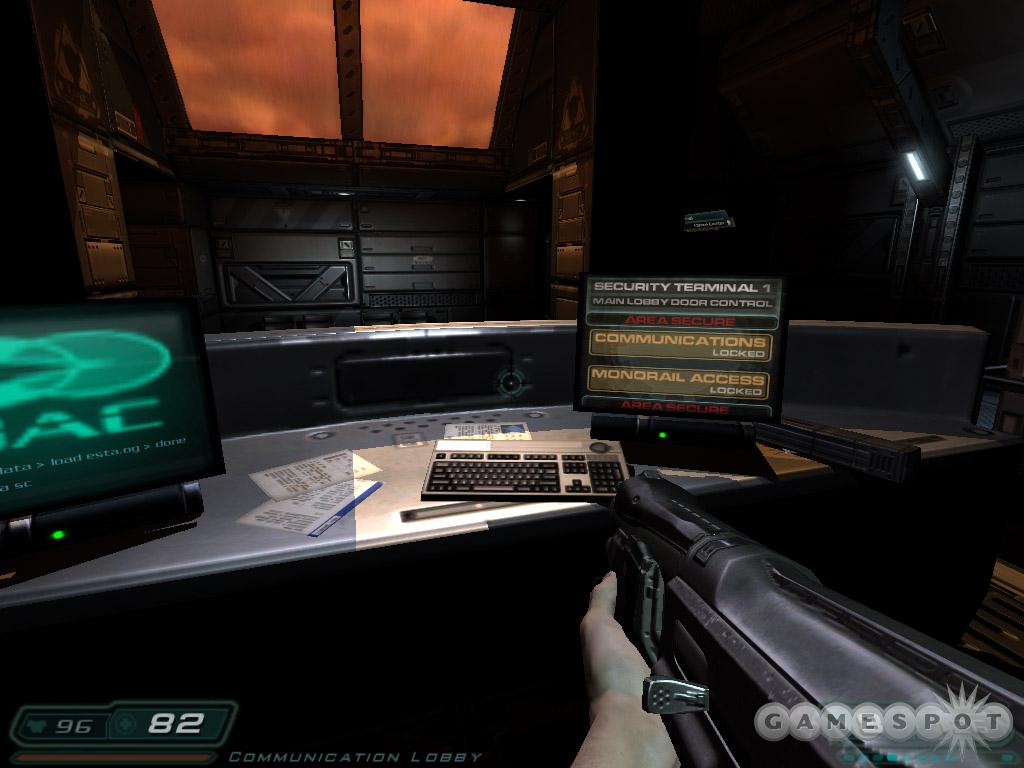
Exit and use your machinegun to defeat the guard through the window. As you go to the right, another creature teleports in. Go through the door on the right. Beware of the imp that comes in behind you. Defeat the guards inside the lobby then move up to the console. Unlock the communications area (the monorail can't be unlocked yet). This triggers a cacodemon and a couple guards that appear to the right. When done, go through the unlocked door around the right corner.
Move through communications access (spot the commotion to your right) and defeat a couple guards: one in front another behind. Walk down the stairs into the main communications room to receive a new objective.
Objective: Satellite Control. Make your way through engineering and locate the Satellite Control Center.
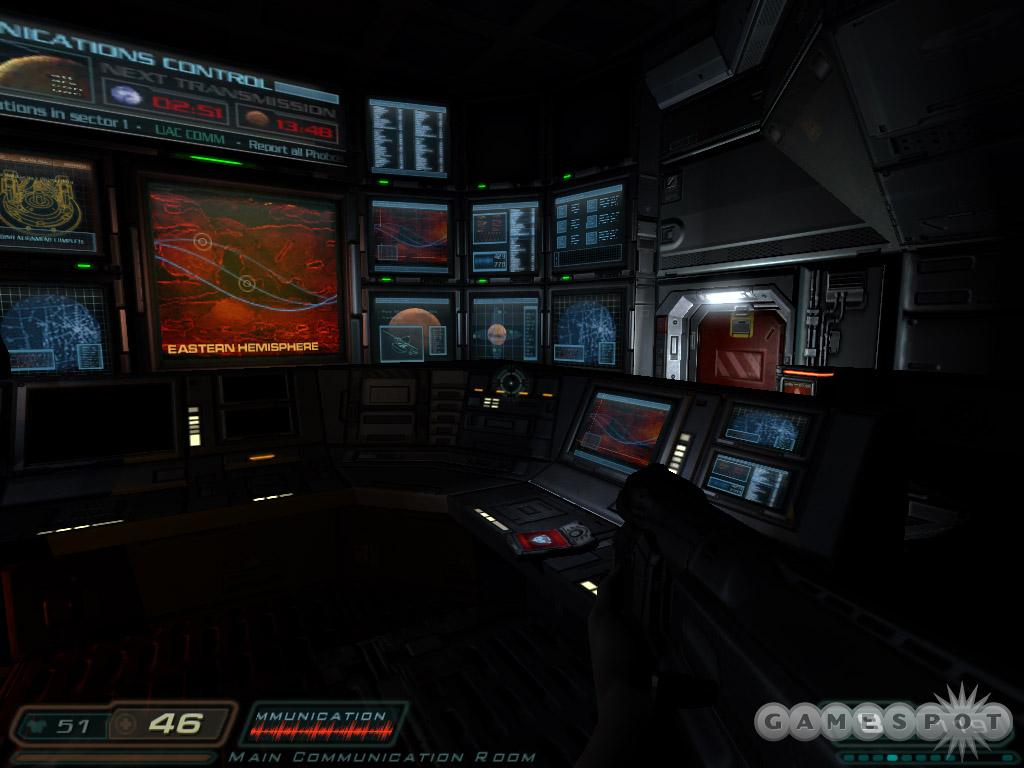
Pick up Seamus Blake's PDA off of the console. Exit and move toward the door into engineering. Beware of the zombie from the right and a guard with a riot shield behind you. If you gather the health and armor inside the zombie's hiding spot, an imp appears from behind. Go through the engineering door. Move along the curved catwalk and into the lift room. Defeat a couple enemies inside.
Use the lift and go down. There's a zombie to the left. Grab the items he's hoarding. As you move forward, beware of the imp to the left. Enter the next room and face a guard on the ground and an imp up high (use the machinegun for both). Cross the room to the next door.
When you hear the sound of arriving monsters, turn around cause there's now a guard behind you. Kill it then take out the guard and zombie now behind you. Gather all health and armor from the corners. More teleporting creatures arrive as you search the back corner of the room. Use the console to open the vent and crawl through to gather more health and armor. When done, cross the room toward the steps and door. Defeat an imp and a zombie that appears behind.
Walk onto the catwalk. The health at the intersection is an obvious trap. Grab it, which summons an imp. If you move to the right along the catwalk another imp appears on the path above. Open the other door into a supply room. Shoot the barrels to clear it out before searching it. Move toward the other door (defeating the high imp with a machinegun) and go through.
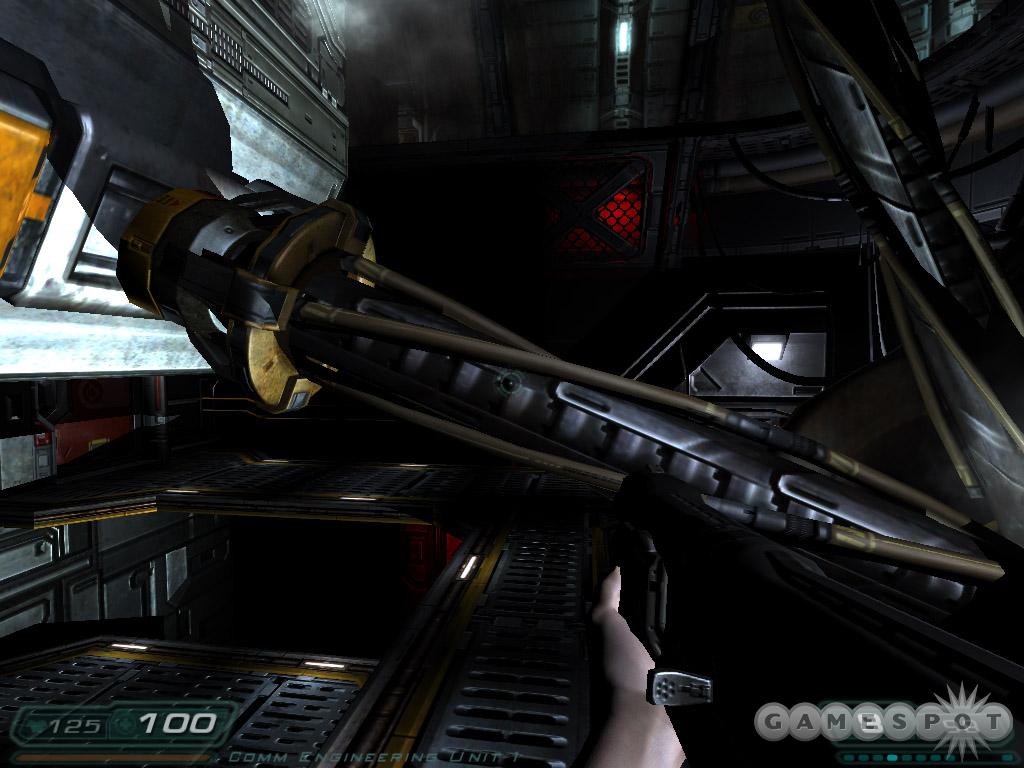
Move into the room until the imp appears. Back out and wait for the imp to move next to the barrel. Go inside the room and defeat the guard that appears. Gather the health and armor from under the stairs. Move past the mechanism when it's closed. Enter the second lift room. The cubbyhole contains some health and armor. Get onto the lift and ride up.
Defeat the imp then go through the left door. In the next tunnel, remain on the upper stairs to defeat two guards. Search below the stairs for health and armor. Pick up Ben Wolfe's PDA near the other door. The second email reveals a communications cabinet code: 246.
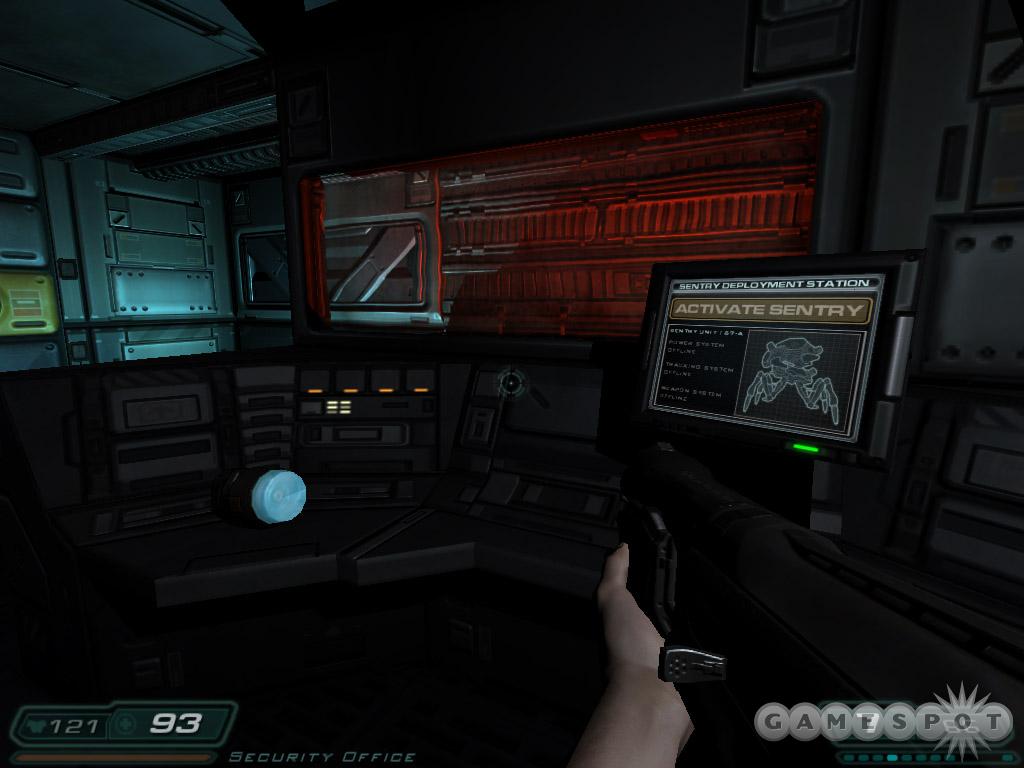
In the next hall, approach the security door ahead. Defeat two cacodemons to the right. Enter the security room and defeat the guard. Open the cabinet with the code 246. Use the health station if needed. Use the console to activate a sentry bot.
Follow the sentry bot along the long route to the next lift. You'll face guards, imps, and cacodemons. Allow the sentry bot to take the brunt of the punishment and assist from safe cover. Reach the elevator and use it to reach satellite control.
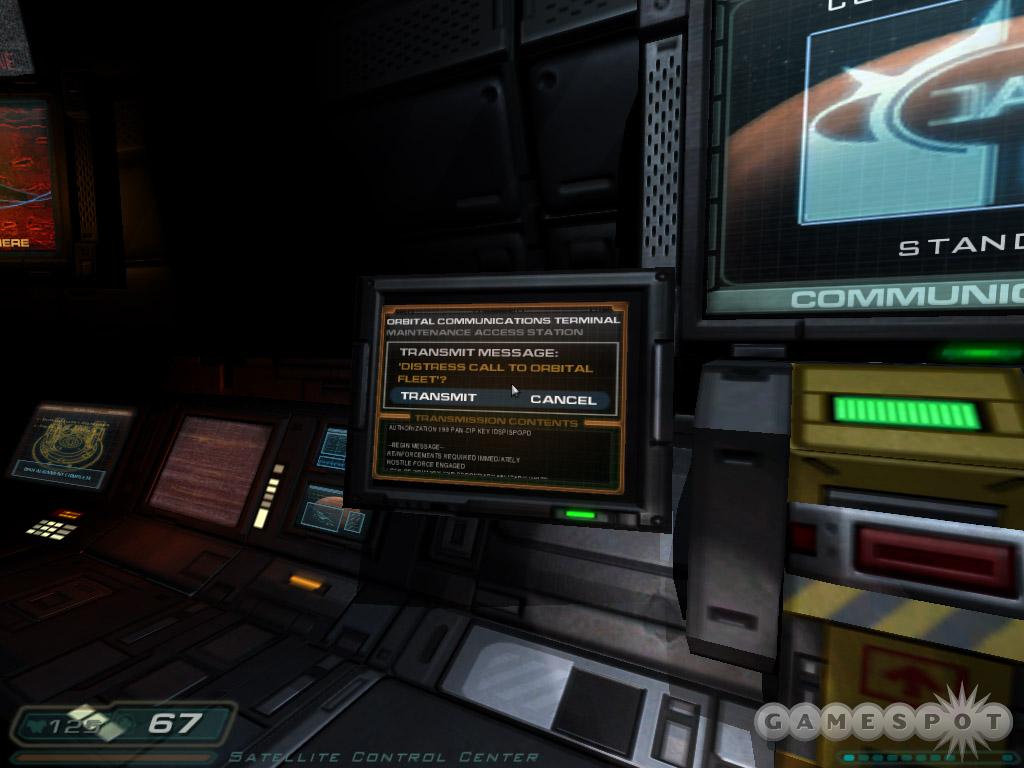
Exit the lift and snag Rob Finch's PDA off the ground. Cross the hallway into the satellite control center. Use the console and receive word from your apparent enemy. Now you must decide to transmit the message or cancel it. Your next objective remains the same either path.
Objective: Reach the Monorail. Return to the lobby and head for the monorail station.
Return to the lift. You can go to left two but you'll find it blocked. Proceed down to maintenance. Defeat the guard and a couple imps. Go onto the catwalk and defeat the two imps to the left. Another guard emerges from in front of you.
Reach the elevator and office on the left (heath there). Beware of the guard and imp (another materializes if you approach the health station). Use the lift to return to communications. Work toward the skyway (beware of a guard that appears to the left) and into the lobby. Open the bay door toward the monorail and complete the level.
Recycling - Sector 1 (Monorail Skybridge)
Main Objective: Reach Delta Labs.
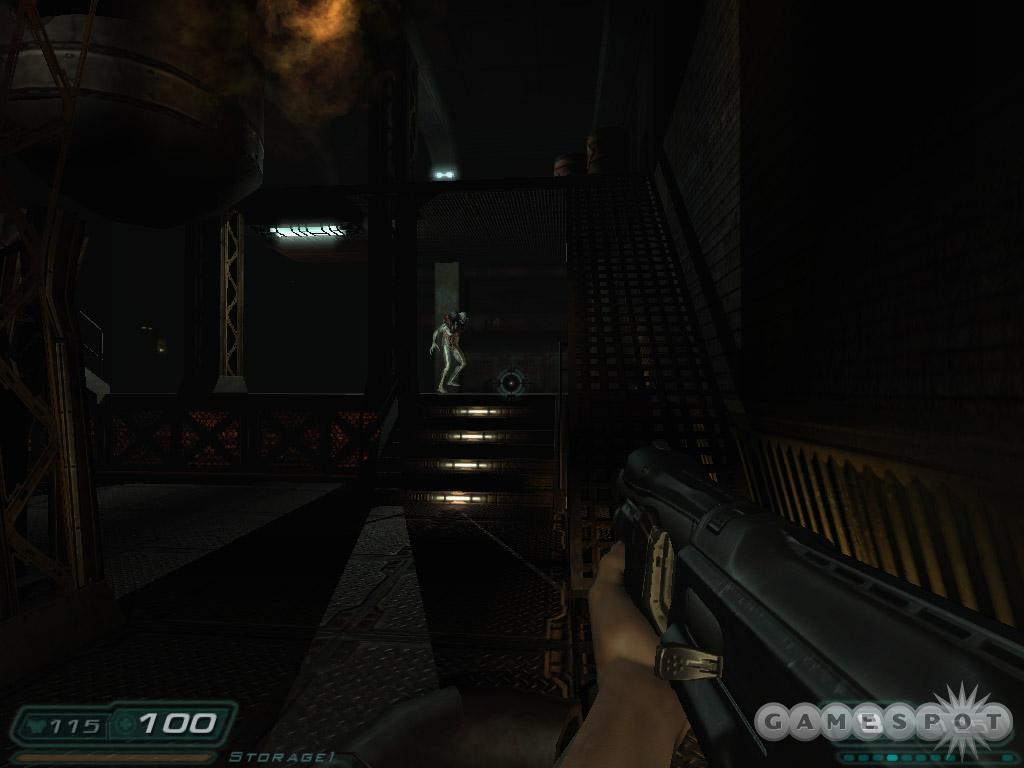
The monorail skybridge crosses over the primary recycling station, a key element in processing waste products into useable resources.
Start across the bridge--but it soon collapses. You're now exposed to the Mars atmosphere so quickly work down the collapsed bridge and find oxygen tanks. Defeat a couple cacodemons then scamper to the airlock. In this access hall, move forward until a demon appears in front of you. Kill it and continue onward.
More creatures appear as you move down the hall: a zombie and maggot to the front and then another zombie behind. Use the health station, gather armor, and then go through the door. Battle the revenant inside the storage room. Dodge its rockets (using pillars as cover). A second enters after the first perishes. Go up the steep ramp along the right wall to find some supplies at the top. Lure the imp to the explosive barrels to kill it.
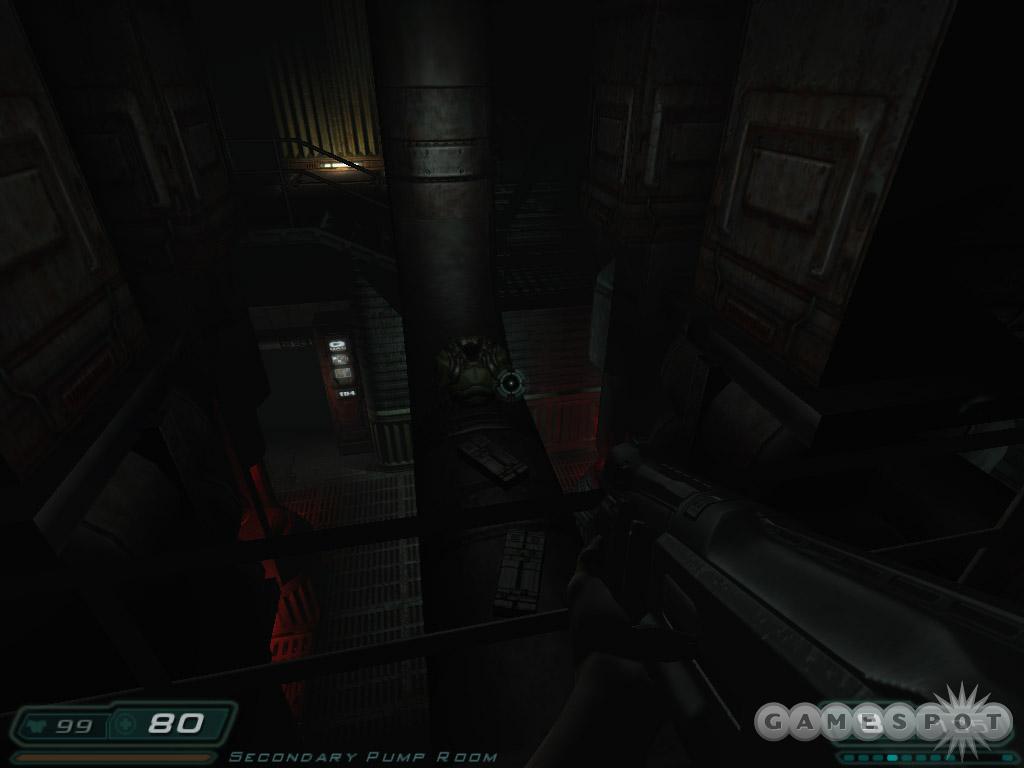
Ascend the other stairs and enter the door at the top. Battle the demon and imp ahead then slice and dice the zombie behind. Go through the door on the right. An imp appears ahead of you. If you back out to face him, beware of a maggot behind you. A second group arrives from the front as well. Descend the lift.
Battle some maggots in the hall before collecting ammo and health. Discover a couple revenants at the intersection. Use corners as cover against their rockets. There's some plasma ammo nearby so use the plasma gun if possible. Defeat both and gather any supplies in the area before using the door at the bottom. Crush the imp and demons waiting on the other side and proceed through.
Proceed into the secondary pump room. Battle some zombies and maggots (watch your back). There's also an imp that should be lured toward the barrel. Ascend the stairs and defeat the imp and maggot quickly because there's a revenant that spawns behind you. Go around the corner and look left to spot some armor and ammo on the pipe. If you get it, be warned that a trio of imps appears. Go through the door at the top.
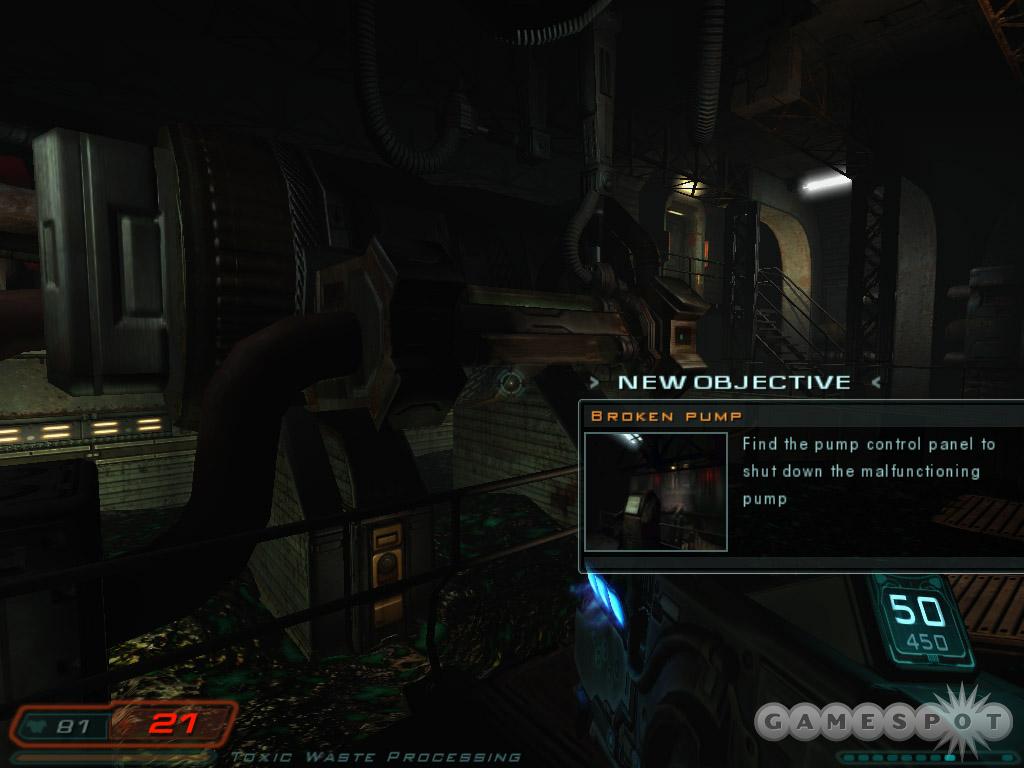
Enter central maintenance but back out after triggering the monsters. Tackle the maggot before attempting to shoot the revenant up and to the right. Go through the door on the left.
Objective: Broken Pump. Find the pump control panel to shut down the malfunctioning pump.
Jump to the platform to the right and maneuver into the narrow hall. Work your way through and up the stairs. Defeat a group of enemies along the way and secure the health from the shelf and corner. Reach the console and use the computer to extend the service ladder. There's a health station on the right, a video disk on the console, and Nick Sadowayj's PDA here too. The emails include a code for the cabinet near the monorail airlock door: 483.
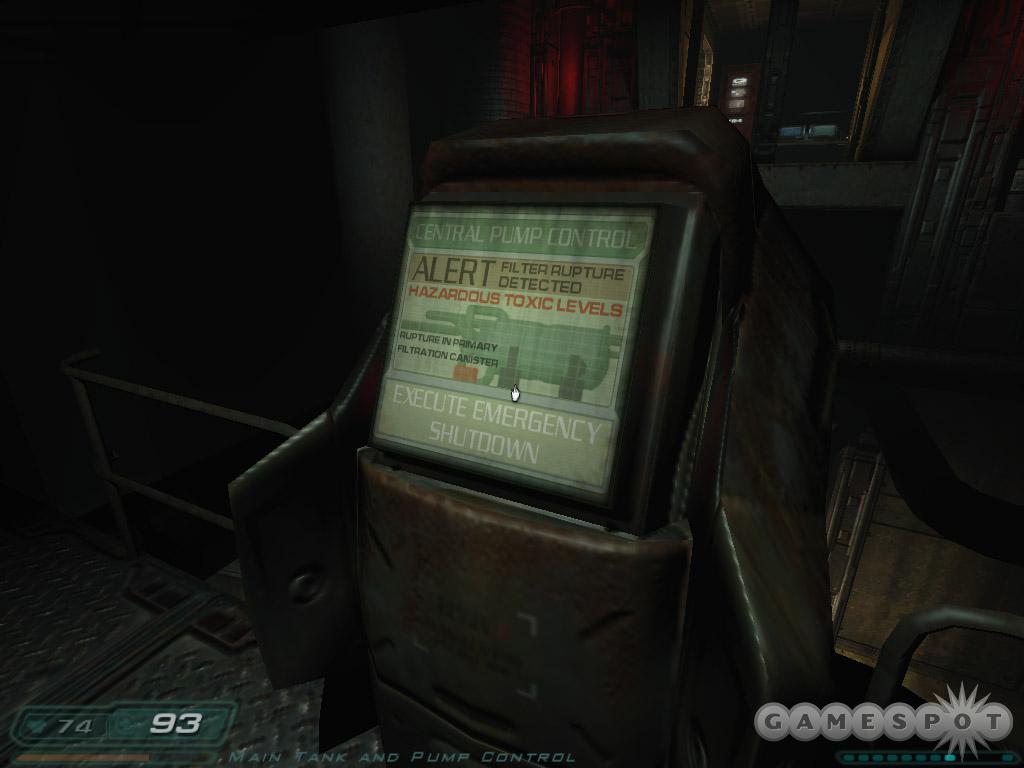
Climb the ladder and move through the upper maintenance hall. Defeat the two imps and reach the overlook on the right. Drop down onto the pipe that leads to the catwalk on the other side. A cacodemon appears. Defeat it as fast as possible. If you get knocked down, just retrace your steps back up to the overlook. Cross the pipe then use the console to shut down the broken pump.
Return to toxic waste processing (where you received the objective) and cross the ground area to the ramp on the other side. Defeat the imps in the way and enter the door toward secondary levels access. Follow the hall and defeat the two demons. Search the storage on the left for ammo and armor then use the health station on the right. Continue through the door ahead.
Traverse the underground tunnel. Spiders appear in front of you and occasionally behind you so turn around often. A single imp joins them near the end. Go through the exit door into the secondary level. As you approach the open doorway, beware of spiders from behind and a maggot in front. The next room contains a revenant. Kill it from long-range with the plasma gun.
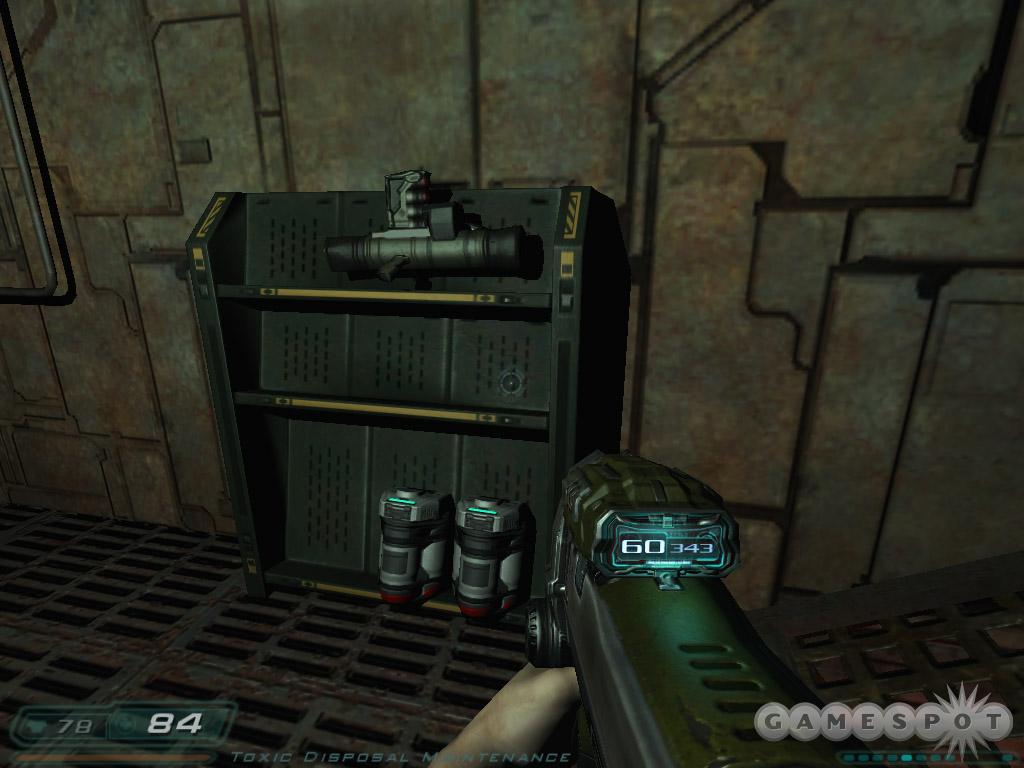
Cross the rock bridge and shoot the barrels next to the imp that appears. As you move to the right, a revenant arrives. Kill it fast with the plasma or chain gun. Approach the console and defeat the maggot. Snag Anthony Garza's PDA and read his email regarding the rocket launcher.
Move into the next hall and defeat the maggot and imp and find the rocket launcher on the rack. Gather up nearby health and ammo before proceeding to the airlock. Cycle it and move outside. A revenant patrols the upper pipeline. Defeat him with the plasma gun.
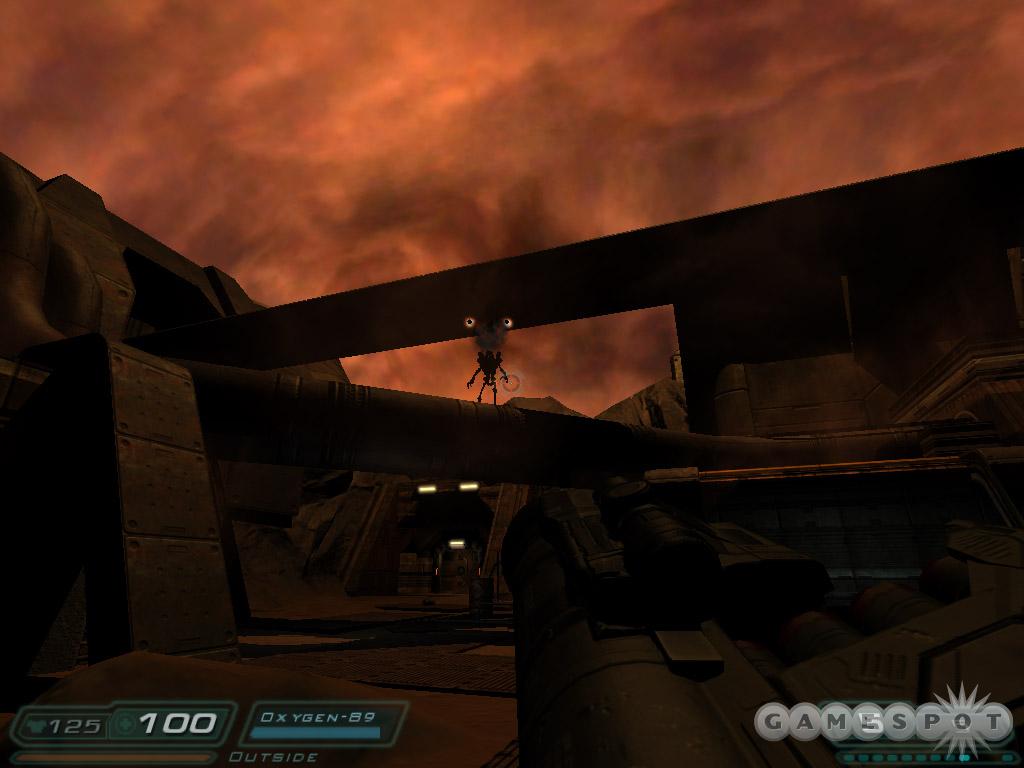
A second revenant appears from the storage room on the right. Lure him near the barrels and shoot the barrels with a rocket or your plasma gun. Gather supplies then ascend the ledges to the upper catwalk (where the other revenant stood). Reach the bay door and beware of cacodemons appearing behind you. Enter the door into the next level.
Recycling - Sector 2
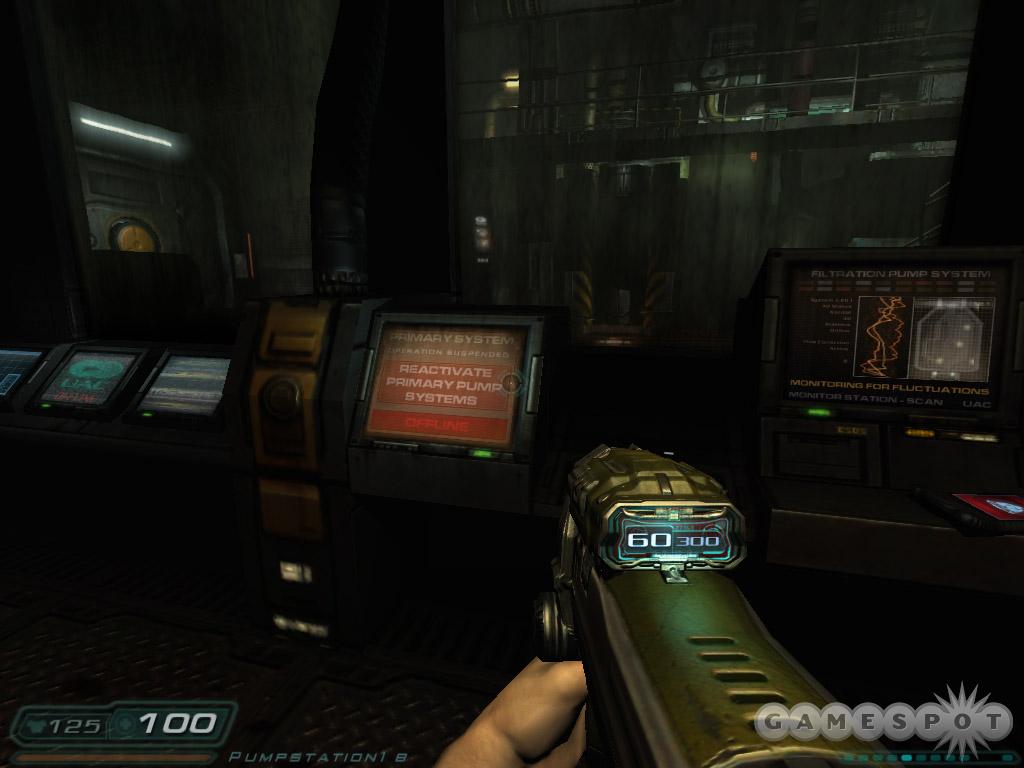
Main Objective: Locate the entrance to the monorail station.
The recycling plant is key to survival on Mars, processing waste products into useable resources. Sector 2 primarily refines and recycles chemical and biological waste.
Enter the pump station and the office on the right side. Snag some armor from the shelf and use the health station to mend wounds. Grab Jeffery Moen's PDA off of the console and read emails. Use the computer, which triggers a communications sequence. Defeat the four imps that arrive (one to the far right). Jump through the broken window. Use the rising cylinder to reach the upper catwalk. Maneuver to the door. Battle a couple imps ahead followed by some lost souls. Beware of the imp that materializes behind you.
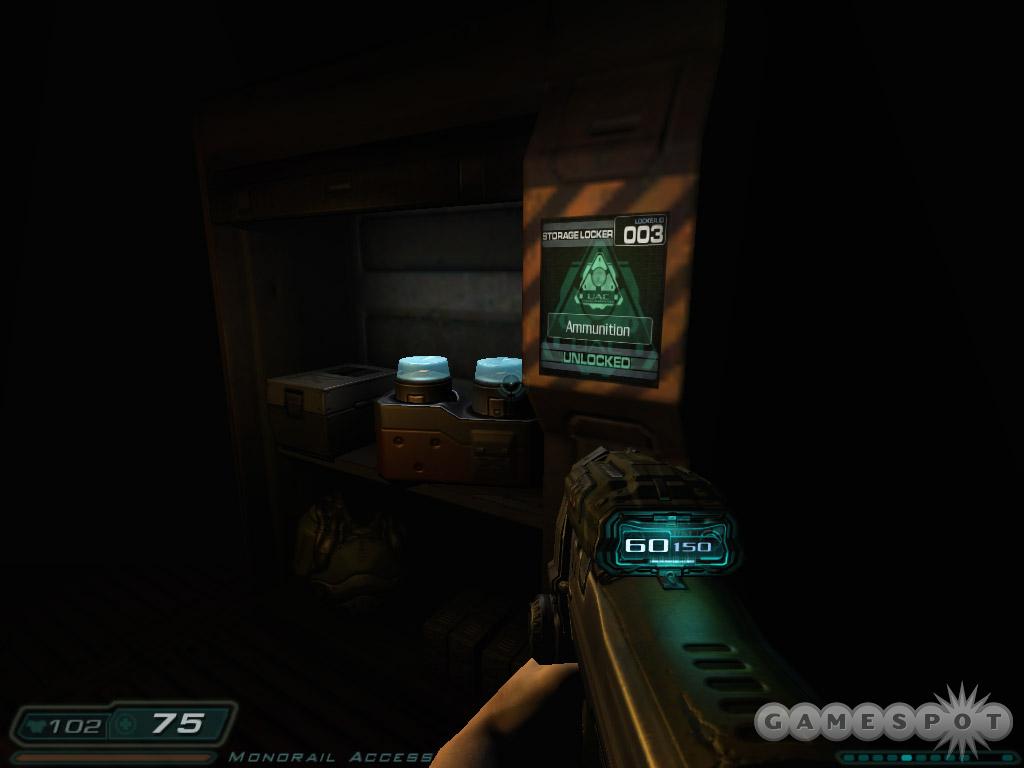
Objective: Hazard Door Sealed. Reactivate Air Filtration System to gain access to the Monorail Station.
Turn right and spot the storage locker. You received the code on the last level: it's 483. Start down the only available route, which triggers an imp ahead and behind. Be cautious around the explosive barrels. The next room contains a couple imps, souls, and a revenant enters from behind. Maneuver into the storage hall. Gather supplies from the shelf.
Descend the stairs in pipe maintenance and be prepared for a fight. There's a revenant that patrols the bottom (try to kill him using the barrel) and a second that arrives from behind. An imp joins the second revenant. Move down the hall and turn around when you hear the imp. Search his alcove for ammo and health.
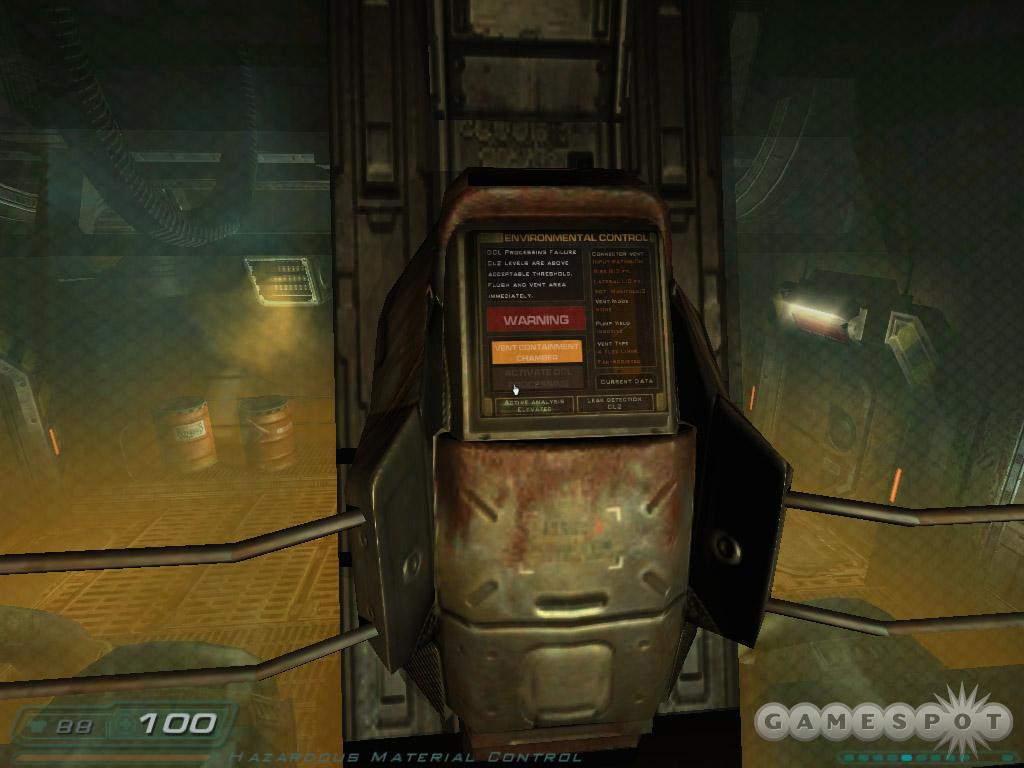
Maneuver through the narrow hallway and watch out for the zombie on the right. Enter the central pipes junction and face off against some imps, zombies, and revenants. The path splits but connects at several points. Go to the left path and find a health station across from a hazard door.
Objective: Containment Chamber. Vent lethal gas.
Go to the right side now and into the storage room. Kill the revenant and imp inside (a grenade works well). Cross to the next door. Imps ambush you in the next hall. Enter hazardous material control. Battle a zombie to the left and grab the ammo behind him. There's also a health station to the right. Approach the controls on the left and vent the chamber. A trio of imps drops down to your right. Slice and dice the zombie to the left and return to the hazard door.
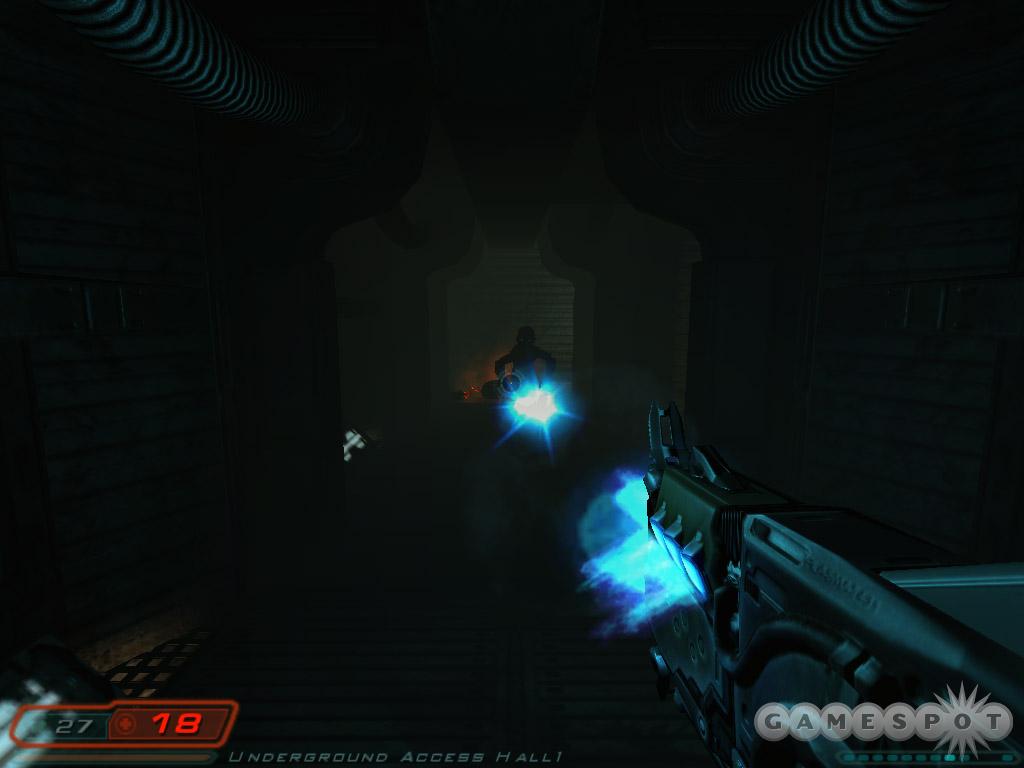
Revenants ambush you inside the hazardous material room. Use explosive barrels to defeat the first then turn around and blast the second quickly. Exit through the opposite door. Face off against several cherubs in the next corridor. Just remain stationary and fire the plasma gun at them. Approach the next storage area and back up when you hear the imp. Shoot the barrels to eliminate the imp. Gather the supplies from the room and use the nearby health station.
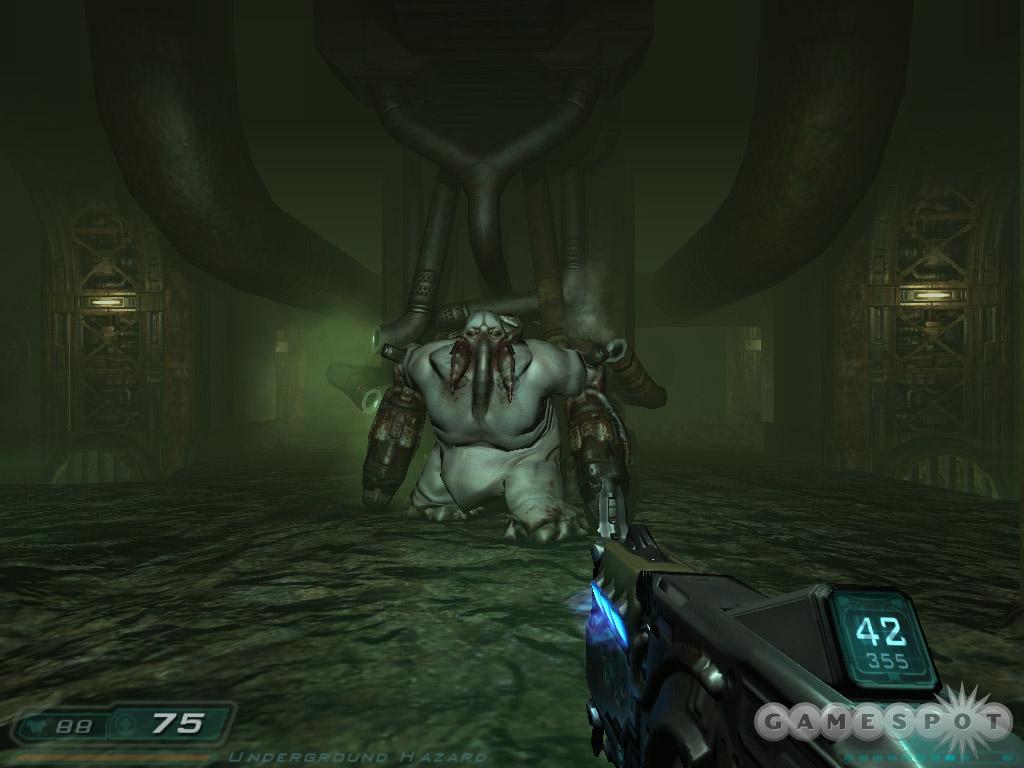
Start up the staircase and defeat the imps that appear. A revenant joins you at the top. Crush him with your chain or plasma gun. Enter the lift area and proceed down. Shoot the cherubs that arrive to the right. In the next room, a cherub hides to the right. Proceed down the ramp and gather the armor behind you.
You'll battle several mancubuses in this underground cavern. Utilize the pillars as cover and avoid standing in front of them and taking the punishment from their projectiles. There are three total. Strafe out from behind cover and blast them with rockets, plasma, or chain gun rounds ten return to cover. Cherubs arrive once all three are dead. Gather health and ammo from room.

Ascend ramp and battle some cherubs near a health station and supply rack. Use the lift. Toxins fill the next room. Quickly work across the catwalk and cycle each of the three vents. A revenant teleports in at the end of the path; you'll also find Scott Harding's PDA here. Go through the exit door and you're back near the monorail. Open the bay door to complete the level.
Monorail
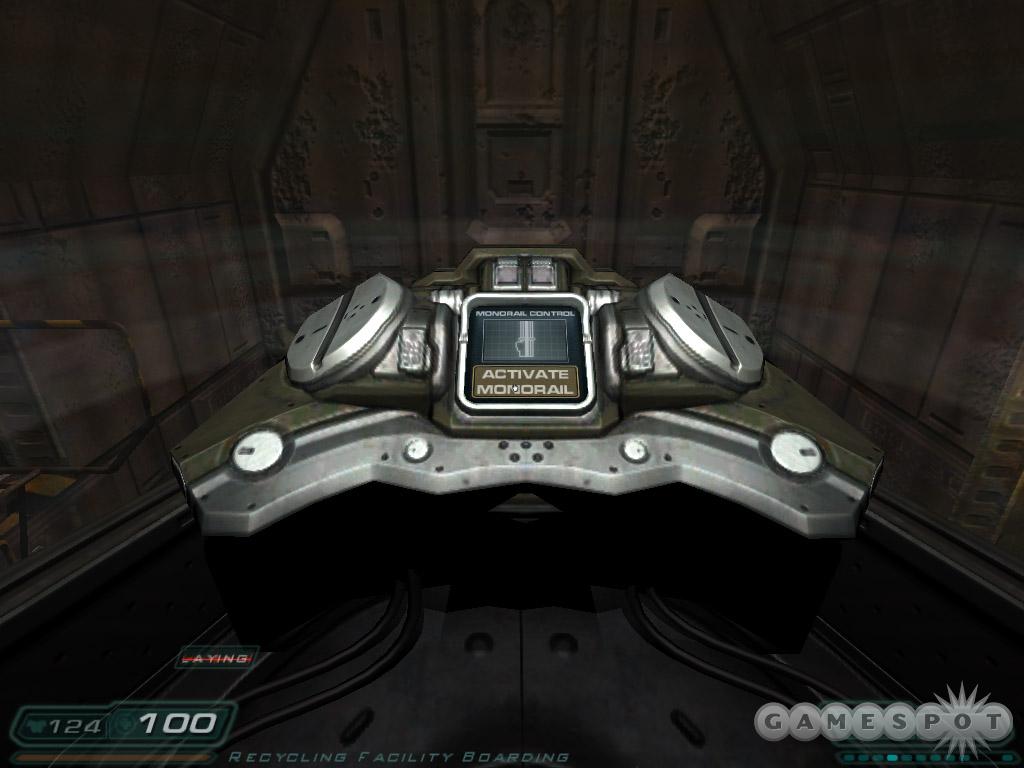
Main Objective: Reach Delta labs.
The monorail serves as transportation between the low level access sectors of the UAC complex and the priority access research facilities. Have all identification and security clearance data prepared for inspection.
Go to the right and pick up Sam Harding's PDA. Grab the supplies and use the health station if needed. Board the monorail and approach its controls. Activate the monorail then talk to T. Ryan when he appears. Reach the next monorail station.
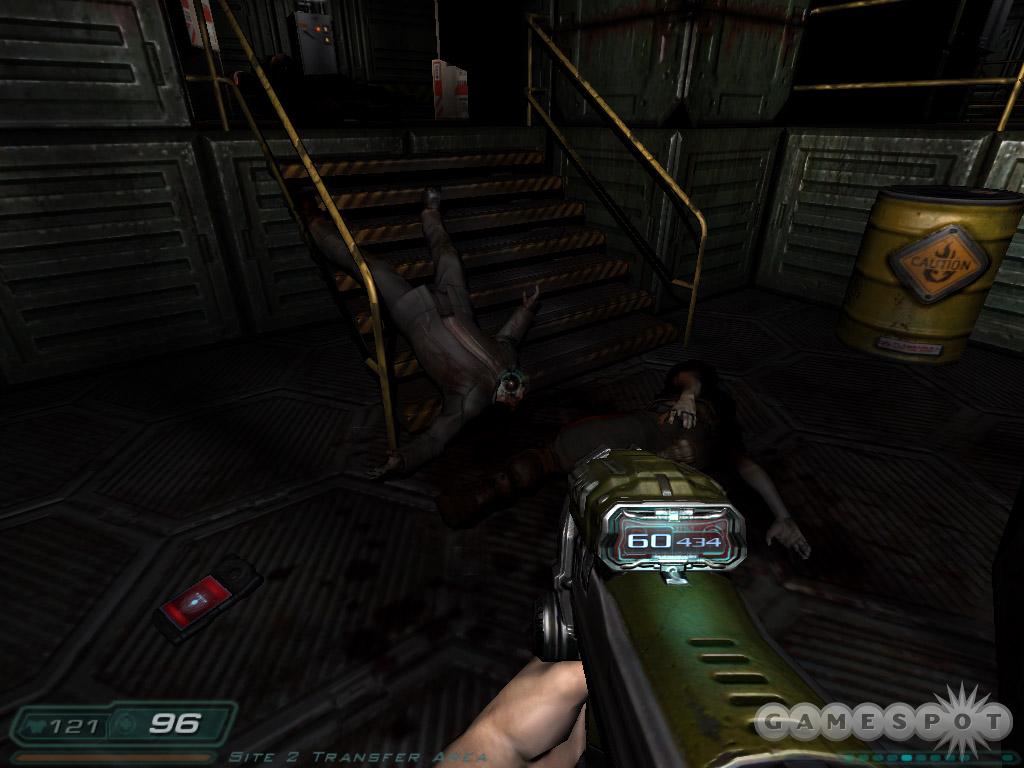
Objective: Override Airlock. Manually override the monorail airlock systems.
Search the station for health and armor (there's more underneath the monorail track). Defeat some spiders then move through the door. Battle the soldier and a handful of guards. Search the corpses on the right for Gary Ross' PDA. The emails include the code for Junction 5, Site 2 airlock: 826.
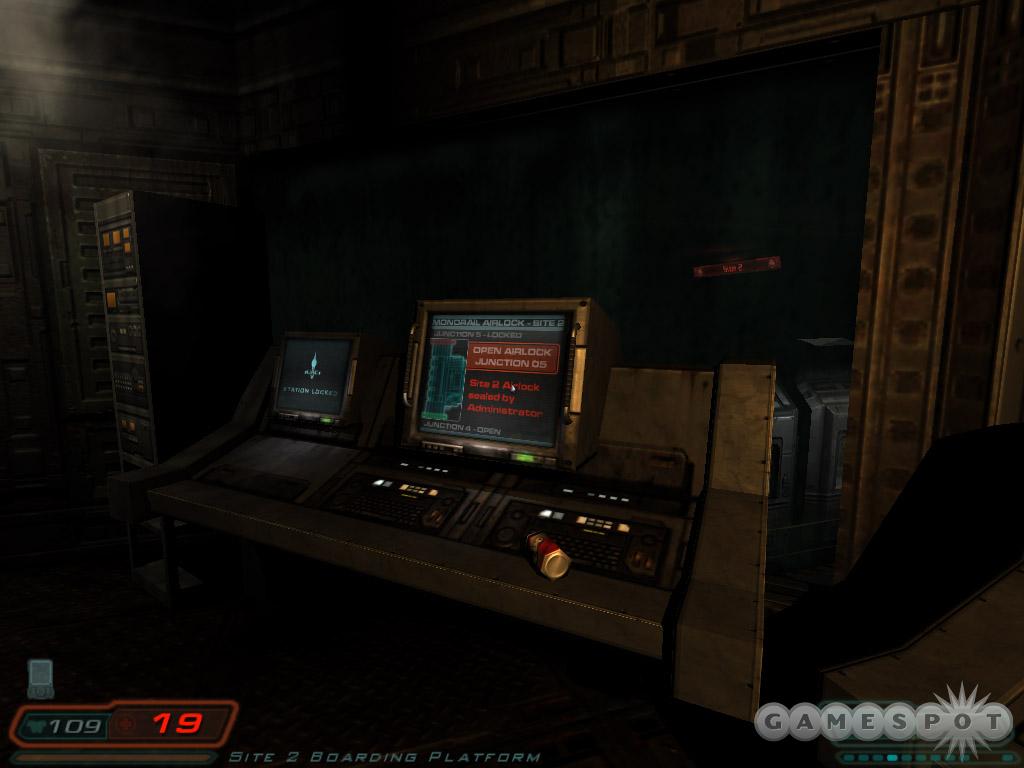
Enter the wide transfer area. Watch around you constantly as guards, soldiers, and imps warp in. Search the shelves and corners for supplies then go up onto the opposite catwalk. At this point more imps and soldiers transport into the room. Ascend to the top. Approach the upper door and smash the soldier on the other side. Enter the control room. Grab Charles Hollies' PDA, which includes a cabinet code 142. Open the supply cabinet then use the computer to override the airlock. Input the code 826.
Retrace your steps back to the monorail and activate the controls. Proceed until the monorail crashes. Climb the ladder and shoot the soldier that approaches. You can grab some health down the path then return to the unlocked door. Kill the spiders in the hall (watch behind you too) and enter the next monorail section. Descend a ladder to go under the rail and find some ammo and supplies. Advance into the next hall and beware of several soldiers and imps that appear.
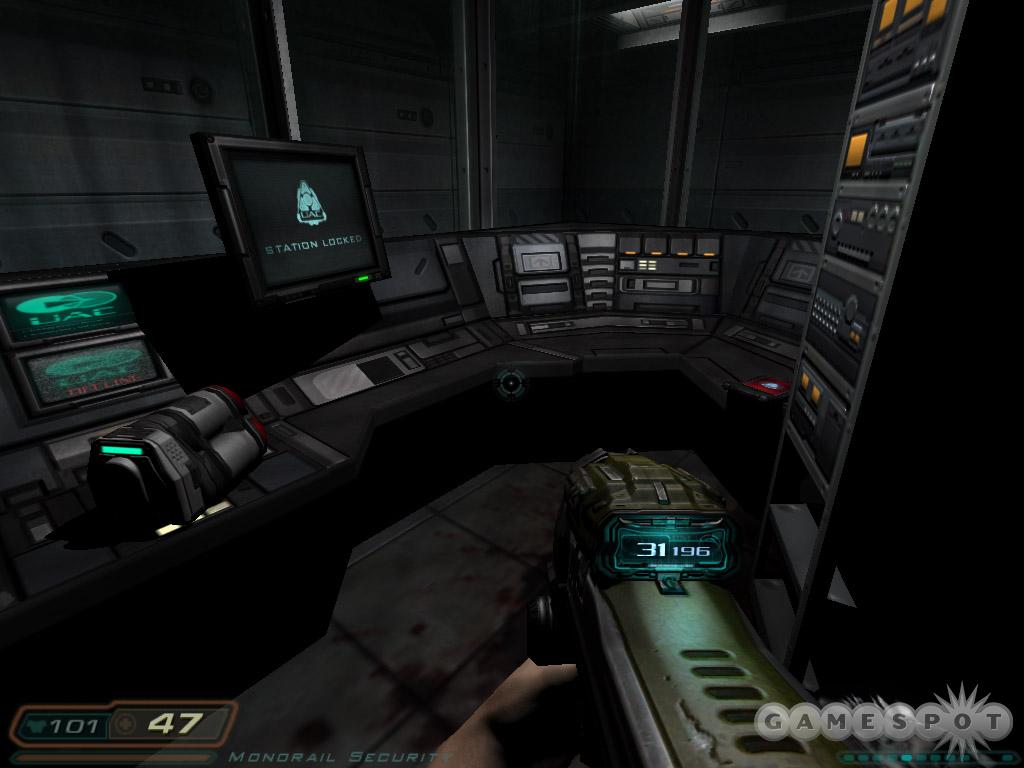
Open the next door and trigger a couple guards on the upper floor. Lure them into your shotgun blast. If one remains above, toss a grenade up there. Enter the security station at the top of the stairs and recover Karl Cullen's PDA. It includes info on the automated turrets and a cabinet code: 364.
Move into the door marked Delta Labs. When the imp appears, retreat and shoot the one that materialized behind you. Cross the bridge and shoot the soldier that enters from the front; turn around quickly to blast the imp.
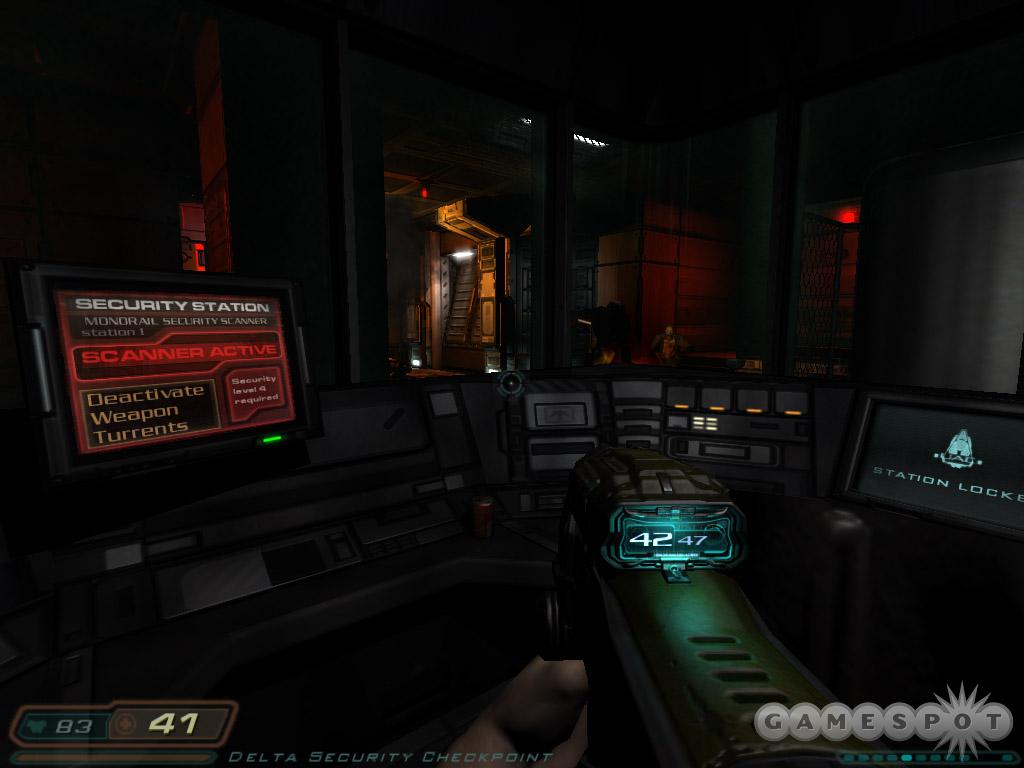
At the security checkpoint, shoot the zombie ahead then scamper through the broken glass into the substation. Open the door behind you and find a couple storage cabinets. Open with the code 364. Allow the turrets to rip through the enemies that arrive. Deactivate the turrets once the enemies are dead and continue to the bay door to complete the level.
Delta Labs - Level 1
Main Objective: Find the main portal.
The delta complex is the most advanced research facility on mars. Sector 1 contains the power systems, energy core distribution center, and services the administrative functions of the entire Delta Complex.
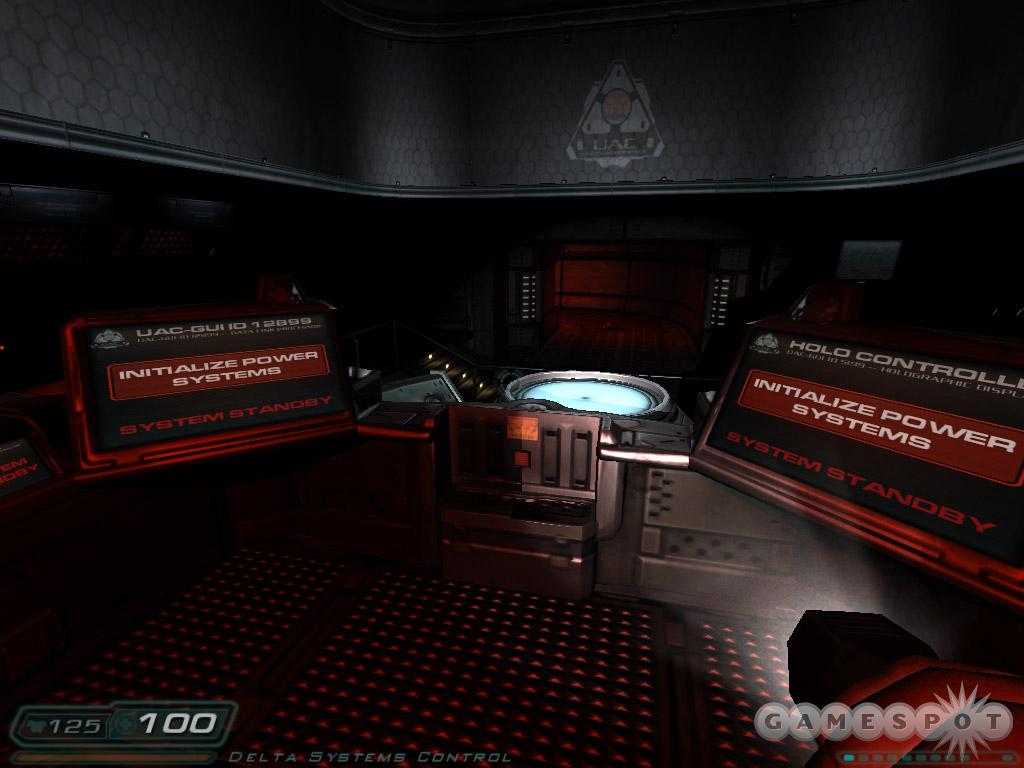
Objective: Delta Power Failure. Restore power to the Delta Labs.
Walk forward and grab Robert Price's PDA off of the ground. Listen to the audio logs and read the emails. One of the audio logs includes info about a locked supply room with the code 298. Grab some armor and a plasma gun in the back corner then proceed toward the locked door. Note the path on the right.
Move into the control corridor. Snag some health on the right (backup files too if you wish). Enter systems control and go to the back console. Attempt to initiate power and receive a new objective.
Objective: Retrieve Data Linker. Retrieve the Data Linker to allow Delta Lab Control Access.
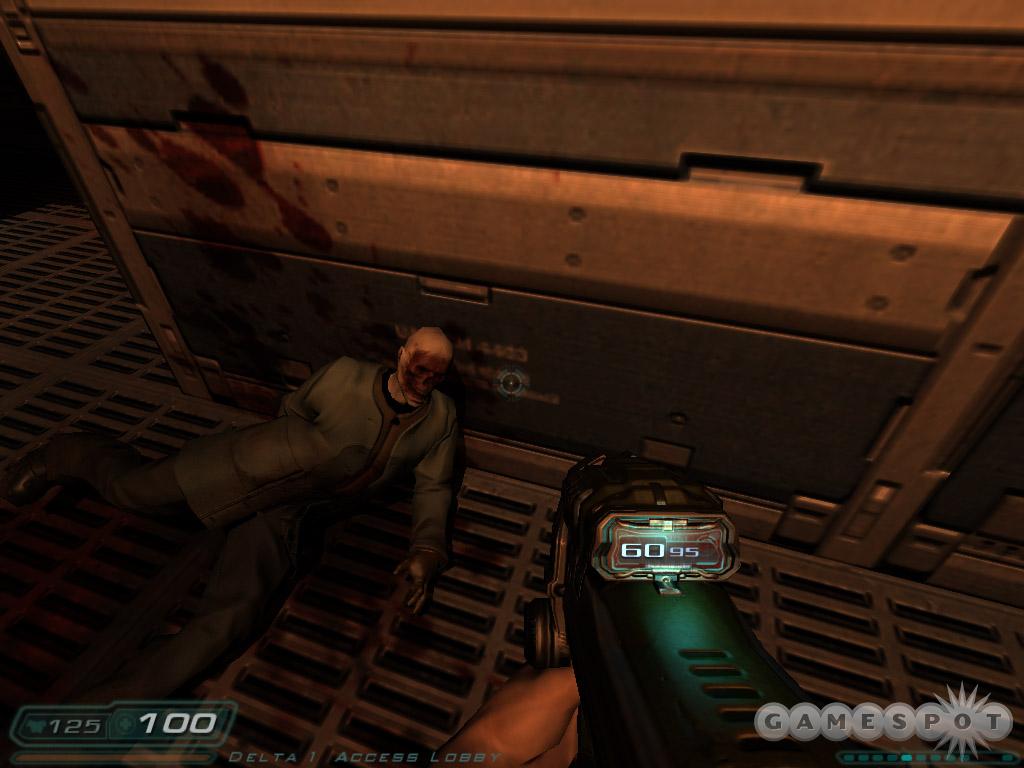
Start back toward the level entrance. The floor bursts open. Crawl through and emerge in Delta's main lobby. There are two lifts here. One is broken and the other requires a clearance you don't have. Move down the opposite hall instead.
Move to the back corner of the room and retrieve the data linker next to the corpse. Return to the systems control room and walk between the monitors to place the data linker.
Objective: Reactor Control Room. Locate Reactor Control Room.
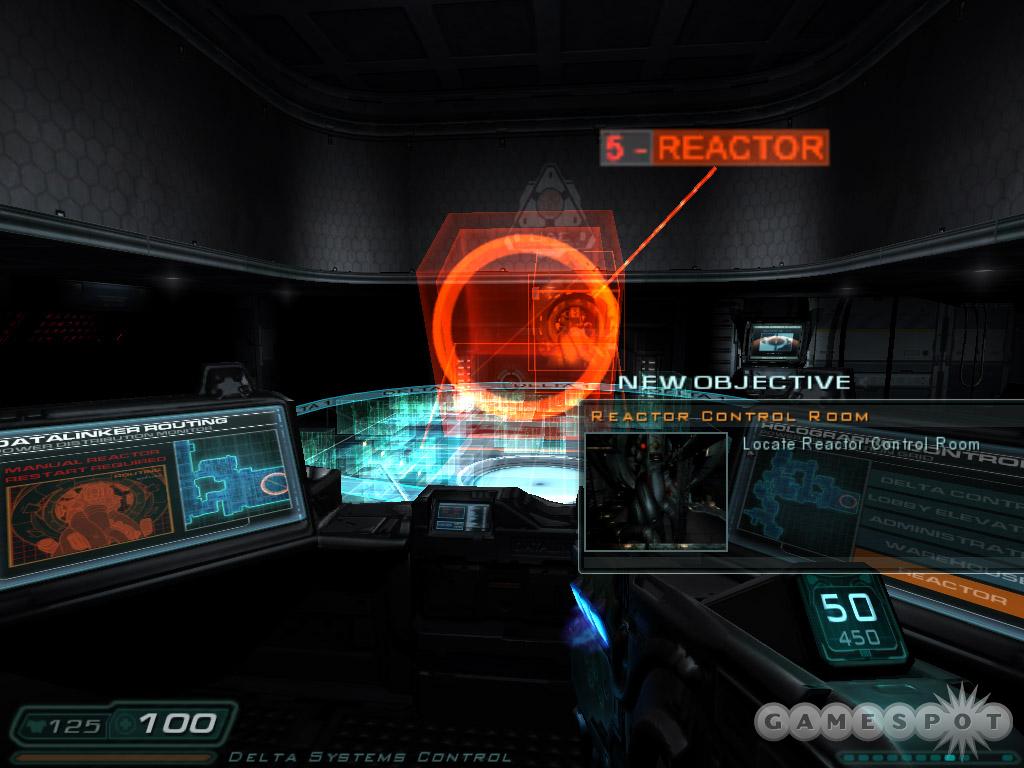
Return to the lobby. Defeat a couple imps and a demon along the way. Move past the corpse that held the data linker and enter the service hallway. Defeat a couple imps inside. Advance to the service area and watch out for the zombie ambush. Crush a soldier and demon and reach the door in the back corner.
Defeat the imp and zombie in the next room. There's a health station in the back left corner. Use it and a soldier teleports in behind you. Enter the service warehouse. Several lost souls attack from the rear section of the warehouse. Search the back area, which triggers a revenant. Use the explosive crates if possible. Grab all health, armor, and ammo then find the open vent shaft. Crawl through.
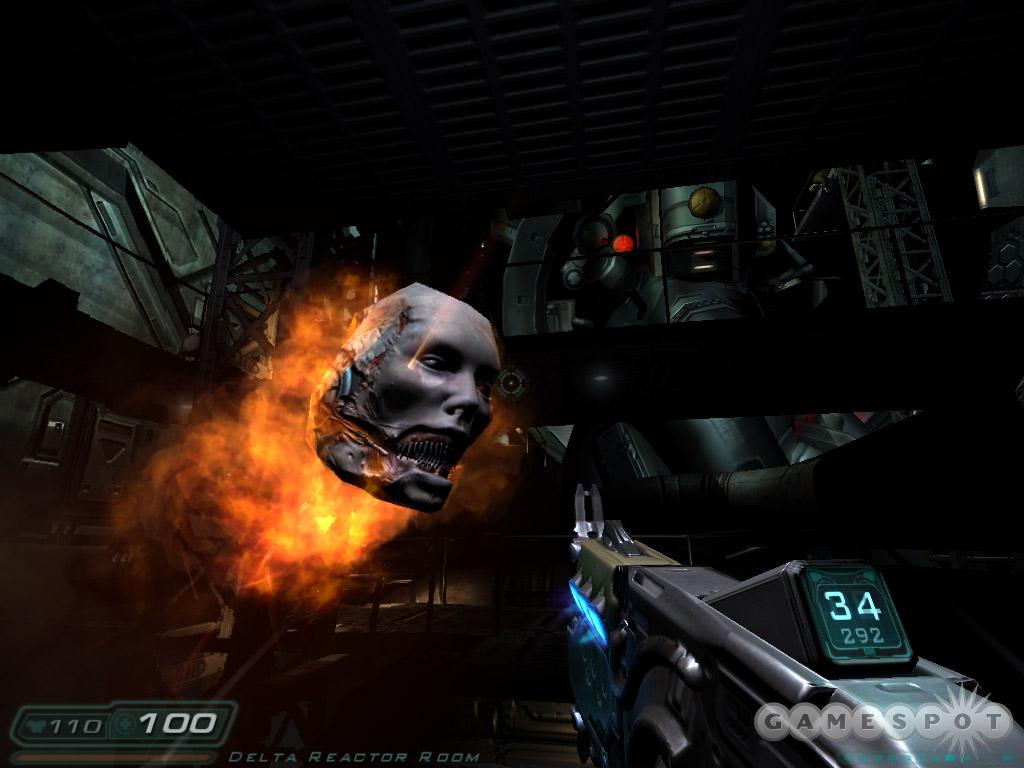
You emerge inside storage 21D--the same one mentioned in one of your logs. Defeat the cacodemon then open the cabinet with the code 298. Work your way through the service tunnel. You'll battle a host of cacodemons, imps, and soldiers. Gather the ammo and find the next path in the back corner. In the reactor support tunnel, you can hop down to the left and find health guarded by a zombie.
Battle the imp in front of the lift. Descend the lift, which breaks. Blast the enemies within the dark chamber. A revenant guards the exit so be ready. Enter the reactor room.
You'll initially encounter some lost souls. Eliminate them all. Cross the catwalk to the ladder. Go up and battle a cacodemon and more lost souls. If you go all the way to the catwalk's end, you'll find some supplies. But be prepared to face more enemies, including a revenant. Go through the unlocked door. Follow the hall to the reactor control room. Initialize the reactor.
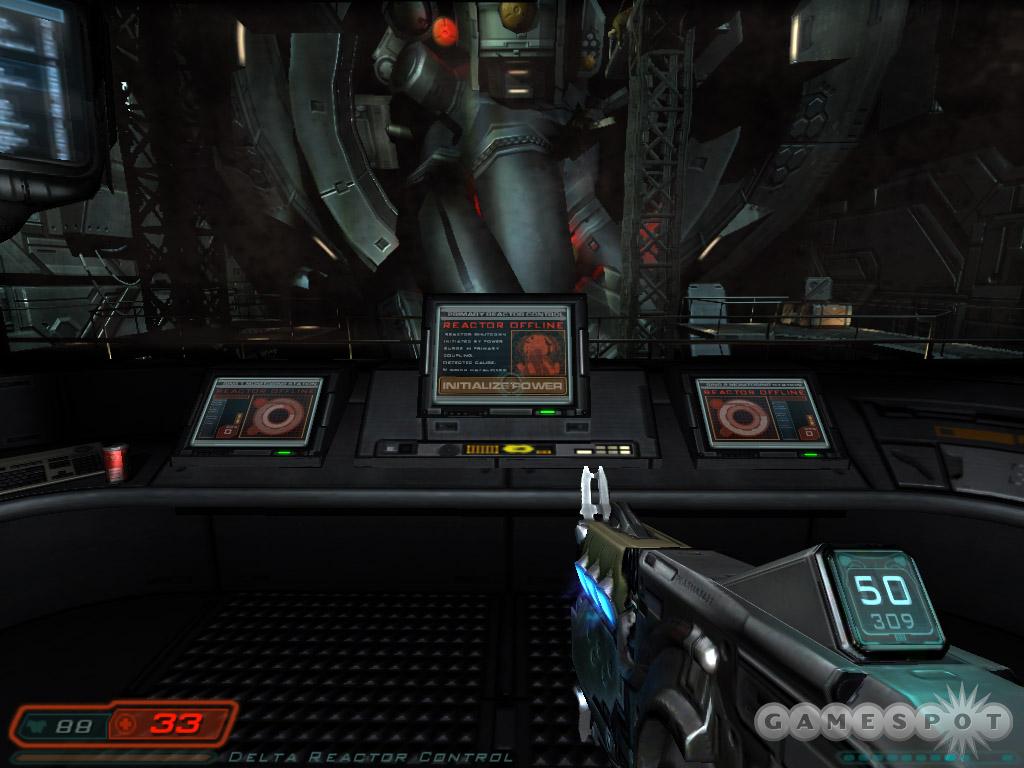
Objective: Delta Main Elevator. Find a way back to the Delta Main Lobby Elevators. These Elevators will allow you to access the lower Delta levels.
Exit through the opposite door and work up into the service access. Defeat the zombies and imps that appear. Gather all needed supplies. Go through the door to the upper reactor catwalks. Battle three cacodemons. Back up to the previous catwalk to face them one at a time. Go snag Brian Mora's PDA to receive new security clearance. Be ready for the lost souls that arrive when you pick up the PDA.
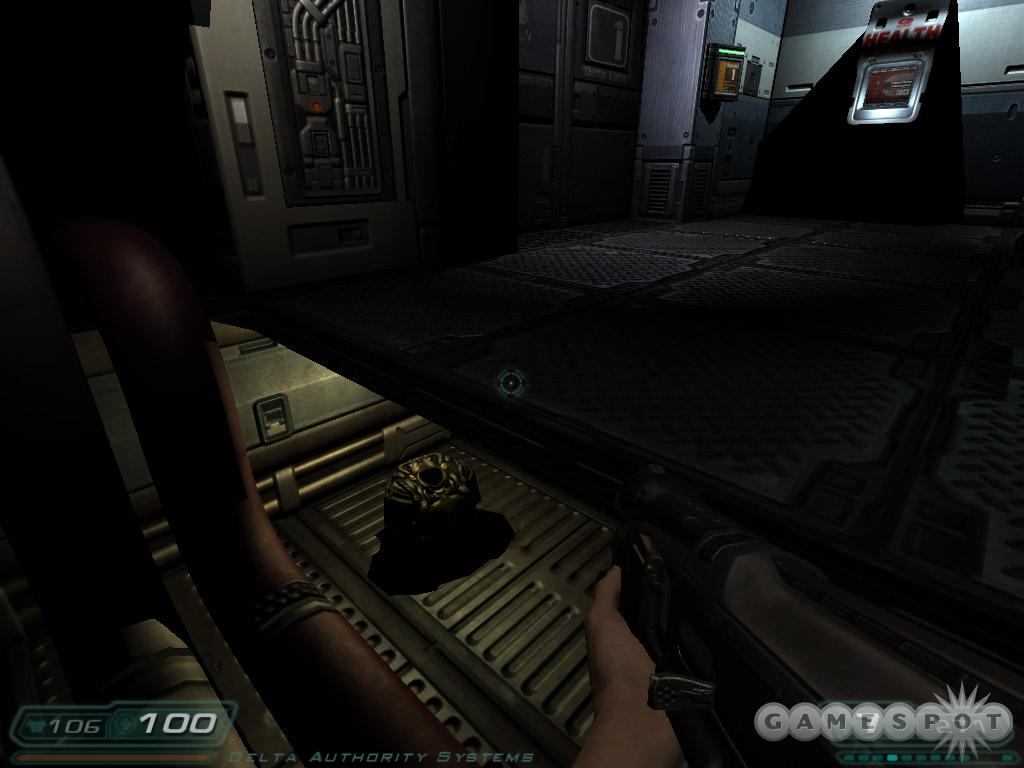
Return to the reactor control room. Defeat a couple soldiers on the way. Open the secured door using your new clearance. Defeat the imp that leaps at you. Battle a group of cacodemons in the service area. Continue to work your way along the sole path; battle some imps and soldiers along the way. Reach the authority systems room where you'll find a health station and some armor under the floor. Take the elevator up to the second floor.
Get off the elevator and defeat the demon and imp. Find the unlocked door and proceed through. Beware of the zombie ambush in the authority archives area. A couple soldiers appear near the other side--one carries a chain gun. Defeat a couple more soldiers in the lobby and find the unlocked hallway. You'll reach a balcony over the lobby. Crush two cacodemons and proceed downstairs to face more soldiers and a revenant.
Maneuver through the lobby corridor and return to the elevators. Defeat a couple soldiers carrying chain guns then use the elevator to proceed to the next level.

Delta Labs - Sector 2a
Delta Labs Research Facility - Sector 2 South contains the matter transfer division focusing on human experimentation and other biological testing. The prototype transfer platform is contained in the upper research hall. Teleporter distance is limited, serving only to test biological effects of matter transference.
Find armor and health to the right--but also a couple imps. Enter the main lobby for a haunting visual. Defeat the two imps then search the lobby and restroom for supplies. There's a button under the main desk that opens a security hatch behind you; find some armor and supplies inside. Use the lift to go to the archives on level two.
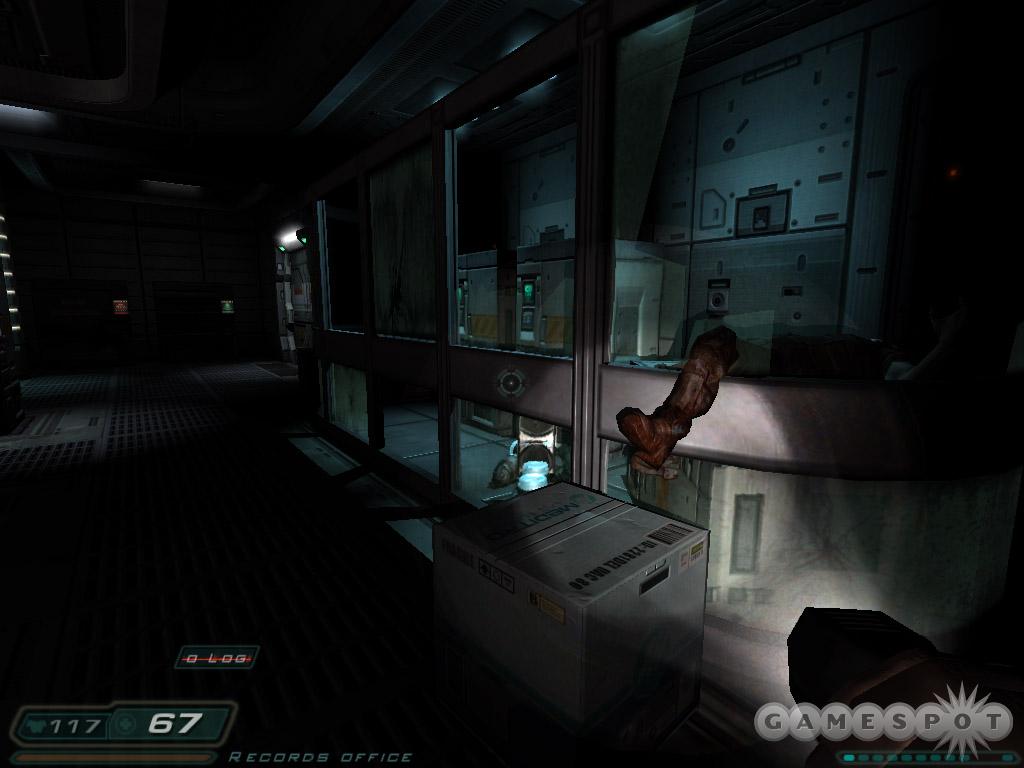
Watch out for the imp and soldier that appear from the right. Enter the records office and slice up some zombies. A couple soldiers also enter as you search the room so be ready. Grab Peter Raleigh's PDA and check it out. There's a broken storage area containing ammo and a rocket launcher. Push a box over to the broken glass and hop inside to gather the material. Find the storage cabinets in the corner next to a health station. One is open; you don't have the code for the other yet.
Proceed through the corridor to the right of the cabinets. Open the door into the central corridor and battle the soldiers and revenant. The rocket launcher works well here. Go to the end of the hall and through the door. Maneuver through the misty narrow room and to the intersection. Go left toward the test chamber. Enter the office to initiate the cut scene.
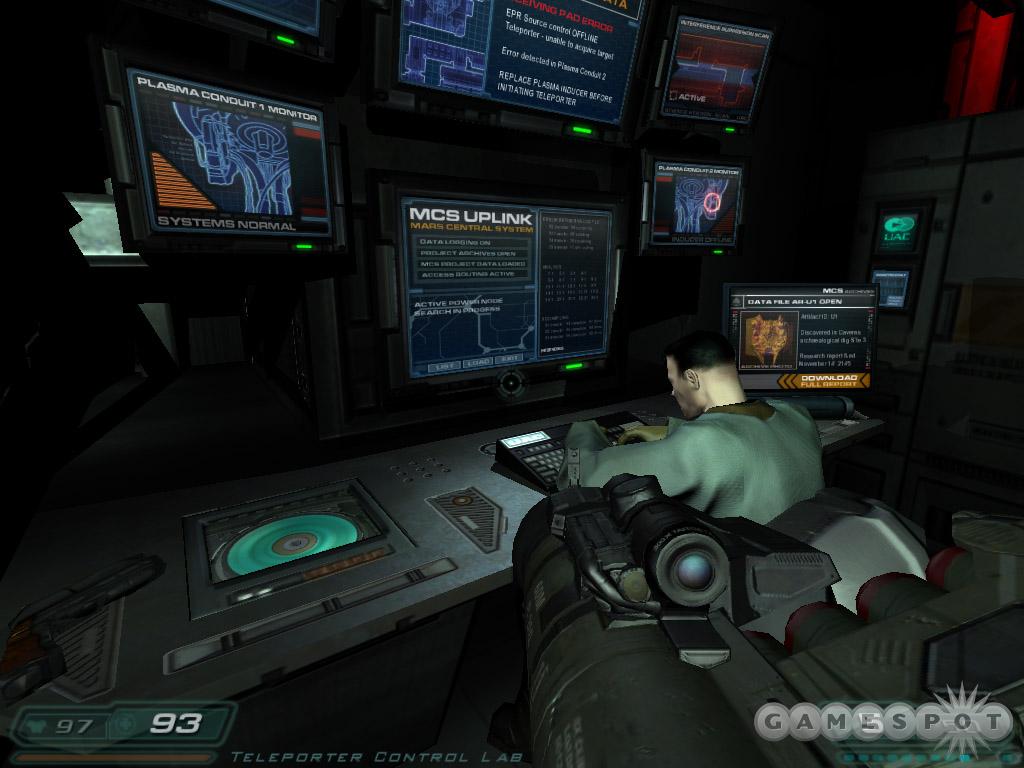
Objective: Power up the Teleporter. Retrieve the Plasma Inducer from the Operations sector server room.
Use the far right monitor to download the artifact report to your PDA. It's in your email--the soul cube. Return to the previous hall (watch out for the revenant that appears behind you) and reach the intersection. One door is marked bio labs; the other door is marked operations. Proceed into operations.
Move around to the right. Battle an imp on the way. Jump into the open window on the right and find Frank Cinders' PDA. The email includes a cabinet code (for cabinet #122)--538. Follow the hall to its end to find a secured door.
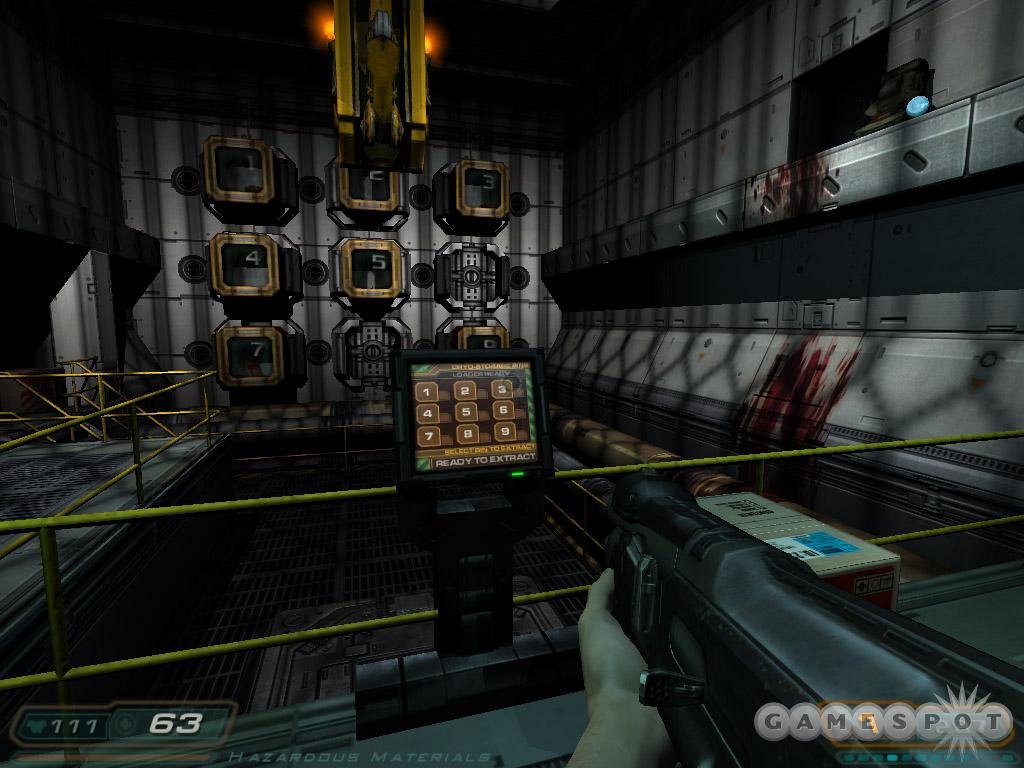
Objective: Terminate Lockdown. Go to sector security and terminate the ops lock down.
Return to the intersection. You can also make a side trip back to records storage and use code 538 to open the locker. Along with Frank's lunch you'll also find some ammo and armor. Go through the door marked security/bio labs.
Follow the main hall into the lobby area. Battle the zombies and imps. Enter the examination room and defeat more zombies. There's a computer containing some background information to peruse. Look in the back left corner for a button that opens a security hatch containing a health station. Move inside the hazardous materials room. Explore the left side for supplies, which triggers a couple imps.
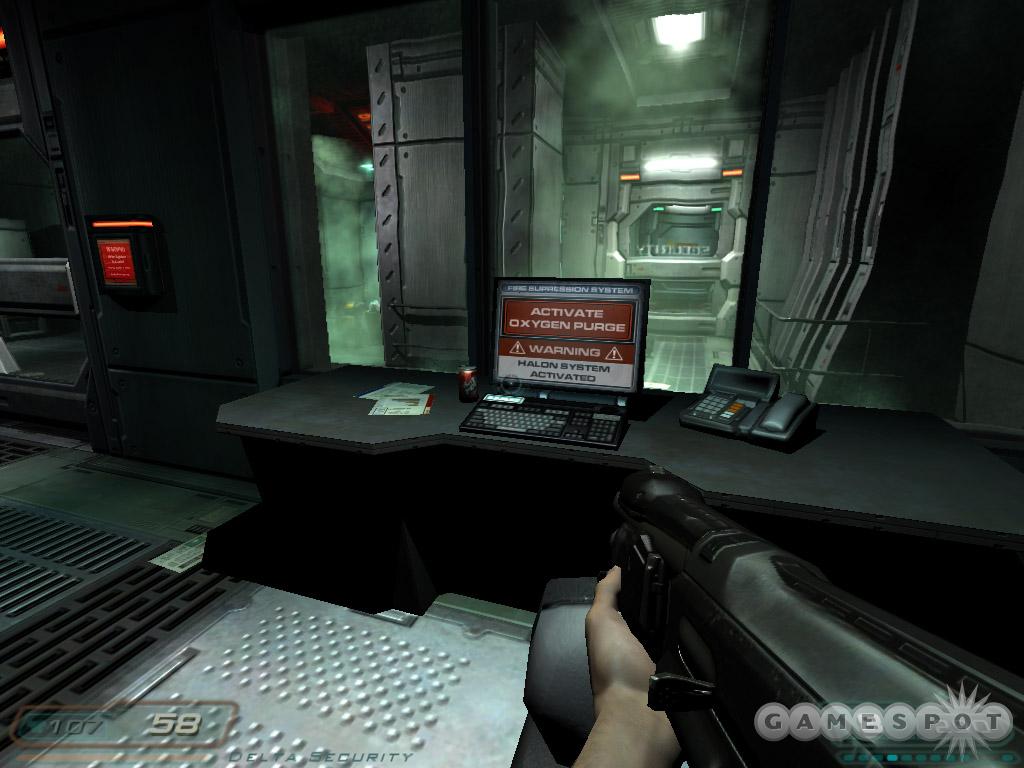
Approach the console and click any bin. Wait for the mechanism to take the bin over to you. Once it's complete, press the same number on the console and jump on top of the bin. Ride it around to the right and near the ledge containing ammo. Jump to the ledge and crawl through the vent.
Drop down into the next hallway. Defeat two imps and push onward. Enter the security station. Use the computer on the left desk and access the last report to learn of cabinet code 972 for locker #116. The locker is just to the right and includes your first BFG cell. Walk to the other desk and activate the oxygen purge.
Enter the next room and approach the console. Use the left computer to unlock the offices and archives. Move through the adjacent door and go back to the main hallway. You'll battle a revenant and imp on the way. Go into operations and take a right toward the offices.
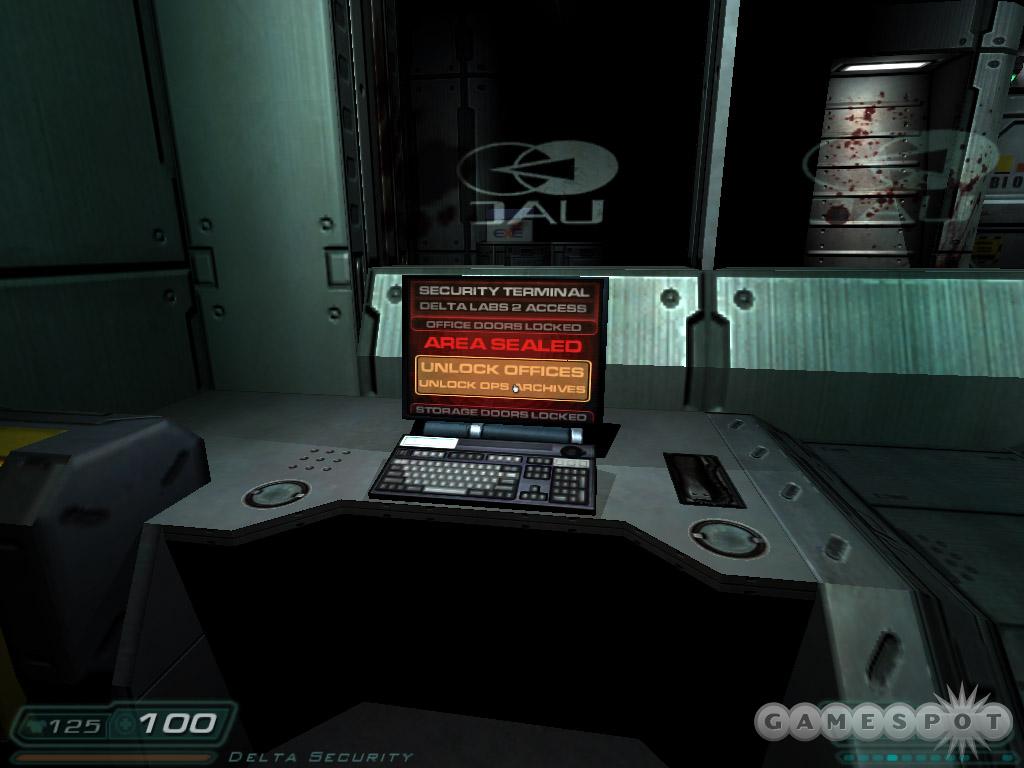 | 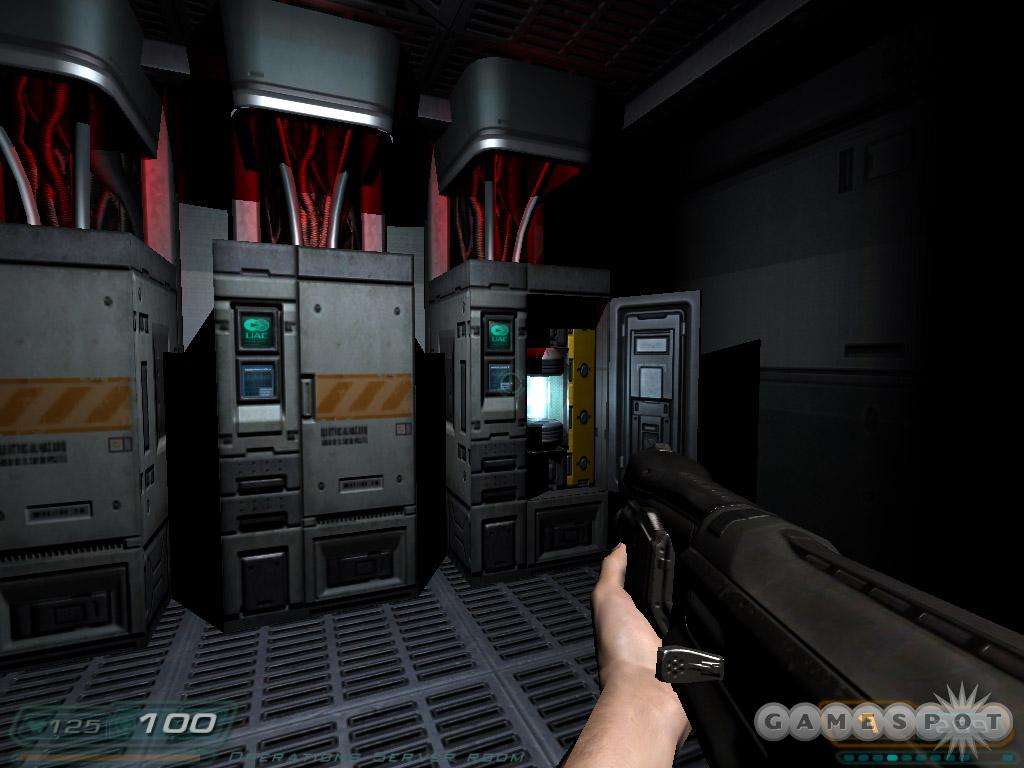 | 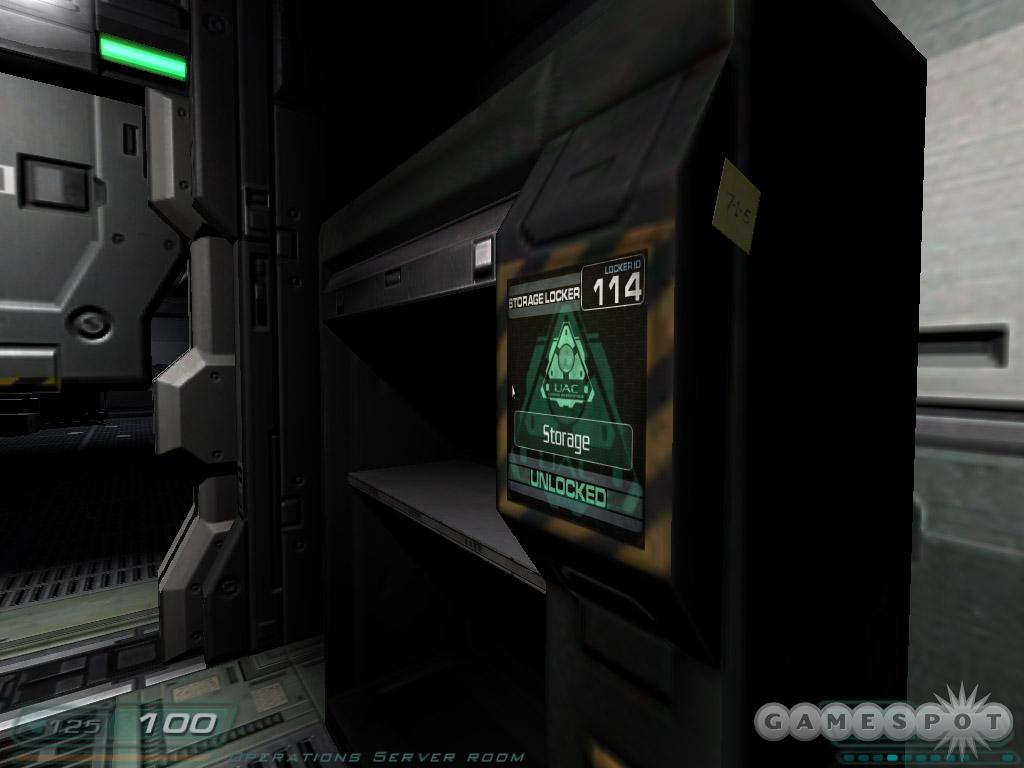 |
Enter Steve Roscoe's office and grab Phil Wilson's PDA. Continue to the end and enter storage area. Enter the server door on the right for a couple cabinets. Look on the right side of the left cabinet for its code: 715. Turn around and grab the plasma inducer from the open server. There are many zombies lurking about so be ready. An imp also materializes behind you. You can use the nearby elevator to return to the lobby. Just push the box out of the way. Once down in the lobby, return to the main hall. Fight a couple soldiers here.
Before returning to your new friend, return through the security and up the hazardous materials bin. Find the office of Chief M. Abrams. A code protects entry but you should have read about the code. It is 931 (changed from Abrams' 901 code). Open it and find the BFG 9000 inside.
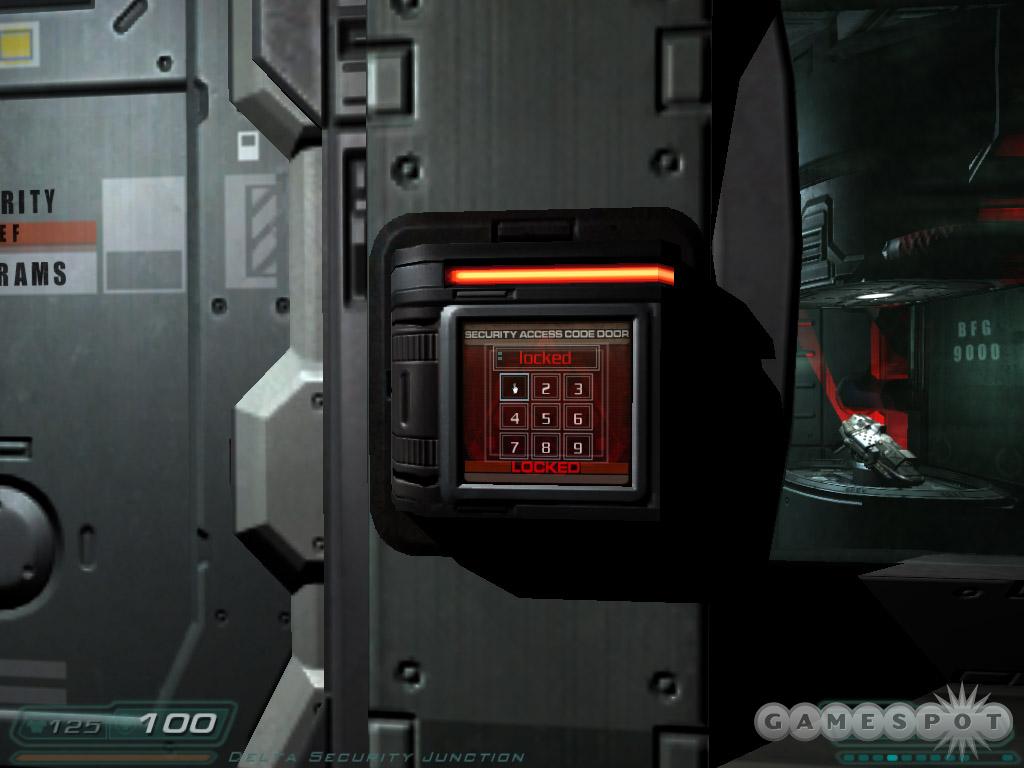 | 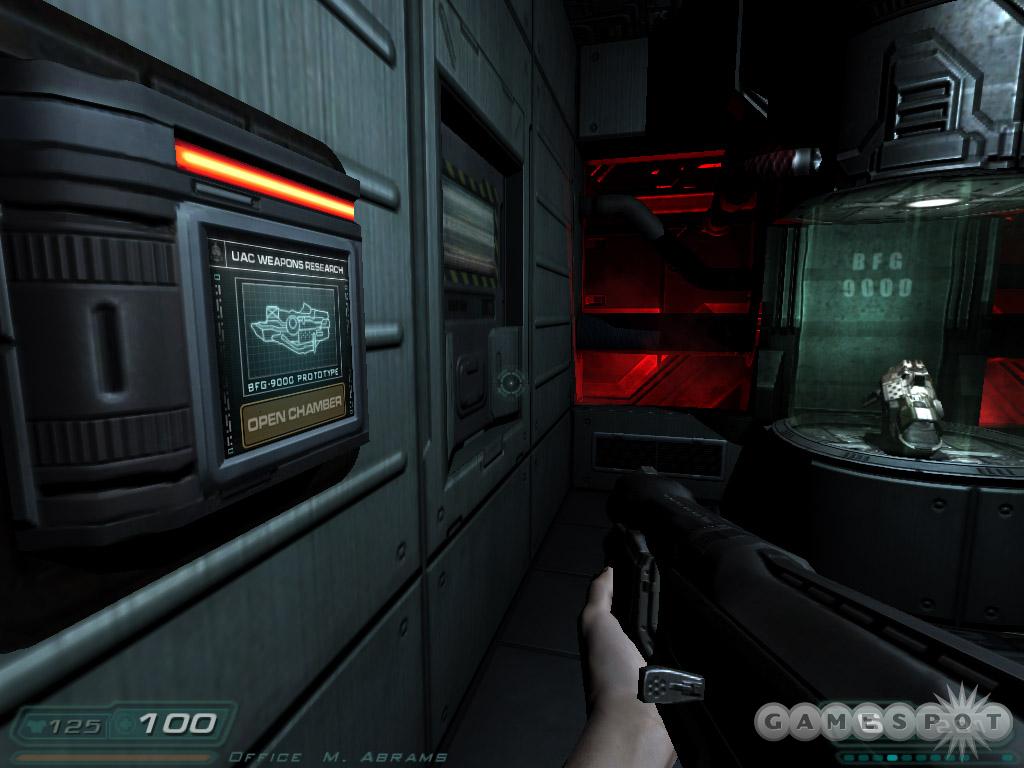 |  |
Return to the teleporter area and approach the man to give him the inducer. Pick up the video disk he gives you and watch it. Go to the left and enter the teleport test area. Stand on and activate the teleporter.
Delta Labs - Sector 2b
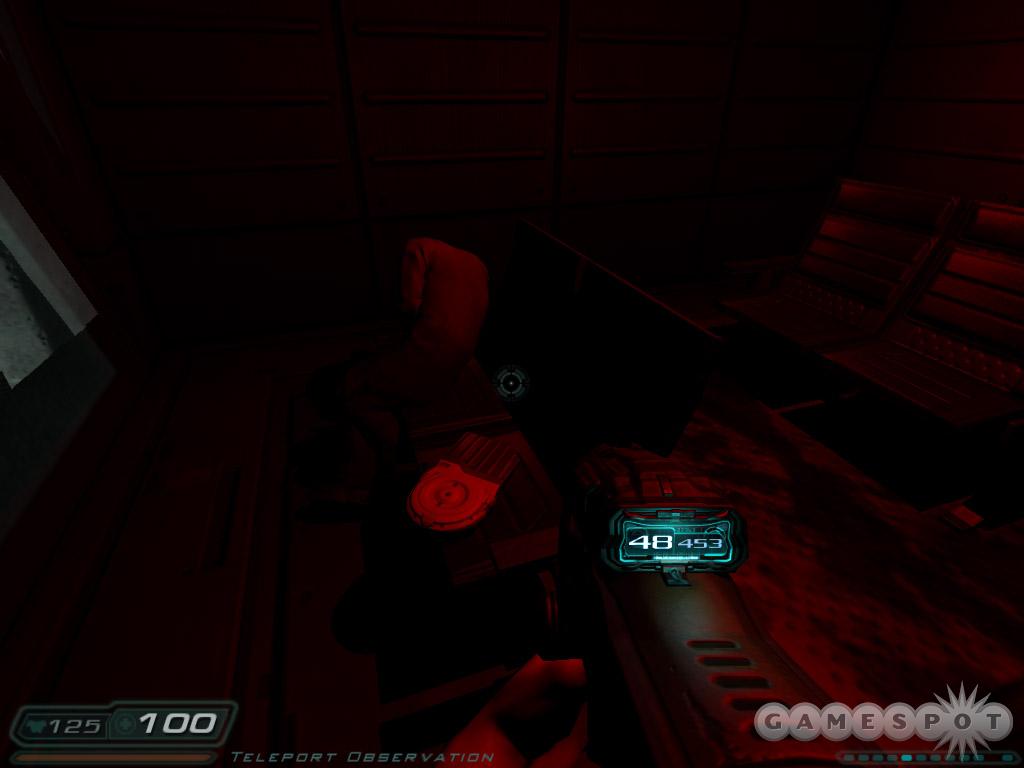
Delta Labs Research Facility - Sector 2 North contains the biological research division, focusing on studying various specimens from matter transfer tests. All specimens are catalogued and stored locally.
Exit and go through the research entrance. A door on the left is locked--need a keycard. Continue around the corner toward the observation area. Kill a flaming zombie and find the keycard on a seat. Kill another zombie then two imps behind you as you return to the locked door.
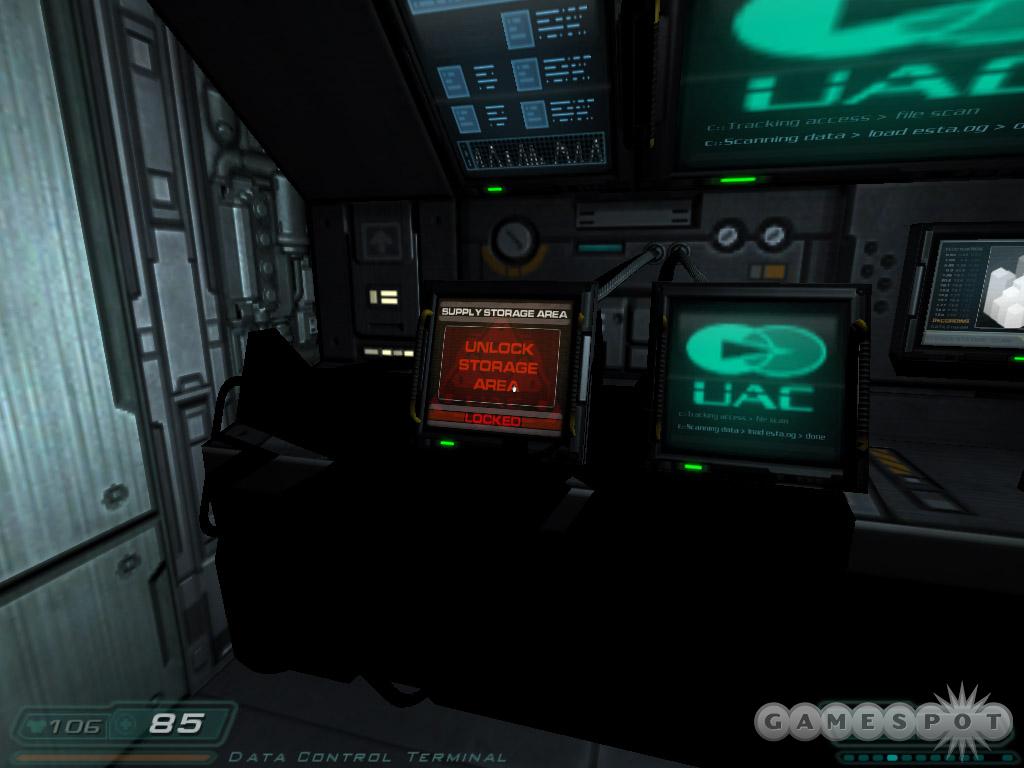
Approach the console on the right. Beware of a couple soldiers that enter. Use the console to unlock the storage room. Enter it to find some armor and health as well as a zombie lurking inside. Exit and cross the room to the other unlocked door.
Maneuver down the hall and battle a mixed group of enemies. Find the PDA on the left; it's Francis Erikson's PDA. Discover a cabinet code in its email: locker #103 and code 259. The cabinet is right behind you. Open it for supplies. Resume course down the hall.
Open the door into central access and eliminate the imp, zombie on left, and soldier ahead. Grab some armor and health in the room. Approach the common area. There's an arch vile roaming the upper floor. He must be stopped immediately! Fire some rockets at his location or even use the BFG 9000 for the first time. Eliminate remaining enemies then search the left room for some health and adrenaline.
Go left and find the lift access door. Eliminate the imps and soldiers in the area then go inside and battle another soldier using chain gun. Ride the lift up. Move to the balcony overlooking the common area and spot another arch vile below. Blast him with rockets then contend with any imps he spawns. Locate the vent on the right and crawl through.
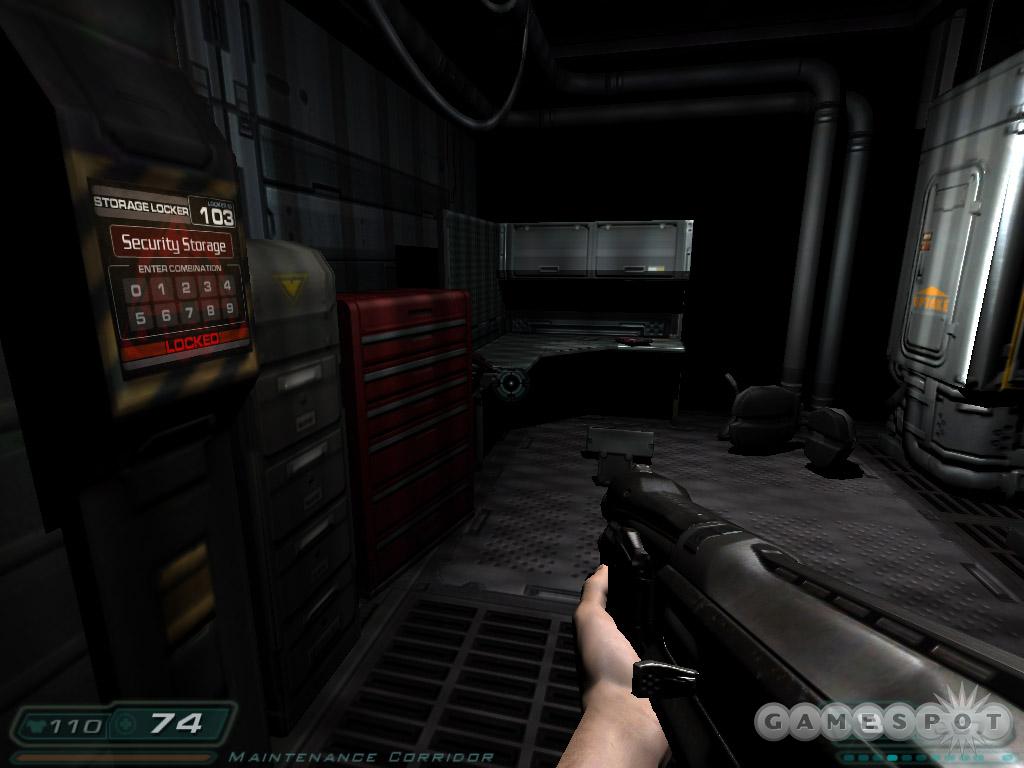 |  | 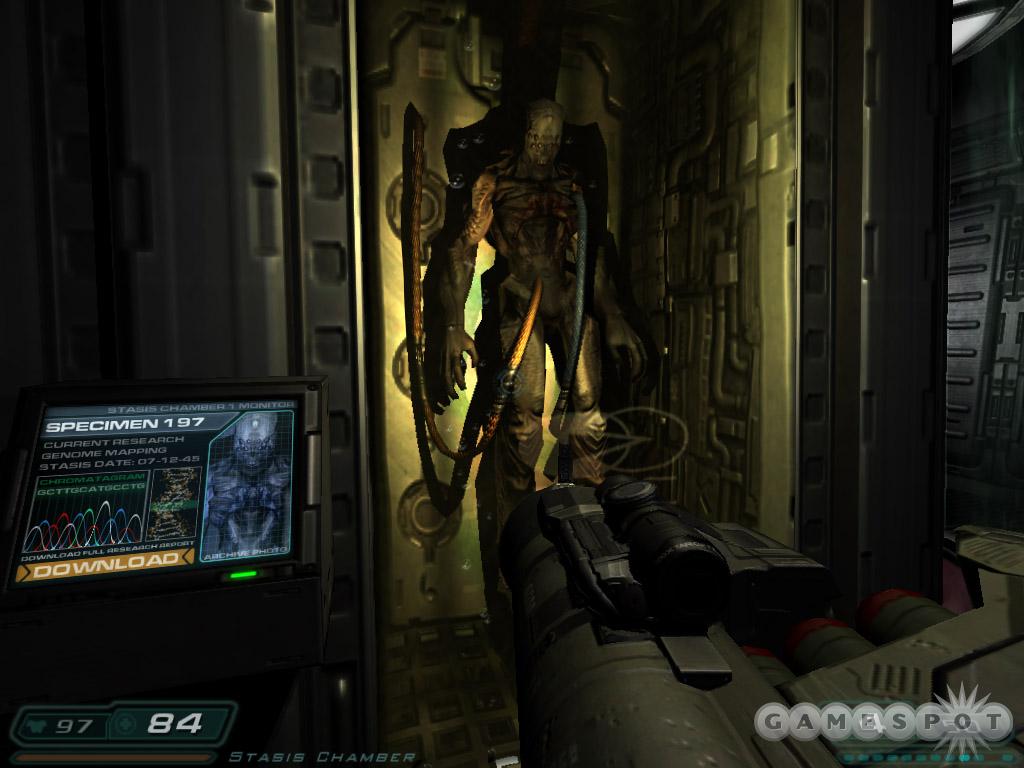 |
Drop into the specimen research lab and talk with Dr. Michaels. He gives you a cabinet code: 624. Find the two cabinets in the back corner and open both with the 624 code. Climb over the debris into research control. An arch vile patrols the upper balcony. Kill it quickly if possible and deal with the imps as they appear.
The locked door soon opens. Kill the soldier that emerges. Enter the stasis chamber and download from each console. Cross the room to the back corner. Listen for the cries of help. Open the service access on the right and go down inside. Find an imp and what's left of the cries for help. Grab the PDA near the corpse. It's Jacob Stemmons. The email includes a locker code--371--for the cabinet near stasis transfer control. Climb the ladder near the corpse to find some ammo and armor.
Exit and go right into stasis transfer. The area is extremely dark and difficult to explore safely. But there is a trick. Activate the stasis conveyer; the transfer tube provides light for you to move through. Imps populate the area so be ready for a fight. It leads you to the exit door. If you get off the path, you may drop down into a recessed area. Imps lurk about so be ready with close-range weaponry.
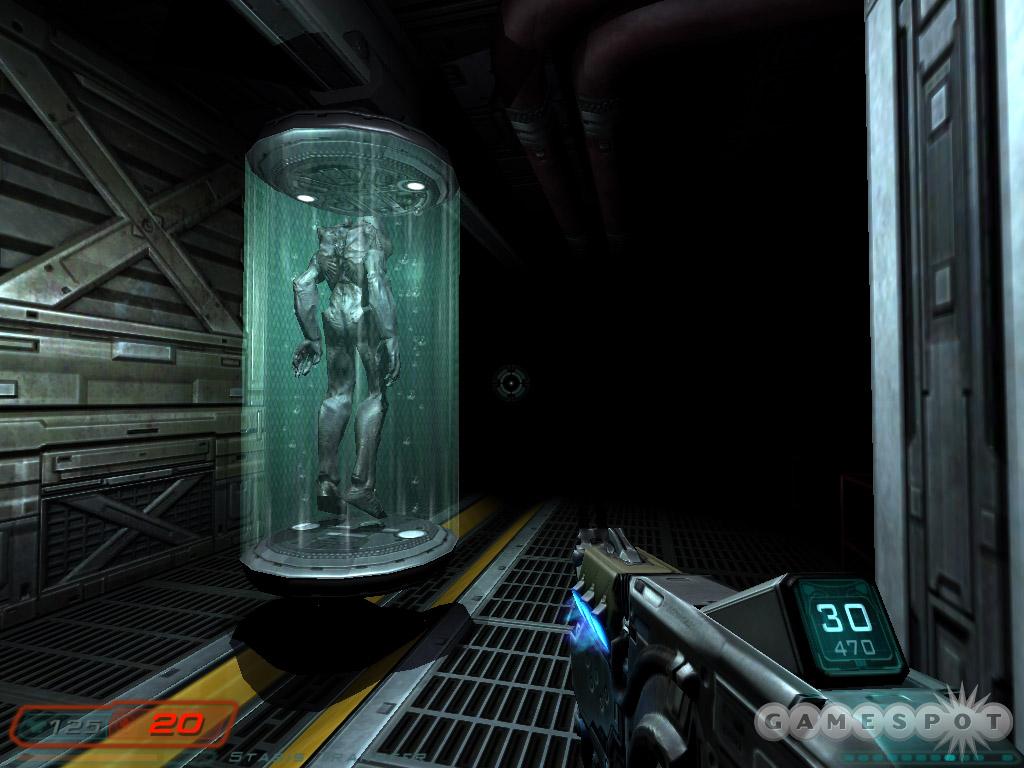
Enter stasis control and replenish your health at the station. Open the locker using code 371. Another dark area and more imps. Allow the transferred tube to provide the light as you move through. Find the door on the left. Enter the lift access and defeat a couple more imps. Grab the video disk before getting onto the lift. Ride up the lift.
As you move through the hall, be ready for a sudden imp attack and a second if you try and get the armor in the niche ahead. Enter analysis control. Go to the console and grab the video disk and Larry Bullman's PDA. There's also storage cabinet #666 here. Find the code on a post-it not on the cabinet's front. It reads "Open with Caution" and it doesn't lie. Stand to the side to avoid the imp that leaps out. There's armor inside.
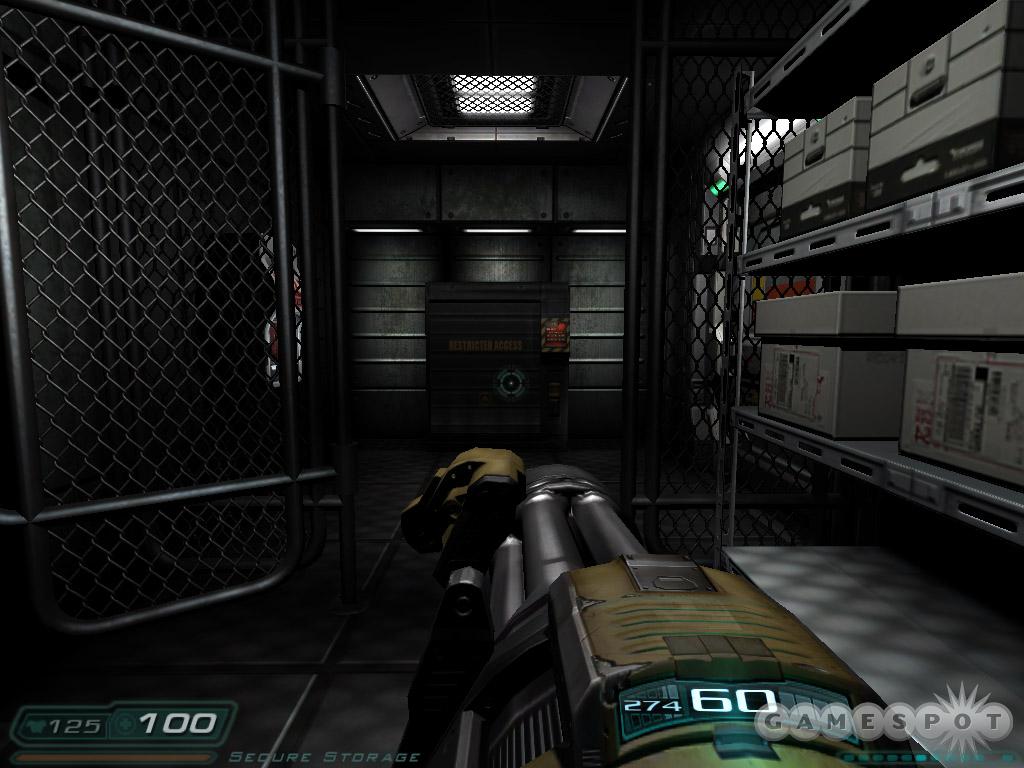
Go through the door in the back corner and battle a couple soldiers and imps. Enter Elizabeth McNeil's office in the back corner. Grab her PDA inside. It includes the code to the storage room 7: 725. It also contains "level 3 access codes" and they are 463.
Enter the storage room using the code 725 and gather supplies. There's also a Martian Buddy crate in here. Open it with the code 0508. Inside are the BFG 9000 and some armor. Go to the level 3 access door and input the code 463. Crush the arch vile inside the room with your rocket launcher. Clean up any spawned monsters before using the lift to the next level.
Delta Labs - Sector 3
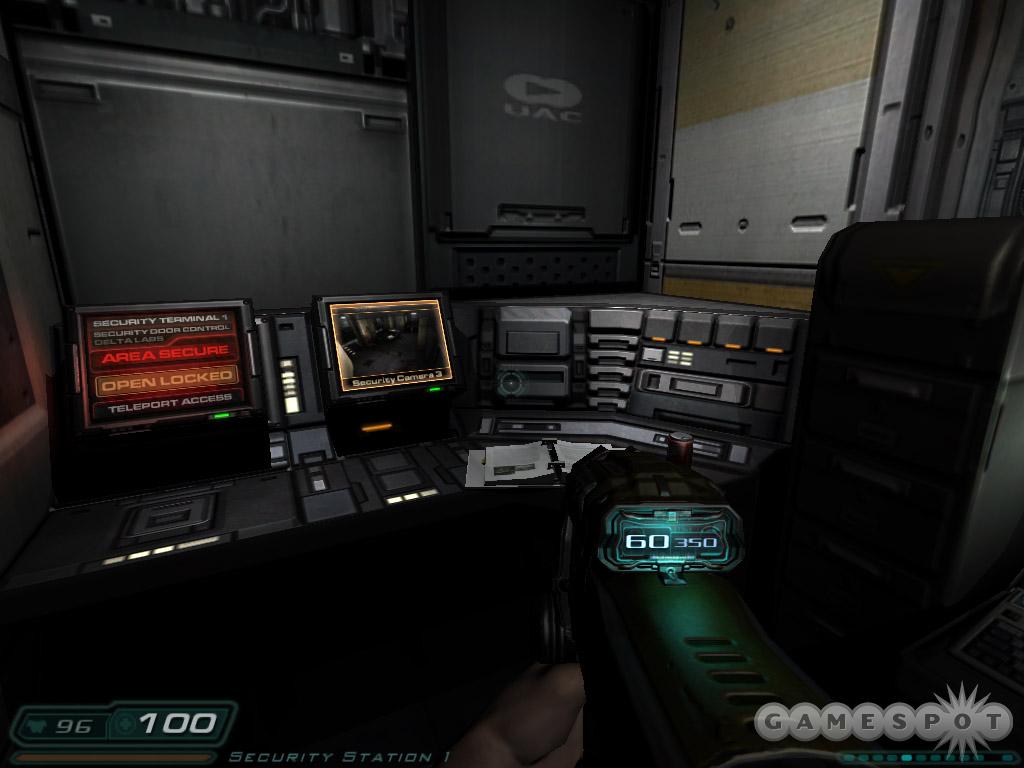
Delta Labs - Sector 3 contains the second generation transfer platforms, able to transport variable distances to small portable receiving platforms. Test chambers must be reserved prior to experimentation. All access is under security supervision.
Exit the lift and battle a couple guards and a soldier. Go through the door and find the security station on the right. Enter and use the computer to unlock the secured area. Watch out behind you; a soldier ambushes you. Exit and go through the unlocked door on the right. Don't forget to search the red-lit area for some supplies.
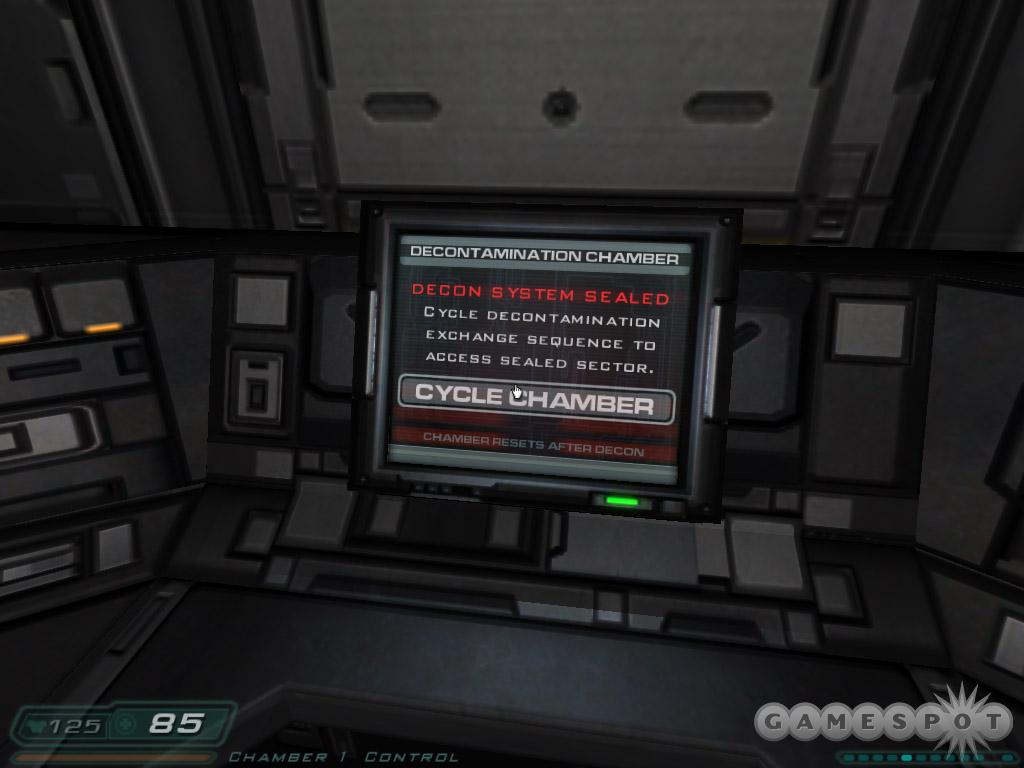
You can search the bathroom on the right for armor but be aware there are a guard and soldier inside. Also an imp ambushes you as you leave. Continue through the next unlocked passage. Search the offices on the right as you blast imps and guards. Find Frank Cerano's PDA on the desk. The email includes a cabinet code. It's for locker #317 in storage room D3-1 across from the terminal offices; the code is 841.
Enter the door in the back corner of the terminal offices. A soldier attacks immediately. Move straight into chamber 1 control and grab Han Lee's PDA off of the desk. It reveals the code to two cabinets (#386 and #387), which is 836. Use the other console to cycle the chamber, which unlocks the door to chamber 1. This also triggers the arrival of an imp and soldier.
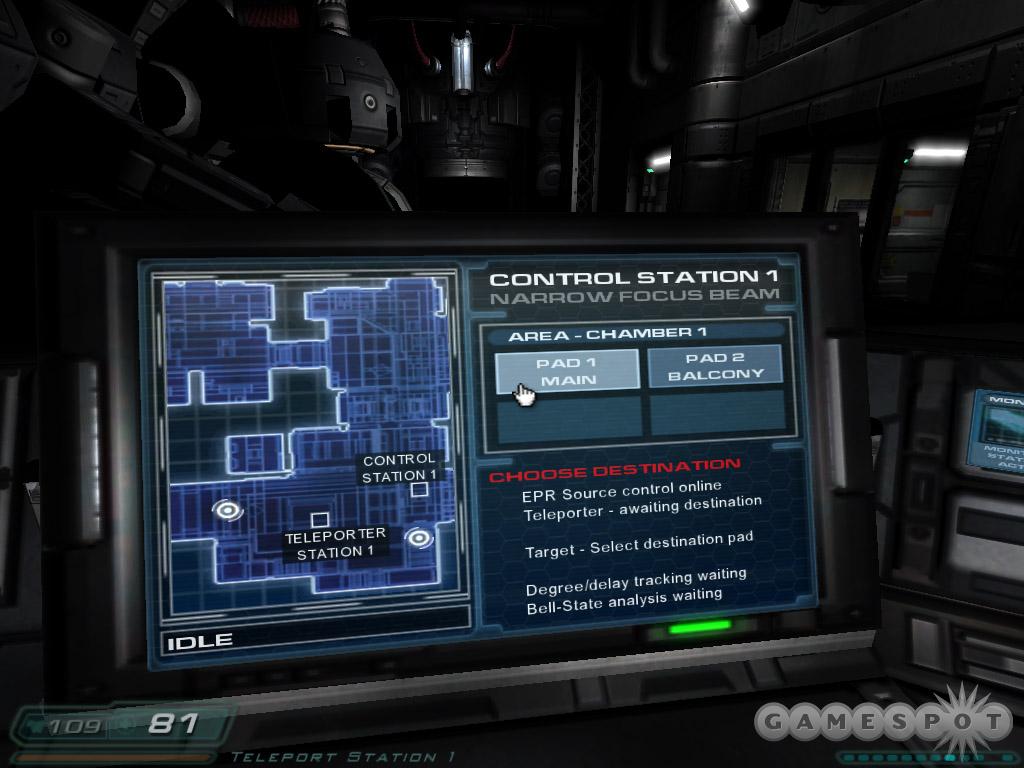
Enter chamber 1. After the decontamination sequence, proceed into teleport station 1 and defeat a couple guards; one uses a chain gun and stands up on the balcony to the left. Use the console, first the left monitor then the second. You have a choice of your teleport destination: pad 1 main or pad 2 balcony. Select pad 2 balcony. Move to the teleporter and proceed.
Defeat the revenant that appears then enter the decontamination room. Defeat a soldier ahead then enter storage room DE3-2 on the right. Eliminate the guards and imp inside and gather ammo and use the health station. Explore chamber 2 access and be ready for spawned monsters, which include imps and a revenant. Enter the security station.
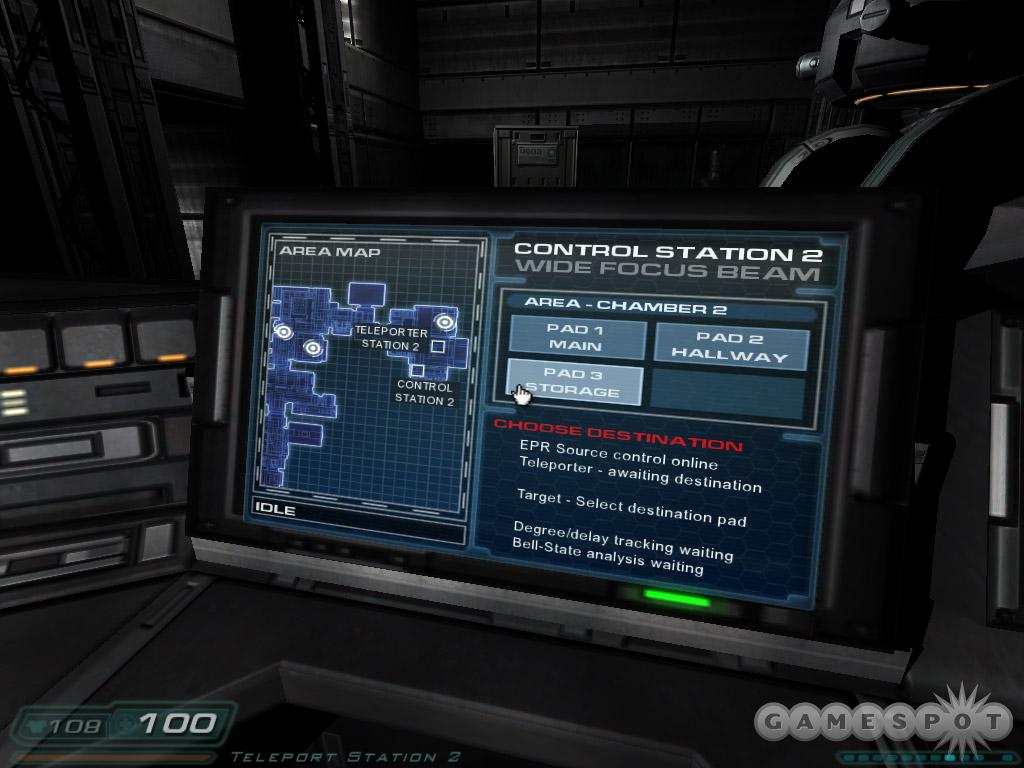
Use the console to unlock the secured area. Defeat a couple soldiers and move to the unlocked door in the back corner of this area. Watch out for the guard and imp in the conference room on the right. There's some armor inside. Cross the room to the unlocked door.
Search terminal processing. Imps and soldiers spawn so be ready. Check the offices for ammo and health. Work around to the far right side and locate the passageway underneath the floor. Maneuver through and hop out into the chamber 2 terminal. Go through the right door, which leads to the console and battle revenants and imps. Use the computer to scan for active pads. You now have three. Proceed to the pad 3 storage.
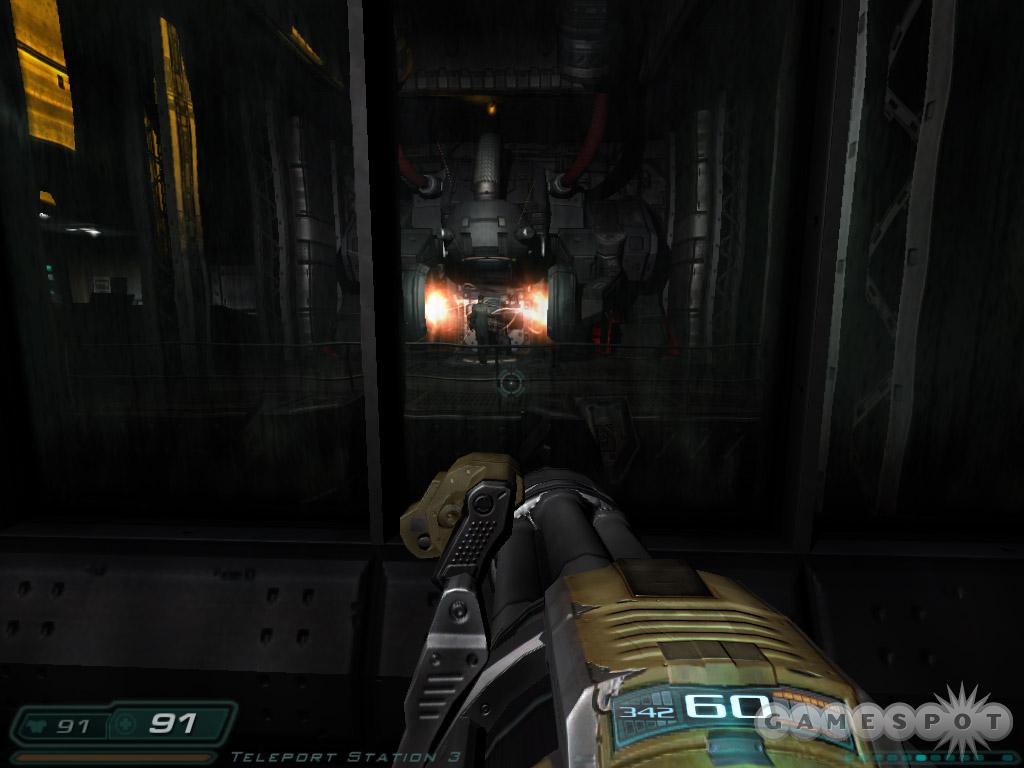
Gather the items from the storage and use the panel to open the door. Exit and battle a couple soldiers. There's a tough fight in the common area. A revenant and chain gun soldier appears; there's also a guard to contend with. When they spawn, back out and take them down one at a time. Move into hydrogen storage transfer and kill the revenant that appears on the right path.
Enter the chamber 3 terminal and keep to the left as you blast the imps that appear. Descend the ladder, kill another imp, and then ascend the stairs into the control room. Gather supplies then use the monitor to cycle the chamber. Exit and face off against a revenant then imp. Go to the opposite side of the terminal and enter the decontamination chamber. Continue through. Battle a couple guards and a revenant as you maintain pursuit.
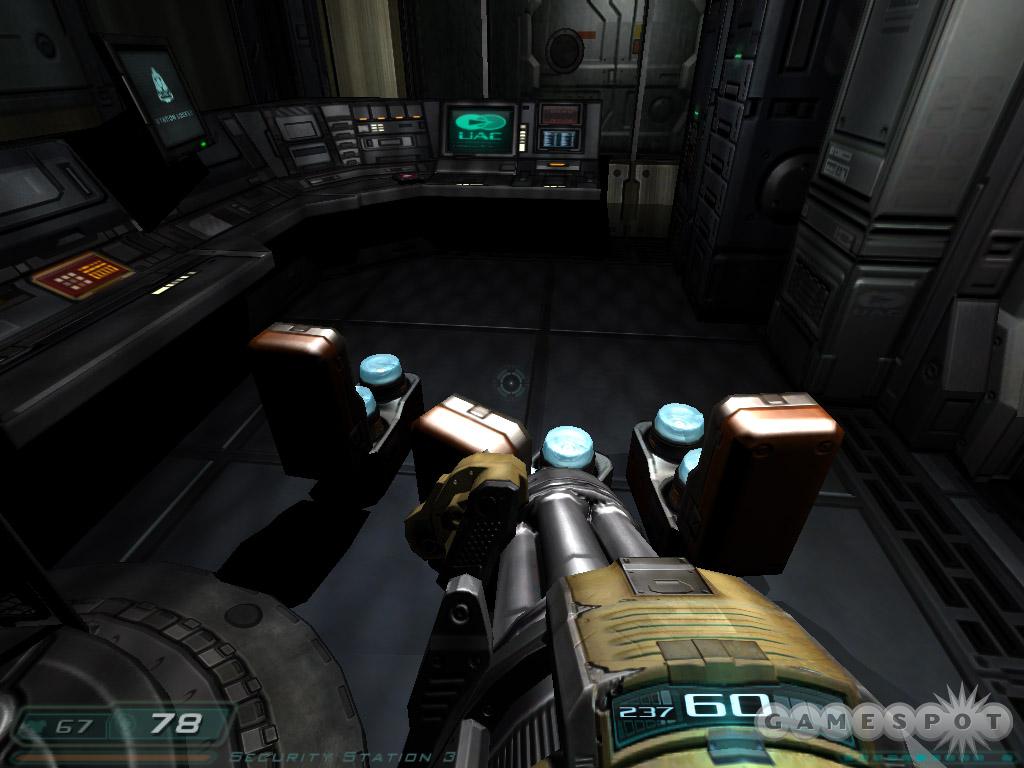
Go over to the console on the left side. You now have four options. Use pad 2 security to enter the locked security office. It contains a bunch of plasma gun ammo and Marten Shultz's PDA. Next try the pad 3 storage, which sends you to storage room D3-1. Use code 841 to open the storage cabinet. If you do this, you'll have to retrace your steps all the way back to chamber 3. Once there, select pad 1 exit. Go through the bay door and into the next level.
Delta Labs - Sector 4
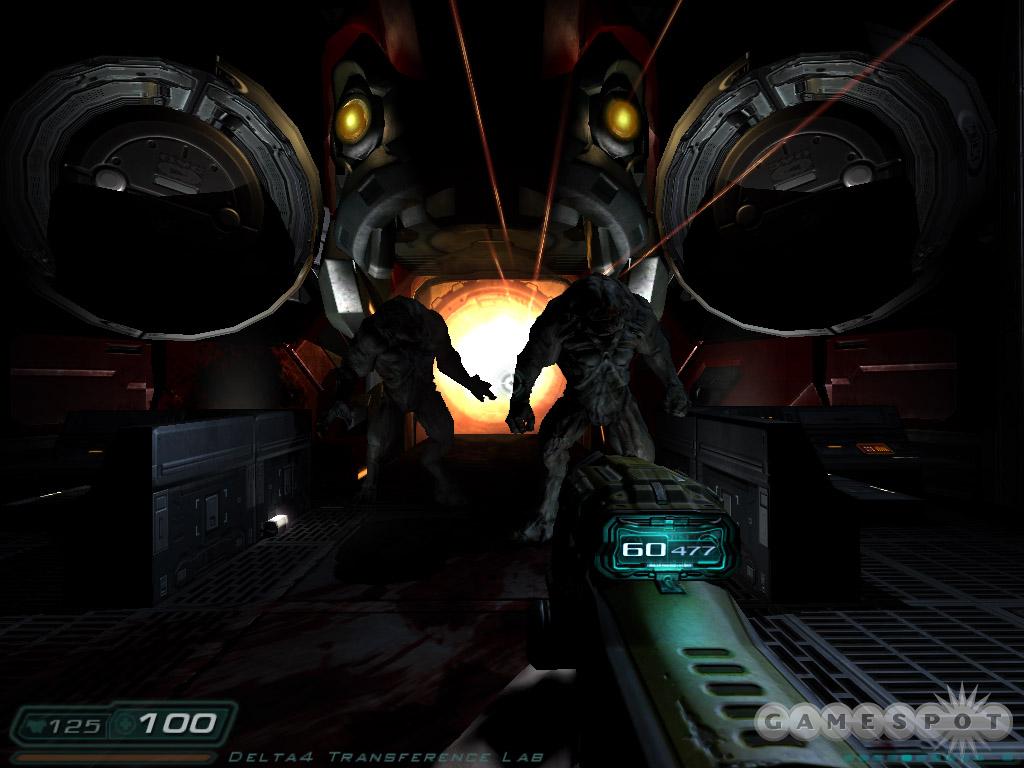
Delta Labs - Sector 4 houses the third generation transfer portal. All teleporter destination research is classified. Only top level personnel have access to the central control room and activation grid for the primary test chamber.
Exit into the blood soaked hallway. Defeat a couple chainsaw zombies as you navigate the hall. Don't let them get close! Go around to the left and find the entrance to the security station. There's a locked cabinet inside (#104) and a health station. Check the left computer for the code to the cabinet: 579.
Exit and cross the hall to the other door. Watch the cut scene and meet your first and second hell knight. The hell knight can toss a projectile like the imp (though with far more splash damage) and can maul you (to put it lightly) up close. Remain at a distance and use your chain gun, plasma gun, or rocket launcher to blast the hell knight. Concentrate on one hell knight to kill it as quickly as possible. Keep your distance and dodge the projectiles.
Hell
Main Objective: Find the soul cube and escape Hell.
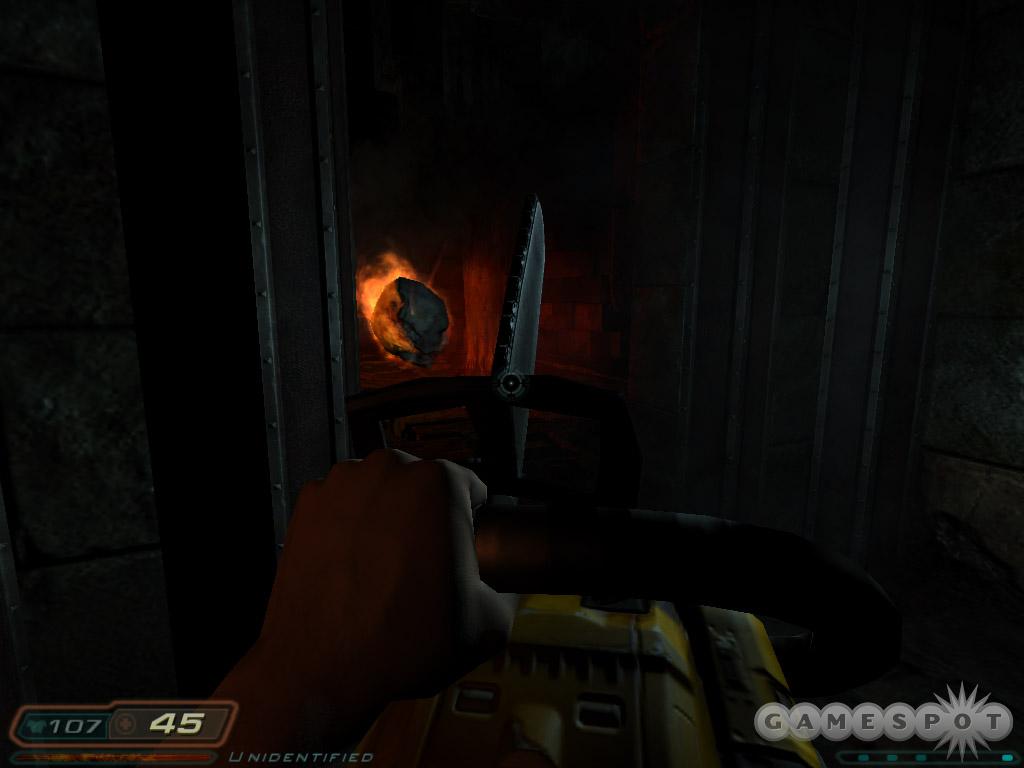
Look to your right for some items: health, armor, and a shotgun. Climb the stairs ahead of you and enter the blue light. After you land, battle the imps. Grab more shotgun shells in the center. After the battle has concluded, cross the stone bridge.
Spot the hell knight enter from the fiery doorway. Search the side alcoves for more ammo, health, and armor but there are imps and cherubs lurking about. The upper right alcove also contains a chainsaw. Battle the hell knight around a pillar. Circle strafe around and avoid being in front of him.
Enter the next chamber. The room on the left contains the chain gun and ammo. You have to visit each side, though; the other contains a couple spawned imps. Move through the newly opened path after exploring both sides. Spot the lost souls. Point your chainsaw at them and slice and dice the lost souls as they approach. It's best just to stay in one of the sight chambers and lure the souls through the chokepoint.

Proceed through the open area. Find health on the right. Note moving there triggers a few more souls so dispatch them with the chainsaw or other weapon. Sprint and jump along the left path until you find the steps leading left. You'll hear souls spawn. Be ready for them and eliminate with the chainsaw or other weapon. Find a small med kit on the left side of the path.
Several more lost souls populate the next area. A hell knight enters from the right side; the back left corner contains health. Annihilate the hell knight with your chain gun. Grab more ammo and health from an opened alcove on the left. Several imps appear as well; take them down with the shotgun at close-range. After the battle, the gate lowers revealing a new path.
As you start down the path, cherubs spawn behind you. Back up and deal with them as a huge mancubus approaches from the other side. Blast him with the chain gun as he approaches. Move past him and gather the ammo, health, and armor. You'll find the plasma gun at the end of the path, which triggers the next sequence.
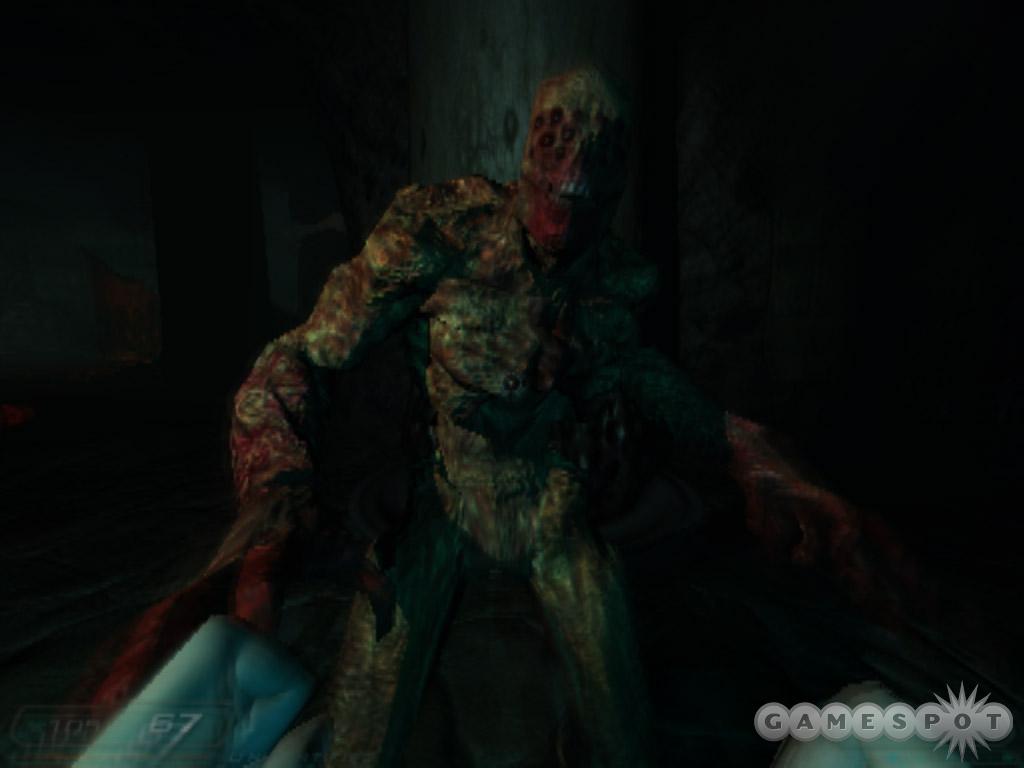
Descend into the cavern and pick up the berserk power-up. Beat the imps down. Once the imps are dead, a hell knight emerges. Switch to another weapon and use the pillars as cover against the knight's melee and projectile attacks. Eliminate remaining enemies and follow the glowing glyphs on the ground toward an ammo stash--including a rocket launcher. You'll also find Simon Garlick's PDA here. Listen to the logs and read the emails. If you haven't discovered it by now, which the email clarifies, you possess unlimited stamina in Hell.
Go through the large door. Advance into the cavern. The pillar drops down, which summons a mancubus to the right. Defeat it with your new rocket launcher. A second appears to the left. Kill it as well before ducking under the smashing pillar and into the next corridor. Kill the souls using the chainsaw and ascend the staircase.
Beware of the imp to the left. Kill it and reach the top. The smashing pillar is to your right. You can drop down and gather ammo but there is another mancubus to the left--before dropping down, walk over to the left and peak down and kill the beast with your rockets.
Return up the stairs and grab the ammo in the back corner. Continue up the back stairs and face off against several imps. Use your shotgun at close-range to defeat them. Open the next door and shoot the lost souls. Imps wait to ambush you to the left and right. Blast them then find a med kit in their dark corner.
As you work up the next ramp, look below to find some armor, health, and ammo. Go down, retrieve the supplies, then continue up and battle more lost souls. Across from the door, find some ammo and health. This triggers some living dead. Blast them with your shotgun rounds.
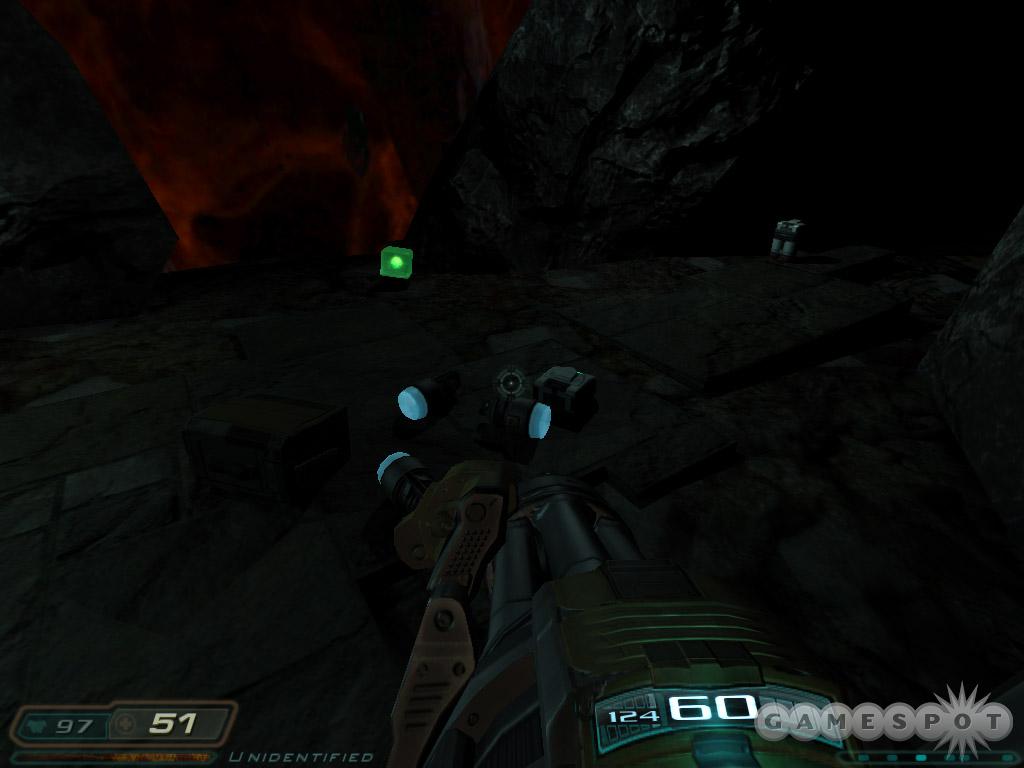
The next room contains a hell knight to the right. Back out and use your chain gun when he reaches the doorway. Finish off the lost souls with the chainsaw to conserve ammo. A hell knight waits behind the next door. Blast him with your remaining chain gun rounds. The next room contains a couple imps. There's health and armor along the left path.
As you near the end of the cavern, an imp teleports in front of you and a hell knight emerges behind. Blast the imp first then tackle the hell knight with your chain or plasma gun. Walk to the end and grab the ammo and health. Note the BFG cube. Locate the BFG just on the other side of the rocks near the very edge. Some lost souls arrive when you grab it.
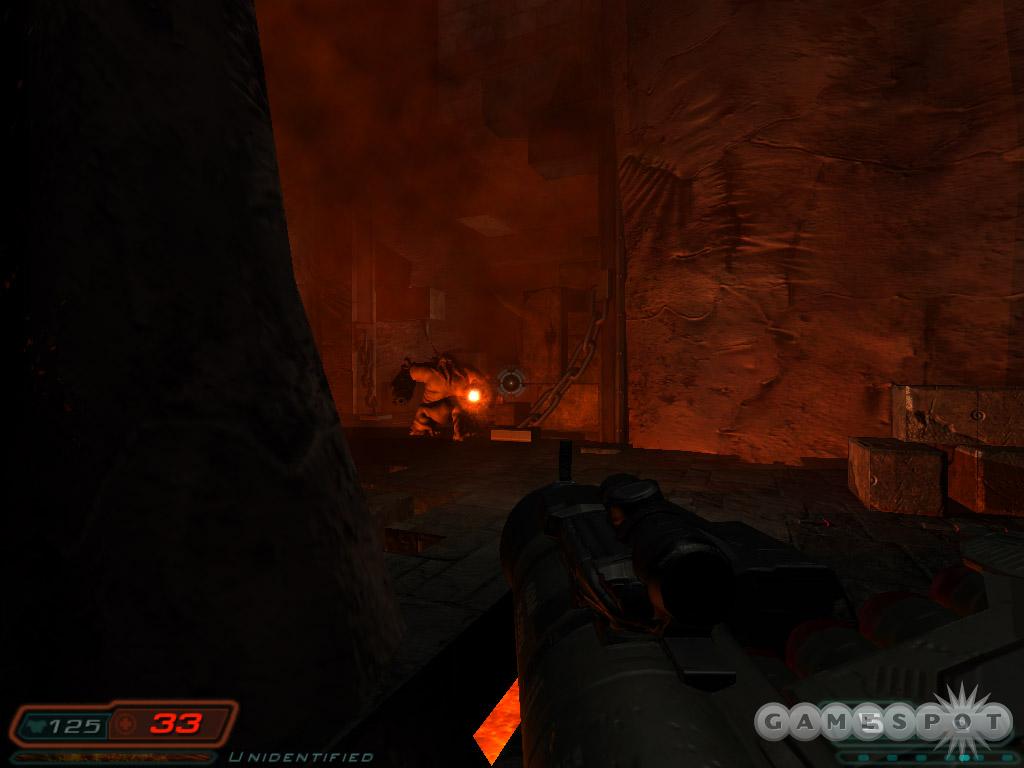
Your next path is around to the left (if facing where you came from). A hell knight arrives from here; eliminate him with your plasma gun or shotgun at close-range. A squad of cherubs and lost souls follow. Watch for more cherubs from the dark corners along the right side. Continue forward and encounter some more lost souls.
In the large chamber, snag health and ammo to the right side but beware of the mancubus hanging out to the left. Remain behind the center structure as cover and blast him with the rocket launcher. Another waits for you behind the next door and a third down the next hall. Beware of cherubs also. When they arrive, back up into the large chamber and deal with them first. Don't accidentally step in the fire in the first room. A hell knight waits in an alcove to the left. Back off and take him out from long-range with the chain or plasma gun.
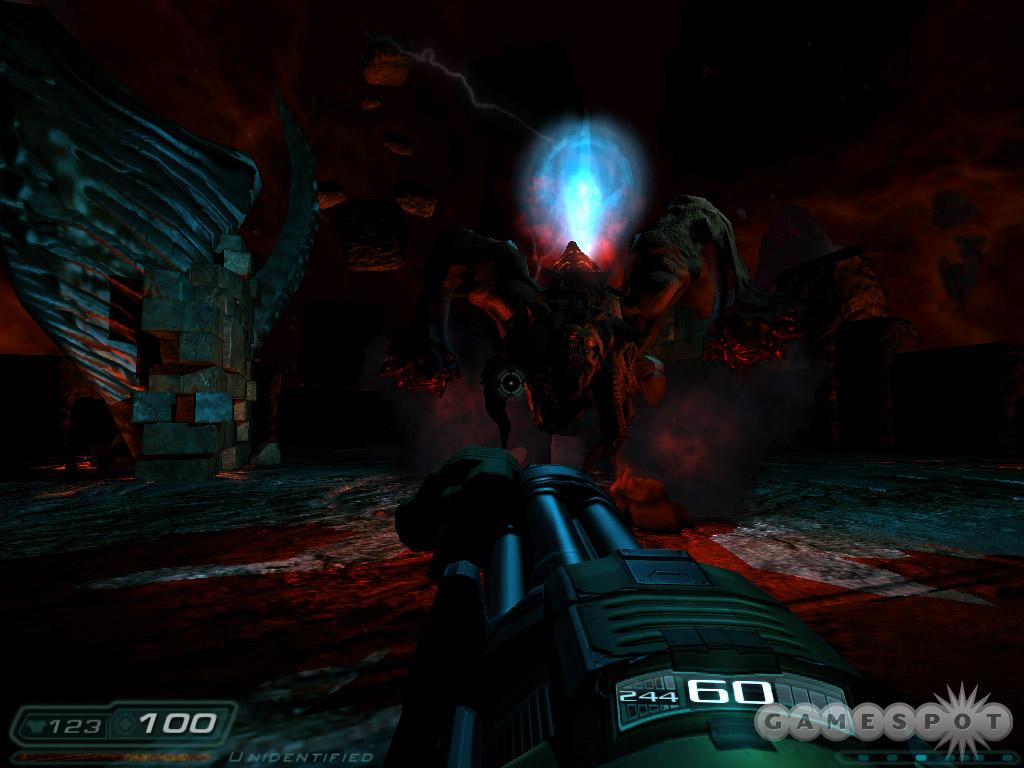
Continue along the only path and through the next door at the top of the stairs. Follow the cavern around to the left. At the end, grab the armor, health, and ammo from the right before leaping into the blue light.
You must battle the guardian and its seekers. Three seekers hover around the guardian. In order to inflict damage on the guardian, you must kill all three seekers. When you do, the guardian remains in place and a blue orb appears above him. During this time, the guardian creates more seekers. But most importantly, the guardian is vulnerable to your attack.
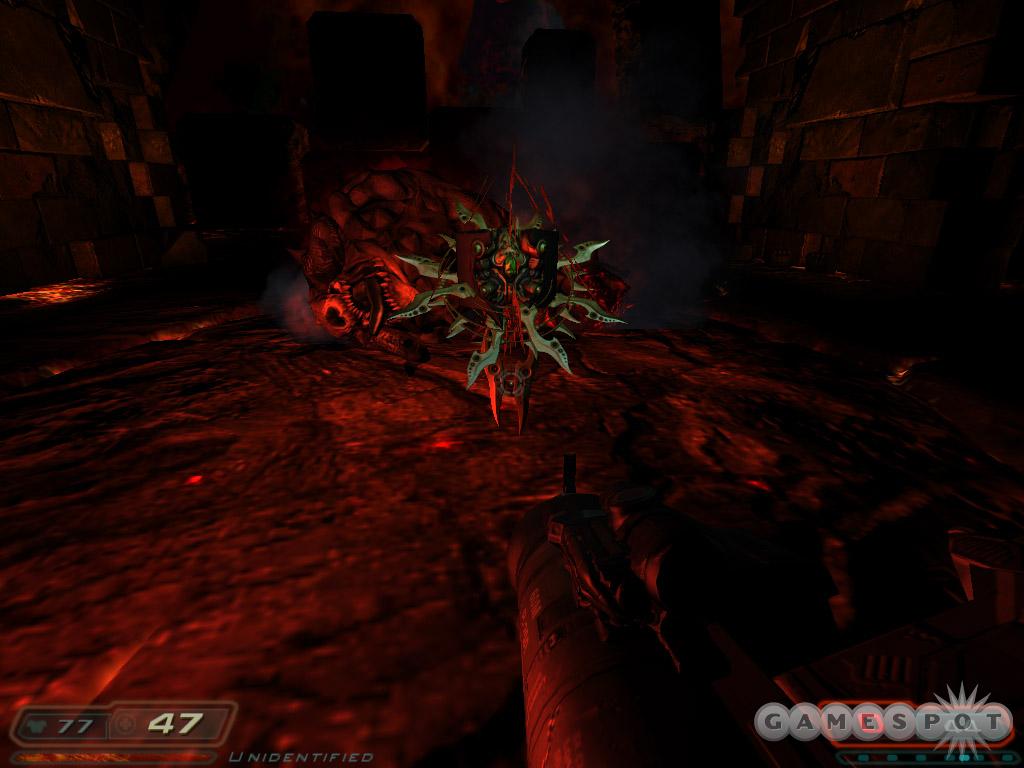
So defeat the seekers using the plasma gun (it's the most accurate and fast firing weapon for the job). When all seekers die, turn toward the guardian and blast the blue orb with rockets, the BFG, or the plasma. Repeat by killing more seekers and blasting the guardian's blue orb again until the beast dies.
After the battle, grab the soul cube. Go into the blue light. Walk back down to the teleporter and use it.
Delta Labs - Sector 5 (Delta Complex)
Main Objective: Stop Sarge.
The Delta Complex is the most advanced research facility on Mars. The complex is divided into three main sectors each serving unique purposes and one smaller sector that houses the main test portal. Aces can only be gained through the monorail of CPU complex.
Grab the weapons and health from the containers on the right. Cross the room and drop into the service duct. Gather the items along the way. Exit into the hall that contains a soldier. Defeat him and grab his chain gun and nearby ammo.

Enter the normal door first (not the bay door) and find a soldier inside. Grab the armor, ammo, and chainsaw near him. Now you can go through the bay door and find a bunch ticks. You could also give the soul cube a workout here. Listen for it to proclaim "Use us!" and then you can cycle your inventory to your new weapon. It regenerates your health by killing a single monster. You don't have to use it immediately. Save it for the toughest monsters. Continue down the hall and face a couple soldiers. Gather the plasma gun and ammo from the rack on the right then climb the ladder in the elevator shaft. Crawl through the vent and drop out into the service tunnel. Eliminate the soldier patrolling below.
Grab the shotgun from the open crate ahead. Face off against the archvile as you move forward. Traverse the upper catwalk to the door, which releases another archvile. Kill it and any creature it spawns. Use the soul cube if available. Call the lift and ride it down.
A soldier appears in the doorway. Mow him down then blast the revenant around the left corner. Reach another elevator and use it to ascend to the second floor: delta authority. Move around the junction to find the door on the opposite side. Enter the lobby and speak with Counselor Shawn. Grab the PDA resting next to him. Listen to the audio logs.
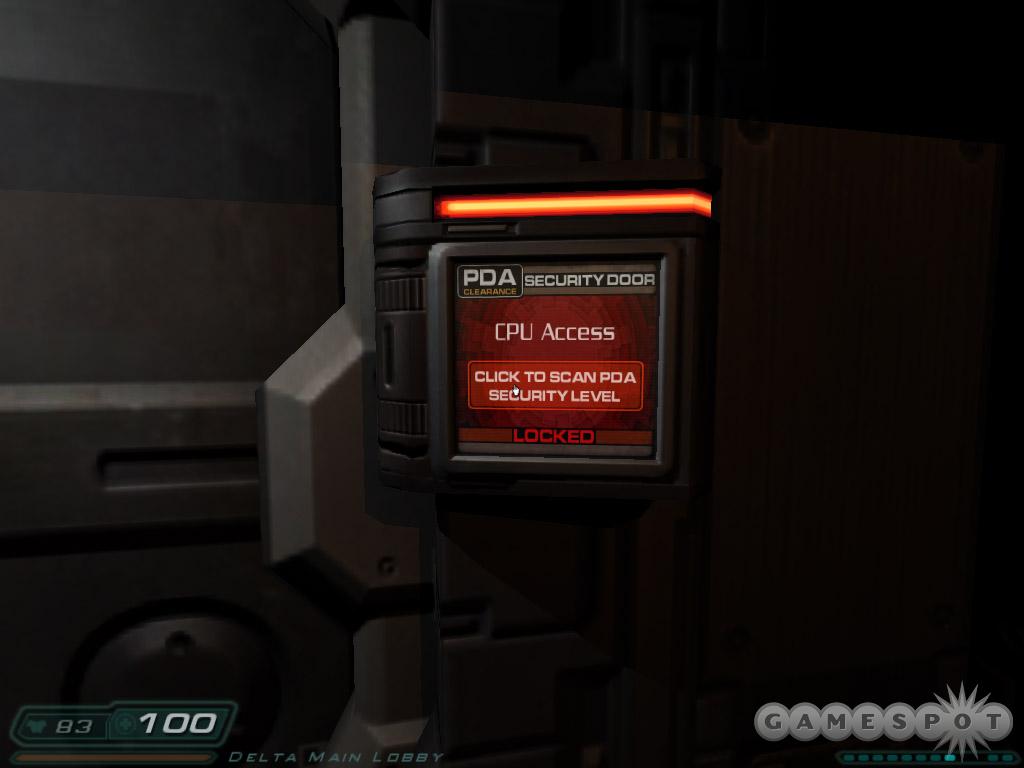
Objective: CPU Complex. Using Swann's PDA gain entrance into the CPU Complex.
Exit through the opposite door. Drop into the crawlspace and find the first ladder. Use it to reach the next level up. Follow it to another ladder. Use the panel to extend the ladder and descend into the main lobby. Blast two arch viles in succession and any monsters spawned. Use the soul cube when available. Grab Bruce Jackson's PDA in a corner. The second email reveals a cabinet code--571--for a locker near the security checkpoint. It contains a rocket launcher.
Use the panel next to the door leading toward the CPU complex. Proceed through. Battle a revenant near the bay door. Defeat it then open the bay door into the next level.
Central Processing
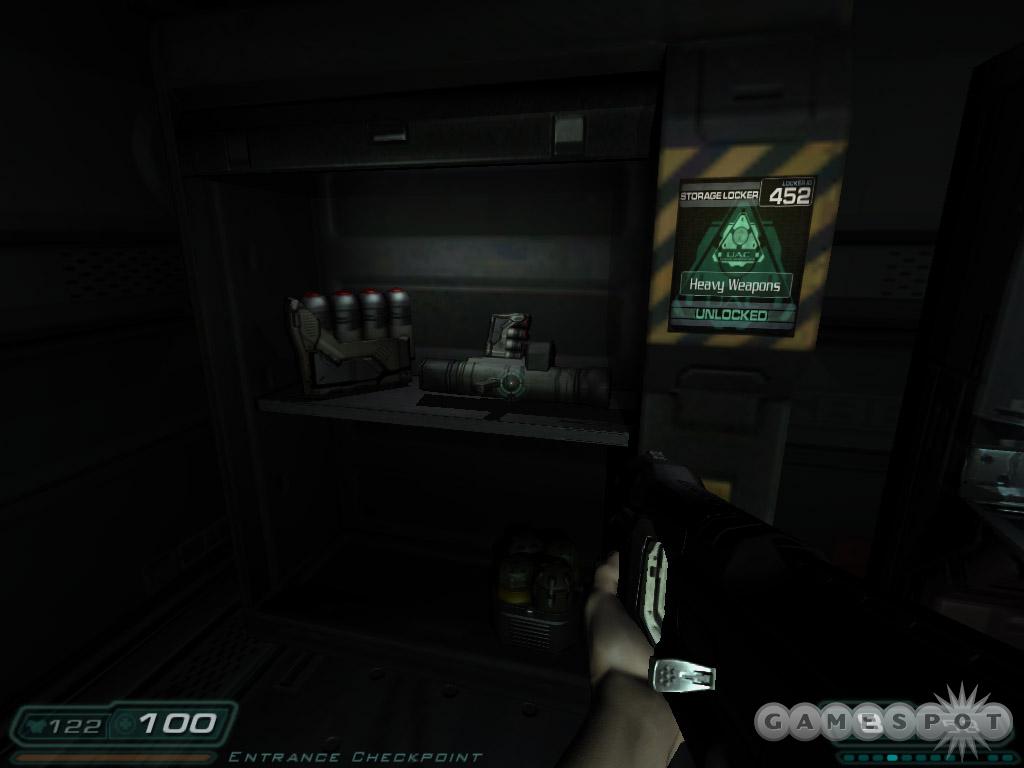
Central Processing houses the control systems which are used to process data for experiments, archive data, and manage the CPU overhead for security and regular day-to-day operations of the entire outpost on Mars.
Move forward and toward the checkpoint on the left. A couple imps appear, including one behind you. Defeat them then enter the checkpoint and use code 571 to open the heavy weapons locker to recover a rocket launcher. Use the console to open another security locker to reveal some armor. Proceed through the door in this room.
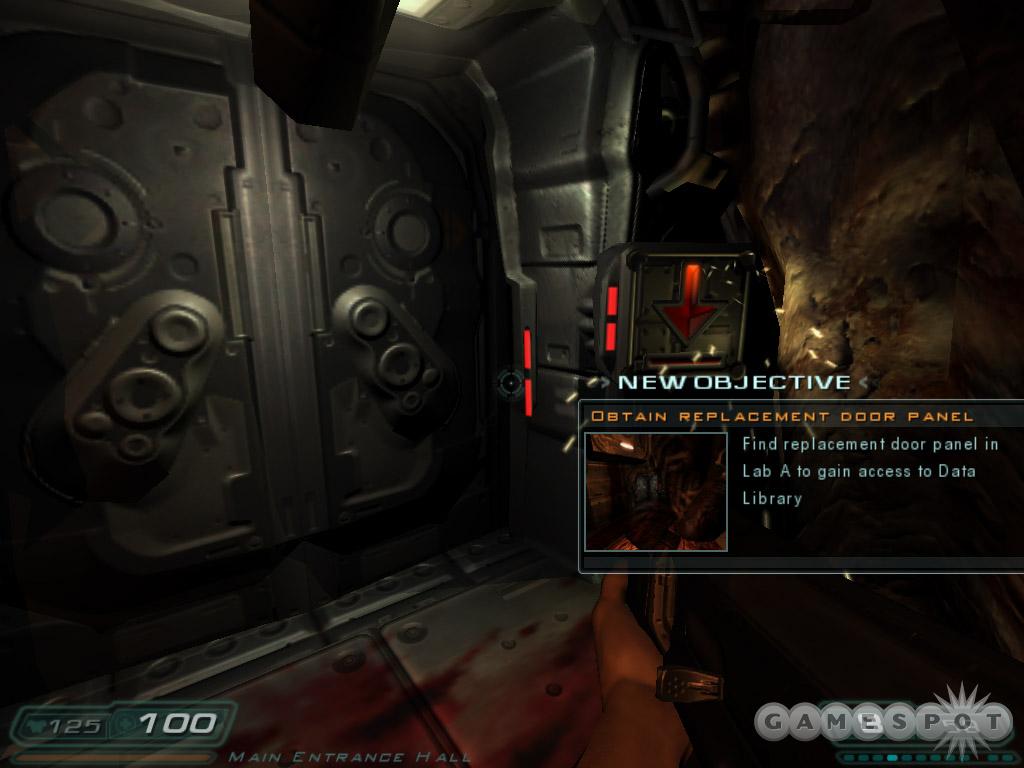
Enter the main entrance hall and defeat the beast that spawns. Go behind the reception desk to grab some armor and health. Check out the door just outside the desk for a new objective.
Objective: Obtain Replacement Door Panel. Find replacement door panel in Lab A to gain access to Data Library.
Go around the left side and investigate the offices for supplies. You'll trigger and imp and some cherubs. Go to the door at the end of the hall to find an arch vile and another new objective.
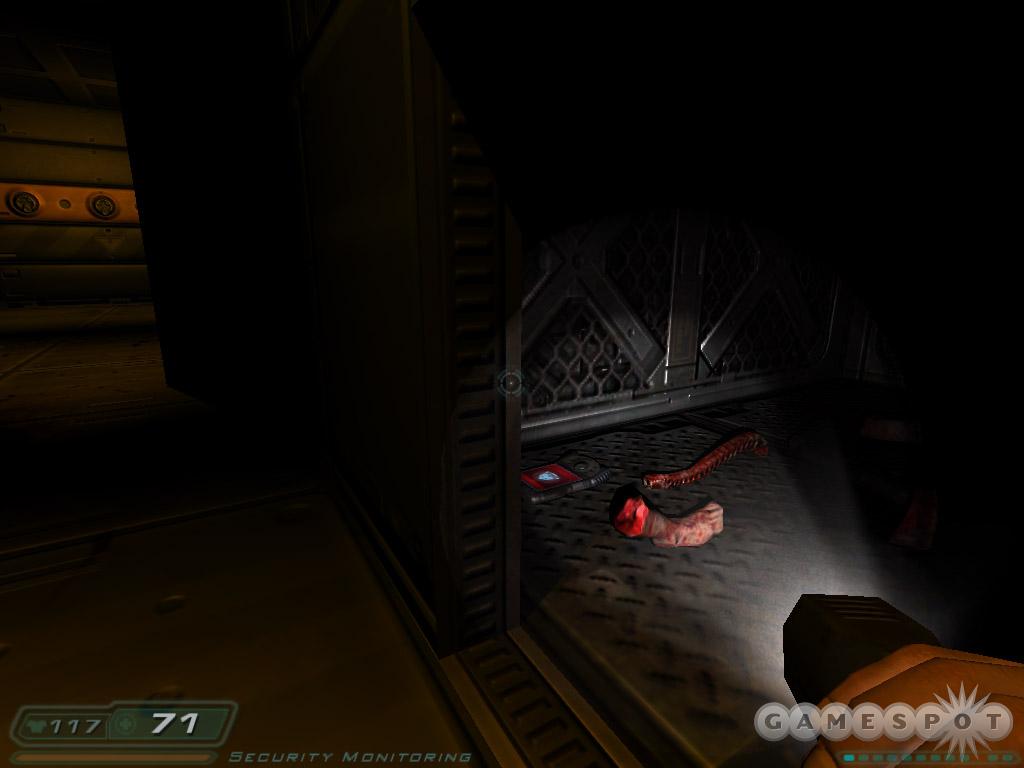
Objective: Obtain Access Codes. Obtain access codes for Lab A.
Return through the main hall and enter the opposite door. Cross the floating bridge and enter security monitoring. Combat the ticks, imps, and soldiers. Search the area for ammo and health. Approach the console and cycle through the security cameras. Beware of the tick that leaps out. Note the Lab A meeting room number: 627. Locate another console and open a security hatch. Search the wall for an open vent and find a PDA inside; it's Tony Bates. His audio log reveals the Lab A code 627. It could have also been obtained from the cameras.
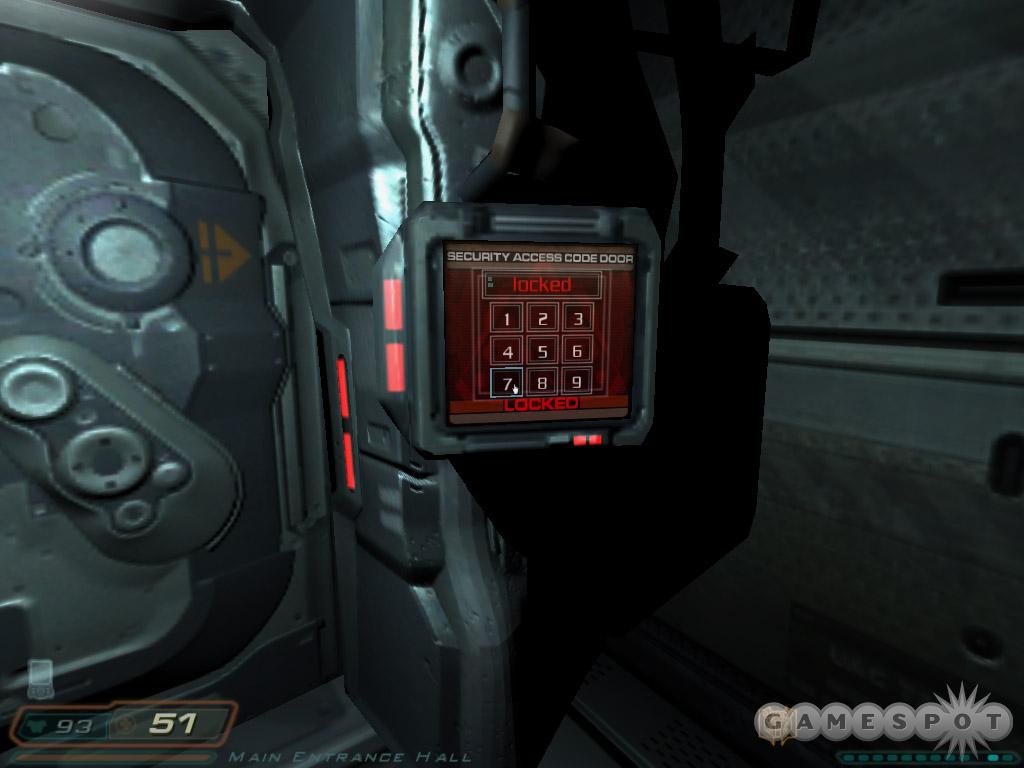
Return to the main hallway and battle the beasts that arrive. Go to the door into Lab A and use code 627 to open the passage. Go through the hall and leap over the floating blocks. Enter CPU processing. Follow around to the meeting room; battle imps and cherubs along the way. Grab the PDA off of the console to the left. Read Charlie Haskell's email for code to locker #669: the code is 468. Explore the floor and take the lift up to the second level of the CPU lab.

More monsters await you here, including an arch vile. Clear the level, grab supplies, and find another lift that takes you to the third level, routing. Defeat imps, cherubs, and soldiers. Proceed into the offices and collect some ammo and defeat more creatures. Follow the door into the upper floors. Defeat an imp and find the supply crates in the back corner. Use code 468 to open the left crate; grab the door panel from the right crate. Grabbing it triggers the arrival of imps and ticks. Be ready. Face the arch vile around the corner on the way out.
Return to the lift and descend to level two. A large group of monsters ambushes you on this floor. Be ready with the plasma gun or the soul cube if it's active. Retrace steps to the other lift and descend to level one. There's another exit out of this floor. It leads to some ammo and armor--just watch your step. Return through the common area and return to the main entrance hall. Fix the door panel and move through. If you need health, check the office on the left. Beware of the tick that appears once you search the room. Continue through the door at the end of the hall--into the CPU core.
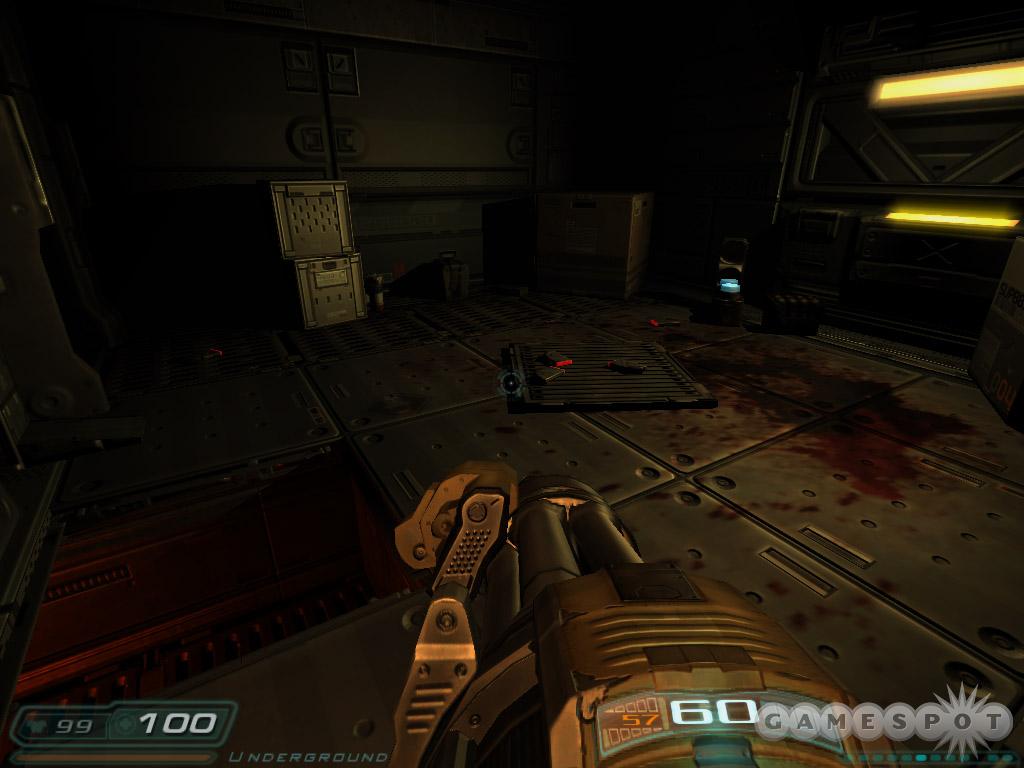
Battle a couple imps ahead then go to the lift on the left and proceed to the main CPU level. Exit and follow the hall to the fallen marine. Speak with Campbell. Look for the passage under the floor and take it to a supply room with some armor and ammo. When done, enter the bay door into the next level.
Central Server Banks
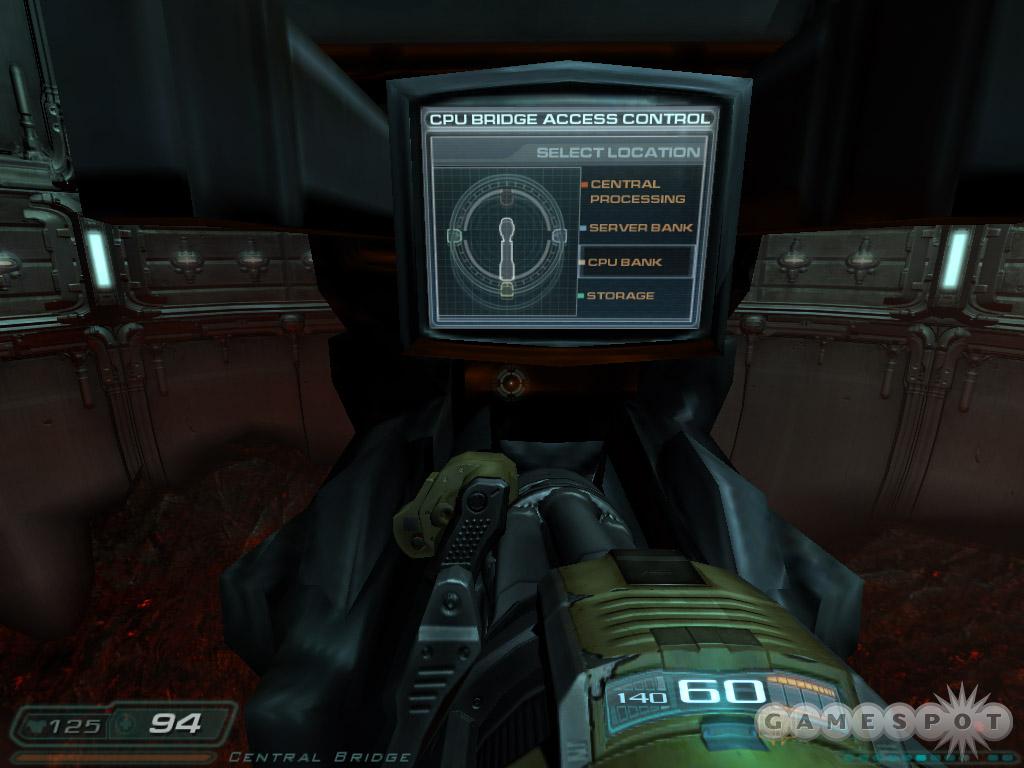
Central Processing houses the control systems which are used to process data for experiments, archive data, and mange the CPU overhead for security and regular day-to-day operations of the entire outpost on Mars.
Walk forward and use the health station on the left if necessary. There's also a rocket launcher and armor near a skeleton at the intersection. As you move, imps, soldiers, and ticks spawn to battle. You'll trigger monsters down either path. Eventually connect into the main server room.
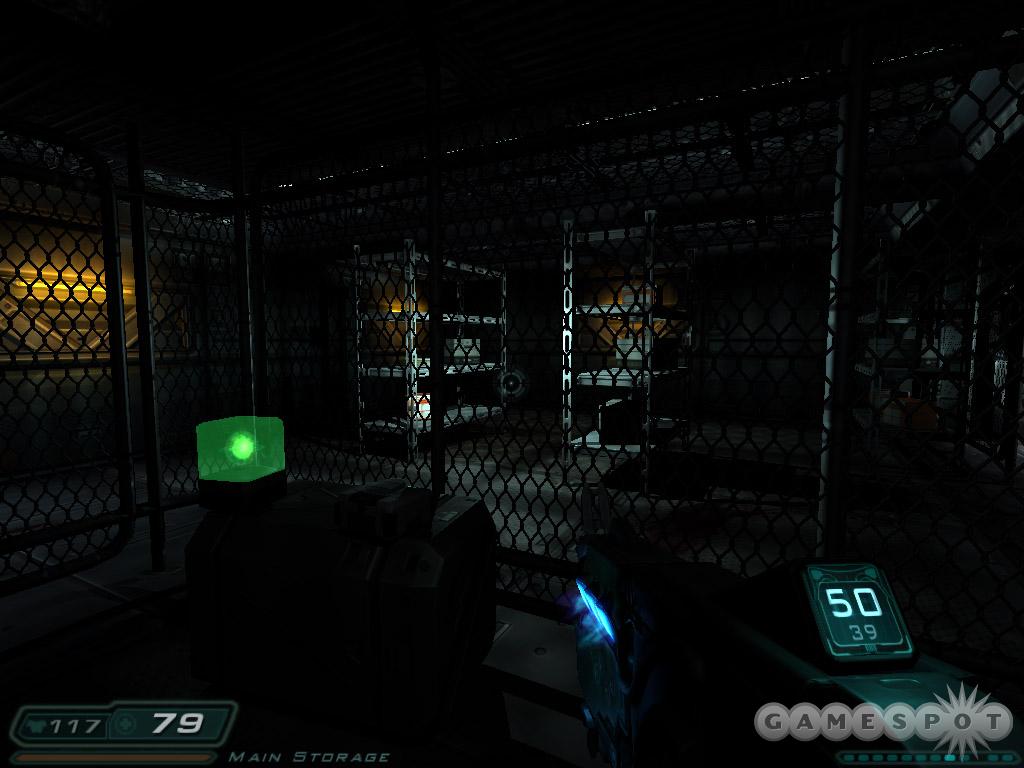
An arch vile spawns first followed by revenants and other beasts. It's a good place for the soul cube if you've been saving it up. Also, toss some grenades around the corner to soften up the revenants. A second arch vile arrives. Defeat it and any minions to unlock the exit door.
Press the panel to activate the bridge. Walk out and battle the cacodemons. Proceed to storage first. The small supply room is to the left. Some imps appear when you go inside so be careful standing around the explosive barrel. Gather the ammo and move down the other hall and defeat some soldiers.
There's another larger supply room on the left. Gather the BFG cell (triggers a revenant) then enter the robust supply room, which triggers an arch vile. Return to the bridge when done. Battle another cacodemon. Proceed to server bank.
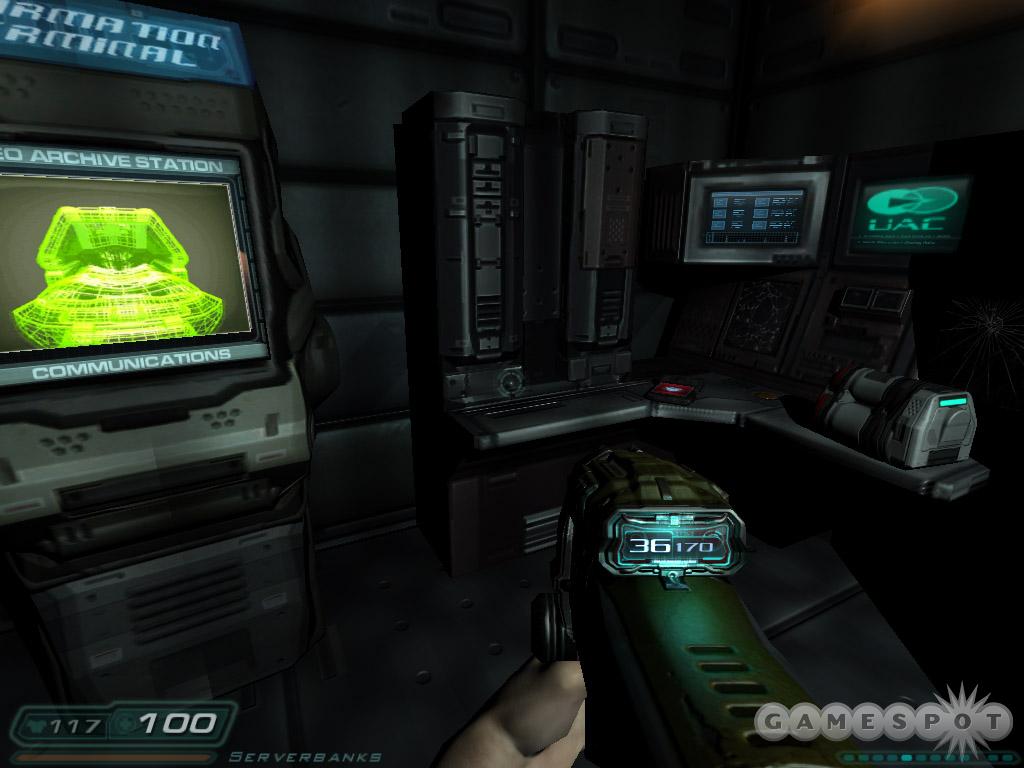
Explore the server banks. Move cautiously and be ready for spawning monsters. Find the stairs to the lower floor and reach the office. Grab Steve Tooloose's PDA on the console and watch the BFG info video if you wish. On your way back up, note the broken window on the left. You can jump to the ammo positioned on the nearby rooftop if you wish. Return to the bridge and proceed to central processing. Destroy more cacodemons as you cross the bridge.
Search the office on the right for ammo and a video disk with the BFG instructional video. Continue through the next door into the CPU and a boss battle.
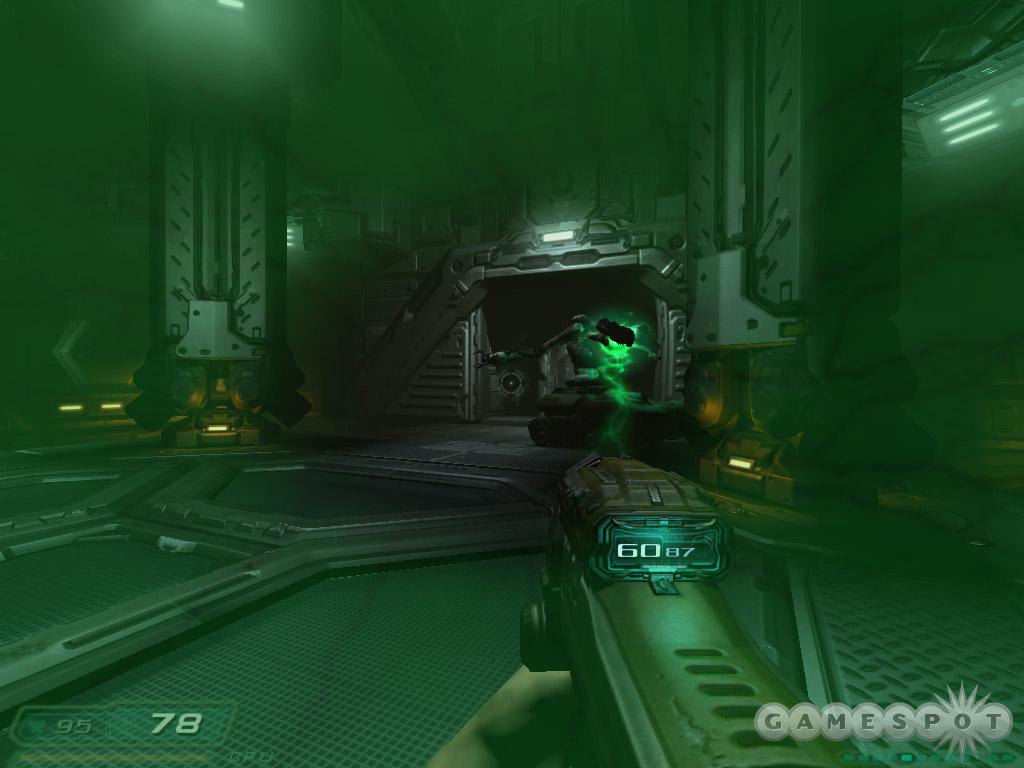
The Saboath is like one-third tank, one-third cyborg, and one-third BFG. Yes, this boss fires the BFG. You can detonate the BFG blast using your own weaponry--as you learned from the instructional video--and it's a wise tactic to avoid suffering damage from the flying BFG projectile. Fire some rockets immediately to detonate the first BFG blast then try to keep cover between you and the Saboath. Watch for side doors to open with new supplies. After defeating the Sabaoth, grab the BFG 9000.
Find the vent hatch in one of the side rooms. Crawl through and drop into sub level 9. Find the lift and use it to reach the next level.
Site 3
Main Objective: Find the Hell Gate.
Site 3 is the ground level access point to the original subterranean Mars base structure. Research objects from the lower levels are analyzed and studied in this facility.
Defeat the hell knight in the hallway. There's a health station to the left. A few more minions arrive. Just annihilate them with the chain gun. Check the door on the right at the end for a new objective.
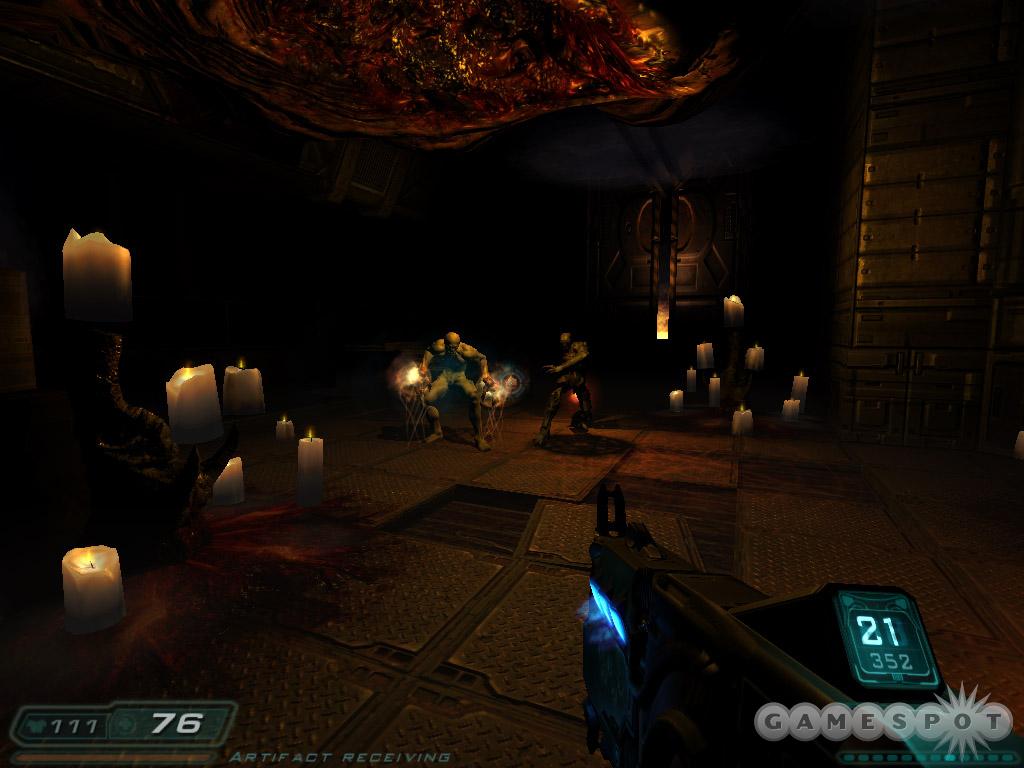
Objective: Site3 Security Lockdown. Gain security clearance for all Site 3 areas.
Enter the other door into the Site 3 hub. Face off against some imps and cacodemons. A hell knight spawns on the far side. Use barrels to help defeat it. Search the back corner for ammo then enter the door marked garage. Enter the freight cart terminal. Defeat a group of enemies. Save the soul cube, if possible, for the hell knight at the end. Search the area for ammo and a health station before moving on.
Enter artifact receiving. The room crumbles and an arch vile enters. Crush him, search for health and armor, and exit. Enter the lab. The large tanks at the bottom right can be shot for explosive damage. Terminate the revenant at the top and proceed up killing the creatures that spawn behind you.
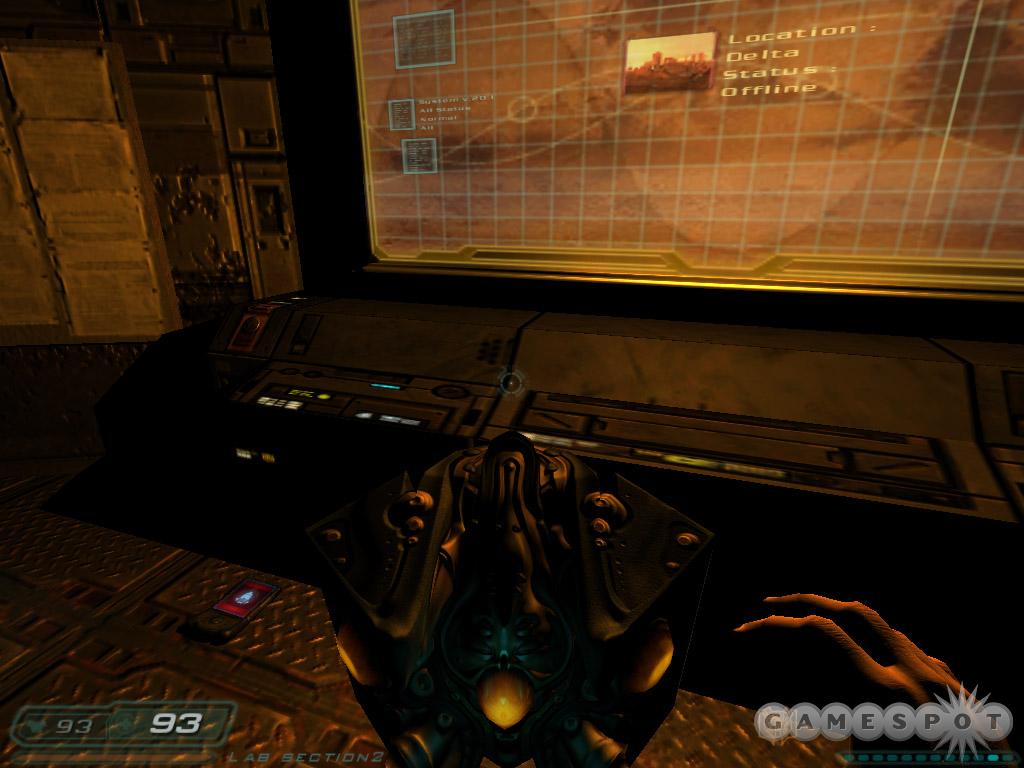
Descend the ladder and enter the control room. Defeat the imps that arrive then pick up Richard Davis' PDA. Go around to the other side and follow the hall. There are a few locked doors here as well as several creatures. Find the ladder in a dark corner in the side hall. Maneuver through the hall and drop down into artifact research. Be ready for a hell knight! Use the soul cube if possible.
Enter the office and find P. Rogers. Speak with him. He offers up his PDA, which includes security codes as well as an email referencing Quake 43. Grab it and the video disk then stock up on ammo. Use the health station if necessary.
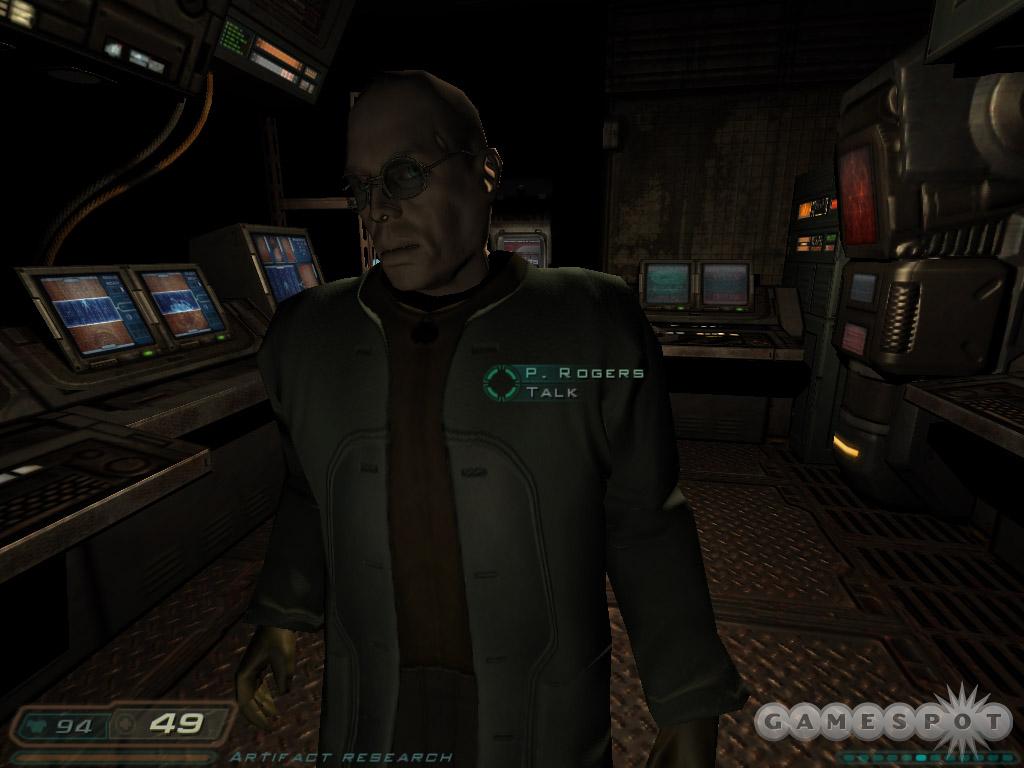
Objective: Freighter Control Room. Locate the freight loader control tower to unlock the entrance to the caverns.
Defeat some maggots and imps as you make your way to the locked door. Use the panel to unlock the door. Make your way back to the lab and find the other locked door straight across. You're now near the level's start. Cross into the room ahead of you into the hub. Defeat the imps and revenant.
Use the panel to unlock the next door. Defeat the creature on the catwalk as well as an imp to the left. Descend a ladder to the right to find some supplies. Board the elevator and proceed to level two, maintenance.
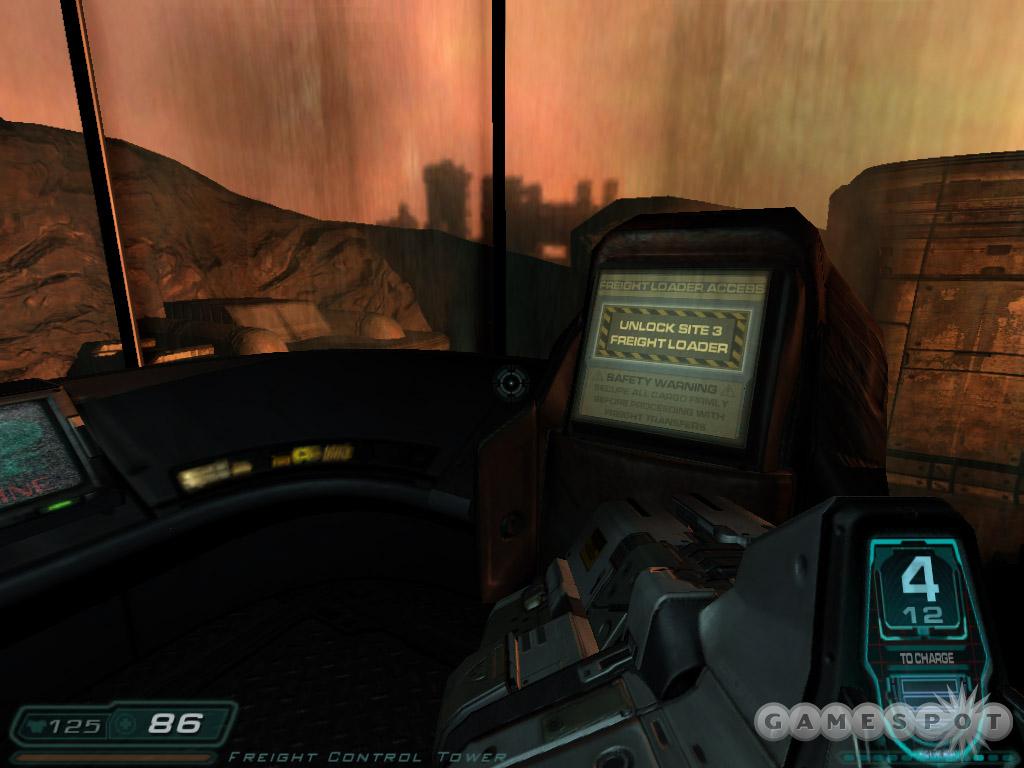
Traverse the slimy tunnel and drop into the intersection. A revenant attacks from the left. Defeat it and search the room for ammo. Turn around and battle an imp as you proceed toward the stairs; battle cacodemons and imps at the top. Enter the next room and grab the supplies, including more BFG ammunition. Enter the door and descend the ladder. Use the console to unlock the freight loader.
Objective: Caverns Entrance. Use the freight loader to gain access to the caverns entrance.
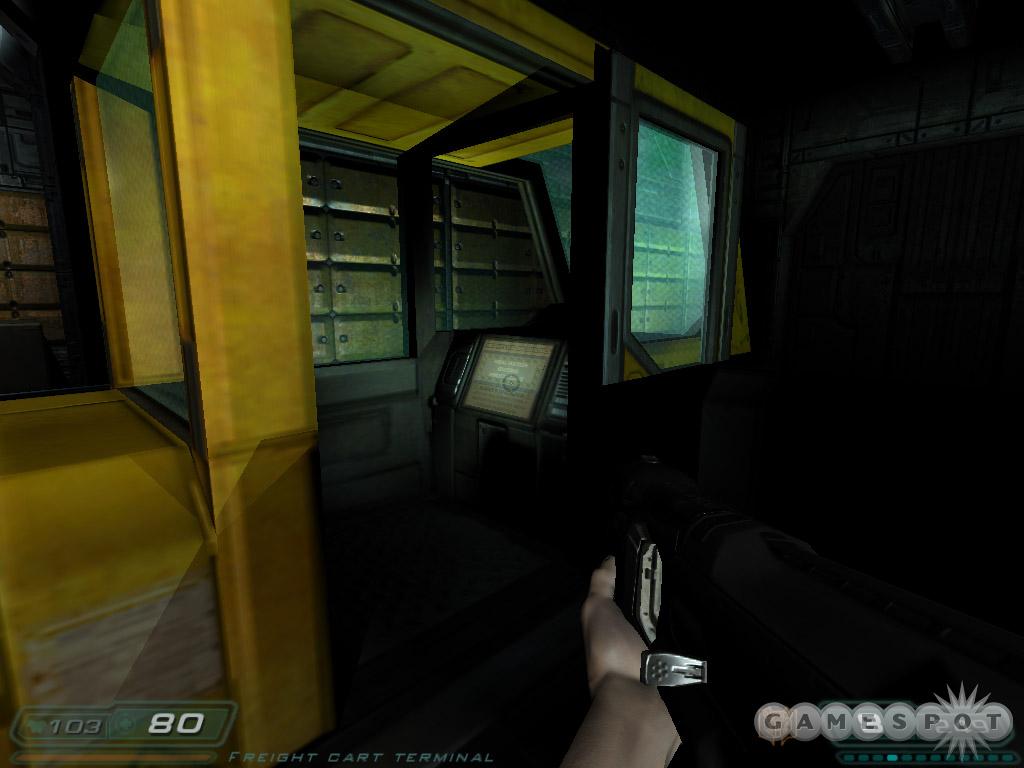
Start back toward the freight area. When the floor breaks, drop down and use the ladder. Descend into the dark tunnel and battle some imps. Maneuver through the slime and drop down onto the catwalk you crossed earlier. Turn right and proceed through the door.
Enter the garage on your left. Beware of an imp from behind then go board the freight. Board and use the freight. Get off and approach the lift. Use it into the next level.
Caverns - Area 1
Main Objective: Destroy the Hellgate.
Caverns Area 1 is the location of the original Mars Base. While all research has been moved to newer structures, this aging facility still serves as the primary material transfer point between Area 2 and Site 3.
Descend the lift. Exit briefly and discover ticks everywhere. Back into the lift and destroy the ticks from there. Use something that won't need reloading often, like the machine gun. Ascend the staircase and enter the offices. Beware of enemies coming from behind. Gather all ammo from the offices, including a BFG cell under the desk. There's also a health station in here. Continue into the junction.
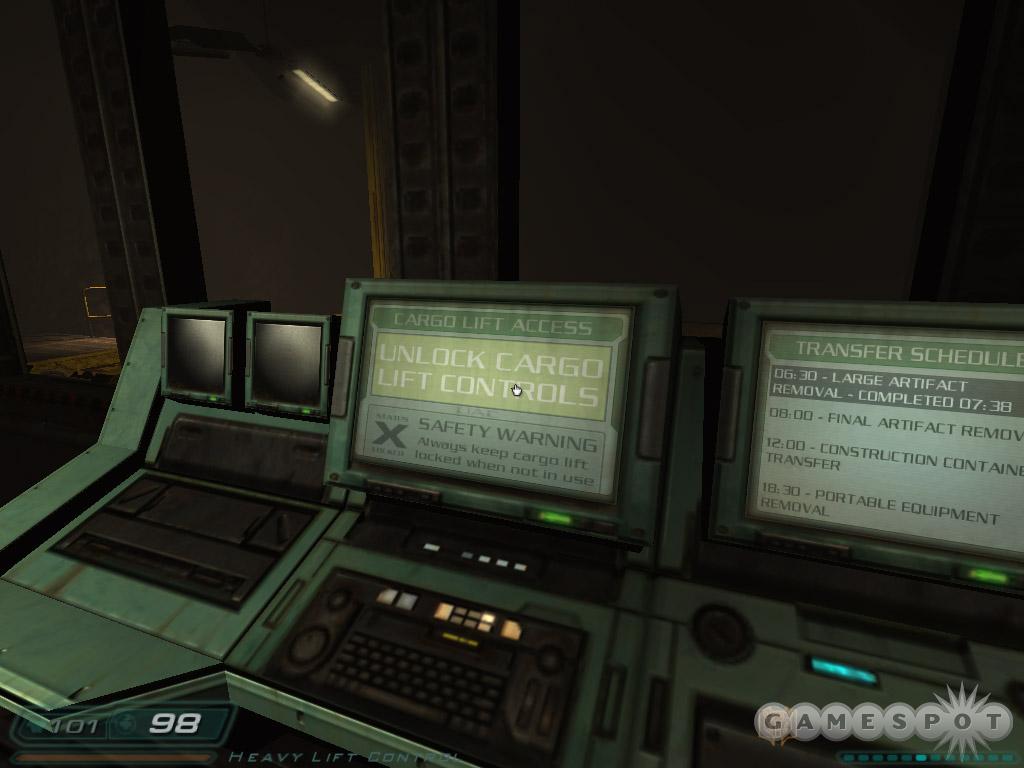
Defeat more beasts in this narrow hall. Take a left and enter containment monitoring. An arch vile patrols inside. Beware of a couple soldiers that ambush you from behind. Gather the health and ammo and continue through the next door. Ticks and imps emerge from the next junction. Slaughter them then use the health station on the left and grab armor from the back right corner.
Objective: Access Lower Levels. Activate the service lift to reach the lower levels of the caverns.
Move to the back corner to find the ladder. Use the panel to extend the ladder and ascend. Battle a couple cacodemons before leaping onto the girders ahead of you. Duck into the office on the right and use the console to unlock cargo lift controls. Enter the next room and gather supplies to the right. Call the lift and use it.
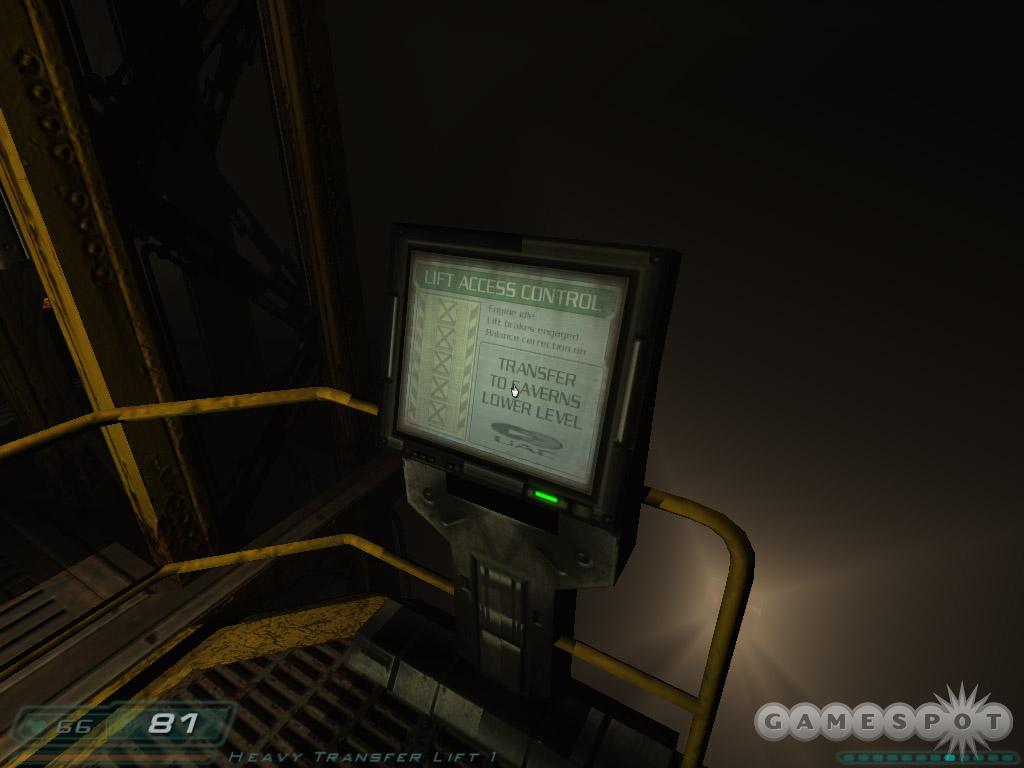
Explore the next room. There's some ammo here. You'll also trigger some ticks by exploring. Exit out of the room and move toward the service lift. It's now active. Arm your best weapon (soul cube if available) and press the panel. A hell knight and support imps spawn in. Terminate the hell knight quickly; the soul cube makes quick work of him. Finish off the remaining imps then board the lift. Start down.
At the bottom, shoot the soldier ahead. Drop down and prepare for a big battle. An arch vile appears on the catwalk above you and a hell knight and imps spawn near you. Blast the arch vile with several rockets on sight. Switch to the plasma gun or chain gun (or soul cube if possible) to blast the knight. Finish off remaining enemies then find the open access hatch panel in the back left corner. Climb the ladder. Grab some BFG ammo to the left behind the crates then go through the door.
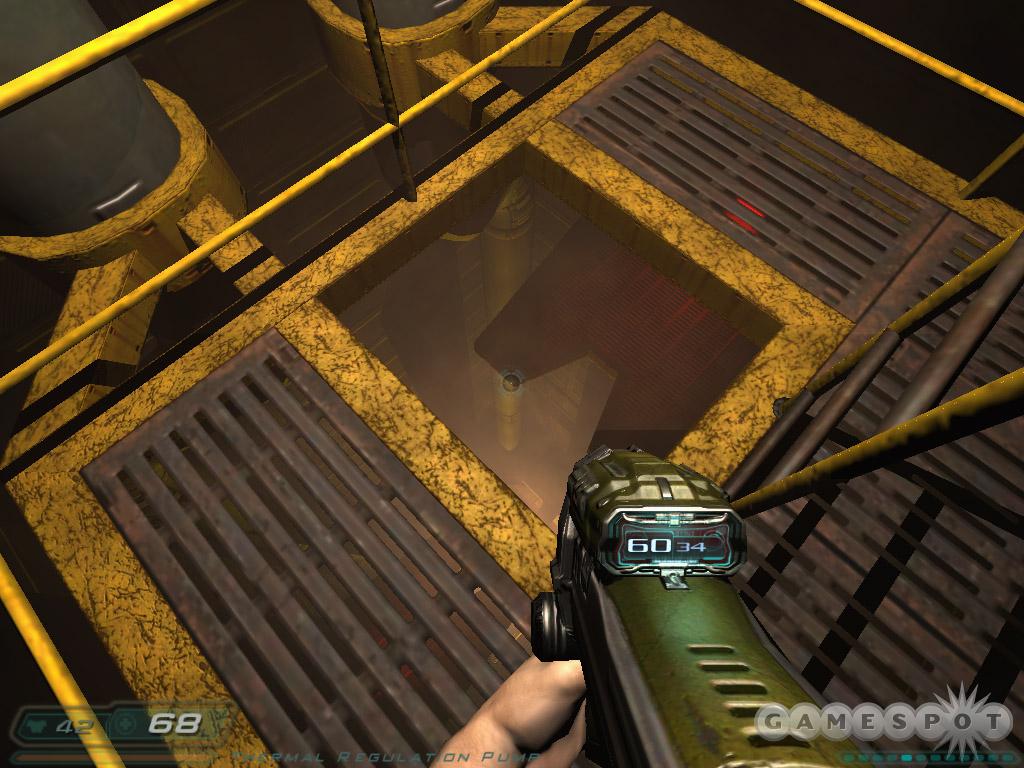
Defeat an imp and other minions. Use the health station on the left. Ascend the lift to the upper floor and beware of an imp to the left. Kill some ticks then check out the security door in the left corner for a new objective.
Objective: Security Access. Locate the security card to gain access to the dig site.
Exit the opposite door and eliminate a couple cacodemons. Go around to the ladder and ascend. Enter the door then start down a series of ladders. At the bottom, look down and spot the moving platforms. You need to drop off to the closest platform. When it begins to move inside, leap to the next extended platform. Continue until you reach the bottom. Climb down the ladder.
Spot the health behind the pipes. Grab it and look right. Spot the cowering worker. Snag the keycard next to him. Use the panel to extend the ladder. Climb it all the way back up. Return up a series of ladders. At the top, battle a large group of cacodemons. Return inside and approach the secured door. Enter, defeat the ticks, and then grab Robert Cody's PDA off of the conference desk.
Exit and turn left. Spot the ladder. Climb up. Kill the creature and locate a secret hatch on the right side. Enter to find some armor and ammo, including a BFG cell. Return down and proceed to the right. Eliminate the imp and several more toward the next door. Defeat all creatures before the door unlocks. Continue through and defeat more beasts as you move to the right. Move through the junction and open the bay door. Enter the material transfer lift area.
Defeat imps and soldiers on the ground then a series of cacodemons from the air. Press the panel next to the ladder the climb up to the crane controls. Rotate the crate. Pull the cargo toward you using the left buttons. Jump to the cargo then down to the other platform ahead. Battle some monsters then search the pipes for ammo and armor.
Enter the personnel transfer station. Try the middle door, which malfunctions. The lights switch off and monsters teleport in. After defeating the imps, beware of the soldiers and their chain guns. Move inside and call the lift. A hell knight rides up. Defeat it then ride the lift down.
Search the immediate area for health. As you proceed, an arch vile appears--great time for a soul cube if possible. Clear out the minions plus a couple more in left caves before you can unlock the exit door. Start across the cavern. Shoot the gunner ahead with your plasma gun then take on the cacodemons above. Enter the next room. Grab the BFG ammo from the right then board the lift and take it into the next section.
Caverns - Area 2
Caverns Area 2 is the primary archeological excavation site. All items are processed and transported to Site 3 for evaluation and analysis.
Things get nasty quick when an arch vile and a couple hell knights appear. Ready the rocket launcher and pummel the arch vile as fast as possible. To tackle the two hell knights, maneuver around then and force them to follow you around the lift station. Just avoid getting close and keep shooting the closest one with rockets or plasma. Exit through the unlocked door.
Navigate the dark tunnel battling minions as you collect supplies. In the open cavern, go right and gather ammo from the scaffolding. Drop down to the left and find some armor. Hop to the bottom and look at the table to find the keycard to the upper storage room. Return up and open the locked door. Gather the supplies. You'll have to battle through some ticks on the way out.
Return down into the cavern and go through the dark passage ahead. Be ready to kill the arch vile and the imps that spawn behind you. Follow the dark tunnel to the levitation site. Several enemies spawn here so be ready to back up and tackle them in fewer numbers. Snag some items off the right shelf, including a video disk.
Continue to the room of stairs where a hell knight and support ticks appear. Back up and keep firing at the hell knight while remaining a safer distance. Return to the room and find imps and another couple hell knights waiting. Proceed to the gallery, where giant spiders await you. Great time for a soul cube or several BFG blasts. Nail the giant spiders as they drop down then back up into the previous junction to get a good shot at them. When the battle concludes, go up the stairs on the right. Use the generator then the lift to move on.
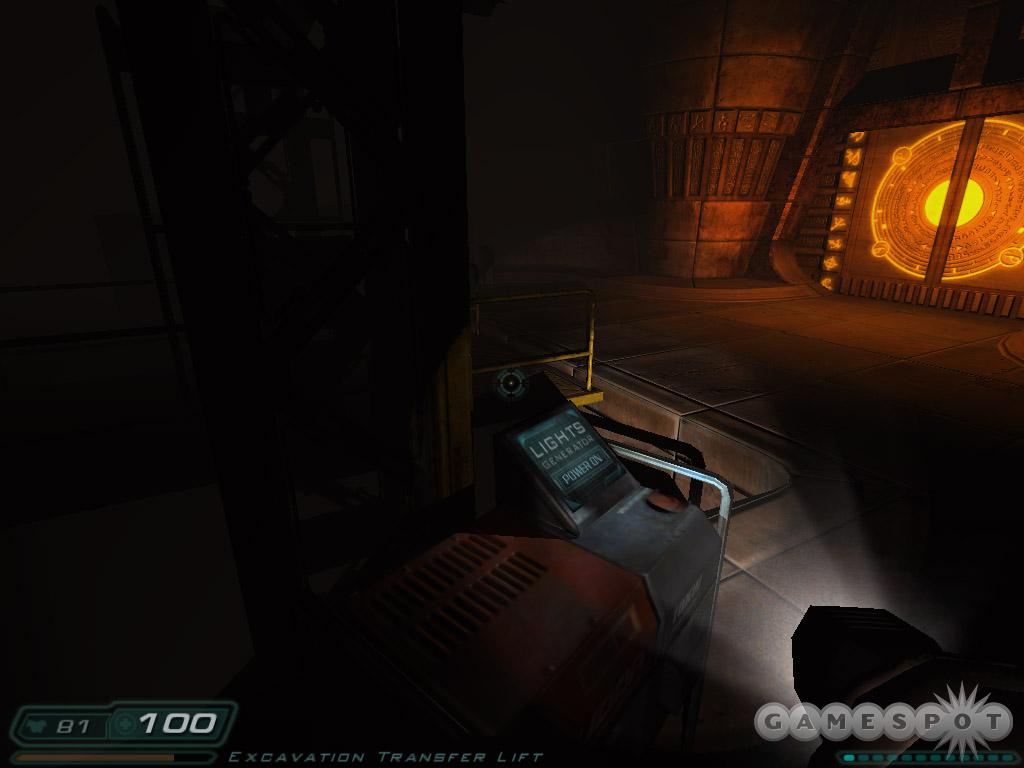
Primary Excavation
Main Objective: Destroy the Hell Hole!
The primary excavation site houses the ancient burial chamber. The discovery of this chamber unearthed the stone tables, soul cube, and many other valuable artifacts.
There's no shortage of ammo here. Stock up on everything by moving through all of the crates. Descend the stairs and enter the bottom chamber. Walk to the back of the chamber to trigger the open route. Get to the lift and ride it down.
Move down the cavern path. Near the bottom of the path, take left at the fork and peek into the cave. It's the id Software logo. Click on it to open a secret chamber containing an Easter egg. Now go to the other side to encounter the final boss.
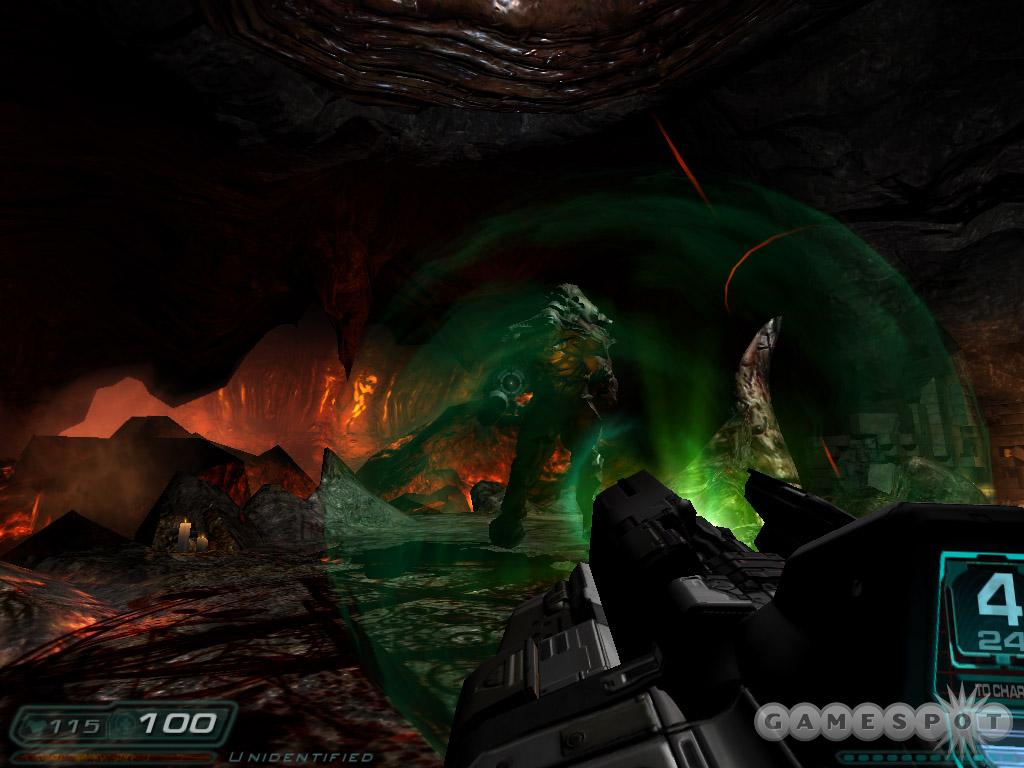
You reach a circular area where the battle against Doom 3's final boss, the cyberdemon, begins. Take advantage of the circular area by constantly moving. Just back pedal and watch the cyberdemon follow. Stay well away from this monstrosity. Keep him slightly out of the line of fire for most of the battle so you don't suffer the massive blast of his rocket projectiles. You'll need to use the soul cube to take him out. As you back pedal around the area, watch out for maggots and imps that emerge from the fiery center. Keep moving backward and switch to the machine gun to defeat your pursuers.
The main tactic is keeping your distance and constantly moving backward around the circular path. The cyberdemon will follow you. Keep enough distance between you and the demon so you can slide along the center edge and take cover against the cyberdemon's projectiles. Defeat the cyberdemon to complete the game.
Chapter 5 - Multiplayer
This section compiles map strategies for Doom 3 multiplayer.
D3DM1 - Tomiko Reactor
Tomiko Reactor is defined, understandably, by a double-floor, circular walkway reactor room. The reactor room houses a couple of the level's most important items. Search the bottom circular catwalk for the rocket launcher resting on a platform attacked to the reactor. Leap carefully to the platform then back to the catwalk. A missed jump sends you plummeting into the darkness below (in other words, instant death).
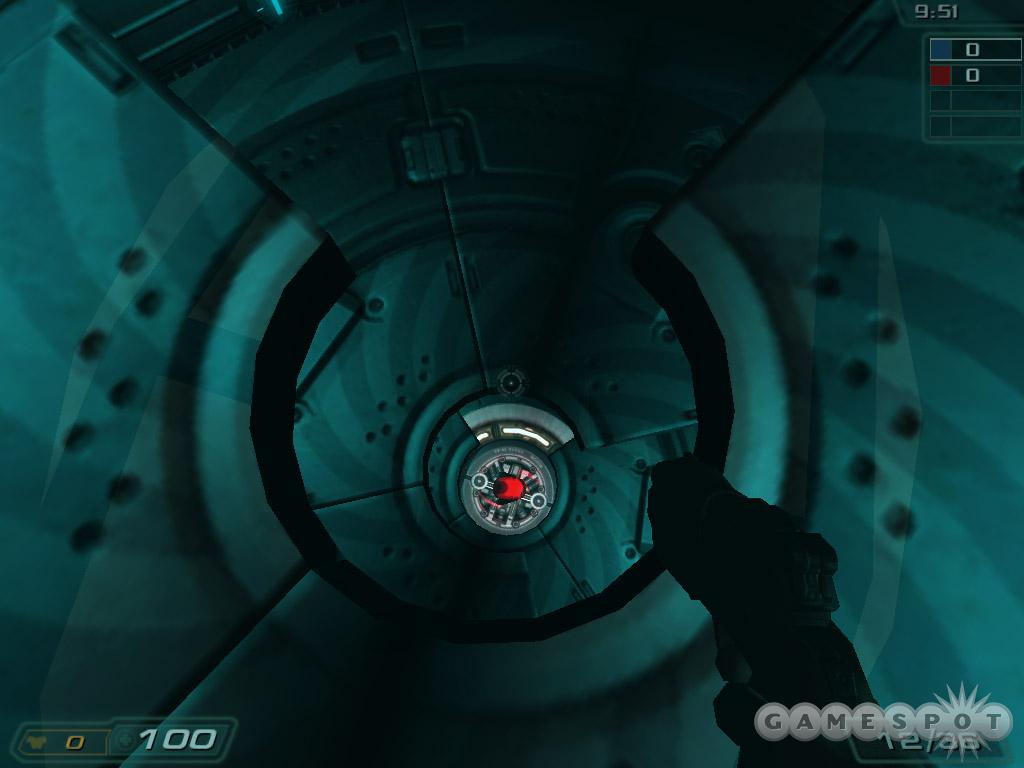
The top of the reactor room holds another price. Walk to the center of the room and look down. You'll see several rotating platforms and a berserk power-up underneath them all. Drop down either on each platform or straight onto the berserk to grab the power-up. A teleporter underneath the berserk sends you back into the map. Now you're ready to unleash some big fist damage on anyone you can find. Don't dive down the reactor when the room is red; there's a red beam coming from the reactor's center and touching it is deadly. Wait until the room is blue and quickly drop to the berserk and get back out.
The plasma gun is positioned in a room containing some sort of piston machine (you may recognize a similar section from the single-player game). If you plan on snagging the plasma gun and walking along the same catwalk, time your advance when the machine is closed. Don't get hit by the piston or the result is instant death. Grab the armor on the other side. Carefully get back to the main path; if you stay to the right you might fall into oblivion.
Find the chain gun on the top of some equipment. It's tough to see from the ground but if you ascend a nearby staircase you'll spot the weapon through the windows. Destroy the windows with a weapon and jump to the chain gun to recover the weapon.
One of the map's key rooms is a multi-exit room just outside the reactor room. It's also the room the berserk teleport transports you to. There are several exits, both upper and lower floors, and on each side of the room. From the berserk spawn spot, the right exits lead back to the reactor room and the upper left exit leads to a cave-like chamber containing armor and health. Expect opponents to move through this chamber frequently moving to and from the reactor room and to the armor in the cave area. If you're hunting here, don't stand too close to the berserk spawn spot or you might be on the receiving end of a rage-filled punch.
D3DM2 - Delta Labs
Delta Labs' most unique feature is the power-up generator. Located in one of the map's more open locations (multiple entrances, wide room, and an upper balcony overlooking the generator), the power-up generator can be used to create a megasphere. The megasphere adds 100 to your current health (up to 200 total health). Activate the console, wait 30 seconds, and pick up your megasphere off of the red spawn pad. Sounds easy enough but during a hectic deathmatch, you're unlikely to have 30 fee seconds to pull off the maneuver completely.

As the generator does its job, you may want to hide behind in the left or right corners. There's some cover there but it's well-lit. However, look up and shoot out the light to provide a bit more darkness (the light still flickers). If you enter the generator room and see the countdown, you can almost be 100% positive there's another player hiding somewhere waiting for that megasphere. Fire your weapon into the room's corners to "smoke" the other player out. And of course attempt to steal that coveted megasphere!
The upper balcony of the room offers an excellent vantage point on the generator and any user. Check to see if the generator is active and watch for hopeful opponents to approach the red pad. Or time a drop carefully and grab the megasphere before your opponent can react.
Locate the rocket launcher in one of the labs. It's near some crates along the back wall. Be cautious, though. There's a dark hiding spot to the left of the weapon. Devious players can hide in the darkness here and wait for players to come and snag the powerful projectile weapon. Then again, you could set a trap yourself.
D3DM3 - Frag Chamber
The aptly named Frag Chamber features, essentially, a frag chamber! It's a chamber with entrances/exits on each of its four sides. The center of the chamber holds the invisibility power-up. You might also call the power-up "bait" because going inside the chamber to grab the invisibility can be fatal. There's a control room overlooking the chamber's interior. A console inside the control room can be used to activate the chamber. If another player activates the chamber while you're inside, it's an instant frag. So it goes without saying: proceed with caution through the frag chamber. Check that window before scurrying through!
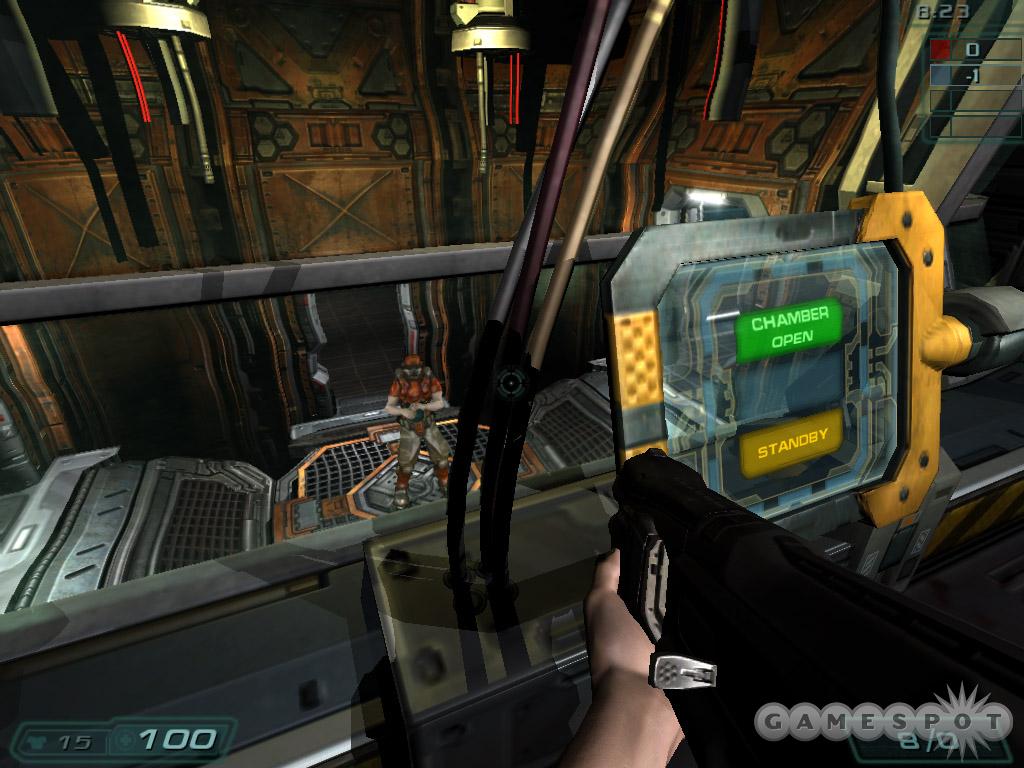
But certainly make efforts to use the frag chamber to your advantage. Take cover near the controls and wait for a player to try and snag that invisibility power-up. As soon as you see a body inside the chamber, click on the chamber console to activate the frag.
The map's plasma gun rests on a small ledge. It's accessible from both sides. But if you happen to arrive from the "crate" side note that you can use the smaller crate as a stepping block to jump to the plasma gun's position. You can also use the larger crates in the room to quickly leap to the armor on the upper catwalk (though there's a nearby lift that will take you there directly). Locate the rocket launcher in its own storage room. It's a fairly open room with multiple floors. Be wary of player's hiding out on the upper catwalk ready to shoot down as you make a run for the rocket launcher.
D3DM4 - The Edge 2
The Edge 2 is a Doom 3 update of the popular Quake 2 deathmatch map Q2DM1 - The Edge. The map is built around a central, multi-level room. Near the bottom of the room you'll find a berserk power-up. Reach the power-up by taking the lift to the berserk's right side, using a rocket jump to reach its spawn spot, or even a teleporter in one of The Edge 2's laboratories.
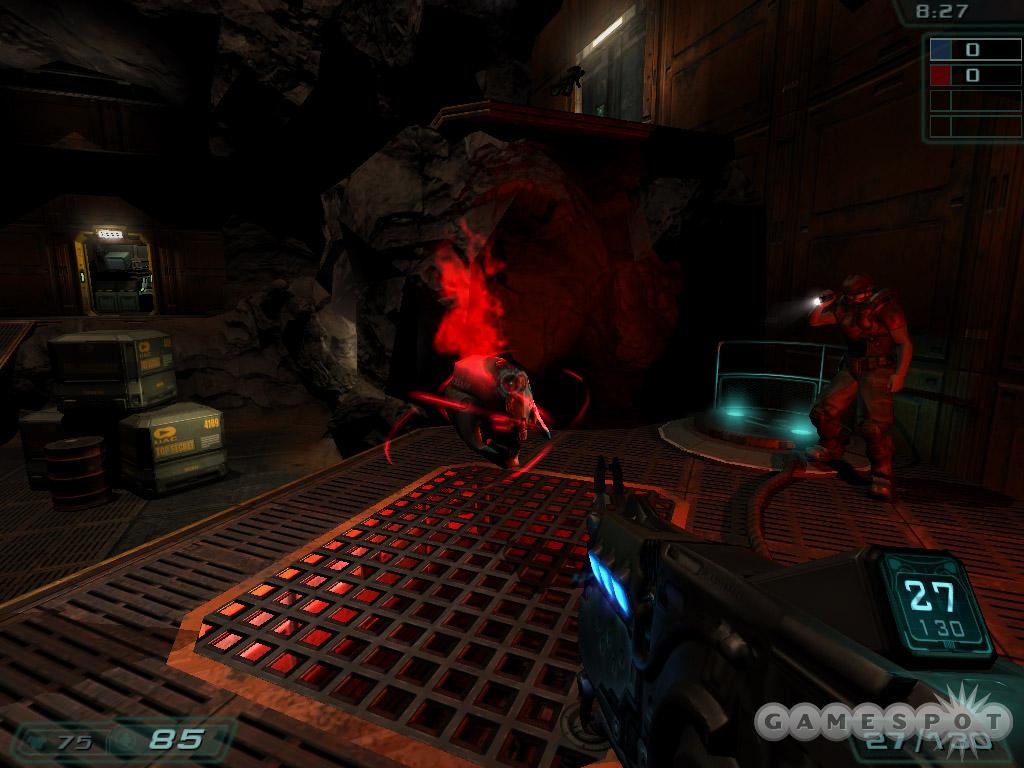
With all of the entrances and exits (and the presence of the berserk power-up) this central area will certainly be a hotspot. Expect high traffic through here and frequent opportunities for a kill...or your own death. Use the explosive barrel on the bottom as explosive assistance against any opponents wandering the ground floor.
As mentioned there are many exits from the room. The lower door (left of the berserk) leads to the chain gun intersection. The first door up the ramp leads to armor and the shotgun. It also moves directly into the lab containing the teleporter to the berserk. The second door up the ramp leads to an intersection: go straight to drop onto a backpack, go left to the plasma gun (look out the window from the plasma gun to see some immediate ammo taking you to 80 cells), and go right for the rocket launcher. In this first rocket launcher room, a panel on the upper catwalk can switch off the room's lights. This offers excellent opportunity to ambush an opponent making a run for the rocket launcher.
The central room also contains a long lift. You can drop off of the lift's top onto the berserk or reach two doors. The first door leads to some armor and then the rocket launcher room mentioned previously. The second door up here goes to the berserk teleporter. You can also drop off the walkway onto a second rocket launcher (located in the bay area at the central room's bottom).
D3DM5 - Lights Out
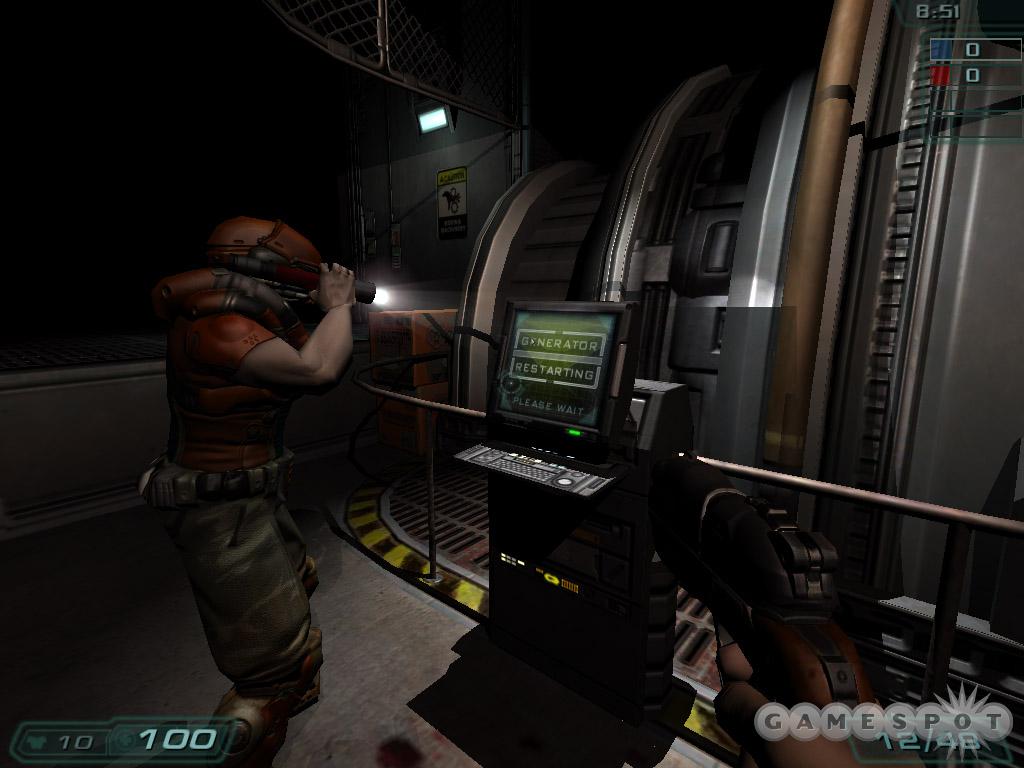
Shroud D3DM5 in darkness by shutting down the generator. It's lights out literally! It's certainly a blast hunting down your opponents through darkness but there's also another reason to shut down the generator: the invisibility power-up. From the generator, move through the door at the top of the steps then take a right through the next door. Find the open hatch at the top of the stairs and spot the uncovered invisibility. Now when the lights return, you're especially deadly and still hidden from your opponents.
Note that in the generator room and the adjacent room, you can use a panel next to the door to close the shutters. This envelops both rooms in darkness. Use this to pounce on an unsuspecting opponent who hopes to fiddle with the generator's controls.
Chapter 6 - Cabinet Codes
This chart reveals cabinet numbers and their corresponding code.
| CABINET NUMBER | CODE |
| 001 | 396 |
| 003 | 483 |
| 009 | 752 |
| 013 | 586 |
| 017 | 347 |
| 023 | 531 |
| 038 | 409 |
| 039 | 102 |
| 047 | 123 |
| 048 | 123 |
| 049 | 123 |
| 054 (Communications) | 246 |
| 054 (Monorail) | 142 |
| 063 | 972 |
| 064 | 651 |
| 078 | 364 |
| 079 | 364 |
| 103 | 259 |
| 104 | 579 |
| 112 | 538 |
| 114 | 715 |
| 116 (Delta 2 South) | 972 |
| 116 (Delta 2 North) | 624 |
| 117 | 624 |
| 213 | 371 |
| 317 | 841 |
| 386 | 836 |
| 387 | 836 |
| 452 | 571 |
| 666 | 372 |
| 669 | 468 |
| Martian Buddy Lockers | 0508 |
Chapter 7 - Cheat Codes
Open the console by pressing "CTRL-ALT-~" during gameplay. Enter any of the following commands to toggle or activate the corresponding cheat.
| CONSOLE COMMAND | CHEAT |
| com_showfps 1 | Toggles on frames per second display. Use "0" to toggle it off. |
| doomhell | Warp to the last level. |
| freeze | Freezes action on the screen. |
| g_showplayershadow 1 | Toggles on player's shadow. Use "0" to toggle it off. |
| give all | Provides all weapons will full ammo, armor, and health. |
| give ammo | Maximizes your ammunition |
| give berserk | Initiates berserk mode. |
| give health | Maximizes your health. |
| give keys | Provides all necessary keys. |
| give pda | Provides the PDAs and video disks on your current level. |
| give weapon_bfg | Gives you a BFG |
| give weapon_chaingun | Gives you a chain gun |
| give weapon_chainsaw | Gives you a chainsaw |
| give weapon_machinegun | Gives you a machine gun |
| give weapon_plasmagun | Gives you a plasma gun |
| give weapon_rocketlauncher | Gives you a rocket launcher |
| give weapon_shotgun | Gives you a shotgun |
| god | Toggles invulnerability mode |
| kill | Commits suicide. |
| killmonsters | Kills all of the monsters. |
| map testmaps/test_box | A test map. |
| map testmaps/test_boxstack | A test map with stacked boxes. |
| map testmaps/test_lotsaimps | A test map with imps. |
| noclip | Toggles the ability to walk through walls and fly. |
| notarget | Toggles invisibility to most monsters. |
| pm_thirdperson 1 | Toggles on third-person view. Use "0" to toggle off third-person view. |
| spawn monster_boss_cyberdemon | Spawns a cyberdemon. |
| spawn monster_boss_guardian | Spawns the guardian. |
| spawn monster_boss_guardian_seeker | Spawns a guardian seeker. |
| spawn monster_boss_sabaoth | Spawns a sabaoth. |
| spawn monster_boss_vagary | Spawns the vagary. |
| spawn monster_demon_archvile | Spawns an arch vile. |
| spawn monster_demon_cherub | Spawns a cherub. |
| spawn monster_demon_hellknight | Spawns a hell knight. |
| spawn monster_demon_imp | Spawns an imp. |
| spawn monster_demon_mancubus | Spawns a mancubus. |
| spawn monster_demon_pinky | Spawns a pinky demon. |
| spawn monster_demon_revenant | Spawns a revenant. |
| spawn monster_demon_tick | Spawns a tick. |
| spawn monster_demon_trite | Spawns a trite. |
| spawn monster_flying_cacodemon | Spawns a cacodemon. |
| spawn monster_flying_lostsoul | Spawns a lost soul. |
| spawn monster_maggot | Spawns a maggot. |
| spawn monster_zombie_bernie | Spawns a flaming zombie. |
| spawn monster_zombie_boney | Spawns a zombie. |
| spawn monster_zombie_commando | Spawns a commando. |
| spawn monster_zombie_commando_cgun | Spawns a commando chain gunner. |
| spawn monster_zombie_fat | Spawns an overweight zombie. |
| spawn monster_zombie_maint | Spawns a maintenance worker zombie. |
| spawn weapon_bfg | Spawns a BFG. |
| spawn weapon_chaingun | Spawns a chain gun. |
| spawn weapon_chainsaw | Spawns a chainsaw. |
| spawn weapon_machinegun | Spawns a machine gun. |
| spawn weapon_pistol | Spawns a pistol. |
| spawn weapon_plasmagun | Spawns a plasma gun. |
| spawn weapon_rocketlauncher | Spawns a rocket launcher. |
| spawn weapon_shotgun | Spawns a shotgun. |
| spawn weapon_soulcube | Spawns the soul cube. |
Chapter 8 - Easter Eggs
This chapter provides information on several Doom 3 Easter eggs.
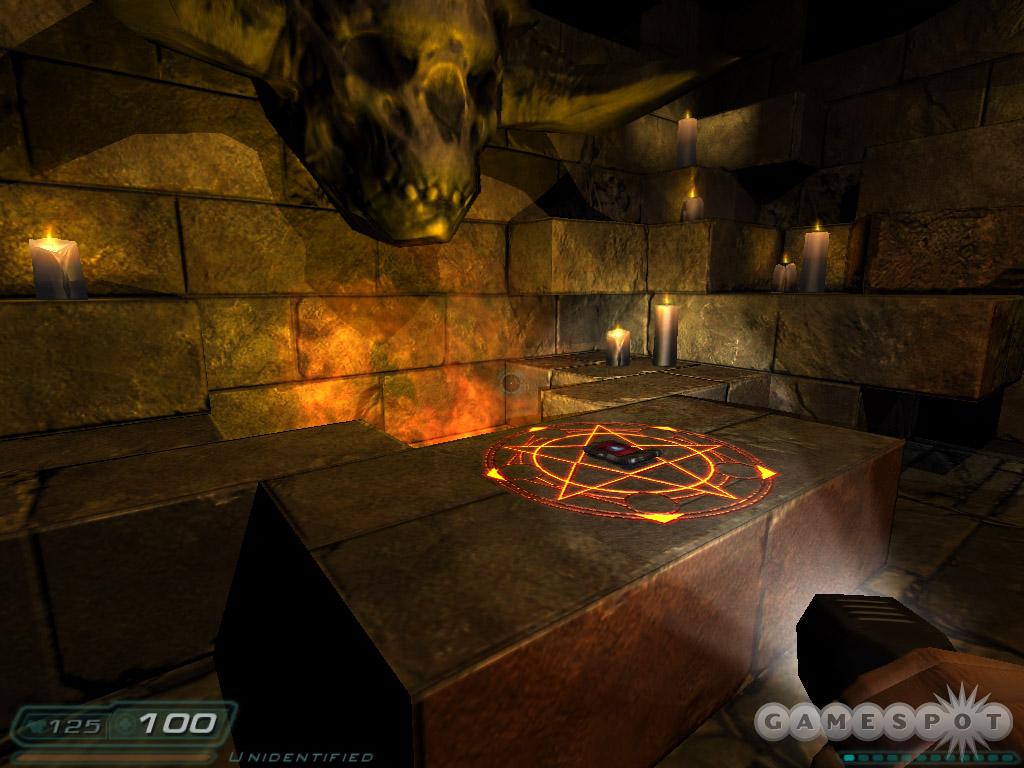
- At the beginning of the game, when you receive your PDA from reception, move behind the receptionist and watch his monitor. He's typing a log. Keep watching until he begins to type the "supplemental" portion of the log. I think he's trying to tell you something.
- On the very last level of the game, as you descend the candlelit cavern toward the final boss, take a left at the fork in the path. Find the id Software logo in the back corner. Approach and click your mouse button on the id logo. You'll hear a distinctive "beep" sound. A nearby wall opens to reveal a hidden chamber. Approach the PDA on the stone block and pick it up. It's id Software's personal data assistant. Read its emails for the programmers' list of "thank yous".
- Open the console with "CTRL-ALT-~" and type in one of the original Doom cheat codes: iddqd. A complimentary message is your reward.
- On the Doom 3's first level, look in the kitchen to find a playable video game: Super Turkey Puncher 3. You'll notice some familiar textures in this unusual arcade game. Look at the door behind the turkey and the face in the corner. Get a really high score (upwards of 20,000) and you receive a special email.
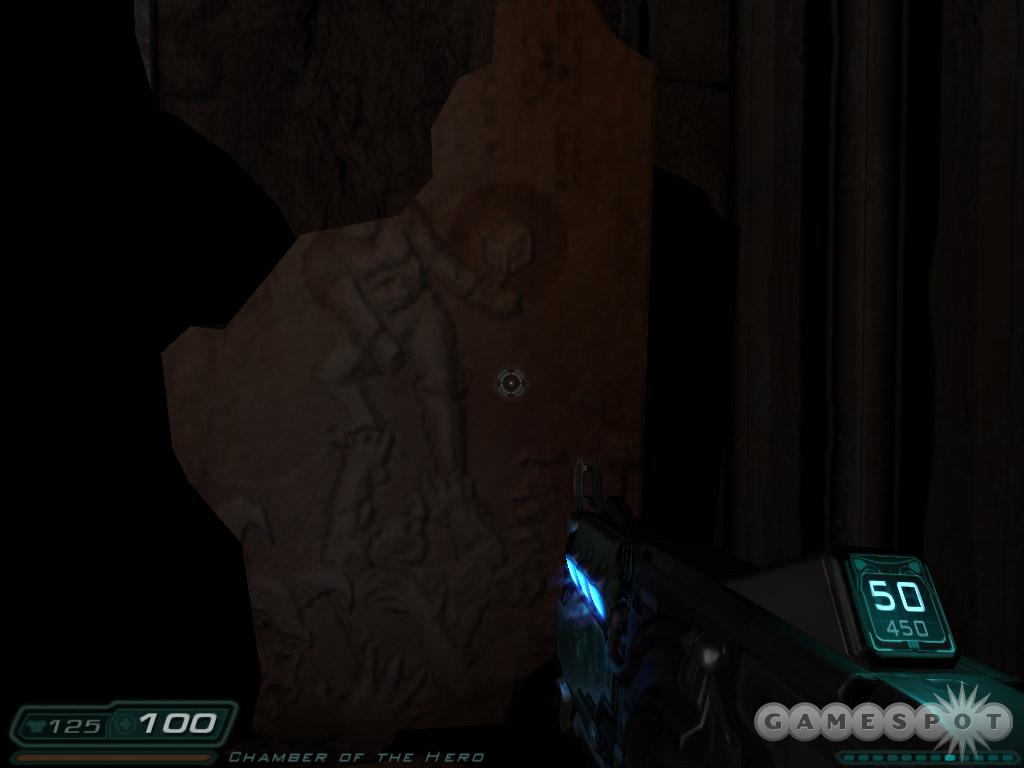
- When you reach Site 3, enter the office and find P. Rogers. Speak with him. He offers up his PDA, which includes security codes as well as an email referencing Quake 43.
- In Alpha Labs - Sector 4, read the writing on the orange cargo containers at the main conveyer. Use the "no clip" cheat to get a close look. Apparently the UAC have an interest in gorillas.
- In the Caverns at the Chamber of the Hero, look at the historical tablets along the wall. One particular tablet closely resembles original Doom artwork...except for the presence of the soul cube.
- A monitor in the satellite control center on the communications level displays an old Doom cheat code: IDSPISPOPD.
Got a news tip or want to contact us directly? Email news@gamespot.com
Join the conversation