Counter-Strike: Condition Zero Walkthrough
The counterterrorists always win after you read our walkthrough to Counter-Strike: Condition Zero. The guide includes weapon tips, and strategies for each map in the Tour of Duty. You also get a full walkthrough for the deleted scenes campaign.
Design by Collin Oguro
One could reasonably argue that Counter Strike, which began as a multiplayer mod for Valve Software’s classic first-person shooter Half-Life, is the most popular multiplayer game of all-time. Counter Strike: Condition Zero builds on its predecessor’s success with enhanced maps, bots for solo play, the single-player "Tour of Duty" challenge mode, and a story-based campaign with the "Deleted Scenes" missions.
This GameSpot guide to Counter Strike: Condition Zero includes:
- General Strategies: Includes general strategies for successfully completing Condition Zero’s Tour of Duty and Deleted Scenes game modes.
- Weapons: Complete statistics for all pistols, shotguns, sub-machine guns, rifles, and machine guns. This section also features vital strategies for combat success.
- Tours of Duty: This section offers an overview of Condition Zero’s Tour of Duty mode. Here you’ll find a complete rundown of all challenges for each difficulty level, map tips, and full team member statistics.
- Deleted Scenes Walk-through: Look here for a complete walk-through for Condition Zero’s single-player campaign, "Deleted Scenes".
Table of Contents
General StrategiesWeapons
Tour of Duty
Tour of Duty 2
Tour of Duty 3
Tour of Duty 4
Tour of Duty 5
Tour of Duty 6
Team Members
Chapter 1 - General Strategies
This section provides general strategies for completing Counter Strike: Condition Zero’s Tour of Duty and Deleted Scenes game modes.
Tour of Duty
- Many challenges include the use of a specific weapon. You don’t necessarily have to use this weapon immediately. Remember you must simple fulfill this objective at some point during the challenge (as long as the terrorists don’t gain the upper hand by two games). You could build a lead on the scoreboard then utilize the particular weapon to meet the challenge goals.
- One of the toughest challenges is winning a round under a certain time limit (as little as 45 seconds for expert mode!). In order to achieve these goals, you must work very quickly to find and kill terrorist enemies. Rifles, particularly the Maverick Carbine, will arguably be your best weapon in meeting the speed goals. As soon as the round begins, switch to your knife or grenade so you run faster. Move quickly to the map location where you will encounter groups of terrorists (for instance, the tunnel on Dust or the double door on Aztec) and open fire. You can also toss an HE or flashbang grenade while running to the location. The resulting explosive may help you gain an advantage against any terrorists present.
- Rescuing a certain number of hostages (and on some maps and difficulty levels, all of the hostages) can also be a challenging objective. Not necessarily because finding the hostages is a difficult task but escorting the hostages back to the rescue zone before your fellow counter-terrorist bots eliminate the map’s terrorists. Use radio commands to keep remaining counter-terrorists near you ("Cover me!") so they aren’t roaming the map searching for the last few terrorists. This may give you added time to return the hostages to the rescue zone. In challenges where you only have to rescue two of the hostages, only escort two of the hostages! Time may be of the essence and moving to each hostage will be a waste.
- While you can’t use the radio commands to tell your CT bots to rush a particular position, the commands are still extremely helpful in completing the challenges. Request your fellow CTs to report in and they’ll report their position and enemy presence. Listen for the CT bots to report the status of bomb sites and hostages. You’ll hear if a bomb site is clear (so you know where the bomb is if it’s ticking) or if the hostage room is free of terrorist enemies.
- On bomb scenarios, always purchase a defuse kit. The increased defuse rate is well worth the extra money. Also, always purchase Kevlar armor and a helmet. Grenades can be purchased if you have the extra funds but you should always purchase the armor before you spend the cash on grenades. Use the "Auto-Buy" function and you’ll automatically purchase the necessary weapons to meet current challenges (or the best available weapon if the challenges have been met). It also will automatically purchase a defuse kit and all armor. You’ll have to purchase your own grenades.
- Terrorist bots will not hesitate to camp. Some may roam the map seeking out targets while others may move slowly through the map and find hiding spots behind crates or walls. Search cautiously around every corner. Beware of terrorists hiding at the hostage rescue zone when you begin to escort the hostages to the safety zone. Upon planting a bomb, expect terrorists to take cover within the bomb site and wait for your arrival.
- Unless you’re trying to meet a time challenge, it’s to your benefit to move around the map with your fellow counter-terrorists. It’s safety in numbers most of the time. If you encounter a terrorist, you’re much more likely to survive the battle if you have an ally or two assisting in the firefight.
Deleted Scenes
- Counter Strike: Condition Zero’s "Deleted Scenes" mode is similar to a story-based first-person shooter. Unlike other Counter Strike modes, you won’t purchase weapons, armor, or grenades. Instead, you’ll acquire these items--as well as additional ammo and health--throughout the levels.
- Although gameplay is different, weapon usage remains the same. Fire your weapons as you would in other Counter Strike game modes. Use short-controlled bursts to increase accuracy, particularly at long distances. Stand still when firing; if you’re moving around wildly, your weapon’s accuracy decreases dramatically.
- The enemies in the "Deleted Scenes" mode have a tendency to hide behind crates and in corners waiting for an opportunity to ambush. If you striving to remain healthy and alive, check around each corner carefully to avoid being surprised by a hidden foe. Also, some of your actions may trigger the appearance of enemies behind you (for instance, a door opens allowing a couple enemies to flank your position). Maintain constant awareness around your position to avoid becoming an ambush victim.
- Save your HE, flashbang, and smoke grenades for tough areas, particularly heavily populated rooms, hallways, or open spaces. You should have plenty of ammunition to kill a small group of enemies. But in tougher rooms, your grenades can become especially useful. Toss an HE grenade at a tightly packed group of enemies to wound several troops at once; hurl a flashbang around a corner to blind a group of enemies leaving them vulnerable to your weapons fire; and use a smoke grenade to create a diversion and shield you from a tough group of enemies (or perhaps one wielding a rocket launcher) so you can sneak by. And be sure to use the ample cover provided by the level designs. Hide behind crates, pillars, or around corners to avoid taking damage from nearby enemies.
- In several missions you’ll have the opportunity to assist computer-controlled allies (or perhaps they will assist you). Use these opportunities wisely. Don’t let your allies sustain a full brunt of damage without offering your own assistance against the present enemies. The sooner your allies die, the less assistance you’ll have. And watch your crosshairs carefully. Don’t accidentally (or purposely!) shoot your allies or they may turn their guns on you!
- The red barrels scattered throughout the "Deleted Scenes" levels are explosive. If you see one, there’s usually a reason. For instance, the added explosive damage will help you defeat a group of enemies or blow apart a wall to open a new passage. Keep your distance from these barrels and, if there are enemies nearby, wait for them to approach within close proximity to the barrel before opening fire.
- There’s plenty of health scattered around the "Deleted Scenes" levels. Remember the location of the health packs and wall-mounted medkits. That way if you don’t need health at the particular moment, you can return to the location later in the level and use the health to mend current wounds.
Chapter 2 - Weapons
This section provides stats and strategic overviews for the pistols, shotguns, sub-machine guns, rifles, and machine guns offered in Counter Strike: Condition Zero. This section also offers general tips on using weapons effectively. The weapon stats focus primarily on the Counter-Terrorist weapons, which will be used in Tour of Duty and Deleted Scenes game modes. Find the statistics for terrorist only weaponry at the end of this section.
Weapon Tips
- The most important weapon tip for Counter Strike: Condition Zero is how movement and weapon usage affects weapon accuracy. For example, you are much more accurate standing still than moving around. So much so that you should strive to stand still each time you shoot. When in a one-on-one firefight, you could strafe slightly, remain still and shoot, strafe slightly, remain still and shoot, repeat. This will help present a more difficult target without sacrificing accuracy.
- How you fire a weapon also affects accuracy--the rifles (the non-sniper rifles) and the M249 machine gun in particular. When using rifles and the M249, fire in burst mode. This means shooting two to three rounds at a time instead of holding down the trigger and firing wildly. Bursting improves accuracy considerably with the rifles such as the Maverick Carbine and Bullpup. The M249 is fairly inaccurate either way but can gain better long-range accuracy with burst shots. Pistols and sub-machine guns, in general, don’t lose as much accuracy out of bursting. Though it’s better to burst at longer range than not.
- Ducking also improves accuracy. Also, when ducked you’ll present a smaller target for your opponent. Duck whenever possible and apply the above weapon tips for maximum accuracy.
- The Night Hawk .50C is the most powerful available pistol. You could almost call it the "rifle" of the pistols. Its primary weakness is its small clip size. Just seven shots and you’re forced to reload.
- Pistols are primarily back-up weapons. For instance, you’ve just ran out of ammo in your Maverick Carbine clip. Instead of reloading, quick switch to the pistol (using the default "Q" and setting up the pistol as your quick switch weapon beforehand) so you can fire off additional rounds. This is also useful for a sniper. If you’re using the Magnum Sniper Rifle and miss an incoming target, quick switch to the pistol since it will be very difficult to snipe the enemy approaching at close-range.
- Shotguns are only effective at close-range…but they’re extremely deadly at close-range. You’ll likely have most success with the shotgun in trying to ambush the enemy. For instance, hiding behind a crate and waiting for an enemy to walk by. Also, tight hallways, rooms, or vent shafts where it’s unlikely that you’ll miss (though a rifle would still be better since it’s effective in other situations as well).
- The K&M Sub-Machine Gun (otherwise known as the MP5) is the best all-around sub-machine gun. It’s a solid combination of good price, accuracy, fire rate, and damage (compared to other sub-machine guns). The Counter-Terrorist’s machine pistol is comparatively weakly powered (though the silencer is handy in surprising enemies from a distance). The ES C90 excels in clip size and fire rate, though overall not as effective as the MP5. Finally, the UMP45 offers greater shot power but suffers in reload time and rate of fire.
- Rifles are the cream of the crop. They’re the best combination of accuracy and power and should be purchased if you have the money. Both the Maverick Carbine and Bullpup offer similar accuracy and power; the Maverick Carbine includes an optional silencer while the Bullpup features a zoom mode. As stated previously, fire these weapons in controlled burst mode to increase long-range accuracy. In very close-range situations you can go full since the larger (closer) target should ensure more rounds striking successfully.
- The Magnum is the reigning king of sniper rifles. The Schmidt Scout is greatly underpowered in comparison and will require headshots for one-shot kills. When aiming the Magnum at an entrance, try to anticipate if your enemy is going to peek out sheepishly or run out aggressively. If you suspect the enemy will run out, position the Magnum’s crosshair a small distance away from the entrance. If you suspect the enemy will simply peek out, aim the crosshair at the entrance’s edge. When sniping, have your pistol ready to quick switch if an enemy enters within close-range.
- The top Counter-Terrorist weapons are the Night Hawk .50C, K&M Sub-Machine Gun, Maverick Carbine, Bullpup, and Magnum Sniper Rifle. The top Terrorist weapons are the Night Hawk .50C, K&M Sub-Machine Gun, CV-47, Krieg 552, and Magnum Sniper Rifle. These are the best all-around weapons for their class. Other weapons can certainly be effective in situations but these offer the best all-around "bang" for the buck.
9X19MM Sidearm
Type: Pistol
Price: $400
Country of Origin: Austria
Caliber: 9MM Parabellum
Clip Capacity: 20 rounds
Rate of Fire: N/A
Weight (Loaded): 0.9 KG
Projectile Weight: 8 grams
Muzzle Velocity: 1132 feet/second
Muzzle Energy: 475 joules
KM .45 Tactical
Type: Pistol
Price: $500
Country of Origin: Germany
Caliber: .45 ACP
Clip Capacity: 12 rounds
Rate of Fire: N/A
Weight (Loaded): 1 KG
Projectile Weight: 15.2 grams
Muzzle Velocity: 886 feet/second
Muzzle Energy: 553 joules
228 Compact
Type: Pistol
Price: $600
Country of Origin: Switzerland/Germany
Caliber: .357 SIG
Clip Capacity: 13 rounds
Rate of Fire: N/A
Weight (Loaded): 1.03KG
Projectile Weight: 8.1 grams
Muzzle Velocity: 1400 feet/second
Muzzle Energy: 600 joules
Night Hawk .50C
Type: Pistol
Price: $650
Country of Origin: Israel
Caliber: .50 action express
Clip Capacity: 7 rounds
Rate of Fire: N/A
Weight (Loaded): 1.8 KG
Projectile Weight: 19.4 grams
Muzzle Velocity: 1380 feet/second
Muzzle Energy: 1650 joules
ES Five-Seven
Type: Pistol
Price: $750
Country of Origin: Belgium
Caliber: 5.7 x 28MM
Clip Capacity: 20 rounds
Rate of Fire: N/A
Weight (Loaded): 0.618KG
Projectile Weight: 2 grams
Muzzle Velocity: 2345 feet/second
Muzzle Energy: 465 joules
Leone 12 Gauge Super
Type: Shotgun
Price: $1700
Country of Origin: Italy
Caliber: 12 gauge
Clip Capacity: 8 rounds
Rate of Fire: N/A
Weight (Loaded): 3.5KG
Projectile Weight: 3.8 grams
Muzzle Velocity: 1250 feet/second
Muzzle Energy: 2429 joules
Leone YG1265 Auto Shotgun
Type: Shotgun
Price: $3000
Country of Origin: Italy
Caliber: 12 gauge
Clip Capacity: 7 rounds
Rate of Fire: 400 RPM
Weight (Loaded): 4KG
Projectile Weight: 3.8 grams/pellet
Muzzle Velocity: 1250 feet/second
Muzzle Energy: 2429 joules
Schmidt Machine Pistol
Type: Sub-Machine Gun
Price: $1250
Country of Origin: Austria
Caliber: 9MM Parabellum
Clip Capacity: 30 rounds
Rate of Fire: 857 RPM
Weight (Loaded): 1.3 KG
Projectile Weight: 8 grams
Muzzle Velocity: 1280 feet/second
Muzzle Energy: 606 joules
KM Sub-Machine Gun
Type: Sub-Machine Gun
Price: $1500
Country of Origin: Germany
Caliber: 9MM Parabellum
Clip Capacity: 30 rounds
Rate of Fire: 800 RPM
Weight (Loaded): 3.43 KG
Projectile Weight: 8 grams
Muzzle Velocity: 1132 feet/second
Muzzle Energy: 637 joules
KM UMP45
Type: Sub-Machine Gun
Price: $1700
Country of Origin: Germany
Caliber: .45 ACP
Clip Capacity: 25 rounds
Rate of Fire: 600 RPM
Weight (Loaded): 2.27 KG
Projectile Weight: 15.2 grams
Muzzle Velocity: 1005 feet/second
Muzzle Energy: 625 joules
ES C90
Type: Sub-Machine Gun
Price: $2350
Country of Origin: Belgium
Caliber: .338 Lapua Magnum
Clip Capacity: 50 rounds
Rate of Fire: 900 RPM
Weight (Loaded): 3KG
Projectile Weight: 2 grams
Muzzle Velocity: 2345 feet/second
Muzzle Energy: 465 joules
Clarion 5.56
Type: Rifle
Price: $2250
Country of Origin: France
Caliber: 5.56 NATO
Clip Capacity: 25 rounds
Rate of Fire: 1100 RPM
Weight (Loaded): 3.40 KG
Projectile Weight: 4 grams
Muzzle Velocity: 2212 feet/second
Muzzle Energy: 1712 joules
Schmidt Scout
Type: Rifle
Price: $2750
Country of Origin: Austria
Caliber: 7.62 NATO
Clip Capacity: 10 rounds
Rate of Fire: N/A
Weight (Loaded): 3.3 KG
Projectile Weight: 8 grams
Muzzle Velocity: 2800 feet/second
Muzzle Energy: 2200 joules
Maverick M4A1 Carbine
Type: Rifle
Price: $3100
Country of Origin: United States of America
Caliber: 5.56 NATO
Clip Capacity: 30 rounds
Rate of Fire: 685 RPM
Weight (Loaded): 3.22 KG
Projectile Weight: 4 grams
Muzzle Velocity: 2900 feet/second
Muzzle Energy: 1570 joules
Bullpup
Type: Rifle
Price: $3500
Country of Origin: Austria
Caliber: 5.56 NATO
Clip Capacity: 30 rounds
Rate of Fire: 727 RPM
Weight (Loaded): 4.09 KG
Projectile Weight: 4 grams
Muzzle Velocity: 2900 feet/second
Muzzle Energy: 1570 joules
Krieg 550 Commando
Type: Rifle
Price: $4200
Country of Origin: Switzerland
Caliber: 5.56 NATO
Clip Capacity: 30 rounds
Rate of Fire: N/A
Weight (Loaded): 7.02 KG
Projectile Weight: 4 grams
Muzzle Velocity: 3100 feet/second d
Muzzle Energy: 1650 joules
Magnum Sniper Rifle
Type: Rifle
Price: $4750
Country of Origin: United Kingdom
Caliber: .338 Lapua Magnum
Clip Capacity: 10 rounds
Rate of Fire: N/A
Weight (Loaded): 6KG
Projectile Weight: 16.2 grams
Muzzle Velocity: 3000 feet/second
Muzzle Energy: 7000 joules
M249
Type: Machine Gun
Price: $5750
Country of Origin: Belgium
Caliber: 5.56 Parabellum
Clip Capacity: 100 rounds
Rate of Fire: 600 RPM
Weight (Loaded): 6 KG
Projectile Weight: 4 grams
Muzzle Velocity: 3000 feet/second
Muzzle Energy: 1600 joules
.40 Dual Elites
Type: Pistol (Terrorist Only)
Price: $1000
Country of Origin: Italy
Caliber: 9MM Parabellum
Clip Capacity: 15 rounds
Rate of Fire: N/A
Weight (Loaded): 1.15 KG
Projectile Weight: 8 grams
Muzzle Velocity: 1280 feet/second
Muzzle Energy: 606 joules
Ingram Mac-10
Type: Sub-Machine Gun (Terrorist Only)
Price: $1400
Country of Origin: United States of America
Caliber: .45 ACP
Clip Capacity: 30 rounds
Rate of Fire: 857 RPM
Weight (Loaded): 3.82 KG
Projectile Weight: 15.2 grams
Muzzle Velocity: 919 feet/second
Muzzle Energy: 584 joules
IDF Defender
Type: Rifle (Terrorist Only)
Price: $2000
Country of Origin: Israel
Caliber: .308
Clip Capacity: 35 rounds
Rate of Fire: 675 RPM
Weight (Loaded): 4.35 KG
Projectile Weight: 4 grams
Muzzle Velocity: 2013 feet/second
Muzzle Energy: 1712 joules
CV-47
Type: Rifle (Terrorist Only)
Price: $2500
Country of Origin: Russia
Caliber: 7.62 NATO
Clip Capacity: 30 rounds
Rate of Fire: 600 RPM
Weight (Loaded): 4.79 KG
Projectile Weight: 7.9 grams
Muzzle Velocity: 2329 feet/second
Muzzle Energy: 1992 joules
Krieg 552
Type: Rifle (Terrorist Only)
Price: $3500
Country of Origin: Switzerland
Caliber: 5.56 NATO
Clip Capacity: 30 rounds
Rate of Fire: 727 RPM
Weight (Loaded): 3.1 KG
Projectile Weight: 4 grams
Muzzle Velocity: 2900 feet/second
Muzzle Energy: 1570 joules
D3/AU-1
Type: Rifle (Terrorist Only)
Price: $5000
Country of Origin: Germany
Caliber: 7.62 NATO
Clip Capacity: 20 rounds
Rate of Fire: N/A
Weight (Loaded): 4.41 KG
Projectile Weight: 8 grams
Muzzle Velocity: 2800 feet/second
Muzzle Energy: 2200 joules
Chapter 3 - Tour of Duty
This section provides a complete overview of Condition Zero’s Tour of Duty challenge mode. Note that some maps and tours increase the number of enemies you’ll face after securing the area. The overviews in this section reveal the enemies in the map’s initial state.
Tour of Duty 1 - Dust
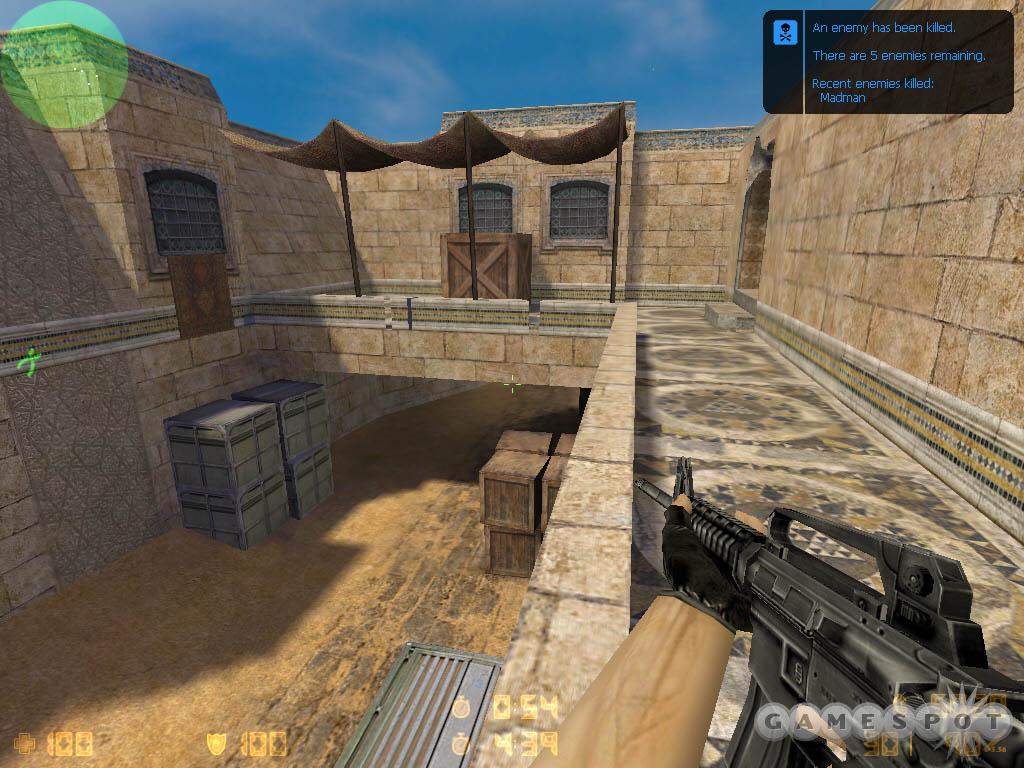
Bomb Defuse Scenario: Your team must prevent the Terrorists from detonating their bomb at one of the bomb sites. To win, defuse the bomb or eliminate all of the Terrorists.
Opponents
EASY: You will face 3 enemies in this match: Weasel, Lunatic, Crackpot.
NORMAL: You will face 3 enemies in this match: Madman, Rat, Screech.
HARD: You will face 5 enemies in this match: Freak, Maniac, Psycho, Rebel, Fiend.
EXPERT: You will face 5 enemies in this match: Rebel, Fiend, Vandal, Razor, Bandit.
Challenges
EASY: You must kill an enemy.
NORMAL: You must kill 5 enemies. You must kill an enemy and survive the round. You must win a round in less than 75 seconds.
HARD: You must kill 7 enemies. You must kill 2 enemies and survive the round. You must win a round in less than 60 seconds. Be careful! Your weapons can hurt friends during this match.
EXPERT: You must kill 10 enemies. You must kill 2 enemies and survive the round. You must win a round in less than 45 seconds. Be careful! Your weapons can hurt friends during this match.
Tips
- Know the location of the two bomb sites. Bomb site A is found on the right side of the map (from the counter-terrorist start position) and bomb site B is located at the counter-terrorist start position.
- Crates, barrels, and other barriers crowd the bomb sites. Your goal should be preventing the terrorist bots from reaching the bomb site completely. If not, you will face a tough time penetrating terrorist defenses. On the flip side, though, mount your own defense of a bomb site by using the available cover.
- The terrorists push toward the bomb sites either through the overpass route on the left side of the map or the primary tunnel straight ahead.
- Defend the overpass by hiding behind the crates below the bridge, by standing on the railing overlooking the ground below, or by using the sniping position at the end of the path.
- Defend the tunnel with grenades (powerful in close quarters) and by splitting away from your CT comrades. If some go through the middle or right side of the tunnel, take the left route near the overpass and vice versa.
Tour of Duty 1 - Office
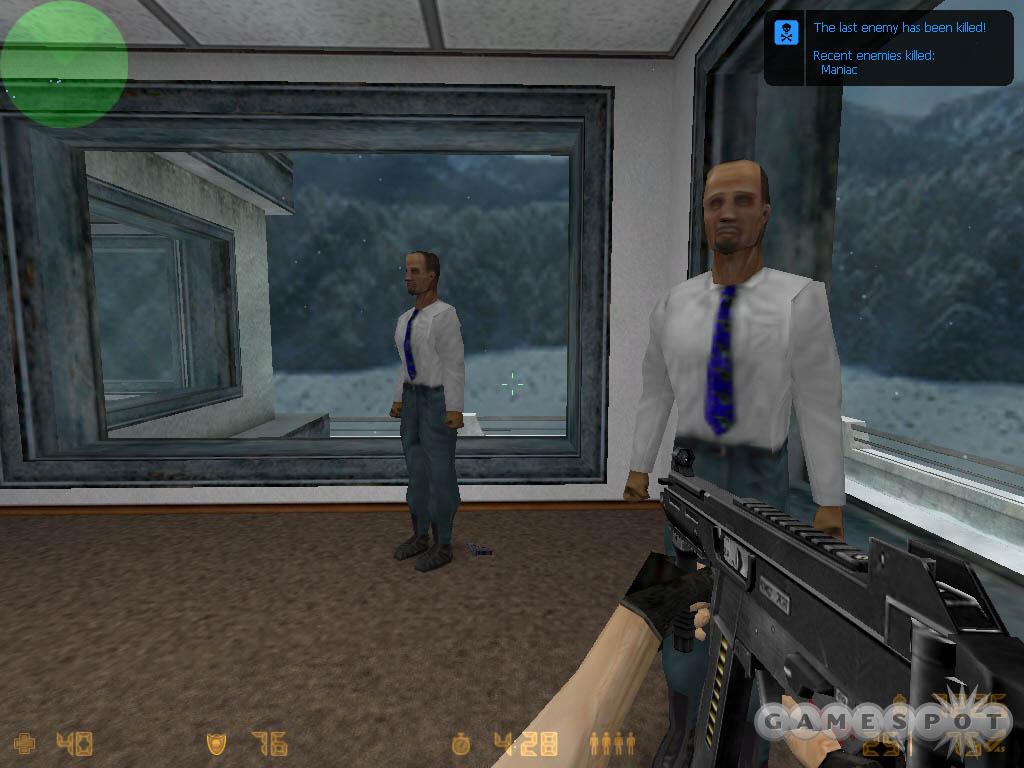
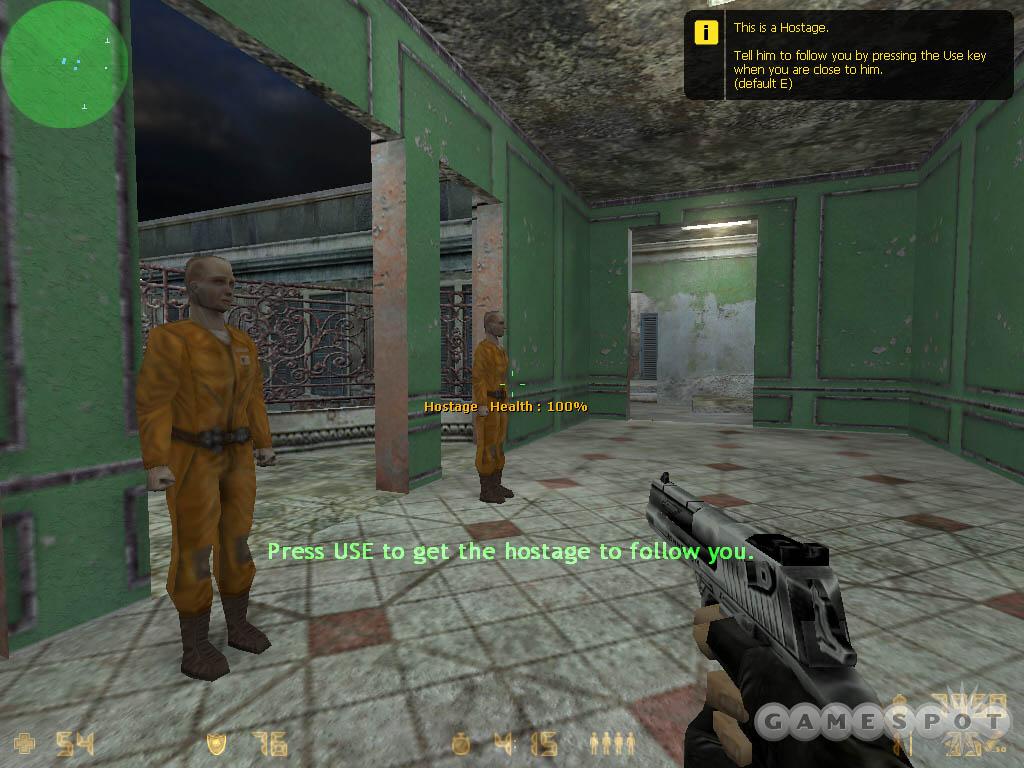
Hostage Rescue Scenario: The Terrorists have taken several hostages. You must rescue them by leading them to a Hostage Rescue Point. To win, rescue all of the Hostages or eliminate all of the Terrorists.
Opponents
EASY: You will face 3 enemies in this match: Weasel, Lunatic, Crackpot.
NORMAL: You will face 3 enemies in this match: Madman, Rat, Screech.
HARD: You will face 5 enemies in this match: Freak, Maniac, Psycho, Rebel, Fiend.
EXPERT: You will face 5 enemies in this match: Rebel, Fiend, Vandal, Razor, Bandit.
Challenges
EASY: You must kill an enemy with a sub-machine gun. You must rescue a hostage.
NORMAL: You must kill 5 enemies. You must kill an enemy with a sub-machine gun. You must rescue 4 hostages.
HARD: You must kill 7 enemies. You must kill 2 enemies with a K&M sub-machine gun and survive the round. You must rescue all of the hostages. Be careful! Your weapons can hurt friends during this match.
EXPERT: You must kill 10 enemies. You must kill 2 enemies with a K&M sub-machine gun and survive the round. You must rescue all of the hostages. Be careful! Your weapons can hurt friends during this match.
Tips
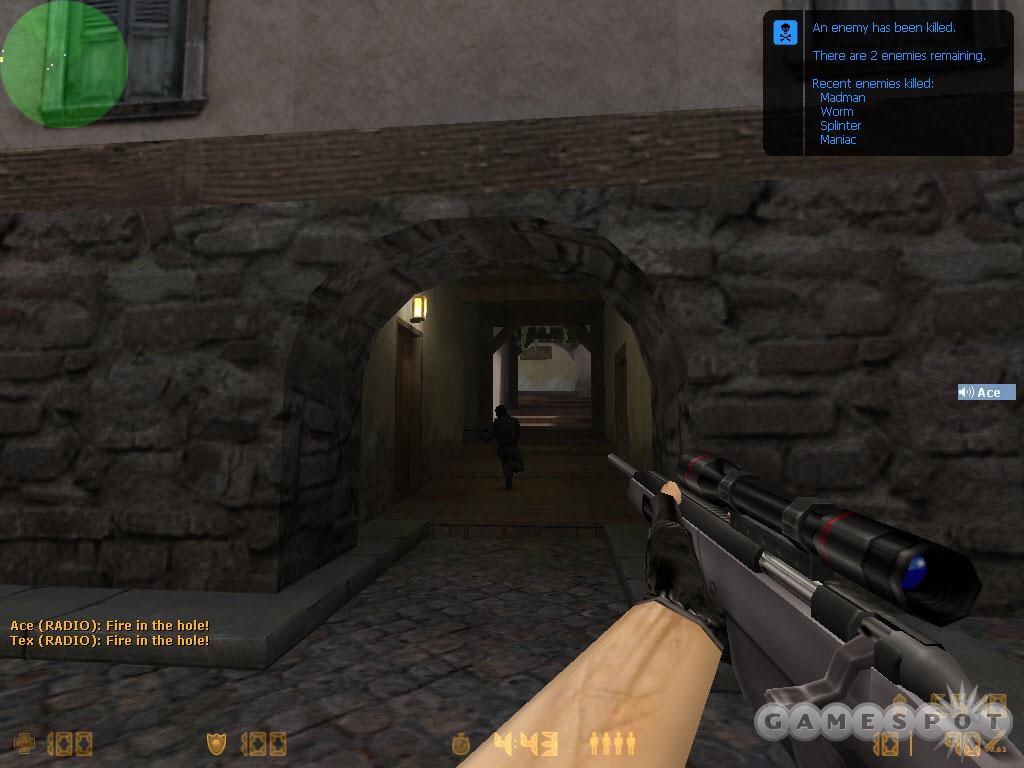
- The counter-terrorists begin a long tunnel containing the hostage rescue zone. The hostages are found deep in the complex; they’ve been split into pairs and shuffled to the back end of a couple offices. The two offices are virtually adjacent to one another.
- The beauty of Office is the number of entrances into the structure. Search both ends of the starting tunnel to find several entrances into the structure. You can jump on top of crates and break windows to jump into the building. You can enter through stairwells and even climb ladders to reach the ledge outside of the large windows.
- There’s a passage connecting to the hostage rescue zone that leads to a large room where you can provide sniper support for your fellow CTs.
- Challenges include scoring a number of kills with a sub-machine gun (K&M specifically for the higher difficulty levels). The sub-machine gun is a good weapon in the tight halls of the Office: combine the narrow space with the sub-machine gun’s high rate of fire.
- Plenty of corners, crates, and desks to hide behind in the Office building. Beware of terrorists using the same tactic! Approach each corner carefully.
Tour of Duty 1 - Prodigy
Bomb Defuse Scenario: Your team must prevent the Terrorists from detonating their bomb at one of the bomb sites. To win, defuse the bomb or eliminate all of the Terrorists.
Opponents
EASY: You will face 3 enemies in this match: Weasel, Lunatic, Crackpot.
NORMAL: You will face 3 enemies in this match: Madman, Rat, Screech.
HARD: You will face 5 enemies in this match: Freak, Maniac, Psycho, Rebel, Fiend.
EXPERT: You will face 5 enemies in this match: Rebel, Fiend, Vandal, Razor, Bandit.
Challenges
EASY: You must kill an enemy with a sniper rifle.
NORMAL: You must kill 5 enemies. You must kill an enemy with a sniper rifle. You must win a round in less than 75 seconds.
HARD: You must kill 7 enemies. You must kill 2 enemies with a Schmidt Scout and survive the round. You must win a round in less than 60 seconds. Be careful! Your weapons can hurt friends during this match.
EXPERT: You must kill 10 enemies. You must kill 2 enemies with a Schmidt Scout and survive the round. You must win a round in less than 45 seconds. Be careful! Your weapons can hurt friends during this match.
Tips
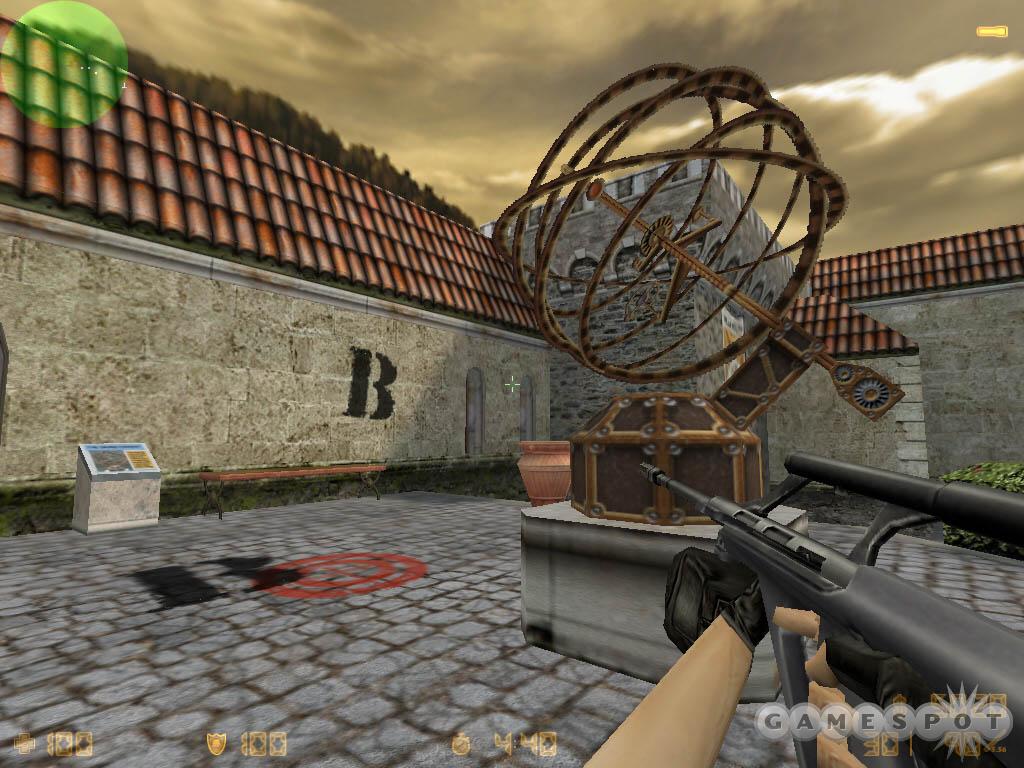
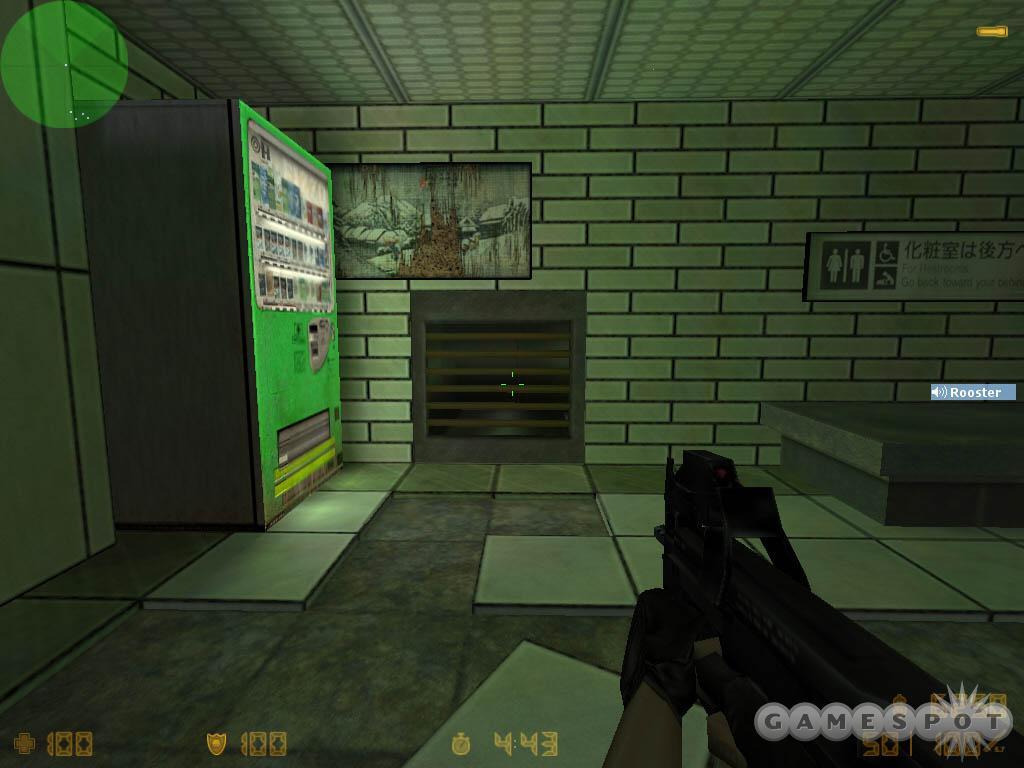
- Both bomb sites in Prodigy are computer rooms. Bomb site B is a small room near the counter-terrorist start position. Bomb site A is a larger computer room close to the CT start position.
- This map’s challenge requires kills with a sniper rifle (Schmidt Scout for the higher difficulty levels). An ideal position for a sniper is at the crate-filled tunnel near the CT start position that leads toward bomb site B. You can also camp on the large pipe that runs adjacent to bomb site B and snipe enemies that approach from either side.
- The "soda machines" is another area that will feature heated encounters between terrorists and counter-terrorists. Watch the crack in the wall within the garage; terrorists can flank from this position.
- A red-tinted vent shaft connects bomb sites and is a good way for a CT to monitor both positions.
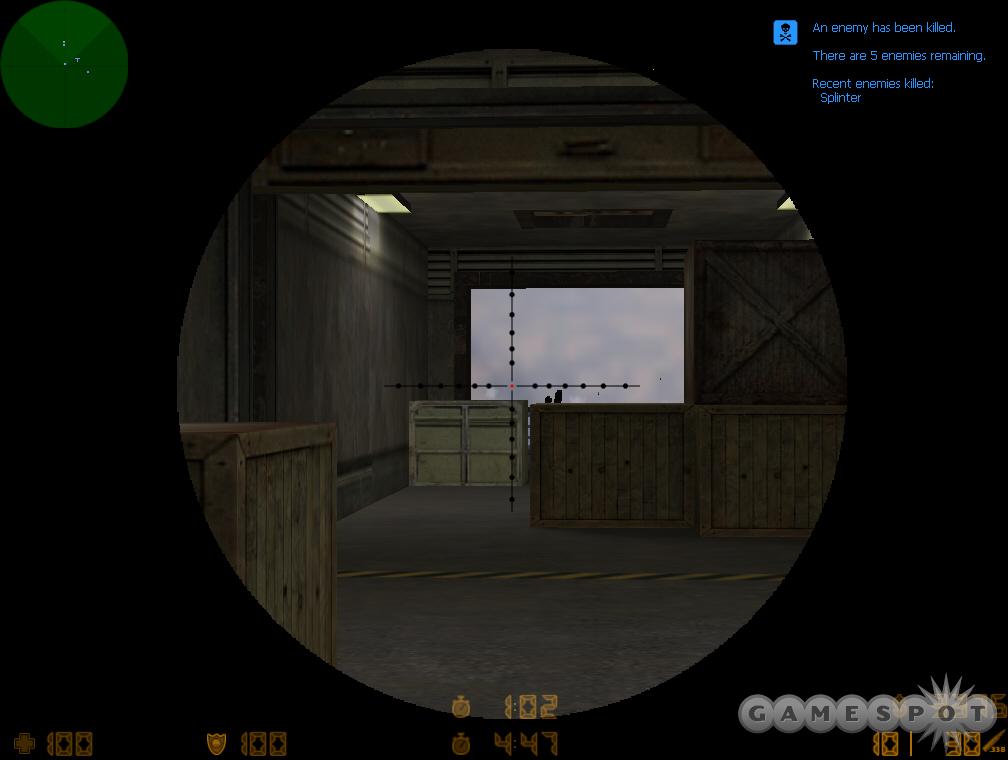
Tour of Duty 2 - Tides
Bomb Defuse Scenario: Your team must prevent the Terrorists from detonating their bomb at one of the bomb sites. To win, defuse the bomb or eliminate all of the Terrorists.
Opponents
EASY: You will face 5 enemies in this match: Weasel, Lunatic, Crackpot, Madman, Rat.
NORMAL: You will face 5 enemies in this match: Madman, Rat, Screech, Worm, Splinter.
HARD: You will face 6 enemies in this match: Freak, Rebel, Fiend, Vandal, Razor, Bandit.
EXPERT: You will face 5 enemies in this match: Razor, Bandit, Raider, Nails, Crank.
Challenges
EASY: You must kill an enemy with a shotgun. You must win a round in less than 90 seconds.
NORMAL: You must kill 6 enemies. You must kill an enemy with a shotgun. You must win a round in less than 75 seconds.
HARD: You must kill 8 enemies. You must kill 5 enemies with a Leone YG1265 auto shotgun. You must win a round in less than 60 seconds. Be careful! Your weapons can hurt friends during this match.
EXPERT: You must kill 12 enemies. You must kill 5 enemies with a Leone YG1265 auto shotgun. You must win a round in less than 45 seconds. Be careful! Your weapons can hurt friends during this match.
Tips
- The counter-terrorists begin a bomb site B. You’ll find bomb site A at the top of an overpass on the far side of the village.
- Bomb site B has two exits (or entrances depending on your view). Move through the tunnel to engage terrorists underneath another overpass. If the terrorists are pressing bomb site B, expect to face them here. Exit bomb site B up the staircase and follow the long hallway until you overlook the overpass containing bomb site A.
- This map’s challenges include killing enemies with a shotgun (specifically the Leone YG1265 for higher difficulty levels). With open spaces, Tides certainly isn’t the ideal map for shotgun. Take cover near the overpass by bomb site B and wait for terrorists to approach and pass. Ambush your enemies with the shotgun.
- Rifles are better suited for the map, particularly the long hall that overlooks the pathways surrounding bomb site A.
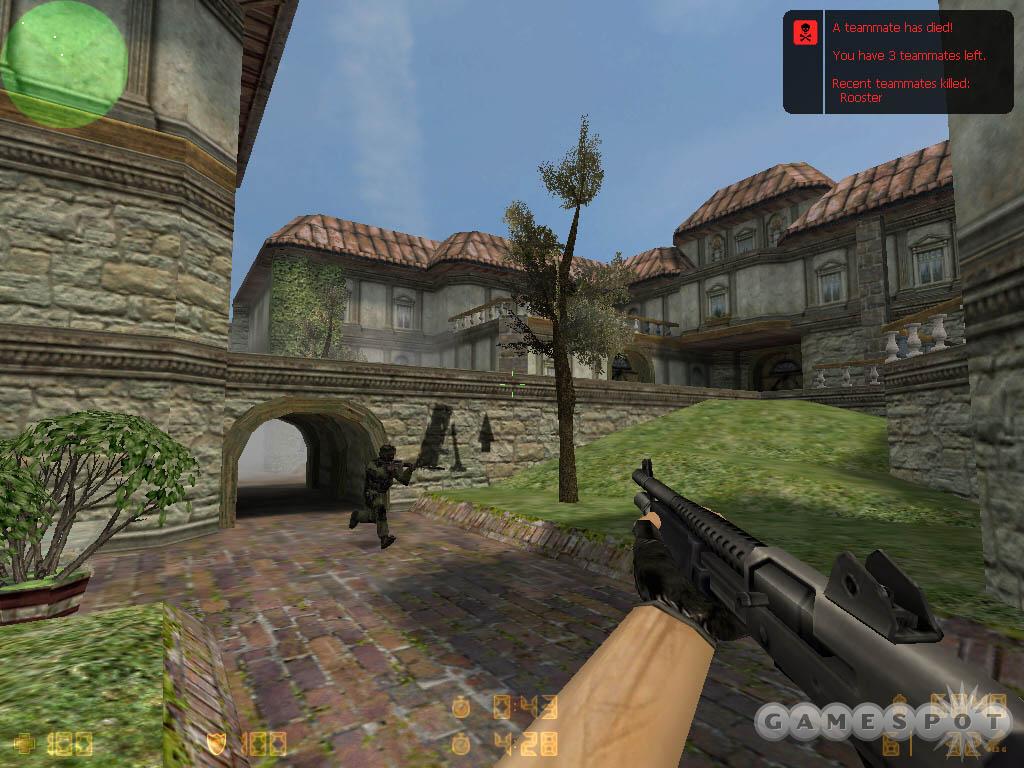
Tour of Duty 2 - Italy
Hostage Rescue Scenario: The Terrorists have taken several hostages. You must rescue them by leading them to a Hostage Rescue Point. To win, rescue all of the Hostages or eliminate all of the Terrorists.
Opponents
EASY: You will face 5 enemies in this match: Weasel, Lunatic, Crackpot, Madman, Rat.
NORMAL: You will face 5 enemies in this match: Madman, Rat, Screech, Worm, Splinter.
HARD: You will face 6 enemies in this match: Maniac, Rebel, Fiend, Vandal, Razor, Bandit.
EXPERT: You will face 5 enemies in this match: Razor, Bandit, Raider, Nails, Crank.
Challenges
EASY: You must kill an enemy with a sniper rifle. You must rescue a hostage.
NORMAL: You must kill 6 enemies. You must kill 2 enemies with a sniper rifle. You must rescue 4 hostages.
HARD: You must kill 4 enemies with a Night Hawk .50C. You must kill 4 enemies with a Magnum Sniper Rifle. You must rescue all of the hostages. Be careful! Your weapons can hurt friends during this match.
EXPERT: You must kill 6 enemies with an ES five-seven. You must kill 6 enemies with a Magnum Sniper Rifle. You must rescue all of the hostages. Be careful! Your weapons can hurt friends during this match.
Tips
- The hostages are found in a two-story structure at the terrorist start position. The Counter-Terrorists can reach the structure through two primary routes: the first is through the market and long tunnel approaching the hostage area and the second is through a structure and its wine cellar found to the left from the CT start position.
- The terrorists have an easily defensible position. Beware of snipers in the upper floor of the hostages’ room; look out for terrorists camping inside the wine cellar area; and beware of terrorists guarding the hostages at close-range.
- Italy’s challenges require the use of a sniper rifle. Through the market and subsequent tunnel is one of the ideal locations for long-range kills. Watch for terrorists at the tunnel’s end or positioned in the upper window.
- The wine cellar route is a winding set of narrow hallways. Beware of camping terrorists hiding behind barrels or around corners. Shotguns can be effective in these tight quarters but aren’t much worth in Italy’s other more open sections. A sub-machine gun or rifle will prove the best all-around weapon for this route.
Tour of Duty 2 - Inferno

Bomb Defuse Scenario: Your team must prevent the Terrorists from detonating their bomb at one of the bomb sites. To win, defuse the bomb or eliminate all of the Terrorists.
Opponents
EASY: You will face 5 enemies in this match: Weasel, Lunatic, Crackpot, Madman, Rat.
NORMAL: You will face 5 enemies in this match: Madman, Rat, Screech Worm, Psycho.
HARD: You will face 6 enemies in this match: Freak, Rebel, Fiend, Vandal, Razor, Bandit.
EXPERT: You will face 6 enemies in this match: Razor, Bandit, Raider, Nails, Crank, Cutter.
Challenges
EASY: You must kill an enemy with a pistol.
NORMAL: You must kill 6 enemies. You must kill an enemy with a Bullpup. You must kill an enemy with a pistol.
HARD: You must kill 8 enemies. You must kill 3 enemies with a Bullpup without dying. You must kill a Flashbang-blinded enemy. Be careful! Your weapons can hurt friends during this match.
EXPERT: You must kill 12 enemies. You must kill 3 enemies with a Bullpup without dying. You must kill a Flashbang-blinded enemy and survive the round. Be careful! Your weapons can hurt friends during this match.
Tips
- The CTs’ start position lies between the two bomb sites: find bomb site A to the right (open area with crates) and bomb site B to the left (covered area with crates). Both sites offer the terrorists plenty of hiding spots so if you’re moving in to defuse the bomb and there are terrorists alive expect to find them hiding in the area.
- Inferno is a combination of interior and exterior routes. The interiors can lead to sniping spots or as an alternate path to a bomb site. For instance, an interior route leads to a balcony overlooking bomb site B.
- A CT sniper can protect the narrow passages leading to the bomb sites as well as utilize the interiors to maneuver to the higher sniping zones.
- There’s a crawlspace that connects Inferno’s sides. Use it as means of flanking the terrorists.
- As mentioned, both bomb sites offer ample cover and this is an asset to a counter-terrorist as well. Camp behind the crates and wait for a terrorist to arrive. As your fellow CTs to report in frequently so you can gauge if the terrorists are moving to your bomb site or the other one.
Tour of Duty 3 - Dust II
Bomb Defuse Scenario: Your team must prevent the Terrorists from detonating their bomb at one of the bomb sites. To win, defuse the bomb or eliminate all of the Terrorists.
Opponents
EASY: You will face 6 enemies in this match: Weasel, Lunatic, Crackpot, Madman, Rat, Screech.
NORMAL: You will face 6 enemies in this match: Rat, Screech, Worm, Freak, Maniac, Psycho.
HARD: You will face 7 enemies in this match: Rebel, Fiend, Vandal, Razor, Bandit, Raider, Blade.
EXPERT: You will face 6 enemies in this match: Razor, Bandit, Raider, Nails, Crank, Cutter.
Challenges
EASY: You must kill 2 enemies with a sniper rifle. You must win a round in less than 90 seconds.
NORMAL: You must kill 7 enemies. You must kill 2 enemies with a Krieg 550 Commando without dying. You must win a round in less than 75 seconds.
HARD: You must kill 9 enemies. You must kill 3 enemies with a Krieg 550 Commando without dying. You must win a round in less than 60 seconds and survive the round. Be careful! Your weapons can hurt friends during this match.
EXPERT: You must kill 14 enemies. You must kill 3 enemies with a Krieg 550 Commando without dying. You must win a round in less than 45 seconds and survive the round. Be careful! Your weapons can hurt friends during this match.
Tips
- The CTs begin in a dark tunnel with directions to each bomb site clearly marked. Bomb site A is the closest and has multiple entry points; bomb site B is furthest from the CT start position but has limited entry.
- The Krieg 550 Commando, which is required for kills in difficulty levels normal and above, will serve you well in protecting entries into both bomb sites. Protect bomb site A by facing the left or right entry point; protect bomb site B by facing the dark tunnel entry or by using the hole in the wall adjacent to the site.
- Both bomb sites offer cover for terrorist bombers and CT defenders. Use those crates and barrels and expect the terrorist bots to do the same.
- When protecting bomb site B, hide in the opposite corner as the bomb site and wait for terrorists to emerge from the dark tunnel. If no one is showing up, proceed quickly to A. Keep in contact with your fellow CTs and request them to report in to determine the terrorist plan.
- Use the opportunities to maintain a height advantage over the incoming terrorists. Several incoming tunnels are positioned below adjacent positions. Wait for unsuspecting terrorists to enter these locations and eliminate them from above.
Tour of Duty 3 - Militia
Hostage Rescue Scenario: The Terrorists have taken several hostages. You must rescue them by leading them to a Hostage Rescue Point. To win, rescue all of the Hostages or eliminate all of the Terrorists.
Opponents
EASY: You will face 6 enemies in this match: Weasel, Lunatic, Crackpot, Madman, Rat, Screech.
NORMAL: You will face 7 enemies in this match: Madman, Rat, Screech, Worm, Freak, Maniac, Psycho.
HARD: You will face 7 enemies in this match: Rebel, Fiend, Vandal, Razor, Bandit, Raider, Nails.
EXPERT: You will face 6 enemies in this match: Razor, Bandit, Raider, Nails, Crank, Cutter.
Challenges
EASY: You must kill 2 enemies with a shotgun. You must rescue a hostage.
NORMAL: You must kill 7 enemies. You must kill 2 enemies with a shotgun without dying. You must rescue 4 hostages.
HARD: You must kill 9 enemies. You must kill a Flashbang-blinded enemy and survive the round. You must rescue all of the hostages. Be careful! Your weapons can hurt friends during this match.
EXPERT: You must kill 14 enemies. You must kill a Flashbang-blinded enemy and survive the round. You must rescue all of the hostages. Be careful! Your weapons can hurt friends during this match.
Tips
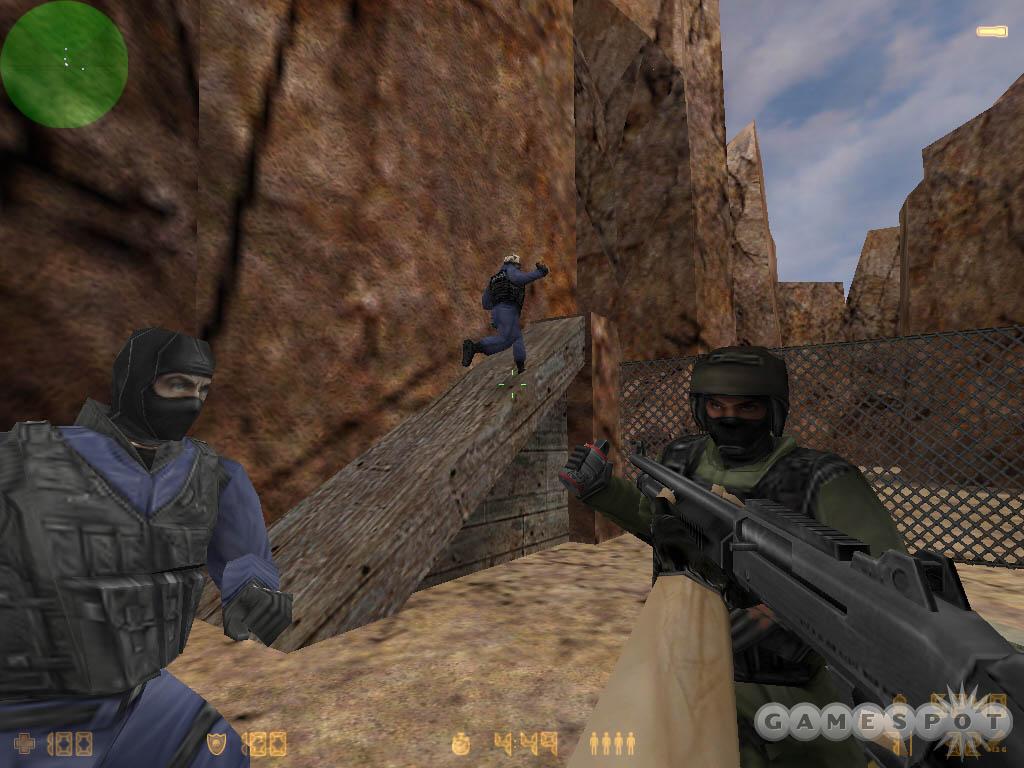
- You’ll find the hostages held inside the heavily defensible house. All four are within close proximity to each other; two hostages can be found in a living room arrangement with the other two nearby in the structure’s garage.
- The house features multiple entry points: the front door, the skylight, a vent into the garage, and back entrances. There’s also a sewer that runs from the front section to the house’s rear area.
- Unless you’re choosing to snipe terrorist defenders from long-range, a rifle is your best option at weapon. The accuracy is required to pick off terrorists on the roof from the front approach. Rifles are also best served in the sewer area.
- You can get to the front approach quicker by moving into the Maintenance Access area and using the wooden ramp to traverse the fence.
- Beware of camping terrorists near the crates along the front and side of the house as well as the areas directly around the hostages. Moving into the garage through the vent can be dangerous because of the ample car cover available inside the garage. Terrorist bots won’t shy away from hiding out here.
- Challenges include killing terrorists with a shotgun. Stick with a pistol on the approach and switch to the shotgun once inside the house and use it against any camping terrorists. Likewise, the hard and expert difficulty levels require successfully blinding an enemy with a flashbang and then killing that enemy. Save your flashbangs for the house interior.
Tour of Duty 3 - Stadium
Bomb Defuse Scenario: Your team must prevent the Terrorists from detonating their bomb at one of the bomb sites. To win, defuse the bomb or eliminate all of the Terrorists.
Opponents
EASY: You will face 6 enemies in this match: Weasel, Lunatic, Crackpot, Madman, Rat, Screech.
NORMAL: You will face 6 enemies in this match: Rat, Screech, Worm, Freak, Maniac, Splinter.
HARD: You will face 7 enemies in this match: Rebel, Fiend, Vandal, Razor, Bandit, Raider, Blade.
EXPERT: You will face 6 enemies in this match: Razor, Bandit, Raider, Nails, Crank, Cutter.
Challenges
EASY: You must kill 2 enemies with a Bullpup. You must win a round in less than 90 seconds.
NORMAL: You must kill 7 enemies. You must kill 3 enemies with a Bullpup. You must win a round in less than 75 seconds.
HARD: You must kill 9 enemies. You must kill 3 enemies with a Bullpup without dying. You must win a round in less than 60 seconds and survive the round. Be careful! Your weapons can hurt friends during this match.
EXPERT: You must kill 14 enemies. You must kill 3 enemies with a Bullpup without dying. You must win a round in less than 45 seconds and survive the round. Be careful! Your weapons can hurt friends during this match.
Tips
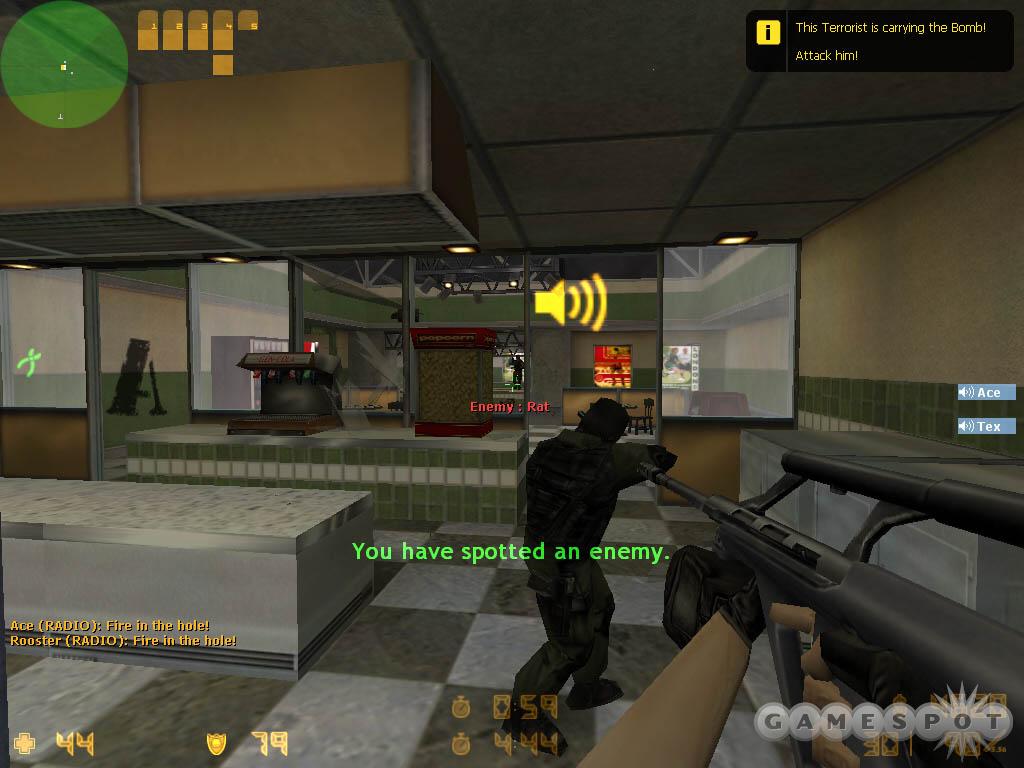
- Directions to each bomb site are clearly marked at the counter-terrorist start position. Bomb site A is a kitchen; bomb site B is a kiosk.
- The kitchen is an extremely cramped bomb site. If the terrorists move to this bomb site, expect to encounter them as you enter. The many obstructions within the kitchen will make aim and accuracy a challenge. The Bullpup, the weapon required in challenge mode, is a good selection. Fire short-controlled bursts to maximize accuracy as you aim at incoming terrorists through the kitchen’s appliances and accessories.
- The ticket kiosk at bomb site B stands in a larger room with multiple levels. The upper level offers an excellent vantage point against incoming terrorists. Good cover on the upper catwalk; use it to your advantage in eliminating the terrorist bomber or any enemy moving through the area.
- Maintaining contact with your fellow CT bots is imperative in Stadium. Getting from one bomb site from the other takes some time. If you need to intercept the terrorists at the other bomb site, it’s important to move quickly. Listen for the location cues and make your move fast.
Tour of Duty 4 - Chateau
Bomb Defuse Scenario: Your team must prevent the Terrorists from detonating their bomb at one of the bomb sites. To win, defuse the bomb or eliminate all of the Terrorists.
Opponents
EASY: You will face 6 enemies in this match: Weasel, Lunatic, Crackpot, Madman, Rat, Screech.
NORMAL: You will face 6 enemies in this match: Rat, Screech, Worm, Freak, Maniac, Psycho.
HARD: You will face 7 enemies in this match: Rebel, Fiend, Vandal, Razor, Bandit, Raider, Blade.
EXPERT: You will face 7 enemies in this match: Nails, Crank, Cutter, Fanatic, Hyena, Wolfhound, Panther.
Challenges
EASY: You must kill 2 enemies with an M249.
NORMAL: You must kill 8 enemies. You must kill 3 enemies with an M249.
HARD: You must kill 10 enemies, you must kill a Flashbang-blinded enemy and survive the round. You must kill 3 enemies with an M249 without dying. Be careful! Your weapons can hurt friends during this match.
EXPERT: You must kill 16 enemies. You must kill a Flashbang-blinded enemy and survive the round. You must kill 3 enemies with an M249 without dying. Be careful! Your weapons can hurt friends during this match.
Tips
- Counter-terrorists enter the crumbling Chateau through two entrances. Bomb sites are marked by small signs and arrows throughout the damaged walls. Bomb site B is the closer of the two. Enter the Chateau through the left entrance to reach bomb site B quickly. Follow the stairwell to the right to reach bomb site A, an exterior garden area.
- Protect bomb site B by moving through the area and into the wine cellar. Watch for the terrorists to approach from the far side. Not necessarily the best area for the M249, the required weapon for Chateau’s challenges. The area is also good for flashbangs.
- Use the windows overlooking bomb site A as means of protecting that bomb site. It’s a good sniping position if you have fulfilled the M249 requirement and switch to a Magnum Sniper Rifle.
- If your fellow CT bots report the terrorists at bomb site A and you’re protecting B, go through the wine cellar and reach bomb site A from its rear side. You’ll likely spot a few terrorists approaching A and can get the upper hand in this flanking maneuver.
Tour of Duty 4 - Havana
Hostage Rescue Scenario: The Terrorists have taken several hostages. You must rescue them by leading them to a Hostage Rescue Point. To win, rescue all of the Hostages or eliminate all of the Terrorists.
Opponents
EASY: You will face 6 enemies in this match: Weasel, Lunatic, Crackpot, Madman, Rat, Screech.
NORMAL: You will face 6 enemies in this match: Rat, Screech, Worm, Freak, Maniac, Psycho.
HARD: You will face 7 enemies in this match: Rebel, Fiend, Vandal, Razor, Bandit, Raider, Blade.
EXPERT: You will face 7 enemies in this match: Nails, Crank, Cutter, Fanatic, Hyena, Wolfhound, Panther.
Challenges
EASY: You must kill 2 enemies with a pistol. You must rescue a hostage.
NORMAL: You must kill 8 enemies. You must kill 3 enemies with a Night Hawk .50C. You must rescue 4 hostages.
HARD: You must kill 10 enemies. You must kill an enemy with a knife. You must rescue all of the hostages. Be careful! Your weapons can hurt friends during this match.
EXPERT: You must kill 16 enemies. You must kill an enemy with a knife. You must rescue all of the hostages. Be careful! Your weapons can hurt friends during this match.
Tips
- The counter-terrorists enter through three derelict apartments off the streets of Havana. These apartments intersect at spots and converge into two open areas: one containing a fountain and a second containing a gazebo.
- You’ll find the hostages on the upper floors of the building. Find the staircases in the map’s open areas and locate two pairs of hostages near balconies overlooking those open areas. The hostages are very close together so it’s easy to free all four within a short amount of time.
- Beware of terrorists hiding in the corners of the hostage room. Search these corners as you enter. If you make a beeline for the hostages without checking corners, you’ll likely pay the price.
- Watch the open windows along the upper floor throughout the Havana apartments and beware of terrorist snipers.
- The open areas are dangerous because it’s difficult to watch all sides as you move through.
- Sub-machine guns and the required Night Hawk .50C are solid weapons to use through the small apartment rooms throughout the map. Plenty of cover in these areas and plenty of terrorist bots will hide out waiting for you to pass by.
Tour of Duty 4 - Cobblestone

Bomb Defuse Scenario: Your team must prevent the Terrorists from detonating their bomb at one of the bomb sites. To win, defuse the bomb or eliminate all of the Terrorists.
Opponents
EASY: You will face 6 enemies in this match: Weasel, Lunatic, Crackpot, Madman, Rat, Screech.
NORMAL: You will face 6 enemies in this match: Rat, Screech, Worm, Freak, Maniac, Psycho.
HARD: You will face 7 enemies in this match: Rebel, Fiend, Vandal, Razor, Bandit, Raider, Blade.
EXPERT: You will face 7 enemies in this match: Nails, Crank, Cutter, Fanatic, Hyena, Wolfhound, Panther.
Challenges
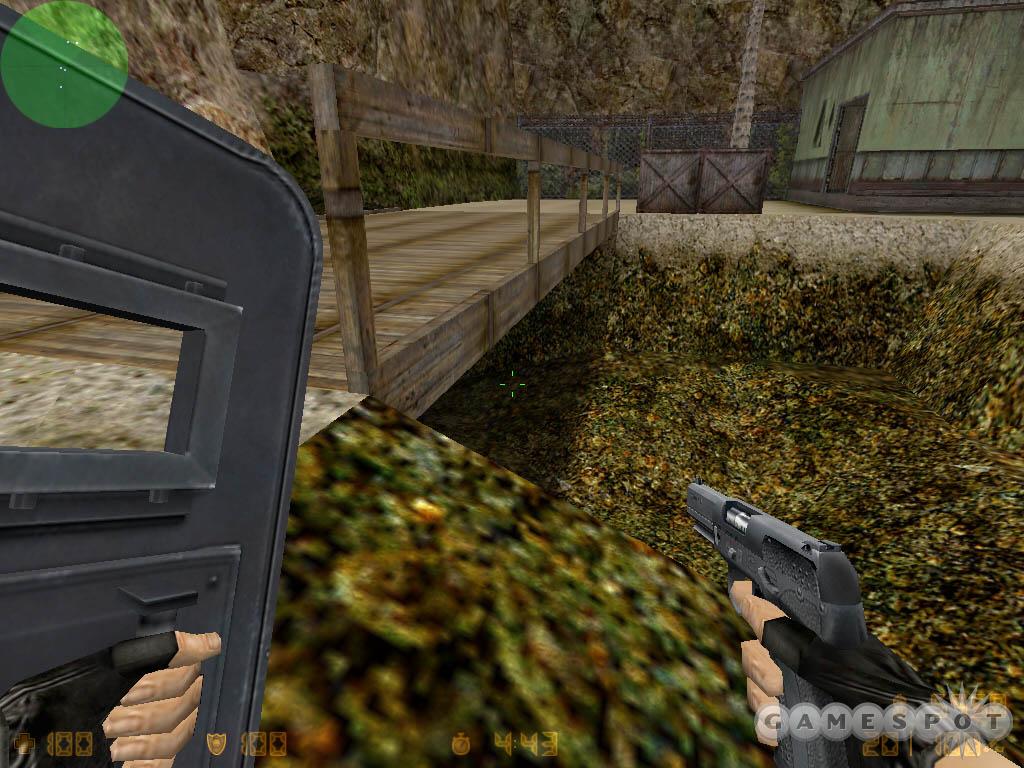
EASY: You must kill 2 enemies with a Tactical Shield. You must win a round in less than 90 seconds.
NORMAL: You must kill 8 enemies. You must kill 3 enemies with a Tactical Shield. You must win a round in less than 75 seconds.
HARD: You must kill 10 enemies. You must kill 3 enemies with a Tactical Shield without dying. You must win a round in less than 60 seconds and survive the round. Be careful! Your weapons can hurt friends during this match.
EXPERT: You must kill 16 enemies. You must kill 3 enemies with a Tactical Shield without dying. You must win a round in less than 45 seconds and survive the round. Be careful! Your weapons can hurt friends during this match.
Tips
- The counter-terrorists begin a bomb site A. Reach bomb site B quickly by moving through the large doors on the right side. Bomb site B is at the far end of this wide open area.
- One of the largest encounter points is the dark hallway that leads into bomb site B. Intercept this position by moving right through the large doors then jump up the incline to the entrance to the dark tunnel.
- Don’t charge into the dark tunnel. Typically there will already be terrorists moving around the corner or even hiding behind the ample cover in the area.
- Use the Tactical Shield as a means of gaining an advantage against the terrorist bots. Take cover behind the shield and maintain a position in front of your fellow counter-terrorist bots. The terrorists may briefly fire upon your invulnerability leaving them open for a quick counter assault by your teammates.
- The bomb sites, particularly bomb site B, offer ample cover--which can be used as a counter-terrorist for defense of the position or a terrorist for defensive of a planted bomb.
- The interiors connecting map areas contain ladders up to sniper positions. Watch out for terrorists using these roosts. As a counter-terrorist, these positions won’t be particularly useful since the terrorist bots’ primary goal is planting the bomb, not necessarily moving around the map hunting for you.
Tour of Duty 5 - Aztec

Bomb Defuse Scenario: Your team must prevent the Terrorists from detonating their bomb at one of the bomb sites. To win, defuse the bomb or eliminate all of the Terrorists.
Opponents
EASY: You will face 7 enemies in this match: Weasel, Lunatic, Crackpot, Madman, Rat, Screech, Splinter.
NORMAL: You will face 7 enemies in this match: Screech, Splinter, Freak, Maniac, Psycho, Rebel, Fiend.
HARD: You will face 8 enemies in this match: Razor, Bandit, Raider, Nails, Crank, Cutter, Crow, Fanatic.
EXPERT: You will face 8 enemies in this match: Nails, Cutter, Fanatic, Hyena, Wolfhound, Panther, Crow, Jackal.
Challenges
EASY: You must kill 3 enemies. You must kill 2 enemies with a Magnum Sniper Rifle. You must win a round in less than 90 seconds.
NORMAL: You must kill 9 enemies. You must kill 3 enemies with a Magnum Sniper Rifle. You must win a round in less than 75 seconds.
HARD: You must kill 12 enemies. You must kill 5 enemies with a Schmidt Scout. You must win a round in less than 60 seconds and survive the round. Be careful! Your weapons can hurt friends during this match.
EXPERT: You must kill 18 enemies. You must kill 5 enemies with a Schmidt Scout. You must win a round in less than 45 seconds and survive the round. Be careful! Your weapons can hurt friends during this match.
Tips
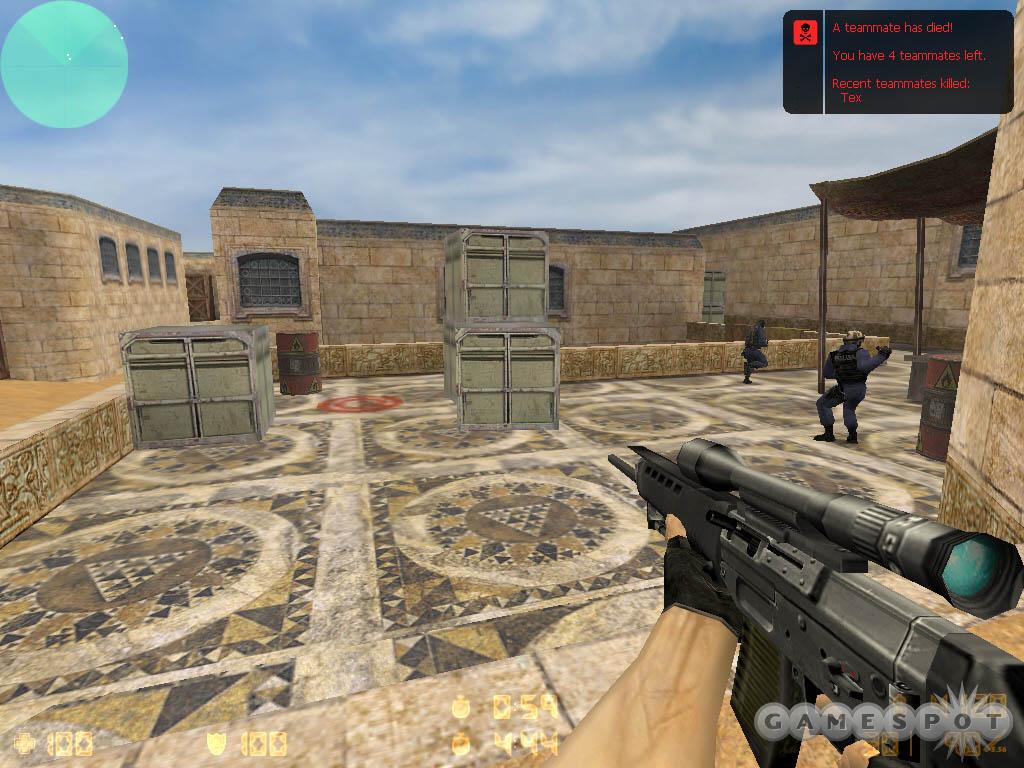
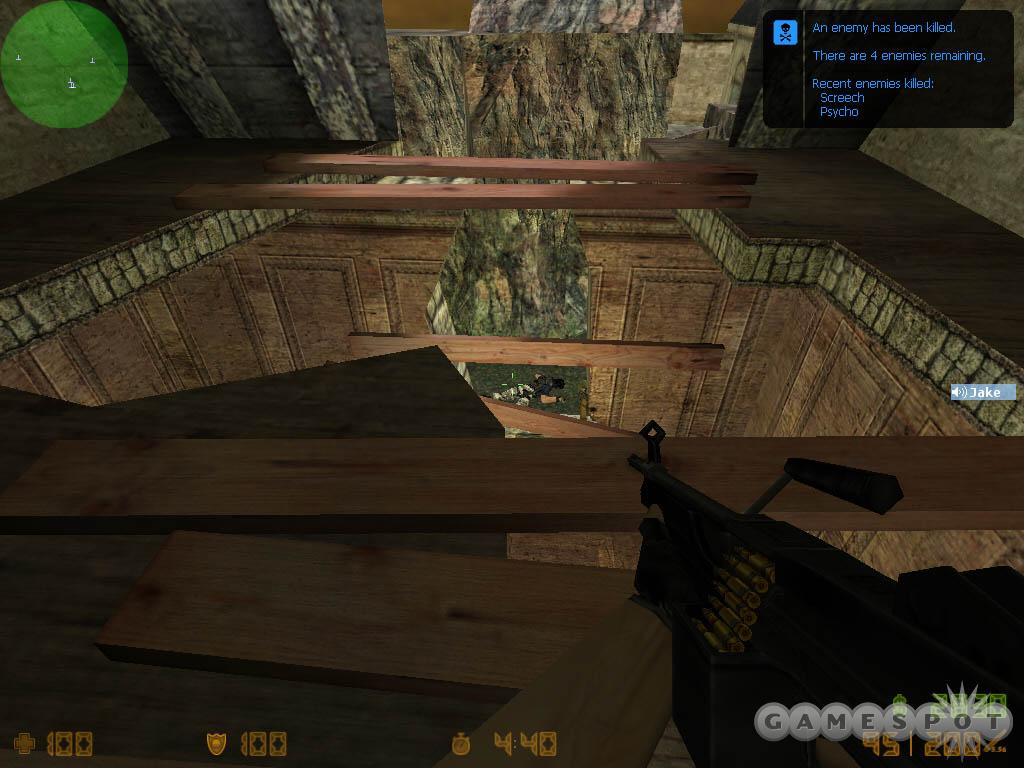
- Aztec features two bomb sites. The counter-terrorists can maneuver to either from their start position by going to the left or the right. One bomb site rests in an open area; the exact target is closer to the counter-terrorist side. The second bomb site can be found through a room at the end of a suspension bridge. Once again it’s closer to the counter-terrorist side.
- The larger bomb site features a slightly ajar set of double doors. This location becomes the primary contact point against the terrorists. If you’ve moved to the bomb site quickly, the terrorists should be at the door or even moving through. The area is heavily defensible, particularly with a Magnum Sniper Rifle (which happens to be a required weapon for the easy and normal challenges) though other rifles will also prove effective.
- Defending the suspension bridge is also a fine place for using the sniper rifle. Beware of the area beneath the bridge. You can be shot from below so be extremely cautious when crossing the bridge or standing along the room’s edge.
- If the terrorists don’t move through the double-doors then push through and you may be able to flank the terrorists as they cross the bridge toward the other bomb site.
- Don’t hesitate to navigate the lower water area. You can use it as a means of flanking terrorists or shooting the terrorists as they cross overhead.
Tour of Duty 5 - Downed
Hostage Rescue Scenario: The Terrorists have taken several hostages. You must rescue them by leading them to a Hostage Rescue Point. To win, rescue all of the Hostages or eliminate all of the Terrorists.
Opponents
EASY: You will face 7 enemies in this match: Weasel, Lunatic, Crackpot, Madman, Rat, Screech, Outcast.
NORMAL: You will face 7 enemies in this match: Rat, Screech Worm, Freak, Maniac, Psycho, Rebel.
HARD: You will face 7 enemies in this match: Razor, Bandit, Raider, Nails, Crank, Cutter, Fanatic.
EXPERT: You will face 8 enemies in this match: Crank, Cutter, Fanatic, Hyena, Wolfhound, Panther, Crow, Spider.
Challenges
EASY: You must kill 3 enemies. You must kill 2 enemies with a Clarion 5.56. You must rescue a hostage.
NORMAL: You must kill 9 enemies. You must kill 3 enemies with a Clarion 5.56. You must rescue 4 hostages.
HARD: You must kill 12 enemies. You must kill 5 enemies with a Clarion 5.56. You must rescue all of the hostages. Be careful! Your weapons can hurt friends during this match.
EXPERT: You must kill 18 enemies. You must kill 5 enemies with a Clarion 5.56. You must rescue all of the hostages. Be careful! Your weapons can hurt friends during this match.
Tips
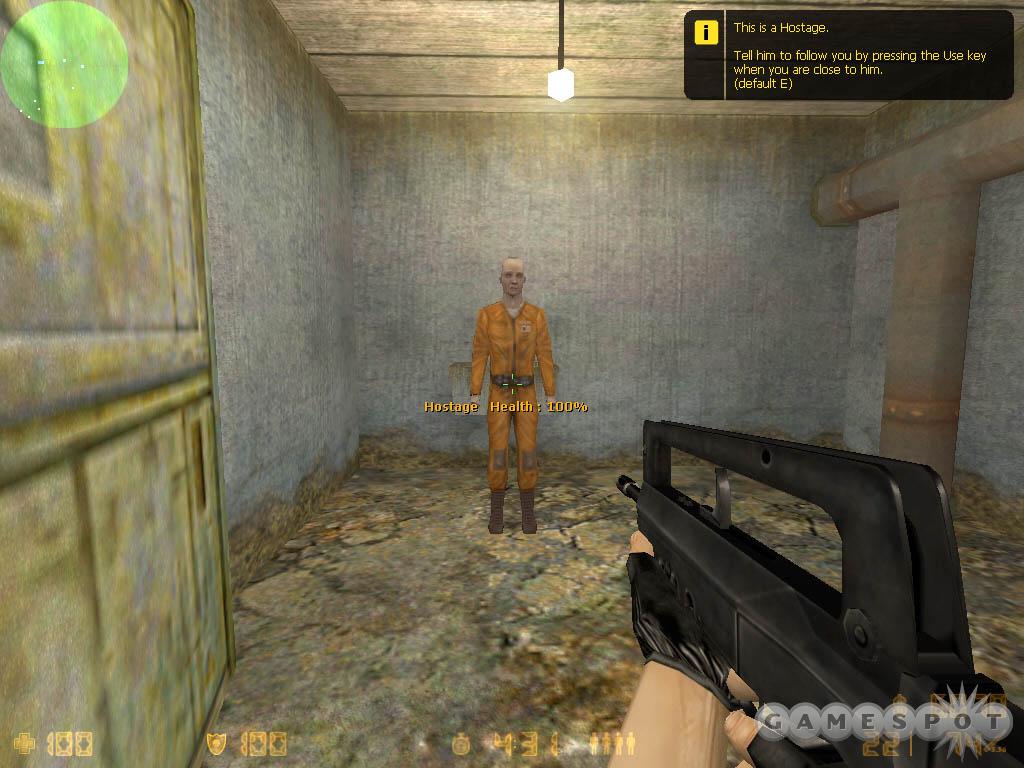
- This map is a reworking of the "Downed Pilot" mission in the Deleted Scenes portion of Condition Zero. It’s a hostage rescue task; the counter-terrorists begin in the hostage rescue zone with the hostages stowed away inside the mines on the other side of the map.
- Two primary paths split from the counter-terrorists start position: one leads through a village and into the mines and one leads down a river and a downed plane toward the mines.
- Take the first right along the river and then the next right again to enter the mines. If you continue past the downed plane, though, you’ll find another mine entrance closer to the hostages.
- One pair of hostages is located in a computer room; the other two are split into two nearby rooms.
- The village and the mines are a winding course of corridors. Terrorist bots won’t shy away from hiding around corners waiting for you to charge through. The structures within the village have two levels. You can even traverse the roof edge to reach the far side. Expect to contact the terrorists in the last structure if they’ve moved to defend the position.
- The terrorist bots are also adept at hiding near the hostage rescue zone waiting for you to return with the hostages.
Tour of Duty 5 - Airstrip
Bomb Defuse Scenario: Your team must prevent the Terrorists from detonating their bomb at one of the bomb sites. To win, defuse the bomb or eliminate all of the Terrorists.
Opponents
EASY: You will face 7 enemies in this match: Weasel, Lunatic, Crackpot, Madman, Rat, Screech, Worm.
NORMAL: You will face 7 enemies in this match: Rat, Screech, Worm, Freak, Maniac, Psycho, Vandal.
HARD: You will face 7 enemies in this match: Razor, Bandit, Raider, Nails, Crank, Cutter, Fanatic.
EXPERT: You will face 8 enemies in this match: Nails, Crank, Fanatic, Hyena, Wolfhound, Panther, Crow, Wolfhound
Challenges
EASY: You must kill 3 enemies. You must kill 2 enemies with a Tactical Shield.
NORMAL: You must kill 9 enemies. You must kill 3 enemies with a Tactical Shield.
HARD: You must kill 12 enemies. You must kill 5 enemies with a Tactical Shield. You must kill 2 enemies with a Krieg 550 Commando and survive the round. Be careful! Your weapons can hurt friends during this match.
EXPERT: You must kill 18 enemies. You must kill 5 enemies with a Tactical Shield. You must kill 2 enemies with a Krieg 550 Commando and survive the round. Be careful! Your weapons can hurt friends during this match.
Tips
- The counter-terrorists begin at bomb site B. You’ll find bomb site A as part of a group of hangers farther away. It’s on the other side of a bridge section. There are multiple routes to the bridge and additional multiple routes in the approach to the bomb site. Expect the terrorists to push toward bomb site A instead of the counter-terrorist start position.
- If you’re not there, expect your counter-terrorist comrade bots to encounter terrorists around the bridge position. Listen for their audio cues and you can assist in intercepting the terrorist advance.
- Move out to the right from the counter-terrorist start position to move through an underground tunnel; it’s a route the terrorists may use to reach bomb site B and not necessarily the optimum CT route since it’s slower than going left from the start position and reaching the bridge quickly.
- If the bomb has been planted at bomb site A, use alternate routes as your approach. For instance, there’s a narrow path between a building and fence that you can use to get a gauge on the terrorists presence at the site. Though even this path could be watched!
Tour of Duty 6 - Piranesi
Bomb Defuse Scenario: Your team must prevent the Terrorists from detonating their bomb at one of the bomb sites. To win, defuse the bomb or eliminate all of the Terrorists.
Opponents
EASY: You will face 7 enemies in this match: Weasel, Lunatic, Crackpot, Madman, Rat, Screech, Splinter.
NORMAL: You will face 8 enemies in this match: Screech, Worm, Freak, Maniac, Psycho, Rebel, Fiend, Vandal.
HARD: You will face 8 enemies in this match: Razor, Bandit, Raider, Nails, Crank, Cutter, Fanatic, Panther.
EXPERT: You will face 8 enemies in this match: Hyena, Wolfhound, Panther, Crow, Jackal, Hawk, Spider, Snake.
Challenges
EASY: You must kill 5 enemies. You must kill 3 enemies with a Bullpup.
NORMAL: You must kill 10 enemies. You must kill 3 enemies with a Bullpup.
HARD: You must kill 15 enemies. You must kill 5 enemies with a Bullpup. You must kill 2 enemies with a pistol without dying. Be careful! Your weapons can hurt friends during this match.
EXPERT: You must kill 20 enemies. You must kill 5 enemies with a Bullpup. You must kill a Flashbang-blinded enemy and survive the round. Be careful! Your weapons can hurt friends during this match.
Tips
- Villa Piranesi is a rather large bomb defuse scenario map with a pair of bomb sites and a lot of extra areas to explore (and possibly get lost within). Bomb site A is positioned at the "Ancient Sundial" and can be found through the front entrance then right at the intersection at the end. Bomb site B is positioned at the "Grand Orrery" and can be found through the front entrance then at the end of the first passage on the left.
- The bomb sites can be attacked or protected from both high and low positions. The challenges require the use of a Bullpup, certainly an effective weapon for the map with its zoom. Sniper rifles will also serve you well in protection of the bomb sites.
- On the terrorist side, directions to bomb site A and bomb site B are ominously marked with graffiti over Piranesi’s sign-based system. On the counter-terrorist side, follow the signs with the Orrery and Sundial symbols to reach the bomb sites.
Tour of Duty 6 - Fastline
Bomb Defuse Scenario: Your team must prevent the Terrorists from detonating their bomb at one of the bomb sites. To win, defuse the bomb or eliminate all of the Terrorists.
Opponents
EASY: You will face 7 enemies in this match: Weasel, Lunatic, Crackpot, Madman, Rat, Screech, Worm.
NORMAL: You will face 8 enemies in this match: Screech, Worm, Freak, Maniac, Psycho, Rebel, Fiend, Vandal.
HARD: You will face 8 enemies in this match: Razor, Bandit, Raider, Nails, Crank, Cutter, Fanatic, Panther.
EXPERT: You will face 8 enemies in this match: Hyena, Wolfhound, Panther, Crow, Jackal, Hawk, Spider, Snake.
Challenges
EASY: You must kill 6 enemies. You must kill 3 enemies with a sub-machine gun.
NORMAL: You must kill 12 enemies. You must kill 3 enemies with an ES C90.
HARD: You must kill 17 enemies. You must kill 5 enemies with an ES C90. You must kill a Flashbang-blinded enemy and survive the round. Be careful! Your weapons can hurt friends during this match.
EXPERT: You must kill 22 enemies. You must kill 5 enemies with an ES C90. You must kill an enemy with an HE Grenade and survive the round. Be careful! Your weapons can hurt friends during this match.
Tips
- The counter-terrorists begin near the subway car, which doubles as one of the two bomb sites. The second bomb site is located at the bottom of the escalators. You can reach this bomb site from either side of the train, though the side opposite the CT start location is a faster route.
- A series of vent shafts offer the terrorists a stealthier approach to the bomb sites. One vent shaft runs through the upper floor, has multiple entrances and exits, and bypasses hallways around the escalator bomb site.
- A second vent shaft can be entered from the locker room side area that’s found in the large room with all of the scaffolding. Shoot open the grate then leap onto the lockers to enter the shaft. You can use it to move overtop of the bomb sites, including the subway car. Beware of terrorist bots using these vents. Listen for your CT teammates call out the vent shaft as an enemy location.
- The scaffolding room is a primary contact point. Watch for terrorists to approach from the far staircase. All of the obstructions (primarily the scaffolding) can make aiming difficult. Beware of terrorists entering the room from the disabled elevator on the left side.
- The expert challenge requires you to eliminate an enemy with an HE grenade. This is best accomplished against a wounded enemy and one in a tight location. The upper floor vent shaft is a good location for a grenade. The narrow space means the terrorist should feel the greatest impact from the explosion. Try to wound the terrorist first before tossing the grenade to score the kill.
Tour of Duty 6 - Torn

Bomb Defuse Scenario: Your team must prevent the Terrorists from detonating their bomb at one of the bomb sites. To win, defuse the bomb or eliminate all of the Terrorists.
Opponents
EASY: You will face 7 enemies in this match: Weasel, Lunatic, Crackpot, Madman, Rat, Screech, Outcast.
NORMAL: You will face 8 enemies in this match: Rat, Screech, Worm, Freak, Maniac, Psycho, Rebel, Fiend.
HARD: You will face 8 enemies in this match: Bandit, Raider, Nails, Crank, Cutter, Crow, Fanatic, Wolfhound.
EXPERT: You will face 8 enemies in this match: Fanatic, Hyena, Wolfhound, Panther, Crow, Jackal, Hawk, Spider.
Challenges
EASY: You must kill 7 enemies. You must kill 3 enemies with a sniper rifle.
NORMAL: You must kill 15 enemies. You must kill 4 enemies with a Magnum Sniper Rifle.
HARD: You must kill 20 enemies. You must kill 5 enemies with a Magnum Sniper Rifle. You must kill 2 enemies with a Night Hawk .50C without dying. Be careful! Your weapons can hurt friends during this match.
EXPERT: You must kill 25 enemies. You must kill 5 enemies with a Magnum Sniper Rifle. You must kill an enemy with a knife and survive the round. Be careful! Your weapons can hurt friends during this match.
Tips
- Torn is a large map filled with narrow city streets, many with ample cover and hiding spots to ambush unsuspecting terrorist bots. There are two bomb sites: the interior of a temple and a small courtyard.
- Counter-terrorists can quickly reach bomb site A, the temple, by moving left off the roof from the start position. Follow the path to the end, go right, then left into the bomb site. Reach bomb site B by moving right from the start position. Keep moving around the corners to the left to enter the courtyard.
- Challenges include using the Magnum Sniper Rifle (and the Night Hawk .50C on hard and expert mode). Torn has several good sniping positions. Many of the narrow street areas will suffice. Stand at the far end and center your scope down the street or alley and wait for a terrorist to move into view.
- If you happen to perish during a match, use free look mode to move to the terrorist spawn position (the fountain and pool of water). Move through the iron gate on one of the pool’s sides to find the hidden terrorist hideout, which includes a labeled layout of Torn.
- Find the dark stairwell adjacent to the terrorist spawn area. Move out from the spawn area and down the stairwell hugging the right wall as you round the corner. Continue to hug the right wall along the barrel and door to the far end. Approximately a minute later, fighter jets will appear over the map and bombard one of the buildings in Torn.
Team Members
The following table reveals statistics for all CT teammates available in Condition Zero’s challenge mode.
| NAME | COST | SKILL | CO-OP | BRAVERY | WEAPON |
| Stanley | 1 | Bad | Bad | High | ES C90 |
| Gus | 1 | Bad | Ok | High | Schmidt Machine Pistol |
| Quincy | 1 | Bad | Good | Ok | KM UMP45 |
| Vern | 1 | Bad | High | Low | KM Sub-Machine Gun |
| Floyd | 1 | Low | Ok | Ok | KM UMP45 |
| Morris | 1 | Low | Ok | Ok | ES C90 |
| Kenny | 1 | Low | Good | Good | Leone 12 Gauge Super |
| Cooper | 1 | Low | High | Bad | KM Sub-Machine Gun |
| Kent | 2 | Ok | Low | High | Clarion 5.56 |
| Ben | 2 | Ok | Ok | Good | Clarion 5.56 |
| Roger | 2 | Ok | Ok | High | Leone YG1265 Auto Shotgun |
| Phil | 2 | Ok | Good | Ok | KM Sub-Machine Gun |
| Pete | 2 | Ok | Good | Good | ES C90 |
| Oscar | 2 | Ok | High | Low | Clarion 5.56 |
| Leon | 2 | Ok | High | Ok | Schmidt Machine Pistol |
| Kirk | 3 | Ok | Low | Bad | Magnum Sniper Rifle |
| Larry | 3 | Good | Ok | High | Maverick M4A1 Carbine |
| Cole | 3 | Good | Good | Good | M249 |
| Travis | 3 | Good | Good | Good | Tactical Shield |
| Ray | 3 | Good | Good | High | Leone YG1265 Auto Shotgun |
| Igor | 3 | Good | High | Low | ES C90 |
| Sam | 3 | Good | High | Ok | Maverick M4A1 Carbine |
| Maverick | 3 | High | Bad | High | Maverick M4A1 Carbine |
| Alex | 4 | Good | Good | Bad | Magnum Sniper Rifle |
| Ace | 4 | High | Low | Ok | Maverick M4A1 Carbine |
| Tex | 4 | High | Low | Ok | Maverick M4A1 Carbine |
| Jake | 4 | High | Good | Ok | Bullpup |
| Lou | 4 | High | Good | Good | M249 |
| Rooster | 4 | High | Good | Good | ES C90 |
| Brent | 4 | High | High | High | Tactical Shield |
| Eagle | 5 | High | High | Ok | Magnum Sniper Rifle |
| Barney | 5 | High | High | High | Maverick M4A1 Carbine |
| Bear | 5 | High | High | High | M249 |
| Duke | 5 | High | High | High | Bullpup |
| Sandman | 5 | High | High | High | ES C90 |
| Steel | 5 | High | High | High | Maverick M4A1 Carbine |
Chapter 4 - Deleted Scenes
This section provides a complete walk-through for Condition Zero’s Deleted Scenes.
Recoil
Overview: An Army Blackhawk has been shot down. Casualties are certain, however there are survivors. It is imperative that any survivors be retrieved and escorted to the evacuation point.
Objectives: Locate the Delta Force operative. Make your way to the evacuation point for extraction.
Time: 05:34 HOURS
Location: Hostile urban environment. Blackhawk crash site, Northern Africa
Organization: U.S. Navy Seal
The opening cut scene reveals the crash of the Blackhawk; you’re part of the crew and begin the mission adjacent to the crash site. Initial orders are to move away from the site and locate Bravo team.
Objective: Move away from the crash site and locate Bravo Team.
The site is already crawling with terrorists. Beware of the doorway ahead; a terrorist bursts through and he’s pretty angry. Move around to the right near the downed Blackhawk to find more terrorists taking cover across the courtyard. Beware of a sniper behind you. Move through the opened passageway and go to the left. Find a health kit on the ground near some crates.
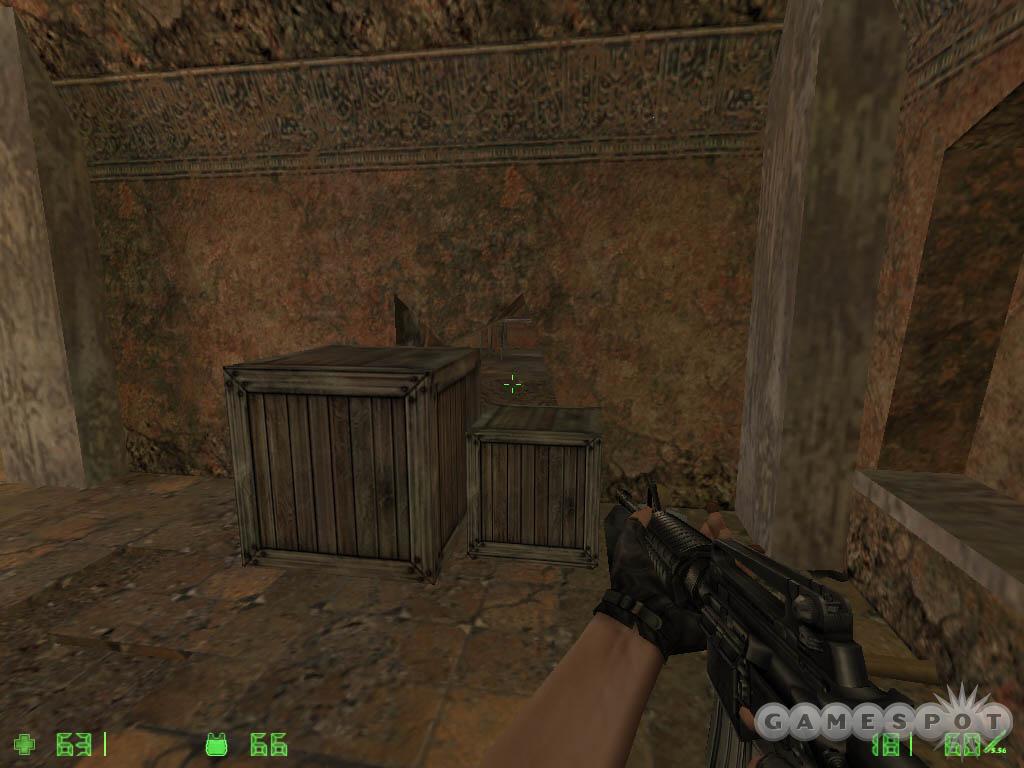
Watch out for grenades when moving toward passageways. Continue through the open door on the left. Enter the next room, which contains a couple crates blocking a hole in the wall. Search a storage room to the left for more terrorists and an ammo clip. Shoot the boxes with your weapon to destroy them and provide access to the hole in the wall.
Crawl through and crab the radio-controlled bomb from the shelf ahead. Use the medkit on the wall. An explosion rocks the next hallway. Move to the right first and combat the terrorists. Snag the health from off the ledge. Return to the smoke-filled corridor (you can also wait for the smoke to dissipate if you wish) and use the slanted beam to ascend through the hole in the ceiling into the next room. Use medkit on the wall then place the radio-controlled bomb on the crack. Detonate and continue through the passage.
Beware of the sniper to the left and more terrorists scrambling below. Leap to the top of the crate to grab the ammo clip. Drop down and collect a second clip. Move left. Proceed through the hall to the right. When the passage opens to the right, beware of a gang of terrorists charging your position. Enter a storage room on the right for ammo and a medkit. Turn around; entering this storage area triggers additional terrorists behind you.
Friendly forces bomb the missile in the next area. Shoot the terrorists manning the machine gun on the right and wait for others to charge you through the smoke. Enter the hall adjacent to the stationary gun and follow it into a storage room containing ammo, grenades, and a medkit.

Ascend the staircase blasting the terrorists as you proceed. Exit onto the roof and terminate more hostiles. Cross the roof to the door on the opposite side. Open it and find a friendly soldier inside.
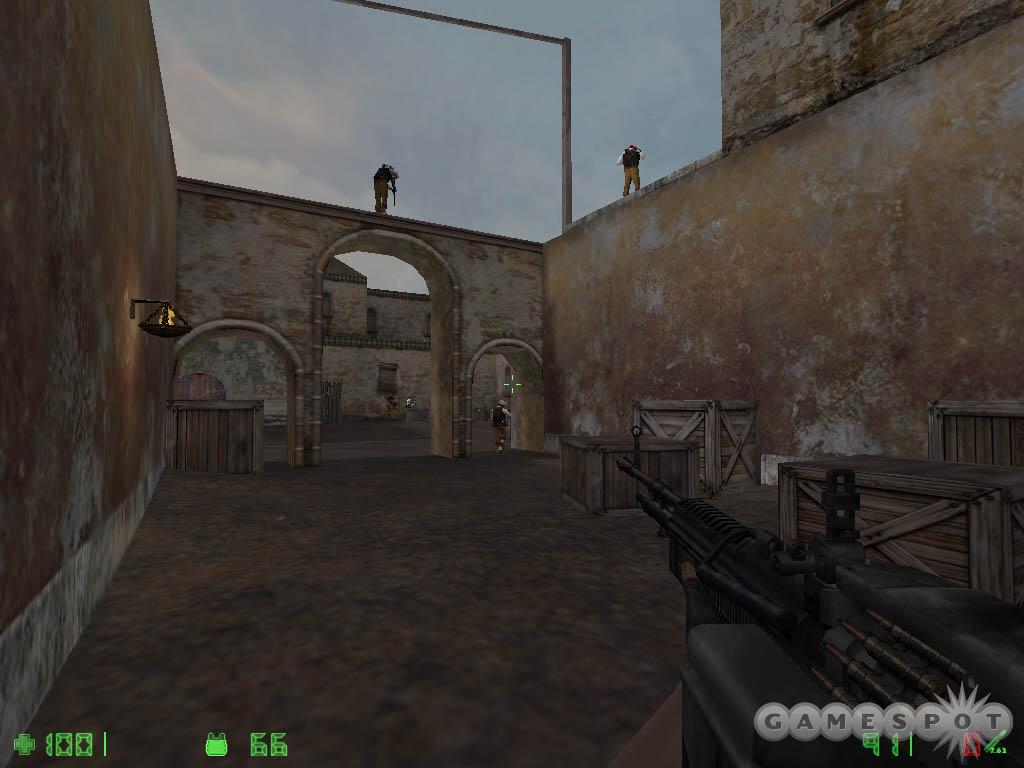
Grab the armor, weaponry, ammo, and use the medkit before following the soldier out of the room. Take the lead through the hallway. When it opens up, shoot the terrorists through the iron fence and watch out for grenades and a sniper above you. Turn right and proceed through the hallway and around the iron fence. Utilize the medical kits along the way as needed. Move through the passageway to the right.
Kill the sniper to the left and work your way around the next hallway. Another sniper waits for you at the end. Terminate him and wait for the door ahead to open revealing another angry terrorist. Kill him and move inside.
Objective: Meet up with the rest of the team at the extraction point.
Your fellow soldier provides a new objective. He’s remaining behind in the tower to provide protection while you maneuver to the nearby extraction point. Use the medkit and return outside. Beware of the suicide bomber approaching your position. Go to the other side of the tower and eliminate the guards on the upper floor. Use the nearby crates to work your way up to this balcony.
Move to the right and down the ramp to find a storage room (look out for the terrorist hiding out on the left side of the room). Grab the ammo and weaponry inside the room. Return up the ramp and to the left side of the balcony.
At the intersection, go to the left and hop over the crates in the next hall. Take a quick detour to the right to find a health pack then return left and toward the stairs to receive a new objective.
Objective: Neutralize hostiles occupying Landing Zone.
Exit the stairs toward the Landing Zone and find it crawling with terrorists. Eliminate the terrorists perched on the high girder than enter the area. Shoot all the terrorists in the area to receive your next objective. Search the opposite side of the Landing Zone to find additional ammo, armor, and health.
Objective: Rescue Delta operator at his last known location.
Delta operator is the sniper that was assisting you. Retrace your steps to the tower, battling additional terrorists on the way. A quick check of the tower reveals he’s no longer positioned there. Continue to retrace your steps back through the level. In the next clearing, a group of terrorists in a modified pick-up truck protect the next tunnel. Eliminate them then continue into the next room to find Delta operator. Clear the room of hostiles. Speak with Delta operator and collect the ammo from the room.
Objective: Get to the evac Landing Zone.

Press the "use" button and Delta operator will follow you. Return to the tower; move cautiously and eliminate the terrorists and snipers guarding the route. Delta operator won’t climb up the crates in the corner so you must find him an alternate route. Ascend the crates and move down the ramp to the right. Shoot the crates that hold the far door closed. Once it’s open, return to Delta operator and order him to start following.
Follow the hallways to the Landing Zone where another Blackhawk awaits to extract you and Delta operator from the position.
Lost Cause
Overview: While on vacation in the Philippines, a group of German nationals has been kidnapped by a terrorist organization.
Objectives: Infiltrate the compound. Locate the hostages. Assist the team to secure the compound.
Time: 23:39 HOURS
Location: Terrorist Camp. Basilan Islands, Philippines
Organization: German GSG-9
Your orders are to silently infiltrate the compound and locate the hostages inside. If you’re detected before locating the hostages, the mission ends in immediate failure.
Objective: Use the Fiber Optic Camera to locate hostages.
Move quietly along the fence. You can search the area to the right but will quickly find it blocked by a padlock. Instead, enter the shack on the left. Move cautiously around the sleeping guard and pick up the blowtorch off of the table. Exit the shack and go to the left. Find the padlock on the ground and use the blowtorch to open the lock.
Drop down into the crawlspace and maneuver underneath the patrolling guards above. Work your way to the end of the crawlspace and find cracks in the ceiling overhead. Use the fiber optic camera on each crack to see the hostage positions as well as a room containing additional guards.
Objective: Report hostage positions to CNC.
The crack underneath the hostages becomes a radio zone. Toggle your inventory and select the radio. Use it to report the hostages’ position.
Objective: Enter compound and provide support for assault team.
Move around to the right side of this crawlspace to find a slanted beam providing access to the compound. Beware of the hostiles charging down; they’re now alerted to your presence. Listen to the warning over the radio: watch out for trip wires!

At the intersection, go down the hall on the right side. There’s a trip wire at your feet. Shoot the device from a safe distance. Eliminate the hostiles in the room to the left and shoot the barrels to open a new passage. Snag the shotgun and ammunition from the table and utilize the medkit as needed. And heed another warning: fires are detonating explosives all over the compound.
Kill the hostile on the other side of the new passage. Turn right and spot another trip wire along the ground. Toss a grenade at the corner and back up into the previous room to avoid taking damage. If the trip wire doesn’t detonate, jump over it. Go to the left. Shoot an open window to the right to find some shotgun ammo and a grenade. Move around the corner on the left (a hostile died here so your friends are near) and find the counter-terrorists in the hostage room.
Objective: Clear path for assault team to the docks.

Listen to your new orders then search the back of the room for health, ammo, armor, and a smoke grenade. Exit the hostage area and return to the right. An explosion opens a passage ahead. Neutralize the hostiles then shoot more in the room to the left. The smoke grenade can prove useful here because of the RPG-wielding hostile across the way. Toss it around the corner for additional cover against the hostiles. You can also strafe carefully around the corner and shoot the RPG launcher before he can fire a shot. Also beware of a sniper along the roof to the left and another in a tower on the right (shoot the barrels for added explosives).
Get into the window using the small crate around the right corner. Look left and shoot the hostile (if you shoot the barrels the explosion will inflict some damage to you). Proceed to the right and spot the trip wire around the corner. Shoot it from a safe distance. Ignore the staircase on the right temporarily and move ahead around the corner to the left. Shoot the barrels in the distance to eliminate some hostages. Return to the staircase and ascend.
There are hostiles on both sides at the top of the stairs. Beware of a trip wire protecting the left entrance as well. Shoot the barrels on the right to open a new passage. Search the barracks on the left for ammo and health (watch your back as a hostile finds you inside).
Drop down into the hole and then another hole below. Maneuver through the crawlspace to the opening above. Shoot the hostile checking out the maps. Use the medkit and exit. Follow the hall left and find a high trip wire around the corner. Duck underneath and quickly shoot the guard on the right to avoid him accidentally nailing the trip device.
Clear the populated hallway ahead (if you still have an HE grenade, it will definitely help here). More hostiles protect the clearing on the left. There’s a medkit ahead but a trip wire protects it (shoot it from a distance). In the clearing, beware of guards in the windows and another perched high in the tree. Push the metal crate underneath the window on the left and grab the smoke grenade inside. Destroy the wooden planks over the window on the right then pull the crate underneath. Clear out any hostiles inside the barracks room then jump inside.
Be cautious around corners in this room as hostiles leap out around each. Watch the first corner on the right then the passageways on the far side of the room. Utilize the two medkits in here as needed and search between the cots for ammo. Cross the room to the passage on the left (the others are blocked). Shoot the trip wire protecting the stairs (strafe back around the corner to avoid the explosion). Ascend the stairs.
Shoot the trip wire at the top of the stairs. Notice the radio-controlled bomb placement on the crates and continue to the left. At the intersection, the door on the right is closed but soon opens revealing an enemy once your back is turned. Eliminate the hostiles occupying the room to the left. A truck blasts through the wall as more hostiles pour out. Retreat behind the corner and lure the hostiles to your position. Collect the ammo from the room.
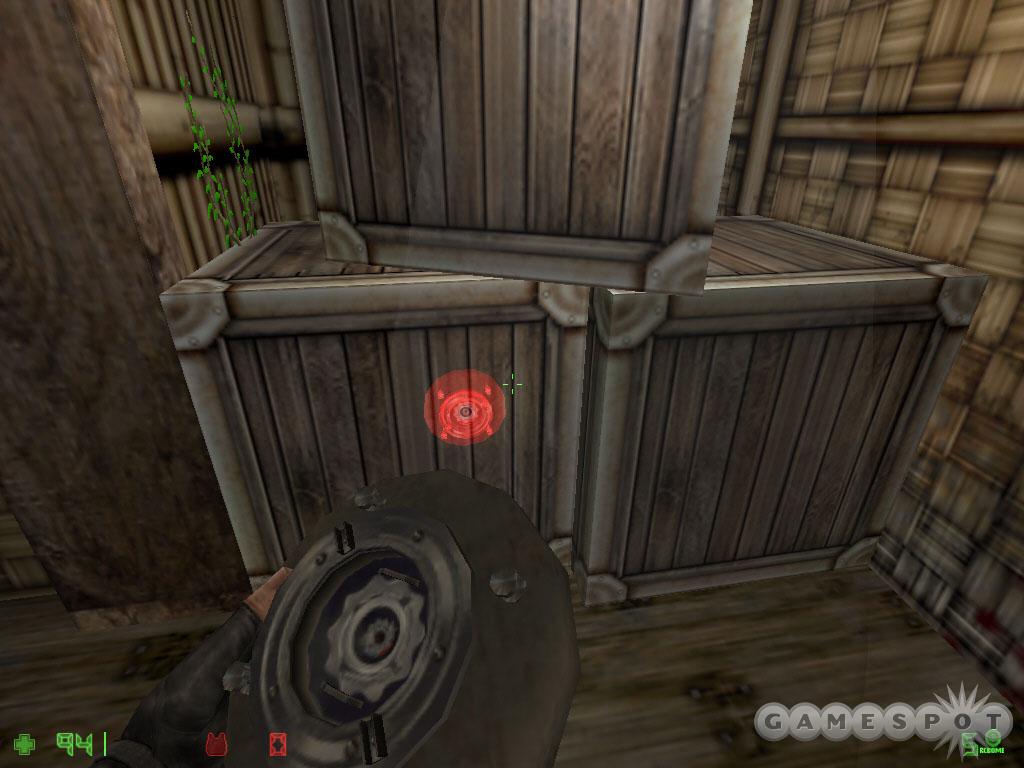
Exit through the hole in the wall (caused by the truck). Shoot the sniper on the roof to the left then use the stationary gun below. Fire it at the enemies from the previous room. Grab the health and ammo then use the crates to enter through the window. Use the medkit on the wall. Work your way into the next room and find the radio-controlled bomb on the shelf. Eliminate the hostiles and retrace your steps back to the bomb placement area—those crates at the top of the stairs. Terminate any enemies that have appeared along the way. Place the bomb, move to a safe distance, and then detonate.
Terminate the hostiles on the other side. Use the medkit and grab the sniper rifle and ammunition. Approach the crack in the floor. Shoot the guard below then shoot the barrels (back off quickly). This destroys the floor and opens a passage. Drop down. Going right returns you to a previous barracks (which may still contain health). Continue to the left.
It opens to a large courtyard. Shoot the red barrels on the left and right; the explosion to the left will destroy a tower. Enter the courtyard and eliminate a guard on the roof to the left. Turn around and face where you entered from and when the pursuing guards enter, shoot the red barrel to their right. Shoot any additional guards that enter from this location. Move around the courtyard until a sniper appears in a window above the entrance. Eliminate him the use the ladder to reach the roof and enter that same window.
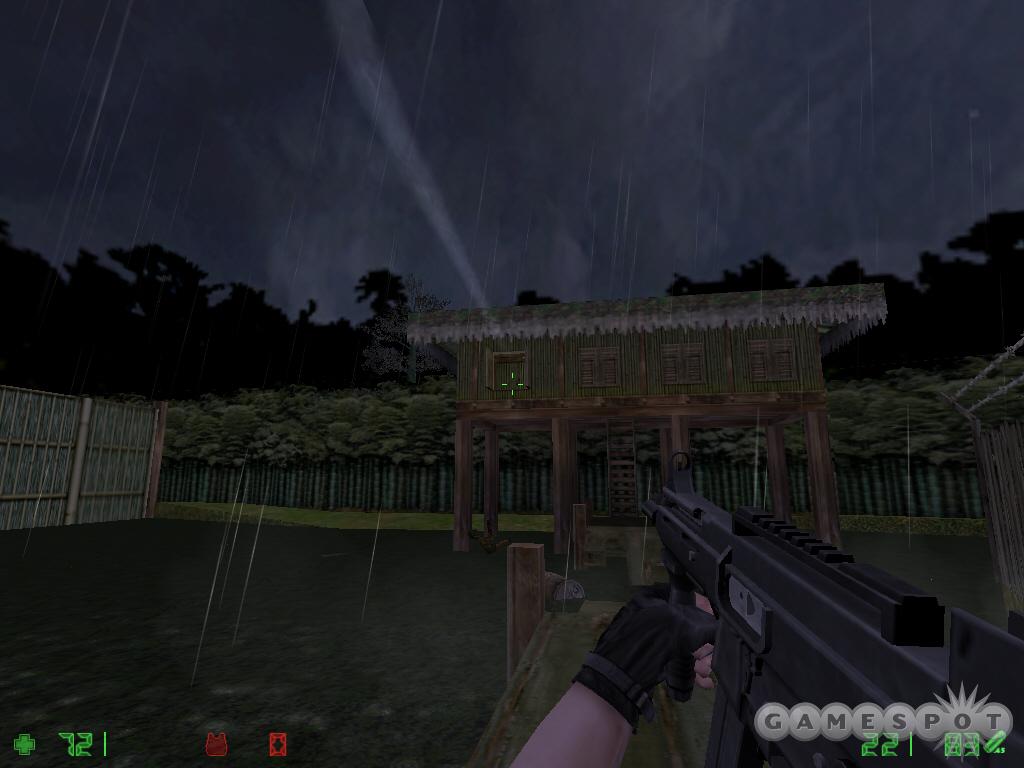
Continue across the catwalk and eliminate your foes. Shoot the hostiles in the room below and drop inside. Find ammo and health in the room. Exit through the open door—the dock area. There are hostiles to the left and another straight across with an RPG. Eliminate the hostiles on the left first using your sniper rifle to hit the further one. Next, move out until the window opens revealing the RPG. Move quickly onto the dock, dodge the rocket, and then eliminate the RPG launcher with your sub machine gun.
Cross the dock toward the shack that contained the RPG launcher. Jump into the water then pull up on the other dock. Kill the guard at the top of the ladder. Ascend the ladder, clear the room, and receive your next objective.
Objective: Radio for boat extraction once area is secure.
Upon clearing the enemies, move to the left side of the room near the desk. Toggle your inventory and use your radio to call for the boat extraction and complete the mission.
Secret War
Overview: Rebels have taken over a remote missile complex in Russia. The threat of nuclear war looms. It is crucial that the facility is reclaimed and that the warhead is disarmed.
Objectives: Locate the nuclear missile silo. Disarm the nuke. Escort all facility support staff from the silo complex.
Time: 13:24 HOURS
Location: ICBM Launch Site. North East Russia.
Organization: Russian Spetsnaz
Orders are to disarm and dismantle the nuclear missile sites. Equipment needs to be destroyed and the support staff should be escorted off the premises.
Approach the commander and the door ahead. There’s no response. Bombs are used to blast open the door. Move inside. The missile station is on emergency power and there’s no response from the communicator.
Objective: Proceed to the bunker building and enable power generators.

Cross the room and exit the far door that leads outside. Cross the snow and into the doorway ahead. Descend the ramp and find the generator at the bottom. Use the switch to enable the power generator. A door opens behind you.
Enter the door and receive word from the commander: they’re under attack! Two terrorist organizations are battling over the nuke. Search the locker room on the left for a grenade.
Objective: Proceed to the control center inside the facility.
Break the broken glass to enter the room on the right. Grab the pistol inside then use the switch on the far wall—this opens a new passage to the right. Proceed down the open passage. Eliminate a hostile down the corridor to the left. Behind those crates you’ll find a couple ammo clips.
Return to the door and use the switch. Move through the small room to another door. The next open room contains a bunch of explosive barrels. Quickly scamper to the right and grab some ammo clips then move down the hall on the left. A chain reaction destroys those barrels and if you’re in the room at the time, you’re destroyed with them.
Find terrorists in battle down the next hall. Eliminate them all. At the far end of the hall, leap through the open window on the left. Terminate the hostile inside. Wait for the explosion to break open the passage on the right side of the room.
Eliminate both terrorist groups occupying the room. Jump over the crates on the right side to reach the ammo and health. Drop down into the room below and eliminate the terrorist in the corner. Move into this corner and pick up a new weapon and ammo (find more on the opposite side by the crate). Beware of terrorists attempting to sneak up on you. Use the medkit as needed and proceed down the new hallway.
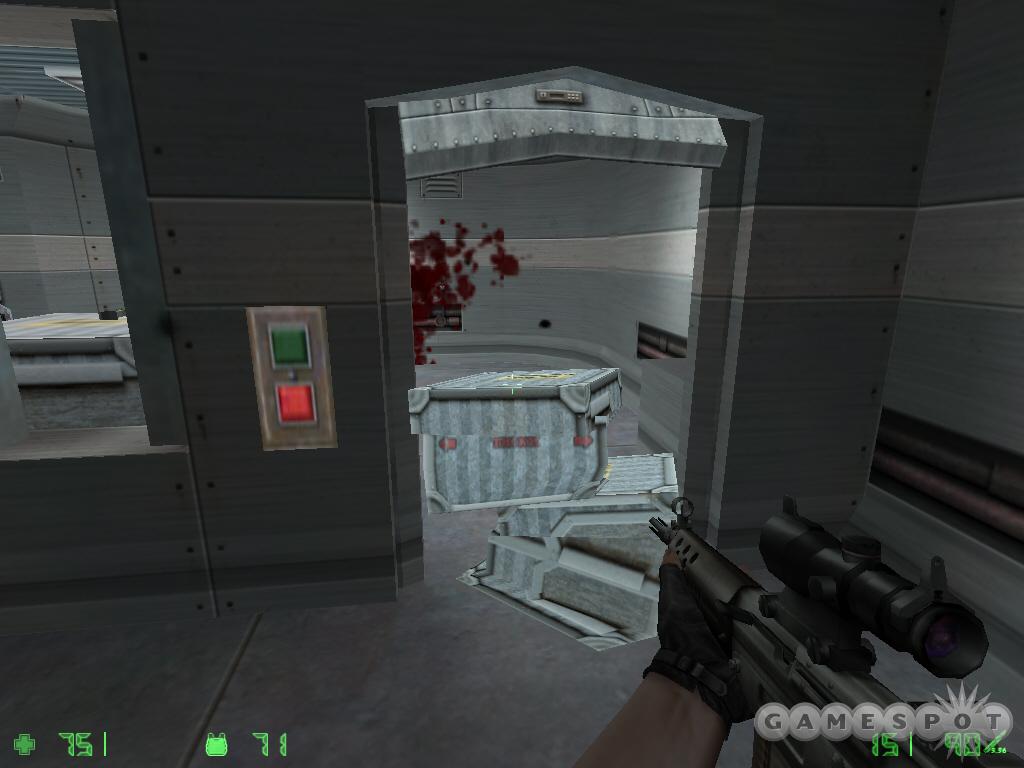
Follow the hall to the door ahead but watch out for a terrorist hiding out on the left. Open the door and blast the terrorist on the left side. Move to the right and notice that crates block the path. Use the door switch; this lowers the door and crunches the crates. Jump over them into the room and terminate the terrorist at the top of the stairs. Grab the clips off of the crates and use the medkit. Ascend the stairs.
Eliminate the guard in the next hall (can shoot the barrel). The factions battle at the next intersection. Use your grenade or just shoot anyone that scampers in your line of sight. Once all are dead, use the valve to turn off the steam. Move past it and into the control room.
Your allies are attempting to take over the control room; they even drop a flashbang inside. Eliminate all hostiles found across the room and on the left side. Listen to new orders: the missile can’t be disabled from the control room. You must find the radio-controlled bombs to plant explosives on the fuel lines.
Objective: Locate radio-controlled bombs.
Exit through the passage on the far side of the room. Ignore the elevator and use the switch by the broken door ahead. Move under the broken door and eliminate the guards along the next catwalk. Beware of the sniper up above. Cross the catwalk to the far room to find the radio-controlled bomb.
Objective: Proceed to fuel line via elevator.
Retrace your steps back to the elevator. Additional terrorists will be found along the way and a friendly will help you clear the area around the lift. Enter and use the elevator.
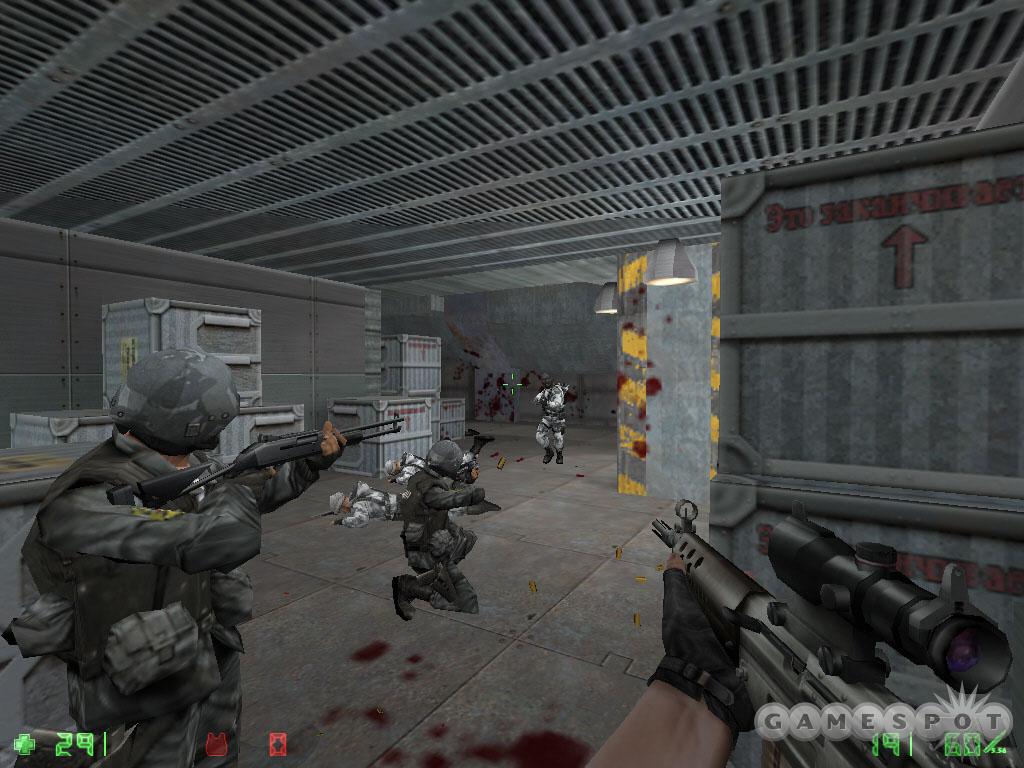
Exit at the bottom and assist the Russian forces against the terrorist group (grabbing weaponry and ammo off the ground as you move). Avoid shooting your friends or they will turn on you! More enemies wait around the corner to the left; it’s a good spot for your flashbang as there is a sniper down the passage as well as additional enemies behind a gate to the right. Eliminate all enemies in this area, including those through the gate.

To advance through this section, jump onto the crates near the entrance to the hall. Ascend up to the walkway that runs over the room. Drop down on the other side of the gate. Use the forklift; the vehicle crashes through the crates ahead. Jump onto the crate on the left and then onto the forklift’s top. Continue through the hall ahead (stopping to use the kit if you must).
Descend the stairs and shoot the hostile below. Use the radio-controlled bomb on the door. Return up the stairs and detonate. Descend and eliminate the hostiles in the next room (use caution as there is a sniper). Flames engulf the room at regular intervals. Wait for the flames to dissipate then cross the center of the room to the ladder on the far side. Enter the next control room (get the health from the left) and rendezvous with the commander; he has your next objective.
Objective: Bomb the fuel line.

Turn right from the commander and find the ladder (essentially just behind the commander). Climb up and use the radio-controlled bomb on the fuel line. Descend the ladder and receive word from the commander—he wants to detonator. Stand next to him and press the use button to give him the detonator.
Objective: Evacuate the missile silo.
Before exiting, climb the opposite ladder for some ammo and health. Exit the room and assist your comrades in eliminating the terrorists to the left. Climb into the back of the truck and use the stationary machine gun as you make the escape.
Objective: Eliminate the Hind.

A helicopter attempts to impede your escape. Shoot it with the stationary machine gun. It starts to your left so start shooting it as quickly as possible. Maintain steady accuracy. Whenever the Hind starts to shoot, retreat inside the truck bed and duck for cover. Return to the gun when the Hind moves away. When you’re low on health, use the medkit in the back of the truck bed.
Building Recon
Enter the briefing room and receive your mission objectives. You’re following the trail of a missing nuke.Objective: Infiltrate warehouse undetected, locate, and photograph missing nuke.
Move through the hole in the fence ahead. Use the fiber optic camera to spot the nearby guards. When they move away, move around the corner and hop into the storage room on the right. With the guards’ backs turned, drop down behind the crates and move to the right. Move along the crates until you reach a fiber optic zone. Use the device and wait for the guards to move to the stairs on the right. One returns to the left. When he moves away from the stairs, go along the right side and up the stairs.
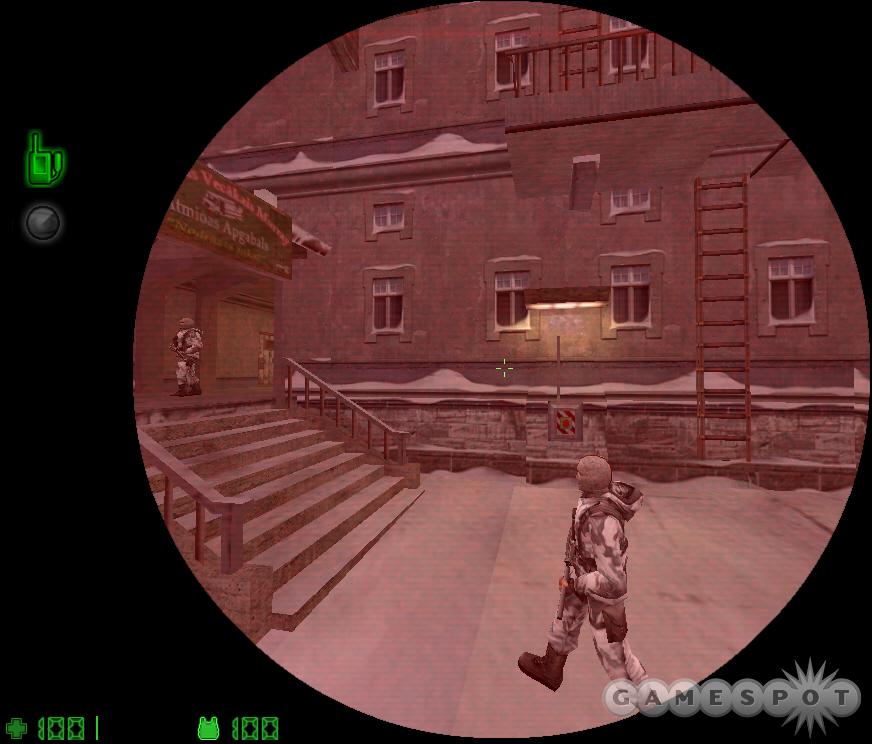
Scamper into the hall on the right. Hide behind the crates on the left and use the camera. When the guard moves to the right, go around the crates and into the crawlspace on the left. Follow the crawlspace to crates on the left. Use the camera and wait for the guards to move to the left. Exit and quickly grab the ladder and ascend. Go up a second ladder to the top.
Turn left and spot the lock. Use the blowtorch to open it. The sound alerts a sleeping guard behind you. Move behind the crates on the right and use the camera to spot the guard’s movements. When he gives up, enter the unlocked door.
Go up the staircase. Move down the hall and hear the voices to your right. Stay behind the crates and work your way across the room in a clockwise formation. Reach the corner ahead and use the camera to spot the guards talking down the hall. They won’t budge. Climb onto the crates to the left and find the padlocked vent. Open it with the blowtorch.
Start through the vent but the floor gives way. Use the blowtorch on the beams to get out of your predicament. Climb up the ladder into the vent and resume course. When you reach the corner, use the camera to spot the guards talking around the corner. Wait for them to move left then exit the vent and cross the hall. Open the far door.
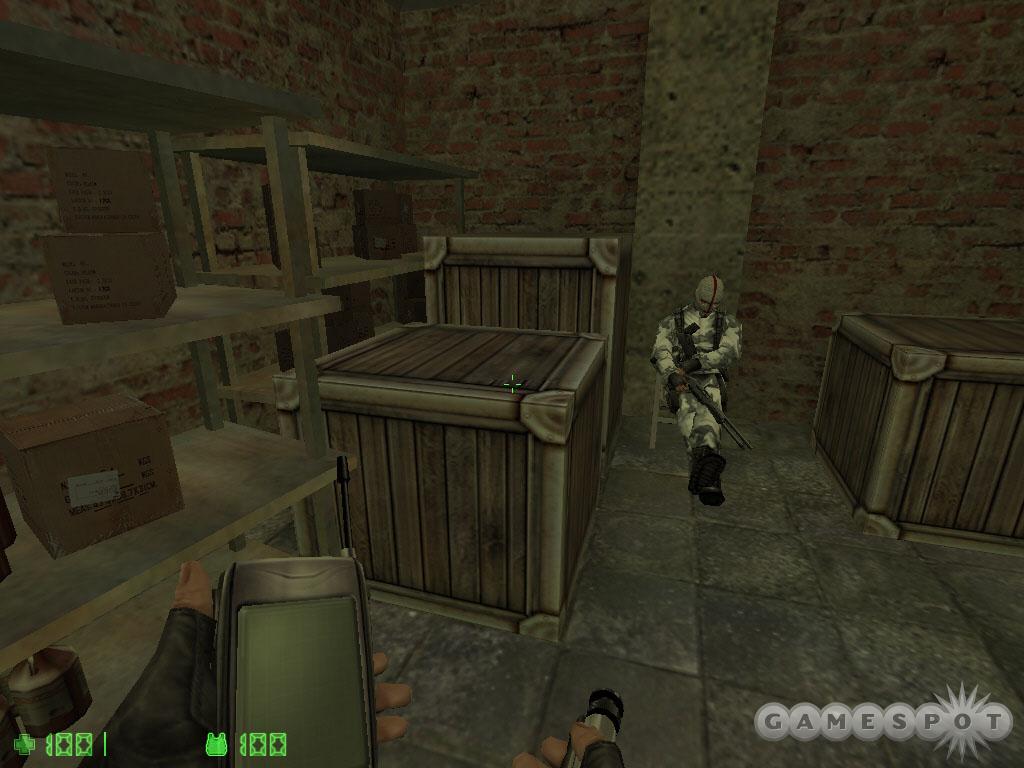
There’s a guard sleeping in this storage room. Do not hit the bottles or you will alert the guard. Jump onto the crate to the guard’s left. Move along the shelves and into the next vent. Cross the vent to the crack in the flooring and use the camera to spot the guard below. Continue through the vent and descend the ladder to the bottom. You’ll spot more guards outside at the next fiber optic station. Exit and work quietly down the hall to the green-lit switch in the back corner.
Use the switch to deactivate the electrified fence. Use the crates to move over the fence. Ascend the staircase. There’s a sleeping guard at the top and he’s next to a noisy bottle! Spot the ledge to his left (facing the guard) and use it to cross to the far staircase. Continue your ascent.
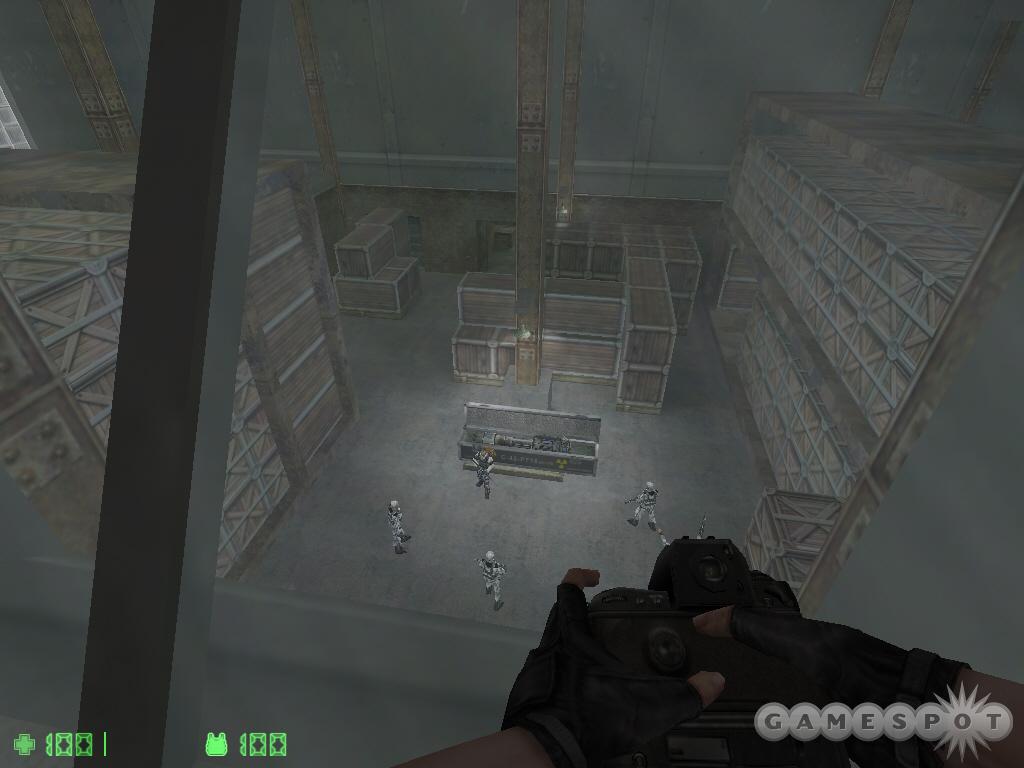
In the top room, grab the ammo and weapons from the table then move to the window on the left. The nuke is below. Use your digital camera quickly and snap a photo.
Objective: Go after the leader and recover the nuke.
Enemies emerge from the door on the right. Move out of their way to avoid taking damage. When the door opens, open fire with your new weaponry. Drop down to the room below and eliminate additional hostiles (and grab the ammo and health). Face the broken elevator to the left. Use the crates and shelves to reach the vent above the elevator. You’ll have to jump to the slanted beam.
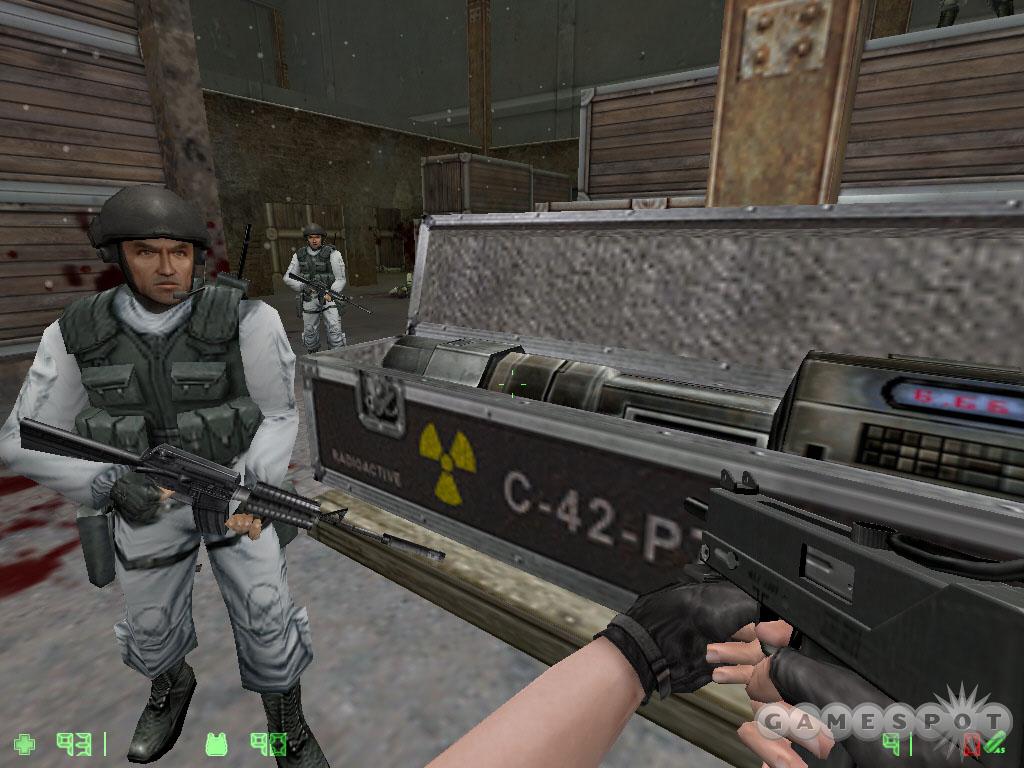
Go through the vent and down the ladder. Wait for the elevator door to explode open below and eliminate the guards in the next room. Grab more ammo and health. Follow the corridor to the warehouse holding the nuke. Assist friendly forces in clearing the room and securing the nuke…but it’s not there. You get word from the men that the enemy leader has left with the nuke. Approach the far door (adjacent to the soldier working on opening it) and be ready to fire when it opens.
Work your way down the hall and rendezvous with more friendly forces. Grab another weapon from the room on the right and receive a new objective.
Objective: Eliminate all opposition.
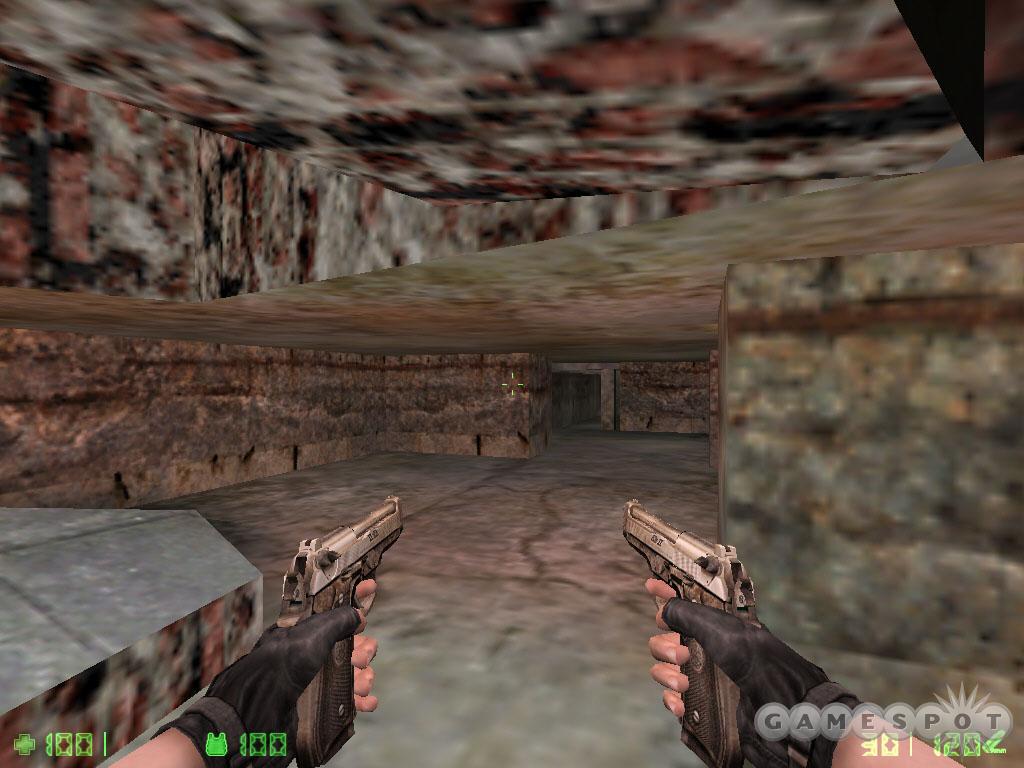
Enter the vent shaft and crawl until you fall through. Blast the surprised terrorist. Drop down into the recess on the left and find an HE grenade. Toss it near the crack in the recess to blow open a passage. Sneak through and follow the crawlspace to the dual pistols. It’s optional and you can choose to keep the grenade instead. Return through the crawlspace and out of the recess. Look through the wooden planks and shoot the explosive barrel on the other side to open a route.
Grab the ammo and follow the hall to the exterior. Your comrades are holed up by a machine gunner on an opposite roof. Wait for the airstrike to take the foe out. Follow your men to the right and eliminate the opposition. Watch out for the sniper above. More enemies occupy the tunnel ahead to the right. There’s a medkit inside if you need it. Cross to the next exterior and eliminate the enemies as bombs explode around you. Move along the right side to the opening in the fence.

Clear the area and listen for the ominous warning of heavy armor approaching your position. The tank arrives to the far left; its arrival causes a pillar to fall. Move into the shack under the pillar and follow the underground tunnel to a storage room containing rocket launchers. Return through the tunnel, climb the ladder out, and shoot the tank. If you miss, return and grab another rocket launcher.
The tank’s explosion opens a passage to the left. Take it and use the medkit inside. More enemies wait for you around the corner to the left. Shoot two before a third appears manning a stationary machine gun. Eliminate this threat by shooting the explosive barrel to the enemy’s left. Snag the weapon to the right.
More hostiles guard the area through the next short hall. There’s a sniper to the right and the leader waits down the hall underneath. You’ll find some ammo and a health pack near a corpse on the left side. This is also a good hiding spot against the enemies down the hall. Shoot the leader to force him to retreat. Enter the hall and defeat the enemies that enter from the right. Use the medkit. Push the metal crate left of the entrance to the fence on the far side of the hall. Jump over.
Hop over some crates on the right and enter the passage to the left. Spot the leader on the far side of the fence. Shoot him and the explosive barrel. Enter the room to the right and grab the armor, ammo, and sniper rifle. Bust the lock with a blowtorch to open the vent. Crawl through into the adjacent room and snag the ammo.
Exit to the right. This courtyard is filled with snipers, including two behind and above you. Move out cautiously and check your rear frequently to shoot those snipers behind you quickly. A double door opens ahead with more enemies behind it. Eliminate them including a sniper at the far end of the corridor. Duck under the broken beam. At the end of the corridor, shoot the enemy machine gunner to the right. Shoot the red barrel to cause an explosion that opens a route to the left. You’ll find more ammo here.
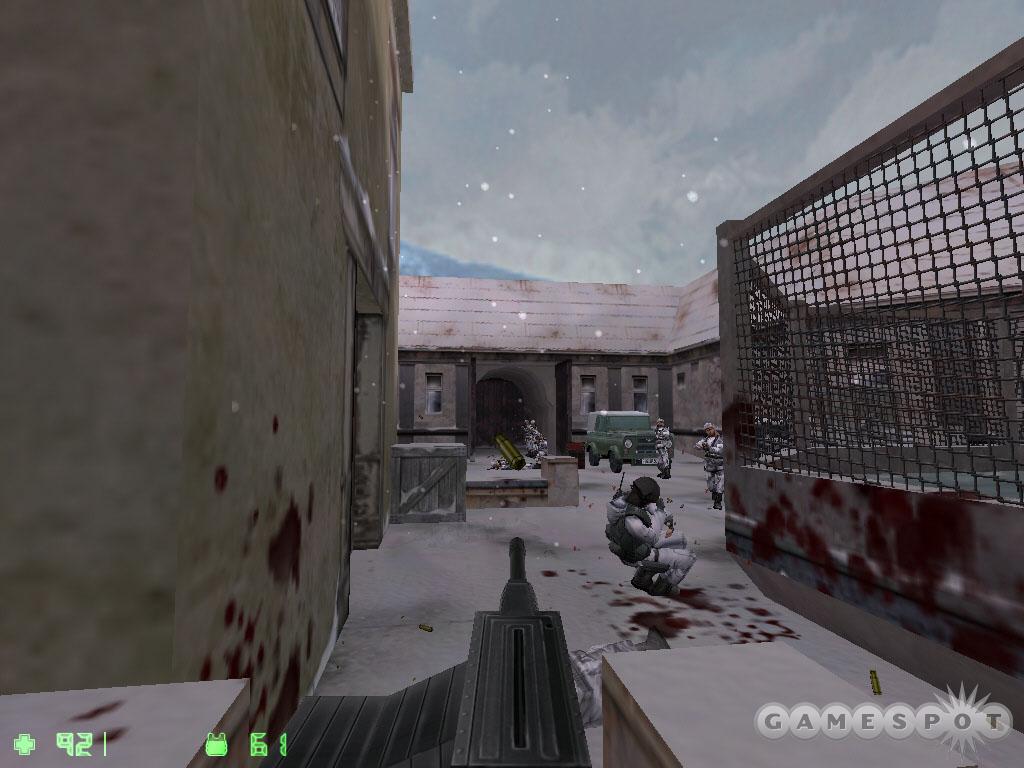
Move beyond the machine gunner and into the square. Wait for your comrades to move in then scurry across to the other side and use the stationary machine gun. Shoot the red barrel near the truck to eliminate most enemies. Mop up any survivors then press onward.
Watch out for enemies in the next hall. The room ahead contains health and ammo. Continue to the right. The first door on the right opens and an enemy emerges. Search the room for a new weapon. Clear the hall and continue your pursuit.
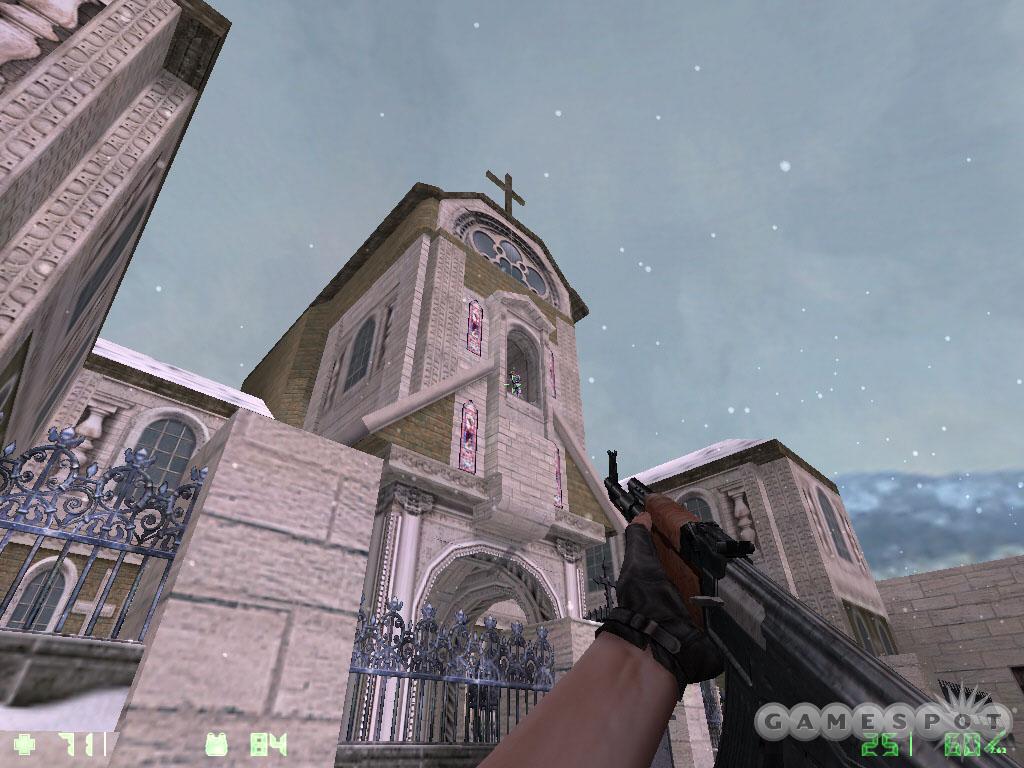
Start up the stairs cautiously. At the top of the first flight, eliminate the foe to the left. Ascend the stairs to the top (watch out for the roof sniper) and open the door. Reach the balcony overlooking the church. Quickly move down the stairs on the right and grab the armor, ammo, and health below. Exit and follow the courtyard to the church (there’s a sniper waiting for you from an upper window). Enter the church and grab the health and armor inside. Beware of snipers as you press onward.
Objective: Defuse the nuclear bomb.
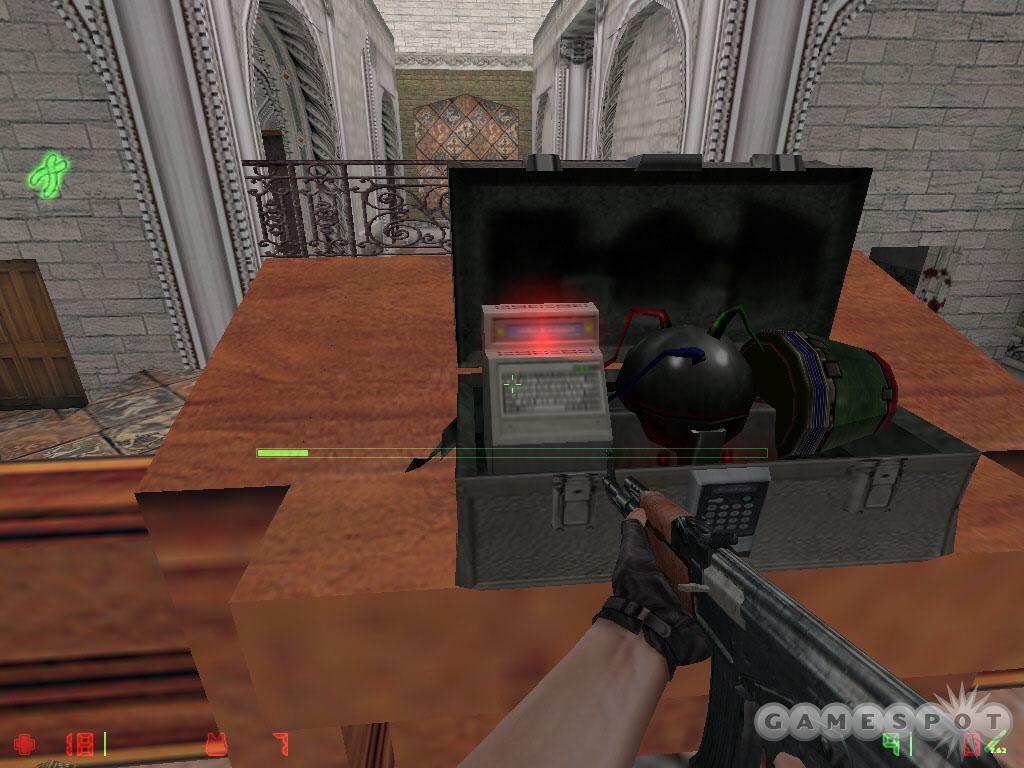
The terrorist leader has the nuclear bomb near the church pulpit. Work around the fences toward the front of the church. Upon entering, eliminate a sniper to the right before you engage the leader. Health packs are scattered on the left and right side of this section of the church. Fire your weapon at the leader; take cover while reloading. Scamper quickly and gather health as needed but you must work fast. As soon as the leader falls, approach the nuke and press the "use" button to defuse the device.
Drug Lab
Overview: Intel has reported that a highly organized drug cartel is running its main packaging and distribution facility in this Columbian jungle.
Objectives: Locate the hostages. Eliminate any opposition. Destroy all drug processing equipment.
Time: 05:56 HOURS
Location: Columbian drug lab. Bogota, Columbia.
Organization: U.S. Navy SEAL
You’re en route to one of the main packaging and processing centers for the Columbian drug rings. They know you’re coming and have taken hostages. Orders are to locate the hostages, eliminate the defenders, and destroy all processing equipment.
Objective: Breach compound.
Move forward around the fencing. Watch for the red lights on the ground—land mines! There’s a sniper in a tower ahead. Eliminate him with your pistol and use the tree trucks as cover. Enter the outpost on the right side and terminate the guard inside (you can also move to the right of the outpost and eliminate the guard before moving inside). Break the boards covering the hole in the floor and drop down. Break the boards over the exit. Terminate the guards outside to the left and right—shotgun works best here. A third and fourth guard fire from the other side of a fence. Use the trees as cover as you close in and eliminate both foes. Shoot the red barrel to open a hole in the fence.
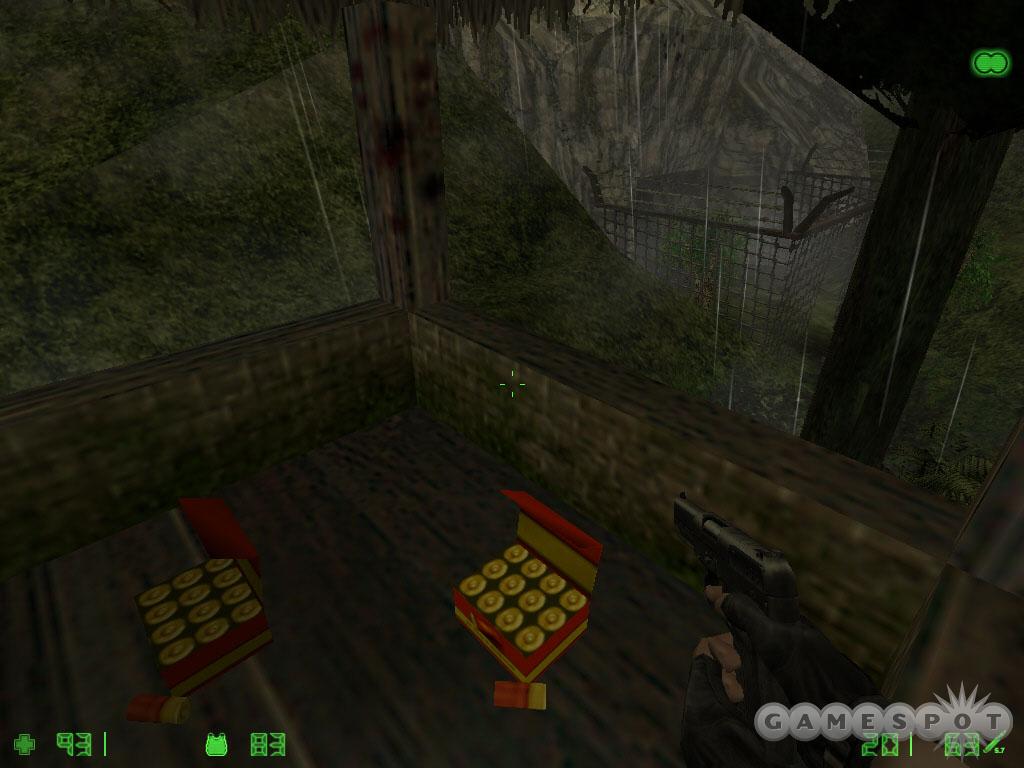
Before moving on, search under the sniper tower for a health pack. Climb the ladder into the tower to discover a couple packs of shotgun shells.
Move through the hole in the fence and press into the cavern. Eliminate the guards patrolling the right side (two sets of three). Grab the health under the lamp and find another shotgun on the right side of the cavern. Approach the hut ahead. Shoot the red barrels to wound or kill defenders. Enter and move into the room on the left and pick up the sniper rifle. Clear the window of the netting (using a gun or knife) then shoot the sniper inside the tower with your rifle. There’s a second sniper to the right as well as a third guard on the ground.
Exit through the window and search the area on the right to find health and ammo. Move to the left side and bust the wooden planks with your knife. Move forward to find your allies and receive a new objective.
Objective: Plant RC bombs on all processing equipment.
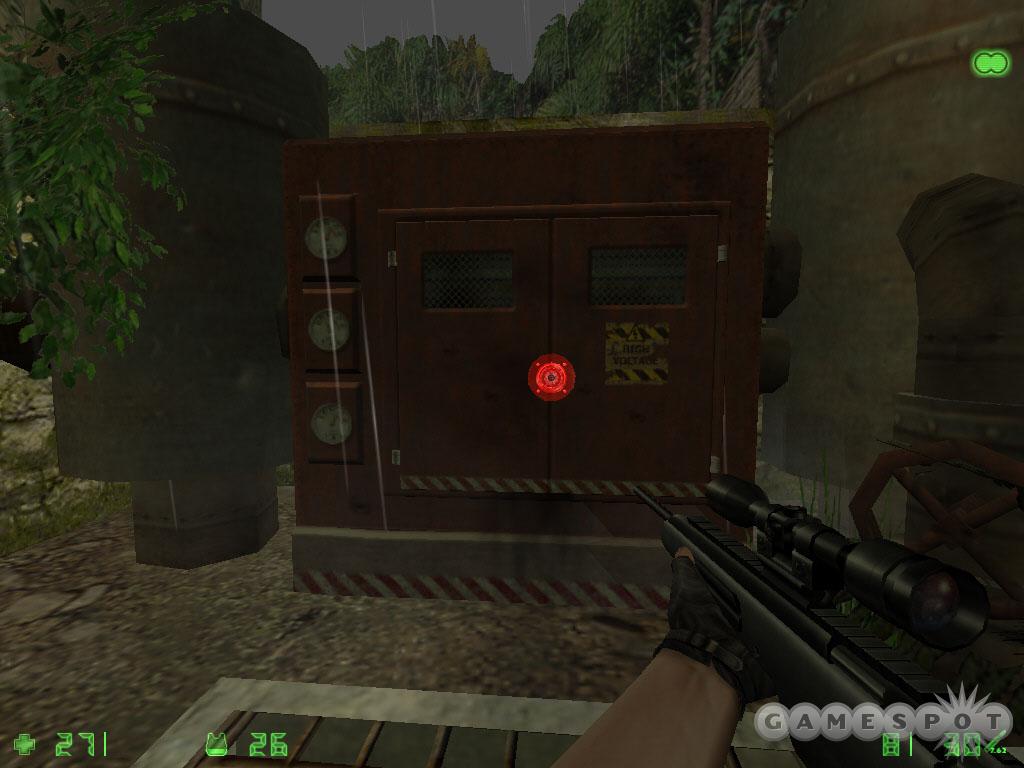
Use one of your radio-controlled bombs on the processing equipment ahead. After it explodes, follow your allies through the door on the right.
An RPG launcher defends the area ahead (he’s in a tower just around the corner to the left). The mission ends in failure if he simply sees and fires at you. Thus, the team leader suggests finding an alternate route into the compound.
Objective: Locate alternate entrance into compound.
Look along the ground left from the team leader and find a locked grate. Use the blowtorch to break the padlock. Drop into the crawlspace. Switch on your night vision goggles to navigate the crawlspace. Guards wait at the end above your position. Blast the guards from inside the hole. Exit and pick up the sub machine gun and ammo off the nearby crate.
Peer around the corner to the right. Two guards protect the processing equipment in the far room. Eliminate the opposition with your sub machine gun. To get into the room, use your knife to break the wooden panes on the left window. Crawl through. Use the medkit in the corner then plant the radio-controlled bomb on the processing equipment. Move away and down the previous hall. Detonate!
The door to the left of the processing room opens after the explosion revealing a staircase and a couple hostiles. Eliminate them then ascend the stairs. At the top of the stairs, combat guard around the left corner and another behind the crates. Jump over the crates and approach the medkit. The RPG launcher waits to the right. Shoot him then grab the medkit.
Wait for the team to acknowledge the elimination of the RPG launcher. The door to the left opens revealing another processor and additional guards. Terminate the guards while taking cover around the corner. Approach the processing equipment and use the RC bomb to destroy it. The explosion destroys a crate to the left, which allows you to access the rest of the catwalk. Watch out for the falling beam and new guard. Use the medkit on the left side of the room. Search the other rooms for ammo.
Find the staircase going down. Instead of going down the stairs, hop onto the crate to the left of the stairs. This is because the stairs crumble beneath your feet and will drop you into a bad situation. From the top of the crate you have a better angle on the guards that appear. Follow the halls and find your team members ahead.
Objective: Provide cover for teammate while hostage cells are opened.
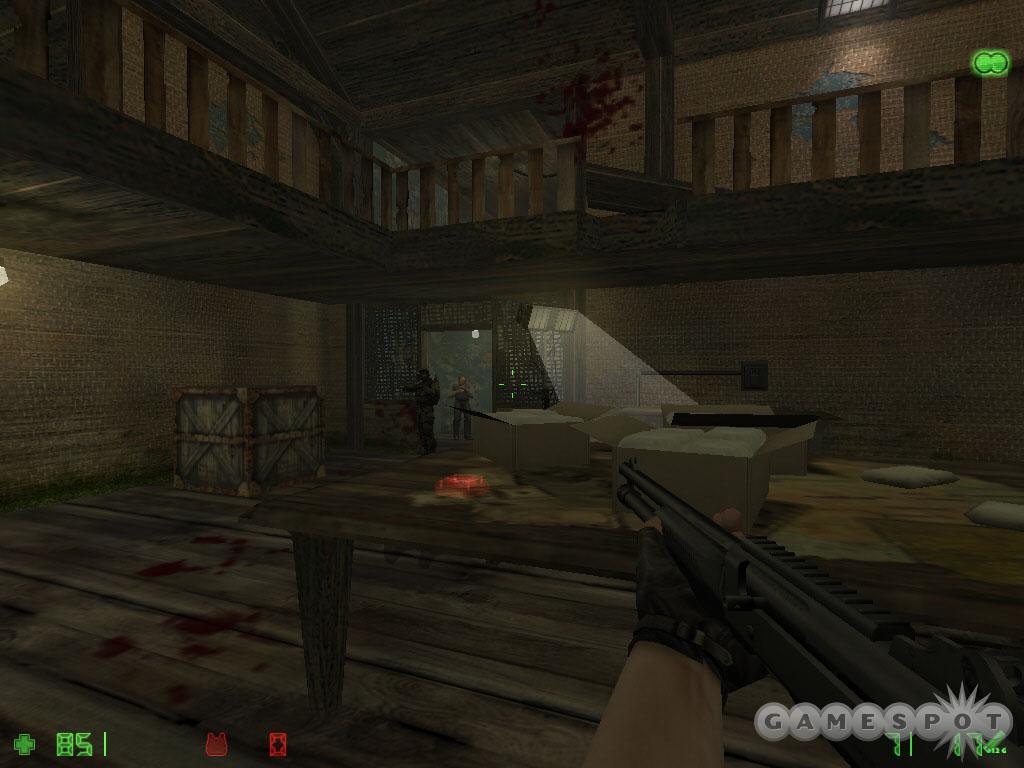
The cells are located in the far corners of this room. The hostiles appear on the balcony above. Keep moving around the ground level to get a shot on the enemies above (they arrive from all sides of the room). After the hostage cells are opened and the area is secure, plant a radio-controlled bomb on the table. Detonate the device from a safe distance.
Objective: Take hostages to outside evac zone.
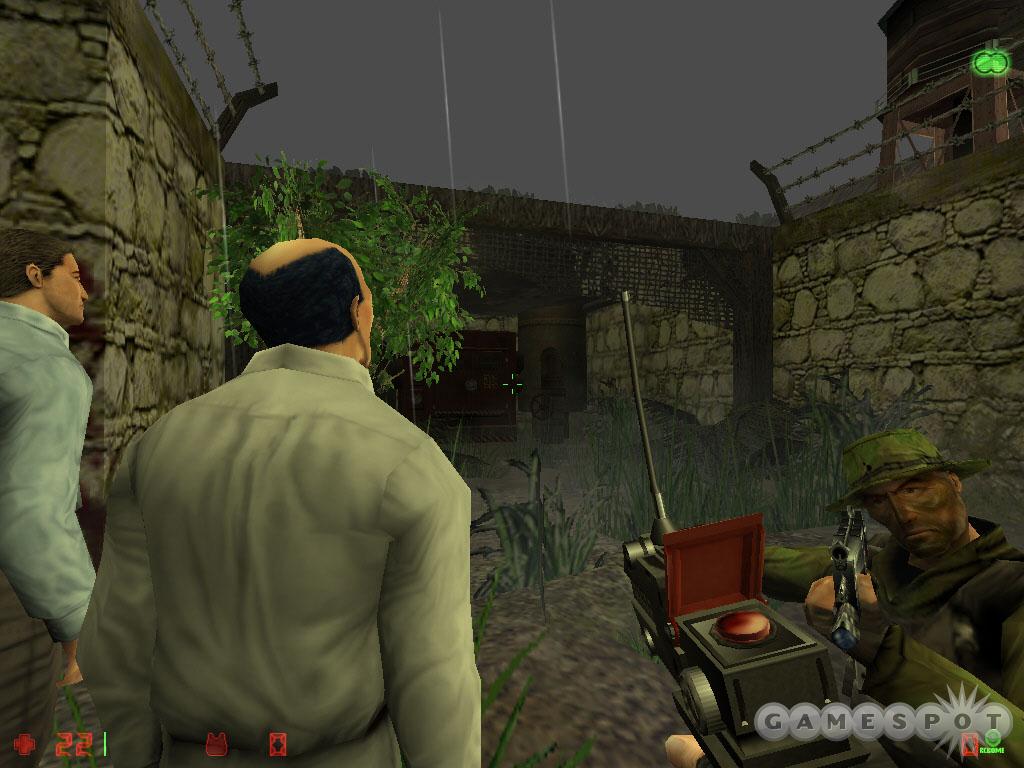
Move to each hostage and press the "use" button to order the hostage to follow you. Enemies appear from the door on the opposite side. Aid your team in eliminating the hostiles entering the room. Peer outside and take out the snipers to the right. There are also additional guards through a gate; shoot the red barrel to eliminate them. Move the hostages outside and destroy the processing equipment with a RC bomb. The team leader calls in evac and the mission ends in success.
Motorcade Assault
Overview: A European terrorist organization has come to prominence resulting in a distinct spike in terrorist activity throughout this region.
Objectives: Take out the motorcade. Assassinate the terrorist leader. Locate the missing ground team.
Time: 02:18 HOURS
Location: Eastern district outside Venice, Italy.
Organization: German GSG-9
The motorcade moves slowly under your position. You automatically move out, with LAW rocket launcher in hand, to a position overlooking the courtyard below.
Objective: Upon commander’s signal, take out the lead car in convoy with LAW.
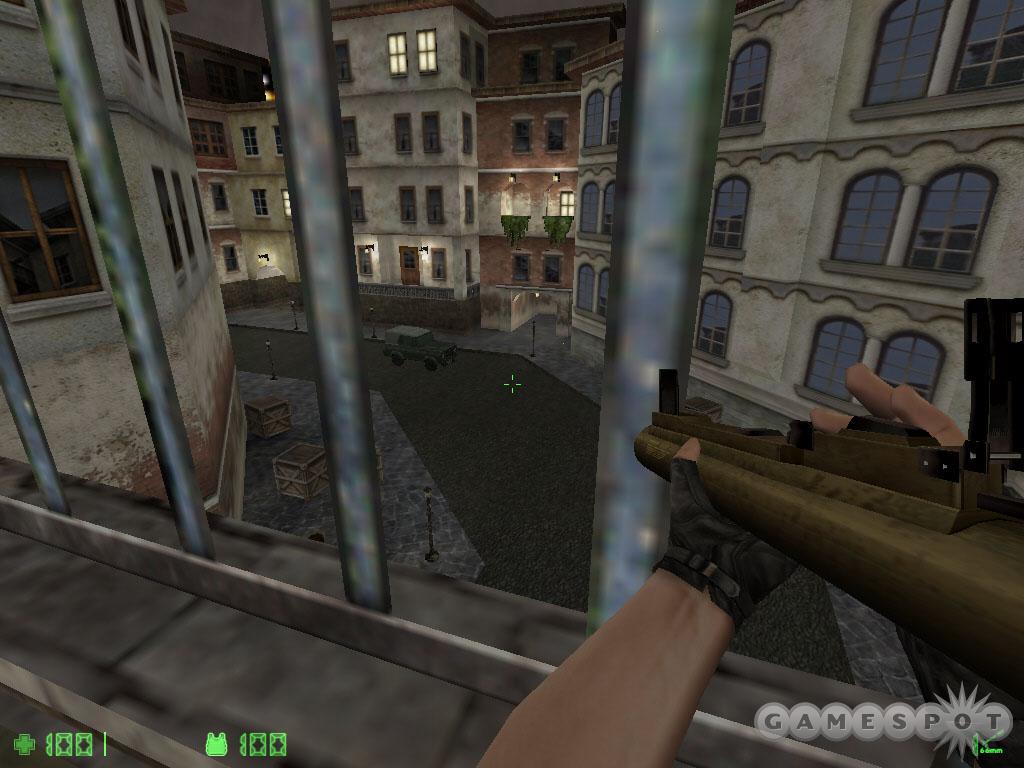
The motorcade arrives moving left to right. Don’t fire until the commander gives the signal; he doesn’t give the signal until the motorcade comes to a stop. Once it does, destroy the lead car.
Objective: Suppress resistance.
You automatically switch weapons. Enemies appear all around the motorcade. Also watch out for a sniper perched in a window in one of the buildings across the courtyard. Eliminate the enemies as quickly as possible. Use short-controlled bursts for maximum accuracy. After clearing the courtyard, turn to the left and face the door. It soon opens revealing a couple more adversaries.
Objective: Locate and eliminate the VIP.
Move out through the hallway ahead (grab the ammo off the crate on the right). Move around the corner to the right and beware of enemies on the right side as well as snipers up high both to the left and right. Take cover where your ally waits. Move through the open door at the top of the stairs.
There are two enemies here: one up the staircase to the left and another behind the crates near the medkit. Eliminate them both then grab the HE grenades off the crate then use the medkit as necessary. Proceed up the staircase. At the top, finish off two guards then snag some ammo from the right side.
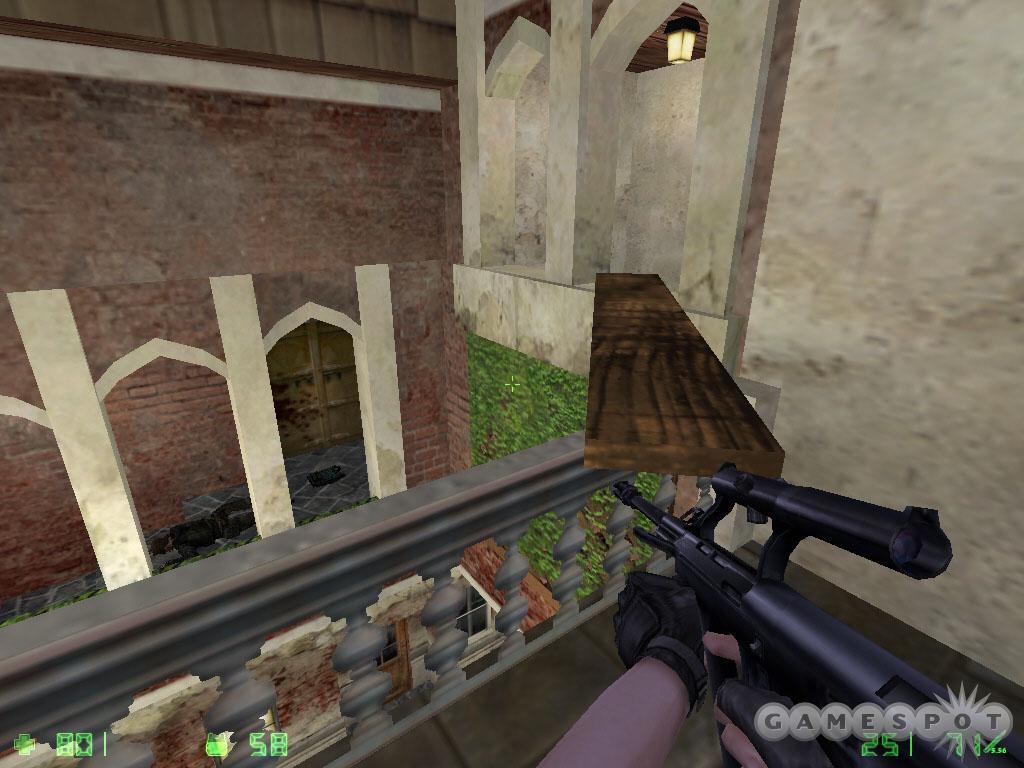
At the balcony, shoot an enemy across from you then use the wooden plank to traverse to the adjacent balcony. Walk to the switch and use it. Turn right and face the courtyard from this balcony.
Objective: Provide cover for the ground team.
Drop down to the crates on the right then move through the open gate ahead. Finish off two guards then work your way down to the door. Use the medkit and pick up the ammo. The door opens shortly. Eliminate the guards outside. Beware of the sniper ahead and another guard hiding behind a window to the right. Move through the open passage to the right ahead. Go up the stairs and take aim on additional guards, including a sniper in a tall building to your left.
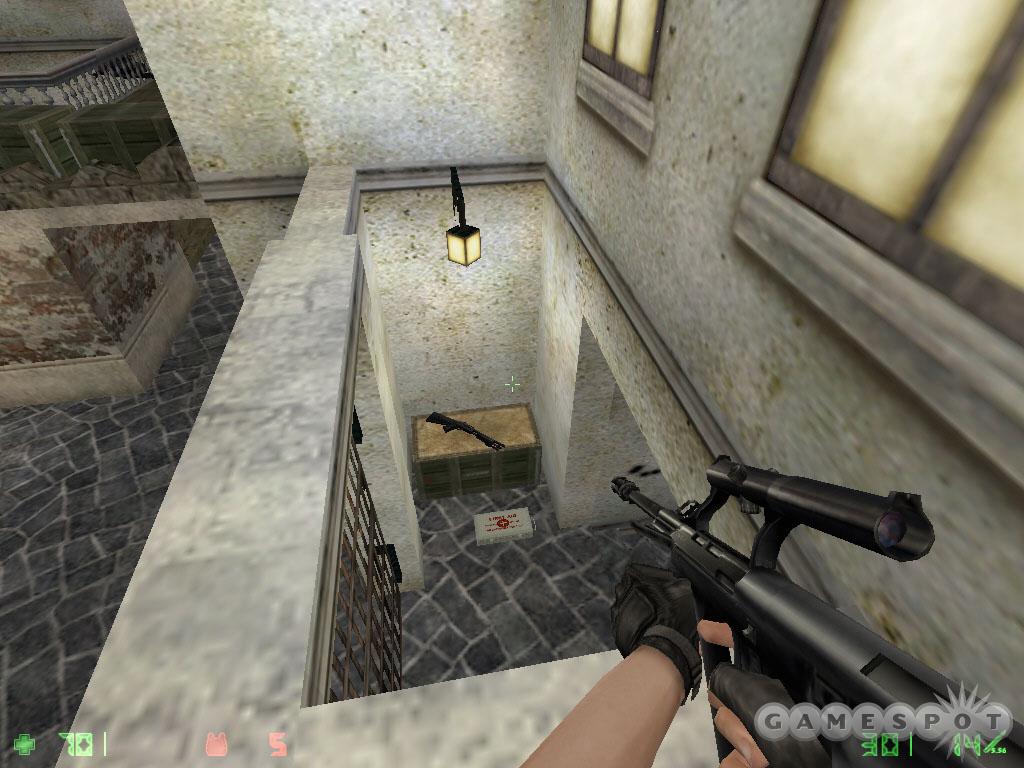
You can hop out onto the ledge that extends out from the balcony. Follow it to the right and around to the far side. Drop behind a locked gate to reach the medkit and shotgun below. Start down the staircase. Take out the guards waiting around the corner to the right. Move down (snag some ammo on the crates to the left) and enter the tunnel. More enemies await; take cover behind the corner. As you move down the tunnel, watch out for an enemy on your left. There’s also a medkit in here.
Continue down the sewer tunnels. Move cautiously around each corner, as the enemies are plentiful down here. Go up the ladder at the end. The manhole cover moves providing access to the street; the stalled motorcade is just ahead. Search an alcove on the right for two enemies, ammo, armor, and a health pack.
Move past the motorcade and spot the VIP (in red) scampering to the right. Take out the sniper then follow the VIP through the short tunnel and to the right. Enemies heavily populate the next opening to the left. Look carefully and you can spot the VIP in a window across the water. Don’t waste ammo on him. Instead, target the hostiles scattered around the area. Use the pillars as cover though it’s most effective to stay far to the left and cautiously strafe into view. If you need health, ammo, and want a sniper rifle, scurry to the far right side to find these items in a small crate-packed alcove. As you move toward the alcove, turn around as additional guards appear and pursue you.
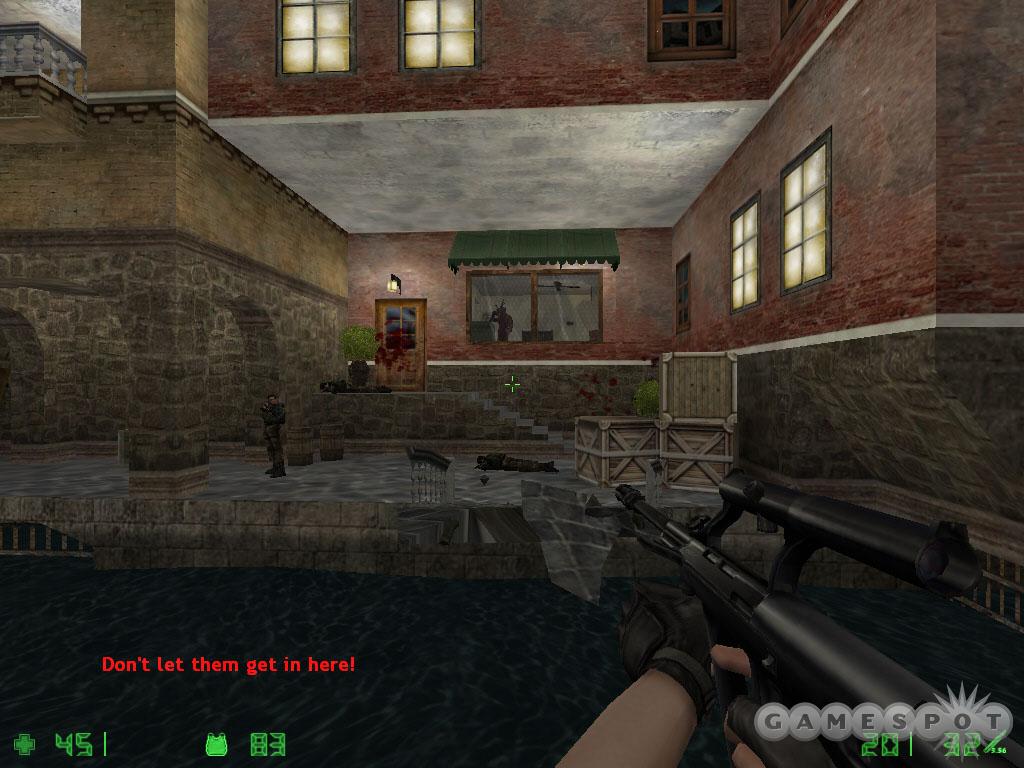
As you approach the bridge, it’s destroyed. Take an alternate route by jumping across the gondolas. If you fall in the water, return to the far right side (facing it) of the walkway to find stairs. You’ll also need to watch behind you as there are additional snipers on the balcony and windows above.
Objective: Eliminate the VIP behind bulletproof glass.
The VIP is behind bulletproof glass—but lucky for you that glass has a hole in it. Grab one of the HE grenades off of the crate on the left side and toss it inside the hole. You can miss and just grab another grenade. If you need additional health, grab some off of the crates near the window. And back away from the grenade if you miss; the explosion radius is pretty big and can certainly kill you if you’ve been wounded.
Objective: Get to the extraction point.
Turn left from the glass and move along the path past the gondolas to find more enemies trying to block your progress. Watch out for a sniper maintaining his post in a high window above. Move through the corridor until you reach the next open courtyard. The extraction point lies on the boat to the right. Eliminate the opposition in this area (snipers across and behind you) to complete the mission successfully.
Thin Ice
You’re onboard a large cargo ship and ordered to find and disable the ship’s engines.Objective: Locate and disable vessel’s engine.
Use the blowtorch to break open the lock. Grab the weapon, flashbang, and ammo from the room. Open the opposite door and eliminate the guard and turret. Descend the staircase and exit to the exterior defeating a couple guards along the way. Turn right once outside and go around the left corner. Hop up and over the crates. Snag the ammo off of the far crate, grab the health kit then plant an RC bomb on the door around the left corner. Detonate!
Follow the staircase down and annihilate the guards. Move cautiously and pick off the guard through the open window ahead and another down the hall on the right. Follow the hall and pick up the ammo off the desk. Turn left and shoot the guard inside the adjacent room. When you enter, look to the right quickly to find another guard. Shoot another guard in the adjacent room to the left.
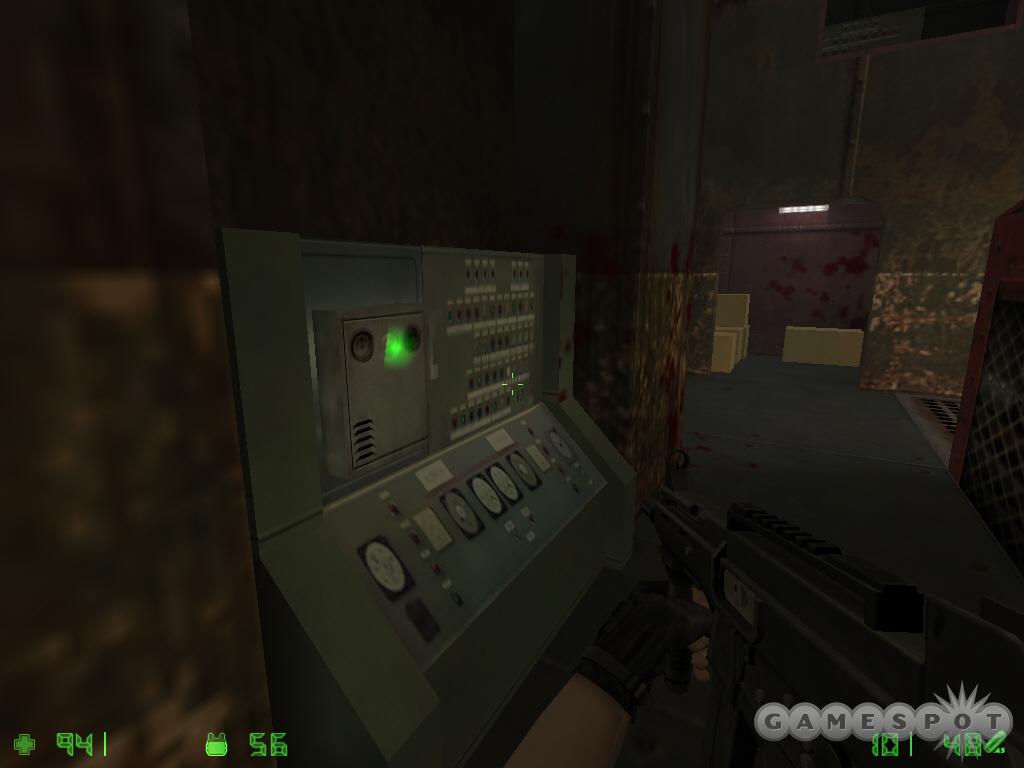
Grab the shotgun, ammo, and health from the far right corner then continue down the narrow hallway. At the intersection, beware of guards to the left and right. The corner to the right contains some ammunition. Descend the stairs into the engine room. Defeat the enemies patrolling room. Beware of a sniper on a balcony on the far side of the room and also watch out for a turret overhead. Activate the three switches to disable the ship’s engines.
Objective: Proceed to bridge and steer vessel away from shore.
Enter the opened gate (grabbing the ammo and health inside) and shoot the guard at the end of the hall. Move that way and open the double doors. At the top of the stairs, shoot the turret through the opening on the right. You can’t move through this door—boxes block it. Turn around and duck. Hop onto the railing and crawl to the far opening on the left. Drop inside and snag the health and pistol.
Beware of guards on the upper floor. Comb this level for ammo and health before moving through the passageway to the right. You’re near the start location. Eliminate the guards around the staircase (there’s one behind some boxes to the left). Go up the stairs and return to your start location for health you may have not used. Go through the open double doors onto the upper floor. Grab the ammo and health. There’s also an HE grenade on the desk in the far corner of the room.
Stand your ground in the next hall as enemies emerge from the left and ahead. Search the left hall for ammo and health before going to the exterior. An enemy drops grenades from above and there is a sniper and a turret to the left. Take out the grenadier first by moving behind the crate and turning around. Then eliminate the sniper and finally the turret. As you move forward beware of the guard on the crate to the right.
Before moving back inside, you can use the slanted beams to reach the upper floor (where the sniper stood). Climb up the far beam then jump duck onto the railing. Up here you’ll find armor, ammo, and health. You’ll find more on top of the crates.
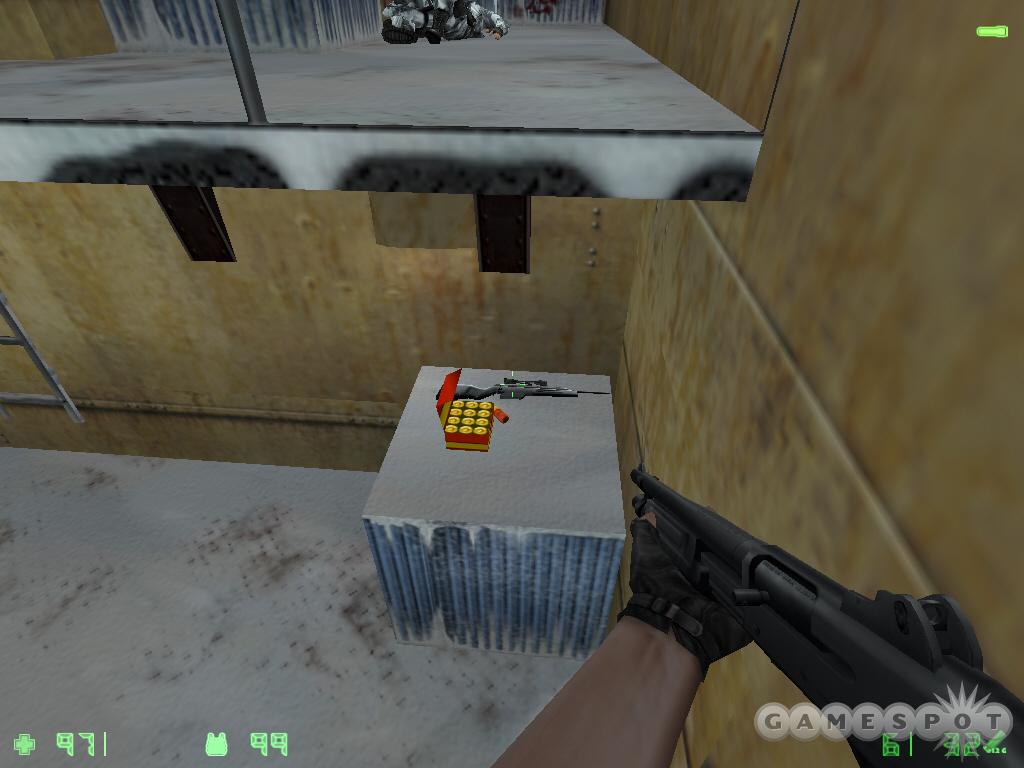
There’s also a sniper rifle and shotgun ammo on one of the upper crates. Hop over one of the railings above and drop onto the ledge above the door. From that spot, hop onto the crate and grab the weapon.
There are two routes to the next area. You can take the high route—the ladders and catwalks along the ship’s top—or return to the lower level and move through the ship’s interior. Either route returns you the ship’s top. Move to the ship’s front and overlook a group of enemies. Eliminate them!
Descend the ladder and beware of more enemies to the right. Search the broken crates at the ship’s bow for additional ammunition. Use the open stairwell to return inside the ship. Eliminate the enemies throughout this storage room.
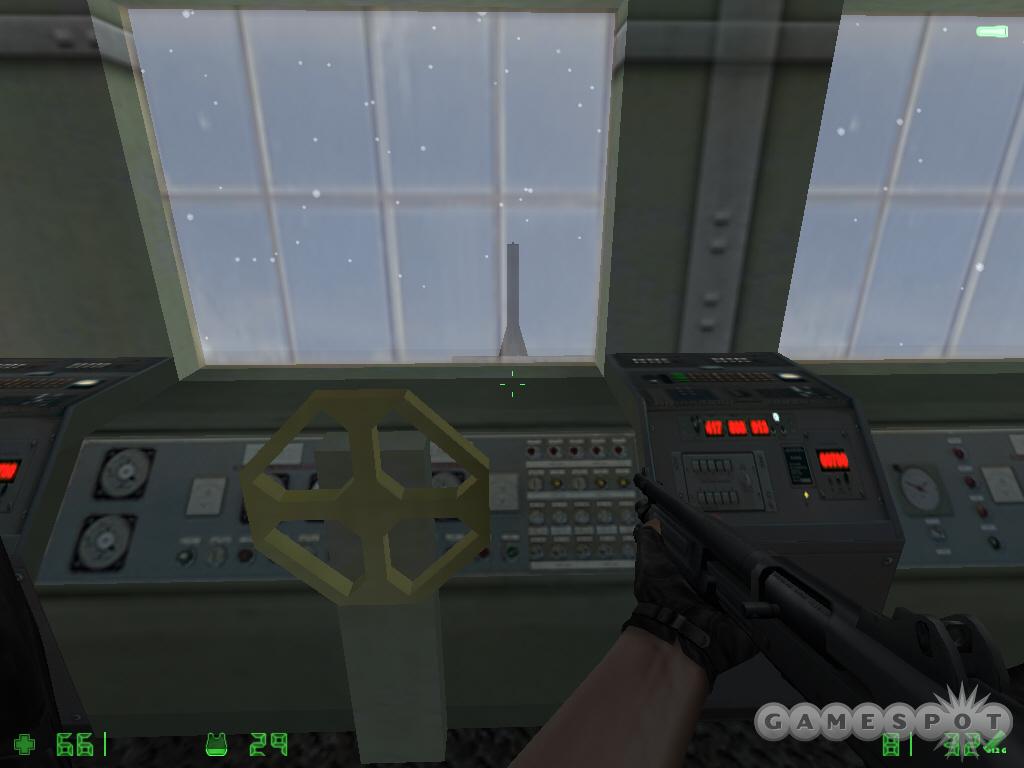
Follow the narrow winding corridor and eliminate the enemies along the way; the tight quarters is perfect for the shotgun. Reach the ladder and climb halfway and drop into a storage room with ammo and health. Continue to the top of the ladder into a conference room. Blast the guards inside and press on through the open passage. Move up the staircase and blast the guards in the bridge (an HE grenade can help clear them out). Use the steering wheel to adjust the ship’s course.
Objective: Prevent terrorists from escaping.
Use a radio-controlled bomb on the door. Move to a safe distance and detonate. Inside the room, use the medkit and grab the armor on the left. Ascend the ladder. Kill the sniper and grab his discarded rifle. Kill another guard below then wait for the jet to fly. Shoot the jet with your sniper rifle.

But it’s easier said than done. The jet uses a machine gun and rockets to retaliate. The rockets can annihilate you in a single explosion. One of the best places to take cover is the structure from which you entered. Stand behind the structure so it’s between you and the jet. Don’t stand directly behind the structure or you may suffer damage from any rocket explosions. Instead, stand a bit away but not up against anything else behind you (because any missiles striking behind you could inflict damage).
When the jet is shooting, duck behind the cover. When it’s not, strafe from behind the cover and shoot the jet with your sniper rifle. Should you need health, there are packs scattered on this roof and there are also two medkits on the structure you’re hiding behind. Shoot the jet enough times to complete the objective and the mission.
Downed Pilot
Overview: A helicopter has been shot down near a mining compound in the jungles of Argentina. The pilots have been taken hostage.
Objectives: Search the area. Locate any survivors and lead them to the extraction point.
Time: 10:27 HOURS
Location: Mining compound. Puerto Iguazu, Argentina.
Organization: German GSG-9
One of our helicopters has been shot down during training. You locate the crash site automatically and are then ordered to follow the blood trail in search of survivors. Expect opposition!
Objective: Search for survivors of helicopter crash.
Break the wooden planks covering the hole in the fence; use your knife. Move along the river to the right. Be sure your allies are following you. Enemies wait just around the corner so be ready. Watch for a sneaky foe in an alcove on the right side. Move beyond the building ahead and continue to the right. Notice the land mine on the ground as you approach the downed aircraft.
Search the aircraft for health near the cockpit and ammo and a sniper rifle near the rear. Before moving to the rear, shoot the explosive barrel to eliminate a couple hostiles. Beware of two more overlooking the cockpit: a sniper up high and one on the ground at the plane’s nose. Exit the plane and move around it’s left side and across the nose to find the narrow path.
Objective: Proceed ahead into mining facility.
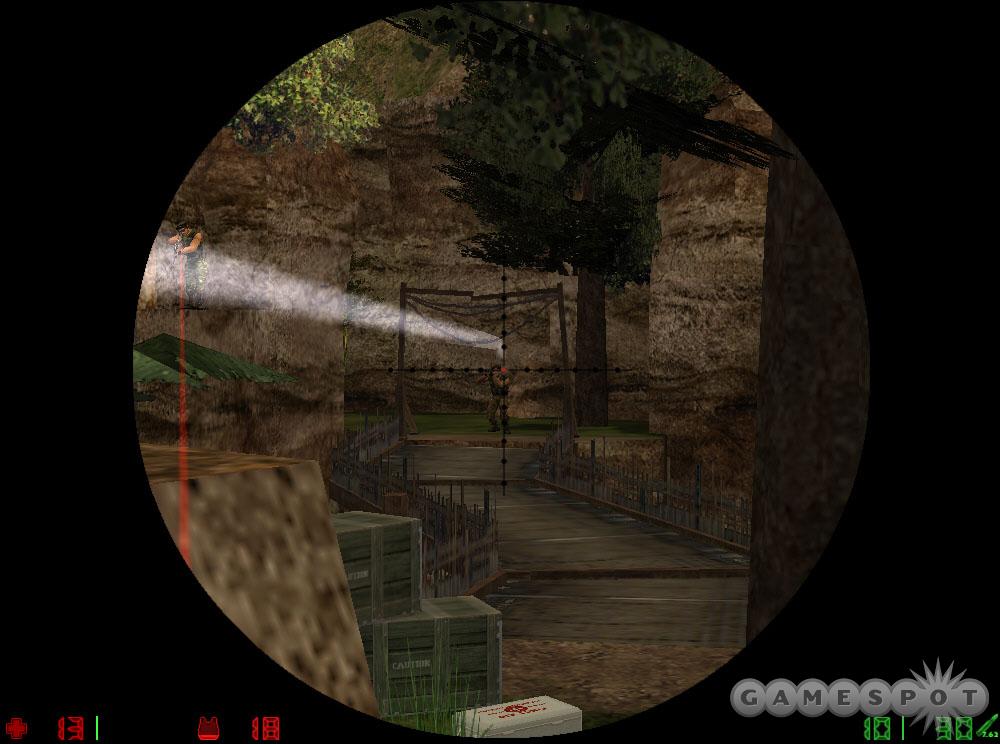
Cut the tree branch with your knife. Avoid the land mines by using the steps on the right. Many enemies wait to the left. There’s a sniper up high to the right, an RPG launcher on the bridge, a third enemy sniper on a ledge to the left, and a final hostile on the ground near the mines. Kill the ground foe and right sniper by strafing carefully to the right. The RPG launcher is tougher. Instead of remaining on the steps, leap off and over the mines. Dodge the incoming rocket then shoot the RPG launcher and the second sniper to the left. Grab the health and cross the bridge.
Cut another branch with your knife and descend into the mines. As the tunnel widens, beware of enemies below. Toss in a flashbang or HE grenade to provide an advantage or just lure them toward your line of fire as you take cover around the corner. Grab the health in the room.
Use the lever behind the mine car on the left; this lowers another car on the right side of the room. Jump on the lowering cart to descend a level. Beware of enemies to the left and right at the next intersection. Turn right and ascend the ladder into the room above. Use the medkit then hit the switch and open the door. Shoot the guards on the other side.
Objective: Move on and locate pilots.
Press on through the storage room and the barracks. Shoot the foe taking cover behind the table; there’s a second hostile hiding near the cots on the right. Cross the room on the left side and hop up onto the cot. Break the grate over the vent using your knife. Crawl inside.
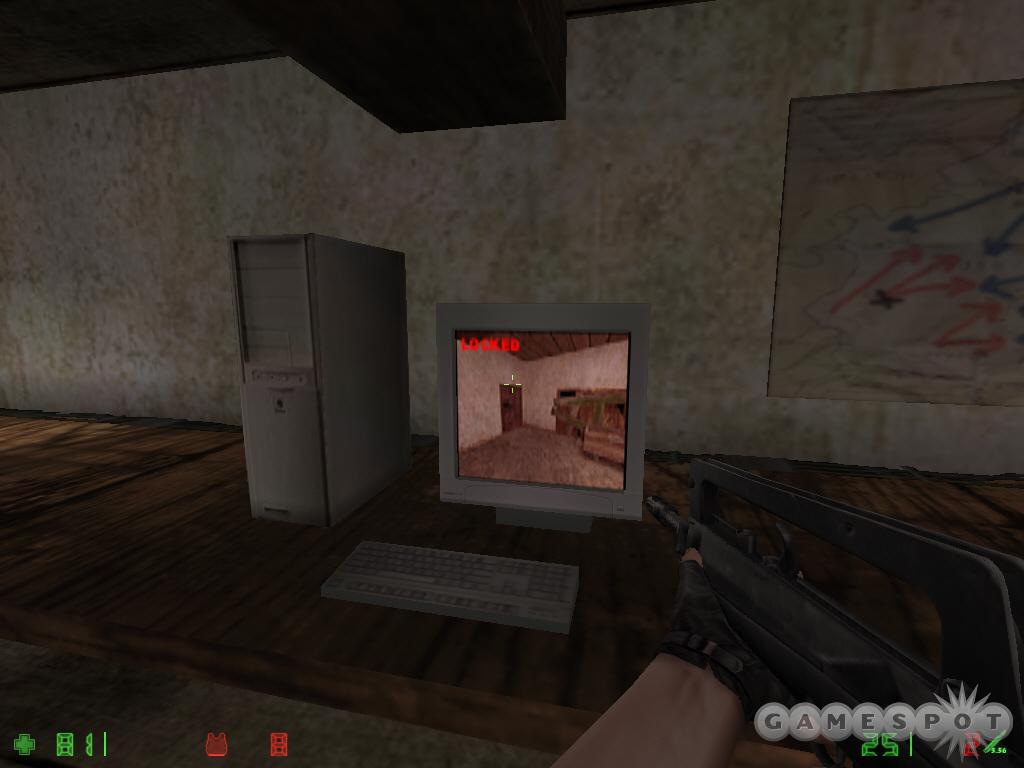
Shoot the grate and enemy at the end. Hop out and enter the office on the left. Take out the enemies in the room including one to the right. Use the computer marked "Locked" so it says "Unlocked". Exit through the door on the far left side of the room. Shoot the enemy near the fan then open the door on the right. Blast the guard behind the crates. Move cautiously around the corner and take out more guards taking cover behind crates as well as another guard behind a grate ahead. He tosses grenades so shoot him quickly.
Go around the corner to the left. More guards wait in the room to the right. Shoot the red barrel quickly. When you do, retreat into the hall to avoid taking damage. Mop up any wounded enemy survivors then search the room for health, ammo, and a new weapon.
Use the lever on the motor to raise up the car. This permits access to the tunnel below. Drop down inside. Follow the tunnel to a ladder. Climb up to the top and blast open the grate. Shoot the red barrel to kill the nearby enemy (hard to avoid damage, though) or just shoot him instead. Exit the vent and follow the stairwell to the left.
A room lies at the bottom of the stairs; a group of enemies guard the room. Shoot the red barrels on the right side of the room to help clear out your foes. Use the wheel valve under the "High Voltage" sign to supply power to the door on the right. It opens and you can move through.
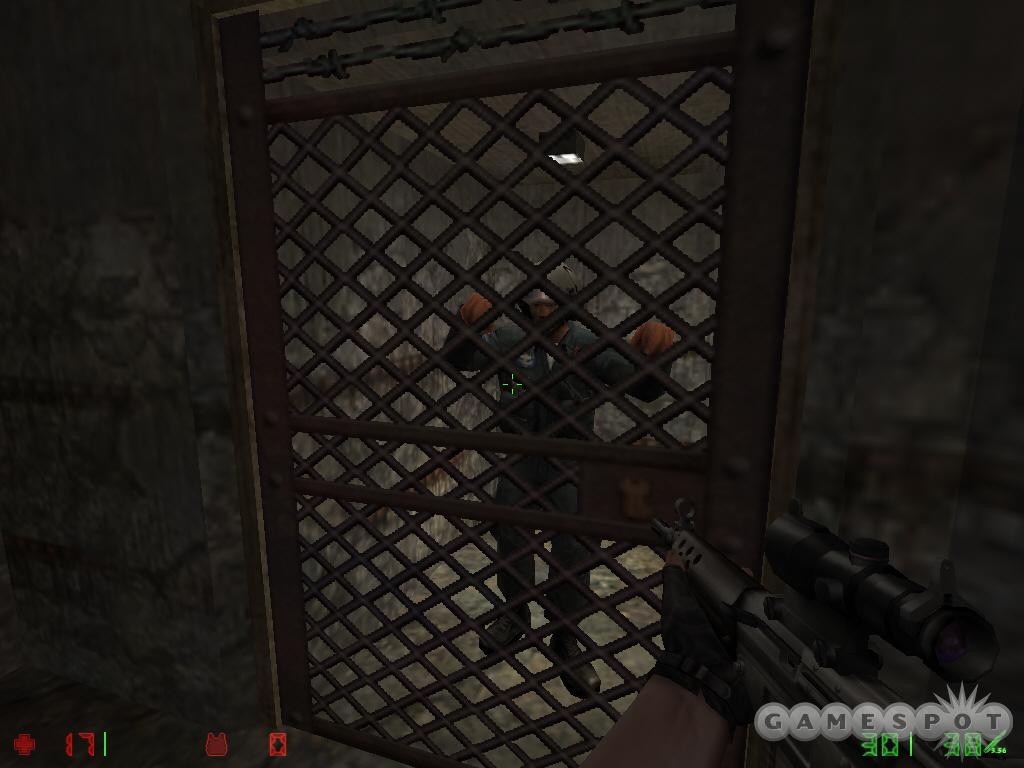
In the next storage room, shoot the barrels to the left (killing an enemy) and another enemy to the right. Search the shelves for a radio-controlled bomb and a blowtorch. Use the medkit then press onward to the left. Descend the staircase.
The room at the bottom contains one of the pilot hostages—and enemies heavily protect the area! Beware of enemies up high forward and to the right. After clearing the room, speak with the hostage. Your allies arrive to secure the hostage and order you to continue on and look for additional survivors. Climb the ladder in the corner of the room and shoot the enemy waiting at the top.
Walk toward where the enemy stood and the floor breaks under your feet. Return up the ladder and jump from the broken floor through the window and into the adjacent room. You can cross the broken area and use the medkit if needed. Pull the lever inside the room; this opens a door on the ground level beneath the ladder. Drop down and continue in that direction.
Follow the tunnel to the next room. The toughest foes wait behind the crates. Spot a sniper up high and another guard behind the fence. After clearing the room, use a radio-controlled bomb on the cracks on the right side of the chamber.
There’s a medkit to use to the left. Your eventual goal is the far left side where you’ll place another radio-controlled bomb. Before doing so, however, jump onto the crates on the right side and break open the grate. Shoot the guard ahead and drop into the room. Beware of two more guards to the right that will ambush you if you aren’t careful. Comb the room; it contains weapons, ammo, grenades and armor. The tank opens a hole in the wall. Return through and detonate another radio-controlled bomb on the crack to the far left.
Use the blowtorch to bust open the lock on the left. Move around to the right and find another spot for a radio-controlled bomb. Place one and detonate. This opens a hole in the grate below. Hop down into the water and follow the crawlspace to the new weapon at the far end. Return outside the crawlspace.
Retrace your steps through the mining facility. Some new guards appear so what your step. Furthermore, the mining facility is collapsing so some rooms may be a bit different than you left them. For example, navigate the right side of the hole in the floor. On the far side you’ll find another spot for a radio-controlled bomb (you passed here earlier). Detonate the bomb.
Move through the open passage and shoot the enemies that attempt to block your advance. Search an alcove on the right for additional ammo and make a stop at the medkit if necessary. Follow the hall into a kitchen and finally into an open office area. Eliminate the guards inside. Go through the left gate to the computers. Use the one marked "Locked" to trigger the next event. Gas enters the room. There’s no escape. You’ve been captured!
Objective: Find way to escape from prison cell.
Crouch and break the bricks in the corner to find a secret room. Pick up the knife. Return to the cell door and press the "use" button to start beating on the door. Do so until you attract the guard’s attention and he walks over. When he opens the door, kill him using the knife (secondary attack). Pick up the weapon on the left side of the room and eliminate the other guard. The far door opens revealing more hostiles. Shoot them (hit the red barrel for added explosive damage) and grab the weapon, ammo case, and armor. Move along the top of the shelf on the left side of the room. From here you can leap to the ladder. Climb up and into the room above.
Grab the grenade off the crate. Jump onto the shelving on the left side of the room. Next, leap to the top of the file cabinets. Break the grate with a weapon and drop through. You’re now in the room that contained the gas. Eliminate the guards and move through the open passage on the right side. Follow the hall down the stairs to the left.
Note the open hole to the right. Your allies are just outside and about to mount an attack on the compound. Defeat an enemy to the left then assist your allies through the valley up toward the compound. Defeat the enemies around the perimeter then go inside the building. Shoot the guards inside. Grab the flashbang and drop down through the hole in the floor. More guards occupy the lower level. Maneuver back outside and eliminate the sniper on the adjacent rooftops. Your allies bust through to assist. Watch for additional enemies to the far left.
Objective: Escort hostages to rescue zone.
Cross the courtyard to the far left side. There’s an open passage here. Shoot the red barrel to cause a damaging explosion. Eliminate remaining guards and find a pilot in an adjacent room. Defeat the guards then escort the pilot back to your allies.
Another door opens on the right side of the courtyard. Assist your allies in eliminating the enemies that appear from the passage. Enter the next structure. Move to its rooftop. Follow the edge of the roof from building to building until you can jump over the fenced in area that contains a health pack. There’s also a hole in the ground here.
Follow the tunnel to another hostage. As soon as you rescue him, an enemy enters the room. Defeat the enemy and follow the tunnels to the exterior. Combat the enemies that appear on the right side. Escort the hostage to the rescue zone to the left to complete the mission.
Hankagai
Overview: The safety of this VIP is vital. His tour of a new Tokyo development will facilitate the revitalization of this region. Hostile forces have threatened to assassinate him.
Objectives: Protect the VIP. Eliminate all would-be assassins.
Time: 17:23 HOURS
Location: Urban renewal project site. Tokyo, Japan.
Organization: Japanese Kidotai
The VIP is arriving on scene shortly. The courtyard is secure. He grandstands with the people below before chaos breaks loose.
Objective: Stay alert for trouble.
Moments after the mission opens, a group of assassins open fire on the VIP. He flees through the hall and past your position as a new objective appears.
Objective: Take out hostiles while the VIP is escorted to safety.
Exit your start position and proceed to the left. Strafe around the corner and face the courtyard. Eliminate all assassins in the courtyard. Watch out for a sniper on a roof to the right.
Objective: Meet up with the VIP protection team.

Return up the stairs and into the hall where the VIP fled. Use the medkit if necessary. Descend the next stairs to find the protection team. The VIP stands indoors.
Objective: Check alley for hostiles.
Move to the alley on the right side of the courtyard (from facing the VIP) and find a group of assassins. One hides behind a dumpster on the left. There’s also a hostile on a catwalk above you. Use the medkit in the corner if needed. Return to the protection team once the alley is cleared.
Objective: Protect the VIP.
Face the alley across from the VIP to spot a sniper. Shoot him quickly; he’ll flee through a passage to your right. He’s the gang leader.
Objective: Go after the gang leader.
Scamper across the alley and down the passage where the gang leader fled. Follow it around a corner and face more would-be assassins on the city streets. A group of assassins wait ahead. Shoot the red barrel to cause a damaging explosion to the group. Beware of the alcove on the right side; don’t let the assassins here surprise you.
Move around to the alcove on the right and find the ladder. Climb up. Maneuver through the narrow vent. Drop down and continue onward. Speak with the woman in the clothing store on the left. She points out a couple assassins. Move through the shop and the hostiles appear outside. Eliminate them then continue through the hallway and through a door on the right.
Follow the hall to a staircase. An explosion rocks the stairwell on your way down. Eliminate the assassin at the bottom. Move right from the stairwell to find ammo and health. Beware of an assassin on a catwalk above you. Now start to the left and shoot a guard on an upper balcony. Defeat the assassins at the bottom of this area. The path resumes over the fence in the corner. Pull and push the metal crate next to the fence. Leap onto the crate then over the fence to continue onward.
Pass the old man knocked down off his bike. Two assassins wait ahead of you (one behind the crates). Turn around the corner to the right and take out the guard on the stairs, the one in the upper window, and another lurking to the right. Grab the ammo next to the building then move through the alley on the right.
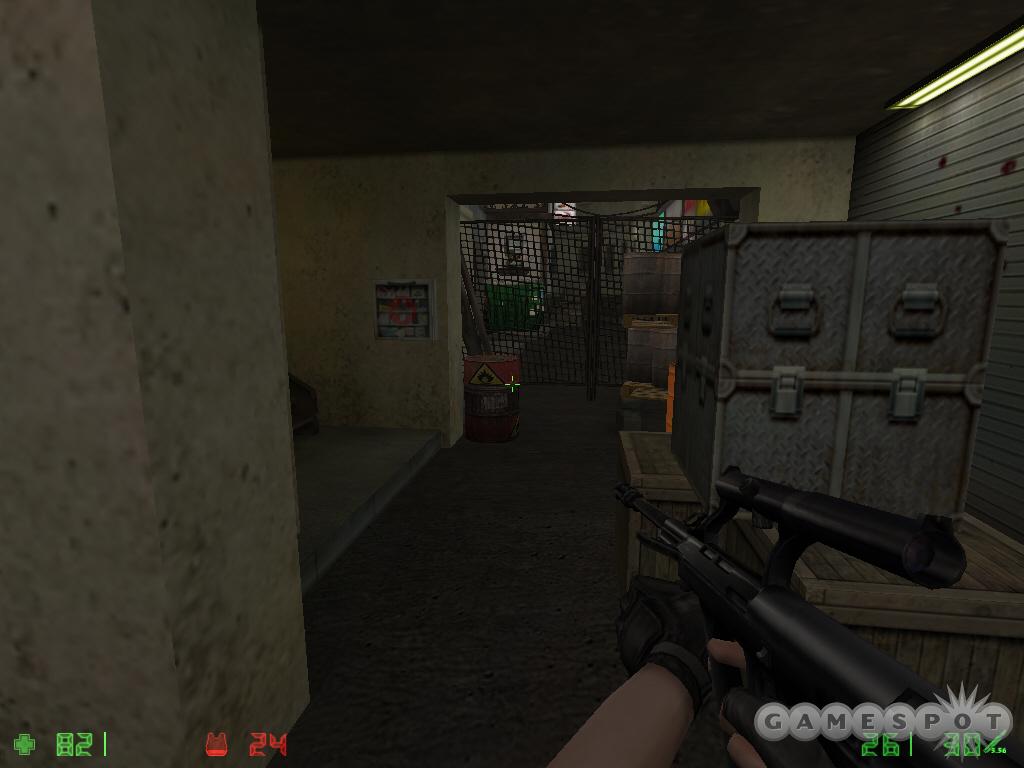
Watch out for the assassin in the alcove on the left. Shoot the red barrel to get it out of the way then blast the guards on the far side of the fence. Move the metal crate off of the boxes on the right. Push the crate against the fence. Leap onto the crate then onto the barrels to the right then finally over the fence.
Move around the corner to the left. A fence blocks the route. A motorist hits the gang leader but the assassin keeps on moving through the door ahead. Shoot the enemies on the road and another in a high window. Find the metal crate along the right side and push it against the fence. Jump onto the crate then onto the ledge along wall. Leap from the ledge over the fence.
Turn down the alley to the left. Find a metal crate on the boxes in a left alcove. Pull the metal crate off. Push it underneath the grate on the opposite wall. Shoot the grate and crawl through the vent. At the far end, shoot the broken grate and exit the vent. Shoot the guards patrolling to the left. Grab the health and ammo.
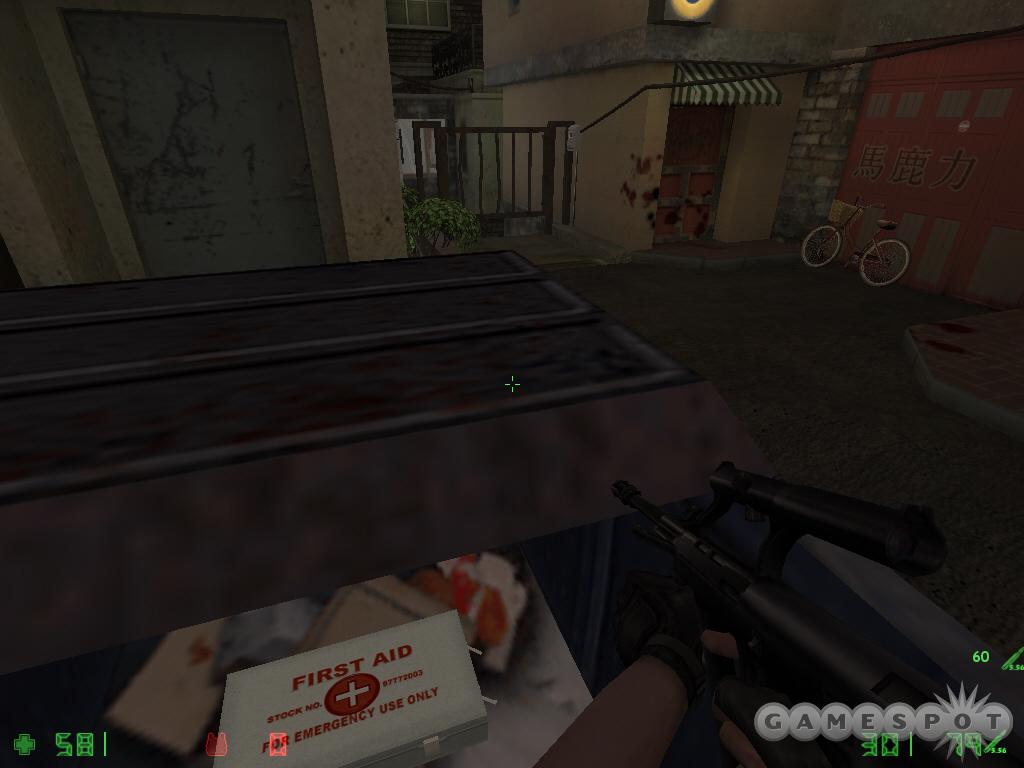
Go to the left side of the garage and shoot the grate in front of the motor. Use the lever on the motor; this opens the garage door to the right. Shoot the sniper overlooking the couple below. As you move ahead, blast the red barrel on the right then defeat the guards in the next room. Use the medkit as necessary.
Go up the stairs and eliminate the assassins to the left. Pick up some ammo from the ledge ahead. Continue left and around the far corner to find more enemies. Hop into the dumpster and collect ammo and health. Drop onto the planter behind the dumpster to discover some armor. Approach the fence to the left and discover the gang leader has a hostage. Watch out for an enemy to appear behind you.
Objective: Rescue hostage.
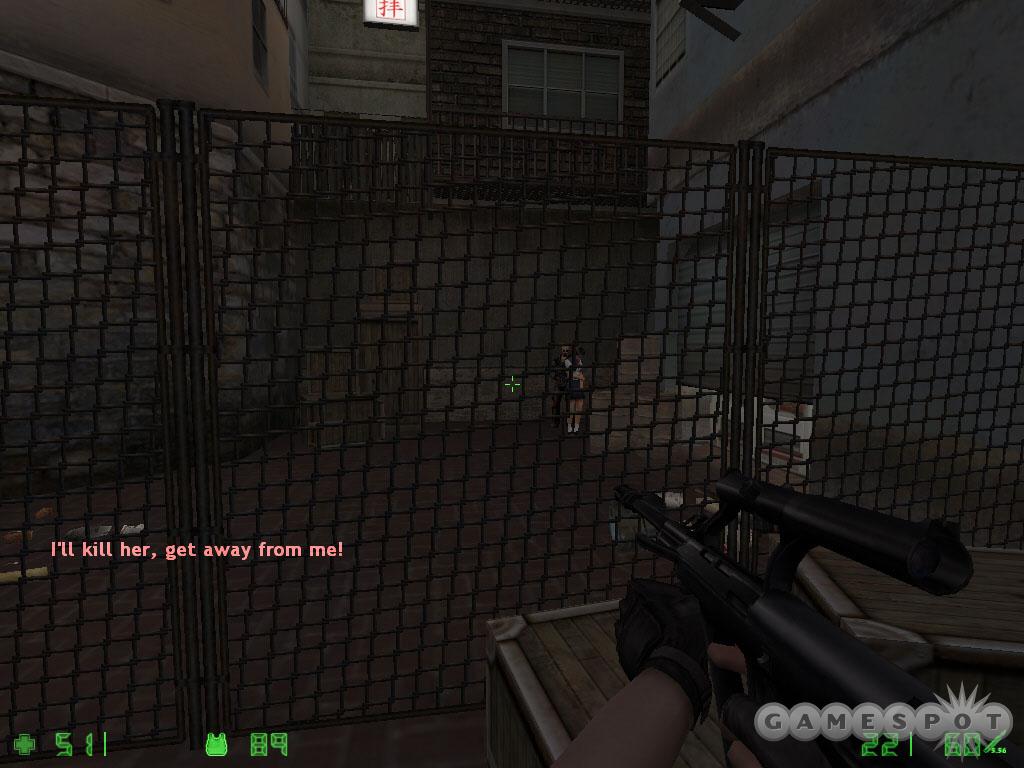
Return to the right and use the lever on the switch box to open the fence. Move through the open fence and down the short staircase. Go around the corner to the right. Spot the gang leader and his hostage behind the fence. Quickly shoot the sniper in the head. If the hostage dies, the mission ends in failure.
Turn of the Crank
Overview: It is suspected that an urban drug ring conducts its operation from within this Modesto neighborhood. The ringleader, Moses Sepulveda has been spotted and is believed to be inside the residence.
Objectives: Confirm that Sepulveda is inside. Signal Command via a rigged briefcase.
Time: 17:00 HOURS
Location: Highway village. Modesto, California USA.
Organization: California SWAT police
You’re outside Sepulveda’s house. When you’re sure Moses Sepulveda is in the building, open the briefcase to alert the team.
Objective: Enter house.
Ring the doorbell. You hear the music lower in the distance and the door opens.
Objective: Give briefcase to drug lord.

Enter the house and go to the left. Open the gate and follow the hall around to the right. Find the drug lord behind the iron bars. Hand him the briefcase.
Objective: Proceed into the warehouse.
Fire in the hole! A flashbang explodes in the room and a weapon appears in your hand. Face the room that contained the drug lord and assist your SWAT teammate with the enemy inside the room. Turn around and face the open window. Eliminate the hostiles on the ground then those on the upper level across the courtyard. Drop down and pick up the health if needed. Clear the area of hostiles. Look for two in the alcoves on the right side of the courtyard. There’s also ammo near the wrecked car.
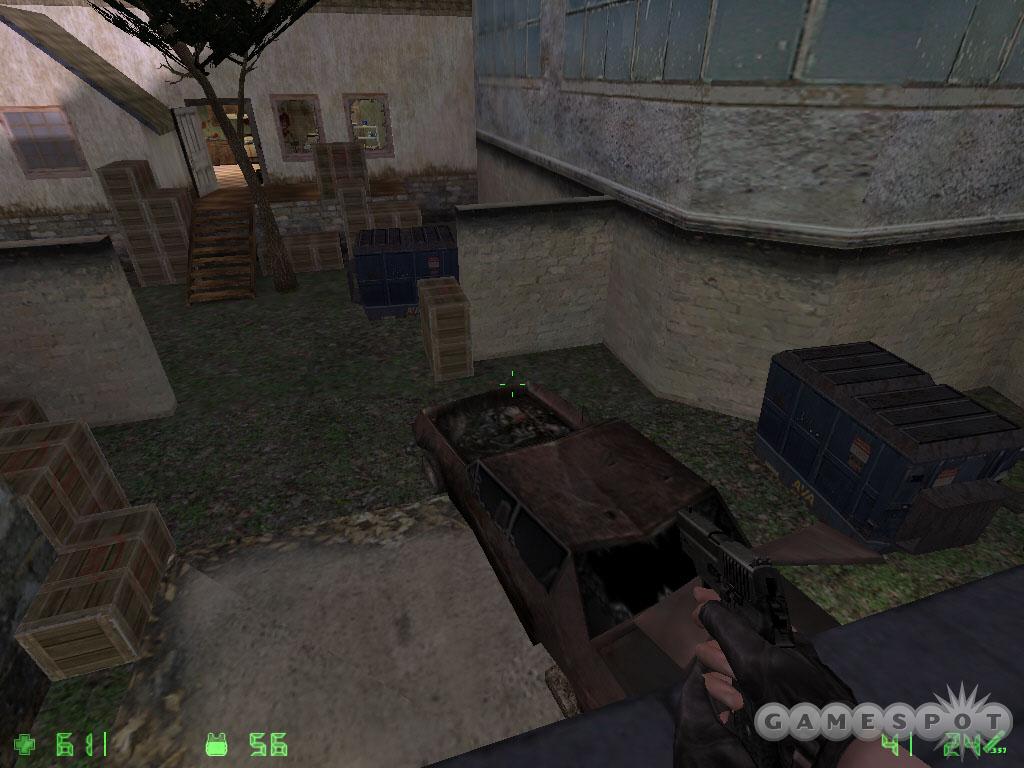
Return to this area’s entrance and search the kitchen area for a sub machine gun. Hop onto the crates and onto the dumpster. Jump to the next set of boxes and then to the wrecked car. Climb the hood and get onto the overhang. Jump from the overhang to the air conditioning unit and find a health pack on the other side. Leap from the air conditioner to the balcony to its right. Move around to the side and shoot the guard. Drop into the hole and into the warehouse.
Objective: Eliminate Moses Sepulveda.
Shoot the guard inside as you gather more ammunition. Search for additional clips in each corner of the room as you press forward. Save the red barrels in the next room and shoot them when several enemies are in the area. Find a medkit on the wall in an alcove on the left but beware of the enemy lurking inside.
Round the far corner to the right and encounter a guard manning a stationary machine gun in the distance. Use the cover on the right side. Aim for a headshot by using the upper firing hole. Work cautiously around the next several corners. Enemies are found both on the ground and upper balconies (as well as the windows along the rooftop). Collect more ammunition from the corners and follow the ground floor to its end—an office containing health and armor.

Find the metal crate in the room’s center and pull it all the way back near the beginning of the warehouse. There are several stacks of boxes near a broken wall. Look through the cracks in the wall to discover a heavy machine gun inside. Push the crate against the wall. Leap onto the metal crate then onto the adjacent boxes. From the top of the boxes, leap over the wall and grab the weapon.
Push and pull the metal crate back to its original location and place it up against the tall stack of crates that lie just under the balcony. Jump up the crates to the top and leap to the balcony. Open the door on the left side. Shoot the guards below and drop to the floor. Move around the corner and spot the guard in the office to the left. Shoot him and move inside to grab the health, armor, and ammo.
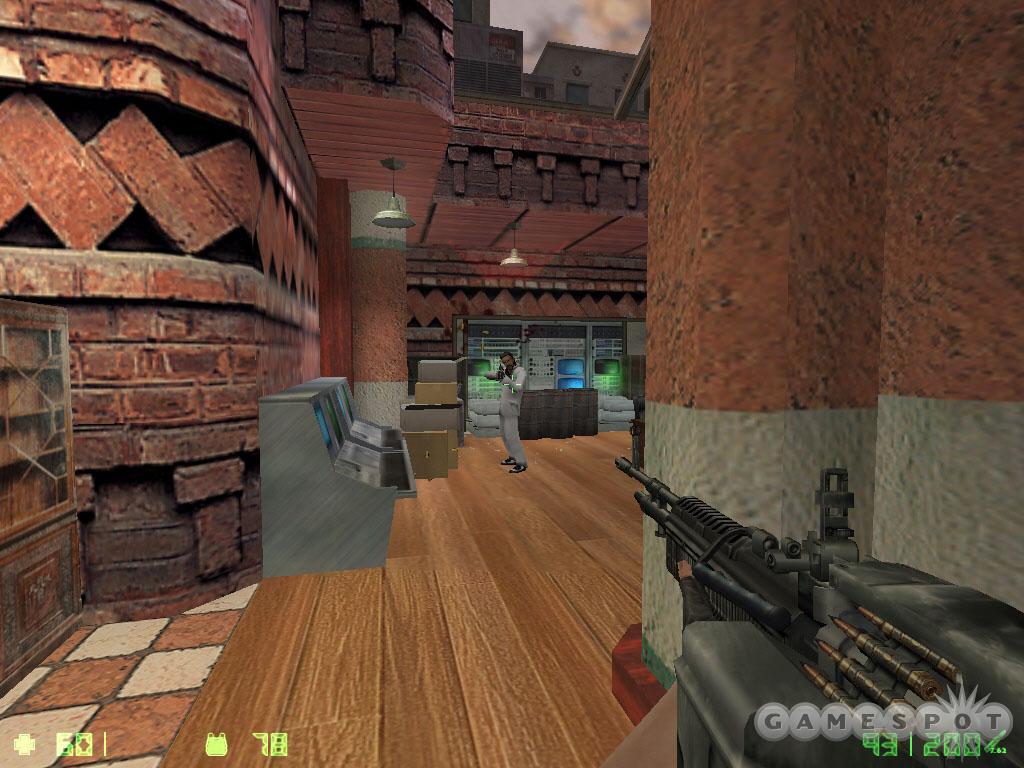
Approach the room with the barrels. Use the red explosive barrels as added damage against the hostiles inside. Clear the hostiles on the ground level then ascend the staircase. Shoot the enemy at the top and collect the health and ammo from the room. Press onward and use the medkit as needed. Turn the corner and shot a couple guards. Moses Sepulveda waits just on the other side of the pillars. Use the pillars as cover and blast the drug lord. Retreat to the medkits if you need health. Defeat Moses to complete the mission.
Alamo
Overview: The US Embassy in Yipiti has been overrun. Hostages have been taken and are being held near the King Kabob Restaurant. The local population, sympathetic to a powerful terrorist sect, occupy each dark corner of this desert province.
Objectives: Proceed toward the King Kabob. Locate the hostages and lead them to the extraction point. Neutralize any opposition or obstacles.
Time: 14:00 HOURS
Location: U.S. Embassy. Yipiti, Boshistan.
Organization: U.S. Navy SEAL
The hostages are being held in the neighborhood behind the Embassy; exact location unknown but thought to be the King Kabob restaurant.
Objective: Locate the King Kabob Restaurant.
Follow your team to the left. Annihilate the guards to the left and right and another in a window above the far door.
Objective: Locate alternate entrance.
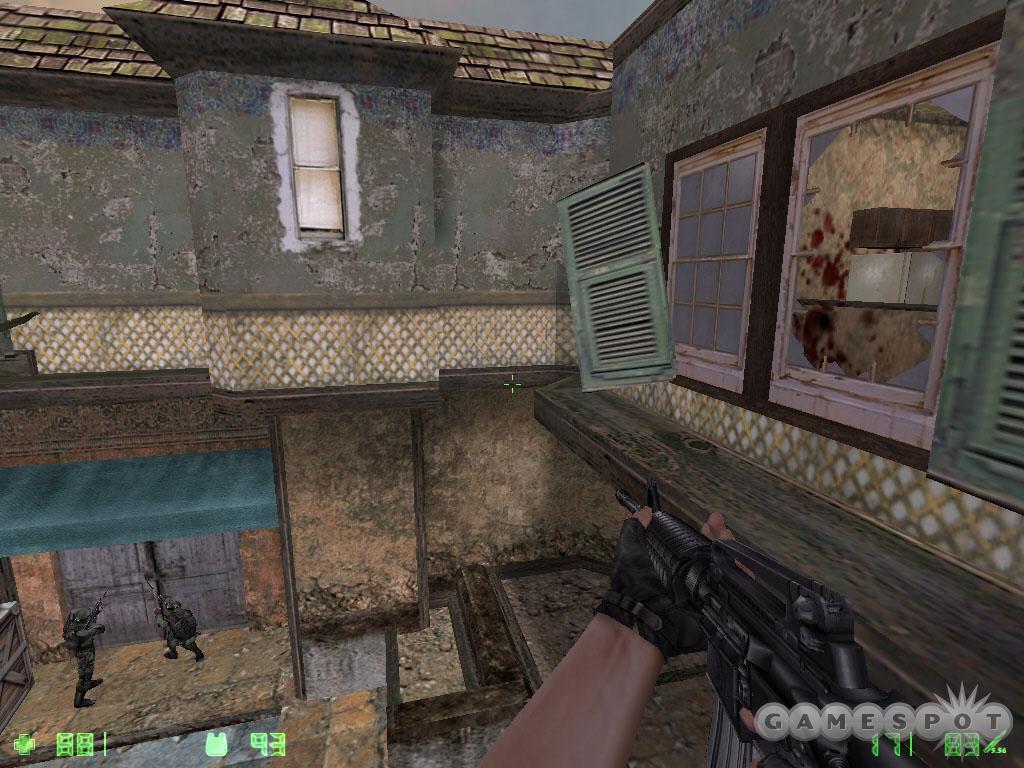
Turn around and spot the dumpster on the left. Use the crates to reach its top then climb the pipe along the wall. You’ll hop onto an upper ledge. Face the windows to your left and shoot the enemies inside. Jump through the window into the kitchen. Use the medkit if necessary. Go into the next room and grab the ammo. Look down the hole in the floor and shoot the enemy below you. Drop down and climb up the stack of crates under the grate. Break the grate and crawl into the vent.
At the end of the vent shaft, bust the grate and shoot the enemy below. Drop out and grab the ammo and use the medkit. Exit to the left. Move cautiously down this hallway. There’s an enemy hidden behind crates to the right. A large group enters from the hall in front of you. Eliminate them in the tight corridor. Move to the end and use the medkit. Find a grenade in an alcove to the left. Exit through the far door.
Defeat the enemies to the left. Climb the rubble to the top and enter through the windows. Find some ammo in a room to the right. There’s also a hole in the wall and you can spot some enemies outside. Shoot the sniper, the red barrels on the ground, and an RPG launcher to the left. Before exiting, turn to face some windows on the far right. Shoot those windows to expose a sniper. Shoot him!
Go down the ladder. Grab the HE grenade and use the medkit. Enemies barge in from the door. Defeat them then exit. Watch out for a machine gunner on a high balcony to the left. Fortunately there’s a red barrel nearby. Shoot it to defeat the gunner. Clear out the recess in the center then drop inside. Jump into the dumpster and to the ledge on the other side. Clear the other recess.
Hop down into the second recess and defeat the guard on the balcony to the right and others that enter from the passage to the left. Shoot the explosive barrel to cause a wooden beam to fall on the debris. Leap onto the car and up the debris. Cross the fallen beam and move through the passage.
Defeat the enemies on the other side of the door. Pick up a smoke grenade from the crate on the right. Face the next open room and shoot the red barrel to kill some enemies and open a hole in the wall. Defeat the remaining enemies to the right and then around to the left. Jump through the open wall.
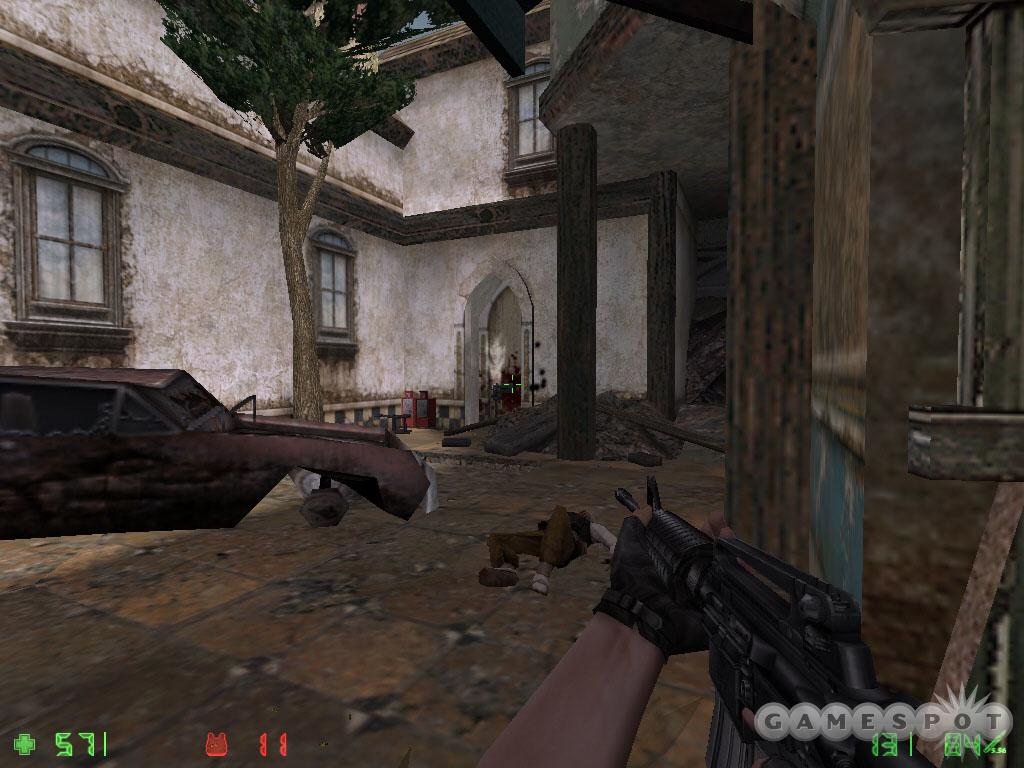
Approach the wrecked car. There’s a machine gunner to the right so strafe around the corner carefully. Jump up onto the car and across the roof to the upper area. Watch out for additional enemies to appear in the high windows.
Move around the far side to the slanted beams. Climb up to the top (still being aware of new enemies appearing in the area) and go to the top of the area. Strafe carefully facing right through the hole; there’s an enemy in the corner. Shoot the enemy under the boards. Break the boards and drop inside to snag some health, ammo, and armor. Strafe facing left through the door to defeat the enemy outside. Enemies fill this large open area. Use the railing as cover against them.
Objective: Locate hostages.
There’s also a machine gunner across the area. Keep your distance and aim for the head. Use the medkit behind him as needed. Beware of a sniper on the opposite side in a high window. Collect the ammo from the area then move through the passageway on the left.
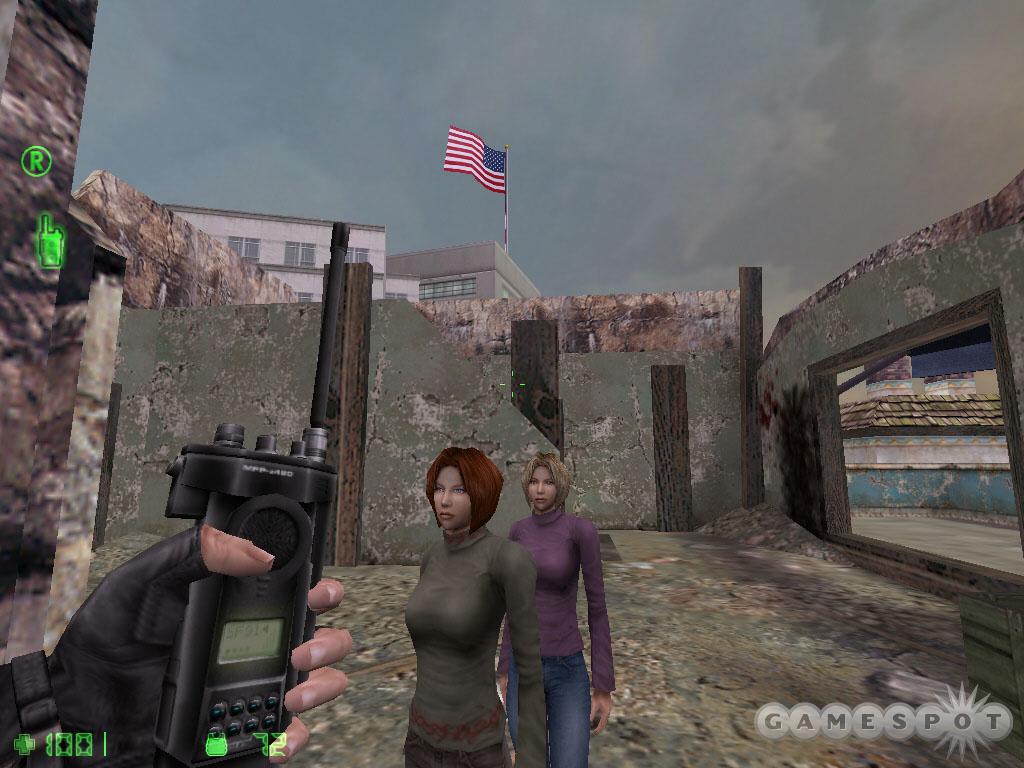
The next passage contains a lot of enemies. Using an HE grenade is recommended. Clear out the hostiles ahead and those to the right (be careful you don’t strike the hostage). Shoot an enemy up stairs on the right. Move over to the hostages and order them to follow you. Grab the ammo and health before leaving.
Objective: Move hostages upstairs to rescue zone.
Go up the stairs on the right. Be sure the hostages are following you. Grab all of the health and ammo you can carry. Escort the hostages to the rescue zone then switch to your radio and use it. Move out onto the balcony and start annihilating the enemies that appear. Beware of the RPG launchers that appear on the rooftop to the right side. Toss some grenades in that doorway to wound or kill the RPG launcher before he becomes a major threat.
Rise Hard
Overview: A group of political radicals has taken over a high rise building. In addition to holding many hostages, this group plans to detonate a nuclear device in two hours.
Objectives: Enter the building undetected. Receive additional orders once the situation is assessed.
Time: 19:40 HOURS
Location: Genaserv corporate headquarters. Belfast, Northern Ireland.
Organization: British SAS
A group of radicals have taken over a high rise in Northern Island and hidden a nuclear device somewhere inside.
Objective: Find way into skyscraper across from this building.
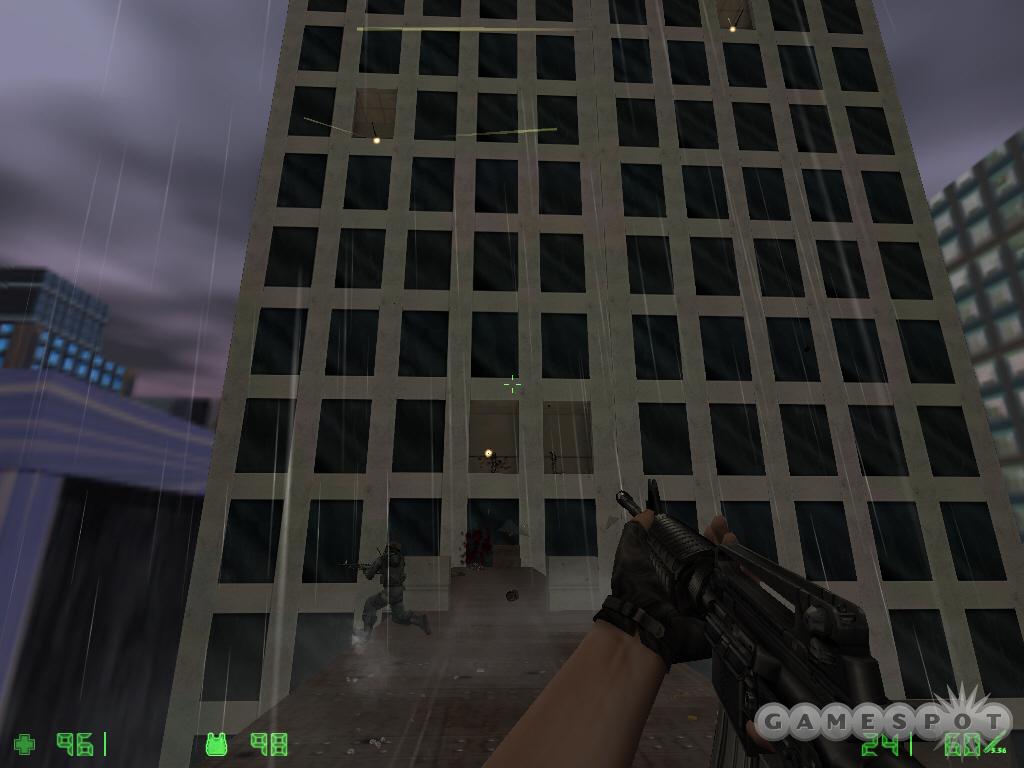
Follow your fellow SAS around the top of this building. You’ll spot the adjacent skyscraper to the right. Cross the bridge connecting the two buildings. Shoot the hostiles in the windows as you move toward the skyscraper. Drop into the open hole at the end to enter the GenaServ building. Open the double doors.
Objective: Locate radio-controlled bombs.
Move through the open office to the left. Battle the radicals inside. Use the desks as cover against their fire. There’s also a medkit in the room if you have wounds that need mending. Search the cubicles for ammo and a smoke grenade. Strafe carefully to the right around the next corner. Shoot the radicals in view. Search these office cubicles for health, ammo, and a shotgun.

Cross the office to the open door on the far left side of the room. You’ve entered a maze-like set of cubicles. Lure enemies around corners and into your line of fire. Move carefully around each corner to get the first shot on each enemy. Investigate each cubicle and find a flashbang and some ammo. At the center of the offices you’ll find an HE grenade. A radical carrying a rocket launcher also patrols near this area. Eliminate him then cross toward the door marked "Main Office".
Search the room to the left of the double doors to find health and ammo. Beware of an enemy attempting to ambush you from the right. Grab the armor in the alcove. Move carefully around the left side. A large group of hostiles patrols this area. Lure them toward your position. Beware of a sniper waiting for you around the right corner. Search the small office ahead for more ammo. Go to the right where the sniper stood.
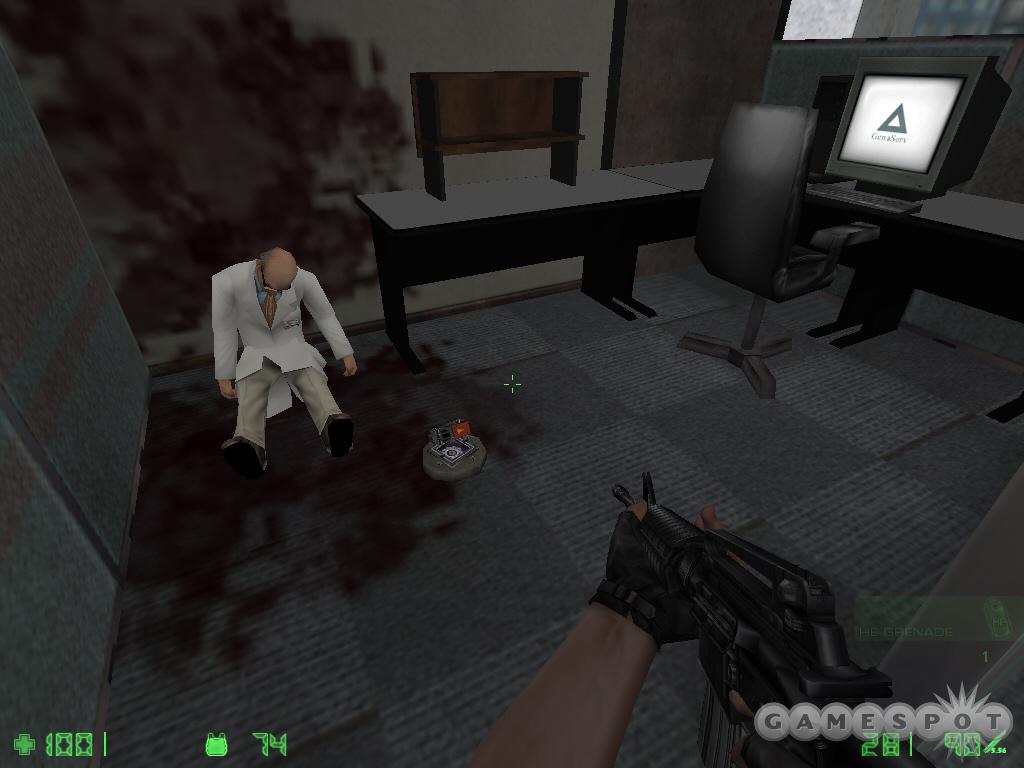
Encounter additional enemies and snipers ahead. Eliminate them. Continue to search cubicles for ammo and health. Look for a cubicle on the right side. It contains a dead scientist and the radio-controlled bombs. Switch to your radio and use it.
Objective: Proceed to elevators.
The enemies arrive from the opposite direction—the route from which you entered the area. Exit the cubicle and strafe around facing left to combat the incoming radicals. Take the first left and move under the GenaServ sign through the open double doors. Before entering the elevator to the left, search the end of the hall for health, ammo, and armor. Use the elevator.
Objective: Proceed to the 3rd floor and disable the building security.

The elevator automatically descends to the 3rd floor. Shoot the radicals quickly when the doors open. Move to the silver double doors and open. Eliminate the radicals on the other side. Pick up the sniper rifle off the ground. Approach the security console and plant a radio-controlled bomb. Retreat outside the room and detonate the explosive.
Objective: Disable gun emplacements with RC bombs.
Move through the security station to the open passage on its opposite side. Eliminate the guards here and those hiding behind crates around the corner. The gun emplacements are just ahead to the left. Place the first RC bomb and detonate. Switch to a gun and eliminate a hidden guard around a crate to the right. Blast apart the second gun emplacement with an RC bomb and receive a new objective.
Objective: Proceed to elevators. Get to top of building and recover nuke.
The elevator you used is closed now. Cross the office and shoot the guards through the door on the left. Find the open elevator through the open passage on the left. Grab the health and armor before moving inside. The elevator stops between the 39th and 40th floor.
Objective: Exit elevator and proceed to the roof.
Enemies blast through the top of the elevator door so be ready. Another guard opens the hatch on the elevator’s roof and waits for you to appear into view. Exit the elevator through the hatch. An adjacent elevator lowers. Its door opens; shoot the radicals waiting there. Cross over the adjacent elevator’s roof and climb the ladder. Move over the open door drop down. Fall onto the edge of the open door and move onto the 40th floor. Grab the nearby health and armor.
Return up the ladder inside the elevator shaft. Cross the narrow ledge to the next ladder on the far left. Face the health packs and jump to those ledges. Jump up to the top and find a grate. Break it and crawl through the vent shaft. The ceiling breaks above you. Shoot the guards there and leap out onto the 43rd floor.
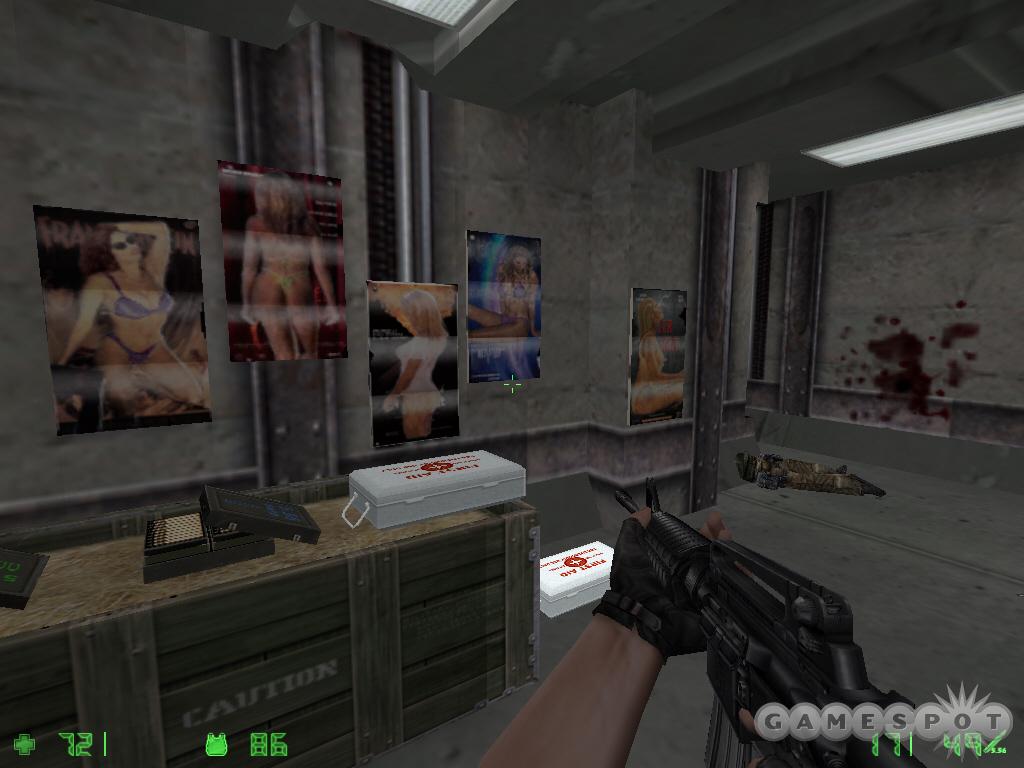
One of the elevators moves up and down. Jump on its roof then drop off to the adjacent ledge where the ladder stands. Climb up the ladder. Spot the nearby ammo and take the detour if necessary. Move from the top of the ladder onto the 46th floor.
Move around to the elevator on the right. Shoot the guard behind the door. Use the door to open it slightly. Walk out onto the ledge and follow it to the ladder. Climb the ladder and enter the door marked "Authorized Personnel Only". Shoot the radicals around the corner and collect the health and ammo near the posters. Go through the door at the far end and climb the ladder behind you. At the top, cross the wooden planks to the far side until you’re over the open door to the left. Drop down inside this area. You’re now on the 50th floor.
Shoot the enemies to the left. Walk around the corner and find ammo, health, and armor. A new objective also appears.
Objective: Avoid helicopter fire.
Find the grate on the left side. Shoot open the grate and crawl through the vent shaft. Exit through the grate at the end. The enemy helicopters lies through the windows on the left. Enemies populate the path ahead toward the large stairwell (grab the health underneath if needed). Keep an eye on the helicopter and avoid its machine gun and rocket fire. As you move up the stairs, beware of the sniper to the right.
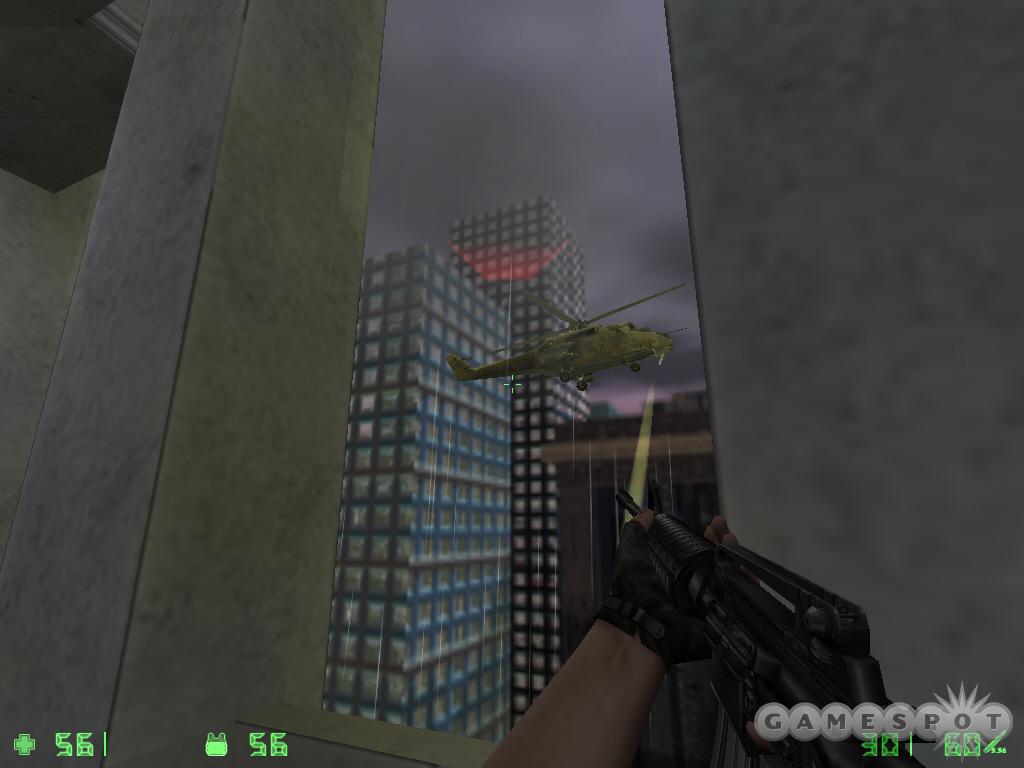
At the top of the stairs, cross the planks carefully and avoid the helicopter’s barrage from your right. Move through the tight corridor. The next stairwell contains an RPG launcher and a sniper above. Plus there are additional enemies at the bottom of the stairs and one in an alcove to the left (conveniently it’s also a good temporary hiding spot and contains a health pack). This is a great area for a flashbang. Toss one around the corner to disorient the RPG launcher (at minimum) so you can mop up the remaining troops. Beware of snipers above and behind you. Oh, and by the way, for fun jump out of the building to read the mission failure message--but save your game first!
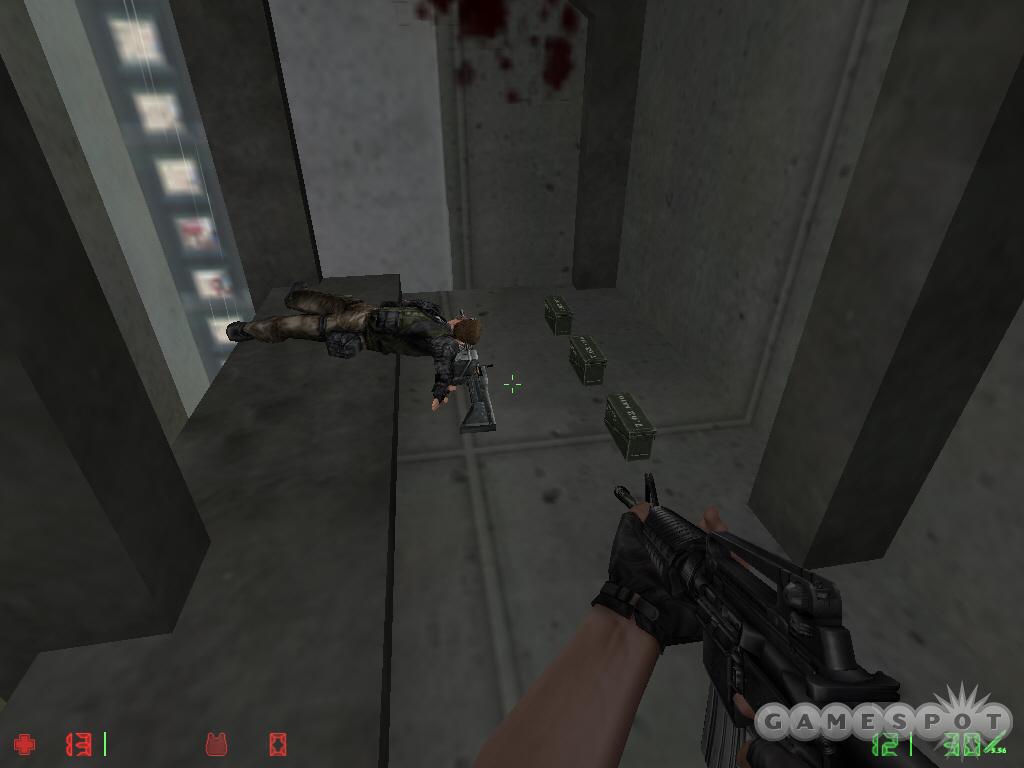
Cross the wooden planks to the far side. Before entering the hall on the right, search the end of this floor for a medkit. Check just beyond the medkit on the right for a distant ledge. Leap to this ledge and find a heavy machine gun and ammunition. Leap from here to the top of the staircase below (just to the left) and retrace your steps back up to the previous floor. Enter the door on the right and eliminate the enemies inside.
Enter the door on the right. Watch out for the radicals at the top of the staircase on the right and another guard behind a door ahead. Enter that room ahead for plentiful ammo and some health and armor. Go up the stairs. Move across the rooftop (defeating enemies, including snipers above you) as you move. Continue through a short tunnel to another section of the roof. Helicopters hover around your position.
Walk along a ledge running to the right. Avoid the helicopter fire as you move. Find a small room on the right; it contains enemies but also ammo, health, and armor. Resume course across the ledge. At the end, turn to the right and shoot the RPG launcher.
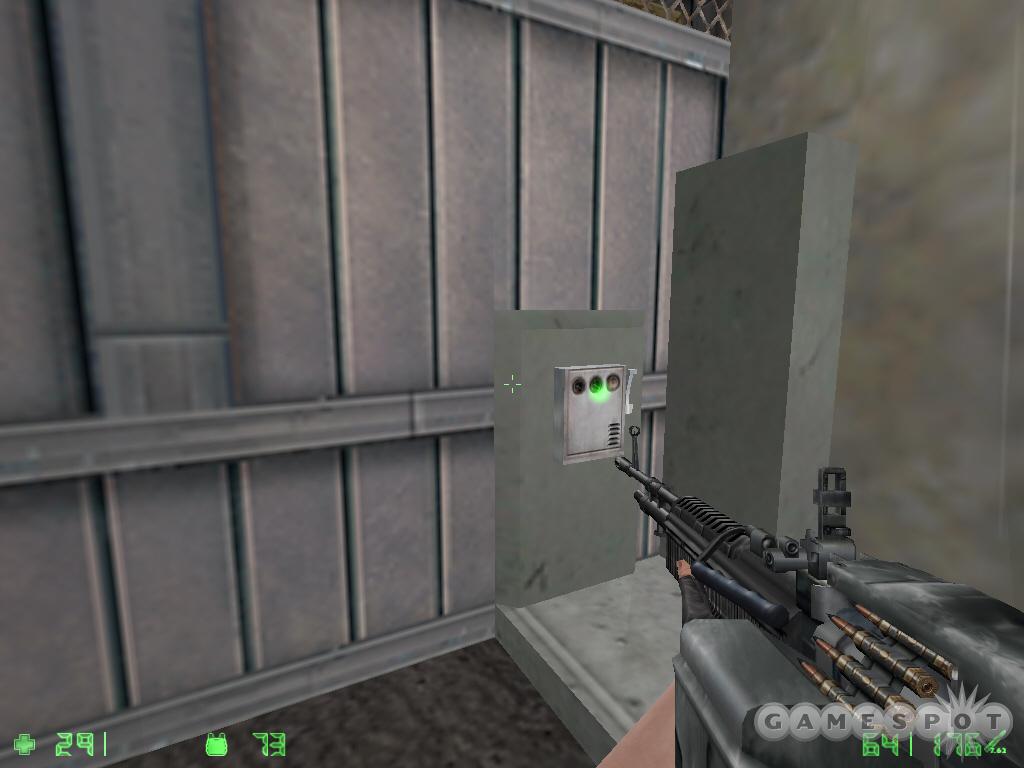
Enter the area and immediately turn to the right and eliminate the two radicals posted here. A grenade would also do the job nicely. Move to that position and turn around and eliminate the other guards in the area. Cross this portion of the roof to the right side and find the switch box. Pull the lever. Look through the fence above and shoot the guards.
Move out onto the helipad. The allied helicopter has been shot down. Gather the health and ammo and eliminate the radicals on the pad and a sniper on a balcony. You can also see the leader through bulletproof glass; he has the nuke detonator.
A door opens adjacent to the helipad. Eliminate the enemy that arrives and shoot the RPG launcher at the far end. Use the medkit if needed. Climb the ladder. Weave through the narrow space. Blast an enemy around a left corner. Grab the ammo and health nearby. Move toward the radio tower and shoot the radicals in the distance.
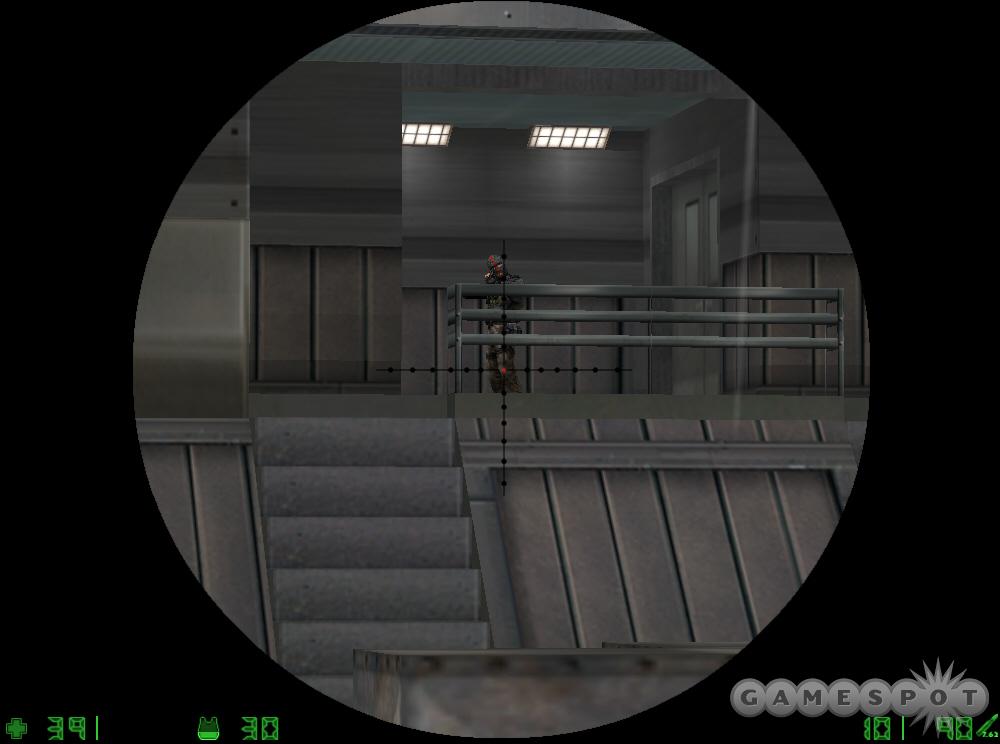
Move beyond the radio tower and face more guards taking cover ahead. Additional guards (including some far in the distance) wait around the corner to the left. The sniper rifle from the security station proves especially valuable here. Eliminate all enemies (grab the health pack if needed) and press onward. Go up the staircase at the far end. Open the double doors on the right. Use the medkit if needed. Start moving to the left. You black out! You wake up in the radical leader’s custody.
Objective: Fight the terrorist leader.
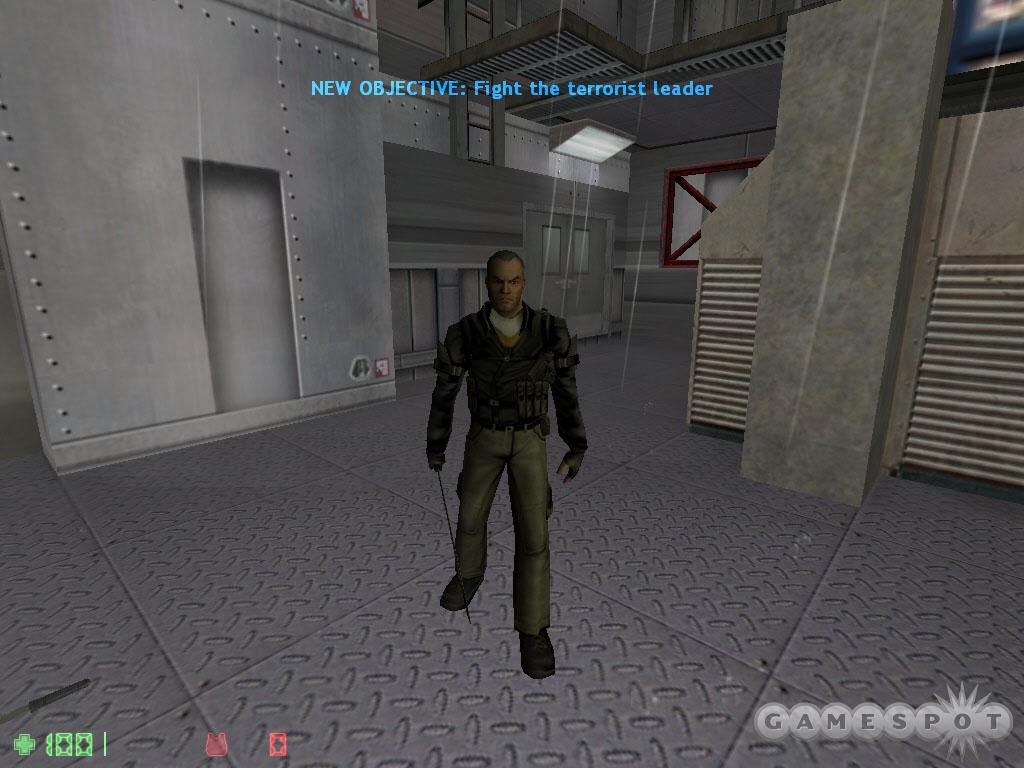
Grab the knife to your left. Hit him quickly with the knife. Use quick strikes and you’ll be too fast for him to retaliate. He escapes up the overhead ladder. A door on the left opens and a guard emerges. Quickly knife him and enter the room. Use the medkit and grab the weapon and ammo in the corner. Beware of the group of radicals to the right side.
Objective: Defuse bombs on communication equipment.
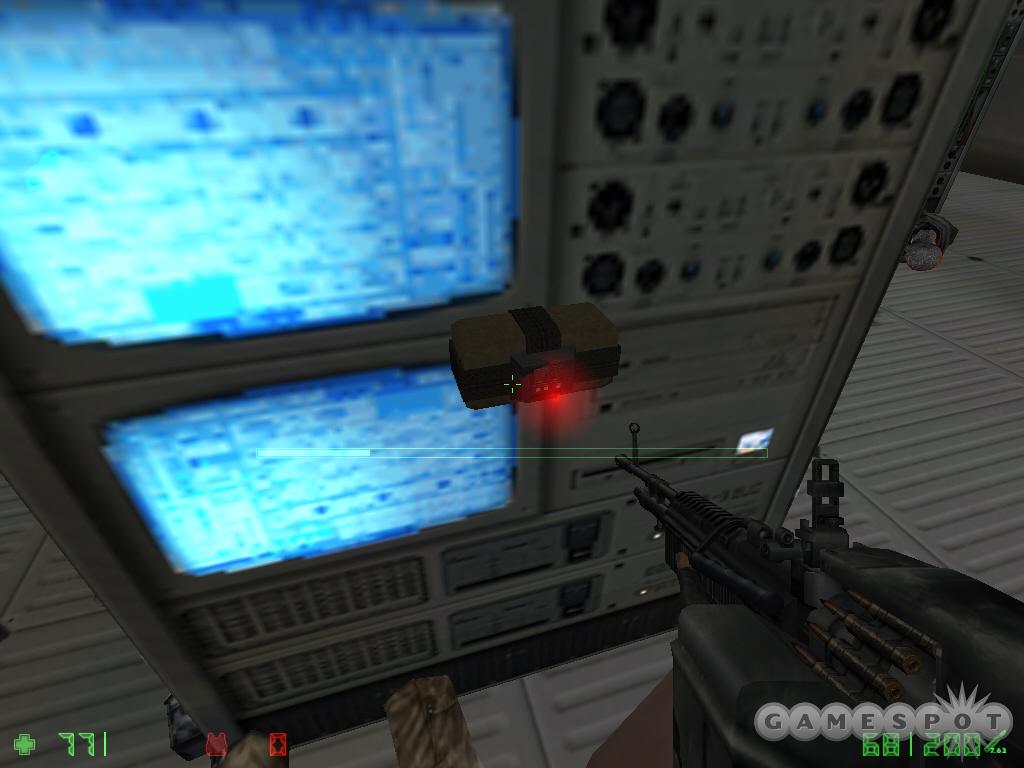
Watch for the radicals in the corners. Find the first bomb on the far right side. Defuse it by standing adjacent to the bomb and pressing the "use" key. Once the first one has been defused, return to the first piece of communication equipment on the left. Defuse the second bomb. A door opens at the opposite end of the room. A group of radicals protect the nuke. Kill them quickly then defuse the nuclear device. Grab the health from the room and exit. Watch for the open doors to the left. A couple of heavy machine gunners enter. Defeat them.
Objective: Eliminate terrorist leader before he can remote detonate nuke.
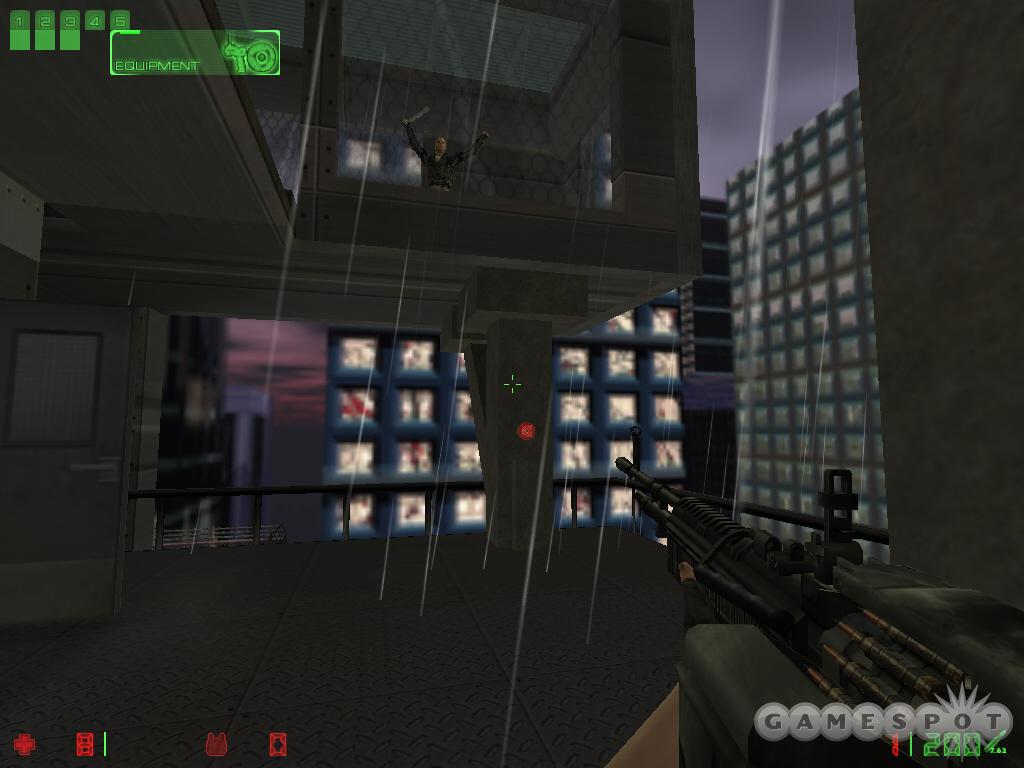
Quickly move to the right and grab the radio-controlled bomb. Return to the left and spot the terrorist leader in an upper room. Place the RC bomb on the pillar and move away. Detonate and watch him plummet to his death Hans Gruber-style.
Got a news tip or want to contact us directly? Email news@gamespot.com
Join the conversation