Final Fantasy: Crystal Chronicles Walkthrough
Need assistance in saving your village from the poisonous miasma? This guide includes an area-by-area walkthrough, a full monster bestiary, tips on forming a good party, and more!
Design by Collin Oguro
Final Fantasy is one of the longest-running series in console gaming history. There have been new Final Fantasy titles coming out continuously for more than fifteen years. Nonetheless, this is a unique moment in the history of the series. Final Fantasy: Crystal Chronicles represents the series' return to Nintendo, a long-term partnership that vanished after Final Fantasy VI. It also represents a departure from the traditional gameplay style that has been the identifying characteristic of the series since day one. Let's face it--how many times have you heard a menu-combat system being described as "like Final Fantasy's?" Final Fantasy: Crystal Chronicles, on the other hand, is a fast-paced, open-ended action game. You can attempt it alone, or you can play with up to three other people in a truly unique and innovative multiplayer mode that ensures cooperation.
As you make your way through the desperate world, teetering on the brink of destruction, you'll visit strange towns, learning news from the locals. You'll visit murky swamps, ancient ruins, and fiery volcanoes. You'll delve into underground fortresses, and battle your way across windy deserts. The strange travelers you'll meet on the roads may offer you dinner, or they may offer danger.
Luckily, you won't have to face this dark, dangerous world alone; you have the GameSpot game guide to Final Fantasy: Crystal Chronicles there to help you every step of the way. Inside you will find advice, hints, tips, and statistics to help you create your alter ego, fight your enemies, and perhaps even live to tell about it. You will find comprehensive listings of spells, items, and strategies for each and every creature you will encounter. If all of that isn't enough, a comprehensive walk-through will guide you through every room, every corridor, of every dungeon. It is written so that you can use it as a literal walk-through or as a general guide as you find your own way through the dangerous world of Final Fantasy: Crystal Chronicles.
Table of Contents
Character CreationBasics
Mog and Moogle Stamps
Secret Items
Artifacts and Special Conditions
General Strategies
Walk-Through
Tipa Peninsula
Iron Mine Downs
Vale of Alfitaria
Veo Lu
Plains of Fum
Kilanda Islands
Rebena Plains
Lynari Isle
The Abyss
Equipment
Character Creation
Once you choose to start a new game, watch the introduction, choose the name of your home town, and read your diary. You will be in a rotary menu. To get started, select Set Out, and then choose one of the eight blank character slots and hit A. Choose your name and gender. All that gender determines is your appearance and whether you can equip a handful of gender-specific items.
Race
Next, you will be asked to choose your race (tribe). Down the left side are the four choices: Clavat, Lilty, Yuke, and Selkie.
Lilties are a short warrior race. They can equip gloves, and they fight with spears. They are the best melee fighters in the game, but are very weak in magic. The gear available to them enhances their ability to survive and cause damage in the front lines of a battle.
Yukes are a mysterious bird-like race, stronger in magic than any of the other races, but weak in close combat. The equipment available to them enhances this, strengthening their magic, speeding up their casting, and so on. In combat, they wear helmets in addition to body armor, and they wield hammers. They are the best spell casters in the game, but keep them out of the front lines!
Clavats are the perfect ‘general' character, with both magic and melee combat ability. They don't excel at either, but they don't have a real weakness, either. In combat, Clavats can be found using shields to supplement their body armor, and wielding swords. Their specialized equipment is likewise balanced--some enhancing their magical abilities, some supplementing their combat skills. They are excellent if you are going it alone, or as a backup to both the fighter and the mage in a party.

Selkies are the rogues of the world. They are generalists, much like the Clavats, but they have especially effective focus attacks (special, long-distance attacks). Wearing belts for defense, Selkies wield unique weapons that can only be described as ‘rackets' in combat. Their specialized accessories improve their ability to avoid hazardous conditions and to enhance their already formidable focus attacks. Selkies are another good choice for playing alone, and they make a great support character in a multiplayer party, combining a moderate proficiency at magic (allowing them to add to fusion spells or act as healers) with the most effective of ranged attacks. They can even fill in on the front lines in a pinch.
| Lilties | Yukes | Clavats | Selkies | |
| Hit Points | 8 | 8 | 8 | 8 |
| Strength | 8 | 5 | 6 | 7 |
| Defense | 8 | 5 | 7 | 6 |
| Magic | 10 | 15 | 13 | 12 |
Parties
If you plan on playing with friends, you should each choose a role ahead of time (fighter, spell caster, healer/support, etc), and craft a character around that role. If the other players do the same, you will have a well-balanced party that will be able to face any challenge that the game can throw at it. The ideal multiplayer party of four would include one of each race. A Lilty to stand up front and take all of the damage, a Yuke to stay in the back and pour on the magic damage, a Clavat to help out whichever of the first two get in over their heads, and a Selkie to heal, add magic, and use ranged focus attacks. Such a party would be much more effective than four Lilties that can't muster a holy spell between them!
If you are playing alone, you will have the most balanced gameplay experience if you choose either a Clavat or Selkie, as their balance of magic and combat abilities will allow you to take on any task. You can, however, be successful in the game with any of the four. Just be sure that you don't neglect your weakest attributes too terribly much, as you will need to be able to both strike enemies and cast spells at times to get through the game.
You can, if you are determined, bypass each race's weaknesses by carefully choosing certain artifacts that enhance your weakest attributes. It is possible, for instance, to create a Yuke fighter. Keep in mind that if you do this, your character, while able to fulfill the chosen role, will never be able to do so with the efficiency of a character whose abilities and race match. This isn't just a matter of statistics, but of the fact that your available equipment will limit you. The best armor and weapon available to your Yuke fighter is about as strong as a mediocre set of gear for a Lilty, and you will be similarly limited in your choice of accessories. You can certainly play this way if you really like the look of a certain race; just remember that your character will be rather limited by doing so.
Once you have decided on your race and selected it, your cursor will be moved to the second column with another four choices. These four choices determine what your character will look like, and have no effect whatsoever on gameplay. Check the manual for illustrations of what each race's eight options look like.
Family Trade
The next screen will ask you to choose your family's trade. Your family will live in your starting town, will write you letters, and will provide goods or services to you. What those goods or services are depends on what trade they follow.
Blacksmith: Blacksmiths can craft items for you in your home town. When you find a pattern in a dungeon or shop, bring it to your parents with the appropriate materials and they will make you a weapon or piece of armor. The better your parents (your father, specifically) like you, the better the items they will be able to make, and the better prices you will receive.
Tailor: Tailors craft accessories out of a pattern and the appropriate materials. How good the completed items are (and how much they will charge you for them) depends on how much your father likes you.
Farmer: Farmers don't sell or make anything, but if you give your parents seeds, they will plant them and give you the food that is grown each year.
Rancher: If your family are ranchers, you will receive meat and/or milk each year, provided you are getting along well with them. Send them a cow if you find one for sale.
Miller: Send your miller parents wheat seeds and they will grind them, giving you bread or flour.
Fisherman: Guess what your fisherman parents give you every year? How much fish you get depends on how well you are getting along with your father.
Merchant: The better your merchant father likes you, the better prices you will get, and the better things he will offer for sale.
Alchemist: Alchemists create the scrolls that are used to craft weapons, armor, and accessories. If you are good to your father, you will receive a scroll as a gift each year. Scrolls can make good gifts for alchemists.
After completing each dungeon and retrieving a drop of myrrh, you will receive a letter from one member of your family. If you answer politely and send a gift, that family member's opinion of you will go up. If you answer negatively and send nothing, it will go down. Always foster your family's affection with friendly replies and gifts. Depending on their trade, some family members will make use of certain specific gifts, and any family member might occasionally ask for a specific item. In any case, money and seeds are almost always good gifts, regardless of the family trade.
Basics
The Crystal Chalice and the Miasma
The entire Crystal Chronicles world is covered with a thick, toxic gas called ‘Miasma'. The Miasma would kill every person in the world if it were not for the massive, magical crystals located in each village. These crystals use the power of the magical secretions of myrrh trees to create a safe zone amongst the Miasma. Every year, a caravan of warriors and magi must go out into the world and seek the myrrh trees to get enough of the secretion to keep the village crystal powered for another year. These caravans carry a much smaller crystal, embedded in a chalice, with them as they travel. These crystal chalices create a small safe zone, just large enough for the caravan and its members. They are also the vessel in which the drops of myrrh are collected.
The Miasma and crystal chalice are one of the major gameplay elements of Final Fantasy: Crystal Chronicles. You will have to spend the entire game within a few feet of the chalice, as you will begin to take damage from the Miasma once you are outside of the small sphere of its influence. Since standing around a magic cup all day would make for a dull game, you will have to carry the chalice with you as you play. In multiplayer, all of the players will take turns carrying it, sometimes setting it down while they fight nearby. In single-player, you will have the help of Mog, a Moogle. He will carry it, following you around as you move.
There is another aspect to the chalice--it can be attuned to one of the four elements in the world (or to a fifth ‘unknown' element) by dropping it on a ‘hot spot' in a dungeon. While attuned to fire, earth, wind, or water, the chalice will give anyone within its range of influence a resistance to magic that comes from the same element, as described in the manual.
Throughout the world, there are natural barriers made of especially strong currents of Miasma. These Miasma Streams are also attuned to a single element, one which changes each year. Only when your party's crystal chalice is attuned to the same element will you be able to pass through a Miasma Stream.
Mog and Moogle Stamps
If you are playing in single-player mode, you will meet up with your Moogle companion, Mog, early in the game. He will follow you around for the rest of the game, carrying your crystal chalice and doing his best to help you out.
If you are fighting an enemy and are taking damage, Mog will sometimes say, "Hang in there!" That is Mog's signal that he is ready to help with your spell casting. Have him drop the chalice (if he has it) and charge up a spell. Mog will charge up his own spell and place his targeting ring on top of yours to create a spell fusion, just like in multiplayer. What spell Mog uses depends on what color he is.
Mog isn't always a willing slave. Sometimes he gets tired, and he will let you know. If you don't take the hint and carry the chalice yourself for a little while, Mog will begin to move very, very slowly. Luckily, he rests quickly, so you should only have to carry the chalice for five or ten seconds before he tells you he is ready to take over again.

When you visit a Moogle nest, you can speak to Mog for the opportunity to groom him. This isn't just a virtual pet-- how you groom Mog has a definite impact on the game. You can trim Mog's hair, paint him, or wash him.
Trim: Mog's hair grows constantly. Leave it long most of the time, as it keeps him warm, but trim it immediately before entering the heat of Kilanda or the Lynari Desert. When you have trimmed his hair enough for it to make a difference, Mog will tell you.
Paint/Wash: You can paint Mog's fur red, green or blue, and washing it returns it to white. What color you paint Mog determines a couple of very important things. It determines, first of all, which spell he is most likely to cast when he offers to help you. If you have a Gameboy Advance plugged into the second controller jack on your Gamecube, the color you paint Mog will determine what the controller displays.
- White fur: Mog will cast a random spell. The GBA will show a map of the area (but doesn't show things like monsters).
- Red fur: Mog will cast a fire spell most of the time. The GBA will have an enemy radar which shows a yellow ‘X' where monsters are, and a red ‘X' where the boss is located. This is not overlaid with a map--it is just colored spots on a plain background.
- Green fur: Mog will usually cast a lightning spell. The GBA will show specific data on the last monster you struck with a weapon or spell, including the monster's strength, defense, magic, weaknesses, and what item it is carrying.
- Blue fur: Mog will generally cast cold spells. The GBA will show a plain field with colored dots representing the locations of all of the treasure chests in the level. This will also not be overlaid with a map--you can see where they are, but not how to get there.
In addition to being a hair salon/painting booth, each Moogle nest is home to a Moogle. If you speak to them, they will stamp your Moogle card. If you get a set of matching Moogle stamps, you will be able to play a multiplayer racing game on your GBAs.
Secret Items
Each town has a single hidden item. This item may be some minor piece of junk that you will turn around and sell, or it may be a valuable, rare material. Every time you collect a drop of myrrh, every item returns to every town, so if you are thorough, you can get quite a few free items between dungeons. The location of all of the secret items will be covered in the walk-through.
Which item you receive is predetermined. The first time you find a secret item, it will be a Wheat Seed, regardless of whether you pick it up in the first town or the last. The next item will be a Bronze Shard--always. The item you get is determined by the list below. Once you complete the list, it will start off again at the beginning.
| 1. Wheat Seed | 10. Mark of Shella | 19. Chunk of Mythril |
| 2. Bronze Shard | 11. Keg of Spring Water | 20. Pressed Flower |
| 3. Chunk of Bronze | 12. Vegetable Seed | 21. Remedy |
| 4. Iron Shard | 13. Ruby | 22. Bannock |
| 5. Fruit Seed | 14. Vegetable Seed | 23. Keg of Spring Water |
| 6. Alloy | 15. Jade | 24. Keg of Spring Water |
| 7. Fruit Seed | 16. Vegetable Seed | 25. Ancient Potion |
| 8. Chunk of Iron | 17. Silver | |
| 9. Fruit Seed | 18. Gold |
Artifacts and Special Conditions
While you adventure through dungeons, you will find various foods, pieces of equipment, and so on. You will also find artifacts. Artifacts are special magical treasures that give you a temporary bonus to one of your stats (ranging from +1 up to +10), increase your hearts by one, add a command slot, or give you a spell automatically upon entering a dungeon (think of them as permanent magicite). You can carry up to four of these items for the duration of that dungeon--as soon as you set foot outside, they vanish. If you complete the dungeon, defeat the boss, and collect a drop of myrrh, you will be allowed to choose one artifact to keep permanently. This is how, instead of experience and levels, you improve your character.
You will get to choose only one, and your choices will be any of the four artifacts you found while exploring (or less, if you weren't very thorough), plus another four that you get for defeating the boss. Some of these are pretty weak, but some can be really beneficial. Whether you are more likely to get good or mediocre artifacts to choose from is based on how many bonus points you earn. The number of bonus points you get is based on how well you fulfilled your special condition.
Each time you enter a dungeon, you will be given a special condition, which can only be seen if you have a GBA in the second controller jack on your Gamecube. This special condition is either a special mission or a restriction. An example of a special mission would be opening as many chests as possible. A restriction would be to fight without using spells. If your condition is a special mission, then you will be given a base number of points, which is then added to every time you succeed. In our examples above, you might start off with zero points, then be given ten points every time you open a chest, or you might start off with 100 points and lose five every time you cast a spell. Exactly how many points you gain or lose can vary from dungeon to dungeon.
In single-player mode, these points determine how good the items are that the boss drops. If you end up with very few bonus points, your four boss items will be chosen from just a few weak items. If you get a ton of points, more powerful items will be added into the list from which the four are chosen. You might still get some weak items, but your chances of getting that +5 defense item are much better.
Multiplayer item choices work the same way, but with an added twist; everybody chooses from the same pool of items. Each player has a different special condition, and whoever finishes the dungeon with the most points gets the first pick. The second highest score gets the next pick, and so on.
The various special conditions are discussed below.
| Special Condition | Meaning |
| Avoid damage | You lose points any time you are damaged in any way. You lose the same number of points regardless of how much damage you take. |
| Defeat enemies with focus attacks | You get bonus points every time you give a monster the final blow with a focus attack. |
| Defeat enemies with spell fusion | You get bonus points every time you make the killing blow on a monster with a fused spell. |
| Defeat enemies with spells | You get points every time you make the killing blow on a monster with a spell. |
| Don't cast spells | Don't cast any spells, including healing spells |
| Don't heal yourself | You lose points every time you heal, whether you use magic or items. |
| Don't pick anything up | Don't pick up any money, items, or magicite. |
| Don't use focus attacks | You will lose points every time you use a focus attack. |
| Don't use physical attacks | You will lose points every time you attack an enemy with a weapon. |
| Inflict damage | Whenever you hurt an enemy, you gain points. You get the points for hurting them, not how much damage you do, so hitting them for one point is the same as hitting them for ten. |
| Open treasure chests | Every time you open a chest you will get points |
| Pick up items | You will get points every time you pick up any item (money is not considered an item). |
| Pick up money | You get points every time you pick up money, regardless of the amount. |
| Take magical damage | Every time you are damaged by an enemy spell, you gain points. How much damage you take is irrelevant. |
| Take physical damage | You gain points every time you are struck physically (not magically) by an enemy. You get the same number of points whether you are hurt a little or a lot. |
Magic
Final Fantasy: Crystal Chronicles has a unique approach to magic. There are only six spells that you can find or learn, but by combining spells, you can cast close to 40 different spells. As an example, if you cast a basic fire spell at a certain spot on the ground, that is what happens--a fire spell. If another player casts a cold spell at the same spot at just about the same time, then the two spells combine to create a different spell, in this case, gravity. Two fire spells going off at the same spot creates a larger fire spell. The process of combining spells is called spell fusion, and it is absolutely essential for success in Final Fantasy: Crystal Chronicles.
The six basic spells are found in dungeons in the form of spheres called magicite. When equipped, these spheres allow you to cast one of the six basic spells. The six magicites are fire, blizzard, and thunder (the elemental spells), plus life, cure, and clear.
Spells
Fire: (fire damage) Creates a burst of fire that damages opponents and sets them on fire.
Blizzard: (cold damage) Creates a burst of cold, damaging opponents and freezing them in ice for a few seconds.
Thunder: (lightning damage) Creates a burst of lightning, damaging opponents and leaving them stunned for a short while.
Life: Brings a dead character back to life.
Cure: Restores hit points to the target.
Clear: Removes all status changes (poison, slow, and so on) from the target.
Any of the spells can be combined with more of the same spell to create a larger, more powerful form of that spell. Two cure spells create a wide-area, powerful cure, and three blizzard spells create a massive cold spell.
Gravity is created by combining two or more different elemental spells, like fire with blizzard, or thunder with fire. A more powerful version comes from combining all three elemental spells at once. Gravity causes a flying creature to fall to the ground, and causes all susceptible enemies to take damage.
Holy is a combination of life and one elemental spell, cast simultaneously (or with life on top, in single-player). Add additional, but different elemental spells, each cast a split-second after holy to increase its power. For example, if two players cast life and blizzard simultaneously, then another player adds thunder a split second later, it will create a stronger holy spell. Holy causes damage like other spells, and causes incorporeal creatures (like Ghosts) to appear so that they can be damaged.
Slow comes from casting life and an elemental spell a split second apart. As you can see, this is a lot like holy (in single-player, place life below the elemental spell). The only difference is the split second between life and the elemental spells. Adding another life spell, cast simultaneously with the second spell, will add to the effect. Slow spells cause an enemy to move and charge their spells more slowly.
Haste is a combination of life and cure, cast a split second apart. Add another cure spell simultaneously with the second spell for a more powerful version. Haste speeds a member of your own party up, including the time it takes to charge spells and focus attacks.
Stop is a tricky spell to cast. Cast a life spell, wait a split second, then cast one elemental spell, followed immediately by a different elemental spell to trigger it. (life--pause--element 1--element 2). It will completely freeze an enemy in place for a short period of time.
Spell Fusion
There are three ways to achieve spell fusion in the game.
Method 1: In a multiplayer game, each spell must be cast by a different player. Each player charges up their spell, moves their targeting rings so that they overlap each other, and then releases their spell. The timing of the spells is critical; as you can see above, the only difference between holy and slow is the timing with which the spells are cast. This is the hardest way, but it is absolutely vital for a party's success. It is highly recommended that you find a dark, quiet corner in some dungeon and practice together until you can consistently cast, at the very least, a 3-spell elemental attack, holy, and gravity. You cannot succeed without them. Note that with only two players, some of the more powerful spells will be unavailable.
Method 2: In a single-player game, you will generally fuse your spells before you cast them. If you put two or more compatible magicites in adjacent command slots, you will be given the option to fuse them. The order in which they are placed can, in some cases, determine what spell is made. Life in the slot above an elemental spell, for instance, fuses to create holy, but life in the slot below an elemental spell creates slow.
Method 3: In single-player mode, Mog can assist you by casting spells to fuse with yours. When you see Mog shout, "Hang in there!," he is ready to cast a spell. Have him drop the chalice and start charging a spell; Mog will join you with one of his own. Which spell he casts is determined by what color you have painted him. Unfortunately, this method is extremely unreliable, and requires that the chalice be stationary. As a result, you will rarely ever use it, except in dire situations.
General Strategies
- While eating foods you like will give you greater benefits, eating those you don't like will increase your appreciation of them. Eat everything you find, and eventually you will love every food.
- Many enemy spells require the same charge-up that yours do. Fortunately for you, they have to target a location before they start to cast, creating an obvious, visible ring on the ground. The ring won't damage you, but serves as warning that a potentially nasty spell is about to hit that spot. Get used to avoiding the rings, and you will be able to avoid most enemy spells.
- Note that if you kill an enemy that is carrying a key and move the key somewhere without putting it onto a pedestal, then die and choose ‘continue,' the key will be back where the enemy dropped it originally, not where you left it.
- Always keep at least one Phoenix Down equipped in one of your command slots. If you should be killed, it will be used automatically, bringing you back to life. This is especially useful during boss fights.
- Spells that stun opponents, such as lightning and cold, do not stack. In other words, if you have a spell that freezes an opponent, and you cast it on them a second time before the first one runs out, it will not extend the time your opponent is frozen. If you want to keep an opponent stunned or frozen for an extended period of time, cast the spell on them once, then charge it and center the spell ring on them. The instant the first spell runs out completely, cast the new one.
- Take advantage of the oil and water urns scattered throughout the dungeons. If a creature is standing in a puddle created by one of these, damage from spells will be increased. Oil urns work with fire spells, and water urns with cold or lightning spells.
Single Player Tips
- If you enter a dungeon with a really, really bad special condition--like your 10 Strength Yuke mega-mage getting ‘Don't Cast Spells' in a tough Cycle 3 dungeon--you can always exit back to the World Map and enter the dungeon again. Don't make a habit of it, as it is cheesy and takes away some of the challenge, but it can save your rear end in a really, really nasty situation.
- When not fighting, heal yourself with cure spells. Save the food for combat, as you can open your commands and heal yourself fully while the game is paused. This strategy is especially useful for boss fights where you might not have the time to charge up a healing spell.
- If you are playing a character that spends a lot of time fighting with regular or focus attacks, always put your cure magicite in the very bottom command slot. That way all you have to do is hit the left trigger to access it, then the right trigger to get back to the attack command.
- If Mog gets tired of carrying the chalice while beasties are about, take it from him and walk around in a circle for a few seconds--he will offer to take it back without your having to go into attack range of enemies.
- When the time comes to choose artifacts after a boss fight, always try to choose something with a high bonus. You may want to raise your strength, but you would be better off waiting for one +4 strength item than grabbing three +1 items and ignoring good bonuses to other stats.
Multiplayer Tips
- If you are fighting a tough opponent, appoint one person with a high health and defense as the official party target. Have him get close to the enemy and focus only on defending himself. The idea is to get the enemy to pay attention only to this one character, perhaps triggering his melee attacks instead of his spells. Meanwhile, the rest of the party sits back and blasts the beastie with magic, focus, or fusion attacks. In a full, four-person party, one person can even be designated a healer, to continuously cast cure on the party while the other two players attack.
- An ideal party will include a mix of different talents. A strong fighter, a strong mage, and a mixed character will do much better than a group of three fighters.
- Since each person in a good party should be focusing on fulfilling a different role (fighter, healer, mage), artifact selection should not cause a conflict, as each person will find a different type of item useful. Keep this in mind when choosing. If you are a fighter, don't choose the item with the +9 to magic; leave that for the mage and choose a strength or heart item. Likewise, if you are a spell caster, take the extra command slot and leave the extra heart for the guys taking the hits.
Walk-through
Introduction
Because Final Fantasy: Crystal Chronicles is such an open game, there can be no single correct way to play, no one ‘best' order in which to tackle the towns and dungeons that you will be exploring. After the first couple of years, you will be able to go in a completely different order than what is listed here, repeating earlier areas to improve your character, and skipping other areas completely.
What this walk-through does is give one possible route through the game's challenges, designed in such a way as to expose the player (or players) to each and every area, while at the same time moving efficiently toward the end of the game.
Because of the way that you will be going back and forth between areas, repeating some of them more than once, a straight, traditional walk-through wouldn't work -- it would limit you to one route, and would have you searching back and forth for information on a certain dungeon that you have decided to repeat. Instead, this walk-through is organized by area rather than by the order you will (or may) visit each area. This will allow you to look up the area that you are in and have all of the relevant information right at your fingertips.
If you prefer to use this guide as a straight, chronological walk-through, visit each area in the order listed at the end of this section. The individual descriptions are written to facilitate this, with each area's description ending with how to get to the next area. If you prefer to do things in your own order, then just ignore the last paragraph of each section and look at the walk-through as a guide to individual locations.
Chronological Walk-through Sequence

Final Fantasy: Crystal Chronicles was designed to give you an open, free-form play experience. If you feel like repeating a certain area, you can. If you would like to do them in a different order, you can. You can even skip some areas completely if you'd like, and while you can beat the game in five game years, you can also play for many times that long, building up your character.
This walk-through was designed to be useful for the free-form player, and yet still function as a traditional, linear walk-through. If you want to do it your own way, you can look up any area in the walk-through and treat it as a general reference to what is in the area, how to beat the boss, and how to solve the puzzles. If, however, you would prefer a more traditional walk-through, simply go to the areas in the order listed below. When you first start the game, for instance, go to Tipa and read the section for Tipa (Year 1). When you are done with Tipa, head to Port Tipa and then River Belle Path, reading the relevant sections as you visit each area. Good luck!
Year 1
Tipa (Year 1)
Port Tipa (Year 1)
River Belle Path (Cycle 1)
Miasma Stream (Water)
Marr's Pass (Year 1)
The Mushroom Forest (Cycle 1)
The Mine of Cathuriges (Cycle 1)
Year 2
Tipa (Year 2)
Goblin Wall (Cycle 1)
Miasma Stream (Fire)
Miasma Stream (Water)
Alfitaria (Year 2)
Tida (Cycle 1)
Moschet Manor (Cycle 1)
Year 3
Tipa (Year 3)
Miasma Stream (Wind)
Miasma Stream (Fire)
Miasma Stream (Water)
Shella (Year 3)
Veo Lu Sluice (Cycle 1)
Miasma Stream (Water)
Miasma Stream (Fire)
Jegon River East (Year 3)
Jegon River West (Year 3)
The Fields of Fum (Year 3)
Daemon's Court (Cycle 1)
Selepation Cave (Cycle 1)
Year 4
Tipa (Year 4)
Miasma Stream (Earth)
Kilanda (Cycle 1)
Miasma Stream (Water)
Conall Curach (Cycle 1)
Rebena Te Ra (Cycle 1)
Year 5
Tipa (Year 5)
Port Tipa (Year 5)
Leuda (Year 5)
Lynari Desert (Cycle 1)
Leuda (Year 5)
Port Tipa (Year 5)
Miasma Stream (Water*)
Mushroom Forest (Cycle 2)
Miasma Stream (Earth*)
Miasma Stream (Wind*)
Veo Lu Sluice (Cycle 2)
Year 6+
Beginning with year 6, you have some real options. There is only one major thing left to do, only one new land left to explore. As soon as you do so, though, the game is over. If you'd like to finish up now, jump ahead to the ‘Final Year' entry below, but why hurry? Each dungeon has three cycles, and you have only seen the first for all but two. There are treasures and enemies that you won't see until the third cycle in many dungeons! Furthermore, there are lots of secondary storylines that you will only hear about through the random encounters between dungeons. Who is the mysterious Black Knight? What is Gurdy up to? Will the Lilties from Marr's Pass ever catch that Goblin? Finally, the last boss (as you might guess) is no push-over, and getting to him is a skin-of-your-teeth battle. Every dungeon you finish, every artifact you collect, strengthens you. Once you have refilled the river at the end of year five, you will be able to go anywhere in the world.
To get the most out of Final Fantasy: Crystal Chronicles, then, it is highly suggested that you spend a few years exploring, going back through dungeons, collecting myrrh, improving your character, and dancing around the village crystal. When you are finally ready to save the world, move ahead to ‘Final Year.'
Final Year
This assumes that you completed the previous year and are starting back home in Tipa. If you are not, the directions up to Miasma Stream (Unknown) might be different.
Tipa (Final Year)
Miasma Stream (Wind*)
Miasma Stream (Unknown**)
* Element is for reference only. You should have the unknown element by this point, allowing you to pass through any Miasma Stream.
** Can only be passed after acquiring the unknown element from the Lynari Desert.
Years and Cycles
As mentioned earlier, your goal in Final Fantasy: Crystal Chronicles is to collect enough myrrh to power your village's crystal for another year. The myrrh comes from myrrh trees hidden at the end of dangerous dungeons. You can get only one drop from each myrrh tree, and it takes three drops to fill your chalice--just enough keep your village alive for another year. Every time you collect three drops of myrrh, then, the game automatically advances time in the world by one year.
Collecting a drop of myrrh from a tree completely depletes that tree; it takes two years before you can get another drop of myrrh from that particular tree. For example, if you got a drop of myrrh from the Mushroom Forest in year one, that particular tree would stay dry until year three, at which point you could harvest myrrh from it once again.
The first time you go through a dungeon, it is said to be at cycle one. After you have collected the drop of myrrh from it, two years have passed, and the tree has a new drop, that dungeon automatically advances to cycle two. In cycle two, all of the enemies are 50% stronger than they were originally, new monsters may appear, and the end boss might gain new attacks. Once you have claimed the myrrh a second time, two years have passed, and the tree has a third drop, the dungeon advances to cycle three. In cycle three the monsters have risen to 250% of their original strength, more new monsters appear, and the boss becomes even stronger. After reaching this point, a dungeon will remain at cycle three for the rest of the game (although the myrrh will still come back every other year).
For the most part, the dungeons work exactly the same from cycle to cycle with no changes other than newer, tougher enemies. There are a couple of exceptions to this, dungeons where new areas open up after a certain period of time. These will be described where they happen. Since the walk-through for each area stays the same, each area's walk-through will be followed by notes that describe what has changed since the last time you visited.
Getting Started

Now that you have begun the game and have created your character, you are ready to head out into the world, right? Wrong. Take a few minutes to create a full party by pressing the B button on the World Map and selecting Set Out again. You want to have a character in each and every slot. Each character's parents should have a different profession--in other words, there are eight character slots and eight professions, and every profession should be represented by one character.
Why bother? Because if you go back into your home town, you will see that it is full of houses (eight of them, in fact). Those houses are the residences of the parents of every character in your save slot. If you only have your own character, then most of them will be empty! By creating a complete set of characters, you will have access to each and every profession and craftsman right there in your home town.
Once you have a full set of characters, choose Set Out one last time and choose your personal character. You can head out onto the Tipa Peninsula to find your first drop of myrrh, stopping at your home town first.
Tipa Peninsula
Tipa
Year 1
Tipa is your home town (assuming you haven't renamed it). It is in Tipa that you will begin and end each year's adventures. If you took our advice and created a full set of characters for your caravan, then there will be plenty of services to be found in Tipa, although you probably won't have much money to spend at the beginning of the game. Still, it is worth visiting Tipa first to find a few goodies and get used to the movement controls and menus.

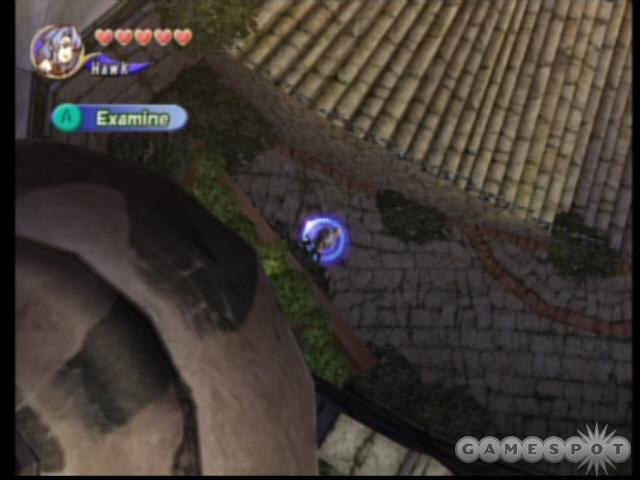
Make your way to the large crystal in the middle of town, and then circle around to the back of it; you will notice the Examine icon appearing. Hit the A button to take a closer look, then choose to go on inside. This is your first Moogle Nest. Question the friendly Moogle inside concerning stamp cards. He will give you a card and your very first stamp.
Now, take the time to follow the narrow path to the northwest of town. Someplace at the top of the path you will see the Examine icon again. Hit A to find your first secret item; it should be a wheat seed this time.
Almost immediately upon leaving Tipa, you will encounter Sol Racht and the caravan from Alfitaria. If you are playing alone, Sol Racht will introduce you to Mog, your companion Moogle (in single-player), and Sol's own Moogle will offer to teach you what he knows. This is the tutorial, and it is recommended that you go through it at least once, if for no other reason than to practice your skills in a safe environment. Once you have completed the tutorial, move your caravan to Port Tipa on the western coast.
Year 2
You will find yourself back in Tipa at the beginning of year two. It is worth the time talk to the people you see, as they will have fresh rumors, and may even give you gifts. Do any shopping you think might be necessary and grab the secret item before heading out to the Goblin Wall, which is now accessible from the road to the Miasma Stream.
Year 3
As before, take some time to gather the secret item, talk to people, and shop before heading out on this year's travels. Your first destination is way up north, past Alfitaria. Set your crystal chalice's element to wind at River Belle Path and push on through the first Miasma Stream. Stop by Marr's Pass for secret items and shopping. Swing by the Mine of Cathuriges to change your element to Fire, and then continue on past the next Miasma Stream. Stop by Alfitaria if you'd like. Finally, go through the last Miasma Stream, stopping by Moschet Manor on the way to switch your element over to water. Shella, to the east, is your destination.
Year 4
Perform your usual business, get the secret item, and talk to the people. Make sure you have at least 500 Gil to spare before you leave--you are going to need it! Sell a few things if you have to-- you probably have far more bronze, iron, and patterns than you will ever use. Stop by the Moogle nest and trim Mog's fur until he speaks. Seriously-- trim that fur; you are going someplace hot, and long fur will get Mog tired faster. This year, you will again be going north to Jegon River East. You will have to stop by the Goblin Wall to set your element to earth before you tackle the Miasma Stream. Afterward, make sure you stop by the Mine of Cathuriges and change your element to fire before continuing on to Jegon River East.
Year 5
If you take the time to talk to everybody in town, you will find out that the Jegon River has run dry. That means that you can't get to any areas that require crossing the river (you can throw a stone across... why they don't build a bridge we will never know...)
We should take care of this problem. The river flows from the Veo Lu Sluice, so we should check there. Unfortunately, due to the way the Miasma Streams have aligned themselves, we can't get past the Iron Mine Downs. Luckily, after the river ran dry, the ferryman from Jegon River moved south, opening up Port Tipa for the first time. Head there now.
Final Year
Talk to the townsfolk, do some shopping, and head down to Port Tipa. The river should be running again, so book passage to the west bank. Be certain that your chalice's crystal is still attuned to the unknown element; if not, you will have to go back to the Lynari Desert first. Continue east through the Plains of Fum and into the Rebena Plains. Along the way, do any crafting or shopping you will need--there won't be any more opportunities once you pass beyond the Rebena Plains. Follow the road past Rebena Te Ra to the final Miasma Stream. Now that you have the unknown element, you will be able to pass through. Do so, and then head to Mag Mell on the west coast.
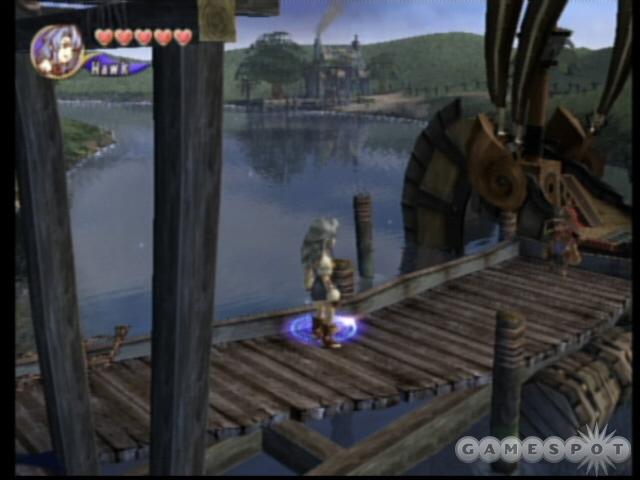
Port Tipa
Year 1, Year 2, Year 3, Year 4
There isn't much to do in Port Tipa prior to year five. You can repeat the tutorial by speaking with the Moogle at the bottom of the ramp, and you can collect another Moogle stamp at the cave near the top.
Year 5
Tristan, the ferryman from Jegon River, has opened up shop here, and will transport you to either Mount Kilanda or Leuda. Take passage to Leuda, pay your 300 Gil, hop aboard, and enjoy the trip. Next stop: Leuda!
Year 6+
The river will remain full, so Port Tipa will give you access to either island or either bank of the Jegon River from this point on.
River Belle Path
Cycle 1
Welcome to your first dungeon! Your goal in dungeons is to explore, to gather treasure, to beat the boss at the end, and to gather the myrrh drop. You will encounter a combination of Goblins, Goblin Chieftains, Mu, and Hedgehog Pies (mmm... pie). Most of them are easy fights, designed more to let you get used to the basic combat techniques than to create any real challenge.
The first thing you should do, just as with any dungeon, is to check your GBA to see what the special condition for the rest of the level will be. Remember, the better job you do of fulfilling your condition, the better the treasure you are likely to find at the end. Once you know your condition, set up your command list (which is probably unnecessary this early--you haven't any artifacts or items yet) and hit A when you are ready.
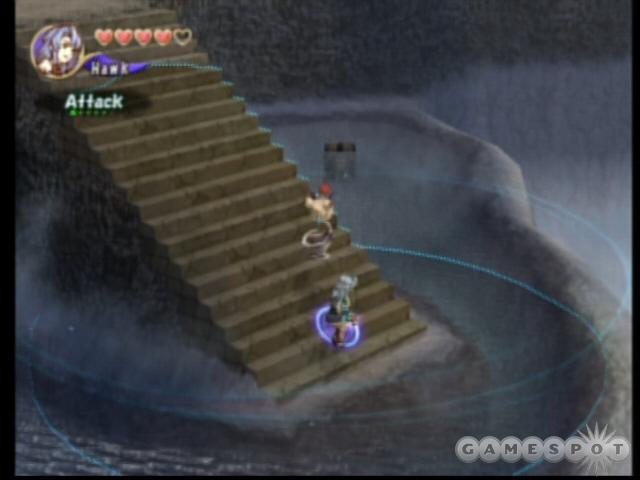
Take the right fork first. There is a drawbridge that has been raised. To lower it, you will have to activate both switches nearby. In multiplayer, both players stand on a switch. In single-player, place your chalice on one and stand on the other. Using your chalice to hold down switches is something that a solo player will be doing repeatedly throughout the game.
Continue up and around to the north, defeating enemies and collecting treasures as you go. If you find any magicite, be sure to take the time to stop and reconfigure your commands so that you can use them. Eventually, you will come to a dead end at a wooden fence with a stone pedestal nearby (it looks a bit like a bird bath). When you defeat the Goblin Chieftain nearby, he will drop a crescent-shaped piece of stone. This is a key, and the pedestal is the lock. Pick up the key and place it on the pedestal to open the gate and continue on.
Go south past this gate until you find yourself near a hot spot. Take the long, narrow path going northeast past it. At the top, take a good look at the northern wall--when the Examine cursor pops up, hit A to enter a Moogle nest and get another stamp for your card. It is also a good idea to lower the other half of the drawbridge in the southernmost corner of this area.
Once you are done exploring the south, return to the gates and head north, unlocking the second gate on the way. Explore all the way to the north without crossing the river, then head back to the destroyed bridge across the river. You will be able to climb down the rail to get to the other side. Grab a chest to the north before continuing south. Things will start getting a bit tougher as you begin to face multiple enemies. Keep moving, wait for an opening before attacking, and don't be afraid to retreat to someplace safe to heal up if you get in over your head. Eventually, you will come to a bridge. Across the bridge to the east is a house with a pair of Moogles. Say hello, then head back toward the bridge. Just to the north of it is a cave--heal up and head in.
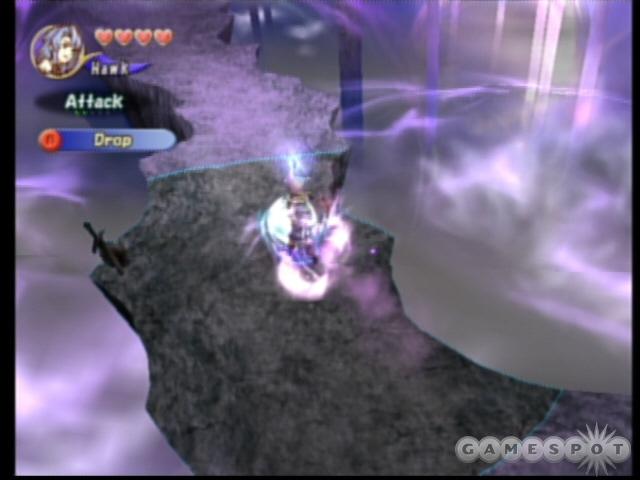
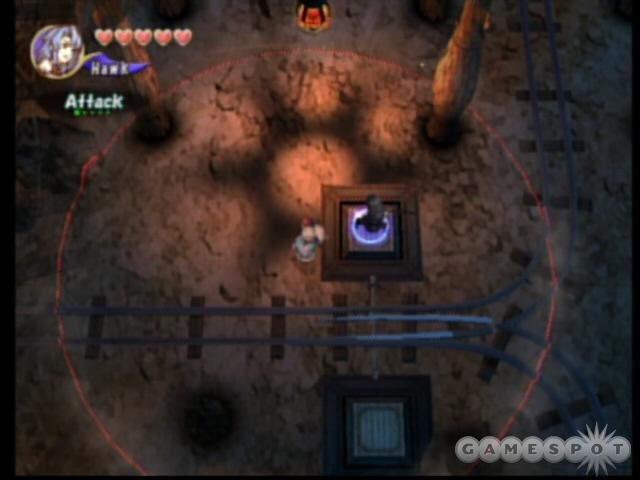
Meet Giant Crab, your first boss. He is a nasty fellow, quite a bit tougher than anything you have faced so far. He attacks with a pair of spells; the first is a glowing orb that slows you down, and the second is a burst of lightning that fires straight ahead. He will also attack with a pair of nasty melee strikes. When he attacks, he alternates a spell and a melee attack, casting a spell, closing in on you for a strike, and then backing off for another spell. If you want to take him with melee attacks, wait until he backs up to cast a spell and dart around his side for a quick combo. If you want to take him down with magic, wait until he casts a spell, dodge it, and immediately start charging your spell. As soon as he advances to strike at you, release your spell and back off, repeating the process until he goes down. He is especially vulnerable to fire and holy, but isn't bothered too much by thunder.
When Giant Crab gets down to about 25% of his health, his carapace will break off and his tactics will change. He will give up on the melee attacks and focus on casting the slow orbs in rapid succession. Dodge them and continue to attack. Every now and then he will cast a medium-powered lightning spell. This is a very, very bad thing for you! If you begin to see a sparkling blue circle where you are at, run as far away as you can, and quickly! The spell will do heavy damage and will paralyze you--often long enough for his next attack to finish you off before you can move.
Eventually, Crabby will go down. Your reward is a single drop of glistening myrrh. You will then receive your first piece of mail from the Mail Moogle. Read it and respond as you see fit; be a good fellow and send a gift with the reply. Once the mail has gone out, you will be given the option to select one of the many artifacts you found to keep permanently. Choose carefully, and you will find yourself back on the world map (don't forget to save).
Congratulations! You just completed your first dungeon, gained your first artifact, and advanced time by 1/3 of a year for the drop of myrrh you received. While your caravan is still on River Belle Path, hit the A button. Instead of entering automatically, you will be given a menu. Make sure the element of your chalice is set to water from this menu, and then head out. You can stop by Tipa to do some shopping if you'd like; if you found patterns and materials (like bronze), you can have the blacksmith craft you some new equipment. Since you found a drop of myrrh, the secret item on the top of the hill will have reset--this time, you should find a bronze shard.
When you are finished, the adventure continues to the north, through the Miasma Stream. Move your caravan there, and notice that the icon that pops up shows the element of water; that is why you set your crystal chalice to water earlier. Go in and walk straight through. You will be slowed down, but will be able to push your way through. If you get bounced back halfway there, then your chalice is not set to water.
Cycle 2
In cycle two, the Goblins of River Belle Path will have been reinforced by Goblin Magi, Griffins, Stone Hedgehogs, and the Giant Crab will have a more powerful lightning attack.
Cycle 3
Starting with cycle three, expect to see Dark Hedgehogs and stronger Goblins along the river. On the bright side, the Hedgehog Pies will have left for good.
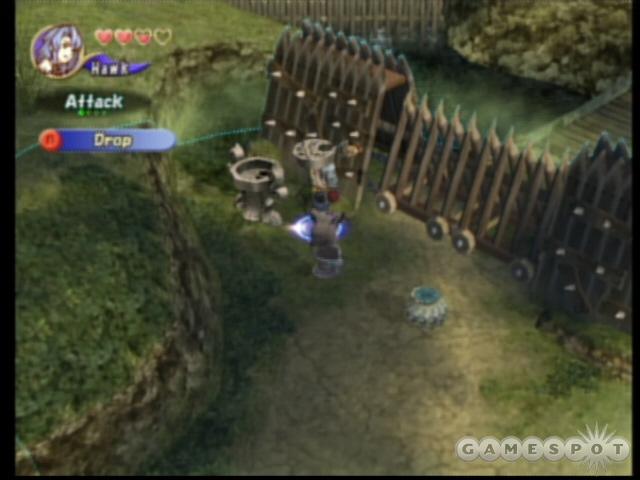
Goblin Wall
Cycle 1
Welcome to Goblin Wall, a nasty, smelly place in which you will meet Goblins, Goblin Chieftains, Goblin Magi, Flan, Electric Jellyfish, and Bats. Quite a menagerie!
Once inside, move straight ahead, killing whatever needs killed. You will notice several chests behind locked grates. Follow the southern wall to the left and you will end up on a ledge above the chests. There are several horned skulls on this ledge; walk up to each of them in turn, hitting them with a melee weapon to open the grate below. Don't bother going down to collect the loot yet, though. Continue up the winding path until you reach the top, throwing all of the switches along the way. Don't forget to go east at the hot spot to get to two isolated switches; one opens a chest on the lowest level, and the other opens a tunnel you will be coming back to later. The grate above these switches cannot be opened until cycle two. The top is a dead end, so turn around and come back down, emptying all the chests as you go. Note that two of the grates don't contain chests, but are connected to each other via a tunnel. Pay attention, as there is a Moogle nest hidden in the tunnel!
After you have collected all of the treasure, head back up to (and through) the tunnel entrance that you uncovered to the east of the hot spot to enter a new section of the caves. There are five switches in this area; throw them all, collect the treasures from the three now-open alcoves, then proceed through the tunnel that one of the switches opened. A chest and two more switches wait just on the other side, and then continue cautiously to the northwest, as several groups of enemies await you. Flip all of the switches and open the single exposed chest. Immediately to the north is the boss, the Goblin King. Take the time to first go down and empty the four chests you just exposed, then heal up and head north, using the key one of the enemies dropped to open the door.
Before you can fight the Goblin King, you will need to take out his lackeys. Two sets of two tough Goblins show up. You don't have much room to maneuver, and you shouldn't count on being able to run away for a cure spell. The second set each drop a key, allowing you to open the path to the Goblin King himself.
The King himself can be a pain. He repeatedly summons spear-wielding Goblins, one at a time. Take them out as soon as they show up, or you may end up dodging two of them at a time. The Goblin King has a moderately weak melee attack if you get too close, but his primary weapons are lightning and poison spells. He casts these spells in quick succession, and they have a wide radius, so be careful! The lightning spell can stun you for an extremely long time, and the poison isn't much fun, either. To actually defeat the fellow, keep moving, dodging his spells while you get rid of his Goblins. As soon as there are no Goblins, wait for him to start casting a spell, move aside, and hit him with either holy or a focus attack. Step back, wait for the next spell, and repeat the process until he summons another Goblin. Kill it and repeat.
Get your myrrh, read your mail, and choose your artifacts. You still need two more drops of myrrh this year, and all of the dungeons you have seen so far are still tapped out. Do some shopping (or collect secret items) if you'd like, then head into the Miasma Stream again (you will need to have your crystal set to fire; Goblin Wall can do so). In the Iron Mine Downs, stop by the Mushroom Forest and change your crystal's element to water. You can stop by Marr's Pass if you'd like, then head for the next Miasma Stream. Alfitaria, straight ahead, is your first stop.
Cycle 2
The Goblin Wall really gets a boost in cycle two with the addition of Cerberus, Ghosts, and a slew of stronger Goblins. The Goblin King learns some new magic--high-level fire and lightning spells. Keep moving when you see the targeting rings appear! Goblin miners have cleared away some rocks from a tunnel mouth just below the entrance to the Goblin King's lair, leading to a short tunnel which in turn leads to a previously inaccessible switch.
Cycle 3
Other than a general boost in stats, nothing changes here in cycle three.
Iron Mine Downs
Marr's Pass
Year 1
Head straight ahead to the town of Marr's Pass. Stop to examine the well along the path into town to find a secret item. It will probably be a Chunk of Bronze. Conveniently, there is a pair of Blacksmiths (one crafts armor, the other weapons) to turn it into something useful if you still have a pattern. Talk to the townsfolk to get a feel for what is going on in the world.
Directly to the south of the armor-crafting blacksmith is a wooden staircase leading down. Take it to find another Moogle nest and get another stamp for your card.
The only other thing worthy of note in Marr's Pass is the Selkie Merchants near the weapon Blacksmith. They sell a fantastic variety of patterns, but are not there in years 2, 4, 6, or 8.
Year 2, Year 3, Year 4, Year 5, Year 6+
Nothing really changes in Marr's Pass after your first visit, although the town remains a convenient place for shopping and crafting.
Jegon River East
Year 1, Year 2
There is nothing of interest here yet. You will be catching ferries across the river here in later years, but for now, there is nothing to see but an empty, lonely dock
Year 3
Finally, something worth doing! Well, not all that much... Talk to the fellow at the end of the dock to ride the ferry across to Jegon River West.
Year 4
Save before you go in, as you won't have a chance for a while, and make sure you have stopped by the Mine of Cathuriges and set your element to fire before coming here--it will help protect you in the next dungeon. Talk to the ferryman, and choose to go to Mount Kilanda. It will be costly, but it will be worth the fee.
Year 5, Year 6+
If you didn't refill the river yourself, it will refill automatically in year eight. When it is dry, there is nothing of interest here, as the ferry man has moved off to Port Tipa. Once the river is again running, you will be able to catch a transport to any aquatic port of call.
The Mushroom Forest
Cycle 1
Welcome to the Mushroom Forest. In this dungeon, you will encounter new, tougher enemies, including Ahriman, Gremlins, Hell Plants, and Tiny Worms. Your old friend the Hedgehog Pie will be back, as well. Check your special condition and then head in and to the left.
Eventually, you will come upon a large mushroom that you can climb onto. Do so to be tossed up into the next section of forest. You will have to bring the chalice with you, and, if you are playing with friends, everyone will have to be on the mushroom at once before it will work. Be careful to explore before venturing onto the mushroom, though, as you won't be able to go back without circling through the entire level.
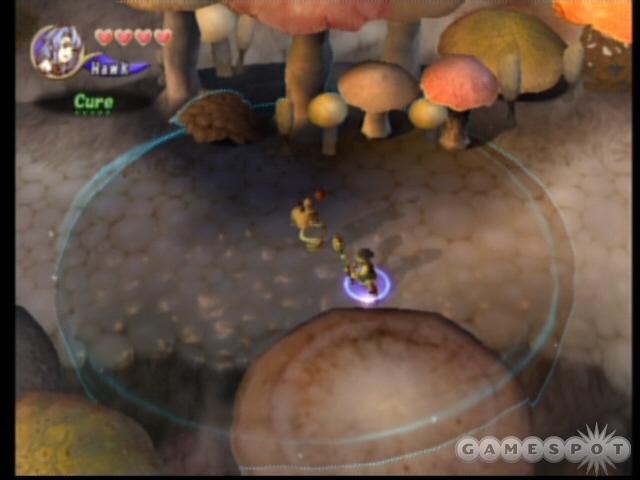
To the south you will come across a hot spot, and further along you will pass another mushroom that you can climb on; don't bother, though, as it will just toss you back to the beginning of the level. Continue on, up and around; the path doesn't branch, so you can't get lost. When you are traveling west again, look toward the northern edge of the path for a large white mushroom you can climb on. It will deposit you next to a chest, to the right of which is another Moogle nest. After you're back out on the path, you will come to two urns; get ready, reassign your commands, and heal up. The boss is just ahead.
Malboro has a number of nasty attacks, but he is easy to take down. His most common offenses are a physical tentacle attack that comes from underground and a dark spell that needs to be charged up before being used. He sometimes also attacks with a wide-area slow spell and poisonous breath. He starts off with two Hell Plants nearby which will respawn after a few minutes if you kill them.
To defeat Malboro, keep moving. You will have a lot of attacks coming at you, so pay attention and dodge them. Hit him with fire spells, as he has a moderate to strong resistance against everything else (except holy, which works, but not as well as fire). Take out the Hell Plants first so that you can focus on Malboro without getting shot in the rump. As soon as both Hell Plants go down, focus everything you have on their boss--blast him with a fire spell, move, and blast him again. As soon as either Hell Plant shows up again, kill them! When Malboro inhales and draws you in close, use it as an opportunity for a few quick melee attacks before backing off for more fire.
Make sure you heal a lot. If you are playing alone and get past half of your hearts, back off and use cure. If you get unlucky, you can lose those last hearts very quickly. It won't be too long before Malboro is pushing up the daisies and you have another drop of myrrh. Stop by Marr's Pass for shopping and to retrieve the new secret item if you'd like before continuing on to the Mine of Cathuriges.
Cycle 2
When you return to the Mushroom Forest, it will, for the most part, be just like it was the first time. However, the dungeon is now in cycle two. You collected the myrrh, left, and the myrrh regenerated, causing the dungeon to advance to a slightly more advanced form.
The first thing you will notice is that there are a few new creatures--Ice Ahriman, Ochu, and Stone Plants (in addition to all of the creatures that were there before). Some of the mushrooms have grown larger, allowing you to reach a new area just to the west of the entrance. The last thing is that Malboro has grown as well--he now adds a high-powered cold spell to his arsenal! Don't worry though, because the treasures you will find have improved along the way, too.
You know what to do; when Malboro is compost, head out and north to the Veo Lu Sluice so we can get the water running. Stop for shopping or to take advantage of the skilled craftsmen along the way.
Cycle 3
Cycle three in the Mushroom Forest comes with lots of changes. Stone Hedgehogs, Dark Hedgehogs, and Carrion Worms will join the throng. If you go just past the springy mushroom that sends you back to the beginning and turn south, you will find that a newly-grown mushroom makes another small area, including a chest, accessible for the first time.
The Mine of Cathuriges
Cycle 1
The Mine of Cathuriges is full of Orcs, Orc Magi, Ogres, and Bombs. Check your special condition, and head on in.
Give the mine cart a whack with your melee weapon to send it rolling around the corner. Go ahead and to the left. Just ahead is a hot spot--after you have cleared out the nearby enemies, be sure to use it to give your party resistance to fire. Go back toward the entrance and follow the tracks to where the cart you hit earlier ended up. Just ahead is a pile of boxes blocking your way. Give the cart another whack to clear the boxes, and then continue through. In the next area, step on the upper switch, then hit the cart again to send it north, following along after, hitting it as needed to keep it with you.
The cart will soon come to another switch. Clear the room, being certain to check out the passageway to the southwest (including the upstairs). When you are ready to continue, step on the northern switch to again change the tracks over. Play Whack-A-Cart and keep heading north. Kill the Ogre in the next area to retrieve his key and continue on.
Be careful as you head north on the narrow tracks, as Orcs line the way. Proceed slowly, and get rid of each one before continuing on, or you may find yourself overwhelmed. When you get to the second large platform, look for the tracks going off to the southwest. Follow them to find another Moogle nest. A snaking section of track follows, then a final platform. Take a break and heal up, because the boss is just ahead.
The Orc King isn't too tough. He has a fire spell that takes a long time to charge up, a single strike melee attack, and a spinning attack that he uses only occasionally. He also summons Orcs to aid him from time to time. Just like in previous boss fights, take out his helpers as soon as they show up! To defeat the Orc King with melee attacks, wait until he starts to charge up his fire spell, then charge straight at him. You should have time for a full combo or a focus attack before he finishes casting it and returns his attention to you. That's it--keep it up until you win. If you want to battle him with magic, use the same basic technique, stepping aside and casting a spell the instant he starts charging his. Use holy or fire for the best results, but don't waste your time with slow or stop, as the Orc King is rather resistant to these.
When you have the King down to just a fraction of his health, he will stop moving or attacking and begin to glow. You have two choices before he blows up, taking you with him. If you think you can do enough damage quickly enough, keep beating on him. If you get his health down to zero, he will die without exploding. Alternately, run to the furthest corner from the Orc King and cast cure on yourself. If you cross enough fingers you should survive.
Myrrh, mail and artifacts follow. After you are done, you will be automatically returned to Tipa. You have saved the village for another year. Congratulations!
Cycle 2
In cycle two, the Mine of Cathuriges will have been reinforced by Bats, Cockatrices, Ice Bombs, Wraiths, and a slew of stronger Orc breeds.
Cycle 3
Nothing changes in the mine after cycle two.
Vale of Alfitaria
Alfitaria
Year 1
This area is not accessible this year.
Year 2
Alfitaria is a fairly large city. Upon entering the city proper, head left and down the first set of steps to meet up with a Selkie; she is here in Alfitaria in years 2, 4, 6, and 8. In the furthest southwestern corner of the city, next to the stairs, you will find Alfitaria's secret item. Head down the southeast stairs and all the way to the end to find another Moogle nest and have your card stamped. There is a Blacksmith's shop northwest of the town's crystal, and a merchant directly west of it. When you are done, leave and had to Tida.
Year 3, Year 4, Year 5, Year 6+
Things don't really change in Alfitaria after your visit, but it remains a good spot for shopping, and the Blacksmith can craft some higher-level equipment.
Tida
Cycle 1
Welcome to Tida. This used to be a town just like yours, but its caravan never returned, its crystal faded, and the Miasma rolled in. What you see is what is left--blackened buildings infested with Bombs, Carrion Worms, Gremlins, Hell Plants, Skeletons, and Skeleton Magi.
Check your special condition and go left upon entering to retrieve some goodies from a chest before returning to the entrance and heading north. Grab the chest past the hot spot, then head back down to the entrance and east. Follow the path until you reach a narrow spot. Just beyond it, you will encounter a pack of enemies. Don't be afraid to back off and draw them out a few at a time if you need to. One of them will drop the key that will grant you access to the next area. You will have to cast a fire spell to clear the vines off of the pedestal before you can use it.

The door opened by the key leads to a small area full of Skeletons, but with a couple of chests to reward you for your trouble. Once you have cleared the area, head back out by where you found the key and move south to find another pair of chests and a Moogle nest under a house. Leave the village and head back to the north until you come to a locked gate. A creature nearby holds the key, but it is worth your time to take a quick jaunt down the path to the east before going through the gate.
Once through the gate, go straight. Just ahead, the path will be blocked by some sort of fungal web. This can be removed with any fire spell. If you don't have fire, whack on the supporting fungus posts a few times and it will start expelling fire magicite. Single-player hint: If you want a nice, powerful fire spell, drop all of your fire magicite on the ground and start whackin' the fungus until there are a total of three. You can then link the three of them together for firaga, the most powerful of the fire spells.
Follow the route to the west for a chest, then backtrack and go east, keeping to the south as much as possible until you come to locked gate in the southern part of a clearing. One of the enemies nearby holds the key. Burn the vines off of the pedestal and go through the gates to retrieve the goodies from two chests before heading out and making your way north again, sticking close to the eastern wall. When you come to a chest, head west and follow the chasm until you come to a bridge, but don't cross it until you collect the chests to the south and west.
Once across the bridge you will fight a pair of baddies; one of them will drop a key. Use said key to open the gate, but don't go through until you are ready--the gate leads to Armstrong, the area boss!
Armstrong has a number of weapons at his disposal. He can issue a green mist that poisons you or a purple mist that slows you. If you are too far away, he will switch to a cannon or a nasty spray that both do some serious damage, and if you get too close he will occasionally attack with his wooden hand. Armstrong will also summon a pair of Skeleton Magi from time to time; as always, take them out as soon as they appear. Stay at a medium distance from Armstrong and hit him with holy, fire, or focus attacks, and he should be an easy kill.
Enjoy your rewards, stock up in town (don't forget the secret item), then head for Moschet Manor for the final stop in year two.
Cycle 2
Tida really gets a boost in cycle two, with Abaddons, Magic Plants, Skeletons, and Stone Plants reinforcing the already cursed population of this tragic town. Armstrong will have a new type of cannonball that paralyzes you. Dodge it the same way you did the regular cannonballs earlier.
Cycle 3
Armstrong gets yet another new cannonball in cycle three, cursing you if you are struck.
Moschet Manor
Cycle 1
Moschet Manor is a bit different from the dungeons you've grown accustomed to. First of all, it is a Gigas Lord's home, not a stinking Goblin hole. Secondly, the entire dungeon is a puzzle--you know you have to defeat the Lord, but how do you get him to show up? The introductory movie has the clue; delay his Tonberry Chefs and he will grow angry. How do you delay monstrous chefs? Swords and spells should do the trick! The chefs aren't alone; expect to meet Gremlins, Gargoyles, and Coeurls as well.
The manor is laid out with seven rooms surrounding a central courtyard. Each room is accessed by a switch linked to a particular race, and which race the switches will open for changes every few seconds. When you want to go in to a room, wait until the switch is showing the symbol for your race (pages 38-41 of the manual show these symbols) and step on.
When you first arrive, you will be at the southern end of the courtyard, which is packed full of Gargoyles. As you don't yet have any magicite to cast gravity with yet, a courtyard full of Gargoyles is a bad, bad thing. Instead of walking into the courtyard, go east into the first room. ‘Delay' the Tonberry Chef inside, along with any company he might have. You should (hopefully) end up with enough magicite to use a gravity spell.
Go back out into the courtyard and head north along the eastern wall, taking out the Tonberry Chefs in each room (every room has at least one). Be careful not to get overwhelmed in the courtyard, as the door lock system ensures that there is no place to run if you find yourself surrounded by Gargoyles and Coeurls. In the northeastern room, the chef is hiding behind the bed. Bump into him to get him moving. Continue to the northernmost room (beware of Gargoyles), then down the western side of the courtyard. Take the time to read books on the three platforms in the library, and look for a Moogle nest in the next room between the table and the chair.
When you have killed the final Tonberry Chef, the Gigas Lord will come looking for his dinner. The first time you hit him, his wife Maggie will show up and start casting slow spells. Hit her with fire or ice, and keep it up until she turns tail and flees. It is completely pointless to attack the Lord while she is around--the Lord can heal both of them as long as she's there.
Once she flees, hit the Gigas Lord with every fire spell you can manage. The Gigas Lord will attack with a punch, a massive stomp, and a breath weapon. He isn't too fast, but his attacks have a wide radius, making them hard to dodge. If you have a high enough defense, just sit there taking the hits while you cast, healing with food whenever you get too low on health. If you'd prefer not to get hit, then keep moving and avoid his stomp.
After he goes down, get your myrrh, read your mail, collect your prize, and enjoy the celebration.
Cycle 2
Maggie will start throwing paralyzation spells in cycle two, but nothing else will have changed.
Cycle 3
The addition of a few Ochu in cycle three won't be enough to keep you from kicking down Jack's doors yet again.
Veo Lu
Shella
*Note: If you have been conscientious in collecting each town's secret items whenever you have had a chance, you will have found a Mark of Shella, the pass required to gain entrance to the city. If you have not, you will have to go through Veo Lu Sluice to find one prior to entering Shella.
Year 1
This area is not accessible in year one.
Year 2
Although this walk-through doesn't bring you to Shella until year three, it is accessible in year two. It will be identical to the year three walk-through.
Year 3
Shella is the home town for the magical Yukes. Give the bridge tender your Mark of Shella to gain entry, and then head across and into town. The first house you see has two merchants standing outside, one of which sells a variety of accessory patterns if you need them; you might also consider buying a spare Shella Mark for your next visit. Check behind the house for a Moogle nest. From the crystal in the center of town, go southeast to find an experienced tailor and a Selkie you should speak to, and then go northeast from the crystal to find the secret item to the right of a house. Talk to the rest of the people in town to learn a bit more about the world, then leave and continue on to Veo Lu Sluice.
Year 4, Year 5, Year 6+
Shella, like most towns, won't change much after you visit the first time. If you talked to the De Nam, the Selkie researcher, he will have left, but don't worry, you'll be hearing from him soon enough. The town's highly skilled tailor is often enough reason to visit Shella late in the game.
Veo Lu Sluice
Year two note: While this walk-through brings you to Veo Lu Sluice in year three, you are able to get there in year two. If you do so, it will be the same as if you had waited until year three.
Cycle 1
Veo Lu Sluice is a massive irrigation project providing water to the lower farmlands. Its beneficial nature doesn't make it safe, though. You will find the sluice guarded by Gigan Toads, Griffins, Lizardmen, Lizard Magi, Ice Bombs, and Water Flan.
Once you have set your commands and have checked your special conditions for the dungeon, move west along the upper edge of the map to find a chest. In the southeast corner of this area is a set of steps leading down into the water with inaccessible treasure chests visible. You will find this situation several more times throughout the sluice. Later on (starting in year five) you will be able to get into these areas.
Head down the southern path; when it emerges onto another landmass, you will find a locked door directly to the south. To get it unlocked, continue west past it until you see a wooden switch next to a chest. Have somebody stand on the switch (or place the chalice on it) and the key will emerge from a nearby hole atop a stream of water. Grab it, then go back and unlock the door.
Moving south, you will come upon a copse of trees, amongst which is a chest. There is another chest down a path due east of the first. Keep going south, unlocking the door, but not going through. You will find another chest all the way south, down the stairs, and east. Once you retrieve it, go back to the top of the stairs and bear west, unlocking the door when you come to it. Continue on, turning north as soon as you get the chance to an area with another locked door on the west side. Through this door is the area boss, but you would be well-served to explore the area directly to the north before going through. You stand a good chance of finding a nice artifact, and there is a Moogle nest where the path dead ends against a cliff. When you are ready, heal up and head through the gate.
Golem will start the fight by summoning a pair of Water Flan. Kill them off first, and take them out as soon as they show back up later. Golem will attack with projectile fists, eye lasers that freeze you, and a slow field that surrounds him now and then. Golem is a boss that is best fought from a distance--he is much more dangerous up close. Avoid his attacks and hit him with your strongest fire or cold spell, repeatedly. Focus attacks work, as well. Once Golem's health is down about halfway, he will add a new attack, spinning around while tracing a perimeter with lasers, then filling that perimeter with a fire. Keep back, as this attack can do a lot of damage. It won't be too long before Golem is gone.
Collect your myrrh, mail, and prize, then head to town for shopping and secret items. Your crystal should already be set to water, so head through the Miasma Stream, stop at Moschet Manor to set it to fire, go through the next Miasma Stream, and make your way to Jegon River to the west.
Cycle 2
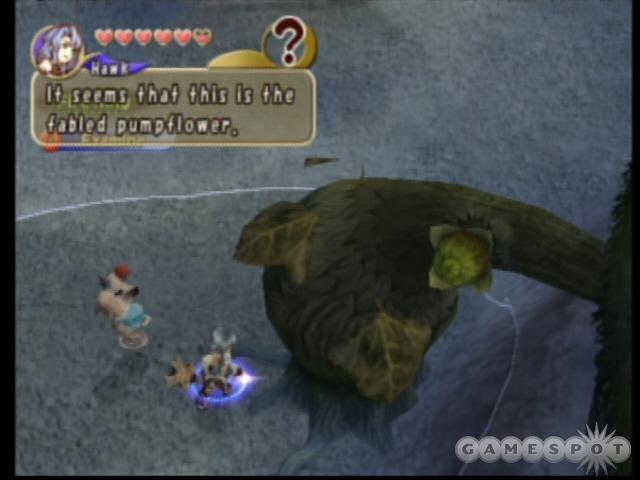
When you go back into the sluice, you will find that the water has drained from the pools. If you spoke to anybody in Shella, you would have learned that this is because the pumpflowers have died. To bring them back to life and refill the river, you will need to cast life on each of the dead plants. There is one of them in almost every drained basin, easily recognized by their giant round stems. Naturally, you will want to take advantage of the lowered water levels to grab all those treasure chests you couldn't reach the last time you were here. Once you have all of the chests and have revitalized all of the pumpflowers, go ahead and finish off Golem again; you may as well keep one of those artifacts you found!

You will find that, while there are no new enemies here like there were in the Mushroom Forest, what is here has grown stronger. Take note that you will not be able to activate the switches to retrieve the keys from the holes until the nearby pumpflower has been revitalized, and that you can cast life on the pumpflowers from the walkway above or from in the basin itself. Golem now has a spinning attack--if you see him stick his arms straight out to his sides, run the other way.
This will end year five, and send you back home. Congratulations, and get ready for year six!
Cycle 3
Nothing else will have changed in cycle three. Same old sluice, same old enemies, same old Golem.
Plains of Fum
Jegon River West
Year 1, Year 2
This area is inaccessible in these years.
Year 3
There isn't much more to do here than there was in Jegon River East. Before you head out onto the plains, check out the Moogle nest near the sign. When you are done, head to the Fields of Fum to the north.
Year 4, Year 5, Year 6+
If you didn't refill the river yourself, it will refill automatically in year eight. Until it has been refilled, you will be unable to access anything from this area, but once the river has risen again, you will be able to book passage to Jegon River East, Leuda, Port Tipa, or Lynari Isle from the docks here.
The Fields of Fum
Year 1, Year 2
This area is not accessible during these years.
Year 3
From the entrance from the world map, go due west to find a bridge. The town's secret item is hidden next to a stump beside the bridge, and a Selkie merchant can be found on the far side during odd numbered years. In the windmill to the south of the bridge is a food merchant, and the southeast corner of town boasts a Moogle nest behind an easily found wooden door. Once you have completed your business, head toward the Daemon's Court to find some myrrh. If your family are ranchers, you may be able to find a cow for sale here in the Fields of Fum.
Year 4, Year 5, Year 6+
The quiet, pastoral Fields of Fum don't change much over the years. The cows still moo, the river still flows, the Moogle still kupos.
Daemon's Court
Cycle 1
The Daemon's Court is not a place to play around; it is a very dangerous dungeon! Upon entering and checking your special condition, turn immediately to your right and follow the wall to a chest. The chest should contain a useful magicite, enough to get you started on the Court's denizens, which include Bombs, Coeurls, Killer Bees, Lizard Skirmishers, Lizard Soldiers, Lizard Warriors, Lizard Wizards, and Wraiths.

Daemon's Court is a bit different from most of the other dungeons you have encountered in the game. Instead of winding passages, it is more like a massive arena full of enemies. There is no best route through most of the area; tactical advice will serve you in better stead. Move slowly and cautiously, and only retreat into areas that you have already cleared, as it is very easy to get yourself surrounded and overwhelmed. Take enemies out with high-level spells (especially cold spells) that can hit several of them at once, and heal your wounds each and every chance you get.
There are a few places worthy of note. Along the upper walls all the way around the Court are chests that are worth the effort of seeking out. In the northwestern corner, right where the central structure meets the outer wall, you will find a Moogle nest. In the eastern part of the court you will find a Bomb guarding a wooden bridge. Destroy the Bomb on the bridge and it will be destroyed. Later on, after you have been on the world map again, come back and destroy the bridge the same way again. Doing so will cause logs to float downriver and into another area (Conall Curach), allowing you to access an area in that dungeon that you wouldn't be able to reach otherwise. Scattered amongst the other defenders, you will find two Lizard Skirmishers with gold armor. They are identical to regular skirmishers, except that they drop keys. Place the keys on the two pedestals at the door to the central building to access the Court's boss, the Lizardman King.
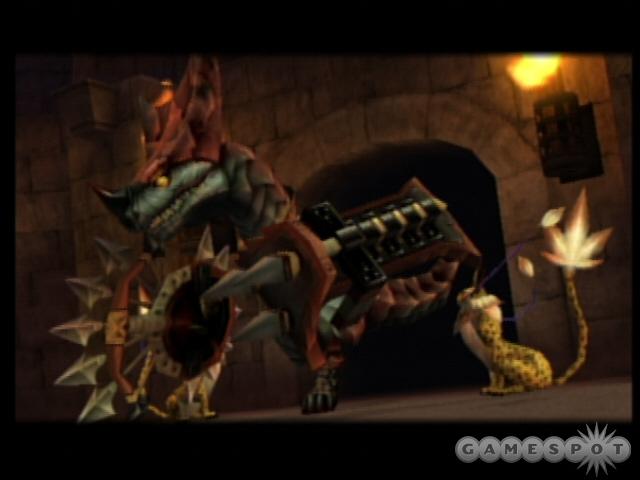
The Lizardman King isn't too tough of a boss. He will start out with a pair of Coeurls and a Lizard Skirmisher for help, summoning more Lizard Skirmishers from time to time. The pit you are fighting in sports a pair of switches, each of which activates a set of spinning blades that can tear your enemy--or you--to shreds. Be careful, as the Skirmishers will activate the switches against you! The King himself attacks mostly with a set of five projectiles, switching to a big spear when you get too close. The spear does a lot of damage, but the projectiles are weak, so stay back. If you have a decent defense, then just hold your position and absorb the projectile hits while hitting the King with your own ranged attacks or spells. He should go down fairly soon.
Enjoy the spoils, do some shopping, then move out to Selepation Cave to the south.
Cycle 2
Despite your overrunning his fortress in cycle one, the Lizard King never orders in any reinforcements. He does, however, add a fire spell to his arsenal.
Cycle 3
In cycle three, the Lizard King learns a cold spell, but nothing else is any different.
Selepation Cave
Cycle 1

Selepation cave is packed with Blazer Beetles, Cockatrice, Electric Jellyfish, Gigas, Killer Bees, Lizard Captains, Lizard Magi, Lizardmen, and Sahagin. Upon entering the cave, turn left, go all the way to the end to get a chest, and then come back to the door. Take a look at the shimmering purple crystals hanging nearby; these are used to unlock the door. In single-player mode, there will be two crystals. You must line yourself up just right so as to hit both of them simultaneously with a melee weapon. In multiplayer mode, there will be three crystals, and you will have to team up to hit all of them at once.
Once through the door, keep moving north, following the path, until you reach a new area. We'll be back later to loot this area; for now, head right and stick to the wall until you reenter the first area through a different entrance. Work your way all the way south, collecting the two treasure chests at the bottom, then backtrack, going down each of the three elevators in the area to collect the loot on the lower level. When you are done, head back into the other area the same way you left.
Once back in the other area, move straight north until you see a deep hole. Bear east to find a chest, and then continue on in the same direction. You will pass a number of Sahagin holes while the path curves away to the north, ending up in a cul-de-sac with a single chest. Move west from that chest, going right past the door with the crystals, past the hot spot, and on to a single chest in the northwest corner. Once you have the contents of the chest, head back to the door and get ready for the boss!
Meet the Cave Worm. He starts the show with a pair of Electric Jellyfish--get rid of them quickly and again if they should show back up later. Cave Worm attacks with either a damaging breath weapon or a projectile that casts slow on its target. If you have a good defense, stay close to Cave Worm and weather the breath attack, hitting as hard and as often as you can. If you need to avoid the damage, then watch for him to rear back and open his mouth, the tell-tale sign that an attack is coming, and run to one side or the other. Hit Cave Worm with holy if you want to use magic. He is highly resistant to most other forms of magic. Focus attacks are probably the best way to kill him, saving the magi for healing. Once he is about halfway dead, he will add a body-slam to his repertoire. This body slam doesn't have a huge radius, but it causes really, really heavy damage, so be ready to run for the back of the cave when he rears up, and don't let your own health stay below half. Keep up the attack, and Cave Worm should go down without too much stress.
Reap your rewards, and get ready for year four.
Cycle 2
The addition of Sonic Bats makes cycle two a bit tougher, but that is all that is different.
Cycle 3
Nothing new here. Move along.
Kilanda Islands
Kilanda
Cycle 1
You'll start off already in the dungeon, so set yourself up and get ready to go. Kilanda isn't a pretty place, full of hot mag-ma, guarded by Blazer Beetles, Coeurls, Lamias, Lava Ahriman, Lava Mus, and a unique, extra-tough breed of Ogres.
As soon as you are moving, turn left until you find a chest, then head north. Take a quick detour down a narrow passageway to the east for a pair of chests, and then continue moving north until you come to a water urn next to flames emanating from a hole. Grab the urn and toss it into the flames to cool the magma and create a bridge to the next area. If you miss with the water, the bridge will still rise, but you'll have to wait a while. Take a quick trip to the southwest for a couple of chests before proceeding, if you'd like. Once up the bridge, head right for a quick chest, then continue north. There are several routes, but all end in the same place.
Once the screen changes, you will see a Goblin carrying a massive sword. It goes without saying that whoever he is taking that sword to is somebody you would rather see without it, so run up and whack him! He'll drop the sword and run away. If you move quickly along the southern edge of the area, you can find a total of three of these Goblins bringing weapons to their boss. Be careful, though, not to get surrounded by other enemies; if you do, you may need to duck back into one of the three entrances to the south to get the heat off your back. If you don't catch all of the Goblins, don't worry; every little bit helps, and taking out just one or two will make things easier for you later on.
Make your way north. There is no single right way, so pick one and keep going until you come to another water urn/fire spout. Watch yourself--the area is packed with enemies. If you are so inclined, there are three chests in the area, clustered around a hill in the north central part of the map. One of them may (or may not) contain the Kilanda Sulfur that the ferryman asked you for. When you are done, heal up, toss a water urn into the flames, and head north to face the Iron Giant.
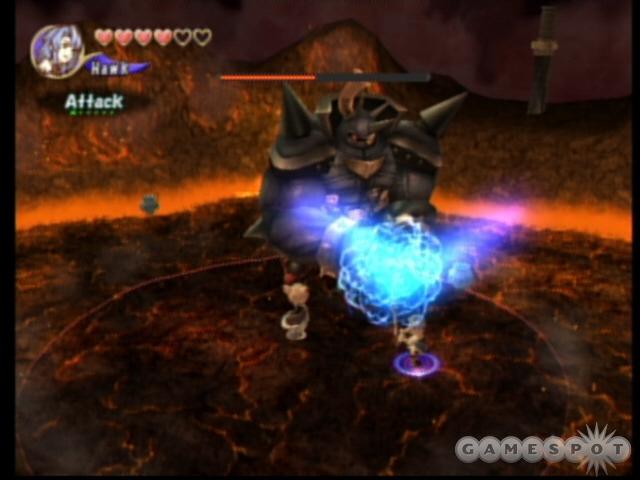
The Iron Giant attacks with a massive sword, using either a devastating chop, a slice with a wide radius, or a projectile attack. After a little while, his sword will shatter, leaving him unarmed and attacking with either a charge or a ground pounding attack until he can find another sword. Now you know what those three Goblins were doing; bringing him extras! If you took two or three of them out, then just dodge his attacks until he has used up his only swords. If he is unarmed, you will be fairly safe up close until his hands start to spark. When they do, back up until after his attack is done, and then move back in for more hacking and slashing. If you only got one of the Goblins (or none of them), then you will have to try and dodge his attacks and keep your distance. In either case, the Iron Giant is strong against all magic except for holy, although fire or cold will work in a pinch. The best way to take him out is with focus attacks. Keep at it, and he will go down eventually.
Exit Kilanda on the east bank, change your element to water at the Mushroom Forest, then go back to Jegon River East and cross over to the other side. Do any shopping you need to do in the Fields of Fum now, then cross the Miasma Stream to the Rebena Plains, heading for Conall Curach in the south.
Cycle 2
Although the existing creatures are stronger in cycle two, they don't receive any reinforcements. The Iron Giant gains a new gravity spell, but it is easily avoided.
Cycle 3
Cycle three is just like cycle two, except for the usual general increases in enemy strength, defense, and magic.
Rebena Plains
Conall Curach
Cycle 1
Conall Curach is a fetid, toxic marsh guarded by Abaddons, Behemoths, Dark Flan, Flan, Ghosts, Gigan Toads, Ice Bombs, Magic Plants, Sahagin, Sahagin Lords, Snow Mus, Stone Sahagin, and Thunder Bombs. That is quite an assortment, and as you may guess, Conall Curach is a dangerous place.
Proceed north into the swamp. There is one chest hidden on the eastern side, but other than that, the path stays pretty straight for a while. Take the westernmost of the two wooden bridges you will eventually come to. You will be herded along a narrow path until you enter into another, larger area of the swamp. Look for three chests in the south central portion of this swamp, then backtrack to where you just entered from and go across the northern boundary for both a chest and an exit into the next area.
Starting with this area, you will be following a series of winding, narrow bridges. At the first intersection, go right, then right at the next. Note: If you have blown up the log bridge in the Daemon's Court, the logs will have floated down to create a partial bridge on the left path here. Once you have destroyed the bridge twice, it will make a full bridge, allowing you to access two additional treasure chests. Anyway, assuming you have taken the right path, take a quick right at the next branch (from the floating log raft) for a chest, then come back and take the left. You will soon come upon a web of passages going every direction. Take the first two southern branches, in order. The first one leads to the Moogle nest (behind the tree), and the second to a chest. Now, come back and go east until you have gotten two chests, then backtrack to the intersection and go north, taking both diverging paths for chests before ending up at a ‘T' intersection. Go east at the ‘T' until you come to a large wooden deck. Just a bit further to the east is the next area, though a quick detour down the western path will net you a pair of chests. You will have a heck of a fight getting past the Abaddons, but it will be worth it!
The next section is fairly straightforward. There are only a few side passages, all of which either end in chests, or loop back onto the main path. Go slowly, as there are Stone Sahagin and Behemoths ahead. You will be safest if you can pull them one by one, killing them individually, instead of fighting them as a group. Make your way steadily along until you come to a large landmass with several Behemoths on it. One more small island after that and you'll meet the boss.
Hello, Zombie Dragon! Zombie Dragon is a nasty fellow who insists on repeatedly summoning Stone Sahagin to help him. By now you know to kill the helpers first, and then concentrate on the boss. The Zombie Dragon is immaterial, much like Ghosts, so you have to cast holy on him before you can get anything done. In fact, holy is one of the best all-around attacks against the Zombie Dragon, and you can take him out with just that if you'd like.

The Zombie Dragon has a number of dangerous attacks. To begin with, he can spit out a straight petrifaction beam. If this happens, waggle your control stick to break out as quickly as you can. He has a breath attack that causes moderate damage directly in front of him, and a melee strike that he can use if you get too close. He also has a green breath weapon that he can sweep the entire platform with. If you see him draw in a big breath of swirling green, run for the nearest corner, as this poison isn't the annoying type you have seen coming from other monsters--this stuff can kill you quickly!
The best technique for battling the Zombie Dragon is to start on one side of the platform, run in close, and cast holy. Immediately sprint to the opposite side of the platform and cast it again, repeating the technique until the Dragon goes down. He is also vulnerable to fire magic, but be careful with the higher power spells, as you don't want to be standing still for too long.
Collect your mail, choose your artifact, and then head north to Rebena Te Ra. You may notice a Miasma Stream further to the west. Unfortunately, no element you can have access to will get you through it.
Cycle 2
Nothing in Conall Curach changes in cycle two, save for the usual basic increase in enemy statistics.
Cycle 3
See cycle two. Same thing. Nothing different. Carry on.
Rebena Te Ra
Cycle 1
Rebena Te Ra is an ancient ziggurat, guarded by a massive horde of dangerous creatures. Expect to see Cerberus, Gargoyles, Ghosts, Mimics, Nightmares, Skeletons, Skeleton Magi, Sonic Bats, and Wraiths. This place is the most dangerous yet--be ready!
As soon as you enter, you will see two treasure chests. Too good to be true? Yep--one of them is a Mimic. The best way to test for Mimics is with magic. If you cast a spell on a regular chest, nothing happens. If you cast a spell on a Mimic, it makes a ‘ching!' sound, warning you that you will have to fight for your treasure. Head left first until you get to the second set of chests, and then turn north down the stairs. In the northwestern corner of these ruins is a bat that will drop a key. You have two choices with the key--the quickest is to use it on the pedestal nearby. If you are patient and want the best equipment, though, carry it back to the entrance, then further east and north to another pedestal. This will open a room giving you access to a chest with a great piece of gear and another key to use in the pedestal by the bats.
Once through the locked door, activate both switches at the same time to lower the barrier, and then turn north at the first opportunity. Grab the chest to the left, and then look at the odd switch by the door. You will see a number of these in this area. To activate the switch, you must hit it with the correct spell (fire, lightning, cold), and then hit it with a melee weapon.
Continue through until you see a glowing barrier with a shimmering orb at each side. This puzzle is intended for multiplayer only. You have to hit both spheres, simultaneously, and then hit them both with weapons within a couple of seconds before they reset. It is next to impossible for one person to do it, but there is a way. Stand by one of the pillars with the chalice on the ground and charge the 3-magicite spell for the opposite pillar with the targeting ring on your pillar. Take damage (the Skeleton Mage nearby does the trick) until Mog offers to help. When he charges up his spell (if it matches the pillar you are next to; if not, try again), he will center his ring over yours. He will only hold his spell for a few seconds. The instant it goes off, release yours. Yours will take a split second to go off, during which time you must switch to your melee weapon and hit the nearest pillar, and then run over to the other pillar. It is possible, but it is a major headache to get right. Inside, you will find a pair of chests and a horde of Mimics. When you are done, leave the area the way you came in.
When you come back out, turn east and follow the passageway until you see another glowing barrier blocking the path. Turn north into a new area. Get the chest in the first room, but don't kill the Skeleton Mage that is wandering around. Do you see that white stone on the floor? Stand on it, and let the Skeleton Mage cast spells at you until the door opens. To clarify--you have to take the correct elemental damage (either fire, lightning, or cold) while standing on the stone to open the door. Once it is open, feel free to kick his bony rear end for casting spells at you.
Follow the progression of rooms until you come to one with four of the floor tiles. In this room, you must stand on each of the tiles, one after another while the Mage casts spells at you. You may need to get hit by each element on each square before the door will open. Keep a healing spell ready, and cast it constantly. Once the door opens, go through to the next puzzle.
For multiplayer: Send one person to step on the switches in this order: Left, move forward, step on right, move forward, step on right, and step onto the previously highest section of wall and wait for the second player to get to the part that is even with the ground. Step on the right switch to raise the wall (and the second player) even with the wall on the right. The second player should run right along the wall to get the key.
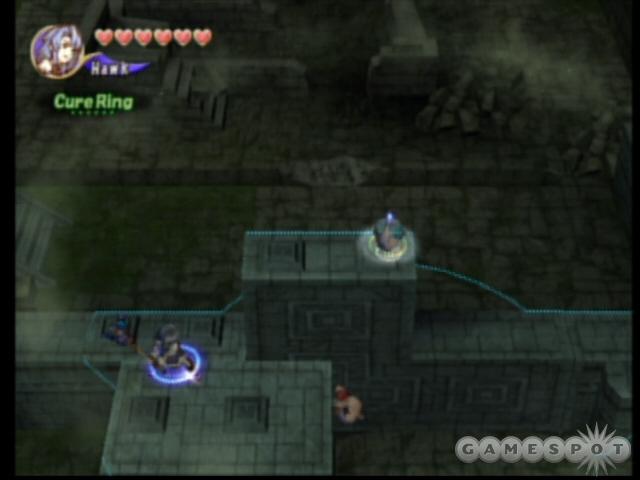
For single-player: Step on the switches in this order: Left, move forward, step on right, move forward, step on right, and step onto the previously highest section of wall and drop the chalice on the right button. Step on the left button to lower the wall again, and then step onto the next lowest section. You should have things arranged like in the screenshot. Now, here is what you do, and move fast! Step onto the upper right switch, lowering the tall wall. The instant the wall starts to move, step onto the lower wall section and onto the left button to lower it. Run, run, run over to lowest section of wall (even with the ground) before the chalice's weight on the switch starts to move it up again. Ride it up, and then run right along the wall to get the key. Jump down at the wide spot on the wall, and then work the switches in such a way that you can get the chalice back. Whew!
The key you just got goes to the pedestal near the second Skeleton Mage/floor plate lock you opened. Carry it back to claim the treasure, and check the southeast corner of the room for a Moogle nest. Head back to the room with the four floor plates, looking this time to the southern part of the room. There are two floor plates here, and two Skeleton Magi. Pick one of the pair, move close enough to activate him, then stand on the floor plate nearest him until he hits you; kill him and repeat the process with the second Mage. Head south and back into the first area of the dungeon.
Go south as far as you can, climbing over the fallen rocks when you get to the end. Work your way along the side of the ziggurat, then up the stairs to active the switch, opening the door that will give you access to the boss. Go down the opposite stairs, grab the chest, and deactivate the magic barrier. Go back the way you came, then down the stairs to the west, deactivating the barrier with the switch there. Take the first left to access a final chest, and then make your way back to the very beginning of the dungeon and up the stairs into the ziggurat to face the boss.
This is the Lich. The Lich is a dangerous boss, with lots of wide radius or high damage spells that come with little warning. His favorite attack is a lightning spell that covers most of the area. It starts as a crackling sphere that charges for a while, then spreads out; run as soon as you see it. He also has a meteor spell that hits with almost no warning. The only way to really avoid these is to keep moving, constantly. He also has a dark sphere spell that he casts from time to time--it does lots of damage, but is more easily avoided. The Lich will summon Skeletons from time to time, so be ready to take them out.
The Lich is protected by a sphere of invulnerability which is powered by two magical switches. Cast a spell (any spell) on each of the two switches to disable the sphere for a few minutes. Once the sphere is down, the Lich fight is a lot like the one against the Zombie Dragon. Hit him hard and fast with holy, run to another point and cast it again. Keep moving, keep casting, using focus attacks if you don't have access to holy.
Collect your myrrh, read your letter, select your artifact, and enjoy the party. Well done!
Cycle 2
Other than some stronger, spear-wielding Skeletons, no new creatures make an appearance in Rebena Te Ra. The level is chaotic enough as it is! The Lich gains a new attack, striking the ground to create shock waves. While the waves won't hurt you, they will stun you momentarily, disrupting any spells or focus attacks that you were charging. It will make defeating him a little tougher, but won't change the strategy needed to do so.
Cycle 3
Nothing new shows up in Rebena Te Ra in cycle three.
Lynari Isle
Leuda
Year 1, Year 2, Year 3, Year 4
This are is not accessible these years.
Year 5
Welcome to Leuda. This is the Selkie home town, and, as you might guess, things aren't always on the up-and-up. Unless you are a Selkie, every time you speak to a resident, you will have your pocket picked for a few Gil! You'll still want to talk to everyone, but either get the information you need the first time around, or let a Selkie do the talking.
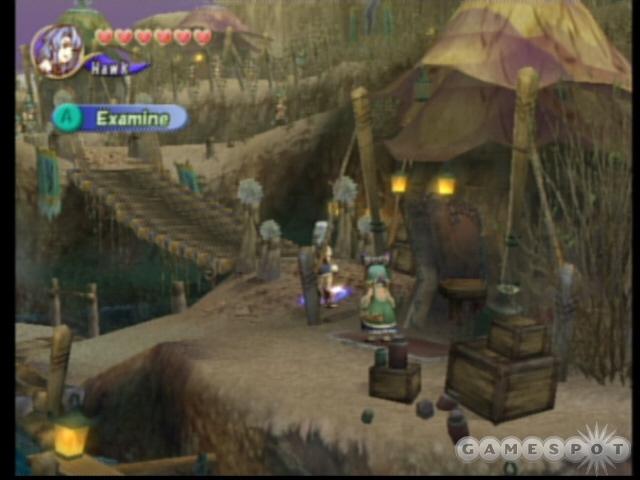
Right next to the very first building you come to is the town's secret item. Grab it, and then go across the bridge. Across the bridge, Selkies can join in with the jumping game, earning prizes if you get enough points. Just hit the buttons as soon as your host calls them out. Move the stick around to get bonus points. You need 500 points to earn a piece of bronze, 1,000 for iron, 2,000 for mythril, and for 4,000 points, you get orichalcum! The Selkie woman standing to the east of the jumping game is a merchant, although you will have to speak to her repeatedly to get her to trade. Up the ramp from the first merchant is a fellow standing guard. If you speak to him twice, he will sell you a number of high-level weapon and armor patterns.
If you go all the way to the western edge of town on the upper level, you will come across a gaudy pink tent. Walk behind it to find the local Moogle nest. While inside the nest, make sure you take the time to thoroughly trim Mog's fur. You are headed into the desert and a hot Moogle means that you will be carrying your own chalice! When you are finished, head back to the east to get to the world map and to the Lynari Desert.
Year 6+
In year six, the Selkies become dishonest. Never mind, that's nothing new. Assuming that you have refilled the Jegon River, the ship at the docks will take you to any other port. If you haven't, the river will refill itself automatically in year eight.
Lynari Desert
Cycle 1
The Lynari Desert is a strange place. While it works like a regular dungeon, it also contains a hidden puzzle, one whose hints have been dropped off and on throughout the game. In case you would rather figure out the riddle for yourself, I will tell you how to clear the first area, and then give the answer to the grand puzzle separately before going on with the rest of the dungeon.
The Lynari Desert is a huge dungeon; not long, but spread out and confusing. You will find it guarded by Cactuars, Chimeras, Lamias, Sand Sahagin, Scorpions, and Zu. Check your special condition, set up your commands, and do try to keep up!
Move north from the entrance, hugging the eastern wall. Soon you will see a cascade of sand coming from high above. If you keep going, you will come upon a whirlpool of sand. If you were to fall into this whirlpool (try it if you'd like) you would come out in the cascade we just saw. These underground currents of sand crisscross the entire desert, and will prove vital in finding your way around. For now, though, head due west at the whirlpool and follow the western wall north until you come upon a chest. Grab what is in the chest, and then continue north just a bit until the cliff you are walking along levels out.
Circle around so that you are heading back south, now on the opposite side of the cliff. When you come to a hot spot, the path will fork. Take the easternmost fork for a chest, then come back and take the western fork. At the dead end are two green cacti that you can smash with a weapon, behind them is a chest, and behind the chest is a Moogle nest. You may want to wash Mog to switch to map radar, as it will be helpful later on.
Now, let's take a shortcut across the desert. Head back to where you first rounded the cliff, then go straight south from the big bush. Less than a screen away is another whirlpool; jump in. You will come out in the far southeastern corner of the desert, right next to a chest, with another chest just to the southwest. Be careful, as some tough enemies are likely to be nearby. Once you have gotten rid of all of them, head north, hugging the eastern wall until you find a chest.
Now you have some options. You have found everything in this area of the desert except for two chests and the grand puzzle. If you want to try for the two chests, one is almost due west of the last one you opened, and the other is northwest from there. They are both in the middle of the rolling desert dunes with no distinguishing landmarks in sight, so you may have to search a bit. As to the grand puzzle--you have been receiving hints about it throughout the game in the form of two-line poems outlining each of the steps required to complete it and advance the main plot of the game. If you would like to figure it out yourself, do so and skip ahead to where it says, "Quest continues". If you need more help, or are stuck, read on.
First of all, make sure you have the means to cast lightning, fire, cold, gravity, and holy spells of some sort. If you do not, you may have to move ahead into the next area and then come back once you have found more magicite. To get started, head north--as far north as you can go. Eventually, you will reach a dead end blocked by two huge boulders. Go south along the western wall just a bit until you find two cacti standing near each other. You will know you are in the right place if you walk up to the large cactus and have the option to Examine it (also, if you have the map-radar on, it will have a big ‘X' on it). Cast a lightning spell on this cactus ("Lightning brings the cactus pain..."). You will know instantly if you did it right.

For the next step, follow the northern wall around to the east until you come upon a ruined camp. Cast gravity on the camp to continue. ("Of crumbled inn...") Continue south along the east wall until just past the two sand cascades. On the wall above you, you will see a mushroom-shaped piece of stone. Make sure you have the right one by checking for the Examine option, and then hit it with a fire spell ("Lonely mushroom bursts to flame...").
To get to the next point, you will have to backtrack to the cactus you hit with the lightning spell. To the south of it is a group of three rocks. You will need to cast a cold spell on each of the three, starting with the smallest and ending with the largest (map radar is helpful here). Make sure you do them in the correct order! Now go back to the southwestern part of the map, just west of where you saw the first whirlpool. Against the wall, you will find a massive pink flower. That is your next target; hit it with holy. It will turn into a hotspot, the only hotspot for the ‘unknown element'. Put your chalice on it and get ready to continue with the dungeon.
Quest continues: Whether you got there alone or with help, you should have ended up on the western edge of the map, near the dungeon entrance, with your chalice set to the unknown element. Follow the western wall north again, jumping into the whirlpool where the cliff levels out. That will take you back to the southeast corner of the map. Again follow the eastern wall north. There is another whirlpool near where you found the last chest before. Jump in to access a new area of the desert.
You will find yourself in a canyon. Should you later need to return to the section you just left, a whirlpool to the south will take you there. For now, though, press on toward the north. When the path splits, go right up the hill, smashing the two cacti that are blocking the way. Around the corner you will come upon a hot spot. Whatever you, don't touch it! Don't use any hot spots anymore unless you absolutely have to. Continue past it until you come upon a giant green barrel cactus; it is a type of chest, so smash it open and claim the goodies.
Carry on north, turning left just before you get to the arch. Stay close to the northern wall until you find a chest, then go back and through the arch. Be careful of the Chimera on the other side. The Chimera can't fit through the arch, so retreat through it when you need to heal. Once it is safe (relatively speaking), go west from the arch. Take a quick detour down the first southern path for a chest, then continue on past two more cacti you will have to smash, going south past the hot spot (don't touch) to get one more cactus-chest. Once you have collected the contents, head back north and west, past the hot spot, past another pair of cacti that need smashed, until you enter a new area.
That sandy pit below you is where you will fight the area boss. Before we deal with that, though, circle all the way around the pit until you change areas and come to a dead end. Smashing the barrel cactus there will sometimes (not always) give you a Cactus Flower which you can present to the ferryman for a permanent discount on his services. Once you are ready, head back to the north side of the pit and go down the ramp.
The boss won't show up right away. This boss is smart, and sends a few waves of minions to soften you up before showing himself. The first wave is Scorpions, followed by Electric Scorpions, and finally Rock Scorpions. The first two groups are best handled with a large radius cold spell, but the Rock Scorpions are immune to that. If nothing else works, have a fighter get right in their faces, positioning himself so that he can hit two or three at once, while a caster continuously heals him. When the last of the scorpions falls, the Antlion will show up.
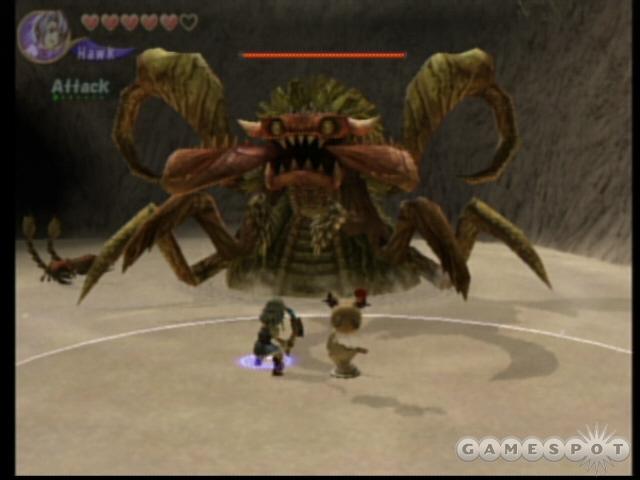
The Antlion is the toughest boss yet. He is huge, and he fills up almost the entire pit. He summons Scorpions to his side, so take them out first. Staying in the back of the area just won't work with this guy. Early on he will attack with either his massive mandibles, stunning you and doing significant damage, or he will breathe a paralyzing breath at you. The only way to stay alive long enough to fight back against this beast is to continuously run in a circle around him, as almost all of his attacks are straight ahead. He will turn almost as quickly as you, so if you stop, you are dead. Let him stop first for his breath attack, then hit him with a very quick focus attack or holy spell (blizzard and fire work too, but not well. Nothing works well on this guy.) When he is about a third of the way dead, he will add another attack--a ground pound that shoots flames all around the front half of him. This is hard to dodge, especially if you are relying on melee attacks to damage him. Finally, when he is about 2/3 gone, he will add another, massive breath weapon. As before, the secret is to not be in front of him when it goes off--keep circling! This applies to both single and multiplayer. In multiplayer, try to have one person ready with a clear spell. Have them out of the way as much as possible, focusing on keeping the other players poison-free. Work together and keep moving, and he will eventually go down--believe it or not.
Collect your reward, read your mail, stop by Leuda for shopping, and catch a ship back to Port Tipa. Now, remember that ‘unknown element' we found? It is a master element that will let you traverse any Miasma Stream, anywhere, including the mysterious stream to the west of The Fields of Fum. Of course, the problem now is that we can't get to the Fields of Fum--the river is still dried up. From Port Tipa, make your way north to the Mushroom Forest. Why the Mushroom Forest? At this point, you could go to any dungeon to collect a spare drop of myrrh, but the Mushroom Forest has areas that were inaccessible the first time through.
Cycle 2
Starting with cycle two, the Scorpions you encountered previously will be mixed in with Electric Scorpions and Stone Scorpions. You will also see Skeleton Magi amongst the dunes. Antlion gets stronger and faster, of course.
Cycle 3
Other than a universal boost in stats for the monsters, cycle three is the same as cycle two.
The Abyss
Mag Mell
Year 1, Year 2, Year 3, Year 4
This area is not accessible during these years.
Year 5
Although this walk-through doesn't bring you here until year six, you can find you way here as early as year five. Nothing will be different from the description of year six.
Year 6+
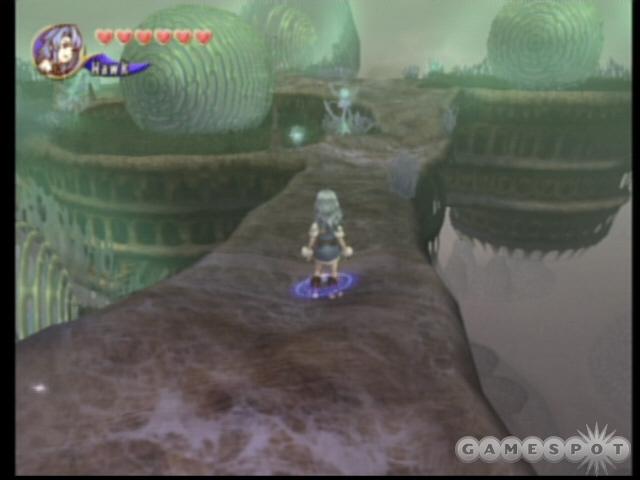
Welcome to Mag Mell. As you can see, the place is pretty much deserted, except for a couple of hold-outs. Take the first left, then a right, and move to the back of the spherical building to find the Moogle nest. Go back to the main trail and all the way up to the north. You'll meet another Moogle by the side of the road. Further to the north is a Carbuncle, sleeping in a sphere. He won't say anything this time, but if you go back into the world at large and keep collecting myrrh, then come back after a year has passed, he will wake up. He will have something new to say each year. There isn't much more to do here in Mag Mell, so head back out and up to Mount Vellenge. Save before you enter--this is it!
Mount Vellenge
Mount Vellenge is not a pretty place, and it is not a safe place. Before you leave, you will encounter Chimeras, Death Knights, Shades, Spheres, Tentacles of all varieties, and Tonberries. There are some ways in which Mount Vellenge differs from other dungeons. For one, the place is littered with chests (14 of them, in fact), but every single one of them contains an artifact. This is a good thing; you won't have any opportunities to spend Gil or have anything crafted after Mount Vellenge (as the game will be over), so materials and money would be a complete waste. The downside is that you can only carry four artifacts, and you cannot drop them once you pick them up. That means that once you have opened four chests and collected the artifacts, you would be just as well off ignoring all of the remaining chests, as you can't pick up what is inside. There are a couple of chests that tend to give better items, and I will point them out, but you still have no control over exactly what you get until you actually pick them up.
Also, since this is the final dungeon, you won't need all of those Crystal Balls and Bronze Shards anymore. You can clear out your inventory early on to carry lots and lots of magicite. After you finish this level, you will be finished with the game, and you won't get to choose an artifact to keep (what would be the point?) Because of this, there is absolutely no advantage to following your special condition. You can do whatever it takes to win!
Ready? Ok, before you move, know that you are going to be facing hordes of what amount to your biggest, toughest enemies in here. If you charge in, don't be surprised when you find yourself facing three Chimeras at once! Take a couple of steps and wait for an enemy to attack. When he does, pull back into a safe area to fight him (hopefully alone). When he has been defeated, go just a tiny bit further and get the next enemy to chase you.
Now, you will have started at the northern edge of the map. Your first destination is a chest nearby. Head south, sticking close to the eastern wall. You will pass a boulder, after which the wall will turn a bit to the west and then south again. The chest lies just ahead. You should find an artifact that gives either a +5 or a +9 to one of your stats.
Once you have the first chest (and an idea of what the fights ahead will be like), head west. You will come to a large boulder. To remove the boulder, a single-player gamer must strike it six times with a melee weapon. Go through the opening you have just created, sticking close to the western wall and following it south, then west, until you find a chest. That chest is your second (hopefully) good artifact. Grab it! The rest of the chests have random, lesser items. Pick any two you see on the way in, and don't worry about the rest.
From this second chest, you will need to remove a boulder just to the northeast of your current location. Once through, curve around the southern wall, hugging it and continuing south until you reach another boulder. Just past this boulder you will enter a new area.
Wheew! We're past the worst of it. Mount Vellenge still has a few surprises in store for us, though. The first is that this section is scattered with dark crystals. When Mog or a player moves too close to one of these, it will completely nullify the effects of your crystal chalice, leaving you standing in the miasma, unprotected, until the dark crystal is destroyed. Destroy the dark crystals the same way that you did the boulders in the previous section--with six weapon hits from a single character.
South and around the corner you go. There will be a chest to the north if you still need artifacts, and further to the east you will cross under a stone bridge. Under the bridge is a Moogle nest (in single-player, be sure to go in, even if you don't want the stamp. You don't want to have too far to walk if you die in the next few minutes). After you collect your Mog Stamp, go back and continue south. There is only one path, and it leads straight to the boss. When you get to two dark crystals growing near each other, you will be close. These two crystals are guarded by a pair of Tentacles, making the area exceedingly dangerous. If you die in single-player after getting too close to one of the crystals, you will spawn all the way back at the Moogle nest with your crystal still not working; you will have to run all the way back to the crystal through the miasma! Dodge the plants' attacks and take them out. If your chalice becomes deactivated, concentrate on destroying the dark crystals first. If all else fails, and you are ready to pull your hair out, you can always just run between the two Tentacles and straight into the next area.
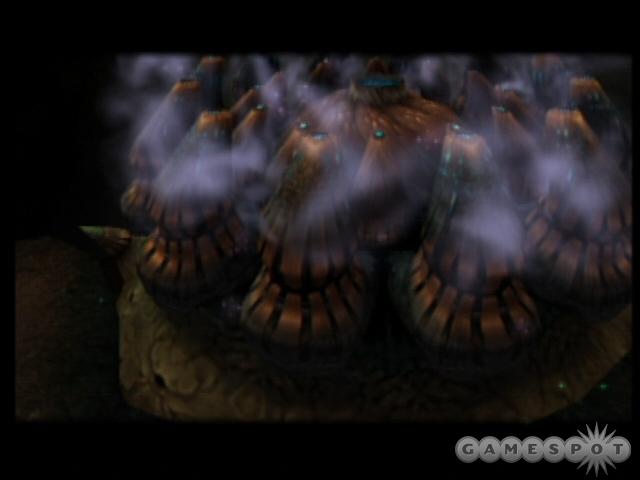
You will view a brief cutscene of the Meteor Parasite, twirling around, giving off the miasma that has been poisoning the world. When you have control, you will see that the Meteor Parasite has a pair of small tentacles growing from the ground, one on each side. You will need to take them out first. Be careful doing so, as these aren't like the Tentacles you have met before. These have a strong melee attack that stuns anyone hit, and their primary weapons are projectiles rather than spells. If they attack with ice, respond with fire spells. If they use fire, retaliate with ice. Use any spell against other forms, and focus attacks can do the trick, as well.
As soon as the two tentacles are destroyed, turn your attention on the Meteor Parasite himself. He will spew out a poisonous cloud. It is hard to avoid, so keep a clear spell handy. In order to damage him, you will have to strike the clawed appendage that he extends to attack with. Wait for him to attack, dodge, and then move in and attack before he can recover. The Meteor Parasite is strong against both weapons and magic, so use whatever you are best with.
Eventually, Meteor will change modes. The tentacles are back, and Meteor has a new set of attacks. Take out the tentacles (or stay out of their reach), and continue to attack the narrow appendage to damage the beast. He can now cast offensive spells that look similar to the meteor spell Bombs use. He can also use a beam attack; when you see it, run to avoid damage. Throughout this form, your focus will be on dodging Meteor's spells and attacks, sneaking in a focus attack or spell on the appendage whenever you get an opportunity.
The third and final mode of attack is the hardest. The two tentacles will spawn right next to Meteor's appendage, making it harder than ever to fight them off. Meteor adds a new attack, a high-speed spray of projectiles that can cut you to pieces if too many hit you. When they begin, run to the edge of the screen and keep moving. Keep moving, keep dodging, and keep taking out those tentacles. Whenever you get the chance, hit that appendage to inflict actual damage! Finally, at last, Meteor Parasite will be on the verge of collapse.
The Nest of Memories
Unfortunately, that isn't the end. You will find yourself in a strange place. Speak to the glowing white spirit. Continue to follow it and speak with it. Eventually, you will be asked a question. This question will come from the diary you have been keeping all these years, so take your time and answer correctly (some hints are provided at the end of the walk-through that may help) If you do, you will be able to move on to the next room, no harm done. If you answer incorrectly, you will have some of your memories erased, and will be attacked by Minions, but will still be able to proceed. Your total memories are the number of diary entries you have received. This number can be seen on the bottom of your GBA screen if you have one. Be careful, though--if you run out of memories before you answer (or fail to answer) five questions, the game will end. You will be using your remaining memories in the final fight, so don't lose too many. Finally, when you have passed all five trials, and, in the process learned about Raem, the true mastermind behind the attack on your world, you will be ready to face him in a final (really final, this time, almost) showdown.
Raem has a pair of Minions with him, but they respawn almost as soon as they are killed. Killing them both, therefore, is a bad idea. You can kill one, but will just have to accept the presence of the second for now. Raem will attack, first of all, by launching slow-moving spheres at you. They will stun you, but are easily avoided. His second attack consists of a pair of beams; if you see them, clear out, as the ensuing explosion is extremely deadly. Raem will occasionally reach out with his arms. When he does so, the safest place is between them, especially since Raem's head will be unprotected for a few moments. Finally, if you get too close, Raem will attack with his entire body. The best way to take him out is to use whatever you are good at--focus attacks or elemental spells work the best. Hit his central mass whenever you have the opportunity, paying attention to his many dangerous attacks and incessant Minions.
Eventually, when you have almost defeated him, Raem will retreat and regroup. This is it. Really--this is it. Heal up and get ready. Raem will begin ripping your memories away, one at a time, devouring them. As soon as a memory (the bubbles) is within reach, strike it or cast cure on it, and then collect the tiny silver sphere that drops down. Raem is one tough cookie, attacking with a pair of beam attacks that can do some significant damage, a claw attack, and a spell that pulls you in toward him. Concentrate on avoiding the attacks and on using focus attacks and elemental spells against Raem. Whenever the bottom portion of Raem is destroyed, equip and use the silver spheres just like magicite (each can be used only once) on the top portion. When the bottom portion regenerates, fall back to focus attacks and spells, saving the devastating silver spheres only for the more vulnerable upper half.
The end. Well done!
Enemies
While you will encounter close to 100 types of enemies, you will find that most of them can easily be split up into categories of similar creatures, which makes coming up with the best strategy simply a matter of figuring out what category they belong to. Note that not all creatures fit into these categories, but most do.
Melee--Most of the major enemy groups will have several variations of a basic melee-only class. They attack only with physical attacks, and are defeated by continuous movement, waiting for their attack, and then attacking in the split second it takes them to recover. A Lizardman, for example, fights exactly like a Goblin, but is more powerful. Examples: Skeleton, Goblin, Orc.
Mage--Many, many creatures you encounter fight only with magic. To defeat them, simply wait for them to cast a spell. When they do, a targeting ring will appear on the ground where their spell will hit, and they will be immobilized for several seconds while they charge up their spell. The more powerful their magical attack, the longer they will have to charge it. Either step away from the rings to cast your own spell, or charge and attack while they are immobilized and vulnerable. Examples: Skeleton Mage, Lizard Wizard.
Fliers--most flying creatures take very little damage while in the air, but cast a gravity spell on them and they will come crashing to the ground, where they will be helpless for a few seconds while you hit them with weapons or spells. Examples: Ahriman, Griffin, Killer Bee.
Dark/Incorporeal--These creatures are not entirely physical, and appear to be semi-transparent. They cannot be damaged until you cast a holy spell on them. Once holy has been cast, they will become opaque for several seconds during which they are typically extremely weak. Examples: Ghost, Wraith, anything with ‘dark in their name (Dark Hedgehog, Dark Flan).
Stone/Rock--Many creatures include a variation with the word ‘stone' or ‘rock' in their name. This variation usually isn't much stronger or more powerful than the regular form, but they are typically extremely difficult to damage and impervious to magic. As an example, the Scorpion has a defense score of five; the Rock Scorpion has a defense of 16, but less than half of the hit points of the regular Scorpion. Most creatures like this can be severely injured by casting a gravity spell on them, but this usually works only one time. Examples: Stone Plant, Stone Sahagin, Rock Scorpion.
Individual Enemy Strategies
Abaddon

Abaddons are bugs. Very big, very angry flying bugs. They attack at range with a nasty, powerful spell, or close up with a ground-shaking melee attack. The best way to get rid of an Abaddon infestation is to wait until they begin to cast their spell, signified by swirling pink rings on the ground. Step out of the way, and then hit the Abaddon with a gravity spell, grounding them. While they are on the ground, hit them with everything you, be it weapons or spells. Almost any type of magic will work against an Abaddon.
Ahriman
Nasty fellows, Ahriman attack with either a beam from their eye that causes slow when it hits, or with a thunder spell that can be seen charging ahead of time. If you get too close to them, they will strike you physically. Ahriman fly, so the secret to defeating them is to cast gravity on them before doing anything else. Once they have been hit by gravity, they will just sit on the ground until it wears off, neither attacking nor defending themselves will you finish them off. Fire is strong against Ahriman, although gravity and holy work well, too. They are resistant to most other types of magic.
Bat
Bats are irritating and dangerous. They are small and hard to see, they move as fast as you do, and, while their attack doesn't do much damage, it is quick and hard to dodge. The best way to get rid of a Bat is with a gravity spell, which grounds them. Cold and lightning don't do much against Bats, but they are weak against fire.
Behemoth

Behemoths are huge. They are one of the largest non-bosses you will come up against. They attack with a melee claw swipe, a huge radius fire or cold ground strike, or with a lightning horn attack that stuns you. They aren't particularly resistant to magic (except for gravity), but they have a lot of hit points, and do a lot of damage. There is no safe way to fight a Behemoth, but it helps if you can fight them alone, by taking out any smaller creatures in the area. If you are with a party, have one character with a high defense stay close and beat on the Behemoth with weapons while another concentrates on healing him. Other characters can stay back and lay down the magic. If you are alone, just keep moving and back off regularly to heal.
Blazer Beetle
Blazer Beetles are large, but they are very, very fast, and can easily run you down. Maneuver yourself behind them and attack with melee weapons, hitting for a quick combo before backing to try again. Blazer Beetles are weak against fire, cold, and lightning, but their speed can make it hard to charge up a spell.
Enemy Strategies - cont.
Bomb
Bombs aren't too dangerous, at least if you know what to expect. They are docile, and won't attack unless you get extremely close to them. When they do attack, they will either drop on you as a melee attack, or cast a fire spell with a long charge time. Occasionally they will attack with another, massive meteor spell, easily recognized by its pink targeting rings. If you see these, it is your opportunity to attack, as charging this spell takes so long that you will have plenty of time to finish off the vulnerable Bomb. While especially vulnerable to cold and lightning, it goes without saying that bombs could care less about fire.
Bombs get really dangerous when they die. After a few seconds, dead bombs detonate themselves in a huge explosion, setting everything nearby on fire. You can use this to your advantage when encountering enemies in groups by killing the bombs first. With luck and planning, you can time their deaths so that when they explode, they will set their own friends on fire!
Cactuar
The Cactuar will be instantly recognizable to fans of the Final Fantasy series. He chases you around, attacking with fast kicks, showers of cactus spines, and occasionally casting a spell. He can be tough, and it is best to either attack at a distance with spells (fire is best; he is immune to lightning) or hit him with a combo when he starts shooting spines.
Carrion Worm
Carrion Worms are huge, strong enemies that attack at range with a lightning spell and close up with a nasty poison attack. Fight Carrion Worms at range, waiting for them to charge their lightning spell, then stepping aside and firing off a spell or ranged focus attack. They are vulnerable to fire, but immune to lightning.
Cerberus
Cerberus may be short a couple of heads, but he has an extra tail, so all's well. He also has a nasty long-range projectile attack, a hard melee attack, and the ability to breathe fire. He is fairly resistant to fire, but is weak against ice. Keep at a distance to invoke his projectile attack, dodge it, and then strike back with magic or focus attacks.
Chimera
Watch out for Chimeras; they are extremely dangerous foes. Their most devastating attack is an electrical field that surrounds them. It does a good bit of damage, and the resulting stun lasts an extremely long time, leaving you an easy target. The Chimera can also breathe fire or cold straight ahead, and has several dangerous melee attacks against targets that get too close. The best way to defeat a Chimera is to have a fighter play bait and keep its attention while the rest of the party hits it with holy spells (it is moderately resistant to cold, lightning, fire, and gravity). If you are going it alone, try to lure the chimera someplace with a narrow opening. You can go through, it cannot. This gives you a chance to back off after every few attacks to heal yourself. Keep moving, hit it with focus attacks, and then back off to heal. Be careful, and heal more often than you think is necessary. Do your absolute best to avoid fighting Chimeras when there are other creatures around. The Chimera's ability to stun and freeze can lead to a very fast death if there are other enemies about to take advantage of the opportunity!
Cockatrice
The Cockatrice has a variety of attacks. It can cast slow spells, use a poison breath weapon, a simple melee attack, a projectile attack, and can temporarily petrify you. The best way to handle them is just to move fast enough to avoid its attacks while retaliating with weapons or fire spells. Cockatrices are resistant to cold spells.
Coeurl
Coeurl are a magical feline capable of some rather nasty damage. They move fast, and attack close up with a pair or tentacles for light damage. At range they cast either a minor fire spell or a high-power lightning spell. Stay out of their way, and hit them with melee or focus attacks when they pause to cast spells. They are highly resistant to most types of magic--except for holy.
Dark Flan
Spectral Dark Flan move quickly, and can hit you with a weak melee strike or a nearly instantaneous slow spell. They are immune to damage until a holy spell has been cast upon them to lower their defenses, after which weapons and fire both work particularly well against them.
Dark Hedgehog
Dark Hedgehogs fight with the same long-range body slam and close-range strike combination that other varieties of Hedgehogs use. Dark Hedgehogs, though, are incorporeal, and cannot be damaged until they have had holy cast on them. They are resistant to elemental spells, but anything else will work fine against them.
Enemy Strategies - cont.
Tentacle, Dark
Dark Tentacles attack, not with damaging spells, but with slow and stop spells with a huge radius. This wouldn't make them too dangerous, except that you will find them side by side with other, more dangerous forms of Tentacles. The best way to defeat them is from a distance with fire, cold, or lightning spells, but be sure to keep moving between castings.
Death Knight
Death Knights hurt. Heck, they do more damage with a regular attack than most bosses do! They attack at close range with a sword and a hammer, and have a secondary attack that stuns anybody nearby. They have a rare attack that launches a high-damage projectile. Their only real weakness is that they are slow. Wait until they start to attack, dodge, and then retaliate before they recover. Magic works well against Death Knights as well--just don't get hit!
Electric Jellyfish
The Electric Jellyfish can be a nasty opponent early in the game. It can cast lightning spells, several at a time, and, if you get too close, it will strike you, stunning you momentarily. The best way to get rid of the Electric Jellyfish is with a cold spell, cast right after it starts casting its own lightning spell. Other spells work, but are not as effective as cold. Electric Jellyfish are immune to lightning. Avoid melee attacks, as hitting an Electric Jellyfish will stun you, leaving you vulnerable.
Electric Scorpion
Electric Scorpions aren't all that different from regular Scorpions, except that they are immune to lightning, and their poison seems to do a bit more damage. Wait until they strike, then hit them back with cold magic or focus attacks before they recover.
Fire Tentacle
Fire Tentacles are huge plants that attack either by slapping when you are close, or by casting a mid-level fire spell from a distance. Tentacle plants are only really dangerous when encountered in close proximity to other enemies. When alone, their immobility, coupled with the slow charge time of their spells, make them easy opponents. Just stand back and hit them with a basic ice spell, over and over, or use focus attacks.
Flan
Flan attack with a short-range melee strike, or with a cloud of noxious fumes that casts slow on whomever it touches. They aren't too much of a threat, and are easily dispatched with weapons or fire spells. Avoid targeting them with stop, slow, or thunder.
Gargoyle
Gargoyles are big, mean, and nasty. They have less than half the hit points of a Goblin, but they are highly resistant to every spell but gravity, and their defense rating is off the scale, making them almost impossible to injure. They attack with a variety of elemental (fire, cold, and lightning) projectiles that can do a good bit of damage, and use a powerful melee attack if you get close. The most effective tactic against Gargoyles is to hit them with gravity, knocking them to the ground, then moving in and hitting them with weapons. If you don't have gravity, the best tactic is running away!
Ghost
Ghosts hit with either a minor melee attack or a radial cold spell. They aren't particularly dangerous or hard to kill, except for one thing: like Wraiths, Ghosts cannot be harmed until you have cast holy on them. Once holy has brought their defenses down, hit them with anything but cold (though they are particularly susceptible to lightning).
Gigan Toad
These giant amphibians attack at range with a basic cold spell, and will give you a real tongue-lashing if you get too close. Nonetheless, they aren't too tough as far as opponents go. Wait until they charge a spell, then move in and attack or step aside and hit them with a fire spell. Cold spells don't bother them, and they are highly resistant to slow or stop.
Gigas
The huge Gigas can attack with a stunning, powerful punch or with cold breath that will freeze you momentarily. They do move slowly, though, and they take time to recover from their melee attack. Keep your distance and attack them with weapons or fire spells. Don't waste your time hitting them with fire. Gigas have a lot of hit points, so they aren't pushovers, but they aren't too bad if you take your time when fighting them.
Goblin
Goblins are rarely a challenge. They attack by throwing a stone from a distance, or with a simple melee attack from up close. Neither attack does much damage, and both of them are slow and easy to avoid. The best way to fight a single Goblin is to just stand there and hit him with a combo. If you prefer magic, cast a lightning or fire spell, although Goblins are vulnerable to all types of magic. Goblins are really only problematic when encountered in large numbers. If this is the case, your best bet is to use a high-level fire or lightning spell to hit several of them at once.
The basic Goblin is armed with a sword. The variants with maces and spears have a few more hit points, but not enough to make them much more of a challenge.
Enemy Strategies - cont.
Goblin Chieftain
Goblin Chieftains are just like Goblins--only bigger. They have more hit points, a little better defense, and they hit a lot harder. They are still slow, though, so take your time and pay attention, stepping out of the way when they pull their weapon back to swing. While they are a bit more resistant to most forms of magic than Goblins, they are still weak against fire.
Goblin Mage
Goblin Magi aren't much more of a challenge than their non-magical brethren. They attack with a basic fire spell, which you can see charging up for several seconds. Step out of the way and take them out with weapons or fire spells (although, like other Goblins, any magic will work).
Gremlin
Gremlins can be tough little fellows, but they are fairly predictable. They strike with a single-hit melee attack by running up to you, pausing for a second, hitting, and then running off to rest for a bit. Whether you want to melee them or take them out with spells, wait until they run up, step aside before they swing, and then follow and hit them when they pause. Gravity and lightning are both good on Gremlins, but they are especially vulnerable to cold attacks. They are moderately resistant to fire.
Griffin

Griffins are large, mean beasts, and can be trouble if encountered with lots of other creatures. They attack with either a long-range projectile or a close-range stomp which causes damage in an area all around them. Keep back, dodge their attacks, and hit them with your best fire attacks to bring them down. Despite appearances, they are not counted as flying creatures; gravity is almost useless against them, as are stop and thunder.
Hedgehog Pie
Hedgehog Pies are fairly easy opponents. They attack with a simple fire spell that can be clearly seen charging up. Wait until you see the fiery circle appear underneath you, then step to the side and either smack the fellow or charge up a spell. As for spells, attack with cold or lightning, but avoid fire.
Hell Plant
Hell Plants are pushovers. They attack with a single, fairly rapid projectile that does only light damage. As soon as they lock onto you, they draw back and let fly. As soon as you see them draw back, move and you will be safe, as they will fire at your previous location. Any kind of spell will take down a Hell Plant, but fire is especially effective.
Ice Ahriman
If you get too close to an Ice Ahriman, he will drop himself bodily on you for minor damage. From a distance, they either use an eye beam that slows you down or a minor cold spell. It goes without saying that they are strong against ice. Bring them down with a gravity spell, and then finish them off with melee attacks or fire magic.
Ice Bomb
Ice Bombs are similar to regular Bombs, except that their basic attack is a cold spell instead of a fire spell, and that they are weak against lightning and fire, but strong against cold. Wait until you see them charging up a spell, then step aside and charge up one of your own. Watch out for the massive explosion of cold when they die!
Ice Tentacle
Ice Tentacles are much like their brethren, except, of course, that they attack with a mid-level ice spell, and, while they are immune to ice, they are extremely vulnerable to fire. Avoid their charging spells and hit them, again and again.
Killer Bee
Killer Bees are small, fast, and hit hard. Their painful, stunning attacks come quickly, and are tough to dodge. Ground them with a gravity spell, then hit them hard with weapons or fire before they get back up.
Lamia
Lamias, half snake, half human, could be dangerous foes, but they tend to rely on the repeated use of a slow spell instead of their fairly solid melee strike. Just wait until they start charging their slow spell, then step in and chop ‘em up. If you like magic, use ice, but don't waste your time with fire, slow, or stop.
Lava Ahriman
Lava Ahriman are much like their less-fiery brothers. They attack with an eye beam that slows you for a little while, a minor fire spell that requires charging, or with a melee attack. They aren't that dangerous, but they are annoying. They fly, so they will have to be brought down with a gravity spell before you will be able to do much damage, and they are highly resistant to most forms of magic. If you absolutely must go after them with spells, use gravity or holy.
Lava Mu
Lave Mu are quick little guys who attack at range with a low-power fire spell, or up close with either claws or tail. The claw attack isn't too bad, but the tail attack is powerful and disrupts spells. They are quick and tough to dodge, but respond especially well to cold spells (although anything but fire will work on the little buggers).
Enemy Strategies - cont.
Lightning Tentacles
Lightning Tentacles will hit you with a hard melee strike if you get too close, but their main offensive weapon is a powerful lightning spell, powerful enough it can kill weaker characters in a single hit. Like their cousins, long charge times and immobility take the teeth from their bite. Stand nearby and wait for them to start charging their spell, then step aside and counter with a focus attack, a fire spell, or a cold spell.
Lizard Mage
Lizard Magi are fairly typical opponents, armed only with a charge-up lightning spell. Just stay out of the sparking circle and attack while he is charging up his spell. Use weapons or cold spells, but avoid fire magic.
Lizard Skirmisher
Lizard Skirmishers attack with a nasty thrown spear. They throw it fast and without much of a recovery time, so you'll have to move fast to defeat them. Luckily, the spear doesn't disrupt spell casting, so hit them with cold spells. They are strong against fire, so avoid using it.
Lizard Soldier
Lizard Soldiers are armed with a sword, which they use to make quick strikes. As with other melee-centric monsters, make your attack with weapons or cold spells as soon as he finishes his attack, taking advantage of the time it takes him to recover.
Lizard Warrior
Lizard Warriors are the largest and strongest of the Lizard subspecies. They have twice as many hit points as Soldiers and Skirmishers, and do a ton of damage (as well as stunning you) with their melee attack. Their weaknesses are their long wind up and slow recovery. As soon as you see them pull back, move out of the way, and then strike back before they have a chance to recover. Like all Lizards, use cold and avoid fire.
Lizard Wizard
In addition to being fun to say, the Lizard Wizard is a typical spell caster. He casts a dangerous lightning spell that injures and stuns you if you are slow enough to get caught in it. Wait until you see the sparkling circle appear under your feet, then charge in with your own attack, or sidestep and cast a cold spell to take him out.
Lizardman
Lizardmen are another form of basic melee troop. Wait until they get ready to attack, dodge out of the way of the swing, then attack before they recover. All magic, except for fire, will work well on a Lizardman, though they are especially vulnerable to cold.
Magic Plant
Magic Plants seem just like Hell Plants, spitting dangerous projectiles rapidly at their target, but Magic Plants can fire off quick-charging spells of all sorts. A pair of them together can be a real challenge. They are resistant to most types of magic (though they are still susceptible to holy), so the best way of dealing with them is to close quickly and attack with weapons, being ready to move the instant a spell charging ring appears on the ground.
Mimic
Mimics disguise themselves as treasure chests, attacking when someone tries to open them. They aren't too dangerous, attacking with one of a variety of basic spells, but they are tough; they are completely immune to ice, fire, and lightning, and highly resistant to all other types of magic. Kill them with melee attacks, avoiding their spells in the process. Alternately, ‘open' them with a focus attack to do a ton of damage before they emerge.
Mu
The little ringtail Mu isn't tough, but they can be a real annoyance. Their main attack is a minor claw hit that does little damage, but their secondary attack is a tail swipe that, while not hurting you badly, disrupts the charging of spells and focus attacks. They aren't a danger by themselves, but when in the presence of other enemies, their ability to disrupt your spells becomes a real liability. Take them out with weapons, fire, or ice spells.
Nightmare
Nightmare attacks will employ a variety of elemental projectiles or a rearing melee strike. They are also incorporeal, so you will need to hit them with a holy spell before you can hurt them. Wait until you hear the low rumble that indicates they are about to fire, then step aside and hit them with a focus attack, holy, or elemental spells. Avoid slow and stop, as they are very strong against them.
Ochu
Ochu look like one of Malboro's offspring--large walking plants with tentacle-like arms. They cast a dangerous poison spell at a distance, and attack up close with a simple strike or with a spinning attack that will knock you back. Their poison spell is their weakness. Stay back until the Ochu begins to cast the spell, then charge in close for weapon hits or step aside for spell casting. The poison spell takes the Ochu so long to cast that you can do significant damage before it can retaliate. Use fire against an Ochu, although holy will work as well.
Enemy Strategies - cont.
Ogre
Ogres are large, and pack quite a punch (not to mention the hammer), but they require a moment to recover after an attack. Let them chase you, and then move in for a combo or a spell while they are recovering. Avoid using paralyze or gravity spells, as they are almost immune to them. Almost anything else will work, although Ogres are especially weak against lightning.
Orc
Orcs are ugly, slow, and stupid. They attack with a nasty overhead chop, but a long wind-up makes it easy to dodge. Just wait until they wind up, step aside, and whack ‘em. If you prefer magic, fire is your best choice, although anything will work.
Orc Mage
Attacking with a variety of spells, Orc Magi are easily defeated by waiting for them to start charging a spell, and then running in and hacking them into green bits. They are susceptible to any form of magic, but fire spells work particularly well.
Rock Scorpion
Rock Scorpions are the toughest of the Scorpion line. While they still attack with the same basic poison sting, Rock Scorpions are highly resistant to all forms of magic (except for gravity), and completely immune to fire, cold, and lightning. Start them off with a single casting of gravity, then move in and whack it out face to face. Hit them for a quick combo, and then back up. When they strike, move in to the side for another flurry before backing up again.
Sahagin
These half-fish attack with a damaging breath weapon, a melee strike, or a basic cold spell. They aren't too tough, though, and fall quickly to fire spells or weapons. Avoid using cold spells against them, as they are moderately resistant to them.
Sand Sahagin
Sand Sahagin like to attack at close range with a melee strike or at long range with a low power cold spell. They are tougher and stronger than other Sahagin, but the same general strategies apply--beat on them with weapons, or cast spells while they are charging their own. Sand Sahagin are vulnerable to ice, and moderately resistant to fire.
Scorpion
Scorpions attack with a poisonous tail strike, making them dangerous if you are not careful. They move quickly, but take a very long time to recover from their attacks. Let them chase you until they strike. Once they do, they will be vulnerable for several seconds. Hit them during that time with weapons, focus attacks, or ice magic.
Shade
Shades are exceedingly dangerous opponents. At range they attack with either slow or a gravity-type spell. These are fairly easily avoided. Close up, they attack with a massive melee strike. On a character with a defense of 50, the attack takes off two full hearts every time! Shades are incorporeal, so you will have to hit them with holy before you can damage, them, but take heart--once visible, they aren't very strong against magic (except gravity). Hit them with holy, and then hit them with the nastiest spells you've got!
Skeleton
Skeletons are basic melee-only attackers. Skeletons are fairly fast, and hit fairly hard, though, so they are not to be taken for granted. The same strategies that apply to other melee-only characters apply here; avoid an attack, then strike back with whatever means you choose before they recover. Anything will work on a Skeleton, although fire works the best. Note that Skeletons armed with spears have a few more hit points than others of their sort, but they are otherwise identical.
Skeleton Mage
Skeleton Magi like to attack with a variety of spells, all of which requiring charging up. As with similar enemies, just wait until you see the glowing circle beneath your feet, step to the side, and attack with spells or focus attacks.
There are a couple of more specialized versions of the Skeleton Mage who focus on one type of spell. They are generally extremely vulnerable to damage from that same type, but highly resistant to all other magic. In other words, if the Skeleton Mage is using lightning against you, use lightning back.
Snow Mu
Vulnerable to fire, resistant to ice, Snow Mus attack with either a weak claw attack or a more powerful tail slap. They are quick, and can be tricky to dodge, but often pause before attacking. That is your opportunity to hit them with weapons or magic.
Sonic Bat
Sonic Bats are small but annoying. They aren't all that dangerous, attacking with a melee strike or a short range projectile. Cast gravity to bring them down, and then use fire or weapons to finish them off.
Sphere
Spheres attack from a distance with either a poison or a slow spell, and can hit you exceedingly hard if you get too close. Spheres have a fairly strong resistance to most magic, but a gravity spell will bring them down where you can finish them off fairly easily with melee weapons or focus attacks.
Enemy Strategies - cont.
Stone Hedgehog
Stone Hedgehogs are stubborn little fellows, attacking with a minor blow from up close, or with a long-range body slam. Like all stone enemies, they are extremely resistant to damage. Hit them once with gravity, and then wear them down with melee weapons.
Stone Plant
Stone Plants have the same basic projectile attack as Hell Plants, but back it up with an extremely high defense score and a strong resistance to every magic except gravity. The attacks are easy to dodge, but it will take quite a few hits from regular or focus attacks before they go down.
Stone Sahagin
Stone Sahagin are tough opponents. They are highly resistant to both magic and weapons. When you see one, hit it with a single gravity spell, then move in and wear it down with weapons. It may take awhile, as their defense scores are extremely high, but it is the only way to go. They are highly resistant to slow, stop, and holy, and completely immune to cold, fire, and lightning--and gravity only works once on them.
Thunder Bomb
Thunder Bombs, as you might have guessed, attack with a massive long-range meteor spell, a mid-range lightning spell, and with a close-range melee strike. Stay back until you see them charging a spell, then step in and hit them with weapons, fire, or ice magic. Be sure to stay back when they die; just like others of their species, they explode when killed.
Tiny Worm
Tiny Worms aren't all that dangerous. They attack by running right up to you and hitting you with a low-damage melee attack. The best way to deal with them is just to have a fighter beat them silly. If you want to take them out with magic, you are best off just absorbing their hits while blasting away at them, as they move quickly, making it tough to get far enough to charge up a spell before getting hit anyway. Use fire against them if you can, although gravity and holy work, too. Avoid slow or stop spells, and note that lightning is completely useless against them.
Tonberry
Tonberries are another staple of the Final Fantasy series. They move slowly, but they hit hard. Their melee attack does a ton of damage, and they have an extremely high defense, making melee weapons other than focus attacks a bad choice against them. If you get too far away, they will cast a slow spell on you. Their lack of speed is their weakness. Walk away, cast a spell, and walk away again. With any luck, you will never get hit. Use any magic other than stop, slow, or gravity, all of which Tonberries are highly resistant to.
Tonberry Chef
Tonberry Chefs are barely even a challenge. If they get close, they hit you with a melee attack that stuns you for a split second, but they move so slowly that there is no reason to let them get close. They will cast an occasional slow spell, but these are easily avoided. Keep back and blast them with ranged focus attacks or spells. Any spells other than slow or stop will work well on them.
Vampire Bat
At first glance, Vampire Bats don't seem like much more than the annoyance that all of the other bats are. Vampire Bats, though, have the distinction of being both flying and incorporeal! That means that you will need to lower their defenses with a holy spell and bring them down with a gravity spell to do significant damage. The best results against Vampire Bats come from fire magic.
Water Flan
Not much different from a regular Flan, the Water Flan attacks with a short range melee attack and a breath weapon that causes slow. Hit them with fire or Holy from a distance, but avoid cold spells.
Wraith
Depending on your gear, Wraiths can be either a problem or a nightmare. They attack with a dangerous melee strike or with a slow spell. The problem is that Wraiths are completely immune to any attack you throw at them until after you hit them with a holy spell. The holy spell makes them fully visible and vulnerable for a few seconds. When vulnerable, take them out with weapons or with fire, ice, or lightning attacks.
Zu
Massive birds, the Zu attack with a variety of long-range elemental projectiles, or swoop down to strike at you if you get too close to their massive talons. Fight them on your own terms by casting a gravity spell on them. While they are on the ground, attack them with weapons or fire spells, but avoid cold, lightning, slow, and stop.
Equipment
Weapons
Each race has one particular type of weapon that they can use. Which weapon you have equipped determines your strength stat and what your focus attack will do. When having weapons made at a blacksmith, one pattern will create a weapon for every race. For example, a Novice's Weapon pattern will create an Iron Sword for a Clavat, a Partisan for a Lilty, or a Solid Racket for a Selkie, depending on which character turns the pattern in to the blacksmith.
Hammers
Heavy, hard-hitting hammers are the weapons of choice for the mysterious Yukes.
| Name | Strength | Focus Attack |
| Orc Hammer | 15 | Power Bomb |
| Treasured Hammer | 18 | Power Bomb |
| Wave Hammer | 20 | Wave Bomb |
| Marr Hammer | 22 | Wave Bomb |
| Rune Hammer | 25 | Shock Bomb |
| Mythril Hammer | 30 | Shock Bomb |
| Goblin Hammer | 31 | Power Bomb |
| Prism Hammer | 31 | Shock Bomb |
| Father's Hammer | 32 | Wave Bomb |
| Sonic Hammer | 32 | Wave Bomb |
| Mystic Hammer | 35 | Magic Bomb |
| Ultima Hammer | 35 | Wave Bomb |
Swords
Swords are the weapons of choice for Clavats.
| Name | Strength | Focus Attack |
| Copper Sword | 15 | Power Slash |
| Treasured Sword | 18 | Power Slash |
| Iron Sword | 20 | Piercing Sweep |
| Marr Sword | 22 | Piercing Sweep |
| Steel Blade | 25 | Bash |
| Rune Blade | 30 | Soulshot |
| Feather Saber | 31 | Power Slash |
| Bastard Sword | 32 | Piercing Sweep |
| Father's Sword | 32 | Piercing Sweep |
| Excalibur | 33 | Soulshot |
| Ragnarok | 35 | Shadowblade |
| Ultima Sword | 35 | Piercing Sweep |
Spears
Spears are the weapons used by the militaristic Lilties.
| Name | Strength | Focus Attack |
| Iron Lance | 15 | Cyclone Slash |
| Treasured Spear | 18 | Cyclone Slash |
| Partisan | 20 | Psi Blast |
| Marr Spear | 22 | Psi Blast |
| Sonic Lance | 25 | Avalanche |
| Dragon Lance | 30 | Pulse Thrust |
| Highwind | 31 | Avalanche |
| Titan Lance | 31 | Cyclone Slash |
| Father's Spear | 32 | Psi Blast |
| Halberd | 32 | Psi Blast |
| Dragoon's Spear | 33 | Pulse Thrust |
| Gungnir | 35 | Cross Slash |
| Ultima Lance | 35 | Psi Blast |
| Longinus | 40 | Bladestorm |
Rackets
The roguish Selkies prefer to fight with heavy, powerful rackets.
| Name | Strength | Focus Attack |
| Aura Racket | 15 | Aura Blast |
| Treasured Maul | 18 | Aura Blast |
| Solid Racket | 20 | Stampede |
| Marr Maul | 22 | Stampede |
| Dual Shooter | 25 | Dual Blast |
| Butterfly Head | 30 | Power Kick |
| Elemental Cudgel | 31 | Aura Blast |
| Prism Bludgeon | 31 | Dual Blast |
| Father's Maul | 32 | Stampede |
| Steel Cudgel | 32 | Stampede |
| Queen's Heel | 33 | Power Kick |
| Dreamcatcher | 35 | Meteor Blast |
| Ultima Maul | 35 | Stampede |
Armor
Every character can wear two pieces of armor--a piece of body armor, plus a piece specific to their race.
Body Armor
Body armor can be worn by every race.
| Name | Defense | Bonus |
| Travel Clothes | 10 | --- |
| Bronze Plate | 13 | --- |
| Iron Plate | 17 | --- |
| Mythril Plate | 22 | --- |
| Blessed Mail | 23 | Resist Poison +1 |
| Eternal Mail | 23 | Resist Stasis +1 |
| Saintly Mail | 23 | Resist Curse +1 |
| Time Mail | 23 | Resist slow +1 |
| Crystal Mail | 24 | Resist Miasma |
| Flame Mail | 24 | Resist Fire +1 |
| Frost Mail | 24 | Resist Ice +1 |
| Gold mail | 24 | Resist Earth +1 |
| Storm Mail | 24 | Resist Lightning +1 |
| Diamond Plate | 27 | --- |
| Gaia Plate (Clavats only) | 30 | --- |
Shields
Shields can be used only by Clavats.
| Name | Defense | Bonus |
| Makeshift Shield | 7 | --- |
| Iron Shield | 10 | --- |
| Mythril Shield | 15 | --- |
| Flame Shield | 17 | Resist Fire +1 |
| Frost Shield | 17 | Resist Ice +1 |
| Storm Shield | 17 | Resist Lightning +1 |
| Rune Shield | 18 | Spell Range +20 |
| Saintly Shield | 18 | Resist Curse +1 |
| Diamond Shield | 22 | --- |
| Chocobo Shield | 25 | --- |
Helms
Helms are worn by Yukes.
| Name | Defense | Bonus |
| Helm | 5 | --- |
| Bronze Helm | 8 | --- |
| Iron Helm | 12 | --- |
| Mythril Helm | 15 | --- |
| Flame Helm | 17 | Resist Fire +1 |
| Frost Helm | 17 | Resist Ice +1 |
| Storm Helm | 17 | Resist Lightning +1 |
| Eternal Helm | 18 | Resist Stasis +1 |
| Time Helm | 18 | Resist slow +1 |
| Diamond Helm | 22 | --- |
Gloves
Only Lilties can use the various armored gloves available in the game.
| Name | Defense | Bonus |
| Gauntlets | 5 | --- |
| Bronze Gauntlets | 8 | --- |
| Iron Gauntlets | 12 | --- |
| Mythril Gauntlets | 15 | --- |
| Flame Armlets | 17 | Resist Fire +1 |
| Frost Armlets | 17 | Resist Frost +1 |
| Storm Armlets | 17 | --- |
| Gold Armlets | 18 | Resist Earth +1 |
| Diamond Armlets | 22 | --- |
Belts
Selkies wear belts to supplement their body armor.
| Name | Defense | Bonus |
| Old Belt | 5 | --- |
| Bronze Belt | 8 | --- |
| Iron Belt | 12 | --- |
| Mythril Belt | 15 | --- |
| Flame Sash | 17 | Resist Fire +1 |
| Frost Sash | 17 | Resist Ice +1 |
| Storm Sash | 17 | Resist Lightning +1 |
| Blessed Sash | 18 | Resist Poison +1 |
| Winged Belt | 18 | Focus Attack Range +20 |
| Diamond Belt | 22 | --- |
Accessories
Every character can wear one accessory at a time. Accessories are made by finding a pattern and taking it to a capable tailor. It is worth carrying several extra accessories with different effects so that you can put on whichever is most beneficial for a given situation. Note that some accessories may be race- or gender-specific.
| Name | Effect | Races |
| Accurate Watch | Resist slow +1 | All |
| Angel's Earring | Resist Status Changes +60 | Selkie |
| Bishop's Soul | Magic +3 | Yuke |
| Blue Misanga | Resist Poison +1 | All |
| Charm of Wisdom | Casting Time -10 | Yuke |
| Crystal Ring | Resist Miasma +30 | All |
| Daemon's Earring | Status Change Effects +30 | Yuke |
| Devil's Earring | Status Change Effects +60 | Clavat |
| Dragon's Heart | Focus Attack +3 | Lilty |
| Eagle Goggles | Focus Attack Range +20 | Selkie |
| Elemental's Soul | Magic Damage +5 | Yuke |
| Flame Badge | Resist Fire +1 | All |
| Flower Bracer | Casting Time -5 | All--Females Only |
| Force Ring | Resist Attack +1 | All |
| Frost Badge | Resist Cold +1 | All |
| Gold Necklace | Resist Stone +1 | All |
| Headband of Healing | Faster Regeneration | All--Males Only |
| Headband of Zeal | Focus Attack Charge Time -5 | All--Males Only |
| Jade Bracer | Faster Regeneration | All--Female Only |
| Lion's Heart | Focus Attack +1 | Lilty |
| Pixie's Earring | Resist Status Changes +30 | Lilty |
| Power Goggles | Focus Attack Range +20 | Lilty |
| Speed Charm | Focus Attach Charge Time -5 | Selkie |
| Talisman of Speed | Focus Attack Charge Time -10 | Selkie |
| Talisman of Wisdom | Casting Time -15 | Clavat |
| Thieves' Emblem | Focus Attack Charge Time -15 | Selkie |
| Thunder Badge | Resist Lightning +1 | All |
| Twisted Scope | Spell Range +20 | Clavat |
| Twisted Spectacles | Spell Range +20 | Yuke |
| Unfaltering Watch | Resist Stasis +1 | All |
| White Misanga | Resist Curse +1 | All |
| Wizard's Soul | Spell Damage +1 | Yuke |
Patterns
Weapons, armor, and accessories are made with patterns you find in dungeons or purchase at shops. If you take a weapon or armor pattern to a Blacksmith, or an accessory pattern to a Tailor, he will use it (along with a few materials) to craft you a new piece of equipment. Patterns you don't need can be sold to merchants for quite a few Gil. Note that not all craftsmen can make all items. Some advanced items require craftsmen of advanced skill. These craftsmen can usually be found in late-game cities. If you conscientiously write letters home, your own parents (if you chose Blacksmith or Tailor) can make advanced items.
| Name | Creates |
| Angel Kit | Angel's Earring |
| Blue Yarn | Blue Misanga |
| Brigandology | Thieves' Emblem |
| Bronze Armor | Bronze Plate |
| Bronze Belt | Bronze Belt |
| Bronze Gloves | Bronze Gauntlets |
| Bronze Sallet | Bronze Helm |
| Celestial Weapon | Longinus |
| Clockwork | Accurate Watch |
| Daemon Kit | Devil's Earring |
| Dark Weapon | Ragnarok |
| Designer Glasses | Twisted Scope |
| Designer Goggles | Eagle Goggles |
| Diamond Armor | Diamond Plate |
| Diamond Belt | Diamond Belt |
| Diamond Gloves | Diamond Armlets |
| Diamond Sallet | Diamond Helm |
| Diamond Shield | Diamond Shield |
| Earth Armor | Gaia Plate |
| Eternal Armor | Eternal Mail |
| Eternal Sallet | Eternal Helm |
| Eyewear Techniques | Twisted Spectacles |
| Faerie Kit | Pixie's Earring |
| Fashion Kit | Jade Bracer |
| Fiend Kit | Daemon's Earring |
| Flame Armor | Flame Mail |
| Flame Belt | Flame Sash |
| Flame Craft | Flame Badge |
| Flame Gloves | Flame Armlets |
| Flame Sallet | Flame Helm |
| Flame Shield | Flame Shield |
| Forbidden Tome | Elemental's Soul |
| Frost Armor | Frost Mail |
| Frost Belt | Frost Sash |
| Frost Craft | Frost Badge |
| Frost Gloves | Frost Armlets |
| Frost Sallet | Frost Helm |
| Frost Shield | Frost Shield |
| Goggle Techniques | Power Goggles |
| Gold Armor | Gold Mail |
| Gold Craft | Gold Necklace |
| Gold Gloves | Gold Armlets |
| Greatest Weapon | Ultima Sword, Ultima Hammer, Ultima Lance, Ultima Maul |
| Healing Kit | Headband of Healing |
| Hero's Weapon | Dragoon's Spear |
| Holy Armor | Saintly Mail |
| Holy Shield | Saintly Shield |
| Iron Armor | Iron Plate |
| Iron Belt | Iron Belt |
| Iron Gloves | Iron Gauntlets |
| Iron Sallet | Iron Helm |
| Iron Shield | Iron Shield |
| Lady's Accessories | Flower Bracer |
| Legendary Shield | Chocobo Shield |
| Legendary Weapon | Excalibur, Gungnir, Mystic Hammer, Queen's Heel |
| Lightning Armor | Storm Mail |
| Lightning Belt | Storm Sash |
| Lightning Craft | Thunder Badge |
| Lightning Gloves | Storm Armlets |
| Lightning Sallet | Storm Helm |
| Lightning Shield | Storm Shield |
| Lunar Weapon | Dreamcatcher |
| Magic Shield | Rune Shield |
| Master's Weapon | Dragon Lance, Mythril Hammer, Butterfly Head, Rune Blade |
| Mighty Weapon | Halberd, Bastard Sword, Sonic Hammer, Steel Cudgel |
| Mythril Armor | Mythril Plate |
| Mythril Belt | Mythril Belt |
| Mythril Gloves | Mythril Gauntlets |
| Mythril Sallet | Mythril Helm |
| Mythril Shield | Mythril Shield |
| New Clockwork | Unfaltering Watch |
| Novice's Weapon | Iron Sword, Partisan, Solid Racket, Wave Hammer |
| Pure Armor | Blessed Mail |
| Pure Belt | Blessed Sash |
| Radiant Armor | Crystal Mail |
| Ring of Invincibility | Force Ring |
| Ring of Light | Crystal Ring |
| Secrets of Speed | Talisman of Speed |
| Secrets of Wisdom | Talisman of Wisdom |
| Soul of the Dragon | Dragon's Heart |
| Soul of the Lion | Lion's Heart |
| Time Armor | Time Mail |
| Time Sallet | Time Helm |
| Tome of Magic | Wizard's Soul |
| Tome of Sorcery | Bishop's Soul |
| Tome of Speed | Speed Charm |
| Tome of Wisdom | Charm of Wisdom |
| Valiant Weapon | Feather Saber, Titan Lance, Goblin Hammer, Elemental Cudgel |
| Victorious Weapon | Defender, Prism Hammer, Prism Bludgeon, Highwind |
| Warrior's Weapon | Steel Blade, Rune Hammer, Sonic Lance, Dual Shooter |
| White Yarn | White Misanga |
| Wind Belt | Winged Belt |
| Zeal Kit | Headband of Zeal |
Got a news tip or want to contact us directly? Email news@gamespot.com
Join the conversation