Star Wars: Knights of the Old Republic Walkthrough
In the following pages, you will find an insanely detailed walkthrough, covering all of the main and optional quests on each of the game's seven massive planets, a thorough overview of character creation, and special strategies for mini-games, like Pazaak and swoop racing.
Design by Katie Bush
The Star Wars saga has seen incarnations in a remarkably broad number of gaming genres: even if we restrict ourselves to discussing console titles, there have been side-scrollers, arcade rail shooters, fighting games, first-person shooters, space-flight sims, and even a kart racer or two in there. Star Wars fans have had the opportunity to indulge their interest in a series of games whose breadth of scope and quality are unmatched by any other major license.
The one exception to this smorgasbord of Star Wars genre-mining has been the role-playing game, which is odd, considering both that role-playing games have a deep fan base, and that Star Wars, with its richly imagined universe and compelling sci-fi archetypes, seems like a natural choice to be the basis for such a game. For whatever reason, though, Star Wars and role-playing games have never come together--until now.
Enter Star Wars: Knights of the Old Republic, an epic new Xbox-exclusive (for now) RPG from BioWare, creators of such RPG masterpieces as Baldur's Gate and Neverwinter Nights, and LucasArts. In case you had any doubts: when you marry the RPG creation skills of BioWare with the world's most powerful license, you wind up with a game of stunning quality that shatters sales records as soon as it hits the shelves. KOTOR is a game that no Xbox owner will want to be without.
And speaking of things you can't live without, GameSpot is proud to present the biggest and best strategy guide that's available for Knights of the Old Republic. In the following pages, you will find:
- An insanely detailed walk-through, covering all of the main and optional quests on each of the game's seven massive planets
- A thorough overview of character creation, from the first level to the last, including detailed analysis of all of the skills, feats, and special Force powers that you'll use throughout your adventure
- Special strategies for mini-games, like Pazaak and swoop racing
As well as the proverbial "much, much more." Many Bothans died to bring us this information, so put it to good use. You'd be surprised at how much torture those little guys can take before they finally crack.
Table of Contents
CHARACTER GENERATIONPARTY MEMBERS
WALK-THROUGH
TARIS
Lower City
Under City
Lower Sewers
Upper Sewers
Black Vulkar Base
Black Vulkar Garage
Swoop Race
Upper City
Sith Military Base
Lower Sith Base
Davik's Estate
Side Quests
KASHYYYK
The Great Walkway
Village of Rwookrrorro
Upper Shadowlands
Lower Shadowlands
Side Quests
MANAAN
West Central
Ahto West
East Central
Ahto East
Sith Base
Hrakert Station
Sea Floor
Kolto Control
Hrakert Rift
Side Quests
Sith Academy Entrance
Sith Academy
Valley of the Dark Lords
Shyrack Caves
Tomb of Ajunta
Tomb of Marko Ragnus
Tomb of Tulak Hord
Tomb of Naga Sadow
Side Quests
THE UNKNOWN PLANET
North Beach
South Beach
Temple Exterior
Temple Interior
Temple Catacombs
Temple Summit
Side Quests
CARTH
JUHANI
BASTILA
JOLEE
HK-47
MISSION
DWINDLING SUPPLIES
THE TROUBLE WITH GIZKA
CALO NORD
DARTH BANDON
GENOHARADAN
GLOSSARY
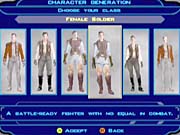
Character Generation
Before you begin your adventure, you will need to create the character that will become your alter ego in the world of KOTOR. Those of you who are familiar with previous BioWare RPGs, such as Neverwinter Nights, will feel right at home with the character creation process, since it strongly resembles the Dungeons and Dragons-style character creation that we all know and love.
Quick Character vs. Custom Character
If you wish to simply jump into the game with a minimum amount of hassle, you'll want to create a quick character. This option lets the game decide your character's attributes and results in a well-balanced, if somewhat generic character. You'll still be allowed to select your character's sex, class, in-game portrait, and name.
If you're used to pre-made characters, such as are found in most console RPGs, by all means select a quick character and jump directly into the game; they're not handicapped at all when compared to a custom character. On the other hand, selecting the custom character option will give you access to a much broader array of customizations and allow you to select your player character's (or PC for short) attributes, skills, and feats, in addition to the cosmetic choices required of quick characters.
Class
Selecting your class is required for either quick or custom characters. You can think of your class as roughly analogous to an innate talent that may be used or squandered as you see fit, rather than as a rigid mold that must be adhered to at all times. In other words, a soldier can try to be stealthy and evade a confrontation with an enemy, but will usually be better off just fighting his or her way through the encounter. Of course, if you intend to be sneaky, you might as well be a scoundrel from the beginning, so think for a bit before you start the game and choose a class that best suits your style of play.
Soldier
Soldiers, as you might expect, generally possess more brawn than brains and are apt to use firepower to blast themselves out of a tight spot. While soldiers are obviously the best class for combat-oriented players, they are less adept at dealing with electronics and security measures than the other classes. If you do make your primary character into a soldier, you'll want to make sure that you keep an NPC with excellent security skills in your party, if only to make it easier to get through locked doors. Soldiers lag behind scoundrels in terms of the number of skills they acquire, both at character creation and at level-up, and have the fewest number of class skills, but gain more feats than either of the other classes upon gaining a level.
Soldiers will miss out on some early opportunities for experience, since they won't be able to use skills to solve problems to gain the optional experience bonuses available in some situations, but you can always come back later on with a highly skilled NPC and gain at least some of that experience, or just wait for some of the respawning enemies later on in the game. Once you do gain a few party members, though, you will probably begin dominating opponents in fights, and your high vitality will enable you to tank for your ranged attackers, giving your entire party a better chance of surviving battles.
Starting Feats:
- Armor Proficiency: Light
- Armor Proficiency: Medium
- Armor Proficiency: Heavy
- Weapon Proficiency: Blaster Pistol
- Weapon Proficiency: Blaster Rifle
- Weapon Proficiency: Heavy Weapons
- Weapon Proficiency: Melee Weapons
- Power Attack
- Power Blast
Class Skills:
- Demolitions
- Awareness
- Treat Injury
Vitality: +10 per Level
Feat Progression: Levels 1, 2, 3, 4, 5, 6, 7, 8, 9, 10, 11, 12, 13, 14, 15, 16, 18, 20
First level skill points: (1 + Intelligence Modifier) * 4
Skill points progression at higher levels: (2 + Intelligence Modifier) / 2
Scout
Someone who makes his or her way through the universe by becoming a jack-of-all-trades would most likely be a scout, since this class is proficient at both combat and the more intellectual methods of problem-solving. Unfortunately, the two class skills that scouts have in addition to the three that soldiers get are somewhat less than useful in practice: computer use and repair are both decent enough skills, but rarely offer players a preferable alternative to combat, unless perhaps you're playing on the hardest difficulty levels. There are some tough fights in KOTOR, to be sure. But assuming you have made decent choices when leveling up and choose useful teammates, few fights should give you trouble. This effectively nullifies the purpose of computer use and repair, which for for the most part is to avoid combat, by creating droid slaves to fight for you, or by using the computer terminals to turn security systems on your opponents. It's also useful to point out that these skills don't make it any easier to actually repair a droid or use a computer; they simply make it so that your character uses fewer computer spikes and parts when performing the action. If you can keep a surfeit of parts and spikes, you will rarely be in dire need of either skill.
For these reasons, it's perhaps best to just rely on your teammates for their computer use and repair talents, and make your player-character either a soldier, if you intend on participating in combat, or a scoundrel, if you wish to utilize truly useful skills, like persuade or security. Scouts seem to be merely downgraded soldiers, with less vitality and fewer feats. Granted, you'll get more skill points when you gain a level, but the skill set that's available to scouts is barely improved over what soldiers are given access to, so this a mediocre benefit at best.
Starting Feats:
- Armor Proficiency: Light
- Armor Proficiency: Medium
- Weapon Proficiency: Blaster Pistol
- Weapon Proficiency: Blaster Rifle
- Weapon Proficiency: Melee Weapons
- Flurry
- Implant Level 1
- Rapid Shot
Class Skills:
- Computer Use
- Demolitions
- Awareness
- Repair
- Treat Injury
Vitality: +8 per Level
Feat Progression: Levels 1, 2, 3, 5, 7, 9, 11, 13, 15, 17, 19
First level Skill points: (3 + Intelligence Modifier) * 4
Skill points progression at higher levels: (6 + Intelligence Modifier) / 2
Scoundrel
If you faint at the sight of blood, or merely wish to avoid any more scars on your chin, then the life of a scoundrel is probably what you're after. Scoundrels are more likely to take on the Sith with brains than with blasters, by utilizing explosives and traps to do the dirty work for them, or by simply evading a confrontation in the first place. As such, scoundrels are unfortunately lacking in the simple toughness needed to gut out toe-to-toe battles, but will gain many more skills than the other classes to supplement their lack of enthusiasm for intimate combat. Unfortunately, they progress in feats more slowly than do soldiers or scouts.
Scoundrels have a rough time for the first few hours of the game, and, indeed, the strategy and stealth required of a scoundrel probably makes this class the most difficult to play with, especially if you're a Light side character. Since they only gain six vitality per level, scoundrels will soon have much less health than a soldier of similar experience, so you'll need to ensure that you have plenty of medpacs available when your health starts to run low. Once you gain party members that are able to step up with a melee weapon and protect you from enemy attackers, though, you should have a much easier time in the game, and when you actually become a Jedi initiate, you'll likely have a step up on the other two classes when it comes to learning and using Force powers, and the defense bonus from the high dexterity required for the ranged weapons that you'll likely be using in the first portions of the game will come in handy when you shed your armor for the robes of the Jedi Order. The scoundrel is also the only class that can easily learn the persuade skill, and since this skill is not usable by party members, you'll be able to do some things that will probably be beyond the ability of the other classes to access, unless they overload themselves on charisma.
Starting Feats:
- Armor Proficiency: Light
- Weapon Proficiency: Blaster Pistol
- Weapon Proficiency: Blaster Rifle
- Weapon Proficiency: Melee Weapons
- Sneak Attack 1
- Scoundrel's Luck
- Sniper Shot
- Critical Strike
Class Skills:
- Demolitions
- Stealth
- Awareness
- Persuade
- Security
Vitality: +6 per Level
Feat Progression: Levels 1, 2, 5, 8, 11, 14, 17, 20
First level Skill points: (4 + Intelligence Modifier) * 4
Skill points progression at higher levels: (8 + Intelligence Modifier) / 2
Jedi Classes
The Jedi classes aren't something you'll need to worry about for some time after the start of the game; you'll have to find a way off of the first planet before you become a Jedi anyhow, and all of your Jedi teammates will come with a Jedi class already chosen.
Once you do reach the second planet, however, and are chosen to become a Jedi Padawan, you'll need to decide which of the three possible classes is right for you. This Jedi class becomes your new class; you no longer advance levels as a soldier, scout, or scoundrel, but instead, all of your level progress comes in the new class that you've chosen.
One thing to keep in mind is that your character has a maximum character level of 20; the game calculates this by adding together the levels that you've gained in your original class, and those that you've gained in your Jedi class. This means that if you proceed through Taris normally, you'll probably hit Dantooine with around 8 levels of experience, and thus, when you do become a Jedi, you will not be able to reach above level 12 in whatever class you pick. This isn't a problem for most players, since you do retain all of the vitality, feats, and skills that you've gained with the standard class that you began the game with.
There are a few drawbacks, though: your Force point reservoir will be smaller than the other Jedi party members (though not by much, since you begin with 40 points automatically); your progress in the defense-boosting Jedi Sense feat will lag behind; and most importantly, you will be allowed to choose fewer Force powers than your party members who started their adventuring careers as Jedi. None of these are critical flaws in your character's power levels, though; indeed, the game has been balanced to take all of this into account, and if you proceed through the game normally, a character that splits 8 levels of a mundane class with 12 levels of a Jedi class shouldn't have a problem beating the game in the end.
All of this is a roundabout way of getting to the point: you can manipulate KOTOR's leveling system so that, once you become a Jedi, you can dump nearly all of your experience points into your chosen Jedi class, thus becoming as powerful, if not much more so, than your Jedi companions. This necessitates making the first planet of the game much more difficult than in a game with "normal" character progression, but can be worth it if you simply want to kick ass later on in the game.
You see, once you become a Jedi Padawan on Dantooine, the game automatically grants you a level-up; you'll now leave your old class behind, and become a level one Jedi, of whichever class you've chosen. But, if you never converted your extra experience into new levels of your old class, all of the level-up opportunities you've skipped will still remain as experience credits for your character, allowing you to instantaneously convert all of those "saved" levels into the new Jedi class that you've just chosen.
For example, your character starts the game as a level one soldier. You proceed through the Endar Spire and parts of Taris, eventually raising him up to a level four soldier. After that, however, when you gain enough experience to advance one level, you leave him as a level four character, thus delaying the level-up, saving it until you get off of Taris and become a Jedi, when you can pile all of those saved levels into your new Jedi class. Assuming you gain a normal amount of experience on Taris, your new Jedi will start out as a level four soldier / level five Jedi guardian (or whichever class you pick), instead of a level eight soldier / level one guardian.
Jedi Classes - cont.
There will be substantial differences in statistics between these two characters. A level eight soldier / level one guardian will have, in most cases, 90 vitality, 44 Force points, nine feats, two Force powers, and somewhere around 12 skill points allocated. A level one soldier / level eight guardian, on the other hand, will have 90 vitality, 72 Force points, five feats, nine Force powers, and, again, somewhere around 12 skill points allocated. The first character will probably be somewhat more deadly in strict weapons-based combat, due to the extra Feats from his soldier levels, but the latter character will be more dangerous overall, due to the larger Force point reservoir and the greatly increased number of Force powers.
Obviously, if you intend to bring a character all the way from the Endar Spire to Dantooine without leveling up, you're going to have a hell of a hard time doing so, since you won't have more than 6--12 vitality at most. It's certainly possible, especially if you use your teammates to fight all of your battles in solo mode, and are willing to make many, many trips to the load game screen. There is a kind of sweet spot, however, that will probably make a bit more sense for most players. Soldier characters will find it easiest to reach level four before ceasing to level-up; this will give them a few feats under their belt, which will make it easier for their Jedi characters to deal damage in combat later on, since the Jedi typically gain fewer feats than do the regular character classes. For the same reason, and also to gain more vitality, the scout and scoundrel may want to reach level five before they stop leveling; they each gain one more feat this way, and the extra life will make the harder fights in the latter stages of Taris a bit easier to manage. Also, keep in mind that your skill progression will drop sharply once you become a Jedi; if you are relying on your player-character to pick locks or do other skill-related tasks, then you'll want to have a few more starting-class levels when you become a Jedi.
There is one other significant drawback to this method of leveling-up: while your character will likely be more powerful, your teammates will not gain quite as much experience when they're not in your party, if indeed they gain any at all. This bug is exacerbated if you choose to "save" levels earlier on: if, for instance, you cease leveling up from the very beginning of the game, your party members will usually lag behind your player-character by almost 30,000 experience. This means that they will be significantly underpowered for much of the mid-game, but by the time you reach the end of the adventure, this gap will be much less than a level, and so things will be a little less complicated. The experience gap is more severe if you try to save more levels, so if you wait until level four or five, your teammates will not lag as far behind.
Of course, you can feel free to proceed in Knights of the Old Republic however you see fit. If you do manage to survive Taris with a low-level character, however, your super-Jedi will make for a very fun playing experience, and will make your character more versatile in his or her use of Force powers as the game goes on. Indeed, this is the biggest difference between the normal method of leveling and this loophole-leveling; characters who exploit a loophole like this will gain more Force powers in the latter stages of the game. If you just want to chop stuff up with a lightsaber, this won't make a large difference in your playing style, but if you plan to become a Jedi consular, you can expect to be spoilt for choice when choosing your Force powers if you do manage to save a few levels before Dantooine.
Now, with that lengthy lemma out of the way, let's proceed to an explanation of the Jedi classes.
Jedi Guardian
The Jedi guardians are those Jedi who aren't afraid to take out their lightsaber when the situation demands it. They shouldn't be thought of as warriors, since "wars not make one great," after all. Indeed, the life of a Jedi guardian should be dedicated to peace, the minimization of bloodshed, and serene meditation on the meaning of the Jedi Code.
I'm kidding, of course. Guardians are meant to kill, kill, kill; that's what they're good for, and that's what you'll be able to do with relative ease if you choose to upgrade your character to this class. Guardians are not as strong in the Force as the other Jedi classes, but are much more powerful when it comes to wielding a lightsaber, and are more physically resilient as well. A guardian is roughly analogous to a soldier.
The Jedi guardian's class-specific feat is Force jump, which is a combat-oriented feat that allows a Jedi to cover massive amounts of ground and deliver a powerful blow when combat begins. The Jedi guardian is also the only class that is allowed to obtain lightsaber specialization, which gives each lightsaber attack +2 damage.
Vitality: +10 per Level
Force Points: +4 per level
Feat Progression: Levels 1, 3, 6, 7, 9, 12, 13, 15, 18
Skill points progression: (2 + Intelligence Modifier) / 2
Jedi Sentinel
The sentinel class is supposedly a balanced, diplomatic class, involved in settling conflicts between parties and arbitrating grievances through negotiations. Given the nature of KOTOR, though, most of a Jedi sentinel's negotiations will be of the aggressive variety, but not to worry; Sentinels are quite adept at handling themselves in combat.
The Jedi sentinel's unique feat is probably the most useful of the three: as a sentinel increases in level, he or she will become increasingly resistant to mind-affecting attacks, such as attacks that cause fear, or stun your character. This will become quite important when battling the Dark Jedi later on in the game, since they will quite often resort to these kinds of attacks when using the Force powers.
As a note, characters who advance through Taris as a soldier, and who want to proceed through the game as a combat-oriented character, may want to consider the sentinel as an alternative to the guardian class. While you do lose out on lightsaber specialization, which hurts, you'll gain more Force points, and will be able to increase your skills a bit faster than you were previously. And not to put too fine a point on it, but Force immunity is almost always going to be a better feat to have than Force jump, especially in the last few stages of the game.
Vitality: +8 per Level
Force Points: +6 per level
Feat Progression: Levels 1, 3, 6, 9, 12, 15, 18
Skill points progression: (4 + Intelligence Modifier) / 2
Jedi Consular
Jedi consulars seem to fit into the mold of the "crazy old wizard," since they are much more adept at channeling the Force than are the other two classes. They don't gain any special Force powers when compared to the other two classes, but do gain Force powers at a very slightly more rapid pace than do guardians and sentinels, and will have a deeper pool of Force points to draw upon when they need to unleash their powers in combat. They spend less time training for physical combat, however, and so are not going to be as appropriate as front-line combat troops. A good example of a Jedi consular, albeit a Dark side example, is the cronish Emperor Palpatine from Return of the Jedi.
The consular's unique Jedi Feat is Force focus, which lends a bonus to the DC of their Force power attacks. Since this is a passive feat, it is always active, and will help your characters stun or incapacitate their opponents.
In addition to the normal Force power that's gained at every level-up, consulars also gain an additional Force power at levels 5, 9, 13, and 17.
Vitality: +6 per Level
Force Points: +8 per level
Feat Progression: Levels 1, 3, 6, 7, 9, 12, 13, 15, 18
First level Skill points: (4 + Intelligence Modifier) * 4
Skill points progression: (2 + Intelligence Modifier) / 2
Attributes
Attributes govern your character's innate physical and mental resources. The bonuses and penalties associated with high or low attributes will affect your character's combat acuity, skill usage, and the efficacy of your Force powers. If you choose to create a quick character, your attributes will be distributed automatically, but if you wish to create a custom character, you'll be able to choose all of your vital statistics individually using a pay-for-points system.
An unmodified character is initially a tabula rasa, and is, in fact, slightly below average in each attribute. In order to increase your attributes, you'll have to buy each additional point using a pool of 30 purchase points. The initial increases to a skill are on a one-for-one basis, but as you progress towards the upper limit of your initial attributes (during character creation, no attribute can be raised above 18), each additional point begins to cost more; purchasing a stat of 15 or 16 will each cost your character two purchase points, while the elite stats of 17 and 18 will each cost three purchase points.
Luckily, you aren't going to be shackled by your initial attribute allotment for the rest of the game: your character will gain one extra point to allocate to any attribute every time you gain a level that's a multiple of four. So, upon reaching level four, you gain an attribute point, and again at level eight, level 12, and so on. These points are simple additions to an attribute; you can raise a score of 18 to 19 just as easily as you can go from 10 to 11.
All of your attributes possess the same bonuses and penalties associated with high or low scores, as shown on the following table.
| Attribute Rank | Modifier |
| 8--9 | - 1 |
| 10--11 | 0 |
| 11--12 | + 1 |
| 13--14 | + 2 |
| 15--16 | + 3 |
| 17--18 | + 4 |
| 19--20 | + 5 |
| 21--22 | + 6 |
| 23--24 | + 7 |
| 25--26 | + 8 |
In addition to the extra attribute points you get at your level-ups, you will also occasionally come across items that will add to one or more of your attributes. Some of these, such as stimulants, are merely temporary boosts, but many items can be equipped to lend a constant bonus to a statistic as long as they are worn. You should be sure to distribute these items where needed among your NPC friends; a soldier probably won't have much use for something that gives a bonus to intelligence, but a scoundrel party member would most certainly benefit from it.
Strength
If you're planning on putting your lightsabers to heavy use in KOTOR, then you'll want to boost your strength score to a decent rank when you create your character. (Maybe; see the dexterity section below for a more detailed look at the way strength works with lightsabers and Jedi characters.) The modifier that you gain from strength is applied to the attack roll and damage of a melee weapon, meaning that a character with high strength will find it both easier to hit an opponent and easier to inflict large amounts of damage. If you plan to focus on ranged weaponry, however, you shouldn't need many points in strength; there are no strength requirements for any items in KOTOR, and since your inventory is unlimited in size, you don't need to have a high strength to carry loot around.
Dexterity
Dexterity is likely going to be the primary attribute for most players, since a high dexterity modifier affects your attack rolls with both ranged weapons and, oddly enough, lightsabers. That bonus is also applied to your defense, making you more agile in battle and thus less likely to be shot or hit with an enemy weapon. Your defense modifier may be reduced or even eliminated if you wear heavier suits of armor that restrict your ability to dodge, so you should be sure to check your defense before and after you put on new threads to ensure that they actually benefit you. The dexterity modifier is also applied as a bonus to your reflex saving throws, allowing you to more easily escape serious injury from situations that call for quick moves, such as a nearby explosion.
The balancing of dexterity and strength will be critical for lightsaber-intensive characters. In most cases, the attack roll of a melee weapon is determined in part by the Strength modifier, but with lightsabers, it appears that the game uses the higher of the strength and dexterity modifiers to add to the attack roll, so that if your character has a dexterity of 16, and a strength of 14, then the attack roll modifier for a lightsaber would be the +3 from the dexterity. The strength modifier would still be applied to the damage rolled, however.
Where this becomes important is in the consideration that many of the Jedi Force powers require your character to not be wearing armor. While the many varieties of Jedi robes offer some light protection, and some Force powers themselves will boost your defense, your character will still generally lag far behind your other Jedi party members in terms of defense, since they will almost always join your party with two levels of the Jedi Sense feat in their belt.
You can probably see where we're going with this: if your Jedi character has a high strength, but low dexterity, he or she will deal quite a bit of damage, but will either have to wear armor to survive combat, and forgo the use of the many useful powers that are armor-restricted, or wade into combat with a low defense. If you possess a high dexterity, but a low strength stat, then you'll be able to go a bit longer in combat without having to resort to the cure power or medpacs, but will deal less damage on the whole than a character with high strength.
Want a hint? Go with dexterity. You may not be a melee powerhouse in the earliest portions of the game, but you'll be able to use any ranged weapon with ease, even without a focus feat, and you'll have the advantage of a very high defense when wearing light armor. You can still pump your strength score at character creation, perhaps by under-boosting constitution and making the difference in vitality back later on with the toughness feat. If you want very specific advice, a 16/16 split between strength and dexterity at character creation makes Taris quite survivable for most characters, and when you become a Jedi, you'll be able to cast off your armor for the Jedi robes without any qualms, especially if you devote the first two attribute additions to dexterity.
Also note that if you plan to become a Jedi guardian, you'll be able to use the lightsaber specialization feat. Since this gives all of your lightsaber attacks +2 damage, it essentially takes the place of four points of strength for lightsaber specialists. (And really, how many guardians are going to be using long swords?)
Constitution
The hale and hearty soldiers of the Republic benefit most from a healthy constitution, seeing as how it simply increases the amount of vitality you gain after each level-up. More vitality is obviously important to characters that see a fair amount of battle, but keep in mind that the benefits of a high constitution can be emulated by the toughness feats. Rather than expending valuable attribute selection points to gain an extra hit point per level, you may wish to reserve those points for an attribute that more directly affects your character, and simply allot one of your feat slots to toughness or its upgraded brethren. This especially holds true for soldier characters, who will gain more feats than either of the other two classes. A high constitution also affects your fortitude saving throw, allowing you to more easily fight off the effects of poison and other harmful physical ailments, or avoid them altogether.
Intelligence
Some people just don't feel like getting singed by blaster fire every time they step out for a cup of java juice at the cantina. Fortunately, a high intelligence score can make combat skills almost irrelevant, since your intelligence modifier both increases the number of points you can spend on skills, and applies itself to those skills that are most useful for evading battle: repair, computer use, and demolitions.
Wisdom
Wisdom is usually associated with sagacious Jedi Masters, such as Yoda. (Speaking of Yoda of Dagobah moreso than the Clone War-era Yoda, of course.) As such, your wisdom score will be important if you intend to rely on the power of the Force more than the speed of your lightsaber. Your modifier here will increase your Force power reservoir and make it easier for you to resist enemy Force powers. In addition, high wisdom will make your Force powers more difficult for your enemies to defend against. Your wisdom modifier, in addition to adding Force points, is also used to modify your will saving throw, which improves your chances of resisting an enemy's Force powers.
Charisma
Jedi radiate a sense of internal power that can greatly affect those around them. For that reason, a high charisma will become fairly important after your character becomes a Jedi, when the modifier for the skill starts to apply to certain Jedi-specific feats and Force powers. Even before you feel the calling of the Force, a charismatic individual will have much greater success in persuading others to see his or her side of an argument.
Charisma and wisdom aren't exactly created equal, though, especially for characters that intend to use Force powers as their prime means of affecting the game world and their enemies. If you're planning on playing a Jedi consular who can wield Force powers with ease, you'll definitely want to increase your wisdom stat at the expense of charisma. Even though both of them add their modifier to the DC of a Force power attack, a high wisdom score also increases the amount of Force points your character possesses, as well as your will saving throw.
Skills
Your character's proficiency in KOTOR's skills will to a large extent determine the path you take through the game. Most soldier characters will use skills only rarely, since most skills are related to non-combat activities, so soldiers will generally have to rely on the talents of NPC teammates to make their way past obstacles. There's never a guarantee that you'll have an NPC along with the right skill when you need it, though, so the choices you make with your PC's skills will still have a great impact on your experience as you play KOTOR. Scouts, and especially scoundrels, will need to hone multiple skills to make up for their lack of raw combat ability.
The number of skills characters get to choose depends on their class, as well as their intelligence modifier. Scoundrels are the most skillful of the KOTOR classes, with scouts coming close behind, while soldiers, rarely the smartest people in the galaxy, lag far behind. You'll be able to select a few skills when you create your character, and you'll get to further enhance your knowledge at each level-up.
Skills, like most everything else in the game, are based upon simulated rolls of a 20-sided die, so even a high level of proficiency in a skill won't always protect you from failure. Most skill-related tasks in the game are assigned a difficulty check (DC) of a number usually between 10 and 30, with higher numbers representing the more challenging scenarios. When you make a skill check, you take your rank in that skill, add or subtract the appropriate modifier for the governing attribute to find your modified skill rank, and then, depending on the circumstances, the game either adds a random number between one and 20 to that rank or simply adds 20 to determine whether or not you succeeded at your task.
The difference between the dice roll and the simple addition of 20 is known as the "take 20" rule: if your character has a theoretically unlimited amount of time to pick a lock, for instance, then their chance of success are going to be much better than that of a character who's attempting to pick the same lock while dodging blaster fire. For the purposes of the game, demolitions and security are the only two skills that are consistently subject to the "take 20" rule, so if you wish to disable a mine, or pick a lock, you'll want to make sure you make your attempt outside of combat.
If the final number that the game generates is equal to or above the DC of the task, then you've accomplished your mission; if it's below, then you failed in some way. Some tasks will allow you to try them multiple times; many, most notably those relying on the persuasion skill, are one-time-only opportunities.
It's important to consider, when making a character, that not all classes are equally adept at all the skills. A soldier is obviously not going to be as useful as a scoundrel when you're confronted with a locked door, and by the same token, you probably wouldn't want a scoundrel looking you over when you need to have a combat wound treated. These congenital deficiencies are represented in-game by the notion of "cross-class skills." Each class has certain skills that they excel at; these are listed in the Class profiles section. These skills are purchased with skill points at a one-to-one ratio. Unfortunately, the cross-class skills, i.e. those that your character just wasn't trained in, are difficult to learn, and are thus much less efficient to improve, requiring two skill purchase points for each single-point upgrade to the actual skill.
Lastly, there is a limit to how high you can raise your rank in a skill. For class skills, this limit is your experience level plus three, resulting in a maximum limit of rank four when you begin the game. For cross-class skills, the limit is half of the limit for your class skills, rounded down, so that, at experience level 4, your upper limit for a cross-class skill would be rank three (experience level four + three equals seven, divided by two is three and a half, which is rounded down).
Computer Use
Modifier: intelligence
Class skill: scout
Luckily, KOTOR comes before the time in the Star Wars universe when a Scomp Link interface like the one R2-D2 possesses was necessary to hack into computer systems. As such, your human character will be able to droidishly override the default programming of computers you encounter along your adventure, provided you have the skill necessary to use the computer "spikes" which act as disposable hacking tools. Each task that can be accomplished with a given computer requires a certain number of spikes, but the computer use skill reduces the number of spikes necessary for a job by one for every four points of proficiency you possess in the skill. Unfortunately, this makes computer use a rather point-hungry skill to upgrade, since you won't necessarily see any benefit from adding less than four skill points, so this is a skill you may want to consider going all-in on, and pumping as high as possible, or simply avoiding it and hoping you have a hacker NPC teammate along when you really need one.
Truthfully speaking, computer use can be disregarded as a serious choice for your skill points, at least for your PC. While there are some occasions where the ability to reprogram all of the droids in an area to fight alongside of your party is useful, the designers have carefully made sure that computer use is never a required skill for passing through an area; thus, there's never any situation where the ability to hack a computer is absolutely required, or will accomplish anything that can't be achieved with the use of brute force, or the security skill. If you have extra skill points hanging around, computer use might be useful as a last resort, but even the weakest characters will rarely find it necessary to resort to hacking to get through an area.
Demolitions
Modifier: intelligence
Class skill: soldier, scoundrel
Every so often, you'll encounter traps in KOTOR. Sometimes you won't see them coming, in which case a high demolitions rank won't be very helpful, but if you do manage to spot a mine in your path (using the awareness skill), you'll need to have some measure of demolitions proficiency in order to disarm it. You can set a mine that you have bought or found by making a check against the DC of the mine, which is either DC 15, DC 20, or DC 25, with the higher difficulties being, of course, the most powerful mines (which are usually used to guard the most valuable locations and items). When you wish to disarm a mine, you add five points to the DC of the task; if you want to both disarm the mine and recover it so that you can use it later, you'll need to add 10 to the DC. Luckily, mine disabling falls under the "take 20" rule: if you have a theoretically unlimited amount of time to perform an action, you'll be able to assume that your roll on the DC check is always a 20, the best possible result. This means that, when you attempt to disarm or recover a mine when your party is not in combat, you'll stand a pretty good chance at doing it. Unfortunately, the high DC of the more difficult mines still makes demolitions another skill that's unwieldy for dabblers; if you don't have a high enough Intelligence modifier to give you a reasonable chance of succeeding on a DC of 25 or more, you may wish to leave the bomb squad heroics to your teammates. They won't mind a bit.
Using mines in an offensive capacity is rarely useful, though when it does work, you can sometimes find the skill single-handedly killing off an opponent that three party members combined can't defeat. (This can come in fairly handy towards the *cough* end of the game.) You don't find quite enough mines to make this a consistently viable approach to combat, though, and while your teammates cannot accidentally trigger your own mines, they do seem to take a peculiar kind of glee in running towards your opponents and attacking them before the enemies walk over your mine field. In order to properly use mines, then, you'll need to: be able to spot your enemies from a distance away (or have died and reloaded, and thus know where they are or which door they're behind); go into solo mode and plant the mines with your other party members far enough away so that they don't spot the enemy and go hostile; get one of the enemies to spot you; then run back across the mines and wait for your foes to blow themselves up. In short, it's often a little more work than it's worth, but it when it does work, it can sometimes single-handedly win a difficult battle for you.
You cannot use the demolitions skill unless you've achieved a skill rank of at least one.
Stealth
Modifier: dexterity
Class skill: scoundrel
While scoundrels are generally ill-equipped to deal with hordes of enemies, the stealth skill gives them a bit of an edge against their foes, by allowing them to sneak past patrols unmolested, hack into computer systems that are behind enemy lines, or plant mines in the midst of a group of enemies. Activating stealth requires a personal camouflage unit, which is provided to a scoundrel at the beginning of the game; more advanced units, which lend a positive modifier to your stealth rank, can be purchased or found later on. Once you activate stealth mode, your character will disappear from sight, allowing you to travel where you wish, provided you don't run across an enemy with keen eyesight. Every time you pass through an enemy's line of sight, that enemy will have the opportunity to make an awareness check; if it succeeds, you can expect to find yourself in the crosshairs within seconds. Your NPC teammates will not join you in stealth mode, nor will they follow you while you're invisible, so if you do find yourself suddenly exposed, they may be too far away to lend you support. If you pump your stealth stat high enough, though, and pair it with state-of-the-art camo gear, you should be as hard to spot as a Dianoga in a trash compactor.
Again, as with some of the other skills here, stealth is a somewhat marginal talent that is not universally useful. Since you're forced to walk while stealth mode is active, using it slows the pace of the game down considerably, but if you're deeply involved in role-playing your character, you may find some interesting solutions to puzzles via this skill.
Awareness
Modifier: wisdom
Class skill: soldier, scout, scoundrel
Awareness allows all of the classes in the game a chance to spot mines that are in your path or that exist as part of a trap on a door or chest, or expose an enemy that has entered stealth mode. Spotting mines is fairly handy, since you can recover and sell them for extra cash, but seeing stealth characters won't be a consideration for your party, since the only enemies that you encounter that are capable of stealth are apparently immune to awareness. It probably isn't worth your while to pump awareness up too high; it is, after all, a somewhat passive skill that merely seeks to let your character avoid damage. Since your characters cannot die outside of combat, and since there are easy ways to heal your characters, the avoidance of mines shouldn't figure too highly on your list of skill priorities.
Persuade
Modifier: charisma
Class skill: scoundrel
Having a good blaster at your side won't always get you where you need to go; in fact, since you're unable to indiscriminately cut down the foolish peons who block your way, you may sometimes find that a silver tongue will gain you access to hidden areas and optional quests more reliably than brute force. persuasion is a dialogue-based skill, and isn't useful in every situation, but the ability to win people over with sheer charm will often open up new options and better quest endings for a persuasive character, or allow you to avoid combat with a tentative or gullible opponent. Only scoundrels are able to truly excel in persuasion, but unfortunately, the computer-controlled character creation process seems to discount the usefulness of this skill: if you choose to make a quick character scoundrel, or let the game select the recommended skills in the custom character design process, you will wind up with exactly zero points in persuasion. This isn't necessarily a bad thing, since persuasion isn't immediately useful when you start the game, but you'll want to be sure to pump this skill up at your first level-up to ensure that you'll be able to use it by the time you reach the first planet. Also, keep in mind that only your PC can use persuade; none of the NPC members of your party are apparently gifted with a way with words. This alone makes advancing this skill doubly important for scoundrels.
Repair
Modifier: intelligence
Class skill: scout
Repair is similar to the computer use skill in that the difficulty of successfully repairing a damaged machine or droid is not based on the use of a DC check. Rather, the repair skill merely reduces the number of parts required to repair a broken droid, allowing you to save one part for every four ranks you possess. It's worth pointing out that, as you progress further into the game, most of the broken droids you encounter will require multiple individual repairs before they're restored to working order, and since you save parts from each repair, you can sometimes save four or five parts per droid for every four levels you possess in repair. Or you can just skip repairing the droid, and make up the couple hundred experience you miss out on by killing one extra enemy somewhere along the line. Repairing droids can be amusing every once in a while, but the occasions where they accomplish what your party alone could not are, well, non-existent, at least in this game.
Repair also governs the amount of vitality that your droid NPCs gain when they use repair kits on themselves to recover from damage.
Security
Modifier: wisdom
Class skill: scoundrel
What would a BioWare RPG be without lockpicking? Security is the euphemism used for that eternally useful skill in KOTOR; characters with at least one point in security can attempt to disable the many locks that you'll encounter throughout the game, with higher skill required for more difficult locks. This skill doesn't necessarily require equipment, although you will encounter lockpicks (excuse me, "security spikes") throughout the game, which can add a positive modifier to a lockpicking attempt. All of these spikes are one-use-only, unfortunately, and are removed from your inventory after you add their modifier to an attempt to breach security (whether the attempt was successful or not).
Of the three tech-oriented skills, security will generally be the most desirable. Again, the game has been carefully crafted to ensure that you never have to have a character with a high security rank in your party, through the use of keys and passcards and such, but most areas will have numerous locked stashes of items that you will miss out on without at least one character with sufficient security to open them. On the other hand, you will be able to make do without security if the locked item is susceptible to bashing; to see if this is possible, use the d-pad to cycle up or down from the "Open" command on your action menu. If the attack icon appears when you have a locked item in your reticule, you can simply hack it open instead of picking the lock. This works on a surprisingly high number of locked doors and containers, but keep in mind that many of these bashable items have a very high damage resistance, meaning that it might take you a very long time to open them without the security skill.
Treat Injury
Modifier: wisdom
Class skill: soldier, scout
The best armor in the galaxy won't prevent your character from taking damage every once in a while. You have a finite amount of vitality, and this precious commodity does not recover by itself over time; you'll either need to find a doctor to repair your wounds, or consume a medpac to gain back your health. The treat injury skill simply adds itself to the amount of vitality you would normally gain from a medpac; this amount can be further increased by using advanced medpacs or life support packs.
Players who intend to become Light Jedis would do well to keep in mind that the cure and heal Force powers essentially replicate the effects of medpacs, and have the bonus of being reusable, since your Force gauge will gradually replenish itself over time. If you plan to focus on using Force powers, you may want to tough out the early sections of the game without over-investing in treat injury if the skill will become less useful when you gain the ability to heal yourself with the Force. On the other hand, soldiers and those who wish to become Dark Jedi will probably want to pump their treat injury skill quite a bit, since it will heal them more than their Force powers will be able to.
Feats
Encompassing a broad variety of specific abilities, feats are used to further specialize a character, largely through customizing the way you conduct yourself during combat. While not all feats are combat-oriented, the majority are, and your choices here will determine what weapons and armor your character can use, as well as any special attacks they can use during battle.
Feats can be upgraded; once you possess both a basic feat and whatever prerequisites are required, and obtain a feat purchase point at a level-up, you may advance that feat to the next level, which allows you to obtain more bonuses to the special ability that the feat affords you. Some feats, such as armor and weapon proficiencies, are cumulative, but most are not, so that achieving the second level in a feat replaces the bonuses that the first level gave you, rather than having them add together.
Passive Combat Feats
For the money, feats that are passive in combat are usually more desirable than those that require activation. Although BioWare has done an admirable job in streamlining the d20 combat system for a console, and although you can always pause at any time you wish, combat can still become a bit hairy and complex with multiple combatants. Since passive feats are always active, working behind the scenes to make your characters better warriors, they ease the burden of micromanagement somewhat.
If you're the type of person who likes to micromanage your PC and let your other party members do as they wish, then you might want to ensure that your NPC party members are selecting passive feats when they level up, rather than letting the game decide to give them active feats. NPCs will use feats as part of their default AI, but not necessarily. It's usually a good idea to load up on the passive feats that match your character's preferred weapon or weapons, and save the active feats for later in the game.
Weapon Proficiencies
(Blaster Rifle, Blaster Pistol, Heavy Weapons, Melee Weapons)
Since combat is such a core aspect of the KOTOR gameplay, every character will want to pick a weapon type (if not two) and advance its proficiency to its second rank. Even if a mere +1 to hit doesn't sound impressive, you have to consider that, over the course of the game, your characters will engage in thousands of rounds of combat, so even a five percent larger chance to connect with a weapon will add up to a large savings in combat time, not to mention medpacs, since some enemies will undoubtedly die before they can deal damage to you due to your improved accuracy.
The third ranks of weapon proficiencies, called weapon specializations, are a unique case, since they are only available to characters of the soldier class. When a character specializes in a weapon, he or she adds two damage to the total damage dealt on the blow.
For those of you planning to use the ol' laser sword later on, keep in mind that the bonuses gained from advanced ranks of melee proficiency do not apply to lightsabers; that weapon has its own proficiency that you'll need to advance in.
| Rank | Prerequisites | Effect |
| Proficiency | Level 1 | Allows use of weapon type with no penalties |
| Weapon Focus | Level 4 | Attacks with weapon type gain +1 attack |
| Weapon Specialization | Level 8 | Successful hits with weapon type gain +2 damage |
Armor Proficiency
A piece of body armor cannot be used by a character unless they have a proficiency for armor of that weight class. Pretty simple, really. Scoundrels start with only the light armor proficiency, but keep in mind that heavier armor generally reduces or negates the dexterity bonus to defense, so if you have a high dexterity stat, you may as well find a great piece of light armor and use that. Also note that many Force powers are not useable while you are wearing armor; this fits thematically into the notion that scoundrels will usually become the most powerful Force users once your character becomes a Jedi. Since feats are somewhat precious commodities as it is, it's probably for the best that you use the default proficiencies that your character starts with, rather than buying a proficiency for higher-level armor that might not be useful later in the game.
| Rank | Prerequisites | Effect |
| Light | Level 1 | Allows use of light armor |
| Medium | Level 1 | Allows use of medium armor |
| Heavy | Level 1 | Allows use of heavy armor |
Two-Weapon Fighting
You might as well just call this "dual lightsabers," because that's probably all anyone will want to use it for. Two-weapon fighting gives you the opportunity to wield a weapon in each of your hands with a reduction to the normal penalty. Although you can use this feat in conjunction with dual blaster pistols, it's most beneficial, or perhaps just cooler, to use it with dual melee weapons, of which, of course, the lightsaber is the most famous example. Unfortunately, the attack penalties are still absolutely horrendous at the first level, so unless you want your enemies to think that you got weapons training from Greedo, you'll probably want to stick with a single weapon until you reach the second rank of this feat. Note that the use of a "balanced" weapon in your off-hand slot can reduce the attack penalty of your main-hand weapon, so be on the lookout for balanced swords and pistols during your travels. Lightsabers are not balanced; you'll need to use a short lightsaber in the off-hand if you want to reduce your main-hand penalty.
| Rank | Prerequisites | Effect |
| First Rank | Level 1 | Attack penalties: -6 (main hand) / -6 (off-hand) |
| Improved Rank | Level 4 | Attack penalties: -4 (main hand) / -4 (off-hand) |
| Master Rank | Level 8 | Attack penalties: -2 (main hand) / -2 (off-hand) |
Conditioning
Conditioning adds a bonus to every saving throw your character makes. Saving throws are used to reduce or negate damage from certain sources, such as explosives and harmful Force powers. A single +1 to saving throws is unlikely to have an immediate impact on your chances of survival, but it will average out to a greater likelihood that a character will live through a powerful attack somewhere along the line.
| Rank | Prerequisites | Effect |
| First Rank | Level 1 | +1 to all saving throws |
| Improved Rank | Level 4 | +2 to all saving throws |
| Master Rank | Level 8 | +3 to all saving throws |
Implant Level 1
This feat allows the character to use implants, which can have drastic effects on a character's statistics and attributes. Since most implants are used to increase a single attribute by one for each level of the implant, gaining a level in this feat can be thought of as gaining another attribute point to allocate (assuming you can find an implant that modifies an attribute that will actually be useful to you). Scouts gain all three levels of this for free as soon as they're available, but the other classes would be wise to consider this as a back-up feat if nothing else seems to pop out at you. This feat is cumulative, so if you achieve the third rank, you can use level one, two, or three implants.
| Rank | Prerequisites | Effect |
| First Rank | Level 1 | Allows use of level one implants |
| Improved Rank | Level 4 | Allows use of level two implants |
| Master Rank | Level 8 | Allows use of level three implants |
Toughness
Toughness has two separate effects, depending on the rank that you advance it to. The first rank and the third rank each cumulatively add one to your vitality total for each level of your character; if you achieved the first rank of this feat upon reaching level 12, for instance, your character would instantly gain 12 vitality, and would gain an extra health point at each level-up thereafter. The third rank doubles the point bonus, meaning that if you achieved the third rank of this feat at level 12, you'd still possess the 12 extra vitality from the first rank, but also instantaneously gain another 12 points. Every time you leveled-up from then, you'd gain two points of vitality.
The second rank differs from the first and third in that it reduces the damage dealt to you by two points. This applies to each individual attack, and works against any form of damage, not just physical. While the extra health from ranks one and three will be helpful to any character, this rank is of most use to melee-range characters, since they will often be taking damage from multiple enemies at the same time, or will be the target of opponents that can attack multiple times per turn. The damage reduction affects every attack from an opponent, so if an opponent with two weapons hits you twice, your character would take four less damage during that round.
This feat is of somewhat universal utility; it fits almost any character, since everyone takes damage. It's perhaps most useful for the aforementioned melee fighters, since they will be the ones who will generally be targeted by the most enemies during any given fight.
| Rank | Prerequisites | Effect |
| First Rank | Level 1 | Adds 1 vitality per level (retroactive) |
| Second Rank | Level 4 | Reduces all damage taken by 2 |
| Third Rank | Level 8 | Adds 1 vitality per level (retroactive) |
Scoundrel's Luck
As you might've guessed from this feat's name, it is only available for the scoundrel class. (So where's the feat called scout's honor?) To compensate for the scoundrel's discomfort when wearing medium or heavy armor, scoundrel's luck simply adds a bonus to defense that is always active, even when the character is wearing no armor. This is an automatic feat that scoundrels gain for free upon hitting the appropriate level.
| Rank | Prerequisites | Effect |
| First Rank | Level 1 | +2 to defense |
| Second Rank | Level 6 | +4 to defense |
| Third Rank | Level 8 | +6 to defense |
Dueling
If you fancy your character to be the model of the traditional Jedi, or perhaps one of Han Solo's progenitors, then the dueling feat will be right up your alley. It's something of an alternative to the Two-weapon proficiency, but instead of reducing penalties, dueling simply takes a good thing and makes it better. If you use a single-handed weapon (such as a lightsaber, sword, or blaster pistol), and keep your off-hand free, then the dueling feat will add a bonus to both your attack and defense. You won't deal any extra damage, but you will last longer in battle and will be able to more easily strike your opponents. This feat is one that you'll want to consider giving to your Jedi NPCs as soon as you get an opportunity; few of them will have enough spare feats to excel in Two-weapon fighting, so a single lightsaber and this feat is a good compromise between defense and offensive capabilities.
| Rank | Prerequisites | Effect |
| First Rank | Level 1 | +1 to attack and defense |
| Second Rank | Level 4 | +2 to attack and defense |
| Third Rank | Level 8 | +3 to attack and defense |
Sneak Attack 1
Only scoundrels can use the sneak attack feat, and indeed get a new rank in it for free at every other level-up; it corresponds roughly to the backstab attack of a thief character in traditional Dungeons & Dragons. When you successfully hit with a sneak attack, you add damage to the blow, but there are conditions. Since it's a sneak attack, you have to ensure that your quarry either doesn't know the blow is about to arrive, or simply can't do anything to defend himself. It can be applied when you are attacking an enemy from behind, if your target is stunned or immobilized, or if the scoundrel is in stealth mode. Since attacking automatically brings you out of stealth mode, you'll only get one shot at a sneak attack before your target is alerted to your presence. Of course, if you kill him or her in one blow, you won't have to worry about that.
The most useful application of sneak attack comes in conjunction with Force powers that stun opponents; since these powers are cheap and generally quite effective, you can have one of your party members stun an opponent, while your scoundrel proceeds to wipe them out with just a few hits.
| Rank | Prerequisites | Effect |
| First Rank | Level 1 | Adds 1-6 damage to a successful hit |
| Second Rank | Level 3 | Adds 2-12 damage to a successful hit |
| Third Rank | Level 5 | Adds 3-18 damage to a successful hit |
| Fourth Rank | Level 7 | Adds 4-24 damage to a successful hit |
| Fifth Rank | Level 9 | Adds 5-30 damage to a successful hit |
| Sixth Rank | Level 11 | Adds 6-36 damage to a successful hit |
| Seventh Rank | Level 13 | Adds 7-42 damage to a successful hit |
| Eighth Rank | Level 15 | Adds 8-48 damage to a successful hit |
| Ninth Rank | Level 17 | Adds 9-54 damage to a successful hit |
| Tenth Rank | Level 19 | Adds 10-60 damage to a successful hit |
Active Combat Feats
While passive feats remain working in the background of the game all of the time, active feats require player input during a battle before they'll be used. These generally allow you to perform an attack that is enhanced in some way, although they will also carry a temporary penalty. There is no activation cost for active Feats, so you can use them and abuse them as much as you like, though working around their penalties will require some strategy depending on your foe.
Critical Strike
Stunner! The primary benefit of critical strike is that it has a good chance of stunning an enemy for a short duration on a successful melee attack (and only melee attacks; critical strike doesn't work with ranged weapons), if they fail a saving throw. That saving throw, however, is checked against a DC that consists of the attacker's experience level plus the attacker's strength modifier, so at low levels, you won't stun an opponent more than 1 time out of three at best. Once you gain 10 levels or so, and gain bonuses to your strength through implants or other items, you will stand a much better chance of incapacitating opponents.
In addition to the stunning effect, critical strike doubles the chance that a hit will result in the possibility of a critical hit. If a weapon would normally perform a critical hit on a roll of 20, for instance, a critical strike will increase that range to 19-20. For best results, try to use this feat with a weapon that already has a critical range of 19-20; the range will be increased to 17-20, giving fully 20% of your attacks the chance to see their damage doubled if they connect. At higher ranks, this feat triples or even quadruples the chances of a critical strike, meaning that, at master rank, a weapon with a natural critical chance of 19-20 will have a 80% probability of a critical hit for each attack. (Note that, due to the mechanics of the critical hit, this doesn't necessarily mean that 80% of your attacks will do double damage. See the glossary entry for "critical hit" to get a bit more in-depth on this topic.) Against some powerful foes, the critical range will actually exceed the range needed for a hit, meaning that 100% of your successful hits will have a chance for double damage.
The drawback is that, when you use a critical strike, your defense is lowered by 5 points for a few seconds. This is obviously a substantial penalty, which balances the powerful effect of critical strike, and should make you wary of using this skill when dealing with multiple enemies, since they'll have a much better chance of hitting you and causing massive vitality damage.
| Rank | Prerequisites | Effect |
| First Rank | Level 1 | Chance to stun enemy; doubles critical strike range |
| Improved Rank | Level 4 | Chance to stun enemy; triples critical strike range |
| Master Rank | Level 8 | Chance to stun enemy; quadruples critical strike range |
Sniper Shot
Sniper shot works exactly the same as critical strike, except that it only works with pistols and other ranged weaponry. Also, when calculating the chance that the target will be stunned, the DC is calculated by your character's level plus the modifier of their intelligence attribute, instead of the strength stat.
| Rank | Prerequisites | Effect |
| First Rank | Level 1 | Chance to stun enemy; doubles critical strike range |
| Improved Rank | Level 4 | Chance to stun enemy; triples critical strike range |
| Master Rank | Level 8 | Chance to stun enemy; quadruples critical strike range |
Flurry
Sometimes quantity counts more than quality; at least, that's the premise behind flurry, which substitutes two poor attacks for one regular attack during a single round. Instead of taking a single attack during a round, flurry allows you to make two attacks, each with a penalty to your attack number, and also lowers your defense for three seconds, so that one of your opponents will usually get in a cheap shot. Like critical strike, flurry is only available for melee weapons.
Flurry is the active combat feat to increase to its highest rank. At low levels, you'll want to have your character pursue passive feats that are always active, but when you begin looking for a useful active feat, this is the one that you'll almost always want to max out. Critical strike has its uses, but the defense penalty is a tremendous drawback, while power attack is, well, fairly useless in most cases. Flurry is just plain better than either of those feats when you compare all of them at their highest ranks. More attacks is a surefire way of increasing the rate that you deal out damage, and the attack penalty at the second and third ranks is negligible, as is the defense penalty. Once you hit the third rank, especially, you will be able to essentially replace your regular attack with a queue full of flurries.
Note that flurry is only good for one extra attack per turn; if you use two weapons at once, the weapon in your main hand will be granted the extra attack, so that you'd have a total of three attacks during a round. However, you can combine flurry with Force speed to gain even more attacks, so that a character with two weapons, master flurry, and master Force speed will have an incredible five attacks per round.
| Rank | Prerequisites | Effect |
| First Rank | Level 1 | Two attacks per round, both at -4 attack; -4 defense for three seconds |
| Improved Rank | Level 4 | Two attacks per round, both at -2 attack; -2 defense for three seconds |
| Master Rank | Level 8 | Two attacks per round, both at -1 attack; -1 defense for three seconds |
Rapid Shot
Rapid shot is essentially the same as flurry, except that it only works in conjunction with blasters or other ranged weapons.
| Prerequisites | Effect | |
| First Rank | Level 1 | Two attacks per round, both at -4 attack; -4 defense for three seconds |
| Improved Rank | Level 4 | Two attacks per round, both at -2 attack; -2 defense for three seconds |
| Master Rank | Level 8 | Two attacks per round, both at -1 attack; -1 defense for three seconds |
Power Attack
If you're using a melee weapon, then power attack can greatly increase the damage a successful strike dishes out, but it unfortunately reduces your attack bonus, rendering said strikes more difficult to accomplish. This is of minor use against powerful opponents, against whom you will need as high a chance to hit as possible, but against less significant foes, the extra damage can end skirmishes quickly. Note that there are diminishing returns as you add a third rank to this skill; if you find that the improved rank helps you kill foes quickly enough, you might want to save your feat point for something more utilitarian.
| Prerequisites | Effect | |
| First Rank | Level 1 | +5 damage per hit; -3 attack penalty |
| Improved Rank | Level 4 | +8 damage per hit; -3 attack penalty |
| Master Rank | Level 8 | +10 damage per hit; -3 attack penalty |
Power Blast
Power blast is essentially the same as power attack, except that it can only be used with a ranged weapon.
| Prerequisites | Effect | |
| First Rank | Level 1 | +5 damage per hit; -3 attack penalty |
| Improved Rank | Level 4 | +8 damage per hit; -3 attack penalty |
| Master Rank | Level 8 | +10 damage per hit; -3 attack penalty |
Passive Skill Feats
Some feats simply add bonus points to skills. These are not bad purchases if you simply can't find something worthwhile on the feats list, especially for soldiers, who will usually have very few skill points to allocate at each level-up, and who gain feats at a more rapid pace than the other classes. Scoundrels and scouts should usually be fine with the number of skill points they get at each level-up. The exception to this rule is for NPC party members; if you're the kind of player who tends to micromanage your PC and lets the other party members act on their own, you may want to give them more of these passive skills instead of loading them up on active combat feats that require you to manually switch over to the character and queue up an action. Note that these feats are definitely not cumulative; the bonuses you gain from the second rank replaces the bonus from the first rank, instead of adding to it, as does the bonus from the third rank. These additions allow you to exceed the maximum skill rank that's imposed by your experience level.
Caution
Caution gives a bonus to demolitions and stealth. If you really enjoy using your stealth skill to wander into an enemy position and set mines, then this might be something you'll need; most characters will want to stay away from this feat, though.
| Prerequisites | Effect | |
| First Rank | Level 1 | Adds +1 to each skill |
| Second Rank | Level 4 | Adds +2 to each skill |
| Third Rank | Level 8 | Adds +3 to each skill |
Empathy
Empathy boosts persuasion, awareness, and treat injury. Any class would stand a fair chance of finding this useful, since it is difficult for soldiers and scouts to increase their persuasion skill, and vice versa for scoundrels and treat injury.
| Prerequisites | Effect | |
| First Rank | Level 1 | Adds +1 to each skill |
| Second Rank | Level 4 | Adds +2 to each skill |
| Third Rank | Level 8 | Adds +3 to each skill |
Gear Head
For the techies among your party, gear head benefits the repair, security, and computer use skills. Perhaps uncoincidentally, these are the three skills that T3-M4 is most adept at, so you may want it to abuse this feat a bit in order to become your party's Swiss Army knife.
| Prerequisites | Effect | |
| First Rank | Level 1 | Adds +1 to each skill |
| Second Rank | Level 4 | Adds +2 to each skill |
| Third Rank | Level 8 | Adds +3 to each skill |
Jedi Feats
Jedi characters, including your PC, will get to choose from a few feats that are specific to the Jedi classes. In addition, each individual Jedi class will get a feat unique to it.
Jedi Sense
Jedi are renowned for their ability to recognize and adapt to the various threats that surround them in a battle situation, and are thus generally much more adept at defending themselves in a fight. The sense abilities, which you gain automatically as your Jedi character gains levels, simply add a bonus to your defense rating, helping to compensate for a Jedi's characteristic lack of armor. Note that, should your PC have been a scoundrel before becoming a Jedi, this addition is cumulative with scoundrel's luck
| Prerequisites | Effect | |
| Jedi Sense | Jedi Level 1 | +2 to Defense |
| Knight Sense | Jedi Level 6 | +4 to Defense |
| Master Sense | Jedi Level 12 | +6 to Defense |
Force Focus
The indomitable will of a Jedi consular can greatly affect the efficacy of his influence on weaker minds, and Force focus is the gameplay extension of this rather nebulous concept. Since consulars are much more in tune with the Force than are the other classes, their Force powers are generally considered to be much stronger and more difficult to resist. Thus, upon gaining skill in wielding the Force, they are able to channel some of their learnings into their powers, reducing the chances that an enemy will successfully make a saving throw. Like the other class-specific feats, this is a passive skill that is always working in the background
| Prerequisites | Effect | |
| Jedi Focus | Jedi consular Level 1 | +1 to DC of Force powers |
| Knight Focus | Jedi consular Level 6 | +2 to DC of Force powers |
| Master Focus | Jedi consular Level 12 | +4 to DC of Force powers |
Force Jump
When a Jedi decides to instigate battle, the results are usually something their opponent will remember for awhile. Of course, not all Jedi are temperamentally suited to aggressive acts, so only Jedi guardians will be capable of pulling off a Force jump, which catapults them towards a distant enemy, and allows the Jedi to cover the intervening ground in the blink of an eye. All Jedi guardians gain additional levels in this feat automatically when they reach the appropriate level.
In practical terms, Force jump gives the Jedi's first strike in battle a bonus to hit and to damage. Juhani, or the PC if you're a guardian, will use this feat automatically every time the conditions apply (you're using a regular attack, and the enemy is more than ten meters away). Sometimes it's not necessarily a good thing to have a single Jedi wandering into the midst of a group of enemies by themselves, however, so you might want to cancel this feat's use by selecting an active combat feat or Jedi power for that Jedi to use; Force jump won't activate in these circumstances.
Note that Force speed will interact with this feat quite favorably; if Juhani or your PC has master Force speed and master Force jump, they will get three attacks after they leap, each at +4 attack and +4 damage.
| Prerequisites | Effect | |
| Force Jump | Jedi guardian Level 1 | Jumping attack; +1 to attack and damage on first strike |
| Improved Force Jump | Jedi guardian Level 6 | Jumping attack; +2 to attack and damage on first strike |
| Master Force Jump | Jedi guardian Level 12 | Jumping attack; +4 to attack and damage on first strike |
Force Immunity
Jedi sentinels are reliant on their personality to resolve conflicts, and to bring together parties in discord so that resolution to their problems can be achieved. This focused determination lends them great mental stability, and protection against many of the mind-affecting afflictions that would cause a less disciplined individual to panic. Like the other class-specific feats, this is always active
| Prerequisites | Effect | |
| Immunity: Fear | Jedi sentinel Level 1 | Jedi is immune to all fear attacks and effects |
| Immunity: Stun | Jedi sentinel Level 6 | Jedi is immune to all stunning attacks and effects |
| Immunity: Paralysis | Jedi sentinel Level 12 | Jedi is immune to all paralysis attacks and effects |
Jedi Defense
Although all Jedi are trained in the proper use of a lightsaber upon initiation into the Jedi Order, it's a simple matter of fact that some of them are more adept at wielding the blade than others. What's more, it's one thing to put your fencing skills to the test; it's another thing entirely to become proficient at using a lightsaber to defend yourself against the nigh-endless number of overeager fools with blaster rifles looking to make their name by taking out a Jedi.
Thus, Jedi defense is a feat that can be pumped in order to give your character an edge when dealing with ranged attackers. Every time your Jedi is attacked with a ranged blaster attack, he or she will have a chance to deflect the blaster shot, or even reflect it back at the attacker (which you'll no doubt discover if you ever attempt to use a blaster rifle to take on a Dark Jedi master). All Jedi have a rudimentary ability to perform this kind of deflection, so that everyone picks up Jedi defense at their first level, but with practice, a Jedi can become much more adept at this skill, thus increasing not only the chance that they'll escape from an attack unharmed, but also turn the attack back upon the attacker. This skill relies on a dice roll that is compared to the opponent's attack roll.
This feat's main drawback is that it is not useful in every situation; when taking on mandalorians, you might save your character a bit of vitality, but when in combat with Tuskan raiders, or Wookiees, or, most importantly, Dark Jedi, this feat won't help you one whit. Even Sith troopers usually resort to melee combat when they're closed in upon. This isn't necessarily a bad feat, but something like flurry is more likely to be useful in every combat situation
| Prerequisites | Effect | |
| Jedi Defense | Level 1 | Able to block incoming blaster fire |
| Advanced Jedi Defense | Level 4 | +3 to your opposing roll |
| Master Jedi Defense | Level 8 | +6 to your opposing roll |
Weapon Proficiency: Lightsaber
Simple enough; increasing this lets your Jedi strike more accurately and deal more damage with a lightsaber, much like all of the other weapon proficiencies. Note that lightsaber specialization is only available to Jedi guardians
| Rank | Prerequisites | Effect |
| Proficiency | None | Allows use of weapon type with no penalties |
| Weapon Focus | None | Attacks with weapon type gain +1 attack |
| Weapon Specialization | None | Successful hits with weapon type gain +2 damage |
Jedi Powers
Oh, baby. Knights of the Old Republic has what is, hands-down, the best integration of Force powers into a Star Wars game we've seen yet. If you've seen it in the movies, you can probably do it; if you haven't seen it in the movies, well, you can probably do that, too.
While lightsabers might give your Jedi a slight edge in battle, you're going to need to call upon your powers to deal with the really beastly fights. Hell, since your Force points recover so quickly outside of battle, you'll be able to use your powers in every fight along the way. You'd think that this would make the game too easy, but let's just say that BioWare has planned accordingly: as you unlock the more advanced Force powers, your enemies will become tough enough to withstand quite a bit of damage, thus actually requiring you to use powers just to give yourself enough of an edge to actually win.
Powers are sorted into Light side, Dark side, and neutral classifications. No power is ever off-limits to you; you'll still be able to pump Force lightning, even if you're the most virtuous of Light side Jedi, but your unfamiliarity with the energies required to summon such harmful effects will take its toll on you; you'll be forced to use more Force points than would a Dark Jedi. On the flip side, Light side Jedi will burn fewer Force points when using a Light side power than would a neutral or Dark Jedi. At its most extreme, this effect will save you 50% on your friendly Force powers, but using powers from the other side of the Force will cost you 50% more than they would if you were neutral. Force costs remain constant when you upgrade a power, so previous iterations of a power will be erased from your combat menu once you do achieve a new rank.
Neutral Powers
Force Push
Force Cost: 10
Push and its derivatives don't deal much damage, but are useful for stunning and incapacitating your enemies. The higher two levels will enable you to quickly and easily knock down opponents, while often rendering them stunned for a round or so afterwards. Even though most powerful opponents won't be stunned or knocked over by this power, you can still render their lower-level goons as numb as the typical audience at a Michael Bay film, leaving you free to gang up on the bossman. Sadly, like that same audience at the Michael Bay film, they will awaken with a powerful desire to kill, so keep an eye on the stunned ones, and be sure to activate the power every other turn or so.

In your rush for the more destructive powers, you might overlook Force push, but discount the efficacy of stunning powers at your own risk. While a Force storm might knock a group of opponents down to half of their life, a Force wave is much more likely to stun a good number of them, which not only makes them easier to kill, but prevents them from dealing damage to you while they're knocked out. If you couple the stunning effects, the wide area of effect, and the low cost of this power, a case could be made for giving each of your Jedi characters three ranks in Force push: it's almost always useful.
| Rank | Prerequisites | Effect |
| Force Push | Level 1 |
|
| Force Whirlwind | Level 9 |
|
| Force Wave | Level 15 |
|
Force Suppression
Force Cost: 25
Restricted By Armor
Suppression sounds like a good deal on the surface: when used, it can strip your opponent of any number of beneficial powers that they may have activated on themselves, such as an aura, or valor. Unfortunately, for the purposes of the game, you'll only be able to remove speed and Force resistance from your opponents, since you won't be facing off against any Light side Jedi during your journey. What's more, very few Dark Jedi seem to actually use the speed skill, so that, at its core, this power is really only good for removing Force resistance. This is still important for Dark side Jedi, who will be relying on powers like drain life and Force lightning, but Light side Jedi won't have to worry as much about an enemy's resistance to their powers, since so few of them target opponents
| Rank | Prerequisites | Effect |
| Force Suppression | Level 9 |
|
| Force Breach | Level 15 |
|
Throw Lightsaber
Force Cost: 20
While throwing your lightsaber around might sound like a good substitute for a ranged attack for Jedi, in truth, the range restriction means that it will only be useful if your character is standing a ways away from his or her target, which means that this power is usually worse than useless in a duel. The damage is decent enough, but not so overwhelming that you would be better using this power than, say, reserving the Force points for an emergency cure.
This power may come in handy, though, if your PC is a former scoundrel who still settles matters with a ranged weapon. If you still use a blaster weapon in battle, then you're unlikely to be powerful enough to go toe-to-toe with a Dark Jedi, but even if you have Jedi teammates who are able to take down opposing Jedi, you'll still usually be unable to fire your weapon at the enemy, since half of them will just be deflected away anyway. In this instance, it might be worth your while to be able to throw your lightsaber, especially since it always hits. If you upgrade it to the second rank, then you'll be able to have your NPC party members engage Jedi at close range, while you sit back and send your lightsaber into the fray every round, with minimum risk to yourself.
| Rank | Prerequisites | Effect |
| Throw Lightsaber | Level 1 | Attacks one target more than five meters away; deals 1-6 damage for every two levels of your character |
| Advanced Throw Lightsaber | Level 9 | Attacks three targets more than five meters away; deals 1-6 damage for every two levels of your character |
Burst of Speed
Force Cost: 20
Restricted By Armor
It's difficult to underestimate the utility of speed. If all it did was allow you to travel through KOTOR's massive outdoor levels and towns at twice the speed, it'd probably still be worth spending a feat on. As it is, it doesn't just reduce your travel time; it also gives you a defense bonus, and, most importantly, gives you free, unpenalized extra attacks per turn. All other things being equal, there's nothing you can do to your character to make him or her more powerful in combat that's quite as efficacious as adding more attacks per round; that's why flurry and rapid shot are so useful, and that's why it's difficult to imagine why any Jedi wouldn't want to get burst of speed up to its third rank as soon as possible. Although it only lasts for 36 seconds, that's about as long as most normal encounters will last anyway, and against Jedi, it's a simple matter to queue up another speed once the first one fades away. Just be sure you don't attempt to activate speed while another instance is already active; this just wastes your Force points, since you can't extend an active speed by using the power again.
| Rank | Prerequisites | Effect |
| Burst of Speed | Level 1 | Double movement speed; +2 to defense |
| Knight Speed | Level 9 | Double movement speed; +4 to defense; 1 extra attack per round |
| Master Speed | Level 15 | Double movement speed; +4 to defense; 2 extra attacks per round |
Force Resistance
Force Cost: 20
Restricted By Armor
This is another of the limited-use Force powers, though this one is more useful than most other powers that fall into this category. Force resistance gives you a decent chance of resisting the effects of an opponent's Force powers when they attempt to use them on you; assuming both the attacking and defending Jedi are of the same level, the attacking Jedi's Force powers only have a 50% chance of working; if they fail, then they have no effect, although the attacking Jedi will still be drained of his Force points. Force immunity gives the defending Jedi an even greater chance of beating back the tides of an opposing Jedi's Force powers
| Rank | Prerequisites | Effect |
| Force Resistance | Level 9 | Opposing Jedi must make a roll of d20 + his level vs. DC of 10 + your character's level, or his Force powers have no effect |
| Force Immunity | Level 15 | Opposing Jedi must make a roll of d20 + his level vs. DC of 15 + your character's level, or his Force powers have no effect |
Energy Resistance
Force Cost: 10
The world of KOTOR is not a safe one, by any stretch of the imagination; in addition to the numerous hostile characters looking to bring your party low, you'll also have to contest with fire and other elemental attacks that may cut through your defenses, if you've only been planning for melee combat with other Jedi. Energy resistance is meant to be a bit of a bulwark against these forms of attack, since it actually renders your character partially immune to the effects of fire, ice, electrical, and sonic attacks. The first 15 points of damage that your character would take from one of these sources is ignored; the rest is dealt as normal. Note that the first rank of this power is, well, fairly useless; you'll be encountering far, far more energy-based damage than any of the types that Energy resistance protects you from, although it can help ward off the special attacks of some droid enemies. The second rank extends the benefits to your whole party, however, which makes it easier to resist area effect weapons, like mines or grenades. The beneficial effects of this power last for a full 120 seconds, so it's fairly easy to keep it on all of the time with a minimum of fuss, if you're in an area where you have to deal with environmental damage.
| Rank | Prerequisites | Effect |
| Energy Resistance | Level 1 | First 15 points of cold, fire, electrical and sonic damage ignored |
| Energy Immunity | Level 9 | Entire party ignores first 15 points of cold, fire, electrical and sonic damage; party immune to poison and disease |
Affect Mind
Force Cost: 0
"These aren't the droids you're looking for...move along." Now that we've gotten that very much obligatory quote out of the way, let's talk about affect mind, which is the Jedi equivalent of the persuasion skill, though both a bit more limited and a bit more powerful.
Like persuasion, affect mind opens up new conversation paths; you'll be able to dominate other people into feeling what you want them to feel, or force them into revealing information that they would otherwise wish very much to conceal. The catch, for the Light side, at least, is that these conversation paths are often interpreted as an act of aggression, and thus will wind up shifting you towards the Dark side, even if you're working towards the greater good. Persuasion, on the other hand, will never shift you in either direction, though it's generally more difficult to use persuasion than it is to use affect mind. Persuasion and affect mind don't always overlap; sometimes you'll be able to persuade someone of something that affect mind won't have an option for, and vice versa.
Affect mind, especially at its second rank, will almost always succeed, but even it has its limits, and if your subject is asked to do something that it would normally find repulsive or endangering, then you're likely to fail in your attempt. Also, like persuasion, this Force power is only available to your PC; giving it to your other party members is a waste.
| Rank | Prerequisites | Effect |
| Affect Mind | Level 1 | Allows you to use the force to persuade the weak-minded, opening up new conversation branches |
| Dominate Mind | Level 6 | More powerful version of affect mind |
Light side Powers
Cure
Force Cost: 25
No Effect on Droids
Utility is a blessed thing, and cure is perhaps the most useful of all of the Light side Force powers. The concept is simple: trade Force points to heal vitality of all of your non-droid party members. Simple is generally powerful, though, and it's definitely so in this case. Since Force points regenerate so quickly in KOTOR, you can quite easily use cure to heal your entire party after every battle, provided you give yourself a short resting period between conflicts. During battle, cure will automatically be used by the party members that are not under your direct control, provided they have sufficient Force points; this will probably save your life a few times, provided you actually do the smart thing and give your teammates the cure power
| Rank | Prerequisites | Effect |
| Cure | Level 6 | All party members are healed for 5 points + Charisma modifier + Wisdom modifier + level of casting character |
| Heal | Level 12 | All party members are healed for 10 points + Charisma modifier + Wisdom modifier + level of casting character; eliminates poison in all party members |
Force Aura
Force Cost: 15
Restricted By Armor
Another of the Light side's myriad defensive-oriented powers, aura is probably not quite as useful as some of the others, except for guardians and Jedi who are intent on always being in the thick of things. Its main drawback is that it only affects the character that uses it; it offers a pretty powerful benefit, but isn't meant for team players. If you breed one of your Jedi NPCs, or your own character, to be the prime battle workhorse at melee range, though, the defense modifiers, which stack with those of Jedi sense, can make you virtually untouchable by all but the most powerful opponents. The short duration of the power (20 seconds), though, makes this an all-or-nothing kind of power; if you want any ranks, you might as well get all three, and be sure to keep it active when you need it
| Rank | Prerequisites | Effect |
| Force Aura | Level 1 | +2 to defense and saving throws |
| Force Shield | Level 6 | +4 to defense and saving throws |
| Force Armor | Level 12 | +6 to defense and saving throws |
Force Valor
Force Cost: 20
Restricted By Armor
This power is roughly congruous to Force aura, except that it is a bit more general in application and affects all of your party members. For the 20 second duration of the power, valor will increase the attributes (strength, dexterity, etc.) and saving throws of all party members by a few points. Higher saving throws are nice, but the real benefit comes with the higher attributes. Each time an attribute hits an even number, you gain an extra +1 to every modifier that relies on that attribute. Thus, the +5 to all attributes that you gain from the third rank of Valor will mean that essentially every action you can perform will get a +2 or +3 modifier to it, whether it's an attack, a damage roll with a melee weapon, a defense check, a skill, or a Force power. Most Force powers, in fact, rely on both your charisma and wisdom modifiers, so that a Force wave initiated when under the influence of Master valor will get either a +4 or +6 to the DC. Heck, the bonus to your constitution alone will result in an immediate increase in vitality equal to at least two or three times your current level.
This is a great skill to initiate just before a tough battle, or when you have a single powerful foe cornered and are dueling to the death
| Rank | Prerequisites | Effect |
| Force Valor | Level 1 | Entire party gains +2 to all attributes and saving throws for 20 seconds |
| Knight Valor | Level 9 | Entire party gains +3 to all attributes and saving throws for 20 seconds |
| Master Valor | Level 15 | Entire party gains +5 to all attributes and saving throws for 20 seconds |
Stun
Force Cost: 20
No Effect on Droids
Fittingly, the Light side has few powers that inflict direct damage upon an opponent, instead focusing on disabling an opponent's defenses, allowing your characters to more easily damage or kill the enemy. Stun fits into this philosophy well; if the enemy fails his or her saving throw, they'll lose any dexterity bonuses to defense, and sneak attacks from your scoundrels will always work (assuming the attack hits), no matter from which side of the target they originate. Even so, stun doesn't make the jump into area-effectiveness until the third rank, so you might want to stick with Force whirlwind for large groups until you access stasis field at level 15. Stun does not work on droids; they get their own special stun droid power
| Rank | Prerequisites | Effect |
| Stun | Level 1 |
|
| Stasis | Level 9 |
|
| Stasis Field | Level 15 |
|
Stun Droid
Force Cost: 10
Since you don't run across quite as many droids as you do human opponents during your journey, it makes sense that stun droid would wind up being a bit more powerful than the regular stun power, but you could make the case that it actually goes a little too far: once one of your characters accesses the third level of stun droid, even the biggest and baddest of the mechanical monstrosities won't threaten you again. You see, unlike stun, destroy droid offers no saving throw to the stunning effect itself, so that anytime you use this power on a droid, it will have no choice but to shut down for a short period of time, while you and your teammates will, of course, be trying not to get flying metal in your eyes while ripping said droid to pieces. What's more, the power penetrates droid energy shields, rendering even the most powerful opponents to so much scrap metal for you to demolish.
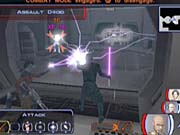
Bottom line: get at least one character to the third rank in this skill, preferably your PC, just so you'll always have it available. At the second and third ranks, the power is area-effect, enabling you to shut down a whole group of droids, turn to attack the human opponents, switch back to stun the droids again, and so on. Fights against droids alone are even more ridiculous; just queue up three destroy droids and almost any droid in the game will be dead by the time you need to queue anything else, since there's significant direct damage on top of the stunning effect.
| Rank | Prerequisites | Effect |
| Stun Droid | Level 1 |
|
| Disable Droid | Level 6 |
|
| Destroy Droid | Level 12 |
|
Dark Side Powers
The insidious and malevolent powers of the Dark side will be off-limits to players that are role-playing a Light side character. You'll still be able to use them, sure, but you'll be hitting a significant Force point penalty every time you do so when compared to comparably priced powers from the Light side of the Force. If you do play a Light side character, you'll want to let Jolee be your quasi-Dark Jedi for the duration of the game; since he's relatively neutral on the Force alignment scale, he can use the powers of either side without penalty, and since he's a Jedi consular, he'll have a deeper well of Force points than any other of your party members.
Drain Life
Force Cost: 20
Restricted By Armor
No Effect on Droids
To reflect the Dark side's selfish and destructive nature, characters of an evil bent will not be easily able to heal themselves through the Force; instead, they'll be required to steal the life from their enemies to revivify themselves, like a vampire. The life gain is decent, but combat-oriented Dark Jedi may still want to let their Light side party members cure them every now and again, as the damage range is 10--40. Even a heal from a 20th level Light side Jedi probably won't restore 40 vitality, but it will always restore at least 30 health; if you're in a heated battle and need to restore your life, on the other hand, drain life might restore just 10 vitality, which is almost never going to be sufficient. In short, it's a bit too unpredictable.
At its second rank, against multiple enemies, death field has a much better chance of getting you back a high amount of vitality, since it gives you life equal to the highest amount of damage that's dealt
| Rank | Prerequisites | Effect |
| Drain Life | Level 9 |
|
| Death Field | Level 18 |
|
Shock
Force Cost: 20
Restricted By Armor
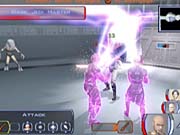
Now we're getting down to it. Of the Dark side's powers, shock and its upgrades are the only ones intended to deal massive amounts of damage to a large number of opponents. While the other powers can sometimes affect large groups, they are intended to simply weaken your foes or make them easier to kill; shock's reason for existence is to deal the killing blow itself, and kill it does, especially at its highest rank. Unfortunately, there is no stunning effect associated with the damage, so even though you'll likely kill a few opponents with a high-level shock, you'll still have to deal with fully mobile foes afterwards.
| Rank | Prerequisites | Effect |
| Shock | Level 1 |
|
| Force Lightning | Level 9 |
|
| Force Storm | Level 18 |
|
Fear
Force Cost: 10
No Effect on Droids
Fear is one of the Dark side's more potent effects, although it may not appear so on the surface. Fear is a counterpart to the Light side's stun power, though it is marginally weaker, since the Dark side's emphasis is on destruction, rather than mere stunning effects. The main difference is that fear's upper ranks feature area-effect stuns at a distance, meaning you can use horror or insanity on your enemies before closing in, whereas stasis field works best when you are surrounded by enemies. If you can hit a few of your opponents with insanity before closing to lightsaber range, you'll be able to divide and conquer that much more easily; another good use for the distanced stunning effect is to pair it up with grenades, which are difficult to use against many Jedi enemies, since they will run towards you as soon as you're spotted. The fact that there is absolutely no effect if the targets make their will save is an obvious strike against this power, though.
| Rank | Prerequisites | Effect |
| Fear | Level 1 |
|
| Horror | Level 6 |
|
| Insanity | Level 12 |
|
Wound
Force Cost: 15
No Effect on Droids
Wound is one of the Dark side's weaker powers at low levels, due to the somewhat tepid damage, short duration of the stun effect, and the fact that it's only capable of targeting one opponent. Once you reach kill, however, you'll obtain a fairly decent method for eliminating wounded opponents. Since the damage dealt by kill is based not on random dice rolls, but on the opponent's maximum vitality, it will always kill an opponent outright if used when that enemy is at less than half of their maximum health. The fact that you can use any rank of this power while wearing armor is also a plus.
| Rank | Prerequisites | Effect |
| Wound | Level 1 |
|
| Choke | Level 9 |
|
| Kill | Level 12 |
|
Slow
Force Cost: 15
No Effect on Droids
Getting tired of powers that are decent only at their highest rank? Unfortunately, you find no respite in slow, which is another power that affects only a single target and has no effect on the lower ranks if that target succeeds in his or her saving throw. The actual effects of the spell on the first two ranks are somewhat laughable: very few common enemies will last 21 or 30 seconds in combat against your party, even if their stats are unaffected by slow, and the more powerful enemies are exactly the ones that will usually make a saving throw in a crunch. Plague, the third rank, is somewhat more useful, if only because there is no saving throw, which makes it slightly more useful against bosses (at least, those that don't activate Force immunity as soon as your fight begins).
| Rank | Prerequisites | Effect |
| Slow | Level 1 |
|
| Affliction | Level 6 |
|
| Plague | Level 12 |
|
Party Members
Carth Onasi
Initial Stats
Class: Soldier
Strength: 13
Dexterity: 16
Constitution: 12
Intelligence: 12
Wisdom: 10
Charisma: 12

If you need something (or someone) blasted to bits, Carth is probably your man; his ability to dual-wield blaster pistols will make him a handy ally during the earliest portions of the game. This has less to do with any special aptitude for battle, however, than with the fact that he's your only ally for the first few hours of gameplay. After Mission and Zaalbar join your party, Soldier characters will want to kick him out to make room for that duo; Scoundrels will want to keep Carth for a bit longer, but after you rescue Bastila, Carth will probably take a permanent back seat for the rest of the game.
That isn't to say he's not a good character to have along in a fight; he deals decent damage with his pistols, since he gets two attacks per round, and his soldier vitality will help him last a bit longer against the tougher opponents you meet. It's just that he's good, not great, and there are other NPCs that perform the ranged attack function better than Carth does.
Attributes: Pump dexterity at every fourth level. If you don't plan on using Carth after Taris, or are saving levels and desperately need someone to engage your enemies for you, give him a point in strength and let him go crazy at point-blank range; just don't expect him to excel in this function.
Skills: Carth gets the same dismal skill progression that's common to all soldiers. The only thing you should ever need is treat injury; you'll be relying heavily on medpacs until you find Bastila.
Feats: Carth will get more feats than most of your other NPCs, luckily, so use these to maximize his effectiveness early in the game. He'll start out with decent feats to augment his dual blasters; what you should pick after those are feats that will give him a standard boost to his combat efficiency, like toughness. Active combat feats aren't a good idea, since most of them will reduce his attack, and he'll already be taking big penalties for dual-wielding weapons.
Bastila Shan
Initial Stats
Class: Jedi Sentinel
Strength: 12
Dexterity: 18
Constitution: 12
Intelligence: 10
Wisdom: 12
Charisma: 15
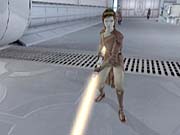
Bastila, being the first Jedi you run across, will be an important part of your escape from Taris. Since she's of the Jedi sentinel class, she's a more balanced Jedi than either Juhani or Jolee, but balanced doesn't always mean better.
Bastila is probably your best choice for a Jedi party member if you find yourself needing to bring along T3-M4 or Mission for their skills; she's fairly good at lightsaber combat, and has a decent Force point reservoir to unleash powers on your opponents. If you are less interested in skills and more interested in combat efficiency, though, you're probably going to want to take both Jolee and Juhani along with you; Juhani is more powerful in combat than Bastila, while Jolee is able to use more Force powers (while not lagging too far behind in lightsaber skills).
Attributes: Just pump dexterity whenever possible. It may look tempting to ease charisma over to 16, but Bastila will rarely use offensive Force powers, and thus will not need to increase the DC of said powers.
Skills: Bastila's only class skills are treat injury and awareness, neither of which is very useful to her. Awareness is probably the better of the two, but you might want to think about giving her a cross-class skill with her points, such as security.
Feats: Get lightsaber focus to begin with; the dual-bladed lightsaber you'll be running around with on Taris will hurt Bastila's attack rating. Note that Bastila starts out with a rank in Two-weapon fighting, so if you're intent on getting one of your characters to fight with two lightsabers, she'll be a good choice.
Force Powers: Cure is definitely a good place to start in terms of powers, along with stun droid and speed, if only to make getting around Taris a little less time-consuming. You'll likely be off Taris before you access whirlwind, but that's still a worthy upgrade when it does come along.
Mission Vao
Initial Stats
Class: Scoundrel
Strength: 10
Dexterity: 16
Constitution: 12
Intelligence: 14
Wisdom: 11
Charisma: 10

Mission fills out KOTOR's video-game quota for annoyingly-voiced teenage girls. Though the character has a lot of brio, it's this spunky attitude and oddly false vocal quality that makes for more than a few nerve-grating conversations as you attempt to advance her side-quest later on in the game.
When it comes to gameplay mechanics, Mission is quite deficient in terms of combat skills, excepting later on in the game, where her sneak attack can be used in conjunction with stunning Force powers to easily overpower most opponents. At the beginning, though, Mission's stats hold her back from being a real force in combat; you'll probably just want to give her a blaster rifle and hope she hits something every once in a while.
Attributes: Dexterity is the only real choice here; Mission will need the attack bonus, and the defense bonus will help supplement her light armor proficiency.
Skills: It's all about security, stealth, and demolitions. You probably won't have Mission in your party enough to really capitalize on her stealth ability, but she'll be very useful in clearing minefields and then using the recovered mines to set traps for oncoming enemies.
Feats: Like other scoundrels, Mission won't have very many feats to give out, so you'll need to pick a weapon class for her to use and stick with it. Blaster rifles are a good choice, since she'll have a hard time getting the Two-weapon fighting feats necessary to dual-wield pistols; the feats you save can be allocated to rapid shot, instead.
Zaalbar
Initial Stats
Class: Scout
Strength: 20
Dexterity: 12
Constitution: 20
Intelligence: 10
Wisdom: 12
Charisma: 8

Zaalbar's stats are the stuff of dreams for munchkin players everywhere; even Bill Gates would think twice before raising his attributes to levels like those of Zaalbar. Obviously enough, the melee bonuses from his 20 strength and the extra Vitality from his 20 constitution make Zaalbar a great candidate to wield a sword during combat; you just have to keep an eye on his health, since he can't wear armor and has almost no dexterity bonus to his defense. This defensive problem will curtail Zaalbar's usefulness in the late game, where enemies have high attack bonuses and deal more damage. Your other characters will have defense ratings in the high 20s near the end of the game, while Zaalbar will remain closer to 12 or 13, meaning that he'll take an awful lot of damage very quickly. In the early parts of the game, however, Zaalbar is going to be one of your party's prime killers.
Attributes: If you actually want to use Zaalbar for any significant portion of the game, he'll need more dexterity than he starts out with, in order to raise his defense. This is also what you should use his implant slot for, providing you find decent dexterity implants.
Skills: Computer use and repair are Zaalbar's raison d'etre, but you know our opinions on those skills. Still, they might come in handy during the sections of the game where Zaalbar is still running around with your party, so you might as well indulge yourself.
Feats: Melee feats are where it's at; mastering both flurry and dueling will help Zaalbar deal immense amounts of damage, plus give him a bit of a bonus to his defense.
T3-M4
Initial Stats
Class: Expert Droid
Strength: 10
Dexterity: 15
Constitution: 14
Intelligence: 20
Wisdom: 10
Charisma: 10
T3-M4 is only required for one specific task throughout the entire game, and apart from breaking open that single door, he probably won't see much action for the rest of your playing time. No one can really match him when it comes to the gear head skills of computer use, repair, and security, but he excels in skills at the cost of power in battle; he gets around eight vitality per level, which isn't horrible, but he can't use any weapons except for blaster pistols during combat, which obviously will hamper his damage output. He does possess the ability to use the special droid equipment, like flamethrowers and stun rays, but this doesn't make him any more special than HK-47, who in general is a more proficient warrior than T3-M4.
Attributes: Since his intelligence is already stratospheric, and you can boost the wisdom-based skills with equipment, you should focus on dexterity for T3; it'll combine well with his combat logic upgrade to increase his defense, and help his chances of connecting when using his blaster pistol.
Skills: Obviously, add to computer use, repair, and security. It's not uncommon to see some of these skills get above 30 by the end of the game, with the proper equipment.
Feats: Don't worry about blaster pistol focus; you'll find targeting computer equipment that will give T3 this feat, and perhaps even specialization, soon enough. Instead, go for gear head to max out his skill potential, followed by either toughness or two-weapon fighting, depending on your tastes.
Canderous Ordo
Initial Stats
Class: Soldier
Strength: 15
Dexterity: 12
Constitution: 14
Intelligence: 10
Wisdom: 14
Charisma: 10

Canderous has some interesting abilities, the most notable of which is his ingrained regeneration, which will slowly bring him back to full health after he's taken damage, and his head-start at using heavy weapons. Unfortunately for Mandalorians everywhere, the regeneration (which nets him a gain of four vitality every round or so) is outpaced by healing methods like cure, while BioWare apparently forgot to put in any good heavy weapons besides the blaster Canderous starts with. Seriously, there are less than half a dozen different heavy weapons in the game, none of which are upgradeable besides Ordo's Repeating Blaster. This takes some of the fun out of playing with Canderous, since the ability to find new weapons is part of the charm of any good RPG.
Attributes: Unfortunately, Canderous' dexterity score is pitiful for a ranged attacker, so you'll need to get this boosted up as quickly as possible.
Skills: Treat injury is the only thing Canderous should be learning; even with his regeneration, he'll still need a good medpac during heavy firefights.
Feats: You'll have a lot of options due to the rapid feat gain of the soldier class, but rapid shot and toughness are both rather nice, with implant being a left-field pick if you want a handy way to increase Canderous' dexterity.
Juhani
Initial Stats
Class: Jedi Guardian
Strength: 13
Dexterity: 16
Constitution: 14
Intelligence: 10
Wisdom: 12
Charisma: 13

Catwoman, as we refer to her, will evolve into your party's prime killing machine with a minimum of fuss. Her vitality growth will outpace that of your other two Jedi party members, allowing her to stand tall amid throngs of rancor without fear. Well, maybe just a little fear; Juhani's far from invincible, even with her huge vitality base, and you'll need to use her correctly so that she doesn't wind up getting overwhelmed in every fight.
Attributes: Raise strength first, just to get that extra damage per attack, then start getting her dexterity up.
Skills: Awareness and treat injury are both good choices. Don't kid yourself; even though Juhani has the ability to use stealth, she's definitely more a broadsword than a scalpel, and should be used appropriately. Without sneak attack, demolitions, repair, or computer use, the ability to turn invisible is somewhat irrelevant.
Feats: Obviously, lightsaber specialization is a good place to start. From there, you'll have to decide whether you want her to use two lightsabers (two-weapon fighting) or just one (toughness or dueling; preferably toughness).
Force Powers: Master speed is a must-have for Juhani: since she'll be in the thick of battle, she'll need both the extra attacks and the defense bonus. After that, good choices are cure, a maxed Force push, and either stasis field or destroy droid, with destroy droid being preferable due to its lower cost and lower level requirements.
Jolee Bindo
Initial Stats
Class: Jedi Consular
Strength: 12
Dexterity: 16
Constitution: 12
Intelligence: 12
Wisdom: 15
Charisma: 15

Jolee is one of the last NPCs you'll add to your party, but he's far from the worst. This semi-retired Jedi consular is found on Kashyyyk, and will lend his mastery of the Force to your cause after you pick him up from that planet's jungle floor.
While Jolee won't have as high a vitality as either Bastila or Juhani, his offensive capabilities are on par with Bastila, at least, and may even exceed hers if both are using the same type of lightsaber. His increased number of Force powers lends him a versatility that's valuable to any team, and while Juhani may be more powerful in melee combat, Jolee is no slouch; his lightsaber combined with Master speed and backed up by offensive Force powers will let him handle many foes by himself, if need be. He will die quickly, though, so you will need to keep an eye on his vitality if he wades into a group of enemies.
Attributes: Knock over wisdom first, then charisma. Once both of these stats hit 16, you should add Jolee's last two attribute bonuses to dexterity.
Skills: Since Jolee only gets one skill point per level-up, you'll have to pick one and stick to it. Awareness is the natural choice, since it dovetails with Jolee's wisdom bonus, and is easily boosted by a large number of headgear items.
Feats: Dueling and toughness will both serve Jolee well. Whatever you do, don't dabble; Jolee will have fewer feats than anyone else in your party by the time the end-game rolls around.
Force Powers: Jolee should be your Dark side Jedi, at least when it comes to Force powers, since he can use any of them without the severe penalties that your Light side Jedi will incur. Cure and heal are still going to be better choices than drain life, since they affect everyone in your party, but you might want to proceed up the ladder to kill or insanity, or even Force storm, provided you don't mind waiting until the end of the game to reach it. Don't forget that Jolee will get more Force power choices than the other Jedi, due to his class, so don't be afraid to experiment a bit.
HK-47
Initial Stats
Class: Combat Droid
Strength: 16
Dexterity: 14
Constitution: 10
Intelligence: 14
Wisdom: 12
Charisma: 10

HK-47 harbors a deep distrust for all organic lifeforms, but reserves most of his frustration for his dealings with those of the pacifist variety. This identity-challenged droid starts out his service to you as a mere translator, but as soon as you begin talking to him, you'll realize that there's something a bit off about him: he seems to be filled with a desire to kill. Luckily, he's quite good at it.
Even though HK is proficient enough at battle when you meet him, characters with a high repair skill will have the opportunity to tune him up a total of four separate times, each of which will add new abilities and attribute bonuses. The first tune-up requires a repair skill or four, and adds two to HK's dexterity; the second upgrade requires eight repair, and adds two defense; the third requires 12 repair, and lets HK regenerate one hit point per round; and the final upgrade requires 16 repair and gives HK an extra +2 to dexterity, and doubles his regeneration rate, as well.
Attributes: Since HK-47 is a blaster rifle specialist, you'll want to increase his dexterity every fourth level.
Skills: Repair is the obvious winner here, but since HK gets two skill points every round, you'll need to find something else to pump. Demolitions is nice, since you will find equipment that adds large bonuses to it, making HK a nice minelayer.
Feats: Rapid shot should be mastered, and toughness should be brought to the second rank to reduce the damage that HK will take. Unfortunately, the handy cure and heal powers that your Jedi wield will not affect HK, so you'll have to churn through repair kits to heal him up, unless you like warping back and forth from the Ebon Hawk.
Walk-through
Before you embark on your quest, you should know that there are certain events in the game that don't necessarily fit into a linear flow; some quests can occur on multiple planets, while there are also mini-games that can be played anywhere. If you come across an event that isn't covered in the main walkthrough, you'll want to refer to the Galaxy Side Quests section; if you want tips on a minigame, then you'll need to check the Minigames and Items section.
Light Side vs. Dark Side
Very few console role-playing games give you much freedom over your character's disposition towards other people, or the game world itself. KOTOR, on the other hand, allows you to choose freely between "good" actions (which correspond to the Light side) and "evil" actions (which align the character with the Dark side of the Force). As your character makes more decisions that involve moral or ethical concerns, you might find that your other party members begin to react to you differently, or that your character's physical appearance begins to change.
This isn't merely a cosmetic affectation, though: the game's design relies upon you making decisions based on how you think your character would respond to a situation. (That's why it's called a role-playing game, after all.) Any one of these decisions will result in a small shift in alignment, towards either the Light side or Dark side of the Force; this alignment will affect such things as the cost of your Force powers, what equipment you can use, and, most importantly, how the ending of the game plays itself out.
In keeping with the spirit of Star Wars, KOTOR is designed so that walking the straight-and-very-narrow path of the Light side is more difficult than simply indulging all of your evil whims and sinking into the Dark side of the Force. Players who intend to become Dark Jedi will have a much easier time in the game, if only because conflict resolution is reduced to picking the conversation options that will most quickly lead to bloodshed. Dark Jedi will find themselves with more credits and more loot than their Light Jedi counterparts.
Light Jedi, on the other hand, will often find themselves bending over backwards to adhere to the Jedi Code. Among other things, the important gameplay aspect of the Light side is that the ends never justify the means, which can be interpreted as a statement of non-violence; the Light side simply doesn't permit you to kill someone without provocation, even if the greater good is served in the end.
Light side characters, in short, will need to:
- Refuse rewards whenever they're offered.
- Find non-violent solutions to disputes.
- Never use their Force Powers to intimidate or coerce NPCs to do something they wouldn't do otherwise.
- Be pleasant and courteously deferential in conversations.
- Serve the public trust.
- Protect the innocent.
- Uphold the law.
And so on and so forth. To put it bluntly, being good in KOTOR, or, at least, being a good Jedi, is hard.
Simply because it is easier to be bad than good, this walk-through, for the most part, is intended to help Light side characters stick to the path of the righteous, since the developers have made it so difficult to do so. Dark side characters are not neglected; whenever the game branches off to allow Dark side characters a separate solution to a problem, that solution is mentioned, even if that solution is, nine times out of ten, as simple as starting a fight and winning. The Dark side's conversation options are often glaringly obvious; if you consistently choose to be avaricious, insulting, and downright violent, then you'll find yourself feeling the hate flow through you soon enough.
Battle Tips
Combat in Knights of the Old Republic can get a little hectic, even when just a few characters are involved. Repetition helps you learn how to manage the fast-paced flow of a battle--hopefully these tips will do the same.
- The single most important thing to remember is that your characters will always have a better chance of surviving a battle if you focus on one target until it's dead, then repeat the cycle with every other target. This isn't crucial with multiple, low-level enemies, but against Dark Jedi and boss monsters, you'll need to coordinate your characters' attacks so that they're all firing at the same target at the same time. After a target is dead, the game picks a new target for each character based on how far away each enemy is, so you'll probably have to re-sync their attacks after every enemy falls.
- Pause early; pause often. The pause button is a critical tool in managing the information that's going to be rushing past you during a battle, so use it! You can re-target characters or queue up actions while a battle is paused.
- The best combination of Force powers in most run-of-the-mill battles is almost always going to be master speed and Force wave. Master speed will make your Jedi harder to hit and double or triple the number of attacks per round, while a successful wave will break up your enemies into smaller groups, and stun at least a few of them. Stunned opponents get no defense bonus from dexterity, and will also automatically be hit with a sneak attack if you have any scoundrels in your party.
- If your character is using a ranged weapon, any enemy that attacks you with a melee weapon will get an automatic +10 bonus to their attack roll, meaning that they'll almost always hit you. Unfortunately, the game doesn't have a weapon switch button, so you have to go into the menu screen and replace your weapons manually, if you decide to do so. A less annoying solution is to simply run away, while retargeting your melee warriors on the enemy that's harrassing your ranged character.
- In case we haven't beaten this into your skull yet, any equipment that gives your character immunity to mind-affecting attacks is invaluably when you come across Dark Jedi opponents, which happens with increasing frequency later in the game. A single insanity attack from a high-level Dark Jedi Master can knock out your entire party, leaving them defenseless; it's often worth putting a Nerve Amplifier Belt in your belt slot, even if other belt items can increase your saving throws.
- Grenades are undoubtedly useful items, but they are best used against ranged opponents, since they move and are thus less likely to run away before a grenade goes off. Note that most grenades have saving throws based on a character's reflex; if you have a character with an unusually high reflex throw, you can use them to tangle up opponents in melee combat, then throw grenades with the assurance that you'll damage the enemies more than your teammate.
- Although you can change targets at will, the game doesn't necessarily shift over immediately, especially if you have actions in your queue. If you want to be sure to shift to your new target at the end of the round, empty your queue with the Y button, then select your new target and queue actions with the X button.
- After you obtain Jolee and (hopefully) Juhani, the non-Jedi members of your party can take a backseat. The availability of Force powers, and especially master speed, unfortunately lend your Jedi characters a huge advantage in battle over your mundane teammates.
Endar Spire
Command Module
Objectives: Escape the Endar Spire
The Endar Spire is intended to be Knights of the Old Republic's in-game tutorial; you'll learn all about the controls and options here, if you didn't bother to read the manual.
After your character awakens for the first time, you'll find yourself accosted by someone who barges into your room without even checking to see if you're dressed. That's pretty rude, even if the ship is under attack, but you'll have to forgive Trask for being an insensitive brute and take him into your party. Grab your equipment from the footlocker nearby and head out into the hallway.
Eventually, you'll run across a Republic soldier getting taken down by a couple of Sith. Trask will display his courage by pushing you out into the hall to take the Sith on by yourself, giving you merely a lame battle cry as support. Once the fight begins, you should cycle over to him and walk him out into the hallway; be sure both he and your PC target the same character. This is the most basic, but useful strategy in the game's many fights: pick a target and take him down before moving to the next one. Your characters are much better off when coordinating their attacks on a single powerful foe than by splitting up and attacking whomever the computer chooses for them to fight.
Luckily for you, the Sith troopers on the Endar Spire are completely inept; they have a huge penalty to both their attack and defense, so you shouldn't have too much trouble with them. If your health starts running low, however, make sure you use a medpac immediately; you don't have a large margin of error between being wounded and being dead.
Once the first two opponents are dead, head through the door nearby to meet up with two more foes; kill them and loot the room. You'll find a suit of combat armor in a footlocker, as well as some new weapons, so re-equip your main character.

Proceeding on, you'll run across a squad of five Sith troopers who have just wiped out a bunch of Republic soldiers. Run towards them a bit, to ensure that the reinforcements arrive, then throw a frag grenade at one of the soldiers in the middle of the group; this should take out most of them and severely weaken the survivors.
Continue through the ship, checking bodies for equipment and items. You'll eventually reach the bridge, where Trask will prevent you from opening the door unless you equip a melee weapon. (This is due to the fact that enemies with melee weapons will get a +10 bonus to their attack rolls if you are equipped with a blaster.) Take out everyone in the bridge, then head out to the starboard side of the Endar Spire.
Starboard Section
Objectives: Meet with Carth Onasi at the escape pods
This brief section starts with a duel with a single Sith trooper. Even without Trask to help you out, you should be able to take him down easily. If you're a scoundrel, however, you'll be forced to activate stealth mode to bypass this guy; he seems to be drastically more powerful when you're a scoundrel than when you're any other class, so use your stealth field generator and leave him behind.

You have a couple of options to get through the room separating you and Carth: you can either repair the droid and send him in to attack the troopers, or use the computer terminal to overload a power conduit near the troopers, killing all of them instantly. The correct answer is: do both. You get experience for either feat, but you can get twice as much as you should if you first repair the droid, let it kill the troopers, then overload the conduit to explode into the now-empty room.
After all of the troopers go down, search the body of the red trooper for a prototype vibroblade, then head through the door to finally meet up with Carth. Take the escape pod to get away from the Endar Spire before it's destroyed.
Taris
Objectives: Find Bastila
Welcome to Taris, the first planet you encounter in Knights of the Old Republic. When you wake up from your dream, Carth is there to provide some handy exposition. After your escape pod crashed on Taris, he luckily managed to find a luxury apartment that just happened to be abandoned by its previous owners. (I suspect foul play; how much do you know about this guy, anyway?) This apartment will be your base of operations for the duration of your stay on the planet; you can warp back here almost any time you feel like it using the map screen in the options menu.
As soon as you exit your apartment, you witness an altercation between a Sith patrol and some aliens. The Sith, of course, spot you, and you find yourself in a fight before you know it. Luckily, you have a bit of an edge in the ion blaster you found on the red trooper's body back on the Endar Spire; it does an extra 1-10 damage when it hits a droid, and the Sith patrol just happens to consist of two battle droids. If you're not a blaster user, let Carth equip the ion blaster, and then go to town. The troops go down easily enough, and you should gain enough experience to hit another level-up.
Explore the Apartments if you wish; you can use Carth to unlock the doors if you don't have points in the security skill. You can steal anything you want from these people's lockers and storage containers; don't worry, petty theft apparently isn't much of an issue to the Force, so larceny won't start you on the path to the Dark side. There is a side-quest here involving a woman named Dia; see the Side Quests at the end of this planet's section to learn more. You'll also run into a merchant named Larrim here; you may want to take this opportunity to familiarize yourself with the merchant interface and sell off any unneeded equipment. Don't bother buying anything, though; he charges 15% more than another merchant you'll encounter in the next area. Once you're done running around, head through the doors to the south that lead to the Upper City.
Upper City
Objectives: Find Bastila
Go ahead and look around for a bit; there's plenty to do and see on Taris. Most of this is optional, but you can earn credits, find out information, discover Side Quests, and perhaps take your first steps towards the Light or Dark sides of the Force by interacting with the residents of Taris. (In case you haven't figured it out yet, NPCs with proper names will generally have something of interest to say to you; generic characters like "Taris Citizen" will have a few canned responses to your attempts at conversation.) You can stop by Kebla Yurt's shop for reasonably-priced goods, or head over to Zelka Forn's medical facility for healing, if you require any. (Healing from NPCs is free.) One event of note is the bounty hunter incident near the entrance to the North Upper City. A merchant who owes protection fees is being hounded by bounty hunters looking to collect on the debt. They eventually decide to make an example of him. You can step in if you like; the choices that follow will determine whether or not you take a step towards the Light side or the Dark side.
There are some other areas of interest in the Upper City, so once you're done looking around... take a look around elsewhere. There are two different ways to prod on the main quest of finding Bastila. In short, you'll need to travel to the Under City, but in order to do so, you'll need to find a way past the Sith Trooper that guards the only elevator leading down. In a word: disguise.
Method #1: The first, and perhaps most obscure method of obtaining the required Sith uniform, is found in the Cantina, which is located directly north of the exit from the South Apartments. There are a couple of off-duty Sith there named Yun Genda (the man) and Sarna (the woman). If you talk to the Sith that's of the opposite sex of your character, you can get invited back to a party that they're throwing later that night. You don't need any points in persuasion; if you simply choose the right responses ("Oh, I'm not from around here." "Don't you need to blow off steam every once in a while?" "There's a bucket of fried chicken in my pants--wanna get greasy?" etc., etc.) you can finagle an invite without needing to persuade the character at all. Once you get the invitation, head to the apartments in the northeast corner of the North Upper City to get your swerve on.
Once you arrive, Yun and Sarna will chat for a bit, then everyone will pass out from too much ale. Apparently the Sith can't hold their ale--has our intrepid hero found the key to ending this horrible conflict once and for all?!? Well, no--but you do find some Sith armor in a Sith backpack on the floor near the unconscious partygoers.
Method #2: If you hit the Upper North City apartments before you talk to the Sith in the Cantina, or if you manage to anger your opposite-sex character, then when you arrive at the same location as the party, you'll instead find a few Sith in full regalia pestering an alien. Kill all of them, and you'll find some Sith armor on one of their bodies.
Once you find the suit, head to the Lower City elevator to the west of the apartments, equip the armor, and head down below. Be sure to talk to the guard before going through the elevator for a tidy experience bonus.
Lower City
Objectives: Make contact with Gadon Thek, leader of the Hidden Beks
Welcome to the frying pan. Remember the content citizens of the Upper City? The polite protocol droids, eager to help? Well, in the Lower City, you're not likely to stumble across any happy citizens--though you may trip over a corpse or two. This is gang-controlled turf, and as soon as you walk out of the elevator, you'll find yourself caught up in a gang war. You don't wind up fighting for your life because you're a human, or because you're from another planet, or because you ask the wrong questions about a missing Jedi, but because some Weequay foot soldier decides that you're a "stranger." That sounds ironically xenophobic coming from an alien from outer space, doesn't it?
Anyway, the first battle pits you against three fighters from the Black Vulkars Gang. Depending on your class, this fight can be quite tough, so keep your medpacs handy--it's probably a good idea to pause every couple of seconds to make sure your health is full. When you unpause the game, try to run back a ways towards the elevator to disperse the crowd. Pause as soon as the aliens come around the corner, and open fire on whichever of the three aliens took the most damage in the gang fight. If you're a melee character, this may be a good time to attempt an active combat feat like flurry on the first enemy, to close within range; these guys don't have much defense, but can overwhelm a fairly strong fighter if they manage to surround you. Keep pausing and making sure that you and Carth are attacking the same enemy, and you'll get them eventually. If you die repeatedly, try catching them off-guard with a grenade before they can chase you.
As in the Upper City, there are plenty of places to go and see down here, but in order to progress in your quest to find Bastila, you'll need to hook up with the "nice" gang leader, Gadon Thek of the Hidden Beks. Take a left from the entrance and head northwest; you'll come to the entrance to the Hidden Bek base without incident. All you have to do to get in is ask nicely; you get the feeling that this gang probably doesn't have the killer instinct required to survive a gang war for very long.
After walking around inside, you encounter Gadon and his bodyguard Zaerdra. Gadon knows where Bastila is, and is willing to help you find her, but first, you must help him out by finding an accelerator for a swoop bike that was stolen by the Vulkars. You'll eventually need to trade him your Sith uniform for a set of Sith papers that will allow you access to the Undercity, since he believes that a Twi'lek named Mission Vao will help you get the accelerator. With papers in hand, you can head further on to the northwest to reach the Undercity elevator, or you can fool around in the Lower City collecting items and experience, if you wish.
Lower City - cont.
Cantina: When you walk in, you'll encounter Calo Nord for the first time, taking down three Black Vulkars that just wanted to talk. Tip: don't let him count to three if he talks to you. You can collect on your bounties here by talking to Zax the Hutt, if you actually killed Dia or Largo. If not, you can attempt to persuade Holgan to drop his bounty, or simply buy his forgiveness with 200 credits. If you treat him right, he'll also tell you about his work as a smuggler for Davik, and his ship, the Ebon Hawk. Sounds like a nice ship.... Zax will also have more info on the serum for Zelka. You can also try to help one Twi'lek dancer get a job at the cantina if you can persuade her that you'd be a good dance partner. The correct moves are: dance close; dance behind; and dance close and face-to-face. Success here appears to be predicated on your dexterity, so if your character's not very graceful, you may wind up falling on your face instead of dancing.
Upper City Elevator Apartments: There's plenty of Black Vulkars just waiting to be put out of their misery here. You can take them on yourself, or repair a sentry droid to do the dirty work for you. There's also a bit of a puzzle here involving a security chest that's triggered to explode unless it's opened via holograms. You can check the desk for the combination, or just select the holos in this order: Elinda, Ujaa, Ujii, Loopa, Fodo, Ashana. The prize? A suit of Echani Fiber Armor, a light armor suit that's upgradeable and has a bit more protection than a generic Combat Suit. You'll also find Matrik, who has a bounty on his head from Davik
Northwestern Apartments: After another little run-in with Calo Nord, explore the area to find an even worse infestation of Black Vulkars than in the other set of apartments. There are some mines here; if you've maxed out your demolitions skill, you should be able to defuse them without incident. If you have no demolitions expertise, you may want to wait until Mission joins your party before wandering around in here. There's another puzzle chest, as well, that requires you to read a letter and answer a few questions before you can gain access to it. (The answers are: Hyperdrive, uncle, and Alderaan.)
Selvan can also be found in one of the locked rooms in the northwestern apartments. While bounty hunting doesn't quite fall under the purview of Light side activities, you can goad her into attacking you by simply walking into her room after she tells you to leave. She puts up quite a fight; you might want to activate an Energy Shield before waltzing in, guns blazing. She gives you a hefty 650 experience reward and has some useful items on her, so it's worth the risk. If you absolutely cannot defeat her with just Carth, come back after you add Mission or Zaalbar to your party and bust her chops.
Once you're done exploring, fight your way to the elevator in the northwest corner of the Lower City to enter the next area.
Under City
Objectives: Find Mission Vao
If the Lower City was the frying pan, then the Under City is the fire. There seems to be a theme developing here, as yet again, you'll be accosted by hooligans as soon as you get off the elevator. Fortunately, they're easy to get rid of, by simply threatening their lives; or you can give them twenty credits for some Light side points. Afterwards, the rather over-eager Shaleena will give you a more hospitable welcome.
Explore the settlement; be sure to talk to Gendar, at the very least, and note that there is a healer within the settlement--you're going to need healing pretty soon. Rukil will give you Side Quest if you agree to find his apprentice.
Once you're ready to proceed, head to the northeastern exit of the compound. A villager has gone outside the gates, for some reason, and the gatekeeper refuses to allow him access, since he's being chased by a Rakghoul. You can either choose to help fend off the Rakghoul for Light side points, or insist that you're not risking your life and watch Hendar die to earn some Dark side points. After this little incident, you'll be able to pass through the gates without needing to speak to the gatekeeper.
Mission will track you down as soon as you step outside of the city and explain that Zaalbar was kidnapped by slavers. In yet another example of quid pro quo, she'll want you to help track him down in exchange for getting you into the Black Vulkar base, and she'll add herself to your party. If you're a soldier, you should start dancing now; you'll finally have someone with some decent security. Her awareness and demolitions skills will come in handy sooner than you think, as well. Equip her with some light armor, if you have any.
Now that you finally have a complete party, you can start looking around outside the city gates. Look hard, too--there are mines scattered here and there, especially around the downed escape pod, so let Mission recover them to add them to your inventory. You'll encounter a wounded and infected Republic soldier near the pod; if you don't have the Rakghoul serum, he'll change almost immediately. If, on the other hand, you've already found the serum, you can give him a dose to gain some Light side points.
There's a massive horde of Rakghouls guarding some bodies to the northwest of the city; one of these is Rakil's apprentice. If you intend to complete his quest, you'll need to search her body and bring her journal back to Rakil. If you can't bust through the Rakghouls, wait until you find Zaalbar and come back.
Heading to the east of the city, you'll run across a Sith patrol. Show your papers, then ask them about the other patrol that was reportedly lost. Once you're done questioning them, you can either leave them alone or slaughter them--if you do kill them, you get the experience, plus a Sith energy shield and a very handy set of motion detection goggles that you can give to Mission, or yourself, if you're a scoundrel, to boost awareness, demolition, and security. Proceed farther south from this point to find the Sith trooper's body with the Rakghoul serum on it.
Once you're done fiddling around, head to the sewers. There are two entrances to the Sewers; the entrance directly to the north of the settlement's exit is closer to Zaalbar's location, so go through that one.
Lower Sewers
Objectives: Find Zaalbar
The lower sewers are permeated with mines, Gamorreans, and Rakghouls. The Gamorreans look ferocious, but aren't particularly strong. They can dish out a fair amount of damage with their vibroblades, though, so if you don't have much vitality, you'll want to track down Zaalbar quickly and let him be your furry tank.
From the entrance, head to the southwest. The first side-room you run across will contain a broken-down droid, as well as a corpse with the first Promised Land journal. If you Repair the droid, he will lead you straight to where Zaalbar is; if you don't have the required parts, just look in the nearby nest of rooms and you'll find him easily enough. You'll be facing a fairly tough fight with three Gamorrean elites and a Gamorrean chief, though, so it'd be worth your while to at least activate the droid, repair its weaponry, and send it on its patrol route; it should distract the Gamorreans long enough to let your party take them all down without getting harmed. Zaalbar is in the room off to the side of the Gamorrean hide-out.
Keep in mind that one of your three companions will have to be sent back to your hideout; since you have a soldier, a scoundrel, and a scout, you may want to choose whichever one overlaps with your class to be given a time-out. You can't remove Mission for story reasons, however, so you might end up doubling up on scoundrels if that's your class as well. Be sure to un-equip Carth if you remove him, since you won't have access to his equipment while he's gone.
Once you have your party set up, pick the lock on the chest in the room nearby to find Zaalbar's Bowcaster and other items. Equip him if he's in your party and begin exploring the Sewers. The only other items of quest-propelling interest are the second Promised Land journal, in a room in the northeast corner of the sewers, and the hidden entrance to the Black Vulkar base, which lies in the area to the east of our sewer entry point. If you wish to wrap up your Promised Land quest, grab the other journal and head back to the settlement; otherwise, go to the force field-protected base entrance and Mission will gain your party access.
Upper Sewers
Objectives: Get past the Rancor into the Vulkar base
The upper sewers contain the same basic threats as the lower sewers: Gamorreans and Rakghouls.

First off, head through the southeastern passage to find some items, then progress east across the level. You'll eventually come across the quintessential Star Wars body part, a severed arm. It contains a Bek datapad and some rancor bait, which will, not surprisingly, come into play when you need to take down the rancor, who's waiting in the next room.
The rancor, luckily, has his back turned, so don't worry about being stealthy here; just don't get too close. Walk over to the corpse pile, take the items, and then plop down a frag grenade and some of the synthesized odor back into the pile. The rancor will eat the grenade and get a sudden and severe case of indigestion. Step through the door, kill the energy-shielded Vulkars, and proceed to the Vulkar base.
Black Vulkar Base
Objectives: Find the Swoop Bike Accelerator
As you might have anticipated, this place is teeming with scum and villainy. If Zaalbar is tagging along with your party, you may want to have him take the lead as part of Operation Wookie Shield; his high vitality makes him a good choice to offer up to enemy groups as a target, leaving your more vulnerable party members somewhat out of harm's way.
There's a sentry droid in the room directly to the west of where you entered the base. If you've raised one of your party members to at least level four in repair, you can activate it, optimize its weapons, and send it on its way for nine repair parts in total. It's worth doing if you're able; the droid's patrol path isn't very large, but it responds to the sound of blaster fire, and runs astoundingly fast, making it an excellent makeshift addition to your gang.
The first place you'll want to visit is the armory, located in the center of your map, a bit to the southwest of your starting point. You can pick the lock on the door to find a wide array of very nice weaponry and upgrades. To the north of this room is a computer terminal that you can use to scope out the base via security cams, unlock all of the locked doors, or get a map uploaded. Don't fool with the terminal just yet, but remember where it is if you run into any trouble.
To the west of the armory is the base's command room, where a Benedict Arnold offers to give you information in exchange for letting him live (you can kill him after he spills his guts, if you wish, for Dark side points). He'll tell you about the need to access the security elevator in the back of the base to find the swoop bike accelerator, but the elevator is guarded by laser cannons. To disable these cannons, you'll need pass cards, which only Vulkar lieutenants possess.
Fortunately, two of these lieutenants reside in the barracks, which is the room next door to the command room. You'll know you're there when you arrive, because you'll be facing off against a group of seven or eight Vulkars, which includes the lieutenants who will activate energy shields as soon as combat begins. (Note that if you don't want to fight, you can either hack into the computer terminal near the armory and overload the power conduit in this room, or let Mission plant a bunch of mines outside the door before you enter, then let the soldiers blow themselves up after the fight starts. You'll need to go into the room in solo mode for this to really work well, though.) This is a situation that calls for grenades if there ever was one; you might want to have two or even all three of your party members simultaneously launch a variety of grenades into the fray before the Vulkars can close in on you. If Zaalbar is using a melee weapon, don't hesitate to heal him with one of your advanced medpacs; he'll be getting hit hard, and the regular medpacs won't be enough to outpace the damage that he'll be taking.
North of this room is the pool. There's nothing critical in here, but there are some good upgrades in the footlocker inside the drained pool. Unfortunately, they're guarded by undetectable poison mines. You can either have your main character walk in via solo mode, creeping carefully along the side of the pool, and retrieve the items (you'll still probably set off at least one of the mines, so have an antidote ready), or repair the nearby droid and have it self-destruct in the pool, which will eliminate the mines as well.
Once you have the pass keys and have explored to your satisfaction, head to the elevator in the northern section of the base and proceed to the garage.
Black Vulkar Garage
Objectives: Recover the Swoop Bike Accelerator
Within moments of your arrival, the garage head and a couple of bodyguards will arrive out of a door to the north. They won't see you right away, so take the opportunity to repair one of the nearby droids to help you if you have extra parts, or just start blasting. After they go down, head to the west, where those enemies were walking from, to find the garage head's office, which contains the garage head's key card and a security terminal, which emulates most of the commands of the terminal in the main facility upstairs.
Head back to the main garage and take the southern passage. Head west at the branch to find a couple of smaller garage facilities, one of which contains a workbench. This is the perfect time to upgrade your weaponry; you should've been finding plenty of items around the Vulkar Base. If anyone in your party uses blaster rifles, you should max out Zaalbar's Bowcaster; if you pump it full of upgrades, you can transform it into a +3 attack bonus beast that deals out 3-12 damage, with a critical range of 17-20.
The eastern rooms here contain one Kandon Ark, a Brejik subcommander with an interesting offer. He says that if you kill Gadon Thek, he'll pay you 500 credits and give you Bastila, without requiring you to win the swoop race. (Note that this is a trick: even if you do kill Gadon, you’ll still be forced into the swoop race. The assassination mission will net you a lot of loot from the Hidden Bek base, though.) This is one of the first critical choices for Dark side candidates, and is a perfectly viable alternative to slaughtering Kandon and his bodyguards. If you decide to be virtuous (for now), kill Kandon and his cohorts. Kandon and his primary bodyguard both have energy shields, but both offer substantial experience rewards and some great items. If you're having trouble with them, cycle through your characters and have them all offload your stockpile of grenades on Kandon's Twi'lek bodyguard; both he and she should fall after five or six of your little friends go off.

If on the other hand, you want to take out Thek, head back to the Bek base, speak to Zaerdra, and start knocking heads. With the key that Kandon gave you, you'll be able to bypass all of the security doors that stymied your progress before. When you reach the second floor, gear up for a fight; Gadon may be blind, but he can still kick some ass when his back is up against the wall.
Before you leave the garage, though, you might want to try your hand at a tough battle in the loading bay. You may need to use the security terminal in the garage head's office to unlock the door; the garage head's key pass doesn't seem to work on it. Once inside, you'll face off against a single Vulkar patrol droid, which has some kind of freezing effect that can stun your party members for a short time. It has 24 defense, which will make it quite difficult for your characters to actually hit it, and deals quite a bit of damage. You may want to let one of your characters get up close, then throw a few ion grenades into the mix to hopefully knock most of its life away. The fight is worth it, though; one of the nearby locked footlockers contains 2,000 credits, plasma grenades, and other items.
Once you reach the Bek base, save your game and talk to Gadon to begin the sequence of events that leads up to the swoop race. If you decided to kill Gadon, then do so and return to the Vulkar base to begin the race.
Swoop Race
Objectives: Win the Swoop Race
The Ithorian mechanic will explain the basics of swoop racing to you. Luckily, it isn't a very complicated mini-game; you use the analog stick to maneuver your bike to the left and right around obstacles, or onto accelerator pads, and you hit the A button once your bike is ready to upshift. The path that the bike travels is straight, so you won't have to worry too much about maneuvering, as long as you can avoid the small obstacles. Hitting the accelerator pads will be necessary to achieve an unbeatable time, and don't forget to upshift when you require extra speed.
The main trick here is to just suck on your first real run (the very first time you get on the track is a trial run); hit obstacles, don't accelerate, and so on. You don't have be outright terrible, but you'll want to get a time above 40 seconds for the first heat. The reason for this is that no matter what your time is, another racer will usually beat it after the first run, forcing you to race again; if you have a great first run, you might not be able to beat your own score, let alone the one set by your competitor. So take a dive on the first run, and save your best effort for the second heat.
After you achieve victory, a short cutscene plays out with Brejik and Bastila, culminating in a fight between yourself and a few of the Black Vulkars. Eliminate Brejik first, then his cronies. (If you have a hard time here, just run away from Brejik and let Bastila take care of the enemies.) After the fight, be sure to search Brejik's body before talking to Bastila; he's got a belt and an armband which are perfect for melee-weapon characters, as well as a set of gloves that give +1 to Dexterity. Oh, and did I mention the lightsaber? He's got one of those, too. Once you've rifled the bodies, talk to Bastila, which will automatically warp you back to your apartment.
Upper City
Objectives: Find a way off this rock
Once you're done chatting with Bastila and Carth, leave the apartment with the party that you had before you finished the swoop race. You'll receive a tip that Canderous Ordo, a Mandalorian that works for Davik, is waiting for you in the Cantina. Unequip your other party members and head back inside, then leave again and choose the party that you want to use to finish off the rest of this planet's quests. Bastila is, quite obviously, an excellent choice; the other member should be a counterweight that possesses skills you're deficient in. If you do choose Bastila, she'll instantly gain three levels once you leave the apartment; load her up on skills that you think will come in handy, and take the chance to examine the new Jedi Feats and Force Powers. (Force Cure should be a mandatory choice for her level 6 Feat.) Head to the Cantina to meet up with Canderous.
Canderous has a grand scheme: he wants to send you into the military base that the Sith control in order to obtain the secret launch codes, without which any ship trying to take off will be destroyed by the Sith's orbital defense array. You'll first need to obtain the T3-M4 droid from Janice Nall; after your conversation with Canderous, Janice will finally offer to sell it to you. If you haven't yet, now might be a good time to earn some experience and credits in the Duel Ring. Even a scoundrel should be able to proceed far enough along to beat at least Ice, and now that you have Bastila to cure you, you won't have to waste medpacs on minor injuries between fights.
If you haven't come back to the Upper City in a while, you might also want to get the permacrete detonator for Matrik, inform Dia about the progress of her bounty quest, and give the Rakghoul serum to Zelka. Proceed to Janice in the North Upper City to get the droid; she'll want 2,000 credits for it, but you can persuade her down to 1,500 if you have enough points in that skill. If you're willing to take a Dark side hit, and have been seriously pumping persuasion, you can knock down the price to 1,000 credits, or even force her to hand over the droid for free.
T3-M4 will be a required member of your party for the next section of the quest. While you're leveling him up, you will probably want to pump his repair and computer use skills, as well as give him another rank in gear head, since all of this put together should get you up to at least the 16th rank in each skill, which will save you spikes and parts over the long term. You probably haven't seen Bastila in action yet, so you might want to take her along, as well.
Once you have your party set up, head over to the military base, near the elevator leading to the Lower City.
Sith Military Base
Objectives: Obtain Sith launch codes
Once T3-M4 unlocks the door to the military base for you, you can replace him with another member of your party if you wish, but you may want to hold on to him for just a moment. Inside, you'll come across a Twi'lek receptionist; you may be able to persuade her not to hit the alarm, but if you can't, just threaten her and she'll back off.
Now that she's gone, you'll be able to access her terminal behind the desk. If you have T3-M4 and around 15 computer spikes, you should be able to access the command functions. Your priorities in this interface are to disable the turrets and eliminate the shields of the battle droid that waits by the elevator. If you have extra spikes, you can hack into the droids' targeting filters, causing the sweet sound of gunfire to come pouring through the walls; congratulations, you've just turned the slaves against their masters. The droid uprising will eliminate most of your Sith opposition on this level. They'll still target you, of course, but they should be weakened from the fighting, and since all the enemies on this level will be droids, you can use an ion blaster or rifle without having to worry about switching your weapons back and forth for different opponents. If you wish, you can use the terminal again to shut down all of the sentry droids, but they're easy enough to kill, and you don't want to miss out on the experience.
Begin searching the area. In a hallway to the north, you'll find the friendly Duros who helped move the bodies of the Sith troops way back when you first arrived on Taris. There's a puzzle on the wall to get him out; moving all of the panels to red will free him, while moving all of them to green will kill him. Numbering the panels from left to right, the code to release the Duros is 3, 4, 2; if you want to fry him, you'll have to figure it out yourself, you sick, sick man.
To the east of this hallway, you'll come across one of the Sith barracks, with some lone survivors of the robot rampage hiding away inside. They will use grenades before battle, so be wary of the sudden drop of health, and have Bastila queue up a couple of cures if necessary. You'll find a military base passcard in a footlocker here.
Avoiding the door to the south, for now, explore the rest of this floor. There are a couple more difficult fights, one in another section of the barracks, and one in the control center on the western end of this level. For the control center, you may wish to repair the droid in the northwestern hallway to do your dirty work for you. As for the other barracks, if you're having trouble, try sending your PC in to open the door alone by using solo mode (back button). This should goad the troopers into throwing their grenades; if you run quickly enough, you may avoid their effects. If not, at least your friends won't be affected, and you'll be able to retreat behind them and hopefully not get killed. Be sure to loot the armory to the south of the control center; there's a flamethrower attachment for T3-M4 that will be quite useful.
Once you've scoured the level, return to the southeastern room to fight off a huge battle droid that guards the elevator. Kill it, then take the lift down to the lower level of the base.
Lower Sith Base
Objectives: Obtain Sith launch codes
Before you open the door here, make sure your entire party is healed. Trust us on this; this will be absolutely critical in the upcoming fight.
Through the door to the north is the Sith Governor; he's the first truly difficult boss fight you'll encounter. He's an absolute badass that can rip any member of your party apart, even Bastila; you'll need to coordinate your efforts in order to defeat him. Even without a lightsaber, he's tough, and quite capable of dealing 40+ damage on a critical hit.
Before you fight him, though, you might want to try laying down a bunch of mines in front of the door leading south. You may have a few in your inventory, if you had Mission recover the ones you encountered in the sewers, and minor mines only require a demolitions rank of one to set properly. If you open the door, then lure him back into the antechamber, you may wind up knocking half of his life off with just a few frag mines. It might be worth a try if you're having an overly difficult time with this boss.
If that fails, then believe it or not, T3-M4 may just wind up winning the battle for you (if he's in your party). Since the droid is immune to the Sith's stunning Force attack, the Sith won't be able to stop his attacks without killing him. That will occur soon enough, but not before you use your shiny new flamethrower to put a serious dent in the Sith's health. Even if the Sith makes his saving throw against the fire, he'll still take at least 15 damage each time the flamethrower is used, so queue it up three times and hope T3 lasts long enough get them all off. If he does, then you should be able to deal the rest of the damage with Bastila or another character fairly easily; the Sith's defense ranking is only 19, which is definitely high, but not impossibly so. If T3 isn't in your party, then you'll have to keep quite a careful eye on your vitality levels and simply wait him out.
After that thriller, search the Sith's body for the launch codes, and don't miss the strong boxes that contain some more goodies. Return to the Upper City, then take the elevator downstairs to meet Canderous in the Lower City Cantina. After hooking up with him, you'll be whisked off to Davik's compound. Canderous will have to be one of your party members; choose the other wisely. If you're a scoundrel with high ranks in security and perhaps computer use, then Bastila is a good choice; there's going to be a lot of fighting in the next area. Otherwise, you may want to bring along Mission or T3-M4, if only to get around some locked doors.
Davik's Estate
Objectives: Steal the Ebon Hawk
After you get squared away in Davik's guest quarters, you should start abusing his hospitality in the most nefarious ways possible. Killing every single person you meet might be a good place to start, whether you're Light side or Dark side; after all, this guy's a crime lord, so his guests aren't exactly going to be upstanding citizens. If you're a Light side trainee, then you may want to not instigate fights flat-out, but don't worry, there are plenty of guards to mow down.
First, though, outfit Canderous with whatever equipment you can spare. He possesses a truly massive blaster, which should suit him fine as a weapon for the time being, and an innate ability to slowly regenerate damage, which makes him an ideal candidate to take the lead when going through doors.
As per usual, explore the area as you see fit; there is quite a lot of treasure hidden away in footlockers throughout Davik's mansion, though some of it is behind locked doors. Proceed in a northwesterly fashion until you come across a bounty hunter roaming the halls. Exterminate him, and pick up the computer passcard from his remains. Proceed northeast from here, into what is winkingly called the "Guest" Room, where the Ebon Hawk's former pilot is being held in a torture cell. Unfortunately, he's guarded by two massively powerful droids who can use stun beams and flamethrowers from across the room. Use ion rifles and ion grenades to take them out, then free the pilot using the control panel. He'll give you the access codes to the Ebon Hawk. Dark side players can murder him afterward to earn some points. Now, continue your sweep of the compound until you find one of the security panels. Use the access card you found to disable the hangar security in the command menu.
You should be able to see the hangar on your map, from the tour, so proceed to the southwest until you find the door. Heal up your party before entering the hangar, and make sure you don't have any areas of the estate that you still want to explore. If Bastila's along, you may want to let her rejuvenate her Force points; just let the game sit unpaused for a few moments, then save your game.
Once you pop into the bay, Davik and Calo appear and start to rather energetically defend their right to take off with the Ebon Hawk. They're both tough, but concentrate your fire on Calo; Davik has a much higher defense (27) than does Calo (19). After you knock Calo's vitality down enough, he'll threaten to blow everyone up with a thermal detonator. Unfortunately, the Sith bombardment throws a kink into his plans. Grab what you can from Davik's body, board the Ebon Hawk, and leave this hellhole behind.
Unfortunately, even the correct launch codes won't protect you from the Sith starfighters that are intent on shooting down the Hawk, so you'll have to jump into the gunner's seat and use your quad-laser cannons to blow some Sith out of the sky. Use the analog stick to aim, and the A button to fire; don't worry about speed here, or, for that matter, during any other of these turret mini-games; the Ebon Hawk seems to have more than enough shielding to handle the fighters. One thing you can do to shorten the fight is to rapidly press the fire button (A) right as the mini-game starts up; most of the fighters will be flying straight and low overhead during this time, so you'll have a good chance of taking down two or three of them immediately.
Side Quests
Dia's Bounty
You'll find Dia in the south apartments, in a locked room near where you first awoke on Tarsis. She had a bit of a run-in with a man named Holdan; he drunkenly attempted to make an unwelcome pass at her, and she felt it necessary to teach him a lesson with a vibroblade. Unfortunately, Holdan couldn't take such a spurning lightly: he decided to place a death mark on her head, and now she fears for her safety and refuses to leave her rooms.
Light side Solution: Track down Holdan in the Cantina in the Lower City. You can attempt to talk him out of the whole bounty idea with a high persuasion, or simply pay the whole 200 credits that he demands.
Dark Side Solution: Congratulations, you just became a bounty hunter. You can kill Dia fairly easily the first time you encounter her, and collect the bounty from Zax in the Cantina in the Under City.
Largo's Bounty
Largo is hiding away in the Upper North apartments. He got into debt with Davik and is unfortunately (for him) unable to pay it off.
Light side Solution: Give Largo 200 credits to clear his debt.
Dark Side Solution: Largo becomes Prestissimo for a moment, and then...the orchestra is silent. Return to Zax for the bounty.
Matrik's Bounty
Matrik is squirreled away in the apartments in the Lower City across from the Upper City elevator. He betrayed some of Davik's friends to the government for some reason, and now resides in a locked room, ever fearful for the day when a bounty hunter comes knocking at his door.
Light side Solution: Return to Kebla Yurt's shop in the Upper City (it's easiest to just warp back to your apartment first) and buy a permacrete detonator. Give it to Matrik for a decent experience boost and some Light side points, and then you can get the bounty from Zax.
Dark Side Solution: Actually, you don't seem to get Dark side points for killing Matrik. You can still kill him, of course; he has a mesh underlay on him that can be used to upgrade the Echeni fiber armor.
Selven's Bounty
Selven's hiding out in the northwestern apartments in the Lower City. Since this is an official government contract, you gain neither Light side nor Dark side points for killing her.
Starkiller's Bounty
Bendak's bounty is only collectible if you proceed through the five rounds of the Duel Ring side-quest, after which he'll challenge you to an old-school, mano-a-mano deathmatch. Participating in the deathmatch itself is an automatic Dark side shift, but winning it gets you 700 credits from the bout's promoter, plus the bounty credit reward, plus Bendak's blaster.
Side Quests - cont.
The Duel Ring
In the Upper City's Cantina, you will find a dueling pit where you can earn a few extra credits by taking on challengers in non-lethal duels. The challenges start off fairly easy, but steadily ramp up in difficulty. If you want the credits for the earliest matches, you can fairly easily make it through a few rounds before heading into the Lower City, but you'll probably want to save the tougher enemies until you return from the Under City with Bastila in your party; her cure skill can save you a fortune in medpacs, and Brejik's belt and armband, which you should've found on Brejik's body after the swoop race, can save you a lot of melee damage.
Deadeye Duncan: Deadeye is intended to be the infant-level difficulty contender, so just cream him a couple of times with any weapon and he'll keel over. You get 100 credits from the fight.
Gerlon Two-Fingers: Another powderpuff opponent. Gerlon'll use blaster pistols from a distance, then switch over to a melee weapon if you attempt to go toe-to-toe. Pick up 200 credits for the win.
Ice: She'll use a blaster pistol from a distance, then switches over to a vibroblade if you close in on her. Your reward is 300 credits.
Marl: Marl's going to be the first real challenge, especially for scoundrels who may not have enough vitality to live through the contest. He uses a dual-bladed vibroblade with master critical strike, gets two attacks per turn, and has +10 to attack and +4 to damage. Needless to say, you're gonna be taking a beating. His weapon can sometimes stun you, and if this happens, you can start reloading right then, because you're not likely to survive the two rounds or so it takes for the stun effect to wear off. Weaker characters might just not be able to get past him (though you might try some creative grenade trickery before he closes in), but soldiers and scouts should be able to take him down. You'll get 400 credits for the win.
Twitch: Twitch initially comes at you with dual blasters, with mainhand stats of +12 attack and +2 damage, and offhand stats of +10 attack and +2 damage. If you close in on him, though, you can force him to whip out a vibroblade, with much less impressive stats of +10 to attack and +1 to damage, with a single attack per round; this is obviously the way to go if you are comfortable with melee combat yourself. Ranged attackers might want to use grenades to soften him up or stun him, since the damage he deals with the blaster pistols can add up quite quickly. You'll get 500 credits for becoming the Duel Ring champion.
Bendak Starkiller: Bendak will only agree to fight you after you've defeated the previous five candidates that Ajuur sets up for you; all things considered, this is a good thing, since he's much tougher than any of the softies that play the simulated duels. Bendak's only interested in the real thing: a deathmatch, and we're not talking Quake 3.
After speaking to both Bendak and Ajuur, leave the cantina, and then re-enter it immediately afterward. Talk to Ajuur to start the match. You'll take an immediate Dark side hit for agreeing to participate in this kind of savagery.
Bendak starts out by chucking plasma grenades at you, so run to either side to avoid their effects. After the third grenade, he'll whip out his trusty blaster pistol and use his +18 attack with master rapid shot and master power blast to pelt you with attacks both powerful and numerous; if you're going to exchange blaster fire with him, now would be a good time to activate an energy shield. Melee combat against Bendak is only slightly less dangerous, since his +15 to attack and +3 damage is coupled with master power attack. His 21 defense will be tough for your character to hit in the best of circumstances unless you've levelled quite a bit.
One opportunity to dish out maximum damage may be to try, as with Twitch, to pelt him into submission with grenades. If you can keep an energy shield up long enough, you should be able to shower him with grenades, which should severely weaken him, if not kill him, assuming you keep it up long enough.
After Bendak falls, talk to Ajuur one last time to get 700 credits that were wagered, as well as Bendak's blaster. If Carth is in your party, you might want to warp back to your apartment and upgrade Bendak's blaster to take the place of whatever you're using in his off-hand.
Side Quests - cont.
Rukil's Apprentice
This is a simple fetch-and-retrieve mission. Once Rukil clues you in to the fact that his apprentice is missing, search for her to the northwest of the Undercity settlement. Bring the journal you find on her corpse back to Rukil to open the Promised Land quest.
The Promised Land
Rukil asks you to bring him the journals of his father and grandfather, in the hopes that they, together with the clues in his apprentice's journal, will provide some answer to the riddle of the Promised Land. Both can be found on skeletal remains in the sewers.
Light side Solution: Find the journals and return them to Rukil. Everyone in the village will leave for the Promised Land, including the healer and the merchant, so you may want to postpone completing this quest until just before you enter the Black Vulkar base in the sewers.
Dark Side Solution: Bring the journals back to Igear, who wishes to destroy them, since he fears that his business would be destroyed if everyone left the settlement.
Rakghoul Serum
Talking to Zelka Forn in the Upper City medical facility, you'll hear about a horrific plague that is sweeping through the population of the Under City. Apparently, it transforms a normal, healthy human into a ghoulish monster, interested only in killing. Zelka will inform you that the Sith patrols in the Under City may have an experimental serum that he could synthesize into a cure, but his assistant, the appropriately named Gurney, wants you to sell the serum to a gangster named Davik Kang for 1,000 credits.
(You can also pick the locked door in the medical facility to find some Republic Soldiers in Bacta tanks. If you threaten to tell the Sith about it, you can force Zelka to hand over 100 credits, and earn some points towards the Dark side. If you keep his secret, you earn Light side points.)
The Rakghoul serum is found on the body of a Sith soldier in the Under City, to the east of the settlement there. Once you kill the Rakghouls guarding his body, you can grab the serum and do with it what you will. Before you dispose of the serum, don't forget about the infected outcasts quest that can be completed in the Under City settlement.
Light side Solution: Track down the serum in the Under City and bring it back to Zelka.
Dark Side Solution: Take the serum to Zax in the Lower City Cantina and sell it to him for a tidy sum.
Infected Outcasts
If you speak to the healer in the Under City settlement, she'll let you know about a group of infected Outcast villagers that have been quarantined nearby. If you do get the Rakghoul Serum, you can enter the quarantine cage and heal two of the infected villagers, gaining a few Light side points, or just kill them. You'll retain enough of the serum to complete the main Rakghoul serum quest.
Dantooine
Jedi Enclave
Before you even get to take a breath of fresh air, Bastila will want you to come with her and visit the Jedi Council. Hope you don't have a lightsaber phobia, because it looks like you'll be the proud owner of one pretty soon.
Before you follow Bastila to the Jedi Council, speak with the Twi'lek in the courtyard to learn of a missing girl, apparently captured during a Mandalorian raid some time ago. This isn't a quest, yet; just some useful information to have. You can also visit the merchants off to the east of this landing pad and sell your excess equipment.
Once you reach the Jedi Council, you'll learn that they're not entirely sure of your true capabilities. They'll discuss the situation, and send you away while they deliberate, only to call you back the next morning. Make a party, but don't bother outfitting them yet. Once you arrive at the Jedi Council for the second time, you'll be invited to join the Jedi Order, after the Council judges your mental state. You can lie every time you are given that option to take a Dark side hit; fortunately, the Council is fairly gullible, and understandably so: it'd be a pretty short game for Dark side players if you got washed out before you even became a Jedi. A quick montage sequence will zoom you through the next few weeks of your PC's life. When you finish the montage, you'll be facing Zhar Lestin, the Jedi Master who has been instructed to test you to ensure your fidelity to the Force.

First off, return to the council hall and speak to Masters Vandar and Vrook to learn of the Jedi Code, which constitutes the first of the three tests you need to pass. (Master Dorak also has some fairly interesting backstory about Malak that you will probably want to hear.) Once you have learned the Code, return to Zhar to attempt the first test. (The answers, in order, are: peace, knowledge, serenity, harmony, and the Force.)
After you pass the first test, return to Dorak and learn a bit about lightsabers. He'll instruct you as to the meaning of the different colors of the blade, and eventually ask you what Jedi class you'd like to proceed as. Read over their definitions in the class section near the beginning of this guide to make sure you're clear on the differences between the classes; this is a binding choice! (In short, soldier = guardian, scout = sentinel, and scoundrel = consular. You can do a complete 180 from your initial class, if you wish, or continue along the path that you've been working on since the game began.)
Once you've chosen your class and gone through the level-up procedure, Dorak will give you a crystal and send you back to Zhar, who will help you construct your saber. Finally! Now you can proceed to the third and final quest; Zhar wants you to find the source of a "taint" that has been infecting a meditation grove near the Jedi Academy. If you need to remove items from some members of your party, go back to the Ebon Hawk and do so, then reform your party and outfit them appropriately. Head through the exit to the outer courtyard when you're ready to proceed with the quest.
Courtyard
Objectives: Complete the third Jedi Test
In the Courtyard, you'll run across a few named NPCs. One of them, named Jon, will interrupt your travel and request that you hunt down and eliminate the Mandalorians that killed his daughter; you'll be able to pursue this quest soon enough. Elise has another quest for you; her droid has gone missing, and she wants you to find it. All in good time.
Proceeding south from Elise, you'll run into a few of the previously mentioned Kath hounds. These guys are very weak, so take this opportunity to slice-n-dice with your newfound lightsaber. You can wander through this area, killing all of the Kath hounds that you find. When you're done, take the westernmost path to the Matale grounds.
Matale Grounds
Objectives: Find the source of the dark taint
Take a look around once you arrive in the Matale Grounds; you should see a group of people standing around some kind of transport on a hill near you. Walk towards them to witness a typical Mandalorian solution to a problem. After the Mandalorian eliminates the settler, he will turn on you and become hostile. If you're lucky, the Duros nearby won't notice the fighting and will leave you be for now, so gang up on the Mandalorian and take him down, then finish the other gangsters off. Don't worry about the rest of this area yet; continue south into the Grove.
Grove
Objectives: Find the source of the dark taint
The grove is a smallish area, but with another side quest implanted in it. See the Murdered Settler side quest entry for more info.
Besides that, there are more Kath hounds around, as well as a group of Mandalorians. In a clearing far on the east side of the area, you'll find the source of the darkness; apparently a Dark Jedi named Juhani has set up camp in a small graveyard-like area. When you approach, she'll declare herself to be your destroyer, incapacitate your party members, and engage you in a one-on-one duel. Whip out your lightsaber, and get it on.
If you have enough vitality, this fight shouldn't pose much of a threat to you, but if you are having trouble, you might want to activate one of those energy shields you should have lying around in your inventory--it'll help blunt the damage from her saber a bit. She deals a fair amount of damage, but doesn't do so very quickly, so you should be able to stay on top of things with cure or medpacs.
Once you knock her life down far enough, she'll surrender and offer you a host of dialog options; follow the quest through to its end according to your character's personality. Your best option is to attempt to persuade or talk her into returning to the Jedi Order, since she will be available as a party member eventually if you manage to convince her to repent. You can kill her if you wish, but even Dark Jedi should recognize the usefulness of having another Jedi in the party; what's more, if you do bring her into your party, you'll eventually be able to shift her back over to the Dark side. Once you've disposed of Juhani, however you choose to do so, return to the Jedi Council and speak to Zhar. You should also visit with Juhani if you did manage to bring her back to the Light side of the force, but you won't be able to add her to your party yet.
Once you return to Zhar, you will be officially inducted into the Jedi Order and given a set of Jedi robes. Speak to Master Vandar to learn about your next main quest, which is to investigate the mysterious ruins which lie to the east of the Courtyard. Afterwards, the paterfamilias of the Matale family will barge into the chambers, and accuse the Sandral family of kidnapping his son. This opens up the Sandral-Matale Feud side quest.
Sandral Grounds
Objectives: Complete side quests.
Believe it or not, you can complete the game without entering this area at all, although you'll probably want to take a look, as many of the side quests for this planet require you to visit the Sandral grounds at some point. Even if you're not the side-questing sort, you may still want to pay a visit to the Crystal Cave in the eastern part of this area to pick up a large number of crystals for your lightsabers.
Ruins
Objectives: Discover what happened to Revan and Malak
Speak to the slave droid in the main room here for a long conversation about what exactly these ruins are. Eventually, the droid will come around to the point; in order to discover what exactly Revan and Malak were up to, you'll need to prove yourself worthy to enter the Builder's construction by undergoing two tests, one to the east, one to the west.
Each area consists of an ancient computer terminal, protected by a guardian droid. These droids are highly resistant to most forms of damage, including energy damage, so your lightsaber won't help you very much. If Bastila or your PC has learned stun droid, then this would be an ideal place to use it; you can even use this power to hold the droid in place while your other party members pelt it with ion grenades. Whip out an ion rifle or ion blaster to finish them off, then access the terminal. It will be garbled at first, but if you talk to it, then insert your datapad, then talk to it again, you'll get an interface in galactic basic. Each will ask you to choose three options from a group of six, based on which types of worlds are more likely to bring death (Barren, Volcanic, and Desert) or life (Arboreal, Oceanic, and Grassland). Access both of the terminals to unlock the passage leading deeper into the ruins.
Once you possess the Star Map, return to the Jedi Council. You'll gain a new party member, Juhani, assuming you didn't punch her ticket back in the grove, and be granted permission to leave Dantooine. Head back to the Ebon Hawk, and take a little time to talk to all of your party members to get up to snuff on their personal journal entries--some of these will open up side quests later on, so it's worth getting up to date while you have a bit of downtime. Juhani, Bastila, and Carth will each have new responses to your inquiries at this point, so make sure you rap with each of them before shuttling off to the next planet. You can choose any of the four; you'll need to visit all of them eventually. Due to its alphabetical preeminence, and because Wookiees are cool, we'll head to Kashyykk first.
Side Quests
Murdered Settler
While walking through the grove, you'll come across a Twi'lek Jedi who's been sent to investigate a suspicious death. He'll ask for your assistance in the case, not because he thinks he can't handle it alone, but because he thinks it'll build character.
Like all character-building exercises, this side quest is a bit tedious and will test your patience. You'll have to question the men involved in the killing, and then tell Bolook whom you think is lying. In between each round of investigation, you'll need to question both men and the information droid to unlock the proper comments to Bolook.
To make a very long story short, the liars are:
- Rickard, who couldn't have seen glare, because the sky was cloudy.
- Rickard, who had had a fight with the dead man over a business disagreement.
- Handon, who lied about having his blaster stolen.
After all of this, get the blood report from the droid, make sure you've explored every dialogue option with the two men, and save your game. Talk to Bolook and tell him that it was Handon's blood, because he is holding his side. Go on to explain that both men are guilty, because Handon held a grudge against the dead man for sleeping with his wife. If you did everything correctly, you should find yourself with 1,310 experience; if you solved only parts of the case, you will find yourself with a substantially smaller reward. This quest doesn't involve Force attunement adjustments; screwing it up will only convince Bolook of your incompetence.
The Crystal Cave
This isn't an official, in-the-journal side quest; merely a desirable, but out-of-the-way place to visit. If you find yourself in the Sandral grounds, head to the eastern end of the upper plains to find the entrance to the cave. Inside, you'll find small groups of spider-like beasts; kill them all and you'll find a motherlode of lightsaber crystals. There are even crystals hiding inside of eggs; Bash these open to automatically gain the crystal inside. The crystals aren't all very useful, mind you; many of them are simply color-changers that you probably won't want to use unless you have extra lightsabers hanging around, but there are a few that add damage or attack bonuses to your lightsaber.
Mandalorian Raiders
You'll meet Jon in the courtyard of the Jedi Academy. He'll spin a tale of woe and dread, and ask you to kindly wipe out the Mandalorians that are preying on the settlers in the nearby hills. If you promise to slaughter them, you can get a small Dark side shift.
There are three groups of Mandalorians, one each in the Matale grounds, the Grove, and the Sandral grounds. Once you've eliminated all three of the groups, return to the grove and fight Sherruk, the leader of the Mandalorians, and a small group of his friends. No bones about it, Sherruk is incredibly tough, both in terms of his health reservoir and his ability to deal damage.
A single use of the Force whirlwind power can incapacitate the entire Mandalorian party, if you've obtained it, but without some kind of Force power intervention, Sherruk will chop up your melee members quite quickly. Even if you can't deter the other enemies from attacking, your best bet is still to try to stun Sherruk somehow and concentrate your attacks on him while he's incapable of fighting back. Powers like Force push, stun, wound, or slow should all be concentrated on Sherruk; hopefully one of them will grab hold of him, allowing you to chop-socky him until he's dead. If worst comes to worst, you might want to have whomever is using a melee weapon in your party activate the Mandalorian melee shield you found in this spot earlier to negate some of the damage Sherruk deals. The shield will drop quite quickly, but you can keep reactivating it, or simply save up the charges and activate them when your tank nears death, then heal up.

Once Sherruk falls, finish off the rest of the gang, taking down the Mandalorians first. Check all of the bodies; Sherruk, especially, has some nice loot, including two lightsabers. If you've been priming your character to dual-wield lightsabers, then rejoice; your time has finally come.
Return to Jon to get the experience for the quest. Even if you refuse his reward, he'll push it on you (1,000 credits), but, of course, you can pressure him for more if you wish to obtain more Dark side points.
Side Quests - cont.
Dead Settler
Once you complete your Jedi training, you'll be able to find the body of Casus Sandral on the eastern side of the Matale grounds. This is the scion of the Sandral family, son of Nurik, who would appreciate learning of his son's fate. You can visit him in his compound in the Sandral Grounds to deliver the unfortunate news.
Note that this quest must be completed before you finish the Sandral-Matale Feud side quest.
Missing Companion
Elise is also found in the courtyard; she, too, has a favor to ask. Apparently a house droid that her husband created for her has wandered off/been stolen/disappeared/whatever. Your quest is to find out what happened to it and retrieve it for her.
C8-42 is found in the Sandral grounds, attempting to commit suicide by goading a group of Kath hounds into attacking. To achieve a favorable Light side result, destroy C8 and agree to tell Elise that he's dead. She'll appear to be devastated by the news, but will hook up with a friendly male settler later on in one of the apartments in the Jedi Enclave. If you seek maximum Dark side points, you should destroy C8, and brag to him that you will tell Elise he's still alive. Then follow through by telling Elise that he's still out there somewhere. She'll continue looking for him forever, leading a hollow, empty, meaningless life, devoid of the richness of human contact, until she finally withers away, her last breath a gasped plea for the presence of the beloved droid you destroyed those many years ago. You filthy scum.
Sandral-Matale Feud
Speak to Ahlan Matale at his estate in the Matale Grounds once you have activated the quest after the third Jedi Test. He will relate the story of the disappearance of his son Shen, and insist that the Sandrals are to blame; he'll even offer a bit of a reward for his safe return. Demand more of a reward for an extra Dark side hit.
Head south to the Sandral grounds to speak to Nurik Matale. Or, that is, attempt to speak to him; he rather curtly asks you to leave once after you begin asking him about Shen's disappearance. Luckily, his daughter intercepts you before you are forced out the door, and informs you that yes, indeed, Nurik has kidnapped Shen, as a result of his belief that Nurik kidnapped his own son, Casus. What a wicked web we weave.... The daughter, Rahasia, will give you a key to the compound's other door and ask you to rescue Shen before her father decides to harm Shen.
Head around to the side entrance and proceed back into the compound. Explore the area thoroughly, destroying the war droids that populate the estate, and you should eventually find Rahasia's room, as well as a room that's marked out as a holding cell on your map. One of the Security Rooms in the southwestern corner of the estate contains the Prison Key you'll need to rescue Shen. Talk to him; he'll tell you he's not going to leave the estate unless Rahasia comes as well. Speak to her, and she'll agree to this. Save your game, and then talk to Shen one more time to exit the compound.
Of course, no daring escape is ever quite as easy as it seems in the Star Wars universe. As soon as Shen and Rahasia meet up outside the Sandral compound, their fathers will approach, intent on settling their feud and preventing their children from seeing each other. Your conversation decisions in the mediation will result in one of five outcomes, from a good Light side bonus to a very gruesome Dark side bonus.
- Select the first two conversation options that encourage the fathers to remain calm, then persuade them to let the children remain together in peace. This might not be possible to obtain for characters without high persuasion ranks.
- The children run away to be married and join the enclave, while their fathers presumably carry on with their bitter feud.
- You convince Shen to break off the relationship, and both children return to their fathers.
- You lie to Shen about Rahasia, causing him to become bitter towards her and break up for personal reasons.
- The Yojimbo option: you encourage the families to fight each other, and then goad them on by lying about Casus' death. The families slaughter each other, and you take one huge step towards the Dark side.
Kashyyyk
Czerka Landing Port
Objectives: Find the Star Map
When you land on Kashyyyk for the first time, form up a party with Zaalbar in it and leave the ship; you'll be hit up for a "landing fee" by an employee of the Czerka Corporation. It's only 100 credits, so you might as well pay it, but you can attempt to Force persuade the Ithorian into dropping the fee if you're capable of doing so.
Once you're done with that little run-in, take someone with a high security score and bust open the footlocker on the dock; there's an interface visor inside that's worth having, since it adds four to demolitions, computer use, and security. Even if you have poor scores in those skills, the bonuses may help you out in a jam; if you run into a lock you can't pick, you can attempt to equip the interface visor rather than switching out party members to see if that will help. At the very least it'll save your computer use expert one spike for every hacking action.
Proceed down the ramp to learn more of Zaalbar's backstory, and talk to Eli Gand to pick up on the Honest Debt side quest. When you reach Janos' office, speak to him for a bit of information about the slaving operations that Czerka runs on Kashyyyk, and be sure to look at the caged Wookiee off to one side to stoke your righteous indignation a bit. Oh yeah; they'll pay for this. They will definitely pay.

For now, let cooler heads prevail; you can even shop for weaponry with Janos, though most of it is non-upgradeable. Proceed to the Great Walkway.
The Great Walkway
Objectives: Find the Star Map
Forest Kinraths immediately attack you; tag ‘em and bag ‘em. There are Czerka guards ahead that have killed a Wookiee; you can either goad them into attacking you by protesting their actions for Light side points, or just go ahead and slaughter them if you're of the violent sort. Zaalbar has some pretty amusing comments here if you ask him whether or not the sight of the dead Wookiee makes him mad, though egging him on will cause a Dark side shift. Search their bodies for a Czerka key card. You can use this at the supply station elsewhere on the Great Walkway to open a couple of locked supply containers, if you don't have adequate Security points.
Continue along the path and head to the north when you hit a fork in the road. You should have your first encounter with one of the Dark Jedi groups that Malak has sent to hunt you down. Don't worry; these guys aren't anywhere near as difficult as the fight with Juhani may have led you to anticipate. You can take them down with relative ease; be sure to search their bodies for lightsabers and crystals. If you're dual-wielding lightsabers, or even if you're not, you might want to make a trip back to the Ebon Hawk to upgrade your sabers with the new crystals; the short lightsabers you found will let you dual-wield without quite as much of an attack penalty. You'll eventually run into a Wookiee guarding the entrance to the village of Rwookrrorro. Un-equip Zaalbar before you get too close to the guard; he'll be leaving your party, and any equipment he has on him will be inaccessible to you for a while.
Village of Rwookrrorro
Objectives: Rescue Zaalbar
After the guard escorts you inside, you'll be treated to a bit more exposition regarding Zaalbar and his brother, Chuundar. Chuundar will hold Zaalbar hostage, and send you on a quest to defeat another Wookiee mad-claw who's been exiled to the Shadowlands below the tree village. You'll also hear about Zaalbar's father, whom has apparently been sold into slavery himself.
You won't have any choice but to accept Chuundar's quest. Before you leave the village, you should head to Woorwill's Home to pick up the A Wookiee Lost side quest. Worrrozner, in the Holder of the Laws building, will have a bit more info on the quest. When you're ready to start looking for the mad-claw, head back out to the Great Walkway and proceed past where the Wookiee guard blocked your way earlier. You'll run into some Wookiees on a hunt; help them kill the Kinraths. If you can get on his good side, the leader will tell you a bit about the planet, and even hint at the presence of a lone human in the Shadowlands.
Once you reach Gorwooken, proceed down the elevator to reach the Shadowlands.
Upper Shadowlands
Objectives: Recruit Jolee Bindo
If this is the first planet you're visiting after Dantooine, Calo Nord will appear after you reach the Shadowlands and attack immediately. Check our Galaxy Side Quests section for more info on this foe.
Proceed throughout the Shadowlands, taking down katarns as you come across them. (Which came first, the Kyle or the katarn?) Near the first batch of katarns, there's a body with a Zabrak Tystel Mark III blaster pistol, which, ignoring the name, is probably the best blaster pistol you've come across so far, excepting Carth's with full upgrades.
Rounding the bend, you'll run across Jolee Bindo, soon to become the newest member of your party. Follow him to his hut to the southeast, where he'll ask you to remove some Czerka poachers that are camping to the northwest.
Once you find the poachers, talk to Commander Dern to learn a bit about the situation. If you want to achieve a Dark side solution to the quest, call him a slaver and kill the lot of them; otherwise, you'll need to ask Dern about what it would take for him to leave, then stop talking to him. The guards and the emitters are the key here; eliminate the sonic field that's being generated, and the poachers will have no choice but to leave the area.

Talking to the guards, you'll be faced with a few options. You can ask them about the emitters, then attempt to persuade them to give you the emitter codes so that you can shut them down; you can attempt to persuade them to leave the area (Dern will shoot them before they get anywhere, and you'll earn a Dark side adjustment); or you can bribe them 200 credits to shut down their emitter. Once you shut down two of the emitters, a very big beast will run through the camp, scaring away the poachers once and for all.
Afterwards, head back to Jolee, but un-equip one of your party members before you do, keeping in mind that Jolee will be a required member for a bit.
Lower Shadowlands
Objectives: Confront Freyyr and find the Star Map
Beware the viper kinraths here; they have a poison attack that can slowly sap your party's health if you don't stay on top of their vitality totals. If you gave Jolee the knight valor Force power, use it before entering battle to protect your entire party from the poison.
Speak to the Wookiee fighting the Mandalorians and heal him to get the Hidden Hunters side quest, then head south to find Freyyr in a small cul-de-sac. You'll need to fight him before he'll calm down enough to speak with you; any Force powers that are capable of stunning will come in handy here.
Once Freyyr calms down, you can either proceed with the assassination that Chuundar requested of you, or attempt to help him in his quest to be reinstated as the chieftain of the Wookiee tribe. He'll ask you to find the blade of the mighty Bacca, an ancient Wookiee tribal leader, which was lost in the hide of a ferocious beast elsewhere in the Shadowlands. You'll need to find some bait before the monster will reveal itself to you.
Explore the area, killing the viper kinraths and pick one up into your inventory. Take its body and head to the ritual marker in the southeastern corner of the map, then suspend the body of one of the kinraths from the dangling vine there, making sure that your party is healed up with full Force points before you do so.
A tarentatek will appear behind your party; this massive beast, as you may have learned on Dantooine, preys on Jedi, among other things, and has a limited ability to use the Force, in this case restricted to the Force push power. Your own Force powers won't be very helpful against it, but you can still utilize defensive measures like knight valor or Force shield. The tarentatek has a lot of health, but luckily doesn't deal much damage; you shouldn't have a very difficult time defeating it. Once it dies, you'll obtain the blade to Bacca's Sword; check the body further to obtain the journal of one of the three Jedi who were tasked with killing these beasts.
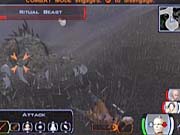
For now, though, bring the blade back to Freyyr, assuming you didn't kill him earlier. He'll go topside to attempt to marshal some troops for a confrontation with Chuundar. Travel all the way back to the elevator, where Gorwooken and a couple of friends will attack you. Unfortunately, there's no way to avoid this fight, so dispatch them and head topside.
Once you arrive back on the Great Walkway, you'll encounter another Wookiee who'll warp you directly to Chuundar's hut. If you're a Light Jedi, you should attempt to talk Zaalbar into attempting to compromise between Chuundar and Freyyr. It won't matter, since Chuundar will start a ruckus anyway, but you'll get a positive alignment adjustment. If you're going for Dark side points, double cross Freyyr and get Zaalbar to side with Chuundar.
Lower Shadowlands - cont.
The fight here is one of the most fun in the game, since it's essentially just 12 characters thrown into a room and told to kill each other. You'll have Freyyr (or Chuundar) and Zaalbar fighting alongside your party, though you won't be able to control Zaalbar, while Chuundar has four Wookiee guards and a couple of Czerka goons by his side. As soon as the battle begins, you'll want to keep it paused and throw down some Force powers to knock the Wookiees on their collective ass, if indeed you have been investing in the ass-knocking powers (again, Force whirlwind is your friend). The battle, surprisingly enough, is not all that difficult. Sure, Chuundar (or Freyyr) can hold his own, but the other Wookiees don't deal very much damage, and the Czerka soldiers might as well be wall decorations. Once all of the enemies are dead, you'll obtain Bacca's Blade, which is arguably the best non-lightsaber melee weapon in the game.
After that, or before that, depending on how adventurous you were, you can find the Star Map in the southwestern corner of the Lower Shadowlands. It's guarded by a computer holosimulation, set up by Malak and Revan to protect the Star Map from anyone but themselves. You should interrogate the computer for all the information you can get, if only so you have more of the backstory. Once you're ready to begin, start to pester it about the Star Map, and it'll start posing hypothetical questions.
You have two basic choices here. Firstly, you can put yourself in Revan's shoes, and answer as he would, i.e. thinking only of your own interests and seeking to maximize your own protection while disregarding that of others. So, you respond:
| 1. | I would accuse Zaalbar to be safe. |
| 2. | My forces attack in ten days. |
| 3. | The death of those people would cause my people to fight. |
| 4. | I let the attack happen. |
Even though you're responding to hypotheticals, you will take a significant Dark side shift from responding this way. If you care to avoid that outcome, answer the questions honorably, and the computer will eventually sic two defense droids on you. These things have shielding that prevents most damage, so you'll have to either ionize them (use any grenades you have) or use stun droid or disable droid to hopefully allow your teammates a bit of uninterrupted time to drop the shields. Even after their shields fall, the droids have resistances to most forms of attack, so you'll want to stick with the ion guns until they die. As usual, if they're too tough for you, and you're adamant about achieving a Light side result, simply come back after you've achieved a few more levels and try again.
After the droids are destroyed, talk to the computer again and it will allow you access to the Star Map.
Side Quests
Honest Debt
At the Kashyyyk Landing Port, you'll run into a merchant named Eli Gand, and his indebted servant Matton Dasol. Apparently Matton's shipmates decided to abandon him on Kashyyyk instead of paying his debt, leaving him high and dry until he works it off. Eli seems to be a bit too unctuous to be believed, however, so it'd be worth your while to look into the matter a bit further.
Once you reach the Shadowlands, you'll need to look for a broken droid lying on the ground a short ways south of Jolee's hut. Salvage its head, then bring it back to Matton. You can either let Matton kill Eli, for a Dark side shift, or allow Eli to run away, with Matton taking his place as the merchant there. Either way, you have to complete this quest before resolving the quest involving Chuundar and the mad-claw in the Shadowlands; Eli and Matton will disappear afterwards.
A Wookiee Lost
When you speak to Woorwill in the Wookiee village, he'll ask you if you have any word of Rorworr, a young Wookiee who had gone on a hunt some time before but had not returned. Other NPC Wookiees in the village will have info on Woorwill, but not much.
When you make it to the Shadowlands, you'll find Rorworr's corpse a bit north of Jolee's Hut. The body contains a slaver contract--Rorworr was apparently one of the Czerka agents responsible for acquisitioning slave labor--as well as a spent bolt casing from a Wookiee bowcaster. And thus, you have yet another murder mystery to solve.
Bring the casing back to Jaarak, Woorwill's friend. He'll recognize it as his, but beg you to ask for a trial from the Holder of the Laws. Go speak to Worrrozner in the building to the east; he's apparently the Wookiee version of a judge and jury. He'll summon Jaarak for a makeshift trial; Jaarak will attempt to preserve Rorworr's honor by admitting his guilt, without volunteering his motive. You should point out the connection to the slavers if you're headed towards the Light side; otherwise, you can let him go to his death for a Dark side shift. You'll get a bit of financial compensation either way.
Hidden Hunters
Once you reach the Lower Shadowlands, you'll stumble across another Wookiee named Grrrwahrr. Heal him after he fights, or he'll die and you won't receive this quest (this gives you a bit of a Light side shift). He'll tell you of groups of Mandalorians that are hiding in the undergrowth, waiting for passersby to put away their weapons before they attack.
In order to complete this quest, you'll need to wander around the Lower Shadowlands with your weapons unequipped until the Mandalorians decide to make a sneak attack. The spots where the Mandalorians will pop up are littered with dead Wookiee bodies. Once they disengage their fancy cloaking technology, you'll have to go back to the menu, re-equip your party, then fight them off. Since these fights will usually start with your party surrounded by a few Mandalorians, you will probably want to use Force powers to immobilize or push away some of them; they'll be easier to kill if you can concentrate on them one at a time. Be sure to search their bodies after they die to gain clues as to why the Mandalorians are on Kashyyyk.
After the second ambush, you should find a swoop bike signal device on one of the bodies. Return to the swoop bike and place the device into one of them to call in the Mandalorian commander. He and his cronies can pose a tough challenge for an under-leveled team of adventurers; if you find yourself getting overwhelmed, you may want to skip these guys for now and come back when you have a bit more vitality under your belt.
That said, the commander seems to be fairly resistant to Force powers, so target your whirlwinds or waves on one of the other Mandalorians to gain the area effect benefit. You'll definitely want to take down the commander first, but make it quick, or the other guys will start throwing in cryoban grenades to slow down the action. Once they're all dead, take the commander's excellent equipment and head back to the Grrrwahrr for your quest experience.
Tatooine
Once you hit the surface, you'll again find yourself in debt to the Czerka Corporation for the total of 100 credits. You can convince the customs agent that you really don't owe him 100 credits, or just pay him off. Buy some bantha fodder from the merchant near the Ebon Hawk; you'll need some later on.
After that, you'll automatically be granted the galaxy side quest The Trouble With Gizka. If you're in a hurry to get rid of them, you'll need some gizka poison, which you can find at the merchant on the docking pad.
Anchorhead
Objectives: Find the Starmap
Your first order of business here will be to acquire a hunting license, if only so that you can leave Anchorhead; the Czerka slugs that own the town refuse to let anyone without a license out of the gates, and that somewhat curtails your options on this planet.
Head to the Czerka office and ask about the possibility of obtaining a license. Unfortunately, they're no longer sold, so you'll have to take on a task before the protocol officer there grants you one. It seems that the Tuskan raiders have been attacking the Czerka's sandcrawlers, apparently out of anger at the technological intrusion into their land. Even I know that you don't violate the Prime Directive without taking your life into your own hands, but apparently the Czerka don't care all that much for Federation law. Anyhoo, the Czerka wants you to wipe them out...all of them. Go ahead and accept the quest; you'll immediately be granted a license, with the understanding that the Czerka will pay a bounty for each gaffi stick you bring back to them.
Once you leave the office, the Duros you saw inside earlier will grab you and ask you to exercise a little restraint in your dealings with the Tuskans. If you're heading down the path of iniquity, you can brush him off right now; otherwise, talk to him to learn of communication problems with the Tuskans that may be solved by a special droid available elsewhere in town.
Another place of interest is the swoop registration office, where you can speak to Motta the Hutt to pick up the Signing Nico side quest, or sign up for some races of your own.
Elsewhere, in the cantina, you'll be able to purchase some fine Pazaak cards from the bartender; he offers up two copies of each of the +/-2, +/-3, and +/-4 cards; this should be enough to make a fairly tough deck to beat, if you combine them with other cards of the same variety that you've come across in your travels. There's also a quasi-cardshark named Furko here who'll offer to play you a few times, with escalating wagers and more difficult side decks as you progress. Unfortunately, once you take him the third time, for 500 credits, he'll refuse to play for money after that. Still, you can clean him out of 750 credits altogether, if you have a decent deck.
Head down to the droid shop to inquire about this mystery droid that can speak Tuskan. Yuka will refuse to let him go for less than 4,000 credits, so exit out of the conversation afterwards and speak to HK-47, the droid in question. Go back to Yuka and you can knock the price down further with a persuade or Force persuade. Once you have bought HK, unequip one of your party members and add the droid to your party.
Before you leave the city, speak to Iziz the Jawa at the city gates to pick up the Fair Trade sidequest, which dovetails into the Sand People quest.
Dune Sea
Objectives: Find the Sand People
Marlena will talk to you when you leave Anchorhead; her husband Tanis has done something or other that displeased her, and she'll make various vague statements regarding his death, and ask you to relay a message to him. This isn't a side-quest, as such, so forget about it for now.
Sand People will occasionally ambush you in groups of three while you're in the Dune Sea, and we can only suppose that Anakin Skywalker wiped out Tuskans that were watered down by millenia of inbreeding, because these guys are tough, especially if you come to Tatooine without a lot of levels under your belt. Their gaffi sticks can stun a member of your party on a successful hit, so bringing along Bastila might be a good idea; she's immune to being stunned due to her Force immunity feat, so she won't stop fighting. If you have any mass-stun powers, use them to break up the attackers, then single one out for destruction. Rinse, repeat.
The sandcrawler to the south of the Dune Sea has recently been attacked by the Sand People. What kind of artillery those Tuskans hide in their canes, Zatoichi-like, is unclear, but whatever it is, it must be pretty powerful to do enough damage to incapacitate a beast of a vehicle like that. Fortunately, they never use it on your party, but they'll still attack en masse once you speak to the sandcrawler's captain, in three waves of four raiders apiece. No holy warriors this time, but you'll have to be careful that you don't overstress your Force powers in the first couple of fights; you'll need to save some to cure or heal your party. Once all three waves of Sand People are vanquished, speak to the captain again to learn a bit about the Sand People's bivouac to the south. Apparently, they've set up a large number of turrets around the position, the better to destroy any approaching intruders.
Proceed still further south from here. There's an amusing diversion involving some broken-down swoop bikes, and exits to the Eastern Dune Sea and the Sand People Territory. When you see the Tuskans guarding the latter exit, engage them and kill them all; there'll be 10 or so in total, so be sure to heal up first. Grab all of the equipment that you can; once you pick up a Sand People uniform, you'll get a quest note explaining that the suits are too small for Zaalbar, so if he's in your party, you'll need to switch him out.
Sand People Territory
Objectives: Find and subdue the Tuskan Raiders
This place is populated by Sand People, obviously, and a whole bunch of mines, so stay frosty on your journey south. You might want to stick to a path near the markers on your way down; the game has a nasty habit of assuming that you're lost and warping you around if you get near the center of the map, which can separate your group.

Once you spot the enclave, dress everyone up in Sand People uniforms and proceed inside. You can try a frontal assault, if you like, but the turrets that are set up in front of the entrance are incredibly resistant to most forms of damage; good luck getting past them. Make sure HK-47 is in your party, if you intend to pursue the best Light side course of action; luckily, the party-switching feature of your map screen is still enabled in this map area. Of course, if you're just gonna cause a ruckus, you can bring whomever you want to the party.
Sand People Enclave
Objectives: Either persuade the Tuskans to cease attacking the Sandcrawlers, or kill them all
Once you're inside the enclave, you can have HK-47 translate for you. The Light side dialogue choices are fairly obvious here, but just be sure you don't accidentally let HK-47 decide what to say - he's a little trigger happy. After a short conversation, you'll be sent back to Anchorhead to find some moisture vaporators. Otherwise, you can go hostile to the Tuskans and kill everyone to find what you came for: the Tuskan Chief's gaffi stick, which you'll have to show to the protocol officer in the Czerka office back in Anchorhead to finish off this quest. Don't miss the Jawas back in the back; these are the tribesmen that Iziz was asking about earlier.
If you decide to help the Tuskans (you'll probably want to use the handy map screen warping tool to jump back to Anchorhead), you'll find that the Czerka protocol officer isn't very interested in your nonviolent solution to the Tuskan problem. Luckily, the Rodian behind the counter is a bit more sympathetic, and will part with a couple of moisture vaporators if you ask him for something specific. Grab them, and head all the way back out to the Sand People enclave.
Once you're there, have HK-47 talk to the guard at the gate; you'll be escorted inside and given another audience with the Chieftain. As long as you play it straight, you'll get everything that you want: the Chieftain's gaffi stick, the Jawa captives, and the ability to look around the enclave. Also, be sure to ask him about the Star Map. One of the rooms to the northeast has some fairly decent items in it, including some heavy plating for HK-47. Don't worry about the rest of the wicker baskets; they mostly contain grenades, and you won't be able to access them without the Tuskans becoming very upset.
Bring the Chieftain's gaffi stick back to the Czerka office for your reward. You can also talk to Iziz by the gates to finish off the Fair Trade quest, assuming you rescued the Jawas. If you missed the East Dune Sea map, either due to not asking the Chieftain about the Star Map, or because you killed him, Iziz will give you a copy of it, so head back out to the vicious wastes and proceed to the East Dune Sea, making sure you have some bantha fodder in your inventory before you do so.
Eastern Dune Sea
Objectives: Investigate the krayt dragon rumors
The eastern portion of the Dune Sea is fairly uninteresting; nothing to see except bantha, dewbacks, and the odd Twi'lek standing in front of a massive cavern. Run over to the cave to watch a little cutscene; you can get close to the cave to see the krayt for yourself, but don't go in. Oh, all right, you can go in if you want. Just make sure you save your game first.
When you're done screwing around, talk to Komad at the cave's entrance. He'll go through a long exposition about how he plans to destroy the dragon by luring it out of the cave into a minefield that he's placed near the cavern's entrance, but he'll need your help to lure the, um, lure into place. It's quite an alluring plan, really.
You did bring bantha fodder, didn't you? If not, you'll need to schlep all the way back to town and get some from the merchant in the spaceport. If you did bring it, just walk up to one of the bantha on the high plains to start it walking towards the cave. The Tuskans will attack, but don't let Komad's fearmongering affect you; they're just Tuskans with blasters. Nothing to worry about unless you plan on podracing through here later on. Dispatch them back to the bosoms of whatever desert gods they worship, then talk to Komad again.
And the other shoe...doesn't fall this time. The plan works, the krayt dragon dies an explosive death, and Komad offers you a reward. This is one time you don't want to be all altruistic and virtuous; we're not talking credits here. You'll receive a krayt dragon pearl for your troubles; use it in a lightsaber to get +2 damage and +3 attack. This is a valuable object, so be sure you pick it up. You can also demand more of the reward and kill Komad for a Dark side shift, but he still only carries one additional pearl, in addition to a couple of grenades.
Head into the cave, checking the bodies and the rubble for items. If you've obtained Bastila's side quest, you'll find her father's holocron next to the Star Map. Get the Map, then head back out of the cave. If you killed Calo Nord earlier, you may run into Darth Bandon here (see the Galaxy Side Quests section for more on Darth Bandon).
Side Quests
Middleman
You'll run into Sharina outside the hunting lodge on Tatooine. She'll spin a tale of woe, and explain that she needs you to sell a wraid plate that her husband found, since she's unable to do it herself due to the fact that she doesn't have a hunting license. You can, of course, simply take it from her for a Dark side shift, or buy it yourself (and turn a profit, once you get your own license), but the best Light side result is gained by offering to sell it for her, and giving her the complete amount of credits that you gain from the sale.
You're going to need a hunting license while you're on Tatooine anyway, so once you get one, return to the hunting lodge. Sell the wraid plate to the Ithorian for 500 credits, and return outside to talk to Sharina. You can either give her back 700 credits, 500 credits, or simply keep all of the money for yourself, with the appropriate alignment adjustments for each answer.
Fair Trade
There's a Jawa by the city gates named Iziz, who claims that some of his tribesmen have been captured by the Tuskan raiders, and asks you to help free them. Free the Jawa prisoners from the Sand People Enclave, and return to Iziz for your reward.
Tanis Trapped
On your first exit to the Dune Sea, you'll come across Marlena, the aggrieved wife of one Tanis, a wraid hunter you may encounter in the hunting office here on Tatooine. She'll make vague threats about killing Tanis, but the quest won't trigger--yet.
Later on, you may spot a few rapidly-moving figures in the distance while on the Dune Sea; this is probably Tanis and the battle droids he uses to hunt with. Marlena, it would appear, has a good repair skill, as she's rigged the droids to explode if Tanis leaves the perimeter that they've set up around him. Guess who gets to repair the explosive droids? That's right.
Actually, you can feel free to leave him if you want, but should you desire to get credit for the quest, you can repair the droids, no parts required. There are four droids in total, each with its own little logic or mathematical puzzle that you can use (in "manual repair" mode) to attempt to bring it back to its proper functioning.
K-X12A Droid: Node 2 is reporting correctly.
K-X12B Droid: The correct value is 7.
K-X12C Droid: Allocate 120 pulses.
K-X12D Droid: Select the third of the four sequences.
Tatooine Swoop Races
As you might expect, this is a fairly straightforward side quest; just keep racing and racing until you beat the best times in each of three tiers to receive a horde of racing bonds, which unfortunately are only useable on Tatooine.
Signing Nico
You'll meet Nico in the swoop offices in Anchorhead; he and Motta have an uneasy relationship, due to Motta's attempts to pressure Nico into signing a contract that's financially weighted towards rewarding Motta for Nico's skills.
If you make nice with Nico, and prove your skills by actually winning the swoop racing championship (and thus completing the Tatooine Swoop Races side-quest), you will eventually be able to: talk Motta into giving Nico a bit more money, for a Light side result; convince Nico to sign the contract; or use your Force persuade skills to force Nico to sign. These latter two have obvious Dark side implications.
Worthy of History
This least essential of side quests involves not only finding a peaceful solution to the Sand People problem, but then bringing them the krayt dragon pearl after you destroy the beast. In order to open up this quest, you'll need to inquire with the Chieftain about his people's history after you bring him back the moisture vaporators; he'll ask you to retrieve the pearl, and after you do so, he will refer you to the tribe's storyteller, who will relate their fairly interesting history. You might want to save your game before handing over the pearl, just in case you don't think the reward is worth the cost.
Manaan
Docking Bay
Objectives: Find the Star Map
Manaan is a neutral world, inhabited freely by both the Sith and the Republic, as the Republic soldier outside the docking bay's doors will tell you. There is only one other NPC in the docking bay, a Selkan by the name of Nubassa, who isn't important except as a solution to the Trouble with Gizka world quest.
West Central
Objectives: Move along, move along
The only point of interest here is Jolan Aphett, a no-nonsense Pazaak player with the endearing combination of a merely average deck and a lot of cash to freely dispense at high limits. If you ever need money, you'll always be able to hit Jolan up for spare credits, provided you have a decent Pazaak deck. Other than him, the only point of interest here is the kolto distribution center, which doesn't have any significance just yet.
Head through the gates to the west courtyard.
Ahto West
Objectives: Pursue side quests
There's nothing critical to KOTOR's main quest in Ahto West, but you can pick up a few side quests for extra experience.
Once you enter the western section of Ahto, you'll run into Elora. If you have Jolee Bindo in your party, she'll ask to speak to him, so shuffle him into your party and initiate a conversation. Thus begins the Sunry Murder Trial side quest. Two other side quests, entitled Missing Selkath and Republic Hiring Mercenaries, are given by a couple of Selkath hanging around in the mercenary enclave. Both of these are fairly easily accomplished as adjuncts to the main quest, so you might as well stop in and say hello to the mercs before continuing on.
East Central
Objectives: Find the Star Map
There's a lot to see and do in east central, mostly relating to the side quests you picked up in Ahto West. If you're in need of Pazaak cards, there's a shifty Rodian standing in the southeast corner of the area with a decent selection of powerful cards; nearby, another, more philosophical Rodian will offer up his opinions on the state of the universe, should you care to hear them.
The main quest picks up again when you speak to Roland Wann at the Republic Embassy. He'll hint that he has information, but will refuse to divulge anything until you help him retrieve a spy droid from the Sith base. Luckily, you'll have a few options for dealing with the situation, roughly corresponding to the different character classes: you can simply assault the base if you think you'll live through some major battles; you can attempt to hack a passcard into the base if you have decent (real-world) math skills; or you can interrogate a Sith prisoner that's being held inside the Republic embassy, if you are decent at persuasion. You don't get experience from the latter two options, so you may want to take the assault mission for an extra thousand XP or so.
The assault takes place in the westernmost hangar at the docking facility; just walk in and start bustin' heads. There is a Dark Jedi apprentice here, who'll prove a minimal threat as long as you have someone with a lightsaber in your party, as well as a Sith grenadier, who can dish out explosive love from a long ways away. You'll want to finish these two off first, preferably after stunning them somehow, then kill the rest of the Sith troopers. When the area is clean, take the transport to the Sith base.
If you wish to hack together a passcard, you'll need to access the terminal in the Republic's computer room. The card has to be coded together via a series of mathematical tests, each following some simple rule. In order, the answers to each matrix are:
- Additive: 22
- Subtractive: 18 (The sequence ends with the subtraction of negative numbers.)
- Multiplicative: 64
- Divisive: 2
- Exponential: 6 (The sequence is 1 to the 6th, 2 to the 5th, and so on.)
- Logarithmic: 7 (Here's where your public school education starts to fail you. Essentially, the first number is equal to 2 raised to the power of the second number. 2 to the 7th power is 128.)
The interrogation is a fairly laborious proceeding--if you don't know what you're doing, that is. The Republic Intelligence officer will fill you in on their interrogation techniques--it seems that the Sith spy can only withstand so much questioning before his mind shuts down entirely, but you'll be able to repeatedly interrogate him without much risk of harm. Not that harm is something the Republic necessarily seems to wish to avoid, here.
At any rate, you'll need to be precise with the questioning if you don't want the prisoner to go into brain-freeze. The best method of questioning is to insinuate that something will happen to Tela; simply ask him about her, then select all three of the persuasion options that appear. (If you continually fail, you may want to try encoding the keycard instead.) He should crack after asking him about his fiancé (but only if you don't threaten him or ask him about his companion), and give with the passcode to the base.
Once you have decided upon your course of action, you'll need to enter the Sith base. If you interrogated the prisoner, or fabricated the keycard, head to the supposed Sith Embassy in the East Courtyard; if you want to start a fight, warp back to the Ebon Hawk and head to the Sith's secured hangar.
| Important: While any party has a decent chance of getting through the Sith base, your best bet is to take along at least one Jedi, preferably two. While this is true of most areas in the game from now on, you'll be seeing some Dark Jedi opponents in the base, and they're much easier to handle if your party members can wield a lightsaber. Also, heading into the base is a one-time proposition, so you should definitely make a save in a new slot before entering; just be sure you don't write over it accidentally. |
Ahto East
Objectives: Enter the Sith Base
Besides the Sith Embassy, there's a droid shop here, as well as the swoop registration offices, where you obviously will go to enter in the Manaan Swoop Races side quest.
Sith Base
Objectives: Find the Republic droid
If you enter the base through the transport from the hangar, head southwest from your starting point; this will place you at the same entrance to the facility that the more stealthy options will use.
Almost immediately after you enter, you'll be challenged by a very hostile receptionist. It's so hard to find good help these days; I'm afraid you'll just have to put her down. She won't listen to you anyway, so select a response and watch as Grann comes down the elevator with four war droids, mark IV. They sound very impressive, but they're no match for destroy droid. Finally, some action!

To achieve your main objective, head north from here until you find the disassembly room. Kill the troops, then take the data module from the droid. You can leave if you want, but if you wish to acquire more info on the missing Selkath, you'll need to proceed further into the base. Note that if you're good at hacking, then you might want to travel to the north computer room in the northwestern corner of the base. You'll need to engage in solo mode and use a speed or cure power to avoid dying from steam exposure, though. Once you arrive you can hack into the base's security measures and cause the usual chaos.)
Head east to find a group of Dark Jedi that need killing, then walk into the flow control room. Dispatch the guards and search the remains for a datapad that'll give you a bit of a clue regarding this base's main puzzle. In order to disengage the airlock venting that blocks access to the northern part of the base, you'll have to learn how to cycle water from one room to the next, without accidentally flooding the room that you're in and drowning. Apparently the Sith engineers don't have to hold themselves up to OSHA standards.
Well, if you want an arbitrary puzzle to solve, please feel free to try and do this one yourself. Otherwise.... Your goal here is to clear a path through one of the two corridors, by shuffling all of the water into the other corridor. There's a very precise solution that can be followed to the letter, or you can endure many minutes of trial and error. The precise solution, starting from the main flow control room, is:
| 1. | Hit the flow control panel outside the left room. |
| 2. | Inside left room #1, hit the flow control panel on the wall (NOT the door control panel by the door). |
| 3. | Go back outside and enter right room #1. Hit the flow control panel on the wall. |
| 4. | Go back to left room #1, then hit the flow control panel on the wall again. Proceed through the doors until you reach the outside corridor. |
From here, head south to engage more Dark Jedi. Afterwards, start following the passage north to eventually find the Training Annex to the base; if you picked up the Missing Selkath quest in the mercenary enclave, you should see a Selkath apprentice just about to enter. After he opens the door, cut him down and proceed inside.
Sith Base - cont.
The medical facility in the eastern corner here holds a dying Selkath who'll give you a personal token that you'll need shortly. Once you have it, head to the dormitory to the west and speak to the Selkath inside. There is a variety of possible outcomes to this encounter, the most favorable of which involves showing the token to the Selkath you speak to, and then using persuade to convince them to leave the embassy for a Light side shift. You can also use Force persuade to get them out of the complex, but this won't get you any closer to that Light side mastery you might want. Of course, you could just slaughter them all for a Dark side shift, but for reasons yet to be revealed, it's best if they leave the facility alive, even if you are a Dark Jedi.
After that conversation (or battle), head through the training room to the east. You might want to save your game first. Just a suggestion.
The Dark Jedi Master here is another toughie, but not impossible. He'll have two Selkath groupies who attack with blasters, but ignore them for the moment. The key here is to incapacitate the Jedi before he can do serious damage; both whirlwind and stasis seem to have a decent chance of connecting, though he will resist your powers more often then not. Once he's incapacitated, gang up on him and take him down hard. Leave the Selkath alone until after he's dead; they're not going to be hurting your Jedi that much anyway.

After the Jedi falls, search his body, and then rifle through the footlocker in the next room. Luckily for you, the Jedi kept detailed financial records of Malak's empire--you'll use this information to take him to court for tax evasion later on. Yeah, he's high and mighty now, but we'll see how a few years in Alcatraz change him.
Now that you've found everything there is to find in the Sith base, proceed back to the elevator and ride up. You will encounter a group of guards seemingly intent on bringing you to trial for causing such a ruckus.
Since you managed to find the Dark Jedi Master's datapad, you'll not have to worry too much about your indiscretions. Just point it out to your arbiter, or choose to represent yourself, and then bring it to the attention of the judges. You get off on a technicality; congratulations. If you had let the Selkath represent you, you would've been executed. Head back to Roland Wann at the Republic Embassy. He'll spin you a tale about an underwater facility that the Republic has built, and you can guess where you'll head off to next.
Hrakert Station
Objectives: Find an Envirosuit and Sonic Emitter
Well, something ominous certainly occurred down here, as the bodies lying about should attest. Search the footlockers here, then head south to run into a very distressed mercenary. After ignoring him completely, go east to find the main area of the base, populated by insane Selkath and roaming droids. There's a fairly simple map layout, and few areas of real interest, so just explore until you find both a sonic emitter (there are two of these in footlockers on this level) and an envirosuit (found in the envirosuit storage section of the station, as marked on your map). When you have both of these, head to the airlock in the middle of the Station's southern side. You'll have to leave your teammates behind for the duration of this mission, so kiss them farewell and step out the airlock.

Sea Floor
Objectives: Get to the Kolto Control facility
This area is the standard model for why walk-throughs exist: to avoid tedium. Your envirosuit is very pretty, but it's also quite slow, and there's nothing you can do to speed yourself up. Luckily, there's a fairly direct path that you can follow.
First off, from your entrance point, take a right to speak to another survivor of the disaster; he'll say that he's heading out to the sea floor. There's only one path to the south (if you head west, you'll be rewarded with two average frag mines in a footlocker, so skip it), so follow your mercenary companion that way.
Exeunt companion stage left, and welcome benthic explorer, to the dreaded vastness of the ocean floor. Head west to run into the sharks, which BioWare, apparently feeling miffed at Sid Meier, have named "firaxa". You can take them out with one shot of your sonic emitter, but, to keep things even, they can kill you in one shot as well. Needless to say, keep your finger on the trigger. If you find yourself getting stuck in the emission animation after taking out a firaxa, don't fret; just sit there for a second and you'll eventually regain control of your character.
Anyway, head west, being sure to loop back into the smashed window to pick up a nerve amplifier belt, and eventually you'll wind up staring at the kolto control facility. Take the southern entrance inside.
Kolto Control
Objectives: Discover the origin of the disaster
You're on your own here, so keep those Force powers at the ready. Once you reach the central room, you'll come across Kono Nolan and Sami, two of the Republic scientists. They'll try to kill you, as all good folks should. You can talk them out of their mistake by banging on the force field repeatedly, or just run over to the computer and hack it to shut down the depressurization fans.
When you calm the pair down, you'll finally learn a bit about what the hell has been happening down here. In sum: there is a monster shark. You must kill it. You have two options: Kono suggests that you attempt to poison the creature by placing a kind of blistering agent in the kolto harvesting machine, and then venting it into the water, which should destroy the beast, but may also have serious side effects on the surrounding environment; Sami thinks you should destroy the drilling equipment that seems to have stirred the monster from its chthonic lair. Either way, you'll need to suit up once again and head back out onto the ocean floor through the airlock behind Kono and Sami.
Hrakert Rift
Objectives: Subdue or destroy the ur-firaxa
Walk a short ways to the east to access the Kolto Control Panel, where you'll face your dilemma alone. As you may surmise, simply by the fact that it was mentioned at all, using the viper's approach will have a fairly adverse effect, and by "adverse" we mean it destroys all of the kolto, as well as precipitates an environmental disaster across all of Manaan. But hey, it's not like you're going to have to stick around here much longer anyway.
Perhaps you would prefer to avoid being called "Oceankiller" by the Selkath for the rest of your life, however. (The poison solution will also get you booted off the planet, so you might want to make sure that you've completed all the side quests that you intend to pursue.) If so, you can choose to destroy the illicit kolto harvester, and most of the surrounding facility, by destabilizing the fuel and causing an explosion. Another mini-game ensues, following the time-honored RPG tradition of attempting to balance the contents of two glasses. In this case, you need to ensure that the container pod is filled to exactly four million sangen, whatever a sangen is. A little reasoning is all that is required to solve this, but for the mathematically disinclined among us, the steps are:
| 1. | Fill the injector pod. (3/0) |
| 2. | Transfer from injector to container. (0/3) |
| 3. | Fill the injector pod. (3/3) |
| 4. | Transfer from injector to container. (1/5) |
| 5. | Dump container pod. (1/0) |
| 6. | Transfer from injector to container. (0/1) |
| 7. | Fill the injector pod. (3/1) |
| 8. | Transfer from injector to container. (0/4) |
In any case, once you've dealt with the firaxan threat, you can now access the Star Map, to the east of the kolto control panel. Return to the surface (being sure to use the northern pressure door in this map; it's a shortcut back to Hrakert station) for dressing-down from Roland, and your reward.
It wouldn't be Manaan without some more litigation, so you won't be able to leave just yet; you'll be apprehended again after you leave the Embassy and brought to trial, under the assumption that you caused the explosions at the Hrakert Rift. They've got you there, and there's no avoiding justice in this situation. Assuming you destroyed the harvester, feel free to be truthful; they'll actually commend you for your environmental awareness, which should make all you Final Fantasy players feel right at home. On the other hand, if you managed to poison the entire planet, then the Selkath will somehow restrain themselves from using you as firaxa chum and banish you from the planet. Either way, you've got what you came for.
Side Quests
Sunry Murder Trial
Again, Jolee will be required before you can complete this mission, so if you haven't acquired his services yet, travel to Kashyyyk to pick him up.
Once you head into West Ahto, Elora will ask Jolee to help her; her husband, an old friend of Jolee's, has been arrested for murder. Speak to the Judge Shelkar in the Ahto High Court to get all of the pertinent information that you'll require; you can then go on to question all of the other judges about the case to get an idea of their prejudices and opinions on the case itself.
Now that you've been declared an Arbiter, you'll be able to enter the jail and speak to Sunry himself; do so and interrogate him thoroughly. Be sure to explore every conversation option to get all the information you need; Sunry will, of course, claim that it was a Sith frame-up, and even ask you to find a way into the Sith Embassy to look for information.
Regardless, the visitor's hotel in east central should be your first stop. Ignus, the hotel's clerk, will stick to his story, where Sunry left Elassa's room after the blaster went off. Note that players with some persuasion ability can easily bribe him to lie in court; this gives you a minor Dark side hit, but will help out your case later on, so you should do it unless you're really into role-playing the virtuous path. The Rodian witness Gluupor will reveal with a minimum of fuss that a male Sith paid him to plant the Republic War Medal in Elassa's hand after she was killed. The other witness, Firith Me, has a story similar to Ignus', but also says that Elassa may have been a Dark Jedi. This information is needed for the trial, but isn't quite enough to clear Sunry.
Once you leave the Hotel, a mysterious stranger will advise you to inquire about the matter at the Embassies of the Republic and the Sith. Why? Your guess is as good as mine; the staff of neither Embassy seems to have much information, and even if you break into the Sith base, you won't find much to incriminate the Sith as an organization.
After visiting the hotel, you can persuade either Elora or Sunry to tell you about his affair. It is fairly vital to get this information before the trial begins, for your information, so be sure to speak to them both if one of them refuses to be persuaded. Once you have every single piece of evidence you can find, proceed back to the judges and begin the trial.
Now, there are several ways to prevent Sunry's execution. The O.J. solution is to win over three of the judges; if a simple majority believe that Sunry is innocent, then he will be set free, while there will be lingering doubt about his innocence, although you'll still get an experience reward. More experience is gained by convincing four of the judges, but the best rewards are reserved for the litigator who can bring all of the judges over to his or her side.
Let's assume that you want the "best" result. Begin by stating that you intend to prove Sunry's innocence. The first witness that will be available for questioning is Firith Me. Ask him:
| 1. | Did you see the murder occur? |
| 2. | Wasn't that medal a little obvious? |
| 3. | Elassa was a Dark Jedi, wasn't she? |
| 4. | No more questions. |
You can poll the judges in between each round of questioning, to see where their opinion is headed. Each will respond with something that corresponds to a not guilty, unsure, or guilty plea. You still have plenty of witnesses, and a closing argument, so don't start worrying about the outcome just yet.
Next up is Gluupor. Ask:
| 1. | Did you see Sunry kill Elassa? |
| 2. | Isn't that medal a little too obvious? |
| 3. | Did you plant the medal? |
| 4. | No further questions. |
Next, Elora.
| 1. | Was your husband having an affair? |
| 2. | No further questions. |
For the man himself, Sunry, ask:
| 1. | How could Elassa have gotten hold of your medal? |
| 2. | You intended to end the affair. Would the Sith have killed her for this? |
| 3. | No further questions. |
Now, the closing argument:
| 1. | No one saw Sunry kill Elassa. |
| 2. | The affair was over, and that's why the Sith killed Elassa. |
If you've done all of this properly, then you'll receive the grand bonus of...wait for it...500 experience. Yes, all of that toil nets you less experience than killing a Sith grenadier. Thanks, BioWare! The good news is that you earned experience points at various steps along the way, so the sum total isn't all that disappointing.
For better or for worse, you can slice into the computer terminal at the Republic Embassy before you complete the actual trial for the real truth behind the case. Note that doing so will prevent you from using the above trial walk-through without taking a shift to the Dark side, but if you're really interested in perverting justice, then it might be worth your while to hack the Republic database, because...he actually did do it. Yep, shot her in the back.
Side Quests - cont.
Missing Selkath
A Selkath in the mercenary enclave in Ahto West will spin you a disturbing tale of adolescent Selkath vanishing; apparently all of this began sometime soon after the Sith began arriving.
Talk to the Iridorian to learn about his role in this affair. He'll refer you to the Sith Embassy, who will understandably not be forthcoming with information. You'll need to find what info you can when you break into the Sith base during the main part of the quest.
Once you grab the datapad from the Dark Jedi Master, and (hopefully) free Sasha, return to Shaelas and break the news. You can accept his reward, or refuse it for a beneficial Light side bonus.
Republic Hiring Mercenaries
Another Selkath in the mercenary enclave will express a bit of worry over the fact that the Republic is paying exorbitant fees to hire elite mercenaries. The other mercenaries around the enclave will tell you little, except that the mercenaries that are hired have a bad habit of never being seen again.
Upon leaving the enclave, you'll run across a Republic officer recruiting a mercenary. If you ask him for a job, he'll refer you to Roland Wann, who resides at the Republic Embassy. Roland won't reveal why they've been hiring mercenaries until after you infiltrate the Sith base for him; once that's done, he'll fill you in on the details. Proceed on to the Hrakert Station to discover the fate of the mercenaries, then report back to Nilko for your reward.
Manaan Swoop Races
You'll run into Queedle in the Manaan swoop registration office. He's been trying to make his way as a swoop racer, but has had a hard time of it, due to the fact that his swoop bike just doesn't seem to be able to compete with the big boys. How you deal with him affects your Force alignment, in much the same manner as your dealings with Nico on Tatooine. Note that giving him money to improve his swoop bike actually gives you lower times to beat during the final tier, which merely goes to show that it is sometimes literally true that nice guys finish last.
Besides your interactions with Queedle, this quest relies on your cunning ability to steer a swoop bike. You'll need to beat the best times in three tiers before you finally achieve championship status on Manaan.
Korriban
Dreshdae
Objectives: Locate the Star Map
Korriban is a world dominated by the Sith; their main training academy is located here. Indeed, this very planet was where Exar Kun fell to the Dark side not many decades before the time of the game.
After you land, pester the mechanic on the docking platform for a bit of background information about Korriban and the Sith Academy. It would seem that the Star Map is likely located on excavations that the Sith are performing on the surface of the planet. Unfortunately, only Sith Academy members are allowed access to the excavations. Guess what you have to do next?
As you proceed into the facilities, you'll come across a couple of vignettes where you'll be forced to choose between violence and inaction. The first involves a group of acolytes attempting to gain access to the Sith Academy--you'll be asked to choose whether their instructor, one Shaardan, should let them live or die. The second involves a confrontation with a group of Sith apprentices. Despite appearances, you won't be able to fight them--yet. There aren't any alignment shifts as a result of this conversation, no matter what you choose.
Speak to the prospective Sith in the Czerka store to get yet more background--it would seem that there's a Sith Academy instructor that hangs around the nearby cantina that you're going to need to impress. Outside that same cantina, there's a Rodian named Lurze Kesh who offers you the Unfinished Business side quest. For now, head out the exit to the Sith Academy Entrance.
(Just as a note, you may eventually be able to buy items from Mika Dorin, the bartender in the cantina in Dreshdae. He sells some fantastically expensive items, such as +5 Strength gloves for more than 20,000 credits. He won't initially offer to sell you items; after you complete the Leviathan portion of the game, a mysterious man will approach you at one of the starports who will tell you to visit Mika; after that, you'll be able to purchase anything you like at this secret shop.)
Sith Academy Entrance
Objectives: Find a way into the Sith Academy
Speak to the guard at the main entrance. He'll inform you of the Sith medallion that you'll need to gain access to the Academy. If you haven't obtained one of these yet, return to the cantina and speak to Yuthura Ban, a Twi'lek Dark Jedi Master. Before you go back, though, you might want to talk to the starving Sith apprentices near the door; they're being slowly tormented by Mekel, who is refusing them food or water. If you speak to them, then speak to Mekel, you will have a chance of getting him to leave for dinner, if you choose the correct responses ("I won't let you do this!", etc.). Once he's gone, speak to each of the candidates again. You can attempt to get them to leave, or have them do something foolish, all of which requires successful persuasion, resulting in the corresponding shifts in Force alignment.
If you're playing Dark side, then you can simply accept Yuthura's offer of sponsorship into the Sith academy, and you'll be teleported there immediately. If not, however, you should attempt to lie to her to gain entrance. She won't fall for it, and will reject your application.
Head back up the ramp towards the Ebon Hawk. You'll be accosted by Sith hooligans, eager to kill seemingly just for the fun of it. You can accept their offer of a fight, or attempt to avoid a fight in order to gain Light side points. If you do kill them, one of their bodies will have the Sith medallion that you need.
If you don't kill them, or even if you do, you can proceed further back towards the Hawk to encounter yet another crazy Sith who wants to kill people. If you attempt to protect the Twi'lek he's threatening, he'll go hostile with you; kill him for a Sith medallion and a bondar crystal.
Once you have your Medallion, you can talk to some of the other prospective Sith to tease them about it, or just talk to Yuthura to gain access to the Academy.
Sith Academy
Objectives: Gain access to the Sith excavations
After you arrive inside the Academy, you'll be given something of an entrance interview with the Academy's headmaster, Uthar Wynn. Answer his questions, and you'll find yourself set loose, along with your fellow candidates, to gain prestige and hopefully become the single candidate chosen to become a Sith. There are quite a few different quests on this planet, some of them small, most of them not.
The Double-Cross: Before you start roaming the school, you'll be caught up by a hall monitor: Yuthura waits outside your room, and offers you the opportunity to help her eliminate Uthar once you become the final candidate. You can follow her instructions to the letter, if you like, but if you do decide to tell Uthar about the plot, he'll give you another quest...
The Double-Double-Cross: With the datapad from Uthar in hand, head to Adrenas to set in motion events that will lead to Yuthura getting a healthy dose of poison, thus weakening her before your final battle. You can, however, turn the tables on the dynamic duo yet again, by informing Yuthura of what Uthar has done. She'll give you a poisonous device to place in Uthar's cot, along with a passkey to get into his room. Now, if you click on Uthar's bed, the device will be implanted, and both Uthar and Yuthura will be weakened during your pending fight. Don't miss the Sith mask in Uthar's footlocker.
You don't get any prestige for either of these quests, but you do get experience, without a Force alignment shift.
Renegade Sith: If you ask Yuthura about gaining prestige, she will tell you about a number of former Sith students who disobeyed an execution order from Uthar, and have thus been sentenced to execution themselves.
The Sith in question are sequestered away in the Shyrack caves, which is the first exit from the path that leads into the Valley of the Dark Lords. Once you track them down, you can, as always, kill them or help them. Helping them entails killing a terentatek in the eastern part of the caves. Whether you help them or destroy them, however, you'll want to fight through the terentatek anyway, since you'll find the bodies of the two other Jedi sent to kill the beasts to the north of its position, along with the incredible Qel-Droma Robes, which only a Light side Jedi can use. Helping them will gain you prestige, as you'll be able to claim to Uthar that you have solved the problem, which is technically true.
The Way of the Sith: After you learn the Sith Code from Yuthura, head back to Uthar and ask to be tested. The answers to his oral exam are:
| 1. | Passion |
| 2. | Strength |
| 3. | Power |
| 4. | Victory |
| 5. | My chains are broken. |
After this, he'll ask you one of three questions about the code.
| 1. | There is nothing worse than love: false. |
| 2. | Victory is always desirable: false. |
| 3. | It is passion that fuels the Force: true. |
The Sword of Ajunta Pall: Speak to one of the Sith students in the main chamber where Uthar Wynn is meditating. If you ask him how to gain prestige, he'll spin you a tale of a great Sith master who's buried in the Valley of the Dark Lords beyond the Academy, and say that if you could recover the sword, you'd undoubtedly gain prestige.
Sith Academy - cont.
A Doubting Sith: To the south of your starting point, you'll find Kel Algwinn, a Sith candidate who appears to be somewhat reticent about his career choice. If you can manage to persuade or Force persuade him to tell you what's wrong, he'll open up about his insecurities. Telling him to join the Jedi is a Light side choice; everything else is either neutral or Dark side, and you can earn a prestige point for eating cheese and ratting him out to Uthar.
Aiding Lashowe: Lashowe, the female candidate for the Sith position, has a bead on an artifact, the retrieval of which would probably impress Uthar to no end. If you can manage to persuade her into telling you what it is, and then letting you help her out, she'll relocate to the far northern end of the Valley of the Dark Lords.
The Hermit in the Hills: Speak to the Sith teacher watching over the lightsaber contestants near the door to the valley to pick up this quest. It seems that Uthar's former master has gone insane, and now inhabits the nearby hills, kidnapping Sith students. Killing him might gain you prestige.
The Mandalorian Weapons Cache: There's a Mandalorian being interrogated in the eastern wing of the Academy; if you ask the interrogator there for a go, he'll let you attempt to get the information that the Sith value, regarding the location of the Mandalorian's weapon stash. If you have high computer use skills, you can attempt to convince the Mandalorian that you intend to help him, then use the console to send him into a coma, from which he will recover, but be useless to the Sith while in.
If you want prestige, and a Dark side penalty, inject the Mandalorian with two small doses of truth serum, then one of the biggest doses, and only then ask him about the weapons. He'll dish with the info, which the interrogator will attempt to claim as the result of his work. Kill the interrogator, then return to Uthar to gain that prestige.
Rogue Droid: This quest isn't available until you reach the Valley of the Dark Lords. Speak to the Sith student outside the Tomb of Marko Ragnus to pick it up, then head inside the same tomb to complete the quest.

One last area of interest here, while not quest-related, is the Dueling Room in the southeastern corner of the academy. While there's not much to do here, there is a computer terminal that you can slice into; one of its options allows you access to the academy's datafiles. Good hackers will able to repeatedly perform this action for very few spikes; T3-M4 is a good choice for this task, obviously, and if you can get his computer use skill up above 36 or so, you can repeatedly perform the action for free. The reason you'd want to do it over and over again is that the game erroneously awards you experience each time you do it, thus creating an experience well that's limited only by your available computer spikes, or by the game's experience cap, if you do manage to hack for free. Cheesy, yes, but very handy for power-leveling.
After you have completed enough of these quests to sufficiently impress Uthar, he'll congratulate you and let you know that you've won. Your final test occurs next, and you'll be going alone, so be sure to loot your teammates of the best lightsabers and other equipment. Once you talk to Uthar again, you'll be whisked off to the Tomb of Naga Sadow.
The Valley of the Dark Lords
Objectives: Gain prestige to become this year's Sith Apprentice
There are exits from this area to the Shyrack Caves, the Tomb of Ajunta Pall, the Tomb of Marko Ragnus, the Tomb of Tulak Hord, and the Tomb of Naga Sadow.
You'll run into Dak Vesser near the entrance to the Valley proper; if Juhani is in your party, he and she will have a frigid little back-and-forth which causes Dak to run off after you're done speaking to him. He'll still fill you in on the Tombs, if you ask nicely.
Lashowe is at the far north end of the tombs. When you meet up with her, a fight against a few tuk'ata will commence; kill them and Lashowe will obtain the holocron. She will, to no one's great surprise, attempt to run off to Uthar and gain the credit for herself. If you insist on presenting the holocron to him together, she'll attack you; kill her and take the holocron for yourself. Don't worry--this is a neutral Force alignment result.
Other than that, the four tombs here present good methods for Light side Jedi to obtain prestige without Dark side alignment shifts.
Shyrack Caves
Objectives: Investigate the renegade Sith
The renegade Sith that you learned of earlier are sequestered away in the Shyrack caves, which is the first exit from the path that leads into the Valley of the Dark Lords. Once you track them down, you can, as always, kill them or help them. Helping them entails killing a terentatek in the eastern part of the caves. Whether you help them or destroy them, however, you'll want to fight through the terentatek anyway, since you'll find the bodies of the two other Jedi sent to kill the beasts to the north of its position, along with the incredible Qel-Droma Robes, which only a Light side Jedi can use.
Whether you kill the students, or help them escape, you'll be able to return to Uthar for prestige upon completion of this quest. If you let them live, lie to him by stating that the students are "gone."
The Tomb of Ajunta
Objectives: Find the Sword of Ajunta
The Tomb of Ajunta Pall is located on the eastern side of the Valley; head in and start looking around, if you can get past the locked door that begins the area (DC 28). Once inside, check the first Sith body you find for a demolitions sensor, which grants you +8 to Awareness and +4 to Demolitions; should be handy for the many mines you will hopefully not be stumbling across.
After you're inside, start picking through the bodies for datapads and other items. There'll be a pillar blocking your way that brings up an inventory screen when you click on it; put an explosive device, like a frag mine, inside of it to blow it up. The droids across the way will all suddenly activate and start firing upon you; destroy droid will shut them down with a minimum of fuss, as will fire from an ion gun. You can run to the far end of the path and pull the lever to kill them easily, but you won't gain any experience from doing so.
After another locked door (DC 28), you'll be inside Ajunta's Tomb. Click on the tomb door, and then the sarcophagus to gain three swords, and release the spirit of Ajunta himself. Talk to him, then place the notched steel sword onto the Sith Statue behind the tomb. Speak to Ajunta again; you'll get his true sword, and you'll also be able to attempt to turn his spirit back to the Light side for a large alignment adjustment. If you choose the wrong sword, or anger Ajunta during your dialogues, he'll attack you.
You'll run into Shaardan on your way out of the tomb, eager to "relieve you of your burden." You can give him one of the false swords, or force him into a fight and kill him. Or, heck, you can even give him the real sword if you wish; let it not be said that KOTOR doesn't give you options. If you do give him a false sword, he'll be killed by Uthar the next time you enter the Academy.
The Tomb of Marko Ragnus
Objectives: Locate and destroy the rogue droid.
After speaking to the Sith student outside, head into the tomb. As you can surmise from her information, there's going to be quite a few droids inside, so you might want to load up on ion weapons for any of your blaster users. If you have a sound dampening stealth unit (you can find one on a corpse just inside the door), you may be able to avoid the droid army, and achieve a Light side solution to the quest by repairing the rogue droid, but there's massive amounts of experience to be gained by killing them.

Once you're inside, there's going to be a sustained run-and-gun up a long passageway that's filled with war droids. The party members that you don't directly control will tend to rush ahead recklessly, so you may need to switch control constantly in order to keep some semblance of order among your party. Obviously, the destroy droid power will be a big help here, especially against the mark V droids.
When you go through the door at the end of the ramp, you'll meet up with the rogue assassin droid and five of his closest friends. Destroy them, then open the tomb (DC 28) to obtain Marko Ragnus' gauntlets and a sigil crystal.
The Tomb of Tulak Hord
Objectives: Destroy the tuk'ata infestation
When you find the ancient console inside this tomb, save your game, then use the console to open the door and pass through, only to be captured by Jorak Uln. He'll force you into taking an examination; all you should be concerned with is not making it a final exam.
Now, you can either answer the questions in a Sith fashion, which will result in Mekel's death and Jorak's hasty exit, or you can refuse to answer or give Light side answers to the questions, which will eventually result in Mekel breaking out of his stasis and freeing all of you, allowing you to attack Jorak. Your player-character is going to be on the brink of death, most likely, so run away from Jorak quickly before he cuts you down.
Afterwards, you can attempt to turn Mekel to the Light side. Search Jorak's body for items, then grab Tulak Hord's mask from his locked sarcophagus (DC 28). The other doors here contain urns with a variety of lightsaber crystals inside of them.
The Tomb of Naga Sadow
Objectives: Find the Star Map
This tomb, by necessity, is the last of the four you will enter, since only by winning the competition and impressing Uthar will you gain access. Once Uthar escorts you to the tomb, you'll be tasked with facing the challenges within by yourself, with only your wits and your lightsaber to help.
To the east of the corridor branching, you encounter an optional minigame that requires you to transfer energy pulses between three pillars until they all reside on the rightmost pillar. Of course, nothing's ever simple in KOTOR, so you'll have to follow certain rules:
| 1. | The top-most energy ring can be transferred between pillars freely. |
| 2. | The upper-middle ring can only be transferred to pillars where there is no top ring. |
| 3. | The bottom-middle ring can only be transferred to pillars where there are no rings, or only a bottom ring. |
| 4. | The bottom ring must be transferred to a bare pillar. |
If you're the sort that likes to solve the minigames, feel free; just keep in mind that if you violate any of the above rules twice, you'll be toasted. The correct solution is as follows:
| 1. | Top ring: left pillar to middle pillar. |
| 2. | Upper-middle: left to right. |
| 3. | Top: middle to right. |
| 4. | Mid-lower: left to middle. |
| 5. | Top: right to left. |
| 6. | Upper-middle: right to middle. |
| 7. | Top: left to middle. |
| 8. | Bottom: left to right. |
| 9. | Top: middle to right. |
| 10. | Upper-middle: middle to left. |
| 11. | Top: right to left |
| 12. | Lower-middle: middle to right. |
| 13. | Top: left to middle. |
| 14. | Upper-middle: left to right. |
| 15. | Top: middle to right. |
That wasn't so bad, now was it? In case you’re wondering whether or not this optional game is worth it, the loot includes a nextor crystal, a Zabrak blaster pistol, an Eriadu strength amplifier, and Naga Sadow’s poison blade, which deals 4-15 damage as a one-handed melee weapon, with a good chance of poisoning your target on a successful hit. Once you’re done raiding the tomb, head back to the corridor branch.
Heading west this time, you'll enter a chamber where you'll face off against two terentateks simultaneously. Even though your party probably handled the earlier beast in the Shyrack Caves easily, two will be a challenge for any solo character. Activate any defensive force powers you have available, and attempt to stun them via, for instance, Force whirlwind if at all possible.
They get +30 to their attack rolls, and deal over 25 damage per hit, so you’ll definitely need to beware sudden drops in health. Equip Brejik’s belt if you can, to save yourself from five points of damage per blow. If you can stun both of the tarentateks, then concentrate your attacks on one of them until it falls, then repeat the process for the other. If you find yourself completely outmatched, you may be able to use stealth to bypass the tarentateks.
The Tomb of Naga Sadow - cont.
After they die, search the body of Shaela, the last of the Jedi terentatek hunters, to pick up her journal and the best lightsaber crystal in the game. Assuming you're a Light side player, you'll want to implant this into your saber as soon as possible. At any rate, you'll need to pull the lever nearby to access the antechamber here, which contains two special grenades.
Take the grenades and head south from the corridor branch. You'll encounter a pool of acid, and will have to decide which grenade to throw in. Since the fire grenade makes the acid airborne and kills you, you might want to use the ice grenade, which freezes the pool and makes it passable.
Walk over the pool and head towards the door; there's a deadly plasma mine that can dish out up to 70 damage to you if you don't spot it, so make sure you're healed up before passing through. Grab the Star Map and the Sith lightsaber, then walk back down to the acid pool for your final test. Go through the same preparations as you did for your fight with Malak: good energy shields, mind-affecting immunity if possible, increased will and fortitude saves, etc.
Uthar and Yuthura wait for you, and this is where all the scheming in the Double-Cross quest will pay off. Your choices are: help Yuthara defeat Uthar; help Uthar defeat Yuthara; or attempt to take both of them on. If you accomplished any of the outcomes of the Double-Cross quests, you'll reap the fruits of your labor here, as one of or both of the competitors will be weakened by poison. Even so, a Dark Jedi of these levels of power is no powder puff.
If you side with Yuthara against Uthar, he will feel the effects of the poison if you placed it in his bed earlier, then both you and Yuthara will be attacked. Uthar is the more difficult of the two, if only because his death field attack will heal him repeatedly just when you think you're about to finish him off. When he runs out of Force points, he'll activate a life support kit; this is when you know you're almost through with him. After he dies, Yuthara will turn on you, and again, if you poisoned her, she'll feel it now. She's a much easier foe than Uthar.
If you choose to stand against Yuthara, you'll take a Dark side hit if you inquired about her past back in the Sith Academy. As stated above, she's not too difficult to defeat. Uthar will subsequently turn on you afterwards, though, unless you displayed a foolish degree of loyalty by following through the Double-Double-Cross quest without informing Yuthara of your plans, and without poisoning him as well. If you did poison him, or if you did tip off Yuthara, you'll have to face Uthar alone, which is obviously a tall order.
Facing Uthar and Yuthara together is obviously going to be difficult for any but the brawniest of Jedi guardians. For once, you might want to dispose of the weaker enemy first and kill Yuthara before Uthar, if only to prevent your energy shield from falling as quickly, and since Uthar will abuse his death field attack to stay alive much longer than he should be able to. If you're interested in a less complicated method of proceeding with this attack, just place as many mines as you have in the corridor leading down to the acid pool; once the pair attack you, run away from them, and when they hit the mines, they should be crippled, if not killed outright. Note that if you do pursue this course, and actually manage to kill both of the Dark Jedi, you'll have to fight your way through the entire student body of the Academy on your way out. You'll regain your teammates once you reach the Academy's interior, though, so this shouldn't be too hard for you; if you're looking for extra experience, or if you just want to be the king of the hill, this is the way to go.
Uthar's body contains 3,000 credits, a Cinnagar war suit, and a security domination interface, while Yuthara's contains just a poison grenade, a hyper-adrenal alacrity stim, and 1,500 credits.
Side Quests
Unfinished Business
Speak to Lurze Kesh outside the cantina here; he'll ask you if you wouldn't mind unlocking a hidden smuggling container on your ship and delivering the contents to him. You can find the container in the cargo hold of your ship, where all the supplies are; if you bring the spice back to Lurze, he'll pay you 1,000 credits, and offer you a courier mission to Motta the Hutt, the swoop track kingpin on Tatooine.

Should you decide to take him up on the offer, a "mysterious box" will be placed in the cargo hold of the Ebon Hawk. Lurze will warn you not to open it, and with good reason: it'll eat your soul and place it inside a prison without walls. You'll encounter your first member of the Rakatan species inside, if indeed you do choose to open the box; in order to escape, you'll have to challenge him to a duel of riddles. The solutions to the Rakatan's riddles are, in order: "time," "tomorrow," "a grave," and finally, "a flame." After you answer all of his riddles correctly, the Rakatan will return you to your body. If you return the box to Motta at the swoop track in Tatooine, he'll give you 2,000 credits for your trouble.
Leviathan
The Leviathan section of the game will automatically begin after you leave the planet where you find the third Star Map. The Ebon Hawk will be tractored aboard Saul Karath's ship, and very bad things will begin to happen.
Carth, Bastila, and your PC will be captured, so you'll need to pick one of your other teammates to hopefully escape imprisonment and rescue you, excepting Zaalbar, who obviously would have a difficult time evading capture by the Sith. Any character that you pick to be involved in the rescue will start completely unequipped, with only their skills and Force powers to rely on.
Before your impromptu excursion begins, though, you'll have to endure some torture at the hands of Saul, Carth's old mentor. Your choices here have no effect on the events to follow; you'll need to break out of the prison whether you freely offer up information, or let your teammates be tortured.

Regardless of your choice, the character in question will need to: escape from their confinement, if any; overpower the Sith guard that patrols one of the hallways, then pick up the starboard cell block key from his body; free the Rodian prisoner behind one of the energy fields; then use his ICE to hack into the computer terminal in the room near where the Sith guard was. Once you've broken into the terminal, you can open all of the cell doors in the prison, which lets out all of the Rodian crazies, then activate the emergency riot system, which will kill all of the Rodians and Sith in the hallway. You can continue to hack until you unlock the door that Carth and Bastila are behind, or just pick up the key from the footlocker in the (now empty) barracks. Regardless, head up to the holding facility and let your teammates free; they'll make a mandatory party for you, and you'll be on your way.
Picking a Character
HK-47
HK begins his little quest inside a droid technician's office. If you had him equipped with items before the Leviathan was boarded, he apparently retains them, so use anything you have to kill the technician, then load up with the parts you find around the office. You can use the parts you find to repair the decommissioned droid in the corner, and use it to take out the Sith troopers that roam the hallways. Follow it down the hallway, until it kills the Sith guard with the keycard you need to rescue Carth and Bastila, then head back towards your point of origin to free them. Otherwise, the flamethrower you find in this room is an excellent killer.
T3-M4
As soon as T3 is left alone in the droid repair office, you'll begin a little mathematical minigame, where you're able to disable the droid that's attempting to wipe your memory. (The correct answers are 3, 10, and 11.) Once the droid is taken care of, grab the equipment from the lockers in the room and load yourself out, then head down to free the Rodian from his cell and free Bastila and the others.
Canderous
How cool is this guy? He volunteers to shut down his healing mods for a few minutes, then detonate a grenade nearby to give the Sith the impression that he's about to die. Once he escapes the medical facility, he'll need to overpower the guards hand-to-hand until he finds the one with the keycard.
Mission
Mission luckily retains a stealth field generator once she breaks out of her cell, which is, you have to admit, a fairly strong indictment against Sith prison policies. Once she's out, you can use her security skill to break the Rodian free from his cell, then activate stealth and head to the terminal in the room near the Sith guard that roams the halls. Unlock the door to the detention area, then head up the hallway and get free Carth, et al.
| Important: There is apparently a bug in the game where, if you free Carth and Bastila while Mission is in stealth mode, she'll stay that way permanently. This can cause huge problems later on, and even make you unable to complete the game if you need to speak to her later on, and can't see her to talk to her. Just to be on the safe side, your best bet is to use another character. |
Jolee
Jolee has a great little scene with a Sith trooper, after which you'll be freed of your cell. If you've given him decent offensive Force powers, he'll be able to take out all of the troops in the Barracks by himself, which gets you the key to the prison where Carth and Bastila are being held; if you want the extra experience, you can go and play rescue the Rodian anyway.
Juhani
Juhani, like Jolee, is powerful enough to overpower any of the Sith in the lower part of this level, so you can either free the Rodian, or enter into the barracks to grab the key, which is the more direct route. There is a Sith heavy trooper patrolling the upper hallways of this level, though, so you'll need to use the stealth ability to get past him without dying.
| Important: As with Mission, there is apparently a bug in the game where, if you free Carth and Bastila while Juhani is in stealth mode, she'll stay that way permanently. This can cause huge problems later on, and even make you unable to complete the game if you need to speak to her later on, and can't see her to talk to her. Just to be on the safe side, your best bet is to use another character. |
Prison Block
Objectives: Make your way to the bridge
Regardless of your method of escape, once you're free you'll find yourself in a storage room where the Sith have somehow managed to stuff every single item in your possession into a single Locker of Holding. Retrieve, re-equip, revenge. Clear out the rest of the level, picking up any items your rescue character may have missed, then head out down to the elevator and take it to the bridge.
Command Deck
Objectives: Mayhem
This is a level dense with rooms; these rooms are often dense themselves with foes, mostly Sith troopers. The two critical areas to find here are the armory, which contains a set of space suits you're going to need, and the exit to bridge storage, which is guarded by not one, not two, but three Dark Jedi masters. Fun.
After exploring the level thoroughly and picking up the insane amount of goodies that is lying around, head to the northeastern corner of the area for the big fight. Surprisingly enough, you shouldn't have too hard a time with this battle; as long as you can continually knock the Dark Jedi around, preferably with Force wave, you should have an upper hand. Be sure to activate speed, valor, and any other defensive powers you may have before entering the room, then divide and conquer, with Bastila and your PC ganging up on one of the Dark Jedi while the other two are on the ground. If you've set up Bastila properly, she can take out any one of the Jedi in just a couple of rounds, assuming she's doing three or four attacks per round (with master flurry and one of the higher two ranks of speed); with your PC in there swinging away as well, you should be able to take out all three of the masters before they have a chance to kill any of your party members. Carth obviously isn't going to be much help here, since the Dark Jedi can reflect most of his blaster shots, so you might want to let him sit back and chuck grenades at any stunned opponents, or give him Bacca's Ceremonial Blade and let him go toe-to-toe; he'll probably have more health than Bastila, so he could be valuable as an extra target to take the heat off her.
At any rate, you'll have to get through the Dark Jedi masters in order to reach the Bridge. Once they fall, head out to the bridge storage. The door is locked, though, so you'll need a high security score (DC 34) or a security spike to get through, or you or you can head to one of the computer terminals and unlock it there; you should have found around 30 spikes on this level and the brig, so don't worry about running out.
Bridge
Objectives: Open the hangar doors so that the Ebon Hawk can escape
Go through the airlock and head out into space, the final frontier, where no one can hear you scream. Scream anyway at the proposition of another interminable sequence in a bulky envirosuit, then cease screaming, since the whole sequence lasts maybe 45 seconds.
Once you reach the second airlock, you'll find yourself on the bridge level proper. Dispatch the troopers here, then heal yourself up and let your Force Points recover before heading up the ramp to the bridge.
Saul is guarded by two Dark Jedi and four Sith troopers scattered around the bridge. These guys are quite grenade-happy, unfortunately, so you might want to concentrate on taking down the two near the door before moving on to the Admiral and his Jedi cronies. If either Bastila or your PC has a mass-stun attack, you can use it on the Admiral, which will usually spread the effects to the other four enemies near him, leaving your other characters free to deal with the rearguard. Alternatively, you can chuck a thermal detonator towards Saul as soon as the battle begins, which will knock down all of the opponents in that direction.
Once the rearguard is finished, use Bastila and your PC to take out the Dark Jedi, then proceed on to Saul. He'll whisper his dying words to Carth. Use the computer terminal nearby to open the hangar doors, then loot Saul's body and get the hell out of Dodge.
The door to the command deck is now repaired, so no need to go through the airlock again. The command deck level will have a few new enemies, mostly Dark Jedi and Sith grenadiers. Head back to the elevator and take it down to the hangar level.
Hangar
Objectives: Escape the Leviathan
The first two rooms here will contain, respectively, a squad of Sith troopers and a group consisting of two Dark Jedi and a Dark Jedi master. Kill all of them, search the rooms, and proceed through the blast doors to the north. Before heading down the ramp, though, you're going to want to re-equip your main character. Be sure you have the best energy shielding available; the verpine prototype shield that Saul dropped is excellent here. A nerve amplifier belt is the next most important thing; hopefully you haven't sold them all. If you have, you can substitute Darth Bandon's fiber armor; it grants you immunity to mind-affecting attacks as well. If you have an implant slot, use anything that will boost your fortitude saves in it. If you've mastered flurry, you might want to put on the heaviest armor you can equip. Un-equip your other teammates completely.
Save your game at the start of the ensuing battle with Darth Malak; despite your best efforts, you might still die during this duel. Your first action should be to activate one of your shields. Malak generally begins by activating Force immunity, so you'll probably want to stick to your lightsaber with regards to damage-dealing. If you did manage to equip an item that grants you immunity to mind-affecting attacks, his horror power won't affect you, which is a good thing, since a successful hit with it leaves you incapable of movement for a couple of rounds.
Aside from Malak's Force powers, you'll have to deal with his lightsaber attacks. He has a fairly decent attack bonus (+16 base), but if you can get your defense up to around 30, he'll still have a hard time getting through. Even if he does, your energy shield should be enough to keep you alive. Aside from the basics of using cure, heal, or a medpac when you run low on life, you'll want to boost your attacks per round, either through flurry or an upgraded speed power. This might also be a good time to use some of those hyper stimulants you've probably been hoarding.
After you knock Malak's health down to around half of his bar, he'll run off. You'll need to follow him, but you'll have to skirt the main room, which is locked, and enter from the rear door. Another small skirmish follows, but this time Bastila comes to rescue you after you're irrevocably stunned by Malak. Make like a tree and leave through the hangar bay doors.
Once you're free from the Leviathan and have fought off the Sith starfighters, you'll have to have a pep rally with your crew. You'll automatically be whisked away to the planet that you haven't recovered the Star Map from.
The Unknown Planet
After you've obtained the four parts of the Star Map, a seventh destination will appear on your Galaxy Map: the Unknown Planet. Head that way once you're ready to begin the endgame, but be forewarned: you won't be able to return to any of the planets you've previously visited once you've made your choice. You might want to liquidate your assets and stock up on supplies before you head out to meet your destiny. If you wind up with a huge number of credits, you might want to pick up thermal detonators, life support packs, and as many deadly mines as you can carry, presuming your PC has a decent demolitions score. These won't be very important right away, but towards the end of the game having proper explosives can make some tasks much easier.
Central Beach
Objectives: Repair your ship
After your rough landing, get out of the ship and begin looking around; you'll soon be attacked by a group of odd-looking aliens; you might recognize them if you entered the prison during the "Unfinished Business" side quest that you obtained on Korriban. After defeating them, you'll get a bit of exposition regarding the island from a group of Duros that are similarly stranded on the planet. Feel free to start exploring if you'd like to do so on your own; otherwise, the next paragraph will give you a bit of an overview of the planet, and what your options are now.
In order to escape from the planet and access the Star Forge, you'll need to align yourself with one of the two surviving tribes of the Rakatan, the species which just attacked you. There's the warrior tribe, which has situated its enclave on the north beach, and the elders, which are descended from the priest caste of the Rakatan, and who have their enclave on the south beach. You'll need to travel through the exterior of an ancient Temple to reach the south beach. Without engaging in harsh judgments that might hurt the feelings of the involved parties, siding with the north beach warrior tribe leans towards the Dark side, while the priestly caste is slightly better for Light side characters.
North Beach
Objectives: Meet with the Rakatan warrior tribe
If you intend to befriend the warrior tribe, head here before you visit with the south beach Rakatans. You'll be given an audience with their solipsistic leader, who's apparently a fan of modern action cinema. The conversation here makes it fairly difficult to actually choose to help the warriors; you have to go through almost the entire conversation tree before you're given the option that you need. If you change your mind about your allegiances while talking, feel free to rebuff The One's advances and let him know that you don't want to attack the priests. He'll get a little angry.
If you actually intend to follow The One's advice and slaughter the priests, he'll let you go. You can start systematically looting the area now for items; the warriors have done a lot of salvage over the years. Head back out to the north beach and talk to warleader Garn, who's standing by the water; he'll speak to you of invisible warriors who have killed his men, and you'll pick up the Invisible Mandalorians side quest.
If, on the other hand, you visit the priest clan and ally yourself with them before heading to the north beach, then the warrior clan here will automatically go hostile to you when you enter this area. You'll need to fight your way to the interior of the enclave in order to achieve your objective.
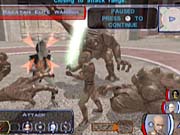
When you've laid waste to the Rakatans inside the enclave, you'll need to head back to The One's makeshift arena and take him out as well. Unfortunately, he has a little scripted sequence where he waits for your party to enter the arena, then releases the hounds. In this case, the hounds are four baby rancors and a few Rakatan warriors, as well as The One himself. It's a difficult fight, obviously, but not impossible, especially if you have Jolee and Juhani tagging along. As soon as you see everyone go hostile, use Force speed on your Jedi party members, then spread your party out a bit to avoid the grenades that The One starts throwing at you. Afterwards, start systematically taking out the rancors, since they'll be the worst offensive threat you're going to be facing. Make sure everyone in your party teams up on one rancor until it falls, then another, and so on. After the rancors die, the Rakatans are mere clean-up duty.
Once everyone is dead, talk to the priest Rakatan who was inside one of the rancor cages to release him back to his people. You can also find some starship parts in one of the rancor cages.
South Beach
Objectives: Meet with the Priest Caste of the Rakatan
When you first enter this area, you'll get a tip-off that there are plasma mines dotting the wreckage of the ship here. Equip any kind of items that boost demolitions or awareness, and make your way through the minefield to find a set of starship parts. If you align yourself with the warrior Rakatans, you'll need this set, since the only other set is locked away in their compound.
Head down to the beach to find the priest's compound. Walk into their little electrical foyer to get an electrical greeting. The priest's butler has a short temper, so if you don't want to take 1,000 points of damage, you'd be wise not to get him upset. The safest answer here is "I seek the Star Forge."
Once inside, you'll be able to choose to slaughter everyone, if you accepted The One's quest. This path leads to the Dark side, obviously, but you can still choose to double-cross The One by listening to what the Elder Councilor has to say on the subject. If you do go on a rampage, you'll need to head to the far southern end of the enclave to find the Rakatan with the Ancient Tome you'll need to bring back to the One.
Should you side with the Elders against the warrior tribe, you'll be sent back to their compound to free one of their compadres. Speak with Ll'awa before you go to pick up the Rakatan Research quest.
Temple Exterior
Objectives: Find a way into the Temple
After you've cast your lot with one of the two Rakatan tribes, and gained their trust by defeating the members of the other caste, you'll need to meet with their Rakatan mystics to begin the ritual which will gain you access to the Rakatan Temple.

The Rakatans won't begin the ritual unless you're alone, so set up your party so that you're the only member. If you've been traveling around with party members not named Jolee or Juhani, make sure your non-Jedi teammates are cleared of critical equipment.
As soon as the ritual begins, Jolee and Juhani will impress upon you the urgency of allowing them to tag along; you'll need to pass this request along to the Rakatan guide who's leading the ritual. If he disagrees, you may have to threaten him, but this will result in a Dark side shift. At any rate, once the ritual is complete, you'll enter the Temple, along with Jolee and Juhani, but not before a rather disturbing freakish cutscene involving Malak and one of his subordinates.
Temple Interior
Objectives: Disable the disruptor field inside the Temple
Your main goal here is to make it to the roof of the Temple. Unfortunately, the door is locked at the moment, so we'll have to find a way to unlock it.
For now, look around. If you don't have a character with a high security rank, you'll have trouble with some of the doors here; there are quite a few DC 30 and 35 locks here. Don't hesitate to use security spikes, though; you won't need them for the rest of the game. You can also hack into a security console and use that to open the door to the armory in the northwestern corner of this level, at least. Speaking of the armory, you'll want to forge a path there before you leave this level; it's guarded by two Dark Jedi and a Dark Jedi master with some fantastic items on their bodies, like Sith power gauntlets (+3 to Strength) and an upari crystal (+3 attack, +1-8 damage). There's even a workbench in the armory you can use to reset your lightsaber crystals before you head to the top floor.
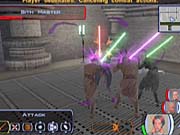
When you're done fooling around, head to the middle of the eastern side of this level to find the passage down into the catacombs.
Temple Catacombs
Objectives: Unlock the passage to the Temple Summit
Hang a left after you take care of the droids here; you'll spot a rune-covered pillar surrounded by deadly frag mines. If you disable the mines here, you can pop a sapith crystal out of the pillar. The footlocker across the way holds a datapad, which you might want to take a look at before you reach the puzzle elsewhere on this level.
Did someone say puzzle? Well, this level's a tiny one, so you'll be on it in no time, and we mean that quite literally. You'll need to walk on the nine squares in order to unlock the door beyond; the tenth square, off to the side, is the game's reset button. If you follow the advice from the datapad, you'll learn that the correct route is to follow an H pattern, and thus you'll find the solution to be, from the perspective of the door that you came through:
| 1. | Bottom left |
| 2. | Middle left |
| 3. | Top left |
| 4. | Middle left |
| 5. | Middle |
| 6. | Middle right |
| 7. | Top right |
| 8. | Middle right |
| 9. | Bottom right |
After passing through the puzzle room, you'll gain access to a Rakata computer, which can unlock the doors to the upper level for you.
Temple Summit
Objectives: Shut down the disruptor field
The game Dragon Warrior for the original NES had an interesting scenario near the end. After a long journey across many different continents, the Dragon Warrior finally comes face to face with the true form of his arch-enemy, the Dragonlord. The Dragonlord offers the Dragon Warrior a choice: a fight to the death, or dominion over half of the world if he accepts an offer to join forces with the Dragonlord. The catch? If you actually choose to join forces with the Dragonlord, he kills you and the game is over. So, in effect, it's a Hobson's choice: you appear to have free will, but in fact, the semblance of a choice is worse than no choice at all.
Luckily, the folks at BioWare apparently didn't form their design document for KOTOR around the tenets of Dragon Warrior, as you're about to find out.
Step out onto the roof of the Temple to meet with Bastila. No matter what you say during the first part of the conversation, you can't prevent a confrontation, so you may want to activate your energy shields before you get close enough to trigger the confrontation, and have all of your characters using items that can prevent mind-affecting attacks. Your conversation choices will still affect your Force alignment, but not as much as what's about to occur.

At any rate, Bastila will attack you. Her insanity attack has a DC of 31, so it'll be difficult for any of your characters to save against it naturally; this is why having a nerve amplifier belt or something similar on your characters is a good idea, since immunity to mind-affecting attacks will render insanity useless. Bastila isn't very tough in actual combat, luckily, so activate speed and engage her point-blank.
When her vitality drops to around half of her meter, Bastila will stop fighting for the moment and offer you the last critical choice of the game. You will be able to either continue your attempts at returning Bastila to the Jedi Order, or acknowledge your true identity and become (again) the Sith Lord and would-be ruler of the galaxy. And yes, it's an actual choice. If you persist in your attempts to turn Bastila, she'll eventually run off to her ship and escape to the Star Forge.
If, on the other hand, you really want the power to destroy an entire planet in response to the pettiest of slights, then you do indeed have the opportunity to fall from grace here, or fall further from grace, if you've been a really bad boy during the preceding events. The choice is obvious: side with Bastila, and accept her offer to join together as the new Sith rulers of the galaxy. Jolee and Juhani are mildly alarmed by this turn of events, so kill them.
Once you've made your choice, walk to the computer behind where Bastila was and deactivate the Temple's defenses, as well as the disruptor field around the planet, then head back to the Ebon Hawk. If you sided with Bastila, Carth acts like a baby after being told of the little plot twist. The rest of your party members will have differing reactions to your mood swing; Mission, however, is the only one with real objections. If you really, really want to be a bastard, use your Force persuasion to have Zaalbar kill his best friend.
Whichever path you decide to take, you'll need to enter the Hawk, then find the hyperdrive at the rear of the ship and click on it to repair it. Take the ship up to the Star Forge, which should appear on your Galaxy Map.
Side Quests
Invisible Mandalorians
If you side with the warrior Rakatan, then you'll be able to obtain this quest from warleader Garn, who stands at the ocean's edge in the north beach area. Once you have the quest in hand, head to the Temple Exterior area and walk towards the pillar in the southeastern corner; you'll be ambushed by five or six Mandalorians once you approach. After you unpause, move your crew away from the middle of their deadly circle; you'll be hit by cryoban grenades if you stick around.
Once they're dead, search the bodies for the Mandalorian head that you need to return to Garn. When you bring it back to him, he'll lead you to a chest containing some of the salvage that he's found over the years, including a thermal shield generator, a verpine prototype shield, a verpine zal alloy mesh heavy armor, and six thermal detonators. Not a bad haul at all.
If you want the loot, but don't want to take the Dark side hit from attacking the Elders, you can initially side with the warriors, complete this quest, then head to the Elders and switch allegiances.
Rakatan Research
Ll'awa of the Elders offers you this quest. In order to complete it, you'll need to pester the computer in the Temple Catacombs for information about the Rakatan's genetic structure; if you do so, and return to Ll'awa with the info, he'll give you a small tip for the trouble.
The Star Forge
Deck 1
Objectives: Penetrate to the interior of the Star Forge
After you land on the Star Forge, you'll have to exit the Ebon Hawk and select a team. Light side players should obviously go with Jolee and Juhani; the Dark side will need to select one of the remaining characters to accompany the PC and Bastila. If you were malicious and had Zaalbar kill off Mission, you might not want to pick him, since he'll turn on you shortly after you leave the ship.

When you've traveled far enough, you'll have to face off against the Star Forge's elite droid defenses. As per usual, these things get knocked over easily by Destroy Droid, but if you never learned the skill (shame on you), you'll have to take them out the hard way. After you run that little gauntlet, you'll pass through a few Dark Jedi defenders on your way to the elevator that takes you to Deck 2.
Deck 2
Objectives: Survive
Speaking of gauntlets.... By our calculations, if the Sith Academy only turns out one full-fledged apprentice every year, then some of these guys have to be at least 400 years old. The ability to zap kids who run onto your lawn with Force lightning must lend a little zest to your old age, though.
At any rate, this level is where the fun begins. There is apparently a finite number of enemies here, so you may run out of foes after a while, but our usage of the phrase "a while" should not be interpreted as a reference to a length of time that human beings can comprehend. By which we mean to say: there is a crapload of Sith here. Dark Jedi, Sith apprentices, Sith heavy troopers, and Sith troopers all apparently take personal offense at your continued presence in this area. And really, how can you blame them? This is Deck 2, now; not Deck 1. Deck 2 matters.
There are few enough viable strategies we can offer to help you through this. The first is simple: turn the game's difficulty down to easy. Yes, that's right, the game has difficulty settings; you can find them in the Gameplay settings of the Options menu.
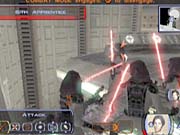
If you're a real man (or woman), though, you'll probably want to know if there's a way to survive this level on the normal difficulty setting. Well, there is. First off, make sure your characters are healed, and have full Force point meters before you start walking around; the thing that makes this level so hard isn't just that there are a lot of enemies, it's that the enemies almost never stop coming at you, which means your characters almost never leave their battle mode, which means that they will almost never regain Force points. If you take out one group of foes, another will magically appear behind you; destroy that group, and another appears immediately afterwards. Prepare to be hounded and harried for quite a while.
The geography of the level offers one small amount of respite: if you can proceed to the large hallway in the southern portion of the level, then reach one of its far ends, the Sith seem to stop respawning for a short while, giving you a bit of a break in which to heal your party and recharge your Force points before entering the fray once again. Indeed, you'll need to reach the southwestern corner of the level anyway; that's where the elevator to the next level is. It's to the southeastern corner you should head first, however.
Deck 2 - cont
Once you get your party into the east end of the southern hallway, you'll probably need to switch over to Solo Mode to prevent them from attacking the enemies that are following you, at least until they retreat far enough from the middle entrance so that the enemies stop endlessly coming at you. If you're having trouble surviving the mere journey to this corner, then that whole difficulty setting joke might not seem so funny to you. But, in all seriousness, there's a point in every game where "challenging" crosses the line and becomes "frustrating," and this section of KOTOR will no doubt drive many a gamer perilously close to that precipice. If you find yourself not having fun, by all means, knock that difficulty down a bit.

Anyway, your party is now in the southeastern corner of the map, hopefully calm, cool, and fully recharged. Save. Your. Game. You will have noticed that there's a small room nearby, marked on your map as the "computer room." Charge up your party with the usual suspects: Force speed, valor, aura, and the like. Break into the computer room, take out the Sith, then quickly hack into the computer system. Shut down the sentry turrets first, and then, if you have enough slices left over, use the computer to generate the "customized Jedi robes." Once the generator makes your item in laboriously slow fashion (keep in mind that the game doesn't pause while you're on the computer, and that Sith are no doubt rushing towards you, so keep things speedy), pop over to the bin and pick up your swank new super robes. These are, for Light side characters, called "Star Forge Robes," and for Dark side characters, "Darth Revan's Robes." Put them on your main character right away, since they're obviously the most powerful robes you're going to find anywhere in the game (the +5 to Wisdom, at least, will increase your saves against all of the Dark Jedi's Force powers), then hit speed on all of your characters.
Now for the semi-tricky part. Sith are probably pouring out of the southern corridor's main entryway and heading towards you as you do all of this. You can try to fight them if you wish, but a quicker way to get the hell off of this deathtrap of a level is to just run for the exit. Unfortunately, you can't force your fellow party members to run alongside you, so you'll have to pick one of them (preferably the one with the least vitality), and sprint over to the western end of the southern corridor, where the elevator to the next level is. Once your chosen character is right on top of the exit, switch Solo Mode on and switch to one of your other characters, then rush them over to the elevator. Repeat the process one more time and, assuming everything goes well, you'll be on your way to the Command Center. If one of your characters dies, then switch over to the other characters near the elevator; eventually, the game will warp the dead character's body to where your active character is, so wait for this to occur, and then head up to the next level.
Command Center
Objectives: Find and destroy Darth Malak
You'll probably notice some similarities between this level and Deck 2; the whole "infinite enemies" thing is certainly a chilling reoccurrence. It's not going to be as big of a deal here, since they stop respawning when you reach a set point.
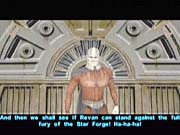
Your goal, then, is to reach that point as quickly as possible, without letting any enemies stand in your way. First off, pick a runner; one of your characters with Force speed and preferably Force resistance or immunity will do nicely. Second, have that character run, as fast as he or she can. You should head out the first door, then take a right into the hallway, then take another right into the first big door you find, then follow that path until you see three Dark Jedi sealing a door with their Force powers. If all goes well, the teammates of your runner character will follow closely, ignoring the enemies, and your party can stand by the sealed door and fight off the enemies together. In any case, numerous instances of Force wave, insanity, or stasis field will help thin the herd a bit, since you'll have so many enemies in such a small space.
After the enemies fall, the previously sealed door will unlock itself. Head into the corridor, but if you're a Light side player, loot your party members of equipment before you open the far door, and use their items to outfit your PC with the best gear in your possession. You guessed it; it's time for some solo mode action.
When you head through the door, the party members of a Light side character will be left behind; only your PC will be allowed to proceed. What follows is your climactic showdown with Bastila. If you sided with Bastila earlier, skip to the next page, to the part that says "Dark side players:"
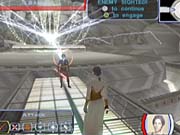
Bastila, as you might've seen during your little contretemps in the Rakatan Temple, is a tough cookie when three of your characters are taking her on; one-on-one she can be fairly overpowering, especially if you let her use her Force powers with impunity. If you have Force immunity, activate it before battle begins, along with speed and an energy shield, just in case she does manage to stun you. As with all Dark Jedi duels, it's a good idea to have something that protects you from mind-affecting attacks, since Bastila may try to use insanity on you.
For the most part, though, you should be able to handle yourself without too much of a problem, especially if you have Master Speed along for the ride. With a decent energy shield, the only way Bastila will be able to damage you will be with her shock attack, and while this hurts, it's nothing a heal or life support pack can't overcome.
Command Center - cont.
After you knock Bastila's life down low enough, she'll start a conversation with you. There are four of these in total, one before the fight, two during, and one that will end the battle. (Well, hopefully.) If you're intent on bringing Bastila back into the fold, then you'll need to follow the script here closely; if you veer off, even to what sometimes seems like it's nearly a synonym for one of the choices here, Bastila may decide to remain with the Dark side at the end of your conversation, and you'll need to reload. Reloading is annoying, so just pick these choices and get it right the first time.
Before the fight:
"I'll never give up on you, Bastila."
First interlude:
"I'm as strong in the Light side as I ever was in the Dark."
"Malak will never let you become that powerful."
"You're dooming yourself to an endless cycle of death and destruction."
Second interlude:
"Then strike me down, Bastila. I will not defend myself."
"You are not evil, Bastila."
Third conversation:
"Now you see the Dark side is not stronger than the Light."
"There's no need for me to kill you."
"I was redeemed, Bastila."
"You can reject the Dark side, Bastila."
"You did protect me, Bastila."
(Note: if you start seeing persuade options here, and you have a high persuade score, then you should choose these. An unsuccessful persuade is not a good thing, though.)
"Help us defeat the Sith."
"I trust you enough to leave myself open to your attack, Bastila."
"You won't, Bastila."
After that, Bastila should cease attacking you, though she will choose to stay near the Star Forge and use her Battle Meditation to aid the Republic fleet, rather than accompany you to confront Malak.
Dark side players: On the other hand, if you and Bastila have claimed the Sith throne by defeating Malak, the two of you will be paired off with three of his more powerful Dark Jedi. They're tough, but they're not substantially different from the Dark Jedi you've been playing against all game. Stun them to break them up, then kill them when they're defenseless.
After you've killed, converted, or defeated your enemies, friends, or loved ones, head through the door to the south to reach the Star Forge's droid factory. Bastila will remain behind at this point if you're a Dark side character. Head to the far end of the factory, where Malak will appear; your choices in the resulting conversation will get you either a Light side or Dark side shift. He'll lock you in regardless, then activate the machinery here, which will produce eight droids right away, each of which will be replaced automatically when you destroy it.
Have no fear, though, because you can rather easily manipulate the machinery to your own ends. You may have noticed the dormant computer terminals scattered around the room; after the factory is activated, these will switch on and allow you access. There's one beside each droid machine, and you'll need to access each one of them, to either shut the machine off, or switch it over to produce friendly droids that will fight on your side. You'll burn through computer spikes fairly quickly, but don't worry: the cylindrical "spike bins" next to each terminal generate a computer spike every time you destroy one of the droids created by that corresponding terminal. One important note is that it's impossible to use the terminals while you're in battle mode; use the B button to switch to normal targeting, then use the terminal.
After you either shut down all of the computers or switch them to friendly robot production, the elevator to the factory level will open up. Gear up for the confrontation you've been looking forward to since the game began, then step into the lift.
Viewing Platform
Objectives: Defeat Darth Malak
Don't kid yourself: no matter how virtuous you are, you won't be able to turn Malak to the Light side. It'd make for a fairly anticlimactic ending. Prepare yourself for battle with everything that you have: equip any verpine prototype shields you have, and use any and all stims in your possession, starting with an Echani battle stim, if you have one, and working your way down the ladder when that runs out.
You will not believe Malak's statistics; this is a fact. To begin with, his base attack bonus is +20, to which he adds +3 from master dueling, +1 from lightsaber focus, and his Strength mod of +9 (holy mackerel!). He will also often have an effect bonus of +5 to attack, for a total of +38 to attack. Darth Malak will whiff on an attack a whopping 5% of the time, when he rolls a natural one on his die roll; otherwise, he will hit you every time he swings.
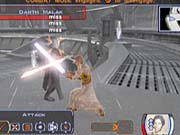
Every time Malak hits you, he gets an automatic +14 to damage. Ouch. He will also use every melee active combat feat at master rank, including critical strike, so it's not uncommon for him to dish out 50 damage or more on a critical hit. Note that, even on regular hits, he will usually do enough damage to take him over the limit of your energy shield, so that you will take at least a bit of damage from every shot.
When it comes to protection, Malak is quite understandably the hardest enemy to hit in the entire game, with a ranking of 37 defense through some inscrutable series of bonuses. With any luck, your attack bonus will be around +27, making it a simple fifty-fifty chance to hit. If you're at any less, though, you'll need to do whatever it takes to boost your attack rating, such as switching from a dual lightsaber to a single-handed one. If you can't hit your opponent, you won't have much of a chance to win the fight.
As expected, Malak keeps himself sheathed in Force immunity for most of the battle, making it difficult for any of your offensive Force powers to connect, but even if he was defenseless, his massive saving throw bonuses would still protect him from most of what you could do. It's best to focus on settling the conflict with your lightsaber. If you can combine master speed with master flurry, or even just use master speed by itself, you should be able to get at least one successful hit in on Malak per turn, assuming you haven't completely neglected your attack bonus. Master speed will be critical to this fight, so try to reserve your Force points by any means necessary. Life support packs can be used in place of heal, for instance, assuming you have a decent treat injury score.

The catch to this battle is that Malak can completely regenerate himself every once in a while, by smashing open one of the creepy floating Jedi that dot the area. After you knock him down to about half of his vitality, he'll take a moment to explain who the Jedi are (and, since conversations take place in real-time, your battle stims, Force powers, and energy shields will have their clocks ticking all the while), and then heal himself completely. In order to prevent this from happening, you'll need to run around the level, destroying the trapped Jedi with your Force powers. Make sure you have Speed activated, then destroy all of the Jedi capsules in one run, if possible, while avoiding Malak as best you can. Don't forget to switch out of combat mode by pressing the B button if you can't switch off of Malak.
Viewing Platform - cont.
After all of the trapped Jedi are destroyed, all you have to do is take off Malak's last health bar and you win. Unlike some of the more annoying Dark Jedi you've run into, Malak won't spam death fields at you; he doesn't appear to have any way to heal himself at all, as a matter of fact.
The same general tactics from the beginning of the fight will hold true for the duration: increase the number of attacks you get per round, without sacrificing attack bonus, while maintaining a constant energy shield and keeping your vitality above the halfway mark. If you drop to near-death, Malak will start chaining together Force lightning attacks, which will penetrate most energy shields easily, and kill you in a couple of rounds.
If you note that you're almost dead and/or almost out of Force points, do the smart thing and start running away. If you switch off of Malak with the B button and get a distance away from him, your Force points should start regenerating, since the game won't think that you're in a battle anymore. If you do this long enough, you should gain enough Force points for a few emergency cures, though you may have to run for an even longer period of time afterward for another complete Force point recharge before taking on Malak again. It's tedious, but it works; just be sure you keep moving, or Malak will likely get in position for a Force jump.
If you find yourself having an extremely difficult time connecting with a lightsaber, you can go the unconventional route and attempt to take down Malak with grenades. He'll usually stay right on top of you, but he will occasionally pause to use a Force power like Force breach. If you can catch him when he's standing still and chuck a thermal detonator at him, he'll be knocked off his feet, allowing you to throw another detonator in the next round, which should also knock him down. If you have enough detonators, you should be able to repeat the process until he dies. It'll take around 15 detonators, though, which will probably be more than you've come across in the entire game, unless you've been buying them, so you will still probably have to engage in at least some saber combat.
The absolute cheesiest way to off Malak, though, is via the handy use of the demolitions skill and a few deadly mines. Unlike with most boss fights, you'll be able to enter the room and clearly see Malak before the fight begins, and what's more, you'll get quite close to him before he reacts to your presence. If you stop a couple meters short of the end of the metal walkway that leads into the room, then lay down mines, you can easily lure him across after you dispense with all of the trapped Jedi. A mix of five deadly frag mines and five deadly plasma mines is enough to almost completely kill Malak, even when he has a full health bar; just make sure you've cleared out all of the trapped Jedi first, because you obviously only get one shot at this. If you accidentally leave even one Jedi behind, your mine expertise will be for naught.
Malak will fall eventually. And that, as they say, is that. The game does, if you're curious, have different endings for Light side and Dark side characters (how could it not?), but we won't spoil those for you. If you have a savegame from just before the fight with Bastila, you can reload that and make a different choice to see the other ending, but the game lends itself well to a complete replay.
Galaxy Side Quests
Galaxy Side Quests, for lack of a better term, are quests that do not take place on any specific planet, but are driven either by your presence on the Ebon Hawk, or by your discussions with your party members as you gain experience and proceed along the main storyline. Unfortunately, the character-specific side quests seem to be unlocked only by having that character in your party a significant portion of the time; if you keep Carth on the Ebon Hawk for most of your journey, for instance, it seems like the game will be less likely to offer you his side quest later on.
To increase your chances of obtaining a character's side quest, speak to them after every time you gain a level.
Canderous
Canderous' many tales of derring-do during his time as a soldier in the Mandalorian Wars are quite entertaining: well-written, with a fantastic voice actor to back them up. The first few times you talk to him, he will regale you with stories of atmospheric entries in battle armor, combat in asteroid fields, and so on. He's not just here to amuse you, however, and eventually, you can expect him to start speaking of the end of the Mandalorian war, and how he came to live a mercenary life.
If you keep Canderous with you, he'll run into a Mandalorian named Jagy eventually, who will challenge him to a fight in the Dune Sea on Tatooine. Find Jagy and kill him to complete Canderous' quest.
Carth
Carth, in addition to being the love object of female PCs, has some pretty serious psychological problems. Unfortunately, you won't be able to drop him off at the shrink's and get him out of your hair; you are, for better or for worse, his ad hoc counselor during your voyage, and he explains in (eventually) meticulous detail the genesis of his untrusting nature. It appears that he was once a protégé of Saul Karath, erstwhile Republic admiral and now commander of the Sith fleet.
Carth's side-quest involves his long-lost son, who disappeared after his home planet was destroyed by the Sith fleet. If you unlock his quest, you'll eventually meet someone who tells Carth that his son is alive and well--and training to become a Sith at the Academy on Korriban. If you travel to Korriban and meet up with Dustil, you'll have to choose between killing him, or obtaining a datapad from Uthar's rooms and convincing Dustil of the error of his ways.
Juhani
Juhani's tale begins with the story of her journey to Dantooine, and eventually extends backwards into her past, including the story of her harsh upbringing on Taris, and the bitterness she feels towards you and Bastila regarding what she feels was your role in its destruction.
Once Juhani relates enough of her backstory, you'll run across a beast of a man named Xor, who apparently intended to buy Juhani as a slave at one point in his past. There is a pretty obvious choice during the first conversation: attack the man (Dark side) or attempt to curb Juhani's rage (Light side).

If you choose the Light side path, Xor will eventually return with a couple of Rodian thugs. He'll be easily defeated, but will still attempt to turn Juhani to the Dark side, so you'll get another chance to egg her on, or impress upon her the need to chill out. Dark side players might be disappointed to know that if you tell Juhani to kill the man, she doesn't actually move any closer to the Dark side. Your character takes a Dark side hit, sure, but Juhani immediately changes her mind about the morality of her action.
Galaxy Side Quests - cont.
Bastila
Bastila is somewhat muted in her relationship with you before you leave Dantooine, but, like Juhani, will eventually open up and begin telling you of how she became a Jedi, after which you will get many and tedious lectures about the temptations of the Dark side, as well as ruminations on the after effects of being permanently separated from your family. If your PC is a man, then Bastila will become your love interest, if you treat her like a lady. Corellian ale, envirosuit walks on Manaan's ocean floor; the whole nine yards. Women eat that stuff up.
If you run around spaceports with Bastila long enough, you'll eventually run into a Twi'lek named Malare, who brings word of Bastila's mother, who is apparently gravely ill on Tatooine. Head to Tatooine, where you'll receive a tip that Helena is in the cantina; go talk to her, if you can stand the chill.
After speaking to Helena, you can pick up a quest that involves finding Bastila's father's body, somewhere in the desert, inside the krayt dragon lair that coincidentally contains Tatooine's Star Map. Once you find the holocron, bring it back to Helena in the cantina. You can freely give it to her, and then attempt to broker a peace between the ice princesses, or just let her know that you're keeping it, with the appropriate shifts in Force alignment.
Jolee
Jolee has a rather Romeo and Juliet tale of love and loss to tease you along with after level-ups. He's an amusing old man, but harbors a deep reservoir of pain beneath his avuncular surface. Although Jolee appears in your journal, he has no real side-quest, like your other party members. He simply has an interesting story to tell about his life before Kashyyyk and how he came to land on that planet.
HK-47
After your initial interrogations, HK will reveal that some of his primary memory functions have been obscured from him, perhaps from physical damage. As mentioned in his character bio, you will have the opportunity to Repair him and restore him to his full functioning, but, like Jolee, he has no real side-quest to speak of.
Mission
Mission's backstory revolves around her search for her brother, Griff. It will take some time after you first meet Mission to reach the terminus of her story, which comes when she continually insists that the search for Griff won't interfere with your mission. Once this occurs, take her into your party and start hitting the starports and towns. Eventually, the Lena from her tale will appear, and let you know that Griff has been captured by the Sand People on Tatooine.
You'll need to follow along the main plot on Tatooine, involving the Czerka's attempts to rid themselves of the Tuskans, in order to free Griff. You'll either be able to free him alongside the Jawas when you return with the moisture vaporators, or simply kill all of the Tuskans and set him loose then.
After Griff is free, he'll return to the Czerka offices, and ask you to retrieve a tach gland for him. These are located on Kashyyyk; you'll need to grab some from one of the bins near the poachers in the Upper Shadowlands and return it to Griff to complete the quest.
Galaxy Side Quests - cont.
Dwindling Supplies
After you first leave Dantooine, speak to Zaalbar to begin this side-quest. Apparently some food supplies have gone missing from the store room. Examine the supply chest, then begin searching the ship for the stowaway. Simply walking around for a while will be enough to get a bead on the stowaway, who eventually returns to the cargo hold.
The girl speaks no Basic, which understandably makes communicating with her fairly difficult. Luckily you're some kind of linguistic super-genius, as are most of your party members, because you can learn her pidgin language in a few minutes, after a process of hearing her speak and guessing what the words that she says mean. Once you are finally able to communicate, you can either kick her off the ship immediately for a Dark side hit or bring her back to Dantooine, where the Twi'lek at the starport will take her home, giving you a Light side shift (yay!).
The Trouble With Gizka
When you land on Tatooine for the first time, a shipment of Gizka will be misallocated to your ship by the docking authorities there. Unfortunately for you, these little creatures will begin multiplying rapidly, until they overrun your ship completely. You have two options: buy some Gizka poison from a docking bay merchant to kill off the Gizka, or bring the entire shipload of them to Manaan, where a Selkath in the docking bay will offer to take them off your hands.

Calo Nord
Calo Nord will be sent after your character once it's clear that your party has escaped Taris intact. He's tough, but fortunately not quite at the one-shot-one-kill level that you would've encountered if you had challenged him when you first met, in the Lower City Cantina. He'll appear on any planet that your party heads to, which is why he's being mentioned in this section, instead of during the regular walkthrough.
Calo comes flanked by two local flunkies; if you followed our advice and headed to Kashyyyk first, for instance, he'll have two Wookiee thugs by his side when the fight begins. Don't worry about the flunkies, though; concentrate all your firepower on Calo himself. His energy shield will let him take quite a beating, but since he'll be using blasters, you can have all of your characters unload on him with grenades until the shield falls, then use your Jedi characters to slice him up.
After he's dead, check Calo's body for an excellent set of armor.
Darth Bandon
Darth Bandon, Malak's apprentice, will attack your party some time after you kill off Calo Nord. As might be expected, he's a toughie, but is not unmanageable, provided you practice simple divide-and-conquer techniques.
He'll appear with two Dark Jedi friends, who should be eliminated before you take on the boss man. As soon as the fight begins, have all of your party members activate Force speed, then attempt to stun the regular Dark Jedi enemies. Kill the Dark Jedi while they're stunned, but make sure Darth Bandon isn't maniacally chopping away at one of your party members; you might want to set up your strongest character to face him while your other characters dispose of his groupies.
After they fall, you'll have no choice but to face the man himself. Bandon will regularly use death field to recharge himself, and will keep using it until he runs out of Force points. You can also sometimes get lucky and deal more damage than he has life in a very short period of time and kill him outright, but more often, you'll need to wait him out and keep your own health up. If you have three Jedi in your party, then you shouldn't have much trouble after teaming up and bashing him. Once he runs out of Force points, he's an easy mark.
Check his body for a set of unique light armor (which should've prevented him from using death field), 3,000 credits, and a double-bladed lightsaber.
Galaxy Side Quests - cont.
Genoharadan
After you finish off Calo Nord, a Twi'lek will eventually approach you on one of the planets (though this may not occur for quite a long time afterwards). He'll give you a datapad, which you can refuse (thus negating the quest), or accept, which launches this side quest.
When you feel like taking it up, or whenever you're on Manaan, speak to Hulas, a Rodian in East Central Ahto. He won't respond if you have party members around, so you'll have to go to the map screen and make sure that you're alone (Solo Mode doesn't count). Once that's done, Hulas will offer you membership in the Genoharadan, an elite and secretive group of bounty hunters. Keep in mind that the Light side of the Force doesn't look kindly on unprovoked bloodshed, even to serve the greater good; you can expect to take a Dark side shift in alignment for each mission you complete.
Your first mission will be to eliminate either of two targets, with one conveniently located in the Republic Embassy right across the way from where Hulas is standing. This prisoner can be easily killed by flipping T3-M4 into your party and letting it access the terminal next to the prison cell; set it to fry the prisoner and your job is done. The reward for this mission is a Genoharadan Poison Blade.
Zuulan is on Dantooine, near the Matale estate. If you just want to off him, put a frag mine in his speeder; if you want to get some items from his body, set off the speeder's alarm and he'll come running, battle droids at the ready. Your reward for his death is a Genoharadan Blaster.
After killing one or both of these targets, return to Hulas (alone), to get three more targets to take down. You won't have a choice about these three; you'll need to take on all of them in order to reach the next level of this quest.
The Selkath target is your first priority, seeing as he lives elsewhere on Manaan. Go to the Swoop Registration offices in Ahto East to meet up with Vek, Ithorak's majordomo. You may need to threaten him before he'll set up the meeting, if you are terrible at persuasion; a 500 credit bribe will follow if this is the case.
Ithorak is in the middle docking bay on Manaan's docking ring; you can attempt to get Vek to stay out of the fight if you wish, but it shouldn't be difficult either way. Kill Ithorak and head on to Tatooine.
Vorn is in the Sand People Territory, but you'll need to track down his combat droid first, which is located in-between the two entrances to the area. Take its health down, and then you'll either be able to put a frag mine in Vorn's sandspeeder, or reprogram the droid to help you track him down. Either way, you'll wind up having to face him in combat; take him out and proceed to Kashyyyk.
The shapeshifter is in the Upper Shadowlands, and can be somewhat time-consuming to find. First off, you'll need to track down the body of a Wookiee south of Jolee's hut, and read the datapad found on it. Heading further south after that, you'll stumble across a lone Wookiee near a campfire.
Talk to him, and after you let him know that you're wise to his little game, he'll assume the form of Jolee and the fight is on. He'll eventually become a terentatek, then a tach; talk to the tach to finish Rulan off. That'll teach the Dominion to mess around in the Alpha Quadrant, eh?

After all three of the targets are dead, head back to Hulas for your rewards: a Genoharadan stealth unit (+8 to Stealth), a Genoharadan visor (Reflex Saves +3, Awareness +4, Demolitions +2), and the true prize, a set of Genoharadan power gloves (+4 to Strength). After all of that work, however, you'll find that Hulak was merely using you to off his competition within the Genoharadan. If you find yourself filled with righteous indignation at this misappropriation of your talents, tell Hulas how you feel, and he'll challenge you to a ritual duel in the Dune Sea, but warn you that you have to come alone.
Ignore him; trick out your best combat party and head for Tatooine. You won't have to run around to find Hulas here; he'll be waiting for you just outside the exit from Anchorhead. Kill him and his gang to complete the quest, and be sure you check his body for a set of Genoharadan mesh armor, one of the best light armors in the game (defense 7, max dexterity bonus +5, stealth +4, dexterity +3).
MiniGames and Items
Pazaak
Pazaak is KOTOR's primary minigame, and will be one of your greatest cash resources, assuming you have a little luck and the patience to reload your game when you hit a bad string of losses.
Tips
The rules of the game are fairly basic; check your Completed Quests entries in the menus to get the basics down. You can also hit up Mission for a tutorial any time you're on the Ebon Hawk.
High-stakes Pazaak will require a good deck. You'll find cards in various places throughout the game worlds, but the most reliable method of acquisition is to simply buy them. Between the cantina bartender on Tatooine and the shady Rodian in East Central Ahto on Manaan, you should be able to compile a deck consisting almost completely of +/-2, 3, and 4 cards; these are the cards that are, given the odds, going to be useful in the most number of situations. The game has an odd way of valuing cards; it may value a +/-1 over a +/-2, but the former card is going to be useful far less often than the latter.
The first rule of Pazaak is: tell no one about Pazaak. The second rule of Pazaak is: the house always wins, with "the house," in this instance, being the computer-controlled player on the other side of the field. Not literally always, of course, but unfortunately, the game is stacked in the computer's favor, since the player is always forced to receive the first card in the game. This will get you near 20 sooner than your opponent most of the time, forcing you to play a card or stand before your opponent does. In a game like Pazaak, being forced to take the first action is a severe disadvantage; if you stay on 19, for instance, your opponent will know exactly what he has to do to win or tie, and will dip into his reservoir of cards only when appropriate.
Unfortunately, there's absolutely no way to get around this built-in penalty of Pazaak's; you'll just need to suck it up and deal with it. Since the computer will always do its damndest to match or beat your score, you'll know that your initial score will have to be at or near 20 in order to win; unless your opponent busts by a huge margin, he'll almost always find a way to hit a 19 or 20 during the first few games, especially if he knows that you're sitting on an 18. The computer also has a suspicious habit of hitting natural 20s more often than you do; whether this is just luck or a way to prevent you from making 100,000 credits before leaving Dantooine is a matter of speculation.
If you get lucky and begin a game with a few low cards, you'll find that the computer will always stay on an 18 or better, and will usually play a card in order to hit 19 or 20. If your opponent has no more cards in his hand, he'll stay on anything better than 16, which gives you a pretty big margin for error. As we've said, though, there's no way to consistently ensure that your opponent draws higher cards than you, so you'll generally need to attempt to get to 19 or 20 and stay there, and hope your opponent can't match up or do better than you.
The third rule of Pazaak is: the first game is important, but less important than the last. You'll want to try and ensure that you have something in your hand when you get to match point; hoping for a natural 20 is rarely a viable game strategy. If you find yourself constantly running out of cards in the third round or later, you'll probably be better off if you play more conservatively in the first round or two. Try to hit to as close to 20 as you can manage, then let the computer waste its cards trying to beat your score. Even if you wind up going in the hole, card advantage becomes much more important as the game goes on, so if you can goad the computer into wasting a card or two to tie a score of yours in the middle of the match, you'll be stronger towards the end game.
For our money, the best side deck consists of three +/-2 cards, three +/-4 cards, and four +/-3 cards, although the numbers of each card doesn't matter as much as the fact that they're there: if you don't have enough +/-3's, replace those slots with other double-sided cards, not a +3 or a -3. Any double-sided card is generally preferable to a single-sided card, though this is less true of the extreme ends of the double-sided types. A +/-6, for instance, should be scrapped in favor of a +3, just because, due to the way the cards hit the table, you're more likely to find a use for it.
It's rumored that some of the Pazaak players will give you a unique reward for winning a certain number of times in a row; most of these rewards are extra cards. Kudos on Tatooine will usually not give you a reward, since beating him ten times in a row activates a bug in the game.
Pazaak Players
The limits listed here are each player's initial limits; if you play long enough with an individual player, they'll raise the maximum stakes you can bet for.
Gelrood
Location: Lower City Cantina, Taris
Limit: 40 credits
Gelrood cheats, so you probably shouldn't play him. Simple enough.
Niklos
Location: Upper City Cantina, Taris
Limit: 40 credits
If you win against Niklos enough, he'll eventually accuse you of cheating and won't play anymore.
Sol'aa
Location: Jedi Enclave, Dantooine
Limit: 120 credits
Sol'aa also sells a few cards. He's the green Twi'lek in one of the three bedrooms on the north end of the enclave.
Jolan Aphett
Location: West Central, Manaan
Limit: 200 credits
This guy somehow manages to say "Less talk, more Pazaak" with only two syllables; an impressive Feat. You can abuse his merely average deck for loads of credits if you have the time to save the game between each match.
Gonto Yas
Location: West Ahto, Mercenary Enclave, Manaan
Limit: 200 credits
Kudos
Location: Hunting Lodge, Tatooine
Limit: 75 credits
Kudos' reward for 10 straight wins is bugged, unfortunately; sometimes you apparently get a sigil crystal, other times you'll get an anomalous entry in your journal which has no bearing on the game.
Furko Nellis
Location: Cantina, Tatooine
Limit: Furko will play you for 50, 200, and 500 credits, then refuses to play for money anymore.
Toll Apkar
Location: Cantina, Korriban
Limit: 100 credits
Swoop Racing
You'll be able to race swoop bikes on Taris, Tatooine, and Manaan. The Taris race is deliberately easy, and quite difficult to lose, especially since you have multiple heats to attempt to get the best score. Unfortunately, the swoop races on Tatooine and Manaan are much more difficult. These are twitch games, no doubt about it, so casual RPG players may find these challenges a bit out of their league.
If you intend to fulfill the ancient prophecy and bring balance to the swoop tracks, you'll need to master a few basics of the game, namely:
- Don't hit obstacles.
- Develop a line from booster pad to booster pad and stick with it.
- Hit the A button only when required.
The first tenet is obvious: if you hit an obstacle, you will never be able to get the time required to win, at least at the highest level of competition, since they will usually knock at least a second off of your time, and your margin of error is going to usually be down to the tenths of a second. Obstacles are bad; avoid them.
This leads into the second rule. As random as the placement of the booster pads may seem, there are definitely lines that need to be followed and planned out for each race track; this is as true for swoop racing as it is for any track in Gran Turismo. Occasionally you may swerve to hit a booster pad, only to find that obstacles are in your way, and that you're out of position for a pair of booster pads on the opposite side of the track. This isn't something you can magically know ahead of time, however, so you'll need to take advantage of the practice runs that are available on each track. It can help to actually go as slow as possible for a couple of the runs, to see how the booster pads are laid out and where the obstacles are placed. The tracks look a lot different at high speed, though, so run them as fast as you can for a dozen repetitions or so, and you'll be well on your way to mastering the course.
Last, but not least, you should develop an instinct for when to shift gears. You can madly tap away at the A button if you want, but every time you try to shift when your bike isn't ready, you'll take a small speed hit. If you wait too long to shift, however, you'll essentially be giving away speed to your competitors. You won't be able to take your eyes off the track while you're racing, so you should develop a habit of keeping the acceleration meter in the lower part of your field of vision, and hitting the shifter right when it first becomes available.
Upgradeable Items
There are quite a few upgradeable items scattered throughout the game world; these will almost always wind up being better than stock items of the same type. When you possess one of these items, you can take it to a workbench (there's one on the Ebon Hawk), and modify it with spare parts to make it better...faster...stronger. Spare parts can be taken in and out of weapons, so if you find something that you think might replace one of your current items, you can strip the old item of its parts and put them into the new item to see how they compare.
Many of these items are available for purchase from various vendors at exorbitant prices. We've taken the liberty of purchasing as many of these as we could and upgrading them completely to give you a before-and-after picture of what they'll look like, so that you don't have to save and reload if you dislike an item. This shouldn't be considered an authoritative listing; there are sure to be other items out there.
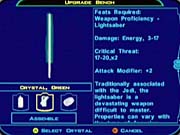
Note that there are no unique lightsabers; each lightsaber you find will have the same beginning stats as all the rest.
Ranged Items
Carth's Blaster
Proficiency: Blaster Rifle
Found: Carth is initially equipped with this weapon.
Before upgrades: Energy: 2-7
After upgrades: Energy: 4-9, +2 Attack
Bendak's Blaster
Proficiency: Blaster Rifle
Found: After defeating Bendak Starkiller in the Duel Ring on Tarsis.
Before upgrades: Energy: 2-7, +1 Attack
After upgrades: Energy: 5-10, +3 Attack
Zaalbar's Bowcaster
Proficiency: Blaster Rifle
Found: In a locked footlocker near where Zaalbar is imprisoned in the sewers on Tarsis.
Before upgrades: Energy: 1-10, +1 Attack
After upgrades: Energy: 3-12, +3 Attack, Keen (double critical range)
Ordo's Repeating Blaster
Proficiency: Blaster Rifle
Found: Canderous is equipped with this weapon when he joins your party.
Before upgrades: Energy: 2-11
After upgrades: Energy: 5-14, +1 Attack, Keen (double critical range)
Jamoh Hogra's Carbine
Proficiency: Blaster Rifle
Found: Bought from merchant on Tatooine.
Before upgrades: Energy: 3-10, +1-4 Physical, Attack +2
After upgrades: Energy: 5-15, +2-8 Physical, Attack +5
Jurgen Kalta's Assault Rifle
Proficiency: Blaster Rifle
Found: Bought from Fazza Utral in the Hunter's Lodge on Tatooine.
Before upgrades: Energy: 1-8, +1-6 vs. Droid, Attack +3
After upgrades: Energy: 2-12, +1-6 vs. Droid, +1-4 Ion, +1-4 Physical, Attack +5
Cassus Fett's Heavy Pistol
Proficiency: Blaster Pistol
Found: Bought from B'ree on Korriban (10,000 credits).
Before upgrades: Energy: 4-11, Attack +3, 25% chance of stunning target for 6 seconds on hit
After upgrades: Energy: 6-19, Attack +5, 25% chance of stunning target for 6 seconds on hit, Keen (double critical range)
Upgradeable Items - cont.
Melee Weapons
Prototype Vibroblade
Found: On the body of a red Sith Trooper just before you reach the escape pod of the Endar Spire.
Before upgrades: Physical: 1-10, +1 Physical
After upgrades: Physical: 1-10, +4 Physical, +3 Attack
Mission's Vibroblade
Found: After Mission joins your party, this item is added to your inventory.
Before upgrades: Physical: 1-10, +1 Physical
After upgrades: Physical: 1-10, +1 Physical, +1 Energy, +2 Attack
Sanasiki's Blade
Found: Bought from Aratech merchants on Dantooine.
Before upgrades: Physical: 3-12, +3 vs. Droid, +2 Attack
After upgrades: Physical: 3-12, +3 vs. Droid, +1-6 Energy, +4 Attack, Keen (double critical range)
Bacca's Ceremonial Blade
Found: Obtained from Chuundar or Freyyr on Kashyyyk.
Before upgrades: Physical: 4-14, +4 Energy, +2 Attack
After upgrades: Physical: 6-16, +2-12 Bludgeoning damage vs. droids, +4 Energy, +4 Attack, +2-12 damage on critical hits
Yusani's Brand
Found: Bought from spaceport merchant on Tatooine (8,000 credits).
Before upgrades: Physical: 4-18, +5 vs. droids, +2 Attack
After upgrades: Physical: 4-18, +6-9 vs. droids, +3 Fire, +3 Attack, 50% chance of 12 second stun on a successful hit
Upgradeable Items - cont.
Armor
Echani Fiber Armor
Found: In riddle-box in Lower City Apartments, near the elevator to the Upper City.
Before upgrades: Defense Bonus: 5, Max Dexterity Bonus: +5
Defense Bonus: 7, Max Dexterity Bonus: +5, DR: 20/- vs. Cold and Fire
Calo Nord's Battle Armor
Found: On body of Calo Nord.
Before upgrades: Defense Bonus: 9, Max Dexterity Bonus: +1, DR: 10/- vs. Cold, Fire, and Sonic
After upgrades: Defense Bonus: 12, Max Dexterity Bonus: +1, DR: 10/- vs. Cold, Fire, and Sonic, Immunity to Critical Hits and Mind-Affecting attacks
Darth Bandon's Fiber Armor
Found: On body of Darth Bandon.
Before upgrades: Defense Bonus: 5, Max Dexterity Bonus: +5, DR: 25/- vs. Fire
After upgrades: Defense Bonus: 7, Max Dexterity Bonus: +5, DR: 25/- vs. Fire, Immunity to Mind-Affecting attacks
Republic Mod Armor
Found: Locked footlocker in Apartments in Lower City, Taris.
Before upgrades: Defense Bonus: 5, Max Dexterity Bonus: +4
After upgrades: Defense Bonus: 6, Max Dexterity Bonus: +4, Immunity to Mind-Affecting attacks
Cassus Fett's Battle Armor
Found: Sold by Adum Larp in the Courtyard on Dantooine for 15,000 credits.
Before upgrades: Defense Bonus: 10, Max Dexterity Bonus: +0, DR: 10/- vs. Sonic, Fire, and Cold
After upgrades: Defense Bonus: 14, Max Dexterity Bonus: +0, DR: 10/- vs. Sonic, Fire, and Cold, +1 Strength
Glossary
For those of you who aren't familiar with PC RPGs or the d20 combat system, this Glossary will hopefully provide you with a small reference that you can refer to while reading this guide, or playing the game, when you encounter a term or acronym that's unfamiliar to you. While the d20 system has been greatly improved since the days of Advanced Dungeons & Dragons 2nd Edition (you won't see any THAC0's, for instance), the system is still fairly hardcore when compared to the rules of most console RPGs.
The game takes care of all of these dice rolls and calculations, but if you ever want to pop the hood and see what's really going on in battle, go to the Messages menu in the Options screen and hit X to show the feedback.

Attack
Also known as the attack roll, attack bonus, or to-hit roll.
In order to damage an opponent in combat, you must first successfully hit them, and the attack number of your characters determines their chances to do so. The attack number, which is displayed on your character's equipment screen, depends on a number of factors, including a character's level and class, their dexterity attribute, the type of weapon used, and what special feats you've selected. This positive number is what is added to the random number the game generates to determine whether or not your character hits their opponent.
For instance, suppose two of your characters both attack an opponent with a defense of 15. One of your characters has no attack bonus, while the other character has an attack bonus of +10. Since your attack roll needs to match or exceed the defense of your target to land a hit, the first character will need to roll a natural (unmodified) 15 or better, while the latter character will only need to roll a five or better (since five plus 10 is 15).
Damage Resistance (DR)
Damage resistance is quite handy in KOTOR, since it can reduce or eliminate the amount of damage a character takes when an enemy successfully attacks him or her. Damage resistance is usually gained through the use of an item, such as an energy shield, and (whether the game tells you this or not) is represented by a number, such as (5/- vs. Fire). The number before the slash is the amount of damage that is ignored; in this case, the first five points of damage from every fire-based attack would be ignored by the character, so that, if an attack was supposed to deal 10 points of fire damage to your whole party, that character would only take five, while the other characters would take full damage. The value after the slash normally represents the kind of weapon that can overcome the damage resistance, but, for the purposes of KOTOR, you won't have to worry about your DR being overcome.
Difficulty Check (DC)
A difficulty check is often required when you attempt to use a Force power or a skill, or make a saving throw. This translates the conceptual difficulty of a task into a number that can be matched to a die roll generated by the game.
To illustrate by way of an example, assume you have a character with a security skill of 10 that is attempting to pick a lock during the middle of a battle. The lock is rather intricate, so the DC is set to 25, meaning that your character must roll a 15 or higher to succeed in the lock-picking attempt.
Glossary - cont.
Defense
A character or monster's defense rating is an aggregate of any bonuses from armor, their dexterity attribute, and any feats or Force powers that are active. Every character in the game has a base defense of 10, to which the aforementioned factors are added to form that character's overall defense. See the attack listing above to get a brief example of how defense works in combat.
Note that the defense score of your characters does not reduce the damage they take; it merely makes them more difficult to hit. Should an enemy's attack roll exceed your defense, the damage calculation takes place without regard to your defense score.
Non-Player Character (NPC)
NPCs are characters that are controlled by the computer. Since KOTOR only allows you to control one party member at a time, your teammates are, technically speaking, often considered to be NPCs, but for the purposes of this guide, we've attempted to reserve the "NPC" term for characters that are never under your control, such as townsfolk, combat opponents, and merchants. Your teammates will usually be referred to as, well, teammates, or party members.
Player Character (PC)
This term is used to refer to the character that you created at the beginning of the game; the character that is always in your party and is the focal point for the story that unfolds in KOTOR.
Saving Throw
A saving throw is what represents your character's ability to escape harm, or, failing that, minimize it through defensive actions. Every threat that forces your character to make a saving throw will have its own unique difficulty check.
There are three different kinds of saving throws: throws for will correspond to a character's ability to resist mental intrusion and mind-affecting attacks; throws for fortitude represent a character's natural resistance to poison and physical harm; and throws for reflex test a character's ability to avoid the brunt of explosive damage by diving out of the way.
For instance, assume a thermal detonator is thrown into a room where two of your characters are standing. Some damage from the explosion is inevitable for both characters, but one of them has a much higher dexterity than the other, giving them an advantage when it comes to quickly moving out of range of the explosion. The DC check of a thermal detonator is 15 against a character's reflex save. The less dexterous member of your party rolls a 10, which is unmodified by Dexterity, meaning that that character will take the full 60 points of damage from the Detonator. The other character rolls a 10 as well, but adds his Reflex bonus to the save, which just happens to be +5, meaning that he quickly finds cover before the explosion and only takes half damage.
Tank
When we say "tank", we don't literally mean that you get to play around with an M-1 Abrams or anything like that, of course. The term refers to the process of using a beefed-up character with high defense and/or vitality to engage your enemies in point-blank combat, while your weaker characters sit behind the lines and take potshots at your foes. Zaalbar performs this function admirably in the first sections of the game; Juhani or your PC will assume the role afterwards.
Got a news tip or want to contact us directly? Email news@gamespot.com
Join the conversation