Call of Duty Walkthrough
Nations banded together to rid the world of fascism. Why should you do it alone? This guide offers a walkthrough, weapon stats and strategies, and tips for playing all multiplayer game types and maps.
Design by Katie Bush
The World War II computer game renaissance has been ongoing for a few years now, so it's rare to see a title garner the kind of hype and attention that Call of Duty has. Then again, it has an impressive pedigree: Infinity Ward, its developer, was formed by members of the team that developed Medal of Honor: Allied Assault, one of the best first-person games in recent memory, and one of the games that helped inspire the current glut of WWII-themed titles.
Thankfully, Call of Duty is every bit as impressive as its spiritual predecessor, with brilliant scripted events, single-player sidekicks, a wide array of authentic weaponry, and an impressive suite of multiplayer options. This guide is an all-purpose primer for Call of Duty, encompassing a full walk-through for the single-player game, multiplayer map descriptions and tips for each of the game's five multiplayer modes, and statistics and info on each of the game's many weapons.
Whether you want to storm the Reichstag, or just conquer your favorite Internet server, this guide is your field manual for every combat situation you'll encounter.
Table of Contents
Walk-through
Mission 2: Burning Village
Mission 3: Village at Dawn
Mission 4: Car Ride
Mission 5: Brecourt Manor
Mission 6: Chateau
Mission 7: POW Camp
Mission 2: Operation Pegasus-Day
Mission 3: Eder Dam
Mission 4: Truck Ride
Mission 5: Eder Dam Airfield
Mission 6: Sabotage the Tirpitz
Mission 2: Red Square
Mission 3: The Train Station
Mission 4: The Sewers
Mission 5: Pavlov's House
Mission 6: Tank Factory
Mission 7: Tank Factory Railyard
Mission 8: Tank Drive - Country
Mission 9: Tank Drive - Town
Multiplayer Tips
Weapons
Walk-through
There are four difficulty levels in Call of Duty. The first three, Greenhorn, Regular, and Hardened, are different only in that you take more damage as you ramp up the setting. Hardened is a good setting for experienced gamers. On the Veteran setting, however, not only do you take the most damage of any of the settings (two or three bullets is usually enough to finish you off), all of the health packs and health kits are removed from the game, meaning that you are forced to play through each level with only a single health bar. Needless to say, you're going to become intimately familiar with your quicksave and quickload keys if you play on this difficulty.
For the purposes of the walk-through, we'll be assuming that you're playing on Veteran mode. If you're playing on a lighter difficulty, feel free to follow a more reckless path than what we recommend.
Single-player Tips
- All reverence aside, no one will be shedding tears for your fallen fellow soldiers, so use them and abuse them. Whenever possible, let them proceed ahead of you to draw enemy fire; this will make it easier for you to spot enemies and take them out with a long-range weapon. This tip is especially true when you're around unkillable teammates, like Captain Foley or Sergeant Waters.
- Get used to utilizing your movement keys. Standing up is fine for moving when there aren't any enemies around, or when you wish to move somewhere quickly, but for the most part, exterior movement should be done in a crouch, to reduce your profile for enemy opponents, who will generally "see" you as soon as you enter their line of sight, no matter how far away you are. Crouching isn't as important when moving inside a building, though, since you don't have to worry about the enemy hearing you.
- Your enemies are often frightfully precise, enough so that they'll be able to drop you if they spot you coming around a corner. Get used to using your lean keys when approaching a door or corridor; although you'll still be able to take fire, you'll be much less likely to actually get hit.
U.S. Campaign
After the bombing of Pearl Harbor, the U.S. began the long preparation for war. By agreement with the other Allied nations, their war machine would be focused on conquering Germany and the other European Axis members before concentrating on Japan, but preparations for retaking the continent weren't complete until two and a half years after the attack on Hawaii galvanized the U.S. Zero hour for the invasion was the early morning of June 6th, 1944, but the previous night, massive amounts of troops were dropped behind the invasion zone in the largest paratrooper operation in history. You begin Call of Duty as one of these paratroopers.
Before you head off to France, however, you begin the game in England, where you start your paratrooping career with a bit of basic training. The first mission is something of a tutorial, designed to show you how to move over and around obstacles, and how to use the various types of weapons that you'll encounter during the game itself. If you're an FPS vet, you shouldn't have too much of a problem with the tasks that the tutorial sets up for you, so breeze through as quickly as you can and move along to the first real mission of the game.
Mission 1--Pathfinder
As an advance unit, dispatched behind enemy lines, you find yourself alone in a field near where your fellow troops will be dropped in shortly after you. You and your cohort, one Sgt. Heath, are tasked with setting up a radio beacon that your planes will lock onto before dropping their cargo.
Before you begin running around, however, you might want to take a moment and adjust the game's brightness settings. You're going to be in the dark for the first couple of missions of the game, and the default gamma settings are awfully dark. Head to the Options screen and slide your brightness bar in the graphics menu up a few notches if you're having trouble seeing; otherwise, you can expect to have a hard time proceeding through the following missions.
After you take care of your vision problems, check your compass; it'll point you towards your first objective, which is to meet up with Sergeant Heath. Your first kill will occur at the top of the hill near where you begin, as a German guard is doing something rather undignified near a tree. Proceed towards him quickly and fire off a few rounds before he can pick up his weapon, then head through the arboreal passageway nearby to stumble across the dear, departed Sgt. Heath. Grab his legbag, and, if you wish, you can switch out your M1A1 Carbine for his M1 Garand. (You should definitely hold on to your Thompson, however.)
Two more Germans are playing checkers in a nearby bunker. You can dispose of them either by charging in with your BAR, or by tossing in a grenade. You'll come across the location for your radio beacon nearby. Place it and head deeper into the field ahead.
The next objective is to "defend the dropzone," a suitably vague task that essentially means that you should stand around for a few moments while your teammates drop in from on high. As they come down, make your way to the buildings to your west; one building towards the north end will soon be populated by Germans firing out of the windows, and you'll want to be underneath those windows when this occurs. After the gunfire starts, use your BAR to clear out the soldiers at short range while your teammates begin advancing on the building. You won't actually be able to proceed inside the building until a friendly soldier comes along and kicks the door in. You should be getting an idea for how Call of Duty handles its single-player game; there are relatively few static enemies in these levels. Rather, the bulk of the game will consist of scripted events that won't activate until you step past a trigger point. While this makes for exciting gameplay, the drawback is that every enemy appears in the same point during each play-through, so if you run across a spot of bad luck, just reload your game and you should be able to predict where the trouble will be coming from the next time through.
Proceed cautiously through the next few areas, as Germans have taken up positions inside most of the buildings here. As you move through the houses and courtyards, be wary of upper-floor windows, some of which conceal Germans who will begin firing out or even throwing grenades at your squad as you try to move along.
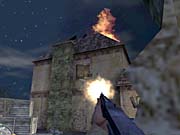
Mission 2--Burning Village
The village of Sgt. Mere Eglise lies astride a highway that the Germans will be using to transport troops along the rear area of the D-Day beaches. In order to prevent them from rapidly shuttling reinforcements to the landing zones, you'll need to take the village from the entrenched Germans and hold it until the invasion forces have advanced far enough inland to relieve you.
The quest begins in a narrow corridor through a cow field, which is bordered on either side by mines. There are three machine gun emplacements in the buildings to the west of your starting point, and the cow field itself will take a few mortar rounds as you head through, so stay away from the craters in the ground.
There are two ways to proceed along the cow field. First, you can head up along the right flank of the soldiers, use your M1A1 Carbine to snipe out the rightmost machine gunner, and then jump over the broken fence to kill the other machine gunners in the building nearby. At close range, they won't be able to let go of the machine guns quickly enough to prevent you from unloading your Browning in their faces.

Alternately, you can head up along the left side of the cow field, hide behind one of the trees near a crater, and then use your M1A1 to snipe the rightmost machine gunner, as well as the gunner in the upper floor of the building ahead. You may have to wait until he's aiming at one of your teammates, however, since he's an awfully small target when he's firing at you.
After the first building is cleared, Cpt. Foley will call to your squad to begin moving up the street. Take note of the halftrack down the road with another machine gunner perched atop it. You won't be able to kill him until you've cleared out the second building to the south, along with the other Germans that will rush you from the burning church here. After there's a lull in the fighting, bring out whatever ranged weapon you have and lean around a corner to get a good shot at the machine gunner's head. When you spot a flying helmet, you'll know that it's time to move on.
Now that you've arrived at the village proper, the number of German troops increases dramatically. They'll fill most of the windows and doorways in the buildings across the street, and there'll be another machine gunner off to the north of where you'll turn the corner. Your best bet is to chuck a grenade or two into the buildings across the street, then run across to the small bit of cover afforded by the bend of the brick wall directly to the south of the first building the Germans occupy. From here, you can proceed along the building, filling any Germans in the windows with lead, and using your grenades to send the rest of the troops scattering. You'll probably be running low on ammo for your Thompson, so if you haven't already, this is a good time to ditch it in favor of a German MP40.
Another difficult sequence occurs immediately after you cross the road, as you make your way across the small set of buildings in the courtyard of the church and attempt to take over that building. If you're having trouble with this area, you can simply proceed far enough into the courtyard until you trigger the scripted advance of the Germans, then just lie prone beneath a fence until your teammates advance beyond your position. They'll do a fair job of killing the Germans for you, after which you can bust out whatever ranged weapon you have and dispatch the machine gunner in the church.
When you're in the clear, head into the church and kill off anyone left inside. There's a hole in the western end of the building, which forms a nice little roost from which you can kill off the Germans manning the machine guns and the mobile flak cannon outside. Do so and head back to the courtyard to find a passageway leading to the AA vehicle, then use your explosives on it and get around a corner before it blows.
There are still two AA vehicles to destroy, so don't get cocky yet. The next one is a ways past the first, and is covered by a half-dozen or so Germans behind the destroyed wall of a building. Let your teammates proceed around the corner ahead of you; you can either follow them around and attempt to flank the Germans from the right, or just use whatever cover you can get to lean around and snipe the Germans from the left of your teammates' defensive position. Whichever method you prefer should work.
When the German threat has been eliminated, you may wish to root through their corpses to find an FG42. This scoped rifle is capable of automatic or semiautomatic fire, and has a zoom distance much, much greater than the M1A1 carbine, or indeed any of the rifles that you've encountered so far. It and an MP40 make a fine pair of weapons that will serve you well in any combat situation.
Destroy the flak cannon here and move through the small passage to the west to begin your trek to the village square. Another flak cannon is parked in the corner of this small road, but don't run directly toward it; there's a machine gun set up across the way, hidden behind a brick wall so that it's difficult to spot from most of the street. You can attempt to circle around the machine gunner by heading up the right side of the street, or just bust out your FG42 and snipe him when he comes into view.
After the crew of the last AA vehicle has been dispatched, grab any ammo from them that you require and blow the vehicle. Cpt. Foley will call a little meeting right in the middle of the street, which doesn't seem very wise, but it does end the mission.
Mission 3--Village At Dawn
Ste. Mere Eglise isn't much prettier in the daytime than it is at night, but it does allow for the Germans to begin a coordinated assault on your positions. What's worse is that they're supported by tanks and mortars, so you'll need to step lively if you wish to escape serious bodily harm. You can expect to become intimately familiar with your quicksave and quickload keys, especially on Veteran difficulty.
From the starting point, head across the street and into the small room where the rest of your squad is hunkering down. The mortars will stop firing shortly, but the hard part is just beginning. On Veteran difficulty, the next sequence will require a little luck and a whole lot of timing on your part if you wish to survive.
Foley will send out a soldier to scout; this poor sap will be redshirted right into an early grave, after which Germans will begin popping over the walls to the north and west of your position. A tank will also be moving in from the northeast, but don't worry about it just yet. Your first order of business is to assist your teammates in clearing out all of the Germans that jumped over the walls, so quicksave and start blasting. As soon as they're dead, more Germans will begin coming in from the east, and the tank there will begin hosing down your position with machine gun fire, if it hasn't already. If you're quick, though, you can make it to the church before you get shot down.
After you reach the church, switch out your ranged weapon for a Panzerfaust, then switch back to your MP40, or whatever you're using for close encounters. More Germans will have jumped over the wall near the entrance to the church, so kill them, then turn your attention to the Germans heading at you from the east. Your teammates will hopefully have eliminated most of them, but a few will usually penetrate to the church entrance, so stay on your toes.
When you have a moment in the clear, you can try to take out the tank with the Panzerfaust. Unfortunately, you'll notice that the PF isn't precisely accurate; the rocket it fires will deviate from the center of your crosshairs, often by a large amount. You can either try to fire multiple times from the church's entrance (you have unlimited ammunition in the church itself), or run up the left side of the street until you reach point-blank range.
Either way, the tank will be destroyed in a very satisfying explosion. Cpt. Foley will call you back to the church right away, as Germans attempt to flank your position. On the lesser difficulty settings, you can man one of the machine guns, but on Veteran, your best bet is to just stay out of the way as much as possible, since the potential for grievous injury is quite high here. Eventually the Germans will begin a retreat, and Foley will call for backup as he attempts to cut them off. Get another Panzerfaust before you head out, if you want to save yourself a boatload of trouble later on.
Foley will lead you back around towards where the second AA vehicle was in the previous mission, except that now the Germans will be where you were before. You'll be fairly safe if you just wait in the narrow corridor outside the firefight and lean around the corner to pop a few rounds off at a time, while waiting for your teammates to kill off most of the enemies. Don't expose yourself too much, or the Germans will lock onto you and take you down.
Eventually the Germans will be routed, after they retreat back towards the church courtyard, but in the distance the sound of a tank should alert you to imminent danger. The tank is actually on a trigger, as they all are, and won't bust through the wall until you get close to the corpse of the flak vehicle. When it does, however, it'll come out firing, and German troops will rush in to support it.
If you brought along a Panzerfaust, you shouldn't have a hard time blowing the tank away, but if you forgot it, or miss, you'll need to trek back to the church and pick up another one. The tank will begin firing off shells at you as you backtrack, so quicksave before moving and move quickly, lest you find yourself buried in the rubble of a bombed-out building.
The tank will eventually be destroyed, so head back to the church and pick up the weapon that you dropped. There's another tank to the southeast of the village square, but you shouldn't have to worry about it; a couple of your teammates will pop onto it and destroy it with a grenade in a very cool scripted sequence after you spot it.
From there, head to the south until Foley and the rest of your squad begin following you. Another scout will notify you of the mortar position to the southwest, which you'll need to destroy. Unfortunately, it's protected by no fewer than four machine gunners, as well as a sniper. If ever there was a time to use and abuse your FG42, this is it; use its scope to pop the heads of each of the machine gunners and the sniper, then start making your way through the field to the trench, where you can duck under the fire of the soldiers who replace the original machine gunners.
The two-man mortar team is located behind the building here, and will be so focused on firing off their shells that you should be able to dispatch them without taking fire in return. After they've fallen, clear out the rest of the soldiers in the field here, and stock up on ammo for your weapons. Find the car that's just rolled out of the garage and get in.
Mission 4--Car Ride
There's a bit of dry irony involved in Call of Duty's depiction of a drive through the country, in that it's not quite a placid trip through the pastoral woodlands of the French countryside; instead, you're going to be locked into a speeding vehicle that's beset at every turn by gunfire and German vehicles intent on ending your journey as soon as possible.
Since Sgt. Moody steers the car, you won't be able to influence the car's direction at all; all you can do is sit tight and hope you don't get taken out by a German soldier. You'll be able to fire through the windows, of course, and fire you must, since it's kill or be killed during this level, especially as you make your way through the German lines.
The only real advice here is to quicksave often. You won't get hit very much, even on Veteran difficulty, but you should still use your MP40 or other weapon and fire on the Germans; even if you only hit them once or twice, they'll still be staggered, and a staggered opponent won't be able to fire back until they regain their balance, which usually won't happen until you're well out of sight. Don't blow through your ammo too quickly, however; you'll need to reserve some of it for a walking portion of the level later on. Instead, fire short bursts at enemy concentrations. You can hit your Use button to stick your head out of the window, but that's generally ill-advised.
Eventually, Moody will come across a tank, get flustered, and drive you into a dead-end, which will prompt the three of you to leave your vehicle and head through the village here on foot. Proceed through the building nearby until you reach another exterior; after a couple of corners, you'll reach a road, at the end of which is a garage with another car in it. Take out the sniper in the building adjacent to the garage, then grab the machine gun next to the Kubelwagen and use it to put down the Germans that appear out in the street while your friend attempts to hotwire the vehicle.
After you're back on the road, you should mostly be home-free, if you can avoid taking fatal damage. The level seems to be pretty lenient on you if you've gotten this far, however, so you should be able to make it from the village to the Allied HQ without any problems.
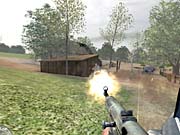
Mission 5--Brecourt Manor
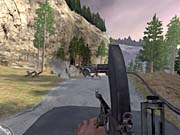
Your mission here is to locate and destroy a series of artillery guns scattered throughout the countryside. Sgt. Moody is invincible, so you may want to stay behind him when you reach the trenches.
In the beginning, however, you'll need to cross some open space to reach the first artillery gun. Your best bet for getting there unharmed is to take the left flank, using the trees and rocks there for cover until you reach the trench that leads off to the south of the artillery, leading with a grenade or two to prevent the Germans from firing on you. Jump into the trench and finish off any troops that your teammates haven't killed yet; Moody will hop down and plant the explosives after all of the Germans are dead.
The trenches here are twisty beasts, populated by numerous soldiers, so watch your corners and keep your head down below surface level. You may want to switch out your Thompson for an MP40 when you have an opportunity, since you'll run out of ammo for it soon enough anyway. Follow Moody down the trench until you reach the next artillery position, which he'll make short work of, but watch out for the German that pops out of the nearby door after it blows. Drop him and head into the little bunker beyond.
Moody will proceed through into a little storage area. This would be a perfect time for a grenade, since Moody is somewhat mentally challenged and won't always fire on the Germans inside. Grab the documents in the next room over and move out to where a medic is cowering in another trench. Moody will proceed out to nab the wounded man, while you provide covering fire and prevent the Germans from reaching your position. The Germans come in through the foliage, and are thus a bit difficult to see, so look for muzzle flashes and aim at those.
After Moody secures the wounded soldier, he'll pass along the explosives and tell you to move on ahead. Destroy the artillery to your south, then use the little stepping stone that the explosion created to get out into the open. Again, the easiest way to approach the enemy position here is to head up along the left flank, ducking behind the rock in the middle of the field. Once you reach the rock, chuck a grenade or two into the enemy position; this'll scatter them from the machine guns and let you charge in, guns blazing, while your teammates come up from the right. Take out the artillery here, then continue along the trench path.
The next enemy gun is guarded by a machine gun position, so you'll want to whip out your Garand or Kar98k. Take out the gunner and the engineers that are manning the artillery, then destroy the artillery itself.
The houses to the south contain your next objective. First, work your way through the farmhouses, then proceed inside the manor house nearby, where the last set of enemy documents are in an upstairs bedroom. You can man the machine gun here as the soldiers charge the house, if you wish; concentrate on the soldiers that come from the left side of the courtyard, as any enemies that reach the house will come up the stairs and assault you from behind. Be careful about the more distant enemies, as well: it'll sometimes appear as if you've dropped them, when instead they're actually just prone, lining up a shot with their Kar98k. If you feel too exposed while manning the MG42, you can try to run down the stairs and take out the Germans as they enter the house.
With the last set of documents in hand, your final goal for this level is to assault and destroy one more piece of artillery. There's another machine gunner outside the exit from the house you're in, though, so be careful as you proceed. From the house's courtyard, proceed to the west, avoiding the open gate to the south. Instead, you'll circle around the artillery and make a frontal assault; this way, Moody will take point (and thus take most of the enemy fire). Dispatch the soldiers, keeping an eye out for the sharpshooter at the rear of the courtyard, and set your explosives to finish off your objectives.
Mission 6--Chateau
The assault on the chateau begins with the dispatch of a few German soldiers manning a guardhouse near the entrance to the mansion. There's an MG42 that overlooks your approach, so you'll need to carefully snipe out its gunner with your BAR. Just fire one shot at a time, hopefully while he's busy shooting away at one of your teammates, until you hear the German scream, then start running towards the guard post itself. There are a few Germans hiding behind cars here, so you'll likely get cut down if you proceed without caution. A few grenades should lighten up the opposition enough for you to proceed past the gates and clear out any stragglers.
The chateau itself is beyond the guard post, but its exterior is guarded by troop transport trucks that are able to teleport to wherever your squad is, as if by magic. These scripted events can be a bit annoying, but as long as you find cover as soon as you hear the squealing tires, you should be all right. The troop transports can be destroyed with enough gunfire, though even the ensuing explosion won't kill the Germans unless they're still inside the vehicle.
The chateau's front door is inconveniently locked, so you'll have to make your way around to the rear of the estate to find an entrance. If you're on a harder difficulty mode, proceed only as far as you need to in order to make Moody and Foley progress; when you have two invincible squad members on your team, it's only fair to make them do the lion's share of the work.
After the scripted sequence where two more troop trucks disgorge their contents into the parking lot at the rear of the estate, you'll have a short path around the corner to find a back door into the mansion itself. Moody and Foley break off your squad, leaving you and two other privates to track down any secret documents in the building. Unfortunately, your squadmates can and will die eventually, so you should quicksave often and take point while you remain inside the chateau. The stopping power of your BAR may come in handy here in the chateau; while it fires less rapidly than the MP40, it will take fewer bullets to kill a man. Just be careful to reload after every gunfight, since its reload animation takes at least twice as long as that of the German weapons.
Despite the proliferation of doors inside the chateau, the path you'll follow is quite linear, since most of the doors will remain locked until a German busts through them, submachine gun at hand, in another of Call of Duty's myriad scripted sequences. This won't happen for a while yet, so for the meantime, make your way through what corridors are available to you until you reach the room where the secret documents are contained.
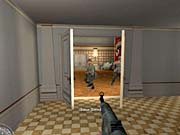
No path is evident from this room, so backtrack until, voila, a German kicks in a door right in front of you, allowing you access to the mansion's ballroom. Kill the soldiers, being mindful of the pair in the balcony above the dance floor, and proceed on to the chateau's foyer, where soldiers will come at you from two different directions.
After that skirmish, you'll need to wrap around the building until you reach the exterior balcony overlooking the parking lot you passed through earlier. This balcony has been repopulated by Germans, so lean out of the doorway to kill them off, then proceed into the far room. You'll notice that another troop truck has unloaded a few more Germans in the parking lot; these fellows will start following the trail of bodies that you've left behind, so keep your ears open for stomping feet as you move on.
From the balcony, keep moving on until you reach a dining room at the foot of a flight of stairs. This seems to be a dead end, but if you look around for a moment, you'll note an eagle flashing on and off by the fireplace. Use it and an Indiana Jones-like secret passage will open up, revealing the Nazis' secret transmitting equipment. Destroy it with a hail of gunfire, and Foley and Moody will finally rejoin your little party.
Follow Foley down into the mansion's nether regions, where Captain Price is squirreled away in one of the prison cells, which one can only suppose are standard-issue on Austrian chateaus. After you kill the soldiers guarding him, you'll be tasked with escorting him back to your thus-far-unseen stolen German truck. Foley and Moody may or may not follow you; their AI seems to be buggy here, so you may have to lead Price up on your own. Keep an eye out for a couple of Nazi ambushes as you make your way to the final checkpoint of the mission.
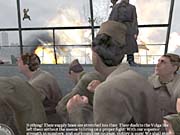
Mission 7--POW Camp
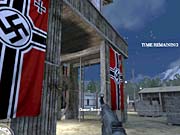
Captain Foley's brilliant plan to rescue Major "Dual" Ingram consists of having you snipe the guards at the gate, busting through the wire fence in the truck, then having you and the rest of the privates assault the troops in the POW camp while he and Moody sit in the truck until you return. To make matters more difficult, the entire mission is on a ten-minute timer which starts counting down as soon as you take your first shot, so you'll need to proceed as quickly as possible.
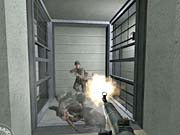
The aforementioned first shot should be aimed at the machine gunner on the right side of the camp's gate. Cap him, then take out the three soldiers to the left; after they're all dead, the truck will ram the gate and you'll be inside. The entrance to the camp is somewhat maze-like, with all of the buildings scattered around, but the other soldiers seem to know where they're going. A good route from the gate consists of moving along the rightmost fence until you reach an impassable building, then heading east along the corridors formed by the shacks in the camp. This will keep you away from the bulk of the barracks to the left of the entrance. As you might expect, German soldiers are to be found around almost every corner, so keep your weapon's ammo topped out whenever possible, and don't hesitate to drop your Thompson for an MP40 or MP44 when you spot a few of them on the ground.
After you pass through the first little nest of buildings, the path to Ingram becomes fairly linear. Stay on your toes, however, as Germans will often pop out of buildings as you pass nearby. When you pass through the camp's interior gate, which separates the holding cells from the German barracks outside, proceed to your left, through the dining hall, until you locate and free Ingram. Be careful for the sharpshooter in a tower outside the jail, though. The Major is, luckily, unkillable, and he'll be a big help during your trek back to the truck, since more soldiers have struggled out of bed, into their uniforms, and out into the camp's corridors.
Guide Ingram back through the extra-deadly corridors to the truck. Don't be fooled by the first truck you come across; this is actually another German troop transport. This minor impediment aside, you should make it back to the truck with a minute or two remaining, assuming you didn't wait around too long during your treks to and from the POW cells.
After returning Ingram to the truck, you'll be rather unceremoniously jettisoned into the British segment of Call of Duty.
British Campaign
After the events of June and July, 1940, in which the French signed an armistice with the Germans, and the Luftwaffe instigated the Battle of Britain, it would be a long five years until the British people finally helped conquer their German foes. Under the leadership of Churchill, the British armed forces fought valiantly on the air, in the skies, and at sea. Call of Duty casts you as a British commando fighting in the months after D-Day, undertaking highly dangerous missions deep within enemy territory.
Mission 1--Operation Pegasus - Night
The cutscene within the glider is rather lengthy, so make a new quicksave as soon as your plane hits the ground, after which you'll find yourself and your teammates overlooking the pillbox which guards the bridge you'll need to capture. Your initial goal is to use your Bren gun to continually strafe the pillbox so that the gunners there duck, which prevents them from firing on your teammates. There isn't a set position for you to do this from, so you'll need to find a good spot from which to fire.
On the harder difficulties, there's a delicate balance between being too far away from the pillbox, and thus being unable to aim accurately, and being too close, which will cause the gunners to chop you in two as soon as they get a lock on you. Keeping in mind that most enemies will fire on the nearest targetable soldier, you'll want to be in a position where you can spot the gunners, while remaining close to your friendlies so that they'll run past you and be the first ones to take fire after you start shooting. A fine location can be found by crawling through the bushes along the eastern side of the road until you run out of shrubbery for cover. From here, fire on the two German soldiers first, then start strafing the pillbox soldiers so that your teammates can get behind the emplacement and kill them.
After the pillbox is taken, the rest of your squadmates will proceed across the bridge to the west and begin eliminating the garrison there. Follow them, but not too closely; let them do the heavy lifting, since they'll all be dying in a few moments anyway. After crossing the bridge, stick close to Captain Price, who'll be crouched near a building to the south of the intersection.
When all of the Germans are dead, a tank begins approaching the bridge from the west. You don't have any way to dispatch it currently, so Price will instruct you to track down Private Mills, who will be able to unlock the flak turret on the eastern side of the bridge so that you can destroy the tank. Mills is off to the north of Captain Price's position, so you'll have to dash across the tank-controlled roadway to reach him.
Mills will immediately cross the bridge after you speak to him, but you shouldn't follow him immediately. Instead, lay prone behind the fence where he was positioned, facing the lantern. A group of almost a dozen Germans will soon be rounding the corner of the fence, firing at you all the while, but if you set up an ambush here, you should be able to eliminate them all without any trouble. If you attempted to follow Mills directly, they would've been firing at your back the whole way, which, combined with the tank's machine gun fire, would've made for a rather sudden increase in your body's lead content.
With the Germans dead, you can finally make your way across the bridge and regroup with Mills near the flak cannon. There is the aforementioned matter of the tank's machine gun to deal with, however. As long as you're moving perpendicular to the tank's front side, it won't be able to hit you very easily, so run as fast as you can towards the bridge, then crouch-move alongside the bridge's north side. The metallic divider here should shield you from the machine gun's fire.
Now, when you reach Mills at the flak cannon, he'll let you access it, so hop aboard with your Use key and immediately begin rotating it around to face the tank. Before firing on the tank, though, you may want to bombard any Germans that have popped up on the southern side of the far bank; you may spot a few muzzle flashes in the darkness. Don't worry about getting shot while shelling the other side of the river; the tank's machine gun will bounce harmlessly off of the flak cannon, as long as you keep it between you and the tank. When you're ready to pop the Panzer, line up your crosshairs with the tank's muzzle flash and blast away. If you miss, rotate the cannon to the left so that you're shielded while the weapon reloads.
One final task awaits you before you can call it a night. Your greatly reduced forces are now required to eliminate the vestiges of the village's German garrison, all of which are situated on the western side of the river. Don't be too hasty to get over there, however; let your teammates take down the first half-dozen targets or so, then make your way carefully across the bridge and kill off the rest. Occasionally the game may get stuck with one enemy remaining; if this occurs, your only option seems to be to reload a previous savegame.
Keep in mind that the next mission will begin loading as soon as all of the Germans are dead, so if you wish to switch out weapons, or pick up extra ammo, you might want to do it before killing the last soldier, or in between the completion of the last objective and the subsequent fade to black.
Mission 2--Operation Pegasus - Day
After a few hours of rest, you'll be awakened by Captain Price and the screaming death sound of incoming mortars. Most of your squad will be cut down instantly, as will you if you don't duck and cover as quickly as possible. As soon as the mission starts, ignore Price and make your way into the bunker nearby; you'll be safe here while the mortars are dropping.
A German assault from the west follows hard upon the bombardment, but, luckily for you, your teammates will hold the western side of the bridge on their own fairly well. They'll still need your help, however, so you'll have to grab the MG42 in the booth on the left side of the bridge and use it to mow down incoming Germans.
It goes without saying that headshots are difficult to come by while using the machine gun at long range, so be thorough in your shooting; tack onto a target and keep firing at him for a second or two, then move on to the next German you see. You're so far away from the far side of the bank that individual Germans are difficult to distinguish from the background, so watch for muzzle flashes and use those to aim. Concentrate your fire on the right side of the village, along where the trench is dug. Soldiers will occasionally lie prone beyond the horizontal range of your gun; if this occurs, disengage from the MG42, duck down so they can't see you, then pop back up after a few seconds and they will usually have moved into your killzone.
The game seems to give you an edge here by making the Germans fire less accurately, meaning that you'll rarely get hit, but if you do take a bullet or two on Veteran mode, you may as well reload your game, since you're going to need your entire health bar later on. It's best to stay at the machine gun for 15 seconds or so, disengage and duck, then save while you're not being fired upon.
There are two scripted events during this little orgy of gunfire. The first occurs around a minute after the assault begins; your game will auto-save, after which a group of eight or nine Germans will pop over the wall behind your position and start firing on your teammates from the eastern side of the bridge. If you keep your ears open, you should hear their gunfire coming from behind you while you're on the MG42. Once you do, let go of the machine gun and use whatever automatic weapon you have to kill these infiltrators.

The second event takes place shortly after the game auto-saves your position once again. Your squad will become overwhelmed by the vast number of German troops that are flooding the town, and will begin to fall back to the other side of the bridge. Your job while this occurs is to support their retreat by mowing down as many of the oncoming troops as possible. A simple task, but there are going to be a greater number of soldiers than before, and you'll have to keep an eye on both the rightmost side of the village and the central road.
Eventually, all of your troops will cross back to your side of the bridge, and your objectives will update. Your only goal now is to wait for five minutes until your reinforcements arrive. The twist is that tanks are approaching your position from the north, south, and across the river to the southwest. They're awfully courteous, though, and will approach one at a time, giving you plenty of opportunity to take them out with the flak cannon or the load of Panzerfausts that popped up behind the bunker at the beginning of the mission.
On lower difficulty settings, the cannon might be the best way to proceed here, but when your life is on the line, you'll want to stay huddled in the protection of the bunker and use the Panzerfausts at long range. Each incoming tank will pop up as an individual objective on your compass, so you'll always have an idea of where the next threat will be coming from. The tanks that approach from the north should be destroyed as they pass by the trench in the rear of the bunker; those coming from the south and southwest can be fired upon from the bunker itself. The Panzerfaust's poor accuracy will usually require you to fire multiple times at the more distant targets, but this is preferable to running through the death field outside to use the cannon. As long as you keep a submachine gun, like the Sten or MP40, and use it take down Germans approaching the bunker from the east, you shouldn't have any problems grabbing as many Panzerfausts as you need from the cache in the trench.
After the five minutes are up, it's a simple matter of clearing out any remaining Germans to finish off the mission.
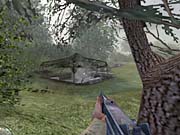
Mission 3--Eder Dam
Now that you've proven your battlefield acumen, you're going to be tasked with a rather large job: assault a dam, disable its anti-air defenses, and destroy its water-powered generators. You're on your own for this level, so it winds up playing just like a run-and-gun level from a more generic shooter game. The level design is astounding, though, so you're not going to be bored.
You start the level with a scoped Kar98k rifle; use it pick off the defenders near the spotlight in front of you, then keep it ready as you move across the top of the dam, destroying the AA guns as you proceed. There's another small defensive position on the far side of the dam, with a machine gun set up below your line of sight, so proceed cautiously to avoid stumbling into its line of fire. When you reach the last AA gun on the surface, plant your explosives and immediately run back towards the now-open door behind you. Kill the German inside and proceed into the guts of the dam.
The interior of the structure is a series of linear corridors, for the most part, broken up in the middle by a large turbine room. Proceed slowly, and be sure to lean around corners before you move into an exposed position. There is a large number of grenades scattered throughout the bowels of the dam, for whatever reason, so don't be afraid to preface your arrival into a room with a grenade or two. Most rooms are going to have enemies in them, but you may have to walk close to the door to actually have them spawn. In other words, even if you don't hear any reaction to a grenade's explosion, there may still be Germans in a room when you turn the corner. Take nothing for granted, and quicksave often. These grenade packs contain ten grenades, which, coincidentally, is your maximum carrying capacity, so try to only pick one up if you're almost out. Any remaining packs can be used on your way back through the dam later on.
Eventually, you'll reach the bottom of the dam and proceed into the generator room. As we were saying, grenade the interior thoroughly, but proceed with caution nonetheless, as soldiers are hidden away behind the boxes and structures here. Set your dynamite, then proceed outside to take out the remaining AA guns. You probably haven't been using your scoped rifle much, but don't miss the extra ammo for it near the first AA gun on the exterior.
After blowing the lower flak guns, you'll need to consider the practical matter of effecting your escape. There's no convenient airlift that will take you back to the top of the dam; you're going to have to beat your feet and backtrack through the entire structure before you can finish the level. And guess what? The Nazis you killed have spontaneously regenerated, and are now waiting to impede your progress yet again as you make your way through the dam. There's no way around it, so quicksave and get going. One thing of note is that the soldiers who reappear in the generator room as you start back carry MP44s, so if you're looking to trade up from the MP40, feel free to do so.
When you make it back to the top of the dam, Captain Price will be waiting for you with a truck. Before you get in, walk along the dam for a ways and use your sniper rifle to pick off the two Germans who are shooting at you. If you don't kill them now, they'll get a fairly easy shot at you as you pass by. When you're ready to go, jump in the truck and kneel for a bit of extra protection as Price gets you the hell out of Dodge.
Mission 4--Truck Ride
The next two missions take place as you ride through the mountains adjacent to the Eder on the back of a truck. You're armed with a Bren and a succession of Panzerfausts that Sergeant Waters hands to you. Aiming, obviously, is a bit of a task with the way the truck bounces over these mountain roads, so stay calm and pick your shots carefully, especially with the Panzerfaust--you don't have unlimited rounds here.
To begin with, you'll need to blow away a truck oncoming from your rear as you start the level. Destroy it, then grab another rocket launcher from Waters and face forward on the truck. If you time it right, you can destroy the parked truck up ahead before it even starts pursuing you. Shortly after it and the Kubelwagen nearby are destroyed, you'll cross a bridge. You'll need to provide cover for Waters as he prepares to destroy it, so take the sniper rifle and use it to pick off the soldiers advancing towards your position. Don't worry overmuch about getting hit; the Germans are pretty poor shots at this distance.
More high-speed mayhem ensues after the bridge is destroyed. After you get through the tunnel, you'll run up against a roadblock consisting of two more trucks. It's around this time that you'll probably run out of Panzerfausts; if you do, then whip out your Bren and concentrate on killing the soldiers in the backs of the truck. You can attempt to fire at the engine block to destroy the truck itself, but this generally leaves you exposed to an awful lot of fire, and the trucks themselves are offensive nonentities after their troops are killed off.
Subsequent threats include motorcycles with sidecars, which can be taken out rather easily with your Bren, followed by a climax involving a simultaneous assault on your vehicle by two trucks, each replete with riflemen. Use your Bren to kill off the passengers or at least fend them off until Price can get you down the hill to the airfield.
Mission 5--Eder Dam Airfield
If you thought that the last mission was difficult, then you may be overwhelmed by your assault on the airfield here. This is the kind of mission that punishes you if you don't know what's coming, so stay on your toes and don't be afraid to reload an auto-save if you get in over your head.
You begin by charging straight into the airfield's outlying buildings. It won't take long for the Germans to sic two trucks on your rear, so use your Bren to lighten their load. Price will quickly maneuver you into position near a flak cannon, which you'll have to use to shoot down incoming Stukas. The trick is that the cannon will be under heavy assault from the building nearby, as well as from the numerous Germans in the field ahead. You can't do much about the Germans in the field, but you can use your Bren to take out the soldiers atop the building, and you should do so before and after every wave of Stukas.
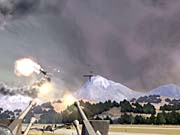
Firing on the Stukas is somewhat difficult due to the way they dive; leading them while they're on approach appears to be almost impossible, so you'll have to wait until they come straight at you before you can send them to the great airfield in the sky. Send them you will, though, and eventually the skies will be clear enough for you and your team to head off to the plane that your fellow soldiers have somehow commandeered. There will likely be more than a few Germans left amidst the cargo in the field, though, so man the machine gun nearby and kill them before heading out, or they'll be shooting at you as you ride in the truck towards the plane.
Mission 6--Sabotage the Tirpitz
Don't fret; despite the fact that you're in disguises, this is only a stealth mission for a few minutes at the beginning. You'll need to follow behind Price as he gets you on board the destroyer, but after you reach the armory, it'll be blazing gunfire from then until you reach your exit boat.
To begin with, though, you'll need to dock with the Tirpitz and follow Price aboard. His mustache apparently isn't distinctively British enough for the Germans to see through your deception, so you'll gain the run of the ship. Price walks fairly slowly, but you can force him to run after you if you simply jog ahead of his path, which leads to the left of the initial ladder.
After you reach the hangar, head downstairs into the bowels of the ship until you reach the armory. Price will kill the guards there, but not without alerting the rest of the ship to your presence--this is where that blazing gunfire starts up. You'll require the explosives and the weapons in the armory, and don't pass up the Kar98k: a rifle will come in handy when you're facing enemies on the other side of the Tirpitz's long interior hallways.
Price guards the door while you set the explosives. There are four spots where they need to be placed near the armory, so head through the door that Price isn't guarding and start laying your dynamite. These hallways, as we mentioned, are quite long, so you'll want to use that Kar98k to pick off any enemies that lean out from behind the far doors before charging through. The hallways near the armory form a square, with the armory itself at one of the corners, so after you've laid down all of your dynamite, you should find yourself right back where you started, although Price is now deceased.
The exit from the hangar back onto the deck of the ship is now overrun with riflemen. There will eventually be soldiers on either side of the exit from the hangar, a sharpshooter at the railing above, and perhaps a machine gunner around the corner. Your path will require you to kill at least the rifleman to the left of the exit; if you think you can survive the gunfire of the others, then just run past them and duck into the doorway nearby. Take the doorway on the left side.
You're now inside the battleship's main tower. Your next objectives are located upstairs, but the tight quarters of this interior space will make checking your corners difficult, so you may want to use any grenades you have left as you proceed onto the bridge of the ship. When you have a moment, follow the objective markers on your compass to find the three radar parts to destroy, then grab the log from the bridge and hightail it back to your boat to end the mission.
Soviet Campaign
Mission 1--Stalingrad Riverbank
If you've ever seen the film Enemy at the Gates, then you'll have a leg up on everyone else as this level starts. In short, Stalin was determined that the German army not be allowed to cross the Volga river, which flowed just to the east of Stalingrad, no matter what the cost to the city or its civilian population, to say nothing of its defenders. The game picks up the eastern front at the point of the German army's farthest advance into Russian territory, as it is slowly but surely worn down by the seemingly limitless number of Soviet troops that stream into the city.
You begin this level as one of these peons and peasants, drafted into the army and sent into the city via a Volga crossing. Despite your immobility, you can still be wounded by the Stukas that pass overhead, so stay down as the boat makes its way onto the docks on the far side of the river. There are a couple of scripted explosions on the far docks, which will give you a bit of shellshock, but won't actually hurt you. That's the job of the machine gunners up ahead.
Unbelievable though it may sound, there aren't enough rifles for all of the Soviet soldiers, so you'll be sent into the city with a mere ammo magazine for company. If you want a rifle, you'll have to pick one up off of the body of one of your comrades. Unfortunately, you won't be finding any weaponry during this level, despite the carnage that's being wrought on the hill above you.
If you've played Medal of Honor, then you should be familiar with the basic template of this level from that game's Omaha Beach landing mission. Without a rifle, though, you've been robbed of even the cold comfort of firing blindly at the machine gunners on the top of the hill, so all you'll be able to do is run from cover to cover. It helps a bit to hit your prone key when you're a few feet away from your chosen cover; this will send you into a dive which will quickly bring you to safety.
Your next objective is to reach Sgt. Borodin, a sniper who needs a bit of assistance killing the MG42 crews. Dash from cover to cover to reach him, following the marker on your compass. He doesn't have a weapon for you, obviously, but will instead require you to draw the machine gunners' fire while he attempts to pick them off with his sniper rifle. You won't be in much danger as long as you begin running towards his targets as soon as he gives you the signal, so keep your ears open and go as soon as he says.
After you make it to the destroyed car, Borodin will rather have a rather novel method for dealing with the Soviet political officer downhill from your position. After you and he reach the safety of the destroyed building, wait for the fireworks and then follow everyone else up to Stalingrad's interior.
Mission 2--Red Square
Welcome to the abattoir that is Red Square, Stalingrad. You're still weaponless, but that won't last for long; the two soldiers who are killed as they attempt to retreat will drop their rifles within easy reach of your starting point, as do all of the other dying soldiers. There are going to be quite a few rifles on the ground after a minute or so of gameplay, so stay prone and crawl around until you have ten rounds or so, then meet up with Sgt. Makarov, who'll ask you to help him flank the German position.
Dance your way to the northern side of the square, and work up towards the German tank there. Before you reach it, artillery shells will explode, opening a hole in the nearby building through which a few foot soldiers pour. Your rifle fires too slowly to be of much use against these MP40-wielding foes, but Makarov has a machine gun, so let him take point as you proceed towards the hole in the wall.
The stairwell inside the building has a well-stocked PPSh submachine gun lying on the floor, so grab it and head upstairs. There are snipers in the building across the street from this one, so be careful not to expose yourself to their fire by dallying in front of the windows. Of course, there are also soldiers inside your own building, but Makarov will do a fair job of dealing with them, as long as you sit back in the corners of the stairwell and allow him to proceed up the steps ahead of you.
On the top floor of the building, you'll find a dead soldier lying astride a sniper rifle. You'll need to locate and kill the four German officers in the courtyard below. Two of them are positioned within the trench behind the German line, while another two are on the steps of the prominent building nearby. After they fall, you can either shoot out the rest of the soldiers there, or simply return down through the hole through which you entered the building to enter the next section of the level.
After the two tanks are destroyed by shelling (this doesn't occur until you leave the building), a new route will be opened to the northwest of the building that the Germans were guarding. Follow it underground until you reach a shelled-out street, above which two snipers are perched, one in a window of a building, the other in the tall tower in the far distance.
From this point, you have a straight shot at the ending point for the level, skirmishes notwithstanding. You do pick up a few teammates just before you encounter the snipers, although they are emphatically killable and, as such, probably won't be with you for long.
Mission 3--The Train Station
Now that you've reached the train station, you'll need to penetrate its exterior until you reach the main building, which contains a makeshift headquarters where you'll receive new orders.
You will have two teammates as you begin the mission, but they likely won't survive through the first building, thanks to the way the AI gets flustered in the narrow corridors. More than once you'll probably be forced to watch one of them throw a grenade, then kneel down for cover less than two meters from where it landed. In short, you're going to be on your own before long, so get used to watching your own back.
After navigating the corridors here, you'll wind up in a defensive position overlooking the catwalks above the train depot. Don't be fooled by the MG42s here; your best bet is to stick with the sniper rifle and take out the defenders on the catwalks one by one. Sniping from around corners and through windows is rather easy to do: zoom out your scope and, instead of leaning, circle-strafe around the window bit by bit, so that you expose progressively more of the exterior of the depot to your sight. This will ensure that you'll be exposed to only one enemy at a time, as opposed to leaning, where everyone will be able to take a shot at you, and your aiming will be disoriented by the vertical shift.
When you step onto the catwalks, four more Germans will pop out of a door to your right and begin taking potshots at you. Again, the easiest way to deal with these fellows is to back up behind the brick wall, then strafe and fire until you get four headshots. From the catwalk, drop down into the depot, but watch your surroundings, because a few more Germans will be popping down from a stairwell at the rear of the yard. If you're feeling mischievous, kneel or lie prone underneath one of the trains and shoot out their legs from a distance.
The stairwell leads up to the other catwalk, where the sniping game with the distant Germans is repeated. From here, you're going to progress along until you reach a couple more teammates, who are valiantly withstanding a German assault. The Germans here seem to spawn forever, if you let them, but you should still use your sniper rifle to pick off targets for a minute or so, until you hit a noticeable lull, then proceed, with your head down, along the trench towards the southwest. If you actually skirt along the buildings to the south, you may be able to bypass the scripted event where a German spawns inside an MG42 next, but you'll definitely run into it if you stay inside the trench itself.
There's one more battle until you reach your destination. You'll come across a German position which is attempting to assault a group of Soviets who have holed themselves up in a building; you're in a perfect flanking position, so use your sniper rifle to eliminate all of the Germans in the yard, then walk around the barbed wire to reach the end of the level.
Mission 4--The Sewers
This is another solo mission, which sees you traveling through the sewer system of Stalingrad in order to reach yet another man who's supposed to get you orders. The sewers make for an exceedingly linear level, somewhat akin to the dam level, except without any exterior adventures. The main difference is that the distances down the "hallways" will be a fair bit larger than what you're probably accustomed to, so you may want to snoop around for an MP44 on dead Germans to replace your PPSh. The MP44 is much more accurate at medium range than the PPSh is, so it'll reduce the number of times you'll need to switch to your rifle to pick off an enemy hiding around a corner.
Other than the straightforward hallway combat, you won't face many challenges, except where the sewers come close enough to the surface that snipers have taken up positions over a formidable crack in its roof. Obviously, caution is at a premium in these areas. The level ends with a similar situation, as the sewer's exit is pelted by gunfire from foes who are difficult to spot without exposing yourself. You'll need to creep forward, sniper rifle at the ready, until you get a glimpse of an enemy, then fire away. You won't be at a range where you'll need to use the scope, so fire from the hip and kill off everyone. The mission is completed when you fall through a hole in the interior of the building across from the sewer's exit.
Mission 5--Pavlov's House
Now that you've met up with Pavlov, your goal is to retake the strategically important apartment building across the field from where you begin. The snipers in the house adjacent to your position will make that difficult, but fortunately, Pavlov will let someone else be the sniper bait, while you sit back and pick them off from the trench in the rear. This is somewhat akin to an old lightgun arcade game; just look for the muzzle flash and shoot the offending window-dweller. After a half-dozen or so dead snipers, you'll be forced to move from the safety of your trench and cross over to the brick wall next to the building the snipers were inhabiting. Move up along the left side of the field for better position during the next portion of the mission.
After you reach the wall, the remaining Germans in the house will begin unloading on your line with three or four MG42s, as well as their rifles and machine guns. You'll need to penetrate the house from the left flank, but even that is guarded by a mass of soldiers. If ever there was a situation where grenades were appropriate, this is it, so chuck a few into the crater around the corner from the wall and use your submachine gun to drop the Germans as they scatter. More soldiers will retake the position, so repeat the grenades until the area is relatively clear, then jump over the wall and cross over to the building as quickly as possible, watching for the Germans that will pop out into the upper-floor balconies.
When you reach the rear of the house, enter through the hole in the wall and begin cutting down the Wermacht inside. Your comrades will begin climbing through the windows, after which your objective will be to complete the cleaning of the house; you'll need to go floor by floor and clear each of them of foes. This kind of task is where solid first-person shooter fundamentals help a great deal, since the close-quarters combat will often result in a German popping up behind you if you don't cover your corners and use your strafe and lean keys to check rooms as you proceed. Starting with the basement, proceed up through the house, using grenades to roust Germans as you go. If you find yourself unable to locate that pesky last German, you may need to retreat back to the building's exterior and search the windows for any suspicious movement.
After you've cleared the building of vermin, the real trouble begins. You can take as much time as you need before meeting with Pavlov, so heal up, if possible, and grab as much ammo as you can. After you rendezvous with Pavlov, two German tanks will approach the building, accompanied by hordes of infantrymen. Your comrades will deal with the soldiers as they approach the building, leaving you to destroy the tanks with the armor piercing rifles on either side of the building.
The rifles operate in the same manner as the MG42s, but when you're facing off against a tank, you're much more likely to take damage. On Veteran mode, it goes without saying that you should quicksave before you approach the rifle, and reload if you take more than a moderate amount of damage; you'll need a healthy reserve later on. Whether or not you take damage is mostly luck here, since you can't predict when the tank will fire a shell at you. The machine gun fire is constant, but distant, making it unlikely that you'll be hit more than a couple of times. Just hold down the attack button until each tank is destroyed; the rifles have a healthy rate of fire and you should be able to blow a tank with a few seconds of constant fire.
The destruction of the tanks will trigger another countdown for reinforcements, but the German soldiers will be swarming the building until they arrive. Since all of your teammates are killable at this point, you'll probably find yourself on your own inside the building before long, especially if you're playing on a harder difficulty setting. Given the porousness of the exterior wall, you'll want to stay away from the outside rooms on the lower floors; wandering too close to a window or hole will invite a tank to blast away at you. Your best bet for survival is to back yourself into a corner on one of the upper rooms, where the Germans will have only one approach to reach you, and start waiting for the trash to come to you, ready to be taken out. Reloading will be your bane here, since the Germans will often step around whatever corner you're inhabiting and drill you at this most inopportune time. You may want to get into the habit of quicksaving after your clip falls to around half-full, then reloading your weapon, with a quickload if you do happen to get shot to pieces as you reload. Cheesy, perhaps, but it works.
When reinforcements arrive, a quick mop-up operation ensues. Most of the Germans will still be on their way to kill you, so hold tight and keep shooting them as they attempt to reach you. The mission ends when you rendezvous with the reinforcements outside the building.
Mission 6--Tank Factory
After a rather sudden geographical shift, the game picks up again after Russia has expelled Germany from Soviet soil, and finds Alexei in Poland, where you're tasked with leading an assault on a tank repair factory.
Unlike many of the other levels, this mission plops you down in the midst of a firefight, with barely enough time to quicksave before the shooting begins. It's a rather simple matter to eradicate the Germans in the tank's courtyard, however, so do so, and exchange your PPSh for either an MP40 or MP44, preferably the latter, since you'll find enough ammo to keep it well-stocked in this level. Your teammates will blow the door to the factory, giving you access to yet another hallway-filled funstravaganza.
You'll need to rely on your grenades in this building, due to the improvised barriers that the Germans have set up, mostly consisting of overturned tables. You unfortunately can't shoot through the wood, but carefully aimed grenades will flush out your enemies, allowing you and your squad to take them down on the run.
The corridors are eventually broken by the appearance of the factory floor, littered with tanks, which will provide the Germans with plenty of cover. Grenades, again, are great for forcing them into the open, but be mindful of the walkways above, from which soldiers will be firing on you. You'll need to reach those walkways, through a stairway in the far corner of the room from which you entered. Try to avoid firing out the windows when you're overlooking a firefight; you only waste ammo here, and increase your risk of taking damage.
The rooms succeeding the factory floor lead you to a long hallway with a grouping of windows looking down onto what appears to be a tank storage facility. Throw a few grenades down through the window to kill off the defenders. More will spawn, but you'll be passing through here shortly, and every man you can kill with a grenade is one who won't be shooting back at you later on.
After you reach the tank storage room, it's a clear shot from its exit to the end of the level.
Mission 7--Tank Factory Railyard
The railyard here is another maze of metal, with Germans pressing on from the west and the north. Your quickest route out of the meatgrinder involves swinging around the southern end of the yard, to approach the Germans that are hugging the western wall. Your teammates won't follow you, but you can lay prone underneath the rail cars to fire on the more distant enemies to soften their position as you proceed.
When you clear the first area, you'll be faced with a corner to round, but instead of heading down the clear path, jump up into the ruined building beside it instead. This will give you a slightly more advantageous vantage point over the German defensive position that's been set up outside of the tank factory. Concentrate your fire on the MG42 gunners, and keep an eye out for reinforcements that will come out of the factory's door.
After the slaughter is over, you can safely hop down from the building's wall to the ground below, but be careful as you approach the factory's door, as there is a large number of Germans inside. A few of them will even have the bright idea of taking one of the tanks and attempting to swing it around so that its turret faces you, so grab the Panzerfausts near the sandbags and do what comes natural. After loosening up the rest of the soldiers (don't hesitate to take advantage of the infinite Panzerfausts), advance inside and head towards the rear of the factory.
The short passage here leads out to what apparently is a German barracks, if the flow of soldiers from it is any indication. You'll have them in a crossfire between yourselves (or yourself, as the case may be), and the Soviet soldiers who are waiting by your escape vehicle, so keep firing on them until the flow of enemies lightens up, then meet up with your teammates near the truck to end the mission.
Mission 8--Tank Drive - Country
Unlike the previous vehicle missions, you're in complete control of the tank in the next two levels. As you begin, get used to the way the strafe keys rotate the base of the tank. You won't need to be highly maneuverable through the first mission here, but knowing how to rotate your turret while independently moving your tank will be useful in the next level.
Luckily, you have a small wargroup of tanks accompanying you throughout this level, so let them drift ahead and draw the fire of German tanks as you proceed. You can hit a tank from a great distance away, so don't bother getting too close to the opposition; let your teammates take the fire while you aim from the back lines.
Your first two tasks involve the destruction of tank groups on the far sides of rivers; these are fairly easy tasks that will let you rack up a few tank kills as you master the aiming mechanism of your vehicle. Your accuracy drops at extreme ranges, so if you see your shells puffing up snow around your target, you may want to close in a bit, but always remember to keep your friendly tanks between the enemy and yourself whenever possible.
After the second tank engagement, the game will auto-save, and your rolling thunder squad will head through a narrow valley containing numerous Germans armed with Panzerfausts. Your pointmen will dispatch most of them, but at least one will hide behind a rock on the left side of the valley, waiting for you to pass by before opening fire. It's difficult to avoid taking a hit here without knowing exactly where this soldier is ahead of time, so you may want to just stop moving and quicksave every 10 seconds or so until you've discovered his hiding position, then reload and blast him with your turret before he can get a shot off.
One major tank battle remains, with your group facing off against eight or nine Panzers on the outskirts of a town. Your teammates will be dispatched rapidly, so you'll need to move quickly from target to target to reduce their numbers, lest the Germans decide to start firing on you. After they're all dead, roll down towards the objective marker to reach the second half of this tank excursion.
Mission 9--Tank Drive - Town
The Panzerfausts are flying in this little hamlet, so the previous caution applies: don't quicksave unless you're standing still. The German soldiers usually don't spawn into a level unless you move past a triggerpoint, so if you're not moving, and things are quiet, your chances of taking a hit right after quicksaving are virtually nil.
You have only one other tank accompanying you here, and you should do your best to support it as it charges ahead, since, if it's destroyed, all of the tanks will begin firing on you. As in Medal of Honor, many of the buildings in the town are destructible, but this doesn't seem to affect the survival of any spawned soldiers; if you destroy the building before a soldier appears inside of it, he'll still spawn and be relatively unaffected by the loss of his habitat.
The path through the town is a straight one, populated by a half-dozen tanks or so, and numerous foot soldiers. After you break through to the other side of the village, you'll find your objectives: two 88-mm artillery guns and a Flakpanzer, each of which you'll need to destroy with your turret. Tanks will begin rolling towards you from over the hill to the west, so you'll be allowed to flex your long-range aiming skills one more time before the mission ends.
Allied Campaign
As 1945 neared its midway point, the victory over Germany was essentially assured. The Americans began looking forward to focusing its war efforts on Japan, while the denizens of London enjoyed the thought of going to sleep at night without having to worry about V-2 rockets. The Soviets, on the other hand, dissimulated to Eisenhower about what their ultimate goal was. After the ignominy of betrayal and invasion by their former ally, their only priority lay in being the first of the Allied nations to reach Berlin.
To round out the game, Call of Duty concludes with one mission for each of the nations represented in the game.
Mission 1--Festung Recogne
The last American mission sees your small band of soldiers attempting to take two German bunkers in the middle of the Ardennes forest. You'll be up against artillery, MG42s, tanks, and, of course, a whole lot of soldiers. The redoubtable Captain Foley will be leading the charge, though, so you will be in good hands. (In a reference to the HBO miniseries Band of Brothers, the random name generator may occasionally place a Lieutenant Spears into your squad, as well.)
As the mission begins, your charge towards the bunkers is met with heavy artillery fire. There's not much you can do in the way of predicting where these shells will hit, but it's a good bet that you'll wind up dead if you stay too close to your squadmates. Instead, follow along the road until you come across a couple of Germans (who may be dead by the time you reach them). Their bodies mark a fork: you can either proceed along the road to the left to cross the bridge, and thus reach the middle of the German position, or head north along the frozen riverbed and flank the Germans from the east. The riverbed is probably the safest path, but you will be facing MG42s on either route, so keep your Garand on hand and be ready to fire down the sights.

You'll need to raid each of the two bunkers for secret documents, but before you head in, you'll want to precede your entrance with a grenade to flush out the Germans hiding inside, whom your teammates will make quick work of as they flee the explosion. Gun down the remaining soldiers inside each bunker, then grab the documents. You'll note that there are a couple of artillery cannons to the rear of each bunker; you may want to eliminate their defenders before picking up the second secret document, as they will make the remaining task that much more difficult.
The remaining task is to destroy the two tanks that attempt to reinforce the German hold on the bunkers. Despite what Captain Foley says, manning an 88 to destroy them is not necessary, and is going to greatly increase the likelihood of your death. Instead, retreat to one of the bunkers and grab Panzerfausts to destroy them. After they get close to the bunkers, they'll stop, allowing you to easily plant rockets in their sides to end the mission.
Mission 2--V-2 Rocket Site
Your last mission as a British commando has you and Sgt. Waters seek out and destroy a mobile launch site for V-2 rockets. You will have a few teammates later on in the level, but as you start out, it's just the two of you. As he has been throughout the game, Waters is indestructible, so ignore his command to take point and let him drift ahead of you whenever possible. You may notice him occasionally acting a little strange, as when he fires at the enemies without any sound or actual bullets coming out of his Bren; if this occurs, just fire a bullet at him to get him back on track.
Your first objectives are two flak cannons hidden in the wilderness. The path through the woods is mostly a clear one, though, so follow your objective pointers until you find the cannons, then lay your charges to destroy them. We're probably sounding like a broken record at this point, but you will want to trade your Sten up to an MP44 as you come across them during your trek. You have a sniper rifle for extreme distance work, but the MP44's increased accuracy will reduce the number of times you'll need to switch between weapons for foes at medium range.
After the second flak cannon is destroyed, follow the path to the north, but veer off to the northwest to reach a bunker overlooking the road. Each of these little pillboxes will contain grenades, which will be helpful as you use up your supply in the woods. Anyway, when you reach the road, another scripted event involving two trucks will play out, following which you'll meet up with the rest of your squad.
From the road, your journey through the backcountry takes on a more dangerous bent, as MG42 positions overlook the path leading to the V-2 site. Again, though, if you let Waters take the lead, you should have ample warning, since he will attract all of their fire.
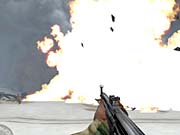
As you near the V-2 site, cut around its western side until you reach the pillbox in the southwestern corner. Eliminate the soldier therein, stock up on grenades, and use the MG42 to cut down any soldiers remaining in the middle of the facility. From here, proceed over the roof of the bunker to the west of the rockets, then drop down into the trench and enter the bunker from there. As you should be expecting, there are a number of soldiers inside, so be liberal with your grenades. Be mindful of your rear, though, because Germans from the northern bunker will probably follow you inside. The controls for fueling the rockets are deep underground, so find them, activate them, and beat a path back to the surface.
After the rockets are fueled, the dynamite you've brought along will be that much more potent. Place them on the rockets to destroy them, then escape through the northern bunker and prepare for the game's final mission.
Mission 3--The Fall of Berlin
As the Soviet war machine rolls into Berlin, every soldier knows that the greatest glory will be reserved for the soldiers that either find Hitler or raise the Soviet flag over the Reichstag. Your unit has been chosen to lead the assault on the latter, an imposing structure which, since the fall of the Weimar Republic, has not been an important political building for the Third Reich, but still symbolizes Berlin for the invading forces, and thus must be conquered.
You'll need tank support to wrest control of the Reichstag away from the Nazis, but the approach to the building is covered by three 88-mm flak cannons, as well as a Panzer, which is hidden away behind a corner, ready to fire on any opposing tanks that attempt to reach the site. Your first mission will be to eliminate all of these threats with dynamite.
Of course, it isn't going to be easy, as the shelled-out visage of 1945 Berlin is going to hide any number of German sharpshooters and machine gunners. You will have plenty of meat for the grinder in the form of your teammates, though, so try to move when they do, but keep your distance from them. Let them draw the enemy fire, then use your sniper rifle to begin picking off enemies at long range.
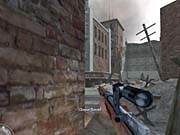
The transition from the buildings to the first flak cannon is a harrowing one, as you'll probably be dodging the machine gun fire from the adjacent tank as you run, but you should be able to survive due to the way it always seems to lag behind you, as long as you're running at full speed. Just be sure that you kill off any Germans in the area of the tank, or the building beside it, before you sprint across.
After the first 88 is destroyed, your objective marker will begin pointing you to the tank, but you should ignore it and head for the nearby flak cannon instead. Again, you'll need to sprint across the street, but as long as you proceed in a path that's mostly perpendicular to the front of the tank, you should be fine. Destroy the second flak cannon, then proceed back to the tank and use your dynamite on it. From there it's a simple matter of approaching the third cannon and destroying it as well. The tanks will roll up to your position and blast a hole in a brick wall for you to pass through.
The Reichstag is fortified with perhaps half a dozen MG42s, so you're not going to be getting anywhere near it without a bit of support, which arrives in a minute or so in the form of the tanks you previously left behind. After they fire on the building for a few moments, the machine gun fire will die down, allowing you to snipe the remaining gunners and approach the building. Be sure you take the main path; the two other ramps up to the entrance appear to place you within the line of fire of your tanks and instantly kill you.
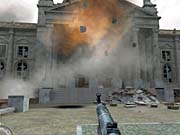
The interior of the Reichstag consists mostly of the main parliamentary hall, itself a mere stumbling block in your path to the ceiling. You can use up the remainder of your grenades in this area, if you wish, as the rest of the subsequent level takes place largely in the open air.
Past the parliament, you'll come across a collapsed portion of the Reichstag's roof. Climb up and out onto the top of the building to meet up with a standard-bearer, who will wave the flag, thus ending this level, and the game.
Congratulations on beating Call of Duty! If you're looking for more action, be sure to check out that other icon on your desktop, which leads to the multiplayer portion of CoD.
Multiplayer
Although many recent first-person games have been shipping with single-player or multiplayer modes, but rarely both, Call of Duty bucks the trend by including a surprisingly robust suite of online game modes right out of the box. Whether you're a traditionalist who simply enjoys going online and shooting people, or a strategist who prefers joining teammates in completing an objective, you'll find something to enjoy when you hop online.
Multiplayer Tips
- Don't be afraid to use your melee attack. While not quite as useful as in single-player, you can still put the hurt down on someone if you both get caught reloading at the same time.
- As you play online, make an effort to distinguish the sounds of the different weaponry in the game. Any Axis player can hear an M1 Garand and lock on to the location of an Allied foe, but it takes effort to learn the difference between the sounds of the various submachine guns. If you can begin recognizing each weapon by the sound that it makes, you'll be able to tilt the signal-to-noise ratio in chaotic multiplayer games in your favor.
- The smaller a game is, the more important it becomes to move silently. When there are thirty players tromping around, the sound of an individual pair of footsteps is unlikely to be distinct amidst the noise, but as you drift down towards games with a dozen players or less, the player who can remain silent as often as possible will have a huge advantage.
- Grenades are used so often in online games that, for most players, listening for and moving away from the distinctive clinking sound of a grenade hitting the ground becomes second nature. You can attempt to make this impossible through what's known as "cooking" the grenade: if you hold the attack button for a few seconds before launching it, you'll let the timer run down, which means that the grenade will explode much sooner after it hits the ground. Just be sure you don't hold on for too long, or the grenade will explode in your hand, killing you instantly. The timer for a grenade is around five seconds.
- Aim down the sights! While it may be difficult to adjust to the notion that all weapons, instead of just sniper rifles, possess a zoom feature, aiming down the sights increases the accuracy of every weapon you wield by a huge amount. For automatic weapons, in particular, the difference between aiming and firing from the hip is usually the difference between surviving a gunfight and waiting for the next round to begin.
- If you wish to gain familiarity with a certain map, or learn where the retrieval or search and destroy objectives are, it's a simple matter to load a gametype and map as a private server. Playing by yourself will help you get a feel for routes, sniping spots, and good ambush spots. This is especially true of the Carentan, Depot, and Harbor maps, none of which possess an analogous level in the single-player game.
- As soon as the gunfire begins, you should begin looking for a weapon to supplement your primary choice. If you have a submachine gun, you'll want a rifle, and vice-versa. You have to manually pick up a weapon with your use key, but this is a relatively simple procedure, even when running at full speed, and the versatility you gain will greatly increase your chances of survival.
- Although moving from place to place in a straight line is the quickest mode of travel, it also makes it much easier for opponents to get a clean shot. When crossing open territory, strafe side to side as you make your way over the terrain; being unpredictable is often the difference between taking a headshot and hearing a bullet impact the ground behind you.
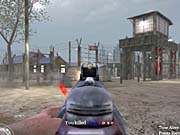
Game Types
There are five different modes of online play, each of which has a common moniker and an abbreviation that's used in Call of Duty's built-in server browser.
Deathmatch (DM)
Deathmatch is the simplest of all of Call of Duty's multiplayer modes, but is no less fun for it. The rules are simple: shoot anything that moves, and avoid being shot yourself. This is generally the least popular mode, so you may have trouble finding a good variety of servers for this gametype.
Tips
- If it moves, kill it. If it makes a sound, kill it more. Deathmatch is the only multiplayer mode in which you don't have to worry about friendly fire, so anyone and everyone is fair game. The sounds, especially, will be a good indicator of where prey is, especially when you yourself are silent. In interiors or otherwise cramped spaces, though, most experienced players will begin creeping around, and thus become silent, so stay on your toes at all times.
- Since you take so few bullets before dying, you should consider abusing your grenade allotment before the bell tolls for thee. You may only have three grenades, but if you die before using them, you've essentially wasted them, since you'll be restored to a full load when you respawn. It's always worth the time to chuck a grenade towards the sound of gunfire and hope you get lucky.
Team Deathmatch (TDM)
Team Deathmatch is pretty much what it sounds like: a killfest that is contested between two teams instead of a number of individuals. Call of Duty's mobile spawn points make TDM particularly fun; if you die, you'll be respawned in the location with the highest concentration of your teammates, thus giving you a few seconds to orient yourself before heading back into battle. As a round progresses, each team will see its base of operations shift multiple times, thus lending this gametype a fluidity that some of the others often lack.
Tips
- Unless you know whether or not the server you're playing on has friendly fire turned on, it's probably a good idea not to go around firing wildly or chucking grenades into the air. If FF is on, you'll likely take out a few teammates; at worst, if friendly fire is set to Reflect, you could find yourself dying, since all the damage that you deal to teammates will instead be taken by you.
- Given that you'll be spawning in different places all over the map, it can be difficult to locate the main body of enemy troops amid the cacophony of individual firefights. Check your compass; it will indicate to you the locations of all of your teammates. It may sound like a platitude, but if you're looking for the enemy, go where your teammates are not. If there's a suspicious gap in your teammates' placement, it's a good bet that that's where the highest concentration of enemies is located.
- Whether you like it or not, TDM is all about teamwork, which means that you'll be better off when you stick close together. Even on random servers where you aren't familiar with the other players, you can still organize informal groupings by requesting partners with your team-specific chat, or simply by choosing someone who looks like they know what they're doing and following them. In groups, you'll have a much easier time taking down targets, and you'll be able to alert your entire group as to the position of enemies with gunfire.
Retrieval (RE)
Retrieval is a twist on the classic Capture the Flag gametype, except that, instead of two teams attempting to capture a flag and return it to base, Retrieval has one team solely dedicated to offense and one team solely dedicated to defending an objective. Players on the offensive team have to track down the items they're meant to retrieve (they're marked on the compass with a gold star), pick them up, and return them to a marked area behind their spawn lines.
There are either one or two objectives, depending on the map; if there are two, then the offensive team is required to retrieve both of them. The defensive team is, of course, responsible for the care and safekeeping of said objectives, although this isn't quite as easy as it sounds, since the documents are often in locations rather distant from the defender's spawn points, and are also in locations that can be difficult to defend. Either team can win a round by killing all of the members of the other team.
To make things a bit more interesting, the defending team is penalized if they let an opponent grab an objective and move it towards the retrieval goal. If said opponent is killed in transit towards his home base, the objectives will fall to the ground, and will remain there for 60 seconds, or until another member of the offensive team comes along to retrieve it. Defending players cannot pick up or return dropped objectives to their original spot, so after an objective is brought a significant portion of the distance back to the defending team's base of operations, the match is usually as good as decided in favor of the defending team, who will spawn closer to the objective than the defending team and will thus be very likely to pick it up again and complete the retrieval.
Tips
- The team that works together wins--it's as simple as that. On random Internet servers, it can be next to impossible to communicate effectively with your teammates, especially when attempting to capture an objective, which tends to tip the scales in favor of the defending party. Make use of your quick-chat keys if you're on the offense to attempt to rally together a raiding party.
- The best spot for defending an objective is rarely the closest one to its location or the one with a clear line of sight to the item itself. If you choose to hang back a bit, try to find a spot with a clear shot at the entrance to the item's location, and remain as still as possible until an enemy approaches it. You can expect the offensive team to throw many grenades at the objective's location as they approach, so you'll want to be able to grab a bit of cover if necessary.
- One alternative to defending the objectives is to defend the retrieval zone. If you find yourself as one of a few remaining defending players as the clock ticks down, you may want to attempt to shift your position from one overlooking an objective to one overlooking the blue zone that offensive players need to reach to successfully capture an item. As a match moves on, most offensive players will head out to find objectives, which will usually leave their retrieval zone unguarded. If you can make it there, and find a spot with good line-of-sight on the surrounding territory, you'll likely be able to kill off any retrievers as they sprint towards home. Any remaining offensive players will usually break off from the objective in an attempt to hunt you down, thus making it more difficult for them to return the objective before time runs out.
- Whichever side you're playing on, keep a careful eye on the clock. As it ticks down, offensive players will generally become more flustered, and will tend to make mental mistakes, such as entering a room without covering the corners. If the timer reaches the point of no return, where it becomes physically impossible for an Allied player to retrieve the objective before time runs out, your priority as a defender should be to disappear and remain completely silent--you don't want to let your opponents snatch your victory by default if they manage to eliminate all of you.
Search and Destroy (SD)
Anyone who's played Counter-strike will be familiar with the premise of sSearch and destroy, in which one team is responsible for defending objectives, and another team is tasked with destroying them. The gameplay is similar to Retrieval, except that there are always two objectives, the destruction of either of which will end the round.
The catch is that the objectives cannot be destroyed by regular weapons, but must instead be demolished with explosives. Every player on the offensive team is assumed to be packing explosives, which take just a few seconds to lay on an objective. On the other hand, every defending player is capable of defusing explosives, but this operation requires a much greater length of time than does the actual explosive-laying. If either team's soldiers are killed off completely, the other team wins automatically.
Tips
- Using your ears becomes more and more important as the number of players in the game diminishes. If you're one of only a few remaining players on your side, you'll be able to compare footsteps with your compass to tell whether or not you're hearing an enemy. Also of note are the sounds made by laying and disarming explosives; if you're defending an objective, and begin to hear someone laying explosives, you're probably already too late to prevent them from completing the task, but you may be able to garner a kill with a blind grenade toss. If you're on offense, and have laid explosives, then hide somewhere out of sight and wait until you hear someone attempting to defuse the bomb. Defusing explosives takes around 15 seconds, so you'll have plenty of time to turn the corner and kill off the enemy.
- Of course, if you're attempting to defuse a bomb, you should always assume that someone is hiding nearby. If you're on your own, try hitting the use button very rapidly while standing over the bomb, then ducking out of the way to see if any foes come into view after they hear you. Bombs take quite a while to detonate, and won't detonate if someone is attempting to defuse them, so you should have enough time for a gambit like this. Otherwise, grenades are always useful when attempting to flush out a hidden enemy, although the hardcore players will remain hidden no matter what, unless they figure to take lethal damage from your grenade.
- As a round proceeds, the chance of a frontal assault succeeding grows stronger, assuming each side has suffered a similar amount of attrition. If you can group all of your soldiers together and rush one of the objectives, you'll likely encounter only half of the defenders, and thus at least one of you should have a chance to plant your dynamite.
- Whether you're laying or defusing a bomb, your chances of survival are much improved when you have one or two teammates around to watch your back. This becomes infinitely more important as the number of surviving players approaches zero; in a two-on-two match, the team that sticks together will almost always wind up winning.
Behind Enemy Lines (BEL)
Behind Enemy Lines is a twist on the standard Team Deathmatch format, in which the Allied team is consistently outnumbered by the Axis players. The Axis side will usually have around two and a half times the number of players on it as the Allies. The Allies do gain the benefit of automatic health regeneration, and gain one point for every ten seconds that they manage to remain alive.
To make things a bit more interesting, though, the Axis also possesses the ability to spot Allied players on their compass. If an Allied player pauses or remains in the same place for too long, a blue question mark will appear on the HUD of every Axis player, thus ensuring that your position will soon be under assault by superior numbers. The final complication, and what makes Behind Enemy Lines so interesting, is that Axis players who kill an Allied player immediately switch sides and become Allies themselves, while their dead target becomes an Axis soldier. Chaos typically ensues.
Tips
- As an Allied player, you should either attempt to stay mobile to avoid appearing on enemy compasses, or attempt to find a killer spot where you're impervious to enemy fire. There are few enough of the latter, but keep in mind that the question mark on a compass doesn't indicate the height of the signal. Thus, on maps with buildings (we're looking at you, mp_pavlov), you can rest assured that the enemy won't be able to get more than an idea of which structure you're hiding inside. If you remain in one place long enough, however, you can expect a hail of grenades to come your way as your conquests respawn.
- As with the other team-based multiplayer games, teamwork is important, especially so for the beleaguered Allies. Since targets are difficult to come by for Axis players, they often rove around levels individually, which can make them easy pickings for pairs or even three Allied players moving together.
Maps
Call of Duty contains 13 maps out of the box; all but three of these are based on levels from the single-player game, so you should be able to jump onto a multiplayer server and feel right at home if you've gone through the campaign.
mp_brecourt
This map appears to be a fairly open one, and it can play that way, but the many shrubs offer hiding spots for resourceful players. Brecourt is somewhat unique in that it possesses two large areas that are divided in half almost evenly, with passage from one to the other possible only at the ends and via a trench underneath the shrubbery in the middle of the map.
Despite the numerous hiding spots, your weapon should still be something capable of hitting someone located a distance away. The MP44 is the natural choice for the German team, while Americans will usually want to go with either a BAR or the M1 Garand; the Thompson is suitable for trench work, but will leave you defenseless against someone attacking from long range.
Tips
- Due to Brecourt's flatness and lack of walls, grenades are more lethal than usual--if you can land them accurately. If you can cook the grenade and judge the distance of your throw properly, you should rack up a few kills due to the lack of obstacles for your target to hide behind. This works especially well when used against soldiers hiding in the bushes.
- In Search and Destroy mode, the Axis team should take care to secure the corner near target A. If you can hide in one of the bushes with a clear line of sight towards the corner, you should be able to pick off the Allied players as they attempt to round it. This won't work forever, as the Allies will become wise and start sweeping around on the far side of the map, but it will let you nab a point or two until they realize that someone's waiting for them.
- If you do plop down into a bush, be sure to lie prone, and try to wait until you have a clear shot before firing. Even though the shrubbery makes for excellent cover, your muzzle flashes and tracers will lead any enemies straight towards you, so if possible, try to wait until you have a solo target before cracking a shot off.
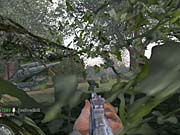
mp_carentan
Carentan is almost evenly divided between interior spaces in the town's buildings and firefights in the many streets and corridors that connect the structures to one another. Matters are complicated somewhat by the maze of broken walls inside the buildings that allow passage to adjacent houses; even if you're on the upper floor of a building, facing the stairs, you may still be in danger of an attack from the rear. Walking down the streets is an even more daunting task; with two MG42 positions on opposite sides of the map, and numerous open windows, staying in the open is essentially asking for a headshot.
Tips
- The building with a mounted machinegun can often be a weak spot in the Axis defense during Search and Destroy games. While the courtyard outside the door can make it difficult to assault, if taken, it allows you easy access to objective A.
- When spawning as an Axis player, it's sometimes worth your while to cook a grenade for a few seconds and throw it over the wall that separates the basemented house with the building that contains the MG42. Grenades thrown this way will land close to the Allied spawn point, and while most of them will have already scattered, you may be able to come up with a lucky frag or two.
- In any kind of team game, be careful when passing through the basement area. There are three entrances to this location, through any of which a foe can come storming through at any time. On the other hand, if you enjoy camping, this is a natural spot to choose.
- Avoid using the street-level MG42 behind the sandbags; there are too many corners and open windows along the street from which you can be fired upon.
mp_chateau
Based on the Chateau level of the single-player game, this map is an amalgam of anfractuous corridor combat and short-range exterior skirmishes. Unlike with most levels that feature buildings, the windows here are less intended to be used as sniping points; rather, most of them will have some type of ladder or boxes leading up to them, rendering either of the two stories easily accessible from the exterior, meaning that you won't be able to turn your back even on seeming dead ends; where there's a window, there's a way in.
Tips
- Retrieval is something of a nightmare for the Allies here. Your best bet is to make a run for the second-floor objective as soon as the round begins; sprint down to the ladder and attempt to get the documents, using grenades to scare off Germans, then jump out the window as soon as possible, while a teammate covers your retreat. There is any number of places for Germans to hide around the ground floor objective, so you may need to simply marshal your forces and storm the dining room, hoping that one of you survives the short journey back to the retrieval area. If the Allies don't group together, the Axis team, no matter how disorganized, will usually manage to win.
mp_dawnville
If you played through the single-player campaign before leaping into multiplayer, then you should be very familiar with this map: with minor modifications, it's almost an exact replica of the Dawnville map from the solo campaign. As with Carentan, it's divided up between houses and streets, although many of the structures are in disrepair, and the streets and open areas are much wider than in that map.
Tips
- Since the objectives in Search and Destroy are so close together on this map, they can be defended with relatively few Axis team members. All other team members should hole up along the main road, inside the church, or in the graveyard, and pick off the Allied players as they make their way towards the Panzerflaks.
- On the other hand, the objectives in Retrieval mode are fairly distant from one another, leading naturally to the opening of two fronts: one along the main road, near the destroyed tank, and another in the graveyard. Keep an eye on your compass as the battle plays out; if you spot numerous arrows disappearing in one direction or the other, you may want to shift to that position to shore up the defenses, or the offense, as the case may be.
mp_depot
The Depot is one of the few completely original multiplayer maps, so a bit of acclimation will probably be required before you get used to the flow of the map. It's roughly based on the railyard from late in the Soviet campaign, with the addition of two warehouses, each with a frighteningly porous set of rafters, and each connected via their rooftops. The rooftops of these buildings are the destination for many players, as they afford a wide view of the ground below, while still allowing you to avoid fire by simply dropping down behind one of the train cars.
Tips
- In Search and Destroy mode, you can make life difficult on the defenders by dropping onto target B from the rafters and laying explosives on top of it. Anyone who wishes to defuse the bomb will be required to take the same route to gain access to the bomb. A good spot for defending position B, however, is nearby, in the rear of the adjacent truck. You'll need to jump onto the back of the truck from the nearby boxes, but if you lie prone, you'll be mostly invisible from anyone on the ground. You'll be easy pickings for anyone in the rafters, however.
- The rafters above the codebook are the nexus for any good defending team in Retrieval. While they may be easily shot through, you can rely on your teammates' gunfire to alert you to any incoming enemies below, while retaining a death grip on the window access to the building. Lying prone on the opposite end of the building from the window should allow you to pick off anyone entering, so long as you have a weapon with decent accuracy.
- It may seem as though the water tower would make for an excellent sniping spot, but in reality, it's far too exposed, both as you climb the ladders, and when you reach the top. Stick to the rooftops of the warehouses if you must gain elevation, but leave the water tower for the noobies.
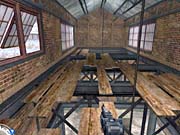
mp_harbor
The Harbor is a tight little map consisting of a harbor area that's cluttered with cargo crates, some wide back alleys, and two warehouses where most of the combat in team games seems to occur. There are plenty of hiding spots available on the map, and although few of them are suitable for sniping, camping is still going to be a concern. As you move around outside, be sure to check around the crates for kneeling opponents; if you suspect someone is lying in ambush, use a grenade to roust them from their nest. Also make sure you check underneath the wooden walkways that lead up to the second floor of the buildings; these are often good hiding spots as well.
Tips
- In Retrieval mode, the distance between the blue zone and the objective is massive, and favors the Axis to a large degree. The Allies' best chance for winning in this mode is usually to win the numbers game by killing off most of the Axis, then grouping together and escorting the carrier back to the retrieval zone.
- When defending in Search and Destroy mode, the first objective you should concentrate on is objective B, which is close enough to the enemy spawn point to allow them access to it at roughly the same time as the Axis. As time marches on, however, it becomes increasingly likely that someone will approach objective A through the passage behind the southern building.
mp_hurtgen
Hurtgen is sniper heaven, since it combines extremely long draw distances with relatively flat terrain and few hiding places. Movement here is always an adventure, but your best bet is to keep to the valleys, listen for the distinctive sounds of a rifle, and attempt to flank or flush out snipers with grenades. Luckily, the Allies are represented by the Americans on this map, who possess the BAR and the M1 Garand--weapons which are well-suited for distance firing--as well as the Springfield.
Tips
- This map is tilted slightly in favor of the Axis in the Search and Destroy and Retrieval gametypes; because of the closeness of the objectives in the former, and because of the single access point to the bunker in the latter, which makes the area much easier to defend for the Germans. Your cause will be greatly helped by proceeding cautiously across the map, preferably along the flanks, and attempting to eliminate as many enemies as possible; while this is always advisable, the Allied team on this map is rarely capable of come-from-behind victories in objective-based gameplay. Also, due to the large size of the map, be sure you budget yourself with 30 seconds or so to cross back to the blue zone when playing in Retrieval mode.
- The large central areas of this map are a killzone for snipers on either side. If you come under fire, take advantage of the numerous trees scattered about; dash from cover to cover until you can reach a bunker or until someone tracks down the sniper and takes him out.
mp_pavlov
Pavlov is one of the more intense of the multiplayer maps, since it combines close-quarters interior combat with a plenitude of sniping spots to make exterior travel quite dangerous. The locus of action here is in the central apartment house, the same building that you took over in the single-player campaign, but there are also three other buildings on the map in various sizes and states of disrepair. Each of these buildings is bristling with exterior windows from which snipers and riflemen will be firing on you, so be very careful when traveling outside; try to stick to the edges of the map as much as possible, and utilize the rubble for cover when needed.
Tips
- Due to the extremes of close-quarters and ranged combat, you'd be well-served by attempting to pick up a rifle or sniper rifle in addition to your automatic weapon, or vice versa. In games with more than a few players, this shouldn't be much of a problem; if you choose an automatic weapon to start the level with, you should be able to find a sniper's weapon on a body near an upper-floor window in either of the two large buildings.
- You can access the roof of the central building by going up the stairs and climbing atop the rubble on the top floor. The southern half of the roof is an excellent spot for Allies to hide during a BEL game; if you lay prone near the spine of the roof, you'll be invisible to everyone except those brave enough to venture close to the southern line of mines. What's more, it's incredibly difficult to chuck a grenade onto the roof, which eliminates the largest source of danger to camping Allies in BEL games. If people start to wise up to your position, you can attempt to bluff them by hiding one floor down from the roof, in the building's attic, and shoot them as they pass by on the way to the rooftop.

mp_powcamp
In terms of sheer size and complexity, few maps can match the POW Camp. From one end to another, it's roughly the size of mp_ship or mp_brecourt, except that the entirety of the level is filled with single-story buildings, making this map the epitome of alleyway combat. Teamwork rules the day, as it so often does, since it's nearly impossible for one player to cover all of the possible angles as they move through the level's exterior. You can enter many of the buildings, but they're often single-room abodes which become deathtraps for players foolish enough to get pinned down inside. They're also very well-lit when compared to the dusk outside, rendering players inside them easily visible, for the most part.
While most of the combat will take place on the ground, there are numerous towers dotting the area, so be on the watch for heightened fire. Snipers will probably be somewhat less effective when firing from a tower, since it's impossible to kneel and see anything, and the scope drift in the standing position is so severe. Players with weapons like the MP44 or the MP40 will have fair accuracy when firing down the sights, however. The lines of sight are also not very appealing, since the numerous buildings will obscure most of your long-distance view. If you spot a player in a tower, or hear shots being fired, approach the bottom of the structure very carefully and quietly, as players up top can be quite difficult to hit from below if they know you're coming.
Most of the towers will give you access to the rooftops of the buildings, which can be advantageous, but you will be fairly noticeable as you crawl around, and much more exposed than when you're on the ground, since you won't have any walls to duck behind.
Tips
- Given the numerous ways that alleys and roads connect on this map, you may want to team up with a buddy during team games and proceed back-to-back along your path, with one player keeping an eye on the road ahead, while the other makes sure that no one sneaks up behind you. Getting popped in the back is a common occurrence here, since there are so few obstacles to hide behind in most alleyways, but with a friend at your side, you can each reduce the other's likelihood of getting surprised.
- In the Retrieval and Search and Destroy modes, the guard tower that straddles the gate in the middle of the map is a prime vantage point for overlooking the entrances to the objective's building. When attempting to approach an objective, you should first eliminate any Germans atop the tower, either by sniping them from one of the smaller towers near your spawn area, or by using a Panzerfaust to make a more explosive point.
mp_railyard
The railyard consists of three parallel avenues, each connected to the one adjacent through passages along the northern and southern ends of the map. This renders the central tank factory a difficult position to defend, as it can be flanked easily and attacked from both sides, if you give your opponents enough time. The ground level of the map is fairly flat, but the railcars, tanks, and crates obscure sightlines through each of the avenues, rendering distance weapons less effective than they are on maps like Brecourt and Hurtgen. The Russians in particular are hurt by their lack of a weapon that is effective at both short and mid ranges, unlike the Germans.
Tips
- As with mp_depot, you can make defusing explosives in Search and Destroy difficult on this map by approaching target A, climbing atop the railcar in front of it, then leaping onto the turret of the tank and laying the explosives at its rear. You'll be horrifically exposed while doing this, but if you pull it off, the nearby building will give you three floor's worth of coverage above the bomb, rendering it fairly easy to defend.
- Possession of the three-story building should be a priority for the Soviets during Retrieval mode, as it gives great line of sight over the objective, and by occupying it, you'll be robbing the Axis of a favorite sniping spot. Just be sure to watch your back; Germans have easy access to the rear entrance to the building, and the third floor lacks an escape route if you get cut off. In a pinch, you can attempt to drop from the third floor down to the ledge outside the second floor's window to avoid the near-lethal damage inherent in falling straight to the ground, but this is very difficult.
mp_rocket
This is a fairly small map in terms of surface area, but unlike the single-player level upon which it's based, mp_rocket has an extensive bunker system that stretches from one side of the map to the other, making this essentially two different levels on top of each other.
The surface area consists of a huge, open space, bordered by a shallow border of trees and surface-level bunkers, making it a long-range combat playground. Snipers, especially, can easily hide on the outskirts of the level, waiting to pick off anyone foolish enough to cross the open ground or man an MG42 position. If you must remain on the surface, you'd be well advised to hide yourself thoroughly.
The bunkers below ground are your typical interior; lots of right angles, lots of corners to cover. There are also numerous arrow loops inset into the walls here, which some players may attempt to use to fire upon passing enemies. There's a long, shallow tunnel in the center of the bunker complex, which leads from one side of the map to the other, and which is essentially a death warrant for anyone attempting to pass through it in large games; since you can't dodge bullets, and can't run from grenades, you'll be ventilated if any of your foes happens to come along.
Tips
- Although the rocket seems as though it would be nearly impossible to target in Search and Destroy games, as the number of players dwindles, it becomes a more tempting objective for offensive players. If you're tasked with defending it, you may want to keep grenades at the ready, and chuck them towards the rocket once you see someone approaching it. This will force them to back off without necessarily revealing your specific position. Keep in mind that it does require only five seconds to lay explosives, so if they get a bead on you and approach the rocket from the opposite side, they may be able to dart in and set their bomb before you get into position where you can fire upon them.
- The Germans spawn next to the objective in Retrieval mode, and will thus have ample time to hide in every nook and cranny of the bunker. Your only real hope as a team is to swarm them in a large group, grab the documents, and engage in a fighting retreat towards the goal marker. If your teammates fragment as the round begins, as they will usually do, follow the largest group of players; it's usually your best bet. If you prefer the lone wolf approach, consider sticking close to the edge of the map and entering the bunker through the entrance near the machine gun and Panzerfausts; the defenders likely won't be expecting an attack from this direction.
mp_ship
Mp_ship is essentially a straight replica of the Tirpitz from the single-player game. Snipers often rule the day here, as the two large towers will give an elevated player unobstructed views along the ship's port and starboard sides. It follows that most of the combat will occur along the spine of the ship, itself cluttered with flak guns and lifeboats. The proliferation of stairs and ladders makes gaining elevation a relatively simple matter, while the main tower provides seemingly endless balconies from which to fire.
There isn't much call for close-order weaponry here, since the only interior areas are in the main tower, which will usually be completely controlled by one team or the other, except in deathmatch. Most of the fighting takes place either on the deck of the ship or in the form of sniping between the two towers, so you'll want something with high accuracy. The Bren gun is suitable for the British, while the MP44 is a good choice for the Axis. Sniper rifles are also popular weapons.
Tips- When playing as the British during retrieval mode, you can charge along the ship's raised deck towards the documents as soon as a round begins if you want to try ending the game almost before it begins. The German spawn points force them to either walk along the lower deck of the ship, then turn around and backtrack towards the documents, or climb up to the bridge of the ship and then climb back down to the documents from there, meaning that the British will usually be able to reach the objective before any Germans are within sight. It's important that you have spotters to help pick off Axis soldiers proceeding down the lower deck, though.
- In the Team Deathmatch and Behind Enemy Lines gametypes, controlling the main tower is often a gamebreaker, since it contains so many defensible positions and chokepoints, such as the stairway to the bridge. So long as you can defend the access points, it won't really matter if everyone on the other team knows where you are. Also, this allows any lone wolves on your team to spread to other areas of the ship, since the players on the other team will often be so focused on conquering the tower.
- The ladders here are death incarnate. While climbing, you cannot fire a weapon, and you make footstep sounds during the entire ascent, which means you may as well paint a bull's-eye on your back. This is less true of the ladders along the exterior portion of the main tower, but if you attempt to climb up a ladder in an exposed position, you're usually as good as dead.
Weapons
Call of Duty features a plenitude of World War II-era weapons, with each nation getting its own unique arsenal from which to choose. Each individual weapon has varying degrees of accuracy and power. In the multiplayer game, you'll also need to consider a weapon's mobility factor: a heavy weapon, such as a machine gun, will weigh more and thus slow your movement while you carry it. Weapons don't impede your movement in the single-player game, however.
German Weapons
You'll be using German weapons for most of the single-player experience in Call of Duty; although you never play as a German soldier, your default weapons will usually run low on ammo within a half-mission or so, leaving you to scavenge weapons from amongst the trail of dead you've left behind you. This isn't a bad thing at all, however, since the German weapons are very dependable arms.
Luger
Accuracy: 5/10
Damage: 5/10
Mobility: 10/10
The Luger is a dependable sidearm, but with the cornucopia of powerful submachine guns and rifles in Call of Duty, you shouldn't be switching over to a pistol very often. In multiplayer, a pistol is the weapon of last resort, except perhaps for snipers, but even they will be better off picking up an automatic weapon rather than sticking with a sidearm. Soviet troops, in addition to the Germans, wield Lugers.
Steilhandgranate
Accuracy: 7/10
Damage: 9/10
Mobility: 9/10
The distinctive "potato masher" grenade of the German army is a useful tool to startle your enemies into leaving fortified positions, abandon machine gun nests, or otherwise flee for their lives. You'll come across these fairly often in the single-player game; they come in packs of ten.
MP40
Accuracy: 4/10
Damage: 6/10
Mobility: 9/10
The MP40 is the Wermacht's standard submachine gun, capable of emptying an entire 32-round clip at a target within seconds. SMGs are not renowned for their accuracy, and indeed the MP40 shouldn't be a primary weapon for multiplayer maps that will require firing across distances, such as mp_brecourt. At mid-range, though, the MP40 is probably the best submachine gun in the game, due to the fact that there is virtually no recoil whatsoever; if you aim down the sights at a target, you won't need to fight against a kicking reflex, as you will with every other weapon capable of automatic fire. This alone will help you land more bullets on quick-moving targets. In the single-player game this is going to be your best friend when paired up with a rifle in your other weapon slot, since you'll be finding enough ammo to keep yourself topped out through most levels.
MP44
Accuracy: 6/10
Damage: 7/10
Mobility: 7/10
The MP44 was one of the earliest mass-produced assault rifles, and its utility in battle inspired such weapons as the AK-47. Its most notable feature is the lack of a tradeoff between precision and rapidity of fire: while it admittedly fires a bit more slowly than the MP40, it is by far that weapon's superior when it comes to mid-range or even long-range targeting. It's no sniper rifle, but is fairly accurate when single shots are fired at distant enemies. Unfortunately, there's little ammo to be found for this weapon in most of the single-player levels, but its strengths are usually worth the effort of preserving your ammunition.
In multi-player, choosing between the MP40 and the MP44 can drive good men mad, but most players will be better off with the MP40. While the MP44 is capable of better accuracy at extreme range, the MP40's recoil-less firing will make a huge difference when attempting to aim down the sights at a moving target. This choice depends on your style of play, though, obviously.
FG42
Accuracy: 10/10
Damage: 9/10
Mobility: 7/10
The powerful Fallschirmjagergewehr 42 is a German paratrooper weapon, and is by far the most deadly weapon in the single-player game, as it combines the rate of fire of a fully automatic weapon with the precision of a sniper rifle. When aimed from the hip, it can be accurately fired at medium range, while the 4x scope will let you pick off distant targets with ease. It's so powerful that it appears in the first three levels of the game, and then is never seen again, and isn't available as a choice in multiplayer. (You may find it in boxes in some multiplayer levels, as with the Panzerfaust). The FG42's main drawback is a vicious climb when fired in automatic mode, but with the game's auto-correcting aiming, it's fairly easy to fire off short bursts without worrying about straying too far off the mark.
Kar98k
Accuracy: 8/10
Damage: 10/10
Mobility: 9/10
The Kar98k is your basic bolt-action rifle: excellent accuracy when aiming down the scope, horrid rate of fire. It's further hamstrung by the small five-round clip, and thus won't be of much use to anyone. In most single-player missions, you will either possess a sniper rifle, or one of the superior Allied rifles.
Scoped Kar98k
Accuracy: 10/10
Damage: 10/10
Mobility: 7/10
You'll possess a Scoped Kar98k for only a single mission of the single-player game, but it will be the weapon of choice, out of necessity, for Axis snipers in multiplayer. It functions exactly the same as the other sniper rifles, with a powerful scope attachment for long-range headshots. Unfortunately, its ammo isn't compatible with the regular Kar98k, for whatever reason, and it requires rounds to be individually reloaded, unlike the Kar98k, which lets you insert a magazine of five rounds when reloading.
Panzerfaust
Accuracy: 2/10
Damage: 10/10
Mobility: 3/10
Call of Duty possesses few methods of destroying tanks, a task at which the Panzerfaust is the most useful. These are single-round weapons, which are discarded from your inventory after one use, so if you intend to snap off a few high explosives towards a tank, you'd best not stray far from a well of infinite Panzerfausts that are found near likely tank targets during the single-player game. The weapon is highly inaccurate, however, even when aimed down the scope, so you'll need to be fairly close to a tank in order to use a rocket launcher on it.
Panzerfausts are found in multiplayer, as well, even though there are no tanks to destroy. In online games, the PF is used to kill opposing players, obviously, but it's rarely worth the trouble to pick one up, due to the inaccuracy and the way you'll be opening yourself up to enemy fire as you drop your expended launcher and switch to your primary weapon. It obviously packs quite a punch, but then, most weapons will kill an opponent in a few hits anyway. On wide-open maps, like the surface of mp_rocket, you can sometimes garner cheap kills by firing blindly towards a concentration of enemies, or by simply following behind a rifleman or machine gunner and snapping off a shot towards wherever he aims.
U.S. Weapons
Colt .45
Accuracy: 5/10
Damage: 5/10
Mobility: 10/10
The Colt .45 is the common weapon of the British and American forces in the game. It and the Luger are comparable in their relative uselessness, although the Luger does possess a single extra round.
M2 Frag Grenade
Accuracy: 7/10
Damage: 9/10
Mobility: 9/10
The M2 is functionally similar to all the other grenades in the game, albeit with what seems to be a slightly shorter arming animation than the German Steilhandgranate.
M1A1 Carbine
Accuracy: 5/10
Damage: 6/10
Mobility: 9/10
M1A1 Carbines are paratrooper weapons, as evidenced by the folding stock, added to reduce the gun's size. In the game, M1A1s come outfitted with a 15 clip magazine, and feature semi-automatic fire, with decent accuracy when aiming down the site. On the other hand, it lacks the stopping power of a Garand, and has a mediocre zoom distance when aiming.
M1 Garand
Accuracy: 7/10
Damage: 8/10
Mobility: 8/10
One of the most distinctive weapons of World War II, the semiautomatic M1 Garand possesses an eight-round clip that automatically discharges from the rifle when it's empty. This weapon is drastically superior to the bolt-action rifles in the game, due to its increased rate of fire and short reload time. And it's just plain cool. Accuracy is superb when aiming down the sight, or from the hip, for that matter. In multiplayer firefights, this is something you'll want to jump on if you've selected a submachine gun or assault rifle as your primary weapon: it'll extend your range, while not rendering you completely ineffective when ambushed.
Thompson
Accuracy: 2/10
Damage: 7/10
Mobility: 9/10
This submachine gun is a dependable weapon, and is well able to drop an enemy with a split-second's worth of concentrated fire, but is inaccurate at any but the shortest ranges. You'll often be trading this for an MP40 in the single-player game, but even in multiplayer you might want to consider vulturing a German weapon from a corpse on the more spacious maps.
Browning Automatic Rifle
Accuracy: 7/10
Damage: 7/10
Mobility: 5/10
The BAR is a heavy-duty piece of machinery, weighing close to 17 pounds when outfitted with a full magazine, and as such, will slow you down considerably during multiplayer. Its smallish 20-round magazine is its other primary bane, but in counterpoint, it does possess quite impressive accuracy when lying prone, and it deals more damage per second than almost any other weapon.
Springfield
Accuracy: 10/10
Damage: 10/10
Mobility: 7/10
As far as sniper rifles go, the Springfield is an impressive breed, with a history stretching back to the turn of 19th century. In gameplay terms, this rifle is a tad more powerful than the other nation's choice of distance weaponry, but its reload time is hampered by the fact that each round has to be inserted into the rifle individually, meaning that if you fire all five rounds, it will take you a few seconds to reload completely. To minimize this drawback, you may wish to either reload as soon as your field of vision is cleared of live targets, or simply find very good cover before reloading.
British Weapons
MK1 Frag Grenade
Accuracy: 7/10
Damage: 9/10
Mobility: 9/10
Functionally speaking, this grenade doesn't appear to be any different than the American M2 model. Both are the standard eggshell shape, with nice, short loading animations.
Lee-Enfield
Accuracy: 7/10
Damage: 10/10
Mobility: 9/10
If you're looking for a bolt-action rifle, the Lee-Enfield is the weapon of choice. You should be familiar with the properties of such a weapon by now, but the L-E distinguishes itself from the rest of the bolt-action weapons in the game with its large 10-round capacity. It takes marginally longer to reload than some of the other bolt-action rifles, due to the fact that you'll need to reinsert two clips when reloading, but you'll need to reload half as often as with other rifles, which more than balances things out.
Sten
Accuracy: 3/10
Damage: 6/10
Mobility: 9/10
The Sten Gun was mass-produced during WWII, which saw over two million of the submachine guns into the hands of Allied forces. Unfortunately, you're going to be one of the soldiers unlucky enough to wield one, for however brief a period of time.
The Sten possesses the typical boons of a submachine gun in its high rate of fire and large magazine, but it is one of the least accurate weapons in the game, and is almost completely unsuitable for shooting at a target at any but the closest ranges. In single-player, you should exchange this weapon for an MP40 as soon as possible; in multiplayer, if you're unlucky enough to be playing as the British, you'll want to grab a Bren, or one of the rifles, and hope to find a decent submachine gun to fill your other slot.
Bren LMG
Accuracy: 7/10
Damage: 7/10
Mobility: 5/10
The Bren is Call of Duty's other big machine gun, accompanying the BAR as the heavy-duty weaponry for multiplayer games. Like that weapon, it's at its best when fired from a prone position, so you'll want to find a spot with a decent amount of cover and a wide field of view. If you need to move to another location, you'll want to find a decent submachine gun before exposing yourself to enemy fire, as the Bren is one of the least-accurate weapons when fired from a standing position.
Soviet Weapons
RGD-33 Stick Grenade
Accuracy: 7/10
Damage: 9/10
Mobility: 9/10
The Soviet grenade is statistically similar to the other nation's portable explosives, but it lags behind each of them due to an elongated priming animation, which will force you to wait an extra half-second or so in-between selecting this weapon and actually having a grenade ready to throw. You won't have much choice in the matter during multiplayer, unfortunately, since you'll be issued these grenades by default when playing as the Soviets.
PPSh
Accuracy: 3/10
Damage: 5/10
Mobility: 9/10
Although it features a mighty 71-round magazine and the highest rate-of-fire of any weapon in the game, the PPSh is too inaccurate to be dependable as a weapon due to its inaccuracy. Whether you fire a single round or blast off half a clip, you'll be lucky to hit anything but wall unless your target is close enough to touch. In multiplayer, Soviet soldiers who wish to possess a decent automatic weapon are forced to use the PPSh, but you should start scouting for an MP40 as soon as you spawn.
Mosin-Nagant
Accuracy: 8/10
Damage: 10/10
Mobility: 9/10
The Soviet Mosin-Nagant rifle was simple to use and cheap to make, and thus perfect for the huge and poorly-trained Soviet army. It possesses a five-round clip with a quick reloading animation.
Scoped Mosin-Nagant
Accuracy: 10/10
Damage: 10/10
Mobility: 7/10
Although the Soviet forces get somewhat stiffed on powerful weapons in Call of Duty, they get a small break with their sniper rifle. Unlike the other sniper rifles in the game, the sniper variation of the Mosin-Nagant features a raised scope, which allows the rifleman to reload the gun with a full five-round clip, instead of having to insert each cartridge individually. A small edge, but an edge nonetheless.
Got a news tip or want to contact us directly? Email news@gamespot.com
Join the conversation