Freelancer Walkthrough
This extensive guide includes mission walkthroughs, general tips, and information about the ships, trade routes, and weapons featured in the game.
Design by Katie Bush
Introduction
Freelancer is a 3D space combat game that features elements of adventure and exploration. Boasting a massive universe full of mystery and intrigue, Freelancer has a mix of open-ended freelancing missions and linear story-driven missions. Freelancer lets you play the game you want--you can play only the single-player game, you can disregard the story and only freelance, or you can do a little of both. Whatever you decide, you will find assistance in this guide.
While you're navigating story missions, refer to the mission walk-throughs. For the times when you hit a free moment in the story, the freelance hints section of the guide offers tips and general gameplay advice. But because Freelancer's universe changes based on individual actions, the only set component of the game is the story missions. Beyond the story, it's up to you to explore and apply the hints, statistics, and strategies we offer.
Table of Contents
Mission Walk-ThroughsMission 5
Mission 6
Mission 7
Mission 8
Mission 9
Mission 10
Mission 11
Mission 12
Missions 13-14
Mission Walk-Throughs
Mission 1 and Mission 2
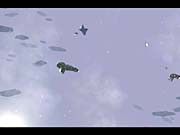
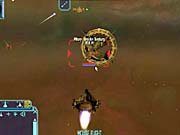
Welcome to Liberty. Your first mission is simple--head to Planet Pittsburg to deliver supplies to a security agent named King. But after you take off, the Rheinland cruiser Donau comes under attack and is supposedly destroyed by a mysterious force called the Order. There isn't much you can do, other than follow your plan to meet the cargo ship Brandt as an escort to Pittsburg. It turns out you're needed, too, because you'll run into some enemy rogues. When you start sustaining damage, use shield batteries to replenish your shields and nanobots to fix your hull. These are expendable, and far better than dying. In the first few missions, you'll explore the Liberty system, engage some minor enemies, get used to the controls, and get a feel for game mechanics.
One of your first challenging battles will be to take down the criminal Sean Ashcroft. If you try to take out his companions first, you might not live very long. However, if you destroy Ashcroft immediately, the game will auto-save. Even if you later fall to his companions, you can load the save and reappear in the same spot, with the mission complete and no more baddies to deal with.
Mission 3

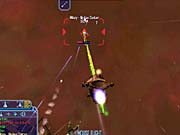
After heading to San Diego, your next stop is Willard Station. Following a mysterious entry through the Barrera Passage, you'll find Willard under attack by pirates. Though you can dispatch them easily, you'll be heading back to Willard again shortly when a distress call comes in. Thankfully you'll get support from Captain Walker and his battleship, but the fight will nonetheless be tough. Take out the Rheinland gunboats first, and then retreat to the asteroids for cover as needed. You're not really pressed for time, so you can always fly off if your shields get low.
Mission 4
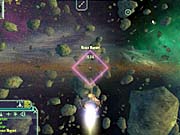
After you return to Manhattan, things fall apart. Next thing you know, you're fleeing Liberty as fugitives. Your mission is to find Dr. Van Pelt, but as soon as you leave New York, you'll come under attack. This entire mission is a strategic retreat--you won't be able to stay anywhere for long. Furthermore, you'll always be outmatched and outgunned, so any prolonged fight is futile. All you need to do is stay alive, and in this case, that doesn't necessarily mean fighting. At any time you can, engage your cruise engines and get away from the battle. Be sure to use countermeasures to evade cruise disruptor missiles.
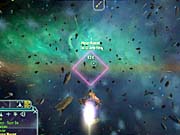
Since you're flying with a large fleet, your friends will deal with the situation, allowing you to recharge your shields as necessary and then come back for short bursts. You will have very few opportunities to replenish your shield batteries and nanobots, so you must always make them last. The key to sustaining less damage is evasion. Strafe, use nearby asteroids to block weapons fire, and use your afterburners to outrun enemies. There's no easy way to get through these battles with the available equipment, but always try to stay out of the thick of combat and let your NPC fleet take the damage. Remember to fly a few thousand kilometers away from the battle, out of combat, to recharge your shields.
After meeting with Dr. Van Pelt, who has some advice about the artifact, you will leave the Liberty system. The destination is Bretonia, and you'll finally be out of the thick of combat, able to take a breather and restock.
Mission 5
Cambridge, Cambridge
After doing some freelancing, you'll eventually reach level nine. Then it will be time for the next story mission. Juni will contact you, asking to meet on Cambridge in the Cambridge system. It'll likely be a long flight there from wherever you've been doing your freelancing in Bretonia, and if you're low on shield batteries, it's a good idea to stock up before making the trek. When you arrive, you'll learn that Juni hasn't yet found Doctor Quintain, the one who can answer all your questions about the artifact. However, she has found someone who knows something. But the Rheinlanders are on your tail, too, and they've found the same person. Before taking off, take a moment to check some of the equipment available on Cambridge. After your freelancing, you'll likely have a good amount of money racked up. Your destination is Sprague in Omega-3.
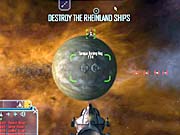
As we know, tensions between Bretonia and Rheinland have been growing, and upon approaching planet Sprague, you'll find yourself in a fight. Four Rheinland fighters will stand between you and your destination. The battle itself is fairly straightforward, but the Rheinland ships pack quite a punch, especially if all of them get on your back.
Sprague
Your best bet is to try to separate some of the ships by leading a few away from the pack before you engage. Since you've just docked, you should have a plentiful supply of shield batteries. But don't let your proximity to a planet fool you. You won't get a chance to stock up on Sprague.
Your stay on Sprague will be short, as an attack from Rheinland comes quickly. As soon as you exit the planet, a waypoint with an escape route to Baxter Station will be available. Do not waste any time fighting. Instead, just get on your way to Baxter, and use any necessary flares to prevent cruise disruption. Don't worry about using shield batteries, as you'll be able to restock on Baxter.
Baxter Station
As usual, Baxter will come under attack almost as soon as you arrive. But don't let that rush you. You can not only resupply before you leave, but you can also upgrade your equipment. Baxter is home to some nice new weapons and shields, and you should take time to peruse the inventory.
Outside of Baxter, you'll enter a hairy fight against a number of Rheinland ships. There are two important strategies. First, take out the gunboat.
There will be only one, and once you've knocked it out, you'll sustain far less damage. As soon as you're done with the gunboat, make for the asteroids. The asteroids will provide a fair degree of cover and can make the difference between making it out alive and joining the floating debris. Once you're done with the fight, remember to make a pass and pick up the leftover goodies.
Back to Leeds
Your next destination is Leeds. Along the way, a pair of Rheinland deserters will join you, and they'll also tell you of a jump hole that'll shorten your trip.
With all these jump holes around, one wonders why they even built jump gates. Regardless, when you arrive, a battleship will be blocking your way. Luckily for you, the defector Rheinlanders will take care of the battleship with torpedoes, though you'll still have to worry about the leftover fighters. Since you have a number of teammates, you can try to pull yourself away from the main conflict if you need to, letting your friends take the bulk of the damage. The path to Leeds will be clear from here, and once you arrive, it's back to freelancing.
Mission 6
Battleship Hood
After some quick hunting, it's time to resume the search for Quintain. The first step is meeting an old pilot that he used to employ, who can be found on the Battleship Hood in the Dublin system. You'll likely run into a few folks who'll try to disrupt your travels, so be sure to stop along the way for supplies and to save, if you need to. Upon arriving at Battleship Hood, the pilot, named Hovis, won't give you the information you need until you beat him in a race.
You'll get a couple of tries against Hovis, but the key to beating him is being stocked up on countermeasure flares. Be sure to activate your cruise engines at the first available moment. Don't use the "go to" function, or you'll find navigation very difficult. Just pop on the cruise engines and navigate yourself. But don't worry if you're behind Hovis most of the race, as toward the end you'll both come under weapons fire and be slowed by cruise disruptors. If you are quick enough with your countermeasure flares, you'll pull ahead of Hovis without getting your cruise disrupted. At the same time, you have to make sure you're flying through the course, but as long as you keep your speed up, you should be fine.
Station Glorious
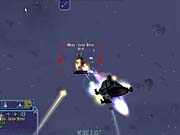
Naturally, the good doctor isn't on the space station, and you'll have to go deeper into the boonies to find him. The next stop is mysterious Station Glorious. As you approach, you'll hit a delegation of Rheinlanders. You'll have backup from some friendly fighters, immediately from the station. The first order of business is to take out the Rheinland gunship, as you will be told. A running theme is to always concentrate on the in-game advice, as it will almost always prove helpful. Once the gunship is gone, you can use the asteroid field to your advantage, if necessary, and take care of the rest of the ships at your leisure. Once you've done away with the enemy ships, you prove yourself a friend to Glorious and are allowed to land. You'll be able to resupply as soon as you land, so don't bother trying to conserve shield batteries.
After some conversation, Quintain decides to return to Leeds with you to continue the research with Sinclair. Luckily for you, he brings friends with him. The intermittent jump gate to Leeds happens to be aligned properly for your jump, but on your way you'll hit an ambush of Rheinlanders. The fight is fairly straightforward.
Back to Leeds Again
After passing through the jump gate to Leeds, you'll have a quiet flight home. Once you arrive, you'll have a merry reunion with your companions, but this time there is no rest for the weary. Rather than heading back to freelancing, you'll begin the next story mission immediately.
Mission 7
Flight From Leeds
Upon your evacuation from Leeds to the Tau-31, two Rheinland ships will decloak and inform you that all exits are blocked. But there are only two of them, and once you take out one ship, the other will cloak itself and flee. This first battle is easy, and immediately after it, the game auto-saves. But that's because the mission has only just begun.
After leaving the trade lane at Stokes Mining Station, four Rheinland ships will intercept you. Again, after you take down half of the ships, the remaining ones will cloak themselves and leave. Keep this in mind during the fight, and try not to use any shield batteries. You need to start conserving for the long haul, and as you can tell, the big fight is yet to come.
Jump to Tau-31
Just as you approach the gate at Tau-31, you'll find a fleet of Rheinland ships, led by a cruiser. The Glasgow outpost will also be under attack, and your team will be in for quite a fight. If you're not careful, the cruiser will destroy your shields within a couple of seconds, and your weapon range is only about as far as that of the cruiser. You can do as is recommended and target the cruiser's weapons, but you still run the risk of not being able to make it through the rest of the fight because of the damage you'll incur.
Even though the in-game advice is to take out the cruiser as soon as possible, in this case, it can be advantageous for you to let your companions take the initial brunt of the attack. This tactic works because Tobias shows up out of nowhere quickly and will dish out serious damage to the cruiser.
Then step in once the cruiser is about half destroyed, and Tobias will likely have absorbed enough damage for you to make it through the fight intact. There are no adverse consequences to letting Tobias take the heat, and you'll burn through far fewer shield batteries early on, allowing you to retain enough to survive the rest of the mission.
Once you've cleared the cruiser, you have to clean up the fighters. But once the cruiser is gone, you'll be in much better shape to handle the battle. What's important is keeping some shield batteries for the fighter cleanup. With any luck, you'll squeak through the battle alive and will be pressured to make the jump to Tau-31. Whatever you do, don't jump yet. Take a moment and dock at Glasgow and restock. Your friends will wait, and it's essential that you reload your expendables before you make the jump.
In Tau-31

Your new destination is Tau-29. But on the road to the jump gate there, you'll run into a massive blockade of Rheinland ships, lead by a battlecruiser. Tobias' friends will sacrifice themselves for your escape, and this time you'll flee. New trade lanes have recently been built leading to a jump hole to Tau-29, but on your way, two Rheinland gunships will block your path. Tobias suggests chasing the gunships while the others escape. Stay behind the slow-moving gunships and fire with your longest-range weapons. After you take one out, Tobias suggests you meet back up with the rest at the jump hole, and before you know it, you're in Tau-29, and on to Shinkaku Station for resupply.
Finding Kress
Quintain plots a course through the Samura asteroid field, which, as he predicts, shields you from the nearby Rheinland vessels for a time. You even arrive at your destination undisturbed. But that's when the fun starts: A fleet of Rheinland vessels led by a battleship decloaks, and there's nowhere to run. Thankfully, some of Kress' friends arrive to help out, and with them, you have a good-sized force too. Quintain will evacuate the scene immediately, leaving your remaining companions to fight.
Tactics are vital to defeating the Rheinland fleet. The first thing to keep in mind is distance. If you keep yourself far away from the battleship, you'll more or less be able to stay out of harm's way. Try to attack enemy ships flying on the periphery of the battleship's range.

Your target will try to lure you closer to the battleship, and coming in close will be inevitable. But take your time and slowly pick away at the outlying targets for as long as you can. Friendly ships will inflict consistent slow damage over time.
If you have to fly in and engage the battleship, fly down its side lengthwise with full afterburn and you'll dodge most of the turrets. Also keep the gunships in mind. Outside of the battleship, the gunships are the source of most of the fire you'll take. Just like when the two gunships blocked your path earlier, if you can stay behind them, you'll only take fire from one turret. If you strafe from side to side, you can dodge the remaining gunfire.
To Tau-23
Kress sent Razor One to rendezvous with you and assist in the fight, and afterward Razor One will send coordinates for a jump to Tau-23 to meet with Kress. The only obstacle along the way to Tau-23 is a methane field. The light blue pockets you'll see as you pass through will damage your ship, and it's important that you manually adjust your trajectory to pass around them. Your onboard computer won't readjust your flight path like it will to avoid large asteroids, so be ready to take control.
Cali Base
You're led to Cali Base, where you meet Kress. It turns out that Kress is part of the Order, the group supposedly launching all the terrorist attacks earlier in the story. Luckily for you, his enemies are your enemies, and he offers to assist you. It just so happens Quintain needs Kress' help in securing the next key to the artifact puzzle, the Proteus Tome. So you and Juni are off to Kusari space, where Kress has an agent, Lord Hakerra, who can help out. The flight to Kyushu will be uneventful, and your meeting with Hakerra will be even more so. It's back to freelancing for a while, which gives you time to check out the Asiatic Kusari.
Mission 8

Tekagi's Transport
After you're done freelancing, Juni calls you to Shinagawa Station, where you meet with Ozu, a representative of the Blood Dragons. He offers to help you nab the Proteus Tome from a Kusari traitor who is transporting the tome to the Rheinlanders. You're off to the Honshu sector to find the transport, via a secret jump hole, rather than the normal jump gate, for surprise.
You'll find the transport by a shipyard, but Ozu has you concentrating on the shipyard's defenses.
It's important to take out the weapons platforms first, as he recommends. You can use the shipyard as cover. Dodge between the shipyard's pylons when you get the weapons platforms firing at you, and swing through the shipyard to get straight shots on the platforms themselves. Once the platforms are gone, between you and the Blood Dragon fighters, you'll make mincemeat of what's left. After taking out most of the fighters, you'll be called away to guard the transport, which is full of gold and artifacts, on its flight to the nebula.
The Nebula
Just as the nebula shielded your approach, it also shields an ambush waiting for you on the way to the jump gate. Fortunately, it's only four fighters. The problem is that if your target flies into the nebula, you'll lose it. But you can do the same. If you run into troubles, head for a nebula cloud, and chances are you'll get the enemy off your tail momentarily. If you're trying to find a target that's done the same, just be patient and wait for it to reemerge.
Once you're done with the ambush, you head on toward Kyoto Base, the home of the Blood Dragons. If you thought this whole mission was too easy, you were right. The whole thing turns out to be a bust, and the Proteus Tome isn't onboard. It's back to freelancing until Ozu finds out what's next.
Mission 9
After the Tome Again

Ozu returns and informs you that Takagi has the Proteus Tome at his main base, which is called Takagi's Arch. You head out and rendezvous with a wing of fighters who will join you on the mission. Along the way to the jump hole to his sector, you'll run into a wing of enemy fighters. Your best bet is to duck below the first volley of fire, as the enemies will target you first, since you're flying point. After the wing passes you, head out to the side and start engaging enemies, using the asteroid field to your advantage. Next up is Takagi's Arch.
Your key objective is to destroy the power generators. Once the generators are down, you'll be able to dock with the base and get the tome.

An easy method is to fly beneath the arch, come up through the center, and unload everything you have into the generators. Use full weapons, and throw in any missiles or mines you might have. Mines will be drawn to the generators, and the missiles will inflict heavy damage. You can use the generators themselves as cover against the nearby battleship. But engaging the area fighters is almost suicide, as there's little hope that you'll knock down a significant number of them and have the strength left over to take out the generator. Once the shields are down, fly in. After all is said and done, you'll be treated to a story segment that answers a great many questions. Then it's back to Kyoto.
Mission 10
Kyoto Chugoku
Before you leave Kyoto, be sure to stock up on plenty of missiles and torpedoes. You'll need them, because you'll soon find yourself in a massive battle. You'll take off from Kyoto with a sizable fleet of mostly heavy fighters led by Lord Takagi. Your mission: Pick up Von Clausen in Rheinland, taking a route there through the Sigma systems.
The Extraction of Von Clausen
It's a fairly uneventful flight until Sigma-13. But shortly after arriving in Sigma-13, you'll be ambushed by a truly massive Rheinland fleet, complete with several battleships, nearly a dozen gunboats, and a huge number of fighters. Thankfully, you'll have plenty of support. If you're in a light fighter, focus on the fighters. Because the Rheinlanders have only heavy fighters, you'll be able to outmaneuver them fairly easily. If you're in a heavy fighter, however, use your torpedoes and missiles to take out the battleships immediately. After they're gone, you'll find the tide of battle has turned very much in your favor. Take out the fighters, then take out the gunships. The procedure should be standard by now: Get behind the gunship and stay out of its weapon arc. After Sigma-13, the flight is fairly uneventful until you hit Rheinland space.
New Berlin
You arrive on New Berlin, and you meet two of Von Clausen's contacts. You're informed that Von Clausen is on a terraformed planet, and you pick up an escort for the journey. As you journey through Rheinland, be sure to marvel at the might of their military. Enjoy the tour, and sympathize with the Rheinlanders. Thankfully you have your contact to guide you, and you don't have to take on the massive armada that is the Rheinland fleet.
Meeting Von Clausen
You arrive on New Berlin and finally meet Von Clausen. After a conversation, Von Clausen leaves with you and asks you to head with him to Bruchsal Base, where you'll meet some friends who will help you take out an experimental shipyard. After an average, uninteresting battle with a squad of heavy fighters from Rheinland, you'll be on your way. Next, dock at Bruchsal Base to restock and meet with the head of the Bruchsal, who supplies you with a fighter wing. Now you're off to the experimental shipyard.
You'll have to pass through a minefield and enter and exit through a 100-meter-wide tunnel of sorts. Navigate through the minefield by following the waypoints, and be sure not to stay in the same area too long, or you'll attract more mines.
Once you get through the minefield, you'll run into a fleet that outnumbers you. The objective here is not to destroy the enemy, but rather to survive long enough for Von Clausen to come to his senses and decide to leave. The experimental ships are thankfully still docked, and you can use them as cover against your enemies. The experimental ships are in hangers, and if you fly inside of them, you shield yourself from the larger ships and have little but missiles to contend with. If you have enough countermeasures, you'll have yourself a very nice hiding place.

If you'd prefer the more difficult approach, you can also head back into the minefield. Enemy ships will not follow you in, but you will have to contend with the mines. If worse comes to worst, you can just fly around the minefield until Von Clausen decides to leave. There is little reason to destroy the experimental ships beyond getting their kills recorded in your player statistics.
After the Experimental Shipyard
Finally, you'll find a second exit from the shipyard, which leads to relative safety. A Rheinland battlecruiser will decloak in front of you, but have no fear! Fortunately, a friendly battlecruiser, the Osiris, decloaks as well, and you can land safely onboard. For the first time, you now get to meet the head of the Order, Orillian. Orillian proceeds to give you his history and explains more of how the Order came to be--not quite the evil organization that was once thought.
Mission 11
Osiris, Texas
With you on board, the Osiris flies back to Texas, in the Liberty system. After leaving the Osiris, your mission is to head to Buffalo Base in the New York system. The journey is uneventful, except for a small battle once you come through the New York jump gate. After the small encounter, you proceed safely to Buffalo.
The Satellite
Your next mission is to take out a satellite in the New York system that can detect cloaked ships. Naturally, since the Osiris is a cloaked vessel, the helpfulness of such a mission is obvious--you'll be able to roam free throughout the New York system. You'll use a jump gate that takes you close to the satellite. At first glance, the satellite appears unguarded, but it is in actuality guarded not only by weapons platforms, but also by a wing of Liberty fighters. Normally Liberty fighters wouldn't be much of a problem, but in this case, the fighters have been armed with alien weapons.
Be very careful about the first pass the fighters make, as their first run in tight formation can easily destroy you. All the fighters are light, but they do have better shields and weapons. Other than trying to avoid fire, there aren't any special tricks to beating them.
Once you take out the fighters, you can ignore the weapons platforms, because they only fire missiles. Use plenty of countermeasures and focus on the satellite, which you can destroy quickly and easily.
Rescue the President
Soon you'll find out that the president of Liberty has been apprehended. It's your task to go rescue her from Zone 21, better known as the fabled Alaska system. Along the way, you'll meet back up with Walker and his battleship. With the two battleships, Juni, King, and a couple of squads of fighters, you continue toward Alaska.
Right before you enter the jump gate to Alaska, you'll encounter a squad of enemy fighters. Now you get to show your enemies how they made you feel earlier on. With all the firepower, you will dispatch them quickly. The next problem is that Juni has to unlock the jump gate. In the meantime, another squad of fighters will fly up, but they won't pose much of a problem.
You'll encounter no resistance as you make your way toward the prison. Docking at the prison will be no problem. Once you arrive, you'll be filled in on numerous story details and will successfully rescue the president.
But when you leave, you encounter the fleet you were expecting to see earlier, and a massive battle ensues. Use evasive tactics--try to run from them and head to the jump gate out of Alaska as fast as possible. When you arrive at the jump gate, two battleships block your path. But Walker arrives and opens a way out for you. After the jump gate, you'll hit yet another blockade. This time, you'll engage them, albeit momentarily. Since the Osiris will promptly decloak, saving you from a having to continue the battle, it's worth conserving your energy and munitions, since the battle will be over quicker than you'd think.
Mission 12
Osiris, Omicron Beta

The Osiris arrives in Omicron Beta, where your mission is to pick up a power cell from an alien structure to complete the puzzle of the artifact you've been holding. If you're suspecting a trap, you're right. When you arrive, you'll meet an enormous number of alien ships. Much like at Takagi's Arch, you'll have to destroy three power generators so you can enter the alien structure and take the power cell. Unlike at Takagi's Arch, you have only nine minutes to get out, get the artifact, and get back.
The main tactics: Get within point-blank range of the generators and use them as cover. You do not need to heavily engage the enemy fighters on the way--your best bet is to evade them and take out the generators as promptly as possible.
If you happen to have torpedoes, it can be helpful to take out the enemy gunboats along the way. But you simply won't be able to survive long in the heat of battle, so just focus on completing the objective. Once you get to the generators, use mines, which are attracted to the generator, and missiles. Give them everything you have, and then fly inside the base.
Before you leave the center of the alien structure, charge your cruise engines. Make sure you do this before you leave, as it is very difficult to charge your engines once you're clear of the structure, due to the massive number of incoming missiles fired from enemy ships outside. On the way back, your top priority again is evasion. If you run out of shield batteries, head for the asteroid field until your shields recharge.
Once you complete your objective, and just when you think you're clear, you'll be jumped by alien gunboats on the way back. It'll only be you, Juni, and King for a while against four alien gunboats and at least a dozen fighters. Fortunately, Von Klausen will arrive with a few support units to assist, but you'll likely already be drained. At this point, you'll be running on fumes, and there's no easy way past. Since you're no longer on the timer, you can head into the asteroid field until your shield charge returns. After this battle, you finally get to head back to the Osiris.
Mission 13 and Mission 14
Toledo, Omicron Alpha
Once you arrive on Toledo, the planetary base of the Order, you'll finally be able to activate the alien artifact. The scientists decode the artifact and determine that, at a certain location, the artifact can be used to destroy or at least slow down the aliens. The plan is to open a galactic-sized jump gate to pull the aliens out of the galaxy. Your job is to buy scientists time to get the artifact ready.
Just as you figure out how the artifact works, the aliens find you and attack Toledo. You head into space to take the aliens on, but joining them are familiar vessels--the experimental ships from earlier are actually alien ships. Your first order of business is to destroy the main alien battleship. If you're in a light fighter, focus on the alien interceptors and stay away from the battleship, letting the others deal with it. You simply won't have the firepower to do much. If you're in a heavy fighter, use missiles and torpedoes to take on the battleship.
If you decide to attack the battleship, keep this in mind: There is a small area on the underbelly of the battleship, near the rear, where its guns cannot hit you. Once you've found this position, you'll be able to attack the battleship without fear of retaliation.
Just as you destroy the first battleship, a second will decloak. But before you engage the second, Orillian thankfully calls you back to the planet to mount the artifact, and then you depart and make for the alien jump gate. Right before you enter the jump gate, an alien capital ship decloaks with a number of fighters, but your own heavy fighter escorts will help a lot. Do what you can, but make for the jump gate. Once through the jump gate, you'll see a massive barrier in front of you, and you'll be in for the epic finale.
At the barrier, you'll need to destroy four generators to get through the shield blocking your path. You'll be met with 30 to 40 alien fighters, but you should once again concentrate on taking out the four green generators rather than fully engaging the oncoming fleet. Possibly the hardest part of this battle will be dealing with your computer system slowing down as it tries to render all the ships. If you head for the power generators, try constantly facing them and strafe to avoid fire.
Once you destroy the four generators, a passageway through the barrier opens. On the other side, you'll find a massive city built on a large asteroid. Surrounding the city are six huge diamond-shaped generators surrounded by smaller weapons platforms. You must destroy two of the diamond-shaped rocks to drop the shields of the alien city. If you head below the generators, using the them as cover, you'll be able to position yourself so the weapon platforms will be unable to hit you. Use thrusters to strafe as needed to protect yourself from the interceptors, and destroy the generators as quickly as possible.
Once done, you've beaten the game, and you're are in for the final, epic cutscene. Congratulations. After this, it's on to freelancing for as long as you'd like.
Keep in mind that there's plenty left to explore, and the following sections of the guide will help illuminate some of the intricacies of freelancing. If you haven't had a chance to do so yet, this is a good time to play with a freighter and explore the trade routes, border worlds, and outer colonies. If you find freelancing to your liking, you'll enjoy the game's multiplayer component, which consists entirely freelance missions.
Freelancing
General Tips
This section will help you better spend the time you have freelancing.
- Explore! For each location you visit, that location's set of trade prices is added to your commodity list. Over time, you'll get a substantially larger list of available prices and commodity sellers.
- When selecting a freelance mission, if a sector is noted, open your map and see how far away it is. You'll save a lot of time if you take missions at locations close to where you are. For example, if you're in 5D on the map, and the mission is in 4E, you'll be pretty well off.
- When you dock at a base, always check for new equipment and always restock on expendables like ammo, shield batteries, and nanobots. When taking long flights, remember to stop at stations or planets along the way to save. You never know when a trade lane might be disrupted, forcing you to fight.
- Generally, missions to take captives or chase particular criminals will be close to where you'll learn about the mission. Hence, selecting these missions can save flying time.
- Missiles cost a lot, and you can often make do without them, especially on freelancing missions. Ditto for mines. Conserve them when you can, and if you feel you're at an easy moment in the game, try replacing missile hardware with extra guns.
- In combat, don't forget to strafe and use the afterburner. These two tools drastically improve your maneuverability and your ability to quickly dispatch enemies.
Mining
It's difficult to find profitable ways to mine. Theoretically, you fly to a mining area (marked on the area map) that has a commodity you want to find. Once in the mining area, you shoot floating rocks. As you destroy the rocks, there is a chance that a commodity will be left behind. Once this happens, you tractor in the commodity. Repeat until your cargo hold is full, and then head to a base where you can sell the commodity for a good price. But finding good mining areas is harder than it sounds. Here are two helpful tips to consider when mining:
- Pick a mining area with a fairly high-value commodity. Mining a cheap commodity like scrap metal is not very profitable, even at the beginning of the game. Look for fields that contain higher-value commodities like beryllium, gold, diamonds, artifacts, alien organisms, niobium, silver, and cobalt.
- Verify your reputation with the field's random population before venturing too far from the shelter of a friendly base. If the dominant criminals in the area are neutral or friendly, it makes a huge difference, since you don't have to constantly fight off attacks. If you are hostile to many of the criminal factions most often present in the asteroid field, it's best to find an area where there is a commercial mining base very close to or within the zone, rather than some distance outside of it. Good examples of this are the GS & M goldfield in the Dublin system and the IMG niobium fields in the Tau system.
Here's a practical example:
First rule of mining: Get on good terms (or at least neutral) with whoever you're going to encounter most in the mining zone--this lessens the amount of trouble you'll encounter considerably. An example of this is in the Silverton and Copperton fields in the Colorado system. Ideally, if you make enemies with the Bounty Hunters, you'd be at least neutral with the Xenos and other criminal factions (as well as not crossing the true-blue Liberty honchos). If you're just starting out, a nice, easy mining run between Copperton and Pueblo is your best bet. The money is good (400c), and it's easily repeatable. Another good run is from Silverton to Los Angeles (700c). Again, the money is good for just starting out (without going as far as New Tokyo), and it allows you to trade up in ships fairly quickly. The only real trouble then is avoiding the Bounty Hunters, but there are fewer of them on patrol and at least you'll have a lot of support out there. Under these circumstances, you'll be able to spend the ample time necessary to mine those asteroid fields with as few interruptions as possible.
Ships
There are three types of ships available in Freelancer, and at first they might seem similar. Your options are light fighter, heavy fighter (and special very heavy fighters), and freighter. All ships fly at the same speed, and even upgrading your thrusters won't change that. But the chief difference between light and heavy fighters is that light fighters have more maneuverability, while heavy fighters allow for more weapons and the use of torpedoes. Freighters are used for cargo runs rather than combat, and they have a unique defensive playing style. Keep in mind that, for whichever class you like, each higher level of ship has more available energy, allowing for the powering of more-deadly weapons, so it's wise to have the best ship you can afford. Below is a complete list of the ships to be found in Freelancer. Use the key to understand the charts.
Key:
Name: The name of the ship.
Price: The base price of the ship. This can vary depending on your faction alignments.
Armor: The amount of armor the ship has. Keep in mind that armor is separate from shields. Shields can be upgraded (see Shields), but your hull armor is set. It's important to get the best ship you can so your armor is at its maximum.
G/T: The number of gun and missile/turret hard points.
Max N/S: The maximum number of loadable nanobots/shield batteries.
OC/MC: The optimal weapon class/maximum weapon class.
Location: The location where the ship can be purchased. When a designation like "Liberty Planets" is given, it is available at all planets that sell regular ships in Liberty. For example, the Liberty Planets are Manhattan, Los Angeles, California Minor, Denver, and Houston.
Light Fighter
Light fighters pack less firepower, but they're highly maneuverable. You might want to choose the light fighter if you're coming to a point in the story where evasion is key. Since light fighters are often cheaper than their heavy counterparts, if you can learn to effectively use light fighters, you can save credits for more necessary purchases.
| Name | Price | Armor | G/T | Cargo | Max N/S | OC/MC | Location |
| Starflier | 6,000 | 1,100 | 3/0 | 20 | 10 | 1/3 | Provided |
| Patriot | 6,600 | 1,300 | 4/0 | 25 | 12 | 2/3 | Liberty Planets |
| Bloodhound | 10,400 | 1,500 | 3/1 | 35 | 14 | 3/5 | Rochester Base |
| Startracker | 15,300 | 1,800 | 3/0 | 30 | 15 | 4/6 | Liberty Planets |
| Piranha | 15,300 | 1,800 | 4/0 | 35 | 15 | 4/6 | Sheffield Station, New London, Cambridge, Leeds |
| Dagger | 15,300 | 1,800 | 4/1 | 35 | 15 | 4/6 | Buffalo Base |
| Cavalier | 22,000 | 2,100 | 4/0 | 30 | 18 | 5/7 | Bretonia Planets, Battleship Hood |
| Legionnaire | 31,400 | 2,400 | 4/0 | 35 | 20 | 5/7 | Trafalgar Depot |
| Drake | 44,500 | 2,800 | 4/0 | 35 | 23 | 6/8 | New Tokyo, Kyushu, Honshu |
| Hawk | 63,200 | 3,300 | 4/0 | 45 | 26 | 7/9 | Kyoto Base, Kyushu, Honshu |
| Banshee | 127,000 | 4,500 | 4/0 | 45 | 33 | 8/10 | Rheinland Planets |
Heavy Fighter
Though heavy fighters can hold more weapons, that doesn't mean they're any easier to play. The problem with heavy fighters is that while you'll inflict more damage, you'll also sustain more damage. Since you're less maneuverable, enemies will hit you far more frequently, and if you come to points in the story where you must flee or escape, you will be at a disadvantage. However, since you can inflict more damage faster, the heavy fighter allows you to kill enemies more quickly. If you can learn to use the heavy fighter efficiently, you can sustain less damage by killing enemies before they can get to you. Also, you get more armor for the price with heavy fighters.
Key:
Name: The name of the ship.
Price: The base price of the ship. This can vary depending on your faction alignments.
Armor: The amount of armor the ship has. Keep in mind that armor is separate from shields. Shields can be upgraded (see Shields), but your hull armor is set. It's important to get the best ship you can so your armor is at its maximum.
G/T: The number of gun and missile/turret hard points.
Max N/S: The maximum number of loadable nanobots/shield batteries.
OC/MC: The optimal weapon class/maximum weapon class.
Location: The location where the ship can be purchased. When a designation like "Liberty Planets" is given, it is available at all planets that sell regular ships in Liberty. For example, the Liberty Planets are Manhattan, Los Angeles, California Minor, Denver, and Houston.
| Name | Price | Armor | G/T | Cargo | Max N/S | OC/MC | Location |
| Defender | 10,400 | 1,600 | 5/1 | 30 | 14 | 3/5 | Liberty Battleships |
| Crusader | 31,400 | 2,600 | 6/0 | 35 | 20 | 5/7 | Bretonia Battleships |
| Barracuda | 63,200 | 3,600 | 5/1 | 45 | 26 | 7/9 | Kusari Planets |
| Dragon | 63,200 | 3,600 | 6/0 | 40 | 26 | 7/9 | Kusari Battleships |
| Wolfhound | 63,000 | 3,600 | 5/1 | 40 | 26 | 7/9 | Arranmore Base |
| Anubis | 100,000 | 4,200 | 6/1 | 70 | 29 | 8/10 | Battleship Osiris, Planet Omicron |
| Stiletto | 127,000 | 4,900 | 5/1 | 45 | 33 | 8/10 | Bruchsal Base |
| Valkyrie | 172,000 | 5,800 | 5/1 | 50 | 38 | 9/10 | Battleship Westfalen |
| Falcon | 227,000 | 6,200 | 5/1 | 60 | 43 | 9/10 | Rheinland Planets |
| Centurion | 388,000 | 9,200 | 5/1 | 45 | 55 | 9/10 | Cadiz Base |
| Name | Price | Armor | G/T | Cargo | Max N/S | OC/MC | Location |
| Hammerhead | 298,000 | 7,900 | 6/1 | 70 | 49 | 9/10 | Freistadt Base |
| Sabre | 505,000 | 10,800 | 5/2 | 70 | 63 | 9/10 | Vogtland Base |
| Eagle | 505,000 | 9,900 | 6/1 | 70 | 63 | 9/10 | Freeport 9 |
| Titan | 658,000 | 12,600 | 6/1 | 70 | 71 | 9/10 | Crete |
Freighter
Possibly the most challenging ship to use in the story missions is the freighter. With a freighter, your chief goal will be trade, thanks to the improved cargo storage offered. Rather than taking on freelance missions, you simply traverse the galaxy on trade runs. When in between story missions, if you feel you have the potential to make lots of money from an trade route in your area, it can be worth it to buy a freighter instead of taking on random freelance missions. The freighter is a unique experience. In combat, the freighter still packs a punch, as it allows for more weapons hard points and turrets than a light fighter. But since your maneuverability is low, your effective use of the turret view is crucial to effective defense. Turrets pivot, allowing you to shoot at passing targets without having to turn your ship (which is difficult with freighters). Refer to the Trade Routes section of this guide to find information about the best trade lanes in the single-player game and beyond.
Key:
Name: The name of the ship.
Price: The base price of the ship. This can vary depending on your faction alignments.
Armor: The amount of armor the ship has. Keep in mind that armor is separate from shields. Shields can be upgraded (see Shields), but your hull armor is set. It's important to get the best ship you can so your armor is at its maximum.
G/T: The number of gun and missile/turret hard points.
Max N/S: The maximum number of loadable nanobots/shield batteries.
OC/MC: The optimal weapon class/maximum weapon class.
Location: The location where the ship can be purchased. When a designation like "Liberty Planets" is given, it is available at all planets that sell regular ships in Liberty. For example, the Liberty Planets are Manhattan, Los Angeles, California Minor, Denver, and Houston.
| Name | Price | Armor | G/T | Cargo | Max N/S | OC/MC | Location |
| Rhino | 7,900 | 1,600 | 2/6 | 80 | 12 | 2/3 | Liberty Planets |
| Clydesdale | 18,360 | 2,100 | 2/6 | 125 | 15 | 4/6 | Bretonia Planets |
| Mule | 18,400 | 2,200 | 2/6 | 175 | 15 | 4/6 | Alcatraz Base |
| Dromedary | 53,400 | 3,600 | 2/6 | 275 | 23 | 6/8 | Mactan Base |
| Drone | 53,400 | 3,600 | 2/6 | 175 | 23 | 6/8 | New Tokyo, Junyo |
| Humpback | 152,000 | 5,800 | 2/6 | 250 | 23 | 8/10 | Rheinland Planets |
Trade Routes
Finding a rewarding route that meshes with your unique circumstances (available cargo space, reputation, cash resources, and access to the known universe), which are constantly in flux, is something that tends to be complicated. Just on the dynamic nature of your reputation alone, some routes will emerge as being more profitable, while others that have been profitable in the past may recede. The routes themselves are not changing, but your ever-changing orientation has an impact on what routes are better and the prices of all goods. There are some routes that are intrinsically more profitable than others. Here is a snapshot of good trade runs, assuming you follow the plot and the allegiances as they shift through the single-player game.
New York System (Missions 1 and 2):
1. H fuel from Ft. Bush to all other bases within the system.
2. Pharmaceuticals from Ft. Bush to Pittsburgh and Missouri.
3. Side arms from Detroit to Missouri, West Point, and Manhattan.
4. Boron from Pittsburgh to Manhattan/Trenton/Newark and Norfolk shipyard.
Liberty Systems (Missions 2 though 4):
1. Side arms from Detroit to military and police bases in Texas, California, and Colorado.
2. Engine components from Houston to Los Angeles.
3. Polymers from Los Angeles to Denver, Baltimore, Pueblo, and Norfolk.
4. Silver from Houston to California Minor.
5. Diamonds from Houston to Manhattan.
6. H-fuel from Denver to bases in New York, California, and Texas.
7. H-fuel from Ft. Bush to California and Texas bases.
Liberty to Bretonia (Mission 4)
1. Boron from Manhattan to Stokes (Leeds system).
2. Side arms from Trenton to Leeds planet.
3. Luxury goods from Manhattan to New London.
Bretonia (Missions 4 through 6)
1. Luxury goods from New London to Shetland (Edinburgh).
2. Beryllium from Cardiff (Cambridge) or Kensington (New London) to LD-14 (Leeds).
3. MOX from LD-14 to Norfolk battleship (Cambridge).
4. Gold from Hood (Dublin system) to New London.
5. Optronics from Glasgow to Southampton and Cambridge.
6. Alien organisms from Glasgow to Cambridge Research Station.
7. H-fuel from Glasgow (Leeds) to the rest of Bretonia.
Kusari to Bretonia (Missions 6 and 7)
1. Buy Gold on the Hood in Dublin at the beginning of Mission 6. Sell it in New Tokyo after Mission 7.
In Kusari (Missions 7 and 8)
1. Side arms from New Tokyo to Matsumoto battleship (Hokkaido).
2. Trade lane parts from Roppongi to Chugoku Gate construction site (Hokkaido).
3. Superconductors from Deshima (Shikoku) to Yokohama Shipyard (New Tokyo) or Yukawa Shipyard (Honshu).
4. MOX from Yokohama to Matsumoto battleship or Chugoku Gate construction site.
5. Side arms from Deshima to Nagumo battleship (Kyushu system).
In the Post-Story Game
1. Diamonds from Rheinland to New Tokyo.
2. Diamonds from Omega-11 and Stuttgart to Bretonia.
3. Engine components from Kusari or Rheinland to Freeports throughout the sector.
4. Niobium from Freeport 6 or New Tokyo to The Ring (New Berlin) and Manhattan.
5. Alien organisms from Kurile (Sigma-17) to California Minor, Willard Research Station, Atka Research Station.
6. Luxury consumer goods from Liberty to Hawaii (Sigma-19) and Shetland (Edinburgh) cruise ships.
7. Luxury food from Stuttgart to Hawaii (Sigma-19).
8. Luxury food from Cambridge to Curacao (Cortez system).
9. Trade lane parts from Liberty to Gate construction sites in Hokkaido and Tau-23.
10. Beryllium from Bretonia to Rheinland and Liberty.
11. Optronics from Honshu to other houses.
12. Side arms from Detroit or The Ring to Sapporo and other Kusari police and military bases.
13. Cobalt from Rheinland and Omega-7 to Honshu.
14. Silver from Rheinland to New Tokyo system bases.
15. Gold from Bretonia to other house capitol systems.
16. MOX from Rheinland and Bretonia to Kusari and Liberty.
17. Superconductors from Liberty to Honshu and The Ring.
Weapons Tips
There are more than 400 different pieces of equipment that can be found on the more than 150 different stations, planets, and battleships in the Freelancer universe. Some of these items cannot be purchased anywhere, but rather have been lost somewhere in a nebula or a debris field and therefore must be found. Below are some interesting facts and stats on the weapons that you can acquire from different factions while exploring the Freelancer universe. Also listed are some of the most notable weapons available and where to get them.
Each criminal faction manufactures its own weapons, as do all the major civilizations and some of the companies. The weapons created by the criminals are similar to those manufactured by the major civilizations, but the criminals, in an effort to gain an advantage, often tweak the design to get more range or power--however, these enhancements often come at a price.
When evaluating a weapon, don't just look at the hull damage. That can be misleading. Instead, analyze how much damage is done per second (hull damage/shield damage times refire rate) and how much energy is used. Some weapons may deliver tons of damage but are offset by their slow fire rate, whereas others may not seem to do quite as much damage in one shot, but that damage is compounded when the weapon fires eight times in one second.
Furthermore, some weapons may be good against shields, while others may be better against a ship's hull. Try to stagger your weapons so that you have some that will heavily damage shields, and something that will heavily damage hulls. Once you've taken the shields down, you can disengage the weapons that chiefly damaged the shields by clicking their name in the bottom right corner of the main HUD. This frees up more power for your guns that damage hulls, allowing you the maximum possible energy for your endeavors.
Junkers
The Junkers manufacture photon-based weapons, having amped up the damage output on them. However, the increased damage also means increased power draw. A weapon of note is the Barrager MK III. You can find it on both the Yanagi and Kreuzberg Depots.
| Name | Price | Class | Type | Hull | Shield | Refire | Power | Range |
| Barrager III | 14,300 | 6 | Photon | 79 | 39 | 8.33 | 23 | 600 |
Liberty Rogues
The Liberty Rogues' weapons are based on stolen Liberty technology. They have increased the damage output of their laser weapons, but the weapons now consume more power. The Vassago is a pretty impressive Rogue laser to own, but keep in mind that it can be purchased only on Buffalo Base.
| Name | Price | Class | Type | Hull | Shield | Refire | Power | Range |
| Vassago | 24,790 | 7 | Laser | 83 | 41 | 8.33 | 26 | 700 |
Outcasts
The Outcasts are one of the few criminal factions that produce more than one weapon type. They manufacture both tachyon and particle weapons, with both of these weapons types yielding a "damage bonus." However, to accomplish this extra power, the tachyon sacrifices its refire rate, while the particle looses some of its range. The Wyrm I and the Kraken I are both level-eight weapons, and both can be found on Ruiz Base or Planet Malta.
| Name | Price | Class | Type | Hull | Shield | Refire | Power | Range |
| Kraken I | 54,810 | 8 | Particle | 381 | 190 | 4 | 79 | 700 |
| Wyrm I | 54,810 | 8 | Tachyon | 424 | 212 | 3 | 106 | 700 |
Bounty Hunters
The Bounty Hunters have tweaked their weapon technology to provide improved range. Bounty Hunter lasers and particle weapons offer some of the longest ranges of their class. To achieve this "range bonus," their lasers consume more energy and their particle weapons loose some of their destructive punch. Take a look at the Gunslinger MK II and the Brave MK II--both are level-four weapons and can be found on the Sheffield and Deshima Stations.
| Name | Price | Class | Type | Hull | Shield | Refire | Power | Range |
| Brave II | 3,700 | 4 | Particle | 75 | 37 | 4 | 23 | 650 |
| Gunslinger II | 3,700 | 4 | Laser | 20 | 10 | 8.33 | 7 | 650 |
Experimental Weapons
These weapons are all level 10 and can be identified by their "CODENAME" designation. CODENAME: ONYX, for example, is in the Sigma 13 system.
| Name | Price | Class | Type | Hull | Shield | Refire | Power | Range |
| CODENAME: ONYX | n/a | 10 | Special | 1,076 | 539 | 2 | 269 | n/a |
How about secret weapons?
While there's no doubt that the bulk of the really good surprises are out in the border- and edge-world systems, there's also no doubt that those are the most dangerous places to explore. If you venture out that far in search of good weapons to grab, you need to be well prepared, and you may want to consider getting on the good side of any factions that might be influential in those areas. For example, high-level equipment hunting can be very lucrative in Omega-11, Omega-5, Sigma-13, and Omicron Gamma. However, it's best to be on good terms with at least one of the two dominant criminal factions (the Corsairs and the Red Hessians) in these areas--preferably the Corsairs. Also, considering that most of the secret ships that are out there belong to criminals, Bounty Hunters, or the military, keep in mind that those factions are the most likely to have salable information about them that can be purchased in bars. Of course, you'll get that information only if you are friendly enough with them.
A lot of good information can be bought. Here are some examples of purchased information leading to some spiffy weapons:
"There is one weapon that's not for sale in any port that I know of. You can plunder its ammunition as loot from your enemies and even buy the ammo (for a lot of money) on certain stations, but the launcher itself remains elusive--that is, of course, unless you want to do a little exploring. If you venture out into Omega 11, you're likely to find a derelict Bounty Hunter very heavy fighter, one of a series of derelicts throughout the universe. If you take the trouble to loot this wreck, voilà, you'll have a new killer weapon in your arsenal."
"Some people may know about this, but many lack the skill to pull it off: If you engage Nomad fighters, and if you're careful and have the shield and armor fortitude to take a beating, you can actually add their weapons to your own ship. It's best not to use missiles for this operation, so you'll have to do it the 'old-fashioned way.' It's obviously a very risky proposition at best, particularly if there are a bunch of Nomads in a cluster (being therefore harder to isolate in a fight). However, keep in mind that no matter how daunting the task, if you are successful you'll be rewarded with a very, very cool new weapon that consumes next to no energy."
Weapons Listing
Simply put, there is an extraordinary number of weapons to choose from in Freelancer. The types of weapons that will be available for you to buy will depend largely on where you visit, as each faction and race has its own specific types of weapons. Many weapons can be found only by salvaging weapons from destroyed ships--meaning that you may need to be the one who destroys said ship to get the weapon. But most normal weapons will be available at the different races' bases and planets. If you come across a weapon you'd like, head to the planet or base you most like of that race, and chances are good you'll find the weapon you're looking for. But because there are so many guns, and because they can come from almost anywhere, what follows is a list of the most common guns found in Freelancer.
Guns
Key:
Name: The name of the weapon.
Price: The base price of the weapon. This can vary depending on your faction alignments.
Class: The class of the weapon from 1-10. This number corresponds to the maximum and optimal weapon class noted on ships.
From: The faction or nation from which the item can be acquired. Most planets and bases of that organization will have the weapon for sale.
Type: The type of damage the weapon inflicts. Certain types of shields protect better against certain types of guns. See the Shields section of the Other Equipment portion of the guide for more information.
Hull: The amount of damage inflicted in one shot against the target's hull.
Shield: The amount of damage inflicted in one shot against the target's shields.
Refire: The number of times the gun fires in one second.
Power: The amount of power consumed in one shot.
Range: The maximum distance that the gun can reach, in meters.
| Name | Price | Class | From | Type | Hull | Shield | Refire | Power | Range |
| Barrager I | 860 | 2 | Junkers | Photon | 30 | 15 | 8.33 | 9 | 600 |
| Barrager II | 3,700 | 4 | Junkers | Photon | 47 | 23 | 8.33 | 14 | 600 |
| Barrager III | 14,300 | 6 | Junkers | Photon | 79 | 39 | 8.33 | 23 | 600 |
| Brave I | 860 | 2 | Bounty Hunters | Particle | 49 | 24 | 4 | 15 | 650 |
| Brave II | 3,700 | 4 | Bounty Hunters | Particle | 75 | 37 | 4 | 23 | 650 |
| Death's Hand I | 70 | 5 | Order | Laser | 40 | 20 | 8.33 | 12 | 750 |
| Death's Hand II | 140 | 6 | Order | Laser | 52 | 26 | 8.33 | 16 | 750 |
| Death's Hand III | 250 | 7 | Order | Laser | 69 | 34 | 8.33 | 21 | 750 |
| Disinfector I | 24,800 | 7 | Kusari | Neutron | 174 | 87 | 4 | 34 | 550 |
| Disinfector II | 54,800 | 8 | Kusari | Neutron | 265 | 132 | 4 | 53 | 550 |
| Dissolver | 14,300 | 6 | Bretonia | Tachyon | 131 | 65 | 4 | 39 | 700 |
| Dissolver (Adv.) | 24,790 | 7 | Bretonia | Tachyon | 174 | 87 | 4 | 52 | 700 |
| Drail | 1,830 | 3 | Liberty Rogues | Laser | 29 | 14 | 8.33 | 9 | 600 |
| Firekiss I | 54,800 | 8 | Rheinland | Plasma | 636 | 132 | 2 | 132 | 600 |
| Firekiss II | 120,500 | 9 | Rheinland | Plasma | 978 | 203 | 2 | 203 | 600 |
| Flamecurse I | 13,000 | 6 | Rheinland | Plasma | 316 | 65 | 2 | 65 | 600 |
| Flamecurse II | 25,200 | 7 | Rheinland | Plasma | 418 | 87 | 2 | 87 | 600 |
| Gendaito | 54,800 | 8 | Blood Dragon | Laser | 106 | 53 | 8.33 | 33 | 600 |
| Gunslinger I | 860 | 2 | Bounty Hunters | Laser | 20 | 10 | 8.33 | 7 | 650 |
| Gunslinger II | 3,700 | 4 | Bounty Hunters | Laser | 31 | 15 | 8.33 | 11 | 650 |
More Guns
Key:
Name: The name of the weapon.
Price: The base price of the weapon. This can vary depending on your faction alignments.
Class: The class of the weapon from 1-10. This number corresponds to the maximum and optimal weapon class noted on ships.
From: The faction or nation from which the item can be acquired. Most planets and bases of that organization will have the weapon for sale.
Type: The type of damage the weapon inflicts. Certain types of shields protect better against certain types of guns. See the Shields section of the Other Equipment portion of the guide for more information.
Hull: The amount of damage inflicted in one shot against the target's hull.
Shield: The amount of damage inflicted in one shot against the target's shields.
Refire: The number of times the gun fires in one second.
Power: The amount of power consumed in one shot.
Range: The maximum distance that the gun can reach, in meters.
| Name | Price | Class | From | Type | Hull | Shield | Refire | Power | Range |
| Hornviper I | 54,800 | 8 | Rheinland | Tachyon | 141 | 70 | 5.88 | 53 | 700 |
| Hornviper II | 120,500 | 9 | Rheinland | Tachyon | 217 | 108 | 5.88 | 81 | 700 |
| Justice I | 500 | 1 | Liberty | Laser | 16 | 8 | 8.33 | 5 | 600 |
| Justice II | 860 | 2 | Liberty | Laser | 20 | 10 | 8.33 | 6 | 600 |
| Justice III | 1,830 | 3 | Liberty | Laser | 24 | 12 | 8.33 | 7 | 600 |
| Katana | 24,790 | 7 | Blood Dragon | Laser | 69 | 34 | 8.33 | 21 | 600 |
| Kraken I | 54,810 | 8 | Outcast | Particle | 381 | 190 | 4 | 79 | 700 |
| Kraken II | 120,480 | 9 | Outcast | Particle | 586 | 293 | 4 | 122 | 700 |
| Lavablade I | 500 | 1 | Liberty | Plasma | 97 | 48 | 2 | 20 | 600 |
| Lavablade II | 860 | 2 | Liberty | Plasma | 122 | 61 | 2 | 25 | 600 |
| Lavablade III | 1,830 | 3 | Liberty | Plasma | 149 | 74 | 2 | 31 | 600 |
| Magma Hammer I | 3,710 | 4 | Liberty | Plasma | 189 | 94 | 2 | 52 | 600 |
| Magma Hammer II | 7,460 | 5 | Liberty | Plasma | 242 | 121 | 2 | 69 | 600 |
| Magma Hammer III | 14,300 | 6 | Liberty | Plasma | 316 | 158 | 2 | 106 | 600 |
| Matterthief | 1,830 | 3 | n/a | Tachyon | 49 | 24 | 4 | 14 | 700 |
| Pyros I | 3,710 | 4 | Outcast | Particle | 113 | 56 | 4 | 23 | 600 |
| Pyros II | 7,460 | 5 | Outcast | Particle | 145 | 72 | 4 | 30 | 600 |
| Pyros III | 14,000 | 6 | Outcast | Particle | 189 | 94 | 4 | 39 | 600 |
| Rapier | 24,790 | 7 | n/a | Pulse | 17 | 522 | 4 | 41 | 600 |
| Ripper | 3,700 | 4 | Bretonia | Tachyon | 79 | 39 | 4 | 23 | 700 |
| Ripper (Adv.) | 7,460 | 5 | Bretonia | Tachyon | 101 | 50 | 4 | 30 | 700 |
| Salamanca I | 54,800 | 8 | n/a | Neutron | 318 | 159 | 4 | 63 | 600 |
| Skyrail | 3,710 | 4 | Bretonia | Particle | 94 | 47 | 4 | 23 | 600 |
| Stunpulse | 770 | 2 | Liberty | Pulse | 4 | 153 | 4 | 9 | 600 |
| Stunpulse (Adv.) | 1,650 | 3 | Liberty | Pulse | 5 | 186 | 4 | 11 | 600 |
| Sunfrenzy I | 24,790 | 7 | Kusari | Photon | 87 | 43 | 8.33 | 26 | 600 |
| Sunfrenzy II | 54,810 | 8 | Kusari | Photon | 132 | 66 | 8.33 | 39 | 600 |
| Sunfury I | 7,460 | 5 | Kusari | Photon | 50 | 25 | 8.33 | 15 | 600 |
| Sunfury II | 14,300 | 6 | Kusari | Photon | 65 | 32 | 8.33 | 19 | 600 |
| Vassago | 24,790 | 7 | Liberty Rogues | Laser | 83 | 41 | 8.33 | 26 | 700 |
| Vengeance I | 3,710 | 4 | Liberty | Laser | 31 | 15 | 8.33 | 9 | 600 |
| Vengeance II | 7,460 | 5 | Liberty | Laser | 40 | 20 | 8.33 | 12 | 600 |
| Vengeance III | 14,300 | 6 | Liberty | Laser | 52 | 26 | 8.33 | 16 | 600 |
| Wakizashi | 14,300 | 6 | Blood Dragons | Laser | 52 | 26 | 8.33 | 16 | 600 |
| Wyrm I | 54,810 | 8 | Outcasts | Tachyon | 424 | 212 | 3 | 106 | 700 |
Turrets
If you're using a heavy fighter or a freighter, you're going to want turrets. Below is a partial list of the most common turrets available in freelancer, including information on who manufactures them, so you can find them more easily.
Key:
Name: The name of the weapon.
Price: The base price of the weapon. This can vary depending on your faction alignments.
Class: The class of the weapon from 1-10. This number corresponds to the maximum and optimal weapon class noted on ships.
From: The faction or nation from which the item can be acquired. Most planets and bases of that organization will have the weapon for sale.
Type: The type of damage the weapon inflicts. Certain types of shields protect better against certain types of guns. See the Shields section of the Other Equipment portion of the guide for more information.
Hull: The amount of damage inflicted in one shot against the target's hull.
Shield: The amount of damage inflicted in one shot against the target's shields.
Refire: The number of times the gun fires in one second.
Power: The amount of power consumed in one shot.
Range: The maximum distance that the gun can reach, in meters.
| Name | Price | Class | From | Type | Hull | Shield | Refire | Power | Range |
| Brave | 3,700 | 4 | Bounty Hunters | Particle | 75 | 37 | 4 | 23 | 750 |
| Disinfector | 24,790 | 7 | Kusari | Neutron | 174 | 87 | 4 | 34 | 650 |
| Dissolver | 14,300 | 6 | Bretonia | Tachyon | 131 | 65 | 4 | 39 | 800 |
| Dragoon I | 3,710 | 4 | Outcasts | Tachyon | 94 | 47 | 4 | 23 | 800 |
| Dragoon II | 14,300 | 6 | Outcasts | Tachyon | 158 | 79 | 4 | 39 | 800 |
| Flamecurse I | 14,300 | 6 | Rheinland | Plasma | 316 | 158 | 2 | 65 | 700 |
| Flamecurse II | 24,790 | 7 | Rheinland | Plasma | 418 | 209 | 2 | 87 | 700 |
| Gunslinger I | 860 | 2 | Bounty Hunters | Laser | 20 | 10 | 8.33 | 7 | 750 |
| Gunslinger II | 3,700 | 4 | Bounty Hunters | Laser | 31 | 15 | 8.33 | 11 | 750 |
| Hornviper | 54,800 | 8 | Rheinland | Tachyon | 141 | 70 | 5.88 | 53 | 800 |
| Justice I | 500 | 1 | Liberty | Laser | 16 | 8 | 8.33 | 5 | 700 |
| Justice II | 860 | 2 | Liberty | Laser | 24 | 12 | 8.33 | 6 | 700 |
| Katana | 24,790 | 7 | Blood Dragons | Laser | 106 | 53 | 8.33 | 33 | 700 |
| Kraken | 54,810 | 8 | Outcast | Particle | 381 | 190 | 4 | 79 | 700 |
| Lavablade I | 500 | 1 | Liberty | Plasma | 97 | 48 | 2 | 20 | 700 |
| Lavablade II | 1,830 | 3 | Liberty | Plasma | 149 | 74 | 2 | 31 | 700 |
| Magma Hammer | 7,460 | 5 | Liberty | Plasma | 242 | 121 | 2 | 50 | 700 |
| Pyros I | 3,710 | 4 | Outcast | Particle | 113 | 56 | 4 | 23 | 700 |
| Pyros III | 14,300 | 6 | Outcast | Particle | 189 | 94 | 4 | 39 | 700 |
| Skyrail | 3,710 | 4 | Bretonia | Particle | 94 | 47 | 4 | 23 | 700 |
| Stunpulse | 770 | 2 | Liberty | Pulse | 4 | 153 | 4 | 9 | 700 |
| Sunfrenzy | 24,790 | 7 | Kusari | Photon | 87 | 43 | 8.33 | 26 | 700 |
| Sunfury I | 7,460 | 5 | Kusari | Photon | 50 | 25 | 8.33 | 15 | 700 |
| Sunfury II | 14,300 | 6 | Kusari | Photon | 65 | 32 | 8.33 | 19 | 700 |
| Vengeance | 7,460 | 5 | Liberty | Laser | 40 | 20 | 8.33 | 12 | 700 |
| Wyrm | 54,810 | 8 | Outcasts | Tachyon | 424 | 212 | 3 | 106 | 800 |
| Zaphiel | 500 | 1 | Liberty Rogues | Laser | 29 | 9 | 8.33 | 6 | 700 |
Missiles
Missiles of all kinds are expensive, but they pack a punch. Since missiles and regular guns take up the same hard points, some players choose to add more guns rather than have missile launchers. But if you're having a hard time, and you don't mind the cost of the ammunition, missiles are a quick way to gain an upper hand. Furthermore, with heavy fighters you can use torpedoes, which will allow you to attack and "sink" battleships. Use the chart below to determine the cost of your available options.
Key:
Name: The name of the weapon.
Price: The base price of the weapon. This can vary depending on your faction alignments.
Class: The class of the weapon from 1-10. This number corresponds to the maximum and optimal weapon class noted on ships.
From: The faction or nation from which the item can be acquired. Most planets and bases of that organization will have the weapon for sale.
Type: The type of damage the weapon inflicts. Certain types of shields protect better against certain types of guns. See the Shields section of the Other Equipment portion of the guide for more information.
Hull: The amount of damage inflicted in one shot against the target's hull.
Shield: The amount of damage inflicted in one shot against the target's shields.
Refire: The number of times the gun fires in one second.
Power: The amount of power consumed in one shot.
Range: The maximum distance that the gun can reach, in meters.
| Name | Launcher | Ammo | Class | Type | Hull | Shield | Range |
| Javelin | 500 | 25 | 1 | Basic | 489 | 244 | 1,000 |
| Slingshot | 1,830 | 92 | 3 | Basic | 747 | 373 | 1,000 |
| Catapult | 7,460 | 373 | 5 | Basic | 1,212 | 606 | 1,000 |
| Lancer | 24,790 | 1,240 | 7 | Basic | 2,091 | 1,045 | 1,000 |
| Cannonball | 120,480 | 6,024 | 9 | Basic | 4,890 | 2,445 | 1,000 |
| Stalker | 650 | 33 | 1 | Homing | 244 | 122 | 1,000 |
| Windstalker | 2,380 | 119 | 3 | Homing | 373 | 186 | 1,000 |
| Moonstalker | 9,700 | 485 | 5 | Homing | 606 | 303 | 1,000 |
| Sunstalker | 32,230 | 1,612 | 7 | Homing | 1,045 | 522 | 1,000 |
| Eraser | 500 | 25 | 1 | EMP | 16 | 652 | 1,000 |
| Sweeper | 3,710 | 186 | 4 | EMP | 31 | 1,264 | 1,000 |
| Neutralizer | 24,790 | 1,240 | 7 | EMP | 69 | 2,788 | 1,000 |
| Paralyzer | 144,580 | 7,229 | 10 | EMP | 195 | 7,824 | 1,000 |
| Wasp | 1,830 | 92 | 3 | Cruise Disruptor | 37 | 18 | 2,500 |
| Hornet | 54,810 | 2,741 | 7 | Cruise Disruptor | 159 | 79 | 3,000 |
| Starkiller | 7,460 | 373 | 5 | Torpedo | 2,424 | 1,212 | 1,500 |
Other Equipment
Thrusters
There are several different levels of thrusters in Freelancer. The key difference in their respective abilities is the amount of "burn time" they produce. Each new level requires less energy and thus provides additional thrust for longer periods of time. There is no restriction on which thrusters can be mounted on which ship, so ideally, you should purchase the most expensive one you can find.
Shields
Getting the best shield is all about what you can afford. The highest class of whatever shield you have is as good as gold. However, once you get out there (and up there), a little strategy is in order.
Depending on your reputation at any given time (and it will change), as well as your objectives, the individual factions you'll have to fight will obviously vary. So if your reputation is bad with a specific group, particularly in an area you know they populate, you'd be wise to get the kind of shields that work best against their weapons. This works well if you plan to make multiple cargo runs through their particular part of space, repeatedly plunder certain ships or containers, or actually go hunting for that particular faction. You can actually keep different shield generators on hand so that, depending on where you are in the universe, if you encounter something unexpected that you recognize, all you have to do is pull into the nearest port that will allow you to land, switch out the shields, and go back out. The same strategy can also be applied to weapons, of course, and both support the idea of having a large rotating arsenal that you change at will.
You can learn what shields and weapons a particular faction uses by picking up rumors at the bar, or by simply scanning enemy ships. But here are a few starters:
Xenos
The Xenos use molecular shields, which provide a strong resistance against plasma and particle weapons. Switching to a tachyon or neutron weapon will make combat a bit easier. Xenos also use particle weapons, so a molecular shield would be a benefit to you as well.
Outcasts
The Outcasts are equipped with positron shields. These shields have an advantage against tachyon or neutron weapons. Laser, neutron, or pulse weapons are your best bet. Positron shields are also your best protection against Outcasts.
Lane Hackers
The Lane Hackers are protected by graviton shields. Laser, neutron, and pulse weapons are at a disadvantage against them, but plasma or particle weapons should give you the edge you need. Also, since Lane Hackers are packing tachyon weapons, positron shields are the way you should go.
In general, each type of shield available defends best against certain types of weapons. Here is the breakdown:
| Shield Type | Is Effective Against: Weapon Type |
| Graviton | Laser, Photon, Pulse |
| Molecular | Plasma, Particle |
| Positron | Tachyon, Neutron |
Got a news tip or want to contact us directly? Email news@gamespot.com
Join the conversation