Xenoblade Chronicles Walkthrough
Our Xenoblade Chronicles guide features a comprehensive walkthrough and additional info on the endless amount of optional content in the game.

Xenoblade is a huge game with a plethora of side-quests and optional content. Our guide will help you through the main story, as well as provide a wealth of information relating to side quests, skills, collectibles, and more!
*I managed to wipe out the first page of the guide when adding new content, so updates will be listed from this point onwards!
Updates:
- May 8, 2012: We have cataloged nearly every quest in the game! Nearly...
- May 2, 2012: Added "Rebuilding Colony 6" to the primers section.
Walkthrough: Prologue
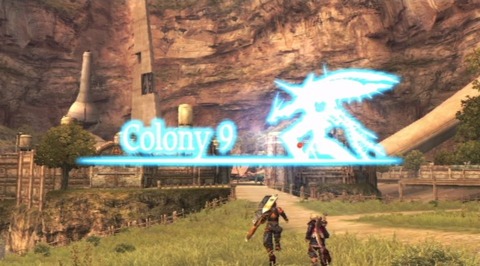
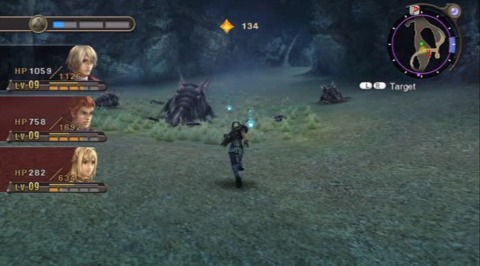
The game starts off during the battle between the Mechons and the Homs in Colony 9. You control Dunban, wielder the Monado, a sword bestowed to the people from Bionis ages ago.
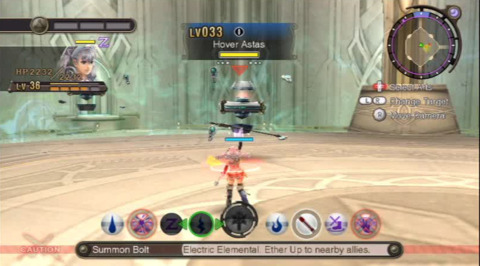
As the Mechon advance on your team, engage them in battle by targeting them with L or R. Once an enemy is targeted, your battle palette will open on the bottom of the screen. This is where you select which skills (Arts) to use during battle. As Dunban, you have three Arts to choose from: Enchant, Attack, and Buster. Quite simply, engage each Mechon as they appear, cast Enchant, and then follow up with the Buster attack.
When you aren’t using a skill, your character will auto attack the enemy every few seconds. Later in the game, landing auto attacks is required to recharge certain abilities known as Talent Arts. You must be within a reasonable range for your weapon in order to attack successfully. The green barrier surrounding the battle will only lift after the fight concludes. Once you’ve defeated a series of M63 and M69 Mechons, a large M82 will drop in front of your team. Follow the same methods to bring him down.
Walkthrough: Mechon Wreckage
The game continues one year after the events in the intro. You take control of a young man named Shulk, busy salvaging wares from the remnants of the prior year’s battle.
You gain control of him during battle and receive backup from Reyn, his good friend and your first team mate. When using your various Arts, there’s a cooldown time that you must endure before reusing an individual Art. Eventually, you can actually level up Arts, decreasing their cooldown time and increasing their effectiveness. Shulk’s Turn Strike is what’s referred to as a Talent Art. These Arts are specific to an individual character. As I mentioned earlier, the Turn Strike icon will refill every time an auto-attack hit connects.
Like the Krabble you just defeated, most enemies drop loot in the form of a chest. There are different grades of chests, differentiated by their appearance. The simpler wooden chests contain common items and materials while more ornate golden chests contain rare and unique items. Next, you’ll get a brief explanation of the Aggro system in the game. Essentially, the more damage a character deals to an individual enemy, the greater the chance is they'll become the target. If a character is targeted due to increased Aggro, a red ring will appear around them.
Continue south, battling enemies and collecting loot while heading towards Colony 9. You won't always have this luxury, but at the moment you can follow the arrow on the top of the screen to reach your next objective. You may notice small, blue orbs littering the landscape. These are known as Collectables and can be picked up by simply walking over them. By collecting one of every type of collectable in an area, you can fill out your Collectopedia to earn rewards in the form of Gems. Gems are accessories for weapons and other equipment that will boost particular stats. Pretty soon, you'll get the ability to craft your own gems.
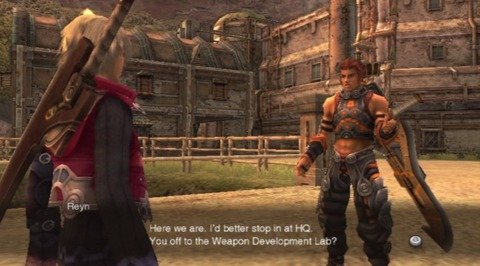
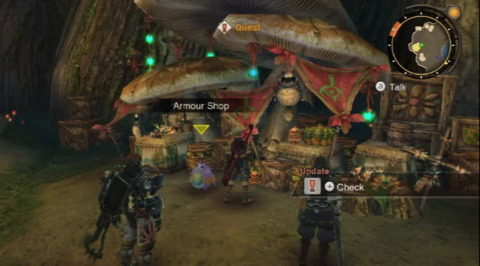
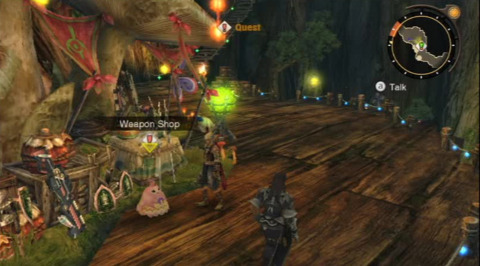
When you reach Colony 9, Reyn will depart for work at the military HQ. Check your inventory and equip any new items that you’ve acquired. Your new goal is to reach the Weapon Development Lab, but first, you should spend some time exploring the Colony. There is a lot to learn about the game here, as well as plenty of side-quests, available right from the start.
If you see a colonist with an exclamation point over their head, that’s your clue that they have a side-quest (or even quests in some cases) to offer. You might also notice that certain colonists have generic names, like "Colonist", while others are given unique names, such as "Rosemary". There are a few reasons that some of these NPCs are differentiated from the rest of the pack:
Trades
NPCs with unique names have items available for trade. You need to offer an item in return that is of equal or greater value. The benefit of this is you can find certain hard to locate collectables, which makes filling out the Collectopedia that much easier. Often, if you over trade by offering the NPC a more valuable item, you can get bonus items in return. The quality of the item is based on the difference and the individual's preset selection of bonus items. Eventually, we'll have a sub-guide featuring the individual NPCs and their trade requirements.
Affinity
Every named NPC plays an important role in the society, local and abroad. Xenoblade weighs heavy on affinity between NPCs, Locations, and your individual team mates. Affinity controls the availability of side-quests primarily, but it also plays an important role in whats known as a "Heart-to-Heart" instances. These are character-development opportunities located throughout the world, noted on the map by an icon representing two hands, held together. These opportunities can only be realized when you meet the proper affinity requirements between the characters involved. For more information on Heart-to-Hearts, check out the sub-guide which contains the locations, requirements, and other info for each Heart-to-Heart in Xenoblade.
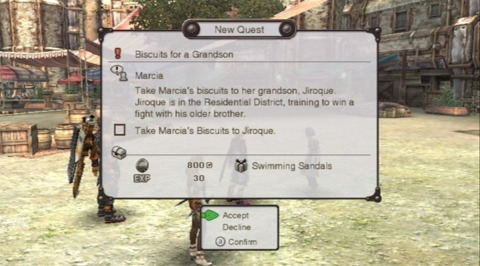
Side-Quests
Xenoblade features 480 side-quests. If completing that many side-quests is daunting to you, you should know it's nothing compared to obtaining them. Quests are offered only if certain conditions are met. The NPC giving the quest must be present, which is determined by the time of day. In some cases they have affinity requirements as well, either between themselves and another NPC, or even between yourself and the particular town. This walkthrough will primarily focus on getting through the story, but our Quest sub-guide will contain info on finding these finicky NPCs, as well as the conditions required to pick up the particular quest.
At this point, Colony 9 is open for exploration. The only limiting factor is your current level; can't explore that mountain if you can't defeat the enemies on it. Feel free to try though, because dying results in your team respawning to the last major landmark you passed. Not a bad deal. Just don't expect to traipse around, picking up collectables ahead of time. If an enemy is pursuing your team, you won't be able to pick acquire them on the run.
When you've settled the itch to explore, head for the Military district, North from the commercial district. Simply follow the nav-arrow at the top of the screen. Once you arrive, you're treated to a another healthy dose of story.
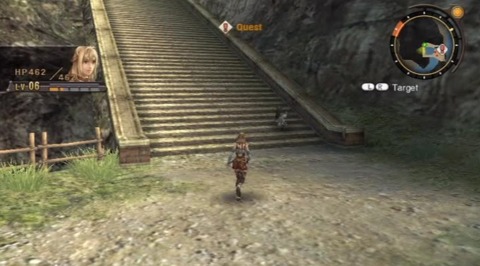
Walkthrough: Colony 9
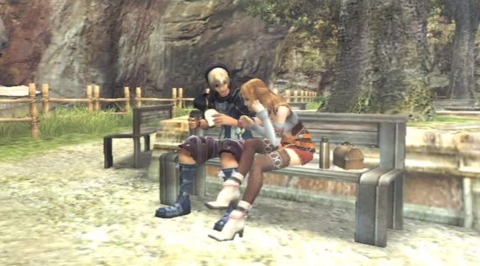
When the cutscene concludes, you are left in control of Fiora, Dunban’s sister. At his suggestion, you have to find Shulk. Head towards the Residential District (west from the Military Dist.) and follow your goal marker to the area known as Outlook Park. When you arrive, you'll learn a little more about Fiora, Shulk, and Dunban.
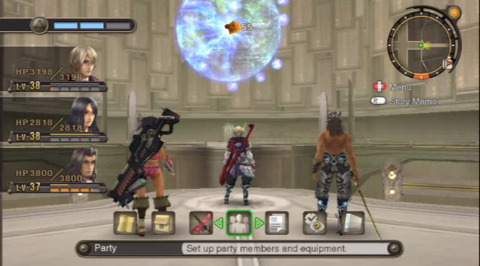
With that complete, head back to the Weapons Development Lab. After your arrival, you'll eventually regain control of Reyn and Shulk. You’ll also get the chance to level up your Arts at this point. You should take the time to examine your Skill Trees at the moment as well. Skills boost certain stats or abilities and can be shared between characters, though sharing does have its limitations.
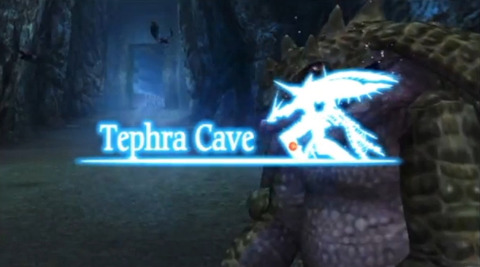
Tephra Hill / Tephra Cave
Your next goal is Tephra Hill. To get there, you need to take the alternate path back at the fork near the entrance of Colony 9. On your way, you’ll reach a point where the path bends northwest. There is a hill on the northern wall. Explore the hill a bit and you’ll see your first Unique Monster UM, Evil Rhangot. I advise that you avoid encountering the Rhangot for now, as it’s likely you’ll lose and respawn at the entrance to Colony 9. For more info on Unique Monsters, take a look at our handy sub-guide.
Continue down the path. Once you reach the Tephra Cave Entrance, Fiora will rejoin your party. Head into the cave, advancing towards the Ether reserves that lie in wait. As you make your way through the cave you’ll come across a pit (The Caterpile Nest) with three Eater Caterpile nearby. Approach with caution, as a large Cellar Bugworm will pop out of the center of the pit. Avoid it for now as best you can. It will likely be too strong for your team at the moment.
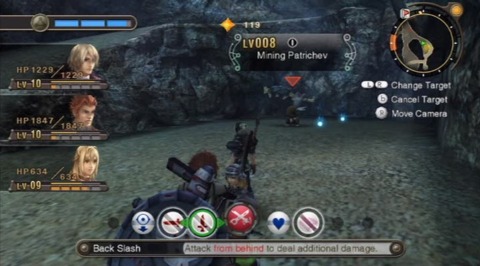
Outside the room are a few Singing Brogs. Don’t let their size fool you, they’re manageable. There’s a path that wraps around to the southeast, but it’s essentially just a shortcut to an earlier part of the cave. There is a UM waiting for you that should be easy to defeat with your team, so keep an eye out for the Mining Patrichev next to the ramp.
You should be close to the goal at this point. Head towards the flag on your map and you’ll enter the Mag Mell Ruins.
Mag Mell Ruins
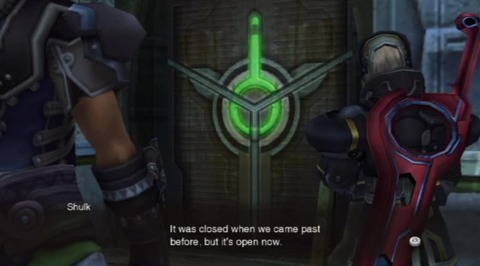
After the cutscene, the game suggests that you travel to town to reequip your party, but it’s merely a suggestion. My suggestion is to carry on! Explore this floor of the ruins for a moment and you’ll see an inaccessible room along the northern wall. That’s all there’s to see for now. Head up the ramp and take a right when you reach the top. If you take a left, you’ll notice a flashing red beacon, but there’s nothing you can do to it or with it at this point.
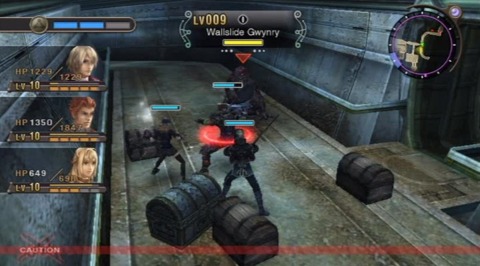
Head through the green doors and you’ll encounter a group of Mell Lizards. If you stick around to fight them, a Unique Monster (Wallslide Gwynry) will appear from the south to join the fray. He presents a bit of a challenge, but it's certainly possible to defeat him. If you attempt to beat him and die, you’ll be sent back to the ruins, so it’s not terribly risky to give it a shot.
Walkthrough: Cylindar Hangar
Continue north and you’ll reach the rear entrance of the cave/ruins. Once you exit, you’ll be just outside the Cylinder Hangar. Enter the hangar to trigger a cutscene. Afterwards, you’ll be confronted by two Ancient Machines. They're relatively minor bosses. Employ the usual tactics to take them out.

When you regain control, you’ll have to head back to the Colony as quickly as possible. What better way to do that than to jump off a cliff. Seriously, just leap off and you’ll land safely in the water. From there, head to shore and return to the Colony. As you approach on land, you’ll get to see a cheerful cut-scene featuring the Mechon devouring colonists. Splendid!
Colony 9
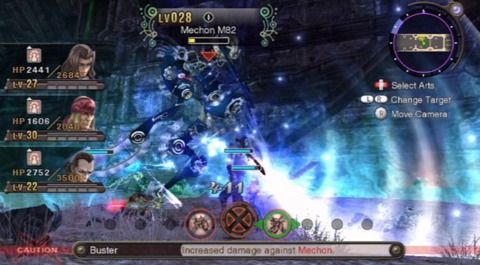
Engage the Mechon in battle, but heed this warning. You must inflict break and topple, before you can inflict damage beyond a single hit point. To accomplish this, use Shulk’s Turn Strike, and keep your fingers crossed that Reyn follows up with Wild Down shortly after. It helps to use Turn Strike right after you see Reyn use an Art, so his following action will (hopefully) be Wild Down before the Break debuff times out.
When you’ve defeated the M63 Mechon, run through the town engaging and avoiding the other Mechon as you see fit. Some of them will try to attack you, but if you’re swift enough, you can make it to the goal without having to face any Mechon. One good path to take would be the balcony, as there are less Mechon likely to attack you. When you get to the Military District, your path to the Monado has been cut off. The only way to reach the lab is through a secret path, located past the Residential District. Head that way.
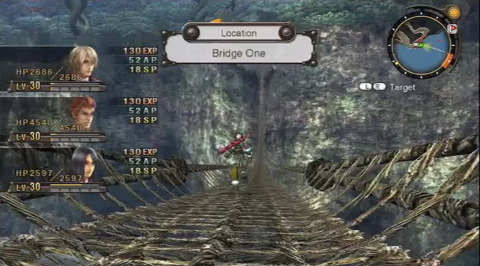
You’ll face off against a couple M31 and M51. Make sure to command your party to focus on one target (using Rz + UP). After the fight, “you know who” arrives with “you know what”, to save Reyn. Work your way back through the Commercial District. When you get to the entrance bridge, Shulk will take up the Monado, and experience its secondary effects. When you gain control of him, auto-attack enough to charge your Monado Art, and use enchant to give your other party members the ability to damage Mechon with their common weapons. Follow up with the Buster Art as well, to deal massive damage.
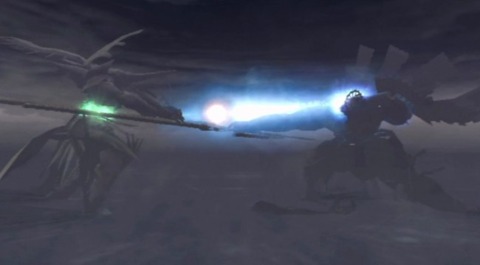
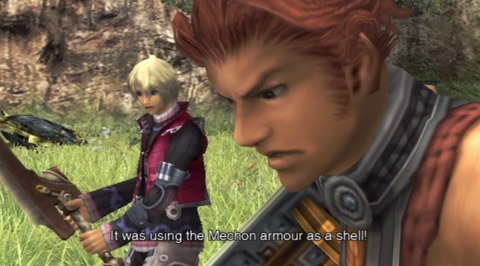
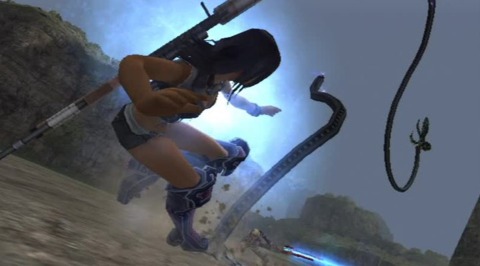
Make your way to the other side of the bridge and run along the shore towards your goal. Take the eventual left turn into the Residential District. As you battle the large Mechon, “Metal Face”, it’ll become clear right away that the Monado is incapable of damaging your enemy. Right about then, Fiora comes roaring onto the scene. The rest, you’ll have to see for yourself.
Let’s teach Metal Face a lesson!
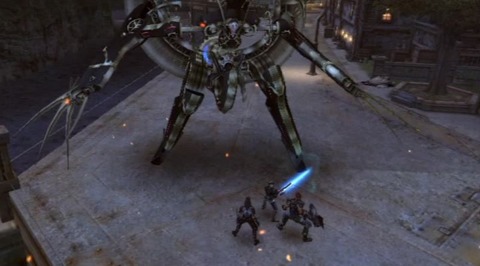
Your crew will start with a full party gauge. As the mini-tutorial instructed, initiate a Chain Attack at the start of the battle. As Shulk, choose Stream Edge to inflict Break from the front of Metal Face. If you don’t have that Art yet, run to the back of Metal Face and use Turn Strike. Follow that up with Reyn’s Wild Down to inflict Topple. Finally, use Dunban’s Blossom Dance to deliver a combo attack. After each hit Dunban lands, get ready to hit the B button to continue the combo. Let Shulk land a few auto-attack blows after Dunban runs out of steam. You only have to deplete half of Metal Face’s health until he departs, leaving Colony 9 in partial ruin.
Your ultimate goal from now on is to hunt Metal Face down. He is your nemesis. You’ll start your search by heading to Colony 6 on the Bionis’ Knee, by way of Tephra Hill/Cave.
Walkthrough: Tephra Cavern
You need to make your way through Tephra Hill/Cave to reach the Mag Mell Ruins, and then continue through a new section of the cave to get to the Bionis’ knee. The enemies up to the cave are not worth the time it takes to fight them. The Wood Bunnits, Prom Skeeters, and Caterpiles only net you 1-5 EXP. You can take on the UM, Evil Rhangot, located at the bend in the hill, which you were likely too under-leveled to defeat earlier. The Monado and your increased levels give you the advantage this time around. There’s not much else to consider before entering the cave, so let’s do that.
When you reach the ruins, head through the recently opened door to enter the Escape Pod Bay. Take note of the ether lamp nearby; they’ll guide you through the cave on your way to the Bionis’ Knee. Just past the Escape Pod Bay is the Tephra Cavern. Along the outer path is a Ice Ether Deposit, which you can mine for Crystals. Drop into the cavern and if you wish, battle some of the Desert Krabble, then take on the Noble Brog along the eastern wall. Follow the ether lamps towards the southern exit. You’ll come across a few Worker Arachno as your approach the next goal marker.
After defeating the Arachno, Reyn and Shulk will return the dead colonists nearby to the Bionis as a form of burial rite. Once you regain control of the duo, you’ll be in combat against roughly eight Worker Arachno and a Director Arachno. It’s not a difficult battle, but rather, a taste of things to come. Head west from there and you’ll come across an Arachno pit. Rather quickly, Reyn will get ambushed with webbing and hauled up into the ceiling and you'll have to come to his rescue. Head for the southern exit.


You’ll enter Vilia Lake. Your goal is the pillar covered in vines just south from your position. (There is another quest related item to the north, the Lost Pendant.) There are some new enemies that you can take on, but avoid the Gluttenous Eugen for now; Shulk can’t defeat him solo. Before climbing up the vine, check out the waterfalls to the south. One of them veils a Water Ether Deposit ripe for mining. After that, climb up the vines and head northwest towards the exit. After a cut-scene, you’ll be thrust in to battle with the Arachno Queen.
The Monado & Visions of the Future
Thankfully, the Monado can provide visions of the possible future during battle, and tip you off to incoming attacks. Take note of the Vision Tag at the top of the screen during battle. It shows you the incoming attack, the intended target, and the result if you are unable to thwart the attack. You’ll also see a gauge reflecting the amount of time before the enemy will unleash their attack, so react/plan accordingly. Part of this planning includes “warning” your teammate(s) by standing nearby and pressing B.
Individual font colors reflect different types of incoming attacks: White > Talent Arts, Red > Physical Arts, Blue > Ether Arts
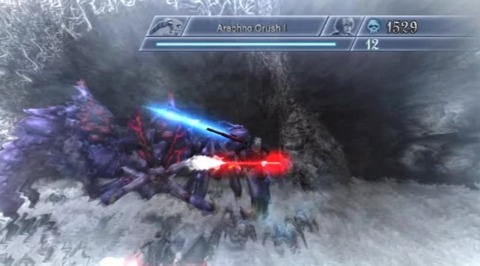
In order to block a Talent Art, the Shield Art is required. You also need to have a full segment of the PG charged at the time of the attack. The Shield Art must also be at the same level of the enemy’s Talent Art in order to be effective. For example, Arachno Crush I requires that Shulk’s Shield Art be at least at level 1.
Use Shulk’s Sweep Strike to damage as many Soldier Arachnos as possible. When the Monado is charged, use the Buster attack on the Queen. Remember; keep an eye out for her Talent Art (you’ll get quite a bit of warning) Make sure to heal Shulk or Reyn if their health dips below half, just in case you get overwhelmed.
With the Queen dispatched head northwest. Remove the webs blocking your path by simply pressing A. At the end of the path, you’ll exit the cave and get your first glimpse of the scale and grandeur of the Bionis and Mechonis, the two beings who comprise your "world".
Walkthrough: Bionis Leg
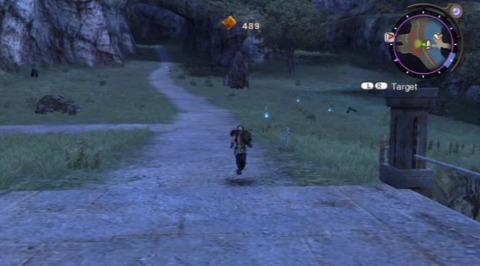
If Colony 9 was large, The Bionis Knee/Leg is enormous. If you want to get right back to the story, head southeast towards the smoking wreck in the distance. If you want to explore the land, you can cover quite a bit of ground. There are some extremely high level monsters throughout the wilderness, even in places where the standard enemy is roughly level 12-14. In most cases, you can avoid combat by staying out of their line of sight and allowing them to pass by.
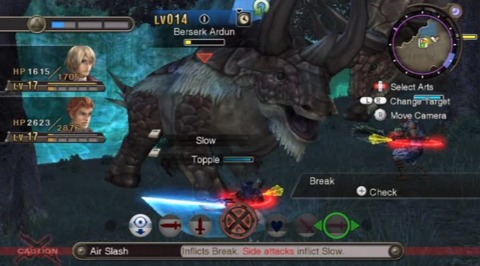
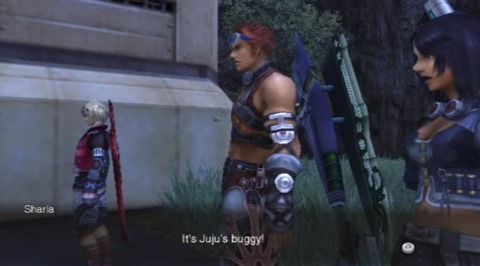
Shulk has a vision when he arrives at the wreck. The boy responsible for the vehicle seems to be in danger, somewhere near a body of water. Take off to the north in search of a water fall and a small lake along the edge of the map. You'll have to face off against two level 14 Berserk Ardun. This fight is simple if you don't make it too hard on yourself. Ignore the Monado's secondary skills. Focus on one Ardun at a time and try to inflict Break. This will allow Reyn to Topple the Ardun so you can beat it into submission.
Once they're done for, you need to escort Juju back to his home, a camp east of your location. To get there, head directly East from the Jabos Rock Rest Area, a landmark that should be on your map at this point. You'll run into some cliff faces adjacent to a group of trees. Follow the bend in the mountains, heading south. From there, the camp will lie just ahead.
Refugee Camp
Head into the camp and talk to the refugees if you are looking for quests, or stock up on new equipment if you've got some cash burning a hole in your pocket, but also know that the Gaur Plain offers plenty of opportunities to pick up special and unique grade items from battle. When you're ready to continue with the story, talk to Sharla to hear about the refugees escape from Colony 6.
Juju has run off again! Your goal is the bridge over Raquel Lake, located east from the camp. Make sure to stock up on new equipment. Sharla has two arts that will come in handy: Shield Bullet (Damage Immunity) and Cure Bullet (Debuff Immunity). Don’t take them for granted. Unless you take control of Sharla or issue direction to the whole team, you’ll have to wait for her to protect Shulk and Reyn.
Raquel Bridge
When you arrive at the bridge, endure the cutscene and consider the available paths before continuing. You can head northeast and use the Windy Cave, but the less lethal route might Raquel Road, located on the same side you approached the bridge from. There are a few Mechon to contend with on the road, but the Windy Cave is littered with level 75-ish enemies that can only be avoided. If you don’t want to risk restarting your trek, it’s advised you take Raquel Road.
The tentacled Mechon that captured Juju is waiting for you at the goal. He’s at level 18, so it’s advised to level up a bit if he’s over your head. A good way to do this is by taking on side quests or exploring the map, both of which can and will keep you busy for hours. Bionis’ Leg is massive.
Once you enter combat, the tactics required to win are fairly straight forward. First off, enchant Sharla and Reyn so they can actually inflict damage. Avoid using the Team Gauge to release a chain attack. Regardless of your efforts to enchant Reyn, or his ability to draw aggro, Shulk will likely be the primary target throughout the fight. It’s best to spend a little longer fighting the boss and reserve your team gauge for Shulk’s revival, should he need it.
This fight lasts two rounds, followed by a third. Use the same tactics for the second round and since the third cannot be “won”, just attack as you please until the game takes control. Once your team decides to pursue the Mechon, head southeast from its location to reach your next destination, Bask Cave. Cross the body of water near the southern end of the map to reach the entrance.
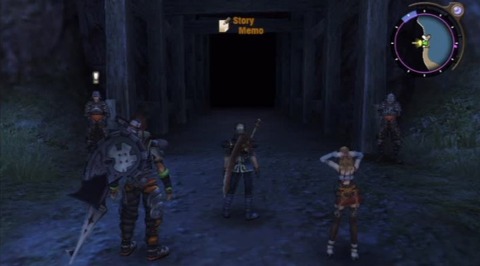
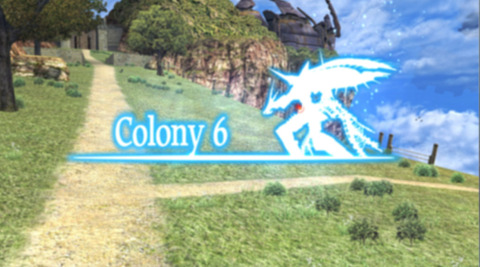
Walkthrough: Colony 6 / Ether Mines
You'll exit the passage near the entrance to Colony 6. Starting from the Watchpoint Junction, your goal is to enter the Ether Mines, via the northwestern path around the bound south from the Junction. You can head for Colony 6 to the south, but the colony is in disarray and cannot be accessed at this time.

Head northwest to access the Splintered Path. Exploring the path will net you plenty of collectables, some of which can be used to complete quests for the Nopon outside Colony 6's entrance. Take the elevator down to the path. Once you exit, you can see the entrance to the mine in the distance. Once you've explored the path to your liking, head into the mine.

Ether Mine
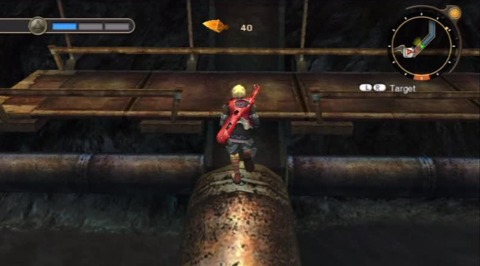
As you continue into the mine, you might notice a collectable sitting on a platform that's out of your reach. To get there, hike up the inclined pipes on your left, and leap off the larger pipe branching off of it to reach the item. That's all there's to do here for now.
Head up the staircase to reach the Drainage Control Room, manned by a couple of Nopon. You can purchase items from the merchant, but most importantly, take the time to manage your arts and skills if you haven't already.
The mines are a twisted maze of corridors. It's not terribly hard to get to the goal, but there are lots of opportunities to mine ether deposits, nab collectables, and otherwise get turned around. The cave is littered with Mechon, so don't forget to Enchant Reyn and Sharla at the start of each fight to move things along. There's a path that heads far south, leading to a secret area, Glowmoss Lake. The main attraction here? For now, the most you'll get out of visiting the lake is a sizable chunk of EXP. The UM in the area is likely too high level for your team at the moment, but there are a few collectables strewn about, if you're on the hunt.
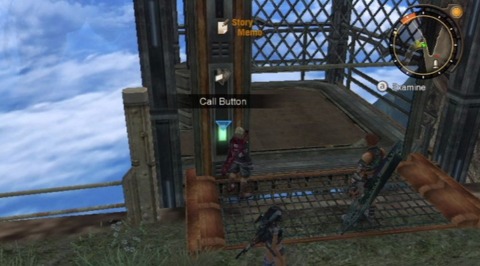
When you've satisfied your need for exploration, head for the goal at Test Pit 3. After the cutscene, take out the Mechon on the platform, and get ready to meet a new ally. After the introductions are made, it's time to head deeper into the mine. There is a Heart-to-Heart location nearby, but not much else in the immediate vicinity.
Central Terminal
Head south and you'll reach the Central Terminal. This is where navigation gets quite tricky. Though your goal is marked on the map, you'll have to activate a device in order to use the elevator located at said goal.

For a point of reference, I'll provide directions from that marker. Return up the path that led you there and take a right, heading northeast. Run up the small staircase and take another right when you reach the next fork in the path. Drop into the gap in the floor and turn right again, heading south this time. Take a quick left, and follow the path northeast until you reach Observation Point. Head down the staircase to your right, and activate the switch to open the gate that was previously locked. Backtrack to the goal and you'll enter the Central Pit.
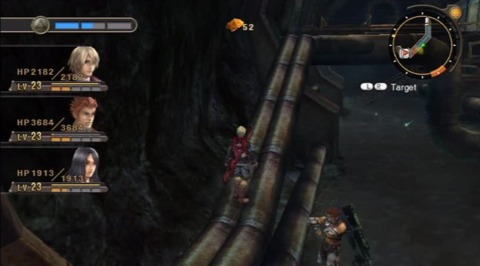
Walkthrough: Ether Mine / Central Pit
Welcome to the Central Pit. Take a ride on the elevator that's north from your starting position. Run towards the machine in the middle of the pit and follow the trail clockwise, being careful to avoid the gigantic rotating fins along the way. Follow the first path you come across, breaking off towards the east. Take a left at the end of the bridge and take the next elevator (Personal Lift 2) down to the Central Pit - Level 2 .
Work your way down the slopes and back onto the large device in the middle of the pit. Head south, continuing clockwise, until you reach an elevator-platform. Hop on board when it's heading up, and hop off on the next level. Take the path clockwise and ride the next elevator down a level. Run north, back towards the cliffs lining the pit. Head as far southeast from there as you can and you'll find Personal Lift 3.
The trick to continuing from here is to ride the rotating fins, one by one, until you reach the other side of the pit. Your first stop is the northern platform. When you arrive, a level 24 M84 Mechon will drop down from the machine. Once he's laid to waste, hop back on the fine towards the next platform where you'll face off against two Mechon M84. Once they're finished, go for the tunnel leading away from the pit. Before hopping on the elevator, check out arts, skills, and equipment; there's a boss fight immediately after your upcoming elevator ride.
Boss: Xord, Level 25
The trick to defeating Xord is to utilize Chain Attacks to inflict Break; attempting to debuff him with Break any other way is destined to fail. It really helps if you can fill up the Party Gauge ahead of time. You can warp to an earlier part in the Mine if you'd like to do that. Otherwise, the weaker Mechon Xord summons make for excellent fodder in the race to recharge the Party Gauge, so have at 'em. You don't need to deplete all of his health at the moment. Once he loses about a third, the fight will conclude…for now.
After the cutscene(s) head up the hill and get on the elevator. Continue through the tunnel and head up the stairs. You want to make your way towards the freight elevator to the south, by way of the large rotating fins. Once you try to activate the elevator, Xord will reappear to finish the fight, so prepare yourself.
Xord is much easier to defeat in his weakened state. Enchant your party and Break/Topple him as early as possible. He won't summon any minor-Mechon, so you can focus on him the entire fight.
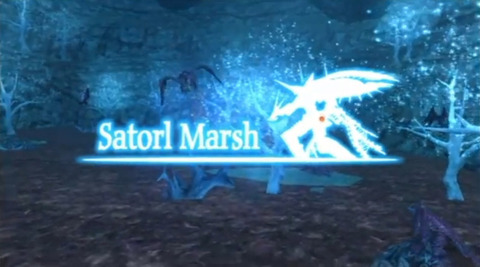
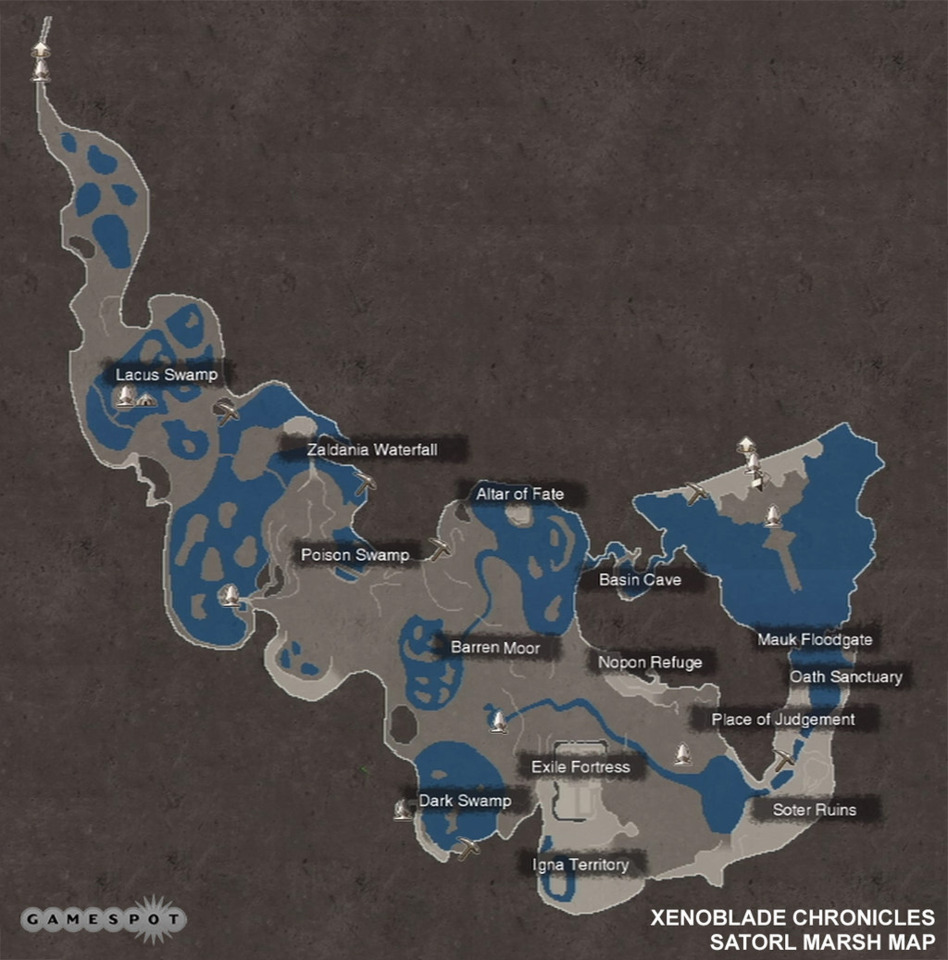
Walkthrough: Colony 6 / Satorl Marsh
After the battle with Xord, you'll end up on the plains near colony 6. Dickson and Dunban join the fray as even more Mechon appear. You'll take on a handful of powerful, common, Mechon, but they shouldn't be too tough. From that point on, Dunban becomes a member of your squad.
Head southeast after the battle and continue along the cliffs. As you work your way around the mountain, you'll know you're in the right spot when you find the Misty Path landmark. This will take you to the Satorl Marsh, your first stop on the way towards the Bionis' head.
Satorl Marsh
Your goal is marked on the map, but there's plenty to explore if you're in the mood. There are two Nopon merchants that will offer a handful of quests along the path to the goal. It might be a good idea to pick up a few quests and encounters; the closer to level 30 you are at this point, the better.
When you reach the final destination, you'll find yourself at a landmark placed by the High Entia. You team will make camp for the night. When it's time to continue, the path to the next goal is a bit unclear. Rather than head north, make sure you circle east, hugging the cliff-face towards your left. When you reach the large body of water to the south, cross over to the other side and use the hills to continue on.
Once you make it to the top of the hill, look out for the high level monsters roaming the area. Just stay out of their line of sight and you'll be fine. Use the land bridge to reach the western path once you reach the Soter Ruins. Jump down into the water at the end of the path and head through the gap in the large gate.
In the middle of the platform ahead is a Nopon with a Story Quest marker overhead. Talk to him, and he'll give you the quest needed to enter the Bionis (The Ancient Ceremony). In short, you have to collect four quest-collectables strewn about the map. Finding them is the easy part, but the hard part is defeating the monsters that protect them. We'll start with the easiest and work our way around the map.
Head west from the Nopon who gave you the quest. There's a cave that will take you to the first collectable. You'll have to take on 3 level 27 Storm Vangs before you can grab the White Radiant collectable.
The next Ancient Offering is located northwest from the cave, atop a windy plateau. To get up the hill you'll have to defeat two level 25 Detox Brogs. When you grab the Offering they're guarding, you can see the two that are left in the distance. Check out your map and you'll see that the Glowing Obelisk is likely closest landmark, depending on how much exploration you've done. Warp to the Obelisk and work your way southeast toward the Igna territory; an area guarded by lizard-men.
As you head up the hill (assuming you're coming from the east), you'll get ambushed by four Igna guards. After dealing with them, the offering awaits you to the left. Rather than run headlong for the Offering, approach from the south so you can grab it without having to battle the powerful Igna gaurd. Wait for his back to turn and you can sneak your way to the Offering.
The next Offering (collectable) is located in the middle of a poisonous swamp, and as such, comes with its own share of perils. When approaching the marsh, there are some Swamp Rahgouls swarming overhead. Take them out one by one before proceeding through the swamp. Running through the swamp causes damage to your team mates and will leave you vulnerable to the Brog guarding the Offering. Once the Coppice quadwings are taken care of, you can safely proceed towards the offering near the Brog.
You've done it! Keep in mind that once you drop off the quest items, you'll have to deal wit ha minor boss fight. Now, warp to the Satoral Statues and drop your Offerings off at the altar. Here comes the boss!
The level 28 Satorl Guardian is difficult only if you are under-leveled, or you use up your party gauge for a chain attack. There's a slight chance that you'll have to revive a party member or two, so hold onto your gauge segments in case someone needs revivin'.
Once you've defeated the Guardian, the ceremony will be complete. An elevator will appear at the foot of the statue, but it's non-operational. Head to the left and you'll find some vines. Climb them, then continue to ascend the statue-face utilizing the form of the statue, and patches of vines, to reach the top, and ultimately, the Bionis' Interior.
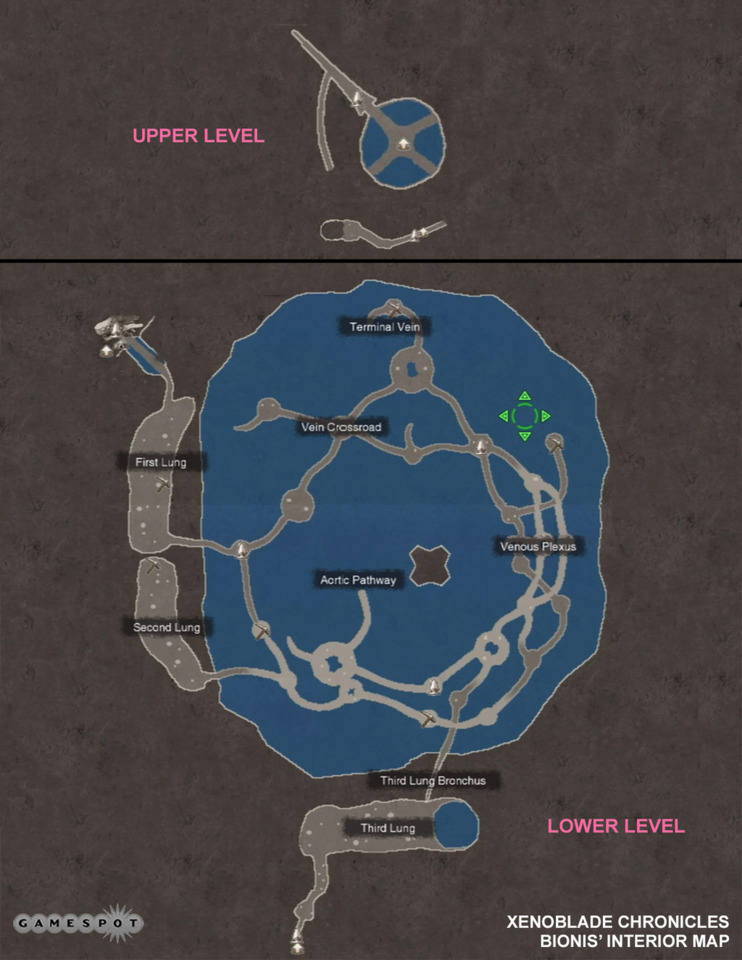
Bionis' Interior
There's not a whole lot to do at this point in the interior. Follow the path to the right, and hop in the water. Settle where there's bubbles coming up from the bottom, and wait for the geyser to erupt, shooting you to the upper interior of the Bionis. Forge ahead and exit the Bionis. You'll regain control of your team at the Makna Path.
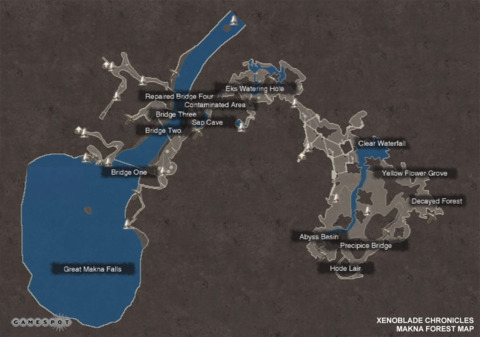
Walkthrough: Makna Path / Forest
Head down the path in front of you and a cutscene will ensue. You'll regain control of your team in a lush forest. There are a slew of new enemies here, hovering around level 28. This is the first time in the game that common enemies present a formidable challenge, especially in groups.
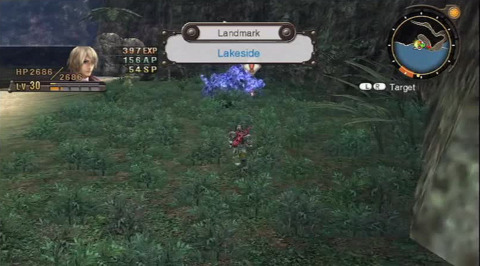
When you reach the Agni Tablet landmark, there's a group of Nopons that provide opportunities to shop or pick up quests. It would be a good idea to descend the cliff nearby in order to reach the Lakeside Landmark. There is a Water Ether reserve there that will come into play very soon. Reaching the landmark now will allow you to warp there, rather than backtrack.
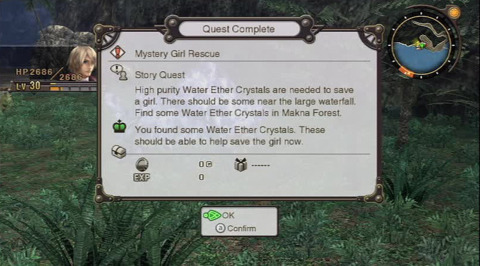
Crossing Bridge 1 is your next step. Continue northeast towards the goal and your team will discover an incapacitated girl. The team needs a potent ether source to revive her. Shulk will venture out on his own, but rather then walking all the way back, just open your map and skip to the Lakeside landmark. Nab the crystal when you get there to complete the "Mystery Girl Rescue" story quest.
You'll also meet a curious fellow, and quickly get thrust into battle with three Puera Telethia. It's not a difficult fight and it serves to introduce two new aspects to the battle system.
Aura / Purge Art
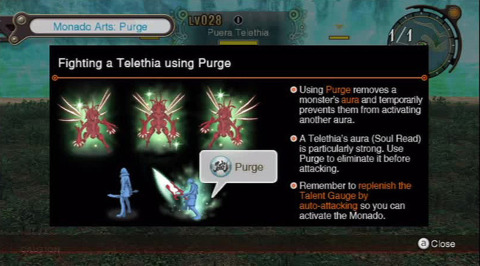
From here on out, certain enemies (usually Telethia), will posses an aura. Auras can bolster their defenses, grant status boosts, and induce the ability to inflict Spike Damage (more on that below). Using Shulk's monado Art, Purge, will seal the aura temporarily, reducing the enemy's advantage in battle.
Spike Damage
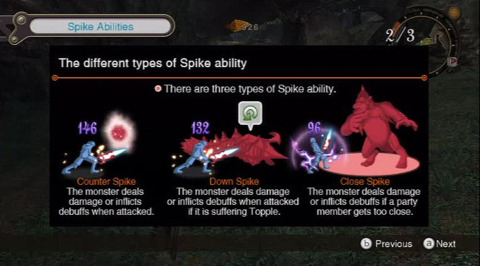
There's nothing good about spike damage, that's for sure. Many enemies posses the ability to inflict Spike Damage and it's impact is not effected by status protection or defense capabilities. You'll receive damage from some enemies by attacking them (the spike is a counter attack), attacking them when toppled, or even by simply getting too close.
Reyn will show up after the battle and take you back to the mysterious girl. Once she's revived, you'll learn a little bit about who she really is.
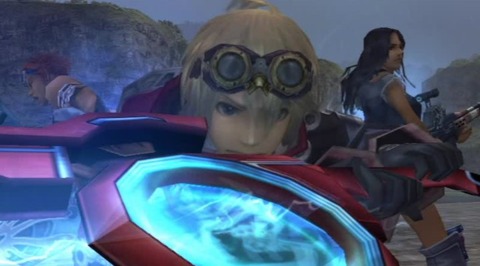
Melia's her name, and she's going to lead your team to the Nopon stronghold known as Frontier Village. Follow the marker at the top of the screen and you'll have no problem finding the entrance. As you approach, there's a few titans roaming the ground beneath the footbridges. No worries, luckily they have no interest in your team.
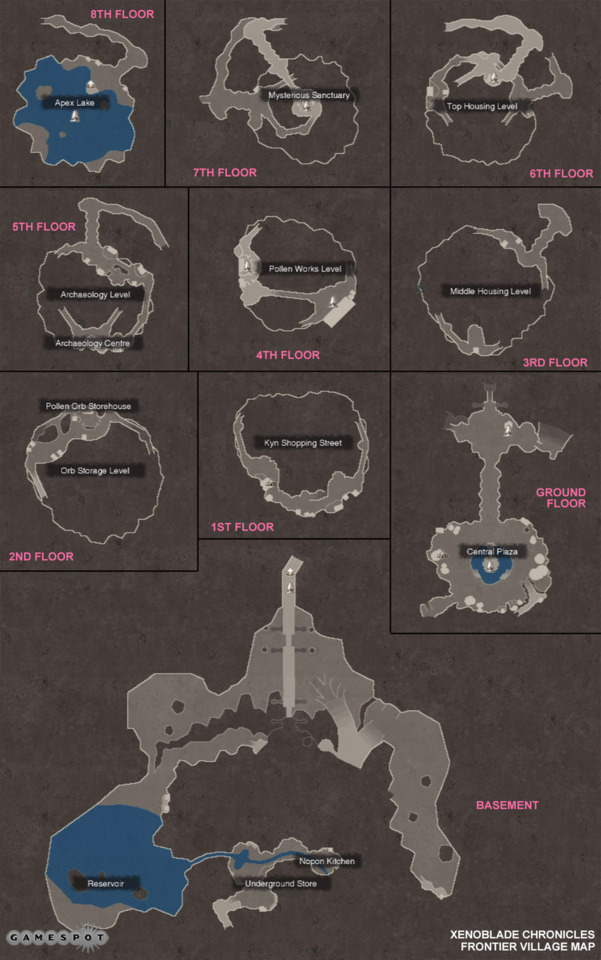
Walkthrough: Frontier Village
There are a lot of quests to undertake at frontier village. We will cover all of them in our upcoming side quest update.
For now, take the time to explore the nearly dozen levels of the village. There is quite a lot to see, including vendors that specialize in particular types of equipment. Once you’ve satisfied your need for exploration, follow the goal compass atop the screen to rejoin Melia.

Once you've spoken to her, return to the ground floor to meat the Nopon Hero, Riki. Don’t bother taking the stairs; you can actually leap from the balcony into the small pool in the middle of Central Plaza. Once you add Riki to your team, its time to get him some equipment. Grab his armor from the vendor on the ground floor, and his weapon from the vendor on the 2nd level.
It’s time to head out. The section of Makna Forest you’ll travel through is full of extremely high level monsters, peaking at lvl. 96. Stick to elevated bridges for now, and head south east. As you approach your goal, keep an eye out for dinosaurs on the ground level. You won't have the safety of elevation anymore, so make sure you pass only when their back is turned.
You’ll get the chance to switch out party members as you head into battle. Make sure to include Melia. Her new art, Mind Blast, will most certainly come in handy. It’s also a great idea to charge up your talent arts and party gauge before heading into battle. The upcoming boss is level 36, and I suggest that you do your best to match his level.
The key to winning against Leone is Shulk’s Purge ability. This will allow you to actually damage Leone. Sadly, if his Aura activates before you are able to disable it, then you face a two pronged challenge: Not only will you be unable to harm him, thus making it hard to fill your talent gauge, but your only resort will be Shulk’s Battle Soul art. This partially fills the talent gauge, but at the cost of half your current health. Sounds manageable, right? Only if Leone doesn’t use his Talent Drain art to completely deplete your gauge. This is why it’s very important to head into battle with the Monado ready to use, so you can stick him with Purge as soon and often as possible.
This is also a two part battle; you deplete half his health in the first round, then come back for the full monty in the second.

When the battles over, you’ll end up back in Frontier Village. Head to the 7th floor to find Melia. Once she’s agreed to continue with the crew, head for the top of the village.From there, you’ll be transported to the Eryth Sea; just talk to the Nopon hanging out on the stout dock by the water.
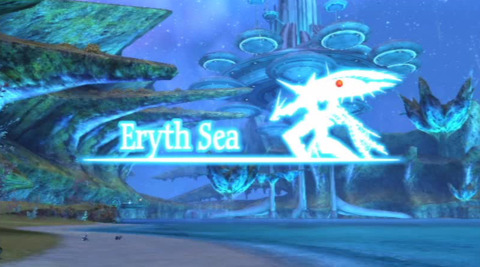
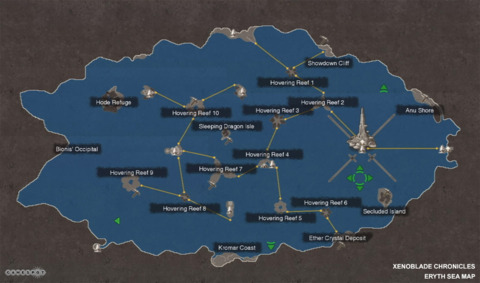
Walkthrough: Eryth Sea
Your goal is quite a distance away. For now, focus on grinding so you are at least level 36. There are plenty of common enemies that will give you between 200-500 XP, so it shouldn’t be too laborious.
East from the starting landmark is a platform that will teleport you to Hovering Reef 1, which features a series of other transports. Check out your map (or the image below) for an idea of where the transport pads will take you. From Hovering Reef 1, the southeastern platform is your first stop.
That will take you to Hovering Reef 2. Again, take the southeast transport to continue towards your goal at the Center Gate landmark.
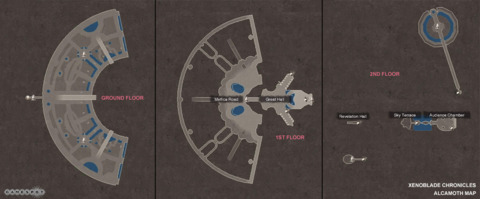
Alcamoth
You’ll be in control of Melia solo for a moment. Take her towards the easy to find goal, and you regain control of Shulk and crew after the cutscene with Melia and the High Entia royalty. There’s nowhere to go, so chit chat with each of your party members for now.
Eryth Sea
After a few more cutscenes, you are back in control of the usual gang, and your offer to assist the Entia is accepted. Return to the sea by transporting to the shore, and continuing to Hovering Reef 2. From there, take the southwest platform to Hovering Reef 3, and then the southern platform to Hovering Reef 4. Your contact is straight ahead. After discussing with him, take the transport behind the lighthouse to Reef 5, and then the southeastern transport to your goal.
You are going to face off against four, level 36 Kromar. It’s a difficult battle due to the Defensive Kromar’s ability to momentarily disable your arts. Stick with it, and reserve your party gauge for revivals, rather than chain attacks.
When the battle is over, talk to the nearby worker to complete the story quest. Once you regain control of your team, head back to Alcamoth.
Alcamoth
Your goal is at the whitewing palace. To get there, take the transport in the southeast corner of the great hall, right at the intersection. When you arrive in the chamber, speak with the attendent. When you're ready to advance the story, agree to rest in the palace.
After Emperor Sorean address the citizens of Alcamoth, Melia will have to face a set of trials within the Entia Tomb. Before making your way to the tomb, the rest of the team will have to defeat a series of Entia scouts, guards, and wizards, in the Whitewing Palace chambers. Focus on a single Entia at a time and make sure to reserve your party gauge in case you need to revive a team mate.
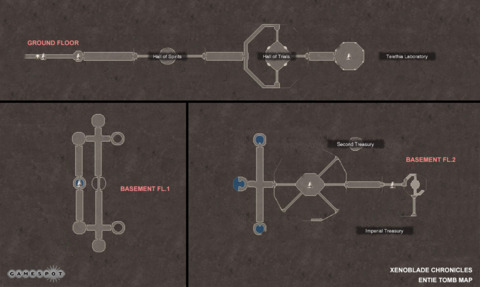
Entia Tomb
When your team is ready, open your map and skip to the Center Gate landmark on the Eryth Sea map. Head east from the Center Gate(via transport pad). You'll briefly have control over Melia, until she uses the verification device and enters the Tomb proper.
Walkthrough: Entia Tomb
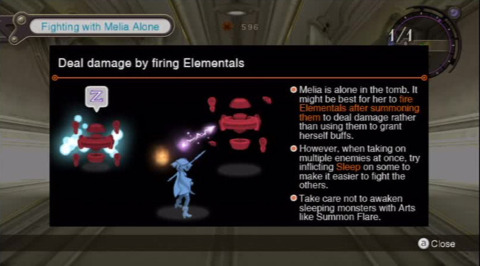
When you have control of Melia again, take note of the mini-tutorial. Since you’ll be fighthing alone, the information it provides in invaluable. The trick is to use an elemental art, then use her elemental discharge to use that elemental against the enemy, dealing greater damage than a stand alone attack. Though Melia’s talent gauge will appear greyed out, it’s definitely active.
After a few brief trial battles, you’ll regain control of the rest of the team. Be wary when exploring the tombs. Enemies generally aren’t visible until they are right on top of you, so if you try to run from a battle, it’s likely that you’ll just attract more enemies. It’s best to stand your ground and handle each encounter individually. As you follow the goal arrow, you’ll have the choice of heading through a long hall to the north, or a ring shaped room towards the east. Head east when you are done exploring. The circular room features a spiral-ramp that will take you to the lower level. Once there, the goal marker is in plain sight. You’ll come to a room with a huge orb in the middle. To get to the platform in the middle of the room, use the walls nearby to climb over to the bridge.
When you get there, you’ll face a lvl 36 hulk of a monster, Rufus Orluga. Keep a healer handy, and be wary of his ability to inflict your team with the Arts Seal debuff. Avoid using a Chain attack in the case you need to revive fallen team mates. This battle isn’t terribly difficult so long as you are on an even level, but it’s not uncommon for one of these guys to incapacitate a team mate.

As you head east towards the next goal, examine the chambers along the northern wall of the long hallway. There is a hidden passage that leads to an area known as the Secondary Treasury. You can obtain a valuable piece of headgear, but be warned, there’s a level 38 enemy guarding the treasure.
Continue forging eastward. You‘ll reach the tower of trials bridge at the end of the hallway. Climb the wall on your left to reach the platform above your current position. There’s another Orluga Rufus waiting for you, level 37 this time, and he’s got a companion as well. You know the drill. Take ‘em out.
Climb up the southeast wall once the path is clear. There’s a final Orluga waiting for you on the next level. Once he’s gone, head up the ramp along the north wall. You're approaching a boss fight, so assess your arts, equipment, and, team.
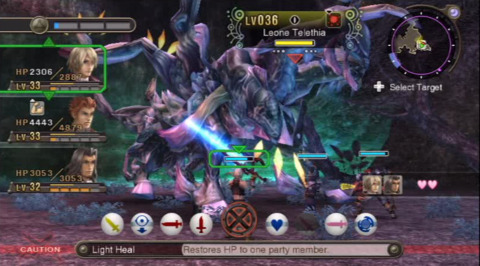
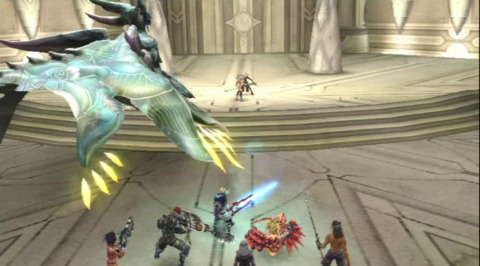
The strategy for this fight is quite simple. The Telethia needs to have his aura broken using Shulk’s Purge Monado Art. Between purges, use Shulk as your secondary healer, and allow him to auto-attack so he can refill his Monado Talent Art gauge. Thankfully, if you neglect to ready the Monado’s powers in time, you can attack the female Entia. Switch your target to her so you can auto attack. While you won’t do much damage against her with the Monado, this will afford you the opportunity to recharge it’s abilities.
This is the one downside to the fight. You need Shulk to break the Telethia’s aura, but he won’t be able to do any damage during the second half of the battle with the Monado. If you are level 40 (or higher) you may not need Sharla’s healing skills during the fight (resorting to Shulk’s light heal) which means you can double up on the heavy hitters, namely Reyn and Dunban.
Skill Trees


- Shulk's Skill Tree -
Humanity
| Healing Wisdom | Healing Arts restore more HP. |
| Kind Encouragement | Restores HP to an encourages ally. |
| Friendship Heals | Heals the party slightly after a chain attack. |
| Cheer of a Friend | Causes Burst Affinity to fil more of the Party Gauge. |
| Chain of Friendship | Increases chance of a Chain Link |
Integrity
| Medium Equipment | Allows Medium Weight Armor to be equipped. |
| Secret of Life | More HP is restored when reviving a party member. |
| Rewarding Work | Successfully completed quests award more EXP. |
| Resilient Warrior | Boosts physical defense and ether defense. |
| Ultimate Teamwork | Increases chain attack damage. |
Intuition
| Battlecry | Allows Medium Weight Armor to be equipped. |
| Underdog | Agility Up buff at start of battle with higher level enemies. |
| Equipment Master | Reduces weight of equipment. |
| Fever Pitch | Increases chance of fever when gem crafting. |
| Element of Surprise | Improves Arts with Bonus Effects from behind. |
Bravery
| Fate Evasion | Grants EXP when vision tags are destroyed. |
| Hero's Privilege | Allows low value items to be offered when trading. |
| Lone Warrior | Grants Agility Up when a party member is incapacitated. |
| Ultimate Defense | Boosts physical and ether defense for the party |
| Glorious Future | Talent Gauge will be at max after a vision. |
Pessimism
| Fight the Future | Extends time before a vision becomes a reality. |
| Stealth Warrior | Reduces aggro drawn from using Arts. |
| Epic Evasion | Increases chance of Burst Affinity after evasion. |
| Forced Mercy | Reduces aggro when damage is taken. |
| Immunization | Grants immunity to debuffs that reduce stats. |
- Reyn's Skill Tree -
Enthusiasm
| Heavy Equipment | Allows heavy weight armor to be equipped. |
| Courageous Taunt | Increases aggro drawn by Mad Taunt. |
| Healing Inspiration | Restores HP to an encouraged ally. |
| Reckless Courage | Strength Up buff at start of battle with higher level enemies. |
| Heroic Taunt | Further increases aggro drawn by mad taunt. |
Spirit
| Medium Equipment | Allows Medium Weight Armor to be equipped. |
| Mental Fortitude | Grants physical def up at start of battle with higher level enemies. |
| Unrelenting Spirit | Prevents incapacitation from lowering tension. |
| Feel the Heat | Increases tension when damage is taken. |
| Sheer Determination | Boosts physical defense when HP is at half. |
Diligence
| Battlecry | Increases max HP. |
| Underdog | Agility Up buff at start of battle with higher level enemies. |
| Battle Character | Increase attack power of equipped weapon. |
| Spoils of War | Increases AP awarded in battle. |
| Wall of Muscle | Further increases max HP. |
Camaraderie
| Ties of Friendship | Increases chance of a Chain Link. |
| Shoulder to Shoulder | Healsthe party after a chain attack. |
| Flying Start | Battle Start Affinity grants Haste bugg to the party. |
| Solitary Fight | Grants strength up when a party member is incapacitated. |
| Friends Forever | Boosts the affinity gained when encouraging an ally. |
Impatience
| Ultimate Taunt | Boosts Mad Taunt's effect on non-targeted enemies. |
| Melee Champion | Grants haste to the party when an enemy is defeated. |
| Rampage | Increases chance of a double attack. |
| Speed Strike | Grants haste buff when an attack misses. |
| Channelled Pain | Fills Talent Gauge when damage is taken. |
- Sharla's Skill Tree -
Perserverance
| Firm Defense | Boosts physical defense. |
| Ether Expansion | Increases Ether |
| Solid Defense | Grants Physical Defense Up buff at start of battle. |
| Ether Unleashed | Increases ether when HP is at half. |
| Ultimate Sniper | Reduces the duration of Cool Off. |
Devotion
| Medium Equipment | Allows Medium Weight Armor to be equipped. |
| Medical Knowledge | Greatly boosts power of Healing Arts in chain attacks. |
| Unrelenting Spirit | Extends range of long-distance arts. |
| Feel the Heat | Increases agility. |
| Sheer Determination | Reduces cooldown of Healing Arts. |
Confidence
| Ether Assault | Increases damage dealt by ether Arts attacks. |
| Initial Endurance | Grants physical protect to party with Battle Start Affinity. |
| Middleweight Expert | Improves physical and ether defense of medium weight armor. . |
| Adrenaline | Increases tension when taking damage. |
| Heavy Equipment | Allows heavy weight armor to be equipped. |
Affection
| Vote of Confidence | Improves Healing Arts after being warned of a vision. |
| Bedside Manner | Healing Arts restore more HP. |
| Hearty Cry | Heals the party slightly after a successful Burst Affinity. |
| Shield of Kindness | Grants Ether Protect buff with Battle Start Affinity. |
| Miracle of Love | Heals remaining party members when Incapacitated. |
Reliance
| Memory of Gadolt | Improves Block Rate. |
| Vendetta | Increases chance of a counter-attack. |
| Decisive Follow-Up | Grants Ether Up buff when an ally defeats an enemy. |
| Revenge | Strength Up and Physical Def Up when an ally is Incapacitated. |
| Ether Explosion | Greatly increases ether. |
- Dunban's Skill Tree -
Wisdom
| Spiritual Awakening | Greatly increases aggro when no armour is equipped. |
| Reckless Abandon | Increases agility when HP is at half. |
| Twin Swords | Increases chance of a double attack. |
| Natural Born Warrior | Reduces weight of equipment. |
| Inner Peace | Greatly increases agility with no armor equipped. |
Bravery
| Medium Equipment | Allows Medium Weight Armor to be equipped. |
| Invincible Hero | In battle, boosts strength when HP is at max.. |
| Warrior's Ambition | Increases tension after successful Battle Start Affinity. |
| Overwhelming | Increases aggro drawn when dealing damage. |
| Hero's Valour | Grants HP Up buff at start of battle. |
Prudence
| Sustained Spirit | Extends the duration of auras. |
| Steel Protection | Reduces the effects of Spike attacks. |
| Mind of the Warrior | Reduces depletion rate of Party Gauge outside of battle. |
| Lightweight Expert | Improves Physical and Ether Def. of light equipment. |
| Critical Drain | Restores HP when dealing a critical hit. |
Enthusiasm
| Charge Acceleration | Grants Haste buff at start of battle. |
| Counter Rage | Increases chance of a counter-attack. |
| Ardent Strike | Increases tension gained after a critical hit. |
| Deadly Determination | Increases tension gained when using Arts. |
| Blazing Aura | Fills party gauge when activating an aura. |
Obstinance
| Equipment Expert | Greatly reduces weight of equipment. |
| Gentleman's Valour | grants HP Up buff at start of battle. |
| Heavy Equipment | Allows heavy weight armor to be equipped. |
| Body of Steel | Reduces physical damage taken. |
| Solid Foundation | Grants immunity to Blow-Down attacks. |
- Melia's Skill Tree -
Honesty
| High Speed | Increases Agility. |
| Whisper of the Wind | Boosts wind damage. |
| Amplified Ether | Grants ether up buff at start of battle. |
| Electric Shock | Boosts electric damage. |
| Enlightenment | Increases accuracy of ether attacks. |
Serenity
| Amplified Healing | Increases HP received from healing Arts. |
| Serenity of Water | Increases HP absorved from water-type Arts. |
| Mining Master | Increases chance of finding rare crystals from deposits. |
| Glistening Ice | Extends Chill duration when dealt to an enemy. |
| Ultimate Ether | Greatly increases ether. |
Reliability
| Ether Awareness | Increases ether. |
| Playing with Poison | Extends poison duration when dealt to an enemy. |
| Power of the Moon | Increases strength during the night. |
| Unyielding Heart | Prevents reduction of accuracu when tension falls. |
| Ether Guard | Grants immunity to Ether down debuff. |
Passion
| Nonchalant Heart | Reduces tension loss when en attack fails. |
| Awakening Strike | Boosts damage dealt to enemies suffering Sleep. |
| Telethia Killer | When an aura is actibe, increases damage dealt to Telethia. |
| Passion of Flame | Extends Blaze duration when dealt to an enemy. |
| Rejection of Evil | Greatly reduces the effects of Spike attacks. |
Reticence
| Palace Guard | Improves block rate. |
| Heavyweight Expert | Improves ether defense the more heavy equipment is worn. |
| Unadorned Beauty | Strength, ether, agility and HP up if no gems are equipped. |
| Mental Barrier | Reduces damage taken from ether area attacks. |
| Arcane Aura | Reduces aggro drawn while an aura is active. |
- Riki's Skill Tree -
Innocence
| Adventure Time! | Increases movement speed. |
| Learning all the Time! | Awards the same AP regardless of the participation in battle. |
| Explore Time! | Awards mroe EXP when discovering a landmark. |
| Make it all better! | Improves healing arts used on an ally with half HP. |
| Dream of Money | Improves chance of monsters dropping gold chests. |
Vivacity
| Like Sun! | Increases strength during the day. |
| Friends Now! | Allows low-value items to be offered when trading. |
| Love Sun! | Reduces cooldown during the day. |
| Lucky Me! | Improves chance of monsters dripping silver chests. |
| Adore Sun! | Increases EXP awarded in battles during the day. |
Flexibility
| Buy Stuff! | Allows items to be sold for a higher price. |
| Riki See, Riki Do | Awards the same EXP regardless of participation in battle. |
| AP for All! | Lets Riki steal AP with Yoink! and share it with the party. |
| Riki Strong | Grants immunity to Strength Down debuff. |
| EXP for All! | Lets Riki steal EXP with Yoink! and share it with the party. |
Heroism
| Heavy Equipment | Allows heavy weight armor to be equipped. |
| Nutritious! | Greatly increases strength. |
| Kissy Kissy! | Halves the Party Gauge usage when reviving allies. |
| Ouchies! | Increases Spike damage dealt. |
| Cuddly Hero! | Increases resistance to all debuffs. |
Cowardice
| Pretty Stars! | Increases strength during the night. |
| Watch Out! | Increases agility when HP is at half. |
| Amazing Stars! | Reduces cooldown during the night. |
| Bullseye! | Improves accuracy of back attacks. |
| Bestest Stars! | Increases EXP awarded in battles during the night. |
- Fiora's Skill Tree -
Daring
| Battle Stance | Grants Strength Up buff at start of battle. |
| Opening Blow | Increases damage of the first strike of a battle. |
| Nimble Feet | Increases movement speed. |
| Physical Resiliance | Reduces physical damage taken. |
| Showdown Stance | All Stats Up buff at start of battle with higher-level monsters. |
Courage
| Mechonis Equipment | Allows special armor from Mechonis to be equipped. |
| Desperate Daggers | Increases counter-attack rate when HP is at half. |
| Second Wind | Increases amount of HP restored when revived. |
| Ultimate Strike | Increases Damage of critical hits. |
| Unwavering Courage | Increases EXP awarded in battles during the day. |
Zeal
| Desperate Defense | Increases block rate when HP is at half. |
| Swift Strike | Rarely grants Haste buff at start of battle. |
| Acceleration | Increases EXP awarded from battle. |
| Strength of Will | Reduces Ether damage taken. |
| Strong Links | Grants Haste buff to the party after Burst Affinity. |
Innocence
| Maiden's Power | Improves chain attack damage when in battle with Shulk. |
| Maiden's Courage | Increases Arts damage if warned of a vision by Shulk. |
| Maiden's Blessing | Restores HP when taking damage when in battle with Shulk. |
| Maiden's Zeal | Prevents tension from becoming low if in battle with Shulk. |
| Maiden's Miracle | Grants All Stats Up buff when encouraged by Shulk. |
Rashness
| Vision Mode | Boosts next Arts damage when warned of a vision. |
| Ultimate Counter | Turns all counter-attacks into critical hits. |
| Vital Force | Dealing damage will occasionally max the Talent Gauge. |
| Critical Combo | Turns all double attacks into critical hits. |
| Explosion of Energy | Increases tension by one level when using Talent Arts. |
Heart-to-Heart Locations
When running through vast landscapes in Xenoblade, you'll come across icons in the shape of two hands held together. These are known as heart-to-hearts, opportunities for two characters to engage in dialogue, giving you the opportunity to alter the affinity between them. Depending on your answers, this can go either way; good or bad.
Heart-to-Heart Locations, Colony 9
Heart-to-Heart Locations, Tephra Cave
Heart-to-Heart Locations, Bionis Leg

Heart-to-Heart Locations, Ether Mine
Heart-to-Heart Locations, Colony 6
Heart-to-Heart Locations, Satorl Marsh
Heart-to-Heart Locations, Makna Forest
Heart-to-Heart Locations, Frontier Village
Heart-to-Heart Locations, Eryth Sea
Heart-to-Heart Locations, Alcamoth

Heart-to-Heart Locations, Entia Tomb

Heart-to-Heart Locations, Valak Mountain
Heart-to-Heart Locations, Fallen Arm
Heart-to-Heart Locations, Bionis' Interior
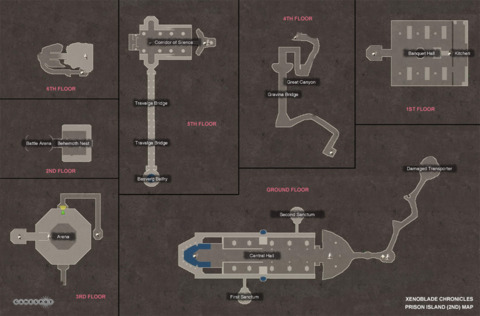
Heart-to-Heart Locations, Prison Island
Gems
Attribute Buff Gems
Offensive Gems
Defensive Gems
Area Maps
Xenoblade features numerous, gigantic, landscapes. Sometimes the unknown is reason enough to explore, but it can also be quite daunting. We're providing these uncovered maps so you can see what's available, without risking precious time.

Under each heading is a map concealed within one of our handy spoiler containers. Just click the torquoise bar to reveal the map for the area listed in the heading above.
In case the preview image is too small, we've also provided links to larger format maps. Enjoy!
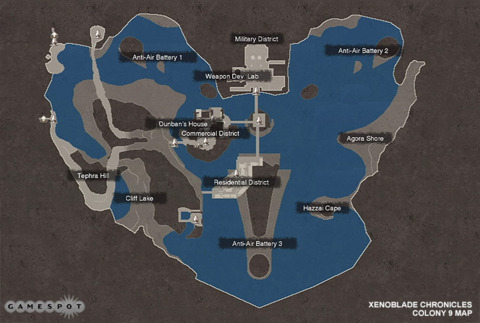
Colony 9
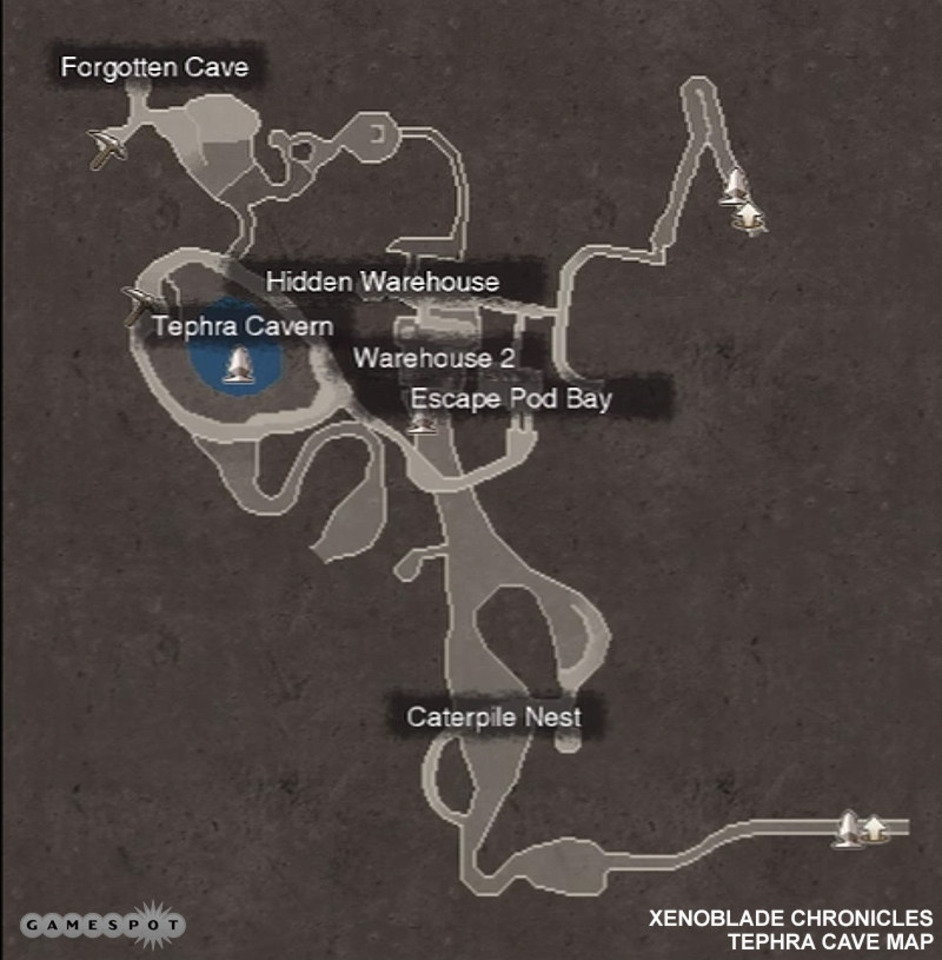
Tephra Cave
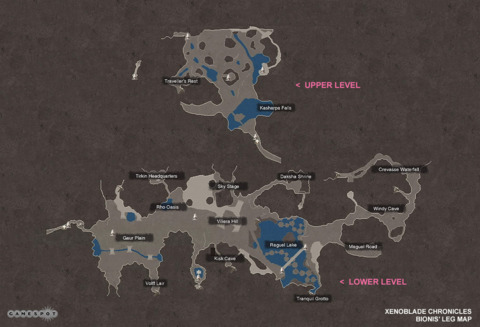
Bionis' Leg
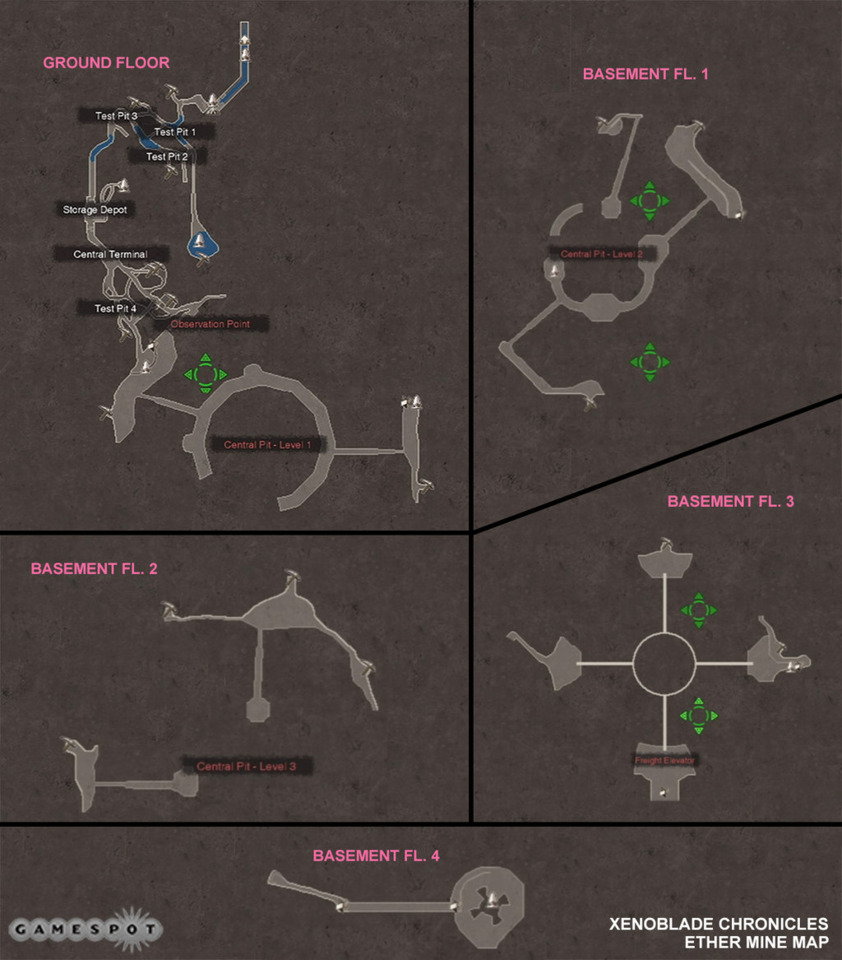
Ether Mine
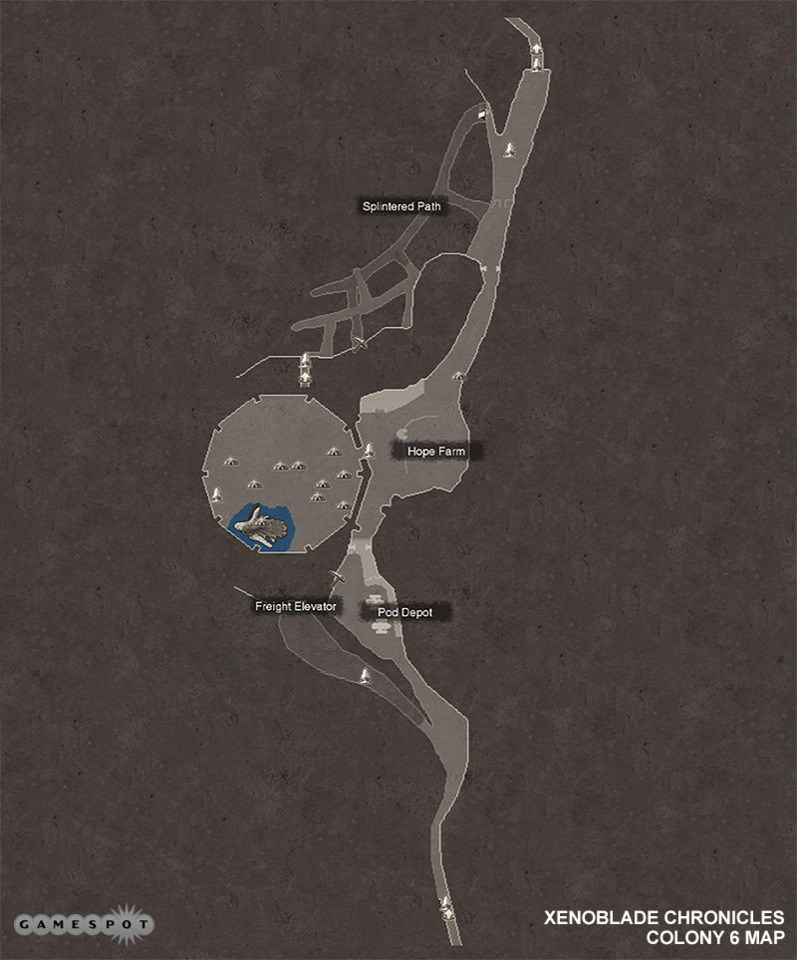
Colony 6
Satorl Marsh
Bionis' Interior
Makna Forest
Frontier Village
Eryth Sea
Alcamoth
Entia Tomb
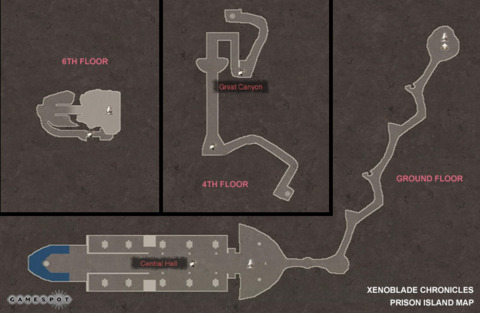
Prison Island
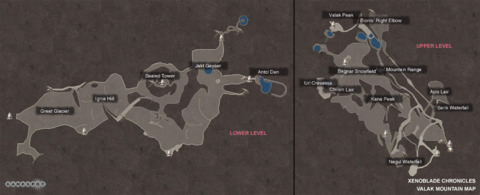
Valak Mountain
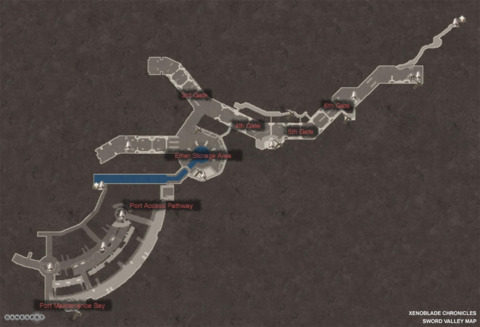
Sword Valley
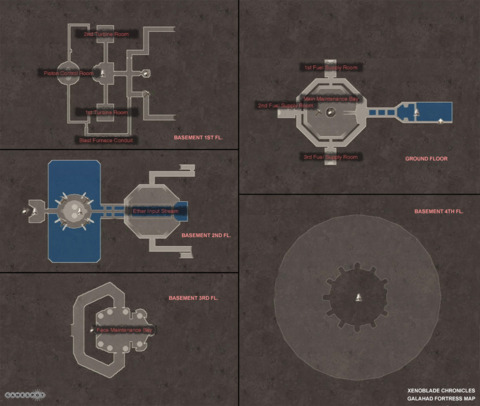
Galahad Fortress
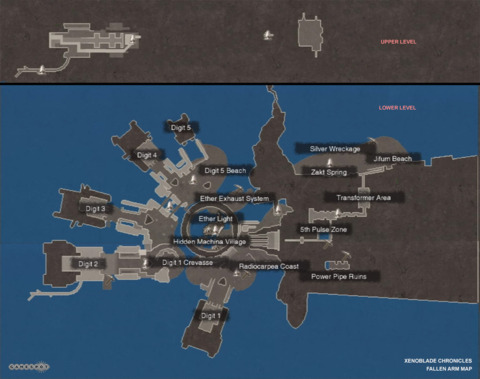
Fallen Arm
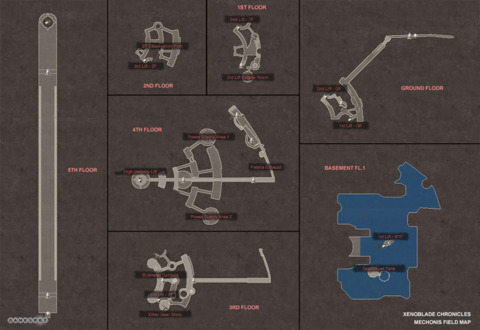
Mechonis Field
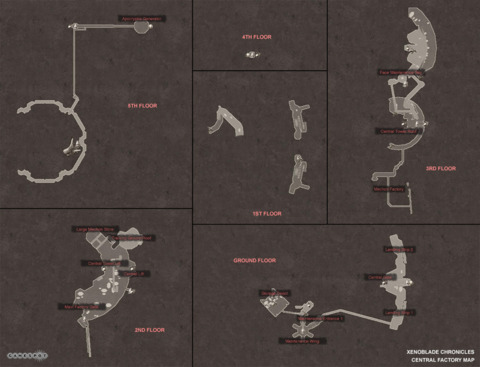
Central Factory
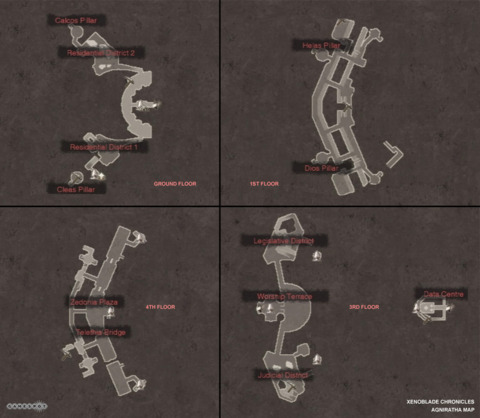
Agniratha
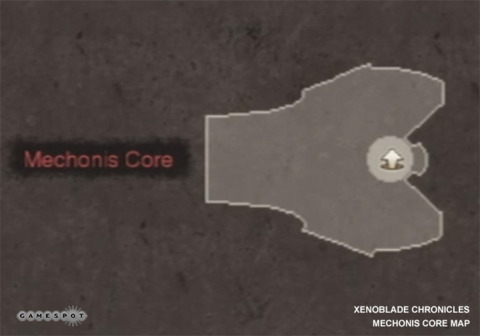
Mechonis Core
Prison Island 2nd Visit
Rebuilding Colony 6
Colony 6 was left in disarray after a visit from the Mechonis, so it's up to your team to return it to its former glory. Granted it's an optional venture, but attempting to complete the reconstruction has it's benefits:
- Additional side quests
- New merchants
- Chances to develop your affinity-tree
- Mine higher-level ether crystals (Colony 6, Ether Mine)
The tables below catalog the required items for each portion of the reconstruction (Housing, Commerce, Nature, and, Special). When you have the proper items, talk to Juju at Reconstruction HQ
Housing
Commerce
Nature
Special
Side Quests
There are 480 side quests in Xenoblade Chronicles. "Whoa" is probably what you're thinking and we don't blame you. In an effort to assist your side-questing ambitions, we've cataloged as many side quests as we could find, including the location and name of the person to get it from.
Similar to the Area Maps page, each area is contained within the cascading spoiler bar; just click on it to reveal the quests for the given area.
Colony 9 Side Quests
Tephra Cave Side Quests
Bionis' Leg Side Quests
Satorl Marsh Side Quests
Makna Forest Side Quests
Frontier Village Side Quests
Eryth Sea Side Quests
Alcamoth Side Quests
Valak Mountain Side Quests
Sword Valley Side Quests
Galahad Fortress Side Quests
Fallen Arm Side Quests
Mechonis Field Side Quests
Central Factory Side Quests
Agniratha Side Quests
Prison Island Side Quests
Got a news tip or want to contact us directly? Email news@gamespot.com
Join the conversation