Wrestlemania XIX Walkthrough
Know your role. GameSpot's walkthrough to Wrestlemania XIX will tell you everything you need to know about every wrestler in the game, how to get through Revenge Mode, and every item available in the ShopZone.
Design by Katie Bush
Take control of WWE superstars The Rock, Kurt Angle, Undertaker, Brock Lesnar, and dozens of others in THQ's latest wrestling game, WrestleMania XIX for the Nintendo Gamecube.
This year's entry offers the new story-based "Revenge" mode, a challenging series of missions in which you control a WWE superstar who has just been stripped of the WWE title and thrown out by Vince McMahon. This game guide features mission walk-throughs so you can get your revenge. You'll also find a comprehensive look at the superstars, strategies for match success, and a "Create a Superstar" primer.
This GameSpot Game Guide to WrestleMania XIX includes:
The Wrestlers:
This section provides bios for all WWE superstars available in WrestleMania XIX and includes grapples and finishing moves.General Strategies:
This section offers a collection of general strategies to consider when battling your friend or playing solo.Match Strategies:
This section covers strategies specific to different match types.Revenge Mode Walk-through:
Look here for a walkthrough of WrestleMania XIX's Revenge mode. This section covers all construction site, shopping mall, parking lot, and harbor missions.Create a Superstar:
This section features a walkthrough of WrestleMania XIX's Create a Superstar mode with a classic Randy "Macho Man" Savage as a sample.ShopZone:
Check here for a complete list of items available in ShopZone and their price.Secrets:
This section compiles a list of secrets to uncover.
Table of Contents
WrestlersGeneral Strategies
Match Strategies
Revenge Mode
Create a Superstar
ShopZone
Secrets
Chapter 1 - The Wrestlers
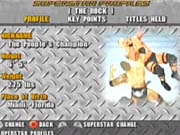
This section provides bios for all the WWE superstars available for selection in WrestleMania XIX. These bios reveal the superstars' finishing moves (including what grapple type to use for them) and the superstars' light and heavy, front and rear grapple maneuvers. The directions after each move indicate in what direction you should move the control stick to perform the move.
Superstars are also rated in strengths and weaknesses. These categories correspond to the abilities section of the Create a Superstar mode. The following list reveals the general meaning of the abilities so you can better gauge your superstar's strengths and weaknesses.
- Basic-Endurance: Relates to the superstar's stamina and ability to endure damage during the match.
- Basic-Strength: The relative strength of the superstar. If strength is a principle trait of a superstar, then he or she is adept at punishing maneuvers.
- Basic-Agility: Relates to the superstar's quickness. Generally a superstar with this specialty is faster than he or she is strong and likely more adept at faster maneuvers and jumping.
- Basic-Jumping: The superstar excels at flying moves, such as off the turnbuckle. The higher this statistic, the farther the superstar can fly.
- Basic-Recovery: The superstar excels at recovering from the opponent's maneuvers.
- Attack-Striking: Relates to the superstar's ability to use strike attacks (B button). If your superstar excels here, his or her strike attacks are tougher to counter.
- Attack-Grappling: Relates to the superstar's ability to use grappling attacks (A button). If your superstar excels here, his or her grappling attacks are tougher to counter.
- Attack-Joint Locks: Relates to the superstar's submission maneuvers. If your superstar excels here, his or her submission moves are more damaging.
- Defense-Resilience: How well the superstar does at countering strike attacks.
- Defense-Escape: How well your superstar can counter grapples.
- Defense-Flexibility: Proficiency at countering submission moves.
The Rock
| Nickname | The People's Champion |
| Height | 6'5" |
| Weight | 275 lbs. |
| Place of Birth | Miami, Florida |
| Special Moves | Rock Bottom (Front Grapple), Clothesline-R (Rear Grapple), People's Elbow (Upper Down Grapple Facing Up), People's Spine Buster (Irish Whip Grapple), Sharpshooter (Lower Down Grapple Facing Up) |
| Light Front Grapple | Headlock Takedown, Suplex (Up), Scoop Slam (Down), Arm Drag (Left), Neck Breaker (Right) |
| Heavy Front Grapple | People's DDT, Headlock (Up), Spine Buster (Down), Dragon Screw 02 (Left), Belly to Belly 01 (Right) |
| Light Rear Grapple | Sleeper Hold, Back Drop (Up), Hair Pull Slam (Down), Shin Breaker (Left), Pendulum Back Breaker (Right) |
| Heavy Rear Grapple | Abdominal Stretch, Atomic Drop (Up), School Boy (Down), Reverse DDT (Left), Russian Leg Sweep (Right) |
| Strengths | Defense-Escape |
| Weaknesses | Flawless |
| Titles Held | WWE Champion, Intercontinental Champion, WWE Tag Team Champion, 2000 Royal Rumble Winner |
Triple H
| Nickname | The Game |
| Height | 6'4" |
| Weight | 272 lbs. |
| Place of Birth | Greenwich, Connecticut |
| Special Moves | Pedigree (Front Grapple), Reverse Suplex (Rear Grapple) |
| Light Front Grapple | Scoop Slam, Suplex (Up), Rib Breaker (Down), Headlock (Left), Neck Breaker (Right) |
| Heavy Front Grapple | Front Neck Lock, Manhattan Drop (Up), Pile Driver (Down), Rolling Spine Buster (Left), Shoulder Arm Breaker (Right) |
| Light Rear Grapple | Sleeper Hold, Back Drop (Up), Hair Pull Slam (Down), Shin Breaker (Left), Falling Neck Breaker (Right) |
| Heavy Rear Grapple | Abdominal Stretch, Dragon Sleeper (Up), School Boy (Down), Russian Leg Sweep (Left), Atomic Drop (Right) |
| Strengths | Defense-Resilience |
| Weaknesses | Basic-Jumping |
| Titles Held | WWE Champion, World Heavyweight Champion, Intercontinental Champion, European Champion, King of the Ring 1997, 2002 Royal Rumble Winner |
Hulk Hogan
| Nickname | N/A |
| Height | 6'7" |
| Weight | 275 lbs. |
| Place of Birth | Venice Beach, California |
| Special Moves | Running Leg Drop (Side Down Grapple Facing Up), Hulk Up Combination (Front Grapple), Axe Bomber (Running Strike), Clothesline-R (Rear Grapple) |
| Light Front Grapple | Front Grapple Push, Suplex (Up), Scoop Slam (Down), Headlock (Left), Arm Wrench with Elbow Stomp (Right) |
| Heavy Front Grapple | DDT, Front Power Slam (Up), Manhattan Drop (Down), Rib Breaker (Left), Shoulder Arm Breaker (Right) |
| Light Rear Grapple | Sleeper Hold, Face Crusher 01 (Up), School Boy (Down), Shin Breaker (Left), Russian Leg Sweep (Right) |
| Heavy Rear Grapple | Abdominal Stretch, Back Drop (Up), Atomic Drop (Down), Pendulum Back Breaker (Left), Backslide Pin (Right) |
| Strengths | Basic-Strength |
| Weaknesses | Basic-Jumping |
| Titles Held | WWE Champion, WWE Tag Team Champion |
Undertaker
| Nickname | Big Evil |
| Height | 6'10" |
| Weight | 305 lbs. |
| Place of Birth | Houston, Texas |
| Special Moves | Last Ride (Front Grapple), Dragon Sleeper (Rear Grapple), Tombstone Pile Driver (Front Grapple), Choke Slam (Irish Whip Grapple), Guillotine with Weapon (Weapon Attack) |
| Light Front Grapple | Choke Throw, Suplex (Up), High Angle Scoop Slam (Down), Neck Breaker (Left), Arm Wrench Lift Up Throwing (Right) |
| Heavy Front Grapple | DDT, Choke Slam (Up), Fujiwara Armbar (Down), Side Walk Slam (Left), Front Power Slam (Right) |
| Light Rear Grapple | Sleeper Hold, Back Drop (Up), Russian Leg Sweep (Down), Shin Breaker (Left), Falling Neck Breaker (Right) |
| Heavy Rear Grapple | Abdominal Stretch, Reverse DDT (Up), School Boy (Down), Atomic Drop (Left), Side Slam (Right) |
| Strengths | Basic-Endurance |
| Weaknesses | Basic-Agility |
| Titles Held | WWE Champion, Hardcore Champion, WWE Tag Team Champion |
Kurt Angle
| Nickname | American Hero |
| Height | 6'2" |
| Weight | 237 lbs. |
| Place of Birth | Pittsburgh, Pennsylvania |
| Special Moves | Angle Slam (Front Grapple), Ankle Lock (Lower Down Grapple Facing Down), Multiple German Suplex (Rear Grapple), Super Angle Slam (Front Turnbuckle Grapple), Moonsault Splash (Attack from Turnbuckle) |
| Light Front Grapple | Fireman's Carry, Suplex (Up), Rib Breaker (Down), Arm Wrench with Elbow Stomp (Left), Headlock Takedown (Right) |
| Heavy Front Grapple | DDT, Back Body Flip (Up), Small Package (Down), Angle Front Suplex (Left), Side Suplex (Right) |
| Light Rear Grapple | Wrestling Lift, Sleeper Hold (Up), Take Down (Down), Shin Breaker (Left), Russian Leg Sweep (Right) |
| Heavy Rear Grapple | Grapevine Choke, German Suplex (Up), School Boy (Down), Falling Back Drop (Left), Abdominal Stretch (Right) |
| Strengths | Attack-Grappling |
| Weaknesses | Flawless |
| Titles Held | WWE Champion, Intercontinental Champion, European Champion, Hardcore Champion, WWE Tag Team Champion, King of the Ring 2000 |
Booker T
| Nickname | 5 Time Champion |
| Height | 6'3" |
| Weight | 256 lbs. |
| Place of Birth | Houston, Texas |
| Special Moves | Scissors Kick (Front Grapple), Rolling Guillotine Leg Drop (Attack from Turnbuckle), Side Slam (Rear Grapple), Book End (Irish Whip Grapple) |
| Light Front Grapple | Arm Drag, Headlock (Up), Scoop Slam (Down), Arm Wrench with Hook Kick (Left), Small Package (Right) |
| Heavy Front Grapple | DDT, Bionic Spine Buster (Up), Book End (Down), Side Walk Slam (Left), Belly to Back Suplex (Right) |
| Light Rear Grapple | Sleeper Hold, Back Drop (Up), School Boy (Down), Shin Breaker (Left), Russian Leg Sweep (Right) |
| Heavy Rear Grapple | Abdominal Stretch, Atomic Drop (Up), Reverse DDT (Down), Falling Neck Breaker (Left), Backslide Pin (Right) |
| Strengths | Attack-Striking |
| Weaknesses | Attack-Joint Locks |
| Titles Held | WWE Tag Team Champion |
Rob Van Dam
| Nickname | RVD |
| Height | 6'0" |
| Weight | 235 lbs. |
| Place of Birth | Battle Creek, Michigan |
| Special Moves | Five Star Frog Splash (Attack from Turnbuckle), Van Daminator (Weapon Attack), High Angle Rolling Clutch Pin (Rear Grapple) |
| Light Front Grapple | Headlock Takedown, Suplex (Up), Jaw Breaker 01 (Down), Small Package (Left), Arm Drag (Right) |
| Heavy Front Grapple | DDT, Gordbuster (Up), Hurracanrana (Down), Double Underhook Back Drop (Left), Roll Throw (Right) |
| Light Rear Grapple | Sleeper Hold, Face Crusher 01 (Up), Take Down (Down), Pendulum Back Breaker (Left), Backslide Pin (Right) |
| Heavy Rear Grapple | Reverse DDT, German Suplex (Up), Japanese Rolling Clutch Pin (Down), Falling Neck Breaker (Left), Abdominal Stretch (Right) |
| Strengths | Basic-Jumping |
| Weaknesses | Attack-Joint Locks |
| Titles Held | Intercontinental Champion, Hardcore Champion, World Tag Team Champion |
Brock Lesnar
| Nickname | N/A |
| Height | 6'4" |
| Weight | 295 lbs. |
| Place of Birth | Minneapolis, Minnesota |
| Special Moves | F-5 (Front Grapple), Shooting Star Splash (Attack from Turnbuckle), Dragon Suplex (Rear Grapple) |
| Light Front Grapple | Choke Throw, Stalling Suplex (Up), Back Body Flip (Down), Front Suplex (Left), Stomach Breaker (Right) |
| Heavy Front Grapple | Bear Hug, Triple Power Bomb (Up), Rolling Power Bomb (Down), Triple Back Breaker (Left), Rolling Spine Buster (Right) |
| Light Rear Grapple | Rough Throw, Sleeper Hold (Up), Wrestling Lift (Down), Shin Breaker (Left), Back Drop (Right) |
| Heavy Rear Grapple | Abdominal Stretch, Atomic Drop (Up), Stomach Breaker (Down), Side Slam (Left), German Suplex (Right) |
| Strengths | Basic-Strength |
| Weaknesses | Basic-Agility |
| Titles Held | WWE Champion, King of the Ring 2002, 2003 Royal Rumble Winner |
Edge
| Nickname | N/A |
| Height | 6'4" |
| Weight | 240 lbs. |
| Place of Birth | Toronto, Ontario, Canada |
| Special Moves | Edgecution (Front Grapple), Edgecator (Lower Down Grapple Facing Up), Edge O'Matic (Rear Grapple), Spear 01 (Running Strike) |
| Light Front Grapple | Headlock Takedown, Suplex (Up), Small Package (Down), Headlock (Left), Arm Drag (Right) |
| Heavy Front Grapple | DDT, Front Suplex (Up), Manhattan Drop (Down), Neck Breaker (Left), Russian Leg Sweep (Right) |
| Light Rear Grapple | Sleeper Hold, Falling Back Drop (Up), School Boy (Down), Russian Leg Sweep (Left), Falling Neck Breaker (Right) |
| Heavy Rear Grapple | Abdominal Stretch, Face Crusher 02 (Up), Japanese Rolling Clutch Pin (Down), Side Slam (Left), German Suplex (Right) |
| Strengths | Basic-Agility |
| Weaknesses | Defense-Flexibility |
| Titles Held | Intercontinental Champion, WWE Tag Team Champion, King of the Ring 2001 |
Stacy Keibler
| Nickname | N/A |
| Height | 5'11" |
| Weight | ??? |
| Place of Birth | Baltimore, Maryland |
| Special Moves | Lip Lock (Front Grapple), Golden Hip (Rear Grapple) |
| Light Front Grapple | Snapmare, Headlock (Up), Jaw Breaker 01 (Down), Neck Breaker (Left), Arm Drag (Right) |
| Heavy Front Grapple | Cat Fight Throw, Arm Wrench with Hook Kick (Up), Manhattan Drop (Down), Bulldog (Left), Russian Leg Sweep (Right) |
| Light Rear Grapple | Sleeper Hold, Face Crusher 01 (Up), School Boy (Down), Take Down (Left), Backslide Pin (Right) |
| Heavy Rear Grapple | Grapevine Choke, Hair Pull Slam (Up), Atomic Drop (Down), Abdominal Stretch (Left), Russian Leg Sweep (Right) |
| Strengths | Defense-Flexibility |
| Weaknesses | Defense-Resilience |
| Titles Held | N/A |
Rey Mysterio
| Nickname | N/A |
| Height | 5'6" |
| Weight | 175 lbs. |
| Place of Birth | San Diego, California |
| Special Moves | 619 (Springboard Attack), West Coast Pop (Attack from Top Rope), Mysterio Rana (Rear Grapple), X-Factor (Front Grapple) |
| Light Front Grapple | Snapmare, Headlock (Up), Jaw Breaker 01 (Down), Small Package (Left), Arm Drag (Right) |
| Heavy Front Grapple | DDT, Back Body Drop (Up), Hurracanrana (Down), Neck Breaker (Left), Russian Leg Sweep (Right) |
| Light Rear Grapple | Face Crusher 01, Japanese Rolling Clutch Pin (Up), Take Down (Down), Backslide Pin (Left), Falling Neck Breaker (Right) |
| Heavy Rear Grapple | Grapevine Choke, High Angle Rolling Clutch Pin (Up), School Boy (Down), Russian Leg Sweep (Left), Wrestling Lift (Right) |
| Strengths | Basic-Agility |
| Weaknesses | Basic-Strength |
| Titles Held | WWE Cruiserweight Champion, WWE Tag Team Champion |
Chris Jericho
| Nickname | Y2J |
| Height | 6'0" |
| Weight | 227 lbs. |
| Place of Birth | Winnipeg, Manitoba, Canada |
| Special Moves | Walls of Jericho (Front Grapple, Irish Whip Grapple, Lower Down Grapple Facing Up), Lionsault (Springboard Attack), Flashback (Rear Grapple) |
| Light Front Grapple | Headlock Takedown, Suplex (Up), Scoop Slam (Down), Headlock (Left), Rib Breaker (Right) |
| Heavy Front Grapple | DDT, Hurracanrana (Up), Power Bomb Whip (Down), W-Arm Back Breaker (Left), Side Suplex (Right) |
| Light Rear Grapple | Sleeper Hold, Face Crusher 01 (Up), Hair Pull Slam (Down), Backslide Pin (Left), Back Drop (Down) |
| Heavy Rear Grapple | Abdominal Stretch, Full Nelson Face Drop (Up), School Boy (Down), Pendulum Back Breaker (Left), Russian Leg Sweep (Right) |
| Strengths | Basic-Agility |
| Weaknesses | Basic-Strength |
| Titles Held | WWE Champion, Intercontinental Champion, European Champion, Hardcore Champion, WWE Tag Team Champion |
Chris Benoit
| Nickname | The Crippler |
| Height | 5'10" |
| Weight | 229 lbs. |
| Place of Birth | Edmonton, Alberta, Canada |
| Special Moves | Crippler Crossface (Front Grapple, Irish Whip Grapple, Side Grapple Facing Down), Diving Headbutt (Attack from Turnbuckle), Multiple German Suplex (Rear Grapple) |
| Light Front Grapple | Snapmare, Snap Suplex (Up), High Angle Scoop Slam (Down), Side Suplex (Left), Dragon Screw 02 (Right) |
| Heavy Front Grapple | DDT, Gordbuster (Up), Power Bomb Whip (Down), Twirl Pile Driver (Left), Northern Light Suplex Pin (Right) |
| Light Rear Grapple | Sleeper Hold, Pendulum Back Breaker (Up), Wrestling Lift (Down), Shin Breaker (Left), Falling Back Drop (Right) |
| Heavy Rear Grapple | Abdominal Stretch, Dragon Suplex Pin (Up), Backslide Pin (Down), German Suplex (Left), German Suplex Pin (Right) |
| Strengths | Attack-Joint Locks |
| Weaknesses | Attack-Striking |
| Titles Held | Intercontinental Champion, WWE Tag Team Champion |
Trish Stratus
| Nickname | N/A |
| Height | N/A |
| Weight | ??? |
| Place of Birth | Toronto, Ontario, Canada |
| Special Moves | Stratusfaction (Front Grapple), Stratusphere (Front Turnbuckle Grapple), High Angle Rolling Clutch Pin (Rear Grapple), Giant Swing (Lower Down Grapple Facing Down) |
| Light Front Grapple | Snapmare, Headlock (Up), Scoop Slam (Down), Small Package (Left), Arm Drag (Right) |
| Heavy Front Grapple | DDT, Hurracanrana (Up), Jaw Breaker 01 (Down), Cat Fight Throw (Left), Neck Breaker (Right) |
| Light Rear Grapple | Face Crusher 01, Sleeper Hold (Up), School Boy (Down), Shin Breaker (Left), Hair Pull Slam (Right) |
| Heavy Rear Grapple | Reverse DDT, Falling Back Drop (Up), Japanese Rolling Clutch Pin (Down), Russian Leg Sweep (Left), Pendulum Back Breaker (Right) |
| Strengths | Defense-Flexibility |
| Weaknesses | Attack-Joint Locks |
| Titles Held | WWE Women's Champion |
Kane
| Nickname | Big Red Machine |
| Height | 7'0" |
| Weight | 326 lbs. |
| Place of Birth | Unknown |
| Special Moves | Choke Slam from Hell (Front Grapple, Irish Whip Grapple), Reverse Suplex (Rear Grapple), Tombstone Pile Driver (Front Grapple) |
| Light Front Grapple | High Angle Scoop Slam, Military Slam (Up), Drop Suplex (Down), Arm Wrench with Elbow Stomp (Left), Choke Throw (Right) |
| Heavy Front Grapple | Neck Hanging, Neck Hanged Slam (Up), Falling Power Bomb (Down), Side Walk Slam (Left), Front Power Slam (Right) |
| Light Rear Grapple | Abdominal Stretch, Back Drop (Up), One Hand Back Breaker (Down), Shin Breaker (Left), Falling Neck Breaker (Right) |
| Heavy Rear Grapple | Reverse DDT, Neck Hanging (Up), Full Nelson Slam (Down), Tilt Slam (Left), Side Slam (Right) |
| Strengths | Basic-Strength |
| Weaknesses | Attack-Joint Locks |
| Titles Held | WWE Champion, Intercontinental Champion, WWE Tag Team Champion |
Bubba Ray Dudley
| Nickname | N/A |
| Height | 6'4" |
| Weight | 293 lbs. |
| Place of Birth | Dudleyville |
| Special Moves | Bubba Slam (Rear Grapple), Dudley Death Drop (Double Team Grapple), Diamond Cutter (Front Grapple) |
| Light Front Grapple | Headlock, Drop Suplex (Up), High Angle Scoop Slam (Down), Back Body Drop (Left), Neck Breaker (Right) |
| Heavy Front Grapple | DDT, Power Bomb Whip (Up), Sit Down Power Bomb Pin (Down), Side Walk Slam (Left), Manhattan Drop (Right) |
| Light Rear Grapple | Hair Pull Slam, Atomic Drop (Up), Backslide Pin (Down), Falling Back Drop (Left), Falling Neck Breaker (Right) |
| Heavy Rear Grapple | Reverse DDT, Sleeper Hold (Up), School Boy (Down), Side Slam (Left), German Suplex (Right) |
| Strengths | Basic-Endurance |
| Weaknesses | Basic-Jumping |
| Titles Held | Hardcore Champion, WWE Tag Team Champion |
Shawn Michaels
| Nickname | Heartbreak Kid |
| Height | 6'1" |
| Weight | 225 lbs. |
| Place of Birth | San Antonio, Texas |
| Special Moves | Sweet Chin Music (Front Grapple), Diving Elbow Drop (Attack from Turnbuckle), Japanese Rolling Clutch Pin (Rear Grapple) |
| Light Front Grapple | Snapmare, Suplex (Up), Jaw Breaker 01 (Down), Neck Breaker (Left), Arm Drag (Right) |
| Heavy Front Grapple | DDT, Back Body Drop (Up), Jumping Pile Driver (Down), Small Package (Left), Russian Leg Sweep (Right) |
| Light Rear Grapple | Face Crusher 01, Sleeper Hold (Up), Backslide Pin (Down), Falling Neck Breaker (Left), Shin Breaker (Right) |
| Heavy Rear Grapple | Reverse DDT, Abdominal Stretch (Up), School Boy (Down), Back Drop (Left), Atomic Drop (Right) |
| Strengths | Defense-Resilience |
| Weaknesses | Basic-Strength |
| Titles Held | WWE Champion, World Heavyweight Champion, Intercontinental Champion, European Champion, WWE Tag Team Champion, 1995 and 1996 Royal Rumble Winner |
Eddie Guerrero
| Nickname | Latino Heat |
| Height | 5'8" |
| Weight | 228 lbs. |
| Place of Birth | El Paso, Texas |
| Special Moves | Frog Splash (Attack from Turnbuckle), Lasso from El Paso (Lower Down Grapple Facing Down), Splash Mountain Bomb Pin (Front Grapple), Tiger Suplex (Rear Grapple), El Paso (Lower Down Grapple Facing Up) |
| Light Front Grapple | Snapmare, Suplex (Up), Hurracanrana (Down), Headlock (Left), Arm Wrench with Elbow Stomp (Right) |
| Heavy Front Grapple | Gorry Special, Brainbuster (Up), Power Bomb Whip (Down), Shoulder Arm Breaker (Left), Small Package (Right) |
| Light Rear Grapple | Sleeper Hold, Falling Back Drop (Up), Take Down (Down), Shin Breaker (Left), Backslide Pin (Right) |
| Heavy Rear Grapple | Abdominal Stretch, Atomic Drop (Up), School Boy (Down), Russian Leg Sweep (Left), German Suplex (Right) |
| Strengths | Defense-Escape |
| Weaknesses | Basic-Recovery |
| Titles Held | Intercontinental Champion, European Champion, WWE Tag Team Champion |
Big Show
| Nickname | Big Nasty Bastard |
| Height | 7'2" |
| Weight | 500 lbs. |
| Place of Birth | Tampa, Florida |
| Special Moves | Show Stopper (Front Grapple), Eye of the Hurricane (Rear Grapple), Alleyoop (Front Grapple), Moonsault Splash 01 (Attack from Turnbuckle) |
| Light Front Grapple | Choke Throw, Military Slam (Up), High Angle Scoop Slam (Down), Headlock (Left), Knee Smash (Right) |
| Heavy Front Grapple | Neck Hanging, Drop Suplex (Up), Power Bomb Whip (Down), Side Walk Slam (Left), Body Press Drop (Right) |
| Light Rear Grapple | Rough Throw, Hair Pull Slam (Up), Shin Breaker (Down), Atomic Drop (Left), Pendulum Back Breaker (Right) |
| Heavy Rear Grapple | Neck Hanging, Reverse Suplex (Up), Stomach Breaker (Down), Side Slam (Left), One Hand Back Breaker (Right) |
| Strengths | Basic-Strength |
| Weaknesses | Basic-Agility |
| Titles Held | WWE Champion, Hardcore Champion, WWE Tag Team Champion |
Matt Hardy
| Nickname | Matt Hardy Version 1.0 |
| Height | 6'2" |
| Weight | 225 lbs. |
| Place of Birth | Cameron, North Carolina |
| Special Moves | Twist of Fate (Front Grapple), Mattitude Guillotine Leg Drop (Attack from Turnbuckle), Flashback (Rear Grapple), Splash Mountain Bomb Pin (Front Grapple) |
| Light Front Grapple | Scoop Slam, Snap Suplex (Up), Jaw Breaker 01 (Down), Arm Drag (Left), Russian Leg Sweep (Right) |
| Heavy Front Grapple | Headlock, Side Effect (Up), DDT (Down), Small Package (Left), Side Suplex (Right) |
| Light Rear Grapple | Sleeper Hold, Back Drop (Up), School Boy (Down), Falling Neck Breaker (Left), Take Down (Right) |
| Heavy Rear Grapple | Abdominal Stretch, Japanese Rolling Clutch Pin (Up), Reverse DDT (Down), Russian Leg Sweep (Left), Side Slam (Right) |
| Strengths | Basic-Agility |
| Weaknesses | Attack-Joint Locks |
| Titles Held | European Champion, Hardcore Champion, WWE Tag Team Champion |
Lita
| Nickname | N/A |
| Height | N/A |
| Weight | ??? |
| Place of Birth | N/A |
| Special Moves | Moonsault Splash (Attack from Turnbuckle), Twist of Fate (Front Grapple), Spinout Power Bomb Pin (Rear Grapple) |
| Light Front Grapple | Arm Drag, Headlock (Up), Scoop Slam (Down), Neck Breaker (Left), Small Package (Right) |
| Heavy Front Grapple | Jaw Breaker 02, Cat Fight Throw (Up), Hurracanrana (Down), Wrist Lock Suplex Pin (Left), Russian Leg Sweep (Right) |
| Light Rear Grapple | Face Crusher 01, Abdominal Stretch (Up), School Boy (Down), Shin Breaker (Left), Falling Neck Breaker (Right) |
| Heavy Rear Grapple | Reverse DDT, Back Drop (Up), Hair Pull Slam (Down), Japanese Rolling Clutch Pin (Left), Russian Leg Sweep (Right) |
| Strengths | Basic-Agility |
| Weaknesses | Attack-Joint Locks |
| Titles Held | WWE Women's Champion |
Ric Flair
| Nickname | Nature Boy |
| Height | 6'1" |
| Weight | 234 lbs. |
| Place of Birth | Charlotte, North Carolina |
| Special Moves | Figure 4 Leglock (Lower Down Grapple Facing Up), Nature Boy Special (Front Grapple), Reverse Suplex (Rear Grapple) |
| Light Front Grapple | Scoop Slam, Suplex (Up), Jaw Breaker 01 (Down), Headlock Takedown (Left), Arm Wrench with Elbow Stomp (Right) |
| Heavy Front Grapple | Neck Breaker, Stalling Suplex (Up), Pile Driver (Down), Low Blow (Left), Russian Leg Sweep (Right) |
| Light Rear Grapple | Sleeper Hold, Hail Pull Slam (Up), Backslide Pin (Down), Shin Breaker (Left), Pendulum Back Breaker (Right) |
| Heavy Rear Grapple | Abdominal Stretch, Atomic Drop (Up), School Boy (Down), Falling Back Drop (Left), Russian Leg Sweep (Right) |
| Strengths | Attack-Joint Locks |
| Weaknesses | Basic-Jumping |
| Titles Held | WWE World Heavyweight Champion (2) |
Scott Steiner
| Nickname | Big Poppa Pump |
| Height | 6'2" |
| Weight | 275 lbs. |
| Place of Birth | Detroit, Michigan |
| Special Moves | Steiner Recliner (Upper Down Grapple Facing Down), Steiner Screw Driver (Front Grapple), Tilt Slam (Rear Grapple) |
| Light Front Grapple | Fireman's Carry, Drop Suplex (Up), High Angle Scoop Slam (Down), Body Press Drop (Left), Side Suplex (Right) |
| Heavy Front Grapple | Shoulder Arm Breaker, T-Bone Suplex (Up), Front Power Slam (Down), Belly to Belly 02 (Left), Underhook Belly to Belly (Right) |
| Light Rear Grapple | Sleeper Hold, Atomic Drop (Up), Wrestling Lift (Down), Back Drop (Left), One Hand Back Breaker (Right) |
| Heavy Rear Grapple | Abdominal Stretch, Reverse Suplex (Up), School Boy (Down), German Suplex (Left), Stomach Breaker (Right) |
| Strengths | Basic-Strength |
| Weaknesses | Basic-Jumping |
| Titles Held | WWE Tag Team Champion |
Christian
| Nickname | N/A |
| Height | 5'10" |
| Weight | 225 lbs. |
| Place of Birth | Toronto, Ontario, Canada |
| Special Moves | Unprettier (Rear Grapple), Gordbuster (Front Grapple), DDT with Weapon (Weapon Attack) |
| Light Front Grapple | Headlock Takedown, Snap Suplex (Up), Scoop Slam (Down), Neck Breaker (Left), Russian Leg Sweep (Right) |
| Heavy Front Grapple | DDT, Manhattan Drop (Up), Stomach Breaker (Down), Belly to Back Suplex (Left), Shoulder Arm Breaker (Right) |
| Light Rear Grapple | Sleeper Hold, Back Drop (Up), Hair Pull Slam (Down), Shin Breaker (Left), Pendulum Back Breaker (Right) |
| Heavy Rear Grapple | Reverse DDT, Atomic Drop (Up), Backhead Crash (Down), Russian Leg Sweep (Left), Abdominal Stretch (Right) |
| Strengths | Basic-Agility |
| Weaknesses | Basic-Strength |
| Titles Held | European Champion, WWE Tag Team Champion |
D-Von Dudley
| Nickname | N/A |
| Height | 6'2" |
| Weight | 250 lbs. |
| Place of Birth | Dudleyville |
| Special Moves | Saving Grace (Rear Grapple), Dudley Death Drop (Double Team Grapple), Power Bomb (Front Grapple) |
| Light Front Grapple | Scoop Slam, Headlock (Up), Manhattan Drop (Down), Neck Breaker (Left), Stomach Breaker (Right) |
| Heavy Front Grapple | DDT, Neck Hanging (Up), Spine Buster (Down), Side Walk Slam (Left), Front Power Slam (Right) |
| Light Rear Grapple | Abdominal Stretch, Back Drop (Up), School Boy (Down), Falling Neck Breaker (Left), Shin Breaker (Right) |
| Heavy Rear Grapple | Reverse DDT, Sleeper Hold (Up), Atomic Drop (Down), Side Slam (Left), Pendulum Back Breaker (Right) |
| Strengths | Attack-Striking |
| Weaknesses | Attack-Joint Locks |
| Titles Held | WWE Tag Team Champion |
The Hurricane
| Nickname | N/A |
| Height | 6'0" |
| Weight | 191 lbs. |
| Place of Birth | Raleigh, North Carolina |
| Special Moves | Vertebreaker (Front Grapple), Eye of the Hurricane (Rear Grapple), Sumo Choke Slam (Front Grapple) |
| Light Front Grapple | Snapmare, Snap Suplex (Up), Small Package (Down), Neck Breaker (Left), Arm Drag (Right) |
| Heavy Front Grapple | DDT, Super Kick (Up), Hurracanrana (Down), Shoulder Arm Breaker (Left), Russian Leg Sweep (Right) |
| Light Rear Grapple | Sleeper Hold, Face Crusher 01 (Up), Backslide Pin (Down), Shin Breaker (Left), Falling Neck Breaker (Right) |
| Heavy Rear Grapple | Abdominal Stretch, Back Drop (Up), School Boy (Down), Backhead Crash (Left), Russian Leg Sweep (Right) |
| Strengths | Basic-Jumping |
| Weaknesses | Attack-Joint Locks |
| Titles Held | European Champion, WWE Hardcore Champion, WWE Cruiserweight Champion, WWE Tag Team Champion |
Batista
| Nickname | N/A |
| Height | 6'5" |
| Weight | 318 lbs. |
| Place of Birth | N/A |
| Special Moves | Sit Down Power Bomb (Front Grapple), Tilt Slam (Rear Grapple), People's Spine Buster (Irish Whip Grapple) |
| Light Front Grapple | Choke Throw, Suplex (Up), High Angle Scoop Slam (Down), Stomach Breaker (Left), Military Slam (Right) |
| Heavy Front Grapple | Front Power Slam, Neck Hanged Slam (Up), Power Bomb Whip (Down), Rolling Spine Buster (Left), Body Press Drop (Right) |
| Light Rear Grapple | Rough Throw, Back Drop (Up), School Boy (Down), Falling Neck Breaker (Left), Side Slam (Right) |
| Heavy Rear Grapple | Neck Hanging, Full Nelson Slam (Up), Atomic Drop (Down), Reverse DDT (Left), Half Nelson Suplex 02 (Right) |
| Strengths | Basic-Strength |
| Weaknesses | Attack-Joint Locks |
| Titles Held | N/A |
John Cena
| Nickname | N/A |
| Height | 6'1" |
| Weight | 240 lbs. |
| Place of Birth | West Newbury, Massachusetts |
| Special Moves | Death Valley Driver (Front Grapple), Protoplex (Rear Grapple) |
| Light Front Grapple | Headlock Takedown, Suplex (Up), Scoop Slam (Down), Neck Breaker (Left), Arm Wrench with Elbow Stomp (Right) |
| Heavy Front Grapple | DDT, Spine Buster (Up), Small Package (Down), Front Suplex (Left), Double Arm Suplex (Right) |
| Light Rear Grapple | Sleeper Hold, Back Drop (Up), Wrestling Lift (Down), Pendulum Back Breaker (Left), Backslide Pin (Right) |
| Heavy Rear Grapple | Grapevine Choke, German Suplex (Up), School Boy (Down), Side Slam (Left), Pendulum Back Breaker (Right) |
| Strengths | Basic-Strength |
| Weaknesses | Basic-Agility |
| Titles Held | N/A |
Torrie Wilson
| Nickname | N/A |
| Height | 5'7" |
| Weight | ??? |
| Place of Birth | Boise, Idaho |
| Special Moves | Full Swinging Slap (Front Grapple), Japanese Rolling Clutch Pin (Rear Grapple), Shattered Dreams (Front Turnbuckle Grapple) |
| Light Front Grapple | Snapmare, Headlock (Up), Jaw Breaker 01 (Down), Small Package (Left), Arm Drag (Right) |
| Heavy Front Grapple | DDT, Cat Fight Throw (Up), Body Stomp (Down), Neck Breaker (Left), Russian Leg Sweep (Right) |
| Light Rear Grapple | Sleeper Hold, Face Crusher 01 (Up), Russian Leg Sweep (Down), Falling Neck Breaker (Left), Backslide Pin (Right) |
| Heavy Rear Grapple | Grapevine Choke, Back Drop (Up), Hair Pull Slam (Down), Abdominal Stretch (Left), Falling Neck Breaker (Right) |
| Strengths | Basic-Agility |
| Weaknesses | Defense-Resilience |
| Titles Held | N/A |
Victoria
| Nickname | N/A |
| Height | 5'8" |
| Weight | 136 lbs. |
| Place of Birth | San Bernardino, California |
| Special Moves | Widow's Peak (Front Grapple), Reverse DDT (Rear Grapple) |
| Light Front Grapple | Headlock Takedown, Suplex (Up), Scoop Slam (Down), Arm Drag (Left), Headlock (Right) |
| Heavy Front Grapple | Cat Fight Throw, Torture Rack (Up), DDT (Down), Side Walk Slam (Left), Russian Leg Sweep (Right) |
| Light Rear Grapple | Sleeper Hold, Face Crusher 01 (Up), Take Down (Down), Shin Breaker (Left), Pendulum Back Breaker (Right) |
| Heavy Rear Grapple | Hair Pull Slam, Atomic Drop (Up), School Boy (Down), Back Drop (Left), Abdominal Stretch (Right) |
| Strengths | Attack-Grappling |
| Weaknesses | Defense-Resilience |
| Titles Held | WWE Women's Champion |
Steve Austin
| Nickname | Stone Cold |
| Height | 6'2" |
| Weight | 252 lbs. |
| Place of Birth | Victoria, Texas |
| Special Moves | Stone Cold Stunner (Front Grapple), Cobra Clutch (Rear Grapple), STF (Lower Down Grapple Facing Up, Lower Down Grapple Facing Down) |
| Light Front Grapple | Headlock Takedown, Suplex (Up), Scoop Slam (Down), Arm Wrench with Elbow Stomp (Left), Russian Leg Sweep (Right) |
| Heavy Front Grapple | DDT, Bionic Spine Buster (Up), Pile Driver (Down), Manhattan Drop (Left), Russian Leg Sweep (Right) |
| Light Rear Grapple | Hair Pull Slam, Sleeper Hold (Up), Atomic Drop (Down), Russian Leg Sweep (Left), Wrestling Lift (Right) |
| Heavy Rear Grapple | Grapevine Choke, German Suplex (Up), School Boy (Down), Abdominal Stretch (Left), Back Drop (Right) |
| Strengths | Attack-Striking |
| Weaknesses | Basic-Jumping |
| Titles Held | WWE Champion, Intercontinental Champion, WWE Tag Team Champion, King of the Ring 1996, Royal Rumble Winner (1997, 1998, 2001) |
Goldust
| Nickname | N/A |
| Height | 6'6" |
| Weight | 250 lbs. |
| Place of Birth | Hollywood, California |
| Special Moves | Shattered Dreams (Front Turnbuckle Grapple), Curtain Call (Front Grapple), Saving Grace (Rear Grapple) |
| Light Front Grapple | Snapmare, Headlock Takedown (Up), Jaw Breaker 01 (Down), Arm Wrench with Elbow Stomp (Left), Arm Drag (Right) |
| Heavy Front Grapple | DDT, Spine Buster (Up), Fujiwara Armbar (Down), Shoulder Arm Breaker (Left), Small Package (Right) |
| Light Rear Grapple | Abdominal Stretch, Falling Back Drop (Up), School Boy (Down), Falling Neck Breaker (Left), Take Down (Right) |
| Heavy Rear Grapple | Sleeper Hold, Atomic Drop (Up), Hair Pull Slam (Down), Russian Leg Sweep (Left), Side Slam (Right) |
| Strengths | Attack-Striking |
| Weaknesses | Basic-Jumping |
| Titles Held | Intercontinental Champion (3), Hardcore Champion, WWE Tag Team Champion |
Vince McMahon
| Nickname | N/A |
| Height | N/A |
| Weight | ??? |
| Place of Birth | Greenwich, Connecticut |
| Special Moves | Stone Cold Stunner (Front Grapple), People's Elbow (Upper Down Grapple Facing Up), Running Leg Drop (Side Down Grapple Facing Up), Octopus Stretch (Rear Grapple), DDT with Weapon (Weapon Attack) |
| Light Front Grapple | Scoop Slam, Headlock (Up), Jaw Breaker 01 (Down), Fireman's Carry (Left), Arm Drag (Right) |
| Heavy Front Grapple | DDT, Back Body Drop (Up), Drop Suplex (Down), Neck Breaker (Left), Russian Leg Sweep (Right) |
| Light Rear Grapple | Sleeper Hold, Hair Pull Slam (Up), School Boy (Down), Shin Breaker (Left), Back Drop (Right) |
| Heavy Rear Grapple | Abdominal Stretch, Pendulum Back Breaker (Up), Atomic Drop (Down), Falling Neck Breaker (Left), Russian Leg Sweep (Right) |
| Strengths | Basic-Strength |
| Weaknesses | Attack-Joint Locks |
| Titles Held | WWE Champion, 1999 Royal Rumble Winner |
Stephanie McMahon
| Nickname | N/A |
| Height | N/A |
| Weight | ??? |
| Place of Birth | Greenwich, Connecticut |
| Special Moves | Full Swinging Slap (Front Grapple), Grapevine Choke (Rear Grapple), Shattered Dreams (Front Turnbuckle Grapple), Pedigree (Front Grapple) |
| Light Front Grapple | Headlock Takedown, Headlock (Up), Small Package (Down), Russian Leg Sweep (Left), Arm Wrench with Elbow Stomp (Right) |
| Heavy Front Grapple | Snapmare, Cat Fight Throw (Up), DDT (Down), Neck Breaker (Left), Over the Shoulder Takedown (Right) |
| Light Rear Grapple | Sleeper Hold, Face Crusher 01 (Up), Take Down (Down), Russian Leg Sweep (Left), Backslide Pin (Right) |
| Heavy Rear Grapple | School Boy, Hair Pull Slam (Up), Falling Neck Breaker (Down), Abdominal Stretch (Left), Atomic Drop (Right) |
| Strengths | Basic-Agility |
| Weaknesses | Attack-Joint Locks |
| Titles Held | WWE Women's Champion |
William Regal
| Nickname | N/A |
| Height | 6'2" |
| Weight | 245 lbs. |
| Place of Birth | Blackpool, England |
| Special Moves | Regal Stretch (Lower Down Grapple Facing Down), Power of the Punch (Front Grapple), Clothesline-L (Rear Grapple) |
| Light Front Grapple | Headlock Takedown, Snapmare (Up), Small Package (Down), Arm Wrench with Elbow Stomp (Left), Russian Leg Sweep (Right) |
| Heavy Front Grapple | Double Arm Suplex, Shoulder Arm Breaker (Up), W-Arm Driver 01 (Down), Sambo Suplex (Left), Regal Cutter (Right) |
| Light Rear Grapple | Sleeper Hold, Wrestling Lift (Up), Take Down (Down), Falling Neck Breaker (Left), Shin Breaker (Right) |
| Heavy Rear Grapple | Abdominal Stretch, Half Nelson Suplex 02 (Up), School Boy (Down), Atomic Drop (Left), Back Drop (Right) |
| Strengths | Attack-Striking |
| Weaknesses | Basic-Jumping |
| Titles Held | Intercontinental Champion, European Champion, WWE Tag Team Champion |
Dawn Marie
| Nickname | N/A |
| Height | 5'8" |
| Weight | ??? |
| Place of Birth | Woodbridge, New Jersey |
| Special Moves | Lip Lock (Front Grapple), Reverse Momo Clutch Pin (Rear Grapple) |
| Light Front Grapple | Snapmare, Headlock (Up), Scoop Slam (Down), Arm Wrench with Elbow Stomp (Left), Low Blow (Right) |
| Heavy Front Grapple | DDT, Cat Fight Throw (Up), Small Package (Down), Fujiwara Armbar (Left), Russian Leg Sweep (Right) |
| Light Rear Grapple | Sleeper Hold, Face Crusher 01 (Up), Take Down (Down), Abdominal Stretch (Left), Falling Neck Breaker (Right) |
| Heavy Rear Grapple | Grapevine Choke, Hair Pull Slam (Up), School Boy (Down), Back Drop (Left), Russian Leg Sweep (Right) |
| Strengths | Basic-Agility |
| Weaknesses | Defense-Resilence |
| Titles Held | N/A |
Tajiri
| Nickname | Japanese Buzzsaw |
| Height | 5'9" |
| Weight | 205 lbs. |
| Place of Birth | Kumamoto, Japan |
| Special Moves | Buzzsaw Kick with Poison Mist (Front Grapple), Dragon Suplex Pin (Rear Grapple) |
| Light Front Grapple | Headlock Takedown, Snap Suplex (Up), Scoop Slam (Down), Arm Drag (Left), Small Package (Right) |
| Heavy Front Grapple | DDT, Northern Light Suplex Pin (Up), Hurracanrana (Down), Arm Wrench with Hook Kick (Left), Russian Leg Sweep (Right) |
| Light Rear Grapple | Face Crusher 01, Sleeper Hold (Up), Backslide Pin (Down), Abdominal Stretch (Left), Back Drop (Right) |
| Heavy Rear Grapple | Octopus Stretch, German Suplex Pin (Up), Japanese Rolling Clutch Pin (Down), Abdominal Stretch (Left), Russian Leg Sweep (Right) |
| Strengths | Basic-Agility |
| Weaknesses | Defense-Resilience |
| Titles Held | WWE Cruiserweight Champion |
Al Snow
| Nickname | N/A |
| Height | 6'0" |
| Weight | 234 lbs. |
| Place of Birth | Lima, Ohio |
| Special Moves | Snow Plow (Front Grapple), Full Nelson Face Drop (Rear Grapple), DDT with Weapon (Weapon Attack) |
| Light Front Grapple | Snapmare, Suplex (Up), Scoop Slam (Down), Double Arm Suplex (Left), Side Suplex (Right) |
| Heavy Front Grapple | DDT, Trapping Headbutts (Up), Fujiwara Armbar (Down), Small Package (Left), Belly to Belly 01 (Right) |
| Light Rear Grapple | Face Crusher 01, Sleeper Hold (Up), Take Down (Down), Shin Breaker (Left), Falling Neck Breaker (Right) |
| Heavy Rear Grapple | Abdominal Stretch, Japanese Rolling Clutch Pin (Up), School Boy (Down), Rolling Back Drop (Left), Russian Leg Sweep (Right) |
| Strengths | Attack-Grappling |
| Weaknesses | Basic-Jumping |
| Titles Held | European Champion, Hardcore Champion, WWE Tag Team Champion |
Chavo Guerrero
| Nickname | N/A |
| Height | 5'9" |
| Weight | 185 lbs. |
| Place of Birth | El Paso, Texas |
| Special Moves | Brainbuster (Front Grapple), High Angle Rolling Clutch Pin (Rear Grapple) |
| Light Front Grapple | Snapmare, Snap Suplex (Up), Scoop Slam (Down), Arm Wrench with Elbow Stomp (Left), Arm Drag (Right) |
| Heavy Front Grapple | DDT, Hurracanrana (Up), Gorry Special Bomb (Down), Roll Throw (Left), Northern Light Suplex Pin (Right) |
| Light Rear Grapple | Sleeper Hold, Wrestling Lift (Up), Take Down (Down), Backslide Pin (Left), Falling Back Drop (Right) |
| Heavy Rear Grapple | Abdominal Stretch, German Suplex Pin (Up), School Boy (Down), Pendulum Back Breaker (Left), Russian Leg Sweep (Right) |
| Strengths | Basic-Agility |
| Weaknesses | Defense-Resilience |
| Titles Held | WWE Cruiserweight Champion, WWE Tag Team Champion |
Randy Orton
| Nickname | N/A |
| Height | 6'4" |
| Weight | 245 lbs. |
| Place of Birth | St. Louis, Missouri |
| Special Moves | Diamond Cutter (Front Grapple), German Suplex Pin (Rear Grapple) |
| Light Front Grapple | Scoop Slam, Snap Suplex (Up), Tiger Spin (Down), Small Package (Left), Arm Drag (Right) |
| Heavy Front Grapple | DDT, Double Arm Suplex (Up), Pile Driver (Down), Orton Driver (Left), Fujiwara Armbar (Right) |
| Light Rear Grapple | Sleeper Hold, Back Drop (Up), Take Down (Down), Shin Breaker (Left), Falling Neck Breaker (Right) |
| Heavy Rear Grapple | Abdominal Stretch, Atomic Drop (Up), School Boy (Down), Side Slam (Left), Russian Leg Sweep (Right) |
| Strengths | Basic-Agility |
| Weaknesses | Defense-Escape |
| Titles Held | N/A |
Chris Nowinski
| Nickname | N/A |
| Height | 6'5" |
| Weight | 270 lbs. |
| Place of Birth | Arlington Heights, Illinois |
| Special Moves | Honor Roll (Front Grapple), Reverse DDT (Rear Grapple) |
| Light Front Grapple | Headlock Takedown, Suplex (Up), Scoop Slam (Down), Headlock (Left), Arm Drag (Right) |
| Heavy Front Grapple | DDT, Spine Buster (Up), Jaw Breaker 01 (Down), Back Body Drop (Left), Russian Leg Sweep (Right) |
| Light Rear Grapple | Sleeper Hold, Back Drop (Up), Take Down (Down), Wrestling Lift (Left), Falling Neck Breaker (Right) |
| Heavy Rear Grapple | Abdominal Stretch, Atomic Drop (Up), School Boy (Down), Side Slam (Left), Russian Leg Sweep (Right) |
| Strengths | Attack-Grappling |
| Weaknesses | Basic-Jumping |
| Titles Held | Hardcore Champion |
Test
| Nickname | N/A |
| Height | 6'6" |
| Weight | 282 lbs. |
| Place of Birth | Toronto, Ontario, Canada |
| Special Moves | Running Big Boot (Running Strike), Sideswipe Falling Power Bomb (Front Grapple), Test Drive (Rear Grapple) |
| Light Front Grapple | High Angle Scoop Slam, Drop Suplex (Up), Military Slam (Down), Choke Throw (Left), Stomach Breaker (Right) |
| Heavy Front Grapple | Neck Breaker, Front Power Slam (Up), Body Press Drop (Down), Side Walk Slam (Left), Neck Hanged Slam (Right) |
| Light Rear Grapple | Abdominal Stretch, Back Drop (Up), Side Slam (Down), Rough Throw (Left), Falling Neck Breaker (Right) |
| Heavy Rear Grapple | Reverse DDT, Full Nelson Slam (Up), Pump Handle Slam (Down), Pendulum Back Breaker (Left), Stomach Breaker (Right) |
| Strengths | Attack-Striking |
| Weaknesses | Basic-Agility |
| Titles Held | Intercontinental Champion, Hardcore Champion, European Champion, WWE Tag Team Champion |
Lance Storm
| Nickname | N/A |
| Height | 5'11" |
| Weight | 230 lbs. |
| Place of Birth | Calgary, Alberta, Canada |
| Special Moves | Sharpshooter (Lower Down Grapple Facing Up), Super Kick (Front Grapple), Back Drop Pin (Rear Grapple), Half Boston Crab (Lower Down Grapple Facing Down) |
| Light Front Grapple | Snapmare, Suplex (Up), Jaw Breaker 01 (Down), Arm Drag (Left), Neck Breaker (Right) |
| Heavy Front Grapple | Headlock, Roll Throw (Up), Manhattan Drop (Down), Orton Driver (Left), Russian Leg Sweep (Right) |
| Light Rear Grapple | Sleeper Hold, Back Drop (Up), Wrestling Lift (Down), Shin Breaker (Left), Pendulum Back Breaker (Right) |
| Heavy Rear Grapple | Abdominal Stretch, German Suplex Pin (Up), School Boy (Down), Russian Leg Sweep (Left), Side Slam (Right) |
| Strengths | Attack-Joint Locks |
| Weaknesses | Defense-Resilience |
| Titles Held | Intercontinental Champion, WWE Tag Team Champion |
Rikishi
| Nickname | N/A |
| Height | 6'1" |
| Weight | 350 lbs. |
| Place of Birth | Samoa |
| Special Moves | Rikishi Driver (Front Grapple), Full Nelson Slam (Rear Grapple), Hip Drop (Upper Down Grapple Facing Up) |
| Light Front Grapple | High Angle Scoop Slam, Drop Suplex (Up), Manhattan Drop (Down), Choke Throw (Left), Body Stomp (Right) |
| Heavy Front Grapple | Belly to Back Suplex, Military Slam (Up), Super Kick (Down), Front Power Slam (Left), Side Walk Slam (Right) |
| Light Rear Grapple | Abdominal Stretch, Back Drop (Up), Take Down (Down), Shin Breaker (Left), Falling Neck Breaker (Right) |
| Heavy Rear Grapple | Reverse DDT, Atomic Drop (Up), School Boy (Down), Side Slam (Left), Russian Leg Sweep (Right) |
| Strengths | Defense-Resilience |
| Weaknesses | Basic-Jumping |
| Titles Held | Intercontinental Champion, WWE Tag Team Champion |
Goldberg
| Nickname | N/A |
| Height | 6'4" |
| Weight | 283 lbs. |
| Place of Birth | Atlanta, Georgia |
| Special Moves | Jack Hammer (Front Grapple), Spear (Running Strike), Tilt Slam (Rear Grapple) |
| Light Front Grapple | High Angle Scoop Slam, Military Slam (Up), Body Press Drop (Down), Front Grapple Push (Left), Hip Toss (Right) |
| Heavy Front Grapple | Fujiwara Armbar, Falling Press Slam (Up), Front Power Slam (Down), Neck Crank Suplex (Left), Sideswipe Falling Power Bomb (Right) |
| Light Rear Grapple | Sleeper Hold, Rough Throw (Up), Stomach Breaker (Down), Back Drop (Left), Pendulum Back Breaker (Right) |
| Heavy Rear Grapple | Grapevine Choke, Reverse Suplex (Up), Full Nelson Slam (Down), German Suplex (Left), Test Drive (Right) |
| Strengths | Defense-Resilience |
| Weaknesses | Basic-Jumping |
| Titles Held | N/A |
Chapter 2 - General Strategies
This section provides a handful of general strategies for playing against your friends or challenging the computer in solo play.
- Know your wrestler! It's an obvious tip but it's also one of the most important. Check over the wrestler biographies and know the superstar's strengths and weaknesses. If your superstar's weakness is "Basic: Jumping" then he won't excel off the turnbuckle or with flying attacks off the apron. You can perform them certainly but don't expect to get the distance or damage of a superstar that excels in that area.
- Similar to the first tip, it's also wise to know your wrestler's special moves and how they're performed. For instance, to perform Ric Flair's Nature Boy Special, you must use a front grapple while pressing the special move buttons (A + B). If you don't do a front grapple, Flair won't perform that particular special move. All of the special moves and how to perform them are revealed in the wrestler bio section of this guide.
- Mix up your attacks. Don't constantly perform light or heavy grapples. Use a full strike combination (keep pressing B) or just use two strikes then go in for the light or heavy grapple. If you use the same maneuver over and over, expect the computer or a friend to start countering very easily. If you become predictable, it's easy to anticipate the move and have a finger primed and ready to press the L or R button to nail that counter. Same goes for when you plan to go for your special move. Throw a punch or two first so it's more difficult for your opponent to counter.
- Don't forget to use your superstar's taunts. They increase your adrenaline gauge. And the faster you raise your adrenaline, the closer you are to being able to perform a powerful finishing move. Note that you are vulnerable to attack while your superstar enacts his taunt animation. However, if your opponent gets close just hit a button to get out of the taunt and resume fighting.
- It can't be stressed enough that counters are extremely key to all match success. You should not rely on the helpful hints provided by the game as to when to counter and what button to use. Instead, memorize the appropriate counter button for the specific situation. If your opponent is punching or kicking, counter with the R button; if your opponent is using a weapon, counter with the R button; if your opponent attempts a grapple, use the L button; if your opponent throws a weapon, counter with the L button; and if your opponent attempts a special move, counter with the L + R button.
- Each superstar's spirit meter is your gauge on how the match is currently progressing. If you're in the red, you have the momentum; if you're in the blue, you're almost done and will likely be pinned. If you're in the green then you're somewhere in between. Effective counters and attacks improve your superstar's spirit. When you're ahead in the match (possess a greater spirit), keep the pressure on. Use everything in your arsenal, like submission holds (especially if your wrestler excels with them). Pick your opponent up off the ground (mixing it up one what you perform from there), and take advantage of the situation with a pin attempt. Close the book on your opponent and don't let him get back in the match with a few counters.
- Don't hesitate to take the fight outside the ring. Pounce on an opponent attempting to follow you out; you can snag a weapon from underneath the ring, or can try and keep your opponent out long enough to get a count out win.
Chapter 3 - Match Strategies
This section offers some strategies specific to the different match types available in WrestleMania XIX.
Tag Team: The classic two-on-two tag team match-up. It's mostly about using your teammate effectively (unless you're playing with a human partner). Memorize the following commands and use them at the appropriate moments to help you win the match:
- Attack current legal opponent and interrupt pin: Z button plus control pad UP. If you want to double team the legal opponent, use this command. If you've been pinned and need immediate help to survive, call in your partner with this command.
- Attack current non-legal opponent and prevent run-in: Z button plus control pad LEFT. You've just pinned the legal opponent. Use this command to send your teammate into the ring to prevent the other opponent from interrupting the pin.
- Set up partner for tag team move: Z button plus control pad DOWN. Pull off some double team moves through this set up command.
- Attack/distract the referee: Z button plus control pad RIGHT. Have your partner distract the ref while you grab a weapon from underneath the ring and smash the legal opponent over the head a few times.
- Triple Threat: Three superstars compete in the ring; the winner is the first to score a submission or pinfall. It's every superstar for himself (or herself) but expect to get teamed up on occasionally…or if you're really unlucky, expect to get teamed up on frequently.
- Fatal Four Way: Four superstars compete in the ring; the winner is the first to score a submission or pinfall. Avoid getting double-teamed as much as possible and work on the weakest wrestler. If you've knocked one opponent down, look for a chance to double team another guy for a few easy blows.
- Handicap: Handicap is similar to a triple threat except it is two on one team and just one on another. You can select to be on the two-man team or choose to face those opponents alone. Slam opponents into each other to knock them both down then quickly unleash another attack on the closest foe.
- Royal Rumble: Be the last man standing from up to 29 other wrestlers. Eliminate other superstars by throwing them out of the ring. Though it won't be easy, you should try to avoid being ganged up on. As Revenge Mode will clearly show you, fighting in an outnumbered situation can drain your spirit quickly. Target weak wrestlers; actively seek them out because they'll be much easier to toss out of the ring (just Irish Whip them close to the side). If they try to hang on, use the B button to unleash strikes to knock them to the ground and out of the tournament.
Match Strategies - cont.
- Hardcore Match: Anything goes in a hardcore match and it primarily means the addition of weaponry. You'll find an arsenal scattered around the ring (pipes, chairs, trash cans) and even more weapons underneath the ring. Weapon strikes are excellent for building spirit (and draining your opponent's) but not good for boosting adrenaline. Don't get too greedy. These strikes are fairly easily countered by hitting the R button; if countered, your opponent grabs the weapon and turns the tables on you! Weapons are also great for opening a wound and don't forget to perform some DDTs on the chairs. Note that pinfalls count anywhere so you can fight outside the ring and even pin your opponent there but the refs are typically too slow to get off a three count from that far.
- Ladder Match: In a ladder match, a belt is suspended above the ring. You must set up the ladder underneath the belt, climb the ladder, and grab the belt to win the match. Lining up the ladder is the first task. Look for the shadow of the belt and place it directly underneath. If you're off, you won't be able to grab the belt after the hard work of getting up the ladder. Secondly, it's often easier to let a computer opponent start climbing the ladder, allowing you to punch or kick him off. That should buy you enough time to get to the top and grab the belt. If you want to pummel your opponent first, do a finishing move preferably as far away from the ladder as possible.
- Table Match: Toss your opponent through the table to win a table match. Grab either table outside the ring (one starts on either side) and set it up inside the ring. You can Irish Whip an opponent onto the table then climb the table yourself and perform a slam or you can set up the table on a turnbuckle, Irish Whip your opponent into it, and perform a running attack to smash the table. Placing the table in a turnbuckle can be tricky. Walk to the turnbuckle and press X plus move the control stick in the direction of the turnbuckle to prop the table up.
- TLC Match: The TLC match has the same rules as a ladder match but with tables and chairs for added punishment. Whack your opponent with some chair and table attacks before setting up that ladder and going for the win. Use the same tactics as a ladder match, but just don't hesitate to employ those weapons.
- Cage Match: The only way to win a cage match is to climb to the top of the cage and out of the ring. All general strategies apply here. You certainly want to pummel your opponent into a pulp before attempting to get out of the cage, but there will be times when you need to make a quick save to stop your opponent from winning. Rattle the cage to knock off a fleeing opponent. If it's a triple threat or fatal four way, you can Irish Whip opponents into the appropriate side of the cage to knock escaping superstars off.
- Hell in a Cell: Compete in an enclosed cell, though fighting can also occur on top of the cell. You can also bust through the cell by Irish Whipping an opponent into the wall three times (it is how you'll reach the top of the cage and snag any weapons underneath the ring). And if you're fighting on top of the cage, perform a suplex or other slam three times on a panel and knock your opponent through for a crushing blow (it breaks on the third blow).
- Ironman Match: Force your opponent to submit as many times as possible within the time limit. Ideally you should select a superstar that excels at joint locks and even has a submission hold as their finishing move.

Chapter 4 - Revenge Mode Walk-through
This section offers a walk-through of WrestleMania XIX's new "Revenge" story mode. In Revenge mode, you've been kicked out of the WWE by Vince McMahon but offered a chance at revenge by fellow WWE superstar, Stephanie McMahon. Revenge mode sends you through a construction site, shopping mall, parking lot, and harbor in an attempt to ruin Vince's wrestling empire.
Revenge mode is a lot tougher than it may appear on the surface. You are often forced to battle two or three enemies at a time. And even though these might be just security officers and dock workers, they have mastered the art of wrestling maneuvers and can dish out a lot of punishment in a short amount of time. Furthermore, you're at the mercy of the clock too; these revenge mode missions have time limits that must be adhered to or the mission ends in failure.
Your first choice in Revenge mode is which WWE superstar to pick. Quick finishing moves can definitely help out in the long run. These special moves are key to quickly draining enemy energy and it certainly helps if they can be performed quickly. Wrestlers with running attack special moves (such as Test, Goldberg, and Edge for instance) certainly provide an advantage. Note that if you chose Goldberg, the ending movie differs slightly than if you used any other superstar.
One of the most frequent challenges is to knock a specific number of wrestlers off an area within a certain amount of time. This can include throwing workers off the harbor or chucking workers off a high platform at the construction site. There are multiple ways to knock these enemies off.
- Face the enemy so the enemy is between you and the edge. Use strikes in combination (press the B button) to push the enemy off the edge. He'll likely lose his balance, fall off, and grab hold of the edge. Walk up to the enemy's hands and use the B button to stomp on his fingers. Two or three strikes will make the enemy lose grip and fall off.
- Instead of using strikes to throw off the enemy, use the Irish Whip maneuver. Stand between the enemy and the edge (with your back to the edge) and press Y plus A at the same time (tap them) to send the enemy on an Irish Whip move off the edge. If the enemy is fairly healthy, he'll lose his balance, fall off, and grab hold of the edge. Now just use B strikes to kick his hand and send him off.
- Use the Irish Whip technique against an enemy with exhausted energy and the enemy won't just lose his balance and grab hold of the edge--he'll be thrown off instantly.
- Use choke throws or similar moves to toss enemies off the edge.
You can use a variety of wrestling moves to weaken encountered enemies. Save up for special finishing moves and use them at key times. For instance, in a mission where you must reach a certain location, use finishing moves to keep enemies down for a longer period of time, providing the opportunity to scamper quickly to the destination.
Revenge Mode Tips - cont.
Weapons are scattered throughout some missions (certain weapon locations are mentioned in the mission walk-throughs) and should be used to help weaken your enemies. Bash enemies in the head when they're standing or pound them on the ground if the enemy has fallen. The enemies are fairly adept at stealing the weapon from your grip so don't use too many standing blows in a row. If the weapon is taken, use the R button to counter and grab the weapon back.
In missions where you are facing multiple enemies, an effective strategy is to weaken one's "spirit" (essentially the health meter) until it's blue or complete gone. That enemy will stay down longer after attacked. Instead of throwing him out of your current location, keep him around and concentrate on the other enemies. He'll stay down longer allowing you to work on the other enemies that arrive.
The biggest plus in Revenge mode is that you earn money for every completed mission. The money can be used in ShopZone to purchase Create a Superstar parts, entrances, moves, and weapons and ability points. Cash is awarded for five different categories:
Base Points: A fixed dollar amount for completing the mission.
Technique Points: Earn more cash by performing special moves and performing a variety of moves. It pays to not use the same maneuver over and over.
Opponent Bonus: Bigger bonus for tougher enemies.
Objective Bonus: You'll receive a higher bonus for utilizing weaponry.
Time Bonus: Complete missions quickly to receive a higher bonus.
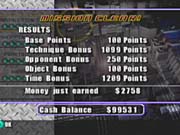
You also receive cash in a sixth category: the amount of points you receive during the mission. Score points by performing strikes and maneuvers on your enemies. Generally the more damaging the move, the more points you receive (perform finishers to receive the most points).
Money accumulates fairly slowly. There is a lot to purchase in ShopZone; if you want everything, you'll have to play missions over and over again.
Some missions are good for accumulating cash. Any mission that requires you to throw enemies off an edge can become a cash cow. Throw all but one off as quickly as possible. Instead of throwing off the last enemy, keep him around and keep performing quick finishing moves (each adds to your point total and the technique bonus). But don't run out of time! Throw off that last enemy before time runs out or you'll lose all of your progress.
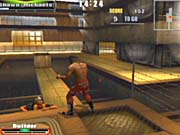
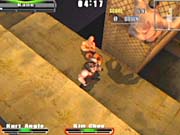
Construction Site Mission 1
Objective: Prevent the workers from constructing the arena. Within the time limit, throw the workers off the construction site platform.
Time Limit: 15 minutes
Enemies: 5
This is the first of many "knock people off ledges" missions in the Revenge mode. Stick near the edges and use the Irish Whip move to fling enemies off the edge. If an enemy tries to regain their balance, start striking until the enemy falls off. If the enemy hangs onto the edge, use strikes to kick the enemy off. You can also drain the enemy's energy with standard wrestling moves (specials are always effective) then Irish Whip them off in a single move. Or use choke throws or other tosses to hurl an enemy off the edge.
Construction Site Mission 2
Objective: Continue to prevent workers from constructing the area. More workers are seeking you out. Within the time limit, knock them off the construction site platform!
Time Limit: 10 minutes
Enemies: 8
Now you must battle two enemies at once. But the same strategy applies. Keep striking an enemy near the edge to send him off; as the enemy hangs on to the edge, use strikes to kick him off. Don't forget your Irish Whips and throw moves to send them flying off the edge. Use weapons nearby to deplete an enemy's health quickly. While one enemy is down (or been thrown off), attack the other aggressively near the edge. You'll also face a random WWE superstar in this one.
Construction Site Mission 3
Objective: Take out Vince's reinforcements! Throw Vince's reinforcements off of the high rise platform!
Time Limit: 15 minutes
Enemies: 10
This is pretty much the same situation as the previous mission, with just a few more enemies to deal with. The same strategies apply. Look to Irish Whip an enemy off the edge or just use strikes to knock the enemy off. If an enemy hangs onto the edge, use strikes to kick the enemy off. You'll be double-teamed again, so try and keep one enemy down at all time. If you can wear one out, work on the other guy. If an enemy is low on health, he'll stay down longer, which means he'll stay out of your way longer.

Construction Site Mission 4
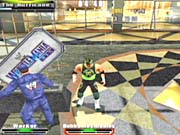
Objective: You've been challenged to a little friendly competition! Compete against a superstar to see who can throw off more workers within the time limit.
Time Limit: 5 minutes
In this mission, there's no required number of workers to toss off the side. Instead, you compete against a random WWE superstar to see who can throw off the most workers in the five minute time limit. Prevent the superstar from throwing off guys, if possible. Hit him when he's engaged. You can also knock the superstar off, which gives you some extra time against the workers. Accumulate more points than your opponent, then just work to prevent him from scoring any more. Just stay engaged with the superstar and dish out some power moves to keep him on the ground and away from the other workers.
Construction Site Mission 5
Objective: Vince sent a superstar after you, so you must take him out! Within the time limit, take out the superstar guarding the wrecking ball control room.
Time Limit: 10 minutes
This is one of the tougher revenge missions. First you must figure out where the WWE superstar even is, then figure out how to get there, and finally figure out how to deal with the two workers preventing you from reaching the superstar! That doesn't even take into consideration what you have to do to the superstar once you find him!
As soon as the mission begins, go toward the large staircase on the far side of the site. When you get to the small fence, climb the ledge to the left. Note the chain link fence on the right; you can climb this fence. The superstar is on the ledge at the top of the fence.
The main problem is you can't simply climb the fence because the other two workers will shake the fence, which knocks you back down to the ground. You must incapacitate the other two workers long enough to climb the fence and reach the superstar. Pummel the two workers and build to your special move ability. Take them down with special moves. It may be wiser to do this away from the fence (once you know its location) so you can then run back to the fence and start the climb while the other workers remain on the ground.
Even if you do reach the top, the workers will follow and pose a difficult triple-team situation. The object is to simply toss the superstar off the left side (the right side is ground). You could toss him off the right side; the fall will cause severe injury but he'll come back up the fence (as will any worker thrown off the right side) but with little or no energy. To complete the mission, throw the superstar off the left side.
Construction Site Mission 6
Objective: Protect the Wrecking Ball controls! You must guard the wrecking ball controls from the workers within the time limit. You will have to use these controls to destroy the arena. Don't let anyone reach the controls!
Time Limit: 5 minutes.
Remember that chain link fence from the previous mission? Now you must guard it from enemy workers and a random "boss" character. Inevitably, an enemy will begin to climb the fence. You must shake the fence (with the A button) to knock any climbers down. Don't let any enemy reach the top or the mission ends in failure and you must start over from the beginning. You could wait until the climber gets high, however; the long fall hurts!
Perform your finishing moves to keep workers on the ground. You don't have to throw people off the side; it's better to have them hurt and slow to get up, because if you throw off a worker, a fresh replacement arrives ready to try and climb that fence. Protect the fence for five minutes to complete the mission.
Shopping Mall Mission 1
Objective: Take out the shopping mall security! Give the security a beating that will never forget. You must knock them all out and make them bleed within the time limit.
Time Limit: 20 minutes
Enemies: 4
There are several missions similar to this one: knock out your enemies and make them bleed! The easiest way to accomplish this task is to use a weapon. Look for one on the shopping mall floor. When your opponent is standing, use strikes to nail them in the head. If the enemy is on the ground, use strikes aimed for their head.
Shopping Mall Mission 2
Objective: Stephanie has been detained by the security force. Within the time limit, break into the security office.
Time Limit: 10 minutes
In this mission, there aren't a specific number of enemies to incapacitate. Instead, you must locate Stephanie McMahon and break down the obstruction blocking her escape. The first part of your mission is locating her. Go down the escalator and cross the middle fountain. Find Stephanie behind the glass-like obstruction.
Avoid the enemies until you reach the security office. Now, just fight any enemies encountered near the door. After tossing one to the ground, shift your focus to the door. Use strikes to pound away at the door at every opportunity. You can also whip enemies into the door to cause damage. The mission concludes once you've destroyed the security office door and freed Stephanie. If you're having trouble getting damage on the door, concentrate on the enemies for a bit and get them to low energy so they won't get up as quickly.
Shopping Mall Mission 3
Objective: Destroy Vince's WrestleMania promotional signage! Destroy all of Vince's WrestleMania signs before time runs out.
Time Limit: 5 minutes
There are three signs to destroy. While the task may seem easy, it's actually quite difficult because the signs can sustain a decent amount of damage, there are two enemies to deal with, and you're on a tight schedule with just a five minute time limit.
You'll need to shift your attacks between the enemies and the sign. Pound the sign with strikes at every opportunity. Face the sign, press the control stick against the sign, and use the B button to strike. After destroying a sign, use the Y button to run to the next sign and begin a second wave of attacks. Try to fight near the sign because your attacks with other enemies may damage the sign and plus when you do throw an enemy down, you're close to the sign to engage the promotional material with strikes.
Shopping Mall Mission 4
Objective: Prevent Vince's security from reaching the briefcase. Vince has stored his WrestleMania main event contract in this briefcase. Prevent his security personnel form getting the briefcase within the time limit.
Time Limit: 5 minutes
This is similar to the construction site mission where you had to prevent workers from climbing the chain fence. Here you must prevent workers from climbing the pole, which leads to Vince's briefcase. To shake the pole, press toward the pole and use the B button. Stay close to the pole and switch targets frequently so you're attacking the enemy nearest the pole. Don't worry about special moves, especially if they're long; while you're performing a finishing move on one guy, the other is likely climbing the pole to victory!
Shopping Mall Mission 5
Objective: Raise havoc and destroy everything in sight! Destroy 20 objects in the mall before time runs out.
Time Limit: 10 minutes
Once again you don't have to worry about incapacitating other workers. Now you're just out to destroy as many objects as you can in the shopping mall! There are enemies in there area, however, and they will try and stop you. Don't deviate from your mission just to tangle with the area's enemies.
Head up the escalator to the second floor; it's littered with breakable objects and it won't take you long to complete the mission if you stay on the upper level. You can break benches, trees, windows, and even the railing along the upper floor edge. Break a railing and move to the adjacent one and break it for another point. Note that you don't receive credit if an enemy happens to break one of the objects. Run away from the workers if necessary to find a brief, quiet place to break more stuff.
Shopping Mall Mission 6
Objective: Protect your getaway car and try to destroy your opponent's car.
Time Limit: 10 minutes
This is one of the toughest revenge mode missions. There are two cars in the shopping mall: your car and your opponent's car. The object is to destroy your opponent's car (marked with the yellow arrow) but your opponent can destroy your car. The problem is your opponent is very aggressive about destroying your car; furthermore, he's brought along a worker friend that makes matters very difficult. The worker can keep you occupied while your opponent (a boss character) beats your car into metal shards.
There's a sledgehammer on the ground between the two cars. You'll need to use the sledgehammer to demolish the car. If you don't use the sledgehammer, the boss will and there's no way to destroy the boss' car with fists faster than the boss destroys your car with the sledgehammer.
Get the sledgehammer as quickly as possible and work on incapacitating the two enemies. Get their energy low so that they take awhile to get up and rejoin the action. Keep the fighting near your opponent's car so you can pound on the vehicle after throwing down the two foes. Note that when the boss grabs the sledgehammer, he'll likely make a quick beeline for your car. If the worker grabs the sledgehammer, he won't try and hit the car; he'll only hit you.
At every opportunity, run with hammer in hand to the target car and get in some strikes. Even try running around the car avoiding the two foes. If you're ahead of them, stop and smash the car a couple times then keep running. If the boss grabs the hammer and heads to your car, chase him quickly and grab him before he can inflict heavy damage. The cars fall fairly quickly to the mighty sledgehammer. If you perform a finisher move, use it on the boss. If you use it on the worker, the boss will likely grab the hammer and start beating on your car during the entire process.
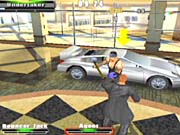
Parking Lot Mission 1
Objective: Destroy the cars in Vince's parking lot! Put three of Vince's security force through a car within the time limit.
Time Limit: 10 minutes
In the first parking lot mission, you must slam three enemies into the cars in Vince McMahon's parking lot. The easiest way to accomplish this task is to use the smaller, sportier cars (easier to get the enemies on). Stand near one of the cars and use the Irish Whip maneuver to send the enemy into the car; the enemy will roll on top of the car. Use the Y button while pressing against the car to join the enemy atop the car. Hit X to grab the enemy then perform some sort of slam maneuver to toss the enemy onto the car. You receive a notification if successful.
Parking Lot Mission 2
Objective: Take out Vince's security force! Give the security force a beating they will never forget. You must knock them all out and make them bleed within the time limit.
Time Limit: 15 minutes
Enemies: 5
In this mission you need to make five enemies bleed within the allotted time limit. Note that you won't face more than two enemies at any given time. As with the previous missions of this type, the key is using the weapon. Grab the sledgehammer and use it to strike the enemies. Use a finisher move to drain an enemy's energy, which causes them to stay down longer. Meanwhile, this gives you more chances to work one-on-one against the other enemy. Bash the foe with the sledgehammer. Finish off all five to complete the mission.
Parking Lot Mission 3
Objective: Seek out the payment Stephanie has left for you! Find and capture the briefcase with your payment.
Time Limit: 10 minutes
This mission requires several different skills to complete. First you must be able to dodge moving traffic! The parking lot is now filled with moving cars. If you're hit by a moving car, the mission instantly ends in failure. Navigating the cars is very tough. You can rotate the camera around and try to look for oncoming traffic or just make a mad dash for the other side.

Go to the end of the ramp (adjacent to the truck). At the bottom of the ramp, turn right and cross to the fair staircase. Once up, you have two guards to contend with. Your goal is to reach the pole near this platform's ledge (overlooking the traffic below). You need to climb the pole then swing from the pole to the briefcase. Look for a sledgehammer to the right of the pole for assistance in the ongoing beat down.
Don't worry about the pole initially. Concentrate on the two enemies. Get their energy down. Fight away from the pole so you have some extra time to climb the pole after knocking them down to the ground. Perform some finishing moves on the enemies to keep them down for awhile. If you don't, the enemies could shake the pole while you're climbing and knock you back to the ground. Once up the pole, rotate around so you're facing the briefcase. Press Y to swing at the briefcase. It takes a moment for your character to build the momentum to swing, so lead the briefcase slightly.
Parking Lot Mission 4
Objective: Destroy Vince's big rig truck! Vince is using his big rig truck to deliver his WrestleMania stage materials to the arena. Destroy the big rig by throwing four opponents through the top of it.
Time Limit: 10 minutes
The truck lies near the start position on the previous mission. You must cross the traffic once again to reach the truck. The hard part is there are multiple enemies waiting for you, including a superstar, and they have no trouble ganging up on you.
You have a few options with the truck. You can toss enemies off the ledge down onto the truck and complete the objectives or you can try and do it right on top of the truck. The danger in fighting on top of the truck is that the enemies can toss you into the truck too (with a simple slam, for instance). If you are tossed into the top of the truck, the mission immediately ends in failure.
If you do get down onto the truck, grab the nearest guy and slam him into the truck. You'll end up on a broken part of the truck. You can be slammed here with no consequence. While on the broken truck part, knock down all the enemies but one. When just one enemy is left standing, use the Y button to climb onto the adjacent truck section. Once this enemy joins you on the adjacent section, grab him and perform a simple slam to damage the next part. Repeat until all four parts are destroyed.
Parking Lot Mission 5
Objective: Get rid of security! Throw all of the security personnel into the moving cars.
Time Limit: 15 minutes
Enemies: 10
This is a challenging mission because you'll face three enemies at a time. It can be very difficult to try and get them off the edge and into traffic. Every time you're striking at the hand of a hanging enemy, another enemy is punching you in the back. Work down enemy energy with the sledgehammer and grappling maneuvers. Use finishers to completely weaken one enemy so you can concentrate on the other two. Irish Whip them off the ledge and into traffic. Unfortunately, enemies won't follow you into traffic so don't bother running across to the other side.
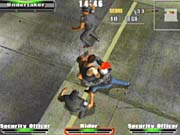
Parking Lot Mission 6
Objective: Take out Vince's personal bodyguard!
Time Limit: 10 minutes.
This is the tough final mission of the parking lot set. You'll have to face a random boss character (Vince's personal bodyguard!). Completing the mission unlocks the boss character for play in other game modes. When you begin, you can cross toward the bodyguard via the pole and chains. You'll use a similar swing method from the previous mission where you had to snag the briefcase. Line yourself up with the chains and use the Y button to swing. Wait until the chain moves close to successfully make the leap.
You'll battle enemies in pairs once you reach their location. You must climb the next pole but the enemies will shake the pole and send you falling down if they aren't taken care of. You could use finishing moves to keep them down for longer, giving you enough time to climb the pole or you could start throwing them into traffic. No more will arrive after you have thrown off ten of them.
Climb the pole and cross the chains toward the boss. If you have left any enemies they won't follow you to the boss (they can't cross the chains) so either way it will be a one-on-one battle. After battling so many outnumbered situations, this one-on-one fight should seem easier. Use special moves to weaken the boss and throw him off to complete the mission.
Harbor Mission 1
Objective: Take out all of Vince's security detail in the shipping cell! Throw all of the security guards off of the shipping cell and into the ocean. You will have to destroy one of the fences in order to do this.
Time Limit: 20 minutes
Enemies: 5
You essentially begin in an enclosed cage. Break the fence behind your start position (press the control stick against the fence and use strikes to break it open) to gain access to the edge, which will be your target area to throw off the workers.
Grab the stick just right of the start position and use the weapon for added damage against the workers. Get close to the edge and Irish Whip weakened enemies off. Stomp on their hands if they try to hang on. Subsequent enemies arrive via the pole in the cage's center. Shake it (B button against the pole) and have them fall down into the cage. Use the X button to grab them, then perform a grappling move or just send them on an Irish Whip to the edge.
Harbor Mission 2
Objective: Escape the shipping cell! Break out of the shipping cell. Climb to the top and escape by climbing the chain to the platform.
Time Limit: 10 minutes
This is another escape mission, which means you need to beat down any workers or guards present before trying to escape (in this mission, you must climb a chain). Otherwise the enemies will simply shake the chain while you attempt to climb.
Grab the stick near your start position. Hit the first guard hard with the stick until he's almost spent. While he's on the ground, break the fence in front of your start position. Another guard will arrive from above. He may beat you to the fence; if so, he'll likely bust open the fence to engage you within the cage. Keep beating both guards with the stick until they're almost out. Don't use your finishing move on either of these guards! Just keep wrestling here until they are both near exhausted.
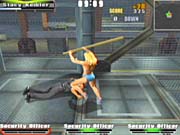
When they're both on the ground, exit the cage through the broken fence and climb the cage's outer surface to the upper level. There's another guard up here. You can try to quickly do a special and go for the chain or just damage him as much as possible and wait for the other two heavily-damaged guards to arrive.
Use special moves to knock out remaining guards. You can also throw them off this top platform, which gives you some extra time (they have to climb back up). When you have damaged all guards, climb the chain to its highest point. The yellow arrow marks the landing spot. Rotate on the chain to face the landing area. Hit the "Y" button while resting still to swing to the landing area, which completes the mission.
Harbor Mission 3
Objective: Take out all of Vince's security detail on the crane platform! Throw all of the security guards off of the crane platform.
Time Limit: 15 minutes
Enemies: 8 enemies
You begin on a narrow bridge; underneath is the sea and a moving platform. Enemies appear from the door on the far side of the platform and arrive two at a time. There's a sledgehammer in the middle of the platform that can be used to damage the enemies.
Run toward the door and battle the enemies close to the door. This is because there's a moving platform underneath your walkway. If an enemy lands on the moving platform after being thrown off the bridge, he won't be eliminated and will return to fight.
Use your special moves to drain enemy energy then Irish Whip the enemy off the side of the bridge. If the enemy tries to regain his balance, use strikes to punch the enemy off.
Harbor Mission 4
Objective: Get to the crate that is being loaded onto the ship! Within the time limit, avoid the security detail and get to the crate. You need to reach this create in time in order to get on Vince's ship.
Time Limit: 10 minutes
This is a challenging mission that requires a combination of speed and brawn. You must run through the shipping area and find a crate destined for Vince's ship. Plus you could have up to three workers (including a superstar) to deal with at the same time.
A worker begins near your start location. Knock him down with strikes or a grapple move. Break the fence with strikes and run up the ramp on the left. When you reach the top, you'll encounter another guard. Instead of running toward the third enemy, a WWE superstar, battle the two guards on this platform (the superstar won't go up here).
Battle these two guards until both are fairly wounded. Don't worry about time; instead, just concentrate on demolishing these two guards. Use nearby weapons for additional damage. Perform a finisher on one once they're both nearly exhausted. Crack the other guy fairly well to keep him down too. Drop down toward the WWE superstar.
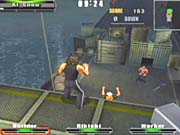
Knock down the superstar with a quick move or a strike combination. Grab one of the wooden crates in the area. Go right (from where you dropped down from) and run up the metal staircase. At the top, toss the wooden crate against the large metal crate (with the A button). When the wooden crate drops to the ground, use the Y button to climb on top of the wooden crate and then the Y button again to climb on the metal crate. This completes the mission.
Harbor Mission 5
Objective: Get rid of the workers on Vince's shipping boat. Throw the workers on the shipping boat into the ocean.
Time Limit: 20 minutes
Enemies: 10
This is a straightforward "toss enemies off the side" mission. There is plenty of time to complete the task so don't feel too rushed. Simply stay near the edge and use your Irish Whip maneuver to toss those enemies over the side. As they hang on the edge, stomp on their fingers with the B button to knock them down into the water. Don't hesitate to take some time weakening these enemies so you can toss them off with less difficulty.
Harbor Mission 6
Objective: Break into the ship's control room! Break down the door to the ship's control room, but watch out for Vince's henchmen.
Time Limit: 10 minutes
You face three enemies in this mission: a standard guard, a WWE superstar, and a random boss character. The guard and WWE superstar begin near your start position and you must deal with them from the mission's beginning. The random boss character remains near the ship's control room door.
Don't rush up to the security room door. Fighting all three characters at full strength is very difficult and it will be hard to get good strikes on the control room door with all three enemies punching you relentlessly. Instead, concentrate on the WWE superstar and guard before rushing up the staircase to the door. Weaken them considerably (ideally with a finishing move) before going up to the boss. Once there, you can begin to work on the boss as the other two will be weaker. Start punching the control room door at every opportunity. The mission ends when the door has been broken.
Chapter 5 - Create a Superstar
This section provides tips on using Wrestlemania XIX's fantastic Create a Superstar mode to create your favorite WWE superstars, yourself, your friends, or anyone else you want to put into the game. As an example, we'll create one of my favorite old school wrestlers, Randy "Macho Man" Savage.
Profile
First begin in the profile section. Here is where you will enter the superstar's name, short name, and nickname. You can also specify what type of superstar he is, either a babyface (good guy) or a heel (bad guy). Let's make him a good guy, back in the old school days when the Macho Man was WWF World Champion.
Name: Randy Savage Short Name: Savage Nickname: Macho Man Type: Babyface
Now shift your focus to the ability section. Here's where you can adjust your superstar's abilities so he or she excels in a particular area. You are given a particular number of ability points to use (you can purchase more in the ShopZone for cash) across all your possible superstars.
You can customize Macho Man any way you wish. His finishing move was the flying elbow drop off the turnbuckle so you will want to add some to the jumping ability to reflect his skill there. If you don't, his flying elbow drop won't be very impressive. If you want Macho Man to really fly, boost the jumping ability to approximately 8.
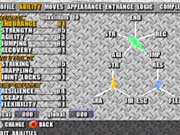
The moves section offers complete customization of the Macho Man's move list. Once again you are free to customize his moves anyway you wish. You can copy the moves of another WWE superstar (if you purchased the move templates from ShopZone) or start creating your own. Make sure you include his patented finishing move in the "Special" list. Select "Special" then "Flying Attack" and then "Attack from Turnbuckle". Select "Diving Elbow Drop 01" for one of his special finishing moves.
Appearance
Now it's time to begin creating Macho Man's appearance. This section will walk you through the various appearance options.
Gender: Male of course.
Hair: Select either Long 03 or Long 08. Make the color very dark brown. One of the brown preset colors is pretty close.
Eyes: Eye shape is fairly open to interpretation. Plus they'll be covered by sunglasses anyhow so don't worry too much. You can also customize the eyelashes and iris color but, once again, they'll be covered by sunglasses!
Eyebrow: Select a standard eye brow with same color as your hair selection. Your sunglasses will cover them anyhow.
Nose: Select Nose 02 or 04.
Mouth: Thin Lips 01.
Mustache: Beard 06 is closest to his old school look. Make the beard and mustache the same color as his hair.
Outline: Face Outline 05.
Now switch over to the "Body Attributes" section.
Body Type: Select Male 01 or 03.
Lower Body: Keep with the short tights. For color, give him one of the pinks (yes this is old school!). Now you should give his shorts a logo. They don't have the "stars" logo often found on his old school outfit but you can use something like Pattern B 17. Just make the color white.

Create a Superstar - cont.
Gear
Now switch to the "Equipment" section.
Wrist: Use Wrist Band 01 on both wrists and change them to pure white.
Knee: Use Supporter 01 on both knees and change both supporters to yellow.
Shoes: Select Long Boots 02. Change the first color to the same as your knee pads and the third color to pure white.
Now switch to the "Gear" section.
You have a few choices here. You can give him a bandana and pretty much make it have any color you wish (Macho Man loved those bandanas). For his sunglasses, select Goggles 02.
You'll need to change the position of the sunglasses to make them adjust to your head. Switch to position and select "Head". Change the "Z" axis to 0 and the "Y" axis to 10. Now move to the scale selection and change the "X" axis to approximately 10.
Scale
Now switch to the "Scale and Placement" section.
Here you can adjust the scale of Macho Man's features. Make his head a little wider (approximately 10 to 20, whatever looks right to you). You should also widen the shoulders and waist, abdomen, thighs, and calves slightly (approximately 10 each).
Extras
Now switch to the "Entrance" section. Here you can customize Macho Man's theme music, what the screen plays when he enters, the animation and effects. Note that more entrance animation and effects can be purchased from the ShopZone. Unfortunately the game doesn't include Macho Man's classic entrance music, "Pomp and Circumstance," but you may find something to your liking.
Finally, the "Logic" section dictates what type of wrestler Macho Man will be when he's controlled by the artificial intelligence.
Now you have completed your first superstar! Send him in the ring to kick Hulk Hogan's butt once and for all!

Chapter 6 - ShopZone
This section lists the items available in WrestleMania XIX's ShopZone and their price. Earn cash by completing the missions in Revenge mode. See the walk-through section of this guide for strategies for completing Revenge missions.
Parts (Includes Hair, Outfits, and Accessories)
| Item | Cash Required |
| Long 07 | $1,000 |
| Long 09 | $1,000 |
| Straight Back Long | $1,000 |
| Native | $1,000 |
| Funny | $1,500 |
| Regent 02 | $1,500 |
| Punk | $1,500 |
| Affectation | $1,500 |
| Sumo | $1,500 |
| Samurai | $2,000 |
| Mohawk | $2,000 |
| Kung Fu | $2,000 |
| Side Wings | $2,000 |
| Super | $2,000 |
| Bristled Up | $2,000 |
| Geisha Girl | $2,000 |
| Chinese Girl | $2,000 |
| Dread 03 | $2,000 |
| Afro 02 | $2,000 |
| T-Shirt 07 | $1,200 |
| Shirt 06 | $1,500 |
| Shirt 24 | $1,500 |
| China Dress 01 | $2,000 |
| Princess | $3,000 |
| Maid | $3,000 |
| Gothic Shirt 03 | $2,000 |
| No Sleeves 03 | $1,500 |
| No Sleeves 06 | $1,500 |
| China Dress 02 | $2,000 |
| China Dress 03 | $2,000 |
| Bustier 01 | $1,500 |
| Bustier 02 | $1,500 |
| Bustier 03 | $2,000 |
| Bandage | $1,200 |
| Mummy | $1,200 |
| Bondage | $1,500 |
| Bustier 06 | $2,500 |
| Carnival | $1,500 |
| Military Jacket | $3,000 |
| Judo Jacket 01 | $2,000 |
| Judo Jacket 02 | $2,000 |
| Leather Jacket 06 | $3,000 |
| Fur Vest | $2,500 |
| Coat 01 | $3,000 |
| Leather Coat 01 | $3,000 |
| Fur Coat | $3,500 |
| Space Suit | $2,000 |
| China Dress 04 | $3,000 |
| Santa Claus | $3,500 |
| Kimono 02 | $2,000 |
| Sailor Suit | $3,000 |
| Football 02 | $2,000 |
| Android | $4,000 |
| Armor | $5,000 |
| Cook Wear 02 | $1,200 |
| Cape 09 | $1,500 |
| Short Jeans | $1,500 |
| Pantaloon 02 | $1,500 |
| Judo Suit | $1,500 |
| Football Pants | $2,000 |
| Mummy | $1,200 |
| Bikini Tights 03 | $1,800 |
| Bikini Tights 05 | $1,800 |
| Bondage 03 | $1,800 |
| Garter Belt | $2,400 |
| Hakama | $2,500 |
| Ninja Wear | $2,500 |
| Space Suit | $2,000 |
| Sumo Tights | $1,200 |
| Android | $4,000 |
| Armor | $5,000 |
| Chaparajos 01 | $1,800 |
| Chaparajos 02 | $1,800 |
| Elbow Thorn 01 | $1,000 |
| Elbow Thorn 02 | $1,000 |
| Armor | $2,000 |
| Crow 01 | $3,000 |
| Brass Knuckles | $1,800 |
| Crow 02 | $4,000 |
| Drill | $5,000 |
| Knee Thorn 01 | $1,200 |
| Knee Thorn 02 | $1,200 |
| Long Boots 03 | $1,800 |
| Sandal 01 | $1,200 |
| Basketball Shoes 04 | $1,500 |
| Magician | $1,800 |
| Geta | $1,000 |
| Western Boots 02 | $2,400 |
| Android | $1,800 |
| Bunny Girl | $1,200 |
| Thorn Bracelet | $1,800 |
| Armor | $2,000 |
| Helmet 01 | $1,800 |
| Helmet 02 | $1,800 |
| Helmet 04 | $2,400 |
| Hat 01 | $1,200 |
| Hat 02 | $1,200 |
| Cooking Hat | $1,000 |
| Hat 04 | $1,200 |
| Headphone | $1,200 |
| Witch | $1,800 |
| Head Accessory | $800 |
| Hat 05 | $1,200 |
| Hat 06 | $1,200 |
| Sunglasses 02 | $800 |
| Sunglasses 03 | $800 |
| Mask 01 | $1,000 |
| Mask 02 | $1,000 |
| Mask 04 | $1,200 |
| Mask 06 | $1,800 |
| Shield 01 | $2,400 |
| Shield 03 | $2,400 |
| Android | $1,800 |
| Goggles 03 | $1,200 |
| Oxygen Cylinder | $2,000 |
| Rocket Engine 01 | $2,400 |
| Shoulder Pad | $1,000 |
| Bow Tie | $500 |
| Rucksack 01 | $600 |
| Backpack | $1,500 |
| Propeller 01 | $1,800 |
| Buoy | $1,200 |
| Tiara | $2,000 |
| Ballerina's Skirt | $1,400 |
| Sword 01 | $3,000 |
| Sword 02 | $3,000 |
| Saber | $3,000 |
ShopZone - cont.
Entrance Scene Animations
| Item | Cash Required |
| Stage Taunt 02 | $1,000 |
| Stage Taunt 07 | $1,000 |
| Stage Taunt 09 | $1,000 |
| Stage Taunt 11 | $1,000 |
| Stage Taunt 13 | $1,000 |
| Stage Taunt 18 | $1,000 |
| Stage Taunt 19 | $1,000 |
| Stage Taunt 21 | $1,000 |
| Stage Taunt Goldberg | $1,000 |
| Stage Taunt 22 | $1,000 |
| Stage Taunt 23 | $1,000 |
| Ramp Taunt 01 | $1,000 |
| Ramp Taunt 03 | $1,000 |
| Ramp Taunt 04 | $1,000 |
| Ring Taunt 05 | $1,000 |
| Ring Taunt 06 | $1,000 |
| Ring Taunt Goldberg | $1,000 |
| Ring Taunt 09 | $1,000 |
| Ring Taunt 14 | $1,000 |
| Ring Taunt 15 | $1,000 |
| Ring Taunt 17 | $1,000 |
| Ring Taunt 20 | $1,000 |
| Ring Taunt 22 | $1,000 |
| Ring Taunt 25 | $1,000 |
| General Walk 05 | $1,000 |
| General Walk 06 | $1,000 |
| General Walk 14 | $1,000 |
| General Taunt 01 | $1,000 |
| General Taunt 02 | $1,000 |
| General Run 01 | $1,000 |
| General Run 02 | $1,000 |
Entrance Scene Effects
| Item | Cash Required |
| Gate Fire Work 01 | $2,000 |
| Gate Fire Work 02 | $2,000 |
| Goldberg Gate 01 | $2,000 |
| Confetti | $2,000 |
| Goldberg Road | $2,000 |
| Road Fire Work | $2,000 |
| Road Smoke | $2,000 |
| Ring Fire Work | $2,000 |
| Ring Smoke 01 | $2,000 |
| Ring Smoke 02 | $2,000 |
Wrestling Moves
| Item | Cash Required |
| Jack Hammer | $2,500 |
| Steiner Screw Driver | $2,500 |
| Stalling Brainbuster | $2,000 |
| Brainbuster DDT | $2,000 |
| Brainbuster Falcon Arrow | $2,000 |
| Outsider's Edge | $2,000 |
| Jack Knife | $2,000 |
| Running Power Bomb Pin | $2,000 |
| Tiger Driver | $3,000 |
| Shining Wizard | $3,000 |
| Emerald Frosion | $3,000 |
| Wrist Clutch Exploder | $2,000 |
| Chicken Wing Suplex Pin | $2,000 |
| STO | $2,500 |
| Fork Strike | $3,000 |
| Amazing Impact | $2,500 |
| Half Nelson Suplex 01 | $2,500 |
| Sleeper Suplex | $2,500 |
| Spinout Choke Slam | $2,500 |
| Demon Neck Crank | $2,500 |
| Ironman Bearhug | $3,000 |
| Super Twisting Arm Breaker | $2,500 |
| Sliced Bread #2 | $2,500 |
ShopZone - cont.
Wrestling Move Templates
| Item | Cash Required |
| The Rock | $5,000 |
| Triple H | $5,000 |
| Hulk Hogan | $5,000 |
| Undertaker | $5,000 |
| Kurt Angle | $5,000 |
| Booker T | $3,000 |
| Rob Van Dam | $3,000 |
| Brock Lesnar | $5,000 |
| Edge | $3,000 |
| Stacy Keibler | $3,000 |
| Rey Mysterio | $3,000 |
| Chris Jericho | $5,000 |
| Chris Benoit | $5,000 |
| Trish Stratus | $3,000 |
| Kane | $3,000 |
| Bubba Ray Dudley | $3,000 |
| Shawn Michaels | $3,000 |
| Eddie Guerrero | $3,000 |
| Big Show | $3,000 |
| Matt Hardy | $3,000 |
| Lita | $3,000 |
| Ric Flair | $3,000 |
| Scott Steiner | $3,000 |
| Christian | $3,000 |
| D-Von Dudley | $3,000 |
| The Hurricane | $3,000 |
| Batista | $3,000 |
| John Cena | $3,000 |
| Torrie Wilson | $3,000 |
| Victoria | $3,000 |
| Steve Austin | $3,000 |
| Goldust | $3,000 |
| Vince McMahon | $10,000 |
| Stephanie McMahon | $3,000 |
| William Regal | $3,000 |
| Dawn Marie | $3,000 |
| Tajiri | $3,000 |
| Al Snow | $3,000 |
| Chavo Guerrero | $3,000 |
| Randy Orton | $3,000 |
| Chris Nowinski | $3,000 |
| Test | $3,000 |
| Lance Storm | $3,000 |
| Rikishi | $3,000 |
| Goldberg | $5,000 |
Weapons
| Item | Cash Required |
| Bamboo Sword | $1,200 |
| Sledge Hammer | $1,500 |
| Fluorescent Lamp | $1,800 |
| Guitar | $1,800 |
| Barded Wire 2x4 | $1,500 |
| Fire Extinguisher | $1,500 |
| Wooden Chair | $1,800 |
| Earthenware Pot | $2,000 |
| Earthenware Statue | $2,000 |
| Concrete Block | $2,000 |
| Bottle | $1,800 |
Chapter 7 - Secrets
This section reveals some of WrestleMania XIX's secrets, which typically revolve around the new "Revenge" gameplay mode.
Revenge mode is split into four primary sections: construction site, shopping mall, parking lot, and the harbor. Beating the six missions in each unlocks special arenas that become available in exhibition mode.
The sixth and final mission in each Revenge locale features a random boss character. Beating these sixth missions unlocks the boss character for play in other game modes. When you select your superstar, move the cursor over the "Boss" square and cycle through unlocked boss characters.
You unlock a random boss character (whomever you fought in that sixth mission) and there are twenty in all. Here are all twenty boss characters and their corresponding number in the selection area.
1: Agent 001 2: Bartender Bismarck 3: Master Builder 4: Ming Chee 5: Rowdy Smith 6: Agent 002 7: Han Zo Mon 8: Champ Bomber Head 9: Black Widow 10: Agent 999 11: Kim Chee 12: Jigoroh 13: Behemoth 14: Bouncer Jack 15: Sgt. Gregory 16: Victor Romanov 17: Ai Kidou 18: Riki 19: Bacchus 20: Yaksha
Beat the WrestleMania XIX Hall mission in Revenge mode (after beating all the missions in the construction site, shopping mall, parking lot, and harbor) to unlock "EX-Special" moves. These are powerful finishers that require three special move slots to perform. Beating Vince McMahon also unlocks six secret warehouse Revenge mode missions with their own objectives. Complete the warehouse section to unlock another boss character and the warehouse arenas for exhibition mode.
If you beat revenge mode for a second time, you unlock the ability to rotate the camera (using the "C-stick" controller) during certain exhibition matches.
You'll earn money through revenge mode but if you complete the training mode with Al Snow (perform every single move in the training move) you receive $5,000, which can be spent at the ShopZone.
Got a news tip or want to contact us directly? Email news@gamespot.com
Join the conversation