Warcraft III: Reign of Chaos Walkthrough
Fight your way through the single-player campaign, get cheat codes, and learn valuable insights on all four of the game's player races in this walkthrough.
Design by Collin Oguro
We never paid any heed to the ancient prophecies... Like fools, we clung to the old hatreds, and fought as we had for generations. Until the day the sky rained fire, and a new enemy came among us. We stand now upon the brink of destruction...for the reign of chaos has come, at last.
After years of role-playing with Diablo and sci-fi strategy with Starcraft, Blizzard is finally revisiting the franchise that originally propelled it to the top of the PC game heap: Warcraft. The newest game in the series, Warcraft III, is in many ways the most advanced and refined entry the real-time strategy genre has ever seen. The game features a variety of changes and improvements to the standard Blizzard RTS formula, including hero units, non-player enemies and buildings, and an increased reliance on smaller, more specialized groups of units rather than huge masses of troops.
Warcraft III contains a massive single-player experience that involves all four of its races. The humans and orcs of the past Warcraft games have returned, and the secretive night elves and vile undead join the fray in this newest installment. In addition, you'll be dealing with an additional, non-playable race of demons called the burning legion. The single-player campaigns in Warcraft III combine to form a continuous and compelling storyline, and we've put together a guide that will walk you through it every step of the way if you should run into trouble. Check out the Campaign Walk-Throughs section for detailed information on achieving victory in the single-player game.
Only two of the four races, the humans and the orcs, have been seen at all before Warcraft III, and even these two have undergone massive changes since their last time out, so we've also compiled a comprehensive rundown of the way each faction acquires resources, builds bases, and attacks enemies. Use this primer to familiarize yourself with the ins and outs of each race before you head into battle. Of course, practice makes perfect, so once you've armed yourself with the know-how, jump into the game and start your path to conquest.
Without further ado, on to the game...
Table of Contents
Basic StrategiesThe Races
Campaigns
Prologue Campaign: Exodus of the Horde
Human Campaign: The Scourge of Lordaeron
2. Blackrock & Roll
3. Ravages of the Plague
4. The Cult of the Damned
5. March of the Scourge
6. The Culling
7. The Shores of Northrend
8. Dissension
9. Frostmourne
2. Digging up the Dead
3. Into the Realm Eternal
4. Key of the Three Moons
5. The Fall of Silvermoon
6. Blackrock & Roll, Too!
7. The Siege of Dalaran
8. Under the Burning Sky
2. The Long March
3. Cry of the Warsong
4. The Spirits of Ashenvale
5. The Hunter of Shadows
6. Where Wyverns Dare
7. The Oracle
8. By Demons Be Driven
Basic Strategies
The four races of Warcraft III differ greatly in most respects, but all of them share the same basic resource, building, and upgrade models, so there are a number of things you can do in both the single-player and multiplayer game to get an edge on your opponent(s).
Micromanagement is key. Possibly the biggest fundamental difference between Starcraft and Warcraft III is the shift in focus from massive armies to smaller, more diverse groups. The supply limit has changed from a whopping 200 in Starcraft to 90 in Warcraft III, a number that may seem paltry at first. Although you can still mass hordes of the same kind of unit, a skilled player who makes full use of the special abilities of his or her heroes and regular units can almost always win with the proper strategy. Many units now have the ability to auto-cast their spells and abilities, but for the ones that don't, you'll have to be fast with the mouse and your noodle to execute the proper attacks and defenses quickly in battle. With the lower supply limit, each unit is more important, and none of them are expendable. Watch all units' health, and do your best to keep each one alive and healthy as long as you can.

Know your heroes. The hero units in Warcraft III are the natural evolution of the character units seen in Starcraft and Warcraft II. These units have their own names and personalities, and in the single-player game, they're integral to the storyline. In gameplay terms, heroes are a lot like the characters in Diablo. They gain experience when enemies are killed, they can learn abilities and spells, and they can pick up special items to enhance their stats and give them special powers. In the single-player game, your levels are capped per mission and you'll basically level up along with the story. In multiplayer, though, leveling your heroes is key to victory. Just one or two levels can make the difference in a skirmish against another player. There are a variety of non-player enemy characters called creeps scattered around the game's maps. As soon as you've produced a small force and a hero, head out to kill creeps to gain experience and pick up the items they drop. A second hero is also a good idea, once you have upgraded your town center and can afford one.
There are three primary attributes for each hero: strength, agility, and intelligence. These stats work together to help determine the hero's hit and mana points, armor, and other statistics. Each hero excels at one of the three attributes, and you can find out which one by hovering your mouse over the hero attributes icon to the right of the weapon and armor icons in the heads-up display. This will provide you with a full description of how each of the three attributes affects that particular hero. Knowing which heroes are good at what will help you know which ones to upgrade in certain ways. For instance, if you pick up a tome of strength, you'll naturally want to let your strength hero use it rather than your intelligence hero.
Beware of upkeep. Another addition to the RTS gameplay in Warcraft III is upkeep. You can think of upkeep as a unit tax. When your total units occupy between zero and 40 supply, you're in no upkeep, and no tax is being withheld. This means each worker who extracts gold from a mine will deliver the full 10 gold per load. Once you go past 40 supply, you're in low upkeep. Although each worker will still remove 10 gold per trip to the mine, you'll only get to keep seven of it. The same thing happens again when you breach 70 supply and enter high upkeep, and this time you're down to four gold per trip. Needless to say, an upkeep situation seriously hinders your supply of gold, and you'll want to avoid it whenever possible. Of course, you will need more than 40 supply's worth of units, and when that happens, you'll need to expand, bringing us to our next point.

Expand immediately. Creating a base expansion at another gold mine isn't a luxury in Warcraft III like it sometimes is in other RTS games--here, it's a necessity. As soon as you kill the creeps around a mine (if there are any) and you can spare the resources, send a worker to construct an expansion at the mine. In multiplayer, it's a good idea to have an expansion at least under construction, if not producing, when you enter low upkeep. Two expansions is a good rule for high upkeep as well. Just because you're hoarding gold, don't be miserly with it. Spend, spend, spend is the rule--you should have buildings, units, or upgrades in progress at all times.

Use groups and subgroups. RTS veterans will already know this one. You can assign up to 12 units to a number key by selecting them, then pressing CTRL + number, and then hit that number key again to select them. So to assign a group to your "1" key, select your units, press CTRL + 1, then select them at any time later just by pressing "1." Learn to assign similar units to one key for easier access and control in battle. For instance, you can put your heroes on one key, your melee attackers on another, your ranged fighters on a third, and your spellcasters on a fourth. Mix and match as needed, but don't use too many groups or you may get confused. You also have subgroups, which consist of multiple groups within a defined group, in Warcraft III. Subgroups are visible in the unit group display as the highlighted group of units. You can switch between subgroups with the Tab key, and holding down Ctrl will let you issue an order to only one subgroup. In this way, you can have multiple types of units in one group but still issue commands to them discretely. This also leads us to the next issue.

Master the hotkeys. This can't be stressed enough. You can do everything in Warcraft III with the mouse, but in the heat of battle, you really don't have time to be clicking every button on the interface repeatedly. Selecting your own units can be done much more quickly with the keyboard than by hunting each one down with the mouse, so use this to your advantage. Likewise, you can move around the map with keys. For example, the space bar will take you to the last announcement that was made, such as an upgrade being completed or an "under attack" warning being given. Each unit and building command also has a hotkey associated with it. Hitting the C key for chain lightning is much faster in battle than hunting down the icon in the lower right and then moving the cursor all the way back up to the battlefield. Also, if your spell-casting units can auto-cast spells, like the orc shaman's bloodlust, remember to set your spells on auto-cast by right-clicking the ability icon in the command window. Deft use of the hotkeys, coupled with a solid strategy, will win every time.
Understand weapon and armor types. Warcraft III introduces a new system for classifying weapons and armor, and damage is adjusted according to which weapon is being used to attack which armor. The three weapon types are normal (melee), piercing (ranged), and siege (siege units like the mortar team and meat wagon). Armor is divided into five categories: small, medium, large, hero, and fortified. The first four are self-explanatory, and the last is for buildings. Each weapon type has a damage rating against each armor type. For instance, normal weapons do 150 percent damage against small armor, but only 50 percent damage against fortified armor. Move the mouse cursor over the weapon and armor icons for a unit or building in-game to get a full description of its weapon and armor class. For more detail, check Blizzard's guide to armor and weapon types.
Attack creeps. Creeps, the neutral monsters encamped at various map locations, are an extra resource in Warcraft III. Defeating creeps provides not only tangible amounts of gold, but also the experience and items that heroes need to grow strong. In a multiplayer game, going creep hunting early and often can have a huge impact on the outcome of your first run-ins with opposing forces, since the extra experience gained from creeps translates into more powerful hero abilities, as well as more hitpoints and mana.
Try to avoid losing units needlessly in battles against creeps. Creeps vary quite a bit in strength, but it's easy enough to see any creature's level by mousing over it. It's smart to start with a hero that can take creeps on with little help. Heroes with strong melee or with summoning abilities have an easier time starting out. Creeps will automatically attack units and buildings in their immediate vicinity, but most sleep at night, allowing troops safe passage."

Take advantage of neutral buildings. Neutral buildings have also been added to Warcraft III. You can activate a neutral building and make its services available by walking a hero up to it. The mercenary camp lets you buy non-standard units for use in battle. The goblin laboratory sells technical units like the zeppelin and shredder. The goblin merchant, on the other hand, sells healing and other items for your heroes. The dragon roost lets you purchase three different dragon units, including the absurdly powerful level-10 red dragon. Finally, the fountains of mana and health make nearby units regenerate their respective attributes at an accelerated rate.
Learn the tech tree. The tech tree consists of the series of related buildings and upgrades that you must make to create new units. For instance, riflemen can't be created at the barracks until you've built a blacksmith. Keep in mind which new buildings you need to unlock the various weapon, armor, and ability upgrades. Whenever you have spare resources that aren't being devoted to units or buildings, spend them on an upgrade.
The Races
Gone are the chessboard days of Warcraft II, when each unit on the human side had an identical counterpart on the orc side. As in Starcraft, the races in Warcraft III all have their own unique units with diverse strengths and weaknesses. There are a few constants among the races, though. First and foremost, heroes are the key to any battle. Though a hero is just one unit, its presence or absence and use or misuse will make or break your chance of success. Learn the heroes and their special abilities inside and out, and you'll have a substantial edge in combat. Of course, the normal units aren't to be ignored. Every unit has some useful function, and using them all properly is the path to victory.
Humans
The humans are your basic bread-and-butter race in Warcraft III. They adequately cover all the categories of attack and defense--melee, ranged, siege, spellcasting, and flyers--but they don't have any overwhelming strengths or glaring weaknesses. A skilled, well-rounded player can do a lot with the humans.
Human Production
The humans use the standard Warcraft resource-gathering model that's been in use since the first game. Peasants walk between the town hall and a gold mine to bring gold home, and they must walk up to trees to chop them down and haul them back to the town hall or lumber mill. There are a few things you can do to expedite resource gathering for the humans. Chiefly, build a lumber mill as close to your largest cluster of trees as possible. This will reduce the walking time required for peasants to get back and forth. You can also upgrade your lumber production rate twice at the lumber mill. The humans have a pretty high overall lumber requirement, so the more wood the better. Also, make sure you have five peasants mining a gold mine at all times for maximum output.
Humans have one advantage in constructing buildings--they can have multiple peasants work on a building's construction to make it go faster. Direct additional peasants to a building in progress and they'll join in. Each peasant who gets in on the construction of a building will make its construction speed up further, but you pay a resource penalty for using this method. Gold and lumber will drain off a little bit at a time while an extra peasant is constructing, and the more that you use, the more you'll lose. Two peasants is manageable, but three is pushing it, and with four you'll be losing resources very quickly. The extra cost to speeding up construction means you should use this carefully, but it's a great advantage nonetheless when judiciously used to rush build critical early structures, like the altar, or base defenses.
Human Base Defense
Humans have a couple of unique methods of base defense. First, they're the masters of towers. You can initially build scout towers, which can't attack but provide sight. Further up the tech tree, you can upgrade these to guard towers, which can attack both land and air units with a fast arrow attack, and cannon towers, which can only attack land units but do additional splash damage. A well-towered human base will be a daunting prospect to any invasion force.
The human town hall also has an interesting and somewhat amusing ability called call to arms. When you activate this option, all your peasants will rush to the town hall and become peasant militiamen. These fighters are certainly weaker than even the weakest real fighting unit, but depending on circumstances, they can actually make a difference in an invasion of your town. The militiamen are especially useful if you get rushed early in a multiplayer game. Usually, you'll have eight or 10 peasants at least by this time, and when they all become fighters, you can often drive off a rush, although at the cost of slowing down resource production.
Human farms don't have an active method of defense, but they can be built side by side such that units can't pass between them, and this can be useful for walling in your more essential buildings or for closing off a key choke point near your town. Finally, one last boon to the human base defense is that you can upgrade your buildings' strength at the lumber mill. This helps especially when you have a variety of towers defending your base--it will take the enemy longer to knock them down, and thus they'll lose more units trying.
Human Heroes
Primary Attribute: Intelligence
Abilities:
• Blizzard: Calls down waves of damaging ice onto an area of effect.
• Water Elemental: Summons a water golem to fight alongside you.
• Brilliance Aura: Quickens mana regeneration for surrounding units.
• Mass Teleport (Ultimate): Teleports the archmage and up to 24 units to a friendly building or unit.
The humans excel at using magic, and the archmage is simply the best of all the human spellcasters. His normal ranged attack isn't incredibly powerful, but he more than makes up for it with his two main attack spells, blizzard and water elemental. Blizzard is incredibly effective against large masses of weaker units, especially if the enemy doesn't move them out of the way quickly. The spell's cooldown time in only six seconds, so you can hassle the enemy's basic units with blizzard nonstop, making them spend all their time trying to move their units out of the way. Water elemental is also good since it provides an extra powerful unit for your fighters. You can alternate between blizzard and water elemental to throw a wrench into the enemy's battle plans.
Devotion aura is a good basic buff to magic-using units since it speeds up their mana regeneration. This also works on allied heroes and the archmage himself, making it pretty useful. The archmage's ultimate spell, mass teleport, isn't too effective in combat terms. You can use it to save your entire army, though, if you see a battle isn't going to go your way.
Primary Attribute: Strength
Abilities:
• Storm Bolt: Damages and stuns an enemy.
• Thunder Clap: Damages and slows nearby units.
• Bash: Lets the mountain king's normal attacks sometimes stun and do extra damage.
• Avatar (Ultimate): The mountain king grows in size, gaining extra armor, hit points, attack power, and spell immunity.
The mountain king is a combat unit, pure and simple. All his abilities are geared directly toward fighting the enemy, and he has no skills that directly benefit other units. Storm bolt is best used on enemy heroes from afar, since it stuns them for several seconds and takes them out of the battle. Thunder clap, on the other hand, is more useful when the mountain king is in the thick of a large melee battle, since it affects all nearby enemy units. This is especially useful when defending against early rushes with lots of enemy units--you can stun your enemies and take them out one by one. Bash is just a passive ability that will help the mountain king out in combat by occasionally making him do extra damage and stunning the unit he's attacking. Finally, his ultimate spell, avatar, is certainly a boon to him in battle, since it makes him much harder to kill and allows him to dish out more damage while he's alive. Be aware that his spell immunity means even the paladin's holy light won't work on him while he's in avatar form, however.
Paladin
Primary Attribute: Strength
Abilities:
• Holy Light: Heals one friendly unit or damages one undead unit.
• Divine Shield: Renders the paladin invincible for a short time.
• Brilliance aura: Gives bonus armor to nearby friendly units.
• Resurrection (Ultimate): Revives the six most powerful slain friendly units in an area.
The paladin is a well-rounded melee fighter and healer who serves as the backbone of a strong human army. He can lead a charge against the enemy as a melee fighter, but he also acts as a support unit with his healing and enhancing abilities. Holy light is an invaluable tool for keeping your basic units and other heroes alive. Especially at high levels, you can seriously annoy the enemy by constantly using holy light on the units they're attacking. Divine shield is useful or obvious reasons--it makes the paladin invincible during a battle, meaning he's alive much longer to heal and attack. Finally, devotion aura is a good enhancer for combat units, as it raises their armor rating.
The paladin's resurrection spell is incredibly useful if the circumstances allow you to use it properly. When you hit it, the six most powerful allied units you've lost in a particular battle immediately come back to life with full health. Resurrection can often turn the tide of a battle by bringing a substantial portion of your attack force back into action. The downside is that you have to keep the paladin alive until you've lost a lot of other units for the spell to really be effective. Divine shield and good micromanagement can help with that.
Basic Human Units
Production: Town Hall
Upgrades: None
Abilities: Call to Arms (at Town Hall)
There's not much to say about the peasant--he's the basic worker unit for the humans. He's a little more useful in base-defense situations than the other races' workers, since the call to arms ability makes him into a makeshift fighter for a short period of time.
Production: Barracks
Upgrades: Barracks, Blacksmith
Abilities: Defend
The footman is the basic melee unit of the human army. He's pretty much in the middle of the road as far as first-tier melee units go; stronger than a ghoul, but weaker than a grunt. Footmen are best when used in masses, as they have reasonably quick movement speed and can swarm enemies. The defend ability makes them especially effective when the enemy is using ranged attacks, as they're almost impossible to kill using ranged units in that state. Defend reduces pierce-type damage, which most ranged units use, by 70 percent.
Production: Barracks
Upgrades: Barracks, Blacksmith
Abilities: Long Rifles (Passive)
Riflemen are the humans' basic ranged attack units. They're quite hearty for ranged units, as they're much harder to kill than, say, a troll headhunter. This is justified by their increased resource and supply cost. Any good human army will have a line of riflemen firing from behind the melee attackers, and this is made easier by the long rifles upgrade, which increases their range.
Production: Barracks
Upgrades: Barracks, Blacksmith
Abilities: Animal War Training (Passive)
The knight is basically a faster, stronger, and more durable footman. Knights are situated in the third tier of the human tech tree, meaning you won't be able to use them until fairly late in the game. They're good all-around melee fighters, and they move very quickly, making them useful overall. The animal war training ability, available at the barracks, is essential for making knights useful, as it raises their hit points from 800 to 950 and makes them that much harder to kill, but the armor upgrade is essential for making knights a powerhouse on the battlefield. Knights are especially effective in sizeable groups.
Production: Workshop
Upgrades: Workshop, Blacksmith
Abilities: Gyrocopter Bombs
The gyrocopter is technically a combat unit, since it has two modes of attack, but this flying unit is really only useful for scouting purposes. The gyrocopter can fly all over the map, of course, revealing terrain and checking up on what the enemy is doing. It has a basic machine gun attack against air units, and the gyrocopter bombs upgrade lets it drop bombs on ground forces, but its attacks are too weak and it dies too easily to be an effective combat unit. Gyrocopters are also able to detect invisible units.
Production: Workshop
Upgrades: Workshop, Blacksmith
Abilities: Flare
The mortar team is the humans' siege unit. They're fairly effective in combat against large masses of ground forces, but only if you can hold these forces off from the teams themselves, since they die very easily. The splash damage of the mortar team's attack is detrimental to your own melee forces as well. Like all siege units, mortar teams are best used against enemy structures to tear them down quickly from afar. The flare ability lets you reveal an area anywhere on the map for 15 seconds, although each individual mortar team can use it only once.
Production: Workshop
Upgrades: Blacksmith
Abilities: None
The steam tank functions somewhat like the mortar team in that it's most effectively used against buildings. Two or three steam tanks can take down an enemy building in seconds. The downside is that their limited range means they'll have to get right next to the building to do so. Luckily, steam tanks have a fortified armor type like buildings, meaning they're extremely hard to kill. Furthermore, you can have a peasant accompany them to repair them as they move through a base, destroying everything in sight. Steam tanks aren't really useful at all in pure combat situations.
Production: Arcane Sanctum
Upgrades: Arcane Sanctum
Abilities: Heal (Auto-Cast), Dispel Magic, Inner Fire
The priest is an excellent support unit for your army, mainly because he can auto-cast heal on other units. With three or four priests healing from behind your front-line melee attackers, your army will stay alive quite a bit longer. Watch out if the enemy targets your priests, though, as they're weak and die very quickly. You can use dispel magic on an area to remove positive buffs, like roar, from enemy units in an area, or to get rid of negative effects on your troops, like the night elves' entangling roots. Finally, inner fire can help out an individual unit by increasing its armor and damage, and it's particularly useful for heroes.
Production: Arcane Sanctum
Upgrades: Arcane Sanctum
Abilities: Slow (Auto-Cast), Invisibility, Polymorph
The sorceress is the humans' other spellcaster, and her spells are geared mostly toward combat effects. She can auto-cast slow on enemies, and a group of several sorceresses doing this will be devastating to an enemy army, as most of its units will be ineffectual attackers for the duration of the spell. Invisibility is only really useful for allowing a unit to scout out the map unseen. Polymorph, though, is an incredibly frustrating spell for your enemy. Though it doesn't work on heroes, it will turn any normal unit into a sheep for an entire minute, rendering it unable to attack or use abilities. Though the sheep retains the hit points and armor of the original unit, it's effectively out of the battle once it's been polymorphed. With several sorceresses, you can turn an entire front line into sleepy grazers.
Production: Gryphon Aviary
Upgrades: Barracks, Blacksmith, Gryphon Aviary
Abilities: Storm Hammers (Passive), Animal War Training (Passive)
Gryphons are the basic flying unit for the humans. They can attack both land and air targets, and they can upgrade their attacks at the aviary with the storm hammers upgrade so that their hammers ricochet off their main target and strike another one for bonus damage. Further, the animal war training upgrade at the barracks increases their hit points along with the knights' hit points. Gryphons are especially useful if the enemy is using a large ground melee force with few ranged units, since most of their army will be unable to attack the gryphons.
Human Race Strategies
Against Orcs - Orcs are by far the most powerful melee race in the game, and their front-line units are the hardest to kill, so your best bet is to reduce the orcs' melee advantages against you. The humans' spellcasters will do this job best. Priests are always good for healing, of course, and dispel magic can be useful to deal with the orc shaman's bloodlust spell, though bloodlust can be auto-cast, so dispelling it can be difficult, especially against large groups. Dispel magic is especially useful against the entangling roots ability of the night elves' keeper of the grove hero. The sorceress' slow spell will seriously hinder the orcs' melee efforts as well, and she can polymorph trouble units like tauren and shamans. Of course, match the orc melee fighters as best you can with fully upgraded knights and strong heroes.
Against Night Elves - The night elves are a primarily range-attacking race, and you can help counter this problem with the footman's defend ability. As soon as you confirm that you're up against night elves, research defend and crank out footmen. Be warned that as of the time of this writing, defend isn't effective against huntresses' attacks. And you'll still have to deal with the elves' melee effort, but this is relatively weak, and you can gain an advantage early in the game by being aggressive with your hero and footmen using defend. The archmage's blizzard spell is also useful against archers and huntresses, who fall to it quickly.
Against Undead - The undead like to swarm you with masses of weak units, so be prepared. First off, upgrade your armor and fortify your buildings as much as you can afford. Keep half a dozen riflemen on hand in case the enemy shows up with necromancers--you'll want to kill these off as soon as possible to reduce the threat of a skeleton flood. If the enemy is using large numbers of ghouls (as is often the case), blizzard will deal with them pretty well, since it covers a large area and can be used repeatedly. Try to mass as many upgraded melee units as you can, because when the undead comes, they will come in force.
Against Humans - When you're up against yourself as humans, you'll need to overwhelm and outstrategize your opponent. Again, the human spellcasters can quickly turn the tide of a battle if you can micromanage them well enough. The paladin can seem like a tempting choice for its powerful ultimate ability, but the archmage's water elementals and blizzard are powerful weapons against early footman rushes, and so is the mountain king's thunder clap. If you plan to use a footman rush, be mindful of guard towers and enemy mountain kings!
Orcs
Like the humans, the orcs have been around since the first Warcraft, so they already have an entrenched identity that most RTS players will be familiar with. In short, the orcish horde is the melee powerhouse of Warcraft III. The orcs are simply unmatched in terms of sheer attack and defense capabilities per unit. While the humans use their diversity to finesse their way into a situation, the orcs use pure brawn to smash their way through. A fully upgraded and bloodlusted orc army ravaging your town is a terrible sight to behold.
Orc Production
As the other previously seen race besides the humans, the orcs share the production legacy of the past two Warcraft games. Their resource and production model is therefore almost identical to that of the humans, with a few small differences. Their basic worker unit, the peon, must also ferry gold back and forth on foot to the great hall. Similarly, the peons chop wood and carry it on foot. Like the humans, the orcs have another building besides their town center to which they can deliver lumber. This building is the war mill, and it is also used for upgrading units' strength and defense. Build your war mill near your greatest concentration of trees so the peons don't have to walk as far to deliver it and you'll speed up your lumber intake.
Unfortunately, orcish peons can't team up to speed build construction like the humans can. They are also unable to make upgrades to the amount of lumber they harvest, although their wood cost is generally lower than that of the humans. You'll be most strapped for gold when using the orcs, so make sure to expand at least once early in the game so you'll have enough income to produce a full army.
Orc Base Defense
The orcs have a lot of options in defending their bases. Like the humans, they have a tower defense in the watchtower. This tower isn't upgradeable, but it can attack in its basic form, making it useful early on in the game. Watchtowers have a high attack rate, and a group of them can be devastating to an invading army. Another more generalized method of defense unique to the orcs is an upgrade available at the war mill called spiked barricades. With this upgrade, all your buildings will sprout some imposing spikes, and these will cause a set amount of damage to any melee unit that attacks one of your structures. Spiked barricades can be upgraded twice to increase the amount of damage caused, and by the third upgrade, they'll be doing enough damage to seriously hinder an invading force.
Orcs are fortunate that their farm structure, the burrow, can also attack incoming enemies. When you place a peon inside a burrow, it becomes armed and will use a ranged spear attack on nearby enemies. Each burrow can be loaded with up to four peons, and the more peons a burrow has, the faster it will attack. A fully loaded burrow has a very high rate of fire, and two or three burrows in this state can actually do a huge amount of damage even to a hero. You can issue the battle stations command to a burrow and nearby peons will run to it and load up automatically. The stand down command will make them resume work when the threat is averted.
Orc Heroes
Primary Attribute: Intelligence
Abilities:
• Chain Lightning: Fires a bolt of electricity that jumps between targets.
• Far Sight: Reveals a portion of the map and detects invisible units.
• Feral Spirit: Creates two ghostly wolves to fight for you.
• Earthquake (Ultimate): This devastating spell affects a large area of the screen, quickly damaging and eventually destroying most buildings, and stunning and slowing down any enemies in the area.
The far seer is the horde's magic-using hero. Like all orc units, he is especially adept at combat for a variety of reasons. The first thing to remember with the far seer is chain lightning, chain lightning, chain lightning. This is an incredibly powerful spell that can be used multiple times in a battle to severely weaken a group of enemy units. Feral spirit is also useful at any level. At the first level, the wolves can act as front-line fodder and run interference for your real troops, and at later levels they become quite powerful fighters in their own right. Far sight is a simple spell that lets you check up on the enemy's progress at any time. Finally, earthquake is an area-of-effect spell that severely slows down units (without damaging them) and ravages buildings. Earthquake is most useful for razing a base's buildings after the threat has been dealt with, since the far seer can't move while he's casting it. In short, no Orc army should be without a far seer.
Primary Attribute: Agility
Abilities:
• Wind Walk: Makes the blademaster invisible and increases his movement speed for a short time.
• Mirror Image: Creates copies of the blademaster to confuse enemy troops.
• Critical Strike: The blademaster will do double, triple, or quadruple damage (depending on level) 15 percent of the time.
• Bladestorm (Ultimate): The blademaster spins around in a flurry of blades, decimating nearby ground units.
The blademaster is a quick and extremely powerful melee fighter. His attacks do a surprising amount of damage for a unit that can move and attack so quickly. The downside to his agility is that he's easier to kill than most melee heroes, so you'll need to micromanage him heavily to keep him alive during a battle. A blademaster with critical strike can do a massive amount of damage to lesser units, sometimes killing them in one or two hits, depending on his level. Mirror image makes him much harder to target in battle, while wind walk is useful for escaping confrontation or scouting the enemy's base unseen. The blademaster is an all-around versatile fighting hero.
Primary Attribute: Strength
Abilities:
• Shock Wave: Does damage to enemies in a straight line.
• War Stomp: Hurts and stuns enemies around the chieftan.
• Endurance Aura: Raises the movement and attack speeds of nearby units.
• Reincarnation (Ultimate): Revives the chieftan with full hit points and mana.
True to the orcs' nature, the tauren chieftan is a hero who works through sheer brawn. The chieftan is a strong but slow melee fighter who can take a huge amount of punishment. His shock wave ability is fairly useful against lesser units arranged in a line, although it can be difficult to use at times. War stomp is much more effective, however, since enemy units have a tendency to cluster around the chieftan. Endurance aura is self-explanatory, and it certainly helps the units near the chieftan in battle. Finally, reincarnation is basically like having two tauren chieftans--as soon as he dies, he comes back to full life, ready to fight again. A high-level chieftan is an excellent leader for your ground troops.
Basic Orc Units
Production: Great Hall
Upgrades: None
Abilities: Battle Stations (at Burrow)
The peon is simply the basic orc worker unit. Use him to harvest gold, chop wood, and build structures. Peons can man the orc supply building, the burrow, to make it attack intruders. Hitting the battle stations command on a burrow will make nearby peons stop what they're doing and jump inside, and issuing the stand down command will make them resume work.
Production: Barracks
Upgrades: Barracks, War Mill, Great Hall
Abilities: Pillage (Passive)
Grunts are the orcs' first-tier melee unit and the backbone of the orcish army. They are far more durable than the other races' basic melee units, but cost more food to produce. Still, with the third-tier berserker strength upgrade (completed at the barracks), they gain extra hit points and attack power, making them strong enough to be useful even late in the game. They can also learn the pillage ability from the great hall, allowing them to acquire a small amount of resources when they attack an enemy building. An army of grunts with bloodlust is a nearly unstoppable force.
Production: Barracks
Upgrades: Barracks, War Mill
Abilities: Troll Regeneration (Passive)
Headhunters make up the bulk of the orcish ranged-attack group. They're unfortunately very weak when compared with riflemen, and they die quickly in battle against strong melee units. Your best bet is to keep much stronger units like grunts and tauren in front of your trolls to protect them. They can learn troll regeneration from the barracks, allowing them to restore their hit points very rapidly. If they can escape a battle without dying, your headhunters will soon be back to full strength with this upgrade.
Production: Beastiary
Upgrades: Beastiary, War Mill, Great Hall
Abilities: Ensnare
The wolf-riding raiders were the equivalent of knights in Warcraft II. In the third game, however, they've taken on a more specialized function. Raiders do siege-type damage, meaning they're reasonably effective against enemy units but absolutely devastating to enemy structures. A team of the fast-moving raiders can rush into a base and destroy a couple of minor buildings in a few seconds--before the enemy can even respond. Like grunts, raiders can use the pillage ability to gain resources while attacking buildings. Raiders are also invaluable against flying units, since their ensnare ability will bring these units to the ground so melee fighters can attack them.
Production: Beastiary
Upgrades: Beastiary
Abilities: Devour
The kodo beast's main purpose is as a support unit for the other orc fighters. Its war drums ability provides a damage bonus to all friendly units in the area, and this ability can be upgraded to further the amount of damage added. The kodo can also use devour to consume an enemy unit, slowly digesting and damaging the unit. If the kodo is killed, the enemy will pop out. Kodos are easily killed, unfortunately, but if you can keep them protected, they enhance your combat ability, and devour is a good way to take a heavy melee unit out of the fight.
Production: Beastiary
Upgrades: Beastiary, War Mill
Abilities: Envenomed Spear (Passive)
The wyvern is the orcs' flying unit. Like the gryphons, they are basic flyers that can attack both land and air units. Wyverns can also learn envenomed spear, which makes their attacks do poison damage to enemies. Like most flyers, wyverns aren't incredibly durable, and they're best used in groups of six or more, which allows you to quickly fly damaged ones back out of harm's way.
Production: Spirit Lodge
Upgrades: Spirit Lodge
Abilities: Purge, Lightning Shield, Bloodlust (Auto-Cast)
The shaman is the combat-minded half of the orcs' spellcasting force. The shaman's initial spell, purge, is a good way to severely hinder units by removing their positive buffs and slowing their movement speed significantly. Purge is an excellent way to slow down a retreating hero so you can surround and slaughter him or her with your own units. Lightning shield can be cast on friendly or enemy units. It damages other units nearby, though, so use it accordingly. The real power of the shaman lies in bloodlust. The orcish army is already quite adept at melee combat, and with bloodlust, they become almost unstoppable. An army of tauren and grunts should be backed by three or four shamans with full mana to cast bloodlust. Once your whole front line is bloodlusted, it will tear through the enemy ranks and buildings like a hot knife through butter.
Production: Spirit Lodge
Upgrades: Spirit Lodge
Abilities: Sentry Ward, Stasis Trap Ward, Healing Ward
The witchdoctor is the master of wards, which are small totems that you can place in a desired location to affect a certain area for a set amount of time. The sentry ward is one that simply provides sight, but the witchdoctor's sentry ward lasts for a whopping 10 minutes, meaning you can easily keep tabs on the enemy's movements by placing sentry wards around the map. The stasis trap ward creates a ward that stuns enemy units that wander into its field. Finally, the most useful ward at the command of the witchdoctor is the healing ward. This ward heals all friendly units (except mechanical units like catapults) in the area for 20 seconds, making them much, much harder to kill during a battle. Healing ward is also useful after a battle is over for rejuvenating wounded troops.
Production: Tauren Totem
Upgrades: War Mill, Tauren Totem
Abilities: Pulverize (Passive)
The orcs' heavy melee unit is the tauren, who, strictly speaking, isn't even an orc. Nevertheless, tauren are mighty warriors who do massive damage to enemies, which justifies their very high supply cost. After you research the pulverize ability, tauren will do splash damage every few hits against other enemies. Three or four tauren with pulverize will mow through an entire group of lesser units, for obvious reasons. Tauren are too expensive and slow to produce to rely on as the main component of your ground army, but adding a few into your mix of grunts and headhunters will make a huge difference.
Production: Barracks
Upgrades: War Mill
Abilities: None
The catapult is the orcs' siege unit, and there's not a whole lot to say about it that doesn't apply to all other siege units. The catapult is incredibly effective at destroying buildings, especially in groups of three to five. Watch out when using it, however, as its splash damage will affect your units as much as those of the opposition. As with other mechanical units, you can have a peon accompany a catapult and repair it as it sustains damage. Catapults aren't incredibly durable, so try to keep them behind your front line.
Orc Race Strategies
Against Humans - Melee combat is the orcs' strength, and you'll want to maximize it against the humans, who also have pretty good melee capabilities. Grunts and tauren are generally stronger than footmen and knights, so lead the charge with those units. Headhunters are quite fragile, though, so if you use them, keep them toward the back. The shaman is a must here for his bloodlust ability. Get several shamans to back you up so you can bloodlust your melee troops and you'll rip through the human ranks quickly.
Against Night Elves - Again, bloodlust is a must here to overwhelm the enemy troops. The faster they die, the less damage the remaining ones can do to your units, and archers and dryads are weak enough that bloodlusted grunts and tauren will tear through them like paper. Beware the dryad's ability to nullify buffs, however. Try to take out the night elf heroes early on, too, if you can, as they have several abilities that will cause you trouble. The keeper of the grove's entangling roots can throw a wrench into your melee plans by rooting your units in place, and the demon hunter's immolation will really wreak havoc as he moves through your ranks. Try to surround the weaker night elves with your melee forces and then smash them.
Against Undead - The far seer's chain lightning spell is a must early in a game against the undead, who will almost invariably be running around with a bunch of ghouls. Likewise, later in the game, the blademaster's bladestorm will chew through masses of weak units like nobody's business. Don't let necromancers create skeletons if you can help it--headhunters and wyverns can quickly dispatch the wizards if necessary. Skeletons are weak individually, but if too many of them get in the way they'll hinder your ability to move freely, and if the orcs' strong melee fighters can't reach their targets, they're useless.
Against Orcs - Orc against orc generally means you'll just have to overpower your opponent with greater numbers and better support. As always, grunts and tauren should lead the charge, with shamans to back them up with bloodlust. The witchdoctor's healing ward is also a great way to keep your units alive longer in battle while they dish out damage. The tauren chieftan's war stomp ability is a good one to use repeatedly against masses of orc melee fighters, as it will continually keep them from attacking effectively.
Undead
The undead are one of the two new races introduced in Warcraft III. They bring some new ideas to the game, and they also draw on some of the innovations made in Blizzard's last RTS game, Starcraft. Veterans of that game will recognize aspects of both the protoss and the zerg in the design of the undead. Like the zerg swarm, the scourge's main strength lies in its ability to overwhelm the enemy with sheer numbers. True to its nature, the undead bolsters its ranks with every unit, friend or foe, that falls in battle.
Undead Production
Building an undead base requires you to obey a number of rules that are very similar to the ones that governed base construction for the zerg and protoss in Starcraft. Like the zerg, the undead can only build its structures on portions of land that it has already infested with its plague of death. In Starcraft, this covering was the creep; in Warcraft III, it's called the blight. Only the necropolis and haunted gold mines can be built outside the blight, and once they're finished, they'll generate blight for other structures to be built upon.
Building construction for the undead is much like that of the protoss. The acolyte can begin summoning a new building and then immediately move on to something else, meaning you need fewer basic worker units overall. The building will finish its construction entirely on its own. You can even "unsummon" buildings to regain part of their initial cost if you're low on resources.
Resource acquisition for the undead is quite a bit different than it is for the orcs and humans. You must "haunt" a gold mine before you can extract gold from it. Once the mine is haunted, your acolytes will attach themselves to the mine and siphon gold out of it directly into your stores without having to walk back and forth, which speeds up gold intake somewhat. Another difference is that the acolyte doesn't even harvest lumber at all. That task falls to the basic undead melee unit, the ghoul. Ghouls are very fast lumber harvesters, fortunately, and two or three is usually plenty to keep your lumber coming in fast. Ghouls can also deliver wood to a special building (the graveyard), which you should build near trees.
Acolytes can haunt a new gold mine and draw gold from it without needing a nearby necropolis, so you can expand to new mines without having to set up an entirely new base. Be wary, however, as a haunted gold mine is a sitting duck just waiting for a roving enemy war party. Make sure to defend it properly when you set it up.
Undead Base Defense
The undead have one major ace up their sleeve when it comes to base defense: their "farm" building, the ziggurat, doubles as a tower-style structure that can attack incoming enemies. Ziggurats can be upgraded to spirit towers, and this gives them a ghostly ranged attack that's quite effective at taking out both land and air units. The necropolis can also attack like this, so if you have spirit towers placed all throughout your base, invading armies will have quite a problem attacking your units and dealing with the implanted defenses as well.
Another boon to the undead masses is their ability to regenerate hit points when they're standing on the blight. Undead heroes regenerate like all other heroes, but normal undead units don't regenerate at all unless they're on the blight. When they are, however, they regenerate hit points very quickly, making it beneficial for you to engage the enemy on your own turf whenever possible.
In Warcraft III, you'll notice that all units leave a skeleton when they die. This is more than mere window dressing, however, as corpses are a valid resource in the game. For one, necromancers can raise them as skeletons, which are weak fighters (but free, in supply terms) that can act as fodder in battle. The graveyard produces corpses constantly, and you can load them into meat wagons for transport or turn them into skeletons with necromancers should you be attacked.
Undead Heroes
Primary Attribute: Strength
Abilities:
• Death Coil: Fires a shot that harms enemy units or heals undead units for double the amount.
• Death Pact: Sacrifices one of your own units to heal the death knight.
• Unholy Aura: Makes nearby units move and regenerate health more quickly.
• Animate Dead (Ultimate): Raises six nearby slain units to fight for you.
The death knight is the all-around agile, powerful melee hero for the undead. In fact, he's very much like an evil version of the human paladin, as his abilities are somewhat similar to the paladin's in a twisted way. Death coil can heal your units like holy light can, and it's often even more useful for attacking enemies, as it does a lot of damage from far away. Death pact is only really decent if the death knight is about to die and you want to save him. Otherwise, it's detrimental to be wasting your other units just to heal. You're better off with a healing potion in those cases. Unholy aura, like most area-effect buffs, is generally beneficial for all nearby units. Finally, animate dead works much like the paladin's resurrection, with a key difference: The revived units aren't living, they're sort of reanimated, and they can only use their normal attacks, not special abilities. Further, they expire after two minutes. Still, when you raise six powerful units like tauren or knights, you can turn the tide of the battle.
Primary Attribute: Strength
Abilities:
• Carrion Swarm: Swarms enemies in an area, damaging them.
• Sleep: Puts the target unit to sleep for a set amount of time.
• Vampiric Aura: Friendly melee units in the area are awarded a percentage of the damage they inflict as hit points.
• Inferno (Ultimate): Summons an infernal, which damages and stuns enemies on impact and then fights for you for three minutes.
The dreadlord is another strong melee fighter like the death knight. His abilities are geared more toward annoying the enemy, however. Carrion swarm can damage multiple enemies in an area, if you happen to catch them in a bunch. The real joy of using the dreadlord lies in sleep and the annoyance it can cause your opponent. Normal units can be put to sleep, of course, but to really throw a wrench into things, put the enemy's hero or heroes to sleep. The only way to wake a sleeping unit is to attack it, and many times the enemy will be too preoccupied with the battle to think of that for quite a while, so the hero will sit there useless for long periods of time. Vampiric aura is a great ability to have if you're using ghouls, who attack so fast they'll regain a significant portion of their hit points rapidly. Finally, inferno is a good booster for your army in the thick of battle, since the act of summoning the demon alone will damage and stun nearby enemies. Once the infernal shows up, it'll wreak plenty of havoc, since it's got massive hit points and spell immunity.
Primary Attribute: Intelligence
Abilities:
• Frost Nova: Damages and slows a target unit and surrounding units.
• Frost Armor: Enhances armor for a friendly unit and makes attackers slow down.
• Dark Ritual: Kills a friendly unit for a mana bonus.
• Death and Decay (Ultimate): Area-of-effect destruction spell that is particularly effective against buildings.
The lich is the token weak spellcasting hero for the undead. Like most spellcasters, his basic attack isn't very powerful and he'll quickly fall to powerful melee units. Keep him on the sidelines and take advantage of his spells for maximum benefit. Frost nova is probably his best normal ability, as it damages not just a target unit but any other units close to it. At higher levels, the splash damage is actually higher than the target damage, and the slowing effect is always beneficial. Frost armor is a good way to protect important units like other heroes, and anyone who attacks a unit with this spell will be slowed. Dark ritual is sort of a last-ditch way to gain more mana, but it's a tough call since you have to kill off one of your units to use it. The lich's ultimate spell, death and decay, is an area-of-effect spell that damages everything in its reach. Death and decay is not unlike earthquake in that it's generally most effective against buildings.
Basic Undead Units
Production: Necropolis
Upgrades: None
Abilities: Unsummon
The acolyte is the basic worker unit of the undead, although he performs fewer tasks overall than the other races' workers. The acolyte attaches to a haunted gold mine to harvest gold, and he can begin the summoning of a new building and then move on to a new task. Acolytes can also use their unsummon ability to remove a building and regain part of its initial resource cost.
Production: Crypt
Upgrades: Crypt, Graveyard
Abilities: Cannibalize, Ghoul Frenzy (Passive)
The ghoul plays a dual role as the undead's lumber harvester and primary melee unit. Ghouls harvest lumber rapidly, so you won't have to waste more than two or three of them on that task. Ghouls are quite weak, and this is reflected in their resource costs, so you can crank out a bunch of them to overwhelm the enemy with. Ghouls are a little reminiscent of zerglings in Starcraft, and they should be used in a similar fashion. Ghouls can use the cannibalize ability to eat nearby corpses and regain hit points rapidly, and they become extra potent with the ghoul frenzy ability, which makes them attack like mad.
Production: Crypt
Upgrades: Crypt, Graveyard
Abilities: Web (Auto-Cast)
The crypt fiend is a good support unit for a swarming force of undead. It uses a sort of quasi-ranged attack involving insects, meaning it can get behind your front line of ghouls or abominations and fire away. Further, since the undead lack any real ranged attackers that can hit air units, the crypt fiend's web ability is invaluable. It brings air units down to the ground so that melee attackers can rush in and destroy them. Crypt fiends are a must if your opponent is making use of flyers.
Production: Crypt
Upgrades: Crypt, Graveyard
Abilities: Stone Form
The gargoyle is the undead's primary flying unit, but unlike the other races' flyers, it's particularly given to being used in large groups because of its low resource cost. Gargoyles are pretty weak, but at only two food, you can afford to make a ton of the things and just swarm your opponent. If gargoyles become damaged, they can escape to a safe place and use stone form to quickly regain their hit points. Be warned that stone form gargoyles are stuck in that form for the duration of the effect and are defenseless during that time.
Production: Slaughterhouse
Upgrades: Slaughterhouse, Graveyard
Abilities: Disease Cloud Aura
The meat wagon is your basic siege weapon, very much like the catapult. Stylistically speaking, the meat wagon hurls corpses rather than cannonballs or mortars, but it's functionally more or less the same as the other races' siege units. It does have a couple of bonus abilities, though. For one, the meat wagon can gather corpses, either on the battlefield or from the graveyard, and then dump them later for the necromancer to raise as skeletons. Also, the meat wagon's attacks can gain the disease cloud ability, which infects enemies with a slow-acting poison, if you research that upgrade at the slaughterhouse.
Production: Slaughterhouse
Upgrades: Slaughterhouse, Graveyard
Abilities: Disease Cloud Aura
Abominations are simply big, dumb, meaty melee attackers. They're roughly equivalent to the knight or the tauren in that they have a large number of hit points and high damage ratings. Like the meat wagon, they can learn the disease cloud ability and then spread its pestilence as they attack enemy units. Abominations are reasonably inexpensive in resource terms and can dish out a lot of damage and take a lot of punishment, making them a valuable addition to your mass of undead units.
Production: Temple of the Damned
Upgrades: Temple of the Damned
Abilities: Raise Dead (Auto-Cast), Unholy Frenzy, Cripple
The necromancer is key to the power of the scourge for one reason alone: he raises skeletons. The raise dead spell is an auto-cast ability that raises skeletons from the corpses of both enemy and friendly units. Though skeletons are incredibly feeble as melee units go, they do cause damage, and enough of them can cause big damage. Furthermore, they get in the way of enemy units, causing serious interference in the chaos of battle. Raise dead is an essential spell to have during any battle when playing as the undead. Unholy frenzy is somewhat like bloodlust in that it greatly speeds the attack rate of the target, but it also drains hit points, making it a trade-off. Finally, cripple is a very useful and effective spell against any unit because it does exactly what it says--dramatically lowering the speed, attack rate, and attack power of the affected unit.
Production: Temple of the Damned
Upgrades: Temple of the Damned
Abilities: Curse (Auto-Cast), Anti-Magic Shell, Possession
The banshee is the other spellcaster for the undead, although she's overshadowed by the incredible effectiveness of raise dead. Her auto-cast spell is curse, which makes units miss occasionally. This spell is decent enough, but not something you can't live without. Anti-magic shell is a good spell to use to protect your heroes from the evils of your opponent's spells. Finally, possession can be a real annoyance, since it steals any non-hero unit from the other side. You'll lose the banshee in the process, unfortunately.
Production: Sacrificial Pit
Upgrades: None
Abilities: True Sight (Passive)
Shades are created by sacrificing an acolyte at the sacrificial pit. The resulting unit is a nonattacking, invisible scout that can check out the enemy's base and movements unseen. The shade's best and only real use is spying on your opponent, so use it for that purpose. Shades can also detect other invisible units.
Production: Bone Yard
Upgrades: Bone Yard, Graveyard
Abilities: Freezing Breath (Passive)
The frost wyrm is a massively powerful and slow air unit that works well when accompanied by other units such as gargoyles. The wyrm's hit points are enormous for an air unit, but it's slow enough that a group of ranged attackers can still give it a rough time if it's not accompanied by other units. Frost wyrms are good against masses of units, since their ice attack has a splash effect that slows surrounding units in addition to the target. The freezing breath upgrade, available at the bone yard, lets the frost wyrm's attack encase a structure in ice, stopping a building's production capabilities or a tower's defensive attack. The frost wyrm is quite a powerful unit, but its massive resource cost (such as a whopping seven supply) means you won't be using too many of them.
Undead Race Strategies
Against Orcs - The orcs will be coming at you with massive melee strength, which you can combat in several ways. For one, the orcs have fairly weak ranged units (chiefly the headhunter), so unless they're massing trolls you can overwhelm their ranged team with a horde of gargoyles and then attack the melee units without reprisal. The necromancer is also a must in ground battles, as the skeletons they generate will interfere with troop movement and give the orcs a huge headache. Masses of ghouls backed by some necromancers will do a lot of damage, since every unit that dies can immediately come back as two skeletons.
Against Night Elves - Again, the necromancer-ghoul combo works effectively on the weaker night elves. One disadvantage when playing against the elves, however, is that with hippogryphs, chimaeras, and druids of the talon, they have a strong air effort. Aside from the undead's own air units, which are far up the tech tree, they don't have a decent ranged air attacker, so if you know you're playing as the undead, research the web ability for the crypt fiend. This will let you bring night elf flyers down to the ground so your ground forces can swarm them as usual. Watch out for the keeper of the grove's tranquility and especially the priestess of the moon's starfall spells. If either one is cast, the dreadlord's sleep ability will immediately make them cancel it.
Against Humans - Honestly, using necromancers to generate units is a good strategy against any race, so remember it again with humans. Approaching a human base is a risky proposition with ghouls, though, as it may well be fortified with towers of various kinds. Fully upgraded human buildings are quite strong and hard to kill, so bring along meat wagons to dispense with the threat of static defenses before moving in for the kill. If the human spellcasters are giving you problems, you can bring along some banshees to possess them and have them turn their formidable magic powers back on the humans themselves.
Against Undead - Undead against undead is going to mean a lot of units onscreen at once, so your best bet is to find ways to gain subtle advantages amidst the chaos. Early in the game, try going for a dreadlord first and then have him learn vampiric aura. If you quickly upgrade your necropolis, you can then make a death knight and give him unholy aura. Crank out ghouls all the while, and then go hunting for your enemy. These two auras stacked on top of each other make the ghouls move and attack very quickly and regain their hit points rapidly with each attack. A mass of ghouls with this double aura will be much harder to kill than normal ghouls, and you can wreak havoc early in the game and gain an advantage.
Night Elves
The night elves are the other newcomers to the world of Warcraft. Like the Undead, they take a few liberties with the traditional Warcraft model in their resources, buildings, and defenses. Starcraft players will also notice one or two tricks from that game showing up among the night elves' buildings and units. The elves excel at ranged attacks and magic, and their wily heroes can be a huge annoyance to anyone who's not prepared to deal with them.
Night Elf Production
The most interesting aspect of the night elf town is that instead of using buildings (although there are a few of those), it's composed primarily of giant, sentient trees. The tree of life is your town center, and you produce units from various ancients (ancient of war, ancient of lore, and ancient of wind), which are also trees. The tree of life and the ancients can actually uproot themselves and walk to a new area on the map--this should remind Starcraft players of the terran ability to fly their buildings around. These walking night elf buildings can also attack enemies as they walk around.
Like the undead, the night elves make some interesting changes to the Warcraft resource-gathering model. For one, their worker unit, the wisp, doesn't have to travel back and forth between the gold mine and the town center. Rather, a tree of life can "entangle" a mine with its roots, and then you can load five wisps into the entangled mine to suck gold directly through the roots back to the town center. Wisps are also the night elf lumber harvesters, but they don't have to move back and forth to carry wood, either. Rather, they can simply attach themselves to trees and transfer lumber directly into your stores. What's more, they do so without destroying the actual trees, so you'll never have to worry about running out of trees around your base. Unfortunately, wisps only gain +5 lumber per load, so you'll generally need five or preferably six of them harvesting at the bare minimum.
Much like the zerg drone in Starcraft, wisps are lost when you build a major structure, like an ancient or tree of life, since the unit basically grows into the building. Normal brick-and-mortar buildings like the hunter's hall let the wisp move on to other tasks when complete, however. Still, be aware that you'll have to crank out another wisp every time you construct one of the elves' tree buildings.
Night Elf Base Defense
The night elves have a bit of a rough time with base defense. Their towerlike unit, the ancient protector, isn't nearly as effective as some of the other races' static defenses. It can hurl boulders at both ground and air units, but unfortunately its slow rate of attack and low number of hit points mean it won't do a whole lot of damage before it's destroyed. Like other towers, ancient protectors can be torn apart in seconds by siege weapons that are outside their attack range. Fortunately, you can have the ancient protector, the tree of life, and all other ancients uproot themselves to attack invaders if you're really in a pinch. This can often hold off an attack for a few moments until your main force teleports or runs in to assist the fight. The tree buildings also have an eat tree ability that lets them munch down on a nearby tree to regain hit points. Trees move very slowly, however, so don't delay in coming home to defend actively.
The night elf "farm" building, the moon well, serves a very useful purpose. Moon wells have the ability to replenish both mana and hit points for your units, and you can do this manually or set it to auto-cast so any passing wounded friendly unit will be healed. If you cluster your moon wells around the entrance you expect attacks to come from, you'll have a ready-made healing device to keep your troops alive during base defense. Moon wells are especially nice for healing a dying hero, since many players like to focus their attacks on a hero until it's dead. With several moon wells, your hero can easily survive an assault by a less skillful player.
Night Elf Heroes
Primary Attribute: Agility
Abilities:
• Mana Burn: Removes a set amount of mana from a target unit and then inflicts the same amount of damage on that unit.
• Immolation: Surrounds the demon hunter in flames, damaging units adjacent to him.
• Evasion: Makes the demon hunter harder to hit.
• Metamorphosis (Ultimate): The demon hunter morphs into a demon, gaining extra hit points and a powerful ranged attack.
The demon hunter is a nimble melee fighter who can be a serious pain for your enemies to deal with. He does a lot of damage per attack and is fast-moving enough to be difficult for enemies to track down. You'll have to micromanage him a lot to keep him alive, however, since he's fairly weak, like the blademaster. His mana burn ability is excellent to use on spellcasting heroes like the far seer or lich, who depend on their spells to be effective. Immolation is also great, since it will cause bonus damage to any unit the demon hunter is attacking. Remember to turn it off when you're done fighting, though, because otherwise it will drain your mana until it's empty. Evasion is a self-explanatory passive ability that gives you a chance of dodging enemy attacks. Finally, metamorphosis makes the demon hunter much more powerful, boosting his hit points by 500 and letting him attack from a distance. The demon hunter is quite an imposing hero when leveled up and used properly.
Primary Attribute: Intelligence
Abilities:
• Entangling Roots: Roots a target hero to the ground, causing damage for several seconds.
• Force of Nature: Creates treants from nearby trees to fight for you.
• Thorns Aura: Nearby units will cause damage to melee attackers when attacked.
• Tranquility (Ultimate): Large area-of-effect healing spell that heals at a rate of 20 hit points per second.
The keeper of the grove is a great support hero for your army alongside a demon hunter or priestess of the moon. His entangling roots ability stops a unit in its tracks and damages it while it's trapped, and it is best used on enemy heroes. You can keep melee heroes from approaching your troops, and fleeing heroes can be trapped so you can surround and destroy them. Force of nature is another excellent ability to have in a battle, as it generates extra melee units for you with no supply cost. Thorns aura is a decent buff for your regular units that will passively help them fight back against melee invaders. Finally, tranquility is a seriously effective healing spell that will make your units very hard to kill in a battle. Be warned that the keeper must be stationary to keep casting tranquility--if he's disrupted, the spell ends.
Primary Attribute: Intelligence
Abilities:
• Sentinel: Creates a ghostly owl that you can use to scout the map.
• Searing Arrows: The priestess' regular attack gains bonus damage at a mana cost.
• Trueshot Aura: Nearby ranged attackers gain bonus damage.
• Starfall (Ultimate): Brings a rain of stars down on the enemy, obliterating it.
The priestess of the moon is probably the best hero to lead your ranged army with. She has a powerful ranged attack herself, making her good to group with archers. Her sentinel ability is useful at the beginning of the game, especially because you can scout out large portions of the map with it. Searing arrows is also an effective ability to use, as it makes the priestess' attacks do substantially more damage. Watch out, though, because searing arrows drains mana with every arrow fired. Don't let it drain all your mana if you can help it. Trueshot aura is another reason the priestess is good to have with units like archers and dryads, since it enhances their attacks. Finally, the best reason to use a priestess of the moon is for her ultimate spell, starfall. In short, starfall is an army killer. It's not simply a small blanket-of-effect area--rather, the stars seek out enemy units over a very wide area and do massive damage per hit. If you can cast starfall and keep the priestess safe for the duration of the spell, the enemy army's destruction is almost guaranteed.
Basic Night Elf Units
Production: Tree of Life
Upgrades: None
Abilities: Detonate
The wisp is the basic night elf worker unit. It can harvest gold and lumber and create all the night elf buildings. The wisp can't attack enemy units, but its detonate ability drains mana and removes buffs from nearby enemy units. This ability sacrifices the wisp, however.
Production: Ancient of War
Upgrades: Ancient of War, Hunter's Hall
Abilities: Improved Bows (Passive), Marksmanship (Passive), Shadowmeld
Interestingly, the most basic night elf fighting unit isn't a melee attacker like in the other races but rather the ranged archer. Archers are paper-thin when it comes to melee fighting, but like other ranged units, they can be quite effective if you keep them away from your front line. They can gain increased attack power and range from upgrades available at the ancient of war, and late in the game they can even mount hippogryphs to become hippogryph riders, delivering their attacks from the air. Archers can also shadowmeld to become invisible at night.
Production: Ancient of War
Upgrades: Ancient of War, Hunter's Hall
Abilities: Sentinel, Moon Glaive (Passive), Shadowmeld
The huntress is the basic melee unit of the night elves, though she is higher on the tech tree than the archer. Huntresses work very well in groups, and their moon glaive ability makes their attacks bounce to an adjacent enemy, making them even more effective--though at the time of this writing, groups of huntresses are powerful enough to mount devastating rush attacks, even without moon glaive. The huntress's sentinel ability is useful for attaching an owl to trees at key points on the map so you can observe your enemy's movements. Huntresses can also shadowmeld at night like many night elf units.
Production: Ancient of War
Upgrades: Ancient of War, Hunter's Hall
Abilities: Impaling Bolt (Passive)
The ballista is the night elf siege unit. It fires giant arrows in a straight line at targets, and like other siege units, it's best used against buildings. The ballista's impaling bolt upgrade makes its shots travel past the initial target and do damage to units or buildings in a line behind it. This upgrade makes the ballista far more effective when attacking small buildings that are clustered together, like farm buildings.
Production: Ancient of Lore
Upgrades: Ancient of Lore, Hunter's Hall
Abilities: Slow Poison (Passive), Abolish Magic (Auto-Cast), Spell Immunity (Passive)
The dryad is an interesting spellcaster. Unlike the other races' magic users, the dryad is actually quite an effective combat unit. Her ranged attack does damage similar to that of the archer's, and it infects the target with slow poison, which saps hit points and slows movement strength. Further, the dryad is immune to all spells, making her even more annoying for the enemy. Finally, she can auto-cast abolish magic, which removes negative buffs from your units or positive ones from the enemy. The dryad makes a great support attacker.
Production: Ancient of Lore
Upgrades: Ancient of Lore, Hunter's Hall
Abilities: Roar, Rejuvenation, Bear Form
The druid of the claw is the heavy melee unit for the night elves, though he must be heavily upgraded before he becomes effective in that role. In druid form, he doesn't do a lot of damage and his hit points are very low, but in bear form, which you can access through two upgrades at the ancient of lore, he becomes much stronger. In druid form, he has some spell abilities: Roar gives nearby units a 45-second damage boost, and rejuvenation slowly heals the target unit for a period of time. Druids of the claw are useful melee units, and roar is a good boost, but you'll probably find them less effective than their counterparts in the other races (knights, tauren, and abominations).
Production: Ancient of Wind
Upgrades: Ancient of Wind, Hunter's Hall
Abilities: Carry Archer
The hippogryph is the basic attacking flying unit for the night elves. Initially, it can only attack air units, which makes it nearly useless. With the hippogryph taming upgrade, available at the ancient of wind, you can have an archer mount the hippogryph, which allows it to attack both land and air units, making it rather more useful. Hippogryphs are inexpensive on their own, so you can make a lot of them, but you'll need to factor the cost of archers into their overall cost.
Production: Ancient of Wind
Upgrades: Ancient of Wind, Hunter's Hall
Abilities: Faerie Fire (Auto-Cast), Crow Form, Cyclone
The druid of the talon is a sort of aerial-themed spellcasting unit. He's weak in battle and should really only be used to support your more powerful troops. Faerie fire can be used on multiple enemies in a battle to reduce their armor significantly. The druid's storm crow form lets him become a giant bird and fly anywhere on the map for scouting purposes. Finally, the druid's most powerful ability is cyclone, which tosses a unit into the air for 30 seconds, removing it completely from battle. If you use cyclone on several of the enemy's heavy melee units, you can cripple their offensive strategy and attack the remaining units with your entire force.
Production: Chimaera Roost
Upgrades: Chimaera Roost, Hunter's Hall
Abilities: Corrosive Breath
The chimaera is interesting because it's effectively a flying siege weapon. It does have a normal attack, which can only be used against ground units, but its best use lies in the corrosive breath upgrade found at the chimaera roost. With this ability, the chimaera can attack buildings with an acid-spitting attack that does massive siege damage. This makes chimaeras effective at showing up at your enemy's base, destroying a building or two, and leaving quickly before the enemy can respond. Chimaeras are slow-moving, though, so don't let them get caught up in defensive tower fire or ranged unit masses.
Night Elf Race Strategies
Against Orcs - Keep dryads on hand here to dispel bloodlust as soon as it appears, or your units will be ripped to shreds. Druids of the claw in bear form and huntresses will give you a melee force that's at least sort of comparable to the orcs', and you can whale on them with your large numbers of ranged units from afar. Flying units will also help against the orc melee units, which can't fight back against them, but watch out if the enemy has a lot of headhunters.
Against Humans - Don't rely too heavily on archers if you're playing against humans, as they may be smart enough to use the footmen's defend ability to make it very difficult for your archers to kill them. Go for huntresses early on instead, and develop your demon hunter with immolation and evasion to lead the charge against the human ground forces. Mana burn can also help against the human spellcasters and archmage. The keeper's tranquility is a good way to keep your units powered up while the battle is going on, too.
Against Undead - The priestess of the moon's starfall is disastrous for the undead's horde of numerous but weak units. However, don't cast starfall if there's an active dreadlord in the area, because he can use sleep to immediately make the priestess stop casting it, ruining everything for you. Lots and lots of huntresses will help keep the masses at bay while your ranged units destroy them from behind the front.
Against Night Elves - Early in the game, group your huntresses and archers together, and when you meet up with the enemy, you can focus fire of both unit types on a particular unit at a time to kill them very quickly. If you have a keeper, use entangling roots on the enemy hero. For the demon hunter, immolation works well against the other side's forces. Finally, the priestess can help support the combat effort with searing arrows enabled. Night elf against night elf often turns into a contest of focusing fire and hero micromanaging.
Campaigns
Prologue: Exodus of the Horde
The first campaign in Warcraft III consists of a scant two missions that serve to familiarize new players with the basic format of the game. However, it also contains an introduction cinematic and other important plot information that help set up the overall story arc for the game, and therefore even real-time strategy veterans should play through the prologue before moving on to the human campaign.
1. Chasing Visions
Thrall, the leader of the orcs, has awakened in the night to the calling of an enigmatic old man who appears to be a prophet. This man calls Thrall out into the night to receive his wisdom.
Main Quests
Find the prophet.
• Follow the narrator's directions.
• Find the prophet.
Optional Quests
None
Walk-Through
As the first mission in the game, this scenario provides almost no room for error. You begin by controlling Thrall, the warchief of the orcish horde, as he searches for a prophet who has come to him in a nighttime vision. A narrator will constantly talk you through this mission, so even the greenest players should have little trouble completing it.

This mission will give you your first taste of the basics of playing Warcraft III. Topics covered include issuing unit movement and attack commands, leveling up your hero and learning new abilities, attacking NPC monsters (also called "creeps"), and picking up treasure. As you approach the goal in the upper right corner of the map, you'll notice a couple of places you can veer off the beaten path and fight creeps that the narrator doesn't mention. The golems in the lower right will yield a ring of protection for Thrall when defeated, and the forest trolls further along will give up a manual of health. These items may come in handy for the next mission.
Completing the mission requirements in this scenario is as simple as following the narrator's spoken instructions and moving Thrall onto the goal at the end of the path.
2. Departures
The mysterious prophet has instructed Thrall to lead his people across the seas to an unknown land called Kalimdor. In the second chapter of the prologue, Thrall prepares his warriors for their journey.
Main Quests
Establish a base.
• Build a burrow.
• Build a war mill.
• Build barracks.
• Train five grunts.
Rescue Grom.
• Find Grom.
• Destroy the guard towers guarding Grom.
Optional Quests
None
Walk-Through
The second prologue mission, like the first, gives you a single path to follow with almost no room for variation or mistakes. At the beginning of this mission, you'll learn more about the basics of playing Warcraft III, including harvesting and managing resources, constructing buildings and training units, and dealing with the upkeep system. As before, a narrator will walk you through issuing the commands required to accomplish your goals, so even inexperienced players should have no trouble.

After you've completed the building requirements, a cinematic will reveal your first real enemy: the humans of Lordaeron. A band of human footmen tells you they've captured a band of trespassing orcs, and Thrall surmises that the missing Grom Hellscream must be among those taken captive. Thus your second objective is to raid the human encampment and rescue Grom from imprisonment. When the cinematic sequence ends, the footmen will begin attacking one of your watchtowers positioned next to the bridge near your base. Attack them with Thrall and the grunts you've trained. With these forces and the offensive capabilities of the watchtowers themselves, you'll have no problem defeating them.

Next, you must lead your troops onward into the human village. You'll encounter pockets of minor resistance, but even Thrall and five grunts will make short work of the footmen, riflemen, and knights you find. However, if you want to train additional grunts or upgrade your weapons and armor at the war mill, you should have plenty of spare resources with which to do so. As you defeat the humans guarding hanging cages in the village, more grunts and two orc shamans will be released to reinforce you. Continue on through town until you reach the area in which Grom is being held. Attack each guard tower in turn with all your forces and they'll fall pretty quickly. After you smash the three towers, Grom is freed and the mission ends.
Thus the orcs set sail to Kalimdor to find their destiny, according to the instructions of the strange prophet...
Human Campaign: The Scourge of Lordaeron
Warcraft III's first real campaign, The Scourge of Lordaeron, finds the leadership of humanity in conflict. The orcs are once again encroaching on the lands of the kingdom, and some of King Terenas' advisors demand that the menace be contained. However, a mysterious plague has infected the northlands, and other representatives insist on turning the kingdom's attention northward. In the midst of this strife, the prophet appears and issues a warning that a shadow will soon fall across the land. The king and his allies are defiant, however, insisting that they will handle matters in their own way. Denied, the prophet makes his exit, and thus begins The Scourge of Lordaeron.
"The warning has been given. Their fate is now their own."
1. The Defense of Strahnbrad
In the first chapter of the human campaign, you take control of a small band of troops led by Prince Arthas, a young paladin and son of King Terenas. As Arthas meets up with Uther the Lightbringer, a hardened old paladin and the hero of Warcraft II, he learns that the village of Strahnbrad is being threatened by orcish forces and requires immediate protection. Uther and his men take off to seek out the nearby orc encampment, while Arthas is charged with protecting the besieged Strahnbrad.
Main Quests
Defend Strahnbrad.
• Travel to Strahnbrad.
• Arthas must survive.
• Defeat the slave master and his guards.
Optional Quests
Defeat the bandit lord.
• Slay Menag, the bandit lord.
• Return the ledger to Gerard.
Save Timmy.
• Slay the gnoll kidnappers.
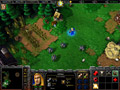
Walk-Through
This is the first mission in Warcraft III in which you're completely on your own; the narrator will no longer give you assistance as you progress. Fortunately, this chapter isn't difficult and won't present any real problems. To begin, lead Arthas and his footmen along the path toward Strahnbrad. Notice Arthas' first ability, holy light, and keep it in mind. It's very useful for healing your troops in battle, and since you can't train more men in this mission, its importance is doubled.
As you move south of your starting point, you can veer off the path to find a woman whose son Timmy has been kidnapped by gnolls. This initiates your first optional quest. If you proceed directly east of the woman, you'll find the small gnoll camp. The monsters are easily dispatched, and the woman will provide you with a ring of protection +1 for Arthas.

Move back to the path and continue onward. After traveling a short distance, you'll run into a group of bandits robbing a farmer, Gerard. He asks you to retrieve his stolen ledger from them, adding another optional quest to your list of goals. Head after the bandits, if you wish, and find them at their camp. Menag, their leader, is the only really strong enemy here, so just attack each bandit in turn, using holy light to heal weakened footmen, and you'll quickly defeat the bandits. Pick up the ledger and bring it back to Gerard to receive a manual of health, which will increase Arthas' hit points.
When you arrive at Strahnbrad, you'll find the village already under siege by the orcs. Attack the attackers and make your way through town. To the west you'll find another group of footmen under attack who will join you to reinforce your group. Head north of the town center to find the slave master. With holy light and a full band of footmen, you can make quick work of the slave master and his guards, finishing the mission. Arthas finds no rest, though, as he's quickly called to join Uther at the orcs' camp.
2. Blackrock & Roll
When Arthas reaches Uther's camp, he learns that the Blackrock orc clan is camped nearby, and Uther asks him to lead an assault on the orcs. The Blackrocks are sacrificing human villagers in order to summon demons, so Arthas resolves to amass a force and put a stop to their evildoing.
Main Quests
Establish base.
• Construct barracks.
• Construct two farms.
• Train six footmen.
Defeat the Blademaster
• Slay the blademaster.
Optional Quests
Defeat Searinox
• Slay Searinox, the black dragon.
• Bring the heart of Searinox to Feranor Steeltoe.

Walk-Through
This chapter finally gives you some freedom in establishing a camp and preparing your forces. The first goal is straightforward enough--build the required buildings and troops to satisfy the base goal. Your job is made a little more difficult by the periodic bands of orc attackers who will show up and hassle your base. Fortunately, Uther, a level-10 paladin, is on constant patrol around the base and will help you deal with these raiders. You should also upgrade at least one of the scout towers on the right side of your base to a guard tower as soon as possible, as this will help you defend the entrance to your base.
After you've built the necessary buildings and put together a group of footmen, a Blackrock blademaster will show up and gloat about his impending victory. An enraged Arthas quickly swears vengeance for the sacrificed townspeople, and so your second goal becomes the destruction of the blademaster. By now you should have enough resources to build additional farms and train more footmen, although the six you already have, coupled with judicious use of holy light, should be enough to see you through.
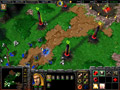
Proceed with Arthas and the footmen east out of camp and you'll run into a group of dwarves who are hunting a black dragon named Searinox. The four riflemen join you, and you can then optionally set off to slay the dragon. If you want to do so, head further east until you find a cave. Inside the cave, you'll find a few lesser dragons that your riflemen can deal with in short order. Once you find Searinox at the back of the cave, your job will get a little tougher. Searinox, a fairly strong level-eight monster, raises skeletons for Arthas and the footmen to deal with. The riflemen must concentrate their fire on the dragon himself. Make sure you heal your riflemen since they'll be sustaining pretty heavy damage from Searinox. After he's defeated, pick up the heart and take it back to the dwarf camp, where you'll receive an orb of fire (which gives Arthas a damage bonus) and access to a blacksmith so you can upgrade your weapons and armor and build riflemen from the barracks.
The blademaster's sacrificial pit is already visible in the northeast corner of your map, so head in that direction with your forces. You'll meet some resistance from grunts, raiders, and headhunters, but they won't pose too much trouble, especially if you've upgraded at the blacksmith and made a few extra troops. Continue on to the blademaster, who you can knock out quickly, to end the mission.
3. Ravages of the Plague
Having left behind the orcish threat for the time being, Arthas' next task is to escort his friend, the sorceress Jaina Proudmoore, as she travels northward to investigate the strange and possibly magical plague that is infecting Lordaeron. As the mission begins, Arthas and a small band of troops meet Jaina on the road leading north.
Main Quests
Investigate villages.
• Explore the countryside.
• Arthas must survive.
• Jaina must survive.
Deal with the grain warehouse.
• Destroy the grain warehouse.
Optional Quests
Locate the fountain of health.
• Find the fountain of health.
Walk-Through
As in the first chapter, you begin this mission with only a handful of troops and no method of reinforcing them. That's OK, though, because the enemies in this area are generally quite weak. The newest addition to your arsenal is Jaina and her archmage abilities. She starts with water elemental, which produces a useful water golem that provides extra support in combat. As she levels up, make sure to have her learn blizzard, which is effective against masses of lesser enemies like the ones you'll soon be facing.
This chapter is pretty straightforward and linear. Simply follow the path laid out before you and you'll soon encounter a village under siege by bandits. Take out the bandits to receive a healing potion, and then continue on to discover that the town bridge has been demolished from the other side, leaving the townspeople scratching their heads. You'll have to find another way across, so continue northward. On the way, a villager will tell you about a legendary fountain of health located somewhere nearby. This will add the optional fountain of health quest to your quest list.
Continue to follow the path. Trudge through the swamp and fight the resident merlocs until you reach dry land. You'll discover a village being attacked by a mass of animated skeletons. Your footmen will gain the defend ability at this time, which greatly reduces the damage they take from ranged attacks. Turn it on to help them against the skeletal archers. After you defeat the skeletons, continue west. You'll see the path split off to the south, so you can head a bit further west to find the fountain of health and let your troops heal or simply proceed south to advance the mission.

When you come upon the diseased grain, Arthas and Jaina realize that the food supply may be spreading the plague and determine that the town granary must be destroyed. Continue on toward the end of town, where the grain warehouse is located, and you'll gain the help of two priests, who can heal your troops, and a mortar team, which is the powerful human siege unit. Continue to use defend, holy light, and water elemental and you'll have no difficulty dispatching the skeleton hordes. You can head south of the place you encountered the mortar team to find a mantle of intelligence for Jaina. When you reach the warehouse, you'll catch a glimpse of the necromancer Kel'Thuzad and his minions. He sets skeletons and a hideous Frankenstein-like monster called an abomination after your troops and then flees. After you deal with the menace, you can attack the grain warehouse. Be wary, though, because a horde of ghouls will descend from the fields to attack you. Dispatch these fairly weak foes and finish off the grain warehouse to end the mission.
4. The Cult of the Damned
Arthas and Jaina have discovered the source of the diseased grain: Andorhal. They journey toward the infected village, and while en route they encounter more of the strange cultists trying to overtake a gold mine. After dispatching these sorcerers, they decide to set up a base camp and then investigate Andorhal itself.
Main Quests
Investigate Andorhal.
• Explore Andorhal.
Confront Kel'Thuzad.
• Find Kel'Thuzad.
Optional Quests
None
Walk-Through
Chapter four starts you off with three peons and a handful of troops. You can grab the two peons working on the farm and barracks and have them help in constructing the town hall to make the construction go more quickly. However, extra resources are consumed for every additional peon you add to a building's construction. After you get your base up and running, you can scout around a bit with your troops and fight creeps to gain experience for Arthas and Jaina. An extra gold mine is available for expansion to the far east, and the game will tell you that you should expand there to increase your gold intake. Frankly, though, it's not really necessary on this mission. A group of powerful level-six stone golems guards the mine, and they'll provide a lot of valuable experience for your heroes if you decide to explore there. Also, a goblin merchant that sells a few useful items can be found a bit west of the second gold mine.
Your base is relatively safe from the beginning of the mission onward, but a couple of guard towers placed at the northwest entrance will be useful, as small groups of the undead ghouls seen in the last mission will show up occasionally to give you a hard time. They're weak, so a tower or two and a few footmen and/or riflemen will hold them off. You'll notice that in this mission you can upgrade your town hall and then build a workshop and an arcane sanctum. These buildings can produce mortar teams and priests, respectively. After you've leveled up your heroes, produced extra troops, and gone through the relevant upgrades at the blacksmith, you can start to explore toward the northwest, into Andorhal.

Before you reach the town, however, you'll notice that the terrain looks blackened and dead. This should tip you off that the undead are nearby. Indeed, there's an undead base between your own base and Andorhal, and you'll have to plow through it to reach the diseased village. The undead base isn't very well defended, and with a sufficient number of troops you can roll over it with ease. Watch out for necromancers, though--they can raise many skeletons at a time from corpses on the ground, and though the skeletons are weak, they can wreak havoc on your battle formations by getting in the way. Here you'll learn how effective mortar teams, like all siege units, can be against buildings. Two or three of them in your attack party will make sure buildings fall far faster than when you're just using simple melee and ranged units.

When you reach Andorhal, you'll find it already ablaze. Kel'Thuzad is again behind the carnage, and after spewing his undead rhetoric, he takes his leave and sets more enemies against you. Thus your first quest is completed and your second, find and destroy Kel'Thuzad, becomes clear. You can destroy the diseased grain silos in the town, but they're all empty; the shipments of infected grain have already left. Press on northward and then head east. Soon you'll encounter more of the dead terrain you saw around the undead camp. This is blight, created by undead buildings. Once you reach it, you'll know you're in for a bigger fight than before, as you're faced with several abominations at one time. These monsters are much stronger than ghouls and skeletons, but with proper use of your heroes' abilities, you can win. Find and destroy Kel'Thuzad to complete your second objective and finish the mission. As he says, though, his death will mean little.
5. March of the Scourge
Arthas continues his march through the ruined towns of the northland, and the next stop is Hearthglen. When he and Jaina arrive, they discover the tragedy that has already befallen the sleepy hamlet--the townspeople have already consumed the cursed grain. The villagers turn into zombies around them, and they're forced to slaughter their own people to survive. Arthas then sends Jaina to retrieve Uther for needed assistance and prepares to defend Hearthglen from the undead menace alone.
Main Quest
Defend Hearthglen.
• Survive for 30 minutes.
Optional Quests
Stop the grain caravan.
• Destroy the grain caravan before it reaches the last village.
Walk-Through
Your task in chapter five is a simple one: stave off the undead's constant offensives against Hearthglen for 30 minutes. There's a timer in the upper right corner of the screen letting you know how long you have to go. It sounds like an easy task, and if you set up your base defenses properly, you should be able to pull through it without too much trouble. You won't be able to let down your guard for a single moment, though.

Towers are the key to success in this mission. Two guard towers have been provided at each of the base's three entrances, but this is only a start. You can disregard the entrance on the right side, as no undead will ever try to attack through it. The two on the left, however, will be bombarded every two or three minutes by wave after wave of attackers. At first, the parties will consist only of ghouls, and you can breathe easy during this period, building the necessary buildings in your base and getting extra towers up. As the mission wears on, though, the raiding parties will start to add necromancers, abominations, and the undead's siege unit, the meat wagon. Try to build two more guard towers for each of the two left entrances as soon as you can--this alone will nearly take care of the early ghoul attacks. Then, once you've built a workshop, add two cannon towers to each of the two entrances. The cannon towers are more powerful against ground forces and will make mincemeat out of ghouls and skeletons.
Of course, towers aren't the only thing you'll need for base defense. A healthy contingent of footmen and riflemen should be your main defense force, and as you complete the second-tier buildings, you can back them up with priests for healing and mortar teams for additional fire. Sorceresses, new to this mission, will also help later on by auto-casting slow on more powerful units like the abominations.

In the middle of the mission, one of your allies will inform you that a diseased grain caravan is making its way through the outlying villages, poisoning everything in its path. Stopping this caravan is your secondary objective for the mission. Once you've got towers and a sizeable group of troops in place, you can detach Arthas and a smaller band of warriors to head northward and intercept the caravan, if you wish. The caravan consists of two necromancers, a few ghouls, and several meat wagons. Arthas will be level five or six by now, and his holy light can sustain units through a fierce battle, so you won't need a huge force to take out the caravan--five or six footmen and five or six riflemen, along with a couple of priests to heal, should do the job. You'll get a medallion of courage and a scroll of town portal for your efforts. Once the caravan is destroyed, head back to Hearthglen to assist in the defense effort.
The undead attacks will increase in intensity during the last 10 minutes of the mission. As long as your towers stay up, however, you should be able to hold them off. When a new raid appears, bypass the ghouls and abominations at first--your towers will deal with them. The necromancers and meat wagons are by far the greater threat. Necromancers raise skeletons, of course, and sometimes a new raiding party will show up before the corpses from the last one have vanished, giving the wizards plenty of fodder to work with. In addition, meat wagons are devastating to your towers. Therefore, bypass the initial melee attackers and target the necromancers and meat wagons quickly. After each raid, head back inside the town's walls to heal up, and assign a couple of peasants to repair your damaged towers.
In the last minute of the chapter, the final undead assault will begin, and sadly, it really can't be won. The undead will throw every type of unit at you that you've already seen, and in addition, you'll be dealing with a level-six lich. This undead hero can cast frost nova on your front lines, devastating them. However, if you've made it this far, you're already in the clear--the timer will hit zero, the mission will end in "success," and you'll be treated to a cinematic featuring the complete destruction of Hearthglen.
6. The Culling
Arthas is beginning to let his youthful vim get the better of him as he watches his countrymen turned into slaves of the undead. After some choice words with Uther, he sets off to the city of Stratholme to confront Mal'Ganis, the dreadlord he believes is responsible for the plague. When he arrives, he finds the entire city has been infected--it's only a matter of time before he has an army of zombies on his hands. He resolves the unthinkable: to slaughter an entire city rather than let them fall to evil undeath. Disgusted with Arthas, Uther and Jaina refuse to assist him on his dark errand and flee the scene, leaving him alone to carry out his tragic mission.
Main Quests
Carry out the culling.
• Destroy plagued villager houses.
• Kill 100 zombies.
• Stop Mal'Ganis from claiming 100 zombies.
Optional Quests
None
Walk-Through
This chapter presents an interesting premise: You must kill the townspeople of Stratholme before Mal'Ganis can claim them as his servants. You start in the northeast corner of the map with a partially constructed base and an enormously rich gold mine. Build up your base as usual, adding a blacksmith, upgrading your town hall, and such. When you've cranked out a few units to supplement your starting force, you can lead Arthas and his crew down toward Stratholme. Don't think your base is safe, however.

You'll notice a counter in the upper right portion of the screen tracking how many townspeople you've killed, and once Mal'Ganis starts his crusade, a counter for his victims will be added as well. Taking out the villagers works like this: When you destroy a house, four people will come sleepwalking out, and within a few seconds they'll become zombies and attack you. If you strike them quickly, you can kill them before they change and sustain no damage. Both the houses and the townspeople aren't considered enemy units by the game, so you'll have to specifically issue the order to attack them.
Mal'Ganis works fast, so to beat him, you'll have to work faster. As you're going about your grim business, you'll notice that the screen shakes every minute or two--this signifies that another building has fallen, and Mal'Ganis has claimed four more souls. You've got an ace up your sleeve in this race, however, and you'll have to play it repeatedly to win. Various parts of the map are permanently revealed, so if you watch the mini map for signs of a green dot, you can track Mal'Ganis' movements. When you locate him, seek him out and engage his forces. Here's the good news: Every time Mal'Ganis dies, he's out of the game for a full three minutes (indicated by a timer in the upper right), and you're free during that time to take out townspeople with abandon. If you knock him out every time he's resurrected, you'll have no trouble staying well ahead of him.

Fighting Mal'Ganis and his cronies can be a pain, but it's not terribly difficult if you micromanage your units properly. He's generally accompanied by a group of ghouls and two or three abominations, and you can make quick work of them with a group of footmen, riflemen, and knights (newly available in this chapter). By far the most annoying aspect of fighting Mal'Ganis is his sleep spell, which he'll use on your troops repeatedly. Sleep doesn't harm a unit, but it immobilizes it until it's attacked, so to wake up a sleeping unit you'll have to attack it yourself. When you're in the thick of battle and you realize half your fighters are asleep, this can really throw a wrench into things. The best solution is to use a rifleman's ranged attack to hit a sleeper once and return it to battle. Just make sure you immediately issue another command to the rifleman or he'll keep attacking the same friendly unit.
Unfortunately, Mal'Ganis' shenanigans in Stratholme aren't the only problem you'll have to deal with in chapter six. After you've started your crusade, your main base will also come under repeated attack from undead forces. The raiders always attack from the south, so build an additional guard or cannon tower near the one provided, and then place a group of knights, riflemen, and priests near the towers to deal with the intruders. Things can get hairy when you've engaged Mal'Ganis and his entourage only to realize your base is also under attack simultaneously, but if you have a decent supply of troops at the south entrance to your base, they and the towers will deal with the abominations and ghouls that show up well enough on their own.
After you've claimed your 100th townsperson, victory, such as it is, will be yours. Arthas misses his chance to defeat Mal'Ganis, however, who taunts the enraged paladin and invites him to the icy land of Northrend so that they might finish their battle.
7. The Shores of Northrend
Lusting for vengeance, Arthas has set sail with a large force of warriors to Northrend in search of Mal'Ganis. Upon arriving, he and his warriors are daunted by the bitter, sunless cold of the arctic climate, but still they press on into the waiting mouth of the undead scourge. Fortunately, they'll encounter some unexpected help along the way.
Main Quests
Establish a base camp.
• Locate a gold mine.
• Arthas must survive.
Destroy Mal'Ganis' base.
• Lay waste to Mal'Ganis' base.
Optional Quests
Rescue Muradin's men.
• Rescue the dwarven base.
Walk-Through
You begin this mission with only Arthas and a few support troops, so your immediate goal is to find a gold mine where you can set up a base camp. There are multiple paths leading east from your starting point, but they meet up to steer you in the same direction, so finding the mine shouldn't be too much trouble. You'll encounter some snow wolves and ice trolls along the way, but these enemies are nothing you can't handle as long as you keep a finger poised over the holy light button.

Once you reach the gold mine, you'll come under brief attack from some dwarves who are quick to apologize and join you. Their leader, Muradin Bronzebeard, tells you that his allies have been attacked and cut off by the undead, and this opens up your optional quest for the mission. As in other missions, saving the stranded dwarves isn't required, but it will make things a lot easier for you later on. For now, start out by deploying your peasants to create a base. Keep your troops ready, though, because almost as soon as you start to build, the undead will attack. The first wave is a cinch to defeat, as it consists mainly of ghouls. You'll want to train more riflemen as soon as possible, though, because the second attack will be made by a group of undead flyers called gargoyles. The three initial riflemen you have can take care of this first wave of gargoyles, but keep holy light ready to make sure you don't lose any of them. By the time more gargoyles show up, you'll have had time to make additional riflemen and build more guard towers.
There are some powerful creeps scattered around the outskirts of your base, so now may be a good time to level up Arthas and Muradin if you choose. Muradin is a mountain king, and his storm bolt ability is especially effective against stronger enemies--not so much for the damage it deals as for the lengthy stun period it causes. While you're leveling up your heroes, continue to climb the tech tree at your base by upgrading your town hall, which will allow you to build knights, priests, and mortar teams. After a while, the undead attacks on your town will intensify, and soon a lich will join the raids. This undead wizard can cast frost nova on your troops, which causes a hefty amount of splash damage to units adjacent to its target. With Arthas and Muradin supporting your troops, though, the lich won't be much of a problem.
Once you have a pretty well stocked army that is strong in melee, ranged, and siege combat, you can proceed northward in a straight line toward the dwarf base. If you encounter any forks in the path, keep bearing to the right. Before you get there, however, you'll notice the telltale blight that signifies an undead settlement. Use your mortar teams to take out any spirit towers guarding the base, and let your fighters deal with any enemies that emerge. As usual, deal with the necromancers first and let other units wait till later. Once you've destroyed this undead settlement and reached the dwarves, you'll gain a second gold mine, extra buildings, and a group of new forces, including steam tanks.

With the addition of these new units, your army should be very well fortified and certainly strong enough to stage an assault on Mal'Ganis' stronghold. From the dwarven camp, head due east to reach it. If you opted not to save the dwarves, travel northeast from your base along an alternate route to get there. Mal'Ganis' fortress isn't very heavily defended; your biggest obstacle will be the spirit towers placed at various points among the other buildings. Again, use mortar teams to nullify the towers quickly and then move in with your melee and ranged forces to stage a full-on assault. Mal'Ganis isn't home, fortunately, and the meager defenses of his base will provide no obstacle for your army. Destroy all the base's buildings to satisfy your second objective and finish the mission.
8. Dissension
As chapter eight begins, Arthas' men receive an message informing them that King Terenas has called back their expedition at Uther's request. Enraged, Arthas vows to prevent this from happening any way he can. His solution? Destroy the very ships that his men need to return home.
Main Quests
Burn the boats.
• Destroy the five ships.
• The timer must not reach 0:00.
Optional Quests
None
Walk-Through
This chapter throws out all manner of base building and puts your combat abilities to the test. You start off with access only to Arthas, Muradin, and two mortar teams, and although you can see a human base, you don't have access to it--it's only there to provide gold as you make your way. You're on a 25-minute time limit for this mission, so don't dally too much. As long as you keep moving, you'll finish with plenty of time to spare.
Start off by heading west immediately and fight your way through the early undead units you encounter. Make sure to keep your mortar teams alive and healthy, because you'll need them later. Use them to take out the spirit tower from outside its range. When you reach the first mercenary camp, you should have amassed enough gold to hire all the units available to you. The ogres are meaty melee units that can take and dish out a lot of punishment, the ice trolls are good for ranged support, and the ice troll priests can heal your units in the same way that normal priests do. Collect all these units and head onward.

At the next undead settlement, you can continue west along the high ridge and hit the three spirit towers from above with your mortar teams. If you keep going further west, you'll find some skeletons that will yield a goblin night scope, which increases your night vision. Swing back around eastward and head down through the undead. Once you reach the first ship, you can hit it with your ice trolls. The easiest way, however, is to use Muradin's storm bolt--one hit from his attack will sink each ship. Each time you encounter one of the five ships, storm bolt it and move on.
As you push on, you'll run into some fairly strong nerubian monsters. Use your combat skills to deal with them and try not to take too many losses. At the next mercenary camp, you can purchase the services of ogre magi, which cast bloodlust, and ice troll berserkers, which are stronger than the standard trolls. Fight your way through the merlocs and head up to where trees are blocking your path. If your mortar teams are still alive, you can have them attack the trees to knock them down. Otherwise, head up the hill, hire some goblin sappers, and have them detonate on the trees to clear the way. At the next mercenary camp, you can hire ogre maulers, troll high priests, and troll trappers. The first two are optional depending on your gold and troop reserves, but you should get at least one trapper to help deal with the blue dragons up ahead. A trapper can throw a net on a flying unit, bringing it to the ground and making it accessible to melee attackers.

The next obstacle is interesting, though easily dealt with. Rows of spirit towers line the sides of the next canyon, and they'll decimate your forces if they try to walk through. The solution: Buy an amulet of recall at the goblin merchant and give it to Arthas. Turn on his divine shield to make him invincible and then move him down the path to the exit. Once he's there, use the amulet to teleport 12 of your units to his position. You'll have to give up the units that don't make it, as they'll be killed trying to walk through the canyon.
You've almost reached the end now. Approach the graveyards up ahead and target the necromancers immediately so that they can only bring a few skeletons to life. Deal with each one in turn, then muster all your remaining forces and charge headlong into the last skirmish of the mission. The abominations, crypt fiends, ghouls, and necromancers may provide a fierce fight if your group is depleted, so make full use of your heroes' abilities. Defeat this last obstacle and sink the last ship to finish the mission.
After the ships are sunk, you'll get a glimpse of the despicable man Arthas is becoming.
9. Frostmourne
Arthas discovers that Muradin and his men have come to Northrend in search of a mythical runeblade named Frostmourne. This weapon sounds to Arthas like just the thing to help him exact his revenge against Mal'Ganis, and he enlists an unwilling Muradin, who is shocked by Arthas' recent actions, to help him retrieve the legendary sword.
Main Quests
Locate Frostmourne.
• Find Frostmourne.
• Arthas must survive.
• Muradin must survive.
Destroy Mal'Ganis' base.
• Flatten Mal'Ganis' base.
Optional Quests
None
Walk-Through
The final chapter of the human campaign presents you with two tasks: First, find the runeblade Frostmourne, and second, raze Mal'Ganis' stronghold to the ground. You're thrust into the former quest from the beginning, as Arthas, Muradin, and a small group of fighters plunge through a way gate to find the sword. Meanwhile, you're also given access to your base, which is already fully constructed at the beginning of the mission. Your efforts should focus on controlling the small party as you look for Frostmourne, but don't neglect your camp, because you'll be receiving undead visitors there almost from the moment the mission begins. Since all your buildings will already be in place, set some extra peasants on gold and wood and start cranking out troops to supplement the ones already in place for base defense.

The path to Frostmourne is littered with powerful creeps, but by now Arthas and Muradin have leveled up so much that you'll make fairly short work of them. As usual, use holy light to keep your other troops alive, and you can alternate between Muradin's storm bolt and thunder clap to help incapacitate enemies. Once you've fought your way to the end of the path, you'll encounter a host of ghostly monsters led by a level-10 revenant called the Guardian. You'll have to defeat this group to pass into the cave and retrieve the sword. Fortunately, the job is made a little easier by one fact: If you kill the Guardian, his entire entourage will die with him. Focus all your attacks directly on him and he'll fall quickly.
After you obtain Frostmourne, Muradin will unfortunately die. This won't hamper your combat efforts very much, however, because Arthas should be at or nearing level 10 by now, and coupled with the extra damage provided by his new blade, this means he's almost unstoppable. Your attention should now be turned to the destruction of Mal'Ganis and his horde. You'll have dealt with several raids by the undead already, and these will continue periodically while you build up your forces. Another gold mine is available for expansion north and slightly east of your base, if you want to increase your gold intake. It's guarded by a small group of nerubians that you can dispatch with ease. Be wary, though, because if you expand to this mine, the undead will often stop to harass the expansion on their way to attack your main base.

Mal'Ganis' force is the green one located in the northeast part of the map. A purple undead force is also located directly to the east of your base. This second group is responsible for many of the raids on your base, so you can attack it if you wish to neutralize some of your base defense headaches. Frankly, though, it's just as well if you bypass this base and proceed directly to Mal'Ganis. With an army maxing out the 90 supply limit, you'll steamroll over the opposition. Arthas should be accompanied by as many knights, riflemen, priests, and mortar teams or steam tanks as you can muster, and additional units like sorceresses and the newly available gryphons will help as well. Once you've got an army together, proceed directly north of your base and you'll find a green expansion. Destroy it quickly, then head east into Mal'Ganis' base itself. The defense of this base is surprisingly paltry, and with a fully stocked army you'll make short work of it. Flatten every last building to satisfy the second mission requirement and complete the human campaign.
Undead Campaign: Path of the Damned
Though Arthas has vanquished Mal'Ganis and seemingly claimed vengeance for his countrymen, he has paid a terrible price: By wielding Frostmourne, he has turned over possession of his soul to the master of the undead, the Lich King. He returns to Lordaeron and slays his own father, bringing with him a plague of undeath that will ravage and consume the lands of humanity.
1. Trudging Through the Ashes
Arthas has been reborn as a death knight in the service of the Lich King, and he is visited by Tichondrius, a dreadlord like Mal'Ganis, who bears Arthas' first assignment. Many of the disciples of the undead cult have disguised themselves as normal villagers and infiltrated the populace. Arthas is to travel unseen through town and rally these acolytes for a greater purpose.
Main Quests
Rescue acolytes.
• Rescue 20 acolytes.
• Arthas must survive.
Optional Quests
Find the graveyard.
• Bring Arthas to the graveyard.
• Arthas must survive.
Walk-Through
This is an interesting and novel mission to start off the undead campaign, because it requires you to use stealth tactics to survive and accomplish your goals. You're looking for the red townspeople scattered throughout the village--these are the acolytes in hiding. Blue villagers should be avoided whenever possible, however, as they'll alert the guards to your presence. With only Arthas and two ghouls at your command, you'll certainly want to avoid conflicts whenever possible. Try not to engage more than one or two soldiers at a time.

Start off by heading west into town, and meet the first acolyte on the path. Continue on into the village itself and you'll see another acolyte next to a villager chopping wood. Deal with the footman to the right when he attacks you. Your ghouls have a useful ability called cannibalize that lets them munch down on corpses to rapidly regain hit points. After you kill the footman, make sure to have the ghouls use this ability to heal up, and remember to use it in future skirmishes throughout the mission. Now, liberate the acolyte, and notice that the blue villager runs and calls for help when you get near him. All of them will react this way, so it's best not to even get near them. If you have no choice, though, make sure to slaughter a screaming villager as quickly as possible before he brings guards to your location.
Continue west, stopping for the acolyte above the path and receiving information about your optional quest, the graveyard. Cross the water and you'll gain access to a shade, an invisible undead unit that's useful for scouting. The next part is fairly tricky, and you'll have to make full use of the shade to get through it unscathed. Have the shade follow the movements of the soldiers that patrol around the stables, and then have Arthas and the ghouls follow behind at a safe distance so as not to alert them. Make sure to keep moving the shade along to keep track of the guards' position, and walk Arthas around to claim the two acolytes on the sides. When you've got them, head north, making the shade move ahead of your other units to reveal nearby units. Instead of plunging through the gate ahead, which is heavily guarded, walk through the shallow water and enter the town through the trees, where there's a break in the wall on the far left.
This section of town is teeming with both regular townsfolk and soldiers, so you'll have to be especially careful not to alert them. Use the shade to scout ahead, and slowly inch Arthas and the ghouls along, talking to acolytes as you go. Hit the first one as soon as you enter the town, then head to the northwest corner to find another. Move the shade east to observe the knight patrolling here, and wait for him to move downward before you proceed. Don't miss the acolyte positioned to the right of the knight's patrol route as you move along. As you travel further up the path, you'll see the graveyard to your right, so enter it with Arthas to gain extra ghouls and some skeletons.
Continue walking the path, then hang a left at the gate. Bandits will attack the town hall just as you pass it, and you can slip through during the confusion to the other side. An acolyte is imprisoned by bandits to the north, so head up there to kill them and free him. Then head south to find another acolyte among the trees. Now head back toward the town hall, and take Arthas down to find one more acolyte next to a villager to the left of the town hall itself. Now, head back to the gates and smash them to enter the last section of the town.
Attack the two footmen chasing the acolyte just inside the gates to free him. After they're dead, you can head down to find another acolyte. When you do, you'll alert a knight, but you can take him out quickly. In fact, with the extra forces you've gained from the graveyard, you can give up on stealth in this last section and just plunge headlong into the local guards if you want to. Use Arthas' death coil ability to damage enemy units or heal your own, and cannibalize will also help to keep your ghouls alive. Several more acolytes are scattered throughout this section of town, and a group of four are located at the east end, making it easy to hit your quota and finish the mission.
2. Digging up the Dead
Arthas has rallied the minions of the dead, and now Tichondrius has given him a new mission: Travel to Andorhal and recover the remains of the Kel'Thuzad, the necromancer that Arthas himself slew in the human campaign.
Main Quests
Recover remains.
• Kill the paladin guarding the graveyard.
• Bring Arthas to Kel'Thuzad's tomb.
• Arthas must survive.
Establish a base.
• Build a necropolis.
• Haunt a gold mine.
• Build a crypt.
• Build a graveyard.
• Build three ziggurats.
Claim the urn.
• Kill the paladins.
• Recover the urn.
Optional Quests
None
Walk-Through
You start the mission in control of Arthas, some ghouls, and three meat wagons, which are the undead's siege unit. Your first task is to gain Kel'Thuzad's remains from the graveyard directly east of your starting position, so head immediately in that direction. Kill the footmen that challenge you along the way, and when you get to the guard tower, use your meat wagons to quickly take it out from outside its firing range. Eventually you'll run into a low-level paladin just outside the graveyard. Swarm him with your ghouls, use death coil to weaken him, and have the meat wagons focus their fire on him, and he'll go down in no time. Once you've gotten the remains, you'll learn you now have to retrieve a special urn from the paladins to transport them in.

Your next task is to construct a base, so go about building the necessary structures. The game will inform you about using the undead, so follow its cues. After you've got the proper buildings up, crank out eight or 10 ghouls, then take them, Arthas, and your meat wagons west to find the first of three paladins. This one is level four and a bit stronger than the last, but you'll make short work of him and his guards. Focus the meat wagons' fire on him while your ghouls deal with the surrounding soldiers. Be mindful of your ghouls' health, though--the splash damage from the meat wagons, coupled with the soldiers' attacks, will eat through them quickly. After you defeat this paladin, head back to your base and recharge on the blight while you construct more troops.

Finishing this mission is just a matter of repeating the same action twice more. Build as many ghouls as you want, then head south of where you found the last paladin to encounter yet another one. This one is level five and is accompanied by footmen and knights, so you'll have to exert a little more effort. Try to protect your meat wagons if possible, as you can't make anymore, and focus on the paladin until he bites the dust. Finally, head further south to discover Uther. After he registers his disgust, you have only to kill him and collect the urn to finish the mission. He's level 10, so he'll require a bit more work to bring down, but with your meat wagons dealing heavy damage, it won't take too long. Pick up the urn he drops to end this chapter.
3. Into the Realm Eternal
Arthas has pleased his master Tichondrius by retrieving the remains of the necromancer Kel'Thuzad. As it turns out, however, the evil wizard can only be resurrected at a place of great mystical energy, and Tichondrius selects the high elven homeland Quel'Thalas as that place. Arthas must amass a force of undead and slaughter his way to the elfgate, the first barrier between him and Silvermoon.
Main Quests
Reach the elfgate.
• Destroy the high elf base (blue) guarding the elfgate.
Optional Quests
None
Walk-Through
As the chapter begins, you're thrust immediately into a battle with high elven forces. The troops provided are more than enough to slaughter the elves and raze their base, so eat through them quickly and then get started constructing your own camp. Stay alert, however, as the elven ranger hero Sylvanas Windrunner will soon lead an assault against your fledgling base. Defeat her and her escort, but be wary, because she can be resurrected like all heroes to fight again. You have access to necromancers on this mission, and they have the powerful raise dead ability, which summons two skeletons from the corpse of each unit that is killed. Raise dead can be auto-cast by right-clicking on its icon. When the spell is set to auto-cast, the necromancer will raise skeletons every time a fresh corpse is generated nearby. Needless to say, it can be an incredibly useful boost to generate new units from fallen enemies in the thick of battle.
The key to winning this mission is speed. In addition to the blue elven base located around the elfgate, there are three green elf bases located around the map. All four of these bases will be generating enemy troops, so you should raise an army as quickly as you can and then move to assault them each in turn. Your primary melee force will be made up of Arthas and a horde of ghouls, and you should bring at least three necromancers to generate skeletons from fallen units. Three or four meat wagons will also help immensely in bringing down the elves' towers and other structures. In addition, there are three places in the map where trees block your path, and you'll need to attack them with meat wagons to bring them down and clear your way. Each of these is marked on the ground by five blue magical symbols.
The easiest of the three green elven settlements to overrun is located to the west of your base, so once you get things running smoothly, take Arthas and your attack force in that direction. Use the meat wagons to knock down the trees, then proceed to destroy the elves located beyond them. This town will give you little trouble, as it's defended by only a tower and several weak ground units. After you've razed all the elven structures, haunt the gold mine located here to get some additional gold coming in. After the gold mine is haunted, the ground will be blighted enough that you'll be able to build a couple of ziggurats near the bridge. Convert these to spirit towers so you'll have some defense should the elves cross the bridge to attack your expansion.
Winning this mission is basically a matter of amassing a huge force of undead and obliterating all the elves in the area. With two gold mines being tapped simultaneously and three ghouls harvesting lumber, you'll have more than enough resources to build a large attack force. You don't have to destroy the second elf village, which is located south across the bridge from the first one you destroyed, but you can if you're feeling particularly vengeful. It will provide a third gold mine if you find it necessary. The third elven hamlet stands between your base and the elfgate, however, and you'll have to raze it to proceed. You can get to it by opening a path through the trees to the southeast of your base. This one is guarded not only by archers and melee troops but also by sorceresses who will use slow on your units, so bring along as many reinforcements as you can.

After you've taken out the third elf town, the way to the elfgate is clear. The blue base is by far the most heavily defended on the map, however, so make as many units as your resources will allow and then begin your assault. Meat wagons will help immensely in neutralizing the towers scattered around the base, while necromancers can raise skeletons and ghouls act as the front-line melee fodder. Arthas' death coil will also help remove enemy units quickly. After you've taken out the base's defenses, raze every last building and you'll finish the mission.
4. Key of the Three Moons
Arthas and the scourge have smashed the first elfgate and breached the outer perimeter of Quel'Thelas in their quest to resurrect the fallen necromancer Kel'Thuzad. To penetrate the second gate, however, Arthas must gain a special key made up of three moon crystals, each of which is kept at an altar located near the gate. As he plunges deeper into the elven homeland, however, Sylvanas appears to stymie the undead's progress by removing the only bridge across a great river. The undead must find a new way to get across the water and accomplish their goal.
Main Quests
Find the three moon crystals.
• Destroy the three high elf altars.
• Collect all three moon crystals.
Reach the gates of Silvermoon.
• Bring Arthas to the gate.
Optional Quests
None
Walk-Through
Sylvanas has destroyed the bridge that Arthas meant to cross, so you'll have to find a new way across the water. Your first priority, however, is to establish a base of operations, and you'll find a minor elven settlement just west of your starting position. It's guarded by two elven flying units called dragon hawks, which can't be hit by melee attackers. Your newly acquired crypt fiends have the web ability, however, which brings flying units to the ground for a short period of time so that melee units can hit them. Make sure web is set to auto-cast and then attack the village to clear a path for your base.

Once you've got things going, move Arthas further west to discover a goblin laboratory. Two goblin zeppelins will already be waiting for you, so move them back over to your base. You can load up to eight units in a zeppelin and use it for aerial transport (although siege units take two unit slots). You're not quite ready to abandon your base, however, because the elves have zeppelins of their own and they'll make regular trips to drop off troops in the middle of it. In addition, dragon hawks will often fly over to harass your outlying buildings from across the water. Both of these threats come from the north, so build all your ziggurats as close to the river north of your base as you can, and then convert them all to spirit towers immediately. With five or six spirit towers lining the river, you'll have plenty of defense against airborne invaders. You can also position an acolyte or two in this area and set their repair ability to auto-cast, which will make them automatically start repairing the spirit towers when they are damaged. Now you can move on to the altars.
Once you have enough troops to fill both zeppelins to full capacity, you should be ready to assault the first of the three altars, which lies across the river to the west. Fly your zeppelins over, drop off your troops on the bank, and attack. The defense of the first altar is paltry, and you can take it out easily. As your troops fall in battle, continue to produce more and fly them over with the zeppelins. Once the troops are dead, destroy the altar and have Arthas pick up the moon crystal left behind. There are a few more elven structures north of here, as well as a second gold mine. If you're short on gold, fly five acolytes over and haunt the mine for some extra income. Proceed to the way gate located nearby to hop to the next area. Be alert, because as soon as you come through the gate, you'll find yourself under attack by more elven forces. Dispatch them as usual. You'll find a third gold mine here, which you probably won't really need. To the west of the way gate you came through, you'll find another way gate that leads to the second altar, and even further west, you'll find yet another way gate that leads to the third altar. Taking these two altars is a straightforward process of producing more troops and flying them over, so go through the gates and claim the remaining moon crystals.
Once you've obtained all three moon crystals, your next objective becomes clear: Move Arthas to the elfgate. No way gates lead to the island on which the gate is located, so you'll have to use zeppelins. You can mount a full assault on the guards protecting the gate if you want, but this is unnecessary, because you can finish the mission simply by moving Arthas onto the circle of power in front of the gate. By now, he'll be strong enough to make it through the guards, but you can bring an entourage along with him if you want. Move him onto the circle to end the mission.
5. The Fall of Silvermoon
Arthas and his undead forces have torn down the second elfgate and reached the high elven capital of Silvermoon. The sunwell, the source of mystical energy that Arthas needs to resurrect Kel'Thuzad, is just ahead. It is guarded by a host of powerful magical creatures, however, and the elves won't give it up easily. To make matters more difficult, Sylvanas Windrunner still lurks in the shadows, plotting to thwart the undead's advance.
Main Quests
Reach the sunwell.
• Defeat the sunwell's guardians.
Optional Quests
Deal with Sylvanas Windrunner.
• Destroy Sylvanas' base.
Stop the Silvermoon runners.
• Eliminate every runner Sylvanas sends.
• Do not alert Silvermoon to your presence.
Walk-Through
Be on your toes as soon as the mission starts, because Sylvanas will attack your base before you've even had time to produce any units. She's leveled up since your last confrontation, too, and she'll bring support troops along with her, so fight her off with the units you've been provided with. Once the threat is over, you can breathe easier and build up your base as usual. Build your ziggurats around the base entrances to use for defense, and start making units. You'll receive elven visitors from time to time, but it won't be anything you can't handle as long as you keep your army properly stocked.

Silvermoon is unaware of the undead presence in this chapter, but Sylvanas will try to do her best to change that by sending messengers to the city from her base to alert them. If a runner gets through, Silvermoon will begin sending forces of its own against your base. You don't want that to happen, of course, so your first secondary objective is to stop all the runners Sylvanas sends to Silvermoon. This is a fairly easy task for several reasons. First, you have a counter in the top right that tells how long before the next runner sets out. Second, you have shared vision with each runner unit, meaning you can see it wherever it goes on the map without the fog of war blocking your view. Finally, you've been given access to gargoyles on this mission, which are the basic undead flying unit. Position your gargoyles at various points over the road, and you'll be able to deal with all the runners that appear.
There are no immediate gold mines available for expansion on this map, so you'll have to make do with the first one for now. Build as many troops as you can, concentrating on crypt fiends and meat wagons with a few necromancers thrown in. Crypt fiends and gargoyles will also make good base defenders, and you'll want to leave some active defense to help your spirit towers, because Sylvanas' soldiers will continue to harass your base periodically. When you've got a large army, head north and then west toward Sylvanas' base, cross the bridge, and proceed to assault her forces. As usual, death coil the lesser forces while your meat wagons take out the towers, and let your necromancers provide new troops with raise dead. After all the buildings of the base have fallen, both of your secondary goals will be fulfilled, and you'll see a cinematic proving what a bastard Arthas has become. After Sylvanas' rather ghastly end, you'll be able to produce banshees as well as necromancers from the temple of the damned.

Now that Sylvanas' base is gone, you can turn your attention to Silvermoon. Since they don't know you're coming, you have all the time you need to prepare your assault. Haunt the gold mine at Sylvanas' old base to generate extra income and start cranking out units. Silvermoon is very heavily fortified, and you'll have to cross a bridge to get to the city, which creates a serious choke point for your ground forces. Again, focus on crypt fiends and meat wagons, and this time add some extra gargoyles into the mix. Spellcasters are optional but can help if you use them properly. With two gold mines and no opposition, you can go ahead and push all the way to the 90 supply limit. Once you've got a massive army, proceed to Silvermoon. You'll face an archmage that will cast blizzard and water elemental, along with a large force of footmen, archers, priests, sorceresses, and dragon hawks, so you'll have quite a battle cut out for you. After the first offensive at the bridge, you can push inward and start taking out buildings so the enemy can't reinforce its troops.
Once the enemy threat is neutralized, regroup your forces before you head to the sunwell. You'll need a lot of crypt fiends and gargoyles to take down the four level-nine stone golems guarding it, and several meat wagons firing from the back will ease the job considerably. The golems are immune to spells, so you can't use Arthas' death coil on them. He can help with his normal attack, but if he dies you'll have to resurrect him before you can finish the mission, so you may want to keep him out of the way. After you finally demolish the last golem, move Arthas onto the circle of power to resurrect Kel'Thuzad and finish the mission.
6. Blackrock & Roll, Too!
Now that Kel'Thuzad has returned to unlife as a powerful lich, he and Arthas must move on to the second phase of their plan to pave the way for a demon invasion. Kel'Thuzad requires access to a demon gate so he can communicate with the demon lord masterminding the invasion. The closest demon gate is controlled by the Blackrock orc clan, so it's decided that the quickest way to get to the gate is to eradicate the orcs who protect it.
Main Quests
Reach the demon gate.
• Destroy the orc base protecting the demon gate.
Optional Quests
Kill the orc heroes.
• Kill Throk'Feroth.
• Kill Mazrigos.
• Kill Khanzo.
• Kill Genjuros.
• Kill Jubei'Thos.
Walk-Through
Chapter six is the first to pit you as the undead against the orcs, so you may want to tailor your strategy to your new opponents. There are five separate orc factions on this map. You actually need to destroy only one of them (the red one in the upper right corner), and not coincidentally, that's the strongest of the five. Taking out the other four first is decidedly beneficial, however, so we'll pursue that course of action.

Expect to be attacked from the east almost immediately after the mission starts by a small band of orcs. Fight them off with the forces provided at the beginning of the mission, then get to work filling out the holes in your base. In particular, you'll need an altar of darkness, a slaughterhouse, and a temple of the damned. You only have one gold mine to work with for now, so keep an eye on your gold and spend with extra units in mind. The meat wagons you start off with are crucial here, as you'll need them to neutralize the orcs' tower defenses while you attack the melee forces. You've been provided with one shade for the mission, so send it in the direction of the first attack to scout out the light blue orc camp--this is the weakest one and you'll want to take it out first. Before you leave to attack, build ziggurats along the northern perimeter of your base, as this is where most attacks will come from for the rest of the mission.
Furthermore, note that the brown orc base is only lightly guarded, and with a sufficient number of units you can crush it easily. After you do so, haunt the gold mine to get a decent amount of gold coming in--you'll need more units to take out some of the later bases, especially the last one. After this, you can take out the other three bases before the last red one in any order you want, as they're all about the same. Each base contains a hero, and killing all five heroes is your secondary objective in this chapter. When a hero is killed, he'll drop a tome that can be used to upgrade either Arthas' or Kel'Thuzad's stats permanently, so it's well worth taking out each one.
The red base isn't much different from the others, with a few exceptions. First, its hero is level eight, making him a good deal more powerful than the others on the map. Second, it has a greater number of troops. Third, and most vexing, it contains a number of red dragons, which are extremely powerful and immune to all spells and special attacks. A mass of gargoyles and frost wyrms will keep the red dragons from causing too much trouble, though, and your ground forces can deal with the orcs. Once Jubei'Thos falls, you can mop up the rest of his troops and then raze his base to access the demon gate and finish the mission.
7. The Siege of Dalaran
Kel'Thuzad has contacted the lord of the burning legion, Archimonde, and the master demon has commanded him to retrieve the spellbook of Medivh, the last guardian, from the Kirin Tor, the wizards' sect located in the magical city of Dalaran. Upon arrival, Arthas and Kel'Thuzad are confronted by Dalaran's archmage Antonidas, who taunts them from behind an aura he and his allies have erected around the city. Any undead who enter this field will be destroyed by its holy energies. Faced with this obstacle, Arthas must find a way to invade Dalaran and retrieve the spellbook without being destroyed himself.
Main Quests
Destroy the three archmagi.
• Slay the first archmage.
• Slay the second archmage.
• Slay Antonidas.
Optional Quests
None
Walk-Through
This chapter is unique in that it requires you to fight and destroy your enemies as quickly as you can. When your units enter the field surrounding Dalaran, they'll start sustaining damage at a rate of around 10 hit points per second, making it imperative that you proceed directly to your goal and destroy it as quickly as possible. There are three archmagi inside the field, and each one controls a section of it. In other words, each time you kill one of the wizards, the aura will dissipate in that section of the city and you'll be free to go about your business unhindered.

The first archmage can actually be taken out very easily if you forget about his aides and go straight for him. He's located directly inside the main gate, and he's of a low enough level that Arthas and Kel'Thuzad alone can dispatch him in seconds. Charge inside with only the two of them, and when you see the archmage, use Arthas' death coil and Kel'Thuzad's frost nova on him in quick succession. This will nearly kill him, so just attack him quickly to slay him and remove the field. Now you can move the other units you started the mission with in to kill the other human units nearby.
There are two human settlements inside Dalaran, and both of them will attempt to attack your base periodically, if you let them. Build extra ziggurats around the main entrance and convert them to spirit towers to keep enemy troops from causing too much damage when they show up. The first town is located northwest of the first archmage, and it blocks your path, so you'll have to destroy it. Before you get there, you can find two cages just outside that will release stone golems, and these golems will fight for you if you destroy them. Grab the golems on your way in and then move to assault the town. The units you start the mission with should be sufficient, provided you've only lost one or two prior to this point. Once you destroy this town, you can haunt the gold mine here for extra income and prepare to move further into Dalaran.
By now the second archmage should have been revealed to you on the map, so you'll know where to find him. You can actually use the same tactic again to kill him, if you wish, but you'll have to deal with more support units this time, so it's a good idea to have some combat units accompany your heroes to run interference while they deal with the wizard. Once he's dead, find another cage just above him that contains an ogre magi. Now head back to the fountain of health you passed on your way in and heal up in preparation for your next assault.

The second town is to the east of the fountain of health, and it's a little more heavily defended than the first. You'll have a fair number of knights and sorceresses to deal with, so stock up on crypt fiends and abominations if you're low. Meat wagons are also invaluable against stationary defenses like towers, of course. Burn this town to the ground to stop it from sending assaults against your own base. By now, you'll probably be visited by some gryphons that spawn from a town you can't access, but these will be destroyed by spirit towers if you've built enough of them. Once the blue town is gone, you're ready to go after Antonidas.
You should definitely have a fairly large force ready to come into the last section of the aura with your heroes, as Antonidas is surrounded by quite an entourage. Again, have your heroes make a beeline for him and let your teeming mass of melee units intercept the fighters nearby. Even the much stronger Antonidas will fall to the combo of death coil and frost nova if you press him with it. Don't worry about trying to kill all his defenders--once he's dead, the mission is over.
8. Under the Burning Sky
Medivh's spellbook has been retrieved and the instructions are clear--Kel'Thuzad must now begin the summoning that will bring Archimonde into the world. Tichondrius charges Arthas with the task of protecting the lich while the summoning is in progress. Of course, the forces of humanity will do their best to stop the unholy event.
Main Quests
Summon Archimonde.
• Kel'Thuzad must survive for 30 minutes.
Optional Quests
Acquire the goblin land mines.
• Find the goblin land mines.
Walk-Through
The last chapter of the undead campaign will really test your ability to manage multiple groups of units and defend multiple entryways simultaneously. Kel'Thuzad is positioned inside a temple structure in the middle of the visible area, and there are three access points that lead inside to his location. The humans' goal in this mission is nothing other than to destroy Kel'Thuzad, which is exactly what you don't want to happen, so to win you'll have to keep them out of the temple. You'll be bombarded from all sides by pretty much everything they have to throw at you, so be prepared.
There are a number of things you can do early on to prepare a good defense. Be wary, though, because you'll be attacked almost immediately once the mission starts. The entrance on the left is surrounded by your base, so enemies will rarely get through to it--they'll be too busy attacking your own buildings. Build a row of spirit towers along the north edge of your base to deal with the invaders who come in that way. These will mostly be riflemen and steam tanks, along with some occasional gryphons. The top and right entrances are the ones you really have to worry about, as initially they're protected by only a single spirit tower each. These towers probably won't last long, and you'll need more. Four or five towers placed along the edge of each entrance is a good idea, as the attackers will be occupied with them long enough for you to move over and take them out. You can also place an acolyte or two behind each row of towers and set their repair ability to auto-cast to make the towers last longer.

The right entrance will mostly see knights, sorceresses, priests, and mortar teams. Since these are all ground forces, one effective method against them is to use goblin land mines, and you're in luck because 12 of them have been provided for you. Take Arthas over to the west to collect the mines when you get a breather in between attacks, and then place them on the right near heavily trafficked areas. These will take out quite a few of the attackers before they can even reach your towers. The top temple entrance is more often visited by steam tanks, gryphons, knights, and an occasional archmage. Since so many flying units come through here, you should keep a healthy supply of gargoyles and crypt fiends (with their web ability set to auto-cast) in this area. You can run your forces back and forth, but it will be easier if you leave an even number of troops at each of the three sides.
A few minutes into the mission, the burning legion will start to reinforce your troops with their own. For a while, you'll get groups of three felhounds at periodic intervals, and they will strengthen your melee effort considerably. Close to the end, you'll also get a group of infernals, which are huge fiery golems with massive supplies of hit points and attack power. Try to keep these extra units alive, because you'll need absolutely everything you can throw at the enemy in the last two minutes or so of the mission. The attacks are fairly regular and of average intensity throughout most of the mission's 30 minutes, but in the last 90 seconds, you'll be blitzed on all sides by a massive attack. Arthas will make an announcement when this assault begins, so be ready. It's imperative that you get as close to the 90 supply limit as you can and have as many towers blocking the entranceways as possible. If the entrances are left open, the human units will pour into the temple at an unstoppable rate and start flaying Kel'Thuzad. All you have to do is keep them out for about a minute. If enemies do get inside, Arthas' death coil is very effective at healing Kel'Thuzad, although you may not be able to keep up with the attack rate. When the timer finally hits zero, you've won the mission.
Orc Campaign: The Invasion of Kalimdor
Unaware of the chaos and destruction that has rained down upon Lordaeron, the orcish warchief Thrall has followed the prophet's guidance and led his people west across the sea to the unknown land of Kalimdor. Though his people have so far avoided the terrible fate that has befallen the lands of humanity, Thrall's own destiny lies with the mysterious peoples who make Kalimdor their home.
1. Landfall
Off the coast of Kalimdor, the orcs encountered a great storm and their ships were scattered along the shoreline. Thrall and a small band of warriors must now set out to brave the untamed wilds and find their lost brethren.
Main Quests
Rally the horde.
• Discover where the other ships have landed.
• Thrall must survive.
Protect Cairne.
• Follow Cairne to the Tauren village.
• Protect Cairne from his enemies.
• Cairne Bloodhoof must survive.
• Thrall must survive.
Optional Quests
None

Walk-Through
This first chapter in the orc campaign is a pretty straightforward mission that involves no base building--you're given a handful of units at the outset and you'll find more along the way. Once you start off on the beach, open the crates as instructed and then head off up the path. There are a lot of creeps in this mission, which will help Thrall raise his levels faster. Simply walk along the road and you'll find your way. Explore as much as you can when you see an opportunity to deviate from the main path, as many of the creeps here have valuable items for Thrall. Healing wards especially will help you keep your limited number of units healthy throughout the mission. Also, you'll remember from the prologue that Thrall's chain lightning spell is very effective, so make sure you make full use of it as you encounter enemies.
Head southwest from the burning village that's north of your starting point, and you'll find some more trolls being held captive down by the beach. Head back up and continue down the main path and you'll find another group of trolls and grunts that will also join you. Keep following the road up around the area where Thrall comments on the centaurs in the canyon below, and you'll soon find a fountain of health that will heal your damaged warriors. Keep moving south from here and you'll eventually run into more of your brethren, and when you do, you'll also meet a new ally for the first time.
Follow Cairne and his tauren warriors to their village. As soon as you arrive, you'll be assaulted by several waves of centaurs. This can be a fairly hairy fight, mainly because both Thrall and Cairne must survive it or the mission will end in defeat. Unfortunately, Cairne doesn't always make the most intelligent moves, so keep an eye on him and defend if necessary. If you picked up any healing wards along the way, use them here. Finishing off the centaurs will also finish off the mission.
2. The Long March
Cairne Bloodhoof has told Thrall about a mysterious oracle that lives to the north. Seeing a chance to make his clouded destiny clear, Thrall commits to accompanying the Bloodhoof tribe northward as they flee the wrath of the centaurs.
Main Quests
Reach all three oases.
• Lead the caravan to the first oasis.
• Lead the caravan to the second oasis.
• Lead the caravan to the third oasis.
• Thrall, Cairne, and the caravan must survive.
Protect the caravan.
• At least two kodo beasts must survive.
• Cairne must survive.
Optional Quests
None

Walk-Through
This chapter is like the first one in the orc campaign in that it provides you with only a few starting units and requires you to make your way from one end of the map to the other without much chance to reinforce your ranks. This time, you have the added burdens of constant attacks by the centaurs and the responsibility of protecting a caravan of kodo beasts. Remain vigilant, though, and you'll make it through.
Your objectives in this chapter are simple: Make it to the first, second, and third oases, each of which contains a fountain of health. The caravan will only move when you do, so you don't have to worry about it getting ahead of you. However, don't stray too far from it, because the centaurs will often attack from the front and rear simultaneously. Cairne and his tauren warriors do a pretty good job of taking out the centaurs that come from the rear, but you'll still want to be around to make sure no serious damage is done to the kodo beasts.

At the first fountain of health, you'll receive some extra grunts. About halfway, you'll run into a goblin merchant, and since you've collected quite a bit of money so far from killing enemies, you can stock up on healing items if you want. Some wolf-riding raiders will also join you at this point. Soon after, you'll encounter a host of harpies, which you can bring down with the raiders' ensnare ability. Finally, the second oasis will supply you with three catapults, the orcs' siege weapon. These will be instrumental toward the end, because you'll run into a lot of watchtowers set up by the centaurs. Press onward, healing your units when possible and protecting the kodos.
In the top right corner, you can veer off the path to find a level-eight centaur khan, a powerful enemy who will yield a pendant of energy for thrall. He has the ability to resurrect himself one time, though, so if you decide to attack him, you should bring everything you've got. Head west of here to reach the third oasis and finish the mission.
3. Cry of the Warsong
After lengthy travels through the desert on the way to the oracle, Thrall and his warriors encounter Grom Hellscream and the Warsong clan attacking a human outpost. Apparently, the forces of Lordaeron also fled to Kalimdor in the wake of the burning legion's destruction. Grom informs Thrall that the humans hold the pass leading up to the oracle, and Thrall resolves to obtain zeppelins to transport his troops over the humans.
Main Quests
Establish a base.
• Build a great hall.
• Thrall must survive.
Secure zeppelins.
• Destroy all hostile units at the laboratory.
• Return two goblin zeppelins to your base.
Optional Quests
Pacify the humans.
• Destroy the human bases.
Walk-Through
Start out this mission by building your base where the destroyed settlement stood. If you're unfamiliar with orc building orders, the game will walk you through the first tier of the tech tree. Start cranking out units at the barracks and beastiary as soon as possible, because you'll soon start having regular visitors. Grunts are the cornerstone of the orc army, and trolls are pretty good ranged attackers to use for backup. Raiders do siege-type damage, which makes them incredibly powerful against buildings--three or four raiders can drop a tower in a few seconds. Finally, a couple of catapults will help you out later on, though you can put them off for now.
There are four human towns in this mission, and they'll all take turns sending raiding parties to hassle your base. Your primary objective, once your base is completed, is to reach the goblin laboratory in the northern part of the map and hire two zeppelins. Only the blue human base actually blocks the path between you and the laboratory, so you can opt to destroy it and ignore the other three if you wish. The secondary objective here is to "pacify" the human forces by obliterating them, though, and frankly, you'll probably find the constant attacks so annoying that you'll be desperate to exact vengeance. Of course, each time you take out one of the bases, the attacks will become less frequent, so it's a good idea to do so anyway.

Grom Hellscream will ignore Thrall's orders pretty soon into the mission, taking off with a few troops to attack one of the bases. You can use this to your advantage by seeing what's going on in a particular town when Grom decides to visit. Furthermore, if you're going to hit a base, you can wait until he goes first and then follow behind him. All the towns have guard towers around their entrances, so bring catapults to disable them before you pour in and wreak havoc. A healthy mix of grunts, trolls, raiders, and Thrall's chain lightning and feral spirit spells will do the trick to neutralize each base in turn. While all this is going on, build a good number of watchtowers around the north side of your base, and build your burrows a bit further back so you'll have some defenses in case you get attacked by one of the other towns while you're away on a raid (which is likely to happen).
Once you've destroyed at least the blue town, or preferably all of them, head through the exit at the back of the blue town and follow the path, battling the centaurs along the way, until you reach the laboratory. Purchase two zeppelins and have them fly back to your own base to win the mission.
4. The Spirits of Ashenvale
Thrall has taken off for the top of Stonetalon Peak to see the oracle, and as punishment for his defiance, Grom Hellscream has been commanded to stay behind and construct a base of operations for Thrall to work from. Grom grudgingly obeys, moving his forces into the wooded quietude of Ashenvale Forest so that a mass of lumber might be collected. But Grom and his forces may soon discover that the forest is home to more than just trees.
Main Quests
Slash and burn.
• Amass 15,000 units of lumber.
Optional Quests
Destroy the furbolg chieftan.
• Slay the furbolg chieftan.
Destroy the trees of life.
• Do away with the trees of life.
Walk-Through
The sole objective in this mission is to bring your lumber stores up to 15,000, and the sooner you do that the better, because the resident night elves are going to cause you some major headaches. You start out with a fully built base, except for one problem--there's no gold mine. Fortunately, one is available just northwest of your original base, so send a peon up that way and build a new town hall as soon as possible to get the gold flowing.

The amount of lumber required in this mission may seem ridiculously high, but fortunately there are two methods you can use to drastically decrease the amount of time and tedious work it will take to achieve your goal. First, move Grom over to see the goblins located just north of your original base. They'll tell you about a group of furbolgs to the west that are giving them trouble, and if you kill them, you'll receive two goblin shredders in return, as well as access to the goblins' stores. You should attack the furbolgs as soon as you have a large force, because shredders can harvest lumber at an incredible rate. Just adding two of these robotic units to your lumber effort will make things go much, much faster.
You also have another option for acquiring mass amounts of lumber, and it will be revealed to you as another secondary objective if you head southwest of your gold mine. You'll encounter several night elf units and a tree of life. If you slay them and destroy the tree, you'll receive 3,000 lumber units. There are four more trees of life located around the map. Two of them are in the extreme northern corners of the map, and one is in the southwestern corner. Each of these is protected by a base and a full complement of troops, making them something of a hassle to access. The fourth is on the east edge of the map, above the goblin shops, and this one has very meager protection. The quickest way to take this one out is to hire two goblin sappers from the laboratory and send them up one at a time to attack the tree of life. They'll just barely make it through the archers' arrows and hit the tree for more than half its hit points each.

A combination of shredders and destroyed trees of life will help you reach your goal of 15,000 lumber units in very short order, although you'll have to deal with night elf annoyances throughout the mission. Stock up on raiders and trolls especially, because the elves will be using a lot of their primary flying unit, the hippogryph, against you. Watchtowers are also quite effective against flyers, of course. Just make sure you've got as many units on hand as you can manage at all times, and you should be able to contain the elf threat. Keep in mind that the more wood you consume, the more you'll have to harvest. As soon as the lumber counter hits 15,000, you win the mission.
5. The Hunter of Shadows
Grom Hellscream and his Warsong clan have constructed a base in Ashenvale Forest per Thrall's instructions. The night elves' demigod, Cenarius, is infuriated by this trespass and emerges with his followers and to lay waste to all that the orcs have built. Meanwhile, the pit lord Mannoroth has baited the orcs with his own unholy energies in a bid to use them against Cenarius and the elves. The orcs themselves are caught unaware in the midst of this power struggle.
Main Quests
Reach the chaos well.
• Discover the source of power.
• Destroy the satyrs guarding the pool.
Destroy Cenarius.
• Slay Cenarius.
Optional Quests
None
Walk-Through
When you start this mission, you have a base that takes up most of the map space. Immediately, though, Cenarius and his ilk will appear to start destroying everything in sight. There's nothing you can do about this, and three of the settlements will be destroyed in very short order. Cenarius happily features around 4,000 hit points, complete immunity to all your attacks, and an attack of his own that does massive amounts of damage. Don't waste time watching him wreaking havoc, however. As soon as the elves are done with the other three bases, they'll be coming for yours. Put three more peons on your gold mine immediately and start cranking out units as quickly as possible. Focus on trolls and raiders (once they've learned ensnare), because the attack will consist largely of hippogryphs and chimaeras, the elves' flying siege unit. Use any spare gold you have to build extra watchtowers around your perimeter. When the attack comes, throw everything you have at the invaders. Grom's bladestorm will decimate ground-based enemies while you focus your trolls' fire on the flyers. With proper planning and luck, you can survive this assault relatively unscathed.

After you deal with the initial assault, expand right away to the gold mine north of your settlement. You'll be making and remaking units a lot in this mission, and you'll need as much gold as you can get. After this is done, set about the usual process of producing and upgrading units. Again, focus on trolls and raiders with a few grunts thrown in for serious ground support. Both orc spellcasters will aid you as well--the shaman's bloodlust spell will make your units incredibly powerful in battle, and the witchdoctor's healing ward will keep them alive. The watchtower is without a doubt your best friend in this mission, and you can't have enough of them. Build them around the perimeter of your main base and at key points near your expansion as well, because the night elves will establish three bases where yours were, and they'll all be pumping out units to attack you with.
The first mission objective here is a little deceptive. Usually, you're meant to plow through your enemies' bases before you can reach whatever goal you're looking for, but in this chapter, you've got to find the goal first. To do this, head north and knock down the trees that are marked with the blue magical symbol. From here, you'll have to follow one linear path all the way to the north end of the map to discover the corrupted fountain of health. A variety of powerful creeps haunt the path, so bring an assortment of melee and ranged attackers, along with some spellcasters for backup. In the meantime, make sure you've got a large and diverse force back at your base to guard against the frequent night elf attacks. The sooner you reach the fountain, the better.

Once Grom and his allies have drunk from the fountain, they'll go from being orcs to chaos orcs, which changes their attacks to chaos-type damage. This also changes the shaman into a chaos warlock, giving him new spells. These new chaos orcs are incredibly powerful and you'll have almost no trouble against the night elves or Cenarius now. Pair up the expeditionary force you took to the fountain with the one that's guarding your base and you'll have plenty to attack with, unless you've suffered heavy casualties up to this point. You can draw Cenarius out simply by attacking one of the night elf settlements. Head to the one west of your base, as it's the most accessible and least defended, and start attacking. When Cenarius appears, surround him with Grom and your other melee attackers and he will fall quickly to your new, unholy weapons.
6. Where Wyverns Dare
While Grom and his allies have been unleashing their demonic furies, Thrall has traveled to Stonetalon Peak to see the oracle. A last line of human defenses bars his way, however, and he must set up camp and attempt to break through. Fortunately, Cairne shows up with his tauren and suggests a new ally that might be of some help.
Main Quests
Reach Stonetalon Peak.
• Destroy the human base guarding the peak.
Optional Quests
Obtain the wyverns.
• Find the wyverns.
• Save the captured wyverns.
Restore the defiled fountain.
• Kill the centaur khan.
• Return the glyph of purification to restore the fountain.
Walk-Through
This chapter is another of the standard orcs vs. humans fare. Unlike last time, fortunately, you've only got two towns to deal with, and one of them is inaccessible by land, which means you won't see too many of its ground troops. Start off as usual, building up your base and making units. You've got access to tauren warriors now, which are incredibly powerful melee fighters. Also, your first secondary mission objective will provide you with the wyvern, which is the orcs' air unit. You'll be dealing with a lot of human attacks that consist of gryphons or ground troops dropped in by zeppelins in this mission, so the wyverns will help out a good deal.
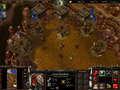
Crank out six or eight trolls and head north with them, Thrall, Cairne, and a small melee force. You'll see a small cinematic that shows harpies who have enslaved the wyverns, so if you want to use them you'll have to rescue them. Head off through the pass to the west to find the wyverns. Leave some more units at home to defend, though--the humans will show up periodically. As always, watchtowers will help you manage attacks at home while your main force is away on an errand. Towers are doubly important on this mission since so many of the attacks are air-based. A row of them along the northern edge of your base will help significantly, as that's where most of the fighters come from.
The wyvern quest isn't too difficult, as long as you keep most of your trolls alive. Thrall's third-level chain lightning is also devastating for the harpies, so use it to the fullest. After you free the wyverns, you can make more at the beastiary. Head back to base and regroup your forces. You'll find a green fountain of health to the southwest of your base, and this will introduce your second goal: Kill the centaur khan to restore the fountain. This quest is entirely optional, but it comes in handy if you need to heal your troops up quickly. The centaurs are located about halfway up the map on the east side, and they're the same as the ones you've been dealing with in past missions. A large melee force and both heroes should handle them with no problem, and then you can drop the glyph you gain from the khan into the fountain to restore it.

You only have to destroy the blue human base that's on top of the mountain in the northeast part of the map to finish the mission, and you can ignore the one on the ground in the northwest if you choose. Of course, taking it out will put a stop to the attacks from that direction, so it's a pretty good idea. If you expand to the gold mine in the middle of the map, make sure it's well defended, since it'll be directly in the path of any incoming attackers. When you're ready to assault the blue base, hire two or three zeppelins from the laboratory in the middle and load them up with the usual assortment of units. Catapults are a must here, as the base is loaded with guard towers. Also, make sure you have a good number of ranged attackers, as there will be quite a few gryphons and possibly even a few gyrocopters. Lead the way with wyverns to make sure no gryphons are hanging out and waiting to take down your zeppelins. Land in the open area, raze the base, and you can proceed into the cave to see the oracle.
7. The Oracle
Thrall, Cairne, and their brethren have entered the cave atop Stonetalon Peak in search of the mythical oracle, but a fiery dungeon fraught with enemies awaits them. They must split up and investigate separate paths to find the right direction.
Main Quests
Reach the oracle.
• Seek out the oracle.
• Thrall must survive.
Return the heart of Aszune.
• Find the heart of Aszune.
• Return the heart to Aszune
Obtain the enchanted gemstone.
• Find the enchanted gemstone.
• Bring the enchanted gemstone to the spectral bridge.
• Cairne Bloodhoof must survive.
Optional Quests
None
Walk-Through
This mission is another dungeon crawl with a small band of units. You start out with Thrall and a few support troops, and you have to make your way through a series of combat encounters and minor puzzles to find the oracle. Micromanagement is key here, since you're working with only a few units that can't be replaced. Keep an eye on the health of each unit and move them around appropriately during battle to keep them alive. The sole witchdoctor's healing ward spell will let you recharge during or after a battle if necessary, and Thrall's chain lightning is invaluable for dealing with multiple enemies. Liberal use of feral spirit is also recommended, as this provides you with disposable units to use as fodder for your charges.

The path is pretty linear and straightforward in this dungeon. Head out of the first room, fighting the skeletons as you go. When you reach the first fork, you can head left to snag a mantle of intelligence +3 for Thrall, then exit the room and head south. You can smash the small gate on the south wall in this next room and kill some enemies to get a ring of regeneration. Head back into the room and exit to the right. Through this passage, you'll encounter your first big battle here, with a high-level revenant and some support skeletons. Head into the back room afterward and grab the tome of intelligence, then return and continue on. Across the bridge, you'll fight another revenant and then a giant skeleton. You'll notice the door to the north is locked here, but if you head through the south door, you'll fight a creep and get the blood key that will open the locked door. The very valuable crown of kings is inside, so make sure you grab it. Now proceed on to the way gate.
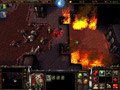
Once through the way gate, you'll see two doors. You can go through the southern door to see an impassable gate, but you can't do anything useful in here yet. Instead, head through the north door, fight the footmen, and continue on. You'll find some trolls in the next room's second cell, and in the third is a high-level creep that will yield a sobi mask upon defeat. Proceed onward, dealing with the humans' little "trap," and approach the room where you see a red dragon fighting harpies. Let the monsters battle it out, and attack what's left to claim the heart of Aszune. Head north to the way gate, and you'll emerge near the statue of Aszune. Head into that room to lower the energy wall and switch to Cairne's party.
Cairne and his tauren start out with a pretty straightforward path. Follow the passageway, dealing with the humans you encounter, and watch their unfortunate mistake. When you reach the fork, head north and then northeast to step on the circle of power and watch the creeps splatter. Then head back a bit, go northeast, and step on the other circle of power to open the doors that lead onward. Head through these and hang a left down into the pit to retrieve the enchanted gemstone. Come back up and head down to find a fountain of health so you can heal your warriors. East of the fountain, you can fight some kobolds to gain claws of attack +12, which will improve Cairne's attack power even further. Head back toward the pit and continue on, fighting the big lizard below. Move back up into the hall and deal with the giant suits of armor that come to life, pick up the ghost key, and move on to meet up with Thrall and find the oracle.
8. By Demons Be Driven
To Thrall's surprise, the vaunted oracle is really the mysterious prophet that sent Thrall and his people to Kalimdor. The prophet informs Thrall that he must ally with Jaina Proudmoore and the forces of humanity to stop the rampaging Grom Hellscream and his demonic clan from dragging the entire orc race down with them. Thrall must now imprison Grom inside a special stone in order for Jaina to remove the demon's curse from him.
Main Quests
Deal with Grom Hellscream.
• Capture Grom in the soul gem.
• Bring the gem to Jaina's ritual circle.
Optional Quests
None
Walk-Through
The chaos orcs that you had so much fun destroying things with in chapter five are now your enemies in this last orc chapter. Your sole requirement for success is to capture Grom in the soul gem and then make it back to Jaina's circle alive. That sounds easy enough, but of course Grom is surrounded by a considerably hellish demonic guard. Furthermore, two chaos orc settlements exist on the map and will attack your base periodically, and one of them lies next to the entrance to Grom's alcove, so you'll have to deal with it when you come for him. Finally, and worst of all, the burning legion will be sending large fiery demons called infernals from the sky to attack you constantly. You can destroy the chaos orcs to stop their attacks if you want, but it will do little good, because the vast majority of offensives against your base will come from the infernals, and there's no way to stop them from showing up. Luckily, the forces of Lordaeron are on your side in this mission, and while they won't actually strike out against the chaos orcs or demons, they will absorb a portion of the attacks.

Start off building all the necessary buildings that aren't already provided for you, and crank out the standard first-tier combat units. The chaos orcs will attack you within a few minutes, but the infernals are a bit further off, so you have a bit of time to build up. There are two gold mines to the east of your base, but both of them are protected by chaos orcs, so when you expand to one of them, send a group led by Thrall or Cairne to clear the mine first. Do not move all your troops away from your main base, though--the chaos orcs and infernals will tear undefended buildings apart. Watchtowers are surprisingly effective against the infernals, and if you have three or four around each entrance to the base, you'll typically be able to take out an infernal before it can destroy even one of them. The path to success in this mission simply consists of defending against the infernals and chaos orcs while you continue to amass resources and build up a large army. All the orc units are useful here, so assemble your army with diversity in mind, focusing mainly on melee fighters. Trolls and spellcasters will provide good support, but you'll be fighting almost exclusively on the ground. There's nothing to stop you from hitting the 90 supply limit here, so produce units until you can't anymore.

When you're ready to retrieve Grom, use Thrall's far sight to reveal more of the area around where he's located. You'll see that Grom's got quite a few felhounds and doom guards waiting with him. With a full army, however, these won't pose too great a problem. Thrall's chain lightning and feral spirit together are extremely effective in battle, and Cairne can lead the charge with war stomp, which stuns enemies for several seconds. The shaman's bloodlust is also extremely effective, and several fully upgraded orc melee units with bloodlust will rip through almost anything in seconds. Once you kill off the guards, you'll notice Grom beating up on your units. He has divine-type armor now, and you can't hurt him, so just use the soul gem on him and you'll capture him. Quickly run Thrall back to the circle of power located near your base and you'll save Grom and finish the mission.
Night Elf Campaign: Eternity's End
The orcish horde and the forces of Lordaeron have finally triumphed over Mannoroth, the pit lord that enslaved the orcs in ages past. Though the orcs are freed, the burning legion's invasion of Kalimdor continues, so the two old enemies have formed a shaky alliance so that they might put an end to the demonic threat once and for all. But as they move deeper into Ashenvale Forest, they'll brush up against the resident night elves, who don't take kindly to unwelcome visitors.
1. Enemies at the Gate
Tyrande Whisperwind, leader of the night elf sentinels, has detected the trespassing orcs and humans on her lands, and she's none too happy. She and her warriors are now moving to extract the invaders by any means necessary.
Main Quests
Establish a night elf base.
• Entangle a gold mine.
• Construct a moon well.
• Construct an ancient of war.
• Train five archers.
Repel the invaders.
• Slay the paladin.
Optional Quests
Aid the furbolg tribe.
• Locate 10 missing furbolgs.
• Return Tyrande to the furbolg shaman.
Walk-Through
Now is your chance to get acclimated to the ways of the night elves, which differ somewhat from what you're used to with the humans and orcs. Tyrande will walk you through the basics of the night elf base, such as entangling a gold mine and the uses of wisps. Build the required buildings and train five archers to receive your next goal, which is to kill the paladin in residence at the orc and human camp. Tyrande's scout ability will produce an ethereal owl that you can use to fly around and scope out the map before you head off into the wilderness.

Before you head off to wage war against the invaders, head south of your base camp to find a furbolg tribe who will tell you about their missing comrades. This will enable your secondary goal so that you can look for the furbolgs as you move about the map. Two of them are located just northwest of your base, near some extra archers who will join you. Two more furbolgs can be found south of the furbolg camp, across a stream. Three more are being held captive by some raiders in the northwest portion of the map. Look for some patrolling gryphons there. Two more furbolgs are just west of here, in the extreme upper left corner of the map, guarded by some wyverns. Finally, the last two are located just outside the southern entrance to the enemy base. After you've gotten 10 furbolgs, head back to their camp and the shaman will send three of his warriors to help you in your fight.

While you're looking for furbolgs, leave some archers at your base, as the humans and orcs will take turns attacking. Position your archers near your moon wells, and set the wells' healing ability to auto-cast--this will make the archers almost impossible to kill. After you've picked up the furbolgs for melee support, head to the enemy settlement. When you attack, focus all your fire directly on the paladin. He'll use holy light on his support troops, making them very hard to kill. When he's almost dead, he'll become invincible with divine shield, and you'll have little choice but to wait until it runs out. As soon as it does, resume attacking him, and when he falls, you'll win the mission.
2. Daughters of the Moon
The burning legion has finally come to overrun the sleepy glades of Ashenvale Forest, and Tyrande and her sisters have fled before their unstoppable assault. Tyrande alone must sneak past the doom guards who now roam the forest and warn the other night elves of the impending chaos.
Main Quests
Escape into shadow.
• Bring Tyrande to the night elf town.
• Hide from the patrolling doom guards.
• Tyrande must survive.
Optional Quests
None
Walk-Through
This mission is all about stealth rather than brawn. Like many of the night elf units, Tyrande can use the shadowmeld ability to become invisible at night while she's not moving or attacking. Keep your finger poised over the I key for this mission, as you'll be using it constantly to avoid the doom guards. Fortunately, they're not too bright, and you can slip past them pretty easily by using shadowmeld deftly. Cross the first river and grab the items on the other side, then head onward. Whenever you see a doom guard coming, quickly shadowmeld and they'll lose track of you. Keep following the path, watching for items along the side, and you'll eventually come upon some archers fighting footmen. They will join you after the battle. Archers can shadowmeld too, so continue using the same strategy to advance past the demons.

The game's clock is slowed significantly in this mission so that it will remain night for a long period of time, but time is still advancing, so don't tarry too long. If you get caught in the daylight, you'll lose the shadowmeld ability and be forced to fight. Moving on, you'll find some footmen engaged in battle with ghouls. Shadowmeld here and let them fight it out, then mop up the survivors and continue on. The same thing will happen soon with orcs and more undead forces. Go invisible and watch them fight it out. The orc base hides a mantle of intelligence +3, which you can obtain with minimal damage through creative use of shadowmeld. Next, continue onward into the way gate.

Here several huntresses will join your party. They too can shadowmeld, of course, so keep pushing ahead. The next area contains shades, which can detect units that are invisible, so getting through will be a little trickier. The best option is to wait until no doom guards are nearby and quickly focus your attacks on a shade to kill it. When the way is clear, keep pushing ahead. Pass the humans fighting the doom guard and head to the fountain of health to receive more troops. If you make it to this point before day breaks, you'll be doing fine, as you won't require invisibility past this point. Run past the spirit tower and collect the ballistae, which are night elf siege units. You can find another fountain of health here with three more ballistae. You can head back and destroy the spirit tower you just passed, if you want--you'll find some valuable items below it, protected by two doom guards. Then head back to the undead settlement and siege your way through it to reach the night elves and finish the chapter.
3. The Awakening of Stormrage
The ancient demigod Cenarius is no more, so only Tyrande has the power to awaken the powerful night elf druids so that they might battle the demonic scourge. Tyrande must retrieve the horn of Cenarius from Moonglade Isle, but the island is blocked by invading orcs. Meanwhile, the undead are cutting through the forest that surrounds Stormrage's resting place. Tyrande must send out her message to the druids before it's too late.
Main Quests
Awaken Furion Stormrage.
• Reach Moonglade Isle behind the orc base.
• Slay the primal guardians.
• Bring Tyrande to the horn of Cenarius.
• Slumbering Furion Stormrage must survive.
Optional Quests
None
Walk-Through

This can be a quick and straightforward mission if you don't waste time. Technically, you're on a time limit of sorts, because the undead are chopping through the trees toward Furion Stormrage. The counter in the top right indicates how many more trees they must cut down before they reach him. You've got that much time to destroy the orcs' base, defeat the guardians on Moonglade Isle, and blow the horn of Cenarius to awaken Furion. In addition to the troops you've already seen, you'll gain access to dryads in this mission. Dryads are much more useful than your average spellcaster for several reasons. Their attacks poison and slow enemies with every hit, they have spell immunity, and they have an auto-cast ability that removes negative effect spells from your units and positive effect spells from enemy units. Construct an ancient of lore along with your other buildings and crank out a few dryads to join your attack force.
There's another gold mine to the east of your base if you feel the need to expand. Be warned, though, that orcish attacks will come from just north of this direction, so if you expand here, leave your troops near the entrance to the area to thwart attackers. The orcs' defenses are paltry, and there's a fountain of health just outside their base. Bring an even mix of four or five archers, huntresses, and dryads each, along with three or four ballistae to deal with static defenses, and level the base. Only the blademaster may cause any problems at all--the troop support will be sparse.

After the orc base is history, you can head onward to Moonglade Isle. There are three primal guardians here, and each one is accompanied by some pretty fierce owlbears. If you've still got most of the troops from your original assault, you can go ahead and attack. Otherwise, you should add a few more to the mix. Focus your fire on each guardian in turn and then deal with his owlbears after they've fallen. When you kill all the enemies on Moonglade Isle, move Tyrande to the horn of Cenarius and Furion Stormrage will be awakened, granting you success.
4. The Druids Arise
Tyrande and Furion have decided that the druids of the talon must be awakened if they are to further their fight against the burning legion's invasion. The druids slumber in barrow dens located at the other end of a large valley, so the night elves must reach the dens quickly to rouse them. Unfortunately, the interlopers from Lordaeron also occupy the valley, as do the vile forces of the undead. The elves will have to avoid them successfully to reach the barrow dens.
Main Quests
Awaken the druids.
• Reach the barrow dens.
• Destroy the corrupted night elf base.
• Bring Furion to the barrow dens.
Optional Quests
Deal with the crazed furbolgs.
• Kill the furbolg warlord.
Restore the cursed glade.
• Kill the death revenant to restore the forest.
Walk-Through

Gold is at an all-time low on this mission, so you'll have to take full advantage of the fact that some night elf buildings (specifically, the ancients) have the ability to uproot themselves and walk around the forest. Move all your ancients and the tree of life north from your starting position and plant them near the gold mine you find there. As it only has 1,500 gold in it, you'll soon be uprooting and moving again, but this will do for now, at least. Once you bring in some gold, produce some units to supplement what you already have. North of where you first root down, there are some dark trolls protecting a fountain of health. Liberate this area so you'll have a place to heal up in the future--with gold as limited as it is, you'll want to prevent the loss of units as much as possible.
Head east when you exhaust the first mine to find another one. The undead, humans, and orcs are all fighting back and forth on this map, mostly with air units. Occasionally, some of them will stop to peck at your base, but usually they'll just fly by without incident. Keep your heroes and troops handy though for when the attacks do come. Just past your second mine, you'll find some corrupted furbolgs, which will introduce the first secondary objective. The rest of the furbolgs are located north of here, and they can be dealt with fairly easily. However, the reward is only a claws of attack +6 item, so you may not find it worthwhile. Either way, your next stop is a human settlement to the east of here. Smash down the doors and flood the town, ravaging everything in your path. You'll need to set up base here after the previous mine is tapped so you can maintain your gold flow.

The next step is to head south through the doors and traverse the valley to reach the barrow dens. But just as you enter, you encounter some of your allies, who warn you that the forest is horribly infested by the undead, and they aren't kidding. Every few steps, you'll be dealing with a variety of skeletons, poisoned treants, and ghosts. The ghosts are the biggest of your worries, since they can possess your units and turn them against you. Each time this happens, you'll lose that unit and will have to kill it. Your heroes can't be possessed, however, so try to attack the ghosts with them and keep your regular units on the lesser enemies. Keep fighting across the forest, and to the southeast you'll finally encounter a death revenant and its guards. Destroy everything, including the revenant, and you'll restore the forest to its original, unspoiled state. Now you can move your ancients through the forest and up to the last mine, which should be visible to you now.
Once you plant your base at this last mine, restock your forces. Make sure you have a reasonable number of all the combat units, along with at least one ballista, and head upward to the corrupted night elf base. There are no enemies here that will give you serious trouble, so plow through them and destroy all the buildings in sight. Once this is done, move Furion up to the barrow den to finish the mission.
5. Brothers in Blood
Furion and Tyrande have roused the druids of the talon from their rest and rallied them to the cause against the burning legion. Now they will descend into the barrow deeps and do the same for the mighty druids of the claw. But what else awaits them in the subterranean depths?
Main Quests
Awaken the druids.
• Discover the location of the barrow deeps.
• Tyrande Whisperwind must survive.
• Furion Stormrage must survive.
• Bring Furion to the circle of power in the center of the cave.
• All druids of the claw must survive.
Free Illidan.
• Locate Illidan's prison.
• Defeat the watchers.
• Tyrande Whisperwind must survive.
Optional Quests
Assist furbolgs.
• Get water from the fountain of life.
• Return the filled vial to the furbolgs.
Walk-Through
Like the other dungeon crawls you've played, this one is fairly linear. Go east at first and kill the wendigos to collect a scroll of healing, then head south and take on the giant spiders. Move on into a room with more spiders and you'll notice that there are several paths going off in different directions. To the west is a room with some undead monsters and a couple of minor items. The other paths that branch to the east all lead to more spiders, so head in that direction, eventually veering southward past a defiled fountain. You'll come upon some furbolgs begging for help for their poisoned shaman, so grab the empty vial and then continue northwest. You'll find the fountain of life guarded by some giant lizards here--take them out, heal up, and drop the vial in to fill it with water. Take it back to the furbolgs and you'll get a talisman that you can use to summon three furbolgs who will fight with you. Now continue southward on the main path.

Soon you'll see a brief cinematic during which Tyrande and her allies decide, against Furion's wishes, to free a mysterious being named Illidan somewhere deeper in the dungeon. They'll split off, leaving you with only Furion and some support units. Keep going until you get to a chasm with a circle of power in front of it. Step on the circle to extend a bridge, and then head on, fighting the watchers when you encounter them. To the south is a fountain of mana, and if you have Furion's tranquility spell, now is a good time to use it and replenish your mana quickly. Head north afterward, fight the dragons, and then you'll finally encounter the druids of the claw. Unfortunately, they'll attack you on sight, so the best option is to use the druid of the talon's cyclone ability to disable them until you move past them. Keep pressing on, fighting the other enemies and neutralizing the druids, until you find the circle of power and switch over to Tyrande's quest.

The gate directly ahead of your starting position here is locked, so head back to where the path splits and go north to step on the circle of power. Now swing back around and go south to step on the circle on this side, opening the gate. Be sure to pick up the archers in the room below the circle here. Go back and then through the main gate. Head into the room with the sleeping guards, take them out, then open the door to the left to enhance your huntresses' weapons. Now go back into the main hall and continue on. In this next passage, you can pick up a ring of regeneration and some extra units. Keep moving on, fighting the treants as you come to them, and then head into the way gate. Heal up at the fountain of health and then proceed on. Hang a left and go down to the little room at the end of the side hall to pick up some goblin land mines, which will come in handy in a moment. When you get to the area where the treants are patrolling, wait for a break in the line and dash up to plant a land mine. One mine will kill a watcher, making your job easier and more amusing than if you'd simply rushed in and fought.
After you take out the rotating watchers, head upward, fight a few more enemies, and then challenge the guardians around Illidan's cell. If you haven't lost too many units, you'll do fine here by focusing your fire first on the keeper of the grove and then on his support units. Kill them all and Illidan will be freed.
6. A Destiny of Flame and Sorrow
Illidan has finally gained freedom after 10 millennia of imprisonment. Suddenly, he is confronted by Arthas and invited to embark on a quest that will supposedly benefit him. Stealing the skull of Gul'dan from Tichondrius will remove the corruption that pervades the forest, but how does it play into the machinations of the lich king?
Main Quests
Obtain the skull of Gul'dan.
• Destroy the demon gate guarding the skull.
• Escort Illidan to the skull of Gul'dan.
Destroy Tichondrius.
• Slay Tichondrius.
Optional Quests
None
Walk-Through
You've lost Furion and Tyrande for this mission, but you gain the use of Illidan and his strong melee abilities. Furthermore, you've got access to the druid of the talon, which is useful as a scout in stormcrow form, and the druid of the claw, which can enhance battle performance with the roar spell and can assume bear form for seriously upgraded combat prowess. Utilize the druid of the claw especially in your army on this mission, along with the standard formula of archers, huntresses, and dryads.

Your first goal is to reach the skull of Gul'dan, which is protected in the upper right corner by several infernals and felhounds. There are gold mines to the west and north of your base, so expand to one of these as soon as you can. Be warned, though--they'll be attacked quite a bit by doom guards and corrupted satyrs. You'll be running your army back and forth between your expansion and your main base constantly, so if you want to split your forces in two and leave one at each base, it's a good idea to do so. There are two corrupted night elf settlements, each about halfway up the map on each side. You can destroy these if you want to eliminate the satyr attacks on your bases. The really annoying attacks are the ones made by doom guards and felhounds, however, and those appear on the map via demon gates, so razing the bases is pretty optional.

Once you have a massive attack force, head up to the skull of Gul'dan. With enough troops you'll make short work of the infernals and doom guards protecting the artifact. Illidan's immolation ability makes him even more effective in combat, as does the druid of the claw's roar. Slaughter the skull's protectors, then move Illidan to it to initiate his metamorphosis. After he becomes a demon, your goal will be to destroy Tichondrius, who is located in the upper right of the map. Tichondrius has a fairly beefy doom guard entourage, and he'll call down a number of infernals as well, making him very well protected. What's worse, he has more than 1,700 hit points, and only Illidan can harm him. As a demon, Illidan has a ranged attack, so your best bet is to surround Illidan with druids of the claw and huntresses to act as a buffer while he hits Tichondrius from out of range. Don't worry about killing any of Tichondrius' guards--as soon as he dies, the mission will be over. Taking him down can be pretty difficult, so take as many units as you possibly can when you attack.
7. Twilight of the Gods
The prophet has brought together the humans, orcs, and night elves in an alliance that will make one last stand against Archimonde and the burning legion's assault on the world tree atop Mount Hyjal. Though the enemy seems unstoppable, Furion Stormrage is putting into motion a plan that he believes will be enough to stop the demonic menace with utter finality. It will take time to enact this plan, though, and so the forces of the new alliance will have to deter Archimonde until the preparations are complete.
Main Quests
Delay Archimonde.
• Delay Archimonde for 45 minutes.
• Archimonde must not reach the world tree.
Optional Quests
None
Walk-Through
You've finally made it to the last mission in Warcraft III, and the game is absolutely going to put you through the wringer before it lets you go. Three bases--human, orc, and night elf--form the defense of the world tree, and the undead and burning legion will attack them in that order. It's up to you and your allies to hold them off for 45 minutes while the trap is laid, and you'll be scrambling nonstop for the entire 45 minutes just to keep them from advancing. You should know right off the bat that while the humans and orcs do fight with you, they won't be putting nearly the effort into the fight that you will, so most of the defense is up to you.

There are a number of valid strategies for this mission, depending on your playing style. One thing that's certain, though, is that you'll have to make more than one of your unit-producing buildings. Whether you're using units made at the ancients of war, lore, or wind, you should make at least two of each to expedite the production, because you'll be losing units left and right to the enemy. Fortunately, there are two extra gold mines provided for expansion to the east and west of your base. Expand to these the second the mission starts, and get two or three more wisps on lumber as well. Build whatever extra buildings you want, and start running your standard upgrades for weapons, armor, and special abilities. The first few waves of attacks will be relatively light and you can handle them with the units provided. Start cranking out the extra units as soon as possible, though, because you'll need them.
Position your troops near the opening of the human base and wait for undead forces to arrive. The attacks will start out consisting mainly of ghouls and crypt fiends, but quickly more-advanced units like abominations, necromancers, meat wagons, and gargoyles will start to appear. Soon you'll be dealing with the whole of the undead tech tree at once, not to mention a level-10 dreadlord and a level-10 lich. As if that weren't bad enough, doom guards and infernals will come over, along with a level-10 pit lord like Mannoroth. The pit lord even resurrects himself once after he dies. Obviously, you've got nonstop headaches to deal with here. The enemies will come in mixed groups, and you'll have a minute or two between attacks to regroup and heal up. You should be working toward the 90 supply limit at all times here. If you're not there, queue up enough units so you will be. Constantly bring them down from your base to the human one.

Of course, all the night elf units can be effective here if used properly. Make sure you exploit the inherent abilities of whichever ones you use. If you're using druids of the claw in your army, hit roar when you see enemies approaching and then convert all the druids to bear form. Druids of the talon can use cyclone on enemy heroes to take them out of the battle for a good period of time. Dryads will help by dispelling negative buffs from your units. Obviously, just about any combination will be useful here, as long as you use all your units effectively. Furion and Tyrande will gain levels at an incredible rate at the beginning, and they should both hit level 10 pretty quickly after the mission starts. Their ultimate spells are incredibly useful when used in tandem during a large battle. Starfall is devastating to large groups of enemies, even the heroes, and tranquility will keep most of your units alive and healed for the duration of the battle. The cooldown for both of these spells is long enough that you'll only get to use them about every two waves, though, so save them for the attacks that are really difficult. Furion's entangling roots is also effective at stopping heroes and sapping their life, so use it when you get a chance.
Unless you're an amazingly good player, eventually you won't be able to stop the human base from being overrun. When that starts to happen, flee to the orc base and watch as Archimonde destroys everything. The same process will be repeated with the orc base: Hang around the front, defending the base against wave after wave of attacks. If things are going badly, the orc base will also be overrun, and the focus will shift to your own settlement. Once you're fighting at home, you won't have the support of the orcs or humans to help you out, although you can cluster your troops around the nearby fountain of health to keep them alive a little longer. The only requirement for winning is to keep Archimonde from reaching the world tree for 45 minutes, so if you can do that, it doesn't matter how much is destroyed. You may have to start the mission more than once to look for attack patterns and hone your strategy accordingly, but if you're fast, you can hold the enemy off. For a preview of what's to come (and maybe for a morale boost), glance at the top area of the map every so often throughout the mission.
Cheat Codes
OK, if you're absolutely, positively stuck in Warcraft III, if you have no other recourse whatsoever, then fine, go ahead and cheat your way through. We won't tell anybody. To use these cheats, hit Enter to bring up the message input line and then type in a code. These codes work in the single-player campaign mode, as well as in custom games against AI opponents.
allyourbasearebelongtous - Instant victory.
somebodysetusupthebomb - Instant defeat.
whosyourdaddy - All units become invincible and kill enemies and buildings in one hit.
iseedeadpeople - Reveal the entire map/disable fog of war.
daylightsavings x - Sets game clock to specific hour where "x" is the desired hour. Without a number, toggles time's passage on and off.
riseandshine - Instant dawn.
lightsout - Instant dusk.
keysersoze x - Instant gold, where "x" is the amount of gold.
leafittome x - Instant lumber, where "x" is the amount of lumber.
warpten - Buildings, units, and upgrades complete at warp speed.
whoisjohngalt - Upgrades complete quickly.
sharpandshiny - Advances the tech tree one level.
thedudeabides - Cooldown is shortened.
thereisnospoon - Unlimited mana.
strengthandhonor - Keep playing a mission after you've achieved victory.
itvexesme - Cannot win.
pointbreak - Disables the food (supply) limit.
synergy - Disables the tech tree.
motherland race x - Warps to a specified mission, including interludes. Example: "motherland human 03"
Got a news tip or want to contact us directly? Email news@gamespot.com
Join the conversation