Unreal II: The Awakening Walkthrough
This complete Unreal II: The Awakening GameSpot Walkthrough includes weapon strategies, mission walkthroughs, cheat codes, and more.
Design by James Cheung
Unreal II: The Awakening, developed by Legend Entertainment, is the sequel to Epic Games' 1998 technologically groundbreaking first-person shooter Unreal. You're John Dalton, an ex-marine and a reluctant player in a new role: marshal for the Terran Colonial Authority, a keeper of the peace patrolling the edges of human space. Dangers lurk on the far ends of the universe. As turmoil erupts between alien races, a larger mystery unfolds. Your skills as an ex-marine and role as a peacekeeper have never been more important.
This complete Unreal II: The Awakening GameSpot Game Guide includes:
- General Strategies: Look here for general guidance on combat, weapon selection, and other techniques for increased success.
- Weapon Strategies: This section reveals Unreal II: The Awakening's diverse weapon arsenal and provides specific strategies for using each.
- Mission Walk-Throughs: Search here for proven solutions for all mission objectives, battle tips for the toughest fights, weapon suggestions, and locations of ammunition, health, and shield power-ups.
- Cheat Codes: This section is a last resort when you need help. It offers Unreal II cheat codes, including invincibility and unlimited ammunition.
Table of Contents
Chapter 1: General StrategiesChapter 2: Weapon Strategies
Combat Assault Rifle
Grenade Launcher
Flamethrower
Shock Lance
Rocket Launcher
Shotgun
Aida's Magnum (Grace)
Sniper Rifle
Spider Gun
Drakk Laser Rifle
Sanctuary
Swamp
Hell
Acheron
Severnaya
Kalydon
Sulferon
Janus
Ka Noja Abad
NC962VIII
Avalon (again)
The Dorian Gray
Chapter 1: General Strategies
This section provides some general strategies for succeeding in Unreal II: The Awakening. Whether you're a first-person shooter veteran or a novice to the genre, apply the tactics presented here to maximize your combat effectiveness, and minimize losing your life to the universe's toughest hostiles.
Take Cover!
John Dalton certainly isn't a scrawny guy, and that powered armor can withstand rockets full of damage, but you aren't invincible, so running wild into combat situations isn't the best technique. There are tons of opportunities to take cover in Unreal II: The Awakening. Crates fill rooms, massive pillars and columns block paths, and much of the exterior terrain is hilly and varied. When you approach a new area, survey the section before going in with guns blazing. Assess the enemy and look for nearby cover. Move into cover position and battle the enemy once you've secured an escape route.
Ambushes
Don't combat the enemy on his or her terms. If you're hidden behind a crate, peek around and assess the situation. Is the enemy taking cover also or approaching your position? If the enemy's approaching, cycle to a powerful close-range weapon (primarily the shotgun) and blast him when he edges close to your covered area. You can also perform an ambush when you're the aggressor. Sneak into new areas and scan for enemies at long range (particularly after you've acquired the sniper rifle). Often, you'll spot new enemies before they've spotted you. Use this to your advantage and blast them from long range. Even if you don't kill the enemy, you've wounded him, and it's much easier to finish the task.
Weapon Selection
There are many available weapons in Unreal II: The Awakening, and most are ideally suited to particular situations. For instance, the shotgun is virtually useless at long range. Its projectile spread is so wide that you're unlikely to even strike the enemy. Save the shotgun for close-quarters fighting. Conversely, Aida's magnum is ideal at medium to long range. It's a powerful shot, but its poor reload time makes it tough to use in tight battles. Consider what you're up against when cycling through weapons. Don't use the same weapon in each battle until its ammo is exhausted. Switch often to maximize the effectiveness of all available ammunition.
Using Health and Shield Power-Ups
There are plenty of power-ups--health and shield energy--scattered throughout the game, and there are even recharge stations for both. But it pays to use them wisely. Don't just grab a power-up without checking your current status first. For example, if you're nearly full on health, don't grab the health power-up. Explore the next area and return to grab the health power-up if you sustain damage. This won't always work, however; sometimes you may enter a new area and not be able to backtrack. Recharge stations hold a certain amount of health or shield energy. Battle nearby enemies and return to the stations to use up the remainder of the health or shield energy the station provides.
Knock Him Down!
There are several means of disorienting most enemies in Unreal II: The Awakening. Capitalize on these opportunities and immediately deliver another damaging shot. For instance, blast a human enemy with the shotgun and he may fall down. You can get off another blast while he attempts to stand up. It's like a free shot. Watch for enemies to go flying when you set off an explosion nearby. Switch weapons and get in extra shots before they can return fire. The concussion grenade also disables enemies temporarily. Follow up the blast by targeting and firing another weapon.
Explosive Situations
A smart marine notes his environment around each turn. Unreal II: The Awakening offers many opportunities to use the environment to your advantage, beginning with the first mission. For example, explosive canisters and toxic barrels are scattered throughout certain missions. You can use these as extra firepower against enemies. Wait until an enemy, or better yet, a group of enemies, approaches near an explosive canister, and then shoot the canister instead of the enemies. The resulting explosion should annihilate the group or at least wound each enemy significantly.
Listen to Your Crew
This, some would say, is a no-brainer, but it pays to speak and listen to the Atlantis crew: Aida, Ne'ban, and Isaak. All of them provide valuable background information on the people, places, and enemies found throughout the game. Isaak in particular offers vital information regarding each weapon, especially when he "tweaks" the weapon and adds a new alternate firing mode. Visit your crew before embarking on a mission.
Chapter 2: Weapon Strategies
This section reveals all weapons in Unreal II: The Awakening and provides strategies for using each. Additional tips are provided throughout the mission walk-throughs, including specific tips and weapon-selection suggestions for succeeding during tough combat encounters.
Dispersion Pistol
The dispersion pistol joins a long line of first-person shooter starting weapons that appear on the surface to be rather useless but really do have a good use. First of all, the dispersion pistol offers unlimited ammunition. Switch to the pistol in a pinch; it's always there, ready for use and loaded with ammo. It does require recharging, however, and if you frequently fire the dispersion pistol, the reload time becomes greater as it recharges. Wait a few seconds for it to charge, and then resume faster firing. Use it in tight hallways, and strafe left and right while firing to make it difficult for enemies to avoid the projectiles. Because of its unlimited ammo, it's a good weapon to use against certain nonhostile targets (like spider eggs) or when you're behind a turret. Hold down the alternate fire button to build up available charge. Release the button to fire a more powerful, but slower, projectile.
Combat Assault Rifle
The combat assault rifle fires quickly and efficiently. If you switch to the assault rifle after you've inflicted heavy damage on an enemy, you'll need just a few hits to finish the enemy off. It's an accurate weapon, so you're likely to inflict damage almost immediately. The alternate fire mode launches a burst of five rounds, which is excellent for close-quarters combat when you have the rifle firmly pointed at the approaching enemy. You'll find plenty of ammo for the assault rifle, and it's available from the first mission. Get used to it quickly, since it will become a weapon you rely on heavily throughout the game. The assault rifle proves effective against the Izanagis and not so much against the skaarj or drakk.
Grenade Launcher
As you get deeper into the game, the grenade launcher becomes increasingly useful, and Isaak prepares new grenades throughout the game. Press the primary fire button to launch a grenade that detonates on contact; use the alternate fire mode to launch a grenade that detonates after several seconds. Early in the game you're limited to a couple of grenades--the fragmentation and incendiary grenades. The frag grenade is a high-damage grenade with no other effects. If you're trying to inflict heavy damage on an enemy as quickly as possible, use the frag grenade. The incendiary grenade sets anything within its blast radius on fire, and it does bonus damage to enemies--and to you, so watch out.
Soon you'll have access to the EMP grenade, which is used to disable machinery, primarily force fields (one grenade takes down a force field) and turrets. Use the toxic grenade to choke targets with deadly gas. The concussion grenade causes an explosion that disorients targets. It can even be used near ledges and cliffs to knock an enemy off. Finally, launch the smoke grenade to provide additional cover, such as if you need to retreat quickly to gather more ammo, health, or shield energy. Look for opportunities to use grenades, such as when you've snuck up on a group of enemies or you believe there are enemies near the top of a ladder or on a floor below your current level.
Flamethrower
As the name suggests, it throws flames. The flamethrower's constant rate of fire consumes ammunition quickly, so use the weapon wisely. Fire short, controlled bursts to set enemies on fire, then switch to another weapon to shoot the enemy while he burns. The flamethrower works well on the first level where you discover it--fry those small arachnids. Don't fire the flamethrower too close to your feet, and avoid touching enemies who are on fire, or you may suffer self-inflicted fire damage. The flamethrower's alternate fire spews flammable liquid on a surface, and you can ignite the liquid with the flamethrower or other weapons. Set up some traps and add to your damage potential by dousing a chokepoint with the liquid.
Shock Lance
You'll grab the shock lance during the first official mission. Its fast rate of fire and ricochet shots make it useful, but not necessarily in the first mission (the izarians that carry it are resistant to the weapon). Fire the shock lance at corners or near crates to peg enemies attempting to take cover. Its primary fire is the fast, ricochet shots; the shock lance's alternate fire launches a slower projectile that consumes a lot of shock lance ammunition and offers decent damage and EMP effects (making it useful against mechanized targets). Use the alternate fire against clusters of enemies, particularly the small arachnids.
Rocket Launcher
A first-person shooter wouldn't be the same without a rocket launcher, and Unreal II: The Awakening boasts a great one. The standard tactics for using the rocket launcher apply in this game. Fire the rocket launcher at a stationary, unsuspecting enemy. It's also useful against approaching enemies, though they may dodge the projectile. At medium range, fire the rocket near the enemy's feet. That way if you do miss, the explosive splash should inflict at least some damage against the target. Be careful during close-range attacks, or you may suffer self-damage from the explosions. The rocket launcher is great for use against bigger targets, such as bosses, skaarj, and drakk. Ammunition is limited, however, so make each shot count. Isaak enhances the weapon with an alternate fire mode between missions. Hold down the alternate fire button to lock rockets onto available targets onscreen (up to four). If you fire before the rockets lock onto a target, they simply fire straight at your crosshairs.
Shotgun
The shotgun is the most effective close-range weapon, and you don't have to worry about accidentally blowing yourself up with it. It fires several small projectiles that increase their spread at medium to long range. Therefore, save the shotgun for close combat. It takes only two close-range shotgun blasts to eliminate a red arachnid or an Izanagi guard. Don't bother attempting to use the shotgun at long range. It's a waste of ammunition. It's better to use another weapon to weaken an enemy from long range and then switch to the shotgun as the enemy approaches. Press the alternate fire button to blast incendiary projectiles and add fire damage to your shotgun blast.
Aida's Magnum (Grace)
During the course of the game, Aida gives you her personal weapon, a .50-caliber magnum pistol she named Grace. Don't let its small size (or its peaceful-sounding name) fool you--it's a great weapon, particularly at medium range. The magnum is strong and accurate, which is a great combination, but it's deficient in its rate of fire, so avoid using the magnum at close range. By the time you get off a couple of shots, the enemy could be dodging wildly and mopping you up with an assault rifle. Use the alternate fire mode to shoot in burst mode, though it's even slower.
Sniper Rifle
The sniper rifle becomes available later in the campaign, but it's one of the most useful weapons in the game, particularly in the mission where you find it. Use the sniper rifle at extremely long ranges. Use its zoom mode (press the alternate fire button, then use the mousewheel to zoom in closer) to pinpoint the location of enemies. Hold the crosshairs steady and fire the sniper rifle, ideally at the enemy's head to score an instant kill (otherwise it may take two or three shots depending on the enemy). Conserve sniper ammunition carefully. Eliminating enemies from the safety of long range is an important tool. You save ammunition from other weapons, and you aren't at risk of sustaining damage, which would then require a hunt for health and shield energy.
Spidergun
Isaak builds the spidergun from elements discovered during the battle with the arachnids. Use its primary fire mode to engulf the enemy with small arachnids (hit the enemy, and he's covered with the small spiders). The alternate fire mode drops a pile of spider eggs on the surface; the eggs hatch when an enemy stands nearby, and the spiders wreak havoc on the unsuspecting enemy. Hold down alternate fire to create larger eggs that release larger arachnids. While the enemy is busy against those spiders, cycle to another weapon and blast him.
Drakk Laser Rifle
This laser rifle is a high-damage, accurate weapon, but it possesses a slow rate of fire. Therefore, maximize each shot by lining up your target carefully. If you miss, the enemy has plenty of time to retaliate while you wait for the rifle to reload. The drakk laser rifle works well against its namesake--blast the drakk with their own weapon. Tougher drakk drop rounds of the rifle's ammunition. Isaak eventually tweaks the laser rifle to add an alternate fire mode. Hold down the button to fire a steady laser stream. Point it at your target to inflict damage as long as it remains on the target.
Chapter 3: Mission Walk-Throughs
This section covers Unreal II: The Awakening's mission walk-throughs. You'll find proven solutions for all objectives, specific battle tips for the toughest fights, weapon suggestions, and locations of ammunition, health, and shield power-ups.
Avalon
You are John Dalton, a marshal in the Terran Colonial Authority, which is an undermanned police force in charge of patrolling the outer reaches of space. You're in charge of keeping the peace in an unruly territory. As Unreal II: The Awakening opens, you're heading back to Odyssey IV and the TCA headquarters. There you speak with Commander Hawkins, who is about to deliver some unsettling news: Commander Drexler has denied your request for reinstatement into the marines.
Time to head back to the Atlantis and continue your role in the TCA. As he concludes, Hawkins states that you can choose to head directly back to the Atlantis or take a refresher course, which is essentially the game's training mode. If you've never played a first-person shooter before, choose the refresher course to learn the basics of Unreal II, otherwise choose to head back to your ship and begin the next stage of the game.
Objective: Go to the elevator. Run through the TCA training program.
The refresher course is found on the bottom floor of your current location. After speaking with Hawkins, turn around and proceed through the door. Descend the staircase onto the platform overlooking the lush planet surface. A marine patrols nearby; speak with him if you wish by approaching him and pressing the use key. From the bottom of the stairs, turn right to locate a second staircase along the side of the platform that leads downward.
Descend the staircase and cross the catwalk until you reach a second marine; he salutes as you approach. Turn left to spot the elevator. Enter and use the elevator to descend to the TCA training area.
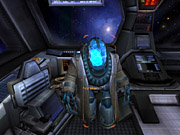
Exit the elevator and proceed down the hall. Spot the training room door on the left. Enter and speak with Raff, your training officer. Raff familiarizes you with the basics of Unreal II, including the function of your armored suit, which provides shielding, and your heads-up display, which reveals the status of your health, your shield level, the number of clips and ammunition you have available, and your current weapon.
Raff provides instruction on several maneuvers, including jumping, crouching, and mantling, which allows you to climb up a tall ledge by holding down the jump button when you're up against the ledge. Continue through the maneuvers area into the weapons-training section, which provides a demonstration of three weapons from Unreal II's arsenal: the dispersion pistol, the assault rifle, and the grenade launcher. Practice firing each into the stationary targets, and don't forget to use the alternate fire modes to better understand each weapon's use.
The final training area features a one-on-one deathmatch battle against Raff. Load up with weapons and ammunition before entering the area. The first to get five "kills" wins the match. Numerous crates litter the arena; these provide cover during the battle. For one kill, you can wait until Raff approaches your hiding spot, then blast him with the assault rifle's alternate fire mode or drop a contact grenade at his feet. Move through the arena to gather additional ammunition, but quickly duck behind crates to avoid Raff's line of fire.
Each time you kill Raff, stand over his armored suit to gather a smidge of shielding. You're killed once your health hits zero; Raff receives a point, and you're immediately regenerated to full health and shield. After the battle, choose to fight again or complete training. Use the health and shield stations in the final training room to automatically return to the Atlantis.
Your first officer, Aida, greets you on Atlantis' drop deck, and she automatically provides a status report on Atlantis' other crewmembers. Respond to her in any fashion in the first dialogue selection. When prompted again, request inspection of the ship if you wish to explore the Atlantis before hearing the mission briefing. Or, if you'd rather skip exploration and get straight to the mission, choose to follow Aida into the briefing room.
If you choose to explore, you're free to maneuver around the Atlantis and interact with the crew as you see fit. Aida remains by the briefing-room door; explore the armory directly across the hall (get a peek at your weaponry inside the locker on the left side of the room). Ascend the ladder in the main hall to reach the upper deck.
You'll find Isaak, the ship engineer and weapons specialist, milling about. He'll provide a tour of the upper-deck rooms, which include the crew's quarters and the bridge (Aida's quarters are above the briefing room, and your quarters are above the armory). Enter the bridge and meet your new pilot, Ne'ban. He has an interesting way with words but seems competent enough. After exploring the ship, return to the lower deck and enter the briefing room. Aida is inside waiting to provide mission info.
Approach and speak with Aida (just press the use key at close range). Tell her you're ready to be briefed. It appears you're headed to the planet Sanctuary. Aida received a distress call a few hours ago. Apparently hostile aliens have overrun a facility. Aida provides a basic layout for the Liandri base but lacks blueprints for the interior.
After the briefing, you can walk over to the armory and speak with Isaak. He offers basic instruction on the dispersion pistol, assault rifle, grenade launcher, and fragmentation grenade (similar info was presented by Raff during the training course). When you're finished with everything on the Atlantis, return to the drop deck and use your dropship to activate the Sanctuary mission.
Sanctuary
Aida has one last reminder for you: It's a search and rescue operation, so no rough stuff. She doesn't want to have to come down there and save your skin. As your ship descends to the planet, you come under attack from some alien forces. So much for no rough stuff.
Objective: Investigate the installation on Sanctuary to discover the cause of the distress call.
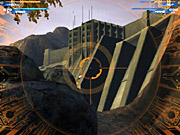
Walk across the courtyard to the far door. Note the head on a stick. You're not exactly dealing with a friendly sort of alien here. Use the door ahead and descend the staircase. At the bottom, walk underneath the stairs and grab the pack of fragmentation grenades at the corpse's feet. Return to the door and use the control mechanism to the door's right.
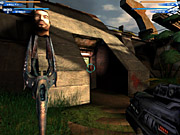
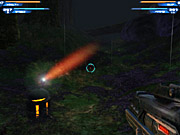
One of those not-so-friendly aliens has one of the workers underneath a door. No matter how fast you attempt to assist, it's a futile effort. If you try to use the control panel to the door's left, it begins to short-circuit--no luck so far on Sanctuary. Turn right and spot the dark hallway. Follow it around to the lit corridor; you'll see an alien scamper past the entrance. Note the canisters to the left of the door. Shoot the canisters to cause a large explosion. Keep this in mind throughout the level. Head to the right and enter the large room.
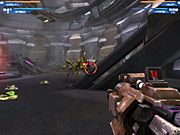
It's time for your first hostile battle against those aliens; they're called izarians. Their weapon of choice is the shock lance, which launches electricity projectiles that bounce off walls. Don't let the izarians get behind you, and avoid getting struck by a ricochet shot. Stay in a corner and fire at the izarians that close in on you. You can collect the discarded shock lances from their corpses, but the weapon has little effect on their hides. Continue to use your assault rifle against them. After the room has been cleared, you hear a transmission; someone can see you on the overhead security camera.
It's Danny Miller, the man who sent the distress call. He's barricaded in a security office in the generator building. There's no direct route to him, but he's able to open a secondary route--time to go for a swim.
Objective: Get to the generator building. Rescue Miller.
A hatch opens in the floor. Dive in. Don't worry about replenishing your breath; your armored suit supplies the necessary oxygen. Swim to the bottom of the floor and comb the area for ammunition. Follow the underwater tunnel as it becomes murkier--unfortunately clouded by the blood of helpless mine workers. Leap out of the underwater tunnel and approach the ladder ahead. Ascend it to its top.
You're underneath a staircase. The nearby door won't open. At the top of the stairs, grab the health power-up. If you're near 100 hit points, save the power-up, because more combat awaits beyond the next door. Enter and use a grenade to surprise those izarians peering at the camera (aim and tap the button to launch a grenade that explodes on contact). Mop up any remaining wounded critters with your assault rifle. Return to pick up the health power-up if you ignored it before.
Proceed through the next doorway. It leads into a large room that offers plenty of cover. Izarians approach from the stairs. Use the columns as cover and mow them down with your assault rifle. Don't descend the stairs until you're certain all the beasts have perished. Walk down and pick up the health power-up at the bottom while Miller cheers on. Miller explains where these aliens came from. The miners unearthed them.
Ascend the long ladder at the end of the short hall. There are some dangers above you. There's a pesky izarian on the first ledge, so nail him with the assault rifle's alternate fire at close range. When you reach the top of the ladder, immediately turn right and blast the izarian hiding in the corner with your assault rifle. Miller continues to cheer on.
Miller warns of unstable material in the next corridor--the aforementioned explosive canisters. This can be a dangerous hallway if you decide to dawdle. First, proceed down the hall and spot the first izarian. Nail him or shoot the canister to cause an explosion capable of splattering the alien against the wall. As you move through the hall, more izarians approach from the front and rear, leaving little room to maneuver.
You must be very careful standing near the canisters. The izarians aren't great shots, but those bouncing shock lance projectiles might strike a canister, causing an unwelcome explosion. The best way to get through the area is to move through the hall quickly. Blast the izarians ahead without turning around or backtracking. Don't stand near the crates, or you risk the possibility of going up in flames. When you reach the door at the far end, turn around and blast any pursuers. Grab the assault rifle ammunition, then enter the doorway into the next section.
Miller greets you with great news. He doesn't see any aliens on camera--apparently there are none in the area. Too bad he's dead wrong. Watch the rooftop to your left. Some izarians approach from up there, and others assault from around the corner. Eliminate all with the assault rifle. Continue around the corner to the left. Avoid dropping into the green, toxic sludge and crouch through the broken door mechanism along the far wall.
Approach the far door. Miller greets you with a sigh of relief but not an apology. A dangerous room lies ahead--it's full of those beasts. Snag the health power-up off the crate on the right, then proceed through the door.
The room is like a deathmatch arena. Columns supply cover, but the izarians are adept at using them. Pick off the first couple of izarians by remaining near the room's entrance. When the izarians peek around a column, blast them with your assault rifle. Lure the others out of hiding by entering the room. Dodge their projectiles, especially the shock lance's alternate fire mode, and finish off the remaining pests. Cross the room to the closed door; Miller opens it. Grab the ammo and shield power-up inside. Open the elevator door by using the controls. Once inside, use the elevator.
Get ready. Something mean and nasty sabotages your ride; look up to see the action unfold. It's a skaarj. Hug the elevator's back wall. The skaarj falls through the elevator's ceiling eventually. Blast him in the back with your assault rifle, first in alternate fire mode, then in a constant stream of primary fire.
Get out of that death trap and into the lift on the right. Use it. At the top, open the door. Snag the health and shield power-ups from beneath the stairs. Ascend the stairs and listen to happy Miller in a state of ignorant bliss. Open the door at the top.
A couple of bad guys, including another skaarj, occupy this courtyard. Nail him with a couple of assault rifle alt-fire mode shots. Comb the courtyard's left side for some piles of ammunition. Enter the door on the far side and go to the next section of the mission.
Approach the door ahead. Listen to Miller's well-wishing as you pick up the ammunition near the corpse. Make note of the canister along the right wall. You can use it against the skaarj outside if you lure him nearby. Open the door using the control mechanism on the right.
Walk forward a bit and a skaarj wakes up ahead of you. Plus, a trio of izarians plan to use you for target practice; they fire shock lances from the top of the hills on the left and right. Eliminate the skaarj first by luring him to the canister or by serving him some grenade sandwiches (fire grenades with primary fire). If you choose to take out the izarians, strafe left and right as you approach their position to avoid their projectiles. Search the murky lake on the right to uncover more assault rifle ammunition.
Cross the bridge. There's a health power-up on the right at the end but also a fierce skaarj on the left. Take him out with a couple of rounds of the assault rifle's primary fire mode. Note the electricity that fires when he dies. Stand on it (like you stood over Raff) and receive a shield boost. Proceed to the far structure, either across the walkway on the left or around to the right. Battle another skaarj and approach the camera on the right side. Miller's excited; he's nearby. In fact, he's too excited. He's coming right out and you haven't secured the area yet. Bad, Miller, bad.
Follow the path around to the right and watch Miller get skewered into skaarj bait. Poor fellow. You need that artifact though. Despite Aida's pleas (or threats), you decide to retrieve it.
Objective: Find the generator control room.
Go to the area where Miller died. Leap onto the catwalk near the door. Turn left and approach the door at the end. Go inside and kill the izarian. Snag the ammunition nearby. Return outside to the catwalk. Follow it through two doors then up a lift. Walk into the hall and look up and to the left. A skaarj busts through that window. Eliminate it and continue to the far door.
Turn right in the next hall to see a skaarj doing its best handiwork. The door won't open. Go to the far left side of the room and descend into a hatch (grab the ammunition nearby). Use the assault rifle alt-fire or the grenade launcher to dispatch the skaarj in this tunnel. Crawl through and up to the right. Another skaarj attacks here. It's rather close for the grenade launcher, so use the assault rifle in alternate fire mode. Use the mantle maneuver to get out of the crawl space.
Objective: Reactivate the generator.
The generator console doesn't appear to be working. To get it working, look on the walkway to the console's right, directly above the crawl space. Pull both switches here (a health pack nearby clues you in to the switch locations). The computer reactivates, but you still must restart it. Wait until a button appears on the left side of the computer, then use it.
Objective: Retrieve the artifact from the bottom of the generator.
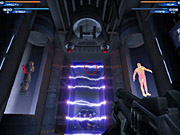
Exit the door across from the computer console. You've been here before. Turn left and backtrack outside. Watch out for your old friends, the izarians, as you go. Return outside. The artifact is at the bottom of the generator. You must make a treacherous descent down the center of the generator. Drop down onto the rotating platform beneath the highest level. Remain on this level until you can leap to one of the platforms that protrude from the wall (these platforms go in and out). Once on these, you can drop down to walkways below. Avoid falling too far, or you'll sustain damage. Get to the bottom of the generator. Don't grab the artifact until you've saved your game.
Objective: Get out of the generator.
Grabbing the artifact triggers a big, mean skaarj. Hopefully you kept some grenades; it's the easiest way to terminate him. Pop several grenades in the skaarj's belly to knock him out flat. If you don't have enough grenades, use the assault rifle alternate fire mode. After killing the skaarj, the center lift door opens. Enter and use the lift to complete the mission.
Swamp
Marines were shot down before they could escape the planet. Their ship crashed in a forest on the far side of the planet. The marines possess an artifact and are holding position until your arrival.
Objectives: Follow the directional beacons to the crash site. Make contact with the surviving marines.
Head directly away from your ship and turn left when you reach the trees. Spot the directional beacon on the hill ahead of you. The beam points the way toward the next beacon. Continue to each beacon until you discover ship wreckage. It's the marines. Follow to the force field. A marine lowers the field and greets you. Speak with him. He has new orders: Proceed to a clearing where the Atlantis can land and pick up you and the entire group.
Objective: Accompany the marines to the clearing that holds the homing beacon.
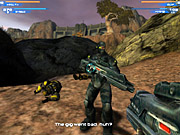
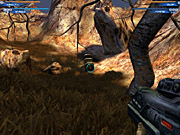
Follow the marines and their orders. For example, wait when instructed to hold position, then move when told to move out. Groups of izarians eventually ambush you. The aliens launch their attack from the trees and from behind the large rocks. Keep moving and eliminate the ground izarians first. Your marine friends should handle the ones up high. If not, help them out with your assault rifle. When ordered to move out, follow the marines.
There are additional izarian battles as you near the drop site. Take cover when under attack, and stick close to the other marines. Scan all around your position in search of incoming izarians. Depending on the terrain, look high and low to spot the approaching pests.
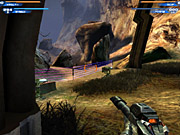
You'll eventually reach the drop site and discover lots of ammunition, a marine shotgun, health power-ups, and a shield station--perhaps a hint of the dangers to come. Stock up and replenish your health and shields.
Objective: Defend the clearing until the Atlantis arrives.
The Atlantis will land in five minutes, but the attacks begin soon after Aida announces the four-minute mark. The marines will be able to handle most of the attackers, but assist them when you can. Take the high ground on the rocks adjacent to the beacon. Blast the skaarj and izarians with your newly acquired shotgun. Patrol between the two drop-site entry points and help out any marines under attack. If you sustain damage, return to the shield station.
The mission automatically ends as the Atlantis approaches. The skaarj and izarians futilely fire at the vessel.
Back on the ship, engage Ne'ban in conversation. Exit the bridge area and go into the briefing room. Aida's there and ready to provide details on your next destination. Tell Aida you're ready for the briefing.
Hell
You're approaching Hell, a frozen moon orbiting Gaigan. Elysium, a research facility on Hell, has sent no transmissions for the past 18 hours. Aida describes the layout of the base--four research modules (each focusing on a different area of weapons research) located around a central hub.
Walk into the armory and speak with Isaak. He's got some weapon briefs for you. Isaak removed a limiter on the shock lance, increasing its power. The alt-fire is an EMP, and it screws up machinery. The marine shotgun is lethal up close and decent at midrange. Its alt-fire launches explosive, incendiary slugs at limited range. Finally, he's got the toxic grenade, which releases a cloud of neurotoxic gas that eats through armor. When you're finished, return to the drop deck and board your vessel to begin Hell.
Objective: Enter the installation. Investigate to determine why contact was lost.
You must reach that bridge in the distance, but you can't get there by going forward. Instead, turn around toward your ship. Hang a right under the ice overpass. There's the bridge. Cross it. There's a sleeping beast lying on the bridge. When it awakes, kill it or just run by it (better to save your ammunition). Drop down into the small recess on the other side, and you're automatically lowered into the facility.
At the bottom of the lift, move forward. You'll enter a security-clearance area. Despite some nervous moments and a bit of sweat, Aida disables the security system in time. Once the system is disabled, head forward into the next area.
Go left. The far door is locked, and Aida can't get you inside. Don't worry; you'll be back. Take the first door on your left and ride the lift down. Cross the room. Take care to avoid the fire by sticking to the right side of the room. Grab the flamethrower off the ground (it's near a corpse). It's a great weapon for this level. Enter the large doorway and follow it until a fire blocks your path. Turn left and proceed into the doorway, which leads to the medical bay.
Objective: Heal the surviving patient.
You hear a cough. Go to the right corner of the room--there's a patient still alive. Use the panel on the bed to heal the patient. His name is Jensen; he's a maintenance worker, and he's got a route to get past that fire outside.

Objective: Bypass the fire through the second-story control room.
Return to the main room with the first fire (where you grabbed the flamethrower). Return up the lift and approach the door that Aida couldn't get through. But Jensen can. He approaches and unlocks the room. Inside, use the control panel on the right side to listen to the facility's audio log--something went horribly wrong in this facility. Pick the ammunition up off the floor in the room's left side. Exit the far door. Cross the catwalk to the crates and gather more ammo. Enter the door (Jensen may beat you there).
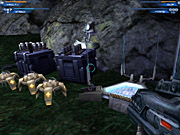
There's a fire on your left, so go right into the doorway. Corpses litter the hallway. Jensen freaks as you begin to hear critter noises throughout the hall. Cautiously move into the next corridor. Walk until you trigger the loud sounds--new creatures, the arachnids, burst through the ceiling vents.
Objective: Find the cause of the arachnid threat.
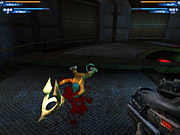
The flamethrower or assault rifle works well against the yellow, smaller arachnids. Use the shotgun against the red, larger arachnids (it takes two direct blasts to terminate one large arachnid). If you use the flamethrower on the large arachnid, fire short, controlled bursts to set the large arachnids on fire and let them roast a bit before firing another burst. Don't waste too much napalm on the smaller spiders. Remain back until all threats are dead (let them come at you). Go through the next two doorways. Another batch of spiders attacks. Approach the barricade and grab more flamethrower ammunition.
Open the next door; more arachnids bust through the ceiling. Spot the canister on the left side of the room and shoot it; the explosion should kill most of the pests. Mop up any survivors with your flamethrower or assault rifle. Keep moving forward. Roast another set of small arachnids before continuing forward into the next mission zone.
Move along either the left or the right pathway and terminate all of the yellow arachnids in the room, using either the flamethrower or the assault rifle. More yellow spiders, including their bigger cousins, arrive from the right-hand doorway. Blast the larger arachnids with the shotgun and finish off the smaller pests with your assault rifle. Go into the right doorway. Comb the catwalk for ammunition (it's on the far side), then enter the door on the right. Ascend the lift to the upper level.
At the top, kill the larger arachnids. Grab the health and shield power-up adjacent to the crate. Ionized plasma gas blocks a path to the left. Investigate, but Aida says you'll need to vent the gas out to get by unharmed.
Objective: Reactivate the fan to vent the plasma gas.
Go right and squirm underneath the immobile fan. Turn right. Terminate the few yellow arachnids here using your assault rifle. Moving forward triggers an onslaught of yellow spiders. Toss a grenade, or better yet, use the shock lance's alternate fire mode at a group (it consumes a lot of ammo, however). Don't get surrounded or those small buggers will chomp you into bits in mere seconds. Go around the corner and finish off more yellow spiders with remaining shock lance ammo or the flamethrower.
Spot the ventilation controls along the right wall. Use them to vent the plasma gas on that catwalk. Retrace your steps out of this crawl space and back onto the catwalk. Move beyond the plasma gas. It's still there, but stick to the right, and you'll avoid damage. Approach the door at the far side. A worker walks onto the catwalk. Don't walk to him. Stay back. Check out those eggs on the walls; arachnids burst from the eggs and attack and kill the worker. Now you have to worry about those eggs too.
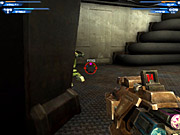
Enter the door and face more spiders. Stick with the shotgun because of the large arachnid presence. Look for the eggs on the crate to the far right. Blast them with your dispersion pistol. Enter the room on the right slowly. There are eggs everywhere. Kill them with the dispersion pistol before fully entering the room. Grab all of the ammunition, health, and shield power-ups.
Exit the room and go left. Move slowly forward, blasting the eggs and the approaching spiders. Avoid the fire by ducking. Once everything in the area is dead, go through the door at the end. Small spiders cover the exterior catwalks on the left and right sides. Terminate them with your assault rifle, then blow up all those eggs. Cross to the far door. Enter, grab the ammo and power-ups on the left, and then go up the stairs.
Open the door. Not surprisingly, there are eggs all over the floor. Nail them all with the dispersion pistol, and terminate any yellow spiders that approach. Cross to the other side of the room (grab the ammunition from the dark corner), and pelt the arachnids and eggs with your assault rifle or dispersion pistol. Switch to the shotgun when fighting larger spiders. Ascend the ramp. Search the catwalk for ammunition before entering the large doorway.
Lure the large spiders and nail each with two shotgun blasts. Hang a right on the walkway and search the first alcove on the right. Blast the eggs and spiders; grab the ammunition and two health power-ups. Explore the opposite side for another alcove containing shield power-ups and more ammunition.
Enter the next doorway and kill a couple of arachnids. Aida provides an update on what you're up against (mutant spiders). Enter the far door and step onto the lift. Ride it into the next mission zone.
Objective: Get to the upper-level lab control room. Disengage the security lockdown.
The door ahead is locked. Turn around and find the elevator controls. Go to the top. When you reach there, go right. You spot another lift, but it won't take you to the destination. Instead, duck under the broken doorway to the left of the lift.
This area is a mess. Harmful beams traverse the room in all directions. You must avoid these beams to stay healthy. You can explore the room for ammunition and health, but your goal is to traverse the beams safely and enter the upper-level lab control room.
From the entrance, go left. Jump over the first beam and duck under the next couple. Spot the structure (the beam comes out of it). Duck under the beam and go to the left to grab some health and shield power. Turn right and leap onto the blocks. Do you see the ammunition up there? That's where you need to go.
Leap onto the pillars. Turn and face to the right when you're in the corner. The room conveniently falls apart. You can leap across the pillars along the wall. Go all the way to the corner where you can grab the shield. Turn right at the corner and jump across the pillars toward the left side of the control room in the distance. Snag the health from the corner, then duck under the beams near the control room. Ascend the pillar that's smashed into the control room and crawl inside the room. Approach the console. Use the plasma beam and bulkhead lockdown overrides.
Objective: Retrace your path to enter the research facility's central hub.
Exit the control room and hop down to the left of the pillar. Exit through the doorway and return down the lift. You're back in the starting room for this section. Cross the room and go through the doorway. More spiders. Kill them, then enter the doorway on the far side.
Objective: Get into the central dome. Find a way to bypass the barricade.
Hang a right. Don't forget the ammunition in the corner. Enter the doorway on the right. There are more spiders and eggs here. Cross to the far door. There are even more spiders, but now you have additional means to destroy them. Shoot those green canisters to cause a harmful explosion. Avoid the spew or you'll be harmed as well. Enter the far door and go up the lift into the atmospherics laboratory.
At the top of the lift, go right. You're in the control room. There are five switches on the console--activate them all. When finished, return down the lift. Approach the far left bulkhead door. Pick up the ammunition nearby, then go through the door. There's more ammunition here and a pile of health and shield power-ups.
Enter the middle bulkhead, then drop down into the shaft. Use the assault rifle against the small arachnids approaching (or use a shock lance alt-fire if you have the ammunition). At the end of the tunnel, use the right hatch controls. Drop down onto the walkway. Blast the arachnids, then cross the walkway to its end for more ammunition. Enter the doorway into another hall filled with spiders. Continue until you reach the lift, then go up. You're now in the biological laboratory.
Go into the control room and deactivate the bulkhead override. Have fun opening the other cages if you want to, and watch those cute critters get supersized. Return down the lift. Move through the right bulkhead door and drop into the hole in the floor.
Walk toward the opening and arm your shotgun. Traverse down the pipes, blasting the large arachnids as you go. Upon reaching the bottom, jump to the right toward the shield and health power-ups. Kill more large arachnids with your shotgun (use the green canisters for assistance). Mop up the remaining small spiders with your assault rifle. Go right into the tunnel. Kill the eggs and collect more ammunition and power-ups.
Objective: Deactivate the main beam. Obtain the artifact. Defeat the queen.
You're in the final room of Hell. As soon as you drop down into the room, the big bad boss arrives--it's a queen spider, and she's not too happy. The queen primarily uses a ranged attack that is punishing at close range. It's also a wide-range attack, so it's difficult to avoid unless you run and are too far away to sustain damage. The best way to avoid the queen's ranged attack is to stick behind cover (like the columns near the edge of the room) and circle-strafe around them. Peek out and blast the queen, but then duck behind the column to avoid the attack.
The queen also launches eggs everywhere. Those eggs hatch into yellow spiders that either attack you or head into the large beam to turn into larger arachnids. If you aren't careful, small and large arachnids fill the room, making the battle nearly impossible.
Start off with your remaining grenades. Blast the queen in the face. If she drops eggs, nail the group of eggs with a grenade. Continue to circle-strafe around the column to avoid the queen's line of fire. Use the assault rifle next, and don't forget to mop up any eggs you see. Collect ammo, health, and shield power-ups from the edges of the room (health and shield power are directly below the room's entrance). The shotgun works well against the queen, but it's tough to blast apart the eggs or small spiders at medium range. Defeating the queen opens the panel that turns off the beam. Use the plasma beam controls and grab the artifact to end the mission
Back on Atlantis, talk with Aida, then follow her into the briefing room. You can eavesdrop on the conversation between Isaak and Ne'ban if you wish. Once you're inside the briefing room, talk to the commander. He provides background on the seven artifacts. When done, talk to Aida--she doesn't trust Drexler Request the briefing.
Acheron
Acheron is the strangest planet in the sector. It's a T-class world where the surface is covered by a single gigantic organism. Izanagi Corporation is slowly killing the creature as it terraforms the planet. The Izanagi forces have converged on a single dig site--perhaps an artifact has been found. You're not supposed to engage in combat, though Aida does give you her personal pistol, named Grace.
Exit and talk to Isaak in the armory. He provides weapon info on Aida's magnum, which fires .50-caliber explosive ammunition. It's accurate and powerful with a three-round burst alternate fire mode. He also provides the incendiary grenade and the flamethrower. You can use the flamethrower's alt-fire mode to spray napalm on surfaces, which you can later ignite (with other weapons too).
If you want, find Ne'ban and speak with him before you go. Dalton provides background on the big players so far in the game. When you're ready, go to the drop deck and board your ship to begin the mission.
Objective: Extract the artifact from the Izanagi terraforming operation. Find a way down into the dig site.
Bad news. The Izanagis detected your ship on approach. When the mission opens, hug the cliffs on the left side and drop down toward the first truck. There's a ghost warrior nearby; take him out with your assault rifle. Stick to the left side as you approach the next truck up ahead. Two more guards await; one tosses grenades and the other launches rockets at long range. Use cover to avoid the rockets, and blast both guards with your shotgun at close range.
Approach the bunker with the grenade launcher armed. Toss in a grenade when the door opens. That should kill the two guards inside, but if not, finish them off with the assault rifle. Collect the ammunition and weaponry (including a rocket launcher). Use the stations to replenish shields and health.
Exit the bunker and go around to its right side. Several guards are down to the right. Use the rock as cover. Lure them up or fire at them at long range and hit the explosive barrels nearby. Use Aida's magnum; it's effective at long range.
Move toward the large circular site on the left. Move slowly and spot the rocket launcher turret on the platform. Destroy it with your own rockets. Climb the ladder to the right of the turret. There are guards above. Toss a couple of grenades near the guards. Climb the ladder to inspect your handiwork, and mop up any survivors with your assault rifle. Collect the ammunition scattered around.
Cross to the far side of the platform and terminate a couple more guards (one carries a rocket launcher). Use the health station nearby and grab the radio. Do your best Han Solo impersonation, then wait for the cutscene. It looks like more Izanagi troops are on the way.
Objective: Find the artifact in the dig site.
Return down to the surface using the ladder near the demolished turret. Those guards you saw are on their way. Eliminate them from long range with Aida's pistol, using the crates as cover. As you traverse the surface, avoid falling into the holes covered in teeth.
Head to the dig site and stand on the yellow lift; it automatically lowers into the dig site. You're literally inside the belly of the beast. Start forward through this misty area. Spot the guards up ahead. Blast them with your rocket launcher if they're stationary, or kill them with the assault rifle as they approach. Continue forward battling additional guards. Use the beast's tendonlike structures as cover against the guard attacks, but avoid standing on the ground tendrils.
You'll eventually reach some equipment. Pick up the ammunition, health, and shield power-ups nearby. The cavern widens as you continue onward. Stick to the left and ascend up to the platform. Terminate the guard up top and use the stations to replenish your health and shield. There are a couple more guards below. Lure them up to the top platform and eliminate them with the assault rifle. Drop down and approach the object underneath the platform.
Objective: Arm all three detonators.
The object is marked with detonators. The Izanagis were looking to unearth something through explosives--the artifact maybe? This won't please the beast, but arm all three detonators to complete the objective. After arming them, run away in the opposite direction to avoid sustaining damage from the explosion.
Objective: Get the artifact
Return to the site and grab the artifact. The beast just went from being not pleased to being really ticked.
Objective: Escape back to your dropship with the artifact.
Run away--fast. Make a beeline back to the elevator. The beast won't make it easy, however. Look out for floating sporelike objects appearing out of the walls. These things float near you and explode, causing damage. If several of them explode at once, it's really painful. Arm your assault rifle; a few shots can detonate the spore. As you flee, turn around on occasion and wipe out all pursuing spores. Keep moving. Ignore any Izanagis, because they've got their own problems to deal with now.
As you near the lift, green ooze pours out of the walls. Avoid it. As you near the lift, do one last rear-check to make sure there are no pursuing spores. If there are, blast them. Leap onto the lift and ride up.
You're almost there, but you have to get back to the ship. The beast spews green gas and liquid on the surface. Exit the lift and stick to the left side of the area as you return to the ship. Keep the road and bunker to your right as you roam back to your vessel. You'll spot an Izanagi trying to get into your ship. It's not a smart move on his part. Eliminate him with any weapon, then approach the ship to complete the mission.
Severnaya
Upon completing your task on Acheron, Aida provides the next mission briefing. There has been an Izanagi revolt on Severnaya, repercussions from your little foray on Acheron. Two marines are pinned down at a dam, the source of the Izanagi installation's power. Locate and rescue the men.
Objective: Make contact with the surviving marines. Save the marines from the attacking mercenaries.
The marines are pinned down nearby. Walk forward, then right around the hill. You witness a marine being shot as you approach. The Izanagis are positioned to the left of this slain marine. Eliminate them with a rocket or with your assault rifle. Gather their weapons and the energy boost, then talk to the surviving marine. He states that there are explosives remaining in the dam. You can complete their mission by arming the explosives. Don't forget to follow his suggestion and snag the EMP grenades and the sniper rifle off his dead comrade.
Objective: Infiltrate the dam. Find and arm the first explosive charge.
Ah, the sniper rifle. It couldn't have come at a better time. The best way to eliminate the Izanagi guards outside the dam is with the sniper rifle. Walk up the path to the dam's right. Zoom in with the rifle (use the alternate fire button) and eliminate any guards in sight. You have very limited sniper ammunition, so be accurate and go for headshots if possible. When you reach the dam's front entrance, zoom in the sniper rifle on the floor above the main door. There are two more guards patrolling here. Eliminate them. Collect all the ammo scattered around the entrance and approach the front door.
It's locked. Descend either ladder adjacent to the door. Go all the way to the bottom where the water runs through the tunnel. Arm your rocket launcher and peer around the corner down the tunnel. Blast the turret and the guard with the rocket launcher. Move into the tunnel and up a ladder on the far right side. Maneuver back to where the turret stood and cross over to the door.
Enter the door. You're automatically detected (the door locks behind you). Continue and go to the left. Don't go up the stairs. Instead, approach the gate, and it will open automatically. Continue up the ladder until you spot the first detonator. Arm it by pressing the use button on the detonator.
Objective: Find and arm the second explosive charge.
Don't go back down the ladder. Instead, cross the room and look to the right. Spot the ladder in the corner and ascend. Traverse the crawl space by ducking under the pipe and then climbing additional ladders. You eventually reach a grate in the floor; several guards patrol below. Open the grate and drop some grenades at the guards' feet. Drop down and finish off any survivors with your assault rifle.
Open all lockers for additional health and ammunition. Face the computer console and use the controls to unlock the two doors. Go through the door opposite the console and descend the stairs. Walk into the first door on the left. There's health to the right and shield power below, but the main object in this room is the second detonator. Arm the detonator and receive the wrath of Aida.
Objective: Find and arm the third explosive charge.
Descend the staircase and enter the door at the bottom. Turn left and enter the next area--it's crawling with guards. Peer around the large tanks to the right side and eliminate the guards. There's also a turret on the far right to deal with. Use a couple of rockets to eliminate it.
Another problem in this room is the plasma fields--the troublesome guards like to erect them around the room. Save your EMP grenades to blast the force fields. Disable the field at the bottom of the ramp. Ascend the ramp and finish off the remaining guards, and collect their weapons for extra ammunition. Cross the catwalk to the far side. Slowly move down the ramp, because there's another turret to your left. Eliminate it with a couple of fragmentation grenades. Kill any guards left in the area with your assault rifle. Toss an EMP grenade at the nearby force field. Beware of the hidden turret on the left. Drop a couple of timed grenades next to it.
Ascend the pipes that resemble stairs; they're on the far wall. Crawl through the tight space and drop down on the other side. Find the third detonator across the room.
Objective: Escape back to your dropship.
Time is critical. You have five minutes before the dam explodes. Don't retrace your steps; instead, hop over the pipes just to the left of the third detonator. Cross the room to the door beyond the tanks. Don't stop to shoot guards. Cross the hall to the far door; it's the dam entrance. Go outside and left, but maneuver around the right side of the truck. There's a rocket turret on the far right side of the platform. Keep running and dodge the incoming rockets by strafing to the left and right. You'll encounter a few more guards on the way back to your ship. Eliminate them with your weapon of choice. Reach the ship to complete the mission.
Back on the Atlantis, a pesky sea goat has caused some problems. Now the Atlantis must land for repairs. Talk to Ne'ban about the briefing. You're headed to Kalydon for ship repairs. The military outpost there serves as a repair and supply depot for ships.
Head into the armory and speak with Isaak about the artifacts and the sea goat and then about the new weapons, including the rocket launcher and its new alternate fire mode that launches homing rockets at up to four targets. Proceed to the drop deck and down the ramp to begin the mission.
Kalydon
When you reach the planet, Isaak provides a tutorial on plasma-field generators and turrets. Pick them up initially as you would any piece of ammunition. Select them by cycling through available weaponry. Once you've selected them, press the primary fire button to place them. Placing two field generators erects the plasma field. You can connect multiple fields or start a new one. Turrets work the same way. You can pick up any placed object by highlighting the object and pressing the use button.
Objective: Find the cache of defensive equipment.
Isaak says there's another cache of generators and turrets nearby. Go find them. From the base, move forward. Look left as you dip into the valley, and spot the grass on the ground--it marks a path across the hill. Follow the path into an area marked by some trees. You'll spot the large canister below. Grabbing the generators and turrets inside starts the timer for the attack. You don't have long before the Liandri angels arrive in force.
Objective: Set up defenses to prepare for enemy assault.
Turn left from the drop and go through the tunnel formed by the rocks. Liandri angels arrive from this area during one of the attacks, so it's wise to block this hole with a plasma field. Place one generator on either side of the hole to delay their progress toward the base.
Objective: Defend the wall until Isaak repairs the Atlantis.
Some notes on the layout: There are two stations near the base to regenerate your health and shields between assaults (there are four assaults total). Rocks litter the area around the base and provide ample cover against the angels, but they also block the line of sight from your turrets. You can move turrets and generators around between attacks if you wish.
Place a rocket turret on the side of the clearing to give it some height advantage so it can better pinpoint targets without having rocks directly in its path. Block off clearing areas with plasma-field generators to force the angels down a specific chokepoint path and into your rocket turrets. Place another rocket turret facing the hole you passed through on the return trip from gathering the defensive equipment. Place the third in the clearing with a direct shot away from the base.
The angels boasting rocket launchers are big threats to your defenses. Run interference on them and eliminate them with your own rocket launcher. Don't forget your new alternate fire mode. It's especially useful when there are multiple angels on the screen. Hold down the alt-fire button and wait for the beeps and the target indication that the rockets have locked on. You may need extra ammo, so gather it from dead angels during the attacks.
When an angel nears the base, she charges the door and begins to interact with the console. It's dangerous to let her get that close, but it's also a good time to attack--while the console distracts her. Fire rockets at her feet and eliminate her before she breaches the door. The fourth wave consists of two rocket-wielding angels. Move the remaining turrets closer to the base door.
After all four waves have been detected, Isaak completes ship repairs, and the mission ends.
When you arrive back on the Atlantis, Hawkins contacts you with new mission orders.
Sulferon
You're headed to Sulferon. The Izanagi facility on that planet has developed a tool to detect alien artifacts. Orders are to recover data on the artifact-detection tool.
Objective: Clear the base and surrounding area of all enemy forces. Obtain important data from the installation's computer system
Approach cautiously with your sniper rifle equipped. Two guards patrol the base's outer perimeter. Eliminate them with headshots if possible (the armored guard can withstand a few shots). If you wish to conserve sniper ammo, nail them once or twice and then finish the guards off with the assault rifle. A third guard patrols the left side. Take him out before approaching the base. Maneuver toward the right side of the base and eliminate the rocket turrets (one in the middle, one on the right). You can enter the base through the middle or around the right side.
Objective: Deactivate the distress call
Peek in the courtyard and focus your sniper rifle on the door. You can eliminate a guard that exits the door. If he spots you he activates a distress call. Either way, the distress call is activated eventually. Take out the few guards here. Cross the area and enter the door.
Look out for the gun turret in the hallway; eliminate it with your rocket launcher and try to nail the nearby guard in the process. Enter the hall and go right immediately to find some health and ammunition. Turn around, enter the opposite room, and eliminate the guards with a couple of grenade tosses. Remain near the stairs and pummel any reinforcements that arrive from across the hall (there's another gun turret there, which should be eliminated or disabled).
Cross the stairs and go into the hall on the right side. Detonate the nearby canister to kill the guard. Pick up the health and ammo on the other side of the crate. Beware of guards sneaking up behind; turn around and make sure none have entered the hall.
Enter the next room. It's a control room with a couple of guards. One blows a control panel to prevent you from deactivating the distress call. Make him pay for that one. Terminate the guards in the room, then gather the ammo, health, and shield power-ups from around and on the crates.
Hug the right wall and enter the doorway. Just beyond the crate ahead is a turret facing the opposite direction. Destroy it with any weapon, including the dispersion pistol, to conserve ammunition. You're now back where you started. Cross the room and spot the door on your left. Open the door, enter, and activate the lift. Ride the lift to the top, and exit the door.
Go right off the lift and prepare your shotgun. Blast the guard hiding in the shadows in the right alcove. One shot is sufficient if you're close enough. Another guard hides around the corner. Blast him with the shotgun too. Grab the sniper ammunition, then use the transmission button on the console. This cuts the distress signal, but all guards must be dead to complete the objective. If you followed this mission path, all of them should be. If not, return down the lift and canvass the bottom floor for guards. Search outside if there are no guards in the structure.
Once you've deactivated the distress call and eliminated all guards, a group of marines land on the planet to assist in its defense.
Objective: Protect the technician until he can retrieve the information from the damaged computer. Destroy all attacking forces.
The marines arrive with the technician. The tech goes to download the mission data; meanwhile, the marines can be ordered around and placed in specific positions to aid in defense. You have 2 minutes and 10 seconds until the first attack wave arrives.
Look closely and notice that each marine carries a different weapon. Caruso bears the sniper rifle, Cosner hoists the rocket launcher, Taba carries the assault rifle, and Easley holds the flamethrower. Consider these weapons when you place each marine. For example, the flamethrower works best at a chokepoint, so order Easley to protect the back door (where the third attack wave arrives from). Cosner is good at frontline defense, so place him at the front door or wall. The assault rifle works well in finishing off wounded enemies, so let Taba guard the control room. Finally, let Caruso guard either the front wall or door, whichever one Cosner isn't posted near.
The first attack wave arrives from the landing pad. Arm your sniper rifle and exit the base through the front wall. It's easy to snipe most of these approaching troublemakers. You can nail most or all of them before they even reach the wall. This helps keep your marines healthy.
The second wave arrives at the front wall. They filter through the middle entrance and are set up nicely in a chokepoint. Blast them with rockets at the chokepoint, and use the alternate fire mode if multiple guards appear within view.
The third wave arrives at the back door. As soon as you eliminate the second wave, run back into the base and go down the hall opposite the back door. Fire rockets toward the back door as you slowly retreat down the hall.
Make a final stand in the control room if necessary. Avoid placing the flamethrower or rocket launcher marine in the control room because of explosion chaos. Also, avoid shooting the marines, since you can damage them. The mission ends once all three waves are dead and the technician retrieves the data successfully.
Janus
There's a secret research lab on Janus, and the Liandri and Izanagi know its location. A Dr. Meyer possesses two artifacts there. Recover both artifacts and make sure the mercenaries don't capture Meyer. Talk to Isaak before leaving for briefings on concussion grenades and the arachnid biomass weapon (it fires eggs at your enemies, which hatch into arachnids). Go to the drop deck and board your ship to begin the mission.
Objective: Find and obtain the two artifacts before your enemies can. Enter the Janus complex.
You're under attack immediately. There's one guard on a tower and another guard on the ground. Move backward immediately, toward your dropship. Cycle through your weaponry and select the sniper rifle. Target the guard on the tower (shooting at you with his rocket launcher) and take him out with a headshot.
The guard on the ground approaches slowly. Take him out with several sniper rounds, or use your rocket launcher. You're about to replenish some sniper ammo, so don't worry about using a few rounds on the guard.
Watch out for a third guard patrolling the area to the left. Avoid him by sticking to the right and climbing the tower (where the guard with the rocket launcher stood). At the top, grab the sniper rifle and ammunition (and health and shield power-ups if necessary). Scan the surrounding area, including the bridge, for guards. You should spot the one on the left side of the bridge and at least one other on the bridge.

Descend the tower and move toward the bridge. Two guards hide behind the crates. Upon detection, the guards erect a force field and a turret. Eliminate everything with rockets; you can also disable the force field with an EMP grenade. Grab the weapons just to the right of the crates.
Move slowly toward the crane; there are more guards nearby. Slowly approach the crane with your sniper rifle ready. You can pick off the three guards that emerge; two of them erect a turret and a force field, but they can be stopped.
Cross the bridge. At the base entrance, discover the guard wielding the rocket launcher, the rocket turret on the right, and another guard behind the turret. Eliminate them all using your rocket launcher.
Go up the stairs to the right and spot a gun turret in the back of the entrance. Eliminate the gun turret with a couple of rockets. Go to where the gun turret stood and grab the power-ups. Use the lift controls to open the door. Walk inside and use the controls to enter into the next section. Enter the door and talk to the axon scientist.
Objective: Find the laboratory section.
Move beyond the scientist and through the doors. You'll spot some guards up ahead. Lure them to the doorway and blast them with your shotgun. Crates fill the next room. There are also several guards inside. Lure them into ambushes. Wait behind a crate, and when you spot a guard, pummel him with a shotgun.
Don't stand in front of the gun turrets at the end of the two rows. Stick along the sides of the room, especially the left side, which holds ammunition, health, and shield power-ups. Cross the room down either side to avoid the gun turrets. Enter the door to proceed into the next section.
Grab the EMP grenades off the crate to the right. Use the door controls and enter the conference room. There's a health station to the right--save it unless you're severely wounded. Open the door to the left and strafe quickly; there's a gun turret inside. Destroy the turret with a couple of rockets. There's also a guard wielding a rocket launcher on the way. Kill him quickly before he gets within close range and uses his flamethrower. Search the far end of the conference room for shield power-ups and ammunition. Exit the room and go right. You hear the pleas of a tortured scientist as you maneuver through.
Objective: Rescue the scientist.
Open the door at the end of the hall and kill the guards. Search the far right of the room for ammunition. Discover the gun turret in the left alcove. Destroy the turret with a couple of rockets and enter. Ride the lift. Follow the corridor until you reach the hole in the floor. You're above the tortured scientist now. Shoot the guard with your sniper rifle. Drop in and kill the other guard. You can also try your new concussion grenades. Toss one in, drop down, and finish off both guards with the shotgun. Free the scientist--it's Meyer.
Meyer moves down the hallway. Follow him. He grabs both artifacts in a nearby room, but he wants your help before he'll hand them over.
Objective: Protect Meyer. Get back to your dropship.
Aida reports that Liandri troops have blown the bridge. There goes your escape route. Now you must get to the roof.
Objective: Get to the roof for extraction.
Follow Meyer into the next mission area. He ushers you into a control room. Search the right side for health power-ups. Open the next door. There are two mercenaries inside; the one on the left holds a rocket launcher. Blast them with your shotgun. Listen to Meyer complain, then follow him again.
Meyer opens the next door; once again, mercenaries populate the room. Blast them all with rockets. Gather the power-ups and ammunition throughout the room.
Objective: Clear the way to the lift on the other side of the building.
Meyer suggests clearing a path outside then calling him when you're through. He makes it sound so easy. The window automatically opens. Exit and go right. Just around the corner begins a series of several fights against Liandri angels. Watch out for turrets as well. If possible, use the sniper rifle or Aida's magnum at long range against the angels; if you face them at close range, blast them with the shotgun. Knock them off the ledge for a quick kill. Follow the ledge until you reach the lift.
Objective: Take Meyer to the roof on the lift.
Wait for the grumbling Meyer to rendezvous at the lift. He uses its controls to reach the roof. Approach Meyer and the marine. Follow Meyer. Grab all the equipment in the room.
Objective: Notify Meyer when he can activate the antique radio.
Meyer is working on getting a transmission out to the Atlantis. Meanwhile you're about to be under attack. Thankfully, you have plenty of time to set up defenses. The attacks won't begin until you tell Meyer he can activate the antique radio. This is a similar objective to the one on Sulferon. You can order the marines into specific positions. But now you get to place your own defenses.
Return outside and grab all of the turrets and field generators to the right of the main door. Locate all of the marines. Make note of their equipment. Crable carries a rocket launcher, Harrison holds a shotgun, Chavez uses the flamethrower, and Sadao wields the assault rifle.
There are three narrow exterior base entrances--perfect for field generators. Block each entrance with a force field. There are also two back doors into the base. Block them with a force field or use the two auto turrets. Order the marines into specific positions. Crable is good on the perimeter or at the front entrance. The rest should be placed on either side or at the front entrance.
Objective: Protect Meyer until he can contact the Atlantis.
There are several attack waves. After killing all of the enemies in a wave, Meyer updates you on the transmission progress. The marines call out the enemy positions as "markers," and the locations are as follows: One is the front of the base, two is the left, three is the right, and four is the rear. Assist the marines with your rocket launcher or sniper rifle.

After eliminating the second attack wave, Meyer states you must raise the antenna. Exit right from the building and through the exterior ledge. Go to the base's rear and use the antenna controls. Terminate the remaining attack waves and wait for the next objective.
Objective: Meet Meyer in the radio room to call the Atlantis.
Return to the control room. Back on the Atlantis, you automatically speak with Hawkins. Afterward, talk to Aida. When finished, exit and talk to "Prince" Ne'ban. Go into the armory and speak to Isaak about the new smoke grenade. Go to the drop deck to begin the next mission.
Na Koja Abad
Aida provides the mission briefing as you descend to the misty planet.
Objectives: Find the alien dig site. Infiltrate the Izanagi research facility.
Go forward (away from the dropship). Keep left, and you'll spot a green path. Consider this the road toward the dig site. You'll hear some guards talking as you approach. Eliminate them with your sniper rifle. Move forward and look left. There are two turrets up high on the gate. Blast them with a couple of rockets.
Objective: Deactivate the force field.
You can't get through the force field. Instead, go right toward the other buildings. There are three guards protecting these buildings--two stand guard at the left of the building and one stands to the right. Toss a couple of grenades at the two guards. Finish them off with the assault rifle. Eliminate the third guard as he approaches. Enter the left building to discover health and shield stations, grenades, and a gun turret. You can place this at any time during the mission (and even pick it back up again to reuse it later). Search the left wall for a fuse box. Open it and disable the force field.
Return to the force field; it's disabled so just go through the opening. Two guards hide behind the rocks ahead. Use the nearby crate for cover and patiently eliminate them with your assault rifle.
Just up ahead is a structure with several guards--two to the right, one wielding a rocket launcher to the left, and a third with a sniper rifle on the upper level. Go up the hill to the right quietly and use the sniper rifle to eliminate them. If necessary, lure remaining guards close and pummel them with your shotgun. Search the structure for ammunition, health, and shield power-ups.
Keep moving beyond the structure, and keep the building to your right side. You reach another force field. Disable it at the panel and enter. There are two gun turrets on top of the gate. Turn around and eliminate them. Go to the right and into the water; wade into the pipe entrance. Climb the ladder into the next mission zone.
Objective: Find the bridge entrance to the alien dig site.
Ascend the ladder and take the first right. Go inside and climb the ladder; you're overlooking a lab. Listen to the two scientists talk. Peer down and spot a guard standing at his post. Terminate him with the sniper rifle. Drop down. Exit through the door to the left of the holograms.
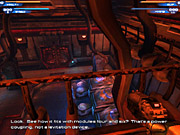
Turn left and spot the steam coming out of the walls. Jump to either ledge. Avoid the steam by timing your crossing when the steam cuts off. Climb the ladder at the end. Go down the hall cautiously; there's a gun turret down the hall. Shoot it with a couple of rockets. Look out, because there's another gun turret nearby. Destroy it too. Keep going until you're overlooking another lab. Kill the guard below with the sniper rifle. Leap down into the lab. Take the takkras from the lab. Save them for later.
There are several exits out of the room. The path opposite the spot you leaped from contains health and ammunition and one guard to deal with. Go into the corridor opposite the hologram. You'll enter a large room with a few guards--a rocket-wielding guard patrols the bottom floor. Eliminate all guards. Comb the area for health power-ups. Also, there's a shield station on the second-level entrance, but a gun turret serves as protection.
Return to the second level by leaping onto crates on the bottom floor or using the ladder below the gun turret. Enter the center structure (more health and shield power-ups are here). Ascend the ladder and cross the path until you're overlooking another lab. Kill the guard with the sniper rifle. Leap down.
Exit the door to the left (the same direction the weapon faces). Guards open the far door. Crush them with the shotgun at close range. Go down the lift. Nail the gun turret down there. Collect health, shield power-ups, and ammo from the corners.
Open the door near the turret. Beware of the rocket-wielding guard at the end of the hall. Eliminate him. Open the door and ride the lift into the next mission zone.
Objective: Find and obtain the artifact.
Turn around and descend another lift. Have the sniper rifle ready. Kill the guard patrolling the bridge. Search the alcove to the left for ammo and health power-ups.
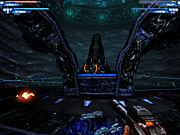
Run across the bridge and open the security hatch. Remember this location, because you'll return here at the end of the mission. Hop inside and eliminate the guards. Enter the door opposite the entrance. Approach the door and listen to the conversation.
Ascend all the ladders to the very top. Cross the corridor. Be quiet near the corridor's end. Use the sniper rifle against the two guards below. Leap onto the platform and descend the ladder. Approach the center structure. Lasers appear everywhere. You can go left or right, but the task remains the same. You must duck under and jump over the various lasers. Go to the opposite side of the room and grab the artifact.
Objective: Escape the dig site with the artifact.
Grabbing the artifact unleashes some perturbed beasts. They're called drakk, and it's not wise to let them get too close. You can blast the drakk to bits with your rocket launcher or shotgun, or you can use some of the weapons you picked up during the mission, such as the gun turret or the takkras. Fire the takkras at the drakk; the small little ball is a mighty weapon. It floats around the drakk, shooting the beast the entire time.
Escape the room by backtracking up the ladder. Return all the way to the security hatch. You'll encounter more drakk on the way. Avoid them if possible, or use your rocket launcher. The mission ends once you've reached the hatch.
Back on the Atlantis, go into the briefing room and speak with Aida for your next mission details.
NC962VIII
This is the home planet of the drakk. It should be fun. Go into the armory and speak with Isaak. He's got a couple of new goodies, including a drakk laser rifle, which is similar to the railgun from the Quake series, and info on the takkras.
Objectives: Enter the drakk homeworld. Secure the last remaining artifact. Discover what happened to previous visitors.
Cross the narrow path all the way to the door. It opens, and the next zone loads. Open the next door directly ahead. Proceed forward. Three drakk approach your position. Equip the drakk laser rifle; it kills these weaker drakk in two hits. Advance until you receive the next objective.
Objective: Find out why the drakk are collecting living specimens.
Gather the ammunition and power-ups on the left and right sides of the hall. Continue through two doors until you reach an open room and another objective appears.
Objective: Destroy the drakk overseers to open the doors.
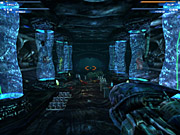
Tougher drakk inhabit this room. They're drakk overseers, and they fire back with their own lasers. Plus, these drakk can be repaired. Make note of the creatures inside the orblike structures. If you damage a drakk overseer, forcing it to fall, this creature pops out of the orb and attempts to repair the overseer. So even if an overseer falls to the ground, don't stop shooting. Pummel it a few more times until it explodes. You can drop down to the left and into a small alcove (duck beneath the steam to avoid damage) and locate a couple of drakk pods, which supply ammo for the drakk laser rifle.
Destroy both overseers in the room to unlock the doors. Battle more drakk and an overseer in the next area. Enter the next door and approach the edge of a platform. An overseer attacks from the right. Blast it to bits. Drop down onto the platform and walk around the orb and into another corridor. Overseers hang out to the left and right. Take them both out with the drakk laser rifle. Go over their corpses to collect more rifle ammo.
There are two strange buttons at the end of this hallway. Lasers protect one of them. Push them both, then ride up the gravity lift. Destroy the overseer at the top. Walk through the doorway into the next section.
Objective: Find out what the drakk are doing with the living body parts.
Walk forward and spot tons of ammunition but also some grisly body parts. Continue forward down the hall ignoring the path on the right. Watch for the overseer coming out of the hole in the floor (snag the drakk pods nearby for ammo). You'll encounter many of these overseers hovering out of holes. Get behind them and blast them with the laser rifle a couple of times before they rise fully. Advance through the hallway beyond the hole until you reach another hole--and another overseer. Keep going forward, and you will complete the current objective by discovering the drakk experiments.
Objective: Find out what the drakk could possibly want to achieve with their experiments.
Continue forward and grab the three drakk pods in the corner. Go right into a large chamber. There are already two overseers floating about. Defeat them both to open a portal into the center structure.
Objective: Ride the gravity lift to the center of the drakk structure.
Jump onto the gravity lift in the room's center to enter the next section. A drakk overseer immediately rises to your left. Eliminate it. Exit the room into the large chamber.
Objective: Find a way into the heart of the drakk.
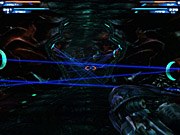
Enter the chamber and go right for several piles of drakk pod ammo (you'll have to slay a drakk overseer to get it, though). Return to your start point and head the other way, battling another drakk as you move.
Laser traps block the next hallway. You must time your advance through the hallway. To do so, stand at the edge of each section and go forward when the lasers disappear in front of you. Be patient. Don't try to cover the full hall in one burst.
At the end, go up the ramp and head left toward the light. You'll find a cage holding a human. Gather all the health and ammo nearby. Torture the human if you wish by using the buttons in front of the cage. If you torture him too much, he'll break out and fight. Turn around and go up the ramp to the large pillar. Enter the door into the next section.
Objective: Defeat the drakk caretaker.

This is one big, mean drakk. Since drakks are essentially machines, use EMP weaponry against this beast (EMP grenades or the shock lance's alternate fire). Health, ammo, and shield power-ups populate the lower level, so head down there if you need to restock. After several solid strikes, the drakk caretaker splits into two. One half stays and fights, and the other retreats to the back of the chamber. There's an orb there that regenerates the half drakk into a full drakk. Follow this half and destroy it before it regenerates. Pummel it with your rocket launcher or laser rifle.
The battle ends once both drakk halves are dead. Search the back of the chamber to find the glowing artifact. Grab it to conclude the level.
Talk to Aida when you return to the Atlantis. You're headed home--to Avalon. Talk to Isaak in the armory. Apparently he's developed an alternate fire for the drakk laser--a steady beam. Go to the drop deck to begin the mission.
Avalon
Something has gone horribly wrong on Avalon. The planetary cannon--usually on the side of the good guys--fires at your dropship and takes a big chunk out of it. Prepare for a crash landing.
Objective: Discover what shot you down.
Aida has bad news: Skaarj have taken over the planet and the planetary cannon. Aida can't come to your rescue in the Atlantis while the cannon remains active--it's too dangerous.
Objective: Disable the planetary cannon.
Walk forward and gather sniper ammo from the corpse (save it too, because you'll need it later in the mission). A skaarj approaches. He's slow but he packs a mean punch. Take him out with rockets from a distance or with the shotgun at close range. Take a right and head toward the building. There are three more skaarj nearby. Engage them one-on-one by moving slowly toward the building and fighting when they appear. Search the waterfront to the left of the building for some assault rifle ammo. Go around the left side of the building. Climb the stairs and ascend in the elevator. There's a skaarj to the right (dangling a poor guy) and some sniper ammo to the left. Remember to save it.
Ascend the stairs into the control room. Two skaarj guard the planetary controls. Defeat them both with your shotgun. Collect the weaponry to the left and the health and shield power-ups to right. Use the console to disable the planetary cannon.
Objective: Meet up with McMillan at the landing pad.
Exit the control room and descend the catwalks. Use the elevator--ack, it's not working. You're ordered to find a good vantage point to protect a marine who will fix the generator powering the elevator.
Objective: Protect the marine technician while he fixes the backup generator.
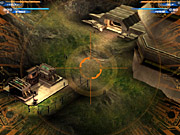
It's a good thing there's a great vantage point nearby, and you grabbed sniper ammo from it. Go to the edge of the catwalk overlooking the base area below. The lower area is the generator; the marine exits from the upper building. If sniper ammo remains on the catwalk because you're holding too much, don't stand on it. Save it for later.
The marine lets you know when he's exited the building. Focus your sniper zoom close on the technician as he walks toward the generator. Notice the explosive canisters scattered around the area. Use them when there are several skaarj in the vicinity. The marine will defend himself, but he can't withstand a great deal of damage.
The skaarj come from the areas north, south, and east of the generator. The weaker skaarj are easy prey, though they're agile and dodge a lot, which makes them hard to hit. The slower, stronger skaarj are easier to hit, but they can withstand several sniper bullets. All skaarj enter the generator area through the same small opening in the fence. So if you're in trouble, point your sniper rifle there. Reload during downtimes so you aren't forced to wait while skaarj overrun the marine.
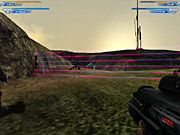
After the marine repairs the generator, return to the elevator and descend. Follow the marine to the landing pad, fighting skaarj as you go. He may perish; just keep going forward and up the hill to the landing pad. More marines meet you there. You spot some ammo, health, and shield power-ups below. A skaarj vessel lands in the area to the right of the landing pad.
There are only a couple of marines to help defend the landing pad against skaarj assaults. One sets up a couple of turrets and a force field, but it won't hold back the skaarj if you don't help. Wait for the skaarj to approach from the hills. Nail them at long range with the remaining sniper ammunition, then with the drakk laser rifle, then with the rocket launcher. Toss some grenades at them, and dodge their projectiles. Defend the position until the Atlantis begins its approach.
Your horrible day continues. Apparently skaarj forces shot down the Atlantis before it could land. You're ordered to retreat to the Dorian Gray, Commander Hawkins' ship. Aida managed to send you one last transmission before the Atlantis exploded. It's time to find out what was in the message.
The Dorian Gray
Objective: Find a way to play back Aida's burst transmission.
Listen to Hawkins explain the situation: The Atlantis, no survivors, the artifact theory, the humble kai holding the DNA of a powerful ancient race, the tosc...it's all come to this. While Hawkins delivers his speech, canvass the room's edges to grab the available ammunition, health, and shield power-ups. That little fellow behind those laser force fields isn't going to be a little fellow much longer. Hawkins was right--the kai turns into a powerful tosc, and it breaks loose from containment.
Objective: Kill the tosc.
The tosc concentrates its fire on your marine pals at first, but they don't last too long against him. The tosc carries a huge gun (think of the BFG from Doom). Protect yourself by hiding behind the columns in the room. Peek out and pummel the tosc with your rocket launcher initially, then switch over to the drakk laser rifle, then the shotgun, then the grenade launcher, and pretty much anything else in your arsenal.
After you've inflicted enough damage, the tosc loses his big gun. It's yours for the taking. Grab it and select it. Fire it at the tosc to wipe it out.
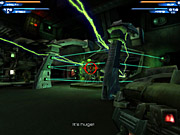
There are two unlocked doors on the far side of your start position. Go through the left door and locate health and shield stations at the first left. Return and go through the right door. Move into the first room on the left, and you're able to play Aida's burst message. It's not good news.
Objective: Find the sector commander.
Time to find that traitor. Go past the desk where you watched Aida's message. Ascend the next ramp to locate Hawkins. You administer your own style of justice on the sector commander.
Objective: Get to the escape pods.
Turn around and go through the door across the room. There's another tosc to deal with here. Assist the marines, and use the tosc's huge gun. Proceed through the next door and into the large room with the catwalk on the right. The marines battle a tosc on a high balcony in the room. Blast it with your big gun.
Objective: Use the failing gravity to get to the upper levels.
The catwalk across the room just broke in half. Cross the path you're on, then go left. Leap to the next section of the catwalk--notice that the lack of gravity makes you float high in the area. Look forward toward the balcony ahead. Notice the lower perch to the right of the upper level. Jump to it then to the upper left. You're now on the upper walkway. Go left to the door.
When you enter the next room, the computer announces a hull breach. Doors are sealed behind you. Go right and around to the right-hand door; the room contains some health and shield power-ups. Leap up to the high door to your right (exiting the power-up room). Go through a couple of doors.
When you reach two doors, open either door and meet up with more marines. They're having a problem getting to the escape pods. Open the door and blast the tosc with his own big gun. Turn left and leap up to the second floor.
There are major ship problems now. The ship tilts underneath your feet. Go through several bulkhead doors. If you get tossed away from the control panels, jump and float to the panel and hit the use key quickly to open the door. Save your game in this hall, because there's one more battle before a mad dash to the escape pods.
Objective: Find an unused escape pod before the ship is destroyed.
One more enemy to beat--it's another tosc, and it's blocking the path to the escape pods. Blast it with the big tosc gun. Duck and cover if it returns fire. You must move quickly after eliminating the tosc--you have less than 30 seconds to make it to the pod. Jump over the obstacles and move through the tunnel (beyond where the tosc stood) to find the pod hatch on the floor. Fall on it to end the mission and the game.
Chapter 4: Cheat Codes
It's a tough universe out there, and even the mighty John Dalton may have trouble against the baddest of diabolical baddies. When the mountain of frustration builds, cheat codes are certainly an option. We don't recommend giving in to the temptation, though, because these codes completely unbalance the game and make even the toughest sections a walk in the park. We suggest you use these cheat codes as a last resort.
To activate Unreal II: The Awakening's cheat codes, open up the console by pressing "~" during gameplay, and type "BeMyMonkey". This enables cheat mode. Type the following codes into the console to activate the corresponding cheats, and press Esc to exit back to the game after entering the code.
GOD -- Toggles invincibility (except to fire damage). You must reenter the code after each area loads.
LOADED -- Gives you all the weapons available in that mission.
ALLAMMO -- Maximizes ammunition for all current weapons.
GHOST -- Enables ghost mode, allowing you to walk through walls, ceilings, and floors. To deactivate it, use the WALK code.
FLY -- Lets you float through the air. Deactivate it by entering the WALK code.
WALK -- Returns you to normal movement, canceling the effects of GHOST or FLY.
SLOWMO # -- Enables slow or fast mode. The default # is 1. Use a number between 0 and 1 for slow motion and a number greater than 1 for fast mode.
TOGGLESPEED -- Doubles the game speed.
TOGGLEINFINITEAMMO -- Eliminates the need for ammunition. This code toggles unlimited ammunition for your current weaponry.
TOGGLEINVISIBILITY -- Toggles invisibility.
NEXTLEVEL -- Skips to the next level.
OPEN (map name) -- Loads a specific map. Search the directory of maps for the list of Unreal II maps. You must use the ".un2" extension in the map name when using the code.
Got a news tip or want to contact us directly? Email news@gamespot.com
Join the conversation