Tribes: Vengeance Walkthrough
Tribes: Vengeance spins an intriguing yarn about two generations of imperial princesses, and their relationships with the Phoenix tribe. This walkthrough includes a full walkthrough for the campaign, as well as tips on weapons and multiplayer action.
Design by Marty Smith
It’s been almost six years since the release of the original Tribes game. Although now multiplayer-only titles seem to be almost the norm when it comes to the FPS genre, at the time (over a year before Quake III or Unreal Tournament hit the market) the thought of a game without any significant single-player component was considered to be revolutionary, if not outright controversial. Some games that attempt to be trendsetters fall by the wayside, but Tribes was embraced by a small but dedicated group of players, and received enough support to encourage its developer, Dynamix, to create a sequel, which was simply called Tribes 2. Although Tribes 2 suffered from an extremely buggy launch, it was eventually patched into working order, and went on to sell over a quarter-million copies in the U.S. alone.
In the PC gaming market, success begets sequels, so it’s no surprise that a new Tribes game has just arrived. Tribes: Vengeance has a different developer and publisher than the previous Tribes games, so it’s no surprise to see a new take on the universe with the inclusion of a full-featured single-player mode. Irrational Games, best known for its work on Freedom Force and System Shock 2, is no stranger to crafting excellent single-player FPS titles, and that’s what they’ve done here. As you play through the game, you’ll control five different characters, each with a different perspective on the world in which they live, and will shift backwards and forwards in time, so that you’ll occasionally see the ramifications of events before you witness the events themselves.
Of course, no Tribes game would be complete without a thorough multiplayer experience, and Tribes: Vengeance doesn’t disappoint. In addition to the capture-the-flag that’s the heart of the series, there are four other multiplayer gametypes included as well, and with support for up to 32 players per server, there’s going to be a whole lot of skiing going on when you get online. The most notable thing about the Tribes experience, besides the gameplay impact of jetpacks, is the sense of speed that the game brings to the table; other multiplayer games will feel sedate in comparison to Vengeance after you spend a little time online.
GameSpot happily welcomes you to peruse its unofficial game guide to Tribes: Vengeance. In addition to a complete walk-through of the single-player game, we’ve thrown in descriptions of all of the weapons, maps, and vehicles, as well as the proverbial "more."
Table of Contents
Armor and ArsenalVehicles
Walk-through
Victoria: The Past - Captured
Julia: The Present - Coliseum
Julia: The Present - Discovery
Julia: The Past - Bloodlines
Daniel: The Past - The Rescue
Victoria: The Past - The Rescue
Daniel: The Past - The Rescue
Daniel: The Past - Mercy
Mercury: The Past - Assassination
Jericho: The Past - Deliverance
Mercury: The Present - Redemption
Victoria: The Past - Proof
Daniel: The Past - Judgment
Victoria: The Past - Retribution
Julia: The Present - Trials
Julia: The Present - Revelation
Julia: The Present - Vengeance
Your Armor and Arsenal
Armor Choices
Kinetic Light
If you choose to enter the battlefield in light armor, you’ll be sacrificing health and the ability to carry a lot of ammo in exchange for speed and maneuverability. Although you will possess only 75 health, you’ll be able to move much more quickly than players in medium or heavy armor; it naturally follows that this is the best class for transporting game items, such as captured flags or the ball in the Ball gametype. If you intend to enter enemy territory, though, you’ll need to be aware of your physical weakness; you can compensate for it somewhat by bringing along a shield pack and using it when someone starts to target you for destruction.
The special weapon for light armor is the sniper rifle, and special it is. Check out the weapons section for a description.
Natural Medium
The "average" armor in Tribes: Vengeance is the medium armor. When you suit up in medium armor, you’re saying that you’re unwilling to trade speed for health, or vice versa; this type of armor is average in all statistical categories, making it ideal for both offense and defense.The armor-specific weapon for medium armor is the buckler.
Colossus Heavy
Heavy armor has been the armor of choice for many redoubtable warriors, especially those who wished to take plenty of damage and keep on kicking. When you do bring heavy armor onto the battlefield, you’ll gain a huge health boost, which will leave you with almost twice as much health as a medium armor soldier, but you’ll pay for it with a large speed hit. Going from light armor to heavy armor can be like jumping into a pool of semi-frozen molasses, but sometimes the extra armor and firepower is worth it. In addition to being able to use the awesomely powerful mortar, heavy armor soldiers will be able to carry much more ammo than their lighter counterparts.
Weapons
Spinfusor
Every FPS has to have a rocket launcher, and the games set in the Tribes universe are no exception. Although it’s called a spinfusor, no one should have a problem using it if you’re familiar with the standard FPS rocket launcher, you shouldn’t have any problems using this weapon.
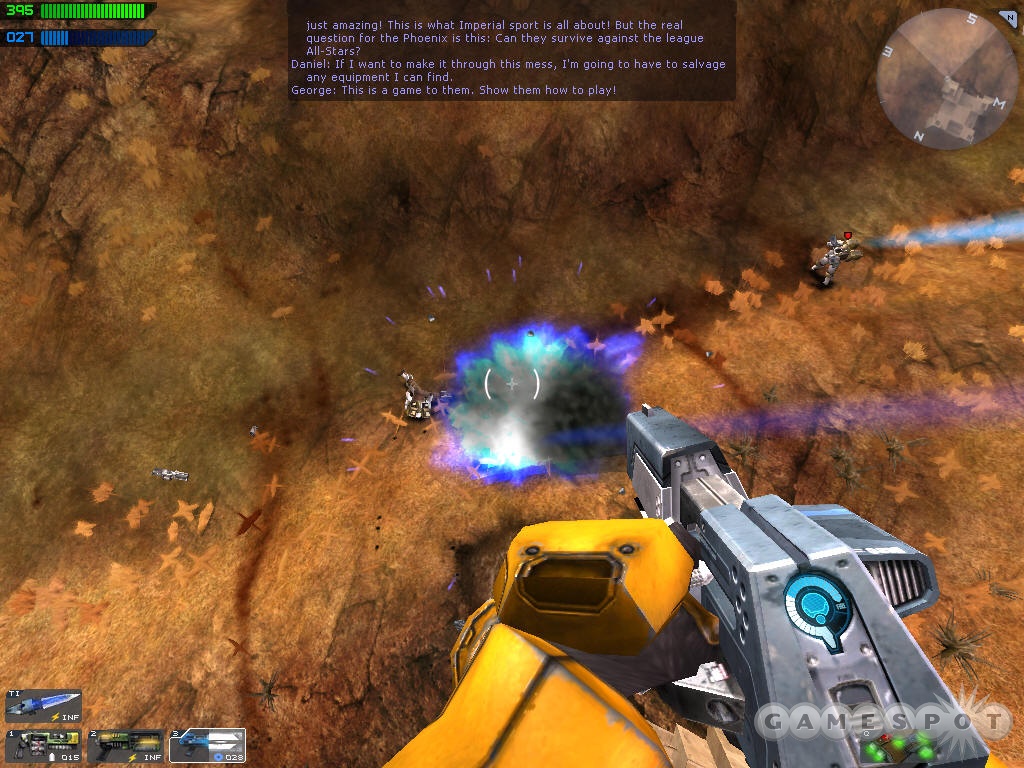
The spinfusor is probably the most universally useful weapon in Tribes: Vengeance. It deals plenty of damage, has a large radius for its splash damage, and can knock your enemies around when they’re caught near the detonation. In a pinch, you can even fire it at your feet to get a bit of a boost before you use your jetpack. Beyond that, there isn’t too much strategy to elucidate for the spinfusor; it’s a rocket launcher, for crying out loud! Point it at your enemy and fire!
The only bad thing about the spinfusor is that it loses effectiveness against enemies in midair, due to the difficulty of actually hitting someone dead-on with a round. If you’re fighting against someone that’s taken flight, you’ll probably want to shift over to the chaingun until they land or get close to a surface that a spinfusor round could detonate against. By the same token, though, you shouldn’t aim the spinfusor directly at an enemy that’s on a level surface, unless you’re above him; aim at their feet. This increases the chance that you’ll actually deal some amount of splash damage to them. Beyond that, you’ll need to practice with the spinfusor in order to figure out how best to lead your enemies.
Blaster
The blaster is effectively a shotgun; it blasts out eight or ten small pellets at a time when fired, which quickly spread out and disperse. When fired in close quarters, you can deal a lot of damage with a blaster, thanks to the fact that you’re firing multiple rounds simultaneously, and also due to the fact that rounds that initially miss will rebound off of walls. (They’ll sometimes hit you, though.) At long range, though, the way that the blaster rounds disperse causes this weapon to be less effective than, say, a chaingun. One benefit to the blaster is that it requires no ammo; it relies solely on your energy reserves to fire. If you run out of energy, though, such as when you jetpack for a long distance, you’ll need to wait for it to regenerate a bit before you can fire.
Chaingun
As you might expect, the chaingun puts a lot of metal in the air, but does so without much regard for where it winds up. If you’re an adherant to the school of spray-and-pray, then this weapon will suit you. In point of fact, its accuracy isn’t terrible, and you’re going to be firing so many rounds that a few are bound to hit your target. Unfortunately, the chaingun gets less accurate the longer you hold down the fire button, so if you’re desperate to take down someone at long range, you’ll either have to switch to something else, or stick to short bursts of fire. On the plus side, the chaingun’s rounds move more quickly than those of almost any other weapon, meaing that you have to lead enemies less severely when you fire, making it ideal for taking out enemies that are running away from you.
Grenade Launcher
In a game that values vertical mobility as much as Tribes: Vengeance does, a weapon with projectiles that only explode on the ground is almost automatically rendered less effective than those that can be aimed at enemies in mid-air. Which isn’t to say that the grenade launcher is bad, per se; it’s just worthless if your enemy has enough energy to use his or her jetpack, unless you’re a good enough shot to land direct hits. Against enemies on the ground, however, or foes in tight quarters, the grenade launcher packs quite a punch, and seems to deal more splash damage than the spinfusor does. It’s also one of the few weapons that can be fired around corners, thanks to the fact that it usually bounces off the first surface it hits. (When fired at long range, the grenade will detonate on the initial impact with whatever surface it hits.)
Burner
Although the burner looks impressive, what with the huge radius of its flame effect, it winds up being more flash than substance. You can use it against multiple enemies at once, true, but this makes it no different from a mortar or spinfusor round, and while it can deal damage over time via burning, you’re going to be accepting that in exchange for almost no initial damage. While there’s something very aggravating about being burned to death, you’ll still probably want to stick with the tried-and-true spinfusor in most combat situations. The main advantage to the burner is that, like the blaster, it requires no ammo, drawing only on your energy reserves.
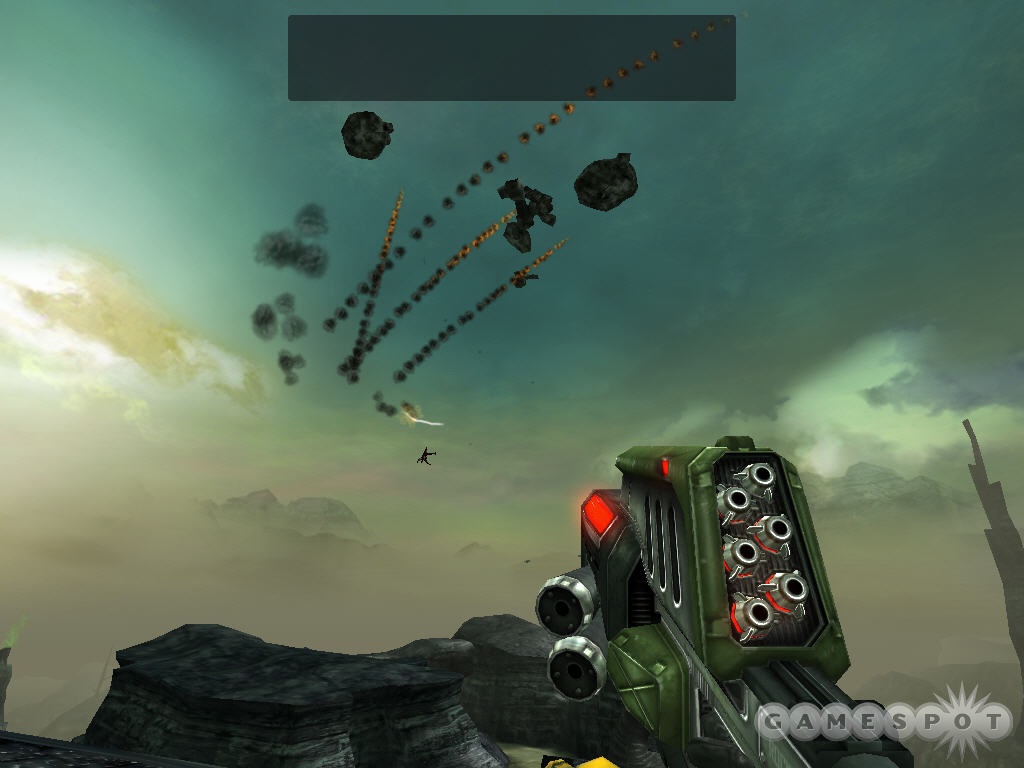
Rocket Pod
Although you may see the word "rocket" in the name of this weapon and assume it’s a rocket launcher, you’d be wrong in that assumption, at least if you thought you’d be picking up a rocket launcher akin to that seen in Unreal or Quake; the rocket pod in Tribes: Vengeance isn’t directly comparable to any weapon you’ve seen in an FPS before. (But then, so few of the weapons are.)
Instead of shooting out one massive projectile that deals heavy damage, the rocket pod will let you blast away with six smaller projectiles that are fired nearly simultaneously. In addition, you can affect the flight path of these projectiles by moving your mouse after they launch; it’s very difficult to gain pinpoint precision with this technique, so don’t count on hitting any jetpacking foes. (Unless you possess monstrously good aim.) The pod is better suited for taking down vehicles, due to their poor maneuverability and inability to rapidly move out of the way of incoming projectiles.
Moreover, rocket pods are essentially useless against most online enemies, due to the way they deal damage. Although one rocket deals minimal damage, each additional rocket hit deals more damage than the last, meaning that if you can connect with five or six, you stand a good chance of getting a kill on a full-health enemy, save for those in heavy armor. The catch is that most players will be moving far too quickly to actually hit with a single rocket, let alone multiples, especially when they’re in the air. The splash damage radius on rocket pod attacks is also notably smaller than that of the spinfusor, mortar, or grenades.
In short, if you’re incredibly skilled, you may be able to use the rocket pod to get kills on enemies who aren’t aware that you’re firing at them. Otherwise, you’re unlikely to hit anyone that’s actively dodging you, rendering the rocket pods suitable only as a back-up weapon in case a vehicle comes along.
Grappler
While the grappler does have some interesting features, such as how it allows you to grab on to items and pull them towards you, its primary use is confusion. In most cases, players using their normal movement keys are capable only of fairly regular movements; you jetpack up, you run forward, and so on. Players using splash damage weapons will thus be able to narrow down the window in which to aim if they want to hit you, based on assumptions about your current path. In the hands of a decent player, though, the grappler can cause all of these assumptions to be thrown out the window.
First off, you’ll need a surface to attach the grappler to. In multiplayer, such a surface can be hard to come by, especially in the large, open arenas, making the grappler more useful indoors, such as on the Cavern map. There is a range limit for grappler shots; if you shoot it at a surface that’s too far away from you, the rope will fall inert and you’ll lose a round of "ammo." When you do manage to connect to a surface, though, your path of travel will immediately shift in ways that will make it difficult for your enemies to target you. If you shot directly at the ceiling above you, for instance, you’ll start swinging along the vines like Tarzan, giving you a good amount of up-and-down motion, while preserving your jetpack juice at the same time. If you aim above and to the side, you’ll start to trace a circle around the impact point of the grapple, making it essentially impossible for a following player to accurately line up a shot. (This will sap some of your forward speed, though.) After you swing as far forward as you can with your shot, detach the cable by hitting the fire button again; you can then fire another grapple shot to swing again, or just use your jetpacks to take advantage of your new direction. Multiple grapple shots are tremendously confusing to anyone trying to hit you, so it’s generally best to continue to use it until you run out of ammo or reach an area where it’s unusable or of minimal utility.
If your flag has been captured by someone that’s using a grappler to get away, there aren’t many ways to get it back. If you have a full reserve of jetpack energy and an energy pack, you can use your active speed boost to try and get close to the flagrunner and blast him at close range. Alternately, if you’re on base defense as a sniper, you’ll want to try and wait for them to ungrapple and blast them with a full-power shot. Otherwise, your best bet is to try and hit them with your chaingun or sentry turret as often as possible. If you have access to a fighter pod or another quick vehicle, try to follow along on the ground and shoot them out of the sky. Alternately, you can take a different tack and steal their flag, preventing them from completing the cap.
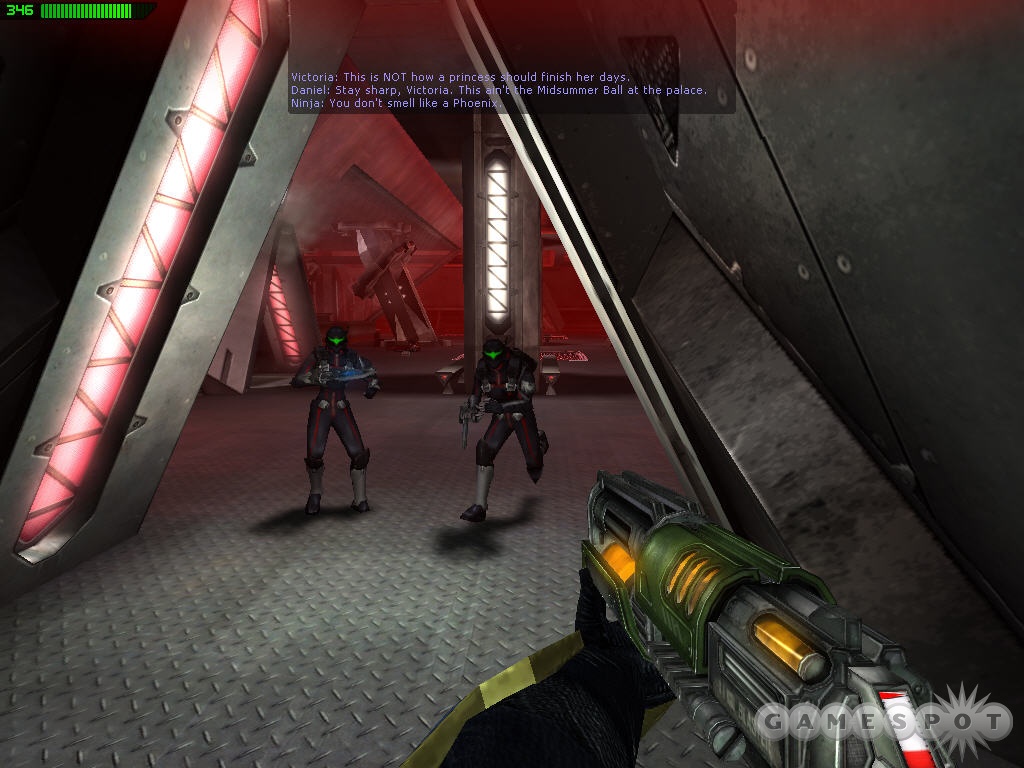
Sniper Rifle
The sniper rifle in Tribes: Vengeance is a critical part of any well-oiled team’s strategy. Anyone who’s played an FPS should be familiar with the concept of a sniper rifle (although the sniper rifle in Vengeance more closely resembles a railgun than a "rifle"): you point it at someone’s head and pull the trigger, then they die.
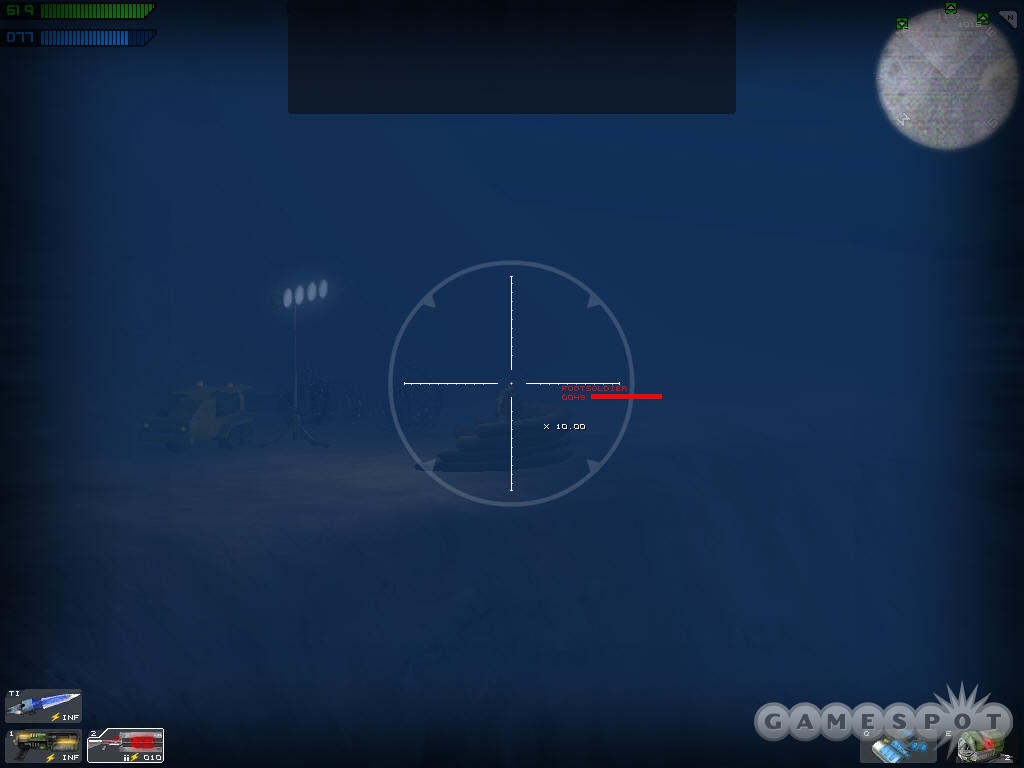
There are a few caveats, of course. To begin with, this is the only weapon that requires both energy and ammunition. In truth, you can fire the sniper rifle when you don’t have much energy, but its damage is greatly increased when you have a lot of energy in your reserves. Unfortunately, this means that you’ll only get one good shot at a time; after you snap off a round, a shot taken immediately afterwards will deal much less damage (thanks to the fact that each shot almost completely drains your energy). If you want to focus on sniping, then, you’ll want to bring along an energy pack, which will let you regenerate this precious resource more quickly.
Still, though, the benefits of the sniper rifle outweigh these negatives. For one thing, this is the only true hitscan weapon in the game, meaning that your projectiles cover the distance to your target instantaneously; no leading required, in other words.
Buckler
A haiku:
The buckler weapon
not very useful, we say
short range, lacks power
Poetics aside, you won’t see too many people using the buckler in multiplayer, we suspect. Although it has a noble goal - to reduce the amount of damage you take by raising a force field - this doesn’t help you perform any of your real goals in the game, which are to kill people and take their flags. You can use the buckler as an offensive weapon; when fired, it zips out and will strike enemies, albeit only those in your immediate vicinity, as the range is quite circumscribed. If this were a bit more powerful, it might see more use, but the damage doesn’t seem to be commensurate with the short range of the weapon. On the plus side, you have a limited amount of mid-air control of the buckler when it’s fired.
Mortar
When you’re looking for pure destruction, there’s nothing that can quite match the mortar. This weapon can only be attached to heavy armor, so you won’t be able to use it unless you’re willing to sacrifice speed for power, but if you do decide to go heavy, you can rest assured that you’ll be able to absolutely annihilate most enemy defenses.
Although mortar rounds possess the same basic weakness as those of the grenade launcher - that they explode on the ground, when most of your enemies will be flying above you - it makes up for this with sheer power: the radius of a mortar detonation is much greater than that of a grenade, and it deals much more damage, as well. Since the primary use of the mortar is to weaken up enemy defenses, you also won’t have as many problems dealing with airborne enemies; most enemies that guard a flag will be sitting around on the ground, if only because jetpack energy runs out so quickly. This isn’t even mentioning turrets, which are prime targets for mortars due to their large size and immobility.
As the name implies, mortars are intended to be used from long range. Since the shells travel in an arc, it will likely take you some time to get used to firing them accurately; you can’t just aim at your target and hit the button, unless you want to fall significantly short. Since there isn’t any real range-finding mechanism, you’ll have to judge the height of your shot by feel, and in this instance, the old adage of practice making perfect applies. After a few rounds of exclusive mortar use, you should get an appreciation for how to aim them properly. If you don’t want to risk embarrassment online, create a non-dedicated multiplayer server and practice by yourself.
Again, though, the primary task of a mortar is to soften up enemy defenses in preparation for a flag-snatching. On open maps, your mortar fire will serve two purposes: it will damage or kill enemy troops on the ground, and it will encourage survivors to come out your way in an attempt to neutralize you. In many ways, the latter event will be better for your team, as you’ll draw the enemy away from their flag position, while an enemy that is killed will often be able to respawn and be back in position within a few seconds. If you do decide to go long-distance with mortars, though, be careful to stop firing a few seconds before your teammate nabs the flag; otherwise, you might turn a perfect capping run into an unintentional friendly-fire incident.
Vehicles
There are four vehicles in Tribes: Vengeance. You’ll see these vehicles scattered throughout the single-player game, although most levels will be solely reliant on footwork; you’ll become more intimately acquainted with their characteristics when you hop online for multiplayer matches.
In multiplayer, there are multiple spawn pads for the vehicles; the type of vehicle you have access to, if any, will depend on the map. After a vehicle initially spawns, only the team that controls the spawn pad will be able to use it; if someone gets into and then leaves a vehicle, though, it’s fair game for players of either side. After a vehicle is destroyed, its pad will reset, and four small pillars will appear at the corners; these pillars will let you know how long it’ll take for the vehicle to respawn. When the pillars retract all the way into the ground, a new vehicle will pop up, ready for use. The more powerful a vehicle is, though, the longer this process will take.
Don’t forget that you can always repair vehicles with deployable repair stations or with a repair pack. Although this process is slower in multiplayer than in single-player, it can still be useful, especially for the larger vehicles like the jump tank or the assault ship, which will take a few minutes to respawn if destroyed.
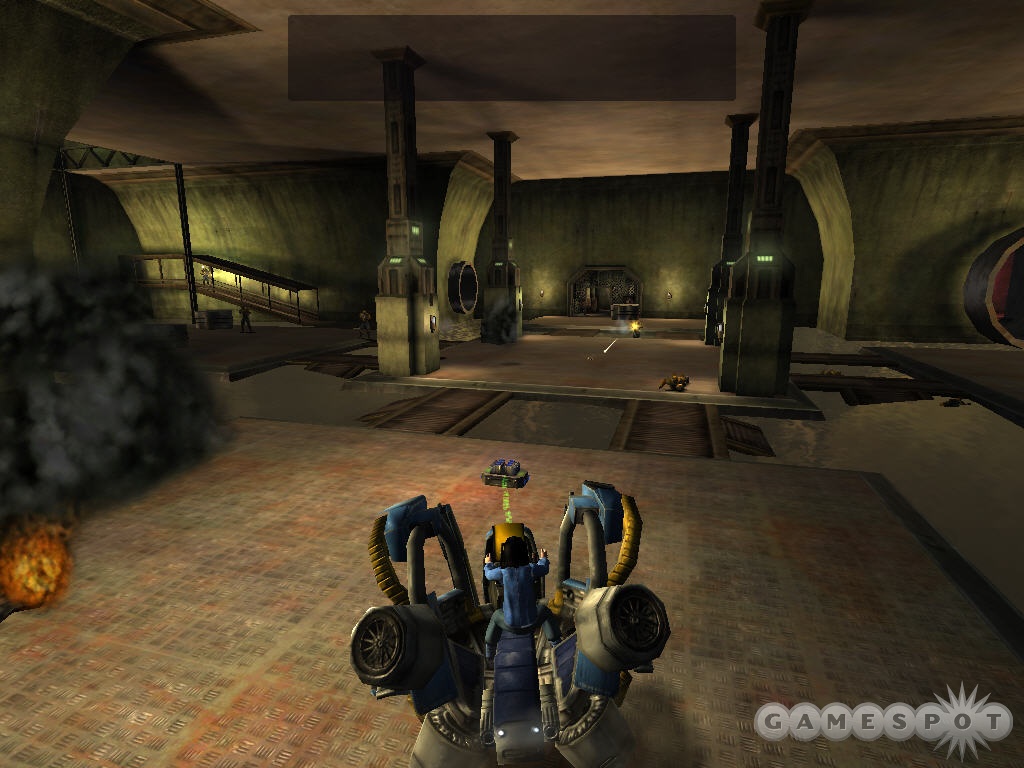
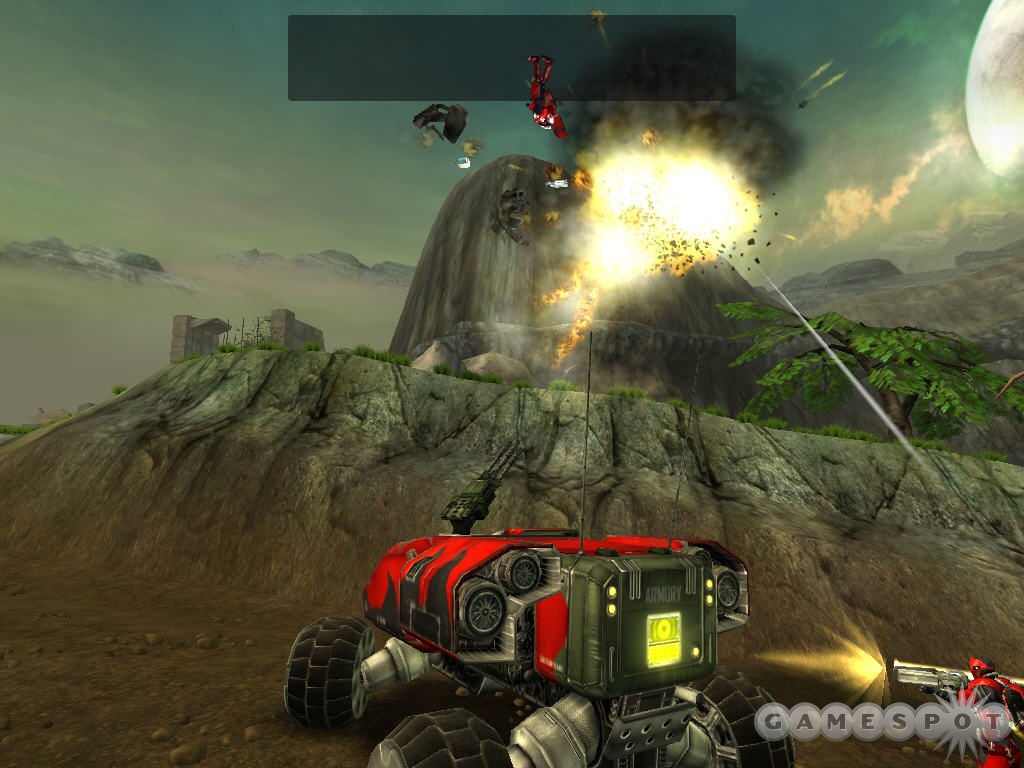
Rover
Although the rover is less capable of taking hits than a jump tank, and possesses lighter weaponry, it does offer a couple of interesting features that make it an integral part of your team’s strategy when you play on a map where it’s available.
To begin with, it acts as a mobile spawn point; when the rover has been piloted away from its initial spawn point, you’ll be able to select it on your spawn screen (or via the spawn towers) and immediately spawn at its location. The utility of this should be obvious; if you drive the rover to an out-of-the-way location near your enemy’s base, you’ll be able to wander in through the back door, so to speak.
Secondly, there’s an inventory station built into the rover’s back side, allowing you to access fresh supplies while you’re out in the field, or switch to another armor class. You’ll also be able to get full health from here, at least until the rover’s destroyed.
The weaponry, though, isn’t as powerful as you might desire. The secondary slot possesses an anti-air turret, which is effective at taking down targets you can get a bead on, but which is difficult to aim while the rover is moving. Since the driver gets no weaponry, it’s usually best to hop into the rover and take off, shifting over to the secondary slot and pausing the car when you want to take someone out. You’ll be a sitting duck for enemy fire, true, but you should be able to deal more damage than they can in the same amount of time, save for mortar-firing heavies.
When you depress your jetpack button, you’ll get an endless amount of acceleration boosting, which can make you go very fast, especially when you’re heading downhill. Since you can’t carry a flag into a vehicle, it’s rarely necessary to go supersonic, but it’s fun nonetheless.
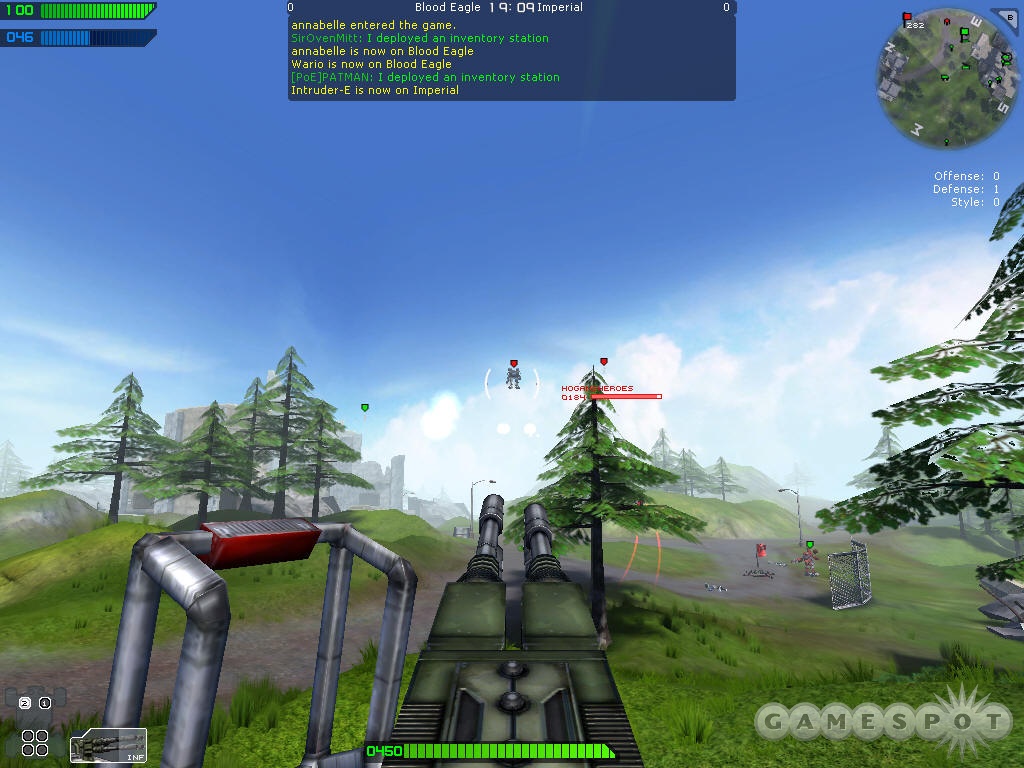
Jump Tank
The jump tank is by far the more powerful of the two land-based vehicles, mostly thanks to its impressive, driver-controlled main cannon. The cannon is on par with the assault ship’s bombs and the mortar weapon in terms of sheer power; it’s ideal for taking out enemy facilities, if you can get them in your sights. The occupant of the secondary slot gains access to a sentry turret, which is more suitable for anti-personnel operations than the cannon, although the latter will do the job quite well when used against enemies on the ground.
The jump tank doesn’t possess the advanced features of the rover, but it can take quite a bit more damage before being destroyed. Its namesake feature comes into play when you hit your jetpack button; if you’re moving forward, you’ll gain a bit of air. It won’t be enough to launch you over a building, but should be enough to clear any minor obstacles in your path.
Fighter Pod
The fighter pod is perhaps the weakest vehicle in the game, both in terms of offense and defense. It can’t take much of a beating; three spinfusor rounds will generally be enough to take one of these puppies out. It also isn’t capable of meting out death from above as much as you might like; the missiles it fires self-destruct after travelling a short range, and don’t deal much damage unless you score a direct hit. It’s also true that your body is open to the air while you fly about in a fighter pod, meaning that you’ll take splash damage from any explosives that hit you, and will likely take stray bullets as well. If you sit still in mid-air, you can even be sniped out of your seat, giving the next person who comes along (even an enemy) a perfectly functional fighter craft.
There are a few pluses to the fighter pod, of course. For one thing, it’s small, and highly maneuverable, making it one of the few vehicles that can go inside buildings and structures. It can also fire more rapidly than other vehicles, save for those with manned turrets; you can easily spam out missiles against people on the ground, and hope that quantity makes up for quality. (You still won’t do enough damage to take out shielded enemy facilities, like generators or sensors.) It’s also a cheap way to gain a bit of air without having to use your jetpack fuel. Although you’ll never go as fast in a fighter pod as you would while skiing, it’s still worth using if your only goal is to get yourself near the enemy flag.
Assault Ship
When you want to make your presence known, there’s nothing quite as likely to attract attention as the appearance of an assault ship over your opponent’s base. The distinctive feature here are the bombs, which are fired by the pilot; these are comparable to mortars and the jump tank’s shells in terms of damage, and are quite capable of destroying enemy facilities from above, including shielded targets like sensors. In addition, there are two mounted anti-air turrets, one on either side of the ship, each with a 180-degree firing angle.
When fully loaded, there’s nothing that can match the assault ship for pure destructive capability, but the fun rarely lasts too long; although the assault ship has a fair amount of armor, it’s a big target, and the soldiers that man the turrets will often be taken out by splash damage from spinfusor rounds before they can do too much damage.
Walk-through
Victoria: The Past - Origins
Your first mission in Tribes: Vengeance takes place after a short cutscene detailing some of the backstory of the Victoria character. It seems that she’s to be the offering in some kind of dynastic marriage, a fate she isn’t exactly embracing. Her feelings are made irrelevant, though, when the ship she’s riding in is attacked by members of the Phoenix tribe. Anyone who played the single-player demo probably has an idea of what’s going to happen at the end of this level, but for now, let’s just play and see!
You don’t have any equipment or armor to start out with, so initially, there’s not much you can do except jump. After you reach the civilians banging on the door, then drop through the floor after it explodes, though, you’ll reach an inventory station, which will give you access to your first suit of armor. You can choose any weapons you wish, but for this mission, a Spinfusor should be considered mandatory.
Take the opportunity to get used to the interface. The most important things to keep an eye on are your radar and health/boost meters. The radar, in the upper-right corner of the screen, will eventually display where your enemies are, but not in this mission. For now, all it’s good for is to show some of the markers that your sister will throw down to show you where to go, as well as give you some idea of what the floorplan of the ship looks like. The health/boost meters will display how much health and boost power you have remaining. Unless you’re playing on hard mode, you don’t stand much of a chance of dying, but you will need to keep an eye on your boost meter, lest you stretch a jump and wind up falling down far enough to hurt yourself.
Soon after you get the suit of armor, you’ll find yourself at the bottom of a shaft, with nowhere to go but up. In most situations, you’ll want to use your jetpack in short bursts, to effect something of a gliding effect, but that’s better for horizontal than for vertical movement. For now, just hit your jetpack button and hold it down until you reach the top of the shaft, then find the open doorway and head on through.
You’ll get your first taste of action here, as the tribals have overrun the throne room. The majority of the tribals on the ship are in light armor, which should let you kill them off with your Spinfusor in a single hit, if you manage to aim it correctly. Don’t aim directly at them; aim for their feet. It’s more important to hit them with a majority of the splash damage than all of the damage that they’ll take from a direct hit, and much easier to do so to boot. Destroy everything that moves, then use your jetpack to escape the room and to find a re-supply station. These are more restricted than inventory stations, in that they won’t let you change your weapons or armor, but will completely refill your ammo.
After jetting up through the shaft near the re-supply station and shooting your way through the rubble, you’ll come to the royal theater. Kill everything here and move on. You’ll come to another inventory station soon enough; this one will let you change into heavy armor, if you wish. Although it’s a bit more ponderous than the medium armor you were using, you’ll be able to take a lot more damage, which will be helpful in the firefight that’s coming up. The tribals have lain down multiple autonomous turrets in the next large room, so abuse that Spinfusor until you’re able to proceed.
Next up are the reactor rooms, which are connected together at the top and bottom. You’ll need to jet up and down these rooms to find the next door; when heading down, don’t forget to use your jetpack to lighten your landing, and beware of tribals on the middle walkways who’ll fire on you as you descend.
After you pass through the medical bay, which follows the fusion reactors, you’ll have to switch back to medium armor to get through the doorway leading to the cargo bay. Note the assault ship on one of the upper levels; you won’t be able to fly it yet, but you can get into one of the side-turrets. Do so, and you’ll be tasked with shooting down a few waves of tribals as they enter the ship. Keep shooting until your sister instructs you that she’s dropped one of the defense shield, then find the green doorway and head on through.
Your last task is to release the clamps on Olivia’s escape pod from the control room nearby. Do so, and the level ends.
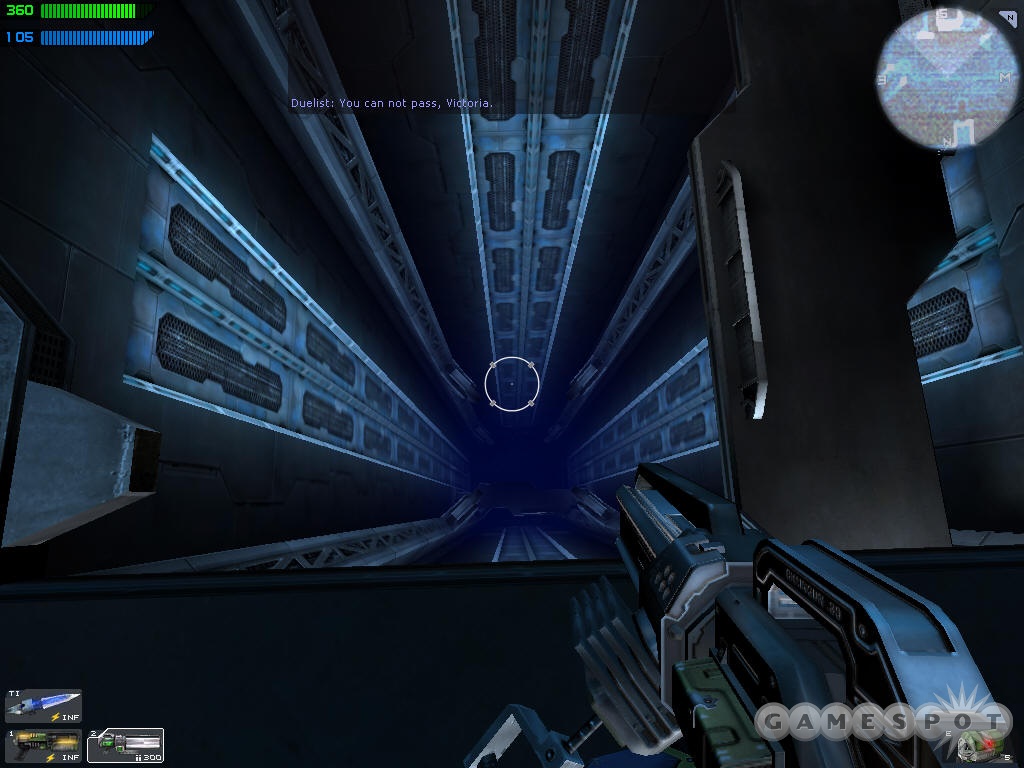
Victoria: The Past - Captured
Part 1
After Victoria wakes up and finds herself in the hands of the fearsome Phoenix tribe, it’ll be your job to jump through the hoops that Daniel places in her way. This mission is split into two separate levels, with the first being a more thorough introduction to the principles of skiing and using your jetpack.
The first couple of trials that you encounter see Victoria attempting to ski down steep slopes to make it through a doorway before a timer shuts down. You can try these as many times as you wish, so don’t feel too pressured to get it done right away. In order to ski, you’ll need to have your ski button bound to something conveniently close to your movement buttons. In effect, skiing lets you remove move of the friction between your feet and whatever surface you’re on; on downward slopes, this will let you keep most of your momentum when you hit the ground and let you accelerate as you move along. You’ll still lose most of your speed when you hit an upslope, though, so be sure to hit your jetpack when this occurs. You also won’t have much control over your lateral movement when skiing; again, using your jetpack to get just off the ground should give you a bit of control here.
After the second skiing trial, Daniel will have you maneuver through the wreck of an ancient city, lighting checkpoints that are scattered around. There isn’t much purpose to this, but at least you’ll get an idea of how to conserve your jetpack juice to glide around. Holding down the jetpack button isn’t an efficient method of gaining flight; it’s good for short vertical bursts, but will drain your reserves too quickly for you to make any appreciable horizontal trips. A better method of vertical travel is to use your jetpack in a medium-length boost to get off the ground, then start tapping the button at regular intervals to slow the speed of your descent.
The checkpoints that Daniel will have you find are all indicated on your HUD’s radar with green arrows. If the arrow is up, the checkpoint is higher than you; if it’s down, then it’s lower. After you find all of the checkpoints and light them (by simply approaching them), you’ll finally be able to pass through one of the forcefields at the bottom of this big zone and head through to the Glorax spawning pit.
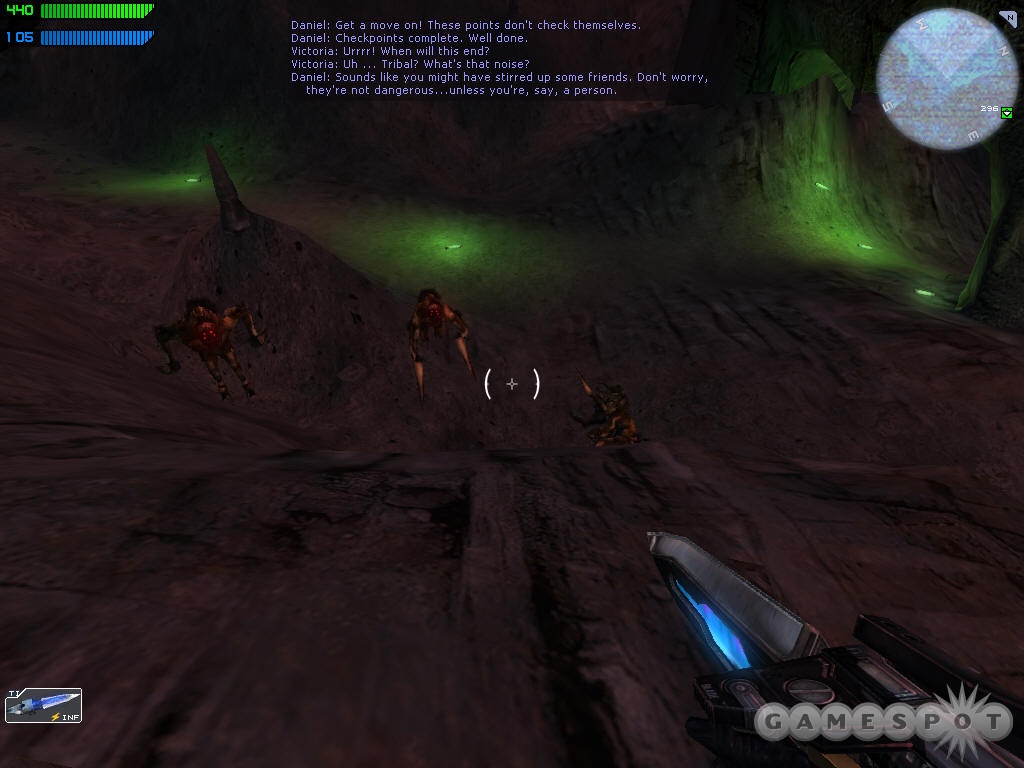
The Glorax may initially appear intimidating, but they’re the easiest enemies in the game. They have a ranged attack, where they spit a glob of mucus at you, but it’s relatively low-damage. Although you only have your energy blade at the moment, you can easily use it to slice through them at close range.
After the Glorax in the caves have been eliminated, you’ll finally gain a decent weapon, the chaingun. Use it to clear out the silo level by level, and this part of the mission will end when you reach the top and jetpack out.
Part 2
Finally, an outdoors level! Anyone who saw the first screenshots of Tribes: Vengeance will no doubt have been looking forward to one of these, and they don’t disappoint. There are some fantastic draw distances here, and plenty of opportunities to ski around on the grass. There is a cap to how high you can jump with your jetpacks here, but you shouldn’t even be able to reach it with a full jetpack blast, so no need to worry about that just yet.
Daniel wants you to recalibrate the comm system in each of the towers here, which apparently consists of lightly touching a control panel in each tower’s interior. While you pass from tower to tower, get used to the feel of open-terrain skiing, as you’ll have need of this skill soon enough.
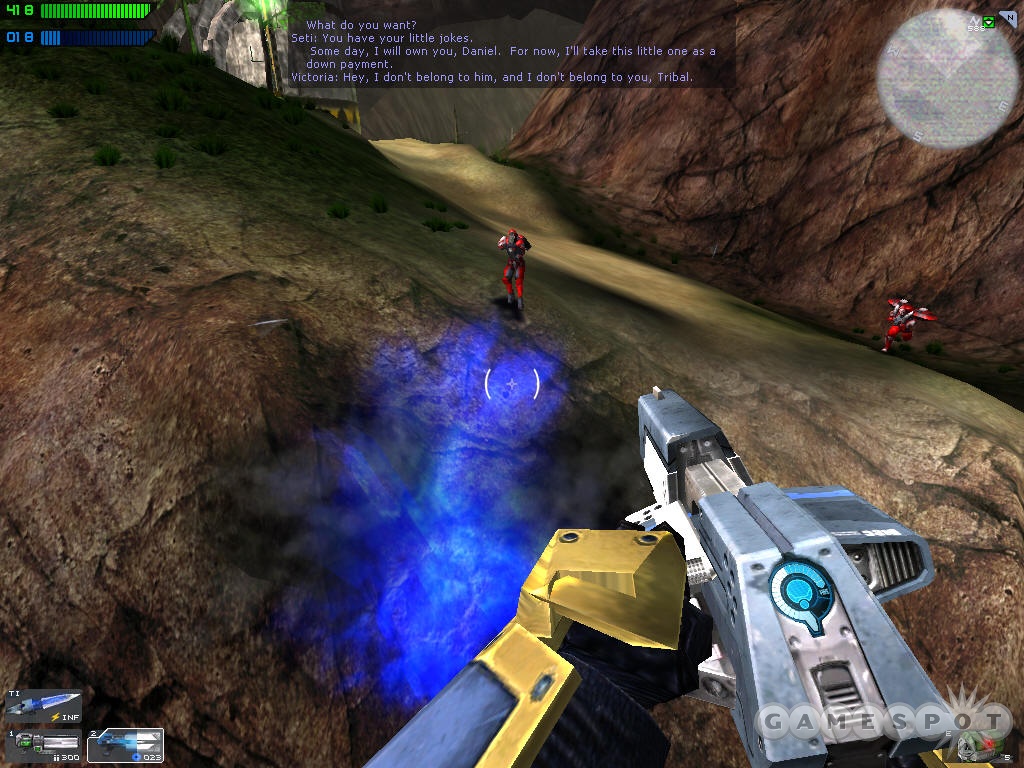
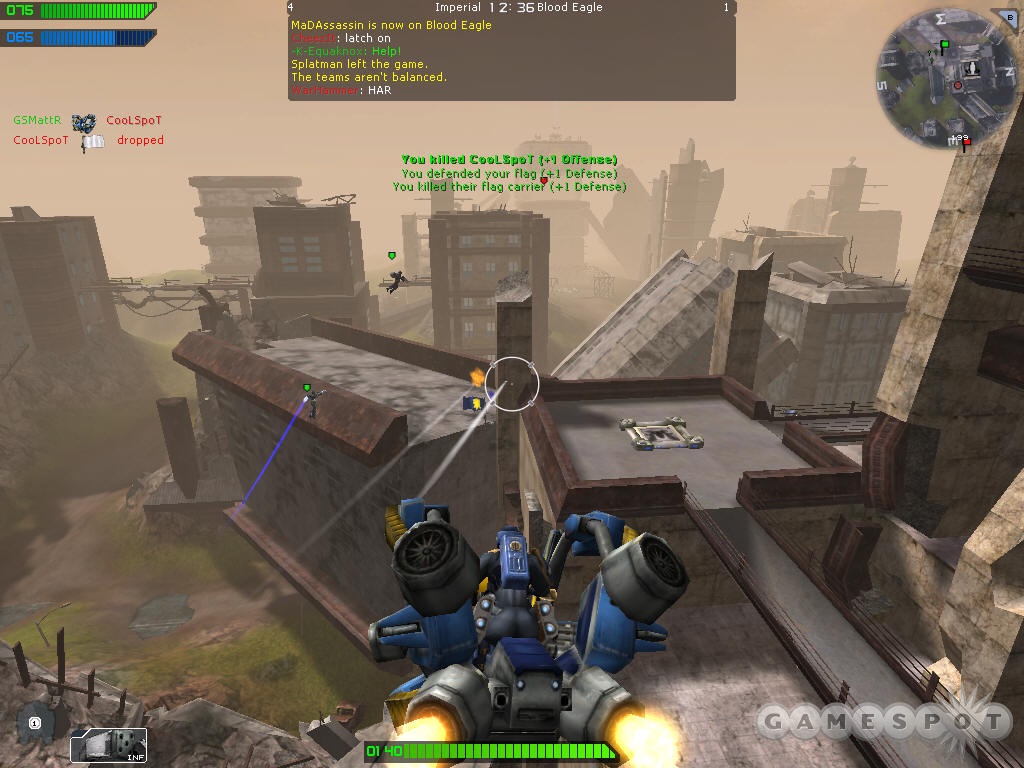
When you reach the final tower, grab the Spinfusor weapon, calibrate it, and head outside to find yourself dab smack in the middle of another tribe’s assault on the Phoenix clan. There appears to be little enough reason for this assault, save to destroy the Phoenix’s equipment, but they’ve come in force. Daniel will instruct you to make your way back to the first tower in the canyon, but you’ll have to backtrack through quite a few Blood Eagles in order to reach it. Try to get used to using your jetpack to clear obstacles and skiing when you’re on the ground, waiting for the jets to recharge. When you have enemies with spinfusors firing at you, however, you’ll want to save your skiing talents for when you’re in a canyon or other land formation that prevents your enemies from firing at you.
As you approach the first tower, you’ll spot a Blood Eagle rover heading your way. You can use the Spinfusor to destroy it, if you wish, but it’s best to just bypass the numerous enemies around the tower and head into the bunker there, which will end the mission.
Julia: The Present - Coliseum
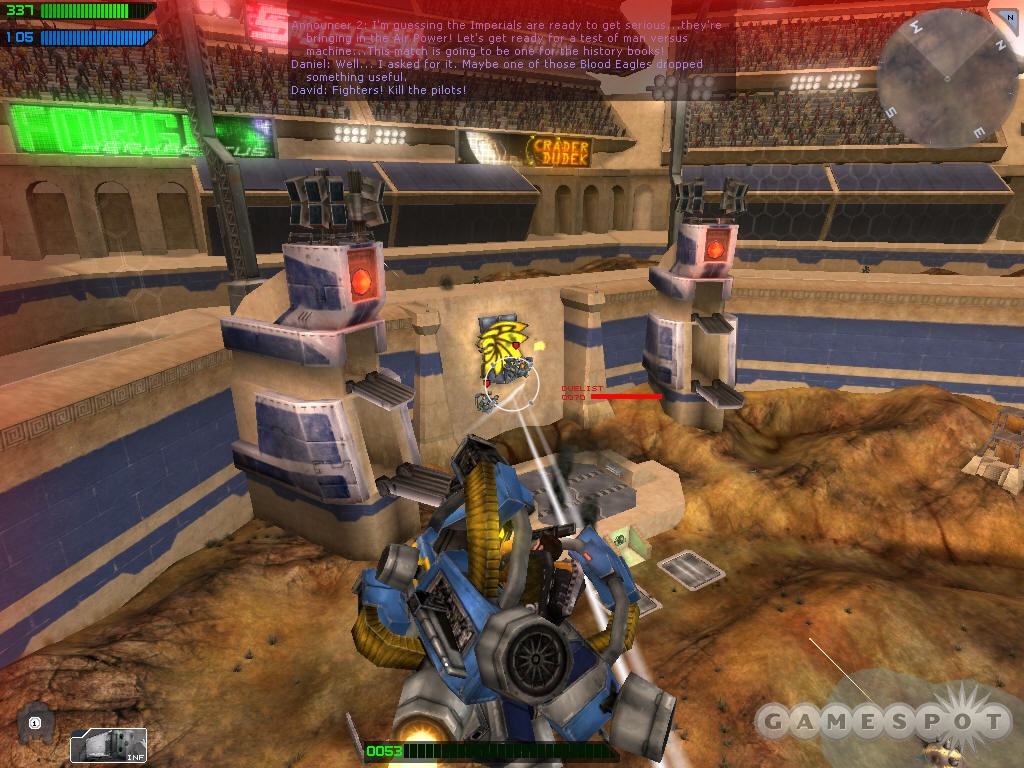
The first of many timeline shifts occurs now; you now gain control of Julia, a fearsome Imperial princess, who’s struggling to defeat the Blood Eagles in Coliseum combat. Your team has managed to fall behind eight rounds to two, but like Achilles come to avenge Patroclus, Julia has come to rescue the Imperials from the brink of defeat, even if it means winning each remaining round.
You’ll have a few of these Coliseum matches in the single-player portion of Tribes: Vengeace. In effect, they’re just rounds of multiplayer games played against bots, in similar fashion to the single-player mode in Quake III or Unreal Tournament. You have a few new gametypes to deal with, but the concepts should be simple enough.
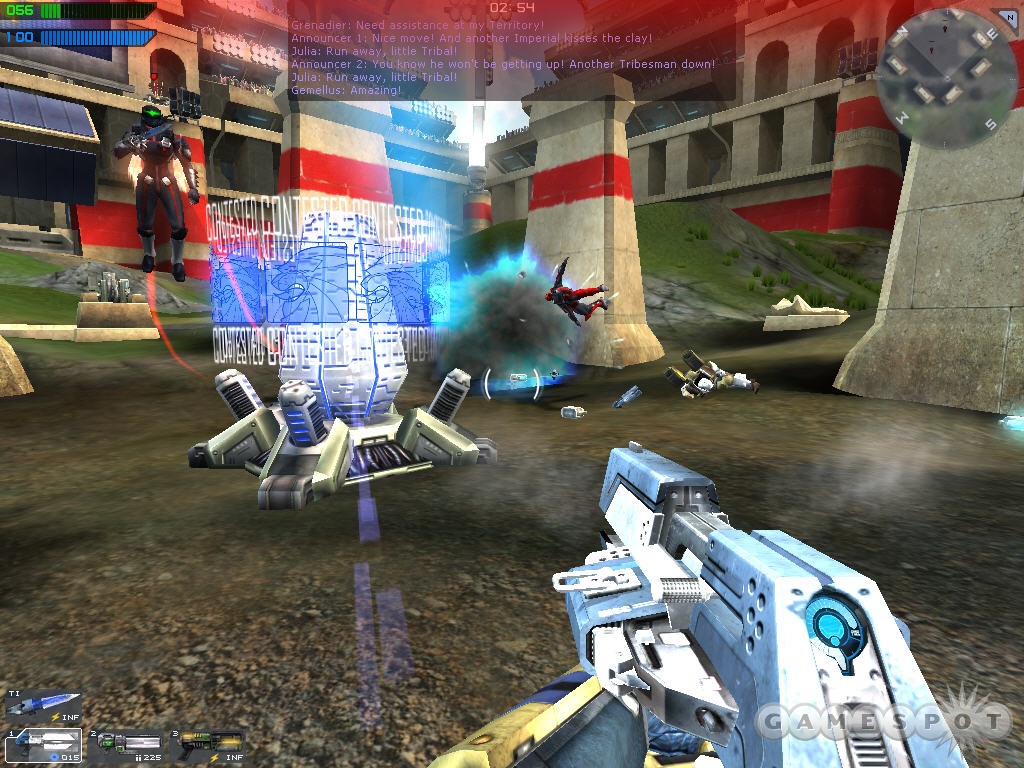
Round 1: You begin with a round of Territory. You begin as the blue team, but all of the Territory markers are in the possession of the Blood Eagles, which are red. Your AI teammates will follow you to the first marker, so get there ASAP and start to convert it. Each time you convert a marker, one of your teammates will break off to defend, so you’ll have to spread your forces out if you want to grab all of them, but this shouldn’t be too maniacally difficult, depending on your prowess. Julia is only wearing light armor, though, so be careful not to get too hot and heavy with the enemies.
Round 2: Another round of Territory, save for the fact that you’re now on pure defense, and will have to keep the Blood Eagles from capturing your markers. This is easiest if you just advance to the marker nearest the Blood Eagle spawn points and camp there, firing away at any enemies that pop out of the gates on the far end of the playing field, and restocking your health and ammo from the weapons and medpacks that your enemies drop. Beyond that, all you have to do is wait; the round is seven minutes or so, so rack up the kills until time runs out.
Round 3: Now you have to deal with the Fuel gametype. The objective here is simple: grab a fuel canister and bring it back to your fuel depot. When the depot is full, your team wins. You’ll have to grab around ten canisters in order to fill your depot, but you shouldn’t have too many problems here. Don’t forget that your resupply point (to the rear of your depot) will give you a full health restore; you should activate it whenever you drop off a canister.
Round 4: Another Fuel round, but this time, you’ll have to nab the fuel directly from your opponent’s depot, by standing underneath it. The Blood Eagles will be bringing a few heavy armors onto the battlefield, so keep an ear open for the telltale whistle of incoming mortars. They’ll sometimes start shelling you while you stand underneath the enemy depot, so keep shifting your position as often as possible. You can only get 15 units of fuel at a go, so grab it, drop it off, hit the resupply for a health boost, and repeat.
Round 5: The second-to-last round is a pure deathmatch, but of course there’s a caveat: you won’t have any teammates to help you out. It’s just Julia versus eight or nine Blood Eagles. The key here is to make this into a series of one-on-one duels, rather than an all-out melee against all of the Eagles at once. Use the terrain to your advantage, note when an enemy runs out of jetpack fuel, and take to the skies to get them with splash damage from your Spinfusor. Stick near your resupply depot to get health boosts when needed.
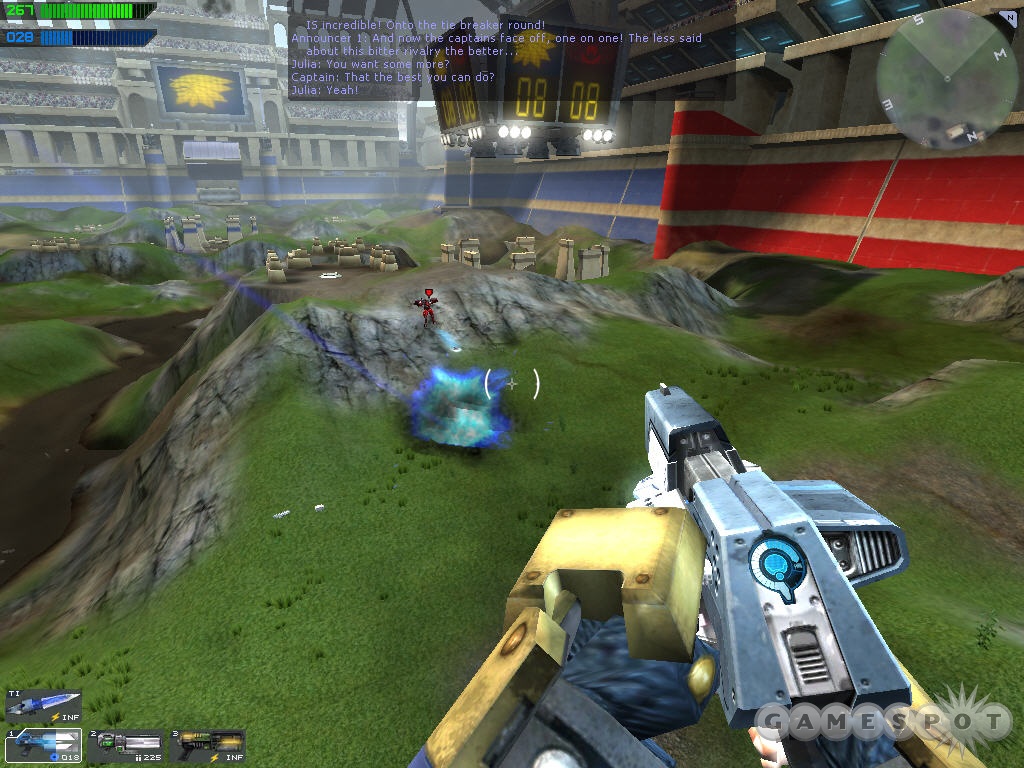
Round 6: This final round pits Julia against one of the Blood Eagle captains, in a true one-on-one match. You shouldn’t have too many problems here, but you will need to keep an eye on your health, as this guy is quite capable of hitting you in mid-air with a Spinfusor round. As per usual, though, you should have nigh-infinite health, thanks to your resupply point; the Blood Eagle won’t use his, so wear him down as gradually as you like before charging in for the kill.
Julia: The Present - Discovery
Part 1
There aren’t too many rail-shooting games nowadays - not on PCs, anyway - so enjoy the opening duck-hunt while it lasts. You shouldn’t have any problems taking out all of the Phoenixes that you spot with the anti-air gun. It’s not terribly effective against ground targets, but it’ll get the job done if you concentrate your fire on a spot long enough. There is splash damage from your rounds, so don’t feel too concerned with being minutely accurate.
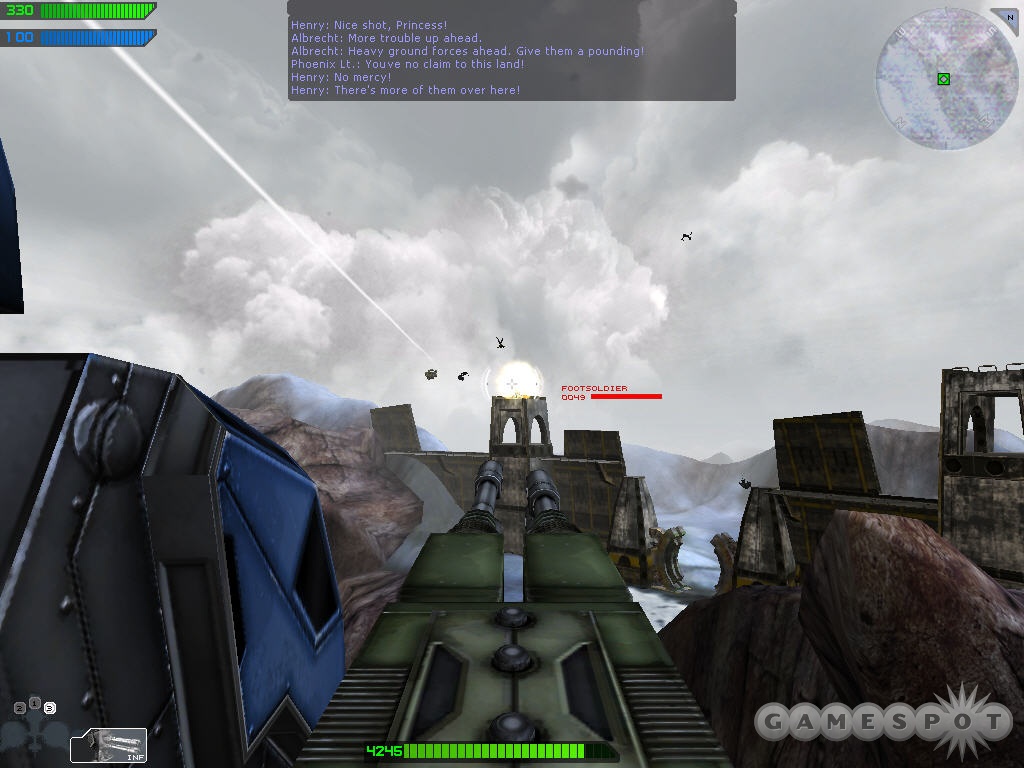
After a few minutes of flying around, you’ll be let off the ship along with Henry. Save your game here; you don’t want to have to sit through all of the gunnery exercises again should you die, and dying is a distinct possibility here. Your goal now is to find and take out three of the anti-air turrets in the area; these are all marked on your radar and command map, if you get lost. There’s no particular order in which you have to do them, so feel free to make your own path. As mentioned, Henry - who has frighteningly different voices depending on whether he’s shouting at the tribals or talking on the radio - is along for the ride, and is packing mortars along with his heavy armor, so let him take out the turrets. As you approach each turret site, stick close to Henry and back him up as he fires from a distance; if he takes damage, use your repair pack to get him some health back. The most important thing here is to not expose yourself to too much fire. The turrets can take you out with just a few shots if you stand in the open, so keep behind a ridge or other terrain feature until you get close enough for Henry to say "I’m getting into position!" or somesuch. After that, he’ll let you know when he’s done destroying the turrets.
When all of the turrets have been destroyed, you’ll be given a new target on your radar; the entrance to the main facility of the Phoenixes. Make your way towards it as best you can. If you wish, you can wait for Henry, as he’ll give you a hand locking down the enemies that appear near the doorway, but you don’t necessarily have to; he’ll catch up eventually either way. After Albrecht gets the door codes cracked, you’ll pass through to the second part of the mission.
Part 2
The interior portion of this mission isn’t too complicated - there’ll be plenty of Phoenix around to kill, but the base is fairly linear in effect, if not in layout. Finding the next doorway is usually a matter of looking around to see which door is lit in green instead of red. You rarely if ever head up, but there is a time or two when you’ll need to drop through a hole in the floor to proceed on your way.
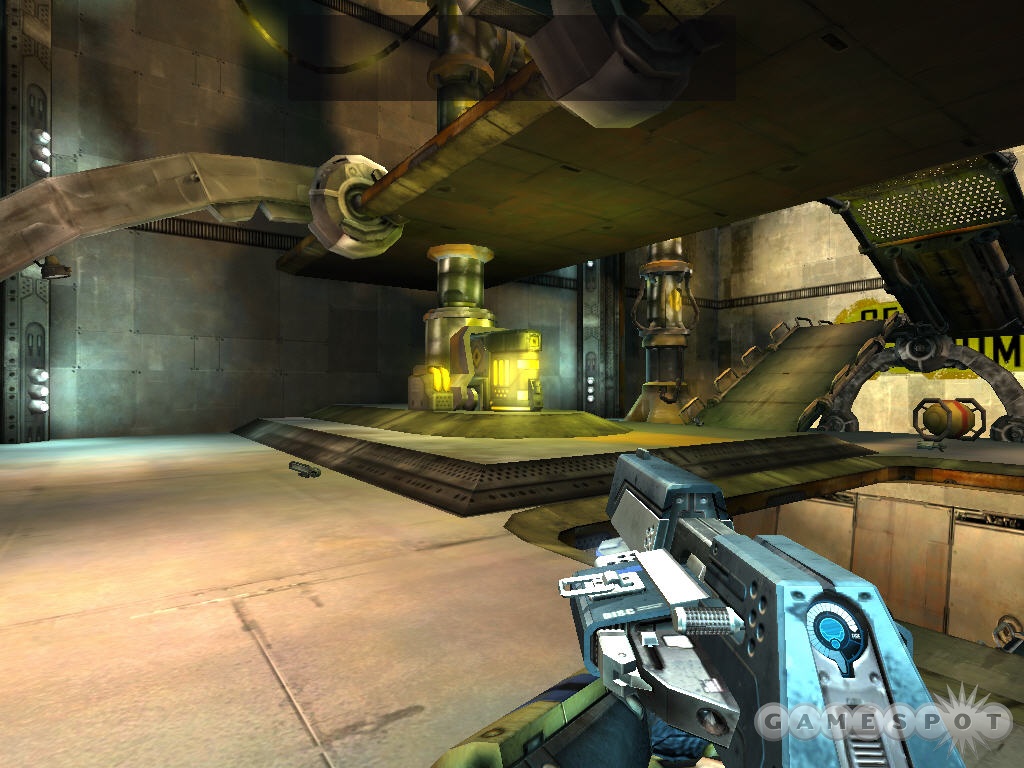
Eventually, you’ll reach a room with numerous energy barriers that effectively form a corridor. To bypass these barriers, you’ll need to take out the power generator, which is astonishingly small when you take into account the size of the base. You’ll know you’re near the generator when you see the signs saying "Generator Room." Funny how that works out. When you’re near the generator, drop down to the middle level of the room and blast it with your spinfusor until it blows.
The destruction of the generator will allow you access to a new hallway, in which numerous Phoenix will appear as you proceed. If you have a grenade launcher, the close quarters here make for a great fish-in-barrel situation, so long as you can stay out of the blast yourself. Eventually, you’ll come to a large room at the bottom of the base; kill everything here to automatically proceed to the archives.
Part 3
Another mano-a-Julia duel here, betwixt yourself and another clown in heavy armor. You won’t have the benfit of infinite health here - no resupply stations - but there are plenty of health packs among the armor on the lower floor. If you do head down below the main fighting area, though, you’re liable to find yourself coming face to face with turrets in the walls, so keep your senses sharp. After defeating the Phoenix, you’re done!
Julia: The Past - Bloodlines
Part 1
This level takes place at an undeterminable point in time after Victoria’s capture by the Phoenix. Soon after the opening cutscene, you’ll find yourself, as a young Julia, navigating through the ventilation system of the Imperial palace. There’s only one way to go, until you come across Gaius. After his ignoble exit from the mortal coil, you’ll have to weave your way through the subsequent room, under heavy fire, to get to the switch that’ll open the door leading to the Imperial soldiers. Good thing Julia’s tough, as she’s going to take a few bullets between now and her escape from the palace. Don’t worry, she’ll give as good as she gets.
The next room is another run-for-your-life affair; weave through the gunfire until you come across a footsoldier exchanging fire with a turret, and smashing out a set of windows in the process. These windows will lead into another small room, so drop down and avoid the turret within until you’re able to bypass the next door and move on. This will lead you onto the next part of the mission.
Part 2
More vent-crawling ensues at the outset of this level. You’ll eventually come to a deadend; when the Imperial and Phoenix troops exchange fire and blow a hole in the vent, crawl back and head through it. You’ll eventually come to the hangar bay, which contains a single Fighter craft, which is apparently a perfect fit for a five-year-old. Dubious morality of letting a toddler mow down soldiers aside, this is your only way out of the palace, so get going.
As you fly through the sewers and palace interior, you’ll come across a few heavy firefights. You’ll need to check your area for mobile repair stations that’ll heal up your ship as you take damage; if you hover over one of these as you pelt the Phoenix with rockets, you should be able to survive anything they throw at you. The only confusing spot in this run is at the end of the sewers; there’s a large vertical shaft that’s topped off by some cracked flooring. Shoot through it to find yourself back in the palace proper.
Eventually, you’ll come to a corridor that’s too narrow for the Fighter to enter; you’ll have to jump out here and follow the soldier, who will, of course, meet a gruesome end within seconds of meeting you. In order to get past the broken bridge, grab his Grappler and use it to pull yourself up to the civilian who’s trying to help you. The next room will feature more grappling, albeit with a bit more pressure involved, as there are Phoenixes who will be shooting at you as you attempt to reach the top of the room. You’ll definitely want to make a save point before trying this little section, as the Grappler can be quite frustrating to use, since it breaks if an object comes between you and the clamping point. Regardless, you’ll need to make it from the bottom of the room to the top, so get grappling.
The next little setpiece involves the kiddie killer taking up a turret and blowing extraneous limbs off of a few waves of Phoenix troops as they come through the doorway. When the flow of troops ebbs a bit, exit the turret and run forward to find a jetpack (but no armor yet). You can use the jetpack to effect your escape from the palace; just keep moving up, being careful to avoid mines when they’re pointed out to you, as well as any more Phoenix troops that you come across. Eventually you’ll reach a door that ends the level.
Daniel: The Past - Rescue
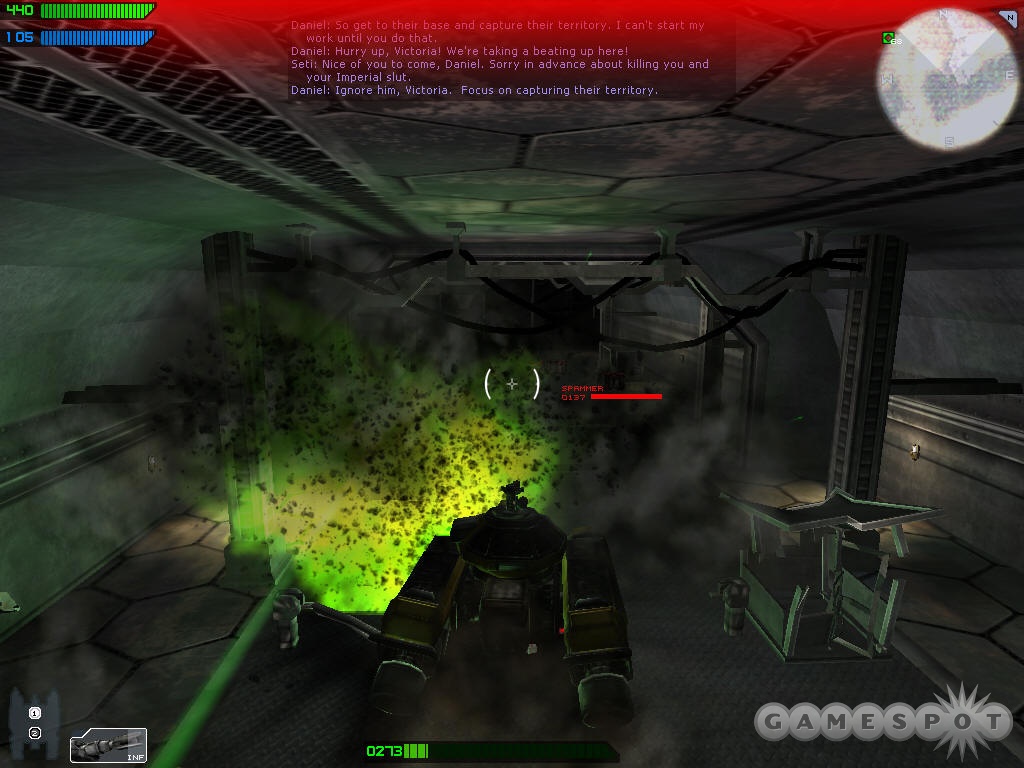
After the capture of the Phoenix civilians by Seti and his gang of satellite dish monitoring true believers, Daniel takes it upon himself to rescue them. Your first goal is to encourage Seti to send reinforcements out from his underground fortress; this will let you penetrate to the fortress itself while the door remains open. To do so, you’ll have to play little game of Territory.
There are four nodes that you’ll need to control. Your first target should be the one in the southwestern corner of the map, as controlling it will allow you access to the resupply station beneath the node itself; if you get into a bad situation healthwise, return here for a full refill. Getting to the node will be a problem, though, as it’s guarded by no less than an Assault Ship. If you’re good at leading with the Spinfusor, you can take it down from long range, or you can use the Rocket Pods if you want to try manually aiming them. Regardless, you don’t actually have to destroy it; killing off the gunners will let you get close enough to the node to capture it. Just be careful not to get caught under it without any jetpack juice; its bombs are devestating when they hit you while you’re on the ground.
After all four of the nodes are captured, the door to the fortress below will open up and show on your radar. Make your way into it before the timer runs down to pass control over to Victoria.
Victoria: The Past - The Rescue
For someone who hadn’t handled a suit of armor up until this point in her life, Victoria seems quite capable of dishing out the pain to these Blood Eagles. To whet her appetite a bit more, head into the barracks, where a few Ninjas await you. Kill everything you see and explore the rooms in this area, if you wish, but your goal is to unlock the door leading to the next zone by using the panel inside the large windowed room.
After heading down the "elevator," proceed on through another area similar in layout to the barracks above. Be careful in the windowed room here, though, as there are a few Grenadiers who’ll pelt you with grenades as you move on. (One of them guards a Repair Pack, so be sure to grab it.) Wipe them out before unlocking the door and moving on to the prison access area.
When you reach the door marked Security, you’ll have to take a detour and head down an elevator or two until you reach the prison cells, which are unfortunately empty. (It’s best to just go through the elevator passages as quickly as possible; there’s a high risk of injury here, and the enemies within won’t follow you to the normal zones.) After you check a nearby computer (which you find underneath the empty cells), you’ll find that the prisoners have been moved to the main hall. Daniel will soon contact you, requesting a security override, so head back up to the Security door and give him what he wants.
After some more running around, you’ll find the prisoners, but the level will soon end.
Daniel: The Past - The Rescue 2
Your goal as Daniel is to penetrate the Beagle facilty (Blood Eagle, Beagle; get it?) and destroy the power generator so that Jericho & Co. can infiltrate from the surface. Unfortunately, the easy way to to the generator is blocked off from you, so you’ll have to unlock another passage, found in the hangar bay. In order to get there, though, you’ll have to do some crawling through the ducts. You can find a passageway into the ventilation system by jetpacking up to the top of the room and destroying the turrets there.
After you clean out the hangar bay, exit through one of the green doors and use the switch there to disable the force field on the bottom of the hangar. From there, it’s a fairly short walk to the generator, which can be easily destroyed by the Rocket Pods, if you still have them, or your Spinfusor. There’s no obvious exit from the generator room, but if you poke around underwater, you’ll notice that the piping forms something of a vertical corridor which you can swim through.
When you surface again, you’ll be faced with a few vertical passages between yourself and the main hall, where the prisoners are being kept. As per usual with vertical rooms, it’s best to just ignore the enemies as much as possible, and just blast through with your jetpack until you can escape. After a couple of these shafts, you’ll come out into the main hall. You’ll face a couple of medium armor foes; after they’re dead you’ll be able to unlock the energy field which holds Victoria and your friends captive.
Daniel: The Past - Mercy
If there are vehicles in a game, there’s gonna be a single-player level where you drive them; it’s as simple as that. For this level, you get to take out a rover for a spin. Daniel’s brother Jericho is along for the ride, as well; he’ll take the gunner position, which leaves you the driver’s slot. You don’t get to use any weapons while you’re steering, so you’ll have to be careful to get the buggy into a position that lets Jericho blast away at anyone nearby. If there’s someone in front of you, then, you’ll want to have the rover on a level surface, or tilting slightly forward.
In point of fact, though, there’s no reason why you can’t get down and dirty at the same time as your brother. All you have to do is jump out of the car and blast away; Jericho will keep on the pressure with the buggy’s guns while you use whichever weapon you wish to mete out your own specific brand of tribal vengeance. You can leave the car at any time you wish, and what’s more, there’s even a resupply/inventory pack on the back of the buggy, which will let you refill your ammo and health whenever you wish. So long as you keep your repair pack handy and use it to heal up the jeep whenever it takes damage, you should be able to make it through this level with nary a hitch.
To begin with, drive down the road a ways until you come to a closed door that blocks your path. You’ll get some audio tips to exit the car; do so, then jet up to the top of the nearby bunker and eliminate the turret and Beagles within. The switch that opens the door is within, so flip it, then get back in the car and proceed.
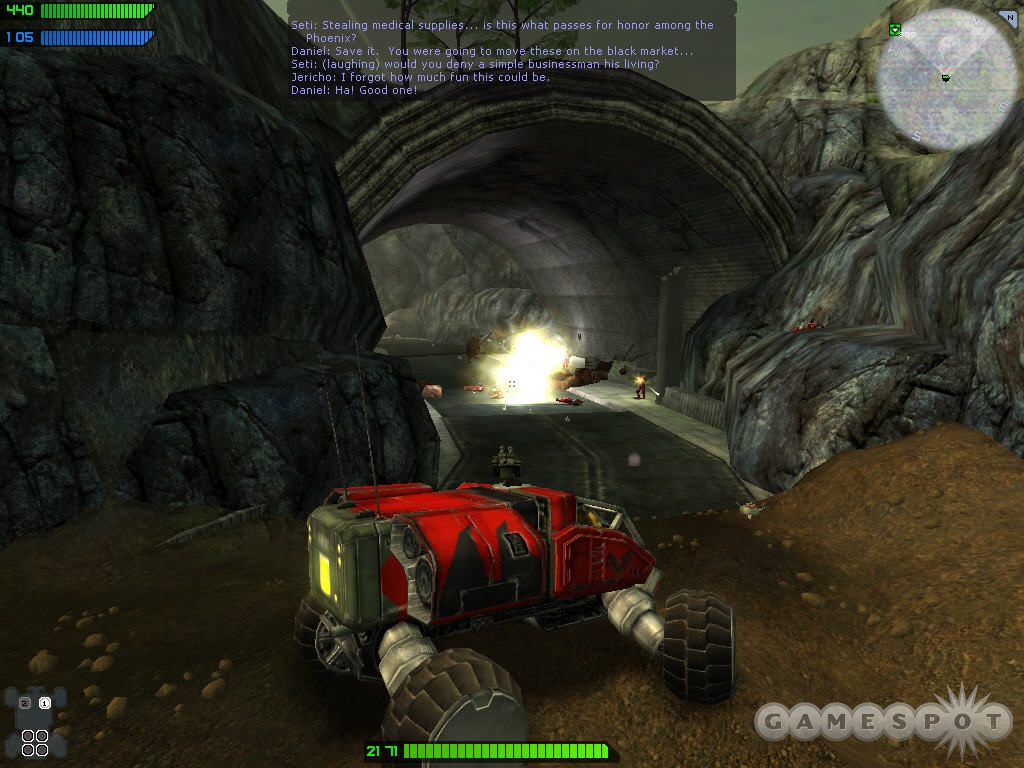
Your next obstacle is a minefield, which has been lain down inside of a tunnel. You obviously don’t want to just plow through such a threat, so get close to the mouth of the tunnel and exit the buggy. Jericho will continue to blast away at any Beagle he sees, freeing you to eliminate the mines with your grenade launcher. You have infinite ammo, thanks to the resupply station in the rear of the rover, so just spam the tunnel with grenades. After checking for any remaining mines, get back in the car and proceed on your way.
Around a bend, you’ll come across some rockfall which prevents your passage. A heavy-armor Beagle also waits near this obstacle, ready to pelt you with mortars, so get out of the buggy and jet up to his position; it’s best to give him two targets to shoot at, lest he deal significant damage to the buggy. When all of the enemies have been taken out, Jericho will automatically blast the barrier; be sure to heal up the buggy with your repair pack before proceeding.
Next up is the ruined city, which you can spot on your command map. There are more and varied threats here, including a short minefield on the approach; beyond that, though, you’ll mostly be facing vanilla Beagles, in various weights of armor. If you’re playing on hard mode, proceed slowly and surely, flushing out Beagles as they appear; on Normal or Easy mode, feel free to hit the gas and work your way through the first set of ruins at top speed. Your ultimate goal is the bridge to the northwest, but before you reach it, a couple of fighter pods will pop up. Jericho can easily shoot these guys down, but you might want to exit the vehicle and activate your repair pod nonetheless, as they can quickly dish out a lot of hurt if you’re unprepared for them.
When you do reach the bridge, it’ll be quickly destroyed by a mortar, but no fear: there’s another one to the north. To reach it, though, you’ll have to guide your buggy up an incline formed by the fallen ruins of a building; check your command map to get an idea of where this is. The city on the western bank of the river possesses similar traps as that to the east: sandbags, Beagles, scattered mines, and so on. Make your way through these scattered threats to the southwest, where the path to the tunnels lie.
After you finally reach the tunnels, a horde of medium-armor Beagles will descend upon your position. You won’t be any help inside the buggy, so jump out and use up any ammo you wish on the enemies, jumping into the inventory station whenever you need more ammo or health. Keep an eye on the buggy’s health here, as well, as it’s liable to take a bit of damage from the grenades. After the door to the tunnel opens, steer the buggy in for the win.
Mercury: The Past - Assassination
Part 1
Mercury, a cybrid, has been tasked with assassinating Daniel. This is your first opportunity to use a sniper rifle, so whip it out and go to town. The sniper rifle does more damage when you have full energy reserves, so if you’re flying around and you see a target, you’ll want to land and let your energy recharge before shooting. Note also that the rifle drains most of your energy when you fire; you don’t want to shoot it when you’re high up in the air, lest you rocket back to earth for want of jetpack juice.
You begin the level near the area marked "Pack Storage" on your map. You’ll get some audio indications pointing you to this area; if you scout around inside, you’ll come across a pulsing, purple Speed Pack. This passively increases your speed, and lets you fire more quickly when you activate it. The energy pack that you start the level with is useful, as well, so decide whether you want to move more quickly or regenerate energy faster. (Don’t worry about the energy barrier here; there isn’t a generator anywhere nearby that will drop it.)
When you’ve made up your mind, you can start creating diversions. There are three locations marked as objectives on your map: Resupply Control, Sensor Control, and Turret Control. You’ll likely want to head to Resupply Control first, as this will let you completely restore your health at any resupply point. As a note, there are dozens of extraneous enemies scattered about the level; the only parts you need worry about are marked on your map, so don’t get into fights just because you can. If you want to snipe people from a million miles away, feel free, but it’s best to avoid unnecessary melees.
Taking over Resupply Control is easier said than done, of course, thanks to it being housed in a sphere hovering a hundred meters or so off the ground. You can jetpack up to it, but you’ll need to be quick about it, because there’s a jump tank and two turrets that’ll be pelting you with rounds as you ascend. It’s best to ignore them for the moment, infiltrate the facility, take over the resupply points, and then heal yourself up before heading back outside. Now that you’ve taken over the resupply points, you can proceed on to the other objectives; if you don’t want to deal with the turrets and tank, just ignore them.
Next up is either the Turret Control or the Sensor Control, take your pick. The Sensor Control is probably a bit more useful, and is closer to the Resupply Control, so head north to find it. It’s even farther off the ground than Resupply Control, so you’ll need to find a way to boost your jump. Unfortunately, it’s also guarded by Rocket Pods. If you can snipe out the driver of one of these, you can use it to get up to the control center; otherwise, blast them out of the sky, then use the catapult to get yourself up to the castle in the sky. After you convert the Sensor Control over to your cause, you’ll be able to see any enemies on the map, both on your personal radar and on the command map.
Check your map to find the Turret Control, then head out and nab it. This is heavily guarded by infantry, but all you need to do is convert it, resupply and heal up, then jet off to the new objective which appears on your radar, leaving all of the infantry in the dust. Don’t make trouble you don’t need!
At the final objective, in the far northwestern corner of your command map, you’ll have to face off against another small squad of infantry before you can penetrate into the Phoenix base.
Part 2
The fruits of your implausible computer virus are retained into the Phoenix base itself, in that you’ll be able to use resupply centers and take control of any turrets that you see. You also managed to back up the sewer systems, resulting in a flood of mucky brown water that you’ll have to wade through, about which no comment is perhaps appropriate.
Keep an eye on the audio squawks here; you’ll often get advance warning of what’s in your path if you pay attention to what Jericho is yelling at his underlings. To begin with, you’ll be able to pick off a bunch of Phoenix troops from beneath the brown water, if you duck back and forth between the first large room and your small corridor. They can’t see you from above, so feel free to snipe them all out before proceeding up. When you surface, you’ll have to find another passage leading into a small flooded shaft before you can finally surface for good.
You’ll shortly come to a locked door leading to the sensor grid; use your virus on the lock panel. While you wait for the virus to actuate, use the turret to blast away at anything that comes your way. If you drop low on ammo or health, you’ll be able to find a resupply center when the hangar doors open and the rocket pods appear.
Proceeding into the sensor grid, you’ll have to fight your way ever downward through a series of elevators. Your journey through the base eventually culminates in a battle against multiple turrets, a heavy armor trooper, and multiple infantry, so come heavy with a grenade launcher, if possible. When you finally make it out of the base, the level ends.
Jericho: The Present - Deliverance
Part 1
Well, apparently Jericho’s going to make these Imperial scum squeal like a pig. He’ll have to begin by capturing the Barracks, the Artillery Point, and the Docking Bay, in any order you choose. Each of these is superficially similar, in that you have to penetrate inside the facility and capture the node within, as in a game of Territory, but each has specific defenses to deal with: the Barracks has a surfeit of infantry, the Docking Bay will have multiple Rocket Pods in the air around it, and the Artillery Point is guarded by multiple turrets.
Since it’s closest to your starting point, it’s best to nab the Barracks first. There isn’t much strategy involved; just storm the area and get inside as quickly as possible, using your mortars to blow away anyone who stands in your way. You’ll take damage, but you should be able to survive the trip, thanks to your heavy armor. After you do take over the base, you’ll gain access to a resupply station, so use it to heal up before leaving the facility.
After you grab the Barracks, you can head out for either of the other two objectives. Both the Artillery Point and the Docking Bay will require a bit more softening up than the Barracks, but you should be able to use your mortars to good effect here. If you spot a soldier with a spinfusor, kill him and grab it; it’s much easier to hit distant, immobile targets like turrets with it, and you’ll have more ammo to boot.
When you’ve managed to capture all of the bases, you’ll be able to infiltrate the prison, but use your scope and mortar or spinfusor to clear out all of the turrets before doing so, or you’ll likely get overwhelmed.
Part 2
Now that you’re inside the prison, you’ll have to find the entrance to the mines, where Esther is being held. You only have one path to follow initially; grab one of the elevators in the first large room and proceed along the corridors until you get locked in by security. This is the first of a few defensive stands that Jericho will have to make in order to get through the level. You won’t have easy access to resupply stations in here, so you’ll have to rely on first aid packs to keep your health up, but when you do need to repel an assault, you’ll usually gain access to a number of deployable turrets and mines, as you do here.
Deploy the mines near the entrances to the room, and the turrets as you wish. It’s perhaps best to deploy the turrets on the upper level of the room, clustered together close enough for you to hit them all with a repair pack when you activate it. (If you don’t have a repair pack, grab one on one of the desks on the lower level of the room.) When the enemies start flooding in, you can use grenades or mortars to kill them while they move about below, and leave the turrets to finish them off if they hit the elevator.
You’ll eventually be able to proceed, but move slowly, as there’s a heavy-armor unit in the hallway leading away from the room. Blast your way through to a central prison area that’s filled with enemies, then start cutting them down with your mortars and grenades, if you have them. Your goal here is to unlock the door leading to the mines; the lock is located in the control room at the top of this area. Flip the switch, then float all the way down to the bottom, disregarding any attackers, and fly through the now-open doorway to proceed on to the next part of the level.
Part 3
The third portion of this mission is essentially a replica of the second. You begin with a straightforward corridor crawl until you reach a set of doors leading further into the mine. Unfortunately, they’re locked, so you’ll have to wait two minutes until a minecart comes along, which will automatically unlock it. As you may have surmised from all the turrets laying around, this is another position you’ll have to defend, so lay down the turrets as best you can before the enemies start coming in. You’ll have to deal with a couple of heavy armor enemies this time, so try to get away from the turrets before you get their attention, lest their mortars destroy all of your little friends.
After the doors unlock, proceed through the mineshafts until you reach Esther’s cell. She’ll be able to effect her escape through a nearby ventilation shaft (what would level designers do without vents and ducts, one wonders), leaving you behind to guard her escape. This is the most difficult of the three defensive stands, in that you don’t have any turrets to deploy, and due to the number and quality of enemies that will be coming in. Most of your foes here will be medium-armor, with a few heavies; many will have grenade launchers, which will cause you no end of trouble. Save your game before this little abattoir opens for business, and use the catapults as best you can to keep yourself off the ground; if you’re in the air, grenades have a very small chance of actually hurting you. If you can, stay on the rafters near the ceiling and pelt everyone from there with your mortars and grenades. After two minutes, the mission automatically ends.
Mercury: The Present - Redemption
Part 1
It appears that, in addition to Jericho, Mercury is also alive and kicking twenty years on from the events of the past. Your goal here is initially undefined; all you’re told is that you have to make your way into the Imperial base in which you first find yourself. You’ve infiltrated into the sewer system, as occurs in seemingly every FPS game. Unfortunately, the sewage here is contaminated with some kind of corrosive, and will eat into your health when you’re submerged. It won’t damage you very quickly, though, so don’t feel too concerned with staying out of the water.
To begin with, you’ll need to maneuver through the first large room you enter and jet up to the top platform around the corner to the left. You’re unlikely to get there on a single bar of energy, so you’ll want to use your grappler to attach to the ceiling and help you along. When you reach the platform, kill off the guards watching over the sewer system - most boring job ever? - and proceed down the open corridors until you find a door leading to an open shaft. After falling down, you’ll find the control room, wherein exists a switch which will stop the ventilation fan near the platform from blowing. Whether you backtrack or proceed forward, you’ll wind up back on the platform, so jump from there through the slowly-moving fan into the next room.
Again, you’ll probably have to use your grappler here to get up to the highest level. You won’t be able to leave this room until you unlock the sluice gate in the water below; you’ll find the control switch in a room on the second-highest level. When you unlock it, you should see the gate opening below your vantage point, so drop down and proceed through it.
After you jet up into the southern portions of your map, you’ll face a straightforward set of corridor crawling that will lead you to the shaft from which you can access the prison proper.
Part 2

Immediately upon entering this level, you’ll learn about the new twist: most of the doors here are locked, which forces you to destroy maintenance computers in order to unlock maintenance shafts. (Read: more narrow vents.) You’ll find the first of these computers above your starting position, which unlocks a door immediately adjacent to it. The computer consoles are tough, so if you’re willing to take a small health hit in order to conserve ammo, use your energy blade to blow them up.
In the ensuing elevator shaft, you can drop to the bottom for more ammo and health, but your goal is to penetrate the guard station at the top. The maintenance computers are marked on your radar, so blow them, then head into the maintenance shaft and walk through to the guard station. Proceed in this fashion until you come to another large room with multiple levels. Again, the maintenance computers are indicated on your radar, so you shouldn’t have any problem locating them, but keep an eye out for enemies. There is a medic here, so if you see a soldier healing up her teammates, concentrate your fire on that target.
As you progress along, you’ll eventually come to a corridor that’s open to the outside air; you’ll know you’re close to Jericho when you hit it. The next room, in fact, should be the prison cells, so clear out any opposition before flipping the switch inside to release Jericho and his compatriots from their cells.
After you make your way to the roof of the prison structure, your motivations - if not those of your employer - are made clear: you let Jericho free solely so you could kill him. Hopefully you still have your sniper rifle, as it’ll make this fight quite easy. Just jump to the top of the tallest building here and take potshots at Jericho from a mile away. He’ll respond with mortar rounds, but you should be able to dash towards and away from the edge of the building’s roof to avoid taking any but minimal damage.
Victoria: The Past - Proof
The beginning of this mission is about as straightforward as they come. All you can do is take your jump tank forward through the tunnels, blasting Beagles as they appear. Your view distance is pretty short, due to the darkness of the underground area you’re in, so you may want to just fire blindly into the night and hope that you hit something; you’ve got enough ammo to spare, and there are certainly enough Beagles around to warrant a little time spent shooting at nothing. If you move too fast, you’re going to get shot up by a billion spinfusors, and Victoria doesn’t have a repair pack to use here.
Your goal is to get to a Territory marker. You don’t have to keep the jump tank alive through the entire tunnel system, but your task will be much easier if you do so, due to the fact the the Territory marker entrance is guarded by multiple heavy armor units.
When you do penetrate to the marker and convert it, Daniel will call you upstairs to begin the base defense. While Daniel is accessing the computer system, you’re going to have to guard the generator against multiple waves of enemy forces. Take the time to make a rough inventory of the base facilities. Inside, you have an inventory station, a resupply station, the generator, a deployable repair machine, three deployable turrets, and two deployable mines, as well as an emergency station which will pop out a repair kit at your request. Outside, you have a sentry turret and a mortar turret mounted above the western and eastern approaches to the base. You’ll need to use all of these assets to properly defend your generator, as the Beagles will be attacking with everything they’ve got.
To begin with, you can use the deployable turrets to completely block off one of the entrances to the interior base. Set these up so that any enemies attempting to reach your generator would have to go over them, then tuck the mobile repair machine close enough to let it repair them, but try to place it behind a wall so that it won’t be in the line of casual fire. The repair machine can easily keep the turrets up and running, but it won’t be able to repair itself, so monitor its health and use your own repair pack as necessary to heal it up. You can cover the other entrance to the interior base by yourself, especially if you equip yourself with heavy armor and a mortar.
In fact, for the first wave of Beagles, that tactic will work well. Set up your turrets, equip yourself in heavy armor, and spam away with mortars in the other entrance to the base. Beagles will also occasionally drop down from the skylight, so stay alert. Use a chaingun or other non-explosive weapon to deal with any troops that actually reach the inside of the base; you don’t want to risk blowing up your own generator.
After a while, you’ll be tasked with returning to the territory marker and defending it from a Beagle strike team. You’ll alternate between defending the marker and defending the generator for a few rounds of combat, before Daniel tells you that he needs to download some data from an external site to break through the Beagle’s encryption. Damn you, PGP! Anyway, this will require him to pop up the four satellite dishes which the base handily has access to. Your goal now is to protect those from destruction.
The Beagles will begin their assault on the dishes with assault ships. These are riotously difficult for a player in a suit to take out, thanks to the fact that the side gunners will quickly pound away at your health with their anti-air guns. If possible, use or repair the sentry turret on the western side of the base and use that to blast away at the ships (there are two) from long range; this is much preferable to having to expose yourself to the gunners’ fire. If the turret is unavailable, use the spinfusor to knock out the gunners before whipping out your rocket pods to finish off the ships.
Next up are a pair of tanks which appear one by one. These guys will quickly destroy any turret you’re in, so you’ll need to take them out on foot. If you’re good at skiing, take advantage of the wide open spaces inside the base by skiing more rapidly than the turret on the tanks can track you while pelting the vehicles with spinfusor rounds or grenades.
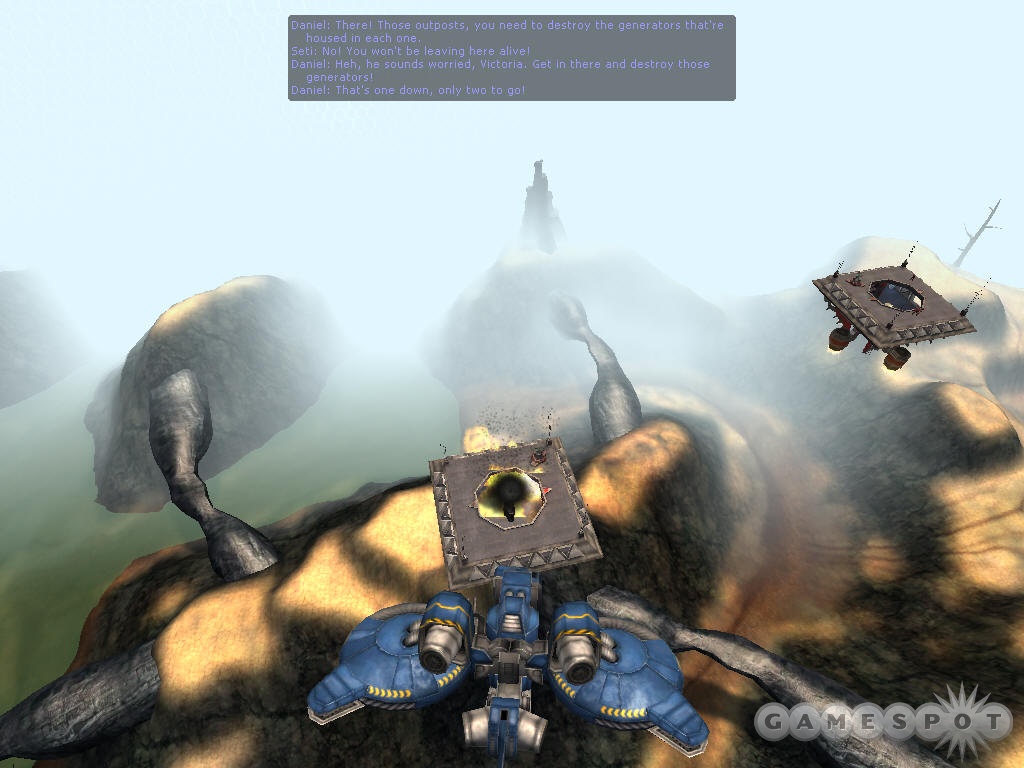
After both tanks are destroyed, you’ll be given access to an assault ship of your own, which you’ll need to fly north in order to destroy three Beagle generators in the sky. Before you head up that way, though, do a fly-by around the base to ensure that there aren’t any more infantry units meandering around; the heavy armor dudes that hang around in the hills will sometimes wander down after you fly away and wreak havoc.
The generators are a tough nut to crack, due to the heavy defenses built up around them. You’ll face multiple incoming spinfusor rounds and turret attacks, so take your time and proceed slowly. If you do get shot down, feel free to return to the base for a heal before proceeding back to the generators "on foot."
After all of the generators are destroyed, you’ll hear Seti calling for a major attack, so get back to the base pronto. The waves of incoming troops are a bit stronger than they were at the start of the base-defense portion of the level, so you’ll need to be on your toes for the three minutes it’ll take for your reinforcements to arrive. The same basic tactic you used before still applies; let your turrets deal with one side of the base, while you spam the other side with mortar rounds, stopping occasionally for a resupply station retrofit. After your three minutes are up, the reinforcements arrive, and it’s off to Victoria’s daddy’s house.
Daniel: The Past - Judgment
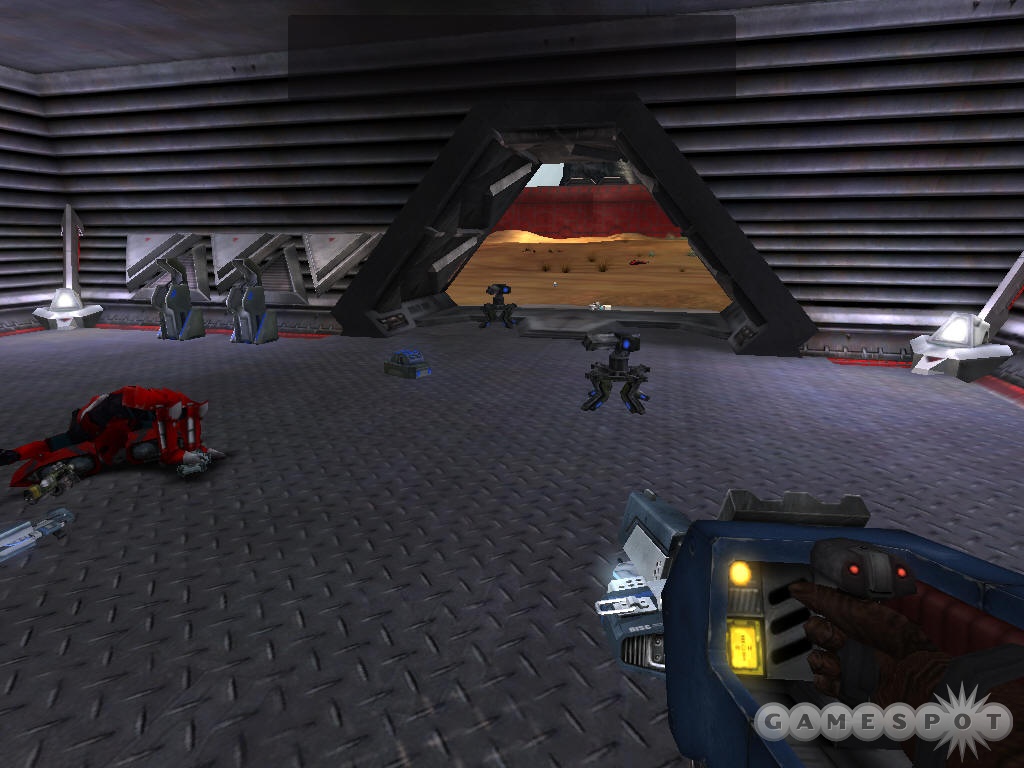
Before Victoria’s father grants Daniel an audience, he wants to see the kind of metal he’s made of. As such, you’re going to have to prove yourself in the Imperial Arena. Anyone who played the single-player demo should be familiar with this level; in it, you’ll face off against monsters, Beagles, and Imperial infantry in nine rounds of combat. Win them all, and you’ll gain your chance to win over Victoria’s father, but if Daniel dies, there aren’t any respawns.
The first round is a simple bout against a few Glorax. If you want to conserve ammo, use your energy blade to blast through their hides; they’ll fall quickly enough. The next round is against the Beagles. Your teammates will man the turrets here, so lead the Beagles into their line of fire and let them do all the hard work. You can use your chaingun now, if you wish; you should find plenty of ammo for it, as well as a few blasters, among the corpses of the Beagles.
The third round is against a solo Imperial who packs a spinfusor. Again, let the turrets do the work, then grab his weapon. The same basic process applies to each of the following rounds; be sure to grab a repair pack from the emergency station near the hangar bay and use it to repair the turrets and restore your teammates’ health.
The main kinks here are the inclusion of vehicles. In one round, you’ll have to take on two waves of two rocket pods apiece. If you use your spinfusor, you may be able to knock the pilot out of one of the craft without destroying it; if this occurs, grab the pod before your teammates blow it up and use it to shoot down anyone else that comes along. The pod will likely be in a fairly precipitous state so far as health is concerned, so it won’t last too long.
The final round is going to be your toughest challenge, as you’ll have to face off against an assault ship and a jump tank in succession. The assault ship won’t be too bad, if you can knock out the gunners quickly; it doesn’t seem to drop bombs, so it’ll be a sitting duck after you do so. The jump tank will be a tougher nut to crack, especially if you’re low on health. It travels along the ditch that runs around the outside of the arena, so you should be able to avoid its fire if you keep the terrain between you and it, but your teammates won’t be so lucky. If your turreteers are still around, they’ll get pounded by the cannon before you can destroy the tank, so don’t worry about them. Use your grenades and spinfusor rounds to off it from a distance.
Victoria: The Past - Retribution
Part 1
The hunt for Daniel is on! He’s fled into the bowels of the palace in an attempt to escape the punishment he so richly deserves. It’s up to Victoria to hunt him down, and hunt you must.
Your initial path here will lead you through a number of deployable turrets that Daniel or his Phoenix henchmen have lain down behind them. These guys sting, so try to strafe out from behind cover and get off a few chaingun rounds and then ducking back before they can get a lock onto you.
Eventually, you’ll reach a control room with a switch that opens up into the biggest vertical shaft you’ve seen in the game thus far. You can use the platforms below to arrest your descent, or just jump and trust in your jetpack to prevent falling damage. You’ll have to keep passing through these shafts until you reach the bottom; when a pair of Phoenix ambush you, though, enter the room from which they came to find a handy spinfusor.
When you do reach the bottom of the shaft and eliminate the Phoenix that guard it, you’ll quickly pass through to the next portion of the mission. Grab any grenade launchers you can find before doing so!
Part 2
More turret fun here, as the first room beyond the level start contains half a dozen or more of the little buggers. If you brought along a grenade launcher, shoot as many rounds as you need through the door until you’ve destroyed most of them, then proceed through and blast any that remain. If you’d prefer to just bypass the whole affair, jet and ski through the room to the door on the far side.
More Phoenix curs will attempt to impede your progress in the industrial areas that follow, but they should fall relatively quickly. More troublesome are the snipers that guard a large open area, but you should be able to move quickly enough to get to them before they deal too much damage to you. Unfortunately, your medium armor prevents you from using the sniper rifles; they would’ve come in quite handy in an upcoming section of the map.
The next major challenge involves grenadiers pelting you from the rafters. If you can, jet up to their positions and destroy them up close; if you can’t reach that high, use your spinfusor and take them out from up close. If you run low on health here - a distinct possibility - you can find some health packs in the ammo containers on the ground.
The rest of this level is an affair similar to what you’ve passed through before, in that it alternates constricted corridors with more open areas. Keep your health up with the health packs that fallen enemies drop, and watch out for any resupply stations that you see.
Part 3
The challenge level has really ramped up since the beginning of this mission; to begin this portion, you’ll face off against eight or nine Phoenixes, all armed with spinfusors. Cut your way through them, then unlock the door leading to another large shaft area, this one packed full of more infantry. You won’t be able to jet all the way to the top in one go, so you’ll either have to jump from bridge to bridge, or use a grappler to help facilitate your ascent. There are plenty of troops here, though, as mentioned, so feel free to cut through a few of them at a time before returning to the resupply stations in the room at the bottom of the shaft. There are also resupply stations at the top, if you just want to grapple and jet your way past all the fire.
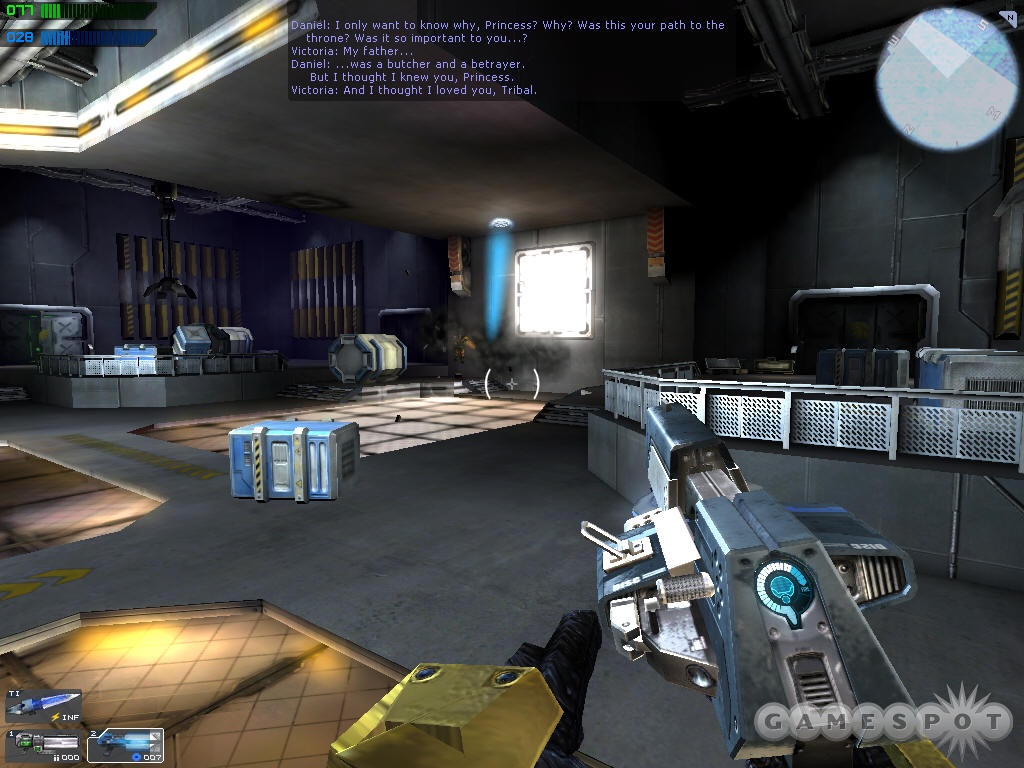
Daniel himself awaits you in a small arena at the top of an elevator, and he is one tough nut to crack, so save your game after resupplying, but before heading up. He’ll use both spinfusors and grenades to wear you down, but he himself will be able to gain back health from the mobile repair stations that he’s lain down around the center of the room. These stations should be your first target; to save ammo, use any throwable grenades that you might have squirrelled away to destroy them before shifting your sights to Daniel himself. The weapon loadout that you’re most likely to have at this point will be the spinfusor, chaingun, and grenade launcher, and you’ll probably need to use all of the ammo from all three weapons to take him out. Needless to say, use your grenades while he’s on the ground, the spinfusor to get him with splash damage while he’s near the ceiling, and the chaingun for the finishing blow from long distance.
Julia: The Present - Trials
In order to get the information she wants out of Esther, who’s back with the Phoenix pack following her rescue from prison, Julia will have to undergo the standard Phoenix initiation, which consists of a number of trials designed to test your various physical and mental abilities. You can attempt the trials in any order, and will get as many attempts as you need to pass each one, so don’t feel too pressured by the whole affair.
Speed: The speed test has you attempting to make six laps up and down a long cylindrical cavern within a set time period. If you can make a lap in around ten seconds, you should be able to complete the test within the given time, but you’ll need to ski with the best of them to accomplish that. To begin with, equip yourself with the spinfusor and speed pack, and when the timer sets down to zero, use the catapult to get yourself underway. After using your jetpack to get yourself up to speed, set down and start skiing the night away.
The key here is to ensure that most of your momentum is along the front/rear axis of the corridor, which means that you should minimize the amount of side-to-side movement you make. The spinfusor is much quicker at correcting your course than is using your jetpack; if you start weaving too much, aim the spinfusor behind you so that its blast will counteract a bit of the off-axis momentum that you’ve picked up. You’ll take damage, sure, but you’ll gain it all back at the end of the trial, anyway. You can also use the spinfusor to put yourself on the correct heading for entering the ends of the cylinder. If you hit the end while in the middle of the floor, you’ll lose all of your momentum; it’s better if you try to ski through it high on one of the walls, which will let you keep most of the speed you had going in. If you need a speed boost coming out of a turn, you can either jetpack for a few moments, or use your spinfusor to get going again.
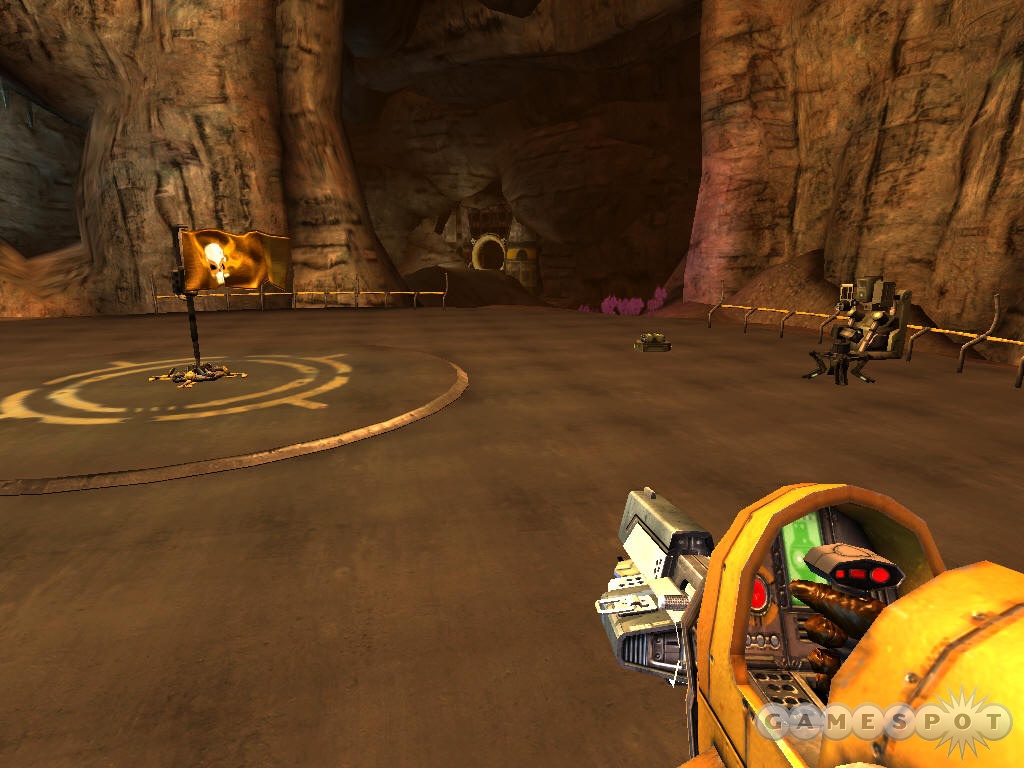
Stamina: In this trial, you’ll have to protect a flag against multiple waves of enemies, but you’ll be well-armed for the task, since you’ll have heavy armor and any weapons you want, as well as a deployable turret. Near the flag, you’ll also be able to pick up a portable repair station and a turret. Lay these down near the resupply station, so that the repair bay can repair both of the other items, as well as yourself.
When the rounds start, use your jetpacks to scout around and detect the enemies as they approach. You’ll have to fend off five or six light-armor enemies as well as a medium-armor foe during each wave. The lights are easily blown to bits with a mortar, but the mediums will be tougher to lock onto, as they’ll often take to the skies and attempt to land directly on the flag; if they even touch it, you’ll have to start over, so you’ll want to focus on killing them first. Use your spinfusor or chaingun to take them down.
Dexterity: The dexterity test has you attempting to place a ball into three separate goals scattered around a large cavern. The ball spawns on the small pedestal in the middle platform, so stand over it as the timer counts down to get it as quickly as possible. When it does spawn in, you’ll want to hit the hardest goal first; this would be the one at the very top of the cavern. You won’t be able to jet directly to it, so you’ll have to use the scattered catapults to get yourself up to it. You don’t need to start at the bottommost catapult, though; pick one that you can jet to from the ball platform and go from there to save yourself a few seconds.
The second goal is the one that rotates around the arena. This one is easy to miss, so be sure you’re as close to it as you can possibly get before letting loose with the ball. Lastly, there’s a goal in a room underneath the water, facing down, so dive as far as you can go to find it.
Finesse: In the finesse test, you’ll have to take out multiple Phoenixes while armed with nothing but a buckler. The buckler isn’t much of an offensive weapon, but it will kill these fools in a couple of shots, so use your jetpack to avoid their fire while closing in for the kill.
Perception: In perception, you’ll be armed with a sniper rifle and a blaster and tasked with killing off a number of Phoenixes as they attempt to destroy a generator. This is one of the easier trials, since the Phoenixs will come into the arena one by one; simply get up next to the one of the yellow energy field doors and use your sniper rifle to pick them off as they appear. If you hear someone coming down the track behind you, switch over to the blaster and use that to off them at close range. If you run out of ammo, there’s a resupply point immediately below the generator itself.
Adaptation: Another easy one. In Adaptation, you’ll be fighting against numerous enemies in a zero-gravity environment. So long as you stay away from surfaces, you should be nearly immune from splash damage, but your foes won’t be as smart, so use your spinfusor to blast them to bits.
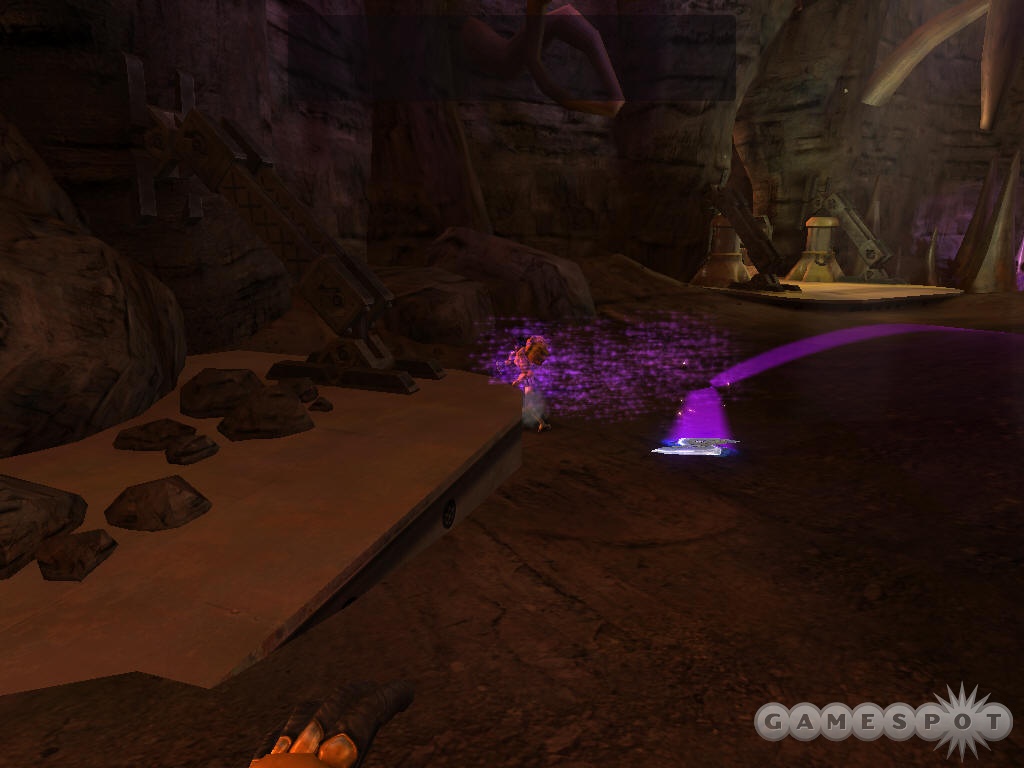
After you complete all of the trials, Esther herself will challenge you to a duel. While you possess only a buckler, she’ll use both her buckler and a chaingun, so stay on your toes. If it comes down to a buckler duel, you’ll win handily, as Esther is apparently too old to aim it properly. Whip her, and you’ll be able to move on to the next mission.
Julia: The Present - Revelation
Part 1
The beginning of this level plays in similar fashion to the earlier mission where Victoria piloted the jump tank; like mother, like daughter, apparently. Fortunately for Julia, though, you will have a gunner along, which will let you concentrate on the primary concentrations of enemies while he takes down any individual irritants.
All you need to do here is blast through the various fortress gates in your path. Not to nitpick, but the fortifications here seem fairly inutile, since they’re weak enough to be blown through by a single tank, and, well, all of the Beagles’ enemies can fly anyway. Brilliant design!
When you reach the main courtyard of the Beagle base, you’ll have to blast through the doors covering their bunker and proceed through on foot. Before you head inside, supplement your weapon loadout with arms dropped by the slaughtered tribals.
Part 2
You have two objectives inside the Blood Eagle base: locate Olivia, then rescue her. The first objective will be accomplished in the Command Centre, located not too far from your starting point. Getting there isn’t much of a challenge; just blast through the Beagles that you come across and make your way along the only path that’s open to you at any given moment. Check your command map if you need tips on where to look for the next doorway, but you shouldn’t have too many problems.
After you access the computer that enables you to locate Olivia, alarms will ring and reinforcements called in. Apparently Albrecht’s access codes weren’t as foolproof as he thought. The bulk of the Beagles will be waiting for you at the bottom of the elevator leading from the Command Centre, so you may want to send down a few grenades before you head all the way down.
From the command centre, you’ll have to head to the southeast to reach the next part of the mission. Beagles have set up ambush points all along the corridors, though, so you may want to just blast through as quickly as possible. The doors leading to the next level will open very slowly, so keep your jetpack powered up to avoid the multiple grenades that will be raining on you.
Part 3
After the big reveal of Albrecht’s treachery, you won’t be able to count on any support from the Imperial soldiers that have penetrated the base. Indeed, both they and the Blood Eagles will be gunning for you, so you’ll have to deal with slightly more enemies than you normally would in a corridor-crawling mission. Luckily for you, the level is fairly straightforward, with no real puzzles to solve. Follow your command map to the northeastern corner of the map, where Albrecht awaits.
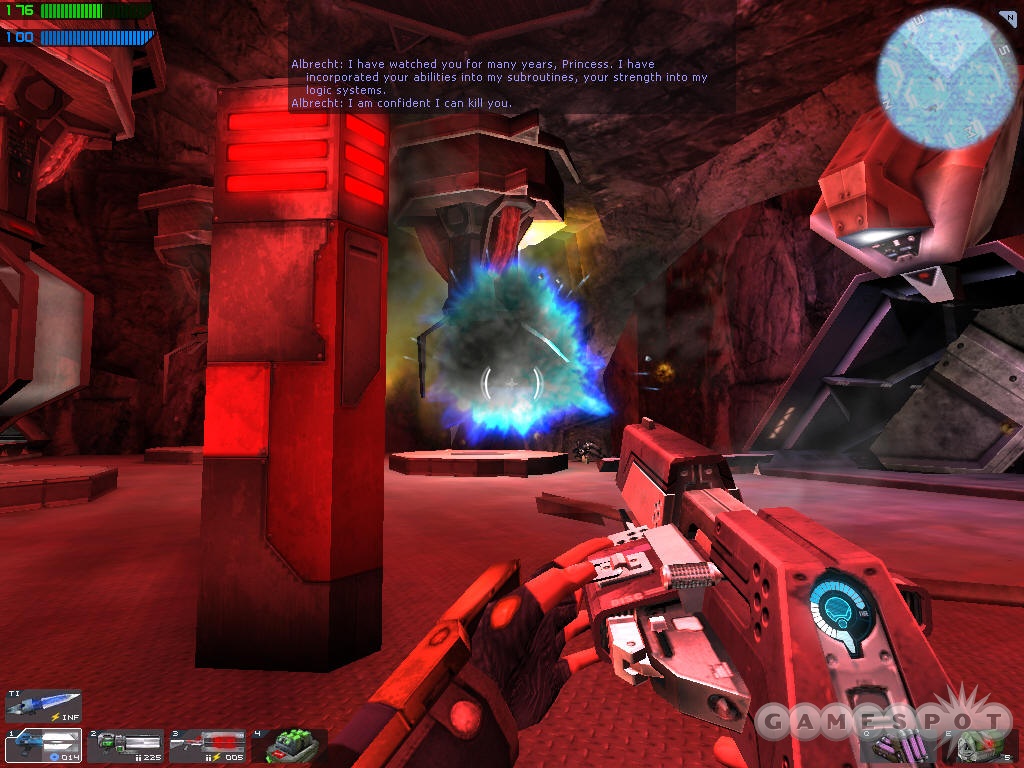
Although Albrecht seems confident that he’ll defeat you, the joke’s on him; he’s a creampuff opponent if you know how to handle him. All you need to do is bounce him with your spinfusor until he’s near one of the large glass chambers in the room, then shoot the chamber to detonate it. These chambers pack a much bigger wallop than do most environmental explosives, so only one or two impacts should be enough to put Albrecht down for the count; just make sure he doesn’t use the same trick on you.
Julia: The Present - Vengeance
Part 1
For some reason, Olivia’s master plan is to crash a ship full of toxins into the Imperial capital city. Why? Apparently to get people upset at the tribals. Considering that the Imperials and the tribals are already in a constant state of war, this seems to be a rather brazen example of doing something just because it sounds cool; nonetheless, you’ll have to stop her.

In order to access Olivia’s ship, you’ll have to destroy three generators that power a forcefield that prevents you from accessing the elevator leading to the ship. Before you head out towards the generators, though, stop off at the mobile inventory station and grab a sniper rifle. Julia’s mobile enough to let you jet up to the tops of mountains and snipe away at the many, many Imperials that guard the generator facilites. You’ll want to pick off anyone who’s manning a turret, for sure, but the juicier targets are the heavy-armor rocketeers that dot the map. Unfortunately, these guys can spot you from beyond your view distance, so you’ll probably just have to get in close and use your grenades or spinfusor rounds to put them out.
The generator facilities all have identical layouts, so you shouldn’t have any trouble penetrating them and destroying the power sources. You may find a deployable inventory source; if you do, save it and deploy it near the gantry itself to give you an easy way to resupply your inventory and restore your health while you take on the duelists and rocketeers that guard that facility. When you’ve killed everyone guarding the gantry, hit the elevator.
Part 2
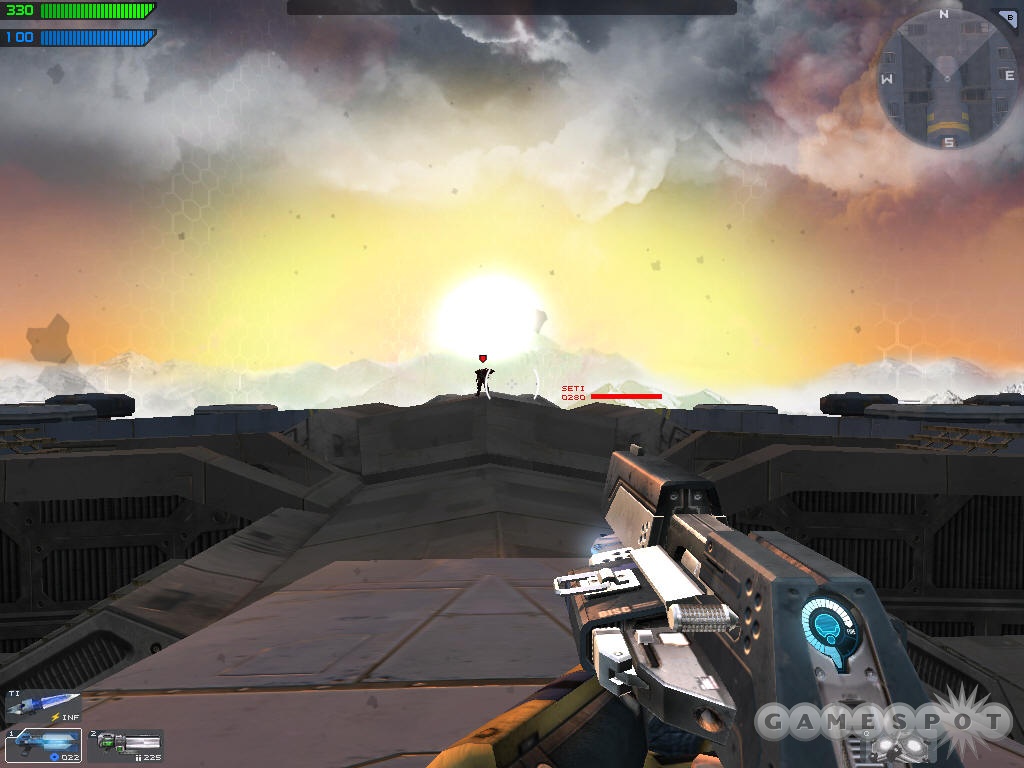
Your duel with Seti is one of the busiest boss fights in the game: in addition to Seti himself, you’ll have to deal multiple light-armor infantry and the turret guns of the ship. You’ll have a difficult time destroying the turrets, as many of them have repair stations set up near their positions, so ignore them as best you can and focus on Seti. You can dip into the many depressions on the ship’s surface if you’re getting pelted by the turrets, but don’t stay in one too long, as the grenadiers will quickly fill your refuge with hot death.
Seti himself is not too difficult to kill when you get a feel for how he moves; just wait for him to hit the ground and use your spinfusor to deal splash damage. The important thing is to not let him get too close to the repair stations, as you can lose all of your progress in the fight in just a few seconds when this occurs, but if you can maneuver him into one of the depressions, you should be able to pound away at his health until he starts jetting away. If you run low on health, seek out one of the light-armor Beagles in the area and take his or her health pack for a small boost.
When Seti goes down, you get to enjoy a bittersweet victory. Even if your primary nemesis did manage to escape, you still managed to save thousands of lives, so be proud of that. The final chapter of this story is yet to be written, no doubt, but you still have plenty of content to occupy yourself with in the multiplayer game. So get hopping!
Multiplayer
Game Types
Arena
Arena is a combination of team deathmatch and the gameplay of Counter-Strike or Rocket Arena, or any other round-based gameplay type. The team deathmatch portion is easy enough to explain: your goal is to track down and kill members of the opposing team, while dying as little as possibly yourself. The arena portion of the gameplay recipe is manifested in the fact that you’ll be playing a succession of rounds; if you die, you’ll be dead until the round is over. A round keeps going until all members of one team are killed, so as long as you have one teammate still standing, you still have a shot at winning the round!
Ball
It’s a scrum at centerfield in the Ball gametype! In it, your team is tasked with grabbing a ball and throwing it into the enemy goal. In essence, this becomes something like a capture the flag game with one flag, as there’ll only be one ball on the playing field at a time. Like a flag, though, this ball can be dropped when you get killed, so you’ll have to balance your efforts between making it to the opponent’s goal and simply staying alive.
Another facet to Ball is the fact that the ball can be thrown, and indeed must be thrown into the enemy’s goal if you wish to score any points. If you’re hurt badly, though, and want to pass the ball off to a stronger teammate, you can use the throw mechanism to do so; just make sure you’re as close as possible to your target, as the ball doesn’t move in a straight line, and thus can be difficult to aim. The same theory applies when you get ready to score a goal. Note that you can hold down the throw button (which is simply the fire button while you have the ball in your active weapon slot) to throw harder.
Capture the Flag
If you’ll permit us to abandon our royal detachment for a second, please also permit us to say that it’s a pleasure to see a multiplayer game come along that’s completely committed to the idea of Capture The Flag as a centerpiece gametype. While Battlefield 1942-esque game types are all the rage nowadays, there’s still nothing quite like the primal feeling of stealing something from your opponents and returning it to your base.
And that, in case you didn’t realize it, is the primary objective of Capture The Flag. In this gametype, two teams square off, each with its own base and flag. The goal is to steal your opponent’s flag (by simply running over it), bring it back to your base, and capture it by touching your own flag. The trick (as if there were only one) is to ensure that your own flag is in place when you return with the flag of your enemy; it’s entirely possible for both flags to be stolen at the same time.
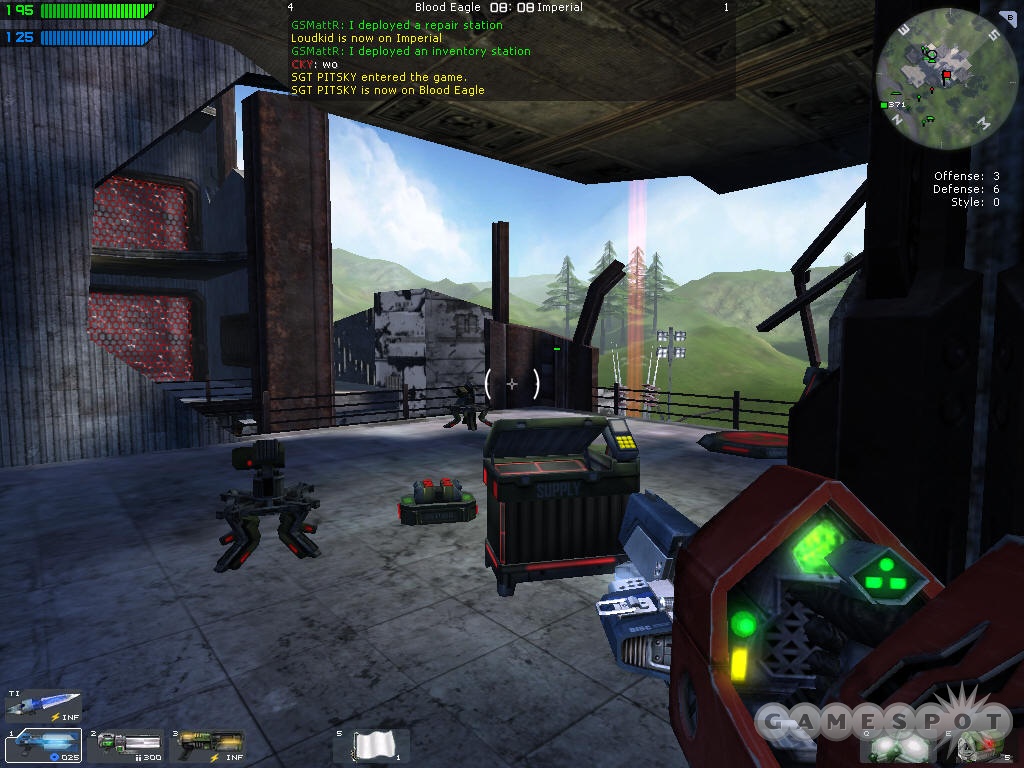
If your flag is stolen, then you’ll need to retrieve it from your enemy and return it. To do this, you’ll have to track down the enemy flag-carrier (who will appear on your radar as a green flag), and kill them. When a flag-carrier dies, the flag they’re holding will drop to the ground; if you touch it, it’ll return to your base, but if an enemy touches it first, they’ll pick it up and you’ll have to kill them in order to return it.
Each successful flag capture will net your team one point, and at the end of a round, the team with the most captures wins. Personal kills don’t count for much except bragging rights; if you want your team to prevail, you’d better coordinate your efforts with those of your teammates! Jetting off and randomly trying to kill enemies can be useful, but you’ll be of much more use to your teammates if you attempt to defend your flag or assault that of the enemy.
Rabbit
Rabbit is essentially a variant of king-of-the-hill. When playing rabbit, the goal is to grab the flag that appears somewhere in the middle of the map, and then attempt to stay alive as long as possible. The catch is that all of the other players on the map will be attempting to do the same thing, which means that they’ll all be coming after you and trying to kill you in order to take the flag from your corpse. The longer you can keep the flag, though, the more points you’ll score.
Fuel
Fuel is similar to CTF, in that your goal is to capture resources and return them to your base, but there are a few twists here. Instead of going after flags, you’re going to be attempting to track down and transport fuel; you’ll find a fuel depot somewhere in the neutral territory that will serve as your primary source for your precious combustibles. All you need to do to grab fuel is stand underneath a depot; you’ll automatically gain fuel reserves, up to a maximum of fifteen units. Return to your team’s depot with the fuel, and it’ll be instantaneously deposited. The first team to completely fill the depot will win the round.
Of course, this isn’t a simple case of a squabble over resources. If you manage to kill an enemy soldier, their team will lose one unit of fuel from their depot. What’s more, if you kill an enemy that’s transporting fuel, you’ll be able to grab whatever fuel that they drop. Lastly, you’re not constrained to only grabbing fuel from the neutral depots; you can also pick it up from the enemy team’s depot. You won’t pick up fuel units as quickly as you will at a neutral depot, but you can rest satisfied that every unit you grab is essentially a two-unit swing in momentum, since you’ll be taking units from them and adding them to your own reserves.
Multiplayer Tips
Skiing Is Fun-damental
Let’s be frank: anyone can use a jetpack. In most gametypes, though (especially CTF, Ball, and Rabbit), your ability to contribute to your team’s success will depend on your ability to effectively use the ski button to increase your speed. Tribes: Vengeance is one of the fastest-moving games on the market today, and if all you can do is run and use your jetpack, you’re going to get left far, far behind the opposition.
The key to skiing lies in taking proper advantage of the terrain. If you attempt to ski uphill, you’ll obviously lose a lot of momentum; thus, you’ll need to learn how to maximize the speed benefits of skiing on downward slopes and level surfaces, while minimizing the speed hits that you’ll take from going uphill. A large amount of your efficacy in skiing will have to be learned in-game, so feel free to start up a multiplayer server that only you can play on to give it a whirl.
How fast you go while skiing depends on your speed when you first hit the ground. If you start skiing while walking, you won’t gain much of a speed boost, if any at all. It’s when you hit the ground already going fast that skiing comes into its own, as you will continue accelerating without using your jetpack fuel, so long as you’re on a mild downslope. You can see this for yourself by simply dropping from a large height onto a slope. If you use your jetpack to get yourself as high as you can go, then fall onto the side of a hill while holding down your skiing button, all of the momentum that you built up while falling will be converted into horizontal momentum, plus a bit that you’ll gain during your slide down the hill.
You can keep holding down the ski button as long as you like, but, as mentioned, you’ll find that attempting to ski uphill will rapidly negate any speed advantages that you might have accrued. Since you don’t expend jetpack fuel while skiing, though, you should be able to use some of your reserves to boost yourself up and over any obstacles in your way. If you wait until you start moving uphill, though, you should also gain a significant vertical boost, just as if you were taking a skateboard off a ramp.
You’ll be able to reach much higher altitudes than you normally would if you ski before jumping, but this isn’t always advantageous. For one thing, your speed, which was formerly all horizontal, will be converted into a mixture of vertical and horizontal, meaning that you’ll be travelling less rapidly in the direction of your goal. If you’re trying to reach one specific location, then, it’s best to stay on the ground as much as possible, and only use as much jetpack verticality as required to clear any hills in your path.
Skiing requires a lot of practice before you’ll be pulling off supersonic flag snatches and the like. But, when mastered, it’s one of the skills that truly separates the men from the boys in multiplayer Tribes. And make no mistake, Tribes: Vengeance is definitely a skill game, so you’ll want to get familiar with the skiing mechanics before you put yourself at the mercy of the internet community at large.
The Grappler - Only $19.95 If You Call Now!
Although the grappler has some exotic features, such as the ability to hook onto items and pull them towards you, the fact that it can be used as a means to change your travel path alone makes it worth equipping, especially for flag-runners. This is mostly due to the fact that there aren’t any hitscan weapons in Tribes: Vengeance, outside of the sniper rifle. Projectiles from hitscan weapons cover the distance from the shooter to the target instantaneously; it’s easier to hit enemies with this kind of weapon, since you don’t have to adjust your aim to account for the time it’ll take for your projectile to travel the distance between yourself and them.
But, sadly enough, only the sniper rifle is capable of instantly hitting a distant enemy. Skillful players will be able to adapt to the varying travel times of the various weapons, though, which means that you won’t be safe from their fire unless you can move in unpredictable ways. If you consistently move in a straight line, it’s a trivial matter for a skilled player to lead you and fire his spinfusor at the spot where you’ll be by the time the rocket covers the intervening ground. By using the grappler, though, you’ll be able to confuse just about anyone, and hopefully take much less damage.

Although this might sound trite, skillful use of the grappler really does depend on in-game practice. Even a few minutes of playing around with it will give you a good headstart on how best to use it during a match. The important thing to pay attention to is the way that the line will snap if an obstacle comes between yourself and the point where the grappler has impacted with a surface. Because of this, you usually won’t want to fire the grappler at any surface where it’ll stand a chance of being cut off, except when you’re truly desperate. Even if you do snap your line, though, you’ll still gain the benefit of a small amount of momentum change; you can use the grappler on the corner of a building, for instance, and whip around said corner to effect a 90-degree change in vector without losing any momentum. It’ll be difficult for any pursuers to adjust their courses without using up most of their jetpack fuel.
Which brings us to another boon of the grappler; when you can use it to keep yourself suspended off of the ground, such as in the Cavern or Detritus maps, you’ll be able to save your jetpack fuel for when you really need it. If someone manages to catch up with you by burning up most of their jetpack fuel, it’s a simple matter to detach your cable (by hitting the fire button again), use your jetpack to extend the distance between you and them, and then return to grappling along when things get to be a bit safer. In these kinds of interior maps, grappling along the ceiling will also make you much more difficult to hit, due to the way your trajectory will dip up and down as you move. It’s difficult to appreciate how frustrating this can be for your pursuers until you’ve attempted to shoot someone who was escaping via grapple; after your first experience with this situation, though, you’ll undoubtably realize how imporant it is to learn how to use this versatile weapon, especially if you intend to go after the enemy flag.
One aspect of the grappler that’s cooler in theory than in practice is its ability to attach to vehicles in motion. With a little practice, you can even use the grappler to waterski behind a rover or a jump tank, except for the fact that you’re on land. In most cases, though, you’ll want to either be in a vehicle or move under your own power, but there’s something to be said for the feeling of attaching yourself to an assault ship and firing away from a mobile perch.
Maps
MP-Arid
Gametypes: CTF, Fuel, Arena
Vehicles ahoy! Arid is perfect for large multiplayer games, thanks to the open expanses of space and the fact that each team gets at least one of each type of vehicle. The wide-open spaces can make this a sniper’s paradise, as well, so be careful of staying in one space for too long.
The feature of this map that’s most notable in CTF is the paved roadway leading across the water to ramps on either side; this makes it quite easy for a flagrunner to ski all the way back to friendly territory at incredible speeds. It’s difficult to defend the bridge with deployables, as most skiiers will be out of range of a turret’s fire before it’ll have time to lock on, but you might still want to plop them down here if you’re willing to make the trip. It’s a bit easier to park the jump tank or rover in the middle of the road and wait for your enemy to come along and slam into it, but of course they’re liable to just jump over you in this instance.

Since it’s difficult to pursue a flagrunner that knows how to get back on the slopes, it’s important to fortify your flag position as much as possible. It’s possible to maneuver the entire assault ship into the flag sphere, if you want, but a single fighter pod can usually serve the same purpose, with less drastic repercussions for your teammates when you fire your weapons. The two fighter pods are also useful for tracking down flagrunners as they speed away.
MP-Cavern
Gametypes: Arena, Rabbit, Ball, CTF
This is one of the maps that gives the grappler its good name. Or bad name, depending on whether you’re on offense or defense. Since the ceilings are so low, you’ll have plenty of opportunities to grapple your way all the way home, if you like, but you’ll want to conserve your grappler ammo while you make your approach to the flag, especially if you’re in light armor, since you won’t have enough rounds to get to the flag and back in most instances. It’s better to approach with a few teammates, giving your enemies a bunch of targets, and save the confusing movements for when you’re attempting to escape with the flag itself.
On the defensive side, you do have two turrets with which to cover your flag. These are hidden away behind the stalagmites near the flag pedestal, so they’re impossible to fire upon from the middle of the cavern, but if you make your presence known, you can expect the next heavy armor unit that comes along to pelt you with splash damage from his mortars. If you start taking damage, then, you’ll want to immediately abandon your position and retreat to safety.
MP-Detritus
Gametypes: Ball, Arena, Rabbit
This interior map might as well be called grappler city, as there are dozens of likely spots for skilled grapplers to ply their wares. Most notable of these are the girders that stretch between the many spires in each of the two large rooms; if you attach your grappler to these, it won’t break, even if you do a complete loop-de-loop around the girder (although it will break if you go around one of the spires). This will let you pull off some pretty impressive mid-air maneuvers and dodges, assuming you can actually hit the girders with any degree of accuracy. Don’t forget that you can switch weapons while you have the grappler hooked onto something; if you’re playing Ball, for instance, you can hook on somewhere, switch to the ball, and throw it while making Ender’s Game-ish aerial shifts in direction.
MP-Emerald
Gametypes: Rabbit, Arena, CTF
Emerald is an open level, with CTF flags that are just close enough together to make for some high-scoring matches, especially when you consider the availability of the flag points themselves; they’re not on a pedestal or otherwise obscured, making them easily capturable by any enemy that happens to come along. Defending your flag will thus be somewhat more difficult here than on maps that keep your flag elevated off the ground.
The flag points themselves have baseball-like chain fences behind them, which prevent weapons fire from coming through. This makes it much easier for heavy enemies to perch atop the ruined buildings in the center of the map and bomb away with mortars from there; the mortars will be caught in the netting and explode, clearing out the flag area for any light-armor cappers that come through. The fences also prevent the enemies from seeing your marker, though, so you can use it to hide from them, at least at long ranges.
To protect your flag, then, you’ll want to either obstruct a runner’s path by parking a deployable item or the rover on top of the flag itself, but again, anything you plant there will have a limited life span. A better plan is to just establish some defenders at medium range, in the buildings in the center of the map, and have them pop out with a fresh jetpack when the flag-carrier goes by. Don’t forget that you can also use your buggy as a mobile spawnpoint; planting it in an out-of-the-way spot near the enemy base is a good way to get quick flag pick-ups.
MP-Fort
Gametypes: CTF, Fuel, Arena, Rabbit
The tactical aspects of Fort, at least in CTF, are dominated by the two large underground complexes on either side of the map. Although there is an energy barrier that prevents access directly to the rear, the front entrances, and the entirety of the interior of the bases, are open to players from either team; when your opponents attack in force, you’ll have to spend a fair amount of time to repel them, especially if they come in with a few heavy armor units. This is a good way to open a flagrunning assault, then; send your heavy armor infantry into the base entrances to form a distraction, then have your light armor flagrunner slide down one of the slopes leading into the base and jet away at top speed with the flag.
In addition to the interior of the bases, though, each team will get a rover, a pair of fighter pods, and a couple of turrets to assist in defense. There are also plentiful deployable items inside the bases; use these to clutter up the skiing ramps near the flag, and you’ll force your enemies to make a conventional assault if they want to grab it.
MP-GarudaGorge
Gametypes: Rabbit, Arena, Ball
Garuda Gorge is one of the smallest and most intense of the maps in multiplayer Tribes: Vengeance. It’s made out of one long valley with a single walkway suspended a few meters above the land below; this walkway is curved, though, which makes it somewhat difficult to ski without constant readjustments.
Although most of the players will naturally stick to the valley, it’s worth noting that nothing prevents you from jetting up to the highlands and sniping or mortaring from on high. The bases here are noticeably unprotected, so if you want to try and destroy a bunch of equipment, it’s a simple matter to home in on their equipment generators with a mortar and blast away. The radar tower in the middle of the walkway is a decent sniping spot, but an obvious one; you’ll usually want to find something a bit less ostentatious before you draw attention to yourself.
MP-Highlands
Gametypes: CTF, Fuel
This relatively featureless map is strongly defensible during CTF matches. Although there is a lane for flagrunners to pass through, each side gets mines and turrets aplenty to lay down along the interior hallway leading to and from the flag. Finding a good skiing lane in the hilly, rock-covered terrain is likewise difficult, but can be done, so you’ll need to make sure that you sap as much momentum from your enemies as possible before they grab the flag. A heavy armor infantryman with a repairkit and a deployable repair station nearby can keep most of your turrets and mines up and running, as well as form a wall which flagrunners may run into, but you’ll need to ensure that no opposing heavies get the rear passages lined up with their mortars. Unfortunately, the tops of your base is open to enemy fire, so you can expect to get spammed with mortars during most matches if you wait around inside.
MP-Isle
Gametypes: Fuel, CTF
Isle might as well be called Aspen, because it’s skiing central. There are some monster slopes for you to abuse here, and during CTF, you can expect to see your flag whisked away at lightspeed by players that’ve memorized the best lines to take in and out. You can practice these maneuvers yourself, and you definitely should, if you intend to be successful in flag captures. In addition to the light armor, you’ll also want to bring along an energy pack for an extra boost of speed, as well as a grappler. There isn’t much to grapple onto in between the bases, but you can use it for a quick modification or correction of your course when you’re near either of the flagstands, since they’re attached to large spires.
On defense, you’ll need to take advantage of the fact that you have numerous vehicles at your disposal if you want to kill someone who’s absconded with your flag. Don’t forget that you have a forward spawn point with a jump tank; if you’re near your spawn station, you can warp yourself forward to get a better position to deal with the usurper.
MP-Junk
Gametypes: CTF, Fuel, Arena
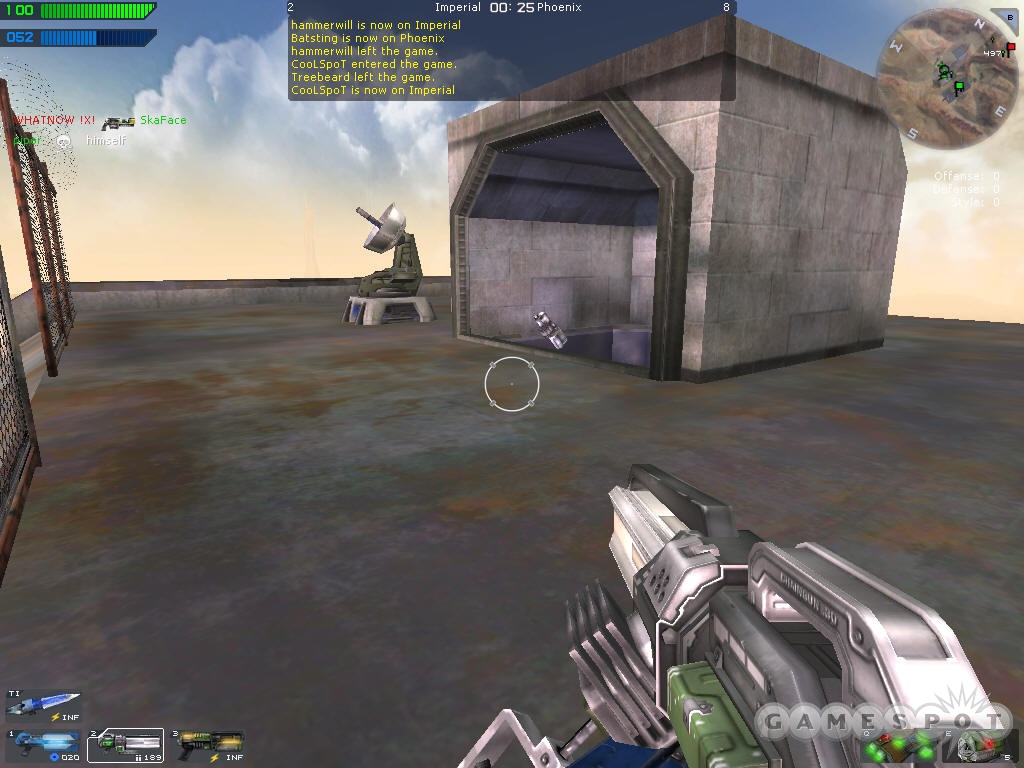
Junk is another large map that will see a lot of play on the 32-player servers. The most unique aspect of it is the fact that the flags are located inside small tubes that are suspended well over the surface of the level, making them among the hardest to get to among those of all the CTF maps in the game. As per usual, proper skiing will be required both pre- and post-grab to get the flag back to your own base without getting destroyed. The skiing actually isn’t the hard part; selecting your line and controlling your speed when approaching the flag is harder, since you can easily wind up going too fast and having to burn most of your jetpack energy correcting.
If you do manage to make a clean approach and exit from the tube, though, there won’t be much your enemies will be able to do to catch up to you. If you can afford the momentum shift, you might want to try turning back towards your own base immediately upon leaving the tube; you can often confuse your enemies by weaving between some of the busted buildings on your way back home.
MP-Royalty
Gametypes: Arena, Rabbit
Royalty can only be played in the Arena and Rabbit modes, making it a rare day indeed when you’ll see this in rotation on an online server. It seems more appropriate for Arena than anything else; it has a classic deathmatch feel to it, what with the multiple platforms on top of each other and the combination of vertical and horizontal movement. The inclusion of jetpacks and the grappler give Tribes: Vengeance a much different feel in deathmatch than in other games, but still, the law of the land is the same: kill or be killed. Since you and your enemies will never be too far from a surface, grab a spinfusor at your loadout and go to town.
MP-Spiridian
Gametypes: CTF, Ball, Rabbit

This large arena has a circular shape, with a large spoke in the middle preventing a pure line-of-sight from one base to the other. The flag stands here are placed well above the surface of the arena, which will force most players to use up their jetpack fuel just to reach them, unless they’ve taken the alternate route by skirting the forcefields on the upper terrace that lines the outside edge of the playing field. You should have plenty of deployable turrets, so this terrace should be the first priority for placement.
If you’re on offense, and want to be incredibly annoying, you can fire mortars from the floodlight stands on either side of the bases. You should be able to pick off the flag defenders relatively easily, but you’ll also be able to destroy much of their inventory and deployable stands inside the base. Expect for heavy reprisals if you do this, as well as much teeth-gnashing in the chat window.
If you’re going for flag captures, you’ll probably want to pack an energy pack and a grappler. You can use the energy pack for a quick boost as you leave the flag stand, and the grappler can be attached to either the central spire or one of the small walkways in between the bases for a quick change of vector.
MP-SurfaceTension
Gametypes: Ball, Arena
In Ball mode, you can easily make it from the central ball-holder to the enemy goal with a single bar of energy, if you’re in light armor and have the speed pack attachment, so you can expect to see plenty of high-scoring games here. If you’re attempting to evade enemy fire, don’t forget that you can survive indefinitely underwater; since there are plenty of icy platforms floating around, you can go underneath the water to avoid any potential hassles on your way to the enemy goal.
MP-Tropics
Gametypes: CTF, Arena
Another open map here, in the manner of Isle, save with smaller hills and a bit of water in the center of the map. Like Isle, though, the main methods of traversing the map are the roads that circle the central lake, at least if you’re in a vehicle; if you’re looking to ski, you can go right through the lake, but you’ll have to be careful of ridges that will sap your speed.

The flag positions here will have to be approached by air; they’re almost level with the ground, but are just high enough above it to be inaccessible unless you jump or fly a tiny amount. It’s useful to set up a deployable inventory station just behind the flag area, so that it’s shielded from mortar rounds; this will let you get inventory and health refills without having to jump all the way back to the base above.
MP-Utopia
Gametypes: CTF, Fuel, Arena, Rabbit
Utopia would more accurately be titled Dystopia, as it consists of a large number of smashed buildings, spread out across a ruined cityscape. There are dozens of places to hide around (and inside) said buildings, as well as plenty of rooftop perches from which to launch mortars or sniper rounds. This is one of the few open maps where the grappler can be really useful, as the buildings are usually tall enough to allow you to attach to them and swing around their corners without losing any altitude. One negative aspect of the density of structures is that it makes it difficult to find an appropriate skiiing route for quick flag captures; defenders thus have a slight edge here.
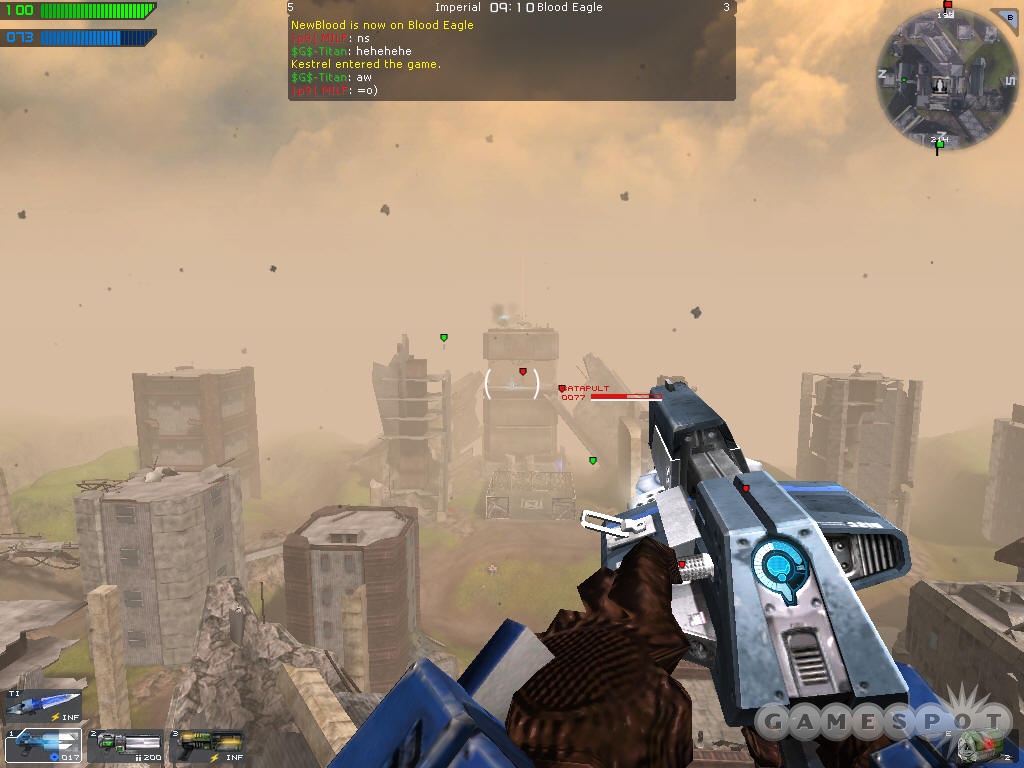
In CTF maps, you can greatly increase your team’s chances of winning if you capture the territory in the center of the map, as it contains a spawn point as well as a couple of fighter pods that will let you hunt down and destroy enemy flagrunners. It’s easier to capture the territory than it is to defend it, though, unless you or one of your teammates sequester yourself inside the territory chamber to destroy any enemies that arrive inside.
MP-Winterlake
Gametypes: CTF, Fuel
Aerial attacks are the rule of the day here, as both teams get an assault ship and a pair of fighter pods. You won’t last long in either kind of vehicle, but if you do manage to get down to your enemy’s base, use the assault ship’s bombs to destroy their sensor, which will make it easier for your infantry units to go after the flag unmolested.
In addition to the vehicle combat, you’ll also have to do a fair amount of anti-infantry to protect your flag. Although it appears difficult to reach, you should always expect pro-level tactics from the opposite team, and since this was one of the levels in the demo, many players have already managed to perfect a flag run that takes them in and out of the flag chamber in approximately no seconds flat. It’s quite easy for enemy heavy units to mortar away any deployables you have there, so you’ll just have to perform your duties the hard way and attempt to interdict enemies on the way in and out of your base.
Got a news tip or want to contact us directly? Email news@gamespot.com
Join the conversation