Tom Clancy's Splinter Cell Pandora Tomorrow Walkthrough
Sam Fisher's on another mission, which means the fate of the world hangs in the balance. Safeguarding freedom isn't easy, so check out our walkthrough for all the crucial intelligence you need to beat Splinter Cell: Pandora Tomorrow.
Design by Collin Oguro
He can sneak along the shadows of dark city streets without making a sound, can counter sophisticated security systems without leaving a trace, can pass through expensive defenses without a scratch, and can drop a heavily armed soldier without firing a bullet. Tom Clancy’s Splinter Cell: Pandora Tomorrow continues the heroics of Third Echelon’s finest operative, Sam Fisher, once again sent into the field with one goal: to save the world.
This GameSpot game guide for Splinter Cell: Pandora Tomorrow includes:
- General Stealth Strategies: This section provides general strategies for remaining hidden and disabling your foes in Pandora Tomorrow’s single-player game.
- Weapons and Equipment: Check here for a rundown of Sam Fisher’s weapons and equipments with strategies for implementing each.
- Walk-through: Find complete walk-throughs for each single-player mission with specific strategies for completing the game’s most difficult sections.
- Multiplayer Strategies: This section offers strategies for Pandora Tomorrow’s spy versus mercenary multiplayer mode.
Table of Contents
General Stealth StrategiesWeapons and Equipment
Walk-through
Paris, France
Paris-Nice, France
Jerusalem, Israel
Kundang Camp, Indonesia
Komodo, Indonesia
Jakarta, Indonesia
Los Angeles, USA
Chapter 1 - General Stealth Strategies
Sam Fisher is at his best when he’s covered in shadow and hidden from his enemies. If you hope to find consistent success in Splinter Cell: Pandora Tomorrow’s single-player game, be prepared to rely more on stealth than combat. While Sam Fisher carries a formidable arsenal, his array of non-lethal weapons and ability to remain undetected in the dark is the best asset.
This section provides general strategies for stealth in the single-player game and how to best disable an enemy if the situation arises.
- One of the most important skills in Pandora Tomorrow is patience. Upon entering a new room or area, don’t move inside without a plan. Find a dark corner and observe the situation. What are the guards doing? What are the guards’ patrol patterns? Often if you remain stationary, you’ll soon discover that the guards’ movements place you exactly where you need to be or will certainly show you where you need to be in order to bypass the guards or disable them. Wait it out and sometimes the guards move away from the area. Furthermore, conversations between guards can reveal hints on what needs to be done to move through the area. Let them talk. Be patient and take time to access the situation before taking action.
- Create additional darkness when possible by shooting out street lights, lamps, and other illumination with your pistol or SC-20K. You should also look for switches to turn interior lights off. Additional darkness provides greater area to hide within. It also creates a larger dark zone for guards to move inside, which gives you more room to perform a successful sneak attack. Note that if the area contains guards, destroying lights causes a disturbance alert and the guards begin a search.
- One of Sam’s most powerful weapons is his mouth. Yes, he does have great sarcastic wit but it’s his whistle that’s a potent tool against enemies. Hide in a large patch of shadow and press the whistle button. It’s enough to alert a nearby enemy but not enough to convince the enemy to set off an alarm. The enemy will raise his weapon and start a search pattern for whatever made the whistling sound. Hide in the shadow and when the enemy moves close, sneak up behind and grab him, punch him out, shoot him with a headshot, or incapacitate him with a non-lethal weapon. When in doubt, try the whistle technique!
- If you’re going for pure stealth, use a whistle or even a glass bottle to alert your enemies. As they search for you, move through the darkness past their position and into the next section. Toss the glass bottle in the opposite direction you plan to move. Rotate the camera to keep an eye on the enemy. If he’s looking away, it’s safe to move through light. If he’s facing you, stick inside the shadow. Remember to move Sam as quiet as possible. Stay crouched and don’t run at full speed to keep Sam undetected.
- Try to save your non-lethal weapons for the toughest areas of a level, particularly areas with multiple guards or areas with very little darkness to hide within. When faced against multiple enemies, be careful how you dispose of one of the guards. Make sure any other guards are looking away before you make your move. If an enemy sees his friend nailed with a sticky shocker, he’s going to set off the alarm. Combine techniques by luring an enemy into shadow using a whistle then blast him at close-range with a sticky shocker or ring airfoil round.
- Sam Fisher has a formidable right hook. If an enemy has moved in the darkness surrounding you, stand up and knock him over the head. Note that it sometimes requires a couple blows to knock out an enemy so don’t stop with just one strike. It’s even possible to run down a scared civilian and knock them down with a punch. The scared civilian is likely running to find an alarm or a police officer; run him down and knock the civilian out before he can reach his destination. And always, always move bodies into the darkness. It takes a couple extra seconds but is an easy way to prevent an unwelcome alarm.
- Speaking of hiding bodies, move them as far into a dark corner as possible especially if there are multiple enemies in the area. Even if the body is in the dark, if a guard patrols the room and happens to step onto a knocked out guard, an alarm will sound! Put the body in the dark and as far away from an enemy patrol as possible just to be safe.
- Visual observation is extremely important in remaining undetected. Use the optic cable at every closed door. If you spot a guard or civilian inside the next room, be patient. Observe that person’s movement and wait to see if the person moves away or turns around. Wait for your opportunity to move into the room safely. Also, rotate the game’s camera around to provide the best view around corners or into open doorways. Adjust the camera successfully and you can see even more than Sam sees and keep him safely undetected from any enemies around a corner or inside an open room.
Chapter 2 - Weapons and Equipment
This section provides an overview of Sam Fisher’s weapons and equipment. There’s no single way to bypass each guard in the game. You may wish to use a sticky shocker, try out the ring airfoil round, or perhaps a headshot with the SC-20K is the way to go. Since ammunition and equipment are fairly limited, the key is maximizing their use throughout the missions.
5.7mm Pistol
The SC pistol is a semi-automatic firearm with 20-round magazine and silencer. It’s definitely not the best means of dispatching an enemy. Without a scope, it’s difficult to score a headshot unless you’re within very close-range. Plus pumping rounds into a guard’s chest requires a lot of ammunition to score a kill.
But the pistol, with its laser sight, excels at shooting lights. This is an important practice throughout the single-player game. Destroy lights in halls, along streets, and inside rooms to create additional darkness to hide within. Note that enemies can see the laser so be certain no enemy looks your way while you use the laser sight to break nearby illumination.
SC-20K
The SC-20K is your primary combat firearm, particularly at long-range with its scope mode. It’s a 5.56x45mm assault rifle and includes scope, silencer, and a multi-purpose launcher for non-lethal weaponry and grenades. Though usually implemented in long-range combat, sniper mode can also be used for close-range situations. For example, lure an enemy guard close with a whistle or other distraction then ready your SC-20K and scope. When the enemy approaches close and within the surrounding darkness, hold your breath to steady aim and score a close-range headshot.
The SC-20K’s other use is its secondary fire function. Equip a host of gadgets and weapons in the SC-20K’s multipurpose launcher, including non-lethal weapons like the sticky shocker, diversion camera, and ring airfoil round.
Disposable Pick
Use the disposable pick to quickly bore out the cylinder of a locked door. The lock pick takes time and, on occasion, time is of the essence. For instance, if there’s a bomb on the other side of that door or if there are guards wandering around the area. If you don’t have the time to utilize the lock pick, select the disposable pick instead.
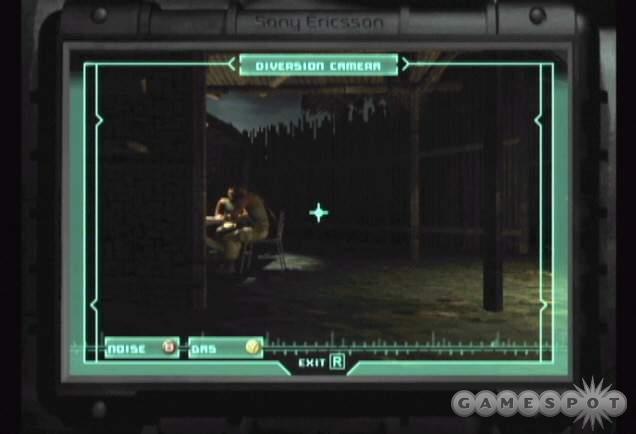
Diversion Camera
Launched from the SC-20K’s multipurpose launcher, the diversion camera is an adhesive camera boasting a noise emitter and CO2 canister to distract and incapacitate. It’s nearly a sure-fire way of disabling a tough guard and can even take out a couple guards if you’re lucky.
The key to using the diversion camera is its placement. Fire the diversion camera at a surface that the guards can reach and will move near. It’s also important to note your own firing line when placing the diversion camera. Find an angle where you remain in shadow but can still launch the diversion camera where it needs to be placed. That way when the guards are in search mode hunting down that whistle sound, they won’t spot you in the back corner.
Use the camera’s whistle to lure guards in front of the CO2 canister. Release the gas when the guard or guards stand in front of the camera. If faced with multiple guards, exit the camera’s view after releasing the gas and deal with any additional guards that weren’t in the camera’s area effect radius.
Sticky Shocker
Equip the SC-20K and place a sticky shocker in its secondary firing launcher for a clean, non-lethal way of incapacitating opponents. Launch the sticky shocker at any enemy body part. The high-voltage jolt incapacitates the recipient within seconds. It’s quick and not too messy. For best results, particularly in situations with two or more enemies present, wait until the recipient moves into a dark area so his slumped body isn’t easily seen by the other enemies patrolling the area. Hit an enemy in water and affect any other enemies standing in the same pool.
Smoke Grenade
The smoke, or gas, grenade serves two purposes: for incapacitating enemies within its area effect radius and for providing cover against snipers or other armed enemies. For instance, you need to escape an area protected by snipers. Drop the smoke grenade at your intended route and use the cover to sneak by the snipers’ line of fire. Along with providing cover, the smoke is also harmful and useful against a group of enemies in an enclosed space. Fire the smoke grenade at the feet of a group of enemies to knock them out.
Ring Airfoil Round
The ring airfoil round is a high-impact, zero penetration round used to knock out opponents. It’s similar to the sticky shocker but the ring airfoil round is a tad harder to use. If you strike an enemy in any body part other than the head, the enemy stands stunned. If you don’t follow up the strike with another weapon, a punch, or a grab the enemy will regain his composure and be like new. This can be a problem if it’s a highly visible area and there are other guards nearby. Try and hit the guard in the shadows and have a route to reach the guard and administer a finishing blow or, if necessary, a grab.
The ring airfoil round is most helpful if you want to stun a guard that you actually need to use. For instance, you need the guard for use on a retinal scanner or to radio his comrades. It can also help keep a civilian from alerting a cop down the street or from reaching an alarm. Aim for the head to knock out the target instantly...just be sure you don’t need that guy first!
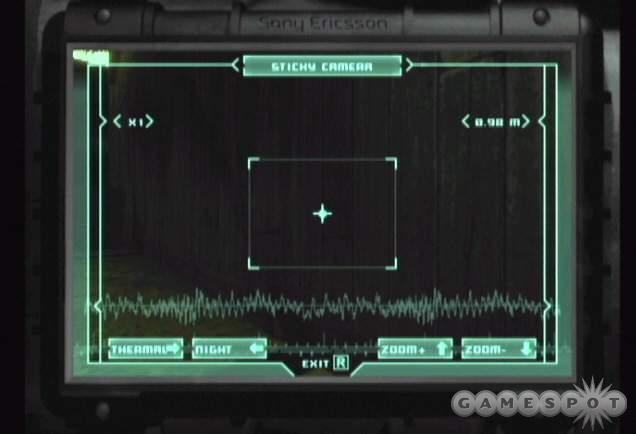
Sticky Camera
The best part about the sticky camera is its reusability. You can fire the sticky camera, scout the next hall or room, deal with what’s inside, then pick up the sticky camera and use it again in the next area. The key is firing the sticky camera at the appropriate location. You want to ensure a good view of the next hall or room but also ensure that Sam is safely hidden from any patrolling guards that might be moving around the same area.
Camera Jammer
Some cameras in Splinter Cell: Pandora Tomorrow are bulletproof. That’s where the camera jammer comes in. Equip the jammer and point it at the camera. Press the fire button to jam the camera. Move underneath or by the jammed camera before the rechargeable battery on the camera jammer runs dry. Wait until the camera faces away from where you wish to move and jam it. It remains in the same position and can buy you extra time to sneak into a shadowy corner if the battery runs dry.
Wall Mine
The wall mine is a motion sensitive explosive device that you can stick to a wall. Lure hapless enemies toward the position and watch the wall mine detonate in a fiery blaze. You’ll encounter enemy wall mines a few times during the single-player campaign. Inch slowly and carefully along the wall toward the wall mine. Move slowly until you can "disable" the device. A motion sensitive high explosive adhesive mine. You can also detonate the wall mine from a safe distance by shooting the explosive.
Frag Grenade
Save fragmentation grenades for opportunities against multiple enemies, particularly in narrow hallways or rooms where the enemies have little chance of evading the frag grenade’s blast radius. It’s a timed grenade; the grenade bounces a few times before coming to a rest (so don’t aim too far). Toss the grenade around a corner to obliterate an unsuspecting guard. Frag grenades are fairly scarce so use them wisely and save them for maximum potential.
Flash Bang
The flash bang creates a flash of lightning to blind nearby enemies. It can be used to aid in evasion or to get the jump on a group of enemies. Blind them with a flash bang and finish them off with your other weaponry. Don’t look at the detonation or it’ll blind you in the process.
Emergency Flare
The emergency flare emits both light and heat; its primary purpose is to distract the automated turrets found in the single-player game. Toss a flare and the turret will fire in the direction the flare lands. Therefore, toss it away from your desired route. If you want to move around the right side of the turret, toss the flare so it lands on the turret’s left side.
Chaff Grenade
Use the chaff grenade to disrupt electrical devices for a period of time. Note that it also affects Sam’s electrical gear. Disable a motion detector or security camera with the cloud of magnetic particles released from the chaff grenade.
Chapter 3 - Walk-through
This section provides a complete walk-through for Splinter Cell: Pandora Tomorrow’s single-player campaign.
Dili, Timor
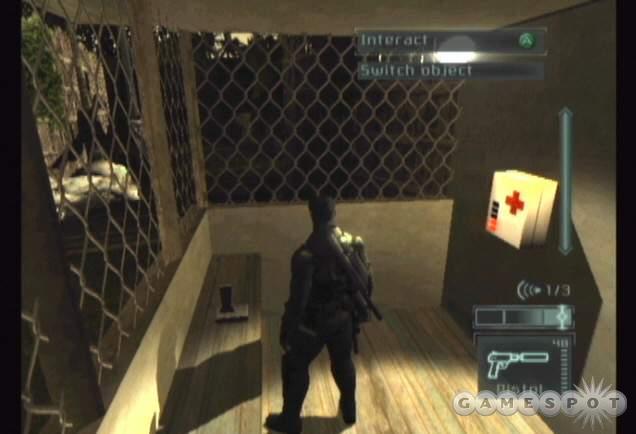
Follow the instructions at the bottom of the screen to unlock the handcuffs. Complete the opening cut scene and receive briefing for your opening mission.
Briefing: The ‘Darah Dan Doa,’ an Indonesian guerilla group led by Suhadi Sadono, has invaded the U.S. Embassy to Dili to retaliate for the installation of a U.S. military base in East Timor.
Objective: Infiltrate the Embassy.
Walk forward to the dock and use the jump button to pull yourself up. Lambert offers a brief tutorial on the importance of stealth. Shoot the light to create darkness (though it’s not necessary with no one around, it’s a good habit to start now) and sneak around the corner. Continue through the shadow to the lit ladder up ahead. Climb the ladder then jump up to the zip line. Ride the line to the pier.
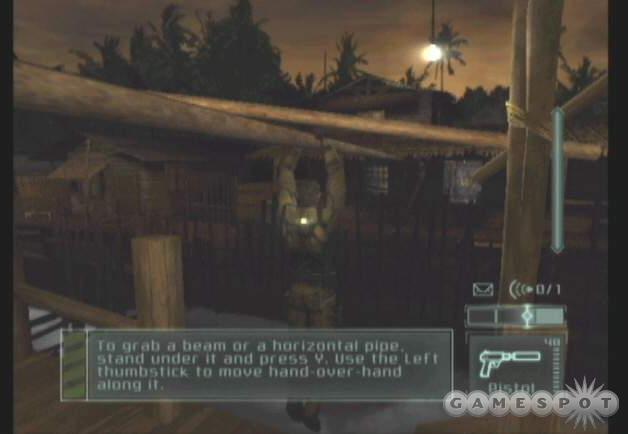
Spot the bar overhead. Jump and grab the bar. Shimmy across. When you reach the fence, use the jump button to pull up your legs and continue across the fence. Follow the instructions for using your pistol while on the bar. Drop down on the far walkway.
Sneak past the window and around the corner to the door. Test out your optic cable and spot no one inside. Open the door and cross the room to the far right side. Pick the door’s lock. You can use the optic cable to check for enemies but it’s not necessary. Open the door and quietly advance inside.
Find the pipe in the back corner of the room. Climb the pipe then switch on your night vision goggles to find the trap door on the room’s corner. Once again use your optic cable to spot no one below. Open the trap door and drop inside. Receive word from Lambert in the next section; the mission is non-lethal with just a single alarm. If you’re detected, the mission ends.
It’s dark outside so switch on your night vision goggles to see where you’re going. Maneuver around the corner to the right and hug the left wall to find a crawlspace underneath the structure. Crawl to the far end. Move up the lit staircase to the right (disabling the light if you wish) and round the corner. Find some ammo on a crate at the back end of the walkway.
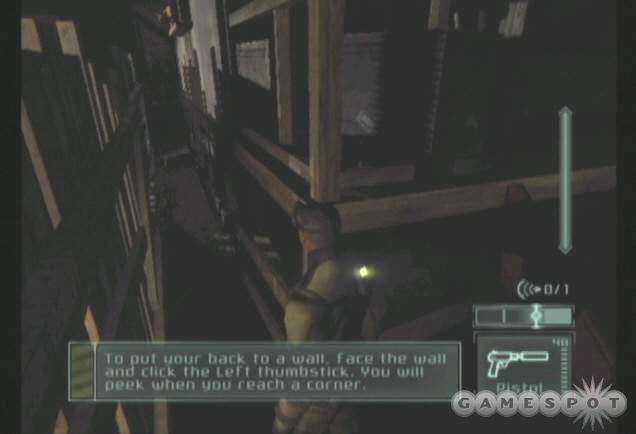
Go down the small staircase and find a narrow walkway behind the structure (essentially behind the crate containing the ammo). To move through this narrow section, you must put your back to the wall. Perform the move then traverse the tight quarters to the far side. Peek around the corner to spot a sitting guard looking away from you. Follow the instructions and shoot out the light. When the guard gets up to investigate, sneak up behind and disable him.
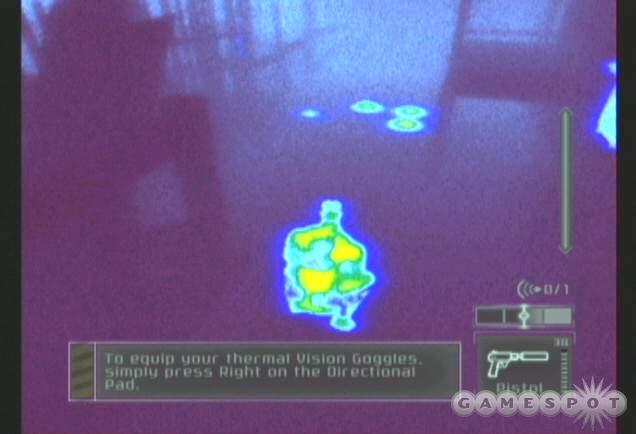
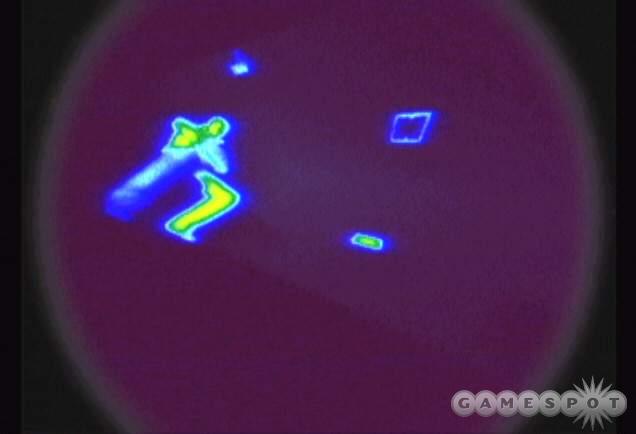
Move past where the guard sat and turn on your thermal vision. The blinking objects on the ground ahead are mines. Bypass the first set of mines using the crawlspace on the right side. When you reach the second set of mines, climb onto the crate on the left side. While on the crate, jump straight up to grab the ledge. Shimmy to the right over the small minefield.
In the next clearing, find the narrow alley on the right side. Follow the instructions to perform a split jump. Grab hold of the upper ledge on the left side. Shimmy to the right until you can pull yourself up. Follow the hall around the right corner until you receive word from Lambert.
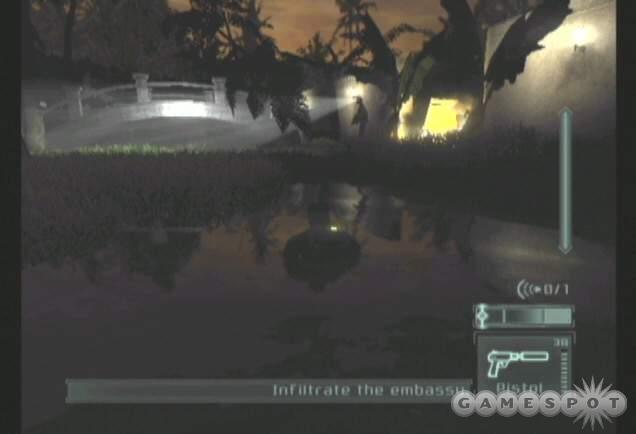
Exit the structure by sliding down the pole. Turn around and spot the stream. Quietly enter the water and turn left. Notice the guard on the right bank searching the stream with a flashlight. You must advance through the water and underneath the bridge when the guard moves away and isn’t monitoring the stream with the flashlight. Move slowly to reduce noise level. You could also whistle and get the guard to search away from the bridge. When he’s turned away, go under the bridge.
Exit the stream on the other side of the bridge. Go around the right corner and receive more instructions from Lambert. Spot the guard up ahead; he’s one of Sadono’s lieutenants. Grab him from behind and interrogate. After squeezing him of all useful information, knock him out and drop him in the dark.
Be patient and wait for the guard patrolling the area to leave. Exit going left and move into the alley by the flaming barrel. It’s another tight alley--perfect for the split jump. Perform the move and grab hold of the upper ledge. Pull up to enter the next section.
Objective: Locate and question Douglas Shetland. Use of lethal force is not allowed.
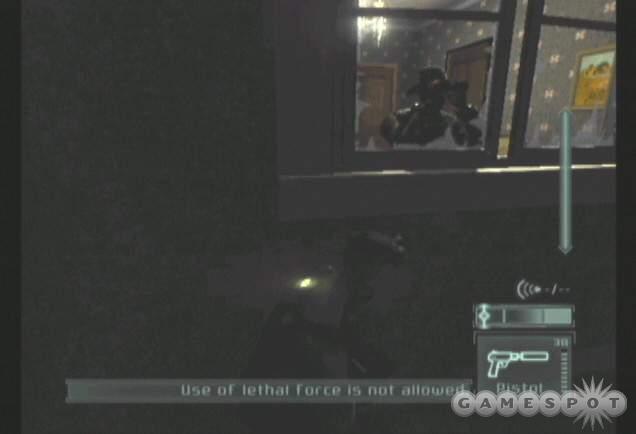
Walk left to the scaffolding and use the ladder. Go right to another ladder and ascend. Drop off onto the ledge and go around the corner found to your right. Spot the window ahead; a guard stands inside looking through binoculars. If you try to crouch and sneak by, you will be detected. Instead, crouch and perform the back to wall maneuver. You’ll slide underneath the window and beneath the guard’s gaze. Continue to the far corner where you hear word from Lambert.
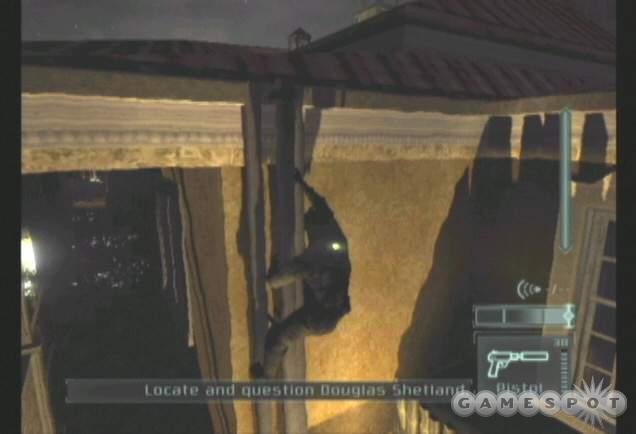
Wait until the conversation concludes. Continue with the back to wall move underneath the next window--the guard gazes out so you must remain low to stay undetected. Move beyond the door using the SWAT maneuver and continue across the walkway. At the end you’ll reach a pipe. Climb out onto the pipe and ascend to the upper ledge. Shimmy to the right along the ledge and past the window. Though you could enter from this location it’s much easier if you continue to the far right side.
Climb out onto the next pipe and descend onto the balcony. Quietly maneuver through the open double doors (switch on night vision if needed). You’ll see the enemy ahead of you torturing Douglas Shetland. Sneak up behind the guard, grab him, knock him out, and drop him in the dark. Search him for some ammunition. Approach and speak with Shetland.
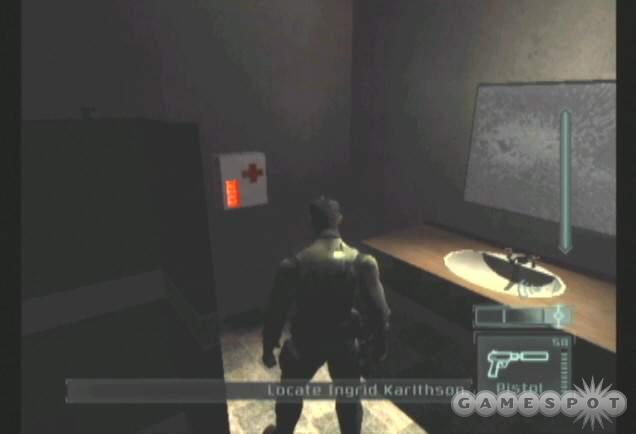
Objective: Locate Ingrid Karlthson and give her the mortified_penguin email for translation.
Cross the room to the door in the right corner. Checking the optic cable reveals a guard looking out a window on the left side. You can check the other door and spot a guard standing post on a balcony. Take the door with the guard on the left side. Sneak through the room quietly. You can grab the guard if you wish or just avoid the glass and reach the door on the opposite side of the room ignoring the guard completely. If you grab him, deposit the guard in a dark corner.
Enter the next room; it’s empty. Move through the door to the right and you’ll reach the top of a staircase. A hall on the right side leads to the guard you spotted on the balcony. You can remove him if you wish or just ignore the guard and proceed downstairs. If you do grab the guard, be sure to check an adjacent bathroom for a medical kit if you have been wounded.
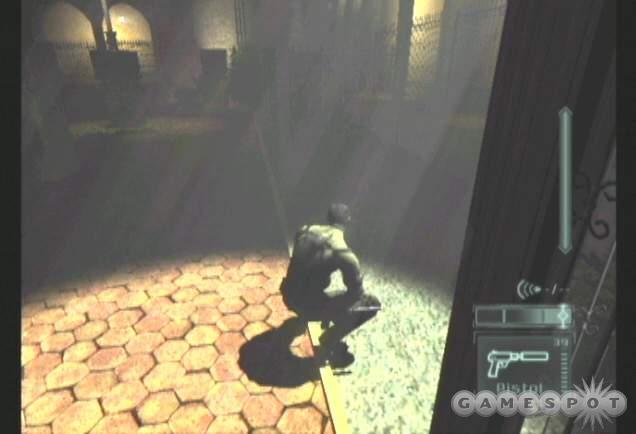
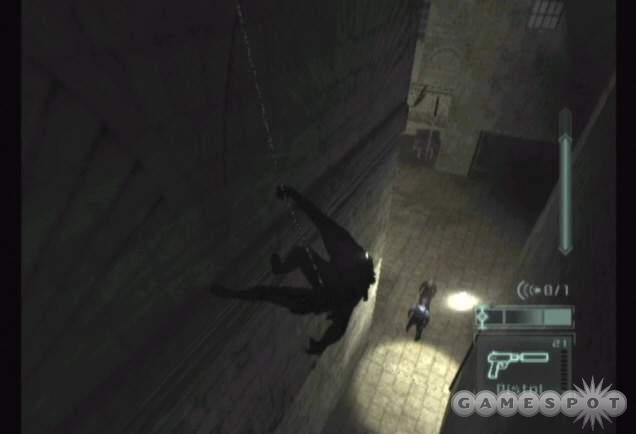
Descend the staircase carefully and stay in the shadows. There are three guards in the room. One patrols in a pattern across the room. Two other guards sit in a well-lit area checking out some sort of plans. Your goal is to reach a hallway on the other side of the two guards.
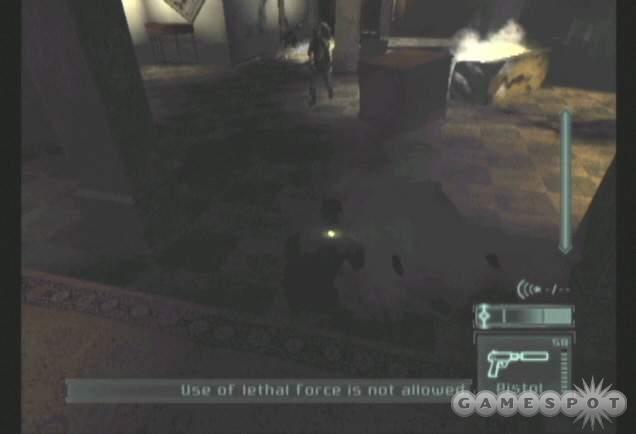
Taking out the patrolling guard is the easier part. Position yourself near the dark column on the right side. There’s an upside-down table to the left side of this column. Crouch and hide next to this table. The patrolling guard will move to this spot and stop momentarily. When he stops, grab the guard and deposit him in the shadows.
Grabbing the other guards is tougher. Break the lights along the left side of the room using your pistol. The disturbance causes the guards to patrol the area. Use your whistle to lure a guard into the darkness. Punch him out or grab him (away from the other guard ideally). Finish off the third guard in a similar fashion. There’s also a bottle on a bar on the right side of the room that can be used to create a distraction. While the guards investigate, maneuver through the darkness of the right side and find the narrow path behind the lights and toward the front of this structure. Search one of the rooms in the front hallway for a medical kit.
Exit through the main door and approach the courtyard to receive instructions from Lambert. Apparently there’s a sniper in the area and he’s wearing night vision goggles. That means the only way to pass the sniper unscathed is to remain in the safety of the spotlight.
Wait for the spotlight on the right side to shine in front of your position. Move inside the light and stay at its center. Follow it along the right side of the courtyard to the far right corner. There’s a pipe here to climb up to the upper balconies. Look up and you’ll spot two balconies. The left balcony contains the sniper; the right balcony contains Ingrid and her flashlight. If you can time your advance to her balcony while the light shines, the sniper won’t see you. If Ingrid has moved away, create a disturbance with a whistle and the sniper will check around while you can move up undetected. Enter the room and speak with Ingrid.
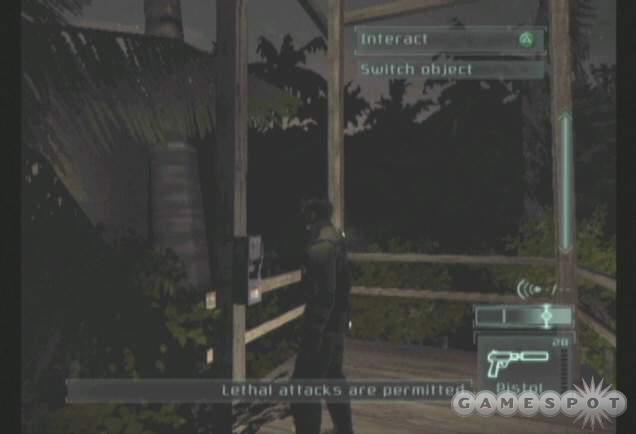
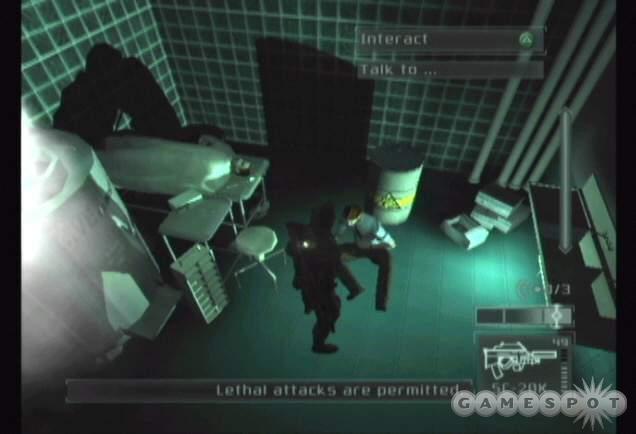
Objective: Take out the spotlights in the village so the Osprey can pick you up. Lethal attacks are permitted.
The sniper is still in the adjacent balcony. You can reach it via the door in Ingrid’s room. Use the optic cable to make sure the sniper is on the balcony and looking away. Open the door quietly and either shoot the sniper in the head or grab him and knock the sniper out. Dump him in the dark.
Move down the staircase across from the sniper’s balcony. There’s a medkit downstairs if you need to mend wounds. There are two doors in the room at the bottom of the stairs; one door is right at the bottom of the stairs and the other is on the far side of the room. Use the door at the bottom of the stairs.
Exit into the dark exterior. Turn the left corner and spot a guard in the distance (you may want your night vision goggles toggled on). When the guard moves out of view, either sneak up on him and knock the guard out or shoot him. Climb the tower on the left side to find the switch box that controls one of the two spotlights. Switch it off.
Move through the alley on the right side. Bust out the lights if you wish to create darkness. Another guard is found just up ahead patrolling from the left to right. Terminate him and climb the second spotlight tower. Switch off the light using the control box. Find the walkway on the right side. Traverse the short dock to the boat at the far end. With both spotlights disabled, the mission ends in success.
Paris, France
Briefing: An enemy agent operating under the alias "mortified_penguin" has broken into the Saulnier Cryogenics lab with a band of French and Syrian mercenaries. Track their path of intrusion to uncover their purpose and the identity of "mortified_penguin."
Objective: Infiltrate Saulnier Cryogenics via the abandoned subway tracks that run alongside the lab. The mercenaries that you are following used the same route and left traps and guards in their wake.
Move forward to the hole and descend the ladder. Drop down into the tunnel. Walk to the corner and peer around to the left. You’ll spot a patrolling guard. Distract him with a whistle or a nearby bottle and take him out. Deposit his body in a dark corner. Approach the subway car.
There are a few ways to tackle this area. You can shoot out lights, move through the subway car, or even move over the subway car. Climb the ladder on the rear of the subway car to reach its roof. Cross the top of the car, drop down inside, and listen to the guard chatter in the distance.
Wait until the conversation concludes. One guard patrols the subway car’s exterior (passing by the open door to the left) and another patrols the car’s interior. Hide in the dark and wait for the guard to approach the inside. Grab or punch the guard and drop him in the dark.
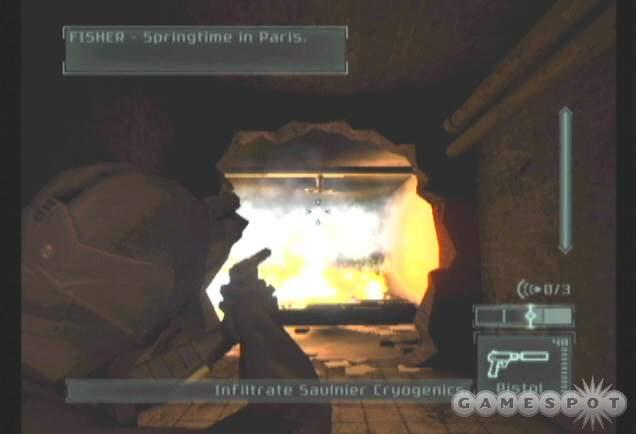
Move around the back corner and face the large fire. Receive a tip from headquarters. Shoot the valve above the fire to release enough water to drown the blaze. Move through the shower and into Saulnier Cryogenics.
Objective: Access the security terminal so Grimsdottir can investigate network activity in the complex.
Cross the dark storage room to the far door. Use the switch to darken the room. There’s a guard on the other side of the door so it’s wise to keep this storage room as dark as possible. Use the optic cable to monitor the guard’s patrol pattern. When he moves away from the door and across the room, open the door and hide in the darkness. Wait for the guard to come by then grab and disable him.
Move across the room to the far door (the computer does nothing). Once again, turn off the lights using the switch. Use the optic cable on the door and monitor the patrolling guard in the next room. Once he moves away from the door, open and enter the shadows of the next room by hiding behind the cubicles on the right side.
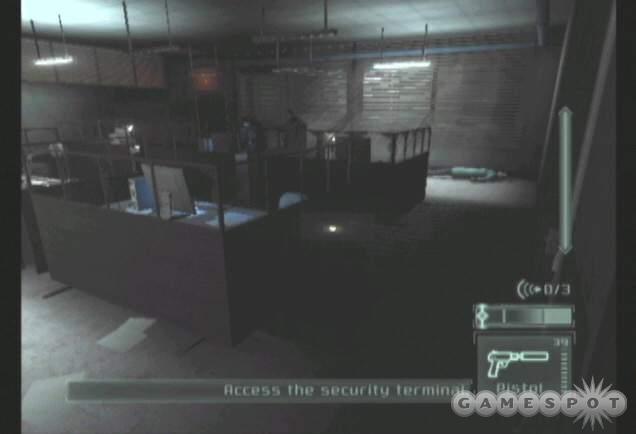
Wait for their conversation to conclude. One guard continues a patrol around the room while the second guard moves to a second computer. When the patrolling guard moves away, grab the guard behind the computer and disable him. Lure the second guard into the shadows with a whistle and knock him out. Put both guards in the dark shadows. You could have also flipped the light switch near the door to aid in the attack but it’s easier to disable one guard instead of forcing both guards to search for you.
Maneuver across the room to the next door. The hallway is empty. Turn left and use the lock pick on the door to enter a locker area containing a medical kit. Turn off the lights in this locker room then use the optic cable on the next door. It appears empty. Enter and move forward until you hear the voices. Quickly scamper into the shadows in the right corner of this auditorium.
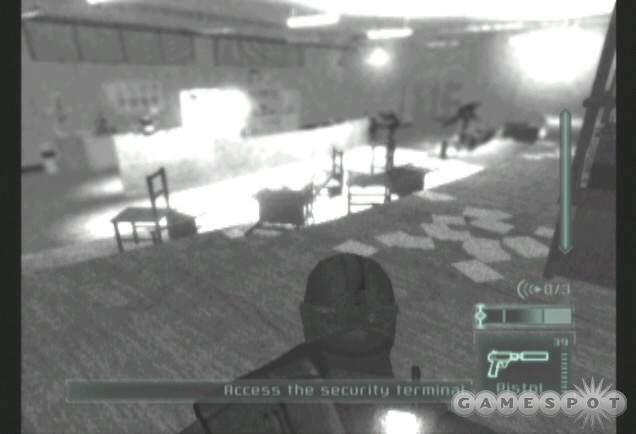
Turn on night vision and watch the troops enter and search the room. Remain in the dark corner until the leader concludes his search and leaves the area. The guard closest to you (the one on the same level) moves close to the right corner. Take him out with a headshot, ring airfoil round, or grab him when he starts to move back. Do it silently so you don’t disturb the other guard. Don’t forget other items in your inventory if you have trouble here. Sticky shocker and the diversion camera will also prove useful against these two guards. Once you nail one, the other can be lured into the darkness with a whistle. Deposit both bodies in the dark. Search their bodies for a data stick and ammo.
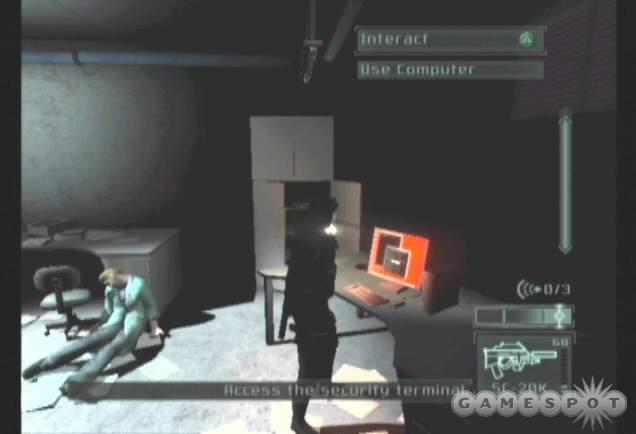
Enter the morgue area and continue to the double door on the left side. Listen to the guards. The computers in the next room are being destroyed. An easy way to prevent it is to make a disturbance causing both guards to search or charge you. If you’re good with your weapon, just nail them as they exit the doorway. Search their bodies for items. Move into the room and use the computer with the red monitor in the back of the room--that’s the security terminal.
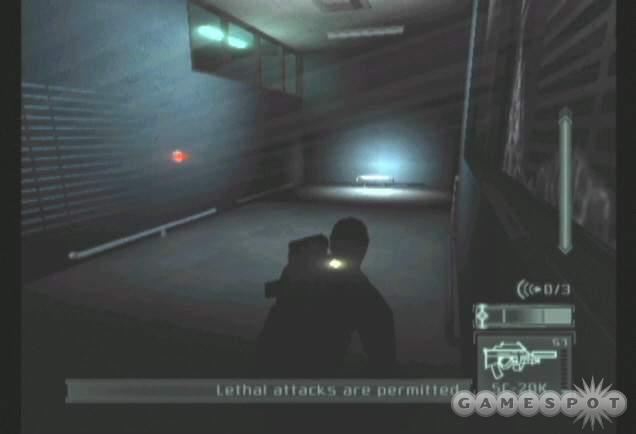
Objective: Disable the bomb in the boiler room.
A bomb has been triggered; Grim says it’s in the boiler room further down the corridor. A counter appears on your screen: 90 seconds to disable the bomb. Exit the computer room to the left. The next door contains a medical kit if you wish to return later and heal up. Look to the right down the hallway. There are a couple guards in the area. The easiest way past is to use your SC-20K and its sniper scope. If you’ve set off alarms, though, it might be risky. You can also wait for them to leave the hallway but that takes time. Enter the second door on the left to find the boiler room. Use the lock pick to open the door (or a disposable pick if time is running out). Approach and disable the bomb.
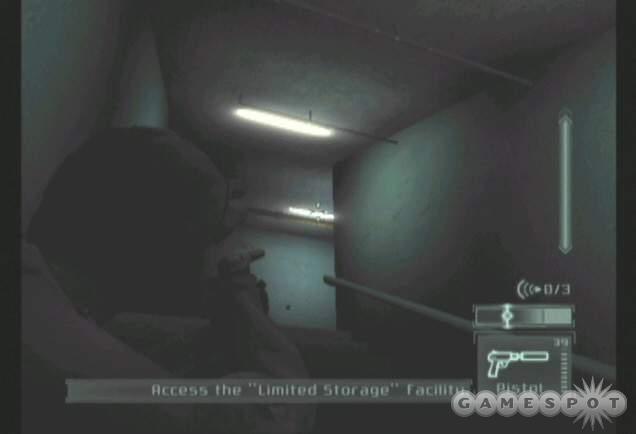
Objective: Access Saulnier Cryogenics’ client database on the first basement.
Exit the boiler room to the left and find the door in the back corner. Be sure to move any bodies into darkness. Open the door into the next area. Ascend the staircase slowly. There’s a motion detector at the top (the red light). Move extremely slowly past the motion detector. Reach the top of the staircase and open the door (there’s nothing on the other side but use the optic cable if you’re paranoid).
Slowly approach the corner and hear enemies firing their machine guns. Wait for them to disperse. When the lone patrol guard moves close, grab him or eliminate him with a headshot. Drop his body in the dark.
There are a couple ways to tackle this area. Double doors across from your location lead toward the database room but it can also be approached from the far left side. Move down the hall and note the red light on the left side. It’s another motion detector so move very slowly near it. Move around the corner and into the hall with three doors: two on the left and one on the right. The one on the right leads to the database room.
If you go the left room, check the second door on the left to spot two guards at the security station. Use the optic cable to monitor the guard that moves around. When he’s facing away, enter the door and disable him. Take out the second guard as well and drop both bodies in the dark. The guards can also be shot if you don’t mind a potential alarm.
Cameras monitor the database room and are the biggest danger. Use your camera jammer to move past the cameras and to the computer. Activate the camera to receive your next objective.
Objective: Find some French brains. Sadono’s men retrieved a list of clients whose brains had been frozen in storage. Fisher needs to access the part of the lab where those brains are stored.
Exit the door to the right and approach the keypad on your left. Check your inventory for the code: 2457. Stay out of the huge light. Lure the guard outside into the room and finish him off with a headshot. The light can also be switched off, which should cause the guard to enter the room. Check for the medical kit in the room as well as a couple ring airfoil rounds.
Exit and slowly move past the motion detector fixed on the left wall. Enter the door in the back left corner. Start up the staircase. Shoot out the lights because there’s a camera on the wall. Once it’s dark, move underneath the camera. There’s another danger here--a wall mine. Move along the back wall very slowly and slide to the wall mine. Disable it as soon as you possibly can.
Continue up the stairs and take out more lights to protect your stealth near the next door. Slide the optic cable under the door to spot the enemies in the next area. One guard patrols near the door while a second stands at the desk--unfortunately behind some protected glass. Grab the first guard and deposit him in the dark. Then approach and disable the second guard. With lethal attacks permitted, you could also simply start shooting. Drop both guards in the dark.
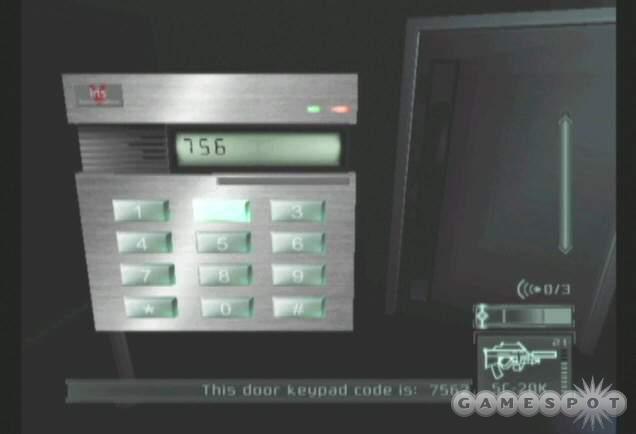
Move through the dark hall in the back of this lobby area. Approach the keypad. Check your inventory for the code: 7562. Enter the room with the brains. Use the medical kit on the right wall as needed.
Objective: Meet Francois Coldeboeuf. Through intercepted communications, Third Echelon leans that one of Saulnier’s security guard has a picture of the mercenary’s leader. Wounded, he has hidden himself in Saulnier’s chop shop. Fisher must find a way into the chop shop.
Approach the steam from the passage in the right corner. Steam means one thing: time for thermal vision. Toggle your thermal vision and enter the misty room. Spot the guard across the room and listen carefully to hear the whine of a turret. It’s just ahead of you on the left side. Approach the controls and deactivate the turret. Maneuver behind the guard and disable him or kill him with a headshot. Search the body for a sticky shocker. Drop the body in the dark.
Move to the door in the back left corner. Use a lock pick to open the door. Keep thermal mode on as you move out onto this catwalk. There are several guards on the far side of the catwalk. You can choose to tackle them with distractions or your weaponry or take a stealthier route by dropping off of the catwalk on the left side (the area without the railing).
Shimmy to Fisher’s left. Time your move past the steam vents or suffer damage. When you reach the far end, wait for the guards to move over to the right then pull up and escape to the left.
Cross the next room toward the medical kit. Move slowly against the right wall and disable the wall mine before using the medical kit. Enter the next room and find the open ceiling grate in the back corner. Climb the cabinet underneath and pull up into the vent. A brief cut scene reveals enemy guards have Francois pinned down inside a vault.
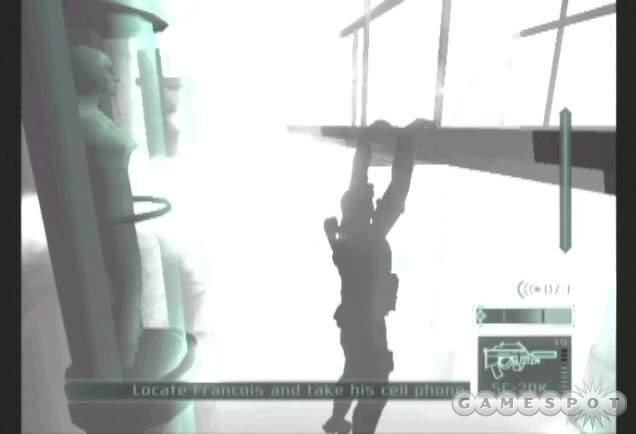
Crawl through the vent and take the first passage on the left. Drop down (search the room for ammo) and speak with Francois. You check out his cell phone for the picture of the mercenary leader.
Objective: Meet Coen for extraction.
The guards outside have upped the ante: they’ve pushed explosive barrels to the vault’s door. A timer appears. It’s decision time. You can shoot the barrels near the guards or let them do the dirty work for you. The explosion is required to escape the level. Just realize Francois is a casualty in the process. Cross the vent shaft to the far end and drop down. Approach the white van ahead of you to escape the level.
Paris-Nice, France
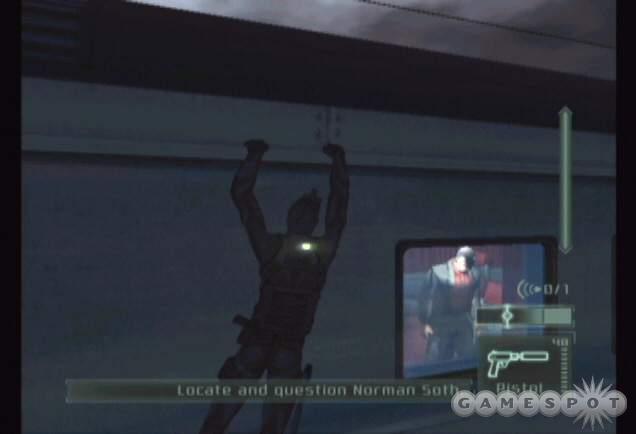
Briefing: CIA-trained operative Norman Soth has been located on a southbound Hespiria Railways train accompanied by a squad of French/Syrian mercenaries. Locate and question Soth in order to determine his status as an enemy or friendly operative.
Objective: Locate and question Norman Soth. Being detected before finding Soth means mission over. Use of lethal force is not allowed.
You begin on top of the speeding train. Move forward and notice you can enter the train car from the hole in the roof. You can also bypass this entrance and move to the end of the car and drop down between the two cars. This is the easier route. Just move across the top of the train car until you can drop down between this car and the next car.
Open the door (using the optic cable reveals mostly darkness). Move forward into the shadows. It soon becomes apparent you’ve entered an enclosed cargo area. Look carefully and spot a guard on the other side of the fence. You need to get him out of the way so you can reach a trap door in front of the cage. Get the guard to investigate the darkness with a couple whistles. When he’s close, grab him or punch him out. Check his satchel for information.
Move to the front of the car and spot the trap door on the ground. This opens up underneath the train. You’re going to traverse the underside of the train to reach the next section. Climb down and move underneath the train slowly and carefully to spot the next trap door. When you can climb up, use the optic cable to spot a guard overhead. Wait for the guard to leave the room then climb up from underneath the train.
Listen to Lambert’s warning then move over to the green control panel on the side wall. Use it to unlock the train’s side doors. Face the door to its left and use the optic cable to ensure no guards or civilians are looking your way. Open the door. Quietly move to the shadow on the left side. Listen to the guard conversation.
Open the adjacent door. From the direction you entered, open the side door on the left side. Rotate the camera around to spot a pipe that you can use to reach the upper edge of the train car. If you don’t see the pipe then you’re on the wrong side. Climb the pipe and grab hold of the train car’s roof.
You must now shimmy across the train’s exterior moving to the right. The danger lies in the guards and civilians looking out the windows. The first window is clean but the second contains a nosy guard. Wait for him to return to his seat then move to the edge of the next window. Wait for the woman to fall asleep completely before moving on (she glances out several times before dozing off). At the next window, wait for the man to put his hand up to his face before shimmying across. Continue moving to the right until you reach the next pipe. Climb onto the pipe then open the door and drop back inside the train.
Use the optic cable on the door to the right. Spot no one inside then open the door and crawl through. Move into the next lit room and crouch on its right side. Listen to Lambert’s suggestion: Soth has a fake leg so you may be able to identify him using thermal vision. Listen to the conductor discuss ear plugs with a passenger. Wait for the conductor to leave the car completely then open the door and quietly move inside.
The passenger room on the right remains open. The easiest way to deal with the civilian is to run in and punch him quietly. You could also use one of your non-lethal weapons if you wish. Deposit his body in the dark then continue. Bypass the next door on the right. There’s someone inside but he’ll stay put. The next door on the right contains Soth. Check under the door with optic cable to spot the fake leg.
Open the door and sneak inside. Soth is asleep. Approach and wake him up. At some point, a guard approaches the door. Soth leaves while you remain quietly inside his room. Lambert automatically contacts you with new orders.
Objective: Access and tap Soth’s laptop computer. Killing Soth will result in mission failure.
Use the laptop inside Soth’s room.
Objective: Laser mic Soth’s phone call.
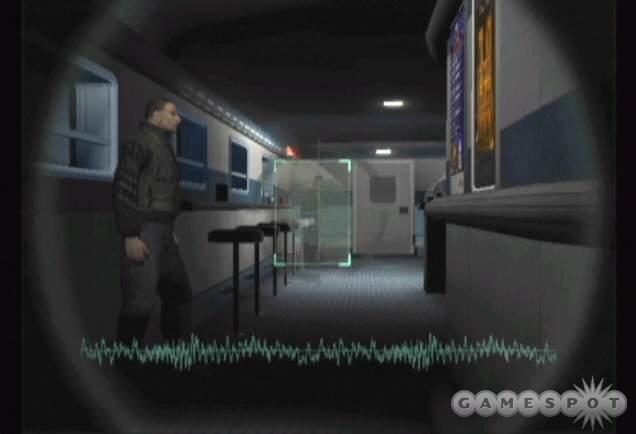
A timer appears in the lower left corner. You only have 45 seconds to reach Soth and his phone call. Exit Soth’s room and quietly move to the right. Ignore the bathroom on your right and open the door ahead of you. Move into the next train car and hide in the shadows next to the door. You’ll spot a guard in front of you on the left side and Soth at the back end of the call. Use your laser mic and point it at Soth. Listen to the conversation.
After the conversation concludes, quietly move to the right corner still in the shadows. Watch as a guard and Soth leave the car. Listen to Lambert for new orders.
Objective: Reach the Osprey at the back of the train, on the roof, for extraction.
A single guard remains in this car. Whistle him over to your position in the shadows and punch him out. You hear Soth over the intercom immediately--since you left his room he realizes the cover has been blown.
Objective: Lethal attacks are permitted.
Watch for a guard to arrive from the door behind you (where you originally entered the room from). Eliminate him. Cross the train car to the other side and through the next door (taking a second to check out the Prince of Persia: The Sands of Time magazine on the couch). Move through the next dark section and use the medical kit on the right wall. Use the ladder near the medical kit to ascend to the roof. Open the hatch and move outside.
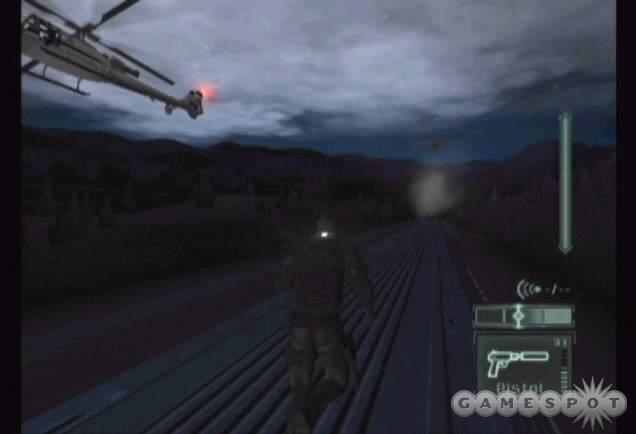
Spot the Osprey in the distance and a helicopter to your left. Don’t try to shoot at the helicopter. Just run across the train car to the Osprey. Grab hold of the rope to complete the mission.
Jerusalem, Israel
Briefing: Third Echelon has linked Suhadi Sadono’s "Springfield Demonstration" to the black market purchase of an unknown biological agent. Rendezvous with Israeli intelligence agent Dahlia Tal in order to infiltrate the black market.
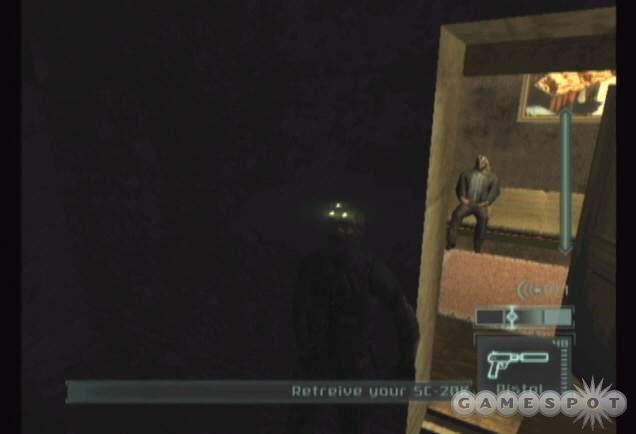
Objective: Retrieve your SC-20K in the grocery shop of Saul. Saul is your CIA contact in Jerusalem. Use of lethal force is not allowed.
Walk forward and speak with Coen then receive word from Lambert on your first mission task. Continue forward to the stairs. Avoid or shoot out the light. The disturbance alerts a nearby guard. If he’s not alerted, just whistle to get his attention. Lure him into the shadows and knock him out. Deposit his body in the dark.
Take the first left turn. There’s an open door on the left with a nosy civilian inside. Lure him outside and take him out with a non-lethal punch. Drop his body in the dark. You could also just sneak by into the shadows down the street and let the civilian wander around where you just were.
There’s also a patrolling cop in the area. Stay against the left wall using the back to wall move so you maneuver carefully underneath the light from the window. Wait for the cop to patrol near your shadows and disable him with a non-lethal attack. Carefully move up to the next corner. Take out the street lights to create additional darkness to hide within.
Look around the left corner and spot another officer patrolling an alley at the end of this side street. He moves around a far corner. Quickly move into that alley and into the shadow on the other side of the light. Look around the corner to the right to spot the cop’s patrol and a couple civilians in conversation. Move through the shadows toward the civilians. Remain along the left wall to stay out of position. Eventually the cop passes by once again and the civilians sit down on the bench.
Quietly and carefully crouch and move behind the bench along the left wall where the darkness lies. Follow it around to the exit on the opposite side. Spot the pipe in the corner. Climb the pipe. Carefully move past the open window and grab the zip line. Ride it to the top of a small roof. Duck into the shadows to avoid being seen by any nearby guards or civilians.
Drop off of the roof into the darkness when the guy in the window across the street isn’t looking. You should also shoot out the nearby light to help conceal your movement. Move into the park ahead of you. Stick in the darkness near the crates. Alert the policeman in the area with a whistle. When he searches you in the darkness, disable the cop with a non-lethal blow.
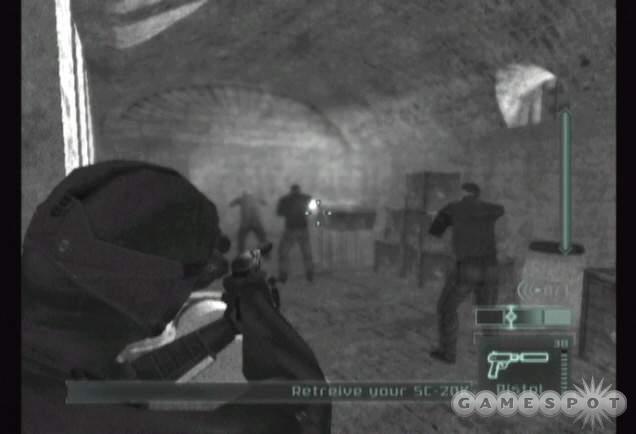
Move around the park in the shadows (or take out the lights). Enter the open grocery store in the back corner of the park. Descend the staircase and listen to the men bullying Saul. Turn on your night vision goggles and target the two men. Shoot the one nearest Saul first, ideally with a headshot for a quick kill. Eliminate the other man then speak with Saul. Follow him over to your SC-20K and some additional goodies, including a sticky shocker, a ring airfoil round, and ammunition.
Speak with Saul again and he’ll offer to demonstrate some modifications to the weapon in a discreet location. Follow him there if you wish. Speak with him against when you reach the location. Equip the SC-20K and use the scope to gain some additional training. At some point a cop enters the area. Get into the shadows. Saul recommends using a sticky shocker or ring airfoil round. Don’t waste them. Just sneak up on the guard and grab him and disable him in the shadows.
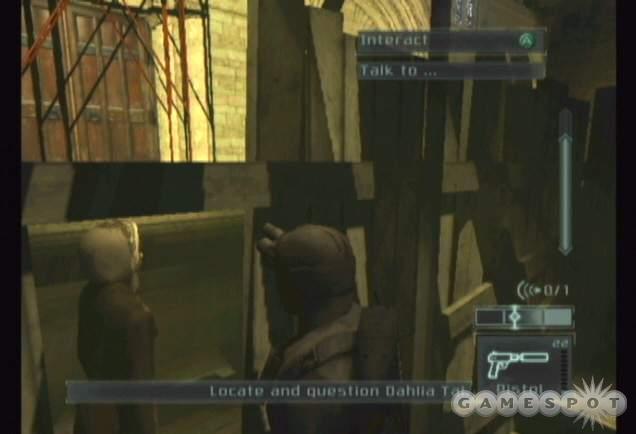
Objective: Locate Dahlia Tal near the Armenian Church.
Exit the area and follow the route to the right. You may encounter another patrolling cop. Disable him in the shadows with a non-lethal attack. Find the well-lit alley. Shoot out the lights with your pistol. It will alert a civilian. Just disable her in the darkness.
Descend the staircases toward the people below. They’ll move off to the right. Eliminate the lights to create more darkness for your movements. Go down the stairs to the street on your right. Begin moving through the street using the darkness and crates as your cover. When you find a good dark section, whistle to alert a nearby cop. When he’s close, punch out the cop and deposit his body in the dark. It’s wise to do this first around the television sets in the window.
Continue down the street taking out any lights. Another cop patrols just ahead. Once again, find a nice patch of shadow and lure the cop to his non-lethal demise. A third guard is found near the end of the street. Shoot out all the lights in the area for cover then punch out the cop when he’s near your position.
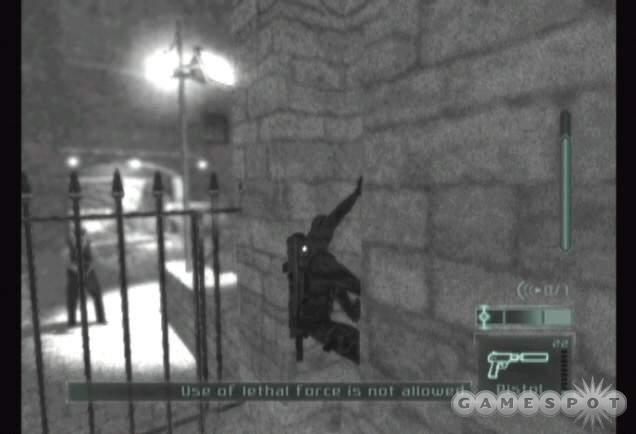
At the end of the street, find the alley in the left corner. Look carefully and spot the guard on the other side of the gate. Shoot out the light to provide some cover then quietly move toward the gate. There’s a pipe on the right side of the gate. Climb the pipe to the rooftop. If you’re worried about the guard spotting you, create some noise and wait for him to go on a search pattern.
Cross the rooftop to the wires. Use the wires as a zip line to reach the other side of the street. Find the object to rappel off of and descend to the bottom and into the next section. Speak with Dahlia Tal who stands on the other side of the fence.
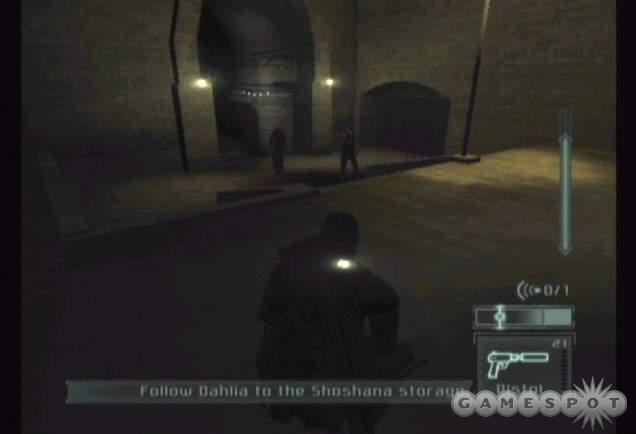
Objective: Rendezvous with Dahlia Tal at the entrance to Shoshana Storage. Infiltrate Shoshana Storage, the warehouse the Syrians are occupying.
Exit through the fence and start to follow Dahlia. Remain in the shadows and turn on your night vision so you can see what’s up ahead. Carefully move past the cop on patrol. Don’t alert the nearby civilians or they will warn the cop. It is possible to disable the cop and still continue.
Dahlia moves through an illuminated tunnel. Shoot out the light then move up close to Dahlia at the next batch of light. She talks to the cop and distracts him momentarily. Take that opportunity to move through the light and get back into the shadows. Wait for Dahlia to complete the conversation. Avoid the cop who moves back on patrol or just punch him out. Leave him in the dark to avoid an alarm. It is better to just avoid him.
Move through the narrow alley on the right side and then follow Dahlia around the corner to the left. She stops to wait for the cop patrols to move. Remain in position in the shadows behind Dahlia to avoid detection. Dahlia will move through a light in this market. Don’t go that way. Instead, stay in the shadows and move to the far left of the market. Wait in the shadows for Dahlia to pass by then follow her down the steps.
Dahlia turns right at the bottom of the steps. Follow her carefully. Look to the left and when the civilians aren’t looking, move through the lit areas. Follow Dahlia up to the next small staircase. Remain hidden in the dark as the cop watches her move away. Wait for the cop to follow Dahlia then continue your pursuit. Move quietly through the lit areas of the next street. Hide along the walls as the cop turns around in his patrol (you could also disable him if he becomes a problem, just do it quietly and in shadow!).
Pursue Dahlia toward another cop. He eventually turns his back. Silently approach him and disable the cop (or use one of your non-lethal weapons) and deposit his body in the dark. Approach the next right corner and listen for Dahlia to speak with another police officer. Fortunately she takes care of this one for you! Move the cop’s body to a dark area then approach Dahlia at the end of the street. Speak with her.
You reach a set of stairs. Dahlia will move to the left while you must move to the right. A cop stands post at the top of the stairs. Whistle to lure him in to the shadows and disable him with a non-lethal attack (or use one of your non-lethal weapons). Continue through the alley on the far right side (not the wide street).
A cop patrols a narrow well-lit alley at the far end. Lure him into shadow and disable the cop. Follow the narrow alley to a pipe on the left wall. Climb the pipe. Drop silently into the bedroom. If not one of the civilians in the other room enters and you’ll have to deal with him. Drop him in the dark or, ideally, just sneak by without disturbing him and his television-watching pal.
Cross the living room area to the open window. Exit onto the ledge and turn right. Remain crouched and maneuver to the pipe. Climb the pipe. Cross the rooftop slowly while crouched. On the wider platform, use the object to rappel down the wall. Descend on the rope and rotate the camera to spot Dahlia talking to a cop. Keep moving quickly because the cop turns around soon enough. When you drop off, get into shadow immediately and avoid a confrontation.
Dahlia moves through the alley. Follow her toward the next corner. Remain in the shadow, however, because a cop is just around the corner. Wait for him to question her; when he turns his back, grab him and disable the cop in the safety of shadow. Follow Dahlia into the structure and to the elevator. Speak with her.
Enter the elevator and receive word from Lambert: Dahlia Tal needs to die! You only have a few seconds to kill Tal. Use your SC-20K and blast her quickly. It’s not a requirement, though. If you let her live, you’ll have a tougher time escaping the end of the level. Descend the lift into the next section.
Objective: Retrieve the ND133 from the Syrians. Lethal attacks are permitted.
Be ready with your weapon at the bottom of the lift. Lethal attacks are now permitted. Shoot the guards at the bottom of the lift with your SC-20K. A third guard approaches from the left side of this area. Be ready with your night vision and scope if necessary to eliminate the guard with a headshot.
Follow the catwalk around the corner and down stairs. Blast guards around the corner to the right. Lure them with a whistle and nail them with headshots from the safety of shadow. Find more guards around the next left corner. Use the same techniques to eliminate the entire squad. Lure them toward your position and blast them from long-range with the SC-20K and its scope.
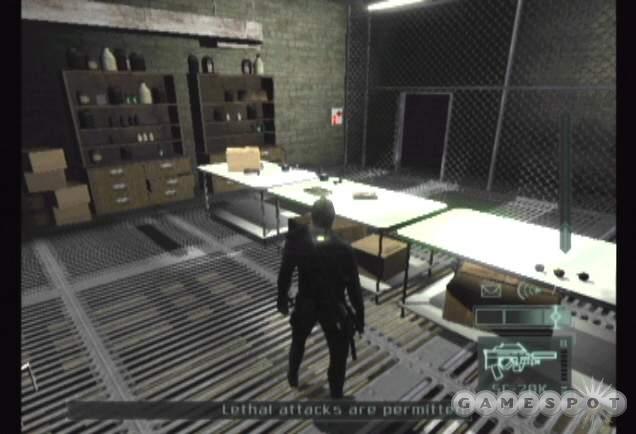
Enter the storage room on the left. Search the table for grenades, ammo, and non-lethal devices. There’s a lot on the table so grab it all. Use the medical kit in the corner. Remember its location in case you need to use it again before the mission’s conclusion.
Exit back to the catwalks and follow them to another left turn into a lab. There will likely be guards in the area unless you alerted them all previously. Eliminate them with your SC-20K. If you’re in a pinch, just use a sticky shocker or toss a grenade in their path. Search the right side of the lab for the ND133.
Objective: Reach the extraction point.
Exit the lab and proceed to the left. There are additional guards in the area. Lure them to your position with whistles and blast them with the SC-20K. If you have the opportunity, though, use long-range scope headshots to eliminate the opposition. Move across the catwalk to the lift on the right side.
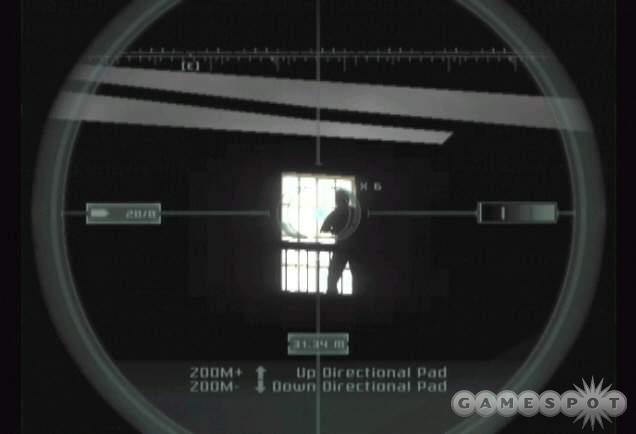
This next part is a cakewalk if you killed Dahlia earlier. If you failed to terminate Dahlia, a group of snipers protects the path toward the extraction point. First, shoot the lights in the hallway you’re in to help protect you from the snipers’ vision. Equip your SC-20K and slowly move forward in a crouch position. Remain in the dark for protection. Use the scope to look across the courtyard to the building on the other side. Look at the top right window for a couple snipers. Eliminate them with headshots. After you eliminate two in that building, you can advance carefully into the courtyard to target the last sniper.
Inch into the right side of the courtyard and use your scope to find the third sniper on scaffolding on the left side of the courtyard. Once this final sniper is eliminated, move along the right side and around the corner to find the extraction point.
Kundang Camp, Indonesia
Briefing: "Pandora Tomorrow" is the code phrase for Sadono’s insurance policy against U.S. attack. He makes daily, secure phone calls to undisclosed U.S. locations, delaying release of the smallpox virus one more day. If he is killed or detained, the virus will be released within 24 hours. Intercept Sadono’s "Pandora Tomorrow" call in order to locate the virus.
Objective: Plant explosives on Sadono’s plane at the entrance of the Kundang camp.
Walk forward along the forest path and greet Shetland. He reiterates the objective and informs you that he has some snipers across the camp. Expect some help later in the mission. Move to the right and use the zip line to descend toward the enemy camp.
The foliage provides good cover as you approach the nearby tents. Approach the closest tent and stay in its shadow as you round the corner to the left. Stay along the very edge of the tent to avoid the nearby enemy patrol (he comes from the tent behind you). When the guard moves into the shadow, grab him from behind.
You could also use one of the bottles on the ground to cause a distraction while you slip by. That’s the easiest way to get by the guards. Toss the bottle into the back right corner. When the guards investigate, move from the corner of the tent into the shadow along the left side of the truck.
Move from the back of the truck behind the barrels on the left side of the path. Listen to the conversation with the guards. Wait for the guard to blow himself up on the trip wire. The conversation offers a clue: expect to find trip wires in the next section! You’ll need to use thermal vision to spot them.
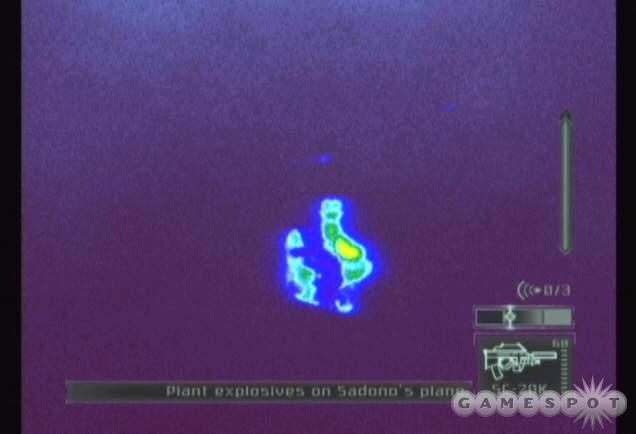
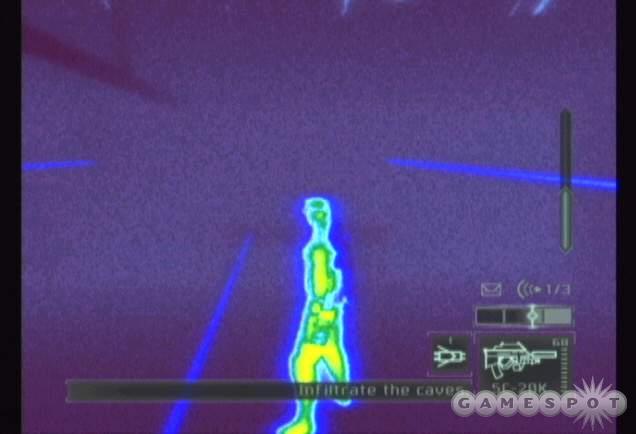
After the explosion, move through the foliage toward the single guard ahead. Distract him or just run up and punch him. Be quick to avoid an alarm. As you advance through the next section, switch on thermal vision and move very slowly. Look for the bright blue markings on the floor. Move slowly and carefully close to those blue circular markings to disable the trip wire.
After disabling the first batch, stop and look up and ahead of your position. There’s a guard patrolling ahead. Wait for him to move within range and terminate the guard with a headshot from your SC-20K with scope. Toggle on thermal vision and resume disabling the trip wires. Both batches include four trip wires.
Approach the truck ahead. The hanger containing Sadono’s plane is just on the other side. Maneuver to the left side of the open hanger door and spot the two guards inside. When the guards look away, carefully sneak into the hanger and move into the shadow on the right side. Spot the ladder. Make sure the guards aren’t looking then climb the ladder. Stay crouched at the top of the ladder as you approach the electrical box. Flip the switch to turn off the hanger lights.

The guards below are essentially now at your mercy. Descend the ladder into the hanger’s darkness and monitor the guard patrols. Turning off the lights does alert them. They’ll search the hanger floor for the disturbance. Wait until a guard maneuvers into the shadow then grab and disable him. Perform a similar move on the other guard to clear the hanger. Search the boxes near the ladder for a sticky shocker. Place both bodies in a back corner near the ladder.
Approach the nose of the plane and plant the explosives. This cues the arrival of another guard from the back door. You moved both bodies to a back corner so this new guard doesn’t spot them too soon. Follow his patrol and grab this third guard and disable him.
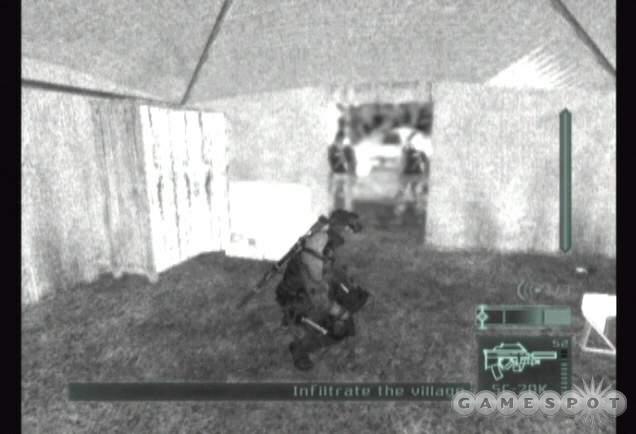
Objective: Infiltrate the village.
Exit the hanger’s back door and listen to the nearby conversation. Remain in the shadow and carefully approach the open gate. Move through the gate and into the right corner to keep in the dark. One guard patrols near you while another stands inside the outpost station. Wait for the patrolling guard to turn his back near you then grab and disable him in the dark corner.
Quickly approach the outpost station. Wait for the guard to turn his back completely (facing out the window) and grab him. You could also lure him out of the outpost and into the shadow by using a whistle. Use the medical kit inside if you need it then use the lever to open the barbed wire gate outside.
Advance through the open gate. As you move down the walkway, a guard and his dog approach from the far side. Hide behind the plywood on the left side of the path. Wait for the two to pass then continue forward. You could also kill both of them if necessary.
Approach the nearest tent and move inside its dark interior. Spot the guards outside and listen to their conversation. They also address another guard in a tower to the left side. Move quietly behind the guard on the left. He’s in shadow. Once the guard on the right exits, grab the left guard and drag him inside the tent. Drop his body in the dark.
The guard that left went to a nearby tent to take a nap. Shoot out the nearby light on the right to add some darkness. The guard in the tower will be alerted but you’ll still be safe. Follow the shadow to the upper left along the next tent. Move around to the tent entrance and notice the sleeping guard. Grab the smoke grenade from the table then eliminate the guard with a close-range headshot.
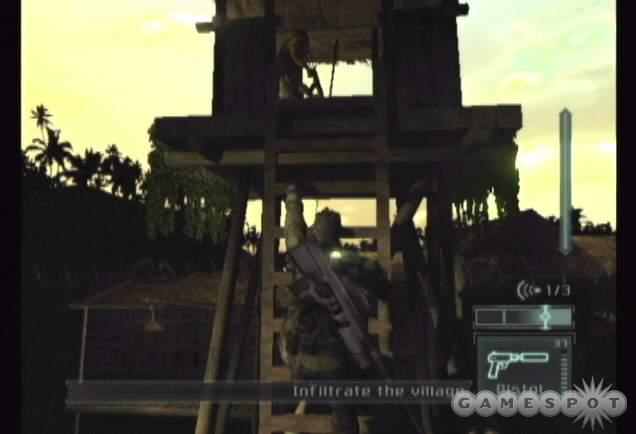
Exit the back of the tent and use thermal vision to spot a couple trip wires on the right side. Move around the same tent to its front (around the right side) and use the old truck as cover. Spot the tower in the distance. Move around to the back side of the tower. Climb the ladder but don’t go up to the very top. Wait for the guard to turn around completely then sneak up behind and grab him. Use the zip line at the top of the tower and ride over the fence and into the village.
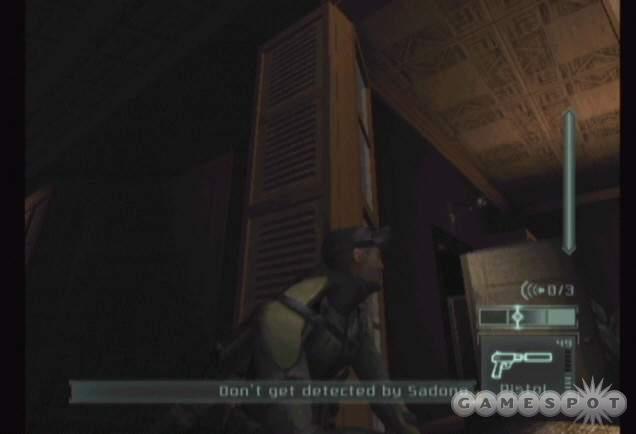
Objective: Trail Sadono to identify the location of his "Insurance" telephone call. Don’t get detected by Sadono.
Move forward quietly toward the intersection. Stay in the shadow and watch Sadono (in white) approach from the right side. Wait for him to greet the guard then move up the ramp and into the structure on the other side. Hide in the shadows on the right side and grab the nearby patrolling guard when no one is watching. Be sure to wait until Sadono is completely gone; if he sees you, the mission is over.
There’s another guard in the area and he may set off an alarm if he detects your action. You could also whistle to lure the guard into the shadows and punch him out there. Drop both guards in the dark then cross to the ramp and enter the structure following Sadono.
Go to the right down the hallway. You’ll reach an open area on the left. Stay in the shadows on the left side of the open area and hear additional word from Lambert. You need to get a pass code--the code changes daily. You’ll have to use a sticky cam to overhear Sadono tell one of three lieutenants the code.
Objective: Record the entrance code of Sadono’s house with your sticky cam.
Equip a stick cam into your SC-20K to prepare for the objective. Move forward through the shadow to the door ahead. Be safe and shoot out the light above the door. Enter the structure and move to the left. Go through the drape in front of you and peer around the right corner.
Sadono is about to speak with a lieutenant. Equip your SC-20K and point it at the wooden door to the left of the lieutenant. Fire the sticky cam at this door to overhear the code--it’s 1492. There are three lieutenants total so you still have two opportunities to get the code if necessary.
Use the SC-20K and scope to eliminate the lieutenant after Sadono enters the structure and leaves the scene. Drop the body in a dark corner. Move to the door Sadono entered and use the optic cable. The coast is clear so enter the door.
The house contains an occupant in the lower living room; he’s on the left side watching television. Knock him out and drop him in the dark. Search the upper floor for a medical kit. Exit the house from the opposite door as its entrance. Peek through with the optic cable to ensure a cleared area.
Move to the left side to avoid the light produced by the fire. Cross the area toward the truck then use the optic cable on the door to the right. Spot Sadono inside. Wait for him to move away then enter the room. Follow him back outside and into the shadow. He speaks with another lieutenant here. Fire the sticky camera if you need the code. Wait in the shadow until the conversation concludes and Sadono moves safely away.
There are three guards left in the area: two humans and one dog. This can be a tough courtyard to get through without setting off an alarm (and of utmost importance, be sure Sadono is completely gone before trying anything). Lure the closest guard into the shadow near the right side of the courtyard. Once he’s in the shadow, disable him or get off a headshot with your SC-20K in scope. Lure the second guard a similar way. You may have to cross the courtyard to lure the dog out. Be ready to shoot the dog; the canine can cause a lot of damage in a short amount of time.
Cross the courtyard to the open entrance on the far right side. Check the door with your optic cable and spot the guard on the right side. Open the door quietly and spot Sadono in conversation again. Use the sticky cam here if you still need the code. Remain in the shadow. Watch Sadono move into the next area and the guard resume his patrol. Use the medical kit if necessary but try and save it for after you eliminate these guards.
One of the best ways to eliminate these two guards is to wait until the one on patrol moves to the far right. While he’s not watching, use your SC-20K with scope to eliminate the second guard standing post by the door on the left. When the other guard moves back on his patrol, eliminate him. Drop both bodies in the dark then enter the structure and approach the ladder. Descend the ladder into the next section.
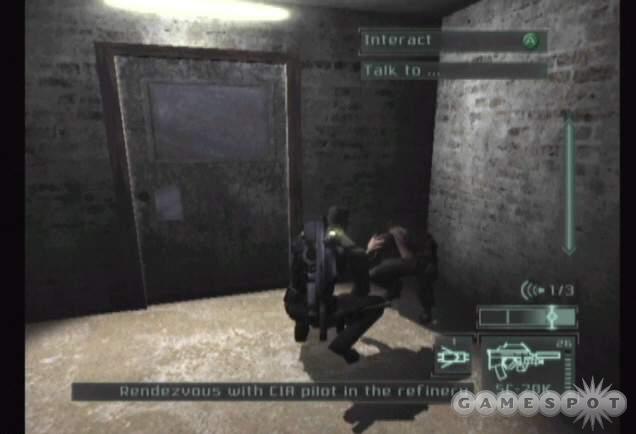
Objective: Rendezvous with pilot/CIA contact Asrul Rrifin in the refinery to receive intelligence regarding Sadono’s Golden Triangle affirmations.
There’s a guard around the corner to the left. Eliminate him with a headshot and put his body in the dark. Whistle to lure a guard below up the stairs then terminate him with a headshot as well. Drag him into the shadows. Descend the staircase.
Approach the door at the bottom of the staircase. Use the optic cable to see no one immediately inside. Open the door and carefully move up the staircase shadows to the right. This area contains guards and civilian lab scientists. You can use a whistle to lure one down the stairs and disable the hostiles. Put them in the dark to avoid alarms. Also, if you can make it up the stairs quietly, find the light switch on the right wall and turn out the lights. When the guard comes to investigate, disable him then sneak up on the remaining enemies in the room.
Cross the lab to the door on the back right side. Peek through with the optic cable to see no one on the other side of the door. Open and move through quietly. You’ll hear a discussion regarding the plane. Move along the left wall and flip the switch. Lure the guards in the area into the sights of your SC-20K and eliminate them both. Find the pilot in the back corner of the adjacent room and speak with him.
Objective: Tap Sadono’s secure phone.
Use the keypad adjacent to the door. The code is 0623. Enter the adjacent room and climb the ladder. Wait for Sadono to move out before pulling up to the top. Stay in the shadow along the right wall and peer around the corner.
Carefully move up to the opening on the right. Remain in the shadow as you look around the corner. Round the corner and grab the flares near the barrel. Stay in the shadows and spot the guards and the turret on the far right side. Whistle to lure one of the guards toward your position. Eliminate the guard with a headshot or other weapon. Do the same with the second guard and place both in the dark.
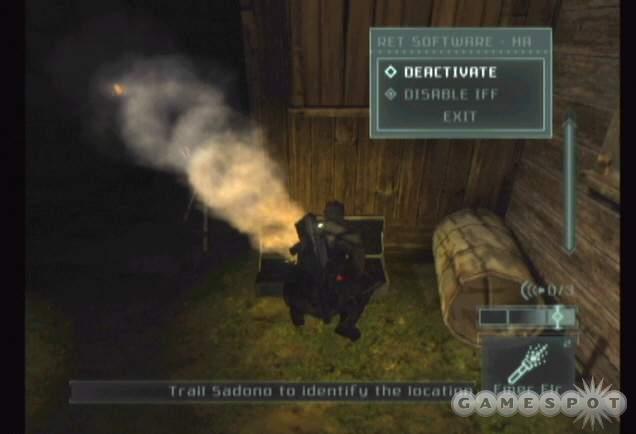
To get past the turret safely, toss a flare along the wall on the left side of the turret. The turret will pick up the heat signature and fire away. As it fires, approach the controls on the turret’s right side and disable the weapon.
Approach the door on the left wall and peek in with the optic cable. It’s a shooting range. Open the door and look to the left. Make sure Sadono is gone before clearing the range of its guards. Search the stalls for some ammunition. Drag any bodies into the dark then proceed to the back exit. Grim provides one last warning as you approach the back door.
Remain in the shadows and lure the nearest guard inside with a whistle. Blast him with the SC-20K when he’s out of view from the other hostile. Lure the next guard in the same way. Exit the structure and remain on the left side. There’s a turret to avoid. Approach the turret from the left side to find the controls. Disable the turret. Enter the door to the turret’s left. Find the medical kit inside as well as some ammo.
Look through the next door using the optic cable. Spot a patrolling guard and a large, very bright spotlight. Open the door and exit onto shadow. Lure the patrolling guard back into the building and eliminate him. Maneuver carefully around the spotlight using the barrels on the left side of the area. As you move through the barrels, shoot the light to create additional darkness. Spot another guard patrolling near the front door.
Take him out with a headshot, sticky shocker, or even a diversion camera. Drop his body in the dark. Meanwhile you should be able to hear Sadono inside. Use the keypad and enter 1492. Shoot out the light above the door before opening the door.
Sadono is in the office to the right. Listen to his phone conversations. He provides today’s code. Wait for him to leave the office. You can monitor his movement by using an optic cable on the double doors to the left of his office. Wait for him to leave completely and return one last time then leave again. If you go into the office after he leaves once, he’ll be back momentarily and detect you.
Peek around the corner and look into his office. Shoot the camera on the left side of the room. Enter the office and use the laptop computer to receive your next objective.
Objective: Exit through the back door of Sadono’s house for extraction.
Search the office for some ammunition. Exit the office to the main hallway and go left around the corner to the back door. Use the switch box on the left side of the hall. Exit the open door on the right side. The level exit is just ahead of you. Open the door. Hostiles ambush you. You’re ordered not to make a move: your friend Shetland is about to assist with his snipers.
Once the enemies are under attack, assist Shetland’s snipers with your SC-20K. Eliminate the enemies in the area then cross dark path to the Osprey at the far end.
Komodo, Indonesia
Briefing: Sadono’s "Pandora Tomorrow" phone call is being forwarded through an encrypted relay in the communication system of a submarine docked with in a supposedly abandoned shipyard. Infiltrate the submarine and access the communication system to further trace the call.
Objective: Infiltrate the caves.
Turn on night vision or thermal vision as you move forward. There’s a guard patrolling this area and he’s difficult to spot unless you use an alternate vision mode. Grab the guard when he’s the farthest away from the enemy camp. That way the enemy in the tower doesn’t see you. Grab the patrolling guard and drop him in the dark.
Approach the camp from the far right side so you can use the old truck as cover against the guard in the tower. Move around the right edge and approach the turret under the tower. Disable the turret using its controls.
Move into the alley behind the tower and switch on your thermal vision. Trip wires trap this alley area. Approach the blue circles marking the trip wires and disable the danger. Move into the next hut and move to the right. Spot the patrolling guard ahead (there’s also a second guard in the area). Remain in the shadow and lure him into the dark with a whistle. Punch him out and drop him in the darkness. If you have trouble getting both guards, shoot out the light on the right fence and don’t hesitate to use some of your weaponry like sticky shockers and ring airfoil rounds.
Move into the hunt on the far side. Be sure to avoid the guard in the tower above by shooting out the light if you didn’t before. Sneak around to the left and spot a couple guards at a table. Use a diversion camera and fire it on the far left wall. Position yourself that you’re in the shadow so the guards don’t see you when they investigate the camera. Gas one of the guards (or both ideally) and finish off the other with one of your weapons. A third may be alerted to the scene; lure him into the dark with a whistle and drop all bodies in shadow.
Continue into the next clearing and toward the stream. Enter the narrow alley adjacent to the stream and perform a split jump. Pull yourself up onto the right ledge. Shimmy over to the opening and enter quietly. There’s an enemy below you. Move to the right side of this platform and drop down onto the crates. Sneak up behind the distracted guard and disable him. Move his body to the darkness.
Quietly move to the left side of the exit. Spot the guard outside shooting his weapon. Take him out with a sticky shocker or lure him inside with a whistle. The turret across the clearing is live. Toss a flare on the left side of the clearing and watch the turret fire away. Move to the turret’s right and find the controls. Deactivate the turret. Move the body into the dark if necessary.
Approach the hut behind the turret. Before entering, switch on your thermal vision to see that lasers protect the interior. With thermal on, time your advance through the lasers. When a laser reaches its peak, move to the next one. Repeat to the end and descend the ladder into the next area. Take the lift down.
Exit the elevator. Search the storage room on the right for a medical kit. Move into the shadow and listen to the patrolling guards. Turn off the lights using a switch on the left wall (find it by searching across from the supply room). With the lights out, taking out the guards becomes much easier. Flip on night vision, lure one close and grab him. Repeat until both guards are disabled and in the dark.
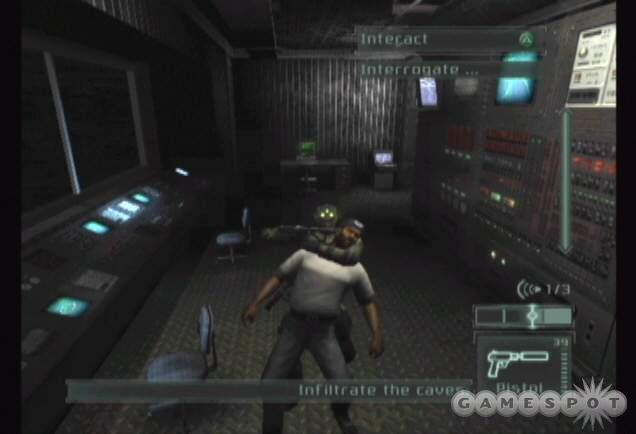
Enter the office on the right side of the hall by going through the double doors. Move around to the back end of the room and find the technician. Grab him--don’t kill him--and interrogate him. You need him to raise the submarine. Move him in front of the controls near the window. Use the computer with technician in hand to raise the sub. Another technician radios in. Before the mission is blown, use the computer again to force the technician to make up a quick story. Hit the tech and leave him in the dark.
Exit the office and go around to the right side. Approach the door to enter the next area. Move up the stairs and shoot out the light above the door. Use an optic cable to spot dangers on the other side of the door. Open the door and whistle to lure the guard inside the dark room. Disable him.
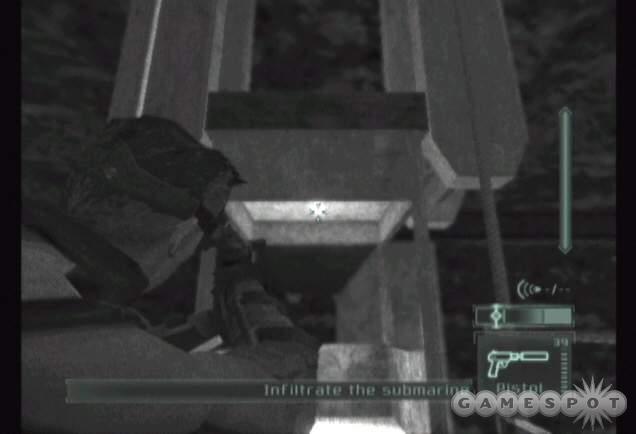
Objective: Infiltrate the submarine.
Emerge onto the catwalk and go to the right. Stay crouched and move quickly through the brighter areas. Turn the corner going left and follow the catwalk to a lift. Shoot out the light in the top of the lift. If you don’t, you become an easy target for the guards in this area. With it dark inside the lift, enter and use the switch to begin the ride.
Stay ducked and in the dark and you will likely avoid taking any damage whatsoever. Face the wall closest to you and equip your SC-20K. You’ll spot a guard inside a window. Take him out if you can. If you fail, don’t fret--you’ll have another chance to deal with him. As the ride stops, you’ll spot a guard on the same catwalk. Take him out with the SC-20K and duck into the shadows. Go right to enter the structure where that guard stands. Inside you’ll find ammo and a smoke grenade. Move bodies into the dark.
Exit and cross the catwalk to the entrance ahead. Descend the stairs to the bottom. Move out onto the catwalk and lure the patrolling guards into the shadow. Grab and eliminate! Follow the catwalk to the top of the submarine and enter through the hatch.
Objective: Access the SISSIKS in the submarine’s command center. Any incident inside the submarine will mean mission failure. Use of lethal force is not allowed.
The task becomes much tougher inside the sub. You only have one alarm--the mission is over if you’re detected and an alarm sounds. At the bottom of the ladder, turn around to find the narrow passage just ahead. Move forward until you hear the conversation. Once it concludes, continue forward and descend the next ladder. Hide in the shadows at the bottom of the ladder and look around the corner to find a patrolling guard. When he turns around from you, grab him and disable him in the dark.
Move forward quietly. Descend the short staircase and go through the door. This is where the other guard is sleeping. Carefully, slowly, and quietly move through the barracks to the far side. Don’t disturb the sleeping guard. Find the hatch on the far side. Descend the ladder.
Look around the left corner to spot a guard sitting down. Take him out with one of your non-lethal weapons or whistle a tune and lure him into the dark. Drop his body in the shadows.
Objective: The colonel is the only one able to enter the SISSIKS room via retinal scanner recognition.
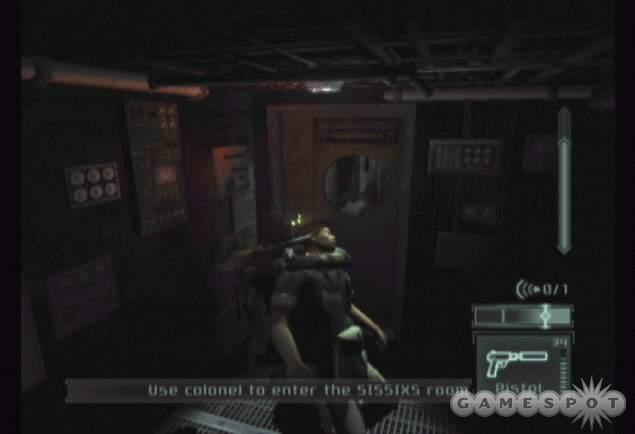
Move through the room and into the passage on the far side. Go around the corner and open the door on the right. Move to the right side of the next door and focus the camera on the window. Watch as the guard--more precisely, the colonel--approaches the door. He enters your area and turns away from you. Grab him!
Drag the colonel through the door and down the hallway. Spot the retinal scanner on the right side. Use the colonel on the retinal scanner. Drop his body on the far side of the hall near the next closed door. That way you can lure guards from inside this room to the dark hall and dispose of them there. Clear the guards out then use the computer to fulfill the objective.
Exit the room back to the hall and go right. Move through the door and up the ladder out of the submarine.
Objective: Go to the extraction point.
Use the medical kit on the wall and grab the grenades and ammo from the top of the crate. Beware of a guard charging up the stairs. As you near the bottom of the stairs, you’ll hear gunfire. Your path to the extraction point has been blocked by several gunmen.
You can utilize newly collected grenades to help defeat these hostiles. Note also that there are explosive barrels near the men. Shoot the barrels to inflict explosive damage. You can also crouch and carefully inch out with your SC-20K with scope mode and snipe each of the guards. The last one is the toughest as he’s basically out of view. Look for his muzzle flash and shoot just above it. With the path cleared, move to the stairs on the right side and descend the ladder to your getaway boat.
Jakarta, Indonesia
Briefing: Now that the ND133 have been located, Sadono is open to attack. Coordinated remotely with Shadownet’s neutralization of the ND133, locate and capture Suhadi Sadono. CIA operative Ingrid Karlthson is on the site, undercover, and will assist in the mission.
Objective: Infiltrate the TV station to find Ingrid Karlthson. We need Sadono alive. Lethal attacks are permitted.
Move forward and speak with Coen. Descend the ladder then use the object to rappel off of and move to the bottom of the area. Quietly drop off the platform into the shadow on the left side of the street. Shoot out the street lamp for additional cover. If it alerts the nearby civilian, take him out in the darkness. If not, the civilian moves down the street to the right to discuss a broken vehicle.

Remain in the shadows while the men talk. Shoot out the lights along the street to create more areas for you to move inside. If a civilian gets close, punch him out and leave him in the dark. Be careful. Alert a civilian and he’ll run to nearby guards and you’ll be under heavy fire.
Note that it’s also possible to traverse the street from the roof. Find the pipe in the back right corner of the first street (the one you drop on) and traverse the rooftop. Find another pipe at the end of the roof and descend when guards aren’t looking. You can also shoot guards from this position.
Reach the far end of the street and hide in the shadows along the right side. Alert nearby guards using the whistle. Lure them into the darkness and disable the guards one by one. Shoot out the lamp above the alley to the right. That provides additional darkness for the incoming guards.
The toughest guards use a headlamp. This makes it hard to hide and impossible to use night vision. Stay in thermal or normal vision and shoot these guards on site. With the alley dark, you can also look down the alley with your SC-20K scope to hunt down guards patrolling the next clearing.
Once the area is secure, find the locked door on the right side and use your lock pick. Enter the store and use the medical kit in the corner. Exit through the back of the shop and approach the shadows near the next door.
Listen to the guards--the lightning outside is going to be a problem. It will blind your night vision but will also make it difficult to remain hidden. Even in shadows, the lightning’s bright flashes will make you visible for a few seconds just long enough for a nearby enemy to spot you.
Face the door and the ambulance on the other side of the road. Shoot out the light above the ambulance. Look out to the left and wait for the patrolling guards to move away. Quickly scurry across the road and behind the van. The closest patrolling guard will move near the front of the ambulance. Hide on the right side of the van and wait for the guard to move close then shoot him in the head with your SC-20K in scope mode. You could also disable him with a sticky shocker or ring airfoil round. While the other guard is away, grab the body and move it behind the van.
The other guard is tougher because he’s better armored. A headshot may not do the deed and if it fails, the alarm goes off immediately. Lure this second guard closer and blast him with a full automatic burst of SC-20K or drop him with a sticky shocker or even punch him out. Beware of the path to the right side; two turrets protect this route so avoid getting close if you’re hunting down the second guard.
Move down the street along the left side. Shoot out all of the lights: the ones on the left and right side of the street. Move across the street to the fence and climb it on the far left side. There’s a gap at the top; drop down on the other side of the fence and take cover in the dark.
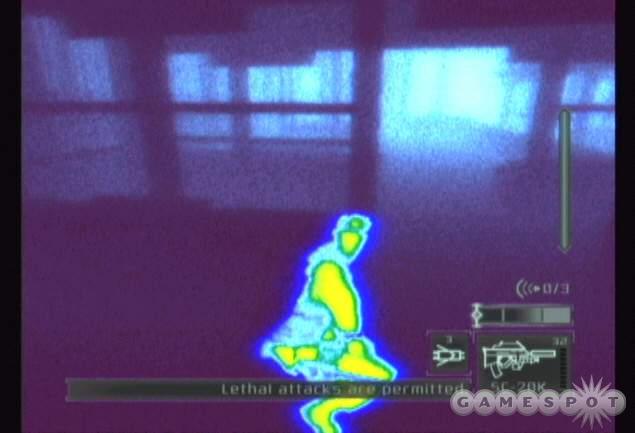
Your goal is just up ahead and to the right. It’s a sewer entrance adjacent to a parked van. The problem is the number of guards in the area. Plus with the lightning, you can be exposed very easily. Start by shooting out the lights within this park. Use your thermal to track the guard movements. Lure them toward your shadow with whistles then terminate them with a headshot (or use one of your non-lethal devices).
Move forward and approach the path on the right. Shoot out the headlight on the van to provide additional darkness. Move into the corner across from the van to find the manhole entrance into the sewer. Clear out the area of hostiles before advancing toward the van and the sewer entrance. Descend the ladder into the sewer.
Find the first passage on your right. Shoot out the light then whistle to alert a nearby guard. Retreat into darkness and shoot the guard with a headshot when he’s close. Move through the passage into another tunnel and go left. Check your thermal or night vision to spot the guard ahead. Whistle to lure this guard into the shadows and eliminate him.
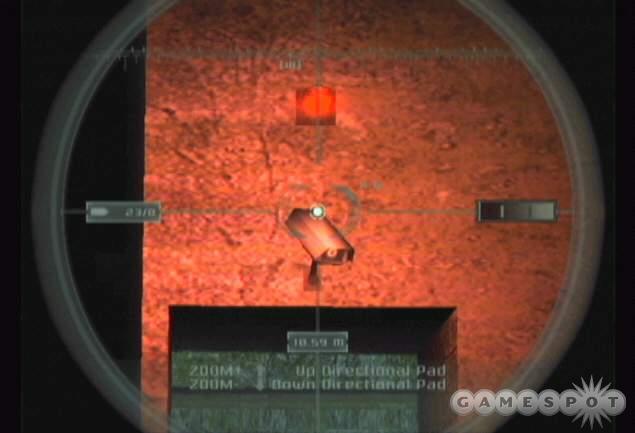
A camera protects the next passage on the left. Shoot out the light within the tunnel to provide additional darkness. Shoot out the camera with your SC-20K and scope while remaining hidden in shadow. Move past the camera and to the right. Jump up to the ladder and ascend.
You’ve reached a rooftop with satellite dishes and spotlights...oh and also snipers and mines. The object is to cross this rooftop area without being seen by the spotlights or the snipers will hit you. You’ll have to use the satellite dishes and the square obstructions as cover against the snipers and their lights. Also, you’ll have to use thermal vision to locate the land mines and successfully navigate a path between them as you move from cover to cover avoiding the light.
Move from cover to cover one at a time. Check thermal vision for the placement of mines then wait for the spotlight to move completely away from your position then move to the next cover while avoiding the mines. You’ll often have to move in a triangular pattern around the mine to reach the next cover objective: a straight path won’t work.
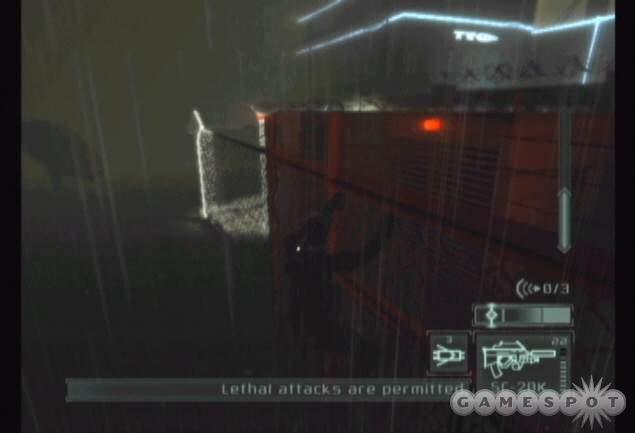
When you reach the far side at the fence, grab and climb up the fence. When the spotlight, which shines on the fence’s left side, moves away, climb over the broken part of barb wire at the fence’s top. Find cover within the power equipment to avoid the spotlight. Turn right and spot the door. It’s locked so you’ll have to take time to pick the lock. Wait for any light to move away then quickly pick the lock and enter quietly.
There’s a guard inside this room. He’s facing away from you so grab him and drop him in the dark corner. Search the console for some ring airfoil rounds and a flare and find a medical kit on the left side of the room. The television station is just outside the left door.
A couple guards patrol the station’s exterior. Stay within the darkness of the control station and lure the guards inside with a whistle. Shoot the guards as they move into the station.
Move left toward the taxi. Jump up to the ledge and pull up. Move to the right and find the narrow alley on the left. Use the split jump maneuver and pull up on the right side to the top of the television station. Move forward to the sky light. Find the cracked glass on the left side (next to the rappel object). Shoot the glass then rappel down. A guard patrols the lobby so take cover quickly and eliminate the hostile. Approach and use the elevator to enter the next section.
Objective: Recover Sadono alive.
Your first task is to find Ingrid. Exit the elevator to the left and look down the left hall. Wait for the guard to move away from the door then inch forward. Beware of another guard patrolling a hall on the left. Once he leaves, move through the door ahead.
You’re approaching an auditorium filled with enemies. You can tackle the auditorium from the lower section or move up to the balcony. It’s a bit easier to go the balcony route. It gives you dark cover and height advantage over the enemies below. It’s also possible to create a distraction from the balcony and quickly reach your goal (backstage) while the enemies wander around searching for the disturbance.
To get to the balcony, walk down the hall until you spot the narrow alcove on the right side. Use the split jump to ascend the narrow gap and pull up on the top. Maneuver out into the dark balcony and observe the enemies below. Find a bottle on the ground between the balcony seats and toss it to the far left side. Once the enemies go looking for the disturbance, drop down on the balcony’s right side and scurry backstage. Be ready because there will likely be a guard backstage. Punch him out or shoot him quickly.
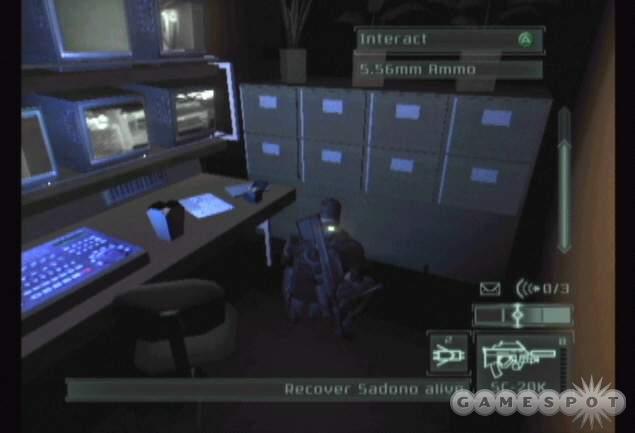
While backstage, use the optic cable on the door. Watch a guard enter from the right side and enter the room on the right. He speaks with Ingrid. Wait for him to leave the hallway. Open the door. Before you greet Ingrid, search the room on the far right (where the guard entered from) to find some ammo. Then before visiting Ingrid, use the optic cable on the door to the left of Ingrid’s room. You see a guard inside and he’s monitoring Ingrid’s chambers. Quietly open the door, sneak up behind the guard, and disable him. Return to the hall and enter Ingrid’s room and speak with her.
Objective: Trail Ingrid Karlthson to the entrance to Sadono’s stronghold. Ingrid’s death will result in mission failure.
Exit the office and follow Ingrid down the hall to the right. Hide in the shadows at the door while she greets the enemies in the next room. After her discussion, carefully move into the room’s shadows on the left side. Adjust the turret controls and disable IFF. Now the turret shoots at your enemies! Watch the enemies move on patrol and get mowed down by the turret. Eliminate any other enemy in the area then search the adjacent waiting area for items. Also, search one of the rooms in the hallway containing the turret for a medical kit.
Continue to follow Ingrid down the hall. Deactivate the turret ahead. As you approach the large doorway, beware of a guard on the far left side. If he didn’t enter the hall with the first turret, he may spot you here. Take him out.
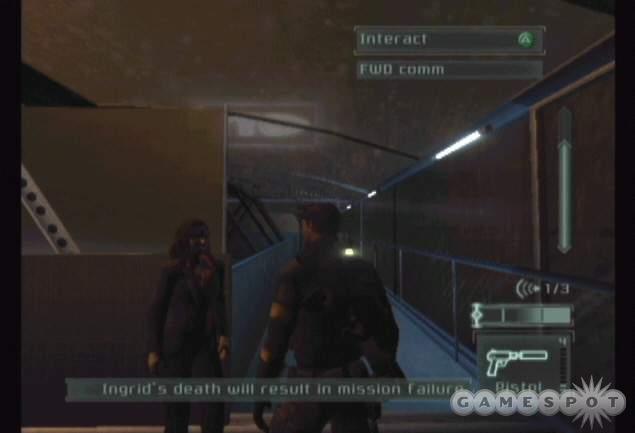
There are two catwalks ahead: one on the left and another on the right. As you cross the catwalk, Ingrid’s cover is blown. You must protect her against five enemies. Despite what’s said, you can stay on the same catwalk and just battle the guards in any fashion you wish. But Ingrid must survive or it’s mission failure.
You can utilize a frag grenade and toss it down the catwalk at the enemies at the far end. Lure them closer and toss the grenade at their feet. You may also want to use a couple sticky shockers to disable guards quickly. The faster you can reduce their numbers the better. Certainly you can use headshots with the SC-20K but its difficult to kill the guards quickly because they move forward and overwhelm you and Ingrid. Also, watch the adjacent catwalk for guards attempting to flank your position.
Objective: You need Sadono conscious. Don’t be detected by Sadono.
Ingrid opens the door at the far end by using the retinal scanner. Enter through the double doors and move around the back right corner. Listen to the announcement from the television station: Sadono is there and he’s taping immediately.
Shoot out the light on the left wall and inch forward. You shot out the light because a camera protects the area in front of you--and it can’t be shot. Use the camera jammer to maneuver underneath the camera and around the corner into the concession area. Beware of the guards around the corner. Lure them toward you and terminate them or use some of your non-lethal devices to clear out the hostiles. Deposit their bodies in darkness. If you want to sneak up to them, move behind the bar and use the light switch. There’s also a medical kit there.
Go to the back of the concession area and climb the pipe. Grab hold of the ledge and shimmy left to the open vent. Climb inside. Follow the vent to the open area on the back right side. Look below and spot the guards and, among them, Sadono. Tackle the area from the safety of this high position. Use the scope to snipe the guards from the upper position. Terminate all the guards leaving Sadono (in the red hat) alive.
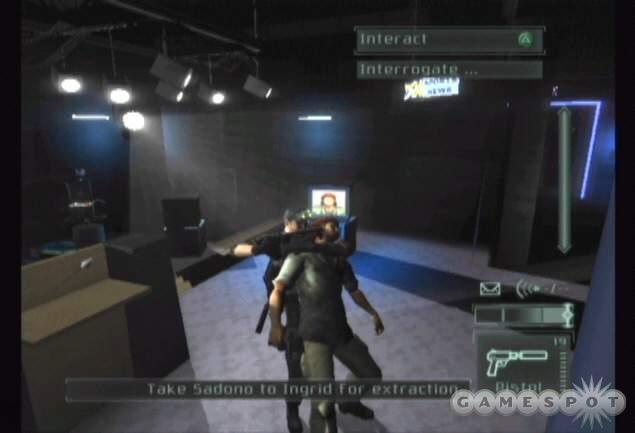
When he’s the sole survivor, drop down. As the objectives state, you must capture Sadono alive and conscious. That means no sticky shockers and certainly no headshots! You could manage to sneak up on him and quickly grab him from behind. However, one of the best ways to get him is using a ring airfoil round. Fire the round into Sadono’s chest. He’ll stand dazed. Take the opportunity to move behind his dazed body and grab him.
Objective: You need to use Sadono to give you access to the roof and deliver him to Ingrid.
Speak with Sadono then drag him to the back corner of the station. There’s a retinal scanner there. Use Sadono on the scanner then drag Sadono to the roof exit and use a second scanner. Drag Sadono out to Ingrid to complete the mission.
Los Angeles, USA
Briefing: Norman Soth has breached LAX security with an unknown number of mercenaries and the final smallpox virus-armed ND133. Neutralize Soth and recover the ND133 before the virus is released.
Objective: Sneak into the truck to infiltrate the airport. Any detection before infiltration of LAX will result in mission failure.
The airport parking garage is just ahead. There are two ways into the parking garage. You can sneak aboard the truck as the mission objective states or you can simply sneak in on foot. Either way is certainly possible though the truck offers the best cover against the guard at the gate station. Once inside the dangers are the same. If you do go on foot, start moving immediately and get over the fence quickly. Move at an angle through the parking lot and follow the guard ahead. Sneak into the tunnel to the right before the guard turns around. Don’t get spotted or the alarm sounds and the mission ends in failure.
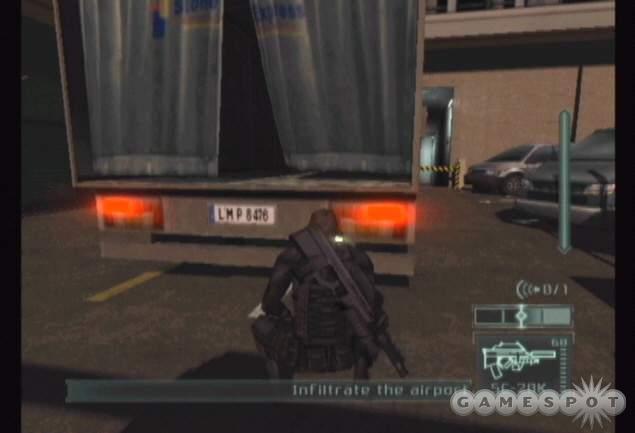
If you’re riding in the truck, climb the fence and hide along the left wall. Wait for the truck to pull in then enter its open rear bay. Hide inside and wait for the truck to come to a stop inside the LAX parking garage.
Objective: Identify and kill all of Soth’s terrorists disguised as LAX employees. Kill Soth and recover the last ND133 smallpox device.
The next danger is a patrolling security guard and his guard dog. The security guard is easy to maneuver around but the guard dog can pick up your scent rather easily and track you down in the usual safety of shadow and end the mission in a quick fashion.
The other problem, as the objective states, is that several of the LAX employees are actually terrorists. Identify these terrorists with your thermal vision mode. The terrorists show up bright red instead of light blue with green and yellow tints. The security guard and his dog are both clean but there’s a guard in the parking office that is a terrorist and he must be eliminated.
Peek out of the back of the truck and wait for the security guard and dog to move away. When the coast is clear, drop out of the truck and move behind the van on the left side. Peer around the corner and watch the security guard and dog’s movements. When they’re moving to the far right of the parking garage, equip your SC-20K and move up the corner.
Look around and spot the window into the parking garage office. When the terrorist inside the garage stands in front of the glass, eliminate him with a headshot with the aid of the SC-20K scope. Now either wait for the security guard and dog to move away again or scamper by the garage and to the entrance on its far side. Pick up the body and drop it in the dark. Don’t turn off the office light or the security guard will notice and be alerted. This could cause the dog to find you!
You may be tempted to shoot out the lights in the parking garage but this alerts the security guard to start searching for you. Doing so could lead to the dog finding your hiding spot and ending the mission. Also it’s possible to shoot the security guard with a sticky shocker out of sight of the parking garage office. Then you can eliminate the dog safely then deal with the terrorist inside the office.
Remember also that the terrorist must die. If you end up using a sticky shocker or a punch on the terrorist, you must finish him off with a bullet.
Enter the door to the parking garage office’s right side. Approach the next door ahead and use the optic cable to look inside the room. Spot the cleaning lady in the next room. Wait for her to move away from the door (she eventually leaves the room). Once she’s away from the door, move inside and into the shadows on the left side of the room.
The door ahead requires a keypad code, which you don’t have. Whistle to alert the guard inside. He’ll open the door for you and check to see what’s going on. When he enters the room, grab him from behind and drag him inside the open door. This isn’t the easiest move to pull off. You could also disable him with one of your non-lethal weapons, though it’s better to save these items for tougher mission situations. The tough part is the door, which closes quickly. If you do put the guard on the ground, you’ll need to bring the body with you so the cleaning lady doesn’t see it and sound an alarm. If you are detected by her before opening the door, knock her out and leave her in the dark.
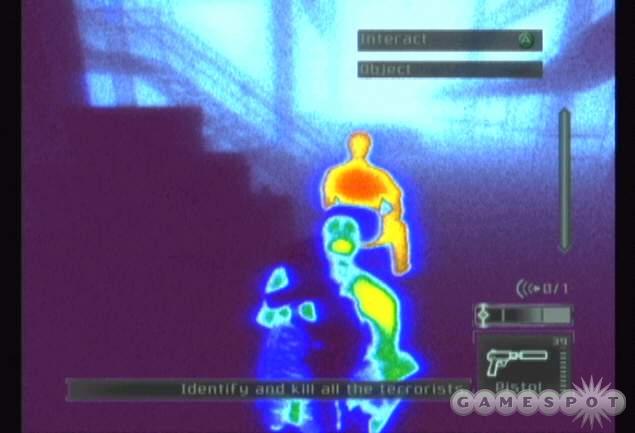
Approach the next door and open it revealing the baggage area. This area is filled with LAX employees and terrorists disguised as LAX employees. As your objective states, you must kill the terrorists before moving onward. Use your thermal vision to distinguish between good guys and bad guys.
Enter the first baggage room and spot the two men. Listen to their conversation and identify the terrorist with your thermal vision. Hide behind the crates on the right side (and grab the item while you’re there). Allow the terrorist to make his rounds. He’ll move into the shadows near your location. When he moves near to your position, grab the terrorist and knock him out. Finish him off with a bullet to the head. To deal with the LAX employee, lure him close with a whistle then punch him out. Put his body in a dark corner.
Approach the adjacent baggage room. Listen to the conversation. One of the men is a terrorist. Move into the room and to the right. Drop between the first and second conveyor belts. Wait patiently and the terrorist walks into the shadows of this area. Grab him and knock him out. Finish off the terrorist with a bullet.
Move back to the left side of this room. Spot the man sitting down in the bright light. He’s also a terrorist. Move through the shadows along the left edge of the room until you maneuver behind the sitting man. Watch the security guard on the upper catwalk and the employee patrolling below. When they’re both looking away, grab the man and pull him into the darkness. Knock him out then finish off this terrorist with a bullet.
Three men left in this area and just one is a terrorist. The remaining man in the bottom area is just an employee but it’s wise to knock him out so he doesn’t see your actions. Move left from the sitting man and move through the shadows near the belts. Watch your step and don’t ride a conveyor belt into the tunnel or the mission ends (you would have been X-rayed!). Wait for the employee to move into the shadows here and grab him and knock him out.
Two men remain and both are on the upper catwalk. The terrorist stands near the office on the right side (if you’re facing the room’s center from your current location). Use thermal vision to spot him moving around. The other man patrols the catwalk. Shoot out the lights above the catwalk to create some darkness. Once the guard resumes patrol, wait until he moves far from the office then shoot him with a sticky shocker. He’s a civilian so don’t use a lethal blow!
Just one man remains and he’s a terrorist. Move to the conveyor belts and watch the terrorist move around the office. When the terrorist approaches the railing on the right side, equip and use your SC-20K with scope to score a headshot. Ascend the staircase and move both bodies into the darkness. Search the offices for a medical kit.

Exit through the door on the office’s right side. Descend the stairs toward the conveyor belts below. Spot the belt ahead of you. Wait until a large piece of luggage appears on the belt and hide behind its right side. The belt passes by a window that an employee monitors. Hide behind the luggage and you remain in shadow and out of sight.
Drop off of the belt and move to the right. Hop onto the belt moving toward you and around the corner to the right. Duck under the overhang. Carefully walk forward and peer into the window on the right. An employee stands inside. Disable him with a sticky shocker then shoot out the light to shroud his body in darkness. Continue past the window.
Hop off this conveyor belt and search the shelves on the left. Pick up the ammo and smoke grenade hidden among the boxes. Move through the next door then ascend the dark stairwell to the door at the top.
Grim and Lambert report new intelligence: there are two more terrorists, one in the waiting room and another in the office area. Use the optic cable on the door ahead and wait for the patrolling employee (a terrorist actually) to move on to the left. Open the door and enter the waiting area. Stay in the shadows until the civilian moves to his seat and faces away from you.
Continue to the left following the terrorist. Move very slowly and quietly so you don’t alert the civilians. There’s another up ahead but he’s already sitting and facing away from you. Move up until you reach the column behind the second civilian. Wait patiently here until the terrorist is relieved by another employee. The terrorist leaves the station and approaches a door on the left side of the room. While he stands at the door using the keypad, shoot him with a sticky shocker.
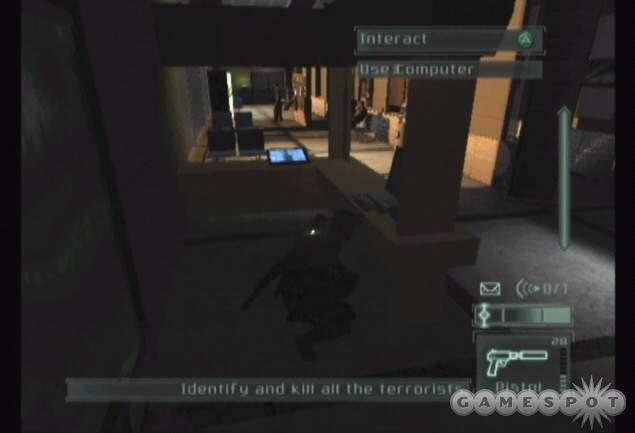
Wait until the other employee moves away and into the waiting room before approaching the stunned terrorist. Pick up the data stick from the terrorist and find a keypad code inside. Don’t forget to finish off the terrorist with a bullet to the head. Alternatively, you could allow the terrorist to enter the door then sneak into the station on the right and use the computer to gain the keypad code. Open the door with the keypad code 5325.
Enter the stairwell. If you didn’t kill the terrorist before, he’s at the bottom of the stairwell in the doorway. Shoot out the lights inside the stairwell. A camera monitors the bottom area; destroy the lights to create shadow to move through. At the bottom of the stairs, use the camera jammer and maneuver under the camera. Turn left and shoot out the light. Move forward to the door.
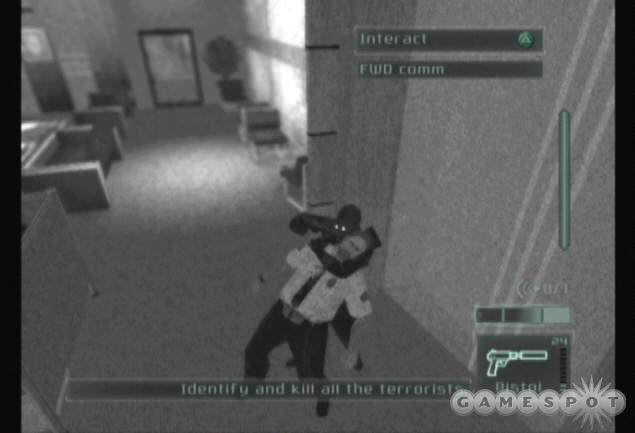
This is the office area. The man on the phone is an LAX employee; the man wandering around is the terrorist. Wait in the shadow and observe the terrorist’s patrol pattern. Grab him from behind. You can interrogate him. Do so then drop him in a dark corner. Shoot him in the head to finish the terrorist off. Sneak up on the other office worker and disable him from behind. If he detects you, he’ll make a break for the alarm on the left wall. Punch him out before he makes it! Beware of guards in the adjacent conference room. You’ll deal with them soon enough but if you alert them, quickly scamper to shadows and wait for your moment to pounce.
Only Soth and his two men remain. Exit out the door on the left side of the room. As you move down the path on the right, shoot out the lights to create darkness. Hide in the shadows as a couple civilians exit the conference room to check out the catwalk. Continue to shoot out the lights and the civilians will search for you. Disable them in the dark and don’t let them reach an alarm. Move their bodies into shadows if necessary.
Objective: ID Soth in the ticketing area.
You’re told Soth is nearby. You have to ID him by using your thermal vision to spot his missing leg. Turn left at the end to find the escalator. Shoot out the lights above the escalator if you wish. Move down the far right side against the wall to remain unseen.
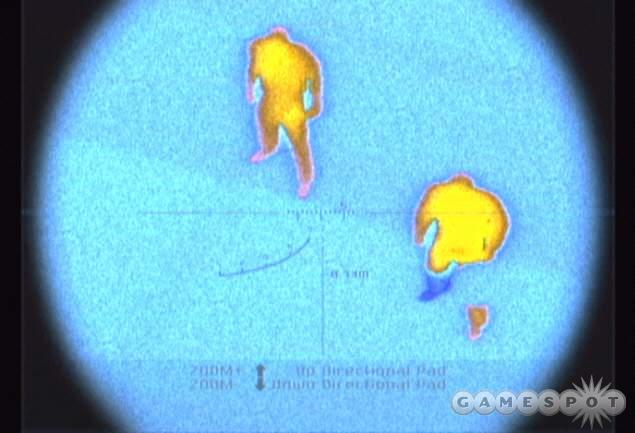
At the bottom of the escalator, turn left and look down into the ticketing area below. Use the thermal vision and your binoculars to find Soth and his two terrorist guards.
Turn around and spot the elevators. Shoot out the lights to create some darkness to help avoid the cameras. Move to the right corner and use the camera jammer to disable the camera so you can move underneath and to the elevator. Hit the call button, enter the elevator, and use the lift.
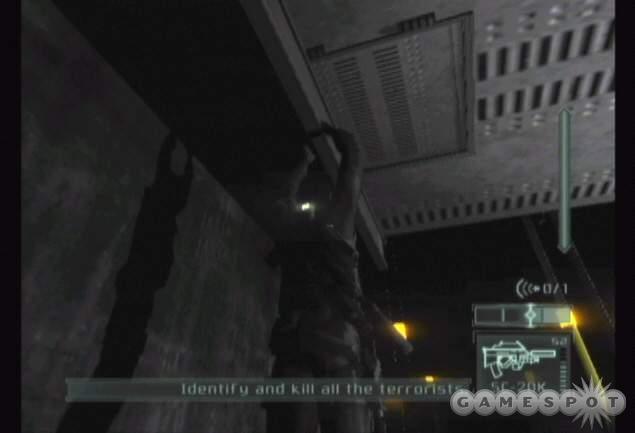
The elevator stops on the way up. Look up and shoot the light grey panel with your pistol. Leap up to the top of the elevator. Climb the striped pole that leads to the higher ledge. Pull yourself up. Once on the next ledge, climb the left cable up to the elevator car above. Shimmy onto the ledge at the bottom of the car. Move below the hatch and push the jump button. Climb up into the hatch. Inside this new elevator car, jump up through the open hatch. Turn around and find the crawlspace. Move forward to the maze of catwalks.
There are many LAX employees moving around these catwalks. You must avoid detection or a countdown begins. If you don’t find and kill Soth and his men before the timer expires, the mission is a failure. Drop down onto the catwalk and observe the employees on the opposite catwalk. You need to reach the ladder t to the right. Shoot out the overhead light to create darkness. Cross to the ladder and ascend carefully and remain out of sight of the employees.
Walk across this upper catwalk through the shadows. At the end, jump up to the overhead beam. Shimmy across the beam over the staircase and to the adjacent catwalk. Drop down from the beam. Move to the right and descend the ladder. At the bottom, hide in shadows until the patrolling employee moves away then scamper to the next ladder on the right. Look to the right of the ladder and spot the alcove in the column. Jump up into the alcove.
From the other side of the alcove, watch the movement of the nearby employee. When the employee moves underneath you and toward the left side, drop down onto the catwalk. Wait for him to move away and move to the right. Spot the repairman on the right. Turn left and move the ladder at the end of this catwalk. Climb up and find another ladder on the right.
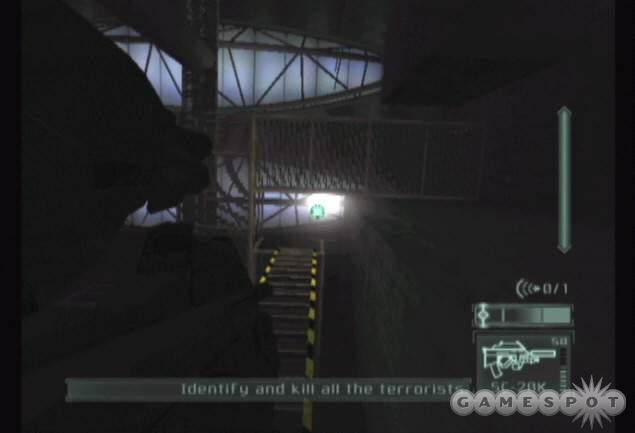
Switch on thermal vision and look at the catwalk above. You’ll spot one of the terrorists. Approach the next ladder on the right and look straight up. Shoot out the light far above you. Climb the ladder.
Look down and to the left and see the patrolling terrorist. You can shoot him from above but as soon as he’s alerted, the countdown begins. Run forward and off the catwalk to fall to the one below containing Soth and his two men. Shoot all three terrorists and approach the ND133 to complete the mission and the game.
Chapter 4 - Multiplayer Strategies
It’s the SHADOWNET spies versus the ARGUS Corporation mercenaries in Splinter Cell: Pandora Tomorrow’s unique multiplayer component. Depending on the game type selected, the spies attempt to neutralize, extract, or sabotage the mercenaries’ ND133 before the time limit expires. Both sides can also attain victory by eliminating the other a sufficient number of times.
This section provides strategies for Pandora Tomorrow’s multiplayer mode, which features weaponry, concepts, and gadgets not used in the single-player game.
The SHADOWNET Spies
The spy excels with stealth. As the game manual states, "SHADOWNET directives call for strictly nonlethal operations." The spy’s goal is to reach the ND133 undetected and neutralize, extract, or sabotage the ND133 depending on the game type. This section offers tips on playing as the spy, reaching the ND133, and completing the mission goal.
- The spy comes equipped with night vision goggles and a thermal vision headset. Utilize night vision to hide in dark corners and maintain sight on the surrounding area. Also important for spotting mines or spy traps placed in dark corners or hallways. Switch on thermal vision to spot lasers, cameras, motion detectors, etc. Thermal vision allows you to tell if a mine is proximity or laser. Be careful relying on night and thermal vision modes too much. A mercenary can use electro-magnetic imaging to see a spy utilizing night and thermal vision modes. Use the vision modes to check a new area then switch back to normal vision.
- Remember the mission goal! It’s not to kill mercenaries. Sure if the opportunity arises and you can sneak up on one then take the kill but your primary goal is to deal with the ND133. Even if you do kill the mercenary you give away your position. It’s usually better to remain hidden and watch the mercenary move off in another direction while you continue toward the goal. But if the opportunity is there--he’s at close-range with back turned or he’s right below you ready to be pounced on--then take the shot. Otherwise you’re meat up against the mercenary’s weaponry at medium to long-range.
- As just stated, if a mercenary spots you at medium to long-range, you’re essentially ill-equipped to deal with the threat. The mercenary’s primary weapon rips through a spy quickly. It’s better to run and lose the pursuer than attempt to win a tough battle. Don’t forget your chaff grenades and flash bangs when trying to make your escape.
- If you do manage to grab a mercenary, choose your next decision wisely. Should you knock out the mercenary or break his neck? Obviously if the mercenaries have perished frequently during the match, go for the neck break but most of the time you should simply knock out the mercenary. Because if you kill the mercenary, he respawns with replenished ammo and gadgets, such as mines and grenades. A mercenary without ammo and his gadgets is much easier to deal with.
- You’ve spotted a mine. You can disable the mine by inching slowly and carefully up to the side of the mine then select the disable function. You could also shoot the mine from long-range. Remember that there are two types of mines: proximity and laser. You may trip the mine by tripping the laser so toggle your thermal vision briefly to check the presence of a laser.
- In team-game, it’s extremely important to coordinate your tactics when playing as spies. It opens many more strategic possibilities and makes countering the mercenaries easier. For instance, split up and set off an alarm (or use an alarm snare) on a particular section of the map then have your ally infiltrate another section. Lure the mercenaries toward one side of the map while infiltrating the other. One spy could also become bait for the mercenaries. Move into view then create a chase situation while your teammate advances by.
- The spy’s sticky shocker firearm temporarily disrupts the mercenary. It’s best used if you’re trapped and need a way to escape. But it can also be used to counter the stunned mercenary with a knock out blow. Just randomly shooting a mercenary on sight might prove annoying to the mercenary but it basically reveals your location. He’ll know you’re close. Once again it’s more important for the spy to remain hidden than to try and go toe-to-toe with the mercenaries.
Spy Gadgets
The following list reveals the spy’s gadget choices and offers tips on using them effectively in a multiplayer game.
- Flash Bang - Disturbs the vision and hearing of any enemy looking at it when it blows. Blind a mercenary by tossing the flash bang in his field of vision. Good at short and long-range. Useful for making an escape when corners or even helping out an ally who’s pinned in by a mercenary. The mercenary can still shoot you while blind so don’t avoid his line of fire if you plan to approach and go for a grab.
- Chaff Grenade - Disables all electronics devices for a short period in its blast radius. Excellent for disabling a security measure, such as a camera or laser field, and particularly powerful when used in a room with multiple security measures. Can also be thrown at ARGUS mercenaries to disrupt several mercenary systems, like their weapon’s targeting system, reload function, and even their motion tracker. Great for making an escape in tight quarters.
- Sticky Camera - Deployable reconnaissance camera allowing the player to see through its point of view. It can also release a toxic gas cloud. Use it to check the defenses of a hall or room or monitor the direction of a mercenary defender.
- Spy Bullet - Mark an enemy on the radar (and enable you to listen to his communications). The spy bullets uses are obvious. In a team game, hearing the enemy’s conversation could help you pinpoint their location and defenses and seeing the enemy on radar will let you know when you’re moving close to the enemy. This can help you move in for a hand-to-hand blow or bypass them to get deeper into the map.
- Smoke Grenade - Creates a suffocating smoke cloud upon detonation. Drop to discourage (and cloud) a mercenary pursuer. Can also combo with the chaff, flash, or sticky shocker firearm. Stun the mercenary then drop a smoke to surround the mercenary in suffocating smoke. Note that the mercenary can see movement through smoke by using the motion tracker vision mode.
- Alarm Snare - Miniature diversion sound device. Can be thrown on detectors to set them off. Set off the detectors at one location and then move and infiltrate another. While the mercenaries search for you at one location, you’re off neutralizing the ND133 in another zone. Works best if you can manage to infiltrate the second area without setting off any alerts.
The ARGUS Corporation Mercenaries
The mercenaries prefer weapons and brute force over sneaking around. The mercenaries boast a much better firearm than the spies, have tough armor, and a couple explosives in their gadget arsenal. Protect the ND133 from the spies--it’s the mercenary’s primary goal. Time is on the mercenary’s side. Prevent the spies from neutralizing, extracting, or sabotaging the ND133 and achieve victory. This section provides tips on assuming the role of an ARGUS mercenary.
- The mercenary boasts plenty of vision and auditory tools to counter the spy’s stealth techniques. First, the motion vision mode can be used to detect a spy’s movements through dark areas. Scan toward dark corners and entrance routes to spot a spy’s infiltration. Note that motion tracking works through smoke. Second, the mercenary can switch on EMF (electromagnetic field vision) to locate interference given off by electric devices. This enables the mercenary to spot a spy using night or thermal vision. Finally, arrows around the targeting reticle reveal the direction of nearby sounds. In a team game, it’s important to know the location of your teammate so you can discern between spy sound indications and your teammate’s noise.
- The mercenary’s flashlight helps scope out dark areas for hiding spies but it also brightly reveals your location. A spy just has to look for the bobbing cone of light moving around the map to track your movement and direction. Using the flashlight is important but don’t rely on it completely.
- Maintain awareness around you at all time. It can be useful to camp at times to monitor a spy’s movement with a motion tracker or to allow your placed spy traps or mines to do their work but if you’re on the move, turn around and check your back occasionally or look up and check above you occasionally. Watch the sound indicator and face that location immediately. Be prepared to fire your weapon, use a tazer, or a melee attack if a spy is approaching at close-range.
- The mercenary carries two items that can be stuck to surfaces to counter the spy: the spy trap and the mine. Spy traps mark a passing spy and allow you to see the enemy on your own radar (and you can also hear his communications). Place them near heavily trafficked areas, such as entrances or dark paths through a section of the map. Don’t waste them near ND133. It’s better to mark a spy as he’s moving in, especially on a neutralization game. You may want to just place one or two because if a spy does disable the trap, you’re told. If you only placed one out there then you know exactly where the spy is! You can plant mines similarly. Though you could certainly protect the ND133 by placing mines nearby, it can be powerful to mine popular routes through each map. Remember you can shoot mines to set them off. Watch for a spy to try and disable a mine and shoot it using your sniper view.
- If you spot a spy ahead of you, don’t wildly fire your weapon in the spy’s direction. Increase your accuracy with short-controlled bursts instead of full automatic spray. Don’t forget to utilize your stash of frag grenades or phosphorous grenades as well. Toss the grenades where you think the spy is moving toward so the spy moves into the grenade’s path. The frag grenade’s blast is enough to kill the spy; the phosphorous grenade clothes the spy in phosphorous making him visible to your EMF vision mode.
Mercenary Gadgets
The following list provides tips on using the mercenary’s gadget selections against the enemy spies in a multiplayer match.
- Frag Grenade - This grenade inflicts area effect damage to anyone in its blast radius. Its uses are obvious: toss at the feet of a spy to eliminate the spy in an explosion. Best used when you’ve found the spy in a tight area, such as a tunnel or vent shaft.
- Tazer - Short range electrical shock that freezes a spy if it hits him. Useful if you’ve caught a spy sneaking up on you or spot one at close-range. He’s pretty much a sitting duck at that point. Note that the mercenary also has a close-range attack that can be used to repel the spy instead. The mercenary’s firearm is weak and hard to use at close-range so the charge or the tazer becomes an option.
- Spy Trap - Marks on the radar the enemy who cut its detection laser beam. Can also listen to the spy’s communications. Obviously place on areas you think the spy will certainly move through. Don’t place right next to an ND133. It’s better to place them on the routes toward the ND133 so you gain the trap’s benefit as early as possible. Try to conceal the trap as best as possible. You also must place it in a somewhat narrow area so the trap’s beam can hit another wall.
- Mine - Double trigger system mines (proximity or laser beam) inflicting damage in its blast radius. Like the spy trap, place on areas you believe the spy will move through.
- Phosphorous Grenade - Marks an enemy with phosphorescent particles in its blast radius. Toss a phosphorous grenade in an area you think the spy is currently located and turn on your EMF to track the spy easily. The effect wears off quickly so make your move as quickly as possible. To track the spy, look for green footprints left from the phosphorous effect.
- Flare - Very bright but temporary short range throwable and stickable source lights. Illuminates an area of the map to help track spy incursion. Toss in the darkest zones where a spy might hide from your view.
Got a news tip or want to contact us directly? Email news@gamespot.com
Join the conversation