Tom Clancy's Rainbow Six Vegas 2 Walkthrough
Vegas is in peril once again, but GameSpot's Walkthrough to Rainbow Six Vegas 2 will help you save it.
It hasn't been too long since the last installment in Tom Clancy's Rainbow Six came to consoles. Rainbow Six Vegas was an excellent game, and the first to really get a good handle on how to adapt the hardcore tactical gameplay of the PC games for console gamepads. (We'll just pretend that Lockdown never happened.) Now, though, Rainbow Six Vegas 2 has appeared, and promises to evolve the franchise with new gameplay features and a conclusion to the storyline that started in Rainbow Six Vegas.
On the whole, though, if you've played Rainbow Six Vegas, you'll feel right at home with Vegas 2, which plays very similarly to its predecessor. In it, you take on the role of Bishop, the team leader of a Rainbow Six squad, as you take on terrorists throughout Las Vegas in a story that parallels that of the original Rainbow Six Vegas. Players of that game will remember that a mole was discovered in the Rainbow Six operation: a soldier named Gabriel had betrayed his comrades. In Vegas 2, you re-encounter Gabriel and are forced to shut down his terrorist operation once and for all.
GameSpot's Game Guide to Rainbow Six Vegas 2 will give you some tips on playing through the game, as well as a guide to the single-player portion of the game.
General Tips
Go High
In many cases during the game, you're going to have the opportunity to breach through multiple doorways, using your team members to head through one while you head through another. This can be valuable when you have tangos on multiple sides of a room without clear lines of sight to one another.
However, in some cases you will also have the choice to enter through to the second floor or the first floor of a room. In almost every case here, you'll want to pick the second floor entrance. Getting height on your enemies will let you fire on them from above, and will also reduce the chance that they'll be able to throw grenades at you. The exceptions to this rule is when there's inadequate cover on the upper floor, or when the upper floor is filled with catwalks. Catwalks can usually be shot through, meaning that enemies below you will have an easy kill waiting for them.
Using Silencers
You can easily tell your team members to use their silencers by tapping the Back or Select buttons, and you can also attach silencers to your own weapons to prevent them from making a huge amount of noise. This infiltration mode works quite well in most cases, but silenced weapons will be a bit less accurate than normal and also deal less damage; they'll probably also penetrate materials less well than they normally would. If you manage to shoot enemies without making much noise, though, they won't have an opportunity to call in reinforcements and thus you'll wind up fighting fewer enemies.
If you're playing on the normal difficulty, then you can definitely play through the entire game with silencers off; you'll have bigger firefights and more enemies to kill, but that's all part of the fun. However, if you choose to use silencers, you'll want to know when to use them. In most cases, taking on large concentrations of enemies, such as are normally found in large rooms, will simply be more difficult if using a silencer; the gunshots of your enemies will almost always draw in more enemies. There are exceptions, though, such as when you can nab a bunch of patrolling enemies with headshots while they're standing away from their posse. In most cases, though, firefights will erupt based on scripts. Even if you enter some rooms completely quietly, you'll still sometimes be forced into a huge battle, so go ahead and take off your silencers for these kinds of encounters.
Still, though, in most cases it's probably best to keep your silencers on, both for yourself and your teammates. If you use the single-fire mode for your weapons, you can get headshots from a decent range, even with an SMG, which will let you stealthily bypass many enemy positions. Plus, it's just kind of fun to kill someone without his friend across the room knowing about it.
Use Your Teammates
Your AI-controlled teammates are very good at their jobs. They have the ability to see enemies relatively easily, whether they’re above them or behind them, and will fire on almost anything that comes into vision immediately. They will also adjust to different lighting conditions, as well, using thermal goggles to see through smoke and nightvision to see in the dark.
What this all adds up to is the fact that your teammates are probably better at the game than you are. There's also the little fact that the game ends when you go down, but doesn't end if a teammate gets shot; you can always attempt to heal them and get them back in the game before moving on.
Thus, in situations where you suspect there might be enemies that you can't see, it's usually beneficial to send your teammates into a room before you and get them behind cover. They'll fire on anything they can, allowing them to take down enemies in odd positions that would probably have capped you had you moved in first. You can, of course, rush in yourself if you like to get experience for all the kills in a level, but don't be surprised if you wind up getting dead more often than not.
Rainbow Six Vegas 2 Walkthrough
This walkthrough is written based on the normal difficulty. If you're playing on the highest difficulty, you'll want to rely more often on smoke grenades to avoid getting hit; going silent whenever possible and eliminating enemies before they spot you will also be beneficial to you. If you want to try a difficulty level between normal and hard, try playing normal without any armor on; it makes it much more difficult to survive gunfire, but you still have a bit of a gap between getting shot and instantly dying.
Pyrenees: Negotiations
At the very start of the game, you'll have to lead a three-man team of soldiers into a hostage situation in the Pyrenees Mountains. As you may expect, the first section of the game is fairly simple, but you can still die quickly if you don't know what you're doing.
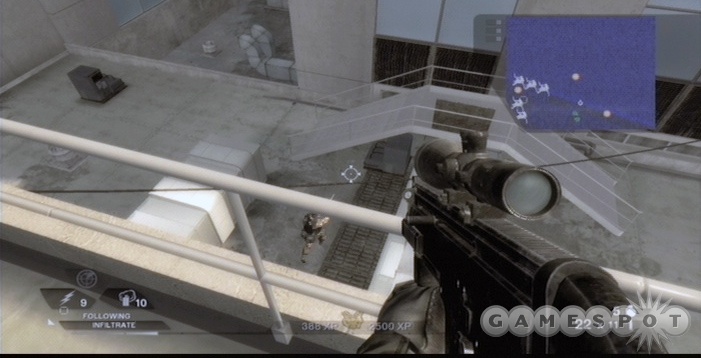
Head along the catwalk and get ready to make your first kill. You may want to switch your weapon over to single-fire mode, which will let you get a little more accuracy than you'll achieve in rapid-fire mode, which in turn will let you peg enemies with headshots and earn some marksman points.
Make your way past the snipers and down the stairs to the outside balcony. Get used to the controls here, which the tutorials should be telling you all about. In general, any door you reach can be safely opened and breached by your team; use a flash-and-clear or frag-and-clear command to clear out the rooms as you go along.

There will be a couple of times here when you have to rappel; you may want your team members to take the lead here, as they'll be capable of firing while dangling a bit more easily than you will. Continue through the level, capping any terrorists you see, until you reach a mined door. Order one of your team members to open it, then head through to reach the area where the hostages are being held.
While the negotiator speaks to the hostages, move around to the left and position yourself near the top of the stairs there. You may want to switch yourself over to smoke grenades before entering the room here. As soon as your teammate rashly opens fire, throw a couple of smoke grenades into the room, then start firing away at the terrorists. You may want to command your teammates to head down the stairs into the room, as a large number of terrorists will be coming your way. The hostages will run, but you'll have to kill all of the enemies before you can move on.
Ambush
After refitting yourselves at the outfitting stations (you can use these even if you don't want new weapons; they'll still refill your grenades and ammo), head out to the area beyond this to meet up with an ambush. Feel free to set your teammates to fire first with the select or back button on your controller.
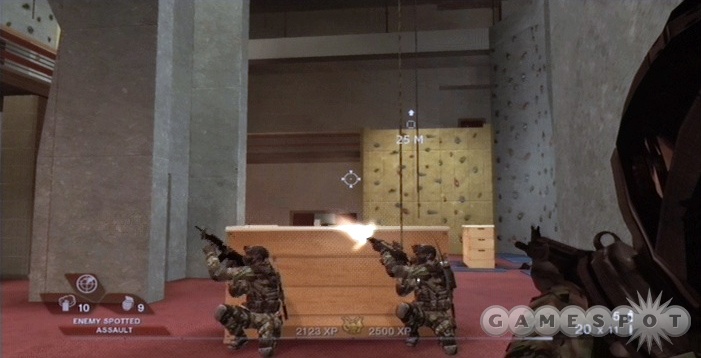
There's another large assortment of enemies here, so feel free to use grenades to clear some of them out, and be sure to position your teammates in such a way that they'll be able to fire on your foes. Be especially careful of the soldier on the rooftops; he can kill you in just a hit or two, especially if other enemies are firing on you. Getting through the assault will be a tricky proposition, but there is a large building to your right that you can enter if you need cover. There'll be a soldier with a shotgun on the top floor, though, so you may want to lead the way with frag grenades.
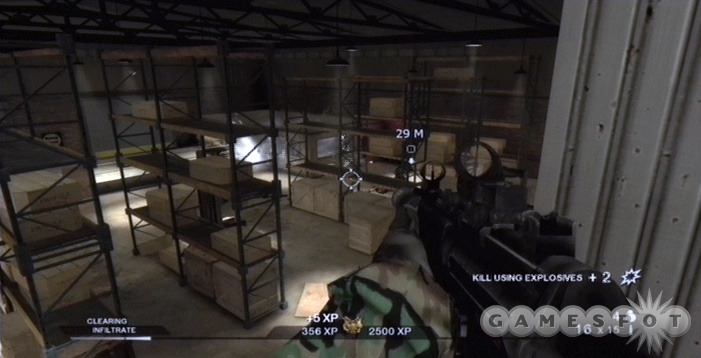
After busting into the next building, take a left and head into the door there to bypass the gunner around the corner. Head up the stairs, where you'll start hearing more chatter from alpha team, indicating that the terrorists are cornered. Unfortunately, pinning them down in the control room will require you to head across the open platform between you and it, and a horde of terrorists are intent on stopping you. Walk out behind the numerous obstructions, drop some smoke in the middle of the area, position your team behind one of the wooden barricades, and go to town. Keep in mind that most of the wooden barriers here won't stop bullets, so feel free to retreat back to the doorway if needed.
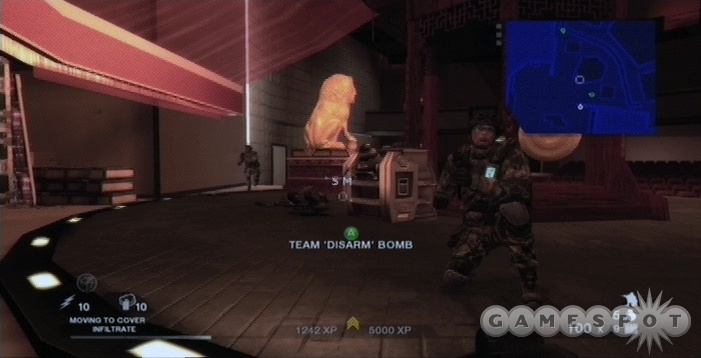
When you've crossed the area, you'll come to the control room. Kill any soldiers inside, then size up the bomb. You need to send your team in to disarm it, but they'll refuse to do so unless you're standing away from them. Get underneath the flags first, then find one of the corners on that side of the room. The two shutters nearby will open up and reveal turrets when the disarming starts, so you'll want to be out of their field of view. You may want to drop a smoke grenade directly on top of yourself before ordering the bomb to be disabled, or just liberally throwing them all around the room. When the bomb is disarmed, another ambush appears; survive it for a few seconds, and you should eventually automatically win the mission.
Old Vegas
Rooftops
Equip yourself well here; you'll want a close-quarters SMG, of course, but you might also want an assault rifle with a 6x scope, if you can find one.
Make your way across the rooftops and into the building nearby. Eventually you'll come to a room with two entrances that your handler will jabber about. Set your boys up for a flash and clear while you head outside and take out the soldier outside the windows. At this point, have your soldiers move to the doorway exit from the room that leads outside while you take the nearby ladder up to the rooftops. If you have a weapon with a decent scope, you can start picking off opponents from long range here for extra marksmanship points.

As you make your way to the railing of the rooftops, have your soldiers enter and clear the lower area while you offer up your gunfire from above. You should be able to clear out the area relatively easily with your team supporting you, then rope up and descend into the building below you; check your map for rope spots if you can't see them.
Eventually you'll pass through a basement area and hear Neville's cover getting blown. Defeat the enemies and head out to the rooftop. There's a rappelling point directly to your right; if you can shoot the snipers on the far buildings, it'll probably be the best way to reach the lower level below you.
Fight your way through the building here until you reach Neville's position. Climb the ladder to the rooftop above his little holding area, then breach through the skylight. You can't save Neville, so don't worry too much about it. Break the skylight with smoke grenades, send your teammates down, and snipe the enemies from above before following yourself.
Nightclub
There are two exits from Neville's room. Set your teammates up at one of them, snake the door, tag some terrorists, then head back for the other exit by yourself. You can feel free to set your ROE to fire at will, and thus use either a breach or frag-and-clear maneuver to pop off the first few enemies. There are more below you, on the lower level of the casino, so you'll have to be somewhat careful when proceeding to the stairs; all of the railings and slot machines will make it difficult to see enemies below you. At any rate, you need to get downstairs via one of the two stairwells and proceed to the main rear door of the casino.
Garage
The parking garage here will be the scene of another ambush, so move your soldiers up a bit before the soldiers come in. You may want to send them up the left side of the area as you proceed up the right side. There are a ton of enemies in here, and most of them are behind pretty solid cover, so make the most of your grenades and smoke grenades as you proceed.

As you pass through the last tunnel, you'll overhear more terrorists talking about your approach. You can send your team to stack up at the door nearby; they'll kill one or two terrorists as they walk by the mouth of the garage, and then you can have them breach and clear into the small room there. You'll need to clear out the street beyond the garage as well. A clear maneuver from the other side of the small room will help flush out any remaining enemies.
After hitting the checkpoint, you'll head into a construction area. There's plenty of cover here, so there's little reason not to send your team in first, but be careful of snipers and the odd frag grenade that'll be coming your way. You'll probably have a couple of cheap deaths in here unless you get pretty good at hearing that soft landing sound of a frag grenade.
Sweatshops
Beyond the construction site are the warehouses and sweatshops where Cabrero is manufacturing his explosives. After passing through to the parking dock, you'll come across a young woman who is key to your moving on through a nearby gate; if she dies, you have no hope of moving on. Keep her alive by telling her to stay put near where you found her, then have your soldiers breach and clear through the door at the top of the ramp. Heading around the corner is suicide, thanks to a turret gunner and a sniper on the rooftops. Stay in the garage as best you can and attempt to flank your foes before taking them out.
After clearing out the garage, have your new friend open the gate. She'll move around to the door and attempt to lure one of the soldiers there out into the parking lot. Wait for him to come out and drop him quickly! This will probably lure out a few more soldiers if your suppressors are off, but either way you'll need to clear out the warehouse. There's a small room in one corner of it with more hostages; quickly move to the door and order a flash and clear to rescue them.
With that done, move out to the next warehouse. In the first small room, you'll find a door on the ground floor and a ladder leading upwards. Have your team stack up on the door while you head up the ladder. After clearing out the small office, order a breach and clear, then sneak out onto the walkways up top and support your team with fire from above.
Head out from there into the loading bay, where more soldiers will appear. Your team can hopefully take a few of them out if you tell them to hide behind the truck here, while you sneak around to the left and get up around the corner and use your grenades to flush out any stragglers. You're almost at the end of the level, so feel free to use up all of the grenades that you have, if you like.
The last room is inside the warehouse. Stack up your soldiers at a door and have them flash and clear while you move around to the rear and fire through the windows at the soldiers as they take cover. When these soldiers are down, head outside to meet with the helicopter and move on.
Rec Center
Gymnasium
You're going to be dropping into enemy fire here, so hit the ground running and get behind cover. You may want to have your team take one lane down the outside seating areas here while you take the other and attempt to set up a crossfire. Don't hesitate to sprint from cover to cover as you make your way down the area. Check the white van at the end to confirm that the bomb has been removed and placed somewhere else in the premises.
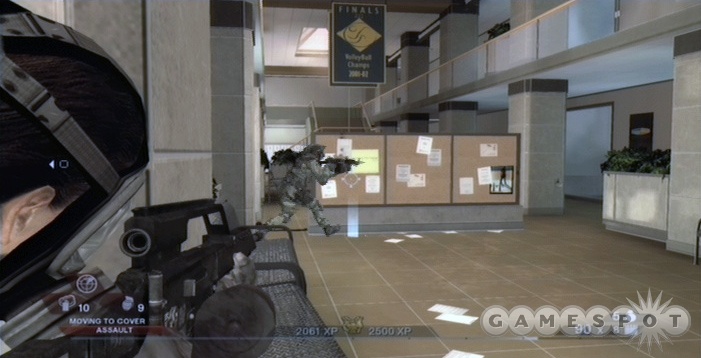
Head up the nearby stairs and do a frag and clear with your teammates; you can fire in from the windows if you like. Inside this area is the gymnasium, a confusing two-level building with lots of doorways. In most cases you'll be able to find an entry point on the second and first floors. Stick to the upper level in most cases, as it's easier to fire down on your enemies as they come up the stairs to reach you than vice-versa.
Continue on through the gym until you reach the rock-climbing center. This is where things get tricky, as there are a lot of enemy terrorists that will attempt to rappel downwards onto you and fire from above. You'll want to place your teammates behind one of the wooden barricades in the center of the bottom of this area, and then move yourself around the bottom of the room in order to spawn in some of the enemies. Your teammates will take out most of the enemies before you even see them. When the coast has cleared a bit, rappel up the room to the very top and move on.
Arena
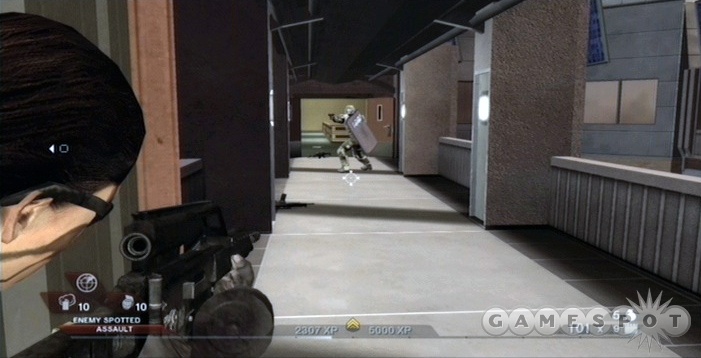
After refitting, start stacking your team up on the lower doors while you bust through the upper. You'll be able to clear the next room and the little park outside if you do so. The enemy concentrations will start to be a bit more dense here, and you'll also start to see enemies using riot shields, so a machinegun or shotgun will help you penetrate the shields and drop them, whereas an SMG will merely bounce off the armor.
The rest of the fitness center is fairly empty, so head through it quickly and make your way to the arena.

Getting across the street to the Baker Arena is an undertaking. The first obstacle is a turret gunner in one of the upstairs windows. Your teammates have a hard time hitting him, so switch to single-shot fire and try to peg him with a distance shot. Next up is a horde of enemies in the lobby of the building. They have a very good angle of fire on your approach, so have your team throw down a smoke grenade in the street, sprint to one of the police cars, and use them for cover while you clear out the entryway.
After breaking into the arena itself, have your soldiers bust through the closed shutters with explosives, then head up to the doorway where hundreds of people are dying miserably. Not much you can do for them, unfortunately, so take your team and start making your way to the checkpoints. There'll be one more tough fight in a storehouse before the end of this section, so send in your teammates first and let them wade through the bulk of the soldiers before hitting the decontamination area and finishing up.
Library
There's no need to move very quickly outside the library; just plant your teammates behind one of the planters and let them start sniping away at the enemies as they come. When the gunfire stops, move them up to the next row of planters and sprint forward yourself. If you move methodically, you'll eventually come around to a corridor where you'll be able to move up and onto one of the upper walkways.
Clear out the next large room to reach a re-equip point. As Sharon suggests, you may want to nab a sniper rifle here; if that's not your bag, then a simple assault rifle with a decent scope will be fine if you want to head up to the rooftops. It's probably not necessary to do so, though; you can breach and clear on one of the lower-level doors and simply pop shots off at the far-away terrorists from behind some solid cover, if you like.
Chase
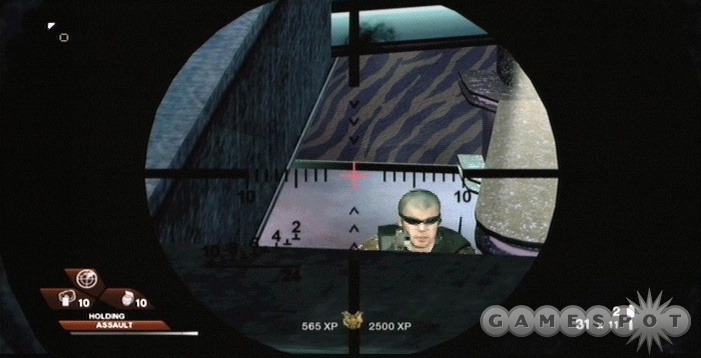
On your way out of the library, you may want to pick up a sniper rifle, as there'll be some long-range fighting in the upcoming area. After heading outside, you'll discover that Cabrera has been hiding in a hazmat suit, and is attempting to escape. The parking lot here is the long-range battlefield we were referring to; a couple of snipers will appear and ping at you from across the lot. Try to take them out with your own long-range rifle, if possible, then send your teammates up to take out any remaining foes.
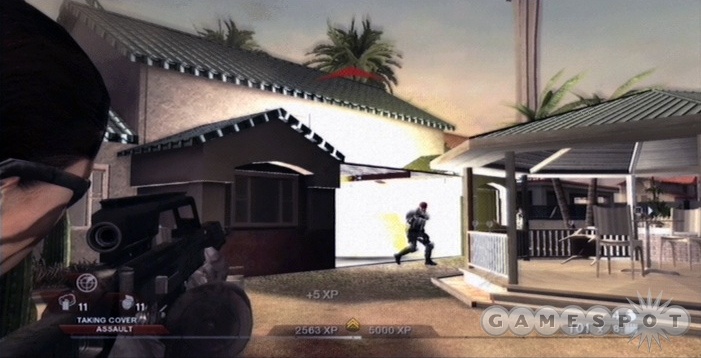
The battle from here on will be much more up-close-and-personal, so drop your sniper rifle for a shotgun or something similar. You're going to be heading through a few different residential backyards at this point, with some extremely up-close combat. There aren't any civilians to deal with here, so feel free to use grenades to clear out some of the terrorists. Proceed slowly and watch your corners.
Eventually you'll wind up in the Logo Junkyard, where casino neon goes to die. Have your teammates jump the barricade leading in before you do, then sit back with a weapon and kill all the terrorists that come your way. When the coast is clear a bit, hop over yourself and start moving forward. If you need a good weapon for this area, nab an enemy FNC; it's a fine little submachinegun that works very well in single-fire mode.
Use grenades and radar scans to clear out the junkyard, but be careful of blind corners; there's a lot of junk here that the enemies will be using for cover. Navigate as best you can to catch up to Manuel, but be ready with your weapon when he pulls out his gun!
Convention
South Hall
You start on the roof of the building here, with the option of either rapelling down the side of the building or entering through a doorway. The doorway's the safer bet. Head down the steps, go through the doorway, and stop while looking over the railing in front of it. That'll let you fire downwards on the enemies that will be appearing from the steps below you. Shoot everything you can, then head down the steps to reach the bottom floor.
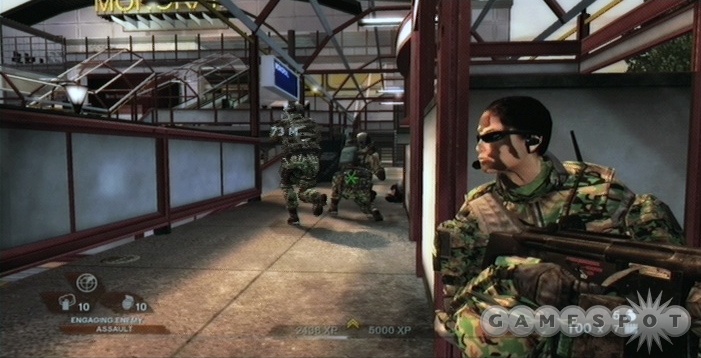
Around the corner, you'll find the south hall itself, a morass of exhibits. It's basically like having a gunfight at an old E3, if you remember what those were like. There are a bunch of terrorists in the center of the hall, as well as in the opposite corner, so stick to the walls! Keep your back against a wall as much as possible to avoid giving the terrorists opportunities to sneak up on you. We preferred to enter and hug the right wall as you come into the hall; there's plenty of cover along there for you to use as you pick off enemies. Be sure that your teammates are in assault mode, too. There are a few shotgun-wielding soldiers in the far corner of the hall, so be sure to have your teammates move first if you assault that portion of the area.
Move through the next set of hallways until you manage to scale the large stairwell leading upward. You'll have to move down one more hallway to move on; be sure to pick cover that will actually deflect bullets! The thin standing displays look comfy, but they're very penetrable.
Exhibition
There's a fairly tough challenge here at the beginning, as you have two doors to clear, both of which lead out onto a loading dock where a number of soldiers are waiting, in addition to a turret gunner and a sniper far across the platform. You'll probably want to perform a smoke and clear on one of the doorways and use the smoke as cover. You can snipe out the sniper with even an SMG, so long as it has a reflex scope. The turret gunner will be a bit more trouble. You may want to send your soldiers off to one side while you sneak around the other way and try to snipe the gunner out of the turret.
After searching the van, head up the stairway nearby and enter the warehouse via the second floor. The soldiers here will use incendiary grenades, which are less likely to hit you if you stay up top, and there are also some shielded opponents, who are easier to kill if you stand above them. The third room will be the most difficult of the three to take on from the top, as there's little cover, but there is a metal plate near the door that can be used as cover.
You'll eventually come to the security offices, where there are two doors. One of them will have a pair of soldiers chatting away right nearby, so breach and clear until the security office is secure, then hack into the security cameras to try and locate your wayward security chief.
Silent Mode!
At this point you'll be asked to put your suppressors on and start going through in silent mode. Use snake cams to mark your targets and attempt to open the first door here while the patrol is walking away from you. It might help to move in front of your team at this point and attempt to get headshots on unsuspecting foes whenever possible. You can, as prompted, use thermal scans to pinpoint your enemies before they're aware of your position. Knowing the direction of their movement will help you approach while they're facing away and take them by surprise.
After you sneak through the hall, you'll find the room where your hostage is being held. It helps to go in through the upper doors, as you'll be able to see the terrorists and tag the two standing closest to the hostage before ordering a flash and clear. When the hostage is free from imminent danger, you can tell one of your soldiers to disarm the bomb around his neck. While he does that, prepare for the counterattack, which will start from the upper doors. There isn't a lot of cover to work with here, so we liked to move up the stairs and sit in the corner near one of the doors and wait for the first wave to appear. Gun them down, use grenades to plow through enemies at the far door, and if you survive the first wave, you should be fine to clear out the rest of your foes.
After this, you'll have to fight your way backwards through the exhibitions to reach the North Hall. It's difficult, especially since the curtains here don't really give you much cover to work with. Set your team to assault mode, though, and keep them in front of you to let them mow down most of the enemies before you can even spot them.
North Hall
Enter through the doors here after tagging a couple of enemies via the snake cam. You may want to keep your suppressors on here, as a goodly number of soldiers will come your way if alerted to your presence via gunfire. Regardless, make your way into the building, head down the steps into the foodcourt, then come up on the other side to reach the upper area of the hall. That will lead into the bathrooms above the food court proper. Enter via the left bathrooms, use a snakecam on the far door to tag some targets, then frag and clear. That'll let you take over the turret here and use it on the remaining terrorists, should you wish to do so.
A couple more long hallways will lead you to refit stations. On the way, be sure to duck into the three-doored room; it'll have more baddies for you to kill and the far door will act as temporary cover while you proceed onward.
Monorail
When you reach the monorail, get ready for a fight. There are two enemy turrets set up overlooking your approach, in addition to a huge number of soldiers that will be coming your way, some with shields. There also isn't a huge amount of cover, either, so you'll need to proceed quickly up one of the sides of the area, with your team following you, to flank the turret gunners. Otherwise they'll simply be replaced by other soldiers as they come forward. Alternately, you can simply sit back and shoot away from good cover until the enemies stop coming.
When you're ready to move on, find the stairs off to the side of the main entrance to the monorail; they should be off to the right. This will lead you into a small bar. Clear it out, and take out as many enemies in the nearby entryway as possible, but don't enter it. Instead, head into the small access hallway nearby; this will let you flank a turret gunner and take him down without much risk.
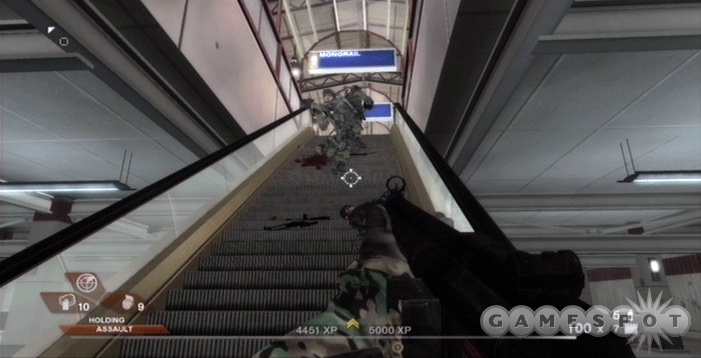
After proceeding through the locker rooms (in a monorail station?), you'll come to the waiting room. There's another turret gunner here, but there are two doors, so you should be able to breach and clear at one of them after snakecamming to look for a shielded enemy. Your teammates will clear the bulk of the room on their own; just make sure that they're behind solid cover. Only one of the two escalators here is functioning, and as you approach it, enemies will start to come down from above, so be sure to keep your teammates close by.
Actually heading up the monorail's escalator will be a tricky subject, since most of the enemies near the bomb won't spawn in until you're almost at the top of the escalator. Send your team upwards first so that they wind up near the top of the steps, which may spawn in some enemies. If not, head upwards until you hear gunfire start cracking, then turn around and throw grenades or incendiaries through the small gap between the railing around the escalator and the glass ceiling. You want to be throwing near the waypoint marker on your HUD, as that's where most of the enemies are. If you're lucky, you'll catch a few of them with your nades without blowing up the bomb itself.
When the area is a bit clearer, charge up and eliminate any remaining foes. Again, this can be tricky, as there isn't much cover and there still might be a few enemies around; try to duck behind whatever you can to improve your defenses while your teammates deal with the foes. Keep an eye on the windows near the bomb, as more enemies will be rappelling down. As your teammates work on hacking, head out onto the little platform near the bomb and shoot at any more rappellers. When the bomb detonates, climb up the ropes to meet up with your helicopter.
Theater
Penthouse
Clear the roof, then start heading downstairs, clearing out this massive penthouse apartment room by room. For the most part, the enemies won't know you're coming, so feel free to go quiet and attempt to avoid any large ambushes, if you like. Alternately, you can go heavy with a machinegun and sweep through all of the enemies in your path. This is especially helpful just after you reach the first supply boxes; the windows nearby are perfect for killing off the next dozen or so opponents, as they'll all spawn and rush into the room after you start taking people out.
Eventually you'll hit a rappel point. Your goal here should be to hit the rappel and breach into the lower room as quickly as possible; any dilly-dallying will get you killed, as there are plenty of enemies in the room below. You may want to send your team into the windows first before heading in yourself.
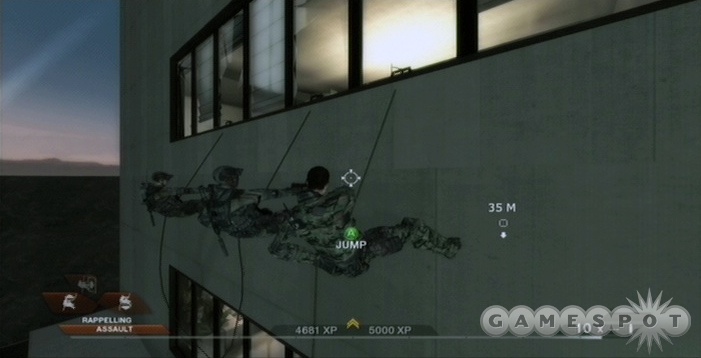
After the second rappel, you'll see the lights get cut. Start being a bit more cautious here; you can start using silencers to sneak up on your foes, as they usually won't come through the doors here to check on their teammates. Scout thoroughly with your snakecam and be sure to stick to the corners. Eventually you'll reach a corner suite with rappel points, as well as a staircase. It's probably better to go through the door, but you can always tell your teammates to breach and clear while you bust through a window on the opposite side of the room if you want to feel like a pro.
You'll eventually lose contact with Echo Team as explosions rip through one of the buildings here. Fast rope down the side of the building and go loud to deal with the enemies there; there's no sense in subtlety when fighting in these large rooms. As you approach the bar with the two turrets in it, keep in mind that you can access a kitchen area through the bar. It's not on your map, but will let you flank around to the side of the large room ahead of you and enter through two doors if you like.
Casino
Go quiet at the beginning of this level, and you should be able to headshot the first few enemies without drawing too much attention. When you reach the open-air casino area, though, go loud and start shooting crap up. It's not feasible to make a front-on assault; split off to the left or right and find cover in the bathrooms. That'll let you get behind a planter and get a bead on the sniper up above before clearing out the rest of the area.
When you reach the gamerooms, it's probably best to just stay loud and draw the enemies to you with noise. You can use your thermal goggles here to highlight enemies, if you wish, but the torrent of gunfire will probably be enough to tell you where they are. Proceed cautiously; there are two turret gunners in the far northern corners of the area to contend with.
Center Stage
Eliminate the soldiers near the SWAT team members, then head upwards towards the ticket booth. Eliminate the other soldiers nearby, then head into the security room's general area. Be prepared to tell your teammates to drop smoke in the hallway here, to obscure the view of the turret gunners nearby.

When you breach the security room (chuck a grenade through the window to clear out stragglers), order your team to hack the computer, then get on the turret here and reload it. Two waves of enemies will come, but you'll be well capable of mowing them down with the turret.
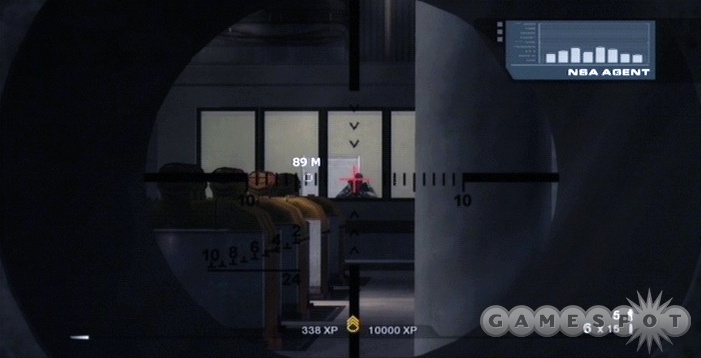
Your goal now is to assault the theater and shut down the bomb before it goes off. The enemies in the theater will trip the countdown if they see you coming, but luckily for you, it's relatively easy to kill them all without anyone noticing. At the outfit station, grab a SR-25 SD sniper rifle. It's silenced, so you'll be able to pop heads from a distance without making any noise. Start by killing the guard on the catwalks, then start picking targets out on the ground below you. The guard in the balcony should go down first, followed by the soldiers walking among the seats, and eventually finishing up with the soldier standing by the bomb itself.
You may want to have your teammates queued up at one of the fast ropes while you snipe away; if alarms are raised, you'll be able to tell them to drop right away and go hot to remove any remaining foes. Get them to the bomb ASAP to disarm it in this case.
Head through the hallway nearby to reach the equipment cases. Although it's easy to miss the two doors here, look around for both entrances to the next room and plan accordingly. One of the doors will have a shielded enemy in front of it, so a breach and clear there will help eliminate him immediately. The rest of the room is pretty populated, so don't be afraid to chuck a grenade into it and see what happens.
The next set of two doors that you reach will feature the hostages. Use your snake cam here; it would appear that the surviving SWAT team member is alive and attempting to negotiate. For whatever reason, the terrorists are letting him stand up and walk around. You'll face a game over if he dies, so use a flash and clear maneuver, then open the door near you and fire while crouching. Fire upwards at the enemies, since the SWAT person crouches; that will hopefully keep you firing above his head. With the hostages free, move out onto the band performance area and use the drum platform as cover while you counterattack the ambush here. A short hike from there will lead you to the last part of the level.
Extraction
No need to be quiet here, except perhaps for the first group of enemies. Stick to the corners as you head up the stairs, and you'll see them come out a doorway. You're pretty close to a refit box, so feel free to use whatever grenades you have.
When you hit the refit box, you'll have one major firefight to get through. There are two doors leading out onto the rooftops, but both you and your teammates should head out through the door near the refit boxes. Tag the turret gunner and shielded foe to your left before stacking up, then set your team to assault mode and nab a machinegun or assault rifle for yourself. Breach and clear, and your team should take down the turret gunner and the shieldbearer, allowing you all to set up behind the airconditioning units on the roof to take down the two dozen or so enemies that will start to come your way. There are two turrets set up on the far side of the roof, so stay behind cover, start chucking grenade at the nearby enemies, and let your teammates do the hard work here. When the coast is clear, head out to the helicopter and land.
Nevada Desert
Drop Off
After getting dropped on the roof here, hit the refit boxes and nab the SR-25 SD sniper rifle. It's silenced scope will help you make a stealthy approach towards the refinery. Match it up with something powerful, like an assault rifle. Silence will be your ally here, so be sure that you're going to be capable of silencing your alternate weapon.
When you drop off, slide down the ladder and into the room below the roof. Head through the door and go through the door in front of and to your right. That will lead you to a window that you can quietly open climb through. Hiding behind one of these dumpsters will let you start firing on your foes with your silenced weapon, hopefully allowing you to finish them off without alerting them. Even if they do catch on, though, you'll still be well protected behind the dumpsters.
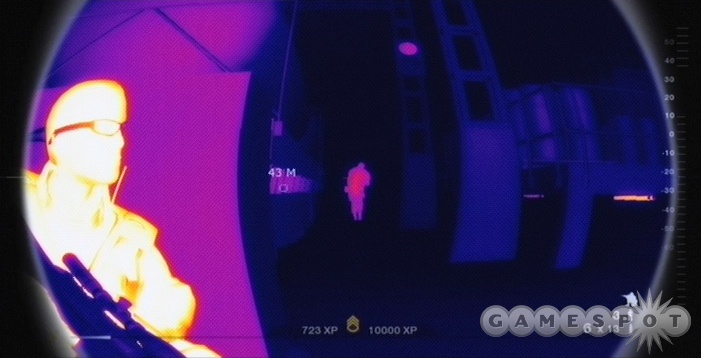
With the restaurant somewhat clear, move over near the burning truck and start sniping at the enemies that appear after the checkpoint. A soldier will man the turret in the guard house, another will walk up near the truck, and a few more will be in position in the refinery. You can snipe all of them. Switch to night vision if you need a bit more contrast in your view; that should help you pick them out.
As you make your way into the refinery, silence will be less important, if not irrelevant. There's only one path to take, and you'll have to walk around a corner into a shooting gallery. There isn't much to do but switch over to your assault rifle, take off your silencer, and start going to town. In your favor, you can hide behind the concrete pillars here to shrug off most fire, and you can fire upwards through the catwalks to hit your opponents. On the downside, there are a lot of them (including a tough-to-spot sniper high on one of the smokestacks), and some of your foes will throw incendiary grenades at you.

Your best bet here is to rile up the first group of opponents, then backtrack to see if the two enemies on the ground floor will come after you. If they do, dispatch them; if not, try to get them from an angle where the enemies above can't see you. With that done, crouch down and use the ceiling for cover until you can take down the enemies above one at a time. When they're all dead, sprint forward and to the left, winding up near where the shotgun enemy first stood. You'll be behind a brick wall, with a ladder off across the area. Switch to automatic fire here and kill any enemies that come down the ladder or up the steps to you. If you can do that, you'll have a few more enemies to kill near all the barrels in the middle of this area; use grenades.
Apart from that, the remaining enemies will include a turret gunner (snipe him from long range), and a few straggling enemies. Make your way to the checkpoint near the gunner to reach the next area.
Furnaces
Whip out your silenced sniper rifle for the trainyard. At the outset, there are three enemies wandering up and down the trainyard in between the trains, so snipe them from a distance. Move towards the checkpoint after that, taking the path along the leftmost wall. When you're around 15 meters away, two more enemies will appear, including one that will patrol along the left passage. Snipe him, then find the other one on your map and take him out too.
The boiler room nearby is more easily infiltrated from the ground floor than from up top. Getting on the walkways also increases your chances of getting shot from below. You're near a checkpoint, too, so you don't need to worry too much about keeping quiet, although it can definitely help. There should be four soldiers in this area, perhaps five. Take them out and move on.
After hitting the checkpoint, your goal will be to shut down the fire alarms. The next large room has a bunch of enemies in it. Head down the stairs and open the doors down there; it's easier to shoot upwards through the catwalks than it is to fire down below, and you can also use thermal imaging to find some of the enemies that hide from you. The enemies here have a harder time detecting your presence, presumably because of the sound of the fire alarm.
One more building awaits you on your trip to the refinery. Check the door with a snakecam, and you'll see two enemies. One will be directly in front of you, and one will be off to the left. You can pop the door open and silently kill both of them without a problem.
Refinery
As soon as you hit the fire alarms here, the enemies nearby will be alerted to your presence. Move back towards the doorway you entered the room from and use your assault rifle on any enemies that come through the door. Your sniper rifle can be used on the two turret gunners that fire through the windows. With them taken out, start making your way out the now-opened door leading on.
There are two paths that you can take here after exiting the door. You can move forward and to the left to wrap around the buildings and down into the parking lot, or you can simply duck down behind one of the sheet metal barricades in the railings to provide cover while you kill off all the soldiers near the vans.
When you reach the next checkpoint, just after killing the soldier that's on the walkie, you can go silent again, as the soldiers beyond him will be patrolling. Take as many of them out as you can without making noise, then go for the rest with everything you have.
There are two entrances to the refinery, either up the ladder or down the stairs. We preferred taking the loud route and heading down the steps, opening one of the doors there, and blowing something up. That'll bring plenty of soldiers down near the doors, where they'll be pretty tightly packed and easily killed with a grenade or two if you stay on your toes. Move on from there up the stairs towards the checkpoint, but be aware that the last room before the checkpoint will have numerous enemies. You'll be pretty close to a refit box, though, so feel free to use up your grenades on these guys.
At the refit station, you may want to grab flash grenades if you want to remain silent; otherwise just gear up for more loud firefights. If you do have flashers, you can open the double-doors on the opposite side of the first large room, chuck a flash in there while both enemies have their backs turned, and gun them both down with a silenced weapon to move on. Make your way down to control room two to reach the last part of this mission.
Airstrip
The first portion of this area will be more sniping. Check your map to see the locations of enemies that you might not be able to detect visually and take them down with your rifle for good times. As you approach the far building, though, be prepared for a full-on counterattack.
Eventually you'll reach a hangar. Fastrope down into it for a cutscene and to end the mission.
Estate
Compound
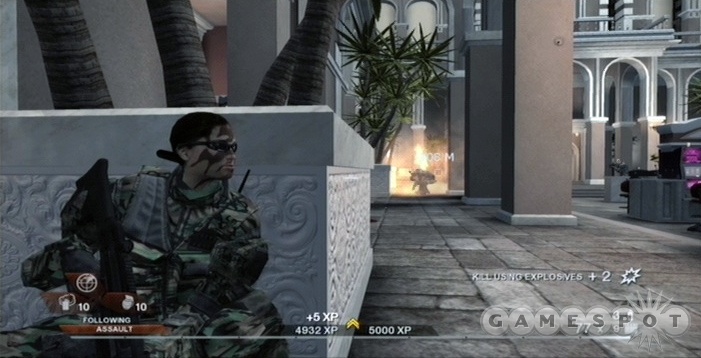
No sense in going quiet at the outset here; bring down a machinegun from the chopper, like the excellent 21E, and start going to town. You're going to die a couple times before reaching the first checkpoint, but you can improve your odds by staying behind cover at all times and using smart positioning of your team. Move them in front of you and be sure that they're behind cover and facing whatever route you're about to take.
After getting to and cutting the power, a door will be unlocked along the path you just took. Backtrack to find it and head through.
Hacienda
After refitting, switch to silent mode for your team and equip a silencer. Snakecam the door and wait for the drivers to move off into their positions, then sneak out the door and start headshotting them from a distance. No need to get a sniper rifle here; an assault rifle with a silencer should have distance enough to kill these guys.
Stealthily make your way across the garage area until you reach the stairs leading up to the residence itself. There are plenty of tangos inside, so it's probably wise to switch back over to your machinegun and go in guns blazing. Enter through the first door you spot and start clearing out the entire place, pausing after every firefight to see if more soldiers don't drop through the skylights. After a while, there'll be a welcome surprise in the form of more Rainbow Six squads that will appear to help out.
Head upstairs and switch back to silent mode, if you like. After clearing out the first few enemies, though, start snaking doors; one of them will have two shielded enemies behind it. Switch back to assault and breach that door to kill them both.
Eventually you'll reach a room with a computer and a bomb in it. As you might be able to tell, this is going to be a tricky situation. You'll certainly want to have a machinegun here. After telling your teammates to hack the computer and disarm the bomb, the bomb will eventually explode, dropping one of your teammates. Tell the other one to patch him up, then get your machinegun ready. Stand underneath the overhanging ceiling and start firing away at the enemies as they drop from the railings and the windows. There are going to be around eight of them all told, with more on the upper level, so as soon as your teammates are fit, bring them back underneath the overhang themselves. If you're having troubles, backtrack to a refit station and use smoke grenades to obscure the area a bit before the bomb goes off.
Showdown
The assault chopper here is going to be pretty annoying, for obvious reasons; it'll kill you rather quickly if it catches you out of cover. At the outset, focus on the small shed off to your left. Kill the enemy that pops out of there, then look to the right and kill the soldier that rappels down from the roof. With that done, your conversation with Joanna should be about done, allowing you to periodically pop over your cover and fire away at the helicopter. You can attempt to blind fire, but you'll probably miss it due to its distance from you.
After a goodly amount of fire (be sure to duck down as you take damage), you'll get confirmation that the chopper is calling for help. When this occurs, it'll fire missiles at you. You'll have to stand up and run away from your cover in order to avoid getting killed here. When the missiles have impacted, work your way around the corner and hide behind the other low walls near the tennis court. You don't need to worry about the chopper at this point. Instead, focus your fire on the soldiers that come out of the shed and attempt to kill them before they reach the tennis court. If they do get close to you, they'll often throw grenades, and there isn't much room between you and the wall behind you, making these lethal more often than not. You're going to get your fair share of cheap deaths here, but if you shoot the enemies as they come out of the building, you'll hopefully be able to prevent them from chucking their deathballs. No need to fire on the chopper during this section of the fight. Eventually, however, it will fire more missiles, so retreat into a corner of the area and get away from your cover.
When the second salvo of missiles lands, you're almost home free. Dash across the tennis court and into the shed, using its windows as cover while you fire on the truly endless stream of enemies here. All you have to do now is survive. Throw your grenades and incendiaries into the tennis court to take out some of the enemies, and use your machinegun to finish off the rest.
After the chopper goes down, the wall of the shed will collapse, leaving you to face Gabriel one-on-one. Wait for him to raise his gun, then blast him in the head to finish him off. Hooray!
Got a news tip or want to contact us directly? Email news@gamespot.com
Join the conversation