Tom Clancy's Ghost Recon Advanced Warfighter Walkthrough
Mexico is in the throes of rebellion, and it's up to the Ghosts to put an end to the coup d'etat. GameSpot's Walkthrough to Advanced Warfighter will get you through the fire!
Design: Randall Montanari
Tom Clancy's Ghost Recon games have always been known for their simulation of near-future tactical squad combat, pitting the wits of a few wily soldiers against the forces of dystopia. In a world on edge, sometimes stabilization requires the insertion of highly-trained special forces soldiers into hostile territory, to clean up a dirty mess or just to make sure that a real war doesn't erupt.
In Ghost Recon Advanced Warfighter, the same basic premise is taken to an extreme. During a political conference in Mexico City, a military coup d'etat is birthed, people are being assassinated, cats and dogs are living together...basically, bad times all around. Luckily for right-thinking people everywhere, the elite Ghosts are on the ground in Mexico City. Although the Mexican President has requested American military intervention, it'll take a while to get forces on the ground, and since you're already in town, it'll be up to the Ghosts to perform the risky missions required to stabilize the situation during the first few days of the insurgency.
Advanced Warfighter has been in the works for a while now, and it's definitely one of the best games to hit the Xbox360 during that console's short lifespan. This guide to Advanced Warfighter concentrates on the single-player portion of the game, giving you plenty of tips and videos to get through the many rough missions of the game. Enjoy!
General Tips & Cheats
Using Cover
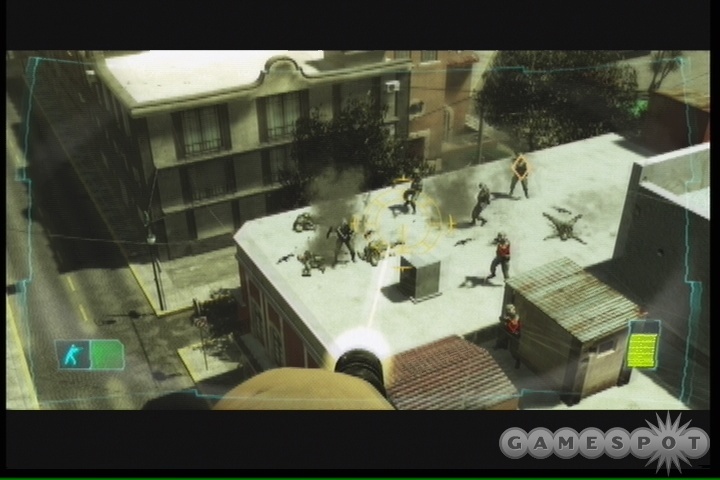
One of the odd realities of life on the ground in Mexico is that you're pretty much always going to be outnumbered by the Mexican rebels there. Apparently all of the troops that are loyal to the President have gone into hiding, so it's going to be up to the dozen or so Ghosts to restore order in the capital.
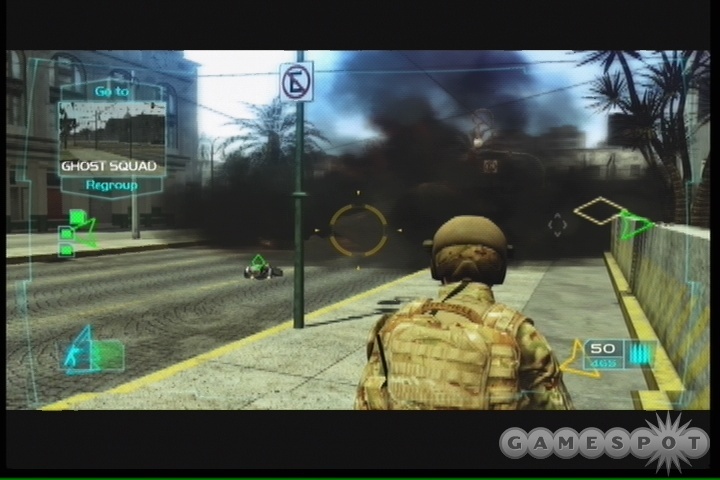
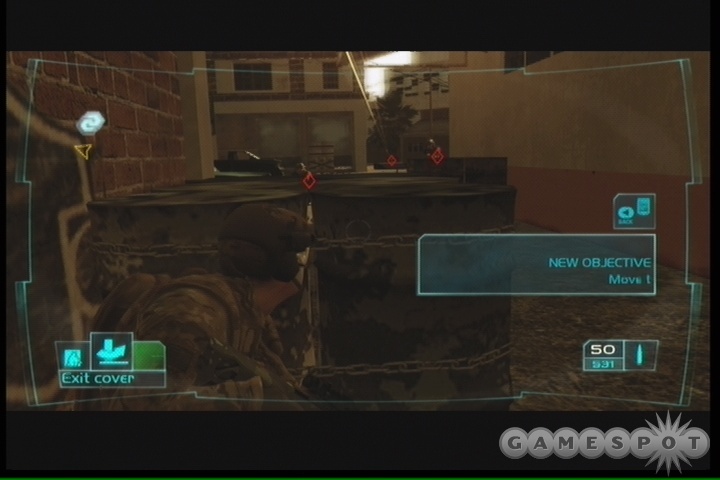
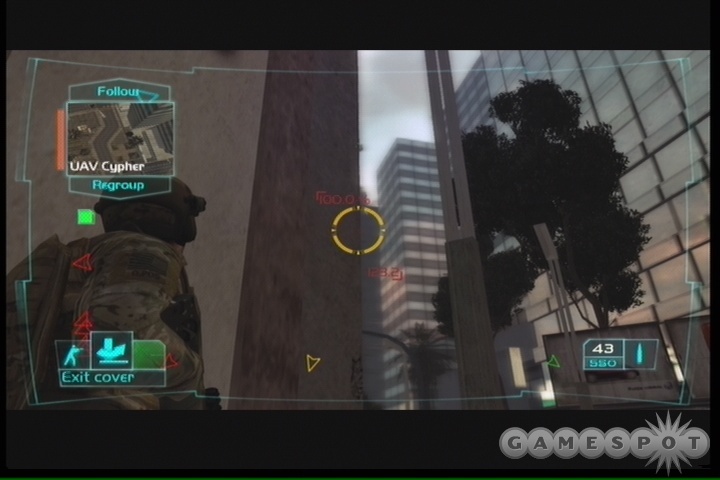
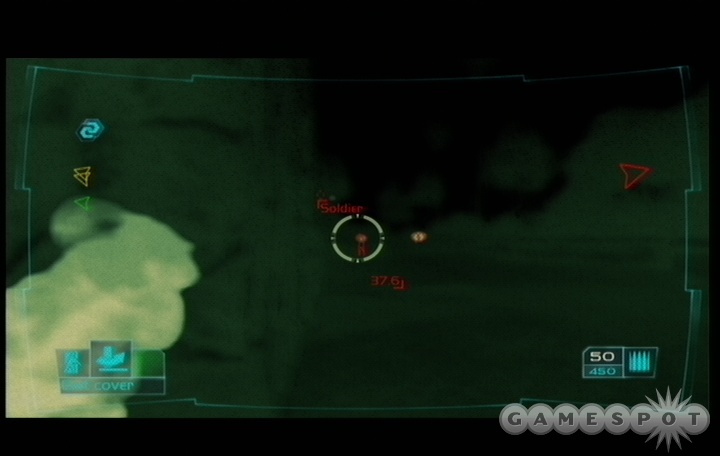
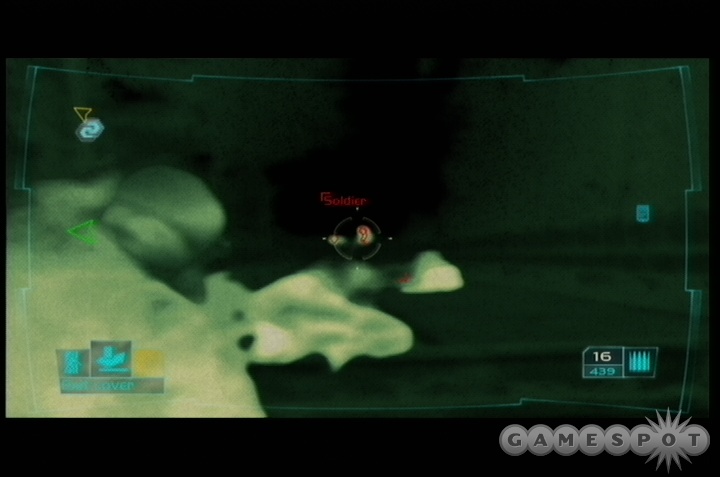
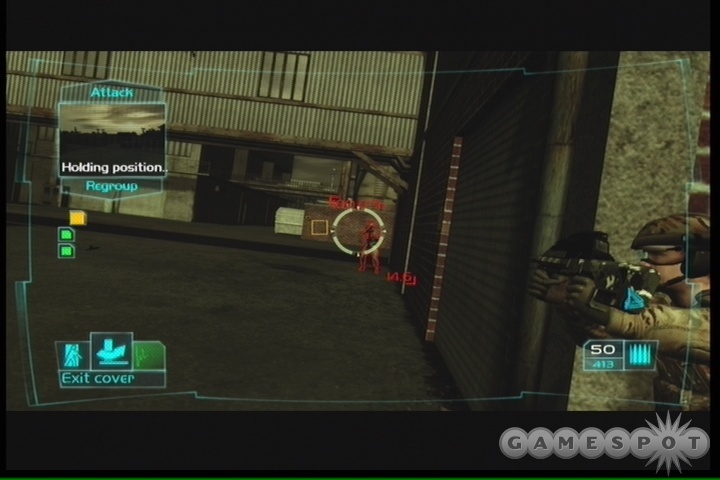
What this basically means is that you're pretty much always going to be outnumbered and outgunned. You won't live very long if you try to play Advanced Warfighter as a straightforward shooter, either; attempting to run into fire will usually wind up with you keeling over dead. Thus, you're going to have to take advantage of the game's cover mechanic. When you see a solid wall or a low wall, press against it to "stick" to it. While sticking to a wall, you'll be able to head to a corner, where most of your shooting is going to be taking place.

At the corner of a wall, you have a few options available to you. If you press around the corner, you'll peek out and be able to get a read on any enemies in the area, with most of them popping up on your HUD for further consideration. If you hold the right trigger, you'll lean out and start firing on your enemies; if you click the right analog stick, you'll lean out and start sniping (which isn't a good idea; see below); but your best option is to hold down the left trigger, which will cause you to lean out and take aim at your opponents. If you lean out with the left trigger, than the fire from your right trigger will be much more accurate. Any of these actions will be cancelled when you let go of the trigger (or in the case of sniping, when you cycle through your zoom levels until you go back to normal view).
Of course, firing from cover doesn't mean that you'll be perfectly safe. Enemies can and will be firing on you, even if you're not really visible to them, so just leaning out into their gunfire will result in some hits on occasion. If dealing with one or two enemies at a time, then you can wait for them to reload and lean out while they're pausing their fire. When you have multiple enemies to take down, though, it's best to use smoke grenades to cover yourself while firing on them.
Where There's Smoke, There's Gunfire
If you have to fire on three or four soldiers at a time, then smoke grenades will greatly improve your chances of survival. Smoke grenades will let you obscure yourself from your enemies while you use your thermal vision to peek through the fog and focus in on your foes.
To use smoke, pull away from a corner a bit to adjust for the minimum throw range, then try to lightly toss your smoke grenade so that it drops right on top of the corner. After a few seconds, the smoke cloud will begin to form, so step away from the wall and stand just behind it, so that the smoke is between you and your foes. If you flip on your thermal vision, you should see their outlines as you normally would, allowing you to start firing on them as normal. They may be able to return fire at you individually (i.e. if you shoot at one of them, he may fire back, but none of his friends will), but they won't be able to see you or shoot until you give your position away.
You only get six smoke grenades per mission, but knowing their utility will greatly help you clear out the more difficult redoubts of enemy soldiers. Since enemies will almost never press their advantage and rush your position, even when they know where you are, you can take advantage of their reticence and turn their defensive strongholds into their graves, with a little help from obfuscation. Hooray for obfuscation!
On Proper Sniping
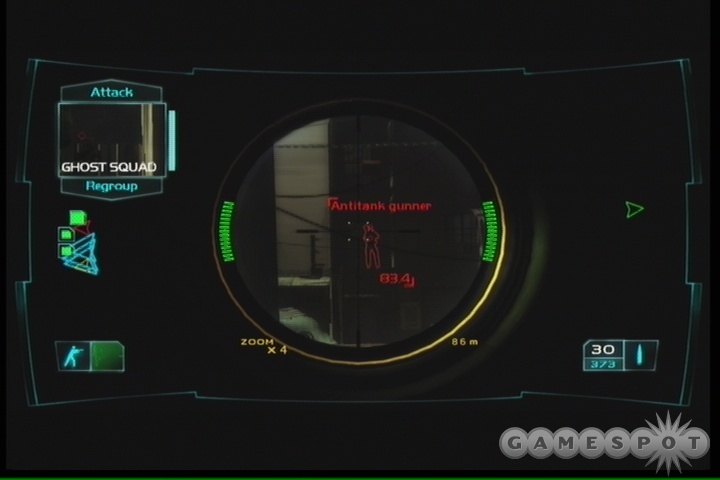
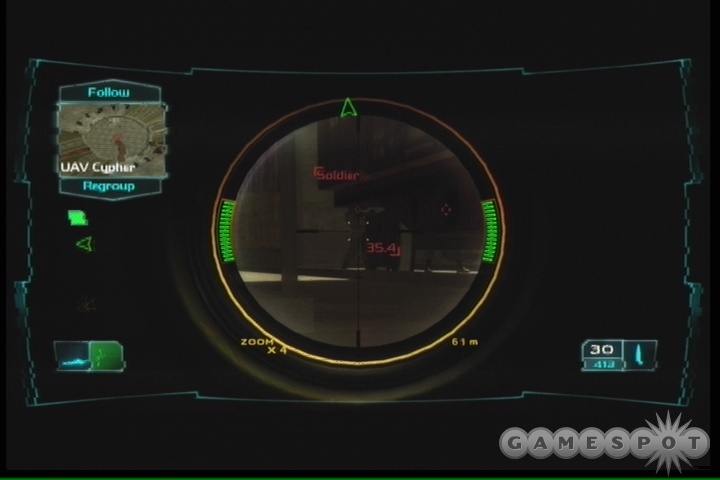
Most assault rifles and sniper rifles have variable zoom levels, accessible via clicking on the right analog stick. (Grenade launchers and light machine guns typically will not have scopes, however, and thus won't be able to zoom.) Now, you can attempt to snipe at enemies from behind cover; when you click on the right stick while at a corner, you'll lean out and automatically zoom in on your foe. Unfortunately, doing so exposes your entire body to enemy fire, and is fairly slow to boot.
Sniping is a lot easier if you actually know where your target is ahead of time. You can either peek around the corner first to get an eye on your foe (after which they'll appear in red on your HUD), or use a UAV to peek out their positions. When you know where you're firing at, step away from the wall. Don't stay stuck to it; it'll be easier to snipe if you're standing away from the wall, while remaining behind cover.
When you're ready to snipe, stay behind cover and zoom in on your target's red marker on your HUD. This should mean that you're effectively zoomed in on a wall, but that's fine; while you're zoomed-in, you can still strafe left and right, however slowly. So, when you're fully zoomed in, just slowly strafe around the corner until you have a clear line of sight towards your target, pop off a few quick shots to the head, then strafe back behind cover before you get taken out.
This might sound counterintuitive, but if you try to snipe directly from a corner, you'll spend a lot of time zooming in again, then trying to find your target. And while doing so, you'll be almost completely out of cover, meaning that you'll likely get shot up before even being able to fire. Strafe-sniping is far easier and less risky than attempting to snipe while sticking to a corner, so get used to doing it!
Cheat Codes
There are a few cheat codes in the Xbox 360 version of Advanced Warfighter that you can use to make the game substantially easier for you. In order to enter these codes, you have to start a mission, then press start. While you're in the pause menu, hold down the Back button, the left trigger, and the right trigger. You have to continue to hold all of these buttons down while you enter these codes. When they're entered correctly, you'll hear a tone indicating that they're active.
Unlock All Levels: Y, RB, Y, RB, X
Turn Scott Mitchell Invincible: Y, Y, X, RB, X, LB
All Ghost Team Members Become Invincible: X, X, Y, RB, Y, LB
Unlimited Ammo (appears to reset if you hit a rally point): RB, RB, LB, X, LB, Y
Recharge Life to 100%: LB, LB, RB, X, RB, Y
Walkthrough
Note that we're writing this walkthrough based on the game's Normal difficulty; if you plan on heading through on the Hard difficulty, then you'll likely wind up having to do things a bit differently due to the increased accuracy of the enemies. When all else fails, don't forget that you can fire through smoke grenades, thanks to your thermal vision; this should help you deal with clusters of enemies that you can't take down normally.
Note also that we're not big fans of the teammate AI in the game. Maybe the fact that they consistently manage to get themselves killed is what drove us off. They're mostly fine if you can place them behind a low wall that they can pop up and fire over, but when placing them near corners, you'll often find that they don't protect themselves very well before they lean out and fire. After the tenth time they start whining for medical attention, you'll be pardoned if you wind up letting them die, just to teach them a lesson. Even better if when you have a grenadier or a rocket launcher teammate attempt to fire on a distant target, but wind up hitting the wall in front of them, killing your entire squad. Fun!
Anyway, on normal mode, you'll be able to kill the bulk of the enemies in each level on your own, assuming you choose a decent weapon. Most of the time, we used either the MR-C or an enemy 36K; both guns possess 2x and 4x sights as well as the capability to switch to single-shot firing for extra accuracy. They're generally the most versatile weapons you're going to have access to, capable of killing enemies at any range, although on occasion you'll want to flip over to a grenade launcher or sniper rifle for specialized tasks.
Lastly, note that this walkthrough is written for the Xbox360 version of the game. The Xbox version may be similar in many regards, so hopefully some of the details here will be useful if you're playing that version of the game.
Mission One: Contact!
Objective: Reach Ramirez's Position
You're going to get dumped onto a bridge at the beginning of the mission here, left to the wilds of Mexico City all on your lonesome. One of your comrades has eyes on a covert meeting between Nicaraguan forces and Mexican rebels, and it's your job to get close to his position and hopefully retrieve him. Initially you're alone, but you actually do have a friend along for the ride: your handy MR-C rifle. This little puppy holds 50 rounds in a magazine, has two zoom modes, and can switch between semi-automatic and automatic fire at the touch of a button. Know it, love it.
You'll eventually get some teammates to help you out, but for now, you're going to be on your own. Head down the highway towards the yellow marker on your HUD; you can either stick to the road, or take one of the stairs leading down to the ground below. If you proceed to the north, you'll eventually spot a couple of soldiers leisurely walking across the road. There are actually three soldiers here, so do your best to take them down. If you get banged up a little bit, don't worry about it; you'll be patched up soon enough.
Objective 2: Move To Rally Point
Soon after taking down the three tangos, you'll be able to move on towards Ramirez's position, only to get a broadcast on your cross-com alerting you to the fact that Ramirez has been spotted and is heading away from his position with all due speed. Not much you can do after that; you're ordered to abort your objective and head towards a new rally point to the northwest. There are going to be another three soldiers in your way, including a gunner, so be prepared for an ambush when you near the large water tower (which should be visible on your tactical map).
After killing off the soldiers, make your way to the rally point and select your new teammates. The default selections here should be fine, but keep in mind that you're going to be able to select your new weapon, if you wish to change from the MR-C. If you think you might want to flip over to a grenade-launcher rifle, then you may want to change your Grenadier teammate to be another Rifleman. If you do go for a grenade launcher, we recommend the MR-C/AGL, which trades in your scope for a grenade launcher, but retains the large, 50-round magazine of the MR-C.
Objective 3: Locate Ramirez With The UAV
After you get your teammates, you'll also obtain the services of a UAV, as well. You can control the UAV as you would your squad, by aiming at the location you want it to scan and pressing Up on your directional pad, but in most cases, you're going to want to control it by checking out your tactical map. If you scroll around on the tactical map, you can pinpoint a distant location and point it there without having to be anywhere nearby. For instance, Ramirez's location is noted by a yellow marker on top of a building fairly far away, so move the UAV there and press your left bumper button to have it drop down and scan. As soon as you hit the checkpoint indicating that you've found Ramirez, raise it up to a safe altitude and get it to Regroup and fall back to you.
Objective 4: Extract With Ramirez
Now that you have a UAV drone and a few teammates along for the ride, it's time to head out and get Ramirez, who's atop a rooftop nearby.
As you make your way towards the highway, be wary of a couple of soldiers behind some barrels near the stairs leading back up to the pavement. You can wrap around a building near them to get behind some barrels of your own and take potshots at them, if you wish.
Now, you can either go underneath the bridge here or head up top, but it's definitely wiser to go up top. When you do, though, you'll quickly learn that there's a soft-vehicle convoy heading in your direction, and indeed this turns out to be true. Two troop transports will be heading towards the overpass, so get your soldiers up behind the white railing and set them to attack one of the trucks. The one that parks on the right side should be a good target; if all of your guys are in position and firing away, you can often destroy it before it pops out any enemies. You can focus on the soldiers from the second transport before telling your soldiers to finish off the truck itself.
When the trucks and soldiers are out of the way, find the steps leading down to the road and take them. If you send your UAV over to the little lumber yard nearby, you should find a few more soldiers. They may have been attracted by the gunfire over the highway; if so, then you'll have to take them as they charge towards you. Otherwise, you can take the road to the north, head into the small, roofed building there, then use the lumber inside as cover for your team while you start firing away at your foes.
The Railyards
After you clear out the lumberyard, you'll reach the railyards. Despite the general's warning here, your objective doesn't really change after his little message: your goal is still to reach the rooftop where Ramirez is stranded so that you can dust off. Of course, you'll have a whole lot of guys to go through before you can do so.
Before heading into the railyards, use your UAV to scan for enemy soldiers. One of them will be on top of one of the water towers overlooking the railyards, so drop back a bit until either you or your teammates can get a clear view of him, then take him down.
Now, there are at least four or five more soldiers in the railyards, so you'll need to proceed as cautiously as possible to take them out. There aren't a lot of angles to hide behind in the railyards, save those of the cars themselves, so after clearing out the soldiers that run towards you, head north to the northmost rail and use its body to protect you from the gunner at the far end. If you reach an open car, you'll be able to climb into the middle of it and down to the other side, enabling you to kill the gunner from behind.
The Factory
When you get around to the Sunrise Factory, be ready for a fairly large fight. As you approach the entrance, it'll open up, revealing half a dozen or so soldiers in the loading docks, including some that will be behind plenty of cover. You only have one entrance here, so making it in can be quite difficult, but luckily, you have a UH-60 Blackhawk circling overhead to help you out. Now, if you just send it in directly, it'll probably get shot down by the small arms fire from the soldiers in the facility. (It'll periodically state that it's taking fire even if you don't manually control it, but it doesn't seem to take any damage unless you direct it towards a target.)
So, you're going to want to try and at least weaken the enemy positions before sending your chopper in. You won't lose if it goes down, but you'll probably want to keep it alive for a while so that it can help you reach the roof of the factory here. You have a few options here. You can either attempt to lay down smoke in front of the entrance, and circle in to the right in an attempt to flank the factory and fire on the soldiers from the side entrance, or just try to take down as many of the soldiers with weapon fire as possible. You can also attempt to use the helicopter to fire on the troop transports in the courtyard, in the hopes that they'll take down a few of the soldiers nearby and weaken the defenses before making your way inside.
Note that there are respawning enemies here; the suite of enemies that you see initially will be refreshed by four or five more enemies that'll come in one at a time as you shoot the Soldiers hiding behind barrels near the rightmost troop transport. Just keep shooting them until they stop coming, and then you should be relatively safe to enter the courtyard.
From the courtyard, enter the factory, but be careful of the soldier that'll appear on the catwalk above you. Take the ramp there up. If you still have your helicopter available for use, all you need to do to complete the mission is park your squad somewhere, then head to the outside portion of the catwalks, lie prone, and start crawling along the bottom edge of the chainlink fence. You'll eventually spot a pair of soldiers on a walkway higher up the building. If you kill them off with the helicopter, then you'll be free to run to the last waypoint and polish off the mission.
Mission Two: Coup D'etat
Objective 1: Secure Insertion Zone
Time for some fun. At the beginning of the level here, you're going to take control of one of your Blackhawk's side-mounted machineguns, and be tasked with clearing out a zone for your team to land in.
It's pretty difficult to really do poorly here; as far as we can tell you should be able to automatically win this mission so long as you just try your best to shoot everyone that's on the ground. You don't have to kill every single guy, though; you can leave a few standing here and there and it won't matter too much. The basic premise of the machinegun is fairly simple; you can hold it down to send out a rapid-fire stream of metal death, but the gun will overheat after a few seconds and start to throttle back. To get maximum firepower again, you'll have to lay off the button until the gun cools down (indicated by the bar in the lower right-hand corner of the screen filling up).
After strafing the rooftops a bit, you'll eventually duck down into a park where a small armored vehicle will appear, with a gunner in tow. Blow it up, then start taking out any soldiers on the ground until a pair of troop transports appear. If you can destroy them, then they won't discharge any troops, but there'll be more than enough soldiers on the ground to keep you occupied for the next few minutes, anyway. Eventually your chopper will hover in place, and you'll be tasked with taking out all of the remaining soldiers before you can move on.
Now, keep in mind that even though it's apparently impossible to get shot down here, you can indeed take damage yourself. The Gunner enemies on the rooftops are really the ones that are going to do serious damage to you. If you find yourself getting down to red health before you hop off the helicopter, then you may want to just start over and try again.
Objective 2: Reach VIP 1's Position
The President has been kidnapped by Mexican rebels. Are you a bad enough dude to rescue the President? Actually, that's not true; the President is (probably) fine, and is under guard by soldiers, so if you can get to him before Bad Things happen, you should be a-ok.
Anyway, head west down the road here until you hit the bus station. There's a small alleyway behind it, so bring your troops there, then head north along the alley until you reach the northern road; there should be two soldiers here for the killing. As you head down towards the western road, though, three more soldiers will appear, and you'll get an audio warning indicating that they're forming a roadblock. If you get the element of surprise on them (which basically entails sneaking up to a corner and scouting them out without sticking your head out), then you should be able to take down one of them rapidly, then put yourself into a position to fire on the other two to kill them and move on.
As you approach the plaza here, be sure your Ghosts are set to Recon mode so that they don't inadvertantly trip off the six soldiers inside. There should be a soldier and gunner combination roaming around near the tents to the west, another soldier/gunner combo hiding behind the fountain to the north, a soldier in one of the northeastern buildings, slightly elevated, and lastly, a marksman hiding away in the tower of one of the buildings on the northern end of the plaza. The marksman is going to be your primary concern here, but if you manage to avoid alerting the soldiers and get to take the first shot, then you should be able to nail him before taking too much return fire.
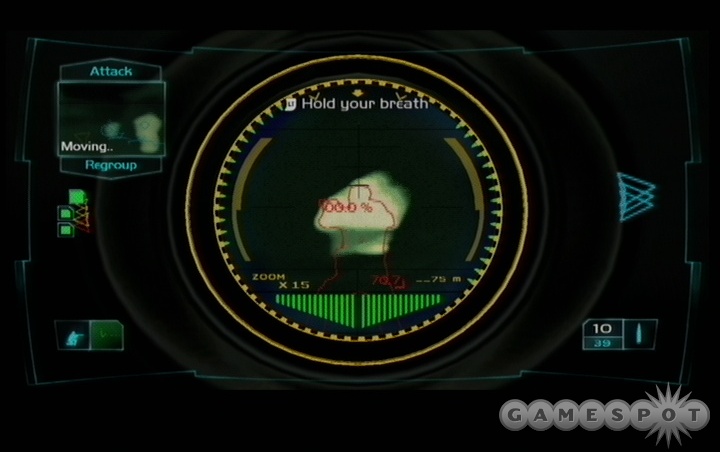
Edge up to one of the buildings in the southeastern corner of the square and use the corner of it to scout out the plaza. When you have eyes on the marksman, quickly lean out and try to zoom in for a headshot. If you don't deal lethal damage to him right off, he and the soldier nearby will begin firing on you, forcing you to try and time your leans out of cover to coincide with their reloading. Even if you don't have a scope on your rifle, or semi-automatic firing, you can still take him down; just be sure to hold your breath before aiming out to fire. It'll take longer, of course, but you really need to kill the marksman before you start moving around in the plaza.
When the marksman goes down, kill the soldier nearby, then move up to the building with all of the small pillars and start creeping along until you can get eyes on the soldiers behind the fountain. When you've racked up six kills, head down to the waypoint marker to check out the President's limo. It blew up good.
Shortly after you're ordered to hold your position, enemies will start coming out of the alleyway to the west, so be ready for them by setting up your team behind the car there or behind one of the tents. After killing a few soldiers, you'll have to take down the gunner riding in the back of another halftrack-esque car, but when you do, the car itself will speed off down the street. Good riddance, we say.
Objective 3: Create A Diversion
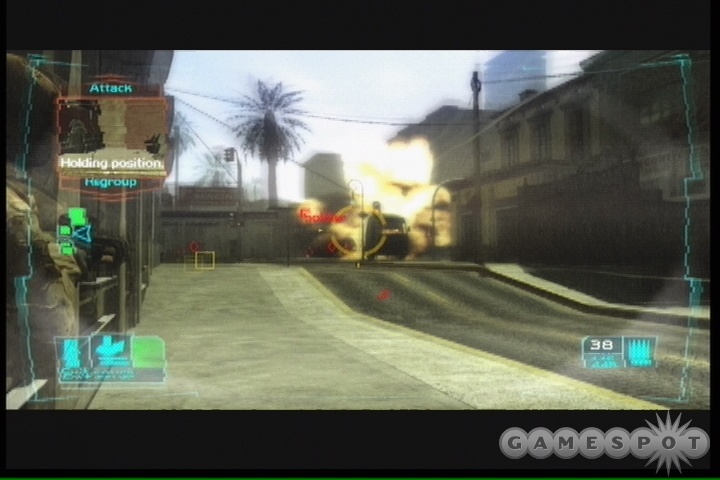
The short conversations that ensue after the car runs off will lead you to another, fun objective: you have to destroy a gas station nearby to draw the rebels away from the President's position. Distractions are fun, especially when they involve blowing stuff up real nice.
Anyway, this is a pretty easy objective to achieve. When you start making your way through the buildings, take the west-leading roads until you find a way to look south on the gas station. Sitting nearby is a fuel tanker, so lean out and put a dozen or so bullets in it to blow it up; this will cause the gas station to pop as well, killing all of the nearby soldiers.
Your next objective is to move to the rally point, a Ghost Truck. A couple of enemies will probably be firing on it as you approach, but they won't see you coming. Feel free to grenade them or just shoot them in the head before reaching the truck.
Objective 4: Secure VIP's Extraction
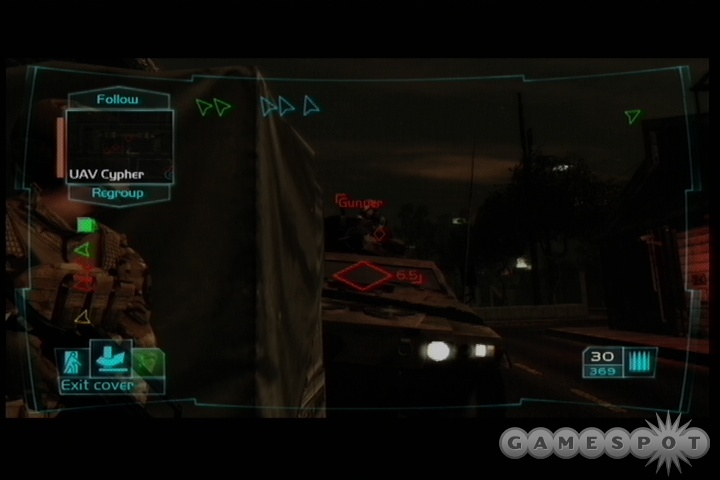
Ah, finally, some real muscle to lend your little excursion legitimacy. After you reach the Ghost Truck, you'll gain the services of an APC Stryker, which possesses a light anti-armor cannon, as well as a gunner that'll do a number on any soldiers that you happen to run across. For instance, the two soldiers that'll appear shortly after it arrives on the scene. Get your ghosts behind cover and watch the fun from there.
Now, the APC is pretty much indestructible here, since there aren't any enemy tanks or rocket launcher foes in the area, but the gunner atop it can indeed be killed. Whether or not he will be killed will depend on how well you support the APC as it drives. You obviously don't have as much control over it as you do for your teammates, but you can tell it to move forwards or backwards as you wish, within reason. It generally won't proceed forward if it sights threats, but will instead pause and open fire, which is just fine by us.
Anyway, if you want to ease its passage a bit, wait until it kills the first two soldiers, then head down to the courtyard it'll have to pass through and kill the gunner there. Creep out into the street and check the southern buildings for a soldier that's standing atop them; he'll rip your team to shreds if you don't spot him and take him down beforehand. He's really the biggest threat in the area; after he's down, you can feel free to move up the APC and start letting it chew through the enemies in the area. The last roadblock before you reach the president's position is a Panhard armored vehicle, which will be easily destroyed by the APC. When it's destroyed, you'll be able to move up to the objective marker and get the President out of dodge.
Secure VIP 2
Unfortunately for the Mexican president, the APC he was supposed to ride out on will be destroyed just before he hops inside. Or maybe it's fortunate that it got taken out before he was inside? Guess it's a glass half full/glass half empty kind of thing.
Anyway, with the VIP2 in tow, run into the parking garage and hit the yellow circle indicated on your HUD. As you may be able to predict, there's an ambush coming your way, so get your Ghosts set up behind the oddly placed barrels (seriously, random barrels in a parking garage?) and have them start dropping fools until you get the cue to head upstairs.
On the roof of the parking lot, you'll find a Kit Station that will allow you to reoutfit yourself with some sweet, sweet rocket launcher action. With your launcher, you'll be able to fire on the two Bradleys on the road below you. Although their fire will be intimidating, you should be able to stand on the edge of the parking garage and fire away at them without getting hit. If you do get taken down, though, you may want to send your Ghosts close to the edge as well, and use them as a distraction while you line up your shot with the rocket launcher. You have to stand still for a second or two before you're able to fire. Just be sure you're actually aiming over the side of the ledge, or your rocket might hit the ledge and blow you all to hell.
When the Bradleys are gone, feel free to take potshots at the rest of the vehicles scattered around below you. You can refill your ammo at the Kit Station here, so you don't need to worry about that. There actually shouldn't be any more live enemies for the rest of the mission, so feel free to blow stuff up until you reach the Extraction Point.
Mission Three: VIP 2 Is Down
Objective 1: Ambush Enemy Convoy
At the beginning of the level here, you'll be tasked with destroying an enemy convoy, which will helpfully stop just where it'll be right in your line of fire. If you're continuing into this mission as part of a campaign, then you'll still have a rocket laucher on board, so feel free to use it to against any of the hard targets that are coming your way while your teammates focus on the soldiers. If you're starting this mission fresh, then you'll have some kind of MR-C, probably, but one of your teammates will have a rocket launcher, so you'll be able to target them on the vehicles to destroy them. Unfortunately the AI for your teammates can get a bit funky here, so if they wind up accidentally firing directly into the wall in front of them and killing themselves, you'll have to wind up restarting.
Don't worry if you or your teammates take damage, as you'll head to a rally point immediately after the convoy gets finished off and be able to change your kit again. Since you're going to have to deal with marksmen in the level, we'd recommend sticking with the MR-C, but make sure it's the kind with semi-automatic fire and a scope. If you want to go with a grenade launcher, feel free to do so; you shouldn't have too hard a time to get the marksmen with them, so long as you know where your opponents are.
Objective 2: Regroup with VIP 2
Now that you've secured your zone, it's time to clear the path leading to the Mexican President. He's holed up in the American embassy, a quarter mile or so away from your position, near Angel Plaza. You'll gain the services of a UAV after you hit the supply truck, so feel free to use it to your advantage.
Specifically, use it to scope out the avenues to the southwest of your position. There are four or five soldiers on the other side of the large building near your rally point, another group of five soldiers a bit further to the southwest, and two marksmen. One is near a billboard on one of the central buildings, while another is one of the buildings along the northwestern side of the zone, way up on a landing. This latter sniper should be your first target, so creep up along the northern edge of the building near your rally point, then poke yourself out from around the corner to fire on the sniper there, after your UAV pinpoints his position.
If you wish, you can then engage the nearby soldiers from your position at the northern end of the building, or you can wrap around to the southern side and take them from there. It's probably best to go from the south, as the second marksman will probably be able to fire on you if you go north.
When the first group of soldiers are dealt with, you can proceed along the southeastern roadway here until you get to the middle stretch of park between the two roads. The second marksman is on top of a building here, but is a bit back from the edge, making it difficult for him to even see you, let alone fire at you. If you want to take him down, get right underneath his position, then back away from him until you can just barely see his head. At this point, open fire on him and take him down hardcore.
The rest of the soldiers are hidden away on the last little stretch of street. The thing you have to be careful of here is the gunner on top of the building, near the Nokia ad. You know, the one Nokia ad, the very special Nokia ad that only appears on this one building. It doesn't appear anywhere else in the game. Ever. That would be crazy.
Anyway, if you can catch these guys unawares, then you should be able to pop the gunner before the rest of his friends open fire on you. If you find that they're opening up a bit too much for you to get a shot off, just wrap around to the other end of the park and try to approach them from that direction. Just be careful, as they will throw grenades at you if you sit around a corner near them for too long.
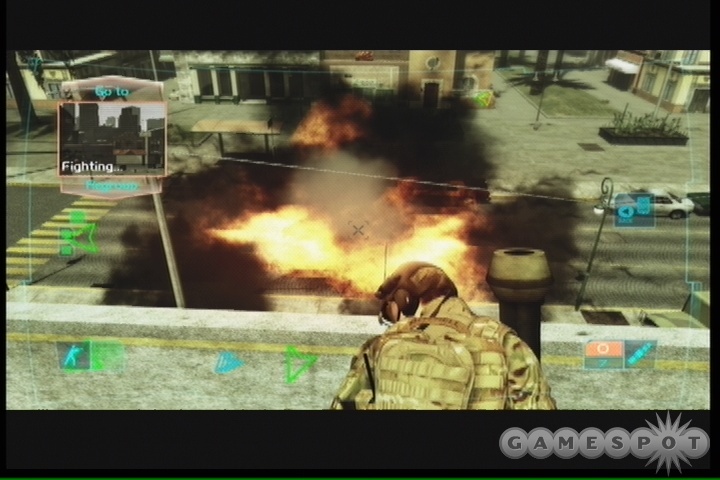
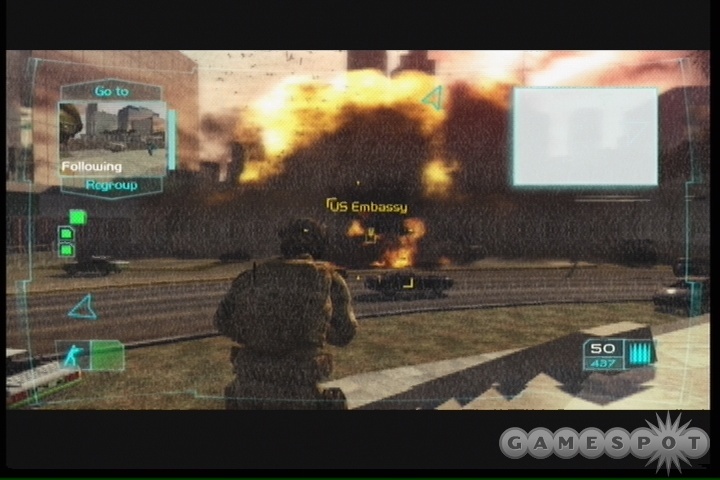
When you reach Angel Plaza, you'll be tasked with approaching the Embassy across the way. Of course, nothing ever goes as planned, and as you approach the embassy, it'll done get blowed up!
Objective 3: Hold Position
After hitting the bombed-out shell of the US Embassy, where the Mexican President miraculously managed to survive the explosion, it'll be up to you to to defend him for the next few minutes until your reinforcements can arrive. Be sure to tell your friendlies about the good job they did on the intel there; they somehow managed to not notice the 30-odd soldiers and assorted vehicles assembling on your position.
Anyway, the basic task here is to wait. Wait and shoot. It's whack-a-mole with high-powered automatic weaponry! Position your Ghosts off to the right of the main Embassy entrance, where they'll be able to fire over the low cover and protect your right flank, shooting at the enemies who come at you through the mess of vehicles on that side. You yourself will want to guard the left flank, hopefully ducking behind one of the small walls behind the burnt-out bus on the side opposite your Ghosts.
After you're set up, it's just a matter of waiting out your opponents. Your teammates should be able to provide pretty significant amounts of fire on the approaching enemies, but they'll definitely focus on the right side, leaving you to take down soldiers approaching from the left, who can and will attempt to flank you by circling around the bus. Just keep solid rock between yourself and all incoming enemies, though, and you should be able to cut them off before they manage to flank you completely.
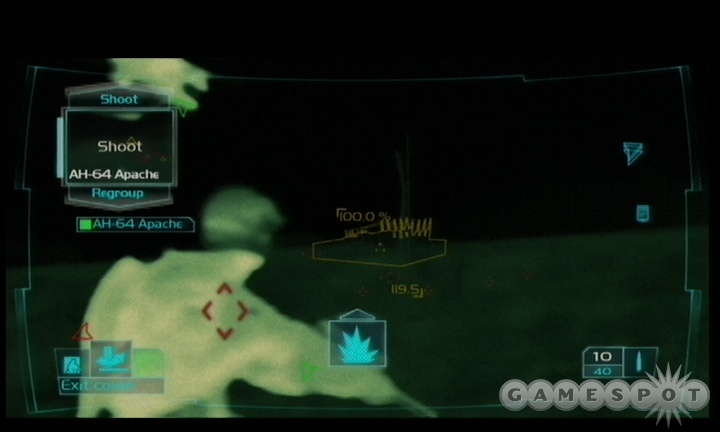
After a while, you'll have to deal with both a Panhard (do your best to shoot out the gunner) and an M1 tank which will appear and start to shell your positions. When the tank arrives, just keep your head down, and most of its shells should be aimed at your teammates. Assuming they're still behind cover, they should be able to ignore most of the damage that'll be coming their way. You won't be able to do anything to the tank in the meantime, but you will eventually get an attack chopper as another support asset, so tab over to control it and tell it to attack the tank. A few ASM's, and it'll blow up real purty-like. From cover, tell your chopper to take out any remaining soldiers in the area, then start making your way to the extraction point, which will let you end the mission.
Mission Four: Strong Point
Time for one of the dreaded night missions. You will, of course, have thermal imaging as needed here, and you're going to need it a lot. Your normal view won't actually give you much information on your surroundings, so flip it over to greenview and fire at any blobs of white stuff.
Objective 1: Destroy Anti-Air Bunkers
Your first task here is to reach your rally point, so feel free to run over there and check out the weapons. You'll be able to switch one of your teammates to a Marksman, if you wish, but it might be a better idea to change the last slot to a gunner, and grab a sniper rifle for yourself. This will allow you to snipe at stuff from extremely long range, without having to expose your teammates to enemy fire.
Your goal here is to attack and destroy two of the anti-air bunkers near your initial position. This isn't going to be massively difficult - there are only three or four guards per bunker - but you will have to deal with a pair of snipers that will pick up on your position from a good distance away. We recommend that you start with the western bunker, head up the road until you're just past the first house overlooking the cliff, then zoom in with your rifle until you spot the sniper in the tower overlooking the bunker there. (If he starts firing on you, then you'll know that you've gone too far!) If you don't have a sniper rifle, then you might just have to get close, running through the sniper's fire in between shots, until you're close enough to zoom in and pop him. Alternately, if you do have a marksman in your group, you can move your squad up and ask them to hit the marksman from a distance, which they should be able to do.
When the marksman is down, reconnoiter the bunker and see if the soldiers there have been alerted to your presence. Regardless of their attitude, you should begin by shooting anyone that's manning an M50, then going after the rest of the soldiers nearby. After placing the C4 charge, repeat the process on the eastern bunker, which has its own marksman in a tower on a hill above it.
When both of the bunkers are destroyed, a Troop Transport will appear and issue forth a few soldiers. Since you should also be able to see the Ghost Truck nearby, you'll know that you're about to get a heal and some fresh troops, so feel free to be a bit daring in attacking it, such as by using your teammates to open fire on it.
Objective 2: Lase Power Generator
Hit the Ghost Truck and get your health and teammates back up to snuff. We stuck with a sniper rifle for ourselves here, and shifted over to a Rifle-Rifle-Marksman team, meaning that we had two snipers and two soldiers along for the ride. You won't be going up against many vehicles for the rest of the level, and when you do, you'll have other assets capable of taking them out.
With team in tow, head down to the targeting position indicated on your map. You're going to get a helicopter support asset here, and you'll soon see numerous other enemy targets on the ground, including the power generators (which appear as a yellow target when you get them in your crosshairs; they're impossible to miss). Before you tell your chopper to start strafing around, though, keep an eye out for an APC that's roaming the area; this should be the heli's first target, as the gunner on the back will do significant damage to it when they spot it.
When the APC's out of the picture, though, feel free to start lighting up the power generators, then task the helicopter on the troop transports and any other soldiers in the area. With a little luck it should be able to kill them all without taking much damage in return.
Objective 3: Neutralize Rebel Camp
Head down the hill beyond the power generators to reach the now-darkened rebel camp. There's only one gate leading to it; when you approach, an M2A2 Bradley will appear and join your little motley gang of hardened killers.
Park your soldiers out of sight and move through the gate, but be ready to backtrack when you hear the action music start up. Two APCs will be coming your way through the gate, so it's best if you move in far enough for them to appear, then backtrack a bit. Your Apache should be able to spot both of them, so the easiest way to take them down will be to just have it shoot at both of them. They'll blow up; no muss, no fuss.
Of course, actually assaulting the base here and taking out the three artillery pieces will be a tall task. There are numerous sandbags and bunkers by the entrance to the base, which will be populated by likewise numerous gunners and soldiers. Getting into the base without getting shot to death is going to be a tall task. Begin by running through the gate with the rest of your squad on follow mode, then start to head directly to the west along the gate wall, so that you eventually wind up towards the northwestern corner of the fort here.
This will put you in a position to lean out and fire southeast towards the guards at the fort's entrance. If you move your Bradley up to the front of the base, you should be able to distract the soldiers long enough to get headshots. Don't stick to the wall here; stand away from it, use it for cover, and zoom in as far as you can before strafing off to the left and firing at a target. Repeating this process a few times should clear out most of the enemies in the area; just keep in mind that more enemies will be flowing through the gates to hit the bunkers and sandbags as you kill off their friends.
When you're ready to head into the fort, be exceedingly cautious. Each of the artillery pieces is going to have a couple of soldiers near it, as well as a manned M50, so you have to be very careful when moving through the base; you may want to bring your Apache over to act as something of a more-power UAV. It'll be able to scout most enemies for you, and will also be able to fire on at least a few of the targets; just make sure it doesn't take too much damage. Also, don't forget that you can fire through the tents here, regardless of what kind of weapon you're using.
Keep your team on follow mode here, so that they can cover your back. Most of the firefights you get into will be short enough for you to revive them if they happen to go down, and since your next mission is going to be a solo one, you don't even really have to worry overmuch if one of them dies. When you've cleared out the area, plant your charges near the Howitzers, then get the heck out of dodge and make it to the extraction point to end the mission.
Mission Five: Mayday! Mayday!
You begin this mission with another turret-gunning whack-a-mole exercise. This one is taking place at like three in the morning, though, so you'll have to content yourself with hitting little white blobs on your screen. Luckily, they seem content to come at you three at a time, so you should be able to hit a few, then give your MG a chance to rest before squeezing off shots at the next group. The entire exercise lasts for around ninety seconds, so be sure to prioritize your targets, focusing on any gunners and vehicles before dealing with the normal soldiers.
Objective 1: Destroy Mobile AA Units
When you hit the ground, welcome to an unpleasant realization: you're flying solo in this mission, with nary a teammate to help you out. If you're still packing a sniper rifle from last mission, you'll want to quickly trade it in for a 36K weapon that your enemies will drop. Otherwise, let's get packing.
Head west along the road as soon as you hit the ground and get behind some cover; a troop transport will be pulling in and offloading some soldiers into the area. Deal with them, then get around the truck and pop off the soldiers behind the sandbags at the end of the road. Don't rush out when they're dead, though; there's a little guard tower beyond the sandbags with another soldier in it, so be sure to kill him before rushing out into the open.
Head up the stairs, but when you reach the second switchback, which heads out onto a longer, flat walkway, be prepared to deal with six or seven soldiers that'll come at you. If you can duck into the little alcove to the right of the walkway, you should be able to get a good shot at most of them. When they're clear, proceed up the steps to the first ADA Location.
The tents here make for excellent cover in the minds of the soldiers that are waiting for you; little do they know that your thermal vision will let you see through the tents, and your guns can penetrate the material as well. Essentially, this area is like an open field for you, so when you clear out the first few guards, move out and start scoping through the tents with your thermal vision. You should be able to get red diamonds for any remaining guards, and the tents won't impede your bullets, so take them all down before dropping the C4 onto the first ADA and blowing it sky-high.
The Next Episode
Moving past the sniper tower here will reveal a fixed M50 position on a hill to the southwest. If you're playing on normal difficulty, then you shouldn't mind the slight bit of exposure that taking it over will, uh, risk you...to. Anyway, grab it, point your crosshairs at things, fire until they turn white and fall down. Or explode; that's usually a bit more fun.
When you do hit the machinegun, a helicopter will give you a flyby and open fire on you before heading out into the jungle again. There's not much you can do to avoid its fire, save hope that it doesn't hit you too badly. Regardless, when it's out of range, you shouldn't have too much difficulty finishing off the rest of the enemies. Just stay on the gun until you're sure that they're all dead; there's a lull of a few seconds between waves, so don't get off until you're totally clear.
Head from here towards the scrambled area. The quixotic little twist on the gameplay here is that the ESM devices affixed to the two ADA vehicles will totally made your HUD go FUBAR. Well, you'll still be able to see, and use your nightvision, but your HUD elements will be futzing around like nobody's business, at least until you destroy the two ADA's. Even if you started the mission with a MR-C/LW, you'll want to trade it in for a 36k at this point; the extra zoom distance will be a big help when dealing with the wide-open spaces in the forest.
When you hit the checkpoint, head west along the road, and start making your way towards the northwestern most tent on top of a hill. It'll make perfect cover for taking down the soldiers around the western ADA, which is less heavily defended than the one to the southeast. Kill off anyone in the area, then plant your C4 and start heading towards the last of the three ADAs.
You may want to head along the southeastern road to approach the last ADA, or you can head towards the tent near its location and use that as cover while you fire on the soldiers nearby. Either way, you're going to have to take some fire to clear out the ADA position; if worst comes to worst, just lie prone and crawl over a hill until you can just barely get eyes on your targets to take them down.
Objective 2: Destroy Artillery Pieces
As you approach the stairs leading up to the castle, see if you can't snipe out one of the guards on the stairs before reaching its base. If you manage the headshot, his partner should run down the steps to attack you, so be ready for him when he arrives. After they're out of the way, proceed up the steps towards the ammo box, but pause before you get there; more soldiers will be coming at you from the walkway, so be sure to take them down before hitting the ammo box.
After getting the health from the ammo box, make your way towards the turn in the walkway. Take cover and shoot the two guards nearby, but hold your position for a second afterwards; another couple of soldiers will appear shortly thereafter and start firing on you.
When you hit the top of the stairs, near where the artillery pieces are stationed, you can expect to find six or seven more soldiers. Thankfully, they'll hold their ground and engage you from a distance instead of rushing you, so stay behind the low wall and pop up to take them out. When you're relatively certain that the area is clear, cautiously walk over to the artillery pieces and lay your C4 to take them out.
With the Howitzers out of commission, make your way to the southeast corner of the castle, staying under the cover of the balcony on the second floor; the helicopter that buzzed you earlier will be coming back and attempting to take you out at this point. Guess they finally decided that you were a threat! You'll have to rush through the forest here to reach your extraction point. So long as you stay under cover, you should be able to avoid any incoming fire, but if you get out from under the trees, expect the helicopter to open up on you. On normal difficulty, they're still going to have trouble hitting you; you'll just have to do your best to stick close to the chainlink fence here (which barely shows up in your nightvision view).
Mission Six: Ready For Bear
Objective 1: Locate Tank Trainers
There's a pretty tough fight to begin this level, as you begin in a fairly open field with five soldiers between you and your initial objective. You do start out with a UAV, though, so you'll be able to use it to scout out all five of the soldiers in your way before engaging them.
We began this engagement by parking our teammates behind the small hill to the northeast of the starting point, near the gate. This keeps them out of sight while you move forward to engage the soldiers that are firing at you. From there, we crept to the northeast ourselves and got into position to fire on the easternmost group of soldiers. When they were taken care of, we shifted focus to the western soldiers, who were difficult to take down without getting shot at. To eliminate them, we popped a smoke grenade just in front of our position and used it as cover to shoot through with our thermal vision.
With the initial soldiers out of the way, we started moving on to the barracks entrance, marked with a yellow square. There's a low wall just outside the entrance, which is perfect for moving your squad behind and ducking behind yourself to take down any roaming enemies in the area. Do so, then use your UAV to scan for more. You should spot one soldier inside a building near the entrance, as well as three or four more scattered around the courtyard of the large building. You might also pick up a Panhard slowly making its way around the large building.
If possible, you'd be best served by taking out the gunner to the Panhard before dealing with any of the other soldiers in the area. If you leave your soldiers back behind the low wall outside the gate, then attempt to shoot at the Panhard, you can get its attention and make it come towards you. Luring it towards your friendlies will often cause them to either shoot the gunner or destroy the vehicle itself, if there's a grenadier along. Of course, if you get a good shot at the gunner, feel free to take him out; the Panhard will drive off and leave you be.
The tank trainers are in a building to the northwest, but before you approach it, be sure to clear out all of the enemies to the south of the large building nearby. With that done, wrap around the building's east side, then head to the trainer's location. Kill any guards outside the building, then head to the eastern gate leading to the trainers. If you position yourself on the southern side of the gate, and poke your head around that, you should be able to spot and kill the two soldiers that are hovering inside the building.
Objective 2: Lead Trainers To The Tanks
Before you head inside, get your squadmates to regroup on your position, and send them into the building ahead of you. When you do head toward your objective, a couple of soldiers will spawn on top of the large building you cleared out before, so if your teammates are in the open, they'll probably take a good amount of fire. It's best if they're under cover when the soldiers spawn, and then told to hang back while you exit the building and single-shot the soldiers from the corner.
The rollout to the warehouse can be difficult, not least because the three trainers will stick pretty close to you, and don't seem to be all that smart about taking cover. You'll have to gently make your way through one of the two entrances leading to the warehouse - we slightly prefer the southern one - with them in tow, then kill the sole soldier inside before the trainers can hit up their tanks. Don't forget to use your UAV to scout the area out before moving in.
Objective 3: Lead Tanks To Reload Point
Alright, you have three tanks on your side; time to rip those Mexican rebels a new one, right? Well, not quite: although the tanks are mobile, they don't have any ammo yet, so they're not going to be useful to you as offensive weapons until you get them to the reload point.
Unfortunately, there's quite a lot of enemies in your path, including a little ambush point directly to the south of the tank warehouse, near the small tunnel between the zones on your map. There are only a few soldiers there at the outset, but when you approach, a troop transport will appear and offload three or four more.
Your best bet for dealing with the soldiers here will be to run over to the hospital across from the tank warehouse. There's a small tunnel that runs through the building; if you take up a position at the corner of the tunnel here, you should be able to see the troop transport approaching. While it's still moving, drop a smoke grenade as close to your position as possible. When the smoke is up, you'll be able to use your thermal imaging to get eyes on the four soldiers near the M50 position nearby, and shoot them all right in the face! Yeah! There'll be another soldier off to the right a bit, as well as two more who'll be a bit behind the troop transport. Hunt them all down and take them out before hitting the ammo box near the tunnel.
When you head into the tunnel, stick to the left wall and duck into one of the little alcoves on the side as soon as you spot one; you may want to leave your teammates well back, beyond the entrance to the tunnel, as they have a nasty habit of getting in the way of enemy bullets. Anyway, the tanks should follow you in, but they'll be stopped by a really ballsy APC. I mean, if you're in an APC, and you see three M1A1 tanks coming at you, wouldn't you normally get the heck out of the way? Apparently not.
Anyway, do your best to clear out the soldiers on the left side of the path, then get behind one of your tanks before leaning out and killing the gunner of the APC, using a smoke grenade to obscure his sight, if necessary. With that done, you can either use grenades to take out the vehicle, or bring your team up and have your grenadier fire on it for maximum effect.
Be prepared for another pair of soldiers near the exit from the tunnel. When they go down, you should be able to escort the tanks to the reload point and form up with the other Ghost team in the area.
Objective 4: Hold Position
While the tanks head into the warehouse here and get rearmed, you'll be given the ability to hit up a rally point, allowing you to select new weapons and heal your teammates. Although you're going to have some M1 tanks on your side after the next little firefight, we still highly recommend that you pick up the rocket launcher that's offered to you, as it'll let you pound through the opposing tanks without having to risk your own M1, whose survival will be critical to the next objective.
Anyway, as soon as you get done with the rally point, you'll have to immediately fend off a huge ambush by enemy soldiers. Your squadmates here aren't exactly great at avoiding fire, so be sure to place them behind one of the small stacks of metal blocks (as opposed to the sandbags, where they might wind up inadvertantly standing up through the firefight and taking heavy damage. As for yourself, you'll obviously want to grab one of the M50s in the courtyard and use it to blast away at the enemies as they appear. You're unlikely to take much damage in the meantime, so feel free to blast away at your enemies until a Bradley shows up.
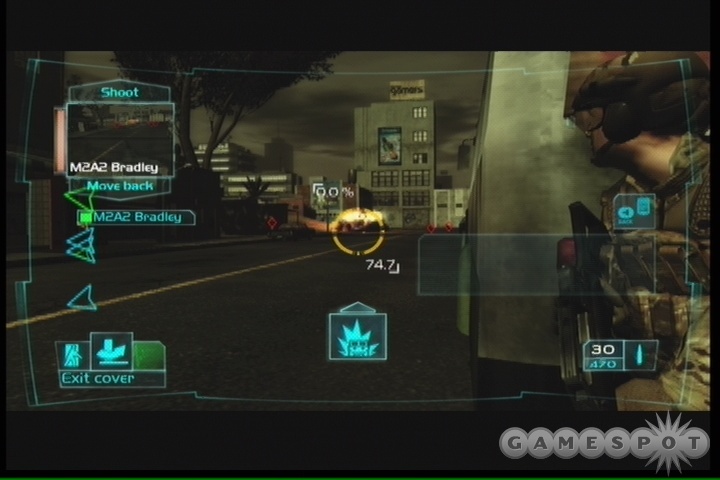
When the Bradley does make its appearance, rest assured that your tanks are almost ready to go. Use your MG to pop out the gunner atop the vehicle, then just duck behind cover until the Abrams' roll out. When they come under your command, order the lead vehicle to destroy the Bradley, and you're set to roll from there.
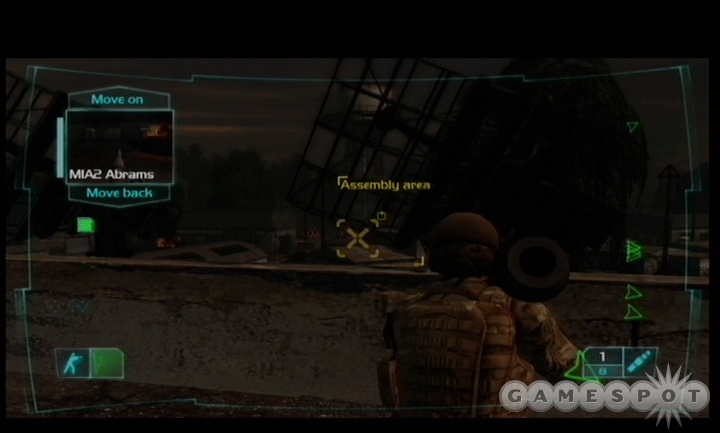
Objective 5: Reach Assembly Area
Now that you have an M1 Abrams tank under your command, you should be pretty much ready to go, right? It should be easy runnings! Well...not quite. Unfortunately for you, there are actually going to be two enemy M1 tanks in the area that you'll have to get your tank past. If it gets blown up, your mission is over, so as mentioned, it'll be best to try and take your foes down yourself with a Zeus rocket launcher.
Now, you'll notice that there are two main gaps in the wall on your map, one to the south and one a bit to the north, through which the Bradley appeared a while ago. To begin with, clear out any soldiers near the northern entrance, then arm your Zeus and get a good eye on the M1 situated to the southwest. To take it out, you'll need to hit it with at least three rockets, so stay near the corner of the opening there, zoom in on it while the wall is between you and it, then strafe off to the side a bit until you can get a clear view. You'll have to stand still for a second or two before you can actually fire on it, but you shouldn't get hit by the gunner atop it, and you should be able to fire a rocket, then strafe back behind the wall before the tank launches a shell. Even if it does get a shell off, it'll have to land awfully close to actually hurt you.
Anyway, three rockets to the tank will destroy it, leaving you free to move yourself and your Ghosts through the southern gap in the wall. Your goal here is to wrap around the building with the Ammo Box on it and gain the rooftop there. Be careful of enemy soldiers in the vicinity (there may even be one on the rooftop itself, so travel with your pistol out instead of your Zeus). Don't worry too much about getting in the line of sight of the second tank to the north, but make sure you don't park your teammates somewhere where they can be shot at.
When you hit the roof of the building, stand near the northwestern corner and look off to the north; you should be able to spot the second M1 from here. With your rocket launcher, take aim at it while crouching and zooming, then stand up and quickly hold your breath to launch a rocket. Again, it should take three or four rockets before the thing actually goes up in the smoke. Keep in mind that there are soldiers that might start running towards your position when you begin hitting the second M1, so have your teammates parked somewhere behind you before opening fire.
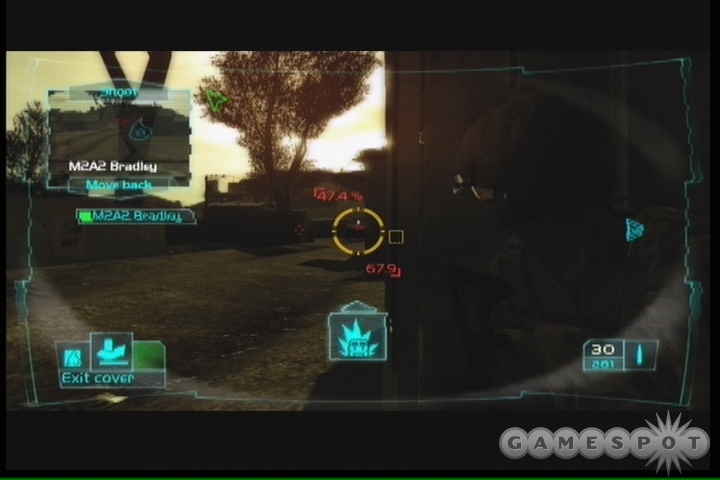
With the second M1 out of the way, tab over to your own M1 Abrams and tell it to Move Forward. (You yourself should stay put on the rooftop and take advantage of the ammo box for more rocket ammo and health.) Eventually, it'll move far enough to spot another Bradley and more soldiers near the northern road. If you move around a bit on the roof here, you should be able to find a spot from which you can just barely hit the Bradley. If that's the case, then chuck a rocket at it, blow it up, then head down to the ground to start moving up near your M1. If there are any corpses in the vicinity, now would be a good time to trade in your Zeus for a 36k or something similar.
Anyway, get behind the Bradley and start working your way past the many soldiers blocking your path to the assembly area. If you still have any rockets left, feel free to use them on the soldiers; you really won't need the Zeus anymore, so do your best to trade it in as soon as possible.
Objective Six: Destroy Helicopters
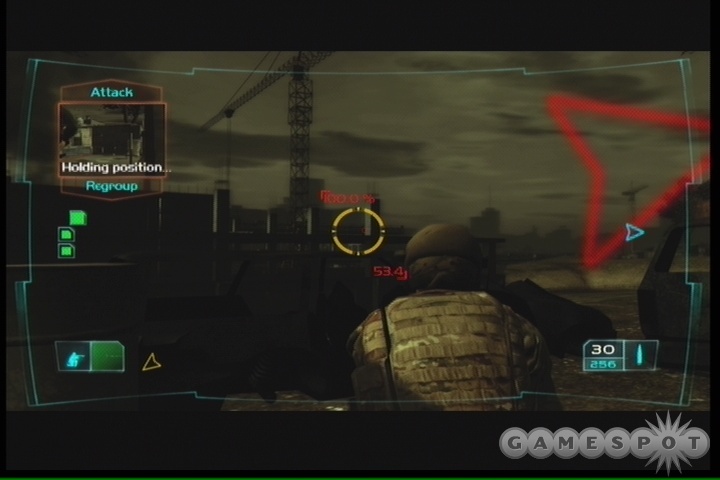
When you get close to the assembly area, you'll have one final mission: attack and kill the two tankbuster helicopters that are coming your way. Your M1 will stay behind as you charge forward into the assembly area, where you'll have two possible objectives: there are a pair of mounted M50 machineguns in the corners of the facility that you will have to take over. A few soldiers will guard them, but at this point you should be pretty used to killing infantry. Kill the soldiers, take over an M50, and use it to shoot down the two helicopters that come your way, then head to the extraction point to end the level.
Mission Seven: Quarterback
Objective 1: Secure US President
You're going to begin this level by entering directly into a firefight with enemy combatants at the far end of the street. Luckily for you, you're going to have a Bradley on your side, which will make your job a bit easier. Your first goal here should be to get your Ghosts behind cover, by telling them to immediately head up and take position behind the Bradley, while you get behind one of the corners on either side of the street, or the bus just up ahead.
With the Bradley, start by targeting the Panhard and taking it out, then firing away at any remaining soldiers on the streets. If you order your Bradley to fire on soldiers that are hiding behind cars, it'll often destroy the cars entirely, making for some easy kills.
After the initial group of soldiers is taken out, you'll be able to proceed down the street and take a left into the shantytown there. There's initially only one road to follow, but when you close to within 250 meters of Salvatore's position, soldiers will appear and begin making their way towards you. You may have to engage them at point-blank range, so be careful. Another Panhard will also become visible to you at around this time, so try to take out the gunner yourself before taking it out with either your Bradley or your grenadier.
Keep moving down the shantytown's streets, keeping your Bradley in the rear for the most part; there is an enemy anti-tank soldier up ahead somewhere. He should appear on your HUD when you close to within around 130 meters of Salvatore's position; he'll be in one of the tallest buildings on your map, at the western end of one of the streets here, so when you spot him, get into a position to snipe him from a good distance away. Doing so should clear out the sole remaining threat to your Bradley, so feel free to push it forward and use it to take the fire and scout out the remaining enemy positions. You should have plenty of cover to use while pressing in on Salvatore's position.
Objective 2: Reach Construction Site
Head down the road leading to the next red zone nearby. As you approach the windmill, though, stop short and get ready for a gunfight; there are numerous soldiers in the area, as well as an APC Mowag at the end of the road to your right. You should be able to engage the soldiers by themselves, so long as you stick to the western side of the road and fire on them from there; there are half a dozen or so of them in the building to the east, so be ready for a lot of targets.
When you get eyes on the APC, do your best to snipe out its gunner before moving your Bradley around to take it out; its fire shouldn't be able to penetrate your Bradley's armor. With it out of the way, make your way towards the Construction Site marker on your HUD, but be ready for three or four soldiers that need killing in its immediate vicinity.
Objective 3: Find the US President
Time to find the quarterback, who's apparently holed up in a construction site. How the heck did he get there from the airport? Did he walk? Why did he leave the airport in the first place? The world may never know.
Head towards the ramp leading down into the construction area, but duck behind the palette full of cinderblocks and look off to the right a bit to pick up the marksman on the rafters of the building. Take him down, then wait for a moment behind the cinderblocks until a pair of soldiers rush your position. Killing them both will let you move on without fear of attack.
Move around either side of the building (preferably heading north to move around on that side) until you find one of the two entrances on the western side. There are some soldiers on the roof, so stick close to the wall of the building as best you can to avoid coming under fire.
When you reach one of the tunnels, get your team to follow you in, then stick against one of the walls and slide along to the corner. When you hear voices, slow down, poke your head out to scope the scene, then, when you have the go order, lean out and pop the rebels in the face. Be sure that your soldiers are on your tail before you do so, though.
Objective 4: Extract with President Ballantine
With the president under your immediate care, you'll have to fight your way out of the construction site and reach the extraction point. There are numerous enemies near the entrance to the tunnels, as well as a marksman on the highway to the west, so be prepared to take a few hits as you exit. You may just want to send your teammates out ahead of you and let them do their worst against any enemies there, then follow them out and revive them if they took damage; you're going to get them replaced soon enough.
With the area clear, jog down to the extraction point and get that President out of here. Unfortunately, your mission isn't over yet, as it'll be revealed that the nuclear football that accompanies the President at all times has gone missing! Are you a bad enough dude to rescue the nuclear football?
Objective 5: Recover The Football
When you reach the rally point here, you'll be given the opportunity to refresh your teammates and select a new weapon. The MR-C/LW might be tempting to you, given that its gun camera will let you fire from around corners without having to expose your body, but it only has a 2x zoom and can't switch to semi-automatic mode, making it difficult to take down enemies at long range. The standard MR-C is always a good choice if you want to fire at distant enemies.
Anyway, your basic goal here is to head down the street that leads to the little factory area nearby. At the end of the street is the football location, so you'll have to kill your way down to it. Feel free to use your soldiers as advance guards, and send them down in front of you to scout out enemy positions. Regardless, this fight shouldn't be too difficult for you; just take your time, pop out any soldiers that appear, and make it to the target zone at your own pace.
When you do hit the football's location, you'll find that it's been taken off into the skies by one of Carlos's choppers. Time to give chase! You'll have to make your way down to another of your own helicopter, then take one of the guns in a mission-climax rail-shooting segment.
Your primary goal here is to shoot down the two enemy helicopters; this is easiest to do if you use your aiming mode to lock on to the choppers as they zoom around. Just keep in mind that there are plenty of ground targets, as well, so whenever you happen to get eyes on soldiers or ground vehicles, feel free to give them a heaping helping of lead.
When both of the choppers are down, you'll fly off into the sunset (for quite a while, if you managed to kill the choppers quickly) and end the level.
Mission Eight: Guardrail IX

Well, the President's safe, but the terrorists have acquired the nuclear football, which contains all of the presidential launch codes for America's nuclear arsenal. Although useless by itself, your commanders suspect that, if the information contained within is combined with the technical capabilites of the Guardrail IX system, the rebels may be able to cause more mayhem than previously suspected. It's up to you to get the football back.
Objective: Recover the Football
Take a left when possible and stick to the northern wall when heading under the overpass; hiding behind one of the large trucks here will let you easily take aim at the soldiers in the vicinity. Heading straight up the road to the east will let the soldiers approach you from two directions, making for a sometimes deadly crossfire.
After killing the first two groups of soldiers, you'll hit a checkpoint near the park outside the train station. Send your UAV over it to get eyes on the soldiers arrayed against you, first off. There's no need to get too fancy here; just find a good angle to attack them from (the rear end of the black tractor-trailer works well) and take them down. Just be mindful that there's a marksman on the tall building to the east. Just be careful as you approach the ammo box here, as more soldiers will likely be heading your way to investigate the disturbance.
There are no fewer than five soldiers and gunners hanging around outside the entrance to the train station, and they're all sandbagged in pretty well. They're easiest to take down either from the west or via the alleyway to the north of their position; either way, the best way to take them down is to pop a smoke grenade in front of their location, then stand behind it and use your thermal vision to shoot everyone in the head. If you have the MR-C/LW, though, you can also attempt to fire on them from around a corner with your zoomed vision.
Objective 2: Disable Guardrail IX
When you enter the trainstation, you'll be told that Guardrail IX is on site and in need of some serious blowing-up. You'll have to make your way through the trainstation in order to reach it, though, and the station itself is mysteriously packed with shipping containers, scattered about haphazardly, even though it'd be almost impossible to move them around without a crane. Those crazy Mexican rebels, they do everything the hard way!
Anyway, fight off the first two soldiers in the windows above the station, then proceed into the warehouse proper; you'll need to use your Climb command to get past the open railcars. When you've done so, though, take a left and head to the southern wall and follow that to the west. There are still plenty of soldiers hiding amongst the boxes, but if you peek around every corner before blindly walking along, you should be able to spot them and take them out relatively quickly. You'll note that you're almost at a Kit Container which will refill your ammo, so if you wish, go ahead and blindly chuck grenades over the containers and hope you get a few enemies that way.
When you do finally manage to reach the kit container, go ahead and switch out your weapon for something suitable to long-range fire; either of the two sniper rifles will do you fine here.
Objective 3: Go To Turntable
Awesome, dude! Time to hit up the spinner and start scratching out some mad beats, yo. That's what turntabling is all about. Oh, they're referring to a train-turning mechanism? ...we knew that.
Anyway, head out into the huge open area here, but be prepared to take down the sniper on one of the water towers overlooking your approach. You can countersnipe him as you like, then run up to and top one of the small hills nearby, which will give you overwatch over the bulk of the area.
After shooting one of the soldiers down the tracks, a Panhard + gunner will appear and start coming your way. You may want to retreat so that your hill is between yourself and it, then wait until it gets fairly close before killing the gunner; that will cause the Panhard to drive away with its tail between its legs.
With the Panhard taken care of, use your UAV to pinpoint any remaining soldiers in the area and fire at them through the walls that they're hiding behind, assuming you're using a sniper rifle. As you approach the southern end of the yard, more soldiers will appear; you can either take them on from there, or backtrack to one of the hills and attempt to snipe them at long range.
When you reach the end of the yard, you'll probably want to trade in your sniper rifle for a 36K or one of the Mexican LMG weapons in the area, as the fight through the trainyard will mostly be taking place at short to mid-range.
Objective 4: Demo the Antenna With C4
After clearing out the exterior area of the turntable, use your UAV to scout out the interior part of the turntable and fight your way through. There are enough soldiers here to probably justify using a smoke grenade to hinder their sight while you pop them thermally. If any of them try to hide behind the train on the turntable, you can probably go prone and shoot at their legs through the gaps.
At the other side of the turntable, you'll come out to an ammo box and another long set of train rails. When you hit the ladder leading up and over the first set of trains, you'll notice that your HUD becomes significantly more garbled. A side effect of this is that enemy targets no longer appear with red outlines on your screen; you're going to have to do everything the old-fashioned way from here on in.
There are three soldiers in the long corridor stretching out in front of you, so shoot them, then head down to the far end and hop through one of the railcars to reach the last line. Before you hop through the very last railcar, though, take a look at the building on the far side, where the Guardrail IX system is installed. You should be able to spot a couple of soldiers on the roof, with another pair walking around inside the windows below. (You can use your thermal imaging to spot them if you can't see them.) There are also two more guards at the base of the building, so be ready for them when you've killed the ones up above.
When everyone's out of the way, head down the ramp and find the entrance to the building, inside the fenced-off little passageway outside, and run upstairs to plant your C4. You'll have 25 seconds to clear the building before the entire place goes up, so quickly backtrack and get back outside!
Objective 5: Hold Position
Your goal now is to fight your way through the two dozen or so soldiers that stand between you and your extraction point. There's a large container just to the north of the exit from the Guardrail building that'll be perfect cover for you here, so hide behind it and start popping out to shoot dudes in the face! There are quite a few of them, but since you just recently hit an ammo box, you should have enough smoke grenades to hide behind if you need to shoot them from cover.
When the soldiers are dead, head to the extraction point and head for the hills.
Mission Nine: Bulldog
You have a location on Carlos Ontiveros: he's located inside the National Palace with his father, as well as the nuclear launch codes. It's up to you to cover the distance to the National Palace, plant a suitcase nuke, and destroy the entire city before Ontiveros can make use of the codes.
Well, no; that's not true. Your goal here is to clear a path for your troops so that they can enter the city without getting blown to pieces by anti-air troops situated at the many roadblocks in the area.
Objective 1: Clear Convoy Route
Your first objective here will be to clear out the roadblock on the street below the building where you're initially inserted. This basically entails killing the four soldiers there, so do your best to pick them off from the rooftop without getting killed yourself.
When the roadblock is destroyed, head to the southwest to find the ramp leading to the next rooftop, but be careful of the marksman to the south of that ramp. Kill him, kill the other soldiers on the roof, then move on to the east.

As you can probably tell from your map here, you're going to have to follow the path to the east for quite a while here. Your track is one of those magical cityscapes, where a single rooftop manages to cover a dozen different buildings without any interruption. (Or maybe it's just one, huge building?) Anyway, you'll hit a ramp here, but don't just rush on up. You'll be warned of snipers; there's one on a building to the northeast, and one off to the east a bit.
Keep moving along the rooftops, moving slowly, and you should be able to learn when the enemies will pop out from behind cover. There's one more tricky sniper position after heading up a ramp, just beyond a checkpoint; the guy is on a ledge on the skyscraper near the turn in the road, almost at the same height you are.
After killing the second sniper, you should be able to sidle up to the eastern side of the building you're on and fire on the soldiers at the next roadblock. Go ahead and take down at least the anti-tank soldier there before letting your M1 roll up and finish off anyone that's doing too good a job of hiding for your sake; alternately, you can just keep on moving around on the rooftop to the left, but again, beware of snipers. There'll be at least two more snipers situated around the next ramp heading upwards.
One last roadblock remains, so keep heading to the east until you reach a metal bridge heading to the last building here. Before you head across the bridge, though, zoom in on the yellow square marker off in the distance; you should be able to spot a couple of the soldiers at the roadblock from there. Shoot them, then get into position to shoot the last soldier, then take off for your helicopter ride!
Objective 2: I Believe I Can Touch The Sky
Yep, another helicopter mission. Most of the early sections here are fairly easy, what with a million bullets flying through the air but none of them hitting you at all. After you destroy a few of the ground-based vehicles, though, you'll eventually swoop back over onto the rooftops. It's here that you need to be especially careful, as there are a pair of anti-tank soldiers on the roofs that aren't above aiming their rocket launchers at a helicopter or two. If you take a hit from an anti-tank weapon, you're going to get hurt, but good. After the soldiers go down, though, you'll eventually land and be able to restock and resupply.
Objective 3: Secure General Martin
General Martin has crashed. Are you a bad enough dude to rescue General Martin? (Ok, that's the last time we'll use that joke, we promise. But seriously, how many presidents and generals are we going to rescue in this game?)
Alright, you're going to have a good long distance to travel before you can get to General Martin's location. You're going to have the option to take on an Anti-Tank soldier here, if you wish, but you should be able to reach the General with just a grenadier and a gunner, as per usual; the choice is up to you. Anti-tank soldiers can obviously pound through any vehicle that gets in your way, but they're more likely to get shot than normal soldiers, since they have to stand still for a while before they can pinch a shot off. However, they'll also use their rocket launchers against normal soldiers, which can be amusing, to say the least.

Anyway, start making your way through the back alleys on the city, staying ahead of your soldiers and acting as a scout to locate enemy positions. There'll be a couple of fights against Panhards early on, so be sure to stay behind cover and attempt to take out their gunners to neutralize them before sending in your anti-tank soldiers. Also be careful of a marksman atop a building near the second Panhard.
Eventually you'll come to a chokepoint; a narrow alley looking down a road at an Arc d' Triomphe-looking building. Park your soldiers behind the four-door car here, then start taking potshots at the soldiers down the way. When they're down, creep along the right-hand side of the alley, but keep an eye on the tree to your left; there's a marksman on the building behind it, so be sure to shoot him before he takes you down. You should be able to see him better if you have your nightvision on.
Objective 4: Protect General Martin
When you reach the General, you're going to find that he's apparently an older version of Bruce Willis from Unbreakable; his helicopter has been completely destroyed, but he apparently doesn't have a scratch on him. It'll be up to you to protect him for a few minutes until your reinforcements can arrive.
Most of the enemies here are going to be coming from the southwest; first they'll attack from the direction of the building directly to the south, then switch over to the park to the west. Unfortunately for you, there's no great place to park your team during all the fighting; there are a bunch of little shacks in the area that'll work well for cover, but they'll also provide pretty good cover to your enemies.
After the first wave of foes is down, get away from the helicopter, which is soon to explode. When that's done, General Martin will shift position and move over to the west, so follow him and set your troops up where they'll be able to fire on any enemies coming in through the park. At this point, you're within a minute or so of finishing the level, so even if they take one bullet too many, you shouldn't have any problems healing them up before heading to the extraction point.
Mission 10: Fierce Resistance
Objective 1: Neutralize The Jamming System
Make your way past all the US Soldiers, but don't forget to stop and bask in their praise; apparently your reputation precedes you. Head down around the M1 tank, but be careful when you begin proceeding to the west towards the checkpoint, as there are soldiers overlooking a poorly-lit area near the yellow marker on your HUD. It's difficult to get into a good spot to shoot at these guys, though, since there isn't much in the way of cover to take advantage of. If you press down closely enough to them, you should be able to hide behind one of the pillars on the exterior of the building nearby and use that for cover. It's probably best to keep your soldiers back out of the way while all of this is going on, though.
Objective 2: Locate and Eliminate The Jamming Source
When you hit the scrambled area of the map, your HUD will become somewhat messed up again, as there are a pair of jamming devices nearby. One is located in a building to the northwest, while another is located to the south. It's probably easiest to head to the northwest jammer first; although the southern jammer is technically closest to you, attempting to attack it from the obvious route will leave you open to a crossfire.
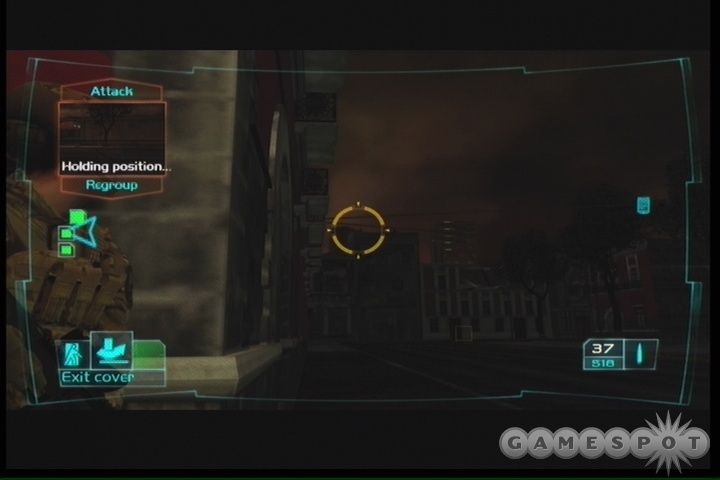
Head north along the road near the checkpoint, but peek around the building at the intersection and look towards the west; there are two snipers atop the building that houses the first jammer. Zoom in from around the corner, then strafe out and take them down one at a time. From there, head up to the building they were standing on, but wrap around on the northern side. When you spot the sandbags near the northwestern corner of the building, be careful! There are four or five soldiers clustered around the jammer, and you'll be approaching them at almost point-blank range. You may want to lead off with a grenade. Don't neglect the two soldiers on the balcony overhead!
When you've cleared the area out, destroy the jammer by shooting it a few times, then start making your way to the south, towards the second jammer. There are a few soldiers in the jammer's immediate vicinity, as well as at least four that are hanging around in the alleys west and south of it. Be careful when approaching corners; when heading towards the jammer from the northwest, you'll often run into them just around corners.
Objective 3: Secure The Zone
With the jammers out of commission, your commander will point you towards a building on the western edge of the zone, from which you'll be lasing targets for a Blackhawk. When you approach it, get ready for a gunfight. Clear the area, then have your teammates take the stairs ahead of you. If you keep them on the ground while you go ahead, they'll get pounded by gunfire when multiple enemies spawn in the streets.
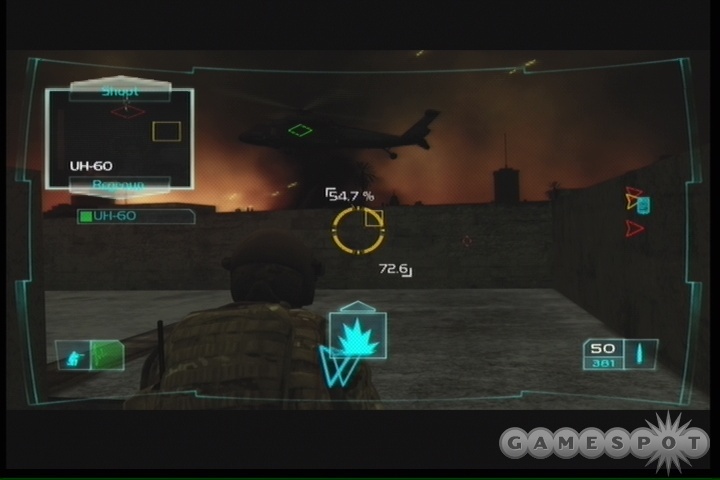
Anyway, when you near the top of the steps here, wait until you hit the checkpoint, but stay down. There's no need to actually fire on anything yourself here, or even look above the roof; when you get your Blackhawk support, tab over to it and start having it take down all the targets that have appeared. As it flies around, it'll likely spot more targets, so just keep telling them what to shoot at by hitting Up on your D-Pad, and it’ll be able to take care of pretty much everything for you.
Objective 4: Protect General Martin
When you reach the Majestic Hotel, take the stairs outside and get into position on the balcony. Your mission here is to provide counter-sniper support fire while General Martin makes his offer to accept Ontiveros' surrender. For some reason he insists on doing so in person; we would've just text messaged him. "Wl u srndr plz? PWNED"
The very fact that you're being told to watch out for snipers should give you a bit of a clue as to what's going to happen. Hey, guess what - there are going to be snipers on the roof! Two of them actually; one on the building to the east, and one to the northeast, in the bell tower. Kill them both when they appear (don't fire on anyone until they show up), then quickly move away from the balcony before the tanks take a shot at you.
Objective 5: Reach the Palacio Nacionale
After the rally point (if you're looking for a safe bet, take the MR-C), head up near the M1A1 and wait for it to come under your command. You should still have both of the enemy tanks on your HUD, so flip up your tactical map and order your M1 to first take out the northern tank, then to go after the southern one. Don't bother telling it to "Move On"; just point at one of the tanks and give it the "Shoot" order. This will let it lock onto the tank before it's in sight and fire as soon as possible. Since both of the tanks are beat up a bit, with a little luck it should be able to take both of them out without getting hit.
When the two enemy tanks are down, move your team up behind the ruins of the southern smoldering tank; it'll provide you cover from the numerous enemies that will be approaching from the southeastern corner of the square. There'll be six or so of them altogether, so use your nightvision to pick up on their locations, or just follow the tracers back to their origin. Kill. Kill. KILLLLLLL.
Another group of enemies appear when you approach the entrance to the Palace, so be ready to either back away from the area or chuck a grenade into the doorway when you creep up on it. If you attempt to rush in, you're just going to get cut down. We liked to position our soldiers behind the tank nearby, walk around and creep forward until we saw the enemies appear, then quickly backtrack around the tank to cover. From there, you can chuck a grenade or two over the tank towards the enemies before strafing out and finishing the rest of them off.
Objective 6: Secure General Ontiveros
After heading into the Palacio Nacionale, stop. Do not run into the central area, unless you like being gutted like swiss cheese. Hmm, can swiss cheese even be gutted? Anyway, just hang back in the first little tunnel initially. Use your nightvision to scope out the area beyond the fountain, and start picking off any soldiers on the upper levels. When you've cleared things out a bit, move your soldiers up a ways so that they're still underneath the balcony in front of the tunnel, but will be able to fire on the enemies on the other sides of the room.
In this manner, you should be able to kill off most of the soldiers here without risking your own life overmuch, which is important if you reached the checkpoint outside of the hotel without a whole lot of life left. When you've cleared the first three sections of the room, you can send your soldiers to the far side so that they can scout out any remaining enemies above you and hopefully finish them off; even if they die, you're really close to the end of the level, so you'll be able to revive them without feeling too guilty.
When all of the soldiers have been taken out, Ontiveros will appear on the balcony. Wait for him to be arrested by the troops that magically appear on the second floor (they could've at least helped out a bit in the firefight!), then head back to the rally point to gear up for the game's final mission.
Mission 11: NORAD On The Line
Objective 1: Clear The Zone
You're going to experience a rare event for you here, as you get unloaded from your APC while it's still under fire from the enemies. It seems like they could've just gone another hundred feet to unload you around the corner, where it's safe and sound, but no matter; as soon as you get control of yourself, order your teammates to get behind the wall here, then get behind one of the corners and start picking off soldiers as best you can. If you enter the level with the default weapon, a light machine gun, then you're going to have obvious accuracy problems, especially since so many of the soldiers here are behind cover.
Still, you only have two vantage points from which to fire on the soldiers here, on opposite edges of the building near where you popped up. You'll have to do what you can to thin the numbers enough to allow you to proceed down the road. This is going to take a while, and you probably won't want to get your teammates involved, since they're liable to get their butts shot off.

Anyway, clear out the enemies until you can make your way down to the nest of green dots on your HUD; this indicates an enemy bunker consisting of a pair of M50s looking down the two road approaches. If need be, you can drop a smoke grenade in front of one of the corners overlooking the area to cover your approach before sniping out the soldiers in the area, or throwing a grenade or two into the nest to cause confusion before bringing your squad up. There's an ammo box inside the bunker, so refill on your ammo and health before heading back to the APC.
Objective 2: Reach Angel Plaza
Cue dramatic music! It's time to take down Carlos once and for all. That bastard's gonna pay...apparently he's headed to the bombed-out American Embassy to upload the codes for a nuclear launch to NORAD. Are you a bad enough dude...oh, yeah, we promised we wouldn't do that anymore.
When you hit the next red zone, wrap around the building there and peek your head out for a look. There are two snipers atop the building across the way, as well as various soldiers milling about below. Kill everything that moves.

You can only pass by the building with the snipers on it by heading to the northwest side, but when you clear it, pass down to the southeast and follow the southeastern road leading on. After the General helpfully tells you that it's time to "kill or be killed" (up until now, you've just been maiming people, supposedly), an MI-17 chopper will come swooping in. To drive it off, you can just kill the gunner in the window; if you have an anti-tank soldier or a grenadier around, you might be able to actually cause it to crash if one of them hits it dead-on.
After the helicopter, you have one more small group of enemies in an alleyway to defeat before you can reach Angel Plaza.
Objective 3: Secure The Nuclear Football
Another group of sandbagged enemies guards the entrance to Angel Plaza. If you have a decently accurate weapon, though, you should be able to take many of them down by popping a smoke grenade near the corner and zooming in from behind the cover it creates. At the very least, these guys won't reinforce themselves, so when you take them down, you'll be relatively secure in heading up to the plaza and facing off against the embassy's defenders.
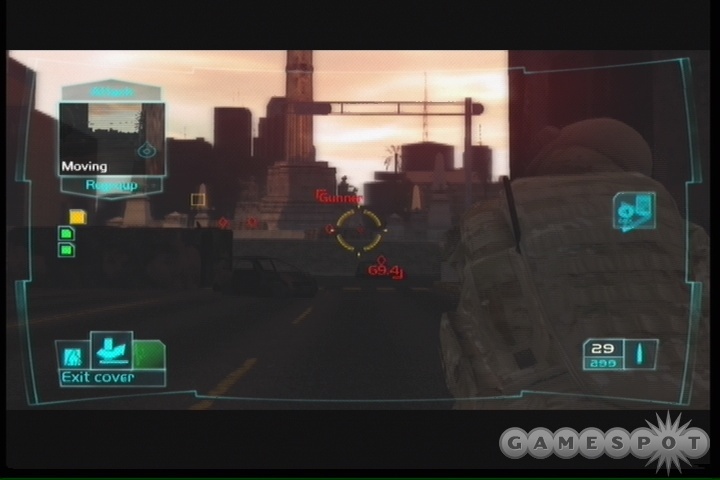
Now, seriously, though; if you could hide anywhere in Mexico City to hack into NORAD, why would you pick an American Embassy that you bombed to smithereens a couple of days ago? Well, because you're a cackling maniac, apparently.
Anyway, Carlos Ontiveros has hidden himself away in the embassy, and it's up to you to find him, take him down, and retrieve the football. Luckily for you, this is all going to be accomplished at long range. Move across the plaza here until you reach the far side of the statue; there'll be another little sandbag here that you can place your soldiers behind, while you yourself can kneel behind one of the small walls off to either side to get an eye on your foes in the embassy itself. If you happen to have an anti-tank soldier in the squad of teammates, then you should find them to be almost absurdly powerful here, since they'll be able to stand up, let loose with a rocket, and kill multiple foes in one hit. You probably won't have to do much of the killing yourself here; just let your teammates spot the enemies and tell them to go to town, and they'll likely finish off most of the foes themselves.
If you don't have an anti-tank gunner along for the ride, though, you'll probably need to do a bit of zooming and sniping yourself, though. After taking down a dozen or so soldiers, Ontiveros himself will appear on the highest level of the building, as another anonymous red dot. Yes, instead of staying locked in the basement or wherever he was and completing his hacking of NORAD, he's going to come out and offer you the chance to shoot him. Oblige him by picking him off, or telling your squad to do so, and he'll fall to the ground, finally losing his grip on the camera that he'd been pointing at his face for the last few hours. A tragic end to a misunderstood life.
At this point, your mission is pretty much complete. Any remaining soldiers in the area will begin retreating now, and you'll be able to head to the evac point to end the mission, even though your whole raison d'etre was supposedly to retrieve the missing football. It's apparently just going to be left behind in the rubble of the US Embassy by yourself, free to be picked up by the next random Mexican soldier to wander along. That's a job well done!
1: Ambushing The Convoy
Although your handler makes it sound like an option, taking out the convoy here is pretty much unavoidable if you want to proceed through the level. Luckily for you, your teammates should be able to destroy the troop transports fairly easily, which in turn will hopefully kill any nearby soldiers.
2: Assaulting the Sunrise
The Sunrise factory is heavily defended, especially in its outer courtyard. There are plenty of soldiers on a spawn here, so if you just send your chopper swooping in, it'll quickly take damage and might even get shot down. This won't end the mission, but it's fairly rude, don't you think? Feel free to use up your smoke and frag grenades in this area if you want to make your job a bit easier.
3: Sniping The Sniper
We probably handled this poorly; it's easier to just zoom in on the sniper's position while standing away from the wall, then strafe off to the left to take him down quickly. Still, an accurate weapon that's capable of shooting in single-shot mode should be decent enough to take this guy out.
4: El Presidente
So your task here is to guard the Mexican President from the assault of the Mexican Rebels. He's got diplomatic immunity, but unfortunately that won't protect him from bullets. Anyway, you should be able to cover most of the left flank by yourself, and leave the right flank to your teammates. Just be ready for the M1 tank when it rolls in; you won't be able to hurt it, so stay behind cover until your chopper comes along to blow it away.
5: Scooby-Doo Time
Assaulting the rebel camp here is a difficult task. Most of the enemies are in bunkers, so that you'll have a hard time taking them down with your helicopter, and likewise, your APC won't be all that great at taking them out, especially if the machinegunner atop it happens to die. If you still have a sniper rifle, you can use it from one corner of the facility to take down the soldiers in the bunkers before heading in.
6: Chopper Chasing
There's not much to say here; it's just an outright run to the extraction point. There doesn't seem to be much you can really do to avoid the chopper, but apparently it'll stop firing on you every once in a while. We surmise this is because of the trees overhead.
7: Ambushing the Ambushers
As per usual, smoke grenades are a great way to take down multiple enemies without putting yourself at risk of return fire. Just pop smoke, hide behind the cloud, and use your thermal vision to see through the cloud to hit any enemies waiting for you there.
8: Rocket attacks!
Sure, you could send your own M1 up against the enemy tanks, but it seems like it'd be difficult to get it past both of them without having it blow up. It's better if you just take a Zeus along and do the heavy lifting yourself; hopefully this video will help you get an idea of where you need to be.
9: Trainstation
The train station isn't all that different from other encounters, save for the way that most of the enemies are right on top of you. Since you're close to an ammo box, feel free to blindly chuck grenades over the boxes; you'll probably get a few kills in without even realizing it.
10: Saving General Martin
General Martin will stay still for most of this fight, but he will move eventually, so stay close to him if possible. The real danger here isn't having him get shot, but rather getting shot yourself, as it's a somewhat confusing battleground to fight in.
11: Palace Ambush
Assaulting the palace can be difficult, especially when you don't have a lot of life left to yourself. Just proceed cautiously, assume that there'll be enemies at every turn, and use your teammates to do the dirty work when possible. You can always revive them later if need be, or just leave them for dead if you wish.
12: Taking Out Carlos
Carlos turned into something of a stereotypical cackling madman at the end of the game, complete with mocking video feeds and ominous statements. Then he'll walk out onto the balcony of a destroyed embassy and let you shoot him. That actually happens fairly often to us in the course of our work days.
Got a news tip or want to contact us directly? Email news@gamespot.com
Join the conversation