The Lord of the Rings: The Battle for Middle-earth Walkthrough
This walkthrough to Electronic Arts' newest real-time strategy game includes tips on each of Battle for Middle-earth's four factions, walkthroughs for both the good and evil campaigns, and multiplayer tips.
Design by Marty Smith
Command the forces of Gondor, Isengard, Mordor, or Rohan and recreate some of the most exciting sequences from Peter Jackson’s The Lord of the Rings movies in The Battle for Middle-earth, a real-time strategy game from EA. Can you hold off the armies of Isengard in defense of Helm’s Deep? Can you breach the defenses of Minas Tirith before Rohan Rohirrim trample your orc hordes? The Battle for Middle-earth features two huge campaigns and four sides with unique units and heroes straight from the feature films. This extensive game guide will aid your quest to destroy--or recover--the One Ring.
This GameSpot game guide to The Lord of the Rings: The Battle for Middle-earth includes:
- General Strategies: This section offers some general strategies for completing The Battle for Middle-earth’s single-player campaign.
- Gondor: Check here for general tips on using Gondor’s units and structures.
- Isengard: This section provides general tips on commanding Isengard’s Uruk warriors.
- Mordor: This section offers strategies for leading Mordor’s orcs into battle.
- Rohan: Look in this section for tips on using Rohan’s Rohirrim and other units.
- Good Campaign Walk-through: This section covers the walk-through for The Battle for Middle-earth’s good campaign. The walk-through reveals all missions and their benefits, provides complete strategies for story missions, and offers general tips for the optional battles.
- Evil Campaign Walk-through: This section covers the walk-through for The Battle for Middle-earth’s evil campaign. The chapter lists all missions and their benefits, offers complete strategies for story missions, and includes general tips for the optional engagements.
- Multiplayer Strategies: This section provides multiplayer strategies for The Battle for Middle-earth and includes a rundown of Evenstar and One Ring powers and each side’s heroes and their abilities.
Table of Contents
General StrategiesGondor
Isengard
Mordor
Rohan
Good Campaign
Moria and Lothlorien
Amon Hen and Eaves of Fangorn
Helm's Deep and Isengard
Northern Ithilien and Osgiliath
Shelob's Lair and Minas Tirith
The Black Gate
Isengard and Fangorn
Amon Hen and Edoras
Helm's Deep and Near Harad
Southern Ithilien and Osgiliath
Cirith Ungol and Minas Tirith
General Strategies
This section offers general strategies for completing The Battle for Middle-earth’s single-player campaign. These strategies apply to both the good and evil campaigns and to all sides.
- Practice using "control groups" when moving and attacking with your unit force. Create a control group by selecting a group of units and pressing CONTROL + a number. Once grouped you can select that particular set of units at any time by simply pressing that number. Control groups are a real-time strategy staple and an invaluable way to move and attack with your units. By using control groups you can quickly select units that are off screen and move them to a desired position. You can easily select certain units during a chaotic battle and focus their attack on a particular set of enemies. It also makes it much easier to micromanage a hero during a battle. Control groups are nothing new to real-time strategy veterans but if you’re new to the genre practice creating and using groups for a much easier way to manipulate your units during the campaign’s battles.
- The forces of good have a 300 command point limit; the forces of evil have a 600 command point limit. However there are times you can elevate your armies above the command limit. Several times during the campaign you’ll receive reinforcements or other additions to your army through the storyline. These reinforcements are automatically added to your army even if it puts you far above the command limit. For that reason, reach your command limit max before calling in the reinforcements. Since the reinforcements will put you far over the limit, you won’t be able to add new units until you fall back under the command limit.
- Unit battalions or hordes that have reached experience level two automatically replace slain members. As long as one member remains, the entire battalion or horde can regenerate. As you lose individual units in a battalion or horde, your command points decrease. If there’s room for another battalion, horde, or unit, then start production! It’ll appear on the battlefield and when your battalion or horde regenerates its units, your command points will be over the limit. So during battles, watch your command points and when the points dip far enough, create additional units.
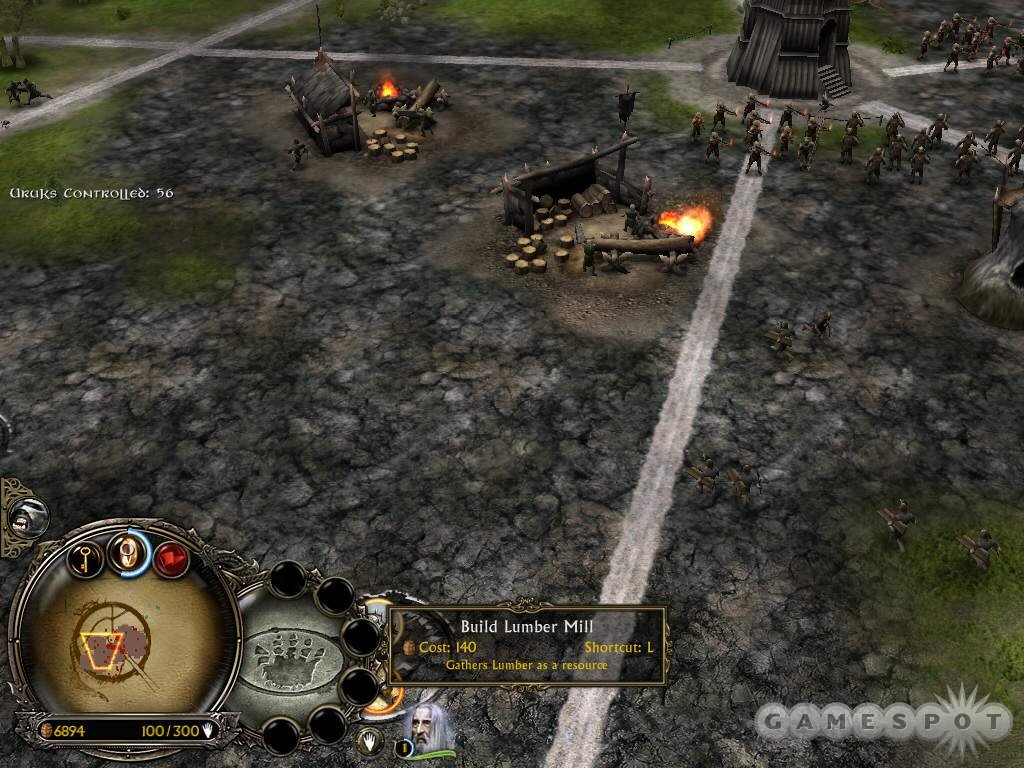
- Certain structures can train new unit types or offer new upgrades once they reach the next experience level. Most structures reach the next experience level through troop production. Train enough troops and the structure reaches the next level and you can produce new unit types or research new upgrades. If you’ve already reached your command limit then training new troops isn’t possible. If you want to raise the structure to the next level in this instance then you’ll need to send units essentially to their death so you can repeatedly create new units so the structure gains experience and eventually reaches the next level. If you’re Isengard or Mordor, send troops into the slaughter house for resources and repeat.
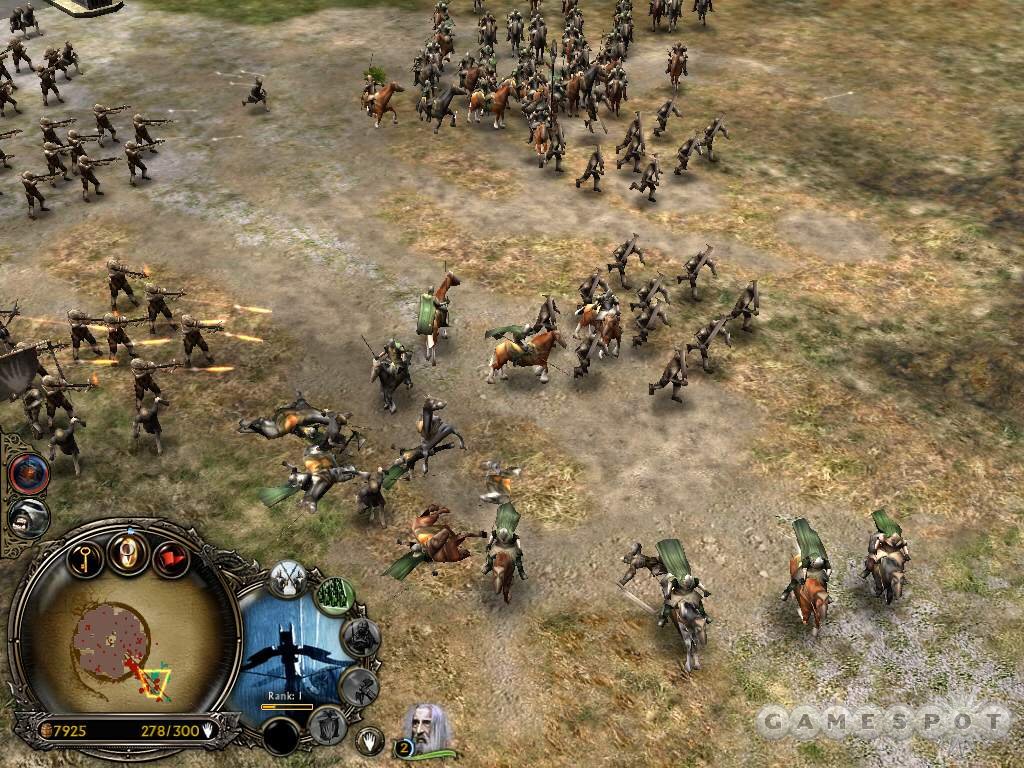
- The Battle for Middle-earth units have their own strengths and weaknesses and often counter other specific unit types. For instance, Isengard’s Uruk pikemen counter cavalry units (offering additional damage against cavalry types). Use control groups to focus your groups’ attacks on specific enemy units. When enemy cavalry approach, recall your pikemen group and target the cavalry. Use Rohan and Gondor cavalry to run over Uruk or Orc hordes; blast Ents with fire arrows; and bombard structures from long-range with trebuchets or catapults.
- In many missions in the The Battle for Middle-earth’s single-player campaign, your army carries over from the previous battle. It’s important to take the most powerful army possible into the next mission and battle. Therefore, spend time near the end of missions acquiring every possible upgrade and enhancing all of your battalions and hordes. Check your heroes and units and see if any are close to reaching the next experience level. If so, use those units to fight enemies so they can get the kills and elevate to the next level.
Gondor
This section covers general tips for using Gondor. For additional details on Gondor’s Evenstar powers, heroes, and units, check the multiplayer section of this game guide.
- Soldiers and tower guards are Gondor’s primary infantry force. You can train tower guards once the barracks reaches level two. Both feature unique formation abilities. Place soldiers and tower guards in block and shield wall formation respectively to increase their armor at the expense of speed. Increase their armor through formation during battles and when rushed by cavalry units.
- Upgrade Gondor infantry at the blacksmith. Erect a blacksmith to begin gaining resources; after it’s created sufficient resources, the blacksmith upgrades to level two, which opens up new upgrades. Upgrade soldier and tower guard attack damage with forged blades and armor with the heavy armor upgrade. Use the banner carrier upgrade to elevate the battalion to experience level two instantly.
- Archers and rangers are Gondor’s ranged units. You can train rangers once your archery range reaches experience level two. Ranged units are extremely powerful; support them with soldier and tower guards. While soldiers and tower guards engage the enemy in battle, use the archers and rangers to fire into the fray from longer range.
- Both unit types are extremely weak in close-range combat. Keep enemy troops occupied so your archers and rangers can attack freely from a distance. Rangers maintain stealth while not moving within forests. Use skirmish formation to increase damage but decrease armor. If you aren’t under attack, switch to skirmish to maximize damage potential. Once the archery range reaches experience level two, research the fire arrow upgrade and enhance all archers and rangers. Fire arrows offer additional damage and counter mumakil and Ents.
- The knights are Gondor’s cavalry unit. Use cavalry to charge enemy infantry battalions or hordes (though avoid pikemen). Place knights in wedge formation to increase damage at the expense of armor. Upgrade the Gondor cavalry units at the blacksmith. Construct a blacksmith. Once the structure reaches experience level two, research forged blades to increase cavalry damage and heavy armor to increase cavalry armor. Add both upgrades to all cavalry battalions. Research banner carrier and use the upgrade to enhance all cavalry to experience level two instantly.
- Once the stable reaches experience level two, research horse shields to improve cavalry armor against archer attacks. Keep cavalry charging enemy battalions and hordes; the knights are much weaker when engaged in stationary battles. Use their speed as an advantage.
- The trebuchet is Gondor’s siege weapon. Its projectiles can crush structures and tightly packed battalions and hordes (though friendly fire is also a possibility so halt fire when necessary!). Trebuchets are extremely vulnerable to enemy infantry, archer, or cavalry attack. Protect your siege units! Enhance trebuchets with the fire stone upgrade purchased from the workshop once it reaches level two. The fire stone upgrade can also be used on the wall trebuchets to aid in Gondor castle defense.
- Gondor offers unique defensive and economic upgrades, which makes Gondor a stronger "turtle" side, which means they can protect themselves from attack while generating a large economy to produce stronger units, upgrades, and heroes. Focus your economy on farms then build a marketplace and acquire the grand harvest upgrade. This upgrade increases farm resource production. Gondor can also build the stoneworker to research defensive upgrades, including increasing damage from towers and enhancing health for walls, towers, and gates.
Isengard
This section covers general tips for using Isengard. For additional details on Isengard’s One Ring powers, heroes, and units, check the multiplayer section of this game guide.
- Isengard’s infantry force includes Orc laborers, Uruk-hai, Uruk pikemen, and berserkers. Orc laborers are trained from lumber mills to gather resources to fund Isengard’s hordes of Uruk warriors. Although they’re primarily resource gatherers, the laborers can be used in combat if necessary (such as aiding in a nearby battle or helping in base defense). Use laborers and their axes against Ents in particular. Uruk-hai are roughly the equivalent of Gondor’s soldiers. Use the infantry units’ block formation to gain additional armor at the expense of speed. The Uruk-hai also feature the bloodthirsty ability; this essentially allows you to sacrifice other Uruk-hai to increase experience of another Uruk-hai horde.
- Uruk pikemen specifically counter enemy cavalry units and are a must to protect your Uruk warriors from the cavalry of Rohan and Gondor in particular. Use the porcupine formation against incoming cavalry to increase armor at the expense of speed (much like the infantry’s block formation). Keep pikemen close to your infantry and ranged units so they can intercept incoming cavalry at a moment’s notice. Berserkers aren’t trained in hordes and don’t require as many command points. They offer strong damage and armor (without upgrades) and excellent in rushing an archer line or thrashing defenses along a castle wall. Use a squad to rampage some settlements while a main force is occupied. Plus they have the light torch ability to light the Isengard’s explosive mine for siege!
- Construct the armory to upgrade Isengard infantry units (Uruk-hai and pikemen) with the forged blade and heavy armor enhancements. Forged blade increases damage and heavy armor increases armor. Research the banner carrier upgrade to instantly elevate your infantry hordes to experience level two.
- Uruk crossbowmen are the Isengard ranged unit and are functionally similar to Mordor’s orc archers or Gondor’s archers. Protect crossbowmen from close-range attack so they can freely bombard enemy units with projectiles from a safe distance. Construct the armory to upgrade the Isengard crossbowmen with fire arrows, heavy armor, and banner carriers. Fire arrows are particularly important for their increased damage. Fire arrows also counter mumakil and Ents and can also be used to light the explosive mine.
- Warg riders are essentially the Isengard cavalry unit. Warg riders are quick, durable, and can help break infantry lines to reach supporting archers. Utilize the howl ability to increase warg rider damage for a short period of time. Upgrade the warg rider’s damage and armor at the armory (with forged blades and heavy armor) and use the banner carrier upgrade to elevate warg riders to experience level two instantly. Use warg riders to harass enemy troops, as scouts, and to scatter formations by charging into engagements.
- Isengard offers a variety of siege units to topple enemy castles and structures. The battering ram crushes gates, walls, and buildings but it must be moved against the structure to inflict damage. The ballistae inflicts solid damage against gates, walls, and structures and can crush stationary battalions and hordes--all from the relative safety of long-range. Use the siege ladders to elevate Uruk warriors onto walls to combat defending archers and reach base interiors quickly. Finally, the explosive mine can obliterate base defenses but must be placed against the structure and then lit to detonate. Light the explosive mine with the berserker’s light torch ability, a fire arrow, or Saruman’s fireball.
Mordor
This section covers general tips for using Mordor. For additional details on Mordor’s One Ring powers, heroes, and units, check the multiplayer section of this game guide.
- Orc warriors and laborers comprise Mordor’s grunt infantry force. Orc laborers are trained at lumber mills and primarily gather resources but can be used in combat if necessary (plus their axes are effective against Ents). Orc warriors are unique in that they are free to train. Mordor must use their numbers as an advantage because the warriors are relatively weak in both health and damage potential. Improve warriors with the bloodthirsty ability; improve experience of one horde at the expense of another.
- The forces of Mordor recruited Haradrim warriors to join their cause in the fight against Gondor. Haradrim lancers offer both melee and ranged attacks. Upon upgrading the Haradrim Palace to the next experience level, Mordor can create The Soldiers of Rhun (or easterlings), which are similar to Gondor’s tower guards. Toggle the easterlings into porcupine formation to increase armor at the expense of speed.
- Enhance Mordor’s infantry troops at both the orc pit (which creates orc warriors) and the Haradrim Palace (which trains the Haradrim Lancers and Soldiers of Rhun). After both structures reach level two, you can research the banner carrier upgrade and instantly elevate an orc or Haradrim horde to experience level two. Raise the structure’s rank by training units at that particular structure.
- Orc archers are Mordor’s primary ranged unit and function similar to other side’s archer battalions and hordes. Protect orc archers from close-range attack so they can freely bombard enemy units with projectiles from a safe distance. Upgrade the archers at the orc pit. Once the orc pit reaches rank two, you can research the fire arrow upgrade to add fire damage to orc archer’s projectiles. Fire arrows help counter mumakil and Ents.
- The forces of Mordor also feature some impressively large units at their disposal. The lumbering, pricey mountain trolls provide excellent support for your other forces. Send him into the fray to rough up cavalry and infantry but beware of massed ranged fire. Mountain trolls can grab rocks and trees for added firepower and even eat an orc to replenish health. The drummer troll (trained at the troll cage level two) adds leadership bonuses to nearby troops by enhancing damage, armor, and experience.
- Haradrim mumakil are massive elephants that can tear through cavalry and other ground forces but are extremely susceptible to ranged fire, especially fire arrows. The mumakil move slowly, which leaves them vulnerable to repeated and massed ranged attack. Support mumakil with other troops and garrison archers enhanced with fire arrows inside the mumakil’s carriage.
- Mordor uses siege towers and catapults to invade castles and bombard structures from long-range. The siege tower is much like Isengard’s siege ladder. Place the tower against a castle wall and maneuver troops inside and up onto the wall to battle defenses. Catapults are extremely fragile to infantry and melee attack. Protect these siege units from close assault and bombard enemy defenses and structures from long-range.
Rohan
This section covers general tips for using Rohan. For additional details on Rohan’s Evenstar powers, heroes, and units, check the multiplayer section of this game guide.
- Rohan peasants are the sole infantry unit, though they aren’t specialized fighters. Peasants repair structures, walls, and gates but can be called into combat duty and enhanced by various upgrades. The Evenstar power "Draft" increases peasant armor and damage to bolster their combat ability. Furthermore, construct a Rohan armory and research forged blades to increase peasant damage further and research heavy armor to increase peasant armor. Peasants can also increase in experience and rank; research banner carrier at the Rohan armory to instantly raise peasant battalions to experience level two.
- Rohan specialize in cavalry units and offer both melee and ranged cavalry units. The Riders of Rohan can tear through enemy infantry lines; charge cavalry at infantry units to cause trample damage. Avoid an attack against Uruk pikemen (or Gondor tower guards in multiplayer) as these units specifically counter cavalry units. Upgrade Rohirrim at the armory; research forged blades to enhance damage and heavy armor to increase armor. Use banner carrier to instantly increase a Rohirrim battalion to rank two. Once the stable reaches rank two, research horse shields to further increase armor.
- Yeoman archers and Rohirrim archers (cavalry archers) are Rohan’s ranged units. Protect ranged units from close-range attack from enemy infantry battalions and hordes. Keep the Rohan archers at a safe distance and damaging enemy units from long-range. Rohan’s cavalry archers are obviously much quicker than Yeoman archers and can escape disadvantageous situations more easily. Enhance both archers once the archery range reaches rank two. Research the fire arrow upgrade to add fire damage to archers and Rohirrim archers. At the armory, research banner carrier to instantly elevate archers and Rohirrim archers to experience level two. Also, use the heavy armor upgrade to increase Yeoman and Rohirrim archer armor.
- In skirmish and multiplayer, Rohan can build Ent Moots on settlements and train Ents, a race of "trees" from the forests of Fangorn. Ents are slow but extremely durable, though somewhat easily countered by fire arrows and axe-wielding laborers. Ents are also Rohan’s siege weapon; toggle Ents between melee and ranged attacks. When using ranged attacks, the Ents grab boulders and hurl the rocks at the designated targets. Ents can thrash base structures fairly quickly.
Good Campaign Walk-through
This section covers the walk-through for The Battle for Middle-earth’s good campaign. The campaign consists of eleven fixed missions and over twenty optional missions. The optional missions are scattered throughout the campaign and a certain number must be completed to advance through the fixed story missions.
This walkthrough covers all eleven fixed mission in detail. You’ll also find the complete living world map layout for the good campaign; the living world map table reveals all possible territories and missions and their benefits. Completing particular missions rewards the forces of light with resource bonuses, a higher command limit, or an increase in Evenstar power. General strategies for the optional missions (which feature the same primary objective) are featured in the next section.
Living World Map
Command the forces of light from Moria to the Black Gate in an effort to hold off the enemies of Isengard and Mordor and give time for Frodo and Sam to reach Mount Doom and destroy the one ring.
The table below reveals all story and optional missions featured in the good campaign. You will play the story missions during the campaign; completing the story missions rewards you with their respective benefits. You will also complete a number of optional missions during the campaign; these can differ between games. The optional missions all feature the same primary objective (destroy the enemy!) but offer different benefits.
Note that completing a mission allows you to attempt and complete adjacent territories. This comes into play in the storyline late in the game where you must complete the territory adjacent to The Black Gate in order to attempt the storyline’s final mission.
| TERRITORY | ACT | STORY MISSION | RESOURCES | COMMAND | POWER |
| Amon Hen | 4 | 3 | - | +20 | +1 |
| Cair Andros | 14 | - | - | +20 | +2 |
| Central Ithilien | 20 | - | +10% | - | +2 |
| Crossroads | 14 | - | - | - | +3 |
| Dagorland | 20 | - | - | - | +3 |
| Dead Marshes | 20 | - | - | - | +1 |
| Dunharrow | 14 | - | - | +20 | +1 |
| East Emnet | 5 | - | - | +20 | - |
| Eastern Rohan | 2 | - | - | - | +1 |
| Eastfold | 8 | - | +10% | +20 | - |
| Eaves of Fangorn | 7 | 4 | +10% | +30 | - |
| Emyn Arnen | 14 | - | +10% | - | +1 |
| Emyn Muil | 20 | - | - | - | +2 |
| Fangorn | 8 | - | - | - | +2 |
| Halifirien | 14 | - | +20% | - | - |
| Harondor | 20 | - | - | - | +2 |
| Helm’s Deep | 10 | 5 | +30% | - | +2 |
| Isengard | 11 | 6 | +10% | - | +2 |
| Lothlorien | 3 | 2 | - | +50 | +1 |
| Minas Tirith | 19 | 10 | - | - | +8 |
| Mirkwood | 20 | - | +20% | - | +3 |
| Moria | 1 | 1 | - | - | +1 |
| Mouths of the Entwash | 14 | - | - | - | +1 |
| Near Harad | 20 | - | - | - | +4 |
| Northern Ithilien | 13 | 7 | +20% | - | - |
| Nurn | 20 | - | +40% | - | +3 |
| Osgiliath | 16 | 8 | - | +20 | +2 |
| Rhun | 20 | - | +10% | - | +3 |
| Rohan | 2 | - | - | +20 | - |
| Shelob’s Lair | 18 | 9 | - | - | +2 |
| Southern Ithilien | 14 | - | +20% | - | - |
| The Black Gate | 20 | 11 | - | - | - |
| West Emnet | 5 | - | +10% | +20 | - |
| Westfold | 2 | - | +10% | - | - |
| Wold | 8 | - | +20% | - | - |
Strategies for Optional Missions
Choose your optional missions based primarily on reward. It’s certainly important to elevate your command limit to the maximum of 300. Story missions alone bump it up +120. Choose optional missions that elevate command points to reach the limit of 300 as soon as possible.
Missions that provide power can help you acquire Evenstar powers as early as possible. The reinforcement Evenstar powers will prove invaluable during Helm’s Deep, Minas Tirith and the Black Gate where you’re up against overwhelming forces.
The primary objective of the optional missions remains the same across each one: destroy all evil forces! Bonus objectives shift between missions. These could include upgrading certain forces, using particular unit functions, or eliminating a particular unit patrol or structure.
The optional missions are best used for army building and upgrading. Your army carries over from battle to battle. The optional missions are an excellent chance to maximize your command limit full of troops and to upgrade them to the highest possible degree. Upgrade your ranged units with fire arrows and armor and upgrade your melee units with forged steel blades and heavy armor.
You should concentrate on unit experience as well as purchasing upgrades. Check your unit groupings and see which squads are close to gaining an additional level. Use them to kill enemies and buildings to put them over to the next level. Carry these experienced, upgraded troops into the next battle as further advantage against the enemy forces.
When an optional mission begins, start construction of your camp. Add buildings depending on current need (if you’re low on troops, you may want multiple troop-production facilities). Add defensive structures as added firepower against enemy forces. If you’re attacked early in the mission, retreat your units to the defensive structures and fight the battle near the additional firepower. Place buildings that will help you upgrade any current or new forces with fire arrows, armor, or weaponry.
Play defensively at first as you build your army, gather resources, and fund upgrades. As your army grows, scout around your initial camp and search for settlements. Construct additional resource gathering structures. Carefully expand from your initial camp and engage encountered enemies. After significant battles, return to a defensive stance and regroup your forces before continuing to expand. Find new outposts and camps and begin to control the map. Return to a defensive stance after each new gain.
Add siege units to your mixed force to topple buildings and defensive structures as quickly as possible. Lure enemy units out of the base and into your ranged units’ fire. Protect your ranged units with a melee force and engage once the attackers move close to your ranged units. Clear as many units as possible before attacking base structures. Priority targets are defensive and troop-producing buildings. If the enemy attempts to rebuild, destroy other structures before targeting the structure that’s currently being built (since it can’t harm you until it’s finished).
Moria
Objectives: Guide the Fellowship through the halls of Moria. All Fellowship members must survive. Destroy the Balrog.
Bonus: Find five treasures. Rank all heroes to level two. Purchase a power.
In the opening story mission of the good campaign, you must guide the Fellowship of the Ring through the goblin-infested Mines of Moria. Your party includes Aragorn, Boromir, Legolas, Gimli, Gandalf, and the four hobbits, Frodo, Sam, Merry, and Pippin. Of your party members, the four hobbits are by far the most fragile. To keep them out of harm’s way, you can set them to use their ranged attack (throw rocks) instead of their melee sword attack.
One of your bonus objectives is to purchase an Evenstar power. As the mission begins, acquire the Elven Gifts power. This Evenstar power increases damage from all of your heroes by 50% and will last throughout the entire campaign.
The other two bonus objectives are somewhat linked. There are five "treasures" scattered throughout the Mines of Moria. These treasures are actually experience bonuses that instantly level up the character that picks up the treasure. Since one of your bonus objectives is to level all heroes up to level two, finding these treasures is extremely important.
You can choose who picks up the treasure or experience bonus. Gathering three of the five treasures with Aragorn, Gandalf, and Gimli is a wise decision because each of these heroes receives a powerful ability upon attaining level two. The hardest heroes to level up will be the hobbits--since you’re more than likely keeping them out of harm’s way. After you’ve leveled up all other heroes, try and score kills exclusively with the hobbits in an effort to meet the bonus objective. Conversely you could use the hobbits to pick up the treasure then keep them away from fights while your other heroes soak up the damage, kills, and experience.
Regardless of your technique, it’s important to have Gandalf at level two by the level’s end sequence. Gimli and his level two leap attack ability will also serve the party well during the concluding combat sequences.
Advance to the northeast and combat the goblins that attack. Keep your heroes together and ensure each hero engages in the battle. Pick up the nearby experience upgrade with the hero of your choice. Grab the next upgrade in the adjacent room while fending off the goblin attacks. At the first northwest turn, explore inside to find a cave troll and goblin archers. Use Gandalf’s wizard blast ability to knock down the troll then move in other heroes to attack. Pick up the next treasure to level up one of your heroes.
Explore the second northwest tunnel to find a squad of melee and ranged goblins protecting the next experience upgrade. Pick up the upgrade with your preferred hero. After battles, take time to heal your hero’s with Aragorn’s athelas.
Continue eastward into Balin’s Tomb. Goblins and a couple cave trolls will attack from the door you entered. Heal up as needed and prepare for the battle. Separate your heroes into two groups placing your melee attackers together and your ranged attackers together. Save Gandalf’s wizard blast for the cave troll. Use Gimli’s leap attack against incoming clusters of goblins; if you have leveled up Aragorn, toggle his blade master ability.

After the battle, continue into the next chamber and toward the bridge of Khazad-dûm. Pick up the final treasure to complete your bonus objective. If any of your heroes haven’t been leveled up, use one to pick up the treasure and any remaining heroes to fight remaining battles before the bridge.
Cross the bridge. Gandalf remains behind to fend off the Balrog while the remaining Fellowship escapes Moria. With Gandalf at level two, you can use his lightning sword ability to damage the Balrog. Move Gandalf around the area to steer clear of the Balrog while the lightning sword ability regenerates. Use the lightning sword attack once again. It will take several blows to down the Balrog. Keep Gandalf away while the ability recharges. Defeat the Balrog to conclude the level.
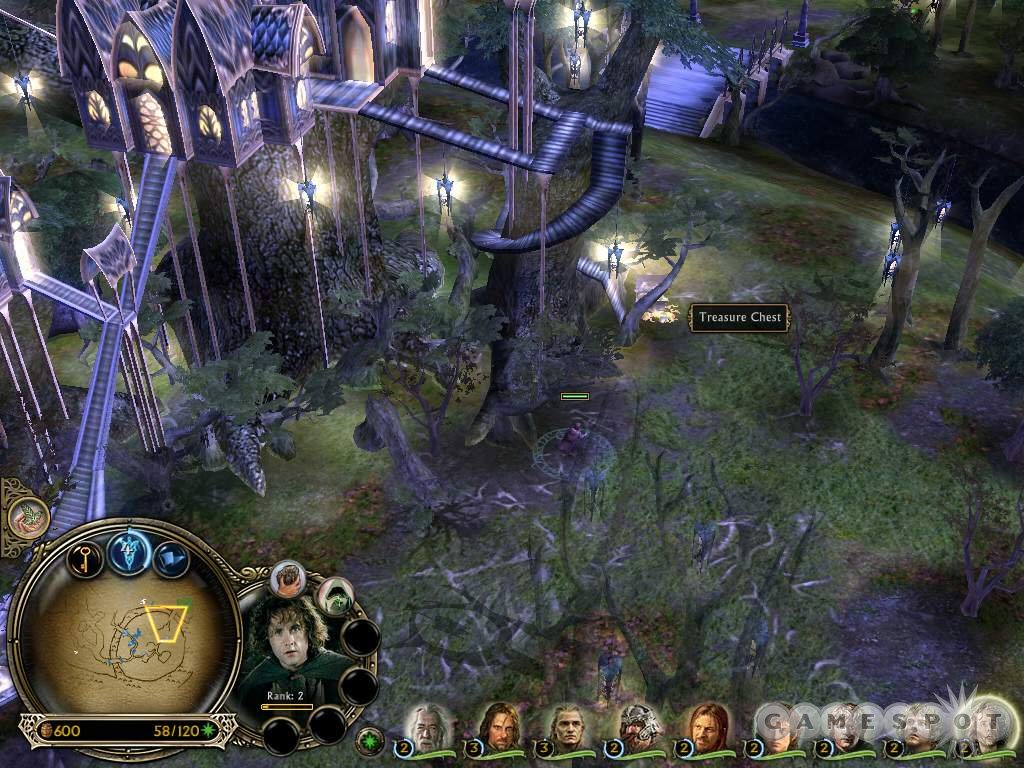
Lothlorien
Objective: Move the Fellowship to Lothlorien.
The Fellowship flees the Mines of Moria to the safe haven of Lothlorien and the company of elves. Unfortunately the goblins and cave trolls have continued their pursuit. The Fellowship must enter Lothlorien and help defend the land from the attackers.
Elven Warriors arrive to help escort the Fellowship. Use the Fellowship to hold off the initial pursuers as you south toward Lothlorien. Eliminate any remaining hostiles and cross the bridge into Lothlorien to begin the next stage of the mission.
Objectives: Build a barracks to train Elven Warriors. Defend Lothlorien from Moria Goblins. All Fellowship members must survive.
Bonus: Destroy enemy Lumber Mills.
The incoming goblin and cave troll assault is much fiercer than those initial pursers. Create barracks to train Elven Warriors. Set the rally point to one of the Lothlorien bridges. Use the elves as ranged units to support your strongest melee heroes--Aragorn, Gandalf, Gimli, and Boromir. Place Legolas in a group with the Elven Warriors to attack incoming enemies at longer range.

To fund your Elven Warriors, gather resources by picking up the treasures scattered throughout Lothlorien. Since your hobbits are more hindrance than help in Lothlorien’s defense (though they can certainly assist with ranged attacks, the hobbits are easily killed, especially by a cave troll), send the hobbits around Lothlorien and pick up all of the treasures to fund defense.
As attackers approach, keep your ranged units behind your hero melee attackers. Engage the goblin attackers with the melee units while archers pelt enemies from long-range. Counter the approaching cave trolls with Gandalf’s wizard blast, which knocks the cave troll to the ground and leaves it vulnerable to melee and ranged attacks.
Destroying the three Lumber Mills (marked on the mini-map) completes a bonus objective and also uncovers some additional treasure. Send a couple squads of Elven Warriors to destroy the undefended Lumber Mills. Don’t send your heroes, which are better used against the incoming attackers. Organize these Elven Warriors into specific groups so you can recall them easily if one of the incoming goblin assaults moves in their direction.
Set your hero abilities to auto so Aragorn uses his blade master, Gimli uses his leap attack, etc--that is if you don’t micromanage the fight. You may have better results using Gimli’s leap attack manually; target an incoming goblin squad for optimum effect. Likewise, cast Gandalf’s lightning sword against a squad of incoming goblins to fry the attackers. Your melee heroes soak most of the damage. Use Aragorn’s athelas ability to heal nearby heroes.
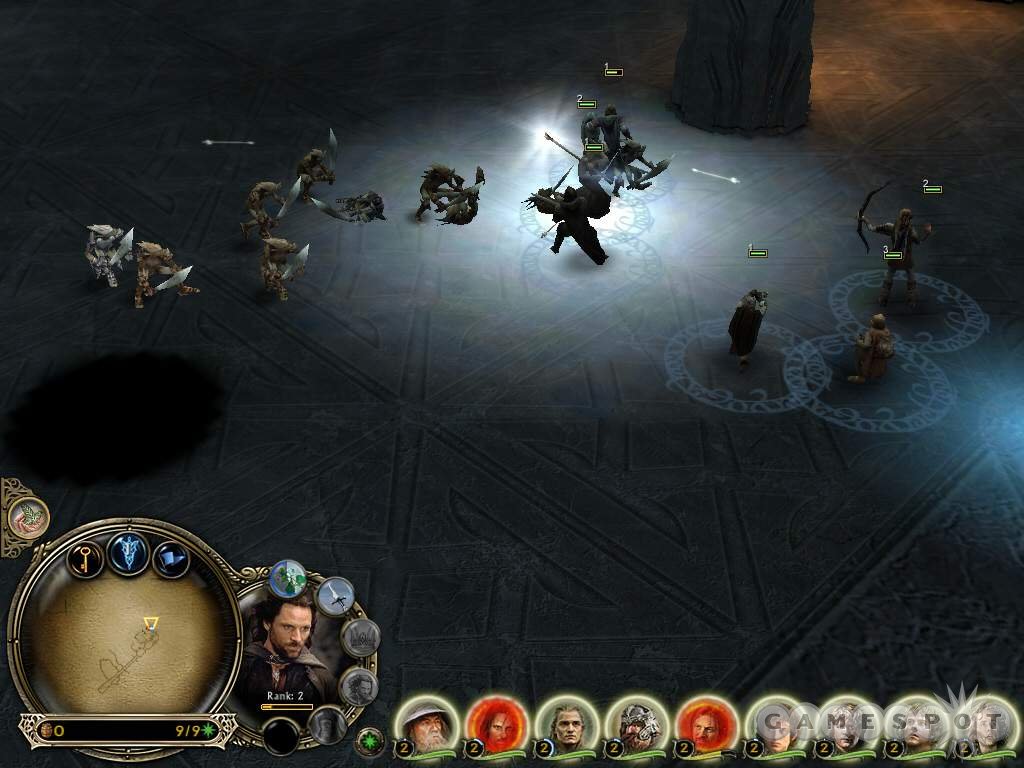
Amon Hen
Objective: Frodo and Sam must survive.
The Fellowship is separated as the mission at Amon Hen opens. Aragorn, Gandalf, Frodo, and Sam begin the southwestern corner on the summit of a hill. Combat the attacking Uruks to complete the first task. The battle is relatively short so Frodo and Sam can participate in the battle, though you could toggle them to ranged attacks so the hobbits stay out of the thick of battle. Activate Aragorn’s blade master and use Gandalf’s wizard blast as needed. Heal the heroes with athelas.
After surviving the attack on the summit, the camera reveals Legolas and Gimli under assault by more Uruks. These heroes are located north of your start position.
Objective: Kill the Uruks attacking Legolas and Gimli.
Select Aragorn, Gandalf, Frodo, and Sam and send them north toward Legolas and Gimli. Set Legolas and Gimli’s special abilities to auto so you can concentrate on maneuvering Aragorn, Gandalf, Frodo, and Sam to rendezvous and assist their comrades. Keep Frodo and Sam behind their stronger allies and set them to ranged attacks so the hobbits remain at long-range during a battle.
While in route to Legolas and Gimli, Aragorn, Gandalf, Frodo, and Sam encounter a couple cave trolls. Use Gandalf’s wizard blast or lightning sword and activate Aragorn’s blade master for the fight. Keep Frodo and Sam back and away from the cave trolls. Move Legolas and Gimli south to assist and add their abilities into the mix. Heal heroes with Aragorn’s athelas ability.
Defend the position against several more Uruk squads and a gang of warg riders. Cycle through your heroes and utilize the available special abilities--or set them to auto--to combat present enemies. Keep Frodo and Sam behind the better fighters; if they become targets, move them away and focus all other hero attention on the pursuers. As you defend the area, Boromir uses the Horn of Gondor--he, Merry, and Pippin are in trouble.
Objective: Assist Boromir and the Hobbits. Kill Lurtz.
Bonus: Save Boromir.
Locate Boromir, Merry, and Pippin on the eastern edge of the map. After clearing the immediate area, group your heroes and proceed east. The road moves through a valley; Uruk crossbowmen maintain position on the mountaintops flanking the valley road. Combat the foes with Legolas’ ranged attack or even send your melee fighters to attack the crossbowmen at close-range. Don’t send Frodo and Sam through the valley first and allow the enemies to target them.
Group your heroes near Boromir to help fend off his attackers. Position Frodo and Sam away from the battle and switch the hobbits to ranged attack (if they aren’t already). Once all are together, activate Aragorn’s athelas ability to heal nearby heroes (including Boromir). Your other heroes’ attack abilities can be on automatic, though you may want to use them manually for optimum effect.
Lurtz, the Uruk-hai hero, arrives shortly from the south. Don’t let him pelt your heroes from long-range. Immediately select your melee forces and concentrate their attacks on Lurtz. Use Aragorn’s athelas once it’s recharged and save Boromir to complete a bonus objective.
Objective: Secure the boat so Frodo and Sam can escape.
The mission’s final task is to ensure Frodo and Sam’s safety in reaching a boat northeast of your current position. The enemy tosses everything at your position in an effort to prevent Frodo and Sam reaching the boat and their escape toward Mordor. Cycle through your heroes and manually implement their special attacks against enemy squads. Counter the cave trolls with Gandalf’s wizard blast then immediately focus all attack on a cave troll while it’s temporarily incapacitated. When Frodo and Sam reach the boat, the mission completes successfully.
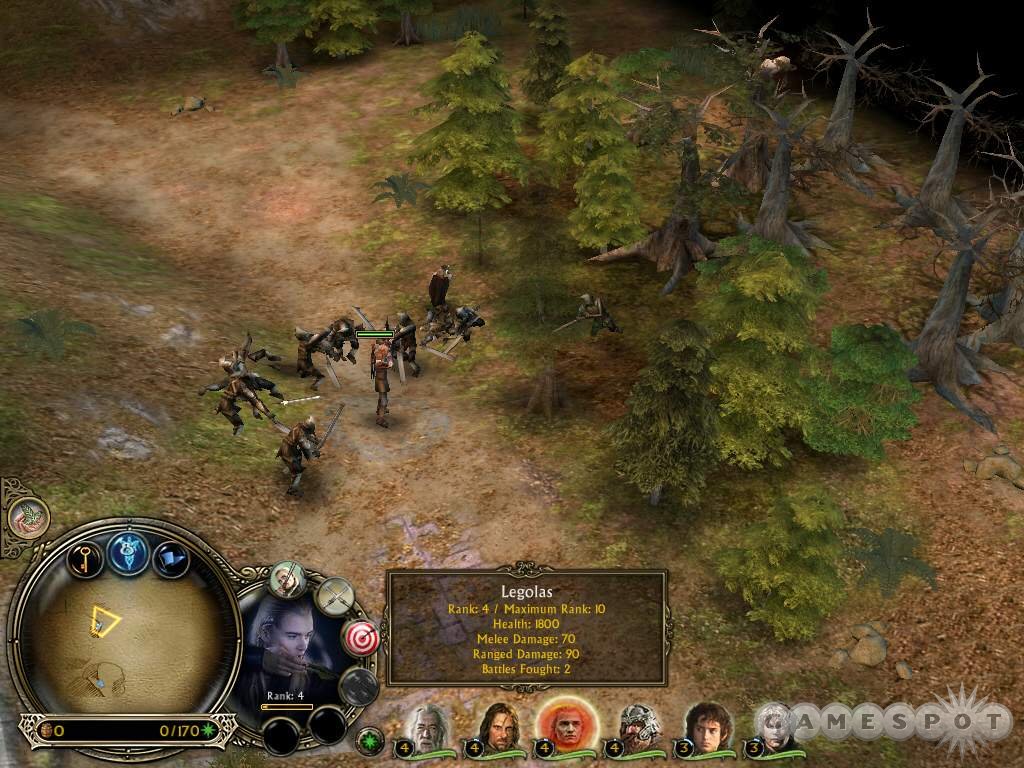
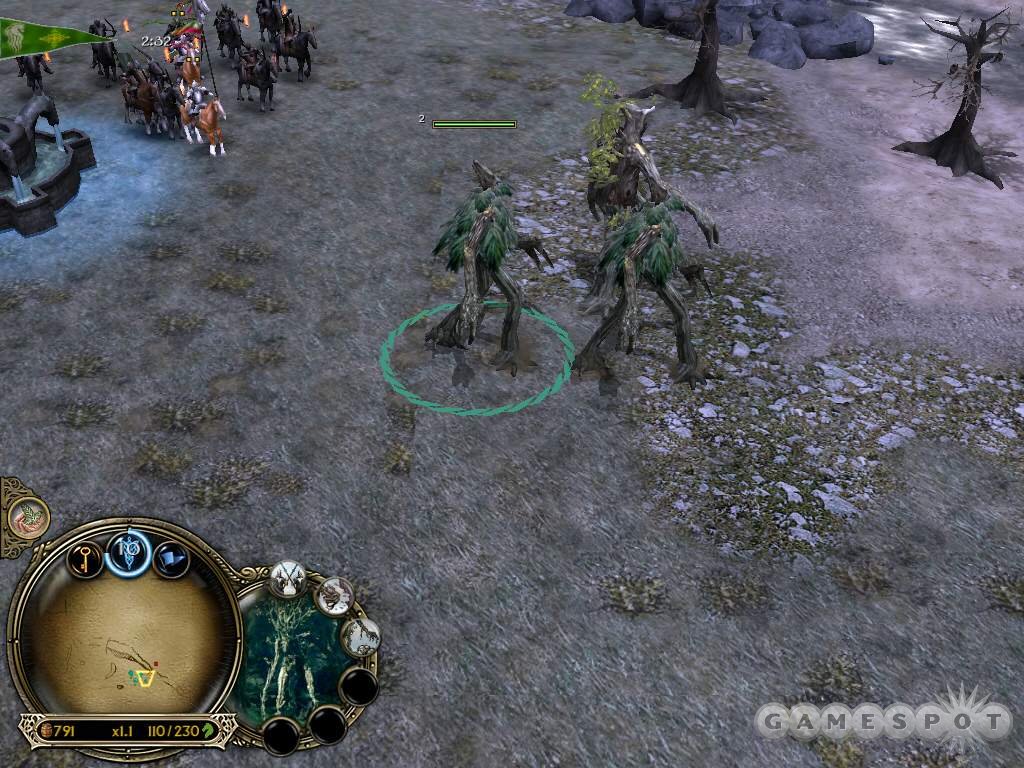
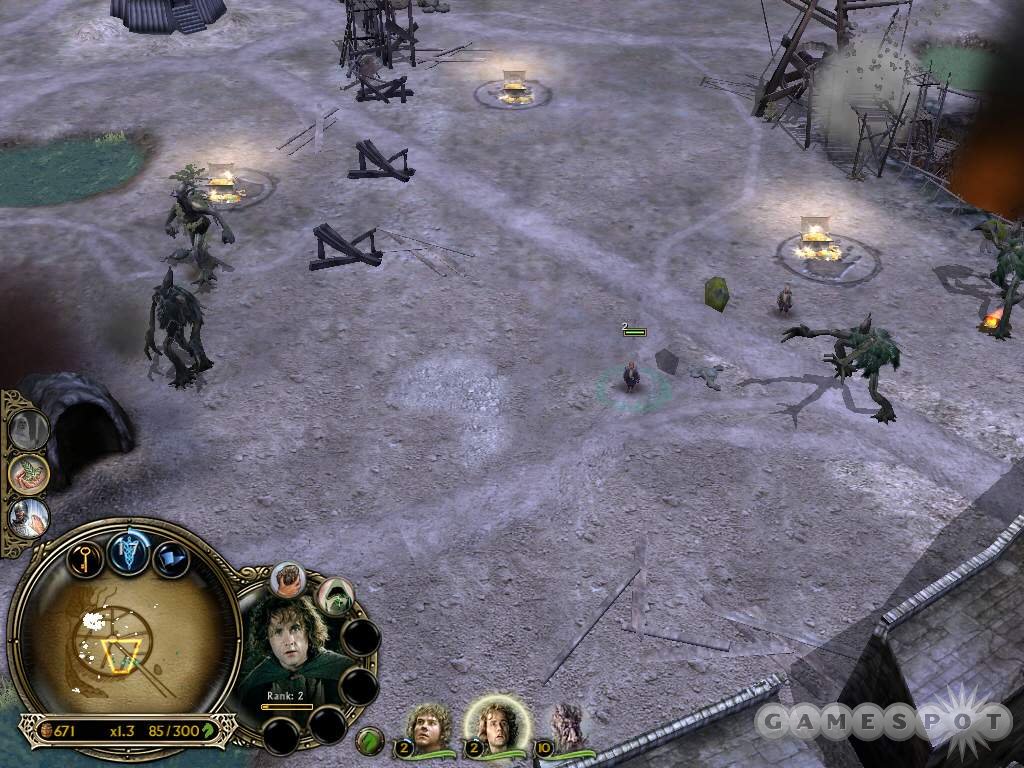
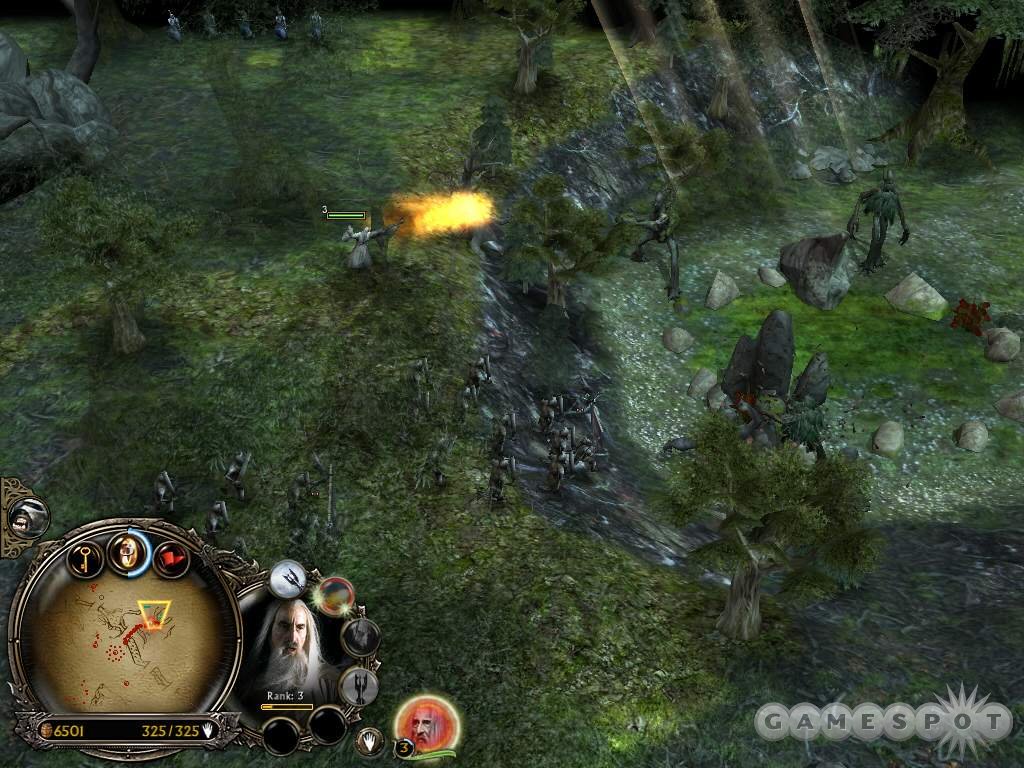
Eaves of Fangorn
Objective: Destroy all enemy buildings. Destroy Lumber Mills to get Ents.
Bonus: Call in Eomer’s army when he arrives. Rescue Merry and Pippin. Level up three battalions.
At the Eaves of Fangorn, your command a small group of Rohan Rohirrim in pursuit of a squad of Uruk-hai, who coincidentally have captured Merry and Pippin, two hobbits from the Fellowship. Your orders are to crumble the enemy structures in the region; eliminating the enemy Lumber Mills, which are destroying Fangorn’s trees, will grant you the use of an Ent. The Ents are a race of "living" trees; they’re mobile (though slow), durable, and offer powerful melee and ranged attacks.
The Rohan army you’ve trained through the optional missions up to this point provides reinforcements into this battle. Obviously the stronger you’ve developed that army, the easier this mission becomes. As the mission opens, move to the southwest corner and just east of the start position to find a couple Lumber Mills. Acquire the Ents and add them to their own grouping.
Push carefully to the east and find the outpost. Build your own outpost and construct a farm, well, and armory. Acquire armory upgrades when available and add them to your Rohirrim and eventually to any of Eomer’s army. There’s another Lumber Mill slightly east; recover a third Ent. There are a couple cave trolls in the southeast corner. Don’t send your Rohirrim there. If you do want to eliminate the cave trolls, use Ents and their melee attacks.
You can toggle Ents between melee and ranged attacks. Keep a few Ents using their melee strikes; keep them at the front line and allow remaining Ents to use their boulder ranged attack to pummel enemy forces from longer range (also excellent at attacking enemy structures).
It’s possible an Ent may be hit by a flaming arrow during the course of the mission. A few hits and the Ent bursts on fire; move the lit Ent to the river and he’ll put out the flames (otherwise he suffers continual damage). Hold position at the outpost and utilize the well to heal your forces.
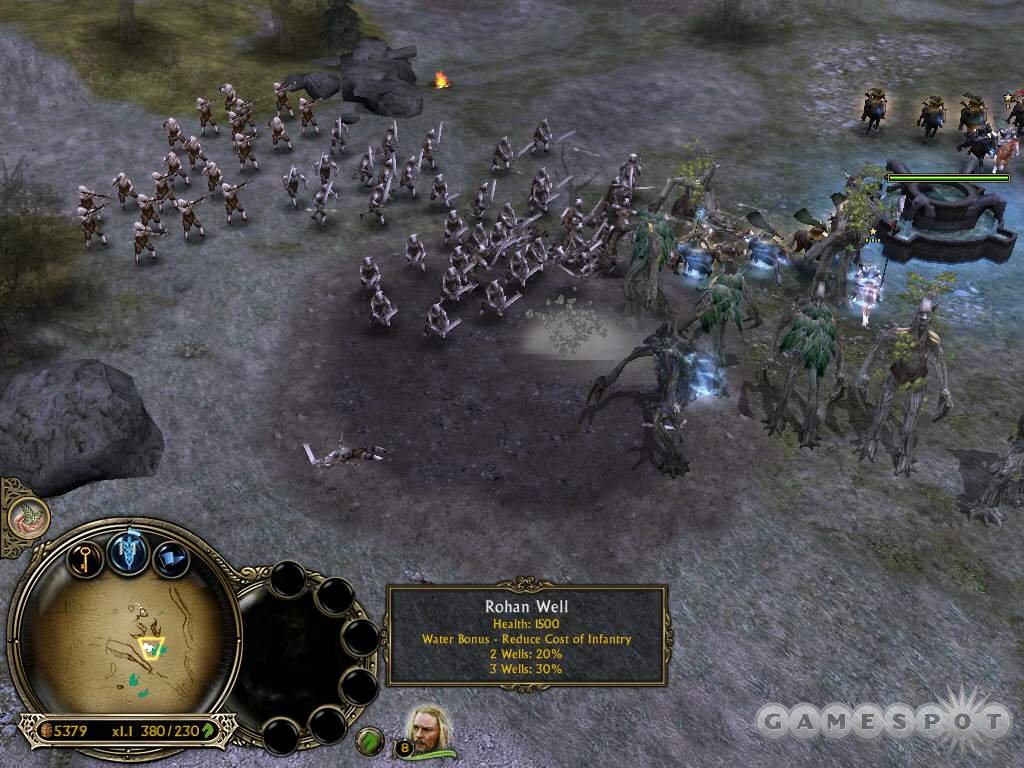
Call in Eomer’s army when available to conduct the push across the river and toward the enemy’s larger base areas. Collect and group the Ents to support your Rohirrim and Eomer’s army. Cross the river and move toward the west. Destroy more Lumber Mills, gain an Ent, and continue the push. Locate Merry and Pippin in the north on the western edge. Eliminate all enemies surrounding the hobbits; Merry and Pippin will escape into the forest.
The primary enemy camp is found in the north middle section of the map. Explore the northeastern area for additional Ents and topple more structures. Build farms on conquered sites to fund your armory upgrades; retreat your forces to the well to replenish health. Don’t hesitate to allow forces to approach your position at the well and bombard them upon arrival. Protect Eomer’s army for future missions. Clear out the enemy base and remaining structures to complete the level.
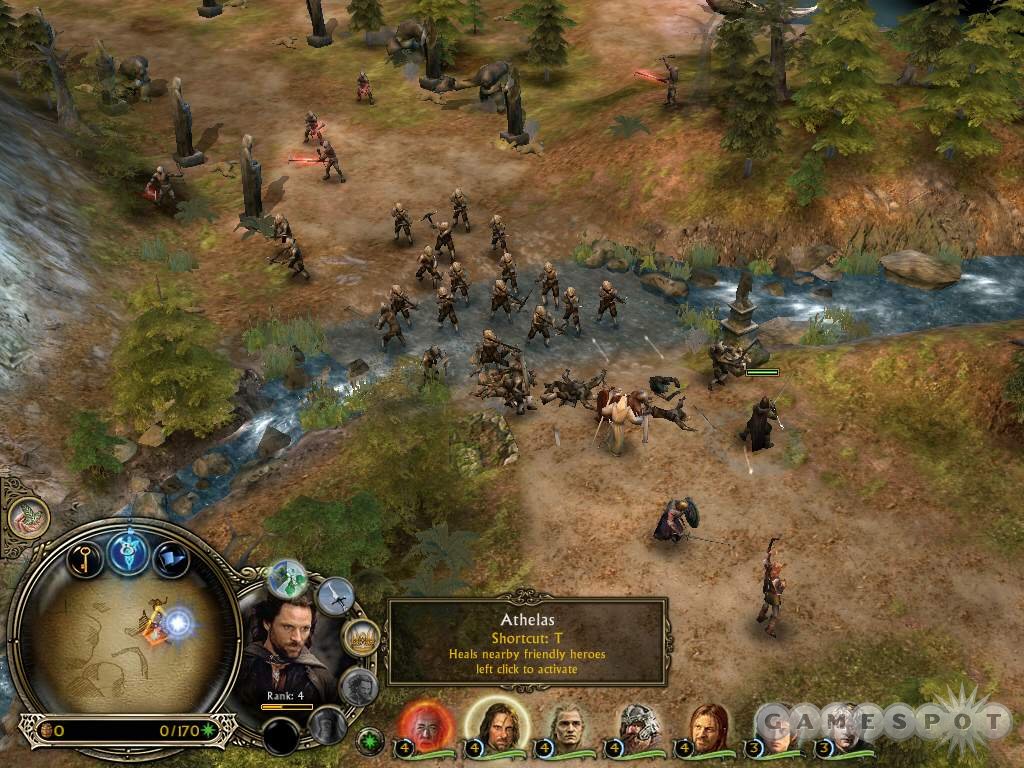
Helm’s Deep
Objective: Destroy all the forces of Isengard.
Bonus: Call in Eomer’s army when he arrives.
This mission recreates one of the most exciting sequences from The Two Towers--the Rohan defense against Isengard’s army at Helm’s Deep. It’s a ferocious, relentless assault. Keys to successfully completing the mission include proper unit placement, acquiring upgrades, and using your heroes to assist in the defense. Begin by immediately constructing farms on build spots to increase resource production. You’ll also want an armory for the heavy armory upgrade.
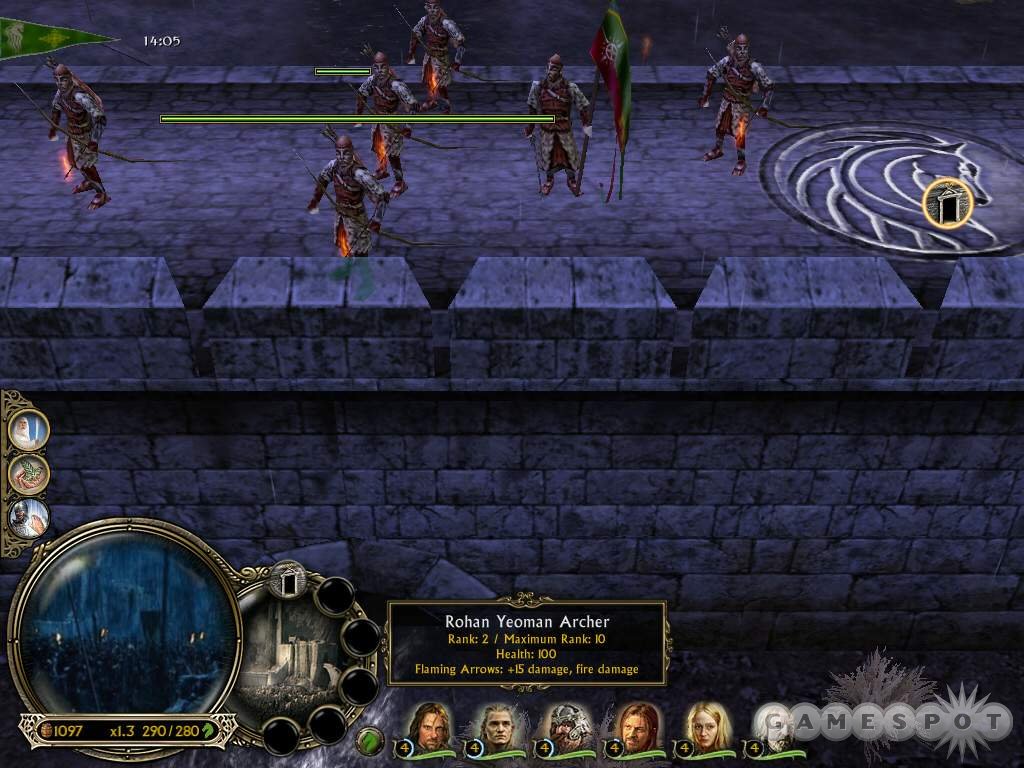
Start training archers at the range and position them along the rampart that stretches from the west to the east. Maintain a large spread, though place a slightly greater concentration over the stream that flows toward the Helm’s Deep wall-- Isengard mine carriers attack this area and must be repelled or the wall will be breached.
Helm’s Deep also offers a few extra resources. Search the area just south of the heroes’ start position to locate the treasure. Move a hero to the position to add the resources to your stockpile. As soon as your archery range adds a rank, research fire arrow and add the upgrade to every archer group. Likewise, upgrade every archer group with the heavy armor upgrade when it’s available.
Position your heroes along the wall. Place Legolas near the wall’s weak spot. Also use Legolas’ train archer ability to upgrade archer groups to level two. You could also use the banner carrier upgrade from the armory once you’ve completed other upgrades and created sufficient archers. Elves arrive early in the mission to provide their assistance. Add the elves to your archer groups along the ramparts. Note that the elven archers can--and should--be upgraded as well.
Other melee heroes will be there to help repel any attackers that reach the wall via siege ladders. Plus, Aragorn and Theoden offer the leadership ability that improves nearby troops. Spread Aragorn and Theoden out to maximize leadership’s coverage. Move Gimli near the gate and set his axe attack ability to auto-fire so he’ll use it against attackers near the gate (which will include battering rams).
At some point before Isengard’s attack, refugees enter from the southern edge. Rescue the refugees with your cavalry units. Send your cavalry out of Helm’s Deep and to the refugees. Fend off the pursuit of the warg riders. Once to Helm’s Deep, the refugees offer a reward of resources. Collect the resources with the new peasants or your cavalry. Make sure the gate is closed.
As stated previously, Isengard’s assault is ferocious and relentless. The troops include infantry, crossbowmen, siege ladders, mine carriers, and ballistae. Force your archer attacks on the siege ladders once they’re within range. If a ladder reaches the wall, enemy forces pour onto the ramparts. Your archers can fall quickly, especially if other archers are focused on incoming Isengard forces. Counter these enemies with your heroes positioned on the rampart.
An archer group or two may be needed above the gate (along with Gimli) to repel the battering rams. Focus attacks on the rams or on any ranged unit below. Repair any damage to the gate with peasants within Helm’s Deep. Ballistae pose another threat because of their long-range; Legolas may be able to reach the ballistae so focus his attack on any ballistae firing on your archers.
Continue to upgrade archers (fire, armor, banner, Legolas training) as needed during the battle. Watch your command points; if you dip below the maximum, create additional archers and set the rally point to the rampart (particularly in the location of most need).
Sufficient defense also requires you to scan the incoming Isengard forces and locate incoming mine carriers. Focus your attack on the mine carriers when it moves within range (Legolas provides invaluable assistance as well). If you aren’t paying attention to incoming forces and hear an announcement that a mine carrier is close, it may be too late. Killing a mine carrier too close to the wall still inflicts damage and could breach the wall. Make sure you destroy the mine as far away from the wall as possible.
If the worst happens and Helm’s Deep is breached by Isengard forces, retreat your archers and form along the chokepoint to create a crossfire situation. Utilize your melee heroes to hold attackers in place while archers bombard them with ranged attacks. Switch unit creation to cavalry (or infantry) to battle incoming attackers hand-to-hand.
Objective: Destroy all Isengard camps.
Call in Eomer’s army (who arrives with Gandalf as well) once it becomes available--though make sure you have already maximized your command points. Use Eomer’s forces to assist your troops at Helm’s Deep if necessary then assault the two Isengard camps along the map’s southern edge.
With situation in hand, push carefully toward the two camps and keep units alive. Don’t waste any units when you’ve essentially already won the battle. Be patient and assault the camps slowly and carefully if necessary.
Isengard
Objective: Destroy the Dam.
Bonus: Kill Saruman. Ensure Treebeard survives.
The flooding of Isengard is a fairly straightforward mission: train Ents at the Ent Moot and level Isengard’s structures en route to the dam in the northwestern corner. The Ents are basically juggernauts and, particularly in numbers, can rip through Isengard’s defensive force. The biggest danger is fire arrows. If fire arrows repeatedly strike, the Ent lights on fire. Move the Ent to a pool (one near the start, a few within Isengard) to douse the flames.
Keep your Ents in one force. Set some Ents to use their melee attacks while remaining Ents use their boulder-toss ranged attack. Merry and Pippin join the Ents in the assault; it’s not worth moving them into battle. The hobbits are extremely fragile and can perish from falling debris if you aren’t careful.
Destroyed Isengard structures leave behind treasures that convert into resources. You’ll use the resources to create more Ents at the Ent Moot. The Ents are quite slow so set the rally point toward Isengard in case you forget to move a produced Ent toward the enemy base.
Check the overhead map and note two neutral sites on the map--one in the northeast corner and another in the southwest corner. Send one Ent to each location to eliminate the neutral foes and the sites and gather more treasure from the destruction.
Rampage slowly through Isengard and bombard enemy units and structures. Move as a group so enemy forces can’t focus on a single Ent. Keep Treebeard using ranged weapons to keep him relatively safe to complete one of the mission’s bonus objective.
The second objective involves eliminating Saruman. Expect him to attack your Ents as they move into Isengard. Focus all of your Ent attacks on the evil wizard; the Ents in force are no match for Saruman. Push patiently and carefully through Isengard. Crush everything with Ent melee and ranged attacks. Assault the dam in the northwest corner once Isengard’s forces are sufficiently repelled. The mission concludes when the dam crumbles and the flooding of Isengard begins.
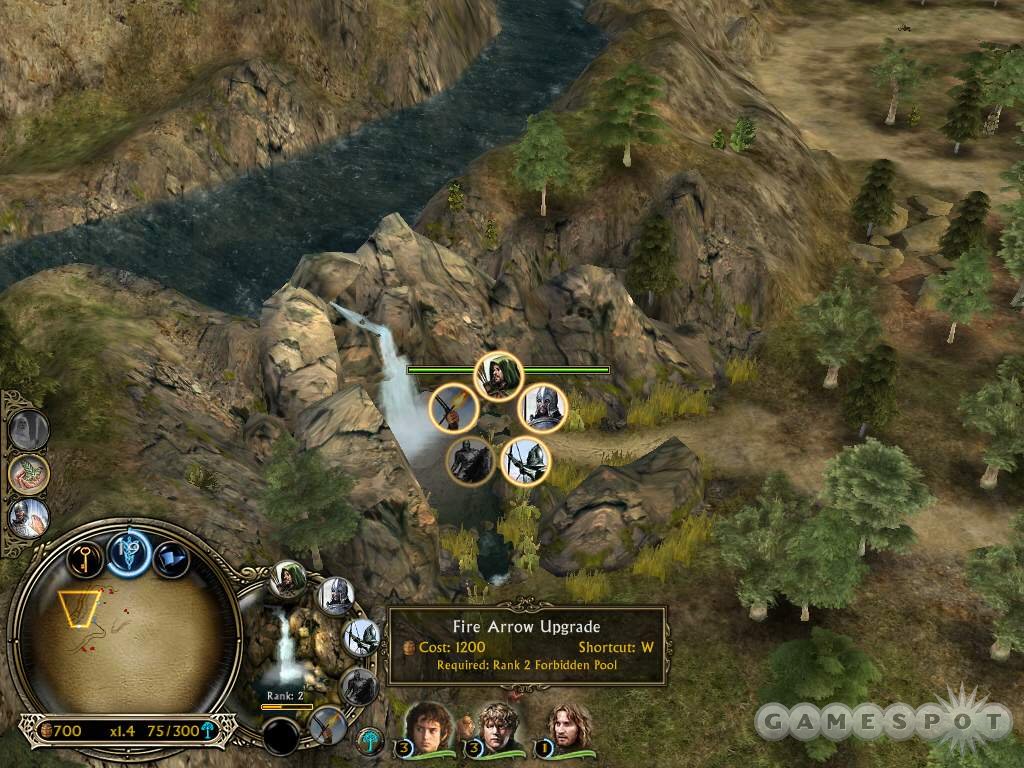
Northern Ithilien
Objectives: Destroy the Lumber Mills to the east. Destroy all Mordor forces in the area. Frodo must survive.
Bonus: Level up Faramir to rank two.
Faramir and Gondor rangers encounter Frodo and Sam at Northern Ithilien. The forces of Haradrim, now aligned with Mordor, possess camps in the area. Your initial forces include Faramir, the two hobbits, and a couple ranger squads. Use initial resources to train more rangers at the Forbidden Pool just to the west. Additional unit creation will upgrade the pool; as soon as the pool upgrades, research fire arrow and add the upgrade to each ranger group.
Group Faramir and the rangers together and proceed to the east. Keep Frodo and Sam safe; if you do choose to use them in battle, set both hobbits to their ranged attack to keep them out of melee engagement. As the mission wears on and the battle becomes much more difficult, position Frodo and Sam away from enemy forces. Faramir can switch between melee and ranged attacks. Activate his wounding arrow ability if you plan to use Faramir from long-range.
Destroy the mills and surrounding forces. A northern camp includes the imposing mumakil. As instructed, shoot your fire arrows (wait for the upgrade if necessary) at the mumakil. Set the mumakil on fire and he’ll rampage and possibly crush nearby enemy troops. Be extremely careful when igniting a mumakil; if your own forces are in the mumakil’s path, you’ll be crushed instead. Destroy three lumber mills to receive a new objective. Gather resources left by destroyed buildings.
Objective: Acquire the rangers to the south.
There are fellow rangers to the south. Continue to upgrade and train more rangers as you gather resources from destroyed structures. Add the rangers to your attack group as you move south through the map’s center.
As the enemy troops grow in number, toggle Faramir to melee mode. He can occupy attackers at the front line while your rangers assault the enemies from a distance. The enemies concentrate their strikes on Faramir leaving your rangers safe and free to bombard them from a distance. Watch Faramir’s health and retreat when necessary and return to ranged strikes.
The elevated southern section contains more small camps and more penned mumakil. Clear out all the camps, gathering revealed resources, and bombard the mumakil with fire arrows. Rescue the rangers in the southwest area of this section; you also receive trebuchets for your effort.
Continue to train rangers from the Forbidden Pool and set the rally point to the southern middle section. Eradicate enemy forces on this southern area to trigger the next objective.
Objective: Destroy the Mordor camp.
There’s a larger Mordor camp in the southeast. Those recently acquired trebuchets prove invaluable. Maneuver your trebuchets within range of the Mordor camp’s structures. Set up your rangers to provide support when Mordor’s army launches their counter attack to your siege bombardment. Focus all ranger (and Faramir) attention on units while the trebuchets crush base structures.
Objective: Set up a camp.
After clearing the southeastern camp, you receive 5,000 in resources to build your own camp on the spot. It is possible to complete the mission without ever building a camp. There’s another Mordor base to the north. You could wipe out that base entirely (using the 5,000 for more rangers) to complete the mission.

However, setting up a camp allows you to build a well--to heal your rangers--and a blacksmith--to upgrade your rangers. Construct three farms, a well, and a blacksmith at minimum. You may also want another archery range so you can add troops quickly. Don’t forget you still have the Forbidden Pool in the northwest and don’t hesitate to bolster your forces with Gondor cavalry. Use the blacksmith to research banner carrier and armor (once the structure upgrades) and spend resources to upgrade all rangers.
It’s announced that an enemy convoy is en route and will arrive within five minutes. You can set up your rangers as instructed on the overhead map (for crossfire coverage on the convoy) or simply place them along the eastern side of the convoy’s path near your own base. That way you’re well within range of retreating to your base and the healing effects of its well. Counter the mumakil with your fire arrows.
Push toward the northern base with a full command point army worth of rangers, archers, and cavalry (and well upgraded). Take the time to maximize units and upgrades. Support your forces with the trebuchets. Retreat to the well as necessary. Destroy the northern Mordor base to complete the level.
Osgiliath
Objective: Secure the bridges. Destroy all Mordor structures.
Bonus: Call in Faramir’s army when he arrives. Change the formation of a battalion of infantry.
Osgiliath is already under assault when the mission opens. Unfortunately, reinforcements in the form of Faramir’s army are 13 minutes away. Immediately gather your troops engaged at each of the three bridges and move them back toward your base. At the base, construct a blacksmiths (for resource gathering), defenses, and a well to heal your forces. There’s a second camp in the southwestern corner; once you possess a significant revenue stream, send a squad south and form a camp. Build additional blacksmiths (as well as defenses) to further bolster resource production.
Train soldiers and archers in mass at your main base. As soon as both structures reach their next level, train tower guards and rangers instead. Don’t forget to research fire arrow at the archery range when available. Once the blacksmith upgrades to level two, research banner carrier, forged steel, and heavy armor upgrades. As resources allow, bolster all of your infantry and archers with appropriate upgrades.
There are also towers at each bridge. Garrison archers inside the towers to help secure and defend the Osgiliath bridges. Beware of catapults waiting on the far side of the bridges. Construct a Gondor workshop and build trebuchets to counter the enemy catapults. After the workshop raises a level, research the fire stone upgrade to increase trebuchet potency.

Listen carefully and you will hear the distinctive screech of a Nazgul flying around the eastern side of the map. Counter the Nazgul with a large force of ranged units. The Nazgul can respawn eventually so be ready for a second (or more) attack during the course of the mission.
Take control of each bridge with mixed forces of infantry and ranged units. Added trebuchets into the mix to protect your forces from catapults and even clusters of enemy ranged units. Place Gondor infantry into block formation to fulfill a bonus objective and to better protect them from attack. The units lose speed but you won’t need speed in defense of the bridge. Toggle formation and return to line as you push across the bridge.
Though your forces will be spread in attack and defense of each of the three bridges, adjust position as needed to support an undermanned area, particularly once Faramir arrives. With the aid of Faramir’s army, push across the bridges and assault each Mordor base in the southeastern corner. Bombard structures with trebuchets while crushing incoming enemies with an archer line followed up with infantry and cavalry attack. Retreat to your base (or southwestern expansion) as needed to heal and regroup.
Shelob’s Lair
Objective: Search for Frodo. Sam must not die.
Bonus: Free all the webbed units in Shelob’s lair. Find all treasures in Shelob’s lair. Use the Phail.
Eliminate the initial spiders with Sam’s melee attack then find the first webbed unit just to the south. Strike the web with Sam’s attack to free the infantry unit. This is a patient trip through Shelob’s lair. Move slowly and carefully to trigger as few enemies as possible as you explore and uncover additional webbed units and treasures (these add to your resources, which will be needed later in the mission).
Objective: Help the soldier find the rest of his party.
Explore the northern area of the cavern and locate another Gondor soldier, a couple archers, and some treasure. The northwestern corner contains more spiders, a webbed unit, and more resources.
Move through the tunnel along the northern edge. There’s a cave troll lurking inside the northern tunnel. Use Sam’s Phail to frighten the cave troll away temporarily while your archers and soldiers attack the beast. Continue to the east and free additional units. The east path leads to a dead-end with some treasure and enemy archers on the ledge above; counter with your own archers.
Proceed to the south and rescue four more units. Reach the primary junction inside the map’s center. As you move south through the map’s middle, spot Gollum overlooking the action. The southern chamber contains Shelob, a gigantic spider. Move Sam around the chamber while your rescued archers fire on Shelob. Utilize Sam’s Phail to keep Shelob away. Surround her with your soldiers and continue to fire arrows into her.
After slaying the monster, explore the western side to uncover additional treasures and units. You’re instructed to proceed toward Cirith Ungol; the path leads through the southeastern corner of the map. Before moving there, be sure you’ve fulfilled bonus objectives and rescued all units and found all treasure. Scan the map and explore the cavern one last time if you haven’t met the requirements.
Move to the east just south of the route to Cirith Ungol and find some orcs protecting an outpost site. Chase away the enemies with the Phail as your troops eliminate the enemy forces.
Objective: Destroy and capture the orc outpost.
Use the Gondor forces gathered to eliminate the orc outpost in the southeastern corner of the lair. Eliminate the lumber mill and begin construction of your own outpost.
Objective: Destroy all enemies so that Sam may travel to the tower.
Build a blacksmith, barracks, and archery range. You could built a well, you’re your troops, then destroy it and erect one of the three structures mentioned. Train soldiers from the barracks and archers from the archery range; when each structure reaches the next level, train tower guards and rangers and research the fire arrow upgrade.
The Gondor blacksmith provides resources. Once it reaches the next level, use the blacksmith to acquire banner carrier, forged steel, and heavy armor upgrades. Bolster your trained army with these upgrades. Note that you won’t be able to upgrade the units rescued from Shelob’s lair.
Defend the outpost from enemies arriving from the north while you maximize your army and upgrades. Don’t advance on the northern army until you have acquired all upgrades and filled your population limit.
Patiently advance to the north. Watch the high defending archers; counter them quickly with your own archers and rangers. Beware of the trolls in the western side of the base. Focus all of your archers and rangers on trolls as they approach. Reinforce your army from the barracks and archery range at the outpost. Crush all base structures and enemy to clear the path for Sam through Cirith Ungol.
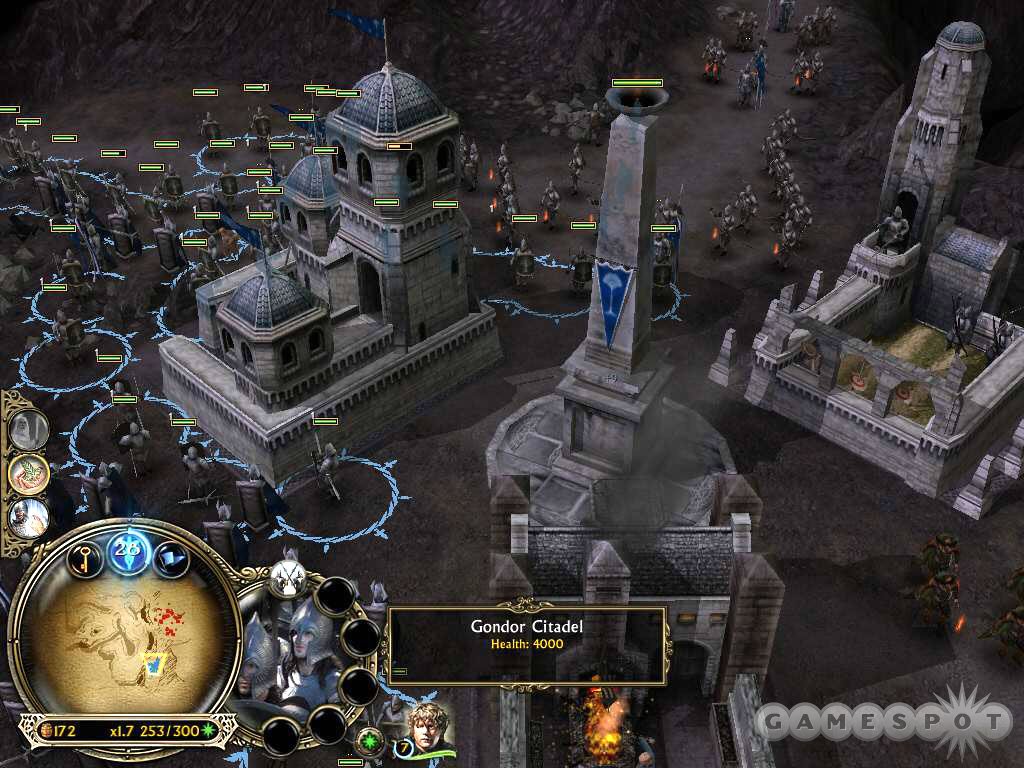
Minas Tirith
Objective: Destroy all evil forces.
Bonus: Level any hero to rank eight.
The forces of Mordor have reached the outskirts of Minas Tirith to attack the great city of Gondor. This mission recreates one of the most exciting sequences in The Return of the King and plays out very similar to the feature film. Gondor begins alone at the level’s start--you have 25 minutes before Rohan reinforcements arrive.
There are many build sites within Minas Tirith. Fill many of them with blacksmiths to generate a lot of income. You should also build a Gondor marketplace and research the iron ore upgrade to further increase resource income from the blacksmiths. Build an archery range and start training archers. Position your archers along Minas Tirith walls, much like you did at Helm’s Deep. Scan along the Minas Tirith walls and build trebuchet defensive emplacements at each spot.
To upgrade the trebuchet defensive emplacements with fire stones, you’ll need to build a workshop and build five or so trebuchets to upgrade the structure and receive the ability to research fire stones.
Faramir’s army arrives during the opening stages of the mission. Continue to train more archers depending on need. Position Faramir on the wall to assist with his ranged attack; maneuver Gandalf onto the wall as well so you can use his lightning sword attack against approaching orcs and his Istari light ability against the eventual Nazgul assault.
After upgrading a blacksmith, begin research of banner carrier and heavy armor. Once the archery range upgrades, be sure to acquire fire arrows. Strengthen your archer squads with all available upgrades.
The orcs of Mordor approach and level the four farms along the outskirts of Minas Tirith. Bombard any orcs within range with the trebuchets. Scan approaching enemies and assign specific targets for your trebuchets and archer defenses as necessary. Make sure you eliminate the siege towers by focusing trebuchet attacks. Mordor catapults may remain out of range. Counter them if possible but if the catapults remain out of range, focus your attacks on closer foes.
Enemy forces eventually move in the Grond to bust down the Minas Tirith gate. Focus all nearby trebuchets and archers onto the Grond to level the attacking siege unit. Continue to scan for important targets and focus attacks as needed. Beware of the Nazgul that enter the battle. Counter the Nazgul with archers, Gandalf’s Istari light, or with the eagles Evenstar power.
When the countdown reaches zero, the forces of Rohan can be called into battle. Be sure you have maximized your Gondor army before calling Rohan in; the reinforcements will put you far over the command limit. Use the Rohan Rohirrim and ranged units to tear through Mordor’s approaching army and bases.
It isn’t long until the mumakil arrive. Take down the mumakil with ranged units; don’t attack the mumakil with cavalry units. If you’re controlling the area around Minas Tirith, bring Gandalf, Faramir, and even units out of Minas Tirith to keep pressure on approaching enemies. If you’re engaged in battle outside Minas Tirith, be sure your own trebuchet emplacements aren’t inadvertently bombarding friendly units.
It’s a long battle against the mumakil and remaining orc forces. Mordor continues to press even though you’ve likely gained a significant advantage. Even if you’re struggling, hold out until mystery reinforcements arrive. Aragorn, Legolas, and Gimli automatically (you don’t call them in) arrive with the Oathbreakers, the army of the dead. When the dead arrive, the battle is essentially over. Maul all remaining Mordor forces, mumakil, and base structures with the Oathbreakers to conclude the mission.
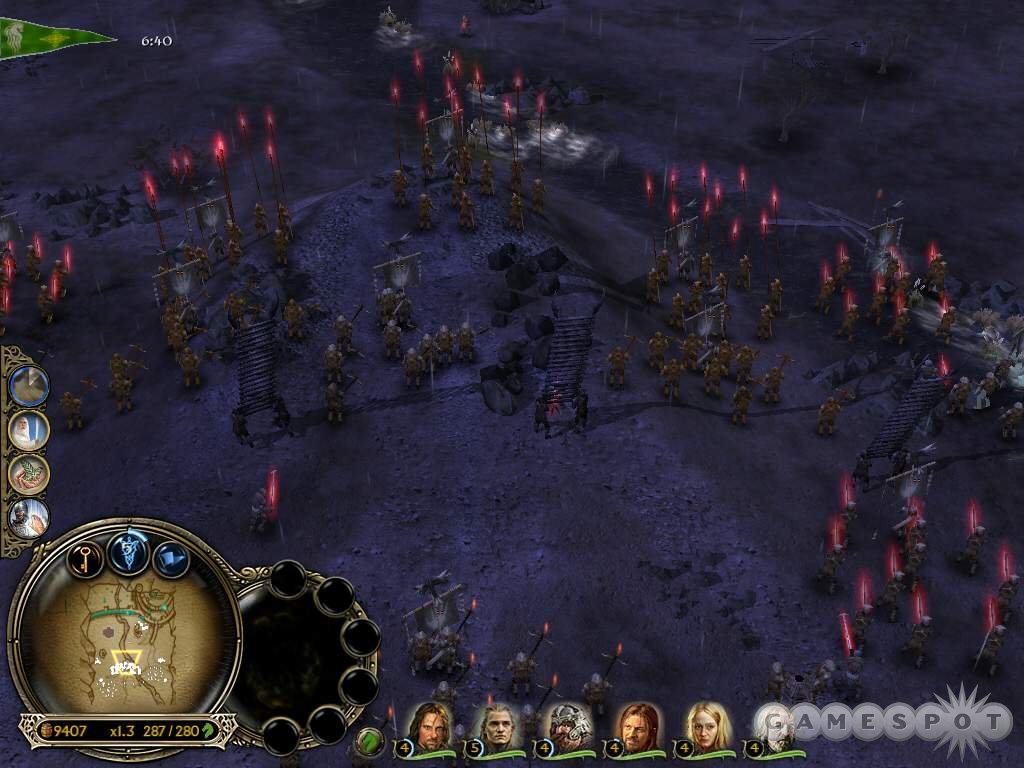
The Black Gate
Objective: Draw out all of Mordor’s forces so Frodo can travel safely to Mount Doom. Survive the first attack wave.
Bonus: Keep heroes alive for the entire battle.
On the living world map, select your strongest army (Rohan or Gondor) to lead into the battle at the Black Gate. The other army will arrive later as reinforcements. At the two camps, immediately build resource gathering structures and add defensive structures to aid in your retreat (if necessary) during the course of the mission.
There’s a third camp site in the center. Erect a camp and add additional resource gathering structures. If available you should also add a Gondor marketplace and use it to further bolster resource production with iron ore or grand harvest. Place wells so you can heal your troops between attack waves.
Crush incoming Orcs with your cavalry units. Support them with your ranged units. Reinforce your army as necessary and eventually acquire upgrades to bolster your current forces’ strength or any army you train throughout the battle. Build a solid economic infrastructure to support any reinforcements you may need throughout the long battle that consists of several attack waves.
Objective: Survive the second attack wave.
Nazgul arrive soon after you hold off the first Orc attack wave. Counter Nazgul with ranged units armed with fire arrows. Concentrate fire on any Nazgul in range; the aerial unit takes priority over any incoming ground force.
The second attack wave consists of a huge Orc ground force. Trample over the Orcs with your cavalry units. Keep your ranged units close to support. Retreat to your wells between battles.
Objective: Survive the third attack wave.
Beware of the warg riders from the northwest and southwest. Defensive structures at your base should handle the invading forces or adjust some cavalry and ranged units as needed. Try not to allow forces from the Black Gate to slip by your main army. This may force you to adjust your units’ position to intercept the incoming units and leave you weaker at the center battle’s point of attack.
The third wave contains mountain and drummer trolls. Focus all ranged attack on the trolls. Keep your melee units targeting Orc forces and steer clear of the trolls. Train plenty of archers (with fire arrow upgrade) in preparation for the next attack wave.
Objective: Survive the fourth attack wave.
You’re in the home stretch once you’re told to survive the fourth attack wave. Unfortunately, it’s a strong attack wave. Mumakil arrive with plenty of ground support. Use fire arrows to counter the mumakil. Do not attack mumakil with melee forces. Retreat to your base defenses if necessary. Continue to train new units and set the rally point to the ongoing battle.
The fourth attack wave is the perfect opportunity to use any Evenstar powers, particularly reinforcement powers, you’ve saved thus far. Mordor is emptying; you must defend the camps at all cost. Hold off enemy forces because your own reinforcement army arrives during the late stages of this mission. Immediately move the army toward your bases to defend your camps.
A countdown begins: Frodo arrives at Mt. Doom in a certain amount of minutes. The mission ends successfully when the countdown reaches zero. Use your reinforcement army to clear your base structures of enemy invaders. Replace any destroyed defensive structures and upgrade units to keep your army strong for the remaining minutes of the battle.
Evil Campaign Walk-through
This section covers the walk-through for The Battle for Middle-earth’s evil campaign. The campaign consists of ten fixed missions and over twenty optional missions. The optional missions are scattered throughout the campaign and a certain number must be completed to advance through the fixed story missions.
This walkthrough covers all ten fixed mission in detail. You’ll also find the complete living world map layout for the evil campaign; the living world map table reveals all possible territories and missions and their benefits. Completing particular missions rewards the forces of darkness with resource bonuses, a higher command limit, or an increase in one ring power. General strategies for the optional missions (which feature the same primary objective) are featured in the next section.
Living World Map
Command the forces of evil from Isengard to the Minas Tirith in an effort to obliterate the armies of Rohan and Gondor and eliminate the heroes of the Fellowship. Prevent the Hobbits from reaching Mount Doom and destroying the one ring.
The table below reveals all story and optional missions featured in the evil campaign. You will play the story missions during the campaign; completing the story missions rewards you with their respective benefits. You will also complete a number of optional missions during the campaign; these can differ between games. The optional missions all feature the same primary objective (destroy the enemy!) but offer different benefits. Note that completing a mission allows you to attempt and complete adjacent territories.
| TERRITORY | ACT | STORY MISSION | RESOURCES | COMMAND | POWER |
| Amon Hen | 4 | 3 | - | - | +1 |
| Anfalas | 13 | - | +10% | - | +3 |
| Anorien | 17 | - | +10% | - | - |
| Belfalas | 13 | - | - | - | +4 |
| Cair Andros | 13 | - | - | - | +3 |
| Central Ithilien | 13 | - | +20% | - | - |
| Cirith Ungol | 16 | 9 | - | - | +10 |
| Crossroads | 14 | - | - | - | +2 |
| Dead Marshes | 13 | - | - | - | +2 |
| Druadan Forest | 17 | - | - | - | +1 |
| Dunharrow | 8 | - | - | +50 | +1 |
| East Emnet | 11 | - | - | +25 | - |
| Eastern Rohan | 11 | - | +10% | - | - |
| Eaves of Fangorn | 3 | - | +10% | - | +1 |
| Edoras | 7 | 4 | - | +50 | +1 |
| Emyn Arnen | 13 | - | - | - | +2 |
| Emyn Muil | 17 | - | - | - | +1 |
| Enedwaith | 11 | - | +10% | - | - |
| Fangorn | 2 | 2 | +20% | - | +1 |
| Fords of Isen | 11 | - | +20% | +50 | - |
| Gap of Rohan | 3 | - | - | +25 | - |
| Harlond | 17 | - | - | - | +2 |
| Helm’s Deep | 10 | 5 | - | +50 | +1 |
| Isengard | 1 | 1 | - | +25 | +2 |
| Lebennin | 17 | - | - | - | +1 |
| Minas Tirith | 18 | 10 | - | - | - |
| Mirkwood | 17 | - | +20% | - | +3 |
| Mouths of the Entwash | 11 | - | +10% | - | - |
| Near Harad | 11 | 6 | - | +50 | - |
| Northern Ithilien | 13 | - | +20% | - | - |
| Old Brown Lands | 17 | - | +10% | - | - |
| Osgiliath | 15 | 8 | - | +50 | - |
| Pelargir | 17 | - | +10% | - | +2 |
| Rohan | 5 | - | - | +50 | - |
| Southern Ithilien | 12 | 7 | - | - | +2 |
| West Emnet | 11 | - | +10% | +50 | - |
| Westfold | 8 | - | +20% | - | - |
Strategies for Optional Missions
Choose your optional missions based primarily on reward. It’s certainly important to elevate your command limit to the maximum of 600. Story missions alone bump it up +200. Choose optional missions that elevate command points to reach the limit of 600 as soon as possible. Missions that provide power can help you acquire one ring powers as early as possible. Resource powers will help you churn out more units to maximize your command limit and the Balrog provides powerful assistance during Minas Tirith.
The primary objective of the optional missions remains the same across each one: destroy all evil forces! Bonus objectives shift between missions. These could include upgrading certain forces, using particular unit functions, or eliminating a particular unit patrol or structure.
The optional missions are best used for army building and upgrading. Your army carries over from battle to battle. The optional missions are an excellent chance to maximize your command limit full of troops and to upgrade them to the highest possible degree. Upgrade your ranged units with fire arrows and upgrade your melee units with forged steel blades.
You should concentrate on unit experience as well as purchasing upgrades. Check your unit groupings and see which squads are close to gaining an additional level. Use them to kill enemies and buildings to put them over to the next level. Carry these experienced, upgraded troops into the next battle as further advantage against the enemy forces.
When an optional mission begins, start construction of your camp. Add buildings depending on current need (if you’re low on troops, you may want multiple troop-production facilities). Add defensive structures as added firepower against enemy forces. If you’re attacked early in the mission, retreat your units to the defensive structures and fight the battle near the additional firepower. Place buildings that will help you upgrade any current or new forces with fire arrows or weaponry.
Play defensively at first as you build your army, gather resources, and fund upgrades. As your army grows, scout around your initial camp and search for settlements. Construct additional resource gathering structures. Carefully expand from your initial camp and engage encountered enemies. After significant battles, return to a defensive stance and regroup your forces before continuing to expand. Find new outposts and camps and begin to control the map. Return to a defensive stance after each new gain.
Add siege units to your mixed force to topple buildings and defensive structures as quickly as possible. Lure enemy units out of the base and into your ranged units’ fire. Protect your ranged units with a melee force and engage once the attackers move close to your ranged units. Clear as many units as possible before attacking base structures. Priority targets are defensive and troop-producing buildings. If the enemy attempts to rebuild, destroy other structures before targeting the structure that’s currently being built (since it can’t harm you until it’s finished).
Isengard
Objective: Chop down trees in Isengard to uncover foundations for building. Build 100 Uruks.
Bonus: Build 16 buildings. Level up Saruman to rank two. Finish the level with 100 Uruks. Purchase a power.
Orc laborers at your Isengard lumber mills are hard at work chopping down trees to fund Saruman’s army of Uruks. As the laborers clean trees, additional build sites are revealed. Construct a Uruk pit on the first build site. The laborers will continue hard at work and reveal build site after build site. Construct a second Uruk pit then fill the rest of the build sites with lumber mills. Scan the map occasionally to search for any uncovered build sites; one of the mission’s bonus objectives is to build 16 buildings.
Train Uruk-hai and crossbowmen from the Uruk pits. One of the main objectives is to train 100 Uruks; one of the mission’s bonus objectives is to finish the level with 100 Uruks. Fill your command limit to the max with Saruman’s army. Purchase the war chant one ring power to fulfill an objective.
Rohan Rohirrim arrive at Isengard. Saruman can handle the invaders on his own. Complete a bonus objective (level up Saruman to rank two) by using Saruman to fight most enemy invaders. Use Saruman’s wizard blast to crush the Rohirrim; finish them off with his standard attack. Yeomen archers also arrive; intercept them with Saruman and use his wizard blast ability and melee attacks to eliminate the foes. Raise Saruman’s level Saruman as soon as possible to receive his fireball ability.
Objective: Kill the Ents.
A group of massive Ents arrive at Isengard to reclaim their forest. The Ents can quickly demolish the wall surrounding Isengard. Remain inside and wait for the Ent to break through. Counter the Ents using crossbowmen equipped with fire arrows or Saruman’s fireball ability (though you may not reach level two until later in the mission). Orc laborers are also effective against the Ents (they are chopping down trees after all). Don’t use Uruk-hai. If you do lose Uruks to the Ents, continue to retrain from the pits.
Counter Elven warriors that arrive from the northeast with Uruk-hai and crossbowmen--and Saruman since he can make quick work with his wizard blast. It’s important to use Saruman to level him up to level two as soon as possible to use fireball against the additional Ents and even the Rohan and Elven units that attack Isengard. Ents move very slowly so keep your crossbowmen back and away from Ent melee attacks.
A large group of Rohan Rohirrim arrives from the south near the mission’s end. Rush the Rohan with all units, including laborers. Soften up the Rohirrim with Saruman’s abilities. Use war chant to aid your Uruks. Bombard the Rohirrim with projectiles; keep 100 Uruks alive to fulfill a bonus objective.
Fangorn
Objective: Destroy the Entmoot. Kill Treebeard.
Bonus: Level up Saruman to rank three. Command a horde of Uruk warriors to use their bloodthirsty power on another horde of Uruk warriors. Combine a horde of Uruk crossbowmen with a horde of Uruk-hai.
The devastation of Fangorn continues. Saruman commands his army of Uruks against the Ents of Fangorn. You’ll battle two Ents immediately; counter the Ents with crossbowmen with fire arrows, Orc laborers, and Saruman’s fireball ability (if available).
Move your forces to the camp site in the northeast. A squad of Elven warriors protects the camp. Eliminate the enemies with crossbowmen (fire arrows specifically) and Saruman. Keep Saruman engaged in most battles (with wizard blast and fireball) so he’ll gain experience and an additional level to fulfill a bonus objective.
During the course of the mission, complete bonus objectives by using the bloodthirsty power from one Uruk horde to another. Also, combine a horde of crossbowmen with Uruk-hai to fulfill a second bonus objective.
Objective: Destroy the Elven camp.

The Elven camp--a barracks--lies in the northwest corner; to complete the mission you must level the Elven camp as well as the Entmoot. At your own camp site, build a couple furnaces, a Uruk pit, an armory, and defensive structures to help hold off Elven patrols. Build a lumber mill just to the northwest on the settlement. Acquire fire arrow and banner carrier upgrades at the armory and upgrade your army as resources allow.
Search the western side of the map for a cave containing three cave trolls. You can add these cave trolls to your army for this map; seek out these allies and save them for the final battle against the Ents at the Entmoot. The cave trolls prove invaluable supported by Saruman and your ranged units.
Maintain position at your camp site and defend against any infiltrators as you prepare to attack the Elven camp in the northwest. Counter Elven warriors with fire arrows and Saruman; counter Ents with fire arrows, laborers, and Saruman’s fireball. Demolish the Elven camp and add resource structures to keep your economy flowing to fund any reinforcements or upgrades needed.
Begin your advance toward the Entmoot. Focus fire arrow attacks on the Ents and use Saruman’s fireball to assist. Group the cave trolls together and focus their attack on the Ents while you support with a barrage of fire arrows. Treebeard is among the Ents and is especially tough. If necessary, retreat to your base and its defensive structures for additional firepower. Utilize the war chant power for additional aid.
Leave the Entmoot after eliminating the Ents so you can regroup your forces. Maximize your army by filling the command limit and acquiring any remaining upgrades. Destroy the Entmoot to complete the level successfully.
Amon Hen
Objective: Kill all the heroes and the Hobbits.
Bonus: Find secret allies. Level up Lurtz to rank two.
You begin Amon Hen with the Uruk hero Lurtz and a couple squads of Uruk-hai and crossbowmen. Train more crossbowmen from your Uruk pit before moving to the south. Organize your army into melee and ranged groups and proceed south to battle the Elven archers in the woods. Continue to push south and locate more archers, including the Fellowship hero Legolas. Ensure Lurtz participates in all battles. You can toggle Lurtz’s weaponry; he can use a bow or a sword. One of the mission’s bonus objectives is to level Lurtz to rank two. Add him to a separate group so you can ensure he’s close to the action at all times. Focus your attack (especially Lurtz’s) on Legolas to eliminate the enemy hero.
Objective: Take control of the summit of Amon Hen.
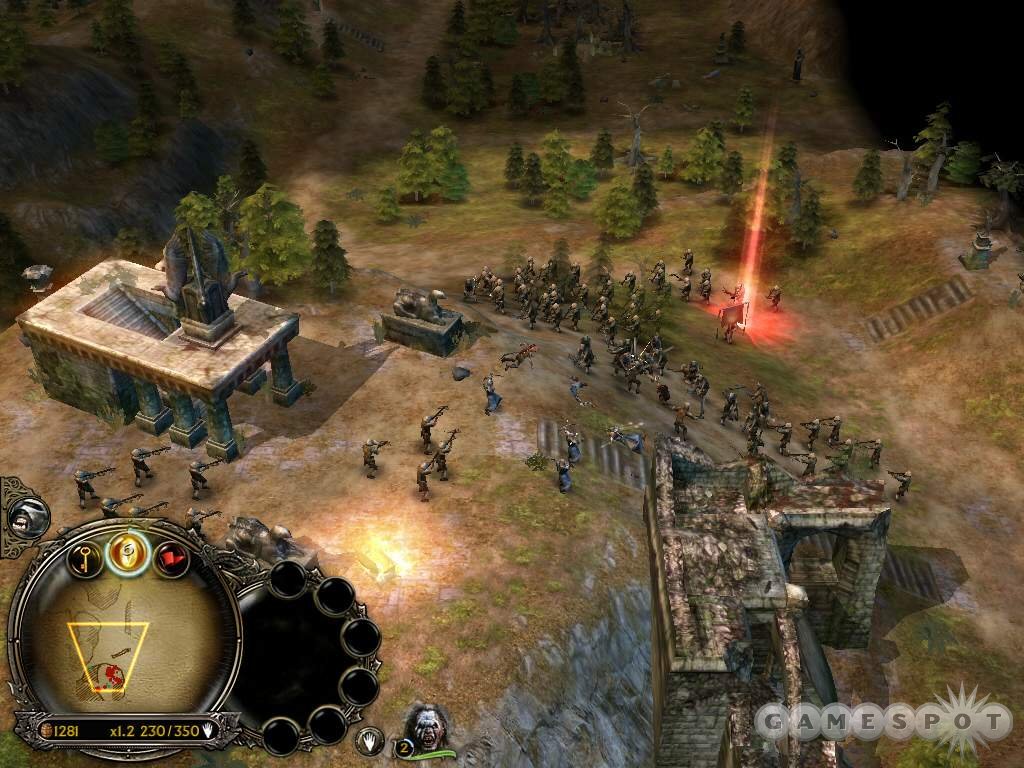
Surround and slaughter the enemies on the summit of Amon Hen. The adversaries include the hero Gimli. Focus Lurtz’s attack and cripple ability on Gimli. Continue to reinforce your army with additional units trained from the pit at the start position. Set the rally point toward your mobile force to usher new troops quickly into the battle area.
One of the mission’s bonus objectives is to seek secret allies. Locate a cave in the southwest corner to add cave trolls to your army. Place the trolls in their own battle group and focus their attack on heroes and tougher enemies. Support these durable melee beasts with your plentiful crossbowmen.
Proceed east and spot the Hobbits Sam and Frodo fleeing the area. Your own reinforcements appear in the area but the Rohan make quick work of your allied troops. Use the Uruk pit to train Uruk pikemen to counter the Rohan cavalry much more effectively. Regroup your army before advancing to the north. Add the pikemen to their own battle group and focus their attack on any cavalry in sight.
To the north you’ll encounter Boromir, Merry, and Pippin with Elven warrior support. The hero Aragorn also joins the fray. Obliterate the heroes with the help of Lurtz, the cave trolls, and your plentiful crossbowmen. Continue to train new troops from the Uruk pit to replace any of your slain warriors. Defeat all heroes, including Merry and Pippin, to complete the level successfully.
Edoras
Objective: Conquer any Rohan camps that protect Edoras. Destroy every Rohan building in the city.
Bonus: Loot the treasures of the dead Rohan kings. Kill the Lady Eowyn.
Edoras is an impressive Rohan stronghold on the northeastern side of the map. Before mounting an assault on Edoras, you’ll need to conquer the two Rohan camps along Edoras’ perimeter. Build an outpost at your start location and construct buildings based on need (depending on the makeup of your army). You’ll certainly need furnaces or slaughterhouses to begin resource collection.
You may want to focus primarily on resources if your initial army is strong enough to take over one of the two Rohan camps that protect Edoras. Once you conquer one of the camps, you can build structures there to focus on reinforcing and enhancing your army. However if you need additional warriors, construct a Uruk and/or a warg pit to bolster your forces before advancing to one of the Rohan camps. Erect defenses so you can retreat to the safety of additional firepower if necessary.
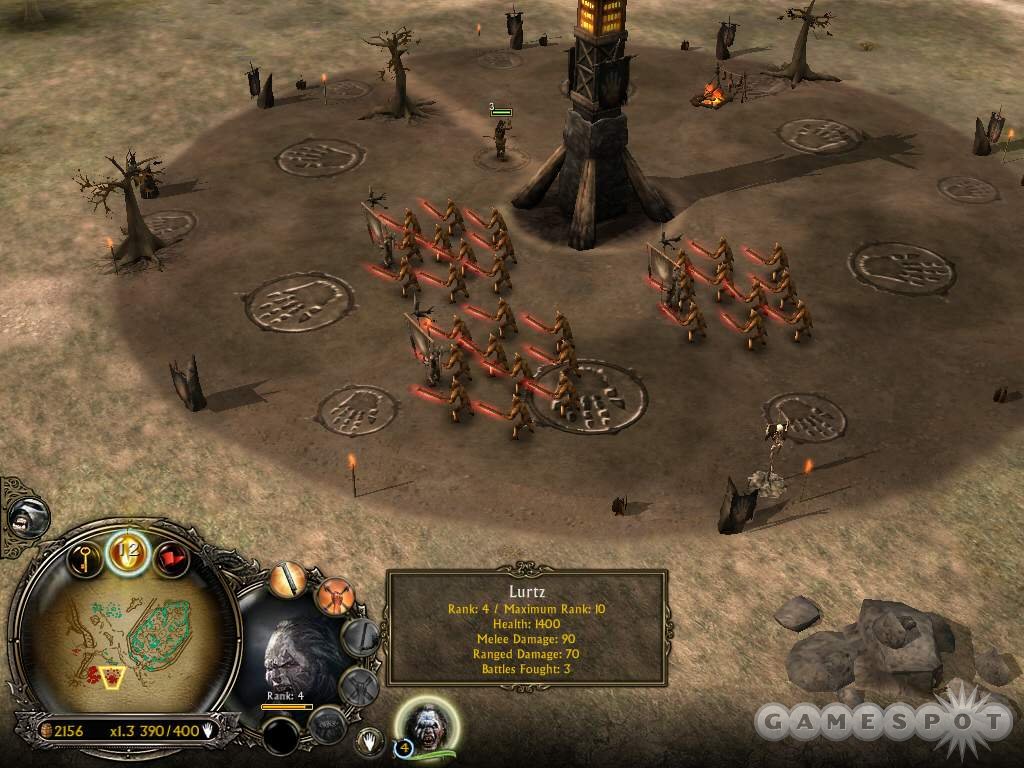
Defeat the southern Rohan camp and counter the Rohirrim counterassault. Construct your new camp and add more structures. You certainly want an armory and siege works if you haven’t built them at the previous camp (or you can wait until you conquer the next Rohan camp). Research upgrades and enhance any of your current or future troops as resources permit.
Eliminate the northern Rohan camp and prepare for any counterassault by keeping your force together and fighting incoming enemies as a group. Spend time reinforcing your army to fill your command limit. Add siege units to your arsenal to help in the attack against Edoras. Siege ladders can escort crossbowmen onto Edoras’ walls while the battering ram can crush the Edoras gate.
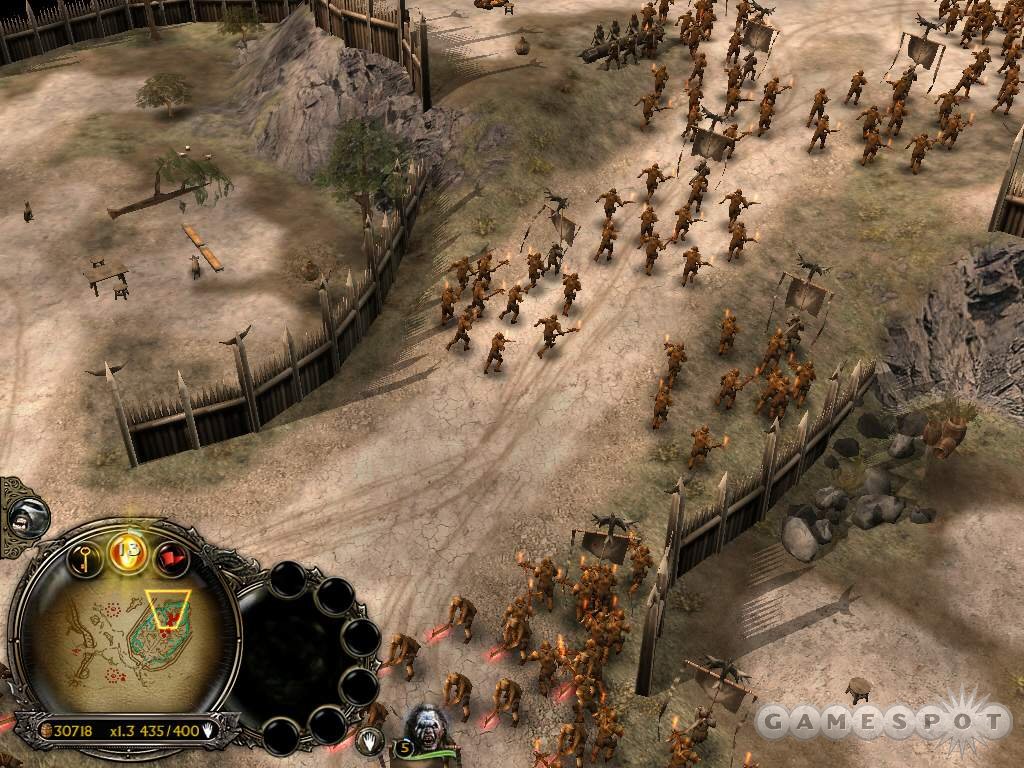
Conquering Edoras can require patience. Clear out defending archers with your own crossbowmen. Keep your Uruk pits training more crossbowmen and set the rally points to your gathered force just outside Edoras. Use siege ladders to place crossbowmen on walls and fire on the units below. Break open the Edoras gate with battering rams. Once inside the city, focus the battering rams on unit producing structures. Select your melee and ranged units and focus their attacks on defending units before assaulting the buildings. Gather treasure left behind upon destroying certain structures. Use the resources to fund any additional upgrades or new reinforcements.
Fulfill a couple bonus objectives by killing Eowyn (a hero aiding in Edoras’ defense) and collecting the treasure in the southeastern area of the map. Once you’ve gained the upper hand in Edoras, be sure you’ve filled your command limit and upgraded all unit hordes before completing the level successfully and advancing to the next battle.
Helm’s Deep
Objective: Crush the defenses of Helm’s Deep and destroy every structure within its walls.
Bonus: Kill all enemy heroes. Destroy the defenders before reinforcements arrive.
This battle recreates one of the most exciting sequences in the Lord of the Rings trilogy: the battle for Helm’s Deep from The Two Towers. But on this level you’re able to rewrite the script to see what would happen if the "evil" side won the fight.
There are several reinforcement groups on countdown. Rohan reinforcements are scheduled to arrive in 25 minutes at the beginning of the level. The survivors of Fangorn (essentially several Ents) arrive in 15 minutes. Finally, your own reinforcements (the army you didn’t enter the battle with) arrive in 30 minutes. It’s certainly possible to complete the level before any reinforcements--good or evil--arrive to Helm’s Deep. Finishing the level before Rohan reinforcements arrive completes the bonus objective.
Begin the level by constructing camps. Structures may depend slightly on need. You’ll certainly want resource-gathering structures to fund an additional war machine. Also build a siege works for ladders, ballistae, and--at level two--explosive mines. Build a Uruk pit for more ground forces and an armory to acquire upgrades for current and future forces.
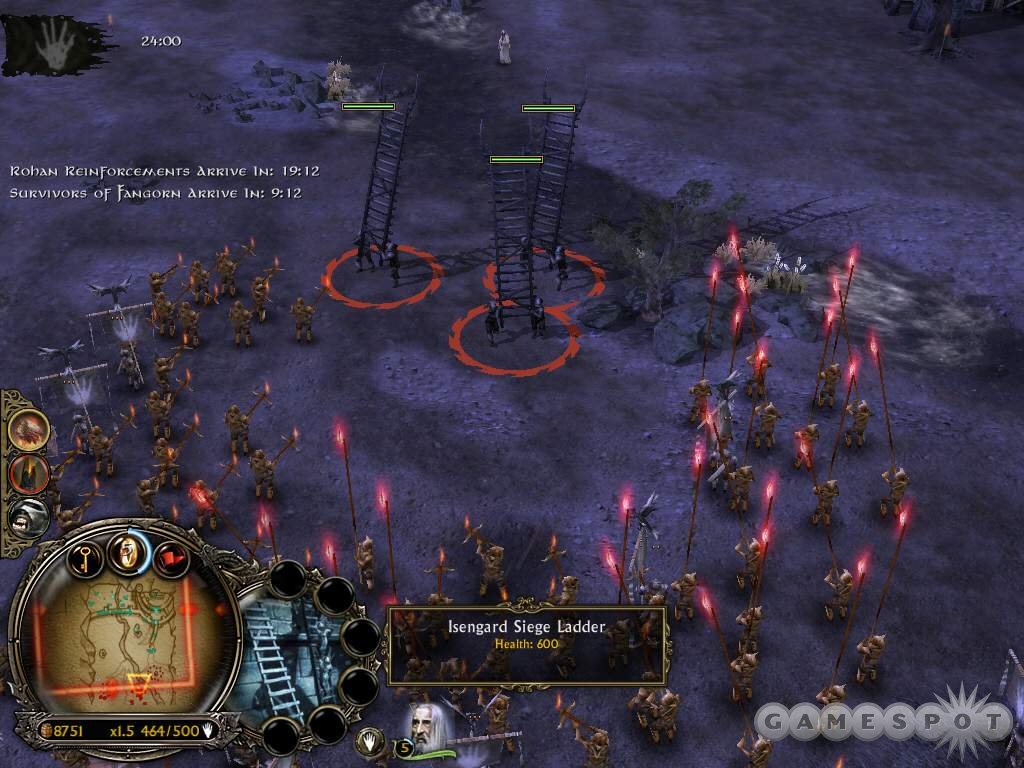
It’s not mandatory to train explosive mines. The siege unit is a quick and relatively easy way of destroying Helm’s Deep’s defensive wall but you can destroy the wall through other means (ballistae fire, for instance) or even avoid the wall altogether by using siege ladders to elevate melee and ranged troops onto the wall. Building explosive mines requires the siege works level two. You may need to train ladders or ballistae and send them to their death and repeat as needed if you’re near the top of the command limit because of your other army.
Maintain your unit position near your camps while you build your force and fund upgrades. Counter any insurgents with your grouped forces (as well as base defenses). Acquire unit upgrades, particularly fire arrows for crossbowmen, before advancing toward Helm’s Deep.
If you’re using siege ladders, advance up the western side and move the siege ladders to the walls of Helm’s Deep. Move up your melee troops to assault the enemy archers along the wall while your own ranged troops fire from below. You’ll find Legolas aiding defenses on the wall while Eowyn helps behind the wall and Aragorn and Gimli defend near the main gate. From the top of the walls you can maneuver troops, though it’s a tight area, throughout Helm’s Deep and eliminate remaining forces and destroy structures.
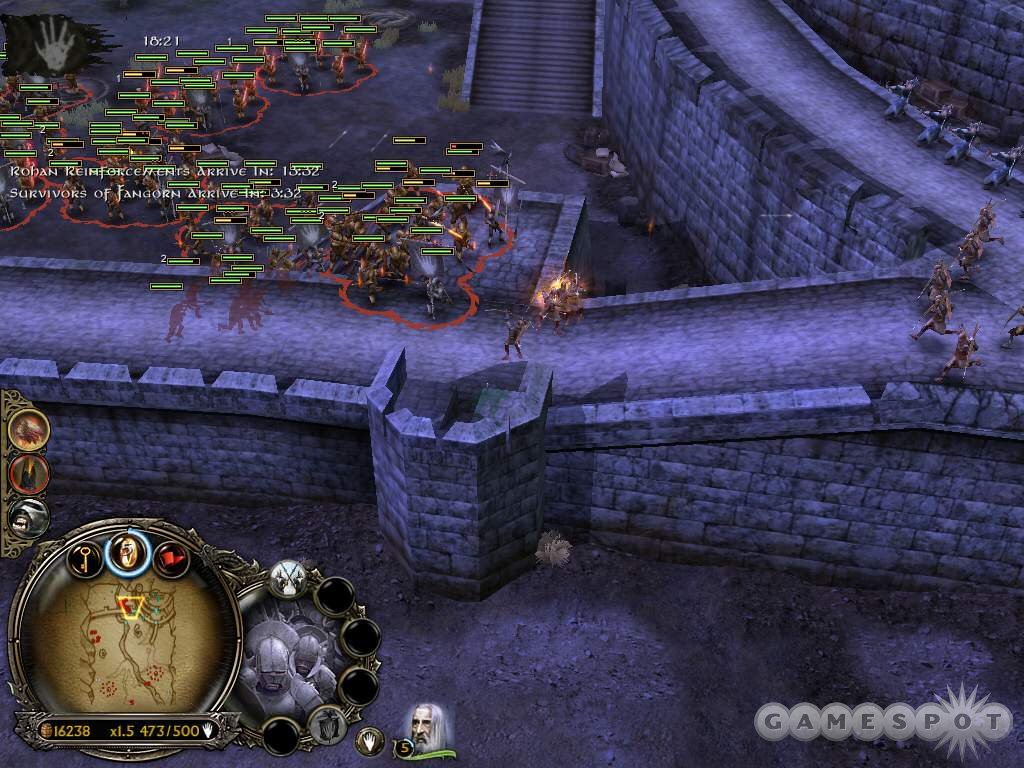
If you’re able to elevate your siege works to level two, train an explosive mine and escort it to the area where the stream connects to Helm’s Deep’s defensive wall. Occupy the defenses along the wall with your own ranged attacks to get the explosive mine there safely. Ignite the mine with a fire arrow (or Saruman’s fireball attack) to destroy the wall. Flood Helm’s Deep with your forces and eliminate all structures and enemies.
Near Harad
Objective: Recruit the Haradrim either by force or by tribute.
This is a unique mission in that you can complete the primary objective using two very different methods. In fact, you can even complete the main objective by combining the two methods. The forces of Mordor hope to convince the Haradrim to join their battle against Gondor.
To convince the Haradrim to join the cause, either send a tribute to each of the three Haradrim camps in the area (each tribute costs 10,000 resources) or simply wipe out the Haradrim in the area and scare them into joining your cause!
Unless you’re eager for a fight, it’s easier to use the tribute method to recruit the Haradrim. Even if you don’t want to use the tribute on all three camps, offering the tribute to one camp awards you with that camp’s entire Haradrim force (which should put you way over your command limit). The addition and your now much larger force should have an easier time eliminating all remaining forces. But you could certainly just use the tribute method and accumulate all Haradrim armies.
To accumulate the necessary resources for the tribute, use the standard method of constructing slaughterhouses or a new method--hunting down peasants. There are some peasants throughout the area. Scout around your start position and eliminate the peasants with your archers and gather the resources left behind.
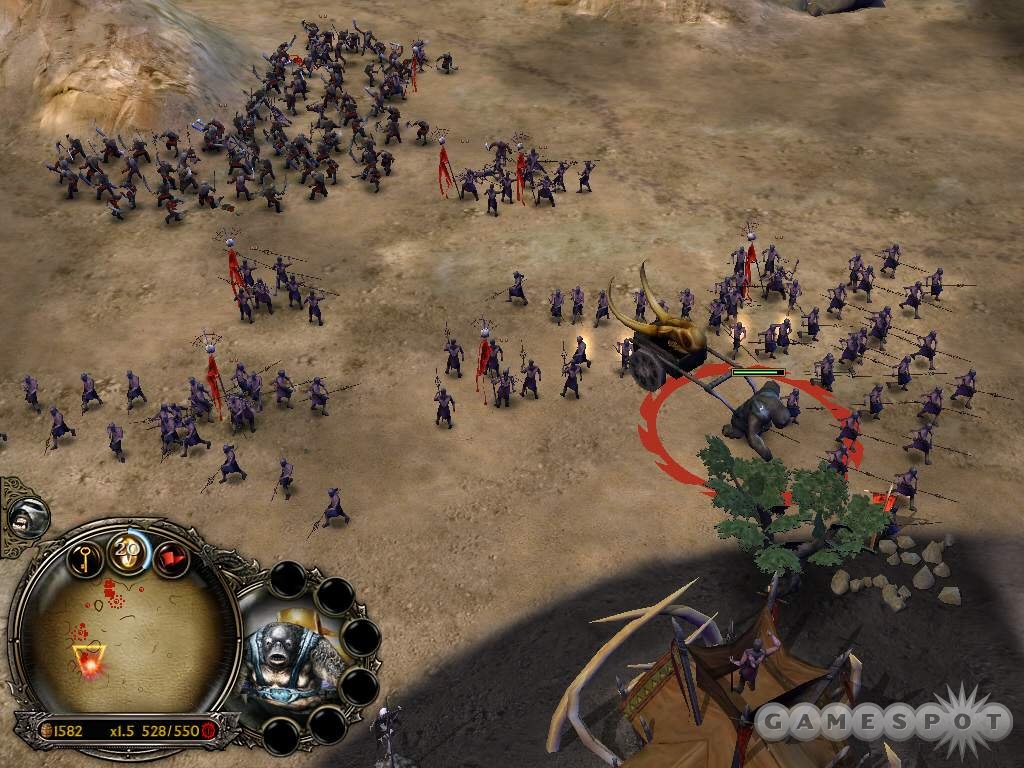
Find a camp to the east and begin base construction. Scout around the start position to find a second camp to use when needed. The Haradrim attack from the south and maintain constant pressure. Fight the Haradrim near your erected base defenses for added firepower. Build slaughterhouses and multiple Orc pits to create units as quickly as possible. Pump out Orcs and Orc archers and elevate your Orc pit to level two and research fire arrow and banner carrier at the first opportunity. Upgrade all your forces with these valuable enhancements.
Don’t worry about saving for the tribute early on. Concentrate on spending collected resources on fielding an army, acquiring upgrades, and enhancing your troops. Maintain fight position near your base defenses. Counter mumakil (if attacked) with fire arrows--concentrate all ranged fire on the mumakil. When ready, save up 10,000 resources and train a tribute cart at the Mordor citadel.
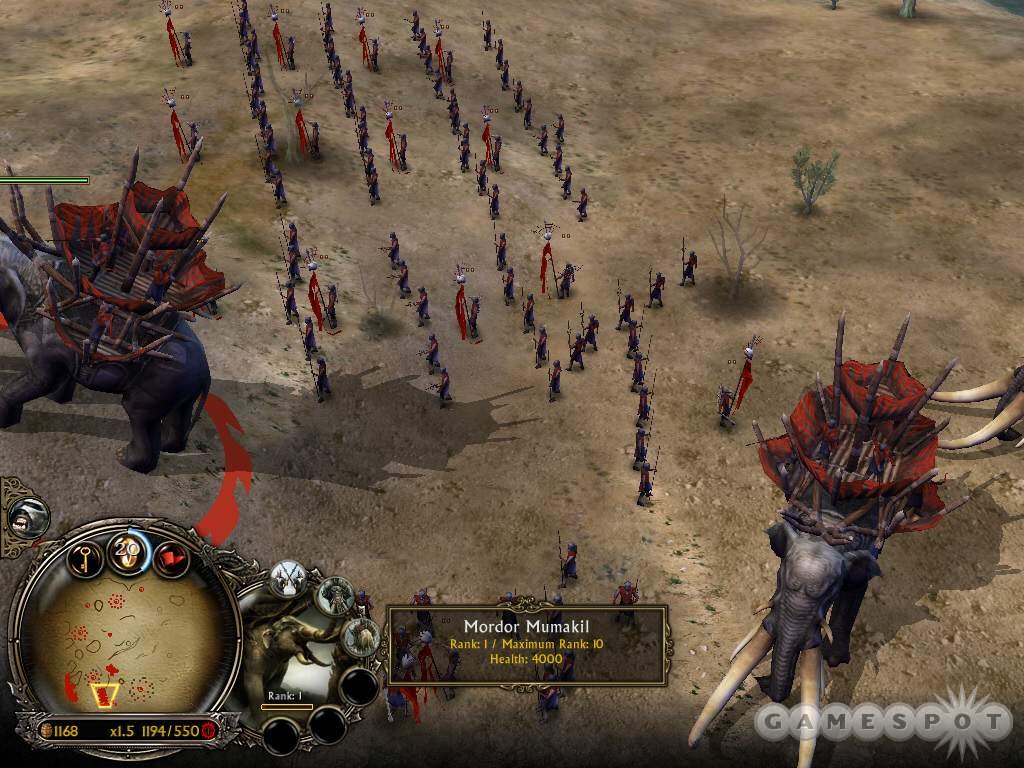
There are three Haradrim bases. The western base is troop heavy; the eastern base is mumakil heavy; and the middle base fields a mixed army. Send the tribute to one of the outer bases. The tribute cart is fairly quick and should be able to reach the base even though it will be attacked by defending Haradrim. As soon as the cart reaches the base and disappears, negotiations begin and moments later the Haradrim army at that base becomes yours.
Continue to defend your camps from any Haradrim pressure and use two more tribute carts (which can be trained at new Haradrim bases) to recruit the remaining Haradrim forces to your cause.
Southern Ithilien
Objective: Destroy the Gondor camp. Find and destroy the Forbidden Pool.
Bonus: Take command of the Orc camp to the north.
The rangers of Gondor populate Sothern Ithilien; these enemy forces hide within trees. Use the Eye of Sauron power to reveal the stealthed enemies; also, move your mumakil around the trees and the enormous oliphants knock down the trees to remove the rangers’ cover.
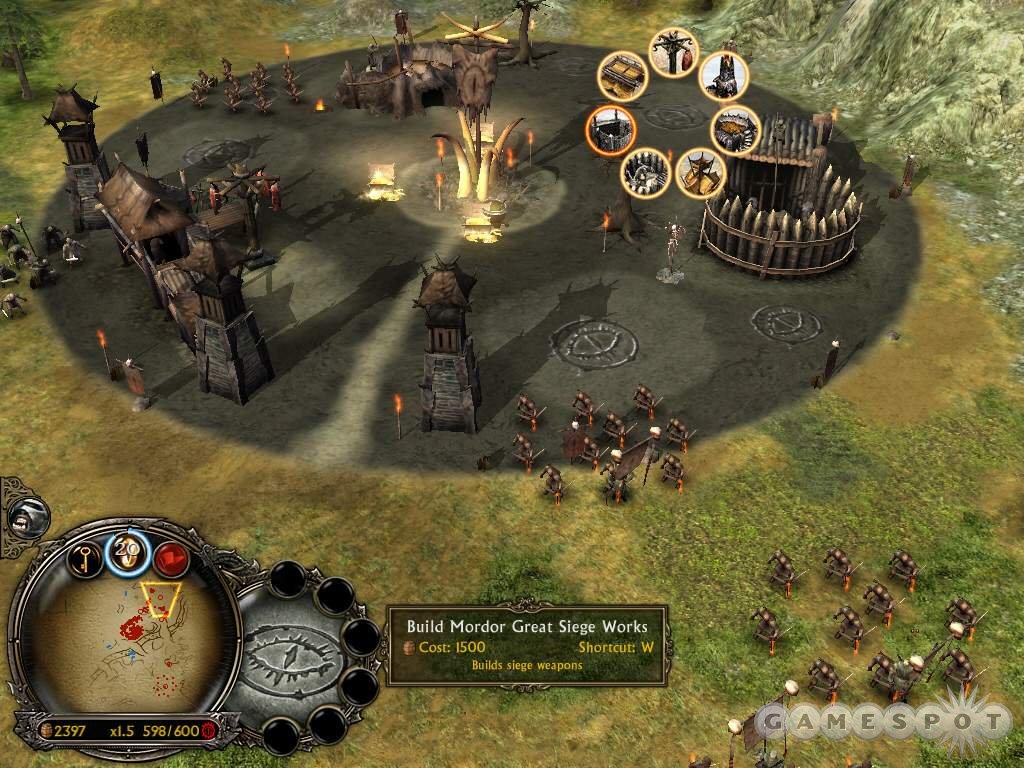
Build a camp and group your forces together. Attack rangers (find a large group to the northwest at the river) with melee troops supported by your ranged units. Keep mumakil away from rangers, especially those enhanced with fire arrows. Scouting also uncovers small ranger camps to destroy. Fill your camp with resource-gathering structures and erect a siege works as soon as possible. Add a squad of catapults to your force for long-range structure bombardment. The siege weapons are also useful in weakening groups of rangers or other Gondor troops before moving in your ground force.
Reaching and commanding the Orc camp to the north of your start position completes the bonus objective. Move your force there after completing base construction, protecting your initial camp, and enhancing your initial army. Erect defenses to protect the new camp from aggressors. Regroup your forces--and be sure to include three or more catapults--before advancing against the Gondor camp.
The catapults prove invaluable against the Gondor structures and tower defenses. The mumakil can certainly inflict some serious damage to the Gondor defenders but the beasts are very vulnerable to fire arrow fire. It’s better to remain at long-range, protect your catapults, and counter any attacking Gondor force with your own melee and ranged units. Reinforce any slain horde with new troops from your Orc camp.
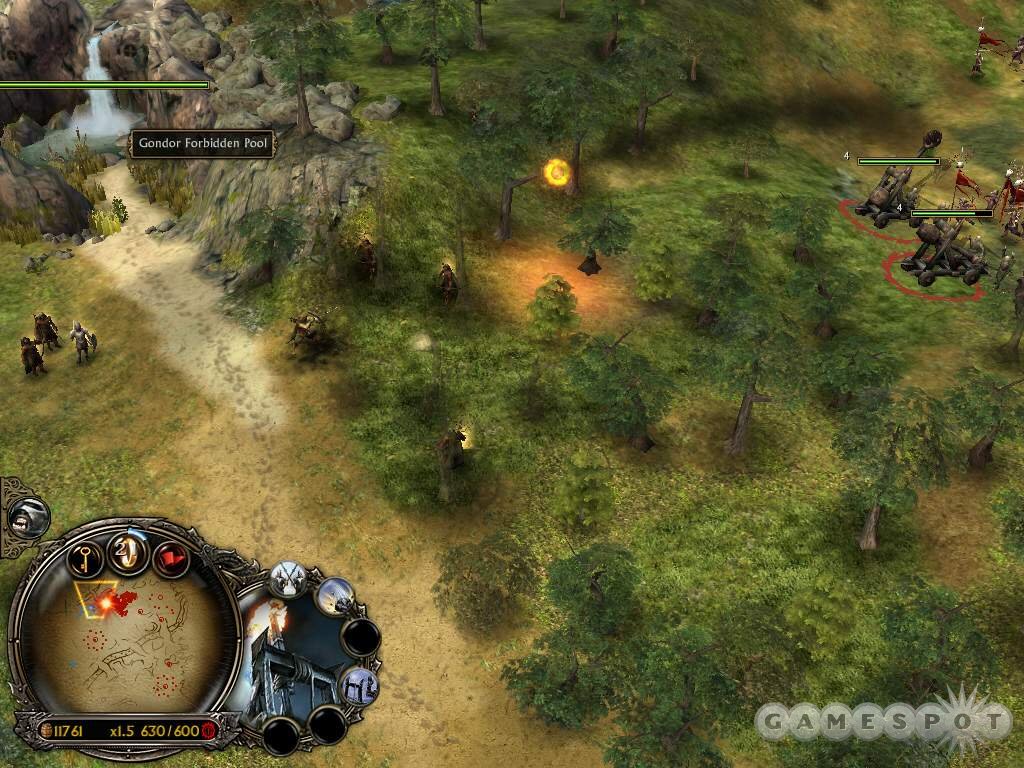
Destroying the Forbidden Pool is the map’s final objective. Locate the pool in the northwestern corner. Faramir, a knight of Gondor, guards the pool with several squads of rangers. When you attack Faramir, additional rangers appear to defend the hero and the pool. Bombard the pool from long-range with catapults while countering the rangers with your own fire arrow-enhanced archers and ground force.
Osgiliath
Objective: Secure the bridges. Destroy all Gondor structures.
Bonus: Collect the heads of 100 fallen Gondor warriors. Command a catapult to fire human heads.
There’s a small Gondor camp nearby. Use your initial force (which includes catapults) to bombard the initial base. Begin training Orcs and Orc archers in mass. Construct a second pit to train more Orcs as quickly as possible. Crush the nearby Gondor camp from long-range. Scan the area for enemy trebuchets; if spotted, focus your catapult attack on the trebuchets before returning focus to the Gondor structures.
Fragile towers litter the Osgiliath landscape. Fire catapults at these towers, especially those near Gondor structures and bases. Striking the towers with catapults will cause the tower to topple onto nearby structures or units; the action can destroy walls and structures. Knock out all garrisoned towers with your catapults. An additional reinforcement of catapults enters early in the mission. Protect your catapults with Orcs and Orc archers. Continue to train ground forces until the pit upgrades then research the upgrades to enhance your forces.
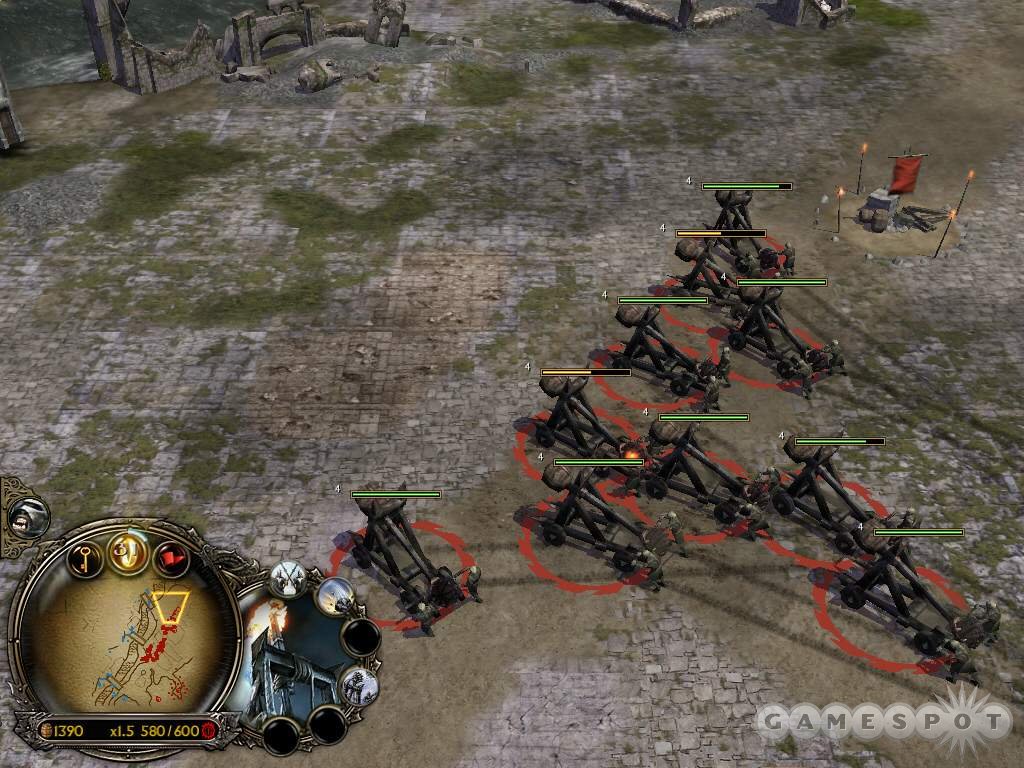
Each catapult kill collects a human head (the counter appears on the left side of the screen). Reach 100 to complete a bonus objective. After collecting 100 human heads, select one catapult and toggle to "human head" ammunition and fire on the enemy; firing human heads into a group of enemy forces instills fear and causes enemies to scatter.
Completing this mission requires a patient, though effective, push against all Gondor bases. Maintain a defensive stance as you maximize your command limit and upgrade forces. Push toward the bridges and Gondor defenses and use catapults to obliterate garrisoned towers, clusters of units, and Gondor structures. Protect your catapults with melee and ranged unit support.
Faramir enters the battle with a reinforcement of Gondor knights. Attack the knights with melee and ranged units; try to keep the knights away from your catapults. Replace all slain Orcs with fresh new troops. You receive your own reinforcement during the battle: Nazgul. Scatter enemy troops with the Nazgul screech and attack groups of soldiers or knights with the Mordor aerial unit.
Defeat the Gondor base in the northwest corner to complete the mission (other units can remain alive and you’ll still complete the mission successfully). Expect the enemy to replace destroyed base towers; it may be more effective to assault farms and unit-producing structures before striking the towers, which may be almost instantly replaced.
Cirith Ungol
Objective: Find and kill the Hobbits.
Bonus: Feed Orcs to Shelob. Free 10 Uruks.
Build a troll cage, Orc pit, and Uruk pit at your start location. Available units are priced differently for the mission (Orcs aren’t free for instance). Trolls offer the best bang for the buck; use collected resources to mass an army of trolls with some support from Orcs and Uruks. Send your initial Orcs and the hero Gollum south and collect the treasures.
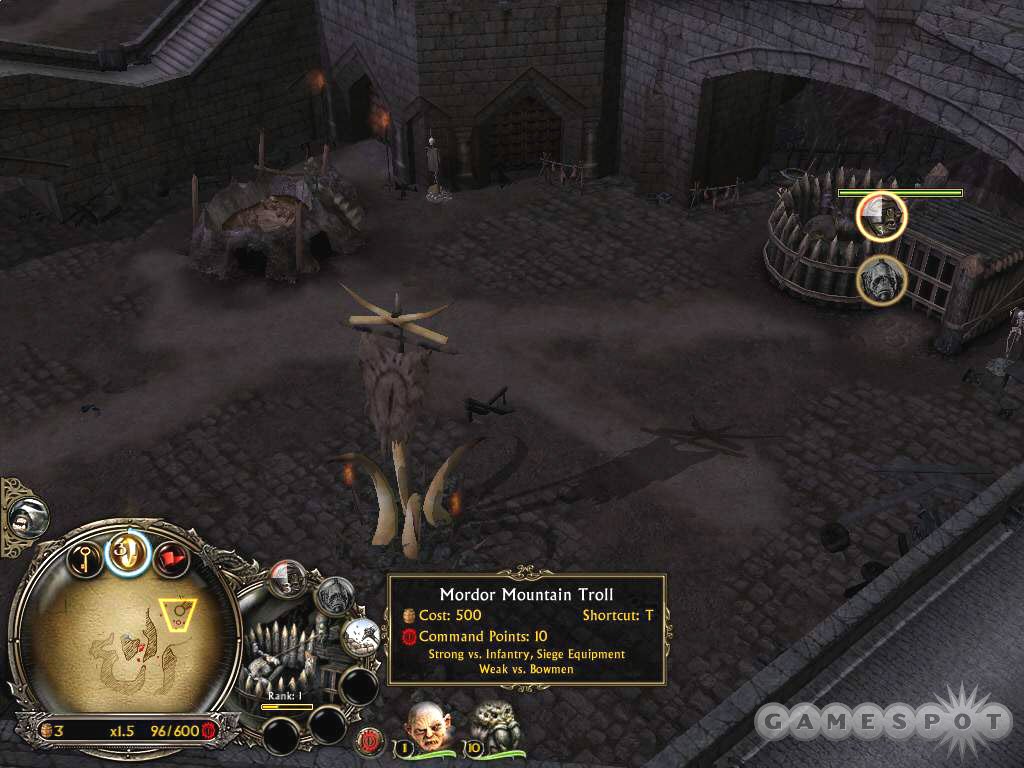
Continue west into Shelob’s chamber. She’s indiscriminate in her attacks; counter Shelob with a horde of Orc to "feed" her and complete a bonus objective. Feeding Shelob tasty Orc also rewards you with control over the giant spider. Add Shelob to your battle group and search the chamber for treasures and webbed Uruk units. Attack the webs to free the Uruks. Add the units to your battle group as you continue to explore Shelob’s lair. As trolls exit the cage, add them to your battle group; set the structure’s rally point toward your primary force.
Search northwest from the chamber fore more treasure and Uruks. Continue through the northeast tunnel. Spot the Hobbits in the next chamber; several Gondor guards block the route. Battle the guards with the troll (or trolls), Shelob, rescued forces, and other units. Ascend the adjacent tunnel to uncover more treasure.
Continue northwest to encounter additional guards. Battle the Gondor guards with trolls at the front line and support with other troops. Follow the tunnel along the northern edge to find plentiful treasure at a dead-end.
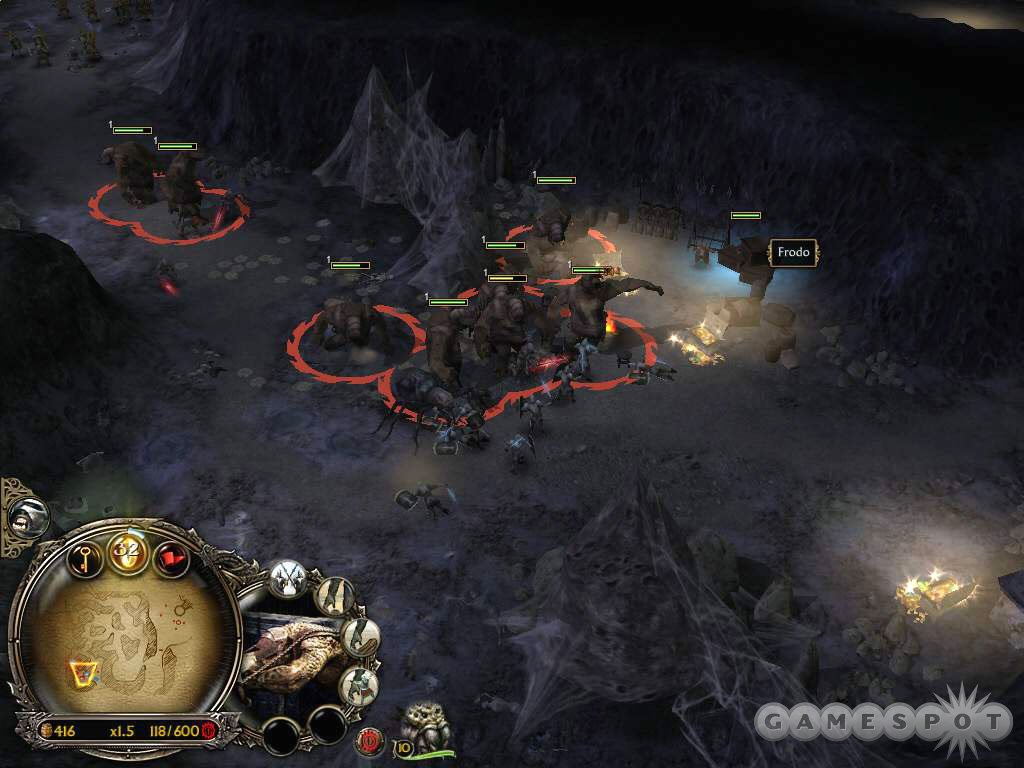
Search the tunnels for treasure and webbed troops as you proceed southwest. Take time to gather trolls as they’re built and maneuver through the lair as a collected group. The southwestern corner contains many troops protecting the Hobbits. Crush the Gondor defenders with your trolls, Shelob, and other forces. Slaughter Sam and Frodo to complete the mission successfully.
Minas Tirith
Objective: Destroy Minas Tirith.
Bonus: Kill all heroes.
This mission recreates one of the most exciting sequences in The Return of the King. Your forces begin in the southeastern corner outside the Gondor city of Minas Tirith. The heavily defended city lies to the northwest. There are two camps near your start position and a third settlement just to the north. Construct two camps and the outpost.
Among the camps, build furnaces, a couple siege works, multiple pits (Orc and Haradrim depending on unit preference), and a mumakil pen and/or a troll cage. Either of these units will become valuable during the Rohan reinforcement stage of the mission. Erect defensive structures to protect your bases during the inevitable counter assault.
You start the mission with a large force and three Nazgul at your disposal (the Witch-King and two other Nazgul). Arrange your forces into melee, ranged, siege, and hero groups. Place mumakil and trolls in their own group. You’ll primarily use these against the Rohan Rohirrim later in the mission.
The Nazgul are excellent at destroying the trebuchets that line of the walls of Minas Tirith. You can also use the screech ability to disrupt enemy unit lines. The Nazgul will suffer damage from enemy archer fire; retreat them away from Minas Tirith and back toward your base to mend wounds.
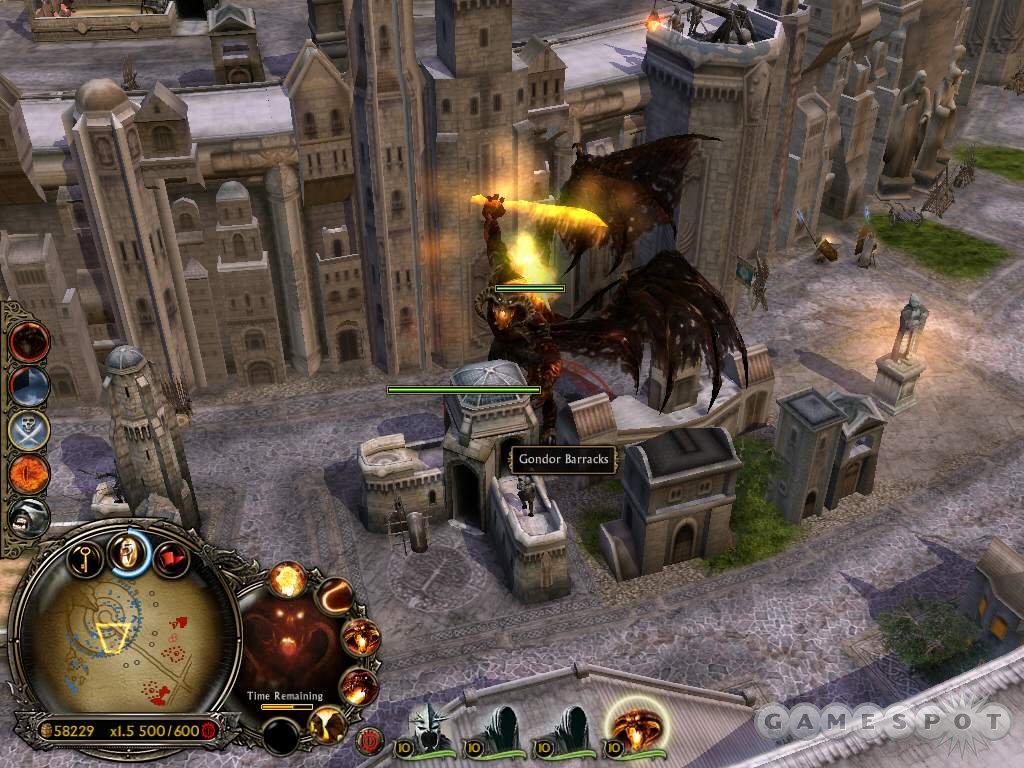
Construct some catapults and save 10 command points for the Grond siege unit to use against the Minas Tirith gate. Crush the farms along the outskirts of Minas Tirith with your catapults. A couple cavalry groups eventually exit Minas Tirith to harass your forces. Annihilate them with the Nazgul or just wait near your base defenses to engage.
You can also move the catapults closer to Minas Tirith to start clearing archers along the city walls. The catapults can also knock out trebuchets in a couple hits; however, the Gondor defensive emplacements can fire on the catapults so you will start losing catapults. Just replace them at the siege works. To keep the Grond healthy, clear out the archers and trebuchets within range of the Minas Tirith gate.
Escort the Grond to the gate and start the siege. This action seems to trigger the countdown for Rohan reinforcements. In three minutes a huge force of Rohirrim enters from the north. The Grond makes quick work of the gate. You can flood the city with your melee and ranged units and start the destruction or hold off until the Rohirrim arrive, repel their attack, and then reorganize your forces for the push against Minas Tirith.
Important tips for repelling the Rohirrim include: fighting near your base defenses, using one ring powers such as Darkness or Balrog, and keeping your Nazgul in the battle to screech or attack the Rohirrim line. You can also bombard Rohirrim groups with catapults but expect quick counterattack. Utilize your mumakil and trolls against the Rohirrim while your ranged units pepper the enemy forces from longer range. Rebuild and regroup as necessary after holding off the Rohirrim.
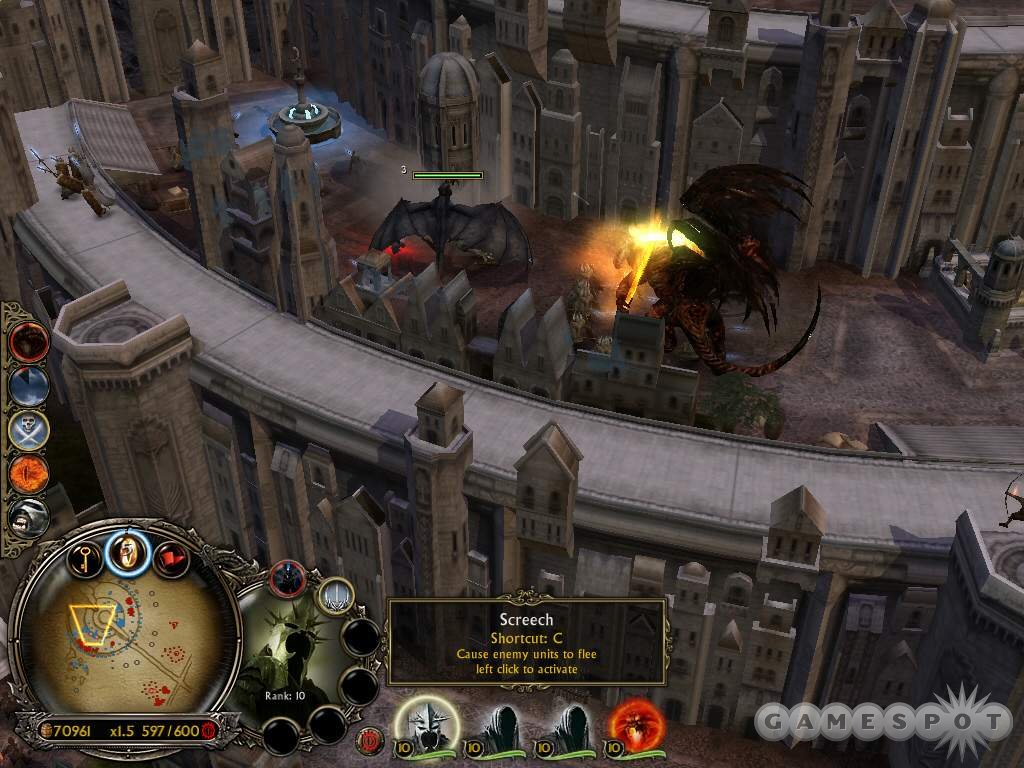
Start a push against Minas Tirith. The Balrog can be used against the city, though he can’t spawn inside the city. Activate the Balrog just outside the city and use his wings ability to move him inside the city walls. Tear down structure after structure until the Balrog disappears. Flood the city with your Orcs and Haradrim and use the Nazgul to screech and assist in the attack.
Further into the battle, an "Umber" reinforcement countdown begins. These reinforcements appear in the western village. Unfortunately these are more reinforcements for Minas Tirith--it’s Aragorn, Legolas, and Gimli escorting the Oathbreakers (the army of the dead) into the battle! The Oathbreakers are on a time limit so even if they start destroying your units and bases, the Oathbreakers will disappear eventually. It’s wise to counter the Oathbreakers with the Balrog if available. Hold off the army of the dead and crush the three heroes to begin the mission’s last stage.
All that remains is maneuvering your troops through Minas Tirith and to the citadel on the upper level. Focus attacks on units and unit-producing structures, aid the attack with the Nazgul, and bring in the Balrog each time it’s available. Crush the Minas Tirith citadel to complete the mission and the campaign.
Multiplayer Strategies
This section offers strategies for The Battle for Middle-earth’s multiplayer mode. Some elements of the multiplayer mode differ from the single-player campaign. For instance, the Evenstar and One Ring powers are slightly different for each side. Also, players can create heroes unique to that side and use their abilities to assist in battle. This chapter provides tips on using powers, controlling the map, attacking and defending, and implementing hero abilities.
Evenstar and One Ring Powers
This section reveals Evenstar and One Ring powers for all sides, their costs, prerequisites, and tips for using each.
Gondor
| EVENSTAR POWER | COST | REQUIREMENT | DESCRIPTION | TIPS |
| Heal | 1 | N/A | Heals units, replaces one dead man per battalion. | Used primarily on heroes, especially the powerful Gandalf. A must have. |
| Elven Wood | 1 | N/A | Creates lush terrain. All ally units get +50% armor. All enemy units lose leadership bonuses. | Aid your troops during an important skirmish. Though the armor boost doesn’t affect heroes, it does negate enemy hero leadership bonuses. |
| Gandalf the White | 2 | Heal | +100% damage from Gandalf’s powers. Powers recharge twice as quickly. | Enhance the powerful Gandalf even more. A must have because Gandalf is arguably the most powerful unit in the game. |
| Summon Elven Allies | 3 | Heal or Elven Wood | Summons a group of elves. | Instant reinforcements for an important skirmish. Can also be used as a diversionary tactic. |
| Summon Rohan Allies | 3 | Elven Wood | Summons Rohirrim. | Instant reinforcements. Trample infantry with the Rohirrim! |
| Cloud Break | 6 | Gandalf the White or Summon Elven Allies | Sun breaks through rain or darkness. Stuns enemy units. | Counter Mordor or Isengard’s darkness or rain. Stun the enemy with light; if they’re stunned, they aren’t fighting. |
| Summon Eagle Allies | 6 | Summon Elven Allies or Summon Rohian Allies. | Summons giant eagles. | Counter Nazgul or use as general reinforcements. |
| Summon Army of the Dead | 10 | Cloud Break or Summon Eagle Allies | Summons the Army of the Dead | Counter the Balrog or lay waste to an enemy army or base area. |
Isengard
| ONE RING POWER | COST | REQUIREMENT | DESCRIPTION | TIPS |
| War Chant | 1 | N/A | +150% damage, +50% armor to targeted units. | Enhance your army during a skirmish. |
| Vision of the Palantir | 1 | N/A | Spy on the enemy forces. | Keep an eye on your opponent’s base building, army movement, and expansion. Scout, scout, scout! Extremely useful and helps you time raids and attacks successfully. |
| Industry | 2 | War Chant | +100% resources from selected structures for a short time. | Provides an income boost to fund expansion, more units, or heroes. |
| Tainted Land | 3 | War Chant or Vision of the Palantir | Taints an area of terrain. All ally units get +50% armor. All enemy units lose leadership bonuses. | The opposite of the good side’s Elven Wood. Aid your troops during an important skirmish. Though the armor boost doesn’t affect heroes, it does negate enemy hero leadership bonuses. |
| Devastation | 4 | Vision of the Palantir | Trees turned into resources. | Obliterate a forest and convert it into resources. |
| Freezing Rain | 6 | Industry or Tainted Lands | All enemy units lose all leadership bonuses. | Negate the leadership effect of heroes (or other units). |
| Fuel the Fires | 6 | Tainted Lands or Devastation | +100% resources from harvesting trees. | Obviously most useful if you have built many lumber mills. |
| Summon Balrog | 20 | Freezing Rain or Fuel the Fire | Summon the Balrog | The evil answer to the Army of the Dead. But the Balrog is very expensive. Don’t use if your opponent has Army of the Dead waiting or your Balrog could get rolled over quickly. |
Mordor
| ONE RING POWER | COST | REQUIREMENT | DESCRIPTION | TIPS |
| Tainted Land | 1 | N/A | Taints an area of terrain. All ally units get +50% armor. All enemy units lose leadership bonuses. | The opposite of the good side’s Elven Wood. Aid your troops during an important skirmish. Though the armor boost doesn’t affect heroes, it does negate enemy hero leadership bonuses. |
| Eye of Sauron | 1 | N/A | Reveals stealthed enemies. Orcs +150% damage, +200% experience, +50% armor. | Useful in an early orc rush to boost their damage, armor, and experience. Move the eye around to follow your orc hordes. |
| Industry | 2 | Tainted Land | +100% resources from selected structures for a short time. | Provides an income boost to fund expansion, more units, or heroes. |
| Scavenger | 4 | Tainted Land or Eye of Sauron | All kills earn extra resources. | This is a passive ability so once acquired, it’s always active. |
| Devastation | 4 | Eye of Sauron | Trees turned into resources. | Obliterate a forest and convert it into resources. |
| Darkness | 6 | Industry or Scavenger | Shrouds the entire map in darkness. All ally infantry hordes get +50% damage, +50% armor. | Bolster those orc hordes! Though improves other Mordor infantry as well. |
| Call the Horde | 6 | Scavenger or Devastation | Increased orc production speed. | Pump out free orcs even quicker. Best used with multiple pits. |
| Summon Balrog | 20 | Darkness or Call the Horde | Summon the Balrog | The evil answer to the Army of the Dead. But the Balrog is very expensive. Don’t use if your opponent has Army of the Dead waiting or your Balrog could get rolled over quickly. |
Rohan
| EVENSTAR POWER | COST | REQUIREMENT | DESCRIPTION | TIPS |
| Draft | 1 | N/A | All peasants become armed. | Increases peasant armor and damage. |
| Heal | 1 | N/A | Heals units, replaces one dead man per battalion. | Used primarily on heroes. A must have. |
| Anduril | 2 | Draft | Aragorn +100% damage. | Rohan’s most powerful hero gains additional damage. |
| Summon Elven Allies | 3 | Draft or Heal | Summons a group of elves. | Instant reinforcements for an important skirmish. Can also be used as a diversionary tactic. |
| Elven Wood | 3 | Heal | Creates lush terrain. All ally units get +50% armor. All enemy units lose leadership bonuses. | Aid your troops during an important skirmish. Though the armor boost doesn’t affect heroes, it does negate enemy hero leadership bonuses. |
| Cloud Break | 6 | Anduril or Elven Allies | Sun breaks through rain or darkness. Stuns enemy units. | Counter Mordor or Isengard’s darkness or rain. Stun the enemy with light; if they’re stunned, they aren’t fighting. |
| Summon Ent Allies | 8 | Summon Elven Allies or Elven Wood | Summons Ents. | Ents are formidable but slow. Use close to an enemy base or group of units to maximize damage potential. |
| Summon Army of the Dead | 10 | Cloud Break or Summon Ent Allies | Summons the Army of the Dead | Counter the Balrog or lay waste to an enemy army or base area. Aragorn possesses the power as well for double the Army of the Dead action! |
Heroes and Abilities
The tables below reveal each side’s heroes, cost, and their abilities.
Gondor
| HERO | COST | ABILITIES |
| Pippin | 100 | Useful as an inexpensive scout. Can hold own against small battalions or hordes. Elven cloak provides stealth when standing still. |
| Faramir | 1200 | You can toggle Faramir between a ranger, soldier, or knight. His ranger mode offers wounding arrow, a more powerful arrow strike that recharges (target heroes). His leadership ability provides +50% armor to nearby troops. Use the Captain of Gondor to give battalions experience. |
| Boromir | 1400 | Blow the horn of gondor to temporarily stun enemies--when they’re stunned, they’re not fighting. Boromir’s leadership grants +100% damage to nearby troops. Boromir also has the Captain of Gondor ability to bestow experience on battalions. |
| Gandalf | 6000 | Gandalf is the most powerful hero in the game by a significant margin. Some might argue he’s nearly invincible in the right hands. Wizard blast blows back an enemy group. Lightning sword sends shockwaves through enemy units. Gandalf’s leadership grants +75% armor and +300% combat experience to nearby troops. Use Istari Light to inflict heavy damage on enemy heroes (possibly instant kill depending on level and the perfect counter to a Nazgul). The Word of Power is devastating and can obliterate an army. Mount Gandalf to increase armor +25% against footmen and cavalry but -50% against archers and pikemen. |
Isengard
| HERO | COST | ABILITIES |
| Lurtz | 1200 | Lurtz can toggle weapons between his bow and sword. While using the bow, Lurtz can use the cripple ability. Use cripple against an enemy hero to pin that hero in place. Focus all attack on the hero. This can be an effective counter to Gandalf. While using his sword, Lurtz can toggle his carnage ability to add +200% damage and +20% armor. Lurtz’s leadership bonus provides +100% damage to nearby troops. The pillage ability provides resources for kills. |
| Saruman | 5000 | Saruman features the wizard blast ability to knock back enemy units. The fireball also knocks back enemy units; the fireball can also light an explosive mine and is an effective counter to an Ent. Use the wormtongue ability to convert enemy units to your side. Speech craft bestows unit experience to Saruman’s uruk forces. |
Mordor
| HERO | COST | ABILITIES |
| Gollum | 50 | Gollum isn’t particularly effective but he is an inexpensive scout. |
| Nazgul | 5000 | Mordor can create two Nazgul in addition to the Witch-king. The Nazgul offers the screech ability, which scatters nearby enemy troops. Avoid Gandalf and fire arrows! |
| Witch-king | 8000 | The Witch-king provides +200% damage and +50% armor leadership bonus. It also has the screech ability to scatter nearby troops. |
Rohan
| HERO | COST | ABILITIES |
| Merry | 100 | Useful as an inexpensive scout. Can hold own against small battalions or hordes. Elven cloak provides stealth when standing still. |
| Theoden | 1200 | Theoden’s leadership grants +150% damage and +50% armor to nearby troops. Glorious charge is one of the best abilities in the game. When activated, Theoden and nearby troops take only 10% of normal damage (used when Theoden is mounted). King’s Favor can be used to grant unit experience. Mount Theoden to increase armor +25% against footmen and cavalry, -50% against archers and pikemen, and +100% more damage from archers and spearmen. |
| Eomer | 1200 | Eomer’s Horse Lord provides a leadership bonus to nearby cavalry granting +100% damage. Outlaw Leadership causes nearby units to receive resources for each kill. Toggle Eomer’s throws spear ability to inflict heavy ranged damage (target heroes). Eomer can also mount to increase armor +25% against footmen and cavalry, -50% against archers and pikemen, and +100% more damage from archers and spearmen. |
| Eowyn | 1200 | Smite is Eowyn’s toggled ranged attack offering increased damage. Target heroes if they’re in the vicinity. Disguise camouflages Eowyn as a Rohirrim. The shield maiden power increases Eowyn’s armor by 55%. You can order Eowyn to mount a horse. She’ll increase armor +25% against footmen and cavalry, -50% against archers and pikemen, and +100% more damage from archers and spearmen. |
| Gimli | 2500 | Gimli’s axe throw is a more powerful ranged attack that recharges (use against heroes). The leap attack inflicts area effect damage and blasts nearby troops back. Toggle Gimli’s slayer ability to auto-activate so he’ll gain +100% attack speed and +200% damage. |
| Legolas | 3000 | The hawk strike is a double-arrow attack for increased damage (use against heroes). Knife fighter is Legolas’ alternate melee attack with +20% armor. Legolas can increase archer experience with his train archers ability. Finally the arrow wind ability launches a volley of arrows. Use against multiple targets. |
| Aragorn | 3000 | Aragorn can heal nearby heroes with athelas. Set blade master to auto-activate to boost Aragorn +100% damage and +100% armor. Aragorn grants leadership to nearby troops with +150% damage and +200% combat experience. Use the Elendil ability to cause nearby enemy units to flee (leaving them vulnerable to attack). Finally, Aragorn can summon the Oathbreakers--the Army of the Dead. |
Map Control
The Battle for Middle-earth uses the concept of "build sites" for base building. Unlike many other real-time strategy games, you can’t simply plop down a building anywhere on the map. You must use a build site to create a resource gathering structure, troop producing structure, or whatever else you wish to construct. Since there are a limited number of build sites on any given map, controlling the map and those build sites becomes extremely important. Basically control the map and you control the game.
Construct a couple resource gathering structures within your base then use your initial units to seek out settlements around your base to build more resource gathering structures. You may wish to add a battalion or horde now or use your initial units to clear out some neutral sites for their gold. The goblin lairs are your targets; wargs and cave trolls are very tough for your initial forces.
Scout your enemy to gauge his or her base building progress, unit production, and expansion. Train a cheap hero if you’re Gondor, Rohan, or Mordor. You can train Pippin (Gondor), Merry (Rohan), or Gollum (Mordor) and use them to scout. Pippin and Merry can even cloak when stationary. As Isengard, use the Vision of the Palantir power to keep an eye on your opponent.
Seek out settlements and expand. Maintain unit production in line with your income. Don’t fall behind on unit production or you could quickly lose your expansions if your opponent has trained several battalions or hordes and sends them to your new structures. The greater the number of expansions in the long run, the more income you’ll generate. The more income you generate, the more units you can produce or, perhaps even better, the more upgrades you can purchase or heroes you can train.
Adjust your forces as needed to protect your expansions. Use the Evenstar or One Ring powers to help you defend or attack expansions. There’s no need to spend resources on a whole new castle early in the game. It’s much too large of a resource hit to fund a whole new base. Concentrate on settlements and expanding your economy.
Troop Management
It’s possible to combine two different battalions or hordes to create a combination unit set. For instance, you could combine pikemen with archers. The pikemen remain in the front while the archers stand behind. You could combine soldiers with cavalry. The soldiers stand in the front and the cavalry remain in the rear; once the soldiers engage in battle, the cavalry rush to disrupt the enemy’s line.
Combining troops allows you to enhance units during battle. Combining tower guards with archers helps protect your ranged units; the tower guards fight on the front line and block the attacks attempting to reach your ranged units. A combination can also help protect a particular unit type from a counter unit.
The downside to unit combining is that it can’t be undone. Also, the new unit moves as a single force. This could be a disadvantage if you want to keep weaker ranged units away from danger but can’t because they move automatically with your other force. You’ll also move the speed of your slowest unit, thus negating some of the speed advantage of cavalry.
As highlighted through the general strategies section, be sure to mix your forces and consider unit counters as you fund and train troops. If your opponent masses cavalry, train units effective against cavalry, such as uruk pikes, tower guards, easterlings, or mumakil.
Four Sides
Your choice of side will certainly dictate your unit production (even though the basics of infantry, ranged, and cavalry spread across all sides). Gondor tends to be the defensive side. Turtle yourself in Gondor’s mighty defenses and utilize economic upgrades to reach the uber-powerful Gandalf. Those fighting against Gondor should maintain constant pressure and prevent economic expansion to try and negate the mighty hero. Use Gandalf’s Istari Light against enemy heroes and crush other units with wizard blast, lightning sword, and word of power.
Mordor can train free orcs, which sounds extremely unbalanced; hower the orcs are basically cannon fodder for most other troops, especially upgraded forces. Churning out free orcs simply to mass a huge army may only serve to grant your opponent lots of free experience. Pressure your opponent early when the orcs have a chance against enemy forces. Send free orcs to the slaughter house for more resources. As the game wears on, Mordor’s orcs become more and more unimportant. Shift production to Haradrim, fire arrow enhanced archers, and catapults. Nazgul can be useful but are countered rather easily by fire arrows and Gandalf. You’ll have to use the nazgul in hit and run strikes and away from these counters to be effective.
Use Rohan to harass and raid your opponent’s expansions. Quick Rohirrim cavalry have a big advantage on smaller maps; the Rohirrim can cover a lot of ground quickly. Use Theoden and Eomer and their leadership bonuses (and Glorious Charge) to aid in every skirmish. Control the map with constant raids and keep economic production above your opponent. Siege enemy bases using Ents and Evenstar powers.
Isengard offers a solid mix of troops, upgrades, and siege weaponry. For instance, the explosive mine can crumble enemy defenses in a single blow. Upgrade your uruk warriors and crossbowmen with forged steel and fire arrows and train pikemen to counter Rohan and Gondor cavalry. Lurtz is one of the better heroes in the game because he can cripple enemy heroes leaving them vulnerable to an immediate focused attack. This is especially useful against Gondor’s Gandalf.
Got a news tip or want to contact us directly? Email news@gamespot.com
Join the conversation