SoulCalibur V Walkthrough
Welcome back to the stage of history. Our SoulCalibur V walkthrough gets you started for combat with new tactics, unlockables, and character moves.

- Basic Changes: SoulCalibur V is a different beast from IV and you'll want to know the fundamentals
- Unlocking Characters and Stages: Learn how to find hidden fighters and their turfs
- Character Overviews: We look at key moves for each hero and villian
What's New:
- February 7 2012: Version 1.3. Xiba's section has been added, along with an update to ZWEI.
- February 3 2012: Version 1.2. Added a page for Aeon and updated the Unlocks section. ZWEI's video will be up soon as well.
- February 2 2012: Version 1.1. The sections for Pyrrha and Leixia have been added, along with some missing info about Just Guard and Quick Step.
- January 31 2012: Version 1.0. The guide goes over basic changes and how to unlock characters. We've also included info about Patroklos, ZWEI, Viola, Ezio, and Devil Jin. Check back soon for info and videos for Natsu, Xiba, Leixia, Pyrrha, and Aeon. Seriously, videos help more than text and static images.
Basic Changes
Most of Soulcaibur V's mechanics are similar to SoulCalibur IV's, so this section will mainly go over to fundamental changes that impact gameplay. The biggest is revamped version of the Soul Gauge meter. The meter can hold up to two full bars that can be used to unleash various moves. Your meter fills up as you attack and take damage. You are also given a free bar when the enemy only needs one KO to win the match.
Nancy Drew: Mystery of the Seven Keys | World Premiere Official Trailer Modern Warfare III & Warzone - Official Cheech & Chong Bundle Gameplay Trailer The Fallout TV Show's Biggest Easter Eggs Teenage Mutant Ninja Turtles: Splintered Fate – Announcement Gameplay Trailer Dead Island 2 – Official SoLA Expansion Gameplay Launch Trailer SteamWorld Heist II – Official Reveal Gameplay Trailer Potionomics: Masterwork Edition - Official Announcement Trailer Genshin Impact - "Arlecchino: Sleep in Peace" | Official Character Teaser Snowbreak: Containment Zone - "Gradient of Souls" Version Trailer Harold Halibut GameSpot Video Review Little Kitty, Big City – Release Date Reveal Cat Quest III - Release Date Trailer
Please enter your date of birth to view this video
By clicking 'enter', you agree to GameSpot's
Terms of Use and Privacy Policy
Brave Edge
Brave Edges alter attacks by making them more powerful, faster, include more hits, Unblockable or may turn them into Break Attacks. Each character has a unique set of moves that can be enhanced into a Brave edge by pressing A+B+K immediately after the original input. A Brave Edge will always consume half a bar of Soul Gauge, regardless if the attack makes contact. Because of this you should be careful about when you use such attacks.
Guard Impact
Guard Impacts aren't new to the series, however this time Guard Impacts will require half a bar of meter to use; this means that there is less emphases on constantly parrying. The input has also changed to simply Back A+B+K, meaning that you can only parry in a single direction. Several characters have attacks and other moves that can Guard Impact and don't require any Soul Gauge Meter. Additionally, Just Guards are much more of an important defensive tactic, though holding a defense can still work.
Just Guard
Just Guards are the new semi-replacement to the Guard Impact. These can be performed for free by blocking just as the enemy lands their attacks. This means that they are best used against characters you already know how to play, giving you an awareness of their speed combo potential. Just Guards will override all other properties, such as Unblockable and Break Attack and will offer a slight speed advantage over normal guarding. They can even stop Critical Edges, though the same goes for a standard guard.
Critical Edge
Nancy Drew: Mystery of the Seven Keys | World Premiere Official Trailer Modern Warfare III & Warzone - Official Cheech & Chong Bundle Gameplay Trailer The Fallout TV Show's Biggest Easter Eggs Teenage Mutant Ninja Turtles: Splintered Fate – Announcement Gameplay Trailer Dead Island 2 – Official SoLA Expansion Gameplay Launch Trailer SteamWorld Heist II – Official Reveal Gameplay Trailer Potionomics: Masterwork Edition - Official Announcement Trailer Genshin Impact - "Arlecchino: Sleep in Peace" | Official Character Teaser Snowbreak: Containment Zone - "Gradient of Souls" Version Trailer Harold Halibut GameSpot Video Review Little Kitty, Big City – Release Date Reveal Cat Quest III - Release Date Trailer
Please enter your date of birth to view this video
By clicking 'enter', you agree to GameSpot's
Terms of Use and Privacy Policy
As a replacement to Critical Finishes, Critical Edges are flashy and powerful moves that can be used at any time. They consume a full bar of Soul Gauge meter, so reserve these moves for desperate attacks or to catch the enemy off guard. Nearly every character uses these moves by entering two quarter circles Forward followed by the standard A+B+K. Some however might need to use it as a counter or input twice for additional damage.
Quick Step
An improved version of the normal Sidetep, the Quick Step is faster and opens up different Eight Way Run attacks. This evasive maneuver is good for dodging enemy Verticals, but typically doesn't cover enough distance to stop Horizontals. It also telegraphs a white streak around your character, allowing the enemy to follow up with their Horizontal.
No Equipment Stats
Nancy Drew: Mystery of the Seven Keys | World Premiere Official Trailer Modern Warfare III & Warzone - Official Cheech & Chong Bundle Gameplay Trailer The Fallout TV Show's Biggest Easter Eggs Teenage Mutant Ninja Turtles: Splintered Fate – Announcement Gameplay Trailer Dead Island 2 – Official SoLA Expansion Gameplay Launch Trailer SteamWorld Heist II – Official Reveal Gameplay Trailer Potionomics: Masterwork Edition - Official Announcement Trailer Genshin Impact - "Arlecchino: Sleep in Peace" | Official Character Teaser Snowbreak: Containment Zone - "Gradient of Souls" Version Trailer Harold Halibut GameSpot Video Review Little Kitty, Big City – Release Date Reveal Cat Quest III - Release Date Trailer
Please enter your date of birth to view this video
By clicking 'enter', you agree to GameSpot's
Terms of Use and Privacy Policy
Even though you can dress up and change your characters, none of the armor or weapon choices will change your character's performance. This also means that there aren't interesting weapon mechanics such as poison, life drain, or instant parrying. You also won't be in peril if your equipment should break in a match or you opted to wield large chicken drumsticks. You won't need to rely on outfitting your character to play normally. Besides, SoulCalibur V has no creative challenge mode or shop, common to the rest of the series.
Body Type Stats
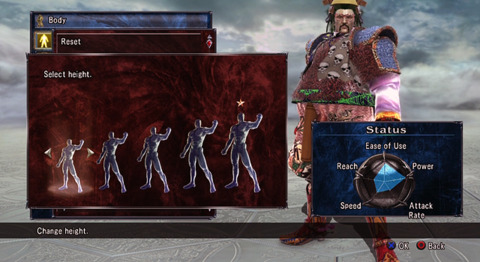
This was a small part of previous character creations, mainly if you have styles of short heroes such as Amy and Talim on larger builds. This time it holds true to every style useable in Original Creations. Shorter heights will move your stats to the right, lowering reach while raising power. Taller characters are the inverse with more reach but less strength. Additionally, these body types can change hit boxes, making for small Astaroths and bulky Tiras.
Unlocking Characters and Stages
SoulCalibur V has six full unlockable characters and a unique Soul for created characters. Most all of these individuals return from previous games, though their fighting styles may be different.
Kilik and Penitentiary of Destiny
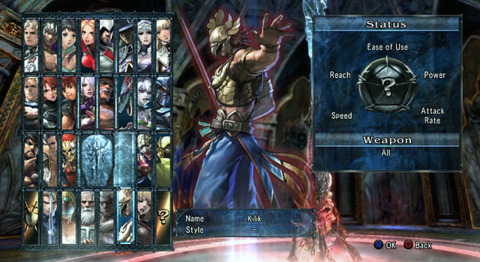
Kilik can be gained by defeating him in Arcade mode. The easiest method is to play as Maxi and encounter Kilik during the sixth and final fight. If nunchucks aren't your style you can face Kilik by setting your route to Asia. You can also meet him during Legendary Souls and sometimes in Quick Battle. As a final Arcade boss, Kilik fights with Xiba's style. As a playable character Kilik is a mimic that can use the weapons of any male character. He can be fully dressed in Creation and orginal characters can access Soul of Kilik.
Unlocking Kilik also grants the stage Penitentiary of Destiny, which is a small square raft that is ripe for ring outs. During a potential last round, the battlefield shifts to a more enclosed space with two walls, though the arena's edges are jagged and uneven. The corresponding track is Samsara: The Wheel of Eternity.
Nancy Drew: Mystery of the Seven Keys | World Premiere Official Trailer Modern Warfare III & Warzone - Official Cheech & Chong Bundle Gameplay Trailer The Fallout TV Show's Biggest Easter Eggs Teenage Mutant Ninja Turtles: Splintered Fate – Announcement Gameplay Trailer Dead Island 2 – Official SoLA Expansion Gameplay Launch Trailer SteamWorld Heist II – Official Reveal Gameplay Trailer Potionomics: Masterwork Edition - Official Announcement Trailer Genshin Impact - "Arlecchino: Sleep in Peace" | Official Character Teaser Snowbreak: Containment Zone - "Gradient of Souls" Version Trailer Harold Halibut GameSpot Video Review Little Kitty, Big City – Release Date Reveal Cat Quest III - Release Date Trailer
Please enter your date of birth to view this video
By clicking 'enter', you agree to GameSpot's
Terms of Use and Privacy Policy
Soul of Devil Jin
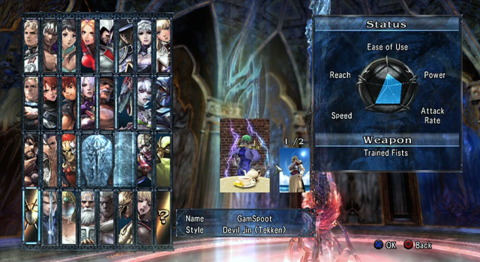
Original Created characters can use the style of Devil Jin from the Tekken series. You can gain this by fighting AI enemies in Quick Battle. The signature fighter is Harada TEKKEN who can be found by searching Japan. However, he has a rank A3 computer making him very challenging. You can instead fight other Devil Jin characters, mostly found in Asian countries and South America.
Devil Jin's stage music is Antares and is associted with Astral Chaos. The stage is avalible right away as it is also home to Ezio.
Alpha Patroklos and Astral Chaos: Pathway
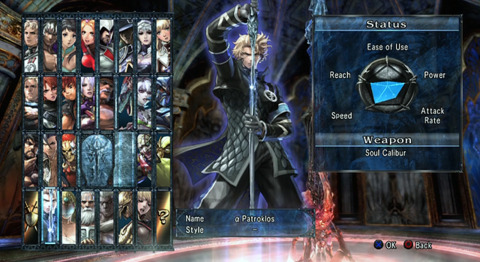
Patroklos has a second fighting style that can be unlocked at the start of Story Mode's 13th chapter. Like others, he can probably also be found during some Quick Battles. He forgoes the shield and instead uses attacks similar to Setsuka from past SoulCalibur games. His style can be used by Original Created heroes.
Alpha Patroklos' stage is Astral Chaos: Pathway, which is unlocked by fighting against him in Quick Battle. It is similar to the normal Astral Chaos, but completely enclosed by a circular wall. His stage music is Virtuous Heart.
Pyrrha Omega and Denever Castle: Eye of Chaos

Pyrrha's second form can be unlocked by clearing the 19th chapter of Story Mode, though you do get to play as her in chapter 11. She fights in a much more aggressive style, similar to Sophitia from earlier games. As with most characters, she can be customized in Creation and Original characters can use her style.
Gaining Pyrrha Omega also unlocks the stage Denever Castle: Eye of Chaos, which is an inverted version of Nightmare's Denever Castle: Assault. Therefor, the wall covers the north side of the arena instead of the south. The stage's theme is Adorned with Evil.
Edge Master and Tower of Glory: Spiral of Good and Evil
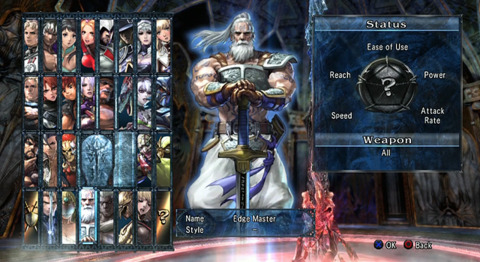
Edge Master from the first SoulCalibur can be obtained by finishing chapter 17 of the story mode. This should be easy as there is no combat during that episode. He can also be fought during Arcade, Legendary Souls, and Quick Battle. He is a mimic character that uses all styles, both male and female. His mimic style can be given to Originals and he can be edited in Creation.
Edge Master's stage is Tower of Glory: Spiral of Good and Evil, and is unlocked by defeating him in Arcade/Legendary Souls/Quick Battle. The stage is enclosed by glass windows that break when a combatant is pushed into them, allowing for future ring outs. The stage's music is Master of Edges.
Elysium and Utopia of the Blessed
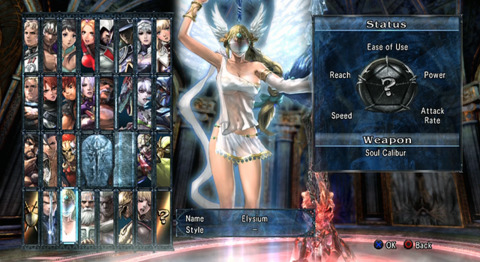
Elysium can be gained by completing the final chapter of Story Mode. Even though she uses Pyrrha Omega's style during Story Mode, she is in fact a female mimic. One difference is that she retains her Critical Edge regardless of what weapon she's wielding. Like with other characters you can edit her outfit and give her soul to Original Creations.
Along with Elysium you'll also gain the stage Utopia of the Blessed. This is an infinite arena for most rounds, but during the potential last round becomes a wall-less hexagon. The stage's music is Sacred Dawn.
Algol and Tower of Glory: Most Holy Dichotomy

The main antagonist of SoulCalibur IV is back as an unlockable. The normal means of fighting him is in Legendary Souls, which will prove to be an uphill battle. You can also find him in Quick Battle, typically in Europe where he will have a C2 computer rank. This is a much faster method than slugging through both Story Mode and Legendary Souls. There is no Soul of Algol to give your newly made creations, but the ancient king can be redressed--not like he is dressed in the first place.
Algol's arena is Tower of Glory: Most Holy Dichotomy, similar to his stage from IV. The stage is covered with eight small walls, allowing verity for both wall hits and ring outs. His them song is Regalia.
Patroklos
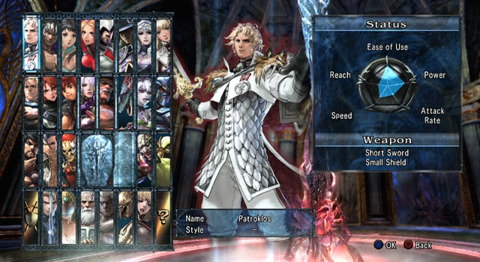
This walkthrough isn't about the entire moveset, but rather key attacks that we feel are the best of each character's arsenal. First off is new poster boy Patroklos. He may wield a sword and shield, but doesn't play much like his mother Sophitia.
Horizontals
Nancy Drew: Mystery of the Seven Keys | World Premiere Official Trailer Modern Warfare III & Warzone - Official Cheech & Chong Bundle Gameplay Trailer The Fallout TV Show's Biggest Easter Eggs Teenage Mutant Ninja Turtles: Splintered Fate – Announcement Gameplay Trailer Dead Island 2 – Official SoLA Expansion Gameplay Launch Trailer SteamWorld Heist II – Official Reveal Gameplay Trailer Potionomics: Masterwork Edition - Official Announcement Trailer Genshin Impact - "Arlecchino: Sleep in Peace" | Official Character Teaser Snowbreak: Containment Zone - "Gradient of Souls" Version Trailer Harold Halibut GameSpot Video Review Little Kitty, Big City – Release Date Reveal Cat Quest III - Release Date Trailer
Please enter your date of birth to view this video
By clicking 'enter', you agree to GameSpot's
Terms of Use and Privacy Policy
His horizontal attacks aren't his strongest point, but there are still few good ones to keep handy. His Forward A is fast, hits high and will leave your opponent open to a follow up attack. Back-Down A hits low and will trip up the enemy. Last Rising A smacks the enemy right in the face and exposes their backside.
Verticals
Patroklos' verticals are among his staple moves. Forward B B B hits for a three part medium-high-medium combo and grounds the enemy. Forward-Down B is a good launcher. Back-Down B hits in the mid section and is also great for grounding. This can also be powered into a Brave Edge Reckoning Saint for two more hits and a launch.
Kicks
Patroklos also has a wide variety of useful kick attacks. Forward K hits high and will send the enemy backwards. Forward-Down K K is nice for going from mid to high. His Rising Kick A is good for two hits that will send the enemy to the floor. Last Jump K can also slam down the enemy; just make sure you have enough time to let it land.
Simultaneous Press
Patroklos also has a few Simultaneous press moves that are well worth knowing. A + B hits high and Guard Impacts; it can also be delayed by holding both button inputs. Down A + B takes about two seconds but hits low and sends the enemy to the floor; it can even be useful against enemies already downed. Up A+B hits tree times and can launch, though each hits is at mid section. B + K has a bit of a wind up, but will really make the enemy fly. Last in Simultaneous presses is Up B + K that will send you high into the air and slam down; it can even be powered into an Unblockable by holding the input.
Eight Way Run
Running attacks are also among Patroklos' strong point. Forward-Run A is a mid smack that will bonk the enemy into a sitting position. It can be powered into a Brave Edge for a second strike and Break Attack. Sidestep-Run A A spins the enemy in into the air and slams them back to earth; the second hit can also become a Break Attack by hold the horizontal button. Back-Sidestep-Run B will launch the enemy completely behind you. Back-Run K K is good for two high kicks: one that spins the enemy and the second that knocks them down.
There are also a few Running Simultaneous to keep in mind. Forward-Run B + K first launches and then comes in for a second smack during the fall. Back-Run B + K is Unblockable, but means it has a long setup animation.
Stance
Patroklos' stance is Justice Step, which can be entered with a quarter circle Forward. It can be followed up with A B for two mid hits; K for a cartwheel kick; and B for a single smash that can be further powered into a Brave Edge.
Pyrrha
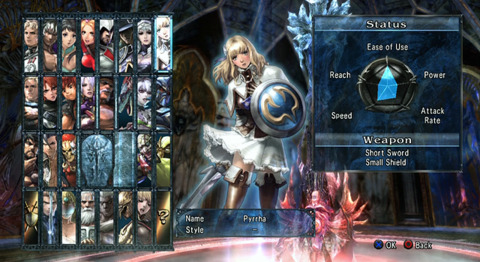
Pyrrha's fighting style is mostly a combination of Sophitia and Cassandra's moves mixed in with a few original attacks. She excels at getting the enemy in the air and plenty of diverse combos.
Horizontals
Among her key Horizontal attacks are A K that swings at a decent speed for around 35 damage from high to mid. Back-Down A A has a slow wind up, but goes from low-mid for 46 damage and will trip up the enemy. Back A A A also isn't very fast--particularly with the first strike--but will mix into a high-low-mid for 66 damage and leave the enemy grounded; it can also become a Brave Edge with a extra low hit and bump the damage up by 28. Back A B will dish out a good 40 damage over two non-consecutive hits from high to mid and leave the enemy floored.
Verticals
Pyrrha also has some good Verticals, mostly to set up her common Just Throw. First off is Forward B K which goes from a 12 damage high into a 18 damage low. She also has a staple launcher from Forward-Down B, which you'll want to follow up with another swift mid attack. Her signature Vertical is Down B B which deals 40 damage over two mid hits; the second stab to the gut can be turned into a Throw by tapping Back, and becomes even more powerful when pressed right on the frame of impact for nearly 80 damage.
Kicks
Pyrrha Kicks aren't as impressive compared to the rest of her other moves. Forward-Down K K will dish out 32 damage over two mid strikes, but its main use is to send your enemy to the floor. Her Rising Kick hits high for 18 damage and exposes the enemy's back for a follow up assault.
Nancy Drew: Mystery of the Seven Keys | World Premiere Official Trailer Modern Warfare III & Warzone - Official Cheech & Chong Bundle Gameplay Trailer The Fallout TV Show's Biggest Easter Eggs Teenage Mutant Ninja Turtles: Splintered Fate – Announcement Gameplay Trailer Dead Island 2 – Official SoLA Expansion Gameplay Launch Trailer SteamWorld Heist II – Official Reveal Gameplay Trailer Potionomics: Masterwork Edition - Official Announcement Trailer Genshin Impact - "Arlecchino: Sleep in Peace" | Official Character Teaser Snowbreak: Containment Zone - "Gradient of Souls" Version Trailer Harold Halibut GameSpot Video Review Little Kitty, Big City – Release Date Reveal Cat Quest III - Release Date Trailer
Please enter your date of birth to view this video
By clicking 'enter', you agree to GameSpot's
Terms of Use and Privacy Policy
Simultaneous Press
Pyrrha can also mix things up with her Simultaneous press attacks. Rising A+B delivers a 20 damage hit to the mid level, but its real power comes for holding the input to become a Break Attack worth 10 additional damage. B+K B is a 30 damage mid-mid attack that results in Pyrrha's familiar gut stab; like with her Down B B, it can be followed up with a Throw or Just Throw by hitting Back. Down B+K B B B will dish out 34 damage over four low hits and is great for punishing both standing and downed enemies. Last, Up B+K causes Pyrrha in the air for a single drop attack that can hit at s-mid or low; it can even be powered into a stronger Unblockable worth 20 more damage by holding the input.
Eight Way Run
Pyrrha also has a strong set of eight way run attacks. Back-Sidestep Run A A goes from low to high for 38 damage, but its main function is to push back the enemy into a wall or out of the ring. Forward-Run B leads to a single shield smack that grounds the enemy for 28 damage; it can be powered into a 58 damage Brave Edge that serves as both a Break Attack and super launcher. One such great follow up--and also nice on its own--is Sidestep-Run B A K, which deals 60 damage as you whisk through the air.
Forward-Sidestep Run B is also a good move to keep in mind as it will pop the enemy up and behind you for 28 damage. Back-Run K A B delivers two instant mid hits, brings you back into the to avoid most counterattacks, and adds in a low-mid finisher. Forward-Run B+K A B mixes in mid-high-mid, lands the enemy behind you and can deal 60 damage after factoring the fall. Finally keep in mind that Pyrrha's Horizontal Throw can be powered up by running with Forward-Run A+G, though you already need to be in close to deal out the extra 30 damage.
Stance
Pyrrha's special stance is Angel Step, which is entered from a quarter circle forward. This can immediately go into a sidestep by pressing Up or Down, tough not all follow-ups work during the sidestep. For both the normal Angel Step and Angel Side Step A A goes from mid to low for 50 damage; it can be turned into a Brave Edge that deals another 12 damage from a mid strike, has Break Attack properties and will push the enemy away.
From the normal Angel Step you can also use K for a 28 damage Guard Impact, though you're somewhat exposed if you miss the hit. B will result in the signature gut stab, where you can once again tap Back for a throw or Just Throw. Exclusive for the sidestep version is B A B, which is a fantastic mid-high-mid combo that pops the enemy behind you.
ZWEI
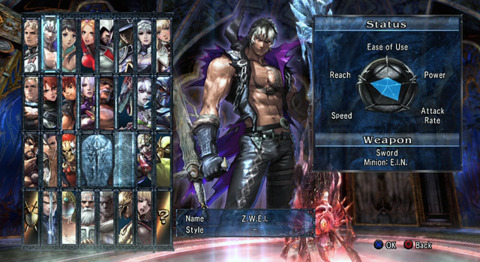
ZWEI is not only a new character in SoulCalibur V, but brings a completely different fighting style. He can summon EIN, a wolf that can be used at range or deployed in combos. One such example is ZWEI's Hold A, which will slash high and bring out EIN for a second hit. However, you don't need to make use of the wolf at all times.
Horizontals
Nancy Drew: Mystery of the Seven Keys | World Premiere Official Trailer Modern Warfare III & Warzone - Official Cheech & Chong Bundle Gameplay Trailer The Fallout TV Show's Biggest Easter Eggs Teenage Mutant Ninja Turtles: Splintered Fate – Announcement Gameplay Trailer Dead Island 2 – Official SoLA Expansion Gameplay Launch Trailer SteamWorld Heist II – Official Reveal Gameplay Trailer Potionomics: Masterwork Edition - Official Announcement Trailer Genshin Impact - "Arlecchino: Sleep in Peace" | Official Character Teaser Snowbreak: Containment Zone - "Gradient of Souls" Version Trailer Harold Halibut GameSpot Video Review Little Kitty, Big City – Release Date Reveal Cat Quest III - Release Date Trailer
Please enter your date of birth to view this video
By clicking 'enter', you agree to GameSpot's
Terms of Use and Privacy Policy
Some other good horizontal attacks include Forward-Down A A, which strikes mid into high; it can also be powered into a stronger Brave Edge, though the second hit will be at mid. Back-Down A is good for a low hit, but is a bit slow. Back A hits high and will cause the enemy to spin; if the input is held EIN will be summoned for a second mid strike.
Verticals
Among ZWEI's best verticals include Forward-Down B that will launch the enemy. Back-Down B isn't much on its own, but holding down the input will bring out EIN for a great high strike; you can also follow up with a standing Kick before or after EIN hits. Back B is fairly fast and will knock the enemy down to the ground; it can also be turned into a Brave Edge for a second mid hit. Last Rising B hits at mid and will pop the enemy behind you.
Kicks
There are a few Kicks that you'll frequently want to make use of. Like most characters, Forward K is good for slamming enemies down to the ground. Back-Down K results in a mid stomp; its main use is as a Brave Edge to summon EIN for a second hit that lifts the enemy. Back K B makes for a two hit high-mid combo. Last, Jump K hits high and will knock the enemy on their ass.
Simultaneous Press
Among ZWEI's key Simultaneous moves is Back A+B that hits at mid and will knock down the enemy; holding the input will delay the strike. Up A+B will cause a mid level jump attack that first lifts, then smacks down your opponent. B+K will release EIN for a quick mid hit; this can be turned into a Brave Edge that hits at s-mid, and can be delayed further by holding the input. Forward B+K uses EIN for a two hit high-mid combo, and during the hit you can follow up with a third high A or mid B; all of these can be delayed by holding the B+K input.
Eight Way Run
Our favorite run attacks included Forward-Run A for a strong high hit that pops the enemy back; this can be used a Brave Edge for a second mid hit from EIN. Back-Run A will bounce ZWEI Forward for a grounding low attack. Forward-Run B A is nice for a mid to high combo that floors the enemy. Forward-Sidestep Run B is a nice quick launcher; when used as a Brave Edge EIN will be summoned for a four hit mid-mid-mid high combo. Back-Run B is a mid-high Break Attack combo, but is a bit slow.
For Simultaneous Runs, you'll want to keep the next three moves handy. Forward-Run A+B hits at mid twice and will pop the enemy; if the input is held, they will instead be smacked to the ground. Forward-Run B+K will leap over the enemy and hit them square in the back. Last, Back-Run B+K is a slow two mid hit Unblockable.
Stance
ZWEI's special stance is Knife Fiend that can be entered with a quarter circle back. This can be followed up with A for a high strike or B for a mid Break Attack.
Viola

Viola is a tricky new character. She fights with a crystal ball and it placement and movement can completely change her attacks. For starters, Viola's throws are different if she has the ball vs it being set. In some cases she uses the ball in her hands for extra hits and not having it in position it will lower your combos. For some other moves not having the ball can increase hits as you summon it back, or simply increase the attacks range. An example is the horizontal A A B: with the ball it does a two hit high combo and leaves the ball behind the enemy; when the ball is out of your hands it instead delivers a three hit combo.
Horizontals
Other good horizontals to keep in mind include Forward A A that combos high to low, but isn't very fast. Forward A A strikes high twice and launches the ball behind the enemy. Back-Down A hits high to s-mid when the ball is in your hands; other wise it results in only one hit.
Verticals
For Verticals keep B B B in mind: it first strikes for two mid hits and will teleport the ball; however if the ball is already set, it will instead lead into a third high hit. Like most other characters Forward-Down B is Viola's go to launcher. Back B is a nice swift hit that will cause your enemy to fall. Finally, Jump B will combo from mid to s-mid and will leave the ball right at the enemy's feet.
Kicks
Viola's kicks aren't as impressive, but there are still a few to recommend. Back K will smash high and knock the enemy to the side. Jump K will give you a great amount of distance if the ball is in your hands; otherwise it's a bit pathetic.
Nancy Drew: Mystery of the Seven Keys | World Premiere Official Trailer Modern Warfare III & Warzone - Official Cheech & Chong Bundle Gameplay Trailer The Fallout TV Show's Biggest Easter Eggs Teenage Mutant Ninja Turtles: Splintered Fate – Announcement Gameplay Trailer Dead Island 2 – Official SoLA Expansion Gameplay Launch Trailer SteamWorld Heist II – Official Reveal Gameplay Trailer Potionomics: Masterwork Edition - Official Announcement Trailer Genshin Impact - "Arlecchino: Sleep in Peace" | Official Character Teaser Snowbreak: Containment Zone - "Gradient of Souls" Version Trailer Harold Halibut GameSpot Video Review Little Kitty, Big City – Release Date Reveal Cat Quest III - Release Date Trailer
Please enter your date of birth to view this video
By clicking 'enter', you agree to GameSpot's
Terms of Use and Privacy Policy
Simultaneous Press
Viola really starts to shine when it comes to Simultaneous inputs. A+B A does two strikes normally, but will add in a third when the ball is out of your hands; it can also be used as a mid-mid-s-mid Brave Edge if the ball is set. Down A+B is a hard hitting Break Attack when you have the ball, and has a huge range when the ball is placed and can be delayed by holding the input. B+K is a quick means of teleporting the ball behind the enemy or summon it back. You can also teleport the ball low while crouching--including while facing away--to change many attacks into low hit versions. Both the standing and crouching version of B+K can be used as Brave Edges to alter their speed. However, keep in mind that Facing Away B+K doesn't teleport the ball and will instead result in a high hit as you leap behind the enemy.
Eight Way Run
Viola also has a nice bit of Run Attack verity. Forward-Run A A B hit three times at high level and will place the ball near the fallen enemy. Back-Run A B hits twice at mid and then once at s-mid, but only when the ball is in your hands; when the ball is set it only hits twice, but can be used as a Brave Edge for a five hit combo. Forward-Sidestep Run B is a launcher that can be delayed by holding the vertical input. Sidestep-Run B isn't impressive on it's own, but if the ball is set it can be used as a Brave Edge that hits three times. Forward-Run K hits twice at mid and can be delayed by holding Kick; its real strength is as a Brave Edge that will add a third hit and slam down the enemy. Forward Sidestep K is a quick means of pushing the enemy to the ground.
Viola also has a few good Simultaneous Runs. Sidestep A+B hits from high to mid and ground the enemy, but only when you have the ball. Back Run A+B is a strong Unblockable that hits three times when you have the ball, but only once if set.
Critical Edge
The ball's placement also affects Viola's Critical Edge. The ball will have a gravitational pull that will suck in and damage the enemy. If the ball is too far your Critical Edge might not do anything.
Leixia
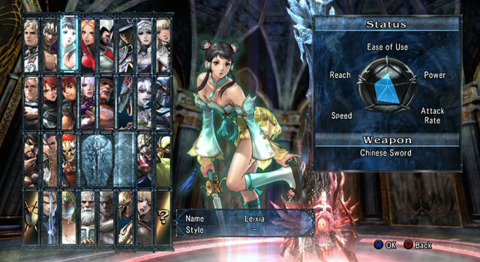
Leixia is the daughter of Xianghua and this new contender has inherited her mother's moveset. She's great for sewing together combos, including canceling a current string to follow up with something different. She also is able to reliably Guard Impact through her stance and simultaneous presses.
Horizontals
Leixia's most basic yet useful Horizontal is A A, which delivers two high hits for 18 damage; it can be followed normally with B for a mid stab at 22 damage, or improved into a Brave Edge 3 mid hits that will total over 60 damage. This Brave Edge can then be followed with a Kick Break Attack that deals 30 damage with close s-mid or low section 20 damage if the enemy is too far.
Forward A hits high for 14 damage; but its main feature is that it can transition into Hou Lee stance by holding the input, allowing you to dodge highs and instantly use a Rising attack. Back-Down A Hold will instantly ground you, which is mostly used to confuse the enemy, switch to a roll, or use your Rising attacks. You'll also have access to While Downed A+B, which doesn't do much damage but can catch the enemy off guard.
Verticals
Forward B A typically results in two high hits that total 35 damage, but turns into a throw during a counter. It can also turn into a mid hit that will down the enemy by sliding aB as the final input. Back B B normally results in two quick mid hits for 28 damage, followed by a slower third hit for an extra 18 damage. It can further be modified by sliding bK instead of the second B for a 20-30 damage Break Attack. Crouching Forward-Down B is a fantastic launcher that pop the enemy high for more mid level punishment; it can instead turn into a delayed low Break Attack by sliding bB. Rising B is a 36 damage mid level Guard Break, and has a Brave Edge version that will bump up to 56 damage over three hits and will send the enemy behind you.
Kicks
Leixia's Kicks aren't the best in the world, but still have a good amount of flavor. Back-Down K K hits low twice for 42 damage, though it windup and small range make it rather limited. Back K is a 12 damage high kick that is worth noting for its push back potential, particularly when near a wall or to ring out. Finally, Jump K will bring in a fast 24 damage with two mid level flutters.
Nancy Drew: Mystery of the Seven Keys | World Premiere Official Trailer Modern Warfare III & Warzone - Official Cheech & Chong Bundle Gameplay Trailer The Fallout TV Show's Biggest Easter Eggs Teenage Mutant Ninja Turtles: Splintered Fate – Announcement Gameplay Trailer Dead Island 2 – Official SoLA Expansion Gameplay Launch Trailer SteamWorld Heist II – Official Reveal Gameplay Trailer Potionomics: Masterwork Edition - Official Announcement Trailer Genshin Impact - "Arlecchino: Sleep in Peace" | Official Character Teaser Snowbreak: Containment Zone - "Gradient of Souls" Version Trailer Harold Halibut GameSpot Video Review Little Kitty, Big City – Release Date Reveal Cat Quest III - Release Date Trailer
Please enter your date of birth to view this video
By clicking 'enter', you agree to GameSpot's
Terms of Use and Privacy Policy
Simultaneous Press
Leixia really starts to shine when it comes to Simultaneous Press moves. Back A+B is a Guard Impact that will hit twice for 40 damage; you can also delay the attack and prevent your opponent from flying away by sliding a+bB. There is some nice mix up potential with Rising A+B B, which results in a low-high-low 38 damage combo; this move can also become a delayed Break Attack by instead sliding bB.
Down B+K is notable for being the same finisher from A A A+B+K K and Back B bK. As with those attacks, this move is a Break attack that will deal 30 damage s-mid or 20 damage low depending on the enemy's distance. Forward-Down B+K K is nice that the first hit will down the enemy and the second will quickly pursuit for 56 damage. Back B+K is one of Leixia's few Unblockables, which means it's slow but will result in 50 damage. The final move to memorize is Up B+K as it will get you on the other side of the enemy as dish out 20 damage.
Eight Way Run
Leixia is at her best while using eight way runs as all of her sidesteps can be used from her special stance, which will be covered more in the next section. Speaking of sidesteps, her Sidestep-Run A has an absurd amount of reach for a Horizontal, though it only pokes with 18 damage. Back-Run A will move Leixia in a way to dodge high attack while following up with a 20 damage mid hit; it can also be delayed with an additional 10 damage high hit by holding the Horizontal input. An alternate means of modifying the move is to instead slide aB, though this still only results in a single 20 damage mid hit.
Back-Run B is Leixia's snap back attack that deals 26 damage and can be followed with a retreating Guard Impact by pressing Back after the hit. Forward-Run B B also offers verity by starting as a two hit-mid-mid for 30 damage. You can further turn it into a Guard Impact by pressing Back, a 44 damage Break Attack by sliding bB, or both by sliding bB and then hitting Back. This amount of control makes it Leixia's most destructive and unpredictable move.
Her last run to be aware of is Sidestep-Run kA A, which deals 33 damage over three mid hits. It can be followed with an extra B for low section 14 damage, or K for a fourth mid hit worth 22 more damage.
Stance
Leixia has several stances to make her more defensive and mobile. Hou Lee is her basic dodge used with B+K, which is the same resulting move from Forward A Hold. As noted before, it's mainly used to avoid a high or quickly use a Rising attack. She can get a double form of defense by both retreating and Guard Impacting from Back-Run B+K, all while safely returning back to her neutral pose. However, her most notable stance is Bea Her Hua from Sidestep-Run B+K. This will first Guard Impact and then can transition into any of her Sidestep-Run attacks, such as the long Reach of A or the crazed combo of kA A B.
Ezio
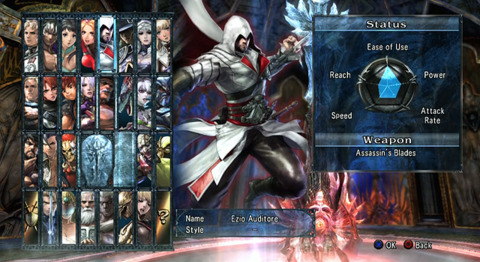
Ezio of the Assassin's Creed series is SoulCalibur V's guest character. He makes use of many of his signature weapons, such as the hidden blade, short swords, and crossbow. He's a great starter character as he's not overly complex while still being powerful. Some of his attacks tend to change when used as counters.
Horizontals
Ezio has three great Horizontals that should be staples of your arsenal. Forward A B B strikes high-high-mid and grounds the enemy. Back-Down A has a long wind up and hits at low, but will follow up with a quick second hit when countered. Back A B will smack high and fire your crossbow for a second high hit; it can be followed up with Sidestep B for a low shot from your crossbow.
Verticals
Ezio's main focus is around Vertical attacks. B B strikes twice own its own, but as a Brave Edge it becomes a four hit Unblockable. Forward B is fast and hits at high level; as a Brave Edge it becomes a Break Attack and adds in two low ranged hits from the crossbow. Forward-Down B is a quick mid stab that grounds the enemy and turns into a powerful throw as a counter. Back-Down B B B is a fast three hit mid-high-high combo with some pushback. Back B will snap Ezio Forward for a mid hit and turns into a strong throw as a counter; pressing Forward during this counter will follow up with a second strike.
Kicks
Kicks are also a great means of assassination--trust us, we completed parts of Brotherhood that way. Forward-Down K hits at mid and will pop the enemy up and back. Back-Down K also hits at mid but raises your advisory into the air. Ezio's Jump K hits high and send your foe to the floor.
Nancy Drew: Mystery of the Seven Keys | World Premiere Official Trailer Modern Warfare III & Warzone - Official Cheech & Chong Bundle Gameplay Trailer The Fallout TV Show's Biggest Easter Eggs Teenage Mutant Ninja Turtles: Splintered Fate – Announcement Gameplay Trailer Dead Island 2 – Official SoLA Expansion Gameplay Launch Trailer SteamWorld Heist II – Official Reveal Gameplay Trailer Potionomics: Masterwork Edition - Official Announcement Trailer Genshin Impact - "Arlecchino: Sleep in Peace" | Official Character Teaser Snowbreak: Containment Zone - "Gradient of Souls" Version Trailer Harold Halibut GameSpot Video Review Little Kitty, Big City – Release Date Reveal Cat Quest III - Release Date Trailer
Please enter your date of birth to view this video
By clicking 'enter', you agree to GameSpot's
Terms of Use and Privacy Policy
Simultaneous Press
Ezio has a good mix of Simultaneous moves as well. A+B will tackle the enemy with a mid attack and can be followed up with Sidestep B for a low crossbow shot. Down A+B is a fast means of knocking the enemy off their feet. B+K is a strong ranged Unblockable, but also means the start up is very long. Speaking of ranged attacks, Forward B+K will let loose a quick shot from the cross bow and like many attacks can follow with Sidestep B for a second low hit. The initial crossbow shot can also be changed by instead holding Down for a low hit, or back for a delayed evasive shot. Last, B+K while turning will instead let out a quick gut stab that will floor the enemy.
Eight Way Run
Ezio also has some amazing Run Attacks. First and foremost is Forward-Run A B which goes from a mid slash to high crossbow shot; as with other crossbow moves you can follow with Sidestep B for a extra low shot. You can also mix things up and remove the middle high hit by hitting Down before the first Vertical. Sidestep-Run A A does two mid level strikes, but as a Brave Edge adds in a third hit that is both Unblockable and a Break Attack. Sidestep-Run B is only average and hits medium, but turns into a good throw as a counter. Back-Sidestep Run B is a leaping mid level Break Attack. Forward-Run K take about a second but will hit high and slam the enemy. Last, Forward-Run A+B is a strong high hit Break Attack.
Soul of Devil Jin
While Jin Kazama doesn't make a physical appearance in SoulCalibur V, created characters can fight using Devil Jin's style. His attacks are still suited for Tekken more than Soucalibur and feature long strings of combos and means of juggling. Several moves chain right into his two stances.
Horizontals
Devil Jin has a strong amount of Horizontal attacks. A A B is the standard three hit combo that ends in a pushing back the enemy. A B A hits high three times with the third hit having a slight delay. A B K K is a four hit high-high-mid-mid combo but there is a vulnerable delay between the second punc ahd first kick. For an absolutely long ten hit combo there is Back A K K K K B B+K A B B which mixes in highs, lows, and mids mostly while standing, but has a few jump attacks. Finaly, Rising A B is a two hit launcher, but can be used as a Brave Edge that adds a third hit and Break Attack.
Verticals
Jin's Verticals also have some viability. B B combos high to mid in about two seconds. Back-Down B is a great means of smacking the enemy down to the floor, through there is a second windup. Back B Forward-Down is a single mid punch but chains right into Advanced Step.
Kicks
Kicks are of course among Kazama's staple moves. As with many characters Forward K is good high kick that sends the enemy back; however you can slide B to instead turn this into mid hit slam kick. Forward-Down K B K Up hits three times at mid and enters flight. Likewise, Back-Up K Up is a single rising kick that will put you in the flying stance.
Simultaneous Press
Simultaneous inputs are among Devil Jin's most brutal attacks, but they have some long setups. A+B is a high Unblockable laser blast, with the downside of being rather slow; it can be used as a Brave Edge to become a faster mid shot, though its range is more limited. In most cases reserve this fore downed enemies. B+K B K is a great four hit attack that goes from s-mid-high-high-mid; you can also change the final kick into a low by hitting Down. Additionally, Back B+K is a nice go to Break Attack, and can be turned into a slower Unblockable by holding the input.
Eight Way Run
Devil Jin's eight way runs also have a strong available mix-up. Sidestep-Run B is a standard launcher, but if Up is tapped during the hit the move will become a three hit Unblockable. Back-Run B also isn't much on its own, but holding the Vertical input will delay the punch and turn it into a Break Attack. Forward-Run K A K is a decent mid-high-mid combo; the final kick can also become a low by hiting Down before the input.
Throw
Devil Jin is one of a few characters with a powerful Brave Edge Throw. His face-to-face Horizontal A+G will turn into a brutal eleven hit laser show. As with all throws this has limited range, so be careful that you don't needlessly waste Soul Gauge meter.
Stance
Devil Jin has two stances. The first is Fly which is done with Up B+K. This can be followed with standard attack from A or K, and a Throw by using B. However, A+B will let out an Unblockable laser blast and Forward A+B will get you behind the enemy before firing. Devil Jin's second stance is Advanced Step that can be entered from a dragon punch motion: Forward Down Forward-Down. The basic follow up is A for a short pop up that can become a Brave Edge, A Forward-Up will lead into a Throw that can also Brave Edge, A K adds in a extra mid kick during the descent, and A Down K will lead to a final low Kick. However, the real prize of Advanced Step is to use B at the fastest input. This will turn the hit into a Break Attack that can send the enemy into a chain of juggles and can become am evil tactic once mastered.
Aeon
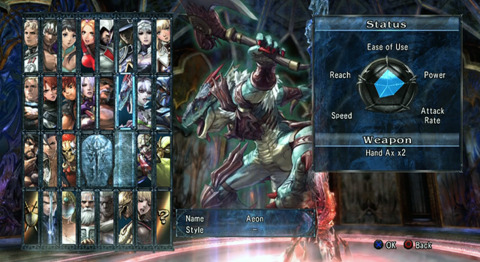
Aeon isn't a new character, but in SoulCalibur V the classic lizardman has exchanged his shield for an offhand axe. This means he is less defensive and more brutal. Along with his new dual wielding, Aeon has also gained a pair of angel wings that into play as part of his stance. Overall, Aeon is closer to a combination of his old self and Kratos from Broken Destiny.
Horizontals
Aeon's Horizontals mostly have the benefit of knocking the enemy down. Back A is a very quick short range high hit that deals 23 damage and will put the enemy on the floor. Back-Down A is rather slow, but is a reliable way of dealing 25 low section damage. Rising A B is one of Aeon's more brutal Horizontals as it deals 46 damage over a high-mid combo.
Verticals
B B B is a practical standard combo that delivers two mid hits worth 32 total and a knockdown, followed by a quick mid follow up for an extra 22 damage. Forward B is fast but only deals 14 damage. Where it really shines is as a Brave Edge that has six rapid mid hits and a launch that can dish 79 damage after the fall. Down-Back B is normally a simple uppercut worth 22 damage, but powered into a Brave Edge it becomes a Break Attack Throw that hits twice for 62 damage. Rising B is also good to remember as it will launch the enemy right behind you, leaving them open to one of your facing away or turning moves.
Kicks
Aeon doesn't have too many useful kicks, but the select few worth remembering are very good. Forward K is a pretty standard 25 damage kick, but by holding the Kick input it can be charged into a Brutal Break Attack that nets 66 damage and knocks down the enemy. Jump K hits high for 26 damage and has some great pushback for a ring out or wall hit.
Simultaneous Press
Aeon's strength comes for some fairly brutal Simultaneous Press attacks. The basic B+K is an easy high Break Attack that will dish out 52 damage. Down-Back B+K is a low Unblockable meaning it has a long set up; however the pay off is 84 damage after factoring the fall. Just keep in mind that you will be grounded after this move, which can be disastrous if you missed.
Back B+K will propel you forward for a 37 damage mid hit tackle; it can be further powered by sliding b+kG which will give you more distance, increase damage, and knockdown the enemy. As with the previous move, you'll be floored weather you hit or missed your target. Finally, be sure to make use of Up B+K as it is a long range pounce that can take you right into Sand Winger stance if the hit was close enough.
Eight Way Run
Eight Way Run attacks offer Aeon the most diversity and a few connections into his stance. Back-Run A deals 16 damage and will transition into Sand Winger; it can be delayed for double damage by holding the Horizontal input. Forward-Run B is also notable for flowing into Sand Winger, plus it deals 35 damage and raises the enemy to your height. If you're looking to send your enemy flying on their own use Forward-Sidestep Run B, which will launch them behind and deal 37 damage when factoring the fall.
Back-Run B A A is serves a three hit mid-high-high combo worth 45 damage and Break Attacks on the last swing. Forward-Run K is a strong headbutt that deals 44 damage and absolutely stellar for wall hits or ring outs. Back-Sidestep Run K will dish out 22 damage from a low leg sweep. Back-Run K normally just does 21 mid section damage, but if you land the attack on a downed enemy's head, becomes a 49 damage throw. Finally, remember to use Forward-Run A+B for its huge pushback plus 42 damage.
Throw
As with a few other characters, Aeon has a special throw. The input is Quarter Circle Back B+G and will dish out 68 damage over six hits, a 16 damage increase over the normal Vertical Throw. Keep in mind that this throw can be used from all sides and is actually weaker than the typical Back Throw.
Stance
As mentioned previously, Aeon's special stance is Sand Winger and can be used with a simple A+B or as a follow up from some Runs and Simultaneous Presses. The common follow up is K, which will deal 48 damage to the mid section. You can also tap the Brave Edge input A+B+K to unleash an Unblockable fireball that deals 15 damage. Alternately, you can slide a+b+kG to fly behind the enemy. Because you you'll remain in the air for a few seconds you can theoretically spam the fireball or flight four times, but that would require two full bars of Soul Gauge meter.
Xiba
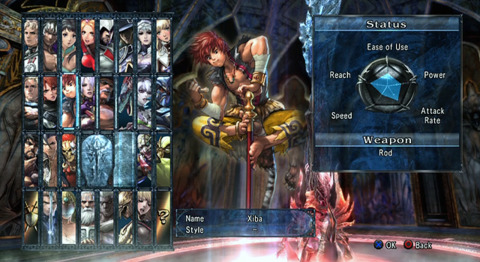
Xiba's a new contender who utilizes a more speedy and rampant version of Kilik's bo staff fighting discipline. Xiba has reach, speed, and huge combo potential, making him one of the most brutal characters once you get a good flow going.
Horizontals
Forward A instantly delivers two high hits that deal 32 damage. This can be quickly followed with a sidestep to the north and a 15 damage hit by pressing K. This kick can be further powered into a Brave Edge for a quick 50 damage headbutt. Forward-Down A B hits at mid for 14 damage and comes in for a high 24 damage slam that will ground the enemy; the second strike isn't very fast so don't expect a combo. A A K will delivery 64 damage from a decent speed high-high-mid string.
Verticals
B B hits mid twice for 40 damage, but its main function is to ground your opponent. By holding the second B you can instead enter Xiba's stance. Forward B K is similar to the Horizontal counter part: a quick 20 damage mid hit followed by a northern sidestep kick for 15 damage. As with the previous sidestep kick you can power it into a Brave Edge headbutt for 60 damage. As with most of the cast, Forward-Down B is a typically means of popping your enemy, but the main thing to keep in mind is that you can quickly enter Remembrance stance by holding the input.
Back B is great for long reach and its ability to provide some distance; it even deals a nice 45 damage. It can be powered into a Break Attack by using the input of B+K instead. Back-Down B is also worth remembering as it hits low and grants you some good distance.
Kicks
kB is great as it hits both high and low at the same time, resulting in 43 damage if both strikes connect. However, the enemy will have time to counterattack. Forward K will produce a cartwheel kick that dishes out 27 damage over two mid hits. Forward-Down kB is a very quick body smack that deals 38 damage and will floor your foe. Back K B firs hits high for 26 damage and smacks down the enemy right before coming in with a low bo jab for 19 more pain. Rising K K can dish out 39 damage from a three hit mid-high-high combo. This can also be powered into a Brave Edge for a fourth hit worth 20 damage. However, you'll need to keep in mind that this combo is interrupted if the initial hit is blocked.
Simultaneous Press
Simultaneous Press attacks are among Xiba's strongest tools. A+B B K first dishes out two mid hits for 15 damage a piece, launches for another 20 damage, and last fallows up with a 10 damage sidestep kick. This can become a Brave Edge that will add in the familiar headbutt tackle for an extra 30 damage. Down A+B is notable for dishing out 40 damage over four low hits, though each strike isn't very fast. Forward B+K is also good for a flurry of strikes, dishing 65 damage over five mid jabs. You can even combo with Turning B+K which dishes out 53 damage over three hits. If you instead hold the input, you'll deliver a single hit 45 damage Break Attack.
Down B+K normally delivers a 24 damage low hit, but holding the input will purposely ground you. This can be followed by While Downed A+B that deals a low 31 damage sweep and gets you back on your feet.
Eight Way Run
Eight Way Runs are also one of Xiba's major strengths. Forward-Sidestep Run A A delivers 30 damage from two low sweeps. Where it shines is as a Brave Edge that can deal 60 damage over four sweeps. Sidestep-Run A B is worth having handy as it will knock the enemy away a fair distance. It can also flow into Remembrance by holding the input. Forward-Run B B B is excellent for delivering 41 damage over three mid hits, with the final one acting as a launcher--making it great for a turning follow-up. Sidestep-Run B is an ultra high launcher that will send the enemy behind you and dishes out 29 damage after the fall.
Forward-Run K B will play out the same animation as Turning B+K, allowing for a barrage of mid hits or can be held for a 45 damage Break Attack. Back-Run K normally simply hits for 30 damage and has a bit of stun that you can combo off of. It can also become a Brave Edge for another 11 damage, but is a little lacking considering it meter cost. Back-Run B+K is Xiba's only Unblockable, which of course means a very slow windup animation.
Throw
Technically a combination of both Throws and Simultaneous Presses, Xiba has two throws that can be initiated with his bo staff. Forward-Down A+B hits for 32 damage over four low hits and becomes a throw on the second hit. If you happen to be too far only the first hit will connect and not result in a throw. Back-Down A+B is a similar throw that will instead deal 47 damage and lift your opponent behind you. This can also possible used to ring out or wall slam a foe.
Stance
As mentioned in a few previous sections, Xiba's special stance is Remembrance. Several moves flow right into this stance, but it can also be entered by hitting B+K. What's nice is the safety of this stance, as it will Guard Impact fairly quickly. There are a few follow ups for this stance. Both B and K are decent for slamming the enemy to the ground. K hits low, while B will hit mid and has much greater range. The ultimate chain though is A K, which will spin out the enemy for a high strike and launch them high, making them very vulnerable to a mid level combo.
Got a news tip or want to contact us directly? Email news@gamespot.com
Join the conversation